Operator'sIVianual - Ppe-pressure-washer-parts.com
Operator'sIVianual - Ppe-pressure-washer-parts.com
Operator'sIVianual - Ppe-pressure-washer-parts.com

You also want an ePaper? Increase the reach of your titles
YUMPU automatically turns print PDFs into web optimized ePapers that Google loves.
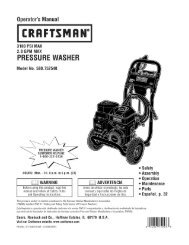
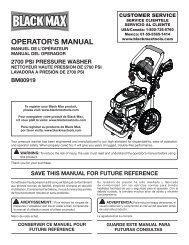
Your <strong>pressure</strong> <strong>washer</strong> requires some assembly and is ready<br />
for use only after it has been properly serviced with the<br />
re<strong>com</strong>mended oil and fuel.<br />
If you have any problemswith the assemblyof your<br />
<strong>pressure</strong><strong>washer</strong>, please call the <strong>pressure</strong><strong>washer</strong> helpline<br />
at 1=800-222-3136.<br />
UNPACKTHEPRESSUREWASHER<br />
Attach Handleand Accessory Tray<br />
1. Place handle (A) onto handle supports (B) connectedto<br />
main unit. Make sure holes (C) in handle align with holes<br />
(C) on handlesupports.<br />
1. Remove everything from carton except <strong>pressure</strong><strong>washer</strong>.<br />
2. Opencarton <strong>com</strong>pletely by cutting each corner from top<br />
to bottom.<br />
3. Remove <strong>pressure</strong> <strong>washer</strong> from carton.<br />
CARTONCONTENTS<br />
Check all contents. If any <strong>parts</strong> are missing or damaged,call<br />
the <strong>pressure</strong> <strong>washer</strong> helplineat 1-800-222-3136.<br />
* Main Unit<br />
* Handle<br />
* Accessory Tray<br />
* High PressureHose<br />
* Spray Gun<br />
* Nozzle Extensionwith Quick Connect Fitting<br />
* Oil Bottle<br />
* Parts Bag(which includes the following):<br />
* Operator's Manual<br />
* Owner's Registration Card<br />
* Bag containing 5 multi-colored Spray Tips<br />
* HandleFasteningHardwareKit (whichincludes):<br />
* Carriage Bolt (2)<br />
* Plastic Knob (2)<br />
* Tree Clips (4)<br />
Be<strong>com</strong>efamiliar with each piece before assembling the<br />
<strong>pressure</strong> <strong>washer</strong>, identify all contents with the illustration on<br />
page 6. if any <strong>parts</strong> are missing or damaged, call the<br />
<strong>pressure</strong> <strong>washer</strong> helpline at 1-800-222-3136.<br />
ASSEMBLINGPRESSUREWASHER<br />
Your Craftsman <strong>pressure</strong> <strong>washer</strong> will needassembly before<br />
operation:<br />
1. Fill out and send in registration card.<br />
2. Attach handle and accessory tray.<br />
3. Add oil to engine crankcase.<br />
4. Add fuel to fuel tank.<br />
5. Connect <strong>pressure</strong> hose to spray gun and pump.<br />
6. Connect water supply to pump.<br />
7. Attach spray tip extension to spray gun.<br />
8. Select/attach quick connect spray tip to spray tip<br />
extension.<br />
NOTICE It may be necessaryto move the handlesupports<br />
from side to side in order to align the handleso it will slide<br />
over the handlesupports.<br />
2. insert carriage bolts (D) through holes from inside of<br />
unit and attach a plastic knob (E) from outside of unit.<br />
Tighten by hand.<br />
3. Placeaccessory tray (F) over holes (G) on handle<br />
(viewing from front of unit). Push the tree clips (H) into<br />
the holes until they sit fiat against the accessory tray.<br />
/<br />
/<br />
4. insert multi-colored quick connect spray tips and other<br />
supplied accessories in spaces provided in accessory<br />
tray. SeeHow to UseAccessory Tray.