AIC-304 Instruction Manual.qxd - PickYourOwn.org
AIC-304 Instruction Manual.qxd - PickYourOwn.org
AIC-304 Instruction Manual.qxd - PickYourOwn.org

You also want an ePaper? Increase the reach of your titles
YUMPU automatically turns print PDFs into web optimized ePapers that Google loves.
Congelador para<br />
Helado de GarrafaA la Antigua<br />
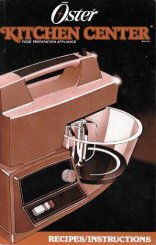
<strong>Manual</strong> De Instrucciones y<br />
Recetario De Cocina<br />
Modelo: <strong>AIC</strong>-<strong>304</strong>EM<br />
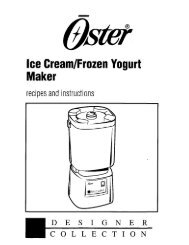
Old Fashioned<br />
Ice Cream Freezer<br />
<strong>Instruction</strong> <strong>Manual</strong><br />
& Recipe Guide<br />
Model <strong>AIC</strong>-<strong>304</strong>EM
Felicidades por su compra del nuevo Congelador para Hacer<br />
Helados. Ahora usted puede hacer su propio helado casero, exquisito y cremoso<br />
o su helado de yogur, con sólo encender un botón. También puede hacer rápido<br />
y fácilmente bebidas heladas y escarchadas y sus nieves y sorbetes favoritos,<br />
saludables y deliciosos. ¡Disfrute su nuevo Congelador para Hacer Helados!<br />
Favor de leer cuidadosamente todas las instrucciones antes de usar este<br />
producto.<br />
Publicada Por:<br />
Aroma Housewares Co.<br />
6469 Flanders Drive<br />
San Diego, CA 92121<br />
U.S.A.<br />
1-800-276-6286<br />
www.aromaco.com<br />
© 2005 Aroma Housewares Company. Todos los derechos reservados.<br />
Congratulations on your purchase of the Ice Cream Freezer. You can<br />
now make your own rich and creamy homemade ice cream or frozen yogurt. You can<br />
also make your own favorite, healthy and delicious sherbet, sorbet, ice and frozen<br />
drinks fast and easy. Enjoy your new Ice Cream Freezer!<br />
Please read all instructions carefully before using this product.<br />
Published By:<br />
Aroma Housewares Co.<br />
6469 Flanders Drive<br />
San Diego, CA 92121<br />
U.S.A.<br />
1-800-276-6286<br />
www.aromaco.com<br />
© 2005 Aroma Housewares Company. All rights reserved.
1. Read all instructions.<br />
2. Do not touch hot surfaces. Use handles or knobs.<br />
3. To protect against electrical shock, do not immerse cords, plugs or the electric motor<br />
in water or other liquid.<br />
4. Close supervision is necessary when any appliance is used by or near children.<br />
5. Unplug from outlet when not in use, before cleaning, and before putting on or taking<br />
off parts.<br />
6. Avoid contacting moving parts. Keep fingers, hair, clothing, as well as utensils away<br />
during operation.<br />
7. Do not operate any appliance with a damaged cord or plug or after the appliance<br />
malfunctions, or has been damaged in any manner. Return appliance to the nearest<br />
authorized service facility for examination, repair or adjustment.<br />
8. The use of accessory attachments not recommended by the appliance manufacturer<br />
may cause injuries.<br />
9. Do not use outdoors.<br />
10. Do not let cord hang over edge of table or counter, or touch hot surfaces.<br />
11. Do not use the appliance for other than intended use.<br />
12. Do not place this appliance on or near a hot gas or electric burner, or in a heated oven.<br />
13. To disconnect power, press switch to OFF position and then remove plug from wall outlet.<br />
14. Never operate ice cream maker dry. Always have ice cream mixture in the container<br />
while plugged in.<br />
IMPORTANT SAFEGUARDS<br />
Basic safety precautions should always be followed when using electrical appliances,<br />
including the following:<br />
15. Do not use hot oil or liquids in ice cream maker. Always chill mixtures before churning.<br />
SAVE THESE INSTRUCTIONS<br />
1<br />
INSTRUCCIONES IMPORTANTES<br />
Al usar aparatos eléctricos siempre deberán observarse las precauciones básicas de<br />
seguridad, incluyendo las siguientes:<br />
1. Lea todas las instrucciones.<br />
2. No toque las superficies calientes. Utilice los mangos y las perillas.<br />
3. Para protegerse y evitar un choque eléctrico, no sumerja en agua o en cualquier otro<br />
líquido los cordones, las clavijas ni el motor eléctrico.<br />
4. Es necesario ejercer una estrecha vigilancia cuando se use el aparato cerca de<br />
niños. Este aparato no está hecho para ser usado por niños.<br />
5. Desconecte el aparato de la toma eléctrica cuando no esté en uso, antes de limpiarlo<br />
y antes de ponerle o quitarle partes.<br />
6. Evite el contacto con las partes que estén en movimiento. Mantenga los dedos, el<br />
cabello, la ropa, así como espátulas y otros utensilios alejados durante el<br />
funcionamiento del aparato.<br />
7. No ponga a funcionar este aparato si el cordón eléctrico o la clavija de enchufe se<br />
dañan o después de que el aparato funcione mal o si se ha dañado de alguna manera.<br />
Regrese el aparato a la agencia de servicio autorizada más cercana, para su revisión,<br />
reparación o ajuste.<br />
8. El uso de accesorios eléctricos que no estén recomendados por el fabricante del<br />
aparato puede ocasionar lesiones.<br />
9. No se use en exteriores.<br />
10. No deje que el cordón cuelgue sobre la orilla de la mesa o del mostrador ni que<br />
esté en contacto con superficies calientes.<br />
11. No utilice el aparato para otro uso que no sea el indicado.<br />
12. No coloque el aparato sobre o cerca de un quemador de gas o eléctrico ni dentro<br />
de un horno caliente.<br />
13. Para desconectar el aparato, presione el interruptor a la posición de apagado,<br />
"OFF" y luego saque la clavija del enchufe de la pared.<br />
14. Nunca ponga a funcionar la máquina de hacer helado, estando en seco su<br />
recipiente interior. Siempre que esté conectada tenga mezcla de helado dentro del<br />
recipiente.<br />
15. Deberá tenerse cuidado extremo al mover un aparato que contenga aceite caliente<br />
u otros líquidos calientes.<br />
GUARDE BIEN ESTAS INSTRUCCIONES<br />
1
INSTRUCCIONES DE CABLE CORTO<br />
1. Un cable de corriente de medida corta es provido cone la finalidad<br />
de reducir los riesgos de que se envede.<br />
a. Asse gurese de que la extenssion sea no mas, o menos, del<br />
voltage del aparato.<br />
b. Asse gurese de que el cordon, cuelge del mostrador, mesa, que pueda<br />
ser jaludo por nino, o tropesear por accidente.<br />
PLOYA POLARISADA<br />
Si este aparato tiene ploya polarizada:<br />
Para reducir el riesgo de descarga electrica, este ploya intensional mente solo debe de<br />
enchurar un lado en enchufes de luz de ploya polarisada, si la clavija no entra<br />
completamente, solo le buelta a la clavija. Si aun la clavija no puede entrar, llame a un<br />
electricista calificada. No intente de modificar la clavija, es muy poligroso.<br />
¡NO DEJE QUE EL CABLE CUELGUE!<br />
¡MANTÉNGASE<br />
LEJOS DE LOS<br />
NIÑOS!<br />
ESTE APARATO ES PARA USO DOMESTICO.<br />
2<br />
SHORT CORD INSTRUCTION<br />
1. A short power-supply cord is provided to reduce risk resulting from becoming<br />
entangled in or tripping over a longer cord.<br />
2. Longer extension cords are available and may be used if care is exercised in their use.<br />
3. If a longer extension cord is used:<br />
a. The marked electrical rating of the extension cord should be at least as great as<br />
the electrical rating of the appliance.<br />
b. The longer cord should be arranged so that it will not drape over the counter top<br />
or tabletop where it can be pulled by children or tripped over unintentionally.<br />
POLARIZED PLUG<br />
This appliance has a polarized plug (one blade is wider than the other); follow the<br />
instructions below:<br />
To reduce the risk of electric shock, this plug is intended to fit into a polarized outlet<br />
only one way. If the plug does not fit fully into the outlet, reverse the plug. If it still does<br />
not fit, contact a qualified electrician. Do not attempt to modify the plug in any way.<br />
This appliance is for household use only.<br />
2
PARTS IDENTIFICATION<br />
1<br />
1. Hand Crank<br />
2. Electric Motor<br />
3. Latch<br />
4. Power Cord<br />
5. Wooden Bucket<br />
6. Stabilizing Ring<br />
7. Canister Lid<br />
8. Canister Lid Cap<br />
9. Ice Cream Canister<br />
10. Plastic Stirrer<br />
11. Dasher<br />
8<br />
7<br />
6<br />
9 10 11<br />
3<br />
5<br />
2<br />
3<br />
4<br />
IDENTIFICACIÓN DE LAS REFACCIONES<br />
1<br />
1. Manivela manual<br />
2. Motor eléctrico<br />
3. Cerrojo<br />
4. Cordón eléctrico<br />
5. Cubeta de madera<br />
6. Anillo estabilizador<br />
7. Tapadera del bote<br />
(garrafa)<br />
8. Tapón de la tapadera del<br />
bote (garrafa)<br />
9. Bote (garrafa) para el<br />
helado<br />
10. Varilla agitadora<br />
11. Agitadora<br />
8<br />
5<br />
2<br />
3<br />
4<br />
7<br />
6<br />
9 10 11<br />
3
CÓMO USAR SU APARATO<br />
Antes de Usar el Congelador para Helado de Garrafa por Primera Vez:<br />
1. Lea todas las instrucciones y las medidas de seguridad importantes.<br />
2. Retire todos los materiales de empaque y asegúrese de que los artículos<br />
se reciban en buenas condiciones<br />
3. Rompa todas las bolsas de plástico, ya que pueden representar un riesgo<br />
para los niños.<br />
4. Lave en agua tibia con jabón la cubierta, la garrafa del congelador y todos los<br />
accesorios.<br />
5. Enjuague y seque perfectamente todas las partes<br />
6. Vacíe agua dentro de la cubeta de madera (a llenarla hasta 2/3<br />
aproximadamente) y déjela durante una hora y media. Esto dará tiempo para<br />
que la madera se hinche, de manera que durante el proceso de<br />
congelamiento no haya fugas de la mezcla de sal y hielo.<br />
• No utilice limpiadores abrasivos ni fibras para tallar.<br />
• Nunca sumerja en agua ni en otro líquido, la base ni el cordón eléctrico.<br />
Mode de Usarse:<br />
1. Seleccione su receta favorita y prepare los ingredientes de acuerdo con las<br />
instrucciones de la receta.<br />
2. Vacíe la mezcla fría del helado dentro del bote frío para el helado (sólo hasta<br />
llenar 2/3 de su capacidad, ya que la mezcla se expandirá durante el<br />
proceso de congelamiento).<br />
3. Inserte la agitadora y asegúrese que su parte inferior quede fija en el centro<br />
de la parte inferior del bote. (Ver Dibujo 1)<br />
4. Coloque la tapadera sobre el bote. (Ver Dibujo 2)<br />
5. Coloque el anillo estabilizador de plástico dentro de la cubeta de madera. (Ver<br />
Dibujo 3).<br />
Dibujo 3 Dibujo 2 Dibujo 1<br />
4<br />
HOW TO USE<br />
Before First Use:<br />
1. Read all instructions and important safeguards.<br />
2. Remove all packaging materials and make sure items have been received in good<br />
condition.<br />
3. Tear up all plastic bags, as they can pose a risk to children.<br />
4. Wash the lid, freezer canister and all accessories in warm soapy water.<br />
5. Rinse and dry all parts thoroughly.<br />
6. Wipe electric motor with a damp cloth.<br />
7. Pour water (about 2/3 full) into the wooden bucket and leave for one and a half hours.<br />
This will give it a chance to swell up so that the salt/ice mixture will not leak out during<br />
the freezing process.<br />
• Do not use abrasive cleaners or scouring pads.<br />
• Do not immerse the base, cord or plug in water at any time.<br />
How to Use:<br />
1. Select your favorite recipe, prepare ingredients per recipe instructions.<br />
2. Pour chilled ice cream mixture into chilled ice cream canister (fill no more than 2/3<br />
full as mixture will expand during freezing process).<br />
3. Insert the dasher and make sure the bottom of dasher is fixed in the center of the<br />
bottom of the canister. (Figure 1)<br />
4. Place the lid on the canister. (Figure 2)<br />
5. Place the plastic stabilizing ring into the wooden bucket. (Figure 3]<br />
Figure 1 Figure 2 Figure 3<br />
4
HOW TO USE<br />
7. Place the canister in the wooden bucket and make sure it engages the cone in the<br />
center of the bucket. (Figure 4)<br />
Figure 4<br />
8. Slide the rectangular end of the hand crank or electric motor into the rectangular<br />
hole on the rim of the bucket (figure 5a). The opposite end of the crank will drop into<br />
the open end, where the latch is (figure 5b). Gently lift the latch so that the wire goes<br />
over the rounded end of the hand crank or motor (you may need to rotate the<br />
canister by hand so that the lid fits into the motor/hand crank)(Figure 5c).<br />
Figure 5a Figure 5b<br />
Figure 5c<br />
9. Plug the power cord into outlet if you are using the electric motor.<br />
10. Fill the wooden bucket with ice to the top of the canister.<br />
11. Crank or run the motor for about 2 to 3 minutes so that the canister chills evenly.<br />
12. Add 2 cups of rock salt to the top of the ice. As the ice melts down 2 to 3 inches,<br />
add more ice and 2 more cups of rock salt.<br />
13. Unplug and remove motor drive once ice cream has churned about 40 minutes, or<br />
once the motor has stopped (if the motor has stopped prematurely, turn it off, break<br />
up any ice blockages with the plastic stirrer and start again).<br />
14. Clear the ice and salt away from the top of the ice cream canister. Wipe carefully to<br />
remove the salt and water before removing the cover.<br />
15. Take the dasher out and scrape off excess ice cream with a wooden spatula.<br />
16. Transfer to a freezable container and freeze or serve straight from the canister.<br />
5<br />
CÓMO USAR SU APARATO<br />
7. Coloque el bote en la cubeta de madera y asegúrese de que el cono encaje en el<br />
centro de la cubeta. (Ver Dibujo 4)<br />
Dibujo 4<br />
8. Deslice el extremo rectangular de la manivela manual O el motor eléctrico en el<br />
agujero rectangular del borde de la cubeta (ver dibujo 5a). El extremo opuesto de la<br />
manivela caerá dentro del extremo abierto, donde está el cerrojo (ver dibujo 5b).<br />
Suavemente levante el cerrojo a fin de que el cerrojo de alambre pase sobre el<br />
extremo redondeado de la manivela manual o del motor (tal vez necesite rotar el<br />
bote con la mano para que la tapadera quede ajustada al motor y/o a la manivela)<br />
(ver dibujo 5c)<br />
Dibujo 5a Dibujo 5b Dibujo 5c<br />
9. Conecte el cordón eléctrico en el tomacorriente si está usando el motor eléctrico.<br />
10.Llene la cubeta de madera con hielo hasta la parte superior del bote.<br />
11.Gire la manivela o ponga a funcionar el motor de 2 a 3 minutos aproximadamente, a<br />
fin de que el bote se enfríe parejo.<br />
12.Agregue 2 tazas de sal de piedra encima del hielo. Conforme el hielo se<br />
derrita de 2 a 3 pulgadas, agregue más hielo y 2 tazas más de sal de piedra.<br />
13.Desconecte y retire el motor una vez que el helado se haya batido durante 40<br />
minutos aproximadamenteo o cuando el motor se detenga (si el motor se detiene<br />
prematuramente, apáguelo, rompa cualquier obstrucción de hielo que haya con el<br />
agitador de plástico e inicie de nuevo).<br />
14.Quite el hielo y la sal de la parte superior del bote del helado. Limpie<br />
cuidadosamente a fin de remover la sal y el agua antes de levantar la cubierta.<br />
15.Saque la agitadora y con una espátula de madera retírele el exceso de helado.<br />
16.Pase el helado a un receipiente para congelar y congélelo o sírvalo directamente del<br />
bote (garrafa).<br />
5
CÓMO USAR SU APARATO<br />
FAVOR DE TOMAR NOTA<br />
• Asegúrese que el hielo que usted ponga en la cubeta esté quebrado en piezas<br />
pequeñas y gruesas. Tal vez necesite usar un mazo o un martillo para romper el<br />
hielo en pedazos pequeños y gruesos.<br />
• Conforme el bote dé vueltas, revuelva y mezcle juntos la sal y el hielo. Utilice el<br />
agitador de plástico cada 10 ó 15 minutos mientras esté en uso la máquina para<br />
hacer helado.<br />
• Para evitar que el helado se escurra fuera del bote, no lo coloque horizontalmente<br />
cuando lo guarde en un congelador.<br />
• Si el helado está muy suave, póngalo en un recipiente para congelar y refrigérelo<br />
durante una o dos horas. También puede incorporar la unidad de la manivela<br />
manual y girarla hasta que el helado tenga la consistencia deseada.<br />
ADVERTENCIAS<br />
• No tape el agujero de drenaje a un lado de la cubeta de madera. Éste es para<br />
drenar el exceso de agua salada y deberá mantenerse abierto siempre.<br />
• En caso de que la máquina de hacer helado se pare antes de que el batido haya<br />
llegado a su término (40 minutos aproximadamente), verifique si no se han atorado<br />
pedazos grandes de hielo contra el bote. Remueva el hielo que se encuentre<br />
atorado.<br />
• La máquina para hacer helado se apagará automáticamente si los ingredientes<br />
dentro del bote están muy espesos para que la paleta de la agitadora pueda dar<br />
vuelta. La máquina para hacer helado funcionará normalmente de nuevo una vez<br />
que los ingredientes espesos sean retirados del bote.<br />
6<br />
HOW TO USE<br />
NOTE:<br />
• Make sure the ice that you put into the bucket is broken into small, coarse pieces.<br />
You may use a mallet or hammer to break into smaller pieces if needed.<br />
• As the canister turns, stir and mix the salt and ice together. Use the plastic stirrer<br />
every 10-15 minutes while the ice cream maker is in use.<br />
• To avoid ice cream seeping out of the canister, do not lay the canister flat when<br />
storing in a freezer.<br />
• If ice cream is too soft, put it in a freezable container and refrigerate for an hour or<br />
two. You may also attach the hand crank unit and crank the ice cream to the desired<br />
consistency.<br />
WARNING:<br />
• Do not plug the drain hole on the side of the wooden bucket. This is for draining<br />
excess salt water and should be kept open at all times.<br />
• Should electric motor stop before churning is complete (approximately 40 minutes),<br />
check to see if large ice cubes are jammed against the canister. If so, turn off motor<br />
and remove jammed ice.<br />
• The electric motor will automatically shut off if the ingredients in the canister are too<br />
hard for the paddle to turn. The ice cream maker will function normally again once<br />
the hard ingredients are removed from the canister.<br />
6
HELPFUL TIPS<br />
• For ice cream recipes that require pre-cooking, it is recommended that you make the<br />
mixture a day ahead. The mixture will then be able to cool completely and expand. Prechilling<br />
any ice cream recipe is suggested for achieving the best results.<br />
• The richer the cream you use, the richer the ice cream will be. Whipped heavy cream is<br />
suggested for the creamiest, smoothest ice cream. Milk can also be substituted for<br />
cream, but the texture and taste of the ice cream may change. You might also consider<br />
using a combination of milk and cream for healthier ice cream.<br />
• Artificial sweeteners may be substituted for sugar. Use the following portion as a<br />
reference:<br />
1 packet of sweetener = 2 tsp. sugar<br />
6 packets = 1/4 cup<br />
8 packets = 1/3 cup<br />
12 packets = 1/2 cup<br />
• If the recipe calls for alcohol, add it during the last few minutes of the freezing cycle.<br />
• You may taste the mixture to adjust the amount of sugar to be added. Note that the<br />
actual ice cream will taste less sweet than the mixture.<br />
7<br />
CONSEJOS ÚTILES<br />
• Para las recetas de helados que requieren algo de cocimiento previo, se recomienda<br />
que la mezcla se haga con un día de anticipación. Así la mezcla podrá enfriarse y<br />
expandirse completamente. Se sugiere enfriar previamente todas las mezclas de las<br />
recetas de helados, con el fin de lograr los mejores resultados.<br />
• Las recetas que no requieren cocimiento se hacen mejor con una batidora o<br />
licuadora eléctricas, que suavizan la mezcla y aumentan su volumen.<br />
• Mientras más espesa sea la crema que usted use, el helado será más cremoso. Se<br />
sugiere usar doble crema batida, a fin de obtener el helado más suave y cremoso.<br />
• También se puede utilizar leche en lugar de crema, pero la textura y el sabor del<br />
helado pueden cambiar. Asimismo, puede considerar usar una combinación de leche<br />
y crema para obtener un helado más saludable.<br />
• Tome nota de que al usar extracto de vainilla, es mejor agregarlo al final. El alcohol<br />
que contiene el extracto de vainilla retardará la velocidad de endurecimiento del<br />
helado. Es mejor agregar el extracto de vainilla a la mezcla cuando la máquina para<br />
hacer helado haya girado ya por lo menos unos 20 minutos.<br />
• El azúcar se puede substituir por edulcorantes artificiales. Utilice las siguientes<br />
equivalencias como referencia:<br />
1 sobrecito de edulcorante = 2 cucharaditas de azúcar<br />
6 sobrecitos = ¼ de taza<br />
8 sobrecitos = 1/3 de taza<br />
12 sobrecitos = ½ taza<br />
• Si la receta pide alcohol, agréguelo durante los últimos minutos del ciclo de<br />
congelamiento.<br />
• Puede probar la mezcla, a fin de ajustar la cantidad de azúcar que vaya a agregar.<br />
Tenga en cuenta que el helado real, final, tendrá un sabor menos dulce que la<br />
mezcla.<br />
7
CÓMO LIMPIAR EL APARATO<br />
Desconecte siempre la unidad y deje que se enfríe completamente antes de<br />
limpiarla.<br />
1. Limpie el motor de accionamiento con una toalla ligeramente húmeda para remover<br />
desechos.<br />
2. Limpie perfectamente la cubeta de madera con una esponja con jabón, a fin de quitar<br />
los residuos del agua salada. Enjuague y seque para asegurarse de que la sal no<br />
corroa las partes metálicas.<br />
3. Lave con agua y jabón y seque perfectamente el bote, la tapadera del bote y la<br />
agitadora. No vuelva a colocar la tapadera hasta que el bote para el helado esté<br />
completamente seco.<br />
• No utilice limpiadores abrasivos ni fibras para tallar.<br />
• Este aparato y los accesorios NO deben lavarse en máquinas lavavajillas.<br />
• No congele el bote (garrafa) cuando esté húmedo.<br />
8<br />
HOW TO CLEAN<br />
Always unplug unit and allow to completely cool before cleaning.<br />
1. Wipe electric motor with a slightly damp cloth to remove debris.<br />
2. Clean wooden bucket with a soapy sponge thoroughly, to remove the salt-water<br />
residue. Rinse and dry to ensure the salt does not corrode the metal parts.<br />
3. Wash canister, lid and dasher with soapy water and dry thoroughly. Do not replace<br />
the lid until the ice cream canister is completely dry.<br />
• Do not use harsh abrasive cleaners.<br />
• This appliance and accessories are NOT dishwasher safe.<br />
• Do not freeze canister when wet.<br />
8
RECIPES<br />
Peanut Butter Chocolate Chip Ice Cream<br />
2-2/3 cups granulated sugar<br />
2 tbsp cornstarch<br />
1/2 tsp salt<br />
1-1/2 tsp vanilla<br />
6 cups milk<br />
4 eggs, beaten<br />
2 cups heavy cream<br />
1-1/3 cups half and half<br />
1-1/2 cup chocolate chips<br />
1 cup peanut butter or 1 cup peanut butter chips, melted<br />
Mix the sugar, cornstarch and salt in a large saucepan. Over medium heat, slowly stir in<br />
the milk, stirring constantly. Very slowly, add the beaten eggs and continue to stir.<br />
Reduce heat to low and cook until mixture thickens slightly. Slowly stir in peanut butter<br />
and whisk until all peanut butter is combined and mixture is smooth. Slowly add vanilla,<br />
half and half, and heavy cream. Pour into a large glass bowl and refrigerate for 2-4<br />
hours or until mixture has chilled. Remove from refrigerator and add chocolate chips.<br />
Pour mixture into the mixing canister and follow directions in the "How to Use" section,<br />
pages 4 to 7.<br />
Mixed Berry Sorbet<br />
2 ,12oz bags of frozen mixed berries<br />
2 cups granulated sugar<br />
1/3 cup fresh lemon juice<br />
4 cups cran-raspberry juice<br />
1 cups apple juice<br />
1 cups water<br />
Finely purée the berries in a blender with apple juice and water. Strain mixture into a<br />
large saucepan to remove seeds. Discard seeds. Add sugar to the seedless mixture,<br />
bring to a boil for 3-4 minutes. Stir in remaining juices. Pour into a large glass bowl and<br />
refrigerate 2-4 hours. Pour mixture into mixing canister and follow directions in the "How<br />
to Use" section, pages 4 to 7.<br />
9<br />
RECETAS<br />
Helado de Mantequilla de Cacahuate y Pedacitos de Chocolate (Chocolate Chips)<br />
2-2/3 tazas de azúcar granulada<br />
2 cucharaditas de maicena<br />
1/2 cucharadita de sal<br />
1-1/2 cucharadita de vainilla<br />
6 tazas de leche<br />
4 huevos batidos<br />
2 tazas de doble crema<br />
1-1/3 tazas de mitad de crema y mitad de leche (half and half)<br />
1-1/2 tazas de pedacitos de chocolate (chocolate chips)<br />
1 taza de mantequilla de cacahuate o 1 taza de pedacitos de mantequilla de cacahuate<br />
(peanut butter chips), derretidos<br />
Mezcle el azúcar, la maicena y la sal en una cacerola grande. A fuego mediano vacíe<br />
lentamente la leche, revolviendo constantemente. Muy lentamente, agregue los<br />
huevos batidos y continúe revolviendo. Baje el fuego y cocine hasta que la mezcla<br />
espese ligeramente. Revolviendo lentamente incorpore la mantequilla de cacahuate y<br />
bata rápidamente hasta que toda la mantequilla de cacahuate quede combinada y la<br />
mezcla quede suave. Lentamente añada la vainilla, la 1 ½ tazas de mitad crema y<br />
mitad leche y la doble crema. Vacíela en un tazón grande de vidrio y refrigere de 2 a 4<br />
horas o hasta que la mezcla se haya enfriado. Sáquela del refrigerador y agregue los<br />
pedacitos de chocolate. Vacíe la mezcla en el bote (garrafa) de mezclar y siga las<br />
instrucciones de la sección "Modo de Usarse", de las páginas 4 a la 7.<br />
9
RECETAS<br />
Helado de Vainilla<br />
2 tazas de azúcar granulada<br />
1-1/2 cucharaditas de maicena<br />
1/4 cucharadita de sal<br />
1-1/2 cucharadita de vainilla<br />
7 tazas de leche<br />
5 huevos batidos<br />
2 ¾ tazas de doble crema<br />
1 ½ tazas de mitad crema y mitad leche (half and half)<br />
Mezcle el azúcar, la maicena y la sal en una cacerola grande. A fuego mediano,<br />
agregue lentamente la leche, revolviendo constantemente. Muy lentamente, añada los<br />
huevos batidos y continúe revolviendo. Reduzca el fuego y cocine hasta que la mezcla<br />
espese ligeramente. Lentamente agregue la vainilla, la 1 ½ tazas de mitad crema y<br />
mitad leche y la doble crema. Vacíela en un tazón grande de vidrio y refrigere de 2 a 4<br />
horas o hasta que la mezcla se haya enfriado. Sáquela del refrigerador. Vacíe la<br />
mezcla en el bote (garrafa) de mezclar y siga las instrucciones de la sección "Modo de<br />
Usarse", de las páginas 4 a la 7.<br />
Nieve de Piña<br />
2 bolsas de 12 onzas de piña congelada<br />
2 tazas de azúcar granulada<br />
1/2 de taza de jugo de limón amarillo fresco<br />
4-1/2 tazas de jugo de piña<br />
1 tazas de jugo de manzana<br />
1 tazas de agua<br />
En una licuadora haga un puré fino con la piña, con el jugo de manzana y agua. Pase<br />
la mezcla por un colador a una cacerola grande para lograr una consistencia suave.<br />
Agregue el azúcar a la mezcla y póngala al fuego a hervir de 3 a 4 minutos. Agréguele<br />
el jugo restante y revuelva. Vacíela en un tazón grande de vidrio y refrigere de 2 a 4<br />
horas. Vacíe la mezcla en el bote (garrafa) de mezclar y siga las instrucciones de la<br />
sección "Modo de Usarse", de las páginas 4 a la 7.<br />
10<br />
RECIPES<br />
Vanilla Ice Cream<br />
2 cups granulated sugar<br />
1-1/2 tbsp cornstarch<br />
1/4 tsp salt<br />
1-1/2 tbsp vanilla<br />
7 cups milk<br />
5 eggs, beaten<br />
2-3/4 cups heavy cream<br />
1-1/2 cups half and half<br />
Mix the sugar, cornstarch and salt in a large saucepan. Over medium heat, slowly stir in<br />
the milk, stirring constantly. Very slowly, add the beaten eggs and continue to stir.<br />
Reduce heat to low and cook until mixture thickens slightly. Slowly add vanilla, half and<br />
half, and heavy cream. Pour into a large glass bowl and refrigerate for 2-4 hours or until<br />
mixture has chilled. Remove from refrigerator. Pour mixture into the mixing canister and<br />
follow directions in the "How to Use" section, pages 4 to 7.<br />
Pineapple Sorbet<br />
2 ,12oz bags of frozen pineapple<br />
2 cups granulated sugar<br />
1/2 cup fresh lemon juice<br />
4-1/2 cups pineapple juice<br />
1 cups apple juice<br />
1 cups water<br />
Finely purée the pineapple in a blender with juice and water. Strain mixture into a large<br />
saucepan for a smooth consistency. Add sugar to the mixture and bring to a boil for 3-4<br />
minutes. Stir in remaining juice. Pour into a large glass bowl and refrigerate 2-4 hours.<br />
Pour mixture into mixing canister and follow directions in the "How to Use" section,<br />
pages 4 to 7.<br />
10
RECIPES<br />
Chocolate Ice Cream<br />
2-2/3 cup granulated sugar<br />
2 tsp cornstarch<br />
1/2 Salt<br />
6 cups milk<br />
4 eggs, beaten<br />
6 squares semi-sweet chocolate, melted<br />
1-1/3 cups half and half<br />
2 cups whipping cream<br />
2 tbsp vanilla extract<br />
Mix the sugar, cornstarch and salt in a large saucepan. Over medium heat, slowly stir in<br />
the milk, stirring constantly until the mixture begins to simmer. Very slowly, add the<br />
beaten eggs and continue to stir. Reduce heat to low and cook until mixture thickens<br />
slightly. Slowly stir in the melted chocolate and whisk until all chocolate is combined and<br />
mixture is smooth. Slowly add vanilla, half and half, and heavy cream. Pour into a large<br />
glass bowl, cover and refrigerate for 2-4 hours or until mixture has chilled. Pour mixture<br />
into the mixing canister and follow directions in the "How to Use" section, pages 4 to 7.<br />
Rocky Road Ice Cream<br />
1-3/4 cup granulated sugar<br />
1/2 Salt<br />
2 cups milk<br />
6 squares semi-sweet chocolate<br />
2 cups half and half<br />
6 cups whipping cream<br />
1 tbsp vanilla extract<br />
2 cups mini marshmallows<br />
1-1/2 cups chocolate chips<br />
1 cups chopped pecans<br />
Mix the milk and chocolate in a large saucepan. Over medium heat, stir until the<br />
chocolate is completely melted. Remove from heat and slowly add sugar and salt, mixing<br />
well, until dissolved. Stir in the remaining ingredients, then cover and refrigerate for<br />
about 30 minutes or until mixture has chilled. Pour mixture into the mixing canister and<br />
follow directions in the "How to Use" section, pages 4 to 7.<br />
11<br />
RECETAS<br />
Helado de Chocolate<br />
2-2/3 tazas de azúcar granulada<br />
2 cucharaditas de maicena<br />
1/2 cucharadita de sal<br />
6 tazas de leche<br />
4 huevos batidos<br />
6 cuadros de chocolate semidulce<br />
1 1/3 tazas mitad crema y mitad leche (half and half)<br />
2 tazas de crema batida<br />
2 cucharadas de extracto de vainilla<br />
Mezcle el azúcar, la maicena y la sal en una cacerola grande, A fuego mediano, agregue<br />
lentamente la leche, revolviendo constantemente hasta que la mezcla comience a hervir.<br />
Muy lentamente, añada los huevos batidos y continúe revolviendo. Reduzca el fuego y<br />
cocine la mezcla hasta que espese ligeramente. Vaya agregando poco a poco y<br />
lentamente la vainilla, la 1 2/3 tazas de mitad crema y mitad leche y la doble crema.<br />
Vacíela en un tazón grande de vidrio, tápelo y refrigere de 2 a 4 horas o hasta que la<br />
mezcla se haya enfriado. Vacíe la mezcla en el bote (garrafa) de mezclar y siga las<br />
instrucciones de la sección "Modo de Usarse", de las páginas 4 a la 7.<br />
Helado Camino Empedrado<br />
1-3/4 tazas de azúcar granulada<br />
1/2 cucharadita de sal<br />
2 tazas de leche<br />
6 cuadros de chocolate semidulce<br />
2 tazas mitad crema y mitad leche (halsf and half)<br />
6 tazas de crema batida<br />
1 cucharadas de extracto de vainilla<br />
2 tazas de malvaviscos miniatura<br />
1-1/2 tazas de pedacitos de chocolate (chocolate chips)<br />
1 tazas de nueces picadas<br />
Mezcle la leche y el chocolate en una cacerola grande. A fuego mediano agregue el<br />
chocolate, revolviendo hasta que se derrita completamente. Retire del fuego y añada<br />
lentamente el azúcar y la sal, mezclando bien hasta que se disuelvan. Revuelva el<br />
resto de los ingredientes, tape y refrigere durante 30 minutos aproximadamente o hasta<br />
que la mezcla se haya enfriado. Vacíe la mezcla en el bote (garrafa) de mezclar y siga<br />
las instrucciones de la sección "Modo de Usarse", de las páginas 4 a la 7.<br />
11
3 tsp plain gelatin<br />
8 cups low fat milk<br />
2 cups sugar free chocolate drink mix<br />
3 cups drained yogurt (the solid half of 2 cups yogurt strained overnight)<br />
4 tsp vanilla extract<br />
1-1/2 tsp salt<br />
RECETAS<br />
Nieve de Frambuesa<br />
2 bolsas de 12 onzas de frambuesas congeladas<br />
2 tazas de azúcar congelada<br />
6 cucharaditas de jugo de limón amarillo fresco<br />
Las claras de 2 huevos<br />
1-1/2 tazas de agua<br />
1-1/2 tazas de crema batida<br />
Mezcle en una cacerola las frambuesas, el azúcar y el agua. Deje hervir a fuego lento<br />
durante 5 minutos. Cuele la mezcla para obtener una consistencia suave y agregue el<br />
jugo de limón. Bata rápidamente hasta que esté ligera, luego envuélvale la crema<br />
batida hasta que espese la mezcla. Vacíe en un tazón grande de vidrio y refrigere de 1<br />
a 2 horas. Vacíe la mezcla en el bote (garrafa) de mezclar y siga las instrucciones de la<br />
sección "Modo de Usarse", de las páginas 4 a la 7.<br />
Para hacer variaciones, usted puede usar la misma receta y substituir las fresas<br />
con duraznos, frambuesas, arándanos o cualquier tipo de fruta congelada.<br />
Helado de Chocolate sin Azúcar<br />
3 cucharaditas de gelatina sin sabor<br />
8 tazas de leche baja en grasa<br />
2 tazas de mezcla para bebida de chocolate sin azúcar<br />
3 tazas de yogur drenado (la mitad sólida de 2 tazas de yogur colado durante la noche)<br />
4 cucharaditas de extracto de vainilla<br />
1-1/2 cucharaditas de sal<br />
Ablande la gelatina en 2 tazas de leche. Caliéntela en una cacerola hasta que la<br />
gelatina se disuelva. Retire del fuego y coloque la cacerola en otro tazón de agua fría o<br />
helada a fin de enfriar la mezcla a temperatura ambiente. Vacíe la mezcla en una<br />
licuadora o procesador de alimentos. Agregue la leche restante, la mezcla para la<br />
bebida de chocolate, el yogur, la vainilla y la sal. Mezcle hasta que esté suave. Vacíe<br />
en un tazón grande de vidrio y refrigere de 1 a 2 horas. Vacíe la mezcla en el bote<br />
(garrafa) de mezclar y siga las instrucciones de la sección "Modo de Usarse", de las<br />
páginas 4 a la 7.<br />
12<br />
RECIPES<br />
Strawberry Sherbet<br />
2 ,12oz bags of frozen strawberries<br />
2 cups granulated sugar<br />
6 tsp fresh lemon juice<br />
2 egg whites<br />
1-1/2 cup water<br />
1-1/2 cups whipping cream<br />
In a sauce pan, mix in strawberries, sugar and water. Let simmer for 5 minutes. Strain<br />
mixture for a smooth consistency and add lemon juice. Whisk until light, then fold in the<br />
whipping cream until the mixture thickens. Pour into a large glass bowl and refrigerate 1-<br />
2 hours. Pour mixture into mixing canister and follow directions in the "How to Use"<br />
section, pages 4 to 7.<br />
For variations, you can use the same recipe and substitute the strawberries for<br />
peaches, raspberries, blueberries or any kind of frozen fruit.<br />
No Sugar Added Chocolate Ice Cream<br />
Soften gelatin in 2 cups milk. Heat in a saucepan until gelatin dissolves. Remove from<br />
heat and place saucepan in another bowl of cold or ice water to cool mixture to room<br />
temperature. Pour mixture into a blender or food processor. Add remaining milk,<br />
chocolate drink mix, yogurt, vanilla and salt. Blend until smooth. Pour into a large glass<br />
bowl and refrigerate 1-2 hours. Pour mixture into mixing canister and follow directions in<br />
the "How to Use" section, pages 4 to 7.<br />
12
LIMITED WARRANTY<br />
Aroma Housewares Company warrants this product free from defects in material<br />
and workmanship for one year from provable date of purchase in continental United<br />
States.<br />
Within this warranty period, Aroma Housewares Company will repair or replace, at<br />
its option, defective parts at no charge, provided the product is returned, freight<br />
prepaid with proof of purchase and U.S. $8.00 for shipping and handling charges<br />
payable to Aroma Housewares Company. Before returning an item, please call the<br />
toll free number below for return authorization number. Allow 2-4 weeks for return<br />
shipping.<br />
This warranty does not cover improper installation, misuse, abuse or neglect on the<br />
part of the owner. Warranty is also invalid in any case that the product is taken<br />
apart or serviced by an unauthorized service station.<br />
This warranty gives you specific legal rights and which may vary from state to state<br />
and does not cover areas outside the United States.<br />
AROMA HOUSEWARES COMPANY<br />
6469 Flanders Drive<br />
San Diego, California 92121<br />
1-800-276-6286<br />
M-F, 8:30 AM - 5:00 PM, Pacific Time<br />
Website: www.aromaco.com<br />
GARANTÍA LIMITADA<br />
Aroma Housewares Company garantiza que este producto no tenga defectos en<br />
sus materiales y fabricación durante un período de un año a partir de la fecha<br />
comprobada de compra dentro de la parte continental de los Estados Unidos.<br />
Dentro de este período de garantía, Aroma Housewares Company reparará o<br />
reemplazará, a su opción, las partes defectuosas sin ningún costo, siempre y<br />
cuando el producto sea devuelto, con el flete prepagado, con comprobación de<br />
compra y $8.00 dólares para cargos de envío y manejo a favor de Aroma<br />
Housewares Company. Antes de devolver un producto, sírvase llamar al número<br />
telefónico gratuito que está más abajo para obtener un número de autorización de<br />
devolución. Espere entre 2-4 semanas para recibir el aparato nuevamente.<br />
Esta garantía no cubre la instalación incorrecta, el uso indebido, maltrato o<br />
negligencia por parte del usuario. La garantía también es inválida en caso de que<br />
el aparato sea desarmado o se le dé mantenimiento en un centro de servicio no<br />
autorizado.<br />
Esta garantía le da derechos legales específicos los cuales podrán variar de un<br />
estado a otro y no cubre áreas fuera de los Estados Unidos.<br />
AROMA HOUSEWARES COMPANY<br />
6469 Flanders Drive<br />
San Diego, California 92121<br />
1-800-276-6286<br />
L-V, 8:30 AM - 5:00 PM, Tiempo del Pacífico<br />
Sitio Web: www.aromaco.com