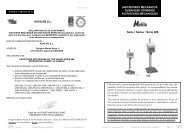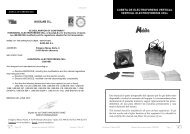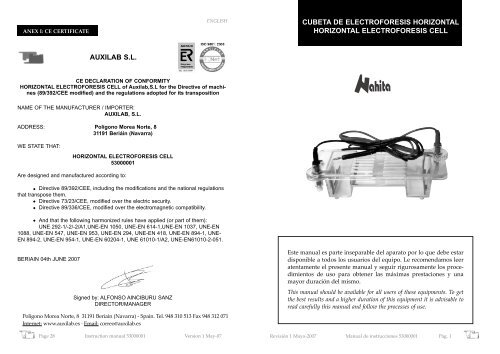
CUBETA DE ELECTROFORESIS HORIZONTAL ... - Auxilab
CUBETA DE ELECTROFORESIS HORIZONTAL ... - Auxilab
CUBETA DE ELECTROFORESIS HORIZONTAL ... - Auxilab

You also want an ePaper? Increase the reach of your titles
YUMPU automatically turns print PDFs into web optimized ePapers that Google loves.
ANEX I: CE CERTIFICATE<br />
ENGLISH<br />
<strong>CUBETA</strong> <strong>DE</strong> <strong>ELECTROFORESIS</strong> <strong>HORIZONTAL</strong><br />
<strong>HORIZONTAL</strong> <strong>ELECTROFORESIS</strong> CELL<br />
AUXILAB S.L.<br />
CE <strong>DE</strong>CLARATION OF CONFORMITY<br />
<strong>HORIZONTAL</strong> <strong>ELECTROFORESIS</strong> CELL of <strong>Auxilab</strong>,S.L for the Directive of machines<br />
(89/392/CEE modified) and the regulations adopted for its transposition<br />
NAME OF THE MANUFACTURER / IMPORTER:<br />
AUXILAB, S.L.<br />
ADDRESS: Polígono Morea Norte, 8<br />
31191 Beriáin (Navarra)<br />
WE STATE THAT:<br />
<strong>HORIZONTAL</strong> <strong>ELECTROFORESIS</strong> CELL<br />
53000001<br />
Are designed and manufactured according to:<br />
• Directive 89/392/CEE, including the modifications and the national regulations<br />
that transpose them.<br />
• Directive 73/23/CEE, modified over the electric security.<br />
• Directive 89/336/CEE, modified over the electromagnetic compatibility.<br />
• And that the following harmonized rules have applied (or part of them):<br />
UNE 292-1/-2/-2/A1,UNE-EN 1050, UNE-EN 614-1,UNE-EN 1037, UNE-EN<br />
1088, UNE-EN 547, UNE-EN 953, UNE-EN 294, UNE-EN 418, UNE-EN 894-1, UNE-<br />
EN 894-2, UNE-EN 954-1, UNE-EN 60204-1, UNE 61010-1/A2, UNE-EN61010-2-051.<br />
BERIAIN 04th JUNE 2007<br />
Signed by: ALFONSO AINCIBURU SANZ<br />
DIRECTOR/MANAGER<br />
Polígono Morea Norte, 8 31191 Beriain (Navarra) - Spain. Tel. 948 310 513 Fax 948 312 071<br />
Internet: www.auxilab.es · Email: correo@auxilab.es<br />
Este manual es parte inseparable del aparato por lo que debe estar<br />
disponible a todos los usuarios del equipo. Le recomendamos leer<br />
atentamente el presente manual y seguir rigurosamente los procedimientos<br />
de uso para obtener las máximas prestaciones y una<br />
mayor duración del mismo.<br />
This manual should be available for all users of these equipments. To get<br />
the best results and a higher duration of this equipment it is advisable to<br />
read carefully this manual and follow the processes of use.<br />
Page 28 Instruction manual 53000001 Version 1 May-07 Revisión 1 Mayo-2007 Manual de instrucciones 53000001 Pág. 1
CASTELLANO<br />
Gracias por haber adquirido este equipo. Deseamos sinceramente que disfrute de la<br />
cubeta de electroforesis horizontal Nahita. Le recomendamos que cuide el equipo conforme<br />
a lo expuesto en este manual.<br />
Nahita desarrolla sus productos según las directrices del marcado CE y haciendo hincapié<br />
en la ergonomía y seguridad del usuario.<br />
La calidad de los materiales empleados en la fabricación y el correcto proceder le permitirán<br />
disfrutar del equipo por muchos años.<br />
El uso incorrecto o indebido del equipo puede dar lugar a accidentes, descargas eléctricas,<br />
cortocircuitos, fuegos, lesiones, etc. Lea el punto de Mantenimiento, donde se recogen<br />
aspectos de seguridad.<br />
ENGLISH<br />
- Remove the screw and the rubber ring located under the banana connector of the tank.<br />
- Remove the broken or damaged electrode by pulling upward from the connector.<br />
- Insert the new electrode; do not forget the rubber ring.<br />
- Put the screw and the rubber ring again and tighten them to form a leak-free seal.<br />
LEA <strong>DE</strong>TALLADAMENTE ESTE MANUAL <strong>DE</strong> INSTRUCCIONES ANTES <strong>DE</strong><br />
OPERAR CON ESTE EQUIPO CON EL FIN <strong>DE</strong> OBTENER LAS MÁXIMAS PRES-<br />
TACIONES Y UNA MAYOR DURACIÓN <strong>DE</strong>L MISMO.<br />
Tenga especialmente presente lo siguiente:<br />
• Este manual es parte inseparable de la cubeta de electroforesis horizontal Nahita, por lo<br />
que debe estar disponible para todos los usuarios del equipo.<br />
• Debe manipularse siempre con cuidado evitando los movimientos bruscos, golpes, caídas<br />
de objetos pesados o punzantes.<br />
• Cualquier duda puede ser aclarada por su distribuidor (instalación, modo de uso, funcionamiento).<br />
Usted puede también mandarnos sus dudas o sugerencias a la siguiente<br />
dirección de correo del Servicio Técnico Nahita (asistencia@auxilab.es) o bien llamando al<br />
Tel: 807117040 (0,30Euros/min).<br />
• Este equipo está amparado por la Ley de garantías y bienes de consumo (10/2003).<br />
• No se consideran en garantía las revisiones del equipo.<br />
• Los accesorios, así como su pérdida, no están cubiertos por dicha garantía. Tampoco<br />
estarán cubiertos por el periodo de garantía las piezas en su desgaste por uso natural.<br />
• Asegúrese de guardar la factura de compra para tener derecho de reclamación o prestación<br />
de la garantía. En caso de enviar el equipo al Servicio Técnico adjunte factura o<br />
copia de la misma como documento de garantía.<br />
• Rellene y envíe la garantía antes de los 15 días después de la compra.<br />
• El fabricante se reserva los derechos a posibles modificaciones y mejoras sobre este<br />
manual y equipo.<br />
¡ATENCIÓN! NO SE ADMITIRÁ NINGÚN APARATO PARA REPA-<br />
RAR QUE NO ESTÉ <strong>DE</strong>BIDAMENTE LIMPIO Y <strong>DE</strong>SINFECTADO.<br />
ÍNDICE <strong>DE</strong> IDIOMAS<br />
Castellano<br />
Inglés<br />
2-15<br />
16-28<br />
Cleaning<br />
• Wash all components gently with water and non abrasive detergents, and rinse well in<br />
deionized water. Note: be careful not to damage the electrode wire when cleaning the<br />
electrophoresis tank.<br />
• Wipe dry with a soft cloth or allow to air dry.<br />
• Never use scourers or substances that can grate as they damage the electrophoresis cell<br />
and produce an early ageing of the equipment.<br />
ATTENTION!! IF EQUIPMENTS ARE NOT PROPERLY CLEAN AND<br />
DISINFECTED THEY WOULD NOT BE ALLOWED TO REPAIR BY OUR<br />
TECHNICAL SERVICE.<br />
INSTRUCTIONS ON ENVIRONMENT PROTECTION<br />
At the end of its life cycle, please, do not dispose of this equipment<br />
by throwing it in the usual garbage; hand it over a collection point for<br />
the recycling of electrical and electronic appliances. It does not contain<br />
dangerous or toxic products for humans but a non adequate disposal<br />
would damage the environment.<br />
The materials are recyclable as mentioned in its marking. By recycling material or by<br />
other forms of re-utilization of old appliances, you are making an important contribution<br />
to protect our environment.<br />
Please inquire at the community administration for the authorized disposal location.<br />
Pág. 2 Manual de instrucciones 53000001 Revisión 1 Mayo-07<br />
Version 1 May-07 Instruction manual 53000001 Page 27
TROUBLE<br />
"Flaming bands" (excessive fluorescence<br />
appearing as a trail above the band)<br />
Bands are not straight lines or parallel to<br />
the top edge of the gel<br />
All bands appear as doublets (each band<br />
is represented twice within the same lane)<br />
7.MAINTENANCE AND CLEANING<br />
COMENTS<br />
ENGLISH<br />
- Reduce the amount of the sample<br />
- Reduce the amount of protein and/or<br />
glycerol of the sample<br />
- Verify that the wells are free of particles<br />
and bubbles before and after loading<br />
samples<br />
- Verify that the agarose is completely<br />
dissolved before casting the gel<br />
- Remove any particulate matter from<br />
the agarose before casting the gel<br />
- Be sure that bubbles are not trapped<br />
against the comb during gel casting<br />
- Concentrate the sample and use a thin<br />
gel with a thin comb<br />
- Avoid movements during gel photography<br />
- Reduce voltage. Band doublets may<br />
result due to denaturalization from excess<br />
heat from electrophoresing gel at high voltage<br />
To get the best results and a higher duration of the horizontal electrophoresis cell it<br />
is essential to follow the processes of use.<br />
Note: All the processes of use mentioned below will not have any value unless you keep<br />
a continued and careful maintenance.<br />
• Please follow the processes of use of this manual.<br />
• This manual should be available for all users of this equipment.<br />
• Always use original components and supplies. Other devices can be similar but they<br />
can damage the equipment.<br />
• NEVER autoclave or dry-heat sterilize the apparatus or components.<br />
• Do not expose the apparatus or components to phenol, benzene, acetone, halogenated<br />
hydrocarbon solvents or undiluted laboratory alcohols.<br />
• Avoid prolonged exposure of the apparatus or components to the UV light.<br />
• In case of breakage or damage of the electrodes proceed as follows for their replacement:<br />
ÍNDICE <strong>DE</strong> CONTENIDOS<br />
1. APLICACIONES <strong>DE</strong>L INSTRUMENTO<br />
2. <strong>DE</strong>SCRIPCIÓN Y COMPONENTES<br />
3. ESPECIFICACIONES TÉCNICAS<br />
4. MODO <strong>DE</strong> USO<br />
5. SOLUCIONES TAMPÓN <strong>DE</strong> <strong>ELECTROFORESIS</strong> Y OTRAS<br />
6. RESOLUCIÓN <strong>DE</strong> PROBLEMAS<br />
7. MANTENIMIENTO Y LIMPIEZA<br />
ANEXO I: CERTIFICADO CE<br />
1. APLICACIONES <strong>DE</strong>L INSTRUMENTO<br />
La cubeta de electroforesis horizontal de Nahita está diseñada para la separación, identificación,<br />
y preparación de moléculas de DNA y RNA en geles de agarosa. El equipo<br />
viene completo con todos los accesorios necesarios para la preparación y electroforesis de<br />
geles de 100x70 mm.<br />
2. <strong>DE</strong>SCRIPCIÓN Y COMPONENTES<br />
Componentes<br />
La cubeta de electroforesis horizontal de Nahita se suministra junto con todos los componentes<br />
necesarios para la preparación y electroforesis de geles de agarosa de 100x70<br />
mm:<br />
• Tanque de electroforesis: fabricado en material de alta calidad resistente a la rotura, la<br />
acción de agentes químicos y presión y temperaturas elevadas. Es un dispositivo duradero,<br />
transparente, bien sellado y sin contaminantes químicos. Presenta 4 patas antideslizantes<br />
y 2 electrodos reemplazables de platino puro resistentes a la corrosión y a elevadas<br />
temperaturas.<br />
• Tapa: al igual que el tanque, está fabricada con un material de elevada calidad y resistencia.<br />
Presenta ranuras para disipar el calor y dos cables fijos de alimentación con conector<br />
tipo banana para conectar a la fuente de alimentación.<br />
- Molde para la preparación de geles:<br />
permite la preparación de geles de<br />
100x70 mm. Presenta ranuras laterales<br />
para la colocación y sujeción de<br />
hasta 2 peines paralelos en caso de<br />
tener que analizar un elevado número<br />
de muestras al mismo tiempo<br />
Ranuras<br />
para peines<br />
CASTELLANO<br />
3<br />
3<br />
5<br />
5<br />
9<br />
11<br />
13<br />
15<br />
Page 26 Instruction manual 53000001 Version 1 May-07<br />
Revisión 1, Mayo-07 Manual de instrucciones 53000001 Pág. 3
- Bandejas para geles: con regla integrada y con<br />
banda oscura para favorecer la visualización de los<br />
pocillos y así facilitar la carga de las muestras<br />
- Peines: el equipo se suministra con 2<br />
peines de 1.0 y 1.5 mm de grosor respectivamente<br />
ambos con 8 dientes en<br />
un lado y 15 en el otro<br />
CASTELLANO<br />
CHART 7 . Concentrated stock of ethidium bromide, 20000x<br />
Component Quantity Concentration<br />
Ethidium bromide 100 mg 10 mg/mL<br />
Deionized water 0.37 g ----<br />
6. TROUBLESHOOTING<br />
TROUBLE<br />
COMENTS<br />
ENGLISH<br />
1. Tanque de electroforesis<br />
2. Electrodos reemplazables<br />
3. Patas antideslizantes<br />
4. Dispositivo para facilitar<br />
la extracción de la tapa<br />
5. Bandeja para geles<br />
6. Tapa<br />
7. Ranuras para dispersión<br />
del calor<br />
8. Cables fijos<br />
6<br />
7<br />
8<br />
Bubbles do not appear on the electrodes<br />
when DC voltage is connected<br />
Bromophenol blue dye turns yellow (pH<br />
change) during electrophoresis. Results are<br />
uninterpretable.<br />
Samples leak underneath the gel upon<br />
loading<br />
- Verify that the DC power supply is<br />
operating properly<br />
- Verify that the lid is properly placed on<br />
the apparatus<br />
- Verify that power leads are in perfect<br />
conditions<br />
- Verify that electrodes are in perfect<br />
conditions<br />
- Check the pH of the electrophoresis<br />
buffer. Be sure to use Tris base not Tris<br />
HCl.<br />
- Mix the buffer periodically during<br />
electrophoresis.<br />
The bottom of the wells were torn when<br />
the comb was removed. To minimize<br />
adhesion of the agarose to the comb,<br />
remove the comb as soon as the agarose is<br />
solidified.<br />
2<br />
5<br />
Gel melts or become soft near sample<br />
wells<br />
- This is due to the combination of pH<br />
drift and high temperatures. Reduce the<br />
electrophoretic voltage.<br />
4<br />
1<br />
Pronounce "smiling" along one edge of<br />
the gel is observed (corresponding bands in<br />
different lanes migrate slower toward one<br />
edge of the gel)<br />
- Gel was cast or electrophoresed out of<br />
level. Use the "bull's eye" level to verify<br />
that the apparatus is levelled prior to gel<br />
casting and electrophoresis.<br />
3<br />
4<br />
S-Shaped lanes (anomalous migration<br />
front results in lanes that are not running at<br />
a uniform speed)<br />
- Mix the buffer periodically during<br />
electrophoresis<br />
- Use a low conductivity / high buffering<br />
capacity buffer (eg. from TAE 1x or TBE 1x<br />
to TBE 0.5x)<br />
- Reduce the salt concentration of the<br />
sample<br />
Pág. 4 Manual de instrucciones 53000001 Revisión 1 Mayo-07<br />
Version 1 May-07 Instruction manual 53000001 Page 25
CHART 5. TAE (Tris acetate/EDTA) buffer, 10x<br />
Component Quantity Concentration<br />
Tris base 48.4 g 400 mM<br />
Na 2 EDTA·2H 2 O 7.4 g 20 mM<br />
Sodium acetate, anhydrous 16.4 g 200 mM<br />
Glacial acetic acid 17.0 mL 296 mM<br />
Deionized water Up to 1 L ----<br />
ENGLISH<br />
Note: This is a 10x concentrated solution. Dilute with deionized water prior to use.<br />
Final pH should be 7.8 at 25 ºC.<br />
5.2 Loading buffer<br />
Loading buffer must be added to samples before loading the gel. This solution must<br />
have enough glycerol to be denser than the electrophoresis buffer.<br />
It is recommended to prepare a concentrated stock and immediately prior to loading<br />
add this stock to samples so that the final concentration at the mixture is 1x. Stock solution<br />
must be kept at 4 ºC.<br />
CHART 6. Loading buffer, 10x<br />
Component Quantity Concentration<br />
Glycerol 5 mL 50% (v/v)<br />
Na 2 EDTA·2H 2 O 0.37 g 100 mM<br />
Sodium dodecyl sulphate (SDS) 0.1 g 1% (w/v)<br />
Bromophenol blue 0.01 g 0.1% (w/v)<br />
Deionized water Up to 10 mL ----<br />
5.3 Ethidium bromide<br />
For visualization of double-stranded DNA after electrophoresis, it is necessary to stain<br />
the gel with a 0.5 g/mL solution of ethidium bromide in deionized water. The gel should<br />
be transferred to the solution and left to stain for a time depending on gel thickness (10-<br />
15 min for 3 mm-thick gels and up to 1 h for 10 mm-thick gels). To reduce fluorescent<br />
background, the gel can be destained in deionized water for 10-15 min (thin gels) or 30<br />
min (thick gels).<br />
Ethidium bromide can also be added directly to the agarose before casting the gel; so<br />
that electrophoresis is preformed in the presence of ethidium bromide. The concentration<br />
of ethidium bromide in the gel must also be 0.5 g/mL.<br />
It is recommended to prepare a concentrate stock of ethidium bromide that must be stored<br />
in the dark.<br />
NOTA: el bromuro de etidio es un agente mutagénico muy potente. Lleve<br />
guantes en todo momento cuando manipule soluciones, geles o equipos que<br />
hayan estado en contacto con esta sustancia.<br />
3. ESPECIFICACIONES TÉCNICAS<br />
Referencia 53000001<br />
Dimensiones gel (mm)<br />
100x70<br />
Nº muestras 8, 15<br />
Grosor peines<br />
Volumen sol. tampón (aprox.)<br />
Condiciones trabajo<br />
Tiempo de trabajo continuo<br />
Max. voltaje entrada<br />
Max. corriente eléctrica<br />
Dimensiones cubeta (LxAxH)<br />
4. MODO <strong>DE</strong> USO<br />
1 y 1.5 mm<br />
260 mL<br />
0-40 ºC y < 80% HR<br />
>24 h<br />
100 V<br />
50 mA<br />
268x116x76 mm<br />
CASTELLANO<br />
4.1 Inspección preliminar<br />
Desembale la cubeta de electroforesis horizontal, retire todas las protecciones y asegúrese<br />
de que no presenta ningún daño debido al transporte. De ser así, comuníquelo inmediatamente<br />
a su transportista o suministrador para que pueda hacer las debidas reclamaciones<br />
en el plazo establecido.<br />
Guarde el embalaje, ya que siempre se deben realizar las devoluciones en su embalaje<br />
original con todos los accesorios suministrados.<br />
Compruebe los accesorios que usted debe recibir junto al equipo:<br />
- 1 Tanque con electrodos<br />
- 1 Tapa con cables fijos<br />
- 1 Molde para preparación de geles<br />
- 2 Bandejas de 74x100 mm para geles<br />
- 2 Peines de 1.0 y 1.5 mm grosor respectivamente<br />
- Garantía<br />
- Manual de instrucciones<br />
Solo aceptamos devoluciones de equipos en los 15 días posteriores al envío y siempre<br />
que vengan completos en su embalaje original.<br />
4.2 Modo de uso<br />
Nota: el equipo está diseñado exclusivamente para su uso en el laboratorio; la temperatura<br />
ambiente debe ser de 0-40 ºC y la humedad relativa no debe exceder del 80%. Para<br />
su utilización, coloque la cubeta de electroforesis en una superficie, plana, lisa y libre de<br />
vibraciones.<br />
Page 24 Instruction manual 53000001 Version 1 May-07 Revisión 1, Mayo-07 Manual de instrucciones 53000001 Pág. 5
• Montaje para preparación del gel<br />
- Coloque la bandeja para geles dentro<br />
del molde. Asegúrese de que la banda<br />
negra para facilitar la visualización de los<br />
pocillos está a la altura de la ranura para la<br />
sujeción del peine.<br />
- Seleccione el peine con el grosor y<br />
número apropiado de pocillos según el experimento<br />
que se vaya a realizar. Generalmente<br />
se utiliza el peine de 1 mm grosor pero en<br />
aquellos casos en los que se trabaje con geles<br />
frágiles, es preferible utilizar el peine de 1.5<br />
mm grosor.<br />
- Inserte el peine en el molde para<br />
geles, de modo que cada uno de los extremos<br />
del peine encaje dentro de las ranuras laterales<br />
del molde.<br />
CASTELLANO<br />
• Preparación del gel<br />
- Seleccione la concentración de agarosa que debe tener el gel de acuerdo al tamaño<br />
de los fragmentos de DNA que desea analizar (Tabla 1).<br />
TABLA 1. Concentración de agarosa recomendada para diferentes tamaños de fragmentos<br />
de DNA.<br />
Concentración agarosa (p/v) Tamaño fragmentos DNA (Kb)<br />
0.5 % 1.0 a 30<br />
0.7 % 0.8 a 12<br />
1.0 % 0.5 a 10<br />
1.2 % 0.4 a 3<br />
1.5 % 0.2 a 3<br />
2.0 % 0.01 a 1<br />
- Seleccione el volumen de agarosa líquida que necesita según el grosor del gel<br />
que desea preparar (Tabla 2).<br />
TABLA 2. Volumen de agarosa requerido y volumen de solución tampón a añadir en el<br />
tanque de electroforesis en función del grosor del gel.<br />
Grosor gel Volumen agarosa Volumen solución tampón (tanque)<br />
10 mm 70 mL 250 mL<br />
5 mm 35 mL 210 mL<br />
3 mm 21 mL 200 mL<br />
ENGLISH<br />
Security<br />
• The horizontal electrophoresis cell must be used by previously qualified staff that<br />
knows how the equipment works thanks to the user manual.<br />
• Put the electrophoresis cell on top of a horizontal, plane and stable table.<br />
• Do not put the electrophoresis cell near any warm supply (burners, blowlamps…).<br />
Avoid vibrations.<br />
• Horizontal electrophoresis cell is intended to use with a DC power supply. An inadequate<br />
manipulation may cause burns, hurts and damages to the electrical installation.<br />
• Never connect the electrophoresis cell to the power supply before starting the experiment.<br />
The electrical current supplied by the power supply is transmitted to the cell<br />
through the leads and the lid assembly.<br />
• Never use the electrophoresis cell without the lid.<br />
• Always turn off the power supply before opening and removing the lid.<br />
• Certain reagents indicated for use in this manual are of a hazardous nature (eg. ethidium<br />
bromide, acetic acid, boric acid). User should strictly observe the safety regulations<br />
indicated for such products.<br />
• The equipments used in these procedures (power supplies, UV lamps, etc.) should be<br />
used following the manufacturer safety recommendations.<br />
5. ELECTROPHORESIS BUFFERS AND OTHER SOLUTIONS<br />
5.1 Electrophoresis buffers<br />
For electrophoresis of gels of the same concentration and at the same voltage TAE buffer<br />
provides better resolution of fragments > 4 Kb in length while TBE buffer provides better<br />
resolution for 0.1-3 Kb fragments. TBE buffer has a higher buffering capacity and a<br />
lower conductivity and therefore is better suited for electrophoresis at high voltage (>150<br />
V). Moreover, this solution generates less heat at equivalent voltage and does not permit<br />
a significant pH drift.<br />
Due to its low buffering capacity, TAE buffer requires recirculation systems or mixing<br />
periodically for full-length electrophoresis, particularly at higher voltages. TAE buffer<br />
provides better results for supercoiled DNA.<br />
It is recommended to prepare a concentrated stock from which a 1x solution will be prepared<br />
when necessary.<br />
CHART 4. TBE (Tris borate/EDTA) buffer, 10x<br />
Component Quantity Concentration<br />
Tris base 121.1 g 1 M<br />
Boris acid, anhydrous 61.8 g 1 M<br />
Na 2 EDTA·2H 2 O 7.4 g 20 mM<br />
Deionized water Up to 1 L ----<br />
Note: This is a 10x concentrated solution. Dilute with deionized water prior to use.<br />
Final pH should be 8.3 at 25 ºC.<br />
Pág. 6 Manual de instrucciones 53000001 Revisión 1 Mayo-07<br />
Version 1 May-07 Instruction manual 53000001 Page 23
ENGLISH<br />
Note: volumes given are approximate. Low-percentage gels and low-melting-point<br />
agarose gels may have lower sample volumes.<br />
- Add loading buffer to samples before loading the gel. Use an automatic pipette<br />
and disposable tips to prepare samples by combining appropriate quantities of loading<br />
buffer and sample. Mixtures can be prepared in microcentrifuge tubes or on a piece of<br />
Parafilm.<br />
- Load the samples into each individual well using the pipetting device. Avoid<br />
bubble formation. Note: caution must be taken at this point to avoid damaging the bottom<br />
and walls of the wells with the pipette tip.<br />
• Electrophoresis<br />
- Cover the electrophoresis tank with the lid. Note: The lid is especially designed<br />
to fit in a unique position thus assuring that the black lead is always connected to the<br />
black electrode and the red lead to the red electrode.<br />
- Plug the power leads to a power supply.<br />
- Switch the power supply on and select the desired voltage. Small bubbles will<br />
rise from each electrode when the power supply is properly connected. Note: Voltage will<br />
depend on thickness, length and percentage of the gel and type of electrophoresis buffer<br />
used:<br />
a. High voltage: the electrophoresis time will be shorter but the heat<br />
will be higher and the resolution lower. High voltages are suitable for selecting and analyzing<br />
purity of samples.<br />
b. Low voltage: the heat produced will be lower and resolution higher<br />
but the time of electrophoresis will be longer.<br />
- Check electrophoresis by following the migration of the bromophenol blue dye.<br />
Migration must be always towards the positive pole. Note: Do not move the cell during<br />
electrophoresis. Small amounts of gases will be produced; make sure the equipment is<br />
located in a well aired area.<br />
- When electrophoresis finishes, switch the power supply off and unplug the<br />
power leads.<br />
• After electrophoresis<br />
- Remove the lid<br />
- Take the tray with the cell out and carefully slide the gel out of the tray for staining<br />
with ethidium bromide and subsequent visualization with UV light. Note: agarose<br />
gels tear easily if not properly supported.<br />
- Properly discard the electrophoresis buffer. Do not reuse the buffer.<br />
- Rinse the tank with deionized water.<br />
- Remove any residual agarose from the tray by rising with deionized water.<br />
CASTELLANO<br />
- Prepare el volumen requerido de agarosa líquida en un frasco o matraz<br />
Erlenmeyer. P. ej.: para la preparación de un gel de 1 cm grosor al 1% de agarosa añada<br />
0.7 g de agarosa en polvo a 70 mL de solución tampón de electroforesis.<br />
- Pese el frasco.<br />
- Caliente la mezcla hasta la ebullición en una placa calefactora o en un microondas<br />
para que la agarosa se disuelva totalmente en la solución tampón. Agite el frasco<br />
ocasionalmente para evitar la formación de grumos.<br />
- Pese de nuevo el frasco y ajústelo al peso original añadiendo agua desionizada<br />
para compensar la pérdida por evaporación.<br />
- Enfríe la agarosa líquida hasta 50-60 ºC aplicando un chorro de agua fría o<br />
introduciendo el frasco en un baño a esa temperatura. Nota: si la temperatura de la agarosa<br />
está por encima de los 60 ºC podría deformar el fondo de la bandeja para geles.<br />
- Vierta la agarosa a 60 ºC sobre la bandeja para geles situada dentro del molde.<br />
Ayúdese de una punta de pipeta para distribuir la agarosa uniformemente por toda la<br />
superficie de la bandeja y para eliminar las burbujas de aire formadas, especialmente<br />
aquellas situadas entre los dientes del peine.<br />
- Espere unos 15-30 min hasta que la agarosa se enfríe y solidifique totalmente.<br />
- Retire el peine cuidadosamente tirando de él verticalmente; extraiga del molde<br />
la bandeja con el gel y colóquela sobre la parte central del tanque de electroforesis.<br />
Coloque el gel de manera que los pocillos queden más cercanos al cátodo (polo negativo,<br />
negro) ya que las muestras migrarán siempre hacia el ánodo (polo positivo, rojo).<br />
Nota: En caso de no utilizar el gel inmediatamente, humedezca la superficie del gel con<br />
solución tampón de electroforesis y selle la bandeja con el gel en una bolsa de plástico.<br />
Manténgalos a 4 ºC, de este modo el gel se puede conservar durante 1 ó 2 días si está bien<br />
sellado.<br />
- Llene el tanque con solución tampón de electroforesis hasta cubrir la superficie<br />
del gel según el volumen indicado en la Tabla 2. Nota: la superficie del gel debe estar<br />
cubierta únicamente por 1 ó 2 mm de solución tampón. De este modo, se evita que el gel<br />
se seque y se asegura un gradiente de voltaje uniforme a lo largo del gel. Un volumen<br />
mayor de solución tampón no es necesario y resulta en un aumento de la corriente y el<br />
calor producido.<br />
• Preparación de las muestras y carga del gel<br />
La cantidad de muestra que puede ser cargada en cada pocillo es variable y depende de<br />
la concentración de las muestras y del tamaño del pocillo. La sobrecarga del gel produce<br />
la aparición de estelas y la distorsión de bandas.<br />
- Seleccione la cantidad de muestra que desea cargar, teniendo en cuenta el tamaño<br />
de los pocillos del gel (Tabla 3) y la concentración de las muestras.<br />
TABLA 3. Volumen máximo de muestra en función del tipo y grosor del peine y del grosor<br />
del gel.<br />
Page 22 Instruction manual 53000001 Version 1 May-07<br />
Revisión 1, Mayo-07 Manual de instrucciones 53000001 Pág. 7
CASTELLANO<br />
Grosor gel (mm) Grosor peine (mm) Anchura diente (mm) Vol/pocillo ( μL)<br />
1.5 4 54<br />
10 2.5 33<br />
1 4 32<br />
2.5 22.5<br />
1.5 4 24<br />
5 2.5 15<br />
1 4 16<br />
2.5 10<br />
Nota: los volúmenes indicados son aproximados. En geles de baja concentración de<br />
agarosa o de agarosa de bajo punto de fusión los volúmenes pueden ser menores que los<br />
indicados<br />
- Añada solución de carga a las muestras antes de cargarlas en los pocillos. Con<br />
ayuda de una pipeta automática y puntas desechables, prepare las muestras combinando<br />
las cantidades apropiadas de solución de carga y muestra. Las mezclas pueden ser preparadas<br />
en tubos o bien sobre un trozo de Parafilm.<br />
- Con ayuda de una pipeta automática llene uno a uno los pocillos con su correspondiente<br />
muestra evitando la formación de burbujas. Nota: extreme la precaución para<br />
no dañar el fondo o las paredes de los pocillos con la punta de la pipeta.<br />
• Electroforesis<br />
- Coloque la tapa sobre el tanque de electroforesis. Nota: El diseño especial de la<br />
tapa únicamente permite colocarla en una posición asegurando siempre que el cable negro<br />
está conectado al electrodo negro y el cable rojo al electrodo rojo.<br />
- Conecte los cables con la fuente de alimentación.<br />
- Encienda la fuente de alimentación y seleccione el voltaje deseado. Si la fuente<br />
está bien conectada, en cada electrodo se formarán pequeñas burbujas. Nota: La selección<br />
del voltaje dependerá del grosor, longitud y concentración del gel y del tipo de solución<br />
tampón utilizada:<br />
a. Voltaje alto: tiempo de electroforesis menor pero el calor producido<br />
será mayor y la resolución menor. El voltaje alto es adecuado para el análisis de pureza o<br />
la selección de muestras.<br />
b. Voltaje bajo: el calor producido será menor y la resolución mayor<br />
pero el tiempo del experimento se alargará.<br />
- Siga la evolución de la electroforesis mediante la migración del colorante azul<br />
de bromofenol. La migración debe realizarse en dirección al polo positivo. Nota: No<br />
mueva la cubeta durante la electroforesis. Pequeñas cantidades de gases se producen<br />
durante el proceso; asegúrese de que el equipo está situado en un lugar con adecuada ventilación.<br />
- Cuando la electroforesis se haya completado, apague la fuente de alimentación<br />
y desconecte los cables de la tapa.<br />
ENGLISH<br />
- Weight the flask again and adjust to the original weight by adding deionized<br />
water to compensate for evaporation.<br />
- Apply a water spurt or introduce the flask into a water bath to cool the liquid<br />
agarose to 50-60 ºC. Note: casting gels with the agarose above 60 ºC may cause the tray<br />
bottom to deform.<br />
- Pour the agarose at 60 ºC on the gel tray fitted into the mould. Use a pipette tip<br />
to distribute the agarose evenly over the whole surface of the tray and to remove air bubbles<br />
especially those situated between and around the teeth of the comb.<br />
- Allow the agarose to cool until completely solidified, usually 15-30 min.<br />
- Remove the comb gently by pulling it vertically; take the tray with the gel out<br />
of the mould and put them at the central part of the electrophoresis tank. Make sure that<br />
the wells of the gel are near the cathode (negative pole, black) since the samples always<br />
migrate towards the anode (positive pole, red).<br />
Note: To store the gel, wet the gel surface with a small amount of electrophoresis buffer<br />
and seal the tray with the gel in a plastic bag. Keep at 4 ºC, at these conditions the gel<br />
can be stored for 1 or 2 days.<br />
- Fill the tank with electrophoresis buffer until covering the surface of the gel<br />
with the volume indicated in Chart 2. Note: the surface of the gel must be covered only<br />
with 1 or 2 mm of buffer. This avoids the gel to dry and assures an even voltage gradient<br />
through the gel. A higher volume of buffer is not necessary and will result in an increase<br />
of the current and heat.<br />
• Sample preparation and loading the gel<br />
The amount of sample to be load is variable and depends on sample concentration and<br />
well size. Overloading the gel causes trailing and distortion of bands.<br />
- Select the amount of sample to be loaded, bearing in mind the size of the wells<br />
(Chart 3) and the concentration of samples.<br />
CHART 3. Maximum volume of sample depending on the type and thickness of the comb<br />
and the thickness of the gel.<br />
Gel thickness (mm) Comb thickness (mm) Tooth width (mm) Vol/well( L)<br />
1.5 4 54<br />
10 2.5 33<br />
1 4 32<br />
2.5 22.5<br />
1.5 4 24<br />
5 2.5 15<br />
1 4 16<br />
2.5 10<br />
μ<br />
Pág. 8 Manual de instrucciones 53000001 Revisión 1 Mayo-07<br />
Version 1 May-07 Instruction manual 53000001 Page 21
• Set up<br />
- Put the gel tray inside the mould<br />
for gel casting. Make sure that the black band<br />
for visualizing the wells stays between the<br />
grooves to hold the comb.<br />
- Select the comb with the appropriate<br />
thickness and number of wells for the experiment.<br />
Usually the 1.0 mm-thick comb is<br />
used but when fragile gels are cast it is advisable<br />
to use the 1.5 mm-thick comb.<br />
- Put the comb on the mould so that<br />
each extreme of the comb fits into one of the<br />
lateral grooves of the mould<br />
• Gel casting<br />
- Select the agarose concentration of the gel according to the size of the DNA<br />
fragments to be analyzed (Chart 1).<br />
CHART 1. Agarose concentration recommended for different sizes of DNA fragments.<br />
Agarose concentration (w/v)<br />
0.5 % 1.0 to 30<br />
0.7 % 0.8 to 12<br />
1.0 % 0.5 to 10<br />
1.2 % 0.4 to 3<br />
Size of DNA fragments (Kb)<br />
ENGLISH<br />
1.5 % 0.2 to 3<br />
2.0 % 0.01 to 1<br />
- Select the volume of liquid agarose depending on the thickness of the gel to be<br />
cast (Chart 2).<br />
CHART 2. Volume of agarose required according to gel thickness. It is also shown the<br />
volume of electrophoresis buffer needed to fill the tank in each case.<br />
Gel thickness Agarose volume Buffer volume (tank)<br />
10 mm 70 mL 250 mL<br />
5 mm 35 mL 210 mL<br />
3 mm 21 mL 200 mL<br />
- In a bottle or Erlenmeyer flask prepare the volume of liquid agarose required.<br />
Eg: to prepare a 10 mm-thick and 1% agarose gel, add 0.7 g of agarose powder to 70 mL<br />
of electrophoresis buffer.<br />
- Weight the flask.<br />
- Heat the mixture in a hot plate or microwave until it boils and mix the flask<br />
occasionally until the agarose is completely dissolved in the buffer.<br />
CASTELLANO<br />
• Después de la electroforesis<br />
- Retire la tapa<br />
- Saque la bandeja con el gel y con cuidado deslice el gel fuera de la bandeja para<br />
su tinción con bromuro de etidio y posterior visualización con luz UV. Nota: los geles de<br />
agarosa se rompen fácilmente si no se manipulan con cuidado.<br />
- Vacíe el tanque en el recipiente de desechos adecuado. No reutilice la solución<br />
tampón.<br />
- Limpie el tanque con agua desionizada<br />
- Elimine de la bandeja posibles restos de agarosa y aclárela con agua desionizada.<br />
Seguridad<br />
• La cubeta de electroforesis horizontal debe ser utilizada por personal cualificado previamente,<br />
que conozca el equipo y su manejo mediante el manual de uso.<br />
• Coloque la cubeta de electroforesis sobre una mesa horizontal, plana y estable.<br />
• No coloque la cubeta de electroforesis en zonas próximas a fuentes de calor (mecheros,<br />
sopletes...). Evite las vibraciones en el lugar de trabajo.<br />
• La cubeta de electroforesis horizontal está preparada para ser conectada a una fuente de<br />
alimentación de CA. Una manipulación no adecuada puede resultar en quemaduras, heridas<br />
y daños a la instalación eléctrica.<br />
• Nunca conecte la cubeta de electroforesis a la fuente de alimentación antes de comenzar<br />
el experimento. La corriente eléctrica proporcionada por la fuente de alimentación se<br />
transmite a la cubeta a través de los cables y la conexión de la tapa<br />
• Nunca intente utilizar la cubeta de electroforesis sin la tapa puesta.<br />
• Apegue siempre la fuente de alimentación antes de abrir la cubeta y retirar la tapa.<br />
• Determinados reactivos indicados en este manual son peligrosos (p.ej.: bromuro de etidio,<br />
ácido acético, ácido bórico). El usuario deberá observar estrictamente las normas de<br />
seguridad indicadas para dichos productos.<br />
• El usuario deberá así mismo seguir las normas de seguridad específicas para los equipos<br />
utilizados en el procedimiento indicado en este manual (transiluminador de luz UV,<br />
fuentes de alimentación, etc.)<br />
5. SOLUCIONES TAMPÓN <strong>DE</strong> <strong>ELECTROFORESIS</strong> Y OTRAS<br />
5.1 Soluciones tampón de electroforesis<br />
Para electroforesis de geles de igual concentración y a un voltaje constante, la solución<br />
TAE proporciona una mejor resolución de fragmentos con una longitud > 4 Kb mientras<br />
que la solución TBE proporciona una resolución mejor para fragmentos de 0.1-3 Kb. La<br />
solución TBE presenta además una mayor capacidad amortiguadora y una menor conductividad<br />
por lo que es preferible su uso en electroforesis a voltajes altos (>150 V).<br />
Además, esta solución genera menos calor a voltajes equivalentes y no permite variaciones<br />
significativas del pH.<br />
Debido a su baja capacidad de amortiguación, la solución TAE requiere sistemas de<br />
recirculación o mezcla ocasional para electroforesis completa sobre todo a voltajes eleva<br />
Page 20 Instruction manual 53000001 Version 1 May-07<br />
Revisión 1, Mayo-07 Manual de instrucciones 53000001 Pág. 9
CASTELLANO<br />
dos. La solución TAE proporciona mejores resultados par el DNA superenrollado<br />
Se aconseja preparar un stock de solución concentrada a partir de la cual se preparará<br />
en el momento el volumen de solución 1x requerido para la preparación del gel y posterior<br />
electroforesis.<br />
TABLA 4. Solución TBE (Tris borato/EDTA), 10x<br />
Componente Cantidad Concentración<br />
Tris base 121.1 g 1 M<br />
Ácido bórico anhidro 61.8 g 1 M<br />
Na 2 EDTA·2H 2 O 7.4 g 20 mM<br />
Agua desionizada Hasta 1 L ----<br />
Nota: Esta es una solución concentrada 10x. Para su uso, diluir previamente con agua<br />
desionizada. El pH final debe ser 8.3 a 25 ºC.<br />
TABLA 5. Solución TAE (Tris acetato/EDTA), 10x<br />
Componente Cantidad Concentración<br />
3. TECHNICAL SPECIFICATIONS<br />
Code 53000001<br />
Gel dimensions (mm)<br />
100x70<br />
Nº samples 8, 15<br />
Comb thickness<br />
1 and 1.5 mm<br />
Buffer volume (approx.)<br />
260 mL<br />
Working conditions<br />
0-40 ºC and < 80% RH<br />
Continuous working time<br />
>24 h<br />
Max. Input voltage<br />
100 V<br />
Max. Current<br />
50 mA<br />
Cell dimensions (LxWxH)<br />
268x116x76 mm<br />
4. OPERATING MO<strong>DE</strong><br />
ENGLISH<br />
Tris base 48.4 g 400 mM<br />
Na 2 EDTA·2H 2 O 7.4 g 20 mM<br />
Acetato sódico anhidro 16.4 g 200 mM<br />
Ácido acético glacial 17.0 mL 296 mM<br />
Agua desionizada Hasta 1 L ----<br />
Nota: Esta es una solución concentrada 10x. Para su uso, diluir previamente con agua<br />
desionizada. El pH final debe ser 7.8 a 25 ºC.<br />
5.2 Solución de carga<br />
La solución de carga debe ser añadida a las muestras antes de cargarlas en los pocillos.<br />
Esta solución debe tener la cantidad suficiente de glicerol para hacer que la muestra sea<br />
más densa que la solución de electroforesis y así caiga hacia el fondo del pocillo.<br />
Se recomienda preparar un stock concentrado e inmediatamente antes de cargar las<br />
muestras añadirles solución de carga de modo que la concentración final en la muestra sea<br />
de 1x. El stock debe ser conservado a 4 ºC.<br />
TABLA 6. Solución de carga, 10x<br />
Componente Cantidad Concentración<br />
Glicerol 5 mL 50% (v/v)<br />
Na 2 EDTA·2H 2 O 0.37 g 100 mM<br />
Dodecil sulfato sódico (SDS) 0.1 g 1% (p/v)<br />
Azul bromofenol 0.01 g 0.1% (p/v)<br />
Agua desionizada Hasta 10 mL ----<br />
4.1 Preliminary inspection<br />
Unwrap the horizontal electrophoresis cell, take off all protections and make sure it<br />
does not present any damage because of the shipment. In case it presents any damage tell<br />
it immediately to your transport agent or dealer so that they can make the claims in the<br />
correct time limit.<br />
Please keep the original wrapping; you will always need it for returns enclosed with all<br />
the accessories supplied.<br />
Please check that all the accessories are enclosed with the equipment:<br />
- 1 Tank with electrodes<br />
- 1 Lid with fixed leads<br />
- 1 Mould for gel casting<br />
- 2 Gel trays (dimensions 74x100 mm)<br />
- 2 combs of 1.0 and 1.5 mm thick respectively<br />
- Warranty<br />
- User's manual<br />
We will only accept any equipment return within 15 days after delivery and provided<br />
it comes in its original wrapping.<br />
4.2 Operating mode<br />
Note: the equipment is exclusively designed for laboratory purposes; ambient temperate<br />
must be 0-40 ºC and relative humidity must not exceed the 80%. Prior to use, put<br />
the electrophoresis cell on a plane, smooth and vibration-free surface<br />
Pág. 10 Manual de instrucciones 53000001 Revisión 1 Mayo-07<br />
Version 1 May-07 Instruction manual 53000001 Page 19
- Gel tray: with integrated rule and dark band to<br />
facilitate well visualization and thus make easier<br />
sample loading<br />
- Combs: the equipment is supplied<br />
with 2 combs of 1.0 and 1.5 mm thick<br />
respectively, both of them with 8 teeth<br />
at one side and 15 teeth at the other.<br />
ENGLISH<br />
CASTELLANO<br />
5.3 Bromuro de etidio<br />
Para visualizar el DNA bicatenario tras la electroforesis, es necesario teñir el gel con una<br />
solución de bromuro de etidio 0.5 g/mL en agua desionizada. Para ello, se introduce el gel<br />
en la solución y se mantiene durante un tiempo que dependerá del grosor del gel (10-15<br />
min para geles de 3 mm y hasta 1 h para geles gruesos de 10 mm). Para reducir el fondo<br />
se recomienda aclarar el gel en agua desionizada durante 10-15 min (geles finos) o 30 min<br />
(geles gruesos).<br />
El bromuro de etidio también puede ser añadido directamente a la agarosa líquida antes<br />
de la preparación del gel; de este modo la electroforesis se realiza en presencia de bromuro<br />
de etidio. La concentración de bromuro de etidio en el gel debe ser también de 0.5<br />
g/mL.<br />
Se recomienda preparar una solución concentrada de bromuro de etidio que debe ser<br />
almacenada en la oscuridad.<br />
TABLA 7. Solución concentrada de bromuro de etidio, 20000x<br />
Componente Cantidad Concentración<br />
1. Electrophoresis tank<br />
2. Replaceable electrodes<br />
3. Antiskid legs<br />
4.Device to facilitate lid<br />
removal<br />
5. Gel tray<br />
6. Lid<br />
7. Slots for heat dispersion<br />
8. Fixed leads<br />
6<br />
7<br />
8<br />
Bromuro etidio 100 mg 10 mg/mL<br />
Agua desionizada 0.37 g ----<br />
NOTA: el bromuro de etidio es un agente mutagénico muy potente. Lleve<br />
guantes en todo momento cuando manipule soluciones, geles o equipos que<br />
hayan estado en contacto con esta sustancia.<br />
6. RESOLUCIÓN <strong>DE</strong> PROBLEMAS<br />
PROBLEMA<br />
COMENTARIOS<br />
2<br />
1<br />
5<br />
No aparecen burbujas en los electrodos<br />
cuando se conecta la fuente de alimentación<br />
- Compruebe que la fuente de alimentación<br />
funciona correctamente<br />
- Compruebe que la tapa está correctamente<br />
colocada<br />
- Compruebe que los cables están en<br />
perfectas condiciones<br />
- Compruebe que los electrodos están en<br />
perfectas condiciones<br />
4<br />
3<br />
4<br />
Todas las bandas aparecen por duplicado<br />
(en una misma calle cada banda aparece<br />
dos veces)<br />
- Concentre la muestra y utilice un gel<br />
fino con un peine fino<br />
- Evite movimientos durante la fotografía<br />
del gel<br />
- Reduzca el voltaje. La aparición de<br />
bandas dobletes puede ser debida a un<br />
proceso de desnaturalización causado por<br />
un exceso de calor durante la electroforesis<br />
Page 18 Instruction manual 53000001 Version 1 May-07<br />
Revisión 1, Mayo-07 Manual de instrucciones 53000001 Pág. 11
PROBLEMA<br />
Las muestras se salen por debajo del gel<br />
durante la carga de los pocillos<br />
El gel se derrite o se reblandece cerca de<br />
los pocillos<br />
Se observa un efecto "smiling" pronunciado<br />
en uno de los lados del gel (bandas iguales<br />
en distintas calles migran más lentamente<br />
en uno de los lados del gel)<br />
Bandas con forma de S (frente de migración<br />
anómalo que resulta en calles que no<br />
migran a velocidad uniforme)<br />
Aparición de estelas (se observa un rastro<br />
de fluorescencia por detrás de las bandas)<br />
Las bandas no son líneas rectas ni paralelas<br />
a los extremos del gel<br />
El azul bromofenol se vuelve amarillo<br />
(cambio de pH) durante la electroforesis.<br />
Los resultados no son interpretables<br />
COMENTARIOS<br />
CASTELLANO<br />
El fondo de los pocillos se ha roto al<br />
retirar el peine. Para minimizar la adhesión<br />
de la agarosa al peine, retire el peine<br />
tan pronto como la agarosa se ha enfriado<br />
y solidificado.<br />
Esto se debe a la variación del pH y a las<br />
elevadas temperaturas. Reduzca el voltaje<br />
de electroforesis<br />
La preparación o electroforesis del gel se<br />
ha realizado en desnivel. Utilice un nivel<br />
de burbuja para asegurarse de que el<br />
molde y la cubeta están perfectamente<br />
nivelados.<br />
- Mezcle ocasionalmente la solución<br />
tampón durante la electroforesis<br />
- Utilice una solución tampón de baja<br />
conductividad y alta capacidad amortiguadora<br />
(p.ej. de TAE 1x o TBE 1x a TBE<br />
0.5x)<br />
- Reduzca la concentración de sal de la<br />
muestra<br />
- Reduzca la cantidad de muestra<br />
- Reduzca la cantidad de proteínas y/o<br />
glicerol de la muestra<br />
- Antes y después de cargar las muestras,<br />
compruebe que los pocillos no contienen<br />
partículas o burbujas<br />
- Compruebe que la agarosa está completamente<br />
disuelta antes de añadirla<br />
sobre el molde para geles.<br />
- Retire cualquier partícula presente en<br />
la agarosa líquida<br />
- Compruebe que no hay burbujas atrapadas<br />
por el peine durante la preparación<br />
del gel<br />
- Compruebe el pH de las soluciones de<br />
electroforesis. Asegúrese de que ha utilizado<br />
Tris base y no Tris HCl para su preparación.<br />
- Mezcle periódicamente la solución<br />
tampón durante la electroforesis<br />
IN<strong>DE</strong>X OF CONTENTS<br />
1. USES OF THE INSTRUMENT<br />
2. <strong>DE</strong>SCRIPTION AND COMPONENTS<br />
3. TECHNICAL SPECIFICATIONS<br />
4. OPERATING MO<strong>DE</strong><br />
5. ELECTROPHORESIS BUFFERS AND OTHER SOLUTIONS<br />
6. TROUBLESHOOTING<br />
7. MAINTENANCE AND CLEANING<br />
ANNEX I: CE CERTIFICATE<br />
1. USES OF THE INSTRUMENT<br />
Nahita horizontal electrophoresis cell is specially designed for separating, identifying<br />
and preparing DNA and RNA molecules in agarose gels. The equipment is provided complete<br />
with all the necessary accessories for preparation and electrophoresis of 100x70 mm<br />
gels.<br />
2. <strong>DE</strong>SCRIPTION AND COMPONENTS<br />
Components<br />
Nahita electrophoresis cell is supplied together with all the necessary components for<br />
preparation and electrophoresis of agarose gels (100x70 mm):<br />
• Electrophoresis tank: made of a high quality material resistant to breakage, chemicals and<br />
high pressure and temperatures. It is a durable, transparent and well-sealed device. It presents<br />
4 antiskid legs and 2 replaceable electrodes made of pure platinum and resistant to<br />
corrosion and high temperatures.<br />
• Lid: it is also made of a high quality and resistant material. It presents slots for heat dispersion<br />
and two fixed power leads with banana connector to be plugged to a power<br />
supply.<br />
- Mould for gel casting: for casting<br />
100x70 mm gels. It presents lateral<br />
grooves to fit and hold up to 2<br />
combs in parallel in case of analyzing<br />
a large amount of samples at<br />
the same time.<br />
Lateral<br />
grooves<br />
ENGLISH<br />
17<br />
17<br />
19<br />
19<br />
23<br />
25<br />
26<br />
28<br />
Pág. 12 Manual de instrucciones 53000001 Revisión 1 Mayo-07<br />
Version 1 May-07 Instruction manual 53000001 Page 17
ENGLISH<br />
Thank you for choosing this equipment. We sincerely wish that you enjoy your Nahita<br />
horizontal electrophoresis cell. We highly recommend looking after this equipment according<br />
to what is stated in this manual.<br />
Nahita develops its products according to the CE marking regulations as well as<br />
emphasizing the ergonomics and security for its user.<br />
The correct using of the equipment and its good quality will permit you to enjoy this<br />
equipment for years.<br />
The improper use of the equipment can cause accidents and electric discharges, circuit<br />
breakers, fires, damages, etc. Please read the point of Maintenance, where we expose the<br />
security notes.<br />
TO GET THE BEST RESULTS AND A HIGHER DURATION OF THE EQUIP-<br />
MENT IT IS ADVISABLE TO READ THOROUGHLY THIS MANUAL BEFORE<br />
OPERATING WITH THE EQUIPMENT.<br />
Please bear in mind the following:<br />
• This manual is inseparable from the Nahita horizontal electrophoresis cell, so it should<br />
be available for all the users of this equipment.<br />
• You should carefully handle the electrophoresis cell avoiding sudden movements,<br />
knocks, free fall of heavy / sharp objects on it.<br />
• If you have any doubt about setting up, installation or functioning do not hesitate in<br />
contacting your wholesaler. You can also tell us any doubts or suggestions you have by<br />
contacting Nahita Technical Assistance Department by email to asistencia@auxilab.es or<br />
by telephone: +34 807 117 040 (0.30 Euros/min).<br />
• This equipment is protected under the Warranties and consumer goods regulation<br />
(10/2003).<br />
• Overhaul is not covered by the equipment warranty.<br />
• Accessories (including their loss) are not covered by the product's warranty. The<br />
warranty neither covers piece's deterioration due to the course of time.<br />
• Please make sure you keep the invoice, either for having the right to claim or asking for<br />
warranty coverage. In case you have to send the equipment to Nahita Technical Assistance<br />
Department you should enclose the original invoice or a copy as guarantee.<br />
• Please do not forget filling the warranty certificate and send it before 15 days after the<br />
date of purchase.<br />
• Manufacturer reserves the right to modify or improve the manual or equipment.<br />
ATTENTION!! IF EQUIPMENTS ARE NOT PROPERLY CLEAN AND<br />
DISINFECTED THEY WOULD NOT BE ALLOWED TO REPAIR BY OUR<br />
TECHNICAL SERVICE.<br />
IN<strong>DE</strong>X OF LANGUAGES<br />
Spanish<br />
English<br />
Page 16 Instruction manual 53000001 Version 1 May-07<br />
2-15<br />
16-28<br />
7. MANTENIMIENTO Y LIMPIEZA<br />
Para un adecuado funcionamiento de la cubeta de electroforesis horizontal es necesario<br />
seguir algunas recomendaciones.<br />
Nota: Todas las normas de utilización citadas anteriormente carecerán de valor si no<br />
se realiza una continua labor de mantenimiento.<br />
• Siga las instrucciones y advertencias relativas a este manual.<br />
• Tenga este manual siempre a mano para que cualquier persona pueda consultarlo.<br />
• Utilice siempre componentes y repuestos originales. Puede ser que otros dispositivos<br />
sean parecidos, pero su empleo puede dañar el equipo.<br />
• NUNCA esterilice mediante autoclave o calor los distintos componentes de la cubeta.<br />
• No exponga el aparato a productos como fenol, benceno, acetona, solventes hidrocarbonatos<br />
halogenados o alcoholes de laboratorio no diluidos.<br />
• Evite la exposición prolongada del equipo o sus componentes a la luz UV.<br />
• En caso de rotura o desgaste de los electrodos proceda de la siguiente manera para su<br />
recambio:<br />
- Retire el tornillo y la arandela de goma situados en la parte inferior del conector<br />
tipo banana del tanque de electroforesis.<br />
- Retire el electrodo roto o dañado tirando del conector tipo banana hacia arriba.<br />
- Inserte el nuevo electrodo; no olvide la arandela de goma.<br />
- Coloque de nuevo el tornillo y su correspondiente arandela de goma y ajústelo<br />
bien para que la junta quede bien sellada<br />
Limpieza<br />
• Limpie los distintos componentes del equipo suavemente con agua y detergentes no<br />
abrasivos y aclárelos con agua desionizada. Nota: ponga especial cuidado en no dañar el<br />
cable de los electrodos cuando limpie el tanque de electroforesis.<br />
• Seque los componentes con un trapo suave o déjelos secar al aire.<br />
• Nunca utilice productos abrasivos, estropajos o productos que puedan rayar, ya que<br />
deterioran el equipo, limitando su vida útil.<br />
Revisión 1, Mayo-07 Manual de instrucciones 53000001 Pág. 13<br />
CASTELLANO
CASTELLANO<br />
ENGLISH<br />
¡ATENCIÓN! NO SE ADMITIRÁ NINGÚN APARATO PARA REPARAR<br />
QUE NO ESTÉ <strong>DE</strong>BIDAMENTE LIMPIO Y <strong>DE</strong>SINFECTADO.<br />
ANEXO I: CERTIFICADO CE<br />
INSTRUCCIONES SOBRE PROTECCIÓN <strong>DE</strong>L MEDIO<br />
AMBIENTE<br />
No se deshaga de este equipo tirándolo a la basura ordinaria cuando<br />
haya terminado su ciclo de vida; llévelo a un punto de recogida para el<br />
reciclaje de aparatos eléctricos y electrónicos. No contiene elementos<br />
peligrosos, tóxicos para el humano pero una eliminación no adecuada, perjudicaría al<br />
medio ambiente.<br />
Los materiales son reciclables tal como se indica en la marcación. Al reciclar materiales<br />
u otras formas de reutilización de aparatos antiguos, esta Ud. Haciendo una contribución<br />
importante a la protección del medio ambiente.<br />
Por favor póngase en contacto con la administración de su comunidad para que le asesoren<br />
sobre los puntos de recogida.<br />
AUXILAB S.L.<br />
<strong>DE</strong>CLARACIÓN CE <strong>DE</strong> CONFORMIDAD<br />
<strong>CUBETA</strong> <strong>DE</strong> <strong>ELECTROFORESIS</strong> <strong>HORIZONTAL</strong> NAHITA de <strong>Auxilab</strong>,S.L a la<br />
Directivade Máquinas (89/392/CEE modificada) y a las reglamentaciones<br />
adoptadas para su transposición<br />
NOMBRE <strong>DE</strong>L FABRICANTE / IMPORTADOR:<br />
AUXILAB, S.L.<br />
DIRECCIÓN: Polígono Morea Norte, 8<br />
31191 Beriáin (Navarra)<br />
<strong>DE</strong>CLARAMOS QUE:<br />
<strong>CUBETA</strong> <strong>DE</strong> <strong>ELECTROFORESIS</strong> <strong>HORIZONTAL</strong><br />
53000001<br />
Están diseñados y fabricados de acuerdo a:<br />
• Directiva 89/392/CEE, incluidas las modificaciones de la misma, y las reglamentaciones<br />
nacionales que la transponen.<br />
• Directiva 89/336/CEE modificada sobre compatibilidad electromagnética.<br />
• Directiva 73/23/CEE modificada sobre seguridad eléctrica.<br />
Y que se han aplicado las siguientes normas armonizadas (o parte de ellas):<br />
UNE 292-1/-2/-2/A1,UNE-EN 1050, UNE-EN 614-1,UNE-EN 1037, UNE-EN<br />
1088, UNE-EN 547, UNE-EN 953, UNE-EN 294, UNE-EN 418, UNE-EN 894-1, UNE-<br />
EN 894-2, UNE-EN 954-1, UNE-EN 60204-1, UNE 61010-1/A2, UNE-EN61010-2-051.<br />
BERIAIN a 04 de JUNIO 2007<br />
Fdo: ALFONSO AINCIBURU SANZ<br />
DIRECTOR/GERENTE<br />
Polígono Morea Norte, 8 31191 Beriain (Navarra) - Spain. Tel. 948 310 513 Fax 948 312 071<br />
Internet: www.auxilab.es · Email: correo@auxilab.es<br />
Pág. 14 Manual de instrucciones 53000001 Revisión 1 Mayo-07<br />
Revisión 1, Mayo-07 Manual de instrucciones 53000001 Pág. 15