
Create successful ePaper yourself
Turn your PDF publications into a flip-book with our unique Google optimized e-Paper software.
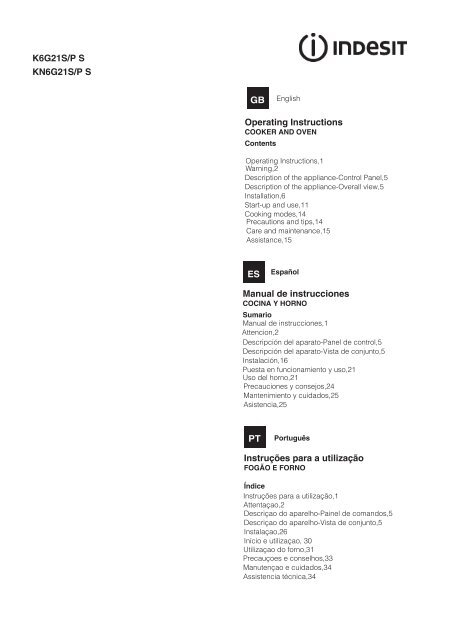
K6G21S/P S<br />
KN6G21S/P S<br />
GB<br />
English<br />
Operating Instructions<br />
COOKER AND OVEN<br />
Contents<br />
Operating Instructions,1<br />
W arning,2<br />
Description of the appliance-Control Panel,5<br />
Description of the appliance-Overall view,5<br />
Installation,6<br />
Start-up and use,11<br />
Cooking mo<strong>de</strong>s,14<br />
Precautions and tips,14<br />
Care and maintenance,15<br />
Assistance,15<br />
ES<br />
Español<br />
<strong>Manual</strong> <strong>de</strong> instrucciones<br />
COCINA Y HORNO<br />
Sumario<br />
<strong>Manual</strong> <strong>de</strong> instrucciones,1<br />
Attencion,2<br />
Descripción <strong>de</strong>l aparato-Panel <strong>de</strong> control,5<br />
Descripción <strong>de</strong>l aparato-Vista <strong>de</strong> conjunto,5<br />
Instalación,16<br />
Puesta en funcionamiento y uso,21<br />
Uso <strong>de</strong>l horno,21<br />
Precauciones y consejos,24<br />
Mantenimiento y cuidados,25<br />
Asistencia,25<br />
PT<br />
Português<br />
Instruções para a utilização<br />
FOGÃO E FORNO<br />
Índice<br />
Instruções para a utilização,1<br />
Attentaçao,2<br />
Descriçao do aparelho-Painel <strong>de</strong> comandos,5<br />
Descriçao do aparelho-Vista <strong>de</strong> conjunto,5<br />
Instalaçao,26<br />
Início e utilizaçao, 30<br />
Utilizaçao do forno,31<br />
Precauçoes e conselhos,33<br />
Manutençao e cuidados,34<br />
Assistencia técnica,34
ES<br />
ATENCIÓN<br />
ATENCIÓN: Este aparato y sus partes<br />
accesibles se calientan mucho durante<br />
el uso.<br />
Por lo tanto, es importante evitar tocar<br />
los elementos calentadores.<br />
Mantenga alejados a los niños menores<br />
<strong>de</strong> 8 años si no son continuamente<br />
vigilados.<br />
El presente aparato pue<strong>de</strong> ser utilizado<br />
por niños mayores <strong>de</strong> 8 años y por<br />
personas con capacida<strong>de</strong>s físicas,<br />
sensoriales o mentales disminuidas o<br />
sin experiencia ni conocimientos, si se<br />
encuentran bajo una a<strong>de</strong>cuada vigilancia<br />
o si han sido instruidos sobre el uso<br />
<strong>de</strong>l aparato <strong>de</strong> modo seguro y compren<strong>de</strong>n<br />
los peligros relacionados con<br />
el mismo. Los niños no <strong>de</strong>ben jugar<br />
con el aparato. Las operaciones <strong>de</strong> limpieza<br />
y <strong>de</strong> mantenimiento no <strong>de</strong>ben ser<br />
realizadas por niños sin vigilancia.<br />
ATENCIÓN: Dejar un quemador con<br />
grasas o aceites sin vigilancia pue<strong>de</strong><br />
ser peligroso y provocar un incendio.<br />
Elimine eventuales líquidos presentes<br />
sobre la tapa antes <strong>de</strong> abrirla. No cierre<br />
la tapa <strong>de</strong> vidrio (si existe) cuando los<br />
quemadores o la placa eléctrica todavía<br />
están calientes.<br />
ATENCIÓN: Antes <strong>de</strong> sustituir la lámpara<br />
controle que el aparato esté apagado<br />
para evitar la posibilidad <strong>de</strong> choques<br />
eléctricos.<br />
NUNCA intente apagar una llama/incendio<br />
con agua, se <strong>de</strong>be apagar el<br />
aparato y cubrir la llama, por ejemplo,<br />
con una tapa o con una manta ignífuga.<br />
No utilice productos abrasivos ni<br />
espátulas <strong>de</strong> metal cortantes para<br />
limpiar la puerta <strong>de</strong> cristal <strong>de</strong>l horno ya<br />
que podrían rayar la superficie y quebrar<br />
el cristal.<br />
Las superficies internas <strong>de</strong>l cajón (cuando<br />
existe) pue<strong>de</strong>n calentarse.<br />
No utilice nunca limpiadores a vapor<br />
o <strong>de</strong> alta presión para la limpieza <strong>de</strong>l<br />
aparato.<br />
ATENCIÓN: el uso <strong>de</strong> protecciones inapropiadas<br />
<strong>de</strong> la placa <strong>de</strong> cocción pue<strong>de</strong><br />
provocar acci<strong>de</strong>ntes.<br />
2
PT<br />
ATENÇAO<br />
ATENÇÃO: Este aparelho e as suas<br />
partes acessíveis aquecem muito<br />
durante a utilização.<br />
É preciso ter atenção e evitar tocar<br />
os elementos que aquecem.<br />
Manter afastadas as crianças com<br />
menos <strong>de</strong> 8 anos, caso não estejam<br />
a ser vigiadas.<br />
O presente aparelho po<strong>de</strong> ser utilizado<br />
por crianças com mais <strong>de</strong> 8 anos<br />
e por pessoas com capacida<strong>de</strong>s<br />
físicas, sensoriais ou mentais reduzidas<br />
ou com pouca experiência e<br />
conhecimentos, caso sejam a<strong>de</strong>quadamente<br />
vigiadas ou caso tenham<br />
recebido instruções em relação ao<br />
uso do aparelho <strong>de</strong> forma segura<br />
e tenham conhecimento dos perigos<br />
associados. As crianças não<br />
<strong>de</strong>vem brincar com o aparelho. As<br />
operações <strong>de</strong> limpeza e manutenção<br />
não <strong>de</strong>vem ser efectuadas por crianças<br />
sem vigilância.<br />
ATENÇÃO: Deixar um fogão com<br />
gordura e óleo sem vigilância<br />
po<strong>de</strong> ser perigoso e provocar um<br />
incêndio.<br />
NUNCA tente apagar as chamas<br />
com água. É necessário <strong>de</strong>sligar o<br />
aparelho e cobrir as chamas com<br />
uma tampa ou com uma manta<br />
ignífuga.<br />
Não utilizar produtos abrasivos nem<br />
espátulas <strong>de</strong> metal cortantes para<br />
limpar a porta em vidro do forno,<br />
uma vez que po<strong>de</strong> riscar a superfície,<br />
provocando a ruptura do vidro.<br />
As superfícies internas da gaveta (se<br />
presentes) po<strong>de</strong>m ficar muito quentes.<br />
Nunca utilize equipamento <strong>de</strong> limpeza<br />
a vapor ou <strong>de</strong> alta pressão para<br />
limpar o aparelho.<br />
Elimine os líquidos presentes na tampa<br />
antes <strong>de</strong> abri-la. Não feche a tampa<br />
<strong>de</strong> vidro (se presente) se os queimadores<br />
ou a chapa eléctrica ainda<br />
estiverem quentes.<br />
ATENÇÃO: Assegure-se <strong>de</strong> que o<br />
aparelho esteja <strong>de</strong>sligado antes <strong>de</strong><br />
substituir a lâmpada, para evitar a<br />
possibilida<strong>de</strong> <strong>de</strong> choques eléctricos.<br />
ATENÇÃO: O uso <strong>de</strong> protecções do<br />
plano ina<strong>de</strong>quadas po<strong>de</strong> causar inci<strong>de</strong>ntes.<br />
3
GB<br />
WARNING<br />
WARNING: The appliance and its<br />
accessible parts become hot during<br />
use.<br />
Care should be taken to avoid<br />
touching heating elements.<br />
Children less than 8 years of age shall<br />
be kept away unless continuously<br />
supervised.<br />
This appliance can be used by<br />
children aged from 8 years and<br />
above and persons with reduced<br />
physical, sensory or mental<br />
capabilities or lack of experience<br />
and knowledge if they have been<br />
given supervision or instruction<br />
concerning use of the appliance in a<br />
safe way and un<strong>de</strong>rstand the hazards<br />
involved. Children shall not play with<br />
the appliance. Cleaning and user<br />
maintenance shall not be ma<strong>de</strong> by<br />
children without supervision.<br />
WARNING: Unatten<strong>de</strong>d cooking on a<br />
hob with fat or oil can be dangerous<br />
and may result in fire.<br />
Do not close the glass cover (if present)<br />
when the gas burners or electric<br />
hotplates are still hot.<br />
WARNING: Ensure that the appliance is<br />
switched off before replacing the lamp<br />
to avoid the possibility of electric shock.<br />
NEVER try to extinguish a fire with<br />
water, but switch off the appliance<br />
and then cover flame e.g. with a lid or<br />
a fire blanket.<br />
Do not use harsh abrasive cleaners<br />
or sharp metal scrapers to clean<br />
the oven door glass since they can<br />
scratch the surface, which may result<br />
in shattering of the glass.<br />
The internal surfaces of the<br />
compartment (where present) may<br />
become hot.<br />
Never use steam cleaners or pressure<br />
cleaners on the appliance.<br />
Remove any liquid from<br />
the lid before opening it.<br />
CAUTION: the use of inappropriate hob<br />
guards can cause acci<strong>de</strong>nts.<br />
4
14<br />
PT<br />
Descrição do aparelho<br />
Vista <strong>de</strong> conjunto<br />
1<br />
2<br />
3<br />
4<br />
5<br />
6<br />
GB<br />
Description of the appliance<br />
Overall view<br />
1 Hob burner<br />
2 Hob Grid<br />
3.Control panel<br />
4.Sliding grill rack<br />
5.DRIPPING pan<br />
6.Adjustable foot<br />
7.Containment surface for spills<br />
8.GUIDE RAILS for the sliding racks<br />
9.position 5<br />
10.position 4<br />
11.position 3<br />
12.position 2<br />
13.position 1<br />
14 Glass Cover *(Available only on certain mo<strong>de</strong>ls)<br />
7<br />
8<br />
9<br />
10<br />
11<br />
12<br />
13<br />
6<br />
1. Queimador a gás<br />
2. Gra<strong>de</strong> do piano <strong>de</strong> trabalho<br />
3. Painel <strong>de</strong> comandos<br />
4. Prateleira GRADE<br />
5. Prateleira BANDEJA PINGADEIRA<br />
6. Pé <strong>de</strong> regulação<br />
7. Plano <strong>de</strong> retenção dos eventuais vazamentos<br />
8. GUIAS <strong>de</strong> <strong>de</strong>slizamento das prateleiras<br />
9. Posição 5<br />
10. Posição 4<br />
11.Posição 3<br />
12. Posição 2<br />
13. Posição 1<br />
14. O sobretampo <strong>de</strong> vidro<br />
(Presente apenas em alguns mo<strong>de</strong>los)<br />
ES<br />
Descripción <strong>de</strong>l aparato<br />
Vista <strong>de</strong> conjunto<br />
1. Quemador <strong>de</strong> gas<br />
2.Plano <strong>de</strong> contención eventuales <strong>de</strong>rrames<br />
3. Panel <strong>de</strong> mandos<br />
4. Rejilla estante <strong>de</strong>l horno<br />
5. Asa<strong>de</strong>ra o plano <strong>de</strong> cocción<br />
6. Patitas regulables<br />
7. Rejilla <strong>de</strong>l plano <strong>de</strong> cocción<br />
8. GUÍAS <strong>de</strong> <strong>de</strong>slizamiento <strong>de</strong> las ban<strong>de</strong>jas<br />
9.POSICIÓN 5<br />
10. POSICIÓN 4<br />
11.POSICIÓN 3<br />
12. POSICIÓN 2<br />
13. POSICIÓN 1<br />
14.Tapa <strong>de</strong> vidrio (Presente sólo en algunos mo<strong>de</strong>los)<br />
1<br />
5<br />
6<br />
1 5<br />
6<br />
2<br />
3<br />
4<br />
2<br />
3<br />
4<br />
GB<br />
Description<br />
ES<br />
Descripción<br />
Control panel<br />
* Only available in certain mo<strong>de</strong>ls.<br />
1.THERMOSTAT indicator light.<br />
2.OVEN CONTROL knob<br />
3.OVEN LIGHT button<br />
4.TIMER knob*<br />
5.GAS BURNER IGNITION button*<br />
6.Hob BURNER control knob<br />
Panel <strong>de</strong> control<br />
1.La luz piloto <strong>de</strong>l termóstato <strong>de</strong>l horno<br />
2.Perilla <strong>de</strong>l horno<br />
3.Botón <strong>de</strong> la luz <strong>de</strong>l forno y asador automático<br />
4.El contador <strong>de</strong> minutos*<br />
5.Encendido electrónico <strong>de</strong> los quemadores*<br />
6.Perillas <strong>de</strong> mando <strong>de</strong> los quemadores<br />
* Presente sólo en algunos mo<strong>de</strong>los.<br />
PT<br />
Descrição<br />
Painel <strong>de</strong> comandos<br />
1.Indicador <strong>de</strong> funcionamento termostato<br />
2.Manípulo do forno<br />
3.Manípulo luz do forno<br />
4.Manípulo conta-minutos*<br />
5.Acen<strong>de</strong>dor electrónico dos queimadores *<br />
6.Botão luz do forno e rotisserie<br />
* Presente apenas em alguns mo<strong>de</strong>los.<br />
5
Installation<br />
GB<br />
! Before operating your new appliance please read<br />
this instruction booklet carefully. It contains important<br />
information concerning the safe installation and<br />
operation of the appliance.<br />
! Please keep these operating instructions for future<br />
reference. Make sure that the instructions are kept with<br />
the appliance if it is sold, given away or moved.<br />
! The appliance must be installed by a qualified<br />
professional according to the instructions provi<strong>de</strong>d.<br />
! Any necessary adjustment or maintenance must be<br />
performed after the cooker has been disconnected<br />
from the electricity supply.<br />
Room ventilation<br />
The appliance may only be installed in permanentlyventilated<br />
rooms, according to current national<br />
legislation. The room in which the appliance is installed<br />
must be ventilated a<strong>de</strong>quately so as to provi<strong>de</strong> as<br />
much air as is nee<strong>de</strong>d by the normal gas combustion<br />
process (the flow of air must not be lower than 2 m 3 /h<br />
per kW of installed power).<br />
The air inlets, protected by grilles, should have a duct<br />
with an inner cross section of at least 100 cm 2 and<br />
should be positioned so that they are not liable to even<br />
partial obstruction (see figure A).<br />
These inlets should be enlarged by 100% - with a<br />
minimum of 200 cm 2 - whenever the surface of the<br />
hob is not equipped with a flame failure safety <strong>de</strong>vice.<br />
When the flow of air is provi<strong>de</strong>d in an indirect manner<br />
from adjacent rooms (see figure B), provi<strong>de</strong>d that these<br />
are not communal parts of a building, areas with<br />
increased fire hazards or bedrooms, the inlets should<br />
be fitted with a ventilation duct leading outsi<strong>de</strong> as<br />
<strong>de</strong>scribed above.<br />
Disposing of combustion fumes<br />
The disposal of combustion fumes should be<br />
guaranteed using a hood connected to a safe and<br />
efficient natural suction chimney, or using an electric<br />
fan that begins to operate automatically every time the<br />
appliance is switched on (see figure).<br />
Fumes channelled<br />
straight outsi<strong>de</strong><br />
! The liquefied petroleum gases are heavier than air<br />
and collect by the floor, therefore all rooms containing<br />
LPG cylin<strong>de</strong>rs must have openings leading outsi<strong>de</strong> so<br />
that any leaked gas can escape easily.<br />
LPG cylin<strong>de</strong>rs, therefore, whether partially or<br />
completely full, must not be installed or stored in rooms<br />
or storage areas that are below ground level (cellars,<br />
etc.). Only the cylin<strong>de</strong>r being used should be stored<br />
in the room; this should also be kept well away from<br />
sources of heat (ovens, chimneys, stoves) that may<br />
cause the temperature of the cylin<strong>de</strong>r to rise above<br />
50°C.<br />
Positioning and levelling<br />
Fumes channelled through<br />
a chimney or a branched<br />
flue system (reserved for<br />
cooking appliances)<br />
! It is possible to install the appliance alongsi<strong>de</strong><br />
cupboards whose height does not exceed that of the<br />
hob surface.<br />
requiring<br />
ventilation<br />
Adjacent room<br />
Room<br />
! Make sure that the wall in contact with the back of<br />
the appliance is ma<strong>de</strong> from a non-flammable, heatresistant<br />
material (T 90°C).<br />
A<br />
A<br />
Ventilation opening<br />
for comburent air<br />
Increase in the gap<br />
between the door and<br />
the flooring<br />
B<br />
! After prolonged use of the appliance, it is advisable to<br />
open a window or increase the speed of any fans used.<br />
To install the appliance correctly:<br />
• Place it in the kitchen, dining room or the bed-sit (not<br />
in the bathroom).<br />
• If the top of the hob is higher than the cupboards,<br />
the appliance must be installed at least 600 mm away<br />
from them.<br />
• If the cooker is installed un<strong>de</strong>rneath a wall cabinet,<br />
there must be a minimum distance of 420 mm<br />
between this cabinet and the top of the hob. This<br />
distance should be increased to 700 mm if the wall<br />
cabinets are flammable (see figure).<br />
6
mm.<br />
420<br />
Min.<br />
HOOD<br />
Min. 600 mm.<br />
Min. 420 mm.<br />
min. 650 mm. with hood<br />
min. 700 mm. without hood<br />
• Do not position<br />
blinds behind the cooker or less than 600 mm away<br />
from its si<strong>de</strong>s.<br />
• Any hoods must be installed according to the<br />
instructions listed in the relevant operating manual.<br />
• The voltage is in the range between the values<br />
indicated on the data plate.<br />
• The socket is compatible with the plug of the<br />
appliance. If the socket is incompatible with the<br />
plug, ask an authorised technician to replace it. Do<br />
not use extension cords or multiple sockets.<br />
! Once the appliance has been installed, the power<br />
supply cable and the electrical socket must be easily<br />
accessible.<br />
! The cable must not be bent or compressed.<br />
! The cable must be checked regularly and replaced<br />
by authorised technicians only.<br />
GB<br />
Levelling<br />
If it is necessary to level the<br />
appliance, screw the adjustable<br />
feet into the places provi<strong>de</strong>d on<br />
each corner of the base of the<br />
cooker (see figure).<br />
The legs* fit into the slots on the<br />
un<strong>de</strong>rsi<strong>de</strong> of the base of the<br />
cooker.<br />
! The manufacturer <strong>de</strong>clines any liability should<br />
these safety measures not be observed.<br />
Gas connection<br />
Connection to the gas network or to the gas cylin<strong>de</strong>r<br />
may be carried out using a flexible rubber or steel hose,<br />
in accordance with current national legislation and after<br />
making sure that the appliance is suited to the type of gas<br />
with which it will be supplied (see the rating sticker on<br />
the cover: if this is not the case see below). When using<br />
liquid gas from a cylin<strong>de</strong>r, install a pressure regulator<br />
which complies with current national regulations. To<br />
make connection easier, the gas supply may be turned<br />
si<strong>de</strong>ways*: reverse the position of the hose hol<strong>de</strong>r with<br />
that of the cap and replace the gasket that is supplied<br />
with the appliance.<br />
Electrical connection<br />
Install a standardised plug corresponding to the load<br />
indicated on the appliance data plate (see Technical<br />
data table).<br />
The appliance must be directly connected to the mains<br />
using an omnipolar circuit-breaker with a minimum contact<br />
opening of 3 mm installed between the appliance and the<br />
mains. The circuit-breaker must be suitable for the charge<br />
indicated and must comply with NFC 15-100 regulations<br />
(the earthing wire must not be interrupted by the circuitbreaker).<br />
The supply cable must be positioned so that it<br />
does not come into contact with temperatures higher than<br />
50°C at any point.<br />
Before connecting the appliance to the power supply,<br />
make sure that:<br />
• The appliance is earthed and the plug is compliant with<br />
the law.<br />
• The socket can withstand the maximum power of the<br />
appliance, which is indicated by the data plate.<br />
* Only available in certain mo<strong>de</strong>ls<br />
! Check that the pressure of the gas supply is<br />
consistent with the values indicated in the Table<br />
of burner and nozzle specifications (see below).<br />
This will ensure the safe operation and durability of<br />
your appliance while maintaining efficient energy<br />
consumption.<br />
Gas connection using a flexible rubber hose<br />
Make sure that the hose complies with current national<br />
legislation. The internal diameter of the hose must<br />
measure: 8 mm for liquid gas supply; 13 mm for<br />
methane gas supply.<br />
Once the connection has been performed, make sure<br />
that the hose:<br />
• Does not come into contact with any parts that reach<br />
temperatures of over 50°C.<br />
• Is not subject to any pulling or twisting forces and<br />
that it is not kinked or bent.<br />
• Does not come into contact with bla<strong>de</strong>s, sharp<br />
corners or moving parts and that it is not<br />
compressed.<br />
7
GB<br />
• Is easy to inspect along its whole length so that its<br />
condition may be checked.<br />
• Is shorter than 1500 mm.<br />
• Fits firmly into place at both ends, where it will<br />
be fixed using clamps that comply with current<br />
regulations.<br />
! If one or more of these conditions is not fulfilled<br />
or if the cooker must be installed according to the<br />
conditions listed for class 2 - subclass 1 appliances<br />
(installed between two cupboards), the flexible steel<br />
hose must be used instead (see below).<br />
Connecting a flexible jointless stainless steel pipe<br />
to a threa<strong>de</strong>d attachment<br />
Make sure that the hose and gaskets comply with<br />
current national legislation.<br />
To begin using the hose, remove the hose hol<strong>de</strong>r on<br />
the appliance (the gas supply inlet on the appliance is<br />
a cylindrical threa<strong>de</strong>d 1/2 gas male attachment).<br />
! Perform the connection in such a way that the hose<br />
length does not exceed a maximum of 2 metres,<br />
making sure that the hose is not compressed and does<br />
not come into contact with moving parts.<br />
Checking the tightness of the connection<br />
When the installation process is complete, check the<br />
hose fittings for leaks using a soapy solution. Never<br />
use a flame.<br />
Adjusting the hob burners’ minimum setting:<br />
1. Turn the tap to the minimum position.<br />
2. Remove the knob and adjust the regulatory screw,<br />
which is positioned insi<strong>de</strong> or next to the tap pin, until<br />
the flame is small but steady.<br />
! If the appliance is connected to a liquid gas supply,<br />
the regulatory screw must be fastened as tightly as<br />
possible.<br />
3. While the burner is alight, quickly change the position of<br />
the knob from minimum to maximum and vice versa several<br />
times, checking that the flame is not extinguished.<br />
! The hob burners do not require primary air<br />
adjustment.<br />
Adapting the oven<br />
Replacing the oven burner nozzle:<br />
1. Open the oven door fully<br />
2. Pull out the sliding oven<br />
bottom (see diagram).<br />
V<br />
3. Remove the oven burner<br />
after unscrewing the screws V<br />
(see figure).<br />
Adapting to different types of gas<br />
It is possible to adapt the appliance to a type of gas<br />
other than the <strong>de</strong>fault type (this is indicated on the<br />
rating label on the cover).<br />
Adapting the hob<br />
Replacing the nozzles for the hob burners:<br />
1. Remove the hob grids and sli<strong>de</strong> the burners off their<br />
seats.<br />
2. Unscrew the nozzles using<br />
a 7 mm socket spanner (see<br />
figure), and replace them with<br />
nozzles suited to the new type<br />
of gas (see Burner and nozzle<br />
specifications table).<br />
3. Replace all the components<br />
by following the above<br />
instructions in reverse.<br />
4. Unscrew the nozzle using a<br />
special nozzle socket spanner<br />
(see figure) or with a 7 mm<br />
socket spanner, and replace it<br />
with a new nozzle that is suited<br />
to the new type of gas (see<br />
Burner and nozzle specifications<br />
table).<br />
Adjusting the gas oven burner’s minimum setting<br />
1. Light the burner (see Start-up and Use).<br />
2. Turn the knob to the minimum position (MIN)<br />
after it has been in the maximum position (MAX) for<br />
approximately 10 minutes.<br />
3. Remove the knob.<br />
4. Tighten or loosen the adjustment screws on the<br />
outsi<strong>de</strong> of the thermostat pin (see figure) until the flame<br />
is small but steady.<br />
! If the appliance is connected to liquid gas, the<br />
8
egulation screw must be fastened as tightly as<br />
possible.<br />
TECHNICAL DATA<br />
Oven Dimensions<br />
HxWxD<br />
Volume<br />
Useful<br />
measurements<br />
relating to the<br />
oven compartment<br />
31x43,5x43,5 cm<br />
58 l<br />
width 46 cm<br />
<strong>de</strong>pth 42 cm<br />
height 8,5 cm<br />
GB<br />
5. Turn<br />
the knob from the MAX position to the MIN position<br />
quickly or open and shut the oven door, making sure<br />
that the burner is not extinguished.<br />
! Be careful of the spark plug wires and the<br />
thermocouple tubes.<br />
! After adjusting the appliance so it may be used with<br />
a different type of gas, replace the old rating label with<br />
a new one that corresponds to the new type of gas<br />
(these labels are available from Authorised Technical<br />
Assistance Centres).<br />
! Should the gas pressure used be different (or vary<br />
slightly) from the recommen<strong>de</strong>d pressure, a suitable<br />
pressure regulator must be fitted to the inlet hose in<br />
accordance with current national regulations relating to<br />
“regulators for channelled gas”.<br />
Voltage and<br />
frequency<br />
Burners<br />
see data plate<br />
may be adapted for use with any<br />
type of gas shown on the data<br />
plate.<br />
EC Directives 2006/95/EC dated<br />
12/12/06 (Low Voltage) and<br />
subsequent amendments -<br />
04/108/EC dated 15/12/04<br />
(Electromagnetic Compatibility)<br />
and subsequent amendments -<br />
2009/142/EC dated 30/11/09 (Gas)<br />
and subsequent amendments -<br />
90/68/EEC dated 22/07/93 and<br />
subsequent amendments. -<br />
2002/96/EC.<br />
1275/2008(Stand-by/Off-mo<strong>de</strong>)<br />
Data plate, is located insi<strong>de</strong> the flap or, after the oven<br />
compartment has been opened, on the left-hand wall<br />
insi<strong>de</strong> the oven.<br />
9
GB<br />
Table of burner and nozzle specifications<br />
Table 1 Liquid Gas Natural Gas<br />
Burner<br />
Diameter<br />
(mm)<br />
Thermal Power<br />
kW (p.c.s.*)<br />
By-Pass<br />
1/100<br />
Nozzle<br />
1/100<br />
Flow*<br />
g/h<br />
Nozzle<br />
1/100<br />
Nominal Reduced (mm) (mm) *** ** (mm)<br />
Fast<br />
(Large)(R)<br />
100 3,00 0,7 41 86 218 214 116 286<br />
Semi Fast<br />
(Medium)(S)<br />
75 1,90 0,4 30 70 138 136 106 181<br />
Auxiliary<br />
(Small)(A)<br />
55 1,00 0,4 30 50 73 71 79 95<br />
Oven - 2,60 1,0 52 78 189 186 119 248<br />
Supply<br />
Pressures<br />
Nominal (mbar)<br />
Minimum (mbar)<br />
Maximum (mbar)<br />
28-30<br />
20<br />
35<br />
37<br />
25<br />
45<br />
20<br />
17<br />
25<br />
Flow*<br />
l/h<br />
* At 15°C and 1013 mbar - dry gas<br />
** Propane P.C.S. = 50.37 MJ/Kg<br />
*** Butane P.C.S. = 49.47 MJ/Kg<br />
Natural P.C.S. = 37.78 MJ/m 3<br />
S<br />
S<br />
R<br />
A<br />
K6G21S/P S<br />
KN6G21S/P S<br />
10
Start-up and use<br />
Using the hob<br />
Lighting the burners<br />
Burner ř Cookware diameter (cm)<br />
Rapid (R) 24 - 26<br />
Semi-Rapid (S) 16 - 20<br />
GB<br />
For each BURNER knob there is a complete ring<br />
showing the strength of the flame for the relevant<br />
burner.<br />
To light one of the burners on the hob:<br />
1. Bring a flame or gas lighter close to the burner.<br />
2. Press the BURNER knob and turn it in an<br />
anticlockwise direction so that it is pointing to the<br />
maximum flame setting E.<br />
3. Adjust the intensity of the flame to the <strong>de</strong>sired level<br />
by turning the BURNER knob in an anticlockwise<br />
direction. This may be the minimum setting C, the<br />
maximum setting E or any position in between the two.<br />
If the appliance is fitted with an electronic lighting<br />
<strong>de</strong>vice* (see figure), press the<br />
ignition button, marked with<br />
the symbol 1, then hold the<br />
BURNER knob down and turn<br />
it in an anticlockwise direction,<br />
towards the maximum flame<br />
setting, until the burner is lit.The<br />
burner may be extinguished<br />
when the knob is released. If this occurs, repeat the<br />
operation, holding the knob down for a longer period of<br />
time.<br />
! If the flame is acci<strong>de</strong>ntally extinguished, switch off the<br />
burner and wait for at least 1 minute before attempting<br />
to relight it.<br />
If the appliance is equipped with a flame failure<br />
safety <strong>de</strong>vice*, press and hold the BURNER knob for<br />
approximately 2-3 seconds to keep the flame alight<br />
and to activate the <strong>de</strong>vice.<br />
To switch the burner off, turn the knob until it reaches<br />
the stop position •.<br />
Practical advice on using the burners<br />
For the burners to work in the most efficient way<br />
possible and to save on the amount of gas consumed, it<br />
is recommen<strong>de</strong>d that only pans that have a lid and a flat<br />
base are used. They should also be suited to the size of<br />
the burner.<br />
WARNING! The glass lid can break in if<br />
it is heated up. Turn off all the burners<br />
and the electric plates before closing<br />
the lid. *Applies to the mo<strong>de</strong>ls with glass<br />
cover only.<br />
Auxilliary (A) 10 - 14<br />
To i<strong>de</strong>ntify the type of burner, please refer to the diagrams<br />
contained in the “Burner and nozzle specifications”.<br />
! On the mo<strong>de</strong>ls supplied with a reducer shelf, remember<br />
that this should be used only for the auxiliary burner when<br />
you use casserole dishes with a diameter un<strong>de</strong>r 12 cm.<br />
Using the oven<br />
! The first time you use your appliance, heat the empty<br />
oven with its door closed at its maximum temperature for<br />
at least half an hour. Ensure that the room is well ventilated<br />
before switching the oven off and opening the oven door.<br />
The appliance may emit a slightly unpleasant odour caused<br />
by protective substances used during the manufacturing<br />
process burning away.<br />
! Never put objects directly on the bottom of the oven; this<br />
will avoid the enamel coating being damaged.<br />
Lighting the oven<br />
To light the oven burner, bring a flame or gas lighter close to<br />
opening F (see figure) and press the OVEN control knob while<br />
turning it in an anticlockwise direction until it reaches the<br />
MAX position.<br />
If the appliance is fitted with an electronic lighting <strong>de</strong>vice*<br />
(see figure), simply press the<br />
OVEN control knob and turn it in an<br />
anticlockwise direction, towards the<br />
MAX position, until the burner is lit.<br />
If, after 15 seconds, the burner is still<br />
not alight, release the knob, open<br />
F<br />
the oven door and wait for at least 1<br />
minute before trying to light it again. If<br />
there is no electricity the burner may be lit using a flame or a<br />
lighter, as <strong>de</strong>scribed above.<br />
! The oven is fitted with a safety <strong>de</strong>vice and it is therefore<br />
necessary to hold the OVEN control knob down for<br />
approximately 6 seconds.<br />
! If the flame is acci<strong>de</strong>ntally extinguished, switch off the<br />
burner and wait for at least 1 minute before attempting to<br />
relight the oven.<br />
* Only available in certain mo<strong>de</strong>ls.<br />
11
GB<br />
Adjusting the temperature<br />
To set the <strong>de</strong>sired cooking temperature, turn the<br />
OVEN control knob in an anticlockwise direction.<br />
Temperatures are displayed on the control panel and<br />
may vary between MIN (150°C) and MAX (250°C).<br />
Once the set temperature has been reached, the oven<br />
will keep it constant by using its thermostat.<br />
Grill<br />
By turning the OVEN control knob in an anticlockwise<br />
direction until it reaches the position, the infrared<br />
ray grill is activated. The grill enables the surface of<br />
food to be browned evenly and is particularly suitable<br />
for roast dishes, schnitzel and sausages. Place the<br />
rack in position 4 or 5 and the dripping pan in position<br />
1 to collect fat and prevent the formation of smoke.<br />
! The GRILL indicator light shows when the grill is<br />
operating.<br />
! Always use the grill with the oven door shut; this<br />
achieves better cooking results and saves energy<br />
(approximately 10%).<br />
Oven light<br />
almost one complete revolution to set the buzzer.<br />
2. Turn the TIMER knob in an anticlockwise direction 5<br />
to set the <strong>de</strong>sired length of time.<br />
Turnspit<br />
To operate the rotisserie (see diagram) proceed as<br />
follows:<br />
1. Place the dripping pan in position 1.<br />
2. Place the rotisserie support in position 4 and insert<br />
the spit in the hole provi<strong>de</strong>d on the back panel of the<br />
oven.<br />
3. Acitvate the function<br />
by pressing the<br />
TURNSPIT button.<br />
The light may be switched on at any moment by<br />
pressing the OVEN LIGHT button.<br />
Timer*<br />
To activate the Timer proceed as follows:<br />
1. Turn the TIMER knob in a clockwise direction 4 for<br />
* Only available in certain mo<strong>de</strong>ls.<br />
12
Oven cooking advice table<br />
GB<br />
Food to be cooked Wt. (wt) Cooking position of<br />
shelves from<br />
bottom<br />
Temperature<br />
(°C)<br />
Pre-heat time (min.)<br />
Cooking time<br />
(min.)<br />
Paste<br />
Lasagne<br />
Cannelloni<br />
Oven-baked noodles<br />
Meat<br />
Veal<br />
Chicken<br />
Turkey<br />
Duck<br />
Rabbit<br />
Pork<br />
Lamb<br />
Fish<br />
Mackerel<br />
Dentex<br />
Trout baked in paper<br />
2,5<br />
2,5<br />
2,5<br />
1,7<br />
1,5<br />
3,0<br />
1,8<br />
2,0<br />
2,1<br />
1,8<br />
1,1<br />
1,5<br />
1,0<br />
3<br />
3<br />
3<br />
3<br />
3<br />
3<br />
3<br />
3<br />
3<br />
3<br />
3<br />
3<br />
3<br />
210<br />
210<br />
210<br />
230<br />
220<br />
Max<br />
230<br />
230<br />
230<br />
230<br />
210-230<br />
210-230<br />
210-230<br />
-<br />
-<br />
-<br />
-<br />
-<br />
-<br />
-<br />
-<br />
-<br />
-<br />
-<br />
-<br />
-<br />
75-80<br />
75-80<br />
75-80<br />
85-90<br />
110-115<br />
95-100<br />
120-125<br />
105-110<br />
100-110<br />
90-95<br />
55-60<br />
60-65<br />
40-45<br />
Pizze<br />
Napolitan 1,0 3 Max 15 30-35<br />
Cake<br />
Biscuits<br />
Tarts<br />
Chocolate cake<br />
Yeast cakes<br />
Grill cooking<br />
Toast<br />
Pork chops<br />
Mackerel<br />
0,5<br />
1,1<br />
1,0<br />
1,0<br />
n.4<br />
1,5<br />
1,1<br />
3<br />
3<br />
3<br />
3<br />
4<br />
4<br />
4<br />
NB: cooking times are approximate and may vary according to personal taste. When cooking using the grill, the<br />
dripping pan must always be placed on the 1st oven rack from the bottom.<br />
180<br />
180<br />
200<br />
200<br />
15<br />
15<br />
15<br />
15<br />
30-35<br />
30-35<br />
45-50<br />
50-55<br />
10<br />
30<br />
35<br />
13
Precautions and tips<br />
GB<br />
! This appliance has been <strong>de</strong>signed and manufactured<br />
in compliance with international safety standards.<br />
The following warnings are provi<strong>de</strong>d for safety reasons<br />
and must be read carefully.<br />
General safety<br />
• The appliance was <strong>de</strong>signed for domestic use insi<strong>de</strong><br />
the home and is not inten<strong>de</strong>d for commercial or<br />
industrial use.<br />
• The appliance must not be installed outdoors, even in<br />
covered areas. It is extremely dangerous to leave the<br />
appliance exposed to rain and storms.<br />
• Do not touch the appliance with bare feet or with wet<br />
or damp hands and feet.<br />
• The appliance should not be operated by people<br />
(including children) with reduced physical, sensory<br />
or mental capacities, by inexperienced individuals<br />
or by anyone who is not familiar with the product.<br />
These individuals should, at the very least, be<br />
supervised by someone who assumes responsibility<br />
for their safety or receive preliminary instructions<br />
relating to the operation of the appliance.<br />
• The instruction booklet accompanies a class 1<br />
(insulated) or class 2 - subclass 1 (recessed<br />
between 2 cupboards) appliance.<br />
• Keep children away from the oven.<br />
• Make sure that the power supply cables of other<br />
electrical appliances do not come into contact with<br />
the hot parts of the oven.<br />
• The openings used for the ventilation and dispersion<br />
of heat must never be covered.<br />
• Always use oven gloves when placing cookware in<br />
the oven or when removing it.<br />
• Do not use flammable liquids (alcohol, petrol, etc...)<br />
near the appliance while it is in use.<br />
• Do not place flammable material in the lower storage<br />
compartment or in the oven itself. If the appliance is<br />
switched on acci<strong>de</strong>ntally, it could catch fire.<br />
• Always make sure the knobs are in the • position<br />
and that the gas tap is closed when the appliance is<br />
not in use.<br />
• When unplugging the appliance, always pull the plug<br />
from the mains socket; do not pull on the cable.<br />
• Never perform any cleaning or maintenance work<br />
without having disconnected the appliance from the<br />
electricity mains.<br />
• If the appliance breaks down, un<strong>de</strong>r no<br />
circumstances should you attempt to repair<br />
the appliance yourself. Repairs carried out by<br />
inexperienced persons may cause injury or further<br />
malfunctioning of the appliance. Contact Assistance.<br />
• Do not rest heavy objects on the open oven door.<br />
• If the cooker is placed on a pe<strong>de</strong>stal, take the<br />
necessary precautions to prevent the same from<br />
sliding off the pe<strong>de</strong>stal itself.<br />
• Do not let children play with the appliance.<br />
• The appliance must be used by adults only for<br />
the preparation of food, in accordance with the<br />
instructions outlined in this booklet. Any other<br />
use of the appliance (e.g. for heating the room)<br />
constitutes improper use and is dangerous.<br />
The manufacturer may not be held liable for any<br />
damage resulting from improper, incorrect and<br />
unreasonable use of the appliance.<br />
! The internal surfaces of the compartment (where<br />
present) may become hot.<br />
Disposal<br />
• When disposing of packaging material: observe local<br />
legislation so that the packaging may be reused.<br />
• The European Directive 2002/96/EC on Waste<br />
Electrical and Electronic Equipment (WEEE),<br />
requires that old household electrical appliances<br />
must not be disposed of in the normal unsorted<br />
municipal waste stream. Old appliances must<br />
be collected separately in or<strong>de</strong>r to optimise the<br />
recovery and recycling of the materials they contain<br />
and reduce the impact on human health and the<br />
environment. The crossed out “wheeled bin” symbol<br />
on the product reminds you of your obligation,<br />
that when you dispose of the appliance it must be<br />
separately collected.<br />
Consumers should contact their local authority<br />
or retailer for information concerning the correct<br />
disposal of their old appliance.<br />
Respecting and conserving the<br />
environment<br />
• Always keep the oven door closed when using the<br />
GRILL mo<strong>de</strong> This will achieve better results while<br />
saving energy (approximately 10%).<br />
• Check the door seals regularly and wipe them clean<br />
to ensure they are free of <strong>de</strong>bris so that they adhere<br />
properly to the door, thus avoiding heat dispersion.<br />
14
Care and maintenance<br />
Switching the appliance off<br />
Disconnect your appliance from the electricity supply<br />
before carrying out any work on it.<br />
Cleaning the appliance<br />
! Never use steam cleaners or pressure cleaners on<br />
the appliance.<br />
• The stainless steel or enamel-coated external parts<br />
and the rubber seals may be cleaned using a<br />
sponge that has been soaked in lukewarm water<br />
and neutral soap. Use specialised products for the<br />
removal of stubborn stains. After cleaning, rinse well<br />
and dry thoroughly. Do not use abrasive pow<strong>de</strong>rs or<br />
corrosive substances.<br />
• The hob grids, burner caps, flame sprea<strong>de</strong>r rings<br />
and burners may be removed to make cleaning<br />
easier; wash them in hot water and non-abrasive<br />
<strong>de</strong>tergent, making sure all burnt-on residue is<br />
removed before drying them thoroughly.<br />
• Clean the terminal part of the flame failure safety<br />
<strong>de</strong>vices* frequently.<br />
• The insi<strong>de</strong> of the oven should i<strong>de</strong>ally be cleaned<br />
after each use, while it is still lukewarm. Use hot<br />
water and <strong>de</strong>tergent, then rinse well and dry with a<br />
soft cloth. Do not use abrasive products.<br />
• Clean the glass part of the oven door using a<br />
sponge and a non-abrasive cleaning product, then<br />
dry thoroughly with a soft cloth. Do not use rough<br />
abrasive material or sharp metal scrapers as these<br />
could scratch the surface and cause the glass to<br />
crack.<br />
• The accessories can be washed like everyday<br />
crockery, and are even dishwasher safe.<br />
The cover<br />
! Do not close the cover when the burners are alight or<br />
when they are still hot.<br />
Inspecting the oven seals<br />
Check the door seals around the oven regularly. If<br />
the seals are damaged, please contact your nearest<br />
Authorised After-sales Service Centre. We recommend<br />
that the oven is not used until the seals have been<br />
replaced.<br />
Gas tap maintenance<br />
Over time, the taps may become jammed or difficult to<br />
turn. If this happens, the tap must be replaced.<br />
! This procedure must be performed by a qualified<br />
technician authorised by the manufacturer.<br />
Replacing the oven light bulb<br />
1. After disconnecting the<br />
oven from the electricity mains,<br />
remove the glass lid covering<br />
the lamp socket (see figure).<br />
2. Remove the light bulb and<br />
replace it with a similar one:<br />
voltage 230 V, wattage 25 W,<br />
cap E 14.<br />
3. Replace the lid and<br />
reconnect the oven to the electricity supply.<br />
Assistance<br />
! Never use the services of an unauthorised technician.<br />
Please have the following information to hand:<br />
• The type of problem encountered.<br />
• The appliance mo<strong>de</strong>l (Mod.).<br />
• The serial number (S/N).<br />
The latter two pieces of information can be found on<br />
the data plate located on the appliance.<br />
* Only available in certain mo<strong>de</strong>ls.<br />
GB<br />
15
Instalación<br />
ES<br />
! Es importante conservar este manual para po<strong>de</strong>r<br />
consultarlo en todo momento. En caso <strong>de</strong> venta,<br />
cesión o traslado, controle que permanezca junto al<br />
aparato.<br />
! Lea atentamente las instrucciones: contienen<br />
información importante sobre la instalación, el uso y la<br />
seguridad.<br />
! La instalación <strong>de</strong>l aparato se <strong>de</strong>be realizar siguiendo<br />
estas instrucciones y por personal calificado.<br />
! Cualquier intervención <strong>de</strong> regulación o mantenimiento<br />
se <strong>de</strong>be efectuar con la cocina <strong>de</strong>sconectada <strong>de</strong> la<br />
red eléctrica.<br />
Descarga <strong>de</strong> los humos <strong>de</strong> la combustión<br />
La <strong>de</strong>scarga <strong>de</strong> los humos <strong>de</strong> la combustión<br />
<strong>de</strong>be estar asegurada mediante una campana<br />
conectada a una chimenea <strong>de</strong> tiro natural <strong>de</strong> óptimo<br />
funcionamiento, o mediante un electroventilador que<br />
comience a funcionar automáticamente cada vez que<br />
se encien<strong>de</strong> el aparato (ver las figuras).<br />
Descarga directamente<br />
Descarga mediante al<br />
Ventilación <strong>de</strong> los ambientes<br />
El aparato se pue<strong>de</strong> instalar sólo en ambientes<br />
permanentemente ventilados, según las normas<br />
nacionales vigentes. En el ambiente en el que se<br />
instala el aparato <strong>de</strong>be po<strong>de</strong>r afluir la cantidad <strong>de</strong> aire<br />
necesaria para la normal combustión (el caudal <strong>de</strong><br />
aire no <strong>de</strong>be ser inferior a 2 m 3 /h por kW <strong>de</strong> potencia<br />
instalada).<br />
Las tomas <strong>de</strong> aire, protegidas por rejillas, <strong>de</strong>ben<br />
poseer un conducto <strong>de</strong> 100 cm 2 <strong>de</strong> sección útil, como<br />
mínimo, y estar colocadas <strong>de</strong> modo que no puedan ser<br />
obstruidas, ni siquiera parcialmente (ver la figura A).<br />
Dichas tomas <strong>de</strong>ben ser aumentadas en un 100%<br />
- con un mínimo <strong>de</strong> 200 cm 2 – cuando la superficie<br />
<strong>de</strong> trabajo <strong>de</strong>l aparato no posea un dispositivo <strong>de</strong><br />
seguridad por ausencia <strong>de</strong> llama y cuando el flujo <strong>de</strong><br />
aire se produce <strong>de</strong> modo indirecto <strong>de</strong>s<strong>de</strong> ambientes<br />
adyacentes (ver la figura B) – siempre que no sean<br />
partes comunes <strong>de</strong>l inmueble, ambientes con peligro<br />
<strong>de</strong> incendio o habitaciones – dotados <strong>de</strong> un conducto<br />
<strong>de</strong> ventilación con la parte externa como se <strong>de</strong>scribe<br />
prece<strong>de</strong>ntemente.<br />
Ambiente adyacente<br />
A<br />
A<br />
Ambiente que se <strong>de</strong>be<br />
ventilar<br />
Abertura <strong>de</strong> ventilación Aumento <strong>de</strong> la rendija para el<br />
aire comburente.<br />
entre la puerta y el<br />
piso<br />
! Después <strong>de</strong> un uso prolongado <strong>de</strong>l aparato, es<br />
aconsejable abrir una ventana o aumentar la velocidad<br />
<strong>de</strong> los ventiladores (si existen).<br />
B<br />
exterior<br />
chimenea o conducto <strong>de</strong><br />
humos ramificado<br />
(reservado a los aparatos<br />
<strong>de</strong> cocción)<br />
! Los gases <strong>de</strong> petróleo licuados, más pesados que el<br />
aire, se <strong>de</strong>positan en las zonas más bajas, por lo tanto,<br />
los ambientes que contienen botellas <strong>de</strong> GPL <strong>de</strong>ben<br />
poseer aberturas hacia el exterior para la evacuación,<br />
<strong>de</strong>s<strong>de</strong> dichas zonas bajas, <strong>de</strong> las posibles fugas <strong>de</strong><br />
gas.<br />
Las botellas <strong>de</strong> GPL, vacías o parcialmente llenas, no<br />
<strong>de</strong>ben ser instaladas o <strong>de</strong>positadas en ambientes o<br />
espacios a un nivel más bajo que el suelo (sótanos,<br />
etc.) En el ambiente <strong>de</strong>be permanecer sólo la botella<br />
en uso, lejos <strong>de</strong> fuentes <strong>de</strong> calor (hornos, chimeneas o<br />
estufas) capaces <strong>de</strong> llevarla a temperaturas superiores<br />
a los 50ºC.<br />
Colocación y nivelación<br />
! Es posible instalar el aparato al lado <strong>de</strong> muebles que<br />
no sean más altos que la superficie <strong>de</strong> trabajo.<br />
! Verifique que la pared que está en contacto con<br />
la parte posterior <strong>de</strong>l aparato sea <strong>de</strong> material no<br />
inflamable y resistente al calor (T 90°C).<br />
Para una correcta instalación:<br />
• coloque el aparato en la cocina, en el comedor o en<br />
un monolocal (no en el cuarto <strong>de</strong> baño);<br />
• si la parte superior <strong>de</strong> la cocina es más alta que la<br />
<strong>de</strong> los muebles, los mismos se <strong>de</strong>ben ubicar, como<br />
mínimo, a 600 mm. <strong>de</strong>l aparato;<br />
• si la cocina se instala <strong>de</strong>bajo <strong>de</strong> un armario <strong>de</strong><br />
pared, este último <strong>de</strong>berá mantener una distancia<br />
mínima <strong>de</strong>l plano <strong>de</strong> cocción <strong>de</strong> 420 mm. Dicha<br />
distancia <strong>de</strong>be ser <strong>de</strong> 700 mm. si los armarios son<br />
<strong>de</strong> material inflamable (ver la figura);<br />
16
mm.<br />
420<br />
Min.<br />
HOOD<br />
Min. 600 mm.<br />
Min. 420 mm.<br />
min. 650 mm. with hood<br />
min. 700 mm. without hood<br />
• la tensión <strong>de</strong> alimentación eléctrica esté<br />
comprendida <strong>de</strong>ntro <strong>de</strong> los valores indicados en la<br />
placa <strong>de</strong> características;<br />
• la toma sea compatible con el enchufe <strong>de</strong>l aparato.<br />
Si no es así, sustituya la toma o el enchufe; no utilice<br />
prolongaciones ni conexiones múltiples.<br />
ES<br />
! Una vez instalado el aparato, el cable eléctrico y la<br />
toma <strong>de</strong> corriente <strong>de</strong>ben ser fácilmente accesibles.<br />
• no coloque cortinas<br />
<strong>de</strong>trás <strong>de</strong> la cocina o a menos <strong>de</strong> 600 mm. <strong>de</strong> sus<br />
costados;<br />
• las campanas se <strong>de</strong>ben instalar siguiendo las<br />
indicaciones contenidas en el correspondiente<br />
manual <strong>de</strong> instrucciones.<br />
Nivelación<br />
Si es necesario nivelar el<br />
aparato, enrosque las patas <strong>de</strong><br />
regulación suministradas con<br />
el aparato, en los ángulos <strong>de</strong> la<br />
base <strong>de</strong> la cocina (ver la figura).<br />
Las patas* se encastran en la<br />
base <strong>de</strong> la cocina.<br />
Conexión eléctrica<br />
Instale en el cable, un enchufe normalizado para la carga<br />
indicada en la placa <strong>de</strong> características colocada en el<br />
aparato (ver la tabla <strong>de</strong> Datos técnicos).<br />
En el caso <strong>de</strong> conexión directa a la red, es necesario<br />
interponer entre el aparato y la red, un interruptor omnipolar<br />
con una distancia mínima entre los contactos <strong>de</strong> 3 mm.,<br />
dimensionado para esa carga y que responda a las<br />
normas NFC 15-100 (el conductor <strong>de</strong> tierra no <strong>de</strong>be ser<br />
interrumpido por el interruptor). El cable <strong>de</strong> alimentación<br />
eléctrica se <strong>de</strong>be colocar <strong>de</strong> modo tal que no alcance<br />
en ningún punto una temperatura que supere en 50°C la<br />
temperatura ambiente.<br />
Antes <strong>de</strong> efectuar la conexión verifique que:<br />
• la toma tenga conexión a tierra y que sea conforme con<br />
la ley;<br />
• la toma sea capaz <strong>de</strong> soportar la carga máxima <strong>de</strong><br />
potencia <strong>de</strong> la máquina indicada en la placa <strong>de</strong><br />
características;<br />
* Presente sólo en algunos mo<strong>de</strong>los.<br />
! El cable no <strong>de</strong>be sufrir pliegues ni compresiones.<br />
! El cable <strong>de</strong>be ser revisado periódicamente y<br />
sustituido sólo por técnicos autorizados.<br />
! La empresa <strong>de</strong>clina toda responsabilidad en los<br />
casos en que no hayan sido respetadas estas<br />
normas.<br />
Conexión <strong>de</strong> gas<br />
La conexión a la red <strong>de</strong> gas o a la botella <strong>de</strong> gas se pue<strong>de</strong><br />
realizar con un tubo flexible <strong>de</strong> goma o <strong>de</strong> acero según<br />
las normas nacionales vigentes y <strong>de</strong>spués <strong>de</strong> haber<br />
verificado que el aparato esté regulado para el tipo <strong>de</strong> gas<br />
con el que será alimentado (ver la etiqueta <strong>de</strong> calibrado<br />
en la tapa: si no es así, ver más a<strong>de</strong>lante). En el caso <strong>de</strong><br />
alimentación con gas líquido, <strong>de</strong>s<strong>de</strong> botella, utilice<br />
reguladores <strong>de</strong> presión conformes con las normas<br />
nacionales vigentes. Para facilitar la conexión, la<br />
alimentación <strong>de</strong> gas se pue<strong>de</strong> orientar lateralmente*:<br />
invierta la boquilla para la conexión con el tapón <strong>de</strong><br />
cierre y sustituya la junta estanca suministrada con el<br />
aparato.<br />
! Para un funcionamiento seguro, un a<strong>de</strong>cuado uso <strong>de</strong><br />
la energía y una mayor duración <strong>de</strong>l aparato, verifique<br />
que la presión <strong>de</strong> alimentación cumpla con los<br />
valores indicados en la tabla “Características <strong>de</strong> los<br />
quemadores e inyectores” (ver más a<strong>de</strong>lante).<br />
Conexión <strong>de</strong> gas con tubo flexible <strong>de</strong> goma<br />
Verifique que el tubo responda a las normas<br />
nacionales vigentes. El diámetro interno <strong>de</strong>l tubo <strong>de</strong>be<br />
ser: 8 mm. para alimentación con gas líquido; 13 mm.<br />
para alimentación con gas metano.<br />
Una vez realizada la conexión, controle que el tubo:<br />
• no esté en contacto, en ningún punto, con partes<br />
que alcancen temperaturas superiores a 50ºC;<br />
• no esté sometido a esfuerzos <strong>de</strong> tracción o <strong>de</strong><br />
torsión y no presente pliegues o estrechamientos;<br />
• no esté en contacto con objetos cortantes, con<br />
bor<strong>de</strong>s o con partes móviles y que no que<strong>de</strong><br />
aplastado;<br />
17
ES<br />
• se pueda inspeccionar fácilmente en todo su<br />
recorrido, para po<strong>de</strong>r controlar su estado <strong>de</strong><br />
conservación;<br />
• tenga una longitud inferior a 1500 mm;<br />
• esté bien calzado en sus dos extremos, don<strong>de</strong> va<br />
fijado con abraza<strong>de</strong>ras <strong>de</strong> manguera conformes<br />
con las normas nacionales vigentes.<br />
! Si alguna <strong>de</strong> estas condiciones no pue<strong>de</strong> se<br />
respetada o si la cocina se instala según las<br />
condiciones <strong>de</strong> la clase 2 – subclase 1 (aparato<br />
empotrado entre dos muebles), es necesario<br />
recurrir al tubo flexible <strong>de</strong> acero (ver más a<strong>de</strong>lante).<br />
Conexión <strong>de</strong> gas con tubo flexible <strong>de</strong> acero<br />
inoxidable <strong>de</strong> pared continua con uniones<br />
roscadas<br />
Verifique que el tubo y las juntas respondan a las<br />
normas nacionales vigentes.<br />
Para poner en funcionamiento el tubo, elimine la<br />
boquilla presente en el aparato (la unión <strong>de</strong> entrada<br />
<strong>de</strong> gas al aparato es roscada 1/2 gas macho<br />
cilíndrica).<br />
! Realice la conexión <strong>de</strong> modo tal, que la longitud<br />
<strong>de</strong> la tubería no supere los 2 metros <strong>de</strong> extensión<br />
máxima y verifique que el tubo no esté en contacto<br />
con partes móviles y que no que<strong>de</strong> aplastado.<br />
Control <strong>de</strong> la estanqueidad<br />
Finalizada la instalación, controle la perfecta<br />
estanqueidad <strong>de</strong> todas las uniones utilizando una<br />
solución jabonosa pero nunca una llama.<br />
Adaptación a los distintos tipos <strong>de</strong><br />
gas<br />
Es posible adaptar el aparato a un tipo <strong>de</strong> gas<br />
diferente <strong>de</strong> aquel para el cual fue fabricado<br />
(indicado en la etiqueta <strong>de</strong> calibrado que se<br />
encuentra en la tapa).<br />
Adaptación <strong>de</strong> la encimera<br />
Sustitución <strong>de</strong> los inyectores <strong>de</strong> los quemadores <strong>de</strong><br />
la encimera:<br />
1. quite las rejillas y extraiga<br />
los quemadores;<br />
2. <strong>de</strong>senrosque los inyectores<br />
utilizando una llave tubular<br />
<strong>de</strong> 7 mm. (ver la figura),<br />
y sustitúyalos por otros<br />
que se adapten al nuevo<br />
tipo <strong>de</strong> gas (ver la tabla<br />
“Características <strong>de</strong> los quemadores e inyectores”);<br />
3. vuelva a colocar en su posición todos los<br />
componentes siguiendo las operaciones en sentido<br />
contrario al <strong>de</strong> la secuencia <strong>de</strong>scripta arriba.<br />
Regulación <strong>de</strong>l mínimo <strong>de</strong> los quemadores <strong>de</strong> la<br />
encimera:<br />
1. lleve la llave a la posición <strong>de</strong> mínimo;<br />
2. extraiga el mando y accione el tornillo <strong>de</strong> regulación<br />
situado en el interior o al costado <strong>de</strong> la varilla <strong>de</strong> la<br />
llave hasta conseguir una pequeña llama regular.<br />
! En el caso <strong>de</strong> gas líquido, el tornillo <strong>de</strong> regulación<br />
<strong>de</strong>berá enroscarse a fondo;<br />
3. compruebe que, al girar rápidamente la llave <strong>de</strong> la<br />
posición <strong>de</strong> máximo a la <strong>de</strong> mínimo, no se apague la<br />
llama.<br />
! Los quemadores <strong>de</strong> la encimera no necesitan<br />
regulación <strong>de</strong> aire principal.<br />
Adaptación <strong>de</strong>l horno<br />
Sustitución <strong>de</strong>l inyector <strong>de</strong>l quemador <strong>de</strong>l horno:<br />
1. abra la puerta <strong>de</strong>l horno completamente;<br />
2. extraiga el fondo <strong>de</strong>l horno <strong>de</strong>slizable (ver la figura);<br />
V<br />
3. extraiga el quemador <strong>de</strong>l<br />
horno <strong>de</strong>spués <strong>de</strong> haber<br />
<strong>de</strong>senroscado el tornillo V;<br />
4. <strong>de</strong>senrosque el inyector <strong>de</strong>l<br />
quemador utilizando la llave tubular<br />
para inyectores (ver la figura) o<br />
con una llave tubular <strong>de</strong> 7 mm<br />
y sustitúyalo con otro a<strong>de</strong>cuado<br />
para el nuevo tipo <strong>de</strong> gas (ver<br />
la tabla Características <strong>de</strong> los<br />
quemadores e inyectores).<br />
Regulación <strong>de</strong>l mínimo <strong>de</strong>l<br />
quemador <strong>de</strong>l horno a gas<br />
1. encienda el quemador (ver Puesta en funcionamiento<br />
y Uso);<br />
2. durante 10 minutos aproximadamente <strong>de</strong>je el mando<br />
en la posición <strong>de</strong> máximo (MAX) y luego llévelo hasta<br />
la posición <strong>de</strong> mínimo (MIN);<br />
3. extraiga el mando;<br />
18
4. accione el tornillo <strong>de</strong> regulación colocado en la<br />
parte externa <strong>de</strong> la varilla <strong>de</strong>l termostato (ver las figuras)<br />
hasta obtener una pequeña llama regular.<br />
! En el caso <strong>de</strong> gas líquido, el tornillo <strong>de</strong> regulación<br />
<strong>de</strong>berá enroscarse a fondo;<br />
5. verifique que no se apague el quemador al girar<br />
rápidamente el mando <strong>de</strong>s<strong>de</strong> la posición MAX hasta la<br />
posición MIN, o al abrir o cerrar rápidamente la puerta<br />
<strong>de</strong>l horno.<br />
! Tenga cuidado con los cables <strong>de</strong> las bujías y con los<br />
tubos <strong>de</strong> los termopares.<br />
! Después <strong>de</strong> la regulación <strong>de</strong>l aparato para un gas<br />
diferente al utilizado en las pruebas, sustituya la<br />
etiqueta <strong>de</strong> calibrado anterior con la correspondiente<br />
al nuevo gas, que se encuentra disponible en los<br />
Centros <strong>de</strong> Asistencia Técnica Autorizados.<br />
! Cuando la presión <strong>de</strong>l gas utilizado sea distinta<br />
a la prevista (o variable), es necesario instalar,<br />
en la cañería <strong>de</strong> ingreso, un regulador <strong>de</strong> presión<br />
conforme con las normas nacionales vigentes<br />
sobre “reguladores para gas para distribución por<br />
conducto”.<br />
DATOS TÉCNICOS<br />
Dimensiones <strong>de</strong>l<br />
Horno HxLxP<br />
31x43,5x43,5 cm<br />
Volumen litros 58<br />
Dimensiones<br />
útiles <strong>de</strong>l cajón<br />
calientaplatos<br />
Tensión y<br />
frecuencia <strong>de</strong><br />
alimentación<br />
Quemadores<br />
ancho 46 cm<br />
profundidad 42 cm<br />
altura 8,5 cm<br />
ver placa <strong>de</strong> características<br />
adaptables a todos los tipos <strong>de</strong><br />
gas indicados en la placa <strong>de</strong><br />
características.<br />
Normas Comunitarias<br />
2006/95/EC <strong>de</strong>l 12/12/06 (Baja<br />
Tensión) y posteriores<br />
modificaciones -2004/108/EC<br />
<strong>de</strong>l 15/12/04 (Compatibilidad<br />
Electromagnética) y posteriores<br />
modificaciones -<br />
93/68/EEC <strong>de</strong>l 22/07/93 y<br />
posteriores modificaciones -<br />
2002/96/EC<br />
2009/142/EC <strong>de</strong>l 30/11/09 (Gas)<br />
1275/2008 (Stand-by/Off mo<strong>de</strong>)<br />
La placa <strong>de</strong> características es situada en el interior <strong>de</strong> la<br />
puerta volcable o, una vez abierto el cajón calienta-platos,<br />
en el costado interior izquierdo <strong>de</strong>l mismo.<br />
ES<br />
19
ES<br />
Tabla <strong>de</strong> características <strong>de</strong> quemadores e inyectores<br />
Tabla 1 Gas liquido Gas natural<br />
Quemador Diametro Potencia térmica<br />
kW (p.c.s.*)<br />
By-pass<br />
1/100<br />
pico<br />
1/100<br />
capacid.*<br />
g/h<br />
pico<br />
1/100<br />
capacid.*<br />
l/h<br />
(mm) Nomin. Reduc. (mm) (mm) *** ** (mm)<br />
Rŕ pido<br />
(Gran<strong>de</strong>)(R)<br />
100 3,00 0,7 41 86 218 214 116 286<br />
Semi Rŕ pido<br />
(Medio)(S)<br />
75 1,90 0,4 30 70 138 136 106 181<br />
Auxiliari<br />
(Pequeńo)(A)<br />
55 1,00 0,4 30 50 73 71 79 95<br />
Horno - 2,60 1,00 52 78 189 186 119 248<br />
Presiones<br />
<strong>de</strong><br />
suministro<br />
Nominal (mbar)<br />
Minimo (mbar)<br />
Mŕ ximo (mbar)<br />
28-30<br />
20<br />
35<br />
37<br />
25<br />
45<br />
20<br />
17<br />
25<br />
* A 15°C y 1013 mbar-gas seco<br />
** Propano P.C.S. = 50.37 MJ/Kg<br />
*** Butano P.C.S. = 49,47 MJ/Kg<br />
Natural P.C.S. = 37.78 MJ/m 3<br />
S<br />
S<br />
R<br />
A<br />
K6G21S/P S<br />
KN6G21S/P S<br />
20
Puesta en funcionamiento y uso<br />
Uso <strong>de</strong> la encimera<br />
Encendido <strong>de</strong> los quemadores<br />
Coincidiendo con cada mando <strong>de</strong> QUEMADOR,<br />
existe un círculo lleno que indica el quemador<br />
correspondiente.<br />
Para encen<strong>de</strong>r un quemador <strong>de</strong> la encimera:<br />
1. acerque al quemador una llama o un encen<strong>de</strong>dor;<br />
2. presione y simultáneamente gire en sentido<br />
antihorario el mando <strong>de</strong>l QUEMADOR hasta el símbolo<br />
<strong>de</strong> llama máxima E.<br />
3. regule la potencia <strong>de</strong> la llama <strong>de</strong>seada, girando en<br />
sentido antihorario el mando <strong>de</strong>l QUEMADOR: hasta<br />
el mínimo C, hasta el máximo E o hasta una posición<br />
intermedia.<br />
Si el aparato posee encendido electrónico* (ver la<br />
figura), primero pulse el botón<br />
<strong>de</strong> encendido i<strong>de</strong>ntificado por el<br />
símbolo 1, luego pulse a fondo<br />
y gire el mando <strong>de</strong>l QUEMADOR<br />
en sentido antihorario hasta la<br />
posición <strong>de</strong> máxima potencia.<br />
Pue<strong>de</strong> suce<strong>de</strong>r que, cuando se<br />
suelte el mando, el quemador se<br />
apague. En ese caso, repita la operación manteniendo<br />
presionado el mando durante un tiempo mayor.<br />
! Si la llama se extingue acci<strong>de</strong>ntalmente, apague el<br />
quemador y espere 1 minuto, como mínimo, antes <strong>de</strong><br />
volver a intentar encen<strong>de</strong>rlo.<br />
Si el aparato posee un dispositivo <strong>de</strong> seguridad*<br />
por ausencia <strong>de</strong> llama, tenga presionado el mando<br />
<strong>de</strong>l QUEMADOR aproximadamente 2 o 3 segundos<br />
para mantener encendida la llama y para activar el<br />
dispositivo.<br />
Para apagar el quemador, gire el mando hasta que se<br />
<strong>de</strong>tenga •.<br />
Consejos prácticos para el uso <strong>de</strong> los quemadores<br />
Para obtener un mayor rendimiento <strong>de</strong> los quemadores<br />
y un mínimo consumo <strong>de</strong> gas, utilice recipientes con<br />
fondo plano, con tapa y <strong>de</strong> dimensiones apropiadas<br />
para ese quemador.<br />
Para i<strong>de</strong>ntificar el tipo <strong>de</strong> quemador ver los diseños<br />
presentes en el párrafo „Características <strong>de</strong> los<br />
quemadores y boquillas”.<br />
! En los mo<strong>de</strong>los dotados <strong>de</strong> rejilla <strong>de</strong> reducción, esta<br />
última <strong>de</strong>berá ser usada únicamente para el quemador<br />
auxiliar, cuando se usan recipientes <strong>de</strong> diámetro<br />
inferior a 12 cm.<br />
Quemador<br />
Uso <strong>de</strong>l horno<br />
! La primera vez que encienda el horno, hágalo<br />
funcionar vacío, durante una hora aproximadamente,<br />
con el termostato al máximo y con la puerta cerrada.<br />
Luego apáguelo, abra la puerta <strong>de</strong>l horno y airee<br />
el ambiente en el que se encuentra. El olor que se<br />
advierte es <strong>de</strong>bido a la evaporación <strong>de</strong> las sustancias<br />
utilizadas para proteger el horno.<br />
! No apoye nunca objetos en el fondo <strong>de</strong>l horno<br />
porque se pue<strong>de</strong> dañar el esmalte. Utilice la posición<br />
1 <strong>de</strong>l horno sólo en caso <strong>de</strong> cocciones con el asador<br />
automático.<br />
Encendido <strong>de</strong>l horno<br />
Para encen<strong>de</strong>r el quemador <strong>de</strong>l horno, acerque al orificio<br />
F (ver la figura) una llama o un encen<strong>de</strong>dor y luego<br />
presione y simultáneamente gire en sentido antihorario<br />
el mando <strong>de</strong>l HORNO hasta la posición MAX.<br />
Si el aparato posee encendido electrónico*, basta<br />
presionar y simultáneamente girar en sentido<br />
antihorario el mando <strong>de</strong>l HORNO hasta MAX, para<br />
que se produzca el encendido. Si <strong>de</strong>spués <strong>de</strong><br />
transcurridos 15 segundos, el quemador no se ha<br />
encendido, suelte el mando,<br />
abra la puerta <strong>de</strong>l horno<br />
y espere 1 minuto, como<br />
mínimo, antes <strong>de</strong> volver a<br />
intentar encen<strong>de</strong>rlo. En el caso<br />
<strong>de</strong> ausencia <strong>de</strong> corriente,<br />
F<br />
es posible encen<strong>de</strong>r el<br />
quemador con una llama o<br />
un encen<strong>de</strong>dor, como se ha<br />
<strong>de</strong>scrito prece<strong>de</strong>ntemente.<br />
! El horno posee un dispositivo <strong>de</strong> seguridad, por lo<br />
tanto, es necesario mantener presionado el mando <strong>de</strong>l<br />
HORNO durante aproximadamente 6 segundos.<br />
! Cuando se produzca una extinción acci<strong>de</strong>ntal <strong>de</strong> la<br />
llama, apague el quemador y espere 1 minuto, como<br />
mínimo, antes <strong>de</strong> volver a intentar encen<strong>de</strong>r el horno.<br />
* Presente sólo en algunos mo<strong>de</strong>los.<br />
ř Diámetro recipientes (cm)<br />
Rápido (R) 24 – 26<br />
Semi Rápido (S) 16 – 20<br />
Auxiliar (A) 10 – 14<br />
ES<br />
21
ES<br />
Regulación <strong>de</strong> la temperatura<br />
Para obtener la temperatura <strong>de</strong> cocción <strong>de</strong>seada,<br />
gire en sentido antihorario el mando <strong>de</strong>l HORNO. Las<br />
temperaturas están indicadas en el panel <strong>de</strong> control<br />
y varían entre el MIN (150ºC) y el MAX (250ºC). Una<br />
vez alcanzada la temperatura, el horno la mantendrá<br />
constante gracias al termostato.<br />
ATENCIÓN! L a tapa <strong>de</strong> vidrio se pue<strong>de</strong><br />
romper, si se calienta. Apagar todos los<br />
quemadores o, si existen, las placas<br />
eléctricas antes <strong>de</strong> cerrarla. *Se refi ere<br />
solo a los mo<strong>de</strong>los con cubierta <strong>de</strong> vidrio<br />
Grill<br />
Girando en sentido antihorario el mando <strong>de</strong>l HORNO<br />
hasta la posición se pone en funcionamiento el grill<br />
<strong>de</strong> rayos infrarrojos. El grill permite dorar los alimentos<br />
y está indicado particularmente para la cocción <strong>de</strong><br />
roast-beef, asados, chuletas y salchichas. Coloque<br />
la parrilla en las posiciones 4 o 5 y una grasera en la<br />
posición 1 para recoger la grasa y evitar la formación<br />
<strong>de</strong> humo.<br />
! El funcionamiento <strong>de</strong>l grill se indica con el encendido<br />
<strong>de</strong>l piloto GRILL.<br />
! Efectúe la cocción al grill con la puerta <strong>de</strong>l horno<br />
cerrada para obtener, a<strong>de</strong>más <strong>de</strong> los mejores<br />
resultados, un sensible ahorro <strong>de</strong> energía (10%<br />
aproximadamente).<br />
Luz <strong>de</strong>l horno<br />
Para accionar el Temporizador (Contador <strong>de</strong> minutos)<br />
proceda <strong>de</strong>l siguiente modo:<br />
1. gire en sentido horario 4 un giro casi completo el<br />
mando <strong>de</strong>l TEMPORIZADOR para cargar la alarma;<br />
2. gire en sentido antihorario 5 el mando <strong>de</strong>l<br />
TEMPORIZADOR fijando el tiempo <strong>de</strong>seado.<br />
La bombilla se pue<strong>de</strong> encen<strong>de</strong>r en cualquier momento<br />
presionando el botón LUZ DEL HORNO.<br />
Timer*<br />
El asador automático<br />
Para accionar el asador automático proceda <strong>de</strong>l siguiente<br />
modo:<br />
a) coloque la ban<strong>de</strong>ja para la grasa en el 1° piso;<br />
b) introduzca el soporte <strong>de</strong>l asador automático en el 4°<br />
piso y coloque el espetón introduciéndolo, a través<br />
<strong>de</strong>l orificio correspondiente, en el asador automático<br />
colocado en la parte posterior <strong>de</strong>l horno;<br />
c) Poner en funciones el asador giratorio efectuando<br />
una presión sobre el pulsador „O”.<br />
* Presente sólo en algunos mo<strong>de</strong>los.<br />
22
Tabla <strong>de</strong> cocción en el horno<br />
ES<br />
Comida para cocinar Peso (Kg) Posición para la<br />
cocción en los<br />
pisos <strong>de</strong>s<strong>de</strong> abajo<br />
Temperatura<br />
(°C)<br />
Tiempo <strong>de</strong><br />
precalentamiento<br />
(minutos)<br />
Tiempo <strong>de</strong><br />
cocción<br />
(minutos)<br />
Fi<strong>de</strong>os<br />
Lasańas<br />
Canelones<br />
Fi<strong>de</strong>os al horno<br />
2.5<br />
2.5<br />
2.5<br />
3<br />
3<br />
3<br />
210<br />
200<br />
200<br />
10<br />
10<br />
10<br />
60-75<br />
40-50<br />
40-50<br />
Carne<br />
Ternera<br />
Pollo<br />
Pato<br />
Conejo<br />
Cerdo<br />
Cor<strong>de</strong>ro<br />
Pescados<br />
Caballa<br />
Dentón<br />
Trucha envuelta<br />
1.7<br />
1.5<br />
1.8<br />
2.0<br />
2.1<br />
1.8<br />
1.1<br />
1.5<br />
1.0<br />
3<br />
3<br />
3<br />
3<br />
3<br />
3<br />
3<br />
3<br />
3<br />
200<br />
220<br />
200<br />
200<br />
200<br />
200<br />
180-200<br />
180-200<br />
180-200<br />
10<br />
10<br />
10<br />
10<br />
10<br />
10<br />
10<br />
10<br />
10<br />
85-90<br />
90-100<br />
100-110<br />
70-80<br />
70-80<br />
90-95<br />
35-40<br />
40-50<br />
40-45<br />
Pizza<br />
Napolitana 1.0 3 220 15 15-20<br />
Tortas<br />
Bizcochos<br />
Torta glaseada<br />
Tortas saladas<br />
Tortas leudadas<br />
Cocción al grill<br />
Bistecs <strong>de</strong> ternera<br />
Chuletas<br />
Hamburguesas<br />
Caballa<br />
Tostadas<br />
Cocción al grill con<br />
asador automático<br />
Asado <strong>de</strong> ternera<br />
Pollo asado<br />
Cocción al grill con<br />
asador automático<br />
múltiple (presente sólo<br />
en algunos mo<strong>de</strong>los)<br />
Broquetas <strong>de</strong> carne<br />
Broquetas <strong>de</strong> verdura<br />
0.5<br />
1.1<br />
1.0<br />
1.0<br />
1<br />
1,5<br />
1<br />
1<br />
n.° 4<br />
1<br />
2<br />
1,0<br />
0,8<br />
3<br />
3<br />
3<br />
3<br />
4<br />
4<br />
3<br />
4<br />
4<br />
-<br />
-<br />
-<br />
-<br />
Nota: los tiempos <strong>de</strong> cocción son indicativos y se pue<strong>de</strong>n modificar en base a sus gustos personales. En las<br />
cocciones al grill la grasera se coloca siempre en el 1° piso contando <strong>de</strong>s<strong>de</strong> abajo.<br />
180<br />
180<br />
180<br />
165<br />
15<br />
15<br />
15<br />
15<br />
5<br />
5<br />
5<br />
5<br />
5<br />
5<br />
5<br />
5<br />
5<br />
30-35<br />
30-35<br />
45-50<br />
35-40<br />
15-20<br />
20<br />
7<br />
15-20<br />
5<br />
70-80<br />
70-80<br />
40-45<br />
25-30<br />
23
Precauciones y consejos<br />
ES<br />
! El aparato ha sido proyectado y fabricado en<br />
conformidad con las normas internacionales sobre<br />
seguridad.<br />
Estas advertencias se suministran por razones <strong>de</strong><br />
seguridad y <strong>de</strong>ben ser leídas atentamente.<br />
Seguridad general<br />
• El aparato ha sido fabricado para un uso <strong>de</strong> tipo no<br />
profesional en el interior <strong>de</strong> una vivienda.<br />
• El aparato no se <strong>de</strong>be instalar al aire libre,<br />
tampoco si el espacio está protegido porque es<br />
muy peligroso <strong>de</strong>jarlo expuesto a la lluvia y a las<br />
tormentas.<br />
• No toque la máquina <strong>de</strong>scalzo o con las manos y<br />
pies mojados o húmedos.<br />
• El manual pertenece a un aparato <strong>de</strong> clase 1<br />
(aislado) o clase 2 - subclase 1 (empotrado entre<br />
dos muebles).<br />
• Mantenga alejados a los niños.<br />
• Evite que el cable <strong>de</strong> alimentación eléctrica <strong>de</strong> otros<br />
electrodomésticos entre en contacto con partes<br />
calientes <strong>de</strong>l aparato.<br />
• No obstruya las aberturas <strong>de</strong> ventilación y <strong>de</strong><br />
eliminación <strong>de</strong>l calor.<br />
• Utilice siempre guantes para horno para introducir o<br />
extraer recipientes.<br />
• No utilice líquidos inflamables (alcohol, bencina, etc.)<br />
cerca <strong>de</strong>l aparato mientras está en funcionamiento.<br />
• No coloque material inflamable en el compartimento<br />
inferior <strong>de</strong> <strong>de</strong>pósito o en el horno: si el aparato se<br />
pone en funcionamiento inadvertidamente podría<br />
incendiarse.<br />
• Cuando el aparato no se utiliza, verifique siempre<br />
que los mandos estén en la posición • y que la<br />
llave <strong>de</strong> gas esté cerrada.<br />
• No <strong>de</strong>sconecte el aparato <strong>de</strong> la toma <strong>de</strong> corriente<br />
tirando <strong>de</strong>l cable sino sujetando el enchufe.<br />
• No realice la limpieza o el mantenimiento sin haber<br />
<strong>de</strong>sconectado primero el aparato <strong>de</strong> la red eléctrica.<br />
• En caso <strong>de</strong> avería, no acceda nunca a los<br />
mecanismos internos para intentar una reparación.<br />
Llame al Servicio <strong>de</strong> Asistencia Técnica.<br />
• No apoye objetos pesados sobre la puerta <strong>de</strong>l horno<br />
abierta.<br />
• Si la cocina se coloca sobre un pe<strong>de</strong>stal, tenga las<br />
precauciones necesarias para que el aparato no se<br />
resbale <strong>de</strong> dicho pe<strong>de</strong>stal.<br />
• No está previsto que el aparato sea utilizado<br />
por personas (niños incluidos) con reducidas<br />
capacida<strong>de</strong>s físicas, sensoriales o mentales, por<br />
personas inexpertas o que no tengan familiaridad<br />
con el producto, a menos que no sean vigiladas por<br />
una persona responsable <strong>de</strong> su seguridad o que no<br />
hayan recibido instrucciones preliminares sobre el<br />
uso <strong>de</strong>l aparato.<br />
• El aparato <strong>de</strong>be ser utilizado para cocinar<br />
alimentos, sólo por personas adultas y<br />
siguiendo las instrucciones contenidas en este<br />
manual. Cualquier otro uso (como por ejemplo:<br />
calefacción <strong>de</strong> ambientes) se <strong>de</strong>be consi<strong>de</strong>rar<br />
impropio y, por lo tanto, peligroso. El fabricante<br />
no pue<strong>de</strong> ser consi<strong>de</strong>rado responsable por los<br />
daños <strong>de</strong>rivados <strong>de</strong> usos impropios, erróneos e<br />
irracionales.<br />
• Evitar que los niños jueguen con el aparato.<br />
! Las superficies internas <strong>de</strong>l cajón (cuando existe)<br />
pue<strong>de</strong>n calentarse.<br />
Eliminación<br />
• Eliminación <strong>de</strong>l material <strong>de</strong> embalaje: respete las<br />
normas locales, <strong>de</strong> esta manera los embalajes<br />
podrán ser reutilizados.<br />
• En base a la Directiva Europea 2002/96/CE <strong>de</strong><br />
Residuos <strong>de</strong> aparatos Eléctricos y Electrónicos<br />
(RAEE), los electrodomésticos viejos no pue<strong>de</strong>n<br />
ser arrojados en los contenedores municipales<br />
habituales; tienen que ser recogidos selectivamente<br />
para optimizar la recuperación y reciclado <strong>de</strong> los<br />
componentes y materiales que los constituyen,<br />
y reducir el impacto en la salud humana y el<br />
medioambiente. El símbolo <strong>de</strong>l cubo <strong>de</strong> basura<br />
tachado se marca sobre todos los productos para<br />
recordar al consumidor la obligación <strong>de</strong> separarlos<br />
para la recogida selectiva.<br />
El consumidor <strong>de</strong>be contactar con la autoridad local<br />
o con el ven<strong>de</strong>dor para informarse en relación a la<br />
correcta eleminación <strong>de</strong> su electrodoméstico viejo.<br />
Ahorrar y respetar el medio ambiente<br />
• Se recomienda efectuar siempre las cocciones<br />
al GRILL con la puerta cerrada: se obtendrán así<br />
mejores resultados y también un sensible ahorro <strong>de</strong><br />
energía (10% aproximadamente).<br />
• Mantenga las juntas en buen estado y limpias para<br />
que se adhieran bien a la puerta y no provoquen<br />
dispersión <strong>de</strong>l calor.<br />
24
Mantenimiento y cuidados<br />
Cortar la corriente eléctrica<br />
Antes <strong>de</strong> realizar cualquier operación, <strong>de</strong>sconecte el<br />
aparato <strong>de</strong> la red <strong>de</strong> alimentación eléctrica.<br />
Limpiar el aparato<br />
! No utilice nunca limpiadores a vapor o <strong>de</strong> alta presión<br />
para la limpieza <strong>de</strong>l aparato.<br />
• Las partes externas esmaltadas o <strong>de</strong> acero<br />
inoxidable y las juntas <strong>de</strong> goma se pue<strong>de</strong>n limpiar<br />
con una esponja empapada en agua tibia y jabón<br />
neutro. Si las manchas son difíciles <strong>de</strong> eliminar use<br />
productos específicos. Enjuague abundantemente<br />
y seque <strong>de</strong>spués <strong>de</strong> la limpieza. No utilice polvos<br />
abrasivos ni sustancias corrosivas.<br />
• Las parrillas, las coronas y los quemadores <strong>de</strong><br />
la encimera con sus tapas, se pue<strong>de</strong>n extraer<br />
para facilitar la limpieza; lávelos con agua<br />
caliente y <strong>de</strong>tergente no abrasivo, quite todas las<br />
incrustaciones y espere que estén perfectamente<br />
secos.<br />
• Limpie frecuentemente la parte terminal <strong>de</strong> los<br />
dispositivos <strong>de</strong> seguridad* por ausencia <strong>de</strong> llama.<br />
• El interior <strong>de</strong>l horno se <strong>de</strong>be limpiar preferentemente<br />
cada vez que se utiliza, cuando todavía está tibio.<br />
Utilice agua caliente y <strong>de</strong>tergente, enjuague y<br />
seque con un paño suave. Evite los productos<br />
abrasivos.<br />
• Limpie el vidrio <strong>de</strong> la puerta con esponjas y<br />
productos no abrasivos y séquelo con un paño<br />
suave; no utilice materiales ásperos abrasivos o<br />
rae<strong>de</strong>ras metálicas afiladas que puedan rayar la<br />
superficie y quebrar el vidrio.<br />
• Los accesorios se pue<strong>de</strong>n lavar como cualquier<br />
vajilla (incluso en lavavajilla).<br />
La tapa<br />
Mantenimiento <strong>de</strong> las llaves <strong>de</strong> gas<br />
Con el tiempo pue<strong>de</strong> suce<strong>de</strong>r que una llave se<br />
bloquee o presente dificultad para girar, en esos<br />
casos será necesario proce<strong>de</strong>r a la sustitución <strong>de</strong><br />
dicha llave.<br />
! Esta operación la <strong>de</strong>be efectuar un técnico<br />
autorizado por el fabricante.<br />
Para sustituir la bombilla <strong>de</strong> iluminación<br />
<strong>de</strong>l horno<br />
1. Después <strong>de</strong> haber<br />
<strong>de</strong>sconectado el horno <strong>de</strong> la red<br />
eléctrica, quite la tapa <strong>de</strong> vidrio<br />
<strong>de</strong>l portalámpara (ver la figura).<br />
2. Extraiga la bombilla y<br />
sustitúyala con una análoga:<br />
voltaje <strong>de</strong> 230V, potencia <strong>de</strong> 25<br />
W, casquillo E 14.<br />
3. Vuelva a colocar la tapa y a conectar el horno a la<br />
red eléctrica.<br />
Asistencia<br />
! No llame nunca a técnicos no autorizados.<br />
Comunique:<br />
• El tipo <strong>de</strong> anomalía;<br />
• El mo<strong>de</strong>lo <strong>de</strong> la máquina (Mod.)<br />
• El número <strong>de</strong> serie (S/N)<br />
Esta información se encuentra en la placa <strong>de</strong><br />
características colocada en el aparato.<br />
ES<br />
! Evite cerrar la tapa cuando los quemadores estén<br />
encendidos o todavía calientes.<br />
Controlar las juntas <strong>de</strong>l horno<br />
Controle periódicamente el estado <strong>de</strong> la junta que<br />
ro<strong>de</strong>a la puerta <strong>de</strong>l horno. Si se encontrara dañada,<br />
llame al Centro <strong>de</strong> Asistencia Técnica Autorizado más<br />
cercano. Es aconsejable no usar el horno hasta que no<br />
haya sido reparada.<br />
* Presente sólo en algunos mo<strong>de</strong>los.<br />
25
Instalação<br />
! É importante guardar este folheto para po<strong>de</strong>r<br />
consultá-lo a qualquer momento. No caso <strong>de</strong> venda,<br />
cessão ou mudança, assegure-se que o mesmo<br />
permaneça com o aparelho.<br />
! Leia com atenção as instruções: nas quais há<br />
informações importantes sobre a instalação, a<br />
utilização e a segurança.<br />
! A instalação do aparelho <strong>de</strong>ve ser realizada segundo<br />
estas instruções e por pessoal profissional qualificado.<br />
! Qualquer intervenção <strong>de</strong> regulação ou manutenção,<br />
<strong>de</strong>ve ser efectuada com o fogão <strong>de</strong>sligado da re<strong>de</strong><br />
eléctrica.<br />
Descarga dos fumos <strong>de</strong> combustão<br />
A <strong>de</strong>scarga dos fumos <strong>de</strong> combustão <strong>de</strong>ve ser<br />
garantida por meio <strong>de</strong> um exaustor ligado a uma<br />
chaminé com tiragem natural <strong>de</strong> segura eficiência,<br />
ou por meio <strong>de</strong> uma ventoinha eléctrica que entre<br />
automaticamente em função cada vez que se ligar o<br />
aparelho (ver figuras).<br />
Descarga directamente<br />
Descarga através <strong>de</strong> uma<br />
PT<br />
Ventilação dos locais<br />
O aparelho po<strong>de</strong>rá ser instalado somente em locais<br />
permanentemente ventilados, nos termos previstos<br />
pelos regulamentos nacionais em vigor. No local no<br />
qual o aparelho é instalado <strong>de</strong>ve po<strong>de</strong>r chegar tanto ar<br />
quanto pedido pela regular combustão do gás (o fluxo<br />
<strong>de</strong> ar não <strong>de</strong>ve ser inferior a 2 m 3 /h por kW <strong>de</strong> potência<br />
instalada).<br />
As tomadas <strong>de</strong> admissão do ar, protegidas por<br />
gra<strong>de</strong>s, <strong>de</strong>vem ter uma conduta <strong>de</strong> ao menos 100<br />
cm 2 <strong>de</strong> secção útil e <strong>de</strong>vem ser colocadas em modo<br />
que não possam ser obstruídas, mesmo parcialmente<br />
(ver figura A).<br />
Estas tomadas <strong>de</strong> ar <strong>de</strong>vem ser aumentadas <strong>de</strong> 100%<br />
- com um mínimo <strong>de</strong> 200 cm 2 – no caso em que o<br />
plano <strong>de</strong> trabalho do fogão não tenha o dispositivo<br />
<strong>de</strong> segurança para a falta <strong>de</strong> chama e quando o fluxo<br />
<strong>de</strong> ar ocorre em modo indirecto a partir <strong>de</strong> locais<br />
adjacentes (ver figura B) - <strong>de</strong>s<strong>de</strong> que não constituam<br />
partes comuns do imóvel, ambientes com perigo <strong>de</strong><br />
incêndio ou quartos <strong>de</strong> dormir - que possuam um<br />
conduto <strong>de</strong> ventilação comunicador com a parte<br />
externa, como <strong>de</strong>scrito acima.<br />
Sala ao lado<br />
A<br />
Sala a ser ventilada<br />
Abertura para ventilação Aumento do vão entre a do ar<br />
B<br />
para o exterior<br />
chaminé ou uma conduta<br />
para fumo ramificada<br />
(reservada para os<br />
aparelhos<strong>de</strong> cozedura).<br />
! Os gases liquefeitos <strong>de</strong> petróleo, mais pesados<br />
que o ar, ficam em baixo, portanto os locais on<strong>de</strong><br />
estão contidos os recipientes <strong>de</strong> GLP <strong>de</strong>vem prever<br />
aberturas para o exterior para o escoamento das<br />
eventuais fugas <strong>de</strong> gás.<br />
Os cilindros <strong>de</strong> GLP, mesmo vazios ou parcialmente<br />
cheios, não <strong>de</strong>vem ser instalados nem guardados<br />
em lugares ou vãos a nível mais baixo do que o solo<br />
(caves etc.). Manter no local somente o cilindro que<br />
estiver sendo utilizado, longe <strong>de</strong> fontes <strong>de</strong> calor<br />
(fornos, chaminés, esquentadores) que possam levá-lo<br />
a uma temperatura superior a 50ºC.<br />
Posizionamento e nivelamento<br />
! É possível instalar o aparelho ao lado <strong>de</strong> móveis que<br />
não superem a altura do plano <strong>de</strong> trabalho.<br />
! Assegurar-se <strong>de</strong> que a pare<strong>de</strong> em contacto com a<br />
parte traseira do aparelho seja <strong>de</strong> um material não<br />
inflamável e resistente ao calor (T 90°C).<br />
comburente<br />
A<br />
porta e o chão<br />
! Após um uso prolongado do aparelho é aconselhável<br />
abrir uma janela ou aumentar a velocida<strong>de</strong> dos<br />
eventuais ventiladores.<br />
Para uma instalação correcta:<br />
• colocar o aparelho na cozinha, na sala <strong>de</strong> jantar ou<br />
numa sala única (não na casa <strong>de</strong> banho);<br />
• se o plano da cozinha for mais alto que o dos<br />
móveis, estes <strong>de</strong>verão ser colocados a e pelo menos<br />
600 mm do aparelho;<br />
• se o fogão for instalado embaixo <strong>de</strong> uma prateleira,<br />
esta <strong>de</strong>verá estar pelo menos a 420 mm.<br />
(milímetros) do plano <strong>de</strong> trabalho.<br />
Tal distância <strong>de</strong>ve ser <strong>de</strong> 700 mm se as prateleiras<br />
forem <strong>de</strong> material inflamável (ver figura);<br />
26
mm.<br />
420<br />
Min.<br />
HOOD<br />
Min. 600 mm.<br />
Min. 420 mm.<br />
min. 650 mm. with hood<br />
min. 700 mm. without hood<br />
• a tensão <strong>de</strong> alimentação seja entre os valores da<br />
placa <strong>de</strong> i<strong>de</strong>ntificação;<br />
• a tomada seja compatível com a ficha do aparelho.<br />
Em caso contrário, substitua a tomada ou a ficha;<br />
não empregue extensões nem tomadas múltiplas.<br />
! Depois <strong>de</strong> ter instalado o aparelho, o acesso ao cabo<br />
eléctrico e à tomada da corrente <strong>de</strong>ve ser fácil.<br />
PT<br />
! O cabo não <strong>de</strong>ve ser dobrado nem comprimido.<br />
• não colocar cortinas atrás do fogão ou a menos <strong>de</strong><br />
200 mm dos seus lados;<br />
• se houver exaustor, o mesmo <strong>de</strong>verá ser instalado<br />
seguindo as indicações contidas no relativo livrete<br />
<strong>de</strong> instruções.<br />
Nivelamento<br />
Ligação eléctrica<br />
Se for necessário nivelar o<br />
aparelho, parafusar os pés<br />
<strong>de</strong> regulação fornecidos em<br />
dotação nos específicos<br />
lugares colocados nos cantos<br />
na base do fogão (ver figura).<br />
As pernas* <strong>de</strong>vem ser<br />
encaixadas na base do fogão.<br />
Monte no cabo uma ficha em conformida<strong>de</strong> com<br />
as normas para a carga indicada na placa <strong>de</strong><br />
i<strong>de</strong>ntificação (veja a tabela dos Dados técnicos).<br />
No caso <strong>de</strong> uma ligação directa à re<strong>de</strong>, será<br />
necessário interpor, entre o aparelho e a re<strong>de</strong>, um<br />
interruptor omnipolar com abertura mínima entre os<br />
contactos <strong>de</strong> 3 mm, na dimensão certa para a carga<br />
e em conformida<strong>de</strong> com as normas NFC 15-100<br />
(a ligação à terra não <strong>de</strong>ve ser interrompida pelo<br />
interruptor). O cabo <strong>de</strong> alimentação <strong>de</strong>ve ser colocado<br />
<strong>de</strong> maneira que em nenhum ponto ultrapasse <strong>de</strong> 50°C<br />
a temperatura do ambiente.<br />
Antes <strong>de</strong> efectuar a ligação, certifique-se que:<br />
• a tomada tenha uma ligação à terra e seja em<br />
conformida<strong>de</strong> com a legislação;<br />
• a tomada tenha a capacida<strong>de</strong> <strong>de</strong> suportar a carga<br />
máxima <strong>de</strong> potência da máquina, indicada na placa<br />
<strong>de</strong> i<strong>de</strong>ntificação;<br />
* Presente apenas em alguns mo<strong>de</strong>los.<br />
! O cabo <strong>de</strong>ve ser verificado periodicamente e<br />
substituído somente por técnicos autorizados.<br />
! A empresa exime-se <strong>de</strong> qualquer responsabilida<strong>de</strong> se<br />
estas regras não forem obe<strong>de</strong>cidas.<br />
Ligação ao gás<br />
A ligação do aparelho à re<strong>de</strong> do gás ou à botija do<br />
gás po<strong>de</strong> ser efectuada com um tubo flexível <strong>de</strong><br />
borracha ou <strong>de</strong> aço, conforme prescrito pelas normas<br />
nacionais em vigor e somente após ter controlado que<br />
o mesmo esteja regulado para o tipo <strong>de</strong> gás com o<br />
qual será alimentado (veja a etiqueta <strong>de</strong> calibragem<br />
sobre a tampa: em caso contrárioveja abaixo). Em<br />
caso <strong>de</strong> alimentação com gás líquido <strong>de</strong> botija, utilizar<br />
reguladores <strong>de</strong> pressão em conformida<strong>de</strong> com as<br />
normas nacionais em vigor. Para facilitar a ligação, a<br />
alimentação do gás é orientável lateralmente *: inverter<br />
o porta-borracha para a ligação com a tampa <strong>de</strong> fecho<br />
e substituir a guarnição <strong>de</strong> vedação fornecida em<br />
dotação.<br />
! Para garantir um funcionamento seguro, uma<br />
utilização <strong>de</strong> energia apropriada e maior duração<br />
da aparelhagem, assegurar-se que a pressão <strong>de</strong><br />
alimentação respeite os valores indicados na tabela<br />
“Características dos queimadores e dos bicos” (ver<br />
abaixo).<br />
Ligação do gás com tubo flexível <strong>de</strong> borracha<br />
Verificar que o tubo seja em conformida<strong>de</strong> com as<br />
normas nacionais em vigor. O diâmetro interno do<br />
tubo <strong>de</strong>ve ser <strong>de</strong>: 8 mm para a alimentação com gás<br />
líquido; 13 mm para a alimentação com gás metano.<br />
Quando a ligação estiver terminada, assegure-se <strong>de</strong><br />
que o tubo:<br />
• não esteja em contacto em ponto algum com partes<br />
que alcancem temperaturas superiores a 50ºC;<br />
• não esteja sujeito a qualquer esforço <strong>de</strong> tracção e<br />
<strong>de</strong> torção não apresente dobras nem apertos;<br />
• não encoste em corpos cortantes, arestas agudas<br />
nem em peças móveis e não esteja esmagado;<br />
27
• seja fácil <strong>de</strong> inspeccionar ao longo <strong>de</strong> todo o<br />
próprio percurso, a fim <strong>de</strong> po<strong>de</strong>r-se controlar o<br />
estado <strong>de</strong> conservação do mesmo;<br />
• tenha um comprimento menor do que 1500 mm;<br />
• esteja bem apoiado nas duas pontas, on<strong>de</strong> <strong>de</strong>ve<br />
ser fixado mediante braça<strong>de</strong>iras <strong>de</strong> bloqueio nos<br />
termos dos regulamentos nacionais em vigor.<br />
! Se uma ou mais <strong>de</strong>stas condições não pu<strong>de</strong>r ser<br />
respeitada ou se o fogão for instalado conforme<br />
as condições da classe 2 – subclasse 1 (aparelho<br />
encaixando entre dois móveis), <strong>de</strong>verá ser utilizado<br />
o tubo flexível <strong>de</strong> aço (ver abaixo).<br />
Ligação com tubo flexível <strong>de</strong> aço inoxidável com<br />
pare<strong>de</strong> contínua com rosca<br />
Verificar que o tubo e as guarnições sejam em<br />
conformida<strong>de</strong> com as normas nacionais em vigor.<br />
Para po<strong>de</strong>r instalar o tubo, elimine o porta-borracha<br />
presente no aparelho (a junta <strong>de</strong> entrada <strong>de</strong> gás no<br />
aparelho tem rosca <strong>de</strong> 1/2 gás macho cilíndrica).<br />
! Efectuar a ligação em modo que o comprimento<br />
da tubagem não supere os 2 metros <strong>de</strong> extensão<br />
máxima e assegurar-se <strong>de</strong> que o tubo não entre em<br />
contacto com partes móveis e não seja esmagado.<br />
Controle da vedação<br />
Ao terminar a instalação controlar a vedação <strong>de</strong><br />
todas as juntas utilizando uma solução <strong>de</strong> sabão e<br />
nunca uma chama.<br />
Adaptação aos diferentes tipos <strong>de</strong> gás<br />
É possível adaptar o aparelho a um tipo <strong>de</strong> gás<br />
diferente daquele para o qual foi preparado<br />
(indicado na etiqueta <strong>de</strong> calibragem na tampa).<br />
Adaptação ao plano <strong>de</strong> cozedura<br />
Substituição dos bicos dos queimadores do plano:<br />
1. retire as gra<strong>de</strong>s e <strong>de</strong>senfie os queimadores das<br />
suas se<strong>de</strong>s;<br />
2. <strong>de</strong>sparafusar os bicos utilizando uma chave<br />
a tubo <strong>de</strong> 7 mm (ver<br />
figura), e substituí-los com<br />
aqueles apropriados para<br />
o novo tipo <strong>de</strong> gás (ver<br />
tabela “Características dos<br />
queimadores e dos bicos”);<br />
3. coloque outra vez<br />
todas as peças no lugar,<br />
realizando as operações na or<strong>de</strong>m contrária à<br />
acima apresentada.<br />
Regulação do mínimo dos queimadores do plano:<br />
1. coloque a torneira na posição <strong>de</strong> mínimo;<br />
2. retire o selector e ajuste o parafuso <strong>de</strong> regulação<br />
situado no interior ou ao lado da haste da torneira até<br />
obter uma pequena chama regular.<br />
! No caso dos gases líquidos, o parafuso <strong>de</strong> regulação<br />
<strong>de</strong>ve ser atarraxado até o fundo;<br />
3. verifique em seguida se ao girar rapidamente a<br />
torneira da posição <strong>de</strong> máximo até a <strong>de</strong> mínimo, o<br />
queimador não se apague;<br />
! Os queimadores do plano não precisam <strong>de</strong> nenhuma<br />
regulação do ar primário.<br />
Adaptação do forno<br />
Troca do bico do queimador do forno:<br />
1. abra inteiramente a porta do forno;<br />
2. retirar a protecção corrediça (veja a figura);<br />
V<br />
3. <strong>de</strong>satarraxe o parafuso que<br />
pren<strong>de</strong> o queimador. Tire o<br />
queimador do forno <strong>de</strong>pois <strong>de</strong><br />
ter tirado o parafuso “V”<br />
4. <strong>de</strong>senrosque o bico do<br />
queimador do forno utilizando a<br />
apropriada chave a tubo para<br />
bicos (ver figura), ou uma chave<br />
a tubo <strong>de</strong> 7 mm e troque-a por<br />
uma a<strong>de</strong>quada ao novo tipo <strong>de</strong><br />
gás (ver tabela Características<br />
dos queimadores e bicos).<br />
Regulação do mínimo do<br />
queimador do forno a gás:<br />
1. acenda o queimador (veja Início e Utilização);<br />
2. coloque o botão na posição <strong>de</strong> mínimo (MIN) <strong>de</strong>pois<br />
<strong>de</strong> ter <strong>de</strong>ixado o mesmo aproximadamente 10 minutos<br />
na posição <strong>de</strong> máximo (MAX);<br />
3. retire o botão;<br />
PT<br />
28
4. regule o parafuso <strong>de</strong> regulação colocado por fora<br />
da haste do termostato (ver figuras) até obter uma<br />
pequena chama regular;<br />
! No caso dos gases líquidos, o parafuso <strong>de</strong> regulação<br />
<strong>de</strong>ve ser atarraxado até o fundo;<br />
5. verifique <strong>de</strong>pois, que rodando rapidamente o botão<br />
da posição MAX à posição <strong>de</strong> MIN, ou fechando e<br />
abrindo rapidamente a porta do forno, o queimador<br />
não se apague.<br />
! Preste atenção especialmente nos cabos das velas e<br />
nos tubos dos termopares.<br />
! Após a regulação com um gás diferente daquele com<br />
o qual foi aferido o aparelho, troque a velha etiqueta <strong>de</strong><br />
calibragem por outra que corresponda ao novo tipo <strong>de</strong><br />
gás, que po<strong>de</strong> ser encontrada junto aos nossos Centros<br />
<strong>de</strong> Assistência Técnica Autorizados.<br />
! Se a pressão do gás utilizado for diferente (ou<br />
variável) daquela prevista, é necessário instalar<br />
na tubagem <strong>de</strong> entrada um regulador <strong>de</strong> pressão<br />
conforme as Normas Nacionais em vigor sobre os<br />
“reguladores para gás canalizados”.<br />
Tabela das características dos queimadores e bicos<br />
DADOS TÉCNICOS<br />
Medidas<br />
Forno HxLxP<br />
31x43,5x43,5 cm<br />
Volume Litros 58<br />
Medidas úteis da<br />
gaveta estufa<br />
Tensão e<br />
frequência <strong>de</strong><br />
fornecimento<br />
Queimadores<br />
largura cm. 46<br />
profundida<strong>de</strong> cm. 42<br />
altura cm. 8,5<br />
veja a placa das características<br />
adaptáveis a todos os tipos <strong>de</strong><br />
fogões a gás indicados na<br />
placa <strong>de</strong> i<strong>de</strong>ntificação.<br />
Directivas Comunitárias<br />
2006/95/EC <strong>de</strong> 12/12/06 (Baixa<br />
Tensão) e posteriores<br />
modificações -<br />
2004/108/EC <strong>de</strong> 15/12/2004<br />
(Compatibilida<strong>de</strong><br />
Electromagnética) e posteriores<br />
modificações - 2009142/EC <strong>de</strong><br />
30/11/09 (Gás) e posteriores<br />
modificações - 93/68/CEE <strong>de</strong><br />
22/07/93 e posteriores<br />
modificações -<br />
2002/96/CE<br />
1275/2008 (Stand-by/ Off mo<strong>de</strong>)<br />
O placa <strong>de</strong> i<strong>de</strong>ntifi caçăo e’ situada no interior da parte<br />
escamoteável ou, uma vez aberto o compartimento<br />
aquecedor <strong>de</strong> alimentos, na pare<strong>de</strong> interna esquerda.<br />
Tabela 1 Gás liquefeito Gás natural<br />
Queimador Diâmetro<br />
(mm)<br />
Poténcia térmica<br />
kW (p.c.s.*)<br />
By-Pass<br />
1/100<br />
bico<br />
1/100<br />
capacid.*<br />
g/h<br />
bico<br />
1/100<br />
capacid.*<br />
l/h<br />
PT<br />
Nomin. Reduz. (mm) (mm) *** ** (mm)<br />
Rŕ pido<br />
(Gran<strong>de</strong>)(R)<br />
100 3,00 0,7 41 86 218 214 116 286<br />
Semi Rŕ pido<br />
(Medio)(S)<br />
75 1,90 0,4 30 70 138 136 106 181<br />
Auxiliar<br />
(Pequeno)(A)<br />
55 1,00 0,4 30 50 73 71 79 95<br />
Forno - 2,60 1,0 52 78 189 186 119 248<br />
Pressőes<br />
<strong>de</strong><br />
alimentaçao<br />
Nominal (mbar)<br />
Minima (mbar)<br />
Mŕ xima (mbar)<br />
28-30<br />
20<br />
35<br />
37<br />
25<br />
45<br />
20<br />
17<br />
25<br />
* A 15°C en 1013 mbar-gás seco<br />
** Propano P.C.S. = 50,37 MJ/Kg<br />
*** Butano P.C.S. = 49,47 MJ/Kg<br />
Natural P.C.S. = 37,78 MJ/m 3<br />
S<br />
R<br />
S<br />
A<br />
K6G21S/P S<br />
KN6G21S/P S<br />
29
Início e utilização<br />
PT<br />
Utilização do plano <strong>de</strong> cozedura<br />
Acendimento dos queimadores<br />
Em correspondência com cada selector <strong>de</strong><br />
QUEIMADOR está indicado um círculo cheio para o<br />
queimador associado.<br />
Para acen<strong>de</strong>r um queimador do plano <strong>de</strong> cozedura:<br />
1. aproximar uma chama ou um acen<strong>de</strong>dor ao<br />
queimador;<br />
2. pressionar e contemporaneamente girar no sentido<br />
contrário ao dos ponteiros do relógio o selector<br />
QUEIMADOR no símbolo da chama máxima E.<br />
3. regular a potência da chama <strong>de</strong>sejada, girando no<br />
sentido contrário ao dos ponteiros do relógio o selector<br />
QUEIMADOR: no mínimo E no máximo . ou numa<br />
posição intermediária.<br />
e o aparelho for equipado com dispositivo <strong>de</strong> acendimento<br />
electrónico* (ver figura) premir<br />
o botão indicado pelo símbolo<br />
, e contemporaneamente<br />
girar no sentido contrário<br />
ao dos ponteiros do relógio<br />
o selector QUEIMADOR no<br />
símbolo <strong>de</strong> chama máxima, até<br />
o acendimento. Po<strong>de</strong> ocorrer<br />
que o queimador se apague no momento em que<br />
se solta o selector. Neste caso, repetira operação<br />
mantendo pressionado o selector por mais tempo.<br />
! Se a chama do queimador se apagar aci<strong>de</strong>ntalmente,<br />
<strong>de</strong>sligue o queimador e aguar<strong>de</strong> ao menos 1 minuto<br />
antes <strong>de</strong> tentar novamente o acendimento.<br />
Se o aparelho for equipado com um dispositivo<br />
<strong>de</strong> segurança* para a falta <strong>de</strong> chama, mantenha<br />
pressionado o selector do QUEIMADOR por<br />
aproximadamente 2-3 segundos para manter acesa a<br />
chama e activar o dispositivo.<br />
Para apagar o queimador, girar o selector até que se<br />
apague•.<br />
Conselhos práticos para utilização dos<br />
queimadores<br />
Para um melhor rendimento dos queimadores e um<br />
consumo mínimo <strong>de</strong> gás é necessário usar recipientes<br />
<strong>de</strong> fundo chato, dotados <strong>de</strong> tampa e proporcionados ao<br />
queimador:<br />
Queimador<br />
Para i<strong>de</strong>ntificar o tipo <strong>de</strong> queimador, consultar os<br />
<strong>de</strong>senhos apresentados no parágrafo “Características<br />
dos queimadores e dos bicos”.<br />
! Nos mo<strong>de</strong>los equipados com grelha <strong>de</strong> redução, a<br />
mesma <strong>de</strong>verá ser utilizada sòmente para o queimador<br />
auxiliar quando se utilizam recipientes <strong>de</strong> diâmetro<br />
inferior a 12 cm.<br />
Utilização do forno<br />
ATENÇÃO! O sobretampo <strong>de</strong> vidro<br />
po<strong>de</strong> fragmentar se estiver quente.<br />
Desligar todos os queimadores e eventuais<br />
placar eléctricas antes <strong>de</strong> o fechar.<br />
*Refere-se somente aos mo<strong>de</strong>los<br />
com a tampa <strong>de</strong> vidro<br />
ř Diametro recipientes (cm)<br />
Rápido (R) 24 - 26<br />
Semi Rápido (S) 16 - 20<br />
Auxiliar (A) 10 - 14<br />
! Antes do uso, remova taxativamente as películas <strong>de</strong><br />
plástico posicionadas aos lados do aparelho.<br />
! Quando o acen<strong>de</strong>r pela primeira vez, aconselhamos<br />
<strong>de</strong> fazer funcionar o forno vazio pelo menos durante<br />
uma hora, com o termóstato posto à temperatura<br />
máxima e a porta fechada. Em seguida, po<strong>de</strong> apagar,<br />
abrir a porta do forno e ventilar a sala. O odor que<br />
se sente é<strong>de</strong>ve-se à evaporação das substâncias<br />
empregadas para proteger o forno.<br />
! Nunca encoste objectos no fundo do forno, para<br />
evitar riscos <strong>de</strong> danos ao esmalte. Utilize a posição 1<br />
do forno apenas no caso <strong>de</strong> cozer usando o espeto<br />
rotatório.<br />
Acen<strong>de</strong>r o queimador do forno<br />
Para acen<strong>de</strong>r o queimador do forno, aproximar a<br />
chama ou o acen<strong>de</strong>dor ao<br />
orifício F (ver figura) , e ao<br />
mesmo tempo pressionar<br />
e rodar o selector do forno<br />
no sentido contrário ao dos<br />
ponteiros do relógio até a<br />
F<br />
posição MAX.<br />
* Presente apenas em alguns mo<strong>de</strong>los.<br />
30
Se o aparelho for equipado com dispositivo <strong>de</strong><br />
acendimento electrónico*, girar no sentido contrário<br />
ao dos ponteiros do relógio o selector FORNO até<br />
a posição MAX, até o acendimento. Se <strong>de</strong>pois <strong>de</strong><br />
15 segundos o queimador não tiver acendido, solte<br />
o selector, abra a porta do forno e aguar<strong>de</strong> pelo<br />
menos 1 minuto antes <strong>de</strong> tentar novamente acen<strong>de</strong>r o<br />
queimador. Em caso <strong>de</strong> falta <strong>de</strong> corrente será<br />
possível acen<strong>de</strong>r o queimador com uma chama ou um<br />
acen<strong>de</strong>dor, como <strong>de</strong>scrito acima.<br />
! O forno é equipado com um dispositivo <strong>de</strong> segurança<br />
portanto é necessário manter pressionado o selector<br />
FORNO por aproximadamente 6 segundos.<br />
! Se a chama do queimador se apagar aci<strong>de</strong>ntalmente,<br />
<strong>de</strong>sligue o queimador e aguar<strong>de</strong> ao menos 1 minuto<br />
antes <strong>de</strong> tentar novamente o acendimento.<br />
Regulação da temperatura<br />
Para obter a temperatura <strong>de</strong> cozedura <strong>de</strong>sejada, girar<br />
no sentido contrário ao dos ponteiros do relógio o<br />
selector FORNO. As temperaturas estão indicadas no<br />
painel <strong>de</strong> comandos e vão do MIN (150ºC) ao MAX<br />
(250ºC). Uma vez alcançada a temperatura, o forno irá<br />
mantê-la constante graças ao termostato.<br />
Grill<br />
Timer*<br />
Para accionar o Timer (contador <strong>de</strong> minutos) proce<strong>de</strong>r da<br />
seguinte maneira:<br />
1. para dar corda na campainha é necessário rodar o<br />
selector do TIMER 4 uma volta quase inteira na direcção<br />
dos ponteiros do relógio;<br />
2. rodar no sentido contrário ao dos ponteiros do relógio<br />
5 o selector TIMER configurando o tempo <strong>de</strong>sejado;.<br />
Luz do forno<br />
A lâmpada po<strong>de</strong> ser acesa a qualquer momento<br />
carregando na tecla LUZ DO FORNO.<br />
Atenção<br />
Durante a cozedura a porta do forno fica muito quente<br />
logo, manter as crianças afastadas.<br />
O espeto rotatório<br />
Para accionar o espeto rotatório proceda da seguinte<br />
maneira:<br />
a) coloque a ban<strong>de</strong>ja pinga<strong>de</strong>ira na 1 a prateleira;<br />
b) coloque o apropriado apoio do espeto rotatório na 4 a<br />
prateleira e coloque o espeto enfiado no furo apropriado,<br />
no virador do espeto, situado na parte traseira do<br />
forno;<br />
c) carregue na tecla “O” para accionar a rotação.<br />
PT<br />
Girando no sentido dos ponteiros do relógio o selector<br />
FORNO, até a posição coloca-se a funcionar o<br />
grill <strong>de</strong> raios infravermelhos. O grill possibilita dourar<br />
os alimentos e é particularmente indicado para assar<br />
rosbife, assados, costelas, chouriços. Coloque a<br />
grelha nas posições 4 ou 5 e uma pinga<strong>de</strong>ira na<br />
posição 1 para recolher a gordura e evitar fumos.<br />
! O funcionamento do grill será indicado pelo<br />
acendimento do indicador luminoso GRILL.<br />
! Efectue a cozedura no grill com a porta do forno<br />
fechada, para obter os melhores resultados e uma<br />
sensível economia <strong>de</strong> energia (aproximadamente 10 %)<br />
* Presente apenas em alguns mo<strong>de</strong>los.<br />
31
PT<br />
Alimento a ser cozido<br />
Massa<br />
Lasanha<br />
Cannellone<br />
Massa gratinč<br />
Carne<br />
Vitela<br />
Frango<br />
Pato<br />
Coelho<br />
Carne <strong>de</strong> porco<br />
Cor<strong>de</strong>iro<br />
Peixe<br />
Cavalai<br />
Peixe <strong>de</strong>ntăo<br />
Truta no cartucho<br />
Peso<br />
(Kg,)<br />
2.5<br />
2.5<br />
2.5<br />
1.7<br />
1.5<br />
1.8<br />
2.0<br />
2.1<br />
1.8<br />
1.1<br />
1.5<br />
1.0<br />
Posiçăo <strong>de</strong><br />
cozedura<br />
prateleiras baixas<br />
3<br />
3<br />
3<br />
3<br />
3<br />
3<br />
3<br />
3<br />
3<br />
3<br />
3<br />
3<br />
Temperatura<br />
(°C)<br />
210<br />
200<br />
200<br />
200<br />
220<br />
200<br />
200<br />
200<br />
200<br />
180-200<br />
180-200<br />
180-200<br />
Tempo <strong>de</strong> pré<br />
aquecimento<br />
(minutos)<br />
10<br />
10<br />
10<br />
10<br />
10<br />
10<br />
10<br />
10<br />
10<br />
10<br />
10<br />
10<br />
Tempo <strong>de</strong><br />
cozedura<br />
(minutos)<br />
60-75<br />
40-50<br />
40-50<br />
85-90<br />
90-100<br />
100-110<br />
70-80<br />
70-80<br />
90-95<br />
35-40<br />
40-50<br />
40-45<br />
Pizza<br />
Napolitana 1.0 3 220 15 15-20<br />
Bolos<br />
Biscoitos<br />
Tortas<br />
Tortas salgadas<br />
Queques fermentados<br />
Cozedura no grill<br />
Bife <strong>de</strong> vitela<br />
Costeletas<br />
Hamburger<br />
Cavala<br />
Tostas<br />
Cozedura no grill com<br />
espeto rotatório<br />
Vitela no espeto<br />
Frango no espeto<br />
Cozedura no grill com<br />
espeto rotatório<br />
múltiplo (presente<br />
somente em alguns<br />
mo<strong>de</strong>los)<br />
Espetinhos <strong>de</strong> carne<br />
Espetinhos <strong>de</strong> verdura<br />
0.5<br />
1.1<br />
1.0<br />
1.0<br />
1<br />
1,5<br />
1<br />
1<br />
n.° 4<br />
1<br />
2<br />
1,0<br />
0,8<br />
3<br />
3<br />
3<br />
3<br />
4<br />
4<br />
3<br />
4<br />
4<br />
-<br />
-<br />
-<br />
-<br />
180<br />
180<br />
180<br />
165<br />
15<br />
15<br />
15<br />
15<br />
5<br />
5<br />
5<br />
5<br />
5<br />
5<br />
5<br />
5<br />
5<br />
30-35<br />
30-35<br />
45-50<br />
35-40<br />
15-20<br />
20<br />
7<br />
15-20<br />
5<br />
70-80<br />
70-80<br />
40-45<br />
25-30<br />
Obs.: os tempos <strong>de</strong> cozedura săo indicativos e po<strong>de</strong>răo serem modificados em funçăo dos próprios gostos<br />
pessoais. Para cozer no grill, é necessário sempre colocar a ban<strong>de</strong>ja pinga<strong>de</strong>ira na 2a prateleira a partir <strong>de</strong> baixo.
Precauções e conselhos<br />
! Este aparelho foi projectado e fabricado em<br />
conformida<strong>de</strong> com as normas internacionais <strong>de</strong><br />
segurança.<br />
Estas advertências são fornecidas por razões <strong>de</strong><br />
segurança e <strong>de</strong>vem ser lidas com atenção.<br />
Segurança geral<br />
• Este aparelho foi concebido para utilização <strong>de</strong> tipo<br />
não profissional no âmbito <strong>de</strong> moradas.<br />
• Este aparelho não <strong>de</strong>ve ser instalado ao ar livre,<br />
mesmo num sítio protegido, porque é muito<br />
perigoso <strong>de</strong>ixá-lo exposto a chuva e temporais.<br />
• Não toque na máquina se estiver <strong>de</strong>scalço, ou se as<br />
suas mãos ou pés estiverem molhados ou húmidos.<br />
• O aparelho <strong>de</strong>ve ser utilizado para cozinhar<br />
alimentos, somente por pessoas adultas e<br />
conforme as instruções contidas neste livrete.<br />
Qualquer outro uso (como por exemplo,<br />
aquecedor <strong>de</strong> ambientes) <strong>de</strong>ve ser consi<strong>de</strong>rado<br />
impróprio e portanto perigoso. O fabricante não<br />
po<strong>de</strong> ser consi<strong>de</strong>rado responsável por eventuais<br />
danos <strong>de</strong>rivados <strong>de</strong> usos impróprios, errados e<br />
irrazoáveis.<br />
• Este folheto diz respeito a um aparelho <strong>de</strong> classe 1<br />
(isolado) ou classe 2 - subclasse 1 (situado entre<br />
dois móveis).<br />
• Durante o uso do aparelho os elementos <strong>de</strong><br />
aquecimento e algumas partes da porta do<br />
forno ficam muito quentes. Tome cuidado para<br />
não tocar nos mesmos e mantenha as crianças<br />
afastadas.<br />
• Evite que o cabo <strong>de</strong> alimentação <strong>de</strong> outros<br />
electrodomésticos encoste-se em partes quentes do<br />
aparelho.<br />
• Não tape as aberturas <strong>de</strong> ventilação e <strong>de</strong> eliminação<br />
<strong>de</strong> calor.<br />
• Evite fechar a tampa <strong>de</strong> vidro do plano <strong>de</strong> cozedura<br />
(presente em alguns mo<strong>de</strong>los) enquanto os<br />
queimadores estiverem acesos ou ainda quentes.<br />
• Utilize luvas <strong>de</strong> forno para colocar e tirar recipientes;<br />
• Não utilize líquidos inflamáveis (álcool, gasolina,<br />
etc.) perto do aparelho enquanto este estiver<br />
funcionando.<br />
• Não guar<strong>de</strong> material inflamável no vão inferior<br />
<strong>de</strong> <strong>de</strong>pósito ou no forno: se o aparelho for<br />
inadvertidamente colocado a funcionar, po<strong>de</strong>ria<br />
incendiar-se.<br />
• Quando o aparelho não for utilizado, assegure-se<br />
sempre <strong>de</strong> que os selectores estejam na posição •<br />
e que a torneira do gás esteja fechada.<br />
• Não puxe pelo cabo para <strong>de</strong>sligar a ficha da<br />
tomada eléctrica, pegue pela ficha.<br />
• Não realize limpeza nem manutenção sem antes ter<br />
<strong>de</strong>sligado a ficha da re<strong>de</strong> eléctrica.<br />
• Se houver avarias, em nenhum caso mexa nos<br />
mecanismos internos para tentar repará-las.<br />
Contactar a Assistência.<br />
• Não coloque objectos pesados sobre a porta do<br />
forno aberta.<br />
• Não é previsto que este aparelho seja utilizado<br />
por pessoas (incluso crianças) com reduzidas<br />
capacida<strong>de</strong>s físicas, sensoriais ou mentais,<br />
por pessoas inexperientes ou que não tenham<br />
familiarida<strong>de</strong> com o produto, a não ser que seja<br />
vigiadas por uma pessoa responsável pela sua<br />
segurança ou que tenham recebido instruções<br />
preliminares sobre o uso do aparelho.<br />
• Não permita que as crianças brinquem com o<br />
aparelho.<br />
Eliminação<br />
• Eliminação do material <strong>de</strong> embalagem: obe<strong>de</strong>ça<br />
as regras locais, <strong>de</strong> maneira que as embalagens<br />
possam ser reutilizadas.<br />
• A directiva Europeia 2002/96/CE referente à gestão<br />
<strong>de</strong> resíduos <strong>de</strong> aparelhos eléctricos e electrónicos<br />
(RAEE), prevê que os electrodomésticos não <strong>de</strong>vem<br />
ser escoados no fluxo normal dos resíduos sólidos<br />
urbanos. Os aparelhos <strong>de</strong>sactualizados <strong>de</strong>vem ser<br />
recolhidos separadamente para optimizar a taxa<br />
<strong>de</strong> recuperação e reciclagem dos materiais que os<br />
compõem e impedir potenciais danos para a saú<strong>de</strong><br />
humana e para o ambiente. O símbolo constituído<br />
por um contentor <strong>de</strong> lixo barrado com uma cruz<br />
<strong>de</strong>ve ser colocado em todos os produtos por forma<br />
a recordar a obrigatorieda<strong>de</strong> <strong>de</strong> recolha separada.<br />
Os consumidores <strong>de</strong>vem contactar as autorida<strong>de</strong>s<br />
locais ou os pontos <strong>de</strong> venda para solicitar<br />
informação referente ao local apropriado on<strong>de</strong><br />
<strong>de</strong>vem <strong>de</strong>positar os electrodomésticos velhos.<br />
Economia e respeito do meio ambiente<br />
• Utilizando o forno nos horários a partir do fim da<br />
tar<strong>de</strong>, até as primeiras horas da manhã, estará<br />
contribuindo para reduzir a carga <strong>de</strong> absorção das<br />
empresas <strong>de</strong> fornecimento <strong>de</strong> electricida<strong>de</strong>.<br />
• É recomendável realizar as cozeduras ao GRILL<br />
sempre com a porta fechada: quer para obter<br />
melhores resultados, quer para uma sensível<br />
economia <strong>de</strong> energia (aproximadamente 10%).<br />
• Mantenha as guarnições eficientes e limpas,<br />
para po<strong>de</strong>rem a<strong>de</strong>rir bem na porta e não causar<br />
dispersão <strong>de</strong> calor.<br />
PT<br />
33
Manutenção e cuidados<br />
PT<br />
Desligar a corrente eléctrica<br />
Antes <strong>de</strong> realizar qualquer operação, <strong>de</strong>sligue o<br />
aparelho da alimentação eléctrica.<br />
Limpeza do aparelho<br />
! Nunca utilize equipamento <strong>de</strong> limpeza a vapor ou <strong>de</strong><br />
alta pressão para limpar a aparelhagem.<br />
• As partes externas esmaltadas ou inoxidáveis e as<br />
guarnições <strong>de</strong> borracha po<strong>de</strong>m ser limpas com uma<br />
esponja molhada com água morna e sabão neutro.<br />
Se for difícil remover as manchas, empregue produtos<br />
específicos. Enxaguar com água abundante e enxugar<br />
<strong>de</strong>pois da limpeza. Não empregue pós abrasivos nem<br />
substâncias corrosivas.<br />
• As gra<strong>de</strong>s, as sobretampas, as coroas<br />
distribuidoras <strong>de</strong> chamas e os queimadores do<br />
plano <strong>de</strong> cozedura são extraíveis para facilitar a<br />
limpeza; lave-os com água quente e <strong>de</strong>tergente<br />
não abrasivo, tendo o cuidado <strong>de</strong> remover toas<br />
as incrustações e aguardar até que estejam<br />
perfeitamente enxutos.<br />
• Limpar frequentemente a parte terminal dos<br />
dispositivos <strong>de</strong> segurança* para a falta <strong>de</strong> chama.<br />
• O interior do forno <strong>de</strong>ve ser sempre limpo <strong>de</strong><br />
preferência <strong>de</strong>pois <strong>de</strong> cada utilização, enquanto<br />
ainda estiver morno. Utilize água quente e<br />
<strong>de</strong>tergente, enxagúe e enxugue com um pano<br />
macio. Evite abrasivos.<br />
• Limpe o vidro da porta com esponjas e produtos<br />
não abrasivos e enxugue com um pano macio;<br />
não use materiais ásperos, abrasivos ou espátulas<br />
metálicas afiadas que po<strong>de</strong>m arranhar a superfície<br />
e quebrar o vidro.<br />
• Os acessórios po<strong>de</strong>m ser facilmente lavados como<br />
quaisquer utensílios, inclusive numa máquina <strong>de</strong><br />
lavar loiça.<br />
• Evite fechar a tampa <strong>de</strong> vidro enquanto os<br />
queimadores estiverem acesos ou ainda quentes.<br />
A tampa.<br />
! Evite fechar a tampa <strong>de</strong> vidro enquanto os<br />
queimadores estiverem acesos ou ainda quentes.<br />
! Elimine eventuais líquidos presentes na tampa antes<br />
<strong>de</strong> abri-la.<br />
Verificação das guarnições do forno<br />
Verifique periodicamente o estado da guarnição ao<br />
redor da porta do forno. Se houver danos, contacte o<br />
Centro <strong>de</strong> Assistência Técnica Autorizado mais perto.<br />
É aconselhável não usar o forno antes do mesmo ter<br />
sido reparado.<br />
Substituir a lâmpada <strong>de</strong> iluminação do<br />
forno<br />
1. Após ter <strong>de</strong>sligado o forno da electricida<strong>de</strong>, remova<br />
a tampa <strong>de</strong> vidro do portalâmpadas<br />
(ver figura).<br />
2. Desenrosque a lâmpada e<br />
troque-a por outra análoga:<br />
tensão 230V, potência 25 W,<br />
engate E 14.<br />
3. Monte novamente a tampa e<br />
restabeleça a ligação eléctrica<br />
do forno.<br />
Manutenção das torneiras do gás<br />
Com o tempo po<strong>de</strong> ocorrer o caso <strong>de</strong> uma torneira<br />
que se bloqueie ou apresente dificulda<strong>de</strong>s na rotação,<br />
portanto será necessário substituir a torneira mesma.<br />
! Esta operação <strong>de</strong>ve ser efectuada por um técnico<br />
autorizado pelo fabricador.<br />
Assistência técnica<br />
! Nunca recorra a técnicos não autorizados.<br />
Comunique:<br />
• o tipo <strong>de</strong> avaria;<br />
• o mo<strong>de</strong>lo da máquina (Mod.);<br />
• o número <strong>de</strong> série (S/N);<br />
Estas últimas informações encontram-se na placa <strong>de</strong><br />
i<strong>de</strong>ntificação situada no aparelho.<br />
* Presente apenas em alguns mo<strong>de</strong>los.<br />
34
35<br />
PT
05/2012 - 195103759.00<br />
XEROX FABRIANO<br />
PT<br />
36