Instructions for installation and use - Hotpoint
Instructions for installation and use - Hotpoint
Instructions for installation and use - Hotpoint

You also want an ePaper? Increase the reach of your titles
YUMPU automatically turns print PDFs into web optimized ePapers that Google loves.
<strong>Instructions</strong> <strong>for</strong><br />
<strong>installation</strong> <strong>and</strong> <strong>use</strong><br />
WASHER-DRYER<br />
! This symbol reminds you to read this instruction manual.<br />
EN<br />
EN<br />
IT<br />
ES<br />
Contents<br />
English,1<br />
PT<br />
Português,37<br />
Italiano,13 Español,25<br />
NL<br />
Nederl<strong>and</strong>s,49<br />
Installation, 2-3<br />
Unpacking <strong>and</strong> levelling<br />
Connecting the electricity <strong>and</strong> water supplies<br />
Technical data<br />
Care <strong>and</strong> maintenance, 4<br />
Cutting off the water <strong>and</strong> electricity supplies<br />
Cleaning the machine<br />
Cleaning the detergent dispenser drawer<br />
Caring <strong>for</strong> your appliance drum<br />
Cleaning the pump<br />
Checking the water inlet hose<br />
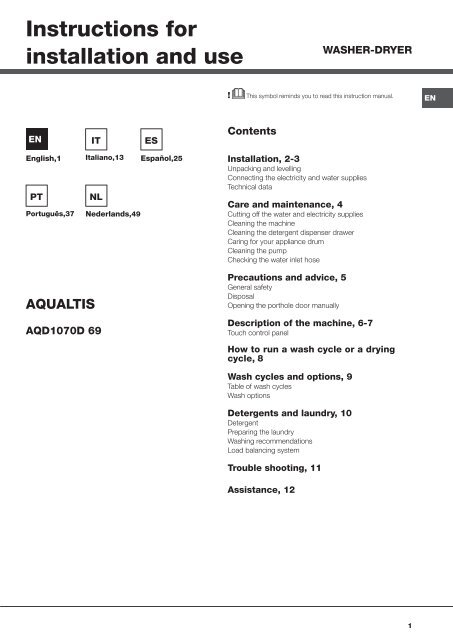
AQUALTIS<br />
AQD1070D 69<br />
Precautions <strong>and</strong> advice, 5<br />
General safety<br />
Disposal<br />
Opening the porthole door manually<br />
Description of the machine, 6-7<br />
Touch control panel<br />
How to run a wash cycle or a drying<br />
cycle, 8<br />
Wash cycles <strong>and</strong> options, 9<br />
Table of wash cycles<br />
Wash options<br />
Detergents <strong>and</strong> laundry, 10<br />
Detergent<br />
Preparing the laundry<br />
Washing recommendations<br />
Load balancing system<br />
Trouble shooting, 11<br />
Assistance, 12<br />
1
Installation<br />
EN<br />
! This instruction manual should be kept in a<br />
safe place <strong>for</strong> future reference. If the Washerdryer<br />
is sold, given away or moved, please<br />
ensure the manual is kept with the machine,<br />
so that the new owner may benefit from the<br />
advice contained within it.<br />
! Read these instructions carefully: they<br />
contain vital in<strong>for</strong>mation relating to the safe<br />
<strong>installation</strong> <strong>and</strong> operation of the appliance.<br />
! Inside the pack containing this manual, you<br />
will also find the guarantee <strong>and</strong> all the details<br />
necessary <strong>for</strong> <strong>installation</strong>.<br />
Unpacking <strong>and</strong> levelling<br />
Unpacking<br />
1. Once you have removed all the packaging<br />
from the Washer-dryer, make sure it has not<br />
been damaged during transportation.<br />
If it has been damaged, contact the retailer<br />
<strong>and</strong> do not proceed any further with the<br />
<strong>installation</strong> process.<br />
2. Remove the 4<br />
protective screws<br />
(<strong>use</strong>d during<br />
transportation) <strong>and</strong><br />
the corresponding<br />
spacer, located on<br />
the rear part of the<br />
appliance (see figure).<br />
3. Close off the holes using the plastic plugs<br />
supplied in the pack.<br />
4. Keep all the parts in a safe place; they will<br />
be needed again if the Washer-dryer is moved<br />
to another location, to prevent the inside of the<br />
appliance being damaged.<br />
! Packaging materials should not be <strong>use</strong>d as<br />
toys <strong>for</strong> children.<br />
Levelling<br />
1. Place the Washerdryer<br />
on a flat sturdy<br />
floor, without resting<br />
it up against walls or<br />
cabinets.<br />
2. If the floor is<br />
uneven, the front feet<br />
of the machine may<br />
be adjusted until it<br />
reaches a horizontal<br />
position (the angle of<br />
inclination must not exceed 2 degrees).<br />
! If the appliance is levelled correctly, it will<br />
be more stable <strong>and</strong> much less likely to ca<strong>use</strong><br />
vibrations <strong>and</strong> noise while it is operating,<br />
particularly during the spin cycle.<br />
! If it is placed on carpet or a rug, adjust the<br />
feet in such a way as to allow a sufficient<br />
ventilation space underneath the Washer-dryer.<br />
Connecting the electricity <strong>and</strong><br />
water supplies<br />
Connecting the water inlet hose<br />
! Be<strong>for</strong>e connecting the inlet hose to the water<br />
supply, run the water until it is perfectly clear.<br />
1. Connect the inlet<br />
hose to the machine<br />
by screwing it onto<br />
the cold water inlet of<br />
the appliance, which<br />
is situated on the top<br />
right-h<strong>and</strong> side of<br />
the rear part of the<br />
appliance (see figure).<br />
2. Connect the inlet<br />
hose by screwing it to<br />
a cold water tap using<br />
a 3/4 gas threaded<br />
connection (see<br />
figure).<br />
3. Make sure that the hose is not folded over<br />
or bent.<br />
! The water pressure at the tap must fall within<br />
the values indicated in the Technical data table<br />
(see next page).<br />
! If the inlet hose is not long enough, contact a<br />
specialised shop or an authorised technician.<br />
! Never <strong>use</strong> second-h<strong>and</strong> or old inlet hoses;<br />
<strong>use</strong> the products supplied with the machine.<br />
2
Connecting the drain hose<br />
65 - 100 cm<br />
Connect the drain<br />
hose to drain duct<br />
piping or a wall drain<br />
located between 65<br />
<strong>and</strong> 100 cm above<br />
the floor, making sure<br />
it is not bent at all.<br />
! Do not <strong>use</strong> extension cords or multiple sockets.<br />
! The cable should not be bent or compressed.<br />
! The power supply cable <strong>and</strong> plug must only<br />
be replaced by authorised technicians.<br />
Warning! The company shall not be held<br />
responsible in the event that these regulations<br />
are not respected.<br />
EN<br />
Alternatively, rest the<br />
drain hose on the<br />
side of a washbasin<br />
or bathtub, fastening<br />
the duct supplied to<br />
the tap (see figure).<br />
The free end of the<br />
hose should not be<br />
underwater.<br />
! We advise against the <strong>use</strong> of hose extensions;<br />
if it is absolutely necessary, the extension must<br />
have the same diameter as the original hose<br />
<strong>and</strong> must not exceed 150 cm in length.<br />
Electrical connections<br />
Be<strong>for</strong>e plugging the appliance into the<br />
electricity socket, make sure that:<br />
• the socket is earthed <strong>and</strong> complies with all<br />
applicable laws;<br />
• the socket is able to withst<strong>and</strong> the maximum<br />
power load of the appliance as indicated in<br />
the Technical data table (see opposite);<br />
• the power supply voltage falls within the<br />
values indicated in the Technical data table<br />
(see opposite);<br />
• the socket is compatible with the plug of the<br />
appliance. If this is not the case, have the<br />
socket or the plug replaced.<br />
! The machine must not be installed outdoors,<br />
even in covered areas. It is extremely<br />
dangerous to leave the appliance exposed to<br />
rain, storms <strong>and</strong> other weather conditions.<br />
! The mains socket must remain within easy<br />
reach after the Washer-dryer has been installed.<br />
Technical data<br />
Model AQD1070D 69<br />
Dimensions<br />
Capacity<br />
Electrical<br />
connections<br />
Water connections<br />
Spin speed<br />
Energy rated<br />
programmes<br />
according to<br />
regulation<br />
EN 50229<br />
width 59.5 cm<br />
height 85 cm<br />
depth 64.5 cm<br />
from 1 to 10 kg <strong>for</strong> the wash<br />
programme<br />
from 1 to 7 kg <strong>for</strong> the drying<br />
programme<br />
please refer to the technical<br />
data plate fixed to the machine<br />
maximum pressure<br />
1 MPa (10 bar)<br />
minimum pressure<br />
0.05 MPa (0.5 bar)<br />
drum capacity 71 litres<br />
up to 1600 rotations per<br />
minute<br />
Wash: programme ; temperature<br />
60°C; using a load<br />
of 10 kg.<br />
Drying: the smaller load<br />
must be dried by selecting<br />
the “EXTRA” dryness level.<br />
The load must consist of 3<br />
sheets, 2 pillowcases <strong>and</strong><br />
1 h<strong>and</strong> towel;<br />
the remainder of the load<br />
must be dried by selecting<br />
the “EXTRA” dryness level.<br />
This appliance con<strong>for</strong>ms to<br />
the following EC Directives:<br />
- 2004/108/EC (Electromagnetic<br />
Compatibility)<br />
- 2006/95/EC (Low Voltage)<br />
- 2002/96/EC<br />
3
Care <strong>and</strong> maintenance<br />
EN<br />
Cutting off the water <strong>and</strong><br />
electricity supplies<br />
• Turn off the water tap after every wash cycle.<br />
This will limit wear on the hydraulic system in<br />
the machine <strong>and</strong> help to prevent leaks.<br />
• Unplug the appliance when cleaning it <strong>and</strong><br />
during all maintenance work.<br />
To access the pre-chamber:<br />
1<br />
2<br />
Cleaning the machine<br />
The outer parts <strong>and</strong> rubber components of the<br />
appliance can be cleaned using a soft cloth<br />
soaked in lukewarm soapy water. Do not <strong>use</strong><br />
solvents or abrasives.<br />
Cleaning the detergent dispenser<br />
drawer<br />
1<br />
2<br />
1<br />
To remove the drawer,<br />
press lever (1) <strong>and</strong> pull<br />
the drawer outwards (2)<br />
(see figure).<br />
Wash it under running<br />
water; this procedure<br />
should be repeated<br />
frequently.<br />
Caring <strong>for</strong> your appliance drum<br />
• Always leave the door ajar to prevent<br />
unpleasant odours from <strong>for</strong>ming.<br />
Cleaning the pump<br />
2<br />
The Washer-dryer is fitted with a selfcleaning<br />
pump which does not require any<br />
maintenance. Sometimes, small items (such<br />
as coins or buttons) may fall into the protective<br />
pre-chamber at the base of the pump.<br />
! Make sure the wash cycle has finished <strong>and</strong><br />
unplug the appliance.<br />
1. take off the cover panel on the front of the<br />
machine by first pressing it in the centre <strong>and</strong><br />
then pushing downwards on both sides until<br />
you can remove it (see figures);<br />
2. position a container<br />
so that it will collect the<br />
water which flows out<br />
(approximately 1.5 l)<br />
(see figure);<br />
3. unscrew the lid by<br />
rotating it in an anticlockwise<br />
direction (see<br />
figure);<br />
4. clean the inside thoroughly;<br />
5. screw the lid back on;<br />
6. reposition the panel, making sure the hooks<br />
are securely in place be<strong>for</strong>e you push it onto<br />
the appliance.<br />
Checking the water inlet hose<br />
Check the inlet hose at least once a year. If<br />
there are any cracks, it should be replaced<br />
immediately: during the wash cycles, water<br />
pressure is very strong <strong>and</strong> a cracked hose<br />
could easily split open.<br />
4
Precautions <strong>and</strong> tips<br />
! The machine was designed <strong>and</strong> constructed in<br />
accordance with international safety regulations. The<br />
following in<strong>for</strong>mation is provided <strong>for</strong> safety reasons <strong>and</strong><br />
must there<strong>for</strong>e be read carefully.<br />
General safety<br />
• This appliance is not intended <strong>for</strong> <strong>use</strong> by persons<br />
(including children) with reduced physical, sensory<br />
or mental capabilities, or lack of experience <strong>and</strong><br />
knowledge, unless they have been given supervision or<br />
instruction concerning <strong>use</strong> of the appliance by a person<br />
responsible <strong>for</strong> their safety.<br />
Children should be supervised to ensure that they do<br />
not play with the appliance.<br />
– Do not dry unwashed items in the tumble dryer.<br />
– Items that have been soiled with substances such<br />
as cooking oil, acetone, alcohol, petrol, kerosene,<br />
spot removers, turpentine, waxes <strong>and</strong> wax removers<br />
should be washed in hot water with an extra amount of<br />
detergent be<strong>for</strong>e being dried in the tumble dryer.<br />
– Items such as foam rubber (latex foam), shower caps,<br />
waterproof textiles, rubber backed articles <strong>and</strong> clothes<br />
or pillows fitted with foam rubber pads should not be<br />
dried in the tumble dryer.<br />
– Fabric softeners, or similar products, should be <strong>use</strong>d<br />
as specified by the fabric softener instructions.<br />
– The final part of a tumble dryer cycle occurs without<br />
heat (cool down cycle) to ensure that the items are left<br />
at a temperature that ensures that the items will not be<br />
damaged.<br />
WARNING: Never stop a tumble dryer be<strong>for</strong>e the end of<br />
the drying cycle unless all items are quickly removed <strong>and</strong><br />
spread out so that the heat is dissipated.<br />
• This appliance was designed <strong>for</strong> domestic <strong>use</strong> only.<br />
• Do not touch the machine when barefoot or with wet or<br />
damp h<strong>and</strong>s or feet.<br />
• Do not pull on the power supply cable when unplugging<br />
the appliance from the electricity socket. Hold the plug<br />
<strong>and</strong> pull.<br />
• Do not touch the drained water as it may reach<br />
extremely high temperatures.<br />
• Never <strong>for</strong>ce the porthole door. This could damage the<br />
safety lock mechanism designed to prevent accidental<br />
opening.<br />
• If the appliance breaks down, do not under any<br />
circumstances access the internal mechanisms in an<br />
attempt to repair it yourself.<br />
• Always keep children well away from the appliance while<br />
it is operating.<br />
• If it must be moved, proceed with the help of two or<br />
three people <strong>and</strong> h<strong>and</strong>le it with the utmost care. Never<br />
try to do this alone, beca<strong>use</strong> the appliance is very heavy.<br />
• Be<strong>for</strong>e loading laundry into the washer dryer, make sure<br />
the drum is empty.<br />
• During the drying phase, the door tends to get<br />
quite hot.<br />
• Do not <strong>use</strong> the appliance to dry clothes that have<br />
been washed with flammable solvents (e.g.<br />
trichlorethylene).<br />
• Do not <strong>use</strong> the appliance to dry foam rubber or<br />
similar elastomers.<br />
• Make sure that the water tap is turned on during<br />
the drying cycles.<br />
Disposal<br />
• Disposing of the packaging materials: observe local<br />
regulations so that the packaging may be re-<strong>use</strong>d.<br />
• The European Directive 2002/96/EC relating to Waste<br />
Electrical <strong>and</strong> Electronic Equipment (WEEE) states<br />
that ho<strong>use</strong>hold appliances should not be disposed of<br />
using the normal solid urban waste cycle. Exhausted<br />
appliances should be collected separately in order to<br />
optimise the cost of re-using <strong>and</strong> recycling the materials<br />
inside the machine, while preventing potential damage<br />
to the atmosphere <strong>and</strong> to public health. The crossed-out<br />
dustbin is marked on all products to remind the owner<br />
of their obligations regarding separated waste collection.<br />
For more in<strong>for</strong>mation relating to the correct disposal of<br />
ho<strong>use</strong>hold appliances, owners should contact their local<br />
authorities or appliance dealer.<br />
Opening the porthole door manually<br />
In the event that it is not possible to open the porthole door<br />
due to a powercut, <strong>and</strong> if you wish to remove the laundry,<br />
proceed as follows:<br />
1. remove the plug from the<br />
electrical socket.<br />
2. make sure the water level<br />
inside the machine is lower<br />
than the door opening; if<br />
it is not, remove excess<br />
water using the drain hose,<br />
collecting it in a bucket as<br />
indicated in the figure.<br />
3. remove the cover panel<br />
on the lower front part of the<br />
washer dryer (see overleaf).<br />
4. pull outwards using the<br />
tab as indicated in the figure,<br />
until the plastic tie-rod is freed<br />
from its stop position; pull<br />
downwards until you hear a<br />
“click”, which indicates that<br />
the door is now unlocked.<br />
5. open the door; if this is<br />
still not possible repeat the<br />
procedure.<br />
6. reposition the panel,<br />
making sure the hooks are<br />
securely in place be<strong>for</strong>e you<br />
push it onto the appliance.<br />
EN<br />
5
210<br />
180<br />
150<br />
120<br />
90<br />
60<br />
Description of the machine<br />
EN<br />
PORTHOLE DOOR<br />
PORTHOLE DOOR<br />
HANDLE<br />
CONTROL<br />
PANEL<br />
KICK STRIP<br />
PORTHOLE DOOR<br />
Always <strong>use</strong> the h<strong>and</strong>le to<br />
open the porthole door (see<br />
figure).<br />
3. extra compartment: Bleach<br />
! The <strong>use</strong> of extra compartment 3 excludes the prewash<br />
function.<br />
washing additives compartment: <strong>for</strong> fabric softener<br />
or liquid additives. We recommend that the maximum<br />
level indicated by the grille is not exceeded, <strong>and</strong> that<br />
concentrated fabric softeners are diluted.<br />
DETERGENT DISPENSER DRAWER<br />
The detergent dispenser<br />
drawer is located inside<br />
the machine <strong>and</strong> can be<br />
accessed by opening the<br />
door.<br />
For more in<strong>for</strong>mation on<br />
detergent measures, please<br />
refer to the chapter entitled<br />
“Detergents <strong>and</strong> laundry”.<br />
B<br />
A<br />
2<br />
3<br />
1<br />
1. pre-wash compartment:<br />
<strong>use</strong> powder detergent.<br />
! Be<strong>for</strong>e pouring in the<br />
detergent, make sure that<br />
extra compartment 3 has<br />
been removed.<br />
2. main wash compartment:<br />
If liquid detergent is <strong>use</strong>d,<br />
it is recommended that the<br />
removable plastic partition A<br />
(supplied) be <strong>use</strong>d <strong>for</strong> proper dosage.If powder detergent is<br />
<strong>use</strong>d, place the partition into slot B.<br />
TOUCH CONTROL PANEL<br />
To adjust the settings, gently<br />
press the icon inside the<br />
sensitive (touch control) area<br />
as illustrated in the figure.<br />
St<strong>and</strong>by mode<br />
This Washer-dryer, in compliance with new energy saving<br />
regulations, is fitted with an automatic st<strong>and</strong>by system<br />
which is enabled after about 30 minutes if no activity is<br />
detected. Press the ON-OFF button briefly <strong>and</strong> wait <strong>for</strong><br />
the machine to start up again.<br />
Consumption in off-mode: 0,5 W<br />
Consumption in Left-on: 0,5 W<br />
6
Touch control panel<br />
WASH CYCLE<br />
SELECTOR knob<br />
M2<br />
M1<br />
SPIN<br />
button<br />
TEMPERATURE<br />
button<br />
START/PAUSE button<br />
with indicator light<br />
ECO<br />
indicator light<br />
WASH<br />
CYCLE<br />
PHASE<br />
icons<br />
EN<br />
DISPLAY<br />
Button with ON/OFF<br />
indicator light<br />
DRYING<br />
button<br />
Button with ON/OFF indicator light: press this briefly to switch<br />
the machine on or off. The green indicator light indicates that the<br />
machine is switched on. To switch off the Washer-dryer during<br />
the wash cycle, press <strong>and</strong> hold the button <strong>for</strong> approximately<br />
3 seconds; if the button is pressed briefly or accidentally the<br />
machine will not switch off. If the machine is switched off during a<br />
wash cycle, this wash cycle will be cancelled.<br />
WASH CYCLE SELECTOR knob: may be turned in either<br />
direction. To select the most suitable wash cycle, please refer<br />
to the “Table of wash cycles”.<br />
The knob will not move during the wash cycle.<br />
M1-M2 buttons: press <strong>and</strong> hold one of the buttons to store<br />
a cycle with your own set preferences in the memory of<br />
the machine. To recall a previously-stored cycle, press the<br />
corresponding button.<br />
DRYING button : press to decrease or exclude drying;<br />
the selected drying level or time will appear on the display<br />
(see “How to run a wash cycle or a drying cycle”).<br />
TEMPERATURE button: press to modify or exclude<br />
the temperature setting; the value selected will appear on the<br />
display above (see “How to run a wash cycle or a drying cycle”).<br />
SPIN CYCLE button: press to modify or exclude the spin<br />
cycle; the value selected will appear on the display above (see<br />
“How to run a wash cycle or a drying cycle”).<br />
DELAYED START button: press to set a delayed start <strong>for</strong><br />
the selected wash cycle; the set delay time will appear on the<br />
display above (see “How to run a wash cycle or a drying cycle”).<br />
OPTION buttons: press to select the available options. The<br />
indicator light corresponding to the selected option will remain<br />
lit (see “How to run a wash cycle or a drying cycle”).<br />
WASH CYCLE PHASE icons: these illuminate to indicate<br />
the progress of the wash cycle (Wash – Rinse – Spin/<br />
Drain – Drying ). The text lights up when the cycle is<br />
complete.<br />
START/PAUSE button with indicator light: when the green<br />
indicator light flashes slowly, press the button to start a wash<br />
cycle. Once the cycle has begun the indicator light will remain<br />
OPTION<br />
buttons<br />
DELAYED START<br />
button<br />
LOCK indicator light<br />
CONTROL PANEL LOCK<br />
button with indicator light<br />
lit in a fixed manner. To pa<strong>use</strong> the wash cycle, press the<br />
button again; the indicator light will flash in an orange colour. If<br />
the “LOCK” indicator light is switched off, the door may be<br />
opened. To start the wash cycle from the point at which it was<br />
interrupted, press the button again.<br />
LOCK indicator light: indicates that the porthole door is<br />
locked. To open the door, pa<strong>use</strong> the wash cycle (see “How to<br />
run a wash cycle or a drying cycle”).<br />
CONTROL PANEL LOCK button with indicator light: to<br />
activate or deactivate the control panel lock, press <strong>and</strong> hold<br />
the button <strong>for</strong> approximately 2 seconds. when the indicator<br />
light is illuminated, the control panel is locked (apart from the<br />
ON/OFF button). This means it is possible to prevent wash<br />
cycles from being modified accidentally, especially where there<br />
are children in the home.<br />
ECO indicator light: the icon lights up when, after altering the<br />
washing parameters, an energy saving of at least 10% is made.<br />
Furthermore, be<strong>for</strong>e the machine enters “St<strong>and</strong>by” mode, the<br />
icon will light up <strong>for</strong> a few seconds; when the machine is switched<br />
off the estimated energy saving will be around the 80% mark.<br />
CHANGE LANGUAGEsThe first time the machine is<br />
switched on, the first language will flash on the display. The<br />
“ “, “OK” <strong>and</strong> “V” symbols will appear on the display, in line<br />
with the 3 buttons on the right-h<strong>and</strong> side. The languages<br />
change automatically every 3”; alternatively, they can be<br />
changed by pressing the buttons next to the “ “ <strong>and</strong> “V”<br />
symbols. Use the “OK” button to confirm the language, which<br />
will be set after 2”. If no buttons are pressed, the automatic<br />
language change will begin again after 30”.<br />
To change the language, switch the machine on <strong>and</strong> off<br />
again; in the 30” time period after it has been switched<br />
off, press <strong>and</strong> hold the temperature +spin<br />
+delayed start buttons simultaneously <strong>for</strong> 5’’. A short<br />
sound alert will be emitted <strong>and</strong> the set language will flash<br />
on the display. Press the buttons next to the “ “ <strong>and</strong> “V”<br />
symbols to change the language. Use the button next to the<br />
“OK” symbol to confirm the language, which will be set after<br />
2”. If no buttons are pressed, the language set previously will<br />
be displayed after 30”. Switch on the machine.<br />
7
How to run a wash cycle or a<br />
drying cycle<br />
EN<br />
WARNING: be<strong>for</strong>e you <strong>use</strong> the Washer-dryer <strong>for</strong> the first time,<br />
run a wash cycle with detergent <strong>and</strong> no laundry, using the 90°<br />
cottons cycle without pre-wash.<br />
1. SWITCH THE MACHINE ON. Press the button. All<br />
the indicator lights will illuminate <strong>for</strong> 1 second <strong>and</strong> the text<br />
AQUALTIS will appear on the display; the indicator light<br />
corresponding to the button will then remain lit in a constant<br />
manner <strong>and</strong> the START/PAUSE indicator light will flash.<br />
2. SELECT THE PROGRAMME. Turn the PROGRAMME<br />
KNOB left or right, until the required programme has been<br />
selected; the name of the programme will appear on the<br />
display. A temperature <strong>and</strong> spin speed is set <strong>for</strong> each<br />
programme; these may be adjusted. The cycle duration will<br />
also appear on the display.<br />
3. LOAD THE LAUNDRY. Open the porthole door. Load the<br />
laundry, making sure you do not exceed the maximum load value<br />
indicated in the table of wash cycles on the following page.<br />
4. MEASURE OUT THE DETERGENT. Pull out the detergent<br />
dispenser drawer <strong>and</strong> pour the detergent into the relevant<br />
compartments as described in “Description of the machine”.<br />
5. CLOSE THE PORTHOLE DOOR.<br />
6. CUSTOMISE THE WASH CYCLE. Use the relevant<br />
buttons on the control panel:<br />
Modify the temperature <strong>and</strong>/or spin speed.<br />
The machine automatically displays the maximum temperature<br />
<strong>and</strong> spin speed values set <strong>for</strong> the selected cycle, or the most<br />
recently-<strong>use</strong>d settings if they are compatible with the selected<br />
cycle. The temperature can be decreased by pressing the<br />
button, until the cold wash “OFF” setting is reached. The<br />
spin speed may be progressively reduced by pressing the<br />
button, until it is completely excluded “OFF”. If these buttons<br />
are pressed again, the maximum values are restored.<br />
! Exception: if the programme is selected, the<br />
temperature can be increased up to a value of 90°C.<br />
Setting the drying cycle.<br />
The first time the button is pressed, the machine will<br />
automatically select the maximum drying cycle which is<br />
compatible with the selected wash cycle. Subsequent presses<br />
will decrease the drying level <strong>and</strong> then the drying time, until<br />
the cycle is excluded completely (“OFF”). If these buttons are<br />
pressed again, the maximum values are restored.<br />
Drying may be set as follows:<br />
A - Based on a set time period: between 20 <strong>and</strong> 180 minutes.<br />
B- Based on the desired laundry dryness level:<br />
Iron: suitable <strong>for</strong> clothes which will need ironing afterwards.<br />
the remaining dampness softens creases, making them<br />
easier to remove.<br />
Hanger: ideal <strong>for</strong> clothes which do not need to be dried fully.<br />
Cupboard: suitable <strong>for</strong> laundry which can be put back in a<br />
cupboard without being ironed.<br />
Extra: suitable <strong>for</strong> garments which need to be dried<br />
completely, such as sponges <strong>and</strong> bathrobes.<br />
If your laundry load to be washed <strong>and</strong> dried is much greater<br />
than the maximum stated load, per<strong>for</strong>m the wash cycle,<br />
<strong>and</strong> when the cycle is complete, divide the garments into<br />
groups <strong>and</strong> put some of them back in the drum. At this<br />
point, follow the instructions provided <strong>for</strong> a “Drying only”<br />
cycle. Repeat this procedure <strong>for</strong> the remainder of the load.<br />
A cooling-down period is always added to the end of each<br />
drying cycle.<br />
Drying only<br />
Use the cycle selector knob to select a drying cycle ( - - )<br />
in accordance with the type of fabric. The desired drying level or<br />
time may also be set using the DRYING button .<br />
Setting a delayed start.<br />
To set a delayed start <strong>for</strong> the selected cycle, press the<br />
corresponding button repeatedly until the required delay period has<br />
been reached. During the setting procedure, the delay period <strong>and</strong><br />
the text “Starts in:” will be displayed, along with the flashing<br />
symbol. After the delayed start has been set, the symbol<br />
will remain fixed on the display, which will also indicate the<br />
duration of the selected cycle with the text “Ends in:” <strong>and</strong> the<br />
cycle duration. Press the DELAYED START button just once to<br />
display the delay time set previously. After the countdown has<br />
begun, the display will show the text “Starts in:” <strong>and</strong> the delay<br />
period. Once the set delay time has elapsed, the machine will<br />
begin its cycle <strong>and</strong> the display will show “Ends in:” <strong>and</strong> the time<br />
remaining until the end of the cycle. To remove the delayed start<br />
option, press the button until the display shows the text OFF;<br />
the symbol will disappear.<br />
Modify the cycle settings.<br />
• Press the button to activate the option; the name<br />
of the option will then appear on the display <strong>and</strong> the<br />
corresponding indicator light will illuminate.<br />
• Press the button again to deactivate the option; the<br />
name of the option will then appear on the display<br />
followed by the text OFF, <strong>and</strong> the corresponding<br />
indicator light will switch off.<br />
! If the selected option is not compatible with the selected<br />
wash cycle, this incompatibility will be signalled by the<br />
flashing of the indicator light <strong>and</strong> a sound alert<br />
(3 beeps); the option will not be activated.<br />
! If the selected option is not compatible with another<br />
option that has been selected previously, the indicator light<br />
corresponding to the first option selected will flash <strong>and</strong><br />
only the second option will be activated; the indicator light<br />
corresponding to the button will remain lit in a constant manner.<br />
! The options may affect the recommended load value <strong>and</strong>/<br />
or the duration of the cycle.<br />
7. START THE PROGRAMME. Press the START/PAUSE<br />
button. The corresponding indicator light remains lit in a fixed<br />
manner <strong>and</strong> the porthole door locks (the LOCK indicator<br />
light illuminates). The icons corresponding to the wash cycle<br />
phases will light up during the cycle to indicate which phase<br />
is currently in progress. To change a wash cycle once it has<br />
already started, pa<strong>use</strong> the Washer-dryer by pressing the<br />
START/PAUSE button; then select the desired cycle <strong>and</strong><br />
press the START/PAUSE button again. To open the door<br />
during a wash cycle, press the START/PAUSE button; if the<br />
LOCK indicator light is switched off you may open the<br />
door. Press the START/PAUSE button again to restart the<br />
wash cycle from the point at which it was interrupted.<br />
8. THE END OF THE WASH CYCLE. This is indicated by<br />
the illuminated text END. The porthole door may be opened<br />
immediately. If the START/PAUSE indicator light is flashing,<br />
press the button to end the cycle. Open the door, unload<br />
the laundry <strong>and</strong> switch off the machine.<br />
! If you wish to cancel a cycle which has already begun, press<br />
<strong>and</strong> hold the button until the cycle stops <strong>and</strong> the machine<br />
switches off.<br />
8
Wash cycles <strong>and</strong> options<br />
Table of wash cycles<br />
Icon Description of the wash cycle<br />
Max. temp.<br />
(°C)<br />
Max.<br />
speed<br />
(rpm)<br />
Drying<br />
Detergent <strong>and</strong> additives<br />
Prewash<br />
Wash Bleach<br />
Fabric<br />
softener<br />
Cotton Coloureds (2): lightly soiled whites <strong>and</strong> delicate colours. 40° 1600 • - • • • 10<br />
Synthetics Resistant 60° 800 • - • • • 5<br />
Whites 60° 1600 • - • - • 6<br />
Coloureds 40° 1600 • - • • • 6<br />
Darks 30° 800 • - • - • 6<br />
Wool Platinum Care: <strong>for</strong> wool, cashmere, etc. 40° 800 • - • - • 2,5<br />
Ultradelicates 30° 0 • - • - • 1<br />
Anti Allergy 60° 1600 • - • - • 6<br />
Rinse - 1600 • - - • • 10<br />
Spin <strong>and</strong> Pump out - 1600 • - - - - 10<br />
Wash&Dry 30° 1600 • - • - • 1<br />
Drying Cottons - - • - - - - 7<br />
Drying Wool - - • - - - - 2,5<br />
Drying Synthetics - - • - - - - 5<br />
Cotton Hygiene Prewash<br />
(Add detergent to the relevant compartment).<br />
Cotton Whites (1): heavily soiled whites <strong>and</strong> resistant colours.<br />
Max.<br />
load<br />
(kg)<br />
90° 1600 • • • - • 10<br />
60°<br />
(Max. 90°C)<br />
1600 • - • • • 10<br />
The length of cycle shown on the display or in this booklet is an estimation only <strong>and</strong> is calculated assuming st<strong>and</strong>ard working conditions. The actual duration can vary according to factors such as<br />
water temperature <strong>and</strong> pressure, the amount of detergent <strong>use</strong>d, the amount <strong>and</strong> type of load inserted, load balancing <strong>and</strong> any wash options selected.<br />
Cycle<br />
duration<br />
(*) The duration of the wash cycles can be checked on the display.<br />
EN<br />
(*) Note: 10 minutes after the START, the machine will recalculate the time remaining until the end of the wash cycle on the basis of the load inside it; this value will then be shown on the display.<br />
For all Test Institutes:<br />
1) Test wash cycle in compliance with regulation EN 50229: set wash cycle with a temperature of 60°C.<br />
2) Long wash cycle <strong>for</strong> cottons: set wash cycle with a temperature of 40°C.<br />
Wash options<br />
Super Wash<br />
2<br />
3<br />
1<br />
This option offers a highper<strong>for</strong>mance<br />
wash due to<br />
the greater quantity of water<br />
<strong>use</strong>d in the initial phase<br />
of the cycle, <strong>and</strong> due to<br />
the increased wash cycle<br />
duration, is particularly <strong>use</strong>ful<br />
<strong>for</strong> the removal of stubborn<br />
stains. It can be <strong>use</strong>d with or<br />
without bleach. If you desire<br />
bleaching, insert the extra<br />
tray compartment (3) into<br />
compartment 1. When pouring in the bleach, be careful<br />
not to exceed the “max” level marked on the central pivot<br />
(see figure). To bleach laundry without carrying out a full<br />
wash cycle, pour the bleach into the extra compartment 3,<br />
select the “Rinse” cycle <strong>and</strong> activate the “Super Wash”<br />
option .<br />
! It cannot be <strong>use</strong>d in conjunction with , , , , , ,<br />
, , , , .<br />
Extra rinse<br />
By selecting this option, the efficiency of the rinse is<br />
increased <strong>and</strong> optimal residual detergent removal is<br />
guaranteed. It is particularly <strong>use</strong>ful <strong>for</strong> skin which is<br />
sensitive to detergents. We recommend this option is <strong>use</strong>d<br />
with a full load of washing, or when a large amount of<br />
detergent is required.<br />
! It cannot be <strong>use</strong>d in conjunction with , , , , ,<br />
, , .<br />
Easy Iron<br />
By selecting this option, the wash <strong>and</strong> spin cycles will be<br />
modified in order to reduce the <strong>for</strong>mation of creases.<br />
At the end of the cycle the Washer-dryer drum will<br />
rotate slowly; the “Easy Iron” <strong>and</strong> START/PAUSE indicator<br />
lights will flash. To end the cycle press the START/PAUSE<br />
button or the “Easy Iron” button.<br />
! It cannot be <strong>use</strong>d in conjunction with , , , , , ,<br />
, , .<br />
Note: If you also want to run the drying cycle, this option is<br />
enabled only if combined with level “Iron”.<br />
Time Saver<br />
If you select this option, the wash cycle duration will be<br />
reduced by up to 50%, depending on the selected cycle,<br />
thereby guaranteeing simultaneous water <strong>and</strong> energy<br />
saving. Use this cycle <strong>for</strong> lightly soiled garments.<br />
! It cannot be <strong>use</strong>d in conjunction with , , , , ,<br />
, , , , , .<br />
9
Detergents <strong>and</strong> laundry<br />
EN<br />
Detergent<br />
The type <strong>and</strong> quantity of detergent required depend on<br />
the type of fabric you are washing (cotton, wool, silk, etc.),<br />
as well as its colour, the washing temperature, the level of<br />
soiling <strong>and</strong> the hardness of the water in the area.<br />
Measuring out the detergent carefully will avoid wastage<br />
<strong>and</strong> help to protect the environment: although they are<br />
biodegradable, detergents still contain ingredients which<br />
alter the balance of nature.<br />
We recommend the following:<br />
• <strong>use</strong> powder detergents <strong>for</strong> white cotton garments <strong>and</strong><br />
pre-washing.<br />
• <strong>use</strong> liquid detergents <strong>for</strong> delicate cotton garments <strong>and</strong><br />
<strong>for</strong> all low-temperature wash cycles.<br />
• <strong>use</strong> gentle liquid detergents <strong>for</strong> wool <strong>and</strong> silk garments.<br />
The detergent should be poured into the relevant<br />
compartment - or the dispenser placed directly inside the<br />
drum - be<strong>for</strong>e the wash cycle begins. In the latter case, it will<br />
not be possible to select the Cottons with pre-wash cycle.<br />
! Do not <strong>use</strong> h<strong>and</strong> washing detergents beca<strong>use</strong> these<br />
create too much foam.<br />
Preparing the laundry<br />
• Shake out the garments be<strong>for</strong>e loading them into the<br />
machine.<br />
• Divide the laundry according fabric type (symbol on the<br />
washing instruction label) <strong>and</strong> colour, making sure you<br />
separate the coloured garments from the white ones;<br />
• Empty all pockets <strong>and</strong> check the buttons;<br />
• Do not exceed the values listed in the “Table of wash cycles”,<br />
which refer to the weight of the laundry when dry.<br />
How much does your laundry weigh?<br />
1 sheet 400-500 g<br />
1 pillowcase 150-200 g<br />
1 tablecloth 400-500 g<br />
1 bathrobe 900-1200 g<br />
1 towel 150-250 g<br />
1 pair of jeans 400-500 g<br />
1 shirt 150-200 g<br />
Washing recommendations<br />
Whites: <strong>use</strong> this cycle to wash white clothes. The<br />
programme is designed to maintain the brightness of white<br />
clothes over time.<br />
If the drying function is selected, a drying cycle<br />
automatically activates at the end of the wash cycle that<br />
resembles open-air drying, with the added advantages<br />
of preserving garments from yellowing due to sunlight<br />
exposure <strong>and</strong> preventing loss of whiteness ca<strong>use</strong>d by the<br />
possible presence of dust in the air. Drying cycles can only<br />
be selected on a level basis.<br />
Coloureds: <strong>use</strong> this cycle to wash bright coloured<br />
clothes. The programme is designed to maintain bright<br />
colours over time.<br />
Darks: Use cycle to wash dark-coloured garments.<br />
This programme is designed to maintain dark colours over<br />
time. We recommend using a liquid detergent <strong>for</strong> the best<br />
results when washing dark-coloured garments.<br />
When you select the drying function, at the end of the<br />
washing cycle the machine will automatically per<strong>for</strong>m a<br />
delicate drying cycle that preserves the colours of the<br />
garments. The display will show the level “Hanger”.<br />
Max. load: 3 kg.<br />
Wool: the wool wash cycle on this <strong>Hotpoint</strong>-Ariston<br />
machine has been tested <strong>and</strong> approved by The Woolmark<br />
Company <strong>for</strong> washing wool garments labelled as h<strong>and</strong><br />
washable provided that the garments are washed<br />
according to the instructions on the garment label <strong>and</strong><br />
those issued by the manufacturer of this Washer-dryer.<br />
<strong>Hotpoint</strong>-Ariston is the first Washer-dryer br<strong>and</strong> to be<br />
approved by The Woolmark Company <strong>for</strong> Apparel Care-<br />
Platinum <strong>for</strong> its washing per<strong>for</strong>mance <strong>and</strong> consumption of<br />
energy <strong>and</strong> water. (M1135)<br />
In UK, Eire, Hong Kong <strong>and</strong> India the Woolmark trade mark<br />
is a Certification trade mark.<br />
Ultradelicates: <strong>use</strong> programme to wash very delicate<br />
garments having strasses or sequins.<br />
We recommend turning the garments inside out be<strong>for</strong>e<br />
washing <strong>and</strong> placing small items into the special bag<br />
<strong>for</strong> washing delicates. Use liquid detergent on delicate<br />
garments <strong>for</strong> best results.<br />
To wash Silk garments <strong>and</strong> Curtains select cycle <strong>and</strong><br />
then option (in this case it will also be possible to<br />
enable the “Extra Rinse” option); the machine will end the<br />
cycle while the laundry is soaking <strong>and</strong> the indicator<br />
light will flash. To drain the water so that the laundry may<br />
be removed, press the START/PAUSE button or the<br />
button.<br />
When selecting an exclusively time-based drying function,<br />
a drying cycle is per<strong>for</strong>med at the end of the wash cycle<br />
that is particularly delicate, thanks to light h<strong>and</strong>ling <strong>and</strong><br />
appropriate temperature control of the water jet.<br />
The recommended durations are:<br />
1 kg of synthetic garments --> 160 min<br />
1 kg of synthetic <strong>and</strong> cotton garments --> 180 min<br />
1 kg of cotton garments --> 180 min<br />
The degree of dryness depends on the load <strong>and</strong> fabric<br />
composition.<br />
Anti Allergy: <strong>use</strong> programme to remove major<br />
allergens such as pollen, mites, cat’s <strong>and</strong> dog’s hair.<br />
Wash&Dry: select programme <strong>for</strong> washing <strong>and</strong> drying<br />
lightly soiled garments (Cotton <strong>and</strong> Synthetic) in a short time.<br />
This cycle may be <strong>use</strong>d to wash <strong>and</strong> dry a laundry load of<br />
up to 1 kg in just 45 minutes. To achieve optimum results,<br />
<strong>use</strong> liquid detergent <strong>and</strong> pre-treat cuffs, collars <strong>and</strong> stains.<br />
Stubborn stains: it is wise to treat stubborn stains with<br />
solid soap be<strong>for</strong>e washing, <strong>and</strong> to <strong>use</strong> the Cottons with<br />
pre-wash cycle.<br />
Load balancing system<br />
Be<strong>for</strong>e every spin cycle, to avoid excessive vibrations<br />
be<strong>for</strong>e every spin <strong>and</strong> to distribute the load in a uni<strong>for</strong>m<br />
manner, the drum rotates continuously at a speed which<br />
is slightly greater than the washing rotation speed. If,<br />
after several attempts, the load is not balanced correctly,<br />
the machine spins at a reduced spin speed. If the load is<br />
excessively unbalanced, the Washer-dryer per<strong>for</strong>ms the<br />
distribution process instead of spinning. To encourage<br />
improved load distribution <strong>and</strong> balance, we recommend<br />
small <strong>and</strong> large garments are mixed in the load.<br />
10
Trouble shooting<br />
Your Washer-dryer could occasionally fail to work. Be<strong>for</strong>e contacting the Technical Assistance Centre (see “Assistance”),<br />
make sure that the problem cannot be solved easily using the following list.<br />
EN<br />
Problem:<br />
The Washer-dryer does not switch<br />
on.<br />
The wash cycle does not start.<br />
The Washer-dryer does not fill with<br />
water.<br />
The Washer-dryer door remains<br />
locked.<br />
The machine continuously fills with<br />
water <strong>and</strong> drains.<br />
The Washer-dryer does not drain or<br />
spin.<br />
The machine vibrates a lot during<br />
the spin cycle.<br />
The Washer-dryer leaks.<br />
The icons corresponding to the<br />
“Phase in progress” flash rapidly<br />
at the same time as the ON/OFF<br />
indicator light.<br />
There is too much foam.<br />
The Washer-dryer door remains<br />
locked.<br />
The washer-dryer does not dry.<br />
Possible ca<strong>use</strong>s / Solutions:<br />
• The appliance is not plugged into the socket fully, or not enough to make<br />
contact.<br />
• There is no power in the ho<strong>use</strong>.<br />
• The door is not closed properly.<br />
• The START/PAUSE button has not been pressed.<br />
• The water tap has not been opened.<br />
• A delayed start has been set.<br />
• The water inlet hose is not connected to the tap.<br />
• The hose is bent.<br />
• The water tap has not been opened.<br />
• There is no water supply in the ho<strong>use</strong>.<br />
• The pressure is too low.<br />
• The START/PAUSE button has not been pressed.<br />
• If you have selected the function, at the end of the cycle the Washer-dryer<br />
drum will rotate slowly; to end the cycle press the START/PAUSE button or the<br />
button.<br />
• The drain hose is not fitted at a height between 65 <strong>and</strong> 100 cm from the floor<br />
(see “Installation”).<br />
• The free end of the hose is under water (see “Installation”).<br />
• If the dwelling is on one of the upper floors of a building, there may be<br />
problems relating to water drainage, causing the Washer-dryer to fill with water<br />
<strong>and</strong> drain continuously. Special anti-draining valves are available in shops <strong>and</strong><br />
help to prevent this inconvenience.<br />
• The wall drainage system is not fitted with a breather pipe.<br />
• The wash cycle does not include draining: Some wash cycles require the drain<br />
phase to be started manually (see “Wash cycles <strong>and</strong> options”).<br />
• The “Easy iron” option is enabled: to complete the wash cycle, press the<br />
START/PAUSE button (“Wash cycles <strong>and</strong> options”).<br />
• The drain hose is bent (see Installation).<br />
• The drainage duct is clogged.<br />
• The drum was not unlocked correctly during <strong>installation</strong> (see “Installation”).<br />
• The machine is not level (see “Installation” ).<br />
• The machine is trapped between cabinets <strong>and</strong> walls (see “Installation”).<br />
• The load is unbalanced (see “Detergents <strong>and</strong> laundry”).<br />
• The water inlet hose is not screwed on properly (see “Installation”).<br />
• The detergent dispenser is blocked (to clean it, see “Care <strong>and</strong> maintenance”).<br />
• The drain hose is not fixed in place properly (see “Installation”).<br />
• Switch off the machine <strong>and</strong> unplug it, wait <strong>for</strong> approximately 1 minute <strong>and</strong><br />
then switch it back on again. If the problem persists, contact the Technical<br />
Assistance Service.<br />
• The detergent is not suitable <strong>for</strong> machine washing (it should display the text<br />
“<strong>for</strong> Washer-dryer” or “h<strong>and</strong> <strong>and</strong> machine wash”, or the like).<br />
• Too much detergent was <strong>use</strong>d.<br />
• Per<strong>for</strong>m the manual unlocking procedure (see “Precautions <strong>and</strong> tips”).<br />
• The appliance is not plugged into the socket, or not enough to make contact.<br />
• There has been a power failure.<br />
• The appliance door is not shut properly.<br />
• A DELAY TIMER has been set.<br />
• DRYING is in the OFF position.<br />
11
Assistance<br />
EN<br />
Be<strong>for</strong>e calling <strong>for</strong> Assistance:<br />
• Check whether you can solve the problem by yourself (see “Trouble shooting”);<br />
• Restart the wash cycle to check whether the problem has been solved;<br />
• If it has not, contact the Authorised Technical Assistance Service.<br />
! If the Washer-dryer has been installed or <strong>use</strong>d incorrectly, you will have to pay <strong>for</strong> the call-out service.<br />
! Always request the assistance of authorised technicians.<br />
Please have the following in<strong>for</strong>mation to h<strong>and</strong>:<br />
• the type of problem;<br />
• the appliance model (Mod.);<br />
• the serial number (S/N).<br />
The above in<strong>for</strong>mation can be found on the data plate located on the appliance itself.<br />
! Note: to exit “Demo mode”, switch machine off, press <strong>and</strong> hold the two “START/PAUSE” <strong>and</strong> “ON/OFF” buttons<br />
simultaneously <strong>for</strong> 3 seconds.<br />
12
Istruzioni per<br />
l’installazione e l’uso<br />
LAVASCIUGA<br />
! Questo simbolo ti ricorda di leggere questo libretto istruzioni.<br />
I<br />
I<br />
Italiano<br />
Sommario<br />
Installazione, 14-15<br />
Disimballo e livellamento<br />
Collegamenti idraulici ed elettrici<br />
Dati tecnici<br />
Manutenzione e cura, 16<br />
Escludere acqua e corrente elettrica<br />
Pulire la macchina<br />
Pulire il cassetto dei detersivi<br />
Curare il cestello<br />
Pulire la pompa<br />
Controllare il tubo di alimentazione dell’acqua<br />
AQUALTIS<br />
AQD1070D 69<br />
Precauzioni e consigli, 17<br />
Sicurezza generale<br />
Smaltimento<br />
Apertura manuale della porta oblò<br />
Descrizione della macchina, 18-19<br />
Pannello com<strong>and</strong>i touch control<br />
Come effettuare un ciclo di lavaggio o<br />
asciugatura, 20<br />
Programmi e opzioni, 21<br />
Tabella Programmi<br />
Le opzioni di lavaggio<br />
Detersivi e biancheria, 22<br />
Detersivo<br />
Preparare la biancheria<br />
Consigli di lavaggio<br />
Sistema bilanciamento del carico<br />
Anomalie e rimedi, 23<br />
Assistenza, 24<br />
Assistenza Attiva 7 giorni su 7<br />
13
Installazione<br />
I<br />
! E’ importante conservare questo libretto per<br />
poterlo consultare in ogni momento. In caso di<br />
vendita, di cessione o di trasloco, assicurarsi<br />
che resti insieme alla lavasciuga.<br />
! Leggere attentamente le istruzioni: ci sono<br />
importanti in<strong>for</strong>mazioni sull’installazione,<br />
sull’uso e sulla sicurezza.<br />
! Nella busta contenente questo libretto<br />
troverete, oltre alla garanzia, dei particolari che<br />
serviranno per l’installazione.<br />
Disimballo e livellamento<br />
Disimballo<br />
1. Una volta disimballata la lavasciuga,<br />
controllare che non abbia subito danni durante<br />
il trasporto.<br />
Se fosse danneggiata non collegarla e<br />
contattare il rivenditore.<br />
2. Rimuovere le 4 viti<br />
di protezione per il<br />
trasporto ed il relativo<br />
distanziale posti nella<br />
parte posteriore (vedi<br />
figura).<br />
! Un accurato livellamento dà stabilità ed<br />
evita vibrazioni e rumorosità soprattutto nella<br />
fase di centrifuga.<br />
! In caso sia posizionata su moquette<br />
o tappeti, regolare i piedini in modo da<br />
conservare sotto la lavasciuga lo spazio<br />
necessario per la ventilazione.<br />
Collegamenti idraulici ed elettrici<br />
Collegamento del tubo di alimentazione<br />
dell’acqua<br />
! Prima di collegare il tubo di alimentazione<br />
alla rete idrica, far scorrere l’acqua finché non<br />
sia limpida.<br />
1. Collegare il tubo<br />
di alimentazione<br />
alla macchina<br />
avvit<strong>and</strong>olo<br />
all’apposita presa<br />
d’acqua, nella parte<br />
posteriore in alto a<br />
destra (vedi figura).<br />
3. Chiudere i <strong>for</strong>i con i tappi di plastica<br />
contenuti nella busta.<br />
4. Conservare tutti i pezzi; qualora la lavasciuga<br />
dovesse essere trasportata, dovranno essere<br />
rimontati per evitare danneggiamenti interni.<br />
! Gli imballaggi non sono giocattoli per bambini.<br />
Livellamento<br />
1. Posizionare la lavasciuga su un pavimento<br />
piano e rigido, senza appoggiarla a muri o<br />
mobili.<br />
2. Compensare le<br />
irregolarità svit<strong>and</strong>o<br />
o avvit<strong>and</strong>o i piedini<br />
finchè la macchina non<br />
sia orizzontale (non<br />
deve essere inclinata<br />
più di 2 gradi).<br />
2. Collegare il tubo<br />
di alimentazione<br />
avvit<strong>and</strong>olo a un<br />
rubinetto d’acqua<br />
fredda con bocca<br />
filettata da 3/4 gas<br />
(vedi figura).<br />
3. Fare attenzione che nel tubo non ci siano<br />
né pieghe né strozzature.<br />
! La pressione idrica del rubinetto deve<br />
essere compresa nei valori della tabella Dati<br />
tecnici (vedi pagina a fianco).<br />
! Se la lunghezza del tubo di alimentazione<br />
non fosse sufficiente, rivolgersi a un negozio<br />
specializzato o a un tecnico autorizzato.<br />
! Non utilizzare mai tubi di carico usati o<br />
vecchi, ma quelli in dotazione alla macchina.<br />
14
Collegamento del tubo di scarico<br />
65 - 100 cm<br />
immersa nell’acqua.<br />
Collegare il tubo<br />
di scarico a una<br />
conduttura di<br />
scarico o a uno<br />
scarico a muro posti<br />
tra 65 e 100 cm<br />
da terra evit<strong>and</strong>o<br />
assolutamente di<br />
piegarlo.<br />
In alternativa,<br />
appoggiare il tubo<br />
di scarico al bordo<br />
di un lav<strong>and</strong>ino o di<br />
una vasca, leg<strong>and</strong>o<br />
la guida in dotazione<br />
al rubinetto (vedi<br />
figura).<br />
L’estremità libera<br />
del tubo di scarico<br />
non deve rimanere<br />
! È sconsigliato usare tubi di prolunga; se<br />
indispensabile, la prolunga deve avere lo<br />
stesso diametro del tubo originale e non<br />
superare i 150 cm.<br />
Collegamento elettrico<br />
Prima di inserire la spina nella presa della<br />
corrente, accertarsi che:<br />
• la presa abbia la messa a terra e sia a<br />
norma di legge;<br />
• la presa sia in grado di sopportare il carico<br />
massimo di potenza della macchina,<br />
indicato nella tabella Dati tecnici (vedi a<br />
fianco);<br />
• la tensione di alimentazione sia compresa<br />
nei valori indicati nella tabella Dati tecnici (vedi<br />
a fianco);<br />
• la presa sia compatibile con la spina della<br />
macchina. In caso contrario far sostituire la<br />
presa o la spina.<br />
! La macchina non va installata all’aperto,<br />
nemmeno se lo spazio è riparato, perché è<br />
molto pericoloso lasciarla esposta a pioggia e<br />
temporali.<br />
! A macchina installata, la presa della<br />
corrente deve essere facilmente raggiungibile.<br />
! Non usare prolunghe e multiple.<br />
! Il cavo non deve subire piegature o<br />
compressioni.<br />
! Il cavo di alimentazione e la spina devono<br />
essere sostituiti solo da tecnici autorizzati.<br />
Attenzione! L’azienda declina ogni<br />
responsabilità qualora queste norme non<br />
vengano rispettate.<br />
Dati tecnici<br />
Modello AQD1070D 69<br />
Dimensioni<br />
Capacità<br />
Collegamenti<br />
elettrici<br />
Collegamenti<br />
idrici<br />
Velocità di<br />
centrifuga<br />
Programmi<br />
di prova<br />
secondo la<br />
direttiva<br />
EN 50229<br />
larghezza cm 59,5<br />
altezza cm 85<br />
profondità cm 64,5<br />
da 1 a 10 kg per il lavaggio<br />
da 1 a 7 kg per l’asciugatura<br />
vedi la targhetta caratteristiche<br />
tecniche applicata sulla<br />
macchina<br />
pressione massima 1 MPa<br />
(10 bar)<br />
pressione minima 0,05 MPa<br />
(0,5 bar)<br />
capacità del cesto 71 litri<br />
sino a 1600 giri al minuto<br />
lavaggio: programma ;<br />
temperatura 60°C; effettuato<br />
con 10 kg di carico.<br />
asciugatura: l’asciugatura<br />
del carico minore deve essere<br />
effettuata selezion<strong>and</strong>o<br />
il livello di asciugatura<br />
“EXTRA”, il carico di biancheria<br />
deve essere composto<br />
da 3 lenzuola, 2 federe e<br />
1 asciugamano;<br />
l’asciugatura del carico<br />
restante deve essere effettuata<br />
selezion<strong>and</strong>o il livello di<br />
asciugatura “EXTRA”.<br />
Questa apparecchiatura è<br />
con<strong>for</strong>me alle seguenti Direttive<br />
Comunitarie:<br />
- 2004/108/CE (Compatibilità<br />
Elettromagnetica)<br />
- 2002/96/CE<br />
- 2006/95/CE (Bassa Tensione)<br />
I<br />
15
Manutenzione e cura<br />
I<br />
Escludere acqua e corrente<br />
elettrica<br />
• Chiudere il rubinetto dell’acqua dopo ogni<br />
lavaggio. Si limita così l’usura dell’impianto<br />
idraulico della macchina e si elimina il pericolo<br />
di perdite.<br />
• Staccare la spina della corrente qu<strong>and</strong>o<br />
si pulisce la macchina e durante i lavori di<br />
manutenzione.<br />
Pulire la macchina<br />
La parte esterna e le parti in gomma possono<br />
essere puliti con un panno imbevuto di acqua<br />
tiepida e sapone. Non usare solventi o abrasivi.<br />
Pulire il cassetto dei detersivi<br />
1<br />
2<br />
1<br />
Curare il cestello<br />
Per estrarre il cassetto<br />
premere la leva (1) e<br />
tirarlo verso l’esterno (2)<br />
(vedi figura).<br />
Lavarlo sotto l’acqua<br />
corrente; questa pulizia<br />
va effettuata<br />
frequentemente.<br />
• Lasciare sempre socchiusa la porta oblò per<br />
evitare che si <strong>for</strong>mino cattivi odori.<br />
Pulire la pompa<br />
2<br />
La macchina è dotata di una pompa<br />
autopulente che non ha bisogno di<br />
manutenzione. Può però succedere che<br />
piccoli oggetti (monete, bottoni) cadano nella<br />
precamera che protegge la pompa, situata nella<br />
parte inferiore di essa.<br />
! Assicurarsi che il ciclo di lavaggio sia<br />
terminato e staccare la spina.<br />
Per accedere alla precamera:<br />
1<br />
2<br />
1. rimuovere il pannello di copertura sul lato<br />
anteriore della macchina premendo verso<br />
il centro, quindi spingere verso il basso da<br />
entrambe i lati ed estrarlo (vedi figure);<br />
2. posizionare un<br />
contenitore per<br />
raccogliere l’acqua<br />
che uscirà (circa 1,5<br />
lt) (vedi figura);<br />
3. svitare il coperchio<br />
ruot<strong>and</strong>olo in senso<br />
antiorario (vedi figura);<br />
4. pulire accuratamente l’interno;<br />
5. riavvitare il coperchio;<br />
6. rimontare il pannello assicur<strong>and</strong>osi, prima<br />
di spingerlo verso la macchina, di aver<br />
inserito i ganci nelle apposite asole.<br />
Controllare il tubo di<br />
alimentazione dell’acqua<br />
Controllare il tubo di alimentazione almeno<br />
una volta all’anno. Se presenta screpolature e<br />
fessure va sostituito: durante i lavaggi le <strong>for</strong>ti<br />
pressioni potrebbero provocare improvvise<br />
spaccature.<br />
16
Precauzioni e consigli<br />
! La macchina è stata progettata e costruita in con<strong>for</strong>mità<br />
alle norme internazionali di sicurezza. Queste avvertenze<br />
sono <strong>for</strong>nite per ragioni di<br />
sicurezza e devono essere lette attentamente.<br />
Sicurezza generale<br />
• Questo apparecchio è stato concepito esclusivamente<br />
per un uso di tipo domestico.<br />
• L’apparecchio non deve essere utilizzato da persone<br />
(bambini compresi) con capacità fisiche, sensoriali<br />
o mentali ridotte e con esperienze e conoscenze<br />
insufficienti, a meno che tale utilizzo non avvenga sotto la<br />
supervisione o le istruzioni di una persona responsabile<br />
della loro sicurezza.<br />
I bambini devono essere sorvegliati per garantire che non<br />
giochino con l’apparecchio.<br />
- Non asciugare capi non lavati.<br />
- I capi sporchi di sostanze quali l’olio di cottura,<br />
l’acetone, l’alcol, la benzina, il cherosene, gli<br />
smacchiatori, la trementina, la cera e le sostanze per<br />
rimuoverla devono essere lavati in acqua calda con<br />
una quantità maggiore di detergente prima di asciugarli<br />
nell’asciugabiancheria.<br />
- Oggetti come la gomma espansa (schiuma di lattice),<br />
le cuffie per la doccia, i materiali tessili impermeabili, gli<br />
articoli con un lato di gomma e i vestiti o i cuscini che<br />
hanno delle parti in schiuma di lattice non devono essere<br />
asciugati nell’asciugabiancheria.<br />
- Ammorbidenti o prodotti simili devono essere usati<br />
con<strong>for</strong>memente alle istruzioni del produttore.<br />
- La parte finale di un ciclo dell’asciugabiancheria avviene<br />
senza calore (ciclo di raffreddamento) per garantire che gli<br />
articoli non vengano danneggiati.<br />
ATTENZIONE: Non arrestare mai un’asciugabiancheria<br />
prima del termine del programma di asciugatura.<br />
In questo caso prelevare rapidamente tutti i capi di<br />
biancheria e stenderli per farli raffreddare rapidamente.<br />
• Non toccare la macchina a piedi nudi o con le mani o i<br />
piedi bagnati o umidi.<br />
• Non staccare la spina dalla presa della corrente tir<strong>and</strong>o il<br />
cavo, bensì afferr<strong>and</strong>o la spina.<br />
• Non toccare l’acqua di scarico, che può raggiungere<br />
temperature elevate.<br />
• Non <strong>for</strong>zare in nessun caso la porta l’oblò: potrebbe<br />
danneggiarsi il meccanismo di sicurezza che protegge<br />
da aperture accidentali.<br />
• In caso di guasto, in nessun caso accedere ai<br />
meccanismi interni per tentare una riparazione.<br />
• Controllare sempre che i bambini non si avvicinino<br />
alla macchina in funzione.<br />
• Se deve essere spostata, lavorare in due o tre persone<br />
con la massima attenzione. Mai da soli perché la<br />
macchina è molto pesante.<br />
• Prima di introdurre la biancheria controllare che il cestello<br />
sia vuoto.<br />
• Durante l’asciugatura l’oblò tende a scaldarsi.<br />
• Non asciugare biancheria lavata con solventi<br />
infiammabili (es. trielina).<br />
• Non asciugare gommapiuma o elastomeri analoghi.<br />
• Assicurati che durante le fasi di asciugatura il<br />
rubinetto dell’acqua sia aperto.<br />
Smaltimento<br />
• Smaltimento del materiale di imballaggio: attenersi<br />
alle norme locali, così gli imballaggi potranno essere<br />
riutilizzati.<br />
• La direttiva Europea 2002/96/CE sui rifiuti di<br />
apparecchiature elettriche ed elettroniche, prevede che<br />
gli elettrodomestici non debbano essere smaltiti nel<br />
normale flusso dei rifiuti solidi urbani. Gli apparecchi<br />
dismessi devono essere raccolti separatamente<br />
per ottimizzare il tasso di recupero e riciclaggio dei<br />
materiali che li compongono ed impedire potenziali<br />
danni per la salute e l’ambiente. Il simbolo del cestino<br />
barrato è riportato su tutti i prodotti per ricordare gli<br />
obblighi di raccolta separata.<br />
Per ulteriori in<strong>for</strong>mazioni, sulla corretta dismissione<br />
degli elettrodomestici, i detentori potranno rivolgersi al<br />
servizio pubblico preposto o ai rivenditori.<br />
Apertura manuale della porta oblò<br />
In mancanza di energia elettrica è possibile aprire la porta<br />
per scaricare il bucato procedendo nel modo seguente:<br />
1. togliere la spina dalla<br />
presa di corrente.<br />
2. verificate che il livello<br />
dell’acqua all’interno della<br />
macchina sia inferiore<br />
rispetto all’apertura dell’oblò;<br />
in caso contrario togliere<br />
l’acqua in eccedenza<br />
attraverso il tubo di scarico<br />
raccogliendola in un secchio<br />
come indicato in figura.<br />
3. rimuovere il pannello di copertura sul lato anteriore<br />
della lavabiancheria (vedi pagina seguente).<br />
4. utilizz<strong>and</strong>o la linguetta indicata in figura tirare verso<br />
l’esterno fino a liberare il tirante in plastica dal fermo;<br />
tirarlo successivamente verso il basso fino a sentire un<br />
“click” che indica che la porta è sbloccata.<br />
5. aprite la porta; nel caso non sia ancora possibile<br />
ripetete l’operazione.<br />
6. rimontare il pannello assicur<strong>and</strong>osi, prima di spingerlo<br />
verso la macchina, di aver inserito i ganci nelle apposite<br />
asole.<br />
I<br />
17
210<br />
180<br />
150<br />
120<br />
90<br />
60<br />
Descrizione della macchina<br />
I<br />
PORTA OBLÒ<br />
PANNELLO<br />
COMANDI TOUCH<br />
CONTROL<br />
MANIGLIA<br />
PORTA OBLÒ<br />
ZOCCOLO<br />
PIEDINI REGOLABILI<br />
PORTA OBLO’<br />
Per aprire la porta oblò<br />
utilizzare sempre l’apposita<br />
maniglia (vedi figura).<br />
Per l’utilizzo del detersivo in polvere riporre la paretina<br />
nella cavità B.<br />
3. vaschetta aggiuntiva: C<strong>and</strong>eggina<br />
! L’utilizzo della vaschetta aggiuntiva 3 esclude il<br />
prelavaggio.<br />
vaschetta per additivi: per ammorbidente o additivi<br />
liquidi. Si raccom<strong>and</strong>a di non superare mai il livello<br />
massimo indicato dalla griglia e di diluire ammorbidenti<br />
concentrati.<br />
CASSETTO DEI DETERSIVI<br />
Si trova all’interno della macchina<br />
e vi si accede aprendo la<br />
porta. Per il dosaggio dei detersivi<br />
vedi il capitolo “Detersivi<br />
e biancheria”.<br />
PANNELLO COMANDI TOUCH CONTROL<br />
Per modificare le<br />
impostazioni premere<br />
leggermente sull’icona<br />
all’interno dell’area sensibile<br />
(touch control) come<br />
indicato nella figura.<br />
B<br />
A<br />
2<br />
3<br />
1<br />
1. vaschetta per il prelavaggio:<br />
usare detersivo in polvere.<br />
! Prima di versare il detersivo<br />
verificare che non sia inserita la<br />
vaschetta aggiuntiva 3.<br />
2. vaschetta per il lavaggio:<br />
Nel caso di utilizzo di detersivo<br />
liquido si consiglia di utilizzare<br />
la paretina A in dotazione per<br />
un corretto dosaggio.<br />
Modalità di st<strong>and</strong> by<br />
Questa lavatrice, in con<strong>for</strong>mità alle nuove normative<br />
legate al risparmio energetico, è dotata di un sistema<br />
di autospegnimento (st<strong>and</strong> by) che entra in funzione<br />
dopo circa 30 minuti nel caso di non utilizzo. Premere<br />
brevemente il tasto ON/OFF e attendere che la macchina<br />
si riattivi.<br />
Consumo in off-mode: 0,5 W<br />
Consumo in Left-on: 0,5 W<br />
18
Pannello com<strong>and</strong>i touch control<br />
Manopola<br />
PROGRAMMI<br />
M2<br />
M1<br />
Pulsante<br />
CENTRIFUGA<br />
Pulsante<br />
TEMPERATURA<br />
Pulsante con spia<br />
START/PAUSE<br />
Spia<br />
ECO<br />
Icone<br />
FASI DI<br />
LAVAGGIO<br />
I<br />
DISPLAY<br />
ON/OFF<br />
Pulsante<br />
ASCIUGATURA<br />
ON/OFF : premere brevemente il pulsante per accendere<br />
o spegnere la macchina. La spia verde indica che la macchina<br />
è accesa. Per spegnere la lavasciuga durante il lavaggio è<br />
necessario tenere premuto il pulsante più a lungo, circa 3<br />
sec.; una pressione breve o accidentale non permetterà lo<br />
spegnimento della macchina. Lo spegnimento della macchina<br />
durante un lavaggio in corso annulla il lavaggio stesso.<br />
Manopola PROGRAMMI: può essere ruotata in entrambe le<br />
direzioni. Per impostare il programma più corretto vedi la “Tabella<br />
programmi”. Durante il lavaggio la manopola resta ferma.<br />
M1-M2: tenere premuto uno dei pulsanti per memorizzare<br />
un ciclo e le proprie personalizzazioni preferite. Per<br />
richiamare un ciclo precedentemente memorizzato premere<br />
il relativo pulsante.<br />
Pulsante ASCIUGATURA: premere per ridurre<br />
o escludere l’asciugatura; il livello o il tempo di<br />
asciugatura selezionato viene indicato nel display (vedi<br />
“Come effettuare un ciclo di lavaggio o asciugatura o<br />
asciugatura”).<br />
Pulsante TEMPERATURA: premere per modificare<br />
o escludere la temperatura; il valore scelto viene indicato<br />
dal display (vedi “Come effettuare un ciclo di lavaggio o<br />
asciugatura”).<br />
Pulsante CENTRIFUGA: premere per modificare<br />
o escludere la centrifuga; il valore scelto viene indicato<br />
dal display (vedi “Come effettuare un ciclo di lavaggio o<br />
asciugatura”).<br />
Pulsante PARTENZA RITARDATA: premere per<br />
impostare una partenza ritardata del programma prescelto;<br />
il valore del ritardo impostato viene indicato dal display (vedi<br />
“Come effettuare un ciclo di lavaggio o asciugatura”).<br />
Pulsanti OPZIONI: premendo il pulsante, sul display<br />
comparirà il nome dell’opzione. L’accensione della relativa<br />
spia indica che l’opzione è stata selezionata.<br />
Icone FASI DI LAVAGGIO: si illuminano ad indicare<br />
l’avanzamento del ciclo (Lavaggio - Risciacquo -<br />
Centrifuga/Scarico - Asciugatura ). La scritta si<br />
illumina qu<strong>and</strong>o il ciclo è terminato.<br />
Pulsanti<br />
OPZIONI<br />
Pulsante<br />
PARTENZA<br />
RITARDATA<br />
Spia<br />
LOCK<br />
BLOCCO<br />
TASTI<br />
START/PAUSE: qu<strong>and</strong>o la spia verde lampeggia lentamente,<br />
premere il pulsante per avviare un lavaggio. A ciclo avviato la<br />
spia diventa fissa. Per mettere in pausa il lavaggio, premere<br />
nuovamente il pulsante; la spia lampeggerà con colore<br />
arancione. Se la spia “LOCK” è spenta, si potrà aprire la<br />
porta oblò. Per far ripartire il lavaggio dal punto in cui è stato<br />
interrotto, premere nuovamente il pulsante.<br />
Spia LOCK: indica che la porta oblò è bloccata. Per aprire<br />
la porta è necessario mettere il ciclo in pausa (vedi pagina<br />
seguente).<br />
BLOCCO TASTI: per attivare o disattivare il blocco del<br />
pannello com<strong>and</strong>i, tenere premuto il pulsante per circa 2<br />
secondi. La spia accesa indica che il pannello di controllo è<br />
bloccato (ad eccezione del tasto ON/OFF). In questo modo si<br />
impediscono modifiche accidentali dei programmi, soprattutto<br />
se in casa ci sono dei bambini.<br />
Spia ECO: l’icona si accenderà qu<strong>and</strong>o, modific<strong>and</strong>o<br />
i parametri di lavaggio, si otterrà un risparmio di energia<br />
di almeno il 10%. Inoltre prima che la macchina entri nella<br />
modalità di “St<strong>and</strong> by” l’icona si accenderà per pochi<br />
secondi; a macchina spenta il recupero energetico stimato<br />
sarà dell’80% circa.<br />
MODIFICA LINGUA<br />
Alla prima accensione della macchina appare nel display la<br />
prima lingua lampeggiante. In corrispondenza dei 3 pulsanti<br />
a destra del display compaiono i simboli “ “ , “OK” e “V”. Le<br />
lingue cambiano automaticamente ogni 3’’ oppure premendo<br />
i pulsanti accanto i simboli “ “ e “V”. Con il pulsante “OK”<br />
si conferma la lingua che si fissa dopo 2’’. Se non si preme<br />
nessun pulsante, trascorsi 30’’ il cambio automatico delle<br />
lingue ricomincia.<br />
Per modificare la lingua è necessario accendere e<br />
spegnere la macchina, nei 30” successivi allo spegnimento<br />
premere contemporaneamente i pulsanti temperatura<br />
+centrifuga +partenza ritardata per 5’’ e oltre ad un<br />
breve segnale acustico appare nel display la lingua impostata<br />
lampeggiante. Premendo i pulsanti accanto i simboli “ “ e “V”<br />
si cambia la lingua. Con il pulsante accanto il simbolo “OK” si<br />
conferma la lingua che si fissa dopo 2’’. Se non si preme nessun<br />
pulsante, trascorsi 30’’ verrà visualizzata la lingua impostata<br />
precedentemente. Riaccendere la macchina.<br />
19
Come effettuare un ciclo di lavaggio<br />
o asciugatura<br />
I<br />
NOTA: la prima volta che si utilizza la lavasciuga, effettuare un<br />
ciclo di lavaggio senza biancheria ma con detersivo impost<strong>and</strong>o<br />
il programma cotone 90° senza prelavaggio.<br />
1. ACCENDERE LA MACCHINA. Premere il pulsante<br />
. Tutte le spie si accenderanno per 1 secondo e sul display<br />
comparirà la scritta AQUALTIS; rimarrà poi accesa fissa la<br />
spia del pulsante e la spia START/PAUSE lampeggerà.<br />
2. SCEGLIERE IL PROGRAMMA. Ruotare la MANOPOLA<br />
PROGRAMMI verso destra o verso sinistra fino a selezionare il<br />
programma desiderato; il nome del programma comparirà sul<br />
display; ad esso è associata una temperatura e una velocità<br />
di centrifuga che possono essere modificate. Sul display<br />
comparirà la durata del ciclo.<br />
3. CARICARE LA BIANCHERIA. Aprire la porta oblò.<br />
Caricare la biancheria facendo attenzione a non superare<br />
la quantità di carico indicata nella tabella programmi della<br />
pagina seguente.<br />
4. DOSARE IL DETERSIVO. Estrarre il cassetto e versare<br />
il detersivo nelle apposite vaschette come spiegato in<br />
“Descrizione della macchina”.<br />
5. CHIUDERE LA PORTA OBLO’.<br />
6. PERSONALIZZARE IL CICLO DI LAVAGGIO. Agire sugli<br />
appositi pulsanti del pannello com<strong>and</strong>i:<br />
Modificare la temperatura e/o la centrifuga. La macchina<br />
visualizza automaticamente la temperatura e la centrifuga<br />
massime previste per il programma impostato o le ultime<br />
selezionate se compatibili con il programma scelto.<br />
Premendo il pulsante si riduce progressivamente la<br />
temperatura sino al lavaggio a freddo “OFF”. Premendo il<br />
pulsante si riduce progressivamente la centrifuga sino<br />
alla sua esclusione “OFF”. Un’ulteriore pressione dei pulsanti<br />
riporterà i valori a quelli massimi previsti.<br />
! Eccezione: selezion<strong>and</strong>o il programma la temperatura<br />
può essere portata sino a 90°.<br />
Modificare l’asciugatura<br />
Alla prima pressione del tasto la macchina seleziona<br />
automaticamente il livello di asciugatura massimo compatibile<br />
al programma selezionato. Le successive pressioni fanno<br />
decrementare il livello e successivamente il tempo di asciugatura<br />
fino alla sua esclusione “OFF”. Un’ulteriore pressione del pulsante<br />
riporterà il valore a quello massimo previsto.<br />
Sono previste due tipi di asciugatura:<br />
A - In base al tempo: da 20’ a 180’.<br />
B - In base al livello di umidità dei capi asciugati:<br />
Stirare: capi leggermente umidi, facili da stirare.<br />
Appendere: ideale per quei capi che non necessitano di<br />
un’asciugatura completa.<br />
Ripiegare: adatto per il bucato da riporre nell’armadio senza<br />
bisogno di stiratura.<br />
Extra: adatto capi che necessitano di un’asciugatura<br />
completa come spugne e accappatoi.<br />
Se eccezionalmente il carico di biancheria da lavare ed asciugare<br />
è superiore al massimo previsto effettuare il lavaggio, e a<br />
programma ultimato, dividere il carico e rimetterne una parte<br />
nel cestello. Seguire a questo punto le istruzioni per effettuare<br />
“SOLO ASCIUGATURA”. Ripeti le stesse operazioni per il<br />
carico rimanente.<br />
Alla fine dell’asciugatura viene effettuato un periodo di<br />
raffreddamento.<br />
SOLO ASCIUGATURA<br />
Selezionare con la manopola dei programmi un’asciugatura<br />
( - - ) in base al tipo di tessuto. È possibile impostare<br />
anche il livello o il tempo di asciugatura desiderato con il<br />
pulsante ASCIUGATURA .<br />
Impostare una partenza ritardata.<br />
Per impostare la partenza ritardata del programma<br />
prescelto, premere il pulsante relativo fino a raggiungere il<br />
tempo di ritardo desiderato. Durante l’impostazione viene<br />
visualizzato il tempo di ritardo insieme alla scritta “Parte<br />
tra:” e il simbolo lampeggiante. Dopo aver impostato<br />
la partenza ritardata il Display visualizzerà il simbolo<br />
fisso e il display ritornerà alla visualizzazione della<br />
durata del ciclo impostato con le scritte “Finisce tra:”<br />
e la durata del ciclo. Premendo il pulsante PARTENZA<br />
RITARDATA una sola volta viene visualizzato il tempo di<br />
ritardo impostato precedentemente. Dopo l’avvio il display<br />
visualizzerà la scritta “Parte tra:” ed il tempo di ritardo. Una<br />
volta trascorso il tempo di ritardo impostato, la macchina<br />
partirà e il display visualizzerà “Finisce tra:” e il tempo<br />
residuo per la fine ciclo. Per rimuovere la partenza ritardata<br />
premere il pulsante fino a che sul display compare la scritta<br />
OFF; il simbolo si spegnerà.<br />
Modificare le caratteristiche del ciclo.<br />
• Premere il pulsante per attivare l’opzione; sul<br />
display comparirà il nome dell’opzione e la spia<br />
corrispondente al pulsante si accenderà.<br />
• Premere nuovamente il pulsante per disattivare<br />
l’opzione; sul display comaprirà il nome dell’opzione<br />
più OFF e la spia si spegnerà.<br />
! Se l’opzione selezionata non è compatibile con il<br />
programma impostato, l’incompatibilità verrà segnalata<br />
con il lampeggio della spia ed un segnale acustico<br />
(3 beep) e l’opzione non verrà attivata.<br />
! Se l’opzione selezionata non è compatibile con un’altra<br />
precedentemente impostata, la spia relativa alla prima<br />
opzione selezionata lampeggerà e verrà attivata solo la<br />
seconda, la spia dell’opzione attivata si fisserà.<br />
! Le opzioni possono variare il carico raccom<strong>and</strong>ato e/o la<br />
durata del ciclo.<br />
7. AVVIARE IL PROGRAMMA. Premere il pulsante START/<br />
PAUSE. La spia relativa si fisserà e la porta oblò si bloccherà<br />
(spia LOCK accesa). Durante il lavaggio, sul display<br />
comparirà il nome della fase in corso e le icone relative alle<br />
fasi si illumineranno. Per cambiare un programma mentre<br />
un ciclo è in corso, mettere la lavasciuga in pausa<br />
premendo il pulsante START/PAUSE; selezionare quindi il<br />
ciclo desiderato e premere nuovamente il pulsante START/<br />
PAUSE. Per aprire la porta mentre un ciclo è in corso<br />
premere il pulsante START/PAUSE; se la spia LOCK è<br />
spenta sarà possibile aprire la porta. Premere nuovamente<br />
sul pulsante START/PAUSE per far ripartire il programma dal<br />
punto in cui era stato interrotto.<br />
8. FINE DEL PROGRAMMA. Viene indicata dalla<br />
scritta END accesa. La porta oblò si potrà aprire<br />
immediatamente. Se la spia START/PAUSE lampeggia,<br />
premere il pulsante per terminare il ciclo. Aprire la porta,<br />
scaricare la biancheria e spegnere la macchina.<br />
! Se si desidera annullare un ciclo già avviato, premere a lungo il<br />
pulsante . Il ciclo verrà interrotto e la macchina si spegnerà.<br />
20
Programmi e opzioni<br />
Tabella programmi<br />
Icona<br />
Descrizione del Programma<br />
Temp.<br />
max.<br />
(°C)<br />
Detersivi e additivi<br />
Velocità<br />
max. Asciugatura<br />
(giri al<br />
minuto)<br />
Prelavaggigigina<br />
Lavag-<br />
C<strong>and</strong>eg-<br />
Ammorbidente<br />
Cotone colorati (2): bianchi e colorati delicati poco sporchi. 40° 1600 • - • • • 10<br />
Sintetici resistenti 60° 800 • - • • • 5<br />
Bianchi 60° 1600 • - • - • 6<br />
Colorati 40° 1600 • - • • • 6<br />
Scuri 30° 800 • - • - • 6<br />
Lana Platinum Care: per lana, cachemire, ecc. 40° 800 • - • - • 2,5<br />
Ultra Delicati 30° 0 • - • - • 1<br />
Antiallergy 60° 1600 • - • - • 6<br />
Risciacquo - 1600 • - - • • 10<br />
Centrifuga e Scarico - 1600 • - - - - 10<br />
Lava&Asciuga 30° 1600 • - • - • 1<br />
Asciugatura Cotone - - • - - - - 7<br />
Asciugatura Lana - - • - - - - 2,5<br />
Asciugatura Sintetici - - • - - - - 5<br />
Cotone con prelavaggio<br />
(Aggiungere il detersivo nell’apposito scomparto).<br />
90° 1600 • • • - • 10<br />
60°<br />
Cotone bianchi (1): bianchi e colorati resistenti molto sporchi.<br />
(Max. 90°C)<br />
1600 • - • • • 10<br />
La durata del ciclo indicata sul display o sul libretto è una stima calcolata in base a condizioni st<strong>and</strong>ard. Il tempo effettivo può variare in base a numerosi fattori quali la temperatura e la pressione<br />
dell’acqua in ingresso, la temperatura ambiente, la quantità di detersivo, la quantità ed il tipo di carico, il bilanciamento del carico, le opzioni aggiuntive selezionate.<br />
Carico<br />
max.<br />
(Kg)<br />
Durata<br />
ciclo<br />
(*) E’ possibile controllare la durata dei programmi<br />
di lavaggi sul display.<br />
I<br />
(*) Nota: dopo circa 10 minuti dallo START, la macchina in base al carico effettuato, ricalcolerà e visualizzera il tempo residuo alla fine del programma.<br />
Per tutti Test Institutes:<br />
1) Programma di controllo secondo la direttiva EN 50229: impostare il programma con una temperaura di 60°C.<br />
2) Programma cotone lungo: impostare il programma con una temperaura di 40°C.<br />
Opzioni di lavaggio<br />
Super Wash<br />
Questa opzione garantisce un lavaggio di alte prestazioni<br />
grazie all’utilizzo di una maggior quantità d’ acqua nella fase<br />
iniziale del ciclo e alla maggior durata del programma ed è<br />
utile per eliminare le macchie<br />
più resistenti.<br />
3<br />
1<br />
Può essere utilizzata con<br />
o senza c<strong>and</strong>eggina. Se si<br />
desidera effettuare anche il<br />
2<br />
c<strong>and</strong>eggio inserire la vaschetta<br />
aggiuntiva 3, in dotazione,<br />
nella vaschetta 1. Nel dosare<br />
la c<strong>and</strong>eggina non superare il<br />
livello “max” indicato sul perno<br />
centrale (vedi figura). Se si<br />
desidera solo c<strong>and</strong>eggiare<br />
senza effettuare il lavaggio completo, versare la<br />
c<strong>and</strong>eggina nella vaschetta aggiuntiva 3, impostare il<br />
programma “Risciacquo” e attivare l’opzione “Super<br />
Wash” .<br />
! Non è attivabile sui programmi , , , , , ,<br />
, , , , .<br />
Extra Risciacquo<br />
Selezion<strong>and</strong>o questa opzione si aumenta l’efficacia del<br />
risciacquo e si assicura la massima rimozione dei residui<br />
del detersivo. E’ utile per pelli particolarmente sensibili ai<br />
detersivi. Si consiglia l’utilizzo di questa opzione con la<br />
lavasciuga a pieno carico o con l’utilizzo di elevate dosi di<br />
detersivo.<br />
! Non è attivabile sui programmi , , , , , , , .<br />
Stira Facile<br />
Selezion<strong>and</strong>o questa opzione, il lavaggio e la centrifuga<br />
saranno opportunamente modificati per ridurre la<br />
<strong>for</strong>mazione di pieghe. Al temine del ciclo la lavasciuga<br />
effettuerà delle lente rotazioni del cestello; le spie<br />
“Stira Facile” e START/PAUSE lampeggeranno. Per<br />
terminare il ciclo premere il pulsante START/PAUSE o il<br />
pulsante “Stira Facile”.<br />
! Non è attivabile sui programmi , , , , , ,<br />
, , .<br />
Note: se si vuole effettuare anche un’asciugatura, questa<br />
opzione è attiva solo selezion<strong>and</strong>o il livello “Stirare”.<br />
Risparmio Tempo<br />
Selezion<strong>and</strong>o questa opzione si riduce la durata del<br />
programma fino al 50% in base al ciclo scelto, garantendo<br />
al contempo un risparmio di acqua ed energia. Utilizzare<br />
questo ciclo per capi non eccessivamente sporchi.<br />
! Non è attivabile sui programmi , , , , , , ,<br />
, , , .<br />
21
Detersivi e biancheria<br />
I<br />
Detersivo<br />
La scelta e la quantità del detersivo dipendono dal tipo di<br />
tessuto (cotone, lana, seta...), dal colore, dalla temperatura<br />
di lavaggio, dal grado di sporco e dalla durezza dell’acqua.<br />
Dosare bene il detersivo evita sprechi e protegge l’ambiente:<br />
pur biodegradabili, i detersivi contengono elementi che<br />
alterano l’equilibrio della natura. Si consiglia di:<br />
• usare detersivi in polvere per capi in cotone bianchi e per<br />
il prelavaggio.<br />
• usare detersivi liquidi per capi delicati in cotone e per tutti<br />
i programmi a bassa temperatura.<br />
• usare detersivi liquidi delicati per lana e seta.<br />
Il detersivo deve essere versato prima dell’inizio del<br />
lavaggio nell’apposita vaschetta, oppure nel dosatore da<br />
porre direttamente nel cestello. In questo caso non si può<br />
selezionare il ciclo Cotone con prelavaggio.<br />
! Non usare detersivi per il lavaggio a mano perché<br />
<strong>for</strong>mano troppa schiuma.<br />
Preparare la biancheria<br />
• Aprire bene i capi prima di caricarli.<br />
• Suddividere la biancheria secondo il tipo di tessuto<br />
(simbolo sull’etichetta del capo) ed il colore facendo<br />
attenzione a separare i capi colorati da quelli bianchi;<br />
• Svuotare le tasche e controllare i bottoni;<br />
• Non superare i valori indicati nella “Tabella Programmi”<br />
riferiti al peso della biancheria asciutta.<br />
Quanto pesa la biancheria?<br />
1 lenzuolo 400-500 gr.<br />
1 federa 150-200 gr.<br />
1 tovaglia 400-500 gr.<br />
1 accappatoio 900-1200 gr.<br />
1 asciugamano 150-250 gr.<br />
1 jeans 400-500 gr.<br />
1 camicia 150-200 gr.<br />
Consigli di lavaggio<br />
Bianchi: utilizzare il ciclo per il lavaggio dei capi<br />
bianchi. Il programma è studiato per il mantenimento della<br />
brillantezza del bianco nel tempo. Per risultati migliori si<br />
raccom<strong>and</strong>a l’utilizzo del detersivo in polvere.<br />
Selezion<strong>and</strong>o la funzione di asciugatura, al termine del<br />
lavaggio viene eseguita automaticamente un’asciugatura<br />
come all’aria aperta con i vantaggi di non favorire<br />
l’ingiallimento a causa dei raggi solari e di evitare la perdita<br />
del c<strong>and</strong>ore a causa del possibile pulviscolo presente<br />
nell’aria. Si possono impostare solo le asciugature a livelli.<br />
Colorati: utilizzare il ciclo per il lavaggio dei capi di<br />
colore chiaro. Il programma è studiato per il mantenimento<br />
della vivacità dei colori nel tempo.<br />
Scuri: utilizzare il ciclo per il lavaggio dei capi di colore<br />
scuro. Il programma è studiato per il mantenimento dei colori<br />
scuri nel tempo. Per risultati migliori si raccom<strong>and</strong>a l’utilizzo del<br />
detersivo liquido, preferibilmente per il lavaggio di capi scuri.<br />
Selezion<strong>and</strong>o la funzione asciugatura, al termine del<br />
lavaggio viene eseguita automaticamente un’asciugatura<br />
delicata che preserva i colori dei capi. Il display visualizzerà il<br />
livello “Appendere”. Carico Max.: 3 kg<br />
Lana: Il ciclo di lavaggio “Lana” di questa lavatrice<br />
<strong>Hotpoint</strong>-Ariston è stato testato e approvato dalla<br />
Woolmark Company per il lavaggio di capi in lana<br />
classificati come “lavabili a mano”, purché il lavaggio<br />
venga eseguito nel rispetto delle istruzioni riportate<br />
sull’etichetta dell’indumento e delle indicazioni <strong>for</strong>nite dal<br />
produttore dell’elettrodomestico. <strong>Hotpoint</strong>-Ariston è la<br />
prima marca di lavatrici ad aver ottenuto dalla Woolmark<br />
Company la certificazione Woolmark Apparel Care -<br />
Platinum per le sue prestazioni di lavaggio e il consumo di<br />
acqua ed energia. (M1135)<br />
Ultra Delicati: utilizzare il programma per il lavaggio<br />
dei capi molto delicati, che presentano applicazioni quali<br />
strass o paillettes.<br />
Si raccom<strong>and</strong>a di rovesciare i capi prima del lavaggio e<br />
di inserire gli indumenti piccoli nell’apposito sacchetto<br />
per il lavaggio dei capi delicati. Per risultati migliori si<br />
raccom<strong>and</strong>a l’utilizzo del detersivo liquido per capi delicati.<br />
Per il lavaggio dei capi in Seta e Tende selezionare il ciclo<br />
e attivare l’opzione (in questo caso sarà possibile<br />
attivare anche l’opzione “Extra Risciacquo”); la macchina<br />
terminerà il ciclo con la biancheria in ammollo e la spia<br />
lampeggerà. Per scaricare l’acqua e poter rimuovere il<br />
bucato è necessario premere il pulsante START/PAUSE o il<br />
pulsante .<br />
Selezion<strong>and</strong>o la funzione di asciugatura esclusivamente<br />
a tempo, al termine del lavaggio viene eseguita<br />
un’asciugatura di particolare delicatezza grazie ad una<br />
movimentazione leggera e da un getto d’aria ad una<br />
temperatura opportunamente controllata.<br />
I tempi consigliati sono:<br />
1 kg di sintetico --> 160 min.<br />
1 kg di sintetico e cotone --> 180 min<br />
1 kg di cotone --> 180 min.<br />
Il grado di asciugatura dipenderà dal carico e dalla<br />
composizione del tessuto.<br />
Antiallergy: utilizzare il programma per la rimozione dei<br />
principali allergeni come polline, acari, peli del gatto e cane.<br />
Lava&Asciuga: utilizzare il programma per lavare e<br />
asciugare capi (Cotone e Sintetici) leggermente sporchi<br />
in poco tempo. Selezion<strong>and</strong>o questo ciclo è possibile<br />
lavare e asciugare fino a 1 kg di bucato in soli 45 minuti.<br />
Per ottenere i migliori risultati utilizzare detersivo liquido;<br />
pretrattare polsini, colli e macchie.<br />
Macchie ostinate: è bene trattare le macchie ostinate<br />
con sapone solido prima del lavaggio e di utilizzare il<br />
programma Cotone con prelavaggio.<br />
Sistema bilanciamento del carico<br />
Prima di ogni centrifuga, per evitare vibrazioni eccessive e<br />
per distribuire il carico in modo uni<strong>for</strong>me, il cestello effettua<br />
delle rotazioni ad una velocità leggermente superiore<br />
a quella del lavaggio. Se al termine di ripetuti tentativi<br />
il carico non fosse ancora correttamente bilanciato la<br />
macchina effettua la centrifuga ad una velocità inferiore a<br />
quella prevista. In presenza di eccessivo sbilanciamento la<br />
lavasciuga effettua la distribuzione anzichè la centrifuga. Per<br />
favorire una migliore distribuzione del carico e il suo corretto<br />
bilanciamento si consiglia di mescolare capi gr<strong>and</strong>i e piccoli.<br />
22
Anomalie e rimedi<br />
Può accadere che la macchina non funzioni. Prima di telefonare all’Assistenza (vedi “Assistenza”), controllare che non si tratti<br />
di un problema facilmente risolvibile aiut<strong>and</strong>osi con il seguente elenco.<br />
Anomalie:<br />
La macchina<br />
non si accende.<br />
Il ciclo di lavaggio<br />
non inizia.<br />
La macchina non carica acqua.<br />
La porta della macchina rimane<br />
bloccata.<br />
La macchina carica e scarica acqua<br />
di continuo.<br />
La macchina non scarica<br />
o non centrifuga.<br />
La macchina vibra<br />
molto durante la centrifuga.<br />
La macchina perde acqua.<br />
Le icone relative alla “Fase in corso”<br />
lampeggiano velocemente contemporaneamente<br />
alla spia ON/OFF.<br />
Possibili ca<strong>use</strong> / Soluzione:<br />
• La spina non è inserita nella presa della corrente, o non abbastanza<br />
da fare contatto.<br />
• In casa non c’è corrente.<br />
• La porta oblò non è ben chiusa.<br />
• Il pulsante START/PAUSE non è stato premuto.<br />
• Il rubinetto dell’acqua non è aperto.<br />
• Si è impostato un ritardo sull’ora di avvio.<br />
• Il tubo di alimentazione dell’acqua non è collegato al rubinetto.<br />
• Il tubo è piegato.<br />
• Il rubinetto dell’acqua non è aperto.<br />
• In casa manca l’acqua.<br />
• Non c’è sufficiente pressione.<br />
• Il pulsante START/PAUSE non è stato premuto.<br />
• Selezion<strong>and</strong>o l’opzione , al temine del ciclo la lavasciuga effettuerà delle lente<br />
rotazioni del cestello; per terminare il ciclo premere il pulsante START/PAUSE<br />
o il pulsante .<br />
• Il tubo di scarico non è installato fra 65 e 100 cm da terra (vedi “Installazione”).<br />
• L’estremità del tubo di scarico è immersa nell’acqua (vedi “Installazione”).<br />
• Se l’abitazione si trova agli ultimi piani di un edificio, è possibile che si verifichino<br />
fenomeni di sifonaggio, per cui la macchina carica e scarica acqua di<br />
continuo. Per eliminare l’inconveniente sono disponibili in commercio apposite<br />
valvole anti-sifonaggio.<br />
• Lo scarico a muro non ha lo sfiato d’aria.<br />
• Il programma non prevede lo scarico: con alcuni programmi occorre avviarlo<br />
manualmente (vedi “Programmi e opzioni”).<br />
• È attiva la opzione “Stira facile”: per completare il programma<br />
premere il pulsante START/PAUSE (vedi “Programmi e opzioni”).<br />
• Il tubo di scarico è piegato (vedi “Installazione”).<br />
• La conduttura di scarico è ostruita.<br />
• Il cestello, al momento dell’installazione, non è stato sbloccato<br />
correttamente (vedi “Installazione”).<br />
• La macchina non è in piano (vedi “Installazione”).<br />
• La macchina è stretta tra mobili e muro (vedi “Installazione”).<br />
• Il carico è sbilanciato (vedi “Detersivi e biancheria”).<br />
• Il tubo di alimentazione dell’acqua non è ben avvitato (vedi “Installazione”).<br />
• Il cassetto dei detersivi è intasato (per pulirlo vedi “Manutenzione e cura”).<br />
• Il tubo di scarico non è fissato bene (vedi “Installazione”).<br />
• Spegnere la macchina e togliere la spina dalla presa, attendere circa 1 minuto<br />
quindi riaccenderla.<br />
Se l’anomalia persiste, chiamare l’Assistenza.<br />
I<br />
Si <strong>for</strong>ma troppa schiuma.<br />
La porta della macchina rimane<br />
bloccata.<br />
La macchina non asciuga.<br />
• Il detersivo non è specifico per lavasciuga (deve esserci la dicitura “per lavatrice”,<br />
“a mano e in lavatrice”, o simili).<br />
• Il dosaggio è stato eccessivo.<br />
• Eseguire la procedura di sblocco manuale (vedi “Precauzioni e consigli”).<br />
• La spina non è inserita nella presa della corrente, o non abbastanza da fare contatto.<br />
• In casa non c’è corrente.<br />
• La porta oblò non è ben chiusa.<br />
• Si è impostato un ritardo sull’ora di avvio.<br />
• L’ ASCIUGATURA è nella posizione “OFF”.<br />
23
Assistenza<br />
I<br />
Prima di contattare l’Assistenza:<br />
• Verificare se l’anomalia può essere risolta autonomamente (vedi “Anomalie e Rimedi);<br />
• Riavviare il programma per controllare se l’inconveniente è stato ovviato;<br />
• In caso negativo, contattare il Servizio Assistenza Tecnico Autorizzato.<br />
! In caso di errata installazione o uso non corretto potrete essere chiamati al pagamento dell’intervento.<br />
! Non ricorrere mai a tecnici non autorizzati.<br />
Comunicare:<br />
• il tipo di anomalia;<br />
• il modello della macchina (Mod.);<br />
• il numero di serie (S/N).<br />
Queste ultime in<strong>for</strong>mazioni si trovano sulla targhetta caratteristiche posta sull’apparecchio.<br />
Assistenza Attiva 7 giorni su 7<br />
*<br />
In caso di necessità d’intervento chiamare il Numero Unico Nazionale 199.199.199*.<br />
Un operatore sarà a completa disposizione per fissare un appuntamento con il Centro Assistenza Tecnico<br />
Autorizzato più vicino al luogo da cui si chiama.<br />
È attivo 7 giorni su 7, sabato e domenica compresi, e non lascia mai inascoltata una richiesta.<br />
! Nota: per uscire dal “Demo Mode”, spegnere la macchina, quindi premere contemporanemanete per 3 sec. i due pulsanti<br />
“START/PAUSE” e “ON/OFF” .<br />
* Al costo di 14,25 centesimi di Euro al minuto (iva inclusa) dal Lun. al Ven. dalle 08:00 alle 18:30, il Sab. dalle 08:00 alle 13:00 e di 5,58 centesimi di<br />
Euro al minuto (iva inclusa) dal Lun. al Ven. dalle 18:30 alle 08:00, il Sab. dalle 13:00 alle 08:00 e i giorni festivi, per chi chiama da telefono fisso.<br />
Per chi chiama da radiomobile le tariffe sono legate al piano tariffario dell’operatore telefonico utilizzato.<br />
Le suddette tariffe potrebbero essere soggette a variazione da parte dell’operatore telefonico; per maggiori in<strong>for</strong>mazioni consultare il sito<br />
www.hotpoint-ariston.eu.<br />
24
Instrucciones para la<br />
instalación y el uso<br />
LAVASECADORA<br />
! Este símbolo te recuerda que debes leer este manual de<br />
instrucciones.<br />
ES<br />
ES<br />
Español<br />
Sumario<br />
Instalación, 26-27<br />
Desembalaje y nivelación<br />
Conexiones hidráulicas y eléctricas<br />
Datos técnicos<br />
AQUALTIS<br />
AQD1070D 69<br />
Mantenimiento y cuidados, 28<br />
Interrumpir el agua y la corriente eléctrica<br />
Limpiar la máquina<br />
Limpiar el contenedor de detergentes<br />
Cuidar el cesto<br />
Limpiar la bomba<br />
Controlar el tubo de alimentación de agua<br />
Precauciones y consejos, 29<br />
Seguridad general<br />
Eliminación<br />
Apertura manual de la puerta<br />
Descripción de la máquina, 30-31<br />
Panel de control “touch control”<br />
Cómo efectuar un ciclo de lavado o de<br />
secado, 32<br />
Programas y opciones, 33<br />
Tabla de Programas<br />
Opciones de lavado<br />
Detergentes y ropa, 34<br />
Detergente<br />
Preparar la ropa<br />
Consejos sobre el lavado<br />
Sistema de equilibrado de la carga<br />
Anomalías y soluciones, 35<br />
Asistencia, 36<br />
25
Instalación<br />
ES<br />
! Es importante conservar este manual para<br />
poder consultarlo en cualquier momento. En el<br />
caso de venta, cesión o traslado, controle que<br />
permanezca junto con la lavasecadora.<br />
! Lea atentamente las instrucciones: ellas<br />
contienen importante in<strong>for</strong>mación sobre la<br />
instalación, el uso y la seguridad.<br />
! En el sobre que contiene este manual<br />
encontrará, además de la garantía, piezas que<br />
servirán para la instalación.<br />
Desembalaje y nivelación<br />
Desembalaje<br />
1. Una vez desembalada la lavasecadora,<br />
controle que no haya sufrido daños durante el<br />
traslado. Si estuviera dañada no la conecte y<br />
llame al revendedor.<br />
2. Quite los 4 tornillos<br />
de protección para<br />
el transporte y el<br />
correspondiente<br />
distanciador, ubicados<br />
en la parte posterior<br />
(ver la figura).<br />
! Una cuidadosa nivelación brinda estabilidad y<br />
evita vibraciones y ruidos, sobre todo durante<br />
el centrifugado.<br />
! Cu<strong>and</strong>o se instala sobre moquetas o<br />
alfombras, regule las patas para que, debajo<br />
de la lavasecadora, quede un espacio<br />
suficiente para la ventilación.<br />
Conexiones hidráulicas y eléctricas<br />
Conexión del tubo de alimentación de<br />
agua<br />
! Antes de conectar el tubo de alimentación a<br />
la red hídrica, haga correr agua hasta que sea<br />
límpida.<br />
1. Conecte el tubo<br />
de alimentación<br />
a la máquina<br />
enroscándolo en<br />
la toma de agua<br />
correspondiente<br />
ubicada en la parte<br />
posterior derecha<br />
(arriba) (ver la figura).<br />
3. Cierre los orificios con los tapones de<br />
plástico contenidos en el sobre.<br />
4. Conserve todas las piezas porque si la<br />
lavasecadora tuviera que ser trasladada<br />
nuevamente, se deberían volver a colocar para<br />
evitar daños internos.<br />
! Los embalajes no son juguetes para los<br />
niños.<br />
Nivelación<br />
1. Instale la lavasecadora sobre un piso plano<br />
y rígido, sin apoyarla en las paredes ni en los<br />
muebles.<br />
2. Compense las<br />
irregularidades<br />
desenrosc<strong>and</strong>o o<br />
enrosc<strong>and</strong>o las patas<br />
hasta que la máquina<br />
quede en posición<br />
horizontal (no debe<br />
estar inclinada más de<br />
2 grados).<br />
2. Conecte el tubo<br />
de alimentación<br />
enroscándolo a un<br />
grifo de agua fría con<br />
la boca roscada de<br />
3/4 gas (ver la figura).<br />
3. Controle que en el tubo no hayan pliegues<br />
ni estrangulaciones.<br />
! La presión de agua del grifo debe estar<br />
comprendida dentro de los valores contenidos<br />
en la tabla de Datos técnicos (ver la página<br />
correspondiente).<br />
! Si la longitud del tubo de alimentación<br />
no es la suficiente, diríjase a un negocio<br />
especializado o a un técnico autorizado.<br />
! No utilice nunca tubos de carga usados o<br />
viejos, utilice siempre los suministrados con la<br />
máquina.<br />
26
Conexión del tubo de descarga<br />
65 - 100 cm<br />
Conecte el tubo<br />
de descarga a una<br />
tubería de descarga<br />
o a una descarga<br />
de pared ubicadas a<br />
una distancia del piso<br />
comprendida entre 65<br />
y 100 cm., evit<strong>and</strong>o<br />
siempre plegarlo.<br />
Una alternativa es<br />
apoyar el tubo de<br />
descarga en el borde<br />
de un lavamanos<br />
o de una bañera,<br />
uniendo la guía<br />
suministrada con el<br />
aparato, al grifo (ver<br />
la figura).<br />
El extremo libre del<br />
tubo de descarga no<br />
debe permanecer sumergido en el agua.<br />
! No se aconseja utilizar tubos de<br />
prolongación, si fuera indispensable hacerlo,<br />
la prolongación debe tener el mismo diámetro<br />
del tubo original y no superar los 150 cm.<br />
Conexión eléctrica<br />
Antes de enchufar el aparato, verifique que:<br />
• la toma tenga la conexión a tierra y haya<br />
sido hecha según las normas legales;<br />
• la toma sea capaz de soportar la carga<br />
máxima de potencia de la máquina indicada<br />
en la tabla de Datos técnicos (ver al costado);<br />
• la tensión de alimentación esté comprendida<br />
dentro de los valores indicados en la tabla<br />
de Datos técnicos (ver al costado);<br />
• la toma sea compatible con el enchufe de la<br />
máquina. Si no es así, sustituya la toma o el<br />
enchufe.<br />
! La máquina no debe ser instalada al aire<br />
libre, ni siquiera si el lugar está protegido, ya<br />
que es muy peligroso dejarla expuesta a la<br />
lluvia o a las tormentas.<br />
! Una vez instalada la máquina, la toma de<br />
corriente debe ser fácilmente accesible.<br />
! No utilice prolongaciones ni conexiones<br />
múltiples.<br />
! El cable no debe estar plegado ni sufrir<br />
compresiones.<br />
! El cable de alimentación y el enchufe deben<br />
ser sustituidos sólo por técnicos autorizados.<br />
¡Atención! La empresa fabricante declina toda<br />
responsabilidad en caso de que estas normas<br />
no sean respetadas.<br />
Datos técnicos<br />
Modelo AQD1070D 69<br />
Dimensiones<br />
Capacidad<br />
Conexiones<br />
eléctricas<br />
Conexiones<br />
hídricas<br />
Velocidad<br />
de<br />
centrifugado<br />
Programas<br />
de prueba<br />
según la<br />
directiva<br />
EN 50229<br />
ancho 59.5 cm<br />
altura 85 cm<br />
profundidad 64,5 cm<br />
de 1 a 10 kg para el lavado<br />
de 1 a 7 kg para el secado<br />
ver la placa de características<br />
técnicas aplicada en la<br />
máquina<br />
presión máxima 1 MPa<br />
(10 bar)<br />
presión mínima 0,05 MPa<br />
(0,5 bar)<br />
capacidad del cesto 71 litros<br />
máxima 1600 r.p.m.<br />
lavado: programa ; temperatura<br />
60ºC; efectuado<br />
con 10 kg. de carga.<br />
secado: el secado de la<br />
carga menor debe realizarse<br />
seleccion<strong>and</strong>o el nivel de<br />
secado “EXTRA”, la carga<br />
de ropa se debe componer<br />
de 3 sábanas, 2 fundas y<br />
1 toalla;<br />
el secado de la carga que<br />
queda debe realizarse seleccion<strong>and</strong>o<br />
el nivel de secado<br />
“EXTRA”.<br />
Esta máquina cumple con lo<br />
establecido por las siguientes<br />
Directivas de la Comunidad:<br />
- 2004/108/CE (Compatibilidad<br />
Electromagnética)<br />
- 2002/96/CE<br />
- 2006/95/CE (Baja Tensión)<br />
ES<br />
27
Mantenimiento y cuidados<br />
ES<br />
Interrumpir el agua y la corriente<br />
eléctrica<br />
• Cierre el grifo de agua después de cada<br />
lavado. De este modo se limita el desgaste<br />
de la instalación hidráulica de la máquina y<br />
se elimina el peligro de pérdidas.<br />
• Desenchufe la máquina cu<strong>and</strong>o la<br />
debe limpiar y durante los trabajos de<br />
mantenimiento.<br />
Limpiar la máquina<br />
La parte externa y las partes de goma se<br />
pueden limpiar con un paño empapado<br />
en agua tibia y jabón. No <strong>use</strong> solventes ni<br />
productos abrasivos.<br />
Limpiar el contenedor de<br />
detergentes<br />
1<br />
2<br />
1<br />
Cuidar el cesto<br />
Para extraer el<br />
contenedor, presione la<br />
palanca (1) y tire hacia<br />
afuera (2) (ver la figura).<br />
Lávelo debajo del agua<br />
corriente, esta limpieza<br />
se debe realizar<br />
frecuentemente.<br />
• Deje siempre semicerrada la puerta para<br />
evitar que se <strong>for</strong>men malos olores.<br />
Limpiar la bomba<br />
2<br />
La máquina posee una bomba autolimpiante<br />
que no necesita mantenimiento. Pero puede<br />
suceder que objetos pequeños (monedas,<br />
botones) caigan en la precámara que protege<br />
la bomba, situada en la parte inferior de la<br />
misma.<br />
! Verifique que el ciclo de lavado haya<br />
terminado y desenchufe la máquina.<br />
Para acceder a la precámara:<br />
1<br />
2<br />
1. quite el panel de cobertura delantero de la<br />
máquina presion<strong>and</strong>o hacia el centro, luego<br />
empuje hacia abajo desde ambos costados y<br />
extráigalo (ver las figuras).<br />
2. coloque un<br />
recipiente para recoger<br />
el agua que se verterá<br />
(aproximadamente 1,5<br />
lt.) (ver la figura);<br />
3. desenrosque la tapa<br />
girándola en sentido<br />
antihorario (ver la<br />
figura);<br />
4. limpie con cuidado el interior;<br />
5. vuelva a enroscar la tapa;<br />
6. vuelva a montar el panel verific<strong>and</strong>o,<br />
antes de empujarlo hacia la máquina, que<br />
los ganchos se hayan introducido en las<br />
correspondientes ranuras.<br />
Controlar el tubo de alimentación<br />
de agua<br />
Controle el tubo de alimentación al menos<br />
una vez al año. Si presenta grietas o rajaduras<br />
debe ser sustituido: durante los lavados, las<br />
fuertes presiones podrían provocar roturas<br />
imprevistas.<br />
28
Precauciones y consejos<br />
! La máquina fue proyectada y fabricada en con<strong>for</strong>midad<br />
con las normas internacionales de seguridad. Estas<br />
advertencias se suministran por razones de seguridad y<br />
deben ser leídas atentamente.<br />
Seguridad general<br />
• Este aparato ha sido fabricado para un uso de tipo<br />
doméstico exclusivamente.<br />
• El aparato no debe ser empleado por personas (niños<br />
incluidos) con capacidades físicas, sensoriales o<br />
mentales reducidas y con experiencias y conocimientos<br />
insuficientes, a menos que dicho uso no se realice<br />
bajo la supervisión o las instrucciones de una persona<br />
responsable de su seguridad.<br />
Los niños deben ser vigilados para asegurarse que no<br />
jueguen con el aparato.<br />
- No secar prendas no lavadas.<br />
- Las prendas sucias con sustancias como aceite<br />
de cocina acetona, alcohol, gasolina, kerosén,<br />
quitamanchas, trementina, cera o sustancias para<br />
quitarlas, deben lavarse con agua caliente con una<br />
cantidad mayor de detergente antes de secarlas en la<br />
secadora.<br />
- Objetos como la goma exp<strong>and</strong>ida (látex), las gorras de<br />
ducha, los materiales textiles impermeables, los artículos<br />
con un lado de goma y las prendas o cojines que tienen<br />
partes de látex no deben secarse en la secadora.<br />
- Suavizantes o productos similares deben emplearse<br />
de acuerdo con las instrucciones del fabricante.<br />
- La parte final de un ciclo de la secadora se realiza<br />
sin calor (ciclo de enfriamiento) para garantizar que los<br />
artículos no se dañen.<br />
ATENCIÓN: Nunca detener una secadora antes que<br />
finalice el programa de secado. En este caso, sacar con<br />
rapidez todas las prendas y colgarlas para enfriarlas con<br />
celeridad.<br />
• No toque la máquina con los pies desnudos ni con las<br />
manos o los pies mojados o húmedos.<br />
• No desenchufe la máquina tir<strong>and</strong>o el cable, sino<br />
tom<strong>and</strong>o el enchufe.<br />
• No toque el agua de descarga porque puede alcanzar<br />
temperaturas elevadas.<br />
• Nunca fuerce la puerta: podría dañarse el mecanismo<br />
de seguridad que la protege de aperturas accidentales.<br />
• En caso de avería, no acceda nunca a los mecanismos<br />
internos para intentar una reparación.<br />
• Controle siempre que los niños no se acerquen a la<br />
máquina cu<strong>and</strong>o está en funcionamiento.<br />
• Si debe ser trasladada, deberán intervenir dos o más<br />
personas, procediendo con el máximo cuidado. La<br />
máquina no debe ser desplazada nunca por una sola<br />
persona ya que es muy pesada.<br />
• Antes de introducir la ropa controle que el cesto esté<br />
vacío.<br />
• Durante el secado la puerta tiende a calentarse.<br />
• No seque ropa lavada con solventes inflamables<br />
(por ej. tricloroetileno).<br />
• No seque gomaespuma o elastómeros análogos.<br />
• Verifique que, durante las fases de secado, el grifo de<br />
agua esté abierto.<br />
Eliminación<br />
• Eliminación del material de embalaje: respete las normas<br />
locales, de ese modo, los embalajes podrán volver a ser<br />
utilizados.<br />
• La norma Europea 2002/96/CE sobre la eliminación<br />
de aparatos eléctricos y electrónicos, indica que los<br />
electrodomésticos no deben ser eliminados de la<br />
misma manera que los desechos sólidos urbanos. Los<br />
aparatos en desuso se deben recoger separadamente<br />
para optimizar el porcentaje de recuperación y<br />
reciclaje de los materiales que los componen e impedir<br />
potenciales daños para la salud y el medio ambiente. El<br />
símbolo de la papelera tachada se encuentra en todos<br />
los productos para recordar la obligación de recolección<br />
separada. Para mayor in<strong>for</strong>mación sobre la correcta<br />
eliminación de los electrodomésticos, los poseedores<br />
de los mismos podrán dirigirse al servicio público<br />
responsable o a los revendedores.<br />
Apertura manual de la puerta<br />
Si falta la energía eléctrica es posible abrir la puerta para<br />
descargar la ropa del siguiente modo:<br />
1. desenchufe la máquina.<br />
2. verifique que el nivel de<br />
agua en el interior de la<br />
máquina sea inferior al hueco<br />
de la puerta; si no es así,<br />
extraiga el agua en exceso<br />
utiliz<strong>and</strong>o el tubo de descarga<br />
y recogiéndola en un balde<br />
como se indica en la figura.<br />
3. quite el panel de cobertura delantero de la lavadora (ver<br />
la página siguiente).<br />
4. utiliz<strong>and</strong>o la lengüeta indicada en la figura, tire hacia<br />
fuera hasta liberar la varilla de plástico del retén; tire<br />
posteriormente hacia abajo hasta sentir un breve sonido<br />
que indica que la puerta está desbloqueada.<br />
5. abra la puerta; si todavía no es posible, repita la operación.<br />
6. vuelva a montar el panel verific<strong>and</strong>o, antes de empujarlo<br />
hacia la máquina, que los ganchos se hayan introducido en<br />
las correspondientes ranuras.<br />
ES<br />
29
210<br />
180<br />
150<br />
120<br />
90<br />
60<br />
Descripción de la máquina<br />
ES<br />
PUERTA<br />
MANIJA DE<br />
LA PUERTA<br />
PANEL DE<br />
CONTROL<br />
ZÓCALO<br />
PATAS REGULABLES<br />
PUERTA<br />
Para abrir la puerta<br />
utilice siempre la manija<br />
correspondiente (ver la<br />
figura).<br />
la máquina, para una correcta dosificación. Cu<strong>and</strong>o utilice<br />
detergente en polvo, vuelva a colocar el tabique divisorio<br />
en la cavidad B.<br />
3. cubeta adicional: Blanqueador<br />
! El uso de la cubeta adicional 3 excluye el<br />
prelavado.<br />
cubeta para aditivos: para suavizante o aditivos líquidos.<br />
Se recomienda no superar nunca el nivel máximo indicado<br />
por la rejilla y diluir los suavizantes concentrados.<br />
CONTENEDOR DE DETERGENTE<br />
El contenedor de detergentes<br />
se encuentra en el interior de<br />
la máquina y se accede a él<br />
abriendo la puerta. Para la<br />
dosificación de detergente,<br />
ver el capítulo “Detergentes y<br />
ropa”.<br />
Panel de control “touch control”<br />
Para modificar las<br />
programaciones presionar<br />
levemente en el icono dentro<br />
del área sensible (touch<br />
control) como se indica en la<br />
figura.<br />
B<br />
A<br />
2<br />
3<br />
1<br />
1. cubeta para el prelavado:<br />
utilice detergente en polvo.<br />
! Antes de verter el<br />
detergente, verifique que<br />
no esté colocada la cubeta<br />
adicional 3.<br />
2. cubeta para el lavado: Si se<br />
utiliza detergente líquido, se<br />
aconseja colocar el tabique<br />
divisorio A suministrado con<br />
Modalidad de st<strong>and</strong> by<br />
Esta lavasecadora está en con<strong>for</strong>midad con las nuevas<br />
normativas vinculadas al ahorro energético. Está dotada de<br />
un sistema de auto-apagado (st<strong>and</strong> by) que, en caso de<br />
no funcionamiento, se activa pasados aproximadamente<br />
30 minutos. Presionar brevemente el botón ON/OFF y<br />
esperar que la máquina se active.<br />
Consumo en off-mode: 0,5 W<br />
Consumo en Left-on: 0,5 W<br />
30
Panel de control “touch control”<br />
Botón CENTRIFUGADO<br />
Botón con piloto<br />
START/PAUSE<br />
ES<br />
M<strong>and</strong>o de<br />
PROGRAMAS<br />
M2<br />
M1<br />
Botón TEMPERATURA<br />
Piloto<br />
ECO<br />
Iconos FASES<br />
DE LAVADO<br />
PANTALLA<br />
Botón con piloto<br />
ON/OFF<br />
Botón<br />
SECADO<br />
Botones<br />
OPCIONES<br />
Botón COMIENZO<br />
RETRASADO Piloto LOCK<br />
Botón con piloto<br />
BLOQUEO DE<br />
BOTONES<br />
Botón con piloto ON/OFF: presione brevemente el botón<br />
para encender o apagar la máquina. El piloto verde indica que la<br />
máquina está encendida. Para apagar la lavasecadora durante<br />
el lavado, es necesario mantener presionado el botón durante<br />
más tiempo, aproximadamente 3 seg.; si se presiona en <strong>for</strong>ma<br />
más breve o accidental, la máquina no se apagará. Si la máquina<br />
se apaga durante un lavado en curso, dicho lavado se anulará.<br />
M<strong>and</strong>o de PROGRAMAS: se puede girar en ambas direcciones.<br />
Para elegir el programa más apropiado, consulte la “Tabla de<br />
programas”. Durante el lavado, el m<strong>and</strong>o no se mueve.<br />
Botones M1-M2: mantenga presionado uno de los botones<br />
para memorizar un ciclo y las personalizaciones deseadas.<br />
Para activar un ciclo previamente memorizado, presione el<br />
correspondiente botón.<br />
Botón SECADO : presionar para reducir o excluir el secado;<br />
el nivel o el tiempo de secado seleccionado se indica en el visor<br />
(ver “Cómo efectuar un ciclo de lavado o de secado”).<br />
Botón TEMPERATURA: presiónelo para modificar o excluir<br />
la temperatura; el valor elegido está indicado en la pantalla (ver<br />
“Cómo efectuar un ciclo de lavado o de secado”).<br />
Botón CENTRIFUGADO: presiónelo para modificar o excluir<br />
la centrifugación; el valor elegido está indicado en la pantalla (ver<br />
“Cómo efectuar un ciclo de lavado o de secado”).<br />
Botón COMIENZO RETRASADO: presiónelo para fijar el<br />
comienzo retrasado del programa elegido; el valor del retraso<br />
elegido está indicado en la pantalla (ver “Cómo efectuar un ciclo<br />
de lavado o de secado”).<br />
Botones con Pilotos OPCIONES: presiónelos para seleccionar<br />
las opciones disponibles. El piloto correspondiente a la opción<br />
seleccionada permanecerá encendido (ver “Cómo efectuar un<br />
ciclo de lavado o de secado”).<br />
Iconos FASES DE LAVADO: se iluminan para indicar el avance<br />
del ciclo (Lavado – Aclarado – Centrifugado/Desagüe –<br />
Secado ). El mensaje se ilumina cu<strong>and</strong>o ha finalizado el ciclo.<br />
Botón con piloto START/PAUSE: cu<strong>and</strong>o el piloto verde<br />
centellea lentamente, presione el botón para que comience el<br />
lavado. Una vez que el ciclo ha comenzado, el piloto se mantiene<br />
fijo. Para poner en pausa el lavado, presione nuevamente el<br />
botón; el piloto centelleará con un color anaranjado.<br />
Si el piloto “LOCK” está apagado, se podrá abrir la puerta.<br />
Para que el lavado se reanude a partir del momento en el cual<br />
fue interrumpido, presione nuevamente el botón.<br />
Piloto LOCK: indica que la puerta está bloqueada. Para abrir la<br />
puerta es necesario poner el ciclo en pausa (ver “Cómo efectuar<br />
un ciclo de lavado o de secado”).<br />
Botón con piloto BLOQUEO DE BOTONES: para activar<br />
o desactivar el bloqueo del panel de control, mantenga<br />
presionado el botón durante 2 segundos aproximadamente. El<br />
piloto encendido indica que el panel de control está bloqueado<br />
(con excepción del botón ON/OFF). De este modo, se evitan<br />
modificaciones accidentales de los programas, sobre todo si<br />
en la casa hay niños.<br />
Piloto ECO: el ícono se encenderá cu<strong>and</strong>o, modific<strong>and</strong>o<br />
los parámetros de lavado, se obtenga un ahorro de energía del<br />
10% como mínimo. Además, antes que la máquina entre en<br />
la modalidad “St<strong>and</strong> by”, el icono se encenderá unos pocos<br />
segundos; con la máquina apagada la recuperación energética<br />
estimada será de aprox. el 80%.<br />
MODIFICACIÓN IDIOMA<br />
Cu<strong>and</strong>o se enciende por primera vez la máquina, aparece<br />
intermitente en el display el primer idioma. En correspondencia<br />
con los 3 botones a la derecha del display aparecen los símbolos<br />
“ ”,”OK” y “V”. Los idiomas cambian automáticamente cada<br />
3’’ o bien presion<strong>and</strong>o los botones al lado de los símbolos “<br />
“ y “V”. Con el botón “OK” se confirma el idioma que se<br />
fija luego de 2’’. Si no se presiona ningún botón, pasados<br />
30’’ el cambio automático de los idiomas recomienza. Para<br />
modificar el idioma es necesario entrar y apagar la máquina,<br />
en los siguientes 30” posteriores al apagado presionar<br />
simultáneamente los pulsadores temperatura + centrífuga<br />
+comienzo retrasado por 5’’ y además de una breve señal<br />
acústica aparece intermitente en el visor el idioma programado.<br />
Presion<strong>and</strong>o los botones al lado de los símbolos “ ” y “V” se<br />
cambia el idioma. Con el botón al lado del símbolo “OK” se<br />
confirma el idioma que se fija luego de 2’’. Si no se presiona<br />
ningún botón, pasados 30’’ se mostrará el idioma programado<br />
anteriormente. Encender la máquina.<br />
31
Cómo efectuar un ciclo de lavado<br />
o de secado<br />
ES<br />
NOTA: la primera vez que se utiliza la lavasecadora, realice un<br />
ciclo de lavado sin ropa pero con detergente, seleccion<strong>and</strong>o el<br />
programa algodón 90º sin prelavado.<br />
1. ENCENDER LA MÁQUINA. Presione el botón . Todos<br />
los pilotos se encenderán durante 1 segundo y en la<br />
pantalla aparecerá el mensaje AQUALTIS; luego quedará<br />
encendido de <strong>for</strong>ma permanente el piloto del botón y el<br />
piloto START/PAUSA centelleará.<br />
2. ELEGIR EL PROGRAMA. Gire el m<strong>and</strong>o de PROGRAMAS<br />
hacia la derecha o hacia la izquierda hasta seleccionar el<br />
programa deseado; el nombre del programa aparecerá en el<br />
display; a dicho programa se le asociará una temperatura y<br />
una velocidad de centrifugado que se pueden modificar. En<br />
la pantalla aparecerá la duración del ciclo.<br />
3. CARGAR LA ROPA. Abra la puerta. Cargue la ropa,<br />
cuid<strong>and</strong>o no superar la cantidad de carga indicada en la<br />
tabla de programas de la página siguiente.<br />
4. DOSIFICAR EL DETERGENTE. Extraiga el contenedor y<br />
vierta el detergente en las cubetas correspondientes como<br />
se explica en “Descripción de la máquina”.<br />
5. CERRAR LA PUERTA.<br />
6. PERSONALIZAR EL CICLO DE LAVADO. Utilice los<br />
botones correspondientes del panel de control:<br />
Modifique la temperatura y/o el centrifugado.<br />
La máquina muestra automáticamente la temperatura y la<br />
centrífuga máximas previstas para el programa fijado o las<br />
últimas seleccionadas si son compatibles con el programa<br />
elegido. Presion<strong>and</strong>o el botón se disminuye progresivamente<br />
la temperatura hasta llegar al lavado en frío (OFF). Presion<strong>and</strong>o<br />
el botón se disminuye progresivamente el centrifugado hasta<br />
su exclusión (OFF). Si se presionan una vez más los botones, se<br />
volverá a los valores máximos previstos.<br />
! Excepción: cu<strong>and</strong>o se selecciona el programa , la<br />
temperatura se puede aumentar hasta 90°.<br />
Programar el secado<br />
Con la primera presión del botón la máquina selecciona<br />
automáticamente el nivel de secado máximo compatible<br />
con el programa seleccionado. Las siguientes presiones<br />
disminuyen el nivel y el tiempo de secado hasta llegar a la<br />
exclusión “OFF”. Si se presionan una vez más los botones,<br />
se volverá a los valores máximos previstos.<br />
Es posible programar el secado:<br />
A - En base al tiempo: de 20 a 180 minutos.<br />
B - En función del nivel de secado deseado<br />
Planchar: especial para prendas que después deben<br />
plancharse. El nivel de humedad residual atenúa las<br />
arrugas y facilita su eliminación.<br />
Colgar: ideal para aquellas prendas que no requieren el<br />
secado completo.<br />
Doblar: se adapta para la ropa que se coloca en el armario<br />
sin necesidad de planchar.<br />
Extra: especial para las prendas que necesitan un secado<br />
completo como toallas o albornoces.<br />
Si excepcionalmente la carga de ropa para lavar y secar es<br />
superior al máximo previsto, realice el lavado, y una vez finalizado el<br />
programa, divida la carga y coloque una parte en el cesto. A partir<br />
de ese momento, siga las instrucciones para efectuar “Sólo el<br />
secado”. Repita las mismas operaciones para la carga restante. Al<br />
finalizar el secado continúa siempre un período de enfriamiento.<br />
Sólo el secado<br />
Seleccionar con el m<strong>and</strong>o de programas el secado<br />
adecuado ( - - ) al tipo de tejido. Se puede programar<br />
también el nivel o el tiempo de secado deseado utiliz<strong>and</strong>o el<br />
botón SECADO .<br />
Seleccionar el comienzo retrasado.<br />
Para seleccionar el comienzo retrasado del programa elegido,<br />
presione el botón correspondiente hasta alcanzar el tiempo de<br />
retraso deseado. Durante la programación aparece el tiempo<br />
de retraso junto con el mensaje “Inicio en”: y el símbolo<br />
centelleante. Una vez programado el arranque retrasado, la<br />
pantalla mostrará el símbolo fijo y la pantalla volverá a<br />
la visualización de la duración del ciclo programado con el<br />
mensaje “Acaba en”: y la duración del ciclo. Presion<strong>and</strong>o el<br />
botón COMIENZO RETRASADO, sólo una vez se visualiza<br />
el retraso seleccionado. Después del arranque, la pantalla<br />
mostrará el mensaje “Inicio en”: y el tiempo de retraso.<br />
Una vez que transcurre el tiempo de retraso programado,<br />
la máquina arrancará y la pantalla mostrará “Acaba en”: y<br />
el tiempo residual para el final ciclo. Para eliminar el inicio<br />
diferido, presione el botón hasta que en el display aparezca<br />
el mensaje OFF; el símbolo se apagará.<br />
Modificar las características del ciclo.<br />
• Presione el botón para activar la opción; en el display<br />
aparecerá el nombre de la opción y se encenderá el<br />
piloto correspondiente al botón.<br />
• Presione nuevamente el botón para desactivar la opción;<br />
en el display aparecerá el nombre de la opción más OFF<br />
y el piloto se apagará.<br />
! Si la opción seleccionada no es compatible con el<br />
programa elegido, la incompatibilidad se indicará con el<br />
centelleo del piloto y una señal sonora (3 sonidos) y la<br />
opción no se activará.<br />
! Si la opción elegida no es compatible con otra seleccionada<br />
precedentemente, el piloto correspondiente a la primera<br />
opción seleccionada centelleará y quedará activada sólo la<br />
segunda, el piloto del botón permanecerá fijo.<br />
! Las opciones pueden variar la carga recomendada y/o la<br />
duración del ciclo.<br />
7. PONER EN MARCHA EL PROGRAMA. Presione el<br />
botón START/PAUSE. El piloto correspondiente quedará fijo<br />
y la puerta se bloqueará (piloto LOCK encendido). Los<br />
iconos correspondientes a las fases de lavado se iluminarán<br />
durante el ciclo para indicar la fase en curso. Para cambiar<br />
un programa mientras un ciclo se está ejecut<strong>and</strong>o, ponga la<br />
lavasecadora en pausa presion<strong>and</strong>o el botón START/PAUSE;<br />
luego seleccione el ciclo deseado y presione nuevamente el<br />
botón START/PAUSE. Para abrir la puerta mientras un ciclo<br />
se está ejecut<strong>and</strong>o, presione el botón START/PAUSE; si el<br />
piloto LOCK está apagado, será posible abrir la puerta.<br />
Presione nuevamente el botón START/PAUSE para reanudar el<br />
programa a partir del momento en el que se había interrumpido.<br />
8. FIN DEL PROGRAMA. Se indica con la palabra END<br />
encendida. La puerta se podrá abrir inmediatamente.<br />
Si el piloto START/PAUSE centellea, presione el botón<br />
para terminar el ciclo. Abra la puerta, descargue la ropa y<br />
apague la máquina.<br />
! Si desea anular un ciclo que ya ha comenzado, mantenga<br />
presionado el botón hasta que el ciclo se interrumpa y la<br />
máquina se apague.<br />
32
Programas y opciones<br />
Tabla de programas<br />
Icono<br />
Descripción del Programa<br />
Temp.<br />
max.<br />
(°C)<br />
Velocidad<br />
max. Secado<br />
(r.p.m.)<br />
La duración del ciclo que se indica en el visor o en el manual es una estimación calculada en base a condiciones estándar. El tiempo efectivo puede variar en función de numerosos factores como la<br />
temperatura y la presión del agua de entrada, la temperatura ambiente, la cantidad de detergente, la cantidad y el tipo de carga, el equilibrado de la carga y las opciones adicionales seleccionadas.<br />
Detergentes<br />
Prelavado<br />
Lavado<br />
Blanqueador<br />
Suavizante<br />
Algodón De color (2): blancos y colores delicados poco sucios. 40° 1600 • - • • • 10<br />
Sintético Resistentes 60° 800 • - • • • 5<br />
Blanco 60° 1600 • - • - • 6<br />
De color 40° 1600 • - • • • 6<br />
Oscuro 30° 800 • - • - • 6<br />
Lana Platinum Care: para lana, cachemira, etc. 40° 800 • - • - • 2,5<br />
Ultradelicado 30° 0 • - • - • 1<br />
Antialérgico 60° 1600 • - • - • 6<br />
Aclarado - 1600 • - - • • 10<br />
Centrifugado y Desagüe - 1600 • - - - - 10<br />
Lava y Seca 30° 1600 • - • - • 1<br />
Secado Algodón - - • - - - - 7<br />
Secado Lana - - • - - - - 2,5<br />
Secado Sintético - - • - - - - 5<br />
Algodón con prelavado<br />
(Aggiungere il detersivo nell’apposito scomparto).<br />
90° 1600 • • • - • 10<br />
60°<br />
Algodón Blanco (1): blancos y colores resistentes muy sucios.<br />
(Max. 90°C)<br />
1600 • - • • • 10<br />
Carga<br />
max.<br />
(Kg)<br />
Duración<br />
del<br />
ciclo<br />
en la pantalla.<br />
(*) Se puede controlar la duración de los programas de lavado<br />
ES<br />
(*) Nota: después de aproximadamente 10 minutos del START, en base a la carga efectuada, la máquina recalculará y visualizará el tiempo que falta para la finalización del programa.<br />
Para todos los Test Institutes:<br />
1) Programa de control según la norma EN 50229: seleccione el programa con una temperatura 60°C.<br />
2) Programa algodón largo: seleccione el programa con una temperatura de 40ºC.<br />
Opciones de lavado<br />
Súper Lavado<br />
Gracias al uso de una mayor<br />
3<br />
1<br />
cantidad de agua en la fase<br />
inicial del ciclo y a la mayor<br />
duración del programa, esta<br />
opción garantiza un lavado<br />
2<br />
con óptimos resultados, es<br />
útil para eliminar las manchas<br />
más resistentes.<br />
Puede emplearse con o sin<br />
lejía. Si se desea efectuar<br />
también el blanqueado<br />
introducir la cubeta adicional<br />
3 en dotación, en la cubeta 1. Al dosificar el blanqueador,<br />
no supere el nivel “max” indicado en el perno central (ver<br />
la figura). Para realizar sólo el blanqueo, sin realizar<br />
un lavado completo, verter el blanqueador en la cubeta<br />
adicional 3, seleccionar el programa “Aclarado” y<br />
activar la opción “Súper Lavado” .<br />
! No se puede activar con los programas , , , , ,<br />
, , , , , .<br />
Extra Aclarado<br />
Al elegir esta opción aumentará la eficacia del aclarado<br />
y se asegurará la máxima eliminación de los residuos de<br />
detergente. Es útil para pieles particularmente sensibles<br />
a los detergentes. Se aconseja el uso de esta opción<br />
cu<strong>and</strong>o la lavasecadora funciona a plena carga o utiliz<strong>and</strong>o<br />
elevadas dosis de detergente.<br />
! No se puede activar con los programas , , , , ,<br />
, , .<br />
Fácil Planchado<br />
Cu<strong>and</strong>o se selecciona esta opción, el lavado y el<br />
centrifugado se modificarán oportunamente para disminuir<br />
la <strong>for</strong>mación de arrugas. Al finalizar el ciclo, la lavasecadora<br />
realizará giros lentos del cesto; los pilotos “Fácil<br />
Planchado” y START/PAUSE centellearán. Para terminar<br />
el ciclo, presione el botón START/PAUSE o el botón “Fácil<br />
Planchado”.<br />
! No se puede activar con los programas , , , , ,<br />
, , , .<br />
Note: Si desea realizar también el secado, este botón<br />
funciona sólo conjuntamente con el nivel “Planchar”.<br />
Ahorro de Tiempo<br />
Seleccion<strong>and</strong>o esta función se disminuye la duración del<br />
programa hasta un 50% según el ciclo elegido, garantiz<strong>and</strong>o<br />
al mismo tiempo un ahorro de agua y energía.<br />
Utilice este ciclo para prendas no excesivamente sucias.<br />
! No se puede activar con los programas , , , , ,<br />
, , , , , .<br />
33
Detergentes y ropa<br />
ES<br />
Detergente<br />
El tipo y la cantidad de detergente dependen del tipo de tejido<br />
(algodón, lana, seda...), del color, de la temperatura de lavado,<br />
del grado de suciedad y de la dureza del agua.<br />
Dosificar bien el detergente evita derroches y protege el<br />
medio ambiente: aún siendo biodegradables, los detergentes<br />
contienen elementos que alteran el equilibrio de la naturaleza.<br />
Se aconseja:<br />
• usar detergentes en polvo para prendas de algodón<br />
blancas y para el prelavado.<br />
• usar detergentes líquidos para prendas delicadas de<br />
algodón y para todos los programas a baja temperatura.<br />
• usar detergentes líquidos delicados para lana y seda.<br />
El detergente se debe verter antes del comienzo del lavado<br />
en la cubeta correspondiente, o en el dosificador que se<br />
coloca directamente en el cesto. En este último caso, no<br />
se puede seleccionar el ciclo Algodón con prelavado.<br />
! No <strong>use</strong> detergentes para lavar a mano porque producen<br />
demasiada espuma.<br />
Preparar la ropa<br />
• Abra bien las prendas antes de cargarlas.<br />
• Divida la ropa según el tipo de tejido (símbolo en la<br />
etiqueta de la prenda) y el color, separ<strong>and</strong>o las prendas<br />
de color de las blancas;<br />
• Vacíe los bolsillos y controle los botones;<br />
• No supere los valores indicados en la “Tabla de<br />
Programas” referidos al peso de la ropa seca.<br />
¿Cuánto pesa la ropa?<br />
1 sábana 400-500 gr.<br />
1 funda 150-200 gr.<br />
1 mantel 400-500 gr.<br />
1 albornoz 900-1200 gr.<br />
1 toalla 150-250 gr.<br />
1 jeans 400-500 gr.<br />
1 camisa 150-200 gr.<br />
Consejos sobre el lavado<br />
Blanco: utilice el ciclo para el lavado de las prendas<br />
blancas. El programa ha sido estudiado para mantener<br />
el brillo de las prendas blancas. Para obtener mejores<br />
resultados, se recomienda el uso de detergente en polvo.<br />
Seleccion<strong>and</strong>o la función de secado, al finalizar el lavado<br />
se realizará automáticamente un secado como si fuera al<br />
aire libre pero con las ventajas de evitar el amarilleo de las<br />
prendas por acción de los rayos solares y la pérdida del<br />
c<strong>and</strong>or debido al polvillo presente en el aire. Se pueden<br />
seleccionar sólo los secados con niveles.<br />
De color: utilice el ciclo para el lavado de prendas de<br />
color claro. El programa ha sido estudiado para mantener<br />
la vivacidad de los colores.<br />
Oscuro: utilice el ciclo para el lavado de prendas<br />
de color oscuro. El programa ha sido estudiado para<br />
mantener los colores oscuros. Para obtener mejores<br />
resultados, cu<strong>and</strong>o lave prendas oscuras se recomienda<br />
utilizar detergente líquido.<br />
Si se selecciona la función de secado, al finalizar el lavado<br />
se ejecutará automáticamente un secado delicado que<br />
preserva los colores de las prendas. La pantalla mostrará el<br />
nivel “Colgar”. Carga máx.: 3 kg.<br />
Lana: el ciclo de lavado “Lana” de esta lavadora <strong>Hotpoint</strong>-<br />
Ariston ha sido probado y aprobado por la Woolmark<br />
Company para el lavado de prendas de lana clasificadas<br />
como “lavables a mano”, siempre que el lavado se realice<br />
respet<strong>and</strong>o las instrucciones contenidas en la etiqueta de<br />
la prenda y las indicaciones suministradas por el fabricante<br />
del electrodoméstico. <strong>Hotpoint</strong>-Ariston es la primera marca<br />
de lavadoras que ha obtenido de la Woolmark Company<br />
la certificación Woolmark Apparel Care - Platinum por<br />
sus prestaciones de lavado y por el consumo de agua y<br />
energía. (M1135)<br />
Ultradelicado: utilice el programa para el lavado de<br />
las prendas muy delicadas que tienen aplicaciones como<br />
strass o lentejuelas.<br />
Se recomienda voltear las prendas antes del lavado e<br />
introducir las más pequeñas en la bolsa para el lavado de<br />
prendas delicadas.<br />
Para obtener mejores resultados, se recomienda el uso de<br />
detergente líquido para prendas delicadas.<br />
Para el lavado de las prendas de Seda y Cortinas, seleccione<br />
el ciclo y active la opción (en este caso también<br />
será posible activar la opción “Extra Aclarado”); a máquina<br />
terminará el ciclo dej<strong>and</strong>o la ropa en remojo y el piloto<br />
centelleará. Para descargar el agua y poder sacar la ropa, es<br />
necesario presionar el botón START/PAUSE o el botón .<br />
Seleccion<strong>and</strong>o la función de secado exclusivamente con<br />
tiempo, al finalizar el lavado se realizará un secado de<br />
particular delicadeza gracias a un movimiento suave y a un<br />
chorro de aire con temperatura controlada.<br />
Los tiempos aconsejados son:<br />
1 kg de sintético --> 160 min.<br />
1 kg de sintético y algodón --> 180 min.<br />
1 kg de algodón --> 180 min.<br />
El grado de secado dependerá de la carga y de la<br />
composición del tejido.<br />
Antialérgico: utilice el programa para la eliminación de<br />
los principales alérgenos como polen, ácaros, pelos de gato<br />
y de perro.<br />
Lava y Seca: utilice el programa para lavar y secar<br />
prendas (Algodón y Sintéticos) ligeramente sucias en poco<br />
tiempo Seleccion<strong>and</strong>o este ciclo se puede lavar y secar<br />
hasta 1 kg de ropa en sólo 45 minutos.<br />
Para alcanzar los mejores resultados utilizar detergente<br />
líquido; pre-tratar puños, cuellos y manchas.<br />
Manchas difíciles: es una buena costumbre tratar las<br />
manchas difíciles con jabón sólido antes del lavado y<br />
utilizar el programa Algodón con prelavado.<br />
Sistema de equilibrado de la carga<br />
Antes de cada centrifugado, para evitar vibraciones excesivas<br />
y para distribuir la carga de modo uni<strong>for</strong>me, el cesto realiza<br />
rotaciones a una velocidad ligeramente superior a la del<br />
lavado. Si después de varios intentos, la carga todavía<br />
no está correctamente equilibrada, la máquina realiza el<br />
centrifugado a una velocidad inferior a la prevista. Cu<strong>and</strong>o<br />
existe un excesivo desequilibrio, la lavasecadora realiza la<br />
distribución antes que el centrifugado. Para obtener una<br />
mejor distribución de la carga y su correcto equilibrado, se<br />
aconseja mezclar prendas gr<strong>and</strong>es y pequeñas.<br />
34
Anomalías y soluciones<br />
Puede suceder que la máquina no funcione. Antes de llamar al Servicio de Asistencia Técnica (ver “Asistencia Técnica”),<br />
controle que no se trate de un problema de fácil solución utiliz<strong>and</strong>o la siguiente lista.<br />
Anomalías:<br />
La máquina no se enciende.<br />
El ciclo de lavado no comienza.<br />
La máquina no carga agua.<br />
La puerta de la máquina<br />
permanece bloqueada.<br />
La máquina carga y descarga<br />
agua continuamente.<br />
La máquina no descarga o no<br />
centrífuga.<br />
La máquina vibra mucho durante<br />
la centrifugación.<br />
La máquina pierde agua.<br />
Los iconos correspondientes a<br />
la “Fase en curso” centellean<br />
velozmente junto con el piloto<br />
ON/OFF.<br />
Se <strong>for</strong>ma demasiada espuma.<br />
La puerta de la máquina<br />
permanece bloqueada.<br />
Posibles causas / Solución:<br />
• El enchufe no está introducido en la toma de corriente, o no hace contacto.<br />
• En la casa no hay corriente.<br />
• La puerta no está bien cerrada.<br />
• El botón START/PAUSE no fue presionado.<br />
• El grifo de agua no está abierto.<br />
• Se fijó un retraso de la hora de puesta en funcionamiento.<br />
• El tubo de alimentación de agua no está conectado al grifo.<br />
• El tubo está plegado.<br />
• El grifo de agua no está abierto.<br />
• En la casa no hay agua.<br />
• No hay suficiente presión.<br />
• El botón START/PAUSE no fue presionado.<br />
• Seleccion<strong>and</strong>o la opción “Fácil Planchado ”, al finalizar el ciclo, la<br />
lavasecadora realizará lentas rotaciones del cesto; para terminar el ciclo,<br />
presione el botón START/PAUSE o el botón “Fácil Planchado ”.<br />
• El tubo de descarga no está instalado entre los 65 y 100 cm. del suelo (ver<br />
“Instalación”).<br />
• El extremo del tubo de descarga está sumergido en el agua (ver “Instalación”).<br />
• Si la vivienda se encuentra en uno de los últimos pisos de un edificio, es posible<br />
que se verifiquen fenómenos de sifonaje, por ello la máquina carga y descarga<br />
agua de modo continuo. Para eliminar este inconveniente se encuentran<br />
disponibles en el comercio válvulas especiales que permiten evitar el sifonaje.<br />
• La descarga de pared no posee un respiradero.<br />
• El programa no prevé la descarga: con algunos programas es necesario ponerla<br />
en marcha manualmente (ver “Programas y opciones”).<br />
• La opción “Fácil Planchado” está activa: para completar el programa, presione el<br />
botón START/PAUSE (ver “Programas y opciones”).<br />
• El tubo de descarga está plegado (ver “Instalación”).<br />
• El conducto de descarga está obstruido.<br />
• El cesto, en el momento de la instalación, no fue desbloqueado correctamente<br />
(ver “Instalación”).<br />
• La máquina no está instalada en un lugar plano (ver “Instalación”).<br />
• Existe muy poco espacio entre la máquina, los muebles y la pared (ver “Instalación”).<br />
• La carga está desequilibrada (ver “Detergentes y ropa”).<br />
• El tubo de alimentación de agua no está bien enroscado (ver “Instalación”).<br />
• El contenedor de detergentes está obstruido (para ‘ver “Mantenimiento y cuidados”).<br />
• El tubo de descarga no está bien fijado (ver “Instalación”).<br />
• Apague la máquina y desenchúfela, espere aproximadamente 1 minuto y luego<br />
vuelva a encenderla. Si la anomalía persiste, llame al Servicio de Asistencia<br />
Técnica.<br />
• El detergente no es específico para la lavasecadora (debe contener algunas de<br />
las frases “para lavadora”, “a mano o en lavadora” o similares).<br />
• La dosificación fue excesiva.<br />
• Realice el procedimiento de desbloqueo manual (ver “Precauciones y consejos”).<br />
ES<br />
La Lavasecadora no seca.<br />
• El enchufe no está introducido en la toma de corriente, o no hace contacto.<br />
• En la casa no hay corriente.<br />
• La puerta no está bien cerrada.<br />
• Se fijó un retraso de la hora de puesta en funcionamiento.<br />
• El SECADO está en la posición OFF.<br />
35
Asistencia<br />
ES<br />
Antes de llamar al Servicio de Asistencia Técnica:<br />
• Verifique si la anomalía la puede resolver Ud. solo (ver “Anomalías y Soluciones”);<br />
• Vuelva a poner en marcha el programa para controlar si el inconveniente fue resuelto;<br />
• Si no es así, llame al Servicio de Asistencia Técnica Autorizado.<br />
! En el caso de una instalación errónea o un uso incorrecto de la lavasecadora, la intervención de asistencia técnica deberá<br />
ser pagada.<br />
! No recurra nunca a técnicos no autorizados.<br />
Comunique:<br />
• el tipo de anomalía;<br />
• el modelo de la máquina (Mod.);<br />
• el número de serie (S/N ).<br />
Esta última in<strong>for</strong>mación se encuentra en la placa de características colocada en el aparato.<br />
La siguiente in<strong>for</strong>mación es válida solo para España.<br />
Para otros países de habla hispana consulte a su vendedor.<br />
Ampliación de garantía<br />
Llame al 902.363.539 y le in<strong>for</strong>maremos sobre el fantástico plan de ampliación de garantía hasta 5 años.<br />
Consiga una cobertura total adicional de<br />
• Piezas y componentes<br />
• Mano de obra de los técnicos<br />
• Desplazamiento a su domicilio de los técnicos<br />
Y NO PAGUE AVERIAS NUNCA MAS<br />
Servicio de asistencia técnica (SAT)<br />
Llame al 902.133.133 y nuestros técnicos intervendrán con rapidez y eficacia, devolviendo el electrodoméstico a sus<br />
condiciones óptimas de funcionamiento.<br />
En el SAT encontrará recambios, accesorios y productos específicos para la limpieza y mantenimiento de su<br />
electrodoméstico a precios competitivos.<br />
ESTAMOS A SU SERVICIO<br />
! Nota: para salir del “Demo Mode”, apagar la lavasecadora e presione simultáneamente durante 3 seg. los dos botones “START/<br />
PAUSE” y “ON/OFF” .<br />
36
Instruções para a instalação e a<br />
utilização<br />
MÁQUINA DE LAVAR E SECAR ROUPA<br />
! Este símbolo serve para lembrar-te de ler este manual de instruções.<br />
PT<br />
PT<br />
Português<br />
Sumário<br />
Instalação, 38-39<br />
Desembalar e nivelar<br />
Ligações hidráulicas e eléctricas<br />
Dados técnicos<br />
Manutenção e cuidados, 40<br />
Interromper a alimentação de água e de corrente eléctrica<br />
Limpar a máquina<br />
Limpar a gaveta dos detergentes<br />
Cuidados com o tambor<br />
Limpar a bomba<br />
Verificar o tubo de alimentação de água<br />
AQUALTIS<br />
AQD1070D 69<br />
Precauções e conselhos, 41<br />
Segurança geral<br />
Eliminação<br />
Abertura manual da porta de vidro<br />
Descrição da máquina, 42-43<br />
Painel de com<strong>and</strong>os “touch control”<br />
Como efectuar um ciclo de lavagem ou<br />
secagem, 44<br />
Programas e opções, 45<br />
Tabela dos Programas<br />
Opções de Lavagem<br />
Detergentes e roupa, 46<br />
Detergente<br />
Preparar a roupa<br />
Conselhos de lavagem<br />
Sistema de balanceamento da carga<br />
Anomalias e soluções, 47<br />
Assistência, 48<br />
37
Instalação<br />
PT<br />
! É importante guardar este livrete para<br />
poder consultá-lo a qualquer momento. Se a<br />
máquina <strong>for</strong> vendida, cedida ou transferida,<br />
certifique-se que este livrete permaneça com a<br />
máquina.<br />
! Leia com atenção estas instruções: há<br />
importantes in<strong>for</strong>mações acerca da instalação,<br />
da utilização e da segurança.<br />
! No envelope que contém este manual<br />
encontrará, além da garantia, também<br />
algumas peças que servirão para a instalação.<br />
Desembalar e nivelar<br />
Desembalar<br />
1. Uma vez desembalada a máquina de lavar<br />
roupas, verifique que a mesma não tenha<br />
sofrido danos durante o transporte.<br />
Se estiver danificada não efectue a sua ligação<br />
e contacte o revendedor.<br />
2. Tire os 4 parafusos<br />
de protecção para<br />
o transporte e o<br />
respectivo calço,<br />
situados na parte<br />
traseira (veja a figura).<br />
! Um cuidadoso nivelamento dá estabilidade e<br />
evita vibrações e ruídos sobretudo na fase de<br />
centrifugação.<br />
! Se a máquina <strong>for</strong> posicionada sobre tapete<br />
ou alcatifa, regule os pés em modo que<br />
embaixo da máquina de lavar roupa haja<br />
espaço suficiente para a ventilação.<br />
Ligações hidráulicas e eléctricas<br />
Ligação do tubo de alimentação da<br />
água<br />
! Antes de ligar o tubo de alimentação à rede<br />
hídrica, deixe a água escorrer até que seja<br />
límpida.<br />
1. Ligue o tubo de<br />
alimentação na<br />
máquina de lavar<br />
roupa atarraxado<br />
no apropriado<br />
<strong>for</strong>necimento da água,<br />
na parte traseira, em<br />
cima à direita (veja a<br />
figura).<br />
3. Tampe os furos com as tampas em plástico<br />
contidas no envelope.<br />
4. Conserve todas as peças; se <strong>for</strong> necessário<br />
transportar a máquina de lavar roupa, terão<br />
de ser montadas outra vez para evitar danos<br />
internos.<br />
! Embalagens não são brinquedos para as<br />
crianças!<br />
Nivelamento<br />
1. Posicione a máquina de lavar roupa sobre<br />
um pavimento plano e rígido, sem encostá-la<br />
em paredes ou móveis.<br />
2. Compense as<br />
irregularidades<br />
desatarrax<strong>and</strong>o ou<br />
atarrax<strong>and</strong>o os pés<br />
até que a máquina<br />
esteja nivelada<br />
horizontalmente<br />
(não deve ter uma<br />
inclinação superior<br />
aos 2 graus).<br />
2. Realize a ligação do<br />
tubo de alimentação<br />
parafus<strong>and</strong>o-o a uma<br />
torneira de água fria<br />
com bocal de rosca<br />
de 3/4 gás (ver figura).<br />
3. Tome cuidado para o tubo não ser dobrado<br />
nem esmagado.<br />
! A pressão hídrica da torneira deve ser entre<br />
os valores da tabela dos Dados técnicos (veja<br />
a página ao lado).<br />
! Se o comprimento do tubo de alimentação<br />
não <strong>for</strong> suficiente, contacte uma oficina<br />
especializada ou um técnico autorizado.<br />
! Nunca utilize tubos de alimentação de água<br />
velhos ou usados, mas sim aqueles <strong>for</strong>necidos<br />
em dotação com a máquina.<br />
38
Ligação do tubo de descarga<br />
65 - 100 cm<br />
emergida na água.<br />
Ligue o tubo de<br />
descarga, sem dobrálo,<br />
a uma conduta de<br />
descarga ou a uma<br />
descarga na parede<br />
situada entre 65 e<br />
100 cm. de altura do<br />
chão.<br />
Em alternativa,<br />
coloque na beira de<br />
um lavabo ou de uma<br />
banheira, prendendo<br />
na torneira a guia<br />
<strong>for</strong>necida com o<br />
produto (veja a<br />
figura).<br />
A ponta solta do tubo<br />
de descarga não<br />
deve permanecer<br />
! É desaconselhado empregar tubos de<br />
extensão; mas se <strong>for</strong> indispensável, a extensão<br />
deve ter o mesmo diâmetro do tubo original e<br />
não medir mais de 150 cm de comprimento.<br />
Ligação eléctrica<br />
Antes de ligar a ficha na tomada eléctrica,<br />
certifique-se que:<br />
• a tomada tenha uma ligação à terra e seja<br />
nos termos da legislação;<br />
• a tomada tenha a capacidade para suportar<br />
a carga máxima de potência da máquina,<br />
indicada na tabela dos Dados técnicos (veja<br />
ao lado);<br />
• a tensão de alimentação seja entre os<br />
valores indicados na tabela dos Dados<br />
técnicos (veja ao lado);<br />
• a tomada seja compatível com a ficha da<br />
máquina. Se não <strong>for</strong>, substitua a tomada ou<br />
a ficha.<br />
! Esta máquina de lavar roupa não deve ser<br />
instalada ao aberto, nem mesmo abrigada,<br />
porque é muito perigoso deixá-la exposta à<br />
chuva e às tempestades.<br />
! Depois de ter instalado a máquina de lavar<br />
roupa, o acesso à tomada eléctrica deve ser<br />
fácil.<br />
! Não empregue extensões nem fichas<br />
múltiplas.<br />
! O cabo não deve ser dobrado nem apertado.<br />
! O cabo de alimentação e a ficha devem<br />
ser substituídos somente por técnicos<br />
autorizados.<br />
Atenção! O fabricante declina toda a<br />
responsabilidade se estas regras não <strong>for</strong>em<br />
respeitadas.<br />
Dados técnicos<br />
Modelo AQD1070D 69<br />
Medidas<br />
Capacidade<br />
Ligações<br />
eléctricas<br />
Ligações<br />
hídricas<br />
Velocidade<br />
da centrifugação<br />
Programas<br />
de controlo<br />
segundo a<br />
directiva<br />
EN 50229<br />
largura 59.5 cm<br />
altura 85 cm<br />
profundidade 64,5 cm<br />
de 1 a 10 kg para a lavagem<br />
de 1 a 7 kg para a secagem<br />
veja a placa das características<br />
técnicas colocada na<br />
máquina<br />
pressão máxima 1 MPa<br />
(10 bar)<br />
pressão mínima 0.05 MPa<br />
(0.5 bar)<br />
capacidade do tambor 71 litros<br />
até 1.600 rotações por<br />
minuto<br />
lavagem: programa ;<br />
temperatura 60°C; realizado<br />
com carga de 10 kg.<br />
secagem: a secagem<br />
da carga menor deve ser<br />
efectuada seleccion<strong>and</strong>o o<br />
nível de secagem “EXTRA”,<br />
a carga da máquina de lavar<br />
roupa deve ser composta<br />
por 3 lençóis, 2 fronhas e<br />
1 toalha de rosto;<br />
a secagem da carga restante<br />
deve ser efectuada<br />
seleccion<strong>and</strong>o o nível de<br />
secagem “EXTRA”.<br />
Esta aparelhagem é em con<strong>for</strong>midade<br />
com as seguintes<br />
Directivas Comunitárias:<br />
- 2004/108/CE (Compatibilidade<br />
Electromagnética)<br />
- 2002/96/CE<br />
- 2006/95/CE (Baixa Tensão)<br />
PT<br />
39
Manutenção e cuidados<br />
PT<br />
Interromper a alimentação de<br />
água e de corrente eléctrica<br />
• Feche a torneira da água depois de cada<br />
lavagem. Desta maneira diminuiu-se o<br />
desgaste do sistema hidráulico da máquina<br />
de lavar roupa e elimina-se o risco de<br />
vazamento.<br />
• Tire a ficha da tomada eléctrica qu<strong>and</strong>o <strong>for</strong><br />
limpar a máquina de lavar roupa e durante<br />
os trabalhos de manutenção.<br />
Limpar a máquina<br />
A parte externa e as peças em borracha<br />
podem ser limpas com um pano molhado com<br />
água morna e sabão. Não empregue solventes<br />
nem abrasivos.<br />
Limpar a gaveta dos detergentes<br />
1<br />
2<br />
1<br />
Cuidados com o tambor<br />
Para extrair a gaveta,<br />
pressione a lingueta<br />
(1) e puxe para <strong>for</strong>a (2)<br />
(veja a figura).<br />
Lave-a com água<br />
corrente; esta limpeza<br />
deve ser efectuada<br />
frequentemente.<br />
• Deixe a porta sempre entreaberta para evitar<br />
que se <strong>for</strong>mem odores desagradáveis.<br />
Limpar a bomba<br />
2<br />
Esta máquina de lavar roupa é equipada com<br />
uma bomba com limpeza automática que<br />
não precisa de operações de manutenção.<br />
Entretanto pode acontecer que pequenos<br />
objectos (moedinhas, botões) caiam na précâmara<br />
que protege a bomba, situada na<br />
parte inferior da mesma.<br />
! Certifique-se que o ciclo de lavagem tenha<br />
terminado e tire a ficha da tomada.<br />
Para obter acesso à pré-câmara:<br />
1<br />
2<br />
1. remova o painel de cobertura no lado<br />
anterior da máquina empurr<strong>and</strong>o para o<br />
centro, em seguida empurre para baixo de<br />
ambos os lados e remova-o (veja as figuras).<br />
2. posicione um<br />
recipiente para recolher<br />
a água que sairá<br />
(aproximadamente 1,5 l)<br />
(ver figura);<br />
3. Para desenroscar<br />
a tampa gire-a na<br />
direcção contrária aos<br />
ponteiros do relógio<br />
(veja a figura);<br />
4. limpe o interior com cuidado;<br />
5. enrosque outra vez a tampa;<br />
6. monte outra vez o painel, certifique-se,<br />
antes de empurrá-la na máquina, que os<br />
ganchos <strong>for</strong>am colocados nas respectivas<br />
ranhuras.<br />
Verificar o tubo de alimentação de<br />
água<br />
Verifique o tubo de alimentação pelo menos<br />
uma vez por ano. Se houver rachaduras ou<br />
fendas, será necessário substitui-lo: durante<br />
as lavagens as <strong>for</strong>tes pressões podem<br />
provocar repentinas quebras.<br />
40
Precauções e conselhos<br />
! Esta máquina foi projectada e fabricada em con<strong>for</strong>midade<br />
com os regulamentos internacionais de segurança. Estas<br />
advertências são <strong>for</strong>necidas por razões de segurança e<br />
devem ser lidas com atenção.<br />
Segurança geral<br />
• Este aparelho foi projectado exclusivamente para um<br />
uso doméstico.<br />
• O aparelho não deve ser utilizado por pessoas<br />
(incluindo crianças) com capacidades físicas,<br />
sensoriais ou mentais reduzidas ou sem experiência e<br />
conhecimentos, salvo se supervisionadas ou se tiverem<br />
recebido instruções sobre a utilização do dispositivo por<br />
parte de uma pessoa responsável pela sua segurança.<br />
As crianças devem ser mantidas sob vigilância para<br />
evitar que brinquem com a máquina.<br />
- Não secar roupas não lavadas.<br />
- As roupas sujas de substâncias como o óleo de fritura,<br />
acetona, álcool, gasolina, querosene, produtos tiramanchas,<br />
cera e substâncias para removê-la, devem<br />
ser lavados com água quente com uma qu<strong>and</strong>idade<br />
superior de detergente antes de serem secas na<br />
máquina de secar roupa.<br />
- Objectos como a borracha exp<strong>and</strong>ida (espuma de<br />
látex), toucas para banho, materiais têxteis impermeáveis,<br />
artigos com um lado de borracha ou roupas e<br />
travesseiros que possuem partes de espuma de látex<br />
não devem ser secos na máquina de secar roupa.<br />
- Produtos para amaciar ou similares devem ser utilizados<br />
em con<strong>for</strong>midade com as instruções do fabricante.<br />
- A parte final de um ciclo da máquina de secar roupas<br />
ocorre sem calor (ciclo de arrefecimento) para garantir<br />
que os produtos não sejam danificados.<br />
ATENÇÃO: Nunca desligue a máquina de secar roupas<br />
antes que tenha terminado o programa de secagem.<br />
Nesse caso, retire rapidamente todas as peças de<br />
roupa e pendure-as para que se esfriem rapidamente.<br />
• Não toque na máquina com os pés descalços nem com<br />
as mãos ou os pés molhados ou húmidos.<br />
• Não puxe o cabo eléctrico para tirar a ficha da tomada,<br />
pegue a ficha mesmo.<br />
• Não toque a água de descarga, que poderá chegar a<br />
temperaturas altas.<br />
• Em nenhum caso <strong>for</strong>ce a porta para abri-la: poderá<br />
danificar o mecanismo de segurança que a protege<br />
contra aberturas acidentais.<br />
• Se houver avarias, em nenhum caso mexa nos<br />
mecanismos internos para tentar reparar.<br />
• Verifique sempre que criança não se aproximem da<br />
máquina a funcionar.<br />
• Se <strong>for</strong> preciso deslocar a máquina, são precisas pelo<br />
menos duas ou três pessoas, com a máxima atenção.<br />
Nunca sozinho porque a máquina é muito pesada.<br />
• Antes de colocar a roupa controle que o tambor esteja<br />
vazio.<br />
• A porta da máquina a enxugar tende a esquentar-se.<br />
• Não enxugue roupa que tenha sido lavada com<br />
solventes inflamáveis (p. ex. trerimbitina).<br />
• Não enxugue espuma de borracha nem<br />
elastômeros análogos.<br />
• Assegure-se que qu<strong>and</strong>o estiver a enxugar, a<br />
torneira da água esteja aberta.<br />
Eliminação<br />
• Eliminação do material de embalagem: obedeça os<br />
regulamentos locais, de maneira que as embalagens<br />
possam ser reutilizadas.<br />
• A directiva Europeia 2002/96/CE relativa aos resíduos<br />
de equipamentos eléctricos e electrónicos prevê que<br />
os electrodomésticos não devem ser eliminados no<br />
normal fluxo dos resíduos sólidos urbanos. Os aparelhos<br />
que deixaram de ser utilizados devem ser recolhidos<br />
separadamente para optimizar a taxa de recuperação<br />
e reciclagem dos materiais que os compõem e impedir<br />
potenciais danos à saúde e ao meio ambiente. O símbolo<br />
do contentor de lixo barrado com uma cruz está presente<br />
em todos os produtos para lembrar o dever de recolha<br />
selectiva. Para mais in<strong>for</strong>mações sobre o correcto<br />
desmantelamento dos electrodomésticos, contacte o<br />
serviço público especializado ou os revendedores.<br />
Abertura manual da porta de vidro<br />
No caso de falta de energia eléctrica, é possível abrir a<br />
porta de vidro para retirar a roupa efectu<strong>and</strong>o as seguintes<br />
operações:<br />
1. tire a ficha da tomada de<br />
corrente.<br />
2. verifique que o nível de<br />
água no interior da máquina<br />
seja inferior respeito à<br />
abertura da porta de vidro;<br />
caso contrário, tirar a água<br />
em excesso através do tubo<br />
de descarga recolhendo-a<br />
num balde como indicado na<br />
figura.<br />
3. remova o painel de cobertura no lado anterior da<br />
máquina de lavar roupa (veja a página seguinte).<br />
4. utiliz<strong>and</strong>o a lingueta indicada na figura, puxe para o<br />
externo até liberar o tirante de plástico do fecho; puxá-lo<br />
sucessivamente para baixo até ouvir um “clique” que indica<br />
que a porta está desbloqueada.<br />
5. abra a porta; se ainda não conseguir, repita a operação.<br />
6. monte outra vez o painel, certifique-se, antes de<br />
empurrá-la na máquina, que os ganchos <strong>for</strong>am colocados<br />
nas respectivas ranhuras.<br />
PT<br />
41
210<br />
180<br />
150<br />
120<br />
90<br />
60<br />
Descrição da máquina<br />
PT<br />
PORTA DE VIDRO<br />
PEGA DA PORTA<br />
DE VIDRO<br />
PAINEL DE<br />
COMANDOS<br />
BASE<br />
PÉS REGULÁVEIS<br />
PORTA DE VIDRO<br />
Para abrir a porta de vidro<br />
<strong>use</strong> sempre a sua pega (veja<br />
a figura).<br />
correcta dosagem. Para o uso do detergente em pó,<br />
coloque o recipiente na cavidade B.<br />
3. Gaveta adicional: água de Javel<br />
! Se utilizar a gaveta adicional 3 exclui-se a prélavagem.<br />
recipiente para os aditivos: para amaciador ou aditivos<br />
líquidos. Recomenda-se não superar o nível máximo<br />
indicado pela grade e diluir os amaciadores concentrados.<br />
GAVETA DOS ETERGENTES<br />
A gaveta dos detergentes<br />
encontra-se no interior da<br />
máquina e para se ter acesso<br />
deve-se abrir a porta. Para<br />
a dosagem dos detergentes<br />
consulte o capítulo<br />
“Detergentes e roupa”.<br />
B<br />
A<br />
2<br />
3<br />
1<br />
1. recipiente para a prélavagem:<br />
<strong>use</strong> detergente em<br />
pó.<br />
! Antes de deitar detergente<br />
verifique se há dentro a<br />
gaveta adicional 3.<br />
2. recipiente para a lavagem:<br />
No caso do uso de detergente<br />
líquido, aconselha-se usar a<br />
parede divisória A <strong>for</strong>necido<br />
com o aparelho para uma<br />
Painel de com<strong>and</strong>os “touch control”<br />
Para modificar as<br />
configurações, carregue<br />
levemente no ícone dentro da<br />
área sensível (touch control)<br />
como indicado na figura.<br />
Modalidade de St<strong>and</strong> by<br />
Esta máquina de lavar roupa, em con<strong>for</strong>midade com as<br />
novas normas sobre a economia energética, dispõe de um<br />
sistema de desligação automática (st<strong>and</strong> by) que entra em<br />
função aproximadamente 30 minutos depois, no caso de<br />
inutilização. Carregue brevemente no botão<br />
ON/OFF e aguarde até a reactivação da máquina.<br />
Consumo em off-mode: 0,5 W<br />
Consumo em Left-on: 0,5 W<br />
42
Painel de com<strong>and</strong>os “touch control”<br />
Selector de<br />
PROGRAMAS<br />
M2<br />
M1<br />
Botão CENTRIFUGAÇÃO<br />
Botão TEMPERATURA<br />
Botão com indicador luminoso<br />
START/PAUSE<br />
Indicador<br />
luminoso<br />
ECO<br />
Ícone FASES DE<br />
LAVAGEM<br />
PT<br />
VISOR<br />
Botão com indicador luminoso<br />
ON/OFF<br />
Botão<br />
SECAGEM<br />
Botões<br />
OPÇÕES<br />
Botão com indicador luminoso ON/OFF: carregue brevemente<br />
no botão para ligar ou desligar a máquina. O indicador luminoso<br />
verde indica que a máquina está ligada. Para desligar a máquina<br />
de lavar roupa durante a lavagem, é necessário manter<br />
pressionado o botão por mais tempo, aproximadamente 3<br />
segundos; uma pressão breve ou acidental não permitirá o<br />
desligamento da máquina. O desligamento da máquina durante<br />
uma lavagem em curso anula a própria lavagem.<br />
Selector de PROGRAMAS: pode ser girado em ambas as<br />
direcções. Para estabelecer o programa mais correcto, veja<br />
a “Tabela dos Programas”. Durante a lavagem o selector<br />
permanece parado.<br />
Botões M1-M2: manter pressionado um dos botões para<br />
memorizar um ciclo e as próprias personalizações preferidas.<br />
Para chamar um ciclo precedentemente memorizado, pressionar<br />
o respectivo botão.<br />
Botão SECAGEM: carregue na tecla para reduzir<br />
ou excluir a secagem; o nível ou o tempo de secagem<br />
seleccionado é indicado no visor (ver “Como efectuar um ciclo<br />
de lavagem ou secagem”).<br />
Botão TEMPERATURA: pressionar para modificar ou<br />
excluir a temperatura; o valor escolhido é indicado no visor (ver<br />
“Como efectuar um ciclo de lavagem ou secagem”).<br />
Botão CENTRIFUGAÇÃO: pressionar para modificar ou<br />
excluir a centrifugação; o valor escolhido é indicado no visor (ver<br />
“Como efectuar um ciclo de lavagem ou secagem”).<br />
Botão INÍCIO POSTERIOR: pressionar para configurar<br />
um início posterior do programa escolhido; o valor do atraso<br />
programado é indicado no visor (ver “Como efectuar um ciclo<br />
de lavagem”).<br />
Botões com Indicadores luminosos OPÇÕES: para seleccionar<br />
as opções disponíveis. O indicador luminoso relativo à opção<br />
seleccionada ficará aceso (ver “Como efectuar um ciclo de<br />
lavagem ou secagem”).<br />
Ícone FASES DE LAVAGEM: acendem-se para indicar o<br />
estado de avanço do ciclo (Lavagem - Enxaguamento<br />
- Centrifugação/Descarga – Secagem ). A escrita<br />
acende-se quanto o ciclo tiver terminado.<br />
Botão com indicador luminoso START/PAUSE: qu<strong>and</strong>o o<br />
indicador luminoso verde acende-se com intermitência lenta,<br />
Botão INÍCIO<br />
POSTERIOR<br />
Indicador luminoso<br />
de LOCK<br />
Botão com indicador<br />
luminoso BLOQUEIO<br />
DAS TECLAS<br />
carregar no botão para iniciar uma lavagem. Qu<strong>and</strong>o o ciclo<br />
iniciar, o indicador permanecerá aceso fixo. Para colocar em<br />
pausa a lavagem, carregar novamente no botão; o indicador<br />
ficará intermitente com uma luz laranja. Se o indicador “LOCK”<br />
estiver apagado, será possível abrir a porta de vidro. Para fazer<br />
iniciar a lavagem do ponto em que foi interrompida, carregar<br />
novamente no botão.<br />
Indicador luminoso LOCK: indica que a porta de vidro está<br />
bloqueada. Para abrir a porta é necessário colocar o ciclo em<br />
pausa (ver “Como efectuar um ciclo de lavagem ou secagem”).<br />
Botão com indicador luminoso BLOQUEIO DAS TECLAS:<br />
para activar ou desactivar o bloqueio do painel de com<strong>and</strong>os,<br />
manter pressionado o botão por aproximadamente 2 segundos.<br />
O indicador luminoso aceso indica que o painel de com<strong>and</strong>os<br />
está bloqueado (à excepção da tecla ON/OFF). Deste modo,<br />
impedem-se modificações acidentais dos programas, sobretudo<br />
se houver crianças em casa.<br />
Indicador luminoso ECO: o ícone irá acender-se qu<strong>and</strong>o, ao<br />
modificar os parâmetros de lavagem, irá obter-se uma economia<br />
energética de ao menos 10%. Além disto, antes que a máquina<br />
entre na modalidade “St<strong>and</strong> by” o ícone irá acender-se por alguns<br />
segundos; com a máquina desligada estima-se uma economia<br />
energética de aproximadamente 80%.<br />
MODIFICAR IDIOMA<br />
A primeira vez que ligar a máquina aparecerá no visor o<br />
primeiro idioma intermitente. Em correspondência dos 3 botões<br />
à direita do visor aparecerão os símbolos “ “ , “OK” e “V” Os<br />
idiomas mudam automaticamente a cada 3” ou carreg<strong>and</strong>o<br />
nos botões ao lado dos símbolos “ “ e “V”. Com o botão “OK”<br />
confirma-se o idioma que irá fixar-se depois de 2”. Se não<br />
carregar em nenhum botão, após 30” irá recomeçar a troca<br />
automática dos idiomas.<br />
Para modificar o idioma é necessário ligar e desligar a<br />
máquina, nos 30” sucessivos ao desligamento, pressione<br />
contemporaneamente as teclas temperatura + centrifugação<br />
+ início posterior por 5’’ e além de um sinal acústico,<br />
aparecerá no display o idioma configurado a piscar. Ao carregar<br />
nos botões ao lado dos símbolos “ “ e “V” muda-se o idioma.<br />
Com o botão ao lado do símbolo “OK” confirma-se o idioma<br />
que irá fixar-se depois de 2”. Se não carregar em nenhum botão,<br />
após 30” será visualizado o idioma configurado anteriormente.<br />
Ligar a máquina.<br />
43
Como efectuar um ciclo de<br />
lavagem ou secagem<br />
PT<br />
Observação: a primeira vez que utilizar a máquina de lavar<br />
roupa, efectue um ciclo de lavagem sem roupas mas com<br />
detergente, us<strong>and</strong>o o programa algodão 90º sem pré-lavagem.<br />
1.LIGAR A MÁQUINA. Pressionar o botão . Todos os<br />
indicadores luminosos se acenderão por 1 segundo e no<br />
display aparecerá a escrita AQUALTIS; em seguida ficará<br />
aceso o indicador luminoso do botão e o indicador<br />
START/PAUSE ficará intermitente.<br />
2. ESCOLHA DE PROGRAMA. Girar o selector de<br />
PROGRAMAS para a direita ou para a esquerda até<br />
seleccionar o programa desejado; o nome do programa<br />
aparecerá no display; será associada uma temperatura,<br />
uma velocidade de centrifugação que podem ser<br />
modificados. No display aparecerá a duração do ciclo.<br />
3. COLOCAR A ROUPA. Abrir a porta de vidro. Coloque<br />
a roupa dentro da máquina prest<strong>and</strong>o atenção para não<br />
superar a carga máxima indicada na tabela dos programas<br />
na página seguinte.<br />
4. DOSAGEM DO DETERGENTE. Extrair a gaveta e deitar<br />
o detergente nos específicos recipientes como explicado<br />
no parágrafo “Descrição da máquina”.<br />
5. FECHAR A PORTA DE VIDRO.<br />
6. PERSONALIZAR O CICLO DE LAVAGEM. Utilizar os<br />
específicos botões no painel de com<strong>and</strong>os:<br />
Modificar a temperatura e/ou a centrifugação.<br />
A máquina visualiza automaticamente a temperatura e a<br />
centrifugação máximas para o programa seleccionado ou as<br />
últimas seleccionadas se compatíveis com o programa escolhido.<br />
Carreg<strong>and</strong>o no botão pode-se reduzir a temperatura<br />
progressivamente até a lavagem a frio (OFF). Carreg<strong>and</strong>o no botão<br />
pode-se reduzir a centrifugação progressivamente até a sua<br />
exclusão (OFF). Uma ulterior pressão dos botões colocará os<br />
valore novamente aos máximos previstos.<br />
! Excepção: seleccion<strong>and</strong>o o programa a temperatura<br />
pode ser aumentada até a 90º.<br />
Ajustar a secagem<br />
Com a primeira pressão da tecla , a máquina selecciona<br />
automaticamente o nível de secagem máximo compatível<br />
com o programa seleccionado. As pressões sucessivas farão<br />
decrementar o nível e sucessivamente o tempo de secagem<br />
até a sua exclusão “OFF”.Uma ulterior pressão dos botões<br />
colocará os valore novamente aos máximos previstos.<br />
É possível programar a secagem<br />
A - De acordo com o tempo: de 20 até 180 minutos.<br />
B - De acordo com o nível de secagem desejado:<br />
Engomar: indicado para as peças que em seguidas devem<br />
ser passadas a ferro. O nível de humidade resíduo amacia<br />
as dobras e facilita a sua remoção.<br />
Estender: ideal para as peças que não precisam secar<br />
completamente.<br />
Guardar: adapto para as peças que devem ser guardadas<br />
no armário sem que seja necessário passar a ferro.<br />
Extra: adapto para as peças que precisam de uma<br />
secagem completa, como toalhas e roupões.<br />
Caso a carga de roupa para lavar e secar <strong>for</strong><br />
excepcionalmente superior ao máximo permitido, efectuar a<br />
lavagem e após o programa ter acabado, dividir a carga e<br />
colocar novamente uma parte no cesto. Cumprir com as<br />
instruções para efectuar<br />
“Só secagem”. Repetir as mesmas operações para a<br />
carga que ficou. No final da secagem efectua-se sempre<br />
um período de resfriamento.<br />
Só secagem<br />
Seleccione com o selector dos programas uma secagem<br />
( - - ) em função do tipo de tecido. É possível<br />
programar também o nível ou o tempo de secagem<br />
desejado com a tecla SECAGEM .<br />
Programar um início posterior.<br />
Para programar o início atrasado do programa escolhido,<br />
carregue no botão relativo até alcançar o tempo de atraso<br />
desejado. Durante a programação, será visualizado o tempo de<br />
atraso junto à escrita “Inicia em”: e o símbolo intermitente.<br />
Após ter programado o início posterior, o visor mostrará o<br />
símbolo aceso fixo e retornará à visualização da duração do<br />
ciclo configurado com a escrita “Acaba em”: e a duração do<br />
ciclo. Ao carregar no botão INÍCIO POSTERIOR uma só vez,<br />
será visualizado o tempo de atraso programado anteriormente.<br />
Após o início, o visor mostrará a escrita “Inicia em”: e o tempo<br />
de atraso. Uma vez passado o tempo de atraso programado, a<br />
máquina iniciará o ciclo e o visor mostrará a mensagem “Acaba<br />
em”: e o tempo que falta para o fim do ciclo. Para cancelar<br />
a opção INÍCIO POSTERIOR, carregue no botão até que no<br />
display apareça a escrita OFF; o símbolo irá desligar-se.<br />
Modificar as características do ciclo.<br />
• Pressionar o botão para activar a opção; no display<br />
aparecerá o nome da opção e o indicador<br />
correspondente ao botão irá acender-se.<br />
• Pressionar novamente o botão para desactivar a opção;<br />
no display aparecerá o nome da opção e a palavra OFF<br />
e o indicador irá apagar-se.<br />
! Se a opção seleccionada não <strong>for</strong> compatível com o<br />
programa escolhido, a incompatibilidade será indicada com<br />
a intermitência do indicador luminoso e um sinal acústico (3<br />
beep) e a opção não será activada.<br />
! Se a opção seleccionada não <strong>for</strong> compatível com uma<br />
outra programada anteriormente, o respectivo indicador<br />
luminoso irá piscar e será activada somente a segunda, o<br />
indicador luminoso do botão ficará aceso fixo.<br />
! As opções podem variar a carga recomendada e/ou a<br />
duração do ciclo.<br />
7. INICIAR O PROGRAMA. Carregar no botão START/<br />
PAUSE. O indicador luminoso ficará aceso fixo e a porta irá<br />
bloquear-se (indicador luminoso LOCK aceso). Os ícones<br />
relativos às fases de lavagem acendem-se durante o ciclo<br />
para indicar a fase em curso. Para modificar um programa<br />
durante a realização do ciclo, colocar a máquina de lavar<br />
roupa em pausa carreg<strong>and</strong>o no botão START/PAUSE;<br />
seleccionar o ciclo desejado e carregar novamente no botão<br />
START/PAUSE. Para abrir a porta durante a realização de<br />
um ciclo, carregar no botão START/PAUSE; se o indicador<br />
luminoso LOCK estiver apagado, será possível abrir a<br />
porta. Carregar novamente no botão START/PAUSE para<br />
fazer iniciar o programa do ponto em que foi interrompido.<br />
8. FIM DO PROGRAMA. É indicado pela escrita END acesa. A<br />
porta de vidro poderá ser aberta imediatamente. Se o indicador<br />
luminoso START/PAUSE piscar, carregar no botão para terminar<br />
o ciclo. Abrir a porta, retirar a roupa e desligar a máquina.<br />
! Se desejar anular um ciclo já iniciado, mantenha pressionada a tecla<br />
até que o ciclo será interrompido e a máquina irá desligar-se.<br />
44
Programas e opções<br />
Tabela dos Programas<br />
Icone<br />
Descrição do Programa<br />
Temp.<br />
max.<br />
(°C)<br />
Velocità<br />
Detergentes e aditivos<br />
max. (rotações<br />
por gem Pré- Lava-<br />
Água de Amacia-<br />
Seca-<br />
minuto) lavagem gem Javel dor<br />
Algodão Coloridos (2): brancos e coloridos delicados muito sujos. 40° 1600 • - • • • 10<br />
Sintéticos resistentes 60° 800 • - • • • 5<br />
Brancos 60° 1600 • - • - • 6<br />
Coloridos 40° 1600 • - • • • 6<br />
Escuros 30° 800 • - • - • 6<br />
Lã Platinum Care: para lã, cashmere, etc. 40° 800 • - • - • 2,5<br />
Ultradelicado 30° 0 • - • - • 1<br />
Antialérgico 60° 1600 • - • - • 6<br />
Enxaguamento - 1600 • - - • • 10<br />
Centrifugação e Descarga - 1600 • - - - - 10<br />
Lava e Seca 30° 1600 • - • - • 1<br />
Secagem Algodão - - • - - - - 7<br />
Secagem Lã - - • - - - - 2,5<br />
Secagem Sintéticos - - • - - - - 5<br />
Algodão com pré-lavagem<br />
(Acrescentar o detergente no específico compartimento).<br />
90° 1600 • • • - • 10<br />
Algodão Brancos (1): brancos e coloridos resistentes muito sujos.<br />
60°<br />
(Max. 90°C)<br />
1600 • - • • • 10<br />
A duração do ciclo indicada no visor ou no manual é uma estima calculada com base nas condições padrão. O tempo efectivo poderá variar a depender de vários factores, tais como a temperatura<br />
e a pressão da água em entrada, a temperatura ambiental, a quantidade de detergente, a quantidade e o tipo de carga, o balanceamento da carga e as opções adicionais seleccionadas.<br />
Carga<br />
max.<br />
(Kg)<br />
Duração<br />
ciclo<br />
(*) É possível controlar a duração dos programas<br />
de lavagem no visor.<br />
PT<br />
(*) Nota: após aproximadamente 10 minutos do START, a máquina, con<strong>for</strong>me a carga efectuada, irá calcular novamente e indicar o tempo faltante para o fim do programa.<br />
Para todos Test Institutes:<br />
1) Programa de controlo segundo a directiva EN 50229: configurar o programa com uma temperatura 60°C.<br />
2) Programa longo para algodão: configurar o programa com uma temperatura 40°C.<br />
Opções de Lavagem<br />
Super Lavagem<br />
Esta opção garante<br />
3<br />
1<br />
uma lavagem com altas<br />
per<strong>for</strong>mances graças ao uso<br />
de uma maior quantidade de<br />
água na fase inicial do ciclo<br />
2<br />
e a uma maior duração do<br />
programa, é útil para eliminar<br />
as manchas mais resistentes.<br />
Pode ser utilizada com ou<br />
sem lixívia.<br />
Se desejar efectuar também<br />
o alvejo, coloque a gaveta adicional 3, <strong>for</strong>necida, na gaveta<br />
1. Qu<strong>and</strong>o deitar a água de javel, não ultrapasse o nível<br />
“máx” indicado no pino central (veja a figura). Para efectuar<br />
somente o branqueamento sem efectuar a lavagem<br />
completa, deitar a lixívia na gaveta adicional 3, estabelecer<br />
o programa “Enxaguamento” e activar a opção “Super<br />
Lavagem” .<br />
! Não pode ser activada com os programas , , , ,<br />
, , , , , , .<br />
Extra Enxaguamento<br />
Seleccion<strong>and</strong>o esta opção aumenta-se a eficácia da<br />
enxaguadura, e garante-se a máxima remoção dos<br />
resíduos de detergente. É útil para quem tem a pele<br />
particularmente sensível aos detergentes. Aconselha-se<br />
o uso desta opção com a máquina de lavar roupa com a<br />
carga cheira ou com gr<strong>and</strong>es doses de detergente.<br />
! Não pode ser activada com os programas , , , , ,<br />
, , .<br />
Engomar Fácil<br />
Seleccion<strong>and</strong>o esta opção, a lavagem e a centrifugação<br />
serão oportunamente modificados para reduzir a <strong>for</strong>mação<br />
de rugas. No fim do ciclo a máquina de lavar roupa<br />
efectuará lentas rotações do tambor; os indicadores<br />
luminosos “Engomar Fácil” e START/PAUSE irão piscar.<br />
Para terminar o ciclo, carregar no botão START/PAUSE ou<br />
no botão “Engomar Fácil”.<br />
! Não pode ser activada com os programas , , , ,<br />
, , , , .<br />
! Se também desejar enxugar, este botão estará activado<br />
somente em combinação com o nível “Engomar”.<br />
Rápido<br />
Seleccion<strong>and</strong>o esta opção, diminui de até 50% a duração<br />
do programa, con<strong>for</strong>me o ciclo escolhido, garantindo ao<br />
mesmo tempo uma economia de água e energia eléctrica.<br />
Use este ciclo apenas para roupas não excessivamente<br />
sujas.<br />
! Não pode ser activada com os programas , , , ,<br />
, , , , , , .<br />
45
Detergentes e roupa<br />
PT<br />
Detergente<br />
A escolha e a quantidade de detergente dependem do tipo<br />
de tecido (algodão, lã, seda...), da cor, da temperatura de<br />
lavagem, do grau de sujidade e da dureza da água. Uma<br />
correcta dosagem de detergente evita desperdícios e protege o<br />
meio ambiente: mesmos os detergentes biodegradáveis contêm<br />
componentes que alteram o equilíbrio da natureza.<br />
Aconselha-se:<br />
• usar detergente em pó para as peças de algodão<br />
brancas e para a pré-lavagem.<br />
• usar detergente líquido para peças delicadas de<br />
algodão e para todos os programas com baixas<br />
temperaturas.<br />
• usar detergente líquido delicado para lã e seda.<br />
O detergente deve ser deitado antes do início da lavagem<br />
no específico recipiente ou no doseador que deve ser<br />
colocado directamente no tambor. Neste caso, não é<br />
possível seleccionar o ciclo Algodão com pré-lavagem.<br />
! Não <strong>use</strong> detergentes para lavagem à mão, porque<br />
<strong>for</strong>mam espuma demais.<br />
Preparar a roupa<br />
• Desdobre bem as roupas antes de carregá-las.<br />
• Divida a roupa em função do tipo de tecido (símbolo na<br />
etiqueta da roupa) e a da cor, prest<strong>and</strong>o atenção para<br />
separar as peças coloridas das peças brancas;<br />
• Esvazie as algibeiras e verifique se há botões soltos;<br />
• Não ultrapasse os valores indicados na Tabela dos<br />
Programas que se referem ao peso da roupa enxuta.<br />
Quanto pesa a roupa?<br />
1 lençol 400-500 gr.<br />
1 fronha 150-200 gr.<br />
1 toalha 400-500 gr.<br />
1 roupão 900-1200 gr.<br />
1 toalha de rosto 150-250 gr.<br />
1 calça de ganga 400-500 gr.<br />
1 camisa 150-200 gr.<br />
Conselhos de lavagem<br />
Brancos: utilize o ciclo para a lavagem de peças<br />
brancas. O programa foi estudado para preservar no tempo<br />
a luminosidade das peças brancas. Para obter melhores<br />
resultados, recomenda-se o uso de detergente em pó.<br />
Ao seleccionar a função de secagem, no final da lavagem<br />
é executada automaticamente uma secagem como ao ar<br />
livre, com as vantagens de não favorecer o amarelecimento<br />
devido aos raios solares e evitar a perda de brancura devido<br />
a eventuais poeiras presentes no ar. É possível configurar<br />
apenas as secagens por nível.<br />
Coloridos: utilizar o ciclo para a lavagem de peças<br />
de cor clara. O programa foi estudado para preservar no<br />
tempo a luminosidade das cores.<br />
Escuros: utilizar o programa para a lavagem de peças<br />
escuras. O programa foi estudado para preservar no<br />
tempo a duração das cores escuras. Para obter melhores<br />
resultados, recomenda-se o uso de detergente líquido,<br />
preferivelmente para peças escuras.<br />
Ao seleccionar a função de secagem, no final da lavagem<br />
é executada automaticamente uma secagem delicada que<br />
protege as cores das peças de roupa. No display surge o<br />
nível “Estender”. Carga máx.: 3 kg.<br />
Lã: o ciclo de lavagem “Lã” desta máquina de lavar<br />
roupa <strong>Hotpoint</strong>-Ariston foi testado e aprovado pela<br />
Woolmark Company para a lavagem de vestuário em lã<br />
classificado como “lavável à mão”, desde que a lavagem<br />
seja executada de acordo com as instruções indicadas<br />
na etiqueta da peça e com as indicações <strong>for</strong>necidas<br />
pelo produtor do electrodoméstico. <strong>Hotpoint</strong>-Ariston é<br />
a primeira marca de máquinas de lavar roupa a obter<br />
a certificação Woolmark Apparel Care - Platinum da<br />
Woolmark Company pelo seu desempenho de lavagem e<br />
consumo de água e energia. (M1135)<br />
Ultradelicado: utilize o programa para a lavagem de<br />
peças muito delicadas, que possuem aplicações como<br />
aplicações ou brilhantes.<br />
Recomenda-se virar do avesso as roupas antes de lavá-las<br />
e colocar as peças pequenas no saquinho específico para<br />
a lavagem das peças delicadas.<br />
Para obter melhores resultados, recomenda-se o uso de<br />
detergente líquido para peças delicadas.<br />
Para a lavagem de peças de Seda e Cortinas seleccionar o<br />
ciclo e activar a opção (neste caso, será possível<br />
activar também a opção “Extra Enxaguamento”); a<br />
máquina terminará o ciclo com a roupa de molho e o<br />
indicador luminoso irá piscar. Para descarregar a água e<br />
poder retirar a roupa é necessário carregar no botão START/<br />
PAUSE ou no botão .<br />
Ao seleccionar a função de secagem exclusivamente a<br />
tempo, no final da lavagem é executada uma secagem<br />
particularmente delicada, graças a uma movimentação<br />
ligeira e a um jacto de ar a uma temperatura<br />
adequadamente controlada.<br />
Os tempos aconselhados são:<br />
1 kg de sintético --> 160 min.<br />
1 kg de sintético e algodão --> 180 min.<br />
1 kg de algodão --> 180 min.<br />
O grau de secagem dependerá da carga e da composição<br />
do tecido.<br />
Antialérgico: utilizar o programa para remover as principais<br />
causas de alergia, como pólen, ácaros, pelos de gato e cão.<br />
Lava e seca: utilizar o programa para lavar e secar as<br />
peças (Algodão e Sintéticos) pouco sujas em pouco tempo.<br />
Seleccion<strong>and</strong>o este ciclo é possível lavar e secar até 1 kg<br />
de roupa em apenas 45 minutos.Para obter os melhores<br />
resultados, utilize um detergente líquido; pré-tratar os punhos,<br />
colarinhos e manchas.<br />
Manchas resistentes: tratar as manchar mais<br />
resistentes com um sabão sólido antes da lavagem e<br />
utilizar o programa Algodão com pré-lavagem.<br />
Sistema de balanceamento da carga<br />
Antes de cada centrifugação, para evitar vibrações<br />
excessivas e para distribuir a carga em modo uni<strong>for</strong>me,<br />
o tambor efectua algumas rotações a uma velocidade<br />
levemente superior àquela de lavagem. Se no fim<br />
de repetidas tentativas a carga ainda não estiver<br />
correctamente balanceada, a máquina efectuará a<br />
centrifugação com uma velocidade inferior àquela<br />
prevista. No caso de um excessivo desbalanceamento, a<br />
máquina de lavar roupa efectuará a distribuição ao invés<br />
da centrifugação. Para favorecer uma melhor distribuição<br />
da carga e o seu correcto balanceamento, aconselha-se<br />
misturar peças gr<strong>and</strong>es com peças pequenas.<br />
46
Anomalias e soluções<br />
Pode acontecer que a máquina não funcione. Antes de telefonar para a Assistência Técnica (veja “Assistência”), verifique se<br />
não se trata de um problema fácil de resolver com ajuda da seguinte lista.<br />
PT<br />
Anomalias:<br />
A máquina de lavar roupa não liga.<br />
O ciclo de lavagem não inicia.<br />
A máquina não carrega água.<br />
A porta da máquina está bloqueada. • Seleccion<strong>and</strong>o a opção ”, no fim do ciclo a máquina de lavar roupa<br />
efectuará lentas rotações do tambor; para terminar o ciclo carregue no botão<br />
START/PAUSE ou no botão ”.<br />
A máquina carrega e descarrega<br />
água continuamente.<br />
A máquina não descarrega ou não<br />
realiza centrifugação.<br />
A máquina de lavar roupa vibra<br />
muito durante a centrifugação.<br />
A máquina está a perder água.<br />
Os ícones relativos à “Fase em<br />
curso” piscam rapidamente<br />
contemporaneamente ao indicador<br />
luminoso ON/OFF.<br />
Está a <strong>for</strong>mar-se demasiada espuma.<br />
A porta da máquina está bloqueada.<br />
A Máquina não seca.<br />
Possíveis causas / Solução:<br />
• A ficha não está colocada na tomada eléctrica, ou não o suficiente para haver<br />
contacto.<br />
• Em casa não há corrente.<br />
• A porta de vidro não está bem fechada.<br />
• O botão START/PAUSE não foi pressionado.<br />
• A torneira da água não está aberta.<br />
• Foi programado um atraso de uma hora no início.<br />
• O tubo de alimentação de água não está ligado na torneira.<br />
• O tubo está dobrado.<br />
• A torneira da água não está aberta.<br />
• Está a faltar água em casa.<br />
• Não há suficiente pressão.<br />
• O botão START/PAUSE não foi pressionado.<br />
• O tubo de descarga não está instalado entre 65 e 100 cm. de altura do chão<br />
(veja “Instalação”).<br />
• A ponta do tubo de descarga está imersa na água (veja “Instalação”).<br />
• Se a morada encontrar-se nos últimos <strong>and</strong>ares de um edifício, é possível que<br />
aconteçam fenómenos de sifão por causa dos quais a máquina de lavar roupa<br />
carrega e descarrega água continuamente. Para eliminar este inconveniente, há<br />
a disposição no comércio apropriadas válvulas contra o efeito sifão.<br />
• Da descarga na parede não foi sangrado o ar.<br />
• No programa não há descarga: com alguns programas será necessário iniciar<br />
a descarga manualmente (veja “Programas e opções”).<br />
• Está activada a opção “Engomar Fácil”: para completar o programa, carregue<br />
no botão START/PAUSE (veja “Programas e opções”).<br />
• O tubo de descarga está dobrado (veja “Instalação”).<br />
• A conduta de descarga está entupida.<br />
• O tambor, no momento da instalação, não foi liberado correctamente (veja<br />
“Instalação”).<br />
• A máquina não está nivelada (veja “Instalação”).<br />
• A máquina está apertada entre móveis e parede (veja “Instalação”).<br />
• A carga está desbalanceada (veja “Detergentes e roupa”).<br />
• O tubo de alimentação da água não está bem enroscado (veja “Instalação”).<br />
• O gaveta dos detergentes está entupida (para limpá-la veja “Manutenção e<br />
cuidados”).<br />
• O tubo de descarga não está bem fixado (veja “Instalação”).<br />
• Desligue a máquina e tire a ficha da tomada, aguarde aproximadamente<br />
1 minuto e volte a ligá-la. Se a anomalia persistir, contacte a Assistência<br />
Técnica.<br />
• O detergente não é específico para máquina de lavar roupa (deve haver a escrita<br />
“para máquina de lavar”, “à mão e para máquina de lavar” ou similares).<br />
• A dose foi excessiva.<br />
• Efectue o procedimento de desbloqueio manual (veja “Precauções e<br />
conselhos”).<br />
• A ficha não está colocada na tomada eléctrica, ou não o suficiente para haver<br />
contacto.<br />
• Em casa não há corrente.<br />
• A porta da máquina não está bem fechada.<br />
• Foi programado um início posterior.<br />
• A SECAGEM fica em posição OFF.<br />
47
Assistência<br />
PT<br />
Antes de contactar a Assistência Técnica:<br />
• Verifique se consegue resolver a anomalia sozinho (veja “Anomalias e soluções”);<br />
• Reinicie o programa para verificar se o inconveniente foi resolvido;<br />
• Em caso negativo, contacte o Serviço de Assistência Técnica autorizado.<br />
! No caso de uma incorrecta instalação ou de um uso não correcto do aparelho, o serviço de assistência será a pagamento.<br />
! Nunca recorra a técnicos não autorizados.<br />
Comunique:<br />
• o tipo de anomalia;<br />
• o modelo da máquina (Mod.);<br />
• o número de série (S/N).<br />
Estas in<strong>for</strong>mações encontram-se na placa de identificação colocada no aparelho.<br />
Nota: para sair do “Demo Mode”, desligue a máquina de lavar roupa, carregue contemporaneamente por 3 segundos nos<br />
botões “START/PAUSE” e “ON/OFF” .<br />
48
Instructies voor<br />
installatie en gebruik<br />
WASDROOGMACHINE<br />
! Dit symbool herinnert u eraan om deze gebruiksh<strong>and</strong>leiding te lezen.<br />
NL<br />
NL<br />
Nederl<strong>and</strong>s<br />
Inhoud<br />
Installatie, 50-51<br />
Uitpakken en waterpas zetten<br />
Water en elektrische aansluitingen<br />
Technische gegevens<br />
Onderhoud en verzorging, 52<br />
Afsluiten van water en stroom<br />
Reinigen van de Wasdroogmachine<br />
Reinigen van het wasmiddelbakje<br />
Verzorging van de trommel<br />
Reinigen van de pomp<br />
Controle van de buis van de watertoevoer<br />
AQUALTIS<br />
AQD1070D 69<br />
Voorzorgsmaatregelen en advies, 53<br />
Algemene veiligheid<br />
Afvalverwijdering<br />
H<strong>and</strong>matige opening van het deurtje<br />
Beschrijving van de Wasdroogmachine, 54-55<br />
“Touch-control” bedieningspaneel<br />
Het uitvoeren van een was- of droogcyclus, 56<br />
Programma’s en opties, 57<br />
Programmatabel<br />
Wasopties<br />
Wasmiddelen en wasgoed, 58<br />
Wasmiddel<br />
Voorbereiden van het wasgoed<br />
Wastips<br />
Balanceersysteem van de lading<br />
Storingen en oplossingen, 59<br />
Service, 60<br />
49
Installatie<br />
NL<br />
! Het is belangrijk dit boekje te bewaren, zodat u<br />
het op ieder gewenst moment kunt raadplegen.<br />
In het geval u de Wasdroogmachine verkoopt<br />
of u verhuist, moet u de h<strong>and</strong>leiding bij het<br />
apparaat bewaren.<br />
! Lees de instructies a<strong>and</strong>achtig door: u vindt<br />
er belangrijke in<strong>for</strong>matie betreffende installatie,<br />
gebruik en veiligheid.<br />
! In de envelop vindt u samen met deze<br />
gebruiksaanwijzing, de garantie en onderdelen<br />
die nodig zijn voor de installatie.<br />
Uitpakken en waterpas zetten<br />
Uitpakken<br />
1. Zodra u de Wasdroogmachine uitgepakt<br />
heeft, dient u te controleren of hij niet<br />
beschadigd is tijdens het transport. Indien<br />
dit wel het geval is moet hij niet worden<br />
aangesloten en moet u contact opnemen met<br />
de h<strong>and</strong>elaar.<br />
2. Verwijder de 4<br />
beschermschroeven<br />
voor het transport<br />
en de bijbehorende<br />
afst<strong>and</strong>sleider die zich<br />
aan de achterkant<br />
bevinden (zie<br />
afbeelding).<br />
3. Sluit de gaten af met de in de envelop<br />
bijgeleverde plastic doppen.<br />
4. Bewaar alle onderdelen; mocht de<br />
Wasdroogmachine ooit nog worden vervoerd,<br />
dan moeten deze weer worden aangebracht<br />
om interne schade te voorkomen.<br />
!Het verpakkingsmateriaal is geen speelgoed<br />
voor kinderen.<br />
Waterpas zetten<br />
1. Installeer de Wasdroogmachine op een<br />
rechte en stevige vloer en laat hem niet tegen<br />
muren of meubels leunen.<br />
2. Compenseer<br />
eventuele<br />
oneffenheden door<br />
de stelvoetjes vast of<br />
los te draaien totdat<br />
de automaat volledig<br />
horizontaal staat (hij<br />
mag niet meer dan 2<br />
graden hellen).<br />
! Een correcte nivellering geeft de machine<br />
stabiliteit en vermijdt, vooral tijdens de<br />
centrifuge, vibraties en lawaai.<br />
! In het geval de Wasdroogmachine op<br />
vloerbedekking of tapijt staat regelt u de<br />
stelvoetjes zodanig dat onder de automaat<br />
genoeg ruimte is voor ventilatie.<br />
Water en elektrische<br />
aansluitingen<br />
Aansluiting van de watertoevoerslang<br />
! Voordat u watertoevoerbuis aansluit op het<br />
waternet moet u het water laten lopen totdat<br />
het helder is.<br />
afbeelding).<br />
1. Verbind de<br />
watertoevoerslang aan<br />
de Wasdroogmachine<br />
door hem met de<br />
haakse aansluiting<br />
op de betreffende<br />
watertoevoer<br />
te schroeven,<br />
rechtsboven aan<br />
de achterkant (zie<br />
2. Sluit de toevoerbuis<br />
aan op de<br />
koudwaterkraan met<br />
een mondstuk met<br />
schroefdraad van 3/4<br />
gas (zie afbeelding).<br />
3. Let erop dat er geen knellingen of kronkels in<br />
de buis zijn.<br />
! De waterdruk van de kraan moet zich<br />
binnen de waarden van de tabel Technische<br />
Gegevens bevinden (zie bladzijde hiernaast).<br />
! Als de toevoerbuis niet lang genoeg is moet u<br />
zich wenden tot een gespecialiseerde winkel of<br />
een bevoegde installateur.<br />
! Gebruik nooit tweedeh<strong>and</strong>s of oude slangen,<br />
maar alleen die slagen die bij het apparaat<br />
worden geleverd.<br />
50
Aansluiting van de afvoerbuis<br />
65 - 100 cm<br />
Verbind de afvoerbuis,<br />
zonder hem te buigen,<br />
aan een afvoerleiding<br />
of aan een afvoer<br />
in de muur die zich<br />
tussen de 65 en 100<br />
cm van de grond af<br />
bevindt.<br />
! Het snoer mag niet geknikt of samengedrukt<br />
worden.<br />
! De voedingskabel en de stekker mogen<br />
alleen door een bevoegde installateur worden<br />
vervangen.<br />
Belangrijk! De fabrikant kan niet aansprakelijk<br />
worden gesteld wanneer deze normen niet<br />
worden nageleefd.<br />
NL<br />
Als alternatief kunt u<br />
de afvoerbuis aan de<br />
r<strong>and</strong> van een wasbak<br />
of badkuip hangen<br />
nadat u hem met de<br />
steun aan de kraan<br />
heeft bevestigd (zie<br />
afbeelding).<br />
Het uiteinde van de<br />
afvoerslang mag niet<br />
onder water hangen.<br />
! Gebruik nooit verlengstukken voor de<br />
slang; indien dit niet te vermijden is moet het<br />
verlengstuk dezelfde doorsnede hebben als de<br />
oorspronkelijke slang en mag hij niet langer zijn<br />
dan 150 cm.<br />
Elektrische aansluiting<br />
Voordat u de stekker in het stopcontact steekt<br />
moet u zich ervan verzekeren dat:<br />
• het stopcontact geaard is en voldoet aan de<br />
geldende normen;<br />
• het stopcontact het maximum vermogen<br />
van de Wasdroogmachine kan verdragen,<br />
zoals aangegeven in de tabel Technische<br />
Gegevens (zie hiernaast);<br />
• de spanning zich bevindt tussen de waarden<br />
die zijn aangegeven in de tabel Technische<br />
Gegevens (zie hiernaast);<br />
• de contactdoos geschikt is voor de stekker<br />
van de automaat. Indien dit niet zo is moet<br />
of de stekker of het stopcontact vervangen<br />
worden.<br />
! De machine mag alleen binnenshuis op een<br />
vorstvrije en droge plek worden geïnstalleerd<br />
om elektronische schade door bevriezing of<br />
condensatie te voorkomen.<br />
! Als de Wasdroogmachine is geïnstalleerd moet<br />
het stopcontact gemakkelijk te bereiken zijn.<br />
! Gebruik geen verlengsnoeren of<br />
dubbelstekkers.<br />
Technische gegevens<br />
Model AQD1070D 69<br />
Afmetingen<br />
Vermogen<br />
Elektrische<br />
aansluitingen<br />
Aansluiting<br />
waterleiding<br />
Snelheid<br />
centrifuge<br />
Controleprogramma’s<br />
volgens<br />
de<br />
norm<br />
EN 50229<br />
breedte cm 59,5<br />
hoogte cm 85<br />
diepte cm 64,5<br />
van 1 tot 10 kg voor het<br />
wassen;<br />
van 1 tot 7 kg voor het drogen;<br />
zie het typeplaatje met de technische<br />
eigenschappen dat op<br />
het apparaat is bevestigd<br />
max. druk 1 MPa (10 bar)<br />
min. druk 0,05 MPa (0,5 bar)<br />
Inhoud trommel 71 liters<br />
tot 1600 toeren per minuu<br />
wassen: programma ;<br />
temperatuur 60°C; uitgevoerd<br />
met 10 kg lading.<br />
drogen: het drogen van de<br />
kleinste lading moet worden<br />
uitgevoerd door het selecteren<br />
van het droogniveau<br />
“EXTRA”. De lading moet<br />
bestaan uit 3 lakens, 2 kussensloop<br />
en 1 h<strong>and</strong>doek;<br />
het drogen van het overgebleven<br />
wasgoed moet<br />
worden uitgevoerd door het<br />
droogniveau “EXTRA” te<br />
selecteren.<br />
Deze apparatuur voldoet<br />
aan de volgende CE voorschriften:<br />
- 2004/108/CE (Elektromagnetische<br />
compatiabiliteit)<br />
- 2002/96/CE<br />
- 2006/95/CE (Laagspanning)<br />
51
Onderhoud en verzorging<br />
NL<br />
Afsluiten van water en stroom<br />
• Sluit na iedere wasbeurt de kraan<br />
af. Hiermee beperkt u slijtage van de<br />
waterinstallatie van de Wasdroogmachine<br />
alsmede lekkagegevaar.<br />
• Sluit altijd eerst de stroom af voordat u<br />
de Wasdroogmachine schoonmaakt en<br />
gedurende onderhoudswerkzaamheden.<br />
Toegang tot het voorvakje:<br />
1<br />
2<br />
Reinigen van de<br />
Wasdroogmachine<br />
De buitenkant en de rubberen onderdelen<br />
kunnen met een spons en een lauw sopje<br />
worden schoongemaakt. Gebruik nooit<br />
schuurmiddelen of oplosmiddelen.<br />
Reinigen van het wasmiddelbakje<br />
1<br />
2<br />
1<br />
2<br />
Verwijder het laatje door<br />
op het hendeltje (1) te<br />
drukken en het naar<br />
voren te trekken (2) (zie<br />
afbeelding).<br />
Was het onder<br />
stromend water. Dit<br />
moet u regelmatig<br />
doen.<br />
Verzorging van de trommel<br />
• Laat de deur van de Wasdroogmachine altijd<br />
op een kier staan om te voorkomen dat er<br />
nare luchtjes worden gevormd.<br />
Reinigen van de pomp<br />
De Wasdroogmachine is voorzien van een<br />
zelfreinigende pomp die niet hoeft te worden<br />
onderhouden. Het kan echter gebeuren dat<br />
kleine voorwerpen (muntjes, knopen) in het<br />
voorvakje dat de pomp beschermt en zich aan<br />
de onderkant ervan bevindt, terechtkomen.<br />
! Verzeker u ervan dat de wascyclus beëindigd<br />
is en haal de stekker uit het stopcontact.<br />
1. verwijder het afdekpaneel aan de voorzijde<br />
van de Wasdroogmachine door er op het<br />
midden op te drukken. Duw beide zijkanten<br />
naar beneden toe en verwijder het paneel (zie<br />
afbeeldingen).<br />
2. plaats een bakje om<br />
het water op te vangen<br />
dat eruit zal lopen (circa<br />
1,5 l) (zie afbeelding).<br />
3. draai het deksel eraf,<br />
tegen de klok in (zie<br />
afbeelding).<br />
4. maak de binnenkant goed schoon;<br />
5. schroef het deksel er weer op;<br />
6. monteer het paneel weer, met de haakjes<br />
goed bevestigd in de juiste openingen, voordat<br />
u het paneel tegen de machine a<strong>and</strong>rukt.<br />
Controle van de buis van de<br />
watertoevoer<br />
Controleer minstens een keer per jaar de<br />
watertoevoerbuis. Als er barstjes of scheuren<br />
in zitten moet hij vervangen worden:<br />
gedurende het wassen kan de hoge waterdruk<br />
onverwachts breuken veroorzaken.<br />
52
Voorzorgsmaatregelen en<br />
advies<br />
! Deze Wasdroogmachine is ontworpen en uitgevoerd<br />
volgens de internationale veiligheidsnormen. Deze<br />
aanwijzingen zijn voor uw eigen veiligheid geschreven en<br />
moeten a<strong>and</strong>achtig worden doorgenomen.<br />
Algemene veiligheid<br />
• Dit apparaat is uitsluitend ontworpen voor huishoudelijk<br />
niet-professioneel gebruik.<br />
• Het apparaat mag niet worden gebruikt door personen<br />
(kinderen inbegrepen), met beperkte lichamelijke,<br />
sensorische of mentale vermogens of met onvoldoende<br />
ervaring en kennis, tenzij het gebruik plaatsvindt onder<br />
het toezicht of volgens de instructies van een persoon<br />
die verantwoordelijk is voor hun veiligheid. Kinderen<br />
moeten in de gaten worden gehouden om te verzekeren<br />
dat ze niet met het apparaat spelen.<br />
- Geen ongewassen kledingstukken drogen.<br />
- Kleding die bevuild is met stoffen zoals kookolie, aceton,<br />
alcohol, benzine, kirosine, vlekkenverwijderaar, terpentine,<br />
was en stoffen om was te verwijderen moet met een<br />
grotere hoeveelheid wasmiddel in warm water gewassen<br />
worden alvorens de kleding in de wasdroger te drogen.<br />
- Voorwerpen zoals schuimrubber, douchemutsen,<br />
waterdichte stoffen, artikelen met een rubberen kant en<br />
kleding of kussens die onderdelen van schuimrubber<br />
bevatten mogen niet in de wasdroger gedroogd worden.<br />
- Wasverzachter en gelijksoortige producten moeten<br />
overeenkmostig de instructies van de fabrikant gebruikt<br />
worden.<br />
- Het laatste deel van een droogcyclus wordt uitgevoerd<br />
zonder warmte (koelcyclus) om te zorgen dat de<br />
artikelen niet beschadigd worden.<br />
LET OP: Stop de wasdroger nooit voordat het<br />
droogprogramma beeindigd is. In dit geval snel al het<br />
wasgoed uit de droger halen en het wasgoed ophangen<br />
om het snel te laten drogen.<br />
• Raak de machine niet aan als u blootsvoets bent of met<br />
natte of vochtige h<strong>and</strong>en of voeten.<br />
• Trek de stekker nooit uit het stopcontact door aan het<br />
snoer te trekken, maar altijd door de stekker zelf beet te<br />
pakken.<br />
• Raak het afvoerwater niet aan aangezien het zeer heet<br />
kan zijn.<br />
• Forceer nooit de deur van de Wasdroogmachine: het<br />
veiligheidsmechanisme dat een ongewild openen van de<br />
deur voorkomt, kan beschadigd worden.<br />
• Probeer in geval van storingen nooit zelf de interne<br />
mechanismen van de Wasdroogmachine te repareren.<br />
• Zorg ervoor dat kleine kinderen niet te dicht bij de<br />
machine komen als deze in werking is.<br />
• Als het apparaat verplaatst moet worden doe dit dan<br />
met twee of drie personen tegelijk en heel voorzichtig.<br />
Doe dit nooit alleen, want het apparaat is erg zwaar.<br />
• Voordat u het wasgoed in de automaat laadt, moet u<br />
controleren of hij leeg is.<br />
• De glazen ruit wordt warm gedurende het drogen.<br />
• Droog geen wasgoed dat met ontvlambare<br />
oplosmiddelen is gewassen (b.v. trieline).<br />
• Droog geen schuimrubber of elastomeren of<br />
kledingstukken met rubberen opschriften e.d.<br />
• Controleer dat gedurende het drogen de water<br />
kraan open is.<br />
Afvalverwijdering<br />
• Het verwijderen van het verpakkingsmateriaal: houdt<br />
u aan de plaatselijke normen zodat het materiaal<br />
hergebruikt kan worden.<br />
• De Europese richtlijn 2002/96/CE, betreffende<br />
afgedankte elektrische en elektronische apparatuur,<br />
voorziet dat huishoudelijke apparatuur niet met het<br />
normale afval mag worden meegegeven.<br />
De afgedankte apparatuur moet apart worden<br />
opgehaald om het wedergebruik van materialen waarvan<br />
hij is gemaakt te optimaliseren en om potentiële schade<br />
aan de gezondheid en het milieu te voorkomen. Het<br />
symbool van de afvalemmer met een kruis staat op elk<br />
product, om aan te geven dat het apart moet worden<br />
weggegooid. Voor verdere in<strong>for</strong>matie betreffende het<br />
correcte verwijderen van huishoudelijke apparatuur<br />
kunnen de gebruikers zich wenden tot de gemeentelijke<br />
reinigingsdienst of de verkoper.<br />
H<strong>and</strong>matige opening van het deurtje<br />
Mocht er in het huis geen stroom aanwezig zijn en u wilt<br />
het deurtje openen om de was op te hangen, dan dient u<br />
het volgende te doen:<br />
1. haal de stekker uit het<br />
stopcontact.<br />
2. controleer dat het<br />
waterniveau in de automaat<br />
lager is dan het deurtje; als<br />
dat niet het geval is kunt het<br />
water weg laten vloeien door<br />
middel van de afvoerbuis en<br />
dit opvangen in een emmer,<br />
zoals aangegeven in de<br />
afbeelding.<br />
3. verwijder het paneel<br />
aan de voorkant van de<br />
Wasdroogmachine (zie<br />
volgende pagina).<br />
4. trek het lipje aangegeven<br />
in de afbeelding naar voren<br />
totdat het plastic b<strong>and</strong>je<br />
loskomt; trek hem daarna<br />
naar beneden totdat u klik<br />
hoort, wat aangeeft dat de<br />
deur is geopend.<br />
5. open de deur; als dat niet<br />
lukt moet u de h<strong>and</strong>eling<br />
herhalen.<br />
6. monteer het paneel<br />
weer, met de haakjes<br />
goed bevestigd in de juiste<br />
openingen, voordat u het<br />
paneel tegen de machine<br />
a<strong>and</strong>rukt.<br />
NL<br />
53
210<br />
180<br />
150<br />
120<br />
90<br />
60<br />
Beschrijving van de<br />
Wasdroogmachine<br />
NL<br />
DEUR<br />
Wasdroogmachine<br />
HANDVAT DEUR<br />
Wasdroogmachine<br />
BEDIENINGS-PANEEL<br />
VOETSTUK<br />
STELVOETJES<br />
DEUR<br />
WASMIDDELBAKJE<br />
A<br />
B<br />
3<br />
1<br />
2<br />
Om de deur van de<br />
Wasdroogmachine te<br />
openen dient u altijd<br />
het speciale h<strong>and</strong>vat te<br />
gebruiken (zie afbeelding).<br />
Het wasmiddelbakje bevindt<br />
zich aan de binnenkant van<br />
de automaat en verschijnt als<br />
u de deur opent.<br />
Voor de dosering van<br />
wasmiddelen zie het<br />
hoofdstuk “Wasmiddelen en<br />
wasgoed”.<br />
1. wasmiddelbakje voorwas:<br />
gebruik waspoeder.<br />
! Voordat u het middel erin<br />
strooit moet u controleren of<br />
het aanvullende bakje 3 er niet<br />
in zit.<br />
2. wasmiddelbakje hoofdwas:<br />
Als u een vloeibaar wasmiddel<br />
gebruikt raden we u aan het<br />
bijgeleverde schotje A te<br />
gebruiken voor een correcte dosering. Voor het gebruik van<br />
poederwasmiddel doet u het schotje terug in de opening B.<br />
3. extra bakje:Bleekmiddel<br />
! Het gebruik van het extra bakje 3 sluit de voorwas uit.<br />
bakje wasverzachters: voor wasverzachter. We<br />
raden u aan om nooit het maximaal aangegeven niveau<br />
te overschrijden (aangegeven door rooster) en om<br />
geconcentreerde wasverzachters aan te lengen.<br />
TOUCH CONTROL bedieningspaneel<br />
Om de instellingen te wijzigen<br />
drukt u zachtjes op het<br />
symbool aan de binnenkant<br />
van het touch control-deel,<br />
zoals op de afbeelding<br />
aangegeven.<br />
St<strong>and</strong>- by modus<br />
Deze Wasdroogmachine beschikt, in overeenkomst met<br />
de nieuwe normen betreffende de energiebesparing,<br />
over een systeem wat het apparaat automatisch na<br />
30 minuten uitschakelt (st<strong>and</strong>-by) indien men het niet<br />
gebruikt. Druk kort op de ON/OFF toets en wacht tot de<br />
Wasdroogmachine weer aangaat.<br />
Gebruik in off-mode: 0,5 W<br />
Gebruik in Left-on: 0,5 W<br />
54
“Touch-control” bedieningspaneel<br />
M2 M1<br />
Knop PROGRAMMA’S<br />
Knop CENTRIFUGEREN<br />
Knop<br />
TEMPERATUUR<br />
Controlelampje<br />
ECO<br />
Knop met controlelampje<br />
START/PAUSE<br />
Symbolen<br />
WASFASES<br />
NL<br />
DISPLAY<br />
Knop met controlelampje<br />
ON/OFF<br />
Knop<br />
DROGEN<br />
Knop met controlelampje ON/OFF: druk even op de knop<br />
om de Wasdroogmachine aan of uit te zetten. Het groene<br />
controlelampje geeft aan dat de Wasdroogmachine aanstaat. Om<br />
de Wasdroogmachine tijdens de wascyclus uit te zetten moet<br />
u de knop iets langer, circa 3 seconden, ingedrukt houden. Als<br />
u de kort of per ongeluk indrukt zal de Wasdroogmachine niet<br />
uitgaan. Als u de Wasdroogmachine tijdens de wascyclus uitdoet<br />
wordt de cyclus automatisch geannuleerd.<br />
Knop PROGRAMMA’S: kan beide richtingen op draaien.<br />
Voor de juiste programmakeuze kunt u de “Programmatabel”<br />
raadplegen. Gedurende het programma blijft de knop stilstaan.<br />
M1-M2 toetsen: druk op een van de twee toetsen om een<br />
wascyclus en uw persoonlijke aanpassingen op te slaan. Om<br />
een voorheen opgeslagen wascyclus te starten drukt u op de<br />
betreffende toets.<br />
Knop DROGEN: druk hierop om het drogen te<br />
verminderen of volledig uit te sluiten. Het gekozen<br />
droogniveau of droogtijd leest u af op het display (zie “Het<br />
uitvoeren van een was- of droogcyclus”).<br />
Knop TEMPERATUUR: druk hierop om de temperatuur<br />
te wijzigen of uit te sluiten. De gekozen waarde leest u af op<br />
bovensta<strong>and</strong> display (zie “Het uitvoeren van een wascyclus”).<br />
Knop CENTRIFUGEREN: druk hierop om de centrifuge<br />
te wijzigen of uit te sluiten. De gekozen waarde leest u af op<br />
bovensta<strong>and</strong> display (zie “Het uitvoeren van een wascyclus”).<br />
Knop UITGESTELDE START: druk hierop om een<br />
uitgestelde start van het gekozen programma in te stellen. De<br />
ingestelde vertraging leest u af van bovensta<strong>and</strong> display (zie “Het<br />
uitvoeren van een wascyclus”).<br />
Knoppen OPTIES: druk hierop om de beschikbare opties<br />
te selecteren. Het controlelampje dat overeenkomt met de<br />
geselecteerde optie blijft aan (zie “Het uitvoeren van een<br />
wascyclus”).<br />
Symbolen WASFASES: gaan aan om weer te geven in welke fase<br />
van de cyclus de automaat zich bevindt (Wassen - Spoelen<br />
- Centrifugeren/Afpompen - Drogen ).<br />
De tekst wordt verlicht als de wascyclus is beëindigd.<br />
Knop met controlelampje START/PAUSE: als het groene<br />
controlelampje langzaam knippert, drukt u op de knop om<br />
Knoppen<br />
OPTIES<br />
Knop<br />
UITGESTELDE<br />
START<br />
Controlelampje<br />
LOCK<br />
Knop met controlelampje<br />
TOETSBLOKKERING<br />
de wascyclus te starten. Als de cyclus is gestart blijft het<br />
controlelampje vast aanstaan. Als u de wascyclus wilt pauzeren<br />
drukt u nogmaals op de knop. Het controlelampje wordt oranje<br />
en gaat knipperen. Als het controlelampje “LOCK” uit is, kunt<br />
u het deurtje openen. Om het programma te hervatten drukt u<br />
opnieuw op de knop.<br />
Controlelampje LOCK: geeft aan dat de LOCK is. Om de deur<br />
te openen moet u de wascyclus pauzeren (zie “Het uitvoeren<br />
van een wascyclus”).<br />
Knop met controlelampje TOETSBLOKKERING: om de<br />
blokkering van het bedieningspaneel in of uit te schakelen dient<br />
u de KNOP een aantal seconden (3-4) ingedrukt te houden. Het<br />
ontstoken controlelampje geeft aan dat het bedieningspaneel<br />
geblokkeerd is (met uitzondering van de knop ON/OFF). Op<br />
deze manier kunt u voorkomen dat er ongewilde wijzigingen<br />
aan de programma’s worden aangebracht, bijvoorbeeld bij<br />
aanwezigheid van kinderen.<br />
Controlelampje ECO: het symbool gaat aan als, nadat u de<br />
wasparameters heeft gewijzigd, u een energiebesparing bereikt van<br />
minstens 10%. Bovendien zal, voor het apparaat in de “St<strong>and</strong> by”<br />
modus treedt, het symbool enkele seconden lang aangaan. Als het<br />
apparaat uitstaat zal de geschatte energiebesparing circa 80% zijn.<br />
TAAL WIJZIGEN<br />
Wanneer de machine voor de eerste keer aangezet wordt,<br />
gaat op de display de eerste taal knipperen. Overeenkomstig<br />
de 3 toetsen aan de rechterkant van de display, verschijnen<br />
de symbolen “ “ , “OK” en “V”. De talen wisselen automatisch<br />
elke 3” of door op de toetsen naast de symbolen “ “en “V” te<br />
drukken. Met de toets “OK” wordt de taal bevestigd die na 2”<br />
vastgezet wordt. Als niet op een toets gedrukt wordt, begint na<br />
30” de automatische wisseling van de talen opnieuw.<br />
Om de taal te wijzigen moet u de Wasdroogmachine in- en<br />
uitschakelen. In de 30’’ die volgen op de uitschakeling drukt<br />
u tegelijkertijd op de temperatuurtoets + centrifuge +<br />
uitgestelde start voor 5 seconden of langer. Naast een kort<br />
geluidssignaal verschijnt op het display knipperend de ingestelde<br />
taal. Door op de toetsen naast de symbolen “ “ en “V” te drukken<br />
kan de taal gewijzigd worden. Met de toets naast het symbool<br />
“OK” wordt de taal bevestigd die na 2” vastgezet wordt. Als niet<br />
op een toets gedrukt wordt, wordt na 30” de eerder ingestelde<br />
taal weergegeven. Zet de machine.<br />
55
Het uitvoeren van een wascyclus<br />
NL<br />
N.B.: voordat u de Wasdroogmachine gaat gebruiken moet u<br />
hem met wasmiddel maar zonder wasgoed een wascyclus laten<br />
uitvoeren. Kies het programma van 90° zonder voorwas.<br />
1. DE Wasdroogmachine AANZETTEN. Druk op de toets<br />
. Alle controlelampjes gaan 1 seconde lang aan en op het<br />
display verschijnt de tekst AQUALTIS; het controlelampje<br />
van de toets zal aan blijven staan en het controlelampje<br />
START/PAUSE zal gaan knipperen.<br />
2. PROGRAMMAKEUZE. Draai de PROGRAMMAKNOP<br />
naar rechts of naar links totdat u het gewenste programma<br />
heeft geselecteerd; de naam van het programma<br />
verschijnt op het display; hieraan worden automatisch<br />
een temperatuur en een centrifugesnelheid gekoppeld<br />
die naderh<strong>and</strong> kunnen worden gewijzigd. Op de display<br />
verschijnt de duur van de cyclus.<br />
3. LAAD HET WASGOED. Open de deur. Laad het<br />
wasgoed in en zorg ervoor nooit de laadhoeveelheid te<br />
overschrijden die wordt aangegeven in de programmatabel<br />
op de volgende bladzijde.<br />
4. WASMIDDEL DOSEREN. Trek het bakje naar buiten en<br />
doe het wasmiddel in de speciale vakjes zoals aangegeven<br />
in “Beschrijving van de Wasdroogmachine”.<br />
5. SLUIT DE DEUR.<br />
6. DE WASCYCLUS AANPASSEN. Dit kunt u doen met<br />
behulp van de knoppen op het bedieningspaneel:<br />
Wijzigen van de temperatuur en/of de centrifuge.<br />
Het apparaat toont automatisch de maximale temperatuur<br />
en centrifuge die voor het ingestelde programma gelden<br />
of de laatst geselecteerde waarden, mits deze compatibel<br />
zijn met het gekozen programma. Door op de knop<br />
te drukken kunt u de temperatuur langzaamaan verlagen,<br />
tot aan de koude wascyclus “OFF”. Door op de knop<br />
te drukken kunt u het toerental van de centrifuge<br />
langzaamaan verlagen, tot aan een complete uitsluiting van<br />
de centrifuge “OFF”. Als u nogmaals op de knoppen drukt<br />
zult u wederom op de maximale waarden terugkeren.<br />
! Uitzondering: als u het programma selecteert kunt u de<br />
temperatuur tot op 90° instellen.<br />
Het drogen instellen<br />
De eerste keer dat u op de toets drukt zal het apparaat<br />
automatisch het maximale droogniveau selecteren dat past<br />
bij het geselecteerde programma. Elke volgende keer dat<br />
u op de toets drukt zal het niveau dalen, waarna ook de<br />
droogtijd, totdat het zal worden uitgesloten, aangegeven<br />
door “OFF”. Als u nogmaals op de knoppen drukt zult u<br />
wederom op de maximale waarden terugkeren.<br />
Het is mogelijk het drogen in te stellen:<br />
A - Op tijdsbasis: van 20 tot 180 minuten.<br />
B - Aan de h<strong>and</strong> van het gewenste droogniveau:<br />
Strijk: geschikt voor wasgoed dat naderh<strong>and</strong> moet worden<br />
gestreken. De overgebleven vochtigheid zal de vouwen<br />
verzachten en het verwijderen ervan vergemakkelijken.<br />
Hanger: ideaal voor die kledingstukken die geen volledige<br />
droging nodig hebben.<br />
Kast: geschikt voor wasgoed dat direct in de kast kan<br />
worden gelegd, zonder te worden gestreken.<br />
Extra: geschikt voor wasgoed dat volledig droog moet zijn,<br />
zoals h<strong>and</strong>doeken en badjassen.<br />
Als in een uitzonderlijk geval de lading wasgoed voor wassen<br />
en drogen meer is dan het toegestane maximum (zie<br />
Programmatabel), dan voert u eerst het wassen uit. Aan het<br />
einde hiervan verdeelt u de lading en laadt u één gedeelte<br />
in de trommel. Volg nu de aanwijzingen voor het uitvoeren<br />
van “Alleen drogen”. Herhaal deze h<strong>and</strong>elingen met de<br />
rest van de lading. Aan het einde van de droogcyclus wordt<br />
altijd een afkoeltijd ingezet.<br />
Alleen drogen<br />
Selecteer met de programmaknop een droogniveau ( - - )<br />
aan de h<strong>and</strong> van het type materiaal. Het is ook mogelijk het<br />
gewenste niveau of de tijd van het drogen in te stellen met<br />
de toets DROGEN .<br />
Een uitgestelde start instellen.<br />
Om de uitgestelde start van het gekozen programma in<br />
te stellen, drukt u op de uitgesteld start-toets totdat u<br />
de gewenste vertragingstijd bereikt. Tijdens het instellen<br />
wordt de vertragingstijd samen met de tekst “Start:” en<br />
het knipperende symbool weergegeven. Nadat de<br />
uitgestelde start is ingesteld, blijft op het display het<br />
symbool staan en geeft de display weer de duur van de<br />
ingestelde cyclus weer met de tekst “Einde:” en de duur<br />
van de cyclus. Door één keer op de toets UITGESTELDE<br />
START te drukken, wordt de eerder ingestelde vertraagtijd<br />
weergegeven. Na het starten toont de display de tekst<br />
“Start:” en de vertraagtijd. Nadat de ingestelde vertraagtijd<br />
is afgelopen, start de machine en toont de display “Einde:”<br />
en de resterende tijd tot het einde van de cyclus. Om de<br />
uitgestelde start te verwijderen drukt u op de knop totdat op<br />
het display de tekst OFF verschijnt. Het symbool gaat uit.<br />
De eigenschappen van de cyclus wijzigen.<br />
• Druk op de toets om de optie te activeren; op het<br />
display verschijnt de naam van de optie en het<br />
overeenkomende maantje zal aangaan.<br />
• Druk nogmaals op de toets om de optie te desactiveren; op<br />
het display verschijnt de naam van de optie plus de tekst OFF,<br />
het maantje zal uitgaan.<br />
! Als de gekozen optie niet geschikt is voor het ingestelde<br />
programma zal het betreffende controlelampje gaan<br />
knipperen, zal er een geluidssignaal klinken (3 pieptonen) en<br />
zal de optie niet worden geactiveerd.<br />
! Als de geselecteerde optie niet compatibel is met een<br />
optie die daarvòòr is ingesteld, zal het controlelampje van<br />
de eerst geselecteerde optie gaan knipperen en zal alleen<br />
de tweede optie worden geactiveerd. Het controlelampje<br />
van de betreffende knop zal aanblijven.<br />
! De opties kunnen het aanbevolen laadgewicht en/of de<br />
duur van de cyclus ver<strong>and</strong>eren.<br />
7. HET PROGRAMMA STARTEN. Druk op de toets<br />
START/PAUSE. Het betreffende controlelampje zal<br />
aanblijven en de deur zal worden geblokkeerd (het<br />
controlelampje LOCK blijft aanstaan). De symbolen<br />
die horen bij de verschillende wasfases worden tijdens<br />
de cyclus verlicht om aan te geven welke fase bezig is.<br />
Om een programma te wijzigen van een reeds gestarte<br />
wascyclus doet u de Wasdroogmachine op pauze met<br />
behulp van de knop START/PAUSE. Selecteer daarna de<br />
gewenste cyclus en druk nogmaals op de knop START/<br />
PAUSE. Om de deur te openen tijdens de wascyclus drukt<br />
u op de knop START/PAUSE. Als het controlelampje LOCK<br />
uit gaat kunt u de deur openen. Om het programma te<br />
hervatten drukt u opnieuw op de knop START/PAUSE.<br />
8. EINDE VAN HET PROGRAMMA. Wordt aangegeven<br />
door de tekst END. De deur kan gelijk worden geopend.<br />
Als het controlelampje START/PAUSE knippert druk u op de<br />
toets om de wascyclus te beëindigen. Open de deur, laad<br />
het wasgoed uit en schakel de Wasdroogmachine uit.<br />
! Als u een reeds gestarte cyclus wilt annuleren houdt u de<br />
knop ingedrukt totdat de cyclus wordt onderbroken en het<br />
apparaat uitgaat.<br />
56
Programma’s en opties<br />
Programmatabel<br />
Symbool<br />
Beschrijving van het Programma<br />
Max.<br />
Temp.<br />
(°C)<br />
Max.<br />
snelheid<br />
(toeren per<br />
minuut)<br />
De duur van de cyclus die wordt aangegeven op het display of op de gebruiksaanwijzing is een geschatte waarde die wordt gecalculeerd bij st<strong>and</strong>aard omst<strong>and</strong>igheden. De effectieve tijd kan variëren<br />
aan de h<strong>and</strong> van talloze factoren zoals temperatuur en druk van de watertoevoer, de kamertemperatuur, de hoeveelheid wasmiddel, de hoeveelheid en type lading, de balancering van de was en<br />
de geselecteerde aanvullende opties.<br />
Drogen<br />
Katoen Bonte was (2): zeer vuile witte en bonte fijne was. 40° 1600 • - • • • 10<br />
Synthet. Resistente stof 60° 800 • - • • • 5<br />
Witte was 60° 1600 • - • - • 6<br />
Bonte was 40° 1600 • - • • • 6<br />
Donkere was 30° 800 • - • - • 6<br />
Wol Platinum Care: voor wol, kasjmier, etc. 40° 800 • - • - • 2,5<br />
ExtradeliIcaat 30° 0 • - • - • 1<br />
Anti Allergie 60° 1600 • - • - • 6<br />
Spoelen - 1600 • - - • • 10<br />
Centrifugeren en Afpompen - 1600 • - - - - 10<br />
Was & Droog 30° 1600 • - • - • 1<br />
Drogen Katoen - - • - - - - 7<br />
Drogen Wol - - • - - - - 2,5<br />
Drogen Synthetisch - - • - - - - 5<br />
Katoen Met voorwas<br />
(Doe het wasmiddel in het speciale vakje).<br />
Katoen Witte was (1): zeer vuil wit en kleurecht bont wasgoed.<br />
Voorwas<br />
Was-middel<br />
Bleekmiddel<br />
Wasmiddel en wasversterkers<br />
Wasverzachter<br />
Max. lading (kg)<br />
90° 1600 • • • - • 10<br />
60°<br />
(Max. 90°C)<br />
1600 • - • • • 10<br />
Duurcyclus<br />
(*) U kunt de duur van de wasprogramma’s op het<br />
display controleren.<br />
NL<br />
N.B.: circa 10 minuten na de START zal de Wasdroogmachine aan de h<strong>and</strong> van het ingeladen wasgoed de resterende tijd tot aan het einde van het programma opnieuw berekenen en tonen.<br />
Voor alle Test Institutes:<br />
1) Controleprogramma volgens de richtlijnen EN 50229: selecteer het programma met een temperatuur van 60°C.<br />
2) Programma katoen lang: selecteer het programma met een temperatuur van 40°C.<br />
Wasopties<br />
Super Wash<br />
Deze optie gar<strong>and</strong>eert<br />
3<br />
een kwalitatief zeer hoog<br />
wasresultaat dankzij het gebruik<br />
1<br />
van een grotere hoeveelheid<br />
water in de beginfase van de<br />
2<br />
cyclus en een langere tijdsduur<br />
van het programma. Kan<br />
met of zonder bleekmiddel<br />
gebruikt worden. Als u de<br />
was ook wilt bleken, het extra<br />
bijgeleverde bakje 3 in bakje<br />
1 doen. Let bij het gieten van het bleekwater dat u het niveau<br />
“max”, aangegeven op de centrale pin, niet overschrijdt (zie<br />
afb.). Als u alleen wilt bleken zonder een volledige was uit<br />
te voeren, giet u het bleekmiddel in het extra bakje 3, stelt u<br />
het programma “Spoelen” in, en activeert de optie “Super<br />
Wash” .<br />
! Deze optie is niet beschikbaar tijdens de programma’s<br />
, , , , , , , , , , .<br />
Extra Spoelen<br />
Door deze optie te selecteren verhoogt u het spoelresultaat en<br />
zorgt u ervoor dat elk spoor van wasmiddel verdwijnt. Deze optie is<br />
vooral nuttig bij personen wiens huid gevoelig is voor wasmiddelen.<br />
We raden deze optie aan wanneer een volle lading moet worden<br />
gewassen of wanneer zeer veel wasmiddel wordt gebruikt.<br />
! Deze optie is niet beschikbaar tijdens de programma’s , ,<br />
, , , , , .<br />
Makkelijk Strijken<br />
Als u deze optie selecteert zullen het wassen en de centrifuge<br />
dusdanig worden aangepast dat er minder kreuken<br />
worden gevormd. Aan het einde van de wascyclus zal de<br />
Wasdroogmachine de trommel langzaam laten ronddraaien.<br />
De controlelampjes “Makkelijk Strijken” en START/PAUSE<br />
gaan knipperen. Om de cyclus te beëindigen drukt u op de<br />
knop START/PAUSE of op de knop “Makkelijk Strijken”.<br />
! Deze optie is niet beschikbaar tijdens de programma’s<br />
, , , , , , , , .<br />
! Als u de was ook wilt drogen, is deze knop alleen actief<br />
wanneer hij gecombineerd is met het niveau “Strijk”.<br />
Tijd besparen<br />
Als u deze optie selecteert verkort u de duur van het programma<br />
tot aan 50%, aan de h<strong>and</strong> van de gekozen cyclus, en zorgt u als<br />
gevolg voor een aanzienlijke water- en energiebesparing. Gebruik<br />
deze cyclus voor niet zo vuil wasgoed.<br />
! Deze optie is niet beschikbaar tijdens de programma’s<br />
, , , , , , , , , , .<br />
57
Wasmiddelen en wasgoed<br />
NL<br />
Wasmiddel<br />
De keuze en de hoeveelheid wasmiddel hangen af van<br />
het type stof (katoen, wol, zijde…), van de kleur van het<br />
wasgoed, de wastemperatuur, de vuilgraad en de hardheid<br />
van het water.<br />
Een juiste dosering van het wasmiddel voorkomt<br />
verspillingen en beschermt het milieu: ook al zijn<br />
wasmiddelen biologisch afbreekbaar, toch bevatten ze<br />
elementen die het evenwicht in de natuur verstoren.<br />
We raden u aan:<br />
• waspoeder te gebruiken voor de witte katoenen was en<br />
voor de voorwas.<br />
• vloeibaar wasmiddel te gebruiken voor fijne katoenen<br />
was en voor alle programma’s op lage temperatuur.<br />
• speciale vloeibare wasmiddelen te gebruiken voor wol<br />
en zijde.<br />
Het wasmiddel kan voor het starten van het programma in<br />
het speciale bakje worden gedaan, of in de wasbol die direct<br />
in de trommel wordt geplaatst. Als u een wasbol gebruikt<br />
kunt u het programma Katoen met voorwas niet gebruiken.<br />
! Gebruik nooit wasmiddelen voor h<strong>and</strong>was aangezien die<br />
te veel schuim vormen.<br />
Voorbereiden van het wasgoed<br />
• Open de kledingstukken voor u ze inlaadt.<br />
• Scheid het wasgoed volgens het type stof (symbool op<br />
het etiket van het kledingstuk) en de kleur. Let er goed<br />
op dat u de bonte was scheidt van de witte was;<br />
• Leeg de zakken en controleer de knopen;<br />
• Overschrijd nooit het gewicht dat wordt aangegeven in<br />
de “Programmatabel” wat geldt voor droog wasgoed.<br />
Hoeveel weegt wasgoed?<br />
1 laken 400-500 gr.<br />
1 kussensloop 150-200 gr.<br />
1 tafellaken 400-500 gr.<br />
1 badjas 900-1200 gr.<br />
1 h<strong>and</strong>doek 150-250 gr.<br />
1 spijkerbroek 400-500 gr.<br />
1 overhemd/blo<strong>use</strong> 150-200 gr.<br />
Wastips<br />
Witte was: gebruik deze cyclus voor het wassen van wit<br />
wasgoed. Het programma is ontwikkeld voor het langdurige<br />
behoud uw stralend witte was. Voor een beter resultaat<br />
raden we u aan een wasmiddel in poedervorm te gebruiken.<br />
Als u een droogfunctie aan het einde van de wascyclus<br />
selecteert, wordt automatisch een droogcyclus uitgevoerd<br />
zoals in de buitenlucht zou plaatsvinden. De voordelen zijn het<br />
niet geel worden van de was door de zonnestralen en het grijs<br />
worden ervan als gevolg van de kleine stofdeeltjes die in de lucht<br />
aanwezig zijn. U kunt droogcycli alleen op niveaus instellen.<br />
Bonte was: gebruik de cyclus voor het wassen van<br />
licht gekleurde was. Het programma is ontwikkeld voor het<br />
langdurige behoud van de mooie kleuren van uw wasgoed.<br />
Donkere was: gebruik de cyclus voor het wassen<br />
van bonte was. Het programma is ontwikkeld voor het<br />
langdurige behoud van de donkere kleuren. Voor een beter<br />
resultaat raden we u aan voor de bonte was een vloeibaar<br />
wasmiddel te gebruiken.<br />
Als u de functie drogen selecteert dan zal, aan het einde<br />
van de wascyclus, automatisch een fijne droogcyclus<br />
worden uitgevoerd die de kleuren van de kleding<br />
beschermt. Het display toont het niveau “Hanger”.<br />
Max. Lading: 3 kg.<br />
Wol: het “Wol” wasprogramma van deze <strong>Hotpoint</strong>-Ariston<br />
wasmachine is door The Woolmark Company getest en<br />
goedgekeurd voor het wassen van wollen kleding die<br />
als h<strong>and</strong>was geclassificeerd is, op voorwaarde dat de<br />
aanwijzingen worden opgevolgd die op het etiket van<br />
het kledingstuk vermeld staan en de instructies van de<br />
fabrikant van de wasmachine. <strong>Hotpoint</strong>-Ariston is het<br />
eerste wasmachinemerk dat voor zijn wasprestaties en het<br />
verbruik van water en energie van The Woolmark Company<br />
de certificering Woolmark Apparel Care – Platinum<br />
verkregen heeft. (M1135)<br />
ExtradeliIcaat: gebruik het programma voor het<br />
wassen van zeer fijne was met stras of pailetten.<br />
We raden u aan de kleding binnenstebuiten te draaien voor<br />
u hem wast en om kleine kledingstukken in het speciale<br />
zakje voor fijne was te stoppen.<br />
Voor een beter resultaat raden we u aan voor de fijne was<br />
een vloeibaar wasmiddel te gebruiken.<br />
Voor het wassen van Zijde kleding of Gordijnen u de cyclus<br />
en activeert u de optie (in dit geval is het ook mogelijk<br />
de optie “Extra Spoelen” te activeren); de Wasdroogmachine<br />
de cyclus door het wasgoed in de week te laten staan. Het<br />
controlelampje gaat knipperen. Om het water af te<br />
voeren en de was uit de automaat te halen moet u op de<br />
knop START/PAUSE drukken of op de knop .<br />
Als u de droogfunctie uitsluitend op een tijdsbasis selecteert, zal<br />
aan het einde van de wascyclus een bijzonder fijne droogcyclus<br />
van start gaan, gekenmerkt door lichte bewegingen en door<br />
een qua temperatuur bijzonder gecontroleerde luchtstroom.<br />
De aanbevolen tijden zijn:<br />
1 kg synthetische was --> 160 min.<br />
1 kg synthetische en katoenen was --> 180 min.<br />
1 kg katoenen was --> 180 min.<br />
De droogtegraad zal afhangen van de lading wasgoed en<br />
de samenstelling van het materiaal.<br />
Anti Allergie: gebruik het programma voor het<br />
verwijderen van de voornaamste allergenen zoals stuifmeel,<br />
mijten, katten- en hondenhaar.<br />
Was & droog: gebruik het programma voor het snel<br />
wassen en drogen van kledingstukken (Katoen en Synthetisch)<br />
die niet zo vuil zijn. Als u deze cyclus selecteert kunt u tot aan<br />
1 kg wasgoed wassen en drogen, in slechts 45 minuten.<br />
Gebruik voor de beste resultaten een vloeibaar wasmiddel.<br />
Beh<strong>and</strong>el manchetten, kragen en vlekken eerst voor met<br />
een speciaal product.<br />
Moeilijke vlekken: het beste kunt u moeilijke vlekken<br />
voorbeh<strong>and</strong>elen met een stuk zeep voor u ze in de<br />
Wasdroogmachine doet en het programma Katoen met<br />
voorwas gebruiken.<br />
Balanceersysteem van de lading<br />
Om overmatige trillingen te vermijden verdeelt de automaat<br />
de lading voor het centrifugeren op een gelijkmatige<br />
manier. Dit gebeurt door de trommel te laten draaien op<br />
een snelheid die iets hoger ligt dan de wassnelheid. Als na<br />
herhaaldelijke pogingen de lading nog steeds niet goed is<br />
gebalanceerd, zal de Wasdroogmachine de centrifuge op<br />
een lagere snelheid uitvoeren dan die voorzien was. Als<br />
de lading zeer uit balans is zal de Wasdroogmachine een<br />
verdeling uitvoeren in plaats van een centrifuge. Teneinde<br />
een betere distributie van de waslading en een juiste<br />
balancering te bereiken raden wij u aan kleine en grote<br />
kledingstukken te mengen.<br />
58
Storingen en oplossingen<br />
Het kan gebeuren dat het apparaat niet werkt. Voor u contact opneemt met de Servicedienst (zie “Service”) moet u<br />
controleren of het niet een storing betreft die u zelf makkelijk kunt verhelpen met behulp van de volgende lijst.<br />
NL<br />
Storingen:<br />
De Wasdroogmachine gaat niet aan. • De stekker zit niet in het stopcontact of niet ver genoeg om contact te maken.<br />
• Het hele huis zit zonder stroom.<br />
De wascyclus start niet.<br />
De Wasdroogmachine heeft geen<br />
watertoevoer.<br />
De deur van het apparaat is<br />
geblokkeerd.<br />
De Wasdroogmachine blijft water<br />
aan- en afvoeren.<br />
De Wasdroogmachine voert het<br />
water niet af of centrifugeert niet.<br />
De machine trilt erg tijdens het<br />
centrifugeren.<br />
De Wasdroogmachine lekt.<br />
De symbolen van “Fase in<br />
voortgang” knipperen snel,<br />
tegelijk met het controlelampje<br />
ON/OFF.<br />
Er ontstaat teveel schuim.<br />
De deur van het apparaat is<br />
geblokkeerd.<br />
De Wasdroogmachine droogt niet<br />
Mogelijke oorzaken / Oplossing:<br />
• De deur is niet goed dicht.<br />
• De START/PAUSE toets is niet ingedrukt.<br />
• De waterkraan is niet open.<br />
• U heeft een uitgestelde start ingesteld.<br />
• De watertoevoerbuis is niet aangesloten op de kraan.<br />
• De toevoerslang is gebogen.<br />
• De waterkraan is niet open.<br />
• Het hele huis zit zonder water.<br />
• Er is onvoldoende druk.<br />
• De START/PAUSE toets is niet ingedrukt.<br />
• Als u de optie “Makkelijk Strijken ”, zal de Wasdroogmachine aan het<br />
einde van de cyclus de trommel langzaam laten ronddraaien. Om de cyclus<br />
te beëindigen drukt u op de knop START/PAUSE of op de knop “Makkelijk<br />
Strijken ”.<br />
• De afvoerbuis is niet op 65 tot 100 cm afst<strong>and</strong> van de grond af geïnstalleerd<br />
(zie “Installatie”).<br />
• Het uiteinde van de afvoerbuis ligt onder water (zie “Installatie”).<br />
• Als u op een van de hoogste verdiepingen van een flatgebouw woont, kan zich<br />
een hevelingsprobleem voordoen, waarbij de Wasdroogmachine voortdurend<br />
water aan- en afvoert. Om deze storing te verhelpen zijn er in de h<strong>and</strong>el<br />
speciale beluchters te koop.<br />
• De afvoer in de muur heeft geen ontluchting.<br />
• Het programma voorziet geen afvoer: bij enkele programma’s moet dit met de<br />
h<strong>and</strong> worden gestart (zie Programma’s en opties”).<br />
• De optie “Makkelijk Strijken” is actief: voor het beëindigen van het programma<br />
drukt u op de toets START/PAUSE (zie “Programma’s en opties”).<br />
• De afvoerslang is gebogen (zie “Installatie”).<br />
• De afvoerleiding is verstopt.<br />
• De trommel is bij het installeren niet op de juiste wijze gedeblokkeerd (zie<br />
“Installatie”).<br />
• De Wasdroogmachine staat niet goed recht (zie “Installatie”).<br />
• De Wasdroogmachine staat te krap tussen meubels en muur (zie “Installatie”).<br />
• De waslading is niet gebalanceerd (zie “Wasmiddelen en wasgoed”).<br />
• De slang van de watertoevoer is niet goed aangeschroefd (zie “Installatie”).<br />
• Het wasmiddelbakje is verstopt (voor reiniging zie “Onderhoud en verzorging”).<br />
• De afvoerslang is niet goed aangesloten (zie “Installatie”).<br />
• Doe de Wasdroogmachine uit en haal de stekker uit het stopcontact. Wacht<br />
circa 1 minuut en doe hem daarna weer aan. Als de storing voortzet, dient u de<br />
Servicedienst in te schakelen.<br />
• Het wasmiddel is niet bedoeld voor wasautomaten (er moet “voor<br />
Wasmachine”, “h<strong>and</strong>was en machinewas”, of dergelijke op staan).<br />
• U heeft teveel wasmiddel gebruikt.<br />
• Voer een h<strong>and</strong>matige deblokkering uit (zie “Voorzorgsmaatregelen en advies”).<br />
• De stekker is niet in het stopcontact of niet ver genoeg ingestoken om contact<br />
te maken.<br />
• Er is geen stroom.<br />
• De deur is niet goed dicht.<br />
• Uitgestelde start is ingesteld.<br />
• De DROOG toets staat op OFF.<br />
59
Service<br />
195107375.00<br />
09/2012 - Xerox Fabriano<br />
NL<br />
Voordat u de Servicedienst inschakelt:<br />
• Controleer eerst of u het probleem zelf kunt oplossen (zie “Storingen en oplossingen”);<br />
• Start het programma opnieuw om te controleren of de storing is verholpen;<br />
• Als dit niet het geval is, kunt u contact opnemen met de erkende Servicedienst.<br />
! In het geval de Wasdroogmachine verkeerd is geïnstalleerd of u hem niet correct heeft gebruikt zal u gevraagd worden de<br />
reparatiekosten te betalen.<br />
! Wendt u nooit tot een niet erkende installateur.<br />
Vermeld:<br />
• het type storing;<br />
• het model Wasdroogmachine (Mod.);<br />
• het serienummer (S/N).<br />
Deze laatste gegevens vindt u op het typeplaatje op het apparaat.<br />
! N.B.: om de “Demo Mode” te verlaten, uitschakelen van de Wasdroogmachine, drukt u tegelijkertijd 3 sec. lang of de twee<br />
knoppen “START/PAUSE” en “ON/OFF” .<br />
60