Istruzioni per l'uso - Hotpoint
Istruzioni per l'uso - Hotpoint
Istruzioni per l'uso - Hotpoint

You also want an ePaper? Increase the reach of your titles
YUMPU automatically turns print PDFs into web optimized ePapers that Google loves.
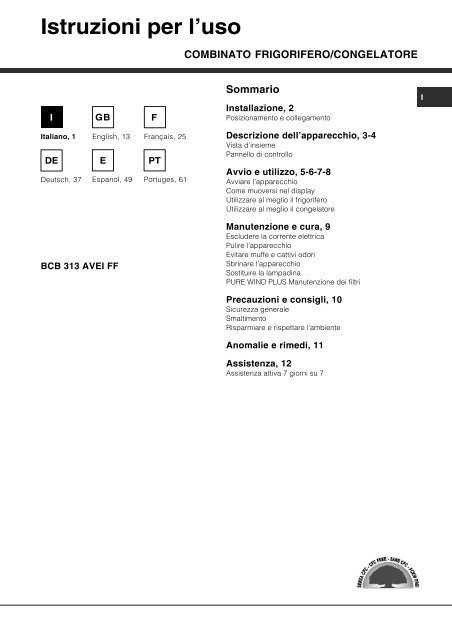
<strong>Istruzioni</strong> <strong>per</strong> l’uso<br />
COMBINATO FRIGORIFERO/CONGELATORE<br />
I<br />
GB<br />
F<br />
Sommario<br />
Installazione, 2<br />
Posizionamento e collegamento<br />
I<br />
Italiano, 1 English, 13 Français, 25<br />
DE E PT<br />
Deutsch, 37 Espanol, 49 Portuges, 61<br />
BCB 313 AVEI FF<br />
Descrizione dell’apparecchio, 3-4<br />
Vista d’insieme<br />
Pannello di controllo<br />
Avvio e utilizzo, 5-6-7-8<br />
Avviare l’apparecchio<br />
Come muoversi nel display<br />
Utilizzare al meglio il frigorifero<br />
Utilizzare al meglio il congelatore<br />
Manutenzione e cura, 9<br />
Escludere la corrente elettrica<br />
Pulire l’apparecchio<br />
Evitare muffe e cattivi odori<br />
Sbrinare l’apparecchio<br />
Sostituire la lampadina<br />
PURE WIND PLUS Manutenzione dei filtri<br />
Precauzioni e consigli, 10<br />
Sicurezza generale<br />
Smaltimento<br />
Risparmiare e rispettare l’ambiente<br />
Anomalie e rimedi, 11<br />
Assistenza, 12<br />
Assistenza attiva 7 giorni su 7
Installazione<br />
I<br />
! È importante conservare questo libretto <strong>per</strong> poterlo<br />
consultare in ogni momento. In caso di vendita,<br />
di cessione o di trasloco, assicurarsi che resti insieme<br />
all’apparecchio <strong>per</strong> informare il nuovo proprietario<br />
sul funzionamento e sui relativi avvertimenti.<br />
! Leggere attentamente le istruzioni: ci sono importanti<br />
informazioni sull’installazione, sull’uso e sulla sicurezza.<br />
Posizionamento e collegamento<br />
Posizionamento<br />
1. Posizionare l’apparecchio in un ambiente ben aerato<br />
e non umido.<br />
2. Non ostruire le griglie posteriori di ventilazione:<br />
compressore e condensatore emettono calore e<br />
richiedono una buona aerazione <strong>per</strong> funzionare bene<br />
e contenere i consumi elettrici.<br />
3. Lasciare l’apparecchio lontano da fonti di calore (la<br />
luce solare diretta, una cucina elettrica).<br />
Collegamento elettrico<br />
Dopo il trasporto, posizionare l’apparecchio<br />
verticalmente e attendere almeno 3 ore prima di<br />
collegarlo all’impianto elettrico. Prima di inserire la spina<br />
nella presa della corrente, accertarsi che:<br />
• la presa abbia la messa a terra e sia a norma di legge;<br />
• la presa sia in grado di sopportare il carico massimo<br />
di potenza della macchina, indicato nella targhetta<br />
caratteristiche posta nel vano frigorifero in basso<br />
a sinistra (es 150 W);<br />
• la tensione di alimentazione sia compresa nei valori<br />
indicati nella targhetta caratteristiche, posta in basso<br />
a sinistra (es 220-240 V);<br />
• la presa sia compatibile con la spina dell’apparecchio.<br />
In caso contrario richiedere la sostituzione della spina<br />
a un tecnico autorizzato (vedi Assistenza); non usare<br />
prolunghe e multiple.<br />
! Ad apparecchio installato, il cavo elettrico e la presa<br />
della corrente devono essere facilmente raggiungibili.<br />
! Il cavo non deve subire piegature o compressioni.<br />
! Il cavo deve essere controllato <strong>per</strong>iodicamente e<br />
sostituito solo da tecnici autorizzati (vedi Assistenza).<br />
! L’azienda declina ogni responsabilità qualora<br />
queste norme non vengano rispettate.<br />
2
ECO<br />
Descrizione<br />
dell’apparecchio<br />
Vista d’insieme<br />
Le istruzioni sull’uso valgono <strong>per</strong> diversi modelli <strong>per</strong> cui è possibile che la figura presenti particolari differenti<br />
rispetto a quelli dell’apparecchio acquistato. La descrizione degli oggetti più complessi si trova nelle pagine seguenti.<br />
I<br />
Balconcino estraibile<br />
A.I.R. SYSTEM<br />
con co<strong>per</strong>chio, con<br />
PORTAUOVA e<br />
SCATOLA BURRO*<br />
Balconcino estraibile<br />
RIPIANO•<br />
PORTAOGGETTI •<br />
Balconcino<br />
PORTALATTINE*<br />
Scatola<br />
MULTI-USO*<br />
Vano <strong>per</strong><br />
BOTTIGLIA DA 2<br />
Cassetto FRUTTA e<br />
LITRI<br />
VERDURA<br />
Balconcino<br />
BOTTIGLIE<br />
PANNELLO DI<br />
CONTROLLO<br />
Vano<br />
CONGELAMENTO e<br />
CONSERVAZIONE<br />
Bacinella<br />
GHIACCIO •<br />
Vano<br />
CONSERVAZIONE<br />
• Variabili <strong>per</strong> numero e/o <strong>per</strong> posizione.<br />
* Presente solo in alcuni modelli.<br />
3
I<br />
Pannello di controllo<br />
Manopola<br />
FUNZIONAMENTO<br />
FRIGORIFERO<br />
Pulsante<br />
MODE<br />
Funzione<br />
SUPER COOL<br />
Funzione<br />
SUPER FREEZE<br />
Pulsante<br />
SELECT<br />
Manopola<br />
FUNZIONAMENTO<br />
CONGELATORE e<br />
ON/OFF PRODOTTO<br />
Impostazione<br />
SCOMPARTO<br />
FRIGORIFERO<br />
Funzione<br />
HOLIDAY<br />
Funzione<br />
ICE PARTY<br />
Impostazione<br />
SCOMPARTO<br />
CONGELATORE<br />
• Manopola FUNZIONAMENTO FRIGORIFERO<br />
Gestisce l’accensione e lo spegnimento dello<br />
scomparto frigorifero e <strong>per</strong>mette di impostare le<br />
relative tem<strong>per</strong>ature di funzionamento.<br />
• Pulsante MODE<br />
Consente lo spostamento all'interno del display <strong>per</strong><br />
arrivare alle varie impostazioni/funzioni e lo<br />
spegnimento degli allarmi sonori.<br />
• Impostazione SCOMPARTO FRIGORIFERO<br />
Visualizza la tem<strong>per</strong>atura impostata nel vano frigo e<br />
lo stato di OFF del comparto frigorifero (scritta OFF<br />
attiva).<br />
• Funzione SUPER COOL<br />
Visualizza lo stato (disattivato, selezionato o<br />
attivato) della funzione SUPER COOL<br />
(raffreddamento rapido del vano frigo).<br />
• Funzione HOLIDAY<br />
Visualizza lo stato (disattivato, selezionato o<br />
attivato) della funzione HOLIDAY (tem<strong>per</strong>ature<br />
ottimali con minimi consumi in caso di lunghe<br />
assenze).<br />
• Funzione SUPER FREEZE<br />
Visualizza lo stato (disattivato, selezionato o<br />
attivato) della funzione SUPER FREEZE<br />
(congelamento rapido).<br />
• Funzione ICE PARTY<br />
Visualizza lo stato (disattivato, selezionato o<br />
attivato) della funzione ICE PARTY (la massima<br />
rapidità nel freddare una bottiglia calda e servirla in<br />
tavola con l’apposito secchiello adatto a<br />
mantenerne la tem<strong>per</strong>atura raggiunta).<br />
• Impostazione SCOMPARTO CONGELATORE<br />
Visualizza la tem<strong>per</strong>atura impostata nel vano<br />
freezer e lo stato di OFF del prodotto (scritta OFF<br />
attiva).<br />
• Pulsante SELECT<br />
Consente la selezione/deselezione delle varie<br />
funzioni e lo spegnimento degli allarmi sonori.<br />
• Manopola FUNZIONAMENTO CONGELATORE e<br />
ON/OFF PRODOTTO<br />
Gestisce l’accensione e lo spegnimento dell’intero<br />
prodotto e <strong>per</strong>mette di impostare le tem<strong>per</strong>ature di<br />
funzionamento nello scomparto freezer.<br />
4
Avvio e utilizzo<br />
Avviare l’apparecchio<br />
! Prima di avviare l’apparecchio, seguire<br />
le istruzioni sull’installazione (vedi Installazione).<br />
! Prima di collegare l’apparecchio pulire bene i vani<br />
e gli accessori con acqua tiepida e bicarbonato.<br />
! L’apparecchio è provvisto di un controllo<br />
salvamotore che fa avviare il compressore solo dopo<br />
circa 8 minuti dall’accensione. Questo accade anche<br />
dopo ogni interruzione dell’alimentazione elettrica,<br />
volontaria o involontaria (black out).<br />
Dopo aver collegato la spina alla presa di corrente<br />
accertarsi che il display sia acceso ((la manopola<br />
FUNZIONAMENTO CONGELATORE e ON/OFF<br />
PRODOTTO non deve essere su Off).<br />
Scomparto congelatore<br />
All’accensione del prodotto (ruotare la manopola<br />
FUNZIONAMENTO CONGELATORE e ON/OFF<br />
PRODOTTO fino ad impostare la tem<strong>per</strong>atura di<br />
funzionamento voluta nel vano freezer) si consiglia di<br />
inserire la funzione SUPER FREEZE <strong>per</strong> accelerare il<br />
raffreddamento del vano; quando quest’ultimo avrà<br />
raggiunto la sua tem<strong>per</strong>atura ottimale, la funzione si<br />
disattiverà e potrete introdurre nel congelatore i surgelati.<br />
Scomparto frigorifero<br />
All’accensione dello scomparto frigo (ruotare la<br />
manopola FUNZIONAMENTO FRIGORIFERO fino ad<br />
impostare la tem<strong>per</strong>atura di funzionamento voluta nel<br />
vano frigorifero) si consiglia di inserire la funzione<br />
SUPER COOL <strong>per</strong> accelerare il raffreddamento del vano:<br />
dopo qualche ora potrete mettere i cibi nel frigorifero.<br />
(vedi figura).<br />
La parete posteriore si presenta co<strong>per</strong>ta di brina o<br />
goccioline d’acqua a seconda che il compressore<br />
sia in funzione o in pausa.<br />
RIPIANI: pieni o a griglia.<br />
Sono estraibili e regolabili in altezza grazie alle<br />
apposite guide (vedi figura),<br />
<strong>per</strong> l’inserimento di contenitori<br />
o alimenti di notevole<br />
dimensione. Per regolare<br />
l’altezza non è necessario<br />
estrarre completamente il<br />
ripiano.<br />
Scatola MULTI-USO: <strong>per</strong><br />
conservare a lungo vari alimenti (<strong>per</strong> esempio<br />
salumi); evita anche che si<br />
rilascino odori nel frigorifero.<br />
Va estratta <strong>per</strong> l’uso e può<br />
essere spostata in senso<br />
laterale <strong>per</strong> ottimizzare lo<br />
spazio (vedi figura).<br />
I<br />
A.I.R. SYSTEM<br />
È riconoscibile dalla presenza del dispositivo sulla<br />
parete su<strong>per</strong>iore del vano frigorifero (vedi figura).<br />
B<br />
A<br />
L’A.I.R. System consente un’ottima conservazione<br />
degli alimenti <strong>per</strong>ché ripristina velocemente la<br />
tem<strong>per</strong>atura dopo l’a<strong>per</strong>tura della porta e<br />
distribuisce omogeneamente la tem<strong>per</strong>atura: l’aria<br />
soffiata (A) si raffredda a contatto della parete<br />
fredda, mentre l’aria più calda (B) viene aspirata<br />
5
I<br />
Utilizzare il display<br />
Impostare la tem<strong>per</strong>atura<br />
Se il vano interessato è spento, sul relativo spazio di<br />
segnalazione sul display (Impostazione SCOMPARTO<br />
FRIGORIFERO e Impostazione SCOMPARTO<br />
CONGELATORE) apparirà la scritta OFF. Se il vano è<br />
acceso appariranno invece le tem<strong>per</strong>ature impostate<br />
in quel momento. Per modificarle agire direttamente<br />
sulla manopola relativa al vano interessato (Manopola<br />
FUNZIONAMENTO FRIGORIFERO e Manopola<br />
FUNZIONAMENTO CONGELATORE e ON/OFF<br />
PRODOTTO).<br />
Le tem<strong>per</strong>ature impostabili <strong>per</strong> il comparto frigorifero<br />
vanno da +2°C a +8°C, mentre quelle <strong>per</strong> il comparto<br />
congelatore vanno da –18°C a –26°C. Gli incrementi o<br />
decrementi possibili sono comunque sempre di 1°C.<br />
Quando è attiva la funzione HOLIDAY non sono<br />
possibili regolazioni di tem<strong>per</strong>atura, ma il prodotto si<br />
posiziona automaticamente alla regolazione ottimale<br />
<strong>per</strong> la situazione: +12°C <strong>per</strong> il comparto frigorifero (se<br />
attivo) e –18°C <strong>per</strong> il comparto congelatore.<br />
Gestione delle funzioni<br />
Simbolo della funzione nel normale<br />
funzionamento<br />
Funzione selezionata (contorno<br />
lampeggiante)<br />
Funzione attiva (contorno acceso)<br />
Attivare/disattivare le funzioni<br />
Premere il pulsante MODE tante volte quante sono<br />
necessarie a far lampeggiare il simbolo della funzione<br />
su cui si vuole agire: ciò indica che la funzione è<br />
selezionata e pronta ad essere attivata o disattivata. A<br />
questo punto si può gestire la funzione tramite il<br />
pulsante SELECT <strong>per</strong> attivarla o disattivarla.<br />
NOTA: se non si dà conferma premendo il pulsante<br />
SELECT entro cinque secondi dall’ultima azione sul<br />
display, quest’ultimo tornerà a visualizzare la funzione<br />
come precedentemente impostata ad indicare che<br />
nessuna modifica è stata impostata.<br />
La funzione SUPER COOL è legata al comparto<br />
frigorifero e quando questo è spento non sarà consentita<br />
alcuna azione su tale funzione; altre prevedono un<br />
funzionamento che può creare dei conflitti (ad esempio<br />
quando vengono attivate contemporaneamente le<br />
funzioni HOLIDAY e SUPER FREEZE), in questo caso si<br />
tiene conto di una priorità già stabilita in modo da<br />
aiutarvi nella gestione del prodotto.<br />
La funzione SUPER FREEZE prevede due modalità di<br />
attivazione (vedere il paragrafo relativo alla gestione<br />
del reparto congelatore).<br />
Attivare/disattivare della modalità DEMO:<br />
Per fare una dimostrazione del funzionamento del<br />
display mantenendo il prodotto spento, si può attivare<br />
la modalità DEMO.<br />
Attivazione:<br />
- posizionare la manopola FUNZIONAMENTO<br />
CONGELATORE e ON/OFF PRODOTTO su Off;<br />
- tenere premuti i due pulsanti “Select” e “Mode” <strong>per</strong><br />
circa 5 secondi, fino a che si sente un suono e<br />
lampeggiano le due scritte “OFF” e “OFF” nel display;<br />
queste scritte lampeggiano <strong>per</strong> tutto il tempo che la<br />
funzione DEMO è attiva.<br />
Disattivazione:<br />
- posizionare la manopola FUNZIONAMENTO<br />
CONGELATORE e ON/OFF PRODOTTO su Off;<br />
- tenere premuti i due pulsanti “Select” e “Mode” <strong>per</strong><br />
circa 5 secondi, fino a che si sente un suono e le due<br />
scritte “OFF” e “OFF” nel display smettono di<br />
lampeggiare.<br />
Funzione holiday<br />
Se si parte <strong>per</strong> un <strong>per</strong>iodo di vacanza non è<br />
necessario spegnere l’apparecchio <strong>per</strong>ché è dotato<br />
di una funzione che <strong>per</strong>mette, con bassi consumi<br />
elettrici, di mantenere la tem<strong>per</strong>atura del vano<br />
frigorifero intorno ai 12°C (<strong>per</strong> proteggere dal caldo<br />
trucchi e cosmetici); la tem<strong>per</strong>atura del congelatore<br />
va impostata sul minimo, indispensabile <strong>per</strong> la<br />
conservazione degli alimenti. Per attivare la funzione<br />
HOLIDAY (vedi Utilizzare il Display).<br />
Utilizzare al meglio il frigorifero<br />
• Per regolare la tem<strong>per</strong>atura utilizzare la manopola<br />
FUNZIONAMENTO FRIGORIFERO (vedi Descrizione).<br />
• Attivare la funzione SUPER COOL (raffreddamento<br />
rapido) <strong>per</strong> abbassare la tem<strong>per</strong>atura in poco<br />
tempo, <strong>per</strong> esempio quando il vano viene riempito<br />
dopo una grossa spesa. La funzione si disattiva<br />
automaticamente trascorso il tempo necessario.<br />
• Inserire soltanto alimenti freddi o appena tiepidi,<br />
non caldi (vedi Precauzioni e consigli).<br />
• Ricordarsi che gli alimenti cotti non si mantengono<br />
più a lungo di quelli crudi.<br />
• Non inserire liquidi in recipienti sco<strong>per</strong>ti:<br />
provocherebbero un aumento di umidità con<br />
conseguente formazione di condensa.<br />
6
Utilizzare al meglio il congelatore<br />
• Per regolare la tem<strong>per</strong>atura utilizzare la manopola<br />
FUNZIONAMENTO CONGELATORE e ON/OFF<br />
PRODOTTO (vedi Descrizione).<br />
• Non ricongelare alimenti che stanno <strong>per</strong> scongelare<br />
o scongelati; tali alimenti devono essere cotti <strong>per</strong><br />
essere consumati (entro 24 ore).<br />
• Gli alimenti freschi da congelare non devono<br />
essere posti a contatto con quelli già congelati;<br />
vanno sistemati nel vano su<strong>per</strong>iore CONGELAMENTO<br />
e CONSERVAZIONE dove la tem<strong>per</strong>atura scende<br />
sotto i -18°C e garantisce una buona velocità di<br />
congelamento.<br />
• Non mettere nel congelatore bottiglie di vetro<br />
contenenti liquidi, tappate o chiuse ermeticamente,<br />
<strong>per</strong>ché potrebbero rom<strong>per</strong>si.<br />
• La quantità massima giornaliera di alimenti da<br />
congelare è indicata sulla targhetta caratteristiche,<br />
posta nel vano frigorifero in basso a sinistra<br />
(esempio: Kg/24h 4).<br />
• Per congelare (se il congelatore è già in funzione):<br />
- Per piccole quantità, inferiori alla capacità massima<br />
indicata sulla targhetta caratteristiche (posta in<br />
basso a sinistra, accanto alla verduriera), attivate dal<br />
display la funzione SUPER FREEZE nella sua<br />
modalità “24 ore” e introducete i cibi da congelare.<br />
Per attivare la funzione premere il pulsante MODE<br />
tante volte quante sono necessarie a far<br />
lampeggiare il simbolo del SUPER FREEZE e, quindi,<br />
premere il pulsante SELECT <strong>per</strong> rendere attiva la<br />
funzione. Dopo 24 ore, o una volta raggiunte le<br />
tem<strong>per</strong>ature ottimali, la funzione di congelamento<br />
rapido si disinserisce automaticamente.<br />
- Per grossi quantitativi di cibi da congelare (fino al<br />
carico massimo indicato nella targhetta delle<br />
caratteristiche posta in basso a sinistra, accanto alla<br />
verduriera) attivate dal display la funzione SUPER<br />
FREEZE nella sua modalità “48 ore”. Per attivare la<br />
funzione premere il pulsante MODE tante volte<br />
quante sono necessarie a far lampeggiare il simbolo<br />
del SUPER FREEZE e, quindi, mantenere premuto<br />
<strong>per</strong> più di tre secondi il pulsante SELECT <strong>per</strong><br />
rendere attiva la funzione (il simbolo SUPER FREEZE<br />
inizia a lampeggiare lentamente). Dopo 24 ore il<br />
simbolo della funzione smetterà di lampeggiare e<br />
tornerà fisso; a questo punto potete introdurre i cibi<br />
da congelare. Dopo altre 24 ore la funzione si<br />
disinserirà automaticamente.<br />
• Al fine di ottenere un spazio maggiore nel reparto<br />
freezer potete togliere i cassetti dalle loro sedi (tranne<br />
quello più in basso e l’eventuale cassetto COOL<br />
CARE ZONE a tem<strong>per</strong>atura variabile), sistemando gli<br />
alimenti direttamente sulle piastre evaporanti.<br />
! Per evitare di ostacolare la circolazione dell’aria<br />
all’interno del congelatore, si raccomanda di non<br />
ostruire con cibi o contenitori i fori di areazione.<br />
! Durante il congelamento evitare di aprire la porta.<br />
! In caso di interruzione di corrente o di guasto,<br />
non aprire la porta del congelatore: in questo modo<br />
congelati e surgelati si conserveranno senza<br />
alterazioni <strong>per</strong> circa 9-14 ore.<br />
I<br />
7
I<br />
Bacinella GHIACCIO.<br />
La collocazione sulla parte su<strong>per</strong>iore dei cassetti<br />
ripisti nel vano freezer garantisce una maggior pulizia<br />
(il ghiaccio non viene più a contatto con gli alimenti)<br />
ed ergonomia (non si sgocciola in fase di<br />
caricamento).<br />
1. Verificare che la bacinella sia completamente vuota<br />
e riempirla d’acqua attraverso l’apposito foro.<br />
2. Fare attenzione a non su<strong>per</strong>are il livello indicato<br />
(MAX WATER LEVEL). Troppa acqua ostacola la<br />
fuoriuscita dei ghiaccioli (se succede, attendere<br />
che il ghiaccio si sciolga e svuotare la bacinella).<br />
3. Ruotare la bacinella di 90°: l’acqua riempie le forme<br />
<strong>per</strong> il principio dei vasi comunicanti (vedi figura).<br />
4. Chiudere il foro con il co<strong>per</strong>chio in dotazione e<br />
riporre la bacinella, inserendo la parte su<strong>per</strong>iore<br />
nell’apposita sede e facendola ricadere.<br />
5. Quando il ghiaccio sarà formato (tempo minimo<br />
circa 8 ore) battere la bacinella su una su<strong>per</strong>ficie<br />
dura e bagnarne l’esterno <strong>per</strong> far staccare i<br />
ghiaccioli; farli poi uscire dal foro.<br />
ICE PARTY: <strong>per</strong> portare a<br />
giusta tem<strong>per</strong>atura una<br />
bottiglia di spumante o<br />
champagne.<br />
Inserire la bottiglia nel<br />
secchiello già congelato<br />
all’interno del vano<br />
CONGELAMENTO e<br />
CONSERVAZIONE e selezionare la funzione sul<br />
display.<br />
Estrarre la bottiglia quando segnalato.<br />
Il secchiello può essere utilizzato <strong>per</strong> servire la<br />
bottiglia mantenendola fresca.<br />
MAX<br />
WATER LEVEL<br />
MAX<br />
WATER LEVEL<br />
8
Manutenzione e cura<br />
Escludere la corrente elettrica<br />
Durante i lavori di pulizia e manutenzione è necessario<br />
isolare l’apparecchio dalla rete di alimentazione:<br />
1. posizionare la manopola FUNZIONAMENTO<br />
CONGELATORE e ON/OFF PRODOTTO su Off;<br />
2. staccare la spina dalla presa.<br />
! Se non si segue questa procedura può scattare<br />
l’allarme: esso non è sintomo di anomalia. Per<br />
ripristinare il normale funzionamento è sufficiente<br />
posizionare la manopola FUNZIONAMENTO<br />
CONGELATORE e ON/OFF PRODOTTO sul valore<br />
desiderato. Per isolare l’apparecchio procedere<br />
seguendo i punti 1 e 2.<br />
evaporare. L’unico intervento da fare <strong>per</strong>iodicamente<br />
consiste nel pulire il foro di scarico affinché l’acqua<br />
possa defluire liberamente.<br />
Sostituire la lampadina<br />
Per sostituire la lampadina di illuminazione del vano<br />
frigorifero, staccare la spina dalla presa di corrente.<br />
Seguire le istruzioni riportate qui sotto.<br />
Accedere alla lampada (A) svitando la vite di<br />
fissaggio (B) posizionata nella parte posteriore del<br />
comprilampada, come indicato (vedi figura).<br />
Sostituirla con una analoga, di potenza non su<strong>per</strong>iore<br />
a 15 W.<br />
I<br />
Pulire l’apparecchio<br />
• Le parti esterne, le parti interne e le guarnizioni in<br />
gomma possono essere pulite con una spugnetta<br />
imbevuta di acqua tiepida e bicarbonato di sodio o<br />
sapone neutro. Non usare solventi, abrasivi,<br />
candeggina o ammoniaca.<br />
• Gli accessori estraibili possono essere messi a<br />
bagno in acqua calda e sapone o detersivo <strong>per</strong><br />
piatti. Sciacquarli e asciugarli con cura.<br />
A<br />
B<br />
Evitare muffe e cattivi odori<br />
• L’apparecchio è fabbricato con materiali igienici<br />
che non trasmettono odori. Per mantenere questa<br />
caratteristica è necessario che i cibi vengano<br />
sempre protetti e chiusi bene. Ciò eviterà anche<br />
la formazione di macchie.<br />
• Nel caso si voglia spegnere l’apparecchio <strong>per</strong> un lungo<br />
<strong>per</strong>iodo, pulire l’interno e lasciare le porte a<strong>per</strong>te.<br />
Sbrinare l’apparecchio<br />
! Attenersi alle istruzioni sottostanti.<br />
Per sbrinare l’apparecchio non usare oggetti taglienti<br />
ed appuntiti che potrebbero danneggiare<br />
irreparabilmente il circuito refrigerante.<br />
Sbrinare il vano<br />
frigorifero<br />
Il frigorifero è dotato di<br />
sbrinamento<br />
automatico: l’acqua<br />
viene convogliata verso<br />
la parte posteriore da<br />
un apposito foro di<br />
scarico (vedi figura)<br />
dove il calore prodotto<br />
dal compressore la fa<br />
9
Precauzioni e consigli<br />
I<br />
! L’apparecchio è stato progettato e costruito<br />
in conformità alle norme internazionali di sicurezza.<br />
Queste avvertenze sono fornite <strong>per</strong> ragioni<br />
di sicurezza e devono essere lette attentamente.<br />
Questa apparecchiatura è conforme<br />
alle seguenti Direttive Comunitarie:<br />
- 73/23/CEE del 19/02/73 (Bassa Tensione)<br />
e successive modificazioni;<br />
- 89/336/CEE del 03/05/89 (Compatibilità<br />
Elettromagnetica) e successive modificazioni;<br />
- 2002/96/CE..<br />
Sicurezza generale<br />
• L’apparecchio è stato concepito <strong>per</strong> un uso di tipo<br />
non professionale all’interno dell’abitazione.<br />
• L’apparecchio deve essere usato <strong>per</strong> conservare<br />
e congelare cibi, solo da <strong>per</strong>sone adulte e secondo<br />
le istruzioni riportate in questo libretto.<br />
• L’apparecchio non va installato all’a<strong>per</strong>to,<br />
nemmeno se lo spazio è riparato, <strong>per</strong>ché è molto<br />
<strong>per</strong>icoloso lasciarlo esposto a pioggia e temporali.<br />
• Non toccare l’apparecchio a piedi nudi o con le<br />
mani o i piedi bagnati o umidi.<br />
• Non toccare le parti interne raffreddanti: c’è<br />
<strong>per</strong>icolo di ustionarsi o ferirsi.<br />
• Non staccare la spina dalla presa della corrente<br />
tirando il cavo, bensì afferrando la spina.<br />
• È necessario staccare la spina dalla presa prima di<br />
effettuare o<strong>per</strong>azioni di pulizia e manutenzione. Non<br />
è sufficiente portare la manopola <strong>per</strong><br />
FUNZIONAMENTO CONGELATORE e ON/OFF<br />
PRODOTTO sulla posizione OFF (apparecchio<br />
spento) <strong>per</strong> eliminare ogni contatto elettrico.<br />
• In caso di guasto, in nessun caso accedere ai<br />
meccanismi interni <strong>per</strong> tentare una riparazione.<br />
• Non utilizzare, all’interno degli scomparti<br />
conservatori di cibi congelati, utensili diversi dal<br />
raschietto fornito in dotazione o apparecchi elettrici<br />
se non sono del tipo raccomandato dal costruttore.<br />
• Non mettere in bocca cubetti appena estratti dal<br />
congelatore.<br />
• Non <strong>per</strong>mettere ai bambini di giocare con<br />
l’apparecchio. In nessun caso devono sedersi sui<br />
cassetti o appendersi alla porta.<br />
• Gli imballaggi non sono giocattoli <strong>per</strong> bambini.<br />
Smaltimento<br />
• Smaltimento del materiale di imballaggio: attenersi<br />
alle norme locali, così gli imballaggi potranno<br />
essere riutilizzati.<br />
• La direttiva Europea 2002/96/CE sui rifiuti di<br />
apparecchiature elettriche ed elettroniche (RAEE),<br />
prevede che gli elettrodomestici non debbano<br />
essere smaltiti nel normale flusso dei rifiuti solidi<br />
urbani. Gli apparecchi dismessi devono essere<br />
raccolti separatamente <strong>per</strong> ottimizzare il tasso di<br />
recu<strong>per</strong>o e riciclaggio dei materiali che li<br />
compongono ed impedire potenziali danni <strong>per</strong> la<br />
salute e l’ambiente. Il simbolo del cestino barrato è<br />
riportato su tutti i prodotti <strong>per</strong> ricordare gli obblighi<br />
di raccolta separata.<br />
Per ulteriori informazioni, sulla corretta dismissione<br />
degli elettrodomestici, i detentori potranno rivolgersi<br />
al servizio pubblico preposto o ai rivenditori.<br />
Risparmiare e rispettare l’ambiente<br />
• Installare l’apparecchio in un ambiente fresco e ben<br />
aerato, proteggerlo dall’esposizione diretta ai raggi<br />
solari, non disporlo vicino a fonti di calore.<br />
• Per introdurre o estrarre gli alimenti, aprire le porte<br />
dell’apparecchio il più brevemente possibile.<br />
Ogni a<strong>per</strong>tura delle porte causa un notevole<br />
dispendio di energia.<br />
• Non riempire con troppi alimenti l’apparecchio: <strong>per</strong><br />
una buona conservazione, il freddo deve poter<br />
circolare liberamente. Se si impedisce la<br />
circolazione, il compressore lavorerà continuamente.<br />
• Non introdurre alimenti caldi: alzerebbero la<br />
tem<strong>per</strong>atura interna costringendo il compressore a<br />
un grosso lavoro, con grande spreco di energia<br />
elettrica.<br />
• Sbrinare l’apparecchio qualora si formasse del<br />
ghiaccio (vedi Manutenzione); uno spesso strato di<br />
ghiaccio rende più difficile la cessione di freddo<br />
agli alimenti e fa aumentare il consumo di energia.<br />
10
Anomalie e rimedi<br />
Può accadere che l’apparecchio non funzioni. Prima di telefonare all’Assistenza (vedi Assistenza), controllare<br />
che non si tratti di un problema facilmente risolvibile aiutandosi con il seguente elenco.<br />
I<br />
Anomalie:<br />
Il DISPLAY non si accende.<br />
Il motore non parte.<br />
Il frigorifero e il congelatore<br />
raffreddano poco.<br />
Nel frigorifero gli alimenti<br />
si gelano.<br />
Il motore funziona di continuo.<br />
L’apparecchio emette<br />
molto rumore.<br />
Sul fondo del frigo c’è dell’acqua.<br />
Allarme porta a<strong>per</strong>ta.<br />
Allarme <strong>per</strong> riscaldamento<br />
anomalo del freezer.<br />
Possibili cause / Soluzione:<br />
• La spina non è inserita nella presa della corrente o non abbastanza da<br />
fare contatto, oppure in casa non c’è corrente.<br />
• L’apparecchio è dotato di un controllo salvamotore (vedi Avvio e utilizzo).<br />
• Le porte non chiudono bene o le guarnizioni sono rovinate.<br />
• Le porte vengono a<strong>per</strong>te molto spesso.<br />
• Le manopole FUNZIONAMENTO non sono in posizione corretta<br />
(vedi Descrizione).<br />
• Il frigorifero o il congelatore sono stati riempiti eccessivamente.<br />
• La manopola FUNZIONAMENTO FRIGORIFERO non è in posizione<br />
corretta (vedi Descrizione).<br />
• Gli alimenti sono a contatto con la parete posteriore.<br />
• Sono state attivate le funzioni SUPER COOL e/o SUPERFREEZE e/o ICE<br />
PARTY (vedi Descrizione).<br />
• La porta non è ben chiusa o viene a<strong>per</strong>ta di continuo.<br />
• La tem<strong>per</strong>atura dell’ambiente esterno è molto alta.<br />
• Il gas refrigerante interno produce un leggero rumore anche quando<br />
il compressore è fermo: non è un difetto, è normale.<br />
• Il foro di scarico dell’acqua è otturato (vedi Manutenzione).<br />
Nel caso in cui la porta del frigorifero rimane a<strong>per</strong>ta <strong>per</strong> un tempo su<strong>per</strong>iore<br />
ai due minuti la lampada di illuminazione interna inizia a lampeggiare; dopo<br />
alcuni secondi è emesso un segnale acustico che è possibile tacitare<br />
chiudendo la porta o premendo il pulsante SELECT . Se la porta rimane<br />
a<strong>per</strong>ta <strong>per</strong> più di 4 minuti la lampada inizia a lampeggiare più velocemente.<br />
1. Per segnalare un eccessivo riscaldamento del freezer (es. momentaneo black<br />
out) viene emesso un segnale acustico e compare un messaggio sul display<br />
“A1” a segnalare un <strong>per</strong>icoloso riscaldamento. Per non far ricongelare il cibo,<br />
il freezer si manterrà ad una tem<strong>per</strong>atura intorno a 0°C, <strong>per</strong>mettendovi di<br />
consumare gli alimenti entro le 24 ore o di ricongelarli previa cottura. Si può<br />
spegnere il segnale acustico premendo semplicemente il pulsante SELECT.<br />
Per tornare al normale funzionamento e cancellare il messaggio sul display si<br />
dovrà spegnere e riaccendere il prodotto, agendo sulla manopola<br />
FUNZIONAMENTO CONGELATORE e ON/OFF PRODOTTO.<br />
2. Se la tem<strong>per</strong>atura continua a salire verso valori eccessivamente alti viene<br />
emesso nuovamente il segnale acustico e compare un altro messaggio sul<br />
display “A2” a segnalare l’eccessivo riscaldamento. Si consiglia di verificare<br />
lo stato del cibo, potrebbe essere necessario gettarlo. In ogni caso il cibo<br />
non va ricongelato se non dopo cottura. Per non far ricongelare il cibo, il<br />
freezer verrà mantenuto ad una tem<strong>per</strong>atura intorno a 0°C. Si può spegnere<br />
il segnale acustico premendo semplicemente il pulsante SELECT. Per<br />
tornare al normale funzionamento e cancellare il messaggio sul display si<br />
dovrà spegnere e riaccendere il prodotto, agendo sulla manopola<br />
FUNZIONAMENTO CONGELATORE e ON/OFF PRODOTTO.<br />
11
Assistenza<br />
195071850.02<br />
02/2011 - Xerox Business Services<br />
I<br />
Prima di contattare l’Assistenza:<br />
• Verificare se l’anomalia può essere risolta autonomamente (vedi Anomalie e Rimedi).<br />
• In caso negativo, contattare il Numero Unico Nazionale 199.199.199.<br />
Comunicare:<br />
• il tipo di anomalia<br />
• il modello della macchina (Mod.)<br />
• il numero di serie (S/N)<br />
Queste informazioni si trovano<br />
sulla targhetta caratteristiche posta<br />
nel vano frigorifero in basso a sinistra.<br />
modello<br />
numero di serie<br />
Assistenza Attiva 7 giorni su 7<br />
Se nasce il bisogno di assistenza o manutenzione basta chiamare il Numero Unico Nazionale 199.199.199*<br />
.<br />
Un o<strong>per</strong>atore sarà a tua completa disposizione <strong>per</strong> fissare un appuntamento con un tecnico del Centro<br />
Assistenza Autrorizzato più vicino a casa tua.<br />
È attivo 7 giorni su 7, sabato e domenica compresi, e non lascia mai inascoltata una richiesta.<br />
*Al costo di 14,25 centesimi di Euro al minuto(iva inclusa) dal Lun. al Ven. dalle 08:00 alle 18:30, il Sab. dalle 08:00<br />
alle 13:00 e di 5,58 centesimi di Euro al minuto (iva inclusa) dal Lun. al Ven. dalle 18:30 alle 08:00, il Sab. dalle 13:00<br />
alle 08:00 e i giorni festivi, <strong>per</strong> chi chiama da telefono fisso.<br />
Per chi chiama da radiomobile le tariffe sono legate al piano tariffario dell’o<strong>per</strong>atore telefonico utilizzato.<br />
12
O<strong>per</strong>ating Instructions<br />
REFRIGERATOR/FREEZER COMBINATION<br />
I<br />
GB<br />
F<br />
Contents<br />
Installation, 14<br />
Positioning and connection<br />
GB<br />
Italiano, 1 English, 13 Français, 25<br />
DE E PT<br />
Deutsch, 37 Espanol, 49 Portuges, 61<br />
BCB 313 AVEI FF<br />
Description of the appliance, 15-16<br />
Overall view<br />
Control panel<br />
Start-up and use, 17-18-19-20<br />
Starting the appliance<br />
Using the display<br />
Using the refrigerator to its full potential<br />
Using the freezer to its full potential<br />
Maintenance and care, 21<br />
Switching the appliance off<br />
Cleaning the appliance<br />
Avoiding mould and unpleasant odours<br />
Defrosting the appliance<br />
Replacing the light bulb<br />
PURE WIND PLUS Filter maintenance<br />
Precautions and tips, 22<br />
General safety<br />
Disposal<br />
Respecting and conserving the environment<br />
Troubleshooting, 23<br />
Assistance, 24
Installation<br />
GB<br />
! Before placing your new freezer into o<strong>per</strong>ation please<br />
read these o<strong>per</strong>ating instructions carefully. They<br />
contain important information for safe use, for<br />
installation and for care of the appliance.<br />
! Please keep these o<strong>per</strong>ating instructions for future<br />
reference. Pass them on to possible new owners of the<br />
appliance.<br />
Positioning and connection<br />
Positioning<br />
1. Place the appliance in a well-ventilated humidityfree<br />
room.<br />
2. Do not obstruct the rear fan grills. The compressor<br />
and condenser give off heat and require good<br />
ventilation to o<strong>per</strong>ate correctly and save energy.<br />
Electrical connections<br />
After the appliance has been transported, carefully<br />
place it vertically and wait at least 3 hours before<br />
connecting it to the electricity mains. Before inserting<br />
the plug into the electrical socket ensure the following:<br />
• The appliance is earthed and the plug is compliant<br />
with the law.<br />
• The socket can withstand the maximum power of the<br />
appliance, which is indicated on the data plate<br />
located on the bottom left side of the fridge (e.g. 150<br />
W).<br />
• The voltage must be in the range between the values<br />
indicated on the data plate located on the bottom left<br />
side (e.g. 220-240V).<br />
• The socket is compatible with the plug of the<br />
appliance. If the socket is incompatible with the<br />
plug, ask an authorised technician to replace it (see<br />
Assistance). Do not use extension cords or multiple<br />
sockets.<br />
! Once the appliance has been installed, the power<br />
supply cable and the electrical socket must be easily<br />
accessible.<br />
! The cable must not be bent or compressed.<br />
! The cable must be checked regularly and replaced<br />
by authorised technicians only (see Assistance).<br />
! The manufacturer declines any liability should<br />
these safety measures not be observed.<br />
14
ECO<br />
Description of the<br />
appliance<br />
Overall view<br />
The instructions contained in this manual are applicable to different model refrigerators. The diagrams may not<br />
directly represent the appliance purchased. For more complex features, consult the following pages.<br />
GB<br />
Removable lidded shelf<br />
A.I.R. SYSTEM<br />
with EGG TRAYand<br />
BUTTER DISH*<br />
SHELVES•<br />
Removable multipurpose<br />
SHELVES•<br />
CAN RACK*<br />
MULTI-USE bin*<br />
Compartment for<br />
A 2 LITRE BOTTLE<br />
FRUIT and<br />
VEGETABLE bin<br />
BOTTLE shelf<br />
CONTROL PANEL<br />
FREEZER and<br />
STORAGE<br />
compartment<br />
ICE tray•<br />
STORAGE<br />
compartments<br />
• Varies by number and/or position.<br />
* Available only on certain models.<br />
15
GB<br />
Control panel<br />
REFRIGERATOR<br />
OPERATION<br />
Knob<br />
MODE<br />
button<br />
SUPER COOL<br />
function<br />
SUPER FREEZE<br />
function<br />
SELECT<br />
button<br />
FREEZER<br />
OPERATION and<br />
APPLIANCE ON/OFF<br />
Knob<br />
REFRIGERATOR<br />
COMPARTMENT<br />
setting<br />
HOLIDAY<br />
function<br />
ICE PARTY<br />
function<br />
FREEZER<br />
COMPARTMENT<br />
setting<br />
• REFRIGERATOR OPERATION Knob<br />
This knob turns the refrigerator compartment on or<br />
off and enables you to set the relative o<strong>per</strong>ating<br />
tem<strong>per</strong>atures.<br />
• MODE button<br />
This button allows you to navigate the display to<br />
have access to the various settings/functions and<br />
to turn off the alarm buzzers.<br />
• REFRIGERATOR COMPARTMENT setting<br />
Displays the tem<strong>per</strong>ature set in the fridge<br />
compartment and when the fridge compartment is<br />
turned OFF (word OFF indicated).<br />
• SUPER COOL function<br />
Displays the status (disabled, selected or enabled)<br />
of the SUPER COOL function (rapid cooling of the<br />
refrigerator compartment).<br />
• HOLIDAY function<br />
Displays the status (disabled, selected or enabled)<br />
of the HOLIDAY FUNCTION (optimal tem<strong>per</strong>atures<br />
with the minimum consumption in the event of<br />
prolonged absence).<br />
• SUPER FREEZE function<br />
Displays the status (disabled, selected or enabled)<br />
of the SUPER FREEZE function (rapid freezing).<br />
• ICE PARTY function<br />
Displays the status (disabled, selected or enabled)<br />
of the ICE PARTY function (maximum speed in<br />
cooling a warm bottle and serving it at the table in<br />
the special bucket designed to maintain the<br />
tem<strong>per</strong>ature reached by the bottle).<br />
• FREEZER COMPARTMENT setting<br />
Displays the tem<strong>per</strong>ature set in the freezer<br />
compartment and when the appliance is turned<br />
OFF (word OFF indicated).<br />
• SELECT button<br />
This button selects/deselects the different functions<br />
and turns off the alarm buzzers.<br />
• FREEZER OPERATION and APPLIANCE ON/OFF Knob<br />
This knob turns the whole appliance on or off and<br />
enables you to set the freezer compartment<br />
o<strong>per</strong>ating tem<strong>per</strong>atures.<br />
16
Start-up and use<br />
Starting the appliance<br />
! Before starting the appliance, follow the<br />
installation instructions (see Installation).<br />
! Before connecting the appliance, clean the<br />
compartments and accessories well with lukewarm<br />
water and bicarbonate.<br />
! The appliance comes with a motor protection control<br />
system which makes the compressor start<br />
approximately 8 minutes after being switched on. The<br />
compressor also starts each time the power supply is<br />
cut off whether voluntarily or involuntarily (blackout).<br />
Once you have plugged the appliance into the mains<br />
socket, make sure the display is on (the FREEZER<br />
COMPARTMENT knob must not be on Off).<br />
Freezer compartment<br />
When you turn the appliance on (by turning the<br />
FREEZER and APPLIANCE ON/OFF Knob to the<br />
required freezer compartment o<strong>per</strong>ating tem<strong>per</strong>ature),<br />
we recommend you enable the SUPER FREEZE<br />
function to speed up the cooling process inside the<br />
compartment; when the latter has reached the optimal<br />
tem<strong>per</strong>ature, the function will be disabled and you<br />
may place the frozen foods inside the freezer.<br />
Refrigerator compartment<br />
When you turn the refrigerator compartment on (by<br />
turning REFRIGERATOR OPERATION Knob to the<br />
required refrigerator compartment o<strong>per</strong>ating<br />
tem<strong>per</strong>ature), we recommend you enable the SUPER<br />
COOL function to speed up the cooling process inside<br />
the compartment: after a few hours, you may place<br />
food inside the refrigerator.<br />
wall, whereas the hotter air (B) is sucked up (see<br />
diagram).<br />
The back wall may be covered in frost or droplets of<br />
water, depending on whether the compressor is in<br />
o<strong>per</strong>ation or whether it is paused.<br />
removal of the shelf.<br />
SHELVES: with or without<br />
grill.<br />
Due to the special guides the<br />
shelves are removable and<br />
the height is adjustable (see<br />
diagram), allowing easy<br />
storage of large containers<br />
and food. Height can be<br />
adjusted without complete<br />
MULTI-USE bin: to store food<br />
(such as cold meats) for a<br />
long time and also prevent<br />
odours from lingering in the<br />
refrigerator. It can be removed<br />
for use and it may be shifted<br />
sideways to optimise space<br />
(see diagram).<br />
GB<br />
A.I.R. SYSTEM<br />
It is recognizable due to the presence of the<br />
mechanism on the top part of the refrigerator<br />
compartment (see diagram).<br />
B<br />
A<br />
The A.I.R. System maintains a constant fridge<br />
tem<strong>per</strong>ature to keep food fresher for longer and will<br />
quickly restore the tem<strong>per</strong>ature to the correct level,<br />
even if the door is opened frequently: the blown air<br />
(A) is cooled when it comes into contact with the cold<br />
17
GB<br />
Using the display<br />
Setting the tem<strong>per</strong>ature<br />
If the compartment concerned is switched off, the word<br />
OFF will appear on the relative indication space on the<br />
display (REFRIGERATOR COMPARTMENT setting and<br />
FREEZER COMPARTMENT setting). If the compartment<br />
is switched on, then the tem<strong>per</strong>atures set at that time will<br />
appear. To change them, turn the relative knob directly<br />
(REFRIGERATOR OPERATION Knob and FREEZER<br />
OPERATION and APPLIANCE ON/OFF Knob).<br />
The refrigerator compartment can be set to between<br />
+2°C and +8°C, while the freezer compartment can<br />
be set to a tem<strong>per</strong>ature of between -18°C and -26°C.<br />
The tem<strong>per</strong>ature in both cases can be increased or<br />
decreased by 1°C at a time.<br />
When the HOLIDAY function is enabled, tem<strong>per</strong>ature<br />
regulations cannot be made, but the appliance<br />
automatically sets itself to the best setting for the<br />
situation: +12°C for the refrigerator compartment (if<br />
enabled) and -18°C for the freezer compartment.<br />
Function status<br />
Function symbol during normal o<strong>per</strong>ation<br />
Function selected (outline flashing)<br />
Function enabled (outline on)<br />
Enabling/disabling the functions<br />
Press the MODE button as many times as necessary<br />
for the red outline of the function you wish to act on to<br />
light up: this indicates that the function has been<br />
selected and is ready to be enabled or disabled. Now<br />
you can enable or disable the selected function using<br />
the SELECT button.<br />
! If you do not confirm your selection by pressing the<br />
SELECT button within five seconds of the last action<br />
<strong>per</strong>formed on the display, the latter shall go back to<br />
displaying the function previously set and indicate that<br />
no new modification has been made.<br />
The SUPER COOL function is linked to the refrigerator<br />
compartment and when the latter is switched off, no<br />
action whatsoever will be possible on the former, other<br />
functions foresee an o<strong>per</strong>ation that can create conflicts<br />
(for example, when the HOLIDAY and SUPER FREEZE<br />
functions are enabled simultaneously), in this case a<br />
pre-set priority is taken into consideration in order to<br />
help you o<strong>per</strong>ate the appliance.<br />
! The SUPER FREEZE function features a double<br />
mode of o<strong>per</strong>ation (see paragraph on o<strong>per</strong>ating the<br />
freezer compartment).<br />
Enabling/disabling the DEMO mode:<br />
To run a demonstration of the display o<strong>per</strong>ation while<br />
keeping the appliance turned off, just enable the<br />
DEMO mode.<br />
Enabling:<br />
- set the FREEZER OPERATION and APPLIANCE ON/<br />
OFF Knob to 0ff;<br />
- keep the two buttons “Select” and “Mode” pressed<br />
for approximately 5 seconds, until you hear the buzzer<br />
and the two words “OFF” and “OFF” flash on the<br />
display; these words will flash for the entire duration<br />
the DEMO mode is enabled.<br />
Disabling:<br />
- set the FREEZER OPERATION and APPLIANCE ON/<br />
OFF Knob to 0ff;<br />
- keep the two buttons “Select” and “Mode” pressed<br />
for approximately 5 seconds, until you hear the buzzer<br />
and the two words “OFF” and “OFF” on the display<br />
stop flashing.<br />
Holiday function<br />
To minimise energy usage when on holiday, it is not<br />
necessary to switch the appliance off. The appliance<br />
has a function which allows it to maintain the<br />
tem<strong>per</strong>ature of the refrigerator compartment at<br />
approximately 12°C (which can also be used to<br />
conserve make-up and beauty products). The freezer<br />
tem<strong>per</strong>ature must be set to the minimum value in order<br />
to preserve the food.<br />
Using the refrigerator to its full potential<br />
• Use the REFRIGERATOR OPERATION knob to<br />
adjust the tem<strong>per</strong>ature (see Description).<br />
• Activate the SUPER COOL function to lower the<br />
tem<strong>per</strong>ature quickly. For example, when you place a<br />
large number of new food items inside a fridge, the<br />
internal tem<strong>per</strong>ature will rise slightly. The function<br />
quickly cools the groceries by temporarily reducing<br />
the tem<strong>per</strong>ature until it reaches the ideal level.<br />
• Place only cold or lukewarm foods in the compartment,<br />
not hot foods (see Precautions and tips).<br />
• Remember that cooked foods do not last longer than<br />
raw foods.<br />
• Do not store liquids in open containers. They will<br />
increase humidity in the refrigerator and cause<br />
condensation to form.<br />
18
Using the freezer to its full potential<br />
• Use the FREEZER OPERATION and APPLIANCE<br />
ON/OFF Knob to adjust the tem<strong>per</strong>ature (see<br />
Description).<br />
• Do not re-freeze food that is defrosting or that has<br />
already been defrosted. These foods must be<br />
cooked and eaten (within 24 hours).<br />
• Fresh food that needs to be frozen must not come<br />
into contact with food that has already been<br />
defrosted. Fresh food must be stored in the top<br />
FREEZER and STORAGE compartment where the<br />
tem<strong>per</strong>ature drops below -18°C and guarantees<br />
rapid freezing.<br />
• Do not place glass bottles which contain liquids,<br />
and which are corked or hermetically sealed in the<br />
freezer because they could break.<br />
• The maximum quantity of food that may be frozen daily<br />
is indicated on the plate containing the technical<br />
pro<strong>per</strong>ties located on the bottom left side of the<br />
refrigerator compartment (for example: Kg/24h: 4).<br />
• To freeze (if the freezer is already o<strong>per</strong>ating):<br />
- For small quantities, less than the maximum capacity<br />
indicated on the data plate (situated on the lower left,<br />
next to the salad cris<strong>per</strong>), enable the SUPER FREEZE<br />
function on the display in the "24 hour" mode and<br />
insert the food to be frozen. To enable the function,<br />
press the MODE button as many times as necessary<br />
for the SUPER FREEZE symbol to start flashing and<br />
then press the SELECT button to enable the SUPER<br />
FREEZE function. After 24 hours, or once the optimal<br />
tem<strong>per</strong>atures have been reached, the rapid freezing<br />
function is automatically disabled.<br />
- For large quantities of food to be frozen (up until the<br />
maximum load indicated on the data plate situated on<br />
the lower left, next to the salad cris<strong>per</strong>), enable the<br />
SUPER FREEZE function on the display in the "48<br />
hours" mode: To enable the function, press the MODE<br />
button as many times as necessary for the SUPER<br />
FREEZE symbol to start flashing and then press the<br />
SELECT button for more than three seconds to ensure<br />
the function is enabled (symbol SUPER FREEZE<br />
function starts to flash slowly). After 24 hours, the<br />
function symbol will stop flashing and go back to<br />
being <strong>per</strong>manently lit; you can now insert the food to<br />
be frozen. After another 24 hours, the function will be<br />
disabled automatically.<br />
! to avoid blocking the air circulation inside the freezer<br />
compartment, it is advisable not to obstruct the<br />
ventilation holes with food or containers.<br />
! Do not open the door during freezing.<br />
! If there is a power cut or malfunction, do not open the<br />
freezer door. This will help maintain the tem<strong>per</strong>ature<br />
inside the freezer, ensuring that foods are conserved<br />
for at least 9 -14 hours.<br />
GB<br />
19
GB<br />
ICE trays.<br />
The Easy Ice trays are set into the top part of the<br />
freezer drawers to maximise the space within the<br />
freezer. The trays are drip-free and sealed to prevent<br />
food from tainting the ice cubes.<br />
1. Check that the tray is completely empty and fill it<br />
with water through the opening provided.<br />
2. Take care not to exceed the level indicated (MAX<br />
WATER LEVEL). Excess water prevents the ice<br />
cubes from dispensing (if this happens, wait for the<br />
ice to melt and empty the tray).<br />
3. Turn the tray 90°: due to the connected<br />
compartments each mould fills with water (see<br />
diagram).<br />
4. Close the opening with the lid provided and put the<br />
tray back, placing the top part in the corresponding<br />
housing and allowing it to drop in again.<br />
5. When the ice has formed (minimum time<br />
approximately 8 hours) knock the tray against a hard<br />
surface and wet the outside so that the ice cubes<br />
come loose and take them out through the opening.<br />
ICE PARTY: tensures bottles<br />
of sparkling wine or<br />
champagne reach the right<br />
tem<strong>per</strong>ature.<br />
Place the bottle in the prefrozen<br />
ice bucket located<br />
inside the FREEZER and<br />
STORAGE compartment and<br />
select the function on the display.<br />
Remove the bottle when the alert is given.<br />
The bucket may be used to serve the bottle, keeping<br />
it cool after it has been removed from the appliance.<br />
MAX<br />
WATER LEVEL<br />
MAX<br />
WATER LEVEL<br />
20
Maintenance and care<br />
Switching the appliance off<br />
During cleaning and maintenance it is necessary to<br />
disconnect the appliance from the electricity supply:<br />
1. set the FREEZER OPERATION and APPLIANCE ON/<br />
OFF Knob on Off<br />
2. pull the plug out of the socket<br />
! If this procedure is not followed, the alarm may sound.<br />
This alarm does not indicate a malfunction. To restore<br />
normal o<strong>per</strong>ation, it is sufficient to set the FREEZER<br />
OPERATION and APPLIANCE ON/OFF knob on the desired<br />
value. To disconnect the appliance, follow point 1 and 2.<br />
Cleaning the appliance<br />
• The external and internal parts, as well as the rubber<br />
seals may be cleaned using a sponge that has been<br />
soaked in lukewarm water and bicarbonate of soda<br />
or neutral soap. Do not use solvents, abrasive<br />
products, bleach or ammonia.<br />
• The removable accessories may be soaked in warm<br />
water and soap or dishwashing liquid. Rinse and dry<br />
them carefully.<br />
Avoiding mould and unpleasant odours<br />
• The appliance is manufactured with hygienic<br />
materials which are odour free. In order to maintain<br />
an odour free refrigerator and to prevent the<br />
formation of stains, food must always be covered or<br />
sealed pro<strong>per</strong>ly.<br />
• If you want to switch the appliance off for an<br />
extended <strong>per</strong>iod of time, clean the inside and leave<br />
the doors open.<br />
Replacing the light bulb<br />
To replace the light bulb in the refrigerator<br />
compartment, pull out the plug from the electrical<br />
socket. Follow the instructions below.<br />
Access the light bulb (A) by unscrewing the fixing<br />
screw (B) which is located at the back of the<br />
lampcover, as shown (see diagram). Replace it with a<br />
similar light bulb, the power of which should not<br />
exceed 15W.<br />
A<br />
B<br />
GB<br />
Defrosting the appliance<br />
! Follow the instructions below.<br />
Do not use objects with sharp or pointed edges to<br />
defrost the appliance as these may damage the<br />
refrigeration circuit beyond repair.<br />
Defrosting the refrigerator compartment<br />
The refrigerator has an automatic defrosting function:<br />
water is ducted to the back of the appliance by a<br />
special discharge outlet<br />
(see diagram) where the<br />
heat produced by the<br />
compressor causes it to<br />
evaporate. It is<br />
necessary to clean the<br />
discharge hole regularly<br />
so that the water can<br />
flow out easily.<br />
21
Precautions and tips<br />
GB<br />
! The appliance was designed and manufactured in<br />
compliance with international safety standards. The<br />
following warnings are provided for safety reasons and<br />
must be read carefully.<br />
This appliance complies with the following<br />
Community Directives:<br />
- 73/23/EEC of 19/02/73 (Low Voltage) and<br />
subsequent amendments;<br />
-89/336/EEC of 03.05.89 (Electromagnetic<br />
Compatibility) and subsequent amendments;<br />
- 2002/96/CE..<br />
General safety<br />
• The appliance was designed for domestic use inside<br />
the home and is not intended for commercial or<br />
industrial use.<br />
• The appliance must be used to store and freeze food<br />
products by adults only and according to the<br />
instructions in this manual.<br />
• The appliance must not be installed outdoors, even in<br />
covered areas. It is extremely dangerous to leave the<br />
appliance exposed to rain and storms.<br />
• Do not touch the appliance with bare feet or with wet<br />
or moist hands and feet.<br />
• Do not touch the internal cooling elements: this<br />
could cause skin abrasions or frost/freezer burns.<br />
• When unplugging the appliance always pull the plug<br />
from the mains socket, do not pull on the cable.<br />
• Before cleaning and maintenance, always switch off<br />
the appliance and disconnect it from the electrical<br />
supply. It is not sufficient to set the FREEZER<br />
OPERATION and APPLIANCE ON/OFF Knob on<br />
OFF (appliance off) to eliminate all electrical contact.<br />
• In the case of a malfunction, under no circumstances<br />
should you attempt to repair the appliance yourself.<br />
Repairs carried out by inex<strong>per</strong>ienced <strong>per</strong>sons may<br />
cause injury or further malfunctioning of the appliance.<br />
• Do not use any sharp or pointed utensils or<br />
electrical equipment - other than the type<br />
recommended by the manufacturer - inside the<br />
frozen food storage compartments.<br />
• Do not put ice cubes taken directly from the freezer<br />
into your mouth.<br />
• Do not allow children to tam<strong>per</strong> with the controls or<br />
play with the appliance. Under no circumstance<br />
should they be allowed to sit on the bins or to hang<br />
from the door.<br />
• Keep packaging material out of the reach of children! It<br />
can become a choking or suffocation hazard.<br />
Disposal<br />
• Observe local environmental standards when<br />
disposing packaging material for recycling<br />
purposes.<br />
• The European Directive 2002/96/EC on Waste<br />
Electrical and Electronic Equipment (WEEE),<br />
requires that old household electrical appliances<br />
must not be disposed of in the normal unsorted<br />
municipal waste stream. Old appliances must be<br />
collected separately in order to optimise the<br />
recovery and recycling of the materials they contain<br />
and reduce the impact on human health and the<br />
environment. The crossed out “wheeled bin”<br />
symbol on the product reminds you of your<br />
obligation, that when you dispose of the appliance<br />
it must be separately collected.<br />
Consumers should contact their local authority or<br />
retailer for information concerning the correct<br />
disposal of their old appliance.<br />
Respecting and conserving the<br />
environment<br />
• Install the appliance in a fresh and well-ventilated<br />
room. Ensure that it is protected from direct sunlight<br />
and do not place it near heat sources.<br />
• Try to avoid keeping the door open for long <strong>per</strong>iods<br />
or opening the door too frequently in order to<br />
conserve energy.<br />
• Do not fill the appliance with too much food:<br />
cold air must circulate freely for food to be<br />
preserved pro<strong>per</strong>ly. If circulation is impeded, the<br />
compressor will work continuously.<br />
• Do not place hot food directly into the refrigerator.<br />
The internal tem<strong>per</strong>ature will increase and force the<br />
compressor to work harder and will consume more<br />
energy.<br />
• Defrost the appliance if ice forms (see<br />
Maintenance). A thick layer of ice makes cold<br />
transference to food products more difficult and<br />
results in increased energy consumption.<br />
• Regularly check the door seals and wipe clean to<br />
ensure they are free of debris and to prevent cold<br />
air from escaping (see Maintenance).<br />
22
Troubleshooting<br />
If the appliance does not work, before calling for Assistance (see Assistance), check for a solution from the following list.<br />
Malfunctions:<br />
Possible causes / Solutions:<br />
GB<br />
The display does not illuminate.<br />
The motor does not start.<br />
The refrigerator and the freezer do not<br />
cool well.<br />
The food inside the refrigerator is<br />
beginning to freeze.<br />
The motor runs continuously.<br />
The appliance makes a lot of noise.<br />
There is water at the bottom of the<br />
refrigerator.<br />
Door open alarm.<br />
Abnormal freezer heating alarm.<br />
• The plug has not been inserted into the electrical socket, or not far<br />
enough to make contact, or there is no power in the house.<br />
• The appliance comes with a motor protection control (see Start-up and use).<br />
• The doors do not close pro<strong>per</strong>ly or the seals are damaged.<br />
• The doors are opened too frequently.<br />
• The OPERATION knobs are not on the correct setting (see Description).<br />
• The refrigerator or the freezer have been over-filled.<br />
• The REFRIGERATOR OPERATION knob is not on the correct setting<br />
(see Description).<br />
• The food is in contact with the back inside wall of the refrigerator.<br />
• The SUPER COOL and/or SUPER FREEZE and/or ICE PARTY functions<br />
are enabled (see Description).<br />
• The door is not closed pro<strong>per</strong>ly or is continuously opened.<br />
• The outside ambient tem<strong>per</strong>ature is very high.<br />
• The internal refrigerant makes a slight noise even when the compressor<br />
is off. This is not a defect, it is normal.<br />
• The water discharge hole is blocked (see Maintenance).<br />
Should the refrigerator door be left open for more than two minutes, the<br />
lamp inside the compartment will begin to flash; after a few seconds, an<br />
alarm buzzer is sounded. To silence this buzzer, just shut the door or<br />
press the SELECT button. Should the door remain open for more than 4<br />
minutes, the lamp will flash more rapidly.<br />
1. To signal an excessive heating on the part of the freezer (e.g. momentary<br />
power failure), a buzzer will sound and a message comes up on the<br />
display “A1” to signal the dangerous heating of the compartment. To<br />
prevent food from refreezing, the freezer will try to maintain a tem<strong>per</strong>ature<br />
of 0°C, thus allowing you to use up the food within 24 hours or to cook<br />
them and then refreeze them. You can turn the buzzer off simply by<br />
pressing the SELECT button.<br />
To return to normal o<strong>per</strong>ation and cancel the message from the display,<br />
you need to turn the appliance off and on again, turning the appliance<br />
FREEZER OPERATION and APPLIANCE ON/OFF Knob.<br />
1. If the tem<strong>per</strong>ature inside the freezer continues to rise to excessively high<br />
values, the buzzer will sound yet again and another message “A2<br />
A2” will<br />
come up on the display to signal the dangerous state of overheating. We<br />
recommend you check the conditions of the food, as it may be necessary<br />
to throw it away. In all cases, food should not be refrozen unless you cook<br />
it first. To prevent food from refreezing, the freezer will try to maintain a<br />
tem<strong>per</strong>ature of 0°C. The buzzer can be turned off by simply pressing the<br />
SELECT button. To return to normal o<strong>per</strong>ation and cancel the message<br />
from the display, you need to turn the appliance off and on again, turning<br />
the appliance FREEZER OPERATION and APPLIANCE ON/OFF Knob.<br />
23
Assistance<br />
195071850.02<br />
02/2011 - Xerox Business Services<br />
GB<br />
Before calling for Assistance:<br />
• Check if the malfunction can be solved on your own (see Troubleshooting).<br />
• If after all the checks, the appliance still does not o<strong>per</strong>ate or the problem <strong>per</strong>sists, call the nearest Service Centre<br />
Communicating:<br />
• type of malfunction<br />
• appliance model (Mod.)<br />
• serial number (S/N)<br />
This information can be found on the data plate<br />
located on the bottom left side of the refrigerator<br />
compartment.<br />
model<br />
serial number<br />
Never call on unauthorized technicians and always refuse spare parts which are not originals.<br />
24
Mode d’emploi<br />
COMBINE REFRIGERATEUR/CONGELATEUR<br />
I<br />
GB<br />
F<br />
Sommaire<br />
Installation, 26<br />
Mise en place et raccordement<br />
F<br />
Italiano, 1 English, 13 Français, 25<br />
DE E PT<br />
Deutsch, 37 Espanol, 49 Portuges, 61<br />
BCB 313 AVEI FF<br />
Description de l’appareil, 27-28<br />
Vue d’ensemble<br />
Tableau de bord<br />
Mise en marche et utilisation, 29-30-31-32<br />
Mise en service de l’appareil<br />
Comment se déplacer sur l'afficheur<br />
Pour profiter à plein de votre réfrigérateur<br />
Pour profiter à plein de votre congélateur<br />
Entretien et soins, 33<br />
Mise hors tension<br />
Nettoyage de l’appareil<br />
Contre la formation de moisissures et de mauvaises odeurs<br />
Dégivrage de l’appareil<br />
Remplacement de l’ampoule d’éclairage<br />
PURE WIND PLUS Entretien des filtres<br />
Précautions et conseils, 34<br />
Sécurité générale<br />
Mise au rebut<br />
Economies et respect de l’environnement<br />
Anomalies et remèdes, 35<br />
Assistance, 36
Installation<br />
F<br />
! Conservez ce mode d’emploi pour pouvoir le consulter<br />
à tout moment. En cas de vente, de cession ou de<br />
déménagement, veillez à ce qu’il suive l’appareil pour<br />
informer le nouveau propriétaire sur son fonctionnement<br />
et lui fournir les conseils correspondants.<br />
! Lisez attentivement les instructions : elles<br />
contiennent des conseils importants sur l’installation,<br />
l’utilisation et la sécurité de votre appareil.<br />
Mise en place et raccordement<br />
Mise en place<br />
1. Placez l’appareil dans une pièce bien aérée et non<br />
humide.<br />
2. Ne bouchez pas les grilles d’aération arrière : le<br />
compresseur et le condensateur produisent de la<br />
chaleur et exigent une bonne aération pour bien<br />
fonctionner et réduire la consommation d’électricité.<br />
3. Installez l’appareil loin de sources de chaleur<br />
(rayons directs du soleil, cuisinière électrique).<br />
Raccordement électrique<br />
Après le transport, placez l’appareil à la verticale et<br />
attendez au moins 3 heures avant de le raccorder à<br />
l’installation électrique. Avant de brancher la fiche<br />
dans la prise de courant, assurez-vous que :<br />
• la prise est bien munie d’une terre conforme à la loi;<br />
• la prise est bien apte à supporter la puissance<br />
maximale de l’appareil, indiquée sur la plaquette<br />
signalétique placée à l’intérieur du compartiment<br />
réfrigérateur en bas à gauche (ex. 150 W);<br />
• la tension d’alimentation est bien comprise entre les<br />
valeurs indiquées sur la plaquette signalétique,<br />
placée en bas à gauche (ex.220-240 V);<br />
• la prise est bien compatible avec la fiche de<br />
l’appareil.<br />
En cas d’incompatibilité, faites remplacer la fiche<br />
par un technicien agréé (voir Assistance); n’utilisez<br />
ni rallonges ni prises multiples.<br />
! Après installation de l’appareil, le câble électrique et<br />
la prise de courant doivent être facilement accessibles.<br />
! Le câble ne doit être ni plié ni excessivement écrasé.<br />
! Il doit être contrôlé prériodiquement et ne peut être<br />
remplacé que par un technicien agréé (voir Assistance).<br />
! Nous déclinons toute responsabilité en cas de<br />
non respect des normes énumérées ci-dessus.<br />
26
ECO<br />
Description de<br />
l’appareil<br />
Vue d’ensemble<br />
Ces instructions d’utilisation s’appliquent à plusieurs modèles, il se peut donc que les composants illustrés<br />
présentent des différences par rapport à ceux de l’appareil que vous avez acheté. Vous trouverez dans les pages<br />
suivantes la description des objets plus complexes.<br />
F<br />
Balconnet amovible à<br />
abattant, contenant un<br />
A.I.R. SYSTEM<br />
SUPPORT A OEUFS<br />
et une BOITE A<br />
BEURRE*<br />
Balconnet amovible<br />
CLAYETTE•<br />
PORTE-OBJETS•<br />
Balconnet PORTE-<br />
CANETTES*<br />
Bac<br />
MULTIFONCTION*<br />
Compartiment pour<br />
BOUTEILLES 2<br />
Bac FRUITS et<br />
LITRES<br />
LEGUMES<br />
Balconnet<br />
BOUTEILLES<br />
TABLEAU DE BORD<br />
Compartiment<br />
CONGELATION et<br />
CONSERVATION<br />
Bac à GLAÇONS •<br />
Compartiment<br />
CONSERVATION<br />
• Leur nombre et/ou leur emplacement peut varier.<br />
* N’existe que sur certains modèles.<br />
27
F<br />
Tableau de bord<br />
Bouton<br />
FONCTIONNEMENT<br />
REFRIGERATEUR<br />
Touche<br />
MODE<br />
Fonction<br />
SUPER COOL<br />
Fonction<br />
SUPER FREEZE<br />
Touche<br />
SELECT<br />
Bouton<br />
FONCTIONNEMENT<br />
CONGELATEUR et<br />
ON/OFF APPAREIL<br />
Programmation<br />
COMPARTIMENT<br />
REFRIGERATEUR<br />
Fonction<br />
HOLIDAY<br />
Fonction<br />
ICE PARTY<br />
Programmation<br />
COMPARTIMENT<br />
CONGELATEUR<br />
• Bouton FONCTIONNEMENT REFRIGERATEUR<br />
C'est lui qui sert à brancher et à débrancher le<br />
compartiment réfrigérateur et à sélectionner les<br />
températures de fonctionnement.<br />
• Touche MODE<br />
Pour se déplacer sur l'afficheur et accéder aux<br />
sélections/fonctions disponibles et éteindre les<br />
alarmes sonores.<br />
• Programmation COMPARTIMENT REFRIGERATEUR<br />
Affiche la température sélectionnée dans le<br />
compartiment réfrigérateur et l'état de OFF du<br />
compartiment réfrigérateur (message OFF activé).<br />
• Fonction SUPER COOL<br />
Affiche l'état (désactivé, sélectionné ou activé) de<br />
la fonction SUPER COOL (refroidissement rapide<br />
du compartiment réfrigérateur).<br />
• Fonction HOLIDAY<br />
Affiche l'état (désactivé, sélectionné ou activé) de<br />
la fonction HOLIDAY (températures optimales à très<br />
faible consommation d'énergie en cas d'absence<br />
prolongée).<br />
• Fonction SUPER FREEZE<br />
Affiche l'état (désactivé, sélectionné ou activé) de<br />
la fonction SUPER FREEZE (congélation rapide).<br />
• Fonction ICE PARTY<br />
Affiche l'état (désactivé, sélectionné ou activé) de<br />
la fonction ICE PARTY (pour refroidir avec un<br />
maximum de rapidité une bouteille et la servir à<br />
table dans son rafraîchisseur spécial qui la<br />
maintiendra à la température atteinte).<br />
• Programmation COMPARTIMENT CONGELATEUR<br />
Affiche la température sélectionnée dans le<br />
compartiment freezer et l'état de OFF de l'appareil<br />
(message OFF activé).<br />
• Touche SELECT<br />
Pour sélectionner/désélectionner les fonctions et<br />
éteindre les alarmes sonores.<br />
• Bouton FONCTIONNEMENT CONGELATEUR et ON/<br />
OFF APPAREIL<br />
C'est lui qui sert à brancher et à débrancher<br />
l'appareil tout entier et à sélectionner les<br />
températures de fonctionnement dans le<br />
compartiment freezer.<br />
28
Mise en marche et<br />
utilisation<br />
Mise en service de l’appareil<br />
! Avant de mettre l’appareil en service, suivez bien<br />
les instructions sur l’installation (voir Installation).<br />
! Avant de brancher votre appareil, nettoyez bien les<br />
compartiments et les accessoires à l’eau tiède<br />
additionnée de bicarbonate.<br />
! Cet appareil est équipé d’un système protège-moteur<br />
qui ne fait démarrer le compresseur que 8 minutes<br />
après son branchement. C’est ce qui se passera aussi<br />
après toute coupure de courant, volontaire ou<br />
involontaire (panne d’électricité.<br />
Branchez la fiche à la prise de courant et vérifiez si<br />
l'afficheur est bien allumé (le bouton<br />
FONCTIONNEMENT CONGELATEUR et ON/OFF<br />
APPAREIL ne doit pas être sur OFF).<br />
Compartiment congélateur<br />
Lors de l'allumage de l'appareil (tournez le bouton<br />
FONCTIONNEMENT CONGELATEUR et ON/OFF<br />
APPAREIL pour sélectionner la température de<br />
fonctionnement souhaitée dans le compartiment<br />
freezer), sélectionnez la fonction SUPER FREEZE pour<br />
accélérer le refroidissement dans le compartiment,<br />
dès que ce dernier aura atteint sa température<br />
optimale, la fonction se désactivera et vous pourrez<br />
ranger vos surgelés à l'intérieur du congélateur.<br />
Compartiment réfrigérateur<br />
Lors de l'allumage de l'appareil (tournez le bouton<br />
FONCTIONNEMENT REFRIGERATEUR pour<br />
sélectionner la température de fonctionnement<br />
souhaitée dans le compartiment réfrigérateur),<br />
sélectionnez la fonction SUPER COOL pour accélérer<br />
le refroidissement dans le compartiment : au bout de<br />
quelques heures rangez les aliments dans le<br />
réfrigérateur.<br />
A.I.R. SYSTEM<br />
On le reconnaît à la présence d’un dispositif appliqué<br />
à la paroi dans le haut du compartiment réfrigérateur<br />
(voir figure).<br />
température après chaque ouverture de porte et en la<br />
distribuant parfaitement à l’intérieur du compartiment<br />
: l’air soufflé (A) refroidit au contact de la paroi froide,<br />
tandis que l’air plus chaud (B) est aspiré (voir figure).<br />
La paroi arrière est tour à tour couverte de givre ou<br />
de gouttelettes d’eau selon que le compresseur est<br />
en marche ou à l’arrêt.<br />
CLAYETTES: pleines ou grillagées.<br />
Elles sont amovibles et réglables en hauteur grâce à<br />
des glissières spéciales (voir figure), pour le<br />
rangement de récipients ou d’aliments de grande<br />
dimension. Pour régler la hauteur, pas besoin de<br />
sortir la clayette<br />
complètement.<br />
Bac MULTIFONCTION* : pour<br />
conserver plus longtemps<br />
certains aliments (la<br />
charcuterie par exemple) et<br />
éviter la diffusion d’odeurs à<br />
l’intérieur du réfrigérateur.<br />
F<br />
B<br />
A<br />
L’A.I.R. System <strong>per</strong>met une conservation optimale<br />
des aliments en rétablissant très rapidement la<br />
*<br />
N’existe que sur certains modèles.<br />
29
F<br />
Comment se déplacer sur l'afficheur<br />
Sélection des températures<br />
Si le compartiment concerné est éteint, le message OFF<br />
apparaîtra dans la partie correspondante de l'afficheur<br />
(Programmation COMPARTIMENT REFRIGERATEUR et<br />
Programmation COMPARTIMENT CONGELATEUR). Si le<br />
compartiment est branché, il y aura par contre affichage<br />
des températures sélectionnées à ce moment-là. Pour les<br />
modifier, servez-vous du bouton correspondant au<br />
compartiment concerné (Bouton FONCTIONNEMENT<br />
REFRIGERATEUR et Bouton FONCTIONNEMENT<br />
CONGELATEUR et ON/OFF APPAREIL).<br />
Les températures pouvant être sélectionnées vont de +2°C<br />
à +8°C pour le compartiment réfrigérateur et de -18°C a<br />
26°C pour le compartiment congélateur. Les augmentations<br />
ou diminutions possibles sont toujours de 1°C.<br />
Quand la fonction HOLIDAY est activée, aucun réglage de<br />
température n'est plus possible, l'appareil se place<br />
automatiquement au réglage optimal correspondant : +12°C<br />
pour le compartiment réfrigérateur (s'il est activé) et -18°C<br />
pour le compartiment congélateur.<br />
Gestion des fonctions<br />
Symbole correspondant à la fonction fonctionnement<br />
normal.<br />
Fonction sélectionnée (pourtour clignotant).<br />
Fonction activée (pourtour allumé)<br />
Activation/désactivation des fonctions<br />
Appuyez sur la touche MODE autant de fois qu'il faut<br />
jusqu'à ce que le symbole de la fonction sur laquelle<br />
vous désirez agir se met à clignoter : ce qui indique<br />
que la fonction est sélectionnée et prête à être activée<br />
ou désactivée. Vous pouvez alors gérer la fonction à<br />
l'aide de la touche SELECT pour l'activer ou la<br />
désactiver.<br />
REMARQUE: si vous n'appuyez pas sur la touche<br />
SELECT pour confirmer dans les cinq secondes qui<br />
suivent votre dernière action sur l'afficheur, ce dernier<br />
reviendra à l'affichage de la fonction précédemment<br />
sélectionnée indiquant ainsi qu'aucune modification<br />
n'a été programmée.<br />
La fonction SUPER COOL est rattachée au<br />
compartiment réfrigérateur, quand ce dernier est<br />
éteint aucune intervention n'est possible sur cette<br />
fonction; d'autres prévoient un fonctionnement<br />
pouvant créer des conflits (les fonctions HOLIDAY et<br />
SUPER FREEZE ne peuvent par exemple pas être<br />
activées en même temps), dans ce cas il y a une<br />
priorité déjà établie pour faciliter la gestion de<br />
l'appareil.<br />
La fonction SUPER FREEZE prévoit deux modes d'activation<br />
(voir paragraphe correspondant à la gestion du<br />
compartiment congélateur).<br />
Activation/désactivation du mode DEMO:<br />
Pour une démonstration de fonctionnement de l’afficheur,<br />
appareil éteint, vous pouvez activer le mode DEMO.<br />
Activation:<br />
- positionnez le bouton températures du freezer sur 0;<br />
- appuyez sur les deux touches “Select” et “Mode”<br />
pendant 5 secondes environ, jusqu’à ce qu’un signal<br />
sonore retentisse et que “OFF” et “OFF” se mettent à<br />
clignoter sur l’afficheur; ces derniers continueront à<br />
clignoter pendant toute la durée d’activation de la<br />
fonction DEMO.<br />
Désactivation:<br />
- positionnez le bouton températures du freezer sur 0;<br />
- appuyez sur les deux touches “Select” et “Mode”<br />
pendant 5 secondes environ, jusqu’à ce qu’un signal<br />
sonore retentisse et que “OFF” et “OFF” cessent de<br />
clignoter sur l’afficheur.<br />
Fonction holiday<br />
Si vous partez en vacances, pas besoin d’éteindre votre<br />
appareil car il est équipé d’une fonction spéciale qui<br />
<strong>per</strong>met, avec une faible consommation d’électricité, de<br />
maintenir une température d’environ 12°C dans le<br />
compartiment réfrigérateur (pour protéger de la chaleur<br />
vos produits de beauté et de maquillage); réglez dans<br />
ce cas la température du congélateur sur une valeur<br />
minimale, indispensable à la conservation des aliments.<br />
Pour profiter à plein de votre réfrigérateur<br />
• Pour régler la température, utilisez le bouton<br />
FONCTIONNEMENT REFRIGERATEUR (voir Description).<br />
• Appuyez sur la touche SUPER COOL (refroidissement<br />
rapide) pour faire baisser la température rapidement, par<br />
exemple quand vous remplissez le compartiment après<br />
avoir fait de grosses provisions. Cette fonction se<br />
désactive automatiquement une fois le temps écoulé.<br />
• N’introduisez que des aliments froids ou à peine tièdes,<br />
jamais chauds (voir Précautions et conseils).<br />
• Les aliments cuits contrairement à ce que l’on croit ne se<br />
conservent pas plus longuement que les aliments crus.<br />
• N’introduisez pas de récipients non fermés contenant des<br />
liquides : ces derniers entraîneraient une augmentation<br />
de l’humidité et la formation d’eau condensée.<br />
30
Pour profiter à plein de votre congélateur<br />
• Pour régler la température, utilisez le bouton<br />
FONCTIONNEMENT CONGELATEUR et ON/OFF<br />
APPAREIL (voir Description).<br />
• Ne recongelez pas des aliments décongelés ou en<br />
cours de décongélation; il faut les faire cuire et les<br />
consommer (dans les 24 heures).<br />
• Les aliments frais à congeler ne doivent pas être<br />
placés au contact d’aliments déjà congelés; il faut les<br />
stocker dans le compartiment supérieur<br />
CONGELATION et CONSERVATION où la température<br />
qui descend au-dessous de -18°C garantit une vitesse<br />
de congélation adéquate.<br />
• Ne stockez pas dans votre congélateur des bouteilles<br />
en verre contenant des liquides, bouchées ou fermées<br />
hermétiquement, elles pourraient se briser.<br />
• La quantité journalière maximale d’aliments pouvant<br />
être congelée est indiquée sur l’étiquette des<br />
caractéristiques, placée dans le compartiment<br />
réfrigérateur en bas à gauche (exemple : 4 Kg/24h).<br />
• Pour gagner de la place à l’intérieur du compartiment<br />
congélation, vous pouvez enlever les tiroirs (sauf le<br />
tiroir du bas et celui de la COOL CARE ZONE à<br />
température variable si votre appareil en est équipé) et<br />
stocker vos aliments directement sur les plaques<br />
évaporantes.<br />
! pour éviter d’empêcher la circulation de l’air à<br />
l’intérieur du congelateur, nous recommandons de ne<br />
pas boucher avec des aliments ou des récipients les<br />
trous d’aération<br />
! Evitez d’ouvrir la porte pendant la phase de<br />
congélation.<br />
! En cas de coupure de courant ou de panne,<br />
n’ouvrez pas la porte du congélateur : les produits<br />
surgelés et congelés se conserveront ainsi sans<br />
problème pendant 9 - 14 heures environ.<br />
F<br />
• Pour congeler (si le congélateur est déjà en service):<br />
- Pour de petites quantités, inférieures à la charge<br />
maximum indiquée sur l'étiquette (placée en bas à<br />
gauche, à côté du bac à légumes), activez sur<br />
l'afficheur la fonction SUPER FREEZE en mode "24<br />
heures" et introduisez les aliments à congeler. Pour<br />
activer la fonction, appuyez sur la touche MODE<br />
autant de fois qu'il faut jusqu'à ce que le symbole<br />
correspondant à SUPER FREEZE commence à<br />
clignoter, appuyez ensuite sur la touche SELECT<br />
pour activer la fonction . Au bout de 24 heures ou<br />
dès que les températures optimales ont été<br />
atteintes, la fonction congélation rapide se<br />
désactive automatiquement.<br />
- Pour de grosses quantités (jusqu'à la charge<br />
maximum indiquée sur l'étiquette placée en bas à<br />
gauche, à côté du bac à légumes) activez sur<br />
l'afficheur la fonction SUPER FREEZE en mode "48<br />
heures". Pour activer la fonction, appuyez sur la<br />
touche MODE autant de fois qu'il faut jusqu'à ce<br />
que le symbole correspondant à SUPER FREEZE<br />
commence à clignoter, appuyez ensuite pendant<br />
plus de trois secondes de suite sur la touche<br />
SELECT pour activer la fonction (le symbole SUPER<br />
FREEZE commence à clignoter lentement).<br />
Au bout de 24 heures le symbole cesse de<br />
clignoter et passe au fixe ; introduisez alors les<br />
aliments à congeler. Au bout de 24 autres heures,<br />
la fonction se désactive automatiquement.<br />
31
F<br />
Bac à GLAÇONS.<br />
Placés dans la partie supérieure des tiroirs du<br />
compartiment freezer, ils sont plus ergonomiques et<br />
garantissent davantage de propreté: en effet, les<br />
glaçons ne touchent plus aux aliments stockés dans<br />
le freezer; de plus, fini l'eau qui dégouline lorsque<br />
vous rangez votre bac (un couvercle est fourni pour<br />
boucher le récipient après l'avoir rempli).<br />
1. Pour sortir le bac, poussez-le vers le haut .<br />
Vérifiez que le bac est bien vide avant de le remplir<br />
en introduisant l’eau par l’ouverture prévue.<br />
2. Attention à ne pas dépasser le niveau indiqué (MAX<br />
WATER LEVEL). Une trop grande quantité d’eau<br />
gêne la sortie des glaçons (si celase produit,<br />
attendez que la glace fonde et videz le bac).<br />
3. Faites pivoter le bac de 90° : l’eau envahit les<br />
cavités selon le principe des vases communicants<br />
(voir figure).<br />
4. Bouchez l’ouverture à l’aide du couvercle fourni,<br />
remettez le bac à sa place.<br />
5. Une fois que la glace s’est formée (il faut compter au<br />
moins 8 heures) tapez le bac contre une surface dure<br />
et mouillez-le à l’extérieur pour détacher les glaçons<br />
que vous ferez sortir par l’ouverture prévue.<br />
ICE PARTY: pour amener une<br />
bouteille de mousseux ou de<br />
champagne à sa température<br />
idéale.<br />
Mettez la bouteille que vous<br />
avez placée dans le<br />
rafraîchisseur déjà congelé<br />
dans le compartiment<br />
CONGELATION et CONSERVATION et sélectionnez la<br />
fonction sur l’afficheur.<br />
Sortez la bouteille dès que le signal retentit.<br />
Servez votre bouteille dans son rafraîchisseur pour la<br />
garder au frais.<br />
MAX<br />
WATER LEVEL<br />
MAX<br />
WATER LEVEL<br />
32
Entretien et soin<br />
Mise hors tension<br />
Pendant les opérations de nettoyage et d’entretien,<br />
débranchez l’appareil du réseau d’alimentation:<br />
1. amenez le bouton FONCTIONNEMENT<br />
CONGELATEUR et ON/OFF APPAREIL sur Off;<br />
2. débranchez la fiche de la prise de courant.<br />
! Si cette procédure n’est pas respectée, l’alarme peut se<br />
déclencher : ceci ne dénote pas une anomalie. Pour<br />
rétablir le fonctionnement correct de l’appareil, il suffit<br />
d’amener le bouton FONCTIONNEMENT CONGELATEUR<br />
et ON/OFF APPAREIL sur la valeur souhaitée. Pour isoler<br />
l’appareil, procédez comme indiqué aux points 1 et 2.<br />
Nettoyage de l’appareil<br />
• Nettoyez l’extérieur, l’intérieur et les joints en<br />
caoutchouc à l’aide d’une éponge imbibée d’eau<br />
tiède additionnée de bicarbonate de soude ou de<br />
savon neutre. N’utilisez pas de solvants, de produits<br />
abrasifs, d’eau de Javel ou d’ammoniaque.<br />
• mettez trem<strong>per</strong> les accessoires amovibles dans de<br />
l’eau chaude additionnée de savon ou de liquide<br />
vaisselle. Rincez-les et essuyez-les soigneusement.<br />
Contre la formation de moisissures et<br />
de mauvaises odeurs<br />
• Cet appareil est fabriqué dans des matériaux<br />
hygiéniques qui ne transmettent pas d’odeur. Pour<br />
sauvegarder cette caractéristique, veillez à bien<br />
emballer et couvrir vos aliments. Vous éviterez par la<br />
même occasion la formation de taches.<br />
• Si vous devez laisser votre appareil éteint pendant<br />
une période de temps prolongée, nettoyez-le bien<br />
l’intérieur et laissez les portes ouvertes.<br />
Remplacement de l’ampoule d’éclairage<br />
Pour remplacer l’ampoule d’éclairage du compartiment<br />
réfrigérateur, débranchez la fiche de la prise de<br />
courant. Suivez les indications fournies ci-dessous.<br />
Pour remplacer l’ampoule (A) dévissez la vis de<br />
fixation (B) située dans la partie arrière du couvercle<br />
de protection de la lampe, comme indiqué (voir figure).<br />
Remplacez-la par une semblable dont la puissance ne<br />
dépasse pas 15 W.<br />
A<br />
B<br />
F<br />
Dégivrage de l’appareil<br />
! Conformez-vous aux instructions suivantes. Ne pas<br />
utiliser d’objets pointus et coupants pour dégivrer<br />
l’appareil, ils risqueraient d’endommager<br />
irréparablement le circuit réfrigérant.<br />
Dégivrage du compartiment réfrigérateur<br />
Le réfrigérateur est muni d’un système de dégivrage<br />
automatique: l’eau est<br />
acheminée vers la paroi<br />
arrière par un trou<br />
d’évacuation (voir figure)<br />
où la chaleur produite par<br />
le compresseur la fait<br />
évaporer. Il vous suffit de<br />
nettoyer périodiquement le<br />
trou d’évacuation pour<br />
<strong>per</strong>mettre à l’eau de<br />
s’écouler normalement.<br />
33
Précautions et conseils<br />
F<br />
! L’appareil a été conçu et fabriqué conformément aux<br />
normes internationales de sécurité. Ces conseils sont<br />
fournis pour des raisons de sécurité et doivent être lus<br />
attentivement.<br />
Cet appareil est conforme aux Directives<br />
Communautaires suivantes :<br />
- 73/23/CEE du 19/02/73 (Basse Tensione) et<br />
modifications suivantes;<br />
-89/336/CEE du 03/05/89 (Compatibilité<br />
Electromagnétique) et modifications suivantes;<br />
- 2002/96/CE..<br />
Sécurité générale<br />
• Cet appareil a été conçu pour un usage familial, de<br />
type non professionnel.<br />
• Cet appareil qui sert à conserver et à congeler des<br />
aliments ne doit être utilisé que par des adultes<br />
conformément aux instructions du mode d’emploi.<br />
• Cet appareil ne doit pas être installé en extérieur,<br />
même dans un endroit à l’abri, il est en effet très<br />
dangereux de le laisser exposé à la pluie et aux<br />
orages.<br />
• Ne touchez pas à l’appareil pieds nus ou si vos mains<br />
ou pieds sont mouillés ou humides.<br />
• Ne touchez pas aux parties refroidissantes:<br />
pourriez vous brûler ou vous blesser.<br />
vous<br />
• Pour débrancher la fiche de la prise de courant, sortez<br />
la fiche, ne tirez surtout pas sur le câble.<br />
• Avant d’effectuer toute opération de nettoyage ou<br />
d’entretien, débranchez la fiche de la prise de courant.<br />
Il ne suffit pas de placer le bouton de REGLAGE DE LA<br />
TEMPERATURE sur Off (appareil éteint) pour éliminer<br />
tout contact électrique.<br />
• En cas de panne, n’essayez en aucun cas d’accéder<br />
aux mécanismes internes pour tenter de réparer<br />
l’appareil.<br />
• Ne pas utiliser, à l’intérieur des compartiments de<br />
conservation pour aliments congelés, d’ustensiles<br />
pointus et coupants ou d’appareils électriques d’un<br />
type autre que celui recommandé par le fabricant.<br />
• Ne pas porter à la bouche des glaçons à peine sortis<br />
du congélateur.<br />
• Ne <strong>per</strong>mettez pas aux enfants de jouer avec l’appareil.<br />
Il ne faut en aucun cas qu’ils s’asseyent sur les tiroirs<br />
ou qu’ils s’accrochent à la porte.<br />
• Les emballages ne sont pas des jouets pour enfants.<br />
Mise au rebut<br />
• Mise au rebut du matériel d’emballage : conformezvous<br />
aux réglementations locales, les emballages<br />
pourront ainsi être recyclés.<br />
• La Directive Européenne 2002/96/EC sur les<br />
Déchets des Equipements Electriques et<br />
Electroniques (DEEE), exige que les appareils<br />
ménagers usagés ne soient pas jetés dans le flux<br />
normal des déchets municipaux. Les appareils<br />
usagés doivent être collectés séparément afin<br />
d’optimiser le taux de récupération et le recyclage<br />
des matériaux qui les composent et réduire l’impact<br />
sur la santé humaine et l’environnement. Le<br />
symbole de la ‘‘poubelle barrée’’ est apposée sur<br />
tous les produits pour rappeler les obligations de<br />
collecte séparée.<br />
Les consommateurs devront contacter les autorités<br />
locales ou leur revendeur concernant la démarche<br />
à suivre pour l’enlèvement de leur vieil appareil.<br />
Economies et respect de l’environnement<br />
• Installez votre appareil dans un endroit frais et bien<br />
aéré, protégez-le contre l’exposition directe aux<br />
rayons du soleil et ne le placez pas près de sources<br />
de chaleur.<br />
• Pour introduire ou sortir les aliments, n’ouvrez les<br />
portes de l’appareil que le temps strictement<br />
nécessaire. Chaque ouverture de porte cause une<br />
considérable dépense d’énergie.<br />
• Ne chargez pas trop votre appareil: pour une bonne<br />
conservation des aliments, le froid doit pouvoir<br />
circuler librement. Si la circulation est entravée, le<br />
compresseur travaillera en <strong>per</strong>manence.<br />
• N’introduisez pas d’aliments chauds : ces derniers<br />
font monter la température intérieure ce qui oblige le<br />
compresseur à travailler beaucoup plus en gaspillant<br />
un tas d’électricité.<br />
• Dégivrez l’appareil dès que de la glace se dépose<br />
(voir Entretien); une couche de glace trop épaisse<br />
gêne considérablement la cession de froid aux<br />
aliments et augmente la consommation d’électricité.<br />
• Gardez toujours les joints propres et en bon état pour<br />
qu’ils adhèrent bien aux portes et ne laissent pas le<br />
froid s’échap<strong>per</strong> (voir Entretien).<br />
34
Anomalies et remèdes<br />
Il peut arriver que l’appareil ne fonctionne pas. Avant de téléphoner au service de dépannage (voir Assistance),<br />
contrôlez s’il ne s’agit pas d’un problème facile à résoudre à l’aide de la liste suivante.<br />
F<br />
Anomalies:<br />
L’afficheur est éteint.<br />
Le moteur ne démarre pas.<br />
Le réfrigérateur et le congélateur<br />
refroidissent peu.<br />
Les aliments gèlent à l’intérieur du<br />
réfrigérateur.<br />
Le moteur est branché en<br />
<strong>per</strong>manence.<br />
L’appareil est très bruyant.<br />
Il y a de l’eau dans le fond du<br />
réfrigérateur.<br />
Alarme porte ouverte<br />
Alarme réchauffement anormal du<br />
freezer<br />
Causes / Solution possibles:<br />
• La fiche n’est pas branchée dans la prise de courant ou pas assez<br />
enfoncée pour qu’il y ait contact ou bien il y a une coupure de courant.<br />
• L’appareil est équipé d’un système protège-moteur (Voir Mise en marche<br />
et utilisation.<br />
• Les portes ne ferment pas bien ou les joints sont abîmés.<br />
• Ouverture trop fréquente des portes.<br />
• La position du bouton de REGLAGE DE LA TEMPERATURE n’est pas<br />
correcte<br />
• Le réfrigérateur et le congélateur sont excessivement remplis.<br />
• La position du bouton de REGLAGE DE LA TEMPERATURE n’est pas<br />
correcte<br />
• Les aliments touchent à la paroi arrière.<br />
• les fonctions SUPER COOL et/ou SUPER FREEZE et/ou ICE PARTY ne<br />
sont pas par hasard activées.<br />
• les portes sont bien fermées ou si elles sont restées ouvertes trop longtemps<br />
• La température à l’extérieur est très élevée.<br />
• Le gaz réfrigérant interne produit un léger bruit même quand le compresseur<br />
est à l’arrêt : il ne s’agit pas d’un défaut, c’est tout à fait normal.<br />
• Le trou d’évacuation de l’eau est bouché (voir Entretien).<br />
Si la porte du réfrigérateur reste ouverte pendant plus de deux minutes,<br />
l'éclairage intérieur commence à clignoter; au bout de quelques secondes<br />
un signal acoustique retentit, ce dernier cesse dès que vous fermez la porte<br />
ou que vous appuyez sur la touche SELECT. Si la porte reste ouverte<br />
pendant plus de 4 minutes, l'éclairage commence à clignoter plus<br />
rapidement.<br />
1. Pour signaler un réchauffement excessif du freezer (ex.: panne de courant<br />
momentanée), un signal acoustique retentit et un message apparaît sur<br />
l'afficheur (A1) pour signaler un réchauffement dangereux. Pour ne pas faire<br />
recongeler les aliments, le freezer maintient une température d'environ 0°C<br />
pour vous <strong>per</strong>mettre de les consommer dans les 24 heures ou de les<br />
recongeler après cuisson. Pour faire cesser le signal acoustique, appuyez<br />
sur la touche SELECT. Pour revenir à un fonctionnement normal et effacer<br />
les message sur l'afficheur, éteignez puis rallumez l'appareil à l'aide du<br />
bouton FONCTIONNEMENT CONGELATEUR et ON/OFF APPAREIL.<br />
2. Si la température continue à grim<strong>per</strong> et atteint des valeurs trop élevées, le<br />
signal acoustique retentit à nouveau et un autre message apparaît sur<br />
l'afficheur (A2) pour signaler un réchauffement excessif. Nous vous<br />
conseillons de contrôler l'état des aliments, il se pourrait qu'il faille les jeter.<br />
De toute manière, les aliments ne peuvent pas être recongelés à moins que<br />
vous ne les fassiez cuire avant. Pour ne pas faire recongeler les aliments, le<br />
freezer maintient une température d'environ 0°C. Pour faire cesser le signal<br />
acoustique, appuyez sur la touche SELECT. Pour revenir à un<br />
fonctionnement normal et effacer les message sur l'afficheur, éteignez<br />
puis rallumez l'appareil à l'aide du bouton FONCTIONNEMENT<br />
CONGELATEUR et ON/OFF APPAREIL.<br />
35
Assistance<br />
195071850.02<br />
02/2011 - Xerox Business Services<br />
F<br />
Avant de contacter le centre d’Assistance :<br />
• Vérifiez si vous pouvez résoudre l’anomalie vous-même (voir Anomalies et Remèdes).<br />
• Si, malgré tous ces contrôles, l’appareil ne fonctionne toujours pas et l’inconvénient <strong>per</strong>siste, faites appel<br />
au service après-vente le plus proche de chez vous.<br />
modèle<br />
numéro de série<br />
Signalez :<br />
• le type d’anomalie<br />
• le modèle de l’appareil (Mod.)<br />
• le numéro de série (S/N)<br />
Vous trouverez tous ces renseignements sur<br />
l’étiquette signalétique placée dans le<br />
compartiment réfrigérateur en bas à gauche.<br />
Ne faites jamais appel à des techniciens non agréés et refusez toujours des pièces détachées non<br />
originales.<br />
36
Gebrauchsanleitungen<br />
KÜHL-/GEFRIERKOMBI<br />
I GB F<br />
Italiano, 1 English, 13 Français, 25<br />
DE E PT<br />
Deutsch, 37 Espanol, 49 Portuges, 61<br />
BCB 313 AVEI FF<br />
Inhaltsverzeichnis<br />
Installation, 38<br />
Aufstellort und elektrischer Anschluss<br />
Beschreibung Ihres Gerätes, 39-40<br />
Geräteansicht<br />
Bedienblende<br />
Inbetriebsetzung<br />
und Gebrauch, 41-42-43-44<br />
Einschalten Ihres Gerätes<br />
So bediene ich das Display<br />
Optimaler Gebrauch des Kühlschranks<br />
Optimaler Gebrauch des Gefrierfachs<br />
Wartung und Pflege, 45<br />
Abschalten Ihres Gerätes vom Stromnetz<br />
Reinigung Ihres Gerätes<br />
Vermeidung von Schimmelpilz- und Geruchsbildung<br />
Abtauen Ihres Gerätes<br />
Lampenaustausch<br />
PURE WIND PLUS. Wartung der Filter<br />
Vorsichtsmaßregeln und Hinweise, 46<br />
Allgemeine Sicherheit<br />
Entsorgung<br />
Energie sparen und Umwelt schonen<br />
Störungen und Abhilfe, 47<br />
Kundendienst, 48<br />
DE
Installation<br />
DE<br />
! Es ist äußerst wichtig, diese Bedienungsanleitung<br />
sorgfältig aufzubewahren, um sie jederzeit zu Rate ziehen<br />
zu können. Sorgen Sie dafür, dass sie im Falle eines<br />
Umzugs oder Übergabe an einen anderen Benutzer das<br />
Gerät stets begleitet, damit auch der Nachbesitzer die<br />
Möglichkeit hat, diese zu Rate zu ziehen.<br />
! Lesen Sie bitte folgende Hinweise aufmerksam<br />
durch, sie liefern wichtige Informationen hinsichtlich<br />
der Installation, dem Gebrauch und der Sicherheit.<br />
Aufstellort und elektrischer Anschluss<br />
Aufstellort<br />
1. Stellen Sie das Gerät in einem gut belüfteten und<br />
trockenen Raum auf.<br />
2. Die hinteren Belüftungsöffnungen dürfen nicht zugestellt<br />
bzw. abgedeckt werden: Kompressor und Kondensator<br />
geben Wärme ab und benötigen eine gute Belüftung<br />
um optimal zu arbeiten und den Stromverbrauch nicht<br />
unnötig zu erhöhen<br />
3. Stellen Sie das Gerät fern von Wärmequellen auf<br />
(Sonnenlicht, Elektroherd).<br />
Elektrischer Anschluss<br />
Warten Sie nach dem Transport etwa 3 Stunden, bevor<br />
Sie das Gerät an das Elektronetz anschließen. Vor<br />
Einfügen des Steckers in die Steckdose ist<br />
sicherzustellen, dass<br />
• die Steckdose über eine normgerechte Erdung verfügt;<br />
• die Steckdose die auf dem Typenschild (befindlich<br />
im Kühlschrank unten links) angegebene max.<br />
Leistungsaufnahme des Gerätes trägt (z.B. 150 W);<br />
• die Netzspannung den auf dem Typenschild<br />
(befindlich in der Kühlzone unten links)<br />
angegebenen Werten entspricht z.B. 220-240 V);<br />
• die Steckdose mit dem Netzstecker übereinstimmt.<br />
Sollte dies nicht der Fall sein, dann lassen Sie den<br />
Stecker durch autorisiertes Fach<strong>per</strong>sonal (siehe<br />
Kundendienst) austauschen; verwenden Sie auf<br />
keinen Fall Verlängerungen oder Vielfachsteckdosen.<br />
! Netzkabel und Stecker müssen bei installiertem<br />
Gerät leicht zugänglich sein.<br />
! Das Netzkabel darf nicht gebogen bzw. eingeklemmt<br />
werden.<br />
! Das Kabel muss regelmäßig kontrolliert werden und<br />
darf nur durch autorisiertes Fach<strong>per</strong>sonal<br />
ausgetauscht werden (siehe Kundendienst).<br />
! Der Hersteller lehnt jede Verantwortung ab, falls<br />
diese Vorschriften nicht eingehalten werden sollten.<br />
38
ECO<br />
Beschreibung Ihres<br />
Gerätes<br />
Geräteansicht<br />
Die Gebrauchsanleitungen gelten für mehrere Gerätemodelle. Demnach ist es möglich, dass die Abbildung Details<br />
enthält, über die Ihr Gerät nicht verfügt. Die Beschreibung weiterer Komponenten ersehen Sie auf nachfolgender Seite.<br />
DE<br />
Abnehmbare Ablagen<br />
mit Deckel, mit<br />
EIERFACH und<br />
A.I.R. SYSTEM<br />
BUTTERDOSE *<br />
Abnehmbare Ablage<br />
für TUBEN UND<br />
ABLAGE•<br />
DOSEN•<br />
Klapphalter für<br />
GETRÄNKEDOSEN*<br />
Schubfach<br />
MEHRZWECKBEHÄLTER*<br />
Fach für eine 2-LITER-<br />
FLASCHE<br />
Schale für OBST<br />
Ablage für<br />
und GEMÜSE<br />
FLASCHEN<br />
Bedienblende<br />
Fach zum<br />
GEFRIEREN und<br />
LAGERN<br />
EISSCHALE •<br />
Fach zum<br />
LAGERN<br />
• Unterschiedliche Anzahl und Platzierung.<br />
* Nicht bei allen Modellen.<br />
39
DE<br />
Bedienblende<br />
Schalter<br />
KÜHLZONE<br />
MODE-<br />
Taste<br />
Funktion<br />
SUPER COOL<br />
Funktion<br />
SUPER FREEZE<br />
SELECT-<br />
Taste<br />
GEFRIERZONE und<br />
Geräte-EIN/AUS-<br />
Schalter<br />
KÜHLZONE -<br />
Einstellung<br />
Funktion<br />
HOLIDAY<br />
Funktion<br />
ICE PARTY<br />
GEFRIERZONE -<br />
Einstellung<br />
• KÜHLZONE-Schalter<br />
Mittels dieser Taste wird die Kühlzone ein- bzw.<br />
ausgeschaltet, und ermöglicht außerdem die<br />
Einstellung der entsprechenden Betriebstem<strong>per</strong>aturen.<br />
• MODE-Taste<br />
Über diese erhalten Sie Zugriff auf die einzelnen<br />
Einstellungen/Funktionen innerhalb des Displays,<br />
und ermöglicht außerdem das Ausschalten der<br />
Alarmsignale.<br />
• KÜHLZONE-Einstellung<br />
Anzeige der eingestellten Kühlzonen-Tem<strong>per</strong>atur,<br />
sowie OFF-Anzeige (Schrift OFF eingeblendet), bei<br />
ausgeschalteter Kühlzone.<br />
• Funktion SUPER COOL<br />
Auf diesem Display ist ersichtlich, ob die Funktion<br />
SUPER COOL (rasches Kühlen der Kühlzone)<br />
ausgeschaltet, gewählt oder aktiviert wurde.<br />
• Funktion HOLIDAY<br />
Auf diesem Display ist ersichtlich, ob die Funktion<br />
HOLIDAY (optimale Tem<strong>per</strong>atur bei Mindestverbrauch<br />
im Falle einer längeren Abwesenheit) ausgeschaltet,<br />
gewählt oder aktiviert wurde.<br />
• Funktion SUPER FREEZE<br />
Auf diesem Display ist ersichtlich, ob die Funktion<br />
SUPER FREEZE (Schockfrieren) ausgeschaltet,<br />
gewählt oder aktiviert wurde.<br />
• Funktion ICE PARTY<br />
Auf diesem Display ist ersichtlich, ob die Funktion<br />
ICE PARTY (äußerst rasches Kühlen einer warmen<br />
Flasche, die zur Erhaltung der Kühltem<strong>per</strong>atur in<br />
dem entsprechenden Kübel auch auf den Tisch<br />
gebracht werden kann) ausgeschaltet, gewählt oder<br />
aktiviert wurde.<br />
• GEFRIERZONE -Einstellung<br />
Anzeige der eingestellten Kühlzonen-Tem<strong>per</strong>atur,<br />
sowie OFF-Anzeige (Schrift OFF eingeblendet), bei<br />
ausgeschalteter Kühlzone.<br />
• SELECT-Taste<br />
Über diese können Sie die einzelnen Funktionen<br />
Wählen/Löschen sowie Alarmsignale ausschalten.<br />
• GEFRIERZONE und Geräte-EIN/AUS-Schalter<br />
Mittels dieser Taste wird das gesamte Gerät (die<br />
Kühl- und die Gefrierzone) ein- bzw. ausgeschaltet,<br />
und ermöglicht außerdem die Einstellung der<br />
Gefrierzonentem<strong>per</strong>atur.<br />
40
Inbetriebsetzung<br />
und Gebrauch<br />
Inbetriebsetzung Ihres Gerätes<br />
! Bevor Sie Ihr Gerät in Betrieb setzen, beachten Sie<br />
bitte aufmerksam die Installationshinweise (siehe<br />
Installation).<br />
! Bevor Sie das Gerät anschließen, müssen die Fächer<br />
und das Zubehör gründlich mit lauwarmem Wasser<br />
und Bikarbonat gereinigt werden.<br />
! Das Gerät ist mit einem Motorschutzkontrollsystem<br />
ausgerüstet, aufgrund dessen der Kompressor erst 8<br />
Minuten nach Einschalten startet. Dies geschieht auch<br />
nach jeder Stromunterbrechung bzw. nach jedem<br />
Stromausfall. (blackout).<br />
Vergewissern Sie sich nach Einstecken des Steckers<br />
in die Steckdose , dass das Display eingeschaltet ist.<br />
(der GEFRIERZONE und Geräte-EIN/AUS-Schalter<br />
darf nicht auf Off geschaltet sein).<br />
Gefrierzone<br />
Bei Einschalten des Gerätes (durch Drehen des<br />
GEFRIERZONE und Geräte-EIN/AUS-Schalter bis auf die<br />
für die Gefrierzone gewünschte Betriebstem<strong>per</strong>atur),<br />
empfiehlt es sich, sofort auch die Funktion SUPER<br />
FREEZE einzuschalten, um das Abkühlen des Fachs zu<br />
beschleunigen. Nach Erreichen der optimalen<br />
Tem<strong>per</strong>atur schaltet sich die Funktion automatisch ab.<br />
Das Gefriergut kann nun eingeräumt werden.<br />
Kühlzone<br />
Bei Einschalten der Kühlzone ( durch Drehen des<br />
Schalters "A" bis auf die für die Kühlzone gewünschte<br />
Tem<strong>per</strong>atur) empfiehlt es sich, sofort auch die<br />
Funktion SUPER COOL einzuschalten, um das<br />
Abkühlen des Fachs zu beschleunigen. Nach Ablauf<br />
einiger Stunden können die Speisen in den<br />
Kühlschrank eingeräumt werden.<br />
A.I.R. SYSTEM<br />
Ist Ihr Gerät mit diesem System ausgestattet,<br />
befindet sich an der Rückwand der Kühlzone die<br />
entsprechende Vorrichtung (siehe Abbildung).<br />
gleichmäßig verteilt wird: Die durch das Gebläse<br />
ausgestoßene Luft (A) erkaltet durch den Kontakt mit<br />
der kalten Geräterückwand, die Warmluft (B)<br />
dagegen wird aufgenommen (siehe Abbildung).<br />
Die Küchenwand ist mit Reif bedeckt, oder es bilden<br />
sich Wassertropfen, je nach dem, ob der<br />
Kompressor in Funktion ist oder nicht.<br />
herauszuziehen.<br />
ABLAGEN: glattflächig oder<br />
in Gitterform.<br />
Sie können herausgezogen<br />
und dank entsprechender<br />
Führungen (siehe Abbildung),<br />
höhenverstellt werden, um<br />
auch große Behältnisse<br />
unterbringen zu können. Zur<br />
Höhenverstellung ist es nicht<br />
erforderlich, die Ablage ganz<br />
Schubfach<br />
MEHRZWECKBEHÄLTER :<br />
Zur längeren Lagerung<br />
unterschiedlichster<br />
Lebensmittel (z.B.<br />
Wurstwaren), unangenehme<br />
Geruchsbildung im<br />
Kühlschrank wird so<br />
vermieden.<br />
DE<br />
B<br />
A<br />
Das A.I.R.-System gewährleistet eine optimale<br />
Konservierung der Lebensmittel, da dank dieses<br />
Systems nach einem Öffnen der Tür die korrekte<br />
Tem<strong>per</strong>atur äußerst schnell wieder hergestellt und<br />
41
DE<br />
So bediene ich das Display<br />
Einstellung der Tem<strong>per</strong>aturen<br />
Ist das Fach, dessen Tem<strong>per</strong>atur eingestellt werden<br />
soll, ausgeschaltet, wird auf dem entsprechenden<br />
Display (KÜHLZONE -Einstellung und GEFRIERZONE<br />
-Einstellung) die Anzeige OFF eingeblendet. Ist das<br />
Fach jedoch eingeschaltet, erscheint die soeben<br />
eingestellte Tem<strong>per</strong>atur. Um diese zu ändern, drehen<br />
Sie den Schalterknopf der entsprechenden Zone<br />
(Schalter KÜHLZONE und GEFRIERZONE und Geräte-<br />
EIN/AUS-Schalter) auf die gewünschte Tem<strong>per</strong>atur.<br />
Die für die Kühlzone einstellbaren Tem<strong>per</strong>aturen<br />
reichen von +2°C bis +8°C, die für die Gefrierzone<br />
einstellbaren Tem<strong>per</strong>aturen von -18°C a -26°C. Das<br />
Herauf- bzw. Herabsetzen einer Tem<strong>per</strong>atur ist jeweils<br />
um nur 1°C möglich.<br />
Wurde die Funktion HOLIDAY aktiviert, sind<br />
Tem<strong>per</strong>atureinstellungen nicht möglich. Das Gerät<br />
schaltet automatisch auf die der jeweiligen Situation<br />
entsprechende, optimale Einstellung. +12°C für die<br />
Kühlzone (wenn aktiviert) und -18°C für die Gefrierzone.<br />
Erläuterungen zu<br />
den Funktionen<br />
Funktionssymbol für normale Betriebsweise.<br />
Gewählte Funktion (Umrandung<br />
eingeschaltet).<br />
Gewählte Funktion (Umrandung<br />
eingeschaltet).<br />
Einschalten/Ausschalten der Funktionen<br />
Drücken Sie die Taste Mode so oft, bis in dem<br />
entsprechenden Feld das Symbol der<br />
entsprechenden Funktion blinkt. Dies bedeutet, dass<br />
die Funktion gewählt wurde und demnach<br />
eingeschaltet bzw. ausgeschaltet werden kann.<br />
Schalten Sie diese nun über die Taste SELECT ein<br />
oder aus.<br />
ANMERKUNG: Wird die Einstellung nicht innerhalb fünf<br />
Sekunden nach der letzten Displayeingabe mittels der<br />
Taste SELECT bestätigt, schaltet das Display auf die<br />
vorher eingestellte Funktion zurück, als Zeichen dafür,<br />
dass keine neue Funktion eingestellt wurde.<br />
Die Funktion SUPER COOL hängt von der Kühlzone ab.<br />
Ist diese ausgeschaltet, sind Einstellungen bzw.<br />
Änderungen an dieser Funktion nicht möglich. Andere<br />
Funktionen sehen eine Betriebsweise vor, die Konflikte<br />
hervorrufen könnte (zum Beispiel wenn zur gleichen<br />
Zeit die Funktionen HOLIDAY und SUPER FREEZE<br />
aktiviert werden), in diesem Falle hilft Ihnen die bereits<br />
vorbestimmte Priorität bei der Handhabung des Geräts.<br />
Die Funktion SUPER FREEZE sieht zwei<br />
Aktivierungsmodalitäten vor (siehe Abschnitt Gefrierzone).<br />
Aktivierung/Deaktivierung der DEMO-Modalität:<br />
Soll bei ausgeschaltetem Gerät die Display-<br />
Funktionsweise nachgewiesen werden, kann dies<br />
durch Aktivierung der Modalität DEMO erfolgen.<br />
Aktivierung:<br />
- Stellen Sie den GEFRIERZONE und Geräte-EIN/AUS-<br />
Schalter auf Off;<br />
- halten Sie die beiden Tasten "Select“ und "Mode“ für<br />
ca. 5 Sekunden gedrückt, bis Sie ein Tonsignal<br />
vernehmen und die beiden Display-Schriftanzeigen<br />
"OFF“ und "OFF“ blinken; diese Schriftanzeigen<br />
blinken für die gesamte Zeit der DEMO-Aktivierung.<br />
Deaktivierung:<br />
- Stellen Sie den GEFRIERZONE und Geräte-EIN/AUS-<br />
Schalter auf 0;<br />
- halten Sie die beiden Tasten "Select“ und "Mode“ für<br />
ca. 5 Sekunden gedrückt, bis Sie ein Tonsignal<br />
vernehmen und die beiden Display-Blinkanzeigen<br />
"OFF“ und "OFF“ erlöschen.<br />
Funktion Holiday<br />
Während Ihrer Ferienzeit ist es nicht erforderlich, das Gerät<br />
abzuschalten. Es ist mit einer Funktion ausgestattet, die es<br />
ermöglicht, bei niedrigstem Stromverbrauch eine<br />
Kühlzonentem<strong>per</strong>atur von ungefähr +12°C zu halten<br />
(praktisch auch zur Aufbewahrung Ihrer Kosmetik und<br />
Schminksachen), die Gefrierzone läuft auf der zur<br />
Konservierung des Gefrierguts erforderlichen<br />
Minimumeinstellung weiter. Aktivierung der Funktion (siehe<br />
So bediene ich das Display)<br />
Optimaler Gebrauch der Kühlzone<br />
• Stellen Sie über den Schalter KÜHLZONE die<br />
Tem<strong>per</strong>atur ein (siehe Beschreibung).<br />
• Drücken Sie die Taste SUPER COOL (Schnellkühlen),<br />
um die Tem<strong>per</strong>atur kurzfristig herabzusetzen, z.B.<br />
wenn die Kühlzone nach einem Großeinkauf besonders<br />
gefüllt wird. Die Funktion wird nach Erreichen der<br />
optimalen Betriebsbedingungen automatisch wieder<br />
ausgeschaltet.<br />
• Legen Sie nur abgekühlte, höchstenfalls lauwarme,<br />
niemals heiße Speisen ein (siehe Vorsichtsmaßregeln<br />
und Hinweise).<br />
• Bitte beachten Sie, dass gekochte Speisen nicht länger<br />
halten als rohe Speisen.<br />
• Bewahren Sie keine Flüssigkeiten in offenen Behältern<br />
auf: sie würden die Feuchtigkeit erhöhen und<br />
demzufolge Kondensbildung verursachen.<br />
42
Optimaler Gebrauch des Gefrierfachs<br />
• Stellen Sie über den Schalter GEFRIERZONE die<br />
Tem<strong>per</strong>atur ein (siehe Beschreibung).<br />
• An- oder aufgetautes Gefriergut darf nicht wieder<br />
eingefroren werden. Solche Lebensmittel müssen zu einem<br />
Fertiggericht verarbeitet werden (innerhalb 24 Std.)<br />
• Bereits gefrorene Lebensmittel dürfen nicht mit den<br />
frisch einzufrierenden Lebensmitteln in Berührung<br />
kommen. Letztere müssen in der oberen Schale<br />
GEFRIEREN und LAGERN eingefroren werden. Dort<br />
sinkt die Tem<strong>per</strong>atur unter -18°C, die Speisen werden<br />
demnach schnell und schonend eingefroren.<br />
• Lagern Sie in der Gefrierzone bitte keine hermetisch<br />
verschlossenen Glasflaschen mit Flüssigkeiten, beim<br />
Gefrieren könnten sie platzen.<br />
• Die Höchstmenge an Lebensmitteln, die täglich<br />
eingefroren werden kann, ist auf dem Typenschild<br />
(befindlich in der Kühlzone unten links) ersichtlich<br />
(Beispiel: Kg/24h 4).<br />
• Lebensmittel eingefrieren (Gefrierzone bereits in Betrieb):<br />
- Für kleine Mengen, die unter der auf dem<br />
Typenschild (unten links neben der Gemüseschale)<br />
angegebenen, maximalen Kapazität liegen, aktivieren<br />
Sie über das Display die Funktion SUPER FREEZE in<br />
der Betriebsart "24 Stunden", und räumen die<br />
einzufrierenden Nahrungsmittel ein. Um diese<br />
Funktion einzuschalten drücken Sie die Taste MODE<br />
so oft, bis das Symbol SUPER FREEZE blinkt, zur<br />
Aktivierung der Funktion drücken Sie dann die Taste<br />
SELECT . Nach Ablauf von 24 Stunden bzw. nach<br />
Erreichen der optimalen Tem<strong>per</strong>atur schaltet sich die<br />
Su<strong>per</strong>frost-Funktion automatisch ab.<br />
- Sollen große Mengen eingefroren werden (Mengen<br />
bis zu der auf dem Typenschild - links unten neben<br />
der Gemüseschale - angegebenen, maximalen<br />
Lademenge), aktivieren Sie über das Display die<br />
Funktion SUPER FREEZE in der Betriebsart "48<br />
Stunden". Um diese Funktion einzuschalten drücken<br />
Sie die Taste MODE so oft, bis das Symbol SUPER<br />
FREEZE blinkt, halten Sie daraufhin die Taste SELECT<br />
für mehr als drei Sekunden gedrückt, um die<br />
Funktion zu aktivieren (das Symbol SUPER FREEZE<br />
blinkt dann langsam). Nach Ablauf von 24 Stunden<br />
schaltet das Symbol dieser Funktion von Blinkanzeige<br />
wieder auf Festanzeige zurück. Nun können die<br />
einzufrierenden Nahrungsmittel eingeräumt werden.<br />
Nach weiteren 24 Stunden schaltet sich die Funktion<br />
automatisch ab. Während des Einfrierens vermeiden<br />
Sie ein Öffnen des Gefrierteils.<br />
• Für mehr Platz in der Gefrierzone können Sie die<br />
Schalen herausnehmen (mit Ausnahme der<br />
untersten Schale sowie der Schale COOL CARE<br />
ZONE mit variabler Tem<strong>per</strong>atur, sofern vorgesehen)<br />
und die Lebensmittel direkt auf die<br />
Verdunsterplatten legen.<br />
! Um die Frischluftzirkulation im Innern des<br />
Gefrierschrankes nicht zu behindern, sollten die<br />
Belüftungsöffnungen nicht durch Lebensmittel oder<br />
Behältnisse zugestellt werden<br />
! Während des Schnellgefrierens sollte das Öffnen der<br />
Tür vermieden werden.<br />
! Auch während eines Stromausfalls oder einer<br />
Störung sollte die Gefrierfachtür nicht geöffnet<br />
werden: Das Gefrier- bzw. Tiefkühlgut hält sich so<br />
unverändert für ungefähr 9-14 Stunden.<br />
DE<br />
43
DE<br />
EISSCHALE.<br />
Dank der Positionierung dieses Behälters oben an den<br />
Schalen der Gefrierzone ist größere Ergonomie und<br />
Sauberkeit gewährleistet: Die Berührung mit dem<br />
gelagerten Gefriergut wird vermieden, wie auch ein<br />
Verschütten von Wasser beim Füllen des Behälters (ein<br />
entsprechender Verschluss, mit dem die Öffnung nach<br />
Füllen verschlossen werden kann, wird mitgeliefert).<br />
1. Ziehen Sie die Eiswürfelschale nach oben hin heraus<br />
Vergewissern Sie sich, dass die Schale ganz leer ist<br />
und füllen Sie sie durch die entsprechende Öffnung.<br />
2. Die angezeigte Füllmenge bitte nicht überschreiten<br />
(MAX WATER LEVEL). Zu viel Wasser behindert das<br />
Herausnehmen der Eiswürfel (in einem solchen Fall<br />
warten Sie, bis das Eis schmilzt und entleeren Sie die<br />
Schale).<br />
3. Drehen Sie die Schale um 90°: das Wasser läuft in die<br />
einzelnen, durch kleine Adern verbundenen Formen<br />
(siehe Abbildung<br />
4. Schließen Sie die Öffnung mit dem mitgelieferten<br />
Deckel.<br />
5. Die geformten Eiswürfel (Mindestzeit ca. 8 Std.) können<br />
durch leichtes Aufschlagen des Behälters auf ein harte<br />
Oberfläche gelöst werden, um sie dann durch die<br />
Öffnung herausrutschen zu lassen.<br />
ICE PARTY: Hier kann eine<br />
Champagner- oder Sektflasche<br />
auf die korrekte Tem<strong>per</strong>atur<br />
gebracht werden.<br />
Geben Sie die Flasche in dem<br />
bereits tiefgekühlten Kübel ins<br />
Innere des Gefrierfachs<br />
GEFRIEREN und LAGERN und<br />
wählen Sie auf dem Display die<br />
entsprechende Funktion.<br />
Entnehmen Sie die Flasche wieder, wenn Ihnen das<br />
Ende des Kühlvorgangs angezeigt wird.<br />
Den Kübel verwenden Sie dann direkt zum Servieren<br />
und Kalthalten der Flasche.<br />
MAX<br />
WATER LEVEL<br />
MAX<br />
WATER LEVEL<br />
44
Wartung und Pflege<br />
Abschalten Ihres Gerätes vom Stromnetz<br />
Bei Reinigungs- und Wartungsmaßnahmen muss das<br />
Gerät vom Stromnetz getrennt werden:<br />
1. Drehen Sie den GEFRIERZONE und Geräte-EIN/AUS-<br />
Schalter auf Off,<br />
2. und ziehen Sie den Netzstecker aus der Steckdose.<br />
! Wird dies nicht befolgt, ertönt das Warnsignal. Dieser<br />
Warnton ist kein Zeichen für eine eventuelle Störung. Um<br />
die normale Betriebsweise wieder herzustellen, drehen Sie<br />
den Schalter GEFRIERZONE auf den gewünschten Wert.<br />
Um das Gerät vom Stromnetz zu trennen, verfahren Sie<br />
gemäß der Punke 1 und 2.<br />
Reinigung Ihres Gerätes<br />
• Das Gehäuse des Gerätes, außen und innen, sowie<br />
die Türdichtungen können mit einem mit Wasser und<br />
Bikarbonat oder einer milden Spüllauge getränkten<br />
Schwamm gereinigt werden. Vermeiden Sie Löse-,<br />
Scheuer-, Bleichmittel oder Ammoniak.<br />
• Das Zubehör kann herausgenommen und in einer<br />
warmen Spüllauge gereinigt werden. Anschließend<br />
sorgfältig klarspülen und trockenreiben.<br />
Vermeidung von Schimmelpilz- und<br />
Geruchsbildung<br />
• Das Gerät wurde mit hygienischen Materialien gefertigt,<br />
die keine Gerüche übertragen. Um diese Eigenschaft<br />
nicht zu verlieren, sind die Lebensmittel stets gut<br />
verschlossen bzw. verpackt zu lagern. Hierdurch wird<br />
auch die Bildung von Flecken vermieden.<br />
• Soll das Gerät für längere Zeit stillgelegt werden,<br />
reinigen Sie den Innenraum und lassen Sie die<br />
Gerätetür offenstehen.<br />
Abtauen Ihres Gerätes<br />
! Verfahren Sie hierzu wie nachstehend beschrieben.<br />
Verwenden Sie zum Abtauen des Gerätes bitte keine<br />
scharfen oder spitzen Gegenstände, die den Kühlkreis<br />
hoffungslos beschädigen könnten.<br />
Abtauen des Kühlschranks<br />
Der Kühlschrank taut automatisch ab: Das Tauwasser wird<br />
nach hinten durch eine<br />
kleine Ablauföffnung (siehe<br />
Abbildung) abgeleitet, wo<br />
es dank der vom<br />
Kompressor erzeugten<br />
Wärme verdampft. Diese<br />
kleine Öffnung sollte<br />
jedoch regelmäßig<br />
gereinigt werden, damit<br />
das Tauwasser<br />
unbehindert ablaufen kann.<br />
Lampenaustausch<br />
Zum Austausch der Lampe der Kühlzonenbeleuchtung<br />
muss der Netzstecker aus der Steckdose gezogen<br />
werden. Verfahren Sie wie nachfolgend beschrieben.<br />
Verschaffen Sie sich Zugang zur Lampe (A) indem Sie<br />
die Lampenabdeckungs-Befestigungsschaube (B)<br />
ausschrauben (siehe Abbildung). Ersetzen Sie die<br />
Lampe durch eine neue gleicher Leistung und Bauform,<br />
nicht höher als 15W.<br />
A<br />
B<br />
DE<br />
45
Vorsichtsmaßregeln und<br />
Hinweise<br />
DE<br />
! Das Gerät wurde nach den strengsten internationalen<br />
Sicherheitsvorschriften entworfen und gebaut.<br />
Nachstehende Hinweise werden aus Sicherheitsgründen<br />
geliefert und sollten aufmerksam gelesen werden.<br />
Dieses Gerät entspricht den folgenden EG-<br />
Richtlinien:<br />
-73/23/EWG vom 19.02.73 (Niederspannung)<br />
und nachfolgenden Änderungen.<br />
- 89/336/EWG vom 03.05.89<br />
(elektromagnetische Verträglichkeit) und<br />
nachfolgenden Änderungen.<br />
- 2002/96/CE..<br />
Allgemeine Sicherheit<br />
• Dieses Gerät ist für den nicht professionellen Einsatz<br />
im privaten Haushalt bestimmt.<br />
• Das Gerät ist zum Kühlen und Einfrieren von<br />
Lebensmitteln zu verwenden, und nur von<br />
Erwachsenen gemäß den Hinweisen der<br />
vorliegenden Gebrauchsanweisung zu benutzen.<br />
• Der Kühl-/ und Gefrierkombi darf nicht im Freien<br />
aufgestellt werden, auch nicht, wenn es sich um<br />
einen geschützten Platz handelt. Es ist gefährlich,<br />
das Gerät Gewittern und Unwettern auszusetzen.<br />
• Berühren Sie das Gerät nicht, wenn Sie barfuß sind,<br />
und auch nicht mit nassen oder feuchten Händen<br />
oder Füßen.<br />
• Berühren Sie nicht den Rückwandverdampfer: es<br />
besteht Verletzungsgefahr.<br />
• Ziehen Sie den Gerätestecker nicht am Netzkabel<br />
aus der Steckdose, sondern nur am Stecker selbst.<br />
• Vor allen Reinigungs- und Wartungsmaßnahmen<br />
muss der Netzstecker gezogen werden.<br />
Es genügt nicht, das Gerät durch Drücken (für länger<br />
als 2 Sekunden) der ON/OFF-Taste auszuschalten,<br />
um jeglichen Stromkontakt auszuschließen.<br />
• Bei etwaigen Störungen versuchen Sie bitte nicht,<br />
das Gerät selbst zu reparieren.<br />
• Verwenden Sie im Innern der Gefriergutlagerfächer<br />
bitte keine scharfen oder spitzen Gegenstände oder<br />
Elektrogeräte, sondern nur die vom Hersteller<br />
erlaubten Hilfsmittel.<br />
• Eiswürfel nicht sofort in den Mund nehmen.<br />
• Erlauben Sie Kindern nicht, mit dem Gerät zu<br />
spielen. Auf keinen Fall dürfen sie sich auf die<br />
Gefrierzonenschalen setzen, oder sich an die Tür<br />
hängen.<br />
• Verpackungsmaterial ist kein Spielzeug für Kinder.<br />
Entsorgung<br />
• Entsorgung des Verpackungsmaterials: Befolgen<br />
Sie die lokalen Vorschriften, Verpackungsmaterial<br />
kann wiederverwertet werden.<br />
• Gemäß der Europäischen Richtlinie 2002/96/EC<br />
über Elektro- und Elektronik-Altgeräte (WEEE)<br />
dürfen Elektrohaushalts-Altgeräte nicht über den<br />
herkömmlichen Haushaltsmüllkreislauf entsorgt<br />
werden. Altgeräte müssen separat gesammelt<br />
werden, um die Wiederverwertung und das<br />
Recycling der beinhalteten Materialien zu<br />
optimieren und die Einflüsse auf die Umwelt und<br />
die Gesundheit zu reduzieren. Das Symbol<br />
„durchgestrichene Mülltonne” auf jedem Produkt<br />
erinnert Sie an Ihre Verpflichtung, dass<br />
Elektrohaushaltsgeräte gesondert entsorgt werden<br />
müssen.<br />
Endverbraucher können sich an Abfallämter der<br />
Gemeinden wenden, um mehr Informationen über<br />
die korrekte Entsorgung ihrer<br />
Elektrohaushaltsgeräte zu erhalten.<br />
Energie sparen und Umwelt schonen<br />
• Stellen Sie das Gerät in einem trockenen, gut<br />
belüftbaren Raum auf, nicht direkt in der Sonne oder<br />
in der Nähe von Wärmequellen.<br />
• Öffnen Sie die Gerätetür so kurz wie möglich, wenn<br />
Sie Lebensmittel lagern oder herausnehmen.<br />
Bei jeder Türöffnung geht wertvolle Energie verloren.<br />
• Das Gerät sollte nicht überladen werden: Zur<br />
Haltbarkeit der Lebensmittel muss die Kälte frei<br />
zirkulieren können. Die Behinderung der Zirkulation<br />
hat zur Folge, dass der Kompressor ständig<br />
arbeitet.<br />
• Stellen Sie keine warmen Speisen in das Gerät, sie<br />
würden die Tem<strong>per</strong>atur erheblich erhöhen und den<br />
Kompressor zu einer höheren Leistung zwingen,<br />
was eine unnötige Verschwendung an Energie<br />
bedeutet.<br />
• Halten Sie die Dichtungen stets effizient und sauber,<br />
damit sie ordnungsgemäß an den Türen anhaften<br />
und die Kälte nicht entweichen lassen (siehe<br />
Wartung).<br />
46
Störungen und Abhilfe<br />
Gerätestörung: Bevor Sie sich an den Technischen Kundendienst wenden (siehe Kundendienst), vergewissern Sie<br />
sich bitte zuerst, ob es sich um eine Kleinigkeit handelt, die Sie selbst beheben können. Ziehen Sie hierzu<br />
nachstehendes Verzeichnis zu Rate.<br />
Störungen:<br />
Mögliche Ursachen / Abhilfe:<br />
DE<br />
Das Display ist vollkommen dunkel<br />
Der Motor startet nicht.<br />
Die Kühlleistung des Kühlschranks<br />
und des Gefrierfachs ist zu gering.<br />
Der Kühlschrank kühlt zu stark, das<br />
Kühlgut gefriert.<br />
Der Motor läuft ununterbrochen.<br />
Das Betriebsgeräusch ist zu stark.<br />
Auf dem Boden des Kühlschranks<br />
steht Wasser.<br />
Alarm wegen offenstehender Tür<br />
Alarm wegen unnormalen<br />
Tem<strong>per</strong>aturanstiegs in der<br />
Gefrierzone<br />
• Der Netzstecker steckt nicht in der Steckdose, oder er sitzt nicht fest, so<br />
dass kein Kontakt hergestellt wird; oder es besteht ein Stromausfall.<br />
• Das Gerät ist mit einem Motorschutzkontrollsystem ausgestattet (siehe<br />
Inbetriebsetzung und Gebrauch).<br />
• Die Türen schließen nicht gut bzw. die Dichtungen sind verschlissen.<br />
• Die Türen werden zu oft geöffnet.<br />
• Der TEMPERATURSCHALTER ist nicht richtig eingestellt.<br />
• Der Kühlschrank oder das Gefrierfach wurde zu sehr beladen.<br />
• Der Schalter KÜHLZONE befindet sich nicht auf der korrekten Einstellung<br />
(siehe Beschreibung).<br />
• Das Kühlgut kommt mit der Rückwand in Berührung.<br />
• vielleicht die Funktionen SUPER COOL und/oder SUPER FREEZE und/oder<br />
ICE PARTY aktiviert wurden;<br />
•· die Außentem<strong>per</strong>atur sehr hoch ist;<br />
• der Tem<strong>per</strong>aturregler richtig eingestellt ist.<br />
• Das Gerät wurde nicht eben aufgestellt (siehe Installation).<br />
• Das Gerät wurde zwischen Möbelteilen oder Gegenständen aufgestellt,<br />
die vibrieren und daher zur Geräuschbildung Ihres Gerätes beitragen.<br />
• Das Kühlmittel verursacht ein leises Geräusch auch wenn der Kompressor<br />
nicht arbeitet: dies ist kein Fehler sondern ganz normal.<br />
• Die Tauwasserablauföffnung ist verstopft (siehe Wartung).<br />
Bleibt die Tür des Kühlschranks länger als 2 Minuten offenstehen, blinkt die<br />
Lampe der Innenbeleuchtung; nach einigen Sekunden ertönt ein akustisches<br />
Signal, das durch Schließen der Tür oder durch Drücken der Taste SELECT<br />
abgestellt werden kann. Bleibt die Tür länger als 4 Minuten offenstehen, blinkt<br />
die Lampe sehr schnell.<br />
1. Um auf einen unnormalen Tem<strong>per</strong>aturanstieg im Innern der Gefrierzone aufmerksam<br />
zu machen (ein vorübergehender Stromausfall), ertönt ein akustisches<br />
Alarmsignal und auf dem Display erscheint eine Meldung (A1), die auf<br />
diesen gefährlichen Tem<strong>per</strong>aturanstieg hinweist. Um zu vermeiden, dass das<br />
Gefriergut erneut eingefroren wird, wird in der Gefrierzone eine Tem<strong>per</strong>atur<br />
von ungefähr 0°C gehalten. Somit wird Ihnen die Möglichkeit gegeben, diese<br />
Lebensmittel innerhalb 24 Stunden zu verwenden bzw. nach dem Kochen als<br />
Fertiggericht erneut einzufrieren. Der Signalton kann durch Druck auf die Taste<br />
SELECT abgestellt werden. Um zur normalen Funktion zurückzukehren, und<br />
die auf dem Display eingeblendete, schriftliche Nachricht zu löschen, muss<br />
das Gerät über den ON/OFF-Geräteschalter zuerst ausgeschaltet und dann<br />
wieder eingeschaltet werden.<br />
2. Sollte die Tem<strong>per</strong>atur auf zu hohe Werte ansteigen, ertönt erneut ein akustisches<br />
Signal, es erscheint ebenfalls eine neue Alarmmeldung auf dem Display<br />
(A2), die Sie auf diesen zu hohen Tem<strong>per</strong>aturanstieg aufmerksam macht.<br />
Es empfiehlt sich, das Gefriergut zu überprüfen, gegebenenfalls ist es nicht<br />
mehr zu verwenden. Auf keinen Fall darf es neu eingefroren werden, es sei<br />
denn, es wird gekocht. Um zu vermeiden, dass das Gefriergut erneut eingefroren<br />
wird, wird in der Gefrierzone eine Tem<strong>per</strong>atur von ungefähr 0°C gehalten.<br />
Das akustische Signal kann durch Druck auf die Taste SELECT abgestellt<br />
werden. Um zur normalen Funktion zurückzukehren, und die auf dem Display<br />
eingeblendete, schriftliche Nachricht zu löschen, muss das Gerät über<br />
den ON/OFF-Geräteschalter zuerst ausgeschaltet und dann wieder eingeschaltet<br />
werden.<br />
47
Kundendienst<br />
195071850.02<br />
02/2011 - Xerox Business Services<br />
DE<br />
Bevor Sie sich an den Kundendienst wenden:<br />
• Prüfen Sie bitte, ob die Störung nicht selbst behoben werden kann (siehe Störungen und Abhilfe).<br />
• Sollte trotz aller Kontrollen das Gerät nicht funktionieren, bzw. die Störung weiter bestehen bleiben,<br />
kontaktieren Sie bitte die nächstgelegene technische Kundendienststelle.<br />
Modell<br />
Modellnummer<br />
Geben Sie bitte Folgendes an:<br />
• die Art der Störung<br />
• das Gerätemodell (Mod.)<br />
• die Modellnummer (S/N).<br />
Entnehmen Sie diese Daten bitte dem Typenschild<br />
(befindlich in der Kühlzone unten links).<br />
Wenden Sie sich auf keinen Fall an nicht autorisierte Techniker und lassen Sie ausschließlich<br />
Original-Ersatzteile einbauen.<br />
48
Manual de instrucciones<br />
COMBINADO FRIGORÍFICO/CONGELADOR<br />
I<br />
GB<br />
F<br />
Sumario<br />
Instalación, 50<br />
Colocación y conexión<br />
E<br />
Italiano, 1 English, 13 Français, 25<br />
DE E PT<br />
Deutsch, 37 Espanol, 49 Portuges, 61<br />
BCB 313 AVEI FF<br />
Descripción del aparato, 51-52<br />
Vista en conjunto<br />
Panel de control<br />
Puesta en funcionamiento y uso, 53-54-55-56<br />
Poner en marcha el aparato<br />
Cómo moverse en el display<br />
Utilizar el refrigerador en forma óptima<br />
Utilizar el congelador en forma óptima<br />
Mantenimiento y cuidados, 57<br />
Cortar la corriente eléctrica<br />
Limpiar el aparato<br />
Evitar la formación de moho y malos olores<br />
Descongelar el aparato<br />
Sustituir la bombilla<br />
PURE WIND PLUS Mantenimiento de los filtros<br />
Precauciones y consejos, 58<br />
Seguridad general<br />
Eliminación<br />
Ahorrar y respetar el ambiente<br />
Anomalías y soluciones, 59<br />
Asistencia, 60
Instalación<br />
E<br />
! Es importante conservar este manual para poder<br />
consultarlo cuando sea necesario. En caso de venta,<br />
cesión o traslado, controle que <strong>per</strong>manezca junto al<br />
aparato para informar al nuevo propietario sobre el<br />
funcionamiento y realizar las correspondientes<br />
advertencias.<br />
! Lea atentamente las instrucciones: contienen<br />
información importante sobre la instalación, el uso y la<br />
seguridad.<br />
Colocación y conexión<br />
Colocación<br />
1. Coloque el aparato en un ambiente bien aireado y seco.<br />
2. No obstruya las rejillas posteriores de ventilación: el<br />
compresor y el condensador emiten calor y requieren<br />
una buena aireación para funcionar bien y limitar el<br />
consumo eléctrico.<br />
4. Mantenga el aparato lejos de fuentes de calor (por ej.<br />
la luz solar directa o una cocina eléctrica).<br />
Conexión eléctrica<br />
Después de su transporte, coloque el aparato<br />
verticalmente y es<strong>per</strong>e 3 horas como mínimo antes de<br />
conectarlo a la red eléctrica. Antes de enchufarlo a la<br />
toma de corriente, controle que:<br />
• la toma posea la conexión a tierra y que sea<br />
conforme a la ley;<br />
• el enchufe sea capaz de soportar la carga máxima<br />
de potencia de la máquina indicada en la placa de<br />
características ubicada en la parte inferior izquierda<br />
del compartimento frigorífico (por ej. 150 vatios);<br />
• la tensión de alimentación esté comprendida entre<br />
los valores indicados en la placa de características<br />
ubicada en la parte inferior izquierda (ej. 220-240V);<br />
• la toma sea compatible con el enchufe del aparato.<br />
Si no fuera así, solicite la sustitución del enchufe a<br />
un técnico autorizado (ver Asistencia); no utilice<br />
prolongaciones ni conexiones múltiples.<br />
! Una vez instalado el aparato, el cable eléctrico y la<br />
toma de corriente deben ser fácilmente accesibles.<br />
! El cable no debe sufrir pliegues ni compresiones.<br />
! El cable debe ser controlado <strong>per</strong>iódicamente y<br />
sustituido por técnicos autorizados (Ver Asistencia.<br />
! La empresa declina toda responsabilidad en los<br />
casos en que no hayan sido respetadas estas<br />
normas.<br />
50
ECO<br />
Descripción del aparato<br />
Vista en conjunto<br />
Las instrucciones sobre el uso son válidas para distintos modelos y por lo tanto es posible que la figura presente<br />
detalles diferentes a los del aparato que Ud. ha adquirido. La descripción de los objetos más complejos se<br />
encuentra en las páginas sucesivas.<br />
E<br />
A.I.R. SYSTEM<br />
ESTANTE•<br />
Balconcito extraíble<br />
con tapa, con<br />
HUEVERA y<br />
COMPARTIMIENTO<br />
PARA<br />
MANTEQUILLA*<br />
Balconcito extraíble<br />
PORTAOBJETOS•<br />
Recipiente<br />
MULTI-USO*<br />
Recipiente FRUTA y<br />
VERDURA<br />
PANEL DE CONTROL<br />
Balconcito<br />
PORTALATAS*<br />
Espacio para UNA<br />
BOTELLA DE 2<br />
LITROS<br />
Balconcito<br />
BOTELLAS<br />
Compartimiento<br />
CONGELAMIENTO y<br />
CONSERVACIÓN<br />
Cubeta de HIELO •<br />
Compartimiento<br />
CONSERVACIÓN<br />
• La cantidad y/o su ubicación pueden variar.<br />
* Se encuentra solo en algunos modelos.<br />
51
E<br />
Panel de control<br />
Perilla de<br />
FUNCIONAMIENTO<br />
DEL REFRIGERADOR<br />
Botón<br />
MODE<br />
Función<br />
SUPER COOL<br />
Función<br />
SUPER FREEZE<br />
Botón<br />
SELECT<br />
Perilla de<br />
FUNCIONAMIENTO<br />
DEL CONGELADOR<br />
y ON/OFF DEL<br />
APARATO<br />
Configuración del<br />
COMPARTIMIENTO<br />
REFRIGERADOR<br />
Función<br />
HOLIDAY<br />
Función<br />
ICE PARTY<br />
Configuración del<br />
COMPARTIMIENTO<br />
CONGELADOR<br />
• Perilla de FUNCIONAMIENTO DEL<br />
EFRIGERADOR<br />
Administra el encendido y apagado del<br />
compartimiento refrigerador y <strong>per</strong>mite fijar las<br />
correspondientes tem<strong>per</strong>aturas de funcionamiento.<br />
• Botón MODE<br />
Permite el desplazamiento en el display para llegar<br />
a las distintas opciones/funciones y el pagado de<br />
las alarmas sonoras.<br />
• Configuración del COMPARTIMIENTO<br />
REFRIGERADOR<br />
Visualiza la tem<strong>per</strong>atura fijada en el refrigerador y<br />
el estado de OFF del compartimiento refrigerador<br />
(palabra OFF activa).<br />
• Función SUPER COOL<br />
Visualiza el estado (desactivado, seleccionado o<br />
activado) de la función SUPER COOL (enfriamiento<br />
rápido del compartimiento refrigerador).<br />
• Función HOLIDAY<br />
Visualiza el estado (desactivado, seleccionado o<br />
activado) de la función HOLIDAY (tem<strong>per</strong>aturas<br />
óptimas con consumos mínimos en el caso de<br />
largas ausencias).<br />
• Función SUPER FREEZE<br />
Visualiza el estado (desactivado, seleccionado o<br />
activado) de la función SUPER FREEZE<br />
(congelamiento rápido)<br />
• Función ICE PARTY<br />
Visualiza el estado (desactivado, seleccionado o<br />
activado) de la función ICE PARTY<br />
(ENFRIAMIENTO RÁPIDO BOTELLA) (la máxima<br />
rapidez para enfriar una botella caliente y servirla<br />
en la mesa con el cubo adecuado para mantener la<br />
tem<strong>per</strong>atura alcanzada)<br />
• Configuración del COMPARTIMIENTO CONGELADOR<br />
Visualiza la tem<strong>per</strong>atura fijada en el congelador y el<br />
estado de OFF del aparato (palabra OFF activa).<br />
• Botón SELECT<br />
Permite seleccionar y anular la selección de las<br />
distintas funciones y el apagado de las alarmas<br />
sonoras.<br />
• Perilla de FUNCIONAMIENTO DEL CONGELADOR<br />
y ON/OFF DEL APARATO<br />
Administra el encendido y apagado de todo el<br />
aparato y <strong>per</strong>mite fijar las tem<strong>per</strong>aturas de<br />
funcionamiento del compartimiento congelador.<br />
52
Puesta en<br />
funcionamiento y uso<br />
Poner en marcha el aparato<br />
! Antes de poner en marcha el aparato, siga las<br />
instrucciones sobre la instalación (ver Instalación).<br />
! Antes de conectar el aparato, limpie bien los<br />
compartimientos y los accesorios con agua tibia y<br />
bicarbonato.<br />
! El aparato posee un control que lo protege contra<br />
sobrecargas, que hace funcionar el compresor sólo<br />
después de aproximadamente 8 minutos del encendido.<br />
Esto sucede también después de cada interrupción de la<br />
alimentación eléctrica, voluntaria o involuntaria (black<br />
out).<br />
Después de haber enchufado el aparato verifique que<br />
el display esté encendido (la <strong>per</strong>illa de<br />
FUNCIONAMIENTO DEL CONGELADOR y ON/OFF<br />
DEL APARATO no debe estar en Off )<br />
“A.I.R.” System <strong>per</strong>mite una óptima conservación de<br />
los alimentos debido a que restablece rápidamente<br />
la tem<strong>per</strong>atura después de la a<strong>per</strong>tura de la puerta y<br />
la distribuye en forma homogénea: el aire soplado<br />
(A) se enfría en contacto con la pared fría, mientras<br />
que el aire más caliente (B) se aspira (ver la figura).<br />
ESTANTES: rellenos o tipo<br />
rejilla.<br />
Son extraíbles y su altura es<br />
regulable gracias a las guías<br />
especiales (ver la figura), se<br />
utilizan para introducir<br />
recipientes o alimentos de<br />
gran tamaño. Para regular la<br />
altura no es necesario extraer<br />
completamente el estante.<br />
E<br />
Compartimiento congelador<br />
Cuando se enciende el aparato (girar la <strong>per</strong>illa de<br />
FUNCIONAMIENTO DEL CONGELADOR y ON/OFF<br />
DEL APARATO hasta fijar la tem<strong>per</strong>atura de<br />
funcionamiento deseada en el congelador), se<br />
aconseja activar la función SUPER FREEZE para<br />
acelerar el enfriamiento del compartimiento; cuando<br />
este último haya alcanzado su tem<strong>per</strong>atura óptima, la<br />
función se desactivará y se podrán introducir en el<br />
congelador los alimentos.<br />
Compartimiento refrigerador<br />
Cuando se enciende el compartimiento refrigerador<br />
(gire la <strong>per</strong>illa de FUNCIONAMIENTO DEL<br />
REFRIGERADOR hasta fijar la tem<strong>per</strong>atura de<br />
funcionamiento deseada en el compartimiento<br />
refrigerador) se aconseja activar la función SUPER<br />
COOL para acelerar el enfriamiento del<br />
compartimiento: después de algunas horas podrá<br />
colocar los alimentos en el refrigerador.<br />
A.I.R. SYSTEM<br />
Es identificable por la presencia del dispositivo en la<br />
pared su<strong>per</strong>ior del compartimiento refrigerador (ver la<br />
figura).<br />
figura).<br />
Recipiente MULTI-USO: se<br />
utiliza para conservar por mucho<br />
tiempo distintos alimentos (por<br />
ejemplo embutidos); evita<br />
también que se formen olores en<br />
el refrigerador. Se debe extraer<br />
para su uso y se puede<br />
desplazar en sentido lateral para<br />
optimizar el espacio (ver la<br />
B<br />
A<br />
53
E<br />
Cómo moverse en el display<br />
Selección de las tem<strong>per</strong>aturas:<br />
Si el compartimiento en cuestión está apagado, en el<br />
espacio correspondiente de comunicación en el display<br />
(Perilla de FUNCIONAMIENTO<br />
DEL REFRIGERADOR para el refrigerador y Perilla de<br />
FUNCIONAMIENTO DEL CONGELADOR y ON/OFF DEL<br />
APARATO para el congelador) aparecerá la palabra<br />
OFF. Si, en cambio, el compartimiento está encendido,<br />
aparecerán las tem<strong>per</strong>aturas seleccionadas en ese<br />
momento. Para modificarlas, utilice directamente la<br />
<strong>per</strong>illa correspondiente al compartimiento en cuestión<br />
(Perilla de FUNCIONAMIENTO DEL REFRIGERADOR y<br />
Perilla de FUNCIONAMIENTO DEL CONGELADOR y<br />
ON/OFF DEL APARATO).<br />
Las tem<strong>per</strong>aturas que se pueden fijar para el<br />
compartimiento refrigerador van desde +2°C a +8°C,<br />
mientras que para el compartimiento congelador van<br />
desde -18°C a -26°C. Los aumentos o disminuciones<br />
posibles son siempre de 1°C.<br />
Cuando se activa la función HOLIDAY no se pueden<br />
realizar regulaciones de tem<strong>per</strong>atura, <strong>per</strong>o el aparato se<br />
coloca automáticamente en la regulación óptima para la<br />
situación: +12°C para el compartimiento refrigerador (si<br />
está activo) y -18°C para el compartimiento congelador.<br />
Administración<br />
de las funciones:<br />
Símbolo de la función en el normal<br />
funcionamiento.<br />
Función seleccionada (contorno<br />
centelleante).<br />
Función activada (contorno encendido)<br />
Activación/desactivación de las funciones<br />
Pulse el botón MODE "C" las veces que sea necesario<br />
para hacer centellear el símbolo de la función con la<br />
cual se desea trabajar: esto indica que la función ha<br />
sido seleccionada y está lista para ser activada o<br />
desactivada. A partir de ese momento, se puede<br />
administrar la función utilizando el botón SELECT para<br />
activarla o desactivarla.<br />
NOTA: si no se confirma pulsando el botón SELECT<br />
dentro de los cinco segundos de la última acción en el<br />
display, este último volverá a visualizar la función como<br />
estaba configurada precedentemente para indicar que<br />
no se ha producido ninguna modificación.<br />
La función SUPER COOL está ligada al compartimiento<br />
refrigerador y cuando el mismo está apagado, no se<br />
<strong>per</strong>mitirá ninguna acción sobre ella; otras, en cambio,<br />
tienen un funcionamiento que puede crear conflictos (por<br />
ejemplo: cuando se activan simultáneamente las funciones<br />
HOLIDAY y SUPER FREEZE …), en este caso se tiene en<br />
cuenta una prioridad ya establecida para ayudarle en la<br />
administración del aparato.<br />
La función SUPER FREEZE prevé dos modalidades de<br />
activación (véase el párrafo correspondiente a la<br />
administración del compartimiento congelador).<br />
Activación/desactivación de la modalidad DEMO:<br />
Para hacer una demostración del funcionamiento del<br />
display manteniendo el producto apagado, se puede<br />
activar la modalidad DEMO.<br />
Activación:<br />
- coloque la <strong>per</strong>illa de FUNCIONAMIENTO DEL<br />
CONGELADOR y ON/OFF DEL APARATO en 0ff;<br />
- mantenga presionados los dos botones “Select” y “Mode”<br />
durante 5 segundos aproximadamente, hasta que escuche<br />
un sonido y centelleen las dos palabras “OFF” y “OFF” en<br />
el display; estas palabras centellean durante todo el<br />
tiempo en el que la función DEMO esté activa.<br />
Desactivación:<br />
- coloque la <strong>per</strong>illa de FUNCIONAMIENTO DEL<br />
CONGELADOR y ON/OFF DEL APARATO en 0ff;<br />
- mantenga presionados los dos botones “Select” y “Mode”<br />
durante 5 segundos aproximadamente, hasta que escuche<br />
un sonido y las dos palabras “OFF” y “OFF” en el display<br />
dejen de centellear.<br />
Función holiday<br />
Si se parte por un <strong>per</strong>íodo de vacaciones, no es necesario<br />
apagar el aparato debido a que posee una función que <strong>per</strong>mite,<br />
con bajo consumo eléctrico, mantener la tem<strong>per</strong>atura del<br />
compartimiento refrigerador alrededor de los 12 C (para<br />
proteger del calor maquillaje y cosméticos); la tem<strong>per</strong>atura del<br />
congelador se debe fijar en el mínimo indispensable para la<br />
conservación de los alimentos. Para activar la función holiday<br />
ver “Cómo moverse en el display”).<br />
Utilizar el refrigerador en forma óptima<br />
• Para regular la tem<strong>per</strong>atura utilice la <strong>per</strong>illa de<br />
FUNCIONAMIENTO DEL REFRIGERADOR (ver Descripción).<br />
• Pulse el botón SUPER COOL (enfriamiento rápido) para<br />
disminuir la tem<strong>per</strong>atura en poco tiempo, por ejemplo cuando<br />
el compartimiento se llena después de una compra<br />
abundante. La función se desactiva automáticamente una vez<br />
transcurrido el tiempo necesario.<br />
• Introduzca sólo alimentos fríos o apenas tibios, nunca<br />
calientes (ver Precauciones y consejos).<br />
• Recuerde que los alimentos cocidos no se mantienen durante<br />
más tiempo que los crudos.<br />
• No introduzca recipientes destapados con líquidos: produciría<br />
un aumento de humedad con la consiguiente formación de<br />
condensado.<br />
54
Utilizar el congelador en forma óptima<br />
• Para regular la tem<strong>per</strong>atura utilice la <strong>per</strong>illa de<br />
FUNCIONAMIENTO DEL CONGELADOR y ON/OFF<br />
DEL APARATO (ver Descripción).<br />
• No vuelva a congelar alimentos que se están por<br />
descongelar o descongelados; dichos alimentos<br />
deben ser previamente cocinados para ser<br />
consumidos (dentro de las 24 horas).<br />
• Los alimentos frescos por congelar no se deben<br />
colocar en contacto con los ya congelados; se deben<br />
colocar en el compartimiento su<strong>per</strong>ior<br />
CONGELAMIENTO y CONSERVACIÓN donde la<br />
tem<strong>per</strong>atura desciende por debajo de los –18ºC y<br />
garantiza una mayor velocidad de congelación.<br />
• No coloque en el congelador botellas de vidrio que<br />
contengan líquidos, tapadas o cerradas<br />
herméticamente porque podrían rom<strong>per</strong>se.<br />
• La cantidad máxima diaria de alimentos por congelar<br />
está indicada en la placa de características ubicada<br />
en el compartimiento refrigerador abajo a la izquierda<br />
(por ejemplo: 4 Kg/24h).<br />
• Para congelar (si el congelar ya está en<br />
funcionamiento):<br />
- Para pequeñas cantidades, inferiores a la<br />
capacidad máxima indicada en la placa de<br />
características (ubicada abajo a la izquierda, al<br />
lado del recipiente para verduras), active desde el<br />
display la función SUPER FREEZE en su modalidad<br />
"24 horas" e introduzca los alimentos que debe<br />
congelar. Para activar la función, pulse el botón<br />
MODE las veces que sea necesario para hacer<br />
centellear el símbolo del SUPER FREEZE y, luego,<br />
pulse el botón SELECT "B" para activar la función<br />
Pasadas las 24 horas, o una vez alcanzada la<br />
tem<strong>per</strong>atura óptima, la función de congelamiento<br />
rápido se desactiva automáticamente.<br />
- Cuando se deben congelar grandes cantidades<br />
de alimentos (hasta la carga máxima indicada en la<br />
placa de características ubicada abajo a la<br />
izquierda, al lado del recipiente para verduras)<br />
active desde el display la función SUPER FREEZE<br />
en su modalidad "48 horas". Para activar la función<br />
pulse el botón MODE las veces que sea necesario<br />
para hacer centellear el símbolo del SUPER<br />
FREEZE y, luego, mantenga presionado durante<br />
más de tres segundos el botón SELECT "B" para<br />
activar la función (el símbolo comienza a centellear<br />
lentamente). Pasadas otras 24 horas, la función se<br />
desactivará automáticamente.<br />
• Para obtener un mayor espacio en el<br />
compartimento congelador, podrá quitar los<br />
recipientes (excepto el inferior y el recipiente<br />
COOL CARE ZONE de tem<strong>per</strong>atura variable) y<br />
colocar los alimentos directamente en las placas<br />
evaporadoras.<br />
! para evitar obstaculizar la circulación de aire en el<br />
interior del congelador, se recomienda no obstruir los<br />
orificios de aireación con alimentos o recipientes.<br />
! Durante el congelamiento evite abrir la puerta.<br />
! Cuando se produzca una interrupción de corriente o<br />
una avería, no abra la puerta del congelador: de este<br />
modo, los alimentos congelados se conservarán sin<br />
alteración durante aproximadamente 9-14 horas.<br />
E<br />
55
E<br />
Cubeta de hielo.<br />
Su colocación en la parte su<strong>per</strong>ior de los cajones del<br />
freezer garantiza una mayor limpieza (el hielo no está en<br />
contacto con los alimentos) y ergonomía (no gotea<br />
cuando se carga).<br />
1. Extraiga la cubeta empujándola hacia arriba.<br />
Controle que la cubeta esté completamente vacía y<br />
llénela de agua utilizando el orificio correspondiente.<br />
2. Tenga cuidado de no su<strong>per</strong>ar el nivel indicado (MAX<br />
WATER LEVEL). Demasiada agua obstaculiza la salida<br />
de los cubitos de hielo (si esto sucede, es<strong>per</strong>e hasta<br />
que el hielo se derrita y vacíe la cubeta).<br />
3. Gire la cubeta 90º: el agua llena las formas por el<br />
principio de vasos comunicantes (ver la figura).<br />
4. Cierre el orificio con la tapa que se suministra con el<br />
aparato y vuelva a colocar la cubeta.<br />
5. Después de que se haya formado el hielo (tiempo<br />
mínimo: 8 horas aproximadamente) golpee la cubeta<br />
sobre una su<strong>per</strong>ficie dura y moje su parte externa para<br />
despegar los cubitos; luego hágalos salir por el orificio.<br />
ICE PARTY: para llevar una<br />
botella de vino espumante o de<br />
champagne a una tem<strong>per</strong>atura<br />
adecuada.<br />
Introduzca la botella en el<br />
cubo ya congelado en el<br />
interior del compartimento<br />
CONGELACIÓN y<br />
CONSERVACIÓN y seleccione<br />
la función en el display.<br />
Extraiga la botella cuando el frigorífico se lo indique.<br />
El cubo se puede utilizar para servir la botella<br />
manteniéndola fresca.<br />
MAX<br />
WATER LEVEL<br />
MAX<br />
WATER LEVEL<br />
56
Mantenimiento y cuidados<br />
Cortar la corriente eléctrica<br />
Durante los trabajos de limpieza y mantenimiento, es<br />
necesario aislar el aparato de la red de alimentación<br />
eléctrica:<br />
1. coloque la <strong>per</strong>illa de FUNCIONAMIENTO DEL DEL<br />
CONGELADOR y ON/OFF DEL APARATO en Off;<br />
2. desenchufe el aparato.<br />
! Si no se efectúa este procedimiento puede desconectar<br />
la alarma: dicha alarma no es síntoma de anomalía. Para<br />
restablecer el normal funcionamiento es suficiente colocar<br />
la <strong>per</strong>illa de FUNCIONAMIENTO DEL CONGELADOR y<br />
ON/OFF DEL APARATO en el valor deseado. Para aislar el<br />
aparato proceda siguiendo los puntos 1 y 2.<br />
Limpiar el aparato<br />
• Las partes externas, las partes internas y las juntas<br />
de goma se pueden limpiar con una esponja<br />
embebida en agua tibia y bicarbonato de sodio o<br />
jabón neutro. No utilice solventes, productos<br />
abrasivos, lejía o amoníaco.<br />
• Los accesorios extraíbles se pueden colocar en<br />
remojo en agua caliente y jabón o detergente para<br />
platos. Enjuáguelos y séquelos con cuidado.<br />
consiste en limpiar el orificio de descarga para que el agua<br />
pueda fluir libremente.<br />
Sustituir la bombilla<br />
Para sustituir la bombilla de iluminación del compartimiento<br />
refrigerador, desenchufe el aparato. Siga las instrucciones<br />
que se dan a continuación.<br />
Acceda a la bombilla (A) desenroscando el tornillo de<br />
fijación (B) ubicado en la parte posterior del cubrelámpara,<br />
como se indica (ver la figura). Sustitúyala con una análoga<br />
de una potencia que no sea su<strong>per</strong>ior a 15 W.<br />
A<br />
B<br />
E<br />
Evitar la formación de moho y malos olores<br />
• El aparato está construido con materiales higiénicos<br />
que no transmiten olores. Para mantener esta<br />
característica es necesario que los alimentos estén<br />
siempre protegidos y bien cerrados. Esto evitará<br />
también la formación de manchas.<br />
• Si se debe apagar el aparato por un largo <strong>per</strong>íodo,<br />
limpie su interior y deje las puertas abiertas.<br />
Descongelar el aparato<br />
! Respete las instrucciones que se dan a continuación.<br />
Para descongelar el aparato no utilice objetos<br />
cortantes o con punta porque podrían dañar<br />
irremediablemente el circuito refrigerante.<br />
Descongelar el compartimiento refrigerador<br />
El refrigerador posee<br />
descongelamiento<br />
automático: el agua se<br />
envía hacia la parte<br />
posterior por un orificio de<br />
descarga (ver la figura)<br />
donde el calor producido<br />
por el compresor la hace<br />
evaporar. La única<br />
intervención que se debe<br />
realizar <strong>per</strong>iódicamente<br />
57
Precauciones y consejos<br />
E<br />
! El aparato ha sido proyectado y fabricado en<br />
conformidad con las normas internacionales sobre<br />
seguridad. Estas advertencias se suministran por<br />
razones de seguridad y deben ser leídas atentamente.<br />
Este equipamiento es conforme con las<br />
siguientes Directivas Comunitarias:<br />
- 73/23/CEE del 19/02/73 (Baja Tensión) y<br />
sucesivas modificaciones;<br />
-89/336/CEE del 03/05/89 (Compatibilidad<br />
Electromagnética) y sucesivas modificaciones;<br />
- 2002/96/CE..<br />
Seguridad general<br />
• El aparato ha sido pensado para un uso de tipo no<br />
profesional en el interior de una vivienda.<br />
• El aparato debe ser utilizado para conservar y<br />
congelar alimentos sólo por <strong>per</strong>sonas adultas y<br />
según las indicaciones contenidas en este manual.<br />
• El aparato no se debe instalar al aire libre ni siquiera<br />
si el lugar está protegido debido a que es muy<br />
peligroso dejarlo expuesto a la lluvia y tormentas.<br />
• No toque el aparato estando descalzo o con las<br />
manos o pies mojados o húmedos.<br />
• No toque las piezas refrigerantes internas:<br />
quemarse o herirse.<br />
podría<br />
• No desenchufe el aparato tirando del cable sino<br />
sujetando el enchufe.<br />
• Es necesario desenchufar el aparato antes de<br />
realizar o<strong>per</strong>aciones de limpieza y de<br />
mantenimiento. No es suficiente llevar el mando<br />
para LA REGULACIÓN DE LA TEMPERATURA<br />
hasta la posición OFF (aparato apagado) para<br />
eliminar todo contacto eléctrico.<br />
• En caso de avería, nunca acceda a los mecanismos<br />
internos para intentar una reparación.<br />
• En el interior de los compartimientos donde se<br />
conservan alimentos congelados, no utilice<br />
utensilios cortantes o con punta ni aparatos<br />
eléctricos, que no sean los recomendados por el<br />
fabricante.<br />
• No introduzca en su boca cubitos apenas extraídos<br />
del congelador.<br />
• No <strong>per</strong>mita a los niños que jueguen con el aparato.<br />
No se deben sentar en los cajones o colgarse de la<br />
puerta.<br />
• Los embalajes no son juguetes para los niños.<br />
Eliminación<br />
• Eliminación del material de embalaje: respete las<br />
normas locales, de esta manera los embalajes podrán<br />
ser reutilizados.<br />
• En base a la Norma europea 2002/96/CE de<br />
Residuos de aparatos Eléctricos y Electrónicos<br />
(RAEE), los electrodomésticos viejos no pueden ser<br />
arrojados en los contenedores municipales<br />
habituales; tienen que ser recogidos selectivamente<br />
para optimizar la recu<strong>per</strong>ación y reciclado de los<br />
componentes y materiales que los constituyen, y<br />
reducir el impacto en la salud humana y el<br />
medioambiente. El símbolo del cubo de basura<br />
tachado se marca sobre todos los productos para<br />
recordar al consumidor la obligación de separarlos<br />
para la recogida selectiva.<br />
El consumidor debe contactar con la autoridad<br />
local o con el vendedor para informarse en relación<br />
a la correcta eleminación de su electrodoméstico<br />
viejo.<br />
Ahorrar y respetar el medio ambiente<br />
• Instale el aparato en una ambiente fresco y bien<br />
aireado, protéjalo de la exposición directa a los rayos<br />
solares y no lo coloque cerca de fuentes de calor.<br />
• Para introducir o extraer los alimentos, abra las<br />
puertas del aparato el menor tiempo posible.Cada<br />
a<strong>per</strong>tura de las puertas produce un notable gasto de<br />
energía.<br />
• No llene con demasiados alimentos el aparato:<br />
para una buena conservación, el frío debe poder<br />
circular libremente. Si se impide la circulación, el<br />
compresor trabajará continuamente.<br />
• No introduzca alimentos calientes: elevarían la<br />
tem<strong>per</strong>atura interior obligando al compresor a un<br />
mayor trabajo con un gran gasto de energía eléctrica.<br />
• Descongele el aparato si se formara hielo (ver<br />
Mantenimiento); una espesa capa de hielo vuelve<br />
más difícil la cesión de frío a los alimentos y hace que<br />
aumente el consumo de energía.<br />
• Mantenga eficientes y limpias las juntas para que se<br />
adhieran bien a las puertas y no dejen salir el frío (ver<br />
Mantenimiento).<br />
58
Anomalías y soluciones<br />
Puede suceder que el aparato no funcione. Antes de llamar al Servicio de Asistencia Técnica (ver Asistencia),<br />
controle que no se trate de un problema fácilmente solucionable con la ayuda de la siguiente lista.<br />
E<br />
Anomalías:<br />
El display no se enciende.<br />
El motor no arranca.<br />
El refrigerador y el congelador<br />
enfrían poco.<br />
En el refrigerador los alimentos se<br />
congelan.<br />
El motor funciona continuamente.<br />
El aparato hace mucho ruido.<br />
En el fondo del refrigerador hay agua.<br />
Alarma por la puerta abierta.<br />
Alarma por calentamiento<br />
anómalo del congelador<br />
Posibles causas / Solución:<br />
• El enchufe no está introducido en el tomacorriente o no lo está suficientemente<br />
como para hacer contacto o bien en la casa no hay corriente.<br />
• El aparato posee un control que lo protege contra sobrecargas (ver Puesta<br />
en funcionamiento y uso).<br />
• Las puertas no cierran bien o las juntas están dañadas.<br />
• Las puertas se abren demasiado frecuentemente.<br />
• Las <strong>per</strong>illas de FUNCIONAMIENTO no están en la posición correcta (ver Descripción).<br />
• El refrigerador o el congelador se han llenado excesivamente.<br />
• La <strong>per</strong>illa de FUNCIONAMIENTO DEL REFRIGERADOR no está en la<br />
posición correcta (ver Descripción).<br />
• Los alimentos están en contacto con la pared posterior.<br />
• Fue pulsado el botón SUPER FREEZE (congelamiento rápido): la luz testigo<br />
amarilla SUPER FREEZE está encendida o centelleante (ver Desc.).<br />
• La puerta no está bien cerrada o se abre continuamente.<br />
• La tem<strong>per</strong>atura del ambiente externo es muy alta.<br />
• El gas refrigerante interior produce un ligero ruido aún cuando el compresor<br />
está detenido: no es un defecto, es normal.<br />
• El orificio de descarga del agua está obturado (ver Mantenimiento).<br />
Si la puerta del refrigerador <strong>per</strong>manece abierta por más de dos minutos, la<br />
lámpara de iluminación interna comienza a centellear; después de algunos<br />
segundos se emite una señal sonora que se puede silenciar cerrando la<br />
puerta o pulsando el botón SELECT. Si la puerta <strong>per</strong>manece abierta más de 4<br />
minutos, la lámpara comienza a centellear más velozmente.<br />
1. Para indicar un excesivo calentamiento del congelador (por ej. una<br />
momentánea interrupción de corriente) se emite una señal acústica y<br />
aparece un mensaje en el display “A1” para indicar un peligroso<br />
calentamiento. Para no volver a congelar los alimentos, el congelador se<br />
mantendrá a una tem<strong>per</strong>atura de alrededor de 0°C, <strong>per</strong>mitiéndole consumirlos<br />
dentro de las 24 horas o volver a congelarlos, previa cocción. Se puede<br />
silenciar la señal sonora simplemente pulsando el botón SELECT. Para volver<br />
al normal funcionamiento y borrar el mensaje en el display se deberá apagar<br />
el aparato y volver a encenderlo, utilizando la <strong>per</strong>illa de FUNCIONAMIENTO<br />
DEL CONGELADOR y ON/OFF DEL APARATO.<br />
2. Si la tem<strong>per</strong>atura continúa aumentando hacia valores excesivamente altos, se<br />
emite nuevamente la señal sonora y aparece otro mensaje en el display “A2”<br />
para indicar el excesivo calentamiento. Es aconsejable verificar el estado de los<br />
alimentos porque podría ser necesario tirarlos. Cualquiera sea el caso, los<br />
alimentos no se deben volver a congelar, si no se cocinan primero. Para no<br />
volver a congelar los alimentos, el congelador se mantendrá a una tem<strong>per</strong>atura<br />
de alrededor de 0°C. Se puede silenciar la señal sonora simplemente pulsando<br />
el botón SELECT "D". Para volver al normal funcionamiento y borrar el mensaje<br />
en el display se deberá apagar el aparato y volver a encenderlo, utilizando la<br />
<strong>per</strong>illa de FUNCIONAMIENTO DEL CONGELADOR y ON/OFF DEL APARATO.<br />
59
Asistencia<br />
195071850.02<br />
02/2011 - Xerox Business Services<br />
E<br />
Antes de llamar al Servicio de Asistencia Técnica:<br />
• Verifique si la anomalía puede ser resuelta por Ud. mismo (ver Anomalías y Soluciones).<br />
• Si, no obstante todos los controles, el aparato no funciona y el inconveniente por Ud detectado continúa,<br />
llame al Centro de Asistencia Técnico más cercano.<br />
modelo<br />
número de serie<br />
Comunique:<br />
• el tipo de anomalía<br />
• el modelo de la máquina (Mod.)<br />
• el número de serie (S/N)<br />
Esta información se encuentra en la placa de<br />
características ubicada en el compartimento<br />
frigorífico abajo a la izquierda.<br />
No recurra nunca a técnicos no autorizados y rechace siempre la instalación de repuestos que no<br />
sean originales.<br />
60
Instruções para a utilização<br />
COMBINADO FRIGORÍFICO/CONGELADOR<br />
I<br />
GB<br />
F<br />
Índice<br />
Instalação, 62<br />
Posicionamento e ligação<br />
PT<br />
Italiano, 1 English, 13 Français, 25<br />
DE E PT<br />
Deutsch, 37 Espanol, 49 Portuges, 61<br />
BCB 313 AVEI FF<br />
Descrição do aparelho, 63-64<br />
Vista geral<br />
Painel de comandos<br />
Início e utilização, 65-66-67-68<br />
Iniciar o aparelho<br />
Como deslocar-se no ecrã<br />
Utilize melhor o frigorífico<br />
Utilize melhor o congelador<br />
Manutenção e cuidados, 69<br />
Interrom<strong>per</strong> a corrente eléctrica<br />
Limpar o aparelho<br />
Evite bolor e maus cheiros<br />
Degelar o aparelho<br />
Substituição da lâmpada<br />
PURE WIND PLUS Mantenimiento de los filtros<br />
Precauções e conselhos, 72<br />
Segurança geral<br />
Eliminação<br />
Economizar e respeitar o meio ambiente<br />
Anomalias e soluções, 71<br />
Assistência, 72
Instalação<br />
PT<br />
! É importante guardar este folheto para poder<br />
consultá-lo a qualquer momento. No caso de venda,<br />
cessão ou mudança, assegure-se que o mesmo<br />
<strong>per</strong>maneça junto com o aparelho para informar ao<br />
novo proprietário sobre o funcionamento e as suas<br />
respectivas advertências.<br />
! Leia com atenção as instruções: há informações<br />
importantes sobre a instalação, a utilização e a<br />
segurança.<br />
Posicionamento e ligação<br />
Posicionamento<br />
1. Posicione o aparelho num ambiente bem ventilado<br />
e não húmido.<br />
2. Não tape as grades traseiras de ventilação: o<br />
compressor e o condensador emitem calor e<br />
necessitam de uma boa ventilação para<br />
funcionarem bem e os consumos de electricidade<br />
diminuírem.<br />
3. Deixe o aparelho longe de fontes de calor (a luz do<br />
sol directa, um fogão eléctrico).<br />
Ligação eléctrica<br />
Depois do transporte, posicione o aparelho na vertical<br />
e aguarde pelo menos 3 horas antes de ligar o<br />
sistema eléctrico. Antes de colocar a ficha na tomada<br />
eléctrica, certifique-se que:<br />
• a tomada tenha uma ligação à terra e seja em<br />
conformidade com a legislação;<br />
• a tomada tenha a capacidade de suportar o carga<br />
máxima.<br />
de potência da máquina, indicada na placa de<br />
identificação situada no compartimento frigorífico<br />
em baixo à esquerda (p. ex.: 150 W);<br />
• a tensão de alimentação seja entre os valores<br />
indicados na placa de identificação, situada<br />
embaixo à esquerda (p. ex.: 220-240 V);<br />
• a tomada seja compatível com a ficha do aparelho.<br />
Em caso contrário peça a substituição da ficha a<br />
um técnico autorizado (veja a Assistência); não<br />
utilize extensões nem tomadas múltiplas.<br />
! Com o aparelho instalado, deve ser fácil o acesso<br />
ao cabo eléctrico e à tomada eléctrica.<br />
! O cabo não deve ser dobrado nem sofrer pressões.<br />
! O cabo deve ser verificado <strong>per</strong>iodicamente e<br />
substituído somente por técnicos autorizados (veja a<br />
Assistência).<br />
! A empresa exime-se de qualquer<br />
responsabilidade se estas regras não forem<br />
obedecidas.<br />
62
ECO<br />
Descrição do<br />
aparelho<br />
Visão geral<br />
Estas instruções sobre a utilização são válidas para vários modelos, portanto é possível que na figura haja<br />
pormenores diferentes do aparelho que adquiriu. Há uma descrição dos assuntos mais complexos nas páginas<br />
seguintes.<br />
PT<br />
A.I.R. SYSTEM<br />
Prateleira extraível da<br />
porta com tampa, com<br />
PORTA OVOS e<br />
CAIXA PARA<br />
MANTEIGA*<br />
PRATELEIRA•<br />
Caixa<br />
MULTI-USO*<br />
Gaveta para<br />
FRUTAS e<br />
HORTALIÇAS<br />
PAINEL DE<br />
COMANDOS<br />
Compartimento para<br />
CONGELAÇÃO e<br />
CONSERVAÇÃO<br />
Recipiente para<br />
gelo •<br />
Prateleira extraível da<br />
porta VÃO PARA<br />
GUARDAR<br />
OBJECTOS •<br />
Prateleira para<br />
LATINHAS*<br />
Vão ara GARRAFA<br />
DE 2 LITROS<br />
Prateleira para<br />
GARRAFAS<br />
Compartimento para<br />
CONSERVAÇÃO<br />
• Variáveis em número e/ou na posição.<br />
* Presente somente em alguns modelos.<br />
63
PT<br />
Painel de comandos<br />
Selector de<br />
FUNCIONAMENTO<br />
DO FRIGORÍFICO<br />
Botão<br />
MODE<br />
Função<br />
SUPER COOL<br />
Função<br />
SUPER FREEZE<br />
Botão<br />
SELECT<br />
Selector de<br />
FUNCIONAMENTO DO<br />
CONGELADOR e<br />
ON/OFF APARELHO<br />
Regulação<br />
COMPARTIMENTO<br />
FRIGORÍFICO<br />
Função<br />
HOLIDAY<br />
Função<br />
ICE PARTY<br />
Regulação<br />
COMPARTIMENTO<br />
CONGELADOR<br />
• Selector de FUNCIONAMENTO DO FRIGORÍFICO<br />
Para ligar e desligar e desligar o compartimento<br />
frigorífero e possibilita definir as respectivas<br />
tem<strong>per</strong>aturas de funcionamento.<br />
• Botão MODE<br />
Para deslocar-se no âmbito do ecrã, para passar<br />
para as várias definições/funções e desligar os<br />
alarmes sonoros.<br />
• Regulação COMPARTIMENTO FRIGORÍFICO<br />
Visualiza a tem<strong>per</strong>atura definida para o vão<br />
frigorífico e o estado de desligado do comparto<br />
frigorífero (escrita OFF activa).<br />
• Função SUPER COOL<br />
Visualiza o estado (desactivada, seleccionada ou<br />
activada) da função SUPER COOL (refrigeração<br />
rápida do compartimento frigorífero).<br />
• Função HOLIDAY<br />
Visualiza o estado (desactivada, seleccionada ou<br />
activada) da função HOLIDAY (tem<strong>per</strong>aturas ideias<br />
com consumos mínimos, no caso de longas<br />
ausências).<br />
• Função SUPER FREEZE<br />
Visualiza o estado (desactivada, seleccionada ou<br />
activada) da função SUPER FREEZE (congelar<br />
rapidamente).<br />
• Função ICE PARTY<br />
Visualiza o estado (desactivada, seleccionada ou<br />
activada) da função ICE PARTY (a máxima rapidez<br />
no esfriar uma garrafa quente e servi-a à mesa com<br />
o apropriado balde adequado para manter a<br />
tem<strong>per</strong>atura obtida).<br />
• Regulação COMPARTIMENTO CONGELADOR<br />
Visualiza a tem<strong>per</strong>atura definida para o vão freezer<br />
e o estado de desligado do aparelho (escrita OFF<br />
activa).<br />
• Botão SELECT<br />
Para seleccionar/anular a selecção das várias<br />
funções e desligar os alarmes sonoros.<br />
• Selector de FUNCIONAMENTO DO CONGELADOR<br />
e ON/OFF APARELHO<br />
Para ligar e desligar e desligar o inteiro aparelho e<br />
possibilita definir as tem<strong>per</strong>aturas de<br />
funcionamento do compartimento freezer.<br />
64
Início e utilização<br />
Iniciar o aparelho<br />
! Antes de iniciar o aparelho, obedeça as instruções<br />
de instalação (veja a Instalação).<br />
! Antes de ligar o aparelho, limpe bem os<br />
compartimentos e os acessórios com água morna e<br />
bicarbonato.<br />
! Este aparelho é equipado com um controlo para<br />
protecção do motor que deixa o compressor iniciar<br />
somente cerca da 8 minutos depois de ser ligado. Isto<br />
acontece também depois de qualquer interrupção na<br />
alimentação eléctrica, voluntária ou involuntária (corte).<br />
Depois de ter ligado a ficha na tomada eléctrica,<br />
assegure-se que o ecrã esteja aceso. (o selector de<br />
FUNCIONAMENTO DO CONGELADOR e<br />
ON/OFF APARELHO não deve estar em Off).<br />
Compartimento congelador.<br />
Quando ligar a aparelhagem (rodando o selector de<br />
FUNCIONAMENTO DO CONGELADOR e<br />
ON/OFF APARELHO até definir a tem<strong>per</strong>atura de<br />
funcionamento que desejar para o compartimento<br />
congelador), é aconselhável activar a função SUPER<br />
FREEZE para acelerar a refrigeração do<br />
compartimento; quando o mesmo tiver chegado à<br />
tem<strong>per</strong>atura ideal, esta função se desactivará e será<br />
possível guardar congelados no congelador.<br />
Compartimento frigorífero.<br />
Quando ligar o compartimento frigorífico (rodando o<br />
selector de FUNCIONAMENTO DO FRIGORÍFICO até<br />
definir a tem<strong>per</strong>atura de funcionamento que desejar<br />
no vão frigorífero), é aconselhável activar a função<br />
SUPER COOL para acelerar a refrigeração do vão:<br />
depois de algumas horas será possível guardar<br />
alimentos no frigorífico.<br />
tem<strong>per</strong>atura, depois de uma abertura da porta e<br />
distribui homogeneamente a tem<strong>per</strong>atura: o ar<br />
soprado (A) arrefece em contacto com a parede fria,<br />
enquanto que o ar mais quente (B) é aspirado (veja a<br />
figura).<br />
A parede posterior apresenta-se coberta de gelo ou<br />
gotinhas de água, conforme o compressor esteja em<br />
funcionamento ou em pausa.<br />
PRATELEIRAS: vidro ou de grade.<br />
Podem ser extraídas e têm altura regulável mediante<br />
as guias para este fim (veja a figura), para introduzir<br />
recipientes ou alimentos de tamanho grande. Para<br />
regular a altura não é necessário retirar inteiramente<br />
a prateleira.<br />
Caixa MULTI-USO: para<br />
guardar muito tempo vários<br />
alimentos (por exemplo<br />
chouriços); também evita a<br />
emissão de odores no<br />
frigorífico. Deve ser retirada<br />
para a utilização e pode ser<br />
deslocada lateralmente para obter mais espaço (veja<br />
a figura).<br />
PT<br />
A.I.R. SYSTEM<br />
Pode ser reconhecido pela presença do dispositivo<br />
na parede su<strong>per</strong>ior do compartimento frigorífico (veja<br />
a figura).<br />
B<br />
A<br />
O A.I.R. System consente uma óptima conservação<br />
dos alimentos porque recu<strong>per</strong>a-se rapidamente a<br />
65
PT<br />
Como deslocar-se no ecrã<br />
Definição das tem<strong>per</strong>aturas:<br />
Se o compartimento em questão estiver desligado, no<br />
espaço do ecrã correspondente à sinalização (Regulação<br />
COMPARTIMENTO FRIGORÍFICO e Regulação<br />
COMPARTIMENTO CONGELADOR ) aparecerá a escrita<br />
OFF. Por outro lado, se o compartimento estiver ligado,<br />
aparecerão as tem<strong>per</strong>aturas definidas actualmente. Para<br />
mudá-la, rode directamente o selector correspondente ao<br />
vão em questão (Selector de FUNCIONAMENTO DO<br />
FRIGORÍFICO e Selector de FUNCIONAMENTO DO<br />
CONGELADOR e ON/OFF APARELHO).<br />
As tem<strong>per</strong>aturas que podem ser definidas para o<br />
compartimento frigorífero vão desde +2°C até +8°C,<br />
enquanto que as do comparto congelador vão desde -<br />
18°C até -26°C. Em todos os casos é sempre possível<br />
aumentá-las ou diminui-las em passos de 1°C.<br />
Quando estiver activa a função HOLIDAY não serão<br />
possíveis regulações de tem<strong>per</strong>atura, mas a<br />
aparelhagem passará automaticamente para a regulação<br />
ideal para a situação: +12°C para o compartimento<br />
frigorífero (se estiver ligado) e -18°C para o<br />
compartimento congelador.<br />
Gestão das funções:<br />
Símbolo da função no normal<br />
funcionamento.<br />
Função seleccionada (contorno a piscar).<br />
Função activada (contorno aceso).<br />
Activação/desactivação das funções<br />
Carregue no botão MODE "C" tantas vezes quando for<br />
necessário, até piscar o símbolo da função que<br />
desejar mudar: isto indicará que a função foi<br />
seleccionada e está pronta para ser activada ou<br />
desactivada. Neste ponto será possível a gestão da<br />
função mediante o botão SELECT "D" para activá-la<br />
ou desactivá-la.<br />
OBSERVAÇÃO: se não confirmar, carregando no<br />
botão SELECT dentro de cinco segundos após a<br />
última acção no ecrã, o mesmo voltará a visualizar a<br />
função da maneira anteriormente definida para indicar<br />
que nenhuma modificação foi definida.<br />
A função SUPER COOL corresponde ao compartimento<br />
frigorífero e quando o mesmo estiver desligado,<br />
nenhuma acção será <strong>per</strong>mitida para esta função; para<br />
outras pode haver funcionamento que poderá criar<br />
conflitos (por exemplo, quando forem activadas<br />
contemporaneamente as funções HOLIDAY e SUPER<br />
FREEZE), neste caso será considerada uma prioridade<br />
já estabelecida para ajudar na gestão do aparelho.<br />
Na função SUPER FREEZE há duas maneira para<br />
activar (veja o parágrafo relativo à gestão do<br />
compartimento congelador).<br />
Activação/desactivação do modo DEMO:<br />
Para ver uma demonstração do funcionamento do<br />
ecrã com o aparelho desligado, é possível activar o<br />
modo DEMO.<br />
Activação:<br />
- coloque o selector de FUNCIONAMENTO DO<br />
CONGELADOR e ON/OFF APARELHO no Off;<br />
- mantenha 5 segundos pressionados os dois botões<br />
“Select” e “Mode”, até ouvir um ruído e começarem a<br />
piscar as duas escritas “Off” e “Off” no ecrã; estas<br />
escritas piscarão durante todo o tempo que a função<br />
DEMO estiver activada.<br />
Desactivação:<br />
- coloque o selector de FUNCIONAMENTO DO<br />
CONGELADOR e ON/OFF APARELHO no Off;<br />
- mantenha 5 segundos pressionados os dois botões<br />
“Select” e “Mode”, até ouvir um ruído e no ecrã<br />
pararem de piscar as duas escritas “Off” e “Off ”.<br />
Função Holiday<br />
Se for partir para férias longas, não é necessário<br />
desligar o aparelho, porque o mesmo é equipado com<br />
uma função que possibilita, com um pequeno<br />
consumo de electricidade, manter a tem<strong>per</strong>atura do<br />
compartimento frigorífico ao redor de 12°C (para<br />
proteger produtos de maquilhagem e cosméticos<br />
contra o calor); enquanto que a tem<strong>per</strong>atura do<br />
congelador deve ser configurada no mínimo<br />
indispensável para a conservação dos alimentos. Para<br />
activar esta função HOLIDAY (veja Como deslocar-se<br />
no ecrã).<br />
Utilize melhor o frigorífico<br />
• Para regular a tem<strong>per</strong>atura utilize o selector de<br />
FUNCIONAMENTO DO FRIGORÍFICO (veja a Descrição).<br />
• Coloque somente alimentos frios ou levemente mornos,<br />
mas não quentes (veja Precauções e conselhos).<br />
• Lembre-se que os alimentos cozidos não se mantêm mais<br />
tempo do que os crus.<br />
• Não guarde líquidos em recipientes destampados:<br />
poderão provocar aumento de humidade com<br />
consequente formação de condensação.<br />
66
Utilize melhor o congelador<br />
• Para regular a tem<strong>per</strong>atura utilize o selector de<br />
FUNCIONAMENTO DO CONGELADOR e ON/OFF<br />
APARELHO (veja a Descrição).<br />
• Não congele novamente alimentos que estiverem a<br />
descongelar-se ou descongelados; estes alimentos<br />
devem ser cozidos para ser consumados (dentro de<br />
24 horas).<br />
• Os alimentos frescos a serem congelados não devem<br />
ser colocados encostados nos já congelados; devem<br />
ser guardados sobre a grade do compartimento<br />
congelador, se possível encostados nas paredes<br />
(laterais e traseiras) nas quais a tem<strong>per</strong>atura desce<br />
abaixo de - 18°C e garante uma boa velocidade de<br />
congelação.<br />
• Não coloque no congelador garrafas de vidro<br />
contendo líquidos, tampadas ou fechadas<br />
hermeticamente, porque poderão partir-se.<br />
• A quantidade máxima diária de alimentos a ser<br />
congelada é indicada na placa de identificação,<br />
situada no compartimento frigorífico, embaixo à<br />
esquerda (por exemplo: Kg/24h 4).<br />
• Para congelar (se o congelador já estiver a funcionar):<br />
- Para pequenas quantidades, inferiores à<br />
capacidade máxima indicada na placa das<br />
características (situada embaixo, à esquerda, ao lado<br />
da gaveta da verdura), active no ecrã a função<br />
SUPER FREEZE no seu modo de "24 horas" e guarde<br />
dentro os alimentos a serem congelados. Para activar<br />
a função carregue no botão MODE tantas vezes<br />
quanto for necessário para piscar o símbolo do<br />
SUPER FREEZE e, em seguida, carregue no botão<br />
SELECT para tornar activa a funçã. Depois de 24<br />
horas, ou depois de ter chegado às tem<strong>per</strong>atura<br />
ideais, a função de automaticamente congelar<br />
rapidamente desactiva-se.<br />
- Para grandes quantidades de alimentos a serem<br />
congelados (até a carga máxima indicada na placa<br />
das características situada embaixo, à esquerda, ao<br />
lado da gaveta da verdura) active no ecrã a função<br />
SUPER FREEZE no seu modo de "48 horas". Para<br />
activar a função carregue no botão MODE tantas<br />
vezes quanto for necessário para piscar o símbolo do<br />
SUPER FREEZE e, em seguida, carregue no botão<br />
SELECT para tornar activa a função (o símbolo<br />
começará a piscar lentamente).<br />
Depois de mais 24 horas a função automaticamente<br />
desactiva-se.<br />
Durante a congelação, evitar abrir a porta do<br />
congelador.<br />
Para obter uma congelação e uma sucessiva<br />
descongelação ideal é aconselhável separar os<br />
alimentos em pequenas porções porque assim<br />
congelam-se rapidamente e de maneira homogénea.<br />
Nas confecções indicar o conteúdo e a data de<br />
congelação.<br />
Não abrir a porta do congelador em caso de falta de<br />
energia eléctrica ou de avaria, assim adiará o<br />
aumento da tem<strong>per</strong>atura no seu interior. Deste modo,<br />
os alimentos comprados congelados e os<br />
congelados por si conservar-se-ão sem alterações<br />
durante cerca de 9 - 14 horas.<br />
Não colocar no congelado garrafas cheias : poderão<br />
partir-se, dado que ao congelarem-se todos os<br />
líquidos aumentam de volume.<br />
• A fim de obter um espaço maior no compartimento<br />
congelador, é possível tirar as gavetas das suas<br />
posições (excepto aquela mais baixa ou a eventual<br />
gaveta COOL CARE ZONE com tem<strong>per</strong>atura variável)<br />
e guardar os alimentos directamente nas chapas de<br />
evaporação.<br />
! Para evitar criar obstáculos para a circulação de ar,<br />
no interior do frigorífico, é recomendável não tampar<br />
os furos de ventilação com alimentos nem recipientes.<br />
! Durante a congelação evite abrir a porta.<br />
! Em caso de interrupção de corrente ou de avaria, não abra<br />
a porta do congelador: desta maneira os alimentos<br />
congelados em casa ou industriais não sofrerão alterações<br />
durante aproximadamente 9 ~ 14 horas.<br />
.<br />
PT<br />
67
PT<br />
Recipiente para gelo<br />
A posição na parte su<strong>per</strong>ior das gavetas no vão do freezer<br />
assegura uma limpeza maior (o gelo não entra mais em<br />
contacto com os alimentos) e ergonomia (não goteja<br />
quando for carregado).<br />
1. Para retirar o recipiente empurre-o para cima.Certifiquese<br />
que o recipiente esteja inteiramente vazio e encha-o<br />
de água pelo furo para este fim.<br />
2. Preste atenção para não ultrapassar o nível indicado<br />
(MAX WATER LEVEL). Água demais dificulta a<br />
extracção do gelo (se acontecer, aguarde o gelo<br />
derreter-se e esvazie o recipiente).<br />
3. Rode o recipiente 90°: a água enche as formas pelo<br />
princípio dos vasos comunicantes (veja a figura).<br />
4. Tape o furo com a tampa fornecida e guarde o<br />
recipiente na respectiva sede.<br />
5. Quando se tiver formato gelo (tempo mínimo<br />
aproximadamente 8 horas) bata o recipiente sobre uma<br />
su<strong>per</strong>fície dura e molhe-o por fora para o gelo soltar-se;<br />
em seguida deixe-o sair pelo furo.<br />
ICE PARTY: para guardar na<br />
tem<strong>per</strong>atura exacta uma<br />
garrafa de espumante ou<br />
champanha.<br />
Coloque a garrafa no balde<br />
anteriormente congelado<br />
dentro do compartimento<br />
CONGELAMENTO e<br />
CONSERVAÇÃO e seleccione a função no display.<br />
Retire a garrafa quando for assinalado.<br />
O balde pode ser utilizado também para servir a<br />
garrafa mantendo-a fria.<br />
MAX<br />
WATER LEVEL<br />
MAX<br />
WATER LEVEL<br />
MAX<br />
WATER LEVEL<br />
68
Manutenção e cuidados<br />
Interrom<strong>per</strong> a corrente eléctrica<br />
Durante as o<strong>per</strong>ações de limpeza e manutenção é<br />
necessário isolar o aparelho da rede eléctrica:<br />
1. coloque o selector de FUNCIONAMENTO DO<br />
CONGELADOR e ON/OFF APARELHO em Off;<br />
2. desligue a ficha da tomada eléctrica.<br />
! Se não se obedecer este processo, o alarme poderá<br />
disparar: mas isto não será um sintoma de anomalia. Para<br />
restabelecer o funcionamento normal é suficiente colocar<br />
o selector de FUNCIONAMENTO DO CONGELADOR no<br />
valor que desejar. Para isolar o aparelho realize as<br />
o<strong>per</strong>ações apresentadas nos pontos 1 e 2.<br />
Substituição da lâmpada<br />
Para substituir a lâmpada de iluminação do<br />
compartimento frigorífico, desligue a ficha da tomada<br />
de corrente.<br />
Para chegar até a lâmpada (A) desatarraxe o<br />
parafuso de fixação (B) situado na parte traseira da<br />
capa da lâmpada, da maneira indicada (veja a figura).<br />
Substitua-a por uma análoga, de potência não<br />
su<strong>per</strong>ior a 15 W.<br />
A<br />
PT<br />
Limpar o aparelho<br />
• As partes externas, as partes internas e as<br />
guarnições de borracha podem ser limpadas com<br />
uma esponja molhada de água morna e bicarbonato<br />
de sódio ou sabão neutro. Não empregue solventes,<br />
abrasivos, água de javel nem amoníaco.<br />
• Os acessórios removíveis podem ser colocados de<br />
molho em água quente e sabão ou detergente para<br />
pratos. Enxagúe-os e enxugue-os com cuidado.<br />
Evite bolor e maus cheiros<br />
• Este aparelho foi fabricado com materiais higiénicos<br />
que não transmitem odores. Para manter esta<br />
característica é necessário os alimentos serem<br />
sempre protegidos e bem fechados. Isto também<br />
evitará a formação de manchas.<br />
• Se for deixar o aparelho muito tempo desligado,<br />
limpe-o por dentro e deixe as portas abertas.<br />
Descongelar o aparelho<br />
! Obedeça as seguintes instruções.<br />
Para degelar o aparelho não utilize objectos cortantes<br />
e pontiagudos que poderiam danificar<br />
irremediavelmente o circuito refrigerante<br />
Descongelar o compartimento frigorífico<br />
Este frigorífico é equipado com degelo automático: a<br />
água derretida é conduzida para a parte traseira através<br />
de um furo de descarga<br />
(veja a figura) desta<br />
maneira o calor<br />
produzido pelo<br />
compressor evapora-se.<br />
A única intervenção a ser<br />
realizada <strong>per</strong>iodicamente<br />
consiste na limpeza do<br />
furo de descarga para a<br />
água poder defluir<br />
desimpedida.<br />
B<br />
69
Precauções e conselhos<br />
PT<br />
! Este aparelho foi projectado e fabricado em<br />
conformidade com as regras internacionais de<br />
segurança. Estas advertências são fornecidas para<br />
razões de segurança e devem ser lidas com atenção.<br />
Esta aparelhagem é em conformidade com a<br />
seguintes Directivas da Comunidade<br />
Europeia:<br />
- 73/23/CEE do 19/02/73 (Baixa Tensão) e<br />
sucessivas modificações;<br />
- 89/336/CEE do 03/05/89 (Compatibilidade<br />
Electromagnética) e sucessivas modificações.<br />
Segurança geral<br />
• Este aparelho foi concebido para uma utilização de<br />
tipo não profissional, no âmbito de uma morada.<br />
• Este aparelho deve ser utilizado somente por pessoas<br />
adultas, para conservar e congelar alimentos,<br />
segundo as instruções apresentadas neste folheto.<br />
• Este aparelho não deve ser instalado ao ar livre<br />
mesmo se num sítio abrigado, porque é muito<br />
<strong>per</strong>igoso deixá-lo exposto à chuva e temporais.<br />
• Não toque neste aparelho com os pés descalços nem<br />
com as mãos ou os pés molhados ou húmidos.<br />
• Não toque nas partes de refrigeração internas:<br />
há <strong>per</strong>igo de queimaduras e feridas.<br />
• Não puxe o cabo eléctrico para desligar a ficha da<br />
tomada, mas pegue pela ficha.<br />
• É necessário desligar a ficha da tomada antes de<br />
realizar o<strong>per</strong>ações de limpeza e manutenção. Não é<br />
suficiente colocar os selectores de regulação da<br />
tem<strong>per</strong>atura na posição OFF (aparelho desligado)<br />
para eliminar todos os contactos eléctricos.<br />
• No caso de avaria, nunca mexa nos mecanismos<br />
internos para tentar reparar.<br />
• Não utilize, no interior dos compartimentos para<br />
guardar alimentos congelados, utensílios cortantes<br />
e pontiagudos ou dispositivos eléctricos se não<br />
forem do tipo recomendado pelo construtor.<br />
• Não coloque na boca cubos de gelo assim que os<br />
retirar do congelador.<br />
• Não <strong>per</strong>mita que crianças brinquem com este<br />
aparelho. Em nenhum caso pode-se sentar-se nas<br />
gavetas ou pendurar-se na porta.<br />
• Os embalagens não são brinquedos para as<br />
crianças.<br />
Eliminação<br />
• Eliminação do material de embalagem: obedeça as<br />
regras locais, ou reutilize as embalagens.<br />
• A directiva Europeia 2002/96/CE referente à gestão<br />
de resíduos de aparelhos eléctricos e electrónicos<br />
(RAEE), prevê que os electrodomésticos não<br />
devem ser escoados no fluxo normal dos resíduos<br />
sólidos urbanos. Os aparelhos desactualizados<br />
devem ser recolhidos separadamente para<br />
optimizar a taxa de recu<strong>per</strong>ação e reciclagem dos<br />
materiais que os compõem e impedir potenciais<br />
danos para a saúde humana e para o ambiente. O<br />
símbolo constituído por um contentor de lixo<br />
barrado com uma cruz deve ser colocado em todos<br />
os produtos por forma a recordar a obrigatoriedade<br />
de recolha separada.<br />
Os consumidores devem contactar as autoridades<br />
locais ou os pontos de venda para solicitar<br />
informação referente ao local apropriado onde<br />
devem depositar os electrodomésticos velhos.<br />
Economizar e respeitar o meio<br />
ambiente<br />
• Instale este aparelho num ambiente fresco e bem<br />
ventilado, proteja-o contra a exposição directa aos<br />
raios do sol, não o coloque <strong>per</strong>to de fontes de<br />
calor.<br />
• Para colocar ou retirar alimentos, abra as portas<br />
deste aparelho o mais rapidamente possível.<br />
Cada vez que abrir as portas causa um notável<br />
gasto de energia.<br />
• Não encha este aparelho com alimentos demais:<br />
para uma boa conservação, o frio deve poder<br />
circular livremente. Se impedir-se a circulação, o<br />
compressor funcionará continuamente.<br />
• Não coloque dentro alimentos quentes: aumentarão<br />
a tem<strong>per</strong>atura interna forçando o compressor a<br />
funcionar muito, com grande des<strong>per</strong>dício de<br />
energia eléctrica.<br />
• Descongele este aparelho quando se formar gelo<br />
(veja a Manutenção); uma camada grossa de gelo<br />
torna mais difícil a transmissão do frio aos<br />
alimentos e aumenta o consumo de energia.<br />
• Mantenha as guarnições eficientes e limpas, de<br />
maneira que adiram bem nas portas e não deixem<br />
o frio sair (veja a Manutenção).<br />
70
Anomalias e soluções<br />
Pode acontecer que este aparelho não funcione. Antes de telefonar à Assistência técnica (veja a Assistência),<br />
verifique se não se trata de um problema fácil de resolver com a ajuda da seguinte lista.<br />
PT<br />
Anomalias:<br />
O ecrã está inteiramente apagado<br />
O motor não inicia.<br />
O frigorífico e o congelador<br />
refrigeram pouco.<br />
Os alimentos congelam-se no<br />
frigorífico.<br />
O motor está a funcionar<br />
continuamente.<br />
O aparelho está a fazer ruído.<br />
No fundo do frigorífico há água.<br />
Alarme da porta aberta.<br />
Alarme de aquecimento anómalo do<br />
congelador.<br />
Possíveis cause / Solução:<br />
• A ficha não está ligada na tomada eléctrica ou não está bem ligada e<br />
portanto não há contacto, ou então não há corrente em casa.<br />
• Este aparelho é equipado com um controlo de protecção para o motor<br />
(veja Início e utilização).<br />
• As portas não se fecham bem ou as guarnições estão estragadas.<br />
• As portas são abertas com frequência excessiva.<br />
• O selector para A REGULAÇÃO DA TEMPERATURA não está na<br />
posição certa<br />
• O frigorífico ou o congelador foram enchidos demais.<br />
• O selector para A REGULAÇÃO DA TEMPERATURA não está na<br />
posição certa.<br />
• Os alimentos estão encostados na parede traseira.<br />
• estão activas as funções SUPER COOL e/ou SUPER FREEZE e/ou ICE<br />
PARTY;<br />
• as portas foram abertas continuamente;<br />
• A tem<strong>per</strong>atura exterior é muito elevada<br />
• O gás refrigerante interno produz um ruído leve mesmo quando o<br />
compressor estiver parado: não é um defeito, é normal.<br />
• O furo de descarga da água está entupido (veja a Manutenção).<br />
Se a porta do frigorífico ficar aberta mais de dois minutos, a lâmpada de<br />
iluminação interna começa a piscar; depois de alguns segundos, toca um<br />
sinal sonoro, que pode ser desligado, se fechar a porta ou carregar no<br />
botão SELECT. Se a porta ficar aberta mais de quatro minutos, a lâmpada<br />
começa a piscar mais depressa.<br />
1. Para avisar que há aquecimento excessivo do congelador (por ex.: por<br />
causa de uma momentânea interrupção da energia) é dado um sinal<br />
sonoro e aparece uma mensagem no ecrã “A1” para assinalar um<br />
<strong>per</strong>igoso aquecimento. Para não congelar novamente os alimentos, o<br />
congelador mantém-se a uma tem<strong>per</strong>atura ao redor de 0°C, para<br />
possibilitar-lhe os alimentos dentro de 24 horas ou para cozê-los e<br />
congelá-los. É possível desligar o aviso sonoro, se simplesmente<br />
carregar no botão SELECET . Para voltar ao normal funcionamento e<br />
apagar a mensagem do ecrã, será necessário desligar e ligar<br />
novamente o aparelho mediante o selector ON/OFF do aparelho.<br />
2. Se a tem<strong>per</strong>atura continuar a subir para valores excessivamente altos, o<br />
sinal tocará novamente e aparecerá outra mensagem no ecrã “A2”<br />
para assinalar o excessivo aquecimento. É aconselhável verificar o<br />
estado dos alimentos, pode ser necessário jogá-los fora. Em todo o<br />
caso, os alimentos não devem ser novamente congelados, se ainda<br />
não estiverem cozidos. Para não deixar congelar novamente os<br />
alimentos, o congelador será mantido a uma tem<strong>per</strong>atura ao redor de<br />
0°C. É possível desligar o aviso sonoro, se simplesmente carregar no<br />
botão SELECET. Para voltar ao normal funcionamento e apagar a<br />
mensagem do ecrã, será necessário desligar e ligar novamente o<br />
aparelho mediante o selector ON/OFF do aparelho.<br />
71
Assistência<br />
195071850.02<br />
02/2011 - Xerox Business Services<br />
PT<br />
Antes de contactar a Assistência técnica:<br />
• Verifique se pode resolver sozinho a anomalia (veja as Anomalias e Soluções).<br />
• Se, apesar de todos os controlos, o aparelho não funcionar e o inconveniente detectado continuar,<br />
contactar o Centro de Assistência mais próximo.<br />
modelo<br />
número de série<br />
Comunique:<br />
• o tipo de anomalia<br />
• o modelo da máquina (Mod.)<br />
• o número de série (S/N)<br />
Estas informações encontram-se na placa<br />
de identificação situada no compartimento<br />
frigorífico embaixo à esquerda.<br />
Nunca recorrer a técnicos não autorizados e negar sempre a instalação de peças sobresselentes não<br />
originais para reposição.<br />
72