REWORK STATION - JBC
REWORK STATION - JBC
REWORK STATION - JBC

Create successful ePaper yourself
Turn your PDF publications into a flip-book with our unique Google optimized e-Paper software.
Reference Guide<br />
Index<br />
Page<br />
English 1<br />
Español 9<br />
Français 17<br />
Deutsch 25<br />
Italiano 33<br />
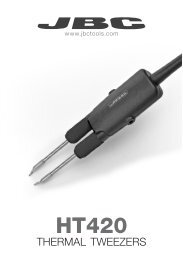
<strong>REWORK</strong> <strong>STATION</strong><br />
AM 6850
ENGLISH<br />
We appreciate the trust you have placed in <strong>JBC</strong> by purchasing this station. It has<br />
been manufactured with the strictest quality standards in order to give you the best<br />
possible service. Before turning on your station, we recommend that you read these<br />
instructions carefully.<br />
Nozzles<br />
Ø6<br />
Ø4<br />
Ø8<br />
0005783 (230V)<br />
0007293 (120V)<br />
Pick & Place and extractors<br />
vacuum selection<br />
Extractor<br />
Tripod<br />
Extractor stand<br />
Ref.0932845<br />
Protector<br />
Control<br />
Unit<br />
DR 8501<br />
desoldering iron stand<br />
Ref.0788501<br />
AD 8241<br />
soldering iron stand<br />
Ref.0788241<br />
AM 6850<br />
rework station<br />
JT 8801<br />
heater stand<br />
Ref.0788801<br />
5600<br />
cartridges<br />
2245<br />
cartridges<br />
DR 5650<br />
desoldering iron<br />
Ref.5650000<br />
Cup<br />
Bent needle<br />
MP 2260<br />
Pick & Place<br />
Ref.2260000<br />
2245 handpiece<br />
Ref.2245000<br />
1
ENGLISH<br />
SPECIFICATIONS<br />
The AM 6850 is a rework station for through-hole<br />
and SMT boards.<br />
- AM 6850 230V Ref. 6850200<br />
- AM 6850 120V Ref. 6850100<br />
It contains 4 modules which cover the main rework<br />
tasks:<br />
- Hot air for desoldering any size of SMD<br />
components.<br />
The station uses the exclusive <strong>JBC</strong> system,<br />
based on protectors-extractors and hot-air<br />
flow, which makes desoldering clean and quick,<br />
concentrating the heat on the IC, and protecting<br />
the rest of the circuit at the same time.<br />
A medium-sized SMD can be desoldered in<br />
less than 20 seconds.<br />
- Desoldering SMTs and cleaning of throughhole<br />
components and pads by using the<br />
DR 5650 desoldering iron, which contains a<br />
self-contained vacuum pump.<br />
- Pick & Place MP 2260 pencil by suction to aid<br />
components positioning.<br />
- Soldering of all types of components, with the<br />
swift response, power and temperature<br />
recovery of the <strong>JBC</strong> series.<br />
Any of the <strong>JBC</strong> tools for soldering-desoldering<br />
can be connected to the two modules: the<br />
soldering handpieces, the DR 5650 desoldering<br />
iron, the AP 1300 solder feed iron and the tweezers.<br />
The standardization of connections allows you to<br />
adapt your configuration in the best way to your<br />
job's needs. Do notice that you can connect only<br />
one desoldering iron.<br />
The station’s components<br />
- Control unit with 1000 W heater<br />
- 2245 handpiece Ref. 2245000<br />
with the 2245-003 cartridge Ref. 2245003<br />
- DR 5650 desoldering iron Ref. 5650000<br />
with the 5600-003 tip Ref. 5600003<br />
- MP 2260 Pick & Place Ref. 2260000<br />
Accessories for the heater:<br />
- JT 8801 heater stand Ref. 0788801<br />
- Extractor stand Ref. 0932845<br />
- Set of 5 protectors.<br />
- Set of 5 extractors.<br />
- 2 tripods for the protectors.<br />
- Set of 4 suction cups Ref. 0930110<br />
- 3 nozzles:<br />
ø 4 Ref. 0932015<br />
ø 6 Ref. 0932012<br />
ø 8 Ref. 0932020<br />
In order to make the nozzles removal easier, the<br />
stand has a special bushing.<br />
- Suction tube with connectors Ref. 0932330<br />
Accessories for the 2245 handpiece:<br />
- AD 8241 soldering iron stand Ref. 0788241<br />
Accessories for the desoldering iron:<br />
- DR 8501 desoldering iron stand Ref. 0788501<br />
- External desoldering air filter Ref. 0821830<br />
- Spare filters Ref. 0781046<br />
- Set of accessories Ref. 0780593<br />
Accessories for the Pick & Place:<br />
- Set of suction cups Pick & Place Ref. 0940163<br />
- Set of straight needles Ref. 0901546<br />
- Set of bent needles Ref. 0861660<br />
- Instructions manual Ref. 0002791<br />
The AM 6850 station has the following<br />
complementary products:<br />
- 2210 handpiece Ref. 2210000<br />
- PA 1200 micro hot tweezers Ref. 1200000<br />
- PA 4200 hot tweezers Ref. 4200000<br />
- AP 1300 solder feed iron Ref. 1300000<br />
- Pedal with cable and connector Ref. 0964551<br />
Control unit technical specifications<br />
- Maximum power soldering iron 50W<br />
- Maximum power desoldering iron 75W<br />
- Power heating unit 1000W<br />
- Temperature selection of the soldering part:<br />
from 90 to 450°C or 190 to 840°F (±5%)<br />
- Temperature selection hot air:<br />
from 150 to 450°C or 300 to 850ºF (±5%)<br />
- Air flow regulation: 6-45 l/min<br />
- Self-contained vacuum pump for holding ICs<br />
- Station's maximum power: 1150W<br />
- ESD protected housing.<br />
Typical surface resistance: 10 5 -10 11 Ohms/<br />
square<br />
- Complies with CE standards on electrical<br />
safety, electromagnetic compatibility and<br />
antistatic protection.<br />
- RoHS compliant.<br />
- Equipotential connector and the tool tip are<br />
connected to station mains ground supply for<br />
ESD protection.<br />
- Weight of complete unit: 19.8 kg<br />
This product should not be thrown in the<br />
garbage.<br />
2
ENGLISH<br />
INTRODUCING <strong>JBC</strong> TECHNOLOGY<br />
The exclusive <strong>JBC</strong> heating system achieves an<br />
exceptional thermal recovery, which increases<br />
productivity, quality, reduces cost of ownership<br />
and ensures fast return on investment.<br />
Unequalled thermal response<br />
An excellent soldering tool features instant thermal<br />
response conceived by a high power/mass ratio.<br />
A high power/mass ratio is being used to maintain<br />
the tip’s temperature as close as possible to the<br />
one selected on the control unit, even when the<br />
thermal load is significant. This is the formula<br />
needed to perform high quality solderjoints and<br />
avoid cold ones, protect the PCB that is being<br />
soldered and increase productivity.<br />
INTELLIGENT HEAT MANAGEMENT<br />
The only time that a soldering tool should be at<br />
working temperature is when it is actually being<br />
used. <strong>JBC</strong> stations identify if and how a tool is<br />
being used and depending on this switches the<br />
tool to one of the following modes with their<br />
respective temperatures:<br />
Work mode: selected working temperature i.e.<br />
350°C.<br />
Sleep mode: during short periods of inactivity<br />
the tool’s temperature is being lowered to an<br />
intermediate temperature i.e. 220°C.<br />
Hibernation mode: During larger periods of<br />
inactivity i.e. 30 minutes, the tool’s power is being<br />
cut off and it cools down to room temperature.<br />
The advantages of this heat management are<br />
significantly increased catridge lifespan and<br />
substantial energy savings which ensures low<br />
cost of ownership.<br />
<strong>JBC</strong> Tools save money by managing Heat<br />
efficiently saving energy, time and improving<br />
processes.<br />
If you would like to change the SLEEP<br />
and HIBERNATION parameters, as any<br />
other function, see page 41.<br />
The red led indicates, that the heating element<br />
is functioning. A malfunction is indicated by the<br />
pulsing of the red led.<br />
On/off switch for the self-contained suction<br />
pump.<br />
The green led indicates that the self-contained<br />
vacuum pump is activated.<br />
- CONTROLS:<br />
TEMPERATURE<br />
Allows fixing the temperature of the heater<br />
between 150 and 450°C or 300 and 850ºF. The<br />
selected temperatures are reference values<br />
which may change depending on the distance<br />
between the heating element and the nozzle.<br />
AIR FLOW<br />
This enables the air flow to be set on a scale<br />
from 1 (corresponding to the lowest setting of<br />
6 l/min) to 10 (corresponding to the highest of<br />
45 l/min).<br />
- VACUUM SELECTOR:<br />
Two vacuum inlets avalaible for tripods and<br />
extractors, being active the one that coincides<br />
with the arrow.<br />
- PEDAL: Hot air is produced when it is held<br />
down. Releasing it the heater is disconnected,<br />
though the turbine continues to operate until<br />
the air temperature falls below 100°C.<br />
USING THE HOT AIR MODULE<br />
Description of controls<br />
- BUTTONS:<br />
Activates or desactivates the hot-air flow. After<br />
a function-time of two minutes the hot-air flow<br />
switches automatically off.<br />
Pedal<br />
Ref. 0964551<br />
3
ENGLISH<br />
Solder/desolder module control<br />
Temperature<br />
increase<br />
Temperature<br />
decrease<br />
See the selected<br />
temperature<br />
Heating element ON-OFF switch<br />
Suction selector for tripods,<br />
extractors and MP 2260<br />
Pick & Place<br />
Heater inlet<br />
Hot air module control<br />
Air flow regulation<br />
Heat temperature dial<br />
4
ENGLISH<br />
DESOLDERING PROCEDURE WITH THE<br />
HEATER<br />
We would also recommend the use of the nozzles<br />
of larger diameter, reserving the smallest one<br />
(diam. 4 mm) for desoldering small components<br />
such as resistors, condensers and the like, bearing<br />
in mind that with this small nozzle the concentration<br />
of heat is greater and care must be taken to avoid<br />
burning the printed circuit; we recommend keeping<br />
below a temperature of 350 °C and air flow of 6.<br />
Depending on the size of the integrated circuit to<br />
be desoldered, you will have to use:<br />
A)Protector + tripod:<br />
- Select protector and tripod size in function of<br />
the IC to be desoldered and place it over the<br />
component.<br />
- Use the SUCTION button to start the pump<br />
and then place the tripod. Press the suction<br />
cup until it sticks onto the component.<br />
- Use the pedal or the ON-OFF button to start<br />
the self-contained hot-air pump, directing it<br />
with a circular movement at the component<br />
terminals and taking care to distribute the heat<br />
evenly.<br />
- Use the pedal or the ON-OFF button to start<br />
the self-contained hot-air pump, directing it<br />
with a circular movement at the component<br />
terminals and taking care to distribute the heat<br />
evenly.<br />
- When the soldering flux turns liquid the<br />
extractor will automatically lift the component.<br />
There are different models of protectors and<br />
extractors as accessories.<br />
C)Tripod:<br />
For small components for which an extractor<br />
cannot be used, we recommend use of tripod 20<br />
Ref. 0932050, as shown in the figure.<br />
Use the tripod 40 Ref. 0932250 for larger integrated<br />
circuits.<br />
- When the soldering flux turns liquid the<br />
extractor will automatically lift the component.<br />
B)Extractor:<br />
- Select extractor size in function of the IC to<br />
be desoldered. Use the SUCTION button to<br />
start the pump.<br />
- Place the extractor and press the suction cup<br />
until it sticks onto the component.<br />
5
ENGLISH<br />
SOLDERING PROCEDURE<br />
1 After desoldering the component, any solder<br />
left on the printed circuit should be removed<br />
with our DR 5650 desoldering iron ref. 5650000.<br />
4 Apply FL 9582 flux ref. 0046565 in pads and<br />
leads.<br />
2 Place the component or printed circuit with<br />
the MP 2260 Pick & Place ref. 2260000.<br />
3 When the component is correctly placed,<br />
solder its pins.In the case of integrated circuits<br />
of the Flat Pack type, first solder one pin of<br />
every IC angle to fix it in place in the circuits.<br />
5 Solder the remaining pins. For this we<br />
recommend to use our soldering irons of the<br />
<strong>JBC</strong> series, which are available in two different<br />
models:<br />
2210 handpiece ref. 2210000 for great<br />
precision tasks, like SMD solders, etc.<br />
2245 handpiece ref. 2245000 for general<br />
soldering tasks in professional electronics.<br />
These soldering irons have a wide range of<br />
cartridges with different models of tips. The<br />
2245-009 cartridge and 2245-010 are<br />
specially designed for soldering SMD circuits<br />
of the QFP and PLCC types.<br />
Solder wire with a diameter of between 0.5 and<br />
0.7 mm should be used.<br />
6 Depending on the nature of the component to<br />
be soldered, use soldering paste together<br />
with our TE 5400 hot air station, which gives<br />
very accurate air-flow regulation, between 4<br />
and 12 l/min.<br />
6
ENGLISH<br />
MAINTENANCE<br />
Changing the heater.<br />
Turn off the station.<br />
Use a wrench to unscrew the cover.<br />
OPERATING INCIDENTS<br />
The suction cup does not adhere to the<br />
component.<br />
Deficient aspiration, Vacuum.<br />
1 Verify if the suction cup is well placed and in<br />
perfect condition.<br />
2 Check the incoming air filter in the interior of<br />
the station and replace it if dirty or obstructed.<br />
Filter<br />
Ref. 0861800<br />
Move back the cover. Pull the connector from the<br />
socket to disconnect the heater from the station.<br />
Follow this process inverted to re-connect the<br />
heater.<br />
Changing the heating element from the heater.<br />
This step has to be performed when the heater<br />
is cold.<br />
1. Untighten screw.<br />
2. Separate the heating element from the<br />
heater’s cable.<br />
0005390<br />
0005398 (230V)<br />
0007297 (120V)<br />
0005783 (230V)<br />
0007293 (120V)<br />
3. Connect the new heating element, pushing<br />
it’s extreme.<br />
4. Insert screw to avoid air-loss which could<br />
reduce the heating element’s lifetime.<br />
Possible errors<br />
In the case of malfunction, the control unit<br />
interrupts the connection.<br />
Following a list of the most common<br />
malfunctions:<br />
- Power failure.<br />
Check for blown fuses.<br />
- The temperature will not rise.<br />
Possible causes:<br />
· Heating element open.<br />
· In case of a long low-power period.<br />
- No reading from the thermocouple.<br />
Possible cause: open thermocouple.<br />
- Insufficient air flow which causes an excesive<br />
rise of the heating temperature.<br />
Before recuperating this type of error you must<br />
wait until the temperature goes down.<br />
Possible causes: leaking or blocked air<br />
conducts or faulty self-contained air pump.<br />
- Faulty reading of the rotationsmeter of the selfcontained<br />
air pump.<br />
Possible causes: air pump damaged or faulty<br />
function of the optical sensor circuit.<br />
To reset any of these errors turn on the general<br />
switch at the back of the station, the pedal<br />
should not be pushed at this moment.<br />
7
ENGLISH<br />
Changing the pump inlet filter<br />
Verify the filter at the entrance of the pump, and<br />
change it if dirty or obstructed, therefor:<br />
Open the filter pulling the flap.<br />
Take out the 2 cotton filters, throw away those<br />
which are soiled and replace them with new<br />
ones. Always use 2 filters.<br />
Close the filter and check the airtightness.<br />
Filter<br />
0781046<br />
0821830<br />
Cleaning the vacuum pump valve.<br />
Open the control unit as follow:<br />
- Disconnect the control unit.<br />
- Remove the fixing screws and lift up the lid.<br />
- Undo the screws fastening the pump.<br />
- Undo the four screws fastening the pump<br />
cover.<br />
- Clean the valve with a cloth dampened in<br />
alcohol. If it is too soiled, replace it with<br />
new one. Ref. 0982970.<br />
You will find all the information about control unit<br />
AM 6850 in our web site:<br />
http://www.jbctools.com<br />
<strong>JBC</strong> reserves the right to make technical changes without prior<br />
notification.<br />
8
ESPAÑOL<br />
Agradecemos la confianza depositada en <strong>JBC</strong> al adquirir esta estación. Ha sido<br />
fabricada con las más estrictas normas de calidad para prestarle el mejor servicio.<br />
Antes de poner en marcha el aparato, recomendamos leer con atención las<br />
instrucciones que a continuación se detallan.<br />
Boquillas<br />
Ø6<br />
Ø4<br />
Ø8<br />
0002450 (230V)<br />
0002452 (120V)<br />
Selector de aspiración del<br />
Pick & Place y los extractores<br />
Extractor<br />
Trípode<br />
Soporte extractores<br />
Ref.0932845<br />
Protector<br />
Unidad de<br />
control<br />
Estación de reparación<br />
multifunción AM 6850<br />
Soporte desoldador<br />
DR 8501<br />
Ref.0788501<br />
Soporte soldador<br />
AD 8241<br />
Ref. 0788241<br />
Soporte calefactor<br />
JT 8801<br />
Ref.0888701<br />
Cartuchos<br />
5600<br />
Cartuchos<br />
2245<br />
Desoldador<br />
DR 5650<br />
Ref.5650000<br />
Ventosa<br />
Aguja doblada<br />
Pick & Place<br />
MP 2260<br />
Ref.2260000<br />
Lápiz 2245<br />
Ref.2245000<br />
9
ESPAÑOL<br />
CARACTERISTICAS<br />
La AM 6850 es una estación de reparación de<br />
circuitos con componentes de inserción y SMD.<br />
- AM 6850 230V Ref. 6850200<br />
- AM 6850 120V Ref. 6850100<br />
Está compuesta por 4 módulos que permiten<br />
realizar las principales operaciones de<br />
reparación:<br />
- Aire caliente para la desoldadura de<br />
componentes SMD, de cualquier tamaño.<br />
Utiliza el sistema exclusivo de <strong>JBC</strong> de<br />
protectores-extractores y aire caliente<br />
pudiendo realizar la desoldadura de una<br />
manera rápida y limpia, concentrando el calor<br />
en el componente a desoldar, protegiendo al<br />
mismo tiempo el resto del circuito.<br />
Se puede desoldar un integrado SMD de<br />
tamaño medio en menos de 20 segundos.<br />
- Desoldadura de componentes de inserción<br />
y limpieza de pads en la desoldadura de SMT.<br />
Para realizar esta función la estación dispone<br />
del desoldador DR 5650, con bomba de<br />
aspiración incorporada.<br />
- Posicionador MP 2260 lápiz por aspiración<br />
para la ayuda en la colocación de<br />
componentes.<br />
- Soldadura de todo tipo de componentes, con<br />
la rapidez de respuesta, potencia y<br />
recuperación de temperatura de la serie <strong>JBC</strong>.<br />
En los dos módulos de soldadura-desoldadura<br />
se pueden conectar cualquiera de las<br />
herramientas <strong>JBC</strong>: los lápices soldadores, el<br />
desoldador DR 5650, las pinzas desoldadoras o<br />
el soldador con aportación de estaño AP 1300.<br />
Esta característica permite obtener múltiples<br />
combinaciones de herramientas y conseguir la<br />
configuración más adecuada al trabajo a realizar.<br />
Únicamente puede haber un desoldador<br />
conectado a la estación.<br />
Composición de la estación<br />
- Unidad de control con calefactor 1000 W<br />
- Lápiz 2245 Ref. 2245000<br />
con el cartucho 2245-003 Ref. 2245003<br />
- Desoldador DR 5650 Ref. 5650000<br />
con la punta 5600-003 Ref. 5600003<br />
- Pick & Place MP 2260 Ref. 2260000<br />
Accesorios para el calefactor:<br />
- JT 8801 soporte calefactor Ref. 0888801<br />
- Soporte extractores Ref. 0932845<br />
- Conjunto de 5 protectores.<br />
- Conjunto de 5 extractores.<br />
- 2 trípodes para los protectores.<br />
- Conjunto de ventosas JT Ref. 0930110<br />
- 3 Boquillas:<br />
ø 4 Ref. 0932015<br />
ø 6 Ref. 0932012<br />
ø 8 Ref. 0932020<br />
Para facilitar la extracción de las boquillas el<br />
soporte del calefactor dispone de un útil<br />
especial.<br />
- Tubo aspiración con conectores Ref. 0932330<br />
Accesorios para el lápiz 2245:<br />
- AD 8241 soporte soldador Ref. 0788241<br />
Accesorios para el desoldador:<br />
- DR 8501 soporte desoldador Ref. 0788501<br />
- Conjunto filtro aspiración Ref. 0821830<br />
- Filtros de recambio Ref. 0781046<br />
- Conjunto de accesorios Ref. 0780593<br />
Accesorios para el Pick & Place:<br />
- Conjunto ventosas Pick & Place Ref. 0940163<br />
- Conjunto agujas rectas Ref. 0901546<br />
- Conjunto agujas dobladas Ref. 0861660<br />
- Manual de instrucciones Ref. 0002791<br />
La estación AM 6850 tiene los siguientes<br />
accesorios, que no se incluyen con la estación:<br />
- Lápiz 2210 Ref. 2210000<br />
- Micro pinza desoldadora PA 1200 Ref. 1200000<br />
- Pinza desoldadora PA 4200 Ref. 4200000<br />
- Soldador con aportación de estaño AP 1300<br />
Ref. 1300000<br />
- Pedal con cable y conector Ref. 0964551<br />
Datos técnicos de la unidad de control<br />
- Potencia máxima soldador 50W.<br />
- Potencia máxima desoldador 75W.<br />
- Potencia calefactor 1000W.<br />
- Selección temperatura soldadura:<br />
entre 90 y 450°C o 190 y 840ºF (±5%).<br />
- Selección temperatura del calefactor:<br />
entre 150 y 450°C o 300 y 850ºF (±5%).<br />
- Regulación del caudal de aire de 6 a 45 l/min.<br />
- Bomba de aspiración para la sujeción de los CI.<br />
- Potencia máxima de la estación: 1150W.<br />
- Caja antiestática.<br />
Resistencia típica superficial: 10 5 -10 11 Ohms/<br />
cuadro.<br />
- Cumple la normativa CE sobre seguridad<br />
eléctrica, compatibilidad electromagnética y<br />
protección antiestática.<br />
- Cumple la normativa RoHS.<br />
- El borne equipotencial y la punta del<br />
soldador están en conexión directa a la<br />
toma de tierra de red para protección ESD.<br />
- Peso del equipo completo: 19,8 kg.<br />
Este producto no debe ser tirado a la<br />
basura.<br />
10
ESPAÑOL<br />
INTRODUCCIÓN A LA TECNOLOGIA <strong>JBC</strong><br />
El exclusivo sistema de calentamiento de <strong>JBC</strong><br />
consigue una excepcional recuperación de la<br />
temperatura, que aumenta la productividad,<br />
calidad, y reduce el coste de propiedad<br />
proporcionando una rápida recuperación de la<br />
inversión efectuada.<br />
Respuesta térmica inigualable<br />
Un soldador excelente con una respuesta térmica<br />
concebida por un alto ratio de potencia/masa.<br />
Un ratio de alta potencia/masa es utilizado para<br />
mantener la temperatura de la punta tan próxima<br />
a la seleccionada en la unidad de control, incluso<br />
cuando la carga termal es importante. Esta es la<br />
formula necesaria para llevar a cabo una alta<br />
calidad de soldaduras, trabajar a temperaturas<br />
máximas mas bajas y evitar soldaduras frías,<br />
con lo cual se protegen los circuitos y<br />
componentes que se están soldando,<br />
aumentando la productividad.<br />
GESTION INTELIGENTE DEL CALOR<br />
La única ocasión que el soldador debe estar a<br />
temperatura de trabajo es cuando se está<br />
utilizando. Las estaciones de <strong>JBC</strong> identifican<br />
como se está utilizando la herramienta y<br />
dependiendo de eso cambia la herramienta a<br />
uno de los siguientes modos con sus respectivas<br />
temperaturas:<br />
Modo de trabajo: Temperatura seleccionada es<br />
350ºC.<br />
Modo sleep: Durante periodos cortos de<br />
inactividad, la temperatura de la herramienta baja<br />
a temperatura intermedia, por ejemplo a 220ºC.<br />
Modo Hibernación: Durante largos periodos de<br />
inactividad, por ejemplo 30 minutos, la potencia<br />
de la herramienta se para y baja la temperatura a<br />
temperatura ambiente.<br />
Las ventajas de esta gestión del calor es el<br />
aumento de la vida de la punta lo que implica un<br />
coste menor de propiedad.<br />
Con el sistema de gestión del calor y ahorro<br />
de energía <strong>JBC</strong> proporciona también<br />
un ahorro de tiempo y mejora de procesos.<br />
Si desea cambiar los parámetros de SLEEP<br />
e HIBERNATCIÓN, así como cualquier<br />
otra función, vea página 41.<br />
FUNCIONAMIENTO DEL MÓDULO DE<br />
AIRE CALIENTE<br />
Descripción de los mandos<br />
- PULSADORES:<br />
En cada pulsación, se activa o desactiva la<br />
11<br />
produción de aire caliente. Se para<br />
automáticamente después de estar dos<br />
minutos en marcha.<br />
Cuando el led rojo está encendido indica<br />
que el calefactor está en marcha. Si está<br />
parpadeando indica que hay un error.<br />
A cada pulsación, se activa o desactiva la<br />
bomba de aspiración.<br />
Cuando el led verde está encendido indica<br />
que la bomba de vacío está en marcha.<br />
- MANDOS:<br />
TEMPERATURE<br />
Permite seleccionar la temperatura entre<br />
150 y 450°C o 300 y 850ºF para el calefactor.<br />
Las temperaturas seleccionadas son valores<br />
de referencia y su valor varía en función de<br />
la distancia a la boquilla del calefactor.<br />
AIR FLOW<br />
Permite regular el caudal de aire en una<br />
escala de 1 a 10, equivalente a un mínimo de<br />
6 l/min. y un máximo de 45 l/min.<br />
- SELECTOR DE VACIO:<br />
Dispone de dos tomas de aspiración para<br />
los trípodes y extractores, estando activada<br />
la que coincida con la flecha.<br />
- PEDAL:<br />
Activa la producción de aire caliente mientras<br />
se mantiene accionado.<br />
Cuando se deja de presionar, el sistema<br />
desconecta el calefactor, pero la turbina<br />
continua funcionando hasta que la<br />
temperatura del aire es inferior a 100 °C.<br />
Pedal<br />
Ref. 0964551
ESPAÑOL<br />
Aumento de la<br />
temperatura<br />
Control del módulo de<br />
soldadura-desoldadura<br />
Disminución de la<br />
temperatura<br />
Consulta la<br />
temperatura<br />
seleccionada<br />
Activación de la bomba de aspiración<br />
Marcha - paro del calefactor<br />
Selector de aspiración de<br />
los trípodes, extractores y<br />
Pick & Place MP 2260<br />
Toma de aire<br />
calefactor<br />
Control del módulo<br />
de aire caliente<br />
Regulación del<br />
flujo de aire<br />
Regulación de la<br />
temperatura del<br />
calefactor<br />
12
ESPAÑOL<br />
PROCESO PARA DESOLDAR CON EL<br />
CALEFACTOR<br />
Recomendamos utilizar las boquillas de mayor<br />
diámetro y reservar la mas pequeña (ø4mm) para<br />
la desoldadura de pequeños componentes como<br />
resistencias, condensadores, etc, téngase en<br />
cuenta que con esta boquilla la concentración de<br />
calor es mayor, por lo que para evitar quemar el<br />
circuito impreso, aconsejamos no sobrepasar la<br />
temperatura de 350 °C y el caudal de aire de 6.<br />
Dependiendo del tamaño del circuito integrado<br />
a desoldar, deberá utilizar:<br />
A)Protector + trípode:<br />
- Seleccione el tamaño de protector y trípode en<br />
función del IC a desoldar y colóquelo sobre el<br />
componente.<br />
- Ponga en marcha la bomba de aspiración<br />
mediante el pulsador de SUCTION y coloque<br />
el trípode. Presione la ventosa hasta que<br />
quede adherida al componente.<br />
- Mediante el pedal o el pulsador ON-OFF ponga<br />
en marcha el generador de aire caliente,<br />
dirigiéndolo con un movimiento circular a los<br />
terminales del componente, procurando repartir<br />
el calor de una forma homogénea.<br />
- Mediante el pedal o el pulsador ON-OFF<br />
ponga en marcha el generador de aire caliente,<br />
dirigiéndolo con un movimiento circular a los<br />
terminales del componente, procurando<br />
repartir el calor de una forma homogénea.<br />
- Cuando la soldadura pase al estado líquido, el<br />
extractor levantará automáticamente el<br />
componente.<br />
Existen como accesorio varios modelos de<br />
protectores y extractores.<br />
C)Trípode:<br />
Para los componentes pequeños y los que no<br />
se puede utilizar extractor, recomendamos el<br />
uso del trípode 20 Ref. 0932050 según la figura.<br />
Use el trípode 40 Ref. 0932250 para integrados<br />
de mayor tamaño.<br />
- Cuando la soldadura pase al estado liquido, el<br />
extractor levantará automáticamente el<br />
componente.<br />
B)Extractor:<br />
- Seleccione el tamaño del extractor en función<br />
del IC a desoldar. Ponga en marcha la bomba<br />
de aspiración mediante el pulsador de<br />
SUCTION.<br />
- Coloque el extractor ypresione la ventosa hasta<br />
que quede adherida al componente.<br />
13
ESPAÑOL<br />
PROCESO PARA SOLDAR<br />
1 Una vez desoldado el componente, deberá<br />
eliminar la soldadura que haya quedado en el<br />
circuito impreso usando nuestro desoldador<br />
DR 5650 ref. 5650000.<br />
4 Aplicar el Flux FL 9582 ref. 0046565 en los<br />
pads y leads.<br />
2 Posicionar el componente o circuito integrado<br />
con el Pick & Place MP 2260 ref. 2260000.<br />
3 Una vez colocado el componente en su<br />
posición correcta, suelde las patas. Si se trata<br />
de un circuito integrado tipo "Flat Pack", suelde<br />
primero una pata de cada ángulo del C I para<br />
fijarlo al circuito.<br />
5 Soldar las patas restantes. Para ello,<br />
recomendamos utilizar nuestros<br />
soldadores <strong>JBC</strong>, disponiendo de<br />
2 modelos de soldador:<br />
Soldador 2210 ref. 2210000 para trabajos<br />
de gran precisión, como soldadura SMD,etc.<br />
Soldador 2245 ref. 2245000 para trabajos<br />
generales de soldadura en electrónica<br />
profesional.<br />
Estos soldadores disponen de una amplia<br />
gama de cartuchos con diferentes modelos<br />
de puntas. Los cartuchos 2245-009 y 2245-<br />
010 están especialmente diseñados para<br />
soldar circuitos SMD tipo QFP y PLCC.<br />
Deberá utilizar hilo de estaño entre 0.5 - 0.7 mm<br />
de diámetro.<br />
6 Dependiendo de las características del<br />
componente utilice pasta de soldar y nuestra<br />
estación de aire caliente TE 5400, que permite<br />
una regulación muy fina del caudal de aire,<br />
entre 4 y 12 l/min.<br />
14
ESPAÑOL<br />
MANTENIMIENTO<br />
Cambio del calefactor.<br />
Apague la estación.<br />
Utilice una llave para desenroscar la tapa.<br />
ANOMALIAS DE FUNCIONAMIENTO<br />
La ventosa no queda adherida al componente.<br />
Aspiración deficiente, Vacuum.<br />
1 Compruebe que la ventosa este colocada<br />
correctamente y en perfecto estado.<br />
2 Compruebe el filtro de entrada de la bomba<br />
de aspiración que hay en el interior de la<br />
estación y cambielo si está sucio u obturado.<br />
Separe la tapa. Estire del casquillo para<br />
desconectar el calefactor de la estación.<br />
Siga el proceso inverso para volver a colocar el<br />
calefactor.<br />
Filtro<br />
Ref. 0861800<br />
Cambio de la resistencia del calefactor.<br />
Esta operación se debe realizar con el calefactor<br />
en frío.<br />
1. Desenrosque el tornillo.<br />
2. Separe la resistencia del cable del calefactor.<br />
0005390<br />
0005398 (230V)<br />
0007297 (120V)<br />
0005783 (230V)<br />
0007293 (120V)<br />
3. Coloque la nueva resistencia, presionando<br />
sobre su extremo.<br />
4. Enrosque el tornillo fuertemente para evitar<br />
escapes de aire que pueden reducir la<br />
duración de la resistencia.<br />
15<br />
Posibles errores<br />
El aparato se para por completo cuando<br />
aparece un error.<br />
Esta es una lista de los errores más habituales:<br />
- Falla la alimentación.<br />
Compruebe si está fundido el fusible de<br />
alimentación.<br />
- La temperatura no aumenta.<br />
Causas posibles:<br />
· Resistencia calefactora abierta.<br />
· Tensión de red baja, muy por debajo de la<br />
nominal.<br />
- No hay lectura del termopar.<br />
Causas posibles: termopar abierto.<br />
- Caudal de aire insuficiente, lo que ha provocado<br />
una subida excesiva de la temperatura del<br />
calefactor.<br />
Antes de recuperar este tipo de error, deberá<br />
esperar a que la temperatura descienda.<br />
Causas posibles: conductos de aire rotos u<br />
obstruidos o bomba de aire estropeada.<br />
- Error en lecturas del cuenta vueltas de la<br />
bomba de aire.<br />
Causas posibles: bomba de aire estropeada<br />
o funcionamiento defectuoso del circuito<br />
sensor óptico.<br />
Para recuperar cualquiera de los errores<br />
anteriores es necesario accionar el interruptor<br />
general situado en la parte posterior de la<br />
estación; en este momento el pedal no puede<br />
estar apretado.
ESPAÑOL<br />
Cambio del filtro de entrada de la bomba<br />
Compruebe el filtro de entrada de la bomba y<br />
cambielo si está sucio u obturado, para ello:<br />
- Abra el filtro tirando de las lengüetas.<br />
- Extraiga los 2 filtros de algodón, deseche los<br />
que estuvieran sucios y coloque unos nuevos<br />
en su lugar. Use siempre 2 filtros.<br />
Cierre el filtro y verifique que no hayan pérdidas<br />
de aspiración.<br />
Filtro<br />
0781046<br />
0821830<br />
Limpieza de la válvula interna de la bomba<br />
de vacío<br />
Debe abrir la unidad de control, para ello:<br />
- Desconecte la estación de la red eléctrica.<br />
- Quite los tornillos de fijación y levante la<br />
tapa superior.<br />
- Desenrosque los tornillos que sujetan a la<br />
bomba.<br />
- Desenrosque los cuatro tornillos que<br />
sujetan la tapa de la bomba.<br />
- Limpie la válvula con un paño mojado<br />
en alcohol. Si estuviera excesivamente<br />
impregnada, cámbiela por una nueva.<br />
Ref. 0982970.<br />
Encontrará toda la información sobre la unidad de<br />
control AM 6850 en nuestra web:<br />
http://www.jbctools.com<br />
<strong>JBC</strong> se reserva el derecho de introducir modificaciones sin<br />
previo aviso<br />
16
FRANÇAIS<br />
Nous vous remercions de la confiance déposée en <strong>JBC</strong> à travers l’acquisition de<br />
cette station. Elle est fabriquée dans les plus strictes normes de qualité pour vous<br />
rendre un meilleur service. Avant de mettre l’appareil en marche, nous vous<br />
recommandons de lire attentivement les instructions détaillées ci-après.<br />
Buses<br />
Ø6<br />
Ø4<br />
Ø8<br />
0002450 (230V)<br />
0002452 (120V)<br />
Sélecteur d’aspiration du<br />
crayon pick & place et des<br />
extracteurs<br />
Trépied<br />
Extracteur<br />
Support extracteurs<br />
Réf.0932845<br />
Unité de<br />
contrôle<br />
Support du fer<br />
à dessouder<br />
DR 8501<br />
Réf.0788501<br />
Station de réparation<br />
multifonction AM 6850<br />
Support fer à souder<br />
AD 8241<br />
Réf.0788241<br />
Support du corps<br />
chauffant<br />
JT 8801<br />
Réf.0788801<br />
Cartouches<br />
5600<br />
Cartouches<br />
2245<br />
Fer à dessouder<br />
DR 5650<br />
Réf.5650000<br />
Ventouse<br />
Aiguille coudée<br />
Protecteur<br />
Crayon positionneur<br />
MP 2260<br />
Réf.2260000<br />
Crayon 2245<br />
Réf.2245000<br />
17
FRANÇAIS<br />
CARACTÉRISTIQUES<br />
L' AM 6850 est une station destinée à la<br />
réparation de composants CMS et d’insertion.<br />
- AM 6850 230V Réf. 6850200<br />
- AM 6850 120V Réf. 6850100<br />
Elle se compose de 4 modules complémentaires<br />
qui permettent de réaliser les principales<br />
opérations de réparation:<br />
- Air chaud pour le dessoudage de<br />
composants CMS de toute taille.<br />
L’utilisateur dispose du système exclusif <strong>JBC</strong><br />
d’extracteurs-protecteurs. En concentrant la<br />
chaleur sur le composant à dessouder, ce<br />
système permet un dessoudage rapide et<br />
propre tout en protègeant le reste du circuit<br />
imprimé.<br />
Le temps moyen pour réaliser l’opération de<br />
dessoudage est de 20 secondes.<br />
- Dessoudage de composants d’insertion et<br />
nettoyage des pistes de composants CMS.<br />
L’utilisateur nécessite pour opérer le fer à<br />
dessouder DR 5650, relié à la pompe à vide de<br />
la station.<br />
- Le crayon positionneur MP 2260 relié à la<br />
pompe à vide facilite le positionnement des<br />
composants.<br />
- Soudage de tous types de composants aux<br />
caractéristiques suivantes: montée en<br />
température extrêmement rapide,<br />
récupération de la température, propres au<br />
système <strong>JBC</strong>.<br />
Sur les deux modules, soudage et dessoudage<br />
on peut connecter n'importe lequel des outils<br />
de la gamme <strong>JBC</strong>: les crayons à souder, à<br />
dessouder DR 5650, les pinces à dessouder ou<br />
le crayon avec apport d'étain AP 1300.<br />
Composition de la station<br />
- Unité de contrôle du corps chauffant 1000 W<br />
- Crayon 2245 Réf. 2245000<br />
livré avec la cartouche 2245-003 Réf. 2245003<br />
- Fer à dessouder DR 5650 Réf. 5650000<br />
livré avec la panne 5600-003 Réf. 5600003<br />
- Crayon positionneur MP 2260 Réf. 2260000<br />
Accessoires du corps chauffant:<br />
- JT 8801 support du corps chauffant<br />
Réf. 0888801<br />
- Support des extracteurs-protecteurs<br />
Réf. 0932845<br />
- Ensemble de 5 protecteurs.<br />
- Ensemble de 5 extracteurs.<br />
- 2 trépieds pour les protecteurs.<br />
- Ensemble de ventouses JT Réf. 0930110<br />
- 3 buses:<br />
ø 4 Réf. 0932015<br />
ø 6 Réf. 0932012<br />
ø 8 Réf. 0932020<br />
Pour faciliter l’extraction des buses, le<br />
support dispose d’un outil spécial.<br />
- Tuyau d’aspiration avec connecteurs<br />
Réf. 0932330<br />
Acessoire du fer à souder 2245:<br />
- AD 8241 support du fer à souder Réf. 0788241<br />
Accessoires pour le fer à dessouder:<br />
- DR 8501 support du fer à dessouder<br />
Réf. 0788801<br />
- Ensemble filtre aspiration Réf. 0821830<br />
- Filtres de rechange Réf. 0781046<br />
- Ensemble d’accessoires Réf. 0780593<br />
Accessoires pour le crayon positionneur:<br />
- Ensemble de ventouses Pick & Place<br />
Réf. 0940163<br />
- Ensemble d’embouts rectilignes Réf. 0901546<br />
- Ensembles d’embouts courbés Réf. 0861660<br />
- Manuel d’instructions Réf. 0002791<br />
La station AM 6850 dispose en option des<br />
accessoires suivants:<br />
- Crayon 2210 Réf. 2210000<br />
- Micropince à dessouder PA 1200 Réf. 1200000<br />
- Pince à dessouder PA 4200 Réf. 4200000<br />
- Crayon avec apport d'étain AP 1300<br />
Réf. 1300000<br />
- Pédale avec câble et connecteur Réf. 0964551<br />
Données techniques concernnat l’unité de<br />
contrôle<br />
- Puissance nominale du fer à souder 50W.<br />
- Puissance nominale du fer à dessouder 75W.<br />
- Puissance du corps chauffant 1000W.<br />
- Sélection de température de soudage:<br />
entre 90 et 450°C ou 190 et 840°F (±5%).<br />
- Sélection de température du corps chauffant:<br />
entre 150 et 450°C ou 300 et 850°F (±5%).<br />
- Regulation du débit d’air de 6 à 45 l/min.<br />
- Pompe d'aspiration pour tenir les CI.<br />
- Puissance nominale de la station: 1150W.<br />
- Boîtier antistatique "skin effect".Résistance<br />
typique superficielle: 10 5 -10 11 Ohms/carré.<br />
- Conforme aux normes CE portant sur la<br />
sécurité électrique, la compatibilité<br />
électromagnétique et la protection antistatique.<br />
- Conforme aux norme RoHS.<br />
- La prise équipotentielle et la cartouche sont<br />
en connexion directe avec la prise de terre<br />
secteur pour la protection antistatique (ESD).<br />
- Poids de l’équipement complet: 19,8 kg.<br />
Ce produit ne doit pas être jeté à la<br />
poubelle.<br />
18
FRANÇAIS<br />
INTRODUCTION A LA TECHNOLOGIE <strong>JBC</strong><br />
Le système de chauffe exclusif <strong>JBC</strong> permet une<br />
exceptionnelle récupération de la température,<br />
ce qui augmente la productivité, la qualité, et<br />
réduit les coûts permettent une rapide<br />
récupération d’investissements.<br />
Réponse thermique inégalée<br />
Un excellent fer à souder avec une réponse<br />
thermique obtenue grâce au un fort ratio de<br />
puissance/masse.<br />
Un fort ratio de puissance/masse est utilisé pour<br />
maintenir la température de la panne au plus<br />
près de celle sélectionnée sur l’unité de contrôle,<br />
même lorsque la charge thermique est importante.<br />
Ceci est la formule nécessaire pour mener à bien<br />
une haute qualité de soudure, éviter des<br />
soudures froides, protéger les circuits à souder<br />
et augmenter la productivité.<br />
GESTION INTELLIGENTE DE LA TEMPERATURE<br />
La seule fois ou le fer à souder doit être à<br />
température de travaille, est lorsqu’il est utilisé.<br />
Les stations <strong>JBC</strong> détectent que le fer est en<br />
mode utilisation et en relation avec cela elles<br />
adaptent le fer aux modes suivants avec<br />
températures respectives:<br />
Mode de travaille: la température sélectionnées<br />
est 350°C.<br />
Mode sleep: pendant de courtes durées d’inactivité,<br />
la température du fer baisse jusqu’à une<br />
température intermédiaire de 220°C par exemple.<br />
Mode hibernation: pendant de longues durée<br />
d’inactivité, par exemple 30 minutes, la puissance<br />
du fer s’arrête et la température baisse jusqu’à<br />
atteindre la température ambiante.<br />
Les avantages d’une telle gestion de la<br />
température sont d’augmenter la durée de vie<br />
des pannes ce qui implique un coût de maintien<br />
moins élevé.<br />
Avec ce système de gestion de la température<br />
et économie d’énergie <strong>JBC</strong> permet également<br />
une économie de temps et une amélioration<br />
du processus.<br />
Si vous souhaitez changer les paramèters<br />
de SLEEP et HIBERNATION, ou toute autre<br />
fonction, voyez page 41.<br />
Quand le voyant rouge est allumé, cela signifie<br />
que le corps chauffant est en marche. S'il<br />
clignote il s'agit d'un erreur.<br />
- COMMANDES:<br />
A chaque pulsation, on active ou<br />
désactive la pompe d'aspiration.<br />
Quand le voyant vert est allumé<br />
cela signifie que la pompe<br />
d'aspiration est en marche.<br />
TEMPERATURE<br />
Permet de sélectionner la température du corps<br />
chauffant entre 150 et 450°C ou 300 et 850°F.<br />
Les températures sélectionnées sont des<br />
valeurs de référence qui varient en fonction de<br />
la distance entre le corps chauffant et l'embout.<br />
AIR FLOW<br />
Permet de régler le débit d’air en fonction d’une<br />
échelle de 1 à 10, équivalente à un minimum de 6<br />
l/min. et un maximum de 45 l/min.<br />
- SÉLECTEUR D'ASPIRATION:<br />
Deux prises d'aspiration sont prévues pour les<br />
trépieds et les extracteurs, on peut les activer<br />
alternativement en les faisant coïncider avec la<br />
flêche.<br />
- PÉDALE: Quand on l’actionne, elle commande<br />
la production de l’air chaud.<br />
Quand on cesse de l’actionner, le système<br />
déconnecte le corps chauffant, mais la turbine<br />
demeure en fonctionnement tant que la<br />
température est supérieure à 100 °C.<br />
FONCTIONNEMENT DU MODULE À AIR<br />
CHAUD<br />
Description des commandes<br />
- BOUTONS:<br />
À chaque pulsation, la<br />
production d'air chaud s'active<br />
ou se désactive. Elle s'éteint<br />
automatiquement après deux<br />
minutes de fonctionnement.<br />
19<br />
Pédale<br />
Réf. 0964551
FRANÇAIS<br />
Augmentation de la<br />
température<br />
Contrôle du module de<br />
soudage/dessoudage<br />
Diminution de la<br />
température<br />
Consulte la<br />
température<br />
selectionnée<br />
Activation de la pompe d'aspiration<br />
Marche - Arrêt de l'air chaud<br />
Sélecteur d’aspiration des<br />
trépieds, extracteurs et Pick<br />
& Place MP 2260<br />
Prise d'air chaud<br />
Contrôle du module<br />
à air chaud<br />
Régulation du<br />
débit d'air chaud<br />
Régulation de la<br />
mpérature du fer<br />
à air chaud<br />
20
FRANÇAIS<br />
PROCESSUS POUR DESSOUDER A<br />
L'AIDE DU CORPS CHAUFFANT<br />
Nous vous recommandons d’utiliser les buses<br />
de plus grand diamètre et réserver la plus petite<br />
(4 mm) pour le dessoudage de petits composants<br />
tels que des résistances, condensateurs,etc.<br />
Quand vous utiliserez la buse de 4mm, en raison<br />
de la concentration de la chaleur, vous risquez<br />
de brûler avec une certaine facilité le circuit<br />
imprimé ou le composant, par conséquent, nous<br />
vous recommandons de ne pas dépasser 6 pour<br />
le débit d’air et 350 °C maximum pour la température.<br />
En fonction de la taille du circuit imprimé à<br />
dessouder, vous devrez utiliser:<br />
A)Protecteur + trépied:<br />
- Sélectionnez la taille du protecteur et trépied<br />
en fonction du CI à dessouder et placez-le sur<br />
le composant.<br />
- Mettre en route la pompe d’aspiration à travers<br />
le bouton SUCTION et placez le trépied.<br />
Poussez la ventouse jusqu’à ce qu’elle adhère<br />
au composant.<br />
- Mettez en route le générateur d’air chaud à<br />
l'aide de la pédale ou le bouton ON-OFF, en le<br />
dirigeant avec un mouvement circulaire aux<br />
terminaux du composant, en repartissant la<br />
chaleur d’une façon homogène.<br />
- Mettez en route le générateur d’air chaud à<br />
l'aide de la pédale ou le bouton ON-OFF, en le<br />
dirigeant avec un mouvement circulaire aux<br />
terminaux du composant, en repartissant la<br />
chaleur d’une façon homogène.<br />
- Quand la soudure devient liquide, l’extracteur<br />
soulève automatiquement le composant.<br />
Il existe en tant qu’accessoires divers<br />
modèles de protecteurs et d’extracteurs.<br />
C)Trépied:<br />
Pour les composants les plus petits et pour ceux<br />
pour lesquels on ne peut pas utiliser l’extracteur,<br />
nous vous recommandons l’usage du trépied 20<br />
Réf. 0932050 selon schéma.<br />
Utilisez le trépied 40 Réf. 0932250 pour des CI<br />
de plus grande taille.<br />
- Quand la soudure deviendra liquide,<br />
l’extracteur soulèvera automatiquement le<br />
composant.<br />
B)Extracteur:<br />
- Sélectionnez la taille de l’extracteur en fonction<br />
du CI à dessouder. Mettez en route la pompe<br />
d’aspiration avec le bouton SUCTION.<br />
- Placez l’extracteur et poussez la ventouse<br />
jusqu’à ce qu’elle adhère au composant.<br />
21
FRANÇAIS<br />
PROCESSUS POUR SOUDER<br />
1 Après avoir dessoudé le composant, vous<br />
devrez éliminer les traces de soudure qui<br />
restent sur le circuit imprimé, en utilisant notre<br />
fer à dessouder DR 5650 réf.5650000.<br />
4 Appliquer du Flux FL 9582 réf. 0046565 sur<br />
les pattes et leads.<br />
2 Positionner le composant ou le circuit intégré<br />
à l'aide du crayon Pick & Place MP 2260 réf.<br />
2260000.<br />
3 Placez le composant dans la bonne<br />
position et soudez les pattes. S’il s’agit<br />
d’un circuit intégré type «Flat Pack»,<br />
soudez tout d’abord une patte de chaque<br />
angle du CI afin de le fixer au circuit.<br />
5 Souder les pattes qui restent. Pour cela, nous<br />
vous recommandons d’utiliser nos fer à<br />
souder <strong>JBC</strong> qui disposent de 2 modèles de<br />
fer à souder:<br />
Fer à souder 2210 réf. 2210000 pour des<br />
travaux de grande précision, tels que soudage<br />
CMS, etc.<br />
Fer à souder 2245 réf. 2245000 pour des<br />
travaux généraux de soudage en électronique<br />
professionnelle.<br />
Ces fers disposent d’une large gamme de<br />
cartouches avec différentes géométries de<br />
pannes. Les cartouches 2245-009 et 2245-<br />
010 sont spécialement conçues pour souder<br />
des circuits CMS de type QFP et PLCC.<br />
Vous devrez utiliser du fil d'étain entre 0,5 et<br />
0,7 mm.<br />
6 Dépendant des caractéristiques du<br />
composant, utilisez de la pâte à souder et<br />
notre station à air chaud TE 5400, qui permet<br />
de régler au minimum le débit d’air (entre 4 et<br />
12 litres/minute).<br />
22
FRANÇAIS<br />
MAINTENANCE<br />
Échange du corps chauffant.<br />
Éteindre la station.<br />
Utilisez un clé pour desserrer l’embout du corps<br />
chauffant.<br />
ANOMALIES DE FONCTIONNEMENT<br />
La ventouse n'adhère pas au composant.<br />
Aspiration defficiente, Vacuum.<br />
1 Vérifiez que la ventouse soit placée<br />
correctement et soit en parfait état.<br />
2 Vérifiez le filtre d'entrée de la pompe d'aspiration<br />
qu'il y a à l'intérieur de la station et changez-le s'il<br />
est sale ou obstrué.<br />
Filtre<br />
Réf. 0861800<br />
Séparez l’embout. Désolidarisez le connecteur<br />
de la station.<br />
Suivez la démarche contraire pour remettre en<br />
place le corps chauffant.<br />
Changement de la résistance du corps<br />
chauffant.<br />
Cette opération doit être réalisée avec la<br />
résistance du corps chauffant à froid.<br />
1. Ôtez le vis.<br />
2. Séparez la résistance du corps chauffant.<br />
0005390<br />
0005398 (230V)<br />
0007297 (120V)<br />
0005783 (230V)<br />
0007293 (120V)<br />
3. Placez la nouvelle résistance en<br />
pressionnant sur son extrêmité.<br />
4. Fixez bien le vis jusqu’au bout afin d’éviter<br />
les fuites d’air qui peuvent conduire à dune<br />
durée de vis réduite de la résistance.<br />
Erreurs possibles<br />
L'appareil se déconnecte complètement.<br />
Vous trouverez ci-dessous une liste des<br />
erreurs les plus courantes:<br />
- Panne d’alimentation.<br />
Vérifiez l’état des fusibles.<br />
- La température n’augmente pas.<br />
Causes possibles:<br />
· Résistance de chauffe ouverte.<br />
· En cas de baisse de tension très en dessous<br />
de la valeur nominale.<br />
- Pas de lectures du thermo-couple.<br />
Causes possibles: thermo-couple ouvert.<br />
- Débit d’air insuffisant, ce qui a provoqué une<br />
montée excessive de la température du corps<br />
chauffant.<br />
Avant de récupérer ce type d'erreur devrez<br />
attendre que la température descende.<br />
Causes possibles: conduits d'air cassés ou<br />
obstrués, pompe à air chaud endommagée.<br />
- Erreur dans les lectures du compte-tours de la<br />
pompe à air.<br />
Causes possibles: pompe à air chaud<br />
abîmée ou fonctionnement déffectueux du<br />
capteur optique.<br />
Pour récupérer n'importe laquelle des erreurs<br />
précédemment citées, appuyer sur<br />
l'interrupteur général situé sur la partie<br />
postérieure de la station. A ce moment-là, la<br />
pédale ne peut pas être actionnée.<br />
23
FRANÇAIS<br />
Changement du filtre d'entrée de la pompe<br />
Vérifiez le filtre d'entrée de la pompe et changezle<br />
s'il est sale ou obstrué, pour cela:<br />
- Ouvrir le filtre en tirant sur les languettes.<br />
- Extrayez les 2 filtres du coton, jetez ceux qui<br />
sont sales et placez les nouveaux à leur place.<br />
Utilisez toujours 2 filtres (réf.0781046).<br />
Fermez le filtre et vérifiez l'étanchéité.<br />
Filter<br />
0781046<br />
0821830<br />
Nettoyage de la soupape de la pompe à vide<br />
Pour cela vous devez ouvrir l’unité de contrôle:<br />
- Débranchez la station du courant électrique.<br />
- Ôtez la vis de fixation et levez le couvercle<br />
supérieur.<br />
- Desserrer les pieds fixant la pompe.<br />
- Desserrer les quatre pieds fixant le<br />
couvercle de la pompe.<br />
- Nettoyez la soupape avec un chiffon imbibé<br />
d’alcool. Si elle est excessivement imprégnée,<br />
remplacez-la par une nouveau. Réf. 0982970.<br />
Vous trouverez toutes les informations concernant<br />
l'unité de contrôle AM 6850:<br />
http://www.jbctools.com<br />
<strong>JBC</strong> se réserve le droit d'apporter des modifications<br />
techniques à ses appareils sans préavis<br />
24
DEUTSCH<br />
Wir danken Ihnen für das <strong>JBC</strong> mit dem Kauf dieser Station erwiesene Vertrauen. Bei ihrer<br />
Fertigung wurden die strengsten Qualitätsmaßstäbe zugrunde gelegt, so dass Sie<br />
optimale Lötergebnisse erwarten dürfen. Vor Inbetriebnahme des Geräts lesen Sie bitte<br />
die vorliegende Betriebsanleitung aufmerksam durch.<br />
Düsen<br />
Ø6<br />
Ø4<br />
Ø8<br />
0002450 (230V)<br />
0002452 (120V)<br />
Saugwählschalter für<br />
Pick & Place und Abzieher<br />
Abziehern<br />
Stativ<br />
Ständer für Abzieher<br />
Ref. 0932845<br />
Steuereinheit<br />
Entlötkolbenständer<br />
DR 8501<br />
Ref. 0788501<br />
AM 6850<br />
Multifunktions-<br />
Reparaturstation<br />
Lötkolbenständer<br />
AD 8241<br />
Ref. 0788241<br />
Ständer für<br />
Heizung<br />
JT 8801<br />
Ref. 0788801<br />
Kartuschen<br />
5600<br />
Kartuschen<br />
2245<br />
Entlötkolben DR 5650<br />
Ref.5650000<br />
Saugnapfe<br />
Gebogene nadel<br />
Schutzvorrichtungen<br />
Pick & Place<br />
MP 2260<br />
Ref.2260000<br />
Handstück 2245<br />
Ref.2245000<br />
25
TECHNISCHE MERKMALE<br />
Die AM 6850 ist eine Reparaturstation für<br />
Insertionselemente und SMT-Boards.<br />
- AM 6850 230 V Ref. 6850200<br />
- AM 6850 120 V Ref. 6850100<br />
Sie besteht aus 4 Modulen, mit denen alle bei der<br />
Bearbeitung von Leiterplatten anfallenden<br />
Aufgaben erledigt werden können:<br />
- Heißluft zum Entlöten von SMD-Bauteilen<br />
sämtlicher Größen.<br />
Arbeitet mit dem auf der Grundlage von<br />
Schutzvorrichtungen-Abziehern und Heißluft<br />
basierenden exklusiven <strong>JBC</strong>-System, womit<br />
das Entlöten schnell und sauber ausgeführt<br />
werden kann, die Hitze auf dem zu entlötenden<br />
Bauteil gebündelt wird und somit gleichzeitig<br />
die anderen Bereiche der Platine geschützt<br />
werden.<br />
Zum Entlöten eines mittelgroßen integrierten<br />
SMD werden weniger als 20 Sekunden benötigt.<br />
- Entlöten von Insertionselementen und<br />
Reinigung von Pads beim Entlöten von SMTs.<br />
Hierzu verfügt die Station über den Entlötkolben<br />
DR 5650, der mit einer unabhängigen<br />
Absaugpumpe geliefert wird.<br />
- Positionierung MP 2260 mit einem<br />
Vakuumstift zur einfacheren Platzierung von<br />
Komponenten.<br />
- Löten aller Art von Bauteilen mit der für die <strong>JBC</strong>-<br />
Serie charakteristischen Reaktionsschnelligkeit,<br />
Leistung und kurzen Anheizzeit.<br />
An den zwei Löt-Entlötmodulen können alle<br />
<strong>JBC</strong>-Werkzeuge angeschlossen werden: die<br />
Löthandstücke, der Entlötkolben DR 5650, die<br />
Entlötpinzetten oder der Lötkolben mit Zinnzufuhr<br />
AP 1300.<br />
Dieses Merkmal erlaubt es, zahlreiche<br />
Werkzeugkombinationen zu erhalten und die für<br />
die auszuführende Arbeit ideale Konfiguration<br />
zusammenzustellen. Es kann nur ein Entlötkolben<br />
an die Station angeschlossen sein.<br />
Aufbau der Station<br />
- Steuereinheit mit 1000-W-Heizung<br />
- Handstück 2245 Ref. 2245000<br />
mit der Kartusche 2245-003 Ref. 2245003<br />
- Entlötkolben DR 5650 Ref. 5650000<br />
mit der Spitze 5600-003 Ref. 5600003<br />
- Pick & Place MP 2260 Ref. 2260000<br />
Zubehör für die Heizung:<br />
- Ständer für Heizung JT 8801 Ref. 0788801<br />
- Ständer für Abzieher Ref. 0932845<br />
- Satz von 5 Schutzvorrichtungen.<br />
- Satz von 5 Abziehern.<br />
- 2 Stative für die Schutzvorrichtungen.<br />
- Satz von 4 Saugnapfen Ref. 0930110<br />
26<br />
DEUTSCH<br />
- 3 Düsen:<br />
ø 4 Ref. 0932015<br />
ø 6 Ref. 0932012<br />
ø 8 Ref. 0932020<br />
Um die Düsen des Heizelements einfacher<br />
zu wechseln, hat der Heizständer eine<br />
Abziehvorrichtung.<br />
- Ansaugrohr mit Anschlußstücken Ref. 0932330<br />
Zubehör für Lötkolben 2245:<br />
- Lötkolbenständer AD 8241 Ref. 0788241<br />
Zubehör für Entlötkolben:<br />
- Entlötkolbenständer DR 8501 Ref. 0788501<br />
- Saugfiltereinheit Ref. 0821830<br />
- Ersatzfilter Ref. 0781046<br />
- Zubehörsatz Ref. 0780593<br />
Zubehör für Pick & Place:<br />
- Saugnapfsatz Pick & Place Ref. 0940163<br />
- Satz gerader Nadeln Ref. 0901546<br />
- Satz gebogener Nadeln Ref. 0861660<br />
- Bedienungsanleitung Ref. 0002791<br />
Die Station AM 6850 verfügt über folgendes<br />
Zubehör:<br />
- Handstück 2210 Ref. 2210000<br />
- Mikroentlötpinzette PA 1200 Ref. 1200000<br />
- Entlötpinzette PA 4200 Ref. 4200000<br />
- Lötkolben mit Zinnzufuhr AP 1300<br />
Ref. 1300000<br />
- Pedal mit Kabel und AnschlußstückRef. 0964551<br />
Technische Daten der Steuereinheit<br />
- Höchstleistung Lötkolben 50 W<br />
- Höchstleistung Entlötkolben 75 W<br />
- Leistung Heizelement 1000 W<br />
- Temperaturwahl des Lötkolbens:<br />
90 bis 450° C oder 190 bis 840º F (±5%).<br />
- Temperaturwahl der Heißluft:<br />
150 bis 450° C oder 300 bis 850º F (±5%).<br />
- Regelung des Luftstroms von 6 bis 45 l/min.<br />
- Vakuum-Pumpe zum Ansaugen der ICs.<br />
- Maximale Leistung der Station: 1150 W<br />
- Astatisches Gehäuse.<br />
Typischer Oberflächenwiderstand:<br />
10 5 -10 11 Ohm/Quadrat<br />
- Erfüllt die EG-Sicherheitsvorschriften über<br />
elektrische Sicherheit, elektromagnetische<br />
Kompatibilität und antistatischen Schutz.<br />
- Erfüllt die RoHS-Vorschriften.<br />
- Die Equipotentialausgleichsbuchse und die<br />
Lötspitze sind zum Schutz gegen<br />
elektrostatische Entladungen mit der<br />
Erdung des Netzsteckers verbunden.<br />
- Gewicht der kompletten Anlage: 19,8 kg<br />
Dieses Produkt darf nicht mit dem<br />
Hausmüll entsorgt werden.
EINFÜHRUNG IN DIE TECHNOLOGIE VON <strong>JBC</strong><br />
Das exklusive <strong>JBC</strong>-Aufheizsystem erreicht eine<br />
außergewöhnliche Temperaturrückgewinnung,<br />
was Produktivität und Qualität steigert, die Kosten<br />
des Betreibers senkt und eine schnelle<br />
Amortisierung der Investition garantiert.<br />
Unerreichtes Ansprechen auf Wärme<br />
Ein exzellentes Lötwerkzeug wartet mit einem durch<br />
ein hohes Leistungs/Masse-Verhältnis erzieltes<br />
umgehendes Ansprechen auf Wärme auf.<br />
Das hohe Leistungs/Masse-Verhältnis wird<br />
benutzt, um die Temperatur in der Lötspitze so<br />
nah wie möglich an der auf dem Steuergerät<br />
gewählten zu halten, sogar wenn eine bedeutende<br />
thermische Last vorhanden ist. Dies ist die<br />
notwendige Formel, um qualitativ erstklassige<br />
Lötverbindungen zu erhalten und kalte zu<br />
vermeiden, die im Lötprozess befindliche PCB zu<br />
schützen und die Produktivität zu erhöhen.<br />
INTELLIGENTES HITZEMANAGEMENT<br />
Ein Lötwerkzeug sollte nur dann Arbeitstemperatur<br />
erreichen, wenn es tatsächlich benutzt wird. Die<br />
Stationen von <strong>JBC</strong> erkennen, ob und wie ein<br />
Werkzeug gerade eingesetzt wird und schalten<br />
das Werkzeug in eine der folgenden Betriebsarten<br />
mit ihren entsprechenden Temperaturen:<br />
Arbeitsmodus: gewählte Arbeitstemperatur d.h.<br />
350ºC.<br />
Schlafmodus: während kurzen Zeiträumen der<br />
Untätigkeit wird die Temperatur des Werkzeug<br />
auf eine mittlere Temperatur d.h. 220ºC<br />
heruntergefahren.<br />
Überwinterungsmodus: Während längeren<br />
Zeiträumen der Untätigkeit, d.h. 30 Minuten, wird<br />
die Stromversorgung des Werkzeugs<br />
abgeschaltet und es auf Raumtemperatur<br />
heruntergefahren.<br />
Die Vorteile dieses Hitzemanagements sind<br />
deutlich längere Kartuschen-Standzeiten und<br />
beträchtliche Energieeinsparungen, die dem<br />
Betreiber geringe Betriebskosten gewährleisten.<br />
Werkzeuge von <strong>JBC</strong> sparen somit durch<br />
effizientes Hitzemanagement Geld, Zeit sowie<br />
Energie und optimieren Prozesse.<br />
Wenn Sie die Parameter für SLEEP und<br />
HIBERNATION sowie irgendeine andere Funktion<br />
ändern möchten, Sehen Sie auf Seite 41.<br />
ARBEITSWEISE DES HEISSLUFTMODULS<br />
Beschreibung der Bedienelemente<br />
- TASTEN: Hat die gleiche Funktion wie das<br />
Pedal. Durch Betätigung dieser<br />
Taste wird die Heißluft aktiviert oder<br />
desaktiviert. Nach zweiminütiger<br />
Funktionszeit schaltet sich die<br />
Heißluft automatisch ab.<br />
27<br />
- WÄHLSCHALTER VAKUUM:<br />
DEUTSCH<br />
Das rote LED zeigt an, dass das Heizelement<br />
in Funktion ist. Blinken des roten LEDs zeigt<br />
eine Fehlfunktion an.<br />
Bei Betätigung dieser Taste<br />
schaltet sich die Ansaugpumpe<br />
ein bzw. aus.<br />
Das grüne LED zeigt an, dass die<br />
Vakuumpumpe in Funktion ist.<br />
- WÄHLSCHALTER:<br />
TEMPERATURE<br />
Erlaubt die Temperatureinstellung des<br />
Heizelements zwischen 150 und 450° C oder<br />
300 bis 850º F.<br />
Die gewählten Temperaturen sind Richtwerte<br />
und ihr tatsächlicher Wert schwankt je nach<br />
dem Abstand zwischen Düse und Heizelement.<br />
AIR FLOW<br />
Erlaubt die Einstellung des Luftstroms in einem<br />
Bereich von 1 bis 10, was dem Bereich<br />
zwischen dem Minimum von 6 l/min und dem<br />
Maximum von 45 l/min entspricht.<br />
Verfügt über zwei Sauganschlüsse für die<br />
Stative und Abzieher, wobei der mit dem Pfeil<br />
übereinstimmende aktiviert ist.<br />
- PEDAL:<br />
Bei Betätigung dieses Pedals schaltet sich die<br />
Heißlufterzeugung ein.<br />
Wird das Pedal nicht mehr gedrückt, schaltet<br />
das System die Heizung ab, während das<br />
Gebläse weiterarbeitet, bis die Lufttemperatur<br />
unter 100° C gesunken ist.<br />
Pedal<br />
Ref. 0964551
DEUTSCH<br />
Erhöhung der<br />
Temperatur<br />
Regelung des<br />
Löt-Entlötmoduls<br />
Regelung des<br />
Heißluftmoduls<br />
Verringerung der<br />
Temperatur<br />
Abfrage der<br />
ausgewählten<br />
Temperatur<br />
Einschalten der Saugpumpe<br />
Ein – Aus der Heizung<br />
Saugwählschalter für<br />
Stative, Abzieher sowie<br />
Pick & Place MP 2260<br />
Anschluss des Heißluftschlauches<br />
Regelung des<br />
Luftstromes<br />
Regulierung der<br />
Heizungstemperatur<br />
28
DEUTSCH<br />
ENTLÖTPROZESS MIT DER HEIZUNG<br />
Es empfiehlt sich, in der Regel die Düsen mit<br />
einem größeren Durchmesser zu verwenden und<br />
die kleinste Düse (Ø 4 mm) für Entlötarbeiten an<br />
besonders kleinen Bauteilen wie Widerständen,<br />
Kondensatoren usw. vorzusehen. Beachten Sie<br />
bitte, dass bei dieser Düse die Hitze stärker<br />
konzentriert wird, weshalb es ratsam ist, eine<br />
Arbeitstemperatur von maximal 350° C und den<br />
Luftstromregler auf 6 zu wählen.<br />
Je nach Größe des zu entlötenden IC ist eine<br />
Schutzvorrichtung mit Stativ bzw. ein Abzieher<br />
zu verwenden:<br />
A)Schutzvorrichtungen + Stativ:<br />
- Die Größe der Schutzvorrichtung und Stativ<br />
gemäß den Abmessungen des zu entlötenden<br />
IC wählen und auf das Bauteil aufsetzen.<br />
- Die Saugpumpe durch Betätigung der<br />
SUCTION-Taste zuschalten und das Stativ<br />
aufsetzen. Den Saugnapf andrücken, bis das<br />
Bauteil gehalten wird.<br />
- Die Heißluftzufuhr mittels Fußschalter oder<br />
ON-OFF-Taste in Betrieb nehmen und den<br />
Luftstrom mit kreisförmigen Bewegungen auf<br />
die Kontakte des Bauteils richten; die Hitze<br />
dabei so gleichmäßig wie möglich verteilen.<br />
- Die Heißluftzufuhr mittels Fußschalter oder<br />
ON-OFF-Taste in Betrieb nehmen und den<br />
Luftstrom mit kreisförmigen Bewegungen auf<br />
die Kontakte des Bauteils richten; die Hitze<br />
dabei so gleichmäßig wie möglich verteilen.<br />
- Wenn der Lötkontakt schmilzt, hebt der<br />
Abzieher das Bauteil automatisch ab.<br />
Als Zubehör sind verschiedene<br />
Schutzvorrichtungen und Abzieher verfügbar.<br />
C)Stativ:<br />
Für kleine Bauteile bzw. Bauteile, bei denen kein<br />
Abzieher eingesetzt werden kann, empfehlen wir<br />
die Verwendung von Stativ 20 (Ref. 0932050;<br />
siehe Abbildung).<br />
Für größere Bauteile benutzen Sie das Stativ<br />
Modell 40 (Ref. 0932250).<br />
- Wenn der Lötkontakt schmilzt, hebt der<br />
Abzieher das Bauteil automatisch ab.<br />
B)Abzieher:<br />
- Die Größe des Abziehers gemäß den<br />
Abmessungen des zu entlötenden IC wählen.<br />
Die Saugpumpe durch Betätigung der<br />
SUCTION-Taste zuschalten.<br />
- Abzieher aufsetzen und den Saugnapf<br />
andrücken, bis das Bauteil gehalten wird.<br />
29
DEUTSCH<br />
LÖTPROZESS<br />
1 Nach Entlöten des Bauteils sind sämtliche<br />
eventuell auf der Leiterplatte verbliebene<br />
Lötreste, mit unserem Entlötkolben DR 5650<br />
Ref. 5650000 zu entfernen.<br />
4 Auf die Pins bringen Sie unser Flussmittel<br />
FL 9582 ref. 0046565.<br />
2 Mit dem Pick & Place MP 2260 Ref. 2260000<br />
das Bauelement in die gewünschte Stellung<br />
bringen.<br />
3 Nachdem das Bauelement in der richtigen<br />
Stellung ist, verlöten Sie die Pins. Handelt es<br />
sich um einen integrierten Schaltkreis des Typs<br />
"Flat Pack“, verlöten Sie zunächst jeweils einen<br />
Pin an den Ecken des IC, um ihn auf der<br />
Leiterplatte zu fixieren.<br />
5 Verlöten der übrigen Pins. Hierfür empfehlen<br />
wir die Benutzung unserer Lötkolben der <strong>JBC</strong><br />
Serie, die über zwei verschiedene Modelle<br />
verfügt:<br />
Lötkolben 2210 Ref. 2210000 für<br />
Präzisionsarbeiten wie SMD-Löten, etc.<br />
Lötkolben 2245 Ref. 2245000 für allgemeine<br />
Arbeiten in der professionellen Elektronik.<br />
Für die Lötkolben steht eine breite Auswahl<br />
von Kartuschen mit unterschiedlichen Spitzen<br />
zur Verfügung. Die Kartuschen 2245-009 und<br />
2245-010 sind speziell für das Löten von<br />
SMD Typ QFP und PLCC entworfen.<br />
Verwenden Sie bitte Lötzinn mit einem<br />
Drahtdurchmesser von 0,5 - 0,7 mm.<br />
6 Ja nach Art des zu verlötenden Bauteils kann<br />
auch Lötpaste und unsere Heißluftstation<br />
TE 5400 verwendet werden, die eine<br />
Feinabstimmung des Luftstrahls von 4 bis 12<br />
l/min erlaubt.<br />
30
DEUTSCH<br />
WARTUNG<br />
Austausch des Heizelements.<br />
Station ausschalten.<br />
Benutzen Sie einen Schlüssel, um die<br />
Abdeckung loszuschrauben.<br />
FUNKTIONSSTÖRUNGEN<br />
Der Saugnapf saugt sich nicht fest.<br />
Mangelhafte Saugung, Vakuum.<br />
1 Kontrollieren Sie ob der Saugnapf richtig<br />
angebracht ist und sich in gutem Zustand befindet.<br />
Trennen Sie die Abdeckung. Ziehen Sie an der<br />
Buchse, um das Heizelement der Station<br />
herauszuziehen.<br />
Um das Heizelement wieder einzusetzen, gehen<br />
Sie in umgekehrter Reihenfolge vor.<br />
Austausch der Heizelementresistenz.<br />
Diese Operation muss durchgeführt werden,<br />
wenn die Heizelementresistenz kalt ist.<br />
1. Lösen Sie die Schraube.<br />
2. Trennen Sie die Resistenz von dem Kabel<br />
des Heizelements.<br />
0005390<br />
0005398 (230V)<br />
0007297 (120V)<br />
0005783 (230V)<br />
0007293 (120V)<br />
3. Setzen Sie die neue Resistenz ein, wobei Sie<br />
auf ihr Ende Druck ausüben.<br />
4. Ziehen Sie die Schraube fest an, um<br />
Luftaustritt zu vermeiden, der die<br />
Lebensdauer der Resistenz verkürzen kann.<br />
31<br />
2 Überprüfen Sie den im Inneren der Station<br />
vorhandenen Lufteingangsfilter der<br />
Vakuumpumpe und ersetzen Sie ihn, falls er<br />
verschmutzt oder verstopft ist.<br />
Filter<br />
Ref. 0861800<br />
Mögliche Fehler<br />
Tritt ein Fehler auf, unterbricht die<br />
Steuereinheit die Verbindung.<br />
Nachfolgend eine Auflistung der häufigsten<br />
Fehler:<br />
- Stromversorgung unterbrochen.<br />
Überprüfen Sie, ob die Sicherung der<br />
Spannungsversorgung durchgebrannt ist.<br />
- Temperatur steigt nicht an.<br />
Mögliche Ursachen:<br />
· Heizwiderstand offen.<br />
· Niedrige Netzspannung, deutlich unter der<br />
Nominalspannung.<br />
- Keine Messung am Temperaturfühler.<br />
Mögliche Ursache: Temperaturfühler offen.<br />
- Unzureichender Luftstrom, was zu einer starken<br />
Erhöhung der Heiztemperatur führt.<br />
Bevor Sie die Funktion wieder herstellen,<br />
sollten Sie warten bis sich die Heiztemperatur<br />
wieder gesenkt hat.<br />
Mögliche Ursachen: Luftleitungen beschädigt<br />
oder verstopft, oder Fehler im Gebläse.<br />
- Lesefehler des Drehzahlmessers der<br />
Luftpumpe.<br />
Mögliche Ursachen: Luftpumpe defekt oder<br />
fehlerhafte Funktion des Schaltkreises des<br />
optischen Sensors.<br />
Um die Funktion wieder herzustellen, betätigen<br />
Sie den Schalter an der Rückseite der Station,<br />
bitte betätigen Sie das Pedal in diesem Moment<br />
nicht.
DEUTSCH<br />
Auswechseln des Pumpenfilters<br />
Kontrollieren Sie die Filter beim Eingang der<br />
Pumpe, und wechseln Sie diese bei<br />
Verschmutzung oder Verstopfung aus. Dafür:<br />
Öffnen Sie den Filter an den dafür<br />
vorgesehenen Flügeln.<br />
Die 2 Baumwollfilter herausnehmen. Sind diese<br />
unbrauchbar geworden, durch neue ersetzen.<br />
Stets 2 Filter verwenden.<br />
Verschließen Sie den Filter und überprüfen Sie,<br />
dass er hermetisch verschlossen ist.<br />
Filter<br />
0781046<br />
0821830<br />
Reinigung des internen Saugpumpenventils<br />
Zum Öffnen der Steuereinheit müssen Sie:<br />
- Den Netzstecker der Station abziehen.<br />
- Befestigungsschrauben lösen und oberen<br />
Gehäuseteil abheben.<br />
- Die Schrauben des Pumpen herausschrauben.<br />
- Die vier Schrauben des Pumpendeckels<br />
herausschrauben.<br />
- Ventil mit einem in Alkohol getränkten Lappen<br />
reinigen. Bei übermäßiger Verschmutzung<br />
austauschen. Ref. 0982970.<br />
Unter dem Link: http://www.jbctools.com finden Sie<br />
die vollständige Information über die Steuereinheit<br />
AM 6850.<br />
<strong>JBC</strong> behält sich das Recht vor, technische oder konstruktive<br />
Änderungen ohne vorherige Ankündigung vorzunehmen<br />
32
ITALIANO<br />
La ringraziamo per la fiducia che ha riposto nella <strong>JBC</strong> con l’acquisto di questa stazione.<br />
Essa è stata fabbricata secondo le più rigide norme di qualità, per offrirLe il servizio<br />
migliore. Prima di accendere l’apparecchio, Le consigliamo di leggere attentamente le<br />
istruzioni che seguono.<br />
Beccuci<br />
Ø6<br />
Ø4<br />
Ø8<br />
0002450 (230V)<br />
0002452 (120V)<br />
Selettore di aspirazione del<br />
Pick & Place e li estrattori<br />
Estrattori<br />
Treppiede<br />
Supporto per estrattori<br />
Rif.0932845<br />
Prottetori<br />
Unità di<br />
controllo<br />
Cartucce<br />
5600<br />
Cartucce<br />
2245<br />
Ventose<br />
Aghi curvi<br />
Pick & Place<br />
MP 2260<br />
Rif.2260000<br />
Supporto<br />
dissaldatore<br />
DR 8501<br />
Rif.0788501<br />
Stilo 2245<br />
Rif.2245000<br />
Stazione di riparazione<br />
multifunzione AM 6850<br />
Supporto<br />
saldatore<br />
AD 8241<br />
Rif. 0788241<br />
Supporto<br />
per riscaldatore<br />
JT 8801<br />
Rif.0788801<br />
Dissaldatore DR 5650<br />
Rif.5650000<br />
33
CARATTERISTICHE<br />
La AM 6850 è una stazione di riparazione di<br />
circuiti con componenti ad inserzione e SMD.<br />
- AM 6850 230V Rif. 6850200<br />
- AM 6850 120V Rif. 6850100<br />
É composta da 4 moduli che consentono realizzare<br />
le principali operazioni di riparazione:<br />
- Aria calda per la dissaldatura di componenti<br />
SMD, di qualsiasi dimensione.<br />
Utilizza il sistema esclusivo <strong>JBC</strong> di protettoriestrattori<br />
ed aria calda realizzando la<br />
dissaldatura in modo rapido e pulito,<br />
concentrando il calore sul componente da<br />
dessaldare, prottegendo allo stesso tempo il<br />
resto del circuito.<br />
Si puó dissaldare un integrato SMD di medie<br />
dimensioni in meno di 20 secondi.<br />
- Dissaldatura di componenti ad inserzione e<br />
pulizia dei pads nella dissaldatura di SMT. Per<br />
realizare questa funzione la stazione dispone<br />
del dissaldatore DR 5650, con pompa di<br />
aspirazione incorporata.<br />
- Posizionatore MP 2260 stilo con aspirazione<br />
per collocare componenti.<br />
- Saldatura di tutti i tipi di componenti, con velocità<br />
di risposta, potenza e recupero della<br />
temperatura della serie <strong>JBC</strong>.<br />
Nei due moduli di saldatura-dissaldatura si può<br />
collegare qualsiasi utensile <strong>JBC</strong>: gli stilo saldanti<br />
e disandanti, le pinze dissaldanti o il saldatore con<br />
apporto di stagno AP 1300.<br />
Questa caratteristica permette di ottenere molteplici<br />
combinazioni di utensili e conseguire la<br />
configurazione più adeguata al lavoro da realizzare.<br />
Solamente può avere un dissaldatore collegato<br />
alla stazione.<br />
Composizione della stazione<br />
- Unità di Controllo con riscaldatore da 1000 W<br />
- Stilo 2245 Rif. 2245000<br />
con la cartuccia 2245-003 Rif. 2245003<br />
- Dissaldatore DR 5650 Rif. 5650000<br />
con la punta 5600-003 Rif. 5600003<br />
- Pick & Place MP 2260 Rif. 2260000<br />
Accessori per il riscaldatore:<br />
- JT 8801 supporto riscaldatore Rif. 0788801<br />
- Supporto estrattori Rif. 0932845<br />
- Complesso di 5 prottetori.<br />
- Complesso di 5 estrattori.<br />
- 2 treppiedi per il prottetori.<br />
- Complesso di ventose JT Rif. 0930110<br />
- 3 beccuci:<br />
ø 4 Rif. 0932015<br />
ø 6 Rif. 0932012<br />
ø 8 Rif. 0932020<br />
34<br />
ITALIANO<br />
Gli ugelli si estraggono dal riscaldatore<br />
mediante la boccola speciale del supporto.<br />
- Tubo aspirazione con connettori Rif. 0932330<br />
Accessori per lo stilo 2245:<br />
- AD 8241 supporto saldatore Rif. 0788241<br />
Accessori per il dissaldatore:<br />
- DR 8501 supporto dissaldatore Rif. 0788501<br />
- Gruppo filtro aspirazione Rif. 0821830<br />
- Filtri di ricambio Rif. 0781046<br />
- Kit accessori Rif. 0780593<br />
Accessori per il Pick & Place:<br />
- Complesso ventose Pick & Place Rif. 0940163<br />
- Complesso aghi retti Rif. 0901546<br />
- Complesso aghi piegati Rif. 0861660<br />
- Manuale di istruzioni Rif. 0002791<br />
La stazione AM 6800 accoglie i seguenti<br />
accessori, che non sono in dotazione con la<br />
stazione:<br />
- Stilo 2210 Rif. 2210000<br />
- Micro pinza dissaldante PA 1200 Rif. 1200000<br />
- Pinza dissaldante PA 4200 Rif. 4200000<br />
- Saldatore con apporto di stagno AP 1300<br />
Rif. 1300000<br />
- Pedale con cavo e connettore Rif. 0964551<br />
Dati tecnici dell'unità di controllo<br />
- Potenza massima saldatore 50W<br />
- Potenza massima dissaldatore 75W<br />
- Potenza riscaldatore 1000W<br />
- Selezione della temperatura di saldatura:<br />
tra 90 e 450°C o 190 e 840°F (±5%).<br />
- Selezione della temperatura del riscaldatore:<br />
tra 150 e 450°C o 300 e 850ºF (±5%).<br />
- Regolazione della portata d’aria da 6 a 45 l/<br />
min.<br />
- Pompa di aspirazione per trattenere i CI.<br />
- Potenza massima della stazione: 1150W<br />
- Cassa antistatica.<br />
Resistenza tipica superficiale: 10 5 -10 11 Ohms/<br />
quadro.<br />
- Compie la normativa CE sulla sicurezza<br />
elettrica, compatibilitá elettromagnetica e<br />
protezione antistatica.<br />
- Compie la normativa RoHS.<br />
- Il connettore equipotenziale e la punta del<br />
saldatore sono collegati direttamente alla<br />
presa di terra della spina per protezione<br />
ESD.<br />
- Peso dell’apparecchio completo: 19,8 kg<br />
Questo prodotto non deve seguire il<br />
normale percorso di smaltimento dei rifiuti.
ITALIANO<br />
INTRODUZIONE ALLA TECNOLOGIA <strong>JBC</strong><br />
Il sistema esclusivo di riscaldamento <strong>JBC</strong> ha un<br />
eccezionale recupero termico che permette di<br />
aumentare produttivitá, qualitá, ridurre i costi di<br />
possesso e garantire dei ritorni sull’ investimento.<br />
Risposta termica ineguagliabile<br />
Un saldatore eccellente é caratterizzato da una<br />
risposta termica istantanea, ottenuta attraverso un<br />
rapporto potenza/massa di valore molto elevato.<br />
Il rapporto alta potenza/massa ridotta é usato<br />
per mantenere la temperatura della punta il piú<br />
vicino possibile alla temperatura selezionata<br />
sull’unitá di controllo, anche quando il carico termico<br />
é significativo. Questa é la formula necessaria per<br />
ottenere saldature di ottima qualitá, evitare<br />
saldature fredde, proteggere il PCB su quale si<br />
sta saldando ed aumentare la produttivitá.<br />
GESTIONE INTELLIGENTE DEL CALORE<br />
L’unico momento in cui il saldatore dovrebbe<br />
stare alla temperatura di lavoro é mentre lo si sta<br />
usando. Le stazioni <strong>JBC</strong> identificano se l’utensile<br />
é in uso ed a seconda della situazione il saldatore<br />
si setta in uno dei seguenti modi caratterizzati<br />
ciascuno dalla sua rispettiva temperatura:<br />
Modo di Lavoro: alla temperatura di lavoro che<br />
si seleziona es. 350ºC.<br />
Modo Sleep: durante brevi periodi di inattivitá la<br />
temperatura dell’utensile scende a un valore<br />
intermedio es. 220ºC.<br />
Modo Ibernazione: durante periodi di tempo<br />
piú lunghi di inattivitá, per es. 30 minuti, la potenza<br />
dell’utensile viene drasticamente ridotta e la punta<br />
raggiunge la temperatura ambiente.<br />
I vantaggi di questa gestione del calore si<br />
traducono in un aumento della vita della cartuccia<br />
ed in risparmi energetici che assicurano bassi<br />
costi successivi all’investimento.<br />
Gli utensili <strong>JBC</strong> permettono un risparmio<br />
monetario perché gestiscono il calore<br />
efficientemente riducendo consumi<br />
energetici, tempi e migliorando i processi.<br />
Si desidera cambiare i parametri di SLEEP<br />
e IBERNAZIONE cosí come qualsiasi altra<br />
funzione, vedasi a pag. 41.<br />
Quando il led rosso è acceso, indica che il<br />
riscaldatore è in funzione. Se lampeggia indica<br />
che c'è una anomalia.<br />
Ogni volta che si preme, si attiva o si disattiva<br />
la pompa di aspirazione.<br />
Quando la luce verde è acceso, indica che la<br />
pompa a vuoto è in funzione.<br />
- COMANDI:<br />
TEMPERATURE<br />
Permette di selezionare la temperatura tra<br />
150 e 450°C o 300 e 850ºF per il riscaldatore.<br />
Le temperature selezionate sono valori di<br />
riferimento e il valore varia in funzione della<br />
distanza dell'ugello del riscaldatore.<br />
AIR FLOW<br />
Permette di regolare la portata dell’aria su<br />
una scala da 1 a 10, equivalente ad un<br />
minimo di 6 l/min e ad un massimo di 45 l/min.<br />
- SELETTORE DEL VUOTO:<br />
Dispone di due prese di aspirazione per i<br />
treppiedi e gli estrattori, quella attiva è<br />
indicata dalla freccia.<br />
- PEDALE:<br />
Attiva la produzione di aria calda mentre si<br />
mantiene premuto.<br />
Quando si rilascia, il sistema disconnette il<br />
riscaldatore, ma la turbina continua a<br />
funzionare finché la temperatura dell’aria sará<br />
inferiore a 100 °C.<br />
FUNZIONAMENTO DEL MODULO DI ARIA<br />
CALDA<br />
Descrizione dei comandi<br />
- PULSANTI:<br />
A ogni pressione, si attiva o disattiva la<br />
produzione di aria calda. Si spegne<br />
automaticamente dopo due minuti di<br />
funzionamento.<br />
35<br />
Pedale<br />
Rif. 0964551
ITALIANO<br />
Aumento della<br />
temperatura<br />
Controllo del modulo di<br />
saldatura / dissaldatura<br />
Riduzione della<br />
temperatura<br />
Consulta la<br />
temperatura<br />
selezionata<br />
Attivazione pompa d'aspirazione<br />
Interruttore dell'elemento riscaldante<br />
Selettore di aspirazione dei<br />
treppiedi, degli estrattori e<br />
della Pick & Place MP 2260<br />
Presa aria calda<br />
Controllo del modulo<br />
di aria calda<br />
Regolazione<br />
flusso aria<br />
Regolazione della<br />
temperatura<br />
dell’elemento<br />
riscaldante<br />
36
ITALIANO<br />
PROCEDIMENTO PER DISSALDARE<br />
CON IL RISCALDATORE<br />
Consigliamo di utilizzare gli ugelli di maggior<br />
diametro e di riservare i più piccoli (Ø 4 mm)<br />
per la dissaldatura di piccoli componenti, come<br />
resistenze, condensatori, ecc. Si tenga presente<br />
che con questo ugello la concentrazione di<br />
calore è maggiore per cui, per evitare di bruciare<br />
il circuito stampato, consigliamo di non<br />
oltrepassare la temperatura di 350 °C ed il<br />
flusso d’aria di 6.<br />
Secondo le dimensioni del circuito stampato da<br />
dissaldare, si dovrà utilizzare:<br />
A)Protettore + treppiede:<br />
- Selezionare il protettore e treppiede delle<br />
dimensioni adeguate al C.I. da dissaldare e<br />
collocarlo sul componente.<br />
- Avviare la pompa d’aspirazione mediante il<br />
pulsante del SUCTION e collocare il treppiede.<br />
Premere la ventosa finché rimanga aderita al<br />
componente.<br />
- Mediante il pedale o il pulsante ON-OFF<br />
avviare il generatore d’aria calda, dirigendolo<br />
con un movimento circolare sui terminali del<br />
componente, cercando di ripartire il calore in<br />
modo omogeneo.<br />
- Quando la saldatura passa allo stato liquido,<br />
l’estrattore solleverà automaticamente il<br />
componente.<br />
Come optional sono disponibili diversi modeli<br />
di protettori i estrattori.<br />
C)Treppiede:<br />
Per i componenti piccoli, in cui non è possibile<br />
utilizzare l’estrattore, consigliamo l’uso del<br />
treppiede 20 (Rif. 0932050) come illustrato nella<br />
figura.<br />
Utilizzare il treppiede 40 Rif. 0932250 per<br />
integrati di maggiore dimensioni.<br />
- Quando la saldatura passa allo stato liquido,<br />
l’estrattore solleverà automaticamente il<br />
componente.<br />
B)Estrattore:<br />
- Selezionare l’estrattore delle dimensioni<br />
adeguate al C.I. da dissaldare. Avviare la<br />
pompa d’aspirazione mediante il pulsante<br />
SUCTION.<br />
- Collocare l’estrattore e premere la ventosa<br />
finché rimanga aderita al componente.<br />
- Mediante il pedale o il pulsante ON-OFF<br />
avviare il generatore d’aria calda, dirigendolo<br />
con un movimento circolare sui terminali del<br />
componente, cercando di ripartire il calore in<br />
modo omogeneo.<br />
37
ITALIANO<br />
PROCEDIMENTO PER SALDARE<br />
1 Una volta dissaldato il componente, si<br />
dovranno eliminare i residui di saldatura<br />
rimasti sul circuito stampato. A tal fine,<br />
raccomandiamo il nostro dissaldatore<br />
DR 5650 rif.5650000.<br />
4 Applicare il Flux FL 9582 rif. 0046565 su piedini<br />
e piazzole.<br />
2 Posizionare e centrare il componente o<br />
circuito integrato con il Pick & Place MP 2260<br />
rif. 2260000.<br />
3 Una volta collocato il componente nella<br />
posizione corretta, saldare i piedini. Se si<br />
tratta di un circuito integrato tipo Flat Pack,<br />
saldare dapprima un piedino di ogni angolo<br />
del CI per fissarlo al circuito.<br />
5 Saldare i piedini rimanenti. Per fare questo,<br />
raccomandiamo utilizzare le nostre stazioni<br />
saldanti <strong>JBC</strong> che dispongono di 2 diversi<br />
modelli di stilo:<br />
Stilo 2210 rif. 2210000 per lavori di grande<br />
precisione, come saldature SMD, etc.<br />
Stilo 2245 rif. 2245000 per lavori generali di<br />
saldatura en elettronica professionale.<br />
Questi stili dispongono di un’ampia gamma<br />
di cartucce con diversi modelli di punte. Le<br />
cartucce 2245-009 e 2245-010 sono<br />
particolarmente progettate per saldare circuiti<br />
SMD tipo QFP e PLCC.<br />
Utilizzare stagno di 0,5 - 0,7 mm di diametro.<br />
6 Secondo le caratteristiche del componente<br />
utilizzare pasta saldante e nostra stazione<br />
ad aria calda TE 5400, che consente una<br />
regolazione della quantità dell'aria molto<br />
bassa entro 4 e 12 l/min.<br />
38
ITALIANO<br />
MANUTENZIONE<br />
Cambio del riscaldatore.<br />
Spenga la stazione.<br />
Utilizzare una chiave per svitare la ghiera.<br />
ANOMALIE DI FUNZIONAMENTO<br />
La ventosa non è aderente al componente.<br />
Aspirazione difettosa, Vacuum.<br />
1 Verificare che la ventosa sia collocata<br />
perfettamente e sia in perfetto stato.<br />
2 Verificare il filtro d´entrata della pompa<br />
d'aspirazione che è all'interno della stazione<br />
e sostituirlo se sporco o otturato.<br />
Filtro<br />
Rif. 0861800<br />
Sfilare la ghiera. Estrarre il riscaldatore per<br />
scollegarlo dalla stazione.<br />
Seguire il processo inverso per collegare il<br />
riscaldatore.<br />
Cambio della resistenza del riscaldatore.<br />
Questa operazione si deve eseguire con la<br />
resistenza del riscaldatore fredda.<br />
1. Svitare le viti.<br />
2. Separare la resistenza del cavo del<br />
riscaldatore.<br />
0005390<br />
0005398 (230V)<br />
0007297 (120V)<br />
0005783 (230V)<br />
0007293 (120V)<br />
3. Inserire la nuova resistenza premendo.<br />
4. Avvitare bene le viti per evitare fughe d’aria<br />
che possono ridurre la durata della<br />
resistenza.<br />
Possibili anomalie<br />
L'apparato si disconnette completamente<br />
quando esiste un'anomalia.<br />
Questo è un elenco di possibili anomalie più<br />
abituali:<br />
- Mancanza di alimentazione.<br />
Controllare che il fusibile di alimentazione non<br />
è interrotto.<br />
- La temperatura non aumenta.<br />
Possibili cause:<br />
· Resistenza riscaldante aperta.<br />
· Tensione di rete bassa, molto al di sotto della<br />
norma.<br />
- Non c’è lettura della termocoppia.<br />
Possibili cause: Termocoppia aperta.<br />
- Portata d’aria insufficiente. Provocato da<br />
eccessivo riscaldamento del riscaldatore.<br />
Prima di recuperare questo errore attendere<br />
che il riscaldatore sia raffreddato.<br />
Possibili cause: condotti d'aria ostruitti o rotti,<br />
o turbina dell'aria guasta.<br />
- Errore nella lettura del conta giri della pompa<br />
dell'aria.<br />
Cause possibili: pompa dell'aria guasta o<br />
funzionamento difettoso del circuito sensore<br />
ottico.<br />
Per recuperare l’errore, azionare l’interruttore<br />
generale situato nella parte posteriore della<br />
stazione, in questo modo il pedale non può<br />
essere premuto.<br />
39
ITALIANO<br />
Cambio del filtro d'entrata della pompa<br />
Verificare il filtro d'entrata della pompa e sostituirli<br />
se sporco od otturato, per questo:<br />
- Aprire il filtro d'entrata dalla linguetta.<br />
- Estrarre i 2 filtri di cotone, eliminare quelli che<br />
siano sporchi e collocarne altri nuovi al loro<br />
posto. Utilizzare sempre 2 filtri.<br />
Chiudere il filtro e verificare che non ci siano perdite.<br />
Filtro<br />
0781046<br />
0821830<br />
Pulizia della valvola interna della pompa a<br />
vuoto<br />
Per aprire l’unità di controllo:<br />
- Staccare la stazione dalla rete elettrica.<br />
- Togliere le viti di fissaggio e sollevare il<br />
coperchio superiore.<br />
- Svitare le viti che fissano la pompa.<br />
- Svitare le quattro viti che fissano il coperchio<br />
della pompa.<br />
- Pulirle con un panno imbevuto d’alcool. Se<br />
fossero eccessivamente impregnate,<br />
sostituirle con altre nuove Rif. 0982970.<br />
Troverá tuttle le informazioni sull'unitá di controllo<br />
AM 6850 al seguente web:<br />
http://www.jbctools.com<br />
<strong>JBC</strong> si reserva il diritto d'introdurre variazioni tecniche senza<br />
preavviso<br />
40
AM 6850 230V/120V/100V
WARRANTY<br />
ENGLISH<br />
The <strong>JBC</strong> 2 years warranty, guarantees<br />
this equipment against all manufacturing<br />
defects, covering the replacement of<br />
defective parts and all necessary labour.<br />
Warranty does not cover product wear<br />
due to use or mis-use.<br />
In order for the warranty to be valid,<br />
equipment must be returned, postage<br />
paid, to the dealer where it was<br />
purchased enclosing this, fully filled in,<br />
sheet.<br />
GARANTIA<br />
ESPAÑOL<br />
<strong>JBC</strong> garantiza este aparato durante 2<br />
años, contra todo defecto de fabricación,<br />
cubriendo la reparación con sustitución<br />
de las piezas defectuosas e incluyendo<br />
la mano de obra necesaria.<br />
Quedan excluidas de esta garantía las<br />
averías provocadas por mal uso del<br />
aparato y desgaste por uso.<br />
Es indispensable para acogerse a esta<br />
garantía el envio del aparato al<br />
distribuidor donde se adquirió, a portes<br />
pagados, adjuntando esta hoja<br />
debidamente cumplimentada.<br />
GARANTIE<br />
FRANÇAIS<br />
<strong>JBC</strong> garantit cet appareil 2 ans contre<br />
tout défaut de fabrication. Cela comprend<br />
la réparation, le remplacement des<br />
pièces défectueuses et la main d'oeuvre<br />
nécessaire.<br />
La garantie ne couvre pas l’usure liée à<br />
l’utilisation et à la mauvaise utilisation du<br />
matériel.<br />
Pour bénéficier de cette garantie il est<br />
indispensable d'envoyer l'appareil chez<br />
le distributeur où il a été acquis, en ports<br />
payés, en joignant cette fiche dûment<br />
remplie.<br />
✂
GARANTIE DEUTSCH<br />
Für das vorliegende Gerät übernimmt<br />
<strong>JBC</strong> eine Garantie von 2 Jahren, für alle<br />
Fabrikationsfehler. Diese Garantie<br />
schliesst die Reparatur bzw. den Ersatz<br />
der defekten Teile sowie die<br />
entsprechenden Arbeitskosten ein.<br />
Ausgeschlossen von dieser<br />
Garantieleistung sind durch<br />
unsachgemässen Gebrauch<br />
hervorgerufene Betriebsstörungen und<br />
normale Gebrauchsabnützungen.<br />
Zur Inanspruchnahme dieser Garantie<br />
muss das Gerät portofrei an den<br />
Vertriebshändler geschickt werden, bei<br />
dem es gekauft wurde. Fügen Sie dieses<br />
vollständig ausgefüllte Blatt bei.<br />
GARANZIA ITALIANO<br />
La <strong>JBC</strong> garantisce quest'apparato 2<br />
anni contro ogni difetto di fabbricazione,<br />
e copre la riparazione e la sostituzione<br />
dei pezzi difettosi, includendo la mano<br />
d'opera necessaria.<br />
Sono escluse da questa garanzia le<br />
avarie provocate da cattivo uso<br />
dell'apparato e logorio da utilizzo.<br />
Per usufruire di questa garanzia, è<br />
indispensabile inviare, in porto franco,<br />
l'apparato al distributore presso il quale<br />
è stato acquistato, unitamente a questo<br />
foglio debitamente compilato.<br />
SERIAL Nº<br />
STAMP OF DEALER<br />
SELLO DEL DISTRIBUIDOR<br />
CACHET DU DISTRIBUTEUR<br />
STEMPEL DES HÄNDLERS<br />
TIMBRO DEL DISTRIBUTORE<br />
DATE OF PURCHASE<br />
FECHA DE COMPRA<br />
DATE D'ACHAT<br />
KAUFDATUM<br />
DATA DI ACQUISTO<br />
✂<br />
MANUFACTURED BY<br />
<strong>JBC</strong> Industrias, S.A.<br />
Ramón y Cajal, 3 - 08750 MOLINS DE REI<br />
BARCELONA - SPAIN<br />
Tel.: +34 93 325 32 00 - Fax: +34 93 680 49 70<br />
http://www.jbctools.com e-mail:info@jbctools.com<br />
0007347-0708