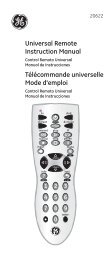
Universal Remote Instruction Manual - Jasco Products
Universal Remote Instruction Manual - Jasco Products
Universal Remote Instruction Manual - Jasco Products

You also want an ePaper? Increase the reach of your titles
YUMPU automatically turns print PDFs into web optimized ePapers that Google loves.
<strong>Universal</strong> <strong>Remote</strong><br />
<strong>Instruction</strong> <strong>Manual</strong><br />
RM24911<br />
rev. 1/07
Table of Contents<br />
Introduction............................................................ 3<br />
Setup...................................................................... 3<br />
Battery Installation............................................ 3<br />
Battery Saver.................................................... 3<br />
Code Saver....................................................... 3<br />
Code Setup....................................................... 3<br />
Button Functions............................................... 4<br />
Direct Code Entry.............................................. 6<br />
Code Search..................................................... 7<br />
Using Your <strong>Remote</strong>................................................ 8<br />
Code Identification............................................ 8<br />
Using SHIFT..................................................... 9<br />
Sleep Function................................................ 10<br />
Controlling Devices with Power On and Off.... 11<br />
Controlling Combo Devices............................ 11<br />
VCR/DVD/DVR Punch-Through..................... 11<br />
Volume/Mute Control and Punch-Through...... 12<br />
All Volume/Mute Control to any one Mode...... 12<br />
Setting any Mode for its own Volume/Mute..... 13<br />
Troubleshooting................................................... 14<br />
Congratulations on your purchase of the RM24911<br />
<strong>Universal</strong> <strong>Remote</strong> Control. The RM24911 is one<br />
of the most easy to use remote controls available<br />
today. With the RM24911, juggling multiple remote<br />
controls is a thing of the past! Your RM24911<br />
controls up to three devices, including the most<br />
popular brands of TV, VCR, DVD, CBL, and SAT.<br />
The RM24911 is easy to use, easy to program,<br />
and it gives you total control—at the touch of your<br />
fingertips!<br />
Note: Some functions from your original remote<br />
may not be controlled by this remote. Use the<br />
original remote, if available, to control such<br />
functions. Sometimes buttons other than described<br />
in these instructions may actually perform the<br />
function. For example, the CHAN and VOL<br />
buttons might be used to navigate through menu<br />
choices. We recommend you experiment with the<br />
remote to identify if such situations pertain to your<br />
equipment.
Setup<br />
Battery Installation<br />
1. On the back of the remote, push down on the<br />
tab and lift the cover off.<br />
2. Match the batteries to the + and - marks inside<br />
the battery case, then insert 2 AAA Alkaline<br />
batteries.<br />
3. Press the battery cover back into place.<br />
Battery Saver<br />
Your remote automatically turns off if the buttons<br />
are depressed more than 30 seconds. This will<br />
save your batteries should your remote get stuck in<br />
a place where the buttons remain depressed (e.g.,<br />
between the sofa cushions).<br />
Code Saver<br />
You will have up to 10 minutes to change the<br />
batteries in your remote without losing codes you<br />
have programmed. However, do not press any<br />
buttons until batteries are installed in the remote.<br />
If buttons are pressed without batteries in the<br />
remote, all codes will be lost.<br />
Code Setup<br />
The SETUP button is used to setup the remote.<br />
You can either setup the remote using the code<br />
tables (on separate sheet), or you can search<br />
through the library of codes until you find a code<br />
that works for your product. Please refer to “ Code<br />
Search” on page 7 for more information on using<br />
the code search feature to learn how to search<br />
through the library of codes for your products.<br />
NOTE: You can store any kind of code under any<br />
mode (except TV). I.E. you can store a VCR code<br />
under the CBL/SAT button, or a Cable code under<br />
the DVD/VCR button, etc. However, you can only<br />
store TV codes under the TV button.
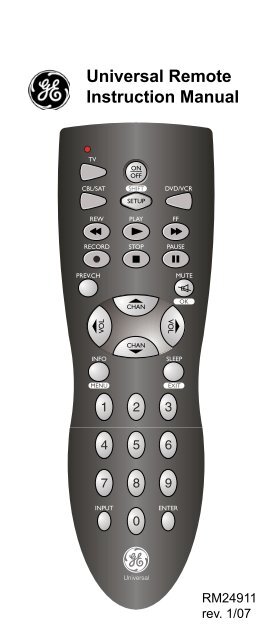
Button Functions<br />
Some buttons on the remote might have functions that<br />
are referred to by different names on the device you<br />
are controlling. E.G. PREV.CH may be called RECALL,<br />
or ENTER may be called DISPLAY. These differences<br />
depend on the brand and model of your product. Also,<br />
this remote can only operate features that exist on your<br />
product. E.G., your product must have PREV.CH ability<br />
for the PREV.CH button to operate this feature.<br />
TV, CBL/SAT, DVD/VCR<br />
Selects product to be operated.<br />
Red Indicator<br />
Lights when any<br />
button is pressed.<br />
RECORD, PLAY, STOP,<br />
REW, FF, PAUSE VCR<br />
control buttons operate<br />
your VCR even when the<br />
remote is set to operate<br />
the TV. Also operates DVD<br />
Scan -/+. Note the VCR<br />
buttons also control DVD<br />
when in DVD Mode.<br />
PREV.CH Returns to<br />
the previously selected<br />
channel.<br />
INFO button brings up DVD<br />
Display or Control Menu for<br />
Chapter/Track/Title number,<br />
Time remaining/elapsed,<br />
system information, etc. Also<br />
displays on-screen channel<br />
information.<br />
MENU Press and release<br />
SHIFT/SETUP then MENU/<br />
INFO to display the Menu on<br />
the TV. See “Using SHIFT for<br />
Menu and Navigation” description<br />
on Page 9 for more<br />
information.
Button Functions, cont.<br />
ON•OFF Turns<br />
product On or Off.<br />
SETUP Used to setup the remote,<br />
and for code search function.<br />
SHIFT Press and release to access buttons<br />
labeled in reverse print (OK, MENU, EXIT).<br />
See “Using SHIFT for Menu and Navigation”<br />
description on Page 9<br />
for more information.<br />
MUTE Turns off the<br />
TV sound while the<br />
picture remains.<br />
OK Selects menu<br />
items for the device<br />
you are controlling.<br />
VOLUME UP/DOWN<br />
Changes the volume<br />
level of the product,<br />
normally the TV.<br />
CHANNEL Up/Down<br />
Changes the channels.<br />
SLEEP enables the remote to<br />
turn off your TV after a period<br />
of 1 to 99 minutes.<br />
EXIT Exits On-Screen Menus<br />
and/or Returns to previous On-<br />
Screen selection.<br />
NUMBERS<br />
Enter numbers for direct<br />
channel selection. Some<br />
products require ENTER to<br />
be pressed after channel<br />
selection.<br />
INPUT<br />
For some TVs, press repeatedly<br />
to select from available viewing<br />
sources (antenna, cable box,<br />
VCR, etc.).<br />
ENTER<br />
For some TV models,<br />
used after direct channel<br />
number entry to<br />
immediately change to<br />
the selected channel.<br />
Note: The REC button must be pressed TWICE to record<br />
from your VCR. For some brands of VCRs, you might<br />
need to press the REC button once, then press it again<br />
for three seconds.
Direct Code Entry<br />
1. Press and hold the SETUP button until<br />
the red indicator stays on, then release<br />
the SETUP button.<br />
2. Press and release the desired device<br />
button (TV, VCR, etc.). The red indicator<br />
blinks, then stays lit.<br />
3. Enter the 4 digit code<br />
from the code tables<br />
(on separate sheet).<br />
Note: after a valid<br />
code entry, the red<br />
indicator turns off. For<br />
an invalid code, the<br />
red indicator flashes.<br />
4. With your device on, press ON•OFF.<br />
If the device turns off, no further<br />
programming is required. Note: If<br />
some buttons do not operate your<br />
equipment, try one of the other<br />
codes for your brand.<br />
Write your codes down here for easy reference<br />
later.<br />
Device<br />
Device stored Code<br />
TV<br />
CBL/SAT<br />
DVD/VCR<br />
TV
Code Search<br />
If your device does not respond after you have<br />
tried all the codes for your brand, or if your brand is<br />
not listed, try searching for your code by following<br />
these steps.<br />
1. <strong>Manual</strong>ly turn on the device (TV, VCR, etc.) to<br />
be controlled.<br />
2. Press and hold the SETUP button<br />
until the red indicator stays on, then<br />
release the SETUP button.<br />
3. Press and quickly release the desired<br />
device button (TV, VCR, etc.). The<br />
red indicator blinks off once.<br />
4. Press the ON•OFF button<br />
repeatedly (up to 300 times) until<br />
the device to be controlled turns<br />
off. The red indicator blinks off with<br />
each button press.<br />
5. Press and release ENTER to install the<br />
code.<br />
Most users will store VCR codes under the VCR<br />
button, Cable codes under CABLE, etc. If (for<br />
example) you want to store a VCR code under<br />
CABLE, first follow the procedure for Direct Code<br />
Entry (previous page) and press CABLE in step 2<br />
of Direct Code Entry, then enter ANY VCR code in<br />
step 3 of Direct Code Entry. Then follow the steps<br />
above for Code Search.<br />
Note: Code Search starts from the currently<br />
stored four digit number under that mode.<br />
Sometimes the first code that “works” with your<br />
device may only allow limited functionality (e.g.<br />
the MENU button might not work). There may be<br />
a code that performs more functions. Continue the<br />
code search process until the best code is found.
Using Your <strong>Remote</strong><br />
Code Identification<br />
The Code Identification Feature allows you to<br />
identify the four digit library code stored under your<br />
device button. For example, if you want to find out<br />
what four digit code is stored under your TV device<br />
button, follow the six steps below:<br />
1. Press and hold the SETUP button until<br />
the red indicator stays on. Release the<br />
SETUP button.<br />
2. Press and release the desired<br />
device button (TV, VCR, etc.). The<br />
red indicator blinks, then stays lit.<br />
3. Press and release the SETUP button.<br />
The red indicator blinks once and<br />
remains lit.<br />
4. To find the first digit<br />
for the code stored<br />
under the device<br />
button pressed in step<br />
2, press each numeric<br />
button from 0-9 in<br />
turn. The number that<br />
causes the indicator<br />
light to blink is the first<br />
digit in your code.<br />
5. To find the second digit, repeat step 4.<br />
6. Repeat step 4 to find the third and fourth digit.<br />
This time the red indicator turns off and stays
Using Your <strong>Remote</strong>, cont.<br />
Using SHIFT for Menu and Navigation<br />
The SHIFT button allows access to more than one<br />
function for certain buttons.<br />
Use the SHIFT/SETUP button prior to accessing<br />
the MENU, OK, EXIT and Navigation functions<br />
e.g.:<br />
For MENU, press and release<br />
SHIFT/SETUP then MENU/INFO.<br />
For OK, press and release<br />
SHIFT/SETUP then OK/MUTE.<br />
For EXIT, press and release SHIFT/<br />
SETUP then EXIT/SLEEP.<br />
For Up, Down, Left or Right<br />
Navigation, press and release SHIFT/<br />
SETUP followed by the respective<br />
Channel or Volume button.
Using Your <strong>Remote</strong>, cont.<br />
Sleep Function<br />
The Sleep button enables the remote to turn off<br />
your TV after a period of 1 to 99 minutes as shown<br />
below. The remote must be in TV mode to set a<br />
Sleep Timer. This feature works even if your TV<br />
does not have a sleep feature.<br />
1. Press and release the TV device button.<br />
2. Press and hold the Sleep button until the<br />
LED remains lit (about 2-3 sec-<br />
onds).<br />
3. Release the Sleep<br />
button.<br />
4. Press and release<br />
the numeric buttons<br />
(01-99) for the time<br />
required. The LED will<br />
blink off to indicate button press acceptance.<br />
5. TV Sleep Timer is set.<br />
6. Leave the <strong>Remote</strong> pointing towards the TV<br />
with an unobstructed path.<br />
To cancel the Sleep Timer, press and hold the<br />
Sleep button until the LED blinks, or press and<br />
10
Using Your <strong>Remote</strong>, cont.<br />
Controlling Devices with Separate<br />
Power On and Off Buttons<br />
Some GE, RCA and ProScan models require<br />
you to press the device button for more than one<br />
second to turn the device on and the ON•OFF<br />
button to turn the device off.<br />
Controlling Combo Devices<br />
Some Combo devices (e.g. TV/VCR, TV/DVD,<br />
DVD/VCR, etc.) will require you to set up two<br />
different Mode buttons to control both parts of the<br />
Combo device. For example, if you have a TV/<br />
DVD Combo, you might need to set up one code<br />
under the TV button to control the TV part AND a<br />
separate code (under any other Mode button) to<br />
control the DVD part.<br />
VCR/DVD Punch-Through<br />
This remote allows the 6 VCR transport buttons<br />
(i.e. PLAY, PAUSE, STOP, FF, REWIND, and<br />
REC) to Punch-Through control from any Mode<br />
programmed with TV, SAT or Cable codes to the<br />
last VCR, or DVD programmed Mode you used.<br />
This feature will not operate if the programmed<br />
TV, SAT or Cable code has its own VCR transport<br />
button control e.g. a TV Combo, SAT/PVR, etc.<br />
11
Using Your <strong>Remote</strong>, cont.<br />
Volume/Mute Control and Punch-<br />
Through<br />
This remote lets you select which device Mode<br />
controls your Volume/Mute buttons. The remote is<br />
initially set for all device Modes to use their own<br />
Volume/Mute control if present. If the programmed<br />
code has no Volume/Mute operation of its own<br />
then those buttons will punch-through control to<br />
the TV Mode device without needing to change to<br />
TV Mode.<br />
Any Mode chosen for Volume/Mute control<br />
MUST have its own Volume/Mute function or<br />
the Volume/Mute buttons will do nothing.<br />
Setting ALL Volume/Mute Control to<br />
any one Mode<br />
This routine can set all Modes to “punch-through”<br />
to any one chosen Mode for Volume/Mute button<br />
control without the needing to change to that<br />
Mode.<br />
1. Press and hold the SETUP button until<br />
the red indicator turns on, then release<br />
the button.<br />
2. Press and hold the MUTE button until the<br />
red indicator blinks off, then release the<br />
button.<br />
3. Press and release the desired Mode button<br />
(TV, VCR, etc.) for Volume/Mute control,<br />
the red indicator blinks then stays on.<br />
4. Press and release the MUTE button<br />
and the red indicator turns off. The<br />
red indicator will blink rapidly for three<br />
seconds if the Mode you have selected<br />
has no Volume/Mute control.<br />
All other Modes will now punch-through to<br />
your chosen Mode for Volume/Mute control.<br />
12
Using Your <strong>Remote</strong>, cont.<br />
Setting any Mode to use its own<br />
Volume/Mute Control<br />
This routine can set any Mode to use only its own<br />
Volume/Mute control. Note - If your chosen Mode<br />
has no Volume/Mute functions of its own then the<br />
Volume/Mute buttons will do nothing.<br />
1. Press and hold the SETUP button until the red<br />
indicator turns on, then release the button.<br />
2. Press and hold the MUTE button until the red<br />
indicator blinks off, then release the<br />
button.<br />
3. Press and release the desired Mode<br />
button (TV, VCR, etc.), the red indicator<br />
blinks then stays on.<br />
4. Press and release the VOLUME- (Down)<br />
button, the red indicator blinks then stays<br />
on.<br />
5. Press and release the MUTE button<br />
and the red indicator turns off.<br />
Your chosen Mode will now use its own<br />
Volume/Mute control.<br />
13
Troubleshooting<br />
<strong>Remote</strong> does not operate your product.<br />
• Press the device button of the product you want<br />
to control.<br />
• Program the remote with a new code.<br />
• Install new batteries. (You might have to<br />
reprogram your remote after installing new<br />
batteries.)<br />
• <strong>Remote</strong> may not be compatible with your<br />
product.<br />
<strong>Remote</strong> does not operate some features of<br />
your product.<br />
• Sometimes a particular code might operate<br />
some features but not all. Try programing<br />
remote with a new code.<br />
• <strong>Remote</strong> may not be able to operate all features<br />
of your product or button names might be<br />
different than your product.<br />
Red Indicator blinks after you program a<br />
product code.<br />
• <strong>Remote</strong> did not accept the code.<br />
• Try to program the code again or try a different<br />
code.<br />
Lost Your Codes?<br />
Enclosed with this remote is a sticker on which<br />
you should write the codes for each device you<br />
programmed. Apply the sticker to the back of<br />
the remote or somewhere convenient for future<br />
reference.<br />
Also on the sticker is our website address which,<br />
should you lose your codes or programming<br />
instructions, you can find available on our website:<br />
www.jascoproducts.com<br />
14
90 Day Limited Warranty<br />
<strong>Jasco</strong> <strong>Products</strong> Company warrants this product<br />
to be free from manufacturing defects for a period<br />
of ninety days from the original date of consumer<br />
purchase. This warranty is limited to the repair<br />
or replacement of this product only and does not<br />
extend to consequential or incidental damage to<br />
other products that may be used with this unit.<br />
This warranty is in lieu of all other warranties<br />
express or implied. Some states do not allow<br />
limitations on how long an implied warranty lasts<br />
or permit the exclusion or limitation of incidental or<br />
consequential damages, so the above limitations<br />
may not apply to you. This warranty gives you<br />
specific rights, and you may also have other rights<br />
which vary from state to state. If unit should prove<br />
defective within the warranty period, return prepaid<br />
with dated proof of purchase to:<br />
<strong>Jasco</strong> <strong>Products</strong> Company<br />
311 N.W. 122nd<br />
Oklahoma City, OK 73114<br />
15
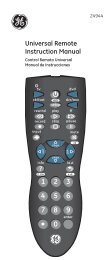
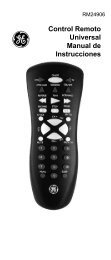
RM24911<br />
Control Remoto <strong>Universal</strong><br />
<strong>Manual</strong> de Instrucciones<br />
<strong>Jasco</strong> <strong>Products</strong> Company<br />
311 N.W. 122nd<br />
Oklahoma City, OK 73114
Tabla de Contenido<br />
Introducción........................................................... 3<br />
Configuración......................................................... 3<br />
Instalación de las baterías................................ 3<br />
Ahorrador de baterías ...................................... 3<br />
Protección de códigos ...................................... 3<br />
Configuración de códigos ................................ 3<br />
Funciones de los botones ................................ 4<br />
Entrada directa de códigos .............................. 6<br />
Búsqueda de códigos ...................................... 7<br />
Cómo utilizar el control remoto ............................. 8<br />
Identificación de códigos .................................. 8<br />
Uso de SHIFT................................................... 9<br />
Función SLEEP............................................... 10<br />
Control de aparatos con botones de<br />
encendido/apagado independientes ......... 11<br />
Control de aparatos combinados.................... 11<br />
Cambio de control en VCR/DVD/DVR............ 11<br />
Control y cambio de control de<br />
Volumen/Mute............................................ 12<br />
Configuración de todo el control de<br />
Volumen/Mute en un solo Modo................ 12<br />
Configuración para que cualquier modo<br />
use su propio control de Volumen/Mute..... 13<br />
Solución de problemas ....................................... 14<br />
Felicitaciones por la compra del Control Remoto<br />
<strong>Universal</strong> RM24911. El RM24911 es uno de los<br />
controles remotos más fáciles de usar disponibles en<br />
la actualidad. ¡Con el RM24911, usar varios controles<br />
remotos diferentes es cosa del pasado! El RM24911<br />
controla hasta tres aparatos, incluyendo las marcas<br />
más populares de televisores, videograbadoras, DVD,<br />
cable y satélite. El RM24911 es fácil de usar, fácil de<br />
programar y le da a usted control total... ¡con la punta de<br />
sus dedos!<br />
Nota: Puede que este control remoto no ejecute algunas<br />
funciones de su control remoto original. Utilice el control<br />
remoto original, si está disponible, para ejecutar tales<br />
funciones. Puede que botones diferentes a los descritos<br />
en este manual algunas veces ejecuten la función. Por<br />
ejemplo, los botones CHAN y VOL podrían usarse para<br />
navegar por las opciones de menú. Le recomendamos<br />
que experimente con el control remoto para identificar si<br />
tales situaciones ocurren en su equipo.
Configuración<br />
Instalación de las Baterías<br />
1. Presione hacia abajo la lengüeta en la parte posterior<br />
del control remoto y retire la tapa.<br />
2. Inserte dos baterías alcalinas tamaño AAA de<br />
manera que correspondan con las marcas + y – del<br />
compartimiento.<br />
3. Ajuste nuevamente la tapa haciendo presión.<br />
Ahorrador de baterías<br />
El control remoto se apagará automáticamente si algún<br />
botón se mantiene oprimido por más de 30 segundos.<br />
Esto prolongará la duración de sus baterías en caso de<br />
que el control remoto se quede atascado en algún lugar<br />
con los botones presionados (por ejemplo, entre los<br />
cojines del sofá).<br />
Protección de códigos<br />
Usted dispondrá de 10 minutos para cambiar las<br />
baterías del control remoto sin perder los códigos que<br />
haya programado. Sin embargo, no presione ningún<br />
botón hasta que las baterías estén instaladas en el<br />
control remoto. Si presiona algún botón sin las baterías<br />
instaladas en el control remoto, se perderán todos los<br />
códigos.<br />
Configuración de Códigos<br />
El botón SETUP se usa para configurar el<br />
control remoto. Usted puede configurar el control<br />
remoto utilizando las tablas de códigos (que se<br />
encuentran en una hoja aparte) o bien buscar en<br />
la biblioteca de códigos hasta que encuentre un<br />
código que funcione para su producto. Por favor,<br />
consulte la sección “Búsqueda de códigos” en<br />
la página 7 donde encontrará más información<br />
acerca del uso de la función de búsqueda de<br />
códigos y la manera de buscar en la biblioteca los<br />
códigos para sus productos.<br />
NOTA: Usted puede almacenar cualquier tipo<br />
de código bajo cualquier modo (excepto TV).<br />
18
Funciones de los Botones<br />
Algunos botones del control remoto podrían tener<br />
funciones que corresponden a nombres diferentes en el<br />
aparato que está controlando. Por ejemplo, puede que<br />
PREV.CH se llame RECALL, o ENTER se llame DIS-<br />
PLAY. Tales diferencias dependen de la marca y el modelo<br />
de su producto. Igualmente, este control remoto sólo<br />
puede ejecutar funciones que existan en su producto.<br />
Por ejemplo, su producto debe tener la función PREV.<br />
TV, CBL/SAT, DVD/VCR<br />
Selecciona el producto que<br />
va a ser operado.<br />
El indicador rojo<br />
se enciende cuando<br />
se presiona<br />
cualquier botón.<br />
RECORD, PLAY, STOP,<br />
REW, FF, PAUSE Los<br />
botones de control de la<br />
videograbadora operan<br />
su videograbadora aun<br />
cuando el control remoto<br />
esté programado para<br />
operar el televisor. También<br />
opera el Scan -/+ del DVD.<br />
Note que los botones de<br />
la videograbadora también<br />
controlan el DVD cuando<br />
está en modo DVD.<br />
PREV.CH regresa al<br />
canal previamente<br />
seleccionado.<br />
El botón INFO muestra la<br />
pantalla de DVD o el Menú<br />
de Control para número de<br />
Capítulo/Pista/Título, tiempo<br />
restante/transcurrido, información<br />
del sistema, etc. También<br />
muestra la información del<br />
canal en pantalla.<br />
MENÚ Presione y suelte<br />
SHIFT/SETUP y luego MENU/<br />
INFO para ver el Menú en el<br />
televisor.<br />
19
Funciones de los botones, continuación<br />
ON-OFF Enciende y<br />
apaga el producto.<br />
SETUP Se usa para configurar el control<br />
remoto y para la función de búsqueda de<br />
códigos. SHIFT Presione y suelte para<br />
acceder a los botones con nombres en<br />
impresión invertida (OK, MENU, EXIT).<br />
INPUT<br />
En algunos televisores, presione<br />
varias veces para seleccionar<br />
fuentes de visualización<br />
disponibles (antena, cable,<br />
videograbadora, etc.).<br />
MUTE Silencia el<br />
sonido del televisor<br />
dejando sólo la<br />
imagen.<br />
OK Selecciona las<br />
opciones de menú<br />
para el aparato que<br />
está controlando.<br />
VOLUME UP/DOWN Cambia<br />
el nivel de volumen del<br />
producto, normalmente el<br />
del televisor.<br />
CHANNEL Up/Down<br />
Cambia de canal.<br />
SLEEP Permite que el control<br />
remoto apague su televisor<br />
después de un periodo de tiempo<br />
de entre 1 y 99 minutos.<br />
EXIT Sale de los menús en<br />
pantalla o regresa a la selección<br />
anterior en pantalla.<br />
NUMBERS<br />
Digite los números para elegir<br />
directamente el canal que<br />
desea. En algunos productos<br />
se debe oprimir ENTER<br />
después de escoger el canal.<br />
ENTER<br />
En algunos modelos<br />
de televisores, se utiliza<br />
después de digitar<br />
los números del canal<br />
para cambiar al canal<br />
deseado.<br />
Nota: El botón REC debe presionarse DOS VECES para<br />
grabar en su videograbadora. En algunas marcas de<br />
videograbadoras, puede que necesite presionar el botón<br />
REC una vez y después presionarlo de nuevo durante<br />
tres segundos. 20
Entrada Directa de Códigos<br />
1. Mantenga presionado el botón SETUP<br />
hasta que el indicador rojo permanezca<br />
encendido y luego suelte el botón<br />
SETUP.<br />
2. Presione y suelte el botón del aparato<br />
deseado (TV, VCR,<br />
etc.). El indicador<br />
rojo parpadeará y<br />
después permanecerá<br />
encendido.<br />
3. Ingrese un código<br />
de quattro dígitos<br />
de las tablas de códigos (que se<br />
encuentran en una hoja aparte).<br />
Nota: Después de ingresar un código<br />
válido, el indicador rojo se apagará.<br />
En caso de que el código sea<br />
inválido, el indicador rojo destellará.<br />
Escriba sus códigos aquí para que pueda consultarlos<br />
fácilmente.<br />
Device Aparato Device Aparato almacenado stored Código Code<br />
TV<br />
CBL/SAT<br />
DVD/VCR<br />
TV<br />
21
Búsqueda de Códigos<br />
Si el aparato no responde después de haber<br />
intentado todos los códigos para la marca o si la<br />
marca no aparece en la lista, busque el código<br />
siguiendo estos pasos.<br />
1. Encienda manualmente el aparato (TV, VCR,<br />
etc.) que va a controlar.<br />
2. Mantenga presionado el botón<br />
SETUP hasta que el indicador rojo<br />
permanezca encendido y luego suelte<br />
el botón SETUP.<br />
3. Presione y suelte rápidamente el<br />
botón del aparato deseado (TV, VCR,<br />
etc.). El indicador rojo parpadeará<br />
una vez y permanecerá apagado<br />
4. Presione varias veces (hasta 300) el<br />
botón ON-OFF hasta que el aparato<br />
que va a controlar se apague. El<br />
indicador rojo parpadeará una vez<br />
cada vez que se oprima el botón.<br />
5. Presione y suelte ENTER para instalar<br />
el código.<br />
La mayoría de usuarios almacenará códigos para<br />
videograbadora en el botón VCR, códigos para cable<br />
en el botón CABLE, etc. Si, por ejemplo, usted desea<br />
almacenar un código para videograbadora en CABLE,<br />
primero siga el procedimiento para entrada directa<br />
de códigos (página anterior) y presione CABLE en el<br />
paso 2 de entrada directa de códigos, luego ingrese<br />
CUALQUIER código para videograbadora en el paso 3<br />
de entrada directa de códigos. Después siga los pasos<br />
anteriores para búsqueda de código.<br />
Nota: La búsqueda de códigos comienza desde el<br />
número de quattro dígitos almacenado actualmente en<br />
ese modo. Puede que el primer código que “funciona”<br />
en el aparato a veces sólo permita una funcionalidad<br />
limitada (por ejemplo, puede que el botón MENU no<br />
funcione). Puede haber un código que ejecute más<br />
funciones. Continúe con el proceso de búsqueda de<br />
códigos hasta que encuentre el mejor código.<br />
22
Cómo utilizar el Control<br />
Identificación de Códigos<br />
La función de identificación de códigos permite<br />
identificar el código de biblioteca de quattro<br />
dígitos almacenado en el botón de cada aparato.<br />
Por ejemplo, si usted quiere saber qué código de<br />
quattro dígitos está almacenado en el botón de<br />
TV, siga estos seis pasos:<br />
1. Mantenga presionado el botón<br />
SETUP hasta que el indicador rojo<br />
permanezca encendido. Suelte el<br />
botón SETUP.<br />
2. Presione y suelte el botón del<br />
aparato deseado (TV, VCR, etc.).<br />
El indicador rojo parpadeará y<br />
después permanecerá encendido.<br />
3. Presione y suelte el botón SETUP. El<br />
indicador rojo parpadeará una vez y<br />
permanecerá encendido.<br />
4. Para hallar el primer dígito<br />
del código almacenado<br />
bajo el botón del aparato<br />
presionado en el paso 2,<br />
presione cada uno de los<br />
botones numéricos del 0<br />
al 9 uno a uno. El número<br />
que hace parpadear el<br />
indicador rojo es el primer<br />
dígito de su código.<br />
5. Para hallar el segundo dígito, repita el paso 4.<br />
6. Relance el paso de progresión 4 para encontrar<br />
los terceros y cuartos dígitos.<br />
23
Cómo utilizar el Control Remoto cont.<br />
Identificación de Códigos<br />
Uso de SHIFT para menú y navegación.<br />
El botón SHIFT permite el acceso a más de una<br />
función de ciertos botones.<br />
Use el botón SHIFT/SETUP antes<br />
de acceder a las funciones MENU,<br />
OK, EXIT y a las de navegación.<br />
Por ejemplo.<br />
Para MENÚ, presione y suelte<br />
SHIFT/SETUP y luego MENU/<br />
INFO.<br />
Para OK, presione y suelte<br />
SHIFT/SETUP y luego OK/<br />
MUTE.<br />
Para EXIT, presione y suelte<br />
SHIFT/SETUP y luego EXIT/<br />
SLEEP.<br />
Para la navegación Arriba,<br />
Abajo, Izquierda o Derecha,<br />
presione y suelte SHIFT/<br />
SETUP seguido del respectivo<br />
botón Channel o Volume.<br />
24
Cómo utilizar el Control Remoto cont.<br />
Función Sleep<br />
La función Sleep permite que el control remoto<br />
apague su televisor después de un periodo entre<br />
1 y 99 minutos como se muestra enseguida. Para<br />
configurar el temporizador de Sleep el control<br />
remoto debe estar en modo TV. La función Sleep<br />
se ejecuta aun cuando su televisor no cuente con<br />
esta característica.<br />
1. Presione y suelte el botón de TV.<br />
2. Mantenga presionado el botón Sleep<br />
hasta que el indicador permanezca<br />
encendido (aproximadamente 2-3<br />
segundos)..<br />
3. Suelte el botón Sleep.<br />
4. Presione y suelte los botones<br />
numéricos (01-99) para fijar<br />
la hora requerida. El indicador<br />
parpadeará y<br />
permanecerá apagado<br />
para indicar que se ha<br />
aceptado el ingreso de<br />
cada botón<br />
5. Ya está configurado el temporizador de Sleep<br />
para el televisor.<br />
6. Deje el control remoto apuntando hacia el<br />
televisor de manera que no haya obstáculos<br />
entre los dos aparatos.<br />
Para cancelar el temporizador de Sleep, mantenga<br />
presionado el botón Sleep hasta que el indicador<br />
25
Cómo utilizar el Control Remoto cont.<br />
Control de Aparatos con Botones de<br />
Encendido/apagado Independientes<br />
En algunos modelos GE, RCA y ProScan es<br />
necesario presionar el botón de aparato durante<br />
más de un segundo para encender el aparato y el<br />
botón ON-OFF para apagarlo.<br />
Control de Aparatos Combinados<br />
Para algunos aparatos combinados (por ejemplo,<br />
TV/VCR, TV/DVD, DVD/VCR, etc.) se necesitará<br />
configurar dos botones de modo diferentes para<br />
controlar ambas partes del aparato combinado.<br />
Por ejemplo, si usted tiene una combinación<br />
TV/DVD, necesitará configurar un código en el<br />
botón TV para controlar la parte del televisor Y<br />
otro código (en cualquier otro botón de modo) para<br />
controlar la parte del DVD.<br />
Cambio de Control en VCR/DVD<br />
Este control remoto permite que los 6 botones de<br />
transporte de la videograbadora (es decir, PLAY,<br />
PAUSE, STOP, FF, REWIND y REC) cambien el<br />
control desde cualquier modo programado con<br />
códigos TV, SAT o Cable al último modo VCR o<br />
DVD programado que usted haya usado. Esta<br />
función no se ejecutará si el código de TV, SAT o<br />
Cable programado tiene su propio control de botón<br />
de transporte para VCR (videograbadora), por<br />
ejemplo, una combinación con TV, SAT/PVR, etc<br />
26
Cómo utilizar el Control Remoto cont<br />
Control y Cambio de Control de<br />
Volumen/Mute<br />
Este control remoto le permite seleccionar el modo del<br />
aparato controlará los botones Volume/Mute. El control<br />
remoto está configurado inicialmente para que todos<br />
los aparatos utilicen su propio control de Volumen/<br />
Mute, si lo tienen. Si el código programado no tiene<br />
operación Volumen/Mute propia, entonces esos botones<br />
cambiarán el control al modo TV sin necesidad de<br />
cambiar a modo TV.<br />
Cualquier modo escogido para control de Volumen/<br />
Mute DEBE tener su propia función Volumen/Mute;<br />
de lo contrario, los botones Volumen/Mute no harán<br />
nada.<br />
Configuración de TODO el control de Volumen/Mute<br />
en un Solo Modo<br />
El control remoto puede configurarse para que el<br />
control de Volumen/Mute sea manejado por un solo<br />
modo escogido, sin necesidad de tener que cambiar<br />
manualmente a ese modo, no importa el modo en el que<br />
se encuentre<br />
1. Mantenga presionado el botón SETUP hasta<br />
que el indicador rojo se encienda y luego<br />
suelte el botón.<br />
2. Mantenga presionado el botón MUTE hasta<br />
que el indicador rojo parpadee y permanezca<br />
apagado; después suelte el botón.<br />
3. Presione y suelte el botón de modo<br />
deseado (TV, VCR, etc.) para el control de<br />
Volume/Mute; el indicador rojo parpadeará y<br />
permanecerá encendido.<br />
4. Presione y suelte el botón MUTE y el indicador<br />
rojo se apagará. El indicador rojo parpadeará<br />
rápidamente durante tres segundos si el modo<br />
que usted ha seleccionado no tiene control de<br />
Volume/Mute.<br />
Ahora todos los otros modos cambiarán el control al<br />
modo escogido para que controle el Volumen/Mute.<br />
27
Cómo utilizar el Control Remoto cont.<br />
Configuración para que cualquier<br />
modo use su propio control de Volume/<br />
Mute<br />
El control remoto puede configurarse para que<br />
cualquier modo use solamente su propio control de<br />
Volumen/Mute. Nota: si el modo escogido no tiene<br />
su propia función de Volumen/Mute, los botones<br />
de Volume/Mute no harán nada.<br />
1. Mantenga presionado el botón SETUP<br />
hasta que el indicador rojo se encienda,<br />
luego suelte el botón.<br />
2. Mantenga presionado el botón MUTE<br />
hasta que el indicador rojo parpadee y<br />
permanezca apagado; después suelte<br />
el botón.<br />
3. Presione y suelte el botón de modo<br />
deseado (TV, VCR, etc.), el indicador rojo<br />
parpadeará y permanecerá encendido.<br />
4. Presione y suelte el botón VOLUME-<br />
(abajo), el indicador rojo parpadeará y<br />
permanecerá encendido.<br />
5. Presione y suelte el botón MUTE y el<br />
indicador rojo se apagará.<br />
Ahora el modo escogido utilizará su propio control<br />
de Volume/Mute.<br />
28
Solución de Problemas<br />
El control remoto no opera el producto.<br />
• Presione el botón de aparato del producto que<br />
quiere controlar.<br />
• Programe el control remoto con un nuevo código.<br />
• Instale baterías nuevas. (Puede que necesite<br />
volver a programar el control remoto después<br />
de instalar las baterías nuevas).<br />
• Puede que el control remoto no sea compatible<br />
con su producto.<br />
El control remoto no ejecuta algunas funciones<br />
en el producto.<br />
• Algunas veces un código particular podría<br />
ejecutar ciertas funciones pero no todas.<br />
Intente programar el control remoto con un<br />
nuevo código.<br />
• Puede que el control remoto no esté en<br />
capacidad de ejecutar todas las funciones<br />
del producto o puede que los nombres de los<br />
botones sean diferentes a los del producto.<br />
El indicador rojo parpadea después de<br />
programar un código para el producto.<br />
• El control remoto no aceptó el código.<br />
• Intente programar el código nuevamente o intente con<br />
un código diferente.<br />
¿Perdió sus códigos?<br />
Se incluye con este control remoto un adhesivo<br />
sobre el cual usted puede escribir los códigos para<br />
cada aparato que usted haya programado. Pegue<br />
el adhesivo en la parte posterior del control remoto<br />
o en otra parte para consultarlo fácilmente en el<br />
futuro.<br />
En el adhesivo también encontrará la dirección<br />
de nuestro sitio web, a la cual puede acudir en<br />
caso de perder los códigos o las instrucciones de<br />
programación: www.jascoproducts.com<br />
29
Garantía Limitada de 90 Días<br />
<strong>Jasco</strong> <strong>Products</strong> Company garantiza que este<br />
producto está libre de defectos de fabricación<br />
durante un periodo de noventa días a partir<br />
de la fecha original de compra por parte del<br />
consumidor. Esta garantía se limita a la reparación<br />
o reemplazo de este producto solamente y no<br />
se extiende a daños derivados o accidentales<br />
causados a otros productos que se usen con esta<br />
unidad. Esa garantía sustituye a todas las demás<br />
garantías explícitas o implícitas. Algunos estados<br />
no autorizan limitaciones en cuanto a la duración<br />
de una garantía implícita ni permiten la exclusión<br />
o limitación por daños accidentales o derivados;<br />
por tanto, puede que las anteriores limitaciones<br />
no apliquen en su caso. Esta garantía le da a<br />
usted derechos específicos, y otros que varían<br />
dependiendo del estado en el que usted viva. Si<br />
dentro del periodo de garantía, la unidad resultare<br />
defectuosa, por favor envíela con porte pagado y<br />
factura de compra a:<br />
<strong>Jasco</strong> <strong>Products</strong> Company<br />
311 N.W. 122nd<br />
Oklahoma City, OK 73114<br />
30