Thermo Scientific Orion Star™ and Star Plus Meter User Guide
Thermo Scientific Orion Star™ and Star Plus Meter User Guide
Thermo Scientific Orion Star™ and Star Plus Meter User Guide

Create successful ePaper yourself
Turn your PDF publications into a flip-book with our unique Google optimized e-Paper software.
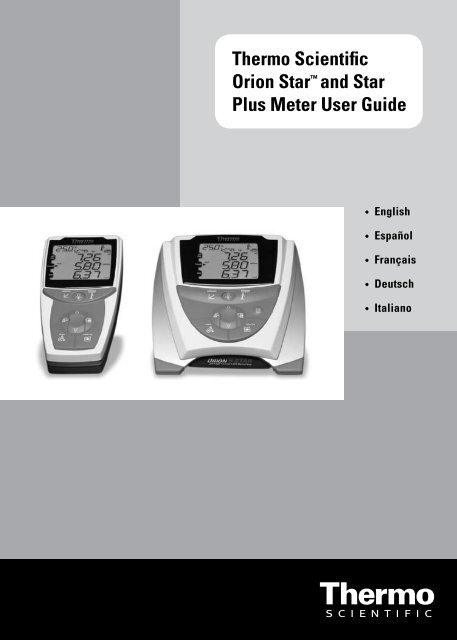
<strong>Thermo</strong> <strong>Scientific</strong><br />
<strong>Orion</strong> <strong>Star</strong> <strong>and</strong> <strong>Star</strong><br />
<strong>Plus</strong> <strong>Meter</strong> <strong>User</strong> <strong>Guide</strong><br />
• English<br />
• Español<br />
• Français<br />
• Deutsch<br />
• Italiano
Ross <strong>and</strong> the COIL trade dress are trademarks of <strong>Thermo</strong> Fisher <strong>Scientific</strong>, Inc. <strong>and</strong><br />
its subsidiaries.<br />
AQUAfast, AQUASensors, BOD AutoEZ, ionplus, KNIpHE, LogR, No Cal, ORION, perpHect,<br />
PerpHecT, pHISA, pHuture, Pure Water, Sage, ROSS, ROSS Ultra, Sure-Flow, Titrator PLUS,<br />
<strong>and</strong> TURBO2 are registered trademarks of <strong>Thermo</strong> Fisher <strong>Scientific</strong>, Inc. <strong>and</strong> its subsidiaries.<br />
A+, All in One, Aplus, AUTO-BAR, AUTO-CAL, Auto-ID, AUTO-READ, AUTO-STIR, Auto-Test,<br />
AutoTration, CISA, digital LogR, DuraProbe, EZ <strong>Star</strong>tup, ISEasy, Low Maintenance Triode,<br />
Minimum Stir Requirement, MSR, NISS, Optimum Results, <strong>Orion</strong> Dual <strong>Star</strong>, <strong>Orion</strong> <strong>Star</strong>, SAOB,<br />
SMART AVERAGING, SMART STABILITY, <strong>Star</strong> LogR, <strong>Star</strong> Navigator 21, Stat Face, <strong>and</strong> Triode<br />
are trademarks of <strong>Thermo</strong> Fisher <strong>Scientific</strong>, Inc. <strong>and</strong> its subsidiaries.<br />
Guaranteed Success <strong>and</strong> The Technical Edge are service marks of <strong>Thermo</strong> Fisher <strong>Scientific</strong>,<br />
Inc. <strong>and</strong> its subsidiaries.<br />
© 2010 <strong>Thermo</strong> Fisher <strong>Scientific</strong> Inc. All rights reserved. All trademarks are the property<br />
of <strong>Thermo</strong> Fisher <strong>Scientific</strong>, Inc. <strong>and</strong> its subsidiaries.<br />
The specifications, descriptions, drawings, ordering information <strong>and</strong> part numbers within<br />
this document are subject to change without notice.<br />
This publication supersedes all previous publications on this subject.
English<br />
Page EN-1<br />
<strong>Thermo</strong> <strong>Scientific</strong> <strong>Orion</strong> <strong>Star</strong> <strong>and</strong> <strong>Star</strong> <strong>Plus</strong> meters are designed for every<br />
application, from basic portable measurements to advanced laboratory analysis.<br />
This user guide contains information on the preparation, operation <strong>and</strong><br />
maintenance for the <strong>Orion</strong> <strong>Star</strong> <strong>and</strong> <strong>Star</strong> <strong>Plus</strong> meters.<br />
Español<br />
Page ES-1<br />
Esta guía del usuario se presenta resumida para incluir los datos más importantes<br />
en inglés, español, francés, alemán e italiano.<br />
Para descargar la versión completa en el idioma de su elección, visite nuestro<br />
sitio web en www.thermoscientific.com/water.<br />
Français<br />
Page FR-1<br />
Ce guide d’utilisation a été abrégé de façon à inclure les informations les plus<br />
pertinentes en anglais, espagnol, français, allem<strong>and</strong> et italien.<br />
Pour télécharger une version complète dans votre langue, connectez-vous à notre<br />
site www.thermoscientific.com/water.
Deutsch<br />
Page DE-1<br />
Die vorliegende Kurzfassung der Bedienungsanleitung enthält die wichtigsten<br />
Anweisungen auf Englisch, Spanisch, Französisch, Deutsch und Italienisch.<br />
Die ausführliche Bedienungsanleitung ist in jeder dieser Sprachen zum Download<br />
verfügbar. Besuchen Sie hierzu die Website www.thermoscientific.com/water.<br />
Italiano<br />
Page IT-1<br />
La presente guida per l’utente è stata ridotta per includere i dettagli più<br />
importanti in Inglese, Spagnolo, Francese, Tedesco e Italiano.<br />
Per scaricare la versione completa nella Vostra lingua, visitate il nostro sito web<br />
all’indirizzo www.thermoscientific.com/water.
E N<br />
E N G L I S H S E C T I O N<br />
Table of Contents<br />
Chapter I Introduction<br />
<strong>Meter</strong> Features. . . . . . . . . . . . . . . . . . . . . . . . . . . . . . . . . . . . . . . . . . . . . . . . . . . EN-2<br />
Chapter II Display<br />
General Description . . . . . . . . . . . . . . . . . . . . . . . . . . . . . . . . . . . . . . . . . . . . . . . EN-3<br />
Chapter III Keypad<br />
General Description . . . . . . . . . . . . . . . . . . . . . . . . . . . . . . . . . . . . . . . . . . . . . . . EN-5<br />
Key Definitions . . . . . . . . . . . . . . . . . . . . . . . . . . . . . . . . . . . . . . . . . . . . . . . . . . . .EN-6<br />
Chapter IV <strong>Meter</strong> Preparation<br />
Installing the Power Adapter. . . . . . . . . . . . . . . . . . . . . . . . . . . . . . . . . . . . . . . . . EN-7<br />
Installing the Batteries . . . . . . . . . . . . . . . . . . . . . . . . . . . . . . . . . . . . . . . . . . . . . EN-8<br />
Connecting the Electrodes . . . . . . . . . . . . . . . . . . . . . . . . . . . . . . . . . . . . . . . . . . EN-9<br />
Turning on the Instrument . . . . . . . . . . . . . . . . . . . . . . . . . . . . . . . . . . . . . . . . . EN-10<br />
<strong>Meter</strong> Maintenance . . . . . . . . . . . . . . . . . . . . . . . . . . . . . . . . . . . . . . . . . . . . . . EN-10<br />
Chapter V <strong>Meter</strong> Setup<br />
Setup Menu . . . . . . . . . . . . . . . . . . . . . . . . . . . . . . . . . . . . . . . . . . . . . . . . . . . . EN-11<br />
Setup Menu Table. . . . . . . . . . . . . . . . . . . . . . . . . . . . . . . . . . . . . . . . . . . . . . EN-12<br />
General Menu Settings. . . . . . . . . . . . . . . . . . . . . . . . . . . . . . . . . . . . . . . . . . . . EN-14<br />
Time <strong>and</strong> Date Settings . . . . . . . . . . . . . . . . . . . . . . . . . . . . . . . . . . . . . . . . . . . EN-15<br />
AUTO-READ , Continuous or Timed Measurement Settings. . . . . . . . . . . . . . . EN-16<br />
Selecting the Measurement Parameter . . . . . . . . . . . . . . . . . . . . . . . . . . . . . . . EN-17<br />
Method Setup. . . . . . . . . . . . . . . . . . . . . . . . . . . . . . . . . . . . . . . . . . . . . . . . . . . EN-18<br />
Chapter VI pH Technique<br />
pH Setup Menu . . . . . . . . . . . . . . . . . . . . . . . . . . . . . . . . . . . . . . . . . . . . . . . . . EN-19<br />
pH Calibration . . . . . . . . . . . . . . . . . . . . . . . . . . . . . . . . . . . . . . . . . . . . . . . . . . . EN-20<br />
pH Measurement . . . . . . . . . . . . . . . . . . . . . . . . . . . . . . . . . . . . . . . . . . . . . . . . EN-21<br />
pH Temperature Display <strong>and</strong> Calibration . . . . . . . . . . . . . . . . . . . . . . . . . . . . . . . EN-22<br />
Chapter VII mV, Relative mV <strong>and</strong> ORP Technique<br />
Relative mV <strong>and</strong> ORP Calibration . . . . . . . . . . . . . . . . . . . . . . . . . . . . . . . . . . . . .EN-23<br />
mV, Relative mV <strong>and</strong> ORP Measurement. . . . . . . . . . . . . . . . . . . . . . . . . . . . . . EN-24<br />
Chapter VIII Polarographic Dissolved Oxygen Technique<br />
Polarographic Dissolved Oxygen Setup Menu . . . . . . . . . . . . . . . . . . . . . . . . . . EN-25<br />
Polarographic Dissolved Oxygen Calibration. . . . . . . . . . . . . . . . . . . . . . . . . . . . EN-26<br />
Polarographic Dissolved Oxygen Measurement. . . . . . . . . . . . . . . . . . . . . . . . . EN-28<br />
Polarographic Dissolved Oxygen Temperature Display <strong>and</strong> Calibration. . . . . . . . EN-29<br />
<strong>Thermo</strong> <strong>Scientific</strong> <strong>Orion</strong> <strong>Star</strong> <strong>and</strong> <strong>Star</strong> <strong>Plus</strong> <strong>Meter</strong> <strong>User</strong> <strong>Guide</strong><br />
EN-I
E N<br />
Table of Contents<br />
Chapter IX RDO ® Optical Dissolved Oxygen Technique<br />
Optical Cap Overview. . . . . . . . . . . . . . . . . . . . . . . . . . . . . . . . . . . . . . . . . . . . . EN-31<br />
RDO Optical Dissolved Oxygen Setup Menu . . . . . . . . . . . . . . . . . . . . . . . . . . . EN-32<br />
RDO Optical Dissolved Oxygen Calibration . . . . . . . . . . . . . . . . . . . . . . . . . . . . EN-35<br />
RDO Optical Dissolved Oxygen Measurement . . . . . . . . . . . . . . . . . . . . . . . . . EN-37<br />
RDO Optical Dissolved Oxygen Temperature Display <strong>and</strong> Calibration . . . . . . . . EN-38<br />
Chapter X Conductivity Technique<br />
Conductivity Setup Menu. . . . . . . . . . . . . . . . . . . . . . . . . . . . . . . . . . . . . . . . . . EN-39<br />
Conductivity Calibration . . . . . . . . . . . . . . . . . . . . . . . . . . . . . . . . . . . . . . . . . . . EN-40<br />
Conductivity Measurement . . . . . . . . . . . . . . . . . . . . . . . . . . . . . . . . . . . . . . . . EN-42<br />
Conductivity Temperature Display <strong>and</strong> Calibration . . . . . . . . . . . . . . . . . . . . . . . EN-43<br />
Chapter XI ISE Technique<br />
ISE Setup Menu . . . . . . . . . . . . . . . . . . . . . . . . . . . . . . . . . . . . . . . . . . . . . . . . . EN-45<br />
ISE Calibration . . . . . . . . . . . . . . . . . . . . . . . . . . . . . . . . . . . . . . . . . . . . . . . . . . EN-46<br />
ISE Measurement. . . . . . . . . . . . . . . . . . . . . . . . . . . . . . . . . . . . . . . . . . . . . . . . EN-47<br />
ISE Temperature Display <strong>and</strong> Calibration . . . . . . . . . . . . . . . . . . . . . . . . . . . . . . EN-48<br />
Chapter XII Data Archiving <strong>and</strong> Retrieval<br />
Datalog <strong>and</strong> Calibration Log . . . . . . . . . . . . . . . . . . . . . . . . . . . . . . . . . . . . . . . . EN-49<br />
Automatic Datalog Feature . . . . . . . . . . . . . . . . . . . . . . . . . . . . . . . . . . . . . . . . . EN-49<br />
Datalog Deletion Setting. . . . . . . . . . . . . . . . . . . . . . . . . . . . . . . . . . . . . . . . . . . EN-50<br />
Viewing <strong>and</strong> Printing the Datalog <strong>and</strong> Calibration Log . . . . . . . . . . . . . . . . . . . . EN-51<br />
Chapter XIII Declaration of Conformity<br />
Declaration of Conformity. . . . . . . . . . . . . . . . . . . . . . . . . . . . . . . . . . . . . . . . . . EN-53<br />
WEEE Compliance . . . . . . . . . . . . . . . . . . . . . . . . . . . . . . . . . . . . . . . . . . . . . . . EN-54<br />
Chapter XIV Troubleshooting<br />
<strong>Meter</strong> Self Test . . . . . . . . . . . . . . . . . . . . . . . . . . . . . . . . . . . . . . . . . . . . . . . . . . EN-55<br />
<strong>Meter</strong> Error Codes . . . . . . . . . . . . . . . . . . . . . . . . . . . . . . . . . . . . . . . . . . . . . . . EN-56<br />
General Troubleshooting . . . . . . . . . . . . . . . . . . . . . . . . . . . . . . . . . . . . . . . . . . . EN-58<br />
Chapter XV <strong>Meter</strong> Specifications<br />
<strong>Meter</strong> Specifications. . . . . . . . . . . . . . . . . . . . . . . . . . . . . . . . . . . . . . . . . . . . . . EN-61<br />
Ordering Information . . . . . . . . . . . . . . . . . . . . . . . . . . . . . . . . . . . . . . . . . . . . . EN-65<br />
Appendix A <strong>Meter</strong> Setup Menu Features<br />
pH Setup Menu Features . . . . . . . . . . . . . . . . . . . . . . . . . . . . . . . . . . . . . . . . . . EN-67<br />
Dissolved Oxygen Setup Menu Features . . . . . . . . . . . . . . . . . . . . . . . . . . . . . . EN-67<br />
Conductivity Setup Menu Features . . . . . . . . . . . . . . . . . . . . . . . . . . . . . . . . . . EN-68<br />
ISE Setup Menu Features. . . . . . . . . . . . . . . . . . . . . . . . . . . . . . . . . . . . . . . . . . EN-72<br />
Appendix B <strong>Orion</strong> <strong>Star</strong> <strong>Plus</strong> Benchtop <strong>Meter</strong> <strong>and</strong> Autosampler Interfacing<br />
<strong>Meter</strong> <strong>and</strong> Autosampler Setup . . . . . . . . . . . . . . . . . . . . . . . . . . . . . . . . . . . . . . EN-73<br />
<strong>Meter</strong> Preparation for Operating the Autosampler . . . . . . . . . . . . . . . . . . . . . . . EN-74<br />
<strong>Meter</strong> <strong>and</strong> Autosampler Operation. . . . . . . . . . . . . . . . . . . . . . . . . . . . . . . . . . . EN-77<br />
EN-II<br />
<strong>Thermo</strong> <strong>Scientific</strong> <strong>Orion</strong> <strong>Star</strong> <strong>and</strong> <strong>Star</strong> <strong>Plus</strong> <strong>Meter</strong> <strong>User</strong> <strong>Guide</strong>
Chapter I Introduction<br />
Congratulations! You have selected an industry-leading <strong>Thermo</strong> <strong>Scientific</strong> <strong>Orion</strong> <strong>Star</strong><br />
or <strong>Star</strong> <strong>Plus</strong> series meter that is designed for electrochemistry measurements in the<br />
field or in the laboratory.<br />
• <strong>Orion</strong> 2-<strong>Star</strong> meters provide the single parameter measurement of pH.<br />
• <strong>Orion</strong> 3-<strong>Star</strong> <strong>and</strong> <strong>Star</strong> <strong>Plus</strong> meters provide the single parameter measurement<br />
of pH, dissolved oxygen, RDO ® optical dissolved oxygen or conductivity.<br />
• <strong>Orion</strong> 4-<strong>Star</strong> <strong>and</strong> <strong>Star</strong> <strong>Plus</strong> meters provide the dual parameter measurements<br />
of pH/dissolved oxygen, pH/conductivity, pH/ISE (ion selective electrode)<br />
or pH/RDO optical dissolved oxygen.<br />
• <strong>Orion</strong> 5-<strong>Star</strong> <strong>and</strong> <strong>Star</strong> <strong>Plus</strong> meters provide the multi-parameter measurements<br />
of pH/ISE/dissolved oxygen/conductivity, pH/dissolved oxygen/conductivity<br />
or pH/RDO optical dissolved oxygen/conductivity.<br />
All meters include a temperature measurement function. All meters<br />
with pH measurement capability include a mV/relative mV/ORP function.<br />
Built to meet the dem<strong>and</strong>s of busy, multiple user laboratory or plant environments,<br />
all <strong>Orion</strong> <strong>Star</strong> <strong>and</strong> <strong>Star</strong> <strong>Plus</strong> series meters are microprocessor controlled, which<br />
aids in the delivery of accurate <strong>and</strong> precise measurements. The waterproof portable<br />
meters can even withst<strong>and</strong> submersion for short periods of time.<br />
The 3-<strong>Star</strong> <strong>Plus</strong>, 4-<strong>Star</strong> <strong>Plus</strong> <strong>and</strong> 5-<strong>Star</strong> <strong>Plus</strong> meters have been enhanced to include<br />
an increased number of datalog points, improved temperature displays <strong>and</strong> a new<br />
temperature calibration mode for each measurement parameter. Benchtop 3-<strong>Star</strong><br />
<strong>Plus</strong>, 4-<strong>Star</strong> <strong>Plus</strong> <strong>and</strong> 5-<strong>Star</strong> <strong>Plus</strong> meters include autosampler capability <strong>and</strong> are<br />
compatible with the AutoTration -500 autosampler. Refer to the AutoTration-500<br />
user guide for information on operating the <strong>Star</strong> <strong>Plus</strong> meters with the autosampler.<br />
Note: Please read this user guide thoroughly before using your benchtop or<br />
portable meter. Any use outside of these instructions may invalidate your warranty<br />
<strong>and</strong> cause permanent damage to the meter.<br />
<strong>Thermo</strong> <strong>Scientific</strong> <strong>Orion</strong> <strong>Star</strong> <strong>and</strong> <strong>Star</strong> <strong>Plus</strong> <strong>Meter</strong> <strong>User</strong> <strong>Guide</strong><br />
EN-1
Introduction<br />
<strong>Meter</strong> Features<br />
To better meet the needs of users in environmental protection <strong>and</strong> control, food<br />
<strong>and</strong> beverage, pharmaceutical <strong>and</strong> consumer product laboratories, the <strong>Orion</strong> <strong>Star</strong><br />
<strong>and</strong> <strong>Star</strong> <strong>Plus</strong> series meters include these key features:<br />
• Password Protected Methods – The meter will save up to ten custom<br />
measurements <strong>and</strong> calibrations for future reference. Password protection<br />
of each method eliminates any tampering with methods as multiple users<br />
access only the procedure most appropriate to their work.<br />
• AUTO-READ – The meter takes a measurement <strong>and</strong> automatically prints<br />
or logs data when the reading becomes stable. The measurement is frozen<br />
on the display until the user prompts the meter to take a new measurement.<br />
• Stirrer Control – All 3-<strong>Star</strong>, 4-<strong>Star</strong> <strong>and</strong> 5-<strong>Star</strong> benchtop meters have a stirrer<br />
control for the stirrer probe, Cat. No. 096019, <strong>and</strong> the AUTO-STIR BOD probe<br />
that eliminates the need for magnetic stir plates <strong>and</strong> stir bars.<br />
• SMART STABILITY <strong>and</strong> SMART AVERAGING – Remove the guesswork<br />
by automatically compensating for measurement conditions <strong>and</strong> optimizing the<br />
meter response time.<br />
• Display Backlight – All 3-<strong>Star</strong>, 4-<strong>Star</strong> <strong>and</strong> 5-<strong>Star</strong> meters include a display<br />
backlight feature. When the meter is on, a quick press of will turn the<br />
backlight on <strong>and</strong> off. When the meter is operating on battery power, the<br />
backlight will automatically turn off after two minutes to conserve power.<br />
When batteries are low, the backlight will no longer turn on.<br />
• Automatic Shutoff – The meters will shut down after 20 minutes without<br />
a keypress. This maximizes battery power on portable meters <strong>and</strong> benchtop<br />
meters that are being run on battery power.<br />
• Audible Signals – The meter will beep whenever a key is pressed, providing<br />
immediate verification that the user’s input was received.<br />
An easy-to-use reference guide, attached to each meter, supports daily meter use.<br />
EN-2<br />
<strong>Thermo</strong> <strong>Scientific</strong> <strong>Orion</strong> <strong>Star</strong> <strong>and</strong> <strong>Star</strong> <strong>Plus</strong> <strong>Meter</strong> <strong>User</strong> <strong>Guide</strong>
Chapter II Display<br />
General Description<br />
Throughout a given process, the display on the <strong>Orion</strong> <strong>Star</strong> <strong>and</strong> <strong>Star</strong> <strong>Plus</strong> series<br />
meters provides temperature <strong>and</strong> calibration data. The temperature appears in the<br />
left, top corner of the display. The icon indicates that a calibration mode or<br />
calibration setup menu is active. The man, 2, 4, 7, 9, 10, <strong>and</strong> 12 icons indicate<br />
which pH buffers were saved after a pH calibration is performed. The setup icon<br />
only appears when the meter is in setup mode. The icon indicates an error<br />
condition <strong>and</strong> when it is displayed with the icon, a calibration alarm or electrode<br />
quality issue exists. The icon indicates that the AUTO-READ measurement<br />
mode is active <strong>and</strong> is discussed in greater detail in the <strong>Meter</strong> Setup section.<br />
Temperature<br />
Calibration<br />
pH/ISE/ORP<br />
Unit<br />
Conductivity<br />
Unit<br />
DO Unit<br />
5 <strong>Star</strong> <strong>Meter</strong><br />
This is the display of the 5-<strong>Star</strong> meter capable of multi-parameter measurements.<br />
The single <strong>and</strong> dual parameter meters will have fewer measurement lines,<br />
depending on the meter capabilities.<br />
Note: In the measurement mode, the three main lines of data on the meter display<br />
correspond to what is being measured.<br />
<strong>Thermo</strong> <strong>Scientific</strong> <strong>Orion</strong> <strong>Star</strong> <strong>and</strong> <strong>Star</strong> <strong>Plus</strong> <strong>Meter</strong> <strong>User</strong> <strong>Guide</strong><br />
EN-3
Display<br />
Measurement Unit Icons<br />
In the measurement mode, the arrow icon on the left side of the display screen<br />
indicates the active line. Press to move the arrow icon to the desired line <strong>and</strong><br />
press / to scroll through the measurement unit icons associated with the<br />
selected line. The measurement unit icons for the 5-<strong>Star</strong> multi-parameter meter are<br />
shown below. The single <strong>and</strong> dual parameter meters will have fewer measurement<br />
lines <strong>and</strong> icons, depending on the meter capabilities.<br />
• The top line displays pH, mV, relative mV, ISE, or temperature.<br />
• The middle line displays conductivity, TDS, salinity, resistivity, or temperature.<br />
• The bottom line displays dissolved oxygen as % saturation, dissolved oxygen<br />
as concentration, barometric pressure or temperature.<br />
The units of measurement, which are displayed on the right side of the screen,<br />
will flash until the reading is stable.<br />
Note: If a measurement line is not needed, press to move the arrow<br />
icon to the measurement line that is not needed <strong>and</strong> press / until the<br />
measurement line is completely blank.<br />
EN-4<br />
<strong>Thermo</strong> <strong>Scientific</strong> <strong>Orion</strong> <strong>Star</strong> <strong>and</strong> <strong>Star</strong> <strong>Plus</strong> <strong>Meter</strong> <strong>User</strong> <strong>Guide</strong>
Chapter III Keypad<br />
General Description<br />
The keypad layout is the same for all <strong>Orion</strong> <strong>Star</strong> <strong>and</strong> <strong>Star</strong> <strong>Plus</strong> series meters.<br />
The portable <strong>and</strong> 2-<strong>Star</strong> benchtop meters have nine keys. The 3-<strong>Star</strong>, 4-<strong>Star</strong> <strong>and</strong><br />
5-<strong>Star</strong> benchtop meters have 10 keys due to the addition of the stir key – .<br />
Portable Keypad<br />
Calibrate<br />
Power/Backlight<br />
Digits<br />
Scroll Down<br />
Setup<br />
Measure<br />
Save/Print<br />
Backlight<br />
Scroll Up<br />
Line Select<br />
View Log<br />
Benchtop Keypad<br />
Power/Backlight<br />
Calibrate<br />
Scroll Up<br />
Digits<br />
Setup<br />
Measure<br />
Save/Print<br />
Stirrer (not on 2-<strong>Star</strong>)<br />
Line Select<br />
View Log<br />
Scroll Down<br />
<strong>Thermo</strong> <strong>Scientific</strong> <strong>Orion</strong> <strong>Star</strong> <strong>and</strong> <strong>Star</strong> <strong>Plus</strong> <strong>Meter</strong> <strong>User</strong> <strong>Guide</strong><br />
EN-5
Keypad<br />
Key Definitions<br />
Key Description Key Description<br />
Turns the meter on, if the meter<br />
is off.<br />
Toggles the backlight on <strong>and</strong> off,<br />
if the meter is on (3-<strong>Star</strong>, 4-<strong>Star</strong><br />
<strong>and</strong> 5-<strong>Star</strong> meters only).<br />
If the meter is on, hold down<br />
the key for about three seconds<br />
to turn off the meter.<br />
Scrolls the arrow icon on left<br />
of screen among the three<br />
display lines, so the selected<br />
line can be edited or calibrated.<br />
<strong>Star</strong>ts the calibration<br />
for the selected line in the<br />
measurement mode.<br />
If the arrow icon points to<br />
the top line <strong>and</strong> the displayed<br />
units are pH, pressing the key<br />
will start a pH calibration.<br />
Each time the key is pressed in<br />
the calibration mode, the meter<br />
will accept the calibration point<br />
<strong>and</strong> move to the next point<br />
until the maximum number of<br />
calibration points are reached.<br />
Enters the setup menu,<br />
starting with selected line<br />
in the measurement mode.<br />
If the arrow icon points to<br />
the top line <strong>and</strong> the displayed<br />
units are ISE, pressing the key<br />
will enter the ISE setup screen.<br />
Changes the measurement<br />
units of the selected line<br />
in the measurement mode.<br />
Changes the value on the<br />
selected line in the setup,<br />
methods <strong>and</strong> log view modes.<br />
Edits the value of the flashing<br />
digit for setup, password entry<br />
<strong>and</strong> calibration modes.<br />
Selects the next digit to edit <strong>and</strong><br />
moves the decimal point<br />
for setup, password entry<br />
<strong>and</strong> calibration modes.<br />
Prints <strong>and</strong> logs a measurement<br />
in the continuous or timed<br />
measurement modes.<br />
Prints, logs <strong>and</strong> freezes the<br />
display when the reading<br />
becomes stable in the AUTO-<br />
READ measurement mode.<br />
Exits the setup menu <strong>and</strong><br />
returns to measurement mode.<br />
Accepts the calibration <strong>and</strong><br />
returns to measurement mode.<br />
Enters the log view <strong>and</strong><br />
download menu.<br />
Turns the stirrer on <strong>and</strong> off.<br />
EN-6<br />
<strong>Thermo</strong> <strong>Scientific</strong> <strong>Orion</strong> <strong>Star</strong> <strong>and</strong> <strong>Star</strong> <strong>Plus</strong> <strong>Meter</strong> <strong>User</strong> <strong>Guide</strong>
Chapter IV <strong>Meter</strong> Preparation<br />
Installing the Power Adapter<br />
The universal power adapter that is included with your benchtop meter is the only<br />
power adapter recommended for use with this unit. The use of any other power<br />
adapter will void your meter warranty. The external electrical power adapter is rated<br />
to be operated at 100 to 240 VAC, 0.5 A, 50/60 Hz.<br />
Based on your wall outlet, select one of the four plug plates provided <strong>and</strong> slide<br />
it into the grooves on the adapter. A click will be heard when the plug is properly<br />
in place.<br />
Connect the output plug of the power adapter to the power input on the benchtop<br />
meter. Refer to the diagram in the Connecting the Electrodes section.<br />
Batteries can be installed in the benchtop <strong>Orion</strong> <strong>Star</strong> or <strong>Star</strong> <strong>Plus</strong> series meters,<br />
so the meter setup settings are protected if the meter is disconnected from the<br />
wall outlet or a brief power outage occurs.<br />
<strong>Thermo</strong> <strong>Scientific</strong> <strong>Orion</strong> <strong>Star</strong> <strong>and</strong> <strong>Star</strong> <strong>Plus</strong> <strong>Meter</strong> <strong>User</strong> <strong>Guide</strong><br />
EN-7
<strong>Meter</strong> Preparation<br />
Installing the Batteries<br />
<strong>Orion</strong> <strong>Star</strong> <strong>and</strong> <strong>Star</strong> <strong>Plus</strong> series meters use four AA alkaline batteries. Do not use<br />
lithium or rechargeable batteries. Improper installation of non-alkaline batteries<br />
could create a hazard.<br />
Note: For benchtop meters, the installation of batteries is not required if the unit<br />
will always be connected to a power source via the universal power supply. For<br />
portable meters, the batteries are supplied from the factory. To access the battery<br />
compartment in portable meters, loosen the two screws in the back of the meter.<br />
1. Confirm that the meter is off <strong>and</strong> gently place the meter upside down<br />
on a clean, lint-free cloth to prevent scratching the display.<br />
2. Remove the battery case cover.<br />
3. Insert new batteries with the + side orientation as depicted in the battery<br />
compartment housing.<br />
4. Replace the battery case cover.<br />
5. Stored data, calibrations <strong>and</strong> methods will remain in the meter’s nonvolatile<br />
memory when the batteries are being replaced. However, the date <strong>and</strong> time<br />
may need to be reset when the batteries are changed.<br />
EN-8<br />
<strong>Thermo</strong> <strong>Scientific</strong> <strong>Orion</strong> <strong>Star</strong> <strong>and</strong> <strong>Star</strong> <strong>Plus</strong> <strong>Meter</strong> <strong>User</strong> <strong>Guide</strong>
Connecting the Electrodes<br />
Follow the diagrams below to correctly connect electrodes <strong>and</strong> probes to the meter.<br />
The multi-parameter meter is depicted; single parameter <strong>and</strong> dual parameter meters<br />
will have fewer connections, depending on the meter measurement capabilities.<br />
Benchtop <strong>Meter</strong> Electrode Connections<br />
<strong>Meter</strong> Preparation<br />
Stirrer Jack for<br />
Stirrer Probe or<br />
BOD AUTO-STIR<br />
DO Probe<br />
Reference<br />
for<br />
pH, ORP<br />
or ISE<br />
BNC for<br />
pH, ORP<br />
or ISE<br />
8 Pin MiniDIN<br />
for Cond<br />
or ATC<br />
RS232<br />
9 Pin<br />
MiniDIN for<br />
Dissolved<br />
Oxygen<br />
Ground<br />
Power<br />
Portable <strong>Meter</strong> Electrode Connections<br />
BNC for<br />
pH, ORP<br />
or ISE<br />
8 Pin MiniDIN<br />
for Cond<br />
or ATC<br />
RS232<br />
9 Pin<br />
MiniDIN for<br />
Dissolved<br />
Oxygen<br />
<strong>Thermo</strong> <strong>Scientific</strong> <strong>Orion</strong> <strong>Star</strong> <strong>and</strong> <strong>Star</strong> <strong>Plus</strong> <strong>Meter</strong> <strong>User</strong> <strong>Guide</strong><br />
EN-9
<strong>Meter</strong> Preparation<br />
<strong>Meter</strong> Connections with Multiple Functions<br />
• Use the BNC input to connect pH, ISE <strong>and</strong> ORP electrodes with a BNC<br />
or waterproof BNC connector.<br />
• Benchtop meters have a reference input that is used to connect a separate<br />
reference electrode. Reference electrodes require an separate, appropriate<br />
sensing electrode for measurements.<br />
• The 970899WP dissolved oxygen probe can be used on the BNC input.<br />
• Use the 8 pin miniDIN input for conductivity probes or for automatic temperature<br />
compensation (ATC) probes.<br />
• The DO AUTO-STIR probe uses the 9 pin miniDIN input <strong>and</strong> the stirrer jack.<br />
• Connect a printer or computer to the RS232 input using the appropriate cable.<br />
Turning on the Instrument<br />
With the batteries installed in the portable meters <strong>and</strong> the power adapter attached<br />
or the batteries installed in the benchtop meter, press to turn on the meter.<br />
If using a 3-<strong>Star</strong>, 4-<strong>Star</strong> or 5-<strong>Star</strong> meter, press when the meter is powered on<br />
to toggle the backlight on <strong>and</strong> off. When the benchtop meter is drawing line power,<br />
the backlight will stay on until is pressed.<br />
To turn off the meter, press <strong>and</strong> hold<br />
for about three seconds.<br />
<strong>Meter</strong> Maintenance<br />
For routine meter maintenance, dust <strong>and</strong> wipe the meter with a damp cloth.<br />
If necessary, a warm water or a mild water-based detergent can be used.<br />
Perform meter maintenance on a daily, weekly or monthly basis, as required<br />
by the environment in which the meter is operated.<br />
Immediately remove any spilled substance from the meter using the proper<br />
cleaning procedure for the type of spill.<br />
EN-10<br />
<strong>Thermo</strong> <strong>Scientific</strong> <strong>Orion</strong> <strong>Star</strong> <strong>and</strong> <strong>Star</strong> <strong>Plus</strong> <strong>Meter</strong> <strong>User</strong> <strong>Guide</strong>
Chapter V <strong>Meter</strong> Setup<br />
Setup Menu<br />
To navigate the setup menu:<br />
1. Press to enter the setup menu.<br />
2. Press / until the desired setup option is displayed on the top line.<br />
3. Press to move the arrow icon to the middle line.<br />
4. Press / until the desired setup option is displayed on the middle line.<br />
5. Press to move the arrow icon to the bottom line.<br />
6. To scroll through a list of options on the bottom line, press / until the<br />
desired option is displayed. To enter a numeric value for an option on the bottom<br />
line, press / to adjust each digit <strong>and</strong> to move to the next digit.<br />
For example, to change the pH measurement resolution press<br />
from 0.01 to 0.001 on the bottom display line.<br />
to scroll<br />
7. Press to move the arrow icon to the top line.<br />
8. Repeat steps 2 through 7 to program a new setup option or press to exit<br />
the setup menu <strong>and</strong> return to the measurement mode.<br />
Note: Refer to Appendix A for a description of the special setup menu features.<br />
<strong>Thermo</strong> <strong>Scientific</strong> <strong>Orion</strong> <strong>Star</strong> <strong>and</strong> <strong>Star</strong> <strong>Plus</strong> <strong>Meter</strong> <strong>User</strong> <strong>Guide</strong><br />
EN-11
<strong>Meter</strong> Setup<br />
Setup Menu Table<br />
The following table is for the complete line of <strong>Orion</strong> <strong>Star</strong> <strong>and</strong> <strong>Star</strong> <strong>Plus</strong> meters.<br />
<strong>Meter</strong>s may not include all of the options listed in this table.<br />
Top Line Middle Line Bottom Line Setup Menu Description (default setting, method specific)<br />
PH rES 0.1, 0.01, 0.001 pH measurement resolution (0.01, yes)<br />
PH bUF USA, EUr0 pH buffer set for automatic buffer recognition during calibration,<br />
USA buffers are 1.68, 4.01, 7.00, 10.01, 12.46 <strong>and</strong> EUrO buffers<br />
are 1.68, 4.01, 6.86, 9.18 (USA, yes)<br />
ISE rES 1, 2, 3 ISE measurement resolution in significant figures (1, yes)<br />
ISE UnIt m, mgL, PEr, PPb, n0nE ISE measurement units (PPb, yes)<br />
ISE rAng L0w, HIgH ISE concentration range for calibration stability criteria (HIgH, yes)<br />
ISE nLIn AUt0, 0FF ISE automatic blank correction for low-level calibration (AUt0, yes)<br />
C0nd tC 0FF, LIn, nLF Conductivity temperature compensation type, LIn is for linear,<br />
nLF is for non-linear pure water samples (LIn, yes)<br />
C0nd C0EF 0.0 to 10.0 Conductivity temperature compensation coefficient in % change<br />
in conductivity per °C, appears if LIn was selected for tC (2.1, yes)<br />
C0nd tdSF 0.00 to 10.0 Conductivity TDS factor value (0.49, yes)<br />
C0nd CELL 0.001 to 199.0 Conductivity default cell constant value for automatic conductivity<br />
calibration mode (0.475, yes)<br />
C0nd trEF 5, 10, 15, 20, 25 Conductivity reference temperature (25, yes)<br />
C0nd tyPE Std, 1, 2, 3, 4, 5, 6, 7, USP Conductivity cell type <strong>and</strong> selectable range. Std is for st<strong>and</strong>ard,<br />
USP is for planar, 1 through 7 for fixed ranges (Std, yes)<br />
See the RDO Optical Dissolved Oxygen Setup Menu section for details on the RDO probe information menus.<br />
d0 rES 0.1, 1 % sat DO % saturation measurement resolution (0.1, yes)<br />
d0 rES 0.01, 0.1 mg/L DO mg/L measurement resolution (0.01, yes)<br />
d0 bAr AUt0, mAn DO barometric pressure compensation type (AUt0, yes)<br />
d0 PrES 450.0 to 850.0 DO manual barometric pressure compensation value, appears<br />
if mAn was selected for bAr (760.0, yes)<br />
d0 SAL AUt0, mAn DO salinity correction type (AUt0, yes)<br />
d0 SALF 0 to 45 DO manual salinity correction value, appears if mAn was selected<br />
for SAL or a DO meter without a conductivity mode is used (0, yes)<br />
d0 CALt AIr, H20, mAn, SEt0 DO calibration type (AIr, yes)<br />
d0 LIFE 365 to 0 Optical cap replacement countdown in days – 3, 4 <strong>and</strong> 5 <strong>Star</strong> <strong>Plus</strong><br />
RDO meters only (Set by RDO probe, no)<br />
dUE PH 0 to 9999 pH calibration alarm value in hours, 0 is off (0, yes)<br />
dUE 0rP 0 to 9999 ORP calibration alarm value in hours, 0 is off (0, yes)<br />
dUE ISE 0 to 9999 ISE calibration alarm value in hours, 0 is off (0, yes)<br />
dUE C0nd 0 to 9999 Conductivity calibration alarm value in hours, 0 is off (0, yes)<br />
dUE d0 0 to 9999 DO calibration alarm value in hours, 0 is off (0, yes)<br />
EN-12<br />
<strong>Thermo</strong> <strong>Scientific</strong> <strong>Orion</strong> <strong>Star</strong> <strong>and</strong> <strong>Star</strong> <strong>Plus</strong> <strong>Meter</strong> <strong>User</strong> <strong>Guide</strong>
<strong>Meter</strong> Setup<br />
Top Line Middle Line Bottom Line Setup Menu Description (default setting, method specific)<br />
rEAd tyPE AUt0, tImE, C0nt, Measurement read type as AUTO-READ, timed or continuous<br />
(AUt0, yes)<br />
rEAd tInE 00:05 to 99:59 Timed measurement value in minutes <strong>and</strong> seconds (01:00, yes)<br />
Note: This submenu is only available when the timed<br />
measurement read type is selected.<br />
L0g dEL n0, YES Delete datalog after download option, select YES to delete the<br />
datalog when it is downloaded or select nO to overwrite the oldest<br />
data when the datalog is full <strong>and</strong> not delete the datalog when<br />
it is downloaded (n0, yes)<br />
L0g AUt0 0FF, 0n Automatic datalog point saving option (0FF, yes)<br />
gEn dEgC -5.0 to 105 Manual temperature value (25.0, yes)<br />
gEn StIr 0FF, 1, 2, 3, 4, 5, 6, 7 Stirrer speed – 3, 4 <strong>and</strong> 5 <strong>Star</strong> benchtop meters only (4, yes)<br />
gEn PASS 0000 to 9999 <strong>Meter</strong> password entry (0000, yes)<br />
gEn AUt0 0n, 0FF Automatic meter shutoff option (0n, no)<br />
gLP SEt 0FF, 0n GLP option, GLP feature enables or disables methods (0FF, no)<br />
dAtE H0Ur HH00 to HH23 Hour setting (HH12, no)<br />
dAtE tInE mm00 to mm59 Minute setting (mm00, no)<br />
dAtE tYPE mdY, dmY Date format as month, day, year or day, month, year (mdY, no)<br />
dAtE YEAr 2000 to 2099 Year setting (2004, no)<br />
dAtE dAtE mm01 to mm12 Month setting (mm01, no)<br />
dAtE dAY dd01 to dd31 Day of the month setting (dd01, no)<br />
r232 bAUd 1200, 2400, 4800, 9600 Baud rate setting (9600, no)<br />
r232 0UtF Prnt, C0mP Output format for printer or computer, COmP format is comma<br />
delimited (Prnt, no)<br />
AUt0 SAPL 0FF, 0n Autosampler – 3, 4 <strong>and</strong> 5 <strong>Star</strong> <strong>Plus</strong> benchtop meters only (OFF, no)<br />
AUt0 trAY 28, 48 Beaker tray setting (28, no)<br />
AUt0 rInb 1, 2, 3, 4, 5 Number of rinse beakers (3, no)<br />
AUt0 rSEC 5 to 60 Rinse time in each rinse beaker, seconds (10, no)<br />
AUt0 PH 0, 1, 2, 3 pH calibration points (3, no)<br />
AUt0 0rP n0, YES ORP calibration option, appears if 0 was selected for PH (n0, no)<br />
AUt0 ISE 0, 2, 3 ISE calibration points, appears if 0 was selected for PH (2, no)<br />
1 AUt0 ISE1 Concentration value of ISE st<strong>and</strong>ard 1, appears if 2 or 3 was<br />
selected for the ISE calibration points (1, no)<br />
10 AUt0 ISE2 Concentration value of ISE st<strong>and</strong>ard 1, appears if 2 or 3 was<br />
selected for the ISE calibration points (10, no)<br />
100 AUt0 ISE3 Concentration value of ISE st<strong>and</strong>ard 1, appears if 3 was selected<br />
for the ISE calibration points (100, no)<br />
AUt0 C0nd 0, 1, 2, 3 Conductivity calibration points (3, no)<br />
AUt0 n0SA 0 to 47 Number of sample beakers (1, no)<br />
<strong>Thermo</strong> <strong>Scientific</strong> <strong>Orion</strong> <strong>Star</strong> <strong>and</strong> <strong>Star</strong> <strong>Plus</strong> <strong>Meter</strong> <strong>User</strong> <strong>Guide</strong><br />
EN-13
<strong>Meter</strong> Setup<br />
General Menu Settings<br />
• Manual Temperature controls temperature compensation<br />
when no temperature probe is attached to the meter.<br />
• Stirrer Speed sets the stirrer speed from 1 (slowest)<br />
through 7 (fastest) <strong>and</strong> off (3-<strong>Star</strong>, 4-<strong>Star</strong> <strong>and</strong> 5-<strong>Star</strong><br />
benchtop meters only).<br />
• Password Protection protects setup menu options <strong>and</strong><br />
methods from being accidentally erased or tampered with<br />
(3-<strong>Star</strong>, 4-<strong>Star</strong> <strong>and</strong> 5-<strong>Star</strong> meters only).<br />
• Automatic Shutoff controls whether the instrument will<br />
automatically turn off after 20 minutes without a keypress.<br />
1. In the measurement mode, press .<br />
2. Press / to scroll through the setup menu until is displayed<br />
on the top line.<br />
3. Press to accept the selection <strong>and</strong> move the arrow icon to the middle line.<br />
4. Press / to scroll through for the manual temperature setting,<br />
for the stirrer speed setting, for password entry <strong>and</strong> for<br />
the automatic shutoff setting.<br />
5. Press to accept the selection <strong>and</strong> move the arrow icon to the bottom line.<br />
6. To scroll through a list of options on the bottom line, press / until the<br />
desired option is displayed. To enter a numeric value for an option on the bottom<br />
line, press / to adjust each digit <strong>and</strong> to move to the next digit.<br />
7. Press to accept the selection <strong>and</strong> move the arrow icon to the top line.<br />
8. Repeat steps 3 through 7 to change another general setting or press<br />
to return to the measurement mode.<br />
EN-14<br />
<strong>Thermo</strong> <strong>Scientific</strong> <strong>Orion</strong> <strong>Star</strong> <strong>and</strong> <strong>Star</strong> <strong>Plus</strong> <strong>Meter</strong> <strong>User</strong> <strong>Guide</strong>
<strong>Meter</strong> Setup<br />
Time <strong>and</strong> Date Settings<br />
• The date <strong>and</strong> time settings are saved with the data <strong>and</strong><br />
calibration log points <strong>and</strong> are included with the data that<br />
is sent to a computer or printer.<br />
• The date format can be set to read month, day, year<br />
or day, month, year according to the user’s preference.<br />
1. In the measurement mode, press .<br />
2. Press / to scroll through the setup menu until is displayed<br />
on the top line.<br />
3. Press to accept the selection <strong>and</strong> move the arrow icon to the middle line.<br />
4. Press / to scroll through for the current hour setting in 24<br />
hour format, for the current minute setting, for the date format<br />
setting, for the current month setting, for the current day setting<br />
<strong>and</strong> for the current year setting.<br />
5. Press to accept the selection <strong>and</strong> move the arrow icon to the bottom line.<br />
6. To scroll through a list of options on the bottom line, press / until the<br />
desired option is displayed. To enter a numeric value for an option on the bottom<br />
line, press / to adjust each digit <strong>and</strong> to move to the next digit.<br />
7. Press to accept the selection <strong>and</strong> move the arrow icon to the top line.<br />
8. Repeat steps 3 through 7 to change another time <strong>and</strong> date setting or press<br />
to return to the measurement mode.<br />
<strong>Thermo</strong> <strong>Scientific</strong> <strong>Orion</strong> <strong>Star</strong> <strong>and</strong> <strong>Star</strong> <strong>Plus</strong> <strong>Meter</strong> <strong>User</strong> <strong>Guide</strong><br />
EN-15
<strong>Meter</strong> Setup<br />
AUTO-READ , Continuous or Timed Measurement Settings<br />
• In the AUTO-READ mode, the meter starts taking<br />
a measurement when is pressed. Once the<br />
measurement is stable, the display freezes <strong>and</strong> the data<br />
is logged <strong>and</strong> printed. The AUTO-READ mode also controls<br />
the stirrer. The stirrer starts when is pressed <strong>and</strong> stops<br />
when the measurement becomes stable.<br />
• In the continuous mode, the meter is constantly taking measurements <strong>and</strong><br />
updating the display. Press to log <strong>and</strong> print a measurement in this mode.<br />
• In the timed mode, the meter is constantly taking measurements <strong>and</strong> updating<br />
the display. The meter logs <strong>and</strong> prints the measurement at the selected time<br />
interval. Timed dissolved oxygen measurements with the RDO probe are taken<br />
only at the selected time interval, which conserves the meter battery power.<br />
1. In the measurement mode, press .<br />
2. Press / to scroll through the setup menu until is displayed<br />
on the top line.<br />
3. Press to accept the selection <strong>and</strong> move the arrow icon to the middle line.<br />
4. If the timed measurement setting is active, press / to scroll<br />
through for the measurement read type <strong>and</strong> for the timed<br />
reading interval.<br />
5. Press to accept the selection <strong>and</strong> move the arrow icon to the bottom line.<br />
6. To scroll through a list of options on the bottom line, press / until the<br />
desired option is displayed. To enter a numeric value for an option on the bottom<br />
line, press / to adjust each digit <strong>and</strong> to move to the next digit.<br />
7. Press to accept the selection <strong>and</strong> move the arrow icon to the top line.<br />
8. Repeat steps 3 through 7 to change another measurement setting or press<br />
to return to the measurement mode.<br />
EN-16<br />
<strong>Thermo</strong> <strong>Scientific</strong> <strong>Orion</strong> <strong>Star</strong> <strong>and</strong> <strong>Star</strong> <strong>Plus</strong> <strong>Meter</strong> <strong>User</strong> <strong>Guide</strong>
<strong>Meter</strong> Setup<br />
Selecting the Measurement Parameter<br />
In the measurement mode, the arrow icon on the left side of the display indicates<br />
the active line. Press to move the arrow icon to the desired measurement line<br />
<strong>and</strong> press / to scroll through the measurement parameters associated with<br />
the selected line.<br />
The measurement lines <strong>and</strong> icons for the 5-<strong>Star</strong> multi-parameter meter are shown<br />
below. The single <strong>and</strong> dual parameter meters will have fewer measurement lines<br />
<strong>and</strong> icons, depending on the meter capabilities.<br />
pH<br />
mV<br />
RmV<br />
ISE<br />
No icon for temperature<br />
No icon <strong>and</strong> no measurement – the measurement line is turned off<br />
μS/cm or mS/cm for conductivity<br />
mg/L for TDS<br />
ppt for salinity<br />
MΩ-cm for resistivity<br />
No icon for temperature<br />
No icon <strong>and</strong> no measurement – the measurement line is turned off<br />
% sat for dissolved oxygen percent saturation<br />
mg/L for dissolved oxygen concentration<br />
No icon for barometric pressure<br />
No icon for sample temperature<br />
No icon for membrane temperature (polarographic DO readings only)<br />
No icon <strong>and</strong> no measurement – the measurement line is turned off<br />
Note: If a measurement line is not needed, press to move the arrow<br />
icon to the measurement line that is not needed <strong>and</strong> press / until the<br />
measurement line is completely blank.<br />
<strong>Thermo</strong> <strong>Scientific</strong> <strong>Orion</strong> <strong>Star</strong> <strong>and</strong> <strong>Star</strong> <strong>Plus</strong> <strong>Meter</strong> <strong>User</strong> <strong>Guide</strong><br />
EN-17
<strong>Meter</strong> Setup<br />
Method Setup<br />
The <strong>Orion</strong> 3-<strong>Star</strong>, 4-<strong>Star</strong> <strong>and</strong> 5-<strong>Star</strong> meters can save up to 10 methods when<br />
the GLP function is enabled. When a method is selected, the meter will use the<br />
last calibration performed in that method, so electrodes that share a common<br />
meter connection can be more easily interchanged. When using multiple methods,<br />
a calibration must be performed for each method that will be used.<br />
1. To enable the GLP function:<br />
a. In the measurement mode, press .<br />
b. Press / until is displayed on top line.<br />
c. Press to move the arrow icon to the middle line <strong>and</strong> press /<br />
until is displayed.<br />
d. Press to move the arrow icon to the bottom line <strong>and</strong> press /<br />
until is displayed.<br />
e. Press to move the arrow icon to the top line.<br />
f. Press to exit the setup menu <strong>and</strong> return to the measurement mode.<br />
2. To display <strong>and</strong> change the current method number:<br />
a. In the measurement mode, press . The current method number will<br />
be displayed.<br />
b. Press / to select a new method number.<br />
c. Press to save the method number <strong>and</strong> press to return to the<br />
measurement mode.<br />
EN-18<br />
<strong>Thermo</strong> <strong>Scientific</strong> <strong>Orion</strong> <strong>Star</strong> <strong>and</strong> <strong>Star</strong> <strong>Plus</strong> <strong>Meter</strong> <strong>User</strong> <strong>Guide</strong>
Chapter VI pH Technique<br />
pH Setup Menu<br />
Note: Refer to the pH Setup Menu section for the Setup Menu Table,<br />
which contains a complete list of meter setup options <strong>and</strong> descriptions.<br />
Refer to Appendix A for a description of the special setup menu features.<br />
1. In the measurement mode, press .<br />
2. Press / to scroll through the setup menu until is displayed<br />
on the top line.<br />
3. Press to accept the selection <strong>and</strong> move the arrow icon to the middle line.<br />
4. Press / to scroll through for pH measurement resolution<br />
<strong>and</strong> for the automatic buffer recognition setting.<br />
5. Press to accept the selection <strong>and</strong> move the arrow icon to the bottom line.<br />
6. To scroll through a list of options on the bottom line, press / until<br />
the desired option is displayed.<br />
7. Press to accept the selection <strong>and</strong> move the arrow icon to the top line.<br />
8. Repeat steps 3 through 7 to change another pH setting or press to return<br />
to the measurement mode.<br />
<strong>Thermo</strong> <strong>Scientific</strong> <strong>Orion</strong> <strong>Star</strong> <strong>and</strong> <strong>Star</strong> <strong>Plus</strong> <strong>Meter</strong> <strong>User</strong> <strong>Guide</strong><br />
EN-19
pH Technique<br />
pH Calibration<br />
1. Prepare the electrode according to the electrode user guide.<br />
2. In the setup mode, select the buffer set ( or ) that will be used<br />
for the automatic buffer recognition feature.<br />
3. In the measurement mode, press until the arrow icon points to the top line,<br />
press until the pH icon is shown <strong>and</strong> press to begin the calibration.<br />
4. Rinse the electrode, <strong>and</strong> ATC probe if being used, with distilled water <strong>and</strong> place<br />
into the buffer.<br />
5. Wait for the pH icon to stop flashing.<br />
a. Automatic buffer recognition – When the pH icon stops flashing the meter<br />
will display the temperature-corrected pH value for the buffer.<br />
b. Manual calibration – When the pH icon stops flashing the meter will display<br />
the actual pH value read by the electrode. Press until the first digit<br />
to be changed is flashing, press / to change the value of the<br />
flashing digit <strong>and</strong> continue to change the digits until the meter displays the<br />
temperature-corrected pH value of the buffer. Once the pH buffer value is<br />
set, press until the decimal point is in the correct location.<br />
6. Press to proceed to the next calibration point <strong>and</strong> repeat steps 4 <strong>and</strong> 5<br />
or press to save <strong>and</strong> end the calibration.<br />
7. The actual electrode slope, in percent, will be displayed in the main field<br />
<strong>and</strong> will be displayed in the lower field.<br />
a. For a one point calibration, press <strong>and</strong> / to edit the slope<br />
<strong>and</strong> press to return to the measurement mode.<br />
b. For a two or more point calibration, the meter will automatically proceed<br />
to the measurement mode after the slope is displayed.<br />
EN-20<br />
<strong>Thermo</strong> <strong>Scientific</strong> <strong>Orion</strong> <strong>Star</strong> <strong>and</strong> <strong>Star</strong> <strong>Plus</strong> <strong>Meter</strong> <strong>User</strong> <strong>Guide</strong>
pH Measurement<br />
Note: Turn on the automatic datalog feature to send measurements to the meter<br />
datalog at the frequency specified in each measurement mode. Refer to the Data<br />
Archiving <strong>and</strong> Retrieval section for details. If the automatic datalog feature is off,<br />
connect the meter to a printer or computer to record the measurements.<br />
1. Rinse the electrode with distilled or deionized water. Shake off any excess water<br />
<strong>and</strong> blot the electrode dry with lint-free tissue.<br />
2. Place the electrode into the sample.<br />
pH Technique<br />
a. If the meter is in the continuous measurement mode, it will start reading<br />
immediately <strong>and</strong> continuously update the display. The pH icon will flash<br />
until the reading is stable. Once the reading is stable, log <strong>and</strong> print the<br />
measurement by pressing . If a benchtop meter is used <strong>and</strong> the stirrer<br />
is enabled, press to start the stirrer. Press again to turn off the<br />
stirrer before removing the electrode <strong>and</strong> stirrer from the sample.<br />
b. If the meter is in the AUTO-READ measurement mode, press to start<br />
the reading. The AR icon will flash until the reading is stable. Once the<br />
reading is stable, the meter will log <strong>and</strong> print the measurement <strong>and</strong> freeze<br />
the display. If a benchtop meter is used <strong>and</strong> the stirrer is enabled, the stirrer<br />
will turn on when is pressed <strong>and</strong> turn off when the reading is stable.<br />
c. If the meter is in the timed measurement mode, it will start reading<br />
immediately <strong>and</strong> continuously update the display. The meter will log <strong>and</strong><br />
print the measurement at the frequency specified in the setup menu.<br />
If a benchtop meter is used <strong>and</strong> the stirrer is enabled, press to start the<br />
stirrer. Press again to turn off the stirrer before removing the electrode<br />
<strong>and</strong> stirrer from the sample.<br />
3. Remove the electrode from the sample, rinse it with distilled or deionized water,<br />
blot it dry, place it in the next sample <strong>and</strong> repeat step 2.<br />
4. Once all of the samples have been measured, rinse the electrode with distilled<br />
or deionized water <strong>and</strong> blot it dry. Consult the electrode user guide for proper<br />
storage techniques.<br />
<strong>Thermo</strong> <strong>Scientific</strong> <strong>Orion</strong> <strong>Star</strong> <strong>and</strong> <strong>Star</strong> <strong>Plus</strong> <strong>Meter</strong> <strong>User</strong> <strong>Guide</strong><br />
EN-21
pH Technique<br />
pH Temperature Display <strong>and</strong> Calibration<br />
pH Temperature Display<br />
<strong>Star</strong> <strong>Plus</strong> meters allow the temperature to be viewed on individual measurement<br />
lines in addition to the temperature display on the top, left of the screen.<br />
To view the temperature for the pH measurement line:<br />
1. In the measurement mode, press to select the top display line.<br />
The arrow icon will point to the selected line.<br />
2. Press / to change the value on the selected line. The top line<br />
can be changed to display pH (pH), millivolts (mV), relative millivolts (RmV),<br />
concentration (ISE), temperature (no icon) or a blank line.<br />
pH Temperature Calibration<br />
The temperature calibration mode of the <strong>Star</strong> <strong>Plus</strong> meter allows the temperature<br />
on each measurement line to be manually adjusted.<br />
To calibrate the temperature for the pH measurement line:<br />
1. In the measurement mode, press to choose the top measurement line<br />
<strong>and</strong> press / until the temperature is shown for the selected line.<br />
2. Press to begin the calibration.<br />
3. When the reading stabilizes, the arrow icon <strong>and</strong> the first digit will flash.<br />
Enter the temperature by pressing / to adjust each digit <strong>and</strong><br />
to move to the next digit.<br />
4. Press to save <strong>and</strong> end the calibration.<br />
EN-22<br />
<strong>Thermo</strong> <strong>Scientific</strong> <strong>Orion</strong> <strong>Star</strong> <strong>and</strong> <strong>Star</strong> <strong>Plus</strong> <strong>Meter</strong> <strong>User</strong> <strong>Guide</strong>
Chapter VII mV, Relative mV<br />
<strong>and</strong> ORP Technique<br />
All meters with pH measurement capability include a mV, relative mV <strong>and</strong> ORP<br />
function. Measure the raw millivolt (mV) values of an electrode in the mV mode.<br />
Calibrate the relative millivolt (RmV) values of a redox electrode for oxidationreduction<br />
potential (ORP) measurements in the relative mV/ORP mode.<br />
Note: The mV measurements are raw readings <strong>and</strong> cannot be calibrated.<br />
Use the relative mV mode to calibrate mV measurements.<br />
Relative mV <strong>and</strong> ORP Calibration<br />
1. Prepare the electrode according to the electrode user guide.<br />
2. In the measurement mode, press until the arrow icon points to the top line,<br />
press until the RmV icon is shown <strong>and</strong> press to begin the calibration.<br />
3. Rinse the electrode with distilled water <strong>and</strong> place it into the st<strong>and</strong>ard.<br />
4. Wait for the RmV icon to stop flashing. If the raw mV reading of the electrode<br />
is 220 mV ± 60 mV, when the RmV icon stops flashing the meter will<br />
automatically calculate <strong>and</strong> display the E H mV value for the electrode at the<br />
measured temperature. If the raw mV reading of the electrode is outside of<br />
the 220 mV ± 60 mV range, when the RmV icon stops flashing the meter will<br />
display 000.0 RmV. Press until the first digit to be changed is flashing,<br />
press / to change the value of the flashing digit <strong>and</strong> continue to change<br />
the digits until the meter displays the millivolt value of the st<strong>and</strong>ard. To change<br />
the value to negative or positive number, press until none of the digits are<br />
blinking <strong>and</strong> the arrow icon is blinking <strong>and</strong> then press to change the sign<br />
of the millivolt value.<br />
5. Press to save <strong>and</strong> end the calibration. The millivolt offset will be displayed<br />
<strong>and</strong> the meter will automatically proceed to the measurement mode.<br />
<strong>Thermo</strong> <strong>Scientific</strong> <strong>Orion</strong> <strong>Star</strong> <strong>and</strong> <strong>Star</strong> <strong>Plus</strong> <strong>Meter</strong> <strong>User</strong> <strong>Guide</strong><br />
EN-23
mV, Relative mV <strong>and</strong> ORP Technique<br />
mV, Relative mV <strong>and</strong> ORP Measurement<br />
Note: Turn on the automatic datalog feature to send measurements to the meter<br />
datalog at the frequency specified in each measurement mode. Refer to the Data<br />
Archiving <strong>and</strong> Retrieval section for details. If the automatic datalog feature is off,<br />
connect the meter to a printer or computer to record the measurements.<br />
1. Rinse the electrode with distilled or deionized water. Shake off any excess water<br />
<strong>and</strong> blot the electrode dry with lint-free tissue.<br />
2. Place the electrode into the sample.<br />
a. If the meter is in the continuous measurement mode, it will start reading<br />
immediately <strong>and</strong> continuously update the display. The mV or RmV icon will<br />
flash until the reading is stable. Once the reading is stable, log <strong>and</strong> print the<br />
measurement by pressing . If a benchtop meter is used <strong>and</strong> the stirrer is<br />
enabled, press to start the stirrer. Press again to turn off the stirrer<br />
before removing the electrode <strong>and</strong> stirrer from the sample.<br />
b. If the meter is in the AUTO-READ measurement mode, press to start<br />
the reading. The AR icon will flash until the reading is stable. Once the<br />
reading is stable, the meter will log <strong>and</strong> print the measurement <strong>and</strong> freeze<br />
the display. If a benchtop meter is used <strong>and</strong> the stirrer is enabled, the stirrer<br />
will turn on when is pressed <strong>and</strong> turn off when the reading is stable.<br />
c. If the meter is in the timed measurement mode, it will start reading<br />
immediately <strong>and</strong> continuously update the display. The meter will log <strong>and</strong><br />
print the measurement at the frequency specified in the setup menu. If a<br />
benchtop meter is used <strong>and</strong> the stirrer is enabled, press to start the<br />
stirrer. Press again to turn off the stirrer before removing the electrode<br />
<strong>and</strong> stirrer from the sample.<br />
3. Remove the electrode from the sample, rinse it with distilled or deionized water,<br />
blot it dry, place it in the next sample <strong>and</strong> repeat step 2.<br />
4. Once all of the samples have been measured, rinse the electrode with distilled<br />
or deionized water <strong>and</strong> blot it dry. Consult the electrode user guide for proper<br />
storage techniques.<br />
EN-24<br />
<strong>Thermo</strong> <strong>Scientific</strong> <strong>Orion</strong> <strong>Star</strong> <strong>and</strong> <strong>Star</strong> <strong>Plus</strong> <strong>Meter</strong> <strong>User</strong> <strong>Guide</strong>
Chapter VIII Polarographic<br />
Dissolved Oxygen Technique<br />
Polarographic Dissolved Oxygen Setup Menu<br />
Note: Refer to the DO Setup Menu section for the Setup Menu Table,<br />
which contains a complete list of meter setup options <strong>and</strong> descriptions.<br />
Refer to Appendix A for a description of the special setup menu features.<br />
1. In the measurement mode, press .<br />
2. Press / to scroll through the setup menu until is displayed<br />
on the top line.<br />
3. Press to accept the selection <strong>and</strong> move the arrow icon to the middle line.<br />
4. Press / to scroll through for the % saturation resolution,<br />
for the mg/L concentration resolution, for the barometer type (automatic or<br />
manual), for the manual barometric pressure compensation value,<br />
for the salinity compensation type (automatic or manual), for the manual<br />
salinity correction value <strong>and</strong> for the dissolved oxygen calibration type.<br />
5. Press to select the option <strong>and</strong> move the arrow icon to the bottom line.<br />
6. To scroll through a list of options on the bottom line, press / until the<br />
desired option is displayed. To enter a numeric value for an option on the bottom<br />
line, press / to adjust each digit <strong>and</strong> to move to the next digit.<br />
7. Press to accept the selection <strong>and</strong> move the arrow icon to the top line.<br />
8. Repeat steps 3 through 7 to change another dissolved oxygen setting or press<br />
to return to the measurement mode.<br />
<strong>Thermo</strong> <strong>Scientific</strong> <strong>Orion</strong> <strong>Star</strong> <strong>and</strong> <strong>Star</strong> <strong>Plus</strong> <strong>Meter</strong> <strong>User</strong> <strong>Guide</strong><br />
EN-25
Polarographic Dissolved Oxygen Technique<br />
Polarographic Dissolved Oxygen Calibration<br />
• Prior to calibration, the dissolved oxygen probe must be prepared <strong>and</strong> polarized.<br />
The probe is continuously polarized when it is connected to the meter. When<br />
the probe is first connected or if the probe is disconnected for more than 60<br />
minutes, connect the probe to the meter, connect the meter to a power source<br />
<strong>and</strong> wait 30 to 60 minutes for the probe to polarize. Disconnecting the probe for<br />
less than one hour will require 5 to 25 minutes for polarization.<br />
• The meters will supply a polarization current to the dissolved oxygen probe<br />
even when the meter power is off. To maximize the meter battery life, unplug<br />
the probe if it will not be used for an extended period.<br />
1. Select one of the following calibration modes in the setup menu.<br />
a. – An air calibration is performed in water saturated air using the<br />
calibration sleeve. This is the simplest <strong>and</strong> most accurate calibration. Due to<br />
the inherent differences between water saturated air <strong>and</strong> air saturated water,<br />
102.3% saturation will be displayed when the calibration reading is stable.<br />
i. The highest possible accuracy is reached when calibration temperature<br />
is the same as the measuring temperature.<br />
ii. Moisten the sponge or absorbent cloth in the calibration sleeve with<br />
distilled water <strong>and</strong> insert the probe into the sleeve without touching<br />
the water saturated material. For BOD measurements, this calibration<br />
can be performed in a BOD bottle.<br />
b. – A water calibration is performed using water that is 100% saturated<br />
with air. Bubble air into a water sample <strong>and</strong> gently stir the sample to prevent<br />
the buildup of air bubbles on the dissolved oxygen probe membrane.<br />
c. – A manual calibration is performed using a water sample with<br />
a known concentration of dissolved oxygen. This method can be used<br />
to calibrate the dissolved oxygen probe to the value achieved by<br />
a Winkler titration.<br />
EN-26<br />
<strong>Thermo</strong> <strong>Scientific</strong> <strong>Orion</strong> <strong>Star</strong> <strong>and</strong> <strong>Star</strong> <strong>Plus</strong> <strong>Meter</strong> <strong>User</strong> <strong>Guide</strong>
Polarographic Dissolved Oxygen Technique<br />
i. A manual calibration involves performing a Winkler titration <strong>and</strong> using<br />
that sample as a calibration st<strong>and</strong>ard. The oxygen level result from the<br />
titration is entered in a manual calibration as the dissolved oxygen value.<br />
This correlates the meter input to the Winkler titration. This method is<br />
inherently less accurate, due to the possibility of titration errors.<br />
d. – A zero point calibration is performed in an oxygen-free solution.<br />
A zero point calibration is not generally required unless measurements will<br />
be taken below 10% saturation or 1 mg/L. Zero the probe when using a new<br />
membrane, using fresh filling solution or when measuring dissolved oxygen<br />
levels below 1 mg/L. An air calibration should be performed prior to the zero<br />
point calibration.<br />
2. Allow the probe <strong>and</strong> calibration st<strong>and</strong>ard (water saturated air, air saturated water,<br />
Winkler st<strong>and</strong>ard or oxygen-free solution) to reach equilibrium.<br />
3. In the measurement mode, press until the arrow icon points to the bottom<br />
line, press until the % sat or mg/L icon is shown <strong>and</strong> press to begin<br />
the calibration.<br />
4. Wait for the dissolved oxygen reading to stabilize.<br />
a. If an air calibration is performed, the meter will display 102.3%<br />
<strong>and</strong> automatically return to the measurement mode.<br />
b. If a water calibration is performed, the meter will display 100.0%<br />
<strong>and</strong> automatically return to the measurement mode.<br />
c. If a manual calibration is performed, wait for the mg/L icon to stop flashing<br />
<strong>and</strong> enter the dissolved oxygen value by pressing until the first digit to<br />
be changed is flashing, press / to change the value of the flashing<br />
digit <strong>and</strong> continue to change the digits until the meter displays the correct<br />
dissolved oxygen value. Once the dissolved oxygen value is set, press<br />
until the decimal point is in the correct location.<br />
d. If a zero point calibration is performed, the meter will display 0.00 <strong>and</strong><br />
automatically return to the measurement mode.<br />
<strong>Thermo</strong> <strong>Scientific</strong> <strong>Orion</strong> <strong>Star</strong> <strong>and</strong> <strong>Star</strong> <strong>Plus</strong> <strong>Meter</strong> <strong>User</strong> <strong>Guide</strong><br />
EN-27
Polarographic Dissolved Oxygen Technique<br />
Polarographic Dissolved Oxygen Measurement<br />
Note: Turn on the automatic datalog feature to send measurements to the meter<br />
datalog at the frequency specified in each measurement mode. Refer to the Data<br />
Archiving <strong>and</strong> Retrieval section for details. If the automatic datalog feature is off,<br />
connect the meter to a printer or computer to record the measurements.<br />
1. Rinse the dissolved oxygen probe with distilled or deionized water.<br />
Shake off any excess water <strong>and</strong> blot the probe dry with lint-free tissue.<br />
2. Place the dissolved oxygen probe into the sample.<br />
a. If the meter is in the continuous measurement mode, it will start reading<br />
immediately <strong>and</strong> continuously update the display. The mg/L or % sat icon<br />
will flash until the reading is stable. Once the reading is stable, log <strong>and</strong> print<br />
the measurement by pressing . If a benchtop meter is used <strong>and</strong> the<br />
stirrer is enabled, press to start the stirrer. Press again to turn off<br />
the stirrer before removing the probe <strong>and</strong> stirrer from the sample.<br />
b. If the meter is in the AUTO-READ measurement mode, press to start<br />
the reading. The AR icon will flash until the reading is stable. Once the<br />
reading is stable, the meter will log <strong>and</strong> print the reading <strong>and</strong> freeze the<br />
display. If a benchtop meter is used <strong>and</strong> the stirrer is enabled, the stirrer will<br />
turn on when is pressed <strong>and</strong> turn off when the reading is stable. If the<br />
BOD AUTO-STIR probe is used, press the button on the probe to start the<br />
AUTO-READ measurement.<br />
Note: Benchtop <strong>Star</strong> <strong>Plus</strong> dissolved oxygen meters allow the measurement<br />
<strong>and</strong> stirring functions to be controlled by the AUTO-STIR probe when the<br />
meter is in the AUTO-READ measurement mode. Press the button on the<br />
AUTO-STIR probe to start <strong>and</strong> stop measurement <strong>and</strong> stirring functions.<br />
c. If the meter is in the timed measurement mode, it will start reading<br />
immediately <strong>and</strong> continuously update the display. The meter will log<br />
<strong>and</strong> print the measurement at the frequency specified in the setup menu.<br />
If a benchtop meter is used <strong>and</strong> the stirrer is enabled, press to start<br />
the stirrer. Press again to turn off the stirrer before removing the probe<br />
<strong>and</strong> stirrer from the sample.<br />
EN-28<br />
<strong>Thermo</strong> <strong>Scientific</strong> <strong>Orion</strong> <strong>Star</strong> <strong>and</strong> <strong>Star</strong> <strong>Plus</strong> <strong>Meter</strong> <strong>User</strong> <strong>Guide</strong>
3. Remove the dissolved oxygen probe from the sample, rinse it with distilled<br />
or deionized water, blot it dry, place it in the next sample <strong>and</strong> repeat step 2.<br />
4. Once all of the samples have been measured, rinse the dissolved oxygen probe<br />
with distilled or deionized water <strong>and</strong> blot it dry. Consult the dissolved oxygen<br />
probe user guide for proper storage techniques.<br />
Polarographic Dissolved Oxygen<br />
Temperature Display <strong>and</strong> Calibration<br />
Polarographic Dissolved Oxygen Technique<br />
Polarographic Dissolved Oxygen Temperature Display<br />
<strong>Star</strong> <strong>Plus</strong> meters allow the temperature to be viewed on individual measurement<br />
lines in addition to the temperature display on the top, left of the screen.<br />
To view the temperature for the dissolved oxygen measurement line:<br />
1. In the measurement mode, press to choose the bottom display line.<br />
The arrow icon will point to the selected line.<br />
2. Press / to change the value on the selected line. The bottom line<br />
can be changed to display dissolved oxygen (% saturation), dissolved oxygen<br />
(mg/L), barometric pressure (no icon), sample temperature (no icon), electrolyte<br />
solution/membrane temperature (no icon, after number) or a blank line.<br />
<strong>Thermo</strong> <strong>Scientific</strong> <strong>Orion</strong> <strong>Star</strong> <strong>and</strong> <strong>Star</strong> <strong>Plus</strong> <strong>Meter</strong> <strong>User</strong> <strong>Guide</strong><br />
EN-29
Polarographic Dissolved Oxygen Technique<br />
Polarographic Dissolved Oxygen Temperature Calibration<br />
The temperature calibration mode of the <strong>Star</strong> <strong>Plus</strong> meter allows the temperature<br />
on each measurement line to be manually adjusted. The dissolved oxygen<br />
measurement line displays the sample temperature <strong>and</strong> the electrolyte solution/<br />
membrane temperature.<br />
To calibrate the sample temperature for the dissolved oxygen measurement line:<br />
1. In the measurement mode, press to choose the bottom measurement line<br />
<strong>and</strong> press / until the sample temperature is displayed (i.e. ).<br />
2. Press to begin the calibration.<br />
3. When the reading stabilizes, the arrow icon <strong>and</strong> the first digit will flash.<br />
Enter the temperature by pressing / to adjust each digit <strong>and</strong><br />
to move to the next digit.<br />
4. Press to save <strong>and</strong> end the calibration.<br />
To calibrate the electrolyte solution/membrane temperature for the dissolved oxygen<br />
measurement line:<br />
1. In the measurement mode, press to choose the bottom measurement line<br />
<strong>and</strong> press / until the membrane temperature is displayed (i.e. ).<br />
2. Press to begin the calibration.<br />
3. When the reading stabilizes, the arrow icon <strong>and</strong> the first digit will flash. Enter<br />
the temperature by pressing / to adjust each digit <strong>and</strong> to move<br />
to the next digit.<br />
4. Press to save <strong>and</strong> end the calibration.<br />
EN-30<br />
<strong>Thermo</strong> <strong>Scientific</strong> <strong>Orion</strong> <strong>Star</strong> <strong>and</strong> <strong>Star</strong> <strong>Plus</strong> <strong>Meter</strong> <strong>User</strong> <strong>Guide</strong>
Chapter IX RDO ®<br />
Optical Dissolved<br />
Oxygen Technique<br />
Note: The RDO optical dissolved oxygen meters have serial numbers that<br />
begin with R (i.e. R12345). Only the RDO meters are compatible with the<br />
RDO optical probes.<br />
Optical Cap Overview<br />
The RDO optical probe has an internal clock that counts down the 365 day<br />
lifespan of a new optical cap. The countdown begins when the optical cap is<br />
installed on the RDO probe, the probe is connected to the meter <strong>and</strong> the first<br />
measurement is taken. The 365 day countdown cannot be reset or changed once<br />
the first measurement is taken. Each optical cap has a unique serial number that is<br />
recognized by the RDO probe, so reinstalling the cap will not reset the countdown.<br />
Note: The power to the meter must be turned off when a new optical cap<br />
is installed on the RDO probe. Once the optical cap is installed, turn the power<br />
to the meter on <strong>and</strong> the new cap information will be sent to the meter.<br />
To print the optical cap information:<br />
1. Connect the meter to a printer or computer <strong>and</strong> verify the meter baud rate<br />
<strong>and</strong> output settings in the setup menu.<br />
2. From the measurement mode, press .<br />
3. Press / to scroll through the setup menu until is displayed<br />
on the top line <strong>and</strong> is displayed on the middle line.<br />
4. Press two times to move the arrow icon to the bottom line.<br />
5. Press / until is displayed on the bottom line.<br />
6. Press to print the optical cap information. Press to return to the<br />
measurement mode.<br />
<strong>Thermo</strong> <strong>Scientific</strong> <strong>Orion</strong> <strong>Star</strong> <strong>and</strong> <strong>Star</strong> <strong>Plus</strong> <strong>Meter</strong> <strong>User</strong> <strong>Guide</strong><br />
EN-31
RDO ® Optical Dissolved Oxygen Technique<br />
RDO Optical Dissolved Oxygen Setup Menu<br />
Note: Refer to the Setup Menu section for the Setup Menu Table, which contains<br />
a complete list of meter setup options <strong>and</strong> descriptions.<br />
1. From the measurement mode, press .<br />
2. Press / to scroll through the setup menu until is displayed<br />
on the top line.<br />
3. Press to accept the selection <strong>and</strong> move the arrow icon to the middle line.<br />
4. Press / to scroll through for the % saturation resolution, for<br />
the mg/L concentration resolution, for the barometer type (automatic or<br />
manual), for the manual barometric pressure compensation value,<br />
for the salinity compensation type (automatic or manual), for the manual<br />
salinity correction value, for the dissolved oxygen calibration type <strong>and</strong><br />
for the optical cap replacement countdown in days.<br />
5. Press to select the option <strong>and</strong> move the arrow icon to the bottom line.<br />
6. To scroll through a list of options on the bottom line, press / until the<br />
desired option is displayed. To enter a numeric value for an option on the bottom<br />
line, press / to adjust each digit <strong>and</strong> to move to the next digit.<br />
7. Press to accept the selection <strong>and</strong> move the arrow icon to the top line.<br />
8. Repeat steps 3 through 7 to change another dissolved oxygen setting or press<br />
to return to the measurement mode.<br />
EN-32<br />
<strong>Thermo</strong> <strong>Scientific</strong> <strong>Orion</strong> <strong>Star</strong> <strong>and</strong> <strong>Star</strong> <strong>Plus</strong> <strong>Meter</strong> <strong>User</strong> <strong>Guide</strong>
RDO ® Optical Dissolved Oxygen Technique<br />
Setup Menu for RDO Optical Probe<br />
The RDO optical dissolved oxygen meters have a special setup menu feature that<br />
allows the user to print information about the RDO optical probe.<br />
Top Line Middle Line Bottom Line Setup Menu Description<br />
Pr0b d0 tESt The tESt option initiates a 30 second test of the communication link<br />
between the RDO probe <strong>and</strong> meter. The temperature display will show a<br />
30 second countdown as the test progresses. The meter will send a report<br />
to the printer or computer when the test is done.<br />
Pr0b d0 CAL The CAL option prints the meter serial number, date, time <strong>and</strong> slope for the<br />
last five dissolved oxygen calibrations that were performed with the RDO<br />
probe that is currently connected to the meter.<br />
Pr0b d0 dFLt The dFLt option prints the factory calibration information for the RDO probe<br />
that is currently connected to the meter.<br />
Pr0b d0 SLP The SLP option prints a drift per minute value of the slope for the last five<br />
dissolved oxygen calibrations that were performed with the RDO probe<br />
that is currently connected to the meter.<br />
Pr0b d0 mEtH The mEtH option prints the RDO specific method information of the last<br />
method used for the RDO probe that is currently connected to the meter.<br />
Pr0b d0 InF0 The InF0 option prints the RDO probe information, including the probe<br />
serial number <strong>and</strong> revision, probe <strong>and</strong> optical cap date of manufacturing,<br />
cap start date, cap life <strong>and</strong> internal real time clock for the probe that is<br />
currently connected to the meter.<br />
1. Connect the meter to a printer or computer <strong>and</strong> verify the meter baud rate<br />
<strong>and</strong> output settings in the setup menu.<br />
2. From the measurement mode, press .<br />
3. Press / to scroll through the setup menu until is displayed<br />
on the top line <strong>and</strong> is displayed on the middle line.<br />
4. Press two times to move the arrow icon to the bottom line.<br />
5. Press / to scroll through for the communication link test,<br />
for the RDO probe calibration information, for the RDO probe factory<br />
calibration information, for the RDO probe slope information, for<br />
the RDO method information <strong>and</strong> for the general RDO probe information.<br />
6. Press to print the selected option.<br />
<strong>Thermo</strong> <strong>Scientific</strong> <strong>Orion</strong> <strong>Star</strong> <strong>and</strong> <strong>Star</strong> <strong>Plus</strong> <strong>Meter</strong> <strong>User</strong> <strong>Guide</strong><br />
EN-33
RDO ® Optical Dissolved Oxygen Technique<br />
7. Press / to select another option from the bottom line <strong>and</strong> press<br />
to print the selected option or press to return to the measurement mode.<br />
Example RDO Probe General Information Printout<br />
smartprobe info<br />
type 1<br />
run_status 255<br />
format_version 1<br />
probe_SN 6<br />
app_version 9<br />
HW_version 1<br />
cap_SN 129614<br />
rtc 1210257372 (05-08-2008 14:36:12)<br />
mfg_time 1208371349 (04-16-2008 18:42:29)<br />
start_time 1210178953 (05-07-2008 16:49:13)<br />
expiration 1241736553 (05-07-2009 22:49:13)<br />
probe_mfg_time 1208440800 (04-17-2008 14:00:00)<br />
write_count 14<br />
pass_count 12<br />
expire<br />
0x01<br />
days_left 364.3<br />
probe_reading 149.529243<br />
temp_reading 24.942651<br />
state 21<br />
general_event 0x00<br />
internal_event 0x00<br />
internal_state 3<br />
internal_retry 0x00<br />
EN-34<br />
<strong>Thermo</strong> <strong>Scientific</strong> <strong>Orion</strong> <strong>Star</strong> <strong>and</strong> <strong>Star</strong> <strong>Plus</strong> <strong>Meter</strong> <strong>User</strong> <strong>Guide</strong>
RDO Optical Dissolved Oxygen Calibration<br />
RDO ® Optical Dissolved Oxygen Technique<br />
1. Select one of the following calibration modes in the setup menu.<br />
a. – An air calibration is performed in water saturated air using<br />
the calibration sleeve. This is the simplest <strong>and</strong> most accurate method.<br />
i. The highest possible accuracy is reached when calibration temperature<br />
is the same as the measuring temperature.<br />
ii. Moisten the sponge in the calibration sleeve with distilled water.<br />
Insert the RDO probe into the sleeve without touching the water<br />
saturated sponge.<br />
b. – A water calibration is performed using water that is 100% saturated<br />
with air. Bubble air into a water sample <strong>and</strong> gently stir the sample to prevent<br />
the buildup of air bubbles on the optical cap.<br />
c. – A manual calibration is performed using a water sample with<br />
a known concentration of dissolved oxygen. This method can be used<br />
to calibrate the RDO probe to the value achieved by a Winkler titration.<br />
i. A manual calibration involves performing a Winkler titration <strong>and</strong> using<br />
that sample as a calibration st<strong>and</strong>ard. The oxygen level result from the<br />
titration is entered in a manual calibration as the dissolved oxygen value.<br />
This correlates the meter input to the Winkler titration. This method is<br />
inherently less accurate, due to the possibility of titration errors.<br />
d. – A zero point calibration is performed in an oxygen-free solution.<br />
A zero point calibration is not generally required unless measurements will<br />
be taken below 10% saturation or 1 mg/L.<br />
2. Allow the RDO probe <strong>and</strong> calibration st<strong>and</strong>ard (water saturated air, air saturated<br />
water, Winkler st<strong>and</strong>ard or oxygen-free solution) to reach equilibrium.<br />
<strong>Thermo</strong> <strong>Scientific</strong> <strong>Orion</strong> <strong>Star</strong> <strong>and</strong> <strong>Star</strong> <strong>Plus</strong> <strong>Meter</strong> <strong>User</strong> <strong>Guide</strong><br />
EN-35
RDO ® Optical Dissolved Oxygen Technique<br />
3. In the measurement mode, press until the arrow icon points to the bottom<br />
line, press until the % sat or mg/L icon is shown <strong>and</strong> press to begin<br />
the calibration.<br />
4. Wait for the dissolved oxygen reading to stabilize.<br />
a. If an air calibration is performed, the meter will display 100.0% <strong>and</strong><br />
automatically return to the measurement mode.<br />
b. If a water calibration is performed, the meter will display 100.0% <strong>and</strong><br />
automatically return to the measurement mode.<br />
c. If a manual calibration is performed, wait for the mg/L icon to stop flashing<br />
<strong>and</strong> enter the dissolved oxygen value by pressing until the first digit to<br />
be changed is flashing, press / to change the value of the flashing<br />
digit <strong>and</strong> continue to change the digits until the meter displays the correct<br />
dissolved oxygen value. Once the dissolved oxygen value is set, press<br />
until the decimal point is in the correct location.<br />
d. If a zero point calibration is performed, the meter will display 0.00 <strong>and</strong><br />
automatically return to the measurement mode.<br />
EN-36<br />
<strong>Thermo</strong> <strong>Scientific</strong> <strong>Orion</strong> <strong>Star</strong> <strong>and</strong> <strong>Star</strong> <strong>Plus</strong> <strong>Meter</strong> <strong>User</strong> <strong>Guide</strong>
RDO Optical Dissolved Oxygen Measurement<br />
Note: Turn on the automatic datalog feature to send measurements to the meter<br />
datalog at the frequency specified in each measurement mode. Refer to the Data<br />
Archiving <strong>and</strong> Retrieval section for details. If the automatic datalog feature is off,<br />
connect the meter to a printer or computer to record the measurements.<br />
1. Rinse the RDO probe with distilled or deionized water. Shake off any excess<br />
water <strong>and</strong> blot the probe dry with lint-free tissue.<br />
2. Place the RDO probe into the sample.<br />
RDO ® Optical Dissolved Oxygen Technique<br />
a. If the meter is in the continuous measurement mode, it will start reading<br />
immediately <strong>and</strong> continuously update the display. The mg/L or % sat icon<br />
will flash until the reading is stable. Once the reading is stable, log <strong>and</strong> print<br />
the measurement by pressing . This mode will use a large amount of<br />
meter battery power.<br />
b. If the meter is in the AUTO-READ measurement mode, press to start<br />
the reading. The AR icon will flash until the reading is stable. Once the<br />
reading is stable, the meter will log <strong>and</strong> print the measurement <strong>and</strong> freeze<br />
the display. This mode uses various amounts of meter battery power,<br />
depending on how often is pressed.<br />
c. If the meter is in the timed measurement mode, it will take a dissolved<br />
oxygen reading at the frequency specified in the setup menu. If parameters<br />
other than dissolved oxygen are measured, the meter will continuously take<br />
the other readings <strong>and</strong> update the display. The meter will log <strong>and</strong> print the<br />
measurement at the predetermined time interval. This mode can be used<br />
to extend the meter battery life, since the power consumption of the RDO<br />
probe is reduced, depending on the set time interval.<br />
3. Remove the RDO probe from the sample, rinse it with distilled or deionized<br />
water, blot it dry, place it in the next sample <strong>and</strong> repeat step 2.<br />
4. Once all of the samples have been measured, rinse the RDO probe with distilled<br />
or deionized water <strong>and</strong> blot it dry. Consult the RDO probe user guide for proper<br />
storage techniques.<br />
<strong>Thermo</strong> <strong>Scientific</strong> <strong>Orion</strong> <strong>Star</strong> <strong>and</strong> <strong>Star</strong> <strong>Plus</strong> <strong>Meter</strong> <strong>User</strong> <strong>Guide</strong><br />
EN-37
RDO ® Optical Dissolved Oxygen Technique<br />
RDO Optical Dissolved Oxygen Temperature<br />
Display <strong>and</strong> Calibration<br />
RDO Optical Dissolved Oxygen Temperature Display<br />
<strong>Star</strong> <strong>Plus</strong> meters allow the temperature to be viewed on individual measurement<br />
lines in addition to the temperature display on the top, left of the screen.<br />
To view the temperature for the RDO dissolved oxygen measurement line:<br />
1. In the measurement mode, press to choose the bottom display line.<br />
The arrow icon will point to the selected line.<br />
2. Press / to change the value on the selected line. The bottom line can<br />
be changed to display dissolved oxygen (% saturation), dissolved oxygen (mg/L),<br />
barometric pressure (no icon), temperature (no icon) or a blank line.<br />
RDO Optical Dissolved Oxygen Temperature Calibration<br />
The temperature calibration mode of the <strong>Star</strong> <strong>Plus</strong> meter allows the temperature<br />
on each measurement line to be manually adjusted.<br />
To calibrate the temperature for the RDO dissolved oxygen measurement line:<br />
1. In the measurement mode, press to choose the bottom measurement line<br />
<strong>and</strong> press / until the temperature is displayed.<br />
2. Press to begin the calibration.<br />
3. When the reading stabilizes, the arrow icon <strong>and</strong> the first digit will flash.<br />
Enter the temperature by pressing / to adjust each digit <strong>and</strong><br />
to move to the next digit.<br />
4. Press to save <strong>and</strong> end the calibration.<br />
EN-38<br />
<strong>Thermo</strong> <strong>Scientific</strong> <strong>Orion</strong> <strong>Star</strong> <strong>and</strong> <strong>Star</strong> <strong>Plus</strong> <strong>Meter</strong> <strong>User</strong> <strong>Guide</strong>
Chapter X Conductivity Technique<br />
Conductivity Setup Menu<br />
Note: Refer to the Conductivity Setup Menu section for the Setup Menu<br />
Table, which contains a complete list of meter setup options <strong>and</strong> descriptions.<br />
Refer to Appendix A for a description of the special setup menu features.<br />
1. In the measurement mode, press .<br />
2. Press / to scroll through the setup menu until is displayed<br />
on the top line.<br />
3. Press to accept the selection <strong>and</strong> move the arrow icon to the middle line.<br />
4. Press / to scroll through setup options: for the temperature<br />
compensation type, for the temperature coefficient value used for<br />
temperature compensation, for the TDS factor value used for total<br />
dissolved solids measurement, for the nominal cell constant value of the<br />
conductivity probe, for the reference temperature used for temperature<br />
compensation <strong>and</strong> for the conductivity cell type.<br />
5. Press to accept the selection <strong>and</strong> move the arrow icon to the bottom line.<br />
6. To scroll through a list of options on the bottom line, press / until the<br />
desired option is displayed. To enter a numeric value for an option on the bottom<br />
line, press / to adjust each digit <strong>and</strong> to move to the next digit.<br />
7. Press to accept the selection <strong>and</strong> move the arrow icon to the top line.<br />
8. Repeat steps 3 through 7 to change another conductivity setting or press<br />
to return to the measurement mode.<br />
<strong>Thermo</strong> <strong>Scientific</strong> <strong>Orion</strong> <strong>Star</strong> <strong>and</strong> <strong>Star</strong> <strong>Plus</strong> <strong>Meter</strong> <strong>User</strong> <strong>Guide</strong><br />
EN-39
Conductivity Technique<br />
Conductivity Calibration<br />
Note: For an automatic calibration, the nominal cell constant of the conductivity<br />
probe must be entered in the setup menu before the calibration is performed. Refer<br />
to Appendix A for the values of conductivity st<strong>and</strong>ards at different temperatures.<br />
1. In the measurement mode, press until the arrow icon points to the middle<br />
line, press until the µS/cm or mS/cm icon is shown <strong>and</strong> press to<br />
begin the calibration.<br />
2. Rinse the probe with deionized water <strong>and</strong> place it into the conductivity st<strong>and</strong>ard.<br />
3. To perform a manual calibration – The manual calibration screen will display the<br />
cell constant on the top line, the conductivity value of the calibration st<strong>and</strong>ard on<br />
the middle line <strong>and</strong> on the bottom line. To change the cell constant, press<br />
until the first digit to be changed is flashing, press / to change the<br />
value of the flashing digit <strong>and</strong> continue to change the digits until:<br />
a. If the conductivity temperature compensation is linear or non-linear (refer<br />
to page EN-12 for conductivity temperature compensation), the displayed<br />
conductivity value matches the value of the st<strong>and</strong>ard at the measured<br />
temperature.<br />
b. If the conductivity temperature compensation is off, the displayed<br />
conductivity value matches the value of the st<strong>and</strong>ard at the conductivity<br />
reference temperature.<br />
Once the value is set, press until the decimal point is in the correct location.<br />
Press to save <strong>and</strong> end the calibration.<br />
Note: In the manual calibration screen, start changing the cell constant within<br />
five seconds or the meter will proceed to the automatic/direct calibration. If this<br />
occurs, press <strong>and</strong> hold to abort the calibration <strong>and</strong> repeat the calibration.<br />
4. To perform an automatic or direct calibration – Wait for the meter to go from<br />
the manual calibration screen to the automatic/direct calibration screen.<br />
The automatic/direct calibration screen will display the conductivity value<br />
of the calibration st<strong>and</strong>ard on the middle line <strong>and</strong> on the bottom line.<br />
EN-40<br />
<strong>Thermo</strong> <strong>Scientific</strong> <strong>Orion</strong> <strong>Star</strong> <strong>and</strong> <strong>Star</strong> <strong>Plus</strong> <strong>Meter</strong> <strong>User</strong> <strong>Guide</strong>
Conductivity Technique<br />
a. Automatic calibration (for conductivity st<strong>and</strong>ards of 10 μS/cm, 1413 μS/cm<br />
<strong>and</strong> 12.9 mS/cm) – When the µS/cm or mS/cm icon stops flashing, the<br />
meter will display the temperature-corrected conductivity of the st<strong>and</strong>ard.<br />
b. Direct calibration – When the µS/cm or mS/cm icon stops flashing,<br />
enter the conductivity value of the st<strong>and</strong>ard at the conductivity reference<br />
temperature. (Refer to page EN-12.) Press until the first digit to be<br />
changed is flashing, press / to change the value of the flashing digit<br />
<strong>and</strong> continue to change the digits until the correct value is displayed. Once<br />
the value is set, press until the decimal point is in the correct location.<br />
5. Press to proceed to the next calibration point, rinse the conductivity probe<br />
with distilled or deionized water, place it into the next conductivity st<strong>and</strong>ard<br />
<strong>and</strong> repeat step 4a / 4b or press to save <strong>and</strong> end the calibration.<br />
6. The cell constant will be displayed in the main field <strong>and</strong> the meter will<br />
automatically advance to the measurement mode.<br />
<strong>Thermo</strong> <strong>Scientific</strong> <strong>Orion</strong> <strong>Star</strong> <strong>and</strong> <strong>Star</strong> <strong>Plus</strong> <strong>Meter</strong> <strong>User</strong> <strong>Guide</strong><br />
EN-41
Conductivity Technique<br />
Conductivity Measurement<br />
Note: Turn on the automatic datalog feature to send measurements to the meter<br />
datalog at the frequency specified in each measurement mode. Refer to the Data<br />
Archiving <strong>and</strong> Retrieval section for details. If the automatic datalog feature is off,<br />
connect the meter to a printer or computer to record the measurements.<br />
1. Rinse the conductivity probe with distilled or deionized water. Shake off any<br />
excess water <strong>and</strong> blot the probe dry with lint-free tissue.<br />
2. Place the conductivity probe into the sample.<br />
a. If the meter is in the continuous measurement mode, it will start reading<br />
immediately <strong>and</strong> continuously update the display. The μS/cm or mS/cm<br />
icon will flash until the reading is stable. Once the reading is stable, log <strong>and</strong><br />
print the measurement by pressing . If a benchtop meter is used <strong>and</strong> the<br />
stirrer is enabled, press to start the stirrer. Press again to turn off<br />
the stirrer before removing the probe <strong>and</strong> stirrer from the sample.<br />
b. If the meter is in the AUTO-READ measurement mode, press to start<br />
the reading. The AR icon will flash until the reading is stable. Once the<br />
reading is stable, the meter will log <strong>and</strong> print the measurement <strong>and</strong> freeze<br />
the display. If a benchtop meter is used <strong>and</strong> the stirrer is enabled, the stirrer<br />
will turn on when is pressed <strong>and</strong> turn off when the reading is stable.<br />
c. If the meter is in the timed measurement mode, it will start reading<br />
immediately <strong>and</strong> continuously update the display. The meter will log <strong>and</strong><br />
print the measurement at the frequency specified in the setup menu.<br />
If a benchtop meter is used <strong>and</strong> the stirrer is enabled, press to start<br />
the stirrer. Press again to turn off the stirrer before removing the probe<br />
<strong>and</strong> stirrer from the sample.<br />
3. Remove the conductivity probe from the sample, rinse it with distilled or<br />
deionized water, blot it dry, place it in the next sample <strong>and</strong> repeat step 2.<br />
4. Once all of the samples have been measured, rinse the conductivity probe with<br />
distilled or deionized water <strong>and</strong> blot it dry. Consult the conductivity probe user<br />
guide for proper storage techniques.<br />
EN-42<br />
<strong>Thermo</strong> <strong>Scientific</strong> <strong>Orion</strong> <strong>Star</strong> <strong>and</strong> <strong>Star</strong> <strong>Plus</strong> <strong>Meter</strong> <strong>User</strong> <strong>Guide</strong>
Conductivity Temperature Display <strong>and</strong> Calibration<br />
Conductivity Temperature Display<br />
Conductivity Technique<br />
<strong>Star</strong> <strong>Plus</strong> meters allow the temperature to be viewed on individual measurement<br />
lines in addition to the temperature display on the top, left of the screen.<br />
1. In the measurement mode, press to choose the middle display line.<br />
The arrow icon will point to the selected line.<br />
2. Press / to change the value on the selected line. The middle line can<br />
be changed to display conductivity (µS/cm or mS/cm), total dissolved solids<br />
(mg/L), salinity (ppt), resistivity (MΩ-cm), temperature (no icon) or a blank line.<br />
Conductivity Temperature Calibration<br />
The temperature calibration mode of the <strong>Star</strong> <strong>Plus</strong> meter allows the temperature<br />
on each measurement line to be manually adjusted.<br />
1. In the measurement mode, press to choose the middle measurement line<br />
<strong>and</strong> press / until the temperature is shown for the selected line.<br />
2. Press to begin the calibration.<br />
3. When the reading stabilizes, the arrow icon <strong>and</strong> the first digit will flash.<br />
Enter the temperature by pressing / to adjust each digit <strong>and</strong> to<br />
move to the next digit.<br />
4. Press to save <strong>and</strong> end the calibration.<br />
<strong>Thermo</strong> <strong>Scientific</strong> <strong>Orion</strong> <strong>Star</strong> <strong>and</strong> <strong>Star</strong> <strong>Plus</strong> <strong>Meter</strong> <strong>User</strong> <strong>Guide</strong><br />
EN-43
This page is intentionally left blank.<br />
EN-44<br />
<strong>Thermo</strong> <strong>Scientific</strong> <strong>Orion</strong> <strong>Star</strong> <strong>and</strong> <strong>Star</strong> <strong>Plus</strong> <strong>Meter</strong> <strong>User</strong> <strong>Guide</strong>
Chapter XI ISE Technique<br />
ISE Setup Menu<br />
Note: Refer to the ISE Setup Menu section for the Setup Menu Table,<br />
which contains a complete list of meter setup options <strong>and</strong> descriptions.<br />
Refer to Appendix A for a description of the special setup menu features.<br />
1. In the measurement mode, press .<br />
2. Press / to scroll through the setup menu until is displayed on the<br />
top line.<br />
3. Press to accept the selection <strong>and</strong> move the arrow icon to the middle line.<br />
4. Press / to scroll through for the ISE measurement resolution,<br />
for the ISE measurement units, for the ISE calibration range<br />
<strong>and</strong> for the non-linear blank correction feature.<br />
5. Press to accept the selection <strong>and</strong> move the arrow icon to the bottom line.<br />
6. To scroll through a list of options on the bottom line, press / until the<br />
desired option is displayed. To enter a numeric value for an option on the bottom<br />
line, press / to adjust each digit <strong>and</strong> to move to the next digit.<br />
7. Press to accept the selection <strong>and</strong> move the arrow icon to the top line.<br />
8. Repeat steps 3 through 7 to change another ISE setting or press to return<br />
to the measurement mode.<br />
<strong>Thermo</strong> <strong>Scientific</strong> <strong>Orion</strong> <strong>Star</strong> <strong>and</strong> <strong>Star</strong> <strong>Plus</strong> <strong>Meter</strong> <strong>User</strong> <strong>Guide</strong><br />
EN-45
ISE Technique<br />
ISE Calibration<br />
The calibration st<strong>and</strong>ards should be prepared in the same ISE units as the<br />
desired sample results. <strong>Star</strong>t the calibration with the lowest concentration<br />
calibration st<strong>and</strong>ard <strong>and</strong> work up to the highest concentration calibration st<strong>and</strong>ard.<br />
Any reagents, such as ionic strength adjustors, should be added to samples<br />
<strong>and</strong> st<strong>and</strong>ards as specified in the electrode user guide.<br />
1. Prepare the electrode, st<strong>and</strong>ards <strong>and</strong> any other required solutions for use<br />
according to the electrode user guide.<br />
2. In the measurement mode, press until the arrow icon points to the top line,<br />
press until the ISE icon is shown <strong>and</strong> press to begin the calibration.<br />
3. Rinse the electrode with distilled or deionized water, shake any excess water off,<br />
blot it dry <strong>and</strong> place the electrode into the least concentrated st<strong>and</strong>ard.<br />
4. Wait for ISE icon to stop flashing. Press until the first digit to be changed<br />
is flashing, press / to change the value of the flashing digit <strong>and</strong><br />
continue to change the digits until the meter displays the concentration value<br />
of the st<strong>and</strong>ard. Once the st<strong>and</strong>ard value is set, press until the decimal<br />
point is in the correct location.<br />
5. Press to proceed to the next lowest calibration st<strong>and</strong>ard <strong>and</strong> repeat<br />
steps 3 <strong>and</strong> 4, working from the lowest concentration st<strong>and</strong>ard to the highest<br />
concentration st<strong>and</strong>ard, or press to save <strong>and</strong> end the calibration.<br />
6. The actual electrode slope, in mV per decade concentration, will be displayed<br />
in the main field <strong>and</strong> will be displayed in the lower field.<br />
a. For a one point calibration, press <strong>and</strong> / to edit the slope.<br />
To change the sign of the slope to negative or positive, press until<br />
none of the digits are blinking <strong>and</strong> the arrow icon is blinking <strong>and</strong> press<br />
to change the sign of the slope. Press to return to the measurement<br />
mode.<br />
b. For a two or more point calibration, the meter will automatically proceed<br />
to the measurement mode after the slope is displayed.<br />
EN-46<br />
<strong>Thermo</strong> <strong>Scientific</strong> <strong>Orion</strong> <strong>Star</strong> <strong>and</strong> <strong>Star</strong> <strong>Plus</strong> <strong>Meter</strong> <strong>User</strong> <strong>Guide</strong>
ISE Measurement<br />
Note: Turn on the automatic datalog feature to send measurements to the meter<br />
datalog at the frequency specified in each measurement mode. Refer to the Data<br />
Archiving <strong>and</strong> Retrieval section for details. If the automatic datalog feature is off,<br />
connect the meter to a printer or computer to record the measurements.<br />
1. Rinse the electrode with distilled or deionized water. Shake off any excess water<br />
<strong>and</strong> blot the electrode dry with lint-free tissue.<br />
2. Place the electrode into the sample.<br />
ISE Technique<br />
a. If the meter is in the continuous measurement mode, it will start reading<br />
immediately <strong>and</strong> continuously update the display. The ISE icon will flash<br />
until the reading is stable. Once the reading is stable, log <strong>and</strong> print the<br />
measurement by pressing . If a benchtop meter is used <strong>and</strong> the stirrer<br />
is enabled, press to start the stirrer. Press again to turn off the<br />
stirrer before removing the electrode <strong>and</strong> stirrer from the sample.<br />
b. If the meter is in the AUTO-READ measurement mode, press to start<br />
the reading. The AR icon will flash until the reading is stable. Once the<br />
reading is stable, the meter will log <strong>and</strong> print the measurement <strong>and</strong> freeze<br />
the display. If a benchtop meter is used <strong>and</strong> the stirrer is enabled, the stirrer<br />
will turn on when is pressed <strong>and</strong> turn off when the reading is stable.<br />
c. If the meter is in the timed measurement mode, it will start reading<br />
immediately <strong>and</strong> continuously update the display. The meter will log <strong>and</strong><br />
print the measurement at the frequency specified in the setup menu.<br />
If a benchtop meter is used <strong>and</strong> the stirrer is enabled, press to start the<br />
stirrer. Press again to turn off the stirrer before removing the electrode<br />
<strong>and</strong> stirrer from the sample.<br />
3. Remove the electrode from the sample, rinse it with distilled or deionized water,<br />
blot it dry, place it in the next sample <strong>and</strong> repeat step 2.<br />
4. Once all of the samples have been measured, rinse the electrode with distilled<br />
or deionized water <strong>and</strong> blot it dry. Consult the electrode user guide for proper<br />
storage techniques.<br />
<strong>Thermo</strong> <strong>Scientific</strong> <strong>Orion</strong> <strong>Star</strong> <strong>and</strong> <strong>Star</strong> <strong>Plus</strong> <strong>Meter</strong> <strong>User</strong> <strong>Guide</strong><br />
EN-47
ISE Technique<br />
ISE Temperature Display <strong>and</strong> Calibration<br />
ISE Temperature Display<br />
<strong>Star</strong> <strong>Plus</strong> meters allow the temperature to be viewed on individual measurement<br />
lines in addition to the temperature display on the top, left of the screen.<br />
To view the temperature for the ISE measurement line:<br />
1. Press <strong>and</strong> hold until the meter displays the measurement mode.<br />
2. Press to choose the top display line. The arrow icon will point to the<br />
selected line.<br />
3. Press / to change the value on the selected line. The top line<br />
can be changed to display pH (pH), millivolts (mV), relative millivolts (RmV),<br />
concentration (ISE), temperature (no icon) or a blank line.<br />
ISE Temperature Calibration<br />
The temperature calibration mode of the <strong>Star</strong> <strong>Plus</strong> meter allows the temperature<br />
on each measurement line to be manually adjusted.<br />
To calibrate the temperature for the ISE measurement line:<br />
1. In the measurement mode, press to choose the top measurement line<br />
<strong>and</strong> press / until the temperature is shown for the selected line.<br />
2. Press to begin the calibration.<br />
3. When the reading stabilizes, the arrow icon <strong>and</strong> the first digit will flash.<br />
Enter the temperature by pressing / to adjust each digit <strong>and</strong> to<br />
move to the next digit.<br />
4. Press to save <strong>and</strong> end the calibration.<br />
EN-48<br />
<strong>Thermo</strong> <strong>Scientific</strong> <strong>Orion</strong> <strong>Star</strong> <strong>and</strong> <strong>Star</strong> <strong>Plus</strong> <strong>Meter</strong> <strong>User</strong> <strong>Guide</strong>
Chapter XII Data Archiving <strong>and</strong> Retrieval<br />
Datalog <strong>and</strong> Calibration Log<br />
All 3-<strong>Star</strong> <strong>Plus</strong> <strong>and</strong> the 4-<strong>Star</strong> <strong>Plus</strong> pH/ISE meters have a 1000 point datalog.<br />
The 4-<strong>Star</strong> <strong>Plus</strong> pH/conductivity <strong>and</strong> pH/dissolved oxygen meters have a 750 point<br />
datalog. The 5-<strong>Star</strong> <strong>Plus</strong> meters have a 500 point datalog. The 2-<strong>Star</strong> meter has<br />
a 50 point datalog <strong>and</strong> all <strong>Orion</strong> <strong>Star</strong> meters have a 200 point datalog.<br />
The <strong>Star</strong> <strong>Plus</strong> meter printouts have been enhanced to include additional information.<br />
The pH <strong>and</strong> ISE calibration printouts now include the average slope, the slope<br />
between points <strong>and</strong> the E o per point. The polarographic dissolved oxygen printouts<br />
now include slope, membrane temperature <strong>and</strong> solution temperature.<br />
Automatic Datalog Feature<br />
The 3-<strong>Star</strong>, 4-<strong>Star</strong> <strong>and</strong> 5-<strong>Star</strong> <strong>Plus</strong> meters have been enhanced to include an<br />
automatic datalog feature that can be turned on or off. To enable the automatic<br />
recording of data into the datalog:<br />
1. In the measurement mode, press .<br />
2. Press / until is displayed on top line.<br />
3. Press to accept the selection <strong>and</strong> move the arrow icon to the middle line<br />
<strong>and</strong> press / until is displayed.<br />
4. Press to accept the selection <strong>and</strong> move the arrow icon to the bottom line<br />
<strong>and</strong> press / until is displayed.<br />
5. Press to accept the selection <strong>and</strong> move the arrow icon to the top line.<br />
6. Press to save the setup option <strong>and</strong> return to measurement mode.<br />
<strong>Thermo</strong> <strong>Scientific</strong> <strong>Orion</strong> <strong>Star</strong> <strong>and</strong> <strong>Star</strong> <strong>Plus</strong> <strong>Meter</strong> <strong>User</strong> <strong>Guide</strong><br />
EN-49
Data Archival <strong>and</strong> Retrieval<br />
Datalog Deletion Setting<br />
The datalog deletion setting determines if the meter will automatically delete<br />
the datalog after it is downloaded to a printer or computer <strong>and</strong> if the meter will<br />
overwrite the datalog points when the datalog is full. If the datalog deletion setting<br />
is set to , the meter will automatically delete the datalog after the datalog<br />
is downloaded to a printer or computer. The meter will also display the<br />
error message when all 200 datalog points are filled <strong>and</strong> the datalog must be<br />
downloaded to a printer or computer to clear the error message. If the datalog<br />
deletion setting is set to , the meter will overwrite the oldest datalog point<br />
when all 200 datalog points are filled <strong>and</strong> will not delete the datalog after the<br />
datalog is downloaded to a printer or computer.<br />
1. In the measurement mode, press .<br />
2. Press / until is displayed on top line.<br />
3. Press to accept the selection <strong>and</strong> move the arrow icon to the middle line<br />
<strong>and</strong> press / until is displayed.<br />
4. Press to accept the selection <strong>and</strong> move the arrow icon to the bottom line<br />
<strong>and</strong> press / until or is displayed.<br />
5. Press to accept the selection <strong>and</strong> move the arrow icon to the top line.<br />
6. Press to save the setup option <strong>and</strong> return to measurement mode.<br />
Note: If the datalog is not required, set the datalog deletion setting to<br />
to prevent the error 038 (datalog full) message.<br />
EN-50<br />
<strong>Thermo</strong> <strong>Scientific</strong> <strong>Orion</strong> <strong>Star</strong> <strong>and</strong> <strong>Star</strong> <strong>Plus</strong> <strong>Meter</strong> <strong>User</strong> <strong>Guide</strong>
Viewing <strong>and</strong> Printing the Datalog <strong>and</strong> Calibration Log<br />
The 3-<strong>Star</strong>, 4-<strong>Star</strong> <strong>and</strong> 5-<strong>Star</strong> <strong>Plus</strong> meters have been enhanced to include<br />
a calibration log view feature in addition to the datalog view, datalog print <strong>and</strong><br />
calibration log print features. The <strong>Orion</strong> <strong>Star</strong> meters include the datalog view,<br />
datalog print <strong>and</strong> calibration log print features.<br />
To view the datalog or calibration log:<br />
Data Archival <strong>and</strong> Retrieval<br />
1. In the measurement mode, press .<br />
2. Press / to scroll through to view the datalog or to view<br />
the calibration log (<strong>Star</strong> <strong>Plus</strong> meters only).<br />
3. Press . The meter will display the date/time screen. The log number will be<br />
on the top of the screen <strong>and</strong> the time, date <strong>and</strong> year the log was recorded will<br />
be on the top, middle <strong>and</strong> bottom display lines respectively. Press /<br />
to scroll through the log.<br />
4. Press . The meter will display the data or calibration point associated with<br />
the selected date/time screen.<br />
a. Press to print the individual data point.<br />
b. Press / to scroll through the log.<br />
c. Press to return to the date/time screen.<br />
5. To exit the log view mode, press until the meter displays the date/time<br />
screen <strong>and</strong> press .<br />
To send the datalog or calibration log to a printer or computer:<br />
1. Connect the meter to a printer or computer <strong>and</strong> verify the meter baud rate <strong>and</strong><br />
output settings in the setup menu.<br />
2. In the measurement mode, press .<br />
<strong>Thermo</strong> <strong>Scientific</strong> <strong>Orion</strong> <strong>Star</strong> <strong>and</strong> <strong>Star</strong> <strong>Plus</strong> <strong>Meter</strong> <strong>User</strong> <strong>Guide</strong><br />
EN-51
Data Archival <strong>and</strong> Retrieval<br />
3. Press / to scroll through to print the datalog or to print<br />
the calibration log. The <strong>Orion</strong> <strong>Star</strong> meters will display instead of .<br />
4. Press to send the selected data to the printer or computer.<br />
To interface the meter with a computer:<br />
The <strong>Orion</strong> <strong>Star</strong> <strong>and</strong> <strong>Star</strong> <strong>Plus</strong> meters can send measurement <strong>and</strong> calibration data to<br />
a computer in a comma delimited format that is easy to parse in computer programs<br />
like Excel. Select the , , output setting in the setup menu.<br />
To send data from the meter to a computer using HyperTerminal:<br />
1. Connect the meter to a computer port using the computer interface cable,<br />
Cat. No. 1010053.<br />
2. Click on the start button on the lower left side of the computer screen.<br />
Select All Programs, Accessories, Communications <strong>and</strong> HyperTerminal.<br />
3. When the HyperTerminal window opens, enter a file name, select an icon<br />
for the connection <strong>and</strong> click on the OK button.<br />
4. When a new window opens, go to the Connect Using drop-down menu, select<br />
the COM port that the meter is connected to <strong>and</strong> click on the OK button.<br />
5. A window will open with the COM port properties listed. Select the following<br />
settings from the drop-down menus <strong>and</strong> then click on the OK button.<br />
Bits per second: 9600<br />
Data bits: 8<br />
Parity: None<br />
Stop bits: 1<br />
Flow control: Hardware<br />
6. Send data from the meter to HyperTerminal.<br />
EN-52<br />
<strong>Thermo</strong> <strong>Scientific</strong> <strong>Orion</strong> <strong>Star</strong> <strong>and</strong> <strong>Star</strong> <strong>Plus</strong> <strong>Meter</strong> <strong>User</strong> <strong>Guide</strong>
Chapter XIII Declaration of Conformity<br />
Manufacturer:<br />
Address:<br />
<strong>Thermo</strong> Fisher <strong>Scientific</strong> Inc.<br />
166 Cummings Center<br />
Beverly, MA 01915<br />
USA<br />
We declare that the following products described below conform to the Directive<br />
<strong>and</strong> St<strong>and</strong>ard listed below:<br />
Product(s):<br />
<strong>Meter</strong>s for measuring pH, conductivity, dissolved oxygen <strong>and</strong>/or<br />
ISE, benchtop meters are rated 100 to 240 VAC, 50/60 Hz, 0.5 A,<br />
h<strong>and</strong>held meters use four non-rechargeable AA batteries<br />
Benchtop <strong>Meter</strong>s<br />
5-<strong>Star</strong> <strong>Plus</strong> pH/ISE/Conductivity/DO <strong>Meter</strong><br />
4-<strong>Star</strong> <strong>Plus</strong> pH/Conductivity <strong>Meter</strong><br />
4-<strong>Star</strong> <strong>Plus</strong> pH/DO<br />
4-<strong>Star</strong> <strong>Plus</strong> pH/ISE <strong>Meter</strong><br />
3-<strong>Star</strong> <strong>Plus</strong> Conductivity <strong>Meter</strong><br />
3-<strong>Star</strong> <strong>Plus</strong> DO <strong>Meter</strong><br />
3-<strong>Star</strong> <strong>Plus</strong> pH <strong>Meter</strong><br />
2-<strong>Star</strong> pH <strong>Meter</strong><br />
Portable <strong>Meter</strong>s<br />
5-<strong>Star</strong> <strong>Plus</strong> pH/ISE/Conductivity/DO <strong>Meter</strong><br />
5-<strong>Star</strong> <strong>Plus</strong> pH/Conductivity/DO <strong>Meter</strong><br />
4-<strong>Star</strong> <strong>Plus</strong> pH/Conductivity <strong>Meter</strong><br />
4-<strong>Star</strong> <strong>Plus</strong> pH/DO <strong>Meter</strong><br />
4-<strong>Star</strong> <strong>Plus</strong> pH/ISE <strong>Meter</strong><br />
3-<strong>Star</strong> <strong>Plus</strong> Conductivity <strong>Meter</strong><br />
3-<strong>Star</strong> <strong>Plus</strong> pH <strong>Meter</strong><br />
3-<strong>Star</strong> <strong>Plus</strong> DO <strong>Meter</strong><br />
5-<strong>Star</strong> <strong>Plus</strong> RDO ® Optical DO/pH/Conductivity <strong>Meter</strong><br />
4-<strong>Star</strong> <strong>Plus</strong> RDO Optical DO/pH <strong>Meter</strong><br />
3-<strong>Star</strong> <strong>Plus</strong> RDO Optical DO <strong>Meter</strong><br />
Equipment<br />
Class:<br />
Measurement, control <strong>and</strong> laboratory<br />
Benchtop meters are EMC Class A<br />
Portable meters are EMC Class D<br />
<strong>Thermo</strong> <strong>Scientific</strong> <strong>Orion</strong> <strong>Star</strong> <strong>and</strong> <strong>Star</strong> <strong>Plus</strong> <strong>Meter</strong> <strong>User</strong> <strong>Guide</strong><br />
EN-53
Declaration of Conformity<br />
Directive(s) <strong>and</strong> St<strong>and</strong>ard(s):<br />
• 89/336/EEC – Electromagnetic Compatibility (EMC Directive)<br />
• EN 61326:1997 + A1:1998 + A2:2001 – Electrical equipment for<br />
measurement, control, <strong>and</strong> laboratory use – EMC requirements<br />
• 73/23/EEC – Low Voltage Directive (LVD)<br />
• EN 61010-1:2001 – Safety requirements for electrical equipment for<br />
measurement, control, <strong>and</strong> laboratory use – general requirements<br />
Manufacturer’s Authorized Representative:<br />
Date:<br />
Patrick Chiu December 1, 2008<br />
Senior Quality Engineer,<br />
Regulatory Compliance<br />
WEEE Compliance<br />
This product is required to comply with the European Union’s Waste Electrical<br />
<strong>and</strong> Electronic Equipment (WEEE) Directive 2002/96/EC. It is marked with the<br />
following symbol:<br />
We have contracted with one or more recycling/disposal companies in each EU<br />
Member State <strong>and</strong> this product should be disposed of or recycled through them.<br />
Further information on compliance with these Directives, the recyclers in your<br />
country, <strong>and</strong> information on <strong>Thermo</strong> <strong>Scientific</strong> <strong>Orion</strong> products which may assist<br />
the detection of substances subject to the RoHS Directive are available at<br />
www.thermo.com/WEEERoHS.<br />
EN-54<br />
<strong>Thermo</strong> <strong>Scientific</strong> <strong>Orion</strong> <strong>Star</strong> <strong>and</strong> <strong>Star</strong> <strong>Plus</strong> <strong>Meter</strong> <strong>User</strong> <strong>Guide</strong>
Chapter XIV Troubleshooting<br />
<strong>Meter</strong> Self Test<br />
1. Disconnect all of the electrodes <strong>and</strong> probes from the meter <strong>and</strong> cover all of the<br />
meter inputs with the black caps.<br />
2. Power on the meter, wait until the software revision is displayed <strong>and</strong> press .<br />
3. All the segments on the display will turn on. Visually inspect the display<br />
segments to verify that all of the segments are lit <strong>and</strong> press .<br />
4. All the segments on the display will turn off. Visually inspect the display<br />
segments to verify that all of the segments are not lit <strong>and</strong> press .<br />
5. The display will read . Press every key on the keypad one at a time in<br />
any order. If the keys are not pressed within five seconds of one another, the<br />
display will read , which indicates a key failure. Press to clear the<br />
error 033 message <strong>and</strong> complete the self test. If all the keys are pressed <strong>and</strong><br />
functioning, the meter will restart <strong>and</strong> proceed to the measurement mode.<br />
Note: If the meter reads<br />
during the self test, ensure that all of the<br />
electrodes are disconnected from the meter, all of the meter inputs are covered<br />
with the black caps <strong>and</strong> the BNC shorting cap is firmly attached to the BNC meter<br />
input. This error code usually occurs if the BNC shorting cap is missing or not fully<br />
connected to the BNC meter input during the meter self test.<br />
<strong>Thermo</strong> <strong>Scientific</strong> <strong>Orion</strong> <strong>Star</strong> <strong>and</strong> <strong>Star</strong> <strong>Plus</strong> <strong>Meter</strong> <strong>User</strong> <strong>Guide</strong><br />
EN-55
Troubleshooting<br />
<strong>Meter</strong> Error Codes<br />
• If the reading on the screen is flashing , the value is out of range.<br />
Perform the meter self test, clean the electrode according to the electrode<br />
user guide <strong>and</strong> re-calibrate the electrode with new st<strong>and</strong>ards.<br />
• If the icon is lit <strong>and</strong> the reading is flashing, the electrode needs to be<br />
calibrated according to the user’s set calibration interval or the pH slope is<br />
outside the range of 85 % to 115%.<br />
• Press to clear an error code. Error codes show on the middle line <strong>and</strong><br />
a set of three alphanumeric characters on the bottom line. Some of these codes<br />
are errors, some are warnings <strong>and</strong> some are purely informational.<br />
Error Code Description Troubleshooting<br />
002, 026,<br />
E##, F##<br />
Hardware or<br />
Memory Error<br />
005 Value Outside<br />
Allowable Range<br />
Press to clear the error. If the error occurs again, contact<br />
Technical Support.<br />
Press <strong>and</strong> re-enter the value. Check meter specifications for the<br />
allowable range of values.<br />
033 Keypad Failure Repeat the self test. When the meter reads , press all the keys,<br />
including the power key, within five seconds of one another.<br />
034 BNC Input Failure Disconnect all the electrodes from the meter, connect the BNC shorting cap<br />
to the meter <strong>and</strong> repeat the self test.<br />
038 Datalog Full Download the datalog to a printer or computer, turn the automatic datalog<br />
feature off in the setup menu (<strong>Star</strong> <strong>Plus</strong> meters only) or change the datalog<br />
setting to , , in the setup menu so the meter deletes the<br />
datalog points when the datalog is full.<br />
D## Remote Control Error Check the programming instructions to verify the correct comm<strong>and</strong>s,<br />
names <strong>and</strong> values.<br />
107 pH Calibration<br />
St<strong>and</strong>ard Error<br />
109 Bad pH Slope or<br />
Calibration Offset<br />
200 Autosampler<br />
Interface Error<br />
201 Autosampler<br />
Signal Error<br />
The millivolts measured during calibration are the same for two buffers.<br />
Review the calibration procedure <strong>and</strong> verify that the electrode was placed<br />
in the buffers at the appropriate time. Clean the electrode according<br />
to the electrode user guide. Re-calibrate the electrode with fresh buffers.<br />
Clean the electrode according to the electrode user guide. Re-calibrate the<br />
electrode with new buffers.<br />
The meter is unable to send a signal to the autosampler. Make sure that<br />
the autosampler is properly connected to the meter.<br />
The autosampler is unable to receive a signal from the meter. Review the<br />
meter setup parameters <strong>and</strong> make sure that the baud rate of the meter is<br />
set to 1200.<br />
EN-56<br />
<strong>Thermo</strong> <strong>Scientific</strong> <strong>Orion</strong> <strong>Star</strong> <strong>and</strong> <strong>Star</strong> <strong>Plus</strong> <strong>Meter</strong> <strong>User</strong> <strong>Guide</strong>
Troubleshooting<br />
Error Code Description Troubleshooting<br />
202 Autosampler<br />
is Jammed<br />
203 Unstable Reading<br />
from Autosampler<br />
306 ISE Automatic<br />
Blank Error<br />
307 ISE Calibration<br />
St<strong>and</strong>ard Error<br />
Turn the autosampler off <strong>and</strong> wait 45 seconds before turning it back on.<br />
The autosampler should return to the home position.<br />
The measurements taken using the autosampler are unstable. Check the<br />
electrodes for proper function. Make sure that the electrode cables are<br />
properly connected.<br />
Disable the automatic blank feature in the setup menu <strong>and</strong> re-calibrate<br />
the meter without using a zero concentration st<strong>and</strong>ard.<br />
The millivolts measured during calibration are the same for two<br />
st<strong>and</strong>ards. Review the calibration procedure <strong>and</strong> verify that the electrode<br />
was placed in the st<strong>and</strong>ards at the appropriate times. Clean the electrode<br />
according to the electrode user guide. Re-calibrate the electrode with<br />
fresh st<strong>and</strong>ards.<br />
309 Bad ISE Slope Clean the electrode according to the electrode user guide. Re-calibrate<br />
the electrode with freshly prepared st<strong>and</strong>ards.<br />
707 Conductivity<br />
Calibration<br />
St<strong>and</strong>ard Error<br />
709 Conductivity Cell<br />
Constant Error<br />
808 Bad Zero Point<br />
DO Slope<br />
The conductivity value measured during calibration is the same for<br />
two st<strong>and</strong>ards. Review the calibration procedure <strong>and</strong> verify that the<br />
conductivity probe was placed in the st<strong>and</strong>ards at the appropriate times.<br />
Clean the conductivity probe according to the probe user guide.<br />
Re-calibrate the probe with new st<strong>and</strong>ards.<br />
The cell constant is not in the range of 0.001 to 199.0 cm -1 . Clean the<br />
conductivity probe according to the probe user guide. Re-calibrate the<br />
probe with new st<strong>and</strong>ards.<br />
An air calibration should be performed before the zero point calibration.<br />
Verify that a solution with zero oxygen is being used for the zero point<br />
calibration. A solution with 15 grams of Na2SO3 dissolved in 250 mL<br />
of distilled water is recommended.<br />
809 Bad DO Slope For polarographic DO probes, connect the probe to the meter, power on<br />
the meter <strong>and</strong> let the probe to polarize for at least 30 minutes. For an air<br />
calibration, check that the sponge in the calibration sleeve is damp <strong>and</strong><br />
there is no water on the probe membrane. For a water calibration, bubble<br />
air into the sample <strong>and</strong> stir to keep bubbles off the membrane. Clean the<br />
DO probe according to the probe user guide. Re-calibrate the DO probe.<br />
880 RDO ® Optical<br />
Probe Not Attached<br />
881 RDO Optical<br />
Probe Expired<br />
882 RDO Optical<br />
Probe Failure<br />
Verify that the RDO probe is properly connected to the meter. Connect<br />
another, known working RDO probe to the meter.<br />
The optical cap attached to the RDO probe has expired. Install a new<br />
optical cap according to the RDO probe user guide.<br />
Verify that the optical cap on the RDO probe was properly installed,<br />
not expired <strong>and</strong> not tampered with. Connect another, known working<br />
RDO probe to the meter.<br />
<strong>Thermo</strong> <strong>Scientific</strong> <strong>Orion</strong> <strong>Star</strong> <strong>and</strong> <strong>Star</strong> <strong>Plus</strong> <strong>Meter</strong> <strong>User</strong> <strong>Guide</strong><br />
EN-57
Troubleshooting<br />
General Troubleshooting<br />
Problem:<br />
Solution:<br />
The display freezes <strong>and</strong> the measurement values will not change.<br />
The meter is in the AUTO-READ measurement mode (the AR icon will<br />
appear in the top, right corner of the display). Press to start a new<br />
reading or select another measurement mode in the setup menu.<br />
Problem: When I press the meter displays .<br />
Solution:<br />
Problem:<br />
The meter is printing <strong>and</strong> cannot enter the calibration mode until the<br />
printing is done. This should rarely occur if the meter is set to a 9600<br />
baud rate. If the meter is at a lower baud rate, the delay will be longer.<br />
The meter did not accept the change I made in the setup menu.<br />
Solution: After making a change in the setup menu, press until the arrow<br />
icon points to the top line (confirms the change) <strong>and</strong> then press<br />
to save the change <strong>and</strong> return to the measurement mode.<br />
Problem:<br />
How do I abort a calibration?<br />
Solution: Press <strong>and</strong> hold to abort any meter operation <strong>and</strong> return to the<br />
measurement mode.<br />
Problem:<br />
Solution:<br />
Problem:<br />
Solution:<br />
Problem:<br />
Solution:<br />
Problem:<br />
Solution:<br />
The printout is a string of numbers <strong>and</strong> units with commas.<br />
The output format in the setup menu is set to the computer output<br />
or the printer baud rate is set incorrectly in the setup menu. Change<br />
the output format to the printer output in the setup menu. Change<br />
the baud rate to the correct value for the printer that is being used.<br />
When I press the stirrer button, the stirrer doesn’t work.<br />
The current stirrer setting is off. Set the speed to 1 through 7 in the<br />
setup menu.<br />
The timed measurement time entry screen does not appear in the<br />
setup menu.<br />
The meter is in the AUTO-READ or continuous mode. When the meter<br />
is set to the timed mode, the next setup screen will be for time entry.<br />
I cannot tell if I have the <strong>Orion</strong> <strong>Star</strong> <strong>Plus</strong> meter or the <strong>Orion</strong> <strong>Star</strong> meter.<br />
When the meter is powered on, the <strong>Star</strong> <strong>Plus</strong> meters with enhanced<br />
features will display<br />
with the meter revision number<br />
( or similar) <strong>and</strong> proceed to the measurement mode.<br />
EN-58<br />
<strong>Thermo</strong> <strong>Scientific</strong> <strong>Orion</strong> <strong>Star</strong> <strong>and</strong> <strong>Star</strong> <strong>Plus</strong> <strong>Meter</strong> <strong>User</strong> <strong>Guide</strong>
Troubleshooting<br />
pH Troubleshooting<br />
Problem:<br />
Solution:<br />
ISE Troubleshooting<br />
Problem:<br />
Solution:<br />
Problem:<br />
The meter does not recognize the pH buffer value during calibration.<br />
Verify that the correct buffer set was selected in the setup menu.<br />
The meter uses the raw mV reading of the electrode to recognize<br />
a buffer during calibration. As the electrode ages or becomes dirty,<br />
its mV readings will drift <strong>and</strong> you will need to manually enter the<br />
pH buffer value when calibrating.<br />
It takes several minutes for the readings to stabilize during a calibration.<br />
The concentration range in the setup menu is set to low. Change the<br />
concentration range to high. The ISE resolution is set to 3 digits in the<br />
setup menu. Change the ISE resolution to 2 digits for faster stabilization<br />
of the readings.<br />
When I use the automatic blank correction setting <strong>and</strong> calibrate an ISE,<br />
the meter gives a slope that is too low or cannot be manually checked.<br />
Solution: Turn the automatic blank correction setting off in the setup menu.<br />
Conductivity Troubleshooting<br />
Problem:<br />
Solution:<br />
Problem:<br />
Solution:<br />
Problem:<br />
Solution:<br />
The meter does not recognize the conductivity st<strong>and</strong>ard during<br />
calibration.<br />
Verify that the default cell constant was entered in the setup menu.<br />
The cell constant is usually printed on the conductivity probe cable.<br />
Verify that the conductivity st<strong>and</strong>ard is one that is programmed into<br />
the meter. Re-calibrate with a fresh st<strong>and</strong>ard.<br />
The temperature coefficient value does not appear in the setup menu.<br />
The current temperature compensation setting is nonlinear or off.<br />
Change the temperature compensation to linear <strong>and</strong> the next screen<br />
will be the temperature coefficient value entry screen.<br />
The measurement is out of range when it should be in range.<br />
Check that the conductivity probe is fully immersed in the solution.<br />
Verify that the cell constant is correct for the conductivity probe that<br />
is connected to the meter. Verify that the cell type selected in the setup<br />
menu is set to Std.<br />
<strong>Thermo</strong> <strong>Scientific</strong> <strong>Orion</strong> <strong>Star</strong> <strong>and</strong> <strong>Star</strong> <strong>Plus</strong> <strong>Meter</strong> <strong>User</strong> <strong>Guide</strong><br />
EN-59
Troubleshooting<br />
General Dissolved Oxygen Troubleshooting<br />
Problem: The manual barometric pressure entry screen does not appear in the<br />
setup menu.<br />
Solution: The barometric pressure compensation is set to automatic in the setup<br />
menu. Change the barometric pressure compensation to manual <strong>and</strong><br />
the next screen will be the manual pressure entry screen.<br />
Problem: The manual salinity factor entry screen does not appear in the<br />
setup menu.<br />
Solution: The salinity correction is set to automatic in the setup menu. Change<br />
the salinity correction to manual <strong>and</strong> the next screen will be the salinity<br />
factor entry screen.<br />
Polarographic Dissolved Oxygen Troubleshooting<br />
Problem: The AUTO-STIR BOD probe does not turn on when the button on the<br />
probe is pressed.<br />
Solution: The read type must be set to AUTO-READ in the setup menu <strong>and</strong> the<br />
stirrer speed must be set from 1 to 7 to initiate a measurement <strong>and</strong><br />
start stirring by pressing the button on the AUTO-STIR BOD probe.<br />
RDO ® Optical Dissolved Oxygen Troubleshooting<br />
Problem: The meter displays an error 881 message <strong>and</strong> will not take a dissolved<br />
oxygen measurement.<br />
Solution: Turn the meter off, replace the old optical cap with a new cap <strong>and</strong> turn<br />
the meter on. This should clear the error message.<br />
Assistance<br />
After troubleshooting all components of your measurement system, contact Technical<br />
Support. Within the United States call 1.800.225.1480 <strong>and</strong> outside the United<br />
States call 978.232.6000 or fax 978.232.6031. In Europe, the Middle East <strong>and</strong> Africa,<br />
contact your local authorized dealer. For the most current contact information, visit<br />
www.thermoscientific.com/water.<br />
For the latest application <strong>and</strong> technical resources for <strong>Thermo</strong> <strong>Scientific</strong> <strong>Orion</strong><br />
products, visit www.thermoscientific.com/water. Select Environmental Analysis<br />
from the Applications drop-down menu <strong>and</strong> click on the Water <strong>and</strong> Wastewater icon<br />
or exp<strong>and</strong> the Application Categories.<br />
Warranty<br />
For the most current warranty information, visit www.thermoscientific.com/water.<br />
EN-60<br />
<strong>Thermo</strong> <strong>Scientific</strong> <strong>Orion</strong> <strong>Star</strong> <strong>and</strong> <strong>Star</strong> <strong>Plus</strong> <strong>Meter</strong> <strong>User</strong> <strong>Guide</strong>
Chapter XV <strong>Meter</strong> Specifications<br />
<strong>Meter</strong> Specifications<br />
Environmental Operating Conditions<br />
Portable <strong>and</strong> Benchtop <strong>Meter</strong> Environmental Operating Conditions<br />
Operating Ambient Temperature 5 to 45 °C<br />
Operating Relative Humidity<br />
Storage Temperature -20 to +60 °C<br />
Storage Relative Humidity<br />
Pollution Degree 2<br />
Overvoltage<br />
Altitude<br />
Weight<br />
Size<br />
AC Powered <strong>Meter</strong>s<br />
Battery Operated <strong>Meter</strong>s<br />
Regulatory <strong>and</strong> Safety<br />
Case Material<br />
5 to 85 %, non-condensing<br />
5 to 85 %, non-condensing<br />
Category II<br />
Up to 2000 meters<br />
Portable: 0.45 kg<br />
Benchtop: 0.91 kg<br />
Portable: 4.8 cm (H) x 9.7 cm (W) x 21.3 cm (D)<br />
Benchtop: 9.4 cm (H) x 17.0 cm (W) x 22.4 cm (D)<br />
Indoor use only<br />
Indoor or outdoor use<br />
CE, CSA, TÜV, UL, FCC Class limits*<br />
Shock <strong>and</strong> Vibration Vibration, shipping/h<strong>and</strong>ling per ISTA #1A<br />
Shock, drop test in packaging per ISTA #1A<br />
Enclosure (designed to meet)<br />
ABS<br />
IP67 (portable meter)<br />
IP54 (benchtop meter)<br />
* TÜV <strong>and</strong> UL certifications are pending for all <strong>Star</strong> RDO ® optical dissolved oxygen meters.<br />
<strong>Thermo</strong> <strong>Scientific</strong> <strong>Orion</strong> <strong>Star</strong> <strong>and</strong> <strong>Star</strong> <strong>Plus</strong> <strong>Meter</strong> <strong>User</strong> <strong>Guide</strong><br />
EN-61
<strong>Meter</strong> Specifications<br />
Universal Power Adapter Environmental Operating Conditions<br />
Operating Ambient Temperature 0 to 50 °C<br />
Operating Relative Humidity<br />
Storage Temperature -20 to +75 °C<br />
Storage Relative Humidity<br />
Pollution Degree 2<br />
Overvoltage<br />
Operating Altitude<br />
Benchtop <strong>Meter</strong>s<br />
<strong>Meter</strong> Parameter Specifications<br />
0 to 90 %, non-condensing<br />
0 to 90 %, non-condensing<br />
Category II<br />
Up to 2000 meters<br />
Indoor use only<br />
The following meter parameter specifications are for the complete line of <strong>Orion</strong><br />
<strong>Star</strong> <strong>and</strong> <strong>Star</strong> <strong>Plus</strong> series meters. Single parameter, dual parameter <strong>and</strong> some<br />
multi-parameter meters will not include all of the parameters listed in this section.<br />
pH<br />
Range -2.000 to 19.999<br />
Resolution 0.1, 0.01, 0.001<br />
Relative Accuracy ± 0.002<br />
Calibration Points 1 to 5<br />
pH (2-<strong>Star</strong> pH <strong>Meter</strong> Only)<br />
Range 0.001 to 14.999<br />
Resolution 0.1, 0.01, 0.001<br />
Relative Accuracy ± 0.002<br />
Calibration Points 1 to 3<br />
Millivolts, Relative Millivolts, ORP<br />
Range<br />
± 1999.9 mV<br />
Resolution<br />
0.1 mV<br />
Relative Accuracy<br />
± 0.2 mV or 0.05 % of reading, whichever is greater<br />
EN-62<br />
<strong>Thermo</strong> <strong>Scientific</strong> <strong>Orion</strong> <strong>Star</strong> <strong>and</strong> <strong>Star</strong> <strong>Plus</strong> <strong>Meter</strong> <strong>User</strong> <strong>Guide</strong>
<strong>Meter</strong> Specifications<br />
ISE<br />
Range 0 to 19999<br />
Resolution<br />
Relative Accuracy<br />
Displayed Units<br />
Calibration Features<br />
Dissolved Oxygen (Polarographic)<br />
Range<br />
Resolution<br />
Relative Accuracy<br />
Salinity Factor<br />
Barometric Pressure<br />
Calibration Types<br />
Probe Type<br />
RDO ® Optical Dissolved Oxygen<br />
Range<br />
Resolution<br />
Relative Accuracy<br />
Salinity Factor<br />
Barometric Pressure<br />
Calibration Types<br />
Probe Type<br />
1 to 3 significant figures<br />
± 0.2 mV or 0.05 %, whichever is greater<br />
M, mg/L, %, ppb or no units<br />
Linear point to point, selectable non-linear automatic blank<br />
correction <strong>and</strong> low concentration range stability<br />
0.00 to 90.0 mg/L<br />
0.0 to 600 %<br />
0.1, 0.01 mg/L<br />
0.1, 1 %<br />
± 0.2 mg/L<br />
± 2 %<br />
0 to 45 ppt<br />
450 to 850 mm Hg<br />
Water saturated air, air saturated water, manual (Winkler), zero point<br />
Polarographic<br />
0.00 to 20.0 mg/L<br />
0.0 to 200 %<br />
0.1, 0.01 mg/L<br />
0.1, 1 %<br />
± 0.1 mg/L up to 8 mg/L; ± 0.2 mg/L from 8 mg/L to 20 mg/L<br />
± 2 %<br />
0 to 45 ppt<br />
450 to 850 mm Hg<br />
Water saturated air, air saturated water, manual (Winkler), zero point<br />
RDO optical<br />
<strong>Thermo</strong> <strong>Scientific</strong> <strong>Orion</strong> <strong>Star</strong> <strong>and</strong> <strong>Star</strong> <strong>Plus</strong> <strong>Meter</strong> <strong>User</strong> <strong>Guide</strong><br />
EN-63
<strong>Meter</strong> Specifications<br />
Conductivity<br />
Range<br />
Resolution<br />
Relative Accuracy<br />
0.000 to 3000 mS/cm, auto-resolution with cell constant dependence<br />
4 significant figures down to 0.001 µS/cm, cell constant dependant<br />
0.5 % ± 1 digit or 0.01 µS/cm, whichever is greater<br />
Cell Constant 0.001 to 199.9 cm -1<br />
Reference Temperature 5 °C, 10 °C, 15 °C, 20 °C or 25 °C<br />
Resistivity Range<br />
Resistivity Resolution<br />
Resistivity Relative Accuracy<br />
Salinity Range<br />
Salinity Resolution<br />
Salinity Relative Accuracy<br />
TDS Range<br />
TDS Resolution<br />
TDS Relative Accuracy<br />
Temperature<br />
0.0001 to 100 Megohm<br />
Automatic<br />
0.5 % ± 1 digit<br />
0.1 to 80.0 ppt NaCl equivalent, 0.1 to 42 ppt practical salinity<br />
0.1 ppt<br />
0.1 ± 1 digit<br />
0 to 19999 mg/L<br />
1 mg/L<br />
0.5 % ± 1 digit<br />
Range -5 to 105 °C<br />
Resolution 0.1 up to 99.9 °C, 1.0 over 99.9 °C<br />
Relative Accuracy ± 0.1 °C<br />
Temperature* (RDO ® Optical Dissolved Oxygen <strong>Meter</strong> Only)<br />
Range 0 to 50 °C<br />
Resolution 0.1 °C<br />
Relative Accuracy ± 0.3 °C<br />
* This temperature specification is only for the <strong>Star</strong> <strong>Plus</strong> RDO optical dissolved<br />
oxygen meter when it is used with the RDO optical probe. The 4-<strong>Star</strong> <strong>and</strong> 5-<strong>Star</strong><br />
RDO meters will have the st<strong>and</strong>ard temperature specifications when used with<br />
an electrode other than the RDO probe.<br />
Note: Specifications are subject to change without notice.<br />
EN-64<br />
<strong>Thermo</strong> <strong>Scientific</strong> <strong>Orion</strong> <strong>Star</strong> <strong>and</strong> <strong>Star</strong> <strong>Plus</strong> <strong>Meter</strong> <strong>User</strong> <strong>Guide</strong>
<strong>Meter</strong> Specifications<br />
Ordering Information<br />
Cat. No.<br />
Description<br />
1111000 2-<strong>Star</strong> pH benchtop meter with universal power adapter <strong>and</strong> user guide<br />
1112000 3-<strong>Star</strong> <strong>Plus</strong> pH benchtop meter with universal power adapter <strong>and</strong> user guide<br />
1212000 3-<strong>Star</strong> <strong>Plus</strong> pH portable meter with batteries <strong>and</strong> user guide<br />
1113000 3-<strong>Star</strong> <strong>Plus</strong> DO benchtop meter with universal power adapter <strong>and</strong> user guide<br />
1213000 3-<strong>Star</strong> <strong>Plus</strong> DO portable meter with batteries <strong>and</strong> user guide<br />
1114000 3-<strong>Star</strong> <strong>Plus</strong> conductivity benchtop meter with universal power adapter <strong>and</strong> user guide<br />
1214000 3-<strong>Star</strong> <strong>Plus</strong> conductivity portable meter with batteries <strong>and</strong> user guide<br />
1115000 4-<strong>Star</strong> <strong>Plus</strong> pH/ISE benchtop meter with universal power adapter <strong>and</strong> user guide<br />
1215000 4-<strong>Star</strong> <strong>Plus</strong> pH/ISE portable meter with batteries <strong>and</strong> user guide<br />
1116000 4-<strong>Star</strong> <strong>Plus</strong> pH/DO benchtop meter with universal power adapter <strong>and</strong> user guide<br />
1216000 4-<strong>Star</strong> <strong>Plus</strong> pH/DO portable meter with batteries <strong>and</strong> user guide<br />
1117000 4-<strong>Star</strong> <strong>Plus</strong> pH/conductivity benchtop meter with universal power adapter<br />
<strong>and</strong> user guide<br />
1217000 4-<strong>Star</strong> <strong>Plus</strong> pH/conductivity portable meter with batteries <strong>and</strong> user guide<br />
1218000 5-<strong>Star</strong> <strong>Plus</strong> pH/DO/conductivity portable meter with batteries <strong>and</strong> user guide<br />
1119000 5-<strong>Star</strong> <strong>Plus</strong> pH/ISE/DO/conductivity benchtop meter with universal power adapter<br />
<strong>and</strong> user guide<br />
1219000 5-<strong>Star</strong> <strong>Plus</strong> pH/ISE/DO/conductivity portable meter with batteries <strong>and</strong> user guide<br />
1213300 3-<strong>Star</strong> <strong>Plus</strong> RDO ® optical DO portable meter with batteries <strong>and</strong> user guide<br />
1213310 4-<strong>Star</strong> <strong>Plus</strong> RDO optical DO/pH portable meter with batteries <strong>and</strong> user guide<br />
1213320 5-<strong>Star</strong> <strong>Plus</strong> RDO optical DO/pH/conductivity portable meter with batteries<br />
<strong>and</strong> user guide<br />
090043 Swing arm electrode st<strong>and</strong><br />
1010003 Universal power adapter<br />
1010006 <strong>Star</strong> series printer with RS232 printer interface cable (Cat. No. 250302-001)<br />
1010053 RS232 computer interface cable<br />
096019 Stirrer probe with paddle, for 3-<strong>Star</strong>, 4-<strong>Star</strong> <strong>and</strong> 5-<strong>Star</strong> benchtop meters<br />
<strong>Thermo</strong> <strong>Scientific</strong> <strong>Orion</strong> <strong>Star</strong> <strong>and</strong> <strong>Star</strong> <strong>Plus</strong> <strong>Meter</strong> <strong>User</strong> <strong>Guide</strong><br />
EN-65
<strong>Meter</strong> Specifications<br />
Cat. No.<br />
8102BNUWP<br />
8107BNUMD<br />
8156BNUWP<br />
8157BNUMD<br />
8165BNWP<br />
8172BNWP<br />
9107APMD<br />
9107BNMD<br />
9157BNMD<br />
9165BNWP<br />
9172BNWP<br />
927005MD<br />
927007MD<br />
9512HPBNWP<br />
9609BNWP<br />
9707BNWP<br />
8611BNWP<br />
083005MD<br />
083010MD<br />
086030MD<br />
087010MD<br />
Description<br />
ROSS Ultra combination pH electrode with glass body<br />
ROSS Ultra low maintenance gel-filled pH/ATC Triode electrode with epoxy body<br />
ROSS Ultra combination pH electrode with epoxy body<br />
ROSS Ultra pH/ATC Triode electrode with epoxy body<br />
ROSS Sure-Flow combination pH electrode with epoxy body<br />
ROSS Sure-Flow combination pH electrode with glass body<br />
AquaPro low maintenance polymer-filled pH/ATC Triode electrode with epoxy body<br />
Gel-filled pH/ATC Triode with epoxy body<br />
Refillable pH/ATC Triode with epoxy body<br />
Sure-Flow combination pH electrode with epoxy body<br />
Sure-Flow combination pH electrode with glass body<br />
ATC probe with epoxy body<br />
ATC probe with stainless steel body<br />
High performance ammonia combination ion selective electrode<br />
Fluoride combination ion selective electrode<br />
Nitrate combination ion selective electrode<br />
ROSS sodium combination ion selective electrode<br />
Polarographic DO probe with calibration sleeve <strong>and</strong> 1.5 meter cable<br />
Polarographic DO probe with calibration sleeve <strong>and</strong> 3 meter cable<br />
Polarographic BOD AUTO-STIR DO probe with calibration sleeve<br />
RDO ® optical probe with stainless steel guard, optical cap <strong>and</strong> 3 meter cable<br />
087001 Replacement optical cap<br />
011050MD<br />
013005MD<br />
013010MD<br />
013016MD<br />
Conductivity probe with 1 µS/cm to 20 mS/cm range <strong>and</strong> 1.5 meter cable<br />
DuraProbe conductivity probe with 1 µS/cm to 200 mS/cm range <strong>and</strong> 1.5 meter cable<br />
DuraProbe conductivity probe with 1 µS/cm to 200 mS/cm range <strong>and</strong> 3 meter cable<br />
Conductivity probe with 0.01 µS/cm to 300 µS/cm range <strong>and</strong> 1.5 meter cable<br />
Visit www.thermoscientific.com/water for additional meter kits, accessories, electrodes<br />
<strong>and</strong> solutions.<br />
EN-66<br />
<strong>Thermo</strong> <strong>Scientific</strong> <strong>Orion</strong> <strong>Star</strong> <strong>and</strong> <strong>Star</strong> <strong>Plus</strong> <strong>Meter</strong> <strong>User</strong> <strong>Guide</strong>
Appendix A <strong>Meter</strong> Setup Menu Features<br />
pH Setup Menu Features<br />
Automatic Buffer Recognition<br />
The <strong>Orion</strong> <strong>Star</strong> <strong>and</strong> <strong>Star</strong> <strong>Plus</strong> pH meters are capable of automatically recognizing pH<br />
1.68, 4.01, 6.86, 7.00, 9.18, 10.01 <strong>and</strong> 12.46 buffers during a pH calibration. During<br />
a calibration, the meter uses the selected buffer set <strong>and</strong> the raw mV reading of the<br />
pH electrode in the buffer to recognize <strong>and</strong> display the buffer value at the measured<br />
temperature. The raw mV value must be about ± 30 mV from the theoretical mV<br />
reading of the buffer in order for the meter to automatically recognize the buffer.<br />
Buffer mV Range Buffer mV Range Buffer mV Range<br />
1.68 +285 to +345 7.00 - 30 to + 30 10.01 -207 to -147<br />
4.01 +207 to +147 9.18 -99 to -159 12.46 -293 to -353<br />
6.86 +38 to -22<br />
Dissolved Oxygen Setup Menu Features<br />
Barometric Pressure Compensation<br />
The <strong>Orion</strong> <strong>Star</strong> <strong>and</strong> <strong>Star</strong> <strong>Plus</strong> dissolved oxygen meters have an internal barometer<br />
that is used for pressure compensated dissolved oxygen readings. The meter can<br />
also use manual barometric pressure compensation if dissolved oxygen is measured<br />
with a submerged probe or in a pressurized vessel. The pressure must be entered<br />
as mm Hg. 1 mm Hg = 0.03937 inch Hg = 1.3332 hPa (mBar) = 0.01934 PSI.<br />
Salinity Correction<br />
Automatic salinity correction for dissolved oxygen readings is available on <strong>Orion</strong><br />
<strong>Star</strong> <strong>and</strong> <strong>Star</strong> <strong>Plus</strong> dissolved oxygen meters that have a conductivity measurement<br />
mode. The meter uses the conductivity value read by the conductivity probe to<br />
calculate the salinity correction factor <strong>and</strong> applies the factor to dissolved oxygen<br />
readings reported as mg/L.<br />
The meter can also use manual salinity correction for dissolved oxygen readings<br />
reported as mg/L. The manual salinity correction factor must be entered as ppt<br />
(parts per thous<strong>and</strong>).<br />
<strong>Thermo</strong> <strong>Scientific</strong> <strong>Orion</strong> <strong>Star</strong> <strong>and</strong> <strong>Star</strong> <strong>Plus</strong> <strong>Meter</strong> <strong>User</strong> <strong>Guide</strong><br />
EN-67
<strong>Meter</strong> Setup Menu Features<br />
Conductivity<br />
at 20 °C<br />
(mS/cm)<br />
Salinity<br />
Correction<br />
Value (ppt)<br />
Conductivity<br />
at 20 °C<br />
(mS/cm)<br />
Salinity<br />
Correction<br />
Value (ppt)<br />
Conductivity<br />
at 20 °C<br />
(mS/cm)<br />
5 3 20 13 35 25<br />
6 4 21 14 36 25<br />
7 4 22 15 37 26<br />
8 5 23 15 38 27<br />
9 6 24 16 39 28<br />
10 6 25 17 40 29<br />
11 7 26 18 42 30<br />
12 8 27 18 44 32<br />
13 8 28 19 46 33<br />
14 9 29 20 48 35<br />
15 10 30 21 50 37<br />
16 10 31 22 52 38<br />
17 11 32 22 54 40<br />
18 12 33 23 56 42<br />
19 13 34 24<br />
Salinity<br />
Correction<br />
Value (ppt)<br />
This table was calculated from the International Oceanographic Tables, Vol. 1, National Institute<br />
of Oceanography of Great Britain, Womley, Godaming, Surrey, Engl<strong>and</strong> <strong>and</strong> Unesco, Paris 1971.<br />
Conductivity Setup Menu Features<br />
Temperature Compensation <strong>and</strong> Reference Temperature<br />
The <strong>Orion</strong> <strong>Star</strong> <strong>and</strong> <strong>Star</strong> <strong>Plus</strong> conductivity meters have the ability to use a<br />
temperature compensation feature that calculates <strong>and</strong> displays the conductivity<br />
measurements at a reference temperature of 5 °C, 10 °C, 15 °C, 20 °C or 25 °C<br />
(<strong>Orion</strong> <strong>Star</strong> meters have a reference temperature of 15 °C, 20 °C or 25 °C only).<br />
The temperature compensation can be set as linear for most aqueous samples,<br />
non-linear for ultra pure <strong>and</strong> low ionic strength samples or off for non-temperature<br />
compensated conductivity measurements.<br />
The closer the sample temperature is to the selected reference temperature, the<br />
more accurate the conductivity measurement will be, especially if the temperature<br />
compensation coefficient is estimated or inaccurate.<br />
EN-68<br />
<strong>Thermo</strong> <strong>Scientific</strong> <strong>Orion</strong> <strong>Star</strong> <strong>and</strong> <strong>Star</strong> <strong>Plus</strong> <strong>Meter</strong> <strong>User</strong> <strong>Guide</strong>
<strong>Meter</strong> Setup Menu Features<br />
The conductivity of a solution with a specific electrolyte concentration changes with<br />
temperature <strong>and</strong> this relationship is described by the temperature coefficient of the<br />
solution. The meter has a default temperature coefficient of 2.1 percent change in<br />
conductivity per ˚C, which is representative of many aqueous samples.<br />
Solution (25 °C to 50 °C)<br />
Temperature Coefficient (% / °C)<br />
Ultra Pure Water 4.55<br />
Salt (NaCl) 2.12<br />
5% NaOH 1.72<br />
Dilute Ammonia 1.88<br />
10% HCl 1.32<br />
5% Sulfuric Acid 0.96<br />
98% Sulfuric Acid 2.84<br />
Sugar Syrup 5.64<br />
Total Dissolved Solids (TDS)<br />
The <strong>Orion</strong> <strong>Star</strong> <strong>and</strong> <strong>Star</strong> <strong>Plus</strong> conductivity meters measure TDS as the total amount<br />
of dissolved inorganics in a solution. The dissolved inorganics carry a current that<br />
is measured by the conductivity probe. Since there is a direct relationship between<br />
conductivity <strong>and</strong> TDS, conductivity readings are used to estimate the presence<br />
of inorganics. The user must enter a TDS factor between 0.01 <strong>and</strong> 10 mg/L in the<br />
setup menu.<br />
The st<strong>and</strong>ard method of determining TDS involves evaporating a sample to dryness<br />
at 180 ˚C <strong>and</strong> weighing the residue. The TDS factor is calculated by taking the<br />
residue weight <strong>and</strong> dividing it by the sample conductivity. Subsequent conductivity<br />
readings are multiplied by the TDS factor to determine the TDS value of the sample.<br />
Automatic Calibration<br />
The <strong>Orion</strong> <strong>Star</strong> <strong>and</strong> <strong>Star</strong> <strong>Plus</strong> conductivity meters are capable of automatically<br />
recognizing 100 µS/cm, 1413 µS/cm <strong>and</strong> 12.9 mS/cm conductivity st<strong>and</strong>ards when<br />
the nominal cell constant of the conductivity probe is entered in the setup menu.<br />
<strong>Thermo</strong> <strong>Scientific</strong> <strong>Orion</strong> <strong>Star</strong> <strong>and</strong> <strong>Star</strong> <strong>Plus</strong> <strong>Meter</strong> <strong>User</strong> <strong>Guide</strong><br />
EN-69
<strong>Meter</strong> Setup Menu Features<br />
Table of Conductivity St<strong>and</strong>ard Values vs. Temperature<br />
Cat. No. 011005 011006 011007 01100910 011008<br />
Temperature<br />
(°C)<br />
111.9 mS/cm<br />
Conductivity<br />
St<strong>and</strong>ard<br />
(mS/cm)<br />
12.9 mS/cm<br />
Conductivity<br />
St<strong>and</strong>ard<br />
(mS/cm)<br />
1413 µS/cm<br />
Conductivity<br />
St<strong>and</strong>ard<br />
(µS/cm)<br />
147 µS/cm<br />
Conductivity<br />
St<strong>and</strong>ard<br />
(µS/cm)<br />
100 µS/cm<br />
Conductivity<br />
St<strong>and</strong>ard<br />
(µS/cm)<br />
0 65.10 7.135 776 81 54<br />
1 66.84 7.344 799 83 56<br />
2 68.59 7.555 822 86 58<br />
3 70.35 7.768 846 88 59<br />
4 72.12 7.983 870 91 61<br />
5 73.91 8.200 894 93 63<br />
6 75.70 8.418 918 96 64<br />
7 77.50 8.638 943 98 66<br />
8 79.32 8.860 968 101 68<br />
9 81.15 9.084 992 103 70<br />
10 82.98 9.309 1017 106 72<br />
11 84.83 9.535 1043 108 73<br />
12 86.69 9.763 1068 111 75<br />
13 88.56 9.993 1094 114 77<br />
14 90.45 10.22 1119 116 79<br />
15 92.34 10.46 1145 119 81<br />
16 94.24 10.69 1171 122 83<br />
17 96.15 10.93 1198 125 85<br />
18 98.08 11.16 1224 127 87<br />
19 100.0 11.40 1251 130 88<br />
20 102.0 11.64 1277 133 90<br />
21 103.9 11.88 1304 136 92<br />
22 105.9 12.12 1331 138 94<br />
23 107.9 12.36 1358 141 96<br />
24 109.9 12.61 1386 144 98<br />
25 111.9 12.85 1413 147 100<br />
26 113.9 13.10 1441 150 102<br />
27 115.9 13.35 1468 153 104<br />
28 117.9 13.59 1496 156 106<br />
29 120.0 13.84 1524 159 108<br />
EN-70<br />
<strong>Thermo</strong> <strong>Scientific</strong> <strong>Orion</strong> <strong>Star</strong> <strong>and</strong> <strong>Star</strong> <strong>Plus</strong> <strong>Meter</strong> <strong>User</strong> <strong>Guide</strong>
<strong>Meter</strong> Setup Menu Features<br />
Cat. No. 011005 011006 011007 01100910 011008<br />
Temperature<br />
(°C)<br />
111.9 mS/cm<br />
Conductivity<br />
St<strong>and</strong>ard<br />
(mS/cm)<br />
12.9 mS/cm<br />
Conductivity<br />
St<strong>and</strong>ard<br />
(mS/cm)<br />
1413 µS/cm<br />
Conductivity<br />
St<strong>and</strong>ard<br />
(µS/cm)<br />
147 µS/cm<br />
Conductivity<br />
St<strong>and</strong>ard<br />
(µS/cm)<br />
100 µS/cm<br />
Conductivity<br />
St<strong>and</strong>ard<br />
(µS/cm)<br />
30 122.0 14.09 1552 161 110<br />
31 124.1 14.34 1580 164 112<br />
32 126.2 14.59 1608 167 114<br />
33 128.3 14.85 1636 170 117<br />
34 130.4 15.10 1665 173 119<br />
35 132.5 15.35 1693 176 121<br />
36 134.6 15.61 1722 179 123<br />
37 136.7 15.86 1751 182 125<br />
38 138.9 16.12 1780 185 127<br />
39 141.0 16.37 1808 188 129<br />
40 143.2 16.63 1837 191 131<br />
41 145.4 16.89 1866 194 134<br />
42 147.6 17.15 1896 197 136<br />
43 149.8 17.40 1925 200 138<br />
44 152.0 17.66 1954 203 140<br />
45 154.2 17.92 1983 206 142<br />
46 156.4 18.18 2013 209 145<br />
47 158.7 18.44 2042 212 147<br />
48 160.9 18.70 2071 215 149<br />
49 163.2 18.96 2101 219 151<br />
50 165.4 19.22 2130 222 154<br />
<strong>Thermo</strong> <strong>Scientific</strong> <strong>Orion</strong> <strong>Star</strong> <strong>and</strong> <strong>Star</strong> <strong>Plus</strong> <strong>Meter</strong> <strong>User</strong> <strong>Guide</strong><br />
EN-71
<strong>Meter</strong> Setup Menu Features<br />
ISE Setup Menu Features<br />
Concentration Range<br />
The <strong>Orion</strong> <strong>Star</strong> <strong>and</strong> <strong>Star</strong> <strong>Plus</strong> ISE meters can be set for a high or low ISE<br />
concentration range that is used to determine the calibration stability criteria.<br />
If a high ISE concentration range is selected, the meter will perform a normal<br />
calibration with no delay in displaying the calibration st<strong>and</strong>ard value. If a low ISE<br />
concentration range is selected, the meter will wait about three to five minutes<br />
before displaying a stable reading for the calibration st<strong>and</strong>ard values. The delay<br />
will depend on the species being measured <strong>and</strong> the concentration of the calibration<br />
st<strong>and</strong>ards. The low ISE concentration range is designed to improve the accuracy<br />
of low concentration measurements by allowing the electrode to have a longer<br />
amount of time to stabilize in the calibration st<strong>and</strong>ards.<br />
Automatic Blank Correction<br />
The <strong>Orion</strong> <strong>Star</strong> <strong>and</strong> <strong>Star</strong> <strong>Plus</strong> ISE meters have an ISE automatic blank correction<br />
feature that uses an algorithm to compensate for the non-linearity of the ion<br />
selective electrode in low-level st<strong>and</strong>ards <strong>and</strong> samples. Since the automatic blank<br />
correction feature requires the use of a set of non-linear equations that can only<br />
be calculated numerically, the user cannot analytically verify the calibration <strong>and</strong> the<br />
average slope value that is displayed on the meter may be outside of the slope<br />
range that is specified in the electrode user guide. In applications were analytical<br />
verification is required, contact Technical Support. See the Assistance section for<br />
contact details.<br />
EN-72<br />
<strong>Thermo</strong> <strong>Scientific</strong> <strong>Orion</strong> <strong>Star</strong> <strong>and</strong> <strong>Star</strong> <strong>Plus</strong> <strong>Meter</strong> <strong>User</strong> <strong>Guide</strong>
Appendix B <strong>Orion</strong> <strong>Star</strong> <strong>Plus</strong> Benchtop<br />
<strong>Meter</strong> <strong>and</strong> Autosampler Interfacing<br />
<strong>Meter</strong> <strong>and</strong> Autosampler Setup<br />
1. Select a location for the system <strong>and</strong> unpack the autosampler <strong>and</strong> meter<br />
components. Prepare the autosampler according to the autosampler user guide.<br />
2. Interface the autosampler with the meter. Use the autosampler to meter<br />
interface cable, Cat. No. ATA02 (labelled 254210-001), to connect the 2.5<br />
mm phono jack RS232 port on the meter to the Com 1 RS232 port on the<br />
autosampler.<br />
Com 2 Port<br />
(to printer)<br />
Power<br />
Button<br />
Power<br />
Connector<br />
!<br />
Com 2<br />
Com 1<br />
Stirrer Jack<br />
RS232<br />
Power<br />
Com 1 Port<br />
(to <strong>Star</strong> <strong>Plus</strong> meter)<br />
3. If the <strong>Orion</strong> <strong>Star</strong> printer will be used, use the autosampler to printer interface<br />
cable, Cat. No. 223664-001, to connect the Com 2 RS232 port on the<br />
autosampler to the 25 pin female RS232 port on the printer.<br />
Note: The printer must have a 9600 baud rate to be connected to the<br />
autosampler. The <strong>Orion</strong> <strong>Star</strong> printer, Cat. No. 1010006, is recommended for use<br />
with the <strong>Orion</strong> <strong>Star</strong> <strong>Plus</strong> meter <strong>and</strong> AutoTration-500 autosampler system.<br />
4. Prepare <strong>and</strong> install the electrodes. Prepare the electrodes according to the<br />
electrode user guides. Connect the electrodes to the back of the meter<br />
using the extension cables <strong>and</strong> cable management system provided with the<br />
autosampler. Insert the electrodes into the electrode holder on the autosampler.<br />
If a stirrer probe will be used, connect the stirrer probe to the stirrer jack on the<br />
back of the meter <strong>and</strong> insert it into the electrode holder on the autosampler.<br />
5. Connect the meter, autosampler <strong>and</strong> printer to a power supply <strong>and</strong> turn on the<br />
power. The default meter baud rate is 9600 <strong>and</strong> the default autosampler baud<br />
rate for the Com 1 port is 1200, so the meter baud rate needs to be set to 1200<br />
or the autosampler dip switches need to be adjusted to 9600 for the Com 1 port.<br />
<strong>Thermo</strong> <strong>Scientific</strong> <strong>Orion</strong> <strong>Star</strong> <strong>and</strong> <strong>Star</strong> <strong>Plus</strong> <strong>Meter</strong> <strong>User</strong> <strong>Guide</strong><br />
EN-73
<strong>Orion</strong> <strong>Star</strong> <strong>Plus</strong> Benchtop <strong>Meter</strong> <strong>and</strong> Autosampler Interfacing<br />
Setup Information for Interfacing <strong>Meter</strong>, Autosampler<br />
<strong>and</strong> Autosampler Navigator Software<br />
1. Select a location for the system <strong>and</strong> unpack the autosampler <strong>and</strong> meter<br />
components. Prepare the autosampler according to the autosampler user guide.<br />
2. Use the straight-wired RS232 cable (provided with the autosampler) to connect<br />
the Com 1 RS232 port on the autosampler to an available RS232 COM port of<br />
the PC.<br />
3. Connect COM 2 of autosampler to <strong>Star</strong> <strong>Plus</strong> <strong>Meter</strong> RS232 port using the <strong>Star</strong><br />
<strong>Plus</strong> serial cable (labeled 236929-001).<br />
4. Adjust DIP switch 4 <strong>and</strong> DIP switch 5 to the OFF position (up) to set the<br />
autosampler to 9600 baud for Com 1.<br />
5. Prepare <strong>and</strong> install the electrodes. Prepare the electrodes according to the<br />
electrode user guides. Connect the electrodes to the back of the meter<br />
using the extension cables <strong>and</strong> cable management system provided with the<br />
autosampler. Insert the electrodes into the electrode holder on the autosampler.<br />
If a stirrer probe will be used, connect the stirrer probe to the stirrer jack on the<br />
back of the meter <strong>and</strong> insert it into the electrode holder on the autosampler.<br />
6. Connect the meter <strong>and</strong> autosampler to a power supply <strong>and</strong> turn on the power.<br />
7. Verify the baud rate for the meter is 9600 <strong>and</strong> that the AutoSampler setup menu<br />
is set to OFF in the meter. Adjust the meter settings if necessary.<br />
8. Run the Autosampler Navigator software on the PC <strong>and</strong> set an autosampler run<br />
from within the Autosampler Navigator user setup & autosampler setup tabs.<br />
(Refer to software instructions if needed.)<br />
9. Press SAVE to save each tab settings.<br />
10. Press START to start your autosampler run.<br />
EN-74<br />
<strong>Thermo</strong> <strong>Scientific</strong> <strong>Orion</strong> <strong>Star</strong> <strong>and</strong> <strong>Star</strong> <strong>Plus</strong> <strong>Meter</strong> <strong>User</strong> <strong>Guide</strong>
<strong>Orion</strong> <strong>Star</strong> <strong>Plus</strong> Benchtop <strong>Meter</strong> <strong>and</strong> Autosampler Interfacing<br />
Setup Information for Interfacing <strong>Meter</strong>, Autosampler Unit<br />
<strong>and</strong> Windows ® Hyperterminal<br />
1. Select a location for the system <strong>and</strong> unpack the autosampler <strong>and</strong> meter<br />
components. Prepare the autosampler according to the autosampler user guide.<br />
2. Interface the autosampler with the meter. Use the autosampler to meter<br />
interface cable, Cat. No. ATA02 (labeled 254210-001), to connect the 2.5<br />
mm phono jack RS232 port on the meter to the Com 1 RS232 port on the<br />
autosampler.<br />
3. Use special NULL modem cable (provided with the autosampler) <strong>and</strong> connect<br />
COM 2 of autosampler to COM port of computer.<br />
Note: Make sure your Hyperterminal COM settings are set to the same settings<br />
as COM2 of the autosampler unit.<br />
4. Adjust DIP switch 4 <strong>and</strong> DIP switch 5 to the OFF position (up) to set the<br />
autosampler to 9600 baud for Com 1.<br />
5. Prepare <strong>and</strong> install the electrodes. Prepare the electrodes according to the<br />
electrode user guides. Connect the electrodes to the back of the meter<br />
using the extension cables <strong>and</strong> cable management system provided with the<br />
autosampler. Insert the electrodes into the electrode holder on the autosampler.<br />
If a stirrer probe will be used, connect the stirrer probe to the stirrer jack on the<br />
back of the meter <strong>and</strong> insert it into the electrode holder on the autosampler.<br />
6. Connect the meter <strong>and</strong> autosampler to a power supply <strong>and</strong> turn on the power.<br />
7. Verify the baud rate for the meter is 9600. Adjust the meter setting if necessary.<br />
8. Enter the AutoSampler setup menu in the meter <strong>and</strong> set to ON. Follow<br />
the instructions in the section titled “<strong>Meter</strong> Preparation for Operating the<br />
Autosampler”.<br />
<strong>Thermo</strong> <strong>Scientific</strong> <strong>Orion</strong> <strong>Star</strong> <strong>and</strong> <strong>Star</strong> <strong>Plus</strong> <strong>Meter</strong> <strong>User</strong> <strong>Guide</strong><br />
EN-75
<strong>Orion</strong> <strong>Star</strong> <strong>Plus</strong> Benchtop <strong>Meter</strong> <strong>and</strong> Autosampler Interfacing<br />
<strong>Meter</strong> Preparation for Operating the Autosampler<br />
1. In the measurement mode, change each display line to the desired parameter<br />
<strong>and</strong> blank any unneeded lines. See the Selecting the Measurement Parameter<br />
section for detailed instructions.<br />
2. Review <strong>and</strong> change the parameters for basic meter functions in the setup menu.<br />
Note: The first time the meter is prepared for use with the autosampler,<br />
confirm all of the applicable setup menus. As long as the meter is connected<br />
to a power supply, the setup parameters do not need to be reprogrammed.<br />
To prevent the meter from losing the programmed parameters in the event<br />
of a power failure, install four AA alkaline batteries in the meter.<br />
If a pH electrode will be calibrated on the autosampler, select the<br />
USA or EUrO buffer set that will be used for automatic calibration.<br />
If an ion selective electrode (ISE) will be calibrated on the<br />
autosampler, select the ISE units that will be used for calibration<br />
<strong>and</strong> analysis.<br />
If a conductivity probe will be calibrated on the autosampler,<br />
enter the nominal cell constant of the conductivity probe for<br />
automatic calibration.<br />
Set the read type on the meter to AUTO-READ.<br />
Turn the automatic datalogging feature On or OFF.<br />
Turn the datalog deletion setting to nO or YES.<br />
See the Datalog <strong>and</strong> Calibration Log section for details<br />
on setting this parameter.<br />
If a stirrer probe will be used, set the stirrer speed.<br />
The stirrer speed can be set from one to seven or OFF.<br />
EN-76<br />
<strong>Thermo</strong> <strong>Scientific</strong> <strong>Orion</strong> <strong>Star</strong> <strong>and</strong> <strong>Star</strong> <strong>Plus</strong> <strong>Meter</strong> <strong>User</strong> <strong>Guide</strong>
<strong>Orion</strong> <strong>Star</strong> <strong>Plus</strong> Benchtop <strong>Meter</strong> <strong>and</strong> Autosampler Interfacing<br />
Turn the meter auto-shutoff feature OFF.<br />
Set the date <strong>and</strong> time on the meter. See the Time <strong>and</strong> Date<br />
Settings section for details on setting this parameter.<br />
Set the baud rate on the meter to 1200.<br />
Alternatively, the meter baud rate can be set to 9600 <strong>and</strong> the<br />
autosampler dip switches can be set to 9600 for the Com 1<br />
port. This is recommended when a printer or computer will<br />
be connected to the autosampler. See the Autosampler Dip<br />
Switch Settings section for instructions.<br />
Set the data output on the meter to printer or computer format.<br />
3. Review <strong>and</strong> change the parameters for the autosampler in the setup menu.<br />
Turn the autosampler function On or OFF.<br />
Select the beaker tray that will be used. Either the 28 beaker<br />
or 48 beaker tray can be selected.<br />
Enter the number of rinse beakers. One to five rinse beakers<br />
can be used.<br />
Enter the electrode rinse time in each rinse beaker. The rinse time<br />
can be set from 5 to 60 seconds.<br />
If a pH electrode will be calibrated on the autosampler, enter<br />
the number of pH calibration points. Zero to three points can be<br />
selected. The meter must perform an automatic calibration with<br />
the autosampler, so only pH buffers in the selected buffer set<br />
can be used. Set the number of calibration points to zero if a pH<br />
calibration with the autosampler is not needed. This menu will<br />
only be shown if the meter has pH function.<br />
<strong>Thermo</strong> <strong>Scientific</strong> <strong>Orion</strong> <strong>Star</strong> <strong>and</strong> <strong>Star</strong> <strong>Plus</strong> <strong>Meter</strong> <strong>User</strong> <strong>Guide</strong><br />
EN-77
<strong>Orion</strong> <strong>Star</strong> <strong>Plus</strong> Benchtop <strong>Meter</strong> <strong>and</strong> Autosampler Interfacing<br />
If an ORP electrode will be calibrated on the autosampler, turn<br />
the ORP calibration feature on by selecting YES. The meter must<br />
perform an automatic calibration with the autosampler, so only<br />
<strong>Thermo</strong> <strong>Scientific</strong> <strong>Orion</strong> ORP st<strong>and</strong>ard can be used. This menu<br />
will be shown if the number of pH calibration points is set to zero.<br />
If an ISE electrode will be calibrated on the autosampler, enter<br />
the number of ISE calibration points. Zero, two or three points<br />
can be selected. Set the number of calibration points to zero if<br />
an ISE calibration with the autosampler is not needed. Once the<br />
number of ISE calibration points is selected, enter the calibration<br />
st<strong>and</strong>ard values in the setup menu. This menu will only be shown<br />
if the meter has ISE function <strong>and</strong> the number of pH calibration<br />
points is set to zero.<br />
Press twice to move the arrow icon to the middle line<br />
<strong>and</strong> press to display the first st<strong>and</strong>ard value. Press to<br />
move the arrow icon to the top line <strong>and</strong> enter the value of<br />
the first st<strong>and</strong>ard. Press until the first digit to be changed is<br />
flashing, press / to change the value of the flashing digit<br />
<strong>and</strong> continue to change the digits until the meter displays the<br />
concentration value of the st<strong>and</strong>ard. Once the st<strong>and</strong>ard value is<br />
set, press until the decimal point is in the correct location.<br />
Repeat this procedure for the second <strong>and</strong> third st<strong>and</strong>ard (if used).<br />
Press twice to move the arrow icon to the middle line <strong>and</strong><br />
then press to display the next setup parameter.<br />
If a conductivity cell will be calibrated on the autosampler, enter<br />
the number of conductivity calibration points. Zero to three points<br />
can be selected. The meter must perform an automatic calibration<br />
when calibrating on the autosampler, so only 100 µS/cm,<br />
1413 µS/cm, <strong>and</strong> 12.9 mS/cm conductivity st<strong>and</strong>ards can be<br />
used. Set the number of calibration points to zero if a conductivity<br />
calibration with the autosampler is not needed. This menu<br />
will only be shown if the meter has conductivity function.<br />
Enter the total number of sample beakers to be measured. Do not<br />
include rinse beakers, calibration beakers or empty beakers.<br />
Note: The error 005 message indicates that a bad value was entered. Press<br />
to return to the setup menu <strong>and</strong> check the allowed value range.<br />
EN-78<br />
<strong>Thermo</strong> <strong>Scientific</strong> <strong>Orion</strong> <strong>Star</strong> <strong>and</strong> <strong>Star</strong> <strong>Plus</strong> <strong>Meter</strong> <strong>User</strong> <strong>Guide</strong>
<strong>Meter</strong> <strong>and</strong> Autosampler Operation<br />
<strong>Orion</strong> <strong>Star</strong> <strong>Plus</strong> Benchtop <strong>Meter</strong> <strong>and</strong> Autosampler Interfacing<br />
1. Prepare the samples, beakers <strong>and</strong> tray. Make sure that the autosampler function<br />
is set to On in the setup menu.<br />
The first one to five beakers are used as rinse beakers, depending on the<br />
number of rinse beakers selected in the setup menu. The next zero to three<br />
beakers are used as pH, ORP or ISE calibration beakers, depending on the type<br />
of calibration <strong>and</strong> number of beakers selected in the setup menu. The next zero<br />
to three beakers are used as conductivity calibration beakers, depending on the<br />
number of beakers selected in the setup menu.<br />
2. Press to initialize the autosampler.<br />
3. The autosampler will move the electrodes to the rinse beaker(s) for the time<br />
specified in the setup menu.<br />
4. The autosampler will move the electrodes to the sample beaker <strong>and</strong> the meter<br />
will take a measurement.<br />
5. The actual measurements will be shown on the display. If a stirrer probe is in<br />
use, the stirrer will automatically begin stirring when the measurement starts<br />
<strong>and</strong> end stirring when all measurement parameters are stable. When a stable<br />
reading is achieved, it will be saved in the datalog <strong>and</strong>/or sent to a printer or<br />
computer, depending on what was selected in the setup menu.<br />
6. The autosampler will move the electrodes to the rinse beaker(s) for the time<br />
specified in the setup menu, move the electrodes to the next sample beaker<br />
<strong>and</strong> then the meter will take a new measurement. The autosampler <strong>and</strong> meter<br />
will continue this process until all sample beakers have been measured.<br />
7. To repeat the same autosampler program, replace the tray <strong>and</strong> press .<br />
To omit the calibration beakers, change the number of rinse beakers or modify<br />
another setup parameter for the autosampler, refer to the <strong>Meter</strong> Preparation<br />
for Operating the Autosampler section.<br />
<strong>Thermo</strong> <strong>Scientific</strong> <strong>Orion</strong> <strong>Star</strong> <strong>and</strong> <strong>Star</strong> <strong>Plus</strong> <strong>Meter</strong> <strong>User</strong> <strong>Guide</strong><br />
EN-79
<strong>Orion</strong> <strong>Star</strong> <strong>Plus</strong> Benchtop <strong>Meter</strong> <strong>and</strong> Autosampler Interfacing<br />
Pausing the Autosampler<br />
To pause the autosampler during operation, press<br />
again.<br />
. To resume operation, press<br />
Stopping the Autosampler<br />
To stop the autosampler during operation <strong>and</strong> abort the run, press <strong>and</strong> hold<br />
for about 3 seconds.<br />
Moving the Electrode Arm<br />
At the end of a run, when the electrode arm<br />
has returned to home position <strong>and</strong> is lowered<br />
into beaker one, press to lift the electrode<br />
arm <strong>and</strong> press again to lower the electrode<br />
arm. See the diagram to the right. This action<br />
is operational only when the autosampler is<br />
not running <strong>and</strong> the electrode arm is in the<br />
home position.<br />
Turning Off the Autosampler Function<br />
To disable the autosampler, press in the measurement mode to enter the<br />
setup menu. Press until is displayed on top line. Press until the<br />
arrow icon points to the middle line <strong>and</strong> press until is displayed. Press<br />
until the arrow icon points to the bottom line <strong>and</strong> press until is<br />
displayed. Press until the arrow icon points to the top line. Press to return<br />
to measurement mode.<br />
Autosampler Dip Switch Settings<br />
The dip switch cover is located on<br />
the rear panel of the autosampler <strong>and</strong><br />
a small Phillips head screw driver is<br />
needed to remove the dip switch cover.<br />
The ON position for the dip switches is<br />
down <strong>and</strong> the OFF position is up. To set<br />
the autosampler dip switches to 9600<br />
for Com 1, adjust DIP switch 4 <strong>and</strong> DIP<br />
switch 5 to the OFF position (up).<br />
DIP 1 DIP 2 DIP 3 DIP 4 DIP 5<br />
Even Parity<br />
ON<br />
No Parity<br />
OFF<br />
9600 Baud OFF OFF<br />
1200 Baud ON OFF<br />
2400 Baud OFF ON<br />
38500 Baud ON ON<br />
EN-80<br />
<strong>Thermo</strong> <strong>Scientific</strong> <strong>Orion</strong> <strong>Star</strong> <strong>and</strong> <strong>Star</strong> <strong>Plus</strong> <strong>Meter</strong> <strong>User</strong> <strong>Guide</strong>
E S<br />
S e c c i o n e n E s p a n o l<br />
Tabla de contenido<br />
Capítulo I Introducción<br />
Características del medidor . . . . . . . . . . . . . . . . . . . . . . . . . . . . . . . . . . . . . . . . . ES-2<br />
Capítulo II Pantalla<br />
Descripción general . . . . . . . . . . . . . . . . . . . . . . . . . . . . . . . . . . . . . . . . . . . . . . . ES-3<br />
Capítulo III Teclado<br />
Descripción general . . . . . . . . . . . . . . . . . . . . . . . . . . . . . . . . . . . . . . . . . . . . . . . ES-5<br />
Definición de teclas . . . . . . . . . . . . . . . . . . . . . . . . . . . . . . . . . . . . . . . . . . . . . . . ES-6<br />
Capítulo IV Preparación del medidor<br />
Cómo instalar el adaptador de corriente. . . . . . . . . . . . . . . . . . . . . . . . . . . . . . . . ES-7<br />
Cómo instalar las baterías. . . . . . . . . . . . . . . . . . . . . . . . . . . . . . . . . . . . . . . . . . . ES-8<br />
Cómo conectar los electrodos . . . . . . . . . . . . . . . . . . . . . . . . . . . . . . . . . . . . . . . ES-9<br />
Cómo encender el instrumento . . . . . . . . . . . . . . . . . . . . . . . . . . . . . . . . . . . . . ES-10<br />
Mantenimiento del medidor . . . . . . . . . . . . . . . . . . . . . . . . . . . . . . . . . . . . . . . ES-10<br />
Capítulo V Configuración del medidor<br />
Menú de configuración. . . . . . . . . . . . . . . . . . . . . . . . . . . . . . . . . . . . . . . . . . . . ES-11<br />
Tabla del menú de configuración . . . . . . . . . . . . . . . . . . . . . . . . . . . . . . . . . . ES-12<br />
Configuración general del menú. . . . . . . . . . . . . . . . . . . . . . . . . . . . . . . . . . . . . ES-14<br />
Configuración de fecha y hora . . . . . . . . . . . . . . . . . . . . . . . . . . . . . . . . . . . . . . ES-15<br />
AUTO-READ , Configuración de medición continua o temporizada. . . . . . . . . . ES-16<br />
Cómo seleccionar el parámetro de medición . . . . . . . . . . . . . . . . . . . . . . . . . . . ES-17<br />
Configuración del método . . . . . . . . . . . . . . . . . . . . . . . . . . . . . . . . . . . . . . . . . ES-18<br />
Capítulo VI Técnica de pH<br />
Menú de configuración de pH . . . . . . . . . . . . . . . . . . . . . . . . . . . . . . . . . . . . . . ES-19<br />
Calibración de pH . . . . . . . . . . . . . . . . . . . . . . . . . . . . . . . . . . . . . . . . . . . . . . . . ES-20<br />
Medición de pH . . . . . . . . . . . . . . . . . . . . . . . . . . . . . . . . . . . . . . . . . . . . . . . . . ES-21<br />
Pantalla y calibración de temperatura en pH. . . . . . . . . . . . . . . . . . . . . . . . . . . . ES-22<br />
Capítulo VII Técnica de mV, mV relativos y ORP<br />
Calibración de mV relativos y ORP . . . . . . . . . . . . . . . . . . . . . . . . . . . . . . . . . . . ES-23<br />
Medición de mV, mV relativos y ORP. . . . . . . . . . . . . . . . . . . . . . . . . . . . . . . . . ES-24<br />
Capítulo VIII Técnica de oxígeno disuelto<br />
Menú de configuración de oxígeno disuelto. . . . . . . . . . . . . . . . . . . . . . . . . . . . ES-25<br />
Calibración de oxígeno disuelto . . . . . . . . . . . . . . . . . . . . . . . . . . . . . . . . . . . . . ES-26<br />
Medición de oxígeno disuelto. . . . . . . . . . . . . . . . . . . . . . . . . . . . . . . . . . . . . . . ES-28<br />
Pantalla y calibración de temperatura de oxígeno disuelto. . . . . . . . . . . . . . . . . ES-29<br />
Guía del usuario del medidor <strong>Thermo</strong> <strong>Scientific</strong> <strong>Orion</strong> <strong>Star</strong> y <strong>Star</strong> <strong>Plus</strong><br />
ES-I
E S<br />
Tabla de contenido<br />
Capítulo IX Técnica de oxígeno disuelto por sonda óptica RDO ®<br />
Tapón óptico, descripción general . . . . . . . . . . . . . . . . . . . . . . . . . . . . . . . . . . . ES-31<br />
Menú de configuración de oxígeno disuelto por sonda óptica RDO. . . . . . . . . . ES-32<br />
Menú de configuración de la sonda óptica RDO . . . . . . . . . . . . . . . . . . . . . . ES-33<br />
Calibración de oxígeno disuelto por sonda óptica RDO . . . . . . . . . . . . . . . . . . . ES-35<br />
Medición de oxígeno disuelto por sonda óptica RDO . . . . . . . . . . . . . . . . . . . . .ES-37<br />
Pantalla y calibración de temperatura de oxígeno disuelto por<br />
sonda óptica RDO. . . . . . . . . . . . . . . . . . . . . . . . . . . . . . . . . . . . . . . . . . . . . . . . ES-38<br />
Capítulo X Técnica de conductividad<br />
Menú de configuración de conductividad. . . . . . . . . . . . . . . . . . . . . . . . . . . . . . ES-39<br />
Calibración de conductividad . . . . . . . . . . . . . . . . . . . . . . . . . . . . . . . . . . . . . . . ES-40<br />
Medición de conductividad . . . . . . . . . . . . . . . . . . . . . . . . . . . . . . . . . . . . . . . . ES-41<br />
Pantalla y calibración de temperatura en conductividad . . . . . . . . . . . . . . . . . . ES-42<br />
Capítulo XI Técnica de ISE<br />
Menú de configuración de ISE . . . . . . . . . . . . . . . . . . . . . . . . . . . . . . . . . . . . . . ES-43<br />
Calibración de ISE. . . . . . . . . . . . . . . . . . . . . . . . . . . . . . . . . . . . . . . . . . . . . . . . ES-44<br />
Medición de ISE . . . . . . . . . . . . . . . . . . . . . . . . . . . . . . . . . . . . . . . . . . . . . . . . . ES-45<br />
Pantalla y calibración de temperatura de ISE . . . . . . . . . . . . . . . . . . . . . . . . . . . ES-46<br />
Capítulo XII Archivo y recuperación de datos<br />
Registro de datos y registro de calibración. . . . . . . . . . . . . . . . . . . . . . . . . . . . . ES-47<br />
Función automática de registro de datos . . . . . . . . . . . . . . . . . . . . . . . . . . . . .ES-47<br />
Configuración de eliminación del registro de datos . . . . . . . . . . . . . . . . . . . . ES-48<br />
Cómo visualizar e imprimir el registro de datos y el registro de calibración. . ES-49<br />
Capítulo XIII Declaración de conformidad<br />
Declaración de conformidad . . . . . . . . . . . . . . . . . . . . . . . . . . . . . . . . . . . . . . . . ES-51<br />
Cumplimiento de la directiva WEEE . . . . . . . . . . . . . . . . . . . . . . . . . . . . . . . . . . ES-52<br />
Capítulo XIV Localización y solución de problemas<br />
Comprobación automática del medidor . . . . . . . . . . . . . . . . . . . . . . . . . . . . . . . ES-53<br />
Códigos de error del medidor . . . . . . . . . . . . . . . . . . . . . . . . . . . . . . . . . . . . . . . ES-54<br />
Localización y solución de problemas generales . . . . . . . . . . . . . . . . . . . . . . . . ES-56<br />
Capítulo XV Especificaciones del medidor<br />
Especificaciones del medidor. . . . . . . . . . . . . . . . . . . . . . . . . . . . . . . . . . . . . . . ES-59<br />
Información para pedidos . . . . . . . . . . . . . . . . . . . . . . . . . . . . . . . . . . . . . . . . . . ES-63<br />
Apéndice A Funciones del menú de configuración del medidor<br />
Funciones del menú de configuración de pH . . . . . . . . . . . . . . . . . . . . . . . . . . . ES-65<br />
Funciones del menú de configuración de oxígeno disuelto . . . . . . . . . . . . . . . . ES-65<br />
Funciones del menú de configuración de conductividad . . . . . . . . . . . . . . . . . . ES-66<br />
Funciones del menú de configuración de ISE . . . . . . . . . . . . . . . . . . . . . . . . . . ES-68<br />
ES-II<br />
Guía del usuario del medidor <strong>Thermo</strong> <strong>Scientific</strong> <strong>Orion</strong> <strong>Star</strong> y <strong>Star</strong> <strong>Plus</strong>
Capítulo I Introducción<br />
¡Felicitaciones! Ha seleccionado un medidor de las series <strong>Thermo</strong> <strong>Scientific</strong> <strong>Orion</strong><br />
<strong>Star</strong> o <strong>Star</strong> <strong>Plus</strong>, líderes de la industria, diseñado para mediciones electroquímicas en<br />
campo o en laboratorio.<br />
• Los medidores 2-<strong>Star</strong> permiten efectuar mediciones de parámetro simple de pH.<br />
• Los medidores 3-<strong>Star</strong> <strong>Plus</strong> permiten efectuar mediciones de parámetro simple<br />
de pH, de oxígeno disuelto, de oxígeno disuelto por sonda óptica RDO ® o<br />
de conductividad.<br />
• Los medidores 4-<strong>Star</strong> <strong>Plus</strong> permiten efectuar mediciones de parámetro doble<br />
de pH/oxígeno disuelto, de pH/conductividad, de pH/ISE (electrodo selectivo de<br />
iones) o de pH/oxígeno disuelto por sonda óptica RDO.<br />
• Los medidores 5-<strong>Star</strong> <strong>Plus</strong> permiten efectuar mediciones de parámetros múltiples<br />
de pH/ISE/oxígeno disuelto/conductividad, de pH/oxígeno disuelto/conductividad o<br />
de pH/oxígeno disuelto por sonda óptica RDO/conductividad.<br />
Todos los medidores incluyen una función de medición de temperatura. Todos<br />
los medidores con capacidad de medición de pH incluyen una función de mV/mV<br />
relativos/ORP.<br />
Creados para satisfacer las exigencias de los entornos de laboratorio o de planta, de<br />
múltiples usuarios y gran actividad, todos los medidores de las series <strong>Orion</strong> <strong>Star</strong> y<br />
<strong>Star</strong> <strong>Plus</strong> son controlados por microprocesador, lo cual contribuye en la obtención de<br />
mediciones exactas y precisas. Los medidores portátiles a prueba de agua pueden<br />
incluso resistir la inmersión durante cortos períodos de tiempo.<br />
Los medidores 3-<strong>Star</strong> <strong>Plus</strong>, 4-<strong>Star</strong> <strong>Plus</strong> y 5-<strong>Star</strong> <strong>Plus</strong> han sido perfeccionados e<br />
incluyen un mayor número de puntos de registro de datos, pantallas de temperatura<br />
mejoradas y un nuevo modo de calibración de temperatura para cada parámetro de<br />
medición. Los medidores de mesa 3-<strong>Star</strong> <strong>Plus</strong>, 4-<strong>Star</strong> <strong>Plus</strong> y 5-<strong>Star</strong> <strong>Plus</strong> incluyen la<br />
capacidad de muestreo automático y son compatibles con el muestreador<br />
automático AutoTration -500. Consulte la guía del usuario de AutoTration-500 para<br />
ver más información sobre la operación de los medidores <strong>Star</strong> <strong>Plus</strong> con el<br />
muestreador automático.<br />
Nota: Lea esta guía del usuario completamente antes de usar su medidor de mesa<br />
o portátil. De no seguir estas instrucciones de uso, su garantía puede ser anulada y se<br />
pueden causar daños permanentes al medidor.<br />
Guía del usuario del medidor <strong>Thermo</strong> <strong>Scientific</strong> <strong>Orion</strong> <strong>Star</strong> y <strong>Star</strong> <strong>Plus</strong><br />
ES-1
Introducción<br />
Características del medidor<br />
Para satisfacer mejor las necesidades de los usuarios en protección y control<br />
ambiental, alimentos y bebidas, laboratorios farmacéuticos y de productos de<br />
consumo, los medidores <strong>Orion</strong> <strong>Star</strong> y <strong>Star</strong> <strong>Plus</strong> incluyen estas características clave:<br />
• Métodos protegidos con contraseña – El medidor guarda hasta diez<br />
mediciones y calibraciones personalizadas para referencia futura. La protección<br />
con contraseña de cada método elimina la alteración de los métodos ya que los<br />
usuarios múltiples acceden sólo al procedimiento más idóneo para su trabajo.<br />
• AUTO-READ – El medidor toma una medición y automáticamente imprime<br />
o registra los datos cu<strong>and</strong>o la lectura se estabiliza. La medición se congela en<br />
pantalla hasta que el usuario solicita al medidor tomar una nueva medición.<br />
• Control de agitador – Todos los medidores de mesa 3-<strong>Star</strong>, 4-<strong>Star</strong> y 5-<strong>Star</strong><br />
tienen control de agitador para la sonda agitadora, catálogo n.° 096019, y sonda<br />
para dem<strong>and</strong>a biológica de oxígeno (DBO) AUTO-STIR que elimina la necesidad<br />
de agitadores magnéticos de placa y barras agitadoras.<br />
• SMART STABILITY y SMART AVERAGING – Deje de adivinar al<br />
compensar automáticamente las condiciones de medición y optimizar el tiempo<br />
de respuesta del medidor.<br />
• Retroiluminación – Todos los medidores 3-<strong>Star</strong>, 4-<strong>Star</strong> y 5-<strong>Star</strong> cuentan<br />
con la característica de retroiluminación de pantalla. Cu<strong>and</strong>o el medidor está<br />
encendido, la retroiluminación se enciende y se apaga al presionar rápidamente<br />
el botón . Cu<strong>and</strong>o el medidor funciona a baterías, la retroiluminación se apaga<br />
automáticamente al transcurrir dos minutos para ahorrar energía. Cu<strong>and</strong>o las<br />
baterías tienen poca carga, la retroiluminación no se activa.<br />
• Apagado automático – Los medidores se apagan al transcurrir 20 minutos,<br />
sin necesidad de presionar un botón. Esto maximiza la carga de las baterías en<br />
medidores portátiles y de mesa que funcionan a batería.<br />
• Señales audibles – El medidor emitirá un sonido cada vez que se presione una<br />
tecla, indic<strong>and</strong>o una comprobación inmediata de que la selección del usuario ha<br />
sido recibida.<br />
Una guía de referencia fácil de usar, incorporada a cada medidor, respalda el uso diario<br />
del medidor.<br />
ES-2<br />
Guía del usuario del medidor <strong>Thermo</strong> <strong>Scientific</strong> <strong>Orion</strong> <strong>Star</strong> y <strong>Star</strong> <strong>Plus</strong>
Capítulo II Pantalla<br />
Descripción general<br />
Durante un proceso específico, la pantalla de los medidores series <strong>Orion</strong> <strong>Star</strong> y <strong>Star</strong><br />
<strong>Plus</strong> indica datos de temperatura y calibración. La temperatura aparece en la esquina<br />
superior izquierda de la pantalla. El ícono indica que hay un modo de calibración<br />
o un menú de configuración de calibración activo. Los íconos man, 2, 4, 7, 9,<br />
10 y 12 indican qué amortiguadores de pH se guardaron después de realizar una<br />
calibración de pH. El ícono setup sólo aparece cu<strong>and</strong>o el medidor está en modo de<br />
configuración. El ícono indica una condición de error y cu<strong>and</strong>o se muestra con el<br />
ícono , una alarma de calibración o un problema de calidad de electrodo. El ícono<br />
indica que el modo de medición de lectura automática (AUTO-READ) está activo.<br />
Esto se trata con más detalles en la sección Configuración del medidor.<br />
Temperatura<br />
Calibración<br />
Unidad<br />
pH/ISE/ORP<br />
Unidad de<br />
conductividad<br />
Unidad<br />
de OD<br />
Medidor 5 <strong>Star</strong><br />
Ésta es la pantalla del medidor 5-<strong>Star</strong>, con capacidad para mediciones de parámetros<br />
múltiples. Los medidores de parámetros simple y doble tienen menos líneas de<br />
medición, dependiendo de las capacidades del medidor.<br />
Nota: En el modo de medición, las tres líneas principales de datos en la pantalla del<br />
medidor corresponden al parámetro que se está midiendo.<br />
Guía del usuario del medidor <strong>Thermo</strong> <strong>Scientific</strong> <strong>Orion</strong> <strong>Star</strong> y <strong>Star</strong> <strong>Plus</strong><br />
ES-3
Pantalla<br />
Íconos de las unidades de medición<br />
En el modo de medición, el ícono de flecha ubicado a la izquierda de la pantalla<br />
indica la línea activa. Presione para mover el ícono de flecha a la línea deseada y<br />
presione / para desplazarse a través de los íconos de unidades de medición<br />
asociados a la línea seleccionada. Los íconos de unidades de medición del medidor<br />
de parámetros múltiples 5-<strong>Star</strong> se muestran a continuación. Los medidores de<br />
parámetros simple y doble tienen menos líneas e íconos de medición, dependiendo<br />
de las capacidades del medidor.<br />
• La línea superior muestra pH, mV, mV relativos, ISE o temperatura.<br />
• La línea intermedia muestra conductividad, sólidos totales disueltos (STD),<br />
salinidad, resistividad o temperatura.<br />
• La línea inferior muestra el oxígeno disuelto en porcentaje de saturación, el<br />
oxígeno disuelto en concentración, la presión barométrica o la temperatura.<br />
Las unidades de medición, que se muestran a la derecha de la pantalla, se mostrarán<br />
intermitentes hasta que la lectura se estabilice.<br />
Nota: Si no se necesita una línea de medición, presione mover el ícono de<br />
flecha a la línea de medición que no se necesita y presione / hasta que la línea<br />
de medición esté totalmente en blanco.<br />
ES-4<br />
Guía del usuario del medidor <strong>Thermo</strong> <strong>Scientific</strong> <strong>Orion</strong> <strong>Star</strong> y <strong>Star</strong> <strong>Plus</strong>
Capítulo III Teclado<br />
Descripción general<br />
La distribución del teclado es la misma en todos los medidores de las series <strong>Orion</strong><br />
<strong>Star</strong> y <strong>Star</strong> <strong>Plus</strong>. Los medidores portátiles y los medidores de mesa 2-<strong>Star</strong> tienen<br />
nueve teclas. Los medidores de mesa 3-<strong>Star</strong>, 4-<strong>Star</strong> y 5-<strong>Star</strong> tienen 10 teclas debido a<br />
la adición de la tecla de agitación – .<br />
Teclado de medidor portátil<br />
Calibrar<br />
Encedido/Retroiluminación<br />
Dígitos<br />
Desplazar hacia abajo<br />
Configuración<br />
Guardar/Imprimir<br />
medición<br />
Retroiluminación<br />
Desplazar hacia arriba<br />
Selección de línea<br />
Ver registro<br />
Teclado de medidor de mesa<br />
Encedido/Retroiluminación<br />
Calibrar<br />
Desplazar hacia arriba<br />
Dígitos<br />
Configuración<br />
Guardar/Imprimir<br />
medición<br />
Agitador (no en 2-<strong>Star</strong>)<br />
Selección de línea<br />
Ver registro<br />
Desplazar hacia abajo<br />
Guía del usuario del medidor <strong>Thermo</strong> <strong>Scientific</strong> <strong>Orion</strong> <strong>Star</strong> y <strong>Star</strong> <strong>Plus</strong><br />
ES-5
Teclado<br />
Definición de teclas<br />
Tecla Descripción Tecla Descripción<br />
Enciende el medidor, si<br />
está apagado.<br />
Enciende y apaga la<br />
retroiluminación, si el medidor está<br />
encendido (sólo en los medidores<br />
3-<strong>Star</strong>, 4-<strong>Star</strong> y 5-<strong>Star</strong>).<br />
Si el medidor está encendido,<br />
mantenga presionada la<br />
tecla durante tres segundos<br />
aproximadamente para apagar<br />
el medidor.<br />
Desplaza el ícono de flecha a la<br />
izquierda de la pantalla entre las<br />
tres líneas de la pantalla, para editar<br />
o calibrar la línea seleccionada.<br />
Inicia la calibración para la línea<br />
seleccionada en el modo<br />
de medición<br />
Si el ícono de flecha apunta hacia<br />
la línea superior y las unidades<br />
mostradas son de pH, al presionar<br />
la tecla se inicia la calibración<br />
de pH.<br />
Cada vez que se presiona la<br />
tecla en el modo de calibración,<br />
el medidor acepta el punto de<br />
calibración y pasa al siguiente<br />
punto, hasta alcanzar el número<br />
máximo de puntos de calibración.<br />
Ingresa al menú de configuración,<br />
comenz<strong>and</strong>o con la línea<br />
seleccionada en el modo<br />
de medición.<br />
Si el ícono de flecha apunta hacia<br />
la línea superior y las unidades<br />
mostradas son de ISE, al presionar<br />
la tecla se ingresa en la pantalla de<br />
configuración de ISE.<br />
Cambia las unidades de medición<br />
de la línea seleccionada en el modo<br />
de medición.<br />
Cambia el valor de la línea<br />
seleccionada en los modos<br />
de configuración, métodos y<br />
visualización de registro.<br />
Edita el valor del dígito intermitente<br />
en los modos de configuración,<br />
ingreso de contraseña<br />
y calibración.<br />
Selecciona el siguiente dígito a<br />
editar y mueve el punto decimal en<br />
los modos de configuración, ingreso<br />
de contraseña y calibración.<br />
Imprime y registra una medición en<br />
los modos de medición continua<br />
o temporizada.<br />
Imprime, registra y congela la<br />
pantalla cu<strong>and</strong>o la lectura se<br />
estabiliza en modo de medición de<br />
lectura automática (AUTO-READ).<br />
Sale del menú de configuración y<br />
vuelve al modo de medición.<br />
Acepta la calibración y vuelve al<br />
modo de medición.<br />
Ingresa a la vista de registro y al<br />
menú de descarga.<br />
Enciende y apaga el agitador.<br />
ES-6<br />
Guía del usuario del medidor <strong>Thermo</strong> <strong>Scientific</strong> <strong>Orion</strong> <strong>Star</strong> y <strong>Star</strong> <strong>Plus</strong>
Capítulo IV Preparación del medidor<br />
Cómo instalar el adaptador de corriente<br />
El adaptador de corriente universal que se incluye con su medidor de mesa es el<br />
único adaptador de corriente recomendado para esta unidad. El uso de cualquier<br />
otro adaptador anulará la garantía de su medidor. El adaptador de corriente eléctrica<br />
externo tiene un régimen de servicio de 100 a 240 V CA; 0,5 A; 50/60 Hz.<br />
Dependiendo del receptáculo de pared, seleccione una de las cuatro placas de<br />
conexión suministradas y deslícela en las ranuras del adaptador. Escuchará un clic<br />
cu<strong>and</strong>o el enchufe esté colocado correctamente.<br />
Conecte el enchufe de salida del adaptador de corriente a la entrada de<br />
alimentación del medidor de mesa. Consulte el diagrama en la sección Cómo<br />
conectar los electrodos.<br />
Es posible colocar baterías a los medidores de las series <strong>Orion</strong> <strong>Star</strong> o <strong>Star</strong> <strong>Plus</strong> para<br />
proteger la configuración del medidor en caso de que el medidor se deconecte del<br />
tomacorriente de pared o en caso de falla del suministro eléctrico.<br />
Guía del usuario del medidor <strong>Thermo</strong> <strong>Scientific</strong> <strong>Orion</strong> <strong>Star</strong> y <strong>Star</strong> <strong>Plus</strong><br />
ES-7
Preparación del medidor<br />
Cómo instalar las baterías<br />
Los medidores de las series <strong>Orion</strong> <strong>Star</strong> y <strong>Star</strong> <strong>Plus</strong> usan cuatro baterías alcalinas AA.<br />
No utilice baterías de litio o baterías recargables. La instalación incorrecta de baterías<br />
no alcalinas puede crear un peligro.<br />
Nota: En los medidores de mesa, no es necesario instalar baterías si la unidad<br />
siempre va a estar conectada a la fuente de alimentación mediante un sistema<br />
de alimentación ininterrumpida (UPS). En el caso de los medidores portátiles, las<br />
baterías se suministran de fábrica. Para acceder al compartimiento de baterías de los<br />
medidores portátiles, desajuste los dos tornillos ubicados en la parte posterior<br />
del medidor.<br />
1. Compruebe que el medidor esté apagado y coloque el medidor boca abajo con<br />
cuidado sobre una superficie limpia, libre de pelusa, para evitar que se raye la<br />
pantalla LCD.<br />
2. Retire la cubierta del compartimiento de baterías.<br />
3. Coloque baterías nuevas con la orientación + lateral como se indica en la cavidad<br />
del compartimiento.<br />
4. Vuelva a colocar la cubierta del compartimiento de baterías.<br />
5. Los datos, calibraciones y métodos almacenados permanecerán en la memoria no<br />
volátil del medidor al reemplazar las baterías. Sin embargo, puede ser necesario<br />
volver a configurar la fecha y la hora al cambiar las baterías.<br />
ES-8<br />
Guía del usuario del medidor <strong>Thermo</strong> <strong>Scientific</strong> <strong>Orion</strong> <strong>Star</strong> y <strong>Star</strong> <strong>Plus</strong>
Cómo conectar los electrodos<br />
Siga las indicaciones de los diagramas inferiores para conectar los electrodos y las<br />
sondas al medidor. Se muestra una representación de los medidores de parámetros<br />
múltiples. Los medidores de parámetros simple y doble tienen menos conexiones,<br />
dependiendo de las capacidades de medición del medidor.<br />
Conexión de electrodos del medidor de mesa<br />
Preparación del medidor<br />
Clavija del agitador<br />
para sonda<br />
agitadora o sonda<br />
de OD AUTO-STIR<br />
para DBO<br />
Referencia<br />
para pH,<br />
ORP o ISE<br />
BNC para<br />
pH, ORP<br />
o ISE<br />
MiniDIN de 8<br />
clavijas para<br />
Cond o CTA<br />
Conexión de electrodos del medidor portátil<br />
RS232<br />
MiniDIN de<br />
9 clavijas<br />
para oxígeno<br />
disuelto<br />
Tierra<br />
Alimentación<br />
BNC para<br />
pH, ORP<br />
o ISE<br />
MiniDIN de 8<br />
clavijas para<br />
Cond o CTA<br />
RS232<br />
MiniDIN de<br />
9 clavijas<br />
para oxígeno<br />
disuelto<br />
Guía del usuario del medidor <strong>Thermo</strong> <strong>Scientific</strong> <strong>Orion</strong> <strong>Star</strong> y <strong>Star</strong> <strong>Plus</strong><br />
ES-9
Preparación del medidor<br />
Conexiones del medidor con funciones múltiples<br />
• Utilice la entrada de BNC para conectar los electrodos de pH, ISE y ORP con un<br />
conector BNC o BNC a prueba de agua.<br />
• Los medidores de mesa tienen una entrada de referencia que se utiliza para<br />
conectar un electrodo de referencia por separado. Los electrodos de referencia<br />
requieren un electrodo sensor adecuado independiente para las mediciones.<br />
• La sonda de oxígeno disuelto 970899WP se puede utilizar en la entrada BNC.<br />
• Utilice la entrada miniDIN de 8 clavijas para sondas de conductividad o para<br />
sondas de compensación automática de temperatura (CTA).<br />
• La sonda de OD AUTO-STIR utiliza la entrada miniDIN de 9 clavijas y la clavija<br />
del agitador.<br />
• Conecte una impresora o una computadora a la entrada RS232 mediante un<br />
cable adecuado.<br />
Cómo encender el instrumento<br />
Con las baterías instaladas en los medidores portátiles y con el adaptador de corriente<br />
conectado o las baterías instaladas en el medidor de mesa, presione para<br />
encender el medidor.<br />
Si utiliza un medidor 3-<strong>Star</strong>, 4-<strong>Star</strong> o 5-<strong>Star</strong>, presione cu<strong>and</strong>o el medidor esté<br />
encendido para encender y apagar la retroiluminación. Cu<strong>and</strong>o el medidor de mesa se<br />
alimenta de la línea, la retroiluminación permanecerá encendida hasta que se<br />
presione .<br />
Para apagar el medidor, presione<br />
segundos aproximadamente.<br />
y manténgalo presionado durante tres<br />
Mantenimiento del medidor<br />
Para hacer el mantenimiento de rutina del medidor, desempolve y limpie el medidor<br />
con un paño húmedo. De ser necesario, se puede utilizar agua tibia o un detergente<br />
suave con base de agua. Haga mantenimiento al medidor una vez al día, a la semana<br />
o al mes, según lo requiera el entorno de funcionamiento del medidor.<br />
Retire de inmediato cualquier sustancia derramada mediante el procedimiento de<br />
limpieza adecuado al tipo de derrame.<br />
ES-10<br />
Guía del usuario del medidor <strong>Thermo</strong> <strong>Scientific</strong> <strong>Orion</strong> <strong>Star</strong> y <strong>Star</strong> <strong>Plus</strong>
Capítulo V Configuración del medidor<br />
Menú de configuración<br />
Para navegar en el menú de configuración:<br />
1. Presione para ingresar al menú de configuración.<br />
2. Presione / hasta que la opción de configuración deseada aparezca en la<br />
línea superior.<br />
3. Presione para mover el ícono de flecha a la línea intermedia.<br />
4. Presione / hasta que la opción de configuración deseada aparezca en la<br />
línea intermedia.<br />
5. Presione para mover el ícono de flecha a la línea inferior.<br />
6. Para desplazarse a través de una lista de opciones en la línea inferior, presione<br />
/ hasta que se muestre la opción deseada. Para ingresar un valor<br />
numérico en una opción en la línea inferior, presione / para ajustar cada<br />
dígito y para pasar al dígito siguiente.<br />
Por ejemplo, para cambiar la resolución de medición de pH, presione<br />
desplazarse de 0.01 a 0.001 en la línea inferior de la pantalla.<br />
para<br />
7. Presione para mover el ícono de flecha a la línea superior.<br />
8. Repita los pasos 2 a 7 para programar una nueva opción de configuración o<br />
presione para salir del menú de configuración y volver al modo de medición.<br />
Nota: Consulte en el Apéndice A una descripción de las funciones especiales del<br />
menú de configuración.<br />
Guía del usuario del medidor <strong>Thermo</strong> <strong>Scientific</strong> <strong>Orion</strong> <strong>Star</strong> y <strong>Star</strong> <strong>Plus</strong><br />
ES-11
Configuración del medidor<br />
Tabla del menú de configuración<br />
Línea<br />
superior<br />
Línea<br />
intermedia<br />
Línea<br />
inferior<br />
Descripción del menú de configuración<br />
(configuración predeterminada, específica del método)<br />
PH rES 0.1, 0.01, 0.001 Resolución de medición de pH (0.01, sí)<br />
PH bUF USA, EUr0 Juego de amortiguadores de pH para reconocimiento automático de<br />
amortiguador durante la calibración, los amortiguadores USA son 1.68,<br />
4.01, 7.00, 10.01, 12.46 y los amortiguadores EUrO son 1.68, 4.01, 6.86,<br />
9.18 (USA, sí)<br />
ISE rES 1, 2, 3 Resolución de medición ISE en cifras significativas (1, sí)<br />
ISE UnIt m, mgL, PEr, PPb, n0nE Unidades de medición ISE (PPb, sí)<br />
ISE rAng L0w, HIgH Rango de concentración ISE para criterios de estabilidad de<br />
concentración (HIgH, sí)<br />
ISE nLIn AUt0, 0FF Corrección automática por blanco de muestra ISE para calibración de<br />
bajo nivel (AUt0, sí)<br />
C0nd tC 0FF, LIn, nLF Tipo de compensación de temperatura-conductividad, LIn para muestras<br />
de agua pura - lineal, nLF para muestras de agua pura - no lineal (LIn, sí)<br />
C0nd C0EF 0.0 a 10.0 Coeficiente de compensación de temperatura-conductividad en cambio<br />
porcentual de conductividad por °C; aparece si se seleccionó Lin para<br />
tC (2.1, sí)<br />
C0nd tdSF 0.00 a 10.0 Valor del factor STD-conductividad (0.49, sí)<br />
C0nd CELL 0.001 a 199.0 Valor de constante de celda predeterminada de conductividad para modo<br />
automático de calibración de conductividad (0.475, sí)<br />
C0nd trEF 5, 10, 15, 20, 25 Temperatura de referencia de conductividad (25, sí)<br />
C0nd tyPE Std, 1, 2, 3, 4, 5, 6, 7, USP Tipo de celda de conductividad USP y rango seleccionable (Std, sí)<br />
Consulte en la sección Menú de configuración para sonda óptica RDO la información detallada sobre los menús de información de sonda RDO.<br />
d0 rES 0.1, 1 % sat Resolución de medición de % de saturación de OD (0,1, sí)<br />
d0 rES 0.01, 0.1 mg/L Resolución de medición de mg/L de OD (0.01, sí)<br />
d0 bAr AUt0, mAn Tipo de compensación de presión barométrica de OD (AUt0, sí)<br />
d0 PrES 450.0 to 850.0 Valor de compensación de presión barométrica manual de OD; aparece si<br />
se seleccionó mAn para bAr (760.0, sí)<br />
d0 SAL AUt0, mAn Tipo de corrección de salinidad de OD (AUt0, sí)<br />
d0 SALF 0 a 45 Valor de corrección de salinidad manual de OD, aparece si se seleccionó<br />
mAn para SAL o si se utiliza un medidor de OD sin un modo de<br />
conductividad (0, sí)<br />
d0 CALt AIr, H20, mAn, SEt0 Tipo de calibración de OD (AIr, sí)<br />
d0 LIFE 365 a 0 Cuenta regresiva de reemplazo de tapón óptico en días – sólo medidores<br />
3, 4 y 5 <strong>Star</strong> <strong>Plus</strong> RDO (Set by RDO probe, no)<br />
dUE PH 0 a 9999 Valor de alarma de calibración de pH en horas, 0 indica Apagado (0, sí)<br />
dUE 0rP 0 a 9999 Valor de alarma de calibración de ORP en horas, 0 indica Apagado (0, sí)<br />
dUE ISE 0 a 9999 Valor de alarma de calibración de ISE en horas, 0 indica Apagado (0, sí)<br />
dUE C0nd 0 a 9999 Valor de alarma de calibración de conductividad en horas, 0 indica<br />
Apagado (0, sí)<br />
dUE d0 0 a 9999 Valor de alarma de calibración de OD en horas, 0 indica Apagado (0, sí)<br />
ES-12<br />
Guía del usuario del medidor <strong>Thermo</strong> <strong>Scientific</strong> <strong>Orion</strong> <strong>Star</strong> y <strong>Star</strong> <strong>Plus</strong>
Configuración del medidor<br />
Línea<br />
superior<br />
Línea<br />
intermedia<br />
Línea<br />
inferior<br />
Descripción del menú de configuración<br />
(configuración predeterminada, específica del método)<br />
rEAd tyPE AUt0, tImE, C0nt, Tipo de lectura de medición: automática (AUTO-READ), temporizada o<br />
continua (AUt0, sí)<br />
rEAd tInE 00:05 a 99:59 Valor de medición temporizada en minutos y segundos (01:00, sí)<br />
L0g dEL n0, YES Opción borrar registro de datos después de la descarga; seleccione YES<br />
para borrar el registro de datos al descargarlo o seleccione nO para<br />
reescribir los datos más antiguos si el registro de datos está llenoy no<br />
borrarlo al descargarlo (n0, sí)<br />
L0g AUt0 0FF, 0n Opción para guardar automáticamente punto de registro de datos (0FF, sí)<br />
gEn dEgC -5.0 a 105 Valor de temperatura manual (25.0, sí)<br />
gEn StIr 0FF, 1, 2, 3, 4, 5, 6, 7 Velocidad del agitador – sólo medidores de mesa 3, 4 y 5 <strong>Star</strong> (4, sí)<br />
gEn PASS 0000 a 9999 Ingreso de contraseña del medidor (0000, sí)<br />
gEn AUt0 0n, 0FF Opción de apagado automático del medidor (0n, no)<br />
gLP SEt 0FF, 0n Opción GLP, la función GLP activa o desactiva los métodos (0FF, no)<br />
dAtE H0Ur HH00 a HH23 Configuración de hora (HH12, no)<br />
dAtE tInE mm00 a mm59 Configuración de minutos (mm00, no)<br />
dAtE tYPE mdY, dmY Formato de fecha: mes-día-año; o día-mes-año (mdY, no)<br />
dAtE YEAr 2000 a 2099 Configuración de año (2004, no)<br />
dAtE dAtE mm01 a mm12 Configuración de 12 meses (mm01, no)<br />
dAtE dAY dd01 a dd31 Configuración de día del mes (dd01, no)<br />
r232 bAUd 1200, 2400, 4800, 9600 Configuración de velocidad en baudios (9600, no)<br />
r232 0UtF Prnt, C0mP Formato de salida para impresora o computadora, el formato COmP está<br />
delimitado por comas (Prnt, no)<br />
AUt0 SAPL 0FF, 0n Muestreador automático – sólo medidores de mesa 3, 4 y 5 <strong>Star</strong> (OFF, no)<br />
AUt0 trAY 28, 48 Configuración de vaso de precipitados (28, no)<br />
AUt0 rInb 1, 2, 3, 4, 5 Número de vasos de enjuague (3, no)<br />
AUt0 rSEC 5 a 60 Tiempo de enjuague en cada vaso de enjuague, en segundos (10, no)<br />
AUt0 PH 0, 1, 2, 3 Puntos de calibración de pH (3, no)<br />
AUt0 0rP n0, YES Opción de calibración de ORP; aparece si se seleccionó 0 para PH (n0, no)<br />
AUt0 ISE 0, 2, 3 Puntos de calibración de ISE, aparece si se seleccionó 0 para PH (2, no)<br />
1 AUt0 ISE1 Valor de concentración de estándar ISE 1, aparece si se<br />
seleccionó 2 o 3 para los puntos de calibración de ISE (1, no)<br />
10 AUt0 ISE2 Valor de concentración de estándar ISE 1, aparece si se<br />
seleccionó 2 o 3 para los puntos de calibración de ISE (10, no)<br />
100 AUt0 ISE3 Valor de concentración de estándar ISE 1, aparece si se<br />
seleccionó 3 para los puntos de calibración de ISE (100, no)<br />
AUt0 C0nd 0, 1, 2, 3 Puntos de calibración de conductividad (3, no)<br />
AUt0 n0SA 0 a 47 Número de vasos de muestra (1, no)<br />
Nota: La tabla siguiente se aplica a toda la línea de medidores <strong>Orion</strong> <strong>Star</strong> y <strong>Star</strong><br />
<strong>Plus</strong>. Los medidores pueden no incluir todas las opciones indicadas en esta tabla.<br />
Guía del usuario del medidor <strong>Thermo</strong> <strong>Scientific</strong> <strong>Orion</strong> <strong>Star</strong> y <strong>Star</strong> <strong>Plus</strong><br />
ES-13
Configuración del medidor<br />
Configuración general del menú<br />
• La función de temperatura manual controla la<br />
compensación de la temperatura cu<strong>and</strong>o no hay sonda de<br />
temperatura colocada en el medidor.<br />
• La función de velocidad del agitador ajusta la velocidad<br />
del agitador de 1 (la más baja) a 7 (la más rápida) y Off<br />
(Apagado) (sólo en medidores de mesa 3-<strong>Star</strong>, 4-<strong>Star</strong> y 5-<strong>Star</strong>).<br />
• La función de protección con contraseña protege las opciones y métodos del<br />
menú de configuración para que no sean borrados accidentalmente o modificados<br />
(sólo en medidores de mesa 3-<strong>Star</strong>, 4-<strong>Star</strong> y 5-<strong>Star</strong>).<br />
• La función de apagado automático controla si los medidores se apagarán<br />
automáticamente al transcurrir 20 minutos, sin necesidad de presionar un botón.<br />
1. En el modo de medición, presione .<br />
2. Presione / para desplazarse a través del menú de configuración hasta<br />
que aparezca en la línea superior.<br />
3. Presione para aceptar la selección y mover el ícono de flecha a la<br />
línea intermedia.<br />
4. Presione / para desplazarse a través de los parámetros de<br />
temperatura manual, de velocidad del agitador, de ingreso de<br />
contraseña y de apagado automático.<br />
5. Presione para aceptar la selección y mover el ícono de flecha a la<br />
línea inferior.<br />
6. Para desplazarse a través de una lista de opciones en la línea inferior, presione<br />
/ hasta que se muestre la opción deseada. Para ingresar un valor<br />
numérico en una opción en la línea inferior, presione / para ajustar cada<br />
dígito y para pasar al dígito siguiente.<br />
7. Presione para aceptar la selección y mover el ícono de flecha a la<br />
línea superior.<br />
8. Repita los pasos 3 a 7 para cambiar otro parámetro de configuración general o<br />
presione para volver al modo de medición.<br />
ES-14<br />
Guía del usuario del medidor <strong>Thermo</strong> <strong>Scientific</strong> <strong>Orion</strong> <strong>Star</strong> y <strong>Star</strong> <strong>Plus</strong>
Configuración del medidor<br />
Configuración de fecha y hora<br />
• La configuración de fecha y hora se guarda con los puntos de<br />
datos y del registro de calibración y se incluye en los datos<br />
enviados a una computadora o impresora.<br />
• El formato de fecha se puede configurar en mes-día-año<br />
o día-mes-año, según prefiera el usuario.<br />
1. En el modo de medición, presione .<br />
2. Presione / para desplazarse a través del menú de configuración hasta que<br />
aparezca en la línea superior.<br />
3. Presione para aceptar la selección y mover el ícono de flecha a la<br />
línea intermedia.<br />
4. Presione / para desplazarse a través de los parámetros de hora<br />
actual, minuto actual, formato de fecha, mes actual,<br />
día actual y año actual.<br />
5. Presione para aceptar la selección y mover el ícono de flecha a la<br />
línea inferior.<br />
6. Para desplazarse a través de una lista de opciones en la línea inferior, presione<br />
/ hasta que se muestre la opción deseada. Para ingresar un valor<br />
numérico en una opción en la línea inferior, presione / para ajustar cada<br />
dígito y para pasar al dígito siguiente.<br />
7. Presione para aceptar la selección y mover el ícono de flecha a la<br />
|línea superior.<br />
8. Repita los pasos 3 a 7 para cambiar otro parámetro de fecha y hora o presione<br />
para volver al modo de medición.<br />
Guía del usuario del medidor <strong>Thermo</strong> <strong>Scientific</strong> <strong>Orion</strong> <strong>Star</strong> y <strong>Star</strong> <strong>Plus</strong><br />
ES-15
Configuración del medidor<br />
AUTO-READ , Configuración de medición continua<br />
o temporizada<br />
• En el modo de lectura automática (AUTO-READ), al medidor<br />
comienza a tomar una medición al presionar<br />
Cu<strong>and</strong>o la<br />
medición se estabiliza, la pantalla se congela y los datos se<br />
registran e imprimen. El modo de lectura automática<br />
(AUTO-READ) también controla el agitador. El agitador<br />
comienza a funcionar al presionar y se detiene cu<strong>and</strong>o la<br />
medición se estabiliza.<br />
• En modo continuo, el medidor toma mediciones y actualiza la pantalla<br />
constantemente. Presione para registrar e imprimir una medición en<br />
este modo.<br />
• En modo temporizado, el medidor toma mediciones y actualiza la pantalla<br />
constantemente. El medidor registra e imprime la medición en el intervalo de<br />
tiempo seleccionado. Las mediciones temporizadas de oxígeno disuelto con la<br />
sonda RDO se toman sólo en el intervalo de tiempo seleccionado, conservado por<br />
la alimentación a baterías del medidor.<br />
1. En el modo de medición, presione .<br />
2. Presione / para desplazarse a través del menú de configuración hasta<br />
que aparezca en la línea superior.<br />
3. Presione para aceptar la selección y mover el ícono de flecha a la<br />
línea intermedia.<br />
4. Presione / para desplazarse hasta para el tipo de lectura de<br />
medición y para el intervalo de lectura temporizada.<br />
5. Presione para aceptar la selección y mover el ícono de flecha a la<br />
línea inferior.<br />
6. Para desplazarse a través de una lista de opciones en la línea inferior, presione<br />
/ hasta que se muestre la opción deseada. Para ingresar un valor<br />
numérico en una opción en la línea inferior, presione / para ajustar cada<br />
dígito y para pasar al dígito siguiente.<br />
ES-16<br />
Guía del usuario del medidor <strong>Thermo</strong> <strong>Scientific</strong> <strong>Orion</strong> <strong>Star</strong> y <strong>Star</strong> <strong>Plus</strong>
Configuración del medidor<br />
7. Presione para aceptar la selección y mover el ícono de flecha a la<br />
línea superior.<br />
8. Repita los pasos 3 a 7 para cambiar otro parámetro de medición o presione<br />
para volver al modo de medición.<br />
Cómo seleccionar el parámetro de medición<br />
En el modo de medición, el ícono de flecha ubicado a la izquierda de la pantalla<br />
indica la línea activa. Presione<br />
para mover el ícono de flecha a la línea<br />
de medición deseada y presione / para desplazarse a través de los<br />
parámetros de medición asociados a la línea seleccionada.<br />
Las líneas e íconos de medición del medidor de parámetros múltiples 5-<strong>Star</strong> se<br />
muestran a continuación. Los medidores de parámetros simple y doble tienen menos<br />
líneas e íconos de medición, dependiendo de las capacidades del medidor.<br />
pH<br />
mV<br />
RmV<br />
ISE<br />
No hay ícono de temperatura.<br />
No hay ícono y no hay medición - la línea de medición está desactivada<br />
μS/cm or mS/cm para conductividad<br />
mg/L para STD<br />
ppt para salinidad<br />
MΩ-cm para resistividad<br />
No hay ícono de temperatura.<br />
No hay ícono y no hay medición - la línea de medición está desactivada<br />
% sat para el porcentaje de saturación de oxígeno disuelto<br />
mg/L para concentración de oxígeno disuelto<br />
No hay ícono de presión barométrica<br />
No hay ícono de temperatura de muestra<br />
No hay ícono para temperatura de membrana (sólo lecturas de<br />
OD polarográficas)<br />
No hay ícono y no hay medición - la línea de medición está desactivada<br />
Nota: Si no se necesita una línea de medición, presione mover el ícono<br />
de flecha a la línea de medición que no se necesita y presione / hasta que<br />
la línea de medición esté totalmente en blanco.<br />
Guía del usuario del medidor <strong>Thermo</strong> <strong>Scientific</strong> <strong>Orion</strong> <strong>Star</strong> y <strong>Star</strong> <strong>Plus</strong><br />
ES-17
Configuración del medidor<br />
Configuración del método<br />
Los medidores <strong>Orion</strong> 3-<strong>Star</strong>, 4-<strong>Star</strong> y 5-<strong>Star</strong> pueden guardar hasta 10 métodos cu<strong>and</strong>o<br />
la función GLP está activada. Al seleccionar un método, el medidor utilizará la última<br />
calibración realizada en ese método, de manera que los electrodos que compartan<br />
una conexión de medidor común se puedan intercambiar más fácilmente. Al utilizar<br />
múltiples métodos, se debe realizar una calibración para cada método que se utilizará.<br />
1. Para activar la función GLP:<br />
a. En el modo de medición, presione .<br />
b. Presione / hasta que aparezca en la línea superior.<br />
c. Presione para mover el ícono de flecha a la línea intermedia y presione<br />
/ hasta que aparezca .<br />
d. Presione para mover el ícono de flecha a la línea inferior y presione<br />
/ hasta que aparezca .<br />
e. Presione para mover el ícono de flecha a la línea superior.<br />
f. Presione para salir del menú de configuración y volver al modo<br />
de medición.<br />
2. Para mostrar y cambiar el número de método actual:<br />
a. En el modo de medición, presione . Se mostrará el número de<br />
método actual.<br />
b. Presione / para seleccionar un nuevo número de método.<br />
c. Presione para guardar el número de método y presione para regresar<br />
al modo de medición.<br />
ES-18<br />
Guía del usuario del medidor <strong>Thermo</strong> <strong>Scientific</strong> <strong>Orion</strong> <strong>Star</strong> y <strong>Star</strong> <strong>Plus</strong>
Capítulo VI Técnica de pH<br />
Menú de configuración de pH<br />
Nota: Consulte la Tabla del menú de configuración en la sección del Menú de<br />
configuración. Esta tabla contiene una lista completa de las opciones y descripciones<br />
de configuración del medidor. Consulte en el Apéndice A una descripción de las<br />
funciones especiales del menú de configuración.<br />
1. En el modo de medición, presione .<br />
2. Presione / para desplazarse a través del menú de configuración hasta<br />
que aparezca en la línea superior.<br />
3. Presione para aceptar la selección y mover el ícono de flecha a la<br />
línea intermedia.<br />
4. Presione / para desplazarse hasta para la resolución de<br />
medición de pH y para la configuración del reconocimiento automático de<br />
amortiguador.<br />
5. Presione para aceptar la selección y mover el ícono de flecha a la<br />
línea inferior.<br />
6. Para desplazarse a través de una lista de opciones en la línea inferior, presione<br />
/ hasta que se muestre la opción deseada.<br />
7. Presione para aceptar la selección y mover el ícono de flecha a la<br />
línea superior.<br />
8. Repita los pasos 3 a 7 para cambiar otro parámetro de configuración de pH o<br />
presione para volver al modo de medición.<br />
Guía del usuario del medidor <strong>Thermo</strong> <strong>Scientific</strong> <strong>Orion</strong> <strong>Star</strong> y <strong>Star</strong> <strong>Plus</strong><br />
ES-19
Técnica de pH<br />
Calibración de pH<br />
1. Prepare el electrodo según las instrucciones de la guía del usuario del electrodo.<br />
2. En el modo de configuración, seleccione el juego de amortiguadores<br />
( o ) que utilizará para la función de reconocimiento automático<br />
de amortiguador.<br />
3. En modo de medición, presione hasta que el ícono de flecha apunte a la línea<br />
superior, presione hasta que aparezca el ícono de pH y presione para<br />
iniciar la calibración.<br />
4. Enjuague el electrodo (y la sonda CTA si se está utiliz<strong>and</strong>o) con agua destilada y<br />
colóquelo en el amortiguador.<br />
5. Espere a que el ícono de pH deje de estar intermitente.<br />
a. Reconocimiento automático de amortiguador – Cu<strong>and</strong>o el ícono de pH deja<br />
de estar intermitente, el medidor indica un valor de pH con corrección de<br />
temperatura para el amortiguador.<br />
b. Calibración manual – Cu<strong>and</strong>o el ícono de pH deja de estar intermitente, el<br />
medidor indicará el valor de pH real captado por el electrodo. Presione<br />
hasta que el primer dígito que va a cambiar esté intermitente, presione<br />
/ para cambiar el valor del dígito intermitente y continúe cambi<strong>and</strong>o<br />
los dígitos hasta que el medidor muestre el valor de pH con corrección de<br />
temperatura del amortiguador. Cu<strong>and</strong>o el valor de pH del amortiguador esté<br />
definido, presione hasta que el punto decimal esté en el lugar correcto.<br />
6. Presione para continuar con el siguiente punto de calibración y repita los<br />
pasos 4 y 5, o presione para guardar y finalizar la calibración.<br />
7. Se mostrará el porcentaje de pendiente real del electrodo en el campo principal y<br />
se mostrará en el campo inferior.<br />
a. Para la calibración de un punto, presione presione / para editar<br />
la pendiente y presione para volver al modo de medición.<br />
b. Para la calibración de dos o más puntos, el medidor pasará automáticamente<br />
al modo de medición luego de mostrar la pendiente.<br />
ES-20<br />
Guía del usuario del medidor <strong>Thermo</strong> <strong>Scientific</strong> <strong>Orion</strong> <strong>Star</strong> y <strong>Star</strong> <strong>Plus</strong>
Medición de pH<br />
Nota: Active la función automática de registro de datos para enviar mediciones al<br />
registro de datos del medidor a la frecuencia especificada en cada modo de medición.<br />
Consulte los detalles en la sección Archivo y recuperación de datos. Si la función<br />
automática de registro de datos está desactivada, conecte el medidor a una impresora<br />
o computadora para registrar las mediciones.<br />
1. Enjuague el electrodo con agua destilada o desionizada. Retire el exceso de agua<br />
y seque el electrodo con un paño libre de pelusa.<br />
2. Coloque el electrodo dentro de la muestra.<br />
Técnica de pH<br />
a. Si el medidor se encuentra en modo de medición continua, comenzará la<br />
lectura inmediatamente y actualizará la pantalla en forma continua. El ícono<br />
de pH estará intermitente hasta que la lectura se estabilice. Cu<strong>and</strong>o la lectura<br />
se estabilice, presione . para registrar la medición e imprimirla. Si está<br />
us<strong>and</strong>o un medidor de mesa y el agitador esta activado, presione para<br />
poner el agitador en funcionamiento. Presione de nuevo para apagar el<br />
agitador antes de retirar el electrodo y el agitador de la muestra.<br />
b. Si el medidor está en modo de medición de lectura automática (AUTO-READ),<br />
presione para iniciar la lectura. El ícono AR estará intermitente hasta que<br />
la lectura se estabilice. Cu<strong>and</strong>o la lectura se estabiliza, la pantalla se congela<br />
y el medidor registra e imprime la medición. Si está us<strong>and</strong>o un medidor de<br />
mesa y el agitador esta activado, el agitador se encenderá al presionar y<br />
se apagará cu<strong>and</strong>o la lectura se estabilice.<br />
c. Si el medidor se encuentra en modo de medición temporizada, comenzará la<br />
lectura inmediatamente y actualizará la pantalla en forma continua. El medidor<br />
registrará e imprimirá la medición a la frecuencia especificada en el menú de<br />
configuración. Si está us<strong>and</strong>o un medidor de mesa y el agitador esta activado,<br />
presione para poner el agitador en funcionamiento. Presione de<br />
nuevo para apagar el agitador antes de retirar el electrodo y el agitador de la<br />
muestra.<br />
3. Retire el electrodo de la muestra, enjuáguelo con agua destilada o desionizada,<br />
séquelo, colóquelo en la siguiente muestra y repita el paso 2.<br />
4. Cu<strong>and</strong>o haya medido todas las muestras, enjuague el electrodo con agua destilada<br />
o desionizada y séquelo. Consulte en la guía del usuario del electrodo las técnicas<br />
de almacenamiento adecuadas.<br />
Guía del usuario del medidor <strong>Thermo</strong> <strong>Scientific</strong> <strong>Orion</strong> <strong>Star</strong> y <strong>Star</strong> <strong>Plus</strong><br />
ES-21
Técnica de pH<br />
Pantalla y calibración de temperatura en pH<br />
Pantalla de temperatura en pH<br />
Los medidores <strong>Star</strong> <strong>Plus</strong> permiten ver la temperatura en líneas de medición<br />
individuales además de la pantalla de temperatura en la parte superior izquierda de la<br />
pantalla.<br />
Para ver la temperatura en la línea de medición de pH:<br />
1. En el modo de medición, presione para seleccionar la línea superior de la<br />
pantalla. El ícono de flecha apuntará a la línea seleccionada.<br />
2. Presione / para cambiar el valor de la línea seleccionada. Se puede<br />
modificar la línea superior para visualizar los valores de pH (pH), milivoltios (mV),<br />
milivoltios relativos (RmV), concentración (ISE), temperatura (sin ícono) o una línea<br />
en blanco.<br />
Calibración de temperatura en pH<br />
El modo de calibración de temperatura del medidor <strong>Star</strong> <strong>Plus</strong> permite ajustar<br />
manualmente la temperatura de cada línea de medición.<br />
Para calibrar la temperatura en la línea de medición de pH:<br />
1. En el modo de medición, presione para seleccionar la línea de medición<br />
superior y presione / hasta que se muestre la temperatura en la<br />
línea seleccionada.<br />
2. Presione para iniciar la calibración.<br />
3. Cu<strong>and</strong>o la lectura se estabiliza, el ícono de flecha y el primer dígito se colocarán<br />
intermitentes. Ingrese la temperatura: presione / para ajustar cada dígito<br />
y para pasar al dígito siguiente.<br />
4. Presione para guardar y finalizar la calibración.<br />
ES-22<br />
Guía del usuario del medidor <strong>Thermo</strong> <strong>Scientific</strong> <strong>Orion</strong> <strong>Star</strong> y <strong>Star</strong> <strong>Plus</strong>
Capítulo VII Técnica de mV, mV relativos<br />
y ORP<br />
Todos los medidores con capacidad de medición de pH incluyen una función de<br />
mV/mV relativos/ORP. Mida los valores no elaborados en milivoltios (mV) de un<br />
electrodo en el modo mV. Calibre los valores de milivoltios relativos (RmV) de un<br />
electrodo redox para mediciones del potencial de oxidación-reducción (ORP) en el<br />
modo mV/ORP.<br />
Nota: Las mediciones de mV son lecturas no elaboradas y no se pueden calibrar.<br />
Utilice el modo de mV relativos para calibrar las mediciones de mV.<br />
Calibración de mV relativos y ORP<br />
1. Prepare el electrodo según las instrucciones de la guía del usuario del electrodo.<br />
2. En modo de medición, presione hasta que el ícono de flecha apunte a la línea<br />
superior, presione hasta que aparezca el ícono de RmV y presione para<br />
iniciar la calibración.<br />
3. Enjuague el electrodo con agua destilada y colóquelo en el estándar.<br />
4. Espere a que el ícono RmV deje de estar intermitente. Si la lectura no elaborada<br />
de mV del electrodo es de 220 mV ± 60 mV, cu<strong>and</strong>o el ícono RmV deje de estar<br />
intermitente, el medidor calculará y mostrará automáticamente el valor de E H<br />
mV del electrodo a la temperatura medida. Si la lectura no elaborada de mV del<br />
electrodo está fuera del margen 220 mV ± 60 mV, cu<strong>and</strong>o el ícono RmV deje<br />
de estar intermitente, el medidor indicará 000.0 RmV. Presione hasta que<br />
el primer dígito que va a cambiar esté intermitente, presione / para<br />
cambiar el valor del dígito intermitente y continúe cambi<strong>and</strong>o los dígitos hasta que<br />
el medidor muestre el valor de milivoltios del estándar. Para cambiar el valor a un<br />
número negativo o positivo, presione hasta que ninguno de los dígitos esté<br />
intermitente y el ícono de flecha se coloque intermitente, y luego presione<br />
para cambiar el signo del valor en milivoltios.<br />
5. Presione para guardar y finalizar la calibración. Se mostrará la desviación en<br />
milivoltios y el medidor pasará automáticamente al modo de medición.<br />
Guía del usuario del medidor <strong>Thermo</strong> <strong>Scientific</strong> <strong>Orion</strong> <strong>Star</strong> y <strong>Star</strong> <strong>Plus</strong><br />
ES-23
Técnica de mV, mV relativos y ORP<br />
Medición de mV, mV relativos y ORP<br />
Nota: Active la función automática de registro de datos para enviar mediciones al<br />
registro de datos del medidor a la frecuencia especificada en cada modo de medición.<br />
Consulte los detalles en la sección Archivo y recuperación de datos. Si la función<br />
automática de registro de datos está desactivada, conecte el medidor a una impresora<br />
o computadora para registrar las mediciones.<br />
1. Enjuague el electrodo con agua destilada o desionizada. Retire el exceso de agua<br />
y seque el electrodo con un paño libre de pelusa.<br />
2. Coloque el electrodo dentro de la muestra.<br />
ES-24<br />
a. Si el medidor se encuentra en modo de medición continua, comenzará la<br />
lectura inmediatamente y actualizará la pantalla en forma continua. El ícono<br />
mV o RmV estará intermitente hasta que la lectura se estabilice. Cu<strong>and</strong>o la<br />
lectura se estabilice, presione . para registrar la medición e imprimirla. Si<br />
está us<strong>and</strong>o un medidor de mesa y el agitador esta activado, presione<br />
para poner el agitador en funcionamiento. Presione de nuevo para apagar<br />
el agitador antes de retirar el electrodo y el agitador de la muestra.<br />
b. Si el medidor está en modo de medición de lectura automática (AUTO-READ),<br />
presione para iniciar la lectura. El ícono AR estará intermitente hasta que<br />
la lectura se estabilice. Cu<strong>and</strong>o la lectura se estabiliza, la pantalla se congela<br />
y el medidor registra e imprime la medición. Si está us<strong>and</strong>o un medidor de<br />
mesa y el agitador esta activado, el agitador se encenderá al presionar y<br />
se apagará cu<strong>and</strong>o la lectura se estabilice.<br />
c. Si el medidor se encuentra en modo de medición temporizada, comenzará la<br />
lectura inmediatamente y actualizará la pantalla en forma continua. El medidor<br />
registrará e imprimirá la medición a la frecuencia especificada en el menú de<br />
configuración. Si está us<strong>and</strong>o un medidor de mesa y el agitador esta activado,<br />
presione para poner el agitador en funcionamiento. Presione de<br />
nuevo para apagar el agitador antes de retirar el electrodo y el agitador de<br />
la muestra.<br />
3. Retire el electrodo de la muestra, enjuáguelo con agua destilada o desionizada,<br />
séquelo, colóquelo en la siguiente muestra y repita el paso 2.<br />
4. Cu<strong>and</strong>o haya medido todas las muestras, enjuague el electrodo con agua destilada<br />
o desionizada y séquelo. Consulte en la guía del usuario del electrodo las técnicas<br />
de almacenamiento adecuadas.<br />
Guía del usuario del medidor <strong>Thermo</strong> <strong>Scientific</strong> <strong>Orion</strong> <strong>Star</strong> y <strong>Star</strong> <strong>Plus</strong>
Capítulo VIII Técnica de oxígeno disuelto<br />
Menú de configuración de oxígeno disuelto<br />
Nota: Consulte la Tabla del menú de configuración en la sección del Menú de<br />
configuración. Esta tabla contiene una lista completa de las opciones y descripciones<br />
de configuración del medidor. Consulte en el Apéndice A una descripción de las<br />
funciones especiales del menú de configuración.<br />
1. En el modo de medición, presione .<br />
2. Presione / para desplazarse a través del menú de configuración hasta<br />
que aparezca en la línea superior.<br />
3. Presione para aceptar la selección y mover el ícono de flecha a la<br />
línea intermedia.<br />
4. Presione / para desplazarse hasta para la resolución del % de<br />
saturación, para la resolución de concentración mg/L, para el tipo<br />
de barómetro (automático o manual), para el valor de compensación de<br />
presión barométrica manual, para el tipo de compensación de salinidad<br />
(automática o manual), para el valor de corrección de salinidad manual y<br />
para el tipo de calibración de oxígeno disuelto.<br />
5. Presione para seleccionar la opción y mover el ícono de flecha a la<br />
línea inferior.<br />
6. Para desplazarse a través de una lista de opciones en la línea inferior, presione<br />
/ hasta que se muestre la opción deseada. Para ingresar un valor<br />
numérico en una opción en la línea inferior, presione / para ajustar cada<br />
dígito y pasar al dígito siguiente.<br />
7. Presione para aceptar la selección y mover el ícono de flecha a la<br />
línea superior.<br />
8. Repita los pasos 3 a 7 para cambiar otro parámetro de oxígeno disuelto o presione<br />
para volver al modo de medición.<br />
Guía del usuario del medidor <strong>Thermo</strong> <strong>Scientific</strong> <strong>Orion</strong> <strong>Star</strong> y <strong>Star</strong> <strong>Plus</strong><br />
ES-25
Técnica de oxígeno disuelto<br />
Calibración de oxígeno disuelto<br />
• Antes de la calibración, se debe preparar y polarizar la sonda de oxígeno disuelto.<br />
La sonda se polariza continuamente cu<strong>and</strong>o está conectada al medidor.<br />
Cu<strong>and</strong>o la sonda se conecta por primera vez o cu<strong>and</strong>o ha estado desconectada<br />
por más de 60 minutos, conecte la sonda al medidor, conecte el medidor a una<br />
fuente de alimentación y espere de 30 a 60 minutos para que se polarice. Si se<br />
desconecta la sonda durante menos de una hora, se requieren de 5 a 25 minutos<br />
de polarización.<br />
• Los medidores suministran corriente de polarización a la sonda de oxígeno<br />
disuelto aún cu<strong>and</strong>o el medidor está apagado. Para maximizar la duración de las<br />
baterías del medidor, desconecte la sonda si no la va a utilizar por un período de<br />
tiempo prolongado.<br />
1. Seleccione uno de los siguientes modos de calibración en el menú<br />
de configuración.<br />
a. – Se realiza una calibración de aire en aire saturado con agua mediante<br />
la manga de calibración. Es la calibración más sencilla y más precisa. Debido a<br />
diferencias inherentes entre el aire saturado con agua y el agua saturada con<br />
aire, se mostrará una saturación de 102.3% cu<strong>and</strong>o la lectura de calibración<br />
se estabilice.<br />
i. Cu<strong>and</strong>o la temperatura de calibración es igual a la temperatura de medición,<br />
se alcanza la precisión más alta posible.<br />
ii. Humedezca la esponja o paño absorbente de la manga de calibración<br />
con agua destilada e introduzca la sonda en la manga sin tocar el material<br />
saturado con agua. Para mediciones de dem<strong>and</strong>a biológica de oxígeno, esta<br />
calibración se puede realizar en una botella de DBO.<br />
b. – Se realiza una calibración de agua utiliz<strong>and</strong>o agua saturada al 100%<br />
con aire. Forme burbujas de aire en una muestra de agua y agite la muestra<br />
suavemente para evitar la acumulación de burbujas de aire en la membrana de<br />
la sonda de oxígeno disuelto.<br />
c. – Se realiza una calibración manual utiliz<strong>and</strong>o una muestra de agua<br />
con una concentración conocida de oxígeno disuelto. Este método se puede<br />
utilizar para calibrar la sonda de oxígeno disuelto al valor obtenido mediante<br />
titulación de Winkler.<br />
ES-26<br />
Guía del usuario del medidor <strong>Thermo</strong> <strong>Scientific</strong> <strong>Orion</strong> <strong>Star</strong> y <strong>Star</strong> <strong>Plus</strong>
Técnica de oxígeno disuelto<br />
i. La calibración manual comprende la realización de una titulación de Winkler<br />
y el uso de una muestra como estándar de calibración. El nivel de oxígeno<br />
resultante de la titulación se ingresa en una calibración manual como el<br />
valor de oxígeno disuelto. Esto correlaciona la entrada del medidor con<br />
la titulación de Winkler. Este método es inherentemente menos preciso,<br />
debido a la posibilidad de errores de titulación.<br />
d. – Se realiza una calibración de punto cero en una solución sin oxígeno.<br />
Normalmente, no se requiere una calibración de punto cero a menos que las<br />
mediciones se tomen con menos de un 10% de saturación o 1 mg/L. Calibre<br />
la sonda a cero al utilizar una nueva membrana, con solución de relleno nueva,<br />
o al medir niveles de oxígeno disuelto inferiores a 1 mg/L. Se debe realizar una<br />
calibración de aire antes de la calibración de punto cero.<br />
2. Permita que la sonda y el estándar de calibración (agua saturada con aire, aire<br />
saturado con agua, estándar de Winkler o solución sin oxígeno) se equilibren.<br />
3. En modo de medición, presione hasta que el ícono de flecha apunte a la línea<br />
inferior, presione hasta que aparezca el ícono % sat o mg/L y presione<br />
para iniciar la calibración.<br />
4. Espere a que la lectura de oxígeno disuelto se estabilice.<br />
a. Si realiza una calibración de aire, el medidor mostrará 102.3% y pasará<br />
automáticamente al modo de medición.<br />
b. Si realiza una calibración de agua, el medidor mostrará 100.0% y pasará<br />
automáticamente al modo de medición.<br />
c. Si realiza una calibración manual, espere a que el ícono mg/L deje de estar<br />
intermitente e ingrese el valor de oxígeno disuelto presion<strong>and</strong>o hasta que<br />
el primer dígito que va a cambiar esté intermitente, presione / para<br />
cambiar el valor del dígito intermitente y continúe cambi<strong>and</strong>o los dígitos hasta<br />
que el medidor indique el valor correcto de oxígeno disuelto. Cu<strong>and</strong>o el valor<br />
de oxígeno disuelto esté definido, presione hasta que el punto decimal<br />
esté en el lugar correcto.<br />
d. Si realiza una calibración de punto cero, el medidor mostrará 0.00 y pasará<br />
automáticamente al modo de medición.<br />
Guía del usuario del medidor <strong>Thermo</strong> <strong>Scientific</strong> <strong>Orion</strong> <strong>Star</strong> y <strong>Star</strong> <strong>Plus</strong><br />
ES-27
Técnica de oxígeno disuelto<br />
Medición de oxígeno disuelto<br />
Nota: Active la función automática de registro de datos para enviar mediciones al<br />
registro de datos del medidor a la frecuencia especificada en cada modo de medición.<br />
Consulte los detalles en la sección Archivo y recuperación de datos. Si la función<br />
automática de registro de datos está desactivada, conecte el medidor a una impresora<br />
o computadora para registrar las mediciones.<br />
1. Enjuague la sonda de oxígeno disuelto con agua destilada o desionizada. Retire el<br />
exceso de agua y seque la sonda con un paño libre de pelusa.<br />
2. Coloque la sonda de oxígeno disuelto dentro de la muestra.<br />
a. Si el medidor se encuentra en modo de medición continua, comenzará la<br />
lectura inmediatamente y actualizará la pantalla en forma continua. El ícono<br />
mg/L o % sat estará intermitente hasta que la lectura se estabilice. Cu<strong>and</strong>o<br />
la lectura se estabilice, presione el ícono . para registrar la medición e<br />
imprimirla. Si está us<strong>and</strong>o un medidor de mesa y el agitador esta activado,<br />
presione el ícono para poner el agitador en funcionamiento. Presione<br />
de nuevo para apagar el agitador antes de retirar la sonda y el agitador de<br />
la muestra.<br />
b. Si el medidor está en modo de medición de lectura automática (AUTO-READ),<br />
presione para iniciar la lectura. El ícono AR estará intermitente hasta que<br />
la lectura se estabilice. Cu<strong>and</strong>o la lectura se estabiliza, la pantalla se congela<br />
y el medidor registra e imprime la lectura. Si está us<strong>and</strong>o un medidor de<br />
mesa y el agitador esta activado, el agitador se encenderá al presionar<br />
y se apagará cu<strong>and</strong>o la lectura se estabilice. Si utiliza una sonda AUTO-STIR<br />
para DBO, presione el botón de la sonda para iniciar la medición de lectura<br />
automática (AUTO-READ).<br />
Nota: Los medidores de oxígeno disuelto <strong>Star</strong> <strong>Plus</strong> de mesa permiten<br />
controlar las funciones de medición y de agitación mediante la sonda AUTO-<br />
STIR cu<strong>and</strong>o el medidor se encuentra en modo de medición de lectura<br />
automática (AUTO-READ). Presione el botón de la sonda AUTO-STIR para<br />
iniciar y detener las funciones de medición y agitación.<br />
ES-28<br />
Guía del usuario del medidor <strong>Thermo</strong> <strong>Scientific</strong> <strong>Orion</strong> <strong>Star</strong> y <strong>Star</strong> <strong>Plus</strong>
c. Si el medidor se encuentra en modo de medición temporizada, comenzará la<br />
lectura inmediatamente y actualizará la pantalla en forma continua. El medidor<br />
registrará e imprimirá la medición a la frecuencia especificada en el menú de<br />
configuración Si está us<strong>and</strong>o un medidor de mesa y el agitador esta activado,<br />
presione el ícono para poner el agitador en funcionamiento. Presione<br />
de nuevo para apagar el agitador antes de retirar la sonda y el agitador de<br />
la muestra.<br />
3. Retire la sonda de oxígeno disuelto de la muestra, enjuáguela con agua destilada o<br />
desionizada, séquela, colóquela en la siguiente muestra y repita el paso 2.<br />
4. Cu<strong>and</strong>o haya medido todas las muestras, enjuague la sonda de oxígeno disuelto<br />
con agua destilada o desionizada y séquela. Consulte en la guía del usuario de la<br />
sonda de oxígeno disuelto las técnicas de almacenamiento adecuadas.<br />
Pantalla y calibración de temperatura de oxígeno disuelto<br />
Pantalla de temperatura de oxígeno disuelto<br />
Los medidores <strong>Star</strong> <strong>Plus</strong> permiten ver la temperatura en líneas de medición<br />
individuales además de la pantalla de temperatura en la parte superior izquierda<br />
de la pantalla.<br />
Para ver la temperatura en la línea de medición de oxígeno disuelto:<br />
Técnica de oxígeno disuelto<br />
1. En el modo de medición, presione para seleccionar la línea inferior de la<br />
pantalla. El ícono de flecha apuntará a la línea seleccionada.<br />
2. Presione / para cambiar el valor de la línea seleccionada. La línea inferior<br />
se puede modificar para mostrar el oxígeno disuelto (% de saturación), el oxígeno<br />
disuelto (mg/L), la presión barométrica (sin ícono), la temperatura de la muestra<br />
(sin ícono), la temperatura de la solución electrolito/membrana (sin ícono,<br />
después del número) o una línea en blanco.<br />
Guía del usuario del medidor <strong>Thermo</strong> <strong>Scientific</strong> <strong>Orion</strong> <strong>Star</strong> y <strong>Star</strong> <strong>Plus</strong><br />
ES-29
Técnica de oxígeno disuelto<br />
Calibración de temperatura en oxígeno disuelto<br />
El modo de calibración de temperatura del medidor <strong>Star</strong> <strong>Plus</strong> permite ajustar<br />
manualmente la temperatura de cada línea de medición. La línea de medición de<br />
oxígeno disuelto muestra la temperatura de la muestra y la temperatura de la solución<br />
electrolito/membrana.<br />
Para calibrar la temperatura en la línea de medición de oxígeno disuelto:<br />
1. En el modo de medición, presione para seleccionar la línea de medición<br />
inferior y presione / hasta que se muestre la temperatura de la muestra<br />
(por ej., ).<br />
2. Presione para iniciar la calibración.<br />
3. Cu<strong>and</strong>o la lectura se estabiliza, el ícono de flecha y el primer dígito se colocarán<br />
intermitentes. Ingrese la temperatura: presione / para ajustar cada dígito<br />
y para pasar al dígito siguiente.<br />
4. Presione para guardar y finalizar la calibración.<br />
Para calibrar la temperatura de la solución electrolito/membrana en la línea de<br />
medición de oxígeno disuelto:<br />
1. En el modo de medición, presione para seleccionar la línea de<br />
medición inferior y presione / hasta que se muestre la temperatura de la<br />
membrana (por ej., ).<br />
2. Presione para iniciar la calibración.<br />
3. Cu<strong>and</strong>o la lectura se estabiliza, el ícono de flecha y el primer dígito se colocarán<br />
intermitentes. Ingrese la temperatura: presione / para ajustar cada dígito<br />
y para pasar al dígito siguiente.<br />
4. Presione para guardar y finalizar la calibración.<br />
ES-30<br />
Guía del usuario del medidor <strong>Thermo</strong> <strong>Scientific</strong> <strong>Orion</strong> <strong>Star</strong> y <strong>Star</strong> <strong>Plus</strong>
Capítulo IX Técnica de oxígeno disuelto<br />
por sonda óptica RDO ®<br />
Nota: Los medidores de oxígeno disuelto por sonda óptica RDO tienen números<br />
de serie que comienzan con R (por ej., R12345). Sólo los medidores RDO son<br />
compatibles con las sondas ópticas RDO.<br />
Tapón óptico, descripción general<br />
La sonda óptica RDO tiene un reloj interno que lleva una cuenta regresiva de los 365<br />
días de vida útil de un tapón óptico nuevo. La cuenta regresiva comienza cu<strong>and</strong>o el<br />
tapón óptico se instala en la sonda RDO, la sonda óptica se conecta al medidor y se<br />
toma la primera medición. La cuenta regresiva de 365 días no se puede restablecer<br />
ni modificar una vez que se toma la medición. Cada tapón óptico tiene un número de<br />
serie único que es reconocido por la sonda RDO, por lo que la cuenta regresiva no se<br />
restablece si el tapón es reinstalado.<br />
Nota: La alimentación del medidor debe estar desconectada para instalar un nuevo<br />
tapón óptico en la sonda RDO. Una vez que el tapón óptico está instalado, conecte la<br />
alimentación del medidor y la información del nuevo tapón será enviada al medidor.<br />
Para imprimir la información del tapón óptico:<br />
1. Conecte el medidor a una impresora o computadora y verifique la velocidad en<br />
baudios y la configuración de salida del medidor en el menú de configuración.<br />
2. En el modo de medición, presione .<br />
3. Presione / para desplazarse a través del menú de configuración<br />
hasta que aparezca en la línea superior y en la línea intermedia.<br />
4. Presione dos veces para mover el ícono de flecha a la línea inferior.<br />
5. Presione / hasta que aparezca en la línea inferior.<br />
6. Presione para imprimir la información del tapón óptico. Presione para<br />
volver al modo de medición.<br />
Guía del usuario del medidor <strong>Thermo</strong> <strong>Scientific</strong> <strong>Orion</strong> <strong>Star</strong> y <strong>Star</strong> <strong>Plus</strong><br />
ES-31
Técnica de oxígeno disuelto por sensor óptico RDO ®<br />
Menú de configuración de oxígeno disuelto por sensor<br />
óptico RDO<br />
Nota: Consulte la Tabla del menú de configuración en la sección del Menú de<br />
configuración. Esta tabla contiene una lista completa de las opciones y descripciones<br />
de configuración del medidor.<br />
1. En el modo de medición, presione .<br />
2. Presione / para desplazarse a través del menú de configuración hasta<br />
que aparezca en la línea superior.<br />
3. Presione para aceptar la selección y mover el ícono de flecha a la<br />
línea intermedia.<br />
4. Presione / para desplazarse hasta para la resolución del<br />
% de saturación, para la resolución de concentración mg/L, para el<br />
tipo de barómetro (automático o manual), para el valor de compensación<br />
de presión barométrica manual, para el tipo de compensación de salinidad<br />
(automática o manual), para el valor de corrección de salinidad manual,<br />
para el tipo de calibración de oxígeno disuelto y para la cuenta<br />
regresiva de reemplazo del tapón óptico en días.<br />
5. Presione para seleccionar la opción y mover el ícono de flecha a la<br />
línea inferior.<br />
6. Para desplazarse a través de una lista de opciones en la línea inferior, presione<br />
/ hasta que se muestre la opción deseada. Para ingresar un valor<br />
numérico en una opción en la línea inferior, presione / para ajustar cada<br />
dígito y pasar al dígito siguiente.<br />
7. Presione para aceptar la selección y mover el ícono de flecha a la<br />
línea superior.<br />
8. Repita los pasos 3 a 7 para cambiar otro parámetro de oxígeno disuelto o presione<br />
para volver al modo de medición.<br />
ES-32<br />
Guía del usuario del medidor <strong>Thermo</strong> <strong>Scientific</strong> <strong>Orion</strong> <strong>Star</strong> y <strong>Star</strong> <strong>Plus</strong>
Técnica de oxígeno disuelto por sensor óptico RDO<br />
Los medidores de oxígeno disuelto por sonda RDO tienen una función especial en<br />
el menú de configuración que permite al usuario imprimir la información de la sonda<br />
óptica RDO.<br />
Línea<br />
superior<br />
Línea<br />
intermedia<br />
Línea<br />
inferior<br />
Descripción del menú de configuración<br />
Pr0b d0 tESt La opción de prueba inicia una prueba de 30 segundos del enlace de<br />
comunicación entre la sonda RDO y el medidor. La pantalla de temperatura<br />
indicará una cuenta regresiva de 30 segundos a medida que la prueba avanza. El<br />
medidor enviará un informe a la impresora o a la computadora cu<strong>and</strong>o la prueba<br />
haya terminado.<br />
Pr0b d0 CAL La opción CAL imprime el número de serie del medidor, la fecha, hora y<br />
pendiente de las últimas cinco calibraciones de oxígeno disuelto que se<br />
realizaron con la sonda RDO actualmente conectada al medidor.<br />
Pr0b d0 dFLt La opción dFLt imprime la información de calibración de fábrica de la sonda RDO<br />
actualmente conectada al medidor..<br />
Pr0b d0 SLP La opción SLP imprime el valor de deriva por minuto de la pendiente de las<br />
últimas cinco calibraciones de oxígeno disuelto que se realizaron con la sonda<br />
RDO actualmente conectada al medidor.<br />
Pr0b d0 mEtH La opción mEtH imprime la información de método específico del último método<br />
utilizado para la sonda RDO actualmente conectada al medidor.<br />
Pr0b d0 InF0 La opción InF0 imprime la información de la sonda RDO, incluidos el número de<br />
serie y revisión de la sonda, la fecha de manufactura de la sonda y del tapón<br />
óptico, la fecha de inicio del tapón, la vida útil del tapón y el reloj interno de hora<br />
real para la sonda actualmente conectada al medidor.<br />
1. Conecte el medidor a una impresora o computadora y verifique la velocidad en<br />
baudios y la configuración de salida del medidor en el menú de configuración.<br />
2. En el modo de medición, presione .<br />
3. Presione / para desplazarse a través del menú de configuración hasta<br />
que aparezca en la línea superior y en la línea intermedia.<br />
4. Presione dos veces para mover el ícono de flecha a la línea inferior.<br />
5. Presione / para desplazarse hasta para la prueba de enlace de<br />
comunicación, para la información de calibración de la sonda RDO,<br />
para la información de calibración de fábrica de la sonda RDO, para la<br />
información de pendiente de sonda RDO, fpara la información del método<br />
RDO y para la información general de la sonda RDO.<br />
6. Presione para imprimir la opción seleccionada.<br />
Técnica de oxígeno disuelto por sensor óptico RDO ®<br />
Guía del usuario del medidor <strong>Thermo</strong> <strong>Scientific</strong> <strong>Orion</strong> <strong>Star</strong> y <strong>Star</strong> <strong>Plus</strong><br />
ES-33
Técnica de oxígeno disuelto con sensor óptico RDO ®<br />
7. Presione / para seleccionar otra opción desde la línea inferior, para<br />
imprimir la opción seleccionada o presione<br />
para volver al modo de medición.<br />
Ejemplo de salida de impresión de información general de la<br />
sonda RDO<br />
smartprobe info<br />
type 1<br />
run_status 255<br />
format_version 1<br />
probe_SN 6<br />
app_version 9<br />
HW_version 1<br />
cap_SN 129614<br />
rtc 1210257372 (05-08-2008 14:36:12)<br />
mfg_time 1208371349 (04-16-2008 18:42:29)<br />
start_time 1210178953 (05-07-2008 16:49:13)<br />
expiration 1241736553 (05-07-2009 22:49:13)<br />
probe_mfg_time 1208440800 (04-17-2008 14:00:00)<br />
write_count 14<br />
pass_count 12<br />
expire<br />
0x01<br />
days_left 364.3<br />
probe_reading 149.529243<br />
temp_reading 24.942651<br />
state 21<br />
general_event 0x00<br />
internal_event 0x00<br />
internal_state 3<br />
internal_retry 0x00<br />
ES-34<br />
Guía del usuario del medidor <strong>Thermo</strong> <strong>Scientific</strong> <strong>Orion</strong> <strong>Star</strong> y <strong>Star</strong> <strong>Plus</strong>
Técnica de oxígeno disuelto por sensor óptico RDO ®<br />
Calibración de oxígeno disuelto por sensor óptico RDO<br />
1. Seleccione uno de los siguientes modos de calibración en el menú<br />
de configuración.<br />
a. – Se realiza una calibración de aire en aire saturado con agua mediante la<br />
manga de calibración. Es el método más sencillo y más preciso.<br />
i. Cu<strong>and</strong>o la temperatura de calibración es igual a la temperatura de medición,<br />
se alcanza la precisión más alta posible.<br />
ii. Humedezca la esponja de la manga de calibración con agua destilada.<br />
Introduzca la sonda RDO en la manga sin tocar la esponja saturada con<br />
agua.<br />
b. – La calibración de agua se realiza utiliz<strong>and</strong>o agua saturada al 100%<br />
con aire. Forme burbujas de aire en una muestra de agua y agite la muestra<br />
suavemente para evitar la acumulación de burbujas de aire en el tapón óptico.<br />
c. – La calibración manual se utiliza utiliz<strong>and</strong>o una muestra de agua con<br />
una concentración conocida de oxígeno disuelto. Este método se puede<br />
utilizar para calibrar la sonda RDO al valor obtenido mediante titulación<br />
de Winkler.<br />
i. La calibración manual comprende la realización de una titulación de Winkler<br />
y el uso de una muestra como estándar de calibración. El nivel de oxígeno<br />
resultante de la titulación se ingresa en una calibración manual como el<br />
valor de oxígeno disuelto. Esto correlaciona la entrada del medidor con<br />
la titulación de Winkler. Este método es inherentemente menos preciso,<br />
debido a la posibilidad de errores de titulación.<br />
d. – Se realiza una calibración de punto cero en una solución sin oxígeno.<br />
Por lo general no se requiere una calibración de punto cero a menos que se<br />
vayan a tomar mediciones con menos de un 10% de saturación o 1 mg/L.<br />
2. Permita que la sonda RDO y el estándar de calibración (agua saturada con aire,<br />
aire saturado con agua, estándar de Winkler o solución sin oxígeno) se equilibren.<br />
Guía del usuario del medidor <strong>Thermo</strong> <strong>Scientific</strong> <strong>Orion</strong> <strong>Star</strong> y <strong>Star</strong> <strong>Plus</strong><br />
ES-35
Técnica de oxígeno disuelto por sensor óptico RDO ®<br />
3. En modo de medición, presione hasta que el ícono de flecha apunte a la línea<br />
inferior, presione hasta que aparezca el ícono % sat o mg/L y presione<br />
para iniciar la calibración.<br />
4. Espere a que la lectura de oxígeno disuelto se estabilice.<br />
a. Si realiza una calibración de aire, el medidor mostrará 100,0% y pasará<br />
automáticamente al modo de medición.<br />
b. Si realiza una calibración de agua, el medidor mostrará 100.0% y pasará<br />
automáticamente al modo de medición.<br />
c. Si realiza una calibración manual, espere a que el ícono mg/L deje de<br />
estar intermitente e ingrese el valor de oxígeno disuelto presion<strong>and</strong>o<br />
hasta que el primer dígito que va a cambiar esté intermitente, presione<br />
/ para cambiar el valor del dígito intermitente y continúe cambi<strong>and</strong>o<br />
los dígitos hasta que el medidor indique el valor correcto de oxígeno disuelto.<br />
Cu<strong>and</strong>o el valor de oxígeno disuelto esté definido, presione hasta que el<br />
punto decimal esté en el lugar correcto.<br />
d. Si realiza una calibración de punto cero, el medidor mostrará 0.00 y pasará<br />
automáticamente al modo de medición.<br />
ES-36<br />
Guía del usuario del medidor <strong>Thermo</strong> <strong>Scientific</strong> <strong>Orion</strong> <strong>Star</strong> y <strong>Star</strong> <strong>Plus</strong>
Medición de oxígeno disuelto por sensor óptico RDO<br />
Nota: Active la función automática de registro de datos para enviar mediciones al<br />
registro de datos del medidor a la frecuencia especificada en cada modo de medición.<br />
Consulte los detalles en la sección Archivo y recuperación de datos. Si la función<br />
automática de registro de datos está desactivada, conecte el medidor a una impresora<br />
o computadora para registrar las mediciones.<br />
1. Enjuague la sonda RDO con agua destilada o desionizada. Retire el exceso de<br />
agua y seque la sonda con un paño libre de pelusa.<br />
2. Coloque la sonda RDO dentro de la muestra.<br />
Técnica de oxígeno disuelto por sensor óptico RDO ®<br />
a. Si el medidor se encuentra en modo de medición continua, comenzará la<br />
lectura inmediatamente y actualizará la pantalla en forma continua. El ícono<br />
mg/L o % sat estará intermitente hasta que la lectura se estabilice. Cu<strong>and</strong>o<br />
la lectura se estabilice, presione el ícono . para registrar la medición e<br />
imprimirla. Este modo consumirá más energía de las baterías del medidor.<br />
b. Si el medidor está en modo de medición de lectura automática (AUTO-READ),<br />
presione para iniciar la lectura. El ícono AR estará intermitente hasta que<br />
la lectura se estabilice. Cu<strong>and</strong>o la lectura se estabiliza, la pantalla se congela<br />
y el medidor registra e imprime la medición. Este modo consume diversas<br />
cantidades de energía de las baterías del medidor, dependiendo de cuántas<br />
veces se presione .<br />
c. Si el medidor está en modo de medición temporizada, tomará una lectura de<br />
oxígeno disuelto a la frecuencia especificada en el menú de configuración. Si<br />
se miden otros parámetros distintos al oxígeno disuelto, el medidor tomará las<br />
otras medidas continuamente y actualizará la pantalla. El medidor registrará e<br />
imprimirá la medición en el intervalo de tiempo predeterminado. Este modo se<br />
puede utilizar para prolongar la duración de las baterías, ya que el consumo de<br />
la sonda RDO es reducido, dependiendo del intervalo de tiempo especificado.<br />
3. Retire la sonda RDO de la muestra, enjuáguela con agua destilada o desionizada,<br />
séquela, colóquela en la siguiente muestra y repita el paso 2.<br />
4. Cu<strong>and</strong>o haya medido todas las muestras, enjuague la sonda RDO con agua<br />
destilada o desionizada y séquela. Consulte en la guía del usuario de la sonda<br />
RDO las técnicas de almacenamiento adecuadas.<br />
Guía del usuario del medidor <strong>Thermo</strong> <strong>Scientific</strong> <strong>Orion</strong> <strong>Star</strong> y <strong>Star</strong> <strong>Plus</strong><br />
ES-37
Técnica de oxígeno disuelto por sensor óptico RDO ®<br />
Pantalla y calibración de temperatura de oxígeno disuelto por<br />
sensor óptico RDO<br />
Pantalla de temperatura de oxígeno disuelto por sensor óptico RDO<br />
Los medidores <strong>Star</strong> <strong>Plus</strong> permiten ver la temperatura en líneas de medición<br />
individuales además de la pantalla de temperatura en la parte superior izquierda de<br />
la pantalla.<br />
Para ver la temperatura en la línea de medición de oxígeno disuelto RDO:<br />
1. En el modo de medición, presione para seleccionar la línea inferior de la<br />
pantalla. El ícono de flecha apuntará a la línea seleccionada.<br />
2. Presione / para cambiar el valor de la línea seleccionada. La línea inferior<br />
se puede modificar para mostrar el oxígeno disuelto (% de saturación), el oxígeno<br />
disuelto (mg/L), la presión barométrica (sin ícono), la temperatura (sin ícono), o una<br />
línea en blanco.<br />
Calibración de temperatura de oxígeno disuelto por sensor óptico RDO<br />
El modo de calibración de temperatura del medidor <strong>Star</strong> <strong>Plus</strong> permite ajustar<br />
manualmente la temperatura de cada línea de medición.<br />
Para calibrar la temperatura en la línea de medición de oxígeno disuelto RDO:<br />
1. En el modo de medición, presione para seleccionar la línea de medición<br />
inferior y presione / hasta que se muestre la temperatura.<br />
2. Presione para iniciar la calibración.<br />
3. Cu<strong>and</strong>o la lectura se estabiliza, el ícono de flecha y el primer dígito se colocarán<br />
intermitentes. Ingrese la temperatura: presione / para ajustar cada dígito<br />
y para pasar al dígito siguiente.<br />
4. Presione para guardar y finalizar la calibración.<br />
ES-38<br />
Guía del usuario del medidor <strong>Thermo</strong> <strong>Scientific</strong> <strong>Orion</strong> <strong>Star</strong> y <strong>Star</strong> <strong>Plus</strong>
Capítulo X Técnica de conductividad<br />
Menú de configuración de conductividad<br />
Nota: Consulte la Tabla del menú de configuración en la sección del Menú de<br />
configuración. Esta tabla contiene una lista completa de las opciones y descripciones<br />
de configuración del medidor. Consulte en el Apéndice A una descripción de las<br />
funciones especiales del menú de configuración.<br />
1. En el modo de medición, presione .<br />
2. Presione / para desplazarse a través del menú de configuración hasta<br />
que aparezca en la línea superior.<br />
3. Presione para aceptar la selección y mover el ícono de flecha a la<br />
línea intermedia.<br />
4. Presione / para desplazarse hasta para el tipo de compensación de<br />
temperatura, para el valor de coeficiente de temperatura utilizado para la<br />
compensación de temperatura , para el valor del factor de sólidos<br />
disueltos totales (STD) utilizado pata la medición de STD, para el valor<br />
nominal de constante de celda de la sonda de conductividad, para la<br />
temperatura de referencia utilizada para la compensación de temperatura y<br />
para el tipo de celda de conductividad.<br />
5. Presione para aceptar la selección y mover el ícono de flecha a la<br />
línea inferior.<br />
6. Para desplazarse a través de una lista de opciones en la línea inferior, presione<br />
/ hasta que se muestre la opción deseada. Para ingresar un valor<br />
numérico en una opción en la línea inferior, presione / para ajustar cada<br />
dígito y para pasar al dígito siguiente.<br />
7. Presione para aceptar la selección y mover el ícono de flecha a la<br />
línea superior.<br />
8. Repita los pasos 3 a 7 para cambiar otro parámetro de conductividad o presione<br />
para volver al modo de medición.<br />
Guía del usuario del medidor <strong>Thermo</strong> <strong>Scientific</strong> <strong>Orion</strong> <strong>Star</strong> y <strong>Star</strong> <strong>Plus</strong><br />
ES-39
Técnica de conductividad<br />
Calibración de conductividad<br />
Nota: Para la calibración automática, el valor nominal de la constante de celda de<br />
la sonda de conductividad se debe ingresar en el menú de configuración antes de<br />
realizar la calibración.<br />
1. En modo de medición, presione hasta que el ícono de flecha apunte a la<br />
línea intermedia, presione hasta que aparezca el ícono μS/cm o mS/cm y<br />
presione para iniciar la calibración.<br />
2. Enjuague la sonda con agua desionizada y colóquela en el estándar de<br />
conductividad.<br />
3. Para realizar una calibración manual – La pantalla de calibración manual mostrará<br />
la constante de celda en la línea superior, el valor de conductividad del estándar<br />
de calibración en la línea intermedia y en la línea inferior. Para cambiar<br />
la constante de celda, presione hasta que el primer dígito a cambiar esté<br />
intermitente, presione / pata cambiar el valor del dígito intermitente<br />
y continúe cambi<strong>and</strong>o los dígitos hasta que el valor de conductividad mostrado<br />
coincida con el valor del estándar a la temperatura medida. Cu<strong>and</strong>o el valor esté<br />
definido, presione hasta que el punto decimal esté en el lugar correcto.<br />
Presione para guardar y finalizar la calibración.<br />
Nota: En la pantalla de calibración manual, comience cambi<strong>and</strong>o la constante<br />
de celda en cinco segundos o el medidor procederá a efectuar la calibración<br />
automática/directa. Si esto ocurre, presione y manténgalo presionado para<br />
salir de la calibración y repetirla.<br />
4. Para realizar una calibración automática o directa – Espere a que el medidor pase<br />
de la pantalla de calibración manual a la pantalla de calibración automática/directa.<br />
La pantalla de calibración automática/directa mostrará el valor de conductividad del<br />
estándar de calibración en la línea intermedia y en la línea inferior.<br />
a. Calibración automática – Cu<strong>and</strong>o el ícono μS/cm o mS/cm deja de estar<br />
intermitente, el medidor mostrará la conductividad con corrección de<br />
temperatura del estándar.<br />
b. Calibración directa – Cu<strong>and</strong>o el ícono μS/cm o mS/cm deja de estar<br />
intermitente, ingrese el valor de conductividad del estándar a la temperatura<br />
medida. Presione hasta que el primer dígito que va a cambiar esté<br />
intermitente, presione / para cambiar el valor del dígito intermitente<br />
y continúe cambi<strong>and</strong>o los dígitos hasta que se muestre el valor correcto.<br />
Cu<strong>and</strong>o el valor esté definido, presione hasta que el punto decimal esté<br />
en el lugar correcto.<br />
ES-40<br />
Guía del usuario del medidor <strong>Thermo</strong> <strong>Scientific</strong> <strong>Orion</strong> <strong>Star</strong> y <strong>Star</strong> <strong>Plus</strong>
Técnica de conductividad<br />
5. Presione para continuar con el siguiente punto de calibración, enjuague<br />
la sonda de conductividad con agua destilada o desionizada, colóquela en el<br />
siguiente estándar de conductividad y repita los pasos 4a / 4b o presione<br />
para guardar y finalizar la calibración.<br />
6. Se mostrará la constante de celda en el campo principal y el medidor pasará<br />
automáticamente al modo de medición.<br />
Medición de conductividad<br />
Nota: Active la función automática de registro de datos para enviar mediciones al<br />
registro de datos del medidor a la frecuencia especificada en cada modo de medición.<br />
Consulte los detalles en la sección Archivo y recuperación de datos. Si la función<br />
automática de registro de datos está desactivada, conecte el medidor a una impresora<br />
o computadora para registrar las mediciones.<br />
1. Enjuague la sonda de conductividad con agua destilada o desionizada. Retire el<br />
exceso de agua y seque la sonda con un paño libre de pelusa.<br />
2. Coloque la sonda de conductividad dentro de la muestra.<br />
a. Si el medidor se encuentra en modo de medición continua, comenzará la<br />
lectura inmediatamente y actualizará la pantalla en forma continua. El ícono<br />
μS/cm o mS/cm estará intermitente hasta que la lectura se estabilice.<br />
Cu<strong>and</strong>o la lectura se estabilice, presione para registrar e imprimir la<br />
medición. Si se está us<strong>and</strong>o un medidor de mesa y el agitador está activado,<br />
presione para encender el agitador. Presione de nuevo para apagar el<br />
agitador antes de retirar la sonda y el agitador de la muestra.<br />
b. Si el medidor está en modo de medición de lectura automática (AUTO-READ),<br />
presione para iniciar la lectura. El ícono AR estará intermitente hasta que<br />
la lectura se estabilice. Cu<strong>and</strong>o la lectura se estabiliza, la pantalla se congela y<br />
el medidor registra e imprime los datos. Si está us<strong>and</strong>o un medidor de mesa<br />
y el agitador esta activado, el agitador se encenderá al presionar y se<br />
apagará cu<strong>and</strong>o la lectura se estabilice.<br />
c. Si el medidor se encuentra en modo de medición temporizada, comenzará la<br />
lectura inmediatamente y actualizará la pantalla en forma continua. El medidor<br />
registrará e imprimirá la medición a la frecuencia especificada en el menú de<br />
configuración. Si está us<strong>and</strong>o un medidor de mesa y el agitador esta activado,<br />
presione para poner el agitador en funcionamiento. Presione de<br />
nuevo para apagar el agitador antes de retirar la sonda y el agitador de<br />
la muestra.<br />
Guía del usuario del medidor <strong>Thermo</strong> <strong>Scientific</strong> <strong>Orion</strong> <strong>Star</strong> y <strong>Star</strong> <strong>Plus</strong><br />
ES-41
Técnica de conductividad<br />
3. Retire la sonda de conductividad de la muestra, enjuáguela con agua destilada o<br />
desionizada, séquela, colóquela en la siguiente muestra y repita el paso 2.<br />
4. Cu<strong>and</strong>o haya medido todas las muestras, enjuague la sonda de conductividad con<br />
agua destilada o desionizada y séquela. Consulte en la guía del usuario de la sonda<br />
de conductividad las técnicas de almacenamiento adecuadas.<br />
Pantalla y calibración de temperatura de conductividad<br />
Pantalla de temperatura en conductividad<br />
Los medidores <strong>Star</strong> <strong>Plus</strong> permiten ver la temperatura en líneas de medición<br />
individuales además de la pantalla de temperatura en la parte superior izquierda de la<br />
pantalla.<br />
1. En el modo de medición, presione para seleccionar la línea intermedia de la<br />
pantalla. El ícono de flecha apuntará a la línea seleccionada.<br />
2. Presione / para cambiar el valor de la línea seleccionada. La línea<br />
intermedia se puede modificar para mostrar la conductividad (μS/cm o mS/cm),<br />
los sólidos totales disueltos (mg/L), la salinidad (ppt), la resistividad (MΩ-cm), la<br />
temperatura (sin ícono) o una línea en blanco.<br />
Calibración de temperatura en conductividad<br />
El modo de calibración de temperatura del medidor <strong>Star</strong> <strong>Plus</strong> permite ajustar<br />
manualmente la temperatura de cada línea de medición.<br />
1. En el modo de medición, presione para seleccionar la línea de medición<br />
intermedia y presione / hasta que se muestre la temperatura en la<br />
línea seleccionada.<br />
2. Presione iniciar la calibración.<br />
3. Cu<strong>and</strong>o la lectura se estabiliza, el ícono de flecha y el primer dígito se colocarán<br />
intermitentes. Ingrese la temperatura: presione / para ajustar cada dígito<br />
y para pasar al dígito siguiente.<br />
4. Presione para guardar y finalizar la calibración.<br />
ES-42<br />
Guía del usuario del medidor <strong>Thermo</strong> <strong>Scientific</strong> <strong>Orion</strong> <strong>Star</strong> y <strong>Star</strong> <strong>Plus</strong>
Capítulo XI Técnica de ISE<br />
Menú de configuración de ISE<br />
Nota: Consulte la Tabla del menú de configuración en la sección del Menú de<br />
configuración. Esta tabla contiene una lista completa de las opciones y descripciones<br />
de configuración del medidor. Consulte en el Apéndice A una descripción de las<br />
funciones especiales del menú de configuración.<br />
1. En el modo de medición, presione .<br />
2. Presione / para desplazarse a través del menú de configuración<br />
hasta que aparezca en la línea superior.<br />
3. Presione aceptar la selección y mover el ícono de flecha a la línea intermedia.<br />
4. Presione / para desplazarse hasta para la resolución de medición<br />
de ISE, para las unidades de medición de ISE, para el rango de<br />
calibración de ISE y para la función de corrección de blancos no lineal.<br />
5. Presione para aceptar la selección y mover el ícono de flecha a la<br />
línea inferior.<br />
6. Para desplazarse a través de una lista de opciones en la línea inferior, presione<br />
/ hasta que se muestre la opción deseada. Para ingresar un valor<br />
numérico en una opción en la línea inferior, presione / para ajustar cada<br />
dígito y para pasar al dígito siguiente.<br />
7. Presione para aceptar la selección y mover el ícono de flecha a la<br />
línea superior.<br />
8. Repita los pasos 3 a 7 para cambiar otro parámetro de ISE o presione para<br />
volver al modo de medición.<br />
Guía del usuario del medidor <strong>Thermo</strong> <strong>Scientific</strong> <strong>Orion</strong> <strong>Star</strong> y <strong>Star</strong> <strong>Plus</strong><br />
ES-43
Técnica de ISE<br />
Calibración de ISE<br />
Los estándares de calibración se deben preparar en las mismas unidades ISE que los<br />
resultados de muestra deseados. Inicie la calibración con el estándar de calibración de<br />
concentración más baja y proceda hacia el estándar de calibración de concentración<br />
más alta. Los reactivos, como los ajustadores de fuerza iónica, se deben agregar a las<br />
muestras y estándares según se especifica en la guía del usuario del electrodo.<br />
1. Prepare el electrodo, los estándares y cualquier otra solución que requiera para<br />
usar según especifica la guía del usuario del electrodo.<br />
2. En modo de medición, presione hasta que el ícono de flecha apunte a la<br />
línea superior, presione hasta que aparezca el ícono ISE y presione<br />
para iniciar la calibración.<br />
3. Enjuague el electrodo con agua destilada o desionizada, retire el exceso de agua,<br />
seque el electrodo y colóquelo en el estándar menos concentrado.<br />
4. Espere a que el icono ISE deje de estar intermitente. Presione hasta<br />
que el primer dígito que va a cambiar esté intermitente, presione / para<br />
cambiar el valor del dígito intermitente y continúe cambi<strong>and</strong>o los dígitos hasta que<br />
el medidor muestre el valor de concentración del estándar. Cu<strong>and</strong>o el valor del<br />
estándar esté definido, presione hasta que el punto decimal esté en el<br />
lugar correcto.<br />
5. Presione para pasar al siguiente estándar de calibración más bajo y repita los<br />
pasos 3 y 4, trabaj<strong>and</strong>o desde el estándar de concentración más bajo al estándar<br />
de concentración más alto, o presione para guardar y finalizar la calibración.<br />
6. Se mostrará la pendiente real del electrodo, en mV por década de concentración,<br />
en el campo principal y se mostrará en el campo inferior.<br />
a. Para una calibración de un punto, presione y / para editar<br />
la pendiente. Para cambiar el signo de la pendiente a negativo o positivo,<br />
presione hasta que ninguno de los dígitos esté intermitente y el ícono de<br />
flecha se coloque intermitente, y luego presione para cambiar el signo de<br />
la pendiente. Presione para volver al modo de medición.<br />
b. Para la calibración de dos o más puntos, el medidor pasará automáticamente<br />
al modo de medición luego de mostrar la pendiente.<br />
ES-44<br />
Guía del usuario del medidor <strong>Thermo</strong> <strong>Scientific</strong> <strong>Orion</strong> <strong>Star</strong> y <strong>Star</strong> <strong>Plus</strong>
Medición de ISE<br />
Nota: Active la función automática de registro de datos para enviar mediciones al<br />
registro de datos del medidor a la frecuencia especificada en cada modo de medición.<br />
Consulte los detalles en la sección Archivo y recuperación de datos. Si la función<br />
automática de registro de datos está desactivada, conecte el medidor a una impresora<br />
o computadora para registrar las mediciones.<br />
1. Enjuague el electrodo con agua destilada o desionizada. Retire el exceso de agua<br />
y seque el electrodo con un paño libre de pelusa.<br />
2. Coloque el electrodo dentro de la muestra.<br />
Técnica de ISE<br />
a. Si el medidor se encuentra en modo de medición continua, comenzará la<br />
lectura inmediatamente y actualizará la pantalla en forma continua. El ícono<br />
ISE estará intermitente hasta que la lectura se estabilice. Cu<strong>and</strong>o la lectura<br />
se estabilice, presione . para registrar la medición e imprimirla. Si está<br />
us<strong>and</strong>o un medidor de mesa y el agitador esta activado, presione para<br />
poner el agitador en funcionamiento. Presione de nuevo para apagar el<br />
agitador antes de retirar el electrodo y el agitador de la muestra.<br />
b. Si el medidor está en modo de medición de lectura automática (AUTO-READ),<br />
presione para iniciar la lectura. El ícono AR estará intermitente hasta que<br />
la lectura se estabilice. Cu<strong>and</strong>o la lectura se estabiliza, la pantalla se congela y<br />
el medidor registra e imprime los datos. Si está us<strong>and</strong>o un medidor de mesa<br />
y el agitador esta activado, el agitador se encenderá al presionar y se<br />
apagará cu<strong>and</strong>o la lectura se estabilice.<br />
c. Si el medidor se encuentra en modo de medición temporizada, comenzará la<br />
lectura inmediatamente y actualizará la pantalla en forma continua. El medidor<br />
registrará e imprimirá la medición a la frecuencia especificada en el menú de<br />
configuración. Si está us<strong>and</strong>o un medidor de mesa y el agitador esta activado,<br />
presione para poner el agitador en funcionamiento. Presione de<br />
nuevo para apagar el agitador antes de retirar el electrodo y el agitador de<br />
la muestra.<br />
3. Retire el electrodo de la muestra, enjuáguelo con agua destilada o desionizada,<br />
séquelo, colóquelo en la siguiente muestra y repita el paso 2.<br />
4. Cu<strong>and</strong>o haya medido todas las muestras, enjuague el electrodo con agua destilada<br />
o desionizada y séquelo. Consulte en la guía del usuario del electrodo las técnicas<br />
de almacenamiento adecuadas.<br />
Guía del usuario del medidor <strong>Thermo</strong> <strong>Scientific</strong> <strong>Orion</strong> <strong>Star</strong> y <strong>Star</strong> <strong>Plus</strong><br />
ES-45
Técnica de ISE<br />
Pantalla y calibración de temperatura de ISE<br />
Pantalla de temperatura en ISE<br />
Los medidores <strong>Star</strong> <strong>Plus</strong> permiten ver la temperatura en líneas de medición<br />
individuales además de la pantalla de temperatura en la parte superior izquierda de la<br />
pantalla.<br />
Para ver la temperatura en la línea de medición de ISE:<br />
1. Presione y manténgalo presionado hasta que el medidor muestre el modo<br />
de medición.<br />
2. Presione para volver a la línea superior. El ícono de flecha apuntará a la<br />
línea seleccionada.<br />
3. Presione / para cambiar el valor de la línea seleccionada. Se puede<br />
modificar la línea superior para visualizar los valores de pH (pH), milivoltios (mV),<br />
milivoltios relativos (RmV), concentración (ISE), temperatura (sin ícono) o una línea<br />
en blanco.<br />
Calibración de temperatura en pH<br />
El modo de calibración de temperatura del medidor <strong>Star</strong> <strong>Plus</strong> permite ajustar<br />
manualmente la temperatura de cada línea de medición.<br />
Para calibrar la temperatura en la línea de medición de ISE:<br />
1. En el modo de medición, presione para seleccionar la línea de medición<br />
superior y presione / hasta que se muestre la temperatura en la<br />
línea seleccionada.<br />
2. Presione iniciar la calibración.<br />
3. Cu<strong>and</strong>o la lectura se estabiliza, el ícono de flecha y el primer dígito se colocarán<br />
intermitentes. Ingrese la temperatura: presione / para ajustar cada dígito<br />
y para pasar al dígito siguiente.<br />
4. Presione para guardar y finalizar la calibración.<br />
ES-46<br />
Guía del usuario del medidor <strong>Thermo</strong> <strong>Scientific</strong> <strong>Orion</strong> <strong>Star</strong> y <strong>Star</strong> <strong>Plus</strong>
Capítulo XII Archivo y recuperación<br />
de datos<br />
Registro de datos y registro de calibración<br />
Todos los medidores de pH/ISE 3-<strong>Star</strong> <strong>Plus</strong> y 4-<strong>Star</strong> <strong>Plus</strong> pH/ISE cuentan con un<br />
registro de datos de 1.000 puntos. Los medidores de pH/conductividad y de pH/<br />
oxígeno disuelto 4-<strong>Star</strong> <strong>Plus</strong> cuentan con un registro de datos de 750 puntos. Los<br />
medidores 5-<strong>Star</strong> <strong>Plus</strong> cuentan con un registro de datos de 500 puntos. El medidor<br />
2-<strong>Star</strong> cuenta con un registro de datos de 50 puntos y todos los medidores <strong>Orion</strong> <strong>Star</strong><br />
cuentan con un registro de datos de 200 puntos.<br />
Las salidas de impresión del medidor <strong>Star</strong> <strong>Plus</strong> han sido mejoradas para incluir<br />
información adicional. Las salidas de impresión de calibración de pH e ISE incluyen<br />
pendiente promedio, pendiente entre puntos y Eo. Las salidas de impresión de<br />
mediciones de oxígeno disuelto por sonda polarográfica ahora incluyen pendiente,<br />
temperatura de membrana y temperatura de la solución.<br />
Función automática de registro de datos<br />
Los medidores 3-<strong>Star</strong>, 4-<strong>Star</strong> y 5-<strong>Star</strong> <strong>Plus</strong> han sido perfeccionados e incluyen una<br />
función automática de registro de datos que se puede activar o desactivar. Para activar<br />
el registro automático de datos en el registro de datos:<br />
1. En el modo de medición, presione .<br />
2. Presione / hasta que aparezca en la línea superior.<br />
3. Presione para aceptar la selección y mover el ícono de flecha a la línea<br />
intermedia y presione / hasta visualizar .<br />
4. Presione para aceptar la selección y mover el ícono de flecha a la línea<br />
inferior y presione / hasta visualizar .<br />
5. Presione para aceptar la selección y mover el ícono de flecha a la<br />
línea superior.<br />
6. Presione para guardar la opción de configuración y volver al modo<br />
de medición.<br />
Guía del usuario del medidor <strong>Thermo</strong> <strong>Scientific</strong> <strong>Orion</strong> <strong>Star</strong> y <strong>Star</strong> <strong>Plus</strong><br />
ES-47
Archivo y recuperación de datos<br />
Configuración de eliminación del registro de datos<br />
La configuración de eliminación del registro de datos determina si el medidor<br />
eliminará automáticamente el registro de datos después de descargarlo en una<br />
impresora o computadora y si el medidor sobrescribirá los puntos de registro cu<strong>and</strong>o<br />
el registro de datos esté lleno. Si la configuración de eliminación del registro de<br />
datos se define en el medidor eliminará automáticamente el registro de datos<br />
después de descargarlo en una impresora o computadora. El medidor mostrará<br />
también el mensaje de error<br />
cu<strong>and</strong>o se completen los 200 puntos<br />
de registro de datos y se deba descargar el registro de datos a una impresora o<br />
computadora para borrar el mensaje de error. Si la configuración de eliminación del<br />
registro de datos se define en , el medidor sobrescribirá el punto de registro<br />
más antiguo cu<strong>and</strong>o se hayan completado los 200 puntos de registro de datos y no<br />
eliminará el registro de datos después de que éste sea descargado a una impresora<br />
o computadora.<br />
1. En el modo de medición, presione .<br />
2. Presione / hasta que aparezca en la línea superior.<br />
3. Presione para aceptar la selección y mover el ícono de flecha a la línea<br />
intermedia y presione / hasta visualizar .<br />
4. Presione para aceptar la selección y mover el ícono de flecha a la línea<br />
inferior y presione / hasta visualizar o .<br />
5. Presione para aceptar la selección y mover el ícono de flecha a la<br />
línea superior.<br />
6. Presione para guardar la opción de configuración y volver al modo<br />
de medición.<br />
Nota: Si el registro de datos no es necesario, ajuste la configuración de eliminación<br />
de registro de datos en para evitar recibir el mensaje de error 038 (registro de<br />
datos lleno).<br />
ES-48<br />
Guía del usuario del medidor <strong>Thermo</strong> <strong>Scientific</strong> <strong>Orion</strong> <strong>Star</strong> y <strong>Star</strong> <strong>Plus</strong>
Cómo visualizar e imprimir el registro de datos y el registro de calibración<br />
Los medidores 3-<strong>Star</strong>, 4-<strong>Star</strong> y 5-<strong>Star</strong> <strong>Plus</strong> han sido perfeccionados e incluyen una<br />
función de visualización del registro de calibración además de las funciones de<br />
visualización del registro de datos, de impresión del registro de datos y de calibración<br />
del registro de datos. Los medidores <strong>Orion</strong> <strong>Star</strong> incluyen las funciones de visualización<br />
de registro de datos, impresión de registro de datos y calibración de registro<br />
Para ver el registro de datos o el registro de calibración:<br />
1. En el modo de medición, presione .<br />
2. Presione / para desplazarse a para ver el registro de datos o a<br />
para ver el registro de calibración (sólo en medidores <strong>Star</strong> <strong>Plus</strong>).<br />
3. Presione . El medidor mostrará la pantalla de fecha y hora. El número de<br />
registro estará en la parte superior de la pantalla, y la hora, fecha y año del<br />
registro estará en las líneas superior, intermedia e inferior, respectivamente.<br />
Presione / para desplazarse a través del registro.<br />
4. Presione . El medidor mostrará el punto de datos o de calibración asociado a<br />
la pantalla de fecha y hora.<br />
a. Presione para imprimir el punto de datos individual.<br />
b. Presione / para desplazarse a través del registro.<br />
c. Presione para volver a la pantalla de fecha y hora.<br />
5. Para salir del modo de visualización del registro, presione hasta que el<br />
medidor muestre la pantalla de fecha y hora y luego presione .<br />
Para enviar el registro de datos o el registro de calibración a una<br />
impresora o computadora:<br />
1. Conecte el medidor a una impresora o computadora y verifique la velocidad en<br />
baudios y la configuración de salida del medidor en el menú de configuración.<br />
2. En el modo de medición, presione .<br />
Archivo y recuperación de datos<br />
3. Presione / para desplazarse a para imprimir el registro de datos o<br />
a para imprimir el registro de calibración. En los medidores <strong>Orion</strong> <strong>Star</strong> se<br />
muestra en lugar de .<br />
4. Presione para enviar los datos seleccionados a la impresora o computadora.<br />
Guía del usuario del medidor <strong>Thermo</strong> <strong>Scientific</strong> <strong>Orion</strong> <strong>Star</strong> y <strong>Star</strong> <strong>Plus</strong><br />
ES-49
Archivo y recuperación de datos<br />
Para colocar el medidor en interfaz con una computadora:<br />
Los medidores <strong>Orion</strong> <strong>Star</strong> y <strong>Star</strong> <strong>Plus</strong> pueden enviar datos de medición y de<br />
calibración a una computadora en un formato delimitado por comas fácil de analizar en<br />
programas de computación como Excel. Seleccione la configuración de salida ,<br />
, en el menú de configuración.<br />
Para enviar datos del medidor a una computadora utiliz<strong>and</strong>o HyperTerminal:<br />
1. Conecte el medidor a un puerto de computadora mediante el cable de interfaz n.°<br />
de catálogo 1010053.<br />
2. Haga clic en el botón Inicio en la esquina inferior izquierda de la pantalla de<br />
la computadora. Seleccione All Programs, Accesories, Communications y<br />
HyperTerminal.<br />
3. Al abrirse la pantalla de HyperTerminal, escriba un nombre de archivo, seleccione<br />
un ícono para la conexión y haga clic en OK.<br />
4. Al abrirse una nueva ventana, vaya al menú desplegable Connect Using,<br />
seleccione el puerto COM al que está conectado el medidor y haga clic en OK.<br />
5. Se abrirá una ventana con las propiedades del puerto COM. Seleccione los<br />
siguientes parámetros en los menús desplegables y luego haga clic en OK.<br />
Bits por segundo: 9600<br />
Bits de datos: 8<br />
Paridad: Ningun<br />
Bits de parada: 1<br />
Control de flujo: Hardware<br />
6. Envíe los datos del medidor a HyperTerminal.<br />
ES-50<br />
Guía del usuario del medidor <strong>Thermo</strong> <strong>Scientific</strong> <strong>Orion</strong> <strong>Star</strong> y <strong>Star</strong> <strong>Plus</strong>
Capítulo XIII Declaración de conformidad<br />
Fabricante:<br />
Dirección:<br />
<strong>Thermo</strong> Fisher <strong>Scientific</strong> Inc.<br />
166 Cummings Center<br />
Beverly, MA 01915<br />
USA<br />
Declaramos que los productos descritos a continuación cumplen la Directiva y el<br />
Estándar abajo enunciados:<br />
Producto(s):<br />
Medidores de pH, conductividad, oxígeno disuelto e/o ISE. Los<br />
medidores de mesa tienen una capacidad norminal de 100 a<br />
240 V CA, 50/60 Hz, 0.5 A. Los medidores portátiles usan cuatro<br />
baterías AA.<br />
Medidores portátiles<br />
Medidores de mesa<br />
Medidor de pH/ISE/Conductividad/OD Medidor de pH/ISE/Conductividad/OD 5-<strong>Star</strong> <strong>Plus</strong><br />
5-<strong>Star</strong> <strong>Plus</strong><br />
Medidor de pH/Conductividad 4-<strong>Star</strong> <strong>Plus</strong> Medidor de pH/Conductividad/OD 5-<strong>Star</strong> <strong>Plus</strong><br />
Medidor de pH/OD 4-<strong>Star</strong> <strong>Plus</strong><br />
Medidor de pH/Conductividad 4-<strong>Star</strong> <strong>Plus</strong><br />
Medidor de pH/ISE 4-<strong>Star</strong> <strong>Plus</strong><br />
Medidor de pH/OD 4-<strong>Star</strong> <strong>Plus</strong><br />
Medidor de Conductividad 3-<strong>Star</strong> <strong>Plus</strong> Medidor de pH/ISE 4-<strong>Star</strong> <strong>Plus</strong><br />
Medidor de OD 3-<strong>Star</strong> <strong>Plus</strong><br />
Medidor de Conductividad 3-<strong>Star</strong> <strong>Plus</strong><br />
Medidor de pH 3-<strong>Star</strong> <strong>Plus</strong><br />
Medidor de pH 3-<strong>Star</strong> <strong>Plus</strong><br />
Medidor de pH 2-<strong>Star</strong><br />
Medidor de OD 3-<strong>Star</strong> <strong>Plus</strong><br />
Medidor de OD por sensor óptico<br />
RDO ® /pH/Conductividad 5-<strong>Star</strong> <strong>Plus</strong><br />
Medidor de OD por sensor óptico RDO/pH<br />
4-<strong>Star</strong> <strong>Plus</strong><br />
Medidor de OD por sensor óptico RDO 3-<strong>Star</strong> <strong>Plus</strong><br />
Clase de equipo: Los medidores de mesa para usos de medición, control y de<br />
laboratorio son dispositivos con clasificación de compatibilidad<br />
electromagnética A (EMC Clase A). Los medidores portátiles son<br />
dispositivos con clasificación de compatibilidad electromagnética<br />
D (EMC Clase D).<br />
Guía del usuario del medidor <strong>Thermo</strong> <strong>Scientific</strong> <strong>Orion</strong> <strong>Star</strong> y <strong>Star</strong> <strong>Plus</strong><br />
ES-51
Declaración de conformidad<br />
Directiva(s) y Estándar(es):<br />
• 89/336/EEC – Compatibilidad Electromagnética (Directiva EMC)<br />
• EN 61326:1997 + A1:1998 + A2:2001 – Equipos eléctricos para usos de<br />
medición, de control y de laboratorio – Requerimientos EMC<br />
• 73/23/EEC – Directiva de bajo voltaje (LVD)<br />
• EN 61010-1:2001 – Requerimientos de seguridad de equipos eléctricos para<br />
usos de medición, de control y de laboratorio – Requerimientos generales<br />
Representante autorizado del fabricante:<br />
Fecha:<br />
Patrick Chiu 1ero de diciembre de 2008<br />
Ingeniero de Calidad Senior,<br />
Cumplimiento Regulatorio<br />
Cumplimiento de la directiva WEEE<br />
Se requiere que este producto cumpla con la Directiva de desechos eléctricos y<br />
electrónicos de la Unión Europea 2002/96/EC (WEEE). Está identificado con el<br />
siguiente símbolo:<br />
Tenemos convenios con una o más compañías de reciclaje/eliminación de desechos<br />
en cada estado miembro de la UE, por lo que este producto se debe desechar a<br />
través de dichas compañías. Encontrará más información sobre el cumplimiento de<br />
estas directivas, sobre las entidades de reciclaje de su país, e información sobre los<br />
productos <strong>Thermo</strong> <strong>Scientific</strong> <strong>Orion</strong> que pueden ayudarle a detectar sustancias sujetas<br />
a la Directiva RoHS en www.thermo.com/WEEERoHS.<br />
ES-52<br />
Guía del usuario del medidor <strong>Thermo</strong> <strong>Scientific</strong> <strong>Orion</strong> <strong>Star</strong> y <strong>Star</strong> <strong>Plus</strong>
Capítulo XIV Localización y solución<br />
de problemas<br />
Comprobación automática del medidor<br />
1. Desconecte todos los electrodos y sondas del medidor y cubra todas las entradas<br />
del medidor con los protectores negros.<br />
2. Encienda el medidor, espere a que se indique la revisión del software y<br />
luego presione .<br />
3. Todos los segmentos de la pantalla se encenderán. Haga una inspección visual de<br />
los segmentos para verificar que todos estén encendidos y luego presione .<br />
4. Todos los segmentos de la pantalla se apagarán. Haga una inspección visual de los<br />
segmentos para verificar que todos estén apagados y luego presione .<br />
5. La pantalla indicará . Presione todas las teclas del teclado, una a la vez, en<br />
cualquier orden. Si tarda más de 5 segundos al pasar de una tecla a otra mientras<br />
las presiona, la pantalla indicará<br />
, lo cual indica una falla de tecla.<br />
Presione para salir del mensaje de error 033 y completar la comprobación<br />
automática. Si al probar las teclas todas funcionan, el medidor se reiniciará y<br />
pasará al modo de medición.<br />
Nota: Si el medidor indica<br />
durante la prueba automática, compruebe<br />
que todos los electrodos estén desconectados del medidor, que todas las entradas<br />
estén cubiertas con los protectores negros y que el conector de cortocircuito BCN<br />
esté firmemente colocado en la entrada del medidor BNC. Este código de error<br />
normalmente ocurre cu<strong>and</strong>o el conector de cortocircuito BCN no está colocado o<br />
cu<strong>and</strong>o no está correctamente conectado en la entrada BCN del medidor durante la<br />
comprobación automática del medidor.<br />
Guía del usuario del medidor <strong>Thermo</strong> <strong>Scientific</strong> <strong>Orion</strong> <strong>Star</strong> y <strong>Star</strong> <strong>Plus</strong><br />
ES-53
Localización y solución de problemas<br />
Códigos de error del medidor<br />
• Si la lectura de la pantalla es , y está intermitente, el valor está fuera de<br />
rango. Realice la comprobación automática del medidor, limpie el electrodo de<br />
acuerdo con las instrucciones de la guía del usuario del electrodo y vuelva a<br />
recalibrar con nuevos estándares.<br />
• Si el ícono está encendido y la lectura está intermitente, es necesario<br />
calibrar el electrodo de acuerdo con el intervalo de calibración definido por<br />
elusuario o bien la pendiente de pH está fuera del rango 85 % - 115%.<br />
• Presione para borrar un código de error. Los códigos de error indican en<br />
la línea intermedia y un juego de tres caracteres alfanuméricos en la línea inferior.<br />
Algunos de estos códigos son errores, otros son advertencias y otros de carácter<br />
puramente informativo.<br />
Error Código Descripción Localización y solución de problemas<br />
002, 026,<br />
E##, F##<br />
Error de hardware<br />
o de memoria<br />
005 Valor fuera del<br />
rango permisible<br />
Presione para borrar el error. Si el error ocurre de nuevo, comuníquese con<br />
Soporte técnico.<br />
Presione y vuelva a ingresar el valor. Compruebe en las especificaciones del<br />
medidor cuál es el rango de valores permitido.<br />
033 Falla de teclado Repita la comprobación automática. Cu<strong>and</strong>o el medidor indique , presione<br />
todas las teclas, incluida la tecla de encendido, en un intervalo de 5 segundos<br />
entre una tecla y otra.<br />
034 Falla de entrada BNC Desconecte todos los electrodos del medidor, coloque el conector de cortocirtuito<br />
BNC en el medidor y repita la comprobación automática.<br />
038 Registro de datos lleno Descargue el registro de datos en una impresora o computadora, desactive la<br />
función automática de registro de datos en el menú de configuración (sólo en<br />
medidores <strong>Star</strong> <strong>Plus</strong>) o cambie la configuración del registro de datos a ,<br />
, en el menú de configuración para que el medidor elimine los puntos<br />
del registro de datos cu<strong>and</strong>o éste esté lleno.<br />
D## Error de control remoto Revise las instrucciones de programación para comprobar los com<strong>and</strong>os, nombres<br />
y valores correctos.<br />
107 Error de estándar de<br />
calibración de pH<br />
109 Pendiente de pH<br />
incorrecta o desviación<br />
de calibración<br />
200 Error de interfaz<br />
del muestreador<br />
automático<br />
Los milivoltios medidos durante la calibración son los mismos para los dos<br />
amortiguadores. Revise el procedimiento de calibración y compruebe que el<br />
electrodo se colocó en los amortiguadores en el momento adecuado. Limpie el<br />
electrodo según las instrucciones de la guía del usuario del electrodo. Vuelva a<br />
calibrar el electrodo con amortiguadores recién preparados.<br />
Limpie el electrodo según las instrucciones de la guía del usuario del electrodo.<br />
Vuelva a calibrar el electrodo con nuevos amortiguadores.<br />
El medidor no puede enviar una señal al muestreador automático. Compruebe que<br />
el muestreador automático esté correctamente conectado al medidor.<br />
ES-54<br />
Guía del usuario del medidor <strong>Thermo</strong> <strong>Scientific</strong> <strong>Orion</strong> <strong>Star</strong> y <strong>Star</strong> <strong>Plus</strong>
Localización y solución de problemas<br />
Error Código Descripción Localización y solución de problemas<br />
201 Error de señal<br />
del muestreador<br />
automático<br />
202 Muestreador<br />
automático atascado<br />
203 Lectura inestable<br />
del muestreador<br />
automático<br />
306 Error de blanco<br />
automático ISE<br />
307 Error de estándar de<br />
calibración ISE<br />
309 Pendiente de<br />
ISE incorrecta<br />
707 Error de estándar<br />
de calibración de<br />
conductividad<br />
709 Error de constante de<br />
celda de conductividad<br />
808 Pendiente de OD de<br />
punto cero incorrecta<br />
809 Pendiente de<br />
OD incorrecta<br />
880 Sonda óptica RDO ®<br />
no conectada<br />
881 Sonda óptica RDO<br />
vencida<br />
882 Falla de sonda óptica<br />
RDO<br />
El muestreador automático no puede recibir una señal del medidor. Compruebe<br />
los parámetros de configuración del medidor y asegúrese de que la velocidad en<br />
baudios esté definida en 1200.<br />
Apague el muestreador automático y espere 45 segundos antes de volver a<br />
encenderlo. El muestreador automático debe volver a su posición inicial.<br />
Las mediciones tomadas con el muestreador automático son inestables.<br />
Compruebe que los electrodos funcionan correctamente. Compruebe que los<br />
cables del electrodo estén conectados correctamente.<br />
Desactive la función de corrección automática por blanco de muestra en el menú<br />
de configuración y recalibre el medidor sin usar un estándar de concentración<br />
cero.<br />
Los milivoltios medidos durante la calibración son los mismos para los dos<br />
estándares. Revise el procedimiento de calibración y compruebe que el electrodo<br />
se colocó en los estándares en el momento adecuado. Limpie el electrodo según<br />
las instrucciones de la guía del usuario del electrodo. Vuelva a calibrar el electrodo<br />
con estándares recién preparados.<br />
Limpie el electrodo según las instrucciones de la guía del usuario del electrodo.<br />
Vuelva a calibrar el electrodo con estándares recién preparados.<br />
El valor de conductividad medido durante la calibración es el mismo para los dos<br />
estándares. Revise el procedimiento de calibración y compruebe que la sonda de<br />
conductividad se colocó en los estándares en el momento adecuado. Limpie la<br />
sonda de conductividad según las instrucciones de la guía del usuario de la sonda.<br />
Vuelva a calibrar la sonda con nuevos estándares.<br />
La constante de celda está fuera del rango 0.001 - 199.0 cm-1. Limpie la sonda de<br />
conductividad de acuerdo con las instrucciones de la guía del usuario de la sonda.<br />
Vuelva a calibrar la sonda con nuevos estándares.<br />
Se debe realizar una calibración de aire antes de la calibración de punto cero.<br />
Asegúrese de utilizar una solución con oxígeno cero para la calibración de punto<br />
cero. Se recomienda una solución con 15 gramos de Na2SO3 disueltos en 250 mL<br />
de agua destilada.<br />
Para las sondas polarográficas de OD: conecte la sonda al medidor, encienda el<br />
medidor y deje polarizar la sonda al menos 30 minutos. Para la calibración de aire,<br />
compruebe que la esponja de la manga de calibración esté húmeda y que no haya<br />
agua en la membrana de la sonda. Para la calibración de agua, forme burbujas en<br />
la muestra de aire y revuelva para mantener las burbujas fuera de la membrana.<br />
Limpie la sonda de OD según las instrucciones de la guía del usuario de la sonda.<br />
Recalibre la sonda de OD.<br />
Compruebe que la sonda RDO esté correctamente conectada al medidor. Conecte<br />
al medidor otra sonda RDO que esté operativa.<br />
El tapón óptico conectado a la sonda RDO ha vencido. Instale un nuevo tapón<br />
óptico según las instrucciones de la guía del usuario de la sonda RDO.<br />
Compruebe que el tapón óptico en la sonda RDO esté correctamente instalado,<br />
que no haya vencido ni haya sido alterado. Conecte al medidor otra sonda RDO<br />
que esté operativa.<br />
Guía del usuario del medidor <strong>Thermo</strong> <strong>Scientific</strong> <strong>Orion</strong> <strong>Star</strong> y <strong>Star</strong> <strong>Plus</strong><br />
ES-55
Localización y solución de problemas<br />
Localización y solución de problemas generales<br />
Problema:<br />
Solución: <br />
La pantalla se congela y los valores de medición no cambian.<br />
El medidor está en modo de medición de lectura automática (AUTO-READ) (el<br />
ícono AR aparecerá en la esquina superior derecha de la pantalla). Presione<br />
para comenzar una nueva lectura o seleccione otro modo de medición en el menú<br />
de configuración.<br />
Problema: Al presionar el medidor muestra .<br />
Solución: El medidor está imprimiendo y no puede ingresar al modo de calibración hasta<br />
que no se haya realizado la impresión. Esto rara vez ocurre si el medidor se<br />
configura a una velocidad en baudios de 9600. Si el medidor está configurado a<br />
una velocidad en baudios menor, la demora será mayor.<br />
Problema: El medidor no aceptó el cambio que efectué en el menú de configuración.<br />
Solución: Después de efectuar un cambio en el menú de configuración, presione hasta<br />
que el ícono de flecha apunte hacia la línea superior (confirme el cambio) y luego<br />
presione para guardar el cambio y volver al modo de medición.<br />
Problema: ¿Cómo salir de una calibración sin terminarla?<br />
Solución: Presione y manténgalo presionado para salir de cualquier operación del<br />
medidor y volver al modo de medición.<br />
Problema:<br />
Solución: <br />
Problema:<br />
Solución: <br />
Problema:<br />
Solución: <br />
Problema:<br />
Solución: <br />
La salida de impresión es una cadena de números y unidades con coma.<br />
El formato de salida en el menú de configuración está configurado en salida<br />
de computadora o la velocidad en baudios de la impresora está configurada<br />
incorrectamente en el menú de configuración. Cambie el formato de salida a<br />
salida de impresora en el menú de configuración. Cambie la velocidad en baudios<br />
al valor correcto para la impresora que está utiliz<strong>and</strong>o.<br />
El agitador no funciona al presionar el botón del agitador.<br />
El ajuste actual del agitador es Desactivado. Defina la velocidad de 1 a 7 en el<br />
menú de configuración.<br />
La pantalla de ingreso del tiempo para medición temporizada no aparece en el<br />
menú de configuración.<br />
El medidor está en modo de medición de lectura automática (AUTO-READ) o<br />
en modo continuo. Cu<strong>and</strong>o el medidor se configura en modo temporizado, la<br />
siguiente pantalla de configuración será para el ingreso del tiempo.<br />
No sé si tengo el medidor <strong>Star</strong> <strong>Plus</strong> o el <strong>Orion</strong> <strong>Star</strong>.<br />
Al encenderse, los medidores <strong>Star</strong> <strong>Plus</strong> con funciones mejoradas indican<br />
(o algo similar) y pasan al modo de medición.<br />
ES-56<br />
Guía del usuario del medidor <strong>Thermo</strong> <strong>Scientific</strong> <strong>Orion</strong> <strong>Star</strong> y <strong>Star</strong> <strong>Plus</strong>
Localización y solución de problemas<br />
Localización y solución de problemas de pH<br />
Problema:<br />
Solución:<br />
El medidor no reconoce el valor del amortiguador de pH durante la calibración.<br />
Compruebe que se seleccionó el juego de amortiguadores correcto en el menú<br />
de configuración. El medidor usa la lectura de mV no elaborada del electrodo para<br />
reconocer un amortiguador durante la calibración. A medida que pasa el tiempo o<br />
que el electrodo se ensucia, sus lecturas de mV varían y es necesario que usted<br />
ingrese manualmente el valor del amortiguador de pH al calibrar.<br />
Localización y solución de problemas de ISE<br />
Problema:<br />
Solución:<br />
Problema:<br />
Solución:<br />
Toma varios minutos para que las lecturas se estabilicen durante una calibración.<br />
El rango de concentración definido en el menú de configuración es Bajo. Cambie<br />
el rango de concentración a Alto. La resolución de ISE está definida en 3 dígitos en<br />
el menú de configuración. Cambie la resolución de ISE a 2 dígitos para acelerar la<br />
estabilización de las lecturas.<br />
Cu<strong>and</strong>o uso la configuración de corrección automática por blanco de muestra y<br />
calibro un ISE, el medidor indica una pendiente demasiado baja o no se puede<br />
comprobar manualmente.<br />
Desactive la configuración de corrección automática por blanco de muestra en el menú<br />
de configuración.<br />
Localización y solución de problemas de conductividad<br />
Problema:<br />
Solución:<br />
Problema:<br />
Solución:<br />
Problema:<br />
Solución:<br />
El medidor no reconoce el estándar de conductividad durante la calibración.<br />
Compruebe que se seleccionó la constante de celda predeterminada en el menú<br />
de configuración. La constante de celda normalmente está impresa en el cable de<br />
la sonda de conductividad. Compruebe que el estándar de conductividad sea uno<br />
programado en el medidor. Vuelva a calibrar con un estándar recién preparado.<br />
El valor del coeficiente de temperatura no aparece en el menú de configuración.<br />
La compensación de temperatura está actualmente configurada como no lineal o<br />
está desactivada. Cambie la compensación de temperatura a lineal y la siguiente<br />
pantalla será la pantalla de ingreso del valor del coeficiente de temperatura.<br />
La medición está fuera de rango y debería estar dentro de rango.<br />
Compruebe que la sonda de conductividad está completamente sumergida en<br />
la solución. Verifique que la constante de celda sea la correcta para la sonda<br />
de conductividad conectada al medidor. Compruebe que el tipo de celda<br />
seleccionada en el menú de configuración sea Std.<br />
Guía del usuario del medidor <strong>Thermo</strong> <strong>Scientific</strong> <strong>Orion</strong> <strong>Star</strong> y <strong>Star</strong> <strong>Plus</strong><br />
ES-57
Localización y solución de problemas<br />
Localización y solución de problemas de medición de oxígeno disuelto<br />
Problema:<br />
Solución:<br />
Problema:<br />
Solución:<br />
Problema:<br />
Solución:<br />
La pantalla de ingreso de la presión barométrica manual no aparece en el menú<br />
de configuración.<br />
La compensación de la presión barométrica está configurada como automática<br />
en el menú de configuración. Cambie la compensación de la presión barométrica<br />
a manual y la siguiente pantalla será la pantalla de ingreso de la presión<br />
barométrica manual.<br />
La pantalla de ingreso del factor de salinidad manual no aparece en el menú<br />
de configuración.<br />
La corrección de la salinidad está configurada como automática en el menú de<br />
configuración. Cambie la corrección de la salinidad a manual y la siguiente pantalla<br />
será la pantalla de ingreso del factor de salinidad.<br />
La sonda AUTO-STIR para DBO no se enciende al presionar el botón de la sonda.<br />
El tipo de lectura se debe configurar en AUTO-READ en el menú de configuración,<br />
la velocidad del agitador se debe configurar de 1 a 7 para iniciar una medición y<br />
comience la agitación presion<strong>and</strong>o el botón en la sonda AUTO-STIR para DBO.<br />
Localización y solución de problemas de oxígeno disuelto por sensor<br />
óptico RDO ®<br />
Problema:<br />
Solución:<br />
El medidor muestra el mensaje de error 881 y no toma la medición de<br />
oxígeno disuelto.<br />
Apague el medidor, reemplace el tapón óptico usado por uno nuevo y encienda el<br />
medidor. Esto debe borrar el mensaje de error.<br />
Asistencia<br />
Identifique los problemas de todos los componentes de su sistema de medición<br />
y comuníquese con Soporte técnico. En los Estados Unidos, llame al número<br />
1.800.225.1480; fuera de los Estados Unidos, llame al número 978.232.6000 o<br />
envíe un fax al 978.232.6031. En europa, Medio Oriente y África, comuníquese<br />
con su distribuidor autorizado. Para ver la información más actualizada,<br />
visite www.thermo.com/contactwater.<br />
Para ver los recursos técnicos y de aplicación de los productos <strong>Thermo</strong> <strong>Scientific</strong><br />
<strong>Orion</strong>, visite www.thermo.com/waterapps.<br />
Garantía<br />
Para ver la información de garantía más actualizada, visite www.thermo.com/water.<br />
ES-58<br />
Guía del usuario del medidor <strong>Thermo</strong> <strong>Scientific</strong> <strong>Orion</strong> <strong>Star</strong> y <strong>Star</strong> <strong>Plus</strong>
Capítulo XV Especificaciones del medidor<br />
Especificaciones del medidor<br />
Condiciones ambientales de operación<br />
Condiciones ambientales de operación de los medidores mortátiles y de mesa<br />
Temperatura ambiente de operación De 5 a 45 °C<br />
Humedad relativa de operación<br />
De 5 a 85 %, sin condensación<br />
Temperatura de almacenamiento De -20 a +60 °C<br />
Humedad relativa de almacenamiento<br />
Contaminación Grado 2<br />
Sobrevoltaje<br />
Altitud<br />
Peso<br />
Dimensiones<br />
Medidores con alimentación de CA<br />
Medidores a baterías<br />
Reglamentación y seguridad<br />
Material del estuche<br />
Choque y vibración<br />
Caja (diseñada para cumplir requisitos))<br />
De 5 a 85 %, sin condensación<br />
Categoría II<br />
Hasta 2000 metros<br />
Portátil: 0,45 kg<br />
De mesa: 0,91 kg<br />
Portátil: 4,8 cm (Alt) x 9,7 cm (Anch) x 21,3 cm (Prof)<br />
De mesa: 9,4 cm (Alt) x 17,0 cm (Anch) x 22,4 cm (Prof)<br />
Sólo para uso en interiores<br />
Para uso en interiores o en exteriores<br />
Límites de Clase CE, CSA, TÜV, UL, FCC*<br />
ABS (Acrilonitrilo butadieno estireno)<br />
Vibración, envío/manejo conforme a certificación ISTA<br />
#1A<br />
Choque, prueba de caída en embalaje conforme a<br />
certificación ISTA #1A<br />
IP67 (medidor portátil)<br />
IP54 (medidor de mesa)<br />
* Todos los medidores de oxígeno disuelto por sensor óptico RDO ® <strong>Star</strong> están pendientes de<br />
recibir certificación TÜV y UL.<br />
Guía del usuario del medidor <strong>Thermo</strong> <strong>Scientific</strong> <strong>Orion</strong> <strong>Star</strong> y <strong>Star</strong> <strong>Plus</strong><br />
ES-59
Especificaciones del medidor<br />
Condiciones ambientales de operación del adaptador de corriente universal<br />
Temperatura ambiente de operación De 0 a 50 °C<br />
Humedad relativa de operación<br />
De 0 a 90 %, sin condensación<br />
Temperatura de almacenamiento De -20 a +75 °C<br />
Humedad relativa de almacenamiento<br />
Contaminación Grado 2<br />
Sobrevoltaje<br />
Altura de operación<br />
Medidores de mesa<br />
Especificación de parámetros del medidor<br />
De 0 a 90 %, sin condensación<br />
Categoría II<br />
Hasta 2000 metros<br />
Sólo para uso en interiores<br />
Las siguientes especificaciones de medidor se aplican a toda la línea de medidores<br />
<strong>Orion</strong> <strong>Star</strong> y <strong>Star</strong> <strong>Plus</strong>. Los medidores de parámetro simple, doble y algunos de<br />
parámetros múltiples no incluyen todos los parámetros incluidos en esta sección.<br />
pH<br />
Rango De -2.000 a 19.999<br />
Resolución 0.1, 0.01, 0.001<br />
Exactitud relativa ± 0.002<br />
Puntos de calibración De 1 a 5<br />
pH (medidor de pH 2-<strong>Star</strong>)<br />
Rango De 0.000 a 14.999<br />
Resolución 0.1, 0.01, 0.001<br />
Exactitud relativa ± 0.002<br />
Puntos de calibración De 1 a 3<br />
Milivoltios, milivoltios relativos, ORP<br />
Rango<br />
± 1999.9 mV<br />
Resolución<br />
0.1 mV<br />
Exactitud relativa<br />
± 0.2 mV o 0.05 % de lectura, la que sea mayor<br />
ES-60<br />
Guía del usuario del medidor <strong>Thermo</strong> <strong>Scientific</strong> <strong>Orion</strong> <strong>Star</strong> y <strong>Star</strong> <strong>Plus</strong>
Especificaciones del medidor<br />
ISE<br />
Rango De 0 a 19999<br />
Resolución<br />
Exactitud relativa<br />
Unidades mostradas<br />
Funciones de calibración<br />
Oxígeno disuelto (polarográfica)<br />
Rango<br />
Resolución<br />
Exactitud relativa<br />
Factor de salinidad<br />
Presión barométrica<br />
Tipos de calibración<br />
Tipo de sonda<br />
De 1 a 3 cifras significativas<br />
± 0.2 mV o 0.05 %, la que sea mayor<br />
M, mg/L, %, ppb o ninguna<br />
Lineal punto a punto; corrección automática por blanco de muestra,<br />
no lineal, seleccionable; y estabilidad de bajo rango<br />
de concentración<br />
De 0.00 a 90.0 mg/L<br />
De 0.0 a 600 %<br />
0.1, 0.01 mg/L<br />
0.1, 1 %<br />
± 0.1 mg/L hasta 8 mg/L; ± 0.2 mg/L de 8 mg/L a 20 mg/L<br />
± 2 %<br />
De 0 a 45 ppt<br />
De 450 a 850 mm Hg<br />
Aire saturado con agua, agua saturada con aire, manual (Winkler),<br />
de punto cero<br />
Polarográfica<br />
Oxígeno disuelto por sensor óptico RDO ®<br />
Rango<br />
Resolución<br />
Exactitud relativa<br />
Factor de salinidad<br />
Presión barométrica<br />
Tipos de calibración<br />
Tipo de sonda<br />
De 0.00 a 20,0 mg/L<br />
De 0.0 a 200 %<br />
0.1, 0.01 mg/L<br />
0.1, 1 %<br />
± 0.1 mg/L up to 8 mg/L; ± 0.2 mg/L from 8 mg/L to 20 mg/L<br />
± 2 %<br />
De 0 a 45 ppt<br />
De 450 a 850 mm Hg<br />
Aire saturado con agua, agua saturada con aire, manual (Winkler),<br />
de punto cero<br />
Óptica RDO<br />
Guía del usuario del medidor <strong>Thermo</strong> <strong>Scientific</strong> <strong>Orion</strong> <strong>Star</strong> y <strong>Star</strong> <strong>Plus</strong><br />
ES-61
Especificaciones del medidor<br />
Conductividad<br />
Rango<br />
Resolución<br />
Exactitud relativa<br />
Constante de celda De 0.001 a 199.9 cm -1<br />
De 0.000 a 3000 mS/cm, resolución automática con dependencia de<br />
constante de celda<br />
4 cifras significativas hasta 0.001 μS/cm, con dependencia de<br />
constante de celda<br />
0.5 % ± 1 dígito o 0.01 μS/cm, la que sea mayor<br />
Temperatura de referencia 5 °C, 10 °C, 15 °C, 20 °C o 25 °C<br />
Rango de resistividad<br />
Resolución de resistividad<br />
Exactitud relativa de<br />
resistividad<br />
Rango de salinidad<br />
Resolución de salinidad<br />
Exactitud relativa de salinidad<br />
Rango de STD<br />
Resolución de SDT<br />
Exactitud relativa de STD<br />
Temperatura<br />
De 0.0001 a 100 Megaohmios<br />
Automática<br />
0.5 % ± 1 dígito<br />
De 0.1 a 80.0 ppt NaCl equivalente, de 0.1 a 42 ppt de salinidad<br />
práctica<br />
0.1 ppt<br />
0.1 ± 1 dígito<br />
De 0 a 19999 mg/L<br />
1 mg/L<br />
0.5 % ± 1 dígito<br />
Rango De -5 a 105 °C<br />
Resolución De 0.1 hasta 99.9 °C, 1.0 sobre 99.9 °C<br />
Exactitud relativa ± 0.1 °C<br />
Temperatura* (Sólo medidor de oxígeno disuelto por sensor óptico RDO ® )<br />
Rango De 0 a 50 °C<br />
Resolución 0.1 °C<br />
Exactitud relativa ± 0.3 °C<br />
* Esta especificación de temperatura se aplica sólo al medidor de oxígeno disuelto por sensor<br />
óptico RDO <strong>Star</strong> cu<strong>and</strong>o se usa con la sonda óptica RDO. Los medidores RDO 4-<strong>Star</strong> y 5-<strong>Star</strong><br />
tienen las especificaciones de temperatura estándar cu<strong>and</strong>o se usan con un electrodo distinto<br />
a la sonda RDO.<br />
Nota: Las especificaciones quedan sujetas a cambio sin previo aviso.<br />
ES-62<br />
Guía del usuario del medidor <strong>Thermo</strong> <strong>Scientific</strong> <strong>Orion</strong> <strong>Star</strong> y <strong>Star</strong> <strong>Plus</strong>
Especificaciones del medidor<br />
Información para pedidos<br />
N.° de cat.<br />
Descripción<br />
1111000 Medidor de pH 2-<strong>Star</strong> de mesa con adaptador de corriente universal y guía del usuario<br />
1112000 Medidor de pH 3-<strong>Star</strong> <strong>Plus</strong> de mesa con adaptador de corriente universal y guía del usuario<br />
1212000 Medidor de pH 3-<strong>Star</strong> <strong>Plus</strong> portátil a baterías y guía del usuario<br />
1113000 Medidor de OD 3-<strong>Star</strong> <strong>Plus</strong> de mesa con adaptador de corriente universal y guía del usuario<br />
1213000 Medidor de OD 3-<strong>Star</strong> <strong>Plus</strong> portátil a baterías y guía del usuario<br />
1114000 Medidor de conductividad 3-<strong>Star</strong> <strong>Plus</strong> de mesa con adaptador de corriente universal y guía<br />
del usuario<br />
1214000 Medidor de conductividad 3-<strong>Star</strong> <strong>Plus</strong> portátil a baterías y guía del usuario<br />
1115000 Medidor de pH/ISE 4-<strong>Star</strong> <strong>Plus</strong> de mesa con adaptador de corriente universal y guía del<br />
usuario<br />
1215000 Medidor de pH/ISE 4-<strong>Star</strong> <strong>Plus</strong> portátil a baterías y guía del usuario<br />
1116000 Medidor de pH/OD 4-<strong>Star</strong> <strong>Plus</strong> de mesa con adaptador de corriente universal y guía del<br />
usuario<br />
1216000 Medidor de pH/OD 4-<strong>Star</strong> <strong>Plus</strong> portátil a baterías y guía del usuario<br />
1117000 Medidor de pH/conductividad 4-<strong>Star</strong> <strong>Plus</strong> de mesa con adaptador de corriente universal y<br />
guía del usuario<br />
1217000 Medidor de pH/conductividad 4-<strong>Star</strong> <strong>Plus</strong> portátil a baterías y guía del usuario<br />
1218000 Medidor de pH/OD/conductividad 5-<strong>Star</strong> <strong>Plus</strong> portátil a baterías y guía del usuario<br />
1119000 Medidor de pH/ISE/OD/conductividad 5-<strong>Star</strong> <strong>Plus</strong> de mesa con adaptador de corriente<br />
universal y guía del usuario<br />
1219000 Medidor de pH/ISE/OD/conductividad 5-<strong>Star</strong> <strong>Plus</strong> portátil a baterías y guía del usuario<br />
1213300 Medidor de OD por sensor óptico RDO ® 3-<strong>Star</strong> <strong>Plus</strong> portátil a baterías y guía del usuario<br />
1213310 Medidor de OD por sensor óptico RDO/pH 4-<strong>Star</strong> <strong>Plus</strong> portátil a baterías y guía del usuario<br />
1213320 Medidor de OD por sensor óptico RDO/pH/conductividad 5-<strong>Star</strong> <strong>Plus</strong> portátil a baterías y guía<br />
del usuario<br />
090043 Base de electrodo de brazo oscilante<br />
1010003 Adaptador universal de corriente<br />
1010006 Impresora Serie <strong>Star</strong> con cable de interfaz de impresora RS232 (N.° de catálogo 250302-001)<br />
1010053 Cable de interfaz de computadora RS232<br />
096019 Sonda agitadora con paleta para medidores 3-<strong>Star</strong>, 4-<strong>Star</strong> y 5-<strong>Star</strong> de mesa<br />
Guía del usuario del medidor <strong>Thermo</strong> <strong>Scientific</strong> <strong>Orion</strong> <strong>Star</strong> y <strong>Star</strong> <strong>Plus</strong><br />
ES-63
Especificaciones del medidor<br />
N.° de cat.<br />
8102BNUWP<br />
8107BNUMD<br />
8156BNUWP<br />
8157BNUMD<br />
8165BNWP<br />
8172BNWP<br />
9107APMD<br />
9107BNMD<br />
9157BNMD<br />
9165BNWP<br />
9172BNWP<br />
927005MD<br />
927007MD<br />
9512HPBNWP<br />
9609BNWP<br />
9707BNWP<br />
8611BNWP<br />
083005MD<br />
083010MD<br />
086030MD<br />
087010MD<br />
Descripción<br />
Electrodo combinado de pH ROSS Ultra con cuerpo de vidrio<br />
Electrodo Triode de pH/CTA relleno con gel y de bajo mantenimiento ROSS Ultra con<br />
cuerpo epóxico<br />
Electrodo combinado de pH ROSS Ultra con cuerpo epóxico<br />
Electrodo Triode de pH/CTA ROSS Ultra con cuerpo epóxico<br />
Electrodo combinado de pH ROSS Sure-Flow con cuerpo epóxico<br />
Electrodo combinado de pH ROSS Sure-Flow con cuerpo de vidrio<br />
Electrodo Triode de pH/CTA relleno con polímero y de bajo mantenimiento AquaPro con<br />
cuerpo epóxico<br />
Electrodo Triode de pH/CTA relleno con gel y con cuerpo epóxico<br />
Electrodo Triode de pH/CTA rellenable, con cuerpo epóxico<br />
Electrodo combinado de pH Sure-Flow con cuerpo epóxico<br />
Electrodo combinado de pH Sure-Flow con cuerpo de vidrio<br />
Sonda de CTA con cuerpo epóxico<br />
Sonda de CTA con cuerpo de acero inoxidable<br />
Electrodo combinado selectivo de iones, de amoníaco, de alto desempeño<br />
Electrodo combinado selectivo de iones, de fluoruro<br />
Electrodo combinado selectivo de iones, de nitrato<br />
Electrodo combinado selectivo de iones, de sodio, ROSS<br />
Sonda polarográfica de OD con manga de calibración y cable de 1,5 metros<br />
Sonda polarográfica de OD con manga de calibración y cable de 3 metros<br />
Sonda polarográfica de OD AUTO-STIR para DBO con manga de calibración<br />
Sonda óptica RDO ® con protector de acero inoxidable, tapón óptico y cable de 3 metros<br />
087001 Tapón óptico de reemplazo<br />
011050MD<br />
013005MD<br />
013010MD<br />
013016MD<br />
Sonda de conductividad con rango de 1 μS/cm a 20 mS/cm y cable de 1,5 metros<br />
Sonda de conductividad DuraProbe con rango de 1 μS/cm a 200 mS/cm y cable de<br />
1,5 metros<br />
Sonda de conductividad DuraProbe con rango de 1 μS/cm a 200 μS /cm y cable de<br />
3 metros<br />
Sonda de conductividad con rango de 0.01 μS/cm a 300 μS /cm y cable de 1,5 metros<br />
Visite www.thermo.com/water donde encontrará otros kits de medidor, electrodos y soluciones.<br />
ES-64<br />
Guía del usuario del medidor <strong>Thermo</strong> <strong>Scientific</strong> <strong>Orion</strong> <strong>Star</strong> y <strong>Star</strong> <strong>Plus</strong>
Apéndice A Funciones del menú de<br />
configuración del medidor<br />
pH Funciones del menú de configuración<br />
Reconocimiento automático de amortiguador<br />
Los medidores de pH <strong>Orion</strong> <strong>Star</strong> y <strong>Star</strong> <strong>Plus</strong> pH tienen capacidad para reconocer<br />
automáticamente amortiguadores de pH 1.68, 4.01, 6.86, 7.00, 9.18, 10.01 y 12.46<br />
durante una calibración de pH. Durante una calibración, el medidor utiliza el juego de<br />
amortiguadores seleccionado y la lectura de mV no elaborada del electrodo de pH en<br />
el amortiguador para reconocer y mostrar el valor del amortiguador a la temperatura<br />
medida. El valor no elaborado de mV debe ser de ± 30 mV a partir de la lectura<br />
teórica de mV del amortiguador para que el medidor reconozca el amortiguador<br />
automáticamente.<br />
Amortiguador Rango de mV Amortiguador Rango de mV Amortiguador Rango de mV<br />
1.68 De +285 a +345 7.00 De- 30 a + 30 10.01 De -207 a -147<br />
4.01 De +207 a +147 9.18 De -99 a -159 12.46 De -293 a -353<br />
6.86 De +38 a -22<br />
Funciones del menú de configuración de oxígeno disuelto<br />
Compensación de presión barométrica<br />
Los medidores de oxígeno disuelto <strong>Orion</strong> <strong>Star</strong> y <strong>Star</strong> <strong>Plus</strong> tienen un barómetro interno<br />
que se utiliza para las lecturas de oxígeno disuelto con compensación de presión. El<br />
medidor también puede usar compensación manual de la presión barométrica si el<br />
oxígeno disuelto se mide con una sonda sumergida o en un recipiente presurizado.<br />
La presión se debe ingresar en mm Hg. 1 mm Hg = 0.03937 pulgadas Hg =<br />
1.3332 hPa (mBar) = 0.01934 PSI.<br />
Correlación de salinidad<br />
Los medidores de oxígeno disuelto <strong>Orion</strong> <strong>Star</strong> y <strong>Star</strong> <strong>Plus</strong> con modo de medición<br />
de conductividad permiten la corrección automática de la salinidad en lecturas de<br />
oxígeno disuelto. El medidor utiliza el valor de conductividad leído por la sonda de<br />
conductividad para calcular el factor de corrección de salinidad y aplica el factor a las<br />
lecturas de oxígeno disuelto informadas como mg/L.<br />
Guía del usuario del medidor <strong>Thermo</strong> <strong>Scientific</strong> <strong>Orion</strong> <strong>Star</strong> y <strong>Star</strong> <strong>Plus</strong><br />
ES-65
Funciones del menú de configuración del medidor<br />
El medidor también puede usar corrección manual de la salinidad en lecturas de<br />
oxígeno disuelto indicadas en mg/L. El factor de corrección manual de salinidad se<br />
debe ingresar en ppt (partes por mil).<br />
Conductividad<br />
a 20 °C<br />
(mS/cm)<br />
Valor de<br />
corrección<br />
de salinidad<br />
(ppt)<br />
Conductividad<br />
a 20 °C<br />
(mS/cm)<br />
Valor de<br />
corrección<br />
de salinidad<br />
(ppt)<br />
Conductividad<br />
a 20 °C<br />
(mS/cm)<br />
Valor de<br />
corrección<br />
de salinidad<br />
(ppt)<br />
5 3 20 13 35 25<br />
6 4 21 14 36 25<br />
7 4 22 15 37 26<br />
8 5 23 15 38 27<br />
9 6 24 16 39 28<br />
10 6 25 17 40 29<br />
11 7 26 18 42 30<br />
12 8 27 18 44 32<br />
13 8 28 19 46 33<br />
14 9 29 20 48 35<br />
15 10 30 21 50 37<br />
16 10 31 22 52 38<br />
17 11 32 22 54 40<br />
18 12 33 23 56 42<br />
19 13 34 24<br />
Esta tabla fue calculada tom<strong>and</strong>o como base las Tablas Oceanográficas Internacionales:<br />
International Oceanographic Tables, Vol. 1, National Institute of Oceanography of Great Britain,<br />
Womley, Godaming, Surrey, Engl<strong>and</strong> <strong>and</strong> Unesco, Paris 1971.<br />
Funciones del menú de configuración de conductividad<br />
Compensación de temperatura y temperatura de referencia<br />
Los medidores de conductividad <strong>Orion</strong> <strong>Star</strong> y <strong>Star</strong> <strong>Plus</strong> tienen la capacidad de usar<br />
una función de compensación de temperatura que calcula y muestra las mediciones<br />
de conductividad a una temperatura de referencia de 5 °C, 10 °C, 15 °C, 20 °C o 25 °C<br />
(los medidores <strong>Orion</strong> <strong>Star</strong> tienen una temperatura de referencia de 15 °C, 20 °C o 25<br />
°C solamente). La compensación de temperatura se puede configurar en Lineal para<br />
la mayoría de las muestras acuosas, No lineal para muestras de elevada pureza y de<br />
baja fuerza iónica, o Desactivada para mediciones de conductividad sin compensación<br />
de temperatura.<br />
ES-66<br />
Guía del usuario del medidor <strong>Thermo</strong> <strong>Scientific</strong> <strong>Orion</strong> <strong>Star</strong> y <strong>Star</strong> <strong>Plus</strong>
Funciones del menú de configuración del medidor<br />
Mientras más se acerque la temperatura de la muestra a la temperatura de referencia<br />
seleccionada, más exacta será la medición de conductividad, especialmente si el<br />
coeficiente de compensación de temperatura es estimado o inexacto.<br />
La conductividad de una solución con una concentración de electrolitos específica<br />
cambia con la temperatura y esta relación es descrita por el coeficiente de<br />
temperatura de la solución. El medidor tiene un coeficiente de temperatura<br />
predeterminado de 2.1 (cambio porcentual en la conductividad por °C), lo cual es<br />
representativo de muchas muestras acuosas.<br />
Solución (De 25 °C a 50 °C)<br />
Coeficiente de temperatura (% / °C)<br />
Agua de elevada pureza 4.55<br />
Sal (NaCl) 2.12<br />
5% NaOH 1.72<br />
Amoníaco diluido 1.88<br />
10% HCl 1.32<br />
Ácido sulfúrico al 5% 0.96<br />
Ácido sulfúrico al 98% 2.84<br />
Jarabe de azúcar 5.64<br />
Sólidos totales disueltos (STD)<br />
Los medidores de conductividad <strong>Orion</strong> <strong>Star</strong> y <strong>Star</strong> <strong>Plus</strong> miden los sólidos totales<br />
disueltos como la cantidad total de materia inorgánica disuelta en una solución.<br />
La materia inorgánica disuelta porta una corriente que es medida por la sonda de<br />
conductividad. Ya que existe una relación directa entre la conductividad y los STD, las<br />
lecturas de conductividad se utilizan para calcular la presencia de materia inorgánica.<br />
El usuario debe ingresar un factor STD de entre 0.01 y 10 mg/L en el menú<br />
de configuración.<br />
El método estándar para la determinación de STD comprende la evaporación de una<br />
muestra hasta sequedad a 180°C y pesar el residuo. El factor STD se determina al<br />
tomar el peso del residuo y dividirlo entre la conductividad de la muestra. Las lecturas<br />
de conductividad subsiguientes se multiplican por el factor SDT para determinar el<br />
valor de STD de la muestra.<br />
Guía del usuario del medidor <strong>Thermo</strong> <strong>Scientific</strong> <strong>Orion</strong> <strong>Star</strong> y <strong>Star</strong> <strong>Plus</strong><br />
ES-67
Funciones del menú de configuración del medidor<br />
Calibración automática<br />
Los medidores de conductividad <strong>Orion</strong> <strong>Star</strong> y <strong>Star</strong> <strong>Plus</strong> tienen capacidad para<br />
reconocer automáticamente estándares de conductividad de 100 μS/cm, 1413 μS/cm<br />
y 12.9 mS/cm cu<strong>and</strong>o la constante de celda nominal de la sonda de conductividad se<br />
ingresa en el menú de configuración. Para que el medidor reconozca el estándar de<br />
conductividad, la constante de celda ingresada debe ser exacta dentro de un factor de<br />
3. Por ejemplo, si la constante de celda real es de 1.0 cm -1 , el ingresar una constante<br />
de celda nominal entre 0.3 cm -1 a 3.0 cm -1 permitiría al medidor identificar el estándar<br />
de conductividad y realizar la calibración automática.<br />
Funciones del menú de configuración de ISE<br />
Rango de Concentración<br />
Los medidores de ISE <strong>Orion</strong> <strong>Star</strong> y <strong>Star</strong> <strong>Plus</strong> se pueden configurar para un rango de<br />
concentración de ISE alto o bajo utilizado para determinar los criterios de estabilidad<br />
de la calibración. Si se selecciona un rango de concentración de ISE alto, el medidor<br />
realizará una calibración normal sin demora en la visualización del valor del estándar<br />
de calibración. Si se selecciona un rango de concentración de ISE bajo, el medidor<br />
esperará de tres a cinco minutos antes de mostrar una lectura estable para la los<br />
valores del estándar de calibración. La demora dependerá de las especies medidas<br />
y de la concentración de los estándares de calibración. El rango de concentración<br />
de ISE bajo está diseñado para mejorar la exactitud de las mediciones de baja<br />
concentración al permitir al electrodo tener una mayor cantidad de tiempo para<br />
estabilizarse en los estándares de calibración.<br />
Corrección automática por blanco de muestra<br />
Los medidores de ISE <strong>Orion</strong> <strong>Star</strong> y <strong>Star</strong> <strong>Plus</strong> cuentan con una función de corrección<br />
automática de ISE por blanco de muestra que emplea un algoritmo para compensar<br />
la no linealidad del electrodo selectivo de iones en estándares y muestras de bajo<br />
nivel. Ya que la función de corrección automática por blanco de muestra requiere<br />
el uso de un conjunto de ecuaciones no lineales que sólo se pueden calcular<br />
numéricamente, el usuario no puede verificar analíticamente la calibración y el valor<br />
de pendiente promedio que se muestra en el medidor puede estar fuera del rango<br />
de pendiente especificado en la guía del usuario del electrodo. En aplicaciones en las<br />
que se requiere la verificación analítica se debe desactivar la función de corrección<br />
automática por blanco de muestra.<br />
ES-68<br />
Guía del usuario del medidor <strong>Thermo</strong> <strong>Scientific</strong> <strong>Orion</strong> <strong>Star</strong> y <strong>Star</strong> <strong>Plus</strong>
F R<br />
S E C T I O N E N F R A N ç A I S<br />
Table des matières<br />
Chapitre I Introduction<br />
Fonctionnalités de l'instrument . . . . . . . . . . . . . . . . . . . . . . . . . . . . . . . . . . . . . . EN-2<br />
Chapitre II Écran<br />
Description globale. . . . . . . . . . . . . . . . . . . . . . . . . . . . . . . . . . . . . . . . . . . . . . . . EN-3<br />
Chapitre III Clavier<br />
Description globale. . . . . . . . . . . . . . . . . . . . . . . . . . . . . . . . . . . . . . . . . . . . . . . . EN-5<br />
Définitions des touches . . . . . . . . . . . . . . . . . . . . . . . . . . . . . . . . . . . . . . . . . . . . EN-6<br />
Chapitre IV Préparation de l'instrument<br />
Installation de l'adaptateur secteur . . . . . . . . . . . . . . . . . . . . . . . . . . . . . . . . . . . EN-7<br />
Mise en place des piles . . . . . . . . . . . . . . . . . . . . . . . . . . . . . . . . . . . . . . . . . . . . EN-8<br />
Connexion des électrodes . . . . . . . . . . . . . . . . . . . . . . . . . . . . . . . . . . . . . . . . . . EN-9<br />
Mise sous tension de l'instrument . . . . . . . . . . . . . . . . . . . . . . . . . . . . . . . . . . . EN-10<br />
Entretien de l'instrument . . . . . . . . . . . . . . . . . . . . . . . . . . . . . . . . . . . . . . . . . . EN-10<br />
Chapitre V Configuration de l'instrument<br />
Menu de configuration (setup) . . . . . . . . . . . . . . . . . . . . . . . . . . . . . . . . . . . . . . EN-11<br />
Tableau du menu de configuration (setup) . . . . . . . . . . . . . . . . . . . . . . . . . . . EN-12<br />
Réglages généraux du menu . . . . . . . . . . . . . . . . . . . . . . . . . . . . . . . . . . . . . . . EN-14<br />
Réglages de l'heure et de la date . . . . . . . . . . . . . . . . . . . . . . . . . . . . . . . . . . . . EN-15<br />
AUTO-READ , continu ou temporisé . . . . . . . . . . . . . . . . . . . . . . . . . . . . . . . . . EN-16<br />
Sélection du paramètre de mesure . . . . . . . . . . . . . . . . . . . . . . . . . . . . . . . . . . EN-17<br />
Configuration de méthodes . . . . . . . . . . . . . . . . . . . . . . . . . . . . . . . . . . . . . . . . EN-18<br />
Chapitre VI Technique pH<br />
Menu de configuration (setup) de pH. . . . . . . . . . . . . . . . . . . . . . . . . . . . . . . . . EN-19<br />
Calibration du pH . . . . . . . . . . . . . . . . . . . . . . . . . . . . . . . . . . . . . . . . . . . . . . . . EN-20<br />
Mesure de pH. . . . . . . . . . . . . . . . . . . . . . . . . . . . . . . . . . . . . . . . . . . . . . . . . . . EN-21<br />
Affichage de température de pH et calibration . . . . . . . . . . . . . . . . . . . . . . . . . . EN-22<br />
Chapitre VII Technique mV, mV relatif et ORP<br />
Calibration mV relatif et ORP . . . . . . . . . . . . . . . . . . . . . . . . . . . . . . . . . . . . . . . EN-23<br />
Mesure mV, mV relatif et ORP . . . . . . . . . . . . . . . . . . . . . . . . . . . . . . . . . . . . . . EN-24<br />
Chapitre VIII Technique oxygène dissous<br />
Menu de configuration (setup) de l'oxygène dissous . . . . . . . . . . . . . . . . . . . . . EN-25<br />
Calibration d'oxygène dissous . . . . . . . . . . . . . . . . . . . . . . . . . . . . . . . . . . . . . . EN-26<br />
Mesure d'oxygène dissous. . . . . . . . . . . . . . . . . . . . . . . . . . . . . . . . . . . . . . . . . EN-28<br />
Affichage de température d'oxygène dissous et calibration. . . . . . . . . . . . . . . . EN-29<br />
Mode d’emploi des instruments de mesure <strong>Thermo</strong> <strong>Scientific</strong> <strong>Orion</strong> <strong>Star</strong> et <strong>Star</strong> <strong>Plus</strong><br />
FR-I
F R<br />
Table des matières<br />
Chapitre IX Technique de mesure optique d'oxygène dissous RDO ®<br />
Aperçu du cache optique . . . . . . . . . . . . . . . . . . . . . . . . . . . . . . . . . . . . . . . . . . EN-31<br />
Menu de configuration (setup) de mesure optique d'oxygène dissous RDO. . . EN-32<br />
Menu de configuration (setup) pour sonde optique RDO. . . . . . . . . . . . . . . . EN-33<br />
Calibration de mesure optique d'oxygène dissous RDO . . . . . . . . . . . . . . . . . . EN-35<br />
Mesure optique d'oxygène dissous RDO. . . . . . . . . . . . . . . . . . . . . . . . . . . . . . EN-37<br />
Affichage de température de mesure optique d'oxygène dissous RDO<br />
et calibration . . . . . . . . . . . . . . . . . . . . . . . . . . . . . . . . . . . . . . . . . . . . . . . . . . . . EN-38<br />
Chapitre X Technique de conductivité<br />
Menu de configuration (setup) de conductivité . . . . . . . . . . . . . . . . . . . . . . . . . EN-39<br />
Calibration de conductivité . . . . . . . . . . . . . . . . . . . . . . . . . . . . . . . . . . . . . . . . . EN-40<br />
Mesure de conductivité . . . . . . . . . . . . . . . . . . . . . . . . . . . . . . . . . . . . . . . . . . . EN-41<br />
Affichage de température de conductivité et calibration . . . . . . . . . . . . . . . . . . EN-42<br />
Chapitre XI Technique ISE<br />
Menu de configuration (setup) ISE . . . . . . . . . . . . . . . . . . . . . . . . . . . . . . . . . . . EN-43<br />
Calibration ISE . . . . . . . . . . . . . . . . . . . . . . . . . . . . . . . . . . . . . . . . . . . . . . . . . . EN-44<br />
Mesure ISE. . . . . . . . . . . . . . . . . . . . . . . . . . . . . . . . . . . . . . . . . . . . . . . . . . . . . EN-45<br />
Affichage de température ISE et calibration . . . . . . . . . . . . . . . . . . . . . . . . . . . . EN-46<br />
Chapitre XII Archivage et récupération des données<br />
Mémorisation de données et journal de calibration . . . . . . . . . . . . . . . . . . . . . . EN-47<br />
Fonction de mémorisation de données automatique . . . . . . . . . . . . . . . . . . . EN-47<br />
Paramètre de suppression de mémorisation de données . . . . . . . . . . . . . . . EN-48<br />
Affichage et impression de la mémorisation de données et du<br />
journal de calibration. . . . . . . . . . . . . . . . . . . . . . . . . . . . . . . . . . . . . . . . . . . . EN-49<br />
Chapitre XIII Déclaration de conformité<br />
Déclaration de conformité . . . . . . . . . . . . . . . . . . . . . . . . . . . . . . . . . . . . . . . . . EN-51<br />
Conformité DEEE . . . . . . . . . . . . . . . . . . . . . . . . . . . . . . . . . . . . . . . . . . . . . . . . EN-52<br />
Chapitre XIV Dépannage<br />
Test automatique de l'instrument. . . . . . . . . . . . . . . . . . . . . . . . . . . . . . . . . . . . EN-53<br />
Codes d'erreur de l'instrument. . . . . . . . . . . . . . . . . . . . . . . . . . . . . . . . . . . . . . EN-54<br />
Dépannage général. . . . . . . . . . . . . . . . . . . . . . . . . . . . . . . . . . . . . . . . . . . . . . . EN-56<br />
Chapitre XV Caractéristiques de l'instrument<br />
Caractéristiques de l'instrument. . . . . . . . . . . . . . . . . . . . . . . . . . . . . . . . . . . . . EN-59<br />
Informations relatives aux comm<strong>and</strong>es . . . . . . . . . . . . . . . . . . . . . . . . . . . . . . . EN-63<br />
Annexe A Fonctionnalités du menu configuration (setup) de l'instrument<br />
Fonctionnalités du menu de configuration (setup) de pH . . . . . . . . . . . . . . . . . . EN-65<br />
Fonctionnalités du menu de configuration (setup) de l'oxygène dissous . . . . . . EN-65<br />
Fonctionnalités du menu de configuration (setup) de conductivité . . . . . . . . . . EN-66<br />
Fonctionnalités du menu de configuration (setup) ISE . . . . . . . . . . . . . . . . . . . . EN-68<br />
FR-II<br />
Mode d’emploi des instruments de mesure <strong>Thermo</strong> <strong>Scientific</strong> <strong>Orion</strong> <strong>Star</strong> et <strong>Star</strong> <strong>Plus</strong>
Chapitre I Introduction<br />
Félicitations ! Vous venez de choisir un instrument de mesure <strong>Thermo</strong> <strong>Scientific</strong> des<br />
séries <strong>Orion</strong> <strong>Star</strong> ou <strong>Star</strong> <strong>Plus</strong>, conçu pour les mesures électrochimiques sur site ou<br />
en laboratoire.<br />
• Les instruments 2-<strong>Star</strong> permettent la mesure de pH uniquement.<br />
• Les instruments 3-<strong>Star</strong> permettent de mesurer le pH, l'oxygène dissous, la<br />
mesure optique d'oxygène dissous RDO ® ou la conductivité, indépendamment.<br />
• Les instruments 4-<strong>Star</strong> permettent de mesurer conjointement le pH/l'oxygène<br />
dissous, le pH/la conductivité, le pH/l'ISE (électrode sélective) ou le pH/la mesure<br />
optique de l'oxygène dissous RDO.<br />
• Les instruments 5-<strong>Star</strong> permettent de mesurer conjointement le pH/l'ISE/l'oxygène<br />
dissous/la conductivité, le pH/l'oxygène dissous/la conductivité ou le pH/la mesure<br />
optique de l'oxygène dissous RDO/la conductivité.<br />
Tous les instruments comprennent une fonction de mesure de température. Tous les<br />
instruments possédant la capacité de mesure de pH comprennent une fonction mV/mV<br />
relatif/ORP.<br />
Conçus pour répondre aux besoins d'environnements actifs, de laboratoires<br />
comprenant de nombreux utilisateurs ou d'usines, tous les instruments des séries<br />
<strong>Orion</strong> <strong>Star</strong> et <strong>Star</strong> <strong>Plus</strong> sont contrôlés par microprocesseur, ce qui permet d'obtenir<br />
des mesures précises et justes. Les instruments portatifs étanches peuvent<br />
également être immergés pendant une courte durée.<br />
Les instruments 3-<strong>Star</strong> <strong>Plus</strong>, 4-<strong>Star</strong> <strong>Plus</strong> et 5-<strong>Star</strong> <strong>Plus</strong> ont été améliorés afin de<br />
permettre l'enregistrement d'une plus gr<strong>and</strong>e quantité de données, d'améliorer<br />
l'affichage de la température et de proposer un nouveau mode de calibration de<br />
température pour chaque paramètre de mesure. Les instruments de table 3-<strong>Star</strong> <strong>Plus</strong>,<br />
4-<strong>Star</strong> <strong>Plus</strong> et 5-<strong>Star</strong> <strong>Plus</strong> possèdent une fonctionnalité de passeur d'échantillons et<br />
sont compatibles avec le passeur d'échantillons AutoTration TM -500. Reportez-vous<br />
au mode d'emploi AutoTration-500 pour plus d'informations sur l'utilisation des<br />
instruments <strong>Star</strong> <strong>Plus</strong> avec le passeur d'échantillons.<br />
Remarque : veuillez lire attentivement ce mode d'emploi avant d'utiliser votre<br />
instrument de table ou portatif. Toute utilisation non respectueuse de ces instructions<br />
peut rendre la garantie nulle et provoquer des dégâts irrémédiables à l'instrument.<br />
Mode d’emploi des instruments de mesure <strong>Thermo</strong> <strong>Scientific</strong> <strong>Orion</strong> <strong>Star</strong> et <strong>Star</strong> <strong>Plus</strong><br />
FR-1
Introduction<br />
Fonctionnalités de l'instrument<br />
Pour répondre de façon plus efficace aux besoins des utilisateurs dans les domaines<br />
de la protection et du contrôle environnemental, de l'industrie alimentaire, des<br />
laboratoires pharmaceutiques et de produits de gr<strong>and</strong>e consommation, les instruments<br />
des séries <strong>Orion</strong> <strong>Star</strong> et <strong>Star</strong> <strong>Plus</strong> offrent les fonctionnalités principales suivantes :<br />
• Procédés protégés par mot de passe – L'instrument peut sauvegarder<br />
jusqu'à dix mesures et calibrations personnalisées. La protection par mot de<br />
passe de chacun de ces procédés évite les altérations en raison de l'accès à<br />
l'instrument par plusieurs utilisateurs, chaque utilisateur accède uniquement<br />
aux procédures adaptées à son travail.<br />
• AUTO-READ – L'instrument prend la mesure et imprime ou enregistre<br />
automatiquement les données une fois stabilisées. La mesure est figée sur<br />
l'écran jusqu'à ce que l'utilisateur dem<strong>and</strong>e à l'instrument d'effectuer une<br />
nouvelle mesure.<br />
• Comm<strong>and</strong>e d'agitation – Tous les instruments de mesure de table 3-<strong>Star</strong>,<br />
4-<strong>Star</strong> et 5-<strong>Star</strong> possèdent une comm<strong>and</strong>e d'agitation destinée à une sonde<br />
agitateur, Cat. No. 096019, ainsi qu'une sonde DBO AUTO-STIR , ainsi, nul<br />
besoin d'éléments d'agitation magnétiques.<br />
• SMART STABILITY et SMART AVERAGING – Permettent d'éviter les<br />
suppositions en compensant automatiquement les conditions de mesure et en<br />
optimisant le temps de réponse de l'instrument.<br />
• Rétroéclairage de l'écran – Les 3-<strong>Star</strong>, 4-<strong>Star</strong> et 5-<strong>Star</strong> offrent un rétroéclairage<br />
de leur écran. Qu<strong>and</strong> l’instrument est allumé, appuyer sur la touche pour<br />
activer ou éteindre le rétroéclairage. Qu<strong>and</strong> l’instrument fonctionne sur piles, le<br />
rétroéclairage va automatiquement se couper après deux minutes afin d'économiser<br />
l'énergie. Lorsque les piles sont faibles, le rétroéclairage ne s'allumera plus.<br />
• Arrêt automatique – L'instrument va se couper au bout de 20 minutes<br />
d'inactivité (aucune touche enfoncée). Ceci permet de maximiser la durée de<br />
vie des piles sur les instruments portatifs et de table qui fonctionnent sur piles.<br />
• Signaux sonores – L'instrument va émettre un bip à chaque fois qu'une touche<br />
est enfoncée, validant immédiatement l'action de l'utilisateur.<br />
Un guide de référence rapide est joint à l'instrument pour aider l'utilisateur dans ses<br />
activités quotidiennes.<br />
FR-2<br />
Mode d’emploi des instruments de mesure <strong>Thermo</strong> <strong>Scientific</strong> <strong>Orion</strong> <strong>Star</strong> et <strong>Star</strong> <strong>Plus</strong>
Chapitre II Écran<br />
Description globale<br />
Au cours d'un processus donné, l'écran des instruments des séries <strong>Orion</strong> <strong>Star</strong> et<br />
<strong>Star</strong> <strong>Plus</strong> proposent des données de température et de calibration. La température<br />
s'affiche dans le coin supérieur gauche de l'écran. L'icône indique que le mode<br />
ou le menu de calibration est actif. Les icônes man, 2, 4, 7, 9, 10 et 12 indiquent<br />
les tampons pH sauvegardés après une calibration de pH. L'icône setup s'affiche<br />
uniquement lorsque l'instrument est en mode configuration. L'icône indique une<br />
condition d'erreur et lorsque l'icône s'affiche en même temps, il existe une alarme<br />
de calibration ou un problème de qualité d'électrode. L'icône indique que le<br />
mode de mesure AUTO-READ est actif, ceci est détaillé à la section Configuration<br />
de l'instrument.<br />
Température<br />
Calibration<br />
Unité pH/<br />
ISE/ORP<br />
Unité de<br />
conductivité<br />
Unité OD<br />
(oxygène<br />
dissous)<br />
Instrument 5-<strong>Star</strong><br />
Voici l'écran de l'instrument 5-<strong>Star</strong> pouvant effectuer des mesures à plusieurs paramètres.<br />
Les instruments de mesure à simple et double paramètres comporteront moins de<br />
lignes de mesure, selon les capacités de l'instrument.<br />
Remarque : en mode mesure, les trois lignes principales de données affichées<br />
sur l'écran de l'instrument correspondent à ce qui est en cours de mesure.<br />
Mode d’emploi des instruments de mesure <strong>Thermo</strong> <strong>Scientific</strong> <strong>Orion</strong> <strong>Star</strong> et <strong>Star</strong> <strong>Plus</strong><br />
FR-3
Écran<br />
Icônes d'unité de mesure<br />
En mode mesure, l'icône flèche située sur le côté gauche de l'écran indique la ligne<br />
active. Appuyer sur pour déplacer l'icône flèche sur la ligne souhaitée et appuyer<br />
sur / pour faire défiler les icônes d'unité de mesure associées à cette ligne.<br />
Les icônes d'unité de mesure de l'instrument multiparamètres 5-<strong>Star</strong> sont indiqués<br />
ci-dessous. Les instruments de mesure à simple et double paramètres comporteront<br />
moins de lignes de mesure et d'icônes, selon les capacités de l'instrument.<br />
• La ligne supérieure affiche pH, mV, mV relatif, ISE ou température.<br />
• La ligne centrale affiche la conductivité, les matières totales dissoutes, la salinité,<br />
la résistivité ou la température.<br />
• La ligne inférieure affiche l'oxygène dissous sous forme de % de saturation,<br />
l'oxygène dissous sous forme de concentration, la pression barométrique ou<br />
la température.<br />
Les unités de mesure, affichées sur le côté droit de l'écran, clignoteront jusqu'à ce<br />
que la valeur se stabilise.<br />
Remarque : si la ligne de mesure est inutile, appuyer sur pour déplacer l'icône<br />
flèche sur la ligne de mesure à supprimer puis appuyer sur / jusqu'à ce que<br />
la ligne soit vierge.<br />
FR-4<br />
Mode d’emploi des instruments de mesure <strong>Thermo</strong> <strong>Scientific</strong> <strong>Orion</strong> <strong>Star</strong> et <strong>Star</strong> <strong>Plus</strong>
Chapitre III Clavier<br />
Description globale<br />
La disposition du clavier est la même pour tous les instruments de mesure des séries<br />
<strong>Orion</strong> <strong>Star</strong> et <strong>Star</strong> <strong>Plus</strong>. Les instruments portatifs et de table 2-<strong>Star</strong> possèdent neuf<br />
touches. Les instruments de table 3-<strong>Star</strong>, 4-<strong>Star</strong> et 5-<strong>Star</strong> possèdent 10 touches en<br />
raison de la touche stir supplémentaire – .<br />
Clavier d'instrument portatif<br />
Calibrer<br />
Alimentation<br />
Chiffres<br />
Défilement vers bas<br />
Configuration<br />
MesureSauvegarder/<br />
Imprimer<br />
Rétroéclairage<br />
Défilement vers le haut<br />
Sélection de ligne<br />
Afficher journal<br />
Clavier d'instrument de table<br />
Alimentation/Rétroéclairage<br />
Calibrer<br />
Défilement<br />
vers le haut<br />
Chiffres<br />
Configuration<br />
MesureSauvegarder/<br />
Imprimer<br />
Agitateur<br />
(absent sur 2-<strong>Star</strong>)<br />
Sélection de ligne<br />
Afficher journal<br />
Défilement vers bas<br />
Mode d’emploi des instruments de mesure <strong>Thermo</strong> <strong>Scientific</strong> <strong>Orion</strong> <strong>Star</strong> et <strong>Star</strong> <strong>Plus</strong><br />
FR-5
Clavier<br />
Définitions des touches<br />
Touche Description Touche Description<br />
Allume l'instrument s'il est<br />
éteint.<br />
Active ou désactive le<br />
rétroéclairage, si l'instrument<br />
est allumé (instruments 3-<strong>Star</strong>,<br />
4-<strong>Star</strong> et 5-<strong>Star</strong> uniquement).<br />
Si l'instrument est allumé,<br />
maintenir la touche enfoncée<br />
pendant environ trois secondes<br />
pour arrêter l'instrument.<br />
Fait défiler l'icône flèche sur<br />
la gauche de l'écran entre les<br />
trois lignes d'affichage, la ligne<br />
sélectionnée peut alors être<br />
modifiée ou calibrée.<br />
Lance la calibration pour la<br />
ligne sélectionnée en mode<br />
de mesure.<br />
Si l'icône flèche pointe vers<br />
la ligne supérieure et que les<br />
unités affichées sont pH, le fait<br />
d'appuyer sur cette touche va<br />
lancer une calibration de pH.<br />
Chaque fois que la touche est<br />
enfoncée en mode calibration,<br />
l'instrument va accepter le<br />
point de calibration et passer au<br />
point suivant jusqu'à ce que le<br />
nombre maximal de points de<br />
calibration soit atteint.<br />
Entre dans le menu configuration<br />
(setup), en commençant par<br />
la ligne sélectionnée en mode<br />
mesure.<br />
Si l'icône flèche pointe vers<br />
la ligne supérieure et que les<br />
unités affichées sont ISE, le<br />
fait d'appuyer sur cette touche<br />
va ouvrir la fenêtre de<br />
configuration ISE.<br />
Modifie les unités de mesure<br />
de la ligne sélection en mode<br />
mesure.<br />
Modifie la valeur de la ligne<br />
sélectionnée dans les modes<br />
setup, methods et log view.<br />
Modifie la valeur du chiffre<br />
clignotant pour les modes<br />
setup, password entry et<br />
calibration.<br />
Sélectionne le chiffre à modifier<br />
suivant et déplace le point<br />
décimal en mode setup,<br />
password entry et calibration.<br />
Imprime et enregistre les<br />
mesures dans les modes de<br />
mesure continu et temporisé.<br />
Imprime, enregistre et fige<br />
l'affichage lorsque la valeur<br />
est stable en mode de mesure<br />
AUTO-READ.<br />
Quitte le menu de configuration<br />
(setup) et revient en mode<br />
mesure.<br />
Valide la calibration et revient<br />
en mode mesure.<br />
Entre dans le menu log view<br />
<strong>and</strong> download.<br />
Active ou désactive l'agitateur.<br />
FR-6<br />
Mode d’emploi des instruments de mesure <strong>Thermo</strong> <strong>Scientific</strong> <strong>Orion</strong> <strong>Star</strong> et <strong>Star</strong> <strong>Plus</strong>
Chapitre IV Préparation de l'instrument<br />
Installation de l'adaptateur secteur<br />
L'adaptateur secteur universel livré avec l'instrument de mesure de table est la seule<br />
source d'alimentation recomm<strong>and</strong>ée pour cet appareil. L'utilisation de tout autre<br />
adaptateur de puissance rendra la garantie nulle. L'adaptateur secteur externe est<br />
fait pour fonctionner de 100 à 240 V alternatif, à 0,5 A, pour 50/60 Hz.<br />
Selon la prise murale, sélectionner une des quatre prises fournies et la faire glisser dans<br />
les rainures de l'adaptateur. Un clic se fera entendre lorsque la prise est correctement<br />
en place.<br />
Connecter la fiche de l'adaptateur à la prise d'alimentation sur l'instrument de mesure<br />
de table. Voir le diagramme de la section Connexion des électrodes.<br />
Il est possible de placer des piles dans les instruments des séries <strong>Orion</strong> <strong>Star</strong> ou <strong>Star</strong><br />
<strong>Plus</strong>, de façon à ce que les réglages de l'instrument ne soient pas perdus en cas de<br />
perte accidentelle de courant, déconnexion ou micro-coupure.<br />
Mode d’emploi des instruments de mesure <strong>Thermo</strong> <strong>Scientific</strong> <strong>Orion</strong> <strong>Star</strong> et <strong>Star</strong> <strong>Plus</strong><br />
FR-7
Préparation de l'instrument<br />
Mise en place des piles<br />
Les instruments des séries <strong>Orion</strong> <strong>Star</strong> et <strong>Star</strong> <strong>Plus</strong> utilisent quatre piles alcalines AA.<br />
Ne pas utiliser de piles lithium ou rechargeables. La pose incorrecte de piles non<br />
alcalines peut créer un danger potentiel.<br />
Remarque : pour les instruments de table, la pose de piles n'est pas nécessaire si<br />
l'unité est toujours branchée à une source de courant par le biais d'une alimentation<br />
électrique tous courants. Pour les instruments portatifs, les piles sont fournies. Pour<br />
accéder au compartiment des piles des instruments portatifs, desserrer les deux vis<br />
au dos de l'instrument.<br />
1. Vérifier que l'instrument est éteint et placer doucement l'instrument à l'envers<br />
sur un tissu propre, non pelucheux, pour éviter de rayer l'écran.<br />
2. Retirer le couvercle du compartiment des piles.<br />
3. Placer les piles neuves dans le sens indiqué sur le compartiment des piles.<br />
4. Remettre le couvercle du compartiment des piles.<br />
5. Les données stockées, les calibrations et les méthodes seront conservées dans<br />
la mémoire non volatile de l'instrument lors du changement des piles. Cependant,<br />
la date et l'heure doivent peut-être être réglées une fois les piles changées.<br />
FR-8<br />
Mode d’emploi des instruments de mesure <strong>Thermo</strong> <strong>Scientific</strong> <strong>Orion</strong> <strong>Star</strong> et <strong>Star</strong> <strong>Plus</strong>
Préparation de l'instrument<br />
Connexion des électrodes<br />
Suivre les diagrammes ci-dessous pour raccorder correctement les électrodes et les<br />
sondes à l'instrument. L'instrument multiparamètres est illustré, les instruments de<br />
mesure à simple et double paramètres comporteront moins de connexions, selon les<br />
capacités de l'instrument.<br />
Connexions d'électrodes sur l'instrument de table<br />
Prise de<br />
l'agitateur pour<br />
sonde agitateur<br />
ou sonde AUTO-<br />
STIR OD BDO<br />
Référence<br />
pour pH,<br />
ORP ou ISE<br />
BNC pour<br />
pH, ORP<br />
ou ISE<br />
MiniDIN 8<br />
broches pour<br />
conductivité<br />
ou ATC<br />
RS232<br />
MiniDIN 9 broches<br />
pouroxygène<br />
dissous<br />
Masse<br />
Alimentation<br />
Connexions d'électrodes sur l'instrument portatif<br />
MiniDIN 8<br />
broches pour<br />
Cond. ou ATC<br />
RS232<br />
BNC pour<br />
mesure pH,<br />
ORP ou ISE<br />
MiniDIN 9<br />
broches pour<br />
oxygène dissous<br />
Mode d’emploi des instruments de mesure <strong>Thermo</strong> <strong>Scientific</strong> <strong>Orion</strong> <strong>Star</strong> et <strong>Star</strong> <strong>Plus</strong><br />
FR-9
Préparation de l'instrument<br />
Connexions à l'instrument avec fonctions multiples<br />
• Utiliser la prise BNC pour connecter les électrodes pH, ISE et ORP à l'aide d'un<br />
connecteur BNC ou BNC étanche.<br />
• Les instruments de table possèdent une entrée de référence servant à connecter<br />
une électrode de référence distincte. Les électrodes de référence nécessitent une<br />
électrode sensible distincte et adaptée aux mesures.<br />
• Il est possible d'utiliser la sonde à oxygène dissous 970899WP sur la prise BNC.<br />
• Utiliser l'entrée miniDIN 8 broches pour les sondes de conductivité ou pour les<br />
sondes à compensation de température automatique (ATC).<br />
• La sonde OD AUTO-STIR utilise l'entrée miniDIN 9 broches et la prise de l'agitateur<br />
(stirrer).<br />
• Connecter une imprimante ou un ordinateur à l'entrée RS232 à l'aide du câble<br />
approprié.<br />
Mise sous tension de l'instrument<br />
Les piles en place dans les instruments portatifs et l'adaptateur secteur branché ou les<br />
piles en place sur les instruments de table, appuyer sur pour allumer l'instrument<br />
de mesure.<br />
Dans le cadre de l'utilisation d'un instrument 3-<strong>Star</strong>, 4-<strong>Star</strong> ou 5-<strong>Star</strong>, appuyer sur<br />
lorsque l'instrument est sous tension pour activer ou désactiver le rétroéclairage.<br />
Lorsque l'instrument de table est connecté au secteur, le rétroéclairage restera actif<br />
jusqu'à ce que l'on appuie sur .<br />
Pour éteindre l'instrument, maintenir la touche<br />
secondes.<br />
Entretien de l'instrument<br />
enfoncée pendant environ trois<br />
Dans le cadre de l'entretien de routine, épousseter et essuyer l'instrument avec un<br />
chiffon humide. Si nécessaire, il est possible d'utiliser de l'eau chaude ou un détergent<br />
doux à base d'eau. L'entretien de routine doit être effectué tous les jours, toutes les<br />
semaines ou tous les mois, selon l'environnement dans lequel l'instrument est utilisé.<br />
Retirer immédiatement toute substance qui a été renversée sur l'instrument en suivant<br />
la procédure de nettoyage appropriée au type de produit renversé.<br />
FR-10<br />
Mode d’emploi des instruments de mesure <strong>Thermo</strong> <strong>Scientific</strong> <strong>Orion</strong> <strong>Star</strong> et <strong>Star</strong> <strong>Plus</strong>
Chapitre V Configuration de l'instrument<br />
Menu de configuration (setup)<br />
Pour naviguer dans le menu configuration (setup) :<br />
1. Appuyer sur pour entrer dans le menu configuration (setup).<br />
2. Appuyer sur / jusqu'à ce que l'option de configuration souhaitée s'affiche<br />
sur la ligne supérieure.<br />
3. Appuyer sur pour déplacer l'icône flèche sur la ligne centrale.<br />
4. Appuyer sur / jusqu'à ce que l'option de configuration souhaitée s'affiche<br />
sur la ligne centrale.<br />
5. Appuyer sur pour déplacer l'icône flèche sur la ligne inférieure.<br />
6. Pour faire défiler la liste des options sur la ligne inférieure, appuyer sur /<br />
jusqu'à ce que l'option souhaitée s'affiche. Pour saisir une valeur numérique pour<br />
une option de la ligne inférieure, appuyer sur / pour modifier chaque<br />
chiffre et sur pour passer au chiffre suivant.<br />
Par exemple, pour modifier la résolution de mesure du pH, appuyer sur<br />
passer de 0.01 à 0.001 sur la ligne inférieure.<br />
pour<br />
7. Appuyer sur pour déplacer l'icône flèche sur la ligne supérieure.<br />
8. Répéter les étapes 2 à 7 pour programmer la nouvelle option de configuration<br />
ou appuyer sur pour quitter le menu configuration (setup) et revenir au<br />
mode mesure.<br />
Remarque : Se reporter à l'Annexe A pour avoir une description des fonctions<br />
spéciales du menu configuration (setup).<br />
Mode d’emploi des instruments de mesure <strong>Thermo</strong> <strong>Scientific</strong> <strong>Orion</strong> <strong>Star</strong> et <strong>Star</strong> <strong>Plus</strong><br />
FR-11
Configuration de l'instrument<br />
Tableau du menu de configuration (setup)<br />
Le tableau suivant concerne la gamme complète d'instruments <strong>Orion</strong> <strong>Star</strong> et <strong>Star</strong><br />
<strong>Plus</strong>. Il se peut que les instruments ne comprennent pas toutes les options indiquées<br />
dans ce tableau.<br />
Ligne<br />
supérieure<br />
Ligne<br />
centrale<br />
Ligne inférieure<br />
Description du menu de configuration (setup) (valeur par défaut,<br />
spécificité aux méthodes)<br />
PH rES 0,1, 0,01, 0,001 Résolution de mesure du pH (0,01, oui)<br />
PH bUF USA, EUr0 Tampon pH défini pour la reconnaissance automatique du tampon lors de<br />
la calibration, les tampons USA sont 1,68, 4,01, 7,00, 10,01, 12,46 et les<br />
tampons EUrO sont 1,68, 4,01, 6,86, 9,18 (USA, oui)<br />
ISE rES 1, 2, 3 Résolution de mesure ISE en chiffres significatifs (1, oui)<br />
ISE UnIt m, mgL, PEr, PPb, n0nE Unités de mesure ISE (PPb, oui)<br />
ISE rAng L0w, HIgH Plage de concentration ISE pour le critère de stabilité de calibration<br />
(HIgH, oui)<br />
ISE nLIn AUt0, 0FF Correction automatique de blanc pour calibration à bas niveau (AUt0, oui)<br />
C0nd tC 0FF, LIn, nLF Type de compensation de conductivité en température, Lln correspond<br />
aux échantillons d'eau pure linéaires et nLF à non linéaires (LIn, oui)<br />
C0nd C0EF 0,0 à 10,0 Le coefficient de compensation de conductivité en température en % de<br />
variation de conductivité par °C, s'affiche si Lln a été sélectionné pour tC<br />
(2,1, oui)<br />
C0nd tdSF 0,00 à 10,0 Valeur du facteur des matières totales dissoutes (0,49, oui)<br />
C0nd CELL 0,001 à 199,0 Valeur de constante de cellule de conductivité par défaut pour le mode<br />
de calibration automatique de conductivité (0,475, oui)<br />
C0nd trEF 5, 10, 15, 20, 25 Température de référence de conductivité (25, oui)<br />
C0nd tyPE Std, 1, 2, 3, 4, 5, 6, 7, USP Type de cellule de conductivité et plage sélectionnable (Std, oui)<br />
Voir la section Menu de configuration (setup) pour sonde optique RDO pour plus de détails sur les menus d'informations<br />
relatives à la sonde RDO.<br />
d0 rES 0,1, 1 % sat Résolution de mesure de saturation d'OD en % (0,1, oui)<br />
d0 rES 0,01, 0,1 mg/L Résolution de mesure d'OD mg/l (0,01, oui)<br />
d0 bAr AUt0, mAn Type de compensation d'OD selon la pression barométrique (AUt0, oui)<br />
d0 PrES 450,0 à 850,0 Valeur de compensation manuelle d'OD selon la pression barométrique,<br />
s'affiche si mAn a été sélectionné pour bAr (760,0, oui)<br />
d0 SAL AUt0, mAn Type de correction d'OD selon la salinité (AUt0, oui)<br />
d0 SALF 0 à 45 Valeur de correction manuelle d'OD selon la salinité, s'affiche si mAn a<br />
été sélectionné pour SAL ou si un instrument de mesure d'OD sans mode<br />
de conductivité est utilisé (0, oui)<br />
d0 CALt AIr, H20, mAn, SEt0 Type de calibration OD (AIr, oui)<br />
d0 LIFE 365 à 0 Compte à rebours de cache optique, en jours – Instruments de mesure<br />
<strong>Star</strong> <strong>Plus</strong> 3, 4 et 5 uniquement (défini par la sonde RDO, non)<br />
dUE PH 0 à 9999 Valeur d'alarme de calibration pH en heures, 0 signifie inactif (0, oui)<br />
dUE 0rP 0 à 9999 Valeur d'alarme de calibration ORP en heures, 0 signifie inactif (0, oui)<br />
dUE ISE 0 à 9999 Valeur d'alarme de calibration ISE en heures, 0 signifie inactif (0, oui)<br />
dUE C0nd 0 à 9999 Valeur d'alarme de calibration de conductivité en heures, 0 signifie<br />
inactif (0, oui)<br />
dUE d0 0 à 9999 Valeur d'alarme de calibration d'OD en heures, 0 signifie inactif (0, oui)<br />
FR-12<br />
Mode d’emploi des instruments de mesure <strong>Thermo</strong> <strong>Scientific</strong> <strong>Orion</strong> <strong>Star</strong> et <strong>Star</strong> <strong>Plus</strong>
Configuration de l'instrument<br />
Ligne<br />
supérieure<br />
Ligne<br />
centrale<br />
Ligne inférieure<br />
Description du menu de configuration (setup) (valeur par défaut,<br />
spécificité aux méthodes)<br />
rEAd tyPE AUt0, tImE, C0nt, Type de lecture de mesure : AUTO-READ, temporisé ou continu<br />
(AUt0, oui)<br />
rEAd tInE 00:05 à 99:59 Valeur de mesure temporisé en minutes et secondes (01:00, oui)<br />
L0g dEL n0, YES Suppression du journal de données après téléchargement, sélectionner<br />
YES pour supprimer le journal de données lorsqu'il est téléchargé, ou<br />
sélectionner nO pour écraser les anciennes données lorsque le journal<br />
est plein et ne pas supprimer le journal de données lorsqu'il est<br />
téléchargé (n0, oui)<br />
L0g AUt0 0FF, 0n Option de sauvegarde automatique de journal de données (0FF, oui)<br />
gEn dEgC -5,0 à 105 Valeur de température manuelle (25,0, oui)<br />
gEn StIr 0FF, 1, 2, 3, 4, 5, 6, 7 Vitesse de l'agitateur – Instruments de table 3-<strong>Star</strong>, 4-<strong>Star</strong> et 5-<strong>Star</strong><br />
uniquement (4, oui)<br />
gEn PASS 0000 à 9999 Saisie de mot de passe de l'instrument (0000, oui)<br />
gEn AUt0 0n, 0FF Option d'arrêt automatique de l'instrument (0n, non)<br />
gLP SEt 0FF, 0n Option GLP, la fonction GLP active ou désactive des méthodes (0FF, non)<br />
dAtE H0Ur HH00 à HH23 Réglage de l'heure (HH12, non)<br />
dAtE tInE mm00 à mm59 Réglage des minutes (mm00, non)<br />
dAtE tYPE mdY, dmY Format de la date sous la forme : mois, jour, année ou jour, mois, année<br />
(mdY, non)<br />
dAtE YEAr 2000 à 2099 Réglage de l'année (2004, non)<br />
dAtE dAtE mm01 à mm12 Réglage du mois (mm01, non)<br />
dAtE dAY dd01 à dd31 Réglage du jour du mois (dd01, non)<br />
r232 bAUd 1200, 2400, 4800, 9600 Réglage du débit (9600, non)<br />
r232 0UtF Prnt, C0mP Format de sortie pour l'imprimante ou l'ordinateur, le format COmP est<br />
délimité par des virgules (Prnt, non)<br />
AUt0 SAPL 0FF, 0n Passeur d'échantillons – Instruments de table 3-<strong>Star</strong>, 4-<strong>Star</strong> et 5-<strong>Star</strong><br />
uniquement (OFF, non)<br />
AUt0 trAY 28, 48 Réglage du plateau à béchers (28, non)<br />
AUt0 rInb 1, 2, 3, 4, 5 Nombre de béchers de rinçage (3, non)<br />
AUt0 rSEC 5 à 60 Temps de rinçage dans chaque bécher de rinçage, en secondes (10, non)<br />
AUt0 PH 0, 1, 2, 3 Points de calibration du pH (3, non)<br />
AUt0 0rP n0, YES Option de calibration ORP, s'affiche si 0 a été sélectionné pour PH<br />
(n0, non)<br />
AUt0 ISE 0, 2, 3 Points de calibration ISE, s'affiche si 0 a été sélectionné pour PH (2, non)<br />
1 AUt0 ISE1 Valeur de concentration de l'étalon ISE 1, s'affiche si 2 ou 3 a été<br />
sélectionné pour les points de calibration (1, non)<br />
10 AUt0 ISE2 Valeur de concentration de l'étalon ISE 1, s'affiche si 2 ou 3 a été<br />
sélectionné pour les points de calibration (10, non)<br />
100 AUt0 ISE3 Valeur de concentration de l'étalon ISE 1, s'affiche si 3 a été sélectionné<br />
pour les points de calibration (100, non)<br />
AUt0 C0nd 0, 1, 2, 3 Points de calibration de conductivité (3, non)<br />
AUt0 n0SA 0 à 47 Nombre de béchers d'échantillon (1, non)<br />
Mode d’emploi des instruments de mesure <strong>Thermo</strong> <strong>Scientific</strong> <strong>Orion</strong> <strong>Star</strong> et <strong>Star</strong> <strong>Plus</strong><br />
FR-13
Configuration de l'instrument<br />
Réglages généraux du menu<br />
1. En mode mesure, appuyer sur .<br />
• Température manuelle comm<strong>and</strong>e la compensation<br />
en température lorsqu'aucune sonde de température n'est<br />
connectée à l'instrument.<br />
• Vitesse de l'agitateur permet de régler la vitesse de<br />
l'agitateur, de 1 (vitesse la plus faible) à 7 (vitesse la plus<br />
gr<strong>and</strong>e) et off (instruments de table 3-<strong>Star</strong>, 4-<strong>Star</strong> et 5-<strong>Star</strong><br />
uniquement).<br />
• Protection par mot de passe permet de protéger<br />
les options et méthodes de menu de toute modification<br />
accidentelle (instruments de table 3-<strong>Star</strong>, 4-<strong>Star</strong> et 5-<strong>Star</strong><br />
uniquement).<br />
• Arrêt automatique permet de dem<strong>and</strong>er à l'instrument<br />
de se couper automatiquement après 20 minutes sans<br />
qu'aucune touche n'ait été enfoncée.<br />
2. Appuyer sur les touches / pour naviguer dans le menu configuration (setup)<br />
jusqu'à ce que s'affiche sur la ligne supérieure.<br />
3. Appuyer sur pour valider la sélection et déplacer l'icône flèche sur la ligne<br />
centrale.<br />
4. Appuyer sur les touches / pour faire défiler les options suivantes :<br />
pour le réglage manuel de température, pour le réglage de la<br />
vitesse d'agitation, pour la saisie du mot de passe et pour l'arrêt<br />
automatique.<br />
5. Appuyer sur pour valider la sélection et déplacer l'icône flèche sur la ligne<br />
inférieure.<br />
6. Pour faire défiler la liste des options sur la ligne inférieure, appuyer sur /<br />
jusqu'à ce que l'option souhaitée s'affiche. Pour saisir une valeur numérique pour<br />
une option de la ligne inférieure, appuyer sur / pour modifier chaque<br />
chiffre et sur pour passer au chiffre suivant.<br />
7. Appuyer sur pour valider la sélection et déplacer l'icône flèche sur la ligne<br />
supérieure.<br />
8. Répéter les étapes 3 à 7 pour modifier un autre paramètre général ou appuyer<br />
sur pour revenir au mode mesure.<br />
FR-14<br />
Mode d’emploi des instruments de mesure <strong>Thermo</strong> <strong>Scientific</strong> <strong>Orion</strong> <strong>Star</strong> et <strong>Star</strong> <strong>Plus</strong>
Réglages de l'heure et de la date<br />
1. En mode mesure, appuyer sur .<br />
Configuration de l'instrument<br />
• Les réglages de date et d'heure sont sauvegardés avec les<br />
données et les points de calibration et sont inclus avec les<br />
données transmises à l'ordinateur ou à l'imprimante.<br />
• Le format de date peut prendre deux formes : mois, jour,<br />
année ou jour, mois, année, selon les préférences de<br />
l'utilisateur.<br />
2. Appuyer sur les touches / pour naviguer dans le menu configuration (setup)<br />
jusqu'à ce que s'affiche sur la ligne supérieure.<br />
3. Appuyer sur pour valider la sélection et déplacer l'icône flèche sur la ligne<br />
centrale.<br />
4. Appuyer sur les touches / pour faire défiler les options suivantes :<br />
pour le réglage actuel de l'heure, pour le réglage actuel des<br />
minutes, pour le réglage du format de la date, pour le réglage<br />
actuel du mois, pour le réglage actuel du jour et pour le réglage<br />
actuel de l'année.<br />
5. Appuyer sur pour valider la sélection et déplacer l'icône flèche sur la ligne<br />
inférieure.<br />
6. Pour faire défiler la liste des options sur la ligne inférieure, appuyer sur /<br />
jusqu'à ce que l'option souhaitée s'affiche. Pour saisir une valeur numérique pour<br />
une option de la ligne inférieure, appuyer sur / pour modifier chaque<br />
chiffre et sur pour passer au chiffre suivant.<br />
7. Appuyer sur pour valider la sélection et déplacer l'icône flèche sur la ligne<br />
supérieure.<br />
8. Répéter les étapes 3 à 7 pour modifier un autre réglage de l'heure et de la date<br />
ou appuyer sur pour revenir au mode mesure.<br />
Mode d’emploi des instruments de mesure <strong>Thermo</strong> <strong>Scientific</strong> <strong>Orion</strong> <strong>Star</strong> et <strong>Star</strong> <strong>Plus</strong><br />
FR-15
Configuration de l'instrument<br />
AUTO-READ , continu ou temporisé<br />
• En mode AUTO-READ, l'instrument lance les mesures lorsque<br />
l'on appuie sur. Une fois la mesure stable, l'affichage se<br />
fige et les données sont consignées et imprimées. Le mode<br />
AUTO-READ comm<strong>and</strong>e également l'agitateur. L'agitateur<br />
démarre lorsque l'on appuie sur et s'arrête lorsque la<br />
mesure est stable.<br />
• En mode continu, l'instrument prend continuellement des mesures et met à jour<br />
l'affichage en conséquence. Appuyer sur pour consigner et imprimer les<br />
mesures dans ce mode.<br />
• En mode temporisé, l'instrument prend continuellement des mesures et met à<br />
jour l'affichage en conséquence. L'instrument consigne et imprime les mesures<br />
à une fréquence déterminée. Les mesures d'oxygène dissous temporisés avec<br />
la sonde RDO sont effectuées uniquement à la fréquence requise, ce qui permet<br />
d'économiser l'énergie des piles.<br />
1. En mode mesure, appuyer sur .<br />
2. Appuyer sur les touches / pour naviguer dans le menu configuration (setup)<br />
jusqu'à ce que s'affiche sur la ligne supérieure.<br />
3. Appuyer sur pour valider la sélection et déplacer l'icône flèche sur la ligne<br />
centrale.<br />
4. Appuyer sur les touches / pour passer de , le type de lecture<br />
de mesure, et , l'intervalle de lecture.<br />
5. Appuyer sur pour valider la sélection et déplacer l'icône flèche sur la ligne<br />
inférieure.<br />
6. Pour faire défiler la liste des options sur la ligne inférieure, appuyer sur /<br />
jusqu'à ce que l'option souhaitée s'affiche. Pour saisir une valeur numérique pour<br />
une option de la ligne inférieure, appuyer sur / pour modifier chaque<br />
chiffre et sur pour passer au chiffre suivant.<br />
7. Appuyer sur pour valider la sélection et déplacer l'icône flèche sur la ligne<br />
supérieure.<br />
8. Répéter les étapes 3 à 7 pour modifier un autre paramètre de mesure ou appuyer<br />
sur pour revenir au mode mesure.<br />
FR-16<br />
Mode d’emploi des instruments de mesure <strong>Thermo</strong> <strong>Scientific</strong> <strong>Orion</strong> <strong>Star</strong> et <strong>Star</strong> <strong>Plus</strong>
Sélection du paramètre de mesure<br />
Configuration de l'instrument<br />
En mode mesure, l'icône flèche située sur le côté gauche de l'écran indique la<br />
ligneactive. Appuyer sur pour déplacer l'icône flèche sur la ligne de mesure<br />
souhaitée et appuyer sur / pour faire défiler les paramètres de mesure<br />
associés à cette ligne.<br />
Les lignes et icônes de mesure de l'instrument multiparamètres 5-<strong>Star</strong> sont indiquées<br />
ci-dessous. Les instruments de mesure à simple et double paramètres comporteront<br />
moins de lignes de mesure et d'icônes, selon les capacités de l'instrument.<br />
pH<br />
mV<br />
RmV<br />
ISE<br />
Pas d'icône pour la température<br />
Pas d'icône et pas de mesure – la ligne de mesure est désactivée<br />
μS/cm ou mS/cm pour la conductivité<br />
mg/L pour matières totales dissoutes<br />
ppt pour la salinité<br />
MΩ-cm pour la résistivité<br />
Pas d'icône pour la température<br />
Pas d'icône et pas de mesure – la ligne de mesure est désactivée<br />
% sat pour le pourcentage de saturation d'oxygène dissous<br />
mg/L pour la concentration d'oxygène dissous<br />
Pas d'icône pour la pression barométrique<br />
Pas d'icône pour la température échantillon<br />
Pas d'icône pour la température de membrane (lectures d'OD<br />
polarographique uniquement)<br />
Pas d'icône et pas de mesure – la ligne de mesure est désactivée<br />
Remarque : si la ligne de mesure est inutile, appuyer sur pour déplacer<br />
l'icône flèche sur la ligne de mesure à supprimer puis appuyer sur /<br />
jusqu à ce que la ligne soit vierge.<br />
Mode d’emploi des instruments de mesure <strong>Thermo</strong> <strong>Scientific</strong> <strong>Orion</strong> <strong>Star</strong> et <strong>Star</strong> <strong>Plus</strong><br />
FR-17
Configuration de l'instrument<br />
Configuration de méthodes<br />
Les instruments <strong>Orion</strong> 3-<strong>Star</strong>, 4-<strong>Star</strong> et 5-<strong>Star</strong> peuvent sauvegarder jusqu'à 10<br />
méthodes lorsque la fonction GLP est activée. Lorsqu'une méthode est sélectionnée,<br />
l'instrument se servira de la dernière calibration pour cette méthode, de cette façon,<br />
les électrodes partageant une connexion commune peuvent facilement être échangées.<br />
Lors de l'utilisation de plusieurs méthodes, il convient d'effectuer une calibration pour<br />
chaque méthode qui sera utilisée.<br />
1. Pour activer la fonction GLP :<br />
a. En mode mesure, appuyer sur .<br />
b. Maintenir / enfoncé jusqu'à ce que s'affiche sur la ligne<br />
supérieure.<br />
c. Appuyer sur pour déplacer l'icône flèche sur la ligne centrale et appuyer sur<br />
/ jusqu'à ce que s'affiche.<br />
d. Appuyer sur pour déplacer l'icône flèche sur la ligne inférieure et appuyer sur<br />
/ jusqu'à ce que s'affiche.<br />
e. Appuyer sur pour déplacer l'icône flèche sur la ligne supérieure.<br />
f. Appuyer sur pour quitter le menu configuration (setup) et revenir au mode<br />
mesure.<br />
2. Pour afficher et changer le numéro de la méthode en cours :<br />
a. En mode mesure, appuyer sur . Le numéro de la méthode en cours<br />
s'affichera.<br />
b. Appuyer sur / pour sélectionner un nouveau numéro de méthode.<br />
c. Appuyer sur pour sauvegarder le numéro de méthode et appuyer sur<br />
pour revenir en mode mesure.<br />
FR-18<br />
Mode d’emploi des instruments de mesure <strong>Thermo</strong> <strong>Scientific</strong> <strong>Orion</strong> <strong>Star</strong> et <strong>Star</strong> <strong>Plus</strong>
Chapitre VI Technique pH<br />
Menu de configuration (setup) de pH<br />
Remarque : se reporter à la section Menu de configuration (setup) pour le Tableau<br />
du menu de configuration (setup) qui contient la liste complète des options de<br />
configuration accompagnées de leur description. Se reporter à l'Annexe A pour<br />
avoir une description des fonctions spéciales du menu configuration (setup).<br />
1. En mode mesure, appuyer sur .<br />
2. Appuyer sur les touches / pour naviguer dans le menu configuration (setup)<br />
jusqu'à ce que s'affiche sur la ligne supérieure.<br />
3. Appuyer sur pour valider la sélection et déplacer l'icône flèche sur la ligne<br />
centrale.<br />
4. Appuyer sur / pour passer de , résolution de mesure du pH, à ,<br />
reconnaissance automatique du tampon.<br />
5. Appuyer sur pour valider la sélection et déplacer l'icône flèche sur la ligne<br />
inférieure.<br />
6. Pour faire défiler la liste des options sur la ligne inférieure, appuyer sur /<br />
jusqu'à ce que l'option souhaitée s'affiche.<br />
7. Appuyer sur pour valider la sélection et déplacer l'icône flèche sur la ligne<br />
supérieure.<br />
8. Répéter les étapes 3 à 7 pour modifier un autre paramètre pH ou appuyer sur<br />
pour revenir au mode mesure.<br />
Mode d’emploi des instruments de mesure <strong>Thermo</strong> <strong>Scientific</strong> <strong>Orion</strong> <strong>Star</strong> et <strong>Star</strong> <strong>Plus</strong><br />
FR-19
Technique pH<br />
Calibration du pH<br />
1. Préparer l'électrode selon les instructions du mode d’emploi de l'électrode.<br />
2. En mode configuration, sélectionner le jeu de tampons ( ou ) à utiliser<br />
pour la reconnaissance automatique du tampon.<br />
3. En mode mesure, appuyer sur jusqu'à ce que l'icône flèche pointe sur la ligne<br />
supérieure, appuyer sur jusqu'à ce que l'icône pH s'affiche puis appuyer sur<br />
pour lancer la calibration.<br />
4. Rincer l'électrode, et la sonde ATC le cas échéant, avec de l'eau distillée et la<br />
placer dans le tampon.<br />
5. Attendre que l'icône pH s'arrête de clignoter.<br />
a. Reconnaissance automatique du tampon – Lorsque l'icône pH s'arrête de<br />
clignoter, l'instrument va afficher la valeur de pH du tampon avec correction<br />
en température.<br />
b. Calibration manuelle – Lorsque l'icône pH s'arrête de clignoter, l'instrument<br />
va afficher la valeur réelle du pH lue par l'électrode. Appuyer sur jusqu'à ce<br />
que le premier chiffre à changer clignote, appuyer sur / pour modifier<br />
le chiffre clignotant et poursuivre avec les autres chiffres jusqu'à ce que<br />
l'instrument affiche la valeur de pH corrigée en température du tampon.<br />
Une fois la valeur du pH du tampon réglée, maintenir la touche enfoncée<br />
jusqu'à ce que le point décimal soit au bon endroit.<br />
6. Appuyer sur pour passer au point de calibration suivant et répéter les étapes<br />
4 et 5 ou appuyer sur la touche pour sauvegarder et quitter la calibration.<br />
7. La pente de l'électrode réelle, en pourcentage, sera affichée dans le champ<br />
principal et s'affichera dans le champ inférieur.<br />
a. Pour une calibration à un point, appuyer sur <strong>and</strong> / pour modifier<br />
la pente puis appuyer sur pour revenir en mode mesure.<br />
b. Pour une calibration à plus de deux points, l'instrument passera<br />
automatiquement en mode mesure une fois la pente affichée.<br />
FR-20<br />
Mode d’emploi des instruments de mesure <strong>Thermo</strong> <strong>Scientific</strong> <strong>Orion</strong> <strong>Star</strong> et <strong>Star</strong> <strong>Plus</strong>
Mesure de pH<br />
Remarque : activer la fonction de mémorisation de données automatique pour<br />
transmettre des mesures à la mémoire de l'instrument à la fréquence spécifiée pour<br />
chaque mode de mesure. Voir la section Archivage et récupération des données pour<br />
plus de détails. Si la fonction de mémorisation de données automatique est désactivée,<br />
raccorder l'instrument à une imprimante ou un ordinateur pour consigner les mesures.<br />
1. Rincer l'électrode avec de l'eau déminéralisée ou distillée. Éliminer toute l'eau<br />
en excès et essuyer l'électrode avec un tissu non pelucheux.<br />
2. Placer l'électrode dans l'échantillon.<br />
a. Si l'instrument est en mode de mesure continue, il débutera immédiatement<br />
les mesures et mettra à jour continuellement l'affichage. Une fois la lecture<br />
stable, l'icône pH s'arrêtera de clignoter. Une fois la mesure stable, consigner<br />
et imprimer la mesure en appuyant sur . Dans le cadre de l'utilisation d'un<br />
instrument de table avec agitateur, appuyer sur pour lancer l'agitateur.<br />
Appuyer sur à nouveau pour couper l'agitateur avant de retirer l'électrode<br />
et l'agitateur de l'échantillon.<br />
b. Si l'instrument est en mode de mesure AUTO-READ, appuyer sur la touche<br />
pour lancer une lecture. Une fois la lecture stable, l'icône AR s'arrêtera<br />
de clignoter. Une fois la mesure stable, l'affichage se fige et les données sont<br />
consignées et imprimées. Dans le cadre de l'utilisation d'un instrument de<br />
table avec agitateur, l'agitateur s'allumera lorsque l'on appuie sur et<br />
s'arrêtera lorsque la mesure est stable.<br />
c. Si l'instrument est en mode de mesure temporisé, il débutera immédiatement<br />
les mesures et mettra à jour continuellement l'affichage. Les mesures seront<br />
consignées et imprimées à la fréquence indiquée dans le menu configuration<br />
(setup). Dans le cadre de l'utilisation d'un instrument de table avec agitateur,<br />
appuyer sur pour lancer l'agitateur. Appuyer sur à nouveau pour couper<br />
l'agitateur avant de retirer l'électrode et l'agitateur de l'échantillon.<br />
3. Retirer l'électrode de l'échantillon, rincer avec de l'eau déminéralisée ou distillée,<br />
sécher, placer dans l'échantillon suivant et répéter l'étape 2.<br />
4. Une fois tous les échantillons mesurés, rincer l'électrode avec de l'eau<br />
déminéralisée ou distillée et sécher. Consulter le manuel de l'électrode<br />
concernant les techniques de stockage.<br />
Technique pH<br />
Mode d’emploi des instruments de mesure <strong>Thermo</strong> <strong>Scientific</strong> <strong>Orion</strong> <strong>Star</strong> et <strong>Star</strong> <strong>Plus</strong><br />
FR-21
Technique pH<br />
Affichage de température de pH et calibration<br />
Affichage de température de pH<br />
Les instruments <strong>Star</strong> <strong>Plus</strong> permettent d'afficher la température sur chaque ligne<br />
de mesure en plus de la température indiquée en haut à gauche de l'écran.<br />
Pour afficher la température sur la ligne de mesure de pH :<br />
1. En mode mesure, appuyer sur pour sélectionner la ligne supérieure. L'icône<br />
flèche pointera sur la ligne sélectionnée.<br />
2. Appuyer sur / pour modifier la valeur de la ligne sélectionnée. La ligne<br />
supérieure peut être modifiée pour afficher le pH (pH), la tension en millivolts<br />
(mV), la tension relative en millivolts (RmV), la concentration (ISE), la température<br />
(sans icône) ou une ligne vide.<br />
Calibration de température du pH<br />
Le mode de calibration de température de l'instrument <strong>Star</strong> <strong>Plus</strong> permet de régler<br />
manuellement la température sur chaque ligne de mesure.<br />
Pour calibrer la température sur la ligne de mesure de pH :<br />
1. En mode mesure, appuyer sur pour sélectionner la ligne de mesure supérieure<br />
et appuyer sur / jusqu'à ce que la température s'affiche pour la ligne<br />
sélectionnée.<br />
2. Appuyer sur pour lancer la calibration.<br />
3. Une fois que la mesure se stabilise, l'icône flèche et le premier chiffre vont<br />
clignoter. Saisir la température en appuyant sur / pour régler chaque<br />
chiffre et sur pour passer au chiffre suivant.<br />
4. Appuyer sur pour sauvegarder et quitter la calibration.<br />
FR-22<br />
Mode d’emploi des instruments de mesure <strong>Thermo</strong> <strong>Scientific</strong> <strong>Orion</strong> <strong>Star</strong> et <strong>Star</strong> <strong>Plus</strong>
Chapitre VII Technique mV, mV relatif et ORP<br />
Tous les instruments possédant la capacité de mesure de pH comprennent une<br />
fonction mV, mV relatif et ORP. Mesurer les valeurs de tension brute en millivolt (mV)<br />
d'une électrode en mode mV. Calibrer les valeurs de tension relative en millivolt (RmV)<br />
d'une électrode d'oxydoréduction pour des mesures de potentiel d'oxydoréduction<br />
(ORP) en mode mV relatif/ORP.<br />
Remarque : les mesures en mV sont des valeurs brutes et ne peuvent être<br />
calibrées. Utiliser le mode mV relatif pour calibrer les mesures mV.<br />
Calibration mV relatif et ORP<br />
1. Préparer l'électrode selon les instructions du mode d’emploi de l'électrode.<br />
2. En mode mesure, appuyer sur jusqu'à ce que l'icône flèche pointe sur la ligne<br />
supérieure, appuyer sur jusqu'à ce que l'icône RmV s'affiche puis appuyer<br />
sur pour lancer la calibration.<br />
3. Rincer l'électrode avec de l'eau distillée et placer dans l'étalon.<br />
4. Attendre que l'icône RmV s'arrête de clignoter. Si la valeur brute en mV de<br />
l'électrode est de 220 mV ± 60 mV, lorsque l'icône RmV s'arrête de clignoter<br />
l'instrument va automatiquement calculer et afficher la valeur E H mV pour<br />
l'électrode à la température mesurée. Si la valeur brute de tension en millivolt<br />
de l'électrode est en dehors de la plage 220 mV ± 60 mV, lorsque l'icône RmV<br />
s'arrête de clignoter l'instrument va afficher 000,0 RmV. Appuyer sur jusqu'à<br />
ce que le premier chiffre à changer clignote, appuyer sur / pour modifier<br />
le chiffre clignotant et poursuivre avec les autres chiffres jusqu'à ce que l'instrument<br />
affiche la valeur de tension en millivolt de l'étalon. Pour modifier la valeur en<br />
nombre négatif ou positif, appuyer sur jusqu'à ce qu'aucun des chiffres ne<br />
clignote et que l'icône flèche clignote puis appuyer sur pour modifier le signe<br />
de la valeur en millivolt.<br />
5. Appuyer sur pour sauvegarder et quitter la calibration. Le décalage de tension<br />
en millivolt sera affiché et l'instrument passera automatiquement en mode mesure.<br />
Mode d’emploi des instruments de mesure <strong>Thermo</strong> <strong>Scientific</strong> <strong>Orion</strong> <strong>Star</strong> et <strong>Star</strong> <strong>Plus</strong><br />
FR-23
Technique mV, mV relatif et ORP<br />
Mesure mV, mV relatif et ORP<br />
Remarque : activer la fonction de mémorisation de données automatique pour<br />
transmettre des mesures à la mémoire de l'instrument à la fréquence spécifiée<br />
pour chaque mode de mesure. Voir la section Archivage et récupération des données<br />
pour plus de détails. Si la fonction de mémorisation de données automatique est<br />
désactivée, raccorder l'instrument à une imprimante ou un ordinateur pour consigner<br />
les mesures.<br />
1. Rincer l'électrode avec de l'eau déminéralisée ou distillée. Éliminer toute l'eau<br />
en excès et essuyer l'électrode avec un tissu non pelucheux.<br />
2. Placer l'électrode dans l'échantillon.<br />
a. Si l'instrument est en mode de mesure continue, il débutera immédiatement<br />
les mesures et mettra à jour continuellement l'affichage. Une fois la lecture<br />
stable, l'icône mV ou RmV clignotera. Une fois la mesure stable, consigner<br />
et imprimer la mesure en appuyant sur . Dans le cadre de l'utilisation d'un<br />
instrument de table avec agitateur, appuyer sur pour lancer l'agitateur.<br />
Appuyer sur à nouveau pour couper l'agitateur avant de retirer l'électrode<br />
et l'agitateur de l'échantillon.<br />
b. Si l'instrument est en mode de mesure AUTO-READ, appuyer sur la touche<br />
pour lancer une lecture. Une fois la lecture stable, l'icône AR s'arrêtera<br />
de clignoter. Une fois la mesure stable, l'affichage se fige et les données sont<br />
consignées et imprimées. Dans le cadre de l'utilisation d'un instrument de<br />
table avec agitateur, l'agitateur s'allumera lorsque l'on appuie sur et<br />
s'arrêtera lorsque la mesure est stable.<br />
c. Si l'instrument est en mode de mesure temporisé, il débutera immédiatement<br />
les mesures et mettra à jour continuellement l'affichage. Les mesures seront<br />
consignées et imprimées à la fréquence indiquée dans le menu configuration<br />
(setup). Dans le cadre de l'utilisation d'un instrument de table avec agitateur,<br />
appuyer sur pour lancer l'agitateur. Appuyer sur à nouveau pour<br />
couper l'agitateur avant de retirer l'électrode et l'agitateur de l'échantillon.<br />
3. Retirer l'électrode de l'échantillon, rincer avec de l'eau déminéralisée ou distillée,<br />
sécher, placer dans l'échantillon suivant et répéter l'étape 2.<br />
4. Une fois tous les échantillons mesurés, rincer l'électrode avec de l'eau<br />
déminéralisée ou distillée et sécher. Consulter le manuel de l'électrode<br />
concernant les techniques de stockage.<br />
FR-24<br />
Mode d’emploi des instruments de mesure <strong>Thermo</strong> <strong>Scientific</strong> <strong>Orion</strong> <strong>Star</strong> et <strong>Star</strong> <strong>Plus</strong>
Chapitre VIII Technique oxygène dissous<br />
Menu de configuration (setup) de l'oxygène dissous<br />
Remarque : se reporter à la section Menu de configuration (setup) pour le Tableau<br />
du menu de configuration (setup) qui contient la liste complète des options de<br />
configuration accompagnées de leur description. Se reporter à l'Annexe A pour<br />
avoir une description des fonctions spéciales du menu configuration (setup).<br />
1. En mode mesure, appuyer sur .<br />
2. Appuyer sur les touches / pour naviguer dans le menu configuration (setup)<br />
jusqu'à ce que s'affiche sur la ligne supérieure.<br />
3. Appuyer sur pour valider la sélection et déplacer l'icône flèche sur la ligne<br />
centrale.<br />
4. Appuyer sur / pour faire défiler les options : pour la résolution<br />
du % de saturation, pour la résolution de concentration en mg/l,<br />
pour le type de baromètre (automatique ou manuel), pour la valeur de<br />
compensation barométrique manuelle, pour le type de compensation de<br />
salinité (automatique ou manuelle), pour la valeur de correction de<br />
salinité manuelle et pour le type de calibration d'oxygène dissous.<br />
5. Appuyer sur pour sélectionner l'option et déplacer l'icône flèche sur la ligne<br />
inférieure.<br />
6. Pour faire défiler la liste des options sur la ligne inférieure, appuyer sur /<br />
jusqu'à ce que l'option souhaitée s'affiche. Pour saisir une valeur numérique pour<br />
une option de la ligne inférieure, appuyer sur / pour modifier chaque<br />
chiffre et sur pour passer au chiffre suivant.<br />
7. Appuyer sur pour valider la sélection et déplacer l'icône flèche sur la ligne<br />
supérieure.<br />
8. Répéter les étapes 3 à 7 pour modifier un autre paramètre d'oxygène dissous<br />
ou appuyer sur pour revenir au mode mesure.<br />
Mode d’emploi des instruments de mesure <strong>Thermo</strong> <strong>Scientific</strong> <strong>Orion</strong> <strong>Star</strong> et <strong>Star</strong> <strong>Plus</strong><br />
FR-25
Technique d'oxygène dissous<br />
Calibration d'oxygène dissous<br />
• Avant la calibration, la sonde à oxygène dissous doit être préparée et polarisée.<br />
La sonde est continuellement polarisée lorsqu'elle est connectée à l'instrument.<br />
Lorsque la sonde est connectée pour la première fois ou si la sonde est déconnectée<br />
pendant plus de 60 minutes, connecter la sonde à l'instrument, connecter<br />
l'instrument à une source de courant et attendre 30 à 60 minutes pour que la<br />
sonde se polarise. Le fait de déconnecter la sonde pendant moins d'une heure<br />
nécessite une attente de 5 à 25 minutes pour polarisation.<br />
• Les instruments produisent un courant de polarisation vers la sonde à oxygène<br />
dissous même si l'instrument n'est pas sous tension. Pour maximiser la durée<br />
de vie des piles, débrancher la sonde si elle n'est pas utilisée pendant une période<br />
prolongée.<br />
1. Sélectionner l'un des modes de calibration ci-après depuis le menu configuration<br />
(setup).<br />
a. – Une calibration d'air est effectuée dans de l'air saturé d'eau à l'aide du<br />
manchon de calibration. Ceci est la méthode la plus simple et la plus précise<br />
de calibration. En raison de différences inhérentes entre l'air saturé d'eau et<br />
l'eau saturée d'air, une saturation de 102,3 % s'affichera une fois la mesure<br />
de calibration stable.<br />
i. La précision la plus élevée est atteinte lorsque la température de calibration<br />
est la même que la température de mesure.<br />
ii. Humidifier l'éponge ou le chiffon absorbant dans le manchon de calibration<br />
avec de l'eau distillée et insérer la sonde dans le manchon, sans toucher le<br />
matériau saturé d'eau. Pour des mesures DBO, cette calibration peut être<br />
effectuée dans un flacon à DBO.<br />
b. – Une calibration d'eau est effectuée avec de l'eau, saturée à 100 %<br />
d'air. Introduire l'air dans l'échantillon d'eau et l'agiter doucement pour éviter<br />
l'accumulation de bulles d'air sur la membrane de la sonde à oxygène dissous.<br />
c. – Une calibration manuelle est effectuée à l'aide d'un échantillon d'eau<br />
contenant une concentration connue d'oxygène dissous. Cette méthode peut<br />
être utilisée pour calibrer la sonde à oxygène dissous pour la valeur atteinte<br />
par une méthode de Winkler.<br />
FR-26<br />
Mode d’emploi des instruments de mesure <strong>Thermo</strong> <strong>Scientific</strong> <strong>Orion</strong> <strong>Star</strong> et <strong>Star</strong> <strong>Plus</strong>
i. Une calibration manuelle implique une méthode de Winkler et l'utilisation<br />
de cet échantillon comme étalon de calibration. Le niveau d'oxygène résultant<br />
de la méthode est saisi en tant que calibration manuelle comme valeur<br />
d'oxygène dissous. Ceci lie l'entrée de l'instrument à la méthode de<br />
Winkler. Cette méthode est par nature moins précise en raison des<br />
possibilités d'erreur lors de la méthode de Winkler.<br />
d. – Une calibration à zéro est effectuée dans une solution exempte<br />
d'oxygène. Une calibration à zéro n'est généralement pas requise à moins que<br />
les mesures ne soient prises pour une saturation inférieure à 10 % ou 1 mg/l.<br />
Remettre la sonde à zéro à l'aide d'une solution fraîche lors de l'utilisation<br />
d'une membrane neuve ou lors de la mesure de niveaux d'oxygène inférieurs<br />
à 1 mg/l. Une calibration d'air doit être effectuée avant la calibration à zéro.<br />
2. Laisser la sonde et l'étalon de calibration (air saturé d'eau, eau saturée d'air, étalon<br />
Winkler ou solution sans oxygène) atteindre l'équilibre.<br />
3. En mode mesure, appuyer sur jusqu'à ce que l'icône flèche pointe sur la ligne<br />
inférieure, appuyer sur jusqu'à ce que l'icône % sat ou mg/L s'affiche puis<br />
appuyer sur pour lancer la calibration.<br />
4. Attendre que la mesure d'oxygène dissous se stabilise.<br />
Technique d'oxygène dissous<br />
a. Dans le cadre d'une calibration d'air, l'instrument va afficher 102,3 % et revenir<br />
automatiquement en mode mesure.<br />
b. Dans le cadre d'une calibration d'eau, l'instrument va afficher 100,0 % et<br />
revenir automatiquement en mode mesure.<br />
c. Dans le cadre d'un calibration manuelle, attendre que l'icône mg/L s'arrête de<br />
clignoter et saisir la valeur d'oxygène dissous en appuyant sur jusqu à ce<br />
que le premier chiffre à modifier clignote, appuyer sur / pour modifier la<br />
valeur du chiffre et continuer avec les autres chiffres jusqu'à ce que l'instrument<br />
indique la valeur d'oxygène dissous correcte. Une fois la valeur d'oxygène<br />
dissous réglée, maintenir la touche enfoncée jusqu'à ce que le point<br />
décimal soit au bon endroit.<br />
d. Dans le cadre d'une calibration à zéro, l'instrument va afficher 0,00 et revenir<br />
automatiquement en mode mesure.<br />
Mode d’emploi des instruments de mesure <strong>Thermo</strong> <strong>Scientific</strong> <strong>Orion</strong> <strong>Star</strong> et <strong>Star</strong> <strong>Plus</strong><br />
FR-27
Technique d'oxygène dissous<br />
Mesure d'oxygène dissous<br />
Remarque : activer la fonction de mémorisation de données automatique pour<br />
transmettre des mesures à la mémoire de l'instrument à la fréquence spécifiée pour<br />
chaque mode de mesure. Voir la section Archivage et récupération des données pour<br />
plus de détails. Si la fonction de mémorisation de données automatique est désactivée,<br />
raccorder l'instrument à une imprimante ou un ordinateur pour consigner les mesures.<br />
1. Rincer la sonde à oxygène dissous avec de l'eau déminéralisée ou distillée.<br />
Éliminer toute l'eau en excès et essuyer la sonde avec un tissu non pelucheux.<br />
2. Placer la sonde à oxygène dissous dans l'échantillon.<br />
a. Si l'instrument est en mode de mesure continue, il débutera immédiatement<br />
les mesures et mettra à jour continuellement l'affichage. Une fois la lecture<br />
stable, l'icône mg/L ou % sat clignotera. Une fois la mesure stable, consigner<br />
et imprimer la mesure en appuyant sur . Dans le cadre de l'utilisation d'un<br />
instrument de table avec agitateur, appuyer sur pour lancer l'agitateur.<br />
Appuyer sur à nouveau pour couper l'agitateur avant de retirer la sonde<br />
et l'agitateur de l'échantillon.<br />
b. Si l'instrument est en mode de mesure AUTO-READ, appuyer sur la touche<br />
pour lancer une lecture. Une fois la lecture stable, l'icône AR s'arrêtera<br />
de clignoter. Une fois la mesure stable, l'affichage se fige et les données sont<br />
consignées et imprimées. Dans le cadre de l'utilisation d'un instrument de<br />
table avec agitateur, l'agitateur s'allumera lorsque l'on appuie sur et<br />
s'arrêtera lorsque la mesure est stable. Si la sonde DBO AUTO-STIR est utilisée,<br />
appuyer sur la touche placée sur la sonde pour lance la mesure AUTO-READ.<br />
Remarque : les instruments de mesure d'oxygène dissous <strong>Star</strong> <strong>Plus</strong> de table<br />
permettent de contrôler les fonctions de mesure et d'agitation par la sonde<br />
AUTO-STIR une fois que l'instrument est en mode de mesure AUTO-READ.<br />
Appuyer sur la touche placée sur la sonde AUTO-STIR pour démarrer et arrêter<br />
les fonctions de mesure et d'agitation.<br />
c. Si l'instrument est en mode de mesure temporisé, il débutera immédiatement<br />
les mesures et mettra à jour continuellement l'affichage. Les mesures seront<br />
consignées et imprimées à la fréquence indiquée dans le menu configuration<br />
(setup). Dans le cadre de l'utilisation d'un instrument de table avec agitateur,<br />
appuyer sur pour lancer l'agitateur. Appuyer sur à nouveau pour<br />
couper l'agitateur avant de retirer la sonde et l'agitateur de l'échantillon.<br />
FR-28<br />
Mode d’emploi des instruments de mesure <strong>Thermo</strong> <strong>Scientific</strong> <strong>Orion</strong> <strong>Star</strong> et <strong>Star</strong> <strong>Plus</strong>
3. Retirer la sonde à oxygène dissous de l'échantillon, rincer avec de l'eau<br />
déminéralisée ou distillée, sécher, placer dans l'échantillon suivant et répéter<br />
l'étape 2.<br />
4. Une fois tous les échantillons mesurés, rincer la sonde à oxygène dissous avec<br />
de l'eau déminéralisée ou distillée et sécher. Consulter le manuel de la sonde<br />
à oxygène dissous concernant les techniques de stockage.<br />
Affichage de température d'oxygène dissous et calibration<br />
Affichage de température d'oxygène dissous<br />
Les instruments <strong>Star</strong> <strong>Plus</strong> permettent d'afficher la température sur chaque ligne<br />
de mesure en plus de la température indiquée en haut à gauche de l'écran.<br />
Pour afficher la température sur la ligne de mesure d'oxygène dissous :<br />
Technique d'oxygène dissous<br />
1. En mode mesure, appuyer sur pour sélectionner la ligne inférieure. L'icône<br />
flèche pointera sur la ligne sélectionnée.<br />
2. Appuyer sur / pour modifier la valeur de la ligne sélectionnée. Il<br />
est possible de modifier la ligne inférieure pour afficher l'oxygène dissous<br />
(% saturation), l'oxygène dissous (mg/L), la pression barométrique (sans icône),<br />
la température de l'échantillon (sans icône), la température de la solution<br />
d'électrolyte/de la membrane (sans icône, après le numéro) ou une ligne vide.<br />
Mode d’emploi des instruments de mesure <strong>Thermo</strong> <strong>Scientific</strong> <strong>Orion</strong> <strong>Star</strong> et <strong>Star</strong> <strong>Plus</strong><br />
FR-29
Technique d'oxygène dissous<br />
Calibration de température d'oxygène dissous<br />
Le mode de calibration de température de l'instrument <strong>Star</strong> <strong>Plus</strong> permet de régler<br />
manuellement la température sur chaque ligne de mesure. La ligne de mesure<br />
d'oxygène dissous indique la température de l'échantillon et la température de<br />
la solution d'électrolyte/de la membrane.<br />
Pour calibrer la température de l'échantillon sur la ligne de mesure d'oxygène dissous :<br />
1. En mode mesure, appuyer sur pour sélectionner la ligne de mesure inférieure et<br />
appuyer sur / jusqu'à ce que la température de l'échantillon s'affiche (c'est à<br />
dire ).<br />
2. Appuyer sur pour lancer la calibration.<br />
3. Une fois que la mesure se stabilise, l'icône flèche et le premier chiffre vont<br />
clignoter. Saisir la température en appuyant sur / pour régler chaque chiffre<br />
et sur pour passer au chiffre suivant.<br />
4. Appuyer sur pour sauvegarder et quitter la calibration.<br />
Pour calibrer la température de la solution d'électrolyte/de la membrane sur la ligne<br />
de mesure d'oxygène dissous :<br />
1. En mode mesure, appuyer sur pour sélectionner la ligne de mesure inférieure<br />
et appuyer sur / jusqu'à ce que la température de la membrane soit<br />
affichée (c'est à dire ).<br />
2. Appuyer sur pour lancer la calibration.<br />
3. Une fois que la mesure se stabilise, l'icône flèche et le premier chiffre vont<br />
clignoter. Saisir la température en appuyant sur / pour régler chaque<br />
chiffre et sur pour passer au chiffre suivant.<br />
4. Appuyer sur pour sauvegarder et quitter la calibration.<br />
FR-30<br />
Mode d’emploi des instruments de mesure <strong>Thermo</strong> <strong>Scientific</strong> <strong>Orion</strong> <strong>Star</strong> et <strong>Star</strong> <strong>Plus</strong>
Chapitre IX Technique de mesure optique<br />
d’oxygène dissous RDO ®<br />
Remarque : les instruments de mesure optique d'oxygène dissous RDO possèdent<br />
des numéros de série commençant par R (ex. R12345). Seuls les instruments RDO<br />
sont compatibles avec les sondes optiques RDO.<br />
Aperçu du cache optique<br />
La sonde optique RDO possède une horloge interne qui effectue le décompte de la<br />
durée de vie de 365 jours du cache optique neuf. Le décompte débute lorsqu'un cache<br />
optique neuf est placé sur la sonde RDO, la sonde est raccordée à l'instrument et la<br />
première mesure est effectuée. Il n'est pas possible de remettre à zéro le compte à<br />
rebours de 365 jours ou de le modifier une fois la première mesure effectuée. Chaque<br />
cache optique possède un numéro de série unique reconnu par la sonde RDO, le fait<br />
de réinstaller le cache ne réinitialisera donc pas le compte à rebours.<br />
Remarque : l'alimentation de l'instrument doit être coupée lorsqu'un nouveau<br />
cache optique est placé sur la sonde RDO. Une fois le cache optique en place, mettre<br />
l'instrument sous tension et les informations du nouveau cache seront transmises<br />
à l'instrument.<br />
Pour imprimer les informations du cache optique :<br />
1. Connecter l'instrument à une imprimante ou un ordinateur et vérifier le débit et<br />
les paramètres de sortie dans le menu de configuration (setup) de l'instrument.<br />
2. En mode mesure, appuyer sur .<br />
3. Appuyer sur / pour faire défiler le menu configuration (setup) jusqu'à ce<br />
que s'affiche sur la ligne supérieure et que s'affiche sur la ligne centrale.<br />
4. Appuyer deux fois sur pour déplacer l'icône flèche sur la ligne inférieure.<br />
5. Maintenir / enfoncé jusqu'à ce que s'affiche sur la ligne inférieure.<br />
6. Appuyer sur pour imprimer les informations du cache optique. Appuyer<br />
sur pour revenir au mode mesure.<br />
Mode d’emploi des instruments de mesure <strong>Thermo</strong> <strong>Scientific</strong> <strong>Orion</strong> <strong>Star</strong> et <strong>Star</strong> <strong>Plus</strong><br />
FR-31
Technique de mesure optique d’oxygène dissous RDO ®<br />
Menu de configuration (setup) de mesure optique d'oxygène<br />
dissous RDO<br />
Remarque : se reporter à la section Menu de configuration (setup) pour le Tableau<br />
du menu de configuration (setup) qui contient la liste complète des options de<br />
configuration accompagnées de leur description.<br />
1. En mode mesure, appuyer sur .<br />
2. Appuyer sur les touches / pour naviguer dans le menu configuration (setup)<br />
jusqu'à ce que s'affiche sur la ligne supérieure.<br />
3. Appuyer sur pour valider la sélection et déplacer l'icône flèche sur la ligne<br />
centrale.<br />
4. Appuyer sur / pour faire défiler les options : pour la résolution<br />
du % de saturation, pour la résolution de concentration en mg/l,<br />
pour le type de baromètre (automatique ou manuel), pour la valeur de<br />
compensation barométrique manuelle, pour le type de compensation de<br />
salinité (automatique ou manuelle), pour la valeur de correction de salinité<br />
manuelle, pour le type de calibration d'oxygène dissous et pour le<br />
compte à rebours de cache optique, en jours.<br />
5. Appuyer sur pour sélectionner l'option et déplacer l'icône flèche sur la ligne<br />
inférieure.<br />
6. Pour faire défiler la liste des options sur la ligne inférieure, appuyer sur /<br />
jusqu'à ce que l'option souhaitée s'affiche. Pour saisir une valeur numérique pour<br />
une option de la ligne inférieure, appuyer sur / pour modifier chaque<br />
chiffre et sur pour passer au chiffre suivant.<br />
7. Appuyer sur pour valider la sélection et déplacer l'icône flèche sur la ligne<br />
supérieure.<br />
8. Répéter les étapes 3 à 7 pour modifier un autre paramètre d'oxygène dissous<br />
ou appuyer sur pour revenir au mode mesure.<br />
FR-32<br />
Mode d’emploi des instruments de mesure <strong>Thermo</strong> <strong>Scientific</strong> <strong>Orion</strong> <strong>Star</strong> et <strong>Star</strong> <strong>Plus</strong>
Menu de configuration (setup) pour sonde optique RDO<br />
Les instruments de mesure optique d'oxygène dissous RDO possèdent une option<br />
de menu configuration (setup) spéciale permettant à l'utilisateur d'imprimer les<br />
informations relatives à la sonde optique RDO.<br />
Ligne<br />
supérieure<br />
Ligne<br />
centrale<br />
Ligne<br />
inférieure<br />
Description du menu de configuration (setup)<br />
Pr0b d0 tESt L'option tESt lance un test de 30 secondes de la liaison de communication entre<br />
la sonde RDO et l'instrument. L'affichage de température va indique un compte<br />
à rebours de 30 secondes à mesure que le test progresse. L'instrument va<br />
transmettre un rapport à l'imprimante ou à l'ordinateur une fois le test terminé.<br />
Pr0b d0 CAL L'option CAL imprime le numéro de série de l'instrument, la date, l'heure et la<br />
pente des cinq dernières calibrations d'oxygène dissous effectuées avec la<br />
sonde RDO actuellement connectée à l'instrument.<br />
Pr0b d0 dFLt L'option dFLt permet d'imprimer les informations de calibration en usine<br />
de la sonde RDO actuellement connectée à l'instrument.<br />
Pr0b d0 SLP L'option SLP imprime la valeur en dérives par minute de la pente des cinq<br />
dernières calibrations d'oxygène dissous effectuées avec la sonde RDO<br />
actuellement connectée à l'instrument.<br />
Pr0b d0 mEtH L'option mEtH permet d'imprimer les informations de méthode spécifiques<br />
à RDO pour la dernière méthode utilisée avec la sonde RDO actuellement<br />
connectée à l'instrument.<br />
Pr0b d0 InF0 L'option InF0 permet d'imprimer les informations relatives à la sonde RDO,<br />
y compris le numéro de série et la révision de la sonde, la date de fabrication<br />
de la sonde et du cache optique, la date de mise en place du cache, la durée<br />
de vie du cache et l'horloge temps réel interne pour la sonde RDO actuellement<br />
connectée à l'instrument.<br />
1. Connecter l'instrument à une imprimante ou un ordinateur et vérifier le débit et<br />
les paramètres de sortie dans le menu de configuration (setup) de l'instrument.<br />
2. En mode mesure, appuyer sur .<br />
3. Appuyer sur / pour faire défiler le menu configuration (setup) jusqu'à ce<br />
que s'affiche sur la ligne supérieure et que s'affiche sur la ligne centrale.<br />
4. Appuyer deux fois sur pour déplacer l'icône flèche sur la ligne inférieure.<br />
5. Appuyer sur / pour accéder aux options suivantes : pour le test<br />
de liaison de communication, pour les informations de calibration de sonde<br />
RDO, pour les informations de calibration en usine de sonde RDO,<br />
pour les informations de pente de sonde RDO, les informations de<br />
méthode de sonde RDO et pour les informations générales de sonde RDO.<br />
6. Appuyer sur pour imprimer l'option sélectionnée.<br />
Technique de mesure optique d’oxygène dissous RDO ®<br />
Mode d’emploi des instruments de mesure <strong>Thermo</strong> <strong>Scientific</strong> <strong>Orion</strong> <strong>Star</strong> et <strong>Star</strong> <strong>Plus</strong><br />
FR-33
Technique de mesure optique d’oxygène dissous RDO ®<br />
7. Appuyer sur / pour sélectionne une autre option depuis la ligne inférieure<br />
et appuyer sur pour imprimer l'option sélectionnée ou sur pour revenir en<br />
mode mesure.<br />
Exemple d'impression d'informations générales de sonde RDO<br />
smartprobe info<br />
type 1<br />
run_status 255<br />
format_version 1<br />
probe_SN 6<br />
app_version 9<br />
HW_version 1<br />
cap_SN 129614<br />
rtc 1210257372 (05-08-2008 14:36:12)<br />
mfg_time 1208371349 (04-16-2008 18:42:29)<br />
start_time 1210178953 (05-07-2008 16:49:13)<br />
expiration 1241736553 (05-07-2009 22:49:13)<br />
probe_mfg_time 1208440800 (04-17-2008 14:00:00)<br />
write_count 14<br />
pass_count 12<br />
expire<br />
0x01<br />
days_left 364.3<br />
probe_reading 149.529243<br />
temp_reading 24.942651<br />
state 21<br />
general_event 0x00<br />
internal_event 0x00<br />
internal_state 3<br />
internal_retry 0x00<br />
FR-34<br />
Mode d’emploi des instruments de mesure <strong>Thermo</strong> <strong>Scientific</strong> <strong>Orion</strong> <strong>Star</strong> et <strong>Star</strong> <strong>Plus</strong>
Technique de mesure optique d’oxygène dissous RDO ®<br />
Calibration de mesure optique d'oxygène dissous RDO<br />
1. Sélectionner l'un des modes de calibration ci-après depuis le menu configuration<br />
(setup).<br />
a. – Une calibration d'air est effectuée dans de l'air saturé d'eau à l'aide du<br />
manchon de calibration. Ceci est la méthode la plus simple et la plus précise.<br />
i. La précision la plus élevée est atteinte lorsque la température de calibration<br />
est la même que la température de mesure.<br />
ii. Humidifier l'éponge dans le manchon de calibration avec de l'eau distillée.<br />
Insérer la sonde RDO dans le manchon, sans toucher l'éponge saturée d'eau.<br />
b. – Une calibration d'eau est effectuée avec de l'eau, saturée à 100 %<br />
d'air. Introduire l'air dans l'échantillon d'eau et l'agiter doucement pour éviter<br />
l'accumulation de bulles d'air sur le cache optique.<br />
c. – Une calibration manuelle est effectuée à l'aide d'un échantillon d'eau<br />
contenant une concentration connue d'oxygène dissous. Cette méthode peut<br />
être utilisée pour calibrer la sonde RDO pour la valeur atteinte par une<br />
méthode de Winkler.<br />
i. Une calibration manuelle implique une méthode de Winkler et l'utilisation<br />
de cet échantillon comme étalon de calibration. Le niveau d'oxygène<br />
résultant de la méthode est saisi en tant que calibration manuelle comme<br />
valeur d'oxygène dissous. Ceci lie l'entrée de l'instrument à la méthode<br />
de Winkler. Cette méthode est par nature moins précise en raison des<br />
possibilités d'erreur lors de la méthode de Winkler.<br />
d. – Une calibration à zéro est effectuée dans une solution exempte<br />
d'oxygène. Une calibration à zéro n'est généralement pas requise à moins que<br />
les mesures ne soient prises pour une saturation inférieure à 10 % ou 1 mg/l.<br />
2. Laisser la sonde RDO et l'étalon de calibration (air saturé d'eau, eau saturée d'air,<br />
étalon Winkler ou solution sans oxygène) atteindre l'équilibre.<br />
Mode d’emploi des instruments de mesure <strong>Thermo</strong> <strong>Scientific</strong> <strong>Orion</strong> <strong>Star</strong> et <strong>Star</strong> <strong>Plus</strong><br />
FR-35
Technique de mesure optique d’oxygène dissous RDO ®<br />
3. En mode mesure, appuyer sur jusqu'à ce que l'icône flèche pointe sur la ligne<br />
inférieure, appuyer sur jusqu'à ce que l'icône % sat ou mg/L s'affiche puis<br />
appuyer sur pour lancer la calibration.<br />
4. Attendre que la mesure d'oxygène dissous se stabilise.<br />
a. Dans le cadre d'une calibration d'air, l'instrument va afficher 100,0 % et revenir<br />
automatiquement en mode mesure.<br />
b. Dans le cadre d'une calibration d'eau, l'instrument va afficher 100,0 % et<br />
revenir automatiquement en mode mesure.<br />
c. Dans le cadre d'un calibration manuelle, attendre que l'icône mg/L s'arrête<br />
de clignoter et saisir la valeur d'oxygène dissous en appuyant sur jusqu'à<br />
ce que le premier chiffre à modifier clignote, appuyer sur / pour modifier<br />
la valeur du chiffre et continuer avec les autres chiffres jusqu'à ce que<br />
l'instrument indique la valeur d'oxygène dissous correcte. Une fois la valeur<br />
d'oxygène dissous réglée, maintenir la touche enfoncée jusqu'à ce que<br />
le point décimal soit au bon endroit.<br />
d. Dans le cadre d'une calibration à zéro, l'instrument va afficher 0,00 et revenir<br />
automatiquement en mode mesure.<br />
FR-36<br />
Mode d’emploi des instruments de mesure <strong>Thermo</strong> <strong>Scientific</strong> <strong>Orion</strong> <strong>Star</strong> et <strong>Star</strong> <strong>Plus</strong>
Mesure optique d'oxygène dissous RDO<br />
Remarque : activer la fonction de mémorisation de données automatique pour<br />
transmettre des mesures à la mémoire de l'instrument à la fréquence spécifiée<br />
pour chaque mode de mesure. Voir la section Archivage et récupération des données<br />
pour plus de détails. Si la fonction de mémorisation de données automatique est<br />
désactivée, raccorder l'instrument à une imprimante ou un ordinateur pour consigner<br />
les mesures.<br />
1. Rincer la sonde RDO avec de l'eau déminéralisée ou distillée. Éliminer toute l'eau<br />
en excès et essuyer la sonde avec un tissu non pelucheux.<br />
2. Placer la sonde RDO dans l'échantillon.<br />
Technique de mesure optique d’oxygène dissous RDO ®<br />
a. Si l'instrument est en mode de mesure continue, il débutera immédiatement<br />
les mesures et mettra à jour continuellement l'affichage. Une fois la lecture<br />
stable, l'icône mg/L ou % sat clignotera. Une fois la mesure stable, consigner<br />
et imprimer la mesure en appuyant sur . Ce mode va consommer une<br />
gr<strong>and</strong>e quantité de l'énergie des piles.<br />
b. Si l'instrument est en mode de mesure AUTO-READ, appuyer sur la touche<br />
pour lancer une lecture. Une fois la lecture stable, l'icône AR s'arrêtera<br />
de clignoter. Une fois la mesure stable, l'affichage se fige et les données sont<br />
consignées et imprimées. Ce mode utilise puise de façon variable sur les<br />
ressources de la pile de l'instrument, selon la fréquence de pression de .<br />
c. Si l'instrument de mesure se trouve en mode de mesure temporisé, il prendra<br />
la mesure de l'oxygène dissous à la fréquence spécifiée dans le menu<br />
configuration (setup). Si des valeurs autres que l'oxygène dissous sont<br />
mesurées, l'instrument va prendre d'autres mesures en continu et mettre<br />
à jour l'affichage en conséquence. L'instrument va consigner et imprimer<br />
les mesures à une fréquence déterminée. Ce mode peut être utilisé pour<br />
prolonger la durée de vie des piles, car la consommation de la sonde RDO<br />
s'en trouve réduite, selon la fréquence définie.<br />
3. Retirer la sonde RDO de l'échantillon, rincer avec de l'eau déminéralisée<br />
ou distillée, sécher, placer dans l'échantillon suivant et répéter l'étape 2.<br />
4. Une fois tous les échantillons mesurés, rincer la sonde RDO avec de l'eau<br />
déminéralisée ou distillée et sécher. Consulter le manuel de la sonde RDO<br />
concernant les techniques de stockage.<br />
Mode d’emploi des instruments de mesure <strong>Thermo</strong> <strong>Scientific</strong> <strong>Orion</strong> <strong>Star</strong> et <strong>Star</strong> <strong>Plus</strong><br />
FR-37
Technique de mesure optique d’oxygène dissous RDO ®<br />
Affichage de température de mesure optique d'oxygène<br />
dissous RDO et calibration<br />
Affichage de température de mesure optique d'oxygène dissous RDO<br />
Les instruments <strong>Star</strong> <strong>Plus</strong> permettent d'afficher la température sur chaque ligne<br />
de mesure en plus de la température indiquée en haut à gauche de l'écran.<br />
Pour afficher la température sur la ligne de mesure d'oxygène dissous RDO :<br />
1. En mode mesure, appuyer sur pour sélectionner la ligne inférieure. L'icône<br />
flèche pointera sur la ligne sélectionnée.<br />
2. Appuyer sur / pour modifier la valeur de la ligne sélectionnée. Il<br />
est possible de modifier la ligne inférieure pour afficher l'oxygène dissous<br />
(% saturation), l'oxygène dissous (mg/L), la pression barométrique (sans icône),<br />
la température (sans icône) ou une ligne vide.<br />
Calibration température de mesure optique d'oxygène dissous RDO<br />
Le mode de calibration de température de l'instrument <strong>Star</strong> <strong>Plus</strong> permet de régler<br />
manuellement la température sur chaque ligne de mesure.<br />
Pour calibrer la température sur la ligne de mesure d'oxygène dissous RDO :<br />
1. En mode mesure, appuyer sur pour sélectionner la ligne de mesure inférieure<br />
et appuyer sur / jusqu'à ce que la température s'affiche.<br />
2. Appuyer sur pour lancer la calibration.<br />
3. Une fois que la mesure se stabilise, l'icône flèche et le premier chiffre vont<br />
clignoter. Saisir la température en appuyant sur / pour régler chaque<br />
chiffre et sur pour passer au chiffre suivant.<br />
4. Appuyer sur pour sauvegarder et quitter la calibration.<br />
FR-38<br />
Mode d’emploi des instruments de mesure <strong>Thermo</strong> <strong>Scientific</strong> <strong>Orion</strong> <strong>Star</strong> et <strong>Star</strong> <strong>Plus</strong>
Chapitre X Technique de conductivité<br />
Menu de configuration (setup) de conductivité<br />
Remarque : se reporter à la section Menu de configuration (setup) pour le Tableau<br />
du menu de configuration (setup) qui contient la liste complète des options de<br />
configuration accompagnées de leur description. Se reporter à l'Annexe A pour<br />
avoir une description des fonctions spéciales du menu configuration (setup).<br />
1. En mode mesure, appuyer sur .<br />
2. Appuyer sur les touches / pour naviguer dans le menu configuration (setup)<br />
jusqu'à ce que s'affiche sur la ligne supérieure.<br />
3. Appuyer sur pour valider la sélection et déplacer l'icône flèche sur la ligne<br />
centrale.<br />
4. Appuyer sur / pour accéder aux différentes options : pour le type de<br />
compensation en température, pour la valeur de coefficient de température<br />
utilisée pour la compensation de température , pour la valeur du<br />
facteur des matières totales dissoutes utilisée pour les mesures de matières<br />
totales dissoutes, pour la valeur nominale de constante de cellule pour<br />
la sonde de conductivité pour la température de référence utilisée en<br />
compensation de température et pour le type de cellule de conductivité.<br />
5. Appuyer sur pour valider la sélection et déplacer l'icône flèche sur la ligne<br />
inférieure.<br />
6. Pour faire défiler la liste des options sur la ligne inférieure, appuyer sur /<br />
jusqu'à ce que l'option souhaitée s'affiche. Pour saisir une valeur numérique pour<br />
une option de la ligne inférieure, appuyer sur / pour modifier chaque<br />
chiffre et sur pour passer au chiffre suivant.<br />
7. Appuyer sur pour valider la sélection et déplacer l'icône flèche sur la ligne<br />
supérieure.<br />
8. Répéter les étapes 3 à 7 pour modifier un autre paramètre de conductivité<br />
ou appuyer sur pour revenir au mode mesure.<br />
Mode d’emploi des instruments de mesure <strong>Thermo</strong> <strong>Scientific</strong> <strong>Orion</strong> <strong>Star</strong> et <strong>Star</strong> <strong>Plus</strong><br />
FR-39
Technique de conductivité<br />
Calibration de conductivité<br />
Remarque : pour une calibration automatique, la constante nominale de cellule de<br />
la sonde de conductivité doit être saisie dans le menu configuration (setup) avant de<br />
lancer la calibration.<br />
1. En mode mesure, appuyer sur jusqu'à ce que l'icône flèche pointe sur la ligne<br />
centrale, appuyer sur jusqu'à ce que l'icône µS/cm ou mS/cm s'affiche puis<br />
appuyer sur pour lancer la calibration.<br />
2. Rincer la sonde avec de l'eau déminéralisée et la placer dans l'étalon de conductivité.<br />
3. Pour effectuer une calibration manuelle – L'écran de calibration manuelle va afficher<br />
la constante de cellule sur la ligne supérieure, la valeur de conductivité et l'étalon<br />
de calibration sur la ligne centrale et sur la ligne inférieure. Pour modifier la<br />
constante de cellule maintenir la touche enfoncée jusqu'à ce que le premier<br />
chiffre à modifier clignote, appuyer sur / pour modifier la valeur du chiffre<br />
clignotant puis continuer avec les autres chiffres jusqu'à ce que la valeur de<br />
conductivité affichée corresponde à l'étalon pour la température mesurée. Une fois<br />
la valeur réglée, maintenir la touche enfoncée jusqu'à ce que le point décimal<br />
soit au bon endroit. Appuyer sur pour sauvegarder et quitter la calibration.<br />
Remarque : sur l'écran de calibration manuelle, changer la constante de cellule dans<br />
les cinq secondes ou l'instrument lancera la calibration automatique/directe. Si cela<br />
survient, maintenir enfoncée la touche pour annuler la calibration et répéter<br />
l'opération.<br />
4. Pour effectuer une calibration automatique ou directe – Attendre que l'instrument<br />
aille depuis l'écran de calibration manuelle à l'écran de calibration automatique/<br />
directe. L'écran de calibration directe/automatique affichera sur la valeur de<br />
l'étalon de conductivité sur la ligne centrale et sur la ligne inférieure.<br />
a. Calibration automatique – Lorsque l'icône µS/cm ou mS/cm s'arrête de<br />
clignoter, l'instrument affiche la valeur corrigée en température de l'étalon<br />
de conductivité.<br />
b. Calibration directe – Lorsque l'icône µS/cm ou mS/cm s'arrête de clignoter,<br />
saisir la valeur de conductivité de l'étalon à la température mesurée. Appuyer<br />
sur jusqu'à ce que le premier chiffre à changer clignote, appuyer sur /<br />
pour modifier le chiffre clignotant et poursuivre avec les autres chiffres<br />
jusqu'à ce que l'instrument affiche la valeur correcte. Une fois la valeur réglée,<br />
maintenir la touche enfoncée jusqu'à ce que le point décimal soit au<br />
bon endroit.<br />
FR-40<br />
Mode d’emploi des instruments de mesure <strong>Thermo</strong> <strong>Scientific</strong> <strong>Orion</strong> <strong>Star</strong> et <strong>Star</strong> <strong>Plus</strong>
Technique de conductivité<br />
5. Appuyer sur pour passer au point de calibration suivant, rincer la sonde de<br />
conductivité avec de l'eau déminéralisée ou distillée, placer la sonde dans l'étalon<br />
de conductivité suivant et répéter les étapes 4a / 4b ou appuyer sur pour<br />
sauvegarder et quitter la calibration.<br />
6. La constante de cellule sera affichée dans le champ principal et l'instrument<br />
va automatiquement passer en mode mesure.<br />
Mesure de conductivité<br />
Remarque : activer la fonction de mémorisation de données automatique pour<br />
transmettre des mesures à la mémoire de l'instrument à la fréquence spécifiée pour<br />
chaque mode de mesure. Voir la section Archivage et récupération des données pour<br />
plus de détails. Si la fonction de mémorisation de données automatique est désactivée,<br />
raccorder l'instrument à une imprimante ou un ordinateur pour consigner les mesures.<br />
1. Rincer la sonde de conductivité avec de l'eau déminéralisée ou distillée. Éliminer<br />
toute l'eau en excès et essuyer la sonde avec un tissu non pelucheux.<br />
2. Placer la sonde de conductivité dans l'échantillon.<br />
a. Si l'instrument est en mode de mesure continue, il débutera immédiatement<br />
les mesures et mettra à jour continuellement l'affichage. L'icône μS/cm ou<br />
mS/cm clignotera jusqu'à ce que la mesure soit stable. Une fois la mesure<br />
stable, consigner et imprimer la mesure en appuyant sur . Dans le cadre<br />
de l'utilisation d'un instrument de table avec agitateur, appuyer sur pour<br />
lancer l'agitateur. Appuyer sur à nouveau pour couper l'agitateur avant de<br />
retirer la sonde et l'agitateur de l'échantillon.<br />
b. Si l'instrument est en mode de mesure AUTO-READ, appuyer sur la touche<br />
pour lancer une lecture. Une fois la lecture stable, l'icône AR s'arrêtera<br />
de clignoter. Une fois la mesure stable, l'affichage se fige et les données sont<br />
consignées et imprimées. Dans le cadre de l'utilisation d'un instrument de<br />
table avec agitateur, l'agitateur s'allumera lorsque l'on appuie sur et<br />
s'arrêtera lorsque la mesure est stable.<br />
c. Si l'instrument est en mode de mesure temporisé, il débutera immédiatement<br />
les mesures et mettra à jour continuellement l'affichage. Les mesures seront<br />
consignées et imprimées à la fréquence indiquée dans le menu configuration<br />
(setup). Dans le cadre de l'utilisation d'un instrument de table avec agitateur,<br />
appuyer sur pour lancer l'agitateur. Appuyer sur à nouveau pour couper<br />
l'agitateur avant de retirer la sonde et l'agitateur de l'échantillon.<br />
Mode d’emploi des instruments de mesure <strong>Thermo</strong> <strong>Scientific</strong> <strong>Orion</strong> <strong>Star</strong> et <strong>Star</strong> <strong>Plus</strong><br />
FR-41
Technique de conductivité<br />
3. Retirer la sonde de conductivité de l'échantillon, rincer avec de l'eau déminéralisée<br />
ou distillée, sécher, placer dans l'échantillon suivant et répéter l'étape 2.<br />
4. Une fois tous les échantillons mesurés, rincer la sonde de conductivité avec de<br />
l'eau déminéralisée ou distillée et sécher. Consulter le manuel de la sonde de<br />
conductivité concernant les techniques de stockage.<br />
Affichage de température de conductivité et calibration<br />
Affichage de température de conductivité<br />
Les instruments <strong>Star</strong> <strong>Plus</strong> permettent d'afficher la température sur chaque ligne<br />
de mesure en plus de la température indiquée en haut à gauche de l'écran.<br />
1. En mode mesure, appuyer sur pour sélectionner la ligne centrale. L'icône<br />
flèche pointera sur la ligne sélectionnée.<br />
2. Appuyer sur / pour modifier la valeur de la ligne sélectionnée. La ligne<br />
centrale peut afficher la conductivité (µS/cm ou mS/cm), les matières totales<br />
dissoutes (mg/L), la salinité (ppt), la résistivité (MΩ-cm), la température (aucune<br />
icône) ou une ligne vide.<br />
Calibration de température de conductivité<br />
Le mode de calibration de température de l'instrument <strong>Star</strong> <strong>Plus</strong> permet de régler<br />
manuellement la température sur chaque ligne de mesure.<br />
1. En mode mesure, appuyer sur pour sélectionner la ligne de mesure centrale<br />
et appuyer sur / jusqu'à ce que la température s'affiche pour la ligne<br />
sélectionnée.<br />
2. Appuyer sur pour lancer la calibration.<br />
3. Une fois que la mesure se stabilise, l'icône flèche et le premier chiffre vont clignoter.<br />
Saisir la température en appuyant sur / pour régler chaque chiffre et sur<br />
pour passer au chiffre suivant.<br />
4. Appuyer sur pour sauvegarder et quitter la calibration.<br />
FR-42<br />
Mode d’emploi des instruments de mesure <strong>Thermo</strong> <strong>Scientific</strong> <strong>Orion</strong> <strong>Star</strong> et <strong>Star</strong> <strong>Plus</strong>
Chapitre XI Technique ISE<br />
Menu de configuration (setup) ISE<br />
Remarque : se reporter à la section Menu de configuration (setup) pour le Tableau<br />
du menu de configuration (setup) qui contient la liste complète des options de<br />
configuration accompagnées de leur description. Se reporter à l'Annexe A pour<br />
avoir une description des fonctions spéciales du menu configuration (setup).<br />
1. En mode mesure, appuyer sur .<br />
2. Appuyer sur les touches / pour naviguer dans le menu configuration (setup)<br />
jusqu'à ce que s'affiche sur la ligne supérieure.<br />
3. Appuyer sur pour valider la sélection et déplacer l'icône flèche sur la ligne<br />
centrale.<br />
4. Appuyer sur / pour accéder aux options : pour la résolution de<br />
mesure ISE, pour les unités de mesure ISE, pour la plage de<br />
calibration ISE et pour la correction automatique de blanc non linéaire.<br />
5. Appuyer sur pour valider la sélection et déplacer l'icône flèche sur la ligne<br />
inférieure.<br />
6. Pour faire défiler la liste des options sur la ligne inférieure, appuyer sur /<br />
jusqu'à ce que l'option souhaitée s'affiche. Pour saisir une valeur numérique pour<br />
une option de la ligne inférieure, appuyer sur / pour modifier chaque<br />
chiffre et sur pour passer au chiffre suivant.<br />
7. Appuyer sur pour valider la sélection et déplacer l'icône flèche sur la ligne<br />
supérieure.<br />
8. Répéter les étapes 3 à 7 pour modifier un autre paramètre ISE ou appuyer sur<br />
pour revenir au mode mesure.<br />
Mode d’emploi des instruments de mesure <strong>Thermo</strong> <strong>Scientific</strong> <strong>Orion</strong> <strong>Star</strong> et <strong>Star</strong> <strong>Plus</strong><br />
FR-43
Technique ISE<br />
Calibration ISE<br />
Les étalons de calibration doivent être préparés en utilisant les mêmes unités ISE que<br />
les résultats attendus des échantillons. Toujours calibrer avec l'étalon de calibration<br />
ayant la concentration la plus faible en premier et atteindre l'étalon de calibration de<br />
concentration la plus forte en dernier. Les réactifs, comme les solutions d'ajustement<br />
de la force ionique, doivent être ajoutés aux échantillons et aux étalons conformément<br />
aux instructions du manuel de l'électrode.<br />
1. Préparer l'électrode, les étalons et toutes les solutions nécessaires conformément<br />
aux instructions du manuel de l'électrode.<br />
2. IEn mode mesure, appuyer sur jusqu'à ce que l'icône flèche pointe sur la ligne<br />
supérieure, appuyer sur jusqu'à ce que l'icône ISE s'affiche puis afficher sur<br />
pour lancer la calibration.<br />
3. Rincer l'électrode avec de l'eau déminéralisée ou distillée, éliminer toute l'eau en<br />
excès, essuyer puis placer l'électrode dans l'étalon de concentration la plus faible.<br />
4. Attendre que l'icône ISE s'arrête de clignoter. Appuyer sur jusqu'à ce que le<br />
premier chiffre à changer clignote, appuyer sur / pour modifier le chiffre<br />
clignotant et poursuivre avec les autres chiffres jusqu'à ce que l'instrument affiche<br />
la valeur de concentration de l'étalon. Une fois la valeur de l'étalon réglée, maintenir<br />
la touche enfoncée jusqu'à ce que le point décimal soit au bon endroit.<br />
5. Appuyer sur pour passer à l'étalon de calibration de plus faible concentration<br />
suivant et répéter les étapes 3 et 4, en progressant de la concentration la plus<br />
faible à la plus élevée, ou appuyer sur pour sauvegarder et terminer la<br />
calibration.<br />
6. La pente de l'électrode réelle, en mV par dizaine d'unité de concentration, sera<br />
affichée dans le champ principal et s'affichera dans le champ inférieur.<br />
a. Pour une calibration à un point, appuyer sur et / pour modifier la<br />
pente. Pour modifier le signe de la pente, négatif ou positif, appuyer sur<br />
jusqu'à ce qu'aucun des chiffres ne clignote et que l'icône flèche clignote puis<br />
appuyer sur pour modifier le signe de la pente. Appuyer sur pour<br />
revenir au mode mesure.<br />
b. Pour une calibration à plus de deux points, l'instrument passera<br />
automatiquement en mode mesure une fois la pente affichée.<br />
FR-44<br />
Mode d’emploi des instruments de mesure <strong>Thermo</strong> <strong>Scientific</strong> <strong>Orion</strong> <strong>Star</strong> et <strong>Star</strong> <strong>Plus</strong>
Mesure ISE<br />
Remarque : activer la fonction de mémorisation de données automatique pour<br />
transmettre des mesures à la mémoire de l'instrument à la fréquence spécifiée pour<br />
chaque mode de mesure. Voir la section Archivage et récupération des données pour<br />
plus de détails. Si la fonction de mémorisation de données automatique est désactivée,<br />
raccorder l'instrument à une imprimante ou un ordinateur pour consigner les mesures.<br />
1. Rincer l'électrode avec de l'eau déminéralisée ou distillée. Éliminer toute l'eau<br />
en excès et essuyer l'électrode avec un tissu non pelucheux.<br />
2. Placer l'électrode dans l'échantillon.<br />
a. Si l'instrument est en mode de mesure continue, il débutera immédiatement<br />
les mesures et mettra à jour continuellement l'affichage. Une fois la lecture<br />
stable, l'icône ISE s'arrêtera de clignoter. Une fois la mesure stable, consigner<br />
et imprimer la mesure en appuyant sur . Dans le cadre de l'utilisation d'un<br />
instrument de table avec agitateur, appuyer sur pour lancer l'agitateur.<br />
Appuyer sur à nouveau pour couper l'agitateur avant de retirer l'électrode<br />
et l'agitateur de l'échantillon.<br />
b. Si l'instrument est en mode de mesure AUTO-READ, appuyer sur la touche<br />
pour lancer une lecture. Une fois la lecture stable, l'icône AR s'arrêtera<br />
de clignoter. Une fois la mesure stable, l'affichage se fige et les données sont<br />
consignées et imprimées. Dans le cadre de l'utilisation d'un instrument de<br />
table avec agitateur, l'agitateur s'allumera lorsque l'on appuie sur et<br />
s'arrêtera lorsque la mesure est stable.<br />
c. Si l'instrument est en mode de mesure temporisé, il débutera immédiatement<br />
les mesures et mettra à jour continuellement l'affichage. Les mesures seront<br />
consignées et imprimées à la fréquence indiquée dans le menu configuration<br />
(setup). Dans le cadre de l'utilisation d'un instrument de table avec agitateur,<br />
appuyer sur pour lancer l'agitateur. Appuyer sur à nouveau pour<br />
couper l'agitateur avant de retirer l'électrode et l'agitateur de l'échantillon.<br />
3. Retirer l'électrode de l'échantillon, rincer avec de l'eau déminéralisée ou distillée,<br />
sécher, placer dans l'échantillon suivant et répéter l'étape 2.<br />
4. Une fois tous les échantillons mesurés, rincer l'électrode avec de l'eau<br />
déminéralisée ou distillée et sécher. Consulter le manuel de l'électrode<br />
concernant les techniques de stockage.<br />
Technique ISE<br />
Mode d’emploi des instruments de mesure <strong>Thermo</strong> <strong>Scientific</strong> <strong>Orion</strong> <strong>Star</strong> et <strong>Star</strong> <strong>Plus</strong><br />
FR-45
Technique ISE<br />
Affichage de température ISE et calibration<br />
Affichage de température ISE<br />
Les instruments <strong>Star</strong> <strong>Plus</strong> permettent d'afficher la température sur chaque ligne<br />
de mesure en plus de la température indiquée en haut à gauche de l'écran.<br />
Pour afficher la température sur la ligne de mesure ISE :<br />
1. Maintenir enfoncée la touche jusqu'à ce que l'instrument affiche le mode<br />
mesure.<br />
2. Appuyer sur pour sélectionner la ligne supérieure. L'icône flèche pointera<br />
sur la ligne sélectionnée.<br />
3. Appuyer sur / pour modifier la valeur de la ligne sélectionnée. La ligne<br />
supérieure peut être modifiée pour afficher le pH (pH), la tension en millivolts<br />
(mV), la tension relative en millivolts (RmV), la concentration (ISE), la température<br />
(sans icône) ou une ligne vide.<br />
Calibration de température ISE<br />
Le mode de calibration de température de l'instrument <strong>Star</strong> <strong>Plus</strong> permet de régler<br />
manuellement la température sur chaque ligne de mesure.<br />
Pour calibrer la température sur la ligne de mesure ISE :<br />
1. En mode mesure, appuyer sur pour sélectionner la ligne de mesure supérieure<br />
et appuyer sur / jusqu'à ce que la température s'affiche pour la ligne<br />
sélectionnée.<br />
2. Appuyer sur pour lancer la calibration.<br />
3. Une fois que la mesure se stabilise, l'icône flèche et le premier chiffre vont<br />
clignoter. Saisir la température en appuyant sur / pour régler chaque<br />
chiffre et sur pour passer au chiffre suivant.<br />
4. Appuyer sur pour sauvegarder et quitter la calibration.<br />
FR-46<br />
Mode d’emploi des instruments de mesure <strong>Thermo</strong> <strong>Scientific</strong> <strong>Orion</strong> <strong>Star</strong> et <strong>Star</strong> <strong>Plus</strong>
Chapitre XII Archivage et récupération<br />
des données<br />
Mémorisation de données et journal de calibration<br />
Tous les instruments de mesure de pH/ISE 3-<strong>Star</strong> <strong>Plus</strong> et 4-<strong>Star</strong> <strong>Plus</strong> possèdent<br />
une mémorisation de données de 1000 points. Les instruments de mesure de pH/<br />
conductivité et pH/oxygène dissous 4-<strong>Star</strong> <strong>Plus</strong> possèdent une mémorisation de<br />
données 750 points. Les instruments 5-<strong>Star</strong> <strong>Plus</strong> possèdent une mémorisation de<br />
données 500 points. L'instrument de mesure 2-<strong>Star</strong> possède une mémorisation de<br />
données de 50 points et tous les instruments de mesure <strong>Orion</strong> <strong>Star</strong> possèdent une<br />
mémorisation de données de 200 points.<br />
Les impressions de l'instrument <strong>Star</strong> <strong>Plus</strong> ont améliorées afin d'inclure des informations<br />
supplémentaires. Les impressions de calibration pH et ISE comprennent maintenant<br />
la pente moyenne, la pente entre les points et E o par point. Les impressions d'oxygène<br />
dissous polarographique comprennent maintenant la pente, la température de<br />
membrane et la température de la solution.<br />
Fonction de mémorisation de données automatique<br />
Les instruments de mesure 3-<strong>Star</strong>, 4-<strong>Star</strong> et 5-<strong>Star</strong> <strong>Plus</strong> ont été améliorés avec<br />
une fonction de mémorisation de données automatique qui peut être activée<br />
ou désactivée. Pour activer l'enregistrement automatique des données :<br />
1. En mode mesure, appuyer sur .<br />
2. Appuyer sur / jusqu'à ce que s'affiche sur la ligne supérieure.<br />
3. Appuyer sur pour valider la sélection et déplacer l'icône flèche sur la ligne<br />
centrale, appuyer ensuite sur / jusqu'à ce que s'affiche.<br />
4. Appuyer sur pour valider la sélection et déplacer l'icône flèche sur la ligne<br />
inférieure, appuyer ensuite sur / jusqu'à ce que s'affiche.<br />
5. Appuyer sur pour valider la sélection et déplacer l'icône flèche sur la ligne<br />
supérieure.<br />
6. Appuyer sur pour sauvegarder et revenir au mode mesure.<br />
Mode d’emploi des instruments de mesure <strong>Thermo</strong> <strong>Scientific</strong> <strong>Orion</strong> <strong>Star</strong> et <strong>Star</strong> <strong>Plus</strong><br />
FR-47
Archivage et récupération des données<br />
Paramètre de suppression de mémorisation de données<br />
Le paramètre de suppression de mémorisation de données permet de comm<strong>and</strong>er<br />
à l'instrument de supprimer automatiquement la mémorisation de données après sa<br />
transmission vers une imprimante ou un ordinateur et si l'instrument doit écraser les<br />
points de données lorsque la mémorisation de données est pleine. Si ce paramètre<br />
est sur , l'instrument supprimera automatiquement la mémorisation de données<br />
une fois celle-ci transmise à une imprimante ou un ordinateur. L'instrument affichera<br />
également le message d'erreur<br />
lorsque les 200 points de la mémorisation<br />
de données sont pleins et qu'il faut transmettre cette dernière à une imprimante ou<br />
un ordinateur pour effacer le message d'erreur. Si ce paramètre est sur , l'instrument<br />
écrasera automatiquement la mémorisation de données la plus ancienne lorsque les<br />
200 points de la mémorisation de données sont pleins et n'effacera pas celle-ci une<br />
fois transmise à une imprimante ou un ordinateur.<br />
1. En mode mesure, appuyer sur .<br />
2. Appuyer sur / jusqu'à ce que s'affiche sur la ligne supérieure.<br />
3. Appuyer sur pour valider la sélection et déplacer l'icône flèche sur la ligne<br />
centrale, appuyer ensuite sur / jusqu'à ce que s'affiche.<br />
4. Appuyer sur pour valider la sélection et déplacer l'icône flèche sur la ligne<br />
inférieure, appuyer ensuite sur / jusqu'à ce que ou s'affiche.<br />
5. Appuyer sur pour valider la sélection et déplacer l'icône flèche sur la ligne<br />
supérieure.<br />
6. Appuyer sur pour sauvegarder et revenir au mode mesure.<br />
Remarque : si la mémorisation de données n'est pas requise, régler le paramètre<br />
de suppression de mémorisation de données sur pour éviter l'affichage du<br />
message d'erreur 038 (mémorisation de données pleine).<br />
FR-48<br />
Mode d’emploi des instruments de mesure <strong>Thermo</strong> <strong>Scientific</strong> <strong>Orion</strong> <strong>Star</strong> et <strong>Star</strong> <strong>Plus</strong>
Affichage et impression de la mémorisation de données et du journal<br />
de calibration<br />
Les instruments de mesure 3-<strong>Star</strong>, 4-<strong>Star</strong> et 5-<strong>Star</strong> <strong>Plus</strong> ont été améliorés avec une<br />
fonction d'affichage de journal de calibration en plus de l'affichage et de l'impression<br />
de la mémorisation de données, et de l'impression du journal de calibration. Les<br />
instruments <strong>Orion</strong> <strong>Star</strong> permettent l'affichage et l'impression de la mémorisation<br />
de données et l'impression du journal de calibration.<br />
Pour afficher la mémorisation de données ou le journal de calibration :<br />
1. En mode mesure, appuyer sur .<br />
2. Appuyer sur / pour faire défiler afin d'afficher la mémorisation de<br />
données ou pour afficher le journal de calibration (instruments <strong>Star</strong> <strong>Plus</strong><br />
uniquement).<br />
3. Appuyer sur . L'instrument affiche alors l'écran date/heure. Le numéro<br />
de journal s'affichera au sommet de l'écran et l'heure, la date et l'année de<br />
l'enregistrement seront respectivement affichées sur les lignes supérieure,<br />
centrale et inférieure. Appuyer sur / pour naviguer dans le journal.<br />
4. Appuyer sur . L'instrument affichera les données ou le point de calibration<br />
associé à l'écran date/heure sélectionné.<br />
a. Appuyer sur pour imprimer un point de données unique.<br />
b. Appuyer sur / pour naviguer dans le journal.<br />
c. Appuyer sur pour revenir à l'écran date/heure.<br />
5. Pour quitter le mode d'affichage de journal, appuyer sur jusqu'à<br />
ce que l'instrument affiche l'écran date/heure et appuyer sur .<br />
Pour transmettre la mémorisation de données ou le journal<br />
de calibration à une imprimante ou un ordinateur :<br />
1. Connecter l'instrument à une imprimante ou un ordinateur et vérifier le débit et<br />
les paramètres de sortie dans le menu de configuration (setup) de l'instrument.<br />
2. En mode mesure, appuyer sur .<br />
Archivage et récupération des données<br />
Mode d’emploi des instruments de mesure <strong>Thermo</strong> <strong>Scientific</strong> <strong>Orion</strong> <strong>Star</strong> et <strong>Star</strong> <strong>Plus</strong><br />
FR-49
Archivage et récupération des données<br />
3. Appuyer sur / pour faire défiler afin d'imprimer la mémorisation<br />
de données ou pour imprimer le journal de calibration. Les instruments<br />
<strong>Orion</strong> <strong>Star</strong> afficheront à la place de .<br />
4. Appuyer sur pour transmettre les données sélectionnées à l'imprimante<br />
ou l'ordinateur.<br />
Interface avec un ordinateur :<br />
Les instruments <strong>Orion</strong> <strong>Star</strong> et <strong>Star</strong> <strong>Plus</strong> peuvent transmettre des données de mesure<br />
et de calibration à un ordinateur sous un format délimité par des virgule. De cette façon,<br />
il est facile d'exploiter les données avec des programmes comme Excel. Sélectionner<br />
le paramètre de sortie , , dans le menu configuration (setup).<br />
Pour transmettre des données depuis l'instrument vers un ordinateur à l'aide de<br />
l'HyperTerminal :<br />
1. Raccorder l'instrument au port de transmission de l'ordinateur avec un câble<br />
d'interface, Cat. No. 1010053.<br />
2. Cliquer sur le bouton démarrer du bureau de l'ordinateur, en bas à gauche.<br />
Sélectionner Programmes, Accessoires, Communications et HyperTerminal.<br />
3. Lorsque la fenêtre de l'HyperTerminal s'affiche, saisir un nom de fichier,<br />
sélectionner une icône correspondant à la connexion et cliquer sur le bouton OK.<br />
4. Lorsqu'une autre fenêtre s'ouvre, se rendre dans Se connecter en utilisant et<br />
avec le menu déroulant choisir le port COM auquel est relié l'instrument, cliquer<br />
ensuite sur le bouton OK.<br />
5. Une fenêtre s'ouvrira indiquant les propriétés du port COM. Sélectionner les<br />
paramètres suivants à l'aide des menus déroulants appropriés et cliquer sur<br />
le bouton OK.<br />
Bits par seconde : 9600<br />
Bits de données : 8<br />
Parité : Aucun<br />
Bits d'arrêt : 1<br />
Contrôle de flux : Matériel<br />
6. Transmettre des données depuis l'instrument à l'HyperTerminal.<br />
FR-50<br />
Mode d’emploi des instruments de mesure <strong>Thermo</strong> <strong>Scientific</strong> <strong>Orion</strong> <strong>Star</strong> et <strong>Star</strong> <strong>Plus</strong>
Chapitre XIII Déclaration de conformité<br />
Fabricant :<br />
Adresse :<br />
<strong>Thermo</strong> Fisher <strong>Scientific</strong> Inc.<br />
166 Cummings<br />
CenterBeverly, MA 01915<br />
États-Unis d'Amérique<br />
Nous déclarons que les produits suivants, décrits ci-dessous, sont en conformité avec<br />
les directives et normes indiquées ci-après :<br />
Produit(s) :<br />
Instruments de mesure de pH, de conductivité, d'oxygène dissous<br />
et/ou d'ISE. Les instruments de table possédant les caractéristiques<br />
électriques suivantes : 100 à 240 V c.a., 50/60 Hz, 0,5 A, et les<br />
instruments portatifs utilisent quatre piles non rechargeables AA.<br />
Instruments de table<br />
Instrument de mesure de pH/ISE/<br />
conductivité/OD 5-<strong>Star</strong> <strong>Plus</strong><br />
Instrument de mesure de pH/<br />
conductivité 4-<strong>Star</strong> <strong>Plus</strong><br />
pH/OD 4-<strong>Star</strong> <strong>Plus</strong><br />
Instrument de mesure de pH/<br />
ISE 4-<strong>Star</strong> <strong>Plus</strong><br />
Instrument de mesure de conductivité<br />
3-<strong>Star</strong> <strong>Plus</strong><br />
Instrument de mesure d'OD 3-<strong>Star</strong> <strong>Plus</strong><br />
Instrument de mesure de pH 3-<strong>Star</strong> <strong>Plus</strong><br />
Instrument de mesure de pH 2-<strong>Star</strong><br />
Classe de l'équipement :<br />
Instruments portatifs<br />
Instrument de mesure de pH/ISE/conductivité/<br />
OD 5-<strong>Star</strong> <strong>Plus</strong><br />
Instrument de mesure de pH/conductivité/<br />
OD 5-<strong>Star</strong> <strong>Plus</strong><br />
Instrument de mesure de pH/conductivité 4-<strong>Star</strong> <strong>Plus</strong><br />
Instrument de mesure pH/OD 4-<strong>Star</strong> <strong>Plus</strong><br />
Instrument de mesure de pH/ISE 4-<strong>Star</strong> <strong>Plus</strong><br />
Instrument de mesure de conductivité 3-<strong>Star</strong> <strong>Plus</strong><br />
Instrument de mesure de pH 3-<strong>Star</strong> <strong>Plus</strong><br />
Instrument de mesure d'OD 3-<strong>Star</strong> <strong>Plus</strong><br />
Instrument de mesure optique d'OD/pH/<br />
conductivité 5-<strong>Star</strong> <strong>Plus</strong> RDO ®<br />
Instrument de mesure optique d'OD/<br />
pH RDO 4-<strong>Star</strong> <strong>Plus</strong><br />
Instrument de mesure optique d'OD RDO 3-<strong>Star</strong> <strong>Plus</strong><br />
Les instruments de table de mesure, de<br />
contrôle et de laboratoire sont CEM classe A<br />
Les instruments portatifs sont CEM classe D<br />
Mode d’emploi des instruments de mesure <strong>Thermo</strong> <strong>Scientific</strong> <strong>Orion</strong> <strong>Star</strong> et <strong>Star</strong> <strong>Plus</strong><br />
FR-51
Déclaration de conformité<br />
Directive(s) et normes(s) :<br />
• 89/336/CEE – Compatibilité électromagnétique (Directive CEM)<br />
• FR 61326:1997 + A1 : 1998 + A2:2001 – Matériel électrique de mesure,<br />
de comm<strong>and</strong>e et de laboratoire – Exigences relatives à la CEM<br />
• 73/23/CEE – Directive basse tension (DBT)<br />
• FR 61010-1 : 2001 – Règles de sécurité pour appareils électriques de<br />
mesurage, de régulation et de laboratoire – Prescriptions générales<br />
Représentant officiel du fabricant : Date :<br />
Patrick Chiu 1er décembre 2008<br />
Ingénieur principal de contrôle de la qualité,<br />
Conformité aux règlements<br />
Conformité DEEE<br />
Ce produit doit être conforme à la directive européenne relative aux déchets<br />
d'équipements électriques ou électroniques (DEEE) 2002/96/CE. Il comporte<br />
le symbole suivant :<br />
Nous somme sous contrat avec une ou plusieurs sociétés de recyclage/de mise au<br />
rebut au sein de chaque état membre de l'UE et ce produit doit être recyclé ou mis<br />
au rebut par leur biais. Il est possible de trouver plus d'informations sur la conformité<br />
avec ces directives, les sociétés de recyclage établies localement ainsi que sur les<br />
produits <strong>Thermo</strong> <strong>Scientific</strong> <strong>Orion</strong> permettant la détection de substances soumises<br />
aux directives RoHS sur le site www.thermo.com/WEEERoHS.<br />
FR-52<br />
Mode d’emploi des instruments de mesure <strong>Thermo</strong> <strong>Scientific</strong> <strong>Orion</strong> <strong>Star</strong> et <strong>Star</strong> <strong>Plus</strong>
Chapitre XIV Dépannage<br />
Test automatique de l'instrument<br />
1. Débrancher toutes les électrodes et sondes raccordées à l'instrument et recouvrir<br />
toutes les entrées de l'instrument avec les caches noirs.<br />
2. Mettre l'instrument sous tension, attendre l'affichage du numéro de révision<br />
du logiciel et appuyer sur .<br />
3. Tous les segments de l'affichage s'allumeront. Contrôler visuellement les<br />
segments de l'affichage pour vérifier qu'ils sont tous allumés et appuyer sur .<br />
4. Tous les segments de l'affichage s'éteindront. Contrôler visuellement les<br />
segments de l'affichage pour vérifier qu'ils sont tous éteints et appuyer sur .<br />
5. L'affichage indiquera . Appuyer sur toutes les touches du clavier, l'une après<br />
l'autre, dans un ordre quelconque. Si la durée entre chaque pression de touche<br />
dépasse les cinq secondes, l'affichage indiquera<br />
, ce qui indique la<br />
présence d'un problème de touche. Appuyer sur pour effacer le message<br />
d'erreur 033 et terminer le test automatique. Si toutes les touches sont enfoncées<br />
et fonctionnent, l'instrument va redémarrer et passer en mode mesure.<br />
Remarque : si l'instrument indique<br />
lors du test automatique, veiller à ce<br />
que toutes les électrodes soient bien déconnectées de l'instrument, que toutes les<br />
entrées de l'instrument sont couvertes par les caches noirs et que le cache de de<br />
court-circuit BNC est correctement placé sur la prise BNC de l'instrument. Ce code<br />
d'erreur est généralement renvoyé si le cache de court-circuit BNC est manquant ou<br />
mal connecté lors du test automatique.<br />
Mode d’emploi des instruments de mesure <strong>Thermo</strong> <strong>Scientific</strong> <strong>Orion</strong> <strong>Star</strong> et <strong>Star</strong> <strong>Plus</strong><br />
FR-53
Dépannage<br />
Codes d'erreur de l'instrument<br />
• Si la valeur indiquée sur l'affichage est clignotant, cela signifie que la<br />
valeur est hors plage. Effectuer le test automatique, nettoyer l'électrode selon<br />
les instructions du mode d’emploi de l'électrode et recalibrer l'électrode avec<br />
de nouveaux étalons.<br />
• Si l'icône est allumée et que la valeur clignote, l'électrode doit être calibrée<br />
selon l'intervalle de calibration défini par l'utilisateur ou la pente du pH se situe<br />
en dehors de la plage de 85 % à 115 %.<br />
• Appuyer sur pour effacer un code d'erreur. En cas de code d'erreur,<br />
s'affiche sur la ligne centrale et trois caractères alphanumériques sont indiqués<br />
sur la ligne inférieure. Certains codes sont des erreurs, d'autres des<br />
avertissements et enfin certains sont simplement informatifs.<br />
Code Description Dépannage<br />
d'erreur<br />
002, 026, Erreur matérielle Appuyer sur pour effacer l'erreur. Si cette erreur se reproduit à nouveau,<br />
E##, F## ou de mémoire prendre contact avec le support technique.<br />
005 Valeur hors de la Appuyer sur et saisir la valeur à nouveau. Vérifier les caractéristiques<br />
plage autorisée de l'instrument pour connaître les plages admises.<br />
033 Panne de clavier Relancer le test automatique. Une fois que l'instrument est prêt , appuyer<br />
sur toutes les touches, l'une après l'autre, à moins de cinq secondes d'intervalle<br />
entre chacune d'entre elles, touche power comprise.<br />
034 Panne d'entrée BNC Déconnecter toutes les électrodes de l'instrument, connecter le cache de courtcircuit<br />
BNC à l'instrument et répéter le test automatique.<br />
038 Mémorisation de<br />
données pleine<br />
D## Erreur de comm<strong>and</strong>e<br />
à distance<br />
107 Erreur d'étalon<br />
de calibration pH<br />
109 Pente de pH ou<br />
décalages de<br />
calibration incorrects<br />
200 Erreur d'interface<br />
de passeur<br />
d'échantillons<br />
201 Erreur de signal<br />
de passeur<br />
d'échantillons<br />
Transmettre la mémorisation de données à une imprimante ou un ordinateur,<br />
désactiver la mémorisation des données automatique dans le menu configuration<br />
(setup) (instruments <strong>Star</strong> <strong>Plus</strong> uniquement) ou changer le paramètre de mémorisation<br />
de données sur , , dans le menu configuration (setup) pour que<br />
l'instrument supprime les points de mémorisation lorsque la mémoire est pleine.<br />
Vérifier que les instructions de programmations sont correctes, que les<br />
comm<strong>and</strong>es, les noms et les valeurs sont corrects.<br />
La tension en millivolts mesurée lors de la calibration est la même pour deux<br />
tampons. Revoir la procédure de calibration et vérifier que l'électrode a été<br />
placée dans les tampons au bon moment. Nettoyer l'électrode selon les<br />
instructions du mode d’emploi de l'électrode. Calibrer à nouveau l'électrode<br />
avec des nouveaux tampons.<br />
Nettoyer l'électrode selon les instructions du mode d’emploi de l'électrode.<br />
Calibrer à nouveau l'électrode avec des nouveaux tampons.<br />
L'instrument ne peut transmettre de signal au passeur d'échantillons. Veiller<br />
à ce que le passeur d'échantillons soit correctement connecté à l'instrument.<br />
Le passeur d'échantillons ne peut recevoir de signal depuis l'instrument. Revoir<br />
les paramètres de configuration de l'instrument et veiller à ce que le débit de<br />
transmission de l'instrument soit sur 1200.<br />
FR-54<br />
Mode d’emploi des instruments de mesure <strong>Thermo</strong> <strong>Scientific</strong> <strong>Orion</strong> <strong>Star</strong> et <strong>Star</strong> <strong>Plus</strong>
Dépannage<br />
Code<br />
d'erreur<br />
Description<br />
202 Le passeur<br />
d'échantillons<br />
est bloqué<br />
203 Lecture instable<br />
en provenance du<br />
passeur d'échantillons<br />
306 Erreur correction<br />
automatique de<br />
blanc ISE<br />
307 Erreur d'étalon<br />
de calibration ISE<br />
Dépannage<br />
Couper le passeur d'échantillons et attendre 45 secondes avant de le rallumer.<br />
Le passeur d'échantillons revient à sa position d'origine.<br />
Les mesures prises avec le passeur d'échantillons sont instables. Vérifier le bon<br />
fonctionnement des électrodes. Veiller à ce que les câbles de l'électrode soient<br />
correctement raccordés.<br />
Désactiver la correction automatique de blanc dans le menu configuration<br />
(setup) et calibrer à nouveau l'instrument avec un étalon de concentration nulle.<br />
La tension en millivolts mesurée lors de la calibration est la même pour deux<br />
étalons. Revoir la procédure de calibration et vérifier que l'électrode a été<br />
placée dans les étalons au bon moment. Nettoyer l'électrode selon les<br />
instructions du mode d’emploi de l'électrode. Calibrer à nouveau l'électrode<br />
avec des nouveaux étalons.<br />
309 Pente ISE incorrecte Nettoyer l'électrode selon les instructions du mode d’emploi de l'électrode.<br />
Calibrer à nouveau l'électrode avec des nouveaux étalons.<br />
707 Erreur d'étalon<br />
de calibration<br />
de conductivité<br />
La conductivité mesurée lors de la calibration est la même pour deux étalons.<br />
Revoir la procédure de calibration et vérifier que la sonde de conductivité a<br />
été placée dans les étalons au bon moment. Nettoyer la sonde de conductivité<br />
selon les instructions du mode d’emploi de la sonde. Calibrer à nouveau la<br />
sonde avec de nouveaux étalons.<br />
709 Erreur de constante de<br />
cellule de conductivité<br />
La constante de cellule ne se trouve pas dans la plage de 0,001 à 199,0 cm -1 .<br />
Nettoyer la sonde de conductivité selon les instructions du mode d’emploi<br />
de la sonde. Calibrer à nouveau la sonde avec de nouveaux étalons.<br />
808 Pente OD à<br />
zéro erronée<br />
Une calibration d'air doit être effectuée avant la calibration à zéro. Vérifier<br />
que la solution à zéro oxygène est utilisée pour la calibration à zéro. La solution<br />
recomm<strong>and</strong>ée contient 15 grammes de Na2SO3 dans 250 ml d'eau distillée.<br />
809 Pente OD incorrecte Pour les sondes OD polarographiques, connecter la sonde à l'instrument, mettre<br />
celui-ci sous tension et laisser la sonde se polariser pendant au moins 30<br />
minutes. Dans le cadre d'une calibration à air, vérifier que l'éponge du manchon<br />
de calibration est bien humide et qu'il n'y a pas d'eau sur la membrane de la<br />
sonde. Dans le cadre d'une calibration à eau, introduire l'air dans l'échantillon<br />
et mélanger pour que les bulles ne se déposent pas sur la membrane. Nettoyer<br />
la sonde OD selon les instructions du mode d’emploi de la sonde. Calibrer à<br />
nouveau la sonde OD.<br />
880 Sonde optique RDO ®<br />
non connectée<br />
881 Sonde optique RDO<br />
arrivée à expiration<br />
882 Panne de sonde<br />
optique RDO<br />
Veiller à ce que le la sonde RDO soit correctement connectée à l'instrument.<br />
Prendre une autre sonde RDO, qui est certaine de fonctionner, et la connecter<br />
à l'instrument.<br />
Le cache optique placé sur la sonde RDO a expiré. Placer un nouveau cache<br />
optique en suivant les instructions du manuel de la sonde RDO.<br />
Vérifier que le cache optique a été correctement placé sur la sonde RDO, qu'il<br />
est toujours valide et qu'il n'a pas été modifié. Prendre une autre sonde RDO,<br />
qui est certaine de fonctionner, et la connecter à l'instrument.<br />
Mode d’emploi des instruments de mesure <strong>Thermo</strong> <strong>Scientific</strong> <strong>Orion</strong> <strong>Star</strong> et <strong>Star</strong> <strong>Plus</strong><br />
FR-55
Dépannage<br />
Dépannage général<br />
Problème :<br />
L'affichage se fige et les valeurs de mesure ne changent plus.<br />
Solution : L'instrument est en mode de mesure AUTO-READ (l'icône AR s'affiche<br />
dans le coin supérieur droit de l'écran). Appuyer sur pour lancer une<br />
nouvelle mesure ou sélectionner un autre mode de mesure dans le<br />
menu configuration (setup).<br />
Problème : Lorsque l'on appuie sur l'instrument affiche .<br />
Solution : L'instrument est en train d'imprimer et ne peut entrer en mode<br />
calibration avant la fin de cette impression. Ceci arrive rarement lorsque<br />
l'instrument est réglé sur 9600 bauds. Si l'instrument est sur un débit<br />
de données inférieur, le délai sera d'autant plus long.<br />
Problème : L'instrument n'a pas accepté des modifications apportées dans<br />
le menu configuration (setup).<br />
Solution : Après tout changement dans le menu configuration (setup), appuyer sur<br />
jusqu'à ce que l'icône flèche pointe sur la ligne supérieure (valide la<br />
modification) puis appuyer sur pour sauvegarder la modification et<br />
revenir au mode mesure.<br />
Problème : Comment annuler une calibration ?<br />
Solution : Maintenir la touche enfoncée pour annuler toute opération<br />
de l'instrument et revenir en mode mesure.<br />
Problème : L'impression n'est qu'une suite de nombres et d'unités avec des virgules.<br />
Solution : Le format de sortie est réglé dans le menu configuration (setup) sur<br />
sortie ordinateur ou le débit de transfert de données de l'imprimante a<br />
été mal réglé dans le menu configuration (setup). Changer le format de<br />
sortie vers sortie imprimante dans le menu configuration (setup). Changer<br />
le débit de transfert de données pour s'adapter à l'imprimante utilisée.<br />
Problème : Lorsque l'on appuie sur le bouton de l'agitateur, celui-ci ne fonctionne pas.<br />
Solution : Le paramètre actuel de l'agitateur est désactivé. Régler la vitesse sur<br />
une valeur de 1 à 7 depuis le menu configuration (setup).<br />
Problème : L'écran de délai de mesure temporisé n'apparaît pas dans le menu<br />
configuration (setup).<br />
Solution : L'instrument est en mode de mesure AUTO-READ ou continue.<br />
Lorsque l'instrument est réglé sur le mode de mesure temporisé,<br />
l'écran suivant est celui permettant la saisie du délai.<br />
Problème : Comment faire la différence entre le <strong>Star</strong> <strong>Plus</strong> et l'<strong>Orion</strong> <strong>Star</strong> ?<br />
Solution : Lorsque l'instrument est mis sous tension, l'instrument <strong>Star</strong> <strong>Plus</strong> avec des<br />
fonctionnalités avancées va afficher<br />
avec le numéro de<br />
révision de l'instrument ( ou similaire) et passera en mode mesure.<br />
FR-56<br />
Mode d’emploi des instruments de mesure <strong>Thermo</strong> <strong>Scientific</strong> <strong>Orion</strong> <strong>Star</strong> et <strong>Star</strong> <strong>Plus</strong>
Dépannage<br />
Dépannage pH<br />
Problème : L'instrument ne reconnaît pas la valeur du tampon pH lors de la calibration.<br />
Solution : Vérifier que le jeu de tampons adéquat a été sélectionné dans le menu<br />
configuration (setup). L'instrument utilise la valeur brute de tension en<br />
mV provenant de l'électrode pour reconnaître un tampon lors de la<br />
calibration. À mesure que l'électrode vieillit ou se salit, les valeurs de<br />
tension en mV vont dériver et il faudra saisir à la main la valeur de<br />
tampon pH lors de la calibration.<br />
Dépannage ISE<br />
Problème : La valeur prend plusieurs minutes à se stabiliser lors d'une calibration.<br />
Solution : La plage de concentration du menu configuration (setup) est sur low<br />
(basse). Changer la plage de concentration en high (élevée). La résolution<br />
ISE est définie à 3 chiffres dans le menu configuration (setup). Changer<br />
la résolution ISE à 2 chiffres pour stabiliser plus rapidement les valeurs.<br />
Problème : Lors de l'utilisation de la correction automatique de blanc et d'une<br />
calibration d'ISE, l'instrument donne une pente qui est trop faible<br />
ou ne peut être vérifiée manuellement.<br />
Solution : Désactiver la correction automatique de blanc dans le menu configuration<br />
(setup).<br />
Dépannage de conductivité<br />
Problème : L'instrument ne reconnaît pas l'étalon de conductivité lors de la calibration.<br />
Solution : Vérifier que la constante de cellule par défaut a été saisie dans le menu<br />
configuration (setup). La constante de cellule est généralement imprimée<br />
sur le câble de la sonde de conductivité. Vérifier que l'étalon de conductivité<br />
est celui programmé dans l'instrument. Calibrer à nouveau avec un<br />
étalon frais.<br />
Problème : La valeur de coefficient de température n'apparaît pas dans le menu<br />
configuration (setup).<br />
Solution : Le paramètre actuel de compensation de température n'est pas linéaire<br />
ou désactivé. Passer la compensation de température à linéaire et l'écran<br />
suivant sera celui de la saisie de la valeur du coefficient de température.<br />
Problème : La mesure est hors plage alors qu'elle devrait l'être.<br />
Solution : Vérifier que la sonde de conductivité est complètement immergée dans<br />
la solution. Vérifier que la constante de cellule est correcte pour la sonde<br />
de conductivité connectée à l'instrument. Vérifier que le type de cellule<br />
sélectionné dans le menu configuration (setup) est Std.<br />
Mode d’emploi des instruments de mesure <strong>Thermo</strong> <strong>Scientific</strong> <strong>Orion</strong> <strong>Star</strong> et <strong>Star</strong> <strong>Plus</strong><br />
FR-57
Dépannage<br />
Dépannage de l'oxygène dissous<br />
Problème : L'écran de saisie manuelle de la pression barométrique n'apparaît pas<br />
dans le menu configuration (setup).<br />
Solution : La compensation de pression barométrique est sur automatique dans<br />
le menu configuration (setup). Passer la compensation de pression<br />
barométrique à manuelle et l'écran suivant sera celui de la saisie<br />
manuelle de la pression barométrique.<br />
Problème : L'écran de saisie manuelle du facteur de salinité n'apparaît pas dans le<br />
menu configuration (setup).<br />
Solution : La correction de salinité est sur automatique dans le menu configuration<br />
(setup). Passer la correction de salinité à manuelle et l'écran suivant sera<br />
celui de la saisie du facteur de salinité.<br />
Problème : La sonde DBO AUTO-STIR ne s'allume pas lorsque le bouton placé sur<br />
la sonde est actionné.<br />
Solution : Le type de lecture doit être sur AUTO-READ dans le menu configuration<br />
(setup) et la vitesse de l'agitateur doit être réglée sur une valeur de 1 à 7<br />
pour pourvoir lancer une mesure et démarrer l'agitation avec le bouton<br />
placé sur la sonde DBO AUTO-STIR.<br />
Dépannage de mesure optiqueRDO ®<br />
Problème : L'instrument affiche le message d'erreur 881 et ne prend pas de mesure<br />
d'oxygène dissous.<br />
Solution : Couper l'instrument, remplacer l'ancien cache optique avec un neuf et<br />
rallumer l'instrument. Cette opération devrait effacer le message d'erreur.<br />
Assistance<br />
Après la recherche de panne dans tous les composants du système, il convient de<br />
prendre contact avec le support technique. Aux États-Unis, appeler le 1.800.225.1480,<br />
hors des États-Unis, appeler le 978.232.6000 ou par télécopie au 978.232.6031. En<br />
Europe, au Moyen-Orient et en Afrique, prendre contact avec le concessionnaire local.<br />
Pour obtenir les coordonnées les plus récentes, voir www.thermo.com/contactwater.<br />
Pour obtenir les dernières applications et les ressources techniques les plus récentes<br />
des produits <strong>Thermo</strong> <strong>Scientific</strong> <strong>Orion</strong>, voir www.thermo.com/waterapps.<br />
Garantie<br />
Pour obtenir les informations les plus récentes relatives à la garantie, voir<br />
www.thermo.com/water.<br />
FR-58<br />
Mode d’emploi des instruments de mesure <strong>Thermo</strong> <strong>Scientific</strong> <strong>Orion</strong> <strong>Star</strong> et <strong>Star</strong> <strong>Plus</strong>
Chapitre XV Caractéristiques de l'instrument<br />
Caractéristiques de l'instrument<br />
Conditions environnementales d'utilisation<br />
Conditions environnementales d'utilisation des instruments portatifs et de table<br />
Température ambiante d'utilisation 5 à 45 °C<br />
Humidité relative d'utilisation<br />
Température de stockage -20 à +60 °C<br />
Humidité relative de stockage<br />
Pollution Degré 2<br />
Surtension<br />
Altitude<br />
Poids<br />
Dimensions<br />
Instruments alimentés par le secteur<br />
Instruments alimentés par des piles<br />
Réglementations et sécurité<br />
Matériau de boîtier<br />
Chocs et vibrations<br />
Coque (conçue pour être conforme à)<br />
5 à 85 %, sans condensation<br />
5 à 85 %, sans condensation<br />
Catégorie II<br />
Jusqu'à 2000 mètres<br />
Portatif : 0,45 kg<br />
De table : 0,91 kg<br />
Portatif : 4,8 cm (H) x 9,7 cm (l) x 21,3 cm (P)<br />
De table : 9,4 cm (H) x 17,0 cm (l) x 22,4 cm (P)<br />
Usage en intérieur uniquement<br />
Usage intérieur ou extérieur<br />
Limites de catégorie CE, CSA, TÜV, UL, FCC*<br />
ABS<br />
Vibration, expédition/manipulation conformément<br />
à ISTA #1A<br />
Essai de résistance au choc dans l'emballage<br />
conformément à ISTA #1A<br />
IP67 (instrument portatif)<br />
IP54 (instrument de table)<br />
* Les certifications TÜV et UL sont en attente pour tous les instruments de mesure optique<br />
d'oxygène dissous <strong>Star</strong> RDO ® .<br />
Mode d’emploi des instruments de mesure <strong>Thermo</strong> <strong>Scientific</strong> <strong>Orion</strong> <strong>Star</strong> et <strong>Star</strong> <strong>Plus</strong><br />
FR-59
Caractéristiques de l'instrument<br />
Conditions environnementales d'utilisation de l'adaptateur secteur universel<br />
Température ambiante d'utilisation 0 à 50 °C<br />
Humidité relative d'utilisation<br />
Température de stockage -20 à +75 °C<br />
Humidité relative de stockage<br />
Pollution Degré 2<br />
Surtension<br />
Altitude d'utilisation<br />
Instruments de table<br />
0 à 90 %, sans condensation<br />
0 à 90 %, sans condensation<br />
Catégorie II<br />
Jusqu'à 2000 mètres<br />
Caractéristiques des paramètres de l'instrument<br />
Usage en intérieur uniquement<br />
Les caractéristiques de paramètres suivantes concernent la gamme complète<br />
de produits <strong>Orion</strong> <strong>Star</strong> et <strong>Star</strong> <strong>Plus</strong>. Les instruments à simple paramètre, à double<br />
paramètres ainsi que certains instruments multiparamètres ne comprendront pas<br />
tous les paramètres répertoriés dans cette section.<br />
pH<br />
Plage -2 000 à 19,999<br />
Résolution 0,1, 0,01, 0,001<br />
Précision relative ± 0,002<br />
Points de calibration 1 à 5<br />
pH (instrument de mesure de pH 2-<strong>Star</strong> uniquement)<br />
Plage 0 à 14,999<br />
Résolution 0,1, 0,01, 0,001<br />
Précision relative ± 0,002<br />
Points de calibration 1 à 3<br />
Millivolts, millivolts relatifs, ORP<br />
Plage<br />
Résolution<br />
Précision relative<br />
± 1999,9 mV<br />
0,1 mV<br />
± 0,2 mV ou 0,05 % de la valeur, selon le plus élevé<br />
FR-60<br />
Mode d’emploi des instruments de mesure <strong>Thermo</strong> <strong>Scientific</strong> <strong>Orion</strong> <strong>Star</strong> et <strong>Star</strong> <strong>Plus</strong>
Caractéristiques de l'instrument<br />
ISE<br />
Plage 0 à 19999<br />
Résolution<br />
Précision relative<br />
Unités affichées<br />
Fonctions de calibration<br />
Oxygène dissous (polarographique)<br />
Plage<br />
Résolution<br />
Précision relative<br />
Facteur de salinité<br />
Pression barométrique<br />
Types de calibration<br />
Type de sonde<br />
1 à 3 chiffres significatifs<br />
± 0,2 mV ou 0,05 % selon le plus élevé<br />
M, mg/L, %, ppb ou sans unités<br />
Linéaire point à point, correction automatique de blanc non linéaire<br />
sélectionnable et stabilité plage de faible concentration<br />
0,00 à 90,0 mg/l<br />
0,0 à 600 %<br />
0,1, 0,01 mg/l<br />
0,1, 1 %<br />
± 0,2 mg/l<br />
± 2 %<br />
0 à 45 ppt<br />
450 à 850 mm Hg<br />
Air saturé d'eau, eau saturée d'air, manuelle (Winkler) ou à zéro<br />
Polarographique<br />
Oxygène ®<br />
Plage<br />
Résolution<br />
Précision relative<br />
Facteur de salinité<br />
Pression barométrique<br />
Types de calibration<br />
Type de sonde<br />
0,00 à 20,0 mg/l<br />
0,0 à 200 %<br />
0,1, 0,01 mg/l<br />
0,1, 1 %<br />
± 0,1 mg/l jusqu'à 8 mg/l ; ± 0,2 mg/l depuis 8 mg/l à 20 mg/L<br />
± 2 %<br />
0 à 45 ppt<br />
450 à 850 mm Hg<br />
Air saturé d'eau, eau saturée d'air, manuelle (Winkler) ou à zéro<br />
Optique RDO<br />
Mode d’emploi des instruments de mesure <strong>Thermo</strong> <strong>Scientific</strong> <strong>Orion</strong> <strong>Star</strong> et <strong>Star</strong> <strong>Plus</strong><br />
FR-61
Caractéristiques de l'instrument<br />
Conductivité<br />
Plage<br />
Résolution<br />
Précision relative<br />
Constante de cellule 0,001 à 199,9 cm -1<br />
0,000 à 3000 mS/cm, résolution automatique avec dépendance<br />
à la constante de cellule<br />
4 chiffres significatifs jusqu'à 0,001 µS/cm, dépendance<br />
à la constante de cellule<br />
0,5 % ± 1 chiffre ou 0,01 µS/cm, selon le plus élevé<br />
Température de référence 5 °C, 10 °C, 15 °C, 20 °C ou 25 °C<br />
Plage de résistivité<br />
Résolution de résistivité<br />
Précision relative de résistivité<br />
Plage de salinité<br />
Résolution de salinité<br />
Précision relative de salinité<br />
Plage des matières totales dissoutes<br />
Résolution des matières totales<br />
dissoutes<br />
Précision relative des matières<br />
totales dissoutes<br />
Température<br />
0,0001 à 100 mégohms<br />
Automatique<br />
0,5 % ± 1 chiffre<br />
0,1 à 80,0 ppt équivalent NaCl, 0,1 à 42 ppt salinité pratique<br />
0,1 ppt<br />
0,1 ± 1 chiffre<br />
0 à 19999 mg/l<br />
1 mg/l<br />
0,5 % ± 1 chiffre<br />
Plage -5 à 105 °C<br />
Résolution 0,1 jusqu'à 99,9 °C, 1,0 au-delà de 99,9 °C<br />
Précision relative ± 0,1 °C<br />
Température (instrument de mesure optique d'oxygène dissous RDO ® uniquement)<br />
Plage 0 à 50 °C<br />
Résolution 0,1 °C<br />
Précision relative ± 0,3 °C<br />
* Ces caractéristiques de température correspondent uniquement à l'instrument de<br />
mesure optique d'oxygène dissous <strong>Star</strong> <strong>Plus</strong> RDO utilisé avec la sonde optique<br />
RDO. Les instruments 4-<strong>Star</strong> et 5-<strong>Star</strong> RDO présenteront des caractéristiques<br />
de température st<strong>and</strong>ards avec une électrode autre que la sonde RDO.<br />
Remarque : ces caractéristiques peuvent être modifiées sans avis préalable.<br />
FR-62<br />
Mode d’emploi des instruments de mesure <strong>Thermo</strong> <strong>Scientific</strong> <strong>Orion</strong> <strong>Star</strong> et <strong>Star</strong> <strong>Plus</strong>
Caractéristiques de l'instrument<br />
Informations relatives aux comm<strong>and</strong>es<br />
Cat. No.<br />
Description<br />
1111000 Instrument de mesure de pH de table 2-<strong>Star</strong> avec adaptateur secteur universel et manuel.<br />
1112000 Instrument de mesure de pH de table 3-<strong>Star</strong> <strong>Plus</strong> avec adaptateur secteur universel et manuel.<br />
1212000 Instrument de mesure de pH portatif 3-<strong>Star</strong> <strong>Plus</strong> avec piles et manuel.<br />
1113000 Instrument de mesure d'OD de table 3-<strong>Star</strong> <strong>Plus</strong> avec adaptateur secteur universel et manuel.<br />
1213000 Instrument de mesure d'OD portatif 3-<strong>Star</strong> <strong>Plus</strong> avec piles et manuel.<br />
1114000 Instrument de mesure de conductivité de table 3-<strong>Star</strong> <strong>Plus</strong> avec adaptateur secteur universel<br />
et manuel.<br />
1214000 Instrument de mesure de conductivité portatif 3-<strong>Star</strong> <strong>Plus</strong> avec piles et manuel.<br />
1115000 Instrument de mesure de pH/ISE de table 4-<strong>Star</strong> <strong>Plus</strong> avec adaptateur secteur universel<br />
et manuel.<br />
1215000 Instrument de mesure de pH/ISE portatif 4-<strong>Star</strong> <strong>Plus</strong> avec piles et manuel.<br />
1116000 Instrument de mesure de pH/OD de table 4-<strong>Star</strong> <strong>Plus</strong> avec adaptateur secteur universel<br />
et manuel.<br />
1216000 Instrument de mesure de pH/OD portatif 4-<strong>Star</strong> <strong>Plus</strong> avec piles et manuel.<br />
1117000 Instrument de mesure de pH/de conductivité de table 4-<strong>Star</strong> <strong>Plus</strong> avec adaptateur secteur<br />
universel et manuel.<br />
1217000 Instrument de mesure de pH/de conductivité portatif 4-<strong>Star</strong> <strong>Plus</strong> avec piles et manuel.<br />
1218000 Instrument de mesure de pH/de conductivité portatif 5-<strong>Star</strong> <strong>Plus</strong> avec piles et manuel.<br />
1119000 Instrument de mesure de pH/ISE/OD/conductivité de table 5-<strong>Star</strong> <strong>Plus</strong> avec adaptateur<br />
secteur universel et manuel.<br />
1219000 Instrument de mesure de pH/ISE/OD/conductivité portatif 5-<strong>Star</strong> <strong>Plus</strong> avec piles et manuel.<br />
1213300 Instrument de mesure optique d'OD RDO ® portatif 3-<strong>Star</strong> <strong>Plus</strong> avec piles et manuel.<br />
1213310 Instrument de mesure optique RDO de pH/OD portatif 4-<strong>Star</strong> <strong>Plus</strong> avec piles et manuel.<br />
1213320 Instrument de mesure optique RDO de pH/OD/conductivité portatif 5-<strong>Star</strong> <strong>Plus</strong> avec piles<br />
et manuel.<br />
090043 Support d'électrode à bras pivotant<br />
1010003 Adaptateur secteur universel<br />
1010006 Imprimante de série <strong>Star</strong> avec câble d'interface d'imprimante RS232 (Cat. No. 250302-001)<br />
1010053 Câble d'interface d'ordinateur RS232<br />
096019 Sonde agitateur avec spatule pour instruments de table 3-<strong>Star</strong>, 4-<strong>Star</strong> et 5-<strong>Star</strong><br />
Mode d’emploi des instruments de mesure <strong>Thermo</strong> <strong>Scientific</strong> <strong>Orion</strong> <strong>Star</strong> et <strong>Star</strong> <strong>Plus</strong><br />
FR-63
Caractéristiques de l'instrument<br />
Cat. No.<br />
8102BNUWP<br />
8107BNUMD<br />
8156BNUWP<br />
8157BNUMD<br />
8165BNWP<br />
8172BNWP<br />
9107APMD<br />
9107BNMD<br />
9157BNMD<br />
9165BNWP<br />
9172BNWP<br />
927005MD<br />
927007MD<br />
9512HPBNWP<br />
9609BNWP<br />
9707BNWP<br />
8611BNWP<br />
083005MD<br />
083010MD<br />
086030MD<br />
087010MD<br />
Description<br />
Électrode combinée pH ROSS Ultra avec corps en verre<br />
Électrode ROSS Ultra faible maintenance, remplie de gel, pH/ATC à triode avec<br />
corps époxy<br />
Électrode combinée pH ROSS Ultra avec corps en époxy<br />
Électrode à triode pH/ATC ROSS Ultra avec corps en époxy<br />
Électrode combinée pH ROSS Sure-Flow avec corps en époxy<br />
Électrode combinée pH ROSS Sure-Flow avec corps en verre<br />
Électrode AquaPro faible maintenance, remplie de polymère, pH/ATC à triode avec<br />
corps époxy<br />
Triode pH/ATC remplie de gel avec corps en époxy<br />
Triode pH/ATC rechargeable avec corps en époxy<br />
Électrode combinée pH Sure-Flow avec corps en époxy<br />
Électrode combinée pH Sure-Flow avec corps en verre<br />
Sonde ATC avec corps en époxy<br />
Sonde ATC avec corps en acier inoxydable<br />
Électrode pour ions spécifiques hautes performances à combinaison d'ammoniaque<br />
Électrode pour ions spécifiques à combinaison de fluor<br />
Électrode pour ions spécifiques à combinaison d'azote<br />
Électrode pour ions spécifiques à combinaison de sodium ROSS<br />
Sonde OD polarographique avec manchon de calibration et câble 1,5 mètre<br />
Sonde OD polarographique avec manchon de calibration et câble 3 mètre<br />
Sonde OD DBO polarographique AUTO-STIR avec manchon de calibration<br />
Sonde optique RDO ® avec protection en acier inoxydable, cache optique et câble<br />
de 3 mètres<br />
087001 Cache optique de rechange<br />
011050MD<br />
013005MD<br />
013010MD<br />
013016MD<br />
Sonde de conductivité avec plage de 1 µS/cm à 20 mS/cm et câble de 1,5 mètre<br />
Sonde de conductivité DuraProbe avec plage de 1 µS/cm à 200 mS/cm et câble<br />
de 1,5 mètre<br />
Sonde de conductivité DuraProbe avec plage de 1 µS/cm à 200 mS/cm et câble<br />
de 3 mètre<br />
Sonde de conductivité avec plage de 0,01 µS/cm à 300 µS/cm et câble de 1,5 mètre<br />
Voir www.thermo.com/water pour obtenir la liste de kits d'instruments de mesure, d'accessoires,<br />
d'électrodes et de solutions supplémentaires.<br />
FR-64<br />
Mode d’emploi des instruments de mesure <strong>Thermo</strong> <strong>Scientific</strong> <strong>Orion</strong> <strong>Star</strong> et <strong>Star</strong> <strong>Plus</strong>
Annexe A Fonctionnalités du menu<br />
configuration (setup) de l'instrument<br />
Fonctionnalités du menu de configuration (setup) de pH<br />
Reconnaissance automatique du tampon<br />
Les instruments de mesure de pH <strong>Orion</strong> <strong>Star</strong> et <strong>Star</strong> <strong>Plus</strong> sont capables de reconnaître<br />
automatiquement les tampons de pH 1,68, 4,01, 6,86, 7,00, 9,18, 10,01 et 12,46 lors<br />
d'une calibration de pH. Lors d'une calibration, l'instrument utilise le jeu de tampons<br />
sélectionné ainsi que la valeur de tension brute en mV de l'électrode pH dans le<br />
tampon afin de reconnaître et d'afficher la valeur du tampon à la température de la<br />
mesure. La valeur de tension brute en mV doit être ± 30 mV la valeur théorique du<br />
tampon afin que l'instrument puisse reconnaître automatiquement le tampon.<br />
Tampon Plage en mV Tampon Plage en mV Tampon Plage en mV<br />
1,68 +285 à +345 7,00 - 30 à + 30 10,01 -207 à -147<br />
4,01 +207 à +147 9,18 -99 à -159 12,46 -293 à -353<br />
6,86 +38 à -22<br />
Fonctionnalités du menu de configuration (setup) de l'oxygène<br />
dissous<br />
Compensation de pression barométrique<br />
Les instruments de mesure d'oxygène dissous <strong>Orion</strong> <strong>Star</strong> et <strong>Star</strong> <strong>Plus</strong> possèdent un<br />
baromètre interne servant aux valeurs de mesure d'oxygène dissous compensées<br />
en pression. L'instrument peut également utiliser une compensation de pression<br />
barométrique manuelle si l'oxygène dissous est mesuré à l'aide d'une sonde<br />
immergée ou dans une enceinte pressurisée. La pression doit être saisie en mm<br />
Hg. 1 mm Hg = 0,03937 inch Hg = 1,3332 hPa (mBar) = 0,01934 PSI.<br />
Correction de salinité<br />
La correction automatique de salinité pour les valeurs d'oxygène dissous est<br />
disponible sur les instruments de mesure d'oxygène dissous <strong>Orion</strong> <strong>Star</strong> et <strong>Star</strong> <strong>Plus</strong><br />
comportant un mode de mesure de conductivité. L'instrument se sert de la valeur<br />
de conductivité lue par la sonde pour calculer le facteur de correction de salinité<br />
puis applique ce facteur aux valeurs d'oxygène dissous en mg/l.<br />
L'instrument peut également utiliser une correction de salinité manuelle pour les<br />
valeurs d'oxygène dissous en mg/l. Le facteur de correction de salinité manuel doit<br />
être saisi en ppt (partie par millier - ppm).<br />
Mode d’emploi des instruments de mesure <strong>Thermo</strong> <strong>Scientific</strong> <strong>Orion</strong> <strong>Star</strong> et <strong>Star</strong> <strong>Plus</strong><br />
FR-65
Fonctionnalités du menu de configuration (setup) de l'instrument<br />
Conductivité<br />
à 20 °C<br />
(mS/cm)<br />
Valeur de<br />
correction de<br />
salinité (ppt)<br />
Conductivité<br />
à 20 °C<br />
(mS/cm)<br />
Valeur de<br />
correction de<br />
salinité (ppt)<br />
Conductivité<br />
à 20 °C<br />
(mS/cm)<br />
5 3 20 13 35 25<br />
6 4 21 14 36 25<br />
7 4 22 15 37 26<br />
8 5 23 15 38 27<br />
9 6 24 16 39 28<br />
10 6 25 17 40 29<br />
11 7 26 18 42 30<br />
12 8 27 18 44 32<br />
13 8 28 19 46 33<br />
14 9 29 20 48 35<br />
15 10 30 21 50 37<br />
16 10 31 22 52 38<br />
17 11 32 22 54 40<br />
18 12 33 23 56 42<br />
19 13 34 24<br />
Valeur de<br />
correction de<br />
salinité (ppt)<br />
Les valeurs de ce tableau ont été calculées à partir de International Oceanographic Tables, Vol. 1,<br />
National Institute of Oceanography of Great Britain, Womley, Godaming, Surrey, Engl<strong>and</strong> <strong>and</strong><br />
Unesco, Paris 1971.<br />
Fonctionnalités du menu de configuration (setup) de conductivité<br />
Compensation en température et température de référence<br />
Les instruments de mesure de conductivité <strong>Orion</strong> <strong>Star</strong> et <strong>Star</strong> <strong>Plus</strong> ont la capacité<br />
d'utiliser une fonction de compensation en température qui calcule et affiche les<br />
mesures de conductivité pour une température de référence de 5 °C, 10 °C, 15 °C,<br />
20 °C ou 25 °C (les instruments <strong>Orion</strong> <strong>Star</strong> présentent uniquement les températures<br />
de référence de 15 °C, 20 °C ou 25 °C). La compensation en température peut être<br />
définie comme linéaire pour la plupart des échantillons aqueux, non linéaire pour les<br />
échantillons ultra-purs et à faible force ionique ou désactivée pour les mesures sans<br />
compensation en température.<br />
<strong>Plus</strong> la température de l'échantillon est proche de la température sélectionnée,<br />
plus la mesure de conductivité sera précise, particulièrement si le coefficient<br />
de compensation en température n'est qu'une estimation ou est imprécise.<br />
FR-66<br />
Mode d’emploi des instruments de mesure <strong>Thermo</strong> <strong>Scientific</strong> <strong>Orion</strong> <strong>Star</strong> et <strong>Star</strong> <strong>Plus</strong>
Fonctionnalités du menu de configuration (setup) de l'instrument<br />
La conductivité d'une solution possédant une concentration d'électrolyte spécifique<br />
varie avec la température, ce rapport est retranscrit par le coefficient de température<br />
de la solution. L'instrument possède un coefficient de température par défaut de<br />
2,1 % de variation de conductivité par °C, ce qui est caractéristique de nombreux<br />
échantillons aqueux.<br />
Solution (25 °C à 50 °C)<br />
Coefficient de température (% / °C)<br />
Eau ultra-pure 4,55<br />
Sel (NaCl) 2,12<br />
5 % NaOH 1,72<br />
Ammoniaque diluée 1,88<br />
10 % HCl 1,32<br />
5 % acide sulfurique 0,96<br />
98 % acide sulfurique 2,84<br />
Sirop 5,64<br />
Matières totales dissoutes (TDS)<br />
Les instruments de mesure de conductivité <strong>Orion</strong> <strong>Star</strong> et <strong>Star</strong> <strong>Plus</strong> mesurent les<br />
matières totales dissoutes (TDS) comme la quantité totale de produits inorganiques<br />
dissous dans une solution. Les produits inorganiques dissous transportent un courant<br />
mesuré par la sonde de conductivité. Comme il existe un rapport direct entre la<br />
conductivité et les matières totales dissoutes (TDS), les mesures de conductivité<br />
servent à évaluer la présence de produits inorganiques. L'utilisateur doit saisir un<br />
facteur TDS entre 0,01 et 10 mg/l dans le menu configuration (setup).<br />
La méthode st<strong>and</strong>ard de détermination des matières totales dissoutes (TDS) comprend<br />
l'évaporation complète d'un échantillon à 180 °C et le pesage des résidus. Le facteur<br />
TDS est calculé en prenant le poids des résidus et en le divisant par la conductivité<br />
de l'échantillon. Les valeurs de conductivité consécutives sont alors multipliées par<br />
le facteur TDS pour déterminer les matières totales dissoutes (TDS) de l'échantillon.<br />
Calibration automatique<br />
Les instruments de mesure de conductivité <strong>Orion</strong> <strong>Star</strong> et <strong>Star</strong> <strong>Plus</strong> peuvent reconnaître<br />
automatiquement les étalons de conductivité de 100 µS/cm, 1413 µS/cm et 12,9 mS/cm<br />
lorsque la constante de cellule nominale de la sonde de conductivité est renseignée<br />
dans le menu configuration (setup). Pour que l'instrument reconnaisse l'étalon de<br />
conductivité, la constante de cellule saisie doit être précise d'un facteur de 3. Par<br />
exemple, si la constante de cellule réelle est de 1,0 cm -1 , saisir une constante de<br />
cellule nominale dans la plage de 0,3 cm -1 à 3,0 cm -1 permettra à l'instrument<br />
d'identifier l'étalon de conductivité et de lancer une calibration automatique.<br />
Mode d’emploi des instruments de mesure <strong>Thermo</strong> <strong>Scientific</strong> <strong>Orion</strong> <strong>Star</strong> et <strong>Star</strong> <strong>Plus</strong><br />
FR-67
Fonctionnalités du menu de configuration (setup) de l'instrument<br />
Fonctionnalités du menu de configuration (setup) ISE<br />
Plage de concentration<br />
Les instruments de mesure ISE <strong>Orion</strong> <strong>Star</strong> et <strong>Star</strong> <strong>Plus</strong> peuvent être réglés pour une<br />
plage de concentration ISE élevée ou faible. Cette plage servira à la détermination du<br />
critère de stabilité de calibration. Pour une plage de concentration ISE élevée, l'instrument<br />
effectuera une calibration normale, sans délai d'affichage de la valeur de l'étalon de<br />
calibration. Pour une plage de concentration ISE faible, l'instrument attendra trois à<br />
cinq minutes avant d'afficher une valeur stable des valeurs de l'étalon de calibration.<br />
Le délai dépendra des espèces mesurées et de la concentration des étalons de<br />
calibration. La plage de concentration ISE faible sert à améliorer la précision de<br />
mesures à basse concentration en laissant plus de temps de stabilisation aux<br />
étalons de calibration.<br />
Correction automatique de blanc<br />
Les instruments de mesure ISE et <strong>Orion</strong> <strong>Star</strong> et <strong>Star</strong> <strong>Plus</strong> possède une fonction de<br />
correction automatique de blanc utilisant un algorithme permettant de compenser la<br />
non linéarité de l'électrode pour ions spécifiques dans des La fonction de correction<br />
automatique de blanc nécessite l'usage d'un ensemble d'équations non linéaires qui<br />
ne peuvent être calculées que numériquement, l'utilisateur ne peut pas vérifier de<br />
façon analytique la calibration et la pente moyenne indiquée sur l'écran peut se<br />
situer hors de la plage de pente spécifiée dans le manuel de l'électrode. Pour des<br />
applications nécessitant une vérification analytique, il convient de désactiver<br />
la correction automatique de blanc.<br />
FR-68<br />
Mode d’emploi des instruments de mesure <strong>Thermo</strong> <strong>Scientific</strong> <strong>Orion</strong> <strong>Star</strong> et <strong>Star</strong> <strong>Plus</strong>
D E<br />
D E U T S C H<br />
Inhalt<br />
Kapitel I – Einleitung<br />
Messgerätfunktionen . . . . . . . . . . . . . . . . . . . . . . . . . . . . . . . . . . . . . . . . . . . . . . . . . . . . . . . . DE-2<br />
Kapitel II – Anzeige<br />
Allgemeine Beschreibung. . . . . . . . . . . . . . . . . . . . . . . . . . . . . . . . . . . . . . . . . . . . . . . . . . . . . DE-3<br />
Kapitel III – Tastatur<br />
Allgemeine Beschreibung. . . . . . . . . . . . . . . . . . . . . . . . . . . . . . . . . . . . . . . . . . . . . . . . . . . . . DE-5<br />
Tastenbeschreibungen . . . . . . . . . . . . . . . . . . . . . . . . . . . . . . . . . . . . . . . . . . . . . . . . . . . . . . . DE-6<br />
Kapitel IV – Messgerät vorbereiten<br />
Netzteil installieren . . . . . . . . . . . . . . . . . . . . . . . . . . . . . . . . . . . . . . . . . . . . . . . . . . . . . . . . . . DE-7<br />
Batterien einlegen. . . . . . . . . . . . . . . . . . . . . . . . . . . . . . . . . . . . . . . . . . . . . . . . . . . . . . . . . . . DE-8<br />
Elektroden anschließen . . . . . . . . . . . . . . . . . . . . . . . . . . . . . . . . . . . . . . . . . . . . . . . . . . . . . . DE-9<br />
Instrument einschalten . . . . . . . . . . . . . . . . . . . . . . . . . . . . . . . . . . . . . . . . . . . . . . . . . . . . . . DE-10<br />
Messgerät warten . . . . . . . . . . . . . . . . . . . . . . . . . . . . . . . . . . . . . . . . . . . . . . . . . . . . . . . . . DE-10<br />
Kapitel V – Messgerät einrichten<br />
Einrichtungsmenü. . . . . . . . . . . . . . . . . . . . . . . . . . . . . . . . . . . . . . . . . . . . . . . . . . . . . . . . . . DE-11<br />
Einrichtungsmenütabelle . . . . . . . . . . . . . . . . . . . . . . . . . . . . . . . . . . . . . . . . . . . . . . . . . . DE-12<br />
Allgemeine Menüeinstellungen . . . . . . . . . . . . . . . . . . . . . . . . . . . . . . . . . . . . . . . . . . . . . . . DE-14<br />
Zeit- und Datumseinstellungen. . . . . . . . . . . . . . . . . . . . . . . . . . . . . . . . . . . . . . . . . . . . . . . . DE-15<br />
AUTO-READ , Einstellungen für Dauer- und Intervallmessungen . . . . . . . . . . . . . . . . . . . . . DE-16<br />
Messparameter auswählen . . . . . . . . . . . . . . . . . . . . . . . . . . . . . . . . . . . . . . . . . . . . . . . . . . DE-17<br />
Methodeneinrichtung . . . . . . . . . . . . . . . . . . . . . . . . . . . . . . . . . . . . . . . . . . . . . . . . . . . . . . . DE-18<br />
Kapitel VI – pH-Verfahren<br />
pH-Einrichtungsmenü . . . . . . . . . . . . . . . . . . . . . . . . . . . . . . . . . . . . . . . . . . . . . . . . . . . . . . . DE-19<br />
pH-Kalibrierung . . . . . . . . . . . . . . . . . . . . . . . . . . . . . . . . . . . . . . . . . . . . . . . . . . . . . . . . . . . . DE-20<br />
pH-Messung. . . . . . . . . . . . . . . . . . . . . . . . . . . . . . . . . . . . . . . . . . . . . . . . . . . . . . . . . . . . . . DE-21<br />
pH-Temperaturanzeige und Kalibrierung . . . . . . . . . . . . . . . . . . . . . . . . . . . . . . . . . . . . . . . . . DE-22<br />
Kapitel VII – mV-, Relativ-mV- und REDOX-Verfahren<br />
Relativ-mV- und REDOX-Kalibrierung . . . . . . . . . . . . . . . . . . . . . . . . . . . . . . . . . . . . . . . . . . . DE-23<br />
mV-, Relativ-mV- und REDOX-Messung . . . . . . . . . . . . . . . . . . . . . . . . . . . . . . . . . . . . . . . . . DE-24<br />
Kapitel VIII – Gelöst- Sauerstoff- Messverfahren<br />
Gelöst- Sauerstoff- Einrichtungsmenü . . . . . . . . . . . . . . . . . . . . . . . . . . . . . . . . . . . . . . . . . . DE-25<br />
Gelöst- Sauerstoff- Kalibrierung . . . . . . . . . . . . . . . . . . . . . . . . . . . . . . . . . . . . . . . . . . . . . . . DE-26<br />
Gelöst- Sauerstoff- Messung . . . . . . . . . . . . . . . . . . . . . . . . . . . . . . . . . . . . . . . . . . . . . . . . . DE-28<br />
Gelöst- Sauerstoff- Temperaturanzeige und Kalibrierung . . . . . . . . . . . . . . . . . . . . . . . . . . . . DE-29<br />
<strong>Thermo</strong> <strong>Scientific</strong> <strong>Orion</strong> <strong>Star</strong> - und <strong>Star</strong> <strong>Plus</strong>-Messgeräte – Bedienungsanleitung<br />
DE-I
D E<br />
Inhalt<br />
Kapitel IX – RDO ® , optisches – Gelöst- Sauerstoff- Verfahren<br />
Optische Membrankappe – Überblick. . . . . . . . . . . . . . . . . . . . . . . . . . . . . . . . . . . . . . . . . . . DE-31<br />
RDO, optische – Gelöst- Sauerstoff- Einrichtungsmenü . . . . . . . . . . . . . . . . . . . . . . . . . . . . . DE-32<br />
Optische RDO- Sonde – Einrichtungsmenü . . . . . . . . . . . . . . . . . . . . . . . . . . . . . . . . . . . . DE-33<br />
RDO, optische – Gelöst- Sauerstoff- Kalibrierung . . . . . . . . . . . . . . . . . . . . . . . . . . . . . . . . . . DE-35<br />
RDO, optische – Gelöst- Sauerstoff- Messung. . . . . . . . . . . . . . . . . . . . . . . . . . . . . . . . . . . . DE-37<br />
RDO, optische – Gelöst- Sauerstoff- Temperaturanzeige und Kalibrierung . . . . . . . . . . . . . . . DE-38<br />
Kapitel X – Leitfähigkeitsverfahren<br />
Leitfähigkeits-Einrichtungsmenü. . . . . . . . . . . . . . . . . . . . . . . . . . . . . . . . . . . . . . . . . . . . . . . DE-39<br />
Leitfähigkeitskalibrierung . . . . . . . . . . . . . . . . . . . . . . . . . . . . . . . . . . . . . . . . . . . . . . . . . . . . DE-40<br />
Leitfähigkeitsmessung . . . . . . . . . . . . . . . . . . . . . . . . . . . . . . . . . . . . . . . . . . . . . . . . . . . . . . DE-41<br />
Leitfähigkeit-Temperaturanzeige und Kalibrierung . . . . . . . . . . . . . . . . . . . . . . . . . . . . . . . . . DE-42<br />
Kapitel XI – ISE- Verfahren<br />
ISE-Einrichtungsmenü . . . . . . . . . . . . . . . . . . . . . . . . . . . . . . . . . . . . . . . . . . . . . . . . . . . . . . DE-43<br />
ISE-Kalibrierung . . . . . . . . . . . . . . . . . . . . . . . . . . . . . . . . . . . . . . . . . . . . . . . . . . . . . . . . . . . DE-44<br />
ISE-Messung . . . . . . . . . . . . . . . . . . . . . . . . . . . . . . . . . . . . . . . . . . . . . . . . . . . . . . . . . . . . . DE-45<br />
ISE- Temperaturanzeige und Kalibrierung . . . . . . . . . . . . . . . . . . . . . . . . . . . . . . . . . . . . . . . . DE-46<br />
Kapitel XII – Datenarchivierung und -abruf<br />
Daten- und Kalibrierungsprotokoll. . . . . . . . . . . . . . . . . . . . . . . . . . . . . . . . . . . . . . . . . . . . . . DE-47<br />
Automatische Datenprotokollierung. . . . . . . . . . . . . . . . . . . . . . . . . . . . . . . . . . . . . . . . . . DE-47<br />
Datenprotokoll-Löscheinstellung . . . . . . . . . . . . . . . . . . . . . . . . . . . . . . . . . . . . . . . . . . . . DE-48<br />
Daten- und Kalibrierungsprotokoll anzeigen und ausdrucken. . . . . . . . . . . . . . . . . . . . . . . DE-49<br />
Kapitel XIII – Konformitätserklärung<br />
Konformitätserklärung . . . . . . . . . . . . . . . . . . . . . . . . . . . . . . . . . . . . . . . . . . . . . . . . . . . . . . DE-51<br />
WEEE-Richtlinie . . . . . . . . . . . . . . . . . . . . . . . . . . . . . . . . . . . . . . . . . . . . . . . . . . . . . . . . . . . DE-52<br />
Kapitel XIV – Problemlösung<br />
Messgerät-Selbsttest . . . . . . . . . . . . . . . . . . . . . . . . . . . . . . . . . . . . . . . . . . . . . . . . . . . . . . . DE-53<br />
Messgerät-Fehlercodes . . . . . . . . . . . . . . . . . . . . . . . . . . . . . . . . . . . . . . . . . . . . . . . . . . . . . DE-54<br />
Allgemeine Problemlösung. . . . . . . . . . . . . . . . . . . . . . . . . . . . . . . . . . . . . . . . . . . . . . . . . . . DE-56<br />
Kapitel XV – Technische Daten<br />
Technische Daten . . . . . . . . . . . . . . . . . . . . . . . . . . . . . . . . . . . . . . . . . . . . . . . . . . . . . . . . . . DE-59<br />
Bestellhinweise . . . . . . . . . . . . . . . . . . . . . . . . . . . . . . . . . . . . . . . . . . . . . . . . . . . . . . . . . . . DE-63<br />
Anhang A – Messgerät-Einrichtungsmenüfunktionen<br />
pH-Einrichtungsmenüfunktionen . . . . . . . . . . . . . . . . . . . . . . . . . . . . . . . . . . . . . . . . . . . . . . DE-65<br />
Gelöst- Sauerstoff-Einrichtungsmenüfunktionen . . . . . . . . . . . . . . . . . . . . . . . . . . . . . . . . . . DE-65<br />
Leitfähigkeits-Einrichtungsmenüfunktionen . . . . . . . . . . . . . . . . . . . . . . . . . . . . . . . . . . . . . . DE-66<br />
ISE- Einrichtungsmenüfunktionen . . . . . . . . . . . . . . . . . . . . . . . . . . . . . . . . . . . . . . . . . . . . . DE-68<br />
DE-II<br />
<strong>Thermo</strong> <strong>Scientific</strong> <strong>Orion</strong> <strong>Star</strong> - und <strong>Star</strong> <strong>Plus</strong>-Messgeräte – Bedienungsanleitung
Kapitel I – Einleitung<br />
Glückwunsch! Sie haben sich für eines der branchenweit führenden Messgeräte der <strong>Thermo</strong><br />
<strong>Scientific</strong> <strong>Orion</strong> <strong>Star</strong>- oder <strong>Star</strong> <strong>Plus</strong>-Serie entschieden – für hoch präzise Messungen unterwegs<br />
oder im Labor.<br />
• 2-<strong>Star</strong>-Messgeräte ermöglichen pH-Einzelparametermessungen.<br />
• 3-<strong>Star</strong> <strong>Plus</strong> ermöglichen Einzelparametermessungen von pH, gelöstem Sauerstoff, optische<br />
RDO ® Messungen von gelöstem Sauerstoff oder Leitfähigkeit.<br />
• 4-<strong>Star</strong> <strong>Plus</strong>-Messgeräte ermöglichen Doppelparametermessungen von pH/gelöstem<br />
Sauerstoff, pH/Leitfähigkeit, pH/ISE (Ionen-selektive Elektrode) oder pH/ RDO- Messungen<br />
(optisch) von gelöstem Sauerstoff.<br />
• 5-<strong>Star</strong> <strong>Plus</strong>-Messgeräte ermöglichen Multiparametermessungen von pH/ISE/gelöstem<br />
Sauerstoff/Leitfähigkeit, pH/gelöstem Sauerstoff/Leitfähigkeit oder pH/ RDO- Messungen<br />
(optisch) von gelöstem Sauerstoff/Leitfähigkeit.<br />
Sämtliche Messgeräte verfügen über eine Temperaturmessfunktion. Sämtliche Messgeräte mit<br />
Möglichkeiten zur pH-Messung sind mit mV-/Relativ-mV/REDOX-Funktionalität ausgestattet.<br />
Alle Messgeräte der <strong>Orion</strong> <strong>Star</strong>- und <strong>Star</strong> <strong>Plus</strong>-Serie wurden für den Einsatz in Labor- und<br />
Produktionsumgebungen entwickelt, werden über Mikroprozessoren gesteuert und liefern<br />
somit akkurate und präzise Messergebnisse. Die wasserdichten, portablen Messgeräte können<br />
kurzzeitig in Flüssigkeiten eingetaucht werden.<br />
Die 3-<strong>Star</strong> <strong>Plus</strong>-, 4-<strong>Star</strong> <strong>Plus</strong>- und 5-<strong>Star</strong> <strong>Plus</strong>-Messgeräte verfügen über eine erweiterte<br />
Anzahl von Datenprotokollierungspunkten, verbesserte Temperaturanzeigen und einen neuen<br />
Temperaturkalibrierungsmodus pro Messparameter. Die 3-<strong>Star</strong> <strong>Plus</strong>-, 4-<strong>Star</strong> <strong>Plus</strong>- und 5-<strong>Star</strong> <strong>Plus</strong>-<br />
Tischmessgeräte sind Autosampler-fähig und mit dem AutoTration -500-Autosampler kompatibel.<br />
Hinweise zum Betrieb der <strong>Star</strong> <strong>Plus</strong>-Messgeräte mit einem Autosampler finden Sie in der<br />
AutoTration-500-Bedienungsanleitung.<br />
Hinweis: Bitte lesen Sie diese Bedienungsanleitung gründlich durch, bevor Sie Ihr portables<br />
oder Tischmessgerät verwenden. Jeglicher Einsatz, der nicht in dieser Bedienungsanleitung<br />
beschrieben wird, lässt die Garantie erlöschen und kann zu dauerhaften Beschädigungen des<br />
Messgerätes führen.<br />
<strong>Thermo</strong> <strong>Scientific</strong> <strong>Orion</strong> <strong>Star</strong> - und <strong>Star</strong> <strong>Plus</strong>-Messgeräte – Bedienungsanleitung<br />
DE-1
Einleitung<br />
Messgerätefunktionen<br />
Um den anspruchsvollen Anforderungen beim Einsatz im Umweltschutz, in der<br />
lebensmittelverarbeitenden Industrie und in Endverbraucherprodukt-Laboratorien zu begegnen,<br />
bieten die Messgeräte der <strong>Orion</strong> <strong>Star</strong>- und <strong>Star</strong> <strong>Plus</strong>-Serie die folgenden Hauptmerkmale:<br />
• Kennwort-geschützte Methoden – Das Messgerät speichert bis zu 10 benutzerdefinierte<br />
Messungen und Kalibrierung zur künftigen Verwendung. Der Kennwortschutz der einzelnen<br />
Methoden verhindert Manipulationen; dies ist besonders wichtig, wenn mehrere Anwender<br />
mit dem Gerät arbeiten und ausschließlich die für ihre Tätigkeit geeigneten Verfahren<br />
nutzen sollen.<br />
• AUTO-READ – Das Messgerät nimmt eine Messung vor und druckt Daten automatisch aus<br />
oder protokolliert diese, sobald sich der Messwert stabilisiert. Der Messwert wird im Display<br />
eingefroren, bis eine neue Messung vorgenommen wird.<br />
• Rührersteuerung – Sämtliche 3-<strong>Star</strong>-, 4-<strong>Star</strong>- und 5-<strong>Star</strong>-Tischmessgeräte verfügen über<br />
eine Rührersteuerung für Rührersonden, Katalognummer 096019, und AUTO-STIR BOD-<br />
Sonden, welche den Einsatz von magnetischen Rühreinrichtungen überflüssig macht.<br />
• SMART STABILITY und SMART AVERAGING – Verhindert “geratene“ Messwerte<br />
durch automatischen Ausgleich unterschiedlicher Messbedingungen und Optimierung der<br />
Reaktionszeit des Messgerätes.<br />
• Displaybeleuchtung – Alle 3-<strong>Star</strong>-, 4-<strong>Star</strong>- und 5-<strong>Star</strong>-Messgeräte sind mit einer Display-<br />
Hintergrundbeleuchtung ausgestattet. Bei eingeschaltetem Messgerät lässt sich die<br />
Beleuchtung durch kurze Betätigung der Taste- ein- und ausschalten. Wird das Messgerät<br />
mit Batterien betrieben, schaltet sich die Beleuchtung zum Energiesparen automatisch<br />
nach 2 Minuten ab. Bei nahezu erschöpften Batterien lässt sich die Beleuchtung nicht<br />
mehr einschalten.<br />
• Automatische Abschaltung – Die Messgeräte schalten sich 20 Minuten nach der<br />
letzten Tastenbetätigung automatisch ab. Dies verlängert die Batterielaufzeit bei portablen<br />
Messgeräten und bei Tischmessgeräten, die über Batterien mit Strom versorgt werden.<br />
• Tonsignale – Das Messgerät quittiert jede Tastenbetätigung mit einem Signalton und<br />
gibt so eine akustische Rückmeldung über die erfolgte Eingabe.<br />
Eine leicht verständliche Kurzbedienungsanleitung an jedem Messgerät erleichtert den<br />
täglichen Einsatz.<br />
DE-2<br />
<strong>Thermo</strong> <strong>Scientific</strong> <strong>Orion</strong> <strong>Star</strong> - und <strong>Star</strong> <strong>Plus</strong>-Messgeräte – Bedienungsanleitung
Kapitel II – Anzeige<br />
Allgemeine Beschreibung<br />
Temperatur<br />
Kalibrierung<br />
Unter verschiedenen Einsatzbedingungen zeigt das Display der <strong>Orion</strong> <strong>Star</strong>- und <strong>Star</strong> <strong>Plus</strong>-<br />
Messgeräte Temperatur- und Kalibrierungsdaten. Die Temperatur wird in der linken oberen Ecke<br />
des Displays angezeigt. Das Symbol zeigt an, dass ein Kalibrierungsmodus oder Kalibrierung-<br />
Einrichtungsmenü aktiv ist. Die Symbole man, 2, 4, 7, 9, 10 und 12 zeigen an, welche pH-Puffer<br />
nach erfolgter pH-Kalibrierung gespeichert wurden. Das Einrichtung-Symbol wird nur angezeigt,<br />
wenn sich das Messgerät im Einrichtungsmodus befindet. Das weist auf einen Fehler<br />
hin. Wenn es gemeinsam mit dem Symbol angezeigt wird, liegt ein Kalibrierungsalarm oder<br />
ein Problem mit der Elektrodenqualität vor. Das Symbol zeigt an, dass der AUTO-READ-<br />
Messmodus aktiv ist; dies wird im Abschnitt Messgeräteeinrichtung detaillierter erläutert.<br />
pH/ISE/REDOX-<br />
Messgröße<br />
Leitfähigkeit-<br />
Messgröße<br />
DO-Messgröße<br />
5 <strong>Star</strong>-Messgerät<br />
Dies ist das Display des 5-<strong>Star</strong>-Messgerätes, mit dem Multiparametermessungen möglich sind.<br />
Einzel- und Doppelparametermessgeräte verfügen (je nach Ausführung des Messgerätes) über<br />
weniger Messwertzeilen.<br />
Hinweis: Im Messmodus informieren die drei Daten-Hauptzeilen im Display des Messgerätes<br />
über die aktuellen Messungen.<br />
<strong>Thermo</strong> <strong>Scientific</strong> <strong>Orion</strong> <strong>Star</strong> - und <strong>Star</strong> <strong>Plus</strong>-Messgeräte – Bedienungsanleitung<br />
DE-3
Anzeige<br />
Maßeinheiten- Symbole<br />
Im Messmodus zeigt das Pfeilsymbol auf der linken Seite des Displays die aktive Zeile an. Mit<br />
der Taste bewegen Sie das Pfeilsymbol auf die gewünschte Zeile, mit den Tasten /<br />
blättern Sie durch die Maßeinheiten- Symbole der ausgewählten Zeile. Die Maßeinheiten-<br />
Symbole der 5-<strong>Star</strong>-Multiparameter-Messgeräte werden nachstehend aufgeführt. Einzel- und<br />
Doppelparametermessgeräte verfügen (je nach Ausführung des Messgerätes) über weniger<br />
Messwertzeilen und Symbole.<br />
• In der oberen Zeile werden pH, mV, Relativ-mV, ISE oder Temperatur angezeigt.<br />
• Die mittlere Zeile zeigt Leitfähigkeit, TDS, Salzgehalt, Widerst<strong>and</strong> oder Temperatur.<br />
• In der unteren Zeile werden gelöster Sauerstoff als %-Sättigung, gelöster Sauerstoff als<br />
Konzentration, barometrischer Druck oder Temperatur angezeigt.<br />
Die auf der rechten Seite des Displays angezeigten Maßeinheiten blinken, bis der Messwert<br />
stabil ist.<br />
Hinweis: Falls eine Messwertzeile nicht benötigt wird, bewegen Sie das Pfeilsymbol mit der<br />
Taste auf die nicht benötigte Messwertzeile, anschließend drücken Sie / , bis die<br />
Messwertzeile komplett leer ist.<br />
DE-4<br />
<strong>Thermo</strong> <strong>Scientific</strong> <strong>Orion</strong> <strong>Star</strong> - und <strong>Star</strong> <strong>Plus</strong>-Messgeräte – Bedienungsanleitung
Kapitel III – Tastatur<br />
Allgemeine Beschreibung<br />
Die Tastenanordnung ist bei sämtlichen <strong>Orion</strong> <strong>Star</strong>- und <strong>Star</strong> <strong>Plus</strong>-Messgeräten identisch. Portable<br />
und 2-<strong>Star</strong>-Tischmessgeräte verfügen über neun Tasten. 3-<strong>Star</strong>-, 4-<strong>Star</strong>- und 5-<strong>Star</strong>-Messgeräte<br />
verfügen aufgrund der zusätzlichen Rührertaste – – über insgesamt 10 Tasten.<br />
Tastatur, portables Gerät<br />
Kalibrieren<br />
Ein/Aus / Beleuchtung<br />
Ziffer<br />
Abwärts blättern<br />
Einrichtung<br />
Messen<br />
Speichern/Drucken<br />
Beleuchtung<br />
Aufwärts blättern<br />
Zeilenauswahl<br />
Protokoll anzeigen<br />
Tastatur, Tischgerät<br />
Ein/Aus / Beleuchtung<br />
Kalibrieren<br />
Aufwärts<br />
blättern<br />
Ziffer<br />
Einrichtung<br />
Messen<br />
Speichern/Drucken<br />
Rührer (nicht bei 2-<strong>Star</strong>)<br />
Zeilenauswahl<br />
Protokoll anzeigen<br />
Abwärts blättern<br />
<strong>Thermo</strong> <strong>Scientific</strong> <strong>Orion</strong> <strong>Star</strong> - und <strong>Star</strong> <strong>Plus</strong>-Messgeräte – Bedienungsanleitung<br />
DE-5
Tastatur<br />
Tastenbeschreibungen<br />
Taste Beschreibung Taste Beschreibung<br />
Schaltet das Messgerät ein – sofern<br />
ausgeschaltet.<br />
Schaltet die Beleuchtung bei<br />
eingeschaltetem Messgerät ein<br />
und aus (nur bei 3-<strong>Star</strong>-, 4-<strong>Star</strong>und<br />
5-<strong>Star</strong>-Messgeräten).<br />
Zum Abschalten eines<br />
eingeschalteten Messgerätes halten<br />
Sie die Taste etwa 3 Sekunden lang<br />
gedrückt.<br />
Bewegt das Pfeilsymbol links<br />
im Display zwischen den drei<br />
Anzeigezeilen – so kann die<br />
ausgewählte Zeile bearbeitet<br />
oder kalibriert werden.<br />
<strong>Star</strong>tet im Messmodus die<br />
Kalibrierung der ausgewählten Zeile.<br />
Wenn das Pfeilsymbol auf die<br />
obere Zeile weist und als Einheit<br />
pH ausgewählt wurde, startet die<br />
pH-Kalibrierung nach der Betätigung<br />
dieser Taste.<br />
Bei jeder Tastenbetätigung im<br />
Kalibrierungsmodus übernimmt das<br />
Messgerät den Kalibrierungspunkt<br />
und wechselt zum nächsten Punkt,<br />
bis die maximale Anzahl von<br />
Kalibrierungspunkten erreicht ist.<br />
Wechselt die Messgrößeneinheit der<br />
im Messmodus ausgewählten Zeile.<br />
Ändert den Wert der in den<br />
Modi Einrichtung, Methoden und<br />
Protokollanzeige ausgewählten Zeile.<br />
Bearbeitet den Wert der in den Modi<br />
Einrichtung, Kennworteingabe und<br />
Kalibrierung blinkenden Ziffer.<br />
Wählt in den Modi Einrichtung,<br />
Kennworteingabe und Kalibrierung<br />
die nächste Ziffer zur Bearbeitung<br />
und verschiebt den Dezimalpunkt.<br />
Druckt und protokolliert eine Messung<br />
im Dauer- und Intervallmodus.<br />
Druckt, protokolliert und friert die<br />
Anzeige ein, sobald ein Messwert im<br />
AUTO-READ- Messmodus stabil ist.<br />
Verlässt das Einrichtungsmenü und<br />
wechselt zurück zum Messmodus.<br />
Übernimmt die Kalibrierung und<br />
wechselt zurück zum Messmodus.<br />
Ruft das Einrichtungsmenü<br />
beginnend mit der im Messmodus<br />
ausgewählten Zeile auf.<br />
Wenn das Pfeilsymbol auf die<br />
obere Zeile weist und als Einheit<br />
ISE ausgewählt wurde, wird der<br />
ISE-Einrichtungsbildschirm nach der<br />
Betätigung dieser Taste aufgerufen.<br />
Ruft die Protokollansicht und das<br />
Herunterladen-Menü auf.<br />
Schaltet den Rührer ein und aus.<br />
DE-6<br />
<strong>Thermo</strong> <strong>Scientific</strong> <strong>Orion</strong> <strong>Star</strong> - und <strong>Star</strong> <strong>Plus</strong>-Messgeräte – Bedienungsanleitung
Kapitel IV – Messgerät vorbereiten<br />
Netzteil installieren<br />
Das mit Ihrem Tischmessgerät gelieferte Universalnetzteil ist das einzige Netzteil, das wir zum<br />
Betrieb des Gerätes empfehlen. Beim Einsatz <strong>and</strong>erer Netzteile erlischt die Garantie Ihres<br />
Messgerätes. Das externe Netzteil arbeitet mit 100 – 240 V Wechselspannung, 0,5 A, 50/60 Hz.<br />
Wählen Sie unter den vier mitgelieferten Steckerplatten die zu Ihren Steckdosen passende Platte<br />
aus, schieben Sie diese in den Schlitz am Netzteil ein. Die Steckerplatte rastet ein, sobald sie<br />
richtig sitzt.<br />
Schließen Sie den kleinen Netzteilstecker an den Stromversorgungseingang des Tischmessgerätes<br />
an. Schauen Sie sich dazu bitte die Abbildung im Abschnitt Elektroden anschließen an.<br />
Die Tischmessgeräte der <strong>Orion</strong> <strong>Star</strong>- und <strong>Star</strong> <strong>Plus</strong>-Serie können auch mit Batterien bestückt<br />
werden. So bleiben die Einstellungen des Messgerätes auch dann geschützt, wenn das Gerät<br />
von der Stromversorgung getrennt wird oder ein kurzer Stromausfall eintritt.<br />
<strong>Thermo</strong> <strong>Scientific</strong> <strong>Orion</strong> <strong>Star</strong> - und <strong>Star</strong> <strong>Plus</strong>-Messgeräte – Bedienungsanleitung<br />
DE-7
Messgerät vorbereiten<br />
Batterien einlegen<br />
Die <strong>Orion</strong> <strong>Star</strong>- und <strong>Star</strong> <strong>Plus</strong>-Messgeräte werden mit vier AA-Alkalibatterien betrieben. Verwenden<br />
Sie keine Lithium-Batterien und keine Akkus. Der Einsatz von Nicht-Alkalibatterien kann zu<br />
Gefährdungen führen.<br />
Hinweis: In Tischmessgeräte müssen keine Batterien eingelegt werden, sofern das Gerät ständig<br />
über das Universalnetzteil mit der Stromversorgung verbunden bleibt. Bei portablen Messgeräten<br />
werden werkseitig Batterien mitgeliefert. Zum Öffnen des Batteriefachs bei portablen<br />
Messgeräten lösen Sie die beiden Schrauben an der Rückseite des Gerätes.<br />
1. Vergewissern Sie sich, dass das Messgerät ausgeschaltet ist, legen Sie es vorsichtig kopfüber<br />
auf ein sauberes, fusselfreies Tuch, damit das Display nicht verkratzt wird.<br />
2. Nehmen Sie den Batteriefachdeckel ab.<br />
3. Legen Sie frische Batterien ein; beachten Sie dabei unbedingt die Polaritätskennzeichnungen<br />
(+/-) im Inneren des Batteriefachs.<br />
4. Setzen Sie den Batteriefachdeckel wieder auf.<br />
5. Gespeicherte Daten, Kalibrierungen und Methoden bleiben dank des nicht-flüchtigen<br />
Speichers Ihres Messgerätes auch beim Batteriewechsel erhalten. Allerdings kann es<br />
vorkommen, dass Datum und Uhrzeit nach einem Batteriewechsel wieder neu eingestellt<br />
werden müssen.<br />
DE-8<br />
<strong>Thermo</strong> <strong>Scientific</strong> <strong>Orion</strong> <strong>Star</strong> - und <strong>Star</strong> <strong>Plus</strong>-Messgeräte – Bedienungsanleitung
Messgerät vorbereiten<br />
Elektroden anschließen<br />
Orientieren Sie sich beim Anschluss von Elektroden und Sonden bitte an den nachstehenden<br />
Abbildungen. Die Abbildungen zeigen ein Multiparameter-Messgerät; Einzel- und Doppelparameter-<br />
Messgeräte verfügen – je nach Ausführung – über weniger Anschlussmöglichkeiten.<br />
Elektrodenanschluss – Tischmessgerät<br />
Rühreranschluss für<br />
Rührersonde oder<br />
BOD AUTO-STIR-<br />
DO- Sonde<br />
Referenz für<br />
pH, REDOX<br />
oder ISE<br />
BNC für<br />
pH, REDOX<br />
oder ISE<br />
8-poliger<br />
MiniDIN für<br />
ATC oder Cond<br />
9-poliger<br />
miniDIN für<br />
gelösten<br />
Sauerstoff<br />
RS232<br />
Masse<br />
Stromversorgung<br />
Elektrodenanschluss – portables Messgerät<br />
BNC für<br />
pH, REDOX<br />
oder ISE<br />
8-poliger<br />
MiniDIN für<br />
ATC oder Cond<br />
9-poliger<br />
miniDIN für<br />
gelösten<br />
Sauerstoff<br />
RS232<br />
<strong>Thermo</strong> <strong>Scientific</strong> <strong>Orion</strong> <strong>Star</strong> - und <strong>Star</strong> <strong>Plus</strong>-Messgeräte – Bedienungsanleitung<br />
DE-9
Messgerät vorbereiten<br />
Messgeräteanschlüsse mit mehreren Funktionen<br />
• An den BNC-Eingang schließen Sie pH-, ISE- und REDOX-Elektroden mit BNC- oder<br />
wasserdichten BNC-Steckern an.<br />
• Tischmessgeräte verfügen über einen Referenzeingang, der zum Anschluss einer separaten<br />
Referenzelektrode genutzt wird. Referenzelektroden benötigen eine separate, geeignete<br />
Fühlerelektrode für Messungen.<br />
• Die 970899WP-Sonde für gelösten Sauerstoff kann an den BNC-Eingang angeschlossen<br />
werden.<br />
• Den 8-poligen miniDIN-Eingang nutzen Sie für Leitfähigkeitssonden oder für<br />
Temperatursonden zur automatischen Temperaturkompensation (ATC).<br />
• DO AUTO-STIR-Sonden werden mit dem 9-poligen miniDIN-Eingang und dem<br />
Rühreranschluss verbunden.<br />
• An den RS232-Anschluss können Sie über passende Kabel einen Drucker oder Computer<br />
anschließen.<br />
Instrument einschalten<br />
Nachdem Sie die Batterien in ein portables Messgerät eingelegt, das Netzteil an ein<br />
Tischmessgerät angeschlossen oder Batterien eingelegt haben, schalten Sie das Messgerät mit<br />
der Taste ein.<br />
Wenn Sie ein 3-<strong>Star</strong>-, 4-<strong>Star</strong>- oder 5-<strong>Star</strong>-Messgerät nutzen, können Sie bei eingeschaltetem<br />
Messgerät die Beleuchtung mit der Taste ein- und ausschalten. Wenn ein Tischmessgerät mit<br />
Netzspannung versorgt wird, bleibt die Beleuchtung eingeschaltet, bis Sie die Taste drücken.<br />
Zum Abschalten des Messgerätes halten Sie die Taste<br />
etwa 3 Sekunden lang gedrückt.<br />
Messgerät warten<br />
Zur Routinewartung wischen Sie das Messinstrument mit einem feuchten Tuch ab. Falls nötig,<br />
können Sie warmes Wasser oder ein mildes Reinigungsmittel auf Wasserbasis verwenden. Warten<br />
Sie das Messgerät täglich, wöchentlich oder monatlich – je nachdem, welchen Beanspruchungen<br />
es ausgesetzt wird.<br />
Entfernen Sie Verschmutzungen durch verschüttete Substanzen unverzüglich vom Messgerät;<br />
bedienen Sie sich dazu der zur Art der Verschmutzung passenden Reinigungsverfahren.<br />
DE-10<br />
<strong>Thermo</strong> <strong>Scientific</strong> <strong>Orion</strong> <strong>Star</strong> - und <strong>Star</strong> <strong>Plus</strong>-Messgeräte – Bedienungsanleitung
Kapitel V – Messgerät einrichten<br />
Einrichtungsmenü<br />
So bedienen Sie das Einrichtungsmenü:<br />
1. Rufen Sie das Einrichtungsmenü mit der Taste auf.<br />
2. Drücken Sie / , bis die gewünschte Einrichtungsoption in der oberen Zeile<br />
angezeigt wird.<br />
3. Bewegen Sie das Pfeilsymbol mit der Taste zur mittleren Zeile.<br />
4. Drücken Sie / , bis die gewünschte Einrichtungsoption in der mittleren Zeile<br />
angezeigt wird.<br />
5. Bewegen Sie das Pfeilsymbol mit der Taste zur unteren Zeile.<br />
6. Mit den Tasten / blättern Sie durch die Optionen in der unteren Zeile, bis die<br />
gewünschte Option angezeigt wird. Zur Eingabe numerischer Werte bei Optionen in der<br />
unteren Zeile passen Sie die einzelnen Ziffern mit den Tasten / an, mit<br />
springen Sie zur nächsten Ziffer.<br />
Ein Beispiel: Zum Ändern der pH- Messauflösung blättern Sie die Optionen 0,01 bis 0,001 in<br />
der unteren Anzeigezeile mit der Taste durch.<br />
7. Bewegen Sie das Pfeilsymbol mit der Taste zur oberen Zeile.<br />
8. Zum Festlegen einer neuen Einrichtungsoption wiederholen Sie die Schritte 2 – 7, zum<br />
Verlassen des Einrichtungsmenüs und zur Rückkehr zum Messmodus drücken Sie .<br />
Hinweis: Im Anhang A finden Sie eine Beschreibung spezieller Einrichtungsmenüfunktionen.<br />
<strong>Thermo</strong> <strong>Scientific</strong> <strong>Orion</strong> <strong>Star</strong> - und <strong>Star</strong> <strong>Plus</strong>-Messgeräte – Bedienungsanleitung<br />
DE-11
Messgerät einrichten<br />
Einrichtungsmenütabelle<br />
Die folgende Tabelle deckt sämtliche <strong>Orion</strong> <strong>Star</strong>- und <strong>Star</strong> <strong>Plus</strong>-Messgeräte ab. Nicht alle in dieser<br />
Tabelle aufgelisteten Optionen sind bei sämtlichen Messgeräten verfügbar.<br />
Obere Zeile Mittlere Zeile Untere Zeile Beschreibung (St<strong>and</strong>ardeinstellung, Methode-spezifisch)<br />
PH rES 0.1, 0.01, 0.001 pH- Messwertauflösung (0.01, ja)<br />
PH bUF USA, EUr0 pH-Puffersatz, eingestellt auf automatische Puffererkennung bei der<br />
Kalibrierung. USA-Puffer: 1.68, 4.01, 7.00, 10.01, 12.46. EUrO-Puffer:<br />
1.68, 4.01, 6.86, 9.18 (USA, ja)<br />
ISE rES 1, 2, 3 ISE-Messwertauflösung in signifikanten Zahlen (1, ja)<br />
ISE UnIt m, mgL, PEr, PPb, n0nE ISE-Maßeinheiten (PPb, ja)<br />
ISE rAng L0w, HIgH ISE-Konzentrationsbereich für Kalibrierung-Stabilitätskriterien (HIgH, ja)<br />
ISE nLIn AUt0, 0FF Automatische ISE-Blindwertkorrektur zur Kalibrierung auf niedriger Stufe<br />
(AUt0, ja)<br />
C0nd tC 0FF, LIn, nLF Leitfähigkeit-Temperaturkompensationstyp, LIn für lineare, nLF für nichtlineare<br />
Funktion (LIn, ja)<br />
C0nd C0EF 0.0 bis 10.0 Leitfähigkeit-Temperaturkompensationskoeffizient in %-Änderung<br />
der Leitfähigkeit pro °C. Erscheint, wenn LIn bei tC ausgewählt wurde<br />
(2.1, ja)<br />
C0nd tdSF 0.00 bis 10.0 Leitfähigkeit-TDS-Faktor (0.49, ja)<br />
C0nd CELL 0.001 bis 199.0 Leitfähigkeit-St<strong>and</strong>ardzellkonstantenwert für automatischen<br />
Leitfähigkeitkalibriermodus (0.475, ja)<br />
C0nd trEF 5, 10, 15, 20, 25 Leitfähigkeit-Referenztemperatur (25, ja)<br />
C0nd tyPE Std, 1, 2, 3, 4, 5, 6, 7, USP Leitfähigkeit-Zelltyp und auswählbarer Bereich (Std, ja)<br />
Informationen zu den RDO- Sonde-Menüs finden Sie im Abschnitt Optische RDO- Sonde – Einrichtungsmenü.<br />
d0 rES 0.1, 1 % sat DO %-Messwertauflösung (0.1, ja)<br />
d0 rES 0.01, 0.1 mg/L DO mg/L-Messwertauflösung (0.01, ja)<br />
d0 bAr AUt0, mAn DO-barometrischer Druck-Kompensationstyp (AUt0, ja)<br />
d0 PrES 450.0 bis 850.0 Manueller Kompensationswert für barometrischen DO-Druck; erscheint,<br />
wenn mAn bei bAr ausgewählt wurde (760.0, ja)<br />
d0 SAL AUt0, mAn DO-Salzgehalt-Korrekturtyp (AUt0, ja)<br />
d0 SALF 0 bis 45 Manueller DO-Salzgehalt-Korrekturtyp; erscheint, wenn mAn bei SAL<br />
ausgewählt wurde oder ein DO-Messgerät ohne Leitfähigkeitsmodus<br />
eingesetzt wird (0, ja)<br />
d0 CALt AIr, H20, mAn, SEt0 DO-Kalibrierungstyp (AIr, ja)<br />
d0 LIFE 365 bis 0 Restliche Tage bis zum Austausch der optischen Kappe – nur bei 3-, 4-<br />
und 5 <strong>Star</strong> <strong>Plus</strong>-RDO-Messgeräten (von RDO- Sonde festgelegt, nein)<br />
dUE PH 0 bis 9999 pH-Kalibrierungsalarmwert in Stunden, 0 = aus (0, ja)<br />
dUE 0rP 0 bis 9999 REDOX-Kalibrierungsalarmwert in Stunden, 0 = aus (0, ja)<br />
dUE ISE 0 bis 9999 ISE-Kalibrierungsalarmwert in Stunden, 0 = aus (0, ja)<br />
dUE C0nd 0 bis 9999 Leitfähigkeit-Kalibrierungsalarmwert in Stunden, 0 = aus (0, ja)<br />
dUE d0 0 bis 9999 DO-Kalibrierungsalarmwert in Stunden, 0 = aus (0, ja)<br />
DE-12<br />
<strong>Thermo</strong> <strong>Scientific</strong> <strong>Orion</strong> <strong>Star</strong> - und <strong>Star</strong> <strong>Plus</strong>-Messgeräte – Bedienungsanleitung
Messgerät einrichten<br />
Obere Zeile Mittlere Zeile Untere Zeile Beschreibung (St<strong>and</strong>ardeinstellung, Methode-spezifisch)<br />
rEAd tyPE AUt0, tImE, C0nt, Messablesungstyp bei AUTO-READ, Intervall- oder Dauermessung<br />
(AUt0, ja)<br />
rEAd tInE 00:05 bis 99:59 Messintervall in Minuten und Sekunden (01:00, ja)<br />
L0g dEL n0, YES Option zum Löschen des Datenprotokolls nach dem Herunterladen: Ja<br />
zum Löschen des Datenprotokolls nach dem Herunterladen, nO zum<br />
Überschreiben der ältesten Daten bei vollem Datenprotokoll – kein<br />
Löschen nach dem Herunterladen (n0, ja)<br />
L0g AUt0 0FF, 0n Option zum automatischen Speichern von Datenprotokollpunkten (0FF, ja)<br />
gEn dEgC -5.0 bis 105 Manueller Temperaturwert (25.0, ja)<br />
gEn StIr 0FF, 1, 2, 3, 4, 5, 6, 7 Rührergeschwindigkeit – nur bei 3-, 4- und 5 <strong>Star</strong>-Tischmessgeräten<br />
(4, ja)<br />
gEn PASS 0000 bis 9999 Messgerät-Passworteingabe (0000, ja)<br />
gEn AUt0 0n, 0FF Automatische Messgerätabschaltung (0n, nein)<br />
gLP SEt 0FF, 0n GLP-Option, GLP-Funktion aktiviert oder deaktiviert Methoden (0FF, nein)<br />
dAtE H0Ur HH00 bis HH23 Stundeneinstellung (HH12, nein)<br />
dAtE tInE mm00 bis mm59 Minuteneinstellung (mm00, nein)<br />
dAtE tYPE mdY, dmY Datenformat: Monat, Tag, Jahr oder Tag, Monat, Jahr (mdY, nein)<br />
dAtE YEAr 2000 bis 2099 Jahreseinstellung (2004, nein)<br />
dAtE dAtE mm01 bis mm12 Monatseinstellung (mm01, nein)<br />
dAtE dAY dd01 bis dd31 Tageseinstellung (dd01, nein)<br />
r232 bAUd 1200, 2400, 4800, 9600 Baudrate (9600, nein)<br />
r232 0UtF Prnt, C0mP Ausgabeformat für Drucker oder Computer; beim COmP-Format werden<br />
Daten mit Kommas getrennt (Prnt, nein)<br />
AUt0 SAPL 0FF, 0n Autosampler – nur bei 3-, 4- und 5 <strong>Star</strong>-Tischmessgeräten (OFF, nein)<br />
AUt0 trAY 28, 48 Bechergläseranzahl Einstellung (28, nein)<br />
AUt0 rInb 1, 2, 3, 4, 5 Anzahl von Spülbechern (3, nein)<br />
AUt0 rSEC 5 bis 60 Spülzeit pro Spülbecher in Sekunden (10, nein)<br />
AUt0 PH 0, 1, 2, 3 pH-Kalibrierungspunkte (3, nein)<br />
AUt0 0rP n0, YES REDOX-Kalibrierungsoption; erscheint, wenn 0 bei PH ausgewählt wurde<br />
(n0, nein)<br />
AUt0 ISE 0, 2, 3 ISE-Kalibrierungsoption; erscheint, wenn 0 bei PH ausgewählt wurde<br />
(2, nein)<br />
1 AUt0 ISE1 Konzentrationswert von ISE-Referenz 1; erscheint, wenn 2 oder 3 bei<br />
ISE-Kalibrierungspunkten ausgewählt wurde (1, nein)<br />
10 AUt0 ISE2 Konzentrationswert von ISE-Referenz 2; erscheint, wenn 2 oder 3 bei<br />
ISE-Kalibrierungspunkten ausgewählt wurde (10, nein)<br />
100 AUt0 ISE3 Konzentrationswert von ISE-Referenz 3; erscheint, wenn 3 bei ISE-<br />
Kalibrierungspunkten ausgewählt wurde (100, nein)<br />
AUt0 C0nd 0, 1, 2, 3 Leitfähigkeit-Kalibrierungspunkte (3, nein)<br />
AUt0 n0SA 0 bis 47 Anzahl von Probenbechern (1, nein)<br />
<strong>Thermo</strong> <strong>Scientific</strong> <strong>Orion</strong> <strong>Star</strong> - und <strong>Star</strong> <strong>Plus</strong>-Messgeräte – Bedienungsanleitung<br />
DE-13
Messgerät einrichten<br />
Allgemeine Menüeinstellungen<br />
• Manuelle Temperatur steuert die Temperaturkompensation, wenn<br />
keine Temperatursonde an das Messgerät angeschlossen ist.<br />
• Rührergeschwindigkeit legt die Rührergeschwindigkeit zwischen<br />
1 (geringste Geschwindigkeit) bis 7 (höchste Geschwindigkeit) und Aus<br />
fest ( nur bei 3-<strong>Star</strong>-, 4-<strong>Star</strong>- und 5-<strong>Star</strong>-Tischmessgeräten).<br />
• Kennwortschutz schützt die Einrichtungsmenüoptionen und<br />
Methoden vor versehentlicher Löschung oder Manipulation (nur<br />
bei 3-<strong>Star</strong>-, 4-<strong>Star</strong>- und 5-<strong>Star</strong>-Messgeräten).<br />
• Automatische Abschaltung legt fest, ob sich das Instrument 20<br />
Minuten nach der letzten Tastenbetätigung automatisch abschaltet.<br />
1. Drücken Sie im Messmodus .<br />
2. Blättern Sie mit / durch das Einrichtungsmenü, bis in der oberen Zeile<br />
angezeigt wird.<br />
3. Mit der Taste übernehmen Sie die Auswahl und bewegen das Pfeilsymbol zur<br />
mittleren Zeile.<br />
4. Blättern Sie mit / zu zur manuellen Temperatureinstellung,<br />
zur Einstellung der Rührergeschwindigkeit, zur Kennworteingabe und<br />
zur Einstellung der automatischen Abschaltung.<br />
5. Mit der Taste übernehmen Sie die Auswahl und bewegen das Pfeilsymbol zur<br />
unteren Zeile.<br />
6. Mit den Tasten / blättern Sie durch die Optionen in der unteren Zeile, bis die<br />
gewünschte Option angezeigt wird. Zur Eingabe numerischer Werte bei Optionen in der<br />
unteren Zeile passen Sie die einzelnen Ziffern mit den Tasten / an, mit<br />
springen Sie zur nächsten Ziffer.<br />
7. Mit der Taste übernehmen Sie die Auswahl und bewegen das Pfeilsymbol zur oberen Zeile.<br />
8. Wenn Sie weitere allgemeine Einstellungen ändern möchten, wiederholen Sie die Schritte<br />
3 – 7; mit der Taste gelangen Sie wieder zurück zum Messmodus.<br />
DE-14<br />
<strong>Thermo</strong> <strong>Scientific</strong> <strong>Orion</strong> <strong>Star</strong> - und <strong>Star</strong> <strong>Plus</strong>-Messgeräte – Bedienungsanleitung
Messgerät einrichten<br />
Zeit- und Datumseinstellungen<br />
• Uhrzeit und Datum werden mit Daten- und<br />
Kalibrierungsprotokollpunkten gespeichert und sind auch in den Daten<br />
enthalten, die an einen Computer oder Drucker gesendet werden.<br />
• Sie können das Datumsformat auf Monat, Tag, Jahr oder Tag, Monat,<br />
Jahr einstellen; je nach Bedarf.<br />
1. Drücken Sie im Messmodus .<br />
2. Blättern Sie mit / durch das Einrichtungsmenü, bis in der oberen Zeile<br />
angezeigt wird.<br />
3. Mit der Taste übernehmen Sie die Auswahl und bewegen das Pfeilsymbol zur<br />
mittleren Zeile.<br />
4. Blättern Sie mit / zu zur Einstellung der aktuellen Stunde, zur<br />
Einstellung der aktuellen Minute, zum Festlegen des Datumsformates,<br />
zur Einstellung des aktuellen Monats, zum Einstellen des aktuellen Tages und<br />
zum Festlegen des aktuellen Jahres.<br />
5. Mit der Taste übernehmen Sie die Auswahl und bewegen das Pfeilsymbol zur<br />
unteren Zeile.<br />
6. Mit den Tasten / blättern Sie durch die Optionen in der unteren Zeile, bis die<br />
gewünschte Option angezeigt wird. Zur Eingabe numerischer Werte bei Optionen in der<br />
unteren Zeile passen Sie die einzelnen Ziffern mit den Tasten / an, mit<br />
springen Sie zur nächsten Ziffer.<br />
7. Mit der Taste übernehmen Sie die Auswahl und bewegen das Pfeilsymbol zur<br />
oberen Zeile.<br />
8. Wenn Sie weitere Datums- und Zeiteinstellung ändern möchten, wiederholen Sie die Schritte<br />
3 – 7; mit der Taste gelangen Sie wieder zurück zum Messmodus.<br />
<strong>Thermo</strong> <strong>Scientific</strong> <strong>Orion</strong> <strong>Star</strong> - und <strong>Star</strong> <strong>Plus</strong>-Messgeräte – Bedienungsanleitung<br />
DE-15
Messgerät einrichten<br />
AUTO-READ , Einstellungen für Dauer- und Intervallmessungen<br />
• Im AUTO-READ-Modus nimmt das Messgerät eine Messung vor,<br />
wenn gedrückt wird. Sobald der Messwert stabil ist, friert die<br />
Anzeige ein, die Daten werden protokolliert und gedruckt. Der Rührer<br />
wird ebenfalls durch den AUTO-READ-Modus gesteuert. Der Rührer<br />
läuft an, wenn Sie drücken und stoppt, sobald der Messwert<br />
stabil ist.<br />
• Im Dauermodus erfasst das Messinstrument fortlaufend Messdaten und aktualisiert die<br />
Anzeige. Mit protokollieren und drucken Sie eine Messung in diesem Modus.<br />
• Im Intervallmodus erfasst das Messinstrument fortlaufend Messdaten und aktualisiert<br />
die Anzeige. Das Messgerät protokolliert und druckt die Messwerte in den festgelegten<br />
Intervallen. Intervallmessungen von gelöstem Sauerstoff mit RDO- Sonde werden lediglich<br />
zu den festgelegten Intervallen vorgenommen; dies spart Energie und verlängert die<br />
Batteriebetriebszeit.<br />
1. Drücken Sie im Messmodus .<br />
2. Blättern Sie mit / durch das Einrichtungsmenü, bis in der oberen Zeile<br />
angezeigt wird.<br />
3. Mit der Taste übernehmen Sie die Auswahl und bewegen das Pfeilsymbol zur<br />
mittleren Zeile.<br />
4. Blättern Sie mit / zu (Messablesungstyp) oder zu<br />
(Messungsintervall).<br />
5. Mit der Taste übernehmen Sie die Auswahl und bewegen das Pfeilsymbol zur unteren Zeile.<br />
6. Mit den Tasten / blättern Sie durch die Optionen in der unteren Zeile, bis die<br />
gewünschte Option angezeigt wird. Zur Eingabe numerischer Werte bei Optionen in der<br />
unteren Zeile passen Sie die einzelnen Ziffern mit den Tasten / an, mit<br />
springen Sie zur nächsten Ziffer.<br />
7. Mit der Taste übernehmen Sie die Auswahl und bewegen das Pfeilsymbol zur<br />
oberen Zeile.<br />
8. Wenn Sie weitere Messeinstellungen ändern möchten, wiederholen Sie die Schritte<br />
3 – 7; mit der Taste gelangen Sie wieder zurück zum Messmodus.<br />
DE-16<br />
<strong>Thermo</strong> <strong>Scientific</strong> <strong>Orion</strong> <strong>Star</strong> - und <strong>Star</strong> <strong>Plus</strong>-Messgeräte – Bedienungsanleitung
Messgerät einrichten<br />
Messparameter auswählen<br />
Im Messmodus zeigt das Pfeilsymbol auf der linken Seite des Displays die aktive Zeile an. Mit der Taste<br />
bewegen Sie das Pfeilsymbol auf die gewünschte Messzeile, mit den Tasten / blättern<br />
Sie durch die Messungsparameter der ausgewählten Zeile.<br />
Die Messzeilen und Symbole der 5-<strong>Star</strong>-Multiparameter-Messgeräte werden nachstehend<br />
aufgeführt. Einzel- und Doppelparametermessgeräte verfügen (je nach Ausführung des<br />
Messgerätes) über weniger Messzeilen und Symbole.<br />
pH<br />
mV<br />
RmV<br />
ISE<br />
Kein Symbol für Temperatur<br />
Kein Symbol und kein Messwert – die Messzeile ist abgeschaltet<br />
μS/cm oder mS/cm – Leitfähigkeit<br />
mg/L – TDS<br />
ppt – Salzgehalt<br />
MΩ-cm – Widerst<strong>and</strong><br />
Kein Symbol für Temperatur<br />
Kein Symbol und kein Messwert – die Messzeile ist abgeschaltet<br />
% sat – gelöster Sauerstoff (%-Sättigung)<br />
mg/L – gelöster Sauerstoff (Konzentration)<br />
Kein Symbol für barometrischen Druck<br />
Kein Symbol für Probentemperatur<br />
Kein Symbol für Membrantemperatur (nur polarographische DO-Messung)<br />
Kein Symbol und kein Messwert – die Messzeile ist abgeschaltet<br />
Hinweis: Falls eine Messzeile nicht benötigt wird, bewegen Sie das Pfeilsymbol mit der Taste<br />
auf die nicht benötigte Messzeile, anschließend drücken Sie / , bis die Messzeile<br />
komplett leer ist.<br />
<strong>Thermo</strong> <strong>Scientific</strong> <strong>Orion</strong> <strong>Star</strong> - und <strong>Star</strong> <strong>Plus</strong>-Messgeräte – Bedienungsanleitung<br />
DE-17
Messgerät einrichten<br />
Methodeneinrichtung<br />
Die <strong>Orion</strong> 3-<strong>Star</strong>-, 4-<strong>Star</strong>- und 5-<strong>Star</strong>-Messgeräte können bei aktivierter GLP-Funktion bis zu<br />
10 Methoden speichern. Bei der Auswahl einer Methode nutzt das Messgerät die letzte<br />
Kalibrierung dieser Methode; auf diese Weise lassen sich Elektroden, die einen gemeinsamen<br />
Messgerätanschluss nutzen, einfacher tauschen. Wenn Sie mehrere Methoden nutzen, muss<br />
für jede genutzte Methode eine Kalibrierung durchgeführt werden.<br />
1. So aktivieren Sie die GLP-Funktion:<br />
a. Drücken Sie im Messmodus .<br />
b. Drücken Sie / , bis in der oberen Zeile angezeigt wird.<br />
c. Bewegen Sie das Pfeilsymbol mit zur unteren Zeile, drücken Sie anschließend<br />
/ , bis angezeigt wird.<br />
d. Bewegen Sie das Pfeilsymbol mit zur unteren Zeile, drücken Sie anschließend<br />
/ , bis angezeigt wird.<br />
e. Bewegen Sie das Pfeilsymbol mit der Taste zur oberen Zeile.<br />
f. Drücken Sie : Das Einrichtungsmenü wird verlassen, das Gerät kehrt zum<br />
Messmodus zurück.<br />
2. So zeigen Sie die aktuelle Methodennummer an oder ändern diese:<br />
a. Drücken Sie im Messmodus . Die aktuelle Methodennummer wird angezeigt.<br />
b. Mit / wählen Sie eine neue Methodennummer.<br />
c. Drücken Sie zum Speichern der Methodennummer, drücken Sie zur Rückkehr<br />
zum Messmodus.<br />
DE-18<br />
<strong>Thermo</strong> <strong>Scientific</strong> <strong>Orion</strong> <strong>Star</strong> - und <strong>Star</strong> <strong>Plus</strong>-Messgeräte – Bedienungsanleitung
Kapitel VI – pH- Verfahren<br />
pH- Einrichtungsmenü<br />
Hinweis: Schauen Sie sich die Einrichtungsmenütabelle im Abschnitt zum Einrichtungsmenü an; hier<br />
finden Sie eine vollständige Liste mit Einrichtungsoptionen und entsprechenden Beschreibungen.<br />
Im Anhang A finden Sie eine Beschreibung spezieller Einrichtungsmenüfunktionen.<br />
1. Drücken Sie im Messmodus .<br />
2. Blättern Sie mit / durch das Einrichtungsmenü, bis in der oberen Zeile<br />
angezeigt wird.<br />
3. Mit der Taste übernehmen Sie die Auswahl und bewegen das Pfeilsymbol zur<br />
mittleren Zeile.<br />
4. Blättern Sie mit / zu zur Einstellung der pH-Messauflösung oder<br />
zu zum Einstellen der automatischen Puffererkennung.<br />
5. Mit der Taste übernehmen Sie die Auswahl und bewegen das Pfeilsymbol zur<br />
unteren Zeile.<br />
6. Mit den Tasten / blättern Sie durch die Optionen in der unteren Zeile, bis die<br />
gewünschte Option angezeigt wird.<br />
7. Mit der Taste übernehmen Sie die Auswahl und bewegen das Pfeilsymbol zur<br />
oberen Zeile.<br />
8. Wenn Sie weitere pH-Einstellungen ändern möchten, wiederholen Sie die Schritte 3 – 7; mit<br />
der Taste gelangen Sie wieder zurück zum Messmodus.<br />
<strong>Thermo</strong> <strong>Scientific</strong> <strong>Orion</strong> <strong>Star</strong> - und <strong>Star</strong> <strong>Plus</strong>-Messgeräte – Bedienungsanleitung<br />
DE-19
pH- Verfahren<br />
pH- Kalibrierung<br />
1. Bereiten Sie die Elektrode gemäß Bedienungsanleitung vor.<br />
2. Im Einrichtungsmenü wählen Sie den Puffersatz ( oder ), der zur automatischen<br />
Puffererkennung genutzt werden soll.<br />
3. Im Messmodus drücken Sie , bis das Pfeilsymbol auf die obere Zeile zeigt, anschließend<br />
drücken Sie , bis das pH-Symbol erscheint. Nun starten Sie die Kalibrierung mit .<br />
4. Spülen Sie die Elektrode (und ATC-Sonde, sofern verwendet) mit destilliertem Wasser<br />
und führen Sie diese in den Puffer ein.<br />
5. Warten Sie, bis das pH-Symbol nicht mehr blinkt.<br />
a. Automatische Puffererkennung – Wenn das pH-Symbol zu blinken aufhört, zeigt<br />
das Messgerät den temperaturkorrigierten pH-Wert des Puffers an.<br />
b. Manuelle Kalibrierung – Wenn das pH-Symbol zu blinken aufhört, zeigt das Messgerät<br />
den tatsächlichen an der Elektrode gemessenen pH-Wert an. Drücken Sie , bis<br />
die erste zu ändernde Stelle blinkt. Drücken Sie nun / zum Ändern des<br />
Wertes der blinkenden Ziffer; ändern Sie die restlichen Ziffern, bis das Messgerät den<br />
temperaturkorrigierten pH- Wert des Puffers anzeigt. Nachdem der pH-Pufferwert<br />
festgelegt wurde, drücken Sie , bis sich der Dezimalpunkt an der richtigen<br />
Stelle befindet.<br />
6. Wechseln Sie mit zum nächsten Kalibrierungspunkt und wiederholen Sie die Schritte 4<br />
und 5; oder speichern und beenden Sie die Kalibrierung mit .<br />
7. Die tatsächliche Elektrodensteilheit in Prozent wird im Hauptfeld, wird im unteren<br />
Feld angezeigt.<br />
a. Zur Ein-Punkt-Kalibrierung drücken Sie und / zur Bearbeitung der Steilheit,<br />
anschließend kehren Sie mit zum Messmodus zurück.<br />
b. Bei einer Kalibrierung mit zwei oder mehr Punkten kehrt das Messgerät nach Anzeige der<br />
Steilheit automatisch zum Messmodus zurück.<br />
DE-20<br />
<strong>Thermo</strong> <strong>Scientific</strong> <strong>Orion</strong> <strong>Star</strong> - und <strong>Star</strong> <strong>Plus</strong>-Messgeräte – Bedienungsanleitung
pH- Verfahren<br />
pH- Messung<br />
Hinweis: Schalten Sie die automatische Datenprotokollierung ein, wenn Sie Messwerte in<br />
den pro Messmodus festgelegten Intervallen an die Datenprotokollierung des Messgerätes<br />
senden möchten. Weitere Informationen finden Sie im Abschnitt Datenarchivierung und -abruf.<br />
Sofern die automatische Datenprotokollierung abgeschaltet ist, verbinden Sie das Messgerät zur<br />
Aufzeichnung der Messwerte mit einem Drucker oder Computer.<br />
1. Spülen Sie die Elektrode mit destilliertem oder entionisiertem Wasser. Schütteln Sie<br />
überschüssiges Wasser ab, tupfen Sie die Elektrode mit einem fusselfreien Tuch trocken.<br />
2. Führen Sie die Elektrode in die Probe ein.<br />
a. Wenn das Messgerät auf Dauermessungen eingestellt ist, werden sofort Messungen<br />
vorgenommen und im Display ständig aktualisiert. Sobald der Messwert stabil ist, hört<br />
das pH-Symbol auf zu blinken. Nach der Stabilisierung des Messwertes protokollieren<br />
und drucken Sie die Messung mit . Sofern Sie ein Tischmessgerät mit aktivem Rührer<br />
verwenden, starten Sie den Rührer mit . Schalten Sie den Rührer durch erneutes<br />
Drücken von ab, bevor Sie Elektrode und Rührer aus der Probe entfernen.<br />
b. Wenn das Messgerät im AUTO-READ- Messmodus arbeitet, starten Sie die Messung mit<br />
. Sobald der Messwert stabil ist, hört das AR-Symbol auf zu blinken. Bei stabilem<br />
Messwert protokolliert und druckt das Messgerät die Messung und friert die Anzeige ein.<br />
Wenn Sie ein Tischmessgerät mit aktivem Rührer nutzen, schaltet sich der Rührer beim<br />
Betätigen von ein und stoppt, sobald sich der Messwert stabilisiert.<br />
c. Wenn das Messgerät im Intervallmessmodus arbeitet, werden Messungen sofort<br />
vorgenommen und im Display ständig aktualisiert. Das Messgerät protokolliert und<br />
druckt die Messungen in den im Einrichtungsmenü festgelegten Intervallen. Sofern Sie<br />
ein Tischmessgerät mit aktivem Rührer verwenden, starten Sie den Rührer mit .<br />
Schalten Sie den Rührer durch erneutes Drücken von ab, bevor Sie Elektrode<br />
und Rührer aus der Probe entfernen.<br />
3. Entfernen Sie die Elektrode aus der Probe, spülen Sie die Elektrode mit destilliertem oder<br />
entionisiertem Wasser und tupfen Sie sie trocken. Anschließend führen Sie die Elektrode<br />
in die nächste Probe ein und wiederholen Schritt 2.<br />
4. Nachdem sämtliche Proben gemessen wurden, spülen Sie die Elektrode mit destilliertem<br />
oder entionisiertem Wasser und tupfen sie trocken. Zur richtigen Aufbewahrung der Elektrode<br />
lesen Sie bitte in der Bedienungsanleitung zur Elektrode nach.<br />
<strong>Thermo</strong> <strong>Scientific</strong> <strong>Orion</strong> <strong>Star</strong> - und <strong>Star</strong> <strong>Plus</strong>-Messgeräte – Bedienungsanleitung<br />
DE-21
pH- Verfahren<br />
pH- Temperaturanzeige und Kalibrierung<br />
pH- Temperaturanzeige<br />
Die <strong>Star</strong> <strong>Plus</strong>-Messgeräte ermöglichen eine Anzeige der Temperatur in einzelnen Messzeilen<br />
– zusätzlich zur Temperaturanzeige oben links im Display.<br />
So zeigen Sie die Temperatur in der pH- Messzeile an:<br />
1. In Messmodus wählen Sie mit die obere Anzeigezeile aus. Das Pfeilsymbol zeigt auf die<br />
ausgewählte Zeile.<br />
2. Ändern Sie den Wert der ausgewählten Zeile mit / . Folgendes kann in der oberen<br />
Zeile angezeigt werden: pH (pH), Millivolt (mV), Millivolt relativ (RmV), Konzentration (ISE),<br />
Temperatur (kein Symbol) oder eine leere Zeile.<br />
pH- Temperaturkalibrierung<br />
Im Temperaturkalibrierungsmodus der <strong>Star</strong> <strong>Plus</strong>-Messgeräte kann die Temperatur pro einzelner<br />
Messzeile manuell angepasst werden.<br />
So kalibrieren Sie die Temperatur in der pH- Messzeile:<br />
1. Im Messmodus wählen Sie mit die obere Messzeile und drücken / , bis die<br />
Temperatur der ausgewählten Zeile angezeigt wird.<br />
2. Drücken Sie zum <strong>Star</strong>ten der Kalibrierung.<br />
3. Bei stabilem Messwert blinken das Pfeilsymbol und die erste Ziffer. Geben Sie die Temperatur<br />
ein. Dazu passen Sie die einzelnen Ziffern mit / an, mit wechseln Sie zur<br />
nächsten Ziffer.<br />
4. Speichern und beenden Sie die Kalibrierung mit .<br />
DE-22<br />
<strong>Thermo</strong> <strong>Scientific</strong> <strong>Orion</strong> <strong>Star</strong> - und <strong>Star</strong> <strong>Plus</strong>-Messgeräte – Bedienungsanleitung
Kapitel VII – mV-, Relativ- mV- und<br />
REDOX- Verfahren<br />
Sämtliche Messgeräte mit Möglichkeiten zur pH-Messung sind mit mV-/Relativ-mV und REDOX-<br />
Funktionalität ausgestattet. Im mV-Modus messen Sie die reinen Millivolt-Werte (mV) einer<br />
Elektrode. Im Relativ-mV-/REDOX-Modus kalibrieren Sie die relativen Millivolt-Werte (RmV) einer<br />
Redoxelektrode zur Messung der Oxidationsreduktion (REDOX).<br />
Hinweis: Bei den mV-Messungen h<strong>and</strong>elt es sich um Rohdaten, die nicht kalibriert werden<br />
können. Nutzen Sie den Relativ-mV-Modus zur Kalibrierung von mV-Messungen.<br />
Relativ-mV- und REDOX-Kalibrierung<br />
1. Bereiten Sie die Elektrode gemäß Bedienungsanleitung vor.<br />
2. Im Messmodus drücken Sie , bis das Pfeilsymbol auf die obere Zeile zeigt, anschließend<br />
drücken Sie , bis das pH-Symbol erscheint. Nun starten Sie die<br />
Kalibrierung mit .<br />
3. Spülen Sie die Elektrode mit destilliertem Wasser, führen Sie sie anschließend in die<br />
Referenz ein.<br />
4. Warten Sie, bis das pH-Symbol nicht mehr blinkt. Falls der mV-Messwert der Elektrode<br />
220 mV ± 60 mV beträgt, berechnet das Messgerät nachdem das RmV-Symbol nicht mehr<br />
blinkt, den E H mV-Wert der Elektrode bei der gemessenen Temperatur automatisch und zeigt<br />
diesen an. Sofern sich der mV-Messwert der Elektrode außerhalb des Bereiches 220 mV ±<br />
60 mV bewegt, zeigt das Messgerät 000.0 RmV an, wenn das RmV-Symbol nicht mehr blinkt.<br />
Drücken Sie , bis die erste zu ändernde Stelle blinkt. Drücken Sie nun / zum<br />
Ändern des Wertes der blinkenden Ziffer; ändern Sie die restlichen Ziffern, bis das Messgerät<br />
den Millivolt-Wert der Referenz anzeigt. Zum Ändern des Wertes in eine negative oder<br />
positive Zahl drücken Sie , bis lediglich das Pfeilsymbol blinkt, nicht jedoch die Ziffern.<br />
Anschließend ändern Sie das Vorzeichen des Millivolt-Wertes mit .<br />
5. Speichern und beenden Sie die Kalibrierung mit . Der Millivolt-Offset wird angezeigt, das<br />
Gerät wechselt automatisch in den Messmodus.<br />
<strong>Thermo</strong> <strong>Scientific</strong> <strong>Orion</strong> <strong>Star</strong> - und <strong>Star</strong> <strong>Plus</strong>-Messgeräte – Bedienungsanleitung<br />
DE-23
mV-, Relativ- mV- und REDOX- Verfahren<br />
mV-, Relativ- mV- und REDOX- Messung<br />
Hinweis: Schalten Sie die automatische Datenprotokollierung ein, wenn Sie Messwerte in den<br />
pro Messmodus festgelegten Intervallen an die Datenprotokollierung des Messgerätes senden<br />
möchten. Weitere Informationen finden Sie im Abschnitt Datenarchivierung und -abruf. Sofern die<br />
automatische Datenprotokollierung abgeschaltet ist, verbinden Sie das Messgerät<br />
zur Aufzeichnung der Messwerte mit einem Drucker oder Computer.<br />
1. Spülen Sie die Elektrode mit destilliertem oder entionisiertem Wasser. Schütteln Sie<br />
überschüssiges Wasser ab, tupfen Sie die Elektrode mit einem fusselfreien Tuch trocken.<br />
2. Führen Sie die Elektrode in die Probe ein.<br />
a. Wenn das Messgerät auf Dauermessungen eingestellt ist, werden sofort Messungen<br />
vorgenommen und im Display ständig aktualisiert. Die Symbole mV oder RmV blinken<br />
bis zur Stabilisierung des Messwertes. Nach der Stabilisierung des Messwertes<br />
protokollieren und drucken Sie die Messung mit . Sofern Sie ein Tischmessgerät<br />
mit aktivem Rührer verwenden, starten Sie den Rührer mit . Schalten Sie den<br />
Rührer durch erneutes Drücken von ab, bevor Sie Elektrode und Rührer aus der<br />
Probe entfernen.<br />
b. Wenn das Messgerät im AUTO-READ- Messmodus arbeitet, starten Sie die Messung mit<br />
. Sobald der Messwert stabil ist, hört das AR-Symbol auf zu blinken. Bei stabilem<br />
Messwert protokolliert und druckt das Messgerät die Messung und friert die Anzeige ein.<br />
Wenn Sie ein Tischmessgerät mit aktivem Rührer nutzen, schaltet sich der Rührer beim<br />
Betätigen von ein und stoppt, sobald sich der Messwert stabilisiert.<br />
c. Wenn das Messgerät im Intervallmessmodus arbeitet, werden Messungen sofort<br />
vorgenommen und im Display ständig aktualisiert. Das Messgerät protokolliert und<br />
druckt die Messungen in den im Einrichtungsmenü festgelegten Intervallen. Sofern Sie<br />
ein Tischmessgerät mit aktivem Rührer verwenden, starten Sie den Rührer mit .<br />
Schalten Sie den Rührer durch erneutes Drücken von ab, bevor Sie Elektrode<br />
und Rührer aus der Probe entfernen.<br />
3. Entfernen Sie die Elektrode aus der Probe, spülen Sie die Elektrode mit destilliertem oder<br />
entionisiertem Wasser und tupfen Sie sie trocken. Anschließend führen Sie die Elektrode<br />
in die nächste Probe ein und wiederholen Schritt 2.<br />
4. Nachdem sämtliche Proben gemessen wurden, spülen Sie die Elektrode mit destilliertem<br />
oder entionisiertem Wasser und tupfen sie trocken. Zur richtigen Aufbewahrung der Elektrode<br />
lesen Sie bitte in der Bedienungsanleitung zur Elektrode nach.<br />
DE-24<br />
<strong>Thermo</strong> <strong>Scientific</strong> <strong>Orion</strong> <strong>Star</strong> - und <strong>Star</strong> <strong>Plus</strong>-Messgeräte – Bedienungsanleitung
Kapitel VIII – Gelöst- Sauerstoff-<br />
Messverfahren<br />
Gelöst- Sauerstoff- Einrichtungsmenü<br />
Hinweis: Schauen Sie sich die Einrichtungsmenütabelle im Abschnitt zum<br />
Einrichtungsmenü an; hier finden Sie eine vollständige Liste mit Einrichtungsoptionen und<br />
entsprechenden Beschreibungen. Im Anhang A finden Sie eine Beschreibung spezieller<br />
Einrichtungsmenüfunktionen.<br />
1. Drücken Sie im Messmodus .<br />
2. Blättern Sie mit / durch das Einrichtungsmenü, bis in der oberen Zeile<br />
angezeigt wird.<br />
3. Mit der Taste übernehmen Sie die Auswahl und bewegen das Pfeilsymbol zur<br />
mittleren Zeile.<br />
4. Blättern Sie mit / zu (%-Sättigung), (mg/L-Konzentration),<br />
(Barometertyp – automatisch oder manuell), (manueller Kompensationswert für<br />
barometrischen Druck), (Salzgehalt-Kompensationstyp – automatisch oder manuell),<br />
(manueller Salzgehalt-Korrekturwert) und (Kalibrierungstyp für gelösten<br />
Sauerstoff).<br />
5. Mit der Taste wählen Sie die gewünschte Option und bewegen das Pfeilsymbol zur<br />
unteren Zeile.<br />
6. Mit den Tasten / blättern Sie durch die Optionen in der unteren Zeile, bis die<br />
gewünschte Option angezeigt wird. Zur Eingabe numerischer Werte bei Optionen in der<br />
unteren Zeile passen Sie die einzelnen Ziffern mit den Tasten / an, mit<br />
springen Sie zur nächsten Ziffer.<br />
7. Mit der Taste übernehmen Sie die Auswahl und bewegen das Pfeilsymbol zur<br />
oberen Zeile.<br />
8. Wenn Sie weitere Gelöst- Sauerstoff- Einstellungen ändern möchten, wiederholen Sie<br />
die Schritte 3 – 7; mit der Taste gelangen Sie wieder zurück zum Messmodus.<br />
<strong>Thermo</strong> <strong>Scientific</strong> <strong>Orion</strong> <strong>Star</strong> - und <strong>Star</strong> <strong>Plus</strong>-Messgeräte – Bedienungsanleitung<br />
DE-25
Gelöst- Sauerstoff- Messverfahren<br />
Gelöst- Sauerstoff- Kalibrierung<br />
• Vor der Kalibrierung muss die Sonde für gelösten Sauerstoff vorbereitet und polarisiert<br />
werden. Die Sonde wird ständig polarisiert, solange sie mit dem Messgerät verbunden<br />
ist. Wenn die Sonde zum ersten Mal angeschlossen wird oder länger als 60 Minuten vom<br />
Messgerät getrennt wurde, schließen Sie die Sonde an das Messgerät an, verbinden das<br />
Messgerät mit der Stromversorgung und warten 30 – 60 Minuten ab; in dieser Zeit wird<br />
die Sonde polarisiert. Wurde die Sonde weniger als 1 Stunde lang getrennt, dauert die<br />
Polarisierung etwa 5 – 25 Minuten.<br />
• Auch in abgeschaltetem Zust<strong>and</strong> versorgt das Messgerät die Sonde für gelösten Sauerstoff<br />
mit einem Polarisierungsstrom. Um eine maximale Batterielaufzeit zu erreichen, trennen Sie<br />
die Probe vom Messgerät, wenn Sie sie längere Zeit nicht benötigen.<br />
1. Wählen Sie einen der folgenden Kalibrierungsmodi im Einrichtungsmenü.<br />
a. – Eine Luftkalibrierung wird unter Einsatz der Kalibrierhülse in Wasserdampfgesättigter<br />
Luft ausgeführt. Dies ist die einfachste und exakteste Kalibrierung. Aufgrund<br />
der typischen Unterschiede zwischen Wasserdampf-gesättigter Luft und Luft-gesättigtem<br />
Wasser wird nach Stabilisierung des Messwertes eine Sättigung von 102,3 % angezeigt.<br />
i. Die bestmögliche Genauigkeit wird erzielt, wenn die Kalibrierungstemperatur mit der<br />
Messtemperatur übereinstimmt.<br />
ii. Feuchten Sie den Schwamm oder das Absorptionstuch in der Kalibrierhülse mit<br />
destilliertem Wasser an, führen Sie die Sonde in die Hülse ein, ohne dabei mit dem<br />
Wasserdampf-gesättigten Material in Berührung zu kommen. Bei BOD-Messungen<br />
kann diese Kalibrierung in einer BOD-Flasche durchgeführt werden.<br />
b. – Eine Wasserkalibrierung wird unter Einsatz von zu 100 % mit Luft gesättigtem<br />
Wasser durchgeführt. Lassen Sie Luft in eine Wasserprobe strömen, rühren Sie die Probe<br />
vorsichtig durch, damit sich keine Luftblasen an der Membran der Gelöst- Sauerstoff-<br />
Sonde absetzen.<br />
c. – Eine manuelle Kalibrierung wird unter Einsatz einer Wasserprobe mit einer<br />
bekannten Konzentration gelösten Sauerstoffs durchgeführt. Dieses Verfahren kann zum<br />
Kalibrieren der Gelöst- Sauerstoff- Sonde auf den durch eine Winkler-Titration erzielten<br />
Wert eingesetzt werden.<br />
DE-26<br />
<strong>Thermo</strong> <strong>Scientific</strong> <strong>Orion</strong> <strong>Star</strong> - und <strong>Star</strong> <strong>Plus</strong>-Messgeräte – Bedienungsanleitung
Gelöst- Sauerstoff- Messverfahren<br />
i. Zur manuellen Kalibrierung zählt die Durchführung einer Winkler-Titration nebst<br />
Einsatz dieser Probe als Kalibrierungsreferenz. Der sich aus der Titration ergebende<br />
Sauerstoffgehalt wird bei einer manuellen Kalibrierung als Gelöst- Sauerstoff- Wert<br />
eingegeben. Dies passt den Messgeräteeingang an die Winkler-Titration an. Dieses<br />
Verfahren ist aufgrund der Möglichkeit von Titrationsfehlern entsprechend weniger exakt.<br />
d. – Eine Nullpunktkalibrierung wird mit einer sauerstofffreien Lösung ausgeführt.<br />
Eine Nullpunktkalibrierung ist nicht grundsätzlich erforderlich, sofern die Messungen<br />
oberhalb einer Sättigung von 10 % oder 1 mg/L ausgeführt werden. Nullen Sie die Sonde,<br />
wenn Sie eine neue Membran nutzen, mit einer frischen Füllungslösung arbeiten oder<br />
einen gelösten Sauerstoffgehalt unterhalb 1 mg/L messen. Eine Luftkalibrierung sollte<br />
grundsätzlich vor der Nullpunktkalibrierung ausgeführt werden.<br />
2. Lassen Sie Sonde und Kalibrierungsreferenz (Wasserdampf-gesättigte Luft, Luft-gesättigtes<br />
Wasser, Winkler-St<strong>and</strong>ard- oder sauerstofffreie Lösung) zum Gleichgewicht gelangen.<br />
3. Im Messmodus drücken Sie , bis das Pfeilsymbol auf die untere Zeile zeigt. Anschließend<br />
drücken Sie , bis das Symbol % sat oder mg/L angezeigt wird; starten Sie die<br />
Kalibrierung mit .<br />
4. Warten Sie, bis sich der Gelöst- Sauerstoff-Wert stabilisiert.<br />
a. Wenn eine Luftkalibrierung durchgeführt wird, zeigt das Messgerät 102.3 % an und<br />
wechselt automatisch in den Messmodus.<br />
b. Falls eine Luftkalibrierung durchgeführt wird, zeigt das Messgerät 100.0 % an und kehrt<br />
automatisch zum Messmodus zurück.<br />
c. Wird eine manuelle Kalibrierung ausgeführt, warten Sie, bis das mg/L-Symbol zu blinken<br />
aufhört. Nun geben Sie den Gelöst- Sauerstoff- Wert ein, indem Sie drücken, bis<br />
die erste zu ändernde Ziffer blinkt. Ändern Sie anschließend den Wert der blinkenden<br />
Ziffer mit / , passen Sie die restlichen Ziffern ebenfalls an, bis das Messgerät<br />
den richtigen Gelöst- Sauerstoff-Wert anzeigt. Nachdem der Gelöst- Sauerstoff-Wert<br />
festgelegt wurde, drücken Sie , bis sich der Dezimalpunkt an der richtigen Stelle<br />
befindet.<br />
d. Wenn eine Nullpunktkalibrierung durchgeführt wird, zeigt das Messgerät 0.00 an und<br />
kehrt automatisch zum Messmodus zurück.<br />
<strong>Thermo</strong> <strong>Scientific</strong> <strong>Orion</strong> <strong>Star</strong> - und <strong>Star</strong> <strong>Plus</strong>-Messgeräte – Bedienungsanleitung<br />
DE-27
Gelöst- Sauerstoff- Messverfahren<br />
Gelöst- Sauerstoff- Messung<br />
Hinweis: Schalten Sie die automatische Datenprotokollierung ein, wenn Sie Messwerte in<br />
den pro Messmodus festgelegten Intervallen an die Datenprotokollierung des Messgerätes<br />
senden möchten. Weitere Informationen finden Sie im Abschnitt Datenarchivierung und -abruf.<br />
Sofern die automatische Datenprotokollierung abgeschaltet ist, verbinden Sie das Messgerät zur<br />
Aufzeichnung der Messwerte mit einem Drucker oder Computer.<br />
1. Spülen Sie die Gelöst- Sauerstoff- Sonde mit destilliertem oder entionisiertem Wasser.<br />
Schütteln Sie überschüssiges Wasser ab, tupfen Sie die Sonde mit einem fusselfreien<br />
Tuch trocken.<br />
2. Führen Sie die Gelöst- Sauerstoff- Sonde in die Probe ein.<br />
a. Wenn das Messgerät auf Dauermessungen eingestellt ist, werden sofort Messungen<br />
vorgenommen und im Display ständig aktualisiert. Die Symbole mg/L oder %sat<br />
blinken bis zur Stabilisierung des Messwertes. Nach der Stabilisierung des Messwertes<br />
protokollieren und drucken Sie die Messung mit . Sofern Sie ein Tischmessgerät<br />
mit aktivem Rührer verwenden, starten Sie den Rührer mit . Schalten Sie den<br />
Rührer durch erneutes Drücken von ab, bevor Sie Sonde und Rührer aus der<br />
Probe entfernen.<br />
b. Wenn das Messgerät im AUTO-READ- Messmodus arbeitet, starten Sie die<br />
Messung mit. Sobald der Messwert stabil ist, hört das AR-Symbol auf zu blinken. Bei<br />
stabilem Messwert protokolliert und druckt das Messgerät den Messwert und friert die<br />
Anzeige ein. Wenn Sie ein Tischmessgerät mit aktivem Rührer nutzen, schaltet sich der<br />
Rührer beim Betätigen von ein und stoppt, sobald sich der Messwert stabilisiert.<br />
Wird eine BOD AUTO-STIR-Sonde eingesetzt, starten Sie die AUTO-READ-Messung mit<br />
der Taste an der Sonde.<br />
Hinweis: Die <strong>Star</strong> <strong>Plus</strong>-Messgeräte für gelösten Sauerstoff ermöglichen die Steuerung<br />
der Mess- und Rührerfunktionen per AUTO-STIR-Sonde, wenn sich das Messgerät im<br />
AUTO-READ- Messmodus befindet. Zum <strong>Star</strong>ten und Stoppen der Messungs- und<br />
Rührerfunktionen drücken Sie die Taste an der AUTO-STIR-Sonde.<br />
c. Wenn das Messgerät im Intervallmessmodus arbeitet, werden Messungen sofort<br />
vorgenommen und im Display ständig aktualisiert. Das Messgerät protokolliert und<br />
druckt die Messungen in den im Einrichtungsmenü festgelegten Intervallen. Sofern Sie<br />
ein Tischmessgerät mit aktivem Rührer verwenden, starten Sie den Rührer mit .<br />
Schalten Sie den Rührer durch erneutes Drücken von ab, bevor Sie Sonde und<br />
Rührer aus der Probe entfernen.<br />
DE-28<br />
<strong>Thermo</strong> <strong>Scientific</strong> <strong>Orion</strong> <strong>Star</strong> - und <strong>Star</strong> <strong>Plus</strong>-Messgeräte – Bedienungsanleitung
Gelöst- Sauerstoff- Messverfahren<br />
3. Entfernen Sie die Gelöst- Sauerstoff- Sonde aus der Probe, spülen Sie die Sonde mit<br />
destilliertem oder entionisiertem Wasser und tupfen Sie sie trocken. Anschließend führen<br />
Sie die Sonde in die nächste Probe ein und wiederholen Schritt 2.<br />
4. Nachdem sämtliche Proben gemessen wurden, spülen Sie die Gelöst- Sauerstoff- Sonde mit<br />
destilliertem oder entionisiertem Wasser und tupfen sie trocken. Zur richtigen Aufbewahrung<br />
der Gelöst- Sauerstoff- Sonde lesen Sie bitte in der Bedienungsanleitung zur Sonde nach.<br />
Gelöst- Sauerstoff- Temperaturanzeige und Kalibrierung<br />
Gelöst- Sauerstoff- Temperaturanzeige<br />
Die <strong>Star</strong> <strong>Plus</strong>-Messgeräte ermöglichen eine Anzeige der Temperatur in einzelnen Messzeilen<br />
– zusätzlich zur Temperaturanzeige oben links im Display.<br />
So zeigen Sie die Temperatur in der Gelöst- Sauerstoff- Messzeile an:<br />
1. In Messmodus wählen Sie mit die untere Anzeigezeile aus. Das Pfeilsymbol zeigt auf die<br />
ausgewählte Zeile.<br />
2. Ändern Sie den Wert der ausgewählten Zeile mit / . Die untere Zeile kann zur<br />
Anzeige von gelöstem Sauerstoff (%-Sättigung), gelöstem Sauerstoff (mg/L), barometrischem<br />
Druck (kein Symbol), Probentemperatur (kein Symbol), Elektrolytlösung-/Membrantemperatur<br />
(kein Symbol, nach der Zahl) oder einer leeren Zeile umgeschaltet werden.<br />
<strong>Thermo</strong> <strong>Scientific</strong> <strong>Orion</strong> <strong>Star</strong> - und <strong>Star</strong> <strong>Plus</strong>-Messgeräte – Bedienungsanleitung<br />
DE-29
Gelöst- Sauerstoff- Messverfahren<br />
Gelöst- Sauerstoff- Temperaturkalibrierung<br />
Im Temperaturkalibrierungsmodus der <strong>Star</strong> <strong>Plus</strong>-Messgeräte kann die Temperatur pro<br />
einzelner Messzeile manuell angepasst werden. Die Gelöst- Sauerstoff- Messzeile zeigt die<br />
Probentemperatur und die Elektrolytlösung-/Membrantemperatur an.<br />
So kalibrieren Sie die Probentemperatur der Gelöst- Sauerstoff- Messzeile:<br />
1. Im Messmodus wählen Sie mit die untere Messzeile und drücken / , bis die<br />
Probentemperatur angezeigt wird (z. B. ).<br />
2. Drücken Sie zum <strong>Star</strong>ten der Kalibrierung.<br />
3. Bei stabilem Messwert blinken das Pfeilsymbol und die erste Ziffer. Geben Sie die Temperatur<br />
ein. Dazu passen Sie die einzelnen Ziffern mit / an, mit wechseln Sie zur<br />
nächsten Ziffer.<br />
4. Speichern und beenden Sie die Kalibrierung mit .<br />
So kalibrieren Sie die Elektrolytlösung-/Membrantemperatur der Gelöst- Sauerstoff- Messzeile:<br />
1. Im Messmodus wählen Sie mit die untere Messzeile und drücken / , bis die<br />
Probentemperatur angezeigt wird (z. B. ).<br />
2. Drücken Sie zum <strong>Star</strong>ten der Kalibrierung.<br />
3. Bei stabilem Messwert blinken das Pfeilsymbol und die erste Ziffer. Geben Sie die Temperatur<br />
ein. Dazu passen Sie die einzelnen Ziffern mit / an, mit wechseln Sie zur<br />
nächsten Ziffer.<br />
4. Speichern und beenden Sie die Kalibrierung mit .<br />
DE-30<br />
<strong>Thermo</strong> <strong>Scientific</strong> <strong>Orion</strong> <strong>Star</strong> - und <strong>Star</strong> <strong>Plus</strong>-Messgeräte – Bedienungsanleitung
Kapitel IX – RDO ® , optisches – Gelöst-<br />
Sauerstoff- Verfahren<br />
Hinweis: Die Seriennummern von optischen RDO-Messgeräten für gelösten Sauerstoff<br />
beginnen mit dem Buchstaben R (z. B. R12345). Nur solche RDO-Messgeräte sind mit optischen<br />
RDO- Sonden kompatibel.<br />
Optische Membrankappe – Überblick<br />
Die optische RDO- Sonde ist mit einer internen Uhr ausgestattet, welche die 365-tägige maximale<br />
Einsatzdauer einer neuen optischen Membrankappe herabzählt. Diese Zeit beginnt, nachdem<br />
die optische Membrankappe an der RDO- Sonde installiert, die Sonde mit dem Messgerät<br />
verbunden und die erste Messung durchgeführt wurde. Nachdem die erste Messung durchgeführt<br />
wurde, lässt sich die Zählung der 365 Tage wieder rücksetzen noch modifizieren. Jede optische<br />
Membrankappe ist mit einer eindeutigen Seriennummer versehen, die von der RDO- Sonde<br />
ausgelesen wird. Die Einsatzzeit lässt sich also nicht durch Wiederanbringen der Kappe verlängern.<br />
Hinweis: Wenn eine neue optische Membrankappe an der RDO- Sonde angebracht wird, muss<br />
die Stromversorgung des Messgerätes abgeschaltet sein. Nachdem die optische Kappe installiert<br />
wurde, schalten Sie das Messgerät ein – die Daten der neuen Kappe werden an das Messgerät<br />
übertragen.<br />
So drucken Sie die Daten der optischen Kappe:<br />
1. Schließen Sie das Messgerät an einen Drucker oder Computer an, überprüfen Sie die<br />
Baudrate- und Ausgabeeinstellungen im Einrichtungsmenü.<br />
2. Drücken Sie im Messmodus .<br />
3. Blättern Sie mit / durch das Einstellungsmenü, bis in der oberen Zeile<br />
und in der mittleren Zeile angezeigt werden.<br />
4. Bewegen Sie das Pfeilsymbol durch zweimaliges Drücken der Taste zur unteren Zeile.<br />
5. Drücken Sie / , bis in der unteren Zeile angezeigt wird.<br />
6. Mit drucken Sie nun die Daten der optischen Membrankappe aus. Kehren Sie mit<br />
zum Messmodus zurück.<br />
<strong>Thermo</strong> <strong>Scientific</strong> <strong>Orion</strong> <strong>Star</strong> - und <strong>Star</strong> <strong>Plus</strong>-Messgeräte – Bedienungsanleitung<br />
DE-31
RDO ® , optisches – Gelöst- Sauerstoff- Verfahren<br />
RDO, optische – Gelöst- Sauerstoff- Einrichtungsmenü<br />
Hinweis: Schauen Sie sich die Einrichtungsmenütabelle im Abschnitt zum Einrichtungsmenü<br />
an; hier finden Sie eine vollständige Liste mit Einrichtungsoptionen und entsprechenden<br />
Beschreibungen.<br />
1. Drücken Sie im Messmodus .<br />
2. Blättern Sie mit / durch das Einrichtungsmenü, bis in der oberen Zeile<br />
angezeigt wird.<br />
3. Mit der Taste übernehmen Sie die Auswahl und bewegen das Pfeilsymbol zur<br />
mittleren Zeile.<br />
4. Blättern Sie mit / zu (%-Sättigung), (mg/L-Konzentration),<br />
(Barometertyp – automatisch oder manuell), (manueller Kompensationswert für<br />
barometrischen Druck), (Salzgehalt-Kompensationstyp – automatisch oder manuell),<br />
(manueller Salzgehalt-Korrekturwert), (Kalibrierungstyp für gelösten<br />
Sauerstoff) und (Restzeit bis zum Austausch der optischen Kappe in Tagen).<br />
5. Mit der Taste wählen Sie die gewünschte Option und bewegen das Pfeilsymbol zur<br />
unteren Zeile.<br />
6. Mit den Tasten / blättern Sie durch die Optionen in der unteren Zeile, bis die<br />
gewünschte Option angezeigt wird. Zur Eingabe numerischer Werte bei Optionen in der<br />
unteren Zeile passen Sie die einzelnen Ziffern mit den Tasten / an, mit<br />
springen Sie zur nächsten Ziffer.<br />
7. Mit der Taste übernehmen Sie die Auswahl und bewegen das Pfeilsymbol zur<br />
oberen Zeile.<br />
8. Wenn Sie weitere Gelöst- Sauerstoff- Einstellungen ändern möchten, wiederholen Sie<br />
die Schritte 3 – 7; mit der Taste gelangen Sie wieder zurück zum Messmodus.<br />
DE-32<br />
<strong>Thermo</strong> <strong>Scientific</strong> <strong>Orion</strong> <strong>Star</strong> - und <strong>Star</strong> <strong>Plus</strong>-Messgeräte – Bedienungsanleitung
RDO ® , optisches – Gelöst- Sauerstoff- Verfahren<br />
Optische RDO- Sonde – Einrichtungsmenü<br />
Die optischen RDO-Messgeräte für gelösten Sauerstoff verfügen über eine spezielle<br />
Einrichtungsmenüfunktion, mit der Sie Daten zur optischen RDO- Sonde ausdrucken können.<br />
Obere Zeile Mittlere Zeile Untere Zeile Einrichtungsmenü-Beschreibung<br />
Pr0b d0 tESt Die tESt-Option startet einen 30-sekündigen Test der Kommunikationsverbindung<br />
zwischen RDO- Sonde und Messgerät. Im Laufe des Tests wird in der<br />
Temperaturanzeige ein 30-Sekunden-Countdown angezeigt. Nach Abschluss des<br />
Tests sendet das Messgerät einen Bericht an den Drucker oder Computer.<br />
Pr0b d0 CAL Die CAL-Option druckt Seriennummer des Messgerätes, Datum, Uhrzeit und<br />
Steilheit der letzten fünf Gelöster- Sauerstoff-Kalibrierungen, die mit der derzeit<br />
an das Messgerät angeschlossenen RDO- Sonde durchgeführt wurden.<br />
Pr0b d0 dFLt Die dFLt-Option druckt die werkseitigen Kalibrierungsdaten der derzeit mit dem<br />
Messgerät verbundenen RDO- Sonde.<br />
Pr0b d0 SLP Die SLP-Option druckt einen Drift-pro-Minute-Wert der Steilheit der letzten<br />
fünf Gelöst- Sauerstoff-Kalibrierungen, die mit der derzeit mit dem Messgerät<br />
verbundenen RDO- Sonde durchgeführt wurden.<br />
Pr0b d0 mEtH Die mEtH-Option druckt die RDO-spezifischen Methodendaten der letzten<br />
Methode, die mit der derzeit mit dem Messgerät verbundenen RDO- Sonde<br />
angew<strong>and</strong>t wurde.<br />
Pr0b d0 InF0 Die InF0-Option druckt RDO- Sondendaten einschließlich Seriennummer und<br />
Revision der Sonde, Herstellungsdatum von Sonde und optischer Kappe, Kappe-<br />
<strong>Star</strong>tdatum, Kappe-Betriebszeit und interne Echtzeituhr der Sonde, die derzeit mit<br />
dem Messgerät verbunden ist.<br />
1. Schließen Sie das Messgerät an einen Drucker oder Computer an, überprüfen Sie<br />
die Baudrate- und Ausgabeeinstellungen im Einrichtungsmenü.<br />
2. Drücken Sie im Messmodus .<br />
3. Blättern Sie mit / durch das Einstellungsmenü, bis in der oberen Zeile<br />
und in der mittleren Zeile angezeigt werden.<br />
4. Bewegen Sie das Pfeilsymbol durch zweimaliges Drücken der Taste zur unteren Zeile.<br />
5. Blättern Sie mit / zu (Test der Kommunikationsverbindung), (RDO-<br />
Sonde-Kalibrierungsdaten), (werkseitige RDO- Sonde-Kalibrierungsdaten),<br />
(RDO- Sonde-Steilheit), (RDO-Methodendaten) oder (allgemeine RDO-<br />
Sondendaten).<br />
6. Mit drucken Sie die ausgewählte Option.<br />
<strong>Thermo</strong> <strong>Scientific</strong> <strong>Orion</strong> <strong>Star</strong> - und <strong>Star</strong> <strong>Plus</strong>-Messgeräte – Bedienungsanleitung<br />
DE-33
RDO ® , optisches – Gelöst- Sauerstoff- Verfahren<br />
7. Wählen Sie mit / eine <strong>and</strong>ere Option aus der unteren Zeile und drücken<br />
Sie zum Ausdrucken der ausgewählten Option – oder kehren Sie mit zum<br />
Messmodus zurück.<br />
Beispiel zum Ausdruck allgemeiner RDO- Sondendaten<br />
smartprobe info<br />
type 1<br />
run_status 255<br />
format_version 1<br />
probe_SN 6<br />
app_version 9<br />
HW_version 1<br />
cap_SN 129614<br />
rtc 1210257372 (05-08-2008 14:36:12)<br />
mfg_time 1208371349 (04-16-2008 18:42:29)<br />
start_time 1210178953 (05-07-2008 16:49:13)<br />
expiration 1241736553 (05-07-2009 22:49:13)<br />
probe_mfg_time 1208440800 (04-17-2008 14:00:00)<br />
write_count 14<br />
pass_count 12<br />
expire<br />
0x01<br />
days_left 364.3<br />
probe_reading 149.529243<br />
temp_reading 24.942651<br />
state 21<br />
general_event 0x00<br />
internal_event 0x00<br />
internal_state 3<br />
internal_retry 0x00<br />
DE-34<br />
<strong>Thermo</strong> <strong>Scientific</strong> <strong>Orion</strong> <strong>Star</strong> - und <strong>Star</strong> <strong>Plus</strong>-Messgeräte – Bedienungsanleitung
RDO, optische – Gelöst- Sauerstoff- Kalibrierung<br />
RDO ® , optisches – Gelöst- Sauerstoff- Verfahren<br />
1. Wählen Sie einen der folgenden Kalibrierungsmodi im Einrichtungsmenü.<br />
a. – Eine Luftkalibrierung wird unter Einsatz der Kalibrierhülse in Wasserdampfgesättigter<br />
Luft ausgeführt. Dies ist die einfachste und exakteste Methode.<br />
i. Die bestmögliche Genauigkeit wird erzielt, wenn die Kalibrierungstemperatur mit<br />
der Messtemperatur übereinstimmt.<br />
ii. Feuchten Sie den Schwamm in der Kalibrierhülse mit destilliertem Wasser an.<br />
Führen Sie die RDO- Sonde in die Hülse ein, ohne den mit Wasser gesättigten<br />
Schwamm zu berühren.<br />
b. – Eine Wasserkalibrierung wird unter Einsatz von zu 100 % mit Luft gesättigtem<br />
Wasser durchgeführt. Lassen Sie Luft in eine Wasserprobe strömen, rühren Sie die<br />
Probe vorsichtig durch, damit sich keine Luftblasen an der optischen Kappe absetzen.<br />
c. – Eine manuelle Kalibrierung wird unter Einsatz einer Wasserprobe mit einer<br />
bekannten Konzentration gelösten Sauerstoffs durchgeführt. Diese Methode kann<br />
zum Kalibrieren der RDO- Sonde auf den durch eine Winkler-Titration erzielten Wert<br />
eingesetzt werden.<br />
i. Zur manuellen Kalibrierung zählt die Durchführung einer Winkler-Titration nebst<br />
Einsatz dieser Probe als Kalibrierungsreferenz. Der sich aus der Titration ergebende<br />
Sauerstoffgehalt wird bei einer manuellen Kalibrierung als Gelöst- Sauerstoff- Wert<br />
eingegeben. Dies passt den Messgeräteeingang an die Winkler-Titration an. Dieses<br />
Verfahren ist aufgrund der Möglichkeit von Titrationsfehlern entsprechend weniger exakt.<br />
d. – Eine Nullpunktkalibrierung wird mit einer sauerstofffreien Lösung ausgeführt.<br />
Eine Nullpunktkalibrierung ist nicht grundsätzlich erforderlich, sofern die Messungen<br />
oberhalb einer Sättigung von 10 % oder 1 mg/L ausgeführt werden.<br />
2. Lassen Sie RDO- Sonde und Kalibrierungsreferenz (Wasserdampf-gesättigte Luft, Luftgesättigtes<br />
Wasser, Winkler-St<strong>and</strong>ard- oder sauerstofffreie Lösung) zum Gleichgewicht<br />
gelangen.<br />
<strong>Thermo</strong> <strong>Scientific</strong> <strong>Orion</strong> <strong>Star</strong> - und <strong>Star</strong> <strong>Plus</strong>-Messgeräte – Bedienungsanleitung<br />
DE-35
RDO ® , optisches – Gelöst- Sauerstoff- Verfahren<br />
3. Im Messmodus drücken Sie , bis das Pfeilsymbol auf die untere Zeile zeigt. Anschließend<br />
drücken Sie , bis das Symbol % sat oder mg/L angezeigt wird;<br />
starten Sie die Kalibrierung mit .<br />
4. Warten Sie, bis sich der Gelöst- Sauerstoff-Wert stabilisiert.<br />
a. Wenn eine Luftkalibrierung durchgeführt wird, zeigt das Messgerät 100.0 % an und<br />
wechselt automatisch in den Messmodus.<br />
b. Falls eine Wasserkalibrierung durchgeführt wird, zeigt das Messgerät 100.0 % an und<br />
kehrt automatisch zum Messmodus zurück.<br />
c. Wird eine manuelle Kalibrierung ausgeführt, warten Sie, bis das mg/L-Symbol zu blinken<br />
aufhört. Nun geben Sie den Gelöst- Sauerstoff- Wert ein, indem Sie drücken, bis<br />
die erste zu ändernde Ziffer blinkt. Ändern Sie anschließend den Wert der blinkenden<br />
Ziffer mit / , passen Sie die restlichen Ziffern ebenfalls an, bis das Messgerät<br />
den richtigen Gelöst- Sauerstoff-Wert anzeigt. Nachdem der Gelöst- Sauerstoff-Wert<br />
festgelegt wurde, drücken Sie , bis sich der Dezimalpunkt an der richtigen Stelle<br />
befindet.<br />
d. Wenn eine Nullpunktkalibrierung durchgeführt wird, zeigt das Messgerät 0.00 an und<br />
kehrt automatisch zum Messmodus zurück.<br />
DE-36<br />
<strong>Thermo</strong> <strong>Scientific</strong> <strong>Orion</strong> <strong>Star</strong> - und <strong>Star</strong> <strong>Plus</strong>-Messgeräte – Bedienungsanleitung
RDO, optische – Gelöst- Sauerstoff- Messung<br />
RDO ® , optisches – Gelöst- Sauerstoff- Verfahren<br />
Hinweis: Schalten Sie die automatische Datenprotokollierung ein, wenn Sie Messwerte in<br />
den pro Messmodus festgelegten Intervallen an die Datenprotokollierung des Messgerätes<br />
senden möchten. Weitere Informationen finden Sie im Abschnitt Datenarchivierung und -abruf.<br />
Sofern die automatische Datenprotokollierung abgeschaltet ist, verbinden Sie das Messgerät zur<br />
Aufzeichnung der Messwerte mit einem Drucker oder Computer.<br />
1. Spülen Sie die RDO- Sonde mit destilliertem oder entionisiertem Wasser. Schütteln Sie<br />
überschüssiges Wasser ab, tupfen Sie die Sonde mit einem fusselfreien Tuch trocken.<br />
2. Führen Sie die RDO- Sonde in die Probe ein.<br />
a. Wenn das Messgerät auf Dauermessungen eingestellt ist, werden sofort Messungen<br />
vorgenommen und im Display ständig aktualisiert. Die Symbole mg/L oder %sat<br />
blinken bis zur Stabilisierung des Messwertes. Nach der Stabilisierung des Messwertes<br />
protokollieren und drucken Sie die Messung mit . Dieser Modus benötigt<br />
reichlich Batteriestrom.<br />
b. Wenn das Messgerät im AUTO-READ- Messmodus arbeitet, starten Sie die Messung mit<br />
. Sobald der Messwert stabil ist, hört das AR-Symbol auf zu blinken. Bei stabilem<br />
Messwert protokolliert und druckt das Messgerät die Messung und friert die Anzeige ein.<br />
Dieser Modus verbraucht eine Menge Batteriestrom; abhängig davon,<br />
wie oft gedrückt wird.<br />
c. Falls das Messgerät im Intervallmessmodus arbeitet, werden die Werte für demgelösten<br />
Sauerstoff in den im Einrichtungsmenü vorgegebenen Intervallen gemessen. Sofern<br />
<strong>and</strong>ere Parameter als gelöster Sauerstoff gemessen werden, führt das Messgerät solche<br />
Messungen fortlaufend durch und aktualisiert die Anzeige kontinuierlich. Das Messgerät<br />
protokolliert und druckt die Messwerte in den vorgegebenen Intervallen. Dieser Modus<br />
kann zum Verlängern der Batterielaufzeit eingesetzt werden, da der Stromverbrauch je<br />
nach festgelegtem Intervall reduziert wird.<br />
3. Entfernen Sie die RDO- Sonde aus der Probe, spülen Sie die Sonde mit destilliertem oder<br />
entionisiertem Wasser und tupfen Sie sie trocken. Anschließend führen Sie die Sonde in die<br />
nächste Probe ein und wiederholen Schritt 2.<br />
4. Nachdem sämtliche Proben gemessen wurden, spülen Sie die RDO- Sonde mit destilliertem<br />
oder entionisiertem Wasser und tupfen sie trocken. Zur richtigen Aufbewahrung der Sonde<br />
lesen Sie bitte in der zugehörigen Bedienungsanleitung nach.<br />
<strong>Thermo</strong> <strong>Scientific</strong> <strong>Orion</strong> <strong>Star</strong> - und <strong>Star</strong> <strong>Plus</strong>-Messgeräte – Bedienungsanleitung<br />
DE-37
RDO ® , optisches – Gelöst- Sauerstoff- Verfahren<br />
RDO, optische – Gelöst- Sauerstoff- Temperaturanzeige und Kalibrierung<br />
RDO, optische – Gelöst- Sauerstoff- Temperaturanzeige<br />
Die <strong>Star</strong> <strong>Plus</strong>-Messgeräte ermöglichen eine Anzeige der Temperatur in einzelnen Messzeilen<br />
– zusätzlich zur Temperaturanzeige oben links im Display.<br />
So zeigen Sie die Temperatur in der RDO-Gelöst- Sauerstoff-Messzeile an:<br />
1. In Messmodus wählen Sie mit die untere Anzeigezeile aus. Das Pfeilsymbol zeigt auf die<br />
ausgewählte Zeile.<br />
2. Ändern Sie den Wert der ausgewählten Zeile mit / . Die untere Zeile kann zur<br />
Anzeige von gelöstem Sauerstoff (%-Sättigung), gelöstem Sauerstoff (mg/L), barometrischem<br />
Druck (kein Symbol), Temperatur (kein Symbol) oder einer leeren Zeile umgeschaltet werden.<br />
RDO, optische – Gelöst- Sauerstoff- Temperaturkalibrierung<br />
Im Temperaturkalibrierungsmodus der <strong>Star</strong> <strong>Plus</strong>-Messgeräte kann die Temperatur pro einzelner<br />
Messzeile manuell angepasst werden.<br />
So kalibrieren Sie die Temperatur der RDO-Gelöst- Sauerstoff- Messzeile:<br />
1. Im Messmodus wählen Sie mit die untere Messzeile und drücken / , bis die<br />
Temperatur angezeigt wird.<br />
2. Drücken Sie zum <strong>Star</strong>ten der Kalibrierung.<br />
3. Bei stabilem Messwert blinken das Pfeilsymbol und die erste Ziffer. Geben Sie die Temperatur<br />
ein. Dazu passen Sie die einzelnen Ziffern mit / an, mit wechseln Sie zur<br />
nächsten Ziffer.<br />
4. Speichern und beenden Sie die Kalibrierung mit .<br />
DE-38<br />
<strong>Thermo</strong> <strong>Scientific</strong> <strong>Orion</strong> <strong>Star</strong> - und <strong>Star</strong> <strong>Plus</strong>-Messgeräte – Bedienungsanleitung
Kapitel X – Leitfähigkeitsverfahren<br />
Leitfähigkeits-Einrichtungsmenü<br />
Hinweis: Schauen Sie sich die Einrichtungsmenütabelle im Abschnitt zum Einrichtungsmenü an; hier<br />
finden Sie eine vollständige Liste mit Einrichtungsoptionen und entsprechenden Beschreibungen.<br />
Im Anhang A finden Sie eine Beschreibung spezieller Einrichtungsmenüfunktionen.<br />
1. Drücken Sie im Messmodus .<br />
2. Blättern Sie mit / durch das Einrichtungsmenü, bis in der oberen Zeile<br />
angezeigt wird.<br />
3. Mit der Taste übernehmen Sie die Auswahl und bewegen das Pfeilsymbol zur<br />
mittleren Zeile.<br />
4. Blättern Sie mit / zu (Temperaturkompensationstyp),<br />
(Temperaturkoeffizient zur -Temperaturkompensation), (TDS-Faktor<br />
zur Gesamtmessung gelöster Festkörper), (Nominal-Zellkonstante der<br />
Leitfähigkeitssonde), (Referenztemperatur zur Temperaturkompensation)<br />
oder (Leitfähigkeit-Zelltyp).<br />
5. Mit der Taste übernehmen Sie die Auswahl und bewegen das Pfeilsymbol zur<br />
unteren Zeile.<br />
6. Mit den Tasten / blättern Sie durch die Optionen in der unteren Zeile, bis die<br />
gewünschte Option angezeigt wird. Zur Eingabe numerischer Werte bei Optionen in der<br />
unteren Zeile passen Sie die einzelnen Ziffern mit den Tasten / an, mit<br />
springen Sie zur nächsten Ziffer.<br />
7. Mit der Taste übernehmen Sie die Auswahl und bewegen das Pfeilsymbol zur<br />
oberen Zeile.<br />
8. Wenn Sie weitere Leitfähigkeitseinstellungen ändern möchten, wiederholen Sie die Schritte<br />
3 – 7; mit der Taste gelangen Sie wieder zurück zum Messmodus.<br />
<strong>Thermo</strong> <strong>Scientific</strong> <strong>Orion</strong> <strong>Star</strong> - und <strong>Star</strong> <strong>Plus</strong>-Messgeräte – Bedienungsanleitung<br />
DE-39
Leitfähigkeitsverfahren<br />
Leitfähigkeitskalibrierung<br />
Hinweis: Zur automatischen Kalibrierung muss die Nominal-Zellkonstante der Leitfähigkeitssonde<br />
im Einrichtungsmenü eingegeben werden, bevor die Kalibrierung durchgeführt wird.<br />
1. Im Messmodus drücken Sie , bis das Pfeilsymbol auf die untere Zeile zeigt. Anschließend<br />
drücken Sie , bis das Symbol µS/cm oder mS/cm angezeigt wird; starten Sie die<br />
Kalibrierung mit .<br />
2. Spülen Sie die Sonde mit entionisiertem Wasser, führen Sie sie anschließend in die<br />
Leitfähigkeitsreferenz ein.<br />
3. Manuelle Kalibrierung – Im Bildschirm zur manuellen Kalibrierung werden die Zellkonstante<br />
in der oberen Zeile, der Leitfähigkeitswert der Kalibrierungsreferenz in der mittleren Zeile und<br />
in der unteren Zeile angezeigt. Zum Ändern der Zellkonstante drücken Sie , bis<br />
die erste zu ändernde Ziffer blinkt. Anschließend drücken Sie / zum Ändern der<br />
ersten blinkenden Ziffer und passen die restlichen Ziffern entsprechend an, bis der angezeigte<br />
Leitfähigkeitswert mit dem Referenzwert der gemessenen Temperatur übereinstimmt.<br />
Nachdem der Wert festgelegt wurde, drücken Sie , bis sich der Dezimalpunkt an der<br />
richtigen Stelle befindet. Speichern und beenden Sie die Kalibrierung mit .<br />
Hinweis: Im Bildschirm zur manuellen Kalibrierung müssen Sie die Zellkonstante innerhalb<br />
von 5 Sekunden ändern; ansonsten fährt das Messgerät mit der automatischen/direkten<br />
Kalibrierung fort. Falls dies geschieht, brechen Sie die Kalibrierung durch Gedrückthalten<br />
von ab und wiederholen die Kalibrierung.<br />
4. Automatische oder direkte Kalibrierung ausführen – Warten Sie, bis das Messgerät<br />
vom Bildschirm zur manuellen Kalibrierung zum Bildschirm zur automatischen/direkten<br />
Kalibrierung wechselt. Im Bildschirm zur automatischen/direkten Kalibrierung werden der<br />
Leitfähigkeitswert der Kalibrierungsreferenz in der mittleren Zeile und in der unteren<br />
Zeile angezeigt.<br />
a. Automatische Kalibrierung – Wenn die Symbole µS/cm oder mS/cm nicht mehr blinken,<br />
zeigt das Messgerät die Temperatur-korrigierte Leitfähigkeit der Referenz an.<br />
b. Direkte Kalibrierung – Wenn die Symbole µS/cm oder mS/cm nicht mehr blinken, geben<br />
Sie den Leitfähigkeitswert der Referenz zur gemessenen Temperatur ein. Drücken Sie<br />
, bis die erste zu ändernde Stelle blinkt. Drücken Sie nun / zum Ändern<br />
des Wertes der blinkenden Ziffer; ändern Sie die restlichen Ziffern, bis der richtige Wert<br />
angezeigt wird. Nachdem der Wert festgelegt wurde, drücken Sie , bis sich der<br />
Dezimalpunkt an der richtigen Stelle befindet.<br />
DE-40<br />
<strong>Thermo</strong> <strong>Scientific</strong> <strong>Orion</strong> <strong>Star</strong> - und <strong>Star</strong> <strong>Plus</strong>-Messgeräte – Bedienungsanleitung
Leitfähigkeitsverfahren<br />
5. Wechseln Sie mit zum nächsten Kalibrierungspunkt, spülen Sie die Leitfähigkeitssonde<br />
mit destilliertem oder entionisiertem Wasser, führen Sie diese in die nächste<br />
Leitfähigkeitsreferenz ein und wiederholen Sie den Schritt 4a / 4b; oder speichern<br />
und beenden Sie die Kalibrierung mit .<br />
6. Die Zellkonstante wird im Hauptfeld angezeigt, das Messgerät wechselt automatisch<br />
zum Messmodus.<br />
Leitfähigkeitsmessung<br />
Hinweis: Schalten Sie die automatische Datenprotokollierung ein, wenn Sie Messwerte in<br />
den pro Messmodus festgelegten Intervallen an die Datenprotokollierung des Messgerätes<br />
senden möchten. Weitere Informationen finden Sie im Abschnitt Datenarchivierung und -abruf.<br />
Sofern die automatische Datenprotokollierung abgeschaltet ist, verbinden Sie das Messgerät zur<br />
Aufzeichnung der Messwerte mit einem Drucker oder Computer.<br />
1. Spülen Sie die Leitfähigkeitssonde mit destilliertem oder entionisiertem Wasser. Schütteln<br />
Sie überschüssiges Wasser ab, tupfen Sie die Sonde mit einem fusselfreien Tuch trocken.<br />
2. Führen Sie die Leitfähigkeitssonde in die Probe ein.<br />
a. Wenn das Messgerät auf Dauermessung eingestellt ist, werden sofort Messungen<br />
vorgenommen und im Display ständig aktualisiert. Die Symbole μS/cm oder mS/cm<br />
blinken bis zur Stabilisierung des Messwertes. Nach der Stabilisierung des Messwertes<br />
protokollieren und drucken Sie die Messung mit . Sofern Sie ein Tischmessgerät<br />
mit aktivem Rührer verwenden, starten Sie den Rührer mit . Schalten Sie den<br />
Rührer durch erneutes Drücken von ab, bevor Sie Sonde und Rührer aus der<br />
Probe entfernen.<br />
b. Wenn das Messgerät im AUTO-READ- Messmodus arbeitet, starten Sie die Messung mit<br />
. Sobald der Messwert stabil ist, hört das AR-Symbol auf zu blinken. Bei stabilem<br />
Messwert protokolliert und druckt das Messgerät die Messung und friert die Anzeige ein.<br />
Wenn Sie ein Tischmessgerät mit aktivem Rührer nutzen, schaltet sich der Rührer beim<br />
Betätigen von ein und stoppt, sobald sich der Messwert stabilisiert.<br />
c. Wenn das Messgerät im Intervallmessmodus arbeitet, werden Messungen sofort<br />
vorgenommen und im Display ständig aktualisiert. Das Messgerät protokolliert und<br />
druckt die Messungen in den im Einrichtungsmenü festgelegten Intervallen. Sofern<br />
Sie ein Tischmessgerät mit aktivem Rührer verwenden, starten Sie den Rührer mit<br />
. Schalten Sie den Rührer durch erneutes Drücken von ab, bevor Sie Sonde<br />
und Rührer aus der Probe entfernen.<br />
<strong>Thermo</strong> <strong>Scientific</strong> <strong>Orion</strong> <strong>Star</strong> - und <strong>Star</strong> <strong>Plus</strong>-Messgeräte – Bedienungsanleitung<br />
DE-41
Leitfähigkeitsverfahren<br />
3. Entfernen Sie die Leitfähigkeitssonde aus der Probe, spülen Sie die Sonde mit destilliertem<br />
oder entionisiertem Wasser und tupfen Sie sie trocken. Anschließend führen Sie die Sonde<br />
in die nächste Probe ein und wiederholen Schritt 2.<br />
4. Nachdem sämtliche Proben gemessen wurden, spülen Sie die Leitfähigkeitssonde mit<br />
destilliertem oder entionisiertem Wasser und tupfen sie trocken. Zur richtigen Aufbewahrung<br />
der Leitfähigkeitssonde lesen Sie bitte in der zugehörigen Bedienungsanleitung nach.<br />
Leitfähigkeit-Temperaturanzeige und Kalibrierung<br />
Leitfähigkeit-Temperaturanzeige<br />
Die <strong>Star</strong> <strong>Plus</strong>-Messgeräte ermöglichen eine Anzeige der Temperatur in einzelnen Messzeilen<br />
– zusätzlich zur Temperaturanzeige oben links im Display.<br />
1. Im Messmodus wählen Sie mit die mittlere Anzeigezeile aus. Das Pfeilsymbol zeigt auf<br />
die ausgewählte Zeile.<br />
2. Ändern Sie den Wert der ausgewählten Zeile mit / . Die mittlere Zeile kann zur<br />
Anzeige von Leitfähigkeit (µS/cm oder mS/cm), gelöste Festkörper gesamt (mg/L), Salzgehalt<br />
(ppt), Widerst<strong>and</strong> (MΩ-cm), Temperatur (kein Symbol) oder einer leeren Zeile umgeschaltet<br />
werden.<br />
Leitfähigkeit-Temperaturkalibrierung<br />
Im Temperaturkalibrierungsmodus der <strong>Star</strong> <strong>Plus</strong>-Messgeräte kann die Temperatur pro einzelner<br />
Messzeile manuell angepasst werden.<br />
1. Im Messmodus wählen Sie mit die mittlere Messzeile und drücken / , bis die<br />
Temperatur der ausgewählten Zeile angezeigt wird.<br />
2. Drücken Sie zum <strong>Star</strong>ten der Kalibrierung.<br />
3. Bei stabilem Messwert blinken das Pfeilsymbol und die erste Ziffer. Geben Sie die Temperatur<br />
ein. Dazu passen Sie die einzelnen Ziffern mit / an, mit wechseln Sie zur<br />
nächsten Ziffer.<br />
4. Speichern und beenden Sie die Kalibrierung mit .<br />
DE-42<br />
<strong>Thermo</strong> <strong>Scientific</strong> <strong>Orion</strong> <strong>Star</strong> - und <strong>Star</strong> <strong>Plus</strong>-Messgeräte – Bedienungsanleitung
Kapitel XI – ISE- Verfahren<br />
ISE-Einrichtungsmenü<br />
Hinweis: Schauen Sie sich die Einrichtungsmenütabelle im Abschnitt zum<br />
Einrichtungsmenü an; hier finden Sie eine vollständige Liste mit Einrichtungsoptionen<br />
und entsprechenden Beschreibungen. Im Anhang A finden Sie eine Beschreibung spezieller<br />
Einrichtungsmenüfunktionen.<br />
1. Drücken Sie im Messmodus .<br />
2. Blättern Sie mit / durch das Einrichtungsmenü, bis in der oberen Zeile<br />
angezeigt wird.<br />
3. Mit der Taste übernehmen Sie die Auswahl und bewegen das Pfeilsymbol zur<br />
mittleren Zeile.<br />
4. Blättern Sie mit / zu (ISE-Messauflösung), (ISE-Maßeinheiten),<br />
(ISE-Kalibrierungsbereich) oder (nicht-lineare Blindwertkorrektur).<br />
5. Mit der Taste übernehmen Sie die Auswahl und bewegen das Pfeilsymbol zur<br />
unteren Zeile.<br />
6. Mit den Tasten / blättern Sie durch die Optionen in der unteren Zeile, bis die<br />
gewünschte Option angezeigt wird. Zur Eingabe numerischer Werte bei Optionen in der<br />
unteren Zeile passen Sie die einzelnen Ziffern mit den Tasten / an, mit<br />
springen Sie zur nächsten Ziffer.<br />
7. Mit der Taste übernehmen Sie die Auswahl und bewegen das Pfeilsymbol zur<br />
oberen Zeile.<br />
8. Wenn Sie weitere ISE-Einstellungen ändern möchten, wiederholen Sie die Schritte 3 – 7;<br />
mit der Taste gelangen Sie wieder zurück zum Messmodus.<br />
<strong>Thermo</strong> <strong>Scientific</strong> <strong>Orion</strong> <strong>Star</strong> - und <strong>Star</strong> <strong>Plus</strong>-Messgeräte – Bedienungsanleitung<br />
DE-43
ISE- Verfahren<br />
ISE-Kalibrierung<br />
Die Kalibrierst<strong>and</strong>ards sollten mit den ISE-Einheiten der erwarteten Probenergebnisse vorbereitet<br />
werden. <strong>Star</strong>ten Sie die Kalibrierung mit dem Kalibrierungsreferenz der geringsten Konzentration,<br />
arbeiten Sie sich anschließend bis zur Kalibrierst<strong>and</strong>ard der höchsten Konzentration vor.<br />
Reagenzien (wie Ionenkonzentrationseinsteller ISA) sollten den Proben und Referenzen wie in der<br />
Bedienungsanleitung zur Elektrode beschrieben zugegeben werden.<br />
1. Bereiten Sie Elektrode, St<strong>and</strong>ards und sämtliche weiteren benötigten Lösungen gemäß der<br />
Bedienungsanleitung zur Elektrode vor.<br />
2. Im Messmodus drücken Sie , bis das Pfeilsymbol auf die obere Zeile zeigt, anschließend<br />
drücken Sie , bis das ISE-Symbol erscheint. Nun starten Sie die Kalibrierung mit .<br />
3. Spülen Sie die Elektrode mit destilliertem oder entionisiertem Wasser, schütteln Sie<br />
überschüssiges Wasser ab, tupfen Sie die Elektrode trocken, führen Sie sie anschließend<br />
in den St<strong>and</strong>ard mit der geringsten Konzentration ein.<br />
4. Warten Sie, bis das ISE-Symbol nicht mehr blinkt. Drücken Sie , bis die erste zu ändernde<br />
Stelle blinkt. Drücken Sie nun / zum Ändern des Wertes der blinkenden Ziffer;<br />
ändern Sie die restlichen Ziffern, bis das Messgerät die Konzentration des St<strong>and</strong>ards anzeigt.<br />
Nachdem der St<strong>and</strong>ardwert festgelegt wurde, drücken Sie , bis sich der Dezimalpunkt<br />
an der richtigen Stelle befindet.<br />
5. Wechseln Sie mit zum nächst geringsten Kalibrierst<strong>and</strong>ard und wiederholen Sie die<br />
Schritte 3 und 4. Arbeiten Sie sich von dem St<strong>and</strong>ard mit der geringsten Konzentrationen<br />
zum St<strong>and</strong>ard mit der höchsten Konzentration vor; oder speichern und beenden Sie die<br />
Kalibrierung mit .<br />
6. Die tatsächliche Elektrodensteilheit in mV pro Dekade-Konzentration wird im Hauptfeld,<br />
im unteren Feld angezeigt.<br />
a. Zur Ein-Punkt-Kalibrierung bearbeiten Sie die Steilheit mit und / . Zum<br />
Ändern des Steilheit-Vorzeichens drücken Sie , bis lediglich das Pfeilsymbol blinkt,<br />
nicht jedoch die Ziffern. Anschließend ändern Sie das Steilheit-Vorzeichen mit .<br />
Kehren Sie mit zum Messmodus zurück.<br />
b. Bei einer Kalibrierung mit zwei oder mehr Punkten kehrt das Messgerät nach Anzeige<br />
der Steilheit automatisch zum Messmodus zurück.<br />
DE-44<br />
<strong>Thermo</strong> <strong>Scientific</strong> <strong>Orion</strong> <strong>Star</strong> - und <strong>Star</strong> <strong>Plus</strong>-Messgeräte – Bedienungsanleitung
ISE- Verfahren<br />
ISE-Messung<br />
Hinweis: Schalten Sie die automatische Datenprotokollierung ein, wenn Sie Messwerte in<br />
den pro Messmodus festgelegten Intervallen an die Datenprotokollierung des Messgerätes<br />
senden möchten. Weitere Informationen finden Sie im Abschnitt Datenarchivierung und -abruf.<br />
Sofern die automatische Datenprotokollierung abgeschaltet ist, verbinden Sie das Messgerät zur<br />
Aufzeichnung der Messwerte mit einem Drucker oder Computer.<br />
1. Spülen Sie die Elektrode mit destilliertem oder entionisiertem Wasser. Schütteln Sie<br />
überschüssiges Wasser ab, tupfen Sie die Elektrode mit einem fusselfreien Tuch trocken.<br />
2. Führen Sie die Elektrode in die Probe ein.<br />
a. Wenn das Messgerät auf Dauermessungen eingestellt ist, werden sofort Messungen<br />
vorgenommen und im Display ständig aktualisiert. Sobald der Messwert stabil ist, hört<br />
das ISE-Symbol auf zu blinken. Nach der Stabilisierung des Messwertes protokollieren<br />
und drucken Sie die Messung mit . Sofern Sie ein Tischmessgerät mit aktivem Rührer<br />
verwenden, starten Sie den Rührer mit . Schalten Sie den Rührer durch erneutes<br />
Drücken von ab, bevor Sie Elektrode und Rührer aus der Probe entfernen.<br />
b. Wenn das Messgerät im AUTO-READ- Messmodus arbeitet, starten Sie die Messung mit<br />
. Sobald der Messwert stabil ist, hört das AR-Symbol auf zu blinken. Bei stabilem<br />
Messwert protokolliert und druckt das Messgerät die Messung und friert die Anzeige ein.<br />
Wenn Sie ein Tischmessgerät mit aktivem Rührer nutzen, schaltet sich der Rührer beim<br />
Betätigen von ein und stoppt, sobald sich der Messwert stabilisiert.<br />
c. Wenn das Messgerät im Intervallmessmodus arbeitet, werden Messungen sofort<br />
vorgenommen und im Display ständig aktualisiert. Das Messgerät protokolliert und<br />
druckt die Messungen in den im Einrichtungsmenü festgelegten Intervallen. Sofern Sie<br />
ein Tischmessgerät mit aktivem Rührer verwenden, starten Sie den Rührer mit .<br />
Schalten Sie den Rührer durch erneutes Drücken von ab, bevor Sie Elektrode<br />
und Rührer aus der Probe entfernen.<br />
3. Entfernen Sie die Elektrode aus der Probe, spülen Sie die Elektrode mit destilliertem oder<br />
entionisiertem Wasser und tupfen Sie sie trocken. Anschließend führen Sie die Elektrode<br />
in die nächste Probe ein und wiederholen Schritt 2.<br />
4. Nachdem sämtliche Proben gemessen wurden, spülen Sie die Elektrode mit destilliertem<br />
oder entionisiertem Wasser und tupfen sie trocken. Zur richtigen Aufbewahrung der Elektrode<br />
lesen Sie bitte in der Bedienungsanleitung zur Elektrode nach.<br />
<strong>Thermo</strong> <strong>Scientific</strong> <strong>Orion</strong> <strong>Star</strong> - und <strong>Star</strong> <strong>Plus</strong>-Messgeräte – Bedienungsanleitung<br />
DE-45
ISE- Verfahren<br />
ISE- Temperaturanzeige und Kalibrierung<br />
ISE- Temperaturanzeige<br />
Die <strong>Star</strong> <strong>Plus</strong>-Messgeräte ermöglichen eine Anzeige der Temperatur in einzelnen Messzeilen<br />
– zusätzlich zur Temperaturanzeige oben links im Display.<br />
So zeigen Sie die Temperatur in der ISE-Messzeile an:<br />
1. Halten Sie gedrückt, bis das Messinstrument zum Messmodus wechselt.<br />
2. Wählen Sie die obere Anzeigezeile mit . Das Pfeilsymbol zeigt auf die ausgewählte Zeile.<br />
3. Ändern Sie den Wert der ausgewählten Zeile mit / . Folgendes kann in der oberen<br />
Zeile angezeigt werden: pH (pH), Millivolt (mV), Millivolt relativ (RmV), Konzentration (ISE),<br />
Temperatur (kein Symbol) oder eine leere Zeile.<br />
ISE- Temperaturkalibrierung<br />
Im Temperaturkalibrierungsmodus der <strong>Star</strong> <strong>Plus</strong>-Messgeräte kann die Temperatur pro einzelner<br />
Messzeile manuell angepasst werden.<br />
So kalibrieren Sie die Temperatur in der ISE-Messzeile:<br />
1. Im Messmodus wählen Sie mit die obere Messzeile und drücken / , bis die<br />
Temperatur der ausgewählten Zeile angezeigt wird.<br />
2. Drücken Sie zum <strong>Star</strong>ten der Kalibrierung.<br />
3. Bei stabilem Messwert blinken das Pfeilsymbol und die erste Ziffer. Geben Sie die Temperatur<br />
ein. Dazu passen Sie die einzelnen Ziffern mit / an, mit wechseln Sie zur<br />
nächsten Ziffer.<br />
4. Speichern und beenden Sie die Kalibrierung mit .<br />
DE-46<br />
<strong>Thermo</strong> <strong>Scientific</strong> <strong>Orion</strong> <strong>Star</strong> - und <strong>Star</strong> <strong>Plus</strong>-Messgeräte – Bedienungsanleitung
Kapitel XII – Datenarchivierung und -abruf<br />
Daten- und Kalibrierungsprotokoll<br />
Sämtliche 3-<strong>Star</strong> <strong>Plus</strong>- und die 4-<strong>Star</strong> <strong>Plus</strong>-pH/ISE-Messgeräte verfügen über ein Datenprotokoll<br />
mit 1000 Punkten. Die 4-<strong>Star</strong> <strong>Plus</strong>-pH/-Leitfähigkeit- und pH/gelöster Sauerstoff-Messgeräte<br />
verfügen über ein Datenprotokoll mit 750 Punkten. Die 5-<strong>Star</strong> <strong>Plus</strong>-Messgeräte bieten ein<br />
Datenprotokoll mit 500 Punkten. Das 2-<strong>Star</strong>-Messgerät bietet ein Datenprotokoll mit 50 Punkten,<br />
sämtliche <strong>Orion</strong> <strong>Star</strong>-Messgeräte verfügen über ein Datenprotokoll mit 200 Punkten.<br />
Die Ausdrucke des <strong>Star</strong> <strong>Plus</strong>-Messgerätes wurden zur Ausgabe zusätzlicher Informationen<br />
erweitert. Bei den pH- und ISE-Kalibrierungsausdrucken werden nun durchschnittliche Steilheit,<br />
Steilheit zwischen Punkten und E o pro Punkt mit ausgegeben. Die Ausdrucke zum polarographisch<br />
gelösten Sauerstoff enthalten nun Steilheit, Membrantemperatur und Lösungstemperatur.<br />
Automatische Datenprotokollierung<br />
Die 3-<strong>Star</strong>-, 4-<strong>Star</strong>- und 5-<strong>Star</strong> <strong>Plus</strong>-Messgeräte wurden um eine abschaltbare automatische<br />
Datenprotokollierungsfunktion erweitert. So schalten Sie die automatische Aufzeichnung von<br />
Daten im Datenprotokoll ein:<br />
1. Drücken Sie im Messmodus .<br />
2. Drücken Sie / , bis in der oberen Zeile angezeigt wird.<br />
3. Übernehmen Sie die Auswahl mit , bewegen Sie das Pfeilsymbol in die mittlere Zeile<br />
und drücken Sie / , bis angezeigt wird.<br />
4. Übernehmen Sie die Auswahl mit , bewegen Sie das Pfeilsymbol in die unteren Zeile<br />
und drücken Sie / , bis angezeigt wird.<br />
5. Mit der Taste übernehmen Sie die Auswahl und bewegen das Pfeilsymbol zur<br />
oberen Zeile.<br />
6. Drücken Sie zum Speichern der Einrichtungsoption und zur Rückkehr zum Messmodus.<br />
<strong>Thermo</strong> <strong>Scientific</strong> <strong>Orion</strong> <strong>Star</strong> - und <strong>Star</strong> <strong>Plus</strong>-Messgeräte – Bedienungsanleitung<br />
DE-47
Datenarchivierung und -abruf<br />
Datenprotokoll-Löscheinstellung<br />
Die Datenprotokoll-Löscheinstellung legt fest, ob das Datenprotokoll nach der Ausgabe zum<br />
Drucker oder Computer automatisch gelöscht wird und ob Datenprotokollpunkte bei vollem<br />
Datenprotokoll überschrieben werden. Wenn die Datenprotokoll-Löscheinstellung auf<br />
eingestellt ist, wird das Datenprotokoll nach der Übertragung zum Drucker oder Computer<br />
automatisch gelöscht. Zusätzlich zeigt das Messgerät die Fehlermeldung<br />
an,<br />
wenn sämtliche Datenprotokollpunkte gefüllt sind und das Datenprotokoll zum Löschen<br />
der Fehlermeldung zu einem Drucker oder Computer übertragen werden muss. Sofern die<br />
Datenprotokoll-Löscheinstellung auf eingestellt ist, überschreibt das Messgerät den<br />
ältesten Datenprotokollpunkt, wenn sämtliche Datenprotokollpunkte gefüllt sind, löscht aber das<br />
Datenprotokoll nicht, nachdem es zum Drucker oder Computer übertragen wurde.<br />
1. Drücken Sie im Messmodus .<br />
2. Drücken Sie / , bis in der oberen Zeile angezeigt wird.<br />
3. Übernehmen Sie die Auswahl mit , bewegen Sie das Pfeilsymbol in die mittlere Zeile und<br />
drücken Sie / , bis angezeigt wird.<br />
4. Übernehmen Sie die Auswahl mit , bewegen Sie das Pfeilsymbol in die unteren Zeile und<br />
drücken Sie / , bis angezeigt wird.<br />
5. Mit der Taste übernehmen Sie die Auswahl und bewegen das Pfeilsymbol zur<br />
oberen Zeile.<br />
6. Drücken Sie zum Speichern der Einrichtungsoption und zur Rückkehr zum Messmodus.<br />
Hinweis: Falls Sie kein Datenprotokoll benötigen, stellen Sie die Datenprotokoll-Löscheinstellung<br />
auf ; dies verhindert die Anzeige der Fehlermeldung 038 (Datenprotokoll voll).<br />
DE-48<br />
<strong>Thermo</strong> <strong>Scientific</strong> <strong>Orion</strong> <strong>Star</strong> - und <strong>Star</strong> <strong>Plus</strong>-Messgeräte – Bedienungsanleitung
Datenarchivierung und -abruf<br />
Daten- und Kalibrierungsprotokoll anzeigen und ausdrucken<br />
Die 3-<strong>Star</strong>-, 4-<strong>Star</strong>- und 5-<strong>Star</strong> <strong>Plus</strong>-Messgeräte wurden zusätzlich zur Datenprotokollansicht,<br />
zum Datenprotokoll- und Kalibrierungsprotokolldruck um eine Funktion zum Anzeigen<br />
von Kalibrierungsprotokollen erweitert. Die <strong>Orion</strong> <strong>Star</strong>-Messgeräte bieten Funktionen zur<br />
Datenprotokollansicht sowie zum Datenprotokoll- und Kalibrierungsprotokolldruck.<br />
So zeigen Sie Datenprotokoll oder Kalibrierungsprotokoll an:<br />
1. Drücken Sie im Messmodus .<br />
2. Blättern Sie mit / zu (Datenprotokoll anzeigen) oder<br />
(Kalibrierungsprotokoll anzeigen) (nur <strong>Star</strong> <strong>Plus</strong>-Messgeräte).<br />
3. Drücken Sie . Das Messgerät zeigt den Datum/Uhrzeit-Bildschirm an. Die<br />
Protokollnummer wird oben im Bildschirm angezeigt, Uhrzeit, Datum und Jahr der<br />
Aufzeichnung erscheinen jeweils in den oberen, mittleren und unteren Anzeigezeilen.<br />
Mit / blättern Sie durch das Protokoll.<br />
4. Drücken Sie . Das Messgerät zeigt den mit dem ausgewählten Datum/Uhrzeit-Bildschirm<br />
verknüpften Daten- oder Kalibrierungspunkt.<br />
a. Mit drucken Sie den einzelnen Datenpunkt aus.<br />
b. Mit / blättern Sie durch das Protokoll.<br />
c. Mit kehren Sie zum Datum/Uhrzeit-Bildschirm zurück.<br />
5. Zum Beenden der Protokollanzeige drücken Sie , bis das Messgerät den<br />
Datum/Uhrzeit-Bildschirm anzeigt und drücken anschließend .<br />
So senden Sie Daten- oder Kalibrierungsprotokoll an einen Drucker<br />
oder Computer:<br />
1. Schließen Sie das Messgerät an einen Drucker oder Computer an, überprüfen Sie die<br />
Baudrate- und Ausgabeeinstellungen im Einrichtungsmenü.<br />
2. Drücken Sie im Messmodus .<br />
<strong>Thermo</strong> <strong>Scientific</strong> <strong>Orion</strong> <strong>Star</strong> - und <strong>Star</strong> <strong>Plus</strong>-Messgeräte – Bedienungsanleitung<br />
DE-49
Datenarchivierung und -abruf<br />
3. Blättern Sie mit / zu (Datenprotokoll ausdrucken) oder<br />
(Kalibrierungsprotokoll ausdrucken) (nur <strong>Star</strong> <strong>Plus</strong>-Messgeräte). <strong>Orion</strong> <strong>Star</strong>-Messgeräte<br />
zeigen statt .<br />
4. Senden Sie die ausgewählten Daten mit an den Drucker oder Computer.<br />
So verbinden Sie das Messgerät mit einem Computer:<br />
<strong>Orion</strong> <strong>Star</strong>- und <strong>Star</strong> <strong>Plus</strong>-Messgeräte können Mess- und Kalibrierdaten an einen Computer<br />
senden. Dazu wird ein durch Kommata begrenztes Format genutzt, das sich leicht mit<br />
Computerprogrammen wie Excel einlesen lässt. Wählen Sie die Ausgabeeinstellung ,<br />
, im Einrichtungsmenü.<br />
So senden Sie Daten über HyperTerminal vom Messgerät an einen Computer:<br />
1. Schließen Sie das Messgerät über ein passendes Schnittstellenkabel(Katalognummer 1010053)<br />
an den Computer an.<br />
2. Klicken Sie auf die <strong>Star</strong>t-Schaltfläche links unten im Computerbildschirm. Wählen Sie (Alle)<br />
Programme, Zubehör, Kommunikation, HyperTerminal. (Unter Windows Vista nicht mehr<br />
vorh<strong>and</strong>en; Alternativen finden Sie unter dem Suchbegriff HyperTerminal in der Windows-Hilfe.)<br />
3. Nach dem Öffnen des HyperTerminal-Fensters geben Sie einen Dateinamen ein, wählen ein<br />
Symbol für die Verbindung und klicken auf die OK-Schaltfläche.<br />
4. Nach dem Öffnen eines neuen Fensters öffnen Sie das Verbinden über-Auswahlmenü, wählen<br />
den COM-Port, an den das Messgerät angeschlossen wurde, und klicken auf die OK-Schaltfläche.<br />
5. Ein Fenster mit den Eigenschaften des COM-Ports öffnet sich. Wählen Sie die folgenden<br />
Einstellungen aus den Auswahlmenüs, klicken Sie anschließend auf die OK-Schaltfläche.<br />
Bits pro Sekunde (Baudrate): 9600<br />
Datenbits: 8<br />
Parität: Keine<br />
Stoppbits: 1<br />
Flusssteuerung: Hardware<br />
6. Senden Sie die Daten vom Messgerät zu HyperTerminal.<br />
DE-50<br />
<strong>Thermo</strong> <strong>Scientific</strong> <strong>Orion</strong> <strong>Star</strong> - und <strong>Star</strong> <strong>Plus</strong>-Messgeräte – Bedienungsanleitung
Kapitel XIII – Konformitätserklärung<br />
Hersteller:<br />
Anschrift:<br />
<strong>Thermo</strong> Fisher <strong>Scientific</strong> Inc.<br />
166 Cummings Center<br />
Beverly, MA 01915<br />
USA<br />
Wir erklären, dass die nachfolgend beschriebenen Produkte den nachstehenden Richtlinien und<br />
Vorgaben entsprechen:<br />
Produkt(e):<br />
Messgeräte zur Messung von pH, Leitfähigkeit, gelöstem Sauerstoff<br />
und/oder ISE. Stromversorgung Tischmessgeräte: 100 – 240 V<br />
Wechselspannung, 50/60 Hz, 0,5 A. Portable Messgeräte werden<br />
über vier AA-Trockenbatterien mit Strom versorgt.<br />
Tischmessgeräte<br />
5-<strong>Star</strong> <strong>Plus</strong>-pH/ISE/Leitfähigkeit/DO-Messgerät<br />
4-<strong>Star</strong> <strong>Plus</strong>-pH/Leitfähigkeit-Messgerät<br />
4-<strong>Star</strong> <strong>Plus</strong>-pH/DO<br />
4-<strong>Star</strong> <strong>Plus</strong>-pH/ISE-Messgerät<br />
3-<strong>Star</strong> <strong>Plus</strong>-Leitfähigkeit-Messgerät<br />
3-<strong>Star</strong> <strong>Plus</strong>-DO-Messgerät<br />
3-<strong>Star</strong> <strong>Plus</strong>-pH-Messgerät<br />
2-<strong>Star</strong>-pH-Messgerät<br />
Portable Messgeräte<br />
5-<strong>Star</strong> <strong>Plus</strong>-pH/ISE/Leitfähigkeit/DO-Messgerät<br />
5-<strong>Star</strong> <strong>Plus</strong>-pH/Leitfähigkeit/DO-Messgerät<br />
4-<strong>Star</strong> <strong>Plus</strong>-pH/Leitfähigkeit-Messgerät<br />
4-<strong>Star</strong> <strong>Plus</strong>-pH/DO-Messgerät<br />
4-<strong>Star</strong> <strong>Plus</strong>-pH/ISE-Messgerät<br />
3-<strong>Star</strong> <strong>Plus</strong>-Leitfähigkeit-Messgerät<br />
3-<strong>Star</strong> <strong>Plus</strong>-pH-Messgerät<br />
3-<strong>Star</strong> <strong>Plus</strong>-DO-Messgerät<br />
5-<strong>Star</strong> <strong>Plus</strong>, optisches RDO ® /DO/pH/<br />
Leitfähigkeit-Messgerät<br />
4-<strong>Star</strong> <strong>Plus</strong>, optisches RDO/DO/pH-Messgerät<br />
3-<strong>Star</strong> <strong>Plus</strong>, optisches RDO/DO-Messgerät<br />
Geräteklasse:<br />
Messung, Steuerung, Labor<br />
Tischmessgeräte entsprechen der EMV-Klasse A. Portable<br />
Messgeräte entsprechen der EMV-Klasse D.<br />
<strong>Thermo</strong> <strong>Scientific</strong> <strong>Orion</strong> <strong>Star</strong> - und <strong>Star</strong> <strong>Plus</strong>-Messgeräte – Bedienungsanleitung<br />
DE-51
Konformitätserklärung<br />
Richtlinien und Vorgaben:<br />
• 89/336/EEC – Elektromagnetische Verträglichkeit (EMV-Direktive)<br />
• EN 61326:1997 + A1:1998 + A2:2001 – Elektrische Mess-, Steuer-, Regel- und<br />
Laborgeräte – EMV-Anforderungen<br />
• 73/23/EEC – Niederspannungsdirektive<br />
• EN 61010-1:2001 – Sicherheitsbestimmungen für elektrische Mess-, Steuer-, Regel- und<br />
Laborgeräte – Allgemeine Anforderungen<br />
Autorisierter Repräsentant des Herstellers:<br />
Datum:<br />
Patrick Chiu 1.12.2008<br />
Senior-Qualitätstechniker,<br />
Einhaltung von Normen<br />
WEEE-Richtlinie<br />
Dieses Produkt muss die Anforderungen der europäischen Richtlinie zu elektrischen<br />
und elektronischen Altgeräten (WEEE - 2002/96/EC) erfüllen. Es ist mit dem folgenden<br />
Symbol gekennzeichnet:<br />
Es bestehen Vereinbarungen zwischen uns und verschiedenen Recycling-/<br />
Entsorgungsunternehmen in den einzelnen EU-Mitgliedstaaten; dieses Produkt sollte über<br />
diese Unternehmen entsorgt oder recycelt werden. Weitere Informationen zur Einhaltung dieser<br />
Richtlinien, zu Recyclingunternehmen in Ihrem L<strong>and</strong> sowie zu <strong>Thermo</strong> <strong>Scientific</strong>-<strong>Orion</strong>-Produkten,<br />
die bei der Eingrenzung von der RoHS-Richtlinie unterliegenden Substanzen helfen können, finden<br />
Sie unter www.thermo.com/WEEERoHS.<br />
DE-52<br />
<strong>Thermo</strong> <strong>Scientific</strong> <strong>Orion</strong> <strong>Star</strong> - und <strong>Star</strong> <strong>Plus</strong>-Messgeräte – Bedienungsanleitung
Kapitel XIV – Problemlösung<br />
Messgerät-Selbsttest<br />
1. Trennen Sie sämtliche Elektroden und Sonden vom Messgerät, verschließen Sie sämtliche<br />
Messgeräteingänge mit den schwarzen Kappen.<br />
2. Schalten Sie das Messgerät ein, warten Sie, bis die Softwarerevision angezeigt wird, drücken<br />
Sie anschließend .<br />
3. Sämtliche Segmente des Displays leuchten auf. Überzeugen Sie sich davon, dass sämtliche<br />
Segmente angezeigt werden, drücken Sie anschließend .<br />
4. Sämtliche Segmente des Displays erlöschen. Überzeugen Sie sich davon, dass sämtliche<br />
Segmente erloschen sind, drücken Sie anschließend .<br />
5. Das Display zeigt . Drücken Sie sämtliche Tasten einmal; die Reihenfolge spielt dabei<br />
keine Rolle. Sofern zwischen den Betätigungen der einzelnen Tasten mehr als 5 Sekunden<br />
vergehen, zeigt das Display<br />
an; dies weist auf einen Tastenfehler hin. Löschen<br />
Sie die Fehlermeldung 033 mit , schließen Sie den Selbsttest ab. Nachdem sämtliche<br />
Tasten betätigt wurden und einw<strong>and</strong>frei funktionieren, startet das Messgerät neu und<br />
wechselt zum Messmodus.<br />
Hinweis: Falls das Messgerät während des Selbsttests<br />
anzeigen sollte,<br />
überzeugen Sie sich davon, dass sämtliche Elektroden und Sonden vom Messgerät getrennt,<br />
sämtliche Messgeräteingänge mit den schwarzen Kappen verschlossen wurden und die BNC-<br />
Abschlusskappe richtig auf dem BNC-Eingang des Messgerätes sitzt. Dieser Fehler<br />
tritt gewöhnlich auf, falls die BNC-Abschlusskappe beim Selbsttest fehlt oder nicht richtig<br />
aufgesetzt wurde.<br />
<strong>Thermo</strong> <strong>Scientific</strong> <strong>Orion</strong> <strong>Star</strong> - und <strong>Star</strong> <strong>Plus</strong>-Messgeräte – Bedienungsanleitung<br />
DE-53
Problemlösung<br />
Messgerät-Fehlercodes<br />
• Falls im Display blinken sollte, befindet sich der Wert außerhalb des Messbereiches.<br />
Führen Sie einen Messgerät-Selbsttest aus, reinigen Sie die Elektrode wie in der zugehörigen<br />
Bedienungsanleitung beschrieben, kalibrieren Sie die Elektrode mit neuen Referenzen erneut.<br />
• Falls das Symbol leuchtet und der Messwert blinkt, muss die Elektrode gemäß des vom<br />
Anwender festgelegten Kalibrierungsintervalls kalibriert werden; oder die pH-Steilheit liegt<br />
außerhalb des Bereiches 85 – 115 %.<br />
• Zum Löschen eines Fehlercodes drücken Sie . Bei Fehlercodes werden in der<br />
mittleren Zeile und eine Kombination aus drei alphanumerischen Zeichen in der unteren Zeile<br />
angezeigt. Einige dieser Codes beschreiben Fehler, <strong>and</strong>ere sind als Warnungen ausgelegt,<br />
wieder <strong>and</strong>ere dienen lediglich der Information.<br />
Fehlercode Beschreibung Problemlösung<br />
002, 026,<br />
E##, F##<br />
Hardware- oder<br />
Speicherfehler<br />
005 Wert außerhalb des<br />
zulässigen Bereiches<br />
Drücken Sie zum Löschen des Fehlers. Sollte der Fehler erneut auftreten, wenden<br />
Sie sich an den technischen Kundendienst.<br />
Drücken Sie und geben Sie den Wert erneut ein. Den zulässigen Wertebereich<br />
entnehmen Sie bitte den technischen Daten des Messgerätes.<br />
033 Tastaturfehler Wiederholen Sie den Selbsttest. Drücken Sie nach Aufforderung der Reihe nach<br />
sämtliche Tasten einschließlich der Ein-/Austaste im Abst<strong>and</strong> von maximal 5 Sekunden.<br />
034 BNC-Eingangsfehler Trennen Sie sämtliche Elektroden vom Messgerät, setzen Sie die BNC-Abschlusskappe<br />
auf und wiederholen Sie den Selbsttest.<br />
038 Datenprotokoll voll Übertragen Sie das Datenprotokoll auf einen Drucker oder Computer, schalten Sie die<br />
automatische Datenprotokollierung im Einrichtungsmenü ab (nur <strong>Star</strong> <strong>Plus</strong>-Messgeräte)<br />
oder ändern Sie die Datenprotokollierungseinstellungen im Einrichtungsmenü zu<br />
, , ab; so löscht das Messgerät die Datenprotokollpunkte, sobald das<br />
Datenprotokoll voll ist.<br />
D## Fernbedienungsfehler Überprüfen Sie anh<strong>and</strong> der Programmierungsanleitung die richtige Eingabe von<br />
Befehlen, Namen und Werten.<br />
107 pH-<br />
Kalibrierst<strong>and</strong>ardfehler<br />
109 pH-Steilheit oder<br />
Kalibrierungsoffset ungültig<br />
200 Autosampler-<br />
Schnittstellenfehler<br />
201 Autosampler-<br />
Signalfehler<br />
Der während der Kalibrierung gemessene Millivolt-Wert ist bei beiden Puffern<br />
identisch. Überprüfen Sie die Vorgehensweise bei der Kalibrierung, überzeugen<br />
Sie sich davon, dass die Elektrode zur richtigen Zeit in die Puffer eingeführt wurde.<br />
Reinigen Sie die Elektrode wie in der Bedienungsanleitung beschrieben. Führen Sie<br />
eine Neukalibrierung der Elektrode mit frischen Puffern aus.<br />
Reinigen Sie die Elektrode wie in der Bedienungsanleitung beschrieben. Führen Sie eine<br />
Neukalibrierung der Elektrode mit neuen Puffern aus.<br />
Das Messgerät kann keine Signale an den Autosampler versenden. Überzeugen Sie sich<br />
davon, dass der Autosampler richtig an das Messgerät angeschlossen wurde.<br />
Der Autosampler kann keine Signale vom Messgerät empfangen. Überprüfen Sie die<br />
Einrichtungsparameter des Messgerätes, überzeugen Sie sich davon, dass die Baudrate<br />
des Messgerätes auf 1200 eingestellt ist.<br />
DE-54<br />
<strong>Thermo</strong> <strong>Scientific</strong> <strong>Orion</strong> <strong>Star</strong> - und <strong>Star</strong> <strong>Plus</strong>-Messgeräte – Bedienungsanleitung
Problemlösung<br />
Fehlercode Beschreibung Problemlösung<br />
202 Autosampler ist blockiert Schalten Sie den Autosampler ab, warten Sie 45 Sekunden, schalten Sie das Gerät<br />
anschließend wieder ein. Der Autosampler sollte in die <strong>Star</strong>tposition zurückkehren.<br />
203 Instabile Messwerte vom<br />
Autosampler<br />
306 Auto-ISE-<br />
Blindwertkorrekturfehler<br />
Die vom Autosampler vorgenommenen Messungen sind nicht stabil. Prüfen Sie<br />
die Elektroden auf einw<strong>and</strong>freie Funktion. Überzeugen Sie sich davon, dass die<br />
Elektrodenkabel richtig angeschlossen wurden.<br />
Schalten Sie die automatische Blindwertkorrektur im Einrichtungsmenü ab, kalibrieren<br />
Sie das Messgerät ohne Einsatz eines Nullkonzentrations-St<strong>and</strong>ards neu.<br />
307 ISE-Kalibrierst<strong>and</strong>ardfehler Der während der Kalibrierung gemessene Millivolt-Wert ist bei beiden Referenzen<br />
identisch. Überprüfen Sie die Vorgehensweise bei der Kalibrierung, überzeugen Sie<br />
sich davon, dass die Elektrode zur richtigen Zeit in die Referenzen eingeführt wurde.<br />
Reinigen Sie die Elektrode wie in der Bedienungsanleitung beschrieben. Führen Sie<br />
eine Neukalibrierung der Elektrode mit frischen Referenzen aus.<br />
309 ISE-Steilheit ungültig Reinigen Sie die Elektrode wie in der Bedienungsanleitung beschrieben. Führen Sie<br />
eine Neukalibrierung der Elektrode mit frisch vorbereiteten St<strong>and</strong>ards aus.<br />
707 Leitfähigkeit-<br />
Kalibrierst<strong>and</strong>ardfehler<br />
709 Leitfähigkeit-<br />
Zellkonstantenfehler<br />
808 Ungültige Nullpunkt-<br />
DO-Steilheit<br />
Der während der Kalibrierung gemessene Leitfähigkeitswert ist bei beiden St<strong>and</strong>ards<br />
identisch. Überprüfen Sie die Vorgehensweise bei der Kalibrierung, überzeugen<br />
Sie sich davon, dass die Leitfähigkeitssonde zur richtigen Zeit in den St<strong>and</strong>ard<br />
eingeführt wurde. Reinigen Sie die Leitfähigkeitssonde wie in der zugehörigen<br />
Bedienungsanleitung beschrieben. Führen Sie eine Neukalibrierung der Sonde mit<br />
neuen St<strong>and</strong>ards aus.<br />
Die Zellkonstante befindet sich nicht im Bereich zwischen 0,001 – 199,0 cm -1 . Reinigen<br />
Sie die Leitfähigkeitssonde wie in der zugehörigen Bedienungsanleitung beschrieben.<br />
Führen Sie eine Neukalibrierung der Sonde mit neuen St<strong>and</strong>ards aus.<br />
Eine Luftkalibrierung sollte grundsätzlich vor der Nullpunktkalibrierung ausgeführt<br />
werden. Vergewissern Sie sich, dass eine Lösung ohne jeglichen Sauerstoffanteil zur<br />
Nullpunktkalibrierung eingesetzt wird. Wir empfehlen eine Lösung aus 15 g Na2SO3,<br />
aufgelöst in 250 ml destilliertem Wasser.<br />
809 Ungültige DO-Steilheit Bei polarographischen DO- Sonden verbinden Sie die Sonde mit dem Messgerät,<br />
schalten das Messgerät ein und lassen die Sonde mindestens 30 Minuten lang<br />
polarisieren. Bei einer Luftkalibrierung vergewissern Sie sich, dass der Schwamm<br />
innerhalb der Kalibrierhülse feucht ist und sich kein Wasser auf der Sondenmembran<br />
befindet. Bei einer Wasserkalibrierung leiten Sie Luft in die Probe und rühren Sie,<br />
damit sich keine Blasen auf der Membran absetzen. Reinigen Sie die DO- Sonde wie<br />
in der zugehörigen Bedienungsanleitung beschrieben. Kalibrieren Sie die DO- Sonde<br />
neu.<br />
880 Optische RDO ® -Sonde<br />
nicht angeschlossen<br />
881 Optische RDO-<br />
Sonde abgelaufen<br />
882 Optische RDO-<br />
Sonde ausgefallen<br />
Überzeugen Sie sich davon, dass die RDO- Sonde richtig an das Messgerät<br />
angeschlossen wurde. Schließen Sie eine <strong>and</strong>ere RDO- Sonde, die nachweislich<br />
einw<strong>and</strong>frei funktioniert, an das Messgerät an.<br />
Die Einsatzdauer der an der RDO- Sonde angebrachten optischen Kappe ist<br />
abgelaufen. Installieren Sie anh<strong>and</strong> der Bedienungsanleitung zur RDO- Sonde eine<br />
neue optische Kappe.<br />
Vergewissern Sie sich, dass die optische Kappe richtig an der RDO- Sonde installiert<br />
wurde, diese nicht abgelaufen ist und nicht daran manipuliert wurde. Schließen Sie eine<br />
<strong>and</strong>ere RDO- Sonde, die nachweislich einw<strong>and</strong>frei funktioniert, an das Messgerät an.<br />
<strong>Thermo</strong> <strong>Scientific</strong> <strong>Orion</strong> <strong>Star</strong> - und <strong>Star</strong> <strong>Plus</strong>-Messgeräte – Bedienungsanleitung<br />
DE-55
Problemlösung<br />
Allgemeine Problemlösung<br />
Problem:<br />
Erläuterung:<br />
Die Anzeige friert ein, die Messwerte werden nicht aktualisiert.<br />
Das Messgerät befindet sich im AUTO-READ- Messmodus (das AR-Symbol mit<br />
oben rechts im Display angezeigt). <strong>Star</strong>ten Sie mit eine neue Messung oder<br />
wählen Sie einen <strong>and</strong>eren Messmodus aus dem Einrichtungsmenü.<br />
Problem: Wenn ich drücke, zeigt das Messgerät an.<br />
Erläuterung:<br />
Problem:<br />
Das Messgerät druckt gerade und kann erst nach Abschluss des Ausdrucks in den<br />
Kalibriermodus wechseln. Dies sollte nur ausgesprochen selten geschehen, sofern<br />
das Messgerät auf eine Baudrate von 9600 eingestellt ist. Bei geringeren Baudraten<br />
treten größere Verzögerungen auf.<br />
Die im Einrichtungsmenü vorgenommenen Änderungen wurden nicht<br />
übernommen.<br />
Erläuterung: Nach Änderungen im Einrichtungsmenü drücken Sie , bis das Pfeilsymbol<br />
auf die obere Zeile zeigt (Änderung bestätigen), anschließend drücken Sie zum<br />
Speichern der Änderungen und zur Rückkehr zum Messmodus auf .<br />
Problem:<br />
Wie breche ich eine Kalibrierung ab?<br />
Erläuterung: Durch Gedrückthalten von brechen Sie sämtliche Aktionen ab und kehren<br />
zum Messmodus zurück.<br />
Problem:<br />
Erläuterung:<br />
Problem:<br />
Erläuterung:<br />
Problem:<br />
Erläuterung:<br />
Problem:<br />
Erläuterung:<br />
Der Ausdruck besteht aus einer Zeichenfolge, die sich aus Zahlen, Einheiten<br />
und Kommata zusammensetzt.<br />
Im Einrichtungsmenü wurde das Ausgabeformat auf Computerausgabe<br />
ausgewählt; oder: Möglicherweise wurde die Drucker-Baudrate im<br />
Einrichtungsmenü nicht richtig eingestellt. Ändern Sie das Ausgabeformat<br />
im Einrichtungsmenü zu Druckerausgabe. Stellen Sie die Baudrate des<br />
angeschlossenen Druckers auf den richtigen Wert ein.<br />
Der Rührer arbeitet nicht, wenn ich die Rührertaste drücke.<br />
Der Rührer ist auf ausgeschaltet eingestellt. Wählen Sie im Einrichtungsmenü<br />
eine Geschwindigkeit zwischen 1 und 7.<br />
Intervallmesszeit- Eingabebildschirm erscheint nicht im Einrichtungsmenü.<br />
Das Messgerät ist auf AUTO-READ- oder Dauermessung eingestellt. Wenn das<br />
Messgerät auf Intervallmessung eingestellt ist, können Sie die Zeit im nächsten<br />
Einrichtungsbildschirm eingeben.<br />
Ich weiß nicht genau, ob ich ein <strong>Star</strong> <strong>Plus</strong>- oder <strong>Orion</strong> <strong>Star</strong>-Messgerät besitze.<br />
Beim Einschalten zeigen die <strong>Star</strong> <strong>Plus</strong>-Messgeräte mit erweitertem<br />
Funktionsumfang<br />
sowie die Messgerät-Revisionsnummer<br />
( oder ähnlich) und wechseln in den Messmodus.<br />
DE-56<br />
<strong>Thermo</strong> <strong>Scientific</strong> <strong>Orion</strong> <strong>Star</strong> - und <strong>Star</strong> <strong>Plus</strong>-Messgeräte – Bedienungsanleitung
Problemlösung<br />
pH- Problemlösung<br />
Problem:<br />
Erläuterung:<br />
ISE- Problemlösung<br />
Problem:<br />
Erläuterung:<br />
Problem:<br />
Erläuterung:<br />
Bei der Kalibrierung erkennt das Messgerät den pH-Pufferwert nicht.<br />
Vergewissern Sie sich, dass der richtige Puffersatz im Einrichtungsmenü<br />
ausgewählt wurde. Das Messgerät erkennt den Puffer bei der Kalibrierung<br />
anh<strong>and</strong> des mV-Rohwertes der Elektrode. Da Elektroden altern oder<br />
verschmutzen, verschieben sich die mV-Messwerte; in diesem Fall müssen<br />
Sie den pH-Pufferwert bei der Kalibrierung manuell eingeben.<br />
Bei der Kalibrierung dauert es einige Minuten, bis sich die Messwerte<br />
stabilisieren.<br />
Der Konzentrationsbereich wurde im Einrichtungsmenü auf niedrig eingestellt.<br />
Stellen Sie einen hohen Konzentrationsbereich ein. Im Einrichtungsmenü wurde<br />
die ISE-Auflösung auf drei Stellen eingestellt. Zur schnelleren Stabilisierung der<br />
Messwerte stellen Sie die ISE-Auflösung auf zwei Stellen ein.<br />
Wenn ich die automatische Blindwertkorrektur nutze und ISE kalibriere, gibt<br />
das Messgerät eine zu geringe oder nicht manuell prüfbare Steilheit aus.<br />
Schalten Sie die automatische Blindwertkorrektur im Einrichtungsmenü aus.<br />
Leitfähigkeit- Problemlösung<br />
Problem:<br />
Erläuterung:<br />
Problem:<br />
Erläuterung:<br />
Problem:<br />
Erläuterung:<br />
Bei der Kalibrierung erkennt das Messgerät dien Leitfähigkeitsst<strong>and</strong>ard nicht.<br />
Vergewissern Sie sich, dass die St<strong>and</strong>ard-Zellkonstante im Einrichtungsmenü<br />
eingegeben wurde. Die Zellkonstante wird gewöhnlich am Kabel der<br />
Leitfähigkeitssonde angegeben. Überzeugen Sie sich davon, dass der<br />
Leitfähigkeitsst<strong>and</strong>ard mit den im Messgerät programmierten Angaben<br />
übereinstimmt. Führen Sie eine Neukalibrierung mit einem frischen St<strong>and</strong>ard aus.<br />
Der Temperaturkoeffizient wird nicht im Einrichtungsmenü angezeigt.<br />
Die Temperaturkompensation ist auf nicht-linear eingestellt oder abgeschaltet.<br />
Wählen Sie lineare Temperaturkompensation – im nächsten Bildschirm können<br />
Sie den Temperaturkoeffizienten eingeben.<br />
Die Messwerte liegen außerhalb des Bereiches, obwohl sie sich innerhalb<br />
befinden sollten.<br />
Achten Sie darauf, dass die Leitfähigkeitssonde vollständig in die Lösung<br />
eingetaucht wird. Vergewissern Sie sich, dass die richtige Zellkonstante für die mit<br />
dem Messgerät verbundene Leitfähigkeitssonde eingestellt wurde. Überzeugen<br />
Sie sich davon, dass der Zelltyp im Einrichtungsmenü auf St<strong>and</strong>ard (Std.)<br />
eingestellt ist.<br />
<strong>Thermo</strong> <strong>Scientific</strong> <strong>Orion</strong> <strong>Star</strong> - und <strong>Star</strong> <strong>Plus</strong>-Messgeräte – Bedienungsanleitung<br />
DE-57
Problemlösung<br />
Gelöst- Sauerstoff – Problemlösung<br />
Problem:<br />
Der barometrischer Druck kannn nicht manuell eingegeben werden.<br />
Erläuterung: Der Wert zur Kompensation des barometrischen Druckes wurde im<br />
Einrichtungsmenü auf automatisch eingestellt. Wählen Sie die manuelle<br />
Kompensation des barometrischen Drucks; im nächsten Bildschirm können<br />
Sie den manuellen Druck eingeben.<br />
Problem:<br />
Der Salzgehaltskorrekturfaktor kann nicht manuell eingegeben werden.<br />
Erläuterung: Die Korrektur des Salzgehaltes wurde im Einrichtungsmenü auf automatisch<br />
eingestellt. Wählen Sie die manuelle Korrektur des Salzgehaltes; im nächsten<br />
Bildschirm können Sie den Salzgehaltsfaktor eingeben.<br />
Problem:<br />
Die AUTO-STIR BOD-Sonde schaltet sich nicht ein, wenn die Taste an der Sonde<br />
gedrückt wird.<br />
Erläuterung: Im Einrichtungsmenü muss der Messungstyp auf AUTO-READ, die<br />
Rührergeschwindigkeit auf 1 bis 7 eingestellt werden, damit die Messung<br />
beim Betätigen der Taste an der AUTO-STIR BOD-Sonde ausgeführt wird<br />
und der Rührer anläuft.<br />
RDO ® , optisch – Gelöst- Sauerstoff – Problemlösung<br />
Problem:<br />
Das Messgerät zeigt den Fehler 881 an und nimmt keine Gelöst- Sauerstoff-<br />
Messung vor.<br />
Erläuterung: Schalten Sie das Messgerät ab, tauschen Sie die alte optische Kappe gegen eine<br />
neue Kappe aus, schalten Sie das Messgerät wieder ein. Die Fehlermeldung sollte<br />
dadurch gelöscht werden.<br />
Unterstützung<br />
Falls unsere Vorschläge nicht zur Lösung des Problems führen sollten, wenden Sie sich bitte an<br />
den technischen Kundendienst. Innerhalb der USA rufen Sie bitte +1 800-225-1480 an, außerhalb<br />
der USA nutzen Sie die Rufnummer +1 978-232-6000 oder senden uns unter + 1 978-232-6031<br />
ein Fax. Aktuellste Kontaktinformationen finden Sie unter www.thermo.com/contactwater.<br />
Aktuelle Anwendungen und technische Ressourcen für <strong>Thermo</strong> <strong>Scientific</strong>-<strong>Orion</strong>-Produkte finden<br />
Sie hier: www.thermo.com/waterapps.<br />
Garantie<br />
Aktuellste Garantieinformationen finden Sie unter www.thermo.com/water.<br />
DE-58<br />
<strong>Thermo</strong> <strong>Scientific</strong> <strong>Orion</strong> <strong>Star</strong> - und <strong>Star</strong> <strong>Plus</strong>-Messgeräte – Bedienungsanleitung
Kapitel XV – Technische Daten<br />
Technische Daten<br />
Einsatzbedingungen<br />
Einsatzbedingungen von portablen und Tischmessgeräten<br />
Umgebungstemperatur im Betrieb 5 bis 45 °C<br />
Relative Luftfeuchtigkeit im Betrieb<br />
Lagerungstemperatur -20 bis +60 °C<br />
Relative Luftfeuchte bei der Lagerung<br />
Kontamination Stufe 2<br />
Überspannung<br />
Höhe<br />
Gewicht<br />
Größe<br />
Netzbetriebene Messgeräte<br />
Batteriebetriebene Messgeräte<br />
Vorgaben und Sicherheit<br />
Gehäusematerial<br />
5 bis 85 %, nicht kondensierend<br />
5 bis 85 %, nicht kondensierend<br />
Kategorie II<br />
Bis 2000 m<br />
Portabel: 450 g<br />
Tischgerät: 0,91 kg<br />
Portabel: 4,8 cm (H) x 9,7 cm (B) x 21,3 cm (T)<br />
Tischgerät: 9,4 cm (H) x 17,0 cm (B) x 22,4 cm (T)<br />
Einsatz nur in Innenräumen<br />
Innen- oder Außeneinsatz<br />
CE, CSA, TÜV, UL, FCC-Klassenbeschränkungen*<br />
Erschütterungen und Vibrationen Vibration, Transport/Vers<strong>and</strong> gemäß ISTA #1A<br />
Erschütterungen, Falltest in verpacktem Zust<strong>and</strong> gemäß<br />
ISTA #1A<br />
Gehäuse (erfüllt)<br />
ABS<br />
IP67 (portables Messgerät)<br />
IP54 (Tischmessgerät)<br />
* TÜV- und UL - Zulassungen sämtlicher optischer <strong>Star</strong>-RDO ® -Messgeräte für gelösten Sauerstoff<br />
bevorstehend<br />
<strong>Thermo</strong> <strong>Scientific</strong> <strong>Orion</strong> <strong>Star</strong> - und <strong>Star</strong> <strong>Plus</strong>-Messgeräte – Bedienungsanleitung<br />
DE-59
Technische Daten<br />
Universalnetzteil – Einsatzbedingungen<br />
Umgebungstemperatur im Betrieb 0 bis 50 °C<br />
Relative Luftfeuchtigkeit im Betrieb<br />
Lagerungstemperatur -20 bis +75 °C<br />
Relative Luftfeuchte bei der Lagerung<br />
Kontamination Stufe 2<br />
Überspannung<br />
Einsatzhöhe<br />
Tischmessgeräte<br />
Messgeräte- Spezifikationen<br />
0 bis 90 %, nicht kondensierend<br />
0 bis 90 %, nicht kondensierend<br />
Kategorie II<br />
Bis 2000 m<br />
Einsatz nur in Innenräumen<br />
Die folgenden Messgeräte-Spezifikationen gelten für sämtliche <strong>Orion</strong> <strong>Star</strong>- und <strong>Star</strong> <strong>Plus</strong>-<br />
Messgeräte. Einzelparameter-, Doppelparameter- und einige Multiparametermessgeräte verfügen<br />
nicht über sämtliche in diesem Abschnitt gelisteten Parameter.<br />
pH<br />
Messbereich -2,000 bis 19,999<br />
Auflösung 0,1 / 0,01 / 0,001<br />
Relative Genauigkeit ± 0.002<br />
Kalibrierungspunkte 1 bis 5<br />
pH (nur 2-<strong>Star</strong>-pH-Messgerät)<br />
Messbereich 0,000 bis 14,999<br />
Auflösung 0,1 / 0,01 / 0,001<br />
Relative Genauigkeit ± 0,002<br />
Kalibrierungspunkte 1 bis 3<br />
Millivolt, Relativ-Millivolt, REDOX<br />
Messbereich<br />
Auflösung<br />
Relative Genauigkeit<br />
± 1.999,9 mV<br />
0,1 mV<br />
± 0,2 mV oder 0,05 % des Messwertes, jeweils größerer Wert<br />
DE-60<br />
<strong>Thermo</strong> <strong>Scientific</strong> <strong>Orion</strong> <strong>Star</strong> - und <strong>Star</strong> <strong>Plus</strong>-Messgeräte – Bedienungsanleitung
Technische Daten<br />
ISE<br />
Messbereich 0 bis 19999<br />
Auflösung<br />
Relative Genauigkeit<br />
Anzeigeeinheiten<br />
Kalibrierungsfunktionen<br />
Gelöst- Sauerstoff (polarographisch)<br />
Messbereich<br />
Auflösung<br />
Relative Genauigkeit<br />
Salzgehaltfaktor<br />
Barometrischer Druck<br />
Kalibrierungstypen<br />
Sondentyp<br />
RDO ® , Gelöst- Sauerstoff - optisch<br />
Messbereich<br />
Auflösung<br />
1 bis 3 signifikante Stellen<br />
± 0,2 mV oder 0,05 %, der jeweils größere Wert<br />
M, mg/L, %, ppb oder keine Einheiten<br />
Linear Punkt-zu-Punkt, wählbare nicht-lineare automatische Blindwertkorrektur<br />
und Niederkonzentration-Bereichstabilität<br />
0,00 bis 90,0 mg/L<br />
0,0 bis 600 %<br />
0,1 / 0,01 mg/L<br />
0,1 / 1 %<br />
± 0,2 mg/L<br />
± 2 %<br />
0 bis 45 ppt<br />
450 bis 850 mm Hg<br />
Wasser-gesättigte Luft, Luft-gesättigtes Wasser, manuell (Winkler), Nullpunkt<br />
Polarographisch<br />
0,00 bis 20,0 mg/L<br />
0,0 bis 200 %<br />
0,1 / 0,01 mg/L<br />
0,1 / 1 %<br />
Relative Genauigkeit ± 0,1 mg/L bis 8 mg/L; ± 0,2 mg/L von 8 mg/L bis 20 mg/L ± 2 %<br />
Salzgehaltfaktor<br />
Barometrischer Druck<br />
Kalibrierungstypen<br />
Sondentyp<br />
0 bis 45 ppt<br />
450 bis 850 mm Hg<br />
Wasser-gesättigte Luft, Luft-gesättigtes Wasser,<br />
manuell (Winkler), Nullpunkt<br />
RDO, optisch<br />
<strong>Thermo</strong> <strong>Scientific</strong> <strong>Orion</strong> <strong>Star</strong> - und <strong>Star</strong> <strong>Plus</strong>-Messgeräte – Bedienungsanleitung<br />
DE-61
Technische Daten<br />
Leitfähigkeit<br />
Messbereich<br />
Auflösung<br />
Relative Genauigkeit<br />
0,000 to 3000 mS/cm, automatische Auflösung, abhängig von der<br />
Zellkonstante<br />
4 signifikante Stellen bis minimal 0,001 µS/cm, Zellkonstante-abhängig<br />
0,5 % ± 1 Stelle oder 0,01 µS/cm, jeweils größerer Wert<br />
Zellkonstante 0,001 bis 199,9 cm -1<br />
Referenztemperatur 5 °C, 10 °C, 15 °C, 20 °C oder 25 °C<br />
Widerst<strong>and</strong>smessbereich<br />
Widerst<strong>and</strong>sauflösung<br />
Relative Widerst<strong>and</strong>sgenauigkeit<br />
Salzgehaltbereich<br />
Salzgehaltauflösung<br />
Relative Salzgehaltgenauigkeit<br />
TDS-Bereich<br />
TDS-Auflösung<br />
Relative TDS-Genauigkeit<br />
Temperatur<br />
0,0001 bis 100 Megaohm<br />
Automatisch<br />
0,5 % ± 1 Stelle<br />
0,1 bis 80,0 ppt NaCl-äquivalent; 0,1 bis 42 ppt praktischer Salzgehalt<br />
0,1 ppt<br />
0,1 % ± 1 Stelle<br />
0 bis 19999 mg/L<br />
1 mg/L<br />
0,5 % ± 1 Stelle<br />
Messbereich -5 bis 105 °C<br />
Auflösung 0,1 bis maximal 99,9 °C; 1,0 über 99,9 °C<br />
Relative Genauigkeit ± 0,1 °C<br />
Temperatur* (nur optische RDO ® -Messgeräte für gelösten Sauerstoff)<br />
Messbereich 0 bis 50 °C<br />
Auflösung 0,1 °C<br />
Relative Genauigkeit ± 0,3 °C<br />
* Diese Temperaturangabe gilt ausschließlich für optische <strong>Star</strong> <strong>Plus</strong>-RDO-Messgeräte für gelösten<br />
Sauerstoff in Verbindung mit einer optischen RDO- Sonde. 4-<strong>Star</strong>- und 5-<strong>Star</strong>-RDO-Messgeräte<br />
weisen Temperatur-St<strong>and</strong>ardspezifikationen auf, wenn sie mit <strong>and</strong>eren Elektroden als RDO-<br />
Sonden eingesetzt werden.<br />
Hinweis: Technische Daten können sich ohne Vorankündigung ändern.<br />
DE-62<br />
<strong>Thermo</strong> <strong>Scientific</strong> <strong>Orion</strong> <strong>Star</strong> - und <strong>Star</strong> <strong>Plus</strong>-Messgeräte – Bedienungsanleitung
Technische Daten<br />
Bestellungshinweise<br />
Katalognummer<br />
Beschreibung<br />
1111000 2-<strong>Star</strong>- pH- Tischmessgerät mit Universalnetzteil und Bedienungsanleitung<br />
1112000 3-<strong>Star</strong> <strong>Plus</strong>- pH- Tischmessgerät mit Universalnetzteil und Bedienungsanleitung<br />
1212000 Portables 3-<strong>Star</strong> <strong>Plus</strong>- pH- Messgerät mit Batterien und Bedienungsanleitung<br />
1113000 3-<strong>Star</strong> <strong>Plus</strong>- DO- Tischmessgerät mit Universalnetzteil und Bedienungsanleitung<br />
1213000 Portables 3-<strong>Star</strong> <strong>Plus</strong>- DO- Messgerät mit Batterien und Bedienungsanleitung<br />
1114000 3-<strong>Star</strong> <strong>Plus</strong>- Leitfähigkeit- Tischmessgerät mit Universalnetzteil und Bedienungsanleitung<br />
1214000 Portables 3-<strong>Star</strong> <strong>Plus</strong>- Leitfähigkeit- Messgerät mit Batterien und Bedienungsanleitung<br />
1115000 4-<strong>Star</strong> <strong>Plus</strong>- pH/ ISE- Tischmessgerät mit Universalnetzteil und Bedienungsanleitung<br />
1215000 Portables 4-<strong>Star</strong> <strong>Plus</strong>- pH/ ISE- Messgerät mit Batterien und Bedienungsanleitung<br />
1116000 4-<strong>Star</strong> <strong>Plus</strong>-pH/ DO- Tischmessgerät mit Universalnetzteil und Bedienungsanleitung<br />
1216000 Portables 4-<strong>Star</strong> <strong>Plus</strong>- pH/ DO-Messgerät mit Batterien und Bedienungsanleitung<br />
1117000 4-<strong>Star</strong> <strong>Plus</strong>- pH/ Leitfähigkeit- Tischmessgerät mit Universalnetzteil und Bedienungsanleitung<br />
1217000 Portables 4-<strong>Star</strong> <strong>Plus</strong>- pH/ Leitfähigkeit- Messgerät mit Batterien und Bedienungsanleitung<br />
1218000 Portables 5-<strong>Star</strong> <strong>Plus</strong>- pH/ DO/ Leitfähigkeit- Messgerät mit Batterien und Bedienungsanleitung<br />
1119000 5-<strong>Star</strong> <strong>Plus</strong>- pH/ ISE/ DO/ Leitfähigkeit- Tischmessgerät mit Universalnetzteil<br />
und Bedienungsanleitung<br />
1219000 Portables 5-<strong>Star</strong> <strong>Plus</strong>- pH/ ISE/ DO/ Leitfähigkeit- Messgerät mit Batterien<br />
und Bedienungsanleitung<br />
1213300 Portables, optisches 3-<strong>Star</strong> <strong>Plus</strong>- RDO ® - DO- Messgerät mit Batterien und Bedienungsanleitung<br />
1213310 Portables, optisches 4-<strong>Star</strong> <strong>Plus</strong>- RDO- DO/ pH- Messgerät mit Batterien<br />
und Bedienungsanleitung<br />
1213320 Portables, optisches 5-<strong>Star</strong> <strong>Plus</strong>- RDO- DO/ pH/ Leitfähigkeit- Messgerät mit Batterien<br />
und Bedienungsanleitung<br />
090043 Elektrodenständer<br />
1010003 Universalnetzteil<br />
1010006 <strong>Star</strong>- Serie- Drucker mit RS232-Druckerkabel (Katalognummer 250302-001)<br />
1010053 RS232- Computerschnittstellenkabel<br />
096019 Rührersonde mit Schaufel, für 3-<strong>Star</strong>-, 4-<strong>Star</strong>- und 5-<strong>Star</strong>-Tischmessgeräte<br />
<strong>Thermo</strong> <strong>Scientific</strong> <strong>Orion</strong> <strong>Star</strong> - und <strong>Star</strong> <strong>Plus</strong>-Messgeräte – Bedienungsanleitung<br />
DE-63
Technische Daten<br />
Katalognummer Beschreibung<br />
8102BNUWP ROSS Ultra-Kombi-pH-Elektrode mit Glasschaft<br />
8107BNUMD ROSS Ultra-pH/ATC-Triodenelektrode, wartungsarm, Gel-Füllung, Epoxydhardz-Schaft<br />
8156BNUWP ROSS Ultra-Kombi-pH-Elektrode mit Epoxydhardz-Schaft<br />
8157BNUMD ROSS Ultra-pH/ATC-Triodenelektrode mit Epoxydhardz-Schaft<br />
8165BNWP ROSS Sure-Flow-Kombi-pH-Elektrode mit Epoxydhardz-Schaft<br />
8172BNWP ROSS Sure-Flow-Kombi-pH-Elektrode mit Glasschaft<br />
9107APMD AquaPro-pH/ATC-Triodenelektrode, wartungsarm, Polymer-Füllung, Epoxydhardz-Schaft<br />
9107BNMD Gel-gefüllte pH/ATC-Triode mit Epoxydhardz-Schaft<br />
9157BNMD Nachfüllbare pH/ATC-Triode mit Epoxydhardz-Schaft<br />
9165BNWP Sure-Flow-Kombi-pH-Elektrode mit Epoxydhardz-Schaft<br />
9172BNWP Sure-Flow-Kombi-pH-Elektrode mit Glasschaft<br />
927005MD ATC-Sonde mit Epoxydhardz-Schaft<br />
927007MD ATC-Sonde mit Edelstahlkörper<br />
9512HPBNWP Ionen-selektive, Ammoniak-Kombi-Hochleistungselektrode<br />
9609BNWP Ionen-selektive, Fluorid-Kombielektrode<br />
9707BNWP Ionen-selektive, Nitrat-Kombielektrode<br />
8611BNWP Ionen-selektive ROSS-Natrium-Kombielektrode<br />
083005MD Polarographische DO- Sonde mit Kalibrierhülse und 1,5 m Kabel<br />
083010MD Polarographische DO- Sonde mit Kalibrierhülse und 3 m Kabel<br />
086030MD Polarographische BOD AUTO-STIR-DO- Sonde mit Kalibrierhülse<br />
087010MD Optische RDO ® - Sonde mit Edelstahlführung, optischer Kappe und 3 m Kabel<br />
087001 Optische Kappe zum Austausch<br />
011050MD<br />
013005MD<br />
013010MD<br />
013016MD<br />
Leitfähigkeitssonde mit 1 µS/cm bis 20 mS/cm Messbereich und 1,5 m Kabel<br />
DuraProbe- Leitfähigkeitssonde mit 1 µS/cm bis 200 mS/cm Messbereich und 1,5 m Kabel<br />
DuraProbe- Leitfähigkeitssonde mit 1 µS/cm bis 200 mS/cm Messbereich und 3 m Kabel<br />
Leitfähigkeitssonde mit 0,01 µS/cm bis 300 mS/cm Messbereich und 1,5 m Kabel<br />
Weitere Messgerätsortimente, Zubehör, Elektroden und Lösungen finden Sie unter<br />
www.thermo.com/water.<br />
DE-64<br />
<strong>Thermo</strong> <strong>Scientific</strong> <strong>Orion</strong> <strong>Star</strong> - und <strong>Star</strong> <strong>Plus</strong>-Messgeräte – Bedienungsanleitung
Anhang A – Messgerät-<br />
Einrichtungsmenüfunktionen<br />
pH-Einrichtungsmenüfunktionen<br />
Automatische Puffererkennung<br />
<strong>Orion</strong> <strong>Star</strong>- und <strong>Star</strong> <strong>Plus</strong>-pH-Messgeräte können pH-1,68-/ 4,01-/ 6,86-/ 7,00-/ 9,18-/ 10,01- und<br />
12,46-Puffer bei der pH-Kalibrierung automatisch erkennen. Während der Kalibrierung nutzt das<br />
Messgerät den ausgewählten Puffersatz und den mV-Rohwert der pH-Elektrode im Puffer zum<br />
Erkennen und Anzeigen des Pufferwertes bei der gemessenen Temperatur. Der mV-Rohwert muss<br />
sich um etwa ± 30 mV vom theoretischen mV-Messwert des Puffers unterscheiden, damit der<br />
Puffer automatisch vom Messgerät erkannt werden kann.<br />
Puffer mV-Bereich Puffer mV-Bereich Puffer mV-Bereich<br />
1.68 +285 bis +345 7,00 -30 bis + 30 10,01 -207 bis -147<br />
4.01 +207 bis +147 9,18 -99 bis -159 12,46 -293 bis -353<br />
6.86 +38 bis -22<br />
Gelöst- Sauerstoff- Einrichtungsmenüfunktionen<br />
Barometrischer- Druck- Kompensation<br />
<strong>Orion</strong> <strong>Star</strong>- und <strong>Star</strong> <strong>Plus</strong>-Messgeräte für gelösten Sauerstoff verfügen über ein internes<br />
Barometer zur Messung druckkompensierter Gelöst- Sauerstoff- Werte. Die Messgeräte können<br />
auch auf eine manuelle Kompensation des barometrischen Drucks zurückgreifen, wenn gelöster<br />
Sauerstoff mit einer eingetauchten Sonde oder in einem unter Druck stehenden Gefäß gemessen<br />
wird. Der Druck wird in mm Hg eingegeben. 1 mm Hg = 0,03937 Zoll Hg = 1,3332 hPa (mBar) =<br />
0,01934 PSI.<br />
Salzgehaltkorrektur<br />
Eine automatische Salzgehaltkorrektur bei Gelöst- Sauerstoff- Messungen ist mit <strong>Orion</strong> <strong>Star</strong>- und<br />
<strong>Star</strong> <strong>Plus</strong>-Messgeräten für gelösten Sauerstoff möglich, die über einen Leitfähigkeits-Messmodus<br />
verfügen. Die Messgeräte nutzen den von der Leitfähigkeitssonde ermittelten Leitfähigkeitswert<br />
zur Berechnung des Salzgehalt-Korrekturfaktors und wenden diesen Faktor auf Gelöst- Sauerstoff-<br />
Messungen in mg/L an.<br />
Die Messgeräte können ebenfalls eine manuelle Salzgehaltkorrektur bei in mg/L ausgegebenen<br />
Gelöst- Sauerstoff- Messungen nutzen. Der manuelle Salzgehalt-Korrekturfaktor muss in ppt (Teile<br />
pro Tausend) eingegeben werden.<br />
<strong>Thermo</strong> <strong>Scientific</strong> <strong>Orion</strong> <strong>Star</strong> - und <strong>Star</strong> <strong>Plus</strong>-Messgeräte – Bedienungsanleitung<br />
DE-65
Einrichtungsmenüfunktionen<br />
Leitfähigkeit<br />
bei 20 °C<br />
(mS/cm)<br />
Salzgehalt-<br />
Korrekturwert<br />
(ppt)<br />
Leitfähigkeit<br />
bei 20 °C<br />
(mS/cm)<br />
Salzgehalt-<br />
Korrekturwert<br />
(ppt)<br />
Leitfähigkeit<br />
bei 20 °C<br />
(mS/cm)<br />
5 3 20 13 35 25<br />
6 4 21 14 36 25<br />
7 4 22 15 37 26<br />
8 5 23 15 38 27<br />
9 6 24 16 39 28<br />
10 6 25 17 40 29<br />
11 7 26 18 42 30<br />
12 8 27 18 44 32<br />
13 8 28 19 46 33<br />
14 9 29 20 48 35<br />
15 10 30 21 50 37<br />
16 10 31 22 52 38<br />
17 11 32 22 54 40<br />
18 12 33 23 56 42<br />
19 13 34 24<br />
Salzgehalt-<br />
Korrekturwert<br />
(ppt)<br />
Diese Tabelle wurde aus den International Oceanographic Tables, Vol. 1, des National Institute of<br />
Oceanography von Großbritannien, Womley, Godaming, Surrey, Engl<strong>and</strong> und der Unesco, Paris<br />
1971, errechnet.<br />
Leitfähigkeit- Einrichtungsmenüfunktionen<br />
Temperaturkompensation und Referenztemperatur<br />
<strong>Orion</strong> <strong>Star</strong>- und <strong>Star</strong> <strong>Plus</strong>-Leitfähigkeitsmessgeräte können eine Funktion zur<br />
Temperaturkompensation nutzen, welche Leitfähigkeitsmessungen bei einer Referenztemperatur<br />
von 5 °C, 10 °C, 15 °C, 20 °C oder 25 °C berechnet und anzeigt (<strong>Orion</strong> <strong>Star</strong>-Messgeräte arbeiten<br />
lediglich mit einer Referenztemperatur von 15 °C, 20 °C oder 25 °C). Die Temperaturkompensation<br />
kann für die meisten wässrigen Proben als linear, bei ultrareinen Proben und Proben mit<br />
geringer Ionenkonzentration als nicht-linear eingestellt, bei nicht temperaturkompensierten<br />
Leitfähigkeitsmessungen auch abgeschaltet werden.<br />
Je geringer der Unterschied zwischen Probentemperatur und gewählter Referenztemperatur,<br />
desto exakter die Leitfähigkeitsmessung – insbesondere bei geschätztem oder nicht exaktem<br />
Temperaturkompensationskoeffizienten.<br />
DE-66<br />
<strong>Thermo</strong> <strong>Scientific</strong> <strong>Orion</strong> <strong>Star</strong> - und <strong>Star</strong> <strong>Plus</strong>-Messgeräte – Bedienungsanleitung
Einrichtungsmenüfunktionen<br />
Die Leitfähigkeit einer Lösung mit einer bestimmten Elektrolytkonzentration ändert sich in<br />
Abhängigkeit von der Temperatur; dieses Verhältnis wird durch den Temperaturkoeffizienten der<br />
Lösung beschrieben. Das Messgerät verfügt über einen St<strong>and</strong>ard-Temperaturkoeffizienten von<br />
2,1 % Änderung der Leitfähigkeit pro °C und repräsentiert damit eine Vielzahl wässriger Proben.<br />
Lösung (25 °C bis 50 °C)<br />
Temperaturkoeffizient (% / °C)<br />
Ultrareines Wasser 4,55<br />
Salz (NaCl) 2,12<br />
5 % NaOH 1,72<br />
Gelöstes Ammoniak 1,88<br />
10 % HCl 1,32<br />
5 % Schwefelsäure 0,96<br />
98 % Schwefelsäure 2,84<br />
Zuckersirup 5,64<br />
Gelöste Feststoffe gesamt (TDS)<br />
<strong>Orion</strong> <strong>Star</strong>- und <strong>Star</strong> <strong>Plus</strong>-Leitfähigkeitmessgeräte messen TDS als Gesamtzahl gelöster<br />
anorganischer Stoffe einer Lösung. Die gelösten anorganischen Stoffe leiten einen bestimmten<br />
Strom, der von der Leitfähigkeitssonde gemessen wird. Da ein direkter Zusammenhang<br />
zwischen Leitfähigkeit und TDS besteht, werden Leitfähigkeitsmessungen zur Abschätzung<br />
des Vorh<strong>and</strong>enseins anorganischer Stoffe eingesetzt. Im Einrichtungsmenü muss ein TDS- Faktor<br />
zwischen 0,01 und 10 mg/L eingegeben werden.<br />
Zur St<strong>and</strong>ardmethode zur TDS- Bestimmung zählt das Verdampfen einer Probe bei 180 °C bis<br />
zur vollständigen Austrocknung und Wiegen der Rückstände. Der TDS- Faktor errechnet sich<br />
aus dem Gewicht der Rückstände geteilt durch die Proben-Leitfähigkeit. Aufein<strong>and</strong>erfolgende<br />
Leitfähigkeitsmessungen werden zur Bestimmung des TDS- Wertes der Probe mit dem TDS-<br />
Faktor multipliziert.<br />
Automatische Kalibrierung<br />
<strong>Orion</strong> <strong>Star</strong>- und <strong>Star</strong> <strong>Plus</strong>-Leitfähigkeitmessgeräte können 100 µS/cm-, 1413 µS/cm- und<br />
12,9 mS/cm-Leitfähigkeitsst<strong>and</strong>ards automatisch erkennen, wenn die Nominal-Zellkonstante<br />
der Leitfähigkeitssonde im Einrichtungsmenü eingegeben wird. Zur Erkennung des<br />
Leitfähigkeitsst<strong>and</strong>ards durch das Messgerät muss die eingegebene Zellkonstante innerhalb<br />
eines Faktors von 3 exakt sein. Ein Beispiel: Wenn die tatsächliche Zellkonstante 1,0 cm -1<br />
beträgt, ermöglicht die Eingabe einer Nominal-Zellkonstante im Bereich 0,3 cm -1 bis 3,0 cm -1 eine<br />
Erkennung der Leitfähigkeitsreferenz durch das Messgerät sowie eine automatische Kalibrierung.<br />
<strong>Thermo</strong> <strong>Scientific</strong> <strong>Orion</strong> <strong>Star</strong> - und <strong>Star</strong> <strong>Plus</strong>-Messgeräte – Bedienungsanleitung<br />
DE-67
Einrichtungsmenüfunktionen<br />
ISE- Einrichtungsmenüfunktionen<br />
Konzentrationsbereich<br />
<strong>Orion</strong> <strong>Star</strong>- und <strong>Star</strong> <strong>Plus</strong>- ISE- Messgeräte können für einen hohen oder geringen ISE-<br />
Konzentrationsbereich eingerichtet werden, der zur Ermittlung von Kalibrierstabilitätskriterien<br />
eingesetzt werden kann. Wenn ein hoher ISE-Konzentrationsbereich ausgewählt wird, führt<br />
das Messgerät eine normale Kalibrierung ohne Verzögerung bei der Anzeige des St<strong>and</strong>ard-<br />
Kalibrierungswertes aus. Bei Auswahl eines geringen ISE-Konzentrationsbereiches lässt das<br />
Messgerät etwa 3 – 5 Minuten verstreichen, ehe es stabile St<strong>and</strong>ard-Kalibrierungswerte anzeigt.<br />
Die Verzögerung hängt von der jeweiligen Probe und des Konzentration der Kalibrierst<strong>and</strong>ards<br />
ab. Ein niedriger ISE-Konzentrationsbereich ist zur Verbesserung der Genauigkeit bei Messungen<br />
niedriger Konzentration vorgesehen; dabei erhält die Elektrode mehr Zeit zur Stabilisierung<br />
innerhalb des Kalibrierst<strong>and</strong>ards.<br />
Automatische Blindwertkorrektur<br />
<strong>Orion</strong> <strong>Star</strong>- und <strong>Star</strong> <strong>Plus</strong> ISE-Messgeräte verfügen über eine automatische ISE-Blindwertkorrektur,<br />
bei der ein Algorithmus zur Kompensation der Nicht-Linearität Ionen-selektiver Elektroden<br />
bei niedrig konzentrierten St<strong>and</strong>ards und Proben eingesetzt wird. Da zur automatischen<br />
Blindwertkorrektur eine Reihe nicht-linearer Gleichungen eingesetzt werden muss, die lediglich<br />
numerisch berechnet werden können, ist es dem Anwender nicht möglich, am Messgerät<br />
angezeigte Kalibrierung und durchschnittliche Steilheit analytisch auf Einhaltung des in<br />
der Bedienungsanleitung zur Elektrode angegebenen Steilheitsbereiches zu überprüfen.<br />
Bei Anwendungen, die einer analytischen Überprüfung bedürfen, sollte die automatische<br />
Blindwertkorrektur abgeschaltet werden.<br />
DE-68<br />
<strong>Thermo</strong> <strong>Scientific</strong> <strong>Orion</strong> <strong>Star</strong> - und <strong>Star</strong> <strong>Plus</strong>-Messgeräte – Bedienungsanleitung
I T<br />
S E Z I O N E I T A L I A N A<br />
Indice<br />
Capitolo I Introduzione<br />
Funzioni del misuratore. . . . . . . . . . . . . . . . . . . . . . . . . . . . . . . . . . . . . . . . . . . . . . IT-2<br />
Capitolo II Display<br />
Descrizione generale . . . . . . . . . . . . . . . . . . . . . . . . . . . . . . . . . . . . . . . . . . . . . . . IT-3<br />
Capitolo III Tastiera<br />
Descrizione generale . . . . . . . . . . . . . . . . . . . . . . . . . . . . . . . . . . . . . . . . . . . . . . . IT-5<br />
Definizione dei tasti . . . . . . . . . . . . . . . . . . . . . . . . . . . . . . . . . . . . . . . . . . . . . . . . IT-6<br />
Capitolo IV Preparazione del misuratore<br />
Installazione dell'adattatore . . . . . . . . . . . . . . . . . . . . . . . . . . . . . . . . . . . . . . . . . . IT-7<br />
Installazione delle batterie . . . . . . . . . . . . . . . . . . . . . . . . . . . . . . . . . . . . . . . . . . . IT-8<br />
Collegamento degli elettrodi. . . . . . . . . . . . . . . . . . . . . . . . . . . . . . . . . . . . . . . . . . IT-9<br />
Accensione dello strumento. . . . . . . . . . . . . . . . . . . . . . . . . . . . . . . . . . . . . . . . . IT-10<br />
Manutenzione del misuratore. . . . . . . . . . . . . . . . . . . . . . . . . . . . . . . . . . . . . . . . IT-10<br />
Capitolo V Impostazione del misuratore<br />
Menu impostazione . . . . . . . . . . . . . . . . . . . . . . . . . . . . . . . . . . . . . . . . . . . . . . . IT-11<br />
Tabella menu impostazione . . . . . . . . . . . . . . . . . . . . . . . . . . . . . . . . . . . . . . . IT-12<br />
Impostazioni di menu generali . . . . . . . . . . . . . . . . . . . . . . . . . . . . . . . . . . . . . . . IT-14<br />
Impostazioni di data e ora. . . . . . . . . . . . . . . . . . . . . . . . . . . . . . . . . . . . . . . . . . . IT-15<br />
Impostazioni di misurazione continua, temporizzata o AUTO-READ . . . . . . . . . IT-16<br />
Selezione del parametro di misurazione. . . . . . . . . . . . . . . . . . . . . . . . . . . . . . . . IT-17<br />
Impostazione del metodo. . . . . . . . . . . . . . . . . . . . . . . . . . . . . . . . . . . . . . . . . . . IT-18<br />
Capitolo VI Tecnica del pH<br />
Menu impostazione pH . . . . . . . . . . . . . . . . . . . . . . . . . . . . . . . . . . . . . . . . . . . . IT-19<br />
Calibrazione pH. . . . . . . . . . . . . . . . . . . . . . . . . . . . . . . . . . . . . . . . . . . . . . . . . . . IT-20<br />
Misurazione pH. . . . . . . . . . . . . . . . . . . . . . . . . . . . . . . . . . . . . . . . . . . . . . . . . . . IT-21<br />
Visualizzazione e calibrazione temperatura pH . . . . . . . . . . . . . . . . . . . . . . . . . . . IT-22<br />
Capitolo VII Tecnica mV, mV relativi e ORP<br />
Calibrazione mV relativi e ORP . . . . . . . . . . . . . . . . . . . . . . . . . . . . . . . . . . . . . . . IT-23<br />
Misurazione mV, mV relativi e ORP . . . . . . . . . . . . . . . . . . . . . . . . . . . . . . . . . . . IT-24<br />
Capitolo VIII Tecnica dell'ossigeno disciolto<br />
Menu impostazione ossigeno disciolto . . . . . . . . . . . . . . . . . . . . . . . . . . . . . . . . IT-25<br />
Calibrazione ossigeno disciolto. . . . . . . . . . . . . . . . . . . . . . . . . . . . . . . . . . . . . . . IT-26<br />
Misurazione ossigeno disciolto. . . . . . . . . . . . . . . . . . . . . . . . . . . . . . . . . . . . . . . IT-28<br />
Visualizzazione e calibrazione temperatura ossigeno disciolto . . . . . . . . . . . . . . . IT-29<br />
<strong>Thermo</strong> <strong>Scientific</strong> <strong>Orion</strong> <strong>Star</strong> e guida per l’utente dei misuratori <strong>Star</strong> <strong>Plus</strong><br />
IT-I
I T<br />
Indice<br />
Capitolo IX Tecnica dell'ossigeno disciolto ottico RDO ®<br />
Panoramica ottica . . . . . . . . . . . . . . . . . . . . . . . . . . . . . . . . . . . . . . . . . . . . . . . . . IT-31<br />
Menu impostazione ossigeno disciolto ottico RDO . . . . . . . . . . . . . . . . . . . . . . . IT-32<br />
Menu impostazione per sonda ottica RDO. . . . . . . . . . . . . . . . . . . . . . . . . . . . IT-33<br />
Calibrazione ottica ossigeno disciolto RDO . . . . . . . . . . . . . . . . . . . . . . . . . . . . . IT-35<br />
Misurazione ottica ossigeno disciolto RDO . . . . . . . . . . . . . . . . . . . . . . . . . . . . . IT-37<br />
Visualizzazione e calibrazione temperatura ossigeno disciolto ottico RDO. . . . . . IT-38<br />
Capitolo X Tecnica della conducibilità<br />
Menu impostazione conducibilità . . . . . . . . . . . . . . . . . . . . . . . . . . . . . . . . . . . . . IT-39<br />
Calibrazione conducibilità . . . . . . . . . . . . . . . . . . . . . . . . . . . . . . . . . . . . . . . . . . . IT-40<br />
Misurazione conducibilità . . . . . . . . . . . . . . . . . . . . . . . . . . . . . . . . . . . . . . . . . . . IT-41<br />
Visualizzazione e calibrazione temperatura conducibilità . . . . . . . . . . . . . . . . . . . IT-42<br />
Capitolo XI Tecnica ISE<br />
Menu impostazione ISE . . . . . . . . . . . . . . . . . . . . . . . . . . . . . . . . . . . . . . . . . . . . IT-43<br />
Calibrazione ISE . . . . . . . . . . . . . . . . . . . . . . . . . . . . . . . . . . . . . . . . . . . . . . . . . . IT-44<br />
Misurazione ISE . . . . . . . . . . . . . . . . . . . . . . . . . . . . . . . . . . . . . . . . . . . . . . . . . . IT-45<br />
Visualizzazione e calibrazione temperatura ISE . . . . . . . . . . . . . . . . . . . . . . . . . . IT-46<br />
Capitolo XII Archiviazione e recupero dati<br />
Datalog e log di calibrazione . . . . . . . . . . . . . . . . . . . . . . . . . . . . . . . . . . . . . . . . . IT-47<br />
Funzione Datalog automatico . . . . . . . . . . . . . . . . . . . . . . . . . . . . . . . . . . . . . . IT-47<br />
Impostazioni di eliminazione Datalog . . . . . . . . . . . . . . . . . . . . . . . . . . . . . . . . IT-48<br />
Visualizzazione e stampa di Datalog e log di calibrazione. . . . . . . . . . . . . . . . . IT-49<br />
Capitolo XIII Dichiarazione di conformità<br />
Dichiarazione di conformità. . . . . . . . . . . . . . . . . . . . . . . . . . . . . . . . . . . . . . . . . . IT-51<br />
Conformità RAEE . . . . . . . . . . . . . . . . . . . . . . . . . . . . . . . . . . . . . . . . . . . . . . . . . IT-52<br />
Capitolo XIV Risoluzione dei problemi<br />
Autotest misuratore . . . . . . . . . . . . . . . . . . . . . . . . . . . . . . . . . . . . . . . . . . . . . . . IT-53<br />
Codici errore misuratore . . . . . . . . . . . . . . . . . . . . . . . . . . . . . . . . . . . . . . . . . . . . IT-54<br />
Risoluzione dei problemi generici. . . . . . . . . . . . . . . . . . . . . . . . . . . . . . . . . . . . . IT-56<br />
Capitolo XV Specifiche tecniche misuratore<br />
Specifiche tecniche misuratore. . . . . . . . . . . . . . . . . . . . . . . . . . . . . . . . . . . . . . . IT-59<br />
Informazioni per gli ordini . . . . . . . . . . . . . . . . . . . . . . . . . . . . . . . . . . . . . . . . . . . IT-63<br />
Appendice A Funzioni del menu impostazione del misuratore<br />
Funzioni del menu impostazione pH. . . . . . . . . . . . . . . . . . . . . . . . . . . . . . . . . . . IT-65<br />
Funzioni del menu impostazione ossigeno disciolto. . . . . . . . . . . . . . . . . . . . . . . IT-65<br />
Funzioni del menu impostazione conducibilità . . . . . . . . . . . . . . . . . . . . . . . . . . . IT-66<br />
Funzioni del menu impostazione ISE . . . . . . . . . . . . . . . . . . . . . . . . . . . . . . . . . . IT-68<br />
IT-II<br />
<strong>Thermo</strong> <strong>Scientific</strong> <strong>Orion</strong> <strong>Star</strong> e guida per l’utente dei misuratori <strong>Star</strong> <strong>Plus</strong>
Capitolo I Introduzione<br />
Congratulazioni! Avete scelto un misuratore <strong>Thermo</strong> <strong>Scientific</strong> <strong>Orion</strong> <strong>Star</strong> o <strong>Star</strong> <strong>Plus</strong><br />
leader del settore, progettato per l'esecuzione di misurazioni elettrochimiche sul<br />
campo o in laboratorio.<br />
• I misuratori 2-<strong>Star</strong> consentono la misurazione a singolo parametro del pH.<br />
• I misuratori 3-<strong>Star</strong> <strong>Plus</strong> consentono la misurazione a singolo parametro di pH,<br />
ossigeno disciolto, ossigeno disciolto ottico RDO ® o conducibilità.<br />
• I misuratori 4-<strong>Star</strong> <strong>Plus</strong> consentono di effettuare misurazioni a due parametri<br />
di pH/ossigeno disciolto, pH/conducibilità, pH/ISE (elettrodo iono selettivo)<br />
o ph/ossigeno disciolto ottico RDO.<br />
• I misuratori 5-<strong>Star</strong> <strong>Plus</strong> consentono la misurazione multiparametro di pH/ISE/<br />
ossigeno disciolto/conducibilità, pH/ossigeno disciolto/conducibilità o pH/ossigeno<br />
disciolto ottico RDO/conducibilità.<br />
Tutti i misuratori includono una funzione di misurazione della temperatura. Tutti i misuratori<br />
con capacità di misurazione del pH includono una funzione mV/mV relativi/ORP.<br />
Costruiti per soddisfare le esigenze di attivi laboratori multi-utente o di ambienti<br />
industriali, tutti i misuratori <strong>Orion</strong> <strong>Star</strong> e <strong>Star</strong> <strong>Plus</strong> sono controllati da microprocessori,<br />
a garanzia di misurazioni precise e accurate. I misuratori portatili a tenuta stagna<br />
possono perfino resistere a immersioni di breve durata.<br />
I misuratori 3-<strong>Star</strong> <strong>Plus</strong>, 4-<strong>Star</strong> <strong>Plus</strong> e 5-<strong>Star</strong> <strong>Plus</strong> sono stati migliorati per includere un<br />
maggior numero di punti datalog, migliori visualizzazioni della temperatura e una nuova<br />
modalità di calibrazione della temperatura per ciascun parametro di misurazione.<br />
I misuratori da banco 3-<strong>Star</strong> <strong>Plus</strong>, 4-<strong>Star</strong> <strong>Plus</strong> e 5-<strong>Star</strong> <strong>Plus</strong> includono capacità di<br />
autocampionamento e sono compatibili con l'autocampionatore AutoTration -500.<br />
Fare riferimento alla guida per l'utente di AutoTration-500 per avere informazioni sul<br />
funzionamento dei misuratori <strong>Star</strong> <strong>Plus</strong> con l'autocampionatore.<br />
Nota: Si prega di leggere attentamente il presente manuale prima di usare i misuratori<br />
da banco o portatili. Qualsiasi impiego non contemplato dalle presenti istruzioni potrebbe<br />
rendere nulla la garanzia e causare danni permanenti al misuratore.<br />
<strong>Thermo</strong> <strong>Scientific</strong> <strong>Orion</strong> <strong>Star</strong> e guida per l’utente dei misuratori <strong>Star</strong> <strong>Plus</strong><br />
IT-1
Introduzione<br />
Funzioni del misuratore<br />
Per soddisfare al meglio le esigenze degli utenti nei laboratori farmaceutici e in quelli<br />
operanti nei settori del controllo e della protezione ambientale, degli alimenti e delle<br />
bev<strong>and</strong>e e dei prodotti di consumo, i misuratori <strong>Orion</strong> <strong>Star</strong> e <strong>Star</strong> <strong>Plus</strong> includono le<br />
seguenti caratteristiche chiave:<br />
• Metodi protetti da password – Il misuratore memorizza fino a dieci misurazioni<br />
e calibrazioni personalizzate per farvi riferimento in futuro. La protezione mediante<br />
password di ogni metodo elimina eventuali manomissioni in quanto i diversi utenti<br />
possono accedere solo alla procedura più adatta al proprio lavoro.<br />
• AUTO-READ – Lo strumento avvia automaticamente una misurazione e stampa<br />
o registra automaticamente i dati qu<strong>and</strong>o la lettura diventa stabile. La misurazione<br />
viene bloccata sul display fino a qu<strong>and</strong>o l'utente indica al misuratore di eseguire<br />
una nuova misurazione.<br />
• Controllo agitatore – Tutti i misuratori da banco 3-<strong>Star</strong>, 4-<strong>Star</strong> e 5-<strong>Star</strong> sono dotati di<br />
un controllo agitatore per l'agitatore, N. Cat. 096019, e per la sonda BOD AUTO-STIR <br />
elimin<strong>and</strong>o così la necessità di piastre di agitazione magnetiche e barre di agitazione.<br />
• SMART STABILITY e SMART AVERAGING – Eliminano i procedimenti<br />
per tentativi compens<strong>and</strong>o automaticamente in base alle condizioni di misurazione<br />
e ottimizz<strong>and</strong>o il tempo di risposta del misuratore.<br />
• Display retroilluminato – Tutti i misuratori 3-<strong>Star</strong>, 4-<strong>Star</strong> e 5-<strong>Star</strong> includono<br />
una funzione di retroilluminazione del display. Qu<strong>and</strong>o il misuratore è acceso, una<br />
rapida pressione del tasto accenderà e spegnerà la retroilluminazione. Qu<strong>and</strong>o<br />
il misuratore è in funzione a batteria, la retroilluminazione si spegnerà automaticamente<br />
dopo due minuti per risparmiare energia. Qu<strong>and</strong>o le batterie sono quasi scariche la<br />
retroilluminazione non si accenderà più.<br />
• Spegnimento automatico – I misuratori si spegneranno automaticamente<br />
trascorsi 20 minuti dall'ultima pressione di un pulsante. Questo massimizza la potenza<br />
della batteria sui misuratori portatili e sui misuratori da banco utilizzati a batteria.<br />
• Segnali acustici – Il misuratore emetterà un segnale acustico ogni volta che<br />
viene premuto un tasto, fornendo così una conferma immediata che l'input<br />
dell'utente è stato ricevuto.<br />
Una guida di riferimento di facile utilizzo è attaccata ad ogni misuratore per facilitare<br />
l'utilizzo quotidiano dello strumento.<br />
IT-2<br />
<strong>Thermo</strong> <strong>Scientific</strong> <strong>Orion</strong> <strong>Star</strong> e guida per l’utente dei misuratori <strong>Star</strong> <strong>Plus</strong>
Capitolo II Display<br />
Descrizione generale<br />
Nel corso di un dato processo, il display dei misuratori <strong>Orion</strong> <strong>Star</strong> e <strong>Star</strong> <strong>Plus</strong> fornisce<br />
dati sulla temperatura e sulla calibrazione. La temperatura appare nell'angolo superiore<br />
sinistro del display. L'icona indica che una modalità di calibrazione o un menu di<br />
impostazione della calibrazione è attivo. Le icone man, 2, 4, 7, 9, 10, e 12 indicano<br />
quali tamponi pH sono stati salvati dopo l'effettuazione di una calibrazione pH. L'icona<br />
setup viene visualizzata solo qu<strong>and</strong>o il misuratore è in modalità impostazione. L'icona<br />
indica uno stato di errore e qu<strong>and</strong>o viene visualizzata insieme all'icona , indica<br />
l'esistenza di un allarme di calibrazione o di un problema di qualità dell'elettrodo.<br />
L'icona indica che la modalità di misurazione AUTO-READ è attiva, come discusso<br />
in dettaglio nella sezione Impostazione misuratore.<br />
Temperatura<br />
Calibrazione<br />
Unità pH/ISE/<br />
ORP<br />
Unità<br />
conducibilità<br />
Unità OD<br />
Misuratore 5 <strong>Star</strong><br />
Questo è il display di un misuratore 5-<strong>Star</strong> in grado di eseguire misurazioni multi parametro.<br />
I misuratori a parametro singolo o doppio avranno meno righe di misurazione, a seconda<br />
delle capacità del misuratore.<br />
Nota: In modalità di misurazione, le tre righe principali di dati del display corrispondono<br />
alle misurazioni che si stanno effettu<strong>and</strong>o.<br />
<strong>Thermo</strong> <strong>Scientific</strong> <strong>Orion</strong> <strong>Star</strong> e guida per l’utente dei misuratori <strong>Star</strong> <strong>Plus</strong><br />
IT-3
Display<br />
Icone unità di misura<br />
In modalità di misurazione, l'icona freccia sul lato sinistro dello schermo indica la<br />
riga attiva. Premere per spostare la freccia alla riga desiderata e premere /<br />
per scorrere le icone delle unità di misura associate con la riga selezionata. Le<br />
icone delle unità di misura per un misuratore multi parametro 5-<strong>Star</strong> sono mostrate<br />
di seguito. I misuratori a parametro singolo e doppio hanno meno righe ed icone di<br />
misurazione, a seconda delle capacità del misuratore.<br />
• La riga superiore visualizza pH, mV, mV relativi, ISE, o temperatura.<br />
• La riga centrale visualizza conducibilità, residuo fisso, salinità, resistività, o temperatura.<br />
• La riga inferiore visualizza l'ossigeno disciolto come % di saturazione, l'ossigeno<br />
disciolto come concentrazione, la pressione barometrica e la temperatura.<br />
Le unità di misura visualizzate sul lato destro dello schermo lampeggeranno fino<br />
a qu<strong>and</strong>o la lettura diverrà stabile.<br />
Nota: Se una riga di misurazione non è necessaria, premere per spostare la freccia<br />
alla riga di misurazione non voluta e premere / fino a qu<strong>and</strong>o la riga di<br />
misurazione è completamente vuota.<br />
IT-4<br />
<strong>Thermo</strong> <strong>Scientific</strong> <strong>Orion</strong> <strong>Star</strong> e guida per l’utente dei misuratori <strong>Star</strong> <strong>Plus</strong>
Capitolo III Tastiera<br />
Descrizione generale<br />
La disposizione della tastiera è identica per tutti i misuratori di serie <strong>Orion</strong> <strong>Star</strong> e <strong>Star</strong> <strong>Plus</strong>.<br />
I misuratori portatili e da banco 2 <strong>Star</strong> dispongono di 9 tasti. I misuratori da banco 3-<strong>Star</strong>,<br />
4-<strong>Star</strong> e 5-<strong>Star</strong> hanno 10 tasti in conseguenza dell'aggiunta del tasto agitazione – .<br />
Tastiera portatile<br />
Calibrazione<br />
Accensione/<br />
Retroilluminazione<br />
Cifra<br />
Scorrimento<br />
in basso<br />
Impostazione<br />
Misurazione<br />
Salva/Stampa<br />
Retroilluminazione<br />
Scorrimento in alto<br />
Selezione riga<br />
Visualizzazione log<br />
Tastiera da banco<br />
Accensione/Retroilluminazione<br />
Calibrazione<br />
Scorrimento<br />
in alto<br />
Cifra<br />
Impostazione<br />
Misurazione<br />
Salva/Stampa<br />
Agitatore (non<br />
sul 2-<strong>Star</strong>)<br />
Selezione riga<br />
Visualizzazione log<br />
Scorrimento<br />
in basso<br />
<strong>Thermo</strong> <strong>Scientific</strong> <strong>Orion</strong> <strong>Star</strong> e guida per l’utente dei misuratori <strong>Star</strong> <strong>Plus</strong><br />
IT-5
Tastiera<br />
Definizione dei tasti<br />
Tasto Descrizione Tasto Descrizione<br />
Accende il misuratore, se è spento.<br />
Accende e spegne la<br />
retroilluminazione, se il misuratore<br />
è acceso (solo misuratori 3-<strong>Star</strong>,<br />
4-<strong>Star</strong> e 5-<strong>Star</strong>).<br />
Se il misuratore è acceso, tenere<br />
premuto il tasto per circa tre<br />
secondi per spegnerlo.<br />
Scorre la freccia a sinistra dello<br />
schermo fra le tre righe del<br />
display, in modo che la riga<br />
selezionata possa essere<br />
modificata o calibrata.<br />
Avvia la calibrazione per la<br />
riga selezionata in modalità<br />
di misurazione.<br />
Se la freccia punta alla riga<br />
superiore e le unità visualizzate<br />
sono il pH, la pressione del tasto<br />
avvierà la calibrazione del pH.<br />
Ogni volta che si preme il tasto<br />
in modalità calibrazione, il<br />
misuratore accetterà il punto<br />
di calibrazione e si sposterà al<br />
punto successivo fino a qu<strong>and</strong>o<br />
viene raggiunto il numero<br />
massimo di punti di calibrazione.<br />
Accede al menu impostazione,<br />
inizi<strong>and</strong>o dalla riga selezionata<br />
in modalità misurazione.<br />
Se la freccia punta alla riga<br />
superiore e le unità visualizzate<br />
sono ISE, premendo il tasto<br />
si accederà alla schermata di<br />
impostazione ISE.<br />
Cambia le unità di misura della<br />
riga selezionata in modalità di<br />
misurazione.<br />
Cambia il valore della riga<br />
selezionata nelle modalità<br />
di impostazione, metodi e<br />
visualizzazione log.<br />
Modifica il valore della cifra<br />
lampeggiante nelle modalità<br />
di impostazione, inserimento<br />
password e calibrazione.<br />
Seleziona la cifra successiva da<br />
modificare e sposta il separatore<br />
decimale per le modalità di<br />
impostazione, inserimento<br />
password e calibrazione.<br />
Stampa e registra una misurazione<br />
in modalità continua o temporizzata.<br />
Stampa, registra e blocca il display<br />
qu<strong>and</strong>o una lettura diviene stabile<br />
nella modalità di misurazione<br />
AUTO-READ.<br />
Esce dal menu impostazione<br />
e ritorna alla modalità di<br />
misurazione.<br />
Accetta la calibrazione e ritorna<br />
alla modalità di misurazione.<br />
Accede alla visualizzazione<br />
log e al menu download.<br />
Accende e spegne l'agitatore.<br />
IT-6<br />
<strong>Thermo</strong> <strong>Scientific</strong> <strong>Orion</strong> <strong>Star</strong> e guida per l’utente dei misuratori <strong>Star</strong> <strong>Plus</strong>
Capitolo IV Preparazione del misuratore<br />
Installazione dell'adattatore<br />
L'adattatore di alimentazione universale incluso con il misuratore da banco è l'unico<br />
adattatore il cui uso è consigliato per l'unità. L'utilizzo di qualsiasi altro adattatore di<br />
alimentazione renderà nulla la garanzia del misuratore. L'adattatore di alimentazione<br />
elettrica esterna è regolato per operare da 100 a 240 VAC, 0,5 A, 50/60 Hz.<br />
In base alla sorgente di alimentazione disponibile, selezionare una delle quattro spine<br />
in dotazione e farla scorrere nelle scanalature dell'adattatore. Qu<strong>and</strong>o la spina è inserita<br />
correttamente, si sente un “click”.<br />
Collegare la spina dell’alimentatore all'ingresso di alimentazione del misuratore da<br />
banco. Fare riferimento allo schema nella sezione Collegamento degli elettrodi.<br />
È possibile installare delle batterie nei misuratori di serie <strong>Orion</strong> <strong>Star</strong> o <strong>Star</strong> <strong>Plus</strong>, in<br />
modo che le impostazioni del misuratore siano protette nel caso il misuratore venga<br />
scollegato dalla presa o qu<strong>and</strong>o si verifica una breve interruzione di corrente.<br />
<strong>Thermo</strong> <strong>Scientific</strong> <strong>Orion</strong> <strong>Star</strong> e guida per l’utente dei misuratori <strong>Star</strong> <strong>Plus</strong><br />
IT-7
Preparazione del misuratore<br />
Installazione delle batterie<br />
I misuratori serie <strong>Orion</strong> <strong>Star</strong> e <strong>Star</strong> <strong>Plus</strong> utilizzano quattro batterie alcaline AA. Non<br />
utilizzare batterie al litio o ricaricabili. L'impiego scorretto di batterie non alcaline può<br />
creare pericoli.<br />
Nota: Per i misuratori da banco l'installazione di batterie non è richiesta se l'unità rimane<br />
sempre collegata ad una sorgente di alimentazione tramite l'adattatore universale.<br />
Per i misuratori portatili le batterie vengono fornite dalla fabbrica. Per accedere allo<br />
scompartimento delle batterie dei misuratori portatili allentare le due viti sul retro.<br />
1. Assicurarsi che il misuratore sia spento e capovolgerlo delicatamente su un panno<br />
pulito e privo di pelucchi per evitare di graffiare il display.<br />
2. Rimuovere il coperchio dello scomparto batterie.<br />
3. Inserire batterie nuove con il polo “+” orientato come raffigurato nello scomparto<br />
delle batterie.<br />
4. Riposizionare il coperchio.<br />
5. Durante la sostituzione delle batterie, i dati, le calibrazioni e i metodi memorizzati<br />
rimangono nella memoria non volatile del misuratore. Tuttavia è possibile dover<br />
reimpostare data e ora.<br />
IT-8<br />
<strong>Thermo</strong> <strong>Scientific</strong> <strong>Orion</strong> <strong>Star</strong> e guida per l’utente dei misuratori <strong>Star</strong> <strong>Plus</strong>
Collegamento degli elettrodi<br />
Seguire gli schemi sottostanti per collegare correttamente sonde ed elettrodi al<br />
misuratore. È rappresentato il misuratore multiparametro; i modelli a parametro<br />
singolo e doppio dispongono di un numero minore di collegamenti, a seconda delle<br />
capacità di misurazione.<br />
Collegamento degli elettrodi misuratore da banco<br />
Preparazione del misuratore<br />
Jack agitatore per<br />
agitatore o sonda<br />
OD BOD<br />
AUTO-STIR<br />
Riferimento<br />
per<br />
pH, ORP<br />
o ISE<br />
BNC per<br />
pH, ORP<br />
o ISE<br />
MiniDIN 8 Pin<br />
per Cond<br />
o ATC<br />
MiniDIN<br />
9 Pin per<br />
ossigeno<br />
disciolto<br />
RS232<br />
Massa<br />
Alimentazione<br />
Collegamento degli elettrodi misuratore portatile<br />
BNC per<br />
pH, ORP<br />
o ISE<br />
MiniDIN 8 Pin<br />
per Cond<br />
o ATC<br />
MiniDIN 9<br />
Pin per<br />
ossigeno<br />
disciolto<br />
RS232<br />
<strong>Thermo</strong> <strong>Scientific</strong> <strong>Orion</strong> <strong>Star</strong> e guida per l’utente dei misuratori <strong>Star</strong> <strong>Plus</strong><br />
IT-9
Preparazione del misuratore<br />
Collegamenti del misuratore con funzioni multiple<br />
• Utilizzare l'ingresso BNC per collegare gli elettrodi pH, ISE e ORP con un connettore<br />
BNC o BNC a tenuta stagna.<br />
• I misuratori da banco dispongono di un ingresso di riferimento utilizzato per<br />
collegare un elettrodo di riferimento separato. Gli elettrodi di riferimento richiedono<br />
un elettrodo di rilevamento appropriato separato per le misurazioni.<br />
• La sonda per ossigeno disciolto 970899WP può essere utilizzata con l'ingresso BNC.<br />
• Utilizzare il miniDIN 8 pin per le sonde di conducibilità e per le sonde di<br />
compensazione automatica della temperatura (ATC).<br />
• La sonda OD AUTO-STIR utilizza l'ingresso miniDIN 9 pin e il jack agitatore.<br />
• Collegare una stampante o un computer all'ingresso RS232 utilizz<strong>and</strong>o un cavo<br />
appropriato.<br />
Accensione dello strumento<br />
Dopo aver inserito le batterie nei misuratori portatili ed aver collegato l'adattatore o<br />
inserito le batterie nei misuratori da banco, premere per accendere il misuratore.<br />
Se si utilizza un misuratore 3-<strong>Star</strong>, 4-<strong>Star</strong> o 5-<strong>Star</strong> premere qu<strong>and</strong>o il misuratore è<br />
acceso per accendere e spegnere la retroilluminazione. Qu<strong>and</strong>o il misuratore da banco<br />
è alimentato dalla corrente di linea, la retroilluminazione rimarrà accesa fino a qu<strong>and</strong>o<br />
viene premuto .<br />
Per spegnere il misuratore, tenere premuto<br />
per circa tre secondi.<br />
Manutenzione del misuratore<br />
Per la manutenzione ordinaria spolverare e strofinare il misuratore con un panno umido.<br />
Se necessario è possibile utilizzare acqua calda o un detergente a base acquosa<br />
delicato. Eseguire la manutenzione del misuratore quotidianamente, settimanalmente<br />
o mensilmente a seconda dell'ambiente in cui viene utilizzato.<br />
Rimuovere immediatamente qualsiasi sostanza versata sul misuratore utilizz<strong>and</strong>o<br />
una procedura di pulizia adeguata alla sostanza stessa.<br />
IT-10<br />
<strong>Thermo</strong> <strong>Scientific</strong> <strong>Orion</strong> <strong>Star</strong> e guida per l’utente dei misuratori <strong>Star</strong> <strong>Plus</strong>
Capitolo V Impostazione del misuratore<br />
Menu impostazione<br />
Per navigare nel menu di impostazione:<br />
1. Premere per accedere al menu di impostazione.<br />
2. Premere / fino a qu<strong>and</strong>o viene visualizzata sulla riga superiore l'opzione<br />
di impostazione desiderata.<br />
3. Premere per spostare la freccia alla riga centrale.<br />
4. Premere / fino a qu<strong>and</strong>o viene visualizzata sulla riga centrale l'opzione<br />
di impostazione desiderata.<br />
5. Premere per spostare la freccia alla riga inferiore.<br />
6. Per scorrere l'elenco delle opzioni sulla riga inferiore, premere / fino a<br />
qu<strong>and</strong>o viene visualizzata l'opzione desiderata. Per inserire un valore numerico per<br />
un'opzione sulla riga inferiore, premere / per regolare ciascuna cifra e<br />
per passare alla cifra successiva.<br />
Ad esempio, per modificare la risoluzione della misurazione del pH premere<br />
per scorrere da 0.01 a 0.001 sulla riga inferiore del display.<br />
7. Premere per spostare la freccia alla riga superiore.<br />
8. Ripetere i passaggi da 2 a 7 per programmare una nuova opzione di impostazione<br />
o premere per uscire dal menu impostazione e tornare alla modalità di<br />
misurazione.<br />
Nota: Fare riferimento all'Appendice A per una descrizione delle funzioni speciali del<br />
menu impostazione.<br />
<strong>Thermo</strong> <strong>Scientific</strong> <strong>Orion</strong> <strong>Star</strong> e guida per l’utente dei misuratori <strong>Star</strong> <strong>Plus</strong><br />
IT-11
Impostazione misuratore<br />
Tabella menu impostazione<br />
La seguente tabella è valida per l'intera linea di misuratori <strong>Orion</strong> <strong>Star</strong> e <strong>Star</strong> <strong>Plus</strong>.<br />
I misuratori potrebbero non includere tutte le opzioni elencate nella tabella.<br />
Riga<br />
superiore<br />
Riga<br />
centrale<br />
Riga inferiore<br />
Descrizione Menu Impostazione (impostazione predefinita,<br />
specifico per il metodo)<br />
PH rES 0.1, 0.01, 0.001 Risoluzione misurazione pH (0.01, sì)<br />
PH bUF USA, EUr0 set di tamponi pH per il riconoscimento automatico del tampone<br />
durante la calibrazione, i tamponi USA sono 1.68, 4.01, 7.00, 10.01,<br />
12.46 e i tamponi EUrO sono 1.68, 4.01, 6.86, 9.18 (USA, sì)<br />
ISE rES 1, 2, 3 risoluzione misurazione ISE in cifre significative (1, sì)<br />
ISE UnIt m, mgL, PEr, PPb, n0nE unità di misura ISE (PPb, sì)<br />
ISE rAng L0w, HIgH intervallo di concentrazione ISE per criteri di stabilità calibrazione<br />
(HIgH, sì)<br />
ISE nLIn AUt0, 0FF correzione per il bianco automatica ISE per calibrazione di basso<br />
livello (AUt0, sì)<br />
C0nd tC 0FF, LIn, nLF Tipo compensazione temperatura conducibilità, LIn per campioni<br />
d'acqua puri lineari, nLF per campioni non lineari (LIn, sì)<br />
C0nd C0EF da 0.0 a 10.0 Coefficiente di compensazione temperatura conducibilità in cambio<br />
% nella conducibilità per °C, appare se è stato selezionato LIn per<br />
tC (2.1, sì)<br />
C0nd tdSF da 0.0 a 10.0 Valore fattore residuo fisso conducibilità (0.49, sì)<br />
C0nd CELL da 0.001 a 199.0 Valore costante cella predefinito conducibilità per modalità<br />
calibrazione automatica conducibilità (0.475, sì)<br />
C0nd trEF 5, 10, 15, 20, 25 Temperatura riferimento conducibilità (25, sì)<br />
C0nd tyPE Std, 1, 2, 3, 4, 5, 6, 7, USP Tipo cella conducibilità e intervallo selezionabile (Std, sì)<br />
Vedere la sezione Menu impostazione per la sonda ottica RDO per ulteriori dettagli sui menu informativi della sonda RDO.<br />
d0 rES 0.1, 1 % sat Risoluzione misurazione % saturazione OD (0.1, sì)<br />
d0 rES 0.01, 0.1 mg/L Risoluzione misurazione mg/L OD (0.01, sì)<br />
d0 bAr AUt0, mAn Tipo compensazione pressione barometrica OD (AUt0, sì)<br />
d0 PrES da 450.0 a 850.0 Valore compensazione pressione barometrica OD, appare se è stato<br />
selezionato mAn per bAr (760.0, sì)<br />
d0 SAL AUt0, mAn Tipo correzione salinità OD (AUt0, sì)<br />
d0 SALF da 0 a 45 Valore correzione manuale salinità OD, appare se è stato selezionato<br />
mAn per SAL o se viene utilizzato un misuratore OD senza modalità<br />
conducibilità (0, sì)<br />
d0 CALt AIr, H20, mAn, SEt0 Tipo calibrazione OD (AIr, sì)<br />
d0 LIFE da 365 a 0 Conto alla rovescia sostituzione ottica in giorni – solo per misuratori<br />
3, 4 e 5 <strong>Star</strong> <strong>Plus</strong> RDO (Impostato dalla sonda RDO, no)<br />
dUE PH da 0 a 9999 Valore allarme calibrazione pH in ore, 0 è spento (0, sì)<br />
dUE 0rP da 0 a 9999 Valore allarme calibrazione ORP in ore, 0 è spento (0, sì)<br />
dUE ISE da 0 a 9999 Valore allarme calibrazione ISE in ore, 0 è spento (0, sì)<br />
dUE C0nd da 0 a 9999 Valore allarme calibrazione conducibilità in ore, 0 è spento (0, sì)<br />
dUE d0 da 0 a 9999 Valore allarme calibrazione OD in ore, 0 è spento (0, sì)<br />
IT-12<br />
<strong>Thermo</strong> <strong>Scientific</strong> <strong>Orion</strong> <strong>Star</strong> e guida per l’utente dei misuratori <strong>Star</strong> <strong>Plus</strong>
Impostazione misuratore<br />
Riga<br />
superiore<br />
Riga<br />
centrale<br />
Riga inferiore<br />
Descrizione Menu Impostazione (impostazione predefinita,<br />
specifico per il metodo)<br />
rEAd tyPE AUt0, tImE, C0nt, Tipo lettura misurazione come AUTO-READ, temporizzata o continua<br />
(AUt0, sì)<br />
rEAd tInE da 00:05 a 99:59 Valore misurazione temporizzata in minuti e secondi (01:00, sì)<br />
L0g dEL n0, YES Opzione eliminazione datalog dopo download, selezionare YES per<br />
eliminare il datalog una volta scaricato oppure nO per sovrascrivere<br />
i dati più vecchi qu<strong>and</strong>o il datalog è pieno e non eliminare il datalog<br />
qu<strong>and</strong>o viene scaricato (n0, sì)<br />
L0g AUt0 0FF, 0n Opzione salvataggio automatico punto datalog (0FF, sì)<br />
gEn dEgC da -5.0 a 105 Valore temperatura manuale (25.0, sì)<br />
gEn StIr 0FF, 1, 2, 3, 4, 5, 6, 7 Velocità agitatore – solo per misuratori da banco 3, 4 e 5 <strong>Star</strong> (4, sì)<br />
gEn PASS da 0000 a 9999 Inserimento password misuratore (0000, sì)<br />
gEn AUt0 0n, 0FF Opzione spegnimento automatico misuratore (0n, no)<br />
gLP SEt 0FF, 0n Opzione GLP, la funzione GLP abilita o disabilita i metodi (0FF, no)<br />
dAtE H0Ur da HH00 a HH23 Impostazione ora (HH12, no)<br />
dAtE tInE da mm00 a mm59 Impostazione minuti (mm00, no)<br />
dAtE tyPE mdY, dmY Formato data come mese, giorno, anno o giorno, mese, anno (mdY, no)<br />
dAtE YEAr da 2000 a 2099 Impostazione anno (2004, no)<br />
dAtE dAtE da mm01 a mm12 Impostazione mese (mm01, no)<br />
dAtE dAY da dd01 a dd31 Impostazione giorno del mese (dd01, no)<br />
r232 bAUd 1200, 2400, 4800, 9600 Impostazione baud rate (9600, no)<br />
r232 0UtF Prnt, C0mP Formato di output per stampante o computer, il formato COmP<br />
è delimitato da virgole (Prnt, no)<br />
AUt0 SAPL 0FF, 0n Autocampionatore – solo per misuratori da banco 3, 4 e 5 <strong>Star</strong> <strong>Plus</strong><br />
(OFF, no)<br />
AUt0 trAY 28, 48 Impostazione vassoio beaker (28, no)<br />
AUt0 rInb 1, 2, 3, 4, 5 Numero di beaker di risciacquo (3, no)<br />
AUt0 rSEC da 5 a 60 Tempo di risciacquo in ciascun beaker di risciacquo, in secondi<br />
(10, no)<br />
AUt0 PH 0, 1, 2, 3 Punti calibrazione pH (3, no)<br />
AUt0 0rP n0, YES Opzione calibrazione ORP, appare se è stato selezionato 0 per PH<br />
(n0, no)<br />
AUt0 ISE 0, 2, 3 Punti calibrazione ISE, appare se è stato selezionato 0 per PH (2, no)<br />
1 AUt0 ISE1 Valore concentrazione riferimento ISE 1, appare se 2 o 3 è stato<br />
selezionato per i punti di calibrazione ISE (1, no)<br />
10 AUt0 ISE2 Valore concentrazione riferimento ISE 1, appare se 2 o 3 è stato<br />
selezionato per i punti di calibrazione ISE (10, no)<br />
100 AUt0 ISE3 Valore concentrazione riferimento ISE 1, appare se 3 è stato<br />
selezionato per i punti di calibrazione ISE (100, no)<br />
AUt0 C0nd 0, 1, 2, 3 Punti calibrazione conducibilità (3, no)<br />
AUt0 n0SA da 0 a 47 Numero di beaker campione (1, no)<br />
<strong>Thermo</strong> <strong>Scientific</strong> <strong>Orion</strong> <strong>Star</strong> e guida per l’utente dei misuratori <strong>Star</strong> <strong>Plus</strong><br />
IT-13
Impostazione misuratore<br />
Impostazioni di menu generali<br />
• Temperatura manuale controlla la compensazione della<br />
temperatura qu<strong>and</strong>o non è collegata alcuna sonda di<br />
temperatura al misuratore.<br />
• Velocità agitatore imposta la velocità dell'agitatore ad un<br />
valore fra 1 (il più lento) e 7 (il più veloce) oppure off (solo per<br />
misuratori da banco 3-<strong>Star</strong>, 4-<strong>Star</strong> e 5-<strong>Star</strong>).<br />
• Protezione password protegge le opzioni del menu di<br />
impostazione e i metodi dalla cancellazione accidentale o<br />
dalla manomissione (solo misuratori 3-<strong>Star</strong>, 4-<strong>Star</strong> e 5-<strong>Star</strong>).<br />
• Spegnimento automatico controlla lo spegnimento<br />
automatico dei misuratori trascorsi 20 minuti dall'ultima<br />
pressione di un pulsante.<br />
1. In modalità misurazione, premere .<br />
2. Premere / per scorrere il menu di impostazione fino a qu<strong>and</strong>o<br />
viene visualizzato nella riga superiore.<br />
3. Premere per accettare la selezione e spostare la freccia alla riga centrale.<br />
4. Premere / per scorrere fra per l'impostazione manuale della<br />
temperatura, per l'impostazione della velocità dell'agitatore, per<br />
l'inserimento della password e per l'impostazione dello spegnimento automatico.<br />
5. Premere per accettare la selezione e spostare la freccia alla riga inferiore.<br />
6. Per scorrere l'elenco delle opzioni sulla riga inferiore, premere / fino a<br />
qu<strong>and</strong>o viene visualizzata l'opzione desiderata. Per inserire un valore numerico per<br />
un'opzione sulla riga inferiore, premere / per regolare ciascuna cifra e<br />
per passare alla cifra successiva.<br />
7. Premere per accettare la selezione e spostare la freccia alla riga superiore.<br />
8. Ripetere i passaggi da 3 a 7 per modificare un'altra impostazione generale oppure<br />
premere per ritornare alla modalità di misurazione.<br />
IT-14<br />
<strong>Thermo</strong> <strong>Scientific</strong> <strong>Orion</strong> <strong>Star</strong> e guida per l’utente dei misuratori <strong>Star</strong> <strong>Plus</strong>
Impostazioni di data e ora<br />
• Le impostazioni di data e ora sono salvate insieme ai punti di<br />
log dei dati e delle calibrazioni e sono incluse nei dati inviati al<br />
computer o alla stampante.<br />
• Il formato della data può essere impostato per visualizzare<br />
mese, giorno, anno oppure giorno, mese, anno a seconda<br />
delle preferenze dell'utente.<br />
1. In modalità misurazione, premere .<br />
2. Premere / per scorrere il menu di impostazione fino a qu<strong>and</strong>o<br />
viene visualizzato nella riga superiore.<br />
Impostazione misuratore<br />
3. Premere per accettare la selezione e spostare la freccia alla riga centrale.<br />
4. Premere / per scorrere fra per l'impostazione dell'ora attuale,<br />
per l'impostazione dei minuti attuali, per l'impostazione del formato<br />
della data, per l'impostazione del mese attuale, per l'impostazione<br />
del giorno attuale e per l'impostazione dell'anno attuale.<br />
5. Premere per accettare la selezione e spostare la freccia alla riga inferiore.<br />
6. Per scorrere l'elenco delle opzioni sulla riga inferiore, premere / fino a<br />
qu<strong>and</strong>o viene visualizzata l'opzione desiderata. Per inserire un valore numerico per<br />
un'opzione sulla riga inferiore, premere / per regolare ciascuna cifra e<br />
per passare alla cifra successiva.<br />
7. Premere per accettare la selezione e spostare la freccia alla riga superiore.<br />
8. Ripetere i passaggi da 3 a 7 per modificare un'altra impostazione di data e ora<br />
oppure premere per ritornare alla modalità di misurazione.<br />
<strong>Thermo</strong> <strong>Scientific</strong> <strong>Orion</strong> <strong>Star</strong> e guida per l’utente dei misuratori <strong>Star</strong> <strong>Plus</strong><br />
IT-15
Impostazione misuratore<br />
Impostazioni di misurazione continua, temporizzata o AUTO-READ <br />
• In modalità AUTO-READ, il misuratore inizia ad effettuare una<br />
misurazione qu<strong>and</strong>o viene premuto . Una volta che la<br />
misurazione è stabile, il display si arresta e il dato viene<br />
registrato e stampato. La modalità AUTO-READ controlla<br />
anche l'agitatore. L'agitatore si avvia qu<strong>and</strong>o viene premuto<br />
e si arresta qu<strong>and</strong>o la misurazione diviene stabile.<br />
• In modalità continua, il misuratore esegue costantemente le misurazioni e<br />
aggiorna continuamente il display. Premere per registrare e stampare una<br />
misurazione in questa modalità.<br />
• In modalità temporizzata, il misuratore esegue costantemente le misurazioni e<br />
aggiorna continuamente il display. Il misuratore registra e stampa la misurazione<br />
eseguita nell'intervallo di tempo selezionato. Le misurazioni di ossigeno disciolto<br />
temporizzate con una sonda RDO vengono effettuale solo nell'intervallo di tempo<br />
selezionato, in modo da conservare la carica della batteria.<br />
1. In modalità misurazione, premere .<br />
2. Premere / per scorrere il menu di impostazione fino a qu<strong>and</strong>o<br />
viene visualizzato nella riga superiore.<br />
3. Premere per accettare la selezione e spostare la freccia alla riga centrale.<br />
4. Premere / per scorrere fra per il tipo di lettura di misurazione<br />
e per l'intervallo di lettura temporizzata.<br />
5. Premere per accettare la selezione e spostare la freccia alla riga inferiore.<br />
6. Per scorrere l'elenco delle opzioni sulla riga inferiore, premere / fino a<br />
qu<strong>and</strong>o viene visualizzata l'opzione desiderata. Per inserire un valore numerico per<br />
un'opzione sulla riga inferiore, premere / per regolare ciascuna cifra e<br />
per passare alla cifra successiva.<br />
7. Premere per accettare la selezione e spostare la freccia alla riga superiore.<br />
8. Ripetere i passaggi da 3 a 7 per modificare un'altra impostazione di misurazione<br />
oppure premere per ritornare alla modalità di misurazione.<br />
IT-16<br />
<strong>Thermo</strong> <strong>Scientific</strong> <strong>Orion</strong> <strong>Star</strong> e guida per l’utente dei misuratori <strong>Star</strong> <strong>Plus</strong>
Impostazione misuratore<br />
Selezione del parametro di misurazione<br />
In modalità di misurazione, l'icona freccia sul lato sinistro dello schermo indica la riga<br />
attiva. Premere per spostare la freccia alla riga di misurazione desiderata e premere<br />
/ per scorrere i parametri di misurazione associati con la riga selezionata.<br />
Le righe di misurazione e le icone per un misuratore multi parametro 5-<strong>Star</strong> sono<br />
mostrate di seguito. I misuratori a parametro singolo e doppio hanno meno righe<br />
ed icone di misurazione, a seconda delle capacità del misuratore.<br />
pH<br />
mV<br />
RmV<br />
ISE<br />
Nessuna icona per la temperatura<br />
Nessuna icona e nessuna misurazione - la riga di misurazione è disattivata<br />
μS/cm o mS/cm per la conducibilità<br />
mg/L per il residuo fisso<br />
ppt per la salinità<br />
MΩ-cm per la resistività<br />
Nessuna icona per la temperatura<br />
Nessuna icona e nessuna misurazione – la riga di misurazione è disattivata<br />
% sat per la saturazione percentuale di ossigeno disciolto<br />
mg/L per la concentrazione di ossigeno disciolto<br />
Nessuna icona per la pressione barometrica<br />
Nessuna icona per la temperatura del campione<br />
Nessuna icona per la temperatura della membrana (solo letture OD<br />
polarografiche)<br />
Nessuna icona e nessuna misurazione – la riga di misurazione è disattivata<br />
Nota: Se una riga di misurazione non è necessaria, premere per spostare la<br />
freccia alla riga di misurazione non voluta e premere / fino a qu<strong>and</strong>o la riga<br />
di misurazione è completamente vuota.<br />
<strong>Thermo</strong> <strong>Scientific</strong> <strong>Orion</strong> <strong>Star</strong> e guida per l’utente dei misuratori <strong>Star</strong> <strong>Plus</strong><br />
IT-17
Impostazione misuratore<br />
Impostazione del metodo<br />
I misuratori <strong>Orion</strong> 3-<strong>Star</strong>, 4-<strong>Star</strong> e 5-<strong>Star</strong> possono salvare fino a 10 metodi qu<strong>and</strong>o viene<br />
abilitata la funzione GLP. Qu<strong>and</strong>o viene selezionato un metodo, il misuratore utilizzerà<br />
l'ultima calibrazione compiuta con quel metodo, in modo che gli elettrodi che condividono<br />
un collegamento comune al misuratore possano essere intercambiati più facilmente.<br />
Qu<strong>and</strong>o si utilizzano metodi multipli deve essere compiuta una calibrazione per<br />
ciascun metodo da utilizzare.<br />
1. Per abilitare la funzione GLP:<br />
a. In modalità misurazione, premere .<br />
b. Premere / fino a qu<strong>and</strong>o viene visualizzato nella riga superiore.<br />
c. Premere per spostare la freccia alla riga centrale e premere /<br />
fino a qu<strong>and</strong>o viene visualizzato .<br />
d. Premere per spostare la freccia alla riga inferiore e premere /<br />
fino a qu<strong>and</strong>o viene visualizzato .<br />
e. Premere per spostare la freccia alla riga superiore.<br />
f. Premere per uscire dal menu impostazione e ritornare alla modalità<br />
di misurazione.<br />
2. Per visualizzare e modificare il numero del metodo attuale:<br />
a. In modalità misurazione, premere . Verrà visualizzato il numero del metodo<br />
attuale.<br />
b. Premere / per selezionare un nuovo numero di metodo.<br />
c. Premere per salvare il numero di metodo e premere per ritornare alla<br />
modalità di misurazione.<br />
IT-18<br />
<strong>Thermo</strong> <strong>Scientific</strong> <strong>Orion</strong> <strong>Star</strong> e guida per l’utente dei misuratori <strong>Star</strong> <strong>Plus</strong>
Capitolo VI Tecnica del pH<br />
Menu impostazione pH<br />
Nota: Fare riferimento alla sezione Menu impostazione per consultare la Tabella del<br />
menu impostazione, che contiene un elenco completo delle opzioni di impostazione<br />
del misuratore e le relative descrizioni. Fare riferimento all'Appendice A per una<br />
descrizione delle funzioni speciali del menu impostazione.<br />
1. In modalità misurazione, premere .<br />
2. Premere / per scorrere il menu di impostazione fino a qu<strong>and</strong>o<br />
viene visualizzato nella riga superiore.<br />
3. Premere per accettare la selezione e spostare la freccia alla riga centrale.<br />
4. Premere / per scorrere fra per la risoluzione di misurazione del pH<br />
e per l'impostazione del riconoscimento automatico del tampone.<br />
5. Premere per accettare la selezione e spostare la freccia alla riga inferiore.<br />
6. Per scorrere l'elenco delle opzioni sulla riga inferiore, premere / fino<br />
a qu<strong>and</strong>o viene visualizzata l'opzione desiderata.<br />
7. Premere per accettare la selezione e spostare la freccia alla riga superiore.<br />
8. Ripetere i passaggi da 3 a 7 per modificare un'altra impostazione del pH oppure<br />
premere per ritornare alla modalità di misurazione.<br />
<strong>Thermo</strong> <strong>Scientific</strong> <strong>Orion</strong> <strong>Star</strong> e guida per l’utente dei misuratori <strong>Star</strong> <strong>Plus</strong><br />
IT-19
Tecnica del pH<br />
Calibrazione pH<br />
1. Preparare l'elettrodo in base alle istruzioni del manuale dell'utente dell'elettrodo<br />
stesso.<br />
2. In modalità impostazione, selezionare il set di tamponi ( o ) che sarà<br />
usato per la funzione di riconoscimento automatico del tampone.<br />
3. In modalità di misurazione, premere fino a qu<strong>and</strong>o la freccia punta alla riga<br />
superiore, premere fino a qu<strong>and</strong>o viene visualizzata l'icona pH e premere<br />
per iniziare la calibrazione.<br />
4. Sciacquare l'elettrodo, e l'eventuale sonda ATC, in acqua distillata, quindi inserirlo<br />
nel tampone.<br />
5. Attendere che l'icona pH smetta di lampeggiare.<br />
a. Riconoscimento automatico tampone – Qu<strong>and</strong>o l'icona pH smette di<br />
lampeggiare il misuratore visualizzerà il valore di pH del tampone corretto in<br />
base alla temperatura.<br />
b. Calibrazione manuale – Qu<strong>and</strong>o l'icona pH smette di lampeggiare il misuratore<br />
visualizzerà il valore di pH reale letto dall'elettrodo. Premere fino a qu<strong>and</strong>o<br />
la prima cifra da modificare lampeggia, premere / per modificare il valore<br />
della cifra lampeggiante e continuare a modificare le cifre fino a qu<strong>and</strong>o il<br />
misuratore visualizza il valore di pH del tampone corretto in base alla temperatura.<br />
Una volta impostato il valore del tampone pH, premere il tasto fino a<br />
qu<strong>and</strong>o il separatore decimale è nella posizione corretta.<br />
6. Premere per passare al punto di calibrazione successivo e ripetere i passaggi<br />
4 e 5 oppure premere per salvare e terminare la calibrazione.<br />
7. Il gradiente reale dell'elettrodo, in percentuale, verrà visualizzato nel campo<br />
principale, mentre verrà visualizzato nel campo inferiore.<br />
a. Per una calibrazione ad un punto, premere e / per modificare<br />
il gradiente, quindi premere per ritornare alla modalità di misurazione.<br />
b. Per una calibrazione a due o più punti, il misuratore passerà automaticamente<br />
alla modalità di misurazione dopo aver visualizzato il gradiente.<br />
IT-20<br />
<strong>Thermo</strong> <strong>Scientific</strong> <strong>Orion</strong> <strong>Star</strong> e guida per l’utente dei misuratori <strong>Star</strong> <strong>Plus</strong>
Misurazione pH<br />
Nota: Attivare la funzione datalog automatico per inviare le misurazioni al datalog<br />
del misuratore con la frequenza specificata per ciascuna modalità di misurazione.<br />
Fare riferimento alla sezione Archiviazione e recupero dati per ulteriori dettagli. Se la<br />
funzione di datalog automatico è disattivata, collegare il misuratore ad una stampante<br />
o ad un computer per registrare le misurazioni.<br />
1. Sciacquare l'elettrodo con acqua distillata o deionizzata. Eliminare l'eventuale<br />
acqua in eccesso e asciugare l'elettrodo con un panno privo di pelucchi.<br />
2. Inserire l'elettrodo nel campione.<br />
Tecnica del pH<br />
a. Se il misuratore è in modalità di misurazione continua, inizierà immediatamente<br />
a prendere le letture e aggiornerà continuamente il display. L'icona pH<br />
lampeggerà fino a qu<strong>and</strong>o la lettura diviene stabile. Una volta che la lettura<br />
è stabile, registrare e stampare la misurazione premendo . Se viene<br />
utilizzato un misuratore da banco e l'agitatore è abilitato, premere per<br />
avviarlo. Premere di nuovo per spegnere l'agitatore prima di rimuovere<br />
l'elettrodo e l'agitatore stesso dal campione.<br />
b. Se il misuratore è in modalità di misurazione AUTO-READ, premere il tasto<br />
per avviare la lettura. L'icona AR lampeggerà fino a qu<strong>and</strong>o la lettura<br />
diviene stabile. Una volta che la lettura è stabile, il misuratore registrerà e<br />
stamperà la misurazione e bloccherà il display. Se viene utilizzato un misuratore<br />
da banco è l'agitatore è abilitato, questo si attiverà qu<strong>and</strong>o viene premuto<br />
e si disattiverà qu<strong>and</strong>o la lettura diviene stabile.<br />
c. Se il misuratore è in modalità di misurazione temporizzata, inizierà immediatamente<br />
a prendere le letture e aggiornerà continuamente il display. Il misuratore<br />
registrerà e stamperà le misurazioni alla frequenza specificata nel menu<br />
impostazione. Se viene utilizzato un misuratore da banco e l'agitatore è<br />
abilitato, premere per avviarlo. Premere di nuovo per spegnere<br />
l'agitatore prima di rimuovere l'elettrodo e l'agitatore stesso dal campione.<br />
3. Rimuovere l'elettrodo dal campione, sciacquarlo in acqua distillata o deionizzata,<br />
asciugarlo, inserirlo nel campione successivo e ripetere il passaggio 2.<br />
4. Una volta misurati tutti i campioni, sciacquare l'elettrodo in acqua distillata o<br />
deionizzata e asciugarlo. Consultare il manuale dell'utente dell'elettrodo per<br />
le tecniche di conservazione appropriate.<br />
<strong>Thermo</strong> <strong>Scientific</strong> <strong>Orion</strong> <strong>Star</strong> e guida per l’utente dei misuratori <strong>Star</strong> <strong>Plus</strong><br />
IT-21
Tecnica del pH<br />
Visualizzazione e calibrazione temperatura pH<br />
Visualizzazione temperatura pH<br />
I misuratori <strong>Star</strong> <strong>Plus</strong> permettono di visualizzare la temperatura su singole righe<br />
di misurazione, oltre che nella parte superiore sinistra dello schermo.<br />
Per visualizzare la temperatura per la riga di misurazione del pH:<br />
1. In modalità di misurazione, premere per selezionare la riga di visualizzazione<br />
superiore. La freccia punterà alla riga selezionata.<br />
2. Premere / per modificare il valore della riga selezionata. La riga superiore<br />
può essere modificata per visualizzare pH (pH), millivolt (mV), millivolt relativi<br />
(RmV), concentrazione (ISE), temperatura (nessuna icona) o una riga vuota.<br />
Calibrazione temperatura pH<br />
La modalità di calibrazione della temperatura del misuratore <strong>Star</strong> <strong>Plus</strong> permette<br />
di regolare manualmente la temperatura di ciascuna riga di misurazione.<br />
Per calibrare la temperatura per la riga di misurazione del pH:<br />
1. In modalità di misurazione, premere per scegliere la riga di misurazione superiore<br />
e premere / fino a qu<strong>and</strong>o viene visualizzata la temperatura per la riga<br />
selezionata.<br />
2. Premere per iniziare la calibrazione.<br />
3. Qu<strong>and</strong>o la lettura si stabilizza, la freccia e la prima cifra inizieranno a lampeggiare.<br />
Inserire la temperatura premendo / per regolare ogni cifra e per<br />
spostarsi alla cifra successiva.<br />
4. Premere per salvare e terminare la calibrazione.<br />
IT-22<br />
<strong>Thermo</strong> <strong>Scientific</strong> <strong>Orion</strong> <strong>Star</strong> e guida per l’utente dei misuratori <strong>Star</strong> <strong>Plus</strong>
Capitolo VII Tecnica mV, mV relativi e ORP<br />
Tutti i misuratori con capacità di misurazione del pH includono una funzione mV/mV<br />
relativi/ORP. Misurare i valori grezzi in millivolt (mV) di un elettrodo in modalità mV.<br />
Calibrare i valori in millivolt relativi (RmV) di un elettrodo redox per le misurazioni<br />
del potenziale di ossido-riduzione (ORP) in modalità mV relativi/ORP.<br />
Nota: Le misurazioni mV sono letture grezze e non possono essere calibrate.<br />
Utilizzare la modalità mV relativi per calibrare le misurazioni mV.<br />
Calibrazione mV relativi e ORP<br />
1. Preparare l'elettrodo in base alle istruzioni del manuale dell'utente dell'elettrodo<br />
stesso.<br />
2. In modalità di misurazione, premere fino a qu<strong>and</strong>o la freccia punta alla riga<br />
superiore, premere fino a qu<strong>and</strong>o viene visualizzata l'icona RmV e premere<br />
per iniziare la calibrazione.<br />
3. Sciacquare l'elettrodo in acqua distillata e inserirlo nel riferimento.<br />
4. Attendere che l'icona RmV smetta di lampeggiare. Se la lettura grezza dei mV<br />
dell'elettrodo è 220 mV ± 60 mV, qu<strong>and</strong>o l'icona RmV smette di lampeggiare il<br />
misuratore calcolerà e visualizzerà automaticamente il valore di E H per l'elettrodo<br />
alla temperatura misurata. Se la lettura grezza dei mV dell'elettrodo è al di fuori<br />
dell'intervallo 220 mV ± 60 mV, qu<strong>and</strong>o l'icona RmV smette di lampeggiare il<br />
misuratore visualizzerà 000.0 RmV. Premere fino a qu<strong>and</strong>o la prima cifra da<br />
modificare lampeggia, premere / per modificare il valore della cifra<br />
lampeggiante e continuare a modificare le cifre fino a qu<strong>and</strong>o il misuratore<br />
visualizza il valore di millivolt del riferimento. Per modificare il valore in numeri<br />
positivi o negativi, premere fino a qu<strong>and</strong>o non lampeggia alcuna cifra ma la<br />
freccia lampeggia, quindi premere per modificare il segno del valore di millivolt.<br />
5. Premere per salvare e terminare la calibrazione. Verrà visualizzato lo scostamento<br />
in millivolt e il misuratore passerà automaticamente alla modalità di misurazione.<br />
<strong>Thermo</strong> <strong>Scientific</strong> <strong>Orion</strong> <strong>Star</strong> e guida per l’utente dei misuratori <strong>Star</strong> <strong>Plus</strong><br />
IT-23
Tecnica mV, mV relativi e ORP<br />
Misurazione mV, mV relativi e ORP<br />
Nota: Attivare la funzione datalog automatico per inviare le misurazioni al datalog<br />
del misuratore con la frequenza specificata per ciascuna modalità di misurazione.<br />
Fare riferimento alla sezione Archiviazione e recupero dati per ulteriori dettagli. Se la<br />
funzione di datalog automatico è disattivata, collegare il misuratore ad una stampante<br />
o ad un computer per registrare le misurazioni.<br />
1. Sciacquare l'elettrodo con acqua distillata o deionizzata. Eliminare l'eventuale<br />
acqua in eccesso e asciugare l'elettrodo con un panno privo di pelucchi.<br />
2. Inserire l'elettrodo nel campione.<br />
a. Se il misuratore è in modalità di misurazione continua, inizierà immediatamente a<br />
prendere le letture e aggiornerà continuamente il display. L'icona mV o RmV<br />
lampeggerà fino a qu<strong>and</strong>o la lettura diviene stabile. Una volta che la lettura<br />
è stabile, registrare e stampare la misurazione premendo . Se viene<br />
utilizzato un misuratore da banco e l'agitatore è abilitato, premere per<br />
avviarlo. Premere di nuovo per spegnere l'agitatore prima di rimuovere<br />
l'elettrodo e l'agitatore stesso dal campione.<br />
b. Se il misuratore è in modalità di misurazione AUTO-READ, premere il tasto<br />
per avviare la lettura. L'icona AR lampeggerà fino a qu<strong>and</strong>o la lettura<br />
diviene stabile. Una volta che la lettura è stabile, il misuratore registrerà<br />
e stamperà la misurazione e bloccherà il display. Se viene utilizzato un<br />
misuratore da banco è l'agitatore è abilitato, questo si attiverà qu<strong>and</strong>o viene<br />
premuto e si disattiverà qu<strong>and</strong>o la lettura diviene stabile.<br />
c. Se il misuratore è in modalità di misurazione temporizzata, inizierà immediatamente<br />
a prendere le letture e aggiornerà continuamente il display. Il misuratore<br />
registrerà e stamperà le misurazioni alla frequenza specificata nel menu<br />
impostazione. Se viene utilizzato un misuratore da banco e l'agitatore è<br />
abilitato, premere per avviarlo. Premere di nuovo per spegnere<br />
l'agitatore prima di rimuovere l'elettrodo e l'agitatore stesso dal campione.<br />
3. Rimuovere l'elettrodo dal campione, sciacquarlo in acqua distillata o deionizzata,<br />
asciugarlo, inserirlo nel campione successivo e ripetere il passaggio 2.<br />
4. Una volta misurati tutti i campioni, sciacquare l'elettrodo in acqua distillata o<br />
deionizzata e asciugarlo. Consultare il manuale dell'utente dell'elettrodo per<br />
le tecniche di conservazione appropriate.<br />
IT-24<br />
<strong>Thermo</strong> <strong>Scientific</strong> <strong>Orion</strong> <strong>Star</strong> e guida per l’utente dei misuratori <strong>Star</strong> <strong>Plus</strong>
Capitolo VIII Tecnica dell'ossigeno disciolto<br />
Menu impostazione ossigeno disciolto<br />
Nota: Fare riferimento alla sezione Menu impostazione per consultare la Tabella del<br />
menu impostazione, che contiene un elenco completo delle opzioni di impostazione<br />
del misuratore e le relative descrizioni. Fare riferimento all'Appendice A per una<br />
descrizione delle funzioni speciali del menu impostazione.<br />
1. In modalità misurazione, premere .<br />
2. Premere / per scorrere il menu di impostazione fino a qu<strong>and</strong>o<br />
viene visualizzato nella riga superiore.<br />
3. Premere per accettare la selezione e spostare la freccia alla riga centrale.<br />
4. Premere / per scorrere fra per la risoluzione di saturazione %,<br />
per la risoluzione di concentrazione in mg/L, per il tipo di barometro<br />
(automatico o manuale), per il valore di compensazione manuale della<br />
pressione barometrica, per il tipo di compensazione della salinità (automatica<br />
o manuale), per il valore di correzione manuale della salinità e per il<br />
tipo di calibrazione dell'ossigeno disciolto.<br />
5. Premere per selezionare l'opzione e spostare la freccia alla riga inferiore.<br />
6. Per scorrere l'elenco delle opzioni sulla riga inferiore, premere / fino a<br />
qu<strong>and</strong>o viene visualizzata l'opzione desiderata. Per inserire un valore numerico per<br />
un'opzione sulla riga inferiore, premere / per regolare ciascuna cifra e<br />
per passare alla cifra successiva.<br />
7. Premere per accettare la selezione e spostare la freccia alla riga superiore.<br />
8. Ripetere i passaggi da 3 a 7 per modificare un'altra impostazione per l'ossigeno<br />
disciolto oppure premere per ritornare alla modalità di misurazione.<br />
<strong>Thermo</strong> <strong>Scientific</strong> <strong>Orion</strong> <strong>Star</strong> e guida per l’utente dei misuratori <strong>Star</strong> <strong>Plus</strong><br />
IT-25
Tecnica dell'ossigeno disciolto<br />
Calibrazione ossigeno disciolto<br />
• Prima della calibrazione, la sonda per l'ossigeno disciolto deve essere preparata e<br />
polarizzata. La sonda viene continuamente polarizzata qu<strong>and</strong>o viene collegata al<br />
misuratore. Qu<strong>and</strong>o la sonda viene collegata per la prima volta oppure se viene<br />
scollegata per più di 60 minuti, collegarla al misuratore, collegare il misuratore<br />
all'alimentazione ed attendere da 30 a 60 minuti che la sonda venga polarizzata.<br />
Se la sonda è stata scollegata per meno di un'ora saranno necessari da 5 a 25<br />
minuti per la polarizzazione.<br />
• I misuratori erogheranno una corrente di polarizzazione alla sonda per l'ossigeno<br />
disciolto anche qu<strong>and</strong>o l'alimentazione è spenta. Per estendere al massimo la vita<br />
della batteria del misuratore, scollegare la sonda se non è necessario utilizzarla per<br />
un periodo prolungato di tempo.<br />
1. Selezionare una delle seguenti modalità di calibrazione dal menu impostazione.<br />
a. – Una calibrazione in aria viene compiuta in aria satura d'acqua utilizz<strong>and</strong>o<br />
un manicotto di calibrazione. Si tratta della calibrazione più semplice ed<br />
accurata. A causa delle differenze intrinseche fra l'aria satura d'acqua e l'acqua<br />
satura d'aria, verrà visualizzata una saturazione del 102,3% qu<strong>and</strong>o la lettura<br />
di calibrazione diviene stabile.<br />
i. L'accuratezza massima possibile viene raggiunta qu<strong>and</strong>o la temperatura<br />
di calibrazione è identica alla temperatura di misurazione.<br />
ii. Inumidire la spugna o il panno assorbente nel manicotto di calibrazione con<br />
acqua distillata e inserire la sonda nel manicotto senza toccare il materiale<br />
saturo d'acqua. Per le misurazioni BOD questa calibrazione può essere<br />
eseguita in una bottiglia BOD.<br />
b. – Una calibrazione in acqua viene compiuta utilizz<strong>and</strong>o acqua satura d'aria al<br />
100%. Soffiare aria in un campione d'acqua ed agitare delicatamente per impedire<br />
l'accumulo di bolle d'aria sulla membrana della sonda per ossigeno disciolto.<br />
c. – Una calibrazione manuale viene compiuta utilizz<strong>and</strong>o un campione<br />
d'acqua con una concentrazione conosciuta di ossigeno disciolto. Questo<br />
metodo può essere utilizzato per calibrare la sonda per ossigeno disciolto<br />
al valore ottenuto con una titolazione Winkler.<br />
IT-26<br />
<strong>Thermo</strong> <strong>Scientific</strong> <strong>Orion</strong> <strong>Star</strong> e guida per l’utente dei misuratori <strong>Star</strong> <strong>Plus</strong>
i. Una calibrazione manuale richiede l'esecuzione di una titolazione Winkler<br />
utilizz<strong>and</strong>o il campione come riferimento di calibrazione. Il risultato del livello<br />
di ossigeno della titolazione viene inserito in una calibrazione manuale come<br />
valore di ossigeno disciolto. Questo associa l'input del misuratore alla titolazione<br />
Winkler. Questo metodo è intrinsecamente meno accurato a causa della<br />
possibilità di errori di titolazione.<br />
d. – Una calibrazione zero viene compiuta in una soluzione priva di ossigeno.<br />
In genere non è richiesta una calibrazione zero a meno che vengano eseguite<br />
misurazioni al di sotto del 10% di saturazione o di 1 mg/L. Azzerare la sonda<br />
qu<strong>and</strong>o si utilizza una nuova membrana o una nuova soluzione di riempimento<br />
oppure qu<strong>and</strong>o si misurano livelli di ossigeno disciolto inferiori a 1 mg/L. Deve<br />
essere compiuta una calibrazione in aria prima di eseguire una calibrazione zero.<br />
2. Lasciare che la sonda e il riferimento di calibrazione (aria satura d'acqua, acqua satura<br />
d'aria, riferimento Winkler o soluzione priva di ossigeno) raggiungano l'equilibrio.<br />
3. In modalità di misurazione, premere fino a qu<strong>and</strong>o la freccia punta alla riga<br />
inferiore, premere fino a qu<strong>and</strong>o viene visualizzata l'icona % sat oppure mg/L<br />
e premere per iniziare la calibrazione.<br />
4. Attendere che la lettura dell'ossigeno disciolto si stabilizzi.<br />
Tecnica dell'ossigeno disciolto<br />
a. Se viene compiuta una calibrazione in aria, il misuratore visualizzerà 102.3%<br />
e ritornerà automaticamente alla modalità di misurazione.<br />
b. Se viene compiuta una calibrazione in acqua, il misuratore visualizzerà 100.0%<br />
e ritornerà automaticamente alla modalità di misurazione.<br />
c. Se viene compiuta una calibrazione manuale, attendere che l'icona mg/L smetta<br />
di lampeggiare e inserire il valore di ossigeno disciolto premendo fino a<br />
qu<strong>and</strong>o lampeggia la prima cifra da modificare, premere / per modificare<br />
il valore della cifra lampeggiante e continuare a modificare le cifre fino a qu<strong>and</strong>o<br />
il misuratore visualizza il valore di ossigeno disciolto corretto. Una volta impostato<br />
il valore di ossigeno disciolto, premere fino a qu<strong>and</strong>o il separatore decimale<br />
è nella posizione corretta.<br />
d. Se viene compiuta una calibrazione zero, il misuratore visualizzerà 0.0%<br />
e ritornerà automaticamente alla modalità di misurazione.<br />
<strong>Thermo</strong> <strong>Scientific</strong> <strong>Orion</strong> <strong>Star</strong> e guida per l’utente dei misuratori <strong>Star</strong> <strong>Plus</strong><br />
IT-27
Tecnica dell'ossigeno disciolto<br />
Misurazione ossigeno disciolto<br />
Nota: Attivare la funzione datalog automatico per inviare le misurazioni al datalog<br />
del misuratore con la frequenza specificata per ciascuna modalità di misurazione.<br />
Fare riferimento alla sezione Archiviazione e recupero dati per ulteriori dettagli. Se la<br />
funzione di datalog automatico è disattivata, collegare il misuratore ad una stampante<br />
o ad un computer per registrare le misurazioni.<br />
1. Sciacquare la sonda per ossigeno disciolto con acqua distillata o deionizzata. Eliminare<br />
l'eventuale acqua in eccesso e asciugare la sonda con un panno privo di pelucchi.<br />
2. Inserire la sonda per ossigeno disciolto nel campione.<br />
a. Se il misuratore è in modalità di misurazione continua, inizierà immediatamente<br />
a prendere le letture e aggiornerà continuamente il display. L'icona mg/L o %<br />
sat lampeggerà fino a qu<strong>and</strong>o la lettura diviene stabile. Una volta che la lettura<br />
è stabile, registrare e stampare la misurazione premendo . Se viene<br />
utilizzato un misuratore da banco e l'agitatore è abilitato, premere per<br />
avviarlo. Premere di nuovo per spegnere l'agitatore prima di rimuovere<br />
la sonda e l'agitatore stesso dal campione.<br />
b. Se il misuratore è in modalità di misurazione AUTO-READ, premere per<br />
avviare la lettura. L'icona AR lampeggerà fino a qu<strong>and</strong>o la lettura diviene<br />
stabile. Una volta che la lettura è stabile, il misuratore registrerà e stamperà la<br />
misurazione e bloccherà il display. Se viene utilizzato un misuratore da banco<br />
è l'agitatore è abilitato, questo si attiverà qu<strong>and</strong>o viene premuto e si disattiverà<br />
qu<strong>and</strong>o la lettura diviene stabile. Se viene utilizzata la sonda BOD AUTO-STIR,<br />
premere il pulsante sulla sonda per avviare la misurazione AUTO-READ.<br />
Nota: I misuratori per ossigeno disciolto da banco <strong>Star</strong> <strong>Plus</strong> consentono<br />
il controllo delle funzioni di misurazione e di agitazione utilizz<strong>and</strong>o la sonda<br />
AUTO-STIR qu<strong>and</strong>o il misuratore è in modalità di misurazione AUTO-READ.<br />
Premere il pulsante sulla sonda AUTO-STIR per avviare e arrestare le funzioni<br />
di misurazione e agitazione.<br />
c. Se il misuratore è in modalità di misurazione temporizzata, inizierà immediatamente<br />
a prendere le letture e aggiornerà continuamente il display. Il misuratore<br />
registrerà e stamperà le misurazioni alla frequenza specificata nel menu<br />
impostazione. Se viene utilizzato un misuratore da banco e l'agitatore è<br />
abilitato, premere per avviarlo. Premere di nuovo per spegnere<br />
l'agitatore prima di rimuovere la sonda e l'agitatore stesso dal campione.<br />
IT-28<br />
<strong>Thermo</strong> <strong>Scientific</strong> <strong>Orion</strong> <strong>Star</strong> e guida per l’utente dei misuratori <strong>Star</strong> <strong>Plus</strong>
Tecnica dell'ossigeno disciolto<br />
3. Rimuovere la sonda per ossigeno disciolto dal campione, sciacquarla in acqua<br />
distillata o deionizzata, asciugarla, inserirla nel campione successivo e ripetere<br />
il passaggio 2.<br />
4. Una volta misurati tutti i campioni, sciacquare la sonda per ossigeno disciolto in<br />
acqua distillata o deionizzata e asciugarla. Consultare il manuale dell'utente della<br />
sonda per ossigeno disciolto per le tecniche di conservazione appropriate.<br />
Visualizzazione e calibrazione temperatura ossigeno disciolto<br />
Visualizzazione temperatura ossigeno disciolto<br />
I misuratori <strong>Star</strong> <strong>Plus</strong> permettono di visualizzare la temperatura su singole righe<br />
di misurazione, oltre che nella parte superiore sinistra dello schermo.<br />
Per visualizzare la temperatura per la riga di misurazione dell'ossigeno disciolto:<br />
1. In modalità di misurazione, premere per selezionare la riga di visualizzazione<br />
inferiore. La freccia punterà alla riga selezionata.<br />
2. Premere / per modificare il valore della riga selezionata. La riga inferiore<br />
può essere cambiata in modo da visualizzare ossigeno disciolto (% saturazione),<br />
ossigeno disciolto (mg/L), pressione barometrica (nessuna icona), temperatura<br />
campione (nessuna icona), temperatura soluzione elettrolita/membrana (nessuna<br />
icona, dopo il numero) o una riga vuota.<br />
<strong>Thermo</strong> <strong>Scientific</strong> <strong>Orion</strong> <strong>Star</strong> e guida per l’utente dei misuratori <strong>Star</strong> <strong>Plus</strong><br />
IT-29
Tecnica dell'ossigeno disciolto<br />
Calibrazione temperatura ossigeno disciolto<br />
La modalità di calibrazione della temperatura del misuratore <strong>Star</strong> <strong>Plus</strong> permette<br />
di regolare manualmente la temperatura di ciascuna riga di misurazione. La riga<br />
di misurazione dell'ossigeno disciolto visualizza la temperatura del campione e la<br />
temperatura della soluzione elettrolita/membrana.<br />
Per calibrare la temperatura del campione per la riga di misurazione dell'ossigeno<br />
disciolto:<br />
1. In modalità di misurazione, premere per scegliere la riga di misurazione<br />
inferiore e premere / fino a qu<strong>and</strong>o viene visualizzata la temperatura<br />
del campione (vale a dire ).<br />
2. Premere per iniziare la calibrazione.<br />
3. Qu<strong>and</strong>o la lettura si stabilizza, la freccia e la prima cifra inizieranno a lampeggiare.<br />
Inserire la temperatura premendo / per regolare ogni cifra e per<br />
spostarsi alla cifra successiva.<br />
4. Premere per salvare e terminare la calibrazione.<br />
Per calibrare la temperatura della soluzione elettrolita/membrana per la riga di<br />
misurazione dell'ossigeno disciolto:<br />
1. In modalità di misurazione, premere per scegliere la riga di misurazione<br />
inferiore e premere / fino a qu<strong>and</strong>o viene visualizzata la temperatura<br />
della membrana (vale a dire ).<br />
2. Premere per iniziare la calibrazione.<br />
3. Qu<strong>and</strong>o la lettura si stabilizza, la freccia e la prima cifra inizieranno a lampeggiare.<br />
Inserire la temperatura premendo / per regolare ogni cifra e per<br />
spostarsi alla cifra successiva.<br />
4. Premere per salvare e terminare la calibrazione.<br />
IT-30<br />
<strong>Thermo</strong> <strong>Scientific</strong> <strong>Orion</strong> <strong>Star</strong> e guida per l’utente dei misuratori <strong>Star</strong> <strong>Plus</strong>
Capitolo IX Tecnica dell'ossigeno disciolto<br />
ottico RDO ®<br />
Nota: I misuratori ottici di ossigeno disciolto RDO hanno numeri di serie preceduti<br />
da una R (ad esempio R12345). Solo i misuratori RDO sono compatibili con le sonde<br />
ottiche RDO.<br />
Panoramica ottica<br />
La sonda ottica RDO è dotata di un orologio interno che conta i 365 giorni di durata<br />
di una nuova ottica. Il conteggio ha inizio qu<strong>and</strong>o l'ottica viene installata sulla sonda<br />
RDO, la sonda viene collegata al misuratore e viene effettuata la prima misurazione.<br />
Il conteggio dei 365 giorni non può essere azzerato o modificato una volta effettuata<br />
la prima misurazione. Ogni ottica è dotata di un numero di serie univoco riconosciuto<br />
dalla sonda RDO, pertanto la reinstallazione dell'ottica non azzera il conto alla rovescia.<br />
Nota: L'alimentazione del misuratore deve essere spenta qu<strong>and</strong>o si installa una nuova<br />
ottica sulla sonda RDO. Una volta installata l'ottica, accendere il misuratore e le<br />
informazioni della nuova ottica verranno inviate al misuratore stesso.<br />
Per stampare le informazioni dell'ottica:<br />
1. Collegare il misuratore ad una stampante o computer e verificare il baud rate<br />
e le impostazioni di trasmissione nel menu impostazione.<br />
2. In modalità misurazione, premere .<br />
3. Premere / per scorrere il menu di impostazione fino a qu<strong>and</strong>o viene<br />
visualizzato nella riga superiore e nella riga centrale.<br />
4. Premere due volte per spostare la freccia alla riga inferiore.<br />
5. Premere / fino a qu<strong>and</strong>o viene visualizzato nella riga inferiore.<br />
6. Per stampare le informazioni dell'ottica premere . Premere il tasto per<br />
ritornare alla modalità di misurazione.<br />
<strong>Thermo</strong> <strong>Scientific</strong> <strong>Orion</strong> <strong>Star</strong> e guida per l’utente dei misuratori <strong>Star</strong> <strong>Plus</strong><br />
IT-31
Tecnica di misurazione ottica dell'ossigeno disciolto RDO ®<br />
Menu impostazione ossigeno disciolto ottico RDO<br />
Nota: Fare riferimento alla sezione Menu impostazione per consultare la Tabella del<br />
menu impostazione, che contiene un elenco completo delle opzioni di impostazione<br />
del misuratore e le relative descrizioni.<br />
1. In modalità misurazione, premere .<br />
2. Premere / per scorrere il menu di impostazione fino a qu<strong>and</strong>o viene<br />
visualizzato nella riga superiore.<br />
3. Premere per accettare la selezione e spostare la freccia alla riga centrale.<br />
4. Premere / per scorrere fra per la risoluzione di saturazione %,<br />
per la risoluzione di concentrazione in mg/L, per il tipo di barometro<br />
(automatico o manuale), per il valore di compensazione manuale della<br />
pressione barometrica, per il tipo di compensazione della salinità (automatica<br />
o manuale), per il valore di correzione manuale della salinità, per il<br />
tipo di calibrazione dell'ossigeno disciolto e per il conto alla rovescia per la<br />
sostituzione dell'ottica in giorni.<br />
5. Premere per selezionare l'opzione e spostare la freccia alla riga inferiore.<br />
6. Per scorrere l'elenco delle opzioni sulla riga inferiore, premere / fino a<br />
qu<strong>and</strong>o viene visualizzata l'opzione desiderata. Per inserire un valore numerico<br />
per un'opzione sulla riga inferiore, premere / per regolare ciascuna cifra<br />
e per passare alla cifra successiva.<br />
7. Premere per accettare la selezione e spostare la freccia alla riga superiore.<br />
8. Ripetere i passaggi da 3 a 7 per modificare un'altra impostazione per l'ossigeno<br />
disciolto oppure premere per ritornare alla modalità di misurazione.<br />
IT-32<br />
<strong>Thermo</strong> <strong>Scientific</strong> <strong>Orion</strong> <strong>Star</strong> e guida per l’utente dei misuratori <strong>Star</strong> <strong>Plus</strong>
Menu impostazione per sonda ottica RDO<br />
I misuratori ottici di ossigeno disciolto RDO sono dotati di una funzione speciale del<br />
menu impostazione che permette di stampare informazioni sulla sonda ottica RDO.<br />
Riga Riga Riga Descrizione menu impostazione<br />
superiore centrale inferiore<br />
Pr0b d0 tESt L'opzione tESt avvia un test di 30 secondi del collegamento di comunicazione<br />
fra la sonda RDO e il misuratore. La visualizzazione della temperatura mostrerà<br />
un conto alla rovescia di trenta secondi per l'avanzamento del test. Il misuratore<br />
invierà un rapporto alla stampante o al computer qu<strong>and</strong>o il test è terminato.<br />
Pr0b d0 CAL L'opzione CAL stampa il numero di serie del misuratore, la data, l'ora e il<br />
gradiente per le ultime cinque calibrazioni dell'ossigeno disciolto compiute<br />
con la sonda RDO attualmente collegata al misuratore.<br />
Pr0b d0 dFLt L'opzione dFLt stampa le informazioni di calibrazione di fabbrica per la<br />
sonda RDO attualmente collegata al misuratore.<br />
Pr0b d0 SLP L'opzione SLP stampa il valore di drift al minuto del gradiente per le ultime<br />
cinque calibrazioni dell'ossigeno disciolto compiute con la sonda RDO<br />
attualmente collegata al misuratore.<br />
Pr0b d0 mEtH L'opzione mEtH stampa le informazioni di metodo specifiche per RDO relative<br />
all'ultimo metodo utilizzato per la sonda RDO attualmente collegata al<br />
misuratore.<br />
Pr0b d0 InF0 L'opzione InF0 stampa le informazioni della sonda RDO, incluso il numero<br />
di serie e di revisione, la data di produzione della sonda e dell'ottica, la<br />
data di inizio dell'ottica, la durata dell'ottica, e l'orologio in tempo reale<br />
interno della sonda attualmente collegata al misuratore.<br />
1. Collegare il misuratore ad una stampante o computer e verificare il baud rate<br />
e le impostazioni di trasmissione nel menu impostazione.<br />
2. In modalità misurazione, premere .<br />
3. Premere / per scorrere il menu di impostazione fino a qu<strong>and</strong>o<br />
viene visualizzato nella riga superiore e nella riga centrale.<br />
4. Premere due volte per spostare la freccia alla riga inferiore.<br />
5. Premere / per scorrere fra per il test del collegamento di<br />
comunicazione, per le informazioni di calibrazione della sonda RDO,<br />
per le informazioni di calibrazione di fabbrica della sonda RDO, per le informazioni<br />
sul gradiente della sonda RDO, per le informazioni sul metodo RDO e<br />
per le informazioni generali sulla sonda RDO.<br />
6. Per stampare l'opzione selezionata premere .<br />
Tecnica di misurazione ottica dell'ossigeno disciolto RDO ®<br />
<strong>Thermo</strong> <strong>Scientific</strong> <strong>Orion</strong> <strong>Star</strong> e guida per l’utente dei misuratori <strong>Star</strong> <strong>Plus</strong><br />
IT-33
Tecnica di misurazione ottica dell'ossigeno disciolto RDO ®<br />
7. Premere / per selezionare un'altra opzione dalla riga inferiore e premere<br />
per stampare l'opzione selezionata oppure premere per ritornare alla<br />
modalità di misurazione.<br />
Esempio di stampa delle informazioni generali della sonda RDO<br />
smartprobe info<br />
type 1<br />
run_status 255<br />
format_version 1<br />
probe_SN 6<br />
app_version 9<br />
HW_version 1<br />
cap_SN 129614<br />
rtc 1210257372 (05-08-2008 14:36:12)<br />
mfg_time 1208371349 (04-16-2008 18:42:29)<br />
start_time 1210178953 (05-07-2008 16:49:13)<br />
expiration 1241736553 (05-07-2009 22:49:13)<br />
probe_mfg_time 1208440800 (04-17-2008 14:00:00)<br />
write_count 14<br />
pass_count 12<br />
expire<br />
0x01<br />
days_left 364.3<br />
probe_reading 149.529243<br />
temp_reading 24.942651<br />
state 21<br />
general_event 0x00<br />
internal_event 0x00<br />
internal_state 3<br />
internal_retry 0x00<br />
IT-34<br />
<strong>Thermo</strong> <strong>Scientific</strong> <strong>Orion</strong> <strong>Star</strong> e guida per l’utente dei misuratori <strong>Star</strong> <strong>Plus</strong>
Calibrazione ottica ossigeno disciolto RDO<br />
Tecnica di misurazione ottica dell'ossigeno disciolto RDO ®<br />
1. Selezionare una delle seguenti modalità di calibrazione dal menu impostazione.<br />
a. – Una calibrazione in aria viene compiuta in aria satura d'acqua utilizz<strong>and</strong>o<br />
un manicotto di calibrazione. Si tratta del metodo più semplice ed accurato.<br />
i. L'accuratezza massima possibile viene raggiunta qu<strong>and</strong>o la temperatura<br />
di calibrazione è identica alla temperatura di misurazione.<br />
ii. Inumidire la spugna nel manicotto di calibrazione con acqua distillata. Inserire<br />
la sonda RDO nel manicotto senza toccare la spugna satura d'acqua.<br />
b. – Una calibrazione in acqua viene compiuta utilizz<strong>and</strong>o acqua satura<br />
d'aria al 100%. Soffiare aria in un campione d'acqua ed agitare delicatamente<br />
per impedire l'accumulo di bolle d'aria sull'ottica.<br />
c. – Una calibrazione manuale viene compiuta utilizz<strong>and</strong>o un campione<br />
d'acqua con una concentrazione conosciuta di ossigeno disciolto. Questo<br />
metodo può essere utilizzato per calibrare la sonda RDO al valore ottenuto<br />
con una titolazione Winkler.<br />
i. Una calibrazione manuale richiede l'esecuzione di una titolazione Winkler<br />
utilizz<strong>and</strong>o il campione come riferimento di calibrazione. Il risultato del livello<br />
di ossigeno della titolazione viene inserito in una calibrazione manuale come<br />
valore di ossigeno disciolto. Questo associa l'input del misuratore alla titolazione<br />
Winkler. Questo metodo è intrinsecamente meno accurato a causa della<br />
possibilità di errori di titolazione.<br />
d. – Una calibrazione zero viene compiuta in una soluzione priva di<br />
ossigeno. In genere non è richiesta una calibrazione zero a meno che non<br />
vengano prese misurazioni inferiori al 10% di saturazione o a 1 mg/L.<br />
2. Lasciare che la sonda RDO e il riferimento di calibrazione (aria satura d'acqua,<br />
acqua satura d'aria, riferimento Winkler o soluzione priva di ossigeno) raggiungano<br />
l'equilibrio.<br />
<strong>Thermo</strong> <strong>Scientific</strong> <strong>Orion</strong> <strong>Star</strong> e guida per l’utente dei misuratori <strong>Star</strong> <strong>Plus</strong><br />
IT-35
Tecnica di misurazione ottica dell'ossigeno disciolto RDO ®<br />
3. In modalità di misurazione, premere fino a qu<strong>and</strong>o la freccia punta alla riga<br />
inferiore, premere fino a qu<strong>and</strong>o viene visualizzata l'icona % sat oppure mg/L<br />
e premere per iniziare la calibrazione.<br />
4. Attendere che la lettura dell'ossigeno disciolto si stabilizzi.<br />
a. Se viene compiuta una calibrazione in aria, il misuratore visualizzerà 100.0%<br />
e ritornerà automaticamente alla modalità di misurazione.<br />
b. Se viene compiuta una calibrazione in acqua, il misuratore visualizzerà 100.0%<br />
e ritornerà automaticamente alla modalità di misurazione.<br />
c. Se viene compiuta una calibrazione manuale, attendere che l'icona mg/L<br />
smetta di lampeggiare e inserire il valore di ossigeno disciolto premendo<br />
fino a qu<strong>and</strong>o lampeggia la prima cifra da modificare, premere / per<br />
modificare il valore della cifra lampeggiante e continuare a modificare le cifre<br />
fino a qu<strong>and</strong>o il misuratore visualizza il valore di ossigeno disciolto corretto.<br />
Una volta impostato il valore di ossigeno disciolto, premere fino a qu<strong>and</strong>o<br />
il separatore decimale è nella posizione corretta.<br />
d. Se viene compiuta una calibrazione zero, il misuratore visualizzerà 0.0% e ritornerà<br />
automaticamente alla modalità di misurazione.<br />
IT-36<br />
<strong>Thermo</strong> <strong>Scientific</strong> <strong>Orion</strong> <strong>Star</strong> e guida per l’utente dei misuratori <strong>Star</strong> <strong>Plus</strong>
Misurazione ottica ossigeno disciolto RDO<br />
Nota: Attivare la funzione datalog automatico per inviare le misurazioni al datalog<br />
del misuratore con la frequenza specificata per ciascuna modalità di misurazione.<br />
Fare riferimento alla sezione Archiviazione e recupero dati per ulteriori dettagli. Se la<br />
funzione di datalog automatico è disattivata, collegare il misuratore ad una stampante<br />
o ad un computer per registrare le misurazioni.<br />
1. Sciacquare la sonda RDO con acqua distillata o deionizzata. Eliminare l'eventuale<br />
acqua in eccesso e asciugare la sonda con un panno privo di pelucchi.<br />
2. Inserire la sonda RDO nel campione.<br />
Tecnica di misurazione ottica dell'ossigeno disciolto RDO ®<br />
a. Se il misuratore è in modalità di misurazione continua, inizierà immediatamente a<br />
prendere le letture e aggiornerà continuamente il display. L'icona mg/L o %<br />
sat lampeggerà fino a qu<strong>and</strong>o la lettura diviene stabile. Una volta che la lettura<br />
è stabile, registrare e stampare la misurazione premendo . Questa<br />
modalità utilizza una quantità notevole di carica della batteria.<br />
b. Se il misuratore è in modalità di misurazione AUTO-READ, premere il tasto<br />
per avviare la lettura. L'icona AR lampeggerà fino a qu<strong>and</strong>o la lettura diviene<br />
stabile. Una volta che la lettura è stabile, il misuratore registrerà e stamperà la<br />
misurazione e bloccherà il display. Questa modalità utilizza quantità variabili di<br />
carica della batteria, a seconda di quanto spesso viene premuto .<br />
c. Se il misuratore è in modalità di misurazione temporizzata, eseguirà una lettura<br />
dell'ossigeno disciolto con la frequenza specificata nel menu impostazione. Se<br />
vengono misurati parametri diversi dall'ossigeno disciolto, il misuratore eseguirà<br />
le altre letture ed aggiornerà il display continuamente. Il misuratore registra e<br />
stampa la misurazione eseguita nell'intervallo di tempo selezionato. Questa<br />
modalità può essere utilizzata per prolungare la vita della batteria, poiché viene<br />
ridotto il consumo energetico della sonda RDO a seconda dell'intervallo di<br />
tempo impostato.<br />
3. Rimuovere la sonda RDO dal campione, sciacquarla in acqua distillata o deionizzata,<br />
asciugarla, inserirla nel campione successivo e ripetere il passaggio 2.<br />
4. Una volta misurati tutti i campioni, sciacquare la sonda RDO in acqua distillata o<br />
deionizzata e asciugarla. Consultare il manuale dell'utente della sonda RDO per<br />
le tecniche di conservazione appropriate.<br />
<strong>Thermo</strong> <strong>Scientific</strong> <strong>Orion</strong> <strong>Star</strong> e guida per l’utente dei misuratori <strong>Star</strong> <strong>Plus</strong><br />
IT-37
Tecnica di misurazione ottica dell'ossigeno disciolto RDO ®<br />
Visualizzazione e calibrazione temperatura ossigeno disciolto<br />
ottico RDO<br />
Visualizzazione e calibrazione temperatura ossigeno disciolto ottico RDO<br />
I misuratori <strong>Star</strong> <strong>Plus</strong> permettono di visualizzare la temperatura su singole righe di<br />
misurazione, oltre che nella parte superiore sinistra dello schermo.<br />
Per visualizzare la temperatura per la riga di misurazione dell'ossigeno disciolto RDO:<br />
1. In modalità di misurazione, premere per selezionare la riga di visualizzazione<br />
inferiore. La freccia punterà alla riga selezionata.<br />
2. Premere / per modificare il valore della riga selezionata. La riga inferiore<br />
può essere cambiata in modo da visualizzare ossigeno disciolto (% saturazione),<br />
ossigeno disciolto (mg/L), pressione barometrica (nessuna icona), temperatura<br />
o una riga vuota.<br />
Calibrazione temperatura ossigeno disciolto ottico RDO<br />
La modalità di calibrazione della temperatura del misuratore <strong>Star</strong> <strong>Plus</strong> permette di<br />
regolare manualmente la temperatura di ciascuna riga di misurazione.<br />
Per calibrare la temperatura per la riga di misurazione dell'ossigeno disciolto RDO:<br />
1. In modalità di misurazione, premere per scegliere la riga di misurazione<br />
inferiore e premere / fino a qu<strong>and</strong>o viene visualizzata la temperatura.<br />
2. Premere per iniziare la calibrazione.<br />
3. Qu<strong>and</strong>o la lettura si stabilizza, la freccia e la prima cifra inizieranno a lampeggiare.<br />
Inserire la temperatura premendo / per regolare ogni cifra e per<br />
spostarsi alla cifra successiva.<br />
4. Premere per salvare e terminare la calibrazione.<br />
IT-38<br />
<strong>Thermo</strong> <strong>Scientific</strong> <strong>Orion</strong> <strong>Star</strong> e guida per l’utente dei misuratori <strong>Star</strong> <strong>Plus</strong>
Capitolo X Tecnica della conducibilità<br />
Menu impostazione conducibilità<br />
Nota: Fare riferimento alla sezione Menu impostazione per consultare la Tabella del<br />
menu impostazione, che contiene un elenco completo delle opzioni di impostazione<br />
del misuratore e le relative descrizioni. Fare riferimento all'Appendice A per una<br />
descrizione delle funzioni speciali del menu impostazione.<br />
1. In modalità misurazione, premere .<br />
2. Premere / per scorrere il menu di impostazione fino a qu<strong>and</strong>o<br />
viene visualizzato nella riga superiore.<br />
3. Premere per accettare la selezione e spostare la freccia alla riga centrale.<br />
4. Premere / per scorrere fra per il tipo di compensazione della<br />
temperatura, per il valore di coefficiente di temperatura utilizzato,<br />
per la compensazione di temperatura, per il valore del fattore residuo fisso<br />
utilizzato per la misurazione del residuo fisso, per il valore nominale della<br />
costante di cella della sonda di conducibilità, per la temperatura di riferimento<br />
utilizzata per la compensazione della temperatura e per il tipo di cella di<br />
conducibilità.<br />
5. Premere per accettare la selezione e spostare la freccia alla riga inferiore.<br />
6. Per scorrere l'elenco delle opzioni sulla riga inferiore, premere / fino a<br />
qu<strong>and</strong>o viene visualizzata l'opzione desiderata. Per inserire un valore numerico per<br />
un'opzione sulla riga inferiore, premere / per regolare ciascuna cifra e<br />
per passare alla cifra successiva.<br />
7. Premere per accettare la selezione e spostare la freccia alla riga superiore.<br />
8. Ripetere i passaggi da 3 a 7 per modificare un'altra impostazione della<br />
conducibilità oppure premere per ritornare alla modalità di misurazione.<br />
<strong>Thermo</strong> <strong>Scientific</strong> <strong>Orion</strong> <strong>Star</strong> e guida per l’utente dei misuratori <strong>Star</strong> <strong>Plus</strong><br />
IT-39
Tecnica della conducibilità<br />
Calibrazione conducibilità<br />
Nota: Per una calibrazione automatica, la costante di cella nominale della sonda di<br />
conducibilità deve essere inserita nel menu impostazione prima di eseguire la calibrazione.<br />
1. In modalità di misurazione, premere fino a qu<strong>and</strong>o la freccia punta alla riga<br />
centrale, premere fino a qu<strong>and</strong>o viene visualizzata l'icona µS/cm oppure mS/cm<br />
e premere per iniziare la calibrazione.<br />
2. Sciacquare la sonda con acqua deionizzata e inserirla nel riferimento di conducibilità.<br />
3. Per compiere una calibrazione manuale – La schermata di calibrazione manuale<br />
visualizza la costante di cella sulla riga superiore, il valore di conducibilità del<br />
riferimento di calibrazione sulla riga centrale e sulla riga inferiore. Per<br />
modificare la costante di cella, premere fino a qu<strong>and</strong>o lampeggia la prima cifra<br />
da modificare, quindi premere / per modificare il valore della cifra lampeggiante<br />
e continuare a modificare le cifre fino a qu<strong>and</strong>o il valore di conducibilità visualizzato<br />
corrisponde al valore del riferimento alla temperatura misurata. Una volta impostato<br />
il valore, premere fino a qu<strong>and</strong>o il separatore decimale è nella posizione corretta.<br />
Premere per salvare e terminare la calibrazione.<br />
Nota: Nello schermo di calibrazione manuale è necessario iniziare a modificare<br />
la costante di cella entro cinque secondi, altrimenti il misuratore passerà alla<br />
calibrazione automatica/diretta. Se dovesse avvenire ciò, tenere premuto<br />
per annullare e ripetere la calibrazione.<br />
4. Per compiere una calibrazione diretta o automatica – Attendere che il misuratore<br />
passi dalla schermata di calibrazione manuale alla schermata di calibrazione diretta/<br />
automatica. La schermata di calibrazione diretta/automatica visualizzerà il valore di<br />
conducibilità del riferimento di calibrazione alla riga centrale e alla riga inferiore.<br />
a. Calibrazione automatica – Qu<strong>and</strong>o l'icona µS/cm o mS/cm smette di lampeggiare il<br />
misuratore visualizzerà la conducibilità del riferimento corretta in base alla temperatura.<br />
b. Calibrazione diretta – Qu<strong>and</strong>o l'icona µS/cm o mS/cm smette di lampeggiare,<br />
inserire il valore di conducibilità del riferimento alla temperatura misurata. Premere<br />
fino a qu<strong>and</strong>o la prima cifra da modificare lampeggia, premere / per<br />
modificare il valore della cifra lampeggiante e continuare a modificare le cifre fino<br />
a qu<strong>and</strong>o viene visualizzato il valore corretto. Una volta impostato il valore,<br />
premere fino a qu<strong>and</strong>o il separatore decimale è nella posizione corretta.<br />
IT-40<br />
<strong>Thermo</strong> <strong>Scientific</strong> <strong>Orion</strong> <strong>Star</strong> e guida per l’utente dei misuratori <strong>Star</strong> <strong>Plus</strong>
Tecnica della conducibilità<br />
5. Premere per passare al punto di calibrazione successivo, sciacquare la sonda<br />
di conducibilità in acqua distillata o deionizzata, inserirla nel riferimento di conducibilità<br />
successivo e ripetere i passaggi 4a / 4b oppure premere per salvare e terminare<br />
la calibrazione.<br />
6. Verrà visualizzata la costante di cella nel campo principale e il misuratore passerà<br />
automaticamente alla modalità di misurazione.<br />
Misurazione conducibilità<br />
Nota: Attivare la funzione datalog automatico per inviare le misurazioni al datalog<br />
del misuratore con la frequenza specificata per ciascuna modalità di misurazione.<br />
Fare riferimento alla sezione Archiviazione e recupero dati per ulteriori dettagli. Se la<br />
funzione di datalog automatico è disattivata, collegare il misuratore ad una stampante<br />
o ad un computer per registrare le misurazioni.<br />
1. Sciacquare la sonda di conducibilità con acqua distillata o deionizzata. Eliminare<br />
l'eventuale acqua in eccesso e asciugare la sonda con un panno privo di pelucchi.<br />
2. Inserire la sonda di conducibilità nel campione.<br />
a. Se il misuratore è in modalità di misurazione continua, inizierà immediatamente<br />
a prendere le letture e aggiornerà continuamente il display. L'icona μS/cm o mS/cm<br />
lampeggerà fino a qu<strong>and</strong>o la lettura diviene stabile. Una volta che la lettura è stabile,<br />
registrare e stampare la misurazione premendo . Se viene utilizzato un<br />
misuratore da banco e l'agitatore è abilitato, premere per avviarlo.<br />
Premere di nuovo per spegnere l'agitatore prima di rimuovere la sonda e<br />
l'agitatore stesso dal campione.<br />
b. Se il misuratore è in modalità di misurazione AUTO-READ, premere il tasto<br />
per avviare la lettura. L'icona AR lampeggerà fino a qu<strong>and</strong>o la lettura diviene<br />
stabile. Una volta che la lettura è stabile, il misuratore registrerà e stamperà la<br />
misurazione e bloccherà il display. Se viene utilizzato un misuratore da banco è<br />
l'agitatore è abilitato, questo si attiverà qu<strong>and</strong>o viene premuto e si disattiverà<br />
qu<strong>and</strong>o la lettura diviene stabile.<br />
c. Se il misuratore è in modalità di misurazione temporizzata, inizierà immediatamente<br />
a prendere le letture e aggiornerà continuamente il display. Il misuratore registrerà<br />
e stamperà le misurazioni alla frequenza specificata nel menu impostazione.<br />
Se viene utilizzato un misuratore da banco e l'agitatore è abilitato, premere<br />
per avviarlo. Premere di nuovo per spegnere l'agitatore prima di<br />
rimuovere la sonda e l'agitatore stesso dal campione.<br />
<strong>Thermo</strong> <strong>Scientific</strong> <strong>Orion</strong> <strong>Star</strong> e guida per l’utente dei misuratori <strong>Star</strong> <strong>Plus</strong><br />
IT-41
Tecnica della conducibilità<br />
3. Rimuovere la sonda di conducibilità dal campione, sciacquarla in acqua distillata o<br />
deionizzata, asciugarla, inserirla nel campione successivo e ripetere il passaggio 2.<br />
4. Una volta misurati tutti i campioni, sciacquare la sonda di conducibilità in acqua<br />
distillata o deionizzata e asciugarla. Consultare il manuale dell'utente della sonda<br />
di conducibilità per le tecniche di conservazione appropriate.<br />
Visualizzazione e calibrazione temperatura conducibilità<br />
Visualizzazione temperatura conducibilità<br />
I misuratori <strong>Star</strong> <strong>Plus</strong> permettono di visualizzare la temperatura su singole righe<br />
di misurazione, oltre che nella parte superiore sinistra dello schermo.<br />
1. In modalità di misurazione, premere per selezionare la riga di visualizzazione<br />
centrale. La freccia punterà alla riga selezionata.<br />
2. Premere / per modificare il valore della riga selezionata. La riga centrale<br />
può essere cambiata in modo da visualizzare conducibilità (µS/cm o mS/cm), residuo<br />
fisso (mg/L), salinità (ppt), resistività (MΩ-cm), temperatura (nessuna icona) o una<br />
riga vuota.<br />
Calibrazione temperatura conducibilità<br />
La modalità di calibrazione della temperatura del misuratore <strong>Star</strong> <strong>Plus</strong> permette<br />
di regolare manualmente la temperatura di ciascuna riga di misurazione.<br />
1. In modalità di misurazione, premere per scegliere la riga di misurazione<br />
centrale e premere / fino a qu<strong>and</strong>o viene visualizzata la temperatura<br />
per la riga selezionata.<br />
2. Premere per iniziare la calibrazione.<br />
3. Qu<strong>and</strong>o la lettura si stabilizza, la freccia e la prima cifra inizieranno a lampeggiare.<br />
Inserire la temperatura premendo / per regolare ogni cifra e per<br />
spostarsi alla cifra successiva.<br />
4. Premere per salvare e terminare la calibrazione.<br />
IT-42<br />
<strong>Thermo</strong> <strong>Scientific</strong> <strong>Orion</strong> <strong>Star</strong> e guida per l’utente dei misuratori <strong>Star</strong> <strong>Plus</strong>
Capitolo XI Tecnica ISE<br />
Menu impostazione ISE<br />
Nota: Fare riferimento alla sezione Menu impostazione per consultare la Tabella del<br />
menu impostazione, che contiene un elenco completo delle opzioni di impostazione<br />
del misuratore e le relative descrizioni. Fare riferimento all'Appendice A per una<br />
descrizione delle funzioni speciali del menu impostazione.<br />
1. In modalità misurazione, premere .<br />
2. Premere / per scorrere il menu di impostazione fino a qu<strong>and</strong>o viene<br />
visualizzato nella riga superiore.<br />
3. Premere per accettare la selezione e spostare la freccia alla riga centrale.<br />
4. Premere / per scorrere fra per la risoluzione di misurazione ISE,<br />
per le unità di misura ISE, per l'intervallo di calibrazione ISE e<br />
per la funzione di correzione per il bianco non lineare.<br />
5. Premere per accettare la selezione e spostare la freccia alla riga inferiore.<br />
6. Per scorrere l'elenco delle opzioni sulla riga inferiore, premere / fino a<br />
qu<strong>and</strong>o viene visualizzata l'opzione desiderata. Per inserire un valore numerico per<br />
un'opzione sulla riga inferiore, premere / per regolare ciascuna cifra e<br />
per passare alla cifra successiva.<br />
7. Premere per accettare la selezione e spostare la freccia alla riga superiore.<br />
8. Ripetere i passaggi da 3 a 7 per modificare un'altra impostazione ISE oppure<br />
premere per ritornare alla modalità di misurazione.<br />
<strong>Thermo</strong> <strong>Scientific</strong> <strong>Orion</strong> <strong>Star</strong> e guida per l’utente dei misuratori <strong>Star</strong> <strong>Plus</strong><br />
IT-43
Tecnica ISE<br />
Calibrazione ISE<br />
I riferimenti di calibrazione devono essere preparati con le stesse unità ISE dei<br />
risultati desiderati del campione. Iniziare sempre la calibrazione utilizz<strong>and</strong>o prima il<br />
riferimento con concentrazione inferiore, pass<strong>and</strong>o gradualmente al riferimento con<br />
concentrazione più elevata. Qualsiasi reagente, quali ad esempio i regolatori di forza<br />
ionica, deve essere aggiunto ai campioni e ai riferimenti come specificato nella guida<br />
dell'utente dell'elettrodo.<br />
1. Preparare all'uso l'elettrodo, i riferimenti e le altre soluzioni richieste in base alle<br />
istruzioni della guida per l'utente dell'elettrodo.<br />
2. In modalità di misurazione, premere fino a qu<strong>and</strong>o la freccia punta alla riga<br />
superiore, premere fino a qu<strong>and</strong>o viene visualizzata l'icona ISE e premere<br />
per iniziare la calibrazione.<br />
3. Sciacquare l'elettrodo in acqua distillata o deionizzata, eliminare l'eventuale acqua<br />
in eccesso, asciugarlo e inserirlo nel riferimento con concentrazione inferiore.<br />
4. Attendere che l'icona ISE smetta di lampeggiare. Premere fino a qu<strong>and</strong>o la<br />
prima cifra da modificare lampeggia, premere / per modificare il valore<br />
della cifra lampeggiante e continuare a modificare le cifre fino a qu<strong>and</strong>o il misuratore<br />
visualizza il valore di concentrazione del riferimento. Una volta impostato il valore<br />
di riferimento, premere fino a qu<strong>and</strong>o il separatore decimale è nella posizione corretta.<br />
5. Premere per passare al riferimento successivo con concentrazione inferiore e<br />
ripetere i passaggi 3 e 4, pass<strong>and</strong>o dal riferimento a concentrazione inferiore a quello<br />
con concentrazione maggiore, oppure premere per salvare e terminare la<br />
calibrazione.<br />
6. Il gradiente reale dell'elettrodo, in mV per concentrazione ad intervalli di dieci, verrà<br />
visualizzato nel campo principale, mentre verrà visualizzato nel campo inferiore.<br />
a. Per una calibrazione ad un punto, premere e / per modificare il<br />
gradiente. Per modificare il segno del gradiente da positivo a negativo, premere<br />
fino a qu<strong>and</strong>o non lampeggia alcuna cifra ma la freccia lampeggia, quindi<br />
premere per modificare il segno del gradiente. Premere il tasto per<br />
ritornare alla modalità di misurazione.<br />
b. Per una calibrazione a due o più punti, il misuratore passerà automaticamente<br />
alla modalità di misurazione dopo aver visualizzato il gradiente.<br />
IT-44<br />
<strong>Thermo</strong> <strong>Scientific</strong> <strong>Orion</strong> <strong>Star</strong> e guida per l’utente dei misuratori <strong>Star</strong> <strong>Plus</strong>
Misurazione ISE<br />
Nota: Attivare la funzione datalog automatico per inviare le misurazioni al datalog<br />
del misuratore con la frequenza specificata per ciascuna modalità di misurazione.<br />
Fare riferimento alla sezione Archiviazione e recupero dati per ulteriori dettagli. Se la<br />
funzione di datalog automatico è disattivata, collegare il misuratore ad una stampante<br />
o ad un computer per registrare le misurazioni.<br />
1. Sciacquare l'elettrodo con acqua distillata o deionizzata. Eliminare l'eventuale<br />
acqua in eccesso e asciugare l'elettrodo con un panno privo di pelucchi.<br />
2. Inserire l'elettrodo nel campione.<br />
Tecnica ISE<br />
a. Se il misuratore è in modalità di misurazione continua, inizierà immediatamente<br />
a prendere le letture e aggiornerà continuamente il display. L'icona ISE<br />
lampeggerà fino a qu<strong>and</strong>o la lettura diviene stabile. Una volta che la lettura<br />
è stabile, registrare e stampare la misurazione premendo . Se viene<br />
utilizzato un misuratore da banco e l'agitatore è abilitato, premere per<br />
avviarlo. Premere di nuovo per spegnere l'agitatore prima di rimuovere<br />
l'elettrodo e l'agitatore stesso dal campione.<br />
b. Se il misuratore è in modalità di misurazione AUTO-READ, premere il tasto<br />
per avviare la lettura. L'icona AR lampeggerà fino a qu<strong>and</strong>o la lettura<br />
diviene stabile. Una volta che la lettura è stabile, il misuratore registrerà e<br />
stamperà la misurazione e bloccherà il display. Se viene utilizzato un misuratore<br />
da banco è l'agitatore è abilitato, questo si attiverà qu<strong>and</strong>o viene premuto<br />
e si disattiverà qu<strong>and</strong>o la lettura diviene stabile.<br />
c. Se il misuratore è in modalità di misurazione temporizzata, inizierà<br />
immediatamente a prendere le letture e aggiornerà continuamente il display. Il<br />
misuratore registrerà e stamperà le misurazioni alla frequenza specificata nel<br />
menu impostazione. Se viene utilizzato un misuratore da banco e l'agitatore<br />
è abilitato, premere per avviarlo. Premere di nuovo per spegnere<br />
l'agitatore prima di rimuovere l'elettrodo e l'agitatore stesso dal campione.<br />
3. Rimuovere l'elettrodo dal campione, sciacquarlo in acqua distillata o deionizzata,<br />
asciugarlo, inserirlo nel campione successivo e ripetere il passaggio 2.<br />
4. Una volta misurati tutti i campioni, sciacquare l'elettrodo in acqua distillata o<br />
deionizzata e asciugarlo. Consultare il manuale dell'utente dell'elettrodo per le<br />
tecniche di conservazione appropriate.<br />
<strong>Thermo</strong> <strong>Scientific</strong> <strong>Orion</strong> <strong>Star</strong> e guida per l’utente dei misuratori <strong>Star</strong> <strong>Plus</strong><br />
IT-45
Tecnica ISE<br />
Visualizzazione e calibrazione temperatura ISE<br />
Visualizzazione temperatura ISE<br />
I misuratori <strong>Star</strong> <strong>Plus</strong> permettono di visualizzare la temperatura su singole righe<br />
di misurazione, oltre che nella parte superiore sinistra dello schermo.<br />
Per visualizzare la temperatura per la riga di misurazione ISE:<br />
1. Tenere premuto fino a qu<strong>and</strong>o l'indicatore visualizza la modalità di misurazione.<br />
2. Premere per selezionare la riga di visualizzazione superiore. La freccia punterà<br />
alla riga selezionata.<br />
3. Premere / per modificare il valore della riga selezionata. La riga superiore<br />
può essere modificata per visualizzare pH (pH), millivolt (mV), millivolt relativi<br />
(RmV), concentrazione (ISE), temperatura (nessuna icona) o una riga vuota.<br />
Calibrazione temperatura ISE<br />
La modalità di calibrazione della temperatura del misuratore <strong>Star</strong> <strong>Plus</strong> permette<br />
di regolare manualmente la temperatura di ciascuna riga di misurazione.<br />
Per calibrare la temperatura per la riga di misurazione ISE:<br />
1. In modalità di misurazione, premere per scegliere la riga di misurazione<br />
superiore e premere / fino a qu<strong>and</strong>o viene visualizzata la temperatura<br />
per la riga selezionata.<br />
2. Premere per iniziare la calibrazione.<br />
3. Qu<strong>and</strong>o la lettura si stabilizza, la freccia e la prima cifra inizieranno a lampeggiare.<br />
Inserire la temperatura premendo / per regolare ogni cifra e per<br />
spostarsi alla cifra successiva.<br />
4. Premere per salvare e terminare la calibrazione.<br />
IT-46<br />
<strong>Thermo</strong> <strong>Scientific</strong> <strong>Orion</strong> <strong>Star</strong> e guida per l’utente dei misuratori <strong>Star</strong> <strong>Plus</strong>
Capitolo XII Archiviazione e recupero dati<br />
Datalog e log di calibrazione<br />
Tutti i misuratori pH/ISE 3-<strong>Star</strong> <strong>Plus</strong> e 4-<strong>Star</strong> <strong>Plus</strong> hanno un datalog da 1000 punti. I<br />
misuratori pH/conducibilità e pH/ossigeno disciolto 4-<strong>Star</strong> <strong>Plus</strong> hanno un datalog da<br />
750 punti. I misuratori 5-<strong>Star</strong> <strong>Plus</strong> hanno un datalog da 500 punti. Il misuratore 2-<strong>Star</strong><br />
ha un datalog da 50 punti e tutti i misuratori <strong>Orion</strong> <strong>Star</strong> hanno un datalog da 200 punti.<br />
Le stampate dei misuratori <strong>Star</strong> <strong>Plus</strong> sono state migliorate per includere ulteriori<br />
informazioni. Le stampate di calibrazione di pH e ISE ora includono il gradiente medio,<br />
il gradiente fra punti e il valore di E o per punto. Le stampate per l'ossigeno disciolto<br />
polarografico ora includono il gradiente, la temperatura della membrana e la<br />
temperatura della soluzione.<br />
Funzione Datalog automatico<br />
I misuratori 3-<strong>Star</strong>, 4-<strong>Star</strong> e 5-<strong>Star</strong> <strong>Plus</strong> sono stati migliorati per includere una funzione<br />
datalog automatica che può essere attivata o disattivata. Per abilitare la registrazione<br />
automatica dei dati nel datalog:<br />
1. In modalità misurazione, premere .<br />
2. Premere / fino a qu<strong>and</strong>o viene visualizzato nella riga superiore.<br />
3. Premere per accettare la selezione e spostare la freccia alla riga centrale,<br />
quindi premere / fino a qu<strong>and</strong>o viene visualizzato .<br />
4. Premere per accettare la selezione e spostare la freccia alla riga inferiore,<br />
quindi premere / fino a qu<strong>and</strong>o viene visualizzato .<br />
5. Premere per accettare la selezione e spostare la freccia alla riga superiore.<br />
6. Premere per salvare l'opzione di impostazione e ritornare alla modalità<br />
di misurazione.<br />
<strong>Thermo</strong> <strong>Scientific</strong> <strong>Orion</strong> <strong>Star</strong> e guida per l’utente dei misuratori <strong>Star</strong> <strong>Plus</strong><br />
IT-47
Archiviazione e recupero dati<br />
Impostazioni di eliminazione Datalog<br />
L'impostazione di eliminazione datalog determina se il misuratore cancella automaticamente il<br />
datalog dopo averlo scaricato su una stampante o un computer o se invece sovrascrive<br />
i punti del datalog qu<strong>and</strong>o quest'ultimo è pieno. Se l'impostazione di eliminazione<br />
del datalog è impostata su , il misuratore eliminerà automaticamente il datalog<br />
dopo averlo scaricato su una stampante o un computer. Il misuratore visualizzerà<br />
anche il messaggio di errore<br />
qu<strong>and</strong>o sono stati utilizzati tutti i 200 punti<br />
del datalog e il datalog deve essere scaricato su una stampante o un computer per<br />
poter eliminare il messaggio di errore. Se l'impostazione di eliminazione del datalog è<br />
impostata su , il misuratore sovrascriverà il punto del datalog più vecchio qu<strong>and</strong>o<br />
sono stati riempiti tutti i 200 punti del datalog, ma non eliminerà il datalog stesso<br />
qu<strong>and</strong>o questo viene scaricato su una stampante o un computer.<br />
1. In modalità misurazione, premere .<br />
2. Premere / fino a qu<strong>and</strong>o viene visualizzato nella riga superiore.<br />
3. Premere per accettare la selezione e spostare la freccia alla riga centrale,<br />
quindi premere / fino a qu<strong>and</strong>o viene visualizzato .<br />
4. Premere per accettare la selezione e spostare la freccia alla riga inferiore,<br />
quindi premere / fino a qu<strong>and</strong>o viene visualizzato o .<br />
5. Premere per accettare la selezione e spostare la freccia alla riga superiore.<br />
6. Premere per salvare l'opzione di impostazione e ritornare alla modalità di<br />
misurazione.<br />
Nota: Se il datalog non è necessario, impostare l'impostazione di eliminazione<br />
del datalog su per impedire il messaggio di errore 038 (datalog pieno).<br />
IT-48<br />
<strong>Thermo</strong> <strong>Scientific</strong> <strong>Orion</strong> <strong>Star</strong> e guida per l’utente dei misuratori <strong>Star</strong> <strong>Plus</strong>
Visualizzazione e stampa di Datalog e log di calibrazione<br />
I misuratori 3-<strong>Star</strong>, 4-<strong>Star</strong> e 5-<strong>Star</strong> <strong>Plus</strong> sono stati migliorati con l'inclusione di una<br />
funzione di visualizzazione del log di calibrazione oltre alla visualizzazione del datalog,<br />
la stampa del datalog e la stampa del log di calibrazione. I misuratori <strong>Orion</strong> <strong>Star</strong> includono<br />
le funzioni di visualizzazione del datalog, di stampa del datalog e di stampa del log di<br />
calibrazione.<br />
Per visualizzare il datalog o il log di calibrazione:<br />
1. In modalità misurazione, premere .<br />
2. Premere / per scorrere fra per visualizzare il datalog oppure<br />
per visualizzare il log di calibrazione (solo misuratori <strong>Star</strong> <strong>Plus</strong>).<br />
3. Premere . Il misuratore visualizzerà la schermata data/ora. Il numero del log<br />
sarà nella parte superiore dello schermo, mentre l'ora, la data e l'anno in cui è<br />
stato registrato il log saranno rispettivamente sulle righe superiore, centrale e<br />
inferiore. Premere / per scorrere lungo il log.<br />
4. Premere . Il misuratore visualizzerà i dati o il punto di calibrazione associato<br />
con la schermata data/ora selezionata.<br />
a. Per stampare il singolo punto dati premere .<br />
b. Premere / per scorrere lungo il log.<br />
c. Premere il tasto per ritornare alla schermata data/ora.<br />
5. Per uscire dalla modalità di visualizzazione log premere fino a qu<strong>and</strong>o<br />
il misuratore visualizza la schermata data/ora e quindi premere .<br />
Per inviare il datalog o il log di calibrazione ad una stampante o computer:<br />
1. Collegare il misuratore ad una stampante o computer e verificare il baud rate<br />
e le impostazioni di trasmissione nel menu impostazione.<br />
2. In modalità misurazione, premere .<br />
Archiviazione e recupero dati<br />
<strong>Thermo</strong> <strong>Scientific</strong> <strong>Orion</strong> <strong>Star</strong> e guida per l’utente dei misuratori <strong>Star</strong> <strong>Plus</strong><br />
IT-49
Archiviazione e recupero dati<br />
3. Premere / per scorrere fra per stampare il datalog oppure<br />
per stampare il log di calibrazione. I misuratori <strong>Orion</strong> <strong>Star</strong> visualizzeranno<br />
invece di .<br />
4. Premere per inviare il dato selezionato alla stampante o al computer.<br />
Per interfacciare il misuratore con un computer:<br />
I misuratori <strong>Orion</strong> <strong>Star</strong> e <strong>Star</strong> <strong>Plus</strong> possono inviare dati di misurazione e calibrazione<br />
ad un computer in formato delimitato da virgole, di semplice interpretazione con<br />
programmi quali Excel. Selezionare le impostazioni di output , ,<br />
nel menu di impostazione.<br />
Per inviare dati dal misuratore ad un computer utilizz<strong>and</strong>o HyperTerminal:<br />
1. Collegare il misuratore ad una porta del computer utilizz<strong>and</strong>o il cavo di interfaccia,<br />
N. Cat. 1010053.<br />
2. Fare clic sul pulsante <strong>Star</strong>t nella parte inferiore sinistra dello schermo del computer.<br />
Selezionare Tutti i Programmi, Accessori, Comunicazioni e HyperTerminal.<br />
3. Qu<strong>and</strong>o si apre la finestra HyperTerminal inserire un nome file, selezionare<br />
un'icona per il collegamento e fare clic sul pulsante OK.<br />
4. Qu<strong>and</strong>o si apre una nuova finestra <strong>and</strong>are al menu a discesa Connetti, selezionare<br />
la porta COM a cui è collegato il misuratore e fare clic sul pulsante OK.<br />
5. Si apre una finestra contenente l'elenco delle proprietà della porta COM. Selezionare<br />
le seguenti impostazioni dai menu a discesa e quindi fare clic sul pulsante OK.<br />
Bit per secondo: 9600<br />
Bit di dati: 8<br />
Parità: Nessuno<br />
Bit di stop: 1<br />
Controllo di flusso: Hardware<br />
6. Inviare i dati dal misuratore a HyperTerminal.<br />
IT-50<br />
<strong>Thermo</strong> <strong>Scientific</strong> <strong>Orion</strong> <strong>Star</strong> e guida per l’utente dei misuratori <strong>Star</strong> <strong>Plus</strong>
Capitolo XIII Dichiarazione di conformità<br />
Produttore:<br />
Indirizzo:<br />
<strong>Thermo</strong> Fisher <strong>Scientific</strong> Inc.<br />
166 Cummings Center<br />
Beverly, MA 01915<br />
USA<br />
Dichiariamo che i prodotti descritti di seguito sono conformi alle Direttive e Norme<br />
elencate di seguito:<br />
Prodotti:<br />
Misuratori del pH, della conducibilità, dell'ossigeno disciolto e/o<br />
di ISE, i misuratori da banco sono classificati da 100 a 240 VAC,<br />
50/60 Hz, 0,5 A, i misuratori portatili utilizzano quattro batterie AA<br />
non ricaricabili<br />
Misuratori da banco<br />
Misuratori portatili<br />
Misuratore 5-<strong>Star</strong> <strong>Plus</strong> pH/ISE/Conducibilità/OD Misuratore 5-<strong>Star</strong> <strong>Plus</strong> pH/ISE/Conducibilità/OD<br />
Misuratore 4-<strong>Star</strong> <strong>Plus</strong> pH/Conducibilità Misuratore 5-<strong>Star</strong> <strong>Plus</strong> pH/Conducibilità/OD<br />
Misuratore 4-<strong>Star</strong> <strong>Plus</strong> pH/OD<br />
Misuratore 4-<strong>Star</strong> <strong>Plus</strong> pH/Conducibilità<br />
Misuratore 4-<strong>Star</strong> <strong>Plus</strong> pH/ISE<br />
Misuratore 4-<strong>Star</strong> <strong>Plus</strong> pH/OD<br />
Misuratore 3-<strong>Star</strong> <strong>Plus</strong> Conducibilità Misuratore 4-<strong>Star</strong> <strong>Plus</strong> pH/ISE<br />
Misuratore 3-<strong>Star</strong> <strong>Plus</strong> OD<br />
Misuratore 3-<strong>Star</strong> <strong>Plus</strong> Conducibilità<br />
Misuratore 3-<strong>Star</strong> <strong>Plus</strong> pH<br />
Misuratore 3-<strong>Star</strong> <strong>Plus</strong> pH<br />
Misuratore 2-<strong>Star</strong> pH<br />
Misuratore 3-<strong>Star</strong> <strong>Plus</strong> OD<br />
Misuratore 5-<strong>Star</strong> <strong>Plus</strong> pH/Conducibilità/OD ottico RDO ®<br />
Misuratore 4-<strong>Star</strong> <strong>Plus</strong> pH/OD ottico RDO<br />
Misuratore 3-<strong>Star</strong> <strong>Plus</strong> OD ottico RDO<br />
Classe delle<br />
apparecchiature:<br />
Misurazione, controllo e laboratorio<br />
I misuratori da banco sono EMC Classe A<br />
I misuratori portatili sono EMC Classe D<br />
<strong>Thermo</strong> <strong>Scientific</strong> <strong>Orion</strong> <strong>Star</strong> e guida per l’utente dei misuratori <strong>Star</strong> <strong>Plus</strong><br />
IT-51
Dichiarazione di conformità<br />
Direttive e Norme:<br />
• 89/336/EEC – Compatibilità elettromagnetica (Direttiva EMC)<br />
• EN 61326:1997 + A1:1998 + A2:2001 – Apparecchi elettrici di misurazione,<br />
controllo e laboratorio - Requisiti EMC<br />
• 73/23/EEC – Direttiva per la bassa tensione (LVD)<br />
• EN 61010-1:2001 – Requisiti di sicurezza delle apparecchiature elettriche<br />
per la misurazione, il controllo e l'uso in laboratorio - requisiti generali<br />
Rappresentante autorizzato del produttore:<br />
Data:<br />
Patrick Chiu 1 Dicembre 2008<br />
Senior Quality Engineer,<br />
Regulatory Compliance<br />
Conformità RAEE<br />
Il presente prodotto deve essere conforme alla Direttiva dell'Unione Europea sui rifiuti<br />
di apparecchiature elettriche ed elettroniche (RAEE) 2002/96/EC. È contrassegnato dal<br />
seguente simbolo:<br />
<strong>Thermo</strong> Fisher <strong>Scientific</strong> ha preso accordi con una o più aziende di riciclaggio/<br />
smaltimento in ciascuno Stato Membro della UE e questo prodotto deve essere<br />
smaltito e riciclato attraverso di esse. Ulteriori informazioni sulla conformità a queste<br />
Direttive, sulle aziende addette al riciclaggio nei vari Paesi e sui prodotti <strong>Thermo</strong><br />
<strong>Scientific</strong> <strong>Orion</strong> che possono agevolare il rilevamento di sostanze soggette alla<br />
Direttiva RoHS sono disponibili alla pagina www.thermo.com/WEEERoHS.<br />
IT-52<br />
<strong>Thermo</strong> <strong>Scientific</strong> <strong>Orion</strong> <strong>Star</strong> e guida per l’utente dei misuratori <strong>Star</strong> <strong>Plus</strong>
Capitolo XIV Risoluzione dei problemi<br />
Autotest misuratore<br />
1. Scollegare tutti gli elettrodi e le sonde dal misuratore e coprire tutti gli ingressi<br />
del misuratore con cappucci neri.<br />
2. Accendere il misuratore, attendere che sia visualizzata la revisione del software<br />
e premere .<br />
3. Tutti i segmenti del display si accenderanno. Controllare visivamente i segmenti<br />
del display per assicurarsi che siano tutti accesi e premere .<br />
4. Tutti i segmenti del display si spegneranno. Controllare visivamente i segmenti<br />
del display per assicurarsi che siano tutti spenti e premere .<br />
5. Il display visualizzerà . Premere tutti i tasti della tastiera, uno alla volta, in<br />
un ordine qualsiasi. Se i tasti non vengono premuti entro cinque secondi l'uno<br />
dall'altro il display visualizzerà<br />
, ad indicare un guasto dei tasti. Premere<br />
per annullare il messaggio di errore 033 e completare il test. Qu<strong>and</strong>o tutti i<br />
tasti sono stati premuti e sono funzionanti il misuratore si riavvierà e passerà alla<br />
modalità di misurazione.<br />
Nota: Se il misuratore visualizza<br />
durante il test, assicurarsi che tutti gli<br />
elettrodi siano scollegati, che tutti gli ingressi del misuratore siano coperti da tappi neri<br />
e che il tappo di corto BNC sia collegato saldamente all'ingresso BNC del misuratore.<br />
Questo codice di errore avviene di solito qu<strong>and</strong>o un tappo di corto BNC è mancante<br />
o non è collegato a fondo all'ingresso BNC del misuratore durante l'autotest.<br />
<strong>Thermo</strong> <strong>Scientific</strong> <strong>Orion</strong> <strong>Star</strong> e guida per l’utente dei misuratori <strong>Star</strong> <strong>Plus</strong><br />
IT-53
Risoluzione dei problemi<br />
Codici errore misuratore<br />
• Se la lettura sullo schermo lampeggia , il valore è fuori intervallo. Eseguire<br />
l'autotest del misuratore, pulire l'elettrodo con le procedure descritte dal manuale<br />
utente dell'elettrodo stesso e ricalibrare l'elettrodo con nuovi riferimenti.<br />
• Se l'icona si accende e la lettura lampeggia, l'elettrodo deve essere calibrato<br />
in base all'intervallo di calibrazione impostato dall'utente oppure il gradiente del<br />
pH è al di fuori dell'intervallo da 85% a 115%.<br />
• Premere per annullare un codice di errore. I codici di errore mostrano<br />
sulla riga centrale e una serie di tre caratteri alfanumerici sulla riga inferiore. Alcuni<br />
di questi codici sono errori, altri avvertimenti e altri ancora sono puramente informativi.<br />
Codice errore Descrizione Risoluzione dei problemi<br />
002, 026,<br />
E##, F##<br />
Errore hardware<br />
o di memoria<br />
Premere per annullare l'errore. Se l'errore dovesse ripetersi, contattare<br />
l'assistenza tecnica.<br />
005 Valore al di fuori<br />
Premere e reinserire il valore. Controllare le specifiche del misuratore<br />
dell'intervallo<br />
per gli intervalli di valore permessi.<br />
permesso<br />
033 Guasto tastiera Ripetere l'autotest. Qu<strong>and</strong>o il misuratore legge , premere tutti i tasti,<br />
incluso il tasto di accensione, entro cinque secondi l'uno dall'altro.<br />
034 Guasto ingresso BNC Scollegare tutti gli elettrodi dal misuratore, collegare il tappo di corto BNC<br />
al misuratore e ripetere l'autotest.<br />
038 Datalog pieno Scaricare il datalog su una stampante o un computer, disattivare la funzione<br />
datalog automatico dal menu impostazione (solo per misuratori <strong>Star</strong> <strong>Plus</strong>) o<br />
modificare le impostazioni del datalog a , , nel menu impostazione<br />
in modo che il misuratore cancelli i punti del datalog qu<strong>and</strong>o questo è pieno.<br />
D##<br />
Errore controllo<br />
a distanza<br />
107 Errore riferimento<br />
di calibrazione pH<br />
109 Gradiente pH o<br />
scostamento di<br />
calibrazione errato<br />
200 Errore interfaccia<br />
autocampionatore<br />
201 Errore segnale<br />
autocampionatore<br />
Controllare le istruzioni di programmazione per verificare che i com<strong>and</strong>i,<br />
i nomi e i valori siano corretti.<br />
I millivolt misurati durante la calibrazione sono identici per due tamponi.<br />
Rivedere la procedura di calibrazione e controllare che l'elettrodo sia stato<br />
inserito nei tamponi al momento appropriato. Pulire l'elettrodo in base<br />
alle istruzioni del manuale dell'utente dell'elettrodo stesso. Ricalibrare<br />
l'elettrodo con nuovi tamponi.<br />
Pulire l'elettrodo in base alle istruzioni del manuale dell'utente<br />
dell'elettrodo stesso. Ricalibrare l'elettrodo con nuovi tamponi.<br />
Il misuratore non è in grado di inviare un segnale all'autocampionatore.<br />
Assicurarsi che l'autocampionatore sia collegato correttamente al misuratore.<br />
L'autocampionatore non è in grado di ricevere un segnale dal misuratore.<br />
Rivedere i parametri di impostazione del misuratore e assicurarsi che il<br />
baud rate del misuratore sia impostato su 1200.<br />
IT-54<br />
<strong>Thermo</strong> <strong>Scientific</strong> <strong>Orion</strong> <strong>Star</strong> e guida per l’utente dei misuratori <strong>Star</strong> <strong>Plus</strong>
Risoluzione dei problemi<br />
Codice errore Descrizione Risoluzione dei problemi<br />
202 Autocampionatore<br />
inceppato<br />
203 Lettura instabile<br />
dall'autocampionatore<br />
306 Errore Bianco<br />
Automatico ISE<br />
307 Errore riferimento<br />
di calibrazione ISE<br />
Spegnere l'autocampionatore e attendere 45 secondi prima di riaccenderlo.<br />
L'autocampionatore dovrebbe tornare in posizione iniziale.<br />
Le misurazioni prese con l'autocampionatore sono instabili. Controllare<br />
che gli elettrodi funzionino correttamente. Assicurarsi che i cavi dell'elettrodo<br />
siano collegati correttamente.<br />
Disabilitare la funzione bianco automatico nel menu impostazione e<br />
ricalibrare il misuratore senza utilizzare un riferimento di concentrazione zero.<br />
I millivolt misurati durante la calibrazione sono identici per due riferimenti.<br />
Rivedere la procedura di calibrazione e controllare che l'elettrodo sia stato<br />
inserito nei riferimenti al momento appropriato. Pulire l'elettrodo in base<br />
alle istruzioni del manuale dell'utente dell'elettrodo stesso. Ricalibrare<br />
l'elettrodo con nuovi riferimenti.<br />
309 Gradiente ISE errato Pulire l'elettrodo in base alle istruzioni del manuale dell'utente<br />
dell'elettrodo stesso. Ricalibrare l'elettrodo con nuovi riferimenti.<br />
707 Errore riferimento<br />
di calibrazione<br />
conducibilità<br />
709 Errore costante di<br />
cella conduttività<br />
808 Gradiente OD<br />
punto zero errato<br />
Il valore di conducibilità misurato durante la calibrazione è identico per due<br />
riferimenti. Rivedere la procedura di calibrazione e controllare che la sonda<br />
di conducibilità sia stata inserita nei riferimenti al momento appropriato.<br />
Pulire la sonda di conducibilità in base alle istruzioni del manuale dell'utente<br />
della sonda stessa. Ricalibrare la sonda con nuovi riferimenti.<br />
La costante di cella non è nell'intervallo da 0,001 a 199,0 cm -1 . Pulire la<br />
sonda di conducibilità in base alle istruzioni del manuale dell'utente della<br />
sonda stessa. Ricalibrare la sonda con nuovi riferimenti.<br />
Prima di una calibrazione zero deve essere compiuta una calibrazione in<br />
aria. Controllare che venga utilizzata una soluzione priva di ossigeno per<br />
la calibrazione zero. Si consiglia una soluzione con 15 grammi di Na2SO3<br />
disciolti in 250 mL di acqua distillata.<br />
809 Gradiente OD errato Per le sonde OD polarografiche, collegare la sonda al misuratore, accenderlo<br />
e lasciare che la sonda polarizzi per almeno 30 minuti. Per la calibrazione<br />
in aria, controllare che la spugna nel manicotto di calibrazione sia umida<br />
e che non vi sia acqua sulla membrana della sonda. Per la calibrazione in<br />
acqua, soffiare aria nel campione e agitare per tenere lontano le bolle dalla<br />
membrana. Pulire la sonda OD in base alle istruzioni del manuale dell'utente<br />
della sonda stessa. Ricalibrare la sonda OD.<br />
880 Sonda ottica RDO ®<br />
non collegata<br />
881 Sonda ottica<br />
RDO scaduta<br />
882 Guasto sonda<br />
ottica RDO<br />
Assicurarsi che la sonda RDO sia collegata correttamente al misuratore.<br />
Collegare un'altra sonda RDO al misuratore il cui funzionamento sia certo.<br />
L'ottica collegata alla sonda RDO è scaduta. Installare una nuova ottica<br />
in base alle istruzioni del manuale dell'utente della sonda RDO.<br />
Controllare che l'ottica sia installata correttamente sulla sonda RDO, che<br />
non sia scaduta e che non sia stata manomessa. Collegare un'altra sonda<br />
RDO al misuratore il cui funzionamento sia certo.<br />
<strong>Thermo</strong> <strong>Scientific</strong> <strong>Orion</strong> <strong>Star</strong> e guida per l’utente dei misuratori <strong>Star</strong> <strong>Plus</strong><br />
IT-55
Risoluzione dei problemi<br />
Risoluzione dei problemi generici<br />
Problema:<br />
Soluzione:<br />
Il display si blocca e i valori di misurazione non cambiano.<br />
Il misuratore è in modalità di misurazione AUTO-READ (l'icona AR viene<br />
visualizzata nell'angolo superiore destro del display). Premere per<br />
avviare una nuova lettura o selezionare un'altra modalità di misurazione<br />
nel menu impostazione.<br />
Problema: Qu<strong>and</strong>o si preme il misuratore visualizza .<br />
Soluzione: Il misuratore sta stamp<strong>and</strong>o e non può entrare in modalità di calibrazione<br />
fino a qu<strong>and</strong>o ha terminato. Accadrà di rado se il misuratore è impostato<br />
su un baud rate di 9600. Se il misuratore è su un baud rate inferiore,<br />
il ritardo sarà maggiore.<br />
Problema: Il misuratore non ha accettato la modifica eseguita nel menu di impostazione.<br />
Soluzione: Dopo aver effettuato una modifica nel menu impostazione, premere<br />
fino a qu<strong>and</strong>o la freccia punta alla riga superiore (conferma della<br />
modifica) quindi premere per salvare la modifica e ritornare<br />
in modalità di misurazione.<br />
Problema: Come si annulla una calibrazione?<br />
Soluzione: Tenere premuto per annullare qualsiasi funzione del misuratore<br />
e ritornare alla modalità di misurazione.<br />
Problema: La stampa è una stringa di numeri e unità separate da virgole.<br />
Soluzione: Il formato di output nel menu impostazione è impostato su output su<br />
computer oppure il baud rate della stampante è impostato erroneamente<br />
nel menu impostazione. Cambiare il formato di output su output<br />
stampante nel menu impostazione. Modificare il baud rate al valore<br />
corretto per la stampante in uso.<br />
Problema: Qu<strong>and</strong>o si preme il pulsante agitatore, l'agitatore non entra in funzione.<br />
Soluzione: L'impostazione attuale dell'agitatore è impostata su spento. Impostare<br />
una velocità da 1 a 7 nel menu impostazione.<br />
Problema: Lo schermo di inserimento dell'ora nella misurazione temporizzata<br />
non appare nel menu impostazione.<br />
Soluzione: Il misuratore è in modalità AUTO-READ o continua. Qu<strong>and</strong>o il misuratore<br />
viene impostato sulla modalità temporizzata, la schermata di impostazione<br />
successiva permette l'inserimento dell'ora.<br />
Problema:<br />
Soluzione:<br />
IT-56<br />
Non si è in grado di dire se si possiede un misuratore <strong>Star</strong> <strong>Plus</strong> oppure<br />
<strong>Orion</strong> <strong>Star</strong>.<br />
Qu<strong>and</strong>o il misuratore è acceso, i misuratori <strong>Star</strong> <strong>Plus</strong> con funzioni avanzate<br />
visualizzeranno<br />
con il numero di revisione del misuratore<br />
( o simile) e passeranno alla modalità di misurazione.<br />
<strong>Thermo</strong> <strong>Scientific</strong> <strong>Orion</strong> <strong>Star</strong> e guida per l’utente dei misuratori <strong>Star</strong> <strong>Plus</strong>
Risoluzione dei problemi<br />
Risoluzione dei problemi pH<br />
Problema:<br />
Il misuratore non riconosce il valore di pH del tampone durante la calibrazione.<br />
Soluzione: Verificare che sia stato selezionato il set di tamponi corretto nel menu<br />
impostazione. Il misuratore utilizza la lettura grezza dei mV dell'elettrodo<br />
per riconoscere un tampone durante la calibrazione. Qu<strong>and</strong>o l'elettrodo<br />
è vecchio o sporco, le sue letture di mV diminuiranno e sarà necessario<br />
inserire manualmente il valore pH del tampone durante la calibrazione.<br />
Risoluzione dei problemi ISE<br />
Problema: Ci vogliono diversi minuti prima che le letture si stabilizzino durante<br />
la calibrazione.<br />
Soluzione:<br />
Problema:<br />
L'intervallo di concentrazione nel menu impostazione è impostato su<br />
basso. Impostare l'intervallo di concentrazione su alto. La risoluzione<br />
ISE è impostata su 3 cifre nel menu impostazione. Cambiare la<br />
risoluzione ISE a 2 cifre per una stabilizzazione più rapida delle letture.<br />
Qu<strong>and</strong>o si utilizza l'impostazione di correzione automatica per il bianco<br />
e si calibra un ISE, il misuratore restituisce un gradiente troppo basso<br />
o impossibile da controllare manualmente.<br />
Soluzione: Disattivare l'impostazione di correzione automatica per il bianco nel menu<br />
impostazione.<br />
Risoluzione dei problemi conducibilità<br />
Problema: Il misuratore non riconosce lo st<strong>and</strong>ard di conducibilità durante la calibrazione.<br />
Soluzione:<br />
Problema:<br />
Soluzione:<br />
Problema:<br />
Soluzione:<br />
Verificare che sia stata inserita la costante di cella predefinita nel menu<br />
impostazione. La costante di cella è in genere stampata sul cavo della<br />
sonda di conducibilità. Verificare che lo st<strong>and</strong>ard di conducibilità sia uno<br />
di quelli programmati nel misuratore. Ricalibrare con un nuovo st<strong>and</strong>ard.<br />
Il valore del coefficiente di temperatura non appare nel menu impostazione.<br />
L'impostazione attuale della compensazione di temperatura è impostata<br />
su non lineare o disattivata. Modificare la compensazione di temperatura<br />
su lineare e la schermata successiva permetterà l'inserimento del<br />
valore del coefficiente di temperatura.<br />
La misurazione è fuori intervallo qu<strong>and</strong>o dovrebbe essere invece<br />
nell'intervallo.<br />
Controllare che la sonda di conducibilità sia completamente immersa<br />
nella soluzione. Verificare che la costante di cella sia corretta per la<br />
sonda di conducibilità effettivamente collegata al misuratore. Verificare<br />
che il tipo di cella selezionato nel menu impostazione sia Std.<br />
<strong>Thermo</strong> <strong>Scientific</strong> <strong>Orion</strong> <strong>Star</strong> e guida per l’utente dei misuratori <strong>Star</strong> <strong>Plus</strong><br />
IT-57
Risoluzione dei problemi<br />
Risoluzione dei problemi ossigeno disciolto<br />
Problema: Lo schermo di inserimento manuale della pressione barometrica non<br />
appare nel menu impostazione.<br />
Soluzione: La compensazione della pressione barometrica è impostata su automatica<br />
nel menu impostazione. Modificare la compensazione di pressione<br />
barometrica su manuale e la schermata successiva permetterà<br />
l'inserimento manuale della pressione.<br />
Problema: Lo schermo di inserimento manuale della salinità non appare nel menu<br />
impostazione.<br />
Soluzione: La compensazione della salinità è impostata su automatica nel menu<br />
impostazione. Modificare la compensazione della salinità su manuale<br />
e la schermata successiva permetterà l'inserimento del fattore di salinità.<br />
Problema: La sonda BOD AUTO-STIR non si accende qu<strong>and</strong>o viene premuto il<br />
pulsante sulla sonda.<br />
Soluzione: Il tipo di lettura deve essere impostato su AUTO-READ nel menu impostazione<br />
e la velocità dell'agitatore deve essere compresa fra 1 e 7 per iniziare una<br />
misurazione ed iniziare ad agitare premendo il pulsante sulla sonda BOD<br />
AUTO-STIR.<br />
Risoluzione dei problemi ossigeno disciolto ottico RDO ®<br />
Problema: Il misuratore visualizza un messaggio di errore 881 e non esegue una<br />
misurazione di ossigeno disciolto.<br />
Soluzione: Spegnere il misuratore, sostituire la vecchia ottica con una nuova e<br />
accendere il misuratore. Questo dovrebbe eliminare il messaggio di errore.<br />
Assistenza<br />
Dopo aver esaminato la risoluzione dei problemi di tutte le parti del sistema di<br />
misurazione, contattare l'assistenza tecnica. Negli Stati Uniti chiamare il numero<br />
1.800.225.1480 e fuori dagli Stati Uniti chiamare il 978.232.6000 o il numero di fax<br />
978.232.6031. In Europa, Medio Oriente e Africa contattare il rivenditore autorizzato<br />
più vicino. Per avere le informazioni di contatto più aggiornate, visitare<br />
www.thermo.com/contactwater.<br />
Per le più recenti applicazioni e risorse tecniche per i prodotti <strong>Thermo</strong> <strong>Scientific</strong> <strong>Orion</strong>,<br />
visitare www.thermo.com/waterapps.<br />
Garanzia<br />
Per avere le informazioni di garanzia più aggiornate, visitare www.thermo.com/water.<br />
IT-58<br />
<strong>Thermo</strong> <strong>Scientific</strong> <strong>Orion</strong> <strong>Star</strong> e guida per l’utente dei misuratori <strong>Star</strong> <strong>Plus</strong>
Capitolo XV Specifiche tecniche misuratore<br />
Specifiche tecniche misuratore<br />
Condizioni ambientali operative<br />
Condizioni ambientali operative misuratori da banco e portatili<br />
Temperatura ambiente operativa da 5 a 45 °C<br />
Umidità relativa operativa<br />
da 5 a 85 %, senza condensa<br />
Temperatura di conservazione da -20 a +60 °C<br />
Umidità relativa di conservazione<br />
Inquinamento Grado 2<br />
Sovratensione<br />
Altitudine<br />
Peso<br />
Dimensioni<br />
Misuratori con alimentazione CA<br />
Misuratori funzionanti a batteria<br />
Regolamenti e sicurezza<br />
Materiale custodia<br />
Shock e vibrazioni<br />
Contenitore (progettato su misura)<br />
da 5 a 85 %, senza condensa<br />
Categoria II<br />
Fino a 2000 metri<br />
Portatile: 0,45 kg<br />
Da banco: 0,91 kg<br />
Portatile: 4,8 cm (Alt.) x 9,7 cm (Largh.) x 21,3 cm<br />
(Lungh.)<br />
Da banco: 9,4 cm (Alt.) x 17,0 cm (Largh.) x 22,4 cm<br />
(Lungh.)<br />
Solo per uso in interni<br />
Uso in interni o in esterni<br />
Limiti* di classe CE, CSA, TÜV, UL, FCC<br />
ABS<br />
Vibrazioni, spedizione/manipolazione come da<br />
ISTA #1A<br />
Shock, test di caduta in imballo come da ISTA #1A<br />
IP67 (misuratore portatile)<br />
IP54 (misuratore da banco)<br />
* Le certificazioni TÜV e UL sono in corso per tutti i misuratori ottici di ossigeno disciolto <strong>Star</strong> RDO ® .<br />
<strong>Thermo</strong> <strong>Scientific</strong> <strong>Orion</strong> <strong>Star</strong> e guida per l’utente dei misuratori <strong>Star</strong> <strong>Plus</strong><br />
IT-59
Specifiche tecniche misuratore<br />
Condizioni ambientali operative adattatore di alimentazione universale<br />
Temperatura ambiente operativa da 0 a 50 °C<br />
Umidità relativa operativa<br />
da 0 a 90 %, senza condensa<br />
Temperatura di conservazione da -20 a +75 °C<br />
Umidità relativa di conservazione<br />
Inquinamento Grado 2<br />
Sovratensione<br />
Altitudine operativa<br />
Misuratori da banco<br />
Specifiche parametri misuratore<br />
da 0 a 90 %, senza condensa<br />
Categoria II<br />
Fino a 2000 metri<br />
Solo per uso in interni<br />
Le seguenti specifiche dei parametri dei misuratori sono valide per l'intera linea di<br />
misuratori <strong>Orion</strong> <strong>Star</strong> e <strong>Star</strong> <strong>Plus</strong>. I misuratori a parametro singolo o doppio e alcuni<br />
multiparametro non includeranno tutti i parametri elencati in questa sezione.<br />
pH<br />
Intervallo da -2,000 a 19,999<br />
Risoluzione 0,1, 0,01, 0,001<br />
Accuratezza relativa ± 0,002<br />
Punti di calibrazione da 1 a 5<br />
pH (solo misuratore 2-<strong>Star</strong>)<br />
Intervallo da 0,000 a 14,999<br />
Risoluzione 0,1, 0,01, 0,001<br />
Accuratezza relativa ± 0,002<br />
Punti di calibrazione da 1 a 3<br />
Millivolt, Millivolt relativi, ORP<br />
Intervallo<br />
± 1999,9 mV<br />
Risoluzione<br />
0,1 mV<br />
Accuratezza relativa<br />
il valore maggiore fra ± 0,2 mV o 0,05 % della lettura<br />
IT-60<br />
<strong>Thermo</strong> <strong>Scientific</strong> <strong>Orion</strong> <strong>Star</strong> e guida per l’utente dei misuratori <strong>Star</strong> <strong>Plus</strong>
Specifiche tecniche misuratore<br />
ISE<br />
Intervallo da 0 a 19999<br />
Risoluzione<br />
da 1 a 3 cifre significative<br />
Accuratezza relativa il valore maggiore fra ± 0,2 mV o 0,05 %<br />
Unità visualizzate<br />
Funzioni di calibrazione<br />
Ossigeno disciolto (Polarografico)<br />
Intervallo<br />
Risoluzione<br />
Accuratezza relativa<br />
Fattore di salinità<br />
Pressione barometrica<br />
Tipi di calibrazione<br />
Tipo sonda<br />
Ossigeno disciolto ottico RDO ®<br />
Intervallo<br />
Risoluzione<br />
Accuratezza relativa<br />
Fattore di salinità<br />
Pressione barometrica<br />
Tipi di calibrazione<br />
Tipo sonda<br />
M, mg/L, %, ppb o nessuna unità<br />
Lineare punto a punto, correzione automatica per il bianco<br />
selezionabile non lineare e stabilità di intervallo bassa concentrazione<br />
da 0,00 a 90,0 mg/L<br />
da 0,0 a 600 %<br />
0,1, 0,01 mg/L<br />
0,1, 1 %<br />
± 0,2 mg/L<br />
± 2 %<br />
da 0 a 45 ppt<br />
da 450 a 850 mm Hg<br />
Acqua satura d'acqua, aria satura d'acqua, manuale (Winkler), zero<br />
Polarografica<br />
da 0,00 a 20,0 mg/L<br />
da 0,0 a 200 %<br />
0,1, 0,01 mg/L<br />
0,1, 1 %<br />
± 0,1 mg/L fino a 8 mg/L; ± 0,2 mg/L da 8 mg/L a 20 mg/L<br />
± 2 %<br />
da 0 a 45 ppt<br />
da 450 a 850 mm Hg<br />
Acqua satura d'acqua, aria satura d'acqua, manuale (Winkler), zero<br />
RDO ottico<br />
<strong>Thermo</strong> <strong>Scientific</strong> <strong>Orion</strong> <strong>Star</strong> e guida per l’utente dei misuratori <strong>Star</strong> <strong>Plus</strong><br />
IT-61
Specifiche tecniche misuratore<br />
Conducibilità<br />
Intervallo<br />
Risoluzione<br />
Accuratezza relativa<br />
da 0,000 a 3000 mS/cm, risoluzione automatica con dipendenza<br />
costante di cella<br />
4 cifre significative fino a 0,001 µS/cm, dipendenza costante di cella<br />
il valore maggiore fra 0,5 % ± 1 cifra o 0,01 µS/cm<br />
Costante di cella da 0,001 a 199,9 cm -1<br />
Temperatura di riferimento 5 °C, 10 °C, 15 °C, 20 °C o 25 °C<br />
Intervallo resistività<br />
Risoluzione resistività<br />
Accuratezza relativa resistività<br />
Intervallo salinità<br />
Risoluzione salinità<br />
Accuratezza relativa salinità<br />
Intervallo residuo fisso<br />
Risoluzione residuo fisso<br />
Accuratezza relativa residuo fisso<br />
Temperatura<br />
da 0,0001 a 100 Megohm<br />
Automatica<br />
0,5 % ± 1 cifra<br />
da 0,1 a 80,0 ppt NaCl equivalente, da 0,1 a 42 ppt salinità pratica<br />
0,1 ppt<br />
0,1 % ± 1 cifra<br />
da 0 a 19999 mg/L<br />
1 mg/L<br />
0,5 % ± 1 cifra<br />
Intervallo da -5 a 105 °C<br />
Risoluzione 0,1 fino a 99,9 °C, 1,0 oltre 99,9 °C<br />
Accuratezza relativa ± 0,1 °C<br />
Temperatura* (Solo per misuratori ottici di ossigeno disciolto RDO ® )<br />
Intervallo da 0 a 50 °C<br />
Risoluzione 0,1 °C<br />
Accuratezza relativa ± 0,3 °C<br />
* Questa specifica di temperatura è solo per il misuratore ottico di ossigeno disciolto<br />
RDO <strong>Star</strong> <strong>Plus</strong> qu<strong>and</strong>o utilizzato congiuntamente con la sonda ottica RDO. I misuratori<br />
RDO 4-<strong>Star</strong> e 5-<strong>Star</strong> avranno le normali specifiche di temperatura se utilizzati con un<br />
elettrodo diverso dalla sonda RDO.<br />
Nota: Le specifiche sono soggette a variazione senza alcuna notifica.<br />
IT-62<br />
<strong>Thermo</strong> <strong>Scientific</strong> <strong>Orion</strong> <strong>Star</strong> e guida per l’utente dei misuratori <strong>Star</strong> <strong>Plus</strong>
Specifiche tecniche misuratore<br />
Informazioni per gli ordini<br />
N. Cat. Descrizione<br />
1111000 Misuratore pH da banco 2-<strong>Star</strong> con adattatore universale e manuale per l'utente<br />
1112000 Misuratore pH da banco 3-<strong>Star</strong> <strong>Plus</strong> con adattatore universale e manuale per l'utente<br />
1212000 Misuratore pH portatile 3-<strong>Star</strong> <strong>Plus</strong> con batterie e manuale per l'utente<br />
1113000 Misuratore OD da banco 3-<strong>Star</strong> <strong>Plus</strong> con adattatore universale e manuale per l'utente<br />
1213000 Misuratore OD portatile 3-<strong>Star</strong> <strong>Plus</strong> con batterie e manuale per l'utente<br />
1114000 Misuratore conducibilità da banco 3-<strong>Star</strong> <strong>Plus</strong> con adattatore universale e manuale<br />
per l'utente<br />
1214000 Misuratore conducibilità portatile 3-<strong>Star</strong> <strong>Plus</strong> con batterie e manuale per l'utente<br />
1115000 Misuratore pH/ISE da banco 4-<strong>Star</strong> <strong>Plus</strong> con adattatore universale e manuale per l'utente<br />
1215000 Misuratore pH/ISE portatile 4-<strong>Star</strong> <strong>Plus</strong> con batterie e manuale per l'utente<br />
1116000 Misuratore pH/OD da banco 4-<strong>Star</strong> <strong>Plus</strong> con adattatore universale e manuale per l'utente<br />
1216000 Misuratore pH/OD portatile 4-<strong>Star</strong> <strong>Plus</strong> con batterie e manuale per l'utente<br />
1117000 Misuratore pH/conducibilità da banco 4-<strong>Star</strong> <strong>Plus</strong> con adattatore universale e<br />
manuale per l'utente<br />
1217000 Misuratore pH/conducibilità portatile 4-<strong>Star</strong> <strong>Plus</strong> con batterie e manuale per l'utente<br />
1218000 Misuratore pH/OD/conducibilità portatile 5-<strong>Star</strong> <strong>Plus</strong> con batterie e manuale per l'utente<br />
1119000 Misuratore pH/ISE/OD/conducibilità da banco 5-<strong>Star</strong> <strong>Plus</strong> con adattatore universale<br />
e manuale per l'utente<br />
1219000 Misuratore pH/ISE/OD/conducibilità portatile 5-<strong>Star</strong> <strong>Plus</strong> con batterie e manuale<br />
per l'utente<br />
1213300 Misuratore ottico OD portatile 3-<strong>Star</strong> <strong>Plus</strong> RDO ® con batterie e manuale per l'utente<br />
1213310 Misuratore ottico pH/OD portatile 4-<strong>Star</strong> <strong>Plus</strong> RDO con batterie e manuale per l'utente<br />
1213320 Misuratore ottico pH/OD/conducibilità portatile 5-<strong>Star</strong> <strong>Plus</strong> RDO con batterie e manuale<br />
per l'utente<br />
090043 Supporto elettrodo con braccio girevole<br />
1010003 Adattatore universale<br />
1010006 Stampante serie <strong>Star</strong> con cavo di interfaccia stampante RS232 (N. Cat. 250302-001)<br />
1010053 Cavo di interfaccia computer RS232<br />
096019 Agitatore con pala per misuratori da banco 3-<strong>Star</strong>, 4-<strong>Star</strong> e 5-<strong>Star</strong><br />
<strong>Thermo</strong> <strong>Scientific</strong> <strong>Orion</strong> <strong>Star</strong> e guida per l’utente dei misuratori <strong>Star</strong> <strong>Plus</strong><br />
IT-63
Specifiche tecniche misuratore<br />
N. Cat. Descrizione<br />
8102BNUWP<br />
8107BNUMD<br />
8156BNUWP<br />
8157BNUMD<br />
8156BNUWP<br />
8172BNWP<br />
9107APMD<br />
9107BNMD<br />
9157BNMD<br />
9165BNWP<br />
9172BNWP<br />
927005MD<br />
927007MD<br />
9512HPBNWP<br />
9609BNWP<br />
9707BNWP<br />
8611BNWP<br />
083005MD<br />
083010MD<br />
086030MD<br />
087010MD<br />
087001 Ottica di riserva<br />
011050MD<br />
013005MD<br />
013010MD<br />
013016MD<br />
Elettrodo pH combinato ROSS Ultra con corpo in vetro<br />
Elettrodo Triode ph/ATC riempito con gel a bassa manutenzione ROSS con corpo<br />
in resina epossidica<br />
Elettrodo pH combinato ROSS Ultra con corpo in resina epossidica<br />
Elettrodo Triode pH/ATC combinato ROSS Ultra con corpo in resina epossidica<br />
Elettrodo pH combinato ROSS Sure-Flow con corpo in resina epossidica<br />
Elettrodo pH combinato ROSS Sure-Flow con corpo in vetro<br />
Elettrodo Triode ph/ATC riempito con polimero a bassa manutenzione AquaPro<br />
con corpo in resina epossidica<br />
Elettrodo Triode pH/ATC riempito con gel con corpo in resina epossidica<br />
Elettrodo Triode pH/ATC ricaricabile con corpo in resina epossidica<br />
Elettrodo pH combinato Sure-Flow con corpo in resina epossidica<br />
Elettrodo pH combinato Sure-Flow con corpo in vetro<br />
Sonda ATC con corpo in resina epossidica<br />
Sonda ATC con corpo in acciaio inox<br />
Elettrodo combinato ionoselettivo per ammoniaca ad elevate prestazioni<br />
Elettrodo combinato iono selettivo per fluoridi<br />
Elettrodo combinato iono selettivo per nitrati<br />
Elettrodo combinato iono selettivo per sodio ROSS<br />
Sonda OD polarografica con manicotto di calibrazione e cavo da 1,5 metri<br />
Sonda OD polarografica con manicotto di calibrazione e cavo da 3 metri<br />
Sonda OD polarografica BOD AUTO-STIR con manicotto di calibrazione<br />
Sonda ottica RDO ® con protezione in acciaio inox, ottica e cavo da 3 metri<br />
Sonda di conducibilità con intervallo da 1 µS/cm a 20 mS/cm e cavo da 1,5 metri<br />
Sonda di conducibilità DuraProbe con intervallo da 1 µS/cm a 200 mS/cm e cavo<br />
da 1,5 metri<br />
Sonda di conducibilità DuraProbe con intervallo da 1 µS/cm a 200 mS/cm e cavo<br />
da 3 metri<br />
Sonda di conducibilità con intervallo da 0,01 µS/cm a 300 mS/cm e cavo da 1,5 metri<br />
Visitare www.thermo.com/water per ulteriori kit misuratore, accessori, elettrodi e soluzioni.<br />
IT-64<br />
<strong>Thermo</strong> <strong>Scientific</strong> <strong>Orion</strong> <strong>Star</strong> e guida per l’utente dei misuratori <strong>Star</strong> <strong>Plus</strong>
Appendice A Funzioni del menu impostazione<br />
del misuratore<br />
Funzioni del menu impostazione pH<br />
Riconoscimento automatico tampone<br />
I misuratori di pH <strong>Orion</strong> <strong>Star</strong> e <strong>Star</strong> <strong>Plus</strong> sono in grado di riconoscere automaticamente<br />
tamponi con pH 1,68, 4,01, 6,86, 7,00, 9,18, 10,01 e 12,46 durante una calibrazione<br />
pH. Durante una calibrazione, il misuratore utilizza il set di tamponi selezionato e la<br />
lettura dei mV grezzi dell'elettrodo pH nel tampone per riconoscere e visualizzare il<br />
valore del tampone alla temperatura misurata. Il valore di mV grezzi deve essere di<br />
circa ± 30 mV dalla lettura teorica dei mV del tampone affinché il misuratore riconosca<br />
automaticamente il tampone.<br />
Tampone Intervallo mV Tampone Intervallo mV Tampone Intervallo mV<br />
1,68 da +285 a +345 7,00 da - 30 a + 30 10,01 da -207 a -147<br />
4,01 da +207 a +147 9,18 da -99 a -159 12,46 da -293 a -353<br />
6,86 da +38 a -22<br />
Funzioni del menu impostazione ossigeno disciolto<br />
Compensazione pressione barometrica<br />
I misuratori di ossigeno disciolto <strong>Orion</strong> <strong>Star</strong> e <strong>Star</strong> <strong>Plus</strong> sono dotati di un barometro<br />
interno utilizzato per le letture dell'ossigeno dissolto compensate in base alla pressione.<br />
Il misuratore può utilizzare anche una compensazione della pressione barometrica<br />
manuale se l'ossigeno disciolto viene misurato con una sonda sommersa o in un<br />
recipiente sotto pressione. La pressione deve essere indicata come mm Hg.<br />
1 mm Hg = 0,03937 pollice Hg = 1,3332 hPa (mBar) = 0,01934 PSI.<br />
Correzione di salinità<br />
La correzione automatica della salinità per le letture di ossigeno disciolto è disponibile<br />
per i misuratori di ossigeno disciolto <strong>Orion</strong> <strong>Star</strong> e <strong>Star</strong> <strong>Plus</strong> dotati di una modalità di<br />
misurazione della conducibilità. Il misuratore utilizza il valore di conducibilità letto dalla<br />
sonda di conducibilità per calcolare il fattore di correzione della salinità e applica tale<br />
fattore alle letture di ossigeno disciolto visualizzate in mg/L.<br />
Il misuratore inoltre può utilizzare la correzione di salinità manuale per le letture di<br />
ossigeno disciolto espresse in mg/L. Il fattore di correzione di salinità manuale deve<br />
essere inserito come ppt (parti per migliaia).<br />
<strong>Thermo</strong> <strong>Scientific</strong> <strong>Orion</strong> <strong>Star</strong> e guida per l’utente dei misuratori <strong>Star</strong> <strong>Plus</strong><br />
IT-65
Funzioni del menu impostazione misuratore<br />
Conducibilità<br />
a 20 °C<br />
(mS/cm)<br />
Valore di<br />
correzione<br />
salinità (ppt)<br />
Conducibilità<br />
a 20 °C<br />
(mS/cm)<br />
Valore di<br />
correzione<br />
salinità (ppt)<br />
Conducibilità<br />
a 20 °C<br />
(mS/cm)<br />
5 3 20 13 35 25<br />
6 4 21 14 36 25<br />
7 4 22 15 37 26<br />
8 5 23 15 38 27<br />
9 6 24 16 39 28<br />
10 6 25 17 40 29<br />
11 7 26 18 42 30<br />
12 8 27 18 44 32<br />
13 8 28 19 46 33<br />
14 9 29 20 48 35<br />
15 10 30 21 50 37<br />
16 10 31 22 52 38<br />
17 11 32 22 54 40<br />
18 12 33 23 56 42<br />
19 13 34 24<br />
Valore di<br />
correzione<br />
salinità (ppt)<br />
Questa tabella è stata calcolata in base alle International Oceanographic Tables, Vol. 1, National Institute<br />
of Oceanography of Great Britain, Womley, Godaming, Surrey, Engl<strong>and</strong> <strong>and</strong> Unesco, Paris 1971.<br />
Funzioni del menu impostazione conducibilità<br />
Compensazione della temperatura e temperatura di riferimento<br />
I misuratori di conducibilità <strong>Orion</strong> <strong>Star</strong> e <strong>Star</strong> <strong>Plus</strong> hanno la possibilità di utilizzare una<br />
funzione di compensazione della temperatura che calcola e visualizza le misurazioni<br />
di conducibilità ad una temperatura di riferimento di 5 °C, 10 °C, 15 °C, 20 °C o 25 °C<br />
(i misuratori <strong>Orion</strong> <strong>Star</strong> hanno una temperatura di riferimento solo di 15 °C, 20 °C o<br />
25 °C). La compensazione di temperatura può essere impostata come lineare per la<br />
maggior parte dei campioni acquei, non lineare per i campioni ultra puri e con bassa<br />
forza ionica oppure disattivata per le misurazioni di conducibilità non compensate in<br />
base alla temperatura.<br />
Quanto più la temperatura del campione è vicina alla temperatura di riferimento<br />
selezionata, tanto più accurata sarà la misurazione della conducibilità, in particolar<br />
modo se il coefficiente di compensazione della temperatura è stimato o non accurato.<br />
IT-66<br />
<strong>Thermo</strong> <strong>Scientific</strong> <strong>Orion</strong> <strong>Star</strong> e guida per l’utente dei misuratori <strong>Star</strong> <strong>Plus</strong>
Funzioni del menu impostazione misuratore<br />
La conducibilità di una soluzione con una specifica concentrazione di elettrolita cambia<br />
con la temperatura e questa relazione è descritta dal coefficiente di temperatura della<br />
soluzione. Il misuratore ha un coefficiente di temperatura predefinito pari ad una modifica<br />
di conducibilità del 2,1 percento per °C, un valore tipico per molti campioni acquei.<br />
Soluzione (da 25 °C a 50 °C)<br />
Coefficiente di temperatura (% / °C)<br />
Acqua ultra pura 4,55<br />
Sale (NaCl) 2,12<br />
5% NaOH 1,72<br />
Ammoniaca diluita 1,88<br />
10% HCl 1,32<br />
5% Acido solforico 0,96<br />
98% Acido solforico 2,84<br />
Sciroppo di zucchero 5,64<br />
Residuo fisso<br />
I misuratori di conducibilità <strong>Orion</strong> <strong>Star</strong> e <strong>Star</strong> <strong>Plus</strong> misurano il residuo fisso come<br />
la quantità totale di sostanze inorganiche disciolte in una soluzione. Le sostanze<br />
inorganiche disciolte hanno una corrente che viene misurata dalla sonda di conducibilità.<br />
Poiché vi è una relazione diretta fra la conducibilità e il residuo fisso, le letture di<br />
conducibilità vengono utilizzate per stimare la presenza di sostanze inorganiche.<br />
L'utente deve inserire un fattore di residuo fisso fra 0,01 e 10mg/L nel menu<br />
impostazione.<br />
Il metodo st<strong>and</strong>ard di determinazione del residuo fisso richiede l'evaporazione di un<br />
campione a secco a 180 °C con successiva pesatura del residuo. Il fattore residuo<br />
fisso è calcolato prendendo il peso residuo e dividendolo per la conducibilità del<br />
campione. Le successive letture di conducibilità vengono moltiplicate per il fattore<br />
di residuo fisso per determinare il valore del residuo fisso del campione.<br />
Calibrazione automatica<br />
I misuratori di conducibilità <strong>Orion</strong> <strong>Star</strong> e <strong>Star</strong> <strong>Plus</strong> sono in grado di riconoscere<br />
automaticamente st<strong>and</strong>ard di conducibilità da 100 µS/cm, 1413 µS/cm e 12,9 mS/cm<br />
qu<strong>and</strong>o la costante di cella nominale della sonda di conducibilità viene inserita nel<br />
menu impostazione. Affinché il misuratore riconosca lo st<strong>and</strong>ard di conducibilità, la<br />
costante di cella inserita deve essere accurata entro un fattore di 3. Ad esempio, se<br />
la costante di cella reale è 1,0 cm -1 , inserendo una costante di cella nominale con<br />
intervallo da 0,3 cm -1 a 3,0 cm -1 il misuratore sarà in grado di identificare lo st<strong>and</strong>ard<br />
di conducibilità e compiere la calibrazione automatica.<br />
<strong>Thermo</strong> <strong>Scientific</strong> <strong>Orion</strong> <strong>Star</strong> e guida per l’utente dei misuratori <strong>Star</strong> <strong>Plus</strong><br />
IT-67
Funzioni del menu impostazione misuratore<br />
Funzioni del menu impostazione ISE<br />
Intervallo di concentrazione<br />
I misuratori ISE <strong>Orion</strong> <strong>Star</strong> e <strong>Star</strong> <strong>Plus</strong> possono essere impostati con un intervallo<br />
di concentrazione ISE alto o basso, utilizzato per determinare i criteri di stabilità della<br />
calibrazione. Se viene selezionato un intervallo di concentrazione ISE alto, il misuratore<br />
eseguirà una calibrazione normale senza alcun ritardo nel visualizzare il valore dello<br />
st<strong>and</strong>ard di calibrazione. Se viene selezionato un intervallo di concentrazione ISE basso,<br />
il misuratore attenderà da tre a cinque minuti prima di visualizzare una lettura stabile<br />
per i valori dello st<strong>and</strong>ard di calibrazione. Il ritardo dipende dalle specie misurate e dalla<br />
concentrazione degli st<strong>and</strong>ard di calibrazione. L'intervallo di concentrazione ISE basso<br />
è progettato per migliorare l'accuratezza delle misurazioni di basse concentrazioni<br />
permettendo all'elettrodo di avere una maggiore quantità di tempo per stabilizzare<br />
gli st<strong>and</strong>ard di calibrazione.<br />
Correzione automatica per il bianco<br />
I misuratori ISE <strong>Orion</strong> <strong>Star</strong> e <strong>Star</strong> <strong>Plus</strong> sono dotati di una funzione di correzione<br />
automatica per il bianco che utilizza un algoritmo per compensare la non linearità<br />
dell'elettrodo iono selettivo in st<strong>and</strong>ard e campioni di basso livello. Poiché la funzione<br />
di correzione automatica per il bianco richiede l'utilizzo di una serie di equazioni non<br />
lineari che può essere calcolata solo numericamente, l'utente non può verificare<br />
analiticamente la calibrazione e il valore di gradiente medio che viene visualizzato<br />
sul misuratore potrebbe essere al di fuori dell'intervallo di gradiente specificato nella<br />
guida per l'utente dell'elettrodo. Nelle applicazioni in cui è richiesta la verifica analitica,<br />
la funzione di correzione automatica per il bianco deve essere disattivata.<br />
IT-68<br />
<strong>Thermo</strong> <strong>Scientific</strong> <strong>Orion</strong> <strong>Star</strong> e guida per l’utente dei misuratori <strong>Star</strong> <strong>Plus</strong>
Water Analysis Instruments<br />
North America<br />
166 Cummings Center<br />
Beverly, MA 01915 USA<br />
Toll Free: 1-800-225-1480<br />
Tel: 1-978-232-6000<br />
info.water@thermo.com<br />
9 0 0 1 : 2 0 0 8<br />
Netherl<strong>and</strong>s<br />
Tel: (31) 033-2463887<br />
info.water.uk@thermo.com<br />
India<br />
Tel: (91) 22-4157-8800<br />
wai.asia@thermofisher.com<br />
Japan<br />
Tel: (81) 045-453-9175<br />
wai.asia@thermofisher.com<br />
China<br />
Tel: (86) 21-68654588<br />
wai.asia@thermofisher.com<br />
Singapore<br />
Tel: (65) 6778-6876<br />
wai.asia@thermofisher.com<br />
www.thermoscientific.com/water<br />
© 2010 <strong>Thermo</strong> Fisher <strong>Scientific</strong> Inc.<br />
All rights reserved.<br />
257250-001 Rev C 0710