Create successful ePaper yourself
Turn your PDF publications into a flip-book with our unique Google optimized e-Paper software.
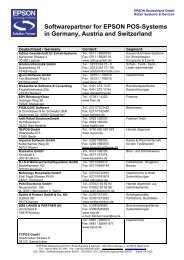
English<br />
Power Switch and Power Switch Cover<br />
The power switch is on the top left of the printer. Press it to turn on the printer,<br />
and press and hold it for more than 3 seconds to turn off the printer.<br />
Power Switch Cover<br />
You can use the enclosed power switch cover to make sure that the power switch<br />
is not accidentally pressed. Peel off the backing tape and press the cover into place<br />
to install it.<br />
WARNING:<br />
If an accident occurs when the power<br />
switch cover (shown to the right) is<br />
attached, immediately remove the<br />
bottom cover and unplug the power<br />
supply cable to avoid a fire hazard.<br />
Unpacking<br />
The following items are included for the standard specification printer. If any<br />
items are damaged, contact your dealer.<br />
❏ Printer<br />
❏ Label roll paper<br />
❏ Power switch cover<br />
❏ Roll paper spacer<br />
❏ Screw for installation of roll paper spacer<br />
❏ Cover operation label<br />
Installing the Printer<br />
Whether you are going to use the printer in the label peeler issuing mode or label<br />
continuous issuing mode (not using the peeler), you must install this printer<br />
vertically (<strong>with</strong> the paper exit at the front). See the illustration at the top of page 5.<br />
You can install it either on a flat surface, or you can hang it on a wall by using the<br />
optional bracket (WH-10).<br />
If the paper exit is blocked by label backing paper accumulating on a table or other<br />
surface, a paper jam or other problem may occur. Install the printer in a location,<br />
such as at the edge of a counter, where the backing paper will not accumulate near<br />
the paper exit.<br />
4 <strong>TM</strong>-<strong>L90</strong> <strong>with</strong> <strong>Peeler</strong> User’s Manual