Handleiding - ELV
Handleiding - ELV
Handleiding - ELV

You also want an ePaper? Increase the reach of your titles
YUMPU automatically turns print PDFs into web optimized ePapers that Google loves.
D942S 48342PL_Ed3 2/1/07 6:31 PM Page 1<br />
48342PL Ed1<br />
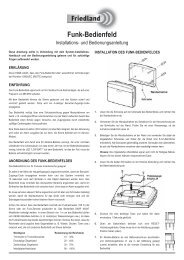
Instruction Manual<br />
D942S Libra+ 150m Plug-in chime with Push/Converter<br />
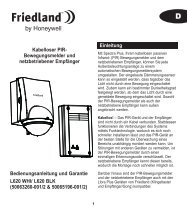
Bedienungsanleitung<br />
D942S Libra+ 150m Reichweite zum Betrieb an einer Steckdose, mit Taster/Erweiterungssender<br />
Manuel d’utilisation<br />
D942S Libra + carillon enfichable sur une prise secteur 150m de portée avec bouton poussoir / convertisseur<br />
Instructie handleiding<br />
D942S Libra+ 150m “Plug-In” gong werkend & Draadloze beldrukknop / converter<br />
Instruccione Manuel<br />
D942S Libra+ Timbre Inalámbricos, con enchufe 150M el pulsador/conversor panorámico<br />
Manuale d’Instruzioni<br />
D942S Libra+ 150mt argento a spina con convertitore/pulsante<br />
Manual de Instruções<br />
D942S Libra+ 150m Carrilhão de porta sem fios com ficha incorporada e alcance de 150m<br />
com Botão/conversor sem-fios
D942S 48342PL_Ed3 2/1/07 6:31 PM Page 2<br />
Libra + 150m Plug-in chime with push/converter<br />
Installation and Use<br />
Checking pack contents ........................................ Pg. 2<br />
Safety ....................................................................<br />
Quick start .............................................................<br />
Plug in the chime .................................................. Pg. 3<br />
Open the bell push/converter ................................<br />
Fit the push battery ...............................................<br />
Switch positions ....................................................<br />
Volume control ......................................................<br />
Sliding window ......................................................<br />
Use of icons .......................................................... Pg. 4<br />
Programming procedures......................................<br />
Changing the tune ................................................<br />
Recall function.......................................................<br />
Chime sounds....................................................... Pg. 5<br />
Mount bell push.....................................................<br />
Push/converter functions ......................................<br />
Typical connections............................................... Pg. 6<br />
Troubleshooting..................................................... Pg. 7<br />
Specifications ........................................................ Pg. 8<br />
Disposal and recycling ..........................................<br />
Guarantee .............................................................<br />
Declaration ............................................................<br />
1<br />
ENGLISH
D942S 48342PL_Ed3 2/1/07 6:31 PM Page 3<br />
Libra + 150m Plug-in chime with push/converter<br />
Thank you for choosing this Friedland product. Please use the following instructions to<br />
ensure correct installation and use. Keep these notes in a safe place for future reference.<br />
Checking pack contents<br />
Unpack your chime kit and identify the<br />
following parts:<br />
¬● Chime<br />
● Bell push/converter<br />
● CR2032 battery for bell push<br />
● Bell wire (for use with a wired push)<br />
● 2 x fixing screws for push<br />
● Adhesive pad<br />
You will need:<br />
● A 4mm cross-head screwdriver<br />
● A small flat bladed screwdriver<br />
Quick start<br />
Safety<br />
Before proceeding with the installation,<br />
please note the following safety warnings:<br />
¬● Always follow the manufacturer’s advice<br />
when using power tools and wear suitable<br />
protective equipment (e.g. safety goggles)<br />
when drilling holes etc.<br />
¬● Before drilling holes in walls, check for<br />
hidden electricity cables and water pipes,<br />
the use of a cable/pipe locater maybe<br />
advisable if in doubt.<br />
¬● When connecting the landscape<br />
push/converter to other manufacturers’<br />
equipment, check manuals and if necessary<br />
consult the manufacturer regarding suitability<br />
for the intended use.<br />
The bell push supplied with this kit is pre-programmed to operate with the chime. You need to do the following to get started:<br />
● Open the bell push<br />
● Fit the push battery<br />
● Check the chime switch setting<br />
● Check the volume setting<br />
● Plug in the chime<br />
When you operate the bell push, the chime will sound and the 1st Icon will flash. If you have additional<br />
pushes or you want to assign a different icon to your push, you will need to follow the programming procedure.<br />
2
D942S 48342PL_Ed3 2/1/07 6:31 PM Page 4<br />
A<br />
Open the bell push/converter<br />
remove nameplate<br />
Using a ball point pen, press at point shown in<br />
Fig 1 (A) and remove the name plate. If desired,<br />
you can prise apart the two halves of the name<br />
plate and write on the card. Undo the retaining<br />
screw (B) and remove the back of the push.<br />
B<br />
Fig. 1<br />
To fit the push/converter battery<br />
Insert the CR2032 coin<br />
cell. Ensure the face<br />
marked ‘+’ is uppermost<br />
(Fig. 2).<br />
Fig. 2<br />
CR2032<br />
+<br />
3<br />
Chime switch positions<br />
Mute<br />
To turn the sound off, set switch (C) to position 1.<br />
Flash off<br />
To turn the flashing light off, set switch (C) to<br />
position 3.<br />
Normal operation<br />
For normal operation (sound + flashing light) set<br />
switch (C) to position 2.<br />
D<br />
Volume control<br />
The volume control is behind the sliding window on<br />
the front of the chime. Initially, set the control to<br />
mid-point. After you have tested your system, adjust<br />
to the desired volume.<br />
Sliding window<br />
Release the catch (D) and slide open the<br />
window (Fig. 3).<br />
C<br />
Fig. 3
D942S 48342PL_Ed3 2/1/07 6:31 PM Page 5<br />
Use of icons<br />
In addition to the chime sounds, your chime has a<br />
visual indication to show which device has activated it.<br />
An icon will illuminate when the chime is<br />
activated by a bell push or another compatible<br />
device. The chime supports 3 icons:<br />
Main<br />
door<br />
Back<br />
door<br />
! Alert<br />
symbol<br />
The ‘Main door’ and ‘Back door’ icons are usually<br />
used for bell pushes. The other icons are intended for<br />
use with other compatible devices, such as PIR<br />
movement detectors and Telephone ring detector.<br />
Icons numbered 1 to 3 are also included. The Icons<br />
are self-adhesive, supplied in strips of 3. They can<br />
be changed, if required, by opening the sliding<br />
window of the chime and gently peeling off the<br />
strips.<br />
If desired, the strips can be cut into individual<br />
icons and fixed to the chime in a different order.<br />
✃<br />
Use the Programming procedure to change the<br />
icon associated with a push.<br />
4<br />
Programming procedure<br />
Learn mode<br />
To enable your chime to learn the identity of your<br />
bell push:<br />
¬● Press the ● button and keep it pressed. Each<br />
Icon will light in turn. When the Icon you want is<br />
lit, release the button.<br />
¬● While the Icon you have selected is lit, operate<br />
your push. The chime will sound. The Icon will flash.<br />
Unlearn procedure<br />
If you want to remove a push from the chime’s<br />
memory:<br />
¬● Press the ● button and keep it pressed.<br />
Each Icon will light in turn. When the Icon<br />
associated with the push to be un-learnt is<br />
lit, release the button.<br />
¬● Press and hold down both ● & buttons,<br />
until a ‘beep’ sound is heard.<br />
Changing the tune<br />
Changing the tune<br />
Operate the push. While the icon is flashing,<br />
press the button. Press the button again<br />
and the tune will change. Repeat until the<br />
tune you want plays.<br />
Recall function<br />
A short push of the ● button will flash the icon that<br />
was last in use.
D942S 48342PL_Ed3 2/1/07 6:31 PM Page 6<br />
Chime sounds<br />
To hear the chime sounds without operating the<br />
bell push, press the button. Press the button<br />
again and the tune will change.<br />
Mount the Push/Converter<br />
Mount using either the double sided adhesive pad,<br />
or the screws provided (see Fig 4). Test your push<br />
before fixing. Avoid fixing to metal structures.<br />
Fig. 4<br />
C1 wired bell push or 'normally open' switch/contacts<br />
C2 door/window contact, 'normally closed' switch/contacts<br />
C3 a lit push (with transformer) when switch is closed,<br />
chime will sound<br />
C4 landscape push/converter - terminal positions<br />
C5 a typical wired bell or chime circuit - transformer powered<br />
C6 converter connected to a wired bell or chime<br />
circuit - transformer powered<br />
C7 converter connected to a wired bell or chime<br />
circuit - battery powered<br />
5<br />
Push/Converter functions<br />
The bell push in this kit can be used as a stand-alone<br />
wirefree push. Additionally, it can be used to interface<br />
with an existing wired doorbell system or any of<br />
the following:<br />
_ A standard wired bell push<br />
_ A lit bell push and transformer<br />
_ A door or window contact<br />
_ Any device with N/O or N/C, voltage free contacts<br />
_ Any device which generates appropriate control<br />
signals < 24 (AC or DC)<br />
See typical connections (C1-7)<br />
Important Note: Additional wiring can be brought into<br />
the push through the grommet in the back of the push.<br />
Once the grommet has been pierced or removed,<br />
we recommend that the push is mounted indoors.<br />
Diagram Applications Operation<br />
when switch is closed, chime will sound<br />
when switch is opened, chime will make<br />
an 'ALERT' sound<br />
when switch is closed, chime will sound<br />
when push is operated, Libra+ chime<br />
will sound<br />
when push is operated, Libra+ chime<br />
will sound
D942S 48342PL_Ed3 2/1/07 6:31 PM Page 7<br />
Typical connections<br />
C1<br />
C2<br />
1<br />
2<br />
3<br />
4<br />
5<br />
1<br />
2<br />
3<br />
4<br />
5<br />
C3 C4<br />
C5 C6 C7<br />
BELL<br />
8V<br />
~<br />
~<br />
240V<br />
8V<br />
~<br />
~<br />
240V<br />
BELL<br />
8V<br />
~<br />
~<br />
240V<br />
6<br />
1<br />
2<br />
3<br />
4<br />
5<br />
1<br />
2<br />
3<br />
4<br />
5<br />
5<br />
4<br />
BELL<br />
1<br />
2<br />
3<br />
1<br />
2<br />
3<br />
4<br />
5
D942S 48342PL_Ed3 2/1/07 6:31 PM Page 8<br />
Troubleshooting<br />
A ‘beep’ sound is heard in learn mode…<br />
¬● The push you are programming has already been learnt by the chime.<br />
¬● If you want to change the icon associated with the push, use the un-learn procedure, then programme the push again.<br />
Two ‘beep’ sounds are heard after the normal chime sound…<br />
¬● This indicates a low battery in the bell push that activated the chime. Fit a new battery, type CR2032.<br />
When the bell push is operated, the amber confidence light does not turn on, or is only<br />
on for a short time…<br />
¬● In normal operation, the amber light will turn on for 1 second. When the battery is weak,<br />
the light will only turn on for a short time. Fit a new battery, type CR2032.<br />
The chime does not work…<br />
● Check that the chime is plugged in to 230V socket.<br />
● Does the socket have a switch? Is it in the ‘ON’ position.<br />
● The chime could be out of range of the bell push. Try the chime in a different location.<br />
● The chime might not have learnt the identity of the bell push. Follow the programming procedure.<br />
The chime does not sound…<br />
● Check the chime switch position.<br />
● Check that the volume control is not at the minimum setting.<br />
The flashing light does not work…<br />
● Check the chime switch position.<br />
Range is reduced…<br />
● Metal structures, including uPVC door frames can reduce the range of the product.<br />
Avoid mounting the push or chime on or near metal structures.<br />
● Other equipment can cause radio interference that affects your chime.<br />
● Walls and ceilings will reduce the range.<br />
● Weak batteries will reduce range. Replace every 12 –18 months. In cold conditions (below 5ºC),<br />
batteries may need to be replaced more often.<br />
When the push converter function is used, the chime does not operate ...<br />
● Ensure that the wiring to the push is correct.<br />
● Check that the correct terminals have been used and that screws are tightened.<br />
Chime/Push does not work with my older Libra equipment …<br />
● Libra + is not compatible with the earlier Libra system.<br />
● Only use accessories marked Libra +.<br />
7
D942S 48342PL_Ed3 2/1/07 6:31 PM Page 9<br />
Specifications<br />
Specification<br />
Operating Temperature<br />
Range (open feild)<br />
RF Frequency – UK/Europe<br />
Sound Level (typical)<br />
RF Power<br />
Battery Type<br />
Battery Life (5 activations/day)<br />
Input<br />
Maximum input voltage<br />
(T1 - T5)<br />
IP Rating<br />
Declaration<br />
Chime<br />
0 to 40ºC<br />
150 m<br />
868 MHz<br />
75dBA @ 1m<br />
-<br />
-<br />
-<br />
230V, 50Hz, 3W<br />
-<br />
IP4x<br />
Bell push<br />
-10 to 40ºC<br />
Friedland, The Arnold Centre, Paycocke Road, Basildon, Essex, SS14 3EA<br />
www.friedland.co.uk<br />
8<br />
150 m<br />
868 MHz<br />
Guarantee<br />
Friedland guarantees this product<br />
for 2 years from the date of purchase.<br />
Proof of purchase is required; this<br />
does not affect your statutory rights.<br />
If you require further information<br />
about our product,<br />
call the Friedland helpline on<br />
01268 563066.<br />
Disposal & Recycling<br />
Batteries and waste electrical<br />
products should not be disposed of<br />
with household waste.<br />
Please recycle where these facilities<br />
exist. Check with your local authority<br />
or retailer for recycling advice.<br />
Novar ED&S hereby declares that this product is in compliance with the essential requirements and other<br />
relevant provisions of the Radio and Telecommunications Terminal Equipment (R&TTE) directive, 1999/5/EC.<br />
-<br />
D942S 48342PL_Ed3 2/1/07 6:31 PM Page 10<br />
Libra+ 150m Reichweite zum Betrieb an einer Steckdose,<br />
mit Taster/Erweiterungssender<br />
Inbetriebnahme<br />
Packungsinhalt überprüfen ................................. Pg. 10<br />
Sicherheit ............................................................<br />
Schnellstart .........................................................<br />
Klingeltaster öffnen/Namensschild herausnehmen .. Pg. 11<br />
Klingeltasterbatterie einlegen ...............................<br />
Schalterpositionen ..............................................<br />
Lautstärke ...........................................................<br />
Schiebefenster ....................................................<br />
Symbol ................................................................ Pg. 12<br />
Programmierung .................................................<br />
Klingeltöne ändern ..............................................<br />
Wiederholung ...................................................... Pg. 13<br />
Klingeltöne ..........................................................<br />
Anbringen des Klingeltasters ..............................<br />
Taster / Erweiterungssender ..............................<br />
Typische Installation ........................................... Pg. 15<br />
Störungssuche .................................................... Pg. 16<br />
Spezifikationen .................................................... Pg. 18<br />
Entsorgung ..........................................................<br />
Garantie ..............................................................<br />
Erklärung .............................................................<br />
9<br />
GERMAN
D942S 48342PL_Ed3 2/1/07 6:31 PM Page 11<br />
Libra+ 150m Reichweite zum Betrieb an einer Steckdose,<br />
mit Taster/Erweiterungssender<br />
Vielen Dank, dass Sie sich für dieses Friedland-Produkt entschieden haben. Bitte befolgen Sie die Anweisungen unten, um<br />
sicherzustellen, dass Sie die Klingel korrekt anbringen und verwenden. Bewahren Sie diese Informationen sorgfältig auf.<br />
Packungsinhalt überprüfen Sicherheit<br />
Packen Sie Ihr Klingelset aus und identifizieren Sie<br />
folgende Teile:<br />
● Klingel<br />
● Taster/Erweiterungssender<br />
● CR2032-Batterie für Taster/Erweiterungssender<br />
● 2 Befestigungsschrauben für<br />
Taster/Erweiterungssenderr<br />
● 2 Wanddübel<br />
● Klebestreifen<br />
Sie benötigen:<br />
● 4 mm Kreuzschlitz-Schraubendreher<br />
● Einen kleinen, flachköpfigen Schraubendreher<br />
Schnellstart<br />
10<br />
Bitte lesen Sie sich vor der Montage folgende<br />
Sicherheitshinweise durch:<br />
● Beachten Sie beim Umgang mit Elektrowerkzeugen<br />
stets die Anweisungen des Herstellers und<br />
tragen Sie beim Bohren usw. geeignete<br />
Schutzausrüstung (z. B. Schutzbrille)<br />
● Bevor Sie in Wände bohren, prüfen Sie,<br />
ob dort Stromkabel und Wasserleitungen<br />
verdeckt verlaufen. Im Zweifelsfall ist die<br />
Verwendung eines Kabel-<br />
/Leitungssuchgeräts zu empfehlen<br />
● Wenn Sie den Taster/Erweiterungssender<br />
mit Geräten anderer Hersteller verbinden,<br />
lesen Sie sich zunächst die entsprechenden<br />
Bedienungsanleitungen durch und erkundigen<br />
Sie sich gegebenenfalls beim Hersteller nach der<br />
Eignung für den beabsichtigten Gebrauch<br />
Der Klingeltaster im Lieferumfang dieses Klingelsets ist für die Klingel vorprogrammiert. Beginnen Sie wie folgt:<br />
● Klingeltaster öffnen<br />
● Klingeltaster-Batterie einlegen<br />
● Einstellung des Klingelschalters überprüfen<br />
● Lautstärkeregelung überprüfen<br />
● Plug In Gong in Steckdose stecken<br />
Bei Betätigen des Klingeltasters ertönt der Klingelton und das erste Symbol blinkt auf. Wenn Sie weitere Klingeltaster<br />
oder kompatible Geräte haben oder dem Taster ein anderes Symbol zuweisen möchten, befolgen Sie die Programmierschritte.
D942S 48342PL_Ed3 2/1/07 6:31 PM Page 12<br />
Klingeltaster öffnen/Namensschild<br />
herausnehmen<br />
Drücken Sie mit einem Kugelschreiber den in<br />
(A Abb. 1) abgebildeten Punkt und entfernen Sie<br />
die Abdeckung. Sie können auch beide Seiten der<br />
Namensschildabdeckung beschriften. Lösen Sie<br />
die Klemmschraube (B) und entfernen Sie die<br />
Rückseite des Gehäuses.<br />
A<br />
Klingeltasterbatterie einlegen<br />
Legen Sie die CR2032-Knopfbatterie ein. Die mit<br />
‚+‘ gekennzeichnete Seite weist dabei nach oben.<br />
Abb. 2<br />
B<br />
CR2032<br />
+<br />
Abb. 1<br />
11<br />
Namensschildabdeckung<br />
Stumm<br />
Um das Klingelgeräusch abzuschalten, stellen Sie<br />
den Schalter (C) auf Position 1.<br />
Blinklicht<br />
Zum Abschalten des Blinklichts stellen Sie den<br />
Schalter (C) auf Position 3.<br />
Normaler Betrieb<br />
Zum normalen Betrieb (Ton + Licht) stellen Sie<br />
Schalter (C) auf Position 2.<br />
Lautstärke<br />
Der Lautstärkeregler befindet sich hinter dem<br />
Schiebefenster vorne an der Klingel. Wählen Sie<br />
anfangs eine mittlere Lautstärke. Nachdem Sie die<br />
Anlage getestet haben, stellen Sie die<br />
gewünschte Lautstärke ein.<br />
Schiebefenster<br />
Lösen Sie den Riegel (D) und öffnen Sie das<br />
Fenster durch Schieben (Abb. 3).<br />
D<br />
C<br />
Abb. 3
D942S 48342PL_Ed3 2/1/07 6:31 PM Page 13<br />
Symbole<br />
Neben dem Klingelton ist Ihre Klingel mit visuellen<br />
Anzeigen versehen, die darauf hinweisen, durch<br />
welches Gerät die Klingel aktiviert wurde.<br />
Sobald die Klingel durch einen Klingeltaster oder<br />
ein anderes kompatibles Gerät aktiviert wird,<br />
leuchtet eines von 3 möglichen Symbolen auf:<br />
!<br />
Haustür Hintertür Alert<br />
symbole<br />
Die „Haustür“- und „Hintertür“-Symbole werden meist<br />
für Klingeltaster verwendet. Die übrigen Symbole<br />
können anderen kompatiblen Geräten wie einem<br />
Funk-Bewegungsmelder und einem Telefon-<br />
Klingeltonmelder zugeordnet werden. Darüber hinaus<br />
gibt es von 1 bis 3 nummerierte Symbole. Die<br />
Symbole sind selbstklebend, 3 Symbolstreifen sind<br />
in der Verpackung enthalten. Sie können bei Bedarf<br />
ausgewechselt werden. Öffnen Sie dazu das<br />
Schiebefenster an der Klingel und lösen Sie vorsichtig<br />
die Klebestreifen. Auf Wunsch können auch die einzelnen<br />
Symbole von den Streifen abgeschnitten und in<br />
anderer Reihenfolge auf der Klingel angebracht werden.<br />
✃<br />
Mit Hilfe der Programmierung ändern Sie, welches<br />
Symbol jeweils durch ein Gerät aktiviert wird.<br />
12<br />
Programmierung<br />
Lernmodus<br />
Aktivieren des Klingelempfänger zum Einlenen des<br />
Klingeltasters:<br />
¬● Halten Sie die Taste ● gedrückt. Die Symbole<br />
leuchten nacheinander auf. Sobald das gewünschte<br />
Symbol aufleuchtet, lassen Sie die Taste los.<br />
¬● Drücken Sie den Klingeltaster, während das<br />
gewählte Symbol aufleuchtet. Der Klingelton<br />
ertönt, und das Symbol blinkt auf.<br />
Programmierung rückgängig machen<br />
Wenn einen Taster aus dem Speicher des<br />
Empfängen entfernen möchten:<br />
¬● Halten Sie die Taste ● gedrückt. Die Symbole<br />
leuchten nacheinander auf. Sobald das Symbol,<br />
das dem zu entfernenden Tasters zugeordnet<br />
ist, aufleuchtet, lassen Sie die Taste los.<br />
¬● Halten Sie sowohl die Taste ● als auch<br />
gedrückt, bis ein Piepton ertönt.<br />
Klingelton ändern<br />
Klingelton ändern<br />
Betätigen Sie den Klingeltaster. Drücken Sie die<br />
Taste , während das Symbol aufblinkt. Drücken<br />
Sie die Taste erneut, um einen anderen Ton zu<br />
hören. Wiederholen Sie dieses Verfahren, bis<br />
Ihnen ein Klingelton gefällt.
D942S 48342PL_Ed3 2/1/07 6:31 PM Page 14<br />
Wiederholung Taster / Erweiterungssenderfunktion<br />
Wenn Sie kurz die Taste ● drücken, blinkt das<br />
zuletzt benutzte Symbol auf.<br />
Klingeltöne<br />
Wenn Sie die Klingeltöne hören möchten ohne den<br />
Klingeltaster zu betätigen, drücken Sie die Taste .<br />
Drücken Sie die Taste erneut, um einen anderen<br />
Klingelton zu hören.<br />
Anbringen des Klingeltasters<br />
Befestigen Sie den Klingeltaster entweder mit Hilfe<br />
des doppelseitigen Klebestreifens oder mit<br />
Hilfe der mitgelieferten Schrauben (siehe Abb. 4).<br />
Testen Sie den Klingeltaster, bevor Sie ihn<br />
anbringen. Befestigen Sie ihn nicht an Metallteilen.<br />
Abb. 4<br />
13<br />
Der Klingeltaster aus diesem Set kann separat als<br />
Funkklingeltaster verwendet werden.<br />
Zusätzlich kann er als Erweiterungssender an<br />
einer bereits bestehenden verdrahteten Klingeloder<br />
Sprechanlage verwendet werde, aber auch<br />
als Erweiterungs-:<br />
Sender für<br />
- einen verdrahteten Standard-Klingeltaster<br />
- einen beleuchteten Klingeltaster mit<br />
Transformatorbetrieb<br />
- einen Fenster- oder Türkontakt<br />
- jedem beliebigen Gerät mit Öffner- oder<br />
Schliesserkontakt,potentialfreiem Kontakt<br />
- jedes Gerät, welches passende Steuersignale<br />
erzeugt
D942S 48342PL_Ed3 2/1/07 6:31 PM Page 15<br />
Diagramm Anwendung Funktion<br />
C1<br />
C2<br />
C3<br />
C4<br />
C5<br />
C6<br />
C7<br />
verdrahteter Klingeltaster oder‚ normalerweise<br />
geöffneter‘ Schalter/Kontakte<br />
Tür-/Fensterkontakt, ‚normalerweise geschlossener‘<br />
Schalter/Kontakte<br />
Beleuchteter Klingeltaster<br />
(mit Transformator)<br />
Taster / Erweiterungssender - Anschlusspositionen<br />
Typischer Schaltkreis für verdrahtete Klingel – mit<br />
Transformator<br />
Erweiterungssender an Schaltkreis für verdrahtete<br />
Klingel angeschlossen – mit Transformator<br />
Erweiterungssender an Schaltkreis für verdrahtete<br />
Klingel angeschlossen – batteriebetrieben<br />
14<br />
Bei geschlossenem Schalter<br />
ertönt Klingelton<br />
Bei geöffnetem Schalter ertönt<br />
der ‚Alarmton‘ der Klingel.<br />
Bei geschlossenem Schalter<br />
ertönt Klingelton.<br />
Bei Betätigen des Klingeltaster<br />
ertönt bein Libra+ Gerät Klingelton.<br />
Bei Betätigen des Klingeltaster<br />
ertönt bein Libra+ Gerät Klingelton.
D942S 48342PL_Ed3 2/1/07 6:31 PM Page 16<br />
Typische Installation<br />
C1<br />
C2<br />
1<br />
2<br />
3<br />
4<br />
5<br />
1<br />
2<br />
3<br />
4<br />
5<br />
C3 C4<br />
C5 C6 C7<br />
Gong BELL<br />
Gong BELL<br />
8V<br />
~<br />
~<br />
240V<br />
8V<br />
~<br />
~<br />
240V<br />
8V<br />
~<br />
~<br />
240V<br />
15<br />
1<br />
2<br />
3<br />
4<br />
5<br />
1<br />
2<br />
3<br />
4<br />
5<br />
5<br />
4<br />
Gong BELL<br />
1<br />
2<br />
3<br />
1<br />
2<br />
3<br />
4<br />
5
D942S 48342PL_Ed3 2/1/07 6:31 PM Page 17<br />
Störungssuche<br />
Im Lernmodus ist ein Piepton hörbar …<br />
¬● Der Klingeltaster, den Sie programmieren, wird bereits von der Klingel erkannt.<br />
¬● Wenn Sie dem Klingeltaster ein anderes Symbol zuweisen möchten, Verfahren Sie wie unter:<br />
„Programmierung rückgängig machen“ beschrieben und programmieren Sie dann den<br />
Klingeltaster erneut ein.<br />
Auf den normalen Klingelton folgen zwei Pieptöne …<br />
¬● Dies weist auf einen niedrigen Batteriestand im Klingeltaster hin, der die Klingel aktivierte.<br />
Legen Sie eine neue Batterie Typ CR2032 ein.<br />
Bei Betätigen des Klingeltaster leuchtet das orangefarbene Licht nicht oder nur kurz auf …<br />
● Im normalen Betrieb leuchtet das orange Licht 1 Sekunde lang auf. Bei schwacher Batterie<br />
leuchtet es kürzer. Legen Sie eine neue Batterie Typ CR2032 ein.<br />
Die Klingel funktioniert nicht …<br />
● Bitte stellen Sie sicher, daß der Gong an 230V angeschlossen ist.<br />
● Hat die Steckdose einen Schalter? Ist er eingeschaltet.<br />
● Möglicherweise befindet sich die Klingel außerhalb der Reichweite des Klingelktasters.<br />
Probieren Sie die Klingel an einer anderen Position aus.<br />
● Möglicherweise ist der Klingeltaster noch nicht in die Klingel einprogrammiert. Programmieren<br />
Sie ihn ein.<br />
Es ist kein Klingelton hörbar …<br />
● Überprüfen Sie die Schalterstellung an der Klingel.<br />
● Vergewissern Sie sich, dass die Lautstärke nicht in der niedrigsten Stellung befindet.<br />
Das Blinklicht leuchtet nicht auf …<br />
● Überprüfen Sie die Schalterstellung an der Klingel.<br />
16
D942S 48342PL_Ed3 2/1/07 6:31 PM Page 18<br />
Störungssuche....<br />
Die Reichweite ist reduziert …<br />
● Metallstrukturen und PVC-Türrahmen können die Reichweite des Produkts verringern.<br />
Montieren Sie Klingeltaster und Klingel möglichst nicht an oder in der Nähe von Metallteilen.<br />
● Andere Geräte können eine Funkstörung erzeugen, welche die Funktion der Klingel<br />
beeinträchtigt.<br />
● Wände und Decken reduzieren die Reichweite.<br />
● Schwache Batterien reduzieren die Reichweite. Wechseln Sie die Batterien alle 12 –18 Monate<br />
aus. Bei kaltem Wetter (unter 5ºC) müssen die Batterien möglicherweise häufiger ausgewechselt<br />
werden.<br />
Bei Verwenden der Erweiterungssenderfunktion ertönt die Klingel nicht …<br />
● Prüfen Sie, ob der Klingeltaster korrekt verdrahtet ist.<br />
● Vergewissern Sie sich, dass die korrekten Anschlüsse verwendet wurden und die Schrauben<br />
fest angezogen sind.<br />
Taster / Erweiterungssender funktionieren nicht in Verbindung mit älteren Libra-Geräten …<br />
● Libra + ist nicht mit dem früheren Libra-System kompatibel.<br />
● Verwenden Sie nur mit Libra + gekennzeichnete Zubehörteile.<br />
17
D942S 48342PL_Ed3 2/1/07 6:31 PM Page 19<br />
Spezifikationen<br />
Spezifikationen<br />
Betriebstemperatur<br />
Funkfrequenz – GB/Europa<br />
Reichweite (für Freiflächen)<br />
Lautstärke (typische Einstellung)<br />
HF-Leistung<br />
Batterie<br />
Batterielebensdauer<br />
(5 Betätigungen pro Tag)<br />
Maximale Eingangsspannung<br />
(T1 - T5)<br />
IP-Schutzklasse<br />
Input<br />
Erklärung<br />
Klingel<br />
0 bis 40ºC<br />
868 MHz<br />
150 m<br />
75dBA @1m<br />
-<br />
-<br />
-<br />
-<br />
IP4x<br />
230V, 50Hz, 3W<br />
Klingeltaster<br />
-10 bis 40ºC<br />
868 MHz<br />
Friedland, The Arnold Centre, Paycocke Road, Basildon, Essex, SS14 3EA<br />
www.novar-friedland.de<br />
18<br />
150 m<br />
Garantie<br />
Friedland gewährt eine 2-Jahre-<br />
Garantie ab Kaufdatum. Ein<br />
Kaufbeleg ist erforderlich. Ihre<br />
gesetzlichen Rechte sind hiervon<br />
nicht betroffen. Weitere<br />
Informationen zu unserem Produkt<br />
erhalten Sie von der Friedland-<br />
Hotline unter 02204 / 76717-0<br />
Entsorgung<br />
Batterien und Elektroartikel sollten<br />
nicht zusammen mit normalem<br />
Hausmüll entsorgt werden. Nach<br />
Möglichkeit sollten Sie vorhandene<br />
Recycling-Einrichtungen nutzen.<br />
Erkundigen Sie sich bei Ihrer<br />
örtlichen Behörde oder Ihrem<br />
Fachhändler nach Recycling-<br />
Möglichkeiten.<br />
Novar ED&S erklärt hiermit, dass dieses Funkklingelset den wesentlichen Anforderungen und anderen<br />
anwendbaren Vorschriften der Richtlinie über Funkanlagen und Telekommunikationseinrichtungen (R&TTE)<br />
1999/5/EC entspricht.<br />
-<br />
D942S 48342PL_Ed3 2/1/07 6:31 PM Page 20<br />
Libra+ enfichable sur une prise secteur 150m de portée<br />
avec bouton poussoir/ convertisseur<br />
Manuel d'utilisation<br />
Vérification du contenu du carton ...................... Pg. 20<br />
Sécurité ..............................................................<br />
Mise en service rapide .......................................<br />
Ouverture du bouton poussoir/ accès à l‚étiquette Pg. 21<br />
Installation de la pile du bouton pousoir ............<br />
Positions du commutateur .................................<br />
Réglage du volume ............................................<br />
Fenêtre coulissante ...........................................<br />
Utilisation des icônes ......................................... Pg. 22<br />
Procédure de programmation ............................<br />
Choix de la sonnerie ..........................................<br />
Fonction Rappel ................................................. Pg. 23<br />
Sonneries du carillon ..........................................<br />
Montage du bouton poussoir .............................<br />
Fonctions du bouton poussoir / convertisseur ...<br />
Connexions types .............................................. Pg. 25<br />
Résolution des problèmes ..................................Pg. 26<br />
Spécifications ..................................................... Pg. 28<br />
Mise au rebut et recyclage .................................<br />
Garantie ..............................................................<br />
Déclaration .........................................................<br />
19<br />
FRANÇAIS
D942S 48342PL_Ed3 2/1/07 6:31 PM Page 21<br />
Libra + enfichable sur une prise secteur 150m de portée avec bouton poussoir/ convertisseur<br />
Nous vous remercions d’avoir choisi un produit Friedland. Veuillez suivre les instructions suivantes pour<br />
installer et utiliser correctement ce produit. Veuillez garder ces instructions dans un endroit sûr de façon à<br />
pouvoir vous y référer à une date ultérieure.<br />
Vérification du contenu du carton<br />
Sortez votre kit carillon de son emballage et<br />
identifiez les pièces suivantes :<br />
¬● Carillon<br />
¬● Bouton poussoir<br />
¬● Pile CR2032 pour bouton poussoir<br />
● Fil de sonnerie (pour une utilisation avec un<br />
bouton poussoir filaire)<br />
¬● 2 vis de fixation pour le bouton poussoir<br />
¬● 2 chevilles<br />
¬● Support adhésif<br />
Vous aurez besoin de : ¬<br />
¬● Un tournevis cruciforme 4 mm<br />
¬● Un petit tournevis à tête plate<br />
Mise en service rapide<br />
Sécurité<br />
Avant de commencer l’installation, veuillez<br />
respecter les consignes de sécurité suivantes :<br />
● Suivez toujours les recommandations du<br />
fabricant lors de l’utilisation d’appareils<br />
électriques et utilisez toujours un équipement<br />
protection (par ex. des lunettes de protection)<br />
lorsque vous percez des trous etc.<br />
● Avant de percer un trou dans un mur, vérifiez<br />
qu’il n’y a pas de canalisation d’eau ou de<br />
câbles électriques encastrés : si vous avez<br />
un doute, nous vous conseillons d’utiliser un<br />
appareil permettant de détecter les câbles/tuyaux.<br />
● Lors de la connexion du bouton poussoir/convertisseur<br />
horizontal à des appareils d’autres fabricants,<br />
veuillez consulter les manuels et, si nécessaire,<br />
le fabricant en ce qui concerne l’usage prévu.<br />
Le bouton poussoir fourni avec le kit a été pré-programmé pour fonctionner avec ce carillon.<br />
Pour l’installer, vous devrez suivre les étapes suivantes.<br />
¬● ouvrir le bouton poussoir<br />
¬● installer la pile du bouton poussoir<br />
● vérifier le réglage du commutateur du carillon<br />
● vérifier le réglage du volume<br />
● brancher le carillon<br />
En appuyant sur le bouton poussoir, le carillon se fait entendre et la première icône clignote. Si vous<br />
appuyez à nouveau sur le bouton poussoir ou si vous voulez assigner une autre icône à votre bouton<br />
poussoir, vous devrez suivre la procédure de programmation.<br />
20
D942S 48342PL_Ed3 2/1/07 6:31 PM Page 22<br />
Ouverture du bouton poussoir/<br />
accès à l‚étiquette<br />
Al’aide d’un style à bille, appuyez à l’endroit<br />
indiqué sur la figure 1 A pour retirer l'étiquette. Si vous<br />
le désirez, vous pouvez séparer les deux moitiés<br />
du porte-étiquette et écrire sur la carte. Enlevez la<br />
vis de retenue B et retirez l’arrière du bouton poussoir.<br />
A<br />
Installation de la pile du bouton<br />
poussoir<br />
Insérez une pile bouton de type CR2032. Assurezvous<br />
que la face marquée ‘+’ est sur le dessus<br />
(Fig. 2).<br />
Fig. 2<br />
B<br />
CR2032<br />
+<br />
Fig. 1<br />
D<br />
21<br />
Positions du commutateur du carillon<br />
Couper le volume<br />
Pour couper le volume, mettre le bouton (C) sur<br />
la position 1.<br />
Eteindre le Flash<br />
Pour éteindre le flash, mettre le bouton (C) sur<br />
la position 3<br />
Utilisation normale<br />
Pour une utilisation normale (son + flah), mettre<br />
le bouton (C) sur la position 2.<br />
Réglage du volume<br />
Le bouton de réglage du volume se situe derrière<br />
la "fenêtre" coulissante à l'avant du carillon.<br />
Initialement, mettre le bouton de réglage sur la<br />
position du milieu. Une fois le sytème testé,<br />
l'ajuster au volume désiré.<br />
Fenêtre coulissante<br />
Relâcher le bouton D et faire coulisser la fenêtre<br />
pour l'ouvrir (Fig. 3).<br />
C<br />
Fig. 3
D942S 48342PL_Ed3 2/1/07 6:31 PM Page 23<br />
Utilisation des icônes<br />
En plus des sonneries, votre carillon indique<br />
visuellement l‚appareil l‚ayant activé. Une icône<br />
s’affiche lorsque le carillon est activé par<br />
un bouton poussoir ou par un autre appareil<br />
compatible. Ce carillon comporte 3 icônes :<br />
Porte<br />
d’entrée<br />
Back<br />
door<br />
!<br />
Alert<br />
symbol<br />
Les icônes (porte d’entrée) et ‘Backdoor’ (porte du<br />
garage ou porte arrière de la maison) sont généralement<br />
utilisées avec les boutons poussoirs. Les autres icônes<br />
sont utilisées avec d’autres appareils compatibles,<br />
comme les détecteurs de mouvements infrarouges<br />
passifs (IRP) ou les détecteurs de sonnerie téléphonique.<br />
Les icônes numérotées de 1 à 3 sont également incluses.<br />
Ces icônes auto-adhésives sont fournies en bandes<br />
de 3. Vous pouvez les changer, si nécessaire, en ouvrant<br />
la fenêtre coulissante du carillon et en décollant avec<br />
précaution les bandes correspondantes. Vous pouvez,<br />
si vous le désirez, découper les bandes en icônes<br />
individuelles et les coller sur le carillon dans un ordre différent.<br />
✃<br />
Utilisez la Procédure de programmation pour<br />
changer l’icône associée à un bouton poussoir.<br />
22<br />
Procédure de programmation<br />
Mode Apprentissage<br />
Pour permettre à votre carillon d’apprendre à<br />
identifier votre bouton poussoir :<br />
¬● Appuyez sur le bouton ● et maintenez-le<br />
enfoncé. Chaque icône s’allume à tour de<br />
rôle. Lorsque l’icône voulue s’allume,<br />
relâchez le bouton.<br />
¬● Lorsque l’icône que vous avez sélectionnée<br />
est allumée, actionnez le bouton poussoir.<br />
Le carillon sonne et l’icône clignote.<br />
Procédure de désapprentissage<br />
Si vous voulez retirer un bouton poussoir de la<br />
mémoire du carillon :<br />
¬● Appuyez sur le bouton ● et maintenez-le<br />
enfoncé. Chaque icône s’allume à tour de rôle.<br />
Lorsque l’icône associée au bouton poussoir à<br />
désenregistrer est allumée, relâchez le bouton.<br />
¬● Appuyez en même temps sur les boutons ●<br />
et et maintenez-les enfoncés, jusqu’à ce<br />
que vous entendiez un ‘bip’ sonore.<br />
Choix de la sonnerie<br />
Changer la sonnerie<br />
Appuyez sur le bouton poussoir. Lorsque<br />
l’icône clignote, appuyez sur le bouton .<br />
Appuyez à nouveau sur ce bouton pour changer<br />
de sonnerie. Recommencez jusqu’à ce que<br />
vous ayez la sonnerie voulue.
D942S 48342PL_Ed3 2/1/07 6:31 PM Page 24<br />
Fonction Rappel<br />
En appuyant rapidement sur le bouton ●, la<br />
dernière icône utilisée se mettra à clignoter.<br />
Sonneries du carillon<br />
Pour entendre les sonneries du carillon sans<br />
appuyer sur le bouton poussoir, appuyez sur le<br />
bouton . Appuyez à nouveau sur ce bouton<br />
pour changer de sonnerie.<br />
Montage du bouton poussoir<br />
Montez le bouton poussoir à l’aide du support<br />
adhésif double face fourni ou des vis fournies<br />
(voir Fig. 4). Testez votre bouton poussoir<br />
avant de le fixer. Evitez de le monter sur des<br />
structures métalliques.<br />
Fig. 4<br />
23<br />
Fonctions du bouton poussoir /<br />
convertisseur<br />
Dans ce kit, le bouton poussoir de la sonnette<br />
peut être utilisé comme bouton poussoir<br />
autonome sans fil.<br />
Par ailleurs, il peut être utilisé comme interface<br />
avec un système de sonnette pré-câblée<br />
ou l’un des composants suivants :<br />
_ Un bouton poussoir filaire standard<br />
_ Un bouton poussoir lumineux et<br />
transformateur<br />
_ Un contact de porte ou de fenêtre<br />
_ Un dispositif avec des contacts sans<br />
tension, des contacts travail ou repos<br />
_ Tout dispositif qui produit des signaux de<br />
contrôle adéquats < 24 (CA ou CC)<br />
Voir les connexions types (C1-7)<br />
Note importante : Un câblage supplémentaire<br />
peut être inséré dans le bouton poussoir<br />
par l’œillet qui se trouve à l’arrière du bouton<br />
poussoir. Une fois l’œillet percé ou enlevé,<br />
nous vous recommandons d’installer le bouton<br />
poussoir dans un endroit couvert, à l’intérieur.
D942S 48342PL_Ed3 2/1/07 6:31 PM Page 25<br />
Schéma Application Utilisation<br />
C1<br />
C2<br />
C3<br />
C4<br />
C5<br />
C6<br />
C7<br />
bouton poussoir filaire pour carillon ou<br />
interrupteurs/contacts ‘normalement ouverts’<br />
Contact porte/fenêtre, interrupteurs/contacts<br />
‘normalement fermés’<br />
Un bouton poussoir lumineux (avec transformateur)<br />
Bouton poussoir/convertisseur horizontal –<br />
positions terminales<br />
Un circuit câblé type pour sonnerie ou carillon –<br />
alimenté par transformateur<br />
Un circuit câblé pour sonnerie ou carillon connecté<br />
à un convertisseur – alimenté par transformateur<br />
Un circuit câblé pour sonnerie ou carillon connecté<br />
à un convertisseur – alimenté par transformateur<br />
24<br />
lorsque l’interrupteur est fermé,<br />
le carillon sonne<br />
lorsque l’interrupteur est ouvert, le<br />
carillon donne une sonnerie « d’alerte ».<br />
lorsque l’interrupteur est fermé,<br />
le carillon sonne<br />
en appuyant sur le bouton poussoir,<br />
le carillon Libra+ sonne<br />
en appuyant sur le bouton poussoir,<br />
le carillon Libra+ sonnecarillon
D942S 48342PL_Ed3 2/1/07 6:31 PM Page 26<br />
Connexions types<br />
C1<br />
C2<br />
1<br />
2<br />
3<br />
4<br />
5<br />
1<br />
2<br />
3<br />
4<br />
5<br />
C3 C4<br />
C5 C6 C7<br />
BELL<br />
8V<br />
~<br />
~<br />
240V<br />
8V<br />
~<br />
~<br />
240V<br />
BELL<br />
8V<br />
~<br />
~<br />
240V<br />
25<br />
1<br />
2<br />
3<br />
4<br />
5<br />
1<br />
2<br />
3<br />
4<br />
5<br />
5<br />
4<br />
BELL<br />
1<br />
2<br />
3<br />
1<br />
2<br />
3<br />
4<br />
5
D942S 48342PL_Ed3 2/1/07 6:31 PM Page 27<br />
Résolution des problèmes<br />
J’entends un ‘ bip’ sonore en mode apprentissage…<br />
● Le bouton poussoir que vous programmez a déjà été configuré avec ce carillon.<br />
● Si vous voulez changer l’icône associée au bouton poussoir, utilisez la procédure de<br />
désapprentissage, puis programmez à nouveau le bouton poussoir.<br />
Deux ‘bips’ retentissent après le carillon normal…<br />
● Cela signifie que la pile du bouton poussoir ayant activé le carillon est bientôt déchargée.<br />
Installez une nouvelle pile de type CR2032.<br />
Lorsque le bouton poussoir est utilisé, la lumière orange de vérification ne s’allume pas ou ne<br />
s’allume que pendant un court moment...<br />
● Pour une utilisation normale, la lumière orange s’allume pendant 1 seconde. Lorsque la pile est<br />
presque déchargée, la lumière s’allume pendant un court moment. Installez une nouvelle pile de<br />
type CR2032.<br />
Le carillon ne fonctionne pas…<br />
● Vérifiez que le carillon est branché sur une prise de 230 V<br />
● La prise est-elle munie d’un interrupteur ? Est-il en position MARCHE ?<br />
● Il est possible que le carillon soit hors de portée du bouton poussoir. Essayez le carillon à un<br />
autre emplacement.<br />
● Le carillon n’a peut-être pas enregistré l’identité du bouton poussoir. Suivez la procédure de<br />
programmation.<br />
Le carillon ne sonne pas…<br />
● Vérifiez la position du commutateur du carillon.<br />
● Vérifiez que le contrôle du volume n’est pas réglé au minimum<br />
La lumière clignotante ne fonctionne pas…<br />
● Vérifiez la position du commutateur du carillon.<br />
26
D942S 48342PL_Ed3 2/1/07 6:31 PM Page 28<br />
La portée est réduite…<br />
● Les structures métalliques, notamment les cadres de fenêtres et de porte en PVC-U, peuvent<br />
réduire la portée du produit. Evitez de monter le bouton poussoir ou le carillon sur ou à proximité<br />
de structures métalliques.<br />
● D’autres équipements engendrent des interférences radio qui risquent d’affecter votre carillon.<br />
● Les murs et les plafonds réduisent la portée de l’appareil.<br />
● La portée est également réduite avec des piles déchargées. Remplacez-les tous les 12 à 18<br />
mois. Dans des conditions climatiques froides (en dessous de +5°C), les piles auront besoin<br />
d’être remplacées plus fréquemment<br />
Lorsque la fonction convertisseur bouton poussoir est utilisée, le carillon ne fonctionne pas…<br />
● Vérifiez que le câblage du bouton poussoir a été effectué correctement.<br />
● Vérifiez que les bons terminaux ont été utilisés et que les vis ont été resserrées.<br />
Le bouton poussoir/convertisseur ne fonctionne pas avec mon ancien appareil Libra…<br />
● Libra + n’est pas compatible avec le système Libra antérieur.<br />
● N’utilisez que des accessoires indiquant Libra +.<br />
27
D942S 48342PL_Ed3 2/1/07 6:31 PM Page 29<br />
Spécifications<br />
Spécifications<br />
Température d’exploitation<br />
Fréquence RF – UK/Europe<br />
Portée (sans obstacle)<br />
Niveau de volume (typique)<br />
Puissance RF<br />
Type de pile<br />
Durée de vie des piles<br />
(5 activations journalières)<br />
Maximum input voltage<br />
(T1 - T5)<br />
Classement IP<br />
Input<br />
Déclaration<br />
Carillon<br />
0 à 40ºC<br />
868MHz<br />
150 mètres<br />
75dBA @ 1m<br />
-<br />
-<br />
-<br />
-<br />
IP4x<br />
230V, 50Hz, 3W<br />
Bouton poussoir<br />
-10 à 40ºC<br />
868MHz<br />
150 mètres<br />
Friedland, The Arnold Centre, Paycocke Road, Basildon, Essex, SS14 3EA<br />
www.friedland.co.uk<br />
28<br />
Garantie<br />
Friedland garantit ce produit pour<br />
une durée de 2 ans à partir de la<br />
date d’achat. Une preuve d’achat<br />
est requise ; vos droits en tant que<br />
consommateur ne sont pas affectés.<br />
Si vous désirez obtenir d’autres<br />
informations sur notre produit,<br />
veuillez appeler Friedland au<br />
0810 00 12 15<br />
Mise au rebut et recyclage<br />
Les piles et les déchets de produits<br />
électriques ne doivent pas être mis<br />
au rebut avec les déchets<br />
ménagers. Veuillez les recycler<br />
lorsque ces installations existent.<br />
Veuillez consulter vos autorités<br />
locales ou votre revendeur pour des<br />
conseils concernant le recyclage.<br />
Par la présente, Novar ED&S déclare que ce kit carillon sans fil est conforme aux exigences essentielles et<br />
aux autres dispositions de la directive 1999/5/CE concernant les équipements hertziens et les équipements<br />
terminaux de télécommunication (R&TTE).<br />
-<br />
D942S 48342PL_Ed3 2/1/07 6:31 PM Page 30<br />
Libra+ 150m “Plug-In” gong werkend<br />
& Draadloze beldrukknop / converter<br />
Installatie<br />
Controleer de inhoud van de verpakking ............ Pg. 30<br />
Veiligheid ............................................................<br />
Snelstart ..............................................................<br />
Open de beldrukknop en verwijder het naamplaatje . Pg. 31<br />
Het plaatsen van de batterij in de beldrukknop ...<br />
Standen van de schakelaar ..................................<br />
Geluidsniveau .........................................................<br />
Schuifvenster ..........................................................<br />
Gebruik van de pictogrammen ............................ Pg. 32<br />
Programmeerprocedure ......................................<br />
De melodie wijzigen ............................................<br />
Herhalingsfunctie ................................................ Pg. 33<br />
Gongmelodieën ..................................................<br />
Het installeren van de beldrukknop .....................<br />
Funciones del pulsador/transformador ....................<br />
Standaard aansluitingen .................................... Pg. 35<br />
Probleemoplossing ............................................. Pg. 36<br />
Specificaties ....................................................... Pg. 38<br />
Verwijderen en recycling .....................................<br />
Garantie...............................................................<br />
Verklaring.............................................................<br />
29<br />
DUTCH
D942S 48342PL_Ed3 2/1/07 6:31 PM Page 31<br />
Libra+ 150m “Plug-In” gong werkend & Draadloze beldrukknop / converter<br />
Dank u dat u voor dit product van Friedland hebt gekozen. Voor een juiste installatie en gebruik vragen wij u<br />
de onderstaande instructies op te volgen. Bewaar deze instructies op een veilige plaats zodat u het later<br />
nogmaals kunt doorlezen.<br />
Controleer de inhoud van de verpakking Veiligheid<br />
Pak uw deurgongset uit en controleer of de<br />
volgende onderdelen aanwezig zijn:<br />
● Gong<br />
● beldrukknop/converter<br />
● CR2032 batterij voor de beldrukknop<br />
● Bedrading voor de bel (te gebruiken bij een<br />
beldrukknopp met bedrading)<br />
● 2 x bevestigingsschroeven voor beldrukknop<br />
● 2 x muurpluggen<br />
U hebt nodig:<br />
● Een 4 mm kruiskopschroevendraaier<br />
● Een kleine, platte schroevendraaier<br />
Snelstart<br />
Voordat u met de installatie doorgaat, dient u de<br />
volgende veiligheidsinstructies in acht te nemen:<br />
● Als u elektrisch gereedschap bij het boren van<br />
gaten etc. gebruikt, dient u te allen tijde het<br />
advies van de fabrikant op te volgen en daarvoor<br />
geschikt veiligheidskleding (bijv. veiligheidsbril)<br />
te dragen.<br />
● Voordat u gaten in de muur boort, controleert u<br />
of er verborgen elektriciteitsbedrading en<br />
waterleidingen zijn. Als u twijfelt kan het beter<br />
zijn om een kabel-/pijpleiding-detector te gebruiken.<br />
● Als de rechtopstaande beldrukker/converter aan<br />
andere apparatuur van een andere fabrikant<br />
wordt aangesloten, dient u de handboeken te<br />
raadplegen.<br />
De beldrukknop die bij deze set wordt geleverd is voorgeprogrammeerd om in combinatie met de gong te functioneren.<br />
Voor het activeren, dient u de volgende procedure aan te houden.<br />
● Beldrukker/converter<br />
● Plaats de batterij voor de beldrukknop/converter<br />
● Controleer de instelling van de gongschakelaar<br />
● Controleer het geluidsvolume<br />
● Plug de gong in het stopcontact<br />
Als u de beldrukknop indrukt zal de gong een geluid geven en het 1 e pictogram begint te knipperen. Indien u<br />
meerdere beldrukknoppen heeft of u wilt een ander icoon aan uw beldrukknop wilt toewijzen, volg dan de<br />
onderstaande procedure.<br />
30
D942S 48342PL_Ed3 2/1/07 6:31 PM Page 32<br />
Open de beldrukker / verwijder<br />
het naamplaatje<br />
Gebruik hiervoor een ballpoint en druk op het<br />
punt zoals aangegeven in Fig 1 en verwijder<br />
vervolgens het naamplaatje. Indien gewenst, kunt<br />
u beide delen van het naamplaatje van elkaar<br />
halen en op het kaartje schrijven. Draai de<br />
opsluitschroef B los en verwijder de achterzijde<br />
van de beldrukker.<br />
Fig. 1<br />
A<br />
Het plaatsen van de batterij voor<br />
de beldrukknop/converter<br />
Plaats de CR2032 batterij. Controleer dat de<br />
kant met de markering ‘+’ naar boven toe<br />
gericht is. (Fig. 2).<br />
Fig. 2<br />
B<br />
CR2032<br />
+<br />
31<br />
Gong standen van de schakelaar<br />
Mute (geluidloos)<br />
Om het geluid uit te schakelen, stelt u de<br />
schakelaar (C) in op stand 1.<br />
Flash-licht uit<br />
Om het we Flash-licht uit te schakelen, stelt u de<br />
schakelaar (C) in op stand 3.<br />
Standaard werking<br />
Voor een standaard werking (geluid + Flashlicht),<br />
stelt u de schakelaar (C) in op stand 2.<br />
Geluidsniveau<br />
De volumeknop voor het regelen van het geluidsniveau<br />
treft u achter het schuifvenster aan, aan de<br />
voorkant van de gong. Stel het geluidsvolume in<br />
eerste instantie op het middelste niveau in. Indien<br />
gewenst kunt u, nadat u uw systeem hebt getest,<br />
het volume aanpassen.<br />
Schuifvenster<br />
Ontgrendel de vergrendeling Den schuif het<br />
venster open<br />
D<br />
C<br />
Fig. 3
D942S 48342PL_Ed3 2/1/07 6:31 PM Page 33<br />
Gebruik van de pictogrammen Programmeerprocedure<br />
Naast de gongtonen, heeft uw gong een visuele<br />
indicatie om aan te geven welk apparaat de gong<br />
geactiveerd heeft.Er zal een pictogram oplichten,<br />
als de gong door een druk op de beldrukknop of<br />
een andere soortgelijk apparaat werd geactiveerd.<br />
De gong is voorzien van 3 pictogrammen:<br />
!<br />
Voordeur Achterdeur Alertheid<br />
symbool<br />
‘De pictogrammen ‘Voordeur’ en ‘Achterdeur’ worden<br />
meestal gebruikt voor het indrukken van de<br />
desbetreffende beldrukknop. De overige pictogrammen<br />
zijn bestemd om te gebruiken bij ander, compatibel<br />
apparatuur, zoals een PIR-bewegingsdetector<br />
of een telefoonbel-detector. Pictogrammen,<br />
met de nummers 1 tot 3 worden eveneens<br />
meegeleverd. De pictogrammen zijn zelfklevend en<br />
worden geleverd in strips van 3. Indien gewenst<br />
kunnen de pictogrammen veranderd worden door<br />
het schuifvenster van de gong te openen en<br />
vervolgens de strips er voorzichtig vanaf te trekken.<br />
Ook kunnen de strips in afzonderlijke pictogrammen<br />
worden geknipt en vervolgens in een andere<br />
volgorde op de gong worden aangebracht.<br />
✃<br />
Gebruik de programeerprocedure om het gerelateerde<br />
pictogram met een druk op de knop te wijzigen<br />
32<br />
Leermodus<br />
Om de gong in te stellen zodat de identiteit van de<br />
beldrukker bij het indrukken hiervan wordt geleerd,<br />
gaat u als volgt te werk:<br />
● Druk op de knop ● en houd deze ingedrukt. Op<br />
volgorde zullen de pictogrammen gaan branden.<br />
Als het pictogram wordt verlicht waaraan u de functie<br />
wilt toewijzen, laat u de knop los.<br />
● Als het door u gekozen pictogram is verlicht,<br />
drukt u op de beldrukker/converter. De gong geeft<br />
geluid. Het pictogram zal gaan knipperen.<br />
Wisprocedure<br />
Als u een functie uit het geheugen van de gong<br />
wilt verwijderen:<br />
● Druk op de knop ● en houd deze ingerukt.<br />
Op volgorde zullen alle pictogrammen gaan<br />
branden. Als het pictogram wordt verlicht waarvan u<br />
de functie wilt wissen, laat u de knop los.<br />
● Druk op de knoppen ● & en houd deze<br />
ingedrukt totdat u een ‘beep’-geluid hoort<br />
De melodie wijzigen<br />
De melodie wijzigen<br />
Druk op de beldrukker/converter. Terwijl het<br />
pictogram knippert, drukt u op deze knop .<br />
Druk nogmaals op deze knop waarna de melodie<br />
zal wijzigen. Herhaal dit totdat u de melodie hoort<br />
die u wilt laten afspelen.
D942S 48342PL_Ed3 2/1/07 6:31 PM Page 34<br />
Herhalingsfunctie<br />
Het kort indrukken van de knop ● zal het<br />
pictogram laten knipperen dat het laatst werd<br />
gebruikt.<br />
Gongmelodieën<br />
Om de melodieën van de gong te kunnen<br />
horen zonder dat de beldrukker wordt ingedrukt,<br />
drukt u op de knop . Door nogmaals op deze<br />
knop drukken zal de melodie wijzigen.<br />
Het installeren van de belknop<br />
Het plaatsen van de beldrukknop kan gedaan<br />
worden door de dubbelzijdige plakstrip of de<br />
meegeleverde schroeven (zie Fig 4).<br />
Test de beldrukknop voordat u deze bevestigt.<br />
Voorkom montage aan of in de nabijheid van<br />
metalen constructies of PVC kozijnen welke<br />
metaal bevatten.<br />
Fig. 4<br />
33<br />
Functies van de beldrukknop /<br />
converter<br />
De beldrukknopr /converter in deze set kan als<br />
een aparte draadloze beldrukknop/converter<br />
worden gebruikt. Bovendien kan de beldrukknop<br />
/converter worden gebruikt als een koppeling<br />
tussen een bestaand, van bedrading voorzien<br />
deurbelsysteem of van een van de volgende systemen:<br />
● Een standaard, van bedrading voorziene,<br />
beldrukknop<br />
● Een verlichte beldrukknop en transformator<br />
● Een raam- of deurcontact<br />
● Elk type apparatuur met N/O of N/ ,<br />
spanningloze contacten.<br />
● Elk type apparatuur dat de juiste controlesignalen<br />
weergeeft < 24V (AC of DC).<br />
Zie Standaard aansluitingen (C1-7).<br />
Belangrijke mededeling: extra bedrading kan via<br />
het doorvoerbuisje aan de achterkant van de<br />
beldrukknop, worden gekoppeld. Zodra het<br />
doorvoerbuisje eenmaal is doorboord of hier een<br />
inkeping in is gemaakt, adviseren wij dat deze binnenshuis<br />
wordt gemonteerd.
D942S 48342PL_Ed3 2/1/07 6:31 PM Page 35<br />
Schema Toepassing Werking<br />
C1<br />
C2<br />
C3<br />
C4<br />
C5<br />
C6<br />
C7<br />
Met bedrading aangesloten beldrukknop of<br />
een “NO” schakelaar / contact<br />
Deur- en raamcontact, of<br />
een “NO” schakelaar / contact<br />
Een verlichte beldrukknop, (met transformator)<br />
Horizontale beldrukknop / converter<br />
– locatie aansluitingspunten<br />
Een standaard deurbel of deurgong installatie met<br />
bedrading en transformator gevoed<br />
Converter aangesloten aan een deurbel of deurgong met<br />
bedrading en door transformator gevoed<br />
Converter aangesloten aan een deurbel of<br />
deurgong met bedrading en door batterij gevoed<br />
34<br />
Als de beldrukknop of schakelaar gesloten<br />
word, geeft de gong een melodie weer.<br />
Als de schakelaar wordt geopend dan geeft de<br />
gong een 'Alarm' geluid weer.<br />
Wanneer de beldrukknop wordt ingedrukt,<br />
geeft de gong een melodie weer.<br />
Als de aangesloten beldrukknop ingedrukt<br />
wordt, zal de Libra+ een gonggeluid weergeven<br />
Als de aangesloten beldrukknop ingedrukt<br />
wordt, zal de Libra+ een gonggeluid weergeven
D942S 48342PL_Ed3 2/1/07 6:31 PM Page 36<br />
Standaard aansluitingen<br />
C1<br />
C2<br />
1<br />
2<br />
3<br />
4<br />
5<br />
1<br />
2<br />
3<br />
4<br />
5<br />
C3 C4<br />
C5 C6 C7<br />
BELL<br />
8V<br />
~<br />
~<br />
240V<br />
8V<br />
~<br />
~<br />
240V<br />
BELL<br />
8V<br />
~<br />
~<br />
240V<br />
35<br />
1<br />
2<br />
3<br />
4<br />
5<br />
1<br />
2<br />
3<br />
4<br />
5<br />
5<br />
4<br />
BELL<br />
1<br />
2<br />
3<br />
1<br />
2<br />
3<br />
4<br />
5
D942S 48342PL_Ed3 2/1/07 6:31 PM Page 37<br />
Probleemoplossing<br />
Een ‘beep’-geluid wordt tijdens de leermodus weergegeven…<br />
● De beldrukknop die u programmeert werd reeds door de gong ingeleerd.<br />
● Als u het pictogram gerelateerd aan de beldrukknop wilt wijzigen, maakt u gebruik van de<br />
resetprocedure en programmeert u de beldrukknop weer opnieuw.<br />
Twee ‘beep’-geluiden worden na de normale melodie van de gong weergegeven…<br />
● Dit geeft aan dat de batterij in de beldrukknop die de gong activeert bijna leeg is. Plaats een nieuwe<br />
batterij, type CR2032<br />
Als de beldrukknopp wordt geactiveerd en de amberkleurige verlichting niet oplicht of slechts<br />
gedurende een korte tijd…<br />
● Bij een normale werking, zal de amberkleurige verlichting gedurende 1 seconde oplichten.<br />
Als de batterij bijna leeg is, zal het licht alleen gedurende korte tijd oplichten. Plaats een nieuwe<br />
batterij, type CR2032.<br />
De gong werk niet…<br />
● Controleer of de deurbel is aangesloten op een 230V contactdoos<br />
● Heeft de contactdoos een schakelaar? Staat de schakelaar AAN?<br />
● Het kan zijn dat de gong buiten het bereik van de beldrukknop staat opgesteld. Probeer de gong<br />
op een andere locatie te plaatsen.<br />
● Het kan zijn dat de gong de code van de beldrukknop nog niet heeft geleerd.<br />
Volg de programmeerprocedure.<br />
De gong geeft geen geluid…<br />
● Controleer of het geluidsniveau niet op de minimale stand staat ingesteld.<br />
36
D942S 48342PL_Ed3 2/1/07 6:31 PM Page 38<br />
Het bereik is gereduceerd…<br />
● Metalen constructies, inclusief PVC-deurframes (met ingebouwd staal) kunnen het bereik van dit<br />
product beperken. Voorkom installatie van de beldrukknop of gong op of bij een metalen constructies.<br />
● Overige apparatuur kunnen radio-interferentie veroorzaken, die de werking van uw gong kunnen beïnvloeden.<br />
● Muren en plafonds beperken het bereik.<br />
● Zwakke batterijen zullen het bereik beperken. Batterijen dienen 1 x per 12 –18 maanden ver<br />
vangen te worden. In koude omstandigheden, (minder dan 5ºC), dienen batterijen mogelijk<br />
vaker vervangen te worden.<br />
Als de converter van de beldrukknop is gebruikt, werkt de gong niet…<br />
● Controleer of de bedrading aan de beldrukknop correct is aangesloten.<br />
● Controleer of de juiste aansluitpunten zijn gebruikt en of de schroeven aangedraaid zijn.<br />
Gong / beldrukknop werkt niet met mijn oudere apparatuur van Libra…<br />
● Libra “+” is niet compatibel met oude Libra-systemen.<br />
● Gebruik alleen accessoires met de markering Libra “+”.<br />
37
D942S 48342PL_Ed3 2/1/07 6:31 PM Page 39<br />
Specificaties<br />
Specificaties<br />
Werktemperatuur<br />
RF- frequentie – UK/Europa<br />
Bereik ( gemeten in het open veld)<br />
Volumeniveau (kenmerkend)<br />
RF- vermogen<br />
Batterijtype<br />
Levensduur batterij<br />
(5 activeringen / dag)<br />
IP-classificatie<br />
Input<br />
Maximum input voltage<br />
(T1 - T5)<br />
Verklaring<br />
Gong<br />
0 tot 40ºC<br />
868MHz<br />
150 meters<br />
75dBA @ 1m<br />
-<br />
-<br />
-<br />
IP4x<br />
230V, 50Hz, 3W<br />
-<br />
Beldrukknop<br />
-10 tot 40ºC<br />
868MHz<br />
150 meters<br />
Friedland, The Arnold Centre, Paycocke Road, Basildon, Essex, SS14 3EA<br />
www.friedland.co.uk<br />
38<br />
Garantie<br />
Friedland garandeert dit product<br />
voor een periode van 2 jaar vanaf<br />
de datum van aankoop. Een bewijs<br />
van aankoop is vereist; dit heeft<br />
geen invloed op uw wettelijke rechten.<br />
Als u meer informatie over ons product<br />
wenst kunt u contact opnemen met<br />
de Friedland helpline op<br />
01268 563066.<br />
Verwijderen en recycling<br />
Batterijen en defecte elektrische<br />
producten dienen niet met het<br />
huishoudelijk afval verwijderd te<br />
worden. Zorg er a.u.b. voor dat deze<br />
producten op de daarvoor bestemde<br />
locaties, ter recycleing, worden<br />
aangeboden. Neem contact op met<br />
de plaatselijke autoriteiten of uw<br />
dealer voor meer informatie over het<br />
verwijderen.<br />
Novar ED&S verklaart hierbij dat deze draadloze deurgongset in overeenstemming is met de noodzakelijke<br />
vereisten en overige relevante bepalingen van de Richtlijn Radio- en telecommunicatieapparatuur (R&TTE),<br />
1999/5/EC.<br />
-<br />
D942S 48342PL_Ed3 2/1/07 6:31 PM Page 40<br />
Libra+ Timbre Inalámbrico,<br />
con enchufe 150M pulsador/conversor panorámico<br />
Instalación y uso<br />
Comprobación del contenido del paquete ......... Pg. 40<br />
Seguridad ...........................................................<br />
Preparación previa..............................................<br />
Apertura de la placa del pulsador....................... Pg. 41<br />
Colocación de la pila del pulsador......................<br />
Posiciones del conmutador.................................<br />
Control de volumen..............................................<br />
Ventana deslizante....................................................<br />
Uso de los iconos............................................... Pg. 42<br />
Procedimiento de programación.........................<br />
Cambio de la sintonía ........................................<br />
Función de recuperación.................................... Pg. 43<br />
Sonidos del timbre .............................................<br />
Posición del timbre.............................................<br />
Funciones del pulsador/transformador ..................<br />
Conexiones típicas .............................................Pg. 45<br />
Diagnóstico de averías ...................................... Pg. 46<br />
Especificaciones ................................................ Pg. 48<br />
Eliminación y reciclado.......................................<br />
Garantía..............................................................<br />
Declaración.........................................................<br />
39<br />
ESPAÑOL
D942S 48342PL_Ed3 2/1/07 6:31 PM Page 41<br />
Libra+ Timbre Inalámbrico, con enchufe 150M pulsador/conversor panorámico<br />
Gracias por elegir este producto Friedland. Para garantizar una instalación y uso correctos, utilice<br />
estas instrucciones. Guárdelas en un lugar seguro para poderlas consultar cuando le haga falta.<br />
Comprobación del contenido del<br />
paquete<br />
Desembale el timbre e identifique las piezas siguientes:<br />
● Timbre<br />
● Pulsador/conversor<br />
● Pila CR2032 para el pulsador<br />
● Cable del timbre (para uso con un interruptor cableado)<br />
● 2 tornillos de anclaje del pulsador<br />
● 2 tacos<br />
● Lámina adhesiva<br />
Herramientas necesarias:<br />
● Un destornillador de 4mm con punta cruciforme<br />
● Un destornillador pequeño de punta plana<br />
40<br />
Seguridad<br />
Antes de empezar a instalar el aparato, tenga en<br />
cuenta las siguientes advertencias de seguridad:<br />
● Cuando use herramientas eléctricas, respete<br />
siempre las instrucciones del fabricante y lleve prendas<br />
de protección adecuadas (por ejemplo, gafas de<br />
seguridad) si va a taladrar agujeros, etc.<br />
● Antes de realizar taladros en las paredes,<br />
compruebe si hay tuberías o conductores<br />
eléctricos ocultos a la vista; si tiene alguna<br />
duda puede resultar aconsejable utilizar<br />
detectores de cables o de tuberías.<br />
● Cuando conecte el pulsador/conversor<br />
panorámico a equipos de otros fabricantes,<br />
consulte los manuales y, si es necesario,<br />
consulte al fabricante para ver si el aparato<br />
es adecuado al uso que se pretende dar.<br />
Preparación previa<br />
El pulsador de timbre suministrado con este aparato viene preprogramado para funcionar con el<br />
timbre. Para empezar, necesitará hacer lo siguiente.<br />
● abra el pulsador del timbre<br />
● coloque las pilas del pulsador/conversor<br />
● compruebe la configuración de conmutación del timbre<br />
● compruebe el ajuste de volumen<br />
● enchufe el timbre<br />
Cuando accione el pulsador, sonará el timbre y parpadeará el 1er icono. Si tiene más pulsadores o quiere<br />
asignar un icono diferente al pulsador, tendrá que realizar el procedimiento siguiente.
D942S 48342PL_Ed3 2/1/07 6:31 PM Page 42<br />
Apertura de la placa del<br />
pulsador/conversor<br />
Con un bolígrafo, presione en el punto indicado en<br />
la figura 1 (A) y quite la placa de datos. Si lo<br />
desea, puede separar las dos mitades de la placa<br />
de datos y escribir en la tarjeta. Quite el tornillo de<br />
sujeción (B) y retire la trasera del pulsador.<br />
A<br />
Colocación de la pila del pulsador<br />
Introduzca la pila discoidal CR2032. Cerciórese de<br />
que la cara marcada con ‘+’ mira hacia arriba.<br />
Fig. 2<br />
CR2032<br />
+<br />
B<br />
Fig. 1<br />
D<br />
41<br />
Timbre posiciones del conmutador<br />
Silencio<br />
Para anular el sonido, ponga el mando (C) en<br />
la posición 1 de Anulación de intermitencia<br />
Para apagar el parpadeo de la luz azul, ponga<br />
el mando (C) en la posición 3.<br />
Funcionamiento normal<br />
Para el funcionamiento normal, (sonido + luz<br />
intermitente), ponga el mando (C) en la posición 2.<br />
Control de volumen<br />
El control de volumen está detrás de la ventana<br />
deslizante, delante del timbre. Inicialmente, ponga el<br />
mando en el punto medio. Después de comprobar el<br />
sistema, ajústelo al volumen deseado.<br />
Ventana deslizante<br />
Suelte el pestillo (D) y deslice la ventana para<br />
abrirla (Fig. 3)<br />
C<br />
Fig. 3
D942S 48342PL_Ed3 2/1/07 6:31 PM Page 43<br />
Uso de los iconos<br />
Además de los sonidos, el timbre tiene un<br />
indicador visual que muestra el artilugio que lo<br />
activa.Se iluminará un icono cuando un pulsador<br />
u otro aparato compatible activen el timbre.<br />
El timbre tiene 3 iconos:<br />
Puerta<br />
principal<br />
Puerta de<br />
servicio<br />
!<br />
Símbolo<br />
de alerta<br />
Normalmente, los iconos de ‘Puerta principal’ y de<br />
‘Puerta de servicio’ se usan para los pulsadores<br />
del timbre. El resto de los iconos se emplea para<br />
otros aparatos compatibles, como detectores PIR<br />
de movimiento y detectores de llamadas telefónicas.<br />
También hay iconos numerados del 1 al 3. Los<br />
iconos son autoadhesivos y se suministran en<br />
tiras de 3. Se pueden cambiar, si se necesita,<br />
abriendo la ventana deslizante del timbre y<br />
despegando las tiras. Si se desea, las tiras se<br />
pueden cortar en iconos individuales y adhiriéndolos<br />
al timbre en un orden diferente.<br />
✃<br />
Use el procedimiento de programación para<br />
cambiar el icono asociado con un pulsador.<br />
42<br />
Procedimiento de programación<br />
Modo de aprendizaje<br />
Para que el timbre reconozca la identidad del<br />
pulsador:<br />
¬● Pulse el botón ● y manténgalo pulsado.<br />
Se encenderá cada icono. Cuando se haya<br />
encendido el icono que desee, suelte el<br />
botón.<br />
¬● Cuando esté encendido el icono seleccionado,<br />
accione el pulsador. El timbre sonará.<br />
El icono parpadeará.<br />
Procedimiento de desprogramación<br />
Si quiere eliminar un pulsador de la memoria<br />
del timbre:<br />
¬● Presione el botón ● y manténgalo pulsado.<br />
Se encenderá cada icono. Cuando se haya<br />
encendido el icono asociado al pulsador que<br />
desea desprogramar, suelte el botón.<br />
¬● Presione los botones ● y y manténgalos<br />
pulsados, hasta que suene un ‘pitido’.<br />
Cambio de la sintonía<br />
Cambio de la sintonía<br />
Accione el pulsador. Cuando parpadee el<br />
icono, presione el botón . Presione el botón<br />
de nuevo y cambiará la sintonía. Repita el<br />
procedimiento hasta que suene la melodía que<br />
quiere.
D942S 48342PL_Ed3 2/1/07 6:31 PM Page 44<br />
Función de recuperación<br />
Una pulsación corta del botón ● hará parpadear el<br />
icono que se usó por última vez.<br />
Sonidos del timbre<br />
Para oír los sonidos del timbre sin accionar el<br />
pulsador, presione el botón . Presione de nuevo<br />
el botón y cambiará la sintonía.<br />
Posición del timbre<br />
Móntelo con la lamina adhesiva de dos caras o<br />
los tornillos que se suministran (vea la Fig 4).<br />
Compruebe el pulsador antes de anclarlo.<br />
Evite el anclarlo a estructuras metálicas.<br />
Fig. 4<br />
43<br />
Funciones del pulsador/transformador<br />
El pulsador de timbre incluido en este kit puede<br />
utilizarse como pulsador inalámbrico por separado.<br />
Además, puede hacer que se comunique con<br />
cualquier sistema de timbre mediante cable<br />
existente, o cualquiera de los componentes<br />
siguientes:<br />
_ Un pulsador de timbre mediante cable estándar<br />
_ Un pulsador de timbre luminoso y transformador<br />
_ Un sensor de contacto en puertas o ventanas<br />
_ Cualquier dispositivo con sensores de contacto<br />
libres de potencia N/O o N/C<br />
_ Cualquier dispositivo que genere señales de<br />
control apropiadas < 24 (CA o CC)<br />
Véanse las conexiones clásicas (C1-7)<br />
Nota importante: Puede pasarse cableado<br />
adicional a través de la arandela del reverso del<br />
pulsador. Una vez perforada o extraída la<br />
arandela, aconsejamos montar el pulsador en<br />
una zona al resguardo de la intemperie.
D942S 48342PL_Ed3 2/1/07 6:31 PM Page 45<br />
Diagrama Aplicación Funcionamiento<br />
C1<br />
C2<br />
C3<br />
C4<br />
C5<br />
C6<br />
C7<br />
Pulsador de timbre cableado o contactos/<br />
conmutador 'normalmente abierto'<br />
contacto de ventana o puerta, contactos/<br />
conmutador 'normalmente cerrado'<br />
Un pulsador de luz, (con transformador)<br />
Pulsador/conversor panorámico – posiciones terminales<br />
Timbre cableado típico o circuito de timbre –<br />
alimentado por transformador<br />
Conversor conectado a un timbre cableado o<br />
circuito de timbre – alimentado por transformador<br />
Conversor conectado a un timbre cableado o<br />
circuito de timbre – alimentado por pilas<br />
44<br />
cuando el conmutador se cierra,<br />
el timbre suena<br />
cuando el conmutador se abre, el<br />
timbre generará un sonido de 'Alerta'<br />
cuando el conmutador se cierra, el<br />
timbre suena<br />
cuando se acciona el pulsador,<br />
suena el timbre Libra +<br />
cuando se acciona el pulsador,<br />
suena el timbre Libra +
D942S 48342PL_Ed3 2/1/07 6:31 PM Page 46<br />
Conexiones típicas<br />
C1<br />
C2<br />
1<br />
2<br />
3<br />
4<br />
5<br />
1<br />
2<br />
3<br />
4<br />
5<br />
C3 C4<br />
C5 C6 C7<br />
BELL<br />
8V<br />
~<br />
~<br />
240V<br />
8V<br />
~<br />
~<br />
240V<br />
240Ç<br />
BELL<br />
8V<br />
~<br />
~<br />
240V<br />
45<br />
1<br />
2<br />
3<br />
4<br />
5<br />
1<br />
2<br />
3<br />
4<br />
5<br />
5<br />
4<br />
BELL<br />
1<br />
2<br />
3<br />
1<br />
2<br />
3<br />
4<br />
5
D942S 48342PL_Ed3 2/1/07 6:31 PM Page 47<br />
Diagnóstico de averías<br />
Se oye un ‘pitido’ en el modo de aprendizaje…<br />
¬● El pulsador que se está programando ya ha sido programado por el timbre.<br />
¬● Si quiere cambiar el icono asociado con el pulsador, use el procedimiento de desprogramación,<br />
luego programe el pulsador de nuevo.<br />
Se oyen dos ‘pitidos’ después del sonido normal del timbre…<br />
¬● Esto es que la pila del pulsador que ha activado el timbre está baja.<br />
Coloque una nueva pila, tipo CR2032.<br />
Cuando se acciona el pulsador, la luz ámbar no se enciende, o sólo lo hace durante un corto<br />
tiempo…<br />
¬● En funcionamiento normal, la luz ámbar se encenderá durante 1 segundo. Cuando la pila esté<br />
baja, la luz sólo se encenderá durante poco tiempo. Coloque una pila nueva de tipo CR2032.<br />
El timbre no va…<br />
¬● Asegúrese de que el timbre esté conectado a un enchufe de 230 V.<br />
¬● Tiene interruptor el enchufe? Está en la posición de encendido?<br />
¬● El timbre podría estar fuera del alcance del pulsador. Pruebe el timbre en un sitio diferente.<br />
¬● El timbre podría no haber memorizado la identidad del pulsador. Siga el procedimiento de<br />
programación.<br />
El timbre no suena…<br />
¬● Compruebe la posición de conmutación del timbre.<br />
¬● Compruebe que el mando de volumen no está al mínimo.<br />
La luz intermitente no va…<br />
● Compruebe la posición de conmutación del timbre.<br />
46
D942S 48342PL_Ed3 2/1/07 6:31 PM Page 48<br />
Hay menos alcance…<br />
¬● Las estructuras metálicas, incluyendo los marcos de puertas de PVC, pueden reducir el alcance<br />
del aparato. Evite montar el pulsador o el timbre en las estructuras metálicas o cerca de ellas.<br />
¬● Otros aparatos pueden provocar interferencias de radio y afectar al timbre.<br />
¬● Las paredes y los techos reducen el alcance.<br />
¬● Las baterías bajas reducen el alcance. Cámbielas cada 12 –18 meses. Cuando haga frío,<br />
(por debajo de 5ºC), puede que haya que cambiar las pilas con más frecuencia.<br />
Cuando se utiliza la función de pulsador/conversor, el timbre no funciona…<br />
¬● Asegúrese de que se ha realizado correctamente el cableado hasta el pulsador.<br />
¬● Compruebe que ha utilizado los bornes correctos y que ha apretado los tornillos.<br />
El pulsador/conversor no funciona con mi antiguo equipo Libra…<br />
¬● Libra + no es compatible con el sistema anterior Libra.<br />
¬● Utilice sólo accesorios marcados como Libra +.<br />
47
D942S 48342PL_Ed3 2/1/07 6:31 PM Page 49<br />
Especificaciones<br />
Especificaciones<br />
Temperatura de funcionamiento<br />
Frecuencia RF – Reino Unido/Europa<br />
Alcance (aire libre)<br />
Nivel acústico (típico)<br />
Potencia RF<br />
Tipo de pila<br />
Vida de la pila (5 activaciones/día)<br />
Índice de protección IP<br />
Entrada<br />
Máximo voltaje de entrada<br />
Declaración<br />
Timbre<br />
0 a 40ºC<br />
868MHz<br />
150 metros<br />
75dBA @ 1m<br />
-<br />
-<br />
-<br />
IP4x<br />
230V, 50Hz,3W<br />
-<br />
Friedland, The Arnold Centre, Paycocke Road, Basildon, Essex, SS14 3EA<br />
www.friedland.co.uk<br />
48<br />
Pulsador<br />
-10 a 40ºC<br />
868MHz<br />
150 metros<br />
Garantía<br />
Friedland garantiza este producto<br />
durante 2 años a partir de la fecha<br />
de compra. Se exige una evidencia<br />
objetiva de la compra; esto no<br />
afecta a sus derechos legales.<br />
Si desea más información sobre<br />
nuestro producto, llame a la línea<br />
de atención al cliente de Friedland:<br />
01268 563066.<br />
Eliminación y reciclado<br />
Las pilas y los productos eléctricos<br />
no deben eliminarse junto con la<br />
basura doméstica. Recíclelos en<br />
instalaciones adecuadas. Para<br />
información sobre el reciclado,<br />
consulte con las autoridades<br />
municipales o con su distribuidor<br />
habitual.<br />
Novar ED&S declara por la presente que este timbre sin cables cumple los requisitos esenciales y otras cláusulas<br />
destacables de la directiva 1999/5/EC sobre Aparatos y terminales de radio y telecomunicación (R&TTE).<br />
-<br />
D942S 48342PL_Ed3 2/1/07 6:31 PM Page 50<br />
Libra+ 150mt argento a spina con convertitore/pulsante<br />
Installazione ed utilizzo<br />
Controllare il contenuto della confezione ............. Pg. 50<br />
Sicurezza .............................................................<br />
Istruzioni iniziali rapide .........................................<br />
Aprire il pulsante del campanello/ rimuovere la<br />
targhetta del nome ................................................ Pg. 51<br />
Montare la batteria del pulsante ..........................<br />
Posizioni dell’interruttore ......................................<br />
Controllo del volume ..............................................<br />
Finestra scorrevole .....................................................<br />
Uso delle icone .................................................... Pg. 52<br />
Procedura di programmazione ............................<br />
Modifica della melodia .........................................<br />
Funzione di richiamo ............................................ Pg. 53<br />
Melodie della suoneria ............................................<br />
Montaggio del pulsante del campanello ..............<br />
Funzioni del pulsante/convertitore .......................<br />
Connessioni tipiche .............................................. Pg. 55<br />
Risoluzione dei problemi ...................................... Pg. 56<br />
Specifiche ............................................................. Pg. 58<br />
Smaltimento e riciclaggio .....................................<br />
Garanzia ..............................................................<br />
Dichiarazione .......................................................<br />
49<br />
ITALY
D942S 48342PL_Ed3 2/1/07 6:31 PM Page 51<br />
Libra+ 150mt argento a spina con convertitore/pulsante<br />
Grazie per aver scelto questo prodotto Friedland. Seguire queste istruzioni per installare ed utilizzare<br />
correttamente il prodotto. Conservare queste istruzioni in un luogo sicuro per poterle consultare in futuro.<br />
Controllare il contenuto della confezione Sicurezza<br />
Aprire la confezione del kit della suoneria e<br />
identificare le seguenti parti:<br />
● Suoneria<br />
● Convertitore/pulsante<br />
● Batteria CR2032 per il pulsante del campanello<br />
● Filo del campanello (per l’uso con un pulsante cablato)<br />
● 2 viti di fissaggio per il pulsante<br />
● 2 tasselli da muro<br />
● Cuscinetto adesivo<br />
Occorrente:<br />
● Un cacciavite con testa a croce da 4 mm<br />
● Un cacciavite a lama piatta piccolo<br />
Istruzioni iniziali rapide<br />
50<br />
Prima di procedere con l’installazione,<br />
osservare le seguenti avvertenze di sicurezza:<br />
● Seguire sempre i consigli del produttore quando<br />
si utilizzano utensili elettrici e indossare apparecchiature<br />
protettive idonee (ad es.occhiali di sicurezza)<br />
quando si eseguono i fori, ecc.<br />
● Prima di eseguire dei fori nelle pareti,<br />
controllare se sono presenti cavi elettrici e<br />
tubature dell’acqua. È consigliato l’uso di un<br />
localizzatore di cavi/tubi, in caso di dubbio.<br />
● Quando si collega il campanello/convertitore<br />
orizzontale ad apparecchi di altri produttori,<br />
controllare i manuali e, se necessario, consultare<br />
il produttore relativamente all’idoneità per l’uso inteso.<br />
Il pulsante del campanello fornito in questo kit è preprogrammato per funzionare con la suoneria. Per iniziare<br />
seguire questo procedimento:<br />
● aprire il pulsante del campanello<br />
● inserire la batteria del pulsante<br />
● controllare l’impostazione dell’interruttore della suoneria<br />
● controllare l’impostazione del volume<br />
● collegare la suoneria alla presa di corrente<br />
Quando si preme il pulsante del campanello, suona la suoneria e lampeggia la 1ª icona. Se si hanno pulsanti<br />
addizionali o si desidera assegnare un’icona diversa al pulsante, seguire la seguente procedura di programmazione.
D942S 48342PL_Ed3 2/1/07 6:31 PM Page 52<br />
Con una penna a sfera, premere sul punto indicato<br />
nella Fig. 1 (A) e rimuovere la targhetta del<br />
nome. Se necessario, separare le due metà della<br />
targhetta del nome e scrivere sul cartoncino.<br />
Svitare la vite di tenuta (B) e rimuovere la parte<br />
posteriore del pulsante.<br />
A<br />
Aprire il pulsante del campanello/<br />
rimuovere la targhetta del nome<br />
Montare la batteria del pulsante<br />
Inserire la batteria a bottone CR2032.<br />
Controllare che la faccia contrassegnata con ‘+’<br />
sia rivolta verso l’alto (Fig. 2).<br />
Fig. 2<br />
CR2032<br />
+<br />
B<br />
Fig. 1<br />
51<br />
Suoneria Posizioni dell’interruttore<br />
Silenzio<br />
Per spegnere il suono, impostare l’interruttore (C)<br />
alla posizione 1.<br />
Lampeggio spento<br />
Per spegnere la luce lampeggiante blu, impostare<br />
l’interruttore (C) alla posizione 3.<br />
Funzionamento normale<br />
Per il funzionamento normale (suono + luce<br />
lampeggiante) impostare l’interruttore (C) alla<br />
posizione 2.<br />
Controllo del volume<br />
Il controllo del volume si trova dietro la finestra scorrevole,<br />
sulla parte anteriore della suoneria. Inizialmente<br />
regolare il controllo al punto centrale. Dopo aver<br />
testato il sistema, regolare al volume richiesto.<br />
Finestra scorrevole<br />
Rilasciare il gancio (D) e aprire la finestra. (Fig. 3).<br />
D<br />
C<br />
Fig. 3
D942S 48342PL_Ed3 2/1/07 6:31 PM Page 53<br />
Uso delle icone<br />
Oltre ai suoni della suoneria, la suoneria comprende<br />
un’indicazione visiva del dispositivo che l’ha attivata.<br />
Si illumina un’icona quando la suoneria è attivata<br />
da un pulsante di campanello o da un altro<br />
dispositivo compatibile. La suoneria supporta 3 icone:<br />
!<br />
Porta<br />
ingresso<br />
Porta<br />
posteriore<br />
Simbolo<br />
allarme<br />
Le icone ‘Porta ingresso’ e ‘Porta posteriore’ sono<br />
in genere utilizzate per i pulsanti del campanello.<br />
Le altre icone sono intese per l’uso con altri<br />
dispositivi compatibili, come rilevatori di movimento<br />
a infrarosso passivo e rilevatori dello squillo di<br />
telefono. Sono anche incluse icone numerate da<br />
1 a 3. Le icone sono autoadesive, fornite in<br />
genere in strisce di 3. Possono essere modificate,<br />
se necessario, aprendo la finestra scorrevole della<br />
suoneria e distaccandole delicatamente. Se necessario,<br />
le icone sulle strisce possono essere separate e<br />
fissate alla suoneria in un ordine diverso.<br />
✃<br />
Usare la Procedura di programmazione per<br />
modificare l’icona associata ad un pulsante.<br />
52<br />
Procedura di programmazione<br />
Modo di apprendimento<br />
Per abilitare la suoneria ad apprendere<br />
l’identità del pulsante del campanello:<br />
● Premere il pulsante ● e tenerlo premuto.<br />
Si illumina ciascuna icona a turno. Quando<br />
l’icona richiesta è illuminata rilasciare il pulsante.<br />
● Mentre l’icona selezionata è illuminata,<br />
azionare il pulsante. Suona la suoneria e<br />
l’icona lampeggia.<br />
Procedura di disapprendimento<br />
Per rimuovere un pulsante dalla memoria della<br />
suoneria:<br />
● Premere il pulsante ● e tenerlo premuto.<br />
Si illumina ciascuna icona a turno. Quando<br />
l’icona associata al pulsante da disapprendere<br />
è accesa, rilasciare il pulsante.<br />
● Premere e tenere premuti i tasti ● e fino<br />
a quando si sente un bip.<br />
Modifica della melodia<br />
Modifica della melodia<br />
Premere il pulsante. Mentre l’icona lampeggia,<br />
premere il tasto . Premere nuovamente il<br />
tasto e la melodia cambia. Ripetere fino a<br />
quando si sente la melodia richiesta.
D942S 48342PL_Ed3 2/1/07 6:31 PM Page 54<br />
Funzione di richiamo<br />
Una breve pressione del tasto ● fa lampeggiare<br />
l’icona utilizzata per ultima.<br />
Melodie della suoneria<br />
Per sentire il suono della suoneria, senza<br />
utilizzare il pulsante del campanello, premere il<br />
tasto . Premere nuovamente il tasto e la melodia<br />
cambia.<br />
Montaggio del pulsante del<br />
campanello<br />
Montarlo usando il cuscinetto biadesivo o le viti<br />
fornite (vedere la Fig. 4). Provare il pulsante prima<br />
di fissarlo. Non montare su superfici metalliche.<br />
Fig. 4<br />
53<br />
Funzioni del pulsante / convertitore<br />
Il pulsante del campanello in questo kit può essere<br />
utilizzato come pulsante autonomo senza fili. Può<br />
essere inoltre utilizzato come interfaccia con un<br />
sistema di campanello collegato esistente o uno<br />
dei seguenti:<br />
- Pulsante del campanello collegato standard<br />
- Pulsante del campanello illuminato e trasformatore<br />
- Contatto per porta o finestra<br />
- Qualsiasi dispositivo con contatti N/O o N/C<br />
senza tensione<br />
- Qualsiasi dispositivo che genera i segnali di<br />
controllo appropriati
D942S 48342PL_Ed3 2/1/07 6:31 PM Page 55<br />
Diagramma Applicazione Operazione<br />
C1 Pulsante del campanello cablato o interruttore/<br />
contatti 'normalmente aperti'<br />
C2 Contatto porta/finestra, interruttore/contatti<br />
'normalmente aperti'<br />
C3 Un pulsante illuminato, (con trasformatore)<br />
C4 Pulsante/convertitore orizzontale – posizioni terminali<br />
C5 Un campanello cablato o circuito di suoneria<br />
tipico - alimentato da trasformatore<br />
C6 Convertitore collegato a campanello circuito di<br />
suoneria cablati - alimentato da trasformatore<br />
C7 Convertitore collegato a campanello o circuito di<br />
suoneria cablati - alimentato da batteria<br />
54<br />
Quando l’interruttore è chiuso,<br />
suona la suoneria<br />
Quando l’interruttore è aperto, la<br />
suoneria emette un suono di ‘Allarme’<br />
Quando l’interruttore è chiuso,<br />
suona la suoneria<br />
Quando si aziona il pulsante,<br />
suona la suoneria Libra+<br />
Quando si aziona il pulsante,<br />
suona la suoneria Libra+
D942S 48342PL_Ed3 2/1/07 6:31 PM Page 56<br />
Connessioni tipiche<br />
C1<br />
C2<br />
1<br />
2<br />
3<br />
4<br />
5<br />
1<br />
2<br />
3<br />
4<br />
5<br />
C3 C4<br />
8V<br />
~<br />
C5 C6 C7<br />
~<br />
240V<br />
campanello BELL<br />
campanello BELL<br />
8V<br />
~<br />
~<br />
240V<br />
8V<br />
~<br />
~<br />
240V<br />
55<br />
1<br />
2<br />
3<br />
4<br />
5<br />
1<br />
2<br />
3<br />
4<br />
5<br />
5<br />
4<br />
campanello BELL<br />
1<br />
2<br />
3<br />
1<br />
2<br />
3<br />
4<br />
5
D942S 48342PL_Ed3 2/1/07 6:31 PM Page 57<br />
Risoluzione dei problemi<br />
Nel modo apprendimento si sente un bip…<br />
● Il pulsante attualmente programmato è stato già appreso dalla suoneria.<br />
● Per modificare l’icona associata al pulsante, utilizzare la procedura di disapprendimento,<br />
e riprogrammare quindi il pulsante.<br />
Dopo il suono normale della suoneria si sentono due bip…<br />
● Questo indica che la carica della batteria è bassa nel pulsante del campanello che attiva la<br />
suoneria. Montare una nuova batteria, tipo CR2032,<br />
Quando si preme il pulsante del campanello, la luce di sicurezza ambra non si accende o si<br />
accende solo brevemente…<br />
● In condizioni di funzionamento normale, la luce ambra si accende per un secondo.<br />
Quando la batteria è parzialmente carica, la luce si accende solo brevemente.<br />
Inserire una nuova batteria CR2032.<br />
La suoneria non funziona…<br />
● Controllare che la spina della suoneria sia inserita in una presa da 230 V<br />
● La presa è dotata di interruttore? L’interruttore è nella posizione ACCESO?<br />
● La suoneria è probabilmente all’esterno della portata del pulsante. Provare la suoneria in una<br />
posizione diversa.<br />
● La suoneria non ha probabilmente appreso l’identità del pulsante. Seguire il procedimento di<br />
configurazione.<br />
La suoneria non suona…<br />
● Controllare la posizione dell’interruttore della suoneria.<br />
● Controllare che il controllo del volume non sia regolato al minimo<br />
La luce lampeggiante non funziona…<br />
● Controllare la posizione dell’interruttore della suoneria.<br />
56
D942S 48342PL_Ed3 2/1/07 6:31 PM Page 58<br />
La portata è ridotta…<br />
● Le strutture metalliche, inclusi i telai delle porte in PVC, possono ridurre la portata del prodotto.<br />
Non montare il pulsante o la suoneria sopra o vicino a strutture metalliche.<br />
● Altre apparecchiature possono provocare interferenza radio che influisce sulla suoneria.<br />
● Le pareti e i soffitti possono ridurre la portata.<br />
● Le batterie parzialmente scariche possono ridurre la portata. Sostituirle ogni 12-18 mesi. In condizioni<br />
fredde (temperature inferiori a 5°C), può essere necessario sostituire le batterie più spesso.<br />
Quando si usa la funzione del convertitore del pulsante, non funziona la suoneria…<br />
● Accertarsi che il collegamento dei fili al pulsante sia corretto.<br />
● Controllare che siano stati utilizzati i terminali corretti e che le viti siano chiuse.<br />
Il pulsante/convertitore non funziona con il mio vecchio apparecchio Libra…<br />
● Libra + non è compatibile con il sistema Libra precedente.<br />
● Usare solo accessori contrassegnati con Libra +.<br />
57
D942S 48342PL_Ed3 2/1/07 6:31 PM Page 59<br />
Specifiche<br />
Specifiche<br />
Temperatura d’esercizio<br />
Radiofrequenza – GB/Europa<br />
Portata (campo aperto)<br />
Livello volume (tipico)<br />
Potenza radiofrequenza<br />
Tipo di batteria<br />
Durata della batteria<br />
(5 attivazioni/giorno)<br />
Grado di protezione internazionale<br />
Input<br />
Maximum input voltage<br />
Dichiarazione<br />
Suoneria<br />
Da 0 a 40ºC<br />
868MHz<br />
150 metri<br />
75dBA @ 1m<br />
-<br />
-<br />
-<br />
IP4x<br />
230V, 50Hz,3W<br />
-<br />
Pulsante<br />
Da -10 a 40ºC<br />
868MHz<br />
150 metri<br />
-<br />
D942S 48342PL_Ed3 2/1/07 6:31 PM Page 60<br />
Libra+ 150m Carrilhão de porta sem fios com ficha incorporada e alcance de 150m<br />
com Botão/conversor sem-fios<br />
Instalação<br />
Verifique o conteúdo da embalagem ................ Pg. 60<br />
Segurança .........................................................<br />
Arranque rápido .................................................<br />
Abra o botão da campainha/ remova a placa para<br />
o name ............................................................... Pg. 61<br />
Instalar a pilha do botão ......................................<br />
Posições do interruptor .....................................<br />
Controlo de volume ...........................................<br />
Janela deslizante ..............................................<br />
Uso de ícones ................................................... Pg. 62<br />
Procedimento de programação .........................<br />
Alterar a melodia ...............................................<br />
Função Recall (resgatar) ................................... Pg. 63<br />
Sons da campainha ..........................................<br />
Montagem do botão da campainha .....................<br />
Funções do botão/conversor .............................<br />
Ligações típicas .................................................. Pg. 65<br />
Resolução de problemas ................................... Pg. 66<br />
Especificações ................................................... Pg. 68<br />
Eliminação e reciclagem ...................................<br />
Garantia .............................................................<br />
Declaração ........................................................<br />
59<br />
PORTUGAL
D942S 48342PL_Ed3 2/1/07 6:31 PM Page 61<br />
Libra+ 150m Carrilhão de porta sem fios com ficha incorporada e alcance de 150m<br />
com Botão/conversor sem-fios<br />
Obrigado por ter escolhido este produto Friedland. De modo a garantir a instalação e a utilização correctas,<br />
siga as seguintes instruções e guarde-as num local seguro para posterior consulta.<br />
Verifique o conteúdo da embalagem Segurança<br />
Retire o kit de campainha da embalagem e<br />
confirme a existência das seguintes peças:<br />
● Campainha<br />
● Botão/conversor<br />
● Pilha tipo CR2032 para o botão da campainha<br />
● Fio da campainha (para utilização com botão com fio)<br />
● 2 x parafusos de montagem do botão<br />
● 2 x buchas<br />
● Fitas autocolantes<br />
Irá precisar de:<br />
● Uma chave de estrela de 4mm<br />
● Uma chave-de-fendas pequena<br />
Arranque rápido<br />
60<br />
Antes de continuar com a instalação, esteja atento<br />
às seguintes normass de segurança:<br />
● Cumpra sempre as recomendações de segurança<br />
do fabricante quando utilizar ferramentas eléctricas<br />
e use equipamento de protecção adequado<br />
(ex.: óculos de segurança) quando estiver a furar, etc.<br />
● Antes de começar a furar a parede, verifique se<br />
existem cabos eléctricos ou tubagens de água.<br />
Em caso de dúvida, recomenda-se a utilização<br />
de um dispositivo de detecção de cabos/tubos.<br />
● Quando ligar o botão/conversor horizontal a<br />
equipamentos de outras marcas, consulte os<br />
manuais e, caso necessário, contacte o<br />
fabricante relativamente à adequabilidade<br />
do uso pretendido.<br />
O botão fornecido com este kit está programado para funcionar com a campainha Para começar, terá de<br />
proceder do seguinte modo.<br />
● Abra o botão da campainha<br />
● Instale a pilha do botão<br />
● Verifique a posição do interruptor da campainha<br />
● Verifique o ajuste de volume<br />
● Plug in da campainha<br />
Ao premir o botão, a campainha toca e o 1º ícone pisca. Se possuir mais botões, ou quiser atribuir um ícone<br />
diferente ao botão, terá de proceder à respectiva programação.
D942S 48342PL_Ed3 2/1/07 6:31 PM Page 62<br />
Com uma esferográfica, prima o ponto ilustrado na<br />
fig. 1 (A) e remova a placa de especificações. Se<br />
desejar, poderá separar as duas metades da<br />
placa para o name e escrever no cartão.<br />
Desaperte o parafuso de fixação (B) e remova a<br />
parte de trás do botão.<br />
A<br />
Abra o botão da campainha/<br />
remova a placa para o name<br />
Instalar a pilha do Botão/conversor<br />
Introduza a pilha tipo CR2032. Certifique-se<br />
de que o lado assinalado com ‘+’ fica voltado<br />
para cima.<br />
Fig. 2<br />
B<br />
CR2032<br />
+<br />
Fig. 1<br />
61<br />
Campainha posições do interruptor<br />
Silenciar<br />
Para desligar o som, coloque o interruptor (C)<br />
na posição 1.<br />
Desligar a luz intermitente<br />
Para desligar a luz azul intermitente, coloque o<br />
interruptor (C) na posição 3.<br />
Funcionamento normal<br />
Para funcionamento normal, (som + luz intermitente),<br />
coloque o interruptor (C) na posição 2.<br />
Controlo de volume<br />
O controlo de volume está por detrás da janela<br />
deslizante, na parte da frente da campainha.<br />
Primeiro, coloque o controlo a meio. Depois de ter<br />
testado o sistema, regule para o volume desejado.<br />
Janela deslizante<br />
Solte a patilha (E) e abra a janela<br />
D<br />
C<br />
Fig. 3
D942S 48342PL_Ed3 2/1/07 6:31 PM Page 63<br />
Uso de ícones<br />
Para além dos vários sons, a campainha possui<br />
uma indicação visual que indica qual o dispositivo<br />
que a activou. Quando o botão da campainha ou<br />
outro dispositivo é premido, acende um ícone.<br />
A campainha admite 3 ícones:<br />
Main<br />
door<br />
Back<br />
door<br />
!<br />
Alert<br />
symbol<br />
Os ícones ‘Main door’ (porta principal) e ‘Backdoor’<br />
(porta das traseiras) são utilizados habitualmente<br />
para botões de campainha. Os outros ícones<br />
destinam-se a utilização com outros dispositivos<br />
compatíveis, tais como detectores de movimento<br />
PIR e detector de toque de telefone. Estão incluídos<br />
também ícones numerados de 1 a 3. Os ícones<br />
são autocolantes e fornecidos em tiras de 3 unidades.<br />
Podem ser alterados em caso de necessidade,<br />
abrindo a janela de correr da campainha e destacando<br />
cuidadosamente a película das tiras. As tiras<br />
podem ser cortadas em ícones individuais e fixadas<br />
na campainha por uma ordem diferente.<br />
✃<br />
Utilize o procedimento de Programação para<br />
alterar o ícone associado a um botão.<br />
62<br />
Procedimento de programação<br />
Modo Learn (memorizar)<br />
Para permitir que a campainha consiga<br />
identificar o botão da campainha:<br />
● Prima o botão ● e mantenha-o premido.<br />
Os ícones acendem sucessivamente. Quando<br />
o ícone pretendido acender, solte o botão.<br />
● Enquanto o ícone que seleccionou estiver<br />
aceso, accione o botão. A campainha toca.<br />
O ícone fica intermitente.<br />
Procedimento Unlearn (desmemorizar)<br />
Se desejar remover um botão da memória da<br />
campainha:<br />
● Prima o botão ● e mantenha-o premido.<br />
Os ícones acendem sucessivamente.<br />
Quando o Ícone associado ao botão<br />
pretendido acender, solte o botão.<br />
● Prima e mantenha premidos os botões ●<br />
e , até escutar um “bip”.<br />
Alterar a melodia<br />
Alterar a melodia<br />
Prima o botão. Enquanto o ícone estiver<br />
intermitente, prima o botão . Prima o botão<br />
novamente para alterar a melodia. Repita o<br />
procedimento até escutar a melodia que<br />
pretende.
D942S 48342PL_Ed3 2/1/07 6:31 PM Page 64<br />
Função Recall (resgatar)<br />
Se premir por breves instantes o botão<br />
o último ícone a ser utilizado ficará intermitente.<br />
Sons da campainha<br />
Para ouvir os sons da campainha sem accionar<br />
o botão da campainha, prima o botão .<br />
Prima novamente o botão para alterar a melodia.<br />
Montagem do botão da campainha<br />
Proceda à montagem utilizando a fita autocolante<br />
frente e verso ou os parafusos fornecidos<br />
(consultar a Fig. 3). Teste o botão antes de<br />
fixar. Evite fixar 7a estruturas metálicas.<br />
Fig. 3<br />
63<br />
Funções do botão/conversor<br />
O botão da campainha deste kit pode ser utilizado<br />
como um botão sem-fios autónomo.<br />
Para além disso, pode ser utilizado para ligação a um<br />
sistema de campainha de porta com cabo existente<br />
ou a qualquer um dos seguintes dispositivos:<br />
_ Um botão de campainha com cabo standard<br />
_ Um botão de campainha iluminado e transformador<br />
_ Um contacto de porta ou campainha<br />
_ Qualquer dispositivo com contactos sem tensão<br />
N/A ou N/F.<br />
_ Qualquer dispositivo que produza sinais de<br />
controlo adequados < 24V, (CA ou CC).<br />
Consultar Ligações típicas (C1-7).<br />
Nota importante: É possível ligar cabos adicionais<br />
ao botão através do passa-fios existente na parte<br />
de trás. Assim que o passa-fios for perfurado ou<br />
removido, recomendamos que o botão seja instalado<br />
em interiores.
D942S 48342PL_Ed3 2/1/07 6:31 PM Page 65<br />
Diagrama Aplicação Funcionamento<br />
C1 botão de campainha comfio ou interruptor/<br />
contactos “normalmente abertos”<br />
C2 contacto de porta/janela, interruptor/contactos<br />
“normalmente fechados”<br />
C3 botão com luz, (com transformador)<br />
C4 botão/conversor horizontal – posições do terminal<br />
quando o interruptor está fechado, toca a campaínha<br />
C5 um circuito de botão ou campainha com fio<br />
típico – alimentado por transformador<br />
C6 conversor ligado a um circuito de botão ou<br />
campainha - alimentado por transformador<br />
C7 conversor ligado a circuito de botão ou campainha<br />
com fios – alimentado por pilha<br />
64<br />
quando o interruptor estiver fechado,<br />
a campainha toca<br />
quando o interruptor está aberto, a<br />
campainha emite um som de “Alerta”<br />
quando o interruptor está<br />
fechado, a campainha toca<br />
quando o botão é accionado, a<br />
campainha Libra+ toca<br />
quando o botão é accionado, a<br />
campainha Libra+ toca
D942S 48342PL_Ed3 2/1/07 6:31 PM Page 66<br />
Ligações típicas<br />
C1<br />
C2<br />
1<br />
2<br />
3<br />
4<br />
5<br />
1<br />
2<br />
3<br />
4<br />
5<br />
C3 C4<br />
8V<br />
~<br />
C5 C6 C7<br />
campaínha BELL<br />
8V<br />
~<br />
~<br />
240V<br />
~<br />
240V<br />
campaínha BELL<br />
8V<br />
~<br />
~<br />
240V<br />
65<br />
1<br />
2<br />
3<br />
4<br />
5<br />
1<br />
2<br />
3<br />
4<br />
5<br />
5<br />
4<br />
campaínha BELL<br />
1<br />
2<br />
3<br />
1<br />
2<br />
3<br />
4<br />
5
D942S 48342PL_Ed3 2/1/07 6:31 PM Page 67<br />
Resolução de problemas<br />
Escuta-se um “bip” no modo learn (memorizar)…<br />
● A campainha já memorizou o botão que está a programar.<br />
● Caso pretenda alterar o ícone associado ao botão, utilize o procedimento un-learn<br />
(desmemorizar) e depois programe novamente o botão.<br />
Escutam-se dois “bips” depois da campainha normal tocar…<br />
● Indica que a pilha está fraca no botão que activou a campainha. Instale uma pilha nova,<br />
tipo CR2032.<br />
Quando premir o botão da campainha, a led indicador de funcionamento permanece acesa<br />
durante um curto período de tempo…<br />
● Em condições normais, esse led âmbar acende durante 1 segundo. Quando a pilha estiver<br />
fraca, a luz apenas acenderá durante um curto período de tempo. Instale uma pilha nova, tipo CR2032.<br />
A campainha não funciona…<br />
● Verifique se a campainha está ligada a uma tomada de 230 V<br />
● A tomada possui um interruptor? O interruptor está na posição “ON” (ligado)?<br />
● A campainha pode encontrar-se fora do alcance do botão. Experimente a campainha num<br />
local diferente.<br />
● A campainha pode não estar a identificar o botão. Cumpra o procedimento de programação.<br />
A campainha não toca…<br />
● Verifique a posição do interruptor da campainha.<br />
● Verifique se o controlo de volume não está no mínimo.<br />
A luz intermitente não funciona…<br />
● Verifique a posição do interruptor da campainha.<br />
66
D942S 48342PL_Ed3 2/1/07 6:31 PM Page 68<br />
O alcance é reduzido…<br />
● Estruturas metálicas, incluindo portas em PVC podem reduzir o alcance do equipamento.<br />
Evite montar o botão ou a campainha próximo ou em estruturas metálicas.<br />
● Existem outros equipamentos que podem provocar interferências rádio que podem afectar a<br />
campainha.<br />
● Paredes e tectos reduzem o alcance.<br />
● Pilhas fracas reduzem o alcance. Substitua ao fim de 12–18 meses. Em condições de temperaturas<br />
reduzidas (abaixo dos 5ºC), poderá ser necessário substituir as pilhas com maior frequência.<br />
Quando utilizar a função do conversor do botão, a campainha não funciona…<br />
● Certifique-se de que a cablagem para o botão está correcta.<br />
● Verifique se foram utilizados os terminais correctos e se os parafusos estão apertados.<br />
O botão/conversor não funcionam com o meu equipamento Libra mais antigo…<br />
● Libra + não é compatível com o sistema Libra mais antigo.<br />
● Utilize apenas acessórios com a indicação Libra +.<br />
67
D942S 48342PL_Ed3 2/1/07 6:31 PM Page 69<br />
Especificações<br />
Especificações<br />
Temperatura de funcionamento<br />
Frequência RF – RU/Europa<br />
Alcance (campo aberto)<br />
Nível do volume (típico)<br />
Potência RF<br />
Tipo de pilhas<br />
Vida útil das pilhas<br />
(5 activações/dia)<br />
Classificação IP<br />
Input<br />
Maximum input voltage<br />
(T1 - T5)<br />
Declaração<br />
Campainha<br />
0 a 40ºC<br />
868MHz<br />
150 metros<br />
75dBA @ 1m<br />
-<br />
-<br />
-<br />
IP4x<br />
230V, 50Hz, 3W<br />
-<br />
Friedland, The Arnold Centre, Paycocke Road, Basildon, Essex, SS14 3EA<br />
www.friedland.co.uk<br />
68<br />
Botão<br />
-10 a 40ºC<br />
868MHz<br />
150 metros<br />
Garantia<br />
A Friedland garante este produto<br />
durante 2 anos desde a data de<br />
aquisição. É necessária a prova de<br />
compra; esta garantia não afecta os<br />
seus direitos estatutários.<br />
Eliminação e reciclagem<br />
As pilhas e os produtos eléctricos<br />
usados não devem ser eliminados<br />
junto com o lixo doméstico. Proceda<br />
à reciclagem sempre que existirem<br />
instalações para o efeito. Para obter<br />
mais informações sobre reciclagem,<br />
consulte a autoridade local ou o<br />
fornecedor.<br />
A Novar ED&S declara que este kit de campainha sem-fios está em conformidade com os requisitos essenciais<br />
e outras disposições relevantes da directiva Equipamentos de Rádio e Equipamentos Terminais de<br />
Telecomunicações (R&TTE), 1999/5/EC.<br />
-<br />