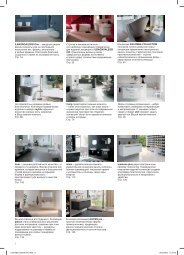
Create successful ePaper yourself
Turn your PDF publications into a flip-book with our unique Google optimized e-Paper software.
la correcta adherencia de toda la superficie.<br />
También se puede aplicar presión con maza de goma.<br />
2.3. APPLICATION OF ADHESIVE.<br />
An adequate amount of adhesive is to be extended with an indented trowel on the<br />
positioning surface. It is important that the adhesive is used within the stated time once<br />
mixed or open to environmental conditions, after a period of time a dry film will form<br />
on the surface of the adhesive and this will harm the adhesion of the tile. The tile is to<br />
be laid on the layer of adhesive by means of a sliding movement and applying pressure<br />
downwards.<br />
2.3. НАНЕСЕНИЕ КЛЕЯ В ОДИН СЛОЙ.<br />
Необходимое количество клея наносится на поверхность для укладки и распределяется<br />
шпателем.<br />
Необходимо проследить за тем, чтобы процесс укладки проходил до застывания клея,<br />
чтобы ничто не препятствовало склеиванию.<br />
Керамическая плитка укладывается на клей и тщательно прижимается для полного<br />
сцепления поверхностей, во избежание образования пустот.<br />
В этом случае возможно использование специальных резиновых молоточков.<br />
2.4. DOBLE ENCOLADO.<br />
Se utilizará en:<br />
Revestimientos y pavimentos exteriores.<br />
Colocación de baldosas con formato superior a N 35x35 cm. o superficie equivalente.<br />
Pavimentos interiores sometidos a cargas dinámicas y estáticas de entidad.<br />
Para aplicarlo:<br />
Por una parte el adhesivo se extiende sobre la superficie de la colocación con llana dentada y<br />
por la otra, el adhesivo se extiende por el reverso de la baldosa con la paleta o paletín, o lado<br />
recto de la llana.<br />
2.4. DOUBLE APPLICATION OF ADHESIVE.<br />
The double application of adhesive should be used when fixing wall of floor tiles in exteriors,<br />
the fixing of floor tiles superior in size of 35x35cm or in the fixing of floor tiles for interior<br />
use that may be submitted to large dynamic and static loads.<br />
Application: the adhesive is to be applied to the supporting structure with an indented trowel.<br />
The adhesive is also applied to the rear side of the tile with a smooth side trowel.<br />
2.4 НАНЕСЕНИЕ КЛЕЯ В ДВА СЛОЯ.<br />
Используется при:<br />
Укладке настенной и напольной плитки в экстерьерах.<br />
Укладке плитки форматом более 35*35 см, либо на определенные поверхности.<br />
Укладке напольной плитки при внутренней отделке помещений с высокой<br />
проходимостью.<br />
Применяется:<br />
Клеевой раствор наносится при помощи зубчатого шпателя на поверхность для укладки<br />
и при помощи мастерка, либо ровной стороной шпателя на обратную сторону плитки.<br />
2.5. COLOCACIÓN DE LAS BALDOSAS.<br />
Antes de proceder a su colocación, es necesario extraer varias piezas de diferentes cajas<br />
y verificar chapando una alfombra de 8 a 10 m2 para ver el efecto, la tonalidad, calibre y<br />
dimensiones.<br />
Las baldosas deben colocarse con juntas rectas y regulares entre si.<br />
La anchura de la junta depende del formato de la baldosa y el uso y esfuerzo previsible a la<br />
que va a ser sometida la instalación.<br />
No se aconseja la utilización de una junta de colocación inferior a 1,5 mm.<br />
En ningún caso se puede colocar sin junta.<br />
Dentro del tiempo de ajuste se recomienda levantar alguna baldosa para comprobar si se está<br />
consiguiendo la superficie de contacto requerida.<br />
Se debe eliminar el adhesivo sobrante de las juntas antes de que endurezca para un correcto<br />
rejuntado.<br />
Para formatos rectangulares, la colocación a traba se realizará a un 15% de la longitud de la<br />
pieza MÁXIMO.<br />
Debemos proteger el acabado cerámico recién instalado, de las inclemencias del tiempo,<br />
heladas y secado prematuro.<br />
Los productos deben tener una manipulación cuidadosa, evitando golpes entre piezas al<br />
arrastrar las piezas una sobre otra para evitar que puedan dañarse las aristas y ralladuras en la<br />
superficie.<br />
Una vez colocado el material es imprescindible una correcta protección de este, con el fin de<br />
evitar posibles daños hasta la finalización de la obra. Este material lo suministramos con una<br />
protección de cera para su manipulación al colocarlo, dicha cera se elimina limpiándolo con<br />
agua caliente.<br />
2.5. FIXING OF THE FLOOR TILES.<br />
Before commencing with the fixing of the tiles it is highly recommended to open and mix<br />
the tiles from several boxes. It is also recommended that a number of tiles be placed on the<br />
support surface to verify the finish to be obtained.<br />
The tiles must be fixed with straight and regular spaces between each tile; the width of<br />
the space between each tile depends upon the size/format of the tiles to be fixed. It is not<br />
advisable to leave a gap of less than 1.5mm between each tile. In no case should the tiles be<br />
fixed without leaving a space.<br />
The excess adhesive is to be removed from the tile before setting.<br />
When fixing rectangular tiles in the “brick bond” effect, the tiles should be staggered no more<br />
than 1/3 of the length of the tile.<br />
Once installed and while setting the tile must be protected from adverse weather conditions<br />
such as frost, it should also be protected from setting to quickly.<br />
Care should also be taken in the manipulation of the tiles to prevent scratches and chipped