Prezentare expresor capsule Lavazza Blue LB 850
Prezentare expresor capsule Lavazza Blue LB 850
Prezentare expresor capsule Lavazza Blue LB 850

You also want an ePaper? Increase the reach of your titles
YUMPU automatically turns print PDFs into web optimized ePapers that Google loves.
Istruzioni per l’uso - Instructions - Mode d’emploi<br />
Bedienungsanleitung - Instrucciones de empleo<br />
Instruções de uso - Gebruiksaanwijzing<br />
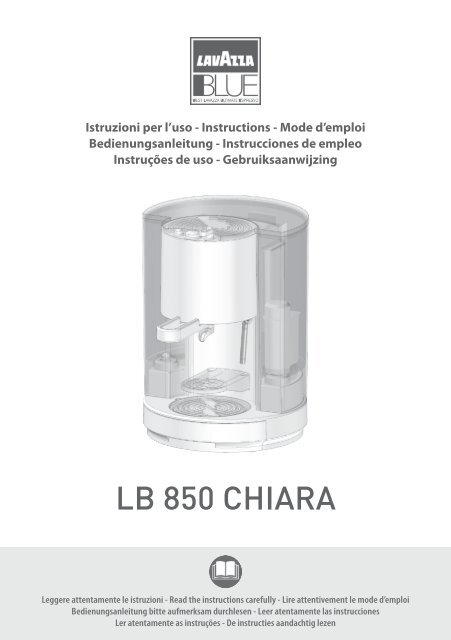
<strong>LB</strong> <strong>850</strong> CHIARA<br />
Leggere attentamente le istruzioni - Read the instructions carefully - Lire attentivement le mode d’emploi<br />
Bedienungsanleitung bitte aufmerksam durchlesen - Leer atentamente las instrucciones<br />
Ler atentamente as instruções - De instructies aandachtig lezen
Congratulazioni!<br />
Gentile Cliente ci congratuliamo per aver scelto la macchina espresso <strong>Lavazza</strong> <strong>LB</strong> <strong>850</strong> CHIARA e<br />
la ringraziamo per la fiducia accordataci.<br />
Prima di mettere in funzione la macchina, consigliamo di leggere attentamente le istruzioni per<br />
l’uso che spiegano come utilizzarla, pulirla e mantenerla in perfetta efficienza. Non ci resta che<br />
augurarle la preparazione di tanti ottimi caffè grazie a <strong>Lavazza</strong>!<br />
Congratulations!<br />
Dear customer, we would like to congratulate you on your choice of the <strong>Lavazza</strong> <strong>LB</strong> <strong>850</strong> CHIARA<br />
espresso machine and thank you for choosing us.<br />
Before using the machine we would advise you to closely read the instruction booklet, which<br />
explains how to use it, clean it and keep it in proper working condition.<br />
All that remains is for us to wish you all the best in preparing many excellent <strong>Lavazza</strong> coffees!<br />
Félicitations !<br />
Cher Client, nous vous félicitons d’avoir choisi la machine pour espresso <strong>Lavazza</strong> <strong>LB</strong> <strong>850</strong> CHIARA,<br />
et nous vous remercions de votre confiance.<br />
Avant de faire fonctionner la machine, nous vous conseillons de lire attentivement le mode<br />
d’emploi qui explique comment l’utiliser, la nettoyer et la maintenir en excellent état.<br />
Il ne nous reste qu’à vous souhaiter de préparer beaucoup d’excellents cafés grâce à <strong>Lavazza</strong> !<br />
Herzlichen Glückwunsch!<br />
Sehr geehrter Kunde wir gratulieren Ihnen zum Kauf der Espressomaschine <strong>Lavazza</strong> <strong>LB</strong> <strong>850</strong> CHIARA<br />
und bedanken uns für Ihr Vertrauen, das Sie uns entgegengebracht haben. Vor Inbetriebnahme der<br />
Maschine raten wir Ihnen die Betriebsanleitungen sorgfältig zu lesen, die Ihnen erklären wie sie zu<br />
benutzen, zu reinigen und in einem perfekten Zustand zu halten ist. Wir wünschen Ihnen, dass Sie<br />
dank <strong>Lavazza</strong> viele ausgezeichnete Tassen Kaffee zubereiten werden!<br />
¡Enhorabuena!<br />
Estimado Cliente le damos nuestra más sincera enhorabuena por haber elegido la máquina<br />
espresso <strong>Lavazza</strong> <strong>LB</strong> <strong>850</strong> CHIARA y le agradecemos por depositar su confianza en nosotros.<br />
Antes de poner en funcionamiento la máquina, le aconsejamos leer atentamente las<br />
instrucciones de empleo que explican cómo utilizarla, limpiarla y mantenerla en perfecto estado<br />
de funcionamiento. Sólo nos queda desearle ¡muchos deliciosos cafés gracias a <strong>Lavazza</strong>!<br />
Parabéns!<br />
Prezado Cliente, parabéns por ter escolhido a máquina expresso <strong>Lavazza</strong> <strong>LB</strong> <strong>850</strong> CHIARA e<br />
agradecemos a confiança dada.<br />
Antes de usar a máquina, aconselhamos ler atentamente as instruções de uso, que explicam<br />
como utilizá-la, limpá-la e mantê-la perfeitamente eficiente.<br />
Depois disso, desejamos que prepare tantos ótimos cafés com a <strong>Lavazza</strong>!<br />
Gefeliciteerd!<br />
Geachte klant, wij feliciteren u met de keuze van het espressoapparaat <strong>Lavazza</strong> <strong>LB</strong> <strong>850</strong> CHIARA<br />
en danken u voor het getoonde vertrouwen in ons. Wij raden u aan, voordat u het apparaat in<br />
gebruik neemt, deze instructies aandachtig te lezen. In deze gebruiksaanwijzing wordt namelijk<br />
uitgelegd hoe u het apparaat het beste kunt gebruiken, schoonmaken en onderhouden.<br />
Tot slot wensen wij dat u nog vele heerlijke koffie zult bereiden danzij <strong>Lavazza</strong>!<br />
IT<br />
Pagina<br />
1<br />
EN<br />
Page<br />
8<br />
FR<br />
Page<br />
15<br />
DE<br />
Seite<br />
22<br />
ES<br />
Página<br />
29<br />
PT<br />
Página<br />
36<br />
NL<br />
Page<br />
43
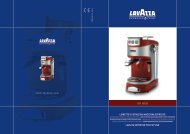
Pulsante attivazione<br />
vapore<br />
Ghiera luminosa<br />
pronto vapore<br />
Ghiera luminosa<br />
pronto erogazione<br />
Coperchio<br />
serbatoio acqua<br />
Gruppo caldaia<br />
Coppetta porta cialde<br />
Cassetto raccogli<br />
gocce/cialde usate<br />
COPPETTA<br />
PORTA CIALDE<br />
Vano inserimento<br />
cialda<br />
Beccuccio erogatore<br />
COMPONENTI<br />
GRUPPO<br />
LANCIA VAPORE<br />
Presa lancia vapore<br />
Lancia<br />
vapore<br />
Interruttore generale<br />
IT<br />
Segnalatore luminoso<br />
macchina accesa<br />
Manopola erogazione<br />
vapore<br />
Pulsante<br />
erogazione caffè<br />
Griglia scalda tazze<br />
Serbatoio acqua<br />
Filtro Brita®<br />
(opzionale)<br />
Gruppo lancia vapore<br />
Griglia estraibile<br />
poggia tazzina<br />
Griglia poggia tazza<br />
grande<br />
ALIMENTAZIONE<br />
Cavo alimentazione<br />
1
2<br />
IT<br />
Non si assumono responsabilità per eventuali<br />
danni in caso di:<br />
• impiego errato e non conforme agli scopi<br />
previsti;<br />
• riparazioni non eseguite presso centri<br />
d’assistenza autorizzati;<br />
• manomissione del cavo d’alimentazione;<br />
• manomissione di qualsiasi componente<br />
della macchina;<br />
• impiego di pezzi di ricambio e accessori<br />
non originali;<br />
• mancata decalcificazione;<br />
• stoccaggio in locali al di sotto di 0°C;<br />
• utilizzo di cialde differenti da quelle indicate.<br />
In questi casi viene a decadere la garanzia.<br />
AVVIAMENTO MACCHINA<br />
Posizionare la macchina su una superficie piana<br />
e stabile, lontano da acqua, fiamme e fonti di calore.<br />
Scollegare l’alimentazione elettrica se presente.<br />
La macchina accesa non deve mai essere<br />
coperta con strofinacci o altro. Al primo utilizzo<br />
e quando l’apparecchio rimane inutilizzato per<br />
lunghi periodi, si consiglia, seguendo il paragrafo<br />
“PREPARAZIONE CAFFE’ di eseguire un’ erogazione<br />
di circa 50cc con la coppetta porta cialde vuota.<br />
1 Sollevare ed estrarre il coperchio del serbatoio<br />
ed il serbatoio stesso, quindi riempire il serbatoio<br />
dell’acqua fino al livello MAX indicato, usando<br />
soltanto acqua fresca potabile non gasata.<br />
1.1 È possibile sollevare il coperchio e riempire direttamente<br />
il serbatoio.<br />
MAX<br />
MIN<br />
PREDISPOSIZIONE MACCHINA<br />
MAX<br />
MIN<br />
Il livello dell’acqua non deve mai superare il MAX<br />
e deve sempre essere mantenuto sopra il MIN.<br />
Utilizzare esclusivamente acqua fresca potabile.<br />
Acqua calda nonché altri liquidi possono danneggiare<br />
il serbatoio. Non mettere in funzione la<br />
macchina senza acqua: accertarsi che l’acqua sia<br />
superiore al livello MIN indicato.<br />
L’utilizzo di un filtro dell’acqua<br />
(accessorio opzionale)<br />
migliora la qualità<br />
dell’acqua e allunga<br />
la durata dell’apparecchio.<br />
Utilizzare il filtro AquaAroma<br />
Crema Brita® per <strong>Lavazza</strong>.<br />
Per inserire il filtro<br />
seguire il foglio di istruzioni<br />
allegato all’accessorio. Si<br />
consiglia di non modificare<br />
la selezione già impostata del filtro.<br />
3 Inserire il cavo di alimentazione e premere l’interruttore<br />
generale portandolo in posizione I. Il<br />
segnalatore luminoso macchina accesa si illumina.<br />
4 Attendere che la ghiera luminosa pronto erogazione<br />
si illumini. A questo punto la macchina è<br />
pronta all’utilizzo.<br />
PREDISPOSIZIONE ALLA PREPARAZIONE<br />
CAFFÈ<br />
La macchina espresso dispone di due posizioni<br />
tazza/tazzina per la preparazione del caffè.<br />
Regolazione griglia poggia tazze:<br />
Tazzina caffè espresso: Tirare verso l’esterno la<br />
griglia estraibile poggia tazzina.<br />
Tazza grande: Spingere verso l’interno<br />
la griglia estraibile poggia tazzina.
EROGAZIONE CAFFÈ<br />
1 Estrarre (se inserita) la coppetta porta cialde ruotandola<br />
di circa 45° in senso orario e tirandola<br />
verso il basso.<br />
2 Inserire la cialda nell’apposito vano inserimento<br />
cialda, quindi reinserire la coppetta porta cialde<br />
nel gruppo caldaia eseguendo a ritroso le operazioni<br />
descritte al punto [ 1 ].<br />
Nel vano inserimento cialde devono essere inserite<br />
esclusivamente cialde <strong>Lavazza</strong> BLUE.<br />
3 Posizionare la tazzina sulla griglia estraibile poggia<br />
tazzina opportunamente estratta.<br />
PREPARAZIONE CAFFÈ<br />
IT<br />
3.1 Posizionare la tazza sulla griglia poggia tazza (se<br />
estratta rientrare la griglia estraibile poggia tazzina).<br />
4 Premere il pulsante erogazione caffè ed attendere<br />
l’erogazione della quantità desiderata di caffè.<br />
5 Premere nuovamente il pulsante erogazione<br />
caffè riportandolo nella posizione iniziale per<br />
terminare l’erogazione, quindi togliere la tazza/<br />
tazzina.<br />
La cialda va estratta dopo ogni erogazione.<br />
6 Attendere alcuni secondi ed estrarre la coppetta<br />
porta cialde come descritto al punto [ 1 ] e rimuovere<br />
la cialda usata dall’apposito vano inserimento<br />
cialda.<br />
Non introdurre le dita od oggetti nella sede<br />
d’inserimento della coppetta porta cialde<br />
all’interno del gruppo caldaia e nemmeno nel<br />
vano inserimento cialda della coppetta porta<br />
cialde.<br />
3
4<br />
IT<br />
Pericolo di scottature! All’inizio dell’erogazione<br />
possono verificarsi brevi spruzzi di acqua calda.<br />
La lancia vapore può raggiungere temperature<br />
elevate: evitare di toccarla direttamente con le<br />
mani. Utilizzare l’apposita presa per muovere<br />
la lancia. La lancia vapore non deve essere<br />
orientata su persone o animali. Non esporsi<br />
mai al getto di vapore. Assicurarsi sempre che<br />
ci sia acqua sufficiente nel serbatoio.<br />
PREPARAZIONE CAPPUCCINO<br />
1 Orientare la lancia vapore in posizione avanzata<br />
utilizzando l’apposita presa.<br />
2 Posizionare il contenitore o la tazza contenente<br />
il latte sotto la lancia vapore in maniera che circa<br />
metà della lancia sia immersa nel latte.<br />
VAPORE<br />
3 Premere e mantenere premuto il pulsante attivazione<br />
vapore finché la ghiera luminosa pronto<br />
vapore non si illumina, quindi rilasciarlo.<br />
4 Attivare l’erogazione ruotando la manopola erogazione<br />
vapore in senso antiorario. Il vapore comincerà<br />
a fuoriuscire.<br />
5 Raggiunta la quantità desiderata di schiuma interrompere<br />
l’erogazione ruotando la manopola<br />
erogazione vapore in senso orario fino alla posizione<br />
di riposo e rimuovere il contenitore o la<br />
tazza.<br />
Dopo l’utilizzo della lancia vapore è necessario<br />
azionarla a vuoto per alcuni secondi al fine di<br />
evitare incrostazioni e intasamenti.
Prima di eseguire operazioni di pulizia assicurarsi<br />
sempre che l’alimentazione elettrica sia<br />
scollegata ed attendere il raffreddamento della<br />
macchina.<br />
Si consiglia di risciacquare quotidianamente il<br />
serbatoio dell’acqua e di riempirlo con acqua<br />
fresca. Svuotare e pulire ogni due/tre giorni<br />
il cassetto raccogli gocce/cialde usate, o comunque<br />
quando è pieno. Non utilizzare forni<br />
a microonde o tradizionali per asciugare la<br />
macchina o sue parti. Mai utilizzare detergenti<br />
alcalini, solventi, alcol o sostanze aggressive.<br />
Non immergere la macchina in acqua. Salvo<br />
specifiche indicazioni tutti i componenti non<br />
smontabili (esclusi quelli elettrici) della macchina<br />
vanno lavati utilizzando acqua fredda o<br />
tiepida e panni o spugne non abrasive.<br />
PULIZIA LANCIA VAPORE<br />
Sfilare la punta della lancia vapore tirandola verso<br />
il basso, lavarla in lavastoviglie o con acqua.<br />
Pulire la lancia vapore con un panno umido e<br />
reinserire la punta infilandola dal basso.<br />
PULIZIA COPPETTA PORTA CIALDE<br />
Estrarre il beccuccio erogatore dalla coppetta<br />
porta cialde. Lavare tutte le parti con acqua tiepida/fresca<br />
corrente ed un panno non abrasivo,<br />
quindi asciugarle e rimontarle.<br />
MANUTENZIONE E PULIZIA<br />
PULIZIA GRIGLIE<br />
IT<br />
1 Estrarre verso l’esterno la griglia estraibile poggia<br />
tazzina e lavarla delicatamente con un panno<br />
umido e acqua fresca/tiepida.<br />
2 La griglia scalda tazze e la griglia poggia tazza<br />
grande possono essere rimosse sollevandole e<br />
lavate con acqua corrente fresca/tiepida.<br />
Asciugarle prima di reinserirle.<br />
PULIZIA CASSETTO RACCOGLI GOCCE/<br />
CIALDE USATE<br />
1 Estrarre il cassetto raccogli gocce/cialde usate<br />
tirandolo verso l’esterno dalla apposita presa.<br />
2 Svuotare il cassetto dai liquidi e lavarlo con acqua<br />
fredda o tiepida, quindi asciugarlo e rimontarlo.<br />
CAPPUCCINATORE LAVAZZA<br />
(accessorio opzionale)<br />
La macchina <strong>LB</strong> <strong>850</strong> CHIARA è compatibile<br />
con il cappuccinatore Cappuccino Cuor di<br />
Crema <strong>Lavazza</strong>.<br />
Per avere maggiori informazioni contatti subito<br />
<strong>Lavazza</strong> o il suo distributore di fiducia.<br />
5
IT<br />
SOLUZIONI AI PROBLEMI PIÙ COMUNI<br />
Problema riscontrato Cause possibili Rimedio<br />
La macchina non si accende. » Macchina non collegata alla rete<br />
elettrica.<br />
» Verificare l’inserimento delle prese.<br />
Le ghiere luminose o il segnalatore » Si è verificato un guasto. » Contattare il servizio consumatori o il<br />
luminoso non si accendono.<br />
centro assistenza.<br />
La pompa è molto rumorosa. » Manca acqua nel serbatoio. » Rabboccare con acqua fresca potabile.<br />
» Filtro non inserito correttamente. » Verificare inserimento del filtro Brita® (vedere<br />
istruzioni fornite col filtro).<br />
La macchina non eroga caffè. » Temperatura non idonea. » Attendere che la ghiera luminosa sia<br />
accesa.<br />
» Erogazione vapore selezionata. » Portare la manopola erogazione vapore in<br />
posizione di riposo.<br />
» Coppetta porta cialde non inserita » Assicurarsi che la coppetta porta cialde<br />
correttamente.<br />
abbia raggiunto la posizione di completo<br />
bloccaggio.<br />
Il caffè non è abbastanza caldo. » Macchina non in temperatura<br />
quando è stato premuto il<br />
pulsante erogazione caffè.<br />
CARATTERISTICHE TECNICHE<br />
» Attendere che la spia macchina resti accesa<br />
fissa.<br />
Il caffè non sgorga o sgorga a gocce. » Erogatore intasato. » Eseguire la pulizia della coppetta porta<br />
cialde (vedi manutenzione e pulizia).<br />
Il caffè sgorga troppo velocemente,<br />
non si forma la crema nell’espresso.<br />
» Cialda già usata. » Inserire una cialda nuova.<br />
Non si forma la schiuma del latte o del<br />
cappuccino.<br />
» Latte non adatto.<br />
» Il latte non è abbastanza freddo.<br />
» Tubo erogazione vapore otturato.<br />
Nessuna erogazione di vapore. » Lancia vapore otturata.<br />
· Voltaggio: 220-240 V 50/60 Hz<br />
· Potenza totale: <strong>850</strong> W<br />
· Capacità serbatoio: 2,5 L<br />
· Dimensioni: Altezza 34 cm<br />
Larghezza 24 cm<br />
6<br />
Profondità 24 cm<br />
» Manca acqua nel serbatoio.<br />
» Filtro non inserito correttamente.<br />
» Utilizzare latte fresco, parzialmente<br />
scremato.<br />
» Usare latte a temperatura di frigorifero.<br />
» Eseguire la pulizia del tubo vapore con un<br />
ago e la pulizia della lancia.<br />
» Eseguire la pulizia lancia (vedi<br />
manutenzione e pulizia). Se il problema<br />
persiste ASSICURARSI CHE LA MACCHINA SIA<br />
SPENTA E LA MANOPOLA EROGAZIONE VAPORE<br />
CHIUSA, quindi pulire il foro dell’erogatore<br />
con un ago sottile, assicurandosi che<br />
sia libero da ostruzioni, poi accendere la<br />
macchina ed erogare una piccola quantità<br />
di vapore.<br />
» Rabboccare con acqua fresca potabile.<br />
» Verificare inserimento del filtro Brita®<br />
(vedere istruzioni fornite col filtro).<br />
Per i guasti non contemplati dalla suddetta tabella o nel caso in cui i rimedi suggeriti non li risolvano, rivolgersi ad un centro assistenza <strong>Lavazza</strong>.<br />
Per le caratteristiche tecniche fare riferimento alla targhetta dati presente sulla macchina.<br />
· Peso: 4,3 kg<br />
· Cassetto raccogli gocce/cialde usate: 8 cialde<br />
· Materiali impiegati per la carrozzeria: termoplastico<br />
2006/42 CE – 2004/108 CE – 2006/95 CE
SICUREZZA<br />
Destinazione d’uso:<br />
La macchina per caffè è prevista esclusivamente per l’impiego domestico. È vietato qualunque utilizzo improprio (non descritto<br />
nelle presenti istruzioni). È vietato apportare modifiche tecniche. La macchina non è destinata ad essere utilizzata da bambini o<br />
persone con ridotte capacità fisiche, mentali o sensoriali, o senza esperienza e conoscenza, a meno che abbiano ricevuto istruzioni<br />
relativamente all’uso della macchina e siano controllati da una persona responsabile per la loro sicurezza.<br />
Ubicazione:<br />
Sistemare la macchina per caffè in un posto sicuro, dove nessuno possa rovesciarla o venirne ferito. Non tenere la<br />
macchina a temperatura inferiore a 0° poiché il gelo potrebbe danneggiarla. Non usare la macchina per caffè all’aperto.<br />
Non posare la macchina su superfici calde e/o nelle vicinanze di acqua, fiamme e fonti di calore. La macchina accesa<br />
non deve mai essere coperta con strofinacci o altro.<br />
Alimentazione di corrente:<br />
Collegare la macchina per caffè soltanto ad una presa di corrente adeguata. La tensione deve corrispondere a quella<br />
indicata sulla targhetta della macchina.<br />
Cavo d’alimentazione:<br />
Non usare la macchina per caffè se il cavo d’alimentazione è difettoso o danneggiato. In tali casi dovrà essere sostituito<br />
immediatamente. Non far passare il cavo d’alimentazione per angoli e su spigoli vivi, sopra oggetti molto caldi e<br />
proteggerlo dall’olio. Non portare o tirare la macchina per caffè tenendola per il cavo. Non estrarre la spina tirandola per<br />
il cavo; non toccarla con le mani bagnate. Evitare che il cavo d’alimentazione cada liberamente da tavoli o scaffali.<br />
Pericolo di folgorazione:<br />
Non mettere mai a contatto dell’acqua le parti sotto corrente.<br />
Protezione d’altre persone:<br />
Tenere i bambini sotto supervisione, per evitare che giochino con l’apparecchio. I bambini non si rendono conto del<br />
pericolo connesso agli elettrodomestici. Non lasciare alla loro portata i materiali utilizzati per imballare la macchina.<br />
Pericolo d’ustioni:<br />
Evitare di dirigere contro se stessi e/o altri il getto di vapore. All’inizio dell’erogazione possono verificarsi brevi spruzzi di<br />
acqua calda. Il tubo d’erogazione può raggiungere temperature elevate: evitare di toccarlo direttamente con le mani.<br />
Non togliere mai la coppetta portacialde durante l’erogazione.<br />
Pulizia:<br />
Prima di pulire la macchina, è indispensabile staccare la spina dalla presa di corrente ed aspettare che la macchina si raffreddi.<br />
Non immergere la macchina nell’acqua! È severamente vietato cercare d’intervenire all’interno della macchina. Non<br />
utilizzare per scopi alimentari l’acqua presente nel serbatoio.<br />
Custodia della macchina:<br />
Quando la macchina rimane inutilizzata per un periodo prolungato, staccare la spina dalla presa e custodirla in luogo<br />
asciutto e non accessibile ai bambini. Proteggerla dalla polvere e dallo sporco.<br />
Riparazioni/Manutenzione:<br />
Nel caso di guasti, difetti o sospetto di difetto dopo una caduta, staccare subito la spina dalla presa. Non mettere in<br />
funzione una macchina difettosa. Soltanto i Centri di Assistenza Autorizzati possono effettuare interventi e riparazioni.<br />
Nel caso di interventi non eseguiti a regola d’arte, si declina ogni responsabilità per eventuali danni.<br />
Serbatoio acqua:<br />
Immettere nel serbatoio soltanto acqua fresca potabile non gassata. Non mettere in funzione la macchina se l’acqua<br />
non supera almeno il livello minimo indicato sul serbatoio.<br />
Vano cialde:<br />
Nel vano cialde devono essere inserite solo cialde <strong>Lavazza</strong> BLUE. Le cialde sono da usarsi una sola volta.<br />
Smaltimento della macchina a fine vita (Direttiva Europea 2002/96/CE – D.L. 25 luglio 2005 n.<br />
151):<br />
Il simbolo del cassonetto apposto sull’apparecchiatura e/o sulla sua confezione indica che il prodotto alla fine della propria<br />
vita utile non dovrà essere gettato tra i normali rifiuti. La macchina dovrà essere portata in uno dei centri di raccolta<br />
differenziata specifici per i rifiuti elettrici ed elettronici esistenti sul territorio nazionale oppure riconsegnata al rivenditore<br />
al momento dell’acquisto di un’apparecchiatura nuova equivalente, in ragione di uno a uno. L’utente è responsabile del<br />
conferimento dell’apparecchio alle appropriate strutture di raccolta, pena le sanzioni previste dalla vigente legislazione<br />
su questa materia. L’adeguata raccolta differenziata di tali apparecchiature per il riciclaggio e/o lo smaltimento<br />
ambientalmente compatibile, contribuisce ad evitare possibili effetti negativi sull’ambiente e sulla salute e favorisce il<br />
reimpiego e/o riciclo dei materiali di cui è composta la macchina. Per informazioni più dettagliate inerenti il sistema di<br />
raccolta disponibile, rivolgersi al locale servizio di smaltimento rifiuti o al rivenditore ove è stato effettuato l’acquisto.<br />
7<br />
IT
8<br />
EN<br />
Steam activation<br />
button<br />
Steam ready<br />
indicator ring<br />
Dispenser ready<br />
indicator ring<br />
Water<br />
reservoir cover<br />
Heater group<br />
Capsule holder<br />
Used cartridge/<br />
drop collection drawer<br />
COMPONENTS<br />
CAPSULE HOLDER<br />
STEAM SPOUT<br />
GROUP<br />
ALIMENTAZIONE<br />
Capsule lodging<br />
Dispensation spout<br />
Steam<br />
spout<br />
Steam spout tool<br />
Steam dispenser knob<br />
Main Switch<br />
Power on indicator<br />
Coffee<br />
dispenser button<br />
Cup heater grille<br />
Water reservoir<br />
Brita® filter<br />
(optional)<br />
Steam spout group<br />
Removable cup<br />
grille<br />
Large mug grille<br />
Mains lead
No responsibility will be assumed for any<br />
damage in case of:<br />
• incorrect use not conforming to the intended<br />
purposes;<br />
• repairs performed by unauthorised repair<br />
centres;<br />
• tampering with the mains lead;<br />
• tampering with any components of the machine;<br />
• use of non original replacement parts or ac-<br />
cessories;<br />
• lack of decalcification;<br />
• storage at temperatures lower than 0°C;<br />
• the use of <strong>capsule</strong>s different than those indicated.<br />
Any of the above cases shall render the warranty<br />
null and void.<br />
MACHINE START UP<br />
Place the unit on a flat, stable surface, far from<br />
water, flames and heat sources. Disconnect<br />
the electrical power if present. Never cover the<br />
machine with cloths or anything else while it is<br />
turned on. At the first use or after a long period<br />
of disuse, it is recommended to dispense about<br />
50cc with the <strong>capsule</strong> holder empty, following<br />
the instructions in the “COFFEE PREPARATION”<br />
paragraph.<br />
1 Lift and extract the reservoir cover and the reservoir<br />
itself and fill the water reservoir up to the<br />
indicated MAX level using only cool, non-carbonated<br />
potable water.<br />
1.1 The cover can be lifted to fill the reservoir.<br />
MAX<br />
MIN<br />
MACHINE PREDISPOSITION<br />
MAX<br />
MIN<br />
The water level must never exceed the MAX indicator<br />
and it must be maintained above the MIN<br />
indicator. Use only cool potable water. Hot water<br />
and other liquids can damage the reservoir.<br />
Do not start up the unit without water: ensure<br />
that the water is above the indicated MIN level.<br />
The use of a water filter<br />
(optional accessory) improves<br />
the quality of the<br />
water and extends the life<br />
of the equipment. Us the<br />
Brita® AquaAroma Crema<br />
filter for <strong>Lavazza</strong>. To insert<br />
the filter, follow the instructions<br />
attached to the accessory.<br />
It is recommended<br />
not to change the selection<br />
already set on the filter.<br />
EN<br />
3 Plug in the mains lead and press the main switch<br />
to position I. The power on indicator will light.<br />
4 Wait for the dispenser ready indicator ring to<br />
light up. At the point, the unit is ready to be<br />
used.<br />
PREPARATION PREDISPOSITION<br />
COFFEE<br />
The espresso machine has two positions - tazza/tazzina<br />
(large cup/cup) for coffee preparation.<br />
Cup holder grille adjustment:<br />
Espresso coffee cup: Pull the removable cup<br />
holder grille toward the outside.<br />
Large cup: Push the removable cup holder<br />
grille toward the inside.<br />
9
10<br />
EN<br />
COFFEE DISPENSER<br />
1 Extract (if inserted) the <strong>capsule</strong> holder by rotating<br />
it about 45° clockwise and pulling it down.<br />
2 Insert the <strong>capsule</strong> in the <strong>capsule</strong> lodging and<br />
re-insert the <strong>capsule</strong> holder in the heater group<br />
reversing the steps in point [1].<br />
Insert only <strong>Lavazza</strong> BLUE <strong>capsule</strong>s into the <strong>capsule</strong><br />
lodging.<br />
3 Place the cup on the opportunely positioned removable<br />
cup holder grille.<br />
PREPARING COFFEE<br />
3.1 Place the cup on the removable cup holder grille<br />
(if extracted, push it back in).<br />
4 Press the coffee dispenser button and wait for<br />
the desired amount of coffee to be dispensed.<br />
5 Press the coffee dispenser button again, placing<br />
it in the initial position, to stop dispensation and<br />
remove the cup.<br />
The <strong>capsule</strong> should be removed away after<br />
each dispensation.<br />
6 Wait a few seconds and remove the <strong>capsule</strong><br />
holder as described in point [1]. Remove the<br />
<strong>capsule</strong> from the <strong>capsule</strong> lodging.<br />
Do not insert your fingers or other objects in the<br />
<strong>capsule</strong> holder lodging in the boiler group and<br />
in the <strong>capsule</strong> holder inside the <strong>capsule</strong> lodging.
Burn danger! At the beginning of each dispensation,<br />
short sprays of hot water may occur.<br />
The steam spout can reach high temperatures:<br />
avoid touching it directly with your hands. Use<br />
the special tool to remove the steam spout. The<br />
steam spout must not be pointed at persons or<br />
animals. Never expose yourself to the steam<br />
jet. Always ensure that there is sufficient water<br />
in the reservoir.<br />
CAPPUCCINO PREPARATION<br />
1 Point the steam spout in the forward position<br />
using the special holder.<br />
2 Place the container or cup containing the mild<br />
under the steam spout in such a way that about<br />
half of the spout is immersed in the milk.<br />
STEAM<br />
EN<br />
3 Press and hold the steam activation button until<br />
the steam ready indicator ring lights and then<br />
release the button.<br />
4 Activate steam dispensation by turning the<br />
steam knob counter clockwise. Steam will begin<br />
to come out.<br />
5 Once you have achieved the desired amount of<br />
foam, stop dispensation by turning the steam<br />
knob clockwise to the standby position and remove<br />
the container or cup.<br />
After each use, the steam spout must be activated<br />
for a few seconds in order to remove encrustation<br />
and clogging<br />
11
12<br />
EN<br />
Before cleaning always ensure that the electrical<br />
power has been removed and wait until the<br />
unit has cooled.<br />
It is recommended that the water reservoir be<br />
emptied and rinsed daily and filled with fresh<br />
water. Empty and clean the used cartridge/<br />
drop collection drawer every two/three days<br />
or, in any case, when full. Do not use microwave<br />
or traditional ovens to dry the machine<br />
or its parts. Never use alkaline detergents, solvents,<br />
alcohol or aggressive substances. Do not<br />
immerse the machine in water. Except where<br />
specifically indicated, all of the unit’s nondetachable<br />
components (except the electrical<br />
ones) should be washed using cold or warm<br />
water and non abrasive cloths or sponges.<br />
STEAM SPOUT CLEANING<br />
Slide the end of the steam spout off pulling it<br />
downward and wash in a dishwasher or with<br />
water. Clean the steam spout with a damp cloth<br />
and re-insert the end sliding it on from the bottom.<br />
CAPSULE HOLDER CLEANING<br />
Remove the dispensation spout from the <strong>capsule</strong><br />
holder. Wash all of the parts with warm/cool<br />
running water and a non abrasive cloth, then dry<br />
and reassemble.<br />
MAINTENANCE AND CLEANING<br />
GRILLE CLEANING<br />
1 Extract the removable cup holder grille toward<br />
the outside and wash it delicately with a damp<br />
cloth and cool/warm water.<br />
2 The cup heater grille and the large cup holder<br />
grille can be removed by lifting them and can<br />
be washed with cool/warm running water. Dry<br />
them before re-inserting.<br />
CLEANING THE USED CARTRIDGE/<br />
DROP COLLECTION DRAWER<br />
1 Remove the used cartridge/drop collection<br />
drawer by pulling it toward the outside of the<br />
holder.<br />
2 Empty the tray of any liquids and wash it with<br />
cold or warm water, dry it and reassemble it.<br />
LAVAZZA MILK FROTHER<br />
(optional accessory)<br />
The <strong>LB</strong> <strong>850</strong> CHIARA machine is compatible<br />
with the Cappuccino Cuor di Crema<br />
<strong>Lavazza</strong> milk frother.<br />
For further information don’t hesitate to contact<br />
<strong>Lavazza</strong> or any good retailer.
TECHNICAL TROUBLESHOOTING<br />
» The <strong>capsule</strong> holder is not correctly<br />
inserted.<br />
TECHNICAL CHARACTERISTICS<br />
EN<br />
Problem encountered Possible causes Solution<br />
The machine does not turn on. » The machine is not connected to<br />
the electrical outlet.<br />
» Verify that the plugs are inserted.<br />
The indicator rings or the indicator light » A failure has occurred. » Contact consumer services or your service<br />
does not turn on.<br />
centre.<br />
The pump is very noisy. » The temperature is not suitable. » Top up the reservoir with cool potable water .<br />
» The filter is not inserted correctly. » Verify the correct insertion of the Brita® filter (see<br />
the instructions which came with the filter).<br />
The machine does not dispense coffee. » Temperatura non idonea. » Wait for the dispenser ready indicator ring<br />
to light up.<br />
» Steam dispensation has been » Move the steam dispensation knob to the<br />
selected.<br />
standby position.<br />
The coffee is not hot enough. » The machine was not up to<br />
temperature when the coffee<br />
dispensation button was pressed.<br />
The coffee does not spout or spouts<br />
in drips.<br />
The coffee spouts too quickly, the<br />
espresso is not creamy.<br />
The milk or cappuccino does not get<br />
foamy.<br />
» Ensure that the <strong>capsule</strong> holder is in the<br />
fully inserted position.<br />
» Wait for the ready light to come on permanently.<br />
» The dispenser is clogged. » Clean the <strong>capsule</strong> holder (see maintenance<br />
and cleaning).<br />
» The <strong>capsule</strong> has already been » Insert a new <strong>capsule</strong>.<br />
used.<br />
» The milk is not suitable.<br />
» Use fresh, partially skimmed milk.<br />
» The milk is not cold enough.<br />
» The steam dispenser tube is<br />
clogged.<br />
No steam comes out. » The steam spout is clogged.<br />
· Voltage: 220-240 V 50/60 Hz<br />
· Total power: <strong>850</strong> W<br />
· Capacity water tank: 2,5 L<br />
· Dimensions: Height 34 cm<br />
Width 24 cm<br />
Depth 24 cm<br />
» There is no water in the reservoir.<br />
» The filter is not inserted correctly.<br />
» Use refrigerated milk.<br />
» Clean the steam tube with a needle and<br />
clean the steam spout.<br />
» Clean the steam spout (see maintenance<br />
and cleaning). If the problem persists<br />
ENSURE THAT THE MACHINE IS OFF AND THE<br />
STEAM DISPENSER KNOB IS CLOSED and clean<br />
the steam dispenser tube hole with a thin<br />
needle, ensuring that it is free of any obstructions<br />
and then turn the machine on<br />
and dispense a small amount of steam.<br />
» Top up the reservoir with cool potable water.<br />
» Verify the correct insertion of the Brita®<br />
filter (see the instructions which came with<br />
the filter).<br />
For any problems not covered in the above table or if the proposed solution does not resolve the problem, refer to an authorised <strong>Lavazza</strong> service centre<br />
For the technical characteristics refer to the data plate on the machine.<br />
· Weight: 4,3 kg<br />
· Used cartridge/drop collection drawer: 8 cartridge<br />
· Materials used for the machine body: Thermoplastic<br />
2006/42 CE – 2004/108 CE – 2006/95 CE<br />
13
14<br />
EN<br />
SAFETY<br />
Purposes:<br />
The coffee machine is designed exclusively for household use. Any improper use (those not described in these<br />
instructions) is forbidden. It is forbidden to make technical changes. The machine is not to be used by children or people<br />
with reduced physical, mental or sensory capabilities, or those without prior experience or knowledge, unless they have<br />
received instructions relating to the use of the machine and are supervised by a person responsible for their safety.<br />
Positioning:<br />
Position the coffee machine in a safe place where nobody can knock it over or hurt themselves. Do not keep the<br />
machine at temperatures of below 0° as the cold may damage it. Do not use the coffee machine in then open air. Do<br />
not place the machine on warm surfaces and/or close to water, flames or sources of heat. When on, never cover the<br />
machine with tea towels or similar.<br />
Power supply:<br />
Only connect the coffee machine to a suitable power source. The voltage should correspond with that indicated on the<br />
machine data plate.<br />
Power cord:<br />
Do not use the coffee machine if the power cord is defective or damaged. In such cases it must be replaced immediately.<br />
Do not run the power cord around angles or sharp edges, or over very hot surfaces, and keep it away from oil. Do not<br />
carry or pull the machine by holding the cord. Do not pull out the plug by pulling the cord; do not touch with wet<br />
hands. Do not allow the power cord to lie across tables or shelves.<br />
Danger of electrocution:<br />
Never allow electric parts to come into contact with water.<br />
Protecting others:<br />
Supervise children to prevent them playing with the machine. Children do not understand the danger connected with<br />
electrical appliances. Do not leave materials used for packing the machine lying around.<br />
Risk of scalding:<br />
Do not direct jets of steam and/or hot water towards yourself or others. When you begin dispensing a coffee there may<br />
be small spurts of hot water. The steam/hot water arm can become very hot: avoid touching it directly with your hands.<br />
Never remove the <strong>capsule</strong> holder when serving.<br />
Cleaning:<br />
Before cleaning the machine, it is essential to unplug it from the electrical mains supply and wait for the machine to<br />
cool down. Do NOT immerse the machine in water! Under no circumstances should you attempt to clean or otherwise<br />
intervene on the internal parts of the machine. Do not use the water in the tank for preparing food.<br />
Looking after the machine:<br />
If the machine remains inactive for a prolonged period, unplug it from the power source and keep it in a dry place, out<br />
of the reach of children. Protect it from dust and dirt.<br />
Repairs/Maintenance:<br />
In the event of breakdowns, defects or suspected defects falling a fall, unplug the machine immediately. Do not attempt<br />
to use a defective machine. Only Authorised Service Centres may carry out maintenance work or repairs. In the event<br />
of unauthorised repairs, <strong>Lavazza</strong> will not be held responsible for eventual damages.<br />
Water tank:<br />
Only fill the water tank with fresh non-sparkling drinkable water. Do not attempt to operate the machine if the water<br />
level is not above the minimum level indicated on the tank.<br />
Cartridge opening:<br />
Only <strong>Lavazza</strong> BLUE cartridges must be inserted in the cartridge slot. Cartidges may only be used once.<br />
Disposing of the machine at the end of its lifetime (European Directive 2002/96/CE – L.D. 25 July<br />
2005 no. 151):<br />
The rubbish skip symbol on the device and/or on the packaging indicates that at the end of its lifetime the product must<br />
not be disposed of along with household refuse. The machine should be taken to a specific electric and electronic waste<br />
disposal centre in Italy or returned to the retailer free of charge when purchasing an equivalent new machine. The user is<br />
responsible for returning the machine to the appropriate collection structures, in accordance with applicable legislation<br />
in force. Failure to do so may result in penalties. By ensuring the recycling and/or environmentally-friendly disposal of<br />
this product, you will help to prevent potential negative effects on the environment and human health and favour the<br />
reuse and/or recycling of the materials of which the machine comprises. For more information about the recycling of<br />
this product please contact your local waste disposal service or the shop where you purchased the product.
Poussoir activation<br />
vapeur<br />
Bague lumineuse<br />
vapeur prête<br />
Bague lumineuse<br />
distribution prête<br />
Couvercle<br />
du réservoir d’eau<br />
Groupe<br />
chaudière<br />
Logement<br />
porte-<strong>capsule</strong>s<br />
Tiroir récupérateur<br />
de gouttes/de<br />
<strong>capsule</strong>s usagées<br />
LOGEMENT<br />
PORTE-CAPSULES<br />
Espace<br />
d’introduction<br />
<strong>capsule</strong><br />
Bec de distribution<br />
COMPONENTS<br />
GROUPE<br />
BUSE VAPEUR<br />
Buse<br />
vapeur<br />
Prise buse vapeur<br />
ALIMENTATION<br />
interrupteur général<br />
FR<br />
Avertisseur lumineux de<br />
machine allumée<br />
Bouton de<br />
distribution de la vapeur<br />
Poussoir<br />
distribution café<br />
Chauffe-tasses<br />
Réservoir d’eau<br />
Filtre Brita®<br />
(sur option)<br />
Groupe de<br />
la buse vapeur<br />
Grille extractible<br />
porte- tasse à café<br />
Grille porte- grande<br />
tasse<br />
Câble d’alimentation<br />
15
16<br />
FR<br />
Nous n’assumons aucune responsabilité<br />
pour dommages éventuels en cas de:<br />
• iemploi erroné et non conforme aux buts<br />
prévus;<br />
• réparations non exécutées dans des centres<br />
d’assistance agréés;<br />
• manipulation frauduleuse du câble d’alimen-<br />
tation;<br />
• manipulation frauduleuse de n’importe quel<br />
composant de la machine;<br />
• emploi de pièces de rechange ou d’accessoires<br />
non originaux;<br />
• absence d’adoucissement de l’eau;<br />
• utilisation de <strong>capsule</strong>s différentes de celles qui<br />
sont indiquées.<br />
Dans ces cas la garantie est déchue.<br />
MISE EN FONCTION DE LA MACHINE<br />
Placer la machine sur une surface plate et stable,<br />
loin de l’eau, des flammes et des sources de<br />
chaleur. Déconnecter l’alimentation électrique<br />
si elle est présente. La machine allumée ne doit<br />
jamais être recouverte de chiffons ou autre. A<br />
la première utilisation, et au cas où l’appareil<br />
serait resté inutilisé pendant une longue période<br />
de temps, il est conseillé d’exécuter une<br />
distribution d’environ 50 cm3 avec le logement<br />
porte-<strong>capsule</strong>s vide en suivant ce qui est décrit<br />
au paragraphe « PREPARATION CAFE ».<br />
1 Soulever et extraire le couvercle du réservoir et<br />
le réservoir lui-même, puis remplir le réservoir<br />
d’eau jusqu’au niveau MAX indiqué, en utilisant<br />
seulement de l’eau fraîche potable non gazeuse.<br />
1.1 Il est possible de soulever le couvercle et de<br />
remplir le réservoir directement.<br />
MAX<br />
MIN<br />
PREDISPOSITION MACHINE<br />
MAX<br />
MIN<br />
L’eau ne doit jamais dépasser le niveau MAX,<br />
et doit toujours être maintenue au-dessus du<br />
niveau MIN. Utiliser seulement de l’eau fraîche<br />
potable. L’eau chaude et d’autres liquides peuvent<br />
endommager le réservoir. Ne pas mettre la<br />
machine en fonction sans eau : vérifier que l’eau<br />
dépasse le niveau MIN indiqué.<br />
L’utilisation d’un filtre<br />
d’eau (accessoire optionnel)<br />
améliore la qualité de<br />
l’eau et prolonge la durée<br />
de l’appareil. Utiliser le<br />
filtre AquaAroma Crema<br />
Brita® pour <strong>Lavazza</strong>. Pour<br />
introduire le filtre suivre,<br />
le mode d’emploi joint à<br />
l’accessoire. Nous vous<br />
conseillons de ne pas modifier<br />
la sélection déjà programmée du filtre.<br />
3 Brancher le câble d’alimentation et appuyer sur<br />
l’interrupteur général en le mettant dans la position<br />
I. L’avertisseur lumineux de machine allumée<br />
s’éclaire.<br />
4 Attendre que la bague lumineuse de distribution<br />
prête s’allume. A ce point la machine est<br />
prête pour l’emploi.<br />
PREDISPOSITION POUR LA PREPARATION<br />
DU CAFE<br />
La machine expresso dispose de deux positions pour<br />
la préparation du café : grande tasse/tasse à café.<br />
Réglage de la grille porte-tasses:<br />
Tasse à café expresso : Tirer vers l’extérieur la<br />
grille porte-tasse extractible.<br />
Grande tasse : Pousser vers l’intérieur la grille<br />
porte-tasse extractible
DISTRIBUTION DU CAFE<br />
1 Extraire (s’il est inséré) le logement porte-<strong>capsule</strong>s,<br />
en le tournant d’environ 45° en sens horaire,<br />
et en le tirant vers le bas.<br />
2 Insérer la <strong>capsule</strong> dans le logement prévu pour<br />
l’insertion de la <strong>capsule</strong>, puis réintroduire le logement<br />
porte-<strong>capsule</strong>s dans le groupe chaudière,<br />
en exécutant en sens inverse les opérations<br />
décrites au point [ 1 ].<br />
Dans le logement porte-<strong>capsule</strong>s on ne doit introduire<br />
que des <strong>capsule</strong>s <strong>Lavazza</strong> BLUE.<br />
3 Placer la tasse à café sur la grille porte-tasse extractible<br />
qu’on a opportunément extraite.<br />
PREPARATION DU CAFE<br />
FR<br />
3.1 Placer la tasse sur la grille porte-tasse (si la grille<br />
porte-tasse est extraite, il faut la rentrer).<br />
4 Appuyer sur le poussoir de distribution du café,<br />
et attendre que la quantité désirée de café ait<br />
été distribuée.<br />
5 Appuyer à nouveau sur le poussoir de distribution<br />
du café en le remettant dans sa position initiale<br />
pour terminer la distribution ; puis enlever<br />
la tasse/tasse à café.<br />
La <strong>capsule</strong> doit être extraite après chaque distribution.<br />
6 Attendre quelques secondes, et extraire le logement<br />
porte-<strong>capsule</strong>s comme décrit au point [1]<br />
et enlever la <strong>capsule</strong> usée de l’espace prévu à cet<br />
effet.<br />
Ne pas introduire les doigts ni les objets dans le<br />
siège d’insertion du logement porte-<strong>capsule</strong>s<br />
à l’intérieur du groupe chaudière, ni dans l’espace<br />
<strong>capsule</strong> à l’intérieur du logement porte<strong>capsule</strong>s.<br />
17
18<br />
FR<br />
Danger de brûlures ! Il peut y avoir quelques<br />
éclaboussures d’eau chaude au début de la distribution.<br />
La buse de vapeur peut atteindre des<br />
températures élevées : éviter de la toucher directement<br />
avec les mains. Utiliser la languette<br />
prévue pour déplacer la buse. La buse vapeur<br />
ne doit jamais être orientée vers des personnes<br />
ou des animaux. Ne jamais s’exposer au jet de<br />
vapeur. Vérifier toujours qu’il y ait suffisamment<br />
d’eau dans le réservoir.<br />
PREPARATION DU CAPPUCCINO<br />
1 Orienter la buse vapeur en position avancée en<br />
utilisant la languette prévue.<br />
2 Placer le conteneur ou la tasse contenant le lait<br />
sous la buse vapeur, de façon qu’environ la moitié<br />
de la buse soit immergée dans le lait.<br />
VAPEUR<br />
3 Appuyer et maintenir appuyé le poussoir d’activation<br />
de la vapeur jusqu’à ce que la bague<br />
lumineuse de vapeur prête s’allume ; puis le relâcher.<br />
4 Activer la distribution en tournant le bouton de<br />
distribution vapeur dans le sens contre-horaire.<br />
La vapeur commencera à sortir.<br />
5 Quand on a obtenu la quantité désirée de<br />
mousse, interrompre la distribution en tournant<br />
le bouton de distribution de vapeur en sens horaire,<br />
jusqu’à la position de repos, et enlever le<br />
conteneur ou la tasse.<br />
Après avoir utilisé la buse vapeur, il faut l’actionner<br />
à vide pendant quelques secondes<br />
pour éviter des incrustations et des obstructions.
Avant d’exécuter les opérations de nettoyage, il<br />
faut toujours vérifier que l’alimentation électrique<br />
soit débranchée, et attendre le refroidissement<br />
de la machine.<br />
Il est conseillé de rincer tous les jours le réservoir<br />
de l’eau et de le remplir avec de l’eau<br />
fraîche. Tous les deux/trois jours, ou en tout<br />
cas quand le tiroir récupérateur de gouttes/de<br />
<strong>capsule</strong>s usagées est plein, il faut le vider et le<br />
nettoyer. Ne pas utiliser de fours à micro-ondes<br />
ni de fours traditionnels pour faire sécher<br />
la machine ou ses pièces. Ne jamais utiliser de<br />
détergents alcalins, ni de solvants, ni d’alcool,<br />
ni de substances agressives. Ne pas immerger<br />
la machine dans l’eau. Sauf indications spécifiques,<br />
tous les composants non démontables<br />
(sauf les pièces électriques) de la machine doivent<br />
être lavés avec de l’eau froide ou tiède et<br />
des lavettes ou éponges non abrasives.<br />
NETTOYAGE DE LA BUSE VAPEUR<br />
Enlever la pointe de la buse vapeur, en la tirant<br />
vers le bas ; la laver à l’eau ou en lave-vaisselle.<br />
Nettoyer la buse vapeur avec une lavette humide,<br />
et réintroduire la pointe en l’enfilant par le bas.<br />
NETTOYAGE DU LOGEMENT PORTE-CAP-<br />
SULES<br />
Extraire le bec de distribution du logement porte-<strong>capsule</strong>s.<br />
Laver toutes les pièces sous l’eau<br />
tiède/fraîche courante et avec une lavette non<br />
abrasive, puis les essuyer et les remonter.<br />
MAINTENANCE ET NETTOYAGE<br />
NETTOYAGE DES GRILLES<br />
FR<br />
1 Extraire la grille porte-tasse à café extractible, et<br />
la laver délicatement avec une lavette humide et<br />
de l’eau fraîche/tiède.<br />
2 Le chauffe-tasses et la grille porte- grande tasse<br />
peuvent être enlevés en les soulevant, et lavés<br />
sous l’eau courante fraîche/tiède. Les essuyer<br />
avant de les remettre en place.<br />
NETTOYAGE DU TIROIR RÉCUPÉRATEUR<br />
DE GOUTTES/DE CAPSULES USAGÉES<br />
1 Extraire le tiroir récupérateur de gouttes/de <strong>capsule</strong>s<br />
usagées en le tirant vers l’extérieur avec la<br />
languette prévue.<br />
2 Vider le tiroir des liquides, et le laver à l’eau froide<br />
ou tiède, puis l’essuyer et le remonter.<br />
CAPPUCCINATEUR LAVAZZA<br />
(accessoire optionnel)<br />
La machine <strong>LB</strong> <strong>850</strong> CHIARA est compatible<br />
avec le cappuccinateur Cappuccino Cuor di<br />
Crema <strong>Lavazza</strong>.<br />
Pour avoir plus d’informations, veuillez contacter<br />
tout de suite <strong>Lavazza</strong> ou votre distributeur de<br />
confiance.<br />
19
FR<br />
SOLUTIONS DES PROBLEMES LES PLUS COMMUNS<br />
Problème rencontré Causes possibles Remède<br />
La machine ne s’allume pas. » La machine n’est pas branchée au<br />
secteur.<br />
» Vérifier si la prise est branchée.<br />
Les bagues lumineuses ou l’avertisseur » Il y a une panne. » Contacter le service clients ou le centre<br />
lumineux ne s’allument pas.<br />
d’assistance.<br />
La pompe est très bruyante. » Il n’y a pas assez d’eau dans le » Remplir avec de l’eau fraîche potable.<br />
réservoir.<br />
» Vérifier si le filtre Brita® est inséré (voir les<br />
» Filtre pas inséré correctement. instructions fournies avec le filtre).<br />
La machine ne distribue pas de café. » Température pas adéquate. » Attendre que la bague lumineuse soit<br />
allumée.<br />
» Distribution de vapeur sélection- » Mettre le bouton de distribution vapeur en<br />
née.<br />
position de repos.<br />
» Logement porte-<strong>capsule</strong>s pas<br />
inséré correctement.<br />
CARACTERISTIQUES TECHNIQUES<br />
» Vérifier si le logement porte-<strong>capsule</strong>s a<br />
atteint la position de blocage complet.<br />
Le café n’est pas assez chaud. » La machine n’avait pas atteint la bonne » Attendre que le voyant machine soit<br />
température quand on a appuyé sur le<br />
poussoir de distribution du café.<br />
allumé fixe.<br />
Le café ne sort pas, ou sort à gouttes. » Bec de distribution bouché. » Faire le nettoyage du logement porte-<strong>capsule</strong>s<br />
(voir Maintenance et nettoyage).<br />
Le café sort trop rapidement, la crème<br />
de l’expresso ne se forme pas.<br />
» Capsule déjà utilisée. » Introduire une nouvelle <strong>capsule</strong>.<br />
La mousse du lait ou du cappuccino ne » Lait non adapté.<br />
» Utiliser du lait frais, demi-écrémé.<br />
se forme pas.<br />
» Le lait n’est pas assez froid. » Utiliser du lait à température de réfrigérateur.<br />
» Le tuyau de distribution vapeur est » Exécuter le nettoyage du tuyau vapeur avec<br />
bouché.<br />
une aiguille et le nettoyage de la buse.<br />
Aucune distribution de vapeur. » Buse vapeur bouchée.<br />
» Faire le nettoyage de la buse (voir Maintenance<br />
et nettoyage). Si le problème<br />
persiste, VERIFIER QUE LA MACHINE EST ETEINTE,<br />
ET QUE LE BOUTON DE DISTRIBUTION VAPEUR EST<br />
FERME ; nettoyer alors le trou du bec de distribution<br />
avec une aiguille fine, en vérifiant<br />
qu’il ne présente aucune obstruction, puis<br />
allumer la machine et faire distribuer une<br />
petite quantité de vapeur.<br />
» Il n’y a pas assez d’eau dans le réservoir. » Remplir avec de l’eau fraîche potable.<br />
» Filtre pas inséré correctement. » Vérifier si le filtre Brita® est inséré (voir les<br />
instructions fournies avec le filtre).<br />
Pour les pannes dont ce tableau ne parle pas, ou au cas où les remèdes suggérés ne donneraient aucun résultat, s’adresser à un centre d’assistance <strong>Lavazza</strong><br />
· Tension : 220-240 V 50/60 Hz<br />
· Puissance totale : <strong>850</strong> W<br />
· Capacité du réservoir : 2,5 L<br />
· Dimensions : Hauteur 34 cm<br />
Largeur 24 cm<br />
Profondeur 24 cm<br />
20<br />
Pour les caractéristiques techniques, voir la plaquette de données qui se trouve sur la machine.<br />
· Poids : 4,3 kg<br />
· Tiroir récupérateur de gouttes/de <strong>capsule</strong>s usagées : 8 <strong>capsule</strong>s<br />
· Matériels employés pour la carrosserie : Thermoplastique<br />
2006/42 CE – 2004/108 CE – 2006/95 CE
SECURITE<br />
FR<br />
Destination d’emploi :<br />
La machine pour café est prévue exclusivement pour l’emploi ménager. Il est interdit de l’utiliser improprement (usage<br />
non décrit dans le présent mode d’emploi). Il est interdit de faire des modifications techniques. La machine n’est pas<br />
destinée à être utilisée par des enfants, ni par des personnes ayant des capacités physiques, mentales ou sensorielles<br />
réduites, ni par des personnes sans expérience et sans connaissances, à moins qu’elles n’aient reçu des instructions sur<br />
l’emploi de la machine et qu’elles ne soient contrôlées par une personne responsable de leur sécurité.<br />
Emplacement :<br />
Placer la machine pour café dans un endroit sûr, où personne ne puisse la renverser ni se blesser avec la machine. Ne<br />
pas tenir la machine à une température inférieure à 0°, car le gel pourrait l’abîmer. Ne pas utiliser la machine pour café<br />
à l’extérieur. Ne pas placer la machine sur des surfaces chaudes et/ou à proximité de l’eau, des flammes et des sources<br />
de chaleur. Il ne faut jamais couvrir la machine allumée avec des torchons ou autres.<br />
Alimentation courant électrique :<br />
Brancher la machine pour café uniquement à une prise de courant adéquate. La tension doit correspondre à celle qui<br />
est indiquée sur la plaquette de la machine.<br />
Câble d’alimentation :<br />
Ne pas utiliser la machine pour café si le câble d’alimentation est défectueux ou endommagé. Dans de tels cas, il<br />
faudra le remplacer immédiatement. Ne pas faire passer le câble d’alimentation sur des angles ou des arêtes vives, ni<br />
au-dessus d’objet très chauds, et le protéger contre l’huile. Ne pas porter ni tirer la machine pour café en la tenant par<br />
le câble. Ne pas extraire la fiche en la tirant par le câble ; ne pas la toucher avec les mains mouillées. Eviter que le câble<br />
d’alimentation tombe librement des tables ou des étagères.<br />
Danger d’électrocution :<br />
Ne jamais mettre les parties sous tension en contact avec de l’eau.<br />
Protection d’autres personnes :<br />
Tenir les enfants sous surveillance, pour éviter qu’ils jouent avec l’appareil. Les enfants ne se rendent pas compte du<br />
danger lié aux appareils électroménagers. Ne pas laisser le matériel utilisé pour l’emballage à leur portée.<br />
Danger de brûlures :<br />
Eviter de diriger le jet de vapeur et/ou d’eau chaude vers soi même et/ou vers d’autres personnes. De petits jets d’eau chaude<br />
peuvent se produire au début de la distribution. Le tuyau de distribution peut atteindre des températures élevées : éviter de<br />
le toucher directement avec les mains. Ne jamais enlever le logement porte-<strong>capsule</strong>s pendant la distribution.<br />
Nettoyage :<br />
Avant de nettoyer la machine, il est indispensable de débrancher la fiche de la prise de courant, et d’attendre que la<br />
machine se soit refroidie. Ne jamais immerger la machine dans l’eau ! Il est sévèrement interdit d’essayer de faire toute<br />
opération à l’intérieur de la machine. Ne pas utiliser pour des buts alimentaires l’eau qui se trouve dans le réservoir.<br />
Rangement de la machine :<br />
Quand la machine reste inutilisée pendant une période prolongée, débrancher la fiche de la prise, et ranger la machine<br />
dans un lieu sec, hors d’atteinte des enfants. La protéger contre la poussière et la saleté.<br />
Réparations/Entretien :<br />
En cas de pannes, défauts, ou défaut suspecté après une chute, débrancher tout de suite la fiche de la prise. Ne pas faire<br />
fonctionner une machine défectueuse. Seuls les Centres d’Assistance Agréés peuvent effectuer des interventions et des<br />
réparations. En cas d’interventions pas exécutées dans les règles de l’art, nous déclinons toute responsabilité pour les<br />
éventuels dommages.<br />
Réservoir d’eau :<br />
Ne mettre dans le réservoir que de l’eau fraîche potable non gazeuse. Ne pas mettre en fonction la machine si l’eau ne<br />
dépasse pas au moins le niveau minimum indiqué sur le réservoir.<br />
Espace <strong>capsule</strong>s :<br />
Dans l’espace <strong>capsule</strong>s, il faut introduire seulement des <strong>capsule</strong>s <strong>Lavazza</strong> BLUE. Les <strong>capsule</strong>s doivent être utilisées une<br />
seule fois.<br />
Elimination de la machine à la fin de sa vie utile (Directive Européenne 2002/96/CE – D.L. 25<br />
juillet 2005 n° 151) :<br />
Le symbole de la poubelle sur l’appareil et/ou sur son emballage indique que le produit ne devra pas, à la fin de sa<br />
vie utile, être jeté dans les déchets normaux. Il faudra porter la machine dans un des centres de collecte sélective<br />
spécifiques pour les déchets électriques et électroniques qui existent sur le territoire national, ou bien il faudra la<br />
rapporter au revendeur au moment de l’achat d’un appareil neuf équivalent, à raison de un pour un. L’utilisateur est<br />
responsable d’apporter l’appareil dans les structures de collecte appropriées, sous peine des sanctions qui sont prévues<br />
par la législation en vigueur en la matière. La collecte sélective adéquate de ces appareils pour le recyclage et/ou<br />
l’élimination compatible avec l’environnement contribue à éviter tous effets possibles négatifs sur l’environnement<br />
et sur la santé, et favorise la réutilisation et/ou le recyclage des matériels dont la machine est composée. Pour des<br />
informations plus détaillées inhérentes au système de collecte disponible, s’adresser au service local d’élimination des<br />
déchets ou au revendeur chez qui on a acheté la machine.<br />
21
22<br />
DE<br />
Taste für<br />
Dampferzeugung<br />
Leuchtanzeige<br />
Dampf betriebsbereit<br />
Leuchtanzeige<br />
Kaffeeausgabe betriebsbereit<br />
Deckel<br />
Wassertank<br />
Boilereinheit<br />
Padhalter<br />
Kasten für die<br />
Tropfenaufnahme/<br />
gebrauchte Patronen<br />
PADHALTER<br />
GRUPPE<br />
DAMPFDÜSE<br />
NETZANSCHLUSS<br />
Padeinführung<br />
Auslaufrohr<br />
Dampfdüse<br />
BAUTEILE<br />
Dampfdüsenstecker<br />
Leuchtanzeige für<br />
eingeschaltetes Gerät<br />
Drehknopf für den<br />
Dampfauslass<br />
Warmhalterost für<br />
die Tassen<br />
Hauptschalter<br />
Taste für die<br />
Kaffeeausgabe<br />
Filter Brita®<br />
(optional)<br />
Gruppe dampfdüse<br />
Ausziehbarer Rost<br />
für Espressotasse<br />
Rost für große Tasse<br />
Netzkabel<br />
Wassertank
VORBEREITUNG FÜR DIE INBETRIEBNAHME DES GERÄTS<br />
Es wird keine Haftung für eventuelle Schäden<br />
übernommen:<br />
• die infolge unsachgemäßen und zweckent<br />
fremdeten Gebrauch entstehen;<br />
• die durch Reparaturen entstehen, die nicht bei zu<br />
gelassenen Service-Centern vorgenommen werden;<br />
• bei Missbrauch des Netzkabels;<br />
• bei Missbrauch irgendeines Teils des Geräts;<br />
• bei Verwendung von nicht Original- Ersatztei-<br />
len bzw. -Zubehör;<br />
• bei nicht durchgeführter Entkalkung;<br />
• bei Lagerung in einem Raum, in dem die Tem-<br />
peratur unter den Gefrierpunkt abfallen könnte;<br />
• bei Verwendung von anderen Kaffeepads als<br />
den angegebenen.<br />
In diesen Fällen erlischt die Garantie.<br />
EINSCHALTEN DES GERÄTS<br />
Stellen Sie die Maschine auf eine ebene und stabile<br />
Fläche, achten Sie dabei, dass sie nicht in<br />
der Nähe von Wasser, offener Flamme oder einer<br />
Wärmequelle steht. Das Kabel aus dem Stecker<br />
nehmen. Das eingeschaltete Gerät darf niemals<br />
mit Geschirrtüchern oder ähnlichem zugedeckt<br />
werden. Beim ersten Gebrauch bzw. wenn das<br />
Gerät längere Zeit nicht verwendet wird, empfiehlt<br />
es sich, rund 50 cc Dampf mit leerem Kapselbehälter<br />
abzulassen entsprechend den Angaben<br />
im Paragraphen “KAFFEEZUBEREITUNG ”.<br />
1 Den Deckel des Wassertanks abheben und Deckel<br />
sowie Tank herausnehmen, den Tank bis<br />
zur Markierungslinie MAX ausschließlich mit frischem,<br />
natürlichen Trinkwasser füllen.<br />
1.1 Es ist auch möglich, nur den Deckel anzuheben<br />
und den Wassertank direkt zu füllen.<br />
MAX<br />
MIN<br />
MAX<br />
MIN<br />
Der MAX Füllstand darf niemals überschritten und der<br />
MIN Füllstand niemals unterschritten werden. Verwenden<br />
Sie ausschließlich frisches Trinkwasser. Warmwasser<br />
und andere Flüssigkeiten können den Wassertank<br />
beschädigen. Die Maschine ohne Wasser nicht in Betrieb<br />
nehmen: Vergewissern Sie sich, dass der Wasserstand<br />
über den angegeben MIN Füllstand liegt.<br />
DE<br />
Die Verwendung eines Wasserfilters<br />
(Zubehör optional)<br />
verbessert die Wasserqualität<br />
und verlängert die Lebensdauer<br />
des Geräts. Verwenden Sie den<br />
Filter AquaAroma Crema Brita®<br />
für <strong>Lavazza</strong>. Um den Filter einzusetzen<br />
folgen Sie den Anweisungen<br />
in der dem Filter beigelegten<br />
Bedienungsanleitung. Es<br />
wird empfohlen, die werkseitig<br />
eingestellten Werte des Filters nicht zu verändern.<br />
3 Kabel an das Netz anschließen und den Hauptschalter<br />
auf Stellung I bringen. Die Leuchtanzeige<br />
für das eingeschaltete Gerät leuchtet auf.<br />
4 Warten Sie, bis die Leuchtanzeige für Kaffeeausgabe<br />
betriebsbereit aufleuchtet. Jetzt ist das Gerät<br />
betriebsbereit.<br />
VORBEREITUNG FÜR DIE<br />
KAFFEEZUBEREITUNG<br />
Die Espressomaschine verfügt über zwei Stellungen<br />
Tasse/Espressotasse für die Zubereitung<br />
von Kaffee.<br />
Regulierung des Tassenrosts:<br />
Espressotasse: Den ausziehbaren Tassenrost<br />
für Espressotassen herausziehen.<br />
Große Tasse: Den ausziehbaren Tassenrost für<br />
Espressotassen hineindrücken.<br />
23
24<br />
DE<br />
KAFFEEAUSGABE<br />
1 Um den Padhalter (falls eingesetzt) herauszuziehen,<br />
drehen Sie den Padhalter um rund 45° im<br />
Uhrzeigersinn und ziehen Sie dann nach unten.<br />
2 Das Kaffeepad in die dafür vorgesehene Mulde<br />
einlegen, dann den Padhalter wieder in die Boilereinheit<br />
eingeben, wobei Sie die unter Punkt<br />
[1] beschriebenen Schritte in umgekehrter Reihenfolge<br />
durchführen.<br />
In die Mulde des Padhalters dürfen nur <strong>Lavazza</strong><br />
BLUE Pads eingesetzt werden.<br />
3 Die Espressotasse auf den herausgezogenen<br />
Tassenrost für Espressotassen positionieren.<br />
KAFFEEZUBEREITUNG<br />
3.1 Die große Tasse auf den Tassenrost für große<br />
Tassen positionieren (falls der Tassenrost für Espressotassen<br />
herausgezogen war, ihn wieder<br />
einrasten lassen).<br />
4 Die Taste für die Kaffeeausgabe betätigen und<br />
auf die Ausgabe der gewünschten Kaffeemenge<br />
warten.<br />
5 Erneut auf die Taste für die Kaffeeausgabe drücken<br />
und in die anfängliche Stellung zurückbringen,<br />
um die Kaffeeausgabe zu beenden, dann<br />
die Tasse/die Espressotasse entnehmen.<br />
Kaffeepad nach Gebrauch entfernen.<br />
6 Einige Sekunden warten und den Kapselbehälter<br />
entsprechend der Beschreibung unter Punkt<br />
[1] herausziehen und die verwendete Kapsel<br />
vom Leer-Kapselbehälter entfernen.<br />
Führen Sie weder Finger noch Gegenstände in<br />
den Raum für den Kapselbehälter innerhalb<br />
des Heizkessels und den Raum für die Kapsel im<br />
Kapselbehälters ein.
Verbrennungsgefahr! Bei Beginn des Kaffeeauslaufs<br />
kann es kurz zu heißen Wasserspritzern<br />
kommen. Die Dampfdüse kann hohe<br />
Temperaturen erreichen: Berühren Sie sie nicht<br />
direkt mit bloßen Händen. Verwenden Sie den<br />
dafür vorgesehen Griff, um die Düse einzustellen.<br />
Achten Sie darauf, dass die Dampfdüse<br />
nicht auf Personen oder Tiere ausgerichtet ist.<br />
Setzen Sie sich niemals dem Dampfstrahl aus.<br />
Vergewissern Sie sich immer, dass genügend<br />
Wasser im Wassertank vorhanden ist.<br />
ZUBEREITUNG DES CAPPUCCINO<br />
1 Bringen Sie die Dampfdüse mit Hilfe des Griffs in<br />
eine vorgeschobene Position.<br />
2 Stellen Sie den Milchbehälter oder die mit Milch<br />
gefüllte Tasse unter die Dampfdüse, wobei das<br />
Rohr bis etwa zur Hälfte in die Milch getaucht<br />
wird.<br />
DAMPF<br />
DE<br />
3 So lange auf die Taste zur Dampferzeugung drücken<br />
bis die Leuchtanzeige für Dampf betriebsbereit<br />
aufleuchtet, dann die Taste wieder lassen.<br />
4 Aktivieren Sie den Auslauf, indem Sie den Drehknopf<br />
für den Dampfauslauf entgegen dem<br />
Uhrzeigersinn drehen. Der Dampf beginnt auszuströmen.<br />
5 Sobald die gewünschte Schaummenge erreicht<br />
ist unterbrechen Sie den Auslauf, indem Sie den<br />
Drehknopf für den Dampfauslauf im Uhrzeigersinn<br />
bis zur Ruhestellung drehen, danach entnehmen<br />
Sie den Milchbehälter oder die Tasse.<br />
Nach Gebrauch der Dampfdüse ist es notwendig,<br />
sie im Leerlauf einige Sekunden lang<br />
in Betrieb zu nehmen um zu vermeiden, dass<br />
Verkrustungen oder Verstopfungen entstehen.<br />
25
26<br />
DE<br />
Bevor Sie die Reinigung vornehmen, vergewissern<br />
Sie sich stets, dass der Stromanschluss<br />
unterbrochen wurde, warten Sie weiters ab, bis<br />
das Gerät abgekühlt ist.<br />
Es wird empfohlen, den Wassertank täglich zu<br />
spülen und ihn stets mit frischem Wasser zu füllen.<br />
Die Kasten für die Tropfenaufnahme/gebrauchte<br />
Patronen ist alle zwei/drei Tage zu entleeren und<br />
zu reinigen, spätestens jedoch wenn sie voll ist. Verwenden<br />
Sie weder Mikrowellengeräte noch traditionelle<br />
Herde, um die Maschine oder Teile derselben<br />
zu trocknen. Verwenden Sie niemals alkalinische<br />
Reinigungsmittel, Lösungsmittel, Alkohol oder<br />
sonstige aggressive Substanzen . Tauchen Sie das<br />
Gerät niemals ins Wasser. Außer bei besonderen<br />
Hinweisen sind alle nicht zerlegbaren Bestandteile<br />
(ausgenommen die elektrischen Komponenten) des<br />
Geräts mit kaltem oder lauwarmem Wasser und mit<br />
Tüchern oder Schwämmen zu waschen, die keine<br />
Scheuermittel enthalten.<br />
REINIGUNG DER DAMPFDÜSE<br />
Ziehen Sie die Spitze der Dampfdüse heraus, indem Sie<br />
sie nach unten ziehen, waschen Sie sie in der Geschirrspülmaschine<br />
oder mit Wasser. Reinigen Sie die Dampfdüse<br />
mit einem feuchten Tuch und setzen Sie die Spitze<br />
wieder ein, indem Sie sie von unten einführen.<br />
REINIGUNG DES PADHALTERS<br />
Ziehen Sie das Rohr des Kaffeeauslaufs aus dem Padhalter<br />
heraus. Waschen Sie alle Teile unter fließendem<br />
lauwarmen/kalten Wasser und mit einem weichen<br />
Tuch, trocknen Sie sie und setzten sie wieder ein.<br />
WARTUNG UND REINIGUNG<br />
REINIGUNG DER ROSTE<br />
1 Ziehen Sie den ausziehbaren Rost für Espressotassen<br />
heraus und waschen Sie ihn vorsichtig<br />
mit einem feuchten Tuch und kaltem/lauwarmem<br />
Wasser ab.<br />
2 Der Warmhalterost für Tassen und der Rost für<br />
große Tassen können durch Anheben entfernt<br />
und mit kaltem/lauwarmem Wasser gewaschen<br />
werden. Bevor sie wieder eingesetzt werden<br />
müssen sie getrocknet werden.<br />
REINIGUNG DER KASTEN FÜR DIE<br />
TROPFENAUFNAHME/GEBRAUCHTE<br />
PATRONEN<br />
1 Ziehen Sie die Kasten für die Tropfenaufnahme/<br />
gebrauchte Patronen am Griff heraus.<br />
2 Entleeren Sie die Schale und waschen Sie sie mit<br />
kaltem oder lauwarmem Wasser, trocknen Sie sie<br />
bevor sie wieder eingesetzt werden.<br />
MILCHAUFSCHÄUMER LAVAZZA<br />
(Zubehör optional)<br />
Die Espressomaschine <strong>LB</strong> <strong>850</strong> CHIARA ist<br />
mit dem Milchaufschäumer von Cappuccino<br />
Cuor di Crema <strong>Lavazza</strong> kompatibel.<br />
Weitere Informationen erhalten Sie direkt bei<br />
<strong>Lavazza</strong> oder dem Händler Ihres Vertrauens.
LÖSUNG DER ALLGEMEINEN PROBLEME<br />
Problem Mögliche Ursachen Abhilfe<br />
Das Gerät schaltet sich nicht ein. » Das Gerät ist nicht an die Steckdose<br />
angeschlossen.<br />
Die Betriebsanzeigen oder die Leuchtanzeige<br />
schalten sich nicht ein.<br />
» Es ist eine Betriebsstörung eingetreten.<br />
Die Pumpe ist sehr laut. » Es fehlt Wasser im Tank.<br />
» Der Filter ist nicht korrekt eingesetzt.<br />
Der Kaffee fließt nicht aus. » Keine geeignete Temperatur.<br />
» Dampfauslauf gewählt.<br />
TECHNISCHE DATEN<br />
DE<br />
» Den Anschluss an die Steckdosen überprüfen.<br />
» Nehmen Sie mit dem Kundendienst oder<br />
dem Service-Center Kontakt auf.<br />
» Frisches Trinkwasser nachfüllen.<br />
» Den Einsatz des Filters Brita® überprüfen<br />
(Siehe Anweisungen in der dem Filter<br />
beigelegten Bedienungsanleitung).<br />
» Warten bis die Leuchtanzeige eingeschaltet<br />
ist.<br />
» Stellen Sie den Drehknopf für den Dampfauslauf<br />
auf die Ruhestellung.<br />
» Vergewissern Sie sich, dass der Padhalter<br />
voll blockiert ist.<br />
Der Kaffee ist nicht warm genug.<br />
» Padhalter ist nicht korrekt eingesetzt.<br />
» Das Gerät hatte nicht die richtige » Warten Sie, bis der Anzeiger nicht mehr<br />
Temperatur erreicht, als die Taste für<br />
die Kaffeeausgabe betätigt wurde.<br />
blinkt.<br />
Der Kaffee tritt nicht aus oder nur » Der Kaffeeauslauf ist verstopft. » Nehmen Sie die Reinigung des Padhalters<br />
tröpfchenweise.<br />
vor (Siehe Abschnitt über Wartung und<br />
Reinigung).<br />
Der Kaffee tritt zu schnell heraus, die<br />
Espresso-Creme formt sich nicht.<br />
» Pad bereits einmal benutzt. » Setzen Sie ein neues Kaffeepad ein.<br />
Es bildet sich kein Milch- oder<br />
» Milch ist nicht geeignet.<br />
» Verwenden Sie frische, teilentrahmte Milch.<br />
Cappuccinoschaum.<br />
» Die Milch ist nicht kalt genug. » Verwenden Sie Milch mit Kühlschranktemperatur.<br />
» Dampfauslaufrohr verstopft. » Reinigen Sie das Dampfrohr mit einer<br />
Nadel und reinigen Sie auch die Düse.<br />
Es tritt kein Dampf aus. » Dampfdüse verstopft.<br />
» Reinigen Sie die Düse (Siehe Wartung und<br />
Reinigung). Besteht weiterhin das Problem<br />
VERGEWISSERN SIE SICH, DASS DAS GERÄT<br />
AUSGESCHALTET UND DER DREHKNOPF DES DAMPF-<br />
AUSLAUFS GESCHLOSSEN IST, dann reinigen<br />
Sie den Auslauf mit einer dünnen Nadel;<br />
stellen Sie sicher, dass keine Verstopfungen<br />
mehr da sind, dann schalten Sie das<br />
Gerät wieder ein und lassen Sie eine kleine<br />
Menge Dampf aus.<br />
» Es fehlt Wasser im Tank.<br />
» Frisches Trinkwasser nachfüllen.<br />
» Der Filter ist nicht korrekt einge- » Den Einsatz des Filters Brita® überprüfen<br />
setzt.<br />
(Siehe Anweisungen in der dem Filter<br />
beigelegten Bedienungsanleitung).<br />
Für Betriebsstörungen, die in dieser Tabelle nicht aufgelistet sind, oder die sich nicht beheben lassen, wenden Sie sich bitte an den technischen Kundendienst von <strong>Lavazza</strong><br />
· Spannung: 220-240 V 50/60 Hz<br />
· Gesamtleistung: <strong>850</strong> W<br />
· Behälterkapazität: 2,5 l<br />
· Ausmasse: Höhe 34 cm<br />
Breite 24 cm<br />
Tiefe 24 cm<br />
Für die technischen Merkmale siehe auf der Maschine angebrachte Datenplakette.<br />
· Gewicht: 4,3 kg<br />
· Kasten für die Tropfenaufnahme/gebrauchte Patronen: 8 Patronen<br />
· Für die Aussenstruktur verwendete Materialien: Thermoplastiches<br />
material<br />
2006/42 CE – 2004/108 CE – 2006/95 CE<br />
27
28<br />
DE<br />
SICHERHEIT<br />
Verwendungsbestimmung:<br />
Die Kaffeemaschine ist ausschliesslich für den häuslichen Zweck vorgesehen. Jegliche ungeeignete Verwendung (nicht<br />
in den vorliegenden Anweisungen beschrieben) ist verboten. Es ist verboten technische Änderungen vorzunehmen.<br />
Die Maschine darf nicht von Kindern oder Personen mit reduzierten physischen, mentalen oder sensoriellen Fähigkeiten<br />
oder ohne Erfahrung und Kenntnis bedient werden, es sei denn dass sie Anweisungen bezüglich des Gebrauchs<br />
der Maschine erhalten haben und von einer für ihre Sicherheit verantwortlichen Person kontrolliert werden.<br />
Standort:<br />
Die Kaffeemaschine an einem sicheren Platz aufstellen wo sie niemand umstürzen oder verletzt werden kann. Die Maschine<br />
nicht bei unter 0° aufstellen, weil die Kälte sie beschädigen kann Die Kaffeemaschine nicht im Freien benutzen.<br />
Die Maschine nicht auf warme Flächen und/oder in der Nähe von Wasser, Flammen und Wärmequellen aufstellen. Die<br />
eingeschaltete Maschine darf niemals mit Lappen oder anderem bedeckt werden.<br />
Stromversorgung:<br />
Die Kaffeemaschine nur an eine Steckdose mit geeignetem Strom anschliessen. Die Spannung muss der auf der Plakette<br />
angegebenen entsprechen.<br />
Stromkabel:<br />
Die Kaffeemaschine nicht benutzen, wenn das Stromkabel defekt oder beschädigt ist. In diesen Fällen muss es sofort<br />
ausgewechselt werden. Das Stromkabel nicht über Ecken oder scharfe Kanten oder über sehr warme Gegenstände führen<br />
und vor Öl schützen. Die Maschine nicht tragen oder ziehen mittels des Kabels. Den Stecker nicht mittels des Kabels herausziehen;<br />
nicht mit nassen Händen berühren. Vermeiden Sie, dass das Stromkabel frei von Tischen oder Regalen fällt.<br />
Gefahr von elektrischem Schlag:<br />
Die unter Strom stehenden Teile nie Wasser aussetzen.<br />
Schutz anderer Personen:<br />
Kinder beaufsichtigen damit sie nicht mit der Maschine spielen. Kinder sind sich der mit den Hausgeräten verbundenen<br />
Gefahren nicht bewusst. Kinder von den Materialien für die Verpackung der Maschine fernhalten.<br />
Verbrennungsgefahr:<br />
Den Dampf und/oder Wasserstrahl nie gegen sich selbst richten. Am Anfang der Ausgab können kurze Spritzer mit<br />
heissem Wasser auftreten. Der Ausgabeschlauch kann hohe Temperaturen erreichen: den direkten Kontakt mit den<br />
Händen vermeiden. Während der Kaffeeausgabe niemals den Kapselträger abnehmen.<br />
Reinigung:<br />
Vor der Reinigung der Maschine muss der Stecker herausgezogen werden und man muss warten bis die Maschine kalt<br />
wird. Die Maschine nicht in Wasser eintauchen! Es ist streng verboten im Inneren der Maschine zu intervenieren. Das<br />
Wasser im Behälter nicht für Lebensmittelzwecke benutzen.<br />
Aufbewahrung der Maschine:<br />
Wenn die Maschine eine längere Zeit nicht benutzt wird, den Stecker herausziehen und sie an einem trockenen für<br />
Kinder unzugänglichen Ort aufbewahren. Vor Staub und Schmutz schützen.<br />
Reparaturen/Wartung:<br />
Im Falle von Schäden, Defekten oder Verdacht auf Defekt nach einem Fall sofort den Stecker aus der Steckdose ziehen.<br />
Keine defekte Maschine benutzen. Nut autorisierte Assistenzzentren können intervenieren oder Reparaturen durchführen.<br />
Bei nicht kunstgerecht ausgeführten Interventionen liegt keine Haftung für eventuelle Schäden vor.<br />
Wasserbehälter:<br />
Den Behälter nur in frisches Trinkwasser ohne Kohlensäure einführen. Die Maschine nicht benutzen wenn das Wasser<br />
nicht zumindest dem minimalen auf dem Behälter angegebenen Niveau entspricht.<br />
Patronenraum:<br />
In den Patronenraum dürfen nur <strong>Lavazza</strong> BLUE Patronen eingeführt werden. Die Patronen werden nur einmal benutzt.<br />
Entsorgung der Maschine am Ende der Betriebsdauer (Europäische Richtlinie 2002/96/CE –<br />
Gesetzesdekret 25 Juli 2005 N. 151):<br />
Das Müllkastensymbol auf der Maschine und/oder auf ihrer Verpackung weist darauf hin, dass das Produkt am Ende seiner<br />
Betriebsdauer nicht auf den normalen Müll geworfen werden darf. Die Maschine muss in eines der Müllzentren für elektrische<br />
und elektronische Abfälle auf dem nationalen Gebiet gebracht werden oder dem Händler beim Kauf einer neuen<br />
äquivalenten Maschine ausgehändigt werden im Verhältnis eins zu eins. Der Verbraucher ist für die Abgabe des Gerätes bei<br />
der geeigneten Sammelstruktur verantwortlich, sonst gelten die vom Gesetz vorgeschriebenen Sanktionen. Die geeignete<br />
differenzierte Sammlung solcher Geräte für das Recycling und/oder umweltfreundlichen Beseitigung trägt dazu bei mögliche<br />
negative Auswirkungen auf die Umwelt und Gesundheit zu vermeiden und unterstützt die Wiederverwendung und/<br />
oder Aufbereitung von Materialien aus denen die Maschine besteht. Für genauere Informationen bezüglich des verfügbaren<br />
Sammelsystems wenden Sie sich an den lokalen Müllverarbeitungsdienst oder an den Händler wo der Kauf getätigt wurde.
Pulsador activación<br />
de vapor<br />
Anillo luminoso<br />
suministro vapor listo<br />
Anillo luminoso<br />
suministro café listo<br />
Tapa<br />
depósito de agua<br />
Grupo caldera<br />
Portacápsulas<br />
Cajón recoge gotas/<br />
cápsulas usadas<br />
COMPONENTES<br />
PORTACÁPSULAS<br />
GRUPO BOQUILLA<br />
DE VAPOR<br />
ALIMENTACIÓN<br />
Compartimento<br />
introducción<br />
cápsulas<br />
Grifo de salida<br />
Enchufe boquilla de vapor<br />
Boquilla<br />
de vapor<br />
Interruptor general<br />
ES<br />
Señalador luminoso<br />
máquina encendida<br />
Mando de suministro<br />
de vapor<br />
Pulsador<br />
café<br />
Parrilla calienta taza<br />
Depósito de agua<br />
Filtro Brita®<br />
(opcional)<br />
Grupo boquilla de vapor<br />
Parrilla extraíble<br />
apoya tacita<br />
Parrilla apoya-taza<br />
grande<br />
Cable de alimentación<br />
29
30<br />
ES<br />
No se asumen responsabilidades por eventuales<br />
daños en caso de:<br />
• uso equivocado y no conforme a los objetivos<br />
previstos;<br />
• reparaciones no efectuadas en los centros de<br />
asistencia autorizados;<br />
• manipulación del cable de alimentación;<br />
• manipulación de cualquier componente de la<br />
máquina;<br />
• uso de piezas de recambio y accesorios no ori-<br />
ginales;<br />
• falta de descalcificación;<br />
• almacenaje en locales con menos de 0ºC;<br />
• uso de cápsulas diferentes a las indicadas;<br />
En estos casos no será válida la garantía.<br />
PUESTA EN FUNCIONAMIENTO DE LA<br />
MÁQUINA<br />
Colocar la máquina en una superficie plana y<br />
estable, alejada del agua, llamas y fuentes de<br />
calor. Desconectar la alimentación eléctrica si<br />
la hay. La máquina encendida nunca debe ser<br />
cubierta ni con trapos ni con nada. La primera<br />
vez que se utilice o cuando la cafetera no se use<br />
durante un largo periodo de tiempo, se aconseja<br />
realizar un suministro de aproximadamente<br />
50 cc con el portacápsulas vacío siguiendo lo<br />
descrito en el apartado “PREPARACIÓN CAFÉ”.<br />
1 Levantar y extraer la tapa del depósito y el depósito,<br />
llenar el depósito de agua hasta el nivel<br />
MAX indicado, usando sólo agua fresca potable<br />
sin gas.<br />
1.1 Es posible levantar la tapa y llenar directamente<br />
el depósito.<br />
MAX<br />
MIN<br />
PREDISPOSIZIONE MACCHINA<br />
MAX<br />
MIN<br />
El nivel del agua no debe superar nunca el MAX<br />
y siempre debe mantenerse por encima del MIN.<br />
Utilizar exclusivamente agua fresca potable. El<br />
agua caliente u otros líquidos pueden dañar el<br />
depósito. No poner en funcionamiento la máquina<br />
sin agua: asegurarse que el agua sea superior<br />
al nivel MIN indicado.<br />
El uso de un filtro de agua<br />
(accesorio opcional) mejora<br />
la calidad del agua<br />
y alarga la duración del<br />
aparato. Utilizar un filtro<br />
AquaAroma Crema Brita®<br />
para <strong>Lavazza</strong>. Para insertar<br />
el filtro seguir las instrucciones<br />
que vienen junto al<br />
accesorio. Se aconseja no<br />
modificar la selección que<br />
ya tiene el filtro.<br />
3 Insertar el cable de alimentación y pulsar el interruptor<br />
general llevándolo a la posición I. El sañalador<br />
luminoso máquina encendida se ilumina.<br />
4 Esperar a que el anillo luminoso suministro listo<br />
se ilumine. En ese momento la máquina está lista<br />
para ser usada.<br />
EMPLAZAMIENTO PARA LA<br />
PREPARACIÓN DEL CAFÉ<br />
La máquina espresso dispone de dos posiciones<br />
taza/tacita para la preparación del café.<br />
Regulación parrilla apoya-tazas:<br />
Tacita café espresso. Tirar hacia fuera la parrilla<br />
extraíble apoya tacita.<br />
Taza grande: Empujar hacia adentro la parrilla<br />
extraíble apoya tacita.
SUMINISTRO CAFÉ<br />
1 Extraer (si está puesta) el portacápsulas rotándolo<br />
unos 45ª en sentido horario y tirándolo hacia<br />
abajo.<br />
2 Insertar la cápsula en el compartimento especial<br />
de introducción cápsulas, volver a insertar el<br />
portacápsulas en el grupo caldera siguiendo las<br />
operaciones descritas en el punto [1].<br />
En el compartimento cápsulas se deben introducir<br />
exclusivamente cápsulas <strong>Lavazza</strong> BLUE.<br />
3 Colocar la tacita en la parrilla extraíble apoya tacita<br />
previamente extraída.<br />
PREPARACIÓN DEL CAFÉ<br />
ES<br />
3.1 Colocar la taza en la parrilla apoya-taza (si ya fue<br />
extraída volver a colocar la parrilla extraíble apoya<br />
tacita).<br />
4 Presionar el pulsador suministro café y esperar el<br />
suministro de la cantidad deseada de café.<br />
5 Presionar nuevamente el pulsador suministro<br />
café llevándolo a la posición inicial para terminar<br />
el suministro, retirar la taza/tacita.<br />
La cápsula debe ser retirada después de cada<br />
suministro.<br />
6 Esperar unos segundos, extraer el portacápsulas<br />
tal como se describe en el punto [1] y sacar la<br />
cápsula usada del compartimento correspondiente.<br />
No introducir los dedos u objetos extraños en la<br />
sede de introducción del portacápsulas dentro<br />
del grupo caldera ni en el compartimento de<br />
las cápsulas dentro del portacápsulas.<br />
31
32<br />
ES<br />
Peligro de quemaduras! Al comienzo del suministro<br />
pueden verificarse algunas salpicaduras<br />
de agua caliente. La boquilla de vapor puede<br />
alcanzar temperaturas elevadas: evitar tocarla<br />
directamente con las manos. Usar el agarradero<br />
especial para mover la boquilla. La boquilla<br />
de vapor nunca debe estar orientada hacia<br />
personas o animales. No exponerse nunca al<br />
chorro de vapor. Asegurarse siempre que haya<br />
suficiente agua en el depósito.<br />
PREPARACIÓN CAPPUCCINO<br />
1 Orientar la boquilla de vapor en posición avanzada<br />
utilizando el agarradero especial.<br />
2 Posicionar el contenedor o la taza conteniendo<br />
la leche debajo de la boquilla de vapor de manera<br />
que cerca de la mitad de la boquilla está<br />
sumergida en la leche.<br />
VAPOR<br />
3 Presionar y mantener presionado el pulsador de<br />
vapor hasta que el anillo luminoso vapor listo no<br />
se ilumina, luego soltarlo.<br />
4 Activar el suministro rotando el mando suministro<br />
vapor en sentido antihorario. El vapor comenzará<br />
a salir.<br />
5 Alcanzada la cantidad deseada de espuma interrumpir<br />
el suministro rotando el mando suministro<br />
vapor en sentido horario hasta llegar a la<br />
posición de reposo y retirar el contenedor o la<br />
taza.<br />
Después del uso de la boquilla de vapor es necesario<br />
accionarla en vacío durante algunos<br />
segundos para evitar incrustaciones u obstrucciones.
Antes de empezar la operación de limpieza asegurarse<br />
siempre que la alimentación eléctrica<br />
esté desconectada y esperar a que se enfríe la<br />
máquina.<br />
Se aconseja enjuagar todos los días el depósito<br />
de agua y llenarlo con agua fresca. Vaciar y<br />
limpiar cada dos/tres días el cajón recoge gotas/cápsulas<br />
usadas, o cuando esté lleno. No<br />
usar hornos a microondas o tradicionales para<br />
secar la máquina o sus partes. No utilizar nunca<br />
detergentes alcalinos, solventes, alcohol o<br />
sustancias agresivas. No sumergir la máquina<br />
en agua. Salvo específicas indicaciones todos<br />
los componentes no desarmables (excluidos<br />
los eléctricos) de la máquina deben ser lavados<br />
con agua fría o tibia y paños o esponjas no<br />
abrasivas.<br />
LIMPIEZA BOQUILLA DE VAPOR<br />
Quitar la punta de la boquilla de vapor tirándola<br />
hacia abajo, lavarla en lavaplatos o con agua.<br />
Limpiar la boquilla de vapor con un paño húmedo<br />
y reinsertar la punta introduciéndola desde<br />
abajo.<br />
LIMPIEZA PORTACÁPSULAS<br />
Extraer la boquilla de salida del portacápsulas.<br />
Lavar todas las partes con agua tibia/fresca corriente<br />
y un paño no abrasivo, secar y volver a<br />
montarla.<br />
MANTENIMIENTO Y LIMPIEZA<br />
LIMPIEZA PARRILLAS<br />
ES<br />
1 Extraer hacia afuera la parrilla extraíble apoya<br />
tacita y lavarla delicadamente con un paño húmedo<br />
y agua fresca/tibia.<br />
2 La parrilla calienta-tazas y la parrilla apoya-taza<br />
grande pueden removerse levantándolas y lavarlas<br />
con agua corriente fresca/tibia. Secar antes<br />
de reinsertar.<br />
LIMPIEZA DEL CAJÓN RECOGE GOTAS/<br />
CÁPSULAS USADAS<br />
1 Extraer el limpieza del cajón recoge gotas/cápsulas<br />
usadas tirando hacia fuera del agarradero<br />
especial.<br />
2 Vaciar el cajón de los líquidos y lavarlo con agua<br />
fría o tibia, secarlo y volverlo a montar.<br />
CAPPUCCINATORE LAVAZZA<br />
(accesorio opcional)<br />
La cafetera <strong>LB</strong> <strong>850</strong> CHIARA es compatible<br />
con el cappuccinatore Cappuccino Cuor di<br />
Crema <strong>Lavazza</strong>.<br />
Para más información, contacte con <strong>Lavazza</strong> o su<br />
distribuidor de confianza.<br />
33
ES<br />
SOLUCIONES A LOS PROBLEMAS MÁS COMUNES<br />
Problema verificado Causas posibles Solución<br />
La máquina no se enciende. » Máquina no conectada a la red<br />
eléctrica.<br />
» Verificar la conexión de las tomas.<br />
Los anillos luminosos o el señalador » Se ha verificado una avería. » Contactar con el servicio consumidores o<br />
luminoso no se encienden.<br />
con el centro de asistencia.<br />
La bomba hace mucho ruido. » Falta agua en el depósito. » Volver a llenar con agua fresca potable.<br />
» Filtro no colocado correctamente. » Verificar la inserción del filtro Brita® (ver las<br />
instrucciones que vienen con el filtro).<br />
La máquina no suministra café. » Temperatura no adecuada. » Esperar que el anillo luminoso esté<br />
encendido.<br />
» Suministro vapor seleccionado. » Llevar el mando de suministro vapor a la<br />
posición de reposo.<br />
» Portacápsulas no insertado correc- » Asegurarse que el portacápsulas haya<br />
tamente.<br />
alcanzado la posición de bloqueo total.<br />
El café no está suficientemente caliente. » La máquina no alcanzó la temperatura<br />
cuando se presionó el<br />
pulsador suministro café.<br />
CARACTERÍSTICAS TÉCNICAS<br />
» Esperar a que el piloto de la máquina<br />
quede encendido fijo.<br />
El café no sale o sale a gotas. » Suministro atascado. » Realizar la limpieza del portacápsulas (ver<br />
mantenimiento y limpieza).<br />
El café sale demasiado rápido, no se<br />
forma la crema en el espresso.<br />
» Cápsula ya usada. » Introducir una cápsula nueva.<br />
No se forma la espuma de la leche o del<br />
cappuccino.<br />
» Leche no adecuada.<br />
» La leche no está suficientemente<br />
fría.<br />
» Tubo suministro vapor obturado.<br />
Ningún suministro de vapor. » Boquilla vapor obturada.<br />
· Voltaje: 220-240 V 50/60 Hz<br />
· Potencia total: <strong>850</strong> W<br />
· Capacidad depósito: 2,5 L<br />
· Dimensiones: Altura 34 cm<br />
Ancho 24 cm<br />
Profundidad 24 cm<br />
34<br />
» Falta agua en el depósito.<br />
» Filtro no insertado correctamente.<br />
» Utilizar leche fresca, semi desnatada.<br />
» Usar leche con temperatura de frigorífico.<br />
» Realizar la limpieza del tubo de vapor con<br />
una aguja y la limpieza de la boquilla.<br />
» Realizar la limpieza de la boquilla (ver<br />
mantenimiento y limpieza). Si el problema<br />
persiste ASEGURARSE QUE LA MÁQUINA ESTÉ APA-<br />
GADA Y EL MANDO SUMINISTRO VAPOR CERRADO,<br />
limpiar entonces el agujero del suministro<br />
con una aguja fina, asegurándose que quede<br />
libre de obstrucciones, luego encender<br />
la máquina y suministrar una pequeña<br />
cantidad de vapor.<br />
» Volver a llenar con agua fresca potable.<br />
» Verificar la inserción del filtro Brita® (ver las<br />
instrucciones que vienen con el filtro).<br />
Para las averías no contempladas en esta tabla o en el caso de que las soluciones sugeridas no las resuelvan, dirigirse a un centro de asistencia <strong>Lavazza</strong>.<br />
Para las características técnicas remitirse a la placa de datos presente en la máquina.<br />
· Peso: 4,3 kg<br />
· Cajón recoge gotas/cápsulas usadas: 8 cápsulas<br />
· Materiales empleados para los acabados externos: Termoplástica<br />
2006/42 CE – 2004/108 CE – 2006/95 CE
SEGURIDAD<br />
ES<br />
SEGURIDAD:<br />
Esta máquina está realizada únicamente para uso doméstico. Está prohibido cualquier tipo de uso que no sea el previsto<br />
(no descrito en las presentes instrucciones). Está prohibido aportar modificaciones técnicas. La máquina no está<br />
destinada para su uso por parte de niños o personas con condiciones físicas, mentales o sensoriales reducidas, o sin<br />
experiencia y conocimiento, a menos que hayan recibido instrucciones con relación al uso de la misma o estén supervisadas<br />
por una persona responsable de su seguridad.<br />
Ubicación:<br />
Colocar la máquina en un lugar seguro, donde ninguno pueda tirarla y hacerse daño. No dejar la máquina a una temperatura<br />
inferior a 0°, el hielo podría dañarla. No utilizar la máquina al aire libre. No colocar la máquina sobre superficies calientes y/o<br />
cerca de agua, llamas y/o fuentes de calor. La máquina encendida no debe estar nunca cubierta con paños de cocina u otros.<br />
Corriente de alimentación:<br />
Enchufar la máquina exclusivamente a una toma de corriente adecuada. La tensión debe corresponderse con la indicada<br />
en la plaquita de la máquina.<br />
Cable de alimentación:<br />
No usar la máquina si el cable de alimentación es defectuoso o está dañado. En ese caso deberá sustituirse inmediatamente.<br />
No hacer que el cable pase por ángulos o esquinas cortantes o sobre objetos muy calientes y protegerlo del<br />
aceite. No transportar o tirar de la máquina cogiéndola por el cable. No extraer el enchufe tirando del cable; no tocarlo<br />
con las manos mojadas. Evitar que el cable de alimentación caiga libremente desde mesas o estanterías.<br />
Peligro de electrocución:<br />
No poner nunca en contacto con el agua las partes con corriente eléctrica.<br />
Protección frente a otras personas:<br />
Mantener siempre a los niños supervisados para evitar que jueguen con la máquina. Los niños no se dan cuenta del<br />
peligro de los electrodomésticos. Mantener fuera de su alcance los materiales utilizados para embalar la máquina.<br />
Peligro de quemadura:<br />
Evitar dirigir contra uno mismo y/u otros el chorro de vapor y/o de agua caliente. Al principio del suministro pueden producirse<br />
pequeñas salpicaduras de agua caliente. El tubo de suministro puede alcanzar temperaturas elevadas: evitar tocarlo<br />
directamente con las manos. No quitar nunca el portacápsulas durante el suministro.<br />
Limpieza:<br />
Antes de limpiar la máquina, es indispensable desenchufar el cable de la toma de corriente y esperar a que la misma<br />
se enfríe. ¡No sumergir la máquina en agua! Está terminantemente prohibido manipular el interior de la máquina. No<br />
utilizar para fines alimentarios el agua presente en el depósito.<br />
Custodia de la máquina:<br />
Cuando la máquina se quede sin utilizar durante un periodo prolongado de tiempo, desenchufarla y guardarla en un<br />
lugar seco y fuera del alcance de los niños. Protegerla del polvo y de la suciedad.<br />
Reparaciones/Mantenimiento:<br />
En caso de averías, defectos o sospecha de que se haya producido un daño tras una caída, desenchufar la máquina inmediatamente.<br />
No poner en funcionamiento una máquina dañada. Sólo los Centros de Asistencia Autorizados pueden<br />
efectuar intervenciones y reparaciones. En caso de intervenciones no realizadas conforme a lo establecido, se declina<br />
cualquier tipo de responsabilidad frente a eventuales daños.<br />
Depósito de agua:<br />
Rellenar el depósito sólo con agua fresca potable sin gas. No poner en funcionamiento la máquina si el agua no supera<br />
el nivel mínimo indicado en el depósito.<br />
Compartimento de cápsulas:<br />
En el compartimento de cápsulas se deben insertar únicamente cápsulas <strong>Lavazza</strong> BLUE. Las cápsulas son de un sólo uso.<br />
Eliminación de la máquina tras su vida útil (Directiva Europea 2002/96/CE – D. Leg. nº 151 del 25<br />
de julio de 2005):<br />
El símbolo del cubo de la basura tachado presente en el aparato y/o en el embalaje del mismo indica que el producto,<br />
al final de su vida útil, no se deberá tirar a la basura como los residuos normales. La máquina se deberá llevar a un centro<br />
de recogida diferenciada específico para residuos eléctricos y electrónicos existente en el territorio nacional o se deberá<br />
devolver al vendedor en el momento de adquirir un aparato nuevo equivalente, en una relación de uno por uno. El usuario<br />
es el responsable de dejar el aparato en las estructuras pertinentes de recogida, so pena las sanciones previstas por la legislación<br />
vigente en esta materia. La recogida diferencia de dichos aparatos para su reciclaje y/o eliminación ambientalmente<br />
compatible contribuye a evitar posibles efectos nocivos sobre el medioambiente y sobre la salud y favorece la reutilización<br />
y/o el reciclaje de los materiales que componen la máquina. Para información más detallada sobre el sistema de recogida<br />
disponible, remitirse al servicio de recogida de basuras o al vendedor donde se haya realizado la compra.<br />
35
36<br />
PT<br />
Botão de ativação<br />
do vapor<br />
Anel luminoso<br />
vapor pronto<br />
Anel luminoso<br />
distribuição pronta<br />
Tampa do<br />
reservatório de água<br />
Grupo caldeira<br />
Recipiente porta<br />
cápsulas<br />
Gaveta recolhe-gotas/<br />
recuperadora<br />
de cápsulas usadas<br />
RECIPIENTE PORTA<br />
CÁPSULAS<br />
Espaço para<br />
inserção da cápsula<br />
Bico distribuidor<br />
COMPONENTES<br />
GRUPO<br />
LANÇA-VAPOR<br />
Pega do lança-vapor<br />
Lançavapor<br />
Sinalizador luminoso<br />
de máquina ligada<br />
Manípulo de<br />
distribuição de vapor<br />
Botão<br />
de distribuição de café<br />
Grelha<br />
escalda-chávenas<br />
ALIMENTAÇÃO<br />
Interruptor geral<br />
Reservatório<br />
de água<br />
Filtro Brita®<br />
(opcional)<br />
Grupo lança-vapor<br />
Grelha extraível de<br />
apoio de chávena pequena<br />
Grelha de apoio de<br />
chávena grande<br />
Cabo de alimentação
Não se assumem responsabilidades por eventuais<br />
danos em caso de:<br />
• emprego errado e não conforme aos objetivos<br />
previstos;<br />
• reparações não executadas junto aos centros<br />
de assistência autorizados;<br />
• modificação do cabo de alimentação;<br />
• modificação de qualquer componente da máquina;<br />
• utilização de peças de reposição e acessórios<br />
não originais;<br />
• não descalcificação;<br />
• depósito em locais com temperaturas inferio-<br />
res a 0ºC;<br />
• utilização de cápsulas diversas daquelas indicadas.<br />
Nestes casos, a garantia caduca<br />
INICIALIZAÇÃO DA MÁQUINA<br />
Posicionar a máquina em uma superfície plana<br />
e estável, longe da água, chamas e fontes de<br />
calor. Desligar a alimentação elétrica, se estiver<br />
presente. A máquina acesa nunca deve ser<br />
coberta por panos ou outros. No primeiro uso<br />
e quando o aparelho não for utilizado durante<br />
muito tempo, recomenda-se fazer uma distribuição<br />
de aproximadamente 50cc com o recipiente<br />
porta cápsulas vazio, seguindo as instruções<br />
do parágrafo “PREPARAÇÃO DO CAFÉ”.<br />
1 Levantar e extrair a tampa do reservatório e o<br />
reservatório, para enchê-lo de água até o nível<br />
MÁX indicado, usando somente água fresca potável<br />
sem gás.<br />
1.1 É possível levantar a tampa e encher o reservatório<br />
diretamente.<br />
MAX<br />
MIN<br />
PREDISPOSIÇÃO DA MÁQUINA<br />
MAX<br />
MIN<br />
O nível da água nunca deve superar o MÁX e<br />
deve ser mantido sempre acima do MÍN. Utilizar<br />
exclusivamente água fresca potável. Água<br />
quente e outros líquidos podem danificar o<br />
reservatório. Não colocar a máquina em funcionamentosem<br />
água: verificar se a água está<br />
acima do nível MÍN indicado.<br />
A utilização de um filtro de<br />
água (acessório opcional)<br />
melhora a qualidade da água<br />
e prolonga a duração do aparelho.<br />
Utilizar o filtro AquaAroma<br />
Crema Brita® para <strong>Lavazza</strong>.<br />
Para inserir o filtro, seguir<br />
a folha de instruções anexa ao<br />
acessório. Aconselha-se não<br />
modificar a seleção já configurada<br />
do filtro.<br />
PT<br />
3 Inserir o cabo de alimentação e pressionar o interruptor<br />
geral, colocando-o na posição I. O sinalizador<br />
luminoso de máquina acesa se ilumina.<br />
4 Aguardar que o anel luminoso de distribuição<br />
pronta se ilumine. A esse ponto, a máquina está<br />
pronta para o uso.<br />
PREDISPOSIÇÃO PARA A PREPARAÇÃO<br />
DE CAFÉ<br />
A máquina de café expresso possui duas posições<br />
chávena/chávena pequena para a preparação<br />
de café.<br />
Regulação da grelha de apoio de chávenas:<br />
Chávena pequena para café expresso: Puxar<br />
para o lado externo a grelha extraível de<br />
apoio de chávena pequena.<br />
Chávena grande: Empurrar para o lado interno<br />
a grelha extraível de apoio de chávena pequena.<br />
37
38<br />
PT<br />
DISTRIBUIÇÃO DE CAFÉ<br />
1 Extrair (se inserido) o recipiente porta cápsulas<br />
rodando-o 45º, aproximadamente, em sentido<br />
horário e puxando-o para baixo.<br />
2 Colocar a cápsula no espaço específico para inserção<br />
da cápsula, colocar o recipiente porta cápsulas<br />
no grupo caldeira, executando, em ordem<br />
inversa, as operações descritas no ponto [1].<br />
No espaço para inserção das cápsulas devem<br />
ser colocadas exclusivamente as cápsulas <strong>Lavazza</strong><br />
BLUE.<br />
3 Posicionar a chávena pequena na grelha extraível<br />
de apoio de chávena pequena, que tinha<br />
sido extraída.<br />
PREPARAÇÃO DO CAFÉ<br />
3.1 Posicionar a chávena na grelha de apoio de chávena<br />
(se foi extraída, recolocar a grelha extraível<br />
de apoio de chávena pequena).<br />
4 Pressionar o botão de distribuição de café e<br />
aguardar a distribuição da quantidade de café<br />
desejada.<br />
5 Pressionar novamente o botão de distribuição<br />
de café, recolocando-o na posição inicial, para<br />
terminar a distribuição e, então, retirar a chávena/chávena<br />
pequena.<br />
A cápsula deve ser extraída após cada distribuição.<br />
6 Esperar alguns segundos e extrair o recipiente<br />
porta cápsulas como descrito no ponto [1] e remover<br />
do espaço específico a cápsula utilizada.<br />
Não introduzir os dedos ou objetos no local<br />
onde é inserido o recipiente porta cápsulas,<br />
dentro do grupo caldeira, e no espaço onde é<br />
inserida a cápsula, dentro do recipiente porta<br />
cápsulas.
Perigo de queimadura! No início da distribuição,<br />
podem verificar-se salpicos de água quente.<br />
O lança-vapor pode alcançar temperaturas<br />
elevadas: evitar tocá-lo diretamente com as<br />
mãos. Utilizar a pega apropriada para mover o<br />
lança-vapor. O lança-vapor não deve ser apontado<br />
para pessoas ou animais. Nunca se exponha<br />
ao jato de vapor. Assegurar-se sempre de<br />
que tenha água suficiente no reservatório.<br />
PREPARAÇÃO DE CAPPUCCINO<br />
1 Direcionar o lança-vapor na posição dianteira<br />
utilizando a pega específica.<br />
2 Posicionar a vasilha ou a chávena com o leite<br />
embaixo do lança-vapor, de modo que metade<br />
do lança-vapor fique dentro do leite.<br />
VAPOR<br />
PT<br />
3 Pressionar e manter pressionado o botão de<br />
ativação de vapor até quando o anel luminoso<br />
de vapor pronto se iluminar; quando se iluminar,<br />
podes soltá-lo.<br />
4 Ativar a distribuição rodando o manípulo de<br />
distribuição de vapor em sentido anti-horário. O<br />
vapor começará a sair.<br />
5 Após obter a quantidade de espuma desejada,<br />
interromper a distribuição, rodando o manípulo<br />
de distribuição de vapor em sentido horário, até<br />
a posição de repouso, e remover a vasilha ou a<br />
chávena.<br />
Após a utilização do lança-vapor, é necessário<br />
acioná-lo em vazio durante alguns segundos,<br />
para evitar incrustações e entupimentos.<br />
39
40<br />
PT<br />
Antes de realizar as operações de limpeza, assegurar-se<br />
sempre de que a alimentação elétrica<br />
esteja desligada e aguardar o arrefecimento<br />
da máquina.<br />
Aconselha-se enxaguar diariamente o reservatório<br />
de água e enchê-lo com água fresca.<br />
Esvaziar e limpar a cada dois/três dias a gaveta<br />
recolhe-gotas/recuperadora de cápsulas<br />
usadas ou, do mesmo modo, quando estiver<br />
cheia. Não utilizar fornos micro-ondas ou tradicionais<br />
para enxugar a máquina ou partes<br />
dela. Nunca utilizar detergentes alcalinos, solventes,<br />
álcool ou substâncias agressivas. Não<br />
introduzir a máquina na água. Salvo indicações<br />
específicas, todos os componentes não<br />
desmontáveis (excluídos aqueles elétricos) da<br />
máquina devem ser lavados utilizando água<br />
fria ou mornas e panos ou esponjas não abrasivas.<br />
LIMPEZA LANÇA-VAPOR<br />
Retirar a ponta do lança-vapor puxando-a para<br />
baixo, lavá-la na máquina de lavar louça ou com<br />
água. Limpar o lança-vapor com um pano húmido<br />
e recolocar a ponta, inserindo-a por baixo.<br />
LIMPEZA DO RECIPIENTE PORTA<br />
CÁPSULAS<br />
Extrair o bico distribuidor do recipiente porta<br />
cápsulas. Lavar todas as partes com água morna/fresca<br />
corrente e um pano não abrasivo,<br />
enxugá-las e remontá-las.<br />
MANUTENÇÃO E LIMPEZA<br />
LIMPEZA GRELHAS<br />
1 Extrair, em direção ao lado externo, a grelha<br />
extraível de apoio de chávena e lavá-la delicadamente<br />
com um pano húmido e água fresca/<br />
morna.<br />
2 A grelha escalda chávenas e a grelha de apoio<br />
de chávena grande podem ser removidas, levantando-as,<br />
e lavadas com água corrente fresca/<br />
morna. Enxugá-las antes de recolocá-las.<br />
LIMPEZA DA GAVETA RECOLHE-GOTAS E<br />
RECUPERADORA DE CÁPSULAS USADAS<br />
1 Extrair a gaveta recolhe-gotas/recuperadora de<br />
cápsulas usadas puxando-a para o lado externo,<br />
utilizando a pega específica.<br />
2 Esvaziar a gaveta e lavá-la com água fria ou morna,<br />
enxugá-la e remontá-lo.<br />
CAPPUCCINADOR LAVAZZA<br />
(acessório opcional)<br />
A máquina <strong>LB</strong> <strong>850</strong> CHIARA é compatível<br />
com a máquina de cappuccino<br />
Cappuccino Cuor di Crema <strong>Lavazza</strong>.<br />
Para mais informações, não hesite em contactar<br />
<strong>Lavazza</strong> ou o seu distribuidor de confiança.
SOLUÇÕES PARA OS PROBLEMAS MAIS COMUNS<br />
Problema verificado Causas possíveis Solução<br />
A máquina não acende. » Máquina não ligada à rede elétrica. » Verificar a inserção das tomadas.<br />
Os anéis luminosos ou o sinalizador<br />
luminoso não acendem.<br />
A bomba é muito ruidosa. » Falta água no reservatório.<br />
» Filtro não inserido corretamente.<br />
A máquina não distribui café. » Temperatura inapropriada.<br />
» Verificou-se uma avaria. » Contatar o serviço consumidores ou o<br />
centro de assistência.<br />
» Distribuição de vapor selecionada.<br />
» Recipiente porta cápsulas não<br />
inserido corretamente.<br />
CARACTERÍSTICAS TÉCNICAS<br />
PT<br />
» Encher com água fresca potável.<br />
» Verificar a inserção do filtro Brita® (ver as<br />
instruções fornecidas com o filtro).<br />
» Aguardar que o anel luminoso se acenda.<br />
» Colocar o manípulo de distribuição de<br />
vapor na posição de repouso.<br />
» Assegurar-se de que o recipiente porta<br />
cápsulas tenha alcançado a posição de<br />
completo bloqueio .<br />
O café não saiu muito quente. » A máquina não estava na tempe- » Aguardar que a luz da máquina fique acesa<br />
ratura correta quando o botão de<br />
distribuição de café foi pressionado.<br />
de modo fixo.<br />
O café não sai ou sai em gotas. » Distribuidor entupido. » Fazer a limpeza do recipiente porta cápsulas<br />
(ver manutenção e limpeza).<br />
O café sai muito rápido, não se forma o<br />
creme do café expresso.<br />
» Cápsula já utilizada. » Inserir uma cápsula nova.<br />
A espuma do leite do cappuccino não<br />
se forma.<br />
» Leite não apropriado.<br />
» O leite não está suficientemente frio.<br />
» Tubo de distribuição de vapor<br />
obturado.<br />
O distribuidor de vapor não funciona. » Lança-vapor obturado.<br />
· Voltagem: 220-240 V 50/60 Hz<br />
· Potência total: <strong>850</strong> W<br />
· Capacidade do reservatório: 2,5 L<br />
· Dimensões: Altura 34 cm<br />
Largura 24 cm<br />
Profundidade 24 cm<br />
» Falta água no reservatório.<br />
» Filtro não inserido corretamente.<br />
» Utilizar leite fresco, parcialmente desnatado.<br />
» Usar leite com a temperatura de geladeira.<br />
» Fazer a limpeza do tubo de vapor com<br />
uma agulha e a limpeza do lança-vapor.<br />
» Fazer a limpeza do lança-vapor (ver<br />
manutenção e limpeza). Se o problema<br />
persistir, ASSEGURAR-SE DE QUE A MÁQUINA<br />
ESTEJA DESLIGADA E DE QUE O MANÍPULO DE<br />
DISTRIBUIDOR DE VAPOR ESTEJA FECHADO, limpar<br />
o furo do distribuidor com uma agulha<br />
fina, assegurando-se de que esteja livre de<br />
obstruções, acender a máquina e distribuir<br />
uma pequena quantidade de vapor.<br />
» Encher com água fresca potável.<br />
» Verificar a inserção do filtro Brita® (ver as<br />
instruções fornecidas com o filtro).<br />
Com relação às avarias não contempladas na ou no caso em que as soluções sugeridas não as resolverem, contatar um centro de assistência <strong>Lavazza</strong>.<br />
Para as características técnicas, conferir a etiqueta presente na máquina.<br />
· Peso: 4,3 kg<br />
· Capacidade da gaveta de recolhimento: 8 pastilhas<br />
· Materiais usados no revestimento exterior: termoplásticos<br />
2006/42 CE – 2004/108 CE – 2006/95 CE<br />
41
42<br />
PT<br />
SEGURANÇA<br />
Destinação:<br />
O uso da máquina de café é exclusivamente doméstico. Estão proibidos os usos impróprios (não descritos nas presentes instruções). Está<br />
proibido realizar modificações técnicas. A máquina não deve ser usada por crianças ou por pessoas com reduzidas capacidades físicas,<br />
mentais ou sensoriais, ou por pessoas que não tenham experiência ou conhecimento sobre a mesma, a menos que estas não tenham<br />
recebido instruções sobre o seu uso e sejam monitoradas por uma pessoa responsável.<br />
Localização:<br />
Colocar a máquina de café num lugar seguro, onde ninguém possa derrubá-la ou ser ferido por ela. Não manter a máquina em<br />
temperatura inferior a 0°, pois o gelo poderia danificá-la. Não usar a máquina para café em lugares abertos. Não posicionar a<br />
máquina em superfícies quentes e/ou perto de água, chamas e fontes de calor. Quando a máquina estiver acesa, nunca deve ser<br />
coberta com panos ou coisas similares.<br />
Alimentação elétrica:<br />
Conectar a máquina de café somente a uma tomada elétrica adequada. A tensão deve corresponder à indicada na etiqueta presente<br />
na máquina.<br />
Cabo de alimentação:<br />
Não usar a máquina para café se o cabo de alimentação estiver danificado ou apresentar defeitos. Em tal caso, deverá ser substituído<br />
imediatamente. Não passar o cabo de alimentação em partes pontiagudas ou angulosas e sobre objetos muito quentes. Protegê-la<br />
do óleo. Não pegar ou puxar a máquina de café pelo fio. Não extrair a máquina da tomada puxando pelo fio; não tocá-la com as<br />
mãos molhadas. Evitar que o cabo de alimentação penda livremente de mesas ou prateleiras.<br />
Perigo de choque:<br />
Nunca colocar na água as partes elétricas.<br />
Proteção de outras pessoas:<br />
Monitorar as crianças, evitando que brinquem com o aparelho. Elas não percebem o perigo que os eletrodomésticos podem<br />
apresentar. Não deixar ao alcance das crianças os materiais usados para embalar a máquina.<br />
Perigo de queimaduras:<br />
Evitar dirigir contra si mesmo e/ou outras pessoas o jato de vapor e/ou água quente. Quando o café começa a sair, pode se verificar<br />
o escape de água quente. O tubo de saída pode atingir temperaturas elevadas: evite tocá-lo diretamente com as mãos. Nunca tirar<br />
o recipiente porta cápsulas durante a distribuição.<br />
Limpeza:<br />
Antes de limpar a máquina, é indispensável desligá-la da tomada e esperar que se esfrie. Não imergir a máquina na água! É<br />
severamente proibido intervir no interior da máquina. Não usar para fins alimentares a água presente no reservatório.<br />
Custódia da máquina:<br />
Quando a máquina não for utilizada por um período prolongado, desligá-la da tomada e guardá-la num lugar enxuto e inacessível<br />
às crianças. Proteger de sujeira e pó.<br />
Reparação/Manutenção:<br />
Em caso de defeitos, falhas ou suspeita dos mesmos depois de uma queda, desconectar imediatamente a máquina da tomada.<br />
Não colocar em funcionamento uma máquina defeituosa. Somente os Centros de Assistência Autorizados podem intervir e efetuar<br />
reparos. Caso haja intervenções inapropriadas, declina-se qualquer responsabilidade por eventuais danos.<br />
Reservatório de água:<br />
Inserir no reservatório exclusivamente água fresca potável sem gás. Não colocar em funcionamento a máquina se a água não<br />
superar o nível mínimo indicado no reservatório.<br />
Vão das pastilhas:<br />
No vão das pastilhas devem ser inseridas exclusivamente pastilhas <strong>Lavazza</strong> BLUE. As pastilhas devem ser usadas somente uma vez.<br />
Eliminação da máquina inutilizada (Diretriz Européia 2002/96/CE – D.L. 25 julho de 2005 n.<br />
151):<br />
O símbolo de caixote de lixo colocado no aparelho e/ou na sua embalagem indica que o produto, ao fim da sua vida útil, não deve ser<br />
eliminado com o lixo normal. A máquina deverá ser levada num dos centros de reciclagem específicos para lixo elétrico e eletrônico<br />
existentes no território nacional, ou ser entregue ao revendedor no momento da compra de um aparelho novo equivalente, em<br />
proporção de um por um. O usuário é responsável pela entrega do aparelho nas estruturas de reciclagem apropriadas, sob pena<br />
de incorrer nas sanções previstas pela legislação vigente em matéria. A adequada reciclagem ou eliminação ambiental compatível<br />
de tais aparelhos contribui a evitar possíveis efeitos negativos para o meio-ambiente e para a saúde, favorecendo a reutilização e/<br />
ou reciclagem dos materiais com que a máquina é composta. Para informações mais detalhadas sobre o sistema de reciclagem<br />
disponível, procurar o serviço local de eliminação do lixo ou o revendedor do qual se comprou o aparelho.
CAPSULEHOUDER STOOMSPUIT UNIT<br />
VOEDING<br />
Stoomspuit<br />
ONDERDELEN<br />
Stoomspuitcontact<br />
Hoofdschakelaar<br />
NL<br />
Stoomschakelaar Controlelamp<br />
machine aan<br />
Lichtring stoom<br />
klaar<br />
Lichtring afgifte<br />
klaar<br />
Waterreservoir<br />
deksel<br />
Boiler unit<br />
Capsulehouder<br />
Verzamellade<br />
gebruikte pads/leklade<br />
Ruimte voor het<br />
plaatsen van de<br />
<strong>capsule</strong>s<br />
Schenktuitje<br />
Stoomtoevoer<br />
draaiknop<br />
Koffieafgifte<br />
knop<br />
Kopjeswarmer<br />
Waterreservoir<br />
Brita® Filter<br />
(optioneel)<br />
Stoomspuit unit<br />
Uitneembaar<br />
kopjesrooster<br />
Koppenrooster<br />
Voedingskabel<br />
43
44<br />
NL<br />
In de volgende gevallen wordt geen aansprakelijkheid<br />
voor eventuele schade aanvaard:<br />
• foutief en onvoorzien gebruik;<br />
• niet door een erkende klantenservice uitgevo-<br />
erde reparatie;<br />
• het onklaar maken van de voedingskabel;<br />
•onklaargemaakteonderdelenvandemachine;<br />
• gebruik van niet originele reserveonderdelen<br />
en accessoires;<br />
• het niet ontkalken;<br />
•opslaginruimtenmettemperaturenonder0°C;<br />
•gebruikvanandere,dandevoorziene<strong>capsule</strong>s.<br />
In deze gevallen is de garantie ongeldig<br />
STARTEN VAN DE MACHINE<br />
Plaats de machine op een vlak en stabiele ondergrond,<br />
ver van water, vuur en warmtebronnen.<br />
Haal de stroomvoeding eraf, indien aanwezig.<br />
De ingeschakelde machine mag nooit met<br />
doeken of ander materiaal worden afgedekt.<br />
Bij het eerste gebruik en wanneer de machine<br />
lange tijd niet gebruikt is, is het aanbevolen een<br />
afgifte van ongeveer 50cc met een lege <strong>capsule</strong>houder<br />
uit te voeren, volgens hetgeen in de<br />
paragraaf “KOFFIE ZETTEN” is beschreven.<br />
1 Til het deksel van het waterreservoir op en verwijder<br />
het, verwijder hierna ook het reservoir. Vul<br />
hierna het waterreservoir tot het aangegeven<br />
MAX niveau, uitsluitend met vers drinkwater,<br />
zonder koolzuur.<br />
1.1 U kunt ook het deksel optillen en het reservoir<br />
rechtstreeks vullen.<br />
MAX<br />
MIN<br />
VOORBEREIDING MACHINE<br />
MAX<br />
MIN<br />
Het waterniveau mag nooit boven het MAX<br />
komen en moet altijd boven het MIN worden<br />
gehouden. Gebruik uitsluitend vers drinkwater.<br />
Warm water of andere vloeistoffen kunnen het<br />
reservoir beschadigen. Zet de machine nooit<br />
zonder water in werking: verzeker u ervan dat<br />
het water boven het aangegeven MIN niveau is.<br />
Het gebruik van een waterfilter<br />
(optionele accessoire)<br />
verbetert de kwaliteit van<br />
het water en verlengt de levensduur<br />
van het apparaat.<br />
Gebruik het AquaAroma<br />
Crema Brita® filter voor <strong>Lavazza</strong>.<br />
Volg voor het plaatsen<br />
van het filter de bij de<br />
accessoire verstrekte handleiding.<br />
Het is af te raden de<br />
reeds ingestelde keuze van het filter te wijzigen.<br />
3 Sluit de voedingskabel aan en druk de hoofdschakelaar<br />
in, door hem in de I-stand te zetten.<br />
De controlelamp van machine aan gaat branden.<br />
4 Wacht totdat de lichtring stoomtoevoer vrij gaat<br />
branden. Nu is de machine klaar voor het gebruik.<br />
VOORBEREIDING VOOR HET KOFFIE ZET-<br />
TEN<br />
De espresso machine heeft twee standen<br />
kop/kopje voor het koffie zetten.<br />
Instelling kopjesrooster:<br />
Kopje espresso koffie: Trek het uitneembare<br />
kopjesrooster naar buiten.<br />
Kop normale koffie: Duw het uitneembare<br />
kopjesrooster in.
KOFFIE AFGIFTE<br />
1 Verwijder (indien ingevoegd) de <strong>capsule</strong>houder<br />
door hem ongeveer 45° met de klok mee te<br />
draaien en omlaag te trekken.<br />
2 Plaats de <strong>capsule</strong> in de speciale ruimte voor het<br />
plaatsen van de <strong>capsule</strong>s, voeg hierna opnieuw<br />
de <strong>capsule</strong>houder in de boiler unit door de in<br />
punt [1] beschreven handelingen in omgekeerde<br />
volgorde uit te voeren.<br />
In de ruimte voor het plaatsen van de <strong>capsule</strong>s<br />
mogen alleen <strong>Lavazza</strong> BLUE <strong>capsule</strong>s worden<br />
geplaatst.<br />
3 Plaats het kopje op het goed uitgetrokken, uitneembare<br />
kopjesrooster.<br />
KOFFIEBEREIDING<br />
NL<br />
3.1 Plaats de kop op het koppenrooster (monteer na<br />
verwijdering opnieuw het uitneembare kopjesrooster).<br />
4 Druk de koffieafgifteknop in en wacht totdat de<br />
gewenste hoeveelheid koffie is ingeschonken.<br />
5 Druk opnieuw de koffieafgifteknop in door hem<br />
in de beginstand terug te zetten om het schenken<br />
te beëindigen, verwijder hierna de kop/het<br />
kopje.<br />
Na het inschenken moet u de <strong>capsule</strong> verwijderen.<br />
6 Wacht enkele seconden en verwijder de <strong>capsule</strong>houder<br />
zoals beschreven in punt [1] en verwijder<br />
de gebruikte <strong>capsule</strong> uit het speciale <strong>capsule</strong>vak.<br />
Kom nooit met de vingers of andere voorwerpen<br />
in de zitting voor het invoegen van de <strong>capsule</strong>houder<br />
b’innen de boiler unit en in de <strong>capsule</strong>houder<br />
zelf.<br />
45
46<br />
NL<br />
Gevaar voor brandwonden! Aan het begin van<br />
de afgifte kunnen korte spetters heet water<br />
worden uitgestoten. De stoomspuit kan erg<br />
heet worden: raak hem nooit rechtstreeks met<br />
de handen aan. Gebruik het speciale handvat<br />
om de spuit te bewegen. Richt de stoomspuit<br />
nooit op mensen of dieren. Blijf uit de buurt van<br />
de stoomstraal. Controleer altijd of er voldoende<br />
water in het reservoir is.<br />
BEREIDING VAN CAPPUCCINO<br />
1 Richt de stoomspuit met behulp van het speciale<br />
handvat in de voorste stand.<br />
2 Plaats het bakje of het kopje met de melk onder<br />
de stoomspuit zodat ongeveer de helft van de<br />
spuit in de melk gedompeld is.<br />
STOOM<br />
3 Druk de stoomschakelaar in en houd hem ingedrukt,<br />
totdat de lichtring stoom klaar aan gaat,<br />
laat hem hierna los.<br />
4 Schakel de afgifte in door de stoomtoevoer<br />
draaiknop tegen de klok in te draaien. Nu wordt<br />
de stoom uitgestoten.<br />
5 Onderbreek, nadat de gewenste hoeveelheid<br />
schuim is verkregen, de afgifte door de stoomtoevoer<br />
draaiknop, tot de ruststand, tegen de<br />
klok in te draaien en verwijder hierna het bakje<br />
of het kopje.<br />
Laat, om kalkafzettingen en verstoppingen te<br />
vermijden, de stoomspuit na het gebruik enkele<br />
seconden vrij stomen.
Controleer altijd, alvorens met de reiniging te<br />
beginnen, of de stroomvoeding is uitgeschakeld<br />
en wacht totdat de machine is afgekoeld.<br />
Het is aanbevolen het waterreservoir dagelijks<br />
schoon te spoelen en opnieuw met vers water<br />
te vullen. Leeg en reinig het verzamellade gebruikte<br />
pads/leklade om de twee/drie dagen,<br />
of zodra het vol is. Gebruik geen magnetron-<br />
of normale oven om de machine of onderdelen<br />
te drogen. Gebruik geen alkalische schoonmaakmiddelen,<br />
oplosmiddelen, alcohol of<br />
agressieve stoffen aggressive. Dompel de<br />
machine nooit in water. Behoudens specifieke<br />
aanwijzingen moeten alle niet demonteerbare<br />
onderdelen (behalve elektrische onderdelen)<br />
van de machine met koud of lauw water en<br />
niet schurende doeken of sponzen worden gereinigd.<br />
REINIGING STOOMSPUIT<br />
Verwijder de punt van de stoomspuit door hem<br />
omlaag te trekken, was hem af in de bordenwasser<br />
of met water. Reinig de stoomspuit met een<br />
vochtige doek en monteer de punt opnieuw<br />
door hem er van onderen in te schuiven.<br />
REINIGING CAPSULEHOUDER<br />
Verwijder het schenktuitje van de <strong>capsule</strong>houder.<br />
Reinig alle onderdelen met koel/lauw stromend<br />
water en een niet schurende doek, droog<br />
ze hierna en hermonteer ze.<br />
ONDERHOUD EN REINIGING<br />
REINIGING ROOSTERS<br />
NL<br />
1 Haal het uitneembare kopjesrooster eruit en<br />
maak het met een vochtige doek en koel/lauw<br />
water voorzichtig schoon.<br />
2 U kunt de kopjeswarmer en het koppenrooster<br />
verwijderen door ze op te tillen en met koud of<br />
lauw stromend water te spoelen. Droog ze goed<br />
af, voordat u ze opnieuw monteert.<br />
REINIGING VAN DE VERZAMELLADE<br />
GEBRUIKTE PADS/LEKLADE<br />
1 Verwijder het lekbakje door het met de speciale<br />
handvat eruit te trekken.<br />
2 Giet het bakje leeg en spoel het met koud of<br />
lauw water, droog en monteer het hierna opnieuw.<br />
CAPPUCCINOFUNCTIE LAVAZZA<br />
(optionele accessoire)<br />
De koffiemachine <strong>LB</strong> <strong>850</strong> CHIARA is compatibel<br />
met de melkschuimer Cappuccino<br />
Cuor di Crema <strong>Lavazza</strong>.<br />
Neem voor verdere informatie onmiddellijk contact<br />
op met <strong>Lavazza</strong> of uw eigen distributeur.<br />
47
NL<br />
OPLOSSINGEN VOOR DE MEEST VOORKOMENDE STORINGEN<br />
Probleem Mogelijke Oorzaken Oslossing<br />
De machine gaat niet aan. » Machine is niet op het stroomnet<br />
aangesloten.<br />
De lichtringen of de controlelamp gaan<br />
niet aan.<br />
De pomp maakt veel lawaai. » Er is geen water in het reservoir.<br />
» Filter niet goed geplaatst.<br />
De machine geeft geen koffie af. » Geen juiste temperatuur.<br />
TECHNISCHE EIGENSCHAPPEN<br />
» Controleer of de stopcontacten goed zijn<br />
aangesloten.<br />
» Er is een storing opgetreden. » Raadpleeg de consumenten- of klantenservice.<br />
» Stoomtoevoer geselecteerd.<br />
» Capsulehouder niet juist geplaatst.<br />
De koffie is niet warm genoeg. » Machine niet op goede temperatuur<br />
wanneer de de koffieafgifteknop<br />
is ingedrukt.<br />
De koffie komt niet of alleen<br />
druppelsgewijs eruit.<br />
De koffie loopt te snel en vormt geen<br />
crème in de espresso.<br />
De melk of de capuccino schuimt niet<br />
goed.<br />
» Vul bij met vers drinkwater.<br />
» Ga na of het Brita® filter juist geplaatst is<br />
(zie de bij het filter verstrekte handleiding).<br />
» Wacht totdat de lichtring aan gaat.<br />
» Draai de stoomtoevoerknop in de ruststand.<br />
» Ga na, of de <strong>capsule</strong>houder de stand van<br />
volledige vergrendeling heeft bereikt.<br />
» Wacht totdat de controlelamp van de<br />
machine aan is en niet meer knippert.<br />
» Afgifte verstopt. » Maak de <strong>capsule</strong>houder schoon (zie onderhoud<br />
en reiniging).<br />
» Reeds gebruikte <strong>capsule</strong>. » Voeg een nieuwe <strong>capsule</strong> in.<br />
» De melk is niet geschikt.<br />
» De melk is niet koud genoeg.<br />
» Het stoomafgiftepijpje is verstopt.<br />
Er komt geen stoom uit. » Stoomspuit verstopt.<br />
· Voltage: 220-240 V 50/60 Hz<br />
· Totaal vermogen: <strong>850</strong> W<br />
· Capaciteit waterreservoir: 2,5 L<br />
· Afmetingen: Hoogte 34 cm<br />
Breedte 24 cm<br />
48<br />
Diepte 24 cm<br />
» Er is geen water in het reservoir.<br />
» Filter niet goed geplaatst.<br />
» Gebruike verse, halfvolle melk.<br />
» Gebruik melk op koelkasttemperatuur.<br />
» Reinig de stoompijp met behulp van een<br />
naald en reinig de stoomspuit.<br />
» Maak de stoomspuit schoon (zie onderhoud<br />
en reiniging). Indien het probleem<br />
aanhoudt, MOET U ZICH ERVAN VERZEKEREN<br />
DAT DE MACHINE IS UITGESCHAKELD EN DE<br />
STOOMTOEVOER DRAAIKNOP GESLOTEN IS. Reinig<br />
nu de opening van de afgifte met behulp<br />
van een dunne naald, waarbij u controleert<br />
dat die niet verstopt is, schakel hierna de<br />
machine in en laat een kleine hoeveelheid<br />
stoom ontsnappen.<br />
» Met vers drinkwater bijvullen.<br />
» Controleer of het Brita® filter juist geplaatst<br />
is (zie de bij het filter verstrekte aanwijzingen).<br />
Voor niet in bovenstaande tabel vermelde storingen of indien de aanbevolen oplossingen het probleem niet hebben verholpen, moet u contact<br />
opnemen met de <strong>Lavazza</strong> klantenservice.<br />
Voor de technische eigenschappen wordt verwezen naar het plaatje dat op de machine geplaatst is.<br />
· Gewicht: 4,3 kg<br />
· Verzamellade: 8 pads<br />
· Gebruikt materiaal voor de behuizing: Thermoplasic<br />
2006/42 CE – 2004/108 CE – 2006/95 CE
VEILIGHEID<br />
NL<br />
Gebruiksbestemming:<br />
De koffiemachine is uitsluitend bestemd voor huishoudelijk gebruik. Elk ongeoorloofd gebruik is verboden (niet beschreven<br />
in deze handleiding). Het aanbrengen van technische wijzigingen is niet toegestaan. Het apparaat is niet bestemd om<br />
gebruikt te worden door personen (inclusief kinderen) met verminderde fysieke, mentale of gevoelige capaciteiten of met<br />
onvoldoende ervaring en bekwaamheid, tenzij ze onder het toezicht staan van een persoon die verantwoordelijk is voor<br />
hun veiligheid en van wie ze instructies verkrijgen aangaande het gebruik van het apparaat.<br />
Plaatsing:<br />
Plaats de koffiemachine op een veilige plek waar niemand het zou kunnen omstoten of zich eraan zou kunnen verwonden.<br />
Bewaar de machine niet op een temperatuur onder de 0°, aangezien de vorst deze zou kunnen beschadigen. Gebruik de<br />
koffiemachine niet buiten. Plaats de machine niet op warme oppervlakken en/of in de nabijheid van water, vuur en warmtebronnen.<br />
De aangestoken koffiemachine mag niet afgedekt worden met doeken of andere voorwerpen.<br />
Stroomtoevoer:<br />
De koffiemachine alleen aansluiten op een geschikt stopcontact. De spanning moet overeenstemmen met de spanning<br />
die op het plaatje van de machine vermeld staat.<br />
Voedingskabel:<br />
Gebruik de koffiemachine nooit als de voedingskabel defect of beschadigd is. In dergelijke gevallen dient deze onmiddellijk<br />
vervangen te worden. Laat de voedingskabel niet over hoeken, scherpe randen of hete voorwerpen lopen en bescherm deze<br />
tegen olie. Draag de koffiemachine niet aan de kabel en trek er niet aan. Haal de stekker niet uit het stopcontact door aan de<br />
kabel te trekken; raak deze niet met natte handen aan. Voorkom dat de voedingskabel los van tafels of planken afhangt.<br />
Elektrocutiegevaar:<br />
Breng de onder stroom staande delen nooit in contact met water.<br />
Bescherming van andere personen:<br />
Houd de kinderen onder toezicht om te vermijden dat ze met het apparaat spelen. De kinderen realiseren zich niet welke<br />
gevaren er verbonden zijn aan elektrische apparaten. Laat het gebruikte verpakkingsmateriaal van de machine niet binnen<br />
bereik van kinderen.<br />
Verbrandingsgevaar:<br />
Richt de hete stoom- en/of waterstraal nooit op uzelf en/of op anderen. Aan het begin van de afgifte kan wat heet water<br />
vrijkomen. Het afgiftepijpje kan zeer hoge temperaturen bereiken: Voorkom directe aanraking met uw handen. U mag<br />
gedurende de afgifte nooit de <strong>capsule</strong>houder verwijderen.<br />
Reiniging:<br />
Alvorens de machine te reinigen, is het noodzakelijk de stekker uit het stopcontact te halen en te wachten tot de machine<br />
afgekoeld is. Dompel de machine niet onder in water! Het is ten strengste verboden pogingen te ondernemen tot reparatie<br />
van de machine aan de binnenkant. Gebruik het water in het waterreservoir niet voor voedingsdoeleinden.<br />
Opslag van de machine:<br />
Wanneer de machine langere tijd niet wordt gebruikt, haal de stekker uit het stopcontact en sla deze op in een droge plaats<br />
niet toegankelijk voor kinderen. Bescherm de machine tegen stof en vuil.<br />
Reparaties/Onderhoud:<br />
Haal de stekker meteen uit het stopcontact bij storingen, defecten of vermoedelijke defecten na een val. Zet de machine<br />
nooit in werking als deze defect is. Alleen de erkende servicentra mogen werkzaamheden en reparaties uitvoeren. Bij ondeskundig<br />
uitgevoerde werkzaamheden wordt iedere vorm van aansprakelijkheid van de hand gewezen.<br />
Waterreservoir:<br />
Vul het reservoir alleen met vers drinkwater zonder koolzuur. Zet de machine niet aan indien het water niet minstens het<br />
minimumniveau overschrijdt dat op het reservoir aangegeven is.<br />
Ruimte voor de koffiepads:<br />
In de ruimte voor de koffiepads dienen enkel koffiepads <strong>Lavazza</strong> BLUE geplaatst worden. De koffiepads dienen eenmalig<br />
gebruikt te worden.<br />
Afdanking van de machine aan het einde van de levensduur (Europese Richtlijn 2002/96/EG – Wetsbesluit<br />
nr. 151 van 25 juli 2005):<br />
Het symbool van de doorkruiste afvalbak dat op de apparatuur en/of de verpakking is weergegeven geeft aan dat het product aan<br />
het einde van zijn nuttige levensduur gescheiden van ander afval moet ingezameld worden. De gebruiker moet het apparaat dus,<br />
op het einde van zijn levensduur, bij de speciale gescheiden inzamelingscentra voor elektrisch en elektronisch afval inleveren die bestaan<br />
op het nationaal grondgebied ofwel het opnieuw bij de winkel inleveren bij de aankoop van een gelijkaardig apparaat, in de<br />
verhouding één op één. De gebruiker is verantwoordelijk voor het toekennen van het apparaat aan de geschikte inzamelingscentra,<br />
op straffe van de voorziene sancties van de van kracht zijnde wetgeving op deze materie. De adequate gescheiden inzameling<br />
om de afgedankte apparatuur vervolgens voor te bereiden voor recycling en/of milieuverantwoorde verwerking en verwijdering,<br />
draagt bij tot het vermijden van mogelijke negatieve gevolgen op het milieu en de gezondheid en bevordert het hergebruik van<br />
het materiaal waaruit de apparatuur bestaat. Voor meer gedetailleerde informatie betreffende de beschikbare inzameling dient men<br />
zich te wenden tot de lokale dienst van verwerking en verwijdering van afval of tot de verdeler waar de aankoop werd gedaan.<br />
49
essedimanuali.it<br />
www.lavazza.com<br />
Model: <strong>LB</strong> <strong>850</strong><br />
10084319 - 01 - 11/09