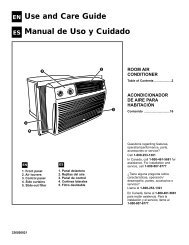
Use and Care Guide Manual de Uso y Cuidado
Use and Care Guide Manual de Uso y Cuidado
Use and Care Guide Manual de Uso y Cuidado

Create successful ePaper yourself
Turn your PDF publications into a flip-book with our unique Google optimized e-Paper software.
EN<br />
ES<br />
<strong>Use</strong> <strong>and</strong> <strong>Care</strong> <strong>Gui<strong>de</strong></strong><br />
<strong>Manual</strong> <strong>de</strong> <strong>Uso</strong> y <strong>Cuidado</strong><br />
4<br />
EN ES<br />
1. Front panel<br />
2. Air louvers<br />
3. Air direction tab<br />
4. Control panel<br />
5. Sli<strong>de</strong>-out filter<br />
1184632<br />
© 2000 All rights reserved<br />
© 2000 Todos los <strong>de</strong>rechos reservados<br />
4<br />
5<br />
5<br />
1. Panel <strong>de</strong>lantero<br />
2. Rejillas <strong>de</strong>l aire<br />
3. Tablilla <strong>de</strong> dirección<br />
<strong>de</strong> aire<br />
4. Panel <strong>de</strong> control<br />
5. Filtro <strong>de</strong>slizable<br />
2<br />
2<br />
1<br />
3<br />
1<br />
3<br />
ROOM AIR<br />
CONDITIONER<br />
ACONDICIONADOR<br />
DE AIRE<br />
Printed in U.S.A.<br />
Impreso en los EE.UU.
Contents<br />
EN ES<br />
Page<br />
A Note To You............................................................2<br />
Air Conditioner Safety .............................................3<br />
Important Safety Instructions ..........................3<br />
Operating Your Air Conditioner ..............................5<br />
Starting your air conditioner............................5<br />
Changing air direction ......................................7<br />
Saving energy....................................................7<br />
Using the Filter Monitor....................................7<br />
Normal operating sounds.................................7<br />
Caring for Your Air Conditioner ............................11<br />
Cleaning the air filter ......................................11<br />
Cleaning the front panel .................................11<br />
Repairing paint damage..................................11<br />
Performing Annual Maintenance ..........................13<br />
Troubleshooting .....................................................15<br />
Or<strong>de</strong>ring Accessories............................................19<br />
Requesting Assistance or Service ......................20<br />
Thank you for buying this appliance.<br />
To ensure you enjoy years of trouble-free operation, we<br />
<strong>de</strong>veloped this <strong>Use</strong> <strong>and</strong> <strong>Care</strong> <strong>Gui<strong>de</strong></strong>. It contains valuable<br />
information about how to operate <strong>and</strong> maintain your<br />
appliance properly <strong>and</strong> safely. Please read it carefully. Also,<br />
please complete <strong>and</strong> mail the Product Registration Card<br />
provi<strong>de</strong>d with your appliance. This card helps us notify you<br />
about any new information on your appliance.<br />
Please record your mo<strong>de</strong>l’s information.<br />
Whenever you call to request service on your appliance,<br />
you need to know your complete mo<strong>de</strong>l number <strong>and</strong><br />
serial number. You can find this information on the<br />
mo<strong>de</strong>l <strong>and</strong> serial number label. (See Installation<br />
Instructions for mo<strong>de</strong>l <strong>and</strong> serial number location.)<br />
Please record the mo<strong>de</strong>l <strong>and</strong> serial number information<br />
below. Also, record the purchase date of your appliance<br />
<strong>and</strong> the store’s name, address, <strong>and</strong> telephone<br />
number.<br />
Mo<strong>de</strong>l Number<br />
Serial Number<br />
Purchase Date<br />
Store Name<br />
Store Address<br />
Store Phone<br />
2<br />
ES<br />
A Note To You<br />
Keep this book <strong>and</strong> the sales slip together<br />
in a safe place for future reference.<br />
Contenido Paginá<br />
Una Nota para Usted................................................2<br />
Seguridad <strong>de</strong>l Acondicionador <strong>de</strong> Aire ................4<br />
Instrucciones Importantes <strong>de</strong> Seguridad .......4<br />
Cómo Usar su Acondicionador <strong>de</strong> Aire.................8<br />
Cómo poner en marcha su acondicionador<br />
<strong>de</strong> aire .................................................................8<br />
Cómo cambiar la dirección <strong>de</strong>l aire...............10<br />
Ahorro <strong>de</strong> energía ...........................................10<br />
Cómo usar el Monitor <strong>de</strong>l Filtro .....................10<br />
Ruidos normales <strong>de</strong> operación .....................10<br />
Cómo Cuidar su Acondicionador <strong>de</strong> Aire ...........12<br />
Limpieza <strong>de</strong>l filtro <strong>de</strong> aire ...............................12<br />
Limpieza <strong>de</strong>l panel <strong>de</strong>lantero ........................12<br />
Reparación <strong>de</strong> la pintura dañada ..................12<br />
Mantenimiento Anual ............................................14<br />
Diagnóstico <strong>de</strong> Problemas ...................................17<br />
Cómo Or<strong>de</strong>nar Accesorios ...................................19<br />
Cómo Solicitar Ayuda o Servicio Técnico ..........21<br />
ES<br />
Gracias por seleccionar este aparato.<br />
Para asegurar que este aparato funcione durante muchos<br />
años sin problemas, hemos diseñado este <strong>Manual</strong> <strong>de</strong> <strong>Uso</strong> y<br />
<strong>Cuidado</strong>. Contiene valiosa información sobre cómo operar y<br />
dar mantenimiento a su aparato <strong>de</strong>bidamente y sin peligro.<br />
Por favor, léalo <strong>de</strong>tenidamente. Asimismo, llene por favor y<br />
envíe por correo la Tarjeta <strong>de</strong> Registro <strong>de</strong>l Producto que viene<br />
con su aparato. Esta tarjeta nos ayudará a notificarle cualquier<br />
información nueva sobre su aparato.<br />
Por favor anote la información sobre su<br />
mo<strong>de</strong>lo.<br />
Siempre que llame para solicitar servicio <strong>de</strong>l aparato,<br />
necesitará saber el número <strong>de</strong>l mo<strong>de</strong>lo y el número <strong>de</strong> serie<br />
completos. Esta información la encuentra en la placa <strong>de</strong><br />
número <strong>de</strong>l mo<strong>de</strong>lo y número <strong>de</strong> serie. (Ver la ubicación <strong>de</strong>l<br />
número <strong>de</strong>l mo<strong>de</strong>lo y <strong>de</strong>l número <strong>de</strong> serie en la Instrucciones<br />
<strong>de</strong> Instalación.)<br />
Por favor anote la información sobre el número <strong>de</strong>l mo<strong>de</strong>lo y<br />
el número <strong>de</strong> serie que se incluye abajo. Anote también la<br />
fecha <strong>de</strong> compra <strong>de</strong>l aparato, así como el nombre, la dirección<br />
y el teléfono <strong>de</strong> la tienda.<br />
Número <strong>de</strong>l mo<strong>de</strong>lo<br />
Número <strong>de</strong> serie<br />
Una Nota para<br />
Usted<br />
Fecha <strong>de</strong> compra<br />
Nombre <strong>de</strong> la tienda<br />
Dirección <strong>de</strong> la tienda<br />
Teléfono <strong>de</strong> la tienda<br />
Guar<strong>de</strong> este manual y la nota <strong>de</strong> compra juntos,<br />
en un lugar seguro para referencia futura.
EN<br />
Air Conditioner Safety<br />
Your safety <strong>and</strong> the safety of others are<br />
very important.<br />
We have provi<strong>de</strong>d many important safety messages<br />
in this manual <strong>and</strong> on your appliance. Always read<br />
<strong>and</strong> obey all safety messages.<br />
This is the safety alert symbol.<br />
This symbol alerts you to potential hazards<br />
that can kill or hurt you <strong>and</strong> others.<br />
All safety messages will follow the safety alert<br />
symbol <strong>and</strong> either the word “DANGER” or<br />
“WARNING”. These words mean:<br />
DANGER<br />
You can be killed or seriously injured if you don’t<br />
immediately follow instructions.<br />
WARNING<br />
You can be killed or seriously injured if you don’t<br />
follow instructions.<br />
All safety messages will tell you what the potential<br />
hazard is, tell you how to reduce the chance of<br />
injury, <strong>and</strong> tell you what can happen if the<br />
instructions are not followed.<br />
IMPORTANT SAFETY<br />
INSTRUCTIONS<br />
WARNING — To reduce the risk of fire, electrical<br />
shock, injury, or sickness when using your air<br />
conditioner, follow these basic precautions:<br />
• Plug into a groun<strong>de</strong>d 3 prong outlet.<br />
• Do not remove ground prong.<br />
• Do not use an adapter.<br />
• Do not use an extension cord.<br />
• Unplug air conditioner before servicing.<br />
• <strong>Use</strong> two or more people to move or install air<br />
conditioner.<br />
• Do not drink water collected insi<strong>de</strong> the cabinet.<br />
— SAVE THESE INSTRUCTIONS —<br />
Help us help you<br />
Please:<br />
• Install your air conditioner in a window that will hold<br />
the weight, <strong>and</strong> secure the air conditioner according to<br />
the Installation Instructions.<br />
• Connect the air conditioner to the proper kind of outlet<br />
with the correct electrical supply <strong>and</strong> ground. (See the<br />
Installation Instructions.)<br />
• Make sure the air conditioner is the correct size for the<br />
area you want to cool.<br />
• <strong>Use</strong> the air conditioner only to do what a window air<br />
conditioner is <strong>de</strong>signed to do.<br />
• Make sure the air conditioner is not used by anyone<br />
unable to operate it properly.<br />
• Maintain the air conditioner properly.<br />
Also, remove the Energy Label. <strong>Use</strong> a damp cloth to<br />
take off any glue residue. DO NOT use sharp<br />
instruments, flammable fluids, or abrasive cleaners.<br />
These can damage the air conditioner finish.<br />
3
4<br />
ES<br />
Seguridad <strong>de</strong>l Acondicionador<br />
<strong>de</strong> Aire<br />
Su seguridad y la seguridad <strong>de</strong> los <strong>de</strong>más<br />
es muy importante.<br />
Hemos incluido muchos mensajes importantes <strong>de</strong><br />
seguridad en este manual y en su electrodoméstico.<br />
Lea y obe<strong>de</strong>zca siempre todos los mensajes <strong>de</strong><br />
seguridad<br />
Este es el símbolo <strong>de</strong> advertencia <strong>de</strong><br />
seguridad.<br />
Este símbolo le llama la atención sobre<br />
peligros potentiales que pue<strong>de</strong>n ocasionar la muerte<br />
o una lesión a usted y a los <strong>de</strong>más.<br />
Todos los mensajes <strong>de</strong> seguridad irán a continuación<br />
<strong>de</strong>l símbolo <strong>de</strong> advertencia <strong>de</strong> seguridad<br />
y <strong>de</strong> la palabra “PELIGRO” o “ADVERTENCIA”. Estas<br />
palabras significan:<br />
PELIGRO<br />
Si no sigue las instrucciones <strong>de</strong> inmediato,<br />
usted pue<strong>de</strong> morir o sufrir una lesión grave.<br />
ADVERTENCIA<br />
Si no sigue las instrucciones, usted pue<strong>de</strong><br />
morir o sufrir una lesión grave.<br />
Todos los mensajes <strong>de</strong> seguridad le dirán el peligro<br />
potencial, le dirán cómo reducir las posibilida<strong>de</strong>s <strong>de</strong><br />
sufrir una lesión y lo que pue<strong>de</strong> suce<strong>de</strong>r si no se<br />
siguen las instrucciones.<br />
INSTRUCCIONES<br />
IMPORTANTES<br />
DE SEGURIDAD<br />
ADVERTENCIA – Para reducir el riesgo <strong>de</strong> incendio,<br />
choque eléctrico, lesiones personales o enfermedad<br />
al usar su acondicionador <strong>de</strong> aire, siga estas<br />
precauciones básicas:<br />
• Conecte a un contacto <strong>de</strong> pared <strong>de</strong> conexión a<br />
tierra <strong>de</strong> 3 terminales.<br />
• No quite el terminal <strong>de</strong> conexión a tierra.<br />
• No use un adaptador.<br />
• No use un cable eléctrico <strong>de</strong> extensión.<br />
• Desconecte el acondicionador <strong>de</strong> aire antes <strong>de</strong><br />
darle servicio.<br />
• <strong>Use</strong> dos o más personas para mover o instalar el<br />
acondicionador <strong>de</strong> aire.<br />
• No beba el agua acumulada <strong>de</strong>ntro <strong>de</strong>l gabinete.<br />
– CONSERVE ESTAS INSTRUCCIONES –<br />
Ayú<strong>de</strong>nos a ayudarlo:<br />
• Instale el acondicionador <strong>de</strong> aire en una ventana que<br />
soporte el peso y asegúrelo <strong>de</strong> acuerdo con las<br />
instrucciones <strong>de</strong> instalación.<br />
• Conecte la unidad al tipo apropiado <strong>de</strong> tomacorriente<br />
con el suministro eléctrico correcto y puesta a tierra.<br />
(Ver la Instrucciones <strong>de</strong> Instalación).<br />
• Asegúrese <strong>de</strong> que la unidad tenga el tamaño correcto<br />
para el área que usted <strong>de</strong>sea enfriar.<br />
• Utilice la unidad únicamente para los fines para los<br />
que está diseñado un acondicionador <strong>de</strong> aire para<br />
ventana.<br />
• Asegúrese <strong>de</strong> que la unidad sea usada únicamente<br />
por personas capacitadas para operarla <strong>de</strong>bidamente.<br />
• Dé a la unidad el mantenimiento <strong>de</strong>bido.<br />
Quite también la Etiqueta <strong>de</strong> Energía. Utilice un paño<br />
húmedo para eliminar cualquier resto <strong>de</strong> goma. NO use<br />
instrumentos afilados, líquidos inflamables o limpiadores<br />
abrasivos. Estos pue<strong>de</strong>n dañar el acabado <strong>de</strong>l<br />
acondicionador <strong>de</strong> aire.
EN<br />
Operating Your Air Conditioner<br />
Operating your air conditioner properly helps you to obtain the best possible results.<br />
This section explains proper air conditioner operation.<br />
IMPORTANT:<br />
• If you turn the air conditioner off, wait at least 3 minutes before turning it back on. This prevents the air conditioner from<br />
blowing a fuse or tripping a circuit breaker.<br />
• Do not try to operate your air conditioner in the cooling mo<strong>de</strong> when outsi<strong>de</strong> temperature is below 65°F (18°C). The<br />
insi<strong>de</strong> evaporator coil will freeze up <strong>and</strong> the air conditioner will not operate properly.<br />
Starting your air conditioner<br />
1. Set the EXHAUST Control (some mo<strong>de</strong>ls) to<br />
CLOSED for maximum continuous cooling. The<br />
EXHAUST Control allows you to draw stale or<br />
smoky air from the room.<br />
OPEN - to exhaust room air to the outsi<strong>de</strong>.<br />
CLOSED - to circulate room air.<br />
The EXHAUST Control will function only when FAN<br />
CONTROL is operating.<br />
2. Set the FAN CONTROL to the <strong>de</strong>sired setting.<br />
When the air conditioner is operating at LOW<br />
COOL, HIGH COOL (some mo<strong>de</strong>ls), or TURBO<br />
COOL, the fan circulates air continuously.<br />
TURBO COOL - for maximum cooling<br />
HIGH COOL (some mo<strong>de</strong>ls) - for normal<br />
cooling<br />
LOW COOL - for sleeping comfort<br />
FAN ONLY<br />
When the FAN ONLY setting is selected, the fan will<br />
run continuously to move air, but the air will not be<br />
cooled.<br />
POWER SAVER (some mo<strong>de</strong>ls)<br />
When the air conditioner is operating on POWER<br />
SAVER, the fan runs only when cooling is nee<strong>de</strong>d.<br />
The fan stops circulating air when the room<br />
temperature matches the THERMOSTAT Control<br />
setting.<br />
Since the fan does not circulate the room air<br />
continuously, less energy is used but the room air is<br />
not circulated as often. <strong>Use</strong> POWER SAVER when<br />
you are away from home or asleep.<br />
HEAT/COOL AIR CONDITIONER HEAT<br />
SETTINGS<br />
TURBO HEAT - for maximum heating<br />
HIGH HEAT - for normal heating<br />
LOW HEAT - for reducing heating<br />
FAN ONLY (some mo<strong>de</strong>ls) - for circulating air<br />
without heating or cooling<br />
CLOSED OPEN<br />
FAN<br />
ONLY<br />
HIGH<br />
HEAT<br />
FAN<br />
ONLY<br />
LOW COOL<br />
OFF<br />
LOW<br />
HEAT<br />
OFF<br />
LOW<br />
COOL<br />
OFF<br />
FAN<br />
ONLY<br />
TURBO<br />
COOL<br />
OFF<br />
FAN<br />
ONLY<br />
TURBO<br />
COOL<br />
HIGH<br />
COOL<br />
HIGH<br />
COOL<br />
TURBO<br />
COOL<br />
POWER<br />
SAVER<br />
LOW<br />
COOL<br />
LOW<br />
COOL<br />
HIGH<br />
COOL<br />
EXHAUST<br />
Your air conditioner has one of these controls:<br />
TURBO<br />
HEAT<br />
TURBO<br />
COOL<br />
FAN CONTROL<br />
FAN CONTROL<br />
FAN CONTROL<br />
FAN CONTROL<br />
5
6<br />
3. Turn the THERMOSTAT Control to a mid-setting.<br />
Adjust the air conditioner's performance by turning<br />
the THERMOSTAT Control clockwise ( ) for<br />
maximum cooling. For less cooling, turn the<br />
THERMOSTAT Control counterclockwise ( ).<br />
Experiment <strong>and</strong> find the setting that suits you best.<br />
Using the HEAT settings (some mo<strong>de</strong>ls)<br />
For heating, turn the THERMOSTAT Control<br />
counterclockwise ( ) .<br />
For mo<strong>de</strong>ls with a heat pump feature:<br />
When the outsi<strong>de</strong> temperature is 45°F (7°C) or above,<br />
the air conditioner operates as a heat pump <strong>and</strong><br />
heats the air running through the unit. When the<br />
outsi<strong>de</strong> temperature is below 45°F (7°C), the unit<br />
switches to an electric-resistance heater to heat the<br />
air.<br />
For mo<strong>de</strong>ls with an electric strip heater only: The<br />
electric strip heater is activated when the FAN<br />
CONTROL is set to a heat setting.<br />
NOTE: Your air conditioner is not <strong>de</strong>signed to be used<br />
as a primary heat source. It is inten<strong>de</strong>d for<br />
supplemental heating only.<br />
Your air conditioner has one of these controls:<br />
5<br />
COLDER<br />
6<br />
4<br />
6<br />
7<br />
3<br />
7<br />
5<br />
WARMER<br />
2<br />
OFF<br />
4<br />
1 1<br />
2<br />
3<br />
1<br />
3<br />
7<br />
COLDER<br />
2<br />
4<br />
6<br />
5<br />
THERMOSTAT<br />
THERMOSTAT
Changing air direction<br />
Tabs<br />
Saving energy<br />
The louvers in the top of the<br />
front panel allow you to<br />
control the direction of the<br />
cooled air. <strong>Use</strong> the tabs to<br />
direct the air up, down, right,<br />
left, or straight ahead.<br />
Along with using POWER SAVER (some mo<strong>de</strong>ls), there are many things you can do to help save energy.<br />
• Improve your home's insulation. Seal doors <strong>and</strong><br />
windows. Close fireplace flue.<br />
• Close blinds or drapes on the sunny si<strong>de</strong> of your<br />
house. Add awnings.<br />
• Make sure drapes or furniture do not block airflow<br />
from your air conditioner.<br />
• Turn lights <strong>and</strong> appliances off when they are not<br />
nee<strong>de</strong>d.<br />
Using the Filter Monitor (some mo<strong>de</strong>ls)<br />
FILTER<br />
MONITOR<br />
The Filter Monitor (some<br />
mo<strong>de</strong>ls) tells you when the<br />
filter needs to be cleaned.<br />
When the amount of dirt on the<br />
filter reaches a level that would<br />
affect cooling performance, a<br />
red flag appears un<strong>de</strong>r the<br />
words “FILTER MONITOR” on<br />
the control panel.<br />
Normal operating sounds<br />
When your air conditioner is operating normally, you may hear sounds such as:<br />
• Droplets of water hitting the con<strong>de</strong>nser, causing a<br />
“pinging” or “clicking” sound. The water droplets<br />
help cool the con<strong>de</strong>nser.<br />
• Air movement from the fan.<br />
• Clicks from the thermostat cycle.<br />
• Ventilate your attic. High temperatures in the attic<br />
add to the air conditioner's cooling load.<br />
• Try not to use heat-producing appliances during the<br />
hottest part of the day.<br />
• Keep heat registers <strong>and</strong> cool-air returns closed.<br />
• <strong>Use</strong> exhaust vent fans while cooking, doing laundry,<br />
or bathing.<br />
IMPORTANT: The FAN CONTROL must be set to<br />
TURBO COOL or TURBO HEAT for the Filter Monitor<br />
to work. If the FAN CONTROL is set to a lower fan<br />
speed, turn the setting to TURBO to check the filter.<br />
Then return the FAN CONTROL to your <strong>de</strong>sired<br />
setting.<br />
• Vibrations or noise due to poor wall or window<br />
construction.<br />
• A high-pitched hum or pulsating noise caused by<br />
the mo<strong>de</strong>rn high-efficiency compressor cycling on<br />
<strong>and</strong> off.<br />
7
8<br />
ES<br />
Cómo Usar Su Acondicionador<br />
<strong>de</strong> Aire<br />
Operar <strong>de</strong>bidamente su acondicionador <strong>de</strong> aire le permite obtener los mejores resultados posibles.<br />
Esta sección le explica cómo operar su acondicionador <strong>de</strong> aire <strong>de</strong>bidamente.<br />
IMPORTANTE:<br />
• Si usted apaga el acondicionador <strong>de</strong> aire, espere por lo menos 3 minutos antes <strong>de</strong> volver a ponerlo en marcha. De lo<br />
contrario se pue<strong>de</strong> quemar un fusible <strong>de</strong>l hogar o disparar un disyuntor <strong>de</strong> circuito.<br />
• No trate <strong>de</strong> operar su acondicionador <strong>de</strong> aire en el modo <strong>de</strong> enfriamiento cu<strong>and</strong>o la temperatura exterior sea menor<br />
<strong>de</strong> 18°C (65°F). El serpenín interior <strong>de</strong>l evaporador se congelará y el acondicionador <strong>de</strong> aire no funcionará<br />
<strong>de</strong>bidamente.<br />
Cómo poner en marcha su acondicionador <strong>de</strong> aire<br />
1. Coloque el Control <strong>de</strong> EXHAUST (“Respira<strong>de</strong>ro”) (en<br />
algunos mo<strong>de</strong>los) en la posición CLOSED (“Cerrada”)<br />
para enfriamiento máximo. El Control <strong>de</strong> EXHAUST<br />
hace escapar el aire añejo/humoso <strong>de</strong> la sala.<br />
OPEN (“Abierto”) - para hacer salir el aire <strong>de</strong> la<br />
sala al exterior.<br />
CLOSED (“Cerrado”) - para que circule el aire en<br />
la sala.<br />
El control <strong>de</strong> EXHAUST funciona únicamente cu<strong>and</strong>o el<br />
Control <strong>de</strong> FAN (“Ventilación”) está funcion<strong>and</strong>o.<br />
2. Ponga el Control <strong>de</strong> FAN en la posición que <strong>de</strong>see.<br />
Cu<strong>and</strong>o el acondicionador <strong>de</strong> aire está funcion<strong>and</strong>o a<br />
temperaturas LOW COOL (“Poco fría”), HIGH COOL<br />
(“Muy fría”) (en algunos mo<strong>de</strong>los) o TURBO COOL<br />
(“Máximo nivel <strong>de</strong> frío”), el ventilador hace circular el aire<br />
continuamente.<br />
TURBO COOL - para enfriamiento máximo<br />
HIGH COOL (en algunos mo<strong>de</strong>los) - para<br />
enfriamiento normal<br />
LOW COOL - para dormir cómodo<br />
FAN ONLY (“SÓLO VENTILACIÓN”)<br />
Cu<strong>and</strong>o se selecciona el modo <strong>de</strong> FAN ONLY (“Sólo<br />
ventilación”), el ventilador funciona continuamente para<br />
hacer circular el aire, pero el aire no se enfriará.<br />
POWER SAVER (“AHORRO DE ENERGÍA”)<br />
(en algunos mo<strong>de</strong>los)<br />
Cu<strong>and</strong>o se usa el modo <strong>de</strong> POWER SAVER (“Ahorro <strong>de</strong><br />
energía”), el ventilador funciona únicamente cu<strong>and</strong>o se<br />
necesita enfriamiento. El ventilador <strong>de</strong>ja <strong>de</strong> hacer circular<br />
el aire cu<strong>and</strong>o la temperatura <strong>de</strong> la sala es igual a la<br />
posición <strong>de</strong>l Control <strong>de</strong> THERMOSTAT (“Temperatura”).<br />
Debido a que el ventilador no hace circular<br />
continuamente el aire <strong>de</strong> la sala, se consume menos<br />
energía, pero el aire <strong>de</strong> la sala circula con menos<br />
frecuencia. Utilice el modo <strong>de</strong> AHORRO DE ENERGÍA<br />
cu<strong>and</strong>o esté fuera <strong>de</strong>l hogar o durmiendo.<br />
CLOSED OPEN<br />
FAN<br />
ONLY<br />
FAN<br />
ONLY<br />
LOW COOL<br />
OFF<br />
OFF<br />
LOW<br />
COOL<br />
OFF<br />
FAN<br />
ONLY<br />
TURBO<br />
COOL<br />
TURBO<br />
COOL<br />
HIGH<br />
COOL<br />
HIGH<br />
COOL<br />
TURBO<br />
COOL<br />
POWER<br />
SAVER<br />
LOW<br />
COOL<br />
EXHAUST<br />
Su acondicionador <strong>de</strong> aire trene uno <strong>de</strong> estos dos controles :<br />
FAN CONTROL<br />
FAN CONTROL<br />
FAN CONTROL
AJUSTES DE CALEFACCIÓN CALIENTE/FRÍO DEL<br />
ACONDICIONADOR DE AIRE<br />
TURBO HEAT - para mayor nivel <strong>de</strong> calefacción<br />
HIGH HEAT - para calefacción normal<br />
LOW HEAT - para reducir la calefacción<br />
FAN ONLY (SÓLO VENTILACIÓN) (en algunos<br />
mo<strong>de</strong>los) - para que el aire circule sin enfriar o<br />
calentar<br />
3. Coloque el Control <strong>de</strong> THERMOSTAT<br />
(“Temperatura”) en una posición intermedia. Ajuste<br />
el enfriamiento <strong>de</strong>l acondicionador <strong>de</strong> aire gir<strong>and</strong>o el<br />
Control <strong>de</strong> THERMOSTAT en la dirección <strong>de</strong> las<br />
manecillas <strong>de</strong>l reloj ( ) para obtener el máxiimo<br />
nivel <strong>de</strong> enfriamiento. Para un nivel <strong>de</strong> enfriamiento<br />
menor, gire el Control <strong>de</strong> THERMOSTAT en dirección<br />
contraria a las manecillas <strong>de</strong>l reloj ( ). Usted<br />
<strong>de</strong>berá experimentar hasta encontrar el ajuste que<br />
más le convenga.<br />
Cómo usar los ajustes <strong>de</strong> CALEFACCIÓN<br />
(en algunos mo<strong>de</strong>los)<br />
Para calentar, gire el Control <strong>de</strong> THERMOSTAT en la<br />
dirección contraria a las manecillas <strong>de</strong>l reloj ( ).<br />
Para mo<strong>de</strong>los con bomba <strong>de</strong> calor:<br />
Cu<strong>and</strong>o la temperatura exterior es <strong>de</strong> 7°C (45°F) o<br />
más, el acondicionador <strong>de</strong> aire funciona como una<br />
bomba <strong>de</strong> calor y calienta el aire que circula por la<br />
unidad. Cu<strong>and</strong>o la temperatura exterior es inferior a<br />
los 7°C (45°F), la unidad funciona como un<br />
calentador <strong>de</strong> resistencia eléctrica.<br />
Para mo<strong>de</strong>los con un calentador con tira<br />
eléctrica solamente : el calentador con tira<br />
eléctrica se activa cu<strong>and</strong>o el Control <strong>de</strong> FAN<br />
(“Ventilación”) se coloca en una posición <strong>de</strong><br />
calefacción.<br />
NOTA: su acondicionador <strong>de</strong> aire no ha sido<br />
diseñado para ser usado como fuente <strong>de</strong> calor<br />
primaria. Sólo <strong>de</strong>be usarse como fuente <strong>de</strong> calor<br />
suplementaria.<br />
HIGH<br />
HEAT<br />
TURBO<br />
HEAT<br />
LOW<br />
HEAT<br />
OFF<br />
FAN<br />
ONLY<br />
OFF<br />
TURBO<br />
COOL<br />
LOW<br />
COOL<br />
HIGH<br />
COOL<br />
FAN CONTROL<br />
Su acondicionador <strong>de</strong> aire trene uno <strong>de</strong> estos dos controles :<br />
5<br />
COLDER<br />
6<br />
4<br />
6<br />
7<br />
3<br />
7<br />
5<br />
WARMER<br />
2<br />
4<br />
1 1<br />
2<br />
3<br />
1<br />
3<br />
7<br />
COLDER<br />
2<br />
4<br />
6<br />
5<br />
THERMOSTAT<br />
THERMOSTAT<br />
9
Cómo cambiar la dirección <strong>de</strong>l aire<br />
10<br />
Tablillas<br />
Ahorro <strong>de</strong> energía<br />
Las rejillas en la parte<br />
superior <strong>de</strong>l panel<br />
<strong>de</strong>lantero, controlan la<br />
dirección <strong>de</strong>l aire enfriado.<br />
<strong>Use</strong> las tablillas para dirigir<br />
el aire hacia la <strong>de</strong>recha,<br />
hacia la izquierda, o<br />
<strong>de</strong>recho al frente.<br />
A<strong>de</strong>más <strong>de</strong> usar <strong>de</strong>l modo <strong>de</strong> POWER SAVER (“Ahorro <strong>de</strong> energía”) (en algunos mo<strong>de</strong>los), usted pue<strong>de</strong> hacer<br />
muchas cosas para ayudar a ahorrar energía:<br />
• Mejore el aislamiento <strong>de</strong> su hogar. Selle las puertas • Ventile el <strong>de</strong>sván. Las temperaturas altas en el<br />
y ventanas. Cierre el tiro <strong>de</strong> la chimenea.<br />
<strong>de</strong>sván aumentan la carga <strong>de</strong> su acondicionador<br />
• Cierre las persianas o cortinas en el lado soleado<br />
<strong>de</strong> aire.<br />
<strong>de</strong> su hogar. Coloque toldos.<br />
• Trate <strong>de</strong> no usar aparatos que producen calor en<br />
• Asegúrese <strong>de</strong> que las cortinas o los muebles no<br />
las horas más calurosas <strong>de</strong>l día.<br />
bloqueen el aire que sale <strong>de</strong>l acondicionador <strong>de</strong><br />
• Mantenga cerrados los registros <strong>de</strong> calor y las<br />
aire.<br />
tomas <strong>de</strong> retorno <strong>de</strong>l aire frío.<br />
• Apague las luces y los aparatos electrodomésticos • <strong>Use</strong> ventiladores aspiradores cu<strong>and</strong>o esté<br />
cu<strong>and</strong>o no los esté us<strong>and</strong>o.<br />
cocin<strong>and</strong>o, lav<strong>and</strong>o la ropa o bañándose.<br />
Cómo usar el Monitor <strong>de</strong>l Filtro (en algunos mo<strong>de</strong>los)<br />
FILTER<br />
MONITOR<br />
El Monitor <strong>de</strong>l Filtro (en<br />
algunos mo<strong>de</strong>los) le indica<br />
cu<strong>and</strong>o el filtro necesita<br />
limpieza. Cu<strong>and</strong>o la cantidad<br />
<strong>de</strong> mugre que está en el filtro<br />
llega a un nivel que afectará la<br />
calidad <strong>de</strong>l enfriamiento,<br />
aparece una b<strong>and</strong>era roja<br />
<strong>de</strong>bajo <strong>de</strong> las palabras<br />
“FILTER MONITOR” en el<br />
panel <strong>de</strong> control.<br />
Ruidos normales <strong>de</strong> operación<br />
Cu<strong>and</strong>o el acondicionador <strong>de</strong> aire está funcion<strong>and</strong>o normalmente, usted podrá escuchar sonidos como:<br />
• Gotas <strong>de</strong> agua que caen sobre el con<strong>de</strong>nsador,<br />
produciendo “tintineos” o “chasquidos”. Las gotas<br />
<strong>de</strong> agua ayudan a enfriar el con<strong>de</strong>nsador.<br />
• El movimiento <strong>de</strong>l aire que sale <strong>de</strong>l ventilador.<br />
• Chasquidos (“clicks”) <strong>de</strong>l ciclo <strong>de</strong>l termostato.<br />
IMPORTANTE: el Control <strong>de</strong> FAN (“Ventilación”) <strong>de</strong>be<br />
estar en la posición TURBO COOL o TURBO HEAT<br />
para que funcione el Monitor <strong>de</strong>l Filtro. Si el Control<br />
<strong>de</strong> FAN está en una velocidad más baja para el<br />
ventilador, coloque el control en la posición TURBO<br />
(“Alta”) para revisar el filtro. Luego vuelva a poner el<br />
Control <strong>de</strong> FAN en la posición que <strong>de</strong>see.<br />
• Vibraciones o ruidos <strong>de</strong>bidos a <strong>de</strong>ficiencias en la<br />
construcción <strong>de</strong> la pared o ventana.<br />
• Un zumbido agudo o un ruido pulsante producido<br />
por la alternación <strong>de</strong> los ciclos <strong>de</strong>l mo<strong>de</strong>rno<br />
compresor <strong>de</strong> alta eficiencia.
EN<br />
Caring for Your Air Conditioner<br />
Your new air conditioner is <strong>de</strong>signed to give you many years of <strong>de</strong>pendable service. This section tells you how to clean<br />
<strong>and</strong> care for your air conditioner properly. Call your local authorized <strong>de</strong>aler for an annual checkup. Remember… the cost<br />
of this service call is your responsibility.<br />
Cleaning the air filter<br />
The air filter is removable for easy cleaning. A clean filter helps<br />
remove dust, lint, <strong>and</strong> other particles from the air <strong>and</strong> is<br />
important for best cooling or heating <strong>and</strong> operating efficiency.<br />
Check the filter every 2 weeks to see if it needs cleaning. Do<br />
not operate the air conditioner without the filter in place.<br />
1. Unplug air conditioner or disconnect power.<br />
2. Sli<strong>de</strong> the air filter up <strong>and</strong> out the top of the front panel.<br />
3. Clean the filter using a vacuum cleaner. If the filter is very<br />
dirty, wash it in warm water with mild <strong>de</strong>tergent.<br />
Do not wash the air filter in the dishwasher or use any<br />
chemical cleaners. Air dry filter thoroughly before replacing<br />
to ensure maximum efficiency.<br />
4. Sli<strong>de</strong> the air filter back down into opening in the top of the<br />
front panel.<br />
5. Plug in air conditioner or reconnect power.<br />
Cleaning the front panel<br />
1. Unplug air conditioner or disconnect power.<br />
2. Remove the air filter <strong>and</strong> clean it separately.<br />
(See “Cleaning the air filter,” above).<br />
3. Remove two screws from bottom of the front panel. Pull<br />
panel out <strong>and</strong> away from the cabinet.<br />
4. Clean front panel with warm water <strong>and</strong> mild soap or<br />
<strong>de</strong>tergent. <strong>Use</strong> a soft cloth.<br />
5. Rinse control panel <strong>and</strong> dry thoroughly with a soft, dry cloth.<br />
6. Insert top of panel into cabinet, then push bottom of panel<br />
into cabinet. Replace screws.<br />
7. Plug in air conditioner or reconnect power.<br />
Repairing paint damage<br />
Check once or twice a year for paint damage. This is<br />
very important, especially in areas near oceans or<br />
where rust is a problem. If nee<strong>de</strong>d, touch up with a<br />
good gra<strong>de</strong> enamel paint.<br />
NOTE: To reduce paint damage during the winter,<br />
install a heavy-duty cover over air conditioner cabinet.<br />
For information on or<strong>de</strong>ring a heavy-duty cover, see<br />
pages 19 <strong>and</strong> 20.<br />
11
ES<br />
Su nuevo acondicionador <strong>de</strong> aire está diseñado para darle muchos años <strong>de</strong> servicio confiable. Esta sección le da la<br />
información acerca <strong>de</strong> la limpieza a<strong>de</strong>cuada y el cuidado <strong>de</strong> su acondicionador <strong>de</strong> aire. Llame al ven<strong>de</strong>dor autorizado <strong>de</strong><br />
su localidad para un chequeo anual. Acuér<strong>de</strong>se…el precio <strong>de</strong> este servico es su responsabilidad.<br />
12<br />
Cómo Cuidar Su Acondicionador <strong>de</strong><br />
Aire<br />
Limpieza <strong>de</strong>l filtro <strong>de</strong> aire<br />
El filtro <strong>de</strong> aire <strong>de</strong>l acondicionador <strong>de</strong> aire se pue<strong>de</strong> <strong>de</strong>smontar para<br />
facilitar su limpieza. Un filtro limpio ayuda a quitar el polvo, las<br />
pelusas y otras partículas <strong>de</strong>l aire, y es importante para que el<br />
aparato caliente y enfríe más eficientemente. Revise el filtro cada<br />
dos semanas para ver si necesita limpieza. No haga funcionar el<br />
acondicionador <strong>de</strong> aire si el filtro no está colocado en su lugar.<br />
1. Desenchufe el acondicionador <strong>de</strong> aire o <strong>de</strong>sconecte el suministro <strong>de</strong><br />
energía.<br />
2. Deslice el filtro hacia arriba y hacia el exterior para sacarlo <strong>de</strong> la<br />
parte superior <strong>de</strong>l panel <strong>de</strong>lantero.<br />
3. Limpie el filtro us<strong>and</strong>o una aspiradora. Si está muy sucio, lave el filtro<br />
con agua tibia y un <strong>de</strong>tergente suave. No lave el filtro <strong>de</strong> aire en la<br />
máquina lavaplatos ni use limpiadores químicos. Seque bien el filtro<br />
al aire antes <strong>de</strong> colocarlo nuevamente para asegurarse la<br />
máxima eficiencia.<br />
4. Vuelva a colocar el filtro <strong>de</strong>slizándolo hacia abajo en la abertura <strong>de</strong> la<br />
parte superior <strong>de</strong>l panel <strong>de</strong>lantero.<br />
5. Enchufe el acondicionador <strong>de</strong> aire o vuelva a conectar el suministro<br />
<strong>de</strong> energía.<br />
Limpieza <strong>de</strong>l panel <strong>de</strong>lantero<br />
1. Desenchufe el acondicionador <strong>de</strong> aire o <strong>de</strong>sconecte el suministro <strong>de</strong><br />
energía.<br />
2. Quite el filtro <strong>de</strong> aire y límpielo por separado.<br />
(Vea “Limpieza <strong>de</strong>l filtro <strong>de</strong> aire” arriba).<br />
3. Quite dos tornillos <strong>de</strong> la parte inferior <strong>de</strong>l panel <strong>de</strong>lantero. Jale el panel<br />
recto hacia afuera para sacarlo <strong>de</strong>l gabinete.<br />
4. Limpie el panel <strong>de</strong>lantero con agua tibia y un jabón o <strong>de</strong>tergente<br />
suave. <strong>Use</strong> un paño suave. Enjuague el panel <strong>de</strong> control y séquelo<br />
completamente con un paño suave y seco.<br />
5. Limpie el panel <strong>de</strong> control con un paño suave y seco.<br />
6. Inserte la parte superior <strong>de</strong>l panel, luego empuje la parte inferior <strong>de</strong>l<br />
panel para colocarlo en el gabinete.<br />
7. Enchufe el acondicionador <strong>de</strong> aire o vuelva a conectar el suministro <strong>de</strong><br />
energía.<br />
Reparación <strong>de</strong> la pintura dañada<br />
Revise una o dos veces al año si hay daños en la<br />
pintura. Esto es muy importante, especialmente en<br />
lugares que están cerca <strong>de</strong> los océanos o don<strong>de</strong> la<br />
herrumbre es un problema. Si es necesario, retoque<br />
con un esmalte <strong>de</strong> buena calidad.<br />
NOTA: para reducir el daño a la pintura durante el<br />
invierno, instale una cubierta resistente sobre el<br />
gabinete <strong>de</strong>l acondicionador <strong>de</strong> aire. Para información<br />
sobre cómo pedir una cubierta resistente, vea las<br />
páginas 19 y 21.
EN<br />
Performing Annual Maintenance<br />
WARNING<br />
Electrical Shock Hazard<br />
Disconnect power before doing any maintenance.<br />
Do not drink water collected by the air conditioner.<br />
Failure to follow these instructions can result in<br />
<strong>de</strong>ath, electrical shock, or sickness.<br />
WARNING<br />
Excessive Weight Hazard<br />
<strong>Use</strong> two or more people to move <strong>and</strong> install<br />
air conditioner.<br />
Failure to do so can result in back or other injury.<br />
Your air conditioner needs annual maintenance to help<br />
ensure steady, top performance throughout the year.<br />
Call your local authorized <strong>de</strong>aler to schedule an annual<br />
checkup. The expense of an annual inspection is your<br />
responsibility.<br />
OR<br />
If you are familiar with electrical appliances, you can do<br />
the cleaning <strong>and</strong> maintenance yourself. If you choose to<br />
do so, follow these steps:<br />
NOTE: Do not lift, push, or pull on any exp<strong>and</strong>ed gray<br />
polystyrene from insi<strong>de</strong> the air conditioner.<br />
1. Unplug air conditioner or disconnect power.<br />
2. Remove the front panel (See “Cleaning the front<br />
panel” on page 11.)<br />
3. Remove green ground wire (A) from the base. Keep<br />
ground screw.<br />
4. Remove air conditioner from cabinet. Take care when<br />
h<strong>and</strong>ling area with sharp metal fins.<br />
A<br />
F<br />
5. Wrap the fan motor (B), connector plug (C), electrical<br />
control box (D), <strong>and</strong> compressor terminals (E) in<br />
plastic film <strong>and</strong> make sure no water or other liquid<br />
gets insi<strong>de</strong> any of these parts. It could damage the<br />
insulation <strong>and</strong> cause serious mechanical problems.<br />
6. <strong>Care</strong>fully clean <strong>and</strong> hose out the base (F), con<strong>de</strong>nser<br />
coil (G), evaporator coil (H), <strong>and</strong> con<strong>de</strong>nsate pan (I).<br />
Clean at least once a year or more often if the con<strong>de</strong>nser<br />
<strong>and</strong> evaporator coils <strong>and</strong> pan collect dirt,<br />
s<strong>and</strong>, leaves, insects, or algae. Also, clean if you<br />
<strong>de</strong>tect an odor coming from the air conditioner.<br />
7. Remove the plastic film from the motor <strong>and</strong> electrical<br />
parts.<br />
WARNING<br />
Electrical Shock Hazard<br />
Connect green ground wire to ground screw.<br />
Failure to do so can result in <strong>de</strong>ath or electrical<br />
shock.<br />
8. Replace air conditioner into cabinet <strong>and</strong> reattach<br />
green ground wire <strong>and</strong> front panel.<br />
NOTE: It is a good i<strong>de</strong>a to wait 24 hours before starting<br />
the air conditioner again. This allows time for all areas<br />
to dry out.<br />
9. Plug in air conditioner or reconnect power.<br />
E<br />
G<br />
D<br />
B<br />
C<br />
I<br />
E<br />
G<br />
H<br />
F<br />
D<br />
B<br />
C<br />
I<br />
H<br />
13
ES<br />
14<br />
Mantenimiento Anual<br />
ADVERTENCIA<br />
Peligro <strong>de</strong> choque eléctrico<br />
Desconecte el suministro <strong>de</strong> energía antes <strong>de</strong> dar<br />
mantenimiento a la unidad.<br />
No beba el agua recolectada por el<br />
acondicionador <strong>de</strong> aire.<br />
No seguir estas instrucciones pue<strong>de</strong> ocasionar la<br />
muerte, un choque eléctrico o una enfermedad.<br />
ADVERTENCIA<br />
Peligro <strong>de</strong> peso excesivo<br />
Se necesitan dos personas o más para mover e<br />
instalar el acondicionador <strong>de</strong> aire.<br />
No seguir esta instrucción pue<strong>de</strong> ocasionar una<br />
lesión en la espalda u otra lesión.<br />
Su acondicionador <strong>de</strong> aire necesita mantenimiento anual<br />
para ayudar a asegurar un rendimiento constante <strong>de</strong> la<br />
mejor calidad durante todo el año. Llame al ven<strong>de</strong>dor<br />
autorizado <strong>de</strong> su localidad para hacer una cita para el<br />
chequeo anual. El precio <strong>de</strong>l chequeo anual es<br />
responsabilidad <strong>de</strong>l consumidor.<br />
O<br />
Si está familiarizado con los artefactos eléctricos, usted<br />
mismo pue<strong>de</strong> hacer la limpieza y el mantenimiento. Si<br />
<strong>de</strong>ci<strong>de</strong> hacerlo, siga los pasos que se indican a<br />
continuación:<br />
NOTA: no levante, empuje, ni jale ninguna pieza <strong>de</strong><br />
espuma <strong>de</strong> goma <strong>de</strong> poliestireno extendida <strong>de</strong>l interior <strong>de</strong>l<br />
acondicionador <strong>de</strong> aire.<br />
1. Desenchufe el acondicionador <strong>de</strong> aire o <strong>de</strong>sconecte el<br />
suministro <strong>de</strong> energía.<br />
2. Quite el panel <strong>de</strong>lantero. Vea “Limpieza <strong>de</strong>l panel<br />
<strong>de</strong>lantero” en la página 12.<br />
3. Quite el alambre ver<strong>de</strong> <strong>de</strong> tierra (A) <strong>de</strong> la base. Guar<strong>de</strong><br />
el tornillo <strong>de</strong> tierra.<br />
4. Saque el acondicionador <strong>de</strong> aire <strong>de</strong>l gabinete. Tenga<br />
cuidado al manipular el área con aletas <strong>de</strong> metal<br />
afiladas.<br />
A<br />
F<br />
E<br />
5. Envuelva el motor <strong>de</strong>l ventilador (B), el enchufe <strong>de</strong>l<br />
conector (C), la caja <strong>de</strong> control eléctrico (D) y los<br />
terminales <strong>de</strong>l compresor (E) en un material plástico y<br />
asegúrese <strong>de</strong> que no caiga agua ni ningún otro líquido<br />
<strong>de</strong>ntro <strong>de</strong> estos elementos. Esto podría dañar el<br />
aislamiento y causar problemas mecánicos serios.<br />
6. Us<strong>and</strong>o una manguera <strong>de</strong> agua limpie con cuidado la<br />
base (F), el serpentín <strong>de</strong>l con<strong>de</strong>nsador (G), el serpentín<br />
<strong>de</strong>l evaporador (H) y el colector <strong>de</strong> con<strong>de</strong>nsado (I).<br />
Haga esta limpieza por lo menos una vez al año, o con<br />
más frecuencia si los serpentines <strong>de</strong>l con<strong>de</strong>nsador y <strong>de</strong>l<br />
evaporador y el colector <strong>de</strong> con<strong>de</strong>nsado acumulan<br />
suciedad, arena, hojarasca, insectos o algas. Asimismo,<br />
haga esta limpieza si <strong>de</strong>tecta algún olor proveniente <strong>de</strong>l<br />
acondicionador <strong>de</strong> aire.<br />
7. Quite el material plástico <strong>de</strong>l motor y <strong>de</strong> las piezas<br />
eléctricas.<br />
ADVERTENCIA<br />
Peligro <strong>de</strong> choque eléctrico<br />
Conecte el alambre ver<strong>de</strong> <strong>de</strong> conexión a tierra al<br />
tornillo <strong>de</strong> conexión a tierra.<br />
No seguir esta instructión pue<strong>de</strong> ocasionar la<br />
muerte o choque eléctrico.<br />
8. Vuelva a colocar el acondicionador <strong>de</strong> aire en el<br />
gabinete y vuelva a fijar el alambre ver<strong>de</strong> <strong>de</strong> tierra y el<br />
panel <strong>de</strong>lantero.<br />
NOTA: es buena i<strong>de</strong>a esperar 24 horas antes <strong>de</strong> poner en<br />
marcha el acondicionador <strong>de</strong> aire. Esto da tiempo para<br />
que se sequen todas las áreas.<br />
9. Enchufe el acondicionador <strong>de</strong> aire o vuelva a conectar<br />
el suministro <strong>de</strong> energía.<br />
G<br />
B<br />
G<br />
D<br />
B<br />
C<br />
I<br />
H<br />
C<br />
E H<br />
F<br />
D<br />
I
EN<br />
Troubleshooting<br />
You can solve many common air conditioner problems easily, saving you the cost of a service call. Try the suggestions<br />
below to see if you can solve your problem without outsi<strong>de</strong> help.<br />
Air conditioner will not operate.<br />
Check if ...<br />
The power supply<br />
cord is unplugged.<br />
A household fuse<br />
has blown or circuit<br />
breaker has tripped.<br />
The FAN CONTROL<br />
is turned to the off<br />
position.<br />
The local power has<br />
failed.<br />
Then ...<br />
Firmly plug the power supply cord into a live outlet with proper voltage.<br />
Replace the fuse or reset the circuit breaker. Make sure the air conditioner is plugged into a<br />
properly groun<strong>de</strong>d outlet as <strong>de</strong>scribed in the Installation Instructions.<br />
Turn the FAN CONTROL to an active setting.<br />
Wait for power to be restored.<br />
Air conditioner blows fuses or trips circuit breakers.<br />
Check if ...<br />
Then ...<br />
Too many appliances Unplug or relocate appliances that share the same circuit.<br />
are being used on the<br />
same circuit.<br />
Time-<strong>de</strong>lay fuse or Replace with a 15-amp time-<strong>de</strong>lay fuse or circuit breaker of the correct capacity. See<br />
circuit breaker of the “Electrical requirements” in the Installation Instructions for the correct capacity.<br />
wrong capacity is<br />
being used.<br />
An extension cord is Do not use an extension cord with this or any other appliance.<br />
being used.<br />
You are trying to Wait at least 3 minutes after turning FAN CONTROL off before trying to restart the air<br />
restart the air conditioner.<br />
conditioner too soon<br />
after turning FAN<br />
CONTROL off.<br />
Air conditioner seems to run too much.<br />
Check if ...<br />
The current air<br />
conditioner replaced<br />
an ol<strong>de</strong>r mo<strong>de</strong>l.<br />
The air conditioner is<br />
in a heavily occupied<br />
room or heatproducing<br />
appliances are in<br />
use in the room.<br />
Then ...<br />
The use of more efficient components may cause the air conditioner to run longer than<br />
an ol<strong>de</strong>r mo<strong>de</strong>l, but the total energy consumption will be less. Newer air conditioners do not<br />
emit the “blast” of cold air you may be accustomed to from ol<strong>de</strong>r units, but this IS NOT an<br />
indication of lesser cooling capacity or efficiency. Refer to the efficiency rating (EER) <strong>and</strong><br />
capacity rating (in BTUs/hr.) marked on the air conditioner.<br />
<strong>Use</strong> exhaust vent fans while cooking or bathing <strong>and</strong> try not to use heat-producing appliances<br />
during the hottest part of the day. A higher capacity air conditioner may be required <strong>de</strong>pending<br />
on the size of the room being cooled.<br />
15
Air conditioner on <strong>and</strong> off too much, or does not cool/heat room in cooling/heating mo<strong>de</strong>.<br />
Check if ...<br />
Then ...<br />
16<br />
FAN CONTROL is set to<br />
POWER SAVER (some<br />
mo<strong>de</strong>ls).<br />
The air conditioner is not<br />
properly sized for your room.<br />
The filter is dirty or<br />
obstructed by <strong>de</strong>bris.<br />
The insi<strong>de</strong> evaporator <strong>and</strong><br />
outsi<strong>de</strong> con<strong>de</strong>nser coils are<br />
dirty or obstructed by <strong>de</strong>bris.<br />
There is excessive heat or<br />
moisture (open container<br />
cooking, showers, etc.)<br />
in the room.<br />
The louvers are blocked.<br />
The outsi<strong>de</strong> temperature is<br />
below 65°F (18°C).<br />
The temperature of the room<br />
you are trying to cool<br />
is extremely hot.<br />
Windows or doors to the outsi<strong>de</strong><br />
are open.<br />
The EXHAUST Control is set<br />
to OPEN.<br />
The THERMOSTAT Control is<br />
not at a cool enough setting.<br />
The air conditioner is<br />
installed on the sunny<br />
si<strong>de</strong> of your house.<br />
The air conditioner in the<br />
heating mo<strong>de</strong> has insufficient<br />
BTUs/hr for the heating<br />
requirements of the room.<br />
<strong>Use</strong> POWER SAVER only when you are away from home or asleep, since the fan<br />
does not circulate the room air continuously. <strong>Use</strong> LOW COOL, HIGH COOL (some<br />
mo<strong>de</strong>ls) or TURBO COOL for your best comfort.<br />
Check the cooling capabilities of your room air conditioner. Room air conditioners are<br />
not <strong>de</strong>signed to cool multiple rooms. Heating units are supplemental only. See page 6.<br />
Clean the filter. See page 11.<br />
Clean the insi<strong>de</strong> evaporator <strong>and</strong> outsi<strong>de</strong> con<strong>de</strong>nser coils. See page 13.<br />
<strong>Use</strong> a fan to exhaust heat or moisture from the room. Try not to use heat-producing<br />
appliances during the hottest part of the day.<br />
Install the air conditioner in a location where the louvers are free from curtains, blinds,<br />
furniture, etc.<br />
Do not try to operate your air conditioner in the cooling mo<strong>de</strong> when the outsi<strong>de</strong><br />
temperature is below 65°F (18°C).<br />
Allow extra time for the air conditioner to cool off a very hot room.<br />
Close all windows <strong>and</strong> doors.<br />
Set the EXHAUST Control to CLOSED for maximum cooling <strong>and</strong>/or heating.<br />
Adjust the THERMOSTAT Control to a cooler setting by turning the knob clockwise.<br />
Turn FAN CONTROL to TURBO COOL.<br />
Install your air conditioner in a more sha<strong>de</strong>d window.<br />
Do not use the air conditioner as a primary source of heat. See page 6.<br />
Water drips from cabinet into your house.<br />
Check if ...<br />
Then ...<br />
The air conditioner is not Level the air conditioner to provi<strong>de</strong> a downward slope toward the outsi<strong>de</strong> (1⁄2 bubble<br />
properly leveled. The air on a carpenter’s level) to ensure proper drainage. See the Installation Instructions.<br />
conditioner should slope Reposition or shim the cabinet as necessary.<br />
slightly downward toward<br />
the outsi<strong>de</strong>.<br />
NOTE: Do NOT drill a hole in the bottom of the metal base <strong>and</strong> con<strong>de</strong>nsate pan.
ES<br />
Diagnóstico <strong>de</strong> Problemas<br />
Usted pue<strong>de</strong> resolver fácilmente muchos problemas frecuentes <strong>de</strong>l acondicionador <strong>de</strong> aire ahorrándose el costo <strong>de</strong><br />
una llamada <strong>de</strong> servicio. Pruebe las sugerencias que se incluyen a continuación para ver si pue<strong>de</strong> resolver el problema<br />
sin ayuda.<br />
Su acondicionador <strong>de</strong> aire no funcionará.<br />
Verifique si ...<br />
Solución ...<br />
El cable <strong>de</strong> alimentación Conecte firmemente el cable en un tomacorriente activo con el <strong>de</strong>bido voltaje.<br />
eléctrica está <strong>de</strong>sconectado.<br />
Se ha fundido un fusible o Reemplace el fusible o reposicione el disyuntor. Asegúrese <strong>de</strong> que el acondicionador<br />
disparado un disyuntor. <strong>de</strong> aire esté conectado a un tomacorriente activo <strong>de</strong>bidamente puesto a tierra como<br />
se <strong>de</strong>scribe en las instrucciones <strong>de</strong> instalación.<br />
El Control <strong>de</strong> FAN<br />
Fije el Control <strong>de</strong> FAN en una posición activa.<br />
(“Ventilación”) se ha fijado en la<br />
posición OFF.<br />
Se ha interrumpido la energía Espere que se restablezca la energía eléctrica.<br />
eléctrica en su localidad.<br />
Se fun<strong>de</strong>n los fusibles o se disparan los disyuntores <strong>de</strong> la unidad.<br />
Verifique si ...<br />
Se están us<strong>and</strong>o muchos<br />
aparatos en el mismo<br />
circuito.<br />
Se está us<strong>and</strong>o un fusible<br />
<strong>de</strong> retardo o un disyuntor<br />
con la capacidad incorrecta.<br />
Se está us<strong>and</strong>o un cordón<br />
<strong>de</strong> extensión.<br />
Usted está trat<strong>and</strong>o <strong>de</strong><br />
volver a poner en marcha<br />
el acondicionador <strong>de</strong> aire<br />
muy poco tiempo <strong>de</strong>spués<br />
<strong>de</strong> poner en OFF el Control<br />
<strong>de</strong> FAN.<br />
Solución ...<br />
Desconecte o ponga en otro lugar los aparatos que estén us<strong>and</strong>o el mismo circuito.<br />
Reemplácelo con un fusible <strong>de</strong> retardo <strong>de</strong> 15 amperes o un disyuntor con la<br />
capacidad correcta. Verifique la capacidad correcta en la sección <strong>de</strong> “Requisitos<br />
eléctricos”. “Requisitos eléctricos” <strong>de</strong> las instrucciones <strong>de</strong> instalación.<br />
No use un cordón <strong>de</strong> extensión con este o cualquier otro aparato.<br />
Espere por lo menos 3 minutos antes <strong>de</strong> poner en marcha el acondicionador <strong>de</strong> aire<br />
<strong>de</strong>spués <strong>de</strong> poner en OFF el Control <strong>de</strong> FAN.<br />
El aire acondicionado parece que funciona excesivamente.<br />
Verifique si ...<br />
Solución ...<br />
Su actual acondicionador El uso <strong>de</strong> componentes más eficientes pue<strong>de</strong> hacer que el acondicionador <strong>de</strong> aire<br />
<strong>de</strong> aire reemplazó un funcione por más tiempo que su antiguo mo<strong>de</strong>lo, pero el consumo total <strong>de</strong> energía<br />
mo<strong>de</strong>lo viejo.<br />
será menor. Los acondicionadores <strong>de</strong> aire más nuevos no emiten las ráfagas <strong>de</strong> aire<br />
frío a las que usted estaba acostumbrado con sus unida<strong>de</strong>s anteriores, pero esto<br />
NO ES indicio <strong>de</strong> menor capacidad o eficiencia en el enfriamiento. Verifique el<br />
régimen <strong>de</strong> eficiencia (EER) y el régimen <strong>de</strong> capacidad (en BTU/hr.) que se indican<br />
en el acondicionador <strong>de</strong> aire.<br />
La unidad se encuentra en <strong>Use</strong> ventiladores aspiradores cu<strong>and</strong>o esté cocin<strong>and</strong>o o bañándose y trate <strong>de</strong> no<br />
una habitación muy conges- usar aparatos que generan calor durante las horas más calurosas <strong>de</strong>l día. Podría<br />
tionada o se están us<strong>and</strong>o necesitar una acondicionador <strong>de</strong> aire con más capacidad, <strong>de</strong>pendiendo <strong>de</strong>l tamaño<br />
en la misma habitación <strong>de</strong> la habitación que se <strong>de</strong>sea enfriar.<br />
aparatos que generan calor.<br />
17
La unidad se encien<strong>de</strong> y se apaga <strong>de</strong>masiado o no enfría/calienta la habitación en el modo <strong>de</strong><br />
enfriamiento/calefacción.<br />
18<br />
Verifique si ...<br />
El Control <strong>de</strong> FAN<br />
(“Ventilación”) está puesto en<br />
POWER SAVER (“Ahorro <strong>de</strong><br />
energía”) (en algunos mo<strong>de</strong>los)<br />
El acondicionador <strong>de</strong> aire no<br />
tiene el tamaño a<strong>de</strong>cuado para<br />
su habitación.<br />
El filtro está sucio u obstruido<br />
por escombros.<br />
El evaporador interno y los<br />
serpentines <strong>de</strong>l con<strong>de</strong>nsador<br />
externo están sucios u<br />
obstruido por escombros.<br />
Hay <strong>de</strong>masiado calor o<br />
humedad (se está cocin<strong>and</strong>o<br />
en recipientes abiertos,<br />
duchas, etc.) en la habitación.<br />
Las rejillas están boqueadas.<br />
La temperatura exterior es<br />
inferior a los 18°C (65°F).<br />
La temperatura <strong>de</strong> la habitación<br />
que está trat<strong>and</strong>o <strong>de</strong> enfriar<br />
está <strong>de</strong>masiado caliente.<br />
Están abiertas ventanas o<br />
puertas que dan al exterior.<br />
El Control <strong>de</strong> EXHAUST<br />
(“Respira<strong>de</strong>ro”) está en OPEN.<br />
El Control <strong>de</strong> THERMOSTAT<br />
(Tempuratura o Termostato) no<br />
está en una posición lo<br />
suficientemente fría.<br />
El acondicionador <strong>de</strong> aire está<br />
instalado en el lado soleado <strong>de</strong><br />
su casa.<br />
El acondicionador <strong>de</strong> aire en el<br />
modo <strong>de</strong> calefacción no tiene<br />
suficiente BTUS/hr para las<br />
necesida<strong>de</strong>s <strong>de</strong> calefacción <strong>de</strong><br />
la habitación.<br />
Solución ...<br />
Utilice el modo <strong>de</strong> POWER SAVER únicamente cu<strong>and</strong>o esté fuera <strong>de</strong> su hogar o<br />
durmiendo, <strong>de</strong>bido a que el ventilador no hace circular el aire <strong>de</strong> la sala continuamente.<br />
Para mayor comodidad use LOW COOL, HIGH COOL (en algunos mo<strong>de</strong>los)<br />
o TURBO COOL.<br />
Verifique la capacidad <strong>de</strong> enfriamiento <strong>de</strong> su acondicionador <strong>de</strong> aire. Los<br />
acondicionadores <strong>de</strong> aire para habitaciones no están diseñados para enfriar varias<br />
habitaciones.Las unida<strong>de</strong>s <strong>de</strong> calefacción son suplementarias únicamente. Ver<br />
página 9.<br />
Limpie el filtro. Ver página 12.<br />
Limpie el evaporador interno y los serpentines <strong>de</strong>l con<strong>de</strong>nsador externo.<br />
Ver página 14.<br />
<strong>Use</strong> un ventilador para eliminar el calor o la humedad <strong>de</strong> la habitación. Trate <strong>de</strong> no<br />
usar aparatos que generan calor durante las horas más calurosas <strong>de</strong>l día.<br />
Instale el acondicionador <strong>de</strong> aire en un lugar don<strong>de</strong> las rejillas no estén bloqueadas<br />
por cortinas, persianas, muebles, etc.<br />
No trate <strong>de</strong> poner en marcha el acondicionador <strong>de</strong> aire cu<strong>and</strong>o la temperatura<br />
exterior sea inferior a los 18°C (65°F).<br />
Deje pasar más tiempo para que el acondicionador <strong>de</strong> aire enfríe una habitación<br />
muy caliente.<br />
Cierre todas las puertas y ventanas.<br />
Ponga el Control <strong>de</strong> EXHAUST en CLOSED (“Cerrado”) para obtener el máximo<br />
enfriamiento.<br />
Ajuste el Control <strong>de</strong> THERMOSTAT a una posición más fría gir<strong>and</strong>o la perilla en la<br />
dirección <strong>de</strong> las manecillas <strong>de</strong>l reloj. Ponga el control <strong>de</strong> FAN en TURBO COOL.<br />
Instale su acondicionador <strong>de</strong> aire en una ventana con mas sombra.<br />
No use el acondicionador <strong>de</strong> aire como una fuente <strong>de</strong> calor primaria. Ver página 9.<br />
Se filtra agua <strong>de</strong>l gabinete a su casa.<br />
Verifique si ...<br />
Solución ...<br />
El acondicionador <strong>de</strong> aire no Nivele el acondicionador <strong>de</strong> aire <strong>de</strong> manera que tenga una inclinación hacia abajo,<br />
está <strong>de</strong>bidamente nivelado. hacia el exterior (1⁄2 nivel en un nivel <strong>de</strong> carpintero) para asegurar el <strong>de</strong>bido<br />
El acondicionador <strong>de</strong> aire <strong>de</strong>sagüe. Ver las instrucciones <strong>de</strong> instalación. Mueva el gabinete o ponga un calce,<br />
<strong>de</strong>be inclinarse ligeramente según sea necesario.<br />
hacia abajo, hacia el exterior. NOTA: NO perfore agujeros en la parte inferior <strong>de</strong> la base <strong>de</strong> metal y <strong>de</strong>l colector<br />
<strong>de</strong> con<strong>de</strong>nsado.
EN<br />
Or<strong>de</strong>ring<br />
Accessories<br />
You can or<strong>de</strong>r the following accessories for your air<br />
conditioner from your local authorized <strong>de</strong>aler or by<br />
calling 1-800-253-1301 from anywhere in the U.S.A. You<br />
will hear a recording. Follow the instructions to place an<br />
or<strong>de</strong>r.<br />
Replacement air filters<br />
A good, clean air filter is important for best cooling with<br />
least energy consumption. Your air filter should be<br />
cleaned regularly. See page 11 for cleaning instructions.<br />
We suggest you replace your air filter once a year.<br />
Installation kits<br />
A st<strong>and</strong>ard installation kit is inclu<strong>de</strong>d with your air<br />
conditioner. These special installation kits are available:<br />
• Outsi<strong>de</strong> Sill Bracket Kit<br />
• Wi<strong>de</strong>-Window Kit<br />
Heavy-duty cover<br />
If you <strong>de</strong>ci<strong>de</strong> to leave your air conditioner installed<br />
during the winter, a heavy-duty cover will help protect<br />
your air conditioner <strong>and</strong> reduce drafts. The cover<br />
protects against cold drafts through the unit’s air<br />
passages <strong>and</strong> protects the cabinet from snow, rain,<br />
sleet, rust, <strong>and</strong> dust.<br />
For a heavy-duty cover sized to fit your air conditioner,<br />
or<strong>de</strong>r part #484069.<br />
ES<br />
Cómo Or<strong>de</strong>nar<br />
Accesorios<br />
Usted pue<strong>de</strong> or<strong>de</strong>nar los siguientes accesorios para su<br />
acondicionador <strong>de</strong> aire en la tienda <strong>de</strong> aparatos electrodomésticos<br />
<strong>de</strong> su localidad.<br />
Filtros <strong>de</strong> aire <strong>de</strong> reemplazo<br />
Un filtro <strong>de</strong> aire limpio y <strong>de</strong> buena calidad es importante<br />
para obtener el mejor enfriamiento con el menor<br />
consumo <strong>de</strong> energía. Limpie regularmente el filtro <strong>de</strong><br />
aire. Vea las instrucciones <strong>de</strong> limpieza en la página 12.<br />
Le recomendamos cambiar su filtro <strong>de</strong> aire una vez al<br />
año.<br />
Juego <strong>de</strong> accesorios <strong>de</strong> instalación<br />
Se incluye un juego <strong>de</strong> accesorios <strong>de</strong> instalación<br />
estándar con su acondicionador <strong>de</strong> aire. Están<br />
disponibles los siguientes juegos <strong>de</strong> instalación<br />
especiales:<br />
• Juego <strong>de</strong> soporte para instalación en el marco <strong>de</strong> una<br />
ventan<br />
• Juego para instalación en ventana ancha<br />
Cubierta resistente<br />
Si usted <strong>de</strong>ci<strong>de</strong> <strong>de</strong>jar instalado su acondicionador <strong>de</strong><br />
aire durante el invierno, una cubierta resistente ayudará<br />
a proteger su aparato y reducir las corrientes <strong>de</strong> aire. La<br />
cubierta protege contra las corrientes <strong>de</strong> aire frío a<br />
través <strong>de</strong> los orificios <strong>de</strong> paso <strong>de</strong> aire <strong>de</strong> la unidad y<br />
protege el gabinete contra la nieve, la lluvia, el agua<br />
nieve, la oxidación y el polvo.<br />
Para obtener una cubierta resistente <strong>de</strong>l tamaño<br />
a<strong>de</strong>cuado para su acondicionador <strong>de</strong> aire, or<strong>de</strong>ne pieza<br />
#484069.<br />
19
EN<br />
To avoid unnecessary service calls, please check the “Troubleshooting <strong>Gui<strong>de</strong></strong>” section. It may save you the cost of a<br />
service call. If you still need help, follow the instructions below.<br />
Call the Customer Interaction Center telephone number.<br />
Dial toll-free 1-800-253-1301. Our consultants are<br />
available to assist you.<br />
When calling: Please know the purchase date, <strong>and</strong> the<br />
complete mo<strong>de</strong>l <strong>and</strong> serial number of your<br />
appliance (see the "A Note to You" section).<br />
This information will help us better respond to<br />
your request.<br />
Our consultants provi<strong>de</strong> assistance with:<br />
• Features <strong>and</strong> specifications on our full line of appliances<br />
• Installation information<br />
If you need to or<strong>de</strong>r replacement parts, we<br />
recommend that you only use factory-authorized parts.<br />
These parts will fit right <strong>and</strong> work right, because they<br />
are ma<strong>de</strong> to the same exacting specifications used to<br />
build every new appliance.<br />
20<br />
Requesting Assistance or Service<br />
If you need assistance or service<br />
If you need replacement parts<br />
For further assistance<br />
If you need further assistance, you can write to ask<br />
any questions or tell us about your concerns to:<br />
Customer Interaction Center<br />
c/o Correspon<strong>de</strong>nce Dept.<br />
2000 North M-63<br />
Benton Harbor, MI 49022-2692<br />
Please inclu<strong>de</strong> a daytime phone number in your correspon<strong>de</strong>nce.<br />
• <strong>Use</strong> <strong>and</strong> maintenance procedures<br />
• Accessory <strong>and</strong> repair parts sales<br />
• Specialized customer assistance (Spanish speaking,<br />
hearing impaired, limited vision, etc.)<br />
• Referrals to local <strong>de</strong>alers, service companies, <strong>and</strong><br />
repair parts distributors<br />
Our service technicians are trained to fulfill the product<br />
warranty <strong>and</strong> provi<strong>de</strong> after-warranty service, anywhere in<br />
the United States.<br />
To locate the authorized service company in your area,<br />
you can also look in your telephone directory Yellow<br />
Pages.<br />
To locate factory-authorized parts in your area, call our<br />
Customer Interaction Center telephone number, your<br />
nearest authorized service center, or Factory Service<br />
at 1-800-442-1111.
ES<br />
Cómo Solicitar Ayuda o Servicio<br />
Técnico<br />
Para evitar llamadas solicit<strong>and</strong>o servicio innecesarias, revise la sección <strong>de</strong> “Diagnóstico <strong>de</strong> problemas”. Podría ahorrarle<br />
el costo <strong>de</strong> una llamada solicit<strong>and</strong>o servicio. Si aún necesita ayuda, siga las siguientes instrucciones.<br />
Si necesita ayuda o servicio técnico<br />
Si necesita ayuda o servicio técnico en los Estados<br />
Unidos.<br />
Llame al Centro <strong>de</strong> Interacción con el Cliente. Llame<br />
gratis al 1-800-253-1301. Nuestros consultores están<br />
disponibles para ayudarlo.<br />
Cu<strong>and</strong>o llame, tenga a mano la fecha <strong>de</strong><br />
compra y el número <strong>de</strong> mo<strong>de</strong>lo y el número <strong>de</strong><br />
serie completos <strong>de</strong> su aparato (ver la sección<br />
“Una nota para usted”). Esta información nos<br />
ayudará a aten<strong>de</strong>rle mejor.<br />
Nuestros consultores le proporcionan ayuda para:<br />
• Características y especificaciones para nuestra línea<br />
completa <strong>de</strong> aparatos electrodomésticos<br />
• Información sobre instalación<br />
• Procedimientos <strong>de</strong> uso y mantenimiento<br />
Si necesita refacciones<br />
Si necesita pedir refacciones, le recomendamos que<br />
utilice únicamente partes autorizadas por la fábrica.<br />
Estas partes se adaptarán y funcionarán<br />
correctamente porque han sido hechas siguiendo las<br />
mismas rigurosas especificaciones utilizadas para<br />
construir todas los nuevos aparatos<br />
electrodomésticos.<br />
Para asistencia adicional<br />
Si necesita asistencia adicional pue<strong>de</strong> escribir para<br />
hacernos cualquier pregunta o comunicarnos sus<br />
problemas, a:<br />
Customer Interaction Center<br />
c/o Correspon<strong>de</strong>nce Dept.<br />
2000 North M-63<br />
Benton Harbor, MI 49022-2692<br />
• Ventas <strong>de</strong> accesorios y refacciones<br />
• Asistencia especializada al cliente (asistencia en<br />
español, para personas con problemas auditivos,<br />
problemas <strong>de</strong> la vista, etc.)<br />
• Direcciones <strong>de</strong> ven<strong>de</strong>dores, compañías <strong>de</strong> servicio y<br />
distribuidores <strong>de</strong> refacciones en su localidad.<br />
Nuestros técnicos en servicio están capacitados para<br />
satisfacer la garantía <strong>de</strong>l producto y proporcionar servicios<br />
posteriores a la garantía, en cualquier parte <strong>de</strong> los<br />
Estados Unidos.<br />
Para localizar a una compañía <strong>de</strong> servicios autorizada<br />
en su área, pue<strong>de</strong> buscar en las páginas amarillas <strong>de</strong> su<br />
Guía Telefónica.<br />
Para localizar partes autorizadas por la fábrica en su<br />
localidad, llame al Centro <strong>de</strong> Interacción con el<br />
Cliente, al centro <strong>de</strong> servicio más cercano o Servicio<br />
<strong>de</strong> Fábrica al 1-800-442-1111.<br />
Por favor incluya en su correspon<strong>de</strong>ncia un número<br />
<strong>de</strong> teléfono en el que se le pueda localizar durante el<br />
día.<br />
21
Part No. 1184632<br />
Pieza N° 1184632<br />
Pièce n° 1184632<br />
Air<br />
Conditioner<br />
Installation<br />
Instructions<br />
Table of Contents<br />
Introduction<br />
Page 2<br />
Requirements<br />
Page 3 <strong>and</strong> 4<br />
Preparation<br />
Page 5<br />
Installation steps<br />
Window: Pages 5 - 7<br />
Through-the-wall: Pages 8 <strong>and</strong> 9<br />
Important:<br />
• Installer: Leave Installation<br />
Instructions with the homeowner.<br />
• Homeowner: Keep Installation<br />
Instructions for future reference.<br />
• Save Installation Instructions for local<br />
electrical inspector‘s use.<br />
Important:<br />
Read <strong>and</strong> save<br />
these instructions.<br />
Acondicionador<br />
<strong>de</strong> Aire<br />
Instrucciones<br />
<strong>de</strong> Instalación<br />
Indice<br />
Introducción<br />
Página 2<br />
Requerimientos<br />
Páginas 3 y 4<br />
Preparación<br />
Página 5<br />
Etapas <strong>de</strong> la Instalación<br />
Ventana: Páginas 5 y 7<br />
A través <strong>de</strong> una pared:<br />
Páginas 8 y 9<br />
Importante:<br />
• Instalador: Devuelva las<br />
instrucciones <strong>de</strong> instalación al<br />
propietario.<br />
• Propietario: Conserve estas<br />
instrucciones <strong>de</strong> instalación para<br />
referencia futura.<br />
• Conserve las instrucciones <strong>de</strong><br />
instalación para uso <strong>de</strong>l inspector<br />
eléctrico local.<br />
Importante:<br />
Lea y conserve<br />
estas instrucciones.<br />
Climatiseur<br />
Instructions<br />
d'installation<br />
Table <strong>de</strong>s matières<br />
Introduction<br />
Page 2<br />
Exigences<br />
Pages 3 et 4<br />
Préparation<br />
Page 5<br />
Étapes d'installation<br />
Fenêtre: Pages 5 - 7<br />
Ouverture murale:<br />
Pages 8 et 9<br />
Important :<br />
• Installateur : Remettre les<br />
instructions d’installation au<br />
propriétaire.<br />
• Propriétaire : Conserver les<br />
instructions d’installation pour<br />
référence ultérieure.<br />
• Conserver les instructions<br />
d’installation pour utilisation par<br />
l’inspecteur local <strong>de</strong>s installations<br />
électriques.<br />
Important :<br />
Lire et conserver<br />
ces instructions.
Introduction<br />
Introducción<br />
Introduction<br />
A<br />
G<br />
H<br />
C<br />
I<br />
F<br />
B<br />
E<br />
D<br />
A. electric drill <strong>and</strong><br />
3/32" or smaller<br />
bit<br />
B. utility knife<br />
C. flat-bla<strong>de</strong><br />
screwdriver<br />
D.level<br />
E. tape measure<br />
Location Ubicación Emplacement<br />
Excessive Weight Hazard<br />
<strong>Use</strong> two or more people to move<br />
<strong>and</strong> install air conditioner.<br />
Failure to do so can result in back<br />
or other injury.<br />
Important: Observe all governing co<strong>de</strong>s<br />
<strong>and</strong> ordinances.<br />
Check location where air conditioner will be<br />
installed. Proper installation is your<br />
responsibility. Make sure you have everything<br />
necessary for correct installation.<br />
The location should provi<strong>de</strong>:<br />
• Groun<strong>de</strong>d electrical outlet within 4 feet<br />
(122 cm) of the window or through-the-wall<br />
location. Do not use an extension cord.<br />
• Free movement of air to rooms to be<br />
cooled.<br />
• A large enough opening for the air<br />
conditioner.<br />
• wood preservative<br />
• 10, #10 x 1" screws<br />
• 1" or heavier lumber<br />
Window opening measurements<br />
Medidas <strong>de</strong> la abertura <strong>de</strong> la ventana<br />
Dimensions <strong>de</strong> l’ouverture dans la fenêtre<br />
WARNING<br />
Window Installation:<br />
26" (66 cm) minimum to 40" (101.6 cm)<br />
maximum opening width<br />
20" (50.8 cm) minimum opening height<br />
Through-the-wall Installation:<br />
26" (66 cm) plus twice thickness of wood<br />
used to build frame (see page 8).<br />
19-3/4" (50.2 cm) plus twice thickness of<br />
wood used to build frame (see page 8).<br />
Installation parts are supplied for doublehung<br />
windows up to 40 inches (101.6 cm)<br />
wi<strong>de</strong>. A special, Wi<strong>de</strong> Window Kit, Part No.<br />
485856, available from your <strong>de</strong>aler or<br />
service center for windows 40" (101.6 cm)<br />
to 54" (137.2 cm) wi<strong>de</strong>.<br />
• A<strong>de</strong>quate wall support for weight of air<br />
conditioner. Air conditioner weighs<br />
between 145 <strong>and</strong> 200 pounds<br />
(65 to 96 kg).<br />
Do not block louvers in air conditioner<br />
cabinet.<br />
Do not install the air conditioner in an<br />
area where the front panel will be exposed to<br />
heat sources that will raise the panel surface<br />
temperature above 120°F (50°C).<br />
Remove storm window or any item that would<br />
not allow proper installation or proper<br />
outward slope of air conditioner.<br />
Tools nee<strong>de</strong>d<br />
26"<br />
(66 cm)<br />
20" (50.8 cm)<br />
F. nut driver<br />
G. socket wrench<br />
7/16" socket <strong>and</strong><br />
1/4" socket or<br />
1/4" nut driver<br />
H. gloves<br />
I. safety glasses<br />
Importante: Observe todos los códigos y<br />
reglamentos aplicables.<br />
Verifique el lugar don<strong>de</strong> se instalará el<br />
acondicionador <strong>de</strong> aire. La instalación correcta<br />
es su responsabilidad. Asegúrese <strong>de</strong> que usted<br />
tiene todo lo necesario para una instalación<br />
correcta.<br />
El lugar <strong>de</strong>be proporcionar:<br />
• Tomacorriente puesto a tierra a cuatro<br />
pies (122 cm) <strong>de</strong> la ventana o a través <strong>de</strong> la<br />
ubicación en la pared. No use cordón <strong>de</strong><br />
extensión.<br />
• Libertad <strong>de</strong> movimiento <strong>de</strong>l aire a las<br />
habitaciones que <strong>de</strong>sea enfriar.<br />
Herramientas<br />
necesarias<br />
A. taladro eléctrico y<br />
una broca <strong>de</strong> 3/32"<br />
o más pequeña<br />
B. cuchillo <strong>de</strong> uso<br />
general<br />
C. <strong>de</strong>sarmador <strong>de</strong><br />
punta plana<br />
D.nivel<br />
E. cinta para medir<br />
Through-the-wall installations: Instalaciones a través <strong>de</strong> la pared:<br />
• preservativo <strong>de</strong> la<br />
ma<strong>de</strong>ra<br />
• 10 tornillos<br />
F. llave para tuercas<br />
G. llave <strong>de</strong> casquillo,<br />
casquillo <strong>de</strong> 7/16"<br />
y casquillo <strong>de</strong> 1/4"<br />
o llave para tuercas<br />
<strong>de</strong> 1/4"<br />
H. guantes<br />
I. anteojos<br />
protectores<br />
#10 x 1<br />
• ma<strong>de</strong>ra <strong>de</strong> 1"<br />
o más pesada<br />
* 26"<br />
(66 cm)<br />
* 19-3/4" (50,2 cm)<br />
Wall opening measurements<br />
Medidas <strong>de</strong> la abertura en la pared<br />
Dimensions <strong>de</strong> l’ouverture murale<br />
* Plus twice thickness of wood used to<br />
build frame (see page 8).<br />
* Más el doble <strong>de</strong>l espesor <strong>de</strong> la ma<strong>de</strong>ra<br />
usada para construir el marco (ver página 8).<br />
* Plus <strong>de</strong>ux fois l’épaisseur du bois utilisé<br />
pour l’encadrement (voir page 8).<br />
ADVERTENCIA AVERTISSEMENT<br />
Peligro <strong>de</strong> Peso Excesivo<br />
Se necesitan dos personas o más<br />
para mover e instalar el<br />
acondicionador <strong>de</strong> aire.<br />
No seguir esta instrucción pue<strong>de</strong><br />
ocasionar una lesión en la espalda<br />
u otra lesión.<br />
• Una abertura con la amplitud suficiente<br />
para el acondicionador <strong>de</strong> aire.<br />
Instalación en una ventana:<br />
Una abertura con ancho mínimo <strong>de</strong> 26"<br />
(66 cm) y máximo <strong>de</strong> 40" (101.6 cm) y una<br />
altura mínima <strong>de</strong> 20" (50.8 cm).<br />
Instalación a través <strong>de</strong> la pared:<br />
26" (66 cm) más el doble <strong>de</strong>l espesor <strong>de</strong> la<br />
ma<strong>de</strong>ra usada para construir el marco (ver<br />
página 8).<br />
19-3/4" (50.2 cm) más el doble <strong>de</strong>l espesor <strong>de</strong><br />
la ma<strong>de</strong>ra usada para contruir el marco (ver<br />
página 8).<br />
Se incluyen piezas <strong>de</strong> instalación para ventanas<br />
<strong>de</strong> guillotina <strong>de</strong> hasta 40 cm (101.6 cm) <strong>de</strong><br />
ancho. Un Juego para Ventana Ancha especial<br />
(Pieza No. 485856) está disponible <strong>de</strong> su<br />
distribuidor o centro <strong>de</strong> servicio para ventanas<br />
<strong>de</strong> 40" (101.6 cm) a 54" (137.2 cm) <strong>de</strong> ancho.<br />
• Soporte a<strong>de</strong>cuado en la pared para el<br />
peso <strong>de</strong>l acondicionador <strong>de</strong> aire. El<br />
acondicionador <strong>de</strong> aire pesa entre 145 y 200<br />
libras (65 y 96 kg).<br />
No bloquee las rejillas en el gabinete <strong>de</strong>l<br />
acondicionador <strong>de</strong> aire.<br />
No instale el acondicionador <strong>de</strong> aire en un<br />
área don<strong>de</strong> el panel <strong>de</strong>lantero esté expuesto a<br />
fuentes <strong>de</strong> calor que aumenten la temperatura <strong>de</strong><br />
la superficie <strong>de</strong>l panel a un nivel superior a los<br />
120°F (50°C).<br />
Quite el guardaventana o cualquier otro objeto que<br />
pueda impedir la <strong>de</strong>bida instalación <strong>de</strong>l aparato.<br />
Risque <strong>de</strong> poids excessif<br />
Utiliser <strong>de</strong>ux personnes ou plus<br />
pour déplacer et installer le<br />
climatiseur.<br />
Le non-respect <strong>de</strong> cette instruction<br />
peut causer une blessure au dos<br />
ou d'autres blessures.<br />
Important : Respecter les prescriptions <strong>de</strong><br />
tous les co<strong>de</strong>s et règlements en vigueur.<br />
Inspecter l’emplacement où le climatiseur sera<br />
installé; c’est au propriétaire qu’incombe la<br />
responsabilité d’une installation correcte. Vérifier<br />
que tout le matériel nécessaire pour une<br />
installation correcte est disponible.<br />
L’emplacement d’installation <strong>de</strong>vrait fournir :<br />
• Prise <strong>de</strong> courant électrique reliée à la<br />
terre située à moins <strong>de</strong> 122 cm (4 pi) <strong>de</strong><br />
l’emplacement d’installation (fenêtre, ou<br />
ouverture murale). Ne pas utiliser une rallonge<br />
électrique pour l’alimentation <strong>de</strong> l’appareil.<br />
• Circulation libre <strong>de</strong> l’air jusqu’aux pièces à<br />
refroidir.<br />
• Ouverture <strong>de</strong> taille suffisante pour<br />
l’installation du climatiseur.<br />
Installation dans une fenêtre<br />
Largeur <strong>de</strong> l’ouverture <strong>de</strong> 66 cm (26 po)<br />
minimum à 101,6 cm (40 po) maximum<br />
Hauteur minimum <strong>de</strong> 50,8 cm (20 po)<br />
Installation dans une ouverture murale:<br />
66 cm (26 po) plus <strong>de</strong>ux fois l’épaisseur du<br />
bois pour construire l’encadrement.<br />
50,2 cm (19-3/4 po) plus <strong>de</strong>ux fois l’épaisseur<br />
du bois pour construire l’encadrement (voir<br />
page 8).<br />
Les pièces d’installation sont fournies pour une<br />
fenêtre à guillotine <strong>de</strong> largeur maximum <strong>de</strong><br />
101,6 cm (40 po). Pour une fenêtre <strong>de</strong> gr<strong>and</strong>e<br />
largeur, <strong>de</strong> 101,6 cm (40 po) à 137,2 cm<br />
(54 po), comm<strong>and</strong>er l’ensemble spécial pour<br />
fenêtre large n° 485856 auprès du<br />
concessionnaire ou du centre d’entretien.<br />
• Support mural adéquat pour le poids du<br />
climatiseur. Le poids du climatiseur est <strong>de</strong><br />
65 à 96 kg (145 à 200 lb).<br />
Ne pas obstruer les jalousies <strong>de</strong> la caisse<br />
du climatiseur.<br />
Ne pas installer le climatiseur à un<br />
emplacement tel que le panneau avant serait<br />
exposé à <strong>de</strong>s sources <strong>de</strong> chaleur susceptibles <strong>de</strong><br />
porter la température superficielle du panneau<br />
avant à plus <strong>de</strong> 120°F (50°C).<br />
Enlever la fenêtre coupe-vent et tout article qui<br />
empêcherait une installation correcte.<br />
Outillage<br />
nécessaire<br />
A. perceuse<br />
électrique et<br />
foret <strong>de</strong> 3/32 po<br />
ou plus petit<br />
B. couteau utilitaire<br />
C. tournevis à lame<br />
plate<br />
D.niveau<br />
E. mètre-ruban<br />
Installation murale :<br />
• Agent <strong>de</strong><br />
préservation d bois<br />
• 10 vis n° 10 x 1 po<br />
F. tourne-écrou<br />
G. clé à douille et<br />
douilles <strong>de</strong><br />
7/16 po et 1/4 po<br />
ou tourne-écrou<br />
<strong>de</strong> 1/4 po<br />
H. gants<br />
I. lunettes <strong>de</strong><br />
sécurité<br />
• bois <strong>de</strong> 1 po<br />
ou plus<br />
2
E<br />
J<br />
I<br />
K<br />
L<br />
A<br />
F<br />
G<br />
N<br />
Requirements<br />
Requerimientos<br />
Exigences<br />
B<br />
O<br />
A<br />
C<br />
P<br />
H<br />
B<br />
C<br />
M<br />
D<br />
Q<br />
Parts supplied<br />
Remove parts from packages. Check that all<br />
parts were inclu<strong>de</strong>d.<br />
A. window lock<br />
bracket<br />
B. filler board<br />
C. 2 vertical<br />
supports<br />
D. 4 foam blocks<br />
E. 6 lock washers<br />
F. 6 flat washers<br />
G. 6 nuts<br />
H. 2 si<strong>de</strong>-mounting<br />
angles<br />
I. 2 angle supports<br />
J. wall rail<br />
K. foam seal,<br />
un<strong>de</strong>rsi<strong>de</strong> of<br />
window sash<br />
L. window rail seal<br />
M.2-1/2" (6.4 cm)<br />
seal strip<br />
N. 4, #8 x 1/2" hexhead,<br />
metal<br />
screws<br />
O. 4, #8 x 3/8" hexhead,<br />
metal<br />
screws<br />
P. 3, #10 x 3/4"<br />
round-head,<br />
wood screws<br />
Q. 6, 3/4" roundhead<br />
bolts<br />
Electrical<br />
Requirements<br />
In the U.S. only: If co<strong>de</strong>s permit <strong>and</strong> a<br />
separate ground wire is used, it is<br />
recommen<strong>de</strong>d that a qualified electrician<br />
<strong>de</strong>termine that the grounding path is<br />
a<strong>de</strong>quate.<br />
Check with a qualified electrician if you are not<br />
sure air conditioner is groun<strong>de</strong>d.<br />
Ground wire (A) must be connected to ground<br />
screw (B) located in lower right corner of air<br />
conditioner when air conditioner is in cabinet.<br />
A three-wire, single-phase, 60-Hz, AC-only,<br />
electrical supply is required on a separate<br />
circuit. See mo<strong>de</strong>l <strong>and</strong> serial label for circuit<br />
amperage required for your specific mo<strong>de</strong>l.<br />
A time <strong>de</strong>lay fuse or circuit breaker is<br />
required. <strong>Use</strong> copper wire only.<br />
The mo<strong>de</strong>l <strong>and</strong> serial label (C) are located<br />
behind the front panel on the front flange of<br />
the base. This label lists the BTU capacity,<br />
amperage, voltage <strong>and</strong> refrigerant charge<br />
requirements.<br />
Piezas<br />
suministradas<br />
Saque las piezas <strong>de</strong> los paquetes. Verifique que<br />
se hayan incluido todas las piezas.<br />
A. soporte <strong>de</strong><br />
seguridad para la<br />
ventana<br />
B. tabla <strong>de</strong> relleno<br />
C. 2 soportes<br />
verticales<br />
D. 4 bloques <strong>de</strong><br />
espuma<br />
E. 6 ar<strong>and</strong>elas <strong>de</strong><br />
seguridad<br />
F. 6 ar<strong>and</strong>elas<br />
planas<br />
G. 6 tuercas<br />
H. 2 ángulos <strong>de</strong><br />
montaje lateral<br />
I. 2 soportes en<br />
ángulo<br />
J. riel <strong>de</strong> pared<br />
K. obturador <strong>de</strong><br />
espuma<br />
L. obturador <strong>de</strong> riel<br />
<strong>de</strong> ventana<br />
M. tira <strong>de</strong><br />
obturación <strong>de</strong><br />
2-1/2" (6,4 cm)<br />
N. 4 tornillos<br />
metálicos<br />
hexagonales <strong>de</strong> 8<br />
x 1/2"<br />
O. 4 tornillos<br />
metálicos<br />
hexagonales #8 x<br />
3/8"<br />
P. 3 tornillos cabeza<br />
redonda para<br />
ma<strong>de</strong>ra #10 x<br />
3/4"<br />
Q. 6 pernos cabeza<br />
redonda <strong>de</strong> 3/4"<br />
Requerimientos<br />
eléctricos<br />
Sólo en los EE.UU.: Si los códigos lo<br />
permiten y se utiliza un alambre <strong>de</strong> puesta<br />
a tierra separado, se recomienda que un<br />
electricista calificado <strong>de</strong>termine si la<br />
trayectoria <strong>de</strong> la puesta a tierra es<br />
a<strong>de</strong>cuada.<br />
Consulte con un electricista calificado para<br />
asegurarse <strong>de</strong> que el acondicionador <strong>de</strong> aire está<br />
<strong>de</strong>bidamente puesto a tierra.<br />
El alambre <strong>de</strong> puesta a tierra (A) <strong>de</strong>be ser<br />
conectado a un tornillo <strong>de</strong> tierra (B) ubicado en<br />
la esquina inferior <strong>de</strong>recha <strong>de</strong>l acondicionador<br />
<strong>de</strong> aire cu<strong>and</strong>o el acondicionador <strong>de</strong> aire esté en<br />
el gabinete.<br />
Se requiere un suministro eléctrico monofásico<br />
<strong>de</strong> tres alambres, <strong>de</strong> 60 Hz, sólo <strong>de</strong> CA, en un<br />
circuito separado. Vea en la etiqueta <strong>de</strong> mo<strong>de</strong>lo y<br />
serie-el amperaje requerido para su mo<strong>de</strong>lo<br />
específico. Se requiere un fusible <strong>de</strong> retardo o un<br />
disyuntor. <strong>Use</strong> solamente alambre <strong>de</strong> cobre.<br />
La etiqueta <strong>de</strong> mo<strong>de</strong>lo y serie (C) se encuentra<br />
<strong>de</strong>trás <strong>de</strong>l panel <strong>de</strong>lantero en la pestaña frontal<br />
<strong>de</strong> la base. Esta etiqueta indica la capacidad BTU,<br />
el amperaje, el voltaje y los requerimientos <strong>de</strong><br />
carga refrigerante.<br />
Pièces fournies<br />
Retirer les pièces <strong>de</strong> leur emballage. Vérifier la<br />
présence <strong>de</strong> toutes les pièces.<br />
A. bri<strong>de</strong> <strong>de</strong> blocage<br />
<strong>de</strong> la fenêtre<br />
B. panneau <strong>de</strong><br />
remplissage<br />
C. 2 supports<br />
verticaux<br />
D.4 blocs <strong>de</strong><br />
mousse<br />
E. 6 ron<strong>de</strong>lles-frein<br />
F. 6 ron<strong>de</strong>lles plates<br />
G. 6 écrous<br />
H.2 cornières <strong>de</strong><br />
montage latérales<br />
I. 2 supports<br />
angulaires<br />
J. tringle d’appui<br />
mural<br />
K.joint <strong>de</strong> mousse<br />
L. joint pour tringle<br />
d’appui <strong>de</strong> la<br />
fenêtre<br />
M.joint<br />
d’étanchéité, 64<br />
mm (2 1/2 po)<br />
N. 4 vis à métaux n°<br />
8 x 1/2 po/tête<br />
hex.<br />
O.4 vis à métaux n°<br />
8 x 3/8 po/tête<br />
hex.<br />
P. 3 vis à bois n° 10<br />
x 3/4 po/tête<br />
ron<strong>de</strong><br />
Q.6 boulons, 19<br />
mm (3/4 po), tête<br />
ron<strong>de</strong> plate<br />
Installation<br />
électrique<br />
WARNING ADVERTENCIA AVERTISSEMENT<br />
Electrical Shock Hazard Peligro <strong>de</strong> Choque Eléctrico<br />
Risque <strong>de</strong> choc électrique<br />
Plug into a groun<strong>de</strong>d 3 prong<br />
outlet.<br />
Conecte a un contacto <strong>de</strong> pared <strong>de</strong><br />
conexión a tierra <strong>de</strong> 3 terminales.<br />
Brancher l’appareil uniquement sur<br />
une prise à 3 alvéoles reliée à la<br />
Do not remove ground prong. No quite el terminal <strong>de</strong> conexión a terre.<br />
Do not use an adapter.<br />
Do not use an extension cord.<br />
Failure to follow these instructions<br />
can result in <strong>de</strong>ath, fire, or<br />
electrical shock.<br />
tierra.<br />
No use un adaptador.<br />
No use un cable eléctrico <strong>de</strong><br />
extensión.<br />
No seguir estas instrucciones<br />
pue<strong>de</strong> ocasionar la muerte,<br />
incendio o choque eléctrico.<br />
Ne pas enlever la broche <strong>de</strong> liaison<br />
à la terre.<br />
Ne pas utiliser un adaptateur.<br />
Ne pas utiliser un câble <strong>de</strong> rallonge.<br />
Le non-respect <strong>de</strong> ces instructions<br />
peut causer un décès, un incendie<br />
ou un choc électrique.<br />
Aux É.-U. seulement : Si un conducteur<br />
distinct <strong>de</strong> liaison à la terre est utilisé<br />
lorsque les co<strong>de</strong>s le permettent, on<br />
recomm<strong>and</strong>e qu’un électricien qualifié<br />
vérifie la qualité <strong>de</strong> la liaison à la terre.<br />
En cas <strong>de</strong> doute quant à la qualité <strong>de</strong> la liaison à<br />
la terre <strong>de</strong> cet appareil, contacter un électricien<br />
qualifié.<br />
Le conducteur <strong>de</strong> liaison à la terre (A) doit être<br />
connecté à la vis <strong>de</strong> liaison à la terre (B) située<br />
dans l’angle inférieur droit du climatiseur<br />
(lorsque le climatiseur est placé dans la caisse).<br />
L’appareil doit être alimenté par un circuit<br />
indépendant à 3 fils (monophase, 60 Hz, CA<br />
seulement). Le circuit doit être protégé par un<br />
disjoncteur ou un fusible temporisé. Utiliser<br />
uniquement <strong>de</strong>s conducteurs <strong>de</strong> cuivre.<br />
On trouve le numéro <strong>de</strong> modèle et le numéro <strong>de</strong><br />
série sur la plaque signalétique (C), <strong>de</strong>rrière le<br />
panneau avant sur la bri<strong>de</strong> <strong>de</strong> la base. La plaque<br />
signalétique indique la capacité thermique<br />
(BTU), les caractéristiques électriques et la<br />
charge <strong>de</strong> réfrigérant à utiliser.<br />
3
Power supply cord plug receptacle<br />
Receptáculo para la clavija <strong>de</strong>l cordón<br />
eléctrico<br />
Fiche <strong>de</strong> branchement et prise <strong>de</strong> courant<br />
1/4 po<br />
(0,6 cm)<br />
1/2 po<br />
(1,3 cm)<br />
Recommen<strong>de</strong>d grounding<br />
method<br />
For your personal safety, this appliance must be<br />
groun<strong>de</strong>d. This air conditioner is equipped with<br />
a power supply cord with a 3-prong grounding<br />
plug. To minimize possible electrical shock<br />
hazard, the cord must be plugged into a mating<br />
3-prong grounding-type wall receptacle,<br />
groun<strong>de</strong>d in accordance with all local co<strong>de</strong>s<br />
<strong>and</strong> ordinances. If a mating 3-prong groundingtype<br />
wall receptacle is not available, it is the<br />
consumer’s responsibility to have a properly<br />
groun<strong>de</strong>d, 3-prong wall receptacle installed<br />
by a licensed installer.<br />
It is the customer’s responsibility:<br />
• To contact a qualified electrical installer.<br />
• To assure that the electrical installation is<br />
a<strong>de</strong>quate <strong>and</strong> in conformance with National<br />
Electrical Co<strong>de</strong>, ANSI/NFPA 70 — latest<br />
edition,* <strong>and</strong> all local co<strong>de</strong>s <strong>and</strong> ordinances.<br />
Copies of the st<strong>and</strong>ards listed may be obtained from:<br />
* National Fire Protection Association<br />
Batterymarch Park<br />
Quincy, Massachusetts 02269<br />
Specific electrical requirements are listed in the<br />
chart. Follow the requirements for the type of<br />
plug on the power supply cord.<br />
Método recomendado para<br />
la puesta a tierra<br />
Para su seguridad personal, este aparato <strong>de</strong>be<br />
ser puesto a tierra. Este acondicionador <strong>de</strong> aire<br />
está equipado con un cordón eléctrico provisto<br />
<strong>de</strong> una enchufe con clavija tripolar <strong>de</strong> conexión<br />
a tierra. Para reducir a un mínimo el riesgo<br />
posible <strong>de</strong> un choque eléctrico, el cordón <strong>de</strong>be<br />
enchufarse en un tomacorriente mural para<br />
clavija con 3 terminales puesto a tierra <strong>de</strong><br />
acuerdo con todos los códigos y reglamentos<br />
locales. Si no se dispone <strong>de</strong> un tomacorriente<br />
para clavija tripolar, es responsabilidad y<br />
obligación personal <strong>de</strong>l cliente hacer instalar un<br />
tomacorriente para clavija con tres terminales<br />
<strong>de</strong>bidamente puesto a tierra por un electricista<br />
calificado.<br />
Es responsabilidad <strong>de</strong>l cliente:<br />
• Llamar a un instalador eléctrico calificado.<br />
• Asegurarse <strong>de</strong> que la instalación eléctrica es<br />
a<strong>de</strong>cuada y <strong>de</strong> acuerdo con el Código<br />
Nacional <strong>de</strong> Energía, ANSI/NFPA 70, última<br />
edición*, y todos los códigos y reglamentos<br />
locales.<br />
Pue<strong>de</strong>n obtenerse copias <strong>de</strong> las normas señaladas<br />
<strong>de</strong>l:<br />
* National Fire Protection Association<br />
Batterymarch Park<br />
Quincy, Massachusetts 02269<br />
Los requerimientos eléctricos específicos se<br />
indican en la tabla. Siga los requerimientos para<br />
el tipo <strong>de</strong> enchufe en el cordón <strong>de</strong> alimentación<br />
eléctrica.<br />
Wiring requirements Requerimientos <strong>de</strong> cableado<br />
• 115 volt (103.5 min. - 126.5 max.)<br />
• 0-12 amperes<br />
• 15-amp time-<strong>de</strong>lay fuse or circuit breaker<br />
• 14 gauge copper wiring<br />
• 230 volt (207 min. - 253 max.) or<br />
• 230/208 volt (197.6 min. - 253 max.)<br />
• 0-12 amperes<br />
• 15-amp time-<strong>de</strong>lay fuse or circuit breaker<br />
• 14 gauge copper wiring<br />
• 230 volt (207 min. - 253 max.) or<br />
• 230/208 volt (197.6 min. - 253 max.)<br />
• 0-16 amperes<br />
• 20-amp time-<strong>de</strong>lay fuse or double-pole<br />
circuit breaker<br />
• 12 gauge copper wiring<br />
• 230 volt (207 min. - 253 max.) or<br />
• 230/208 volt (197.6 min. - 253 max.)<br />
• 0-24 amperes<br />
• 30-amp time-<strong>de</strong>lay fuse or circuit breaker<br />
• 10 gauge copper wiring<br />
• 115 voltios (103.5 mín. - 126.5 máx.)<br />
• 0-12 amperes<br />
• fusible <strong>de</strong> retardo o disyuntor <strong>de</strong> 15 amperes<br />
• cables <strong>de</strong> cobre calibre 14<br />
• 230 voltios (207 mín. - 253 máx.) o<br />
• 230/208 voltios (197.6 mín. - 253 máx.)<br />
• 0-12 amperes<br />
• fusible <strong>de</strong> retardo o disyuntor <strong>de</strong> 15 amperes<br />
• cables <strong>de</strong> cobre calibre 14<br />
• 230 voltios (207 mín. - 253 máx.) o<br />
• 230/208 voltios (197.6 mín. - 253 máx.)<br />
• 0-16 amperes<br />
• fusible <strong>de</strong> retardo o disyuntor bipolar <strong>de</strong> 20<br />
amperes<br />
• cables <strong>de</strong> cobre calibre 12<br />
• 230 voltios (207 mín. - 253 máx.) o<br />
• 230/208 voltios (197.6 mín. - 253 máx.)<br />
• 0-24 amperes<br />
• fusible <strong>de</strong> retardo o disyuntor <strong>de</strong> 30 amperes<br />
• cables <strong>de</strong> cobre calibre 10<br />
Métho<strong>de</strong> <strong>de</strong> liaison à la<br />
terre recomm<strong>and</strong>ée<br />
Pour la sécurité personnelle <strong>de</strong>s utilisateurs, il<br />
faut que cet appareil soit relié à la terre. Cet<br />
appareil est alimenté par un cordon électrique<br />
comportant une fiche <strong>de</strong> branchement à 3<br />
broches, pour liaison à la terre. Pour minimiser<br />
le risque <strong>de</strong> choc électrique, brancher le<br />
cordon d’alimentation sur une prise <strong>de</strong> courant<br />
murale compatible à 3 alvéoles, reliée à la terre<br />
conformément aux prescriptions <strong>de</strong> tous les<br />
co<strong>de</strong>s et règlements locaux en vigueur. Si une<br />
prise <strong>de</strong> courant compatible avec la fiche <strong>de</strong><br />
branchement n’est pas disponible, c’est au<br />
client qu’incombe l’obligation <strong>de</strong> faire installer<br />
une prise <strong>de</strong> courant murale à 3 alvéoles<br />
convenablement reliée à la terre, par un<br />
électricien qualifié.<br />
C’est au client qu’incombe la responsabilité <strong>de</strong><br />
• Contacter un électricien qualifié.<br />
• Veiller à ce que l’installation électrique soit<br />
réalisée adéquatement et en conformité avec<br />
les prescriptions du Co<strong>de</strong> national <strong>de</strong>s<br />
installations électriques, ANSI/NFPA 70<br />
(<strong>de</strong>rnière édition*), et <strong>de</strong> tous les co<strong>de</strong>s et<br />
règlements locaux en vigueur.<br />
On peut obtenir un exemplaire <strong>de</strong>s normes<br />
mentionnées aux adresses suivantes :<br />
*National Fire Protection Association<br />
Batterymarch Park<br />
Quincy, Massachusetts 02269<br />
Le tableau ci-<strong>de</strong>ssous indique les<br />
caractéristiques électriques spécifiques à<br />
respecter. Respecter les exigences indiquées<br />
pour le type <strong>de</strong> fiche <strong>de</strong> branchement du cordon<br />
d’alimentation.<br />
Spécifications <strong>de</strong> câblage<br />
• 115 V (103,5 min.-126,5 max.)<br />
• 0-12 A<br />
• Disjoncteur ou fusible temporisé, 15 A<br />
• Câblage <strong>de</strong> calibre 14 (cuivre)<br />
• 230 V (207 min.-253 max.) ou<br />
• 230/208 V (197,6 min.-253 max.)<br />
• 0-12 A<br />
• Disjoncteur ou fusible temporisé, 15 A<br />
• Câblage <strong>de</strong> calibre 14 (cuivre)<br />
• 230 V (207 min.-253 max.) ou<br />
• 230/208 V (197,6 min.-253 max.)<br />
• 0-16 A<br />
• Disjoncteur ou fusible temporisé, 20 A<br />
• Câblage <strong>de</strong> calibre 12 (cuivre)<br />
• 230 V (207 min.-253 max.) ou<br />
• 230/208 V (197,6 min.-253 max.)<br />
• 0-24 A<br />
• Disjoncteur ou fusible temporisé, 30 A<br />
• Câblage <strong>de</strong> calibre 10 (cuivre)<br />
4
Preparation<br />
Preparación<br />
Préparation<br />
Installation<br />
Instalación<br />
Installation<br />
E<br />
A<br />
C<br />
B<br />
D<br />
E<br />
D<br />
A<br />
B<br />
C<br />
F<br />
Cabinet<br />
Preparation<br />
H<strong>and</strong>le the air conditioner with care.<br />
Watch out for the sharp metal fins on<br />
the front <strong>and</strong> rear coils.<br />
Remove air conditioner from carton <strong>and</strong><br />
place on cardboard.<br />
Remove ground screw (A) <strong>and</strong> ground wire<br />
(B) from front of air conditioner base. Save<br />
ground screw.<br />
Important: Do not remove any exp<strong>and</strong>ed<br />
polystyrene from insi<strong>de</strong> the air conditioner. It<br />
is not packing material.<br />
Remove the Energy Label.<br />
Air conditioner must be removed from<br />
cabinet. Pull on h<strong>and</strong>le (C) to sli<strong>de</strong> air<br />
conditioner out of cabinet. Place air<br />
conditioner on cardboard.<br />
Window<br />
Installation<br />
Attach si<strong>de</strong>-mounting angle (A) to cabinet<br />
with two, hex-head, metal screws (B). <strong>Use</strong> a<br />
1/4" socket <strong>and</strong> socket wrench or 1/4" nut<br />
driver (C) to tighten screws.<br />
Be sure cabinet does not fall out of the<br />
opening during installation.<br />
Air conditioner should be placed no more<br />
than 4 feet (122 cm) from a groun<strong>de</strong>d outlet.<br />
Center empty cabinet (D) in window. Lower<br />
window sash (E) to hold cabinet in place.<br />
Measure the distance from the right si<strong>de</strong> of<br />
the cabinet to insi<strong>de</strong> of the window channel<br />
(F). Repeat for the left si<strong>de</strong>. Adjust the<br />
cabinet until the distance on each si<strong>de</strong> is the<br />
same. When cabinet is centered in the<br />
window, write down the measurement. Then<br />
add 1/8" (3.2 mm) for the final<br />
measurement to be used in the next step.<br />
Preparación<br />
<strong>de</strong>l gabinete<br />
Trate el acondicionador <strong>de</strong> aire con<br />
cuidado. Tenga cuidado con las aletas <strong>de</strong><br />
metal filosas <strong>de</strong> los serpentines<br />
<strong>de</strong>lanteros y traseros.<br />
Saque el acondicionador <strong>de</strong> aire <strong>de</strong> la caja y<br />
colóquelo sobre el cartón.<br />
Quite el tornillo <strong>de</strong> puesta a tierra (A) y el<br />
alambre <strong>de</strong> puesta a tierra (B) <strong>de</strong>l frente <strong>de</strong><br />
la base <strong>de</strong>l acondicionador <strong>de</strong> aire. Guar<strong>de</strong> el<br />
tornillo <strong>de</strong> puesta a tierra.<br />
Importante: no quite la espuma <strong>de</strong> goma <strong>de</strong><br />
poliestireno gris extendida <strong>de</strong>l interior <strong>de</strong>l<br />
acondicionador <strong>de</strong> aire. Esto no es material<br />
<strong>de</strong> empaque.<br />
Quite la Etiqueta <strong>de</strong> Energía y la Guía <strong>de</strong>l<br />
Comprador. Para eliminar cualquier resto <strong>de</strong><br />
goma, vierta sobre la superficie <strong>de</strong>tergente<br />
líquido para lavar platos y límpiela con un<br />
paño húmedo. No use instrumentos afilados,<br />
líquidos inflamables o limpiadores abrasivos.<br />
Estos pue<strong>de</strong>n dañar el acabado <strong>de</strong>l<br />
acondicionador <strong>de</strong> aire.<br />
Debe quitar el acondicionador <strong>de</strong> aire <strong>de</strong>l<br />
gabinete. Tire <strong>de</strong>l asa (C) para <strong>de</strong>slizar el<br />
acondicionador <strong>de</strong> aire fuera <strong>de</strong>l gabinete.<br />
Coloque el acondicionador <strong>de</strong> aire sobre el<br />
cartón.<br />
Instalación en<br />
una ventana<br />
Fije el ángulo <strong>de</strong> montaje lateral (A) al gabinete<br />
con dos tornillos metálicos hexagonales (B).<br />
Utilice un casquillo y una llave <strong>de</strong> casquillo <strong>de</strong><br />
1/4" o una llave para tuercas <strong>de</strong> 1/4" (C) para<br />
apretar los tornillos.<br />
Asegúrese <strong>de</strong> que el acondicionador <strong>de</strong><br />
aire no se caiga <strong>de</strong> la abertura durante la<br />
instalación.<br />
El acondicionador <strong>de</strong> aire <strong>de</strong>be colocarse a una<br />
distancia no mayor <strong>de</strong> 4 pies (122 cm) <strong>de</strong> un<br />
contacto <strong>de</strong> pared <strong>de</strong> conexión a tierra.<br />
Centre el gabinete vacío (D) en la ventana. Baje<br />
la vidriera <strong>de</strong> la ventana (E) para mantener el<br />
gabinete en su lugar. Mida la distancia <strong>de</strong>l lado<br />
<strong>de</strong>recho <strong>de</strong>l gabinete a la parte interior <strong>de</strong>l<br />
canal <strong>de</strong> la ventana (F). Repita la operación<br />
para el lado izquierdo. Ajuste el gabinete hasta<br />
que la distancia a cada lado sea igual. Cu<strong>and</strong>o el<br />
gabinete esté centrado en la ventana, anote la<br />
medida final. Agregue 1/8" (3.2 mm) a esa<br />
medida.<br />
continued on page 6 continúa en la página 6 suite à la page 6<br />
Préparation <strong>de</strong><br />
la caisse<br />
Manipuler pru<strong>de</strong>mment le climatiseur.<br />
Les ailettes <strong>de</strong>s échangeurs <strong>de</strong> chaleur<br />
avant et arrière sont acérées.<br />
Retirer le climatiseur <strong>de</strong> son emballage; placer<br />
l’appareil sur une feuille <strong>de</strong> carton.<br />
Détacher <strong>de</strong> la base du climatiseur la vis <strong>de</strong><br />
liaison à la terre (A) et le conducteur <strong>de</strong><br />
liaison à la terre (B). Conserver la vis.<br />
Important : Ne jamais enlever un<br />
quelconque élément <strong>de</strong> polystyrène expansé<br />
gris qu’on peut trouver à l’intérieur du<br />
climatiseur. Ce n’est pas un matériau<br />
d’emballage.<br />
Enlever l’étiquette d’information<br />
(consommation d’énergie et la liste <strong>de</strong><br />
contrôle du consommateur. Pour éliminer<br />
tout résidu <strong>de</strong> colle, mouiller la zone<br />
affectée avec un détergent à vaisselle liqui<strong>de</strong><br />
puis frotter avec un chiffon humi<strong>de</strong>. Ne<br />
jamais utiliser d’instruments acérés, flui<strong>de</strong>s<br />
inflammables ou produits <strong>de</strong> nettoyage<br />
abrasifs susceptibles <strong>de</strong> détériorer la finition<br />
du climatiseur.<br />
Le climatiseur doit être retiré <strong>de</strong> la caisse.<br />
Tirer sur la poignée (C) pour faire glisser<br />
le climatiseur hors <strong>de</strong> la caisse. Placer le<br />
climatiseur sur une feuille <strong>de</strong> carton.<br />
Installation dans<br />
une fenêtre<br />
Fixer les cornières <strong>de</strong> montage latérales (A)<br />
sur la caisse avec <strong>de</strong>ux vis à métaux à tête<br />
hexagonale (B). Utiliser la clé à douille avec<br />
douille <strong>de</strong> 1/4 po ou le tourne-écrou (C) <strong>de</strong><br />
1/4 po pour serrer les vis.<br />
S’assurer que votre climatiseur ne tombe<br />
pas <strong>de</strong> l’ouverture dans la fenêtre<br />
pendant l’installation.<br />
Le climatiseur ne <strong>de</strong>vrait pas être placé à plus<br />
<strong>de</strong> 122 cm (4 pi) d’une prise <strong>de</strong> courant reliée<br />
à la terre.<br />
Centrer la caisse vi<strong>de</strong> (D) dans la fenêtre.<br />
Abaisser le châssis mobile <strong>de</strong> la fenêtre (E)<br />
pour qu’il maintienne la caisse en place.<br />
Mesurer la distance entre le bord du côté<br />
droit <strong>de</strong> la caisse et la face intérieure du<br />
montant profilé droit <strong>de</strong> la fenêtre (F).<br />
Répéter cette opération pour le côté gauche.<br />
Ajuster la position <strong>de</strong> la caisse pour que les<br />
distances mesurées <strong>de</strong> part et d’autre soient<br />
i<strong>de</strong>ntiques. Lorsque la caisse est centrée dans<br />
la fenêtre, noter la mesure finale. Ajouter<br />
3,2 mm (1/8 po) à cette mesure.<br />
5
S<br />
G<br />
I<br />
K<br />
foam seal<br />
obturador <strong>de</strong> espuma<br />
joint <strong>de</strong> mousse<br />
I<br />
K<br />
O<br />
H<br />
R P Q<br />
J<br />
M<br />
L<br />
K<br />
M<br />
I<br />
I<br />
N<br />
cabinet<br />
gabinete<br />
caisse<br />
continued from page 5 viene <strong>de</strong> la página 5 suite <strong>de</strong> la page 5<br />
<strong>Use</strong> final measurement to measure in from each<br />
edge of the filler board <strong>and</strong> mark lines (G). <strong>Use</strong><br />
a utility knife to cut filler boards to size at the<br />
lines. Make cut so the outsi<strong>de</strong> edges of filler<br />
boards will have screw holes (H).<br />
Pull cabinet part way out of window. Attach<br />
right filler board (I) to front of a si<strong>de</strong>mounting<br />
angle (J) with two 1/2" hex-head<br />
screws.<br />
Place cabinet back into the window with filler<br />
board (I) tight against window channel (K).<br />
Insert left filler board into window channel.<br />
Push filler board against si<strong>de</strong>-mounting angle<br />
<strong>and</strong> attach with two 1/2" hex-head screws.<br />
From the outsi<strong>de</strong>, push filler boards (I) as far<br />
forward in window channels as possible.<br />
Measure the distance between the channel<br />
edge <strong>and</strong> the filler board (L). Cut foam<br />
blocks 1/4" (6.4 mm) wi<strong>de</strong>r. Insert foam<br />
blocks (M) into channel behind filler boards.<br />
Measure insi<strong>de</strong> width of window frame (N).<br />
Cut foam window sash seal with square ends<br />
to fit.<br />
Hold cabinet to prevent it from falling. Raise<br />
window sash. Align foam seal with front edge<br />
of window sash <strong>and</strong> attach seal with adhesive<br />
si<strong>de</strong> against un<strong>de</strong>rsi<strong>de</strong> of sash (O). Lower<br />
window sash.<br />
<strong>Use</strong> a level (P) to check that cabinet is level<br />
si<strong>de</strong>-to-si<strong>de</strong>. <strong>Use</strong> a 3/32" drill bit to drill<br />
starter holes in the cabinet <strong>and</strong> into the<br />
window sill. <strong>Use</strong> wood screws (Q) to attach<br />
cabinet to window sill (R). Do Not tighten<br />
screws.<br />
Check that air conditioner cabinet is<br />
tilted to the outsi<strong>de</strong> so that water will<br />
run to the outsi<strong>de</strong>.<br />
Place level insi<strong>de</strong> cabinet on the right si<strong>de</strong>.<br />
The cabinet should tilt to the outsi<strong>de</strong><br />
approximately a full bubble (S) for proper<br />
drainage. Place the level on the left si<strong>de</strong> <strong>and</strong><br />
check that cabinet is tilted properly. If cabinet<br />
is not properly positioned, reposition or shim<br />
cabinet to provi<strong>de</strong> the proper tilt.<br />
Utilice las medidas finales para medir hacia<br />
a<strong>de</strong>ntro <strong>de</strong>s<strong>de</strong> cado extremo <strong>de</strong> la tabla <strong>de</strong><br />
relleno y marque las líneas (G). Utilice un<br />
cuchillo <strong>de</strong> uso general para cortar las tablas <strong>de</strong><br />
relleno al tamaño a<strong>de</strong>cuado en las líneas. Haga<br />
el corte <strong>de</strong> manera que los bor<strong>de</strong>s exteriores <strong>de</strong><br />
las tablas <strong>de</strong> relleno tengan orificios para<br />
tornillos (H).<br />
Tire parte <strong>de</strong>l gabinete fuera <strong>de</strong> la ventana. Fije<br />
la tabla <strong>de</strong> relleno <strong>de</strong>recha (I) al frente <strong>de</strong> un<br />
ángulo <strong>de</strong> montaje lateral (J) con dos tornillos<br />
hexagonales <strong>de</strong> 1/2".<br />
Vuelva a colocar el gabinete en la ventana con la<br />
tabla <strong>de</strong> relleno (I) bien ajustada contra el<br />
canal <strong>de</strong> la ventana (K).<br />
Inserte la tabla <strong>de</strong> relleno izquierda en el canal<br />
<strong>de</strong> la ventana. Empuje la tabla <strong>de</strong> relleno contra<br />
el ángulo <strong>de</strong> montaje lateral y fíjela con dos<br />
tornillos hexagonales <strong>de</strong> 1/2".<br />
Des<strong>de</strong> el exterior, empuje las tablas <strong>de</strong> relleno<br />
(I) todo lo que pueda hacia a<strong>de</strong>lante en los<br />
canales <strong>de</strong> la ventana.<br />
Mida la distancia entre el bor<strong>de</strong> <strong>de</strong>l canal y la<br />
tabla <strong>de</strong> relleno (L). Corte los bloques <strong>de</strong><br />
espuma 1/4" (6.4 mm) más anchos. Inserte los<br />
bloques <strong>de</strong> espuma (M) en el canal <strong>de</strong>trás <strong>de</strong><br />
las tablas <strong>de</strong> relleno.<br />
Mida el ancho interno <strong>de</strong>l marco <strong>de</strong> la ventana<br />
(N). Corte el obturador <strong>de</strong> espuma para que<br />
encajen los extremos cuadrados.<br />
Sostenga el gabinete para evitar que se caiga.<br />
Suba la vidriera <strong>de</strong> la ventana. Alinee el<br />
obturador <strong>de</strong> espuma con el bor<strong>de</strong> frontal <strong>de</strong> la<br />
vidriera <strong>de</strong> la ventana y fije el obturador con el<br />
lado adhesivo contra la parte inferior <strong>de</strong> la<br />
vidriera (O). Baje la vidriera <strong>de</strong> la ventana.<br />
Utilice un nivel (P) para verificar que el<br />
gabinete esté nivelado <strong>de</strong> lado a lado. Utilice<br />
una broca <strong>de</strong> barrena <strong>de</strong> 3/32" para perforar<br />
los primeros orificios en el gabinete y en el<br />
umbral <strong>de</strong> la ventana. <strong>Use</strong> tornillos para ma<strong>de</strong>ra<br />
(Q) para fijar el gabinete al umbral <strong>de</strong> la<br />
ventana (R). No apriete los tornillos.<br />
Verifique que el acondicionador <strong>de</strong> aire<br />
esté inclinado hacia el exterior <strong>de</strong> manera<br />
que el agua corra hacia afuera.<br />
Coloque el nivel <strong>de</strong>ntro <strong>de</strong>l gabinete al lado<br />
<strong>de</strong>recho. El gabinete <strong>de</strong>be inclinarse hacia<br />
afuera aproximadamente un nivel completo (S)<br />
para el <strong>de</strong>bido <strong>de</strong>sagüe. Coloque el nivel al lado<br />
izquierdo y verifique que el gabinete esté<br />
inclinado <strong>de</strong>bidamente. De lo contrario,<br />
inclínelo correctamente o coloque una<br />
planchita <strong>de</strong> relleno para que tenga la <strong>de</strong>bida<br />
inclinación.<br />
continued on page 7 continúa en la página 7 suite à la page 7<br />
Utiliser la mesure finale pour mesurer à partir<br />
du bord <strong>de</strong> la planche <strong>de</strong> remplissage et<br />
marquer les lignes (G). Avec un couteau<br />
utilitaire, découper les planches <strong>de</strong><br />
remplissage à la taille appropriée le long <strong>de</strong>s<br />
lignes. Choisir la ligne <strong>de</strong> coupe <strong>de</strong> telle<br />
manière que les trous <strong>de</strong> vis (H) restent<br />
disponibles sur le bord externe <strong>de</strong>s planches<br />
<strong>de</strong> remplissage.<br />
Retirer partiellement la caisse hors <strong>de</strong> la<br />
fenêtre. Fixer la planche <strong>de</strong> remplissage du<br />
côté droit (I) à l’avant d’une cornière <strong>de</strong><br />
montage latérale (J), avec <strong>de</strong>ux vis à tête<br />
hexagonale <strong>de</strong> 1/2 po.<br />
Réinstaller la caisse dans la fenêtre tout en<br />
plaçant une planche <strong>de</strong> remplissage (I) en<br />
contact contre le montant profilé <strong>de</strong> la<br />
fenêtre (K).<br />
Insérer la planche <strong>de</strong> remplissage du côté<br />
gauche dans le montant profilé <strong>de</strong> la fenêtre.<br />
Pousser la planche <strong>de</strong> remplissage contre la<br />
cornière <strong>de</strong> montage latérale; fixer avec <strong>de</strong>ux<br />
vis (1/2 po) à tête hexagonale.<br />
Depuis l’extérieur, pousser les planches <strong>de</strong><br />
remplissage (I) aussi loin que possible vers<br />
l’avant dans les montants profilés <strong>de</strong> la<br />
fenêtre.<br />
Mesurer la distance entre le montant profilé et<br />
la planche <strong>de</strong> remplissage (L). Ajouter 6,4 mm<br />
(1/4 po) à cette mesure pour découper les<br />
blocs <strong>de</strong> mousse. Insérer <strong>de</strong>s blocs <strong>de</strong> mousse<br />
(M) dans la rainure <strong>de</strong>rrière les planches <strong>de</strong><br />
remplissage.<br />
Mesurer la largeur interne du châssis <strong>de</strong> la<br />
fenêtre (N). Découper une tringle <strong>de</strong> mousse<br />
<strong>de</strong> taille appropriée, avec extrémités à<br />
l’équerre.<br />
Maintenir la caisse pour l’empêcher <strong>de</strong><br />
tomber. Soulever le châssis mobile <strong>de</strong> la<br />
fenêtre. Aligner le joint <strong>de</strong> mousse avec le<br />
bord avant du châssis <strong>de</strong> la fenêtre, et fixer ce<br />
joint en plaçant sa face adhésive contre la face<br />
inférieure du châssis (O). Abaisser le châssis<br />
mobile <strong>de</strong> la fenêtre.<br />
Utiliser un niveau (P) pour contrôler l’aplomb<br />
transversal <strong>de</strong> la caisse. Utiliser un foret <strong>de</strong><br />
3/32 po pour percer <strong>de</strong>s avant-trous dans la<br />
caisse et dans la tablette <strong>de</strong> la fenêtre. Fixer la<br />
caisse sur la tablette <strong>de</strong> la fenêtre (Q) à l’ai<strong>de</strong><br />
<strong>de</strong> vis à bois (R). Ne pas serrer les vis.<br />
Veiller à ce que la caisse du climatiseur<br />
soit inclinée vers l’extérieur, pour que<br />
l’eau puisse s’écouler vers l’extérieur.<br />
Placer le niveau à l’intérieur <strong>de</strong> la caisse, du<br />
côté droit. La caisse <strong>de</strong>vrait être inclinée vers<br />
l’extérieur environ une longueur complète <strong>de</strong><br />
la bulle (S) pour qu’il y ait un bon drainage.<br />
Contrôler l’inclinaison <strong>de</strong> la même manière du<br />
côté gauche.<br />
6
BB<br />
DD<br />
Y<br />
X<br />
Z<br />
EE<br />
U<br />
AA<br />
FF<br />
W<br />
T<br />
HH<br />
V<br />
GG<br />
V<br />
II<br />
CC<br />
continued from page 6 viene <strong>de</strong> la página 6 suite <strong>de</strong> la page 6<br />
Place the 2-1/2" (6.4 cm) seal strip (T)<br />
insi<strong>de</strong> the cabinet. Make seal flush with<br />
cabinet front edge. This seal strip fits between<br />
the air conditioner base <strong>and</strong> the cabinet.<br />
Attach vertical supports (U) to angle supports<br />
(V) using bolts (W), flat washers (X), lock<br />
washers (Y) <strong>and</strong> nuts (Z).<br />
Attach support assembly to bottom of cabinet.<br />
Do Not tighten bolts at this time.<br />
Attach wall rail (AA) to angle supports (V).<br />
Sli<strong>de</strong> each support assembly toward house<br />
until wall rail is firmly against wall.<br />
Note: If your house is constructed of material<br />
that could be damaged by wall-mounting<br />
support, fasten a board between wall rail <strong>and</strong><br />
house.<br />
Check that cabinet still tilts a full bubble to<br />
the outsi<strong>de</strong>. Tighten bolts (BB) securely with<br />
a 7/16" socket <strong>and</strong> socket wrench. Tighten<br />
angled support bolts (CC) last so wall rail fits<br />
tightly against house.<br />
Tighten screws attaching cabinet to window<br />
sill.<br />
NOTE: Install window-lock bracket to<br />
prevent air conditioner from falling out of<br />
window.<br />
Place window-lock bracket (DD) on top of<br />
lower window <strong>and</strong> against upper window<br />
sash. <strong>Use</strong> a 3/32" drill bit to drill a starter<br />
hole through the hole in the bracket. Attach<br />
window-lock bracket with wood screw.<br />
Insert window rail seal (EE) behind the top<br />
of the lower window sash <strong>and</strong> against the<br />
glass of the upper window.<br />
Seal small openings around window with<br />
gum-type sealer..<br />
WARNING<br />
Electrical Shock Hazard<br />
Connect green ground wire to<br />
ground screw.<br />
Failure to do so can result in <strong>de</strong>ath<br />
or electrical shock.<br />
Insert air conditioner into cabinet. Reattach<br />
ground wire (FF) to ground screw (GG).<br />
Put excess ground wire between coil <strong>and</strong> air<br />
conditioner cabinet.<br />
Remove the 2 front panel screws (HH) from<br />
air conditioner base. Push front panel (II)<br />
straight on <strong>and</strong> then lower it slightly to lock it<br />
in place. Attach bottom front of panel with<br />
front panel screws.<br />
Coloque la tira <strong>de</strong> obturación (T) <strong>de</strong> 2-1/2"<br />
(6.4 cm) <strong>de</strong>ntro <strong>de</strong>l gabinete. Alinee el<br />
obturador con el bor<strong>de</strong> <strong>de</strong>lantero <strong>de</strong>l gabinete.<br />
Esta tira <strong>de</strong> obturación se inserta entre la base<br />
<strong>de</strong>l acondicionador <strong>de</strong> aire y el gabinete.<br />
Fije el soporte vertical (U) a los soportes en<br />
ángulo (V) utiliz<strong>and</strong>o pernos (W), ar<strong>and</strong>elas<br />
planas (X), ar<strong>and</strong>elas <strong>de</strong> seguridad (Y) y<br />
tuercas (Z).<br />
Fije los soportes a la parte inferior <strong>de</strong>l gabinete.<br />
No apriete los pernos todavía.<br />
Fije el riel <strong>de</strong> pared (AA) a los soportes en<br />
ángulo (V). Deslice cada conjunto <strong>de</strong> soporte<br />
hacia la casa hasta que el riel <strong>de</strong> pared que<strong>de</strong><br />
firmemente contra la pared.<br />
Nota: Si su casa está construida <strong>de</strong> material que<br />
pue<strong>de</strong> dañarse por los soportes montados en la<br />
pared, coloque una tabla entre el riel <strong>de</strong> la<br />
pared y la casa.<br />
Verifique que el gabinete siga inclinado un nivel<br />
completo hacia afuera. Apriete bien los pernos<br />
(BB) con un casquillo y llave <strong>de</strong> casquillo <strong>de</strong><br />
7/16". Apriete los pernos (CC) <strong>de</strong>l soporte en<br />
ángulo por último para que el riel <strong>de</strong> pared<br />
que<strong>de</strong> bien fijado contra la casa.<br />
NOTE: Instale un soporte <strong>de</strong> seguridad en la<br />
ventana para evitar que el acondicionador <strong>de</strong><br />
aire se caiga <strong>de</strong> la ventana.<br />
Coloque el soporte <strong>de</strong> seguridad <strong>de</strong> la ventana<br />
(DD) en la parte superior <strong>de</strong> la ventana inferior y<br />
contra la vidriera superior <strong>de</strong> la ventana. Utilice<br />
una broca <strong>de</strong> barrena <strong>de</strong> 3/32" para perforar un<br />
primer orificio a través <strong>de</strong>l orificio en el soporte.<br />
Fije el soporte <strong>de</strong> seguridad <strong>de</strong> la ventana con<br />
tornillo para ma<strong>de</strong>ra.<br />
Inserte el obturador <strong>de</strong>l riel <strong>de</strong> la ventana (EE)<br />
<strong>de</strong>trás <strong>de</strong> la parte superior <strong>de</strong> la vidriera inferior<br />
<strong>de</strong> la ventana y contra el cristal <strong>de</strong> la ventana<br />
superior.<br />
Selle las aberturas pequeñas alre<strong>de</strong>dor <strong>de</strong> la<br />
ventana con un sellador tipo goma.<br />
ADVERTENCIA<br />
Peligro <strong>de</strong> Choque Eléctrico<br />
Conecte el alambre ver<strong>de</strong> <strong>de</strong><br />
conexión a tierra al tornillo <strong>de</strong><br />
conexión a tierra.<br />
No seguir esta instrucción pue<strong>de</strong><br />
ocasionar la muerte o<br />
choque eléctrico.<br />
Inserte el acondicionador <strong>de</strong> aire en el gabinete.<br />
Vuelva a fijar el alambre <strong>de</strong> puesta a tierra (FF)<br />
al tornillo <strong>de</strong> puesta a tierra (GG). Ponga lo<br />
que sobre <strong>de</strong>l alambre <strong>de</strong> puesta a tierra entre<br />
el serpentín y el gabinete <strong>de</strong>l acondicionador <strong>de</strong><br />
aire.<br />
Quite los 2 tornillos <strong>de</strong>l panel <strong>de</strong>lantero (HH)<br />
<strong>de</strong> la base <strong>de</strong>l acondicionador <strong>de</strong> aire. Empuje<br />
el panel <strong>de</strong>lantero (II) <strong>de</strong>recho hacia a<strong>de</strong>lante,<br />
bajándolo luego ligeramente para que encaje en<br />
su lugar. Fije el frente inferior <strong>de</strong>l panel con los<br />
tornillos <strong>de</strong>l panel <strong>de</strong>lantero.<br />
Placer le joint d’étanchéité plat (T) <strong>de</strong> 6,4 cm<br />
(2 1/2 po) à l’intérieur <strong>de</strong> la caisse. Veiller à<br />
ce que le joint soit en affleurement avec le<br />
bord avant <strong>de</strong> la caisse du climatiseur. Ce joint<br />
est placé entre la base du climatiseur et la<br />
caisse.<br />
Fixer les supports verticaux (U) sur le support<br />
incliné (V). Utiliser les boulons (W), ron<strong>de</strong>lles<br />
plates (X), ron<strong>de</strong>lles-frein (Y) et écrous (Z).<br />
Fixer les supports sous la caisse, sans serrer<br />
les boulons <strong>de</strong> fixation.<br />
Fixer la tringle d’appui mural (AA) sur les<br />
supports (V). Faire glisser l’ensemble du<br />
support vers le mur <strong>de</strong> la maison jusqu’à ce<br />
que la tringle d’appui soit fermement en appui<br />
contre le mur.<br />
Remarque : Si la maison est construite <strong>de</strong><br />
matériaux que les supports fixés au mur<br />
pourraient endommager, placer une planchette<br />
<strong>de</strong> bois entre le mur et la tringle d’appui mural.<br />
Vérifier que la caisse est encore inclinée vers<br />
l’extérieur (une longueur complète <strong>de</strong> bulle du<br />
niveau). Serrer fermement les boulons (BB)<br />
avec une clé à douille <strong>de</strong> 7/16 po. Serrer en<br />
<strong>de</strong>rnier lieu les boulons (CC) <strong>de</strong>s supports<br />
inclinés pour que la tringle d’appui mural soit<br />
bien en appui contre le mur.<br />
NOTA : Installer la bri<strong>de</strong> <strong>de</strong> blocage dans la<br />
fenêtre pour empêcher le climatiseur <strong>de</strong><br />
tomber hors <strong>de</strong> la fenêtre.<br />
Placer la bri<strong>de</strong> <strong>de</strong> blocage (DD) <strong>de</strong> la fenêtre<br />
en haut du châssis mobile, et contre le châssis<br />
supérieur <strong>de</strong> la fenêtre. Percer un avant-trou<br />
dans le cadre à travers le trou <strong>de</strong> la bri<strong>de</strong>, avec<br />
un foret <strong>de</strong> 3/32 po. Fixer la bri<strong>de</strong> <strong>de</strong> blocage<br />
<strong>de</strong> la fenêtre avec une vis à bois.<br />
Installer le joint <strong>de</strong> mousse (EE) pour le<br />
calfeutrage <strong>de</strong> la fenêtre, contre le haut du<br />
châssis mobile <strong>de</strong> la fenêtre, et contre la vitre<br />
du châssis supérieur.<br />
Assurer l’étanchéité <strong>de</strong>s petites ouvertures<br />
autour <strong>de</strong> la fenêtre avec un mastic approprié.<br />
Insérer la coupelle <strong>de</strong> drainage en plastique<br />
AVERTISSEMENT<br />
Risque <strong>de</strong> choc électrique<br />
Brancher le fil vert <strong>de</strong> liaison à la<br />
terre à la vis <strong>de</strong> liaison à la terre.<br />
Le non-respect <strong>de</strong> cette<br />
instruction peut causer un décès<br />
ou un choc électrique.<br />
Insérer le climatiseur dans la caisse. Connecter<br />
le conducteur <strong>de</strong> liaison à la terre (FF) avec la<br />
vis <strong>de</strong> liaison à la terre (GG). Placer l’excès <strong>de</strong><br />
longueur du fil entre le serpentin et la caisse.<br />
Retirer les 2 vis (HH) du panneau avant à la<br />
base du climatiseur. Pousser le panneau avant<br />
(II) en ligne droite, tout en l’abaissant<br />
légèrement pour qu’il se cale en place. Fixer la<br />
base du panneau avant avec les vis.<br />
7
A<br />
I<br />
C<br />
B<br />
F<br />
26" (66 cm)<br />
E<br />
D<br />
19-3/4"<br />
(50.2 cm)<br />
J<br />
L<br />
K<br />
G<br />
H<br />
C<br />
B<br />
Through-the-wall<br />
Installation<br />
For sli<strong>de</strong>-out chassis mo<strong>de</strong>l only. Solamente para mo<strong>de</strong>lo con chasis<br />
<strong>de</strong>slizable.<br />
It is the customer's responsibility <strong>and</strong><br />
obligation to have this product installed by a<br />
qualified technician familiar with through-thewall<br />
room air conditioner installations.<br />
When using a wood, metal or plastic molding<br />
(A), the finish frame (B) should line up with<br />
insi<strong>de</strong> wall (C) as shown. If the plastered wall<br />
(D) is to be flush with the cabinet <strong>and</strong> no<br />
molding is used, the finish frame (B) must be<br />
set 1/2 inch (13 mm) into the insi<strong>de</strong> wall<br />
(C).<br />
Cut opening through the wall. Remove <strong>and</strong><br />
save insulation.<br />
<strong>Use</strong> 1-inch (2.5 cm) or heavier lumber for<br />
wood frame. Measure outsi<strong>de</strong> width (F) <strong>and</strong><br />
height (G) of frame to <strong>de</strong>termine wall<br />
opening dimensions.<br />
Dimension for (H) <strong>de</strong>pends on wall thickness<br />
<strong>and</strong> type of molding.<br />
Apply wood preservative to the outsi<strong>de</strong><br />
exposed surface.<br />
Insert the frame in the wall opening. Square<br />
<strong>and</strong> level frame. Nail frame securely to the<br />
wall studs.<br />
Insert cabinet into the wall opening. The top<br />
of the cabinet should extend 1/2" (13 mm)<br />
into the room (I). If there is trim (J), the<br />
cabinet should extend 1/2" (13 mm) past the<br />
trim.<br />
Place level insi<strong>de</strong> cabinet on the right si<strong>de</strong>.<br />
The cabinet should tilt to the outsi<strong>de</strong><br />
approximately a full bubble (L) for proper<br />
drainage. Place the level on the left si<strong>de</strong> <strong>and</strong><br />
check.<br />
Reuse the insulation to seal opening between<br />
cabinet <strong>and</strong> frame.<br />
Drill four holes on each si<strong>de</strong> <strong>and</strong> two through<br />
the top of the cabinet into the frame. <strong>Use</strong> ten<br />
#10 x 1" wood screws (not provi<strong>de</strong>d) to<br />
attach cabinet to frame.<br />
Instalación a<br />
través <strong>de</strong> la<br />
pared<br />
Es responsabilidad y obligación <strong>de</strong>l cliente<br />
hacer que este producto sea instalado por un<br />
técnico calificado familiarizado con<br />
instalaciones a través <strong>de</strong> la pared <strong>de</strong><br />
acondicionadores <strong>de</strong> aire <strong>de</strong> habitaciones.<br />
Cu<strong>and</strong>o utilice una moldura <strong>de</strong> ma<strong>de</strong>ra, metal o<br />
plástico (A), el marco <strong>de</strong> sujeción (B) <strong>de</strong>be<br />
estar alineado con la pared interior (C) como<br />
se muestra. Si la pared enyesada (D) va a<br />
nivelarse con el gabinete y no se utiliza ninguna<br />
moldura, el marco <strong>de</strong> sujeción (B) <strong>de</strong>be<br />
colocarse 1/2 pulgada (13 mm) <strong>de</strong>ntro <strong>de</strong> la<br />
pared interior (C).<br />
Corte una abertura a través <strong>de</strong> la pared. Quite y<br />
guar<strong>de</strong> el aislamiento.<br />
Utilice ma<strong>de</strong>ra <strong>de</strong> 1 pulgada (2.5 cm) o más<br />
pesada para el marco <strong>de</strong> ma<strong>de</strong>ra. Mida el ancho<br />
exterior (F) y la altura (G) <strong>de</strong>l marco para<br />
<strong>de</strong>terminar las dimensiones <strong>de</strong> la abertura <strong>de</strong> la<br />
pared.<br />
Las dimensiones <strong>de</strong> (H) <strong>de</strong>pen<strong>de</strong>n <strong>de</strong>l espesor<br />
<strong>de</strong> la pared y <strong>de</strong>l tipo <strong>de</strong> moldura.<br />
Aplique un preservativo <strong>de</strong> ma<strong>de</strong>ra a la<br />
superficie exterior expuesta.<br />
Inserte el marco en la abertura en la pared.<br />
Cuadre y nivele el marco. Clave con firmeza el<br />
marco en los montantes <strong>de</strong> la pared.<br />
Inserte el gabinete en la abertura <strong>de</strong> la pared. La<br />
parte superior <strong>de</strong>l gabinete <strong>de</strong>be exten<strong>de</strong>rse<br />
1/2" (13 mm) <strong>de</strong>ntro <strong>de</strong> la habitación (I). Si<br />
hay un resguardo (J), el gabinete <strong>de</strong>be<br />
exten<strong>de</strong>rse 1/2" (13 mm) más allá <strong>de</strong>l<br />
resguardo.<br />
Coloque el nivel <strong>de</strong>ntro <strong>de</strong>l gabinete al lado<br />
<strong>de</strong>recho. El gabinete <strong>de</strong>be inclinarse hacia<br />
afuera aproximadamente un nivel completo (L)<br />
para el <strong>de</strong>bido <strong>de</strong>sagüe. Coloque el nivel al lado<br />
izquierdo y verifique.<br />
Vuelva a utilizar el aislamiento para sellar la<br />
abertura entre el gabinete y el marco.<br />
Perfore cuatro orificios a cada lado y dos a<br />
través <strong>de</strong> la parte superior <strong>de</strong>l gabinete <strong>de</strong>ntro<br />
<strong>de</strong>l marco. <strong>Use</strong> diez tornillos para ma<strong>de</strong>ra #10 x<br />
1" (no provistos) para fijar el gabinete al<br />
marco.<br />
Installation dans<br />
une ouverture<br />
murale<br />
Modèle à châssis coulissant seulement<br />
C’est au client qu’incombent la responsabilité<br />
et l’obligation <strong>de</strong> faire installer ce produit par<br />
un technicien qualifié qui connaît bien le<br />
processus d’installation d’un climatiseur dans<br />
une ouverture murale.<br />
Si une moulure (A) <strong>de</strong> bois, métal ou<br />
plastique est utilisée, l’encadrement (B)<br />
<strong>de</strong>vrait être aligné avec la surface intérieure<br />
du mur (C) (voir l’illustration). Si la surface<br />
du plâtre du mur (D) doit être en<br />
affleurement avec la caisse lorsqu’aucune<br />
moulure n’est utilisée, l’encadrement (B) doit<br />
être en retrait <strong>de</strong> 13 mm (1/2 po) dans le mur<br />
interne (C).<br />
Do not block louvers (E). No bloquee las rejillas (E). Ne pas obstruer les claire-voies (E).<br />
Check that air conditioner cabinet is<br />
tilted to the outsi<strong>de</strong> so that water will<br />
run to the outsi<strong>de</strong>.<br />
<strong>Use</strong> a level (K) to check that cabinet is level<br />
si<strong>de</strong>-to-si<strong>de</strong>.<br />
Do Not overtighten screws or cabinet<br />
will distort <strong>and</strong> provi<strong>de</strong> a poor air seal<br />
between cabinet <strong>and</strong> air conditioner.<br />
Verifique que el gabinete <strong>de</strong>l<br />
acondicionador <strong>de</strong> aire esté inclinado<br />
hacia afuera para que el agua corra hacia<br />
afuera.<br />
<strong>Use</strong> un niel (K) para verificar que el gabinete<br />
esté nivelado <strong>de</strong> lado a lado.<br />
No apriete <strong>de</strong>masiado los tornillos para<br />
que el gabinete no se <strong>de</strong>forme<br />
perjudic<strong>and</strong>o la obturación <strong>de</strong>l aire entre<br />
el gabinete y el acondicionador <strong>de</strong> aire.<br />
continued on page 9 continúa en la página 9 suite à la page 9<br />
Réaliser l’ouverture murale. Enlever et<br />
conserver l’isolant.<br />
Pour réaliser l’encadrement en bois, utiliser<br />
<strong>de</strong>s planches épaisses <strong>de</strong> 25 mm (1 po) ou<br />
plus. Mesurer la largeur externe (F) et la<br />
hauteur (G) <strong>de</strong> l’encadrement pour<br />
déterminer les dimensions <strong>de</strong> l’ouverture<br />
murale.<br />
La dimension (H) dépend <strong>de</strong> l’épaisseur du<br />
mur et du type <strong>de</strong> moulure utilisée. Appliquer<br />
un produit <strong>de</strong> préservation du bois sur les<br />
surfaces extérieures exposées.<br />
Insérer l’encadrement dans l’ouverture<br />
murale. Veiller à l’aplomb et l’équerrage <strong>de</strong><br />
l’encadrement. Fixer soli<strong>de</strong>ment<br />
l’encadrement aux poteaux du colombage<br />
avec <strong>de</strong>s clous.<br />
Insérer la caisse dans l’ouverture murale. Le<br />
sommet <strong>de</strong> la caisse <strong>de</strong>vrait dépasser <strong>de</strong><br />
13 mm (1/2 po) dans la pièce (I). S’il y a une<br />
garniture (J), la caisse <strong>de</strong>vrait dépasser <strong>de</strong> 13<br />
mm (1/2 po) au-<strong>de</strong>là <strong>de</strong> la garniture.<br />
Veiller à ce que la caisse du climatiseur<br />
soit inclinée vers l’extérieur, afin que<br />
l’eau puisse s’écouler à l’extérieur.<br />
Utiliser un niveau (K) pour contrôler l’aplomb<br />
transversal <strong>de</strong> la caisse.<br />
Placer le niveau à l’intérieur <strong>de</strong> la caisse, du<br />
côté droit. La caisse <strong>de</strong>vrait être inclinée vers<br />
l’extérieur environ une longueur complète <strong>de</strong><br />
la bulle (L) pour qu’il y ait un bon drainage.<br />
Contrôler l’inclinaison <strong>de</strong> la même manière<br />
du côté gauche.<br />
Réutiliser l’isolant pour combler l’ouverture<br />
entre la caisse et l’encadrement.<br />
Percer quatre avant-trous <strong>de</strong> chaque côté et<br />
<strong>de</strong>ux trous à travers le sommet <strong>de</strong> la caisse<br />
(dans l’encadrement). Fixer la caisse à<br />
l’encadrement à l’ai<strong>de</strong> <strong>de</strong> dix vis à bois n° 10<br />
x 1 po (non fournies).<br />
Ne pas serrer excessivement les vis; ceci<br />
provoquerait une déformation <strong>de</strong> la caisse<br />
et réduirait l’étanchéité à l’air entre la<br />
caisse et le climatiseur.<br />
8
O<br />
M<br />
Q<br />
P<br />
N<br />
R<br />
continued from page 8 viene <strong>de</strong> la página 8 suite <strong>de</strong> la page 8<br />
Place the 2-1/2" (6.4 cm) seal strip (M)<br />
insi<strong>de</strong> the cabinet as shown. Make seal flush<br />
with cabinet front edge. (This seal strip fits<br />
between the air conditioner base <strong>and</strong> the<br />
cabinet.)<br />
Insert drain cup (N) (optional) into hole in<br />
cabinet rail. Drain cup is available from your<br />
local authorized <strong>de</strong>aler.<br />
Electrical Shock Hazard<br />
Connect green ground wire to<br />
ground screw.<br />
Failure to do so can result in<br />
<strong>de</strong>ath or electrical shock.<br />
Insert air conditioner into cabinet. Reattach<br />
ground wire (O) to ground screw (P). Put<br />
excess ground wire between coil <strong>and</strong> air<br />
conditioner cabinet.<br />
Remove the 2 front panel screws (Q) from air<br />
conditioner base. Push front panel (R)<br />
straight on <strong>and</strong> then lower it slightly to lock it<br />
in place. Attach bottom front of panel with<br />
front panel screws.<br />
Caulk all outsi<strong>de</strong> wall openings around<br />
cabinet.<br />
If nee<strong>de</strong>d, install molding around room si<strong>de</strong><br />
of cabinet.<br />
Coloque la tira <strong>de</strong> obturación (M) <strong>de</strong> 2-1/2"<br />
(6,4 cm) <strong>de</strong>ntro <strong>de</strong>l gabinete como se<br />
muestra. Nivele el obturador con el bor<strong>de</strong><br />
<strong>de</strong>lantero <strong>de</strong>l gabinete. (La tira <strong>de</strong> obturación<br />
se inserta entre la base <strong>de</strong>l acondicionador <strong>de</strong><br />
aire y el gabinete).<br />
Inserte la taza <strong>de</strong> <strong>de</strong>sagüe (N) (opcional) en<br />
el orificio <strong>de</strong>l riel <strong>de</strong>l gabinete. La taza <strong>de</strong><br />
<strong>de</strong>sagüe está disponible en la tienda<br />
autorizada <strong>de</strong> su localidad.<br />
Inserte el acondicionador <strong>de</strong> aire en el gabinete.<br />
Vuelva a fijar el alambre <strong>de</strong> puesta a tierra (O)<br />
al tornillo <strong>de</strong> puesta a tierra (P). Ponga lo que<br />
sobre <strong>de</strong>l alambre <strong>de</strong> puesta a tierra entre el<br />
serpentín y el gabinete <strong>de</strong>l acondicionador <strong>de</strong><br />
aire.<br />
Quite los 2 tornillos <strong>de</strong>l panel <strong>de</strong>lantero (Q) <strong>de</strong><br />
la base <strong>de</strong>l acondicionador <strong>de</strong> aire. Empuje el<br />
panel <strong>de</strong>lantero (R) <strong>de</strong>recho hacia a<strong>de</strong>lante,<br />
bajándolo luego ligeramente para fijarlo en su<br />
lugar. Fije el frente inferior <strong>de</strong>l panel con los<br />
tornillos <strong>de</strong>l panel <strong>de</strong>lantero.<br />
Calafatee todos las aberturas exteriores <strong>de</strong> la<br />
pared alre<strong>de</strong>dor <strong>de</strong>l gabinete.<br />
Si fuera necesario, instale la moldura alre<strong>de</strong>dor<br />
<strong>de</strong>l lado <strong>de</strong>l gabinete que da a la habitación.<br />
Placer le joint d’étanchéité plat <strong>de</strong> 6,4 cm<br />
(2 1/2 po) (M) à l’intérieur <strong>de</strong> la caisse<br />
selon l’illustration. Placer le joint en<br />
affleurement avec le bord avant <strong>de</strong> la caisse.<br />
(Ce joint sera placé entre la base du<br />
climatiseur et la caisse.)<br />
Insérer la coupelle <strong>de</strong> drainage (N)<br />
(facultative) dans le trou <strong>de</strong> la tringle <strong>de</strong> la<br />
caisse. La coupelle <strong>de</strong> drainage est<br />
disponible <strong>de</strong> votre concessionnaire local<br />
autorisé.<br />
WARNING ADVERTENCIA AVERTISSEMENT<br />
Congratulations!<br />
You have successfully installed your new<br />
air conditioner. To get the most efficient<br />
use from your new air conditioner, read<br />
the <strong>Use</strong> <strong>and</strong> <strong>Care</strong> <strong>Gui<strong>de</strong></strong> section of this<br />
book.<br />
Peligro <strong>de</strong> Choque Eléctrico<br />
Conecte el alambre ver<strong>de</strong> <strong>de</strong><br />
conexión a tierra al tornillo <strong>de</strong><br />
conexión a tierra.<br />
No seguir esta instrucción pue<strong>de</strong><br />
ocasionar la muerte o<br />
choque eléctrico.<br />
¡Felicitaciones!<br />
Usted ha instalado con éxito su nuevo<br />
acondicionador <strong>de</strong> aire. Para obtener el<br />
uso más eficiente <strong>de</strong> su nuevo<br />
acondicionador <strong>de</strong> aire, lea la sección <strong>de</strong><br />
Guía <strong>de</strong> <strong>Uso</strong> y <strong>Cuidado</strong> <strong>de</strong> este folleto.<br />
Risque <strong>de</strong> choc électrique<br />
Brancher le fil vert <strong>de</strong> liaison à la<br />
terre à la vis <strong>de</strong> liaison à la terre.<br />
Le non-respect <strong>de</strong> cette<br />
instruction peut causer un décès<br />
ou un choc électrique.<br />
Insérer le climatiseur dans la caisse.<br />
Connecter le conducteur <strong>de</strong> liaison à la terre<br />
(O) avec la vis <strong>de</strong> liaison à la terre (P). Placer<br />
l’excès <strong>de</strong> longueur du fil entre le serpentin et<br />
la caisse.<br />
Retirer les 2 vis (Q) du panneau avant à la<br />
base du climatiseur. Pousser le panneau avant<br />
(R) en ligne droite, tout en l’abaissant<br />
légèrement pour qu’il se cale en place. Fixer la<br />
base du panneau avant avec les vis.<br />
Calfeutrer les orifices <strong>de</strong> l’ouverture murale,<br />
tout autour <strong>de</strong> la caisse.<br />
Si nécessaire, installer une moulure autour <strong>de</strong><br />
la caisse, à l’intérieur <strong>de</strong> la pièce.<br />
Félicitations!<br />
Vous avez réussi à installer votre<br />
nouveau climatiseur. Pour tirer le plus<br />
gr<strong>and</strong> parti <strong>de</strong> votre nouveau<br />
climatiseur, veuillez lire le <strong>Gui<strong>de</strong></strong><br />
d’utilisation et d’entretien.<br />
9