Model: 26-0300 Lit. #: 91-0231/12-05 iNstructioN ... - Bushnell
Model: 26-0300 Lit. #: 91-0231/12-05 iNstructioN ... - Bushnell
Model: 26-0300 Lit. #: 91-0231/12-05 iNstructioN ... - Bushnell
You also want an ePaper? Increase the reach of your titles
YUMPU automatically turns print PDFs into web optimized ePapers that Google loves.
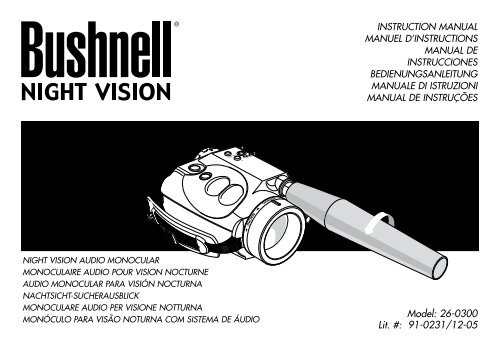
Night visioN audio MoNocuLar<br />
MoNocuLaire audio pour visioN NocturNe<br />
audio MoNocuLar para visióN NocturNa<br />
Nachtsicht-sucherausbLick<br />
MoNocuLare audio per visioNe NotturNa<br />
MoNócuLo para visão NoturNa coM sisteMa de áudio<br />
<strong>iNstructioN</strong> MaNuaL<br />
MaNueL d’<strong>iNstructioN</strong>s<br />
MaNuaL de<br />
iNstruccioNes<br />
bedieNuNgsaNLeituNg<br />
MaNuaLe di istruzioNi<br />
MaNuaL de iNstruções<br />
<strong>Model</strong>: <strong>26</strong>-<strong>0300</strong><br />
<strong>Lit</strong>. #: <strong>91</strong>-<strong>0231</strong>/<strong>12</strong>-<strong>05</strong>
ENGLISH 2<br />
FraNçaIS 10<br />
ESpañoL 18<br />
DEutScH <strong>26</strong><br />
ItaLIaNo 34<br />
portuGuêS 42<br />
2
2<br />
ENGLISH<br />
SPECIFICATIONS<br />
Magnification: 2.5 X<br />
Objective Size: 42 mm<br />
Vertical Resolution: 25 line/mm<br />
Viewing Range (Ft.)* 4 –600 ft.<br />
Range of Built-In Infrared Illuminator 90 yards<br />
Field of View: 79 feet at 100 yards<br />
Battery Type: AA (2)<br />
Operating Time: Up to 20 hours<br />
Temperature Range: -22 to 104 degrees F / -30 to 40 degrees Celsius<br />
Eyepiece Adjustment: +/- 5 diopter<br />
Length: 6.7 inches / 170mm<br />
Length with antenna: 14 inches / 365 mm<br />
Width: 3.7 inches / 95mm<br />
Height: 2.7 inches / 70mm<br />
Weight: 17 oz. / 0.5 kg<br />
Characteristics of the microphone:<br />
Equivalent Noise Level: 20db<br />
Sound Amplification: 0-66 db<br />
Frequency Response: 500-10000 Hz<br />
Sensitivity at frequency level of 1000Hz 20+5mV/Pa<br />
* Maximum distance at which a human figure can be recognized under ideal viewing conditions; defined as clear conditions (no<br />
fog, dust, etc.) under the light of 1/4 moon.<br />
Congratulations on the purchase of your <strong>Bushnell</strong> Night Vision Product. <strong>Bushnell</strong> Night Vision products are comprised of high quality<br />
image intensifier tubes and optics. <strong>Bushnell</strong> Night Vision products amplify existing light, allowing you to see in dark conditions too<br />
dark for the naked eye.<br />
HoW NIGHt VISIoN WorKS<br />
<strong>Bushnell</strong> Night Vision products collect and amplify existing light through the objective lens, which is then focused on the image<br />
intensifier. Inside the intensifier, a photocathode is “excited” by the light and converts the photon energy into electrons. These<br />
electrons accelerate across an electrostatic field inside the intensifier and strike a phosphor screen (like a green monochrome TV<br />
screen) which emits an image that you can see. It is the acceleration of electrons, which provides gain and enhances the image.<br />
This is a Generation I device.<br />
Your Night Vision device offers a Directional Sound Amplification System (DSAS), providing you with the added benefit of a highly<br />
sophisticated sound amplification system. DSAS utilizes the latest developments in electronic sound amplification by combining our<br />
exclusive high sensitivity DIRECTIONAL microphone with a state of the art noise reduction system, providing unparalleled sound<br />
enhancement.<br />
Your Night Vision device is ideal for a variety of professional and recreational uses including the following:<br />
• Wild Life Observation<br />
• Astronomy<br />
• Boating / Marine Use<br />
• Police / Law Enforcement<br />
• Search and Rescue<br />
• Security<br />
• Property Management<br />
3
4<br />
GETTING STARTED<br />
Installing Batteries<br />
This device operates on two AA batteries. To install, unscrew the battery<br />
compartment cover located on the bottom of the unit. Insert the batteries<br />
into the battery compartment so that the (+) and negative (-) terminals of<br />
the batteries match the markings inside the compartment. Replace the<br />
battery cover carefully – do not over tighten.<br />
Use and Testing<br />
This device operates on two AA batteries. Make sure they have been<br />
installed according to the instructions above.<br />
Attach the receiving antenna of the DSAS directional microphone<br />
(1) and insert headphone plug into the audio output jack (2). If<br />
you wish to test your night vision device in a lighted area, be sure<br />
the objective lens cap is covering the objective lens (3) prior to<br />
pressing the “POWER” button. The objective lens cap has a pinhole<br />
opening to admit a small amount of light for testing purposes.<br />
If testing or using the device in the dark, remove the objective lens<br />
cap and activate the device by pushing the “POWER” button (4).<br />
Set the preliminary focus adjustment by placing the adjusting mark<br />
(located on top of the objective focusing ring) opposite the letter “N” in<br />
the word “Normal”(11).<br />
Place headphone in ears and activate the DSAS microphone by<br />
depressing the “ON” button (6).<br />
If the subject is to be viewed in a completely dark area where no<br />
ambient light source (such as moonlight) is available, activate the Infrared<br />
Illuminator by pressing the Infrared Illuminator button (5) located next to<br />
the “POWER” button.<br />
Infrared<br />
power<br />
Direct the device at an object at a distance approximately 100 yards and rotate the eyepiece<br />
(7) to give the best quality image. After the adjusting, do not rotate the eyepiece any longer irrespective<br />
of the distance and other conditions. Direct the device at the subject to be viewed and adjust the final focus by rotating the objective<br />
lens focusing ring until the image quality is optimal.<br />
Adjust sound amplification volume to an optimal level by pressing the volume control buttons (8). If the sound is to be recorded,<br />
insert the tape recorder plug into the jack (9) and start recording.<br />
The Green LED indicates that the light amplifier unit is on. The Red LED indicates that the Infrared Illuminator is on. The Yellow<br />
LED indicates that the DIRECTIONAL SOUND AMPLIFICATION SYSTEM is operating. Always remember to turn off the unit when<br />
done. Do not store this device while the indicators are lit. This device can be mounted on any tripod with a 1/4“ tripod socket (10).<br />
5
6<br />
Caution: This device can be used in extreme cold weather. However, when the unit is brought back into a warm environment, you<br />
must wait approximately 5 hours before using the unit again. Damage may occur due to condensation that may have accumulated<br />
on the internal circuitry of the unit.<br />
Spots In The Image<br />
• You may see spots in the image. These vary from device to device and are cosmetic blemishes inside the device. These are<br />
normal for Night Vision devices and are NOT a defect.<br />
TROUBLESHOOTING<br />
scope will not turn on.<br />
Check that the batteries are installed properly. Replace the batteries with new ones. Check the battery contacts to ensure they are<br />
clean and free of corrosion. Check that the power is in the “ON” position.<br />
image is not focused.<br />
Adjust the focus on the Eyepiece (7). Adjust the Objective Lens Focusing Ring. If still no improvement, clean the lenses; they may<br />
be foggy or dusty.<br />
visibility decreases or disappears.<br />
Bright light sources such as headlights may cause visibility to degrade or disappear completely. Turn the Power OFF (4) and turn the<br />
scope away from the light source. The unit will restore itself in 1 or 2 minutes. Conditions such as fog or extremely dark environments<br />
will decrease visibility.<br />
scope flashes.<br />
The scope may flash when used in a bright environment. It may also flash during the first few seconds of use in dark environments.<br />
the sound amplification system is not amplifying properly.<br />
Make sure the DIRECTIONAL antenna is tightly connected to the microphone. Check your headset connection; make sure your<br />
batteries are fresh.<br />
CARE AND MAINTENANCE<br />
Your <strong>Bushnell</strong> Night Vision device was designed to provide many years of reliable service. To ensure that you get the most enjoyment<br />
out of your Night Vision device, always obey the following warning and precautions:<br />
• Do not point this device toward any light source greater than 1 lux such as car headlights, for an extended period of time. This<br />
device utilizes an internal flash protection system which minimizes potential damage, but long-term exposure to bright lights can<br />
damage the unit. Any such damage may void your warranty.<br />
• This device was designed to be self-contained. Do not open the body of the device or otherwise attempt to service this device.<br />
• Always store the device in a dry, well-ventilated room.<br />
• Remove the batteries if the device is to be stored for longer than 2 months.<br />
• Keep the device away from any heating and air conditioning vents or other heating devices, direct sunlight, and moisture.<br />
• Avoid dropping or otherwise shocking the unit. Although designed for rugged outdoor use, this device incorporates a sophisticated<br />
optical system, which could be damaged in extreme cases of misuse.<br />
• Clean the optical lenses with professional lens cleaning supplies.<br />
• Clean the exterior of the device with a soft clean cloth.<br />
Class 1 LED product per IEC 60825-1/nov 1993, appendix EN 60825-1A11/oct1996<br />
7
TWO-Year LIMITED WARRANTY<br />
Your <strong>Bushnell</strong>® product is warranted to be free of defects in materials and workmanship for two years after the date of purchase. In<br />
the event of a defect under this warranty, we will, at our option, repair or replace the product, provided that you return the product<br />
postage prepaid. This warranty does not cover damages caused by misuse, improper handling, installation, or maintenance<br />
provided by someone other than a <strong>Bushnell</strong> Authorized Service Department.<br />
Any return made under this warranty must be accompanied by the items listed below:<br />
1) A check/money order in the amount of $10.00 to cover the cost of postage and handling<br />
2) Name and address for product return<br />
3) An explanation of the defect<br />
4) Proof of Date Purchased<br />
5) Product should be well packed in a sturdy outside shipping carton, to prevent damage in transit, with return postage<br />
prepaid to the address listed below:<br />
IN U.S.A. Send To: IN CANADA Send To:<br />
<strong>Bushnell</strong> Performance Optics <strong>Bushnell</strong> Performance Optics<br />
Attn.: Repairs Attn.: Repairs<br />
8500 Marshall Drive 25A East Pearce Street, Unit 1<br />
Lenexa, Kansas 66214 Richmond Hill, Ontario L4B 2M9<br />
For products purchased outside the United States or Canada please contact your local dealer for applicable warranty information.<br />
In Europe you may also contact <strong>Bushnell</strong> at: BUSHNELL Performance Optics Gmbh<br />
European Service Centre<br />
MORSESTRASSE 4<br />
D- 50769 KÖLN<br />
GERMANY<br />
Tél: +49 (0) 221 709 939 3<br />
Fax: +49 (0) 221 709 939 8<br />
This warranty gives you specific legal rights.<br />
You may have other rights which vary from country to country.<br />
©20<strong>05</strong> <strong>Bushnell</strong> Outdoor Products<br />
8 9
10<br />
FraNçaIS<br />
SPÉCIFICATIONS<br />
Grossissement : 2,5 x<br />
Dimension de l'objectif : 42 mm<br />
Résolution verticale : 25 lignes/mm<br />
Plage d'observation (mètres)* 1,2 à 183 m<br />
Plage de l'illuminateur infrarouge intégré 82,3 m<br />
Largeur de champ : 24 m à <strong>91</strong>,4 m<br />
Type de pile : AA (2)<br />
Durée de fonctionnement : jusqu'à 20 heures<br />
Plage de températures : -30 à +40 degrés Celsius<br />
Réglage de l'oculaire : +/- 5 dioptries<br />
Longueur : 170 mm<br />
Longueur avec antenne : 365 mm<br />
Largeur : 95 mm<br />
Hauteur : 70 mm<br />
Poids : 400 g<br />
Caractéristiques du microphone:<br />
Niveau d'intensité sonore : 20 dB<br />
Amplification des sons : 0 - 66 dB<br />
Réponse en fréquence : 500 - 10 000 Hz<br />
Sensibilité à niveau de fréquence de 1 000 Hz 20 + 5 mV/Pa<br />
*Distance maximum à laquelle une silhouette humaine peut être reconnue dans des conditions d'observation idéales,<br />
c'est-à-dire claires (sans brouillard ni poussière ou autre), sous 1/4 de lune.<br />
Merci de votre achat d'un produit Night Vision de <strong>Bushnell</strong> ® . Ces produits sont conçus avec des tubes et dispositifs optiques<br />
intensificateurs d'images de haute qualité. Les produits Night Vision de <strong>Bushnell</strong> amplifient la lumière existante et permettent de voir<br />
dans une obscurité trop sombre pour toute détection à l'oeil nu.<br />
FONCTIONNEMENT DES PRODUITS NIGHT VISION<br />
Les produits Night Vision de <strong>Bushnell</strong> ® recueillent et amplifient la lumière existante dans l'objectif. Celle-ci est alors focalisée sur<br />
l'intensificateur d'images. À l'intérieur de l'intensificateur, une photocathode est «excitée» par la lumière et convertit l'énergie des<br />
photons en électrons. La vitesse de ces électrons s'accélère dans un champ électrostatique à l'intérieur de l'intensificateur et ils<br />
frappent un écran luminescent (comme un écran de TV monochrome vert) qui émet une image que l'on peut voir. C'est l'accélération<br />
des électrons qui fournit le gain et rehausse l'image. C'est un dispositif de génération I.<br />
Cet instrument Night Vision dispose d'un avantage supplémentaire : son système directionnel très sophistiqué d'amplification<br />
des sons (DSAS). Ce système utilise les tout derniers perfectionnements de l'amplification électronique des sons en alliant notre<br />
microphone DIRECTIONNEL exclusif à haute sensibilité à un dispositif d'avant-garde de réduction des parasites, procurant ainsi<br />
une mise en valeur inégalée des sons.<br />
L'instrument Night Vision (pour vision de nuit) est idéal pour une variété d'usages professionnels et récréatifs, parmi lesquels :<br />
• Observation de la faune<br />
• Astronomie<br />
• Navigation / usage maritime<br />
• Police / application de la loi<br />
• Recherches et secours<br />
• Sécurité<br />
• Gestion immobilière<br />
11
POUR COMMENCER<br />
Mise en place des piles<br />
Cet instrument fonctionne avec deux piles de type AA. Pour les mettre en<br />
place, dévisser pour ouvrir le couvercle du compartiment des piles situé<br />
au bas de l'instrument. Insérer les piles dans le compartiment, de façon<br />
que les bornes positive (+) et négative (-) des piles soient placées en face<br />
des marques correspondantes à l'intérieur du compartiment. Remettre le<br />
couvercle en place avec précaution, en évitant de trop serrer.<br />
Utilisation et test<br />
Cet instrument fonctionne avec deux piles de type AA. S'assurer qu'elles<br />
ont été installées selon les instructions ci-dessus.<br />
Attacher l'antenne réceptrice du microphone directionnel (1) du système<br />
d'amplification et insérer la fiche de l'écouteur dans le jack (2) de<br />
sortie audio. Si l'on souhaite tester l'instrument pour vision de nuit<br />
dans un endroit éclairé, vérifier que le capuchon de lentille d'objectif<br />
recouvre bien la lentille (3), avant d'appuyer sur le bouton « POWER »<br />
(ALIMENTATION). Le capuchon de lentille d'objectif comporte un trou de<br />
visée qui admet une petite quantité de lumière nécessaire pour le test.<br />
Si le test ou l'utilisation de l'instrument se fait dans l'obscurité, retirer le<br />
capuchon de lentille d'objectif et activer l'instrument en appuyant sur le<br />
bouton « POWER » (ALIMENTATION) (4).<br />
Effectuer le réglage préliminaire de mise au point en plaçant le repère de<br />
réglage (situé sur le dessus de la bague de mise au point de l'objectif) à<br />
l'opposé de la lettre « N » du mot « Normal ».<br />
Placer l'écouteur sur l'oreille et activer le microphone du système<br />
d'amplification en appuyant sur le bouton « ON » (MARCHE) (6).<br />
Si le sujet à observer se trouve dans un endroit en obscurité totale,<br />
sans aucune source de lumière ambiante (sans clair de lune), activer<br />
l'illuminateur infrarouge en appuyant sur le bouton (5) de l'illuminateur,<br />
près du bouton « POWER » (ALIMENTATION).<br />
<strong>12</strong><br />
Infrared<br />
power<br />
Diriger l'instrument vers un objet situé à une distance d'environ 90 mètres et tourner l'oculaire (7)<br />
pour obtenir la meilleure image possible. Après le réglage, ne plus tourner l'oculaire, quelles que soient<br />
la distance et les conditions. Diriger l'instrument vers le sujet à observer et effectuer la mise au point finale en<br />
tournant la bague de mise au point de l'objectif, jusqu'à ce que la qualité de l'image soit optimale.<br />
Régler le volume d'amplification des sons à un niveau optimal en appuyant sur les boutons de commande de volume (8).Si le son<br />
doit être enregistré, insérer la fiche du magnétophone dans le jack (9) et commencer à enregistrer.<br />
L'indicateur lumineux vert (DEL) allumé signifie que le dispositif amplificateur de lumière fonctionne. L'indicateur lumineux rouge<br />
(DEL) allumé signifie que l'illuminateur infrarouge fonctionne. L'indicateur lumineux jaune (DEL) allumé signifie que le SYSTÈME<br />
DIRECTIONNEL D'AMPLIFICATION DES SONS fonctionne. Toujours se souvenir de mettre l'instrument hors tension après<br />
l'utilisation. Ne pas ranger cet instrument quand les indicateurs sont allumés. Cet instrument peut se monter sur une douille de<br />
fixation pour trépied de 1/4 de pouce (10).<br />
13
14<br />
Attention : Il est possible d'utiliser cet instrument par temps très froid. Cependant, lorsqu'il est ramené dans un environnement chaud,<br />
il faut attendre environ 5 heures avant de l'utiliser à nouveau, car la condensation qui s'est accumulée sur les circuits internes de<br />
l'instrument provoquerait des dommages.<br />
Points sur l'image<br />
• Il est possible que des points apparaissent sur l'image. Ceux-ci varient selon les instruments mais ce ne sont que de petites<br />
taches cosmétiques internes. Il s'agit d'un phénomène normal dans les dispositifs Night Vision, et NON PAS d'un défaut.<br />
DÉPANNAGE<br />
La lunette ne se met pas sous tension.<br />
Vérifier que les piles sont installées correctement. Remplacer les piles par des neuves. Vérifier que les contacts des<br />
piles sont propres et exempts de corrosion. Vérifier que le bouton d'alimentation est à la position « ON » (MARCHE).<br />
L'image n'est pas au point.<br />
Régler la mise au point sur l'oculaire (7). Régler la bague de mise au point de l'objectif. S'il n'y a toujours pas d'amélioration,<br />
nettoyer les lentilles ; elles sont peut-être couvertes de buée ou de poussière.<br />
La visibilité diminue ou disparaît.<br />
Des sources de lumière intense telles que des phares peuvent faire diminuer ou disparaître complètement la<br />
visibilité. DÉSACTIVER (4) la lunette et la tourner à l'écart de la source lumineuse. L'instrument doit se réinitialiser de<br />
lui-même en 1 à 2 minutes. Des conditions telles que le brouillard ou une obscurité profonde font diminuer la visibilité.<br />
clignotement de la lunette.<br />
Il est possible que la lunette clignote lorsqu'elle est utilisée dans un environnement très lumineux. Elle risque aussi de clignoter durant<br />
les premières secondes de l'utilisation dans l'obscurité.<br />
Le système d'amplification des sons n'amplifie pas correctement.<br />
Vérifier que l'antenne DIRECTIVE est étroitement connectée au microphone. Vérifier la connexion du casque ; vérifier que les piles<br />
ne sont pas usées.<br />
PRÉCAUTIONS ET ENTRETIEN<br />
L'instrument Night Vision de <strong>Bushnell</strong> a été conçu pour rendre un service fiable pendant de nombreuses années. Pour être sûr d'en<br />
profiter au maximum, tenir compte des mises en garde et précautions suivantes :<br />
• Ne pas diriger l'instrument vers une source lumineuse d'une intensité supérieure à 1 lux, des phares d'automobile par exemple, pendant<br />
un moment prolongé. Cet instrument est doté d'un système de protection interne contre la lumière éclair qui minimise les risques de dégâts,<br />
mais l'exposition prolongée à une lumière vive endommagerait définitivement l'instrument. De tels dégâts annuleraient la garantie.<br />
• Cet instrument a été conçu pour être autonome. Ne pas ouvrir le boîtier ni essayer de réparer l'instrument.<br />
• Toujours ranger l'instrument dans un local sec, bien aéré.<br />
• Enlever les piles si l'instrument doit rester inutilisé pendant plus de 2 mois.<br />
• Ne pas placer l'instrument près de bouches de chauffage ou de climatisation, de dispositifs de chauffage, de la lumière solaire<br />
directe ni au contact de l'humidité.<br />
• Veiller à ne pas laisser tomber l'instrument et à ne pas le soumettre à des chocs. Bien qu'il soit conçu pour résister à des activités<br />
de plein air, cet instrument doté d'un système optique sophistiqué risquerait d'être endommagé en cas d'usage impropre.<br />
• Nettoyer les lentilles optiques avec des fournitures de nettoyage de lentilles de qualité professionnelle.<br />
• Nettoyer l'extérieur de l'instrument à l'aide d'un tissu doux et propre.<br />
Produit à DEL de classe 1 conforme à IEC 60825-1/nov. 1993, annexe EN 60825-1A11/oct. 1996<br />
15
GARANTIE LIMITÉE de DEUX ans<br />
Votre produit <strong>Bushnell</strong>® est garanti exempt de défauts de matériaux et de fabrication pendant deux ans après la date d'achat.<br />
Au cas où un défaut apparaîtrait sous cette garantie, nous nous réservons l'option de réparer ou de remplacer le produit, à<br />
condition de nous le renvoyer en port payé. La présente garantie ne couvre pas les dommages causés par une utilisation, une<br />
manipulation, une installation incorrecte(s) ou un entretien incorrect ou fourni par quelqu'un d'autre qu'un centre de réparation<br />
agréé par <strong>Bushnell</strong>.<br />
Tout retour effectué dans le cadre de la présente garantie doit être accompagné des articles indiqués ci-dessous :<br />
1) un chèque ou mandat d'une somme de 10,00 $ US pour couvrir les frais d'envoi et de manutention<br />
2) le nom et l'adresse pour le retour du produit<br />
3) une description du défaut constaté<br />
4) la preuve de la date d'achat<br />
5) Le produit doit être emballé soigneusement, dans un carton d'expédition solide, pour éviter qu'il ne soit endommagé<br />
durant le transport ; envoyez-le en port payé, à l'adresse indiquée ci-dessous :<br />
Aux États-Unis, envoyez à: Au CANADA, envoyez à:<br />
<strong>Bushnell</strong> Performance Optics <strong>Bushnell</strong> Performance Optics<br />
Attn.: Repairs Attn.: Repairs<br />
8500 Marshall Drive 25A East Pearce Street, Unit 1<br />
Lenexa, Kansas 66214 Richmond Hill, Ontario L4B 2M9<br />
Pour les produits achetés en dehors des États-Unis et du Canada, veuillez contacter votre distributeur local pour tous renseignements<br />
concernant la garantie. En Europe, vous pouvez aussi contacter <strong>Bushnell</strong> au :<br />
BUSHNELL Performance Optics Gmbh<br />
European Service Centre<br />
MORSESTRASSE 4<br />
D- 50769 Cologne<br />
Allemagne<br />
Tél: +49 (0) 221 709 939 3<br />
Fax: +49 (0) 221 709 939 8<br />
La présente garantie vous donne des droits légaux spécifiques. Vous pouvez avoir d'autres droits qui varient selon les pays.<br />
©20<strong>05</strong> <strong>Bushnell</strong> Outdoor Products<br />
16 17
18<br />
ESpañoL<br />
ESPECIFICACIONES<br />
Amplificación: 2,5x<br />
Tamaño del objetivo: 42 mm<br />
Resolución vertical: 25 líneas/mm<br />
Gama de visión*: 1,2 m a 183 m<br />
Gama de iluminador infrarrojo incorporado: 82,3 m<br />
Campo de visión: 24 m a <strong>91</strong>,4 m<br />
Tipo de pilas: AA (2)<br />
Tiempo de funcionamiento: Hasta 20 horas<br />
Gama de temperaturas: -30 a 40 grados centígrados (-22 a 104°F)<br />
Ajuste del ocular: ±5 dioptrías<br />
Longitud: 170 mm (6,7 pulgadas)<br />
Longitud con antena: 365 mm (14 pulgadas)<br />
Anchura: 95 mm (3,7 pulgadas)<br />
Altura: 70 mm (2,7 pulgadas)<br />
Peso: 400 gramos (14 onzas)??? (17oz/0.5kg)<br />
Características del micrófono:<br />
Nivel equivalente de ruido: 20 db<br />
Amplificación del sonido: 0-66 db<br />
Respuesta de frecuencia: 500-10.000 Hz<br />
Sensibilidad a un nivel de frecuencia de 1.000 Hz: 20 + 5 mV/Pa<br />
* La distancia máxima a la que se puede reconocer una figura humana en condiciones visuales ideales, definidas como claras<br />
(sin niebla ni polvo) a la luz de 1/4 de luna.<br />
Felicidades por haber comprado su Night Vision de <strong>Bushnell</strong> ® . Los productos Night Vision de <strong>Bushnell</strong> ® están compuestos<br />
por unos tubos intensificadores de imagen y una óptica de la más alta calidad. Los productos Night Vision de<br />
<strong>Bushnell</strong> ® amplifican la luz existente permitiendo ver en condiciones demasiado oscuras para observar a simple vista.<br />
CÓMO FUNCIONA NIGHT VISION<br />
Los productos Night Vision de <strong>Bushnell</strong> ® captan y amplifican la luz existente a través del objetivo, que se enfoca entonces en el<br />
intensificador de imagen. Dentro del intensificador hay un fotocátodo que es "excitado" por la luz y convierte la energía fotónica en<br />
electrones. Estos electrones aceleran su velocidad a través de un campo electrostático dentro del intensificador y hacen impacto con<br />
una pantalla fosforescente (igual que una pantalla de televisión monocroma de color verde) que emite una imagen que se puede<br />
ver. Es la aceleración de electrones lo que proporciona la captación y realza la imagen. Es un dispositivo de la Generación I.<br />
Su unidad Night Vision ofrece un sistema direccional de amplificación del sonido (DSAS, siglas en inglés),<br />
proporcionándole el beneficio adicional de sistema amplificador muy refinado. El DSAS utiliza los últimos avances de<br />
la amplificación electrónica del sonido combinando nuestro micrófono DIRECCIONAL, de alta sensibilidad, con un<br />
sistema de reducción de ruido de la tecnología más avanzada, lo que proporciona un realce del sonido sin paralelo.<br />
Su dispositivo Night Vision es ideal para diversos usos profesionales y recreativos, entre los que se encuentran los siguientes:<br />
• Observación de la vida silvestre<br />
• Astronomía<br />
• Usos marinos y de navegación<br />
• Policía y aplicación de las leyes<br />
• Búsqueda y rescate<br />
• Seguridad<br />
• Administración de propiedades<br />
19
20<br />
PARA EMPEZAR<br />
Instalación de pilas<br />
Este dispositivo funciona con dos pilas AA. Para instalar éstas<br />
últimas, desenrosque la tapa del compartimiento de las pilas<br />
situado en la parte inferior de la unidad. Inserte las pilas en<br />
dicho compartimiento de tal modo que sus bornas o terminals (+)<br />
y (-) coincidan con las marcas al interior del receptáculo. Vuelva a<br />
poner la tapa de las pilas con cuidado no la apriete demasiado.<br />
Utilización y pruebas<br />
Este dispositivo funciona con dos pilas AA. Asegúrese de que<br />
se han instalado de acuerdo con las instrucciones anteriores.<br />
Acople la antena receptora del micrófono direccional DSAS (1) e<br />
inserte el enchufe del casco de escucha en la toma de salida de<br />
audio (2). Si desea probar su dispositivo de visión nocturna en una<br />
zona iluminada, asegúrese de que el protector esté tapando el lente<br />
del objetivo (3) antes de pulsar el botón de "MARCHA" ("POWER").<br />
El protector del lente del objetivo tiene una abertura del tamaño de un<br />
alfiler para admitir una pequeña cantidad de luz con fines de prueba.<br />
Si va a probar o utilizar la unidad en la oscuridad, quite el protector del<br />
lente del objetivo y active el dispositivo pulsando el botón de "MARCHA"<br />
("POWER") (4).<br />
Regule el ajuste preliminar del enfoque, poniendo la marca (situada en la<br />
parte superior del anillo de enfoque del objetivo) frente a la letra "N" de<br />
la palabra "Normal".<br />
Póngase el casco de escucha en los oídos y active el micrófono del DSAS<br />
pulsando el botón de "Encendido" ("ON") (6).<br />
Si se va a ver el objeto en una zona completamente oscura donde no<br />
haya disponible ninguna fuente de luz ambiental (como la de la luna),<br />
active el iluminador infrarrojo pulsando su botón correspondiente (5).<br />
Infrared<br />
power<br />
situado junto al de "MARCHA" ("POWER").<br />
Apunte el dispositivo hacia un objeto a una distancia aproximada de 90 m (100 yardas) y gire el ocular<br />
(7) para obtener la imagen de mejor calidad posible. Después de efectuar el ajuste, no gire más el ocular, sean<br />
cuales sean las condiciones y las distancias. Dirija la unidad hacia el objeto que vaya a ver y ajuste el enfoque final, girando el<br />
anillo de enfoque del lente del objetivo hasta que la calidad de la imagen sea óptima.<br />
Ajuste el volumen de amplificación del sonido al nivel óptimo, oprimiendo los botones de control de volumen (8).Si se va a registrar<br />
el sonido, inserte el enchufe de la grabadora de cinta en la clavija (9) e inicie la grabación.<br />
El LED (diodo emisor de luz) verde indica que la unidad amplificadora de la iluminación está activada. El LED rojo señala que el<br />
iluminador infrarrojo está encendido. El amarillo indica que está funcionando el SISTEMA DIRECCIONAL DE AMPLIFICACIÓN<br />
DEL SONIDO. Acuérdese siempre de apagar la unidad cuando ya no vaya a usarla. No guarde este instrumento con sus<br />
21
22<br />
indicadores encendidos. Este dispositivo se puede montar en cualquier trípode con un casquillo de 1/4 (10).<br />
Precaución: Este instrumento se puede usar en climas muy fríos; sin embargo, cuando se regrese la unidad a un ambiente cálido,<br />
deberá esperar aproximadamente 5 horas antes de volver a usar la unidad. Pueden producirse daños debidos a la condensación<br />
que pueden acumularse en los circuitos internos de la unidad.<br />
Puntos en la imagen<br />
• Es posible que vea puntos en la imagen que pueden variar de un telescopio a otro y son manchas cosméticas dentro del telescopio.<br />
Son normales en los Night Vision y NO se trata de defectos.<br />
LOCALIZACIÓN Y REPARACIÓN DE AVERÍAS<br />
el telescopio no se enciende.<br />
Vea si las pilas están bien instaladas. Reemplácelas con otras nuevas. Examine los contactos para asegurarse de que estén limpios<br />
y sin corrosión. Compruebe que la alimentación eléctrica esté en la posición de "Encendido" ("ON"),<br />
La imagen no está bien enfocada.<br />
Ajuste el enfoque en el ocular (7). Regule el anillo de enfoque del objetivo. Si todavía no mejora, limpie las lentes; puede que<br />
estén empañados o con polvo.<br />
La visibilidad disminuye o desaparece.<br />
Las fuentes de luz brillante, como, por ejemplo, los faros delanteros de los vehículos, pueden hacer que la visibilidad se degrade<br />
o desaparezca por completo. Apague la alimentación eléctrica (4) y aparte el telescopio de la fuente de luz. La unidad se<br />
restaurará por sí misma en uno o dos minutos. La visibilidad disminuirá en condiciones de niebla o cuando la oscuridad sea muy<br />
profunda.<br />
el telescopio destella.<br />
El telescopio puede destellar cuando se use en un ambiente brillante. También podría hacerlo así durante los primeros segundos<br />
de uso en ambientes obscuros.<br />
el sistema de amplificación del sonido no funciona bien.<br />
Asegúrese de que la antena DIRECCIONAL esté firmemente acoplada al micrófono. Verifique la conexión de su casco de escucha<br />
y compruebe que las pilas sean nuevas.<br />
CUIDADO Y MANTENIMIENTO<br />
Los instrumentos Night Vision (de visión nocturna) de <strong>Bushnell</strong> se diseñaron de modo que proporcionen muchos años de servicio<br />
fiable. Para asegurarse de obtener el mejor rendimiento de su dispositivo Night Vision, observe siempre las advertencias y<br />
precauciones que siguen:<br />
• No apunte este instrumento hacia ninguna fuente de luz de más de 1 lux como, por ejemplo, los faros de un vahículo, durante<br />
un periodo prolongado. Este telescopio utiliza un sistema interno de protección contra destellos que reduce al mínimo los daños<br />
posibles; pero la exposición prolongada a luces brillantes puede dañar la unidad. Cualquier daño de ese tipo podrá<br />
anular su garantía.<br />
• Este instrumento se diseñó para que estuviera encerrado. No abra su cuerpo ni trate de repararlo de ningún modo.<br />
• Mantenga siempre el dispositivo en un lugar seco y bien ventilado.<br />
• Quite las pilas cuando el dispositivo vaya a permanecer guardado durante más de dos meses.<br />
• Mantenga el instrumento lejos de las salidas de calefacción o aire acondicionado o de otros dispositivos calentadores, los rayos<br />
directos del sol y la humedad.<br />
• Evite golpear o dejar caer la unidad. Aunque se diseñó para usos toscos al exterior, contiene un sistema óptico refinado, que<br />
podría sufrir daños en casos extremados de maltrato.<br />
• Limpie las lentes ópticas con productos de limpieza profesional.<br />
• Limpie el exterior de la unidad con un lienzo suave y limpio.<br />
Producto LED de clase 1 según IEC 60825-1/nov 1993, apéndice EN 60825-1A11/oct 1996<br />
23
GARANTÍA LIMITADA DE DOS AÑOS<br />
Su producto <strong>Bushnell</strong>® está garantizado contra defectos de material y fabricación durante dos años a partir de la fecha de<br />
compra. En caso de defectos bajo esta garantía, nosotros, a nuestra opción, repararemos o sustituiremos el producto siempre que<br />
lo devuelva con portes pagados. Esta garantía no cubre defectos causados por el uso indebido, ni por un manejo, instalación<br />
o mantenimiento del producto inapropiados o el mantenimiento hecho por otro que no sea un Centro de Servicio Autorizado de<br />
<strong>Bushnell</strong>.<br />
Cualquier envío que se haga bajo garantía deberá venir acompañado por lo siguiente:<br />
1) Un cheque/giro postal por la cantidad de 10 dólares para cubrir los gastos de manejo y envío<br />
2) Nombre y dirección donde quiere que se le envíe el producto<br />
3) Una explicación del defecto<br />
4) Prueba de fecha de compra<br />
5) El producto debe empaquetarse bien en una caja resistente para evitar que se dañe durante el transporte, y enviarse con<br />
portes pagados a la dirección que se muestra a continuación:<br />
En EE UU, enviar a: En CANADÁ, enviar a:<br />
<strong>Bushnell</strong> Performance Optics <strong>Bushnell</strong> Performance Optics<br />
Attn.: Repairs Attn.: Repairs<br />
8500 Marshall Drive 25A East Pearce Street, Unit 1<br />
Lenexa, Kansas 66214 Richmond Hill, Ontario L4B 2M9<br />
En el caso de los productos comprados fuera de los Estados Unidos o Canadá, llame al distribuidor local para la información<br />
pertinente sobre la garantía. En Europa también puede llamar al: BUSHNELL Performance Optics Gmbh<br />
European Service Centre<br />
MORSESTRASSE 4<br />
D- 50769 KÖLN<br />
ALEMANIA<br />
Tél: +49 (0) 221 709 939 3<br />
Fax: +49 (0) 221 709 939 8<br />
Esta garantía le ofrece derechos legales específicos. Puede que tenga otros derechos que varían de un país a otro.<br />
©20<strong>05</strong> <strong>Bushnell</strong> Outdoor Products<br />
24 25
<strong>26</strong><br />
DEUTSCH<br />
TECHNISCHE DATEN<br />
Vergrößerung: 2,5x<br />
Objektivdurchmesser: 42 mm<br />
Vertikale Auflösung: 25 Linien/mm<br />
Sichtbereich (in m)* 1,2–183 m<br />
Arbeitsbereich des eingebauten IR-Illuminators 82,<strong>26</strong> m<br />
Sichtfeld: 24,07 m auf <strong>91</strong>,4 m<br />
Batteriegröße: 2 Mignonzellen<br />
Betriebszeit: bis zu 20 Stunden<br />
Temperaturbereich: –30 bis +40 °C<br />
Einstellbereich des Okulars: +/– 5 Dioptrien<br />
Länge: 170 mm<br />
Länge mit montierter Antenne: 365 mm<br />
Breite: 95 mm<br />
Höhe: 70 mm<br />
Gewicht: 0,5 kg<br />
Technische Daten des Mikrofons:<br />
Äquivalentes Rauschniveau: 20 dB<br />
Akustische Verstärkung: 0–66 dB<br />
Frequenzgang: 500–10.000 Hz<br />
Empfindlichkeit bei einer Frequenz von 1.000 Hz 20 + 5 mV/Pa<br />
*Maximaler Abstand, bei dem ein Mensch unter idealen Sichtbedingungen wahrgenommen werden kann; klare<br />
Umgebungsbedingungen (kein Nebel, Staub o.ä.); Viertelmond.<br />
Herzlichen Glückwunsch zum Kauf Ihres Nachtsichtgerätes von <strong>Bushnell</strong>. Unsere Geräte aus der <strong>Bushnell</strong>-Nachtsichtgeräte-Serie<br />
beinhalten hochwertige Bildverstärkerröhren und optische Systeme. Nachtsichtgeräte von <strong>Bushnell</strong> verstärken die bestehenden<br />
Lichtverhältnisse und ermöglichen so noch eine gute Sicht unter Umgebungsbedingungen, bei denen mit bloßem Auge nichts mehr<br />
wahrgenommen werden könnte.<br />
FUNKTIoNSWEISE DES NaCHTSICHTGErÄTES<br />
Produkte aus der Nachtsichtgeräte-Serie von <strong>Bushnell</strong> sammeln und verstärken das vorhandene Licht über die Objektivlinse und<br />
bündeln es anschließend auf dem Bildverstärker. Im Inneren des Verstärkers wird eine Fotokathode durch die auftretende Lichtmenge<br />
angeregt und wandelt dabei die Photonenenergie in Elektronen um. Diese Elektronen werden über ein elektrostatisches Feld im<br />
Verstärker beschleunigt und treffen im Anschluss auf einen Phosphorbildschirm auf (kann man sich wie einen einfarbigen grünen TV-<br />
Bildschirm vorstellen), der ein für Sie sichtbares Bild überträgt. Die eigentliche Verstärkung der vorhandenen Lichtverhältnisse sowie<br />
Aufbereitung des Bildes wird also über die Beschleunigung von Elektronen erreicht. Bei diesem Produkt handelt es sich um ein Gerät<br />
der Generation I.<br />
Ihr <strong>Bushnell</strong>-Nachtsichtgerät ist mit unserem so genannten System DSAS ausgestattet (Directional Sound Amplification System),<br />
das Ihnen neben der reinen Objekterkennung den Zusatznutzen einer leistungsfähigen Verstärkung akustischer Signale bietet.<br />
DSAS basiert auf den jüngsten Entwicklungen auf dem Gebiet der elektronischen Schallverstärkung und kombiniert dabei ein<br />
hoch empfindliches RICHTMIKROFON mit einem innovativen Rauschunterdrückungssystem höchster Qualität. Das Ergebnis: eine<br />
technisch und qualitativ einzigartige Tonaufbereitung und -wiedergabe.<br />
Ihr Nachtsichtgerät eignet sich für eine Vielzahl von professionellen Einsätzen und Freizeitanwendungen; dazu zählen z.B.:<br />
• Beobachtung von Wildtieren<br />
• Astronomie<br />
• Bootsport/Marine-Anwendungen<br />
• Polizei und andere Ordnungskräfte<br />
• Such- und Rettungseinsätze<br />
• Sicherheitsanwendungen<br />
• Grundstücksüberwachung<br />
27
ERSTE SCHRITTE<br />
Einsetzen der Batterien<br />
Dieses Gerät wird mit zwei Mignonzellen betrieben. Zum Einsetzen<br />
der Batterien den Batteriefachdeckel auf der Unterseite des Gerätes<br />
aufschrauben. Anschließend die Batterien so einlegen, dass der (+)und<br />
(–)-Pol der Batterien auf die jeweilige Markierung im Inneren des<br />
Batteriefachs zeigen. Nach Einlegen der Zellen den Deckel wieder<br />
vorsichtig festschrauben und Schrauben dabei nicht überdrehen.<br />
Verwendung und Test<br />
Dieses Gerät wird mit zwei Mignonzellen betrieben. Vergewissern Sie<br />
sich, dass die Batterien so wie oben beschrieben eingelegt wurden.<br />
Befestigen Sie die Empfangsantenne des DSAS-Richtmikrofons (1) und<br />
stecken Sie den Ohrhörerstecker in die Audio-Ausgangsbuchse (2).<br />
Wenn Sie Ihr Nachtsichtgerät in einer gut beleuchteten Umgebung<br />
zuvor erst einmal testen möchten, vergewissern Sie sich bitte vor<br />
Drücken von POWER, dass der Objektivdeckel auf der Objektivlinse<br />
(3) sitzt. Der Deckel ist mit einer kleinen Öffnung versehen, über die<br />
eine kleine Lichtmenge für Testzwecke in das Gerät gelangen kann.<br />
Für Tests oder zum Einsatz des Gerätes in der Dunkelheit bitte den<br />
Objektivdeckel entfernen und das Gerät durch Drücken des POWER-<br />
Knopfes einschalten (4).<br />
Danach die vorläufige Schärfeeinstellung durch Ausrichten der Stellmarke<br />
(befindet sich auf dem Fokussierring des Objektivs) auf den Buchstaben<br />
„N" im Wort „Normal" aktivieren.<br />
Anschließend die Ohrhörer in die Ohren stecken und DSAS-Mikrofon<br />
durch Drücken von ON (6) aktivieren.<br />
Muss die Betrachtung des gewünschten Objekts in vollständiger Dunkelheit<br />
erfolgen und stehen dabei keinerlei weitere Lichtquellen (wie etwa<br />
Mondlicht) zur Verfügung, aktivieren Sie den Infrarot-Illuminator durch<br />
Drücken des entsprechenden Knopfes (5) neben dem POWER-Knopf.<br />
28<br />
Jetzt das Gerät auf ein Objekt in einer Entfernung von ca. 100 Metern ausrichten und dabei das<br />
Okular (7) so lange drehen, bis eine optimale Abbildungsqualität erreicht wird. Nach dieser Einstellung<br />
bitte das Okular unabhängig von wechselnden Entfernungen und anderen Parametern nicht mehr verdrehen.<br />
Richten Sie nun das Gerät auf das zu betrachtende Objekt aus und stellen Sie die endgültige Schärfe durch Drehen des<br />
Fokussierrings an der Linse so lange nach, bis eine optimale Bildqualität erreicht ist.<br />
Durch Drücken der entsprechenden Lautstärkeknöpfe (8) die Wiedergabelautstärke wie gewünscht anpassen.Soll das empfangene<br />
akustische Signal aufgenommen werden, den Stecker des Aufnahmegerätes in Buchse (9) einstecken und Aufnahme starten.<br />
Über die grüne LED wird angezeigt, dass die Lichtverstärkungseinheit arbeitet. Die rote LED zeigt an, dass der Infrarot-Illuminator<br />
29
aktiv ist. Ein Aufleuchten der gelben LED bedeutet, dass das DIRECTIONAL SOUND AMPLIFICATION SYSTEM arbeitet. Bitte<br />
vergessen Sie niemals, das Gerät nach der Benutzung wieder auszuschalten. Bitte vor der Lagerung sicherstellen, dass keine LEDs<br />
mehr leuchten. Dieses Nachtsichtgerät kann auf jedes handelsübliche Stativ mit einer 1/4-Zoll-Kupplung (10) montiert werden.<br />
Achtung: Dieses Gerät ist auch für einen Einsatz unter extrem niedrigen Umgebungstemperaturen geeignet. Bitte bei Rückführung<br />
in wärmere Umgebungen anschließend ca. 5 Stunden warten, bevor das Gerät wieder benutzt wird. Anderenfalls können durch<br />
Entfrostung der Schaltkreise im Inneren des Systems und Kondensbildung Schäden auftreten.<br />
Flecken auf dem Sucherbild<br />
• Unter Umständen können Flecken auf dem Sucherbild auftreten. Dabei handelt es sich um kosmetische Erscheinungen, die von Gerät<br />
zu Gerät variieren. Sie sind bei einem Nachtsichtgerät als absolut normal zu betrachten und stellen KEINEN Fertigungsfehler dar.<br />
FEHLERBEHEBUNG<br />
gerät schaltet nicht ein.<br />
Vergewissern Sie sich, dass die Batterien korrekt eingelegt wurden. Gegebenenfalls die vorhandenen Batterien durch neue ersetzen.<br />
Die Kontakte im Inneren des Batteriefachs müssen absolut sauber sein und dürfen keinerlei Korrosion zeigen. Überprüfen Sie, ob<br />
sich der Einschaltknopf in Stellung ON befindet.<br />
kein scharfes bild.<br />
Schärfe am Okular (7) einstellen. Anschließend Bildschärfe durch Drehen des Fokussierrings am Objektiv nachstellen. Wenn immer<br />
noch keine Verbesserung erreicht werden kann, Sucher und Linsen von eventuellem Beschlag oder Staub befreien.<br />
sicht lässt nach oder verschwindet völlig.<br />
Bei Auftreffen von sehr hellen Lichtquellen wie etwa den Scheinwerfern eines Fahrzeugs kann die Sicht nachlassen oder sogar<br />
vollständig verschwinden. In einem solchen Fall das Gerät durch Drücken der Taste (4) ausschalten (Stellung OFF) und von der<br />
Lichtquelle wegrichten. Das System stellt sich nach 1 bis 2 Minuten selbstständig zurück. Bitte beachten Sie, dass die Sichtverhältnisse<br />
bei Nebel oder extrem dunklen Umgebungsbedingungen nachlassen können.<br />
gerät blinkt.<br />
ZBei Einsatz unter sehr hellen Umgebungsbedingungen kann das Gerät blinken. Dieses kann auch innerhalb der ersten Sekunden<br />
bei Einsatz in dunklen Umgebungen der Fall sein.<br />
keine adäquate verstärkung des akustischen signals.<br />
Vergewissern Sie sich, dass die RICHTANTENNE fest mit dem Mikrofon verbunden ist. Überprüfen Sie die Verbindung der Ohrhörer.<br />
Gegebenenfalls Batterien durch neue Zellen ersetzen.<br />
30<br />
PFLEGE UND WARTUNG<br />
Ihr <strong>Bushnell</strong>-Nachtsichtgerät wurde für viele Jahre des zuverlässigen Betriebs entwickelt und hergestellt. Für ein optimales<br />
Sichtergebnis beachten Sie bitte die folgenden Hinweise und Warnungen.<br />
• Das Gerät niemals über einen längeren Zeitraum hinweg auf eine Lichtquelle mit einer Intensität von mehr als 1 Lux (zum Beispiel<br />
Fahrzeugscheinwerfer) ausrichten. Das System beinhaltet zwar eine interne Schutzschaltung gegen übermäßig helle Lichtquellen;<br />
eine länger anhaltende Einwirkung von sehr hellem Licht kann jedoch bleibende Schäden verursachen. Derartige Schäden können<br />
unter Umständen zu einem Verlust der Gewährleistung führen.<br />
• Ihr Nachtsichtgerät ist ein geschlossenes System. Bitte das Gehäuse niemals öffnen oder in anderer Form Wartungsarbeiten an den<br />
inneren Komponenten vornehmen.<br />
• Das Gerät immer in einem trockenen, gut belüfteten Raum lagern.<br />
• Soll das Gerät für einen Zeitraum von mehr als 2 Monaten nicht verwendet werden, bitte die Batterien entnehmen.<br />
• Bitte auf ausreichenden Abstand zu den Auslässen von Heizungs- und Klimaanlagen sowie anderen Heizquellen achten. Vor<br />
Feuchtigkeit und direkter Sonneneinstrahlung schützen.<br />
• Bitte das Gerät vor sehr harten Schlägen schützen und niemals auf harte Oberflächen fallen lassen. Obwohl<br />
Ihr <strong>Bushnell</strong>-Nachtsichtgerät für einen Einsatz unter extrem rauen Bedingungen konzipiert wurde, kann das darin<br />
enthaltene optische System durch grobe Fälle von falschem Gebrauch in Mitleidenschaft gezogen werden.<br />
• Bitte Verschmutzungen der optischen Linsen des Gerätes ausschließlich mit professionellen Reinigungsmitteln aus dem<br />
Fachhandel entfernen.<br />
• Das Gehäuse mit einem weichen, sauberen Tuch reinigen.<br />
LED-Produkt der Klasse 1 gemäß IEC 60825-1/Nov. 1993, Anhang EN 60825-1A11/Okt. 1996<br />
31
ZWEIJÄHRIGE BESCHRÄNKTE GARANTIE<br />
Sie erhalten für Ihr <strong>Bushnell</strong>®-Produkt eine Garantie für einen Zeitraum von zwei Jahren ab dem Kaufdatum. Die Garantie erstreckt sich auf Materialund<br />
Herstellungsfehler. Für den Fall, dass ein Mangel im Rahmen dieser Garantie auftritt, werden wir das Produkt nach unserer Wahl reparieren<br />
oder austauschen, vorausgesetzt, dass Sie das Produkt freigemacht zurückschicken. Von dieser Garantie ausgeschlossen sind Schäden, die auf<br />
Missbrauch, unsachgemäße Behandlung, Installations- oder Wartungsarbeiten, die nicht von einer autorisierten <strong>Bushnell</strong>-Kundendienstabteilung<br />
vorgenommen werden, zurückzuführen sind.<br />
Jeder Rücksendung im Rahmen dieser Garantie müssen folgende Dokumente und Angaben beigefügt werden:<br />
1) Ein Scheck/eine Zahlungsanweisung in Höhe von 10,00 USD zur Abdeckung der Porto- und Bearbeitungskosten<br />
2) Name und Anschrift für die Rücksendung des Produkts<br />
3) Eine Erläuterung des Mangels<br />
4) Nachweis des Kaufdatums<br />
5) Das Produkt sollte zur Vermeidung von Transportschäden gut verpackt in einemstabilen Versandkarton an die nachstehend<br />
aufgeführte Adresse geschickt werden,wobei die Gebühren für die Rücksendung im Voraus zu entrichten sind.<br />
Adresse für Rücksendungen in die USA: Adresse für Rücksendungen nach KANADA<br />
<strong>Bushnell</strong> Performance Optics <strong>Bushnell</strong> Performance Optics<br />
Attn.: Repairs Attn.: Repairs<br />
8500 Marshall Drive 25A East Pearce Street, Unit 1<br />
Lenexa, Kansas 66214 Richmond Hill, Ontario L4B 2M9<br />
Bei Produkten, die Sie außerhalb der Vereinigten Staaten oder Kanadas gekauft haben, erhalten Sie die entsprechenden Informationen zur<br />
Garantie von ihrem Händler vor Ort. In Europa erreichen Sie <strong>Bushnell</strong> auch unter: BUSHNELL Performance Optics Gmbh<br />
European Service Centre<br />
MORSESTRASSE 4<br />
D- 50769 KÖLN<br />
Deutschland<br />
Tél: +49 (0) 221 709 939 3<br />
Fax: +49 (0) 221 709 939 8<br />
Mit dieser Garantie erwerben Sie bestimmte Rechtsansprüche. Sie haben möglicherweise darüber hinaus noch andere Rechte,<br />
die von Land zu Land variieren. ©20<strong>05</strong> <strong>Bushnell</strong> Outdoor Products<br />
32 33
34<br />
ItaLIaNo<br />
DATI TECNICI<br />
Ingrandimento: 2,5 X<br />
Diametro dell’obiettivo: 42 mm<br />
Risoluzione verticale: 25 linee/mm<br />
Portata di osservazione*: 1,22 – 183 m<br />
Portata dell’illuminatore a raggi infrarossi integrato: 82,30 m<br />
Campo visivo: da 24 m a <strong>91</strong> m<br />
Tipo di pila: AA (2)<br />
Durata di funzionamento: fino a 20 ore<br />
Limiti di temperatura: da -30 a 40oC<br />
Regolazione dell’oculare: +/- 5 diottrie<br />
Lunghezza: 17 cm<br />
Lunghezza con antenna: 36,5 cm<br />
Larghezza: 95 mm<br />
Altezza: 70 mm<br />
Peso: 0,5 kg<br />
Caratteristiche del microfono<br />
Livello di rumore equivalente: 20db<br />
Amplificazione acustica: 0-66 db<br />
Risposta in frequenza: 500-10000 Hz<br />
Sensibilità al livello di frequenza di 1000 Hz: 20+5mV/Pa<br />
* La distanza massima alla quale è possibile riconoscere una figura umana in condizioni di osservazione ideali, cioè in presenza di<br />
aria limpida (assenza di nebbia, polvere, ecc.) con illuminazione di un quarto di luna.<br />
Grazie per la preferenza accordataci acquistando un prodotto per visione notturna <strong>Bushnell</strong>. Gli strumenti per visione notturna<br />
<strong>Bushnell</strong> sono costruiti con ottiche e tubi intensificatori di immagine di alta qualità per amplificare la luce disponibile, consentendo<br />
l’osservazione in condizioni di illuminazione insufficienti per l’occhio nudo.<br />
COME FUNZIONANO GLI STRUMENTI PER VISIONE NOTTURNA<br />
Gli strumenti per visione notturna <strong>Bushnell</strong> raccolgono e amplificano la luce attraverso l’obiettivo e la focalizzano sull’intensificatore<br />
di immagine. Quest’ultimo contiene un fotocatodo che, colpito dalla luce, trasforma l’energia dei fotoni in elettroni. Questi<br />
ultimi vengono accelerati in un campo elettrostatico all’interno dell’intensificatore e colpiscono uno schermo al fosforo (simile a<br />
uno schermo televisivo monocromatico verde), sul quale si forma l’immagine visibile. Il guadagno luminoso e il miglioramento<br />
dell’immagine sono dovuti all’accelerazione degli elettroni. Lo strumento descritto è un dispositivo della prima generazione.<br />
Questo strumento per visione notturna è dotato di un sistema amplificatore acustico direzionale (SAAD) che offre l’ulteriore vantaggio<br />
di un amplificatore acustico di grandissima qualità. L’amplificatore direzionale utilizza la più avanzata tecnologia di amplificazione<br />
del suono abbinando il nostro esclusivo microfono DIREZIONALE di elevata sensibilità con un modernissimo sistema di riduzione del<br />
rumore; ne risulta un potenziamento sonoro senza confronti.<br />
Questo strumento per visione notturna è ideale per svariate applicazioni ricreative e professionali:<br />
• osservazione di animali selvatici<br />
• astronomia<br />
• utilizzo in barca o marino<br />
• operazioni di polizia<br />
• soccorso<br />
• sicurezza<br />
• tutela della proprietà<br />
35
PER INIZIARE<br />
Installazione delle pile<br />
Questo strumento è alimentato da due pile di tipo AA. Per installarle,<br />
svitate il coperchio del vano delle pile situato sul fondo dell’unità.<br />
Inserite le pile nell’apposito vano in modo che i terminali positivo (+) e<br />
negativo (-) corrispondano ai simboli riportati all’interno del vano. Con<br />
attenzione, riposizionate il coperchio sul vano delle pile senza stringere<br />
troppo.<br />
Utilizzo e collaudo<br />
Questo strumento è alimentato da due pile di tipo AA. Accertatevi che<br />
siano installate in conformità alle istruzioni di cui sopra.<br />
Montate l’antenna ricevente del microfono direzionale SAAD (1) e inserite<br />
la spina della cuffia nel jack di uscita audio (2). Se volete verificare il<br />
funzionamento dello strumento in un’area illuminata, accertatevi che il<br />
coperchio dell’obiettivo (3) copra la lente prima di premere il pulsante<br />
di accensione “POWER”. Nel coperchio è praticato un forellino per<br />
consentire il passaggio di una piccola quantità di luce a scopo di<br />
collaudo.<br />
Se intendete verificare il funzionamento dello strumento o usarlo<br />
nell’oscurità, rimuovete il coperchio e accendete lo strumento premendo<br />
il pulsante “POWER” (4).<br />
Indossate la cuffia e attivate il microfono SAAD premendo il pulsante “ON” (6).<br />
Se il soggetto viene visto in un’area completamente buia dove non è presente alcuna sorgente luminosa ambientale (quale la luna),<br />
attivate l’illuminatore a raggi infrarossi premendo il relativo pulsante (5) situato accanto al pulsante “POWER”.<br />
Puntate lo strumento verso un oggetto situato a una distanza di circa 90 metri e ruotate l’oculare (7) fino a ottenere la migliore<br />
qualità possibile dell’immagine. Una volta eseguita la regolazione, non ruotate più l’oculare indipendentemente dalla distanza del<br />
Impostate la regolazione preliminare della messa a fuoco ponendo il<br />
soggetto e da altre condizioni. Puntate lo strumento verso il soggetto da osservare ed eseguite la messa a fuoco finale ruotando<br />
simbolo di regolazione (situato sopra l’anello di messa a fuoco dell’obiettivo)<br />
l’anello di messa a fuoco dell’obiettivo fino a quando la qualità dell’immagine risulta ottima.<br />
dalla parte opposta alla lettera “N” della parola “Normal” (11).<br />
Regolate il volume dell’amplificazione acustica su un livello ottimale premendo i pulsanti di controllo del volume (8). Se desiderate<br />
36 37<br />
Infrared<br />
power
egistrare il sonoro, inserite la spina del registratore a nastro nella presa (9) e iniziate la registrazione.<br />
Il LED verde indica che l’amplificatore della luce è acceso. Il LED rosso indica che l’illuminatore a raggi infrarossi è acceso. Il LED<br />
giallo indica che il sistema amplificatore acustico direzionale è operativo. Spegnete sempre lo strumento al termine dell’utilizzo.<br />
Non riponete mai lo strumento con le spie accese. Questo strumento può essere montato su un treppiede qualsiasi con uno zoccolo<br />
di ¼” (10).<br />
Attenzione: questo strumento può essere adoperato a temperature estremamente basse. Tuttavia, quando lo si riporta in un<br />
ambiente a temperatura normale, occorre attendere circa 5 ore prima di usarlo nuovamente. Questa precauzione ha lo scopo di<br />
prevenire danni a causa della condensa che potrebbe essersi depositata sui circuiti interni.<br />
Punti sull’immagine<br />
• È possibile che si vedano punti sull’immagine; essi variano da uno strumento all’altro e sono difetti estetici interni, normali negli<br />
strumenti per visione notturna; NON sono difetti funzionali<br />
RISOLUZIONE DEI PROBLEMI<br />
il monocolo non si accende.<br />
Accertatevi che le pile siano installate correttamente. Eventualmente sostituitele con pile nuove. Verificate che i contatti delle pile<br />
siano puliti e senza tracce di corrosione. Verificate che il pulsante di accensione sia sulla posizione “ON”.<br />
L’immagine è sfocata.<br />
Mettetela a fuoco regolando l’oculare (7). Regolate l’anello di messa a fuoco dell’obiettivo. Se ancora l’immagine non va a fuoco,<br />
pulite le lenti; potrebbero essere appannate o impolverate.<br />
Il monocolo può lampeggiare quando viene adoperato in un ambiente luminoso e anche durante i primi secondi di utilizzo in<br />
ambienti oscuri.<br />
L’amplificatore acustico non amplifica correttamente.<br />
Verificate che l’antenna direzionale sia saldamente collegata al microfono. Controllate il collegamento della cuffia; verificate che<br />
le pile siano nuove.<br />
CURA E MANUTENZIONE<br />
Questo strumento per visione notturna <strong>Bushnell</strong> è costruito in modo da assicurare diversi anni di utilizzo senza problemi. Per ottenere<br />
le massime prestazioni, seguite sempre queste avvertenze e precauzioni:<br />
• Non puntate a lungo lo strumento verso nessuna sorgente luminosa che emetta più di 1 lux, come ad esempio gli abbaglianti<br />
di un autoveicolo. Lo strumento utilizza un sistema interno di protezione dai lampi che riduce al minimo il rischio di danni, ma<br />
un’esposizione prolungata a luci molto intense può causare danni che annullerebbero la garanzia.<br />
• Lo strumento è chiuso ermeticamente. Non cercate di aprirlo o di ripararlo in alcun altro modo.<br />
• Conservate sempre lo strumento in un locale asciutto e ben ventilato.<br />
• Estraete le pile se lo strumento non sarà utilizzato per più di 2 mesi.<br />
• Tenete lo strumento lontano da bocchette di riscaldamento e climatizzazione e da altri apparecchi di riscaldamento, dalla luce<br />
solare diretta e dall’umidità.<br />
• Evitate che lo strumento cada o subisca urti. Sebbene sia stato costruito con caratteristiche di robustezza per l’uso all’aperto, lo<br />
strumento contiene un sofisticato sistema ottico che potrebbe essere danneggiato da sollecitazioni estreme.<br />
• Pulite le lenti con delicatezza utilizzando i prodotti appositi.<br />
• Pulite l’esterno dello strumento con un panno morbido e pulito.<br />
La visibilità diminuisce o si annulla.<br />
Le sorgenti che irradiano una luce forte, come gli abbaglianti, possono peggiorare o annullare la visibilità. Spegnete lo strumento<br />
premendo l’apposito pulsante sulla posizione OFF (4) e rivolgete il monocolo in direzione opposta alla sorgente luminosa. Lo<br />
strumento ritorna al normale funzionamento entro 1 o 2 minuti. Condizioni quali nebbia o ambienti con pochissima luce fanno<br />
Prodotto LED Classe 1 ai sensi IEC 60825-1/nov 1993, appendice EN 60825-1A11/ott1996<br />
diminuire la visibilità.<br />
il monocolo lampeggia.<br />
38 39
GARANZIA LIMITATA PER DUE ANNI<br />
Si garantisce che questo prodotto <strong>Bushnell</strong>® sarà esente da difetti di materiale e fabbricazione per due anni a decorrere dalla<br />
data di acquisto. In caso di difetto durante il periodo di garanzia, a nostra discrezione ripareremo o sostituiremo il prodotto<br />
purché sia restituito franco destinatario. Sono esclusi dalla garanzia eventuali danni causati da abuso, maneggiamento improprio,<br />
installazione o manutenzione eseguiti da persone non autorizzate dal servizio di assistenza <strong>Bushnell</strong>.<br />
A un prodotto restituito e coperto da questa garanzia occorre allegare quanto segue.<br />
1) Assegno/ordine di pagamento per l’importo di 10 $US per coprire i costi di spedizione.<br />
2) Nome e indirizzo da utilizzare per la restituzione del prodotto.<br />
3) Una spiegazione del difetto.<br />
4) Scontrino riportante la data di acquisto.<br />
5) Il prodotto deve essere imballato in una scatola robusta, per prevenire danni durante il trasporto, e va spedito franco<br />
destinatario a uno dei seguenti indirizzi.<br />
Recapito negli Stati Uniti: Recapito in Canada:<br />
<strong>Bushnell</strong> Performance Optics <strong>Bushnell</strong> Performance Optics<br />
Attn.: Repairs Attn.: Repairs<br />
8500 Marshall Drive 25A East Pearce Street, Unit 1<br />
Lenexa, Kansas 66214 Richmond Hill, Ontario L4B 2M9<br />
Per prodotti acquistati fuori degli Stati Uniti o del Canada, rivolgersi al rivenditore per le clausole pertinenti della garanzia. In<br />
Europa si può anche contattare la <strong>Bushnell</strong> a questo numero: BUSHNELL Performance Optics Gmbh<br />
European Service Centre<br />
MORSESTRASSE 4<br />
D- 50769 - Cologne<br />
Germania<br />
Tél: +49 (0) 221 709 939 3<br />
Fax: +49 (0) 221 709 939 8<br />
Questa garanzia dà specifici diritti legali. Eventuali altri diritti variano da una nazione all’altra.<br />
©20<strong>05</strong> <strong>Bushnell</strong> Outdoor Products<br />
40 41
portuGuêS<br />
ESPECIFICAÇÕES<br />
ampliação: 2.5 X<br />
tamanho da objetiva: 42 mm<br />
resolução vertical: 25 linhas/mm<br />
Faixa de visualização (em pés)*: 4–600 pés<br />
Faixa do iluminador infravermelho integrado: 90 jardas (82 m)<br />
campo de visão: 79 pés a 100 jardas (24 m a <strong>91</strong> m)<br />
tipo de pilha: aa (2)<br />
tempo de operação: até 20 horas<br />
Faixa de temperatura: -22 a 104 graus F / -30 a 40 graus celsius<br />
ajuste do corpo da ocular: +/- 5 dioptria<br />
comprimento: 6,7 polegadas / 170 mm<br />
comprimento com a antena: 14 polegadas / 365 mm<br />
Largura: 3,7 polegadas / 95 mm<br />
altura: 2,7 polegadas / 70 mm<br />
peso: 17 onças / 0,5 kg<br />
características do microfone<br />
Nível de ruído equivalente: 20 db<br />
amplificação do som: 0-66 db<br />
resposta de freqüência: 500-10000 Hz<br />
Sensibilidade no nível freqüência de 1000 Hz:20+5mV/pa<br />
*Distância máxima na qual uma figura humana poderá ser reconhecida sob condições ideais de visualização; definidas<br />
como condições claras (sem neblina, poeira, etc.) sob a luz de 1/4 de lua.<br />
parabéns pela aquisição de seu produto <strong>Bushnell</strong> com visão noturna. os produtos com visão noturna da <strong>Bushnell</strong> apresentam<br />
tubos intensificadores de imagem e óptica de alta qualidade. Eles amplificam a luz existente, permitindo fazer observações<br />
em condições que, a olho nu, seriam demasiadamente escuras.<br />
COMO FUNCIONA A VISÃO NOTURNA<br />
os produtos com visão noturna da <strong>Bushnell</strong> absorvem e amplificam a luz existente através da lente objetiva; após,<br />
a luz é focalizada no intensificador de imagem. No interior do intensificador, um fotocátodo é “estimulado” pela<br />
luz e converte a energia fotônica em elétrons. Esses elétrons aceleram no campo eletrostático dentro do intensificador<br />
e golpeiam uma tela de fósforo (como a tela monocromática verde de televisão), que emite uma imagem visível. É a<br />
aceleração dos elétrons que proporciona a captação e melhoria da imagem. Este é um dispositivo de Geração I.<br />
o dispositivo com visão noturna oferece um Sistema de amplificação de Som Direcional (DSaS - Directional<br />
Sound amplification System), proporcionando o benefício adicional de alta sofisticação. o DSaS<br />
emprega as últimas novidades na amplificação do som, combinando nosso exclusivo microfone DIrEcIoNaL<br />
com alta sensibilidade e sistema de redução de ruído avançado, oferecendo inigualável aperfeiçoamento sonoro.<br />
o dispositivo com visão noturna é ideal para uma variedade de utilizações profissionais e recreativas, incluindo:<br />
• observação de animais selvagens<br />
• astronomia<br />
• Navegação / atividades marítimas<br />
• atividades policiais e de cumprimento da lei<br />
• Busca e resgate<br />
• Segurança<br />
• administração de propriedades<br />
42 43
COMO COMEÇAR<br />
Instalação das pilhas<br />
Este dispositivo opera com duas pilhas de tamanho aa. para<br />
instalá-las, desaparafuse a tampa do compartimento de pilhas localizado<br />
na parte inferior da unidade. Insira as pilhas no compartimento<br />
de forma que seus terminais positivos (+) e negativos<br />
(-) correspondam às marcações que se encontram no interior do<br />
compartimento. recoloque a tampa com cuidado, sem apertar demasiadamente.<br />
Uso e teste<br />
Este dispositivo opera com duas pilhas de tamanho aa. certifiquese<br />
de que tenham sido instaladas de acordo com as instruções<br />
acima.<br />
conecte a antena receptora do microfone direcional do DSaS (1) e<br />
insira o plugue dos fones de ouvido no conector de saída de áudio<br />
(2). caso deseje testar o dispositivo com visão noturna em uma<br />
área iluminada, não esqueça de cobrir a lente objetiva(3) com a<br />
tampa antes de pressionar o botão “poWEr”. a tampa da lente<br />
objetiva possui um orifício muito pequeno para permitir a entrada<br />
de uma pequena quantidade de luz, para fins de teste.<br />
caso esteja testando ou usando o dispositivo no escuro, retire a<br />
tampa da lente objetiva e acione o mesmo pressionando o botão<br />
“poWEr”(4).<br />
regule o foco inicialmente posicionando a marca de ajuste (localizado<br />
na parte superior do anel de foco da objetiva) defronte da<br />
letra “N” da palavra “Normal” (11).<br />
coloque os fones de ouvido e acione o microfone DSaS pressionando o botão “oN” (6).<br />
caso o objeto a ser visualizado esteja em uma área totalmente escura, sem nenhuma fonte de luz ambiental (como a luz da<br />
lua), acione o iluminador infravermelho pressionando o botão correspondente (5), localizado próximo ao botão “poWEr”.<br />
aponte o dispositivo para um objeto a aproximadamente <strong>91</strong> metros e gire a ocular (7) para que proporcione a melhor qualidade<br />
de imagem. após o ajuste, não gire mais a ocular, independentemente da distância ou de outras condições. aponte o<br />
dispositivo para o objeto a ser visualizado e faça o ajuste final girando o anel de foco da lente objetiva até obter excelente<br />
qualidade de imagem.<br />
ajuste o volume de amplificação de som em um nível ideal pressionando os botões de controle de volume (8). para gravar,<br />
insira o plugue do gravador no conector (9) e inicie a gravação.<br />
44 45<br />
Infrared<br />
power
o LED verde indica que a unidade amplificadora de luz está ligada. o LED vermelho indica que o iluminador infravermelho<br />
está ligado. o LED amarelo indica que o SIStEMa DE aMpLIFIcaçÃo DE SoM DIrEcIoNaL está em funcionamento. Não<br />
esqueça de desligar a unidade após o uso. Não armazene este dispositivo se os indicadores estiverem acesos. Ele pode ser<br />
montado em qualquer tripé com soquete de 1/4” (10).<br />
cuidado: este dispositivo pode ser usado em climas extremamente frios. Entretanto, quando a unidade for levada de volta a<br />
um ambiente de temperatura morna, é necessário aguardar aproximadamente 5 horas antes de usá-la novamente. poderão<br />
ocorrer danos resultantes da condensação acumulada no circuito interno da unidade.<br />
Manchas na imagem<br />
• poderão ser observadas manchas na imagem. Elas variam de dispositivo para dispositivo e são imperfeições cosméticas no<br />
seu interior, o que é normal em dispositivos com visão noturna e NÃo constituem defeito.<br />
IDENTIFICAÇÃO E SOLUÇÃO DE PROBLEMAS<br />
A luneta não liga.<br />
Verifique se as pilhas estão instaladas corretamente. troque por pilhas novas. Verifique os contatos das pilhas para<br />
assegurar que estejam limpos e sem corrosão. Verifique se a força se encontra na posição “oN” (LIGaDa).<br />
A imagem não está bem focalizada.<br />
ajuste o foco na ocular (7). ajuste o anel de foco da lente objetiva. Se isto não ajudar, limpe as lentes, pois poderão<br />
estar embaçadas ou empoeiradas.<br />
A visibilidade diminui ou desaparece.<br />
Fontes de brilho intenso, como faróis de carros, podem fazer com que a visibilidade seja reduzida ou desapareça<br />
completamente. Desligue a força (4) e gire a luneta afastando-a da fonte de luz. a unidade se ajustará dentro de<br />
1 ou 2 minutos. condições como a neblina ou ambientes extremamente escuros reduzirão a visibilidade.<br />
A luneta pisca.<br />
a luneta poderá piscar quando utilizada em ambientes iluminados. Isso poderá ocorrer também durante os primeiros<br />
segundos de uso em ambientes escuros.<br />
O sistema de amplificação de som não está funcionando corretamente.<br />
certifique-se de que a antena DIrEcIoNaL esteja firmemente conectada ao microfone. Verifique a conexão do jogo dos<br />
fones de ouvido; certifique-se de que as pilhas são novas.<br />
CUIDADO E MANUTENÇÃO<br />
o dispositivo com visão noturna da <strong>Bushnell</strong> foi projetado para proporcionar muitos anos de serviço confiável. para assegu<br />
rar máximo proveito de seu dispositivo com visão noturna, sempre observe os avisos e precauções a seguir:<br />
• Não aponte o dispositivo para uma fonte de luz superior a 1 lux, como faróis de carros, por períodos prolongados. Esse<br />
dispositivo utiliza um sistema de proteção interno contra o brilho que minimiza possíveis danos, mas a exposição prolonga<br />
da à luz intensa poderá danificar a unidade. Este tipo de dano poderá anular a sua garantia.<br />
• Este dispositivo foi projetado para funcionar de forma independente. Não abra o corpo do dispositivo nem tente realizar<br />
serviços de manutenção.<br />
• armazene o dispositivo sempre em uma área seca e bem ventilada.<br />
• remova as pilhas se o dispositivo precisar ser armazenado por mais de 2 meses.<br />
• Sempre mantenha o dispositivo afastado de registros de aquecedores, ar condicionado, outros dispositivos de aquecimento,<br />
luz direta do sol e umidade.<br />
• cuide para não deixar cair ou bater a unidade contra outros objetos. Embora tenha sido projetado para uso em ambientes<br />
externos, o dispositivo possui um sistema óptico sofisticado, que poderia ser danificado em casos extremos de utilização<br />
indevida.<br />
• Limpe as lentes ópticas com produtos de limpeza profissionais para este fim.<br />
• Limpe a parte externa do dispositivo com um pano limpo e macio.<br />
produto LED da classe 1 de acordo com a IEc 60825-1/nov de 1993, apêndice EN 60825-1a11/outubro de 1996<br />
46 47
GARANTIA LIMITADA DE DOIS ANOS<br />
Garantimos que seu produto <strong>Bushnell</strong>® estará isento de defeitos materiais e de fabricação. por dois anos após a data de aquisição. caso<br />
tenha algum um defeito sob esta garantia, iremos a nossa opção, consertar ou trocar este produto desde que o produto seja devolvido com<br />
porte pago. Esta garantia não abrange danos causados por uso indevido, operação, instalação, ou manutenção incorretas efetuadas por<br />
alguém a não ser que seja do Departamento do Serviço de Manutenção autorizada da <strong>Bushnell</strong>.<br />
Qualquer devolução efetuada sob esta garantia deve incluir os itens relacionados a seguir:<br />
1) um cheque/ordem de pagamento no montante de $10,00 para cobrir as despesas de porte e gastos administrativos<br />
2) Nome e endereço para a devolução do produto<br />
3) uma explicação do defeito<br />
4) comprovante da Data de aquisição<br />
5) o produto deve ser cuidadosamente embalado, numa caixa de papelão resistente para prevenir danos enquanto em trânsito e<br />
enviado para os endereços indicados a seguir com porte de devolução pago:<br />
NOS EUA REMETER PARA: NO CANADÁ REMETER PARA:<br />
<strong>Bushnell</strong> performance optics <strong>Bushnell</strong> performance optics<br />
attn.: repairs attn.: repairs<br />
8500 Marshall Drive 25a East pearce Street, unit 1<br />
Lenexa, Kansas 66214 richmond Hill, ontario L4B 2M9<br />
para produtos adquiridos fora dos Estados unidos ou do canadá favor contatar seu revendedor local quanto a informações aplicáveis<br />
referentes a sua garantia. a <strong>Bushnell</strong> também pode ser contatada na Europa pelo telefone: BuSHNELL performance optics Gmbh<br />
European Service centre<br />
MorSEStraSSE 4<br />
D- 50769 KÖLN<br />
alemanha<br />
tél: +49 (0) 221 709 939 3<br />
Fax: +49 (0) 221 709 939 8<br />
Esta garantia lhe dá direitos legais específicos.<br />
poderá ter outros direitos que podem variar de país para país.<br />
©20<strong>05</strong> <strong>Bushnell</strong> performance optics<br />
48 49
©<strong>Bushnell</strong> outdoor products<br />
www.bushnell.com


