Libretto di Istruzioni Instructions Manual Manuel d ... - Falcon
Libretto di Istruzioni Instructions Manual Manuel d ... - Falcon Libretto di Istruzioni Instructions Manual Manuel d ... - Falcon
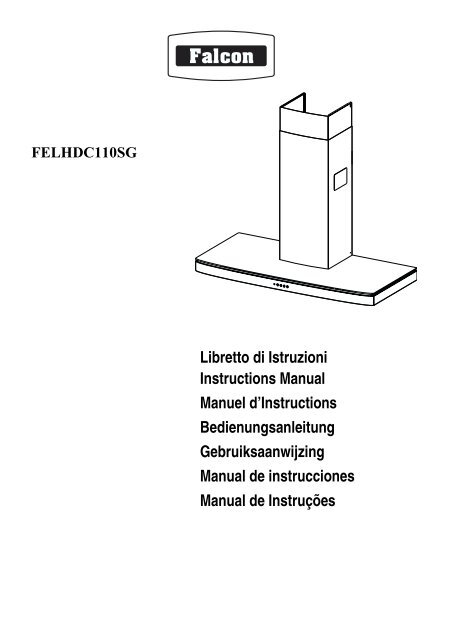
FELHDC110SG Libretto di Istruzioni Instructions Manual Manuel d’Instructions Bedienungsanleitung Gebruiksaanwijzing Manual de instrucciones Manual de Instruções
- Page 2 and 3: Libretto di Istruzioni INDICE CONSI
- Page 4 and 5: Manuel d’Instructions SOMMAIRE CO
- Page 6 and 7: Gebruiksaanwijzing INHOUDSOPGAVE AD
- Page 8 and 9: Manual de Instruções ÍNDICE CONS
- Page 10 and 11: CARATTERISTICHE IT 740 500 70 259 I
- Page 12 and 13: Montaggio Corpo Cappa Prima di agga
- Page 14 and 15: USO IT S V1 V2 V3 L Luci Accende e
- Page 16 and 17: RECOMMENDATIONS AND SUGGESTIONS The
- Page 18 and 19: INSTALLATION EN Wall drilling and b
- Page 20 and 21: ELECTRICAL CONNECTION Connect the h
- Page 22 and 23: MAINTENANCE EN Grease filters CLEAN
- Page 24 and 25: CARACTERISTIQUES FR 740 500 70 259
- Page 26 and 27: Montage Corps Hotte Avant d’accro
- Page 28 and 29: UTILISATION FR S V1 V2 V3 L Lumièr
- Page 30 and 31: EMPFEHLUNGEN UND HINWEISE Diese Geb
- Page 32 and 33: MONTAGE DE Bohren der Befestigungsl
- Page 34 and 35: ELEKTROANSCHLUSS Bei Anschluss der
- Page 36 and 37: WARTUNG Fettfilter SELBSTTRAGENDER
- Page 38 and 39: EIGENSCHAPPEN NL 740 500 70 259 Bui
- Page 40 and 41: Montage van de Wasemkap Alvorens de
- Page 42 and 43: GEBRUIK NL S V1 V2 V3 L Lichten Hie
- Page 44 and 45: CONSEJOS Y SUGERENCIAS Las presente
- Page 46 and 47: INSTALACIÓN ES Taladrado pared y f
- Page 48 and 49: CONEXIÓN ELÉCTRICA Conectar la ca
- Page 50 and 51: MANTENIMIENTO ES Filtros antigrasa
FELHDC110SG<br />
<strong>Libretto</strong> <strong>di</strong> <strong>Istruzioni</strong><br />
<strong>Instructions</strong> <strong>Manual</strong><br />
<strong>Manuel</strong> d’<strong>Instructions</strong><br />
Be<strong>di</strong>enungsanleitung<br />
Gebruiksaanwijzing<br />
<strong>Manual</strong> de instrucciones<br />
<strong>Manual</strong> de Instruções
<strong>Libretto</strong> <strong>di</strong> <strong>Istruzioni</strong><br />
INDICE<br />
CONSIGLI E SUGGERIMENTI ..............................................................................................................................................9<br />
CARATTERISTICHE ............................................................................................................................................................10<br />
INSTALLAZIONE..................................................................................................................................................................11<br />
USO ......................................................................................................................................................................................14<br />
MANUTENZIONE .................................................................................................................................................................15<br />
IT<br />
2
<strong>Instructions</strong> <strong>Manual</strong><br />
INDEX<br />
RECOMMENDATIONS AND SUGGESTIONS....................................................................................................................16<br />
CHARACTERISTICS............................................................................................................................................................17<br />
INSTALLATION ....................................................................................................................................................................18<br />
USE.......................................................................................................................................................................................21<br />
MAINTENANCE....................................................................................................................................................................22<br />
EN<br />
3
<strong>Manuel</strong> d’<strong>Instructions</strong><br />
SOMMAIRE<br />
CONSEILS ET SUGGESTIONS ..........................................................................................................................................23<br />
CARACTERISTIQUES .........................................................................................................................................................24<br />
INSTALLATION ....................................................................................................................................................................25<br />
UTILISATION........................................................................................................................................................................28<br />
ENTRETIEN..........................................................................................................................................................................29<br />
FR<br />
4
Be<strong>di</strong>enungsanleitung<br />
INHALTSVERZEICHNIS<br />
EMPFEHLUNGEN UND HINWEISE....................................................................................................................................30<br />
CHARAKTERISTIKEN..........................................................................................................................................................31<br />
MONTAGE............................................................................................................................................................................32<br />
BEDIENUNG.........................................................................................................................................................................35<br />
WARTUNG............................................................................................................................................................................36<br />
DE<br />
5
Gebruiksaanwijzing<br />
INHOUDSOPGAVE<br />
ADVIEZEN EN SUGGESTIES .............................................................................................................................................37<br />
EIGENSCHAPPEN...............................................................................................................................................................38<br />
INSTALLATIE .......................................................................................................................................................................39<br />
GEBRUIK..............................................................................................................................................................................42<br />
ONDERHOUD ......................................................................................................................................................................43<br />
NL<br />
6
<strong>Manual</strong> de instrucciones<br />
ÍNDICE<br />
CONSEJOS Y SUGERENCIAS ...........................................................................................................................................44<br />
CARACTERÍSTICAS ............................................................................................................................................................45<br />
INSTALACIÓN......................................................................................................................................................................46<br />
USO ......................................................................................................................................................................................49<br />
MANTENIMIENTO................................................................................................................................................................50<br />
ES<br />
7
<strong>Manual</strong> de Instruções<br />
ÍNDICE<br />
CONSELHOS E SUGESTÕES ............................................................................................................................................51<br />
CARACTERÍSTICAS ............................................................................................................................................................52<br />
INSTALAÇÃO .......................................................................................................................................................................53<br />
UTILIZAÇÃO.........................................................................................................................................................................56<br />
MANUTENÇÃO ....................................................................................................................................................................57<br />
PT<br />
8
CONSIGLI E SUGGERIMENTI<br />
Questo libretto <strong>di</strong> istruzioni per l'uso è previsto per più versioni dell' apparecchio.<br />
É possibile che siano descritti singoli particolari della dotazione, che non<br />
riguardano il Vostro apparecchio.<br />
INSTALLAZIONE<br />
Il produttore declina qualsiasi responsabilità per danni dovuti ad installazione<br />
non corretta o non conforme alle regole dell’arte.<br />
La <strong>di</strong>stanza minima <strong>di</strong> sicurezza tra il Piano <strong>di</strong> cottura e la Cappa deve essere<br />
<strong>di</strong> 650 mm.<br />
Verificare che la tensione <strong>di</strong> rete corrisponda a quella riportata nella targhetta<br />
posta all’interno della Cappa.<br />
Per Apparecchi in Classe Ia accertarsi che l’impianto elettrico domestico garantisca<br />
un corretto scarico a terra.<br />
Collegare la Cappa all’uscita dell’aria aspirata con tubazione <strong>di</strong> <strong>di</strong>ametro pari o<br />
superiore a 120 mm. Il percorso della tubazione deve essere il più breve possibile.<br />
Non collegare la Cappa a condotti <strong>di</strong> scarico dei fumi prodotti da combustione<br />
(caldaie, caminetti, ecc.).<br />
Nel caso in cui nella stanza vengano utilizzati sia la Cappa che apparecchi non<br />
azionati da energia elettrica (ad esempio apparecchi utilizzatori <strong>di</strong> gas), si deve<br />
provvedere ad una aerazione sufficiente dell’ambiente. Se la cucina ne fosse<br />
sprovvista, praticare un’apertura che comunichi con l’esterno, per garantire il<br />
richiamo d’aria pulita.<br />
USO<br />
La Cappa è stata progettata esclusivamente per uso domestico, per abbattere<br />
gli odori della cucina.<br />
Non fare mai uso improprio della Cappa.<br />
Non lasciare fiamme libere a forte intensità sotto la Cappa in funzione.<br />
Regolare sempre le fiamme in modo da evitare una evidente fuoriuscita laterale<br />
delle stesse rispetto al fondo delle pentole.<br />
Controllare le friggitrici durante l’uso: l’olio surriscaldato potrebbe infiammarsi.<br />
Non preparare alimenti flambè sotto la cappa da cucina; pericolo d'incen<strong>di</strong>o.<br />
Questo apparecchio non deve essere utilizzato da persone (bambini inclusi)<br />
con ridotte capacità psichiche, sensoriali o mentali, oppure da persone senza<br />
esperienza e conoscenza, a meno che non siano controllati o istruiti all’uso<br />
dell’apparecchio da persone responsabili della loro sicurezza.<br />
I bambini devono essere supervisionati per assicurarsi che non giochino con<br />
l’apparecchio.<br />
MANUTENZIONE<br />
Prima <strong>di</strong> procedere a qualsiasi operazione <strong>di</strong> manutenzione, <strong>di</strong>sinserire la<br />
Cappa togliendo la spina elettrica o spegnendo l’interruttore generale.<br />
Effettuare una scrupolosa e tempestiva manutenzione dei Filtri secondo gli<br />
intervalli consigliati.<br />
Per la pulizia delle superfici della Cappa è sufficiente utilizzare un panno umido<br />
e detersivo liquido neutro.<br />
Il simbolo sul prodotto o sulla confezione in<strong>di</strong>ca che il prodotto non deve essere considerato<br />
come un normale rifiuto domestico, ma deve essere portato nel punto <strong>di</strong> raccolta appropriato per<br />
il riciclaggio <strong>di</strong> apparecchiature elettriche ed elettroniche. Provvedendo a smaltire questo prodotto<br />
in modo appropriato, si contribuisce a evitare potenziali conseguenze negative per l’ambiente<br />
e per la salute, che potrebbero derivare da uno smaltimento inadeguato del prodotto. Per informazioni<br />
più dettagliate sul riciclaggio <strong>di</strong> questo prodotto, contattare l’ufficio comunale, il servizio<br />
locale <strong>di</strong> smaltimento rifiuti o il negozio in cui è stato acquistato il prodotto.<br />
IT<br />
650 mm min.<br />
9
CARATTERISTICHE<br />
IT<br />
740<br />
500 70<br />
259<br />
Ingombro<br />
Componenti<br />
Rif. Q.tà Componenti <strong>di</strong> Prodotto<br />
1 1 Corpo Cappa completo <strong>di</strong>: Coman<strong>di</strong>, Luce, Gruppo<br />
Ventilatore, Filtri<br />
2 1 Camino Telescopico formato da:<br />
2.1 1 Camino Superiore<br />
2.2 1 Camino Inferiore<br />
8a 1 Griglia Direzionata DX Uscita Aria<br />
8b 1 Griglia Direzionata SX Uscita Aria<br />
9 1 Flangia <strong>di</strong> Riduzione ø 150-120 mm<br />
10 1 Anello <strong>di</strong> Maggiorazione ø 120-125 mm<br />
14 1 Prolunga Uscita Aria Corpo Cappa formata da 2 Semigusci<br />
14.1 2 Prolunga Raccordo Uscita Aria<br />
15 1 Raccordo Uscita Aria<br />
Rif. Q.tà Componenti <strong>di</strong> Installazione<br />
7.2.1 2 Staffe Fissaggio Camino Superiore<br />
11 6 Tasselli<br />
12a 6 Viti 4,2 x 44,4<br />
12c 6 Viti 2,9 x 9,5<br />
Q.tà Documentazione<br />
1 <strong>Libretto</strong> <strong>Istruzioni</strong><br />
300<br />
min. 740<br />
260<br />
max. 940<br />
10<br />
9<br />
2<br />
1<br />
2.1<br />
8b<br />
2.2<br />
132<br />
14<br />
90<br />
427<br />
650 min.<br />
15<br />
12a 7.2.1 11<br />
12c<br />
8a<br />
14.1<br />
11<br />
12a<br />
10 1<br />
0
INSTALLAZIONE<br />
Foratura Parete e Fissaggio Staffe<br />
Tracciare sulla Parete:<br />
• una linea Verticale fino al soffitto o al limite superiore, al centro della zona prevista per il<br />
montaggio della Cappa;<br />
una linea Orizzontale a: 650 mm min. sopra il Piano <strong>di</strong> Cottura.<br />
Appoggiare come in<strong>di</strong>cato la Staffa 7.2.1 a 1-2 mm dal soffitto o dal limite superiore, allineando<br />
il suo centro (intagli) sulla linea Verticale <strong>di</strong> riferimento.<br />
Segnare i centri dei Fori della Staffa.<br />
Appoggiare come in<strong>di</strong>cato la Staffa 7.2.1 a X mm sotto la prima staffa (X = altezza Camino<br />
Superiore in dotazione), allineando il suo centro (intagli) sulla linea Verticale <strong>di</strong> riferimento.<br />
Segnare i centri dei Fori della Staffa.<br />
Segnare come in<strong>di</strong>cato, un punto <strong>di</strong> riferimento a 116 mm dalla linea Verticale <strong>di</strong> riferimento,<br />
e 328 mm sopra la linea Orizzontale <strong>di</strong> riferimento.<br />
Ripetere questa operazione dalla parte opposta.<br />
Forare ø 8 mm i punti segnati.<br />
Inserire i tasselli 11 nei fori.<br />
Fissare le Staffe, utilizzando le Viti 12a (4,2 x 44,4 ) in dotazione.<br />
Avvitare 2 Viti 12a (4,2 x 44,4) in dotazione nei fori per il fissaggio del corpo Cappa, lasciando<br />
uno spazio <strong>di</strong> 5-6 mm fra la parete e la testa della vite.<br />
IT<br />
650 min.<br />
7.2.1<br />
11<br />
12a<br />
116 116<br />
1÷2<br />
328 X<br />
11 1<br />
1
Montaggio Corpo Cappa<br />
Prima <strong>di</strong> agganciare il Corpo Cappa, serrare le 2 Viti Vr situate<br />
sui punti <strong>di</strong> aggancio del Corpo Cappa.<br />
Agganciare il Corpo Cappa alle Viti 12a.<br />
Serrare definitivamente le Viti 12a <strong>di</strong> supporto.<br />
Agire sulle Viti Vr per livellare il Corpo Cappa.<br />
IT<br />
Connessioni<br />
USCITA ARIA VERSIONE ASPIRANTE<br />
Per installazione in Versione Aspirante collegare la Cappa alla<br />
tubazione <strong>di</strong> uscita per mezzo <strong>di</strong> un tubo rigido o flessibile <strong>di</strong><br />
ø150 o 125 mm, la cui scelta è lasciata all'installatore.<br />
Per collegamento con tubo ø125 mm, inserire la Flangia <strong>di</strong> riduzione<br />
9 sull’Uscita del Corpo Cappa e l’anello <strong>di</strong> maggiorazione<br />
10 ø120-125 sulla Flangia .<br />
Fissare il tubo con adeguate fascette stringitubo. Il materiale<br />
occorrente non è in dotazione.<br />
Togliere eventuali Filtri Antiodore al Carbone attivo.<br />
USCITA ARIA VERSIONE FILTRANTE<br />
Assemblare i Semigusci della Prolunga Corpo Cappa 14.<br />
Inserire a pressione la Prolunga Corpo Cappa 14 così ottenuta,<br />
sull’Uscita Aria.<br />
Inserire a pressione il Raccordo 15 sulla Prolunga Corpo Cappa<br />
14.<br />
Inserire lateralmente le Prolunghe Raccordo 14.1 sul Raccordo<br />
15.<br />
Assicurarsi che l’uscita delle Prolunghe Raccordo 14.1 risulti<br />
in corrispondenza delle bocchette del Camino sia in orizzontale<br />
che in verticale. Se così non fosse, aggiustare la posizione invertendo<br />
le Prolunghe Raccordo 14.1 o tagliando la Prolunga<br />
Corpo Cappa 14 in corrispondenza <strong>di</strong> una delle lunghezze prestabilite<br />
dalle scanalature <strong>di</strong> minor spessore e rimontare i particolari<br />
come prima descritto.<br />
Le Griglie <strong>di</strong>rezionate Uscita Aria 8a - 8b devono essere montate<br />
dopo l’installazione del Camino Inferiore 2.2.<br />
Assicurarsi della presenza del Filtro Antiodore al Carbone attivo.<br />
8b<br />
12a<br />
14<br />
ø 150<br />
15<br />
10<br />
9<br />
Vr<br />
14.1<br />
ø 125<br />
8a<br />
12 1<br />
2
CONNESSIONE ELETTRICA<br />
Collegare la Cappa all’Alimentazione <strong>di</strong> Rete interponendo un<br />
Interruttore bipolare con apertura dei contatti <strong>di</strong> almeno 3 mm.<br />
Rimuovere i Filtri antigrasso (ve<strong>di</strong> par. “Manutenzione”) e assicurarsi<br />
che il connettore del Cavo <strong>di</strong> alimentazione sia correttamente<br />
inserito nella presa dell’Aspiratore<br />
Montaggio Camino<br />
Camino superiore<br />
Allargare leggermente le due falde laterali, agganciarle <strong>di</strong>etro<br />
le Staffe 7.2.1 e richiuderle fino a battuta.<br />
Fissare lateralmente alle Staffe con 4 Viti 12c (2,9 x 9,5) in<br />
dotazione.<br />
Camino inferiore<br />
Allargare leggermente le due falde laterali del Camino, agganciarle<br />
tra il Camino superiore e la parete e richiuderle fino a<br />
battuta.<br />
Fissare lateralmente la parte inferiore al Corpo Cappa, con 2<br />
Viti 12c (2,9 x 9,5) in dotazione.<br />
Per la Versione Filtrante applicare le Griglie <strong>di</strong>rezionate 8a -<br />
8b nelle apposite se<strong>di</strong>, in modo che i simboli <strong>di</strong>rezionali risultino<br />
orientati verso l’alto e il fronte della Cappa. Assicurarsi<br />
inoltre che risultino inserite correttamente nelle Prolunghe<br />
Raccordo 14.1.<br />
IT<br />
2<br />
2.1<br />
8b<br />
2.2<br />
7.2.1<br />
8a<br />
12c<br />
12c<br />
13 1<br />
3
USO<br />
IT<br />
S<br />
V1 V2 V3<br />
L Luci Accende e spegne l’Impianto <strong>di</strong> Illuminazione.<br />
S Led Led accensione Motore.<br />
V1 Motore Accende e spegne il motore Aspirazione a velocità minima, adatta ad un<br />
ricambio d’aria continuo particolarmente silenzioso, in presenza <strong>di</strong> pochi<br />
vapori <strong>di</strong> cottura.<br />
V2 Velocità Velocità me<strong>di</strong>a, adatta alla maggior parte delle con<strong>di</strong>zioni d’uso, dato<br />
l’ottimo rapporto tra portata d’aria trattata e livello sonoro.<br />
V3 Velocità Velocità massima, adatta a fronteggiare le massime emissioni <strong>di</strong> vapore <strong>di</strong><br />
cottura, anche per tempi prolungati.<br />
L<br />
14 1<br />
4
MANUTENZIONE<br />
Filtri antigrasso<br />
PULIZIA FILTRI ANTIGRASSO METALLICI AUTOPORTANTI<br />
Sono lavabili anche in lavastoviglie, e necessitano <strong>di</strong> essere<br />
lavati ogni 2 mesi circa <strong>di</strong> utilizzo o più frequentemente, per un<br />
uso particolarmente intenso.<br />
Togliere i Filtri uno alla volta, spingendoli verso la parte posteriore<br />
del gruppo e tirando contemporaneamente verso il basso.<br />
Lavare i Filtri evitando <strong>di</strong> piegarli, e lasciarli asciugare prima<br />
<strong>di</strong> rimontarli.<br />
Rimontarli facendo attenzione a mantenere la maniglia verso la<br />
parte visibile esterna.<br />
IT<br />
Filtro antiodore (Versione Filtrante)<br />
SOSTITUZIONE FILTRO ANTIODORE AL CARBONE ATTIVO<br />
Non è lavabile e non è rigenerabile, va sostituito almeno ogni 4<br />
mesi o più frequentemente, per un uso particolarmente intenso.<br />
Togliere i Filtri antigrasso metallici.<br />
Rimuovere il Filtro antiodore al Carbone attivo saturo, agendo<br />
sugli appositi agganci.<br />
Montare il nuovo Filtro agganciandolo nella sua sede.<br />
Rimontare i Filtri antigrasso metallici.<br />
Illuminazione<br />
SOSTITUZIONE LAMPADE<br />
Lampade alogene da 20 W.<br />
Togliere le due viti che fissano il Supporto illuminazione e sfilarlo<br />
dalla Cappa.<br />
Estrarre la Lampada dal Supporto.<br />
Sostituirla con una nuova <strong>di</strong> uguali caratteristiche, facendo attenzione<br />
<strong>di</strong> inserire correttamente i due spinotti nella sede del<br />
Supporto.<br />
Rimontare il Supporto fissandola con le due Viti precedentemente<br />
tolte.<br />
15 1<br />
5
RECOMMENDATIONS AND SUGGESTIONS<br />
The <strong>Instructions</strong> for Use apply to several versions of this appliance. Accor<strong>di</strong>ngly,<br />
you may find descriptions of in<strong>di</strong>vidual features that do not apply to<br />
your specific appliance.<br />
INSTALLATION<br />
The manufacturer will not be held liable for any damages resulting from incorrect<br />
or improper installation.<br />
The minimum safety <strong>di</strong>stance between the cooker top and the extractor<br />
hood is 650 mm.<br />
Check that the mains voltage corresponds to that in<strong>di</strong>cated on the rating<br />
plate fixed to the inside of the hood.<br />
For Class I appliances, check that the domestic power supply guarantees<br />
adequate earthing.<br />
Connect the extractor to the exhaust flue through a pipe of minimum <strong>di</strong>ameter<br />
120 mm. The route of the flue must be as short as possible.<br />
Do not connect the extractor hood to exhaust ducts carrying combustion<br />
fumes (boilers, fireplaces, etc.).<br />
If the extractor is used in conjunction with non-electrical appliances (e.g. gas<br />
burning appliances), a sufficient degree of aeration must be guaranteed in<br />
the room in order to prevent the backflow of exhaust gas. The kitchen must<br />
have an opening communicating <strong>di</strong>rectly with the open air in order to guarantee<br />
the entry of clean air.<br />
USE<br />
The extractor hood has been designed exclusively for domestic use to eliminate<br />
kitchen smells.<br />
Never use the hood for purposes other than for which it has been designed.<br />
Never leave high naked flames under the hood when it is in operation.<br />
Adjust the flame intensity to <strong>di</strong>rect it onto the bottom of the pan only, making<br />
sure that it does not engulf the sides.<br />
Deep fat fryers must be continuously monitored during use: overheated oil<br />
can burst into flames.<br />
Do not flambè under the range hood; risk of fire<br />
This appliance is not intended for use by persons (inclu<strong>di</strong>ng children) with<br />
reduced physical, sensory or mental capabilities, or lack of experience and<br />
knowledge, unless they have been given supervision or instruction concerning<br />
use of the appliance by a person responsible for their safety.<br />
Children should be supervised to ensure that they do not play with the appliance.<br />
MAINTENANCE<br />
Switch off or unplug the appliance from the mains supply before carrying out<br />
any maintenance work.<br />
Clean and/or replace the Filters after the specified time period.<br />
Clean the hood using a damp cloth and a neutral liquid detergent.<br />
The symbol on the product or on its packaging in<strong>di</strong>cates that this product may not be treated<br />
as household waste. Instead it shall be handed over to the applicable collection point for the<br />
recycling of electrical and electronic equipment. By ensuring this product is <strong>di</strong>sposed of correctly,<br />
you will help prevent potential negative consequences for the environment and human health,<br />
which could otherwise be caused by inappropriate waste handling of this product. For more<br />
detailed information about recycling of this product, please contact your local city office, your<br />
household waste <strong>di</strong>sposal service or the shop where you purchased the product.<br />
EN<br />
650 mm min.<br />
16 1<br />
6
CHARACTERISTICS<br />
EN<br />
740<br />
500 70<br />
259<br />
Dimensions<br />
Components<br />
Ref. Q.ty Product Components<br />
1 1 Hood Body, complete with: Controls, Light, Blower,<br />
Filters<br />
2 1 Telescopic Chimney comprising:<br />
2.1 1 Upper Section<br />
2.2 1 Lower Section<br />
8a 1 Right Air Outlet Grill<br />
8b 1 Left Air Outlet Grill<br />
9 1 Reducer Flange ø 150-120 mm<br />
10 1 Adapting ring ø 120-125 mm<br />
14 1 Hood Body Air Outlet Extension Piece consisting of two<br />
Half Shells<br />
14.1 2 Air Outlet Connection Extension<br />
15 1 Air Outlet Connection<br />
Ref. Q.ty Installation Components<br />
7.2.1 2 Upper Chimney Section Fixing Brackets<br />
11 6 Wall Plugs<br />
12a 6 Screws 4,2 x 44,4<br />
12c 6 Screws 2,9 x 9,5<br />
Q.ty Documentation<br />
1 Instruction <strong>Manual</strong><br />
300<br />
min. 740<br />
260<br />
max. 940<br />
10<br />
9<br />
2<br />
1<br />
2.1<br />
8b<br />
2.2<br />
132<br />
14<br />
90<br />
427<br />
650 min.<br />
15<br />
12a 7.2.1 11<br />
12c<br />
8a<br />
14.1<br />
11<br />
12a<br />
17 1<br />
7
INSTALLATION<br />
EN<br />
Wall drilling and bracket fixing<br />
650 min.<br />
7.2.1<br />
11<br />
12a<br />
116 116<br />
Wall marking:<br />
Draw a vertical line on the supporting wall up to the ceiling, or as high as practical, at the<br />
centre of the area in which the hood will be installed.<br />
Draw a horizontal line at 650 mm above the hob. Place bracket 7.2.1 on the wall as shown<br />
about 1-2 mm from the ceiling or upper limit aligning the centre (notch) with the vertical<br />
reference line.<br />
Mark the wall at the centres of the holes in the bracket.<br />
Place bracket 7.2.1 on the wall as shown at X mm below the first bracket (X = height of the<br />
upper chimney section supplied), aligning the centre (notch) with the vertical line.<br />
Mark the wall at the centres of the holes in the bracket.<br />
Mark a reference point as in<strong>di</strong>cated at 116 mm from the vertical reference line and 328 mm<br />
above the horizontal reference line.<br />
Repeat this operation on the other side.<br />
Drill ø 8 mm holes at all the centre points marked.<br />
Insert the wall plugs 11 in the holes.<br />
Fix the brackets using the 12a (4,2 x 44,4) screws supplied.<br />
Insert the two screws 12a (4,2 x 44,4) supplied in the hood body fixing holes, leaving a gap<br />
of 5-6 mm between the wall and the head of the screw.<br />
1÷2<br />
328 X<br />
18 1<br />
8
Mounting the hood body<br />
Before attaching the hood body, tighten the two screws Vr located<br />
on the hood body mounting points.<br />
Hook the hood body onto the screws 12a.<br />
Fully tighten support screws 12a.<br />
Adjust screws Vr to level the hood body.<br />
EN<br />
Connections<br />
DUCTED VERSION AIR EXHAUST SYSTEM<br />
When installing the ducted version, connect the hood to the<br />
chimney using either a flexible or rigid pipe ø 150 or 125 mm,<br />
the choice of which is left to the installer.<br />
To install a ø 125 mm air exhaust connection, insert the reducer<br />
flange 9 on the hood body air outlet and the adapting<br />
ring ø120-125 10 on the reducer flange.<br />
Fix the pipe in position using sufficient pipe clamps (not supplied).<br />
Remove any activated charcoal filters.<br />
RECIRCULATION VERSION AIR OUTLET<br />
Assemble the two halves of the hood body extension piece 14.<br />
Push fit the assembled hood body extension piece 14 onto the<br />
air outlet.<br />
Push fit connection 15 onto the hood body extension piece 14.<br />
Insert the connection extension pieces laterally 14.1 in connection<br />
15.<br />
Make sure that the outlet of the extension pieces 14.1 is horizontally<br />
and vertically aligned with the chimney outlets. If this<br />
is not the case, adjust the position by either reversing the connection<br />
extension pieces 14.1 or by cutting the hood body extension<br />
14 along one of the thinner section channels denoting<br />
the pre-fixed lengths, then reassemble as described previously.<br />
The air outlet <strong>di</strong>rectional grills 8a - 8b must be fitted after the<br />
lower outlet duct has been installed.<br />
Ensure that the activated charcoal filters have been inserted.<br />
8b<br />
12a<br />
14<br />
ø 150<br />
15<br />
10<br />
9<br />
Vr<br />
14.1<br />
ø 125<br />
8a<br />
19 1<br />
9
ELECTRICAL CONNECTION<br />
Connect the hood to the mains through a two-pole switch having<br />
a contact gap of at least 3 mm.<br />
Remove the grease filters (see paragraph Maintenance) being<br />
sure that the connector of the fee<strong>di</strong>ng cable is correctly inserted<br />
in the socket placed on the side of the fan.<br />
Flue assembly<br />
Upper exhaust flue<br />
Slightly widen the two sides of the upper flue and hook them<br />
behind the brackets 7.2.1, making sure that they are well<br />
seated.<br />
Secure the sides to the brackets using the 4 screws 12c (2,9 x<br />
9,5) supplied.<br />
Lower exhaust flue<br />
Slightly widen the two sides of the flue and hook them between<br />
the upper flue and the wall, making sure that they are<br />
well seated.<br />
Fix the lower part laterally to the hood body using the 2 screws<br />
12c (2,9 x 9,5) supplied.<br />
On the recirculation version, fit the <strong>di</strong>rectional grids 8a – 8b in<br />
their housings making sure that the <strong>di</strong>rectional symbols are towards<br />
the top and front of the hood. Also make sure that they<br />
are correctly inserted in the connection extension pieces 14.1.<br />
EN<br />
2<br />
2.1<br />
8b<br />
2.2<br />
7.2.1<br />
8a<br />
12c<br />
12c<br />
20 2<br />
0
USE<br />
EN<br />
S<br />
V1 V2 V3<br />
L Light Switches the lighting system on and off.<br />
S Led Motor running led.<br />
V1 Motor Switches the extractor motor on and off at low speed. Used to provide a<br />
contin-uos and silent air change in the presence of light cooking vapours.<br />
V2 Speed Me<strong>di</strong>um speed, suitable for most operating con<strong>di</strong>tions given the optimum<br />
treated air flox/noise level ratio.<br />
V3 Intensive Maximum speed, used for eliminating the highest cooking vapour emission,<br />
inclu<strong>di</strong>ng long periods.<br />
L<br />
21 2<br />
1
MAINTENANCE<br />
EN<br />
Grease filters<br />
CLEANING METAL SELF- SUPPORTING GREASE FILTERS<br />
The filters must be cleaned every 2 months of operation, or<br />
more frequently for particularly heavy usage, and can be<br />
washed in a <strong>di</strong>shwasher.<br />
Remove the filters one at a time by pushing them towards the<br />
back of the group and pulling down at the same time.<br />
Wash the filters, taking care not to bend them. Allow them to<br />
dry before refitting.<br />
When refitting the filters, make sure that the handle is visible<br />
on the outside.<br />
Activated charcoal filter (Recirculation version)<br />
REPLACING THE ACTIVATED CHARCOAL FILTER<br />
The filter is not washable and cannot be regenerated, and must<br />
be replaced approximately every 4 months of operation, or<br />
more frequently for particularly heavy usage.<br />
Remove the metal grease filters<br />
Remove the saturated activated carbon filter by releasing the<br />
fixing hooks<br />
Fit the new filter by hooking it into its seating<br />
Replace the metal grease filters.<br />
Lighting<br />
LIGHT REPLACEMENT<br />
20 W halogen light.<br />
Remove the 2 screws fixing the Lighting support, and pull it<br />
out of from the Hood.<br />
Extract the lamp from the Support.<br />
Replace with another of the same type, making sure that the<br />
two pins are properly inserted in the lamp holder socket holes.<br />
Replace the Support, fixing it in place with the two screws removed<br />
as above.<br />
22 2<br />
2
CONSEILS ET SUGGESTIONS<br />
La présente notice d'emploi vaut pour plusieurs versions de l'appareil. Elle peut contenir<br />
des descriptions d'accessoires ne figurant pas dans votre appareil.<br />
INSTALLATION<br />
Le fabricant décline toute responsabilité en cas de dommage dû à une installation non<br />
correcte ou non conforme aux règles de l’art.<br />
La <strong>di</strong>stance minimale de sécurité entre le plan de cuisson et la hotte doit être de 650<br />
mm au moins.<br />
Vérifier que la tension du secteur correspond à la valeur qui figure sur la plaquette<br />
apposée à l’intérieur de la hotte.<br />
Pour les Appareils appartenant à la Ière Classe, veiller à ce que la mise à la terre de<br />
l’installation électrique domestique ait été effectuée conformément aux normes en vigueur.<br />
Connecter la hotte à la sortie d’air aspiré à l’aide d’une tuyauterie d’un <strong>di</strong>amètre égal ou<br />
supérieur à 120 mm. Le parcours de la tuyauterie doit être le plus court possible.<br />
Ne pas connecter la hotte à des conduites d’évacuation de fumées issues d’une combustion<br />
tel que (Chau<strong>di</strong>ère, cheminée, etc…).<br />
Si vous utilisez des appareils qui ne fonctionnent pas à l’électricité dans la pièce ou est<br />
installée la hotte (par exemple: des appareils fonctionnant au gaz), vous devez prévoir<br />
une aération suffisante du milieu. Si la cuisine en est dépourvue, pratiquez une ouverture<br />
qui communique avec l’extérieur pour garantir l’infiltration de l’air pur.<br />
UTILISATION<br />
La hotte a été conçue exclusivement pour l’usage domestique, dans le but d’éliminer<br />
les odeurs de la cuisine.<br />
Ne jamais utiliser abusivement la hotte.<br />
Ne pas laisser les flammes libres à forte intensité quand la hotte est en service.<br />
Toujours régler les flammes de manière à éviter toute sortie latérale de ces dernières<br />
par rapport au fond des marmites.<br />
Contrôler les friteuses lors de l’utilisation car l’huile surchauffée pourrait s’enflammer.<br />
Ne pas préparer d’aliments flambés sous la hotte de cuisine : risque d’incen<strong>di</strong>e<br />
Cet appareil ne doit pas être utilisé par des personnes (y compris les enfants) ayant<br />
des capacités psychiques, sensorielles ou mentales réduites, ni par des personnes<br />
n’ayant pas l’expérience et la connaissance de ce type d’appareils, à moins d'être sous<br />
le contrôle et la formation de personnes responsables de leur sécurité.<br />
Les enfants doivent être surveillés pour s'assurer qu'ils ne jouent pas avec l'appareil.<br />
ENTRETIEN<br />
Avant de procéder à toute opération d’entretien, retirer la hotte en retirant la fiche ou en<br />
actionnant l’interrupteur général.<br />
Effectuer un entretien scrupuleux et en temps dû des Filtres, à la cadence conseillée.<br />
Pour le nettoyage des surfaces de la hotte, il suffit d’utiliser un chiffon humide et détersif<br />
liquide neutre.<br />
Le symbole sur le produit ou son emballage in<strong>di</strong>que que ce produit ne peut être traité comme<br />
déchet ménager. Il doit plutôt être remis au point de ramassage concerné, se chargeant du recyclage<br />
du matériel électrique et électronique. En vous assurant que ce produit est éliminé correctement,<br />
vous favorisez la prévention des conséquences négatives pour l’environnement et la santé<br />
humaine qui, sinon, seraient le résultat d’un traitement inapproprié des déchets de ce produit. Pour<br />
obtenir plus de détails sur le recyclage de ce produit, veuillez prendre contact avec le bureau municipal<br />
de votre région, votre service d’élimination des déchets ménagers ou le magasin où vous avez<br />
acheté le produit.<br />
FR<br />
650 mm min.<br />
23 2<br />
3
CARACTERISTIQUES<br />
FR<br />
740<br />
500 70<br />
259<br />
Encombrement<br />
Composants<br />
Réf. Q.té Composants de Produit<br />
1 1 Corps Hotte équipé de: Commandes, Lumière, Groupe<br />
Ventilateur, Filtres<br />
2 1 Cheminée Télescopique formée de:<br />
2.1 1 Cheminée Supérieure<br />
2.2 1 Cheminée Inférieure<br />
8a 1 Grille en Direction Droite Sortie Air<br />
8b 1 Grille en Direction Gauche Sortie Air<br />
9 1 Flasque de Réduction ø 150-120 mm<br />
10 1 Anneau de raccord Ø 120 - 125 mm<br />
14 1 Rallonge Sortie Air Corps Hotte formée de 2 Semi-<br />
Coques<br />
14.1 1 Rallonge Raccord Sortie Air<br />
15 1 Raccord Sortie Air<br />
Réf. Q.té Composants pour l’installation<br />
7.2.1 2 Brides Fixation Cheminée Supérieure<br />
11 6 Chevilles<br />
12a 6 Vis 4,2 x 44,4<br />
12c 6 Vis 2,9 x 6,5<br />
Q.té Documentation<br />
1 <strong>Manuel</strong> d’instructions<br />
300<br />
min. 740<br />
260<br />
max. 940<br />
10<br />
9<br />
2<br />
1<br />
2.1<br />
8b<br />
2.2<br />
132<br />
14<br />
90<br />
427<br />
650 min.<br />
15<br />
12a 7.2.1 11<br />
12c<br />
8a<br />
14.1<br />
11<br />
12a<br />
24 2<br />
4
INSTALLATION<br />
FR<br />
Perçage Paroi et Fixation Brides<br />
650 min.<br />
7.2.1<br />
11<br />
12a<br />
116 116<br />
Tracer sur la paroi:<br />
une ligne verticale allant jusqu’au plafond ou à la limite supérieure, au centre de la zone<br />
prévue pour le montage de la hotte;<br />
une ligne horizontale à 650 mm min. au-dessus du plan de cuisson.<br />
Poser comme in<strong>di</strong>qué une bride 7.2.1 sur la paroi à 1-2 mm du plafond ou de la limite supérieure,<br />
en alignant son centre (découpes) sur la ligne verticale de repère.<br />
Marquer les centres des trous rainurés de la bride.<br />
Poser comme in<strong>di</strong>qué la bride 7.2.1 à X mm sous la première bride (X = hauteur cheminée<br />
supérieure fournie), en alignant son centre (découpes) sur la ligne verticale de repère.<br />
Marquer les centres des trous rainurés de la bride.<br />
Marquer comme in<strong>di</strong>qué, un point de référence à 116 mm de la ligne verticale de repère, et<br />
328 mm au-dessus de la ligne horizontale de repère.<br />
Répéter cette opération sur le côté opposé.<br />
Percer de ø 8 mm tous les points marqués.<br />
Insérer les chevilles 11 dans les trous.<br />
Fixer les brides en utilisant les vis 12a (4,2 x 44,4) fournies.<br />
Visser les 2 vis 12a (4,2 x 44,4) fournies dans les trous de fixation du corps hotte, en laissant<br />
un espace de 5-6 mm entre le mur et la tête de la vis.<br />
1÷2<br />
328 X<br />
25 2<br />
5
Montage Corps Hotte<br />
Avant d’accrocher le corps hotte, serrer les deux vis Vr situées<br />
sur les points d’accrochage du corps hotte.<br />
Accrocher le corps hotte aux vis 12a prévues à cet effet.<br />
Serrer définitivement les vis 12a de support.<br />
Agir sur les vis Vr pour niveler le corps hotte.<br />
FR<br />
Connexions<br />
SORTIE DE L'AIR EN VERSION EVACUATION<br />
Pour l’installation dans la Version Aspirante, connecter la hotte au tuyau<br />
d’évacuation, au moyen d’un tuyau rigide ou flexible de ø 150 ou 125<br />
mm, que l’installateur pourra choisir à son propre gré.<br />
Pour raccord de ø 125 mm, insérer la bride de réduction 9 sur la sortie<br />
du corps de hotte et l’anneau d’agran<strong>di</strong>ssement 10 de ø 120-125 mm<br />
sur la bride.<br />
Fixer le tuyau à l’aide du collet serre-tuyaux. Le matériel nécessaire<br />
n'est pas fourni avec l'appareil.<br />
Retirer les filtres anti-odeur au charbon actif, s’ils sont montés.<br />
SORTIE AIR VERSION FILTRANTE<br />
Assembler les semi-coques de la rallonge corps hotte 14.<br />
Insérer sous pression la rallonge corps hotte 14 ainsi obtenue, à<br />
la sortie air.<br />
Insérer sous pression le raccord 15 sur la rallonge corps hotte<br />
14.<br />
Insérer latéralement les rallonges raccord 14.1 sur le raccord<br />
15.<br />
S’assurer que la sortie des rallonges raccord 14.1 se trouve au<br />
niveau des bouches de la cheminée aussi bien en horizontal<br />
qu’en vertical.<br />
Si tel n’est pas le cas, ajuster la position en inversant les rallonges<br />
raccord 14.1 ou en coupant la rallonge corps hotte 14 au<br />
niveau d’une des longueurs prédéfinies par les rainures moins<br />
épaisses et remonter les pièces comme décrit au préalable.<br />
Les grilles 8a - 8b en <strong>di</strong>rection sortie air doivent être montées<br />
après l’installation de la cheminée inférieure.<br />
S’assurer de la présence des filtres anti-odeur au charbon actif.<br />
8b<br />
12a<br />
14<br />
ø 150<br />
15<br />
10<br />
9<br />
Vr<br />
14.1<br />
ø 125<br />
8a<br />
26 2<br />
6
BRANCHEMENT ELECTRIQUE<br />
Brancher la hotte sur le secteur en interposant un interrupteur<br />
bipolaire avec ouverture des contacts d’au moins 3 mm.<br />
Enlever les filtres à graisse (voir § "Entretien") et s'assurer que<br />
le connecteur du câble d'alimentation soit bien branché dans la<br />
prise du <strong>di</strong>ffuseur.<br />
Montage Cheminée<br />
Cheminée supérieure<br />
Elargir légèrement les deux bords latériaux, et les accrocher<br />
derrières les brides 7.2.1 ; refermer jusqu’à la butée.<br />
Fixer latéralement aux brides à l’aide des 4 vis 12c (2,9 x 9,5)<br />
fournies.<br />
Cheminée inférieure<br />
Elargir légèrement les deux bords latériaux de la Cheminée et<br />
les accrocher entre la Cheminée supérieure et la paroi; refermer<br />
jusqu’à la butée.<br />
Fixer latéralement la partie inférieure au corps hotte, à l’aide<br />
des deux 2 vis 12c (2,9 x 9,5) fournies.<br />
Pour la version filtrante, appliquer les grilles en <strong>di</strong>rection 8a – 8b<br />
dans les logements appropriés, pour que les symboles de <strong>di</strong>rection<br />
soient orientés vers le haut et la partie avant de la hotte.<br />
S’assurer également qu’elles sont bien insérées dans les rallonges<br />
raccord 14.1.<br />
FR<br />
2<br />
2.1<br />
8b<br />
2.2<br />
7.2.1<br />
8a<br />
12c<br />
12c<br />
27 2<br />
7
UTILISATION<br />
FR<br />
S<br />
V1 V2 V3<br />
L Lumières Allume et éteint l’installation de l’éclairage.<br />
S Del Del allumage Moteur.<br />
V1 Moteur Met en marche et à l’arrêt le moteur aspiration à vitesse minimale, pour un<br />
rechange d’air permantent particulièrement silencieux en cas de faibles vapeurs<br />
de cuisson.<br />
V2 Vitesse Vitesse moyenne pour la plupart des con<strong>di</strong>tions d’utilisation, étant donné le<br />
rapport optimal entre débit d’air traité et niveau sonore.<br />
V3 Vitesse Vitesse maximum, pour faire face aux émissions maximum de vapeur de<br />
cuisson, même pendant des temps prolongés.<br />
L<br />
28 2<br />
8
ENTRETIEN<br />
FR<br />
Filtres anti-graisse<br />
NETTOYAGE FILTRES ANTI-GRAISSE METALLIQUES AUTOPORTEURS<br />
Lavables au lave-vaisselle, ils doivent être lavés environ tous<br />
les 2 mois d’emploi ou plus fréquemment en cas d’emploi particulièrement<br />
intense.<br />
Retirer les filtres l’un aprés l’autre, en les poussant vers la partie<br />
arrière du groupe et en tirant simultanément vers le bas.<br />
Laver les filtres en évitant de les plier et les laisser sécher avant<br />
de les remonter.<br />
Remonter les filtres en veillant à ce que la poignée reste vers la<br />
partie visible externe<br />
Filtre anti-odeur (Version filtrante)<br />
REMPLACEMENT FILTRE AU CHARBON ACTIF<br />
Ni lavable, ni régénérable, le remplacer au moins tous les 4<br />
mois d’emploi ou plus fréquemment en cas d’emploi particulièrement<br />
intense.<br />
Retirer les filtres anti-graisse métalliques.<br />
Retirer le filtre anti-odeur au charbon actif colmaté, en agissant<br />
sur les crochets prévus à cet effet.<br />
Monter le nouveau filtre anti-odeur au charbon actif.<br />
Remonter les filtres anti-graisse métalliques.<br />
Eclairage<br />
REMPLACEMENT LAMPES<br />
Lampe halogène de 20 W.<br />
Retirer les 2 Vis qui fixent le Support éclairage et ôter ce dernier<br />
de la Hotte.<br />
Extraire la Lampe du Support.<br />
Remplacer par une nouvelle lampe possédant les mêmes caractéristiques,<br />
en veillant à ce que les deux fiches soient correctement<br />
insérées dans le logement de la Douille.<br />
Remonter le Support en le fixant à l’aide des deux Vis précédemment<br />
retirées.<br />
29 2<br />
9
EMPFEHLUNGEN UND HINWEISE<br />
Diese Gebrauchsanleitung gilt für mehrere Geräte-Ausführungen. Es ist möglich,<br />
dass einzelne Ausstattungsmerkmale beschrieben sind, <strong>di</strong>e nicht auf Ihr Gerät zutreffen.<br />
MONTAGE<br />
Der Hersteller haftet nicht für Schäden, <strong>di</strong>e auf eine fehlerhafte und unsachgemäße<br />
Montage zurückzuführen sind.<br />
Der minimale Sicherheitsabstand zwischen Kochmulde und Haube muss 650 mm<br />
betragen.<br />
Prüfen, ob <strong>di</strong>e Netzspannung mit dem Wert auf dem im Haubeninneren angebrachten<br />
Schild übereinstimmt.<br />
Bei Geräten der Klasse I ist sicherzustellen, dass <strong>di</strong>e elektrische Anlage des Wohnhauses<br />
über eine vorschriftsmäßige Erdung verfügt.<br />
Das Anschlussrohr der Haube zur Luftaustrittsöffnung muss einen Durchmesser<br />
von 120 mm oder darüber aufweisen. Der Rohrverlauf muss so kurz wie möglich<br />
sein.<br />
Die Haube darf an keine Entlüftungsschächte angeschlossen werden, in <strong>di</strong>e<br />
Verbrennungsgase (Heizkessel, Kamine usw.) geleitet werden.<br />
Werden im Raum außer der Dunstabzugshaube andere, nicht elektrisch betriebene<br />
(z.B. gasbetriebene) Geräte verwendet, muss für eine ausreichende Belüftung gesorgt<br />
werden. Sollte <strong>di</strong>e Küche <strong>di</strong>esbezüglich nicht entsprechen, ist an einer Aussenwand<br />
eine Öffnung anzubringen, <strong>di</strong>e Frischluftzufuhr gewährleistet.<br />
BEDIENUNG<br />
Die Dunstabzugshaube ist ausschließlich zum Einsatz im privaten Haushalt und zur<br />
Beseitigung von Küchengerüchen vorgesehen.<br />
Unsachgemäßer Einsatz der Haube ist zu unterlassen.<br />
Große Flammen bei eingeschalteter Haube niemals unbedeckt lassen.<br />
Die Intensivität der Flamme ist so zu regulieren, dass sie den Topfboden nicht überragt.<br />
Frittiergeräte müssen während des Gebrauchs stets beaufsichtigt werden: überhitztes<br />
Öl kann sich entzünden.<br />
Keine flambierten Speisen unter der Abzugshaube zubereiten: Brandgefahr.<br />
Dieses Gerät darf nicht von Personen, auch Kindern, mit verminderten psychischen,<br />
sensorischen und geistigern Fähigkeiten, oder von Personen ohne Erfahrung und<br />
Kenntnisse benutzt werden, sofern sie nicht von für ihre Sicherheit verantwortlichen<br />
Personen beaufsichtigt und beim Gebrauch des Geräts angeleitet werden.<br />
Kinder dürfen sich nicht unbeaufsichtigt in der Nähe des Geräts aufhalten und auf<br />
keinen Fall mit dem Gerät spielen.<br />
WARTUNG<br />
Bevor Wartungsarbeiten durchgeführt werden, muss <strong>di</strong>e Stromzufuhr zur Haube<br />
unterbrochen werden, indem der Stecker gezogen oder der Hauptschalter abgeschaltet<br />
wird.<br />
Bei der Filterwartung müssen <strong>di</strong>e vom Hersteller empfohlenen Zeiträume zum Austauschen<br />
der Filter genauestens eingehalten werden.<br />
Zur Reinigung der Haubenflächen Wir empfehlen ein feuchtes Tuch und ein mildes<br />
Flüssigreinigungsmittel.<br />
Das Symbol auf dem Produkt oder seiner Verpackung weist darauf hin, dass <strong>di</strong>eses Produkt<br />
nicht als normaler Haushaltsabfall zu behandeln ist, sondern an einem Sammelpunkt für das Recycling<br />
von elektrischen und elektronischen Geräten abgegeben werden muss. Durch Ihren Beitrag zum<br />
korrekten Entsorgen <strong>di</strong>eses Produkts schützen Sie <strong>di</strong>e Umwelt und <strong>di</strong>e Gesundheit Ihrer Mitmenschen.<br />
Umwelt und Gesundheit werden durch falsches Entsorgen gefährdet. Weitere Informationen<br />
über das Recycling <strong>di</strong>eses Produkts erhalten Sie von Ihrem Rathaus, Ihrer Müllabfuhr oder dem<br />
Geschäft, in dem Sie das Produkt gekauft haben.<br />
DE<br />
650 mm min.<br />
30 3<br />
0
CHARAKTERISTIKEN<br />
DE<br />
740<br />
500 70<br />
259<br />
Platzbedarf<br />
Komponenten<br />
Pos. St. Produktkomponenten<br />
1 1 Haubenkörper mit Schaltern, Beleuchtung, Gebläsegruppe,<br />
Filter<br />
2 1 Teleskopkamin bestehend aus:<br />
2.1 1 oberer Kaminteil<br />
2.2 1 unterer Kaminteil<br />
8a 1 Luftleitgitter Luftaustritt rechts<br />
8b 1 Luftleitgitter Luftaustritt links<br />
9 1 Reduzierflansch ø 150-120 mm<br />
10 1 Anschlussflansch ø 120-125 mm<br />
14 1 Verlängerungsstück f. Luftaustritt Haubenkörper, bestehend<br />
aus 2 Rohrhälften<br />
14.1 1 Verlängerung Luftaustritt-Anschlussstück<br />
15 1 Luftaustritt-Anschlussstück<br />
Pos. St. Montagekomponenten<br />
7.2.1 2 Befestigungsbügel oberer Kaminteil<br />
11 6 Dübel<br />
12a 6 Schrauben 4,2 x 44,4<br />
12c 6 Schrauben 2,9 x 6,5<br />
St. Dokumentation<br />
1 Be<strong>di</strong>enungsanleitung<br />
300<br />
min. 740<br />
260<br />
max. 940<br />
10<br />
9<br />
2<br />
1<br />
2.1<br />
8b<br />
2.2<br />
132<br />
14<br />
90<br />
427<br />
650 min.<br />
15<br />
12a 7.2.1 11<br />
12c<br />
8a<br />
14.1<br />
11<br />
12a<br />
31 3<br />
1
MONTAGE<br />
DE<br />
Bohren der Befestigungslöcher und Fixieren der Befestigungsbügel<br />
650 min.<br />
7.2.1<br />
11<br />
12a<br />
116 116<br />
Nachstehende Linien an <strong>di</strong>e Wand zeichnen:<br />
eine vertikale Linie bis zur Decke oder oberen Begrenzung, und zwar in der Mitte des Bereiches,<br />
in dem <strong>di</strong>e Haube montiert werden soll;<br />
eine horizontale Linie mit einem minimalen Abstand von 650 mm zur Kochfläche.<br />
Einen Bügel 7.2.1 zirka 1-2 mm unter der Decke oder oberen Begrenzung an <strong>di</strong>e Wand legen<br />
und seinen Mittelpunkt (Einschnitte) auf <strong>di</strong>e vertikale Bezugslinie ausrichten.<br />
Die Mitte der beiden Bügellöcher an der Wand markieren.<br />
Den zweiten Bügel 7.2.1 an <strong>di</strong>e Wand legen, wobei ein Abstand X mm vom oberen Bügel<br />
einzuhalten ist (X = Höhe des jeweiligen oberen Kaminteils); den Mittelpunkt (Einschnitte)<br />
auf <strong>di</strong>e vertikale Bezugslinie ausrichten.<br />
Die Mitte der Bügellöcher an der Wand markieren.<br />
Wie beschrieben einen Bezugspunkt 116 mm von der vertikalen Bezugslinie und 328 mm<br />
oberhalb der horizontalen Bezugslinie kennzeichnen.<br />
Gleichermaßen an der gegenüberliegenden Seite vorgehen.<br />
Mit einem Bohrer ø 8 mm <strong>di</strong>e markierten Punkte bohren.<br />
Die Dübel 11 in <strong>di</strong>e Bohrungen einfügen.<br />
Die Bügel mit den mitgelieferten Schrauben 12a (4,2 x 44,4) fixieren.<br />
2 der mitgelieferten Schrauben 12a (4,2 x 44,4) bei den Befestigungslöchern des Haubenkörpers<br />
einschrauben, wobei zwischen Wand und Schraubenkopf ein Freiraum von 5-6 mm<br />
zu belassen ist.<br />
1÷2<br />
328 X<br />
32 3<br />
2
Montage des Haubenkörpers<br />
Bevor der Haubenkörper eingehakt wird, <strong>di</strong>e 2 Schrauben Vr<br />
bei den Haubenkörper-Anhakpunkten festziehen.<br />
Den Haubenkörper bei den Schrauben 12a einhängen.<br />
Die Halteschrauben 12a definitiv festziehen.<br />
Den Haubenkörper mit Hilfe der Schrauben Vr ausrichten.<br />
Anschlüsse<br />
LUFTAUSTRITT BEI DER ABSAUGVERSION<br />
Für <strong>di</strong>e Installation als Absaugversion <strong>di</strong>e Haube mittels eines starren<br />
oder flexiblen Rohrs mit ø 150 oder 125 mm anschließen, das vom<br />
Installateur ausgewählt wird.<br />
Für den Anschluss an ø 125 mm, den Reduzierflansch 9 am Ausgang<br />
des Haubenkörpers und den Vergrößerungsring 10 ø 120-<br />
125 mm am Flansch einstecken.<br />
Das Rohr mit geeigneten Rohrschellen fixieren. Das hierzu erforderliche<br />
Material wird nicht mitgeliefert.<br />
Die eventuell vorhandenen Aktivkohlefilter ausbauen.<br />
ANSCHLUSS IN UMLUFTVERSION<br />
Die beiden Rohrhälften des Verlängerungsstücks 14 zusammenbauen.<br />
Das auf <strong>di</strong>ese Weise erzielte Verlängerungsstück 14 beim<br />
Luftaustritt eindrücken.<br />
Den Anschluss 15 beim Verlängerungsstück 14 eindrücken.<br />
Die Verlängerungen 14.1 beim Anschluss 15 seitlich einfügen.<br />
Überprüfen, ob <strong>di</strong>e Verlängerungen 14.1 mit den entsprechenden<br />
Kaminstutzen sowohl horizontal wie auch vertikal übereinstimmen.<br />
Sollte <strong>di</strong>es nicht der Fall sein, müssen <strong>di</strong>e Verlängerungen 14.1<br />
miteinander vertauscht oder muss das Haubenkörper-<br />
Anschlussstück 14 bei einer der vorgegebenen Längen (schmale<br />
Nut) abgeschnitten und wie zuvor beschrieben wieder zusammengebaut<br />
werden.<br />
Die Luftleitgitter werden nach der Installation des unteren Kaminteils<br />
montiert.<br />
Kontrollieren, ob der Aktivkohle-Geruchsfilter vorhanden ist.<br />
DE<br />
8b<br />
12a<br />
14<br />
ø 150<br />
15<br />
10<br />
9<br />
Vr<br />
14.1<br />
ø 125<br />
8a<br />
33 3<br />
3
ELEKTROANSCHLUSS<br />
Bei Anschluss der Haube an das Stromnetz muss ein zweipoliger<br />
Schalter mit einem Öffnungsweg von mindestens 3 mm<br />
zwischengeschaltet werden.<br />
Entfernen Sie <strong>di</strong>e Fettfilter (s. Abschnitt „Wartung“) und versichern<br />
Sie sich, daß <strong>di</strong>e Kabelverbindung in <strong>di</strong>e Steckdose des<br />
Gebläses einwandfrei eingesteckt wird.<br />
Kaminmontage<br />
Oberer Kaminteil<br />
Die beiden seitlichen Schenkel leicht auseinanderbiegen, hinter<br />
den Bügeln 7.2.1 einhängen und bis zum Anschlag wieder<br />
schließen.<br />
Bei den Bügeln 7.2.1 mit Hilfe der 4 mitgelieferten Schrauben<br />
12c (2,9 x 9,5) fixieren.<br />
Unterer Kaminteil<br />
Die beiden seitlichen Schenkel des Kaminteils leicht auseinanderbiegen,<br />
zwischen dem oberen Kaminteil und der Wand einhängen<br />
und bis zum Anschlag wieder schließen.<br />
Den unteren Teil seitlich am Haubenkörper mit 2 der mitgelieferten<br />
Schrauben 12c (2,9 x 9,5) fixieren.<br />
Bei Umluftbetrieb <strong>di</strong>e Luftleitgitter 8a – 8b in <strong>di</strong>e entsprechenden<br />
Sitze einsetzen, wobei darauf zu achten ist, dass <strong>di</strong>e<br />
Richtungssymbole nach oben und vorne weisen. Ferner überprüfen,<br />
ob sie korrekt bei den Verlängerungen 14.1 eingesetzt<br />
wurden.<br />
DE<br />
2<br />
2.1<br />
8b<br />
2.2<br />
7.2.1<br />
8a<br />
12c<br />
12c<br />
34 3<br />
4
BEDIENUNG<br />
DE<br />
S<br />
V1 V2 V3<br />
L Beleucht. Schaltet <strong>di</strong>e Beleuchtung ein und aus.<br />
S Led Betriebsanzeigelampe.<br />
V1 Motor Schaltet den Gebläsemotor mit minimaler Geschwin<strong>di</strong>gkeit ein oder aus.<br />
Diese Stufe ist für einen stän<strong>di</strong>gen und besonders leisen Luftaustausch bei<br />
geringer Kochdunstentwicklung geeignet.<br />
V2 Geschw. Mittlere Gebläsestufe, eignet sich aufgrund des guten Verhältnisses zwischen<br />
Fördervolumen und Geräuschentwicklung für <strong>di</strong>e meisten Anwendungssituationen.<br />
V3 Geschw. Höchste Gebläsestufe, eignet sich für starke Kochdunstentwicklung, auch<br />
über längere Zeit hin.<br />
L<br />
35 3<br />
5
WARTUNG<br />
Fettfilter<br />
SELBSTTRAGENDER METALLFETTFILTER REINIGUNG<br />
Sie müssen nach 2-monatigem Betrieb bzw. bei starkem Einsatz<br />
auch häufiger gereinigt werden, was im Geschirrspüler<br />
möglich ist.<br />
Die Filter nacheinander aushaken, indem sie auf <strong>di</strong>e Rückseite<br />
der Gruppe geschoben und gleichzeitig nach unten gezogen<br />
werden.<br />
Die Filter reinigen (darauf achten, sie nicht zu verbiegen) und<br />
vor der Remontage trocknen lassen.<br />
Bei der Remontage ist darauf zu achten, dass sich der Griff auf<br />
der sichtbaren Außenseite befindet.<br />
DE<br />
Geruchsfilter (Umluftversion)<br />
AUSTAUSCHEN DER AKTIVKOHLE FILTER<br />
Dieser Filter kann weder gewaschen noch wiederverwendet<br />
werden und ist alle 4 Betriebsmonate bzw. bei starkem Einsatz<br />
auch häufiger auszutauschen.<br />
Die Metallfettfilter entfernen.<br />
Den gesättigten Aktivkohle-Geruchsfilter aushaken.<br />
Den neuen Filter in seinem Sitz einhaken.<br />
Die Metallfettfilter wieder montieren.<br />
Die Kohlefilter können mit dem Hausmüll entsorgt werden.<br />
Beleuchtung<br />
AUSWECHSELN DER LAMPEN<br />
Halogenlampe 20 W<br />
Vor dem Auswechseln der Lampen, <strong>di</strong>e beiden Schrauben der<br />
Lampenhalterung loesen und <strong>di</strong>e Lampenhalterung aus der<br />
Dunstabzugshaube ziehen.<br />
Die Lampe aus der Halterung nehmen.<br />
Die Lampe durch eine gleichwertige ersetzen und bei der Remontage<br />
darauf achten, daß <strong>di</strong>e beiden Steckerstifte vorschriftsmäßig<br />
in <strong>di</strong>e Lampenfassung eingeführt werden.<br />
Die Lampenhalterung wieder montieren, indem <strong>di</strong>e beiden zuvor<br />
entfernten Schrauben wieder angezogen werden.<br />
36 3<br />
6
ADVIEZEN EN SUGGESTIES<br />
Deze gebruiksaanwijzing geldt voor verschillende uitvoeringen van het apparaat.<br />
Het is mogelijk dat er een aantal kenmerken worden beschreven <strong>di</strong>e niet van toepassing<br />
zijn op uw apparaat.<br />
INSTALLATIE<br />
De fabrikant aanvaardt geen enkele aansprakelijkheid voor schade <strong>di</strong>e voortkomt uit<br />
onjuiste of niet overeenkomstig de regels der kunst uitgevoerde installaties.<br />
De minimale veiligheidsafstand tussen de kookplaat en de wasemkap bedraagt 650<br />
mm.<br />
Controleer of de netspanning correspondeert met de spanning <strong>di</strong>e aangegeven is<br />
op het plaatje aan de binnenkant van de wasemkap.<br />
Voor apparaten van klasse I <strong>di</strong>ent u zich ervan te verzekeren dat het elektriciteitsnet<br />
in uw huis over een goede aar<strong>di</strong>ng beschikt.<br />
Verbind de wasemkap met de luchtuitlaat door middel van een lei<strong>di</strong>ng met een<br />
<strong>di</strong>ameter van 120 mm of groter. De lei<strong>di</strong>ng moet een zo kort mogelijke route afleggen.<br />
Sluit de wasemkap niet aan op afvoerpijpen van rook <strong>di</strong>e geproduceerd is door<br />
verbran<strong>di</strong>ng (verwarmingsketels, open haarden etc.).<br />
Als er in het vertrek zowel de wasemkap als apparaten <strong>di</strong>e niet op elektriciteit werken<br />
(bijvoorbeeld gasapparaten) worden gebruikt, moet ervoor worden gezorgd dat<br />
het vertrek voldoende geventileerd wordt. In<strong>di</strong>en de keuken geen gat in de buitenmuur<br />
heeft om de aanvoer van schone lucht te garanderen, <strong>di</strong>ent <strong>di</strong>t gemaakt te<br />
worden.<br />
GEBRUIK<br />
De wasemkap is uitsluitend ontworpen voor huishoudelijk gebruik, voor het elimineren<br />
van kookgeuren. Gebruik de kap nooit op oneigenlijke wijze.<br />
Laat geen hoog brandende branders onbedekt onder de wasemkap<br />
terwijl deze in werking is.<br />
Regel de vlammen altijd zo dat ze niet langs de pannen omhoogkomen.<br />
Controleer frituurpannen tijdens het gebruik: de oververhitte olie zou vlam kunnen<br />
vatten.<br />
Er mag niet onder de afzuigkap geflambeerd worden; brandgevaar<br />
Dit apparaat mag niet worden gebruikt door personen (inclusief kinderen) met beperkte<br />
psychische, sensorische en geestelijke vermogens, of door personen zonder<br />
ervaring en kennis, tenzij ze onder toezicht staan of worden geïnstrueerd over het<br />
gebruik van het apparaat door personen <strong>di</strong>e verantwoordelijk zijn voor hun veiligheid.<br />
Kinderen moeten worden gecontroleerd om er zeker van te zijn dat ze niet met het<br />
apparaat spelen.<br />
ONDERHOUD<br />
Alvorens onderhoudswerkzaamheden uit te voeren, moet de wasemkap uitgeschakeld<br />
worden door de stekker uit het stopcontact te halen of de hoofdschakelaar om<br />
te zetten.<br />
Voer het onderhoud van de filters altijd tij<strong>di</strong>g en nauwgezet uit,volgens de aanbevolen<br />
intervallen.<br />
Om de oppervlakken van de kap schoon te maken is het voldoende een vochtige<br />
doek en een neutraal reinigingsmiddel te gebruiken.<br />
Het symbool op het product of op de verpakking wijst erop dat <strong>di</strong>t product niet als huishoudafval<br />
mag worden behandeld. Het moet echter naar een plaats worden gebracht waar elektrische en<br />
elektronische apparatuur wordt gerecycled. Als u ervoor zorgt dat <strong>di</strong>t product op de correcte manier<br />
wordt verwijderd, voorkomt u mogelijk voor mens en milieu negatieve gevolgen <strong>di</strong>e zich zouden kunnen<br />
voordoen in geval van verkeerde afvalbehandeling. Voor meer details in verband met het recyclen van<br />
<strong>di</strong>t product, neemt u het best contact op met de gemeentelijke instanties, het bedrijf of de <strong>di</strong>enst belast<br />
met de verwijdering van huishoudafval of de winkel waar u het product hebt gekocht.<br />
NL<br />
650 mm min.<br />
37 3<br />
7
EIGENSCHAPPEN<br />
NL<br />
740<br />
500 70<br />
259<br />
Buitenafmetingen<br />
Onderdelen<br />
Ref. Productonderdelen<br />
1 1 Wasemkap compleet met: Be<strong>di</strong>eningen, Licht, Ventilatorgroep,<br />
Filters<br />
2 1 Telescopische Schouw Bestaande uit:<br />
2.1 1 Bovenstuk<br />
2.2 1 Onderstuk<br />
8a 1 Richtingsrooster Rechts Luchtuitlaat<br />
8b 1 Richtingsrooster Links Luchtuitlaat<br />
9 1 Reductieflens ø 150-120 mm<br />
10 1 Flens ø 120-125 mm<br />
14 1 Verlengstuk Luchtuitlaat Wasemkap bestaande uit<br />
twee helften<br />
14.1 1 Verlengstuk Verbin<strong>di</strong>ngsstuk Luchtuitlaat<br />
15 1 Verbin<strong>di</strong>ngsstuk Luchtuitlaat<br />
Ref. Installatieonderdelen<br />
7.2.1 2 Bevestigingsbeugels Bovenstuk van de Schouw<br />
11 6 Pluggen<br />
12a 6 Schroeven 4,2 x 44,4<br />
12c 6 Schroeven 2,9 x 6,5<br />
Documentatie<br />
1 Gebruiksaanwijzing<br />
300<br />
min. 740<br />
260<br />
max. 940<br />
10<br />
9<br />
2<br />
1<br />
2.1<br />
8b<br />
2.2<br />
132<br />
14<br />
90<br />
427<br />
650 min.<br />
15<br />
12a 7.2.1 11<br />
12c<br />
8a<br />
14.1<br />
11<br />
12a<br />
38 3<br />
8
INSTALLATIE<br />
NL<br />
Boren van gaten in de wand en bevestiging van de draagbeugels<br />
650 min.<br />
7.2.1<br />
11<br />
12a<br />
116 116<br />
Trek de volgende lijnen op de wand:<br />
een verticale lijn tot aan het plafond of tot aan de bovenlimiet, in het midden van de zone<br />
waar u de wasemkap wilt installeren;<br />
een horizontale lijn op 650 mm min. boven de kookplaat.<br />
Plaats, zoals aangegeven, de beugel 7.2.1 op 1-2 mm van het plafond of van de bovenlimiet,<br />
en lijn het midden ervan (inkepingen) uit op de verticale referentielijn.<br />
Teken de middelpunten van de gaten in de beugel af.<br />
Plaats, zoals aangegeven, de beugel 7.2.1 op X mm onder de eerste beugel (X = hoogte bijgeleverde<br />
bovenstuk van de schouw), en lijn het midden ervan (inkepingen) uit op de verticale<br />
referentielijn.<br />
Teken de middelpunten van de gaten in de beugel af.<br />
Teken, zoals aangegeven, een referentiepunt af op 116 mm van de verticale referentielijn en<br />
op 328 mm boven de horizontale referentielijn.<br />
Herhaal deze handeling aan de andere kant.<br />
Boor op de afgetekende punten gaten van ø 8 mm.<br />
Schuif de pluggen 11 in de gaten.<br />
Bevestig de beugels met behulp van de bijgeleverde schroeven 12a (4,2 x 44,4).<br />
Schroef 2 van de bijgeleverde schroeven 12a (4,2 x 44,4) in de gaten voor bevestiging van de<br />
wasemkap en laat hierbij een ruimte van 5-6 mm tussen de wand en de kop van de schroef.<br />
1÷2<br />
328 X<br />
39 3<br />
9
Montage van de Wasemkap<br />
Alvorens de wasemkap vast te haken, de 2 schroeven Vr, <strong>di</strong>e<br />
zich op de bevestigingspunten van de wasemkap bevinden,<br />
aanhalen.<br />
Haak de wasemkap vast aan de schroeven 12a.<br />
De dragende schroeven 12a definitief aanhalen.<br />
Draai aan de schroeven Vr om de wasemkap recht te hangen.<br />
Aansluitingen<br />
LUCHTUITGANG – AANZUIGENDE UITVOERING<br />
Voor de installatie van de Aanzuigende Uitvoering de Kap aansluiten<br />
op de uitgaande lei<strong>di</strong>ng met behulp van een onbuigzame<br />
of buigzame buis van ø150 of 125 mm, de keuze wordt overgelaten<br />
aan de installateur.<br />
Voor de aansluiting van ø125 mm, de reductieflens 9 op de<br />
uitgang van de behuizing van de kap schuiven en de vergrotingsring<br />
10 ø120-125 mm op de flens.<br />
Maak de buis vast met geschikte slangbeugelstrips. Het beno<strong>di</strong>gde<br />
materiaal is niet bijgeleverd.<br />
Verwijder eventuale actieve koolstof geurfilters.<br />
LUCHTUITLAAT FILTERVERSIE<br />
Assembleer de helften van het verlengstuk van de wasemkap 14.<br />
Druk het zo verkregen verlengstuk van de wasemkap 14 met<br />
kracht op de luchtuitlaat.<br />
Druk het verbin<strong>di</strong>ngsstuk 15 met kracht op het verlengstuk van<br />
de wasemkap 14.<br />
Monteer de verlengstukken van het verbin<strong>di</strong>ngsstuk 14.1 zijdelings<br />
op het verbin<strong>di</strong>ngsstuk 15.<br />
Verzeker u ervan dat de uitlaat van de verlengstukken van het<br />
verbin<strong>di</strong>ngsstuk 14.1 zowel horizontaal als verticaal correspondeert<br />
met de mondstukken van de schouw.<br />
Als <strong>di</strong>t niet zo is, de positie corrigeren door de verlengstukken<br />
van het verbin<strong>di</strong>ngsstuk 14.1 om te keren of door het verlengstuk<br />
van de wasemkap 14 af te snijden op één van de lengtes <strong>di</strong>e bepaald<br />
worden door de kleinere groeven en plaats alle onderdelen<br />
weer terug zoals eerder werd beschreven.<br />
De richtingsroosters voor de luchtuitlaat moeten pas na de installatie<br />
van het onderstuk van de schouw gemonteerd worden 2.2.<br />
Verzeker u ervan dat het geurfilter met actieve koolstof geïnstalleerd<br />
is.<br />
NL<br />
8b<br />
12a<br />
14<br />
ø 150<br />
15<br />
10<br />
9<br />
Vr<br />
14.1<br />
ø 125<br />
8a<br />
40 4<br />
0
ELEKTRISCHE AANSLUITING<br />
Sluit de wasemkap aan op de netspanning met een tweepolige<br />
schakelaar ertussen met een opening tussen de contacten van<br />
tenminste 3 mm.<br />
Verwijder de vetfilters (zie par. "Onderhoud") en verzeker u<br />
ervan dat de stekker van de voe<strong>di</strong>ngskabel goed in de contactdoos<br />
van de afzuigkap is gestoken.<br />
Montage van de schouw<br />
Bovenstuk van de schouw<br />
De twee zijplaten enigszins openen, ze vasthaken achter de<br />
beugels 7.2.1 en ze weer zo ver mogelijk sluiten.<br />
Aan de zijkant aan de beugel bevestigen met de 4 bijgeleverde<br />
schroeven 12c (2,9 x 9,5).<br />
Onderstuk van de schouw<br />
De twee zijplaten van de schouw enigszins openen, ze vasthaken<br />
tussen het bovenstuk van de schouw en de wand en ze<br />
weer zo ver mogelijk sluiten.<br />
Bevestig het onderstuk aan de zijkanten aan de wasemkap met<br />
2 van de bijgeleverde schroeven 12c.<br />
Plaats voor de filterversie de richtingsroosters 8a – 8b in hun<br />
behuizing, zodanig dat de richtingssymbolen naar de bovenkant<br />
en de voorkant van de wasemkap wijzen. Verzeker u er<br />
boven<strong>di</strong>en van dat ze correct in de verlengstukken van het verbin<strong>di</strong>ngsstuk<br />
14.1 geplaatst zijn.<br />
NL<br />
2<br />
2.1<br />
8b<br />
2.2<br />
7.2.1<br />
8a<br />
12c<br />
12c<br />
41 4<br />
1
GEBRUIK<br />
NL<br />
S<br />
V1 V2 V3<br />
L Lichten Hiermee schakelt u de verlichting aan en uit.<br />
S Led Led motorinschakeling.<br />
V1 Motor Inschakeling en uitschakeling van de afzuigmotor op minimumsnelheid,<br />
geschikt voor een continue en zeer stille luchtverversing, als er weinig<br />
kookdampen zijn.<br />
V2 Snelheid Gemiddelde snelheid, geschikt voor de meeste gebruiksomstan<strong>di</strong>gheden,<br />
gezien de uitstekende verhou<strong>di</strong>ng tussen de hoeveelheid behandelde lucht<br />
en het geluidsniveau.<br />
V3 Snelheid Maximumsnelheid, geschikt om de grootste kookdampen tegen te gaan,<br />
ook voor langere tijd.<br />
L<br />
42 4<br />
2
ONDERHOUD<br />
Vetfilters<br />
REINIGING VAN DE ZELFDRAGENDE METALEN VETFILTERS<br />
De filters moeten eens in de 2 maanden of, bij bijzonder intensief<br />
gebruik, vaker gereinigd worden, en kunnen ook in de<br />
vaatwasmachine worden gewassen.<br />
Verwijder de filters één voor één door ze naar de achterkant<br />
van de groep te duwen en ze tegelijkertijd omlaag te trekken.<br />
Was de filters en vermijd hierbij ze te buigen, en laat ze drogen<br />
alvorens ze terug te plaatsen.<br />
Plaats de vetfilters terug en let er hierbij op dat de handgreep<br />
zichtbaar blijft.<br />
Geurfilter (filterversie)<br />
VERVANGING FILTER MET ACTIEVE KOOLSTOF<br />
Het filter kan niet gewassen en niet geregenereerd worden en<br />
moet minstens eens in de 4 maanden worden vervangen, of, bij<br />
bijzonder intensief gebruik, zelfs nog vaker.<br />
Verwijder de metalen vetfilters.<br />
Verwijder het verza<strong>di</strong>gde geurfilter met actieve koolstof door<br />
de bevestigingen los te maken.<br />
Monteer het nieuwe filter door het op zijn plaats vast te drukken.<br />
Plaats de metalen vetfilters terug.<br />
Verlichting<br />
VERVANGING VAN DE LAMPEN<br />
Halogeenlamp van 20 W.<br />
Verwijder de 2 schroeven waarmee de lamphouder is bevestigd<br />
en verwijder de houder uit de kap.<br />
Trek de lamp uit de houder.<br />
Vervang de lamp door een nieuwe lamp met dezelfde eigenschappen<br />
en let er hierbij op dat de twee pinnen correct in de<br />
behuizing van de worden gestoken.<br />
Monteer de houder door hem te bevestigen met de twee eerder<br />
verwijderde schroeven.<br />
NL<br />
43 4<br />
3
CONSEJOS Y SUGERENCIAS<br />
Las presentes instrucciones de servicio son válidas para <strong>di</strong>ferentes modelos de<br />
aparato; por ello puede ser posible que se describan detalles y características de<br />
equipamiento que no concuerden íntegramente con las de su aparato concreto.<br />
INSTALACIÓN<br />
El fabricante declina cualquier responsabilidad debida a los daños provocados<br />
por una instalación incorrecta o no conforme con las reglas.<br />
La <strong>di</strong>stancia mínima de seguridad entre la encimera y la campana debe ser de<br />
650 mm.<br />
Comprobar que la tensión de red corresponda a la in<strong>di</strong>cada en la placa situada<br />
en el interior de la campana.<br />
Para los aparatos de 1ª clase asegurarse de que la instalación eléctrica doméstica<br />
posea una toma de tierra eficaz.<br />
Conectar la campana a la salida del aire de aspiración me<strong>di</strong>ante un tubo de<br />
120mm de <strong>di</strong>ámetro como mínimo. El recorrido del tubo debe ser lo más corto<br />
posible.<br />
No conectar la campana a tubos de descarga de humos producidos por combustión<br />
(calderas, chimeneas, etc.).<br />
En el caso que en la cocina se utilice de manera silmultánea la campana y otros<br />
aparatos no eléctricos (por ejemplo aparatos de gas), debe existir un sistema de<br />
ventilación suficiente para todo el ambiente. Si la cocina no posee un orificio que<br />
comunique con el exterior, hay que realizarlo para garantizar el recambio del aire.<br />
USO<br />
La campana ha sido concebida exclusivamente para un uso doméstico, para<br />
eliminar los olores de la cocina. No utilizarla de manera inadecuada.<br />
No dejar llamas libres de fuerte intensidad mientras la campana esté funcionando.<br />
Regular siempre las llamas de manera que éstas no sobresalgan lateralmente<br />
con respecto al fondo de las ollas.<br />
Controlar las freídoras durante su uso: el aceite muy caliente se puede inflamar.<br />
No preparar alimentos flambè debajo de la campana de la cocina; peligro de<br />
incen<strong>di</strong>o<br />
Este aparato no tiene que ser utilizado por personas (niños incluídos) con capacidades<br />
psíquicas, sensoriales o mentales reducidas, o bien por personas sin<br />
experiencia y conocimientos en la materia, a menos que no lo hagan bajo el control,<br />
o instruídos, por personas responsables de su seguridad.<br />
Controlar que los niños no jueguen con el aparato.<br />
MANTENIMIENTO<br />
Antes de efectuar cualquier operación de mantenimiento, desenchufar la campana<br />
de la red eléctrica o apagar el interruptor general.<br />
Efectuar un mantenimiento escrupuloso e inme<strong>di</strong>ato de los filtros, según los intervalos<br />
de tiempo aconsejados.<br />
Para limpiar las superficies de la campana es suficiente utilizar un trapo mojado y<br />
detergente líquido neutro.<br />
El símbolo en el producto o en su embalaje in<strong>di</strong>ca que este producto no se puede tratar<br />
como desper<strong>di</strong>cios normales del hogar. Este producto se debe entregar al punto de recolección<br />
de equipos eléctricos y electrónicos para reciclaje. Al asegurarse de que este producto se deseche<br />
correctamente, usted ayudará a evitar posibles consecuencias negativas para el ambiente<br />
y la salud pública, lo cual podría ocurrir si este producto no se manipula de forma adecuada.<br />
Para obtener información más detallada sobre el reciclaje de este producto, póngase en contacto<br />
con la administración de su ciudad, con su servicio de desechos del hogar o con la tienda<br />
donde compró el producto.<br />
ES<br />
650 mm min.<br />
44 4<br />
4
CARACTERÍSTICAS<br />
ES<br />
740<br />
500 70<br />
259<br />
Dimensiones<br />
Componentes<br />
Ref. Cant. Componentes del Producto<br />
1 1 Cuerpo Campana dotado con: mandos, luz, grupo de<br />
ventilación, filtros<br />
2 1 Chimenea telescópica formada por:<br />
2.1 1 Chimenea superior<br />
2.2 1 Chimenea inferior<br />
8a 1 Rejilla orientada der. salida del aire<br />
8b 1 Rejilla orientada izq. salida del aire<br />
9 1 Brida de reducción ø 150-120 mm<br />
10 1 Anillo de adaptación ø 120-125 mm<br />
14 1 Extensión de salida del aire del cuerpo de la campana<br />
formada por 2 semicascos<br />
14.1 2 Extensión del racor de salida del aire<br />
15 1 Racor de salida del aire<br />
Ref. Cant. Componentes de Instalación<br />
7.2.1 2 Bridas de fijación chimenea superior<br />
11 6 Buchas<br />
12a 6 Tornillos 4,2 x 44,4<br />
12c 6 Tornillos 2,9 x 9,5<br />
Cant. Documentación<br />
1 <strong>Manual</strong> de instrucciones<br />
300<br />
min. 740<br />
260<br />
max. 940<br />
10<br />
9<br />
2<br />
1<br />
2.1<br />
8b<br />
2.2<br />
132<br />
14<br />
90<br />
427<br />
650 min.<br />
15<br />
12a 7.2.1 11<br />
12c<br />
8a<br />
14.1<br />
11<br />
12a<br />
45 4<br />
5
INSTALACIÓN<br />
ES<br />
Taladrado pared y fijación de las bridas<br />
650 min.<br />
7.2.1<br />
11<br />
12a<br />
116 116<br />
Trazar en la pared:<br />
una línea vertical hasta el cielorraso o límite superior, al centro de la zona prevista para el<br />
montaje de la campana;<br />
una línea horizontal a 650 mm mín. sobre el plano de cocción.<br />
Apoyar como se in<strong>di</strong>ca la brida 7.2.1 a 1-2 mm del cielo o del límite superior, alineando su<br />
centro (muescas) con la línea vertical de referencia.<br />
Marcar los centros de los orificios de la brida.<br />
Apoyar como se in<strong>di</strong>ca la brida 7.2.1 a X mm debajo de la primera brida (X = altura chimenea<br />
superior en dotación), alineando su centro (muescas) con la línea vertical de referencia.<br />
Marcar los centros de los orificios de la brida.<br />
Marcar como se in<strong>di</strong>ca, un punto de referencia a 116 mm de la línea vertical de referencia, y<br />
328 mm sobre la línea horizontal de referencia.<br />
Repetir esta operación en la parte opuesta.<br />
Perforar ø 8 mm los puntos marcados.<br />
Introducir los tacos 11 en los orificios.<br />
Fijar las bridas, usando los tornillos 12a (4,2 x 44,4) en dotación.<br />
Atornillar los 2 tornillos 12a (4,2 x 44,4) en dotación en los orificios para la fijación del<br />
cuerpo de la campana, dejando un espacio de 5-6 mm entre la pared y la cabeza del tornillo.<br />
1÷2<br />
328 X<br />
46 4<br />
6
Montaje del cuerpo de la campana<br />
Antes de enganchar el cuerpo de la campana,apretar los 2<br />
tornillos Vr situados en los puntos de enganche del cuerpo de<br />
la campana .<br />
Enganchar el cuerpo de la campana en los tornillos 12a pre<strong>di</strong>spuestos.<br />
Apretar definitivamente los tornillos 12a de soporte.<br />
Operar en los tornillos Vr para nivelar el cuerpo de la campana.<br />
Conexiones<br />
SALIDA DEL AIRE VERSIÓN ASPIRANTE<br />
Para la instalación de la versión aspirante, conectar la campana al<br />
tubo de salida me<strong>di</strong>ante un tubo rígido o flexible de ø150 o 125<br />
mm, a <strong>di</strong>screción del instalador.<br />
Para conectarlo a un tubo de ø 125mm, colocar la arandela de<br />
reducción 9 en la salida del cuerpo de la campana y el anillo de<br />
aumento 10 ø 120-125 en la arandela.<br />
Fijar el tubo con abrazaderas adecuadas. Este material no se<br />
proporciona en dotación.<br />
Quitar los filtros antiolor al carbón activo.<br />
SALIDA DEL AIRE VERSIÓN FILTRANTE<br />
Ensamblar los semicascos de la extensión del cuerpo de la<br />
campana 14.<br />
Introducir a presión la extensión del cuerpo de la campana 14<br />
obtenida de esta manera, en la salida del aire.<br />
Introducir a presión el racor 15 en la extensión del cuerpo de la<br />
campana 14.<br />
Introducir lateralmente la extensión racor 14.1 en el racor 15.<br />
Comprobar que la salida de las extensiones del racor 14.1 resulte<br />
en el punto correspon<strong>di</strong>ente a las bocas de la chimenea<br />
tanto en horizontal como en vertical. Si así no fuera, ajustar la<br />
posición invirtiendo las extensiones del racor 14.1 o cortando<br />
la extensión del cuerpo de la campana 14 en el punto correspon<strong>di</strong>ente<br />
a una de las longitudes pre-establecidas por las ranuras<br />
de menor espesor y montar los detalles como se ha descrito<br />
precedentemente.<br />
Las rejillas orientadas hacia salida del aire 8a - 8b deben montarse<br />
después de la instalación de la chimenea inferior 2.2.<br />
Comprobar la presencia del filtro antiolor de carbón activo.<br />
ES<br />
8b<br />
12a<br />
14<br />
ø 150<br />
15<br />
10<br />
9<br />
Vr<br />
14.1<br />
ø 125<br />
8a<br />
47 4<br />
7
CONEXIÓN ELÉCTRICA<br />
Conectar la campana a la red de alimentación eléctrica instalando<br />
un interruptor bipolar con apertura de los contactos de 3<br />
mm como mínimo.<br />
Quitar los Filtros antigrasa y asegurase de que el conector del<br />
Cable de acometida esté colocado correctamente en el enchufe<br />
del Aspirador.<br />
Montaje de la chimenea<br />
Chimenea superior<br />
Ensanchar ligeramente las dos faldas laterales, engancharlas<br />
detrás de las bridas 7.2.1 cerrarlas<br />
hasta el tope.<br />
Fijar a los lados de las bridas con los 4 tornillos 12c (2,9 x 9,5)<br />
en dotación.<br />
Chimenea inferior<br />
Ensanchar ligeramente las dos faldas laterales de la chimenea,<br />
engancharlas entre la chimenea superior y la pared y cerrarlas<br />
hasta el tope.<br />
Fijar lateralmente la parte inferior en el cuerpo de la campana,<br />
con los 2 tornillos 12c (2,9 x 9,5) en dotación.<br />
Para la versión filtrante aplicar las rejillas de <strong>di</strong>rección 8a–8b<br />
en los asientos correspon- <strong>di</strong>entes, de manera que los símbolos<br />
que in<strong>di</strong>can la <strong>di</strong>rección resulten orientados hacia arriba y<br />
hacia el frente de la campana. Comprobar además que resulten<br />
correctamente insertados en las extensiones del racor 14.1.<br />
ES<br />
2<br />
2.1<br />
8b<br />
2.2<br />
7.2.1<br />
8a<br />
12c<br />
12c<br />
48 4<br />
8
USO<br />
ES<br />
S<br />
V1 V2 V3<br />
L Luces Enciende y apaga la instalación de iluminación.<br />
S Led Led de encen<strong>di</strong>do motor.<br />
V1 Motor Enciende y apaga el motor de aspiración a velocidad mínima, adecuada para<br />
un recambio de aire continuo particularmente silencioso, cuando hay pocos<br />
vapores de cocción.<br />
V2 Velocidad Velocidad me<strong>di</strong>a, in<strong>di</strong>cada para la mayor parte de las con<strong>di</strong>ciones de uso,<br />
gracias a la óptima relación entre caudal de aire tratado y nivel de ruido.<br />
V3 Velocidad Velocidad máxima, in<strong>di</strong>cada para hacer frente a grandes cantidades de vapor<br />
de cocción, incluso para tiempos prolongados.<br />
L<br />
49 4<br />
9
MANTENIMIENTO<br />
ES<br />
Filtros antigrasa<br />
LIMPIEZA DE LOS FILTROS ANTIGRASA METÁLICOS<br />
Se pueden lavar en el lavavajillas y requieren un lavado cada 2<br />
meses aproximadamente o más a menudo si su uso es muy intenso.<br />
Quitar los filtros uno por vez, operando en los enganches correspon<strong>di</strong>entes.<br />
Lavar los filtros evitando que se doblen y dejarlos secar antes<br />
de volverlos a montar.<br />
Montar los filtros prestando atención en mantener la manija<br />
hacia la parte visible exterior..<br />
Filtro antiolor (Versión filtrante)<br />
SUSTITUCIÓN DEL FILTRO DE CARBÓN ACTIVO<br />
No se puede lavar ni regenerar, se debe cambiar cada 4 meses<br />
aproximadamente o más a menudo si su uso es muy intenso.<br />
Quitar el filtro antigrasa metálico.<br />
Quitar el filtro antiolor de carbón activo saturado, operando en<br />
los enganches correspon<strong>di</strong>entes.<br />
Montar el nuevo filtro enganchándolo en su asiento.<br />
Montar nuevamente el filtro antigrasa.<br />
Iluminación<br />
SUSTITUCIÓN DE LAS BOMBILLAS<br />
Lámparas halógenas de 20 W<br />
Quitar los dos tornillos que fijan el soporte.<br />
Extraer la lámpara desde el soporte.<br />
Sustituirla con una nueva con las mismas características, poniendo<br />
cuidado en insertar correctamente los dos enchufes en<br />
el asiento del soporte.<br />
Montar nuevamente el soporte fijándolo con los dos tornillos<br />
que se habían quitado precedentemente.<br />
50 5<br />
0
CONSELHOS E SUGESTÕES<br />
Estas instruções de serviço aplicam-se a vários modelos de aparelhos.<br />
É. por isso, possível que se encontrem descritas várias características de<br />
equipamento que não <strong>di</strong>zem respeito ao seu aparelho.<br />
INSTALAÇÃO<br />
O fabricante declina toda e qualquer responsabilidade pelos danos decorrentes<br />
de uma instalação não correcta ou feita não em conformidade com as<br />
normas da boa técnica.<br />
A <strong>di</strong>stância mínima de segurança entre a placa de cozedura e o exaustor deve<br />
ser de 650 mm.<br />
Verifique se a tensão da rede coincide com a in<strong>di</strong>cada na placa de características<br />
aplicada no interior do exaustor.<br />
Para os aparelhos de Classe Ia , certifique-se de que a instalação doméstica<br />
garanta uma descarga correcta à terra.<br />
Ligue o exaustor à saída do ar aspirado utilizando um tubo de <strong>di</strong>âmetro igual<br />
ou superior a 120 mm. O percurso do tubo deve ser o mais breve possível.<br />
Não ligue o exaustor a tubos de descarga de fumaça produzida porcombustão<br />
(caldeiras, lareiras, etc...).<br />
Caso no mesmo local sejam utilizados quer o exaustor, quer aparelhos não<br />
accionados pela corrente eléctrica (por exemplo, aparelhos alimentados a<br />
gás), será preciso providenciar uma ventilação suficiente do aposento. Se a<br />
cozinha não possuir uma abertura que comunique com o exterior, providencie<br />
a sua realização para garantir a entrada de ar limpo.<br />
USO<br />
O exaustor foi projectado para ser utilizado exclusivamente em ambientes<br />
domésticos, sendo a sua finalidade a de reduzir os odores de cozedura. Não<br />
utilize o aparelho de maneira imprópria.<br />
As chamas de forte intensidade não devem ficar descobertas enquanto o<br />
exaustor estiver a funcionar.<br />
Regule sempre as chamas de maneira que não sobressaiam do fundo das<br />
panelas.<br />
Mantenha as frigideiras sob controlo durante o uso: o óleo excessivamente<br />
aquecido pode inflamar-se.<br />
No prepare alimentos flamejados sob o exaustor. Perigo de incên<strong>di</strong>o!<br />
Este aparelho não deve ser utilizado por pessoas (incluindo crianças) <strong>di</strong>minuídas<br />
psíquica, sensorial ou mentalmente nem por in<strong>di</strong>víduos sem experiência e<br />
conhecimento, salvo se vigiados ou instruídos para utilização do aparelho por<br />
pessoas responsáveis pela respectiva segurança.<br />
As crianças devem ser vigiadas no sentido de assegurar que não brinquem<br />
com o aparelho.<br />
MANUTENÇÃO<br />
Antes de efectuar qualquer operação de manutenção, desligue o exaustor<br />
tirando a ficha da tomada de corrente ou desligando o interruptor geral.<br />
Faça uma manutenção atenta e rápida dos filtros, respeitando os intervalos<br />
aconselhados.<br />
Para limpar as superfícies do exaustor, é suficiente utilizar um pano húmido e<br />
detergente líquido neutro.<br />
O símbolo no produto ou na embalagem in<strong>di</strong>ca que este produto não pode ser tratado<br />
como lixo doméstico. Em vez <strong>di</strong>sso, deve ser entregue ao centro de recolha selectiva para a<br />
reciclagem de equipamento eléctrico e electrónico. Ao garantir uma eliminação adequada deste<br />
produto, irá ajudar a evitar eventuais consequências negativas para o meio ambiente e para a<br />
saúde pública, que, de outra forma, poderiam ser provocadas por um tratamento incorrecto do<br />
produto. Para obter informações mais pormenorizadas sobre a reciclagem deste produto, contacte<br />
os serviços municipalizados locais, o centro de recolha selectiva da sua área de residência<br />
ou o estabelecimento onde adquiriu o produto.<br />
PT<br />
650 mm min.<br />
51 5<br />
1
CARACTERÍSTICAS<br />
PT<br />
740<br />
500 70<br />
259<br />
Dimensões<br />
Componentes<br />
Ref. Qtd. Componentes do Produto<br />
1 1 Corpo do exaustor equipado com: Comandos, iluminação,<br />
grupo do ventilador e filtros<br />
2 1 Chaminé telescópica constituída por:<br />
2.1 1 Chaminé superior<br />
2.2 1 Chaminé inferior<br />
8a 1 Grade <strong>di</strong>reccionada de saída de ar Dir.<br />
8b 1 Grade <strong>di</strong>reccionada de saída de ar Esq.<br />
9 1 Flange de redução ø 150-120 mm<br />
10 1 Adaptar anel ø 120-125 mm<br />
14 1 Extensão da saída de ar do corpo do exaustor formada<br />
por dois meios-tubos<br />
14.1 2 Extensão de conexão da saída de ar<br />
15 1 Conexão da saída de ar<br />
Réf. Qtd Componentes de instalação<br />
7.2.1 2 Suportes de fixação da chaminé superior<br />
11 6 Buchas<br />
12a 6 Parafusos 4,2 x 44,4<br />
12c 6 Parafusos 2,9 x 9,5<br />
Qtd Documentação<br />
1 <strong>Manual</strong> de Instruções<br />
300<br />
min. 740<br />
260<br />
max. 940<br />
10<br />
9<br />
2<br />
1<br />
2.1<br />
8b<br />
2.2<br />
132<br />
14<br />
90<br />
427<br />
650 min.<br />
15<br />
12a 7.2.1 11<br />
12c<br />
8a<br />
14.1<br />
11<br />
12a<br />
52 5<br />
2
INSTALAÇÃO<br />
PT<br />
Perfuração da parede e fixação dos suportes<br />
650 min.<br />
7.2.1<br />
11<br />
12a<br />
116 116<br />
Marque na parede:<br />
uma linha vertical que vá até ao tecto ou ao limite superior, ao centro da zona destinada à<br />
montagem do exaustor;<br />
uma linha horizontal a, pelo menos, 650 mm de <strong>di</strong>stância acima da placa do fogão.<br />
Apoie o suporte 7.2.1 como in<strong>di</strong>cado, a 1-2 mm de <strong>di</strong>stância do tecto ou do limite superior,<br />
alinhando o centro deste (entalhes) sobre a linha de referência vertical.<br />
Marque os centros dos furos do suporte.<br />
Apoie o suporte 7.2.1 como in<strong>di</strong>cado, X mm abaixo do primeiro suporte (X = altura da chaminé<br />
superior fornecida de série), alinhando o seu centro (entalhes) sobre a linha de referência<br />
vertical.<br />
Marque os centros dos furos do suporte.<br />
Marque, com in<strong>di</strong>cado, um ponto de referência a 116 mm de <strong>di</strong>stância da linha de referência<br />
vertical, e 328 mm acima da linha de referência horizontal.<br />
Repita esta operação do lado oposto.<br />
Fure os pontos marcados com ø 8 mm .<br />
Introduza as buchas 11 nos furos.<br />
Fixe os suportes, utilizando os parafusos 12a (4,2 x 44,4) fornecidos com o aparelho.<br />
Aperte os 2 parafusos 12a (4,2 x 44,4), fornecidos com o aparelho, nos furos para fixação do<br />
corpo do exaustor, deixando uma fissura de 5-6 mm entre a parede e a cabeça do parafuso.<br />
1÷2<br />
328 X<br />
53 5<br />
3
Montagem do corpo do extractor<br />
Antes de fixar o corpo do extractor, aperte os dois parafusos<br />
Vr situados nos pontos de montagem do corpo do extractor.<br />
Pendure o corpo do extractor nos dois parafusos 12a.<br />
Aperte totalmente os parafusos do suporte 12a.<br />
Ajuste os parafusos Vr para nivelar o corpo do extractor.<br />
PT<br />
Ligações<br />
SAÍDA DO AR PARA A VERSÃO ASPIRANTE<br />
Para a instalação na Versão Aspirante, ligue o exaustor ao tubo<br />
de saída utilizando um tubo rígido ou flexível de ø150 ou 125<br />
mm; esta escolha deve ser feita pelo instalador.<br />
Para a ligação com um tubo de ø125 mm, instale a flange de<br />
redução 9 na saída do corpo do exaustor e o anel ø120-125 10<br />
na flange.<br />
Fixe o tubo com braçadeiras de aperto adequadas. O material<br />
necessário não é fornecido com o aparelho.<br />
Tire os filtros anti-odor de carvão activo, se presentes.<br />
SAÍDA DO AR PARA A VERSÃO FILTRANTE<br />
Reuna os dois meios tubos da extensão do corpo do exaustor<br />
14.<br />
Encaixe, à pressão, a extensão do corpo do exaustor 14 assim<br />
obtida, na saída de ar.<br />
Encaixe a conexão 15 , à pressão, na extensão do corpo do<br />
exaustor 14.<br />
Introduza lateralmente as extensões de conexão 14.1 na conexão<br />
15.<br />
Assegure-se de que a saída das extensões de conexão 14.1 está<br />
na posição correspondente às bocas da chaminé, tanto na horizontal,<br />
como na vertical. Caso contrário, ajuste a posição, invertendo<br />
as extensões de conexão 14.1 ou cortando a extensão<br />
do corpo do exaustor 14 a todo o comprimento de um dos sulcos<br />
de menor espessura; monte de novo todos os componentes<br />
como descrevemos anteriormente.<br />
As grades <strong>di</strong>reccionadas de saída de ar 8a - 8b devem ser montadas<br />
depois da instalação da chaminé inferior 2.2.<br />
Certifique-se da presença do filtro anti-odor de carvão activo.<br />
8b<br />
12a<br />
14<br />
ø 150<br />
15<br />
10<br />
9<br />
Vr<br />
14.1<br />
ø 125<br />
8a<br />
54 5<br />
4
LIGAÇÃO ELÉCTRICA<br />
Ligue o extractor à alimentação utilizando um interruptor de<br />
dois pólos com uma folga de contacto de pelo menos 3 mm.<br />
Retire os filtros contra gordura (ver parágrafo da Manutenção)<br />
certificando-se de que o conector do cabo de alimentação está<br />
correctamente instalado na tomada existente do lado do ventilador.<br />
Montagem da chaminé<br />
Chaminé superior<br />
Alargue ligeiramente as duas folhas laterais, prenda-as atrás<br />
dos suportes 7.2.1 e volte a fechálas completamente.<br />
Fixe lateralmente aos suportes com os 4 parafusos 12c (2,9 x<br />
6,5) fornecidos com o aparelho.<br />
Chaminé inferior<br />
Alargue ligeiramente as duas folhas laterais da chaminé, prenda-as<br />
entre a chaminé superior e a parede e feche-as de novo<br />
completamente.<br />
Fixe lateralmente a parte inferior do corpo do exaustor com os<br />
2 parafusos 12c (2,9 x 6,5) fornecidos com o aparelho.<br />
Para a versão filtrante, aplique as grades <strong>di</strong>reccionadas 8a – 8b<br />
nos respectivos encaixes, de modo a fazer com que os símbolos<br />
<strong>di</strong>reccionais fiquem orientados para cima e para a frente do<br />
exaustor. Assegure-se ainda de que estão encaixadas correctamente<br />
nas extensões de<br />
conexão 14.1.<br />
PT<br />
2<br />
2.1<br />
8b<br />
2.2<br />
7.2.1<br />
8a<br />
12c<br />
12c<br />
55 5<br />
5
UTILIZAÇÃO<br />
PT<br />
S<br />
V1 V2 V3<br />
L Luzes Liga e desliga a luz do sistema.<br />
S Led Led de motor em funcionamento.<br />
V1 Motor Liga e desliga o motor do extractor a baixa velocidade. Utilizada para proporcionar<br />
uma circulação de ar contínua e silenciosa quando existirem ligeiros vapores de cozedura.<br />
V2 Velocidade Velocidade mé<strong>di</strong>a, adequada para a maior parte das con<strong>di</strong>ções de funcionamento devido<br />
à óptima relação do caudal de ar tratado/nível de ruído.<br />
V3 Velocidade Velocidade máxima, utilizada para eliminar as elevadas emissões de vapor da cozedura,<br />
incluindo durante longos períodos.<br />
L<br />
56 5<br />
6
MANUTENÇÃO<br />
Filtros contra gordura<br />
LIMPAR OS FILTROS METÁLICOS CONTRA GORDURA<br />
Os filtros deverão ser limpos de 2 em 2 meses de funcionamento,<br />
ou mais frequentemente em situações de utilização extrema e<br />
podem ser lavados na máquina de lavar louça.<br />
Retire os filtros, um de cada vez, empurrando-os para trás e puxando-os<br />
ao mesmo tempo.<br />
Lave os filtros, tendo cuidado para não os dobrar. Antes de os<br />
instalar novamente, certifique-se de que ficam bem secos.<br />
Ao instalar novamente os filtros, certifique-se de que a pega fica<br />
visível do exterior.<br />
Filtro de carvão activado (Versão com recirculação)<br />
SUBSTITUIR O FILTRO DE CARVÃO ACTIVADO<br />
O filtro não é lavável e não pode ser regenerado e deverá ser<br />
substituído aproximadamente de 4 em 4 meses, ou mais frequentemente<br />
em casos de grande utilização.<br />
Retire os filtros metálicos contra gordura.<br />
Retire o filtro de carvão activado que está saturado soltando os<br />
ganchos de fixação.<br />
Instale o novo filtro encaixando-o no respectivo lugar.<br />
Instale novamente os filtros metálicos contra gordura.<br />
Iluminação<br />
SUBSTITUIÇÃO DAS LÂMPADAS<br />
Lâmpadas de halogéneo de 20 W<br />
Tire os 2 parafusos que fixam o suporte de iluminação e extraia-o<br />
do exaustor.<br />
Extraia a lâmpada do suporte.<br />
Substitua-a por uma nova de características iguais lembrandose<br />
de introduzir correctamente os dois pinos na sede do suporte.<br />
Reinstale o suporte fixando-o com os dois parafusos tirados na<br />
operação anterior.<br />
PT<br />
57 5<br />
7
436004151_ver2<br />
AGA RANGEMASTER GROUP PLC<br />
<strong>Falcon</strong> is a business name of AGA RANGEMASTER GROUP PLC


