Instalación - Mabe
Instalación - Mabe Instalación - Mabe
Installation Consumer Support Troubleshooting Tips Operating Instructions Safety Instructions Instructions About the shelves and bins. Not all features are on all models. Some models have wire shelves that can be adjusted in the same manner. 46 Rearranging the Shelves Shelves in the refrigerator compartment are adjustable. Refrigerator Compartment To remove: Remove all items from the shelf. Tilt the shelf up at the front. Lift the shelf up at the back and bring the shelf out. To replace: While tilting the shelf up, insert the top hook at the back of the shelf in a slot on the track. Lower the front of the shelf until the bottom of the shelf locks into place. Non-Adjustable Shelves on the Door (on some models) To remove: Lift the shelf straight up; then pull out. To replace: Engage the shelf in the molded supports on the door and push down. It will lock in place.
About the crispers and pans. ge.com Not all features are on all models. Fruit and Vegetable Crisper Excess water that may accumulate in the bottom of the drawers or under the drawers should be wiped dry. Adjustable Humidity Crisper (on some models) Slide the control all the way to the HIGH setting to provide high humidity recommended for most vegetables. Snack Pan (on some models) This pan can be moved to the most useful location for your family’s needs. Slide the control all the way to the LOW setting to provide lower humidity levels recommended for most fruits. To remove, slide the pan out to the stop position, lift the pan up and past the stop position and lift it out. 47 Safety Instructions Operating Instructions Installation Instructions Troubleshooting Tips Consumer Support
- Page 1 and 2: FOR THE ENGLISH VERSION GO TO PAGE
- Page 3 and 4: ¡ADVERTENCIA! COMO CONECTAR LA ELE
- Page 5 and 6: El filtro de agua. (en algunos mode
- Page 7 and 8: Sobre las gavetas preservadoras y c
- Page 9 and 10: Sobre la compartimiento del congela
- Page 11 and 12: Cuidado y limpieza del refrigerador
- Page 13 and 14: Cómo reemplazar las bombillas. ge.
- Page 15 and 16: Instrucciones para la instalación
- Page 17 and 18: 6 Instrucciones para la instalació
- Page 19 and 20: 10 A B C CÓMO NIVELAR EL REFRIGERA
- Page 21 and 22: Instrucciones para la instalación
- Page 23 and 24: 2 A B C D E 3 A Instrucciones para
- Page 25 and 26: A B C 9 Instrucciones para la insta
- Page 27 and 28: 1 C D Instrucciones para la instala
- Page 29 and 30: 4 5 CÓMO ALINEAR LAS PUERTAS DOBLE
- Page 31 and 32: QUÉ NECESITA (CONT.) Instrucciones
- Page 33 and 34: Sonidos normales de la operación.
- Page 35 and 36: Problema Causas Posibles Qué hacer
- Page 37 and 38: Garantía del Refrigerador. (Para c
- Page 39 and 40: Servicio al consumidor. Página Web
- Page 41 and 42: Notas. ge.com 41 Seguridad Operaci
- Page 43 and 44: WARNING! HOW TO CONNECT ELECTRICITY
- Page 45: About the water filter. (on some mo
- Page 49 and 50: About the freezer compartment. (on
- Page 51 and 52: Care and cleaning of the refrigerat
- Page 53 and 54: Replacing the light bulbs. ge.com T
- Page 55 and 56: Installation Instructions INSTALLIN
- Page 57 and 58: 6 REMOVE THE FRESH FOOD DOOR HANDLE
- Page 59 and 60: 10 A B C LEVEL THE REFRIGERATOR The
- Page 61 and 62: Installation Instructions REPLACING
- Page 63 and 64: 2 A B C D E 3 A REMOVE THE FREEZER
- Page 65 and 66: 9 A B C 10 REHANG REFRIGERATOR DOOR
- Page 67 and 68: Installation Instructions REPLACING
- Page 69 and 70: WHAT YOU WILL NEED (CONT.) NOTE: Th
- Page 71 and 72: Normal operating sounds. ge.com New
- Page 73 and 74: Problem Possible Causes What To Do
- Page 75 and 76: Refrigerator Warranty. (For custome
- Page 77 and 78: State of California Department of H
- Page 80: 32 Mabe S.A. de C.V. garantiza este
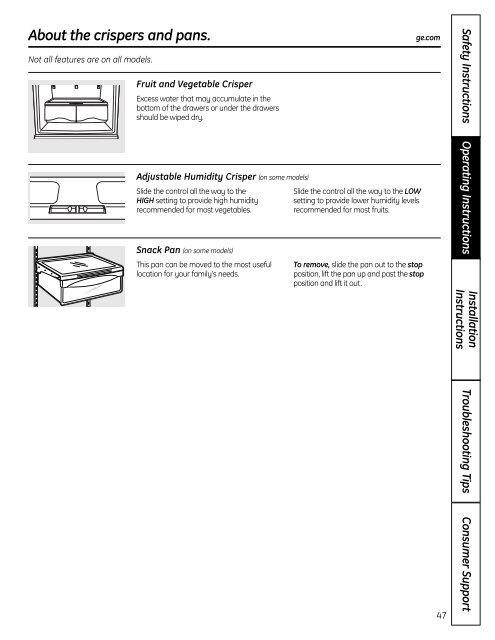
About the crispers and pans. ge.com<br />
Not all features are on all models.<br />
Fruit and Vegetable Crisper<br />
Excess water that may accumulate in the<br />
bottom of the drawers or under the drawers<br />
should be wiped dry.<br />
Adjustable Humidity Crisper (on some models)<br />
Slide the control all the way to the<br />
HIGH setting to provide high humidity<br />
recommended for most vegetables.<br />
Snack Pan (on some models)<br />
This pan can be moved to the most useful<br />
location for your family’s needs.<br />
Slide the control all the way to the LOW<br />
setting to provide lower humidity levels<br />
recommended for most fruits.<br />
To remove, slide the pan out to the stop<br />
position, lift the pan up and past the stop<br />
position and lift it out.<br />
47<br />
Safety Instructions<br />
Operating Instructions<br />
Installation<br />
Instructions<br />
Troubleshooting Tips<br />
Consumer Support


