

warning - Appliance Factory Parts
warning - Appliance Factory Parts
warning - Appliance Factory Parts

Create successful ePaper yourself
Turn your PDF publications into a flip-book with our unique Google optimized e-Paper software.
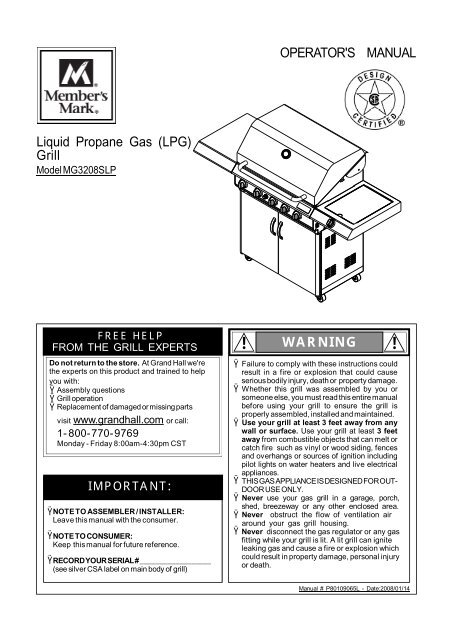
Liquid Propane Gas (LPG)<br />
Grill<br />
Model MG3208SLP<br />
FREE HELP<br />
FROM THE GRILL EXPERTS<br />
Do not return to the store. At Grand Hall we're<br />
the experts on this product and trained to help<br />
you with:<br />
Assembly questions<br />
Grill operation<br />
Replacement of damaged or missing parts<br />
visit www.grandhall.com or call:<br />
1-800-770-9769<br />
Monday - Friday 8:00am-4:30pm CST<br />
IMPORTANT:<br />
NOTE TO ASSEMBLER / INSTALLER:<br />
Leave this manual with the consumer.<br />
NOTE TO CONSUMER:<br />
Keep this manual for future reference.<br />
RECORD YOUR SERIAL # __________________<br />
(see silver CSA label on main body of grill)<br />
OPERATOR'S MANUAL<br />
! WARNING !<br />
Failure to comply with these instructions could<br />
result in a fire or explosion that could cause<br />
serious bodily injury, death or property damage.<br />
Whether this grill was assembled by you or<br />
someone else, you must read this entire manual<br />
before using your grill to ensure the grill is<br />
properly assembled, installed and maintained.<br />
Use your grill at least 3 feet away from any<br />
wall or surface. Use your grill at least 3 feet<br />
away from combustible objects that can melt or<br />
catch fire such as vinyl or wood siding, fences<br />
and overhangs or sources of ignition including<br />
pilot lights on water heaters and live electrical<br />
appliances.<br />
THIS GAS APPLIANCE IS DESIGNED FOR OUT-<br />
DOOR USE ONLY.<br />
Never use your gas grill in a garage, porch,<br />
shed, breezeway or any other enclosed area.<br />
Never obstruct the flow of ventilation air<br />
around your gas grill housing.<br />
Never disconnect the gas regulator or any gas<br />
fitting while your grill is lit. A lit grill can ignite<br />
leaking gas and cause a fire or explosion which<br />
could result in property damage, personal injury<br />
or death.<br />
Manual # P80109065L - Date:2008/01/14
Table of Contents<br />
Primary Safety Warnings...........................1-3<br />
Pre-Assembly Instructions..............................3<br />
Part Diagrams and Lists ........................4-10<br />
Assembly Instructions.............................11-16<br />
Use & Care Instructions:<br />
• Gas Safety and Leak Tests........... 17-19<br />
• Lighting Instructions ............................ 20-21<br />
• Troubleshooting..........................................21<br />
• Rotisserie Instruction........................... 22-24<br />
• Cleaning and Maintenance ................ 25-26<br />
• Cooking Guide ................................... A1-A3<br />
• Frequently Asked Questions............ A4-A5<br />
Warranty Terms...........................Back Cover<br />
! DANGER !<br />
If you smell gas:<br />
1. Shut off gas to the appliance.<br />
2 Extinguish any open flame.<br />
3. Open lid.<br />
4. If odor continues, keep away from<br />
the appliance and immediately call<br />
your gas supplier or your fire<br />
department.<br />
1.<br />
2.<br />
! WARNING !<br />
Do not store or use gasoline or<br />
other flammable liquids or vapors in<br />
the vicinity of this or any other<br />
appliances.<br />
An LP cylinder not connected for<br />
use shall not be stored in the vicinity<br />
of this or any other appliance.<br />
! WARNING !<br />
Keep any electrical supply cord and the fuel<br />
supply hose away from any heated surface.<br />
2<br />
•<br />
•<br />
•<br />
•<br />
•<br />
! WARNING !<br />
LPG models must be used with Liquid<br />
Propane Gas and the regulator assembly<br />
supplied. Natural Gas models must be used<br />
with Natural Gas only. Any attempt to convert<br />
the grill from one fuel type to another is<br />
hazardous and must be performed by a<br />
qualified gas technician only, using a NG<br />
Conversion Kit purchased from Grand Hall.<br />
Keep gas regulator hose away from hot grill<br />
surfaces and dripping grease. Avoid unnecessary<br />
twisting of hose. Visually inspect hose<br />
prior to each use for cuts, cracks, excessive<br />
wear or other damage. If the hose appears<br />
damaged do not use the gas grill. Call Grand<br />
Hall at 1-800-770-9769 for a certified replacement<br />
hose.<br />
California Proposition 65<br />
Combustion byproducts produced when using<br />
this product contain chemicals known to the<br />
State of California to cause cancer, birth defects,<br />
or other reproductive harm.<br />
Brass components on the grill, such as hose<br />
fittings, propane cylinder valves (sold separately)<br />
and burner valve stems, contain lead<br />
which is known to the State of California to<br />
cause cancer, birth defects, or other reproductive<br />
harm.<br />
Never use charcoal or lighter fluid in this gas<br />
grill. Failure to comply with these instructions<br />
could result in a grease fire or explosion that<br />
could cause serious bodily injury, death or<br />
property damage.<br />
The Grease Draining Tray and Grease Receptacle<br />
must be visually inspected before each<br />
grill use. Remove any grease and wash Grease<br />
Draining Tray and Grease Receptacle with a<br />
mild soap and warm water solution. Failure to<br />
comply with these instructions could result<br />
in a grease fire or explosion that could<br />
cause serious bodily injury, death or property<br />
damage.
Pre-Assembly Instructions For Your Safety<br />
Failure to comply with these instructions could<br />
result in a fire or explosion that could cause<br />
serious bodily injury, death or property damage.<br />
Spiders and small insects can spin webs and<br />
nest in the grill Burner Tubes during transit and<br />
warehousing which can lead to a gas flow<br />
obstruction resulting in a fire in and around the<br />
Burner Tubes. This type of "FLASHBACK FIRE"<br />
can cause serious grill damage and create an<br />
unsafe operating condition for the user.<br />
To reduce the chance of FLASHBACK<br />
FIRE you must clean the Burner Tubes<br />
as follows before assembling your grill.<br />
Also do this at least once a month in summer<br />
and fall or whenever spiders are active in your<br />
area, and if your grill has not been used for an<br />
extended period of time.<br />
1.<br />
2.<br />
3.<br />
4.<br />
! WARNING !<br />
Remove the screw from the rear of each Burner<br />
using a Phillips Head Screwdriver.<br />
Carefully lift each Burner up and away from the<br />
Gas Valve Orifice.<br />
Check and clean Burner/Venturi Tubes for<br />
insects and insect nests. A clogged tube can<br />
lead to a fire beneath the grill.<br />
Refer to the figure below and perform one of<br />
these 3 cleaning methods:<br />
METHOD 1: Bend a stiff wire or wire coat<br />
hanger into a small hook as shown and run<br />
the hook through the Burner Tube and inside<br />
the Burner several times to remove debris.<br />
TO CLEAN BURNER<br />
TUBE, INSERT HOOK<br />
HERE<br />
9<br />
Burner<br />
METHOD 2: Use a bottle brush with a flexible<br />
handle and run the brush through the Burner<br />
Tube and inside the Burner several times to<br />
remove any debris.<br />
METHOD 3: Use an air hose to force air<br />
through each Burner Tube. The forced air<br />
should pass debris or obstructions through<br />
the Burner and out the Ports.<br />
For safe operation ensure the Gas Valve Assembly<br />
Orifice is inside the Burner Tube before using your<br />
grill. See figure. If the Orifice is not inside the Burner<br />
Tube, lighting the Burner may cause explosion<br />
and/or fire resulting in serious bodily injury and/or<br />
property damage.<br />
Gas Valve Assembly<br />
Burner Port Foot<br />
Orifice Burner Tube<br />
3<br />
To expedite the assembly process follow these<br />
general guidelines:<br />
Tools Required for Assembly:<br />
• protective work gloves<br />
• protective eyewear<br />
• Phillips Head Screwdriver<br />
While it is possible for one person to unpack this gas<br />
grill, obtain assistance from another person when<br />
handling the large pieces.<br />
Use the Hardware and Part Diagrams to ensure all<br />
items are included and free of damage.<br />
Do not assemble or operate the grill if it appears<br />
damaged. If there are damaged or missing parts<br />
when you unpack the shipping box or you have<br />
questions during the assembly process, call the:<br />
Grill Information Center 1-800-770-9769<br />
8am-4:30pm CST, Monday through Friday<br />
Grill Installation Codes<br />
The installation must conform with local codes or, in the<br />
absence of local codes, with either the National Fuel<br />
Gas Code, ANSI Z223.1/NFPA 54, Natural Gas and<br />
Propane Installation Code, CSA B149.1, or Propane<br />
Storage and Handling Code, B149.2.
Hardware Pack <strong>Parts</strong> List for Models MG3208SLP<br />
PART # PART DESCRIPTION QTY PURPOSE OF PART<br />
P06002025A Hardware Pack 1 For use in assembly<br />
S112G0306B Phillips Head Screw 3/16"x3/8" 4 Attaches Cart Rear Panel and Cart Side Panels<br />
S112G0308B Phillips Head Screw 3/16"x1/2" 4<br />
S313G0306B Flange Nut 3/16" 4<br />
P00201001C Door Handle 2 Attaches to Doors<br />
S112G0306B Phillips Head Screw 3/16"x3/8" 7<br />
S112G0306B Phillips Head Screw 3/16"x3/8" 2<br />
4<br />
Attaches Partition Panel and Partition Panel Basket<br />
to Cart<br />
Attaches Door Bracket to Left and Right Cart Side<br />
Panel<br />
S112G0419B Phillips Head Screw 1/4"x1-3/16" 4 Attaches Grill Bowl to Cart<br />
S112G0408E Phillips Head Screw 1/4"x1/2" 12<br />
S313G0408E Flange Nut 1/4" 4<br />
S112G0306B Phillips Head Screw 3/16"x3/8" 4<br />
S313G0306B Flange Nut 3/16" 4<br />
P05536001Z Hose Holder 2<br />
Already installed in the Tank Holder<br />
S233G0408B Wing Bolt 1/4"x1/2" 1 Secures Gas Tank<br />
Preassembled in the Door Handle<br />
Attaches Tank Holder to Cart Bottom Shelf<br />
Attaches Left Side Shelf and Side Burner Frame to<br />
Bowl Panels<br />
Attaches Regulator Assembly to Cart Rear Panel<br />
S112G0304E Phillips Head Screw 3/16"x1/4" 4 Attaches Door Handles to Doors
Phillips Head Screw<br />
1/4" x 1/2"<br />
Qty. 12<br />
Part # S112G0408E<br />
Flange Nut 1/4"<br />
Qty. 4<br />
Part # S313G0408E<br />
Door Handle<br />
Qty. 2<br />
Part # P00201001C<br />
Hose Holder<br />
Qty. 2<br />
Part # P05536001Z<br />
Scale 1:2<br />
Hardware Pack for Models MG3208SLP<br />
Phillips Head Screw<br />
3/16" x 3/8"<br />
Qty. 17<br />
Part # S112G0306B<br />
Phillips Head Screw<br />
3/16" x 1/2"<br />
Qty. 4<br />
Part # S112G0308B<br />
* One Battery/AA included in the Hardware Pack.<br />
5<br />
Phillips Head Screw<br />
1/4" x 1-3/16"<br />
Qty. 4<br />
Part# S112G0419B<br />
Preassembled in the Door Handle<br />
Phillips Head Screw<br />
3/16" x 1/4"<br />
Qty. 4<br />
Part # S112G0304E<br />
Flange Nut 3/16"<br />
Qty. 8<br />
Part # S313G0306B<br />
Hardware already installed on the Tank Holder<br />
Wing Bolt 1/4" x 1/2"<br />
Qty. 1<br />
Part # S233G0408B<br />
Hardware
36<br />
37<br />
38<br />
58<br />
61<br />
65<br />
63<br />
82<br />
83<br />
34<br />
35<br />
40<br />
<strong>Parts</strong> Diagram <strong>Parts</strong> Diagram for Models for Models M3207ALP MG3208SLP & M3207ANG<br />
15<br />
16<br />
31<br />
39<br />
66<br />
28<br />
86<br />
74<br />
73<br />
75<br />
57<br />
19<br />
33<br />
93<br />
56 55<br />
79<br />
84<br />
97<br />
27<br />
98<br />
17<br />
88<br />
89<br />
67<br />
1<br />
2<br />
7<br />
3<br />
5<br />
8<br />
11<br />
13<br />
14<br />
22<br />
23<br />
51<br />
68<br />
76 74<br />
80<br />
69<br />
70<br />
29<br />
52<br />
6<br />
32<br />
47<br />
73<br />
78<br />
71<br />
77<br />
72<br />
81<br />
94<br />
62<br />
12<br />
18<br />
60<br />
87<br />
26<br />
100<br />
44<br />
50 46<br />
48 49<br />
6<br />
9<br />
10<br />
30<br />
20<br />
21<br />
96<br />
24<br />
25<br />
95<br />
27<br />
45<br />
16<br />
17<br />
64<br />
85<br />
59<br />
4<br />
41<br />
43<br />
42<br />
99<br />
53<br />
54<br />
92<br />
91<br />
90
<strong>Parts</strong> List for Models MG3208SLP<br />
KEY DESCRIPTION PART # QTY<br />
1 Lid Assembly Y0110045 1<br />
2 Temperature Gauge P00601067A 1<br />
3 Lid Handle P00205069B 1<br />
4 Protective Pad P05518002I 4<br />
5 Cooking Rack/Secondary P01507020G 1<br />
6 Cooking Grid/13" P016040144 2<br />
7 Cooking Grid/6.5" P016040154 1<br />
8 Burner/Main P020080244 3<br />
9 Infrared Burner P020050104 1<br />
10 Infrared Burner Electrode Assembly Y0320011 1<br />
11 Savor Plates ® P017080074 3<br />
12 Savor Plates ® Bracket, Front P033280504 3<br />
13 Savor Plates ® Bracket, Rear P033280514 3<br />
14 Burner Bracket P0220342DD 1<br />
15 Side Shelf, Left P011060054 1<br />
16 Side Shelf Bracket, Left Front/Right Rear P01204005B 2<br />
17 Side Shelf Bracket, Right Front/Left Rear P01206005B 2<br />
18 Grill Bowl P0071335S4 1<br />
19 Grease Draining Plate P069020094 2<br />
20 Back Burner Wind Shield P06905046A 1<br />
21 Back Burner Frame P02011054E 1<br />
22 Back Burner P02007016D 1<br />
23 Back Burner Electrode P02610005B 1<br />
24 Back Burner Orifice P06527003A 1<br />
25 Back Burner Extension Tube P03717050B 1<br />
26 Burner Heat Shield P07523003P 1<br />
27 Lid Hinge P055010204 2<br />
28 Gas Collector Box with Electrode P02609030M 3<br />
29 Electric Wire Set P02615120A 1<br />
30 Infrared Burner Thermocouple P05305028A 1<br />
31 Gas Valve/Manifold Assembly Y0060505 1<br />
32 Gas Fitting P03911001A 1<br />
33 Control Panel, Upper P0290919HS 1<br />
34 Control Panel, Extension P0290940HS 1<br />
35 Control Panel P0290930IS 1<br />
36 Control Knob Seat P03415014S 5<br />
37 Control Knob Spring P05504021A 5<br />
38 Control Knob for Main Burner P03411503L 3<br />
39 Control Knob for Back/Infrared Burner P03411513L 2<br />
40 Electric Ignitor, 6-port P02502265C 1<br />
41 Side Burner Lid P01127004S 1<br />
42 Side Burner Frame P011040104 1<br />
43 Side Burner Body P023010154 1<br />
44 Side Burner Pot Support P008050104 1<br />
45 Side Burner P02002012A 1<br />
7
<strong>Parts</strong> List for Models MG3208SLP<br />
KEY DESCRIPTION PART # QTY<br />
46 Side Burner Electrode P02614007C 1<br />
47 Control Knob for Side Burner P03411523L 1<br />
48 Control Knob Spring P05504021A 1<br />
49 Side Burner Control Knob Seat P03408053S 1<br />
50 Side Burner Gas Valve Y0060506 1<br />
51 Side Burner Connection Hose, Socket P03705050E 1<br />
52 Side Burner Connection Hose, Plug P03705049H 1<br />
53 Side Burner Extension Hose Bracket P033410014 2<br />
54 Side Burner Bracket P03327029S 1<br />
55 Grease Tray P02705205B 1<br />
56 Grease Tray Handle P00213008O 1<br />
57 Grease Tray Heat Shield P06903048B 1<br />
58 Bowl Support Bracket, Left P01301007K 1<br />
59 Bowl Support Bracket, Right P01302007K 1<br />
60 Cart Rear Panel, Upper P069060244 1<br />
61 Door Hinge Bracket, Left Upper P033020214 1<br />
62 Door Hinge Bracket, Right Upper P033020224 1<br />
63 Cart Side Panel, Left P07605030N 1<br />
64 Cart Side Panel, Right P07603025N 1<br />
65 Door Bracket P01316006K 1<br />
66 Door Magnet P05523004K 4<br />
67 Cart Rear Panel P07701064N 1<br />
68 Cart Bottom Shelf P01003020T 1<br />
69 Grease Tray Heat Shield, Upper P06903049A 1<br />
70 Grease Tray Heat Shield, Lower P06903050M 1<br />
71 Caster Seat, Left Front/Right Rear P05327035W 2<br />
72 Caster Seat, Right Front/Left Rear P05327036W 2<br />
73 Cart Panel Bracket-A, Left Front/Right Rear P033420014 2<br />
74 Cart Panel Bracket-A, Right Front/Left Rear P033420024 2<br />
75 Cart Panel Bracket-B, Left Front P033420034 1<br />
76 Cart Panel Bracket-B, Left Rear P033420044 1<br />
77 Cart Panel Bracket-B, Right Front P033420054 1<br />
78 Cart Panel Bracket-B, Right Rear P033420064 1<br />
79 Door Hinge Bracket, Left Lower P033020234 1<br />
80 Door Hinge Bracket, Right Lower P033020244 1<br />
81 Caster, 2.5 in., with Brake P05110006D 4<br />
82 Door Handle P00201001C 2<br />
83 Door, Left P04302036L 1<br />
84 Door, Right P04303036L 1<br />
85 Regulator with Hose P03601004A 1<br />
86 Lighting Stick P05313009B 1<br />
87 Hose Holder P05536001Z 2<br />
88 Door Guide Plate P055100194 1<br />
89 Partition Panel P07512007O 1<br />
90 Griddle Handle P05709004E 1<br />
91 Griddle P05705002E 1<br />
8
<strong>Parts</strong> List for Models MG3208SLP<br />
KEY DESCRIPTION PART # QTY<br />
92 Side Burner Heat shield P06907001M 1<br />
93 Name Plate P00414005Q 1<br />
94 Weight P05344003Q 2<br />
95 Back Burner Thermocouple P05305027A 1<br />
96 Back Burner Thermocouple Bracket P033430104 1<br />
97 Tank Holder P05358001G 1<br />
98 Partition Panel Bracket P03303025S 1<br />
99 Side Burner valve Heat shield P06915001M 1<br />
100 Bowl Wind Shield P069060304 1<br />
Grill Cover P07007018A 1<br />
Rotisserie Assembly Y0250143 1<br />
Hardware Pack P06002025A 1<br />
Operator's Manual P80109065L 1<br />
To Order Grand Hall Certified Replacement <strong>Parts</strong>, Call 1-800-770-9769<br />
To obtain the correct replacement parts for your gas grill, please refer to the part numbers in this parts<br />
list. The following information is required to ensure you receive the correct parts:<br />
1. Model and Serial Number (see CSA label on grill)<br />
2. Part Number<br />
3. Part Description<br />
4. Quantity of parts needed<br />
Important: Use only Grand Hall certified replacement parts. The use of any part that is not a factory<br />
authorized part can be dangerous and will also void your product warranty. Keep this Operator's Manual<br />
for convenient referral and for part replacement.<br />
9
KEY<br />
1.<br />
2.<br />
3.<br />
4.<br />
5.<br />
6.<br />
7.<br />
8.<br />
9.<br />
10.<br />
11.<br />
DESCRIPTION<br />
Rot. Thumbscrew<br />
3/8"x1/2"<br />
Qty. 3<br />
Part# S196G06084<br />
Y0250143 Rotisserie Assembly <strong>Parts</strong> Diagram<br />
Y0250143 Rotisserie Assembly <strong>Parts</strong> List<br />
Rot. Handle<br />
Rot. Bushing<br />
Rot. Thumbscrew 3/8"x1/2"<br />
Rot. Collar<br />
Rot. Spit<br />
Rot. Holding Fork<br />
Rot. Motor Bracket<br />
Rot. Motor/AC<br />
Rot. Screw #10-24x3/4" UNC<br />
Rot. Washer<br />
Rot. Nut #10-24<br />
9<br />
8<br />
3<br />
10<br />
11<br />
Rot. Screw#10-24x3/4"<br />
UNC<br />
Qty. 2<br />
Part# S112G10124<br />
PART#<br />
Hardware for Rotisserie<br />
Rot. Washer<br />
Qty. 2<br />
Part# S411G03084<br />
Grill Information Center: If you have questions about assembly or grill operation, or<br />
if there are damaged or missing parts when you unpack this unit from the shipping box, call us<br />
8:00 am - 4:30 pm CST, Monday through Friday at: 1-800-770-9769<br />
10<br />
7<br />
6<br />
3<br />
4<br />
P05508004E<br />
P05508092F<br />
S196G06084<br />
P05508091F<br />
P05508146F<br />
P05508090F<br />
P03307010A<br />
P07101045A<br />
S112G10124<br />
S411G03084<br />
S362G10124<br />
5<br />
3<br />
QTY<br />
1<br />
1<br />
3<br />
1<br />
1<br />
2<br />
1<br />
1<br />
2<br />
2<br />
2<br />
2<br />
1<br />
Rot. Nut#10-24<br />
Qty. 2<br />
Part# S362G10124
Assembly Instructions<br />
Remove all packed components. Use the parts list to check that all necessary parts have been included.<br />
Assemble the gas grill on a protective work surface to avoid scratching grill surfaces. Inspect your grill for damage<br />
as you proceed. Do not assemble or operate your grill if it appears damaged.<br />
Assemble Cart<br />
1 Unfold the Cart Side Panel, Right, Cart Side Panel, Left and Cart<br />
Rear Panel.<br />
2<br />
Phillips Head Screw<br />
3/16" x 3/8"<br />
Qty. 4<br />
Part # S112G0306B<br />
Phillips Head Screw<br />
3/16" x 1/2"<br />
Qty. 4<br />
Part # S112G0308B<br />
Flange Nut 3/16"<br />
Qty. 4<br />
Part # S313G0306B<br />
Install Cart Rear Panel and Cart Side Panels<br />
Secure the Cart Rear Panel between the Cart Side Panels using<br />
2 of 3/16"x3/8" Phillips Head Screws.<br />
Secure the Cart Side Panel, Left/Right using 2 of 3/16"x3/8"<br />
Phillips Head Screws.<br />
Intall the Tank holder to Cart Bottom Shelf using 4 of 3/16"x1/2"<br />
Phillips Head Screws and 4 of 1/4" Flange Nut.<br />
11<br />
Cart Rear Panel
3<br />
Phillips Head Screw<br />
3/16" x 1/4"<br />
Qty. 4<br />
Part # S112G0304E<br />
Phillips Head Screw<br />
3/16" x 3/8"<br />
Qty. 7<br />
Part # S112G0306B<br />
Door Handle<br />
Qty. 2<br />
Part # P00201001C<br />
54<br />
Phillips Head Screw<br />
3/16" x 3/8"<br />
Qty. 2<br />
Part # S112G0306B<br />
Phillips Head Screw<br />
1/4" x 1-3/16"<br />
Qty. 4<br />
Part # S112G0419B<br />
Install Door Handles, Partition Panel and Door<br />
Intall the Door Handles to Doors using 4 of 3/16"x1/4" Phillips<br />
Head Screws.<br />
Install the Partition Panel to Left Cart Side Panel and Cart<br />
Rear Panel using 4 of 3/6"x3/8" Phillips Head Screws.<br />
Install the Partition Panel Bracket between Partition Panel and<br />
Cart Bottom Shelf using 3 of 3/16"x3/8" Phillips Head Screws.<br />
Insert Bottom Left Door Hinge into Bottom Left Door Hinge<br />
Bracket. Then align Top Door Hinge and insert into the hole<br />
on Top Left Door Hinge Bracket.<br />
Repeat both steps for Right Door.<br />
Install Door Bracket and Grill Bowl<br />
Install the Door Bracket between the Left and Right Cart<br />
Side Panel using 2 of 3/16" x 3/8" Phillips Head Screws.<br />
Remove cooking components from Grill Head. With an<br />
assistant, lift and position Grill Head on the Cart. Tighten<br />
securely using 4 of 1/4" x 1-3/16" Phillips Head Screws.<br />
12
5<br />
6<br />
Flange Nut 1/4"<br />
Qty. 4<br />
Part # S313G0408E<br />
Install Grease Tray<br />
From the front of the grill, slide the Grease Tray side tabs over the<br />
side rails underneath the Grill Bowl.<br />
Phillips Head Screw<br />
1/4" x 1/2"<br />
Qty. 12<br />
Part # S112G0408E<br />
Grease Tray<br />
Install Left Side Shelf and Right Side Burner Frame<br />
Attach the Side Shelf to the left Bowl Panel.<br />
Tighten securely by using Screws and Nuts provided.<br />
Repeat both steps for Right Side Burner Frame.<br />
13
7<br />
8<br />
Install Side Burner Connection Hose<br />
Figure A<br />
Figure B<br />
Figure C<br />
Phillips Head Screw<br />
3/16" x 3/8"<br />
Qty. 4<br />
Part # S112G0306B<br />
Flange Nut 3/16"<br />
Qty. 4<br />
Part # S313G0306B<br />
Hose Holder<br />
Qty. 2<br />
Part # P05536001Z<br />
Scale 1:2<br />
Push back Sleeve of the Socket. See Figure A.<br />
Insert Plug then release Sleeve. See Figure B.<br />
Push Plug until sleeve snaps forward locking the<br />
Plug into the Socket. See Figure C.<br />
Push the Side Burner Hose into hose holder.<br />
PLUG<br />
SOCKET<br />
SLEEVE<br />
SLEEVE<br />
Plug<br />
Install Regulator Assembly<br />
Place the LPG Regulator inside the cart through the<br />
opening above Cart Rear Panel. Fix the hose of LPG<br />
Regulator by Hose Holder onto Cart Rear Panel.<br />
Tighten securely by using Screws and Nuts provided.<br />
Hose<br />
Cart Rear Panel<br />
14<br />
Socket<br />
Sleeve<br />
Hose<br />
Holder<br />
Hose Holder<br />
LPG Regulator
Install Ignitor Battery<br />
9 Unscrew Ignitor Cap from Control Panel.<br />
Place supplied AA battery into the Ignitor<br />
Slot with positive pole facing you.<br />
Position the Cap and Spring over the AA<br />
battery and tighten onto Control Panel.<br />
10<br />
With the assistance of another person,<br />
perform this Electrode Check before<br />
proceeding.<br />
This test will ensure that the Spark Electrode Tips<br />
are properly positioned so your grill lights easily<br />
and properly.<br />
3/16" Spark Gap Gas Collector Box<br />
Spark Electrode Tip<br />
Spark Receiver<br />
Be sure all Control Knobs are set to<br />
"OFF" and open the Grill Lid.<br />
Have your assistant stand behind to the<br />
right of the grill and look toward the front<br />
of the grill bowl. Never put your face<br />
inside the Grill Head.<br />
Push the Igniter Cap in and have<br />
assistant watch for a blue spark within<br />
each Gas Collector Box. If a spark is<br />
present the Electrode Tips are properly<br />
positioned.<br />
Side Burner Electrode Check<br />
11 Open side burner lid. Remove plastic<br />
shipping band from burner and pot<br />
support.<br />
Push and turn side burner Control Knob<br />
to HIGH. Look for spark between tip of<br />
electrode and burner.<br />
If you don't see a spark from side burner electrode,<br />
adjust gap between electrode and<br />
burner surface to 3/16 in.<br />
Final Grill Assembly Step<br />
When you have finished assembling your<br />
grill be sure that all screws are tightened<br />
for safe operation of your grill.<br />
15<br />
12<br />
!<br />
Ignitor Cap<br />
Spring<br />
Cooking Grids<br />
Place the Savor Plates ® above the<br />
Burners.<br />
Place the Cooking Grids on the ledge<br />
above the Savor Plates ® .<br />
Place the Secondary Cooking Rack on<br />
the slots on either side of the Grill<br />
Bowl.<br />
Secondary Cooking Rack<br />
Savor Plates ®<br />
AA Battery<br />
+<br />
Ignitor Slot<br />
Install Cooking Components<br />
WARNING !<br />
Failure to read and follow the Use and Care<br />
Instructions could result in a fire or explosion<br />
that could cause serious bodily injury, death or<br />
property damage.<br />
_
13<br />
Optional Wind Shield for More Effective Cooking<br />
When cooking with only the main burners you can generate more heat for your cooking if you<br />
place the wind shield on your cooking grid. If the searing burner is in operation there is no need<br />
for the wind shield.<br />
Open lid and remove the secondary cooking rack.<br />
Before igniting burners, tilt the cooking grid up at the middle point of the grill. See Fig. 1.<br />
Place the base of the wind shield in-between the cooking grids and then lower<br />
the cooking grid to its original position. See Fig. 2.<br />
Replace the secondary cooking rack.<br />
Bowl Wind Shield<br />
!<br />
The Right Rack<br />
Fig. 1.<br />
1.<br />
WARNING !<br />
Do NOT Touch after cooking.<br />
16<br />
Bowl Wind Shield<br />
Fig. 2.<br />
The Right Rack
CORRECT LP GAS TANK USE<br />
LP Gas grill models are designed for use with a<br />
standard 20 lb. Liquid Propane Gas (LP Gas) tank,<br />
not included with grill. Never connect your gas grill to<br />
an LP Gas tank that exceeds this capacity. A tank of<br />
approximately 12 inches in diameter by 18-1/2 inches<br />
high is the maximum size LP Gas tank to use. You<br />
must use an "OPD" gas tank which offers a listed<br />
Overfill Prevention Device. This safety feature<br />
prevents tank from being overfilled which can cause<br />
malfunction of LP Gas tank, regulator and/or grill.<br />
The LP Gas tank must be constructed and marked<br />
in accordance with the Specifications for LP-Gas<br />
Cylinders of the U.S. Department of Transportation<br />
(D.O.T.) or the National Standard of Canada, CAN/<br />
CSA-B339, Cylinders, Spheres and Tubes for Transportation<br />
of Dangerous Goods; and Commission,<br />
as applicable.<br />
The LP Gas tank must have a shutoff valve,<br />
terminating in an LP Gas supply tank valve outlet,<br />
that is compatible with a Type 1 tank connection<br />
device. The LP Gas tank must also have a safety<br />
relief device that has a direct connection with the<br />
vapor space of the tank.<br />
The tank supply system must be arranged for<br />
vapor withdrawal.<br />
The LP Gas tank used must have a collar<br />
to protect the tank valve.<br />
Never connect an unregulated LP gas tank to your<br />
gas grill. The gas regulator assembly supplied with<br />
your gas grill is adjusted to have an outlet pressure<br />
of 11" water column (W.C.) for connection to an LP<br />
gas tank. Only use the regulator and hose assembly<br />
supplied with your gas grill. Replacement regulators<br />
and hose assemblies must be those specified by<br />
the Manufacturer.<br />
Have your LP Gas dealer check the release valve<br />
after every filling to ensure it remains free of defects.<br />
Always keep LP Gas tank in upright position.<br />
Do not subject the LP Gas tank to excessive heat.<br />
Never store an LP Gas tank indoors. If you store<br />
your gas grill in the garage always disconnect the<br />
LP Gas tank first and store it safely outside.<br />
LP Gas tanks must be stored outdoors in a wellventilated<br />
area and out of the reach of children.<br />
Disconnected LP Gas tanks must not be stored in a<br />
building, garage or any other enclosed area.<br />
The regulator and hose assembly can be seen after<br />
opening the doors (if applicable) and must be<br />
inspected before each use of the grill. If there is<br />
excessive abrasion or wear or if the hose is cut, it<br />
must be replaced prior to using the grill again.<br />
Never light your gas grill with the lid closed or<br />
before checking to ensure the burner tubes are fully<br />
seated over the gas valve orifices.<br />
Never allow children to operate your grill. Do not<br />
allow children or pets to play near your grill.<br />
USE AND CARE INSTRUCTIONS<br />
17<br />
A.<br />
B.<br />
C.<br />
•<br />
•<br />
•<br />
•<br />
•<br />
Use of alcohol, prescription or non-prescription<br />
drugs can impair your ability to properly assemble<br />
and safely operate your grill.<br />
Keep fire extinguisher readily accessible. In the<br />
event of a oil/grease fire, do not attempt to<br />
extinguish with water. Use type B extinguisher<br />
or smother with dirt, sand or baking soda.<br />
In the event of rain, cover the grill and turn off<br />
the burner and gas supply.<br />
Use your grill on a level, stable surface in an<br />
area clear of combustible materials.<br />
Do not leave grill unattended when in use.<br />
Do not move the appliance when in use.<br />
Allow the grill to cool before moving or storing.<br />
Do not use your grill as a heater.<br />
This grill is not intended to be installed in<br />
or on recreational vehicles and/or boats.<br />
Never use charcoal in this gas grill.<br />
!<br />
WARNING !<br />
Do not store a spare LP-Gas tank under or near<br />
this appliance.<br />
Never fill the tank beyond 80 percent full; and<br />
If the information in "(a)" and "(b)" is not followed<br />
exactly, a fire causing death or serious injury may<br />
occur.<br />
! WARNING !<br />
Use your grill at least 3 feet away from any<br />
wall or surface. Use your grill at least 3 feet<br />
away from combustible objects that can melt<br />
or catch fire such as vinyl or wood siding, fences<br />
and overhangs or sources of ignition including pilot<br />
lights on water heaters and live electrical appliances.<br />
Outdoor cooking gas appliance shall not be used<br />
under overhead combustible construction.<br />
Never use your gas grill in a garage, porch, shed,<br />
breezeway or any other enclosed area.<br />
Never obstruct the flow of ventilation air around your<br />
gas grill housing.<br />
In windy conditions, always position the front of grill to<br />
face oncoming wind to reduce smoke and heat blowing in<br />
your face and prevent potential hazards to self and grill.<br />
3ft.<br />
WIND<br />
DIRECTION<br />
3ft.
NOTE about LP Gas Tank Exchange Programs<br />
Many retailers that sell grills offer you the option of<br />
replacing your empty LP Gas tank through an exchange<br />
service. Use only those reputable exchange<br />
companies that inspect, precision fill, test and certify<br />
their tanks. Exchange your tank only for an OPD safety<br />
feature-equipped tank as described in the LP Gas tank<br />
section of this manual.<br />
Always keep new and exchanged LP Gas tanks in an<br />
upright position during use, transit or storage.<br />
Leak test new and exchanged LP Gas tanks BEFORE<br />
connecting one to your grill.<br />
How to Leak Test your LP Gas Tank<br />
For your safety:<br />
All leak tests must be repeated each time your LP<br />
Gas tank is exchanged or refilled.<br />
When checking for gas leaks do not smoke.<br />
Do not use an open flame to check for gas leaks.<br />
Your grill must be leak tested outdoors in a wellventilated<br />
area, away from ignition sources such as<br />
gas fired or electrical appliances. During the leak test,<br />
keep your grill away from open flames or sparks.<br />
Do not use household cleaning agents. Damage to<br />
gas assembly components can result.<br />
Use a clean paintbrush and a 50/50 mild soap and<br />
water solution.<br />
Brush soapy solution onto LP Gas tank in the<br />
areas indicated by the arrows. See diagram.<br />
If growing bubbles appear do not use or move the<br />
LP Gas tank. Call an LP Gas Supplier or your Fire<br />
Department.<br />
! WARNING !<br />
If growing bubbles appear do not use or move<br />
the LP Gas tank. Contact an LP Gas Supplier<br />
or your fire department!<br />
USE AND CARE INSTRUCTIONS<br />
18<br />
LP Gas Model only:<br />
Secure a 20lb LP Gas Tank to Gas Grill or<br />
Range<br />
Turn your LP Gas Tank Valve clockwise to the<br />
closed or OFF positon.<br />
Unscrew the Wing Bolt from right bracket of tank<br />
holder.<br />
Place LP Gas tank into tank holder on the Tank<br />
Tray.<br />
Install the tank so the Tank Valve faces the rear<br />
right corner of cabinet.<br />
Align an additional nut and screw the Wing Bolt<br />
into right bracket of tank holder to secure the<br />
gas tank.<br />
Wing Bolt 1/4"x1/2"<br />
Qty. 1<br />
Part # S233G0408B<br />
One Nut is fixed to<br />
Tank Holder. An<br />
additional Nut and<br />
Wing Bolt is secured<br />
AFTER inserting tank<br />
into tank hole.<br />
Additional Nut
LP Gas Model only:<br />
Connect Regulator with Hose to your LPG Tank<br />
Turn all Burner Valves to the OFF position.<br />
Inspect the valve connection port and regulator<br />
assembly for damage or debris. Remove any<br />
debris. Never use damaged or plugged<br />
equipment.<br />
Connect the regulator assembly to the tank valve<br />
and HAND TIGHTEN nut clockwise to a full stop.<br />
DO NOT use a wrench to tighten because it could<br />
damage the Quick Coupling Nut and result in a<br />
hazardous condition.<br />
Open the tank valve 1/4 to 1/2 (counterclockwise)<br />
and use a soapy water solution to check all<br />
connections for leaks before attempting to light<br />
your grill. See "Checking for LP Gas Leaks". If<br />
a leak is found, turn the tank valve off and do not<br />
use your grill until the leak is repaired.<br />
USE AND CARE INSTRUCTIONS<br />
Type 1 connection per<br />
ANSI Z21.58- 2007<br />
Quick<br />
Coupling Nut<br />
CAUTION: When the appliance is not in use the gas<br />
must be turned off at the tank.<br />
Place dust cap on cylinder valve outlet whenever the<br />
cylinder is not in use. Only install the type of dust<br />
cap on the cylinder valve outlet that is provided with<br />
the cylinder valve. Other types of caps or plugs may<br />
result in leakage of propane.<br />
! WARNING !<br />
Before using this gas appliance read all<br />
instructions and perform all gas leak-check<br />
procedures even if the product was<br />
pre-assembled by the retailer or manufacturer.<br />
19<br />
Check all connections for LP Gas Leaks<br />
Never test for leaks with a flame. Prior to first use,<br />
at the beginning of each season, or every time<br />
your LP Gas tank is changed, you must check for<br />
gas leaks. Follow these three steps:<br />
Make a soap solution by mixing one part liquid<br />
detergent and one part water.<br />
Turn the grill Control Knobs to the full OFF<br />
position, then turn the gas ON at source.<br />
Apply the soap solution to all gas connections<br />
indicated by the arrows. See diagram. If<br />
bubbles appear in the soap solution the<br />
connections are not properly sealed. Check<br />
each fitting and tighten or repair as necessary.<br />
Gas Valve / Manifold Assembly<br />
LP Gas Tank<br />
Regulator with Hose (LPG)<br />
! WARNING !<br />
If you have a gas leak that cannot be repaired by<br />
tightening, turn off the gas at the source, disconnect<br />
fuel line from your grill and call 1-800-770-9769<br />
or your gas supplier for repair assistance.<br />
Never disconnect the gas regulator or any gas<br />
fitting while your grill is lit. A lit grill can ignite<br />
leaking gas and cause a fire or explosion which<br />
could result in property damage, personal injury<br />
or death.<br />
Disconnecting A Liquid Propane Gas (LPG)<br />
Tank From Your Grill<br />
Make sure the Burner Valves and LP Gas tank valve<br />
are off. (Turn clockwise to close.)<br />
Detach the hose and regulator assembly from the<br />
LP Gas tank valve by turning the Quick Coupling<br />
Nut counterclockwise.
Grill Lighting Instructions<br />
1. Before each use, check all hoses for cracks, nicks, cuts,<br />
burns or abrasions. If a hose is damaged in any way, do<br />
not use your grill before replacing the hose with an<br />
authorized part from the <strong>Parts</strong> List. Also make sure all<br />
gas supply connections are securely tightened.<br />
6. Set Control Knobs to OFF and open the LP Gas<br />
tank valveSLOWLY<br />
1/4 of a turn.<br />
Push and turn the Main Burner Control Knob to<br />
ON/ . Always light the LEFT Main Burner first.<br />
Press the electric ignitor 3 to 4 seconds to light the<br />
burner.<br />
7. If ignition does not occur in 5 seconds, turn gas off<br />
at source and turn Control Knobs OFF. Wait at least<br />
5 minutes for gas to clear, then retry. If your grill still<br />
fails to light turn the burner Control Knob(s) and gas<br />
source OFF and conduct a leak test of ALL gas<br />
connections and gas sources as explained in the<br />
Use and Care section of this manual. If no leaks are<br />
detected, wait 5 minutes for any gas to clear and<br />
repeat the lighting procedure.<br />
8. After one Burner is lit, turn the tank valve SLOWLY<br />
one more 1/4 of a turn for 1/2 of one complete turn.<br />
9. Repeat steps to light each burner individually. Turn<br />
other burners to ON/ to light as you move towards<br />
the fuel source.<br />
USE AND CARE INSTRUCTIONS<br />
2. Familiarize yourself with the safety and Use and Care<br />
instructions in this manual. Do not smoke while lighting<br />
grill or checking gas supply connections.<br />
3. Be sure the LP Gas tank is filled.<br />
4. Open the Grill Lid during lighting.<br />
5. Check that the end of each Burner Tube is properly<br />
located over each Valve Orifice (see page 25).<br />
! WARNING !<br />
Failure to replace a faulty hose, secure gas supply<br />
connections or to open the Lid before proceeding<br />
to the Lighting Procedures could result in a fire<br />
or explosion that could cause serious bodily injury,<br />
death, or property damage.<br />
OFF<br />
ON/<br />
LOW<br />
OFF<br />
Open LP<br />
gas tank<br />
20<br />
Burner Control Knobs on Control Panel<br />
Grill<br />
Main Burner<br />
Infrared Burner Lighting Instructions<br />
1. Follow steps 1 through 6 of the Grill Lighting<br />
Instructions.<br />
2. Then, push and turn the Infrared Burner Control Knob<br />
to ON/ and press the electric ignitor 3 to 4 seconds<br />
to light the burner. Hold the knob in 10 seconds before<br />
releasing. If ignition does not occur follow step 7<br />
before retrying.<br />
ON/<br />
3. After the Infrared Burners is lit it will reach cooking<br />
temperature quickly. The orange/red glow will even<br />
out within minutes.<br />
Back Burner Lighting Instructions<br />
1. Follow steps 1 through 6 of the Grill Lighting<br />
Instructions.<br />
2. Then, push and turn the Back Burner Control Knob<br />
to ON/ and press the electric ignitor 3 to 4<br />
seconds to light the Burner. Hold the knob in 10<br />
seconds before releasing. If ignition does not occur<br />
follow step 7 before retrying.<br />
ON/<br />
OFF<br />
Back Infrared<br />
Burner Burner<br />
3. After the Back Burner is lit it will reach cooking<br />
temperature quickly. The orange/red glow will<br />
even out within minutes.<br />
Side Burner Lighting Instructions<br />
1. Follow steps 1 through 5 of the Grill Lighting<br />
Instructions.<br />
2. Open Side Burner Lid.<br />
3.<br />
4.<br />
5.<br />
OFF<br />
Set Control Knob to OFF and open the LP Gas tank<br />
valve SLOWLY 1/4 of a turn.<br />
Push and turn the Control Knob to ON/ . The built<br />
spark ignitor will light the Burner automatically.<br />
You may have to pusk and turn the Control Knob up to<br />
3 to 4 times to light.<br />
6. If ignition does not occur, turn the burner Control Knob<br />
and gas source OFF and conduct a leak test of ALL<br />
gas connections and fuel sources. If no leaks are<br />
detected, wait 5 minutes for any gas to clear and repeat<br />
the lighting procedure.<br />
IMPORTANT: Do not use the Back Burner and<br />
Main Burners at the same time. Backburner is<br />
for Rotisserie Cooking only.
Manually Lighting Your Grill By Paper Match<br />
To light your gas grill by match, insert a match into the<br />
Lighting Stick and follow steps 1 through 6 of the Grill<br />
Lighting Instructions. Then, light the match and place<br />
Lighting Stick through the Cooking Grid on the grill as<br />
shown below. Turn the nearest Control Knob to the HI<br />
setting to release gas. The Burner should light immediately.<br />
Match<br />
Lighting<br />
Stick<br />
! WARNING !<br />
Never lean over the grill cooking area while<br />
lighting your gas grill. Keep your face and body<br />
a safe distance (at least 18 inches) from the<br />
Lighting Hole or Burners when lighting your grill<br />
by match.<br />
!<br />
USE AND CARE INSTRUCTIONS<br />
WARNING !<br />
Should a FLASHBACK fire occur in or around<br />
the Burner Tubes, follow the instructions below.<br />
Failure to comply with these instructions could<br />
result in a fire or explosion that could cause<br />
serious bodily injury, death, or property damage.<br />
Shut off gas supply to the gas grill.<br />
Turn the Control Knobs to OFF position.<br />
Open the Grill Lid.<br />
Put out any flame with a Class B fire<br />
extinguisher.<br />
Once the grill has cooled down, clean<br />
the Burner Tubes and Burners according<br />
to the cleaning instructions in this<br />
Operator's Manual.<br />
! WARNING !<br />
If ignition does not occur in 5 seconds, turn the Control<br />
Knob(s) and gas source OFF and conduct a leak test<br />
as explained in the Use and Care section of this manual.<br />
If no leaks are detected, wait 5 minutes for any gas<br />
to clear and repeat the lighting procedure.<br />
Troubleshooting<br />
If the grill fails to light :<br />
1. Turn gas off at source and turn Control Knobs to OFF.<br />
Wait at least 5 minutes for gas to clear, then retry.<br />
2. If your grill still fails to light, check gas supply and<br />
connections.<br />
3. Repeat lighting procedure. If your grill still fails to<br />
operate, turn the gas off at source, turn the Control<br />
Knobs to OFF, then check the following:<br />
Misalignment of Burner Tubes over Orifices<br />
Correction: Reposition Burner Tubes over Orifices.<br />
Obstruction in gas line<br />
Correction: Remove fuel line from grill. Do not smoke!<br />
Open gas supply for one second to clear any obstruction<br />
from fuel line. Close WARNING<br />
off gas supply at source and reconnect<br />
fuel line to grill.<br />
Plugged Orifice<br />
Correction: Remove Burners from grill by removing the<br />
screw from the rear of each Burner using Phillips Head<br />
Screwdriver. Carefully lift each Burner up and away from<br />
gas valve Orifice. Remove the Orifice from gas valve and<br />
gently clear any obstruction with a fine wire. Then<br />
reinstall all Orifices, Burners, screws and cooking<br />
components.<br />
If an obstruction is suspected in Gas Valves or Manifold,<br />
call the Grill Information Center 1-800-770-9769 8am to<br />
4:30pm CST, Monday through Friday.<br />
Obstruction in Burner Tubes<br />
Correction: Follow the Burner Tube cleaning procedure<br />
on page 26 of this Operator's Manual.<br />
Misalignment of Ignitor on Burner<br />
Correction: Check for proper position of the Electrode<br />
Tip as shown in step 10 page 15. The gap between<br />
the Spark Electrode Tip and Spark Receiver should be<br />
approximately 3/16". Adjust if necessary. With the gas<br />
supply closed push the Igniter Cap in and watch for the<br />
presence of a spark within each Gas Collector Box.<br />
Disconnected Electric Wires<br />
Correction: Inspect the Ignitor Junction Box found behind<br />
the Control Panel. Connect loose Electric wires to<br />
Junction Box and try to light the grill.<br />
Weak AA battery<br />
Correction: Unscrew the Ignitor Cap and replace the<br />
battery.<br />
If the grill still does not light you may need to purge<br />
air from the gas line or reset the regulator excess<br />
gas flow device. Note: This procedure should be<br />
done every time a new LP Gas tank is connected to<br />
your grill.<br />
21<br />
To purge air from your gas line and/or reset<br />
the regulator excess gas flow device:<br />
Turn Control Knobs to the OFF position.<br />
Turn off the gas at the tank valve.<br />
Disconnect regulator from LP Gas tank.<br />
Let unit stand 5 minutes to allow air to purge.<br />
Reconnect regulator to the LP Gas tank.<br />
Turn tank valve on SLOWLY 1/4 of a turn.<br />
Open the Grill Lid.<br />
Push and turn the Left Main Burner Control Knob to<br />
ON/ .<br />
Press Electric Ignitor for 3-4 seconds to light the<br />
burners.
CORRECT ROTISSERIE USE<br />
1.<br />
2.<br />
3.<br />
4.<br />
5.<br />
Read all instructions before initial use.<br />
IMPORTANT: When using electrical appliances, basic<br />
safety precautions should always be used.<br />
The Rotisserie Motor is set for 120V, 60Hz AC current.<br />
The Rotisserie is for outdoor use only.<br />
Do not let children operate or play nearby your grill or<br />
Rotisserie.<br />
Connecting Rotisserie<br />
Always attach the assembled Rotisserie to your grill first<br />
and then plug the Cord into an outlet.<br />
Operating Rotisserie<br />
Do not operate the Rotisserie if the cord or plug becomes<br />
damaged, or if the Rotisserie malfunctions or<br />
has been damaged in any manner.<br />
The use of accessory attachments is not recommeded<br />
by the manufacturer and may cause injuries. Do not use<br />
this Rotisserie other than intended use.<br />
Do not immerse Electrical Cord, Plug or Motor in water<br />
or expose to rain, as this may result in an electrical<br />
shock.<br />
Disconnect Rotisserie<br />
Careful as all surfaces will be hot, both grill and Rotisserie<br />
parts. Use protective mitts to handle the Rotisserie.<br />
Unplug the Rotisserie from electrical outlet when not in<br />
use and before cleaning. Allow to cool before adding or<br />
removing parts.<br />
When Roitsserie cooking place a Cooking Pan under<br />
the food to be cooked as this will capture the drippings<br />
and keep your grill clean of excess grease which could<br />
cause a fire.<br />
CAUTION: Handle with care when moving a Cooking<br />
Pan with hot oils<br />
Should a grease fire occur, turn the burners and gas off<br />
and leave the grill lid Closed until the fire is out.<br />
Store the Rotisserie indoors<br />
When Rotisserie is not in use, store it indoors in a dry<br />
place.<br />
! WARNING !<br />
To protect against electrical shock, do not immerse<br />
electrical cord, plugs or motor in water or expose to<br />
rain. Protect electrical elements from burners, hot<br />
grill surfaces and grease.<br />
USE AND CARE INSTRUCTIONS<br />
22<br />
! CAUTION !<br />
To protect against shock hazard risk, connect<br />
only to properly Grounded Outlet.<br />
ELECTRICAL EQUIPMENT USE<br />
1.<br />
2.<br />
3.<br />
4.<br />
5.<br />
6.<br />
7.<br />
8.<br />
9.<br />
To protect against electric shock, do not immerse<br />
cord or plugs in water or other liquid.<br />
Unplug from the outlet when not in use and before<br />
cleaning. Allow to cool before putting on or taking<br />
off parts.<br />
Do not operate any outdoor cooking gas appliance<br />
with a damaged cord, plug, or after the appliance<br />
malfunctions or has been damaged in any manner.<br />
Contact the manufacturer for repair.<br />
Do not let the cord hang over the edge of a table or<br />
touch hot surfaces.<br />
Do not use an outdoor cooking gas appliance for<br />
purposes other than intended.<br />
When connecting, first connect plug to the outdoor<br />
cooking gas appliance then plug appliance into the<br />
outlet.<br />
Use only a Ground Fault Interrupter (GFI)<br />
protected circuit with this outdoor cooking gas<br />
appliance.<br />
Never remove the grounding plug or use with an<br />
adapter of 2 prongs.<br />
Use only extension cords with a 3 prong grounding<br />
plug, rated for the power of the equipment, and<br />
approved for outdoor use with a W-A marking.
1. Remove all components from the carton.<br />
2.<br />
3.<br />
Rotisserie Instructions<br />
Attach the Motor Bracket on the outside of the left grill bowl panel. Align the two holes of the Bracket<br />
with the holes on the grill bowl. Tighten securely using two Screws #10-24x3/4" UNC, Plain Washers<br />
and Nuts provided.<br />
Rot. Screw #10-24x3/4" UNC x2<br />
Rot. Washer x2<br />
Rot. Nut #10-24 x2<br />
Slide the Spit through the piece of meat or poultry and the Holding Forks onto each end of the Rotisserie<br />
Spit. Adjust spacing between Holding Forks to accommodate your food, then tighten the Thumbscrews<br />
to keep the Holding Forks in position. Slide the Collar and Bushing onto the threaded end of the Spit.<br />
Do not tighten the Collar Thumbscrew until the Rotisserie is placed into your grill. Last, screw the<br />
Handle onto the threaded end of Rotisserie Spit as shown.<br />
Rot.Thumbscrew 3/8"x1/2" x3<br />
Rot. Screw#10-24x3/4"<br />
UNC with<br />
washers and nuts<br />
Thumbscrew<br />
3/8"x1/2"<br />
Spit<br />
Motor Bracket<br />
23<br />
Holding Forks<br />
Thumbscrew<br />
3/8"x1/2"<br />
Washer #10-24 Nut.<br />
Outside of left grill<br />
bowl panel<br />
Handle<br />
Collar<br />
Bushing
4.<br />
5.<br />
Install the AC (alternating current) Rotisserie Motor onto the Motor Bracket as shown below. Be sure<br />
the Motor attaches to the Bracket with the electrical cord down. This installation insures that once<br />
the Spit is inserted into the Motor it will also rest securely into the slot of your grill bowl.<br />
Insert the assembled Rotisserie into the Motor as shown below. The Motor should be on the left side<br />
of your grill and the Handle on the right side. Place the Bushing into the slot opening on the right<br />
side of your grill bowl, then tighten the Collar Thumbscrew to the left of the Bushing. The Collar will<br />
stabilize the Rotisserie during the cooking process and the Bushing allows the Rotisserie Spit to turn<br />
smoothly. Plug the Rotisserie into an outlet and turn on to test.<br />
Motor<br />
Rotisserie Motor<br />
Motor Bracket<br />
Rotisserie Spit must rest securely<br />
into the slot of your grill bowl.<br />
Thumbscrew<br />
Holding Forks Thumbscrew<br />
Collar<br />
Bushing<br />
Handle<br />
The Bushing and Collar must always be used with this Rotisserie.<br />
BEFORE rotisserie cooking you will need to remove the Cooking Grid(s) and possibly the Savor Plates®<br />
from your grill. When rotisserie cooking place a Cooking Pan under the food to be cooked. This will<br />
capture the drippings and keep your grill clean of excess grease which could cause a fire. Use caution<br />
when moving a Cooking Pan containing hot oils.<br />
24<br />
Spit
CLEANING AND MAINTENANCE<br />
Proper care and maintenance will keep your grill in top<br />
operating condition and prolong its life. Follow these<br />
cleaning procedures on a timely basis and your grill will<br />
stay clean and operate with minimum effort.<br />
CAUTION: Be sure your grill is OFF and cool before cleaning.<br />
Cleaning The Cooking Grids<br />
Before initial use, and periodically, wash your<br />
Cooking Grids in a mild soap and warm water<br />
solution. You can use a wash cloth or vegetable<br />
brush to clean your Cooking Grids.<br />
Cleaning The Savor Plates ®<br />
Periodically you should wash the Savor Plates ® in a<br />
soap and warm water solution. Use a vegetable brush<br />
to remove stubborn burnt-on cooking residue. Dry the<br />
Savor Plates ® thoroughly before you reinstall them<br />
into the cooking bowl.<br />
Cleaning The Grease Tray<br />
To reduce the chance of fire, the Grease Draining<br />
Tray should be visually inspected before each grill<br />
use. Remove any grease and wash Grease Tray<br />
with a mild soap and warm water solution.<br />
Cleaning the Inside of the Grill Lid<br />
Grease can have a tendency to build up on the<br />
inside of the Grill Lid and could drip onto deck or<br />
patio when the lid is opened. Visually inspect the<br />
inside of the Grill Lid before each grill use. Remove<br />
any grease and wash with a mild soap and warm<br />
water solution.<br />
Regular Cleaning of The Grill Interior<br />
1.<br />
2.<br />
3.<br />
Burning-off excess food after every cookout will<br />
keep it ready for instant use. However,at least every<br />
3 months you must give the entire grill a thorough<br />
cleaning to minimize your risk of grease fire and<br />
keep the grill in top shape. Follow these steps:<br />
Turn all Burner Valves to the full OFF position.<br />
Turn the LP gas tank valve to the full OFF position.<br />
Disconnect the regulator from the gas tank. Inspect<br />
the hose with regulator assembly for cracking, cuts<br />
or any other damage, and replace as neccessary.<br />
Refer to the <strong>Parts</strong> List in this Operator's Manual.<br />
Remove and clean the Savor Plates ® , Cooking<br />
Grids, Cooking Rack and Grill Burners.<br />
Cover each Gas Valve Orifice with aluminum foil.<br />
Brush the inside and bottom of the grill with a fiber<br />
pad or nylon brush and wash with a mild soap and<br />
warm water solution. Rinse thoroughly and let dry.<br />
Remove aluminum foil from Orifices and check<br />
each Orifice for obstruction.<br />
Check each Spark Electrode, adjusting as needed.<br />
The space between the Spark Electrode Tip and<br />
Spark Receiver should be approximately 3/16".<br />
Replace the Burners and adjust the Gas<br />
Collector Box. The edge of the collector box should<br />
be overlapping the Burner Port.<br />
10. Replace Savor Plates<br />
11.<br />
® 4.<br />
5.<br />
6.<br />
7.<br />
8.<br />
9.<br />
and Cooking Grids.<br />
Reconnect the gas source and observe the<br />
Burner flame for correct operation.<br />
25<br />
Cleaning Exterior painted Surfaces:<br />
Before initial use, and periodically thereafter, we<br />
suggest you wash your grill using a mild soap<br />
and warm water solution. You can use a wash<br />
cloth or sponge for this process. Do not use a stiff<br />
wire or brass brush. These will scratch stainless<br />
steel and chip painted surfaces (varies by model)<br />
during the cleaning process.<br />
Cleaning Exterior Stainless Steel Surfaces:<br />
1.<br />
2.<br />
3.<br />
Routine care and maintenance is required to preserve<br />
the appearance and corrosion resistance of stainless<br />
steel. The fact is stainless steel can corrode, rust and<br />
discolor under certain conditions. Rust is caused<br />
when regular steel particles in the atmosphere<br />
become attached to the stainless steel surface. Steel<br />
particles can also become attached to your grill if you<br />
use steel wool or stiff wire brushes to clean the grill<br />
instead of non-abrasive cloth, sponge or nylon<br />
cleaning tools. In coastal areas rust pits can develop<br />
on stainless surfaces that cannot be fully removed.<br />
Bleach and other chlorine based solutions used for<br />
household and pool cleaning can also cause corrosion<br />
to stainless steel. Weathering, extreme heat,<br />
smoke from cooking and machine oils used in the<br />
manufacturing process of stainless steel can cause<br />
stainless steel to turn tan in color. Although there are<br />
many factors which can affect the surface appearance<br />
of stainless steel, they do not affect the integrity of the<br />
steel or the performance of the grill.<br />
To help maintain the finish of stainless steel follow<br />
these cleaning procedures for the best results:<br />
After every use (after your grill has cooled down), wipe<br />
stainless surfaces with a soft, soapy cloth or sponge<br />
then rinse with water. Be sure to remove all food<br />
particles, sauces or marinades from stainless steel<br />
because these can be highly acidic and damaging to<br />
stainless surfaces.<br />
Never use abrasive cleaners, scrubbers or stiff wire<br />
brushes of any type on your grill.<br />
Use a heat resistant Stainless Steel Cleaner and rub<br />
or wipe in the direction of the stainless steel grain or<br />
polish lines NOT against the grain.<br />
! WARNING !<br />
Failure to comply with these instructions could<br />
result in a fire or explosion that could cause serious<br />
bodily injury, death or property damage.<br />
•<br />
•<br />
•<br />
•<br />
Keep grill area clear and free from combustible<br />
materials, gasoline and other flammable vapors<br />
and liquids.<br />
Do not obstruct the flow of air for combustion<br />
and ventilation.<br />
Keep the ventilation openings of the tank enclosure<br />
cabinet free and clear of debris.<br />
Visually check burner flames occasionally to<br />
ensure proper flame pattern as shown below.<br />
MAGNIFIED VIEW OF<br />
BURNER FLAME<br />
THROUGH LIGHTING<br />
HOLE
CLEANING THE BURNER TUBES AND BURNER PORTS<br />
To reduce the chance of FLASHBACK FIRE you must<br />
clean the Burner Tubes as follows at least once a month<br />
in summer and fall or whenever spiders are active in your<br />
area, and if your grill has not been used for an extended<br />
period of time.<br />
1.<br />
2.<br />
3.<br />
4.<br />
5.<br />
6.<br />
7.<br />
Turn all Burner Valves to the full OFF position.<br />
Turn the LP Gas tank valve to the full OFF position.<br />
Detach the LP Gas regulator assembly from your<br />
gas grill.<br />
Remove the Cooking Grids and Savor Plates ® from<br />
your grill.<br />
Remove the screws from the rear of each Burner<br />
using a Phillips Head Screwdriver.<br />
Carefully lift each Burner up and away from the<br />
Gas Valve Orifice.<br />
Check and clean burner/venturi tubes for insect<br />
and insect nests. A clogged tube can lead to a fire<br />
beneath the grill.<br />
8. Refer to Figure 1 and perform one of these<br />
three cleaning methods:<br />
Figure 1<br />
TO CLEAN BURNER TUBE,<br />
INSERT HOOK AS INDICATED BY THE ARROW<br />
9<br />
METHOD 1: Bend a stiff wire or wire coat<br />
hanger into a small hook as shown and<br />
run the hook through the Burner Tube and<br />
inside the Burner several times to remove<br />
debris.<br />
METHOD 2: Use a bottle brush with a<br />
flexible handle and run the brush through<br />
the Burner Tube and inside the Burner<br />
several times to remove any debris.<br />
METHOD 3: Use an air hose to force air<br />
through each Burner Tube. The forced air<br />
should pass debris or obstructions through<br />
the Burner and out the Ports.<br />
26<br />
Regardless of which Burner cleaning procedure you<br />
use, we recommend you also complete the following<br />
steps to help prolong Burner life.<br />
1. Use a fiber pad or nylon brush to clean the entire<br />
outer surface of each Burner until free of food<br />
residue and dirt.<br />
2. Clean any clogged ports with a stiff wire, such as<br />
an open paper clip.<br />
3.<br />
Inspect each Burner for damage (cracks or<br />
holes) and if such damage is found, order and<br />
install a new Burner. After installation, check<br />
to ensure that the Gas Valve Orifices are<br />
correctly placed inside the ends of the Burner<br />
Tubes. Also check the position of your Spark<br />
Electrode.<br />
! WARNING !<br />
For safe operation ensure the Gas Valve<br />
Assembly Orifice is inside the Burner Tube<br />
before using your grill. See figure. If the Orifice<br />
is not inside the Burner Tube, lighting the<br />
Burner may cause explosion and/or fire resulting<br />
in serious bodliy injury and/or property<br />
damage.<br />
Tube Burner<br />
Burner Tube<br />
Gas Valve Assembly<br />
Burner Port<br />
Orifice Burner Tube<br />
Foot
Burn-Off<br />
Before cooking on your gas grill for the first time, you<br />
should "burn off" the grill to eliminate any odor or<br />
foreign matter. Ignite the burners, lower the Lid, and<br />
operate grill on ON/ setting for 3 to 5 minutes.<br />
CAUTION: Operating ALL main burners on ON/<br />
setting for longer than five minutes may damage<br />
certain parts of your grill. Do not leave your grill<br />
unattended when in use.<br />
Preheating<br />
To preheat, light your grill on ON/ , lower the Lid<br />
and follow this timetable:<br />
For high temperature cooking, preheat grill 3 to 5<br />
minutes.<br />
For low temperature cooking, preheat grill 3<br />
minutes.<br />
To slow cook, preheating is not necessary.<br />
Cooking Temperatures<br />
High setting: The HIGH Control Knob setting should<br />
only be used to pre-heat your grill the first 3-5 minutes<br />
and for burning food residue off the grill for 3-5 minutes<br />
after cooking is complete. Never use the ON/<br />
setting for extended cooking.<br />
CAUTION: Operating ALL main burners on ON/<br />
setting for longer than five minutes may damage<br />
certain parts of your grill. Do not leave your grill<br />
unattended when in use.<br />
Medium to Low Settings: Most recipes specify<br />
medium to low settings, including all smoking,<br />
rotisserie cooking and cooking lean cuts such as fish.<br />
An Important Note About Cooking Temperatures<br />
Unlike the controlled environment inside your kitchen,<br />
variables like outside temperatures, direction<br />
and conditions of wind, as well as grill location will<br />
affect your grill's heat distribution. Because these<br />
conditions vary, no two cooking situations are alike.<br />
For this reason, we recommend you monitor your grill<br />
closely so you can adjust heat settings and rotate<br />
foods as needed to prevent overcooking and ensure<br />
the most delicious results every time.<br />
The Infrared Searing Burner (far right-side) offers the<br />
most intense heat to quickly lock in the natural juices<br />
and flavor of poultry and meats.<br />
Within the primary cooking area, the middle and back<br />
areas offer the highest heat for grilling.<br />
The Secondary Cooking Rack offers medium heat for<br />
preparing breads and firm vegetables like potatoes<br />
and corn.<br />
The front primary cooking area offers less heat and is<br />
ideal for preparing delicate foods and for keeping<br />
cooked foods warm.<br />
Direct Cooking<br />
The direct cooking method can be used with the<br />
supplied Cooking Grids and food placed directly over<br />
the lit grill Burners. Direct Cooking requires the Grill<br />
Cooking Instructions<br />
A-1<br />
Lid to be open. This method is ideal for searing,<br />
grilling, deep frying and whenever you want foods to<br />
have an open-flame barbecued taste.<br />
Indirect Cooking<br />
The indirect cooking method can also be used with<br />
the supplied Cooking Grids. To cook indirectly, the<br />
food should be placed on the left or right side of your<br />
grill with the Burner lit on the opposite side. Or place<br />
your food on the Secondary Cooking Rack and light<br />
the outer grill Burners. Either way, indirect cooking<br />
must be done with the Lid down.<br />
Prepare Cooking Grids for Grilling<br />
Greasing the cooking surface will help keep foods<br />
from sticking during the cookout and reduces the<br />
amount of cleanup required. Use a brush to apply a<br />
thin layer of cooking oil or vegetable shortening onto<br />
each Cooking Grid before each cookout. We do not<br />
suggest spray type oils unless they are specified for<br />
high-temperature cooking. Be sure to coat the entire<br />
cooking surface including edges and any areas with<br />
chipped porcelain.<br />
! WARNING !<br />
Failure to comply with these instructions could<br />
result in a fire or explosion that could cause<br />
serious bodily injury, death or property damage.<br />
Never cover the cooking grids, Savor Plates®,<br />
bottom of grill bowl or Grease Draining Tray with<br />
charcoal, aluminum foil, sand or any substance that<br />
can absorb grease.<br />
Before each use of your grill: Pull out the Grease<br />
Tray and remove all grease and food debris to<br />
prevent grease fire hazard.<br />
Use your grill at least 3 feet away from any<br />
wall or surface. Use your grill at least 3 feet<br />
away from combustible objects that can melt or<br />
catch fire (such as vinyl or wood siding, fences<br />
and overhangs) or sources of ignition including<br />
pilot lights on water heaters and live electrical<br />
appliances.<br />
Never use your gas grill in a garage, porch, shed,<br />
breezeway or any other enclosed area.<br />
Your grill will get very hot. Always wear a flame<br />
retardant BBQ Mitt when cooking on your grill.<br />
Never lean over cooking areas while using grill.<br />
Do not touch cooking surfaces, Lid, grill housing<br />
or other parts while grill is in operation, or until<br />
the grill has cooled down after use.
Guide to Rotisserie Cooking<br />
Slow Cooking with a Rotisserie<br />
Rotisserie cooking produces foods that are moist,<br />
flavorful and attractive. The rotisserie system is most<br />
commonly used for cooking meat or poultry and is<br />
designed to cook food slowly. You can place a cooking<br />
pan beneath the food to collect juices for basting and<br />
gravy. To flavor the contents of the cooking pan you<br />
may add herbs, onions, or other spices of your choice.<br />
The cooking times on a rotisserie will be approximately<br />
the same as for oven cooking.<br />
Balancing the Food<br />
In rotisserie cooking, balancing the food is of utmost<br />
importance. The rotisserie must turn evenly or the<br />
stopping and starting action will cause the food to cook<br />
unevenly and possibly burn the heavier side.<br />
The easiest foods to balance are those of uniform<br />
shape and texture. To test if the food is balanced<br />
correctly when secured, place the ends of the rotisserie<br />
spit loosely in the palms of your hands. If there is<br />
no tendency to roll, give the spit a quarter turn. If it is<br />
still stable, give it a final quarter turn. It should rest<br />
without turning in each of these positions. It can then<br />
be attached to your grill.<br />
Food Preparation<br />
When preparing poultry, truss the birds tightly so that<br />
wings and drumsticks are close to the body of the bird.<br />
The cavity of the bird may be stuffed prior to this. Pull the<br />
neck skin down and, using a small skewer, fix it to the<br />
back of the bird. Push the rotisserie spit through lengthwise,<br />
catching the bird in the fork of the wishbone. Center<br />
the bird and tighten with the holding forks. Test the<br />
balance as described before.<br />
A rolled piece of meat requires the rotisserie skewer to be<br />
inserted through the center of the length of meat, then<br />
secured and balanced.<br />
For meats that contain bones, it is best to secure the<br />
rotisserie skewer diagonally through the meaty sections. If<br />
protruding bones or wings brown too quickly, cover with<br />
pieces of foil.<br />
Vegetables are generally easy to cook on the grill. The<br />
Cooking Rack makes it convenient because you can still<br />
use the main cooking area while the vegetables are<br />
suspended above the grids.<br />
Pre-cook hard vegetables by briefly boiling or microwaving<br />
them before cooking on the grill. Wrap vegetables in a<br />
double thickness of foil to protect them while cooking on<br />
the grill. Then, remove the foil if desired, 10-15 minutes<br />
before the end of cooking, brush vegetables with butter or<br />
oil and finish cooking.<br />
Preparing to Smoke<br />
Smoking gives food a distinctive, delicious flavor. You will<br />
find a variety of wood chips available for use in smoking<br />
grilled foods. Pre-soaking of wood chips may be required<br />
so read and follow the manufacturers instructions<br />
for preparing smoking chips prior to use.<br />
Note: It is our experience that many smoking chip<br />
products do not actually produce a smoke but instead<br />
infuses the food with flavor. Please read product labels<br />
carefully and if in doubt, ask your retailer for details.<br />
Using A Smoker Box<br />
There are many optional smoker boxes available for<br />
purchase. Follow these guidelines and always refer to<br />
the label of your smoking chips for specific directions.<br />
Raise your Grill Lid and light the grill. Lower the Grill Lid<br />
allowing your grill to reach the desired cooking temperature<br />
for the food you are grilling. Fill your smoker box with<br />
your prepared smoking chips. Dried herbs and spices<br />
may also be added to produce different flavors. Wear a<br />
flame retardant BBQ Mitt and place your smoker box on a<br />
Cooking Grid or Savor Plate ® directly above a lit grill<br />
Burner. The heated smoking chips will flavor your foods.<br />
Tips for Smoking<br />
Guide to Using the Cooking Rack<br />
A-2<br />
Guide to Smoking<br />
You can reduce the strength of the smoke flavor by only<br />
smoking for half or three quarters of the cooking time.<br />
The heat required for smoking is normally LOW to<br />
MEDIUM.<br />
Foods naturally high in oils lend themselves well to<br />
smoking, while drier foods benefit from a marinade.<br />
•<br />
•<br />
•<br />
•<br />
•<br />
•<br />
•<br />
•<br />
•<br />
Tuna steaks, marinated in Asian flavors of sesame<br />
oil, soy sauce and sherry.<br />
Pork fillets, rubbed with ginger, orange rind and<br />
brushed with maple syrup.<br />
Mussels, brushed with lemon rind and chili oil.<br />
Lamb cutlets, marinated in virgin olive oil, lemon,<br />
oregano and black pepper. The same marinade can<br />
be used for a whole leg or rack of lamb.<br />
Chicken, boneless chicken pieces—especially sliced<br />
breasts.<br />
Fish, sliced fillets of firm fish, assorted seafood such<br />
as prawns, scallops and calamari.<br />
Pork, sliced fillets, diced or minced pork, sliced leg<br />
steak, sliced chops.<br />
Beef, sliced fillet, rib-eye, round, rump, sirloin.<br />
Lamb, sliced fillet, round, loin.<br />
The Cooking Rack can be used for purposes other than<br />
just the obvious. Consider using the rack for warming<br />
French bread, garlic bread, croissants or even bagels.<br />
A small whole fish wrapped in foil also cooks well on the<br />
Cooking Rack. Parcels of seafood such as scallops,<br />
prawns and sliced fish fillets prepared in a sauce and<br />
portioned into small foil wraps cook well this way, too.
OPTIONAL MG3208SLP GRILL ACCESSORIES<br />
wire hexagon roti-tumble basket secures<br />
food to your rotisserie<br />
Now you can grill anything on your rotisserie including<br />
vegetables, fish, steak as well as traditional foods like<br />
chicken and tenderloin without piercing the food. The<br />
basket secures to your rotisserie spit and holds foods in<br />
place for slow cooking. Adjustable thumbscrew hardware<br />
allows for a snug fit on large and small diameter spits.<br />
Can be used on grills with or without a back burner.<br />
Measures: 13”w x 6”h<br />
natural gas<br />
conversion kit<br />
The MG3208SLP can be<br />
converted to natural gas with<br />
this natural gas kit and a<br />
qualified gas technician only.<br />
In order to convert this grill<br />
the tech will need this grill<br />
conversion kit.<br />
natural gas 12’ hose<br />
If you are converting your grill<br />
to use natural gas, in most<br />
cases you will need this<br />
optional 12’ extension hose<br />
with 3/8” ID (inner diameter).<br />
Online registration and unique cooking accessories now<br />
available at www.grandhall.com<br />
For personal assistance, call the Grill Information Center, 8am to 4.30pm CST, Monday through Friday at:<br />
1-800-770-9769<br />
A-3<br />
cast-iron cooking pan with lid<br />
This heavy-duty Pan and Lid<br />
set (weighs 22 pounds)<br />
offers a porcelain matte<br />
finish and includes handles<br />
for lifting. Cast-iron heats<br />
better and cooks evenly,<br />
making this the ideal<br />
accessory for preparing<br />
fajitas, pizza, potatoes, stew,<br />
corn bread and desserts.<br />
This Cooking Pan sits on<br />
top of cooking grids.<br />
Measures:<br />
16-3/4”l x 11-1/4”w x 2-1/2”d<br />
chrome roasting rack<br />
When placed inside the<br />
optional Cast-iron Pan, this<br />
heavy duty Roasting Rack<br />
achors your tenderloin, ham,<br />
turkey or chicken and configures<br />
your grill for slow<br />
roasting. Measures:<br />
15-1/2” x 10-3/4” x 3”d<br />
deep fry basket<br />
This chrome plated wire Fry<br />
Basket rests in the optional<br />
Cast-Iron Cooking Pan<br />
allowing you to fry on your<br />
grill and keep heat, odor<br />
and mess out-doors. The<br />
detachable 6” handle<br />
allows foods to be lowered<br />
and removed easily from<br />
hot cooking oil. Measures:<br />
14-3/4” x 8-1/2” x 2-1/2”d<br />
(includes 1/2” raised feet)<br />
stainless steel<br />
skewers<br />
These skewers are ideal for<br />
grilling vegetables, shrimp<br />
and meat kabobs. Constructed<br />
of stainless steel<br />
with a mirrored polish finish.<br />
Set of 4 are dishwasher<br />
safe. Measures: 18” long
FREQUENTLY ASKED QUESTIONS (FAQ'S)<br />
Question:<br />
Can I convert my grill from one fuel type to another in<br />
other words from LPG to NG or vice versa?<br />
Answer:<br />
Yes, however any attempt to convert the grill from one<br />
fuel type to another is extremely hazerdous and must<br />
be performed by a qualified gas technician only, using<br />
a NG Conversion Kit purchased by Grand Hall.<br />
Question:<br />
Are the serial and model numbers of my grill listed<br />
somewhere for reference?<br />
Answer:<br />
The serial and model numbers are listed on a silver<br />
CSA label placed on the grill. Depending on the grill<br />
model the silver CSA label will be located on the left or<br />
right side bowl panel underneath the side shelf,<br />
underneath the right side of the control panel, outside<br />
left or right of control panel or on the back of the grill<br />
cabinet.<br />
Question:<br />
My grill will not light properly. Why?<br />
Answer:<br />
Always light the Main Burner farthest from the fuel<br />
source first. This will draw gas across the manifold<br />
helping prevent air pockets which obstruct gas-flow and<br />
prevent proper grill lighting. Also try this procedure:<br />
1. Turn gas off at source and turn Control Knobs OFF.<br />
Wait at least 5 minutes for gas to clear, then retry.<br />
2.<br />
If your grill still fails to light, turn the Burner Control<br />
Knob(s) and gas source OFF and conduct a leak test of<br />
ALL gas connections and gas sources as explained in<br />
the Use and Care section of this manual.<br />
3. If no leaks are detected, wait 5 minutes for any gas to<br />
clear and repeat the lighting procedure.<br />
Question:<br />
If my ignitor or battey is not working how can I light<br />
my grill manually? And - Why would I need the silver<br />
lighting stick that hangs from the side of my grill?<br />
Answer:<br />
If your ignition fails to work or your battery needs<br />
replacing, you can light your grill through the Lighting<br />
Hole on the side of the grill bowl using the Manual<br />
Lighting Stick that hangs from the side of your grill. The<br />
Lighting Stick is designed to hold a paper match and<br />
allows you to safely insert a match through the Lighting<br />
Hole without getting close to the Burner. Never remove<br />
the Cooking Grids or Savor Plates ® and attempt to light<br />
the grill from above. To light your gas grill manually,<br />
insert a paper match into the Manual Lighting Stick and<br />
follow steps 1 through 6 of the Basic Lighting<br />
Procedures. Then, light the match and place it through<br />
the Lighting Hole on the right side of the grill (location of<br />
hole varies by grill model). Turn the Grill Burner Control<br />
Knob to the High setting to release gas. The Burner<br />
should light immediately.<br />
Question:<br />
Sometimes I hear a humming sound coming from my<br />
regulator. What causes this? And - My grill has a low<br />
flame and sometimes will not light. Why?<br />
A-4<br />
Answer:<br />
The humming sound is gas flowing through the<br />
regulator. A low volume of sound is normal and will not<br />
interfere with the operation of your grill. Loud or<br />
excessive regulator humming and/or low flow and<br />
intermittent lighting may be caused by the regulator's<br />
excess gas flow device. Opening the tank valve all the<br />
way or too quickly is what triggers the regulator's<br />
safety device to restrict gas flow, preventing excess<br />
gas flow to your grill. Lighting the main Burner farthest<br />
from the fuel source every time will help eliminate air<br />
pockets in the manifold. Note: This procedure should<br />
be done every time a new LP Gas tank is connected to<br />
your grill.<br />
Turn all Control Knobs to the OFF position.<br />
Turn off the LP Gas tank at the tank valve.<br />
Disconnect regulator from LP Gas tank.<br />
Let unit stand for 5 minutes.<br />
Reconnect regulator to the LP Gas tank.<br />
Open grill Lid (or Side Burner Lid if you are lighting<br />
the Side Burner).<br />
Turn the tank valve slowly ¼ of one turn.<br />
Light main Burner farthest from fuel source.<br />
Turn the tank valve slowly one more ¼ of one turn<br />
for ½ of one complete turn.<br />
Continue to light Burners moving towards the fuel<br />
source.<br />
Do not turn tank valve more than ½ of one turn on<br />
LPG models.<br />
Question:<br />
Where do I use my grill for safer operation and better<br />
performance?<br />
Answer:<br />
Strong winds and low temperatures can affect the<br />
heating and performance of your gas grill so factor<br />
in these elements when positioning your grill<br />
outdoors for cooking.<br />
In windy conditions, always position the front of<br />
grill to face oncoming wind to reduce smoke and<br />
heat blowing in your face and prevent potential<br />
hazards to self and grill.<br />
Use your grill at least 3 feet away from any wall or<br />
surface.<br />
Use your grill at least 3 feet away from<br />
combustible objects that can melt or catch fire<br />
such as vinyl or wood siding, fences and<br />
overhangs) or sources of ignition including pilot<br />
lights on water heaters and live electrical<br />
appliances.<br />
Never use your gas grill in a garage, porch, shed,<br />
breezeway or any other enclosed area.<br />
Never obstruct the flow of ventilation air around<br />
your gas grill housing.
Question:<br />
The Regulator and Hose supplied with my gas grill<br />
does not fit the older LP Gas tank I’ve used for<br />
years. Why not?<br />
Answer:<br />
The U.S. Government regulates gas appliances and<br />
LP Gas tanks. When regulations are changed the LP<br />
Gas tank fittings are altered to insure compliance. If<br />
your LP Gas tank does not fit the Regulator and Hose<br />
supplied with your new grill, the tank is outdated and<br />
must be replaced. Note: Effective April 1, 2002 all LP<br />
Gas tanks sold must include an “OPD” Overfill<br />
Prevention Device. The OPD tanks are identified by<br />
their triangular-shaped valve wheel. This internal<br />
device prevents the LP Gas tank from being<br />
overfilled. Tanks without an OPD valve can not be<br />
refilled.<br />
Question:<br />
What causes grill parts to rust and what affect does<br />
it have on my grill?<br />
Answer:<br />
Rusting is a natural oxidation process and will not<br />
affect the short term performance of your grill.<br />
To slow the rusting process on Cooking Grids we<br />
recommend greasing the grids before and after<br />
each cookout. Use a brush to apply a thin layer of<br />
cooking oil or vegetable shortening onto each grid.<br />
We do not suggest spray type oils unless they are<br />
specified for high-temperature cooking. If your<br />
Cooking Grids are Porcelain coated, be sure to<br />
coat the entire cooking surface including edges<br />
and any areas with chipped porcelain.<br />
Routine care and maintenance is required to preserve<br />
the appearance and corrosion resistance of stainless<br />
steel. The fact is stainless steel can corrode, rust and<br />
discolor under certain conditions. Rust is caused<br />
when regular steel particles in the atmosphere<br />
become attached to the stainless steel surface. Steel<br />
particles can also become attached to your grill if you<br />
use steel wool or stiff wire brushes to clean the grill<br />
instead of non-abrasive cloth, sponge or nylon<br />
cleaning tools. In coastal areas rust pits can develop<br />
on stainless surfaces that cannot be fully removed.<br />
Bleach and other chlorine based solutions used for<br />
household and pool cleaning can also cause corrosion<br />
to stainless steel.<br />
Weathering, extreme heat, smoke from cooking and<br />
machine oils used in the manufacturing process of<br />
stainless steel can cause stainless steel to turn tan in<br />
color. Although there are many factors which can affect<br />
the surface appearance of stainless steel, they do not<br />
affect the integrity of the steel or the performance of the<br />
grill. To help maintain the finish of stainless steel<br />
follow these cleaning procedures for the best results:<br />
After every use (after your grill has cooled down), wipe<br />
stainless surfaces with a soft, soapy cloth or sponge<br />
then rinse with water. Be sure to remove all food<br />
particles, sauces or marinades from stainless steel<br />
because these can be highly acidic and damaging to<br />
stainless surfaces.<br />
Never use abrasive cleaners, scrubbers or stiff wire<br />
brushes of any type on your grill.<br />
Use a heat resistant Stainless Steel Cleaner and rub<br />
or wipe in the direction of the stainless steel grain or<br />
polish lines NOT against the grain.<br />
A-5<br />
Question:<br />
Which is a better cooking surface to grill on;<br />
porcelain coated steel / cast-iron cooking grids or<br />
stainless steel grids?<br />
Answer:<br />
They all have their advantages. For traditional grilling<br />
and searing meats, cast-iron or steel grids offer<br />
better heat conductivity. To protect against the natural<br />
rusting process, steel or cast-iron cooking grids offer<br />
a porcelain finish which requires routine<br />
maintenance to keep the grids well seasoned.<br />
Stainless steel is popular with those who prefer less<br />
maintenance.<br />
A new innovative solution is available on select<br />
models called Stainless Clad Therma-Core ® . This<br />
Cooking Grid combines a heat conducting steel core<br />
with an easy-to-clean stainless outer shell.<br />
You may also review FAQ’s, Troubleshooting<br />
and Care & Maintenance Tips online at<br />
www.grandhall.com.<br />
FREQUENTLY ASKED QUESTIONS (FAQ'S)
Grand Hall Enterprise Co., Ltd. will warrant to the ORIGINAL PURCHASER of this gas grill that it will be<br />
free of defects in material and workmanship for set periods below from the date of purchase when used under<br />
normal outdoor use and correct assembly:<br />
Full Warranty on Grill - 1 year (except for paint loss, rusting and ignitor battery)<br />
Tube Burners - 3 years no rust through<br />
All other grill parts - 2 years (except Savor Plates ® , cooking grids and ignitor battery)<br />
Grand Hall will require reasonable proof of your date of purchase. Therefore, you should send in the owner<br />
registration card or register online at www.grandhall.com. Save your receipt in case it is required as proof<br />
of purchase.<br />
This Limited warranty is limited to replacement of parts at Grand Hall's option that proved to be defective<br />
under normal use and service. You will be charged for shipping and handling of the replacement parts.<br />
Grand Hall may require the return of defective parts for examination before issuing replacement parts. If you<br />
are required to return defective parts, shipping charges must be prepaid.<br />
Upon examination and to Grand Hall's satisfaction, if the original part is proven defective Grand Hall may approve<br />
your claim and elect to replace such parts without charge. You will be charged for shipping and handling<br />
of the replacement parts.<br />
This Warranty does not cover any failures or operating difficulties due to accident, abuse, misuse, alteration,<br />
misapplication, vandalism, improper installation, maintenance or service, damages caused by flashback fires<br />
or grease fires, as set out in this Operator's Manual.<br />
This warranty does not cover scratches, dents, corrosion or discoloration caused by weather, heat, abrasive<br />
and chemical cleaners, pool or spa chemicals or any tools used in the assembly or installation of this unit.<br />
This warranty does not cover paint loss, surface rust, corrosion or stainless steel discoloration which is considered<br />
normal wear. This warranty does not cover the cost of any inconvenience, personal injury or property damage<br />
due to improper use or product failure.<br />
Deterioration or damage due to severe weather conditions such as hail, hurricane, earthquakes, tsunami,<br />
tornadoes, Acts of God or terrorism, discoloration due to exposure to chemicals either directly or in the<br />
atmosphere, is not covered by this Limited Warranty.<br />
No part returns will be accepted without prior authorization from Grand Hall. Authorization for the return of parts<br />
may be requested by calling 1-800-770-9769 8 am – 4:30 pm CST, Monday through Friday.<br />
Warranty Restrictions<br />
•<br />
•<br />
•<br />
This warranty gives you specific legal rights, and you may also have other rights which vary from<br />
state to state.<br />
This grill is safety certified for use only in the country where purchased. Modification for use<br />
in any other location is a safety hazard and will void the warranty.<br />
Manufacturer:<br />
Grand Hall Enterprise Co., Ltd.<br />
9th Fl., No.298, Rueiguang Rd., Neihu,<br />
Taipei, Taiwan (114)<br />
Grand Hall Limited Warranty<br />
All warranty coverage is void if this product is used for commercial or rental purposes.
Parrilla de Gas Propano<br />
Líquido(LPG)<br />
Modelo MG3208SLP<br />
YUDA GRATUITA<br />
DE LOS EXPERTOS DEL GRILL<br />
No lo devuelva a la tienda. En Grand Hall<br />
somos expertos en este producto y estamos<br />
formados para ayudarle con:<br />
Preguntas de montaje<br />
Funcionamiento del Grill<br />
Sustitución de partes dañadas o que faltan<br />
visite www.grandhall.com o llame al :<br />
1-800-770-9769<br />
Lunes- Viernes 8:00 am-4:30 pm CST<br />
IMPORTANTE:<br />
NOTA AL ENSAMBLADOR/ instalación:<br />
Deje este manual con el consumidor.<br />
NOTA AL CONSUMIDOR:<br />
Guarde este manual para futuras consultas.<br />
Escriba su # de serie:__________________<br />
(Vea la placa CSA de identificación en la<br />
parrilla.<br />
Manual de Operación<br />
! ADVERTENCIA !<br />
Fallo en cumplir con estas instrucciones puede<br />
producir una explosión o incendio que pueden<br />
causar lesiones serias, muerte o daños a la<br />
propiedad.<br />
Aunque usted u otra persona hayan ensamblado<br />
esta parrilla, usted debe leer el manual por<br />
entero antes de usarla para asegurarse que la<br />
parrilla esté correctamente ensamblada, instalada<br />
y mantenida.<br />
Use su parrilla por lo menos a 3 pies de distancia<br />
de cualquier pared o superficie. Use su parrilla<br />
por lo menos 3 pies de distancia de objetos<br />
combustibles que pueden derretirse o incendiarse<br />
como vinilo o tablas de madera forrada, cercas y<br />
techos o fuentes inflamables incluyendo lámparas,<br />
llamas del piloto de calentadores de agua y aparatos<br />
eléctricos encedidos.<br />
ESTE APARATO DE GAS HA SIDO DISEÑADO<br />
PARA USO AL AIRE LIBRE SOLAMENTE.<br />
Nunca use su parrilla de gas en un garaje, porche,<br />
cobertizo, pasajes o cualquier otra área cerrada.<br />
Nunca obstruya la circulación de aire alrededor de<br />
la armazón de la parrilla de gas.<br />
Nunca desconecte el regulador de gas o cualquier<br />
encaje de gas mientras que su parrilla está<br />
encendida. Una parrilla encendida puede<br />
encender cualquier escape de gas y causar un<br />
incendio o explosión que pueden resultar en<br />
daños a la propiedad, lesiones personales o<br />
muerte.<br />
Manual # P80109065L - Date:2008/01/14
Tabla de Contenido<br />
Advertencias de seguridad principales......1-3<br />
Instrucciones para antes del ensamblaje...3<br />
Diagramas de partes y listas...............4-10<br />
Instrucciones para el ensamblaje...........11-16<br />
Instrucciones para uso y cuidado:<br />
• Seguridad del gas y escapes ........ 17-19<br />
• Instrucciones para encender................20-2<br />
• Reparación técnica ..................................21<br />
• Instrucción del rotisor........................ 22-24<br />
• Limpieza y mantenimiento ................ 25-26<br />
• Guía para cocinar............................. A1-A3<br />
• Preguntas frecuentes ......................... A4-A5<br />
Términos de la garantía...........Cubierta trasera<br />
! PELIGRO !<br />
SI HAY OLOR A GAS:<br />
1.<br />
2<br />
3.<br />
4.<br />
1.<br />
Cierre el gas que va a la parrilla.<br />
Apague cualquier llama viva.<br />
Abra la tapa.<br />
Si el olor continúa, retírese de la<br />
parrilla e inmediatamente llame al<br />
suplidor de gas o a los bomberos.<br />
! ADVERTENCIA !<br />
2.<br />
N'entreposez ni n'utilisez<br />
d'essence ou toute vapeur ou<br />
liquide inflammable à proximité de<br />
cet appareil.<br />
Un tanque de gas LP desconectado<br />
no se debe almacenar en la<br />
vecinad de este o cualquier otro<br />
aparato.<br />
! ADVERTENCIA !<br />
Mantenga cualquier cable eléctrico y la<br />
manguera de suministro de combustible lejos<br />
de las superficies calientes.<br />
2<br />
•<br />
•<br />
•<br />
•<br />
!<br />
ADVERTENCIA !<br />
Los modelos de la parrilla de LPG deben usarse<br />
con Gas Propano Líiquido y el regulador del<br />
ensamble proporcionado con la parrilla. Los<br />
modelos de gas natural deben ser usados con<br />
gas natural. Cualquier intento de cambiar la parrilla<br />
de un tipo de combustible a otro es sumamente<br />
peligroso y anulará la garantía.<br />
Maintenez le tuyau du détendeur éloigné des<br />
surfaces chaudes du grill et des projections de<br />
graisse. Evitez toute torsion inutile du tuyau. Contrôlez<br />
visuellement le tuyau avant toute utilisation:<br />
coupures, craquelures, usure excessive ou autre<br />
dommage. En cas de tuyau endommagé, n’utilisez<br />
pas le grill. Llame al 1-800-770-9769 para obtener<br />
las manguera de reemplazo certificadas por Grand<br />
Hall.<br />
Proposición 65 de California<br />
Los subproductos de combustión producidos al<br />
usar este producto contienen agentes químicos<br />
conocidos por el Estado de California por causar<br />
cáncer, defectos congénitos, u otros daños al<br />
sistema reproductor.<br />
Los componentes de latón en la parrilla, como<br />
los accesorios de la manguera, válvulas del<br />
cilindro de propano (vendida por separado) y<br />
vástagos de las válvulas de los fogones, contienen<br />
plomo que el Estado de California reconoce<br />
pueden causar cáncer, defectos congénitos, u<br />
otros daños al sistema reproductor.<br />
Nunca use en esta parrilla carbón o líquido<br />
encendedor.Fallo en cumplir con estas<br />
instrucciones puede resultar en un fuego de grasa<br />
o explosión que puede causar serias lesiones al<br />
cuerpo, muerte o daños a la propiedad.<br />
La bandeja para el drenaje de la grasa y el<br />
receptáculo para la grasa deben ser inspeccionados<br />
visualmente cada vez que va a usar<br />
la parrilla. Debe remover cualquier grasa y lavar<br />
la bandeja de drenaje y el receptáculo para la<br />
grasa con una solución de agua tibia enjabonada.<br />
Fallo en cumplir con estas instrucciones<br />
puede resultar en un fuego de grasa o explosión<br />
que pueden causar serias lesiones al<br />
cuerpo, muerte o daños a la propiedad.
Fallo en cumplir con estas instrucciones puede<br />
producir una explosión o incendio que pueden<br />
causar lesiones serias, muerte o daños a la<br />
propiedad.<br />
Arañas e insectos pequeños pueden tejer y anidar<br />
telarañas en los tubos del fogón durante el<br />
tránsito resultando en una obstrucción de la<br />
circulación del gas causando un fuego alrededor<br />
de los tubos del fogón. Este tipo de fuego se<br />
llama "RETROCESO DE LLAMA"puede causar<br />
daños serios a la parrilla y crear una función que<br />
puede ser peligrosa para el usuario.<br />
Para reducir la oportunidad de tener RETROCESO<br />
DE LLAMA usted debe limpiar los tubos del<br />
fogón de la siguiente manera antes del montaje<br />
de su parrilla. También haga esto por lo menos<br />
una vez al mes en verano y otoño, y si su parrilla<br />
no ha sido usada por un período de tiempo<br />
prolongado.<br />
1.<br />
2.<br />
3.<br />
4.<br />
! ADVERTENCIA !<br />
PARA LIMPIAR EL TUBO DEL<br />
FOGÓN INSERTE EL<br />
GANCHO AQUÍ<br />
9<br />
Fogón Pie<br />
MÉTODO 2: Use un cepillo de botella con un<br />
mango flexible y dirija el cepillo a través del tubo<br />
del fogón varias veces para remover cualquier<br />
escombro.<br />
MÉTODO 3: Use una manguera de aire a presión<br />
para forzar aire por cada tubo del fogón. El aire<br />
debe forzar y sacar los escombros a través del<br />
fogón y afuera de los puertos.<br />
Puerto del fogón<br />
Para una operación sin peligro asegúrese que el<br />
orificio del ensamble de la válvula de gas esté<br />
dentro del tubo de fogón antes de usar su<br />
parrilla. Vea la figura. Si el orificio no está dentro<br />
del tubo del fogón, al encender el fogón podría<br />
causar una explosión y/o incendio resultando en<br />
lesiones corporales serias y/o daños materiales.<br />
Válvula de gas<br />
Instrucciones para antes del ensamblaje<br />
Retire el tornillo de la parte trasera de cada fogón<br />
usando un destornillador de cabeza de Phillips.<br />
Levante cada fogón hacia arriba alejándolo<br />
cuidadosamente del orificio de la válvula de gas.<br />
Verifique y limpie los tubos del fogón y los tubos<br />
Venturi por nidos e insectos. Un tubo obstruido<br />
puede resultar en un fuego debajo de la parrilla.<br />
Refiérase a la figura de abajo y oficie uno<br />
de los 3 métodos de limpieza:<br />
MÉTODO 1: Use un alambre rígido, o una<br />
percha de alambre, dóblada en forma de<br />
gancho pequeño como se muestra en el<br />
dibujo y entre el gancho por el tubo de fogón<br />
varias veces para limpiar los escombros.<br />
Orificio<br />
3<br />
Para apresurar el proceso de ensamblaje siga las<br />
siguientes instrucciones generales:<br />
Herramientas requeridas para el ensamble:<br />
• Guantes de trabajo protectivos<br />
• Gafas protectivas para trabajo industrial<br />
• Destornillador con cabeza Phillips<br />
Mientras que es posible que una persona desempaque<br />
este ahumador de gas, es prudente conseguir la ayuda<br />
de otra persona para manejar las partes grandes.<br />
Use el diagramas de partes y ferretería para<br />
asegurarse que todas las partes estan incluidas y<br />
libres de daños.<br />
No ensamble u opere la parrilla si parece que algo<br />
iestá dañado. Si hay daños o partes que faltan<br />
cuando desempaca la parrilla de la caja de envío o<br />
usted tiene preguntas sobre el proceso del<br />
ensamblaje, llame al:<br />
Centro de información de Parrillas 1-800-770-9769<br />
8am a 4:30pm CST, lunes a viernes<br />
Códigos para la instalación de la parrilla<br />
La instalación debe estar de acuerdo con los<br />
códigos locales o en ausencia de códigos locales,<br />
deben estar bajo el Código Nacional del Combustible<br />
de Gas ANSI Z223.1/NFPA 54, o con el código de<br />
instalación de Gas Natural y Propano CSA B149.1 y<br />
el Código de Alnacenamiento y Manejo, B149.2
Lista de partes del paquete de ferretería Modelos MG3208SLP<br />
Lista de partes del paquete de ferretería Modelos MG3208SLP<br />
PART # PART DESCRIPTION QTY PURPOSE OF PART<br />
P06002025A Paquete de ferretería 1 Para uso en el ensamblaje.<br />
S112G0306B<br />
S112G0308B<br />
Tornillo de cabeza Phillips<br />
3/16"x3/8"<br />
Tornillo de cabeza Phillips<br />
3/16"x1/2"<br />
S313G0306B Tuerca de reborde 3/16" 4<br />
P00201001C Manija de la puerta 2 Se fija a las puertas<br />
S112G0306B<br />
S112G0306B<br />
S112G0419B<br />
Tornillo de cabeza Phillips<br />
3/16"x3/8"<br />
Tornillo de cabeza Phillips<br />
3/16"x3/8"<br />
Tornillo de cabeza Phillips 1/4"x1-<br />
3/16"<br />
S112G0408E Tornillo de cabeza Phillips 1/4"x1/2" 12<br />
S313G0408E Tuerca de reborde 1/4" 4<br />
S112G0306B<br />
Tornillo de cabeza Phillips<br />
3/16"x3/8"<br />
S313G0306B Tuerca de reborde 3/16" 4<br />
P05536001Z Retén de la manguera 2<br />
Ya instalado en el soporte de la bombona<br />
4<br />
4<br />
4<br />
7<br />
2<br />
Fija el panel trasero de la carreta y paneles<br />
laterales<br />
Cesta del panel de la partición de los agregados y<br />
del panel de la partición a cart<br />
Une el soporte de tapa a los paneles laterales<br />
izquierdo y derecho del carro<br />
4 Fija el tazón de la parrilla a la carreta<br />
S233G0408B Tuerca mariposa 1/4"x1/2" 1 Asegura el tanque de gas<br />
Preassembled in the Door Handle<br />
S112G0304E<br />
Tornillo de cabeza Phillips<br />
3/16"x1/4"<br />
4<br />
Une el soporte de depósito al estante inferior del<br />
carro<br />
Fije la repisa lateral izquierda y el marco del fogón<br />
lateral los paneles del tazón<br />
Fija el retén de la manguera al panel trasero de la<br />
carreta<br />
4 Fija las manijas de la puerta a las puertas
Tornillo de cabeza Phillips<br />
1/4" x 1/2"<br />
Unidades 12<br />
Parte # S112G0408E<br />
Tuerca de reborde<br />
1/4"<br />
Unidades 4<br />
Parte # S313G0408E<br />
Manija de la puerta<br />
Unidades 2<br />
Parte # P00201001C<br />
Retén de la manguera<br />
Unidades 2<br />
Parte # P05536001Z<br />
Escala 1:2<br />
Paquete de ferretería Modelos MG3208SLP<br />
Tornillo de cabeza Phillips<br />
3/16" x 3/8"<br />
Unidades 17<br />
Parte # S112G0306B<br />
Tornillo de cabeza Phillips<br />
3/16" x 1/2"<br />
Unidades 4<br />
Parte # S112G0308B<br />
*Una baterías /AA incluida en el paquete de ferretería<br />
5<br />
Tornillo de cabeza Phillips<br />
1/4" x 1-3/16"<br />
Unidades 4<br />
Parte # S112G0419B<br />
Pre-ensamblados en la manija de la puerta<br />
Tornillo de cabeza Phillips<br />
3/16" x 1/4"<br />
Unidades 4<br />
Parte # S112G0304E<br />
Tuerca de reborde<br />
3/16"<br />
Unidades 8<br />
Parte # S313G0306B<br />
Aparato ya instalado en el soporte de la bombona<br />
Tornillo Mariposa 1/4" x 1/2"<br />
Unidad 1<br />
Parte # S233G0408B
Diagrama de parte para los modelos MG3208SLP<br />
6<br />
39<br />
19<br />
63<br />
58<br />
61<br />
65<br />
3<br />
9<br />
10<br />
12<br />
67<br />
89<br />
55<br />
33<br />
93<br />
6<br />
47<br />
71<br />
78<br />
81<br />
73<br />
77<br />
72<br />
82<br />
83<br />
88<br />
79<br />
84<br />
80<br />
31<br />
4<br />
1<br />
14<br />
7<br />
2<br />
26<br />
11<br />
13<br />
5<br />
8<br />
35<br />
36<br />
38<br />
37<br />
40<br />
76 74<br />
34<br />
75<br />
73<br />
74<br />
66<br />
86<br />
57<br />
56<br />
28<br />
51<br />
52<br />
32<br />
29<br />
62<br />
92<br />
16<br />
60<br />
87<br />
17<br />
59<br />
85<br />
90<br />
91<br />
45<br />
50 46<br />
44<br />
48 49<br />
27<br />
54<br />
43<br />
42<br />
41<br />
53<br />
16<br />
15<br />
17<br />
70<br />
69<br />
23<br />
21<br />
25<br />
24<br />
20<br />
22<br />
64<br />
18<br />
94<br />
68<br />
30<br />
95<br />
96<br />
97<br />
27<br />
98<br />
99<br />
100
Lista de partes para los modelos MG3208SLP<br />
Código Descripción Parte # Unidades<br />
1 Ensamble de la tapa Y0110045 1<br />
2 Indicador de temperatura P00601067A 1<br />
3 Manija de la tapa P00205069B 1<br />
4 Material protector P05518002I 4<br />
5 Rejas secundarias para asar P01507020G 1<br />
6 Reja para asar /12.9 pulgadas P016040144 2<br />
7 Reja para asar /6.4 pulgadas P016040154 1<br />
8 Fogón principal P020080244 3<br />
9 Fogón infrarrojo P020050104 1<br />
10 Ensamble del electrodo del fogón infrarrojo Y0320011 1<br />
11 Savor Plates ® P017080074 3<br />
12 Soporte frontal del Savor Plate ® P033280504 3<br />
13 Soporte trasero del Savor Plate ®<br />
7<br />
P033280514 3<br />
14 Soporte del fogón P0220342DD 1<br />
15 Repisa del lado, izquierdo P011060054 1<br />
16 Soporte lateral de la repisa, frontal izquierdo/posterior derecho P01204005B 2<br />
17 Soportelateral de la repisa, frontal derecho/posterior izquierdo P01206005B 2<br />
18 Tazón de la parrilla P0071335S4 1<br />
19 Bandeja para drenaje de grasa P069020094 2<br />
20 Protector de viento del fogón trasero P06905046A 1<br />
21 Marco del fogón trasero P02011054E 1<br />
22 Fogón trasero P02007016D 1<br />
23 Electrodo del fogón trasero P02610005B 1<br />
24 Orificio del fogón trasero P06527003A 1<br />
25 Tubo de extensión del fogón trasero P03717050B 1<br />
26 Protector de calor para fogones P07523003P 1<br />
27 Bisagra de la tapa P055010204 2<br />
28 Caja colectora de gas, con electrodo P02609030M 3<br />
29 Juego de cables eléctricos P02615120A 1<br />
30 Fogón infrarrojo Thermocouple P05305028A 1<br />
31 Válvula de gas/ensamble del múlltiple Y0060505 1<br />
32 Encaje del gas P03911001A 1<br />
33 Panel de control superior P0290919HS 1<br />
34 Extensión del panel de control P0290940HS 1<br />
35 Panel de control P0290930IS 1<br />
36 Base de la perilla de control P03415014S 5<br />
37 Resorte de la perilla de control P05504021A 5<br />
38 Perilla de control para el fogón principal P03411503L 3<br />
39 Perilla de control para el fogón trasero infrarrojo P03411513L 2<br />
40 Encendedor eléctrico, 6-puertos P02502265C 1<br />
41 Tapa del fogón lateral P01127004S 1<br />
42 Armazón del fogón lateral P011040104 1<br />
43 Cuerpo del fogón lateral P023010154 1<br />
44 Soporte de la olla del fogón lateral P008050104 1<br />
45 Fogón lateral P02002012A 1
Lista de partes para los modelos MG3208SLP<br />
Código Descripción Parte # Unidades<br />
46 Electrodo del fogón lateral P02614007C 1<br />
47 Perilla de control para el fogón lateral P03411523L 1<br />
48 Resorte de la perilla de control P05504021A 1<br />
49 Base de la perilla de control del fogón lateral P03408053S 1<br />
50 Válvula de gas del fogón lateral Y0060506 1<br />
51 Enchufe para la conexión de la manguera del fogón lateral P03705050E 1<br />
52 Enchufador para la conexión de la maguera del fogón lateral P03705049H 1<br />
53 Soporte de la extensión de la manguera del fogón lateral P033410014 2<br />
54 Soporte del fogón lateral P03327029S 1<br />
55 Bandeja para las grasa P02705205B 1<br />
56 Manija de la bandeja de grasa P00213008O 1<br />
57 Protector de calor de la bandeja de grasa P06903048B 1<br />
58 Refuerzo del suporte del tazón, izquierdo P01301007K 1<br />
59 Refuerzo del suporte del tazón, derecho P01302007K 1<br />
60 Panel trasero de la carreta, superior P069060244 1<br />
61 Soporte de la bisagra superior izquierda de la puerta P033020214 1<br />
62 Soporte de la bisagra superior derecha de la puerta P033020224 1<br />
63 Panel lateral izquierdo de la carreta P07605030N 1<br />
64 Panel lateral derecho de la carreta) P07603025N 1<br />
65 Soporte de la puerta P01316006K 1<br />
66 Imán de la puerta P05523004K 4<br />
67 Panel trasero de la carreta P07701064N 1<br />
68 Panel lateral derecho de la carreta P01003020T 1<br />
69 Protector susperior para el calor de la bandeja de grasa P06903049A 1<br />
70 Protector inferior para el calor de la bandeja de grasa P06903050M 1<br />
71 Base de la rueda, izquierda frontal, derecha posterior P05327035W 2<br />
72 Asiento del rollete, frente derecho/izquierdo atrás P05327036W 2<br />
73<br />
74<br />
Panel de soporte-A, frontal izquierdo/trasero derecho de la<br />
carreta<br />
Panel de soporte-A, frontal derecho/trasero izquierdo de la<br />
carreta<br />
8<br />
P033420014 2<br />
P033420024 2<br />
75 Panel de soporte-B, frontal izquierdo de la carreta P033420034 1<br />
76 Panel de soporte-B, trasero izquierdo de la carreta P033420044 1<br />
77 Panel de soporte-B, frontal derecho de la carreta P033420054 1<br />
78 Panel de soporte-B, trasero derecho de la carreta P033420064 1<br />
79 Soporte de la bisagra de la puerta, inferior izquierda P033020234 1<br />
80 Soporte de la bisagra de la puerta, inferior derecha P033020244 1<br />
81 Rueda, 2.5 pulgadas, con freno P05110006D 4<br />
82 Manija de la puerta P00201001C 2<br />
83 Puerta, izquierda P04302036L 1<br />
84 Puerta, derecha P04303036L 1<br />
85 Regulador con manguera P03601004A 1<br />
86 Palillo encendedor P05313009B 1<br />
87 Retén de la manguera P05536001Z 2<br />
88 Placa guía de la puerta P055100194 1<br />
89 panel de la partición P07512007O 1
Lista de partes para los modelos MG3208SLP<br />
Código Descripción Parte # Unidades<br />
90 Manija de la plancha P05709004E 1<br />
91 Plancha P05705002E 1<br />
92 Manguera de extensión del fogón lateral P06907001M 1<br />
93 Placa con el nombre P00414005Q 1<br />
94 Peso P05344003Q 2<br />
95 Termocupla del fogoón trasero P05305027A 1<br />
96 Soporte de fogón trasero Thermocouple P033430104 1<br />
97 Sostén del tanque P05358001G 1<br />
98 Soporte del panel de la partición P03303025S 1<br />
99 Escudo térmico lateral de la válvula de la hornilla P06915001M 1<br />
100 Parabrisas cóncavo P069060304 1<br />
Corbertor de la parrilla P07007018A 1<br />
Ensamble del rotisor Y0250143 1<br />
Paquette de ferretería P06002025A 1<br />
Manual de Operación P80109065L 1<br />
Para ordernar partes de reemplazo certificados de Grand Hall, llame al 1-800-770-9769<br />
Para obtener las partes correctas de reemplazo para la carreta de servir, por favor a los números de partes<br />
indicados en esta lista. La siguiente informacion es requerida para asegurarse que recibira las partes correctas:<br />
1. Modelo y Número de Serie (Ver la placa CSA en la parrilla)<br />
2. Número de la parte<br />
3. Descripción de la parte<br />
4. Cantidad de partes requeridas<br />
Importante: Sólo use para reemplazo las partes certificadas de Grand Hall. El uso de cualquier parte que<br />
no sea autorizada puede ser peligroso y le anulará la garantía del producto. Mantenga el Manual de<br />
Operación en un lugar conveniente para su referencia y lista de partes.<br />
9
Y0250143 Diagrama del ensamble de partes del Rotisor<br />
CÓDIGO DESCRIPIÓN<br />
1.<br />
2.<br />
3.<br />
4.<br />
5.<br />
6.<br />
7.<br />
8.<br />
9.<br />
10.<br />
11.<br />
Rot. Tornillo mariposa<br />
3/8"x1/2"<br />
Unidades 3<br />
Parte# S196G06084<br />
Y0250143 Lista de partes - ensamble del Rotisor<br />
Rot. Manguillo<br />
Rot. Cojinete<br />
Rot. Tornillo mariposa 3/8"x1/2"<br />
Rot. Cuello<br />
Rot. Brocheta<br />
Rot. Tenedores para apresar<br />
Rot. Soporte del motor<br />
Motor del rotisor<br />
Rot. Tornillo #10-24x3/4" UNC<br />
Rot. Arandela simple<br />
Rot. Nut #10-24<br />
9<br />
8<br />
3<br />
10<br />
11<br />
Rot. Tornillo<br />
#10-24x3/4" UNC<br />
Unidades 2<br />
Parte # S112G10124<br />
#DE PARTE<br />
Partes de Ferretería del Rotisor<br />
Rot. Arandela simple<br />
Unidades 2<br />
Parte # S411G03084<br />
UNIDADES<br />
1<br />
1<br />
3<br />
1<br />
1<br />
2<br />
1<br />
1<br />
2<br />
2<br />
2<br />
Rot. Tuerca #10-24<br />
Unidades 2<br />
Parte # S362G10124<br />
Centro de Información de parrillas: Si tiene alguna preguntas sobre el ensamblaje o la operación de<br />
la parrilla, o si hay partes dañadas o que faltan al desempacar la unidad de la caja de envío, llámenos<br />
de las 8:00 am - 4:30 pm CST, lunes a viernes al: 1-800-770-9769<br />
10<br />
7<br />
6<br />
3<br />
4<br />
P05508004E<br />
P05508092F<br />
S196G06084<br />
P05508091F<br />
P05508146F<br />
P05508090F<br />
P03307010A<br />
P07101045A<br />
S112G10124<br />
S411G03084<br />
S362G10124<br />
5<br />
3<br />
2<br />
1
Tornillo de cabeza Phillips<br />
3/16" x 3/8"<br />
Unidades 4<br />
Parte # S112G0306B<br />
Instrucciones del Ensamblaje<br />
Quite todos los componentes embalados. Use la lista de partes para asegurase que toda la partes necesarias han<br />
sido incluídas.<br />
Ensamble la parilla de gas sobre una superficie de trabajo protegido para evitar rayar las superficies de la parilla.<br />
Al proceder inspeccione las partes por daños. Si le parece que la parrilla ha llegado dañada no la use.<br />
Ensamble la carreta<br />
1 Desdoble los paneles laterales de la carreta, derecho, izquierdo<br />
y el panel trasero de la carreta.<br />
Instale el panel trasero de la carreta y los paneles laterales<br />
2 Asegure el panel trasero de la carreta entre los paneles<br />
laterales de la carreta usando 2 tornillos con cabeza Phillips 3/<br />
16"x3/8".<br />
Asegure el panel lateral izquierdo/derecho usando 2 tornillos<br />
Tornillo de cabeza Phillips<br />
3/16" x 1/2"<br />
Unidades 4<br />
Parte # S112G0308B<br />
Tuerca de reborde 3/16"<br />
Unidades 4<br />
Parte # S313G0306B<br />
con cabeza Phillips 3/16"x3/8".<br />
Instale el soporte de depósito al estante inferior del carro<br />
usando 4 tornillos de cabeza Phillips de 3/16"x1/2" y 4 roscas<br />
planas de 1/4".<br />
11<br />
Panel trasero de<br />
la carreta
3<br />
Instale las manijas de la puerta, el panel tabique y puerta<br />
Tornillo de cabeza Phillips<br />
3/16" x 1/4"<br />
Unidades 4<br />
Parte # S112G0304E<br />
Manija de la puerta<br />
Unidades 2<br />
Parte # P00201001C<br />
54<br />
Instale el soporte de la puerta y el tazón de la parrilla<br />
Instale el soporte de la puerta entre el panel izquierdo y<br />
derecho de la carreta usandon 2 tornillos con cabeza Phillips<br />
3/16” x 3/8”.<br />
Saque los componentes para cocinar del cabezal de la<br />
parrilla. Con un ayudante, levante y posicione el cabezal de la<br />
parrilla sobre la carreta. Usando 4 tornillos con cabeza Phillips<br />
de 1/4” x 1-3/16” aprételos con seguridad.<br />
Tornillo de cabeza Phillips<br />
3/16" x 3/8"<br />
Unidades 2<br />
Parte # S112G0306B<br />
Tornillo de cabeza Phillips<br />
1/4" x 1-3/16"<br />
Unidades 4<br />
Parte # S112G0419B<br />
Instale las manijas a las puertas usando 4 Tornillos con cabeza<br />
Phillips 3/16"x1/4".<br />
Instale el panel tabique al panel lateral de la carreta izquierdo y al panel<br />
trasero de la carreta usandon 4 tornillos con cabeza Phillips 3/16" x 3/8".<br />
Instale el soporte del panel tabique entre el panel tabique y la repisa<br />
inferior de la carreta usandon 3 tornillos con cabeza Phillips 3/16" x 3/8".<br />
Inserte la bisagra de la puerta inferior izquierda dentro del<br />
soporte de la bisagra de la puerta inferior. Luego alinie la<br />
bisagra superior de la puerta e insértela en el hueco del<br />
soporte de la bisagra superior de la puerta.<br />
Repita ambos pasos para la puerta derecha.<br />
Tornillo de cabeza Phillips<br />
3/16" x 3/8"<br />
Qty. 7<br />
Part # S112G0306B<br />
12
5<br />
6<br />
Tornillo de cabeza Phillips<br />
1/4" x 1/2"<br />
Unidades 12<br />
Parte # S112G0408E<br />
Tuerca de reborde<br />
1/4"<br />
Unidades 4<br />
Parte # S313G0408E<br />
Instale la bandeja para el drenaje de grasa<br />
Por el frente de la parrilla, deslice las lengüetas de la bandeja de grasa por<br />
encima de los rieles laterales debajo del tazón de la parrilla.<br />
Grease Tray<br />
Instalando la repisa lateral y marco del fogón lateral<br />
Fija las repisas laterales al panel del tazón izquierda.<br />
Aprétese con seguridad usando los tornillos y tuercas incluidos.<br />
Repita ambos pasos para la marco del fogón lateral.<br />
13
7<br />
8<br />
Instale la manguere de conexión al fogón lateral<br />
Jale hacia atrás la manga del enchufe. Vea la fig. A.<br />
Inserte el enchufador, luego suelte la manga. Vea la fig. B.<br />
Empuje el enchufador hasta que chasquée hacias adelante<br />
la manga encerrando el enchufe dentro del enchufador. Vea<br />
la Fig. C.<br />
Empuje la manguera del fogón lateral dentro del sostén de<br />
la manguera.<br />
Figura A<br />
Figura B<br />
Figura C<br />
Enchufe<br />
Manga<br />
Manga<br />
Instale el ensamble del regulador<br />
Coloque el regulador LPG dentro de la carreta a través de<br />
la apertura encima del panel trasero de la carreta. Fije la<br />
manguera del regulador LPG en el retén de la manguera<br />
al panel trasero de la carreta.<br />
Aprételos con seguridad usando los tornillos y tuercas<br />
proporcionados.<br />
Tornillo de cabeza Phillips<br />
3/16" x 3/8"<br />
Unidades 4<br />
Parte # S112G0306B<br />
Tuerca de reborde 3/16"<br />
Unidades 4<br />
Parte # S313G0306B<br />
Retén de la manguera<br />
Unidad 2<br />
Parte # P05536001Z<br />
Escala 1:2<br />
Tomacorrientes<br />
Manguera<br />
Enchufe<br />
Panel trasero de la<br />
carreta<br />
14<br />
Tomacorrientes<br />
Manga<br />
Retén de la<br />
manguera<br />
Retén de la<br />
manguera<br />
Regulador de gas<br />
propano liquido (LPG)
9<br />
10<br />
Instale la batería del encendedor<br />
Remueva la tapa del encendedor del panel de<br />
control.<br />
Coloque las baterías AA en la ranura del<br />
encendedor con el polo positivo cara a<br />
usted.<br />
Posicione la tapa y el resorte por encima<br />
de las baterías AA y apriételo hacia el<br />
panel de control.<br />
Con la ayuda de otra persona ejecute el<br />
chequeo de este electrodo antes de<br />
proseguir.<br />
Esta prueba le asegura que las puntas del<br />
electrodo de chispa estén correctamente<br />
posicionadas para que su parrilla encienda<br />
sin dificultad.<br />
3/16"<br />
Espacio de la<br />
chispa Caja colectora de gas<br />
Recibidor de chispa<br />
Asegúrese que las perillas de Control están<br />
todas puestas en "OFF" y abra la tapa de la<br />
parrilla.<br />
Su ayudante debe pararse detrás a la derecha<br />
de la parrilla y mirar hacia el frente del tazón<br />
de la parrilla. Nunca ponga la cara dentro del<br />
cabezal de la parrilla.<br />
Punta del electrodo de chispa<br />
Presione el casquillo de ignición y aguarde<br />
la chispa azul de cada Caja colectora de<br />
gas.Si hay chispa las puntas del electrodo<br />
están correctamente posicionadas.<br />
Inspeccion de electrodos de los fogones laterals<br />
11 Abra la tapa de la parrilla. Remueva la<br />
banda plástica de envoltura del fogón y<br />
soporte de la olla.<br />
Gire la perilla del fogón lateral a HIGH y<br />
empuje. Debe ver una chispa azul entre<br />
la punta del elec- trodo y el fogón.<br />
Si no ve una chispa del electrodo en los<br />
fogones de atrás o del lado, ajuste la<br />
distancia entre el electrodo y el fogón<br />
a 3/16".<br />
Paso final del ensamblaje<br />
de la parrilla<br />
Cuando haya terminado de ensamblar su<br />
parrilla asegúrese que todos los tornillos<br />
estén bien apretados para una operación<br />
segura.<br />
15<br />
12<br />
!<br />
Tapa del<br />
encendeddor<br />
Resorte<br />
AA Battería<br />
+<br />
_<br />
Raja del<br />
encendedor<br />
Instale los componentes para cocinar<br />
Coloque los Savor Plates ® de cerámica<br />
sobre las rejas del Savor Plate ® y<br />
colóquelas en la saliente más baja<br />
encima de los fogones.<br />
Coloque las rejas para asar en la<br />
saliente encima del Savor Plates ® de<br />
cerámica.<br />
Coloque las rejas secundarias dentro de<br />
los huecos de arriba, izquierda y<br />
derecha del fogón trasero con la parte<br />
de abajo descansando en las ranuras<br />
del tazón de la parrilla.<br />
Rejas secundarias<br />
Rejas para<br />
asar<br />
Savor Plates ®<br />
ADVERTENCIA !<br />
Fallo en leer y seguir las instrucciones del<br />
uso y cuidado de la parrilla puede causar una<br />
explosión que puede producir serias lesiones<br />
al cuerpo, muerte o daños a la propiedad.
13<br />
Parabrisas opcional para una cocción mįs efectiva<br />
Cuando cocine exclusivamente con los fogones principales, puede generar mįs calor para<br />
cocinar si pone el parabrisas sobre la parrilla. Si el fogón de asado estį funcionando no es<br />
necesario el parabrisas.<br />
Abra la tapa y saque la parrilla secundaria.<br />
Antes de encender los fogones, incline la parrilla hacia arriba en el punto medio de la barbacoa.<br />
Ver Fig. 1.<br />
Ponga la base del parabrisas entre las parrillas y baje la parrilla a su posición original. Ver Fig. 2.<br />
Vuelva a colocar la parrilla secundaria.<br />
Parabrisas cóncavo<br />
!<br />
ADVERTENCIA !<br />
NO tocar después de cocinar<br />
Parrilla derecha Parabrisas cóncavo<br />
Fig. 1. Fig. 2.<br />
16<br />
Parrilla derecha
Instalación del tanque de gas LP<br />
USO CORRECTO DEL TANQUE DE GAS LP<br />
Los modelos de la parrilla de gas LP están diseñados<br />
para uso con un tanque estándar de 20 libras, (no<br />
incluido con la parrilla). Nunca conecte su parrilla de<br />
gas a un tanque de gas LP que sobrepasa esta<br />
capacidad. Un tanque aproximadamente de 12 pulgadas<br />
de diámetro y 18-1/2 pulgadas de altura es el tanque<br />
de gas LP de tamaño máximo para usarse. Usted debe<br />
usar un tanque de gas "OPD" que brinda un dispositivo<br />
de prevención de sobrellenado. Este control impide que<br />
el tanque se sobrellene lo cual puede causar mal<br />
funcionamiento del tanque de Gas LP, regulador y/o la<br />
parrilla.<br />
El tanque de gas LP debe ser construido y marcado<br />
en conformidad con las especificaciones de cilindros<br />
LP de gas del Ministerio de Transporte (D.O.T) de<br />
U.S.A. o el Estándar nacional del Canadá, Canada/<br />
CSA - B339, cilindros, esferas y tubos para el<br />
transporte de artículos peligrosos; y Comisión como<br />
sea aplicable.<br />
El tanque de gas LP debe tener una válvula de<br />
cierre, terminando en la salida de la válvula del<br />
tanque de suministro de gas LP, que sea compatible<br />
con un dispositivo de conexión Tipo 1. El tanque de<br />
gas LP debe tener un dispositivo de seguridad con<br />
una conexión directa con el espacio de vapor del<br />
tanque.<br />
El sistema de suministro de tanque debe estar<br />
organizado para el retraimiento de vapor.<br />
El tanque de gas LP usado debe tener un cuello<br />
para proteger la válvula de tanque.<br />
Nunca conecte un tanque de gas LP irregulado a su<br />
parrilla de gas. El regulador de gas proporcionado<br />
con su parrilla está ajustado para una presión de<br />
tomacorriente de columna de agua 11 " (W.C.) para<br />
la conexión a un tanque de gas LP. Solamente use<br />
el regulador y el ensamble de manguera<br />
proporcionadas con su parrilla de gas. Sustitución<br />
de reguladores y ensambles de manguera deben<br />
ser los especificados por Kenmore. Vea la lista de<br />
partes.<br />
Haga que su comerciante de gas LP inspeccione la<br />
válvula de nivel de gas después de cada llenado y<br />
que le asegure que está libre de defectos.<br />
Almacene siempre el tanque de Gas LP en una<br />
posición vertical.<br />
No sujete el tanque de gas LP a un calor excesivo.<br />
Nunca guarde un tanque de gas LP dentro de la<br />
casa. Si usted guarda su parrilla de gas en el<br />
garaje, siempre desconecte el tanque de gas LP y<br />
almacénelo afuera.<br />
Los tanques de gas LP deben ser almacenados<br />
fuera de la casa en un área bien ventilada y fuera<br />
del alcance de niños.<br />
Los tanques de gas LP desconectados no deben<br />
guardarse en edificios, garajes o cualquier área<br />
cerrada.<br />
El regulador y el ensamble de las mangueras se<br />
pueden ver al abrir las puertas (si es aplicable) y<br />
deben ser inspeccionados antes de cada uso de la<br />
parrilla. Si hay cortadas, daños excesivos o si la<br />
manguera ha sido muy doblada, deben ser<br />
reemplazado antes de usar la parrilla otra vez.<br />
Nunca encienda su parrilla de gas con la tapa<br />
cerrada o antes de asegurarse que los tubos de los<br />
fogones estén bien colocados dentro del orificio de<br />
la válvula de gas.<br />
Nunca permita que niños operen su parrilla. No<br />
permita que niños o mascotas jueguen cerca de su<br />
parrilla.<br />
17<br />
El uso de alcohol, recetado o en medicamentos<br />
vendidos sin prescripción puede afectar su habilidad<br />
para apropiadamente ensamblar y operar su parrilla sin<br />
peligro.<br />
Mantenga el extintor fácilmente accesible. En<br />
caso de un fuego de grasa, no trate de<br />
extinguirlo con agua. Use un extintor tipo B o use<br />
tierra, arena o bicarbonato.<br />
En el evento de lluvia, apague el fogón y el<br />
suministro de gas y cubra la parrilla.<br />
Use su parrilla sobre una superficie horizontal y<br />
estable en un área lejos de materiales combustibles.<br />
No deje la parrilla desatendida cuando está en uso.<br />
No mueva el aparato cuando está en uso.<br />
Permita que la parrilla se enfríe antes de la<br />
moverla o almacenarla.<br />
No use su parrilla como un calentador.<br />
Esta parrilla no es para ser instalada en<br />
caravanas, botes y/o vehículos de recreo.<br />
Nunca use carbón en esta parrilla.<br />
!<br />
ADVERTENCIA !<br />
A.<br />
No almacene su tanque extra de Gas LP debajo<br />
o cercano a este aparato;<br />
B. Nunca llene el tanque a más del 80% de lleno;<br />
C. Si la información en "(A)" y "(B)" no se sigue con<br />
exactitud, un incendio causando muerte o lesiones<br />
serias puede ocurrir.<br />
•<br />
•<br />
•<br />
•<br />
•<br />
! ADVERTENCIA !<br />
Use su parrilla por lo menos a una distancia<br />
de 3 pies de cualquier pared o superficie. Use<br />
su parrilla por menos a una distancia de 3 pies de<br />
objetos combustibles que pueden derretirse o<br />
incendiarse (como vinilo o tabla de forro de madera,<br />
cercas y salientes) u otros orígenes para encender<br />
incluyendo llamas del piloto de calentadores de agua<br />
y aparatos eléctricos.<br />
Los aparatos de gas para cocinar al aire libre no se<br />
deben usar bajo techos o sobresalientes.<br />
Nunca use su parrila de gas dentro de un garaje, porche,<br />
cobertizo, pasabrisas o cualquier área encerrada.<br />
Nunca obstruya la circulación de aire al rededor de su<br />
parrilla.<br />
En condiciones de vientos fuertes, siempre coloque el<br />
delantero de la parrilla cara hacia el viento para reducir que<br />
el humo y calor le peguen a su cara y prevenir posibles<br />
peligros hacia usted y la parrilla.<br />
3 pies<br />
DIRECCIÓN<br />
DEL VIENTO<br />
3 pies
INSTRUCCIONES PARA USO Y CUIDADO<br />
NOTA: Programas para tanques de gas LP<br />
Muchos vendedores de parrillas al por menor le ofrecen<br />
la alternativa de reemplazar su tanque de gas LP vacío<br />
a través de un servicio de intercambio. Use solamente<br />
esas compañías de intercambio reputables que<br />
inspeccionan, llenan a presición, evalúan y certifican su<br />
tanque. Cambie su tanque solamente por un tanque de<br />
seguridad OPD - equipado como se describe en la<br />
sección de tanque de gas LP de este manual.<br />
Mantenga su tanque de gas LP en una posición vertical<br />
durante su uso, tránsito o almacenamiento.<br />
Haga pruebas de escape en su nuevo tanque antes<br />
de conectarlo a su parrilla.<br />
Como hacer pruebas de escapes en su tanque LP<br />
Para su seguridad:<br />
Las pruebas de escapes deben ser repetidas cada vez<br />
que su tanque de gas LP se cambia o es vuelto a<br />
llenar.<br />
No fume cuando está buscando escapes de gas.<br />
No use llama viva cuando esta buscando escapes de<br />
gas.<br />
Su parrilla debe ser probada por escapes fuera de la<br />
casa en una área bien ventilada, alejadas de origenes de<br />
encendido como aparatos de gas o eléctricos. Mantenga<br />
la parrilla alejada de llamas vivas o chispas.<br />
No use limpiadores domésticos. Puede resultar en daño<br />
a los ensambles y sus componentes.<br />
Use una brocha limpia y una solución enjabonada de<br />
50/50 jabón/agua.<br />
Pinte la solución enjabonada en el tanque de gas LP<br />
en las áreas demostradas por las flechas. Vea el<br />
diagrama.<br />
Si se forman burbujas no use o cambie de lugar el<br />
tanque de gas LP. Llame a un proveedor de gas de LP<br />
o al Departamento de Bomberos.<br />
! ADVERTENCIA !<br />
Si se forman burbujas y siguen aumentando no<br />
use o mueva el tanque de gas LP ¡Póngase en<br />
contacto con su proveedor de gas LP o el<br />
Departamento de Bomberos!<br />
18<br />
Modelo para gas LP solamente:<br />
Asegure a la parrilla un tanque de gas LP<br />
de 20lbs.<br />
Gire la válvula de gas LP hacia la derecha a la<br />
pósición OFF.<br />
Destornille los pernos de mariposa del estante<br />
derecho de la bombona.<br />
Coloque la bombona de gas LP dentro del<br />
soporte para bombona en la bandeja para la<br />
bombona.<br />
Instale el tanque de manera que la válvula del<br />
tanque mire hacia la esquina derecha de atrás<br />
del gabinete.<br />
Alinee una tuerca adicional y atornille los pernos<br />
de mariposa dentro del estante derecho del<br />
soporte de la bombona para asegurar la<br />
bombona de gas.<br />
Tornillo Mariposa 1/4"x1/2"<br />
Unidad 1<br />
Parte # S233G0408B<br />
Una tuerca se fija al<br />
soporte para la<br />
bombona. Una tuerca<br />
adicional y perno de<br />
mariposa se aprietan<br />
DESPUÉS de insertar<br />
la bombona dentro del<br />
agujero para la<br />
bombona.<br />
Tuerca<br />
adicional
INSTRUCCIONES PARA USO Y CUIDADO<br />
Solamente para el modelo de gas LP:<br />
Conecte el regulador con la manguera a<br />
su tanque LPG<br />
Gire todas las válvulas del fogón hacia a OFF.<br />
Inspeccione el puerto de conexión de la válvula<br />
y el ensamble del regulador por daños o<br />
escombros. Retire cualquier escombro. Nunca<br />
use equipo dañado o obstruido.<br />
Conecte el ensamble del regulador a la válvula<br />
del tanque y a la rosca de acoplamiento rápido<br />
APRIÉTELA A MANO hacia la derecha. NO USE<br />
una llave inglesa para apretar porque podría<br />
dañar la rosca de acoplamiento-rápido y resultar<br />
en una situación peligrosa.<br />
Abra la válvula del tanque 1/4 a 1/2 (girando<br />
hacia la izquierda) y use una solución de agua<br />
enjabonada para examinar todas las conexiones<br />
en busca de escapes antes de intentar<br />
encender su parrilla. Vea "Buscando escapes<br />
de gas LP". Si un escape es encontrado, cierre<br />
la válvula de tanque y no use su parrilla hasta<br />
que el escape sea arreglado.<br />
Conexión tipo 1 por<br />
ANSI Z21.58 - 2007<br />
Rosca de<br />
acoplamiento<br />
rápido<br />
CUIDADO: Cuando el aparato no está en uso debe<br />
apagarse (ponerse en OFF) en el tanque de gas.<br />
Coloque la tapa del polvo sobre la salida de la<br />
válvula del cilindro siempre que el cilindro no esté<br />
siendo utilizado. Instale solamente el tipo de tapa<br />
de polvo proporcionada con la válvula del cilindro<br />
sobre la válvula de salida del cilindro.Otros tipos de<br />
tapas o tapones pueden causar fugas de propano.<br />
!<br />
ADVERTENCIA !<br />
Si usted tiene un escape de gas que no se<br />
puede reparar apretando la tuerca, cierre el gas<br />
en su punto de origen, desconecte la línea del<br />
combustible a su parrilla y llame 1-800-770-9769<br />
o a su suplidor de gas para que le ayude.<br />
Nunca desconecte el regulador de gas o<br />
cualquier encaje de gas mientras que su parrilla<br />
está encendida. Una parrilla encendida puede<br />
encender cualquier escape de gas y causar un<br />
incendio o explosión que pueden resultar en<br />
daños a la propiedad, lesiones personales o<br />
muerte.<br />
19<br />
Debe chequear todas las conexiones por<br />
escapes de gas<br />
Nunca use una llama viva para hacer pruebas de<br />
escapes. Haga la prueba en el primer uso y<br />
luego en cada estación anual, o cuando cambia<br />
el tanque de gas LP, Asegúrese que no hayan<br />
escapes de gas. Siga estos tres pasos:<br />
Haga una solución de jabón mezclando<br />
detergente líquido con agua una parte jabon: a<br />
una de agua.<br />
Gire las perillas de Control del fogòn por<br />
completo a la posición OFF, luego encienda el<br />
gas (ON) en su punto de origen.<br />
Aplique la solución de jabón a todas las<br />
conexiones de gas indicadas por las flechas.<br />
Vea el diagrama. Si se forman burbujas en las<br />
conexiones debe apretar mejor la conexión<br />
porque no está bien sellada. Verifique cada<br />
juntura y apriete o repare como sea necesario.<br />
Válvula de gas / Ensamble<br />
Tanque de gas<br />
Regulador con manguera (LPG)<br />
! ADVERTENCIA !<br />
Antes de usar este aparato lea todas las instrucciones<br />
y realice todas las pruebas para escapes de<br />
gas como se indican en el manual, aunque el<br />
producto haya sido ensamblado por su vendedor o<br />
el fabricante<br />
Desconectando el tanque de gas propano<br />
líquido (LPG) de su parrilla<br />
Asegúrese que las válvulas del fogón y del<br />
tanque de gas LP estén cerradas (Gírelas<br />
hacia la derecha para cerrarlas).<br />
Separe el ensamble de la manguera de la<br />
válvula del tanque de gas LP girando la rosca<br />
de acoplamiento-rápido hacia la izquierda.
6. Empuje y gire las perillas de control a OFF y abra la válvula<br />
de gas DESPACIO 1/4 de vuelta.<br />
OFF<br />
INSTRUCCIONES DE USO Y CUIDADO<br />
Instrucciones para encender la parrilla<br />
1. Antes de usarse, examine todas mangueras en busca<br />
de rajaduras, cortes, reducciones, quemaduras o<br />
rasguños. Si una manguera está dañada, no use su<br />
parrilla antes de reemplazar la manguera con una pieza<br />
autorizada. También asegúrese que todas conexiones<br />
de suministro de gas estén bien apretadas.<br />
2.<br />
Familiarícese con la seguridad, uso y cuidado en este<br />
manual. No fume mientras enciende la parrilla o està<br />
chequeándo las conexiones de gas.<br />
3. Asegúrese que el tanque de gas LP esté lleno.<br />
4. Abra la tapa de la parrilla.<br />
5. Verifique que el final de cada tubo del fogón estè<br />
apropiadamente ubicado sobre cada orificio de la<br />
válvula (ver la página 25).<br />
! ADVERTENCIA !<br />
Fallo en reemplazar una manguera defectuosa, asegurar<br />
las conexiones del suministro de gas o abrir la tapa<br />
antes de seguir el proceso para encender pueden<br />
resultar en un fuego o explosión que pueden causar<br />
lesiones serias y/o daños materiales.<br />
Abra el tanque de gas<br />
LP hacia la izquierda<br />
Empuje y gire la rueda de control del quemador a ON/ .<br />
Encienda siempre el quemador principal DERECHA<br />
primero. Presione el encendedor eléctrico 3 o 4<br />
segundos para encender el quemador.<br />
ON/<br />
LOW<br />
OFF<br />
7. Si no nenciende en 5 segundos, cierre el gas en el origen de<br />
suministro y gire las perillas de control a OFF. Espere por lo menos<br />
5 minutos para aclarar el gas, y vuelva a tratar. Si su parrilla<br />
todavía no enciende gire las perillas de control de los fogones y la<br />
fuente de gas a la posición OFF y lleve a cabo una prueba de fuga<br />
de todas las conexiones de gas y orígenes de gas como se expliuca<br />
en la sección de "Uso y Cuidado" en este manual. Si no hay<br />
escapes, espere 5 minutos para aclarar el gas y repita el<br />
procedimiento.<br />
8. Después que el fogón está encendido gire la perilla de nuevo a<br />
HIGH a y gire la válvula del tanque DESPACIO otro 1/4 de vuelta<br />
hasta llegar a una 1/2 media vuelta completa.<br />
9. Repita estos pasos para encender cada fogón<br />
individualmente. Gire la perilla a ON/ para encender los<br />
otros fogones a medida que se acerca al origen del<br />
suministro de gas.<br />
20<br />
Perillas de control del panel de control de los fogones<br />
Fogón<br />
Principal<br />
Fogón Trasero<br />
Fogón Infrarrojo<br />
Instrucciones para encender el fogón infrarrojo<br />
1. Siga los pasos 1 a través del 6 para encender la parrilla.<br />
2. Luego presione y gire la rueda de control del<br />
quemador infrarrojo a ON/ y presione el<br />
encendedor eléctrico 3 o 4 segundos para<br />
encender el quemador. Mantenga presionada la<br />
rueda durante 10 segundos antes de soltarla.<br />
Si no se enciende, siga el paso 7 antes de<br />
intentarlo de nuevo.<br />
ON/<br />
OFF<br />
3. Después de encenderse el quemador infrarrojo<br />
se llegará a la temperatura de cocción<br />
rápidamente. El brillo naranja /rojo aparecerá<br />
en unos minutos.<br />
Back Burner Lighting Instructions<br />
1. Siga los pasos 1 a través del 6 para encender la parrilla.<br />
2. Entonces empuje y gire la rueda de control del<br />
quemador trasero a ON/ y presione el<br />
encendedor eléctrico 3 o 4 segundos para<br />
encender el quemador. Sostenga la rueda<br />
durante 10 segundos antes de soltarla. Si no<br />
se enciende siga el paso 7 antes de intentarlo<br />
de nuevo.<br />
OFF<br />
ON/<br />
3. Después de encenderse el quemador trasero,<br />
se llegará a la temperatura de cocción<br />
rápidamente. El brillo naranja /rojo aparecerá en<br />
unos minuto<br />
Side Burner Lighting Instructions<br />
1. Siga los pasos de 1 a 5 de las instrucciones para<br />
encender la parrilla.<br />
2. Abra la tapa del fogón lateral.<br />
3. Ponga las perillas de control en OFF y abra la válvula<br />
de gas LP DESPACIO 1/4 de vuelta.<br />
4. Empuje y gire la perilla de control a ON/ . automáticamente<br />
el encender encenderá el fogón.<br />
5. Tendrá que empujar y girar la perilla del control varias<br />
veces antes que encienda.<br />
6. Si no enciende, gire las perillas de control del fogón y<br />
del gas a OFF y haga una prueba de escapes en todas<br />
las conexiones de gas y sus orígenes. Si no encuentra<br />
escapes, espere 5 minutos para aclarar el gas y repita<br />
el procedimiento.<br />
IMPORTANTE: No use el fogón trasero y el fogón<br />
principal al mismo tiempo. El fogón trasero es<br />
sólo para cocinar con el rotisor.
INSTRUCCIONES DE USO Y CUIDADO<br />
Encendiendo la parrilla manualmente con<br />
fósforos<br />
Para encender su parrilla de gas con fósforos, inserte un<br />
fósforo en el palillo encendedor y siga los pasos del 1 al<br />
6 de las instrucciones para encender la parrilla. Luego,<br />
encienda el fósforo y coloque el palillo encendedor a<br />
través del agujero para encender situado a la derecha de<br />
la parrilla como se muestra abajo. Gire la perilla de<br />
Control más cercano al tanque abierto a HI para dejar<br />
salir el gas. El fogón debe encenderse de inmediato.<br />
!<br />
Nunca se recline sobre el área de cocinar de la<br />
parrilla mientras enciende el gas. Mantenga su<br />
cara y cuerpo a una distancia segura (al menos<br />
18 pulgadas) de los fogones cuando enciende<br />
la parrilla con un fósforo.<br />
!<br />
Si ocurriese un RETROCESO DE LLAMA en o<br />
alrededor de los tubos del fogón, debe seguir las<br />
instrucciones de abajo. Fallo en obedecer estas<br />
instrucciones podría resultar en un fuego o una<br />
explosión que podría causar lesiones serias,<br />
muerte, o daños materiales.<br />
Cierre el suministro de gas que va a la parrilla.<br />
Gire las perillas de Control hacia la posición<br />
OFF.<br />
Abra la tapa de la parrilla.<br />
Apague cualquier llama con un extintor clase B.<br />
Una vez que la parrilla se haya enfriado,<br />
limpie los tubos de fogón y los fogones de<br />
acuerdo con las instrucciones indicadas en<br />
este manual.<br />
!<br />
Fósforo<br />
Palillo<br />
encendedor<br />
ADVERTENCIA !<br />
ADVERTENCIA !<br />
ADVERTENCIA !<br />
Si no se enciende en 5 segundos, gire la perilla de<br />
Control a OFF y la salida de la fuente de gas a OFF y haga<br />
una prueba de escapes como se indica en la sección<br />
de este manual de Uso y Cuidado. Si no hay<br />
escapes espere 5 minutos y trate de nuevo.<br />
21<br />
Reparación técnica - Si la parrilla no enciende<br />
1. Apague el gas en la fuente y gire las perillas de control<br />
a OFF. Espérese al menos cinco minutos para que se<br />
disperse el gas, y vuelva a tratar.<br />
2. Si su parrilla todavía no enciende, verifique el<br />
suministro de gas y las conexiones.<br />
3. Repita el procedimiento para encender. Si su parrilla<br />
todavía no opera, apague el gas en la fuente, gire las<br />
perillas de Control a OFFy verifique lo siguiente:<br />
Mala alineación de los tubos de los fogones sobre los<br />
orificos<br />
Corrección: Reposicione los tubos sobre los orificios.<br />
Obstrucción en la línea de gas:<br />
Corrección: Retire la línea de combustible de la parrilla. ¡No<br />
fume! Abra el suministro de gas por un segundo para<br />
despejar cualquier obstáculo de la línea de combustible.<br />
Cierre el suministro de gas en el punto de origen y reconecte<br />
la línea de combustible WARNING<br />
a la parrilla.<br />
Orificio obstruido<br />
Corrección: Saque los fogones de la parrilla retirando el<br />
tornillo trasero de cada fogón usando un destornillador<br />
para cabeza Phillips. Levante cada fogón y aléjelos<br />
cuidadosamente del orificio de la válvula de gas. Retire el<br />
orificio de la válvula de gas y remueva cualquier obstáculo<br />
suavemente con un cable fino. Luego reinstale todos los<br />
orificios, fogones, presillas Cotter y componentes de asar.<br />
Si sospecha que hay un obstáculo en las válvulas de gas o<br />
en el múltiple, llame al Centro de Información de Parrillas al<br />
1-800-770-9769 de 8 a.m. a las 4: 30 p.m. CST, de lunes a<br />
viernes.<br />
Obstáculo dentro de los tubos de los fogones<br />
Corrección: Proceda a limpiar el tubo del fogón usando el<br />
procedimiento en la página 26 del manual de Operación.<br />
Mala aliniación del encendedor sobre el fogón<br />
Corrección: examine la punta y chequée la posición correcta del<br />
electrodo como se muestra en el paso 10, página 15 de este<br />
Manual. El espacio entre la Punta del electrodo y el recibidor debe ser<br />
approximadamente de 3/16". Debe cambiarlo si necesita ajustarse.<br />
Con el suministro de gas cerrado presione el casquillo de<br />
ignición y aguarde la presencia de una chispa en cada Caja<br />
colectora de gas.<br />
Cables eléctricos desconectados<br />
Corrección: inspeccione la caja del encendedor que se<br />
encuentra detrás del panel de control. Conecte cualquier<br />
cable desconectado a la caja y trate de nuevo de encender la<br />
parrilla.<br />
Baterías AA débiles<br />
Correction: Destape el encendedor y reemplaze las baterías<br />
Si la parrilla todavía no se enciende usted puede necesitar<br />
purgar el aire de la tubería de gas o volver a poner el<br />
dispositivo regulador del exceso de circulación de gas. Nota:<br />
este procedimiento debe ser hecho cada vez que un nuevo<br />
tanque de gas LP se conecta a su parrilla.<br />
Purgando el aire de la línea de gas y/o ajustando el<br />
dispositivo del regulador por exceso de gas:<br />
Gire las perillas de control a la posición OFF.<br />
Apague el gas en la válvula del tanque.<br />
Si desconecte el regulador del tanque de gas LP.<br />
Deje la unidad descansar 5 minutos para permitir<br />
que el aire se purgue.<br />
Reconecte el regulador al tanque de gas LP.<br />
Gire DESPACIO la válvula del tanque un 1/4 de<br />
veulta.<br />
Abra la tapa de la parrilla.<br />
Empuje y gire la perilla de control del Fogón principal<br />
DERECHO hacia ON/ .<br />
Presione el encendedor eléctrico entre 3-4 segundos<br />
para encender el fogón.
USO CORRECTO DEL ROTISOR<br />
1.<br />
2.<br />
3.<br />
4.<br />
5.<br />
INSTRUCCIONES DE USO Y CUIDADO<br />
Lea todas las instrucciones antes de su uso inicial.<br />
IMPORTANTE: Cuando usa aparatos electrodomésticos,<br />
siempre se deben usar las precauciones básicas de<br />
seguridad.<br />
El motor del rotisor está fijado en 120V, 60Hz AC.<br />
Este rotisor es solamente para ser usado al aire libre.<br />
No permita que los niños jueguen cerca de la parrilla<br />
o del rotisor.<br />
Conectando el rotisor<br />
Siempre fije primero el rotisor ya ensamblado a la<br />
parrilla y luego conecte el enchufe del cable a un<br />
tomacorriente.<br />
Operando el rotisor<br />
No opere el rotisor si la cuerda o el enchufe se<br />
encuentran dañados, o si malfunciona el rotisor o ha<br />
tenido un daño cualquiera que sea.<br />
El uso de accesorios no es recomendado por el<br />
fabricante debido a que pueden causar lesiones. No<br />
debe exponer este rotisor a ningun otro uso que no sea<br />
el intentado.<br />
No permita que se moje la cuerda eléctrica, el enchufe<br />
o el motor, y tampoco los exponga a la lluvia, lo cual<br />
puede resultar en una descarga eléctrica.<br />
Desconectando el rotisor<br />
Tenga cuidado ya que todas las superficies de ambos<br />
la parrilla y el rotisor estarán muy calientes. Use<br />
guantes contra el calor para manejar el rotisor.<br />
Desenchufe el rotisor del tomacorrientes cuando no<br />
está en uso o antes de limpiarlo. Déje que se enfríe<br />
antes de remover las partes.<br />
Cuando va a cocinar con el rotisor coloque un recipiente<br />
de metal debajo de la comida para capturar la grasa y<br />
mantener la parrilla libre de exceso de grasa la que<br />
puede causar un incendio.<br />
CUIDADO: trate con cuidado cualquier receptáculo de<br />
cocinar con grasa caliente.<br />
Si ocurriese un fuego causado por grasa caliente, cierre<br />
los fogones y el gas a "OFF" y deje la tapa de la parrilla<br />
cerrada hasta que se apague el fuego.<br />
Guarde el rotisor dentro de la casa<br />
Cuando el rotisor no está en uso, guárdelo dentro de la<br />
casa en un lugar seco.<br />
22<br />
! ADVERTENCIA !<br />
Para protegerse contra las descargas eléctricas,<br />
no sumerja la cuerda eléctrica, el enchufe o motor<br />
en agua o exponerlos a la lluvia. Proteja los<br />
elementos eléctricos de los fogones, superficies<br />
calientes de la parrilla y de la grasa.<br />
! CUIDADO !<br />
Para protegerse contra descargas eléctricas , debe<br />
conectarse sólo a un tomacorrientes que este<br />
correctamente puestos a tierra.<br />
USO DE LOS EQUIPOS ELÉCTRICAS<br />
1. Para protegerse contra choque eléctrico. No moje la<br />
cuerda, enchufes, o la parrilla con ningún líquido.<br />
2. Desconecte del enchufe antes de limpiar. Permita que la<br />
parrilla se enfríe antes de remover o colocar partes.<br />
3. No use aparatos de cocción a gas de exterior con el<br />
cable o el enchufe dañados, ni si el aparato funciona<br />
incorrectamente o se ha dañado de cualquier modo.<br />
Póngase en contacto con el fabricante para repararlo.<br />
4. No permita que la cuerda cuelgue del borde de la<br />
mesa, área de trabajo, o que toque las supeprficies<br />
calientes.<br />
5. No use aparatos de cocción a gas de exterior para<br />
fines distintos a los que les corresponden.<br />
6. Al conectar, conecte primero el enchufe al aparato de<br />
cocción a gas de exterior y luego enchufe el aparato a la<br />
toma.<br />
7. Use exclusivamente un circuito protegido con<br />
Interrupción de Fallo a Tierra (GFI) con este aparato de<br />
cocción a gas de exterior.<br />
8. No saque nunca el enchufe con toma de tierra ni use<br />
un adaptador de 2 patillas.<br />
9. Use exclusivamente cables extensores de 3 patillas<br />
con toma de tierra, adecuados para la alimentación del<br />
equipo, y aprobados para su uso en exterior con la<br />
marca W-A.
1. Remover todas las partes del cartón de envío.<br />
2.<br />
3.<br />
Adjunte el soporte del motor al exterior del panel izquierdo del tazón de la parrilla. Alìnie los dos<br />
agujeros del soporte con los hoyos enrroscados sobre el tazón de la parrilla. Ajústelo bien apretado<br />
usando dos tornillos 10-24x3/4" UNC y arandelas.<br />
Rot. Tornillo<br />
10-24x3/4" UNC<br />
Unidades 2<br />
Rot. Arandela<br />
Unidades2<br />
Instrucciones para montar el rotisor y la brocheta<br />
Rot. Tuerca #10-24<br />
Unidades 2<br />
Deslice la presa de carne o pollo a través de la espada. Coloque los tenedors en ambos lados contra<br />
la presa manteniéndola estable en el rotisor. Ajuste el espaciador entre ellos para acomodar la presa<br />
de carne, ajuste los tornillos de mariposa, para mantener los tenedores en posición, deslice el cuello<br />
y el cojinete al final de la brocheta. No ajuste el tornillo de orejas del cuello hasta que el Rotisor<br />
esté colocado en la ranura de la parrilla. Atornille el manguillo al final de la brocheta como se muestra<br />
en el dibujo.<br />
Rot. Tornillo de mariposa<br />
3/8"x1/2"<br />
Unidades 3<br />
Soporte del motor<br />
Rot. Tornillo<br />
10-24x3/4" UNC<br />
Tornillo mariposa<br />
3/8"x1/2"<br />
Brocheta<br />
23<br />
Tornillo mariposa<br />
3/8"x1/2<br />
Tenedores para<br />
apresar<br />
Rot. Arandela Rot. Tuerca #10-24<br />
Exterior izquierda<br />
del panel del<br />
tazón de la parrilla<br />
Manguillo<br />
Cuello<br />
Cojinete
4.<br />
5.<br />
Instale el Motor del rotisor de (corriente alterna) AC al soporte del motor como se muestra abajo.<br />
Asegúrese que el motor esté adjunto al soporte con el cable eléctrico hacia abajo. Esta instalación<br />
asegura que cuando la brocheta ha sido insertada dentro del motor también se apoyará con seguridad<br />
en la ranura del tazón de la parrilla.<br />
Inserte el rotisor ensamblado dentro del motor como se muestra abajo. El motor debe estar al lado<br />
izquierdo de su parrilla y la manguillo al lado derecha. Coloque el cojinete en la ranura al lado derecha<br />
del tazón de la parrilla, ajuste el tornillo mariposa del Cuello y luego a la derecha del cojinete. El<br />
cuello estabilizará el rotisor durante el proceso de cocinar y el cojinete permite que la brocheta gire<br />
suavemente. Conecte el rotisor a un enchufe y pruebe que trabaje correctamente.<br />
Motor<br />
Motor del rotisor<br />
Soporte del motor<br />
Tornillo<br />
mariposa<br />
El espetón de asado debe apoyarse<br />
con firmeza en la ranura de la parrilla<br />
Tenedor para<br />
apresar<br />
Tornillo<br />
mariposa<br />
Cuello<br />
Cojinete<br />
Manguillo<br />
Deben usarse siempre el cojinete y el cuello con este rotisor.<br />
ANTES de cocinar con el rotisor debe remover de la parrilla las rejas de asar y posiblemente los<br />
Savor Plates ® . Cuando cocina con el rotisor coloque una bandeja de aluminio debajo dela comida para<br />
que reciba el goteo de la grasa y jugos de la carne. Esto mantendrá su parrilla limpia y libre de<br />
exceso de grasa lo cual puede causar un incendio. Use cuidado cuando mueve un utensilio con<br />
grasa caliente.<br />
24<br />
Brocheta
LIMPIEZA Y MANTENIMIENTO<br />
Un cuidado correcto y mantenimiento mantendrán su<br />
parrilla en una condición operativa superior y prolongarán<br />
su vida. Siga estos procedimientos de limpieza con<br />
regularidad y su parrilla se mantendrá limpia y trabajará<br />
con mínimo esfuerzo.<br />
CUIDADO: Asegúrese que su parrilla está en OFF y fría<br />
antes de limpiarla.<br />
Limpiando las rejas de cocinar<br />
Antes de su uso inicial y periódicamente, lave las rejas<br />
con una solución de jabón y agua tibia. Usando un trapo<br />
o una cepillo de verduras.<br />
Limpiando los Savor Plates ®<br />
Periódicamente usted debe lavar los Savor Plates®® en<br />
una solución de agua tibia enjabonada. Puede usar un<br />
trapo para lavar o un cepillo para verduras y secarlos<br />
totalmente antes de volverlos a colocar y reinstalar en el<br />
tazón de la parrilla.<br />
Limpiando la bandeja de grasa<br />
Para reducir la oportunidad de fuego, la bandeja para la<br />
grasa deben ser inspeccionados visualmente antes de<br />
cada uso de la parrilla. Retire cualquier grasa y lave la<br />
bandeja de grasa y recipiente con una solución<br />
enjabonada con agua caliente.<br />
Limpiar el interior de la tapa de la parrilla<br />
La grasa puede tener una tendencia de acumularse en<br />
el interior de la tapa de la parrilla y podría gotear en la<br />
terraza o patio cuando la tapa está abierta. Inspeccione<br />
el interior de la tapa de la parrilla visualmente antes de<br />
cada uso. Retire cualquier grasa y lave con una solución<br />
de jabón y agua tibia.<br />
Limpieza frecuente del interior de la parrilla<br />
Quemando el exceso de comida después de cada uso<br />
al aire libre dejará la parrilla lista para otro uso. Sin<br />
embargo, por lo menos cada 3 meses usted debe dar<br />
una limpieza minuciosa a la parrilla entera para minimizar<br />
su riesgo de fuego por grasa y mantener la parrilla en la<br />
mejor forma. Siga estos pasos:<br />
1. Gire todas las válvulas de los fogones a la posición OFF.<br />
2. Gire la válvula de gas LP a la posición OFF.<br />
3. Desconecte el regulador del tanque de gas. Inspeccione<br />
la manguera y ensamble del regulador por grietas,<br />
cortadas o cualquier otro daño, y reemplaze como sea<br />
necesario. Consulte la lista de partes en este Manual de<br />
operación.<br />
4. Retire y limpie los Savor Plates®, rejas para asar, rejas<br />
secundarias para asar y fogones de la parrilla.<br />
5. Cubra cada orificio de la válvula de gas con papel de<br />
aluminio.<br />
6. Cepille el interior y la parte inferior de la parrilla con una<br />
almohadilla fibra o cepillo de nilón y lave con agua<br />
enjabonada tibia y debe enjuagarlo y dejarlo secar.<br />
7. Retire el papel de aluminio de los orificios y examine cada<br />
orificio en busca de obstrucciones.<br />
Inspeccione cada electrodo de chispa, ajustándolo como<br />
8. sea necesario. El espacio entre la punta del Electrodo de<br />
chispa y el recibidor de chispa debe ser de 3/16"<br />
aproximadamente .<br />
9. Reemplace los fogones y ajuste la caja colectora de gas.<br />
El borde de la caja colectora de gas debe estar traslapando<br />
el puerto del fogón.<br />
10. Reemplace los Savor Plates® y las rejas.<br />
11. Reconecte el origen de gas y observe la llama del<br />
fogón para una operación correcta.<br />
Limpieza de las superficies exteriores pintadas:<br />
Antes del uso inicial, y periódicamente de allí en adelante,<br />
sugerimos que usted lave su parrilla usando una solución<br />
enjabonada. Usted puede usar un paño de lavado o<br />
esponja para este proceso. No use un alambre rígido o<br />
cepillo de latón. Éstos rayan la superficie del acero inoxidable<br />
y descascaran las superficies pintadas (varía por modelo)<br />
durante el proceso de la limpieza.<br />
Limpiando el exterior del acero inoxidable<br />
Cuidado rutinario y mantenimiento es requerido para mantener<br />
la aparencia y la resistencia a la corrosión del acero inoxidable.<br />
El hecho es que el acero inoxidable puede corroerse, oxidación<br />
y pérdida de color pueden ser causadas bajo ciertas<br />
condiciones. El óxido es causado cuando las partículas de acero<br />
regulares en la atmósfera se fijan a la superficie de acero<br />
inoxidable. Partículas de acero también pueden fijarse a su<br />
parrilla con el uso de lana de acero o cepillos de metal rígidos<br />
para limpiar la parrilla en lugar de materiales o telas noabrasivas,<br />
esponja o nilón las que son mejores para limpiar.<br />
En áreas de la costa descarche de óxido pueden desarrollarse<br />
sobre superficies inoxidables que no pueden ser removidas<br />
por completo. Blanqueadores y otras soluciones a base de<br />
cloro usadas para la limpieza de la casa y piscinas también<br />
pueden causar corrosión al acero inoxidable.<br />
La intemperie, el calor extremo, el humo al cocinar y aceites de<br />
maquinaria usados en el proceso de fabricar el acero inoxidable<br />
pueden causar que el acero inoxidable se vuelva color caramelo.<br />
Aunque hay muchos factores que pueden afectar la apariencia<br />
de la superficie del acero inoxidable, estos no afectan la<br />
integridad del acero o el rendimiento de la parrilla.<br />
Para ayudar en mantener el terminado de acero inoxidable,<br />
siga los siguientes procedimientos para obtener los mejores<br />
resultados:<br />
1. Después de cada uso (después de que su parrilla se ha<br />
enfríado), pase un trapo a cubertería de acero inoxidable<br />
que las superficies con un paño blando y jabonoso o<br />
esponja entonces/luego enjuagan con el agua. Sea sure<br />
retirar todas partículas de comida, salsas o escabeches de<br />
acero inoxidable porque éstos pueden ser muy acídicos y<br />
perjudicial para las superficies inoxidables.<br />
2. No use tintorería abrasiva, depuradores de airees o cepillos<br />
de cable rígidos de ningún tipo nunca sobre su parrilla.<br />
Use un calor limpiador de acero inoxidable contrario y la<br />
frotación o la limpieza en dirección a el grano de acero<br />
3. inoxidable o saque lustre a líneas no contra el cereal.<br />
25<br />
! ADVERTENCIA !<br />
Fallo en cumplir con estas instrucciones puede<br />
causar una situación peligrosa la que si no se<br />
impide puede resultar en lesiones.<br />
•<br />
•<br />
•<br />
•<br />
Mantenga el área de la parrilla libre de materiales<br />
combustibles, gasolina, otros vapores y líquidos<br />
inflamables.<br />
No obstruya la circulación de aire para buena<br />
ventilación.<br />
Mantenga las aperturas de ventilación del gabinete<br />
del tanque libres y despejadas de escombros.<br />
Visualmente inspeccione de vez en cuando las<br />
llamas del fogón para asegurar que tiene el tipo<br />
de llama correcto como se indica abajo.<br />
VISTA MAGNIFICADA DE<br />
LA LLAMA DEL FOGÓN A<br />
TRAVÉS DEL HUECO DE<br />
OBSERVACIÓN.
LIMPIANDO LOS TUBOS Y PUERTOS DE LOS FOGONES<br />
Para reducir el chance de FUEGO DE RETROCESO debe<br />
limpiar los tubos de los fogones de la siguiente manera por<br />
lo menos una vez al mes en el verano y otoño o cuando las<br />
arañas esten activas en su área, o si su parrilla no ha sido<br />
usada por un tiempo.<br />
1.<br />
2.<br />
3.<br />
4.<br />
5.<br />
6.<br />
7.<br />
8.<br />
Gire todas las válvulas del fogón a la posición OFF<br />
Gire la válvula de tanque de gas LP a la posición OFF.<br />
Remueva el ensamble del regulador de gas LP.<br />
Remueva las rejas de cocinar, los Savor Plates® de<br />
cerámica y las bandejad para la grasa de su parrilla.<br />
Remueva el tornillo en la parte de atrás de cada fogón<br />
usando un destornillador con cabeza Phillips.<br />
Levante con cuidado cada fogón y aléjelos del orificio<br />
de la válvula de gas.<br />
Fíjese que estén limpios o limpie los tubos Venturi<br />
de los fogones de insecto y nidos de insecto. Un tubo<br />
obstruido puede causar un fuego debajo de la parrilla.<br />
Refiérase a la Figura 1 y lleve a cabo uno de estos tres<br />
métodos de limpieza:<br />
9<br />
MÉTODO 1: Doble un alambre rígido o<br />
percha de alambre en forma de gancho<br />
pequeño como se muestra en el dibujo y<br />
entre el gancho por el tubo del fogón<br />
varias veces para limpiar los escombros.<br />
MÉTODO 2: Use un cepillo de botella con<br />
un mango flexible y dirija el cepillo a través<br />
del tubo del fogón y entrándolo y sacándolo<br />
varias veces para remover cualquier<br />
escombro.<br />
MÈTODO 3: Use una manguera de aire a<br />
presión para forzar aire a través del tubo<br />
del fogón.El aire debe forzar los escombros<br />
a través del fogón y fuera de los puertos.<br />
Figure 1<br />
PARA LIMPIAR EL TUBO DEL FOGÓN,<br />
INSERTE EL GANCHO DONDE INDICA<br />
LA FLECHA.<br />
Sin importar que tipo de limpieza de los fogones usa, le<br />
recomendamos que también complete los siguientes<br />
pasos para ayudarle a prolongar la vida del fogón<br />
1.<br />
2.<br />
3.<br />
! ADVERTENCIA !<br />
Para una operación sin peligro asegúrese que<br />
el orificio del ensamble de la válvula de gas<br />
está dentro del tubo del fogón antes de usar<br />
su parrilla. Vea la figura 1. Si el orificio no<br />
está dentro del tubo del fogón, al encender el<br />
fogón podría causar una explosión, incendio<br />
que resultarían en lesiones corporales serias y/<br />
o daños materiales.<br />
Tubo del fogón<br />
Tubo del fogón<br />
26<br />
Use un cepillo de fibra o de nilón para limpiar la<br />
superficie de cada fogón hasta que queden<br />
libres de comida, residuos o suciedad.<br />
Limpie cualquier puerto que esté atascado con<br />
un alambre tieso como un sujetapapeles<br />
Inspeccione cada fogón por daños (grietas o huecos)<br />
y si encuentra los mencionados daños, ordene e<br />
instale un fogón nuevo. Después de la instaalación,<br />
verifique para assegurarse que los orificios de la<br />
válvula de gas estén correctamente colocados dentro<br />
de los finales de los tubos de los fogones. También<br />
debe verificar la posición del electrodo para producir<br />
chispa.<br />
Ensamble de la válvula<br />
de gas<br />
Puerto del fogón<br />
Orificio Tubo del fogón<br />
Pie
Quemando los residuos<br />
Antes de cocinar en su parrilla por primera vez, debe<br />
quemar los residuos para eliminar cualquier olor o<br />
o aceites de la fábrica. Encienda el fogón principal,<br />
baje la tapa y opere la parrilla en ON/ entre 3 y 5<br />
minutos.<br />
ADVERTENCIA: Si opera TODOS los fogones<br />
principales en ON/ por más de 5 minutos puede<br />
causarle daño a ciertas partes de su parrilla. No<br />
descuide su parrilla cuando está en uso.<br />
Precalentado<br />
Para precalentar los fogones principales, encienda su<br />
parrilla en ON/ , baje la tapa y siga las instrucciones.<br />
Para cocinar con temperaturas altas, caliente la<br />
parrilla entre 3 y 5 minutos.<br />
Para cocinar a bajas temperaturas, precaliente la<br />
parrilla por 3 minutos.<br />
Para cocinar lentamente el precalentdo no es<br />
necesario.<br />
Temperaturas para asar<br />
Temperaturas altas: La perilla puesta en HIGH, sólo<br />
debe usarse para precalentar la parrilla entre 3-5<br />
minutos y para quemar los residuos de comidas.<br />
Nunca use ON/ para cocinar por largo tiempo.<br />
ADVERTENCIA: Si opera TODOS los fogones<br />
principales en ON/ por más de 5 minutos puede<br />
causarle daño a ciertas partes de su parrilla. No<br />
descuide su parrilla cuando está en uso.<br />
Temperaturas medianas: La mayoría de las recetas<br />
piden el calor entre medio y bajo, incluyendo las<br />
carnes ahumadas, cocinando con el rotisor, carnes<br />
sin grasa o pescado.<br />
Una nota importante sobre las temperturas para asar<br />
Hay algunas diferencia en el ambiente controlado dentro<br />
de su cocina, y variables incluyendo las temperaturas<br />
exteriores, dirección y condiciones del viento, tanto como<br />
la ubicación de la parrilla que pueden afectar la<br />
distribución de calor de su parrilla. Porque estas<br />
condiciones varían, y no hay dos jardínes o patios<br />
iguales, ofrecemos estas guías para su conveniencia.<br />
Recomendamos que usted vigile su parrilla atentamente<br />
y le de vuelta a la comida como se necesita para prevenir<br />
cocinarla demasiado y asegurar los mejores resultados<br />
todo el tiempo.<br />
El fogón infrarrojo (lado derecho lejano) ofrece el calor<br />
más intenso para rápidamente sellar los jugos y<br />
sabores de las carnes y aves.<br />
Dentro del área primaria para cocinar, los fogones<br />
del centro y traseros ofrecen el calor más intenso<br />
para asar.<br />
Las rejas secundarias para asar brindan unl calor<br />
mediano para preparar panes y verduras firmes.<br />
El área del frente es la primaria para cocinar comidas<br />
delicadas y para mantener la comida caliente.<br />
Cocinado Directo<br />
Instrucciones para Asar<br />
El método de cocinar directo puede hacerse sobre las<br />
rejas incluídas y comida colocada directamente sobre los<br />
fogones. El cocinado directo requiere que la tapa de la<br />
parrilla esté abrieta.<br />
A-1<br />
El método es ideal para asar y sellar los jugos dentro<br />
de la carne, para freir en aceite profundo y cuando<br />
desee tener un sabor del concinado al air libre.<br />
Cocinando indirecto<br />
El método de cocina indirecto también puede ser<br />
usado con las rejas de cocinar proporcionadas.<br />
Para cocinar indirectamente, la comida debe ser<br />
puesta sobre el lado izquierdo o derecho de su<br />
parrilla con el fogón principal encendido al lado<br />
opuesto. Debe colocar la comida sobre las rejas<br />
secundarias y encender los fogones principales<br />
exteriores. De cualquier manera, para cocinar de<br />
una manera indirecta la tapa tiene que estar<br />
cerrada.<br />
Preparando las rejas para asar<br />
Engrasando la superficie de cocinar ayudará a<br />
prevenir que las comidas se puegen durante la<br />
cocinada y reducirá la cantidad de la limpieza a fondo<br />
requerida. Use un cepillo para aplicar una capa fina<br />
de aceite de cocina o manteca vegetal en cada reja<br />
de asar asar antes de cada comida al aire libre. No<br />
sugerimos aceites de tipo de aerosol a menos que<br />
sean especificadas para cocinar en tempuratura alta.<br />
Asegúrese cubrir con aceite todas las partes para<br />
asar Incluyendo los bordes y cualquier área con<br />
porcelana desportillada.<br />
! ADVERTENCIA !<br />
Fallo en cumplir con estas instrucciones puede<br />
causar un incendio o explosión que pueden causar<br />
lesiones serias, muerte o daños a la propiedad.<br />
Nunca cubra las cuadrículas, Savor Plates, la<br />
parte inferior del tazón de la parrilla o de la<br />
bandeja para drenar la grasa con carbón, papel<br />
de aluminio, arena o cualquier substancia que<br />
pueda absorber grasa.<br />
Antes de cada uso de su parrilla: remueva la<br />
bandeja de grasa y retire toda la grasa y comida<br />
para prevenir un peligroso fuego de grasa.<br />
Use su parrilla por lo menos a 3 pies de distancia<br />
de cualquier pared o superficie. Use su parrilla<br />
por lo menos a 3 pies de distancia de objetos<br />
combustibles que pueden derretirse o captar<br />
incendios (como vinilo o tabla de forro de madera,<br />
cercas y salientes) o fuentes encendidas como la<br />
llama del piloto de calentadores de agua y aparatos<br />
eléctricos encendidos.<br />
Nunca use su parrilla de gas en un garaje, porche,<br />
cobertizo, pasabrisas o cualquier otra área cercada.<br />
Su parrilla se pondrá muy caliente. Use un guante<br />
para parrillas protector de llamas siempre que va<br />
a cocinar en su parrilla. No se recline sobre la<br />
superficie de la parrilla cuando está cocinando.<br />
Todas las superficies guardan mucho calor<br />
cuando la parrila está en operación. Para limpiarla<br />
espere que la parrilla se enfrie.
GUÍA PARA ASAR CON EL ROTISOR<br />
Asar despacio con el rotisor<br />
Cocinando con el rotisor produce comidas atractivas y<br />
sabrosas. El sistema de rotisería se usa más para<br />
carnes y aves y está diseñado para cocinar despacio.<br />
Prepare las aves uniendo las alas y las patas al cuerpo<br />
del ave. También la cavidad del ave se puede rellenar<br />
antes de cocinarla. Usted puede colocar una casuela,<br />
para atrapar los juegos de la carne y hacer salsas. Para<br />
darles sabor a las carnes puede usar especies y yerbas<br />
de olor.<br />
Cocinando con el rotisor se demora lo mismo que<br />
asando al horno.<br />
Balanceando las carnes en el rotisor<br />
Poner el peso de la carne de una manera bien<br />
balanceada en la brocheta del rotisor es de mucha<br />
importancia. La carne se debe colocar de tal manera que<br />
esl peso esté bien distribuido. El rotisor debe girar<br />
uniformemente o cuando para y la acción de arranque<br />
causarán que la comida se cocine desigualmente y<br />
puede quemarse el lado más pesado.<br />
Las comidas más fáciles para balancear son ésas de<br />
forma uniforme y textura. Evaluar si la comida se<br />
balanceada correctamente antes de asegurarla a la<br />
brocheta. Coloque los finales de la brocheta en cada<br />
palma de sus manos. Si no hay ninguna tendencia de<br />
rodar, déle 1/4 de vuelta. Si todavía está estable, déle otro<br />
cuarto de vuelta. Debe descansar sin girar en cada uno<br />
de estas posiciones. Después de esta prueba puede<br />
colocarla la brocheta en su parrilla.<br />
Preparación de comida<br />
Cuando está preparando aves, amarre bien todas las<br />
partes contra el cuerpo del ave, de tal manera que<br />
parezca una bola. Jale la piel del cuello y usando una<br />
brocheta pequeña, amárrela a la parte posterior del ave.<br />
Arregle los dos tenedores y métalos dentro del cuerpo del<br />
ave para sostener bien la presa. Antes de entrar los<br />
tenedores haga la aprueba de balance.<br />
Un pedazo de carne enrollado requiere que la brocheta<br />
del rotisor sea insertada a través del centro a lo largo del<br />
rollo de la carne, luego siendo asegurado su balance.<br />
Para carnes que contienen huesos, es mejor asegurar la<br />
brocheta del rotisor diagonalmente a través de las<br />
secciones con más carne. Si los huesos sobresalientes<br />
o las alas se broncean demasiado rápido, puede<br />
cubrirlas con papel de aluminio.<br />
Las verduras son en general fáciles cocinar sobre la<br />
parrilla. El enrejado para asar lo hace conveniente<br />
porque usted todavía puede usar el área de asar<br />
principal mientras las verduras están puestas encima<br />
de las rejas.<br />
Preparación para ahumar<br />
GUÍA PARA AHUMAR<br />
El ahumador da un sabor distintivo y delicioso a<br />
comida. Usted encontrará una variedad de fichas de<br />
madera disponible para uso en el ahumador. Hay que<br />
remojar las fichas de madera con anterioridad, siga las<br />
instrucciones del fabricante.<br />
Nota: Es nuestra experiencia que muchas de los<br />
productos para ahumar no producen humo, pero<br />
inculcan sabor a la comida. Lea las etiquetas con<br />
cuidado y si tiene dudas pregúntele pídale detalles a<br />
minorista.<br />
Usando una caja ahumadora<br />
Hay muchas cajas ahumadoras disponibles en el<br />
mercado. Siga estas pautas y siempre refiérase a la<br />
etiqueta de sus fichas ahumadoras para los detalles<br />
del ahumado. Llene la caja para ahumar con las fichas<br />
o el producto que haya comprado. Puede añádir hierbas<br />
secas y especies para producir diferentes sabores. Use<br />
un guante de BBQ que retarda las llamas y coloque la<br />
caja de ahumar sobre las rejas para cocinar o sobre los<br />
Savor Plates® directamente encima de un fogón<br />
encendido. Las fichas le prestarán sabor a su comida.<br />
Consejos para ahumar<br />
Usted puede reducir la fuerza del sabor a humo<br />
cocinando en el ahumador la mitad o tres cuartos del<br />
tiempo.<br />
La temperatura que se requiere para ahumar es<br />
normalmente LOW a MEDIO.<br />
Comidas naturales altas en aceite se prestan bien para<br />
ahumar. Mioentras que comidas más secas se<br />
benefician se un adobado líquido.<br />
• Filetes de atún, adobado en los sabores asiáticos de<br />
aceite de ajonjolí, salsa de soy y jeréz.<br />
• Filetes de cerdo, adobado con cáscara de jengibre,<br />
naranja y pintado con sabor de "Maple".<br />
• Mejillones, enjugados con cáscara de limón y aceite<br />
de chile.<br />
• Chuletas de cordero, adobado en aceite de oliva<br />
virgen, limón, orégano y pimienta negra. El mismo<br />
escabeche puede ser usado para una pierna entera o<br />
un lomo de cordero.<br />
• Pollo, sin huesos, piezas cortadas en filetes o cortes<br />
pequeños, ahumadas con sabores orientales.<br />
• Pescado, de carne firmes y mariscos surtidos como<br />
langostinos, mejillones y calamari.<br />
• Puerco, cortado en dados o cerdo picado, filete,<br />
pierna, costillas ahumadas.<br />
• Carne de res filete cortado en chuletas, costillas,<br />
lomo, bistec<br />
• Cordero, lomo de cordero, filete, pierna y costillas.<br />
GUIA PARA USAR LAS REJAS DE ASAR<br />
Precocine las verduras firmes hirviendo brevemente o<br />
cocinándolas en horno de microondas antes de<br />
cocinarlas sobre la parrilla. Envuelva verduras en un<br />
grosor doble de papel de aluminio para protegerlas<br />
mientras se cocinan sobre la parrilla. Lluego, sáquelas<br />
del envoltorio de papel si desea, 10-15 minutos antes del<br />
A-2<br />
finalizar el tiempo de cocinar, pinte las verduras con<br />
mantequilla o aceite y termine de cocinarlas. Las rejas<br />
de asar pueden ser usadas con otro propósito que el de<br />
cocinar. Considere usar las rejas para calentar el pan<br />
francés, hacer pan de ajo, medialunas o incluso<br />
rosquillas de pan.<br />
Un pez entero pequeño envuelto en papel de aluminio<br />
se puede asar sobre las rejas. Los paquetes de<br />
mariscos como mejillones, langostinos y filetes de pez<br />
cortados colocados en envoltorios de papel individuales<br />
se cocinan bien de esta manera.
cesta de alambre para asado giratorio que<br />
fija los alimentos<br />
Ahora puede asar cualquier cosa en su asador incluyendo<br />
verduras, pescado y bistec, además de los alimentos<br />
tradicionales como pollo y lomo sin perforarlos. La cesta<br />
se fija al espetón asador y aguanta los alimentos en su<br />
lugar para la cocción a fuego lento. El tornillo ajustable<br />
permite adaptarse a espetones de diámetro grande y<br />
pequeño. Puede usarse con asadores con y sin fogón<br />
trasero. Medidas: 13”w x 6”h<br />
kit de conversión a<br />
gas natural<br />
El MG3208SLP puede<br />
convertirse a gas natural<br />
exclusivamente con este kit<br />
de gas natural y un técnico<br />
de gas cualificado. Para<br />
convertir este asador el<br />
técnico necesitará este kit de<br />
conversión de asador.<br />
Manguera de 12". de<br />
gas natural<br />
Si convierte su asador para<br />
usar gas natural, en la<br />
mayoría de casos necesitará<br />
esta manguera extensora<br />
opcional de 12" . con DI<br />
(diámetro interno) de 3/8".<br />
ACCESORIOS OPCIONALES PARA SU PARRILLA MG3208SLP<br />
Regístrese en línea y obtenga los accesorios para cocinar<br />
disponibles en www.grandhall.com<br />
Para recibir ayuda personal llame al Centro de Información de Parrillas al 1-800-770-9769 entre las 8:00 am y<br />
4:30 pm CST de lunes a viernes.<br />
A-3<br />
Olla de hierro fundido con tapa para cocinar<br />
Este kit de alto rendimiento<br />
de paella y tapa (pesa 10<br />
kilos) ofrece un acabado en<br />
porcelana mate e incluye<br />
asas para levantarla. El<br />
hierro colado se calienta<br />
mejor y cocina<br />
uniformemente, haciendo<br />
de este kit el accesorio ideal<br />
para preparar fajitas, pizza,<br />
patatas, estofado, tortitas y<br />
postres. Esta paella se<br />
pone encima de las<br />
parrillas.Medidas:<br />
16-3/4”l x 11-1/4”w x 2-1/2”d<br />
parrilla de asado<br />
cromada<br />
Al ponerla dentro de la paella<br />
de hierro colado opcional,<br />
esta parrilla de asado de alto<br />
rendimiento aguanta el lomo,<br />
jamón, pavo o pollo y<br />
configura su parrilla para un<br />
asado lento.Medidas:<br />
15-1/2” x 10-3/4” x 3”d<br />
cesta para freír<br />
Esta cesta para freír cromada<br />
de alambre se apoya en la<br />
paella de acero colado<br />
opcional, permitiéndole freír<br />
en su parrilla y mantener el<br />
calor, el olor y la suciedad<br />
fuera de casa. El asa<br />
desmontable de 6”. permite<br />
bajar los alimentos y<br />
sacarlos fácilmente del<br />
aceite caliente para<br />
cocinarlos. Medidas:<br />
14-3/4” x 8-1/2” x 2-1/2”d<br />
brochetas de acero<br />
inoxidable<br />
Estas brochetas son ideales<br />
para cocinar verduras,<br />
gambas y kebabs de carne.<br />
Fabricadas en acero<br />
inoxidable con un acabado<br />
pulido en espejo. El kit de 4<br />
pueden lavarse en el<br />
lavavajillas. Medidas:<br />
18” de longitud
PREGUNTAS FRECUENTES<br />
Pregunta:<br />
¿Puedo convertir mi parrilla de un tipo de gas a otro,<br />
es decir, de Gas LPG a NG o vice'versa?<br />
Respuesta:<br />
Sí, sin embargo, cualquier intento de convertir la parrilla<br />
de un tipo de combustible a otro es muy peligroso y<br />
debe ser realizado por un técnico de gas cualificado<br />
exclusivamente, usando un Kit de conversión GN<br />
adquirido de Grand Hall.<br />
Pregunta:<br />
¿Estan los números de Serie y modelo listados en algún<br />
lugar en la parrilla para mi referencia?<br />
Respuesta:<br />
La serie y los números del modelo están puestos en en<br />
la placa color plateado de CSA que se encuentra en la<br />
parrilla. Dependiendo del modelo la placa CSA estará<br />
ubicada a la izquierda o derecha del tazón debajo de la<br />
repisa del lado o abajo o los lados derecho o izquierdo<br />
del panel de control o detrás del gabinete de la parrilla.<br />
Pregunta:<br />
¿Mi parrilla no enciende bien, por qué?<br />
Respuesta:<br />
Siempre encienda primero el fogón principal más lejos de<br />
la fuente de combustible. Esto atraerá el gas al otro lado<br />
del grupo colector que ayuda a prevenir espacios de aire<br />
que obstruyen la circulación de gas y previenen el encender<br />
la parrilla correctamente. También pruebe usar este<br />
procedimiento:<br />
1.<br />
2.<br />
3.<br />
Apague el gas en la fuente y gire las perillas de<br />
control a OFF. Espere por lo menos 10 minutos<br />
para que se disperse el gas, y vuelva a tratar.<br />
Si su parrilla todavía no enciende, verifique el<br />
suministro de gas y las conexiones.<br />
Repita el procedimiento de alumbrado. Si su<br />
parrilla falla en operar, desconecte el gas en<br />
su origen, ponga todas las perillas en OFF y<br />
refiérase a la sección de "Reparación Técnica"<br />
por más información, o llame al Centro de<br />
Información de Parrillas.<br />
Pregunta:<br />
¿Si el encendedor o baterías no están trabajando, cómo<br />
puedo encender my parrilla manualmente?<br />
Y - ¿Porqué voy a necesitar el palillo encendedor<br />
plateado que cuelga al lado de mi parrilla?<br />
Si su encendedor deja de funcionar o su batería necesita<br />
ser reemplazada, usted puede encender su parrilla a<br />
través del agujero de alumbrado al lado del tazón de la<br />
parrilla con el palillo encendedor que cuelga al lado de<br />
su parrilla. El palillo encendedor está diseñado para<br />
sujetar un fósforo de papel y permite insertar un fósforo<br />
encendido sin peligro a través del agujero de alumbrado<br />
sin tener que acercarse al fogón. No retire las rejas de<br />
cocinar o Savor Plates<br />
A-4<br />
® Respuesta:<br />
y NUNCA intente encender la<br />
parrilla desde arriba. Para encender la parrilla a mano,<br />
inserte un fósforo de papel en el palillo encendedor<br />
manual y siga los pasos 1 a 6 de los procedimientos de<br />
alumbrado básicos. Luego, encienda el fósforo y<br />
póngalo a través del hueco para encender a la mano<br />
derecha de la parrilla (el lugar del hueco varía por<br />
modelo). Gire la perilla de Control del fogón principal a<br />
más cercano hacia HIGH para dejar salir el gas. El fogón<br />
debe encenderse al instante.<br />
Pregunta:<br />
Aveces oigo un murmullo que sale de mi<br />
regulador. ¿Cúal es la causa? y - mi parrilla tiene<br />
una llama baja y aveces no enciende. ¿Porqué?<br />
Respuesta:<br />
El sonido activo es gasolina que fluye a través del<br />
regulador. Un volúmen bajo de sonido es normal y no<br />
obstruirá la operación de su parrilla. El regulador con<br />
un volúmen de sonido fuerte o excesivo y un encendido<br />
irregular podría ser causado por el dispositivo de<br />
circulación con gas excesivo del regulador. Puede ser<br />
causado al abrir la válvula de tanque muy rápido o<br />
demasiado lo cual causa que el dispositivo de<br />
seguridad del regulador retenga la circulación de gas,<br />
impidiendo la circulación de gas a su parrilla. Siempre<br />
encienda el fogón principal más lejos de la fuente de<br />
combustible que le ayudará a eliminar los espacios<br />
de aire en la manguera del colector. Nota: este<br />
procedimiento debe ser hecho cada vez que un tanque<br />
nuevo de gas LP se conecta a su parrilla.<br />
Respuesta:<br />
Gire las perillas de control a la posición OFF.<br />
Cierre el tanque de gas por la válvula de gas.<br />
Desconecte el regulador del tanque de gas LP.<br />
Deje que el aparato descanse por 5 minutos.<br />
Reconecte el regulador al tanque de gas LP.<br />
Abra la puerta de la parrilla (o la puerta del fogón<br />
lateral si usted está encendiendo el fogón lateral).<br />
Gire DESPACIO la válvula a 1/4 de vuelta.<br />
Encienda el fogón más lejano a la fuente de gas.<br />
Gire la válvula de gas otro 1/4 de vuelta para<br />
completar media vuelta completa.<br />
Continúe encendiendo los fogones moviéndose<br />
hacia la fuente de gas.<br />
No gire la válvula del tanque más 1/2 de una vuelta<br />
en modelos LPG.<br />
Pregunta:<br />
¿A donde uso mi parrilla para una mejor seguridad<br />
y funcionamiento?<br />
Los vientos fuertes y las temperaturas bajas<br />
pueden afectar la calefacción y el rendimiento de<br />
su parrilla de gas lo cual es un factor en los<br />
elementos cuando coloca su parrilla de cocinar al<br />
aire libre.<br />
En condiciones de vientos fuertes, siempre coloque el<br />
delantero de la parrilla cara hacia el viento para reducir<br />
que el humo y calor le peguen a su cara y prevenir<br />
posibles peligros hacia usted y la parrilla.<br />
Use su parrilla por lo menos 3 pies alejada de<br />
cualquier pared o superficie.<br />
Use su parrilla por lo menos a 3 pies de objetos<br />
combustibles que se pueden derretir o incendiar<br />
Nunca use use su paprrilla en un garaje, porche,<br />
pasabrisas, o cualquier otra área cerrada.<br />
Nunca obstruya la corriente de aire que ventila al<br />
rededor de su parrilla.
Pregunta:<br />
¿Por qué no le quedan a mi tanque viejo de gas LP el<br />
regulador y la manguera proporcionadas con mi<br />
nueva parrilla de gas?<br />
Respuesta:<br />
El gobierno de EE.UU. regula los aparatos de gas y<br />
tanques de gas LP. Cuando las reglas cambian los<br />
accesorios de tanque de gas de LP son modificados<br />
para asegurar el cumplimiento de la ley. Si a su tanque<br />
de gas LP no le queda el regulador y la manguera<br />
proporcionada con su nueva parrilla, el tanque es<br />
anticuado y debe ser reemplazado. Nota: en vigencia<br />
a partir de 1 de abril de 2002 todos los tanques de<br />
gas LP vendidos deben incluir el dispositivo de<br />
prevención de sobrellenado "OPD". Los tanques de<br />
OPD se pueden identificar por la rueda de la válvula<br />
en forma triangular. Este dispositivo interno impide<br />
que el tanque de gas LP sea sobrellenado. Los<br />
tanques que no tienen una válvula de OPD no se<br />
pueden volver a llenar.<br />
Pregunta:<br />
¿Qué causa que se oxíden ciertas partes de la<br />
parrilla y que efecto tienen?<br />
Respuesta:<br />
El herrumbre es un proceso natural y puede<br />
aparecer en partes de hierro fundido y de acero<br />
inoxidable las partes no afectarán la operación de<br />
tiempo corto de su parrilla.<br />
Para reducir el proceso de oxidación en las rejas<br />
para cocinar en (modelos selectos) recomendamos<br />
engrasar las las rejas para cocinar antes y después<br />
de cada comida al aire libre.<br />
Use un cepillo para aplicar una capa fina de aceite<br />
de cocina o manteca vegetal en cada reja para<br />
cocinar. No sugerimos aceites de tipo de rociador a<br />
menos que sean especificadospara cocinar en altas<br />
temperaturas. Asegúrese de engrasar la superficie<br />
de cocinar incluyendo bordes y cualquier áreas con<br />
porcelana escarchada.<br />
Cuidado rutinario y mantenimiento es requerido para<br />
mantener la aparencia y la resistencia a la corrosión del<br />
acero inoxidable. El hecho es que el acero inoxidable<br />
puede corroerse, oxidación y pérdida de color pueden<br />
ser causadas bajo ciertas condiciones. El óxido es<br />
causado cuando las partículas de acero regulares en la<br />
atmósfera se fijan a la superficie de acero inoxidable.<br />
Partículas de acero también pueden fijarse a su parrilla<br />
con el uso de lana de acero o cepillos de metal rígidos<br />
para limpiar la parrilla en lugar de materiales o telas noabrasivas,<br />
esponja o nilón las que son mejores para<br />
limpiar. En áreas de la costa descarche de óxido pueden<br />
desarrollarse sobre superficies inoxidables que no<br />
pueden ser removidas por completo. Blanqueadores y<br />
otras soluciones a base de cloro usadas para la limpieza<br />
de la casa y piscinas también pueden causar corrosión<br />
al acero inoxidable.<br />
La intemperie, el calor extremo, el humo al cocinar y<br />
aceites de maquinaria usados en el proceso de fabricar<br />
el acero inoxidable pueden causar que el acero inoxidable<br />
se vuelva color caramelo. Aunque hay muchos factores<br />
que pueden afectar la apariencia de la superficie del<br />
acero inoxidable, estos no afectan la integridad del acero<br />
o el rendimiento de la parrilla.<br />
Para ayudar en mantener el terminado de acero<br />
inoxidable, siga los siguientes procedimientos para<br />
obtener los mejores resultados:<br />
A-5<br />
Después de cada uso (después de que su parrilla se<br />
ha enfríado), pase un trapo a cubertería de acero<br />
inoxidable que las superficies con un paño blando y<br />
jabonoso o esponja entonces/luego enjuagan con el<br />
agua. Sea sure retirar todas partículas de comida, salsas<br />
o escabeches de acero inoxidable porque éstos pueden<br />
ser muy acídicos y perjudicial para las superficies<br />
inoxidables.<br />
No use tintorería abrasiva, depuradores de airees o<br />
cepillos de cable rígidos de ningún tipo nunca sobre su<br />
parrilla.<br />
Use un calor limpiador de acero inoxidable contrario y la<br />
frotación o la limpieza en dirección a el grano de acero<br />
inoxidable o saque lustre a líneas no contra el cereal.<br />
Pregunta:<br />
¿Cúal es la mejor superficie para asar; Acerocubierto<br />
en porcelana / rejas hechas de hierro fundido o de<br />
acero inoxidable?<br />
Respuesta:<br />
Todos tienen sus ventajas. Para asado tradicional de<br />
carne a la parrilla, hierro fundido o rejas de acero brindan<br />
el mejor conducto de calor. Para proteger contra el<br />
proceso natural de oxidación, acero o rejas para cocinar<br />
de hierro fundido poséen un terminado de porcelana<br />
que requiere un mantenimiento rutinario de las rejas<br />
las cuales hay que secarlas muy bien.<br />
El acero inoxidable es popular con aquellos que<br />
prefieren hacer menos mantenimiento.<br />
Una nueva solución innovativa está disponible para<br />
ciertosmodelos llamado Therma - Core ® inoxidable. Esta<br />
rejas para cocinar combinan un centro de acero<br />
inoxidablecon una capa de acero inoxidable fácil de limpiar.<br />
Puede tambien revisar las preguntas más frecuentes,<br />
soluciones y los consejos de cuidado y<br />
mantenimiento en www.grandhall.com.
GARANTÍA LIMITADA DE GRAND HALL<br />
Grand Hall Enterprise Co., Ltd. le garantiza al COMPRADOR ORIGINAL de este producto que está libre de defectos<br />
en material y mano de obra por los períodos determinados abajo desde la fecha de la compra cuando el producto es<br />
usado al aire libre bajo condiciones normales y ensamble correcto.<br />
Garantía completa de la parrilla - 1 año ( pérdida de pintura, herrumbre y corrosión)<br />
Partes de acero inoxidable y Fogones – 3 años sin corrosión a través<br />
Partes bañadas en porcelana - 2 años (salvo Savor Plates ® , planchas de cocciσn y baterνas de<br />
encendido)<br />
Grand Hall requerirá prueba razonable de la fecha de compra. Por lo tanto, usted debe enviar la tarjeta de registro<br />
de propietario o registrar su parrilla por medio del Internet. Guarde su recibo en caso de que la prueba de compra<br />
sea requerida.<br />
Esta Garantía limitada se limita sólo a la reparación o sustitución de partes, bajo la opción de Grand Hall que<br />
pruebe el producto se encuentra defectuoso bajo uso normal y servicio.<br />
Grand Hall podría requerir el regreso de piezas defectuosas para ser examinadas antes de suministrar reemplazos<br />
o reparos. Si usted es exigido devolver las piezas defectuosas, los costos de transporte deben ser pagados por<br />
anticipado.<br />
Bajo el examen y a la satisfacción de Grand Hall, isi la pieza original muestra ser defectuosa, Grand Hall puede<br />
aprobar su reclamo y elegir reemplazar tales piezas libres de costo. Usted es responsable por el flete de transporte<br />
de las partes de reemplazo.<br />
Esta garantía no cubre ningún fallo o dificultades en su funcionamiento atribuibles a accidente, abuso, mal uso,<br />
alteración, mala aplicación, vandalismo, instalación impropia, mantenimiento, servicio o daños causados por<br />
retroceso de llamas, como se ha indicado en este manual de operación.<br />
Esta garantía no cubre raspaduras, rayones, aboyaduras, corrosión o pérdida de color causada por mal tiempo,<br />
calor, abrasivos y limpiadores químicos, agentes químicos para albercas o spas o cualquier herramienta usada en<br />
el ensamblaje o instalación de esta unidad. Esta garantía no cubre pérdida de pintura, herrumbre en la superficie o<br />
descoloración del acero inoxidable lo cual se considera que ocurre en su uso normal. Esta garantía no cubre el<br />
costo de cualquier inconveniencia, lesiones personales o daños a la propiedad debido a uso incorrecto o fallo del<br />
producto.<br />
Deterioration or damage due to severe weather conditions such as hail, hurricane, earthquakes, tsunami,<br />
tornadoes, Acts of God or terrorism, discoloration due to exposure to chemicals either directly or in the<br />
atmosphere, is not covered by this Limited Warranty.<br />
Ningún regreso será aceptado sin la previa autorización de Grand Hall. La autorización para el regreso puede ser<br />
obtenida llamando al 1-800-770-9769 8am a 4:30pm CST, lunes a viernes<br />
Restricciones de la Garantía<br />
•<br />
•<br />
•<br />
La seguridad de esta parrilla esta certificada cuando se usa sólo en el país donde ha sido comprada.<br />
Modificaciones para ser usada en cualquier otro lugar es un peligro contra la seguridad y anulará su<br />
garantía.<br />
Esta garantía le proporciona derechos legales específicos y usted puede también tener otros<br />
derechos que varían de estado a estado.<br />
Se anularα toda cobertura de garantνa si el producto se utiliza para fines comerciales o de alquiler.<br />
Fabricante:<br />
Grand Hall Enterprise Co., Ltd.<br />
9th Fl., No.298, Rueiguang Rd., Neihu,<br />
Taipei, Taiwan (114)


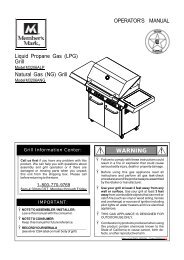

![Owner's Manual (General) [pdf] - Appliance Factory Parts](https://img.yumpu.com/10889401/1/190x245/owners-manual-general-pdf-appliance-factory-parts.jpg?quality=85)
![Owner's Manual (General) [pdf] - Appliance Factory Parts](https://img.yumpu.com/10788964/1/189x260/owners-manual-general-pdf-appliance-factory-parts.jpg?quality=85)