User's Guide - ELPMB29 Interactive Table Mount - Epson
User's Guide - ELPMB29 Interactive Table Mount - Epson
User's Guide - ELPMB29 Interactive Table Mount - Epson

You also want an ePaper? Increase the reach of your titles
YUMPU automatically turns print PDFs into web optimized ePapers that Google loves.
Do not install this product in a location where the operating temperature for the projector may be<br />
exceeded.<br />
Such an environment may damage the projector.<br />
About This <strong>Guide</strong><br />
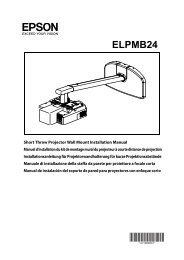
This guide describes how to install the following projectors on a table using the <strong>Interactive</strong> <strong>Table</strong> <strong>Mount</strong><br />
(<strong>ELPMB29</strong>):<br />
BrightLink 475Wi<br />
BrightLink 475wi+<br />
BrightLink 480i<br />
BrightLink 485Wi<br />
BrightLink 485wi+<br />
Note: BrightLink model availability varies by country.<br />
Package Contents<br />
Bolts<br />
Have the necessary tools ready before you begin the installation.<br />
4<br />
Base frame unit with adjuster bolts<br />
Attachment plate<br />
Accessory tray<br />
Hexagon wrenches (for M4 and<br />
M8)<br />
Shape Name Quantity Application<br />
M4 ×12 mm hexagon socket head cap bolt with<br />
washer and spring washer<br />
Caution<br />
Bolts<br />
4 For mounting the attachment plate to<br />
the projector.<br />
M4 × 8 mm hexagon socket head cap bolt 1 For mounting the tray to the base<br />
frame unit.<br />
2 Used as stoppers. (Pre-installed in the<br />
base frame unit in mount position 2.)<br />
M8 × 35 mm hexagon socket head cap bolt 2 For mounting the attachment plate to<br />
the base frame unit.