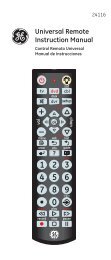
SunSmartTM Digital Timer - Jasco Products
SunSmartTM Digital Timer - Jasco Products
SunSmartTM Digital Timer - Jasco Products

You also want an ePaper? Increase the reach of your titles
YUMPU automatically turns print PDFs into web optimized ePapers that Google loves.
ON/OFF - <strong>Timer</strong> Override<br />
(Push to turn ON/OFF)<br />
SETUP<br />
- Push once to set<br />
Calendar/Clock.<br />
- Push twice to set or<br />
change programming.<br />
SunSmart TM <strong>Digital</strong> <strong>Timer</strong><br />
RESET - Hold firmly for 3<br />
seconds to clear all settings<br />
and program timer.<br />
RANDOM - Push once after<br />
program is set to randomly<br />
vary ON/OFF timers within 30<br />
minutes of programmed times.<br />
Note: The timer will automatically return to the clock mode if a button is not pushed for 20<br />
seconds. Push the setup button once to return to program mode if this happens.<br />
Initial Setup:<br />
Setting the Calendar, Clock, DST, Zone<br />
1. Using a paper clip or pen press firmly and hold the reset button for 3 seconds or until you<br />
see the word “RESET” scroll across the screen. Release the “RESET” button and the screen will<br />
be flashing 12:00 AM<br />
2. Press the “SETUP” button and CAL will be flashing on the screen. Press “Enter” to begin<br />
setting the Calendar.<br />
3. The Year will be flashing: Use the + or – buttons until the year is correct. Press “ENTER”<br />
to confirm.<br />
4. The Month will be flashing: Use the + or – buttons to find the current month is correct. Press<br />
“ENTER” to confirm.<br />
5. The Day will be flashing: Use the + or – buttons to find the current day. Press “ENTER”<br />
to confirm.<br />
6. The screen should be blinking CLK for Clock. Press “ENTER” to begin setting the clock.<br />
7. The hour should be blinking. Use the + or – to set the correct hour. If you pass 11 to 12 you<br />
will change the AM to PM. Once the correct hour is found press “ENTER” to confirm.<br />
8. The Minute should be blinking. Use the + or – to set the correct minute. Press “ENTER”<br />
to confirm<br />
9. The Screen should be blinking DST for “Daylight Savings Time” Press “ENTER” to set DST.<br />
10. DST is either “ON” or “OFF”. DST will automatically reset the times in the timer to match the<br />
time change. Use the + or – button to change DST setting in the timer and press “ENTER”<br />
to confirm.<br />
11. The screen should show the word ZONE blinking. Press “ENTER” to set your ZONE.<br />
Look at the map below and determine which zone best fits your location. Use the + or – to<br />
scroll through the available zones in the timer and stop when you find the zone where the<br />
timer is being installed. Press “ENTER” to confirm.<br />
The screen will show DAWN (Sunrise) and a time with the hour blinking. This is the timers<br />
preset time for DAWN. If the hour is not correct use the + or – buttons to adjust the hour to<br />
match DAWN for your area. Press “ENTER” to confirm. If the hour is correct press “ENTER”<br />
to move to the next step. The minutes are now blinking. If the minutes are not correct use<br />
the + or – buttons to adjust the minutes to match DAWN for your area. Press “ENTER” to<br />
confirm. If the minutes are correct press “ENTER” to move to the next step.<br />
NORTH<br />
CENTRAL<br />
SOUTH<br />
ALASKA<br />
SETUP<br />
RESET<br />
AUTO<br />
ENTER<br />
RND<br />
+<br />
-<br />
HAWAII<br />
AUTO - Push when<br />
programming is complete<br />
to activate timer.<br />
UP/DOWN - Use to scroll<br />
through menu options.<br />
ENTER - Push to<br />
confirm settings<br />
during programming.<br />
TIMER DOOR<br />
- Close after programing.<br />
- Push to turn ON/OFF.<br />
(<strong>Timer</strong> Override)<br />
NORTH<br />
CENTRAL<br />
SOUTH<br />
The screen will show DUSK (Sunset) and a time with the hour blinking. This is the timers<br />
preset time for DUSK. If the hour is not correct use the + or – buttons to adjust the hour to<br />
match DUSK for your area. Press “ENTER” to confirm. If the hour is correct press “ENTER” to<br />
move to the next step. The minutes are now blinking. If the minutes are not correct use the<br />
+ or – buttons to adjust the minutes to match DUSK for your area. Press “ENTER” to confirm.<br />
If the minutes are correct press “ENTER” to move to the next step.<br />
12. The screen will now say “SAVE.” Press “ENTER” to save data to the timer.<br />
Programming ON/OFF Events:<br />
1. Press “SETUP” twice to begin programming times.<br />
2. P1 (Program 1) ON should be blinking. Press “ENTER” to begin setting P1 ON time. You may<br />
also use the + or – buttons to scroll through all 7 programs.<br />
3. The screen will show SET, if you wish to set a time press “ENTER” to confirm. You may also<br />
use the + or – button to scroll to DEL. If you press “Enter” on DEL you will delete the program<br />
you are on.<br />
If you pushed “ENTER” at SET for P1 the screen will show PRG, P1 ON and the days of the week<br />
will be blinking. Use the + or – buttons to scroll through the options in which the timer will be<br />
active. The options are:<br />
• S, S • M, T, W, F • M through S: Individual days • T, TH • M, W, F • S, M, T, W, Th, F, S (default)<br />
Choose the days you want the program to be active and press “ENTER.”<br />
Now that you have chosen the days the timer will function the next step is to choose the time.<br />
The screen should show DAWN blinking. There are 3 options to choose from when selecting the<br />
program ON time. Use the + or – to scroll through the options. • DAWN • DUSK • TIME (to set<br />
custom time).<br />
If you would like the timer to turn on at the Pre Set time for DAWN press “ENTER” and move to<br />
P1 OFF setting.<br />
If you would like the timer to turn on at the Pre Set time for DUSK use the + or – buttons to<br />
change the option on the screen to DUSK and press “ENTER” and move to P1 OFF setting<br />
If you would like choose a custom time other than DAWN or DUSK use the + or – buttons to<br />
change the option on the screen to TIME and press “ENTER”. The hour should be blinking. Use<br />
the + or – to set the correct hour. If you pass 11 to 12 you will change the AM to PM. Once the<br />
correct hour is found press “ENTER” to confirm. The Minute should be blinking. Use the + or – to<br />
set the correct minute. Press “Enter” to confirm.<br />
The screen will show PRG, P1 OFF and the days of the week will be blinking. Choose the days<br />
you want the program to be active and press “ENTER”. Now that you have chosen the days the<br />
timer will function the next step is to choose the time the program will turn off. There are 3<br />
options to choose from when selecting the program OFF time. Use the + or – to scroll through<br />
the options. • DAWN • DUSK • TIME<br />
If you would like the timer to turn off at the Pre Set time for DAWN press “Enter” .<br />
Programming<br />
Instructions<br />
If you would like the timer to turn off at the Pre Set time for DUSK use the + or – buttons to<br />
change the option on the screen to DUSK and press “ENTER” .<br />
If you would like choose a custom time other than DAWN or DUSK use the + or – buttons to<br />
change the option on the screen to TIME and press “ENTER”. The hour should be blinking. Use<br />
the + or – to set the correct hour. If you pass 11 to 12 you will change the AM to PM. Once the<br />
correct hour is found press “ENTER” to confirm. The Minute should be blinking. Use the + or – to<br />
set the correct minute. Press “ENTER” to confirm. The screen will now say “SAVE” Press “ENTER”<br />
to save program 1 to the timer. P2 (Program 2) ON should be blinking. Press “ENTER” to begin<br />
setting P2 ON. You may also use the + or– buttons to scroll through all 7 programs or push<br />
AUTO to complete the programming.<br />
Random Security Option:<br />
The random feature will turn lights on and off using the programmed times + or – 30 minutes,<br />
giving the house a more lived in appearance while occupant is away.<br />
1. Push RND (Random) button to activate the Random feature. The screen will change from<br />
AUTO to RDM.<br />
2. Push AUTO button to de-activate the Random feature and return the timer to its current<br />
programming.<br />
15312<br />
12-17-2010<br />
www.jascoproducts.com
TM Instrucciones<br />
Temporizador <strong>Digital</strong> SunSmart de programación<br />
ENCENDIDO/APAGADO:<br />
Anulación del temporizador<br />
(Presione para encender/apagar)<br />
SETUP<br />
- Presione dos veces para<br />
programar o cambiar la<br />
programación.<br />
- Presione una vez para ajustar<br />
el calendario o el reloj.<br />
RESET<br />
Mantenga firmemente<br />
durante tres segundos<br />
para borrar todas las<br />
configuraciones y programar<br />
el temporizador.<br />
RND (RANDOM)<br />
Presione una vez después de<br />
programar para variar aleatoriamente<br />
los temporizadores de encendido y<br />
apagado + o - treinta minutos de las<br />
horas programadas.<br />
Nota: El temporizador regresará automáticamente al modo de reloj si no se ha presionado ningún<br />
botón durante veinte segundos. Si esto sucede, presione el botón de configuración (SETUP) una vez para<br />
regresar al modo de programa.<br />
Configuración inicial:<br />
Ajuste del calendario, reloj, horario de verano, zona<br />
1. Con el uso de un clip de papel o bolígrafo, mantenga presionado firmemente el botón de reinicio (RESET)<br />
durante tres segundos o hasta que aparezca en la pantalla la palabra “RESET”. Suelte el botón RESET y la<br />
pantalla parpadeará 12:00 a.m.<br />
2. Presione el botón SETUP y parpadeará “CAL” en la pantalla. Presione ENTER para empezar a configurar<br />
el calendario.<br />
3. Parpadeará el año: Utilice los botones + o - hasta que el año sea el correcto. Presione ENTER para<br />
confirmar.<br />
4. Parpadeará el mes: Utilice los botones + o – hasta que el mes sea el correcto. Presione ENTER para<br />
confirmar.<br />
5. Parpadeará el día: Utilice los botones + o – hasta que el día sea el correcto. Presione ENTER para<br />
confirmar.<br />
6. Deberá parpadear CLK para el reloj en la pantalla. Presione ENTER para comenzar a ajustar el reloj.<br />
7. Deberá parpadear la hora. Utilice los botones + o - para ajustar la hora correcta. Al pasar de 11 a 12, se<br />
cambia de AM a PM. Una vez que encuentre la hora correcta, presione ENTER para confirmar.<br />
8. Deberán parpadear los minutos. Utilice los botones + o - para ajustar los minutos correctos. Presione el<br />
botón ENTER para confirmar.<br />
9. Deberá parpadear DST para “horario de verano” en la pantalla. Presione el botón ENTER para ajustar el<br />
horario de verano.<br />
10. El horario de verano está “activado” o “desactivado”. El horario de verano reiniciará automáticamente las<br />
horas del temporizador para que coincidan con el cambio de hora. Utilice los botones + o - para cambiar<br />
el ajuste del horario de verano en el temporizador y presione ENTER para confirmar.<br />
11. Deberá aparecer la palabra ZONE parpadeando en la pantalla. Presione ENTER para ajustar su zona.<br />
Mire el siguiente mapa y determine cuál es la mejor zona para su ubicación. Utilice los botones + o - para<br />
desplazarse por las zonas disponibles del temporizador y deténgase cuando encuentre la zona para<br />
instalar el temporizador. Presione ENTER para confirmar.<br />
Aparecerá DAWN (amanecer) y una hora parpadeando en la pantalla. Se trata de la hora preestablecida<br />
de los temporizadores para DAWN. Si la hora no es la correcta, utilice los botones + o - para ajustar<br />
la hora de manera que coincida con DAWN de su zona. Presione el botón ENTER para confirmar. Si la<br />
hora es correcta, presione ENTER para avanzar al siguiente paso. Ahora los minutos parpadearán. Si los<br />
minutos no son correctos, utilice los botones + o - para ajustar los minutos de manera que coincidan con<br />
DAWN de su zona. Presione ENTER para confirmar. Si los minutos son correctos, presione ENTER para<br />
avanzar al siguiente paso.<br />
NORTE<br />
CENTRO<br />
SUR<br />
ALASKA<br />
SETUP<br />
RESET<br />
AUTO<br />
ENTER<br />
RND<br />
+<br />
-<br />
HAWAII<br />
AUTO<br />
Presione al completar la<br />
programación para activar el<br />
temporizador.<br />
ARRIBA/ABAJO<br />
Use para desplazarse por las<br />
opciones de menú.<br />
ENTER<br />
Presione para confirmar las<br />
configuraciones durante la<br />
programación.<br />
Tapa del temporizador<br />
- Cierre después de programar.<br />
- Presione para encender<br />
y apagar. (Anulación del<br />
temporizador).<br />
NORTE<br />
CENTRO<br />
SUR<br />
Aparecerá DUSK (atardecer) y una hora parpadeando en la pantalla. Se trata de la hora preestablecida<br />
de los temporizadores para DUSK. Si la hora no es la correcta, utilice los botones + o - para ajustar la<br />
hora de manera que coincida con DUSK de su zona. Presione el botón ENTER para confirmar. Si la hora es<br />
correcta, presione ENTER para avanzar al siguiente paso. Ahora los minutos parpadearán. Si los minutos<br />
no son correctos, utilice los botones + o - para ajustar los minutos de manera que coincidan con DUSK<br />
de su zona. Presione ENTER para confirmar. Si los minutos son correctos, presione ENTER para avanzar al<br />
siguiente paso.<br />
12. Aparecerá ahora “SAVE” en esta pantalla. Presione ENTER para guardar los datos del temporizador.<br />
Programación de eventos de encendido y apagado:<br />
1. Presione SETUP dos veces para comenzar las horas de programación.<br />
2. Deberá aparecer P1 ON (encendido del programa 1), parpadeando en la pantalla. Presione ENTER<br />
para comenzar a configurar la hora de encendido de P1. También puede utilizar los botones + o - para<br />
desplazarse por los siete programas.<br />
3. Ahora aparecerá SET en la pantalla. Si desea ajustar una hora, presione ENTER para confirmar. También<br />
puede utilizar los botones + o - para desplazarse hasta DEL. Si presiona ENTER cuando la pantalla<br />
muestre DEL, se eliminará el programa en que se encuentra.<br />
Si usted presionó ENTER en SET para P1, la pantalla mostrará PRG, P1 ON y parpadearán los días de la<br />
semana. Utilice los botones + o - para desplazarse por las opciones en las que el temporizador estará activo.<br />
Las opciones son:<br />
• S, S (sábado, domingo) • M, T, W, F (lunes, martes, miércoles, viernes) • M through S (lunes a domingo): días<br />
individuales • T, TH (martes, jueves) • M, W, F (lunes, miércoles, viernes) • S, M, T, W, Th, F, S (domingo, lunes,<br />
martes, miércoles, jueves, viernes, sábado): por defecto.<br />
Elija los días en que desea que el programa se active y presione ENTER.<br />
Ahora que ha elegido los días en que funcionará el temporizador, el siguiente paso es elegir la hora. En la<br />
pantalla deberá aparecer DAWN, parpadeando. Al seleccionar la hora de encendido del programa, hay tres<br />
opciones. Utilice los botones + o - para desplazarse por dichas opciones para ajustar la hora personalizada: •<br />
DAWN (amanecer) • DUSK (atardecer) • TIME (hora).<br />
Si desea que el temporizador se encienda a la hora preestablecida para DAWN, presione ENTER y pase a la<br />
configuración de apagado de P1.<br />
Si desea que el temporizador se encienda a la hora preestablecida para DUSK, utilice los botones + o - para<br />
cambiar la opción en la pantalla para DUSK y presione ENTER y pase a la configuración de apagado de P1.<br />
Si desea elegir una hora personalizada diferente a DAWN o DUSK, utilice los botones + o - para cambiar la<br />
opción en la pantalla para TIME y presione ENTER. Deberá parpadear la hora. Utilice los botones + o - para<br />
ajustar la hora correcta. Si pasa de 11 a 12, se cambia de AM a PM. Una vez que encuentre la hora correcta,<br />
presione ENTER para confirmar. Deberán parpadear los minutos. Utilice los botones + o - para ajustar los<br />
minutos correctos. Presione ENTER para confirmar.<br />
En la pantalla aparecerá PRG, P1 OFF y parpadearán los días de la semana. Elija los días en que desea que<br />
el programa se active y presione ENTER. Ahora que ha elegido los días en que funcionará el temporizador,<br />
el siguiente paso es elegir la hora en que se apagará el programa. Al seleccionar la hora de apagado del<br />
programa, hay tres opciones. Utilice los botones + o - para desplazarse por dichas opciones: • DAWN<br />
(amanecer) • DUSK (atardecer) • TIME (hora).<br />
Si desea que el temporizador se apague a la hora preestablecida para DAWN, presione ENTER.<br />
Si desea que el temporizador para apague a la hora preestablecida para DUSK, utilice el botones + o - para<br />
cambiar la opción en la pantalla para DUSK y presione ENTER.<br />
Si desea elegir una hora personalizada diferente a DAWN o DUSK, utilice los botones + o - para cambiar la<br />
opción en la pantalla para TIME y presione ENTER. Deberá parpadear la hora. Utilice los botones + o - para<br />
ajustar la hora correcta. Si pasa de 11 a 12, se cambia de AM a PM. Una vez que encuentre la hora correcta,<br />
presione ENTER para confirmar. Deberán parpadear los minutos. Utilice los botones + o - para ajustar los<br />
minutos correctos. Presione ENTER para confirmar. Ahora aparecerá en la pantalla SAVE. Presione ENTER<br />
para guardar el programa 1 en el temporizador. Deberá parpadear P2 ON (encendido del programa 2).<br />
Presione ENTER para comenzar a configurar el encendido de P2. También puede utilizar los botones + o-para<br />
desplazarse por los siete programas o presione AUTO para completar la programación.<br />
Opción aleatoria de seguridad:<br />
La función aleatoria encenderá y apagará las luces según los tiempos programados + o - 30 minutos, lo que<br />
le da a la vivienda una mejor apariencia de estar habitada, mientras que los ocupantes no se encuentran.<br />
1. Presione RND (RANDOM) para activar la función aleatoria. La pantalla cambiará de AUTO a RDM.<br />
2. Presione el botón AUTO para desactivar la función aleatoria y regresar el temporizador a su<br />
programación actual.<br />
15312<br />
12-17-2010<br />
www.jascoproducts.com