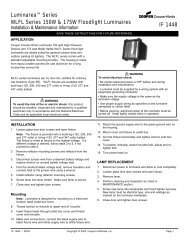
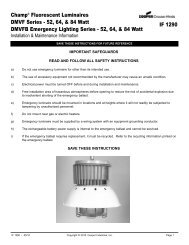
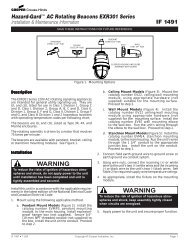
ENGLISH - Cooper Industries
ENGLISH - Cooper Industries
ENGLISH - Cooper Industries

You also want an ePaper? Increase the reach of your titles
YUMPU automatically turns print PDFs into web optimized ePapers that Google loves.
MS80 (Bronze)<br />
MS80W (White)<br />
<strong>ENGLISH</strong><br />
ITEMS REQUIRED<br />
(Purchase separately)<br />
• Phillips screwdriver<br />
• Flathead screwdriver<br />
• Hammer<br />
• Outdoor weatherproof silicone caulking<br />
HOW IT WORKS<br />
Your motion activated floodlight senses heat images from<br />
objects such as people, large animals and automobile engines.<br />
When motion is detected, the lights will automatically turn<br />
on. Once motion has stopped, the lights will turn off after a<br />
preselected time delay. Your motion activated floodlight may<br />
also be used as a standard floodlight.<br />
Instruction Manual/Instrucciones<br />
Questions?/¿Preguntas? 1-800-334-6871 ConsumerProducts@cooperlighting.com<br />
PACKAGING CONTENTS/CONTENIDO DEL PAQUETE<br />
A. Motion detector<br />
and light fixture<br />
Detector de<br />
movimiento y<br />
artefacto de luz<br />
B. 150 watt quartz halogen bulb<br />
(preinstalled)<br />
Foco halógeno de cuarzo de<br />
150 vatios (preinstalado)<br />
180 degrees<br />
Up to<br />
70 feet<br />
WARNINGS AND CAUTIONS<br />
• Follow all instructions.<br />
• For outdoor use only.<br />
• cULus LISTED for wet locations.<br />
• Connect fixture to a 120 volt, 60 Hz power source. Any other connection voids the warranty.<br />
• Fixture must be mounted to a grounded recessed junction box marked for use in wet locations.<br />
• Suitable for wall mount or eave mount only. NOT suitable for ground mount installation.<br />
• Do not allow sensor head to touch light housing – maintain at least 1 inch space between<br />
fixture and sensor.<br />
• Keep away from flammable objects. Do not position fixture within two inches<br />
of any combustible materials.<br />
• Do not position lamp housing within two inches of house.<br />
• Bulb gets HOT quickly!<br />
• The bulb and fixture get extremely hot during use. Disconnect power and allow fixture to<br />
cool before changing bulb or handling fixture.<br />
• Fixture should be installed by persons with experience in household wiring or by a qualified<br />
electrician. The electrical system, and the method of electrically connecting the fixture to it,<br />
must be in accordance with the National Electrical Code and local building codes.<br />
• Always replace bulb with the same wattage or lower wattage than included. Installing a<br />
bulb of a higher wattage could create a fire hazard. Use of a higher wattage bulb will void<br />
the warranty. (Maximum 150 watt halogen bulb.) To meet ENERGY STAR ® requirements,<br />
maximum lamp wattage cannot exceed 250 watts.<br />
• Never touch the bulb with your bare hands, as oil from your skin can cause premature<br />
failure. Always handle bulb with gloves or a soft cloth.<br />
• For proper operation and protection against damage, the motion<br />
sensor head adjustment knobs must be facing the ground.<br />
4˚<br />
• For maximum bulb life, position fixture so the quartz halogen<br />
bulb remains within 4 degrees of horizontal.<br />
1<br />
• Do not use this apparatus near water.<br />
• Clean only with a dry cloth.<br />
• Do not block any ventilation openings. Install in accordance with the manufacturer’s<br />
instructions.<br />
• Do not install near any heat sources such as radiators, heat registers, stoves or other<br />
apparatus (including amplifiers) that produce heat.<br />
• Only use attachments/accessories specified by the manufacturer.<br />
• Disassembly of your fixture will void the warranty.<br />
• Your fixture is prewired and preassembled for easy installation.<br />
• MINIMUM 90° C SUPPLY CONDUCTORS.<br />
• If lens is replaced, use only tempered safety glass of equal thickness per UL requirements.<br />
• This device complies with Part 15 of the FCC Rules. Operation is subject to the following<br />
two conditions: (1) This device may not cause harmful interference, and (2) this device must<br />
accept any interference received, including interference that may cause undesired operation.<br />
Under Part 15 of the FCC Rules, any changes or modifications to the motion detector<br />
described in this instruction sheet that are not expressly approved by <strong>Cooper</strong> Lighting, LLC<br />
could void the user’s authority to operate the equipment.<br />
NOTE: This equipment has been tested and found to comply with the limits for a Class B<br />
digital device, pursuant to Part 15 of the FCC Rules. These limits are designed to provide<br />
reasonable protection against harmful interference in a residential installation. This<br />
equipment generates, uses and can radiate radio frequency energy and if not installed<br />
and used in accordance with the instructions, may cause harmful interference to radio<br />
communications. However, there is no guarantee that interference will not occur in a particular<br />
installation. If this equipment does cause harmful interference to radio or television reception,<br />
which can be determined by turning the equipment off and on, the user is encouraged to try to<br />
correct the interference by one or more of the following measures:<br />
- Reorient or relocate the receiving antenna.<br />
- Increase the separation between the equipment and receiver.<br />
- Connect the equipment into an outlet on a circuit different from that to which the receiver<br />
is connected.<br />
- Consult the dealer or an experienced radio/TV technician for help.<br />
WARNING: FCC Regulations state that any unauthorized changes or modifications<br />
to this equipment not expressly approved by the manufacturer could void the user’s<br />
authorization to operate this equipment.<br />
SAVE THESE INSTRUCTIONS.<br />
C. Coverplate gasket<br />
FOR BEST RESULTS<br />
• Install the motion sensor/transmitter 8-12 feet<br />
above the ground. (Motion sensor is less sensitive<br />
above 12 feet.)<br />
• Locate motion sensor so motion moves across<br />
detection zone (Fig. 1).<br />
• Locate sensor away from heat producing sources to<br />
prevent false triggering. Also be very careful not to<br />
include objects such as windows, white walls and<br />
water in the detection zone.<br />
Junta de la placa<br />
de cubierta<br />
D. (2) #6 and (2) #8 mounting screws<br />
(use the size that fits your junction box)<br />
(2) Tornillos #6 y (2) tornillos #8 de montaje<br />
(utilice el tamaño que mejor se adecue a<br />
su caja de conexión)<br />
E. (3) Wire nuts<br />
(3) Tuercas<br />
para alambre<br />
Fig. 1
• Locate sensor away from moving objects such as<br />
trees, large shrubs and street traffic.<br />
• Do not install more than one motion activated<br />
floodlight on one wall switch.<br />
MOUNTING AND WIRING YOUR FIXTURE<br />
WARNING: Risk of electric shock. Disconnect<br />
power at fuse or circuit breaker before installing<br />
or servicing.<br />
NOTE: Fixture can be wall or eave mounted.<br />
NOTE: Junction box must be at least 1-1/2 inch in<br />
depth for proper installation (Fig. 2).<br />
1. Match up screws on the floodlight coverplate (C)<br />
with the junction box screw holes. (If necessary,<br />
lightly tap selected coverplate holes with a hammer<br />
and screwdriver to open them.)<br />
2. Thread fixture wires through coverplate gasket (C)<br />
(Fig. 3).<br />
3. Position the gasket (C) on the coverplate and<br />
connect the black wire from the fixture to the black<br />
house supply wire and the white wire from the<br />
fixture to the white supply wire using the wire nuts<br />
(E) provided. Attach the ground wire coming from<br />
your house to the copper ground wire from the<br />
fixture using wire nut (E) provided. If no house<br />
ground wire is available, attach the copper ground<br />
wire from the fixture to the junction box if it is metal<br />
and grounded. If junction box is not metal and no<br />
house ground wire is available, an alternative ground<br />
source must be used for safe operation (Fig. 4).<br />
4. Attach fixture (A) to the junction box with two of the<br />
screws (D) provided. Either (2) #6 or (2) #8 screws<br />
will work with most standard junction boxes.<br />
5. Apply silicone caulk around the edges of the<br />
coverplate to provide a watertight seal from rain<br />
and moisture.<br />
6. Turn on power at mainfuse/breaker box.<br />
OPERATING YOUR FIXTURE<br />
1. Move slide switch on bottom of the sensor<br />
to “TEST”. Set sensitivity knob to medium<br />
(halfway) (Fig. 5).<br />
2. Turn on the power to fixture. Allow fixture to warm<br />
up approximately 90 seconds before testing. (Lights<br />
may not come on during warm-up period.)<br />
3. Aim sensor head toward desired detection area,<br />
maintaining a 15° down angle to allow moisture<br />
to drain.<br />
NOTE: Maintain air spacing between lamps and<br />
sensor head, at least 1 inch. Make sure sensor<br />
head is positioned with control switches facing<br />
towards the ground.<br />
4. Walk across the detection zone at the farthest<br />
distance you wish your detector to detect motion.<br />
5. Adjust sensitivity until you get desired results. Light<br />
will turn off 4 seconds after all motion stops.<br />
NOTE: For maximum range performance, allow fixture<br />
to operate in any mode (with power to the unit) for at<br />
least 48 hours.<br />
6. Move slide switch to 4 min. or 12 min. (AUTO<br />
mode). Light may turn on for the selected time, and<br />
then will operate at dusk in the AUTO setting.<br />
NOTE: Do not position lamp housing within two inches<br />
of house.<br />
REPLACING THE BULBS<br />
NOTE: Disconnect power and allow fixture to cool<br />
before removing burned-out bulbs.<br />
1. Remove screws from behind lens frame.<br />
2. Push old bulb into spring-loaded socket and pull<br />
opposite end out of the other socket.<br />
3. Using a clean cloth or gloves, remove new bulb<br />
from package and protective wrap.<br />
NOTE: Never touch bulb with bare hands as oil from<br />
your skin can cause premature failure.<br />
4. To install bulb, position bulb into spring-loaded<br />
socket and push bulb toward socket until it<br />
depresses. Position other end of bulb into stationary<br />
socket (opposite socket). Be sure each end of bulb<br />
is securely positioned against the socket.<br />
A<br />
Fig. 2<br />
1-1/2 inch 1-1/2 inch<br />
Round<br />
A<br />
Black<br />
fixture<br />
wire<br />
TEST 4 MIN. 12 MIN.<br />
Fig. 3<br />
Wall mount<br />
A<br />
C<br />
Fig. 4<br />
Fixture<br />
ground<br />
White<br />
fixture<br />
wire<br />
Fig. 5<br />
Octagonal<br />
C<br />
Eave mount<br />
E<br />
House<br />
ground<br />
E<br />
E<br />
Black house<br />
power wire<br />
SENSITIVITY<br />
White<br />
house<br />
power<br />
wire<br />
2<br />
5. Replace glass lens cover. Insert and tighten the<br />
screws that secure the glass lens cover.<br />
NOTE: Make sure your lamp housing is not positioned<br />
within two inches of house.<br />
CAUTION: When replacing bulb in fixture, always<br />
replace with the same wattage bulb or a lower<br />
wattage bulb. DO NOT replace with a bulb of<br />
greater wattage than specified on the fixture.<br />
To do so could create a fire hazard and/or shorten<br />
the life of the bulb.<br />
ENERGY STAR ®<br />
To meet ENERGY STAR ® requirements, the photo sensor control knob must be in the<br />
“Auto” mode to prevent operation during full daylight. Maximum lamp wattage cannot<br />
exceed 250 watts.<br />
SELECTING YOUR DESIRED FEATURE<br />
Mode of MODE Knob How to Set<br />
Operation Adjustment Power Switch<br />
“Auto” Setting<br />
(motion activated)<br />
Lights should turn ON with<br />
motion only at night and<br />
should turn OFF after<br />
4-12 minutes of no motion.<br />
Dusk-to-Dawn Setting<br />
(activated only at night)<br />
Lights should stay ON from<br />
dusk to dawn and then reset<br />
to “Auto” setting at<br />
the next dawn.<br />
Standard Floodlight Setting<br />
Lights should stay ON<br />
continuously both day and night<br />
(must be reset manually).<br />
Test Setting<br />
Lights should turn ON with<br />
motion both day and night.<br />
Lights should turn OFF<br />
after 4 seconds.<br />
Return to “Auto”<br />
(motion activated) Setting<br />
from any of<br />
the above settings.<br />
TROUBLESHOOTING<br />
Outdoor Light<br />
Comes On For No<br />
Apparent Reason<br />
At Night<br />
Light Stays On At<br />
Night And Does<br />
Not Turn Off<br />
ENERGY STAR ® is sponsored by the U.S.<br />
Environmental Protection Agency & U.S.<br />
Department of Energy.<br />
Visit www.energystar.gov to learn more.<br />
AUTO 4 MIN<br />
or<br />
AUTO 12 MIN<br />
AUTO 4 MIN<br />
or<br />
AUTO 12 MIN<br />
TEST<br />
AUTO 4 MIN<br />
or<br />
AUTO 12 MIN<br />
Keep the power<br />
to the fixture ON.<br />
Turn the power<br />
OFF-ON-OFF-ON<br />
within 3 seconds.<br />
TEST Turn the power<br />
OFF-ON-OFF-ON<br />
within 3 seconds.<br />
Keep the power<br />
to the fixture ON.<br />
Turn the power OFF<br />
for at least 90 seconds<br />
and then back ON.<br />
There is motion in the detection zone.<br />
• Make sure the sensor is not picking up moving objects such as<br />
trees, traffic, etc.<br />
TEST FOR YOURSELF.<br />
• Cover the sensor lens with cardboard to prevent sensor from<br />
detecting motion. If the light stays off, something in the detection<br />
zone is triggering the sensor.<br />
• If this is the case, reduce the sensitivity.<br />
• Reposition the sensor.<br />
* If the light stays on with the sensor lens covered, contact<br />
customer service.<br />
There is motion in the detection zone.<br />
• Make sure the sensor is not picking up moving objects such as<br />
trees, traffic, etc.<br />
• Reduce the sensitivity.<br />
• Reposition the sensor.<br />
Unit is in override mode (if there is no motion).<br />
• Turn the light switch to the OFF position for 90 seconds, and then<br />
turn back to the ON postion. This will send the unit back into the<br />
“Auto” mode.<br />
* If the light stays on with the sensor lens covered, contact<br />
customer service.
Problem Cause / Solution<br />
Outdoor Light<br />
Does Not Come<br />
On With Motion<br />
At Night<br />
Light<br />
Continuously<br />
Blink On and<br />
Off At Night<br />
Light Is On<br />
During The Day<br />
Cannot Activate<br />
Dusk to Dawn<br />
Mode At Night<br />
(Override)<br />
No power to the fixture.<br />
• Check if circuit breaker tripped.<br />
• Confirm wall switch is ON.<br />
Bulb is faulty.<br />
• Replace bulb.<br />
Surrounding external ambient light is too bright. (If so, the unit may<br />
think it is daytime.)<br />
• Re-aim the head.<br />
• Relocate or reposition the unit away from the light.<br />
TURN OFF POWER BEFORE CONTINUING<br />
Wiring to the unit is loose.<br />
• Check wiring, and reconnect if necessary using wire<br />
nuts (E) provided.<br />
The light given from the unit’s own lamp is affecting the<br />
motion sensor.<br />
• Re-aim the lamp.<br />
• Reposition motion sensor.<br />
The controls on the bottom of the motion sensor are in the test mode.<br />
• Move the switch to the AUTO 4 or 12 position.<br />
The motion detector is shadowed.<br />
• Reposition motion sensor.<br />
Surrounding external ambient light is too bright. (If so, the unit may<br />
think it is daytime.)<br />
• Re-aim the head.<br />
• Relocate or reposition the unit away from the light.<br />
Not enough time is allowed to enter the dusk to dawn mode.<br />
• Turn power OFF-ON-OFF-ON within 3 seconds.<br />
There is more than one fixture on an indoor wall switch.<br />
• If so, put them on separate switches.<br />
2-YEAR LIMITED WARRANTY<br />
THE FOLLOWING WARRANTY IS EXCLUSIVE AND IN LIEU OF ALL OTHER WARRANTIES,<br />
WHETHER EXPRESS, IMPLIED OR STATUTORY INCLUDING, BUT NOT LIMITED TO, ANY<br />
WARRANTY OF MERCHANTABILITY OR FITNESS FOR ANY PARTICULAR PURPOSE.<br />
<strong>Cooper</strong> Lighting, LLC (“<strong>Cooper</strong> Lighting”) warrants to customers that, for a period of two years<br />
from the date of purchase, <strong>Cooper</strong> Lighting’s products will be free from defects in materials<br />
and workmanship. The obligation of <strong>Cooper</strong> Lighting under this warranty is expressly limited<br />
to the provision of replacement products. This warranty is extended only to the original<br />
purchaser of the product. A purchaser’s receipt or other proof of date of original purchase<br />
acceptable to <strong>Cooper</strong> Lighting. This is required before warranty performance shall be rendered.<br />
This warranty does not apply to <strong>Cooper</strong> Lighting products that have been altered or repaired<br />
or that have been subjected to neglect, abuse, misuse or accident (including shipping damages).<br />
This warranty does not apply to products not manufactured by <strong>Cooper</strong> Lighting which have been<br />
supplied, installed, and/or used in conjunction with <strong>Cooper</strong> Lighting products. Damage to the<br />
product caused by replacement bulbs or corrosion or discoloration of brass components are<br />
not covered by this warranty.<br />
LIMITATION OF LIABILITY:<br />
IN NO EVENT SHALL COOPER LIGHTING BE LIABLE FOR SPECIAL, INDIRECT, INCIDENTAL, OR<br />
CONSEQUENTIAL DAMAGES (REGARDLESS OF THE FORM OF ACTION, WHETHER IN CONTRACT,<br />
STRICT LIABILITY, OR IN TORT INCLUDING NEGLIGENCE), NOR FOR LOST PROFITS; NOR SHALL<br />
THE LIABILITY OF COOPER LIGHTING FOR ANY CLAIMS OR DAMAGE ARISING OUT OF OR<br />
CONNECTED WITH THESE TERMS OR THE MANUFACTURE, SALE, DELIVERY, USE, MAINTENANCE,<br />
REPAIR OR MODIFICATION OF COOPER LIGHTING PRODUCTS, OR SUPPLY OF ANY REPLACEMENT<br />
PARTS THEREFORE, EXCEED THE PURCHASE PRICE OF COOPER LIGHTING PRODUCTS GIVING RISE<br />
TO A CLAIM. NO LABOR CHARGES WILL BE ACCEPTED TO REMOVE OR INSTALL FIXTURES.<br />
To obtain warranty service, please contact <strong>Cooper</strong> Lighting, LLC, at 1-800-334-6871, press<br />
option 2 for Customer Service, or via e-mail ConsumerProducts@cooperlighting.com and<br />
include the following information:<br />
• Name, address and telephone number<br />
• Date and place of purchase<br />
• Catalog and quantity purchase<br />
• Detailed description of problem<br />
All returned products must be accompanied by a Return Goods Authorization Number issued<br />
by the Company and must be returned freight prepaid. Any product received without a Return<br />
Goods Authorization Number from the Company will be refused.<br />
<strong>Cooper</strong> Lighting, LLC is not responsible for merchandise damaged in transit. Repaired or<br />
replaced products shall be subject to the terms of this warranty and are inspected when<br />
packed. Evident or concealed damage that is made in transit should be reported at once to<br />
the carrier making the delivery and a claim filed with them.<br />
Reproductions of this document without prior written approval of <strong>Cooper</strong> Lighting, LLC are strictly prohibited.<br />
For assistance, call 1-800-334-6871 or e-mail us at ConsumerProducts@cooperlighting.com<br />
Printed in China<br />
3<br />
ESPAÑOL<br />
ARTÍCULOS NECESARIOS<br />
(se compran por separado)<br />
• Destornillador en cruz (Phillips)<br />
• Destornillador de cabeza plana<br />
• Martillo<br />
• Calafateo de silicona resistente a la intemperie<br />
CÓMO FUNCIONA<br />
La lámpara de alta intensidad activada por movimiento<br />
detecta imágenes térmicas de objetos tales como<br />
personas, animales grandes y motores de automóviles.<br />
Cuando se detecte movimiento, la luz se encenderá<br />
automáticamente. Una vez que el movimiento haya<br />
cesado, la luz se apagará después de un tiempo de<br />
retardo preseleccionado. Esta lámpara de alta intensidad<br />
activada por movimiento también puede ser utilizada<br />
como una lámpara de alta intensidad estándar.<br />
180 grados<br />
Hasta<br />
70 pies<br />
ADVERTENCIAS Y PRECAUCIONES<br />
• Siga todas las instrucciones.<br />
• Sólo para uso en exteriores.<br />
• cULus para ubicaciones mojadas.<br />
• El portalámparas debe estar conectado a una fuente de energía de 120 Voltios, 60 Hz.<br />
Cualquier otro tipo de conexión anula la garantía.<br />
• Debe montar el artefacto sobre una caja de conexiones empotradas con toma de tierra<br />
marcada para usar en lugares húmedos.<br />
• Adecuado para instalarse en la pared o en aleros solamente. No es adecuado para<br />
instalarse montándolo en el suelo.<br />
• No permita que el sensor toque el alojamiento de la lámpara – mantenga por lo menos<br />
1 pulgadas (2,54 cm) de espacio entre el portalámparas y el sensor.<br />
• Manténgalo alejado de objetos inflamables. No coloque el artefacto en<br />
posición dentro de dos pulgadas (5 cm) de cualquier material combustible.<br />
• No coloque la lámpara a menos de dos pulgadas (5 cm) de la casa.<br />
• ¡La bombilla se CALIENTA rápidamente!<br />
• La lámpara y el artefacto se calientan extremadamente durante el uso. Antes de intentar<br />
reposicionar el artefacto, deje que se enfríe totalmente.<br />
• El portalámparas debe ser instalado por personas con experiencia en cableado<br />
doméstico o por un electricista calificado. El sistema eléctricoy el método de conexión<br />
eléctrica del portalámparas debe cumplir con el Código eléctrico nacional y los códigos<br />
locales sobre edificios.<br />
• Reemplace siempre la bombilla con una del mismo vatiaje o más bajo que el marcado. Si<br />
instala lámparas de mayor potencia, puede crear riesgo de incendio. Si usa lámparas de<br />
mayor potencia, se anula la garantía. (Utilice una bombilla de halógeno de un máximo de<br />
150 W.) Para cumplir con los requerimientos de ENERGY STAR®, la potencia máxima de la<br />
bombilla no debe exceder 250 W.<br />
• No toque la bombilla con las manos desnudas, ya que el aceite natural de la piel<br />
puede ocasionar el fallo prematuro de la bombilla. Coja la bombilla con guantes o con<br />
un trapo suave.<br />
• Para un funcionamiento y protección adecuados contra posibles daños,los botones de<br />
ajuste de la cabeza del sensor de movimiento se deben ajustar en dirección al piso.<br />
• Para que el foco dure el mayor tiempo posible, coloque la<br />
luz de manera que el foco halógena quede a 4 grados<br />
de la línea horizontal.<br />
4˚<br />
• No use este aparato cerca de agua.<br />
• Limpie únicamente con un trapo seco.<br />
• No obstruya las aberturas de ventilación. Instale de conformidad<br />
con las instrucciones del fabricante.<br />
• No instale cerca de fuentes de calor tales como radiadores, rejillas de aire caliente, estufas<br />
u otros aparatos (incluyendo amplificadores) que produzcan calor.<br />
• Use únicamente acoplamientos/accesorios especificados por el fabricante.<br />
• Si desarma el artefacto, se anula la garantía.<br />
• La lámpara es percableada y ensamblado para facilitar la instalación.<br />
• UTILICE CONDUCTORES DE SUMINISTRO QUE SOPORTEN UN MÍNIMO DE 90°C.<br />
• Si se reemplaza el vidrio, utilice solo vidrio de seguridad compactado de igual grosor a los<br />
requisitos de UL.<br />
• Este dispositivo cumple con la Parte 15 de las Reglas de la Comisión Federal de<br />
Comunicaciones (FCC) de los E. U. de A. La operación está sujeta a las dos condiciones<br />
siguientes: (1) Este dispositivo no puede causar interferencia dañina, y (2) este dispositivo<br />
debe aceptar toda interferencia recibida, incluyendo la interferencia que pueda causar un<br />
funcionamiento indeseado. Según la Parte 15 de las Reglas de la FCC, todo cambio o<br />
modificación al detector de movimiento descripto en esta hoja de instrucciones que no<br />
esté expresamente aprobado por <strong>Cooper</strong> Lighting, LLC podría anular la autorización del<br />
usuario para operar el equipo.<br />
NOTA: Este equipo ha sido probado, y se ha verificado que cumple con los límites de un
dispositivo digital Clase B, de acuerdo con la Parte 15 de las Reglas de la FCC. Estos<br />
límitesestán diseñados a fin de proveer una protección razonable contra la interferencia<br />
dañina en una instalación residencial. Este equipo genera, usa y puede irradiar energía de<br />
radio frecuencia, y si no se instala y utiliza de acuerdo con las instrucciones, puede causar<br />
interferencia dañina en las comunicaciones de radio. Sin embargo, no se garantiza que no<br />
vaya a producirse interferencia en una instalación en particular. Si este equipo efectivamente<br />
causa una interferencia dañina en la recepción de radio o televisión, lo que puede<br />
determinarse apagándolo y encendiéndolo, se recomienda al usuario que trate de corregir<br />
la interferencia por medio de una o más de las siguientes medidas:<br />
- Reoriente o cambie de lugar la antena receptora.<br />
- Aumente la separación entre el equipo y el receptor.<br />
- Conecte el equipo en un tomacorriente que esté en un circuito difer ente de aquél al que<br />
se conecta el receptor.<br />
- Consulte a su proveedor, o a un técnico de radio / TV experimenta do, para que le ayuden.<br />
ADVERTENCIA: Las Reglamentaciones de la FCC establecen que todo cambio o<br />
modificación no autorizados en este equipo, que no estén aprobados expresamente por<br />
el fabricante, podrían anular la autorización del usuario para operar el equipo.<br />
GUARDE ESTAS INSTRUCCIONES.<br />
PARA OBTENER LOS MEJORES RESULTADOS<br />
• Instale el sensor de movimiento / transmisor a<br />
2,45 –3,65 m (8 – 12 pies) de altura sobre el suelo<br />
(por encima de 3,65 m / 12 pies, el sensor de<br />
movimiento es menos sensible).<br />
• Coloque el portalámparas de manera que se mueva<br />
por toda la zona de detección (Fig. 1).<br />
• Coloque el sensor lejos de fuentes que produzcan<br />
calor, a fin de evitar falsos disparos. Además, medida<br />
de lo posible, tenga mucho cuidado de no incluir<br />
objetos tales como ventanas, paredes blancas y<br />
agua, en la zona de detección.<br />
• Coloque el sensor lejos de objetos móviles, como por<br />
ejemplo árboles, arbustos grandes y tráfico callejero.<br />
• No instale más de un detector de movimiento en un<br />
interruptor de pared o circuito.<br />
MONTAJE Y CABLEADO DEL ACCESORIO<br />
ADVERTENCIA: Riesgo de choque eléctrico. Antes<br />
de la instalación o reparación, desconecte la<br />
alimentación eléctrica en el fusible o interrupto<br />
automático.<br />
NOTA: El accesorio puede ser montado en la pared<br />
o el alero.<br />
NOTA: La caja eléctrica debe tener una profundidad<br />
mínima de 3,81 cm (1-1/2 in.) para asegurar una<br />
instalación adecuada en aplicaciones empotradas<br />
(Fig. 2).<br />
1. Haga que los tornillos de la placa de la cubierta del<br />
portalámparas (C) coincidan con los agujeros de<br />
los tornillos de la caja de empalmes. (Si fuera<br />
necesario, golpee ligeramente con un martillo y un<br />
destornillador los agujeros seleccionados en la<br />
placa de la cubierta para abrirlos.)<br />
2. Pase los cables del artefacto a través de la junta de<br />
la placa de cubierta (C) (Fig. 3).<br />
3. Posicione el gasket (C) en la cubierta y conecte el<br />
alambre negro del luminario con el alambre negro<br />
de la casa y el blanco con el blanco de la casa<br />
usando la tuerca de alambre (E) proveido. Conecte<br />
el alambre neutral de la casa con el neutral del<br />
luminario, usando la tuerca de alambre (E) proveido.<br />
Si la casa no tiene alambre neutral disponible,<br />
conecte el alambre neutral del luminario a la caja<br />
de conexión si es de metal. Una fuente neutral<br />
alternativa se debe utilizar en caso que la caja<br />
de conexión no es de metal y la casa no tiene<br />
alambre neutral (Fig. 4).<br />
4. Sujete el portalámpara (A) a la caja de conexiones<br />
con los dos tornillos (D) adjuntos. Ya sean (2)<br />
tornillos #6 o (2) #8 funcionarán con la mayoría<br />
de cajas de conexiones estándar.<br />
5. Aplique calafateo de silicona alrededor de los<br />
bordes de la placa de cubierta y en todo agujero<br />
abierto, a fin de proveer un cierre que sea estanco<br />
para la lluvia y la humedad.<br />
6. Encienda la electricidad desde la caja de fusibles/<br />
interruptores automáticos.<br />
A<br />
A<br />
Fig. 1<br />
Fig. 2<br />
3,81 cm 3,81 cm<br />
Redonda<br />
Octagonal<br />
Montaje de pared<br />
A<br />
Fig. 3<br />
Montaje de alero<br />
Alambre neutral<br />
del luminario<br />
Alambre<br />
negro del<br />
accesorio<br />
Fig. 4<br />
C<br />
C<br />
Alambre neutral<br />
del hogar<br />
E<br />
Alambre<br />
blanco del<br />
accesorio<br />
E<br />
E<br />
Alambre<br />
blanco<br />
del hogar<br />
Alambre negro<br />
del hogar<br />
4<br />
OPERACIÓN DEL ACCESORIO<br />
1. Mueva el interruptor corredizo que se encuentra<br />
en la parte inferior del sensor a “TEST”. Ajuste el<br />
botón de sensibilidad a la posición media (hasta<br />
la mitad) (Fig. 5).<br />
2. Active la energía del portalámparas. Deje que el<br />
portalámpara se caliente aproximadamente 90<br />
segundos antes de hacer las pruebas. (Puede que<br />
las luces no se enciendan durante el período de<br />
calentamiento.)<br />
3. Dirija la cabeza del sensor hacia el área de<br />
detección deseada, manteniendo un ángulo<br />
de 15° hacia abajo, para permitir el drenaje de<br />
la humedad.<br />
NOTA: Deje un espacio de aire de por lo menos 2,54 cm<br />
(1 in.) entre las lámparas y el sensor. Asegúrese<br />
de que la cabeza del sensor esté colocada con los<br />
interruptores de control en dirección al piso.<br />
4. Camine a través de la zone de detección tan lejos<br />
como desee que su detector registre movimiento.<br />
5. Ajuste la sensibilidad hasta obtener los resultados<br />
deseados. Las luces se apagarán 4 segundos<br />
después de que todo movimiento se ha detenido.<br />
NOTA: Para obtener un rendimiento de alcance máximo,<br />
deje que el aparato funcione en cualquiera de las<br />
modalidades (con corriente llegando a la unidad)<br />
durante al menos 48 horas.<br />
6. Mueva el interruptor corredizo a 4 MIN o 12 MIN<br />
(AUTO modo). La luz puede prenderse el tiempo<br />
determinado y después funcionará al crepúsculo<br />
en automático (AUTO).<br />
NOTA: No coloque la lámpara a menos de dos pulgadas<br />
(5 cm) de la casa.<br />
REEMPLAZO DE LAS BOMBILLAS<br />
NOTA: Desconecte el accesorio y permita que se enfríe<br />
antes reemplazar las bombillas.<br />
1. Quite los tornillos detrás del marco del vidrio.<br />
2. Empuje la bombilla en el portalámparas con<br />
resorte y jale el extremo opuesto fuera del<br />
otro portalámparas.<br />
3. Usando un paño limpio o guantes, retire el nuevo<br />
foco de su paquete y del envoltorio de protección.<br />
NOTA: Nunca toque el foco con las manos ya que el<br />
aceite de su piel puede acortar su duración.<br />
4. Para instalar el foco colóquela en el casquillo con<br />
muelle y empuje el foco contra el casquillo hasta<br />
que éste ceda. Coloque el otro extremo de el foco<br />
en el casquillo fijo (el del otro extremo). Asegúrese<br />
de que los dos extremos del foco estén bien<br />
asegurados en sus casquillos respectivos.<br />
5. Vuelva a colocar la cubierta del vidrio. Inserte y<br />
apriete los tornillos que sujetan la cubierta.<br />
NOTA: Asegúrese de que la lámpara no quede a menos<br />
de dos pulgadas (5 cm) de la casa.<br />
CUIDADO: Siempre reemplace el foco con el mismo<br />
wattage o uno de menos wattage. No instale el<br />
foco en el luminario con un wattage más grande.<br />
Esto puede crear un peligro de fuego o disminuir<br />
la vida del foco.<br />
ENERGY STAR ®<br />
TEST 4 MIN. 12 MIN.<br />
Fig. 5<br />
ENERGY STAR ® está patrocinado por la de EE.UU.) y el U.S.<br />
Department of Energy (Departamento de Energía de EE.UU.).<br />
Visite www.energystar.ca.gov para más información.<br />
SENSITIVITY<br />
Para cumplir con los requerimientos de ENERGY STAR ® , la perilla de control del fotosensor<br />
debe estar en el modo “Auto” (automático) para evitar que esté en funcionamiento cuando<br />
haya suficiente luz de día. La potencia máxima de la bombilla no debe exceder los 250 W.
SELECCIONE LA FUNCIÓN DESEADA<br />
Modo de Adjuste de la perilla Como adjustar<br />
funcionamiento de MODO interruptor electrico<br />
Ajuste Automático<br />
(activado por movimiento)<br />
Las luces deberán encenderse con el<br />
movimiento únicamente durante la<br />
noche y apagarse después de 4-12<br />
minutos que cese el movimiento.<br />
Ajuste Amanecer-Atardecer<br />
(activado sólo durante la noche)<br />
Las luces deben permanecer<br />
encendidas desde el atardecer<br />
hasta el amanecer y luego<br />
restituirse a la posición de ajuste<br />
automático al amanecer siguiente.<br />
Ajuste Estándar de Una Lámpara<br />
de Alta Intensidad<br />
Las luces deben permanecer<br />
encendidas continuamente, durante<br />
el día y la noche<br />
(se debe ajustar a mano).<br />
Ajuste de Prueba<br />
Las luces deben encenderse<br />
por el movimiento tanto en el día<br />
como en la noche. Las luces deben<br />
apagarse después de 4 segundos.<br />
Mueva la perilla al ajuste de<br />
activación por movimiento<br />
desde cualquiera de los<br />
ajustes anteriores.<br />
AUTO 4 MIN<br />
o<br />
AUTO 12 MIN<br />
AUTO 4 MIN<br />
o<br />
AUTO 12 MIN<br />
DIAGNOSTICO Y SOLUCION DE PROBLEMAS<br />
Mantenga la<br />
alimentación del<br />
portalámparas activada.<br />
TEST Mantenga la<br />
alimentación del<br />
portalámparas activada.<br />
AUTO 4 MIN<br />
o<br />
AUTO 12 MIN<br />
Problema Causa Posible / Acción Correctiva<br />
La Luce<br />
Exterior Se<br />
Enciende Durante<br />
La Noche Sin<br />
Motivo Aparente<br />
La Luce<br />
Exterior No Se<br />
Enciende Durante<br />
La Noche Aunque<br />
Haya Movimiento<br />
APAGUE (OFF), ENCIENDA (ON),<br />
APAGUE (OFF) y ENCIENDA (ON)<br />
la corriente en menos de<br />
3 segundos.<br />
TEST APAGUE (OFF), ENCIENDA (ON),<br />
APAGUE (OFF) y ENCIENDA<br />
(ON)<br />
la corriente en menos de<br />
3 segundos.<br />
APAGUE (OFF) la corriente por<br />
al menos 90 segundos y luego<br />
ENCIENDALA (ON) de nuevo.<br />
Hay movimiento en la zona de detección.<br />
• Asegúrese de que el sensor no esté reaccionando a objetos<br />
móviles tales como árboles, tráfico, etc.<br />
COMPRUÉBELO USTED MISMO.<br />
• Cubra la lente del sensor con un trozo de cartón para evitar<br />
que detecte movimiento. Si las luces permanecen apa gadas,<br />
hay algo en el área de detección que está activando el sensor.<br />
• Si este es el caso, disminuya la sensibilidad.<br />
• Cambie la posición del sensor de movimiento.<br />
* Si las luces permanecen encendidas con la lente del<br />
sensor cubierta, póngase en contacto con el servicio de<br />
asistencia al cliente.<br />
Las Luces Se Hay movimiento en la zona de detección.<br />
Encienden Durante • Asegúrese de que el sensor no esté reaccionando a objetos<br />
La Noche Y No Se móviles tales como árboles, tráfico, etc.<br />
Apagan<br />
• Si este es el caso, disminuya la sensibilidad.<br />
• Cambie la posición del sensor de movimiento.<br />
La unidad está en modo de anulación (si no hay movimiento).<br />
• Ponga el interruptor de la luz en “OFF” durante 90 segundos<br />
y vuel va a colocarlo en “ON”. Esto colocará de nuevo la unidad<br />
en la modalidad “Auto” (automático).<br />
* Si las luces permanecen encendidas con la lente del sensor<br />
cubierta, póngase en contacto con el servicio de asistencia<br />
al cliente.<br />
No llega electricidad al bombilla.<br />
• Revise si el interruptor de circuito ha saltado.<br />
• Confirme que el interruptor de pared esté encendido.<br />
La bombilla está defectuoso.<br />
• Cambie la bombilla.<br />
La luz ambiental exterior es demasiado brillante. (Sí es así, para la<br />
unidad es de día).<br />
• Redirija el cabezal.<br />
• Cambie la ubicación de la unidad o diríjala en dirección contraria<br />
a la luz.<br />
DESCONECTE LA ENERGÍA ANTES DE CONTINUAR.<br />
El cableado hacia la unidad está flojo.<br />
• Revise los cables y vuélvalos a conectar si fuera necesario<br />
usando las tuercas (E) que se incluyen.<br />
5<br />
Problema Causa Posible/Acción Correctiva<br />
Las Luces Se<br />
Encienden Y<br />
Se Apagan<br />
Continuamente<br />
Durante La Noche<br />
Las Luces Se<br />
Encienden<br />
Durante El Dia<br />
No Se Puede<br />
Activar La<br />
Modalidad<br />
De “Atardecer-<br />
Amanecer”<br />
(Encendido)<br />
La luz proveniente de la propia lámpara de la unidad está afectando<br />
al sensor de movimiento.<br />
• Cambie la dirección de la lámpara.<br />
• Cambie la posición del sensor de movimiento.<br />
Los controles en la base del detector de movimiento se encuentran<br />
en el modo de prueba.<br />
• Mueva la perilla de MODO de la TEST a una selección de tiempo<br />
(1m-12m).<br />
Hay sombra sobre el detector de movimiento.<br />
• Cambie la posición del sensor de movimiento.<br />
La luz ambiental exterior es demasiado brillante. (Sí es así, para la<br />
unidad es de día).<br />
• Redirija el cabezal.<br />
• Cambie la ubicación de la unidad o diríjala en dirección contraria<br />
a la luz.<br />
No se dejó pasar suficiente tiempo para que el accesorio entrara en<br />
el modo de amanecer-atardecer.<br />
• APAGUE (OFF), ENCIENDA (ON), APAGUE (OFF) y ENCIENDA (ON)<br />
la corriente en menos de 3 segundos.<br />
Más de un accesorio está conectado en un interruptor de<br />
pared interior.<br />
• Si es así, conéctelos en interruptores diferentes.<br />
GARANTIA LIMITADA DE 2 AÑOS<br />
LA SIGUIENTE GARANTÍA ES EXCLUSIVA Y REEMPLAZA A TODAS LAS DEMÁS GARANTÍAS, YA<br />
SEAN IMPLÍCITAS, EXPLÍCITAS O ESTATUTARIAS, INCLUIDAS ENTRE OTRAS, LAS GARANTÍAS<br />
DE COMERCIABILIDAD E IDONEIDAD PARA UN FIN PARTICULAR.<br />
<strong>Cooper</strong> Lighting, LLC (“<strong>Cooper</strong> Lighting”) garantiza a sus clientes que los productos de <strong>Cooper</strong><br />
Lighting no presentarán defectos en los materiales y en la fabricación durante un período de<br />
dos años desde la fecha de compra. La obligación de <strong>Cooper</strong> Lighting según esta garantía se<br />
limita expresamente al suministro de los productos de reemplazo. Esta garantía se extiende<br />
sólo para el comprador original del producto. Un recibo del comprador u otra prueba de la<br />
fecha de compra original aceptable para <strong>Cooper</strong> Lighting. Esto es necesario para la ejecución<br />
de la garantía.<br />
Esta garantía no se aplica a los productos de <strong>Cooper</strong> Lighting que hayan sido alterados o<br />
reparados o que estuvieron sujetos a negligencia, abuso, mal uso o accidente (incluso los<br />
daños durante el envío). Esta garantía no se aplica a los productos <strong>Cooper</strong> Lighting no<br />
fabricados por <strong>Cooper</strong> Lighting que hayan sido suministrados, instalados o utilizados junto con<br />
los productos <strong>Cooper</strong> Lighting. Los daños del producto causados por bombillas de reemplazo,<br />
corrosión o decoloración de los componentes de latón no están cubiertos por esta garantía.<br />
LIMITACIÓN DE RESPONSABILIDAD:<br />
COOPER LIGHTING NO SERÁ RESPONSABLE LEGAL EN NINGÚN CASO DE DAÑOS INDIRECTOS,<br />
ACCIDENTALES O RESULTANTES (SIN IMPORTAR LA ACCIÓN LEGAL, YA SEA POR CONTRATO,<br />
RESPONSABILIDAD ESTRICTA O DE FORMA EXTRACONTRACTUAL INCLUYENDO LA<br />
NEGLIGENCIA) TAMPOCO DE LA PÉRDIDA DE GANANCIAS, COOPER LIGHTING TAMPOCO SERÁ<br />
RESPONSABLE DES O DAÑOS QUE SURJAN O ESTÉN CONECTADOS CON ESTOS TÉRMINOS<br />
O CON LA FABRICACIÓN, VENTA, ENTREGA, USO, MANTENIMIENTOM, REPARACIÓN O<br />
MODIFICACIÓN DE LOS PRODUCTOS DE COOPER LIGHTING O DEL SUMINISTRO DE CUALQUIER<br />
PIEZA DE REPUESTO QUE EXCEDA EL PRECIO DE COMPRA DE LOS PRODUCTOS DE COOPER<br />
LIGHTING ORIGINANDO UN RECLAMO. NO SE ACEPTARÁN CARGOS POR MANO DE OBRA PARA<br />
QUITAR O INSTALAR LOS ACCESORIOS.<br />
Para obtener el servicio de la garantía comuníquese con <strong>Cooper</strong> Lighting, LLC, al<br />
1-800-334-6871, presione la opción 2 para el Servicio al Cliente, o por correo electrónico a<br />
ConsumerProducts@cooperlighting.com e incluya la siguiente información:<br />
• Nombre, dirección y número de teléfono<br />
• Fecha y lugar de compra<br />
• Catálogo y cantidad de la compra<br />
• Descripción detallada del problema<br />
Todos los productos devueltos deben estar acompañados por un Número de autorización<br />
de productos devueltos emitido por la compañía y deben devolverse con flete prepagado.<br />
Se rechazará todo producto recibido sin un Número de autorización de productos devueltos<br />
desde la compañía.<br />
<strong>Cooper</strong> Lighting, LLC no se hace responsable por la mercancía dañada durante el transporte.<br />
Los productos reparados o reemplazados estarán sujetos a los términos de esta garantía<br />
y se inspeccionan al ser empacados. El daño evidente y oculto que se provoque durante el<br />
transporte se debe informar de inmediato al transportista que realiza la entrega y se debe<br />
presentar un reclamo.<br />
La reproducción de este documento sin la aprobación previa por escrito de <strong>Cooper</strong> Lighting, LLC está estrictamente prohibida.<br />
Para solicitar ayuda, llame al 1-800-334-6871 o envíe un correo electrónico a ConsumerProducts@cooperlighting.com<br />
Impreso en China<br />
Customer First Center<br />
1121 Highway 74 South, Peachtree City, GA 30269<br />
www.cooperlighting.com<br />
© 2010 <strong>Cooper</strong> Lighting, LLC<br />
07/10<br />
825-0538