

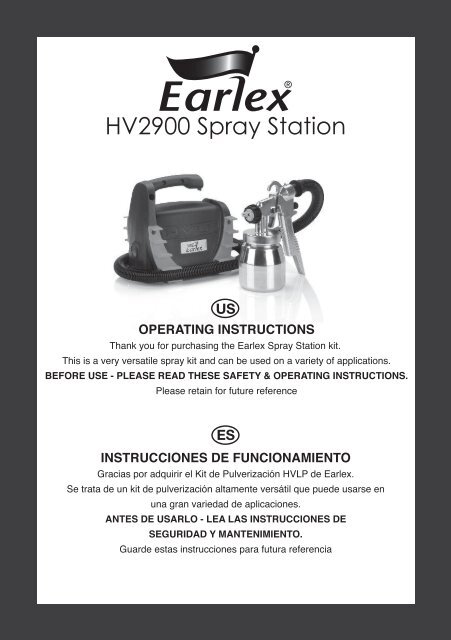
HV2900 Spray Station - Earlex
HV2900 Spray Station - Earlex
HV2900 Spray Station - Earlex

Create successful ePaper yourself
Turn your PDF publications into a flip-book with our unique Google optimized e-Paper software.
<strong>HV2900</strong> <strong>Spray</strong> <strong>Station</strong><br />
US<br />
OPERATING INSTRUCTIONS<br />
Thank you for purchasing the <strong>Earlex</strong> <strong>Spray</strong> <strong>Station</strong> kit.<br />
This is a very versatile spray kit and can be used on a variety of applications.<br />
BEFORE USE - PLEASE READ THESE SAFETY & OPERATING INSTRUCTIONS.<br />
Please retain for future reference<br />
ES<br />
INSTRUCCIONES DE FUNCIONAMIENTO<br />
Gracias por adquirir el Kit de Pulverización HVLP de <strong>Earlex</strong>.<br />
Se trata de un kit de pulverización altamente versátil que puede usarse en<br />
una gran variedad de aplicaciones.<br />
ANTES DE USARLO - LEA LAS INSTRUCCIONES DE<br />
SEGURIDAD Y MANTENIMIENTO.<br />
Guarde estas instrucciones para futura referencia
SAFETY INSTRUCTIONS<br />
WARNING! FIRE AND EXPLOSION HAZARD.<br />
● CAUTION: TO REDUCE THE RISK OF<br />
ELECTRIC SHOCK OR INJURY, DO<br />
NOT EXPOSE TO RAIN; STORE<br />
INDOORS.<br />
● The substances used with this spray<br />
applicator (paint, thinners etc) may contain<br />
hazardous, harmful, explosive or corrosive<br />
materials. ALWAYS COMPLY WITH THE<br />
SAFETY INSTRUCTIONS ISSUED WITH<br />
THIS PRODUCT AND THE MATERIAL<br />
BEING USED.<br />
● The spray applicator must be used only with<br />
paints and solvents that have a suitable<br />
flash point for spraying. If in doubt, consult the<br />
paint or solvent manufacturer's data.<br />
● Always ensure there is adequate ventilation<br />
when spraying.<br />
● NEVER spray near an open flame, including<br />
an appliance pilot flame.<br />
● NEVER smoke when spraying.<br />
● Always disconnect the unit from the electrical<br />
outlet when cleaning the spray applicator.<br />
● Always ensure the spray area is safe and free<br />
from all debris that may present a fire or fall<br />
hazard.<br />
● NEVER, under any circumstances, point the<br />
spray gun at another person or animal. In the<br />
event of an injury, seek immediate medical<br />
attention.<br />
IMPORTANT ELECTRICAL INFORMATION<br />
● NEVER allow children or unauthorized users<br />
to operate or play with the spray equipment.<br />
This equipment is only for professional use.<br />
● Always read the paint manufacturer's thinning<br />
instructions before use.<br />
● Always wear the correct protective face mask<br />
when spraying. We also recommend wearing<br />
gloves, goggles and overalls.<br />
● Ensure that you clean the spray gun<br />
thoroughly and grease the gland washer.<br />
● Use only genuine manufacturer replacement<br />
parts.<br />
● Use the spray equipment only as detailed in<br />
these instructions.<br />
● Do not use the air hose or power cord to pull<br />
the HVLP unit.<br />
● Check the hoses, hose connectors and power<br />
cord daily. Any worn or damaged parts should<br />
be replaced immediately.<br />
● This appliance is recommended only for<br />
household use.<br />
● This appliance is not intended for use by<br />
persons (including children) with reduced<br />
physical, sensory or mental capabilities, or<br />
lack of experience and knowledge, unless they<br />
have been given supervision or instruction<br />
concerning use of the appliance by a person<br />
responsible for their safety.<br />
EXTENSION CORDS<br />
Your <strong>Earlex</strong> HVLP <strong>Spray</strong> <strong>Station</strong> is supplied with a power cord that is 6 feet long. Make sure your<br />
extension cord is in good condition. When using an extension cord, be sure to use one heavy<br />
enough to carry the current your product will utilize. For lengths up to 50 feet, No 18 AWG extension<br />
cords should be used.<br />
DOUBLE INSULATED APPLIANCE<br />
This is a double insulated appliance and, as such, does not require three-way grounding. This product<br />
is equipped with a polarized alternating current line plug (a plug having one blade wider than the<br />
other) and does not require a grounding adapter. This plug will fit into the power outlet only one<br />
way. This is a safety feature.<br />
If you are unable to insert the plug fully into the outlet, try reversing the<br />
plug. If the plug should still fail to fit, contact a qualified electrician to<br />
replace the obsolete outlet. Do not defeat the safety purpose of the<br />
polarized plug.<br />
2<br />
POWER<br />
SWITCH<br />
SHOWN IN OFF<br />
POSITION
14<br />
EXPLODED PARTS VIEW<br />
1<br />
11<br />
2<br />
12<br />
4<br />
3<br />
PARTS LIST<br />
5<br />
No. Description Part No.<br />
01. Air Cap Ring L0215<br />
02. Air Cap L0205<br />
03. <strong>Spray</strong> Direction Plate L0206<br />
04. Fluid Tip (3.0 mm) (0.12”) L1022<br />
05. Fluid Tip Seal L0211<br />
06. Fluid Needle (3.0 mm) (0.12”) L1021<br />
07. Spring L0216<br />
08. Fluid Adjusting Screw L0210<br />
09. Gland Nut L0208<br />
10. Gland Seal L0272<br />
11. Pick-up Tube L0214<br />
16<br />
15<br />
6 7<br />
17<br />
13<br />
10<br />
9<br />
3<br />
8<br />
18 19 20<br />
No. Description Part No.<br />
12. Paint Container Seal L0335<br />
13. Paint Container L0878<br />
14. Viscosity Cup SG243<br />
15. Trigger L0202<br />
16. Pivot Pin L0209<br />
17. Hose Assembly L0896<br />
18. Hose Clip L0930<br />
19. Hose Clip L0931<br />
20. Screw (4xAC45) L0639<br />
21. Filter L0290<br />
21
IMPORTANT: SELECTING PAINT<br />
This is a very versatile <strong>Spray</strong> <strong>Station</strong> that can be used with several different spray mediums including<br />
varnishes, wood preservatives, enamels, oil and water-based paints and automotive paints.<br />
However some materials cannot be sprayed so please check the recommendation of the<br />
manufacturer before buying the paint. If a material refers to brush application only then it usually<br />
cannot be sprayed. THIS UNIT CANNOT BE USED FOR TEXTURED PAINTS. USE OF THESE<br />
MATERIALS WILL CAUSE PREMATURE WEAR, WHICH WILL VOID YOUR WARRANTY.<br />
TO OBTAIN THE BEST RESULTS FROM YOUR SPRAY KIT, PLEASE READ THE<br />
INSTRUCTIONS CAREFULLY BEFORE USE.<br />
PREPARATION<br />
Preparation of the surface and thinning of the paint are the two most important areas with which to<br />
be concerned to obtain the best results from your <strong>Spray</strong> <strong>Station</strong>. Ensure all surfaces are free from<br />
dust, dirt, rust and grease. If necessary rub down with sandpaper, or similar.<br />
Masking of areas is important to ensure you do not spray those areas you wish to remain untouched.<br />
Your <strong>Spray</strong> <strong>Station</strong> 2900 comes with a 3.0mm (0.12”) Fluid Tip and a 3.0mm (0.12”) Fluid Needle fitted<br />
(for thicker viscosity materials and coarser finish). We recommend that you attach the 1.5mm<br />
(0.06”) Fluid Tip and Needle, included in pack for thin viscosity material and finer finish.<br />
THINNING<br />
Your <strong>Spray</strong> <strong>Station</strong> is supplied with a Viscosity Cup. Viscosity is a technical term used to indicate if a<br />
product is very thin or very thick. If thin, the viscosity is said to be low, while if very thick the<br />
viscosity is said to be high. Viscosity is measured in seconds. In order to spray some materials they<br />
need to be “thinned” (diluted). Thinning is very important when spraying. Most paints are supplied<br />
ready for brush application and may need to be thinned (diluted) for spraying purposes. Follow the<br />
manufacturer’s guide for thinning in conjunction with a spray gun. If in doubt please contact the<br />
manufacturers of the paint. The viscosity cup will help you determine the correct thickness of the<br />
paint. Paint is “thinned” by adding the substance upon which the paint is based. If it is water-based<br />
paint then water is added; if oil based then mineral spirit or manufacturer’s recommended thinnner.<br />
As some paints, wood preservatives and other sprayable materials contain particles that have differing<br />
qualities, please ensure that when filling the paint container of the spray gun that the paint is filtered<br />
through either a funnel with a filter on it or through hosiery. This will ensure that no large particles<br />
enter the paint container, so preventing blockages and providing you with trouble-free spraying. Ensure<br />
that a face mask, gloves and goggles are worn at all times when spraying.<br />
Water-based paints and 25 - 120 seconds<br />
Latex<br />
Oil-based paints 45 - 50 seconds<br />
Wood preservatives No dilution<br />
Primers 45 - 50 seconds<br />
IDEAL VISCOSITY<br />
Varnishes/ Lacquer/<br />
polyurethane No dilution<br />
Aluminium paints No dilution<br />
Wood stains No dilution<br />
Automotive Paints Manufacturer’s ratio<br />
If paint requires thinning, start with 10% dilution. To do this, fill a paint mixing<br />
container with one quart of paint leaving room to add the required thinner.<br />
Using the viscosity cup, block the hole at the bottom with your finger and fill with<br />
the required thinner (this represents approx 10% of a quart). Pour into your<br />
paint and stir well and re-test your viscosity. If further thinning is required repeat<br />
by adding ½ of a viscosity cup (approx 5%) until desired viscosity is achieved.<br />
If mixing larger batches of paint, for instance a gallon then add four viscosity<br />
cups of appropriate thinner which is approximately 10% of a gallon. If further thinning is required<br />
repeat by adding two viscosity cups (approx 5% of a gallon) until desired viscosity is achieved.<br />
4<br />
Fig.1
OPERATION<br />
Fill the Paint Container (13) with the material to be sprayed. DO NOT OVERFILL above the start of<br />
the threaded neck. Push the Pick-up Tube (11) firmly into the base of the <strong>Spray</strong> Gun body. Screw<br />
the Paint Container onto the <strong>Spray</strong> Gun body tightly. Place the motor unit onto a clean surface, free<br />
from any loose debris or liquids. Connect the Hose (17) to the back of the <strong>Spray</strong> Gun. Uncoil the<br />
power cord and plug in. ALWAYS KEEP THE MOTOR UNIT AS FAR AWAY FROM THE SPRAY-<br />
ING AREA AS POSSIBLE TO PREVENT PAINT CONTAMINATING THE MOTOR. MASK ANY<br />
AREA YOU DO NOT WISH TO SPRAY. Once you have set up and are ready to spray, switch on<br />
the unit. No paint will be sprayed until the trigger on the <strong>Spray</strong> Gun is gently pulled. We recommend<br />
before starting any work regardless of material being sprayed that you spend some time<br />
practicing on cardboard or newspaper until you are familiar with how the spray gun works<br />
and material flow rate.<br />
● An airtight seal is essential for the correct operation of this <strong>Spray</strong> Gun.<br />
● Before operating the unit please ensure that the Paint Container (13) is securely fixed to the<br />
<strong>Spray</strong> Gun body and the Gland Nut (9) is not loose.<br />
● To obtain the optimum setting gradually unscrew the Gland Nut by turning it in a<br />
counterclockwise direction until the Fluid Needle (6) moves forward into the Fluid Tip (4). To<br />
check that your settings are correct, spray a container of water. Re-adjust if necessary.<br />
● Each Fluid Needle is manufactured to fit the size of the corresponding Fluid Tip. Do not try to fit<br />
a 1.5mm (0.06”) Fluid Needle to a 3.0mm (0.12”) Fluid Tip.<br />
SPRAY PATTERNS<br />
The <strong>Spray</strong> Gun has three different spray patterns – Horizontal, Vertical and Round (Fig.2). The Hor-<br />
izontal and Vertical are recommended for large surfaces. The<br />
Round spray is used for small objects or for areas such as corners<br />
that are difficult to reach. To change the spray pattern<br />
simply rotate the Air Cap (2) until it clicks into the positions as<br />
shown in (Fig.2). The overall size of the selected spray pattern<br />
can be varied by turning the Air Cap Ring (1). When viewed<br />
from the front, rotate it clockwise to increase the pattern size, or counterclockwise to reduce<br />
the pattern size.<br />
PAINT VOLUME<br />
The volume of paint sprayed is easily adjustable (Fig.3). Completely close the<br />
Fluid Adjusting Screw (8) by turning this clockwise as far as it will go. While<br />
pulling the Trigger, begin turning the Fluid Adjusting Screw counterclockwise<br />
until the volume of paint you require is obtained. If the paint spray is too wide<br />
or contains too much paint, turn the Fluid Adjusting Screw clockwise again.<br />
Once the correct spray pattern is obtained you are able to begin spraying.<br />
The paint volume needs to be adjusted every time you change the spray pattern<br />
especially when you use the Round pattern, as this spray pattern can<br />
often contain too much paint.<br />
SPRAYING TECHNIQUE<br />
1. To obtain the best results always keep your <strong>Spray</strong> Gun level and spray equally from side to side<br />
or up or down from the surface. Avoid spraying at an angle as this will lead to runs on the<br />
surface (Fig.4-6).<br />
2. Let your arm control the left to right movement rather than your wrist as this will help with even<br />
paint distribution over the whole area.<br />
3. Do not tip the <strong>Spray</strong> Gun to more than a 45˚ angle when<br />
the motor is switched OFF.<br />
4. When spraying a ceiling ensure Pick-up Tube (11) is facing<br />
towards the back of the container and vise versa for<br />
spraying decks.<br />
Fig.4<br />
Fig.5<br />
5<br />
Fig.2<br />
Vertical Jet Round Jet<br />
Horizontal Jet<br />
Fig.3<br />
Fig.6
HELPFUL HINTS<br />
1. Evenly control the speed of movement of the <strong>Spray</strong> Gun. A fast speed will give a thin coat and a<br />
slow speed will give a heavy coat.<br />
2. Only apply one coat at a time. If a further coat is required follow the paint manufacturer’s<br />
instructions for drying times.<br />
3. If spraying small areas or objects keep the adjusting screw setting<br />
low as this will avoid excessive use of paints and will minimize<br />
overspray.<br />
4. When spraying large areas or objects, it is best to use a criss-cross<br />
pattern, either from left to right then up or down or vice versa. This<br />
will ensure maximum coverage (Fig.7).<br />
5. Avoid stopping and starting when spraying as this can lead to too<br />
much or not enough material on a surface.<br />
6. To ensure edges are covered, commence spraying just to the side of<br />
area being sprayed.<br />
7. CLEAN SPRAY GUN AFTER EVERY USE (SEE CLEANING INSTRUCTIONS).<br />
CLEANING INSTRUCTIONS<br />
Let go of the trigger at the<br />
end of each spray<br />
movement to avoid<br />
excessive paint and drips Fig.7<br />
THE SPRAY GUN SHOULD BE THOROUGHLY CLEANED AND THE GLAND WASHERS<br />
LUBRICATED, IMMEDIATELY AFTER EACH USE. IF THE PAINT DRIES INSIDE THE GUN<br />
CLEANING WILL BE MUCH MORE DIFFICULT AND MAY RENDER THE GUN INOPERABLE.<br />
THIS IS NOT COVERED BY THE GUARANTEE.<br />
SPRAY GUN<br />
● Remove the Paint Container (13).<br />
● Pour any leftover paint into its container so that it can be used for the future.<br />
● Clean the Paint Container (13), Pick-up Tube (11) and Paint Container Seal (12) inside the <strong>Spray</strong><br />
Gun body.<br />
● Pour 1/2 quart of the respective thinner into Paint Container, reassemble the <strong>Spray</strong> Gun, then<br />
spray this liquid until the spray is coming through with no traces of paint.<br />
● Clean any traces of paint off the outside of the <strong>Spray</strong> Gun.<br />
● Over time the Gland Seal (10) will wear and need adjusting. To check that the Gland Nut is<br />
correctly fitted you will need a small adjustable spanner. Pull the Trigger (15) back and gradually<br />
tighten the Gland Nut by turning it in a clockwise direction until the Needle is not free to move<br />
when the Trigger is released.<br />
FLUID TIP & NEEDLE<br />
● Unscrew Air Cap Ring (1)<br />
● Remove the Air Cap (2)<br />
● Completely remove Fluid Adjusting Screw (8)<br />
● Remove the Spring (7)<br />
● Remove the Fluid Needle (6) by gently pulling the Trigger (15)<br />
● Remove the Fluid Tip (4)<br />
● Remove <strong>Spray</strong> Direction Plate (3) noting the position of notches<br />
● Remove Fluid Tip Seal (5)<br />
● Remove Paint Container Seal (12)<br />
● Place all of these items except the Paint Container Seal (12) into a container and clean them<br />
using a brush and clean thinners<br />
● Clean the inside of the body of the <strong>Spray</strong> Gun<br />
● Thoroughly dry these parts before reassembling<br />
● Grease the Gland Seal (10). (USE PETROLEUM JELLY. DO NOT USE SILICONE-BASED<br />
GREASE.)<br />
● Reassemble parts in reverse order.<br />
It is recommended to fit the Fluid Tip (4) prior to the Needle (6).<br />
All of the components above can be immersed in thinners and cleaned. After cleaning your <strong>Spray</strong><br />
Gun and before fitting the Needle, dip the tip into some petroleum jelly which will lubricate the Gland<br />
Seal as the Needle is inserted. The external surfaces of the <strong>Spray</strong> Gun can be wiped clean with a<br />
cloth soaked in thinners or warm soapy water.<br />
6
TURBINE UNIT<br />
The turbine unit only requires minimal maintenance.<br />
● Ensure its Filter (21) element is kept clean at all times.<br />
This is the Filter underneath the outlet body of the Motor Unit. Disconnect the unit from the<br />
outlet, turn on side and remove foam material. This can be washed out if necessary and<br />
replaced when dry. From time to time this filter will need replacing.<br />
● The turbine bearings are sealed and lubricated for life. There is no maintenance or adjustment<br />
required.<br />
● The hose is stored by coiling it between the motor housing and hose cover.<br />
● The power cord is stored by wrapping around the base of the unit and locating the plug in the<br />
space at the back of the unit.<br />
TROUBLESHOOTING<br />
PROBLEM CAUSE ACTION REQUIRED<br />
The paint runs on the<br />
item being sprayed<br />
Paint is thin or<br />
irregular<br />
No paint being<br />
produced<br />
FINISHING TIPS<br />
Paint too diluted Add undiluted material<br />
Paint volume too high Reduce the paint flow with Fluid Adjusting<br />
Screw (8)<br />
Moving too slowly Increase speed of application<br />
Gun trigger being held for too long Release Trigger earlier<br />
Gun too close Increase the distance between <strong>Spray</strong> Gun<br />
and workpiece<br />
Paint too diluted Add undiluted material<br />
Paint volume too low Increase the paint flow by turning Fluid Adjusting<br />
Screw (8)<br />
Moving too fast Reduce speed of application<br />
<strong>Spray</strong> Gun clogged Clean the <strong>Spray</strong> Gun<br />
<strong>Spray</strong> Gun too far away Reduce the distance between <strong>Spray</strong> Gun<br />
and workpiece<br />
Paint too thick Add thinner<br />
<strong>Spray</strong> Gun clogged Clean the <strong>Spray</strong> Gun<br />
Pick-up Tube clogged Clean Pick-Up Tube (11)<br />
Air hose split Replace Hose Assembly (17)<br />
Grainy paint Filter the paint<br />
Paint Container almost empty Refill Paint Container<br />
<strong>Spray</strong> Gun at an angle Ensure Pick-up tube (11) is angled towards<br />
paint<br />
Air intake blocked Check for paper or loose debris blocking the<br />
Filter (21) on the unit<br />
Orange Peel: Reduce Viscosity. Increase atomization with a smaller Fluid Tip (4). <strong>Spray</strong> area<br />
may be too cold. <strong>Spray</strong> Gun too far from object.<br />
Sags or Runs: Move <strong>Spray</strong> Gun faster. <strong>Spray</strong> lighter coat. Increase atomization.<br />
Wet and Milky: Finish applied too heavy. This condition is prone to trap water within coats.<br />
Apply lighter coat.<br />
Blushing: Seal coat applied over solvent-based stain that has not been completely dried.<br />
Rough Surface: Seal coat not sanded enough. Sand smooth and re-coat.<br />
7
SERVICING OF DOUBLE-INSULATED APPLIANCES<br />
In a double-insulated appliance, two systems of insulation are provided instead of grounding. No<br />
grounding means is provided on a double-insulated appliance, nor should a means for grounding<br />
be added to the appliance. Servicing a double-insulated appliance requires extreme care and<br />
knowledge of the system, and should be done only by a qualified service personnel. Replacement<br />
parts for a double-insulated appliance must be identical to the parts they replace. This double-insulated<br />
appliance is marked with the DOUBLE-INSULATED symbol (square within a square).<br />
PLEASE NOTE: We have done all we can to ensure that if used correctly and according to these<br />
instructions, this spray gun will have a long and trouble-free life. We accept no responsibility for<br />
damage caused by the use of incorrect or unsuitable substances, paints or fluids which have not<br />
been thinned correctly or are unsuitable for the surfaces to which they are applied, health hazards<br />
arising from lack of ventilation when working in confined spaces or failure of the equipment due<br />
to inadequate cleaning of the components after use. If in doubt, always test a small<br />
inconspicuous area first. Always read the paint manufacturer’s instructions first. Neither our<br />
guarantee nor the above statement affects your statutory rights.<br />
EC Declaration of Conformity<br />
We declare that the unit: <strong>HV2900</strong> Conforms to LVD 2006/95/EC, EN60335-1, EMC<br />
2004/108/EC, EN55014-1, EN55014-2, EN61000-3-2, EN61000-3-3, EMF EN50366.<br />
WARRANTY<br />
This product is guaranteed for a period of 24 months against faulty manufacture and materials.<br />
It is not guaranteed for industrial or hire purposes. The guarantee does not affect your statutory<br />
rights. <strong>Earlex</strong> Inc. will accept no responsibility for the use of this product if used for any<br />
purposes other than detailed herein.<br />
© <strong>Earlex</strong> Inc. 2009<br />
Tim Hopper Technical Director<br />
British Registered Design Nos: GB 3022947, FR 06/5463,<br />
EU 000608856, US D563, 503<br />
Copyright & Design Right Reserved © 2009<br />
If you require further assistance, please contact our helpline on<br />
Tel: 704 827 7889 Fax: 704 827 7849<br />
Customer Service: Toll Free 888-783-2612<br />
Website: www.earlex.com Email: service@earlex.com<br />
<strong>Earlex</strong> Inc, 8261 Hwy 73, Suite F, Stanley, N.C. 28164, USA<br />
8
INSTRUCCIONES DE SEGURIDAD<br />
¡ADVERTENCIA! RIESGO DE INCENDIO Y EXPLOSIÓN.<br />
● PRECAUCIÓN: PARA REDUCIR EL<br />
RIESGO DE DESCARGA ELÉCTRICA<br />
O LESIÓN, NO EXPONGA AL LLUVIA,<br />
ALMACÉN EL DISPOSITIVO EN<br />
INTERIOR.<br />
● Las sustancias utilizadas con este aplicador<br />
de spray (pintura, disolventes, etc.) pueden<br />
contener materiales peligrosos, nocivos,<br />
explosivos o corrosivos. SIGA SIEMPRE LAS<br />
INSTRUCCIONES DE SEGURIDAD<br />
ENTREGADAS CON ESTE PRODUCTO Y<br />
CON EL MATERIAL QUE ESTÁ SIENDO<br />
UTILIZADO.<br />
● El aplicador de spray debe ser utilizado<br />
solamente con pinturas y disolventes que ten<br />
gan un punto de inflamación adecuado para la<br />
pulverización. En caso de duda, consulte la<br />
información proporcionada por el fabricante<br />
de la pintura o el disolvente.<br />
● Asegúrese siempre de que la habitación tiene<br />
una ventilación adecuada cuando aplique el<br />
spray.<br />
● No pulverice NUNCA cerca de fuego abierto,<br />
incluidos dispositivos con llama de encendido.<br />
● No fume NUNCA mientras esté pulverizando.<br />
● Desconecte siempre la unidad de la red<br />
eléctrica cuando rellene el tanque de pintura.<br />
● Asegúrese siempre de que el área a<br />
pulverizar es segura y está libre de residuos<br />
que puedan provocar riesgo de incendio o<br />
ropiezos.<br />
● NUNCA, bajo ninguna circunstancia, debe<br />
apuntar con la pistola pulverizadora una<br />
persona o animal. En el caso de que se<br />
produzca un accidente con lesiones, acuda a<br />
INFORMACIÓN ELÉCTRICA IMPORTANTE<br />
la consulta de un médico inmediatamente.<br />
● No deje NUNCA que niños o personas no<br />
autorizadas usen o jueguen con el equipo de<br />
pulverización. Este equipo es solamente para<br />
uso profesional.<br />
● Lea siempre las instrucciones del fabricante<br />
para el rebajado de la pintura antes de uti<br />
lizarla.<br />
● Lleve siempre una mascarilla adecuada<br />
cuando efectúe la pulverización. También re<br />
comendamos el uso de guantes, gafas y mono<br />
de trabajo.<br />
● Después de cada utilización asegúrese de<br />
limpiar la pistola pulverizadora a fondo y<br />
lubricar las rondanas.<br />
● Use solamente piezas de recambio originales<br />
del fabricante.<br />
● Use esta unidad solamente del modo<br />
detallado en las instrucciones.<br />
● No utilice el tubo flexible de vacío o el cable de<br />
alimentación de red para arrastrar la unidad<br />
HVLP.<br />
● Compruebe los tubos, los conectores de los<br />
tubos y el cable de alimentación de red a<br />
diario. Cualquier parte desgastada o<br />
deteriorada debe ser sustituida de forma<br />
inmediata.<br />
● Este dispositivo no ha sido diseñado para el<br />
uso de personas (niños incluidos) con dis<br />
capacidad física, sensorial o intelectual; o que<br />
no dispongan de una experiencia o<br />
conocimiento suficientes, salvo que reciban<br />
supervisión o formación respecto a su uso, por<br />
parte de una persona al cargo de su<br />
seguridad.<br />
CABLES DE PROLONGACIÓN<br />
El <strong>Earlex</strong> HVLP se entrega con un cable de alimentación de 6ft. de longitud. Asegúrese de que el<br />
cable de prolongación está en buenas condiciones. Cuando utilice un cable de prolongación,<br />
asegúrese de usar uno que sea lo suficientemente fuerte como para soportar la corriente que el<br />
producto generará. Para longitudes entre 0t. y 50ft, deberían utilizarse cables de prolongación No<br />
18 AWG.<br />
APARATO DE DOBLE AISLAMIENTO<br />
Este es un aparato de doble aislamiento y como tal, no requiere enchufe con conexión a tierra de<br />
tres clavijas. Este producto está equipado con un enchufe polarizado<br />
(un enchufe con una clavija más ancha que la otra) y no requiere<br />
adaptador de alimentación. Este enchufe encaja en la toma de corriente<br />
sólo de una manera. Esto es una medida de seguridad.<br />
Interruptor<br />
de red<br />
mostrado en<br />
posición de<br />
apagado.<br />
En caso de no poder insertar el enchufe completamente en la toma<br />
de corriente, intente darle la vuelta. Si el enchufe sigue sin encajar,<br />
contacte con un electricista cualificado para que reemplace la toma de corriente obsoleta. No<br />
rechace la seguridad, que es la razón por la que se suministra el enchufe polarizado.<br />
9
14<br />
DIAGRAMA ESTALLADO<br />
1<br />
11<br />
2<br />
12<br />
5<br />
4<br />
3<br />
DIAGRAMA DE DESPIECE<br />
Nº Descripción Pieza Nº<br />
01. Regulador del capuchón del aire L0215<br />
02. Capuchón del aire L0205<br />
03. Placa de caudal de aire L0206<br />
04. Boquilla de fluido de 3.0 mm (0.12”)L1022<br />
05. Junta de la boquilla de fluido L0211<br />
06. Aguja de 3.0mm (0.12”) L1021<br />
07. Muelle L0216<br />
08. Tornillo regulador de fluido L0210<br />
09. Tuerca del prensaestopas L0208<br />
10. Junta del prensaestopas L0272<br />
11. Manguera de alimentación de producto L0214<br />
16<br />
15<br />
6 7<br />
17<br />
13<br />
10<br />
9<br />
10<br />
8<br />
18 19 20<br />
Nº Descripción Pieza Nº<br />
12. Junta del depósito de pintura L0335<br />
13. Depósito de pintura L0878<br />
14. Vaso de viscosidad SG243<br />
15. Copa Ford SG243<br />
16. Filtro L0290<br />
14. Conjunto de la manguera L0896<br />
18. Pinza de la manguera L0930<br />
19. Pinza de la manguera L0931<br />
20. Tornillo (x 4) L0639<br />
21. Pasador de giro L0209<br />
21
IMPORTANTE: SELECCIÓN DE LA PINTURA<br />
Este es un kit de pulverización altamente versátil que puede ser usado con diferentes medios de<br />
pulverización, incluyendo barnices, productos conservantes de la madera, esmaltes, pinturas a<br />
base de aceite y de agua. Sin embargo, algunos materiales no pueden ser pulverizados, así que<br />
le rogamos compruebe las recomendaciones del fabricante antes de comprar la pintura. Si un<br />
material hace referencia a la aplicación únicamente con brocha, entonces generalmente no podrá<br />
ser pulverizado.<br />
ESTA UNIDAD NO PUEDE SER USADA CON PINTURAS TEXTURADAS. EL USO DE DICHOS<br />
MATERIALES CAUSARÁ UN DESGASTE PREMATURO, LO QUE INVALIDARÍA LA GARAN-<br />
PREPARACIÓN<br />
TÍA. PARA OBTENER LOS MEJORES RESULTADOS DE SU KIT DE PULVERIZACIÓN, LE<br />
ROGAMOS LEA CON ATENCIÓN LAS INSTRUCCIONES ANTES DE USARLO.<br />
La preparación de la superficie y el rebajado de la pintura son dos de los aspectos más importantes<br />
a los que se debe prestar atención para obtener los mejores resultados posibles de su kit de<br />
pulverización. Asegúrese de que todas las superficies están libres de polvo, suciedad, óxido y grasa.<br />
En caso necesario, elimine dichas sustancias con papel de lija o similar.<br />
REBAJADO<br />
El cubrimiento de superficies es importante para asegurar que no pulveriza aquellas áreas que<br />
desea que permanezcan intactas.El kit de pulverización es suministrado con un depósito de<br />
viscosidad. Viscosidad es un término técnico usado para indicar si un producto es muy claro o muy<br />
espeso. Si es claro, se dice que la viscosidad es baja; mientras que si es muy espeso, se dice que<br />
la viscosidad es alta. La viscosidad se mide en segundos. Algunos materiales, para ser<br />
pulverizados, deben ser “rebajados” (diluidos). El rebajado es muy importante cuando se pulveriza.<br />
La mayoría de pinturas, etc. son suministradas a punto para la aplicación con brocha y es posible<br />
que deban ser rebajadas (diluidas) si se quieren usar para la pulverización. Siga la guía del<br />
fabricante para el rebajado junto a una pistola pulverizadora. Si tiene alguna duda, póngase en<br />
contacto con el fabricante de la pintura. El depósito de viscosidad le ayudará a determinar el<br />
espesor correcto de la pintura. La pintura se “rebaja” añadiéndole la misma sustancia que la<br />
pintura tiene como base. En el caso de una pintura a base de agua, se añade agua; con la pintura<br />
a base de aceite se añade “white spirit”. Dado que algunas pinturas, productos conservantes de la<br />
madera y otros materiales pulverizables contienen partículas que tienen diferentes cualidades,<br />
asegúrese al llenar el contenedor de pintura de la pistola pulverizadora de que la pintura sea filtrada,<br />
ya sea mediante un embudo con filtro o mediante medias de nylon. Esto asegurará que no entren<br />
partículas grandes en el contenedor, previniendo de este modo obstrucciones y ofreciendo una<br />
pulverización sin problemas. Asegúrese de llevar en todo momento careta, guantes y gafas de<br />
protección mientras esté pulverizando. La unidad 2900 trae instalada una boquilla de fluido y una<br />
aguja de 3.0 mm (0.12”), tintes para le recomendamos que coloque en su unidad el conjunto de boquilla<br />
de fluido y aguja de 1.5 mm (0.06”) incluido.<br />
VISCOSIDAD IDEAL<br />
Pinturas y emulsiones 25 - 120 segundos<br />
a base de agua<br />
Pinturas a base de aceite 45 - 50 segundos<br />
Conservantes de la madera Sin dilución<br />
Pintura base 45 - 50 segundos<br />
Barnices Sin dilución<br />
Pinturas de aluminio Sin dilución<br />
Emplastes Sin dilución<br />
Esta pistola pulverizadora puede ser usada con productos que tengan una<br />
viscosidad desde 25 hasta un máximo de 120 segundos. Sumerja el depósito<br />
de viscosidad en el material y llénelo. Calcule el tiempo que tarda en vaciarse<br />
el depósito de viscosidad (Fig.1).<br />
Use la tabla anterior (o las instrucciones del fabricante) como guía para determinar<br />
si el material requiere rebajado; en caso afirmativo, proceda al rebajado.<br />
11<br />
Fig.1
FUNCIONAMIENTO<br />
Llene el contenedor de pintura con el medio de pulverización. Tenga cuidado en no llenarlo en exceso.<br />
Introduzca firmemente el tubo del fluido en la base del cuerpo de la pistola. Atornille bien el contenedor al<br />
cuerpo de la pistola. Coloque la unidad del motor en un espacio limpio en el suelo, libre de desechos sueltos,<br />
líquidos o capas de polvo que pudieran bloquear el conducto de admisión del motor. Desenrolle la manguera<br />
de la caja principal y conéctela a la parte posterior de la pistola. Desenrolle el cable de alimentación de la base<br />
de la unidad y enchúfelo.<br />
MANTENGA SIEMPRE LA UNIDAD DEL MOTOR TAN LEJOS COMO SEA POSIBLE DE LA ZONA DE PUL-<br />
VERIZACIÓN PARA EVITAR LA CONTAMINACIÓN DEL MOTOR CON PINTURA.<br />
CUBRA TODO EL ÁREA QUE NO DESEE PULVERIZAR.<br />
Una vez la ha ajustado para proceder a la pulverización, encienda la unidad. La unidad de la pistola no pulverizará<br />
nada de pintura hasta que se apriete el gatillo de la pistola pulverizadora. Antes de empezar cualquier<br />
operación que implique la pulverización de objetos reales, le recomendamos que invierta una pequeña cantidad<br />
de tiempo practicando sobre cartón o papel de periódico hasta que se haya familizarizado con el funcionamiento<br />
de la pistola.<br />
● Para el correcto funcionamiento de esta pistola resulta fundamental utilizar un sello hermético.<br />
● Antes de utilizar la unidad, asegúrese de que el contenedor esté fijado de manera segura al cuerpo de la<br />
pistola y que la tuerca del prensaestopas (13) no esté suelta.<br />
● Con el paso del tiempo, el sello del prensaestopas (9) se desgastará y sera necesario volverlo a ajustar.<br />
Para comprobar si la tuerca del prensaestopas está ajustada correctamente es necesario utilizar un destornil<br />
lador regulable pequeño. Desplace el gatillo hacia adelante y apriete la tuerca del prensaestopas gradualmente<br />
girándola en el sentido de las agujas del reloj hasta que la aguja no pueda moverse cuando se suelte el gatillo.<br />
● Para obtener el ajuste óptimo, destornille gradualmente la tuerca girándola en el sentido contrario a las<br />
agujas del reloj hasta que la aguja se displace hacia adelante y se introduzca en la boquilla de fluido (4). Para<br />
comprobar que los ajustes son los adecuados, pulverice un depósito con agua. Reajuste en caso necesari<br />
TIPOS DE PULVERIZACIÓN<br />
La pistola tiene 3 tipos distintos de pulverización: horizontal, vertical y circular (Fig.2). Los tipos horizontal y ver-<br />
tical se recomiendan para grandes superficies. La pulverización<br />
circular se usa para objetos pequeños o áreas de<br />
difícil acceso, tales como esquinas. Para cambiar el tipo<br />
de pulverización, simplemente gire el soporte de la boquilla<br />
de aire (2) hasta que haga clic en las diferentes posiciones,<br />
tal y como se muestra en la Fig.2. El tamaño general del<br />
tipo de pulverización seleccionado puede ser modificado<br />
girando el anillo del soporte de la boquilla de aire (1). Visto<br />
desde delante, gírelo en el sentido de las agujas del reloj para aumentar el tamaño, o en sentido contrario a las<br />
agujas del reloj para reducirlo.<br />
VOLUMEN DE PINTURA<br />
El volumen de pintura pulverizada es fácilmente ajustable (Fig.3). Cierre completamente<br />
el tornillo de ajuste (8) girándolo en el sentido de las agujas del reloj hasta que ya no se<br />
pueda más. Mientras aprieta el gatillo, empiece a girar el tornillo de ajuste en el sentido<br />
contrario a las agujas del reloj hasta que se obtenga el volumen de pintura deseado. Si<br />
la pulverización contiene demasiada pintura, gire el tornillo de ajuste en el sentido de las<br />
agujas del reloj para reducirlo. Una vez ajustado el tipo de pulverización y el volumen de<br />
pintura, ya puede empezar a pulverizar.<br />
TÉCNICA DE PULVERIZACIÓN<br />
Fig.2<br />
chorro vertical chorro horizontal chorro circular<br />
1. Para obtener los mejores resultados, mantenga siempre la pistola de pulverización plana y pulverice equitati<br />
vamente de lado a lado o de arriba a bajo, a 25-30cm de la superficie. Evite pulverizar en ángulo, pues esto<br />
causará goteo en la superficie (Fig.4-6).<br />
2. Deje que su brazo, no su muñeca, controle el movimiento de izquierda a derecha, pues esto ayudará a con<br />
seguir una distribución regular de la pintura sobre toda la zona.<br />
3. No incline la pistola pulverizadora en un ángulo de más de 45˚ cuando el motor está apagado.<br />
4. Puede inclinar aún más la pistola pulverizadora cuando aplique el spray en<br />
techos, entablados de cobertura, etc., en caso de que el motor esté<br />
encendido.<br />
Para pulverizar en ángulo, le rogamos direccione el tubo de<br />
alimentación de pintura (11) hacia el ángulo contrario en el<br />
que está pulverizando, donde hay más pintura en el tanque.<br />
Fig.4<br />
Fig.5<br />
12<br />
Fig.3<br />
Fig.6
CONSEJOS ÚTILES<br />
1. Controle con uniformidad la velocidad de movimiento de la pistola pulverizadora. Con una velocidad rápida<br />
se aplicará una fina capa y con una velocidad baja se dará una capa densa.<br />
2. Aplique solamente un capa cada vez. Si es necesaria otra capa, siga las instrucciones del fabricante de la<br />
pintura para los tiempos de secado.<br />
3. Si pulveriza áreas u objetos pequeños, mantenga el tornillo de ajuste poco abierto,<br />
pues esto evitará el uso excesivo de pintura y minimizará la neblina de<br />
Fig.7<br />
pulverización.<br />
4. Cuando pulverice áreas u objetos grandes, es mejor usar un patrón de cruzamiento<br />
alternativo, ya sea de izquierda a derecha y luego de arriba a bajo o viceversa. Esto<br />
asegurará la máxima cobertura (Fig.7).<br />
5. Evite detenerse y empezar durante la pulverización, pues esto puede resultar en la<br />
aplicación de demasiado, o no suficiente material en una superficie.<br />
6. Para asegurarse de cubrir los bordes, comience a pulverizar justamente en el lado<br />
del área que está siendo pulverizada.<br />
7. LIMPIE LA PISTOLA PULVERIZADORA DESPUÉS DE CADA USO (VEA<br />
LAS INSTRUCCIONES DE LIMPIEZA).<br />
INSTRUCCIONES DE LIMPIEZA<br />
LA PISTOLA PULVERIZADORA DEBE SER LIMPIADA A FONDO Y LAS ARANDELAS DEL<br />
PRENSAESTOPAS LUBRICADAS INMEDIATAMENTE DESPUÉS DE CADA USO. SI LA<br />
PINTURA SE SECA EN EL INTERIOR, LA LIMPIEZA DE LA PISTOLA SERÁ MUCHO MÁS<br />
DIFÍCIL Y PUEDE DEJAR LA PISTOLA INUTILIZABLE. ESTE EVENTO NO ESTÁ CUBIERTO<br />
POR LA GARANTÍA.<br />
La pistola pulverizadora es lo mismo que una brocha; si no se limpia, la pintura se pondrá dura y será inutilizable.<br />
Por lo tanto, debe limpiarla después de cada uso.<br />
Limpie los residuos de pintura de la pistola pulverizadora del modo siguiente:<br />
Retire el contenedor de pintura (13) de la pistola pulverizadora.<br />
Vierta todo el residuo de pintura en su contenedor original para utilizarlo en el futuro.<br />
Use un paño empapado en diluyente para eliminar el exceso de pintura del contenedor, la cara inferior de la<br />
tapa y la junta.<br />
Vierta una pequeña cantidad de diluyente limpio en el contenedor, vuelva a ajustar el contenedor a la pistola<br />
pulverizadora y agite suavemente la pistola.<br />
Pulverice todo el diluyente con la pistola.<br />
Repita esta operación, usando cada vez diluyente limpio, hasta que no quede ningún rastro de pintura en el<br />
diluyente que se está pulverizando.<br />
Para limpiar a fondo la resta de la pistola pulverizadora, saque todas las partes operantes, de acuerdo con el<br />
esquema de piezas de recambio de la p.41, del siguiente modo:<br />
Desatornille el anillo de ajuste (1).<br />
Saque el soporte de la boquilla de aire (2).<br />
Saque del todo el tornillo de ajuste (8).<br />
Saque el muelle (7).<br />
Saque la aguja (6), no use ninguna herramienta para realizar esta operación (15).<br />
Saque la boquilla del fluido (4).<br />
Saque la placa del caudal del aire (3).<br />
Saque la arandela de la boquilla (5).<br />
Coloque todos estos elementos en un recipiente y límpielos usando un cepillo y diluyentes limpios. (12)<br />
Limpie el interior de la pistola.(12)<br />
Seque a conciencia estas piezas andes de volverlas a montar.<br />
Vuelva a montar las partes en el orden contrario. Se recomienda colocar la boquilla del fluido antes que la<br />
aguja.<br />
Después de limpiar la pistola pulverizadora y antes de colocar la aguja, sumerja la boquilla en vaselina, lo que<br />
lubricará las arandelas del prensaestopas al insertar la aguja.<br />
Las superficies externas de la pistola pulverizadora pueden ser limpiadas con un paño empapado en diluyente.<br />
Importante: cada tamaño de aguja está diseñado para ajustarse a su correspondiente boquilla de fluido. No<br />
intente colocar la aguja de 3.0mm (0.12”) en la boquilla de fluido de 1.5 mm (0.06”).<br />
Se recomienda instalar la boquilla de fluido (4) antes que la aguja.<br />
NO TIRE NUNCA POR EL DESAGÜE PINTURA O DISOLVENTE . PÓNGASE EN CONTACTO CON EL<br />
AYUNTAMIENTO LOCAL PARA ORGANIZAR SU RECOGIDA O PARA SABER LA UBICACIÓN DEL<br />
VERTEDERO DE RESIDUOS REGISTRADO MÁS CERCANO.<br />
13
UNIDAD DE TURBINA<br />
La unidad de turbina solamente requiere un mantenimiento mínimo:<br />
● Asegúrese de que su elemento de filtrado (21) se mantiene limpio en todo momento. Se trata del filtro situado<br />
debajo del cuerpo principal de la unidad del motor. Desconecte la unidad de la alimentación, póngala de lado<br />
y saque el material poroso. Éste puede ser lavado si fuera necesario y vuelto a colocar una vez seco. De vez<br />
en cuando este filtro deberá ser sustituido.<br />
● Los cojinetes de la turbina están sellados y lubricados de por vida. No es necesario ningún tipo<br />
de mantenimiento o ajuste.<br />
● Limpie la turbina y la unidad de la manguera con un paño húmedo después del uso.<br />
● La manguera se guarda enrollándola entre la caja del motor y la cubierta de la manguera.<br />
● El cable de red se guarda envolviéndolo alrededor de la base de la unidad y colocando el enchufe<br />
en el espacio que queda detrás de la unidad.<br />
SOLUCIÓN DE PROBLEMAS<br />
PROBLEMA CAUSA ACCIÓN NECESARIA<br />
La pintura gotea La pintura está demasiado diluida Añada material no diluido<br />
sobre el artículo<br />
pulverizado<br />
El volumen de pintura es demasiado<br />
alto<br />
Reduzca el flujo de pintura ajustando el<br />
tornillo (8)<br />
Movimiento demasiado lento Aumente la velocidad de aplicación<br />
El gatillo de la pistola se mantiene<br />
apretado demasiado tiempo<br />
Suelte el gatillo más rápidamente<br />
La pistola está demasiado cerca Aumente la distancia entre la pistola y<br />
la pieza de trabajo<br />
La pintura es La pintura está demasiado diluida Añada material no diluido<br />
clara o irregular El volumen de pintura es demasiado Aumente el flujo de pintura ajustando el<br />
bajo<br />
tornillo (8)<br />
Movimiento demasiado rápido Reduzca la velocidad de aplicación<br />
La pistola está atascada Limpie la pistola<br />
La pistola está demasiado lejos Reduzca la distancia entre la pistola y<br />
la pieza de trabajo<br />
No sale la pintura La pintura es demasiado espesa Añada diluyente<br />
La pistola está atascada Limpie la pistola<br />
El tubo de recolección está atascado Limpie el tubo de recolección (11)<br />
La manguera de aire se ha partido Sustituya la manguera de aire (17)<br />
La pintura es granulada Filtre la pintura<br />
El contenedor está casi vacío Rellene el contenedor<br />
La pistola está en ángulo Asegúrese de que el tubo de recolección<br />
(11) está orientado hacia la pintura<br />
La entrada de aire está bloqueada Compruebe que no haya papel o desechos<br />
sueltos que puedan bloquear la<br />
entrada de aire debajo de la unidad(21)<br />
14
CONEXIÓN A LA RED<br />
Esta unidad es un equipo de la Clase II, lo que significa que tiene doble aislamiento para su<br />
protección, no es necesario cable de conexión a tierra.<br />
Si el cable de alimentación está dañado, debe ser sustituido por <strong>Earlex</strong> Ltd o por uno de nuestros<br />
distribuidores autorizados.<br />
Si usa un cable de extensión, éste debe tener una tensión mínima de 6 amps y debe estar<br />
completamente desenrollado. No haga funcionar la unidad con un cable de tensión inferior a 6<br />
amps, pues esto causará un fallo prematuro del motor que no está cubierto por la garantía.<br />
ATENCIÓN: Hemos hecho todo lo posible para asegurar que, usada correctamente y de acuerdo<br />
a estas instrucciones, esta pistola pulverizadora tendrá una vida larga y sin problemas. No<br />
aceptamos ninguna responsabilidad por daños causados por el uso de sustancias incorrectas o<br />
no adecuadas, pinturas o fluidos que no hayan sido rebajados correctamente o que sean i<br />
nadecuados para las superficies a las que han sido aplicados; problemas de salud originados de<br />
una falta de ventilación al trabajar en espacios confinados; o fallo del equipo debido a una limpieza<br />
inadecuada de los componentes después del uso. Si existe alguna duda, haga una prueba<br />
primero en una zona pequeña y poco notoria. Lea siempre las instrucciones del fabricante de la<br />
pintura en primer lugar. Ni nuestra garantía ni esta declaración afectan sus derechos<br />
estatutarios.<br />
Declaración de conformidad CE<br />
Declaramos que la unidad: <strong>HV2900</strong> se adecua a LVD 2006/95/EC, EN 60335-1,<br />
EMC 2004/108/EC, EN55014-1, EN55014-2, EN61000-3-2, EN61000-3-3, EMF EN50366.<br />
Tim Hopper Director técnico<br />
Nª de diseño registrado en la Gran Bretaña:<br />
GB3022947, FR 06/5463, EU 000608856, US D563, 503<br />
Copyright y Derecho de Diseño Reservado 2009 ©<br />
GARANTÍA<br />
Este producto está garantizado durante un periodo de 24 meses contra materiales defectuosos o<br />
defectos de fabricación. No se garantiza si se hace un uso industrial o se alquila. La garantía no<br />
afecta sus derechos estatutarios. <strong>Earlex</strong> Inc. no se responsabilizará del uso de este producto si se<br />
usa para propósitos diferentes a los detallados en las presentes instrucciones.<br />
Si necesita ayuda, contacte con nuestro servicio de atención al cliente en el<br />
Tel: 704 827 7889 Fax: 704 827 7849<br />
Servicio de atención al cliente: Línea gratuita de atención al cliente 888-783-2612<br />
Sitio Web: www.earlex.com Email: service@earlex.com<br />
<strong>Earlex</strong> Inc, 8261 Hwy 73, Suite F, Stanley, N.C. 28164, USA<br />
© <strong>Earlex</strong> Inc. 2009 L1116 01/09<br />
15
Notes

