V1.3.GV-NVR System Lite User Manual
V1.3.GV-NVR System Lite User Manual
V1.3.GV-NVR System Lite User Manual

Create successful ePaper yourself
Turn your PDF publications into a flip-book with our unique Google optimized e-Paper software.
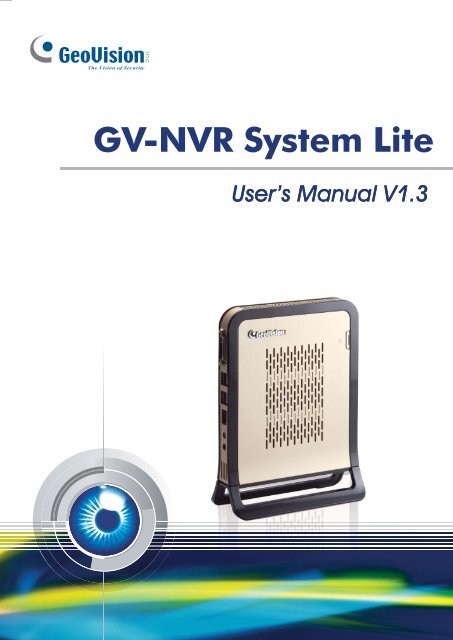
GV-<strong>NVR</strong> <strong>System</strong> <strong>Lite</strong><br />
<strong>User</strong>’s <strong>Manual</strong> V1.3
© 2010 GeoVision, Inc. All rights reserved.<br />
Under the copyright laws, this manual may not be copied, in whole or in part,<br />
without the written consent of GeoVision.<br />
Every effort has been made to ensure that the information in this manual is<br />
accurate. GeoVision, Inc. makes no expressed or implied warranty of any kind<br />
and assumes no responsibility for errors or omissions. No liability is assumed<br />
for incidental or consequential damages arising from the use of the information<br />
or products contained herein. Features and specifications are subject to<br />
change without notice.<br />
GeoVision, Inc.<br />
9F, No. 246, Sec. 1, Neihu Rd.,<br />
Neihu District, Taipei, Taiwan<br />
Tel: +886-2-8797-8377<br />
Fax: +886-2-8797-8335<br />
http://www.geovision.com.tw<br />
Trademarks used in this manual: GeoVision, the GeoVision logo and GV<br />
series products are trademarks of GeoVision, Inc. Windows and Windows XP<br />
are registered trademarks of Microsoft Corporation.<br />
April 2011
<strong>User</strong>’s <strong>Manual</strong> for<br />
GV-<strong>NVR</strong> <strong>System</strong> <strong>Lite</strong><br />
Welcome to the GV-<strong>NVR</strong> <strong>System</strong> <strong>Lite</strong> <strong>User</strong>’s <strong>Manual</strong>.<br />
The <strong>Manual</strong> provides an overview of the GV-<strong>NVR</strong> <strong>System</strong> <strong>Lite</strong> and its accessories. It<br />
also includes the instructions to guide you through the installation and use of the<br />
GV-<strong>NVR</strong> <strong>System</strong> <strong>Lite</strong>:<br />
• Chapter 1, Introduction<br />
Identifies the GV-<strong>NVR</strong> <strong>System</strong> <strong>Lite</strong>’s accessories and options.<br />
• Chapter 2, Overview<br />
Identifies the GV-<strong>NVR</strong> <strong>System</strong> <strong>Lite</strong>’s features.<br />
• Chapter 3, Getting Started<br />
Provides step-by-step instructions on setting up the GV-<strong>NVR</strong> <strong>System</strong> <strong>Lite</strong>.<br />
• Chapter 4, Advanced Applications<br />
Introduces how to update firmware to the GV IP cameras.<br />
• Chapter 5, Mobile Phone Connection<br />
Introduces how to connect mobile phones to the GV-<strong>NVR</strong> <strong>System</strong> <strong>Lite</strong>.<br />
• Chapter 6, <strong>NVR</strong> Health Analysis<br />
Introduces how to collect data to obtain the service of <strong>NVR</strong> health analysis<br />
from GeoVision.<br />
• Chapter 7, Troubleshooting<br />
Suggests courses of action if the GV-<strong>NVR</strong> <strong>System</strong> <strong>Lite</strong> doesn’t seem to be working<br />
properly.
ii<br />
Contents<br />
Regulatory Notices.................................................................................................. iv<br />
Safety Instructions ................................................................................................... v<br />
Bundled Software and Cameras............................................................................. vi<br />
Chapter 1 Introduction .......................................................................................... 1<br />
1.1 Packing List.............................................................................................................. 1<br />
1.2 Options.....................................................................................................................3<br />
Chapter 2 Overview ............................................................................................... 4<br />
2.1 Front and Left-Side View ...............................................................................4<br />
2.2 Right-Side View .............................................................................................5<br />
Chapter 3 Getting Started...................................................................................... 6<br />
3.1 Installing Base Stand ................................................................................................ 6<br />
3.2 Installing Computer Mount........................................................................................ 7<br />
3.3 Basic Installation....................................................................................................... 8<br />
3.4 Changing the IP Address........................................................................................ 10<br />
3.5 Formatting the External Hard Drive ........................................................................ 14<br />
3.6 Adding the External Hard Drive to the Recording Path .......................................... 21<br />
3.7 Changing Video Codec and Resolution.................................................................. 22<br />
3.8 Exiting to Windows ................................................................................................. 24<br />
3.9 Returning to GV-Desktop........................................................................................ 25<br />
3.10 Restoring <strong>System</strong> ................................................................................................. 26<br />
3.11 Updating GV-<strong>NVR</strong> <strong>System</strong> <strong>Lite</strong>............................................................................. 28<br />
Chapter 4 Firmware Upgrade for GV IP Cameras.............................................. 29<br />
4.1 Using the Web Configuration Interface................................................................... 30<br />
4.2 Using the IP Device Utility ...................................................................................... 31<br />
Chapter 5 Mobile Phone Connection.................................................................. 33<br />
5.1 Windows PDA......................................................................................................... 35<br />
5.2 Windows Smartphone ............................................................................................ 43<br />
5.3 Symbian Smartphone ............................................................................................. 47<br />
5.4 BlackBerry Phone................................................................................................... 51
5.5 3G Mobile Phone.................................................................................................... 54<br />
5.6 I-Mode Phone ......................................................................................................... 57<br />
5.7 iPhone and iPod Touch ......................................................................................... 59<br />
5.8 iPad…..................................................................................................................... 66<br />
5.9 Android Mobile Application ..................................................................................... 72<br />
Chapter 6 <strong>NVR</strong> Health Analysis .......................................................................... 78<br />
6.1 <strong>System</strong> Settings...................................................................................................... 78<br />
6.2 <strong>System</strong> Log............................................................................................................. 80<br />
6.3 Information of Your Computer <strong>System</strong>.................................................................... 81<br />
6.4 Health Analysis Form.............................................................................................. 83<br />
6.5 Check List............................................................................................................... 83<br />
Chapter 7 Troubleshooting ................................................................................. 84<br />
Specifications ......................................................................................................... 88<br />
Warranty Policy....................................................................................................... 91<br />
Microsoft Software License Terms for: Windows® XP Embedded Runtime ..... 94<br />
Warranty Form ........................................................................................................ 99<br />
iii
Regulatory Notices<br />
iv<br />
CE Notice<br />
This is a Class A product. In a domestic environment, this product may cause radio<br />
interference in which case the user may be required to take adequate measures.<br />
RoHS Compliance<br />
The Restriction of Hazardous Substances (RoHS) Directive is to forbid the use of hazardous<br />
materials of production. To meet the RoHS Directive requirements, this product is made to be<br />
RoHS compliant.<br />
VCCI Notice<br />
The Voluntary Control Council for Interference by Information Technology Equipment (VCCI)<br />
mark is administered by VCCI for information technology equipment (ITE) sold in Japan.<br />
Products displaying the VCCI Mark are perceived as high quality.
Safety Instructions<br />
Observe these safety instructions to help ensure against injury to yourself and damage<br />
to the product.<br />
� Read all safety and installation instructions before you operate the product.<br />
� Do not operate the product in high humidity areas or expose it to water or moisture.<br />
� Do not put the product in an unstable, a slanting or vibrated place.<br />
� Do not block any ventilation opening.<br />
� Do not install the product near any heat sources such as radiator, heat register or<br />
other apparatus that produce heat.<br />
� Operate the product using only the type of power source indicated on the marking label.<br />
� Do not defeat the safety purpose of the grounding-type plug. A grounding plug has two<br />
blades and a third grounding prong. The third prong is provided for your safety. If the<br />
provided plug does not fit into your outlet, consult an electrician for replacement of the<br />
obsolete outlet.<br />
� Do not overload wall outlets or extension cords, as this may cause fire or electric<br />
shock.<br />
� Do not use the product when abnormality occurs, such as emitting smoke from the<br />
product, smelling burning, being damaged by drop, invasion of foreign objects inside the<br />
product, etc. Be always sure to remove the AC adaptor at once and contact your dealer.<br />
� Do not use accessories or attachments not recommended by the manufacturer, as they<br />
may cause hazards and void the warranty.<br />
� Do not attempt to service the product yourself, as removing the casing may expose<br />
you to dangerous voltage and void the warranty.<br />
v
Bundled Software and Cameras<br />
The Bundled Software:<br />
The bundled software preinstalled in the GV-<strong>NVR</strong> <strong>System</strong> <strong>Lite</strong> (GV-Desktop < Program<br />
button < Multicam Installation) is a lite version, specially designed for the GV-<strong>NVR</strong> <strong>System</strong><br />
<strong>Lite</strong> to implement the GV IP cameras.<br />
1. It includes a lite version of video analysis applications, featuring Advanced Motion<br />
Detection, Privacy Mask, Scene Change Detection and Counter only.<br />
2. The ViewLog player only supports Single View playback. For Quad View or Multi View<br />
playback, you need to additionally install Remote ViewLog (GV-Desktop < Program<br />
button < Multicam Installation).<br />
Note: For Counter application, it is recommended to set up only one camera and draw only<br />
one line on the camera image to mark the boundary of detection zone to maintain a better<br />
CPU performance.<br />
vi
The Bundled GV IP Cameras:<br />
You can select four GV IP cameras from one of the following two combinations:<br />
� Select any 4 units from Section A.<br />
� Select any 3 units from Section A and 1 unit from Section B.<br />
Section Camera Model Camera Type Max. Frame Rate (fps)<br />
GV-BX110D Box Camera 15<br />
A<br />
B<br />
GV-MFD110 Mini Fixed Dome 15<br />
GV-BL110D Bullet Camera 15<br />
GV-PT110D PT Camera 15<br />
GV-PTZ010D-N PTZ Camera 30<br />
GV-PTZ010D-P PTZ Camera 25<br />
GV-SD010 / GV-SD010S NTSC PTZ Camera 30<br />
GV-SD010 / GV-SD010S PAL PTZ Camera 25<br />
GV-BX120D Box Camera 30<br />
GV-BX220D Box Camera 15<br />
GV-BX320D Box Camera 6<br />
GV-BL120D Bullet Camera 30<br />
GV-BL220D Bullet Camera 15<br />
GV-BL320D Bullet Camera 6<br />
GV-VD120D Vandal Proof Dome 30<br />
GV-VD220D Vandal Proof Dome 15<br />
GV-VD320D Vandal Proof Dome 6<br />
GV-FD120D Fixed Dome 30<br />
GV-FD220D Fixed Dome 15<br />
GV-FD320D Fixed Dome 6<br />
GV-CB120 Cube Camera 30<br />
GV-CB220 Cube Camera 15<br />
GV-FE110 / GV-FE111 Fisheye Camera 6<br />
GV-FE420 / GV-FE421 Fisheye Camera 2<br />
vii
Chapter 1 Introduction<br />
1<br />
Introduction<br />
The GV-<strong>NVR</strong> <strong>System</strong> <strong>Lite</strong> is a light-weight and an ultra-slim <strong>NVR</strong> system, which you can<br />
record video files directly to the internal hard drive. Exclusively designed for GV IP cameras<br />
for networking surveillance, the GV-<strong>NVR</strong> <strong>System</strong> <strong>Lite</strong> supports a plug and play function to<br />
connect up to 4 cameras automatically. The GV-<strong>NVR</strong> <strong>System</strong> <strong>Lite</strong> is an ideal <strong>NVR</strong> system for<br />
small business or retail stores.<br />
Its six USB 2.0 ports enable to connect with multiple peripheral devices, such as USB HDD,<br />
USB DVD player and etc. Its Gigabit Ethernet function enables high-speed Internet access for<br />
seamless Web browsing. Moreover, our VESA mounting solution allows you to mount the<br />
ultra-slim unit on the back of a computer monitor.<br />
Main Features<br />
• Compact and slim<br />
• Up to 4 channels<br />
• Exclusively designed for GV IP cameras<br />
• H.264 / MJPEG / MPEG4 supported<br />
• Dual video streams<br />
• Automatic connection to GV IP cameras<br />
• Video analysis (Advanced Motion Detection, Privacy Mask, Scene Change Detection and<br />
Counter)<br />
• All-in-one solution (Live View, Playback, Recording, Backup, CMS)<br />
• Standing mount and VESA mount options<br />
• Pre-installation recovery from the hidden partition<br />
• Direct recording to the internal hard drive<br />
• Low power consumption<br />
• Smart phones access supported<br />
• Multiple (16) languages supported<br />
1
1.1 Packing List<br />
The GV-<strong>NVR</strong> <strong>System</strong> <strong>Lite</strong> package includes the following items:<br />
Important: Please keep the original carton and all packing materials for future shipping need.<br />
• GV-<strong>NVR</strong> <strong>System</strong> <strong>Lite</strong> x 1<br />
• GV IP camera x 4 (The shipping models of the GV IP cameras are by order.)<br />
• AC Power Cord x 1<br />
• Power Adapter x 1<br />
• Standing Mount Kit (1 Base Stand and 1 Base Stand Screw included) x 1<br />
• VESA Monitor Mount Kit (1 Stand Screw and 4 Fix Screws included) x 1<br />
• GV-<strong>NVR</strong> <strong>System</strong> <strong>Lite</strong> Quick Start Guide x 1<br />
If any of the items are missing or damaged, contact your dealer to arrange a replacement.<br />
2
1.2 Options<br />
1<br />
Introduction<br />
Optional devices can expand your GV-<strong>NVR</strong> <strong>System</strong> <strong>Lite</strong>’s capabilities and versatility. Contact<br />
your dealer for more information.<br />
GV-Data Capture V3 Box GV-Data Capture V3 Box can integrate the GV-<strong>NVR</strong> <strong>System</strong><br />
<strong>Lite</strong> to an electronic POS system, while GV-Data Capture V3E<br />
Box can establish such integration through LAN or Internet.<br />
GV-Hub Box An easy way for serial port extension. This hub can add 4<br />
RS-232/RS-485 serial ports through the GV-<strong>NVR</strong> <strong>System</strong> <strong>Lite</strong>’s<br />
USB port.<br />
GV-COM Box This unit can add 1 RS-232/RS-485 serial port through the<br />
GV-<strong>NVR</strong> <strong>System</strong> <strong>Lite</strong>’s USB port.<br />
GV-IO Box (4 Ports) GV-IO Box 4 provides 4 inputs and 4 relay outputs, and<br />
supports both DC and AC output voltages. A USB port is also<br />
provided for PC connection.<br />
GV-IO Box (8 Ports) GV-IO Box 8 provides 8 inputs and 8 relay outputs, and<br />
supports both DC and AC output voltages. A USB port is also<br />
provided for PC connection.<br />
GV-IO Box (16 Ports) GV-IO Box 16 provides 16 inputs and 16 relay outputs, and<br />
supports both DC and AC output voltages. A USB port is also<br />
provided for PC connection.<br />
RAM Multiple options for the amount of RAM are available to meet<br />
different needs.<br />
3
Chapter 2 Overview<br />
2.1 Front and Left-Side View<br />
4<br />
6<br />
7<br />
1<br />
2<br />
3<br />
4<br />
5<br />
No. Name Description<br />
Figure 2-1<br />
1 DVI Port Connects a monitor.<br />
2 USB 2.0 Port Connects USB devices.<br />
3 Giga LAN Port Connects the switch or hub.<br />
4 Power Port Connects to the power outlet.<br />
5 AUX Port Connects the speaker amplifier.<br />
6 Base Stand Screw Fastens the Base Stand to the GV-<strong>NVR</strong> <strong>System</strong> <strong>Lite</strong>.<br />
7 Base Stand Supports the GV-<strong>NVR</strong> <strong>System</strong> <strong>Lite</strong> to stand.<br />
8 Power Button Turns on the power of GV-<strong>NVR</strong> <strong>System</strong> <strong>Lite</strong>.<br />
8
2.2 Right-Side View<br />
No. Name Description<br />
Figure 2-2<br />
1 Audio Input Connects a microphone.<br />
2 Audio Output Connects speakers.<br />
3 USB 2.0 Port Connects USB devices.<br />
2<br />
Overview<br />
5
Chapter 3 Getting Started<br />
There are two methods to mount the GV-<strong>NVR</strong> <strong>System</strong> <strong>Lite</strong>. One is to use the base stand to<br />
support the unit to stand. The other is to use the VESA monitor mount to mount the unit on the<br />
back of the computer monitor.<br />
3.1 Installing Base Stand<br />
6<br />
Figure 3-1<br />
1. Attach the base stand to the GV-<strong>NVR</strong> <strong>System</strong> <strong>Lite</strong>.<br />
2. Tighten the base stand screw.
3.2 Installing Computer Mount<br />
3<br />
Getting Started<br />
1. Using the 4 fix screws, tighten the VESA monitor mount on the back of the computer<br />
monitor.<br />
Figure 3-2<br />
2. Attach the GV-<strong>NVR</strong> <strong>System</strong> <strong>Lite</strong> to the VESA monitor mount and tighten the stand screw.<br />
Figure 3-3<br />
Stand Screw<br />
Note: For the mounting method of computer monitor, make sure your monitor is VESA<br />
compliant. The supplied VESA monitor mount features the two mounting-hole patterns of 3" x<br />
3" and 4" x 4".<br />
7
3.3 Basic Installation<br />
This section describes basic installation required to program and operate the GV-<strong>NVR</strong><br />
<strong>System</strong> <strong>Lite</strong>.<br />
8<br />
Figure 3-4<br />
1. Connect the speakers to the GV-<strong>NVR</strong> <strong>System</strong> <strong>Lite</strong>.<br />
2. Connect the microphone to the GV-<strong>NVR</strong> <strong>System</strong> <strong>Lite</strong>.<br />
3. Using the USB cables, connect a keyboard and a mouse to the GV-<strong>NVR</strong> <strong>System</strong> <strong>Lite</strong>.<br />
4. Using the DVI cable, connect the computer monitor to the GV-<strong>NVR</strong> <strong>System</strong> <strong>Lite</strong>.<br />
5. Using the RJ-45 cable, connect a switch or a hub to the GV-<strong>NVR</strong> <strong>System</strong> <strong>Lite</strong>.<br />
6. Connect the GV IP cameras to the same LAN with the GV-<strong>NVR</strong> <strong>System</strong> <strong>Lite</strong> Then power<br />
on the GV IP cameras.<br />
7. Using the supplied power adapter, connect the GV-<strong>NVR</strong> <strong>System</strong> <strong>Lite</strong> to the power outlet.<br />
After the power is turned on, the GV-<strong>NVR</strong> <strong>System</strong> <strong>Lite</strong> will search and connect to GV IP<br />
cameras automatically without any setup. And the GV-<strong>NVR</strong> <strong>System</strong> <strong>Lite</strong> will bring you to the<br />
main screen with 4-channel display.<br />
IMPORTANT: Before you power on the GV-<strong>NVR</strong> <strong>System</strong> <strong>Lite</strong>, make sure the GV IP cameras<br />
are connected to the same LAN with the GV-<strong>NVR</strong> <strong>System</strong> <strong>Lite</strong> and the cameras are<br />
powered on.
Note:<br />
3<br />
Getting Started<br />
1. The monitor you use must be capable of having a screen resolution of 1280 x 1024 and<br />
display color of 32 bits.<br />
2. The automatic connection between GV-<strong>NVR</strong> <strong>System</strong> <strong>Lite</strong> and GV IP cameras only works<br />
when they are connected to the same LAN.<br />
9
3.4 Changing the IP Address<br />
By default, the GV-<strong>NVR</strong> <strong>System</strong> <strong>Lite</strong> has the IP address of 192.168.0.200 and the GV IP<br />
camera has the IP address of 192.168.0.10. The default IP address settings allow the<br />
GV-<strong>NVR</strong> <strong>System</strong> <strong>Lite</strong> and GV IP cameras automatically connect together on the LAN when<br />
they are started for the first time. The GV-<strong>NVR</strong> <strong>System</strong> <strong>Lite</strong> will assign unused IP addresses<br />
on the LAN to each GV IP camera with the IP address like this: 192.168.0.X.<br />
The assigned IP addresses will be fixed on the GV IP cameras unless you manually change<br />
them.<br />
10<br />
Figure 3-5<br />
If the IP address of your LAN is not 192.168.0.X, you may need to change the IP addresses of<br />
GV IP cameras and GV-<strong>NVR</strong> <strong>System</strong> <strong>Lite</strong> accordingly. To change IP addresses, make sure to<br />
change the cameras’ first and then the GV-<strong>NVR</strong> <strong>System</strong> <strong>Lite</strong>’s.
To change the IP address of the GV IP camera:<br />
3<br />
Getting Started<br />
1. From the desktop of GV-<strong>NVR</strong> <strong>System</strong> <strong>Lite</strong>, click the Program button and select VS Utility.<br />
This dialog box appears. The GV IP device utility will automatically detect the GV IP<br />
cameras on the LAN.<br />
Figure 3-6<br />
2. Double-click the found GV IP camera in the list. This dialog box appears.<br />
Figure 3-7<br />
3. Type the user name and password of the GV IP camera. By default both values are<br />
admin.<br />
4. Type the new IP information.<br />
5. Click OK. The new IP address will be updated to the camera.<br />
11
To change the IP address of the GV-<strong>NVR</strong> <strong>System</strong> <strong>Lite</strong>:<br />
1. On the GV-Desktop, click the Programs button, and select Control Panel.<br />
12<br />
Figure 3-8<br />
2. Type the ID and password. The default ID and password are “0000”. The Control Panel<br />
window appears.<br />
Figure 3-9<br />
3. Double-click Network Connections, right-click Local Area Connection, and select<br />
Properties.<br />
Figure 3-10
3<br />
Getting Started<br />
4. In the Local Area Connection Properties dialog box, select Internet Protocol (TCP/IP)<br />
and click Properties.<br />
Figure 3-11<br />
5. Select Use the following IP address, type the new IP information, and click OK to finish<br />
the setting.<br />
Figure 3-12<br />
Note:<br />
1. If you want to install more than one unit of GV-<strong>NVR</strong> <strong>System</strong> <strong>Lite</strong> on the same LAN, you<br />
need to change the IP addresses of the first GV-<strong>NVR</strong> <strong>System</strong> <strong>Lite</strong> and its bundled GV IP<br />
cameras before installing the second GV-<strong>NVR</strong> <strong>System</strong> <strong>Lite</strong> in avoid of IP address conflict.<br />
2. After you change the IP address of GV-<strong>NVR</strong> <strong>System</strong> <strong>Lite</strong>, you should also change the IP<br />
addresses of GV IP cameras accordingly to the same network; otherwise, the GV-<strong>NVR</strong><br />
<strong>System</strong> <strong>Lite</strong> cannot detect the cameras.<br />
13
3.5 Formatting the External Hard Drive<br />
The GV-<strong>NVR</strong> <strong>System</strong> <strong>Lite</strong> records audio and video to the internal hard drive. You can also use<br />
an external hard drive to expand recording space. You must format the hard drive before you<br />
can use it.<br />
1. On the GV-Desktop, click the Programs button, and select Disk Management.<br />
14<br />
Figure 3-13<br />
2. Type the ID and password in the dialog box. The default ID and password are “0000”.<br />
Figure 3-14
3. The Initialize and Convert Disk Wizard appears. Click Next to continue.<br />
Figure 3-15<br />
3<br />
Getting Started<br />
Note: If the Wizard does not appear, you need to initialize the drives one by one. To manually<br />
initialize a drive, right-click on the name of the drive and select Initialize Disk.<br />
4. The screen shows the drives you selected to initialize. Make sure all drives are checked,<br />
and click Next to continue.<br />
Figure 3-16<br />
15
5. The screen gives you the option to convert the drives from basic to dynamic storage.<br />
16<br />
Leave all drives unchecked, and click Next to continue.<br />
Figure 3-17<br />
6. When the initialization is complete, click Finish to close the wizard.<br />
Figure 3-18
7. Right-click in the unallocated space of a new drive, and select New Partition.<br />
Figure 3-19<br />
8. The New Partition Wizard appears. Click Next to continue.<br />
Figure 3-20<br />
3<br />
Getting Started<br />
17
9. Select Primary partition, and click Next to continue.<br />
18<br />
Figure 3-21<br />
10. The default partition size is the same as the maximum disk space. Make changes if<br />
necessary. Click Next to continue.<br />
Figure 3-22
Getting Started<br />
11. Assign a drive path that is not in use by other devices, and click Next to continue.<br />
Figure 3-23<br />
Note: The default drive path starts from E:\.<br />
12. Type a name in the Volume label box, ex. HDD1, and click Next to continue.<br />
Figure 3-24<br />
3<br />
19
13. When the formatting is complete, click Finish to close the wizard.<br />
20<br />
Figure 3-25<br />
14. When the drive is successfully initialized, partitioned, and formatted, its status description<br />
should display “Healthy.”<br />
Figure 3-26
3<br />
Getting Started<br />
3.6 Adding the External Hard Drive to the Recording Path<br />
Before you start recording to the external hard drive, you need to add the formatted external<br />
hard drive to the recording path.<br />
1. On the GV-Desktop, click the Programs button, and select Hot Swap HDD Tool. The<br />
MediaMan Tools window appears.<br />
Figure 3-27<br />
2. Right-click the hard drive in the MediaMan Tools window, select Add for recording, and<br />
then select the storage group from the drop-down list. The Storage 1 is created by default.<br />
3. Click OK to automatically configure the hard drive to the recording path.<br />
4. In the MediaMan Tools window, if the hard disk drive is successfully added to store data,<br />
its Status field will display “Standby”.<br />
Figure 3-28<br />
5. To add another formatted hard disk drive for storage, repeat the above steps.<br />
21
3.7 Changing Video Codec and Resolution<br />
The table below lists the default video resolution, codec and max. frame rate for different<br />
cameras when connecting to GV-<strong>NVR</strong> <strong>System</strong> <strong>Lite</strong>.<br />
Default Resolution (Dual Streams)<br />
Camera Model<br />
Recording and<br />
Single Live View<br />
(H.264)<br />
Quad View<br />
(MPEG4)<br />
Max. Frame<br />
Rate (fps)<br />
GV-BX110D / GV-MFD110D /<br />
GV-BL110D / GV-PT110D<br />
GV-BX120D / GV-BL120D /<br />
1280 x 1024 320 x 256 15<br />
GV-VD120D / GV-FD120D /<br />
GV-CB120<br />
GV-BX220D / GV-BL220D /<br />
1280 x 1024 320 x 256 30<br />
GV-VD220D / GV-FD220D /<br />
GV-CB220<br />
1920 x 1080 448 x 252 15<br />
GV-BX320D / GV-BL320D /<br />
GV-VD320D / GV-FD320D<br />
2048 x 1536 320 x 240 6<br />
GV-PTZ010D-N /<br />
GV-SD010 / GV-SD010S NTSC<br />
704 x 480 352 x 240 30<br />
GV-PTZ010D-P /<br />
GV-SD010 / GV-SD010S PAL<br />
704 x 576 352 x 288 25<br />
Camera Model<br />
Default Resolution<br />
(Single Stream H.264)<br />
Max. Frame<br />
Rate (fps)<br />
GV-FE110 / GV-FE111 1280 x 1024 6<br />
GV-FE420 / GV-FE421 2048 x 1944 2<br />
Note:<br />
1. Several resolution, aspec ratio and codec options are available for each IP camera,<br />
except GV-FE110 / GV-FE111 / GV-FE420 / GV-FE421. But the default resolution for<br />
Quad View images (CIF) cannot be changed.<br />
2. Once the GV IP camera is connected to the GV-<strong>NVR</strong> <strong>System</strong> <strong>Lite</strong>, the video resolution<br />
and codec set on the GV-<strong>NVR</strong> <strong>System</strong> <strong>Lite</strong> will override those set on the camera’s Web<br />
interface.<br />
3. When connecting GV-FE420 / GV-FE421, it is required to set the screen resolution to<br />
1280 x 1024 or lower to get better CPU performance.<br />
22
To change the video codec and resolution, follow the steps below.<br />
3<br />
Getting Started<br />
1. On the main screen, click the Configure button, select General Setting, select Camera /<br />
Audio Install, and click IP Camera Install. This dialog box appears.<br />
Figure 3-29<br />
2. Click Scan Camera to detect all the IP cameras on the same LAN. After the scanning<br />
process is finished, this dialog box appears.<br />
Figure 3-30<br />
3. Double-click the IP cameras to add them to the list.<br />
4. Click the listed camera, and select Change preview codec, Change record codec or<br />
Change Resolution to change the Live View codec or Recording codec and Recording<br />
resolution.<br />
Figure 3-31<br />
5. Click the listed camera, and select Display position to map the IP camera to a channel on<br />
the GV-<strong>NVR</strong> <strong>System</strong> <strong>Lite</strong>.<br />
6. The Status column now should display “Connected”. Click OK to exit.<br />
23
3.8 Exiting to Windows<br />
The GV-<strong>NVR</strong> <strong>System</strong> <strong>Lite</strong> is protected by GV-Desktop that is limited to run the selected<br />
programs. If you need to exit to Windows desktop, follow these steps.<br />
1. On the GV-Desktop, click the Settings button, and type the valid ID and password. The<br />
default ID and Password are “0000”. The Settings dialog box appears.<br />
2. Under Desktop Type, select Windows from the drop-down list, and click OK.<br />
3. Click the Log Off button, and enter the valid ID and Password. The Windows desktop<br />
appears.<br />
24<br />
1 3 2<br />
Figure 3-32 The GV-Desktop
3.9 Returning to GV-Desktop<br />
3<br />
Getting Started<br />
Click the Windows Start button, select All Programs, click GV-<strong>NVR</strong>, and click Key Lock<br />
Utility.<br />
Figure 3-33 Windows XP desktop<br />
25
3.10 Restoring <strong>System</strong><br />
You can restore preinstalled files once they are damaged by running the recovery from the<br />
hidden partition. To restore the operating system and all preinstalled software, follow the steps<br />
below.<br />
Note: After recovery, you need to re-install all settings and passwords. But the recovery will<br />
not delete your recording files saved in the partition D since it only reformats the partition C.<br />
1. Restart the GV-<strong>NVR</strong> <strong>System</strong> <strong>Lite</strong>. This image appears.<br />
26<br />
Figure 3-34<br />
2. Once the above image appears, keep on clicking the F8 button on the keyboard until the<br />
following image appears. Then select Return to OS Choices Menu.<br />
Figure 3-35
3. Select Recovery GeoVision <strong>NVR</strong> <strong>System</strong>.<br />
Figure 3-36<br />
3<br />
Getting Started<br />
4. Wait until the “Recover your partition now. Are you sure?” message appears. Click OK to<br />
start the recovery.<br />
Figure 3-37<br />
5. When the recovery process is complete, the confirmation message “The recovery process<br />
is finished. Please remove DVD and press “OK” to reboot?” will appear. Click OK to restart<br />
the GV-<strong>NVR</strong> <strong>System</strong> <strong>Lite</strong>.<br />
27
3.11 Updating GV-<strong>NVR</strong> <strong>System</strong> <strong>Lite</strong><br />
If you like to update your GV-<strong>NVR</strong> <strong>System</strong> <strong>Lite</strong>, contact your dealer for more information.<br />
Before contacting your dealer, you may check software update news at our website:<br />
http://www.geovision.com.tw<br />
28
4<br />
Firmware Upgrade for GV IP Cameras<br />
Chapter 4 Firmware Upgrade for GV IP Cameras<br />
GeoVision will periodically release the updated firmware of GV IP camera on the website. The<br />
new firmware can be simply loaded into the GV IP camera by using the Web interface of GV<br />
IP camera or IP Device Utility of the GV-<strong>NVR</strong> <strong>System</strong> <strong>Lite</strong>.<br />
Important Notes before You Start<br />
Before you start updating the firmware, please read these important notes:<br />
1. While the firmware is being updated,<br />
A) the power supply of the camera must not be interrupted, and<br />
B) do not unplug the Ethernet cable of the camera if the cable is the source of power<br />
supply (Power over Ethernet or PoE supported).<br />
2. Do not turn the camera power off in 10 minutes after the firmware is updated.<br />
3. If you use the IP Device Utility for firmware upgrade, the GV-<strong>NVR</strong> <strong>System</strong> <strong>Lite</strong> used to<br />
upgrade firmware must be under the same network of the camera.<br />
WARNING: The interruption of power supply during updating causes not only update<br />
failures but also damages to the camera. In this case, please contact your sales<br />
representative and send your device back to GeoVision for repair.<br />
29
4.1 Using the Web Configuration Interface of GV IP<br />
30<br />
Camera<br />
1. In the Live View window, click the Show <strong>System</strong> Menu button, select Remote Config,<br />
and click the Firmware Upgrade tab. The Remote Config dialog box appears.<br />
Figure 4-1<br />
2. Click the Browser button to locate the firmware file (.img) saved at your GV-<strong>NVR</strong> <strong>System</strong><br />
<strong>Lite</strong>.<br />
3. Click the Firmware Upgrade button to start the upgrade.
4.2 Using the IP Device Utility<br />
4<br />
Firmware Upgrade for GV IP Cameras<br />
The IP Device Utility provides a direct way to upgrade the firmware to multiple units of GV IP<br />
camera. Note GV-<strong>NVR</strong> <strong>System</strong> <strong>Lite</strong> used to upgrade firmware must be under the same<br />
network of the camera.<br />
1. On the GV-Desktop, click the Programs button. This dialog box appears.<br />
Figure 4-2<br />
2. Select VS Utility. This dialog box appears.<br />
Figure 4-3<br />
3. Click the Search button to locate available cameras on the same LAN. Or click the New<br />
button and assign the IP address to locate the camera over the Internet. Or highlight one<br />
camera in the list and click the Delete button to remove it.<br />
31
4. Double-click one camera in the list. This dialog box appears.<br />
32<br />
Figure 4-4<br />
5. Click the Firmware Upgrade tab. This dialog box appears.<br />
Figure 4-5<br />
6. Click the Browse button to locate the firmware file (.img) saved at your GV-<strong>NVR</strong> <strong>System</strong><br />
<strong>Lite</strong>.<br />
7. If you like to upgrade all the cameras in the list, select Upgrade all devices.<br />
8. Type Password, and click Upgrade to start the upgrade.
Chapter 5 Mobile Phone Connection<br />
5<br />
Mobile Phone Connection<br />
You can receive live video streaming from the GV-<strong>NVR</strong> <strong>System</strong> <strong>Lite</strong> by using a PDA,<br />
Smartphone or 3G-enabled mobile phone. The GV mobile phone applications and their major<br />
features are listed as below.<br />
Overview of GV Mobile Phone Applications<br />
Handheld Device View GV-GView V2 for Windows PDA<br />
OS Supported<br />
Windows Mobile 5.0 and 2003 for Pocket PC<br />
Windows Mobile 6.0 / 6.1 / 6.5 Classic and Professional<br />
Port Live View Port: 8866, RPB Port: 5511<br />
Protocol TCP/IP (Streaming)<br />
Functions<br />
Video streaming, I/O device control, Remote Playback (RPB)<br />
and etc.<br />
Handheld Device View GV-MSView V2 for Windows Smartphone<br />
OS Supported<br />
Windows Mobile 5.0 and 2003 for Smartphone<br />
Windows Mobile 6.0 / 6.1 / 6.5 Standard and Professional<br />
Port Live View Port: 8866, RPB Port: 5511<br />
Protocol TCP/IP (Streaming)<br />
Functions<br />
Video streaming, output device control, Remote Playback<br />
(RPB) and etc.<br />
Handheld Device View GV-MSView V3 for Windows Smartphone<br />
OS Supported Windows Mobile 6.0 / 6.1 / 6.5 Standard and Professional<br />
Port Live View Port: 8866, RPB Port: 5511<br />
Protocol TCP/IP (Streaming)<br />
Functions<br />
Video streaming, output device control, Remote Playback<br />
(RPB) and etc.<br />
Handheld Device View GV-SSView V3 for Symbian Smartphone<br />
OS Supported Nokia S60 2nd Edition and 3rd Edition<br />
Port Live View Port: 8866, RPB Port: 5511<br />
Protocol TCP/IP (Streaming)<br />
Functions<br />
Video streaming, Remote Playback (RPB), output device<br />
control and etc.<br />
Handheld Device View 3GPP Viewer for 3GPP Phone<br />
OS Supported<br />
Mobile phones with players supporting RTSP (Real Time<br />
Streaming Protocol)<br />
Port TCP Port: 8554, UDP Port: 17300-17380, Http Port: 80<br />
Protocol TCP/IP (Streaming)<br />
Functions Video streaming, Remote Playback (RPB), Audio and etc.<br />
33
Handheld Device View GV-Remote View V1.1 / V1.2 for BlackBerry Smartphone<br />
OS Supported<br />
34<br />
V1.1: BlackBerry OS 4.2.1 to 5.0<br />
V1.2: BlackBerry OS 5.0 to 6.0<br />
Port Live View Port: 8866, Http Port: 80<br />
Protocol TCP/IP (JPEG)<br />
Functions Video streaming, output device control<br />
Handheld Device View GV-iView for iPhone and iPod Touch<br />
OS Supported iPhone OS 2.2 or above<br />
Live View Port: 8866, RPB Port: 5511, HTTP Port: 80;<br />
Port<br />
Command Port: 4550 (for PTZ control); Data Port: 5550 (for<br />
PTZ control)<br />
Protocol TCP/IP (JPEG)<br />
Functions<br />
Video streaming, Remote Playback (RPB), output device<br />
control and etc.<br />
Handheld Device View GV-iView HD for iPad<br />
OS Supported iPad OS 4.2.1 or above<br />
Port<br />
Data Port: 8866, RPB Port: 5511, HTTP Port: 80; Command<br />
Port: 4550 (for PTZ control); Data Port: 5550 (for PTZ control)<br />
Protocol TCP/IP (JPEG)<br />
Functions<br />
Video streaming, Remote Playback (RPB), PTZ control, output<br />
control and etc.<br />
Handheld Device View GV-AView for Android Smartphone<br />
OS Supported Android version 2.2<br />
Port Data Port: 8866, HTTP Port: 80, VSS Port: 10000<br />
Protocol<br />
TCP/IP (JPEG from GV-<strong>NVR</strong> <strong>System</strong> <strong>Lite</strong>;<br />
JPEG/MPEG4/H.264 from GV IP Devices)<br />
Codec MJPEG, MPEG4, H.264<br />
Resolution<br />
Supported<br />
MJPEG 704 x 480 or below<br />
MPEG4 704 x 480 or below<br />
H.264 320 x 240 or below<br />
Functions Video streaming, Audio (from GV IP devices), PTZ control<br />
Note:<br />
1. For the 3G-enabled mobile phone, you can receive live video from GV-<strong>NVR</strong> <strong>System</strong><br />
<strong>Lite</strong> without installing any GV mobile applications.<br />
2. Currently GV-AView does not support Samsung and Sony smartphones and tabs.<br />
3. To access live view on your mobile phone, enter the Live View Port on your mobile<br />
phone. To play video back, enable Run ViewLog Server on the WebCam Server and<br />
enter the RPB Port on your mobile phone.
5.1 Windows PDA<br />
5<br />
Mobile Phone Connection<br />
GV-GView V2 is a remote view application for Microsoft PDA. For the supported Windows<br />
version, see the Overview of GV Mobile Phone Applications chart earlier in this chapter.<br />
When GV-GView V2 detects the big screen panel of the mobile phone, images from the<br />
connected GV-<strong>NVR</strong> <strong>System</strong> <strong>Lite</strong> will be horizontally rotated for a better view. Resolution is set<br />
to be CIF by default.<br />
Installing GV-GView<br />
1. On the GV-Desktop, click the Programs button, and select Multicam Installation.<br />
Figure 5-1<br />
2. Click Install V x.x.x <strong>System</strong>, and click Microsoft PDA Viewer V2.<br />
3. Follow the on-screen instructions to complete the installation. The default installation<br />
directory is C:\Microsoft PDA Viewer V2.<br />
4. Exit from the GV-Desktop to the Windows. See 3.8 Exiting to Windows.<br />
5. Through the synchronization program such as ActiveSync, install GViewV2.exe from the<br />
installation directory to your PDA. Consult your PDA user’s manual for how to install a<br />
program to the PDA.<br />
35
Activating the GView Function<br />
To allow remote access to the GV-<strong>NVR</strong> <strong>System</strong> <strong>Lite</strong>, you must enable the Mobile function on<br />
the WebCam Server.<br />
On the main screen, click the Network button, select WebCam Server, click the Mobile tab,<br />
activate the settings of communication ports, and then click OK.<br />
36<br />
Figure 5-2<br />
Connecting to GV-<strong>NVR</strong> <strong>System</strong> <strong>Lite</strong><br />
Once GV-GView V2 is installed on your PDA, you can use it to monitor your GV-<strong>NVR</strong> <strong>System</strong><br />
<strong>Lite</strong>. Make sure your PDA has wireless LAN adapter properly in place with access to the<br />
Internet.<br />
1. Run GView V2 on your PDA.<br />
Figure 5-3
Mobile Phone Connection<br />
2. Click the button located at the lower left corner. The login screen appears.<br />
Figure 5-4<br />
3. Enter the IP address of your GV-<strong>NVR</strong> <strong>System</strong> <strong>Lite</strong>, port value (default value is 8866), a<br />
username and a password. Then click OK.<br />
4. Once the connection is established, the live video will appear.<br />
Playing Back the Recordings<br />
To play back the recordings, follow these steps:<br />
1. Start the WeBCam Server with the following two functions enabled.<br />
A. Select the Run ViewLog Server option on the General tab.<br />
Figure 5-5<br />
5<br />
37
38<br />
B. Select the Mobile option on the Mobile tab, and keep the RPB port to be 5511 or<br />
modify it if necessary (Figure 5-2).<br />
2. Run GView V2 on your PDA.<br />
3. Click the button located at the lower left corner (Figure 5-3). The login screen<br />
appears.<br />
Figure 5-6<br />
4. Enter the IP address of the GV-<strong>NVR</strong> <strong>System</strong> <strong>Lite</strong>, port value (default value is 5511), a<br />
username and a password. Then click OK to connect.<br />
5. Select the desired recording on the event list for playback.
Other Functions<br />
5<br />
Mobile Phone Connection<br />
In addition to live view and playback, GView V2 offers these functions: viewing and controlling<br />
I/O devices, adjusting image quality, starting and stopping recording.<br />
On the live view screen, click the buttons on the toolbar to have the desired functions.<br />
Figure 5-7<br />
Button Description<br />
Click it to stop the connection.<br />
Click it to adjust the image quality.<br />
Click it to access the connected I/O devices. For details, see Accessing<br />
I/O Devices later in this chapter.<br />
Click it to start or stop recording.<br />
Click it to display the camera status. For details, see Viewing Camera<br />
Status later in this chapter.<br />
Use this drop-down list to switch cameras.<br />
39
Accessing I/O Devices<br />
To access the connected I/O devices, use the drop-down list to select the desired camera and<br />
click the button. The I/O module button appears on the toolbar.<br />
Figure 5-8<br />
The number on the toolbar indicates the connected module. Click the desired number to<br />
access its I/O devices. The I/O control buttons appear on the toolbar.<br />
40<br />
Figure 5-9<br />
Button Description<br />
I Click it to view the log of input triggers.<br />
O Click it to display and force the connected output devices.
Viewing Input-Triggered Events<br />
5<br />
Mobile Phone Connection<br />
All input triggers are logged on the Alarm list. Click the “I” button (Figure 5-9) to view the list of<br />
trigger events.<br />
Figure 5-10<br />
Forcing Outputs<br />
To force any connected output devices, click the “O” button (Figure 5-9), and click the desired<br />
number. The numbers on the toolbar indicate the connected output devices.<br />
Figure 5-11<br />
41
Viewing Camera Status<br />
To view the camera status, click the button on the live view screen (Figure 5-7).<br />
42<br />
Figure 5-12<br />
This screen displays the status of camera activity. Three messages indicate the current<br />
camera status.<br />
Message Description<br />
Normal The camera is turned on and not recording.<br />
Inactive The camera is turned off.<br />
Recording The camera is recording.
5.2 Windows Smartphone<br />
5<br />
Mobile Phone Connection<br />
With the GV-MSView V2 / V3 applications, you can monitor your GV-<strong>NVR</strong> <strong>System</strong> <strong>Lite</strong><br />
remotely through a Windows-based Smartphone. For the supported Windows version, see<br />
the Overview of GV Mobile Phone Applications chart earlier in this chapter.<br />
Installing GV-MSView V2 / V3<br />
1. On the GV-Desktop, click the Programs button, and select Multicam Installation (Figure<br />
5-1).<br />
2. Click Install V x.x.x <strong>System</strong> and select Microsoft Smartphone Viewer V2 or Microsoft<br />
Smartphone Viewer V3.<br />
3. Follow the on-screen instructions to complete the installation. The default installation<br />
directory is C:\SmartPhone Viewer V2 or C:\SmartPhone Viewer V3.<br />
4. Exit from the GV-Desktop to the Windows. See 3.8 Exiting to Windows.<br />
5. Through the synchronization program such as ActiveSync, install MsviewV2.exe or<br />
MsviewV3.exe from the installation directory to your Smartphone. Consult your<br />
Smartphone user’s manual for how to install a program to the Smartphone.<br />
Activating the GV-MSView V2 / V3 Function<br />
To allow remote access to the GV-<strong>NVR</strong> <strong>System</strong> <strong>Lite</strong>, you must enable the Mobile function on<br />
the WebCam Server (Figure 5-2).<br />
Connecting to GV-<strong>NVR</strong> <strong>System</strong> <strong>Lite</strong><br />
The following operations may vary slightly for different modules.<br />
1. Run MSViewV2.exe or MSViewV3.exe on your Smartphone.<br />
Figure 5-13<br />
43
2. Click Type and select Live.<br />
44<br />
Figure 5-14<br />
3. On the login screen, enter the IP address of the GV-<strong>NVR</strong> <strong>System</strong> <strong>Lite</strong>, port value (default<br />
value is 8866), a username and a password. Then click Control and select Connect.<br />
Figure 5-15
5<br />
Mobile Phone Connection<br />
4. Once the connection is established, the live video will appear. You can use the scroll key<br />
on your Smartphone to navigate camera channels.<br />
Figure 5-16<br />
Playing Back the Recordings<br />
To play back the recordings, follow these steps:<br />
1. Start the WeBCam Server with the following two functions enabled.<br />
A. Select the Run ViewLog Server option on the General tab (Figure 5-5).<br />
B. Select the Mobile option on the Mobile tab, and keep the RPB port to be 5511 or<br />
modify it if necessary (Figure 5-2).<br />
2. Run MSView V2 or MSView V3 on your Smartphone.<br />
3. Click Type and then select RPB (Figure 5-14). If you want to search the recordings within<br />
a specific period of time for playback, select RPB with time.<br />
45
4. On the Login screen, enter the IP address of the GV-<strong>NVR</strong> <strong>System</strong> <strong>Lite</strong>, port value (default<br />
46<br />
value is 5511), a username and a password. Then click Select and click GV DVR to start<br />
the connection.<br />
Figure 5-17<br />
5. Select the desired video recording on the event list for playback.<br />
Other Functions<br />
In addition to live view, GV-MSView V2 or GV-MSView V3 offers these functions: rotating<br />
images and controlling outputs. Select the Control option to have these features.
5.3 Symbian Smartphone<br />
5<br />
Mobile Phone Connection<br />
With the GV-SSView V3 application, it’s also possible to monitor your GV-<strong>NVR</strong> <strong>System</strong> <strong>Lite</strong><br />
through a Symbian-based Smartphone. For the supported Symbian version, see the<br />
Overview of GV Mobile Phone Applications chart earlier in this chapter.<br />
Installing GV-SSView V3<br />
1. On the GV-Desktop, click the Programs button, and select Multicam Installation (Figure<br />
5-1).<br />
2. Click Install V x.x.x <strong>System</strong>, select Symbian Smartphone Viewer V3 (For Nokia S60<br />
2nd and 3rd).<br />
3. Follow the on-screen instructions to complete the installation. The default installation<br />
directory is C:\Symbain SmartPhone Viewer V3.<br />
4. Exit from the GV-Desktop to the Windows. See 3.8 Exiting to Windows.<br />
5. Make a note of the modification date of SsviewV3_2nd.sis or SsviewV3_3rd.sis.<br />
Right-click the file, select Properties and find the date listed in the Modified field.<br />
6. Turn off the Certificate Check function and change the date settings on the Smartphone<br />
first. Here we use Nokia E61 as the example to illustrate the steps.<br />
A. On the main menu of the Smartphone, select Tools Option � App.manager �<br />
Options � Open� App.downloads � Options� Settings � Online<br />
certif..check, and then set Online certif..check to be Off.<br />
B. Return to the main menu, select Tools � Options � Open � Settings � Options<br />
� Open � Date and time � Options � Open, and then reset the date to be any<br />
within a year from the modification date of the application in the Date field. For<br />
example, if the modification date of SsviewV3_3rd.sis is January 30, 2007, you can<br />
reset the date in the Date field to be any between January 30, 2007 and January 29,<br />
2008.<br />
7. Begin the installation of GV-SSView V3 on your Smartphone. If your Smartphone is of S60<br />
2nd Edition, install SsviewV3_2nd.sis from the installation directory to the Smartphone. If<br />
your Smartphone is of S60 3rd Edition, install SsviewV3_3rd.sis. Consult your<br />
Smartphone user’s manual for how to install a program to the Smartphone.<br />
8. Change the date on your Smartphone back to today’s date.<br />
Activating the GV-SSView V3 Function<br />
To allow remote access to the GV-<strong>NVR</strong> <strong>System</strong> <strong>Lite</strong>, you must enable the Mobile function on<br />
the WebCam Server (Figure 5-2).<br />
47
Connecting to GV-<strong>NVR</strong> <strong>System</strong> <strong>Lite</strong><br />
The following operations may vary slightly for different modules.<br />
1. Run GV-SSView V3 on your Smartphone.<br />
48<br />
Figure 5-18<br />
2. Click Options, and select Live Connect.<br />
Figure 5-19<br />
3. On the Login screen, enter the IP address of the GV-<strong>NVR</strong> <strong>System</strong> <strong>Lite</strong>, port value (default<br />
value is 8866), a login username and a password. Then click Options and select<br />
Connect.<br />
Figure 5-20
4. Once the connection is established, the live video will appear.<br />
Quick Connection<br />
Figure 5-21<br />
5<br />
Mobile Phone Connection<br />
The IP addresses of connected servers can be stored for quick connection in the future. Press<br />
the [] buttons on the mobile device to select the desired server for connection.<br />
Playing Back the Recordings<br />
To play back the recordings from the GV-<strong>NVR</strong> <strong>System</strong> <strong>Lite</strong>, follow these steps:<br />
1. Start the WeBCam Server with the following two functions enabled.<br />
A. Select the Run ViewLog Server option on the General tab (Figure 5-5).<br />
B. Select the Mobile option on the Mobile tab, and keep the RPB port to be 5511 or<br />
modify it if necessary (Figure 5-2).<br />
2. Run GV-SSView V3 on your Smartphone.<br />
3. Click Options, and select RPB (Figure 5-19). If you want to search the recordings within a<br />
specific period of time for playback, select RPB With Time.<br />
Figure 5-22<br />
49
4. On the Login screen, enter the IP address of your GV-<strong>NVR</strong> <strong>System</strong> <strong>Lite</strong>, port value (default<br />
50<br />
value is 5511), a username and a password. Then click Options and select Video Server.<br />
5. Select the desired recording on the event list for playback.<br />
Other Functions<br />
In addition to live view, SSView offers other useful functions, such as changing camera<br />
channels, rotating images and seeing Server and WebCam information. Select Options to<br />
have these features.
5.4 BlackBerry Phone<br />
5<br />
Mobile Phone Connection<br />
With the GV-Remote View V1.1 and V1.2 phone applications, you can remotely view live<br />
video, force output devices to be triggered, and start and stop monitoring from your<br />
BlackBerry phone.<br />
Important: The version of GV-Remote View program on the software DVD is V1.0. To<br />
download GV-Remote View of version 1.1 and 1.2, please click Here.<br />
Installing GV-Remote View<br />
1. On the GV-Desktop, click the Programs button, and select Multicam Installation (Figure<br />
5-1).<br />
2. Click Install V x.x.x <strong>System</strong>, select BlackBerry Smartphone Viewer, and follow the<br />
on-screen instructions to complete the installation. The default installation directory is C:\<br />
BBView.<br />
3. Exit from the GV-Desktop to the Windows. See 3.8 Exiting to Windows.<br />
4. Through the synchronization program such as Desktop Manager, install BBViewV1.alx<br />
from the created installation directory to your BlackBerry. Consult the BlackBerry phone<br />
user’s manual for how to install a program to the phone.<br />
Activating the GV-Remote View Function<br />
To allow remote access to GV-<strong>NVR</strong> <strong>System</strong> <strong>Lite</strong>, enable these two functions on the WebCam<br />
Server:<br />
1. On the main screen, click the Network button, select WebCam Server, click the JPG tab,<br />
and select Create JPEG/GIF file(s).<br />
Figure 5-23<br />
2. Enable the Mobile function on the Mobile tab, and keep the RPB port to be 5511 or<br />
modify it if necessary (Figure 5-2).<br />
51
Connecting to GV-<strong>NVR</strong> <strong>System</strong> <strong>Lite</strong><br />
To connect your BlackBerry phone to GV-<strong>NVR</strong> <strong>System</strong> <strong>Lite</strong>, follow these steps:<br />
1. Click the GV-Remote View icon on your phone, the welcome page appears.<br />
2. Select Create Live Connection. The Login page appears.<br />
52<br />
Figure 5-24<br />
3. Enter the IP address, port value (default value is 8866), a username and a password to log<br />
in GV-<strong>NVR</strong> <strong>System</strong> <strong>Lite</strong>.<br />
4. Select Connect to start. Once the connection is established, the Camera List appears.<br />
Figure 5-25<br />
5. Select the desired camera and select OK to access the live view.<br />
6. To change to another camera, select Change Camera, and follow Step 3.
Forcing Outputs<br />
5<br />
Mobile Phone Connection<br />
1. To force any connected output devices, select a camera from the Camera List and select<br />
IO Module. The IO Module List appears.<br />
Figure 5-26<br />
2. Scroll down to select the desired output device on the list, and push in the scroll wheel to<br />
select Force Output.<br />
3. To force another output device, select IO Module again and repeat Step 2.<br />
PTZ Control<br />
1. To access the PTZ functions, select a camera from the Camera List and select PTZ<br />
control. The PTZ control panel appears.<br />
Figure 5-27<br />
2. You can tap the direction buttons and the zoom buttons to control the<br />
camera. Tap the home button to return to home position. You can also adjust the focus<br />
of the camera using the focus buttons or tap the autofocus button .<br />
Note: The PTZ control function is only supported in GV-Remote View V1.2.<br />
53
5.5 3G Mobile Phone<br />
Without installing any GV applications, you can directly access live video or recordings from a<br />
3G-enabled mobile phone.<br />
Activating the 3G Mobile Phone Function<br />
To allow remote access to GV-<strong>NVR</strong> <strong>System</strong> <strong>Lite</strong>, you must enable the 3GPP function on the<br />
WebCam Server.<br />
On the main screen, click the Network button, select WebCam Server, click the 3GPP tab,<br />
activate the settings of communication ports, and then click OK.<br />
54<br />
Figure 5-28<br />
Connecting to GV-<strong>NVR</strong> <strong>System</strong> <strong>Lite</strong><br />
1. On the mobile phone, open the Internet browser, and enter the IP address of the GV-<strong>NVR</strong><br />
<strong>System</strong> <strong>Lite</strong> to establish the connection.<br />
2. On the Login page, enter a username and a password, select 3G, and click Submit.<br />
Figure 5-29
Mobile Phone Connection<br />
3. Select Live. If you want to change the video settings, use the drop-down lists to configure<br />
video size, quality and audio codec. Then scroll down the page to click Submit.<br />
Figure 5-30<br />
4. On the camera list, click the desired camera to access its live view, and then click Next.<br />
Figure 5-31<br />
5. The default player is called up and the live video appears. Note the players on the mobile<br />
phones may be different.<br />
Figure 5-32<br />
5<br />
55
Playing Back the Recordings<br />
You can play back the recordings on the 3G mobile phone. Note that only the videos recorded<br />
in the CIF resolution are available for playback.<br />
To search the recordings of the specific time, follow these steps:<br />
1. On the Settings page (Figure 5-30), select RPB and click Submit. This page appears.<br />
56<br />
Figure 5-33<br />
2. Use the drop-down lists to define the specific time for search, and then click Submit.<br />
3. The event list will display the 10 recordings after the defined time. Select the desired<br />
recording on the event list for playback.<br />
To play back the last ten recordings, follow these steps:<br />
1. On the Settings page (Figure 5-30), select Last 10 Video Files and click Submit.<br />
2. The event list will display the last 10 recordings. Select the desired recording on the event<br />
list for playback.
5.6 I-Mode Phone<br />
You can monitor your GV-<strong>NVR</strong> <strong>System</strong> <strong>Lite</strong> remotely with<br />
� I-Mode phone, or<br />
� Mobile phone supporting xhtml, chtml, or html and capable of GPRS.<br />
5<br />
Mobile Phone Connection<br />
When using i-Mode services, you do not pay for the connection time, but will be charged by<br />
the volume of data transmitted and/or received. Therefore, i-Mode will NOT receive live video<br />
streaming; instead, it will receive one image at a time and will not receive another unless it is<br />
requested to do so. To request another image, simply press the Enter key on your i-Mode<br />
phone. The images are in GIF or JPEG format with resolution of 96x72 pixels.<br />
Activating the i-Mode Function<br />
To allow the remote access to GV-<strong>NVR</strong> <strong>System</strong> <strong>Lite</strong>, you must enable the Create JPEG/GIF<br />
file(s) function on the WebCam Server (Figure 5-23).<br />
Connecting to GV-<strong>NVR</strong> <strong>System</strong> <strong>Lite</strong><br />
The following operations may vary slightly for different modules.<br />
1. Open the i-Mode menu, and select Input Web Address.<br />
Figure 5-34<br />
57
2. Enter the IP address of your GV-<strong>NVR</strong> <strong>System</strong> <strong>Lite</strong> in the Address column, and then press<br />
58<br />
OK.<br />
Address:<br />
http://65.59.37.172<br />
OK<br />
Cancel<br />
Figure 5-35<br />
3. Type a valid username and password, and then press Submit.<br />
<strong>User</strong> Name:<br />
Passwords:<br />
Submit Cancel<br />
Figure 5-36<br />
4. Select the desired camera channel, and then press Enter.<br />
Live View<br />
1. Camera 1<br />
2. Camera 2<br />
3. Camera 3<br />
4. Camera 4<br />
5. Camera 5<br />
6. Camera 6<br />
7. Camera 7<br />
Figure 5-37<br />
5. If you log in successfully, the i-Mode phone will start receiving live video from the GV-<strong>NVR</strong><br />
<strong>System</strong> <strong>Lite</strong>.
5.7 iPhone and iPod Touch<br />
5<br />
Mobile Phone Connection<br />
GV-iView function is introduced to support iPhone and iPod Touch for the mobile surveillance<br />
application. For the supported operating system version, see the Overview of GV Mobile<br />
Phone Applications chart earlier in this chapter.<br />
Installing GV-iView<br />
You can download GV-iView V2.1.1 from App Store and install the application. The GV-iView<br />
icon will appear on the desktop.<br />
Figure 5-38<br />
Note: You can also download GV-iView on iTunes Store through the computer.<br />
59
Activating the GV-iView Function<br />
To allow remote access to GV-<strong>NVR</strong> <strong>System</strong> <strong>Lite</strong>, the following two functions must be enabled<br />
on the WebCam server:<br />
1. On the main screen, click the Network button, select WebCam Server, click the JPG tab,<br />
and select Create JPEG/GIF file(s) (Figure 5-23).<br />
2. Click the Mobile tab, and activate the settings of communication ports (Figure 5-2).<br />
Note: If there is a router or firewall installed, ensure these communication ports required by<br />
the WebCam server are open: HTTP Port 80, HTTPS Port 443 (if SSL is enabled), Live View<br />
Port 8866 and RPB Port 5511.<br />
Accessing Live View<br />
To access live view on your mobile device:<br />
1. Activate GV-iView on the mobile device.<br />
2. On the login screen, enter the IP address of the GV-<strong>NVR</strong> <strong>System</strong> <strong>Lite</strong>, port value (default<br />
value is 8866), ID and Password. Then press Connect. Once the connection is<br />
established, the live display of 6 cameras will appear.<br />
3. Select ON for HTTPS if SSL is enabled for WebCam Server. If the default SSL port of 443<br />
on the WebCam Server is modified, specify the new port number used for HTTPS<br />
connection at the end of the IP address, e.g., www. geovision.com.tw:445.<br />
60<br />
Figure 5-39<br />
Note: If the default HTTP port of 80 on the WebCam Server is modified, specify the new port<br />
number used for HTTP connection at the end of the IP address, e.g., webcam.geovision.com.tw:81.
Playing Back the Recordings<br />
5<br />
Mobile Phone Connection<br />
To retrieve the events recorded on the GV-<strong>NVR</strong> <strong>System</strong> <strong>Lite</strong> and play them back:<br />
Note:<br />
1. The remote playback (RPB) function is only supported if the video was recorded with a<br />
resolution of CIF or lower.<br />
2. The remote playback (RPB) function does not support the playback of video files<br />
recorded on the GV IP devices.<br />
1. On the login screen (Figure 39), press RPB View .<br />
2. Enter the IP address of the GV-<strong>NVR</strong> <strong>System</strong> <strong>Lite</strong>, port value (default value is 5511), ID and<br />
Password. You can also search the recordings of a specified date and time by selecting<br />
RPB Time Setting and entering the date and time. Then press Connect.<br />
Figure 5-40 Figure 5-41<br />
61
3. Select the desired recordings from the event list for playback. Use the Change cam<br />
62<br />
button at the top right corner to switch cameras.<br />
Figure 5-42
Other Functions<br />
After you enlarge one channel, you can find the following buttons for control.<br />
Figure 5-43<br />
Button Name Function<br />
Enable Record Activates recording controls.<br />
Record One Channel<br />
Record All Channels<br />
5<br />
Mobile Phone Connection<br />
The button is available when you press the Enable<br />
Record button. Starts / stops recording the current<br />
channel.<br />
The button is available when you press the Enable<br />
Record button. Starts / stops recording all<br />
channels.<br />
Enable I/O Activates the output controls.<br />
Snapshot Takes a snapshot of image.<br />
63
PTZ Speed Control for PTZ Cameras<br />
Click anywhere on the Live View screen of PTZ camera to bring up the PTZ Speed Setting<br />
panel. Select your desirable level of PTZ speed. Higher value means higher speed.<br />
64<br />
Figure 5-44<br />
Accessing I/O Devices<br />
1. Press the Enable I/O button. The screen, similar to the following image, appears.<br />
2. Use the left and right buttons to change the I/O module, and use the scrollbar to change<br />
the output device.<br />
3. Press to manually force the output to be activated.<br />
Figure 5-45
My Favorite<br />
5<br />
Mobile Phone Connection<br />
On the login screen (Figure 5-39) you can find the My Favorite option, allowing you to add<br />
several links of GV-<strong>NVR</strong> <strong>System</strong> <strong>Lite</strong> servers for quick connections. Up to 50 links can be<br />
created.<br />
Figure 5-46<br />
65
5.8 iPad<br />
GV-iView HD function is introduced to support iPad for the mobile surveillance application<br />
Installing GV-iView<br />
You can download GV-iView HD from App Store and install the application. The GV-iViewHD<br />
icon will appear on the desktop.<br />
66<br />
Figure 5-47<br />
Note: You can also download GV-iView HD on iTunes Store through the computer.
Activating the GV-iView HD Function<br />
5<br />
Mobile Phone Connection<br />
To allow remote access to GV-<strong>NVR</strong> <strong>System</strong> <strong>Lite</strong>, the following two functions must be enabled<br />
on the WebCam server:<br />
1. On the main screen, click the Network button, select WebCam Server, click the JPG tab,<br />
and select Create JPEG/GIF file(s) (Figure 5-23).<br />
2. Click the Mobile tab, and activate the settings of communication ports (Figure 5-2).<br />
Note: If there is a router or firewall installed, ensure these communication ports required by<br />
the WebCam server are open: HTTP Port 80, HTTPS Port 443 (if SSL is enabled), Live View<br />
Port 8866 and RPB Port 5511.<br />
Accessing Live View<br />
To access live view on your mobile device:<br />
4. Activate GV-iView HD on the mobile device.<br />
5. On the login screen, enter the IP address of the GV-<strong>NVR</strong> <strong>System</strong> <strong>Lite</strong>, port value (default<br />
value is 8866), ID and Password. Then press Connect. Once the connection is<br />
established, the live display of 6 cameras will appear.<br />
6. Select ON for HTTPS if SSL is enabled for WebCam Server. If the default SSL port of 443<br />
on the WebCam Server is modified, specify the new port number used for HTTPS<br />
connection at the end of the IP address, e.g., www. geovision.com.tw:445.<br />
Figure 5-48<br />
Note: If the default HTTP port of 80 on the WebCam Server is modified, specify the new port<br />
number used for HTTP connection at the end of the IP address, e.g., webcam.geovision.com.tw:81.<br />
67
Playing Back the Recordings<br />
To retrieve the events recorded on the GV-<strong>NVR</strong> <strong>System</strong> <strong>Lite</strong> and play them back:<br />
Note:<br />
1. The remote playback (RPB) function is only supported if the video was recorded with a<br />
resolution of CIF or lower.<br />
2. The remote playback (RPB) function does not support the playback of video files<br />
recorded on the GV IP devices.<br />
1. On the login screen (Figure 48), press RPB View .<br />
2. Enter the IP address of the GV-<strong>NVR</strong> <strong>System</strong> <strong>Lite</strong>, port value (default value is 5511), ID and<br />
Password. You can also search the recordings of a specified date and time by selecting<br />
RPB Time Setting and entering the date and time. Then press Connect.<br />
68<br />
Figure 5-49 Figure 5-50<br />
3. Select the desired recordings from the event list for playback. Use the Change cam<br />
button at the top right corner to switch cameras.<br />
Figure 5-51
Other Functions<br />
After you enlarge one channel, you can find the following buttons for control.<br />
Figure 5-52<br />
Button Name Function<br />
Enable Record Activates recording controls.<br />
Record One Channel<br />
Record All Channels<br />
5<br />
Mobile Phone Connection<br />
The button is available when you press the Enable<br />
Record button. Starts / stops recording the current<br />
channel.<br />
The button is available when you press the Enable<br />
Record button. Starts / stops recording all<br />
channels.<br />
Enable I/O Activates the output controls.<br />
Snapshot Takes a snapshot of image.<br />
69
PTZ Speed Control for PTZ Cameras<br />
Click anywhere on the Live View screen of PTZ camera to bring up the PTZ Speed Setting<br />
panel. Select your desirable level of PTZ speed. Higher value means higher speed.<br />
70<br />
Figure 5-53<br />
Accessing I/O Devices<br />
4. Press the Enable I/O button. The screen, similar to the following image, appears.<br />
5. Use the left and right buttons to change the I/O module, and use the scrollbar to change<br />
the output device.<br />
6. Press to manually force the output to be activated.<br />
Figure 5-54
My Favorite<br />
5<br />
Mobile Phone Connection<br />
On the login screen (Figure 5-48) you can find the My Favorite option, allowing you to add<br />
several links of GV-<strong>NVR</strong> <strong>System</strong> <strong>Lite</strong> servers for quick connections. Up to 50 links can be<br />
created.<br />
Figure 5-55<br />
71
5.9 Android Smartphone<br />
You can now access GV-<strong>NVR</strong> <strong>System</strong> <strong>Lite</strong> and GV-IP devices using Android version 2.2.<br />
Download GV-AView from Android Market, and after installing the application, the GV-AView<br />
icon will appear on the desktop. Follow the steps below to access a GV-<strong>NVR</strong> <strong>System</strong> <strong>Lite</strong> or a<br />
GV IP device.<br />
72<br />
Figure 5-56
Accessing to GV IP devices<br />
1. Double-tap the GV-AView icon on the main page.<br />
Figure 5-57<br />
5<br />
Mobile Phone Connection<br />
2. Press the Menu button on the mobile phone and then tap the Add button . The login<br />
page appears.<br />
Figure 5-58<br />
3. Type the name, IP address, port number, user name and password of the GV-IP device.<br />
4. You can press the Menu button on the mobile phone and tap the Version button to<br />
see the version information or tap the Address Book button<br />
book.<br />
to see the address<br />
5. Tap the Add button to add the login information to the address book. If you want to<br />
edit existing login information, tab the Edit button<br />
making the changes.<br />
to save the information after<br />
73
6. Tap the Connection button to connect to the IP device. The live view will appear.<br />
74<br />
Figure 5-59<br />
7. The following function buttons are available on the bottom of the screen.<br />
� Snapshot : Saves the current image in the mobile device.<br />
� PTZ Control : Enables the PTZ function. A message will appear asking if you<br />
want to use Gesture Detector to control PTZ. Tap OK if you want to be able to drag<br />
across the live view screen to control the PTZ function in addition to using the PTZ<br />
control buttons on the bottom of the screen. Tap the arrow button to switch<br />
between the direction buttons and the zoom/iris buttons . Tap<br />
the home button to return to home position.<br />
� Screen Division : Displays up to four channels on the same page.<br />
� Dual Stream<br />
dual streams.<br />
: Switches between the video streams if the GV-IP device supports<br />
� Audio : Enables the audio function.<br />
8. If the GV IP device supports multiple channels, tap the numbers on the top of the screen<br />
to switch to other channels.
Accessing to GV-<strong>NVR</strong> <strong>System</strong> <strong>Lite</strong><br />
5<br />
Mobile Phone Connection<br />
To access the GV-<strong>NVR</strong> <strong>System</strong> <strong>Lite</strong> using GV-AView, you need to first activate the JPG<br />
settings and the mobile function on the GV-<strong>NVR</strong> <strong>System</strong> <strong>Lite</strong> and then connect to the GV-<strong>NVR</strong><br />
<strong>System</strong> <strong>Lite</strong> from your mobile device.<br />
Allowing Remote Access to GV-<strong>NVR</strong> <strong>System</strong> <strong>Lite</strong>:<br />
1. In the main system, click the Network button and select Webcam Server.<br />
2. In the dialog box that appears, click the JPG tab and select Create JPEG/GIF file(s).<br />
3. Click the Mobile tab and select the checkbox to enable the mobile function.<br />
4. Click OK to save the settings.<br />
Connecting to GV-<strong>NVR</strong> <strong>System</strong> <strong>Lite</strong>:<br />
1. On your mobile phone, double-tap the GV-AView icon on the main page.<br />
2. Tap the <strong>NVR</strong>/DVR View tab on the top. The login page appears.<br />
Figure 5-60<br />
3. In the login page, enter the IP address, port number, user name and password of the<br />
GV-<strong>NVR</strong> <strong>System</strong> <strong>Lite</strong>.<br />
4. On the bottom of the screen, you can tap the My favorite button to save the connection<br />
information or tap the Image setting button to change the image quality between Normal<br />
and Good.<br />
5. Tab the Connect button to connect to the GV-<strong>NVR</strong> <strong>System</strong> <strong>Lite</strong>. Up to 6 camera<br />
live views can be displayed on each page. To see other channels, use the scroll bar on<br />
the bottom of the screen.<br />
75
6. Press the menu button on the mobile phone to see the following options:<br />
76<br />
Figure 5-61<br />
� Next Page: See the channels on the next page.<br />
� Previous Page: See the channels on the previous page.<br />
� Record Event: Start or stop recording the current channel or all channels.<br />
� Image setting: Changes the image quality between Normal and Good.<br />
7. Double-tap the live view to see it in single view. If the camera supports PTZ functions, tap<br />
the PTZ button and use the touch screen to control the camera. You can also use the<br />
direction buttons and the zoom/iris buttons to control the camera.<br />
Tap the home button to return to home position.<br />
Figure 5-62
Mobile Phone Connection<br />
8. In the single view mode, press the Menu button to access the following options: PTZ,<br />
Record event, Image setting, and Capture image.<br />
Figure 5-63<br />
5<br />
77
Chapter 6 <strong>NVR</strong> Health Analysis<br />
GeoVision offers health analysis to GV-<strong>NVR</strong> <strong>System</strong> <strong>Lite</strong>. The service is intended to give<br />
diagnosis for early and immediate detection of problems.<br />
It is recommended to have the health analysis during the first week after you install the<br />
GV-<strong>NVR</strong> <strong>System</strong> <strong>Lite</strong>, and then have the checkup every three months. It will take 5 working<br />
days for response.<br />
Please prepare the following data for analysis, and send to dvrsystem@geovision.com.tw<br />
� <strong>System</strong> Settings<br />
� <strong>System</strong> Log<br />
� Information of your computer system (Processor; Drives; Voltage, Temperature and<br />
Fans)<br />
6.1 <strong>System</strong> Settings<br />
Please back up your system configurations using the Fast Backup and Restore application.<br />
1. Run Fast Backup & Restore Main <strong>System</strong> from the Start menu.<br />
78<br />
Figure 6-1
<strong>NVR</strong> Health Analysis<br />
2. Select Backup MultiCam Settings or Restore Defaults, and select Backup Current<br />
<strong>System</strong>. This dialog box appears.<br />
Figure 6-2<br />
3. Press the Next Step button to back up all your system settings. The Save As<br />
dialog box appears.<br />
4. Select the destination drive to store the backup file. When the backup is complete, this<br />
message “Successfully Backup MultiCam <strong>System</strong> Settings” will appear.<br />
6<br />
79
6.2 <strong>System</strong> Log<br />
Please provide the sys*.mdb files of system log. The files by default are saved at<br />
D:\Log\database. If you have modified the default location, you can check the path by the<br />
following steps:<br />
1. Click the Configure button on the Main <strong>System</strong>, point to General Setting, and then<br />
select <strong>System</strong> Log Setting. This dialog box appears.<br />
80<br />
Figure 6-3<br />
2. Click Set Location. You should see the location of your system log.<br />
Figure 6-4
6.3 Information of Your Computer <strong>System</strong><br />
6<br />
<strong>NVR</strong> Health Analysis<br />
To get the information of your computer system, please follow the steps below to install the<br />
free software PC WIZARD. By using the software, the following computer information can be<br />
easily collected and saved for analysis:<br />
� Processor: includes Type, Frequency, Data Cache L1, Trace Cache L1, Cache L2,<br />
Voltage, Processor Temperature, FPU Coprocessor.<br />
� Drives: includes Number of Hard Disk, Number of Drive, Total Size and Free Space of<br />
Drive.<br />
� Voltage, Temperature and Fans: includes Monitoring Chip, Voltage CPU, Chassis Fan,<br />
Processor Temperature, Mainboard Temperature, Hard Disk Temperature.<br />
1. Download and install PC WIZARD from http://www.cpuid.com/pcwizard.php .<br />
2. After installation, run the program.<br />
3. Right-click the Processor icon<br />
Figure 6-5<br />
and click Save as.<br />
81
82<br />
4. In the Save As dialog box, select Format HTML and click OK.<br />
Figure 6-6<br />
5. Select the Save location, type the file name, and then click Save to save the Processor<br />
information as HTML file.<br />
6. Repeat Steps 3-5 to save the Drives information as HTML file.<br />
7. To save the Voltage, Temperature and Fans information , please follow these<br />
steps:<br />
A. Click the Voltage, Temperature and Fans icon. The related data is displayed at the<br />
right window.<br />
B. Click the first item Monitoring Chip.<br />
C. Click Edit on the menu bar and click Select All to highlight all the contents.<br />
D. Click Edit on the menu bar and select Copy.<br />
E. Open a Notepad. Paste and save the information to TXT file.
6.4 Health Analysis Form<br />
6<br />
<strong>NVR</strong> Health Analysis<br />
Please send the related data for analysis along with this Health Analysis Form to<br />
dvrsystem@geovision.com.tw.<br />
Health Analysis of GV-<strong>NVR</strong> <strong>System</strong> <strong>Lite</strong><br />
Contact Person: Title:<br />
Company Name:<br />
Telephone: (O) (H)<br />
Fax:<br />
E-Mail:<br />
Model:<br />
Bar Code:<br />
6.5 Check List<br />
Read this check list before submitting the health analysis request:<br />
� <strong>System</strong> Settings- EXE file<br />
� <strong>System</strong> Log- sys*.mdb<br />
� Computer <strong>System</strong>- Processor information of HTML file<br />
� Computer <strong>System</strong>- Drives information of HTML file<br />
� Computer <strong>System</strong>- Voltage, Temperature and Fans information of TXT file<br />
� Health Analysis Form<br />
83
Chapter 7 Troubleshooting<br />
GV-<strong>NVR</strong> <strong>System</strong> <strong>Lite</strong> is designed for durability. However, should problems occur, following the<br />
procedures here can help determine the cause.<br />
GV-<strong>NVR</strong> <strong>System</strong> <strong>Lite</strong> won’t turn on.<br />
If your GV-<strong>NVR</strong> <strong>System</strong> <strong>Lite</strong> won’t turn on or you don't hear a startup sound or any fan or drive<br />
noise, try these steps:<br />
1. Make sure that you press the Power button. The power LED will turn blue when the<br />
GV-<strong>NVR</strong> <strong>System</strong> <strong>Lite</strong> is turned on.<br />
84<br />
Figure 7-1<br />
2. Make sure that the power cord is properly connected to both GV-<strong>NVR</strong> <strong>System</strong> <strong>Lite</strong> and<br />
power outlet. If you are using a power strip, make sure that the strip is powered on.<br />
3. If the problem persists, consult your dealer.<br />
GV-<strong>NVR</strong> <strong>System</strong> <strong>Lite</strong> stops responding (aka “crashed” or froze”).<br />
If your GV-<strong>NVR</strong> <strong>System</strong> <strong>Lite</strong> is not responding to your clicking, typing, or mouse movements,<br />
try to press the Power button on the GV-<strong>NVR</strong> <strong>System</strong> <strong>Lite</strong> to turn it off. Wait 30 seconds and<br />
then press the Power button again to turn it on.
GV-<strong>NVR</strong> <strong>System</strong> <strong>Lite</strong>’s hard disk corrupts<br />
7<br />
Troubleshooting<br />
If you are experiencing file system corruption problems, such as lost clusters, cross-linked<br />
files or invalid files or directories, try these steps:<br />
1. Use the HD Tune utility to scan the external hard disk for errors. Follow these steps:<br />
A. Download and install HD Tune from http://www.hdtune.com/<br />
B. Click the Error Scan tab and click Start to scan. Any found defects will be shown as<br />
red blocks (Figure 7-3).<br />
Figure 7-2<br />
C. If your hard disk drive is damaged, replace a new one.<br />
2. If the HD Tune utility does not find any defects, use the Windows built-in utility to attempt<br />
to fix the errors. Follow these steps:<br />
A. On the GV-Desktop, click the Programs button, and select Disk Management<br />
(Figure 3-6).<br />
85
86<br />
B. Right-click the desired hard disk and select Properties from the file menu to display<br />
the Properties window.<br />
Figure 7-3<br />
C. Click the Tools tab in the upper portion of the window.<br />
D. Under Error-checking, click the Check Now button.<br />
Figure 7-4<br />
E. Select Automatically fix file system errors and Scan for and attempt recovery of<br />
bad sectors.<br />
F. Click Start.<br />
Figure 7-5<br />
3. If the Windows hard disk utility still cannot fix the problem in Partition C, try rebuilding the<br />
operating system and GV-<strong>System</strong> Software. Refer to 3.10 Restoring <strong>System</strong>.<br />
4. If the problem persists, replace an external hard drive.
GV-<strong>NVR</strong> <strong>System</strong> <strong>Lite</strong> suffers virus attack.<br />
7<br />
Troubleshooting<br />
GV-<strong>NVR</strong> <strong>System</strong> <strong>Lite</strong> is designed and optimized for Windows XP platform. It may be<br />
vulnerable to newly created worms and exploits that attack any of the underlying operating<br />
system’s previously undocumented flaws. If your GV-<strong>NVR</strong> <strong>System</strong> <strong>Lite</strong> suffers virus attack, try<br />
rebuilding the operating system and GV-<strong>System</strong> Software. Refer to 3.10 Restoring <strong>System</strong>.<br />
Live video is not displayed smoothly.<br />
If some of live videos are not displayed smoothly, check the following status:<br />
1. Check the bandwidth status of the network that is connected to the GV-<strong>NVR</strong> <strong>System</strong> <strong>Lite</strong>.<br />
2. Check if several users are accessing the Web interface of the GV IP camera. Try to close<br />
some of open Web interfaces.<br />
Unable to locate all the GV IP cameras by using the IP Device Utility.<br />
If you can not locate all the GV IP cameras by using the IP Device Utility, try the following<br />
instructions:<br />
1. Ensure all the GV IP cameras are connected to the same LAN with the GV-<strong>NVR</strong> <strong>System</strong><br />
<strong>Lite</strong> and check the network connectivity.<br />
2. Ensure you have powered on all the GV IP cameras.<br />
3. Click the Search button of the IP Device Utility again to detect the GV IP cameras.<br />
Black images are displayed<br />
If there is no image displayed after the GV IP cameras are connected to GV-<strong>NVR</strong> <strong>System</strong> <strong>Lite</strong>,<br />
check if these GV IP cameras are compatible. For compatible GV IP cameras, see Bundled<br />
Software and Cameras.<br />
How can I find more help?<br />
1. Visit our website at http://www.geovision.com.tw/english/4_1.asp<br />
1. Write us at dvrsystem@geovision.com.tw<br />
87
Specifications<br />
<strong>System</strong><br />
CPU Intel Processor<br />
RAM 1 GB<br />
OS Microsoft Windows XP Embedded<br />
DirectX 9.0c<br />
Power Output: 40W, 19V, 2.1A; Input: 100~240V, 50~60Hz<br />
<strong>System</strong> Monitoring and Recovery<br />
Power Restoration Power restored after AC power loss<br />
Monitoring Software Watchdog<br />
Recovery Automatic system rebuild from internal hard disk.<br />
Connector<br />
Ethernet RJ-45, 10 / 100 / 1000 Mbps<br />
DVI Output DVI-D Output<br />
USB 2.0<br />
Right Side<br />
Left Side<br />
2 ports<br />
4 ports<br />
Sensor and Alarm<br />
Sensor and Alarm<br />
88<br />
GV-IO Box 16 ports (Optional) 16 inputs, 16 outputs<br />
GV-IO Box 8 ports (Optional) 8 inputs, 8 outputs<br />
GV-IO Box 4 ports (Optional) 4 inputs, 4 outputs<br />
Motion Detection 4 channels<br />
Audio<br />
Audio Input 4 channels<br />
Compression G.711<br />
Video<br />
Video Input 4 channels<br />
Compression MJPEG / MEPG4 (ASP) / H.264<br />
Live Resolution CIF for 4 screen divisions<br />
Recording Mode<br />
Round the Clock / Motion Detection / Sensor Detection /<br />
Pre & Post Recording / Schedule Recording<br />
Instant Playback 10 sec. / 30 sec. / 1 min. / 5 min.<br />
Water Marking Support
Specifications<br />
Video Resolution and Frame Rate<br />
Default Resolution (Dual Streams)<br />
Camera Model<br />
Recording and<br />
Single Live View<br />
(H.264)<br />
Quad View<br />
(MPEG4)<br />
Max. Frame<br />
Rate (fps)<br />
GV-BX110D / GV-MFD110D /<br />
GV-BL110D / GV-PT110D<br />
GV-BX120D / GV-BL120D /<br />
1280 x 1024 320 x 256 15<br />
GV-VD120D / GV-FD120D /<br />
GV-CB120<br />
GV-BX220D / GV-BL220D /<br />
1280 x 1024 320 x 256 30<br />
GV-VD220D / GV-FD220D /<br />
GV-CB220<br />
1920 x 1080 448 x 252 15<br />
GV-BX320D / GV-BL320D /<br />
GV-VD320D / GV-FD320D<br />
2048 x 1536 320 x 240 6<br />
GV-PTZ010D-N /<br />
GV-SD010 / GV-SD010S NTSC<br />
704 x 480 352 x 240 30<br />
GV-PTZ010D-P /<br />
GV-SD010 / GV-SD010S PAL<br />
704 x 576 352 x 288 25<br />
Camera Model<br />
Default Resolution<br />
(Single Stream H.264)<br />
Max. Frame<br />
Rate (fps)<br />
GV-FE110 / GV-FE111 1280 x 1024 6<br />
GV-FE420 / GV-FE421 2048 x 1944 2<br />
Note:<br />
1. Several resolution, aspec ratio and codec options are available for each IP camera,<br />
except GV-FE110 / GV-FE111 / GV-FE420 / GV-FE421. But the default resolution for<br />
Quad View images (CIF) cannot be changed.<br />
2. Once the GV IP camera is connected to the GV-<strong>NVR</strong> <strong>System</strong> <strong>Lite</strong>, the video resolution<br />
and codec set on the GV-<strong>NVR</strong> <strong>System</strong> <strong>Lite</strong> will override those set on the camera’s Web<br />
interface.<br />
3. When connecting GV-FE420 / GV-FE421, it is required to set the screen resolution to<br />
1280 x 1024 or lower to get better CPU performance.<br />
Searching and Playback<br />
Search Method Date / Time<br />
Date / Time / Event Search Selectable on the tree list and calendar<br />
Log Search Through the log data to find the video event / time<br />
Backup Type<br />
DVD+R (DL) / DVD-R (DL) / DVD+R / DVD+RW / DVD-R /<br />
DVD-RW / CD-R / CD-RW<br />
Note: For backup function, you need to connect an external USB DVD/CD burner.<br />
89
Remote Client Software<br />
WebCam / Twin Server / CenterV2 / VSM / Control Center<br />
/ Remote Playback Server / Remote View / IP Multicast /<br />
Monitoring Environment<br />
GView / MSView / SSView / Remote View / 3GPP / AView /<br />
iView / iView HD<br />
WebCam Live View Max. 4 channels transmission<br />
Remote Search WebCam’s Remote Playback / Remote Playback Server<br />
Networking<br />
Type TCP/ IP, LAN, WAN, Internet, ISDN<br />
Environment<br />
Operating Temp. 0°C ~ 35 °C / 32 °F ~ 95 °F<br />
Humidity 0% ~ 80% RH (non-condensing)<br />
Physical<br />
Color Champagne gold<br />
Dimensions<br />
(W x H x D)<br />
Weight 650 g / 1.44 lbs<br />
Language<br />
Type<br />
90<br />
153.5 x 20 x 172.5 mm / 6.04 x 0.79 x 6.79 in<br />
English / Czech / Danish / French / German / Hebrew /<br />
Hungarian / Italian / Japanese / Polish / Portuguese (Brazil)<br />
/ Russian / Serbian / Spanish / Simplified Chinese /<br />
Traditional Chinese<br />
Product design and specifications are subject to change without notice.
Warranty Policy<br />
Warranty Coverage<br />
Warranty Policy<br />
GeoVision, Inc. warrants GV-<strong>NVR</strong> <strong>System</strong> <strong>Lite</strong> against defects in materials and workmanship<br />
for a period of TWO (2) years from the date of purchase.<br />
Other packaged accessories and software (including but not limited to <strong>System</strong><br />
Software) are excluded.<br />
If a defect where due to causes attributable to GeoVision arises and a valid claim is received<br />
by GeoVision within the Limited Warranty Period, at its option, GeoVision will (1) repair the<br />
product at no charge, using new or refurbished replacement parts, or (2) exchange the<br />
product with a product that is new or which has been manufactured from new or serviceable<br />
used parts and is at least functionally equivalent to the original product.<br />
GeoVision warrants replacement parts or repairs for thirty (30) days from the date of<br />
GeoVision shipment or for the remainder of the Limited Warranty Period, whichever provides<br />
longer coverage for you. When a product or part is exchanged, any replacement item<br />
becomes your property and the replaced item becomes GeoVision’s property.<br />
Exclusions and Limitations<br />
The Customer shall have no coverage or benefits under this Limited Warranty if any of the<br />
following conditions are applicable:<br />
1. The product has been subjected to abnormal use, failure to follow the instructions<br />
prescribed in <strong>User</strong>’s <strong>Manual</strong>s, improper storage, improper packaging, improper<br />
maintenance, unauthorized modifications, unauthorized repair, misuse, neglect, abuse,<br />
accident, alternation, improper hardware/software installations, or other acts due to<br />
causes not attributable to GeoVision, including damage caused by shipping.<br />
2. The product was not purchased from an authorized distributor or agent.<br />
3. The product has been damaged from exposure to rain, flood, storm, moisture, dampness,<br />
weather conditions, an Act of God, force majeure, improper use of any electrical source, or<br />
the connection to other products not recommended for interconnection by GeoVision.<br />
4. Defects or damage caused due to virus attack.<br />
5. The product bar code on the system case has been removed, defaced or altered.<br />
6. The system case has been opened.<br />
91
THIS WARRANTY IS IN LIEU OF ALL OTHER WARRANTIES, WHETHER ORAL OR<br />
WRITTEN, EXPRESS OR IMPLIED. THE WARRANTY IS LIMITED TO REPAIR OR<br />
EXCHANGE THE PRODUCT AT GEOVISION’S OPTION. OTHER EXPRESSED OR<br />
IMPLIED WARRANTIES FOR THIS PRODUCT, INCLUDING THE IMPLIED WARRANTIES<br />
OF MERCHANTABILITY AND FITNESS FOR A PARTICULAR PURPOSE ARE<br />
EXCLUDED IN DURATION TO THE WARRANTY PERIOD. NO WARRANTIES<br />
EXPRESSED OR IMPLIED WILL APPLY AFTER THIS PERIOD. GEOVISION SHALL NOT<br />
BE LIABLE FOR SPECIAL, DIRECT, INDIRECT, CONSEQUENTIAL DAMAGES.<br />
GEOVISION SHALL NOT BE LIABLE FOR LOST PROFITS, LOST OF DATA, PROGRAMS<br />
OR OTHER INFORMATION, DAMAGE TO OTHER PROPERTY CAUSED BY ANY<br />
DEFECTS OF THIS PRODUCT, OR DAMAGES BASED UPON INCONVENIENCE, LOSS<br />
OF PRODUCT USE, LOSS OF TIME, COMMERCIAL USE, INCIDENTAL AND/OR<br />
CONSEQUENTIAL DAMAGES FOR THE BREACH OF ANY EXPRESSED OR IMPLIED<br />
WARRANTY, INCLUDING DAMAGES TO PROPERTY, AND TO THE EXTENT PERMITTED<br />
BY LAW, DAMAGES FOR PERSONAL INJURY, OR OTHERWISE, EVEN IF GEOVISION<br />
HAS BEEN ADVISED OF THE POSSIBILITIES OF SUCH DAMAGES.<br />
Warranty Requirements<br />
To validate your purchase, you shall complete the online Product Registration within 30 days<br />
from the date of purchase at 1http://www.geovision.com.tw/english/4_6.asp. Or click<br />
GeoVision Online Registration in My Favorite for a direct link.<br />
If you fail to complete the Product Registration, the warranty period will start from the date of<br />
shipment.<br />
Before you return the product<br />
Some problems you experience may be related to software or the operating system. It is<br />
important to investigate other sources of assistance first. Before returning the product, try the<br />
following:<br />
1. Review troubleshooting sections in the documentation for software and peripheral<br />
devices.<br />
2. Try rebuilding the operating system and GV-<strong>System</strong> from the hidden partition.<br />
3. Consult your dealer. They are your best sources for current information and support. Or<br />
you can call or email GeoVision offshore offices for assistance.<br />
92<br />
When you call or e-mail, please inform us the following:
� Model name<br />
� Bar Code<br />
� Details of the defect or problem<br />
� Attempted solutions<br />
� Your contact information<br />
� Reseller’s contact information<br />
Warranty Policy<br />
4. If you find it is the software problem, please check our website or your dealer for software<br />
updates.<br />
Obtaining Warranty Service<br />
If you are still unable to solve the problem and suspect that it is hardware related, follow<br />
these:<br />
1. Send an e-mail to GeoVision to start Return Merchandise Authorization (RMA) process.<br />
E-Mail: sales@geovision.com.tw or dvrsystem@geovision.com.tw<br />
2. Securely pack the product in its original carton using the original packing material, or in<br />
equivalent packaging.<br />
3. The product shall be returned to GeoVision, Taiwan at your expense for shipping and<br />
insurance costs.<br />
BEFORE YOU DELIVER YOUR GV-<strong>NVR</strong> SYSTEM LITE FOR WARRANTY SERVICE, IT IS<br />
YOUR RESPONSIBILITY TO BACK UP YOUR DATA. YOU WILL BE RESPONSIBLE FOR<br />
REINSTALLING ALL DATA, SETTINGS AND PASSWORDS. DATA RECOVERY IS NOT<br />
INCLUDED IN THE WARRANTY SERVICE AND GEOVISION IS NOT RESPONSIBLE FOR<br />
DATA THAT MAY BE LOST OR DAMAGED DURING TRANSIT OR A REPAIR.<br />
93
Microsoft Software License Terms for:<br />
Windows® XP Embedded Runtime<br />
These license terms are an agreement between you and [OEM]. Please read them. They<br />
apply to the software included on this device. The software also includes any separate media<br />
on which you received the software.<br />
The software on this device includes software licensed from Microsoft Corporation or its<br />
affiliate.<br />
The terms also apply to any Microsoft<br />
• Updates,<br />
• Supplements,<br />
• Internet-based services, and<br />
• Support services<br />
for this software, unless other terms accompany those items. If so, those terms apply. If you<br />
obtain updates or supplements directly from Microsoft, then Microsoft, and not [OEM],<br />
licenses those to you.<br />
As described below, using some features also operates as your consent to the<br />
transmission of certain standard computer information for Internet-based services.<br />
By using the software, you accept these terms. If you do not accept them, do not use or<br />
copy the software. Instead, contact [OEM] to determine its return policy for a refund or<br />
credit.<br />
If you comply with these license terms, you have the rights below.<br />
1. Use Rights.<br />
94<br />
You may use the software on the device with which you acquired the software.<br />
2. Additional Licensing Requirements and/or Use Rights.<br />
a. Specific Use. [OEM] designed this device for a specific use. You may only use the<br />
software for that use.<br />
b. Other Software. You may use other programs with the software as long as the other<br />
programs<br />
• Directly support the manufacturer’s specific use for the device, or<br />
• Provide system utilities, resource management, or anti-virus or similar protection.<br />
Software that provides consumer or business tasks or processes may not be run on<br />
the device. This includes email, word processing, spreadsheet, database,<br />
scheduling and personal finance software. The device may use terminal services<br />
protocols to access such software running on a server.
c. Device Connections.<br />
Microsoft Software License Terms<br />
• You may use terminal services protocols to connect the device to another device<br />
running business task or processes software such as email, word processing,<br />
scheduling or spreadsheets.<br />
• You may allow up to ten other devices to access the software to use<br />
• File Services,<br />
• Print Services,<br />
• Internet Information Services, and<br />
• Internet Connection Sharing and Telephony Services.<br />
The ten connection limit applies to devices that access the software indirectly through<br />
“multiplexing” or other software or hardware that pools connections. You may use<br />
unlimited inbound connections at any time via TCP/IP.<br />
3. Scope of License. The software is licensed, not sold. This agreement only gives you<br />
some rights to use the software. [OEM] and Microsoft reserve all other rights. Unless<br />
applicable law gives you more rights despite this limitation, you may use the software only<br />
as expressly permitted in this agreement. In doing so, you must comply with any technical<br />
limitations in the software that allow you to use it only in certain ways. For more<br />
information, see the software documentation or contact [OEM]. Except and only to the<br />
extent permitted by applicable law despite these limitations, you may not:<br />
• Work around any technical limitations in the software;<br />
• Reverse engineer, decompile or disassemble the software;<br />
• Make more copies of the software than specified in this agreement;<br />
• Publish the software for others to copy;<br />
• Rent, lease or lend the software; or<br />
• Use the software for commercial software hosting services.<br />
Except as expressly provided in this agreement, rights to access the software on this<br />
device do not give you any right to implement Microsoft patents or other Microsoft<br />
intellectual property in software or devices that access this device.<br />
You may use remote access technologies in the software such as Remote Desktop to<br />
access the software remotely from another device. You are responsible for obtaining any<br />
licenses required for use of these protocols to access other software.<br />
• Remote Boot Feature. If the [OEM] enabled the device Remote Boot feature of the<br />
software, you may<br />
(i) use the Remote Boot Installation Service (RBIS) tool only to install one copy of<br />
the software on your server and to deploy the software on licensed devices as<br />
part of the Remote Boot process; and<br />
(ii) use the Remote Boot Installation Service only for deployment of the software<br />
to devices as part of the Remote Boot process; and<br />
(iii) download the software to licensed devices and use it on them.<br />
95
96<br />
For more information, please refer to the device documentation or contact [OEM].<br />
• Internet-Based Services. Microsoft provides Internet-based services with the<br />
software. Microsoft may change or cancel them at any time.<br />
a. Consent for Internet-Based Services. The software features described below<br />
connect to Microsoft or service provider computer systems over the Internet. In<br />
some cases, you will not receive a separate notice when they connect. You may<br />
switch off these features or not use them. For more information about these<br />
features, visit<br />
http://www.microsoft.com/windowsxp/downloads/updates/sp2/docs/privacy.mspx.<br />
By using these features, you consent to the transmission of this information.<br />
Microsoft does not use the information to identify or contact you.<br />
b. Computer Information. The following features use Internet protocols, which send<br />
to the appropriate systems computer information, such as your Internet protocol<br />
address, the type of operating system, browser and name and version of the<br />
software you are using, and the language code of the device where you installed<br />
the software. Microsoft uses this information to make the Internet-based services<br />
available to you.<br />
• Web Content Features. Features in the software can retrieve related content<br />
from Microsoft and provide it to you. To provide the content, these features send<br />
to Microsoft the type of operating system, name and version of the software you<br />
are using, type of browser and language code of the device where the software<br />
was installed. Examples of these features are clip art, templates, online<br />
training, online assistance and Appshelp. These features only operate when<br />
you activate them. You may choose to switch them off or not use them.<br />
• Digital Certificates. The software uses digital certificates. These digital<br />
certificates confirm the identity of Internet users sending X.509 standard<br />
encrypted information. The software retrieves certificates and updates<br />
certificate revocation lists. These security features operate only when you use<br />
the Internet.<br />
• Auto Root Update. The Auto Root Update feature updates the list of trusted<br />
certificate authorities. You can switch off the Auto Root Update feature.<br />
• Windows Media Player. When you use Windows Media Player, it checks with<br />
Microsoft for<br />
• Compatible online music services in your region;<br />
• New versions of the player; and<br />
• Codecs if your device does not have the correct ones for playing content.<br />
You can switch off this feature. For more information, go to:<br />
http://microsoft.com/windows/windowsmedia/mp10/privacy.aspx.
Microsoft Software License Terms<br />
• Windows Media Digital Rights Management. Content owners use Windows<br />
Media digital rights management technology (WMDRM) to protect their<br />
intellectual property, including copyrights. This software and third party software<br />
use WMDRM to play and copy WMDRM-protected content. If the software fails<br />
to protect the content, content owners may ask Microsoft to revoke the<br />
software’s ability to use WMDRM to play or copy protected content. Revocation<br />
does not affect other content. When you download licenses for protected<br />
content, you agree that Microsoft may include a revocation list with the licenses.<br />
Content owners may require you to upgrade WMDRM to access their content.<br />
Microsoft software that includes WMDRM will ask for your consent prior to the<br />
upgrade. If you decline an upgrade, you will not be able to access content that<br />
requires the upgrade. You may switch off WMDRM features that access the<br />
Internet. When these features are off, you can still play content for which you<br />
have a valid license.<br />
c. Misuse of Internet-based Services. You may not use these services in any way<br />
that could harm them or impair anyone else’s use of them. You may not use the<br />
services to try to gain unauthorized access to any service, data, account or<br />
network by any means.<br />
4. Windows Update Agent (also known as Software Update Services). The software on<br />
the device includes Windows Update Agent (“WUA”) functionality that may enable your<br />
device to connect to and access updates (“Windows Updates”) from a server installed with<br />
the required server component. Without limiting any other disclaimer in this Microsoft<br />
Software License Terms or any EULA accompanying a Windows Update, you<br />
acknowledge and agree that no warranty is provided by MS, Microsoft Corporation or their<br />
affiliates with respect to any Windows Update that you install or attempt to install on your<br />
device.<br />
5. Product Support. Contact [OEM] for support options. Refer to the support number<br />
provided with the device.<br />
6. Backup Copy. You may make one backup copy of the software. You may use it only to<br />
reinstall the software on the device.<br />
7. Proof Of License. If you acquired the software on the device, or on a disc or other media,<br />
a genuine Certificate of Authenticity label with a genuine copy of the software identifies<br />
licensed software. To be valid, this label must be affixed to the device, or included on or in<br />
[OEM]’s software packaging. If you receive the label separately, it is not valid. You should<br />
keep the label on the device or packaging to prove that you are licensed to use the<br />
software. To identify genuine Microsoft software, see http://www.howtotell.com.<br />
8. Transfer to a Third Party. You may transfer the software only with the device, the<br />
Certificate of Authenticity label, and these license terms directly to a third party. Before the<br />
transfer, that party must agree that these license terms apply to the transfer and use of the<br />
97
98<br />
software. You may not retain any copies of the software including the backup copy.<br />
9. Not Fault Tolerant. The software is not fault tolerant. [OEM] installed the software on<br />
the device and is responsible for how it operates on the device.<br />
10. Restricted Use. The Microsoft software was designed for systems that do not require<br />
fail-safe performance. You may not use the Microsoft software in any device or system in<br />
which a malfunction of the software would result in foreseeable risk of injury or death to<br />
any person. This includes operation of nuclear facilities, aircraft navigation or<br />
communication systems and air traffic control.<br />
11. No Warranties for the Software. The software is provided “as is”. You bear all risks of<br />
using it. Microsoft gives no express warranties, guarantees or conditions. Any warranties<br />
you receive regarding the device or the software do not originate from, and are not binding<br />
on, Microsoft or its affiliates. When allowed by your local laws, [OEM] and Microsoft<br />
exclude implied warranties of merchantability, fitness for a particular purpose and<br />
non-infringement.<br />
12. Liability Limitations. You can recover from Microsoft and its affiliates only direct<br />
damages up to two hundred fifty U.S. Dollars (U.S. $250.00). You cannot recover any<br />
other damages, including consequential, lost profits, special, indirect or incidental<br />
damages.<br />
This limitation applies to:<br />
• Anything related to the software, services, content (including code) on third party<br />
internet sites, or third party programs; and<br />
• Claims for breach of contract, breach of warranty, guarantee or condition, strict<br />
liability, negligence, or other tort to the extent permitted by applicable law.<br />
It also applies even if Microsoft should have been aware of the possibility of the damages.<br />
The above limitation may not apply to you because your country may not allow the<br />
exclusion or limitation of incidental, consequential or other damages.<br />
13. Export Restrictions. The software is subject to United States export laws and regulations.<br />
You must comply with all domestic and international export laws and regulations that apply<br />
to the software. These laws include restrictions on destinations, end users and end use.<br />
For additional information, see www.microsoft.com/exporting.
Warranty Form<br />
<strong>User</strong>’s <strong>Manual</strong> for<br />
GV-<strong>NVR</strong> <strong>System</strong> <strong>Lite</strong><br />
Warranty Form<br />
Thank you for purchasing the GV-<strong>NVR</strong> <strong>System</strong> <strong>Lite</strong>. To help us validate your purchase and<br />
better serve you in the future, please go to 1http://www.geovision.com.tw/english/4_6.asp or<br />
click GeoVision Online Registration in My Favorite for a direct link to register online within<br />
30 days from the date of purchase. Please keep this copy for your records.<br />
Name: First (given) Surname (family name)<br />
Company Name (only if the product is owned by company):<br />
Mailing Address:<br />
City/Town: Province/State:<br />
Country: Postal Code:<br />
Telephone: (O) (H)<br />
Fax:<br />
E-Mail:<br />
Date of Purchase: (e.g. 16-APR-2008)<br />
Bar Code:<br />
Shipment Date:<br />
99
100<br />
GeoVision, Inc.<br />
9F, No. 246, Sec. 1, Neihu Rd.,<br />
Neihu District, Taipei, Taiwan<br />
Tel: +886-2-8797-8376<br />
Fax: +886-2-8797-8335<br />
Email: sales@geovision.com.tw<br />
dvrsystem@geovision.com.tw<br />
http://www.geovision.com.tw