Remote PRefab Housing - Forintek Canada Corp.
Remote PRefab Housing - Forintek Canada Corp.
Remote PRefab Housing - Forintek Canada Corp.
- TAGS
- prefab
- housing
- forintek
- forintek.ca

You also want an ePaper? Increase the reach of your titles
YUMPU automatically turns print PDFs into web optimized ePapers that Google loves.
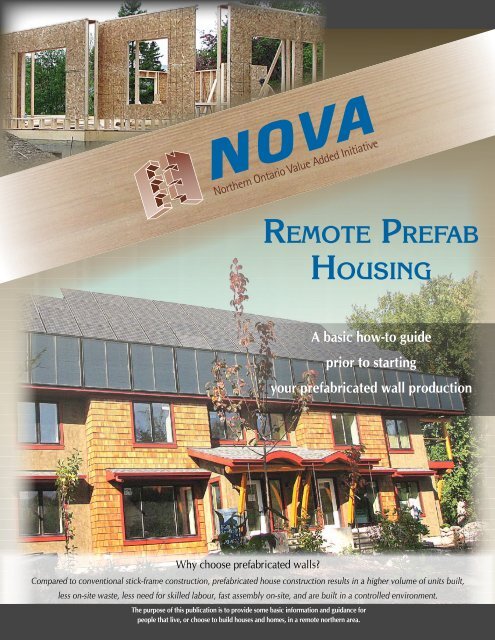
Why choose prefabricated walls?<br />
Compared to conventional stick-frame construction, prefabricated house construction results in a higher volume of units built,<br />
less on-site waste, less need for skilled labour, fast assembly on-site, and are built in a controlled environment.<br />
The purpose of this publication is to provide some basic information and guidance for<br />
people that live, or choose to build houses and homes, in a remote northern area.<br />
Rem o t e PR e fa b<br />
Hou s i n g<br />
A basic how-to guide<br />
prior to starting<br />
your prefabricated wall production
Rem o t e PR e fa b Ho u s i n g<br />
Table 1<br />
Comparison between<br />
prefabricated house and<br />
stick built house<br />
2<br />
Prefabricated house vs. stick built house<br />
The pros and cons of different building methods<br />
The table below compares the framing of two identical buildings built side-by-side,<br />
one stick-built and the other using prefabricated walls.<br />
Source: Build Alberta – Framing the Future, FPInnovations<br />
Self help DIY: Websites, Who to talk to?<br />
• FPInnovations ............................................................ www.fpinnovations.ca<br />
• Build Alberta – Framing the Future, DVD from FPInnovations<br />
• First Nations National <strong>Housing</strong> Managers<br />
Association ................................................................ www.fnnhma.com<br />
Impact of Location<br />
It is important that the site chosen for any construction is appropriate for that<br />
purpose. Ground drainage at the building site will determine the need for preparation,<br />
additional drainage, leveling, rock removal etc. Ensure that the site is not in the flood<br />
zone. Choosing the appropriate foundation is key to reducing the risk from extreme<br />
conditions such as flooding, strong winds or earthquakes. Northern locations will also<br />
require thicker exterior walls to accommodate more insulation than buildings in the<br />
warmer climates of the country. Location will also determine which building codes,<br />
standards and by-laws are applied during construction and to the final building.<br />
Currently, the building code recognizes four climatic zones in <strong>Canada</strong> based on an<br />
average annual temperature indicator called a heating degree-day (HDD). A heating<br />
degree-day is the sum over a full year of the difference between 18°C and the average<br />
daily temperatures that fell below 18°C. These zones were developed specifically for<br />
the ENERGY STAR program for windows‚ doors and skylights.<br />
The Ontario building code recommends a minimum thermal resistance (wall<br />
insulation) of RSI 3.80 (R-22) for southern Ontario and RSI 4.67 (R-26) for northern<br />
Ontario, climate zone B and C/D respectively. However when studying maps like<br />
the climate zone, plant hardiness zones and annual normal degree-days over 18°C<br />
(Figure 1) there are indications that the more northern part in each region would<br />
require better insulated walls to have the same annual heating energy costs as the<br />
southern parts of each zone.<br />
R-2000 is a voluntary standard administered by Natural Resources <strong>Canada</strong> (NRCan)<br />
and is delivered through a network of service organizations and professionals<br />
across <strong>Canada</strong>. Houses built to the R-2000 Standard typically exceed the energy<br />
performance requirements of the current Canadian and provincial building codes<br />
and are recognized as meeting a high standard of environmental responsibility.<br />
Since energy costs will continue to rise, construction in Northern communities may<br />
want to consider Low-energy or NetZero building principles. These highly energy<br />
efficient buildings will cost slightly more to build, but will save money in energy<br />
costs over time.
Annual Normal Degree-Days below 18°C<br />
Figure 1<br />
Energy Efficiency, www.nrcan.gc.ca<br />
www.stenull.paroc.se<br />
Figure 2<br />
Wall thickness according to minimum code vs. wall thickness for<br />
Low-energy or NetZero buildings. A high energy efficient building with thick<br />
walls needs a larger footprint to have the same floor area of a building with<br />
minimum wall insulation requirements. A 204 m² floor area building would<br />
require up to 13.5% increase in footprint area, depending on wall thickness,<br />
with a deep wall construction compared to a standard 2 ´ 6 wall construction.<br />
Rem o t e PR e fa b Ho u s i n g<br />
Climate Zones<br />
D, significant heating<br />
requirements, >8000 HDDs<br />
C, >5500 to 3500 to
Rem o t e PR e fa b Ho u s i n g<br />
4<br />
Design and Planning<br />
The design and planning of a building go far beyond determining insulation<br />
levels for walls, floors and roof and other components of the building envelope.<br />
Will the intended building be for a family of 2, 3, 4, 5, 6…? Bedrooms, living room,<br />
dining room, kitchen, bathroom, storage/laundry room, they all have to be considered<br />
in the design and planning process.<br />
Will one or several houses be built? All the same or custom built to suit individual<br />
needs? Will the house host one or several families/generations? In the case of multifamily<br />
units, even interior walls would have to be insulated to provide soundproofing<br />
and fire protection.<br />
Will the building be built to incorporate cultural designs and lifestyles? Will it have a<br />
basement, concrete slab or crawl space? Is there a need for wheelchair access?<br />
In the case the building will, in one way or another, interfere with its surroundings; it<br />
is always recommended to discuss the project with neighbours during the planning<br />
process to avoid disputes and potentially expensive modifications after construction.<br />
In planning a building project, there are a number of good resources that can be<br />
useful in learning more about:<br />
• Building permits<br />
• National, provincial and local building codes<br />
• Construction, design and material purchase<br />
• Funding, grants and benefits<br />
The book Canadian Wood-frame House Construction is a valuable source regarding<br />
wood framing, including floor framing.<br />
Indian and Northern Affairs <strong>Canada</strong> does not cover the full cost of housing, however<br />
the Department does provide various forms of assistance to support the development<br />
of First Nation on-reserve housing.<br />
Self help DIY: Websites, Who to talk to?<br />
• Building Permits for First Nations ....................... www.fnnboa.ca<br />
• National Model Construction Code Documents ... www.nationalcodes.ca<br />
• Ontario Building Code ...................................... www.mah.gov.on.ca<br />
• Canadian Wood-frame House Construction book,<br />
CHMC .............................................................. www.cmhc-schl.gc.ca<br />
• First Nation <strong>Housing</strong> .......................................... www.ainc-inac.gc.ca<br />
• First Nations National <strong>Housing</strong> Managers<br />
Association ........................................................ www.fnnhma.com<br />
• Assembly of First Nations/<strong>Housing</strong> .................... www.afn.ca<br />
• First Nations <strong>Housing</strong> Market Fund .................... www.fnmhf.ca<br />
• Anishinabek Nation Credit Union ..................... www.ancu.ca<br />
• First Nations <strong>Housing</strong> Solutions ........................ www.fnhs.ca<br />
• Aboriginal <strong>Canada</strong> Portal/<strong>Housing</strong> and<br />
Infrastructure ..................................................... www.aboriginalcanada.gc.ca<br />
• R-2000, National Recourses <strong>Canada</strong> ................. www.nrcan.gc.ca<br />
• Passive Buildings <strong>Canada</strong> .................................. www.passivebuildings.ca<br />
• ENERGY STAR qualified homes ........................ www.esnewhomes.ca
Use of Local Species<br />
Significant costs can be saved by using local species when building a house<br />
in a remote location. In Ontario; Black spruce, White spruce, Red spruce and Jack<br />
pine are species that are frequently used when framing walls. Balsam fir appears<br />
to be particularly well-suited for stud-size dimension lumber, however, to follow<br />
the National and Provincial building codes all lumber must be graded according to<br />
the National Lumber Graders Association (NLGA) standards for construction lumber.<br />
Producing lumber for local use in house framing may not be an immediate option for<br />
many remote communities, but could be part of their plans for future sustainability.<br />
The Ontario building code stipulates that<br />
stud wall framing with load bearing members<br />
should use at least No.2 grade lumber and<br />
for stud wall framing with non-loadbearing<br />
members to use No.3 or better. Although<br />
not required by NLGA, lumber that has been<br />
dried to 19% moisture content (S-Dry) results<br />
in a superior final building and eliminates one<br />
possible source of moisture for mould growth.<br />
To produce lumber for housing, the lumber<br />
needs to be either air dried or kiln-dried and<br />
then preferably planed as well.<br />
Planing of lumber is especially important<br />
in single-stud wall construction due to tight<br />
dimensional tolerances, while a double-stud<br />
wall has larger acceptance for variations due<br />
to the ability to “hide” the variations within the<br />
wall.<br />
Table 3<br />
Lumber dimensions and its possible usage in house construction<br />
Self help DIY: Websites, Who to talk to?<br />
• FPInnovations – Softwoods of Eastern <strong>Canada</strong> ......... www.fpinnovations.ca<br />
• First Nations Forestry Program ................................ www.nrcan-rncan.gc.ca<br />
• National Lumber Grades Authority ......................... www.nlga.org<br />
• Ontario Building code compendium, latest version<br />
Rem o t e PR e fa b Ho u s i n g<br />
5
Rem o t e PR e fa b Ho u s i n g<br />
6<br />
Framing and Assembly<br />
Pre-fabricated wall production in a controlled environment allows year<br />
round production of high quality sections. The building where the wall sections will<br />
be assembled can be fairly small, 50’ ´ 50’ or larger. It can be done also be done in<br />
large temporary structures such as in a large tent or marquis. However it is important<br />
to keep the finished wall-frames protected from the weather elements and moisture.<br />
Although panelization can be utilized in single-family, multi-family or commercial<br />
construction, there are factors to consider before using panelized construction. These<br />
include:<br />
• Site conditions – panelized walls take up more space than lumber (and doublestud<br />
wall-sections even more). Building sites need adequate space for panel storage<br />
otherwise a just-in-time delivery system must be set up.<br />
• Labour pool – builders working with a small crew per site are ideally suited for<br />
panelized wall utilization as fewer workers are needed for stand up.<br />
• Scheduling and delivery – planning, delivery, and execution require a different<br />
organization of scheduling and preplanning. Builders using panels need to adopt<br />
and learn how to organize the construction process using panelized walls.<br />
• Equipment – erecting panelized walls often requires the use of a zoom-boom<br />
forklift or a boom truck, which a stick frame builder may or may not need. With<br />
multi-storey construction, builders might even require a crane.<br />
Figure 3<br />
Example of wall components and its common names.<br />
For more details, see Canadian Wood-Frame House Construction (CHMC) – “Wall framing used with platform construction”,<br />
FPInnovations – “Wood Products for Construction”. Right, Riverdale NetZero. Photo Habitat Studios.
Component tables, (the tables where the frames are assembled), can be quite<br />
sophisticated or they can be quite simple, depending on production volumes and<br />
targeted markets etc. For remote areas and small production, a simple plywood table<br />
will do the job.<br />
Figure 4<br />
The VarioTec WTV100 self build kit<br />
could be the ideal self build kit solution<br />
for a component/assembly table.<br />
WEINMANN provides the technology,<br />
you build the table. Weinmann.<br />
There are basically three major components of a successful prefabrication<br />
methodology:<br />
1. Careful design for prefabrication<br />
2. Thoughtful material handling<br />
3. Reusable jigs and fixtures<br />
Designing for prefabrication is different than for site construction (stick built). One<br />
major difference is that the designer cannot make as many design assumptions that<br />
rely on the skill of a job site carpenter to interpret what is required. Rather the designer<br />
must take into account virtually all the details that are associated with the design.<br />
Thoughtful material handling starts with careful design and needs to service the needs<br />
of the actual assembly process.<br />
For fabrication of a wall frame you may need just a working table large enough to<br />
build a wall section.<br />
The thickness of the wall will<br />
depend on the targeted total<br />
insulation value, R17 to R91,<br />
6” to 20” (140 mm to 608 mm).<br />
Due to expected higher energy<br />
prices the need for better<br />
insulated homes becomes<br />
necessary.<br />
Walls with thicknesses beyond<br />
that stipulated in the building<br />
code (2 ´ 6) depending on the<br />
insulation used, that would be<br />
found in Low-energy house or<br />
a Net-zero building.<br />
In the project Riverdale<br />
NetZero, a Deep Wall System<br />
(DWS) was developed and<br />
Figure 5<br />
Single-stud wall being<br />
insulated using fiber batts.<br />
Manufacturer in Latvia.<br />
Rem o t e PR e fa b Ho u s i n g<br />
helped the project in their goals to save energy. Please visit their website or CMHC for more details and information. The DWS<br />
wall is a double-stud wall frame construction and is made of 2 ´ 4 lumber. 2 ´ 4 can be produced from smaller diameter trees<br />
and seems to be a good fit with a DWS wall system.<br />
Even if some building materials can be sourced locally, most material has to be brought in for remote locations. Materials such<br />
as, cement, nails, screws, plywood, OSB and drywall sheets, pressure treated lumber, metal roofing sheets or metal shingles<br />
(for sustainability), thermal, fire and sound insulations, air and vapour barriers, electrical wires, truss plates etc all have to be<br />
brought in when road or weather conditions allow. The average sheet of ¼-inch thick, 4 ´ 8-foot plywood weighs 25 lbs (11 kg).<br />
A ½-inch sheet is about 50 lbs (23 kg) and a ¾-inch sheet is about 75 lbs (34 kg). You can estimate the weight of thicker sheets<br />
by adding 25 lbs for every additional ¼ inch of thickness.<br />
7
Rem o t e PR e fa b Ho u s i n g<br />
N.B. Blown-in cellulose fibre will<br />
more readily fill irregular spaces than<br />
other insulation materials. Cellulose is<br />
also the only blown-in insulation that<br />
can significantly restrict airflow when<br />
blown to proper densities. Stipulate in<br />
the contract that the density should be<br />
no less than 56 kg/m³ (3½ lbs/ft³.). This<br />
density is approximately one and a half<br />
times the density of insulation normally<br />
used for attic applications.<br />
8<br />
Another project, the Prairie Double Wall, used double top/bottom plates with an<br />
OSB top/bottom spacer of only 8 mm or 9.5 mm. The extra height helps facilitate the<br />
installation of the ceiling drywall.<br />
The advantage of the double-stud wall, beyond the obvious extra<br />
insulation, is that there are few, if any, thermal bridges.<br />
Figure 6<br />
Corner of Riverdale NetZero DWS (Deep Wall System)<br />
connecting two double-stud wall sections. 19 mm OSB<br />
top and bottom spacer plates are used in combination<br />
with a double 2 ´ 4 top plate and a single 1 ´ 4<br />
bottom plate which makes the total exterior wall height<br />
the same as the interior partitions.<br />
Table 4<br />
R-values for different type of walls and wall thicknesses<br />
Figure 7<br />
Cross-section and front view of<br />
a double-stud wall for use in<br />
Table 5.<br />
o.c. (on-centre) is usually 16”<br />
or 24” but sometimes even<br />
12”, depending on design<br />
load the wall must support.<br />
Thickness of bottom/top plate,<br />
D = 2” (38 mm).<br />
E is the thickness of the<br />
Bottom/Top spacer plates.
The DWS requires the Bottom Spacer Plate (BSP) and Top Spacer Plate (TSP) when<br />
nailing two wall frames (double-frame) together. The BSP and TSP can be made of<br />
OSB. Typical size of an OSB or plywood sheet is 4’ ´ 8’ (1220 mm ´ 2440 mm).<br />
Depending on the wall thickness OSB strips should be laid out and cut for BSP and<br />
TSP to maximize recovery from each sheet and minimize waste.<br />
The Tables 5 and 6 illustrate that wall thicknesses of 302 mm, 404 mm and, in the<br />
extreme, 608 mm are those that maximize TSP/BSP components from OSB sheets<br />
with a minimum of waste.<br />
Note: The cellulosic insulations thermal resistance in a wall is rated at RSI-0.0263/mm (R-3.79/inch) as insulation value.<br />
Conversion: 1 RSI = 5.68 R-value, 1 R-value = 0.1761 RSI.<br />
Rem o t e PR e fa b Ho u s i n g<br />
Table 5<br />
Wall thickness optimized for zero waste when 4’ ´ 8’ OSB board is cut along the length of the board, with resulting theoretical<br />
calculated insulation values due to the wall thickness.<br />
Window and door linings cut from the OSB sheet will have the same width as the<br />
BSP/TSP and depending on the length of the wall opening; the lining can be cut<br />
either along the OSB sheet or transversely, table 6.<br />
Table 6<br />
Optimized OSB sheet cuts based on 8 ft length and transverse cuts<br />
This simple method illustrates that wall thicknesses of 302 mm, 404 mm, 486 mm<br />
and, in the extreme, 608 mm are those that maximize TSP/BSP components from<br />
OSB sheets with a minimum of waste.<br />
Insulation batts usually come in 16” or 24” widths to fit within the stud spacing;<br />
however when using blown-in insulation this restriction still applies because of the<br />
standard sizes of plywood and gypsum sheeting for exterior and interior wall cover.<br />
The recommendation is therefore to follow common practice and in the case of using<br />
double-stud exterior walls use an on-centre (o.c.) of 16” (400 mm) between the studs.<br />
This spacing may be changed to 12” (300 mm) or 24” (600 mm) o.c. depending on<br />
the load and the limitations imposed by the type and thickness of the wall covering<br />
used.<br />
If using several layers of batt insulation, the dimensioning factor would be the<br />
thickness for the batts used, 89 mm for R14, 140 mm for R22, where the total layers<br />
of batt insulation add up to the total (inbound) wall insulation thickness. Reducing<br />
this cavity space by 10 mm would help prevent vertical space to allow convection.<br />
For double-stud wall sections using insulation batts with no or little gap inbetween<br />
the two stud wall frames, the two wall frames “must” be somewhat off-set from each<br />
other to minimize thermal bridging<br />
(as wood has a lower insulation value<br />
than insulation and/or to avoid creating<br />
a vertical cavity). The problem with<br />
thermal bridging diminishes with<br />
more highly insulated, thicker walls<br />
eliminating the need for frame off-sets.<br />
Interior walls are framed as single-stud<br />
walls using 2 ´ 4 studs and plates.<br />
To soundproof bedrooms, TV room,<br />
washrooms etc the walls can be sound<br />
insulated using insulation batts or sound<br />
bars. Special sound insulation batts are<br />
available for this purpose. Also an extra,<br />
third layer, of drywall, on either side of<br />
the wall is recommended.<br />
An advantage of using a doublestud<br />
wall construction and blown-in<br />
insulation is that you can blow in the<br />
insulation from one location per wall<br />
segment after the electrical wiring,<br />
and plumbing is done (although both<br />
should be avoided whenever possible in<br />
exterior walls). Prior to insulating, fabric<br />
mesh, vapour barrier, exterior sheathing,<br />
plates for window and door openings<br />
and electrical outlets etc all have to be<br />
in place and well sealed. When blownin<br />
insulation is installed in wood-framed<br />
walls, it must be a type that is not prone<br />
to settling, and the insulation needs to<br />
be installed behind a membrane (fabric<br />
mesh) that permits visual inspection<br />
9
Rem o t e PR e fa b Ho u s i n g<br />
Figure 8<br />
Principle of blown-in insulation<br />
in a double-stud wall section.<br />
Figure 9<br />
Infrared image of house exterior:<br />
In this infrared photo of a typical<br />
sidewall of a house, the yellow<br />
shows excessive heat loss in winter<br />
because the house was not built with<br />
the comprehensive air barriers and<br />
proper insulation details found in<br />
ENERGY STAR homes.<br />
Black areas illustrate thermal bridges,<br />
possibly where studs are located.<br />
10<br />
prior to the installation of the interior cladding or finish. It is very important that<br />
sufficient pressure is reached when blowing in the insulation in the wall cavity. A<br />
minimum density of 56 kg/m³ is recommended.<br />
There are different types of blown-in insulation equipment on the market, with<br />
different capacities and configurations (stationary, mobile, mounted on a truck,<br />
electrical or gas powered). Furthermore this equipment can be leased, rented or<br />
bought, new or second-hand. Safety, noise level and capacity are issues that have to<br />
be reviewed closely. Equipment can handle different types of blown-in insulation,<br />
such as cellulose, mineral wool and fiber glass, all of which have somewhat different<br />
characteristics. Blown cellulose insulation is composed of 85% recycled newspaper.<br />
The remaining 15% is composed of non-toxic borate compounds which resist fire,<br />
insects and mould. Cellulose earns “green points” since it requires less energy than<br />
fiberglass to manufacture. (www.insotec.ca)<br />
Infrared scans (figure 9) of existing walls confirm that cavity insulation works best<br />
when installed in an air tight construction. To accomplish this, an air tight insulation<br />
sandwich is constructed for all exterior walls and sloped ceilings. Depending on a<br />
number of variables, such as sheathing type, this air tight sandwich is a combination<br />
of exterior and interior air tight sheathing with dry-blown, dense packed cellulose in<br />
between.<br />
Low loss High loss<br />
Photo: www.energystar.gov<br />
Experience indicates that one<br />
of the main advantages with<br />
DWS is the very modest or<br />
negligible disruption to the<br />
normal construction sequence.<br />
No trades need to make extra<br />
trips, there is no extra work<br />
that must be done on scaffold,<br />
no insulation gets wet. For<br />
framing on 24” centres there<br />
is no extra material other than<br />
the OSB spacer plates and the<br />
insulation.
Self help DIY: Websites, Who to talk to?<br />
• <strong>Canada</strong> Mortgage and <strong>Housing</strong> <strong>Corp</strong>oration,<br />
CMHC ............................................................. www.cmhc-schl.gc.ca<br />
• Riverdale NetZero Deep Wall System ............. www.cmhc-schl.gc.ca<br />
• Riverdale NetZero project ............................... www.riverdalenetzero.ca<br />
• ENERGY STAR in <strong>Canada</strong> ... oee.nrcan.gc.ca/residential/energystar-portal.cfm<br />
• Build Green <strong>Canada</strong> ........................................ www.buildgreen.ca<br />
• DIY-Prefab ....................................................... www.diy-prefab.com<br />
• European Closed Wall Systems and Technologies<br />
reports, Business Innovation Partnership ............ www.iforwood.com<br />
• Wall equipment manufacturers manuals<br />
and websites .................................................... www.weinmann-partner.com<br />
.................................................... www.danburysales.com<br />
11<br />
Rem o t e PR e fa b Ho u s i n g<br />
Figure 10<br />
Cross-sections and top-views, left side<br />
illustrating a 2 ´ 6 wall with exterior<br />
insulation and to the right a DWS<br />
construction where wall thickness<br />
depends on location or targeted total<br />
insulation value.<br />
The bottom left top-view also illustrates<br />
a thermal bridge.
Rem o t e PR e fa b Ho u s i n g<br />
Figure 11<br />
The dark is mould that<br />
has grown on the wetted<br />
sheathing on the cold side<br />
of the insulation. Air has<br />
been leaking into the wall<br />
through the electrical box.<br />
12<br />
Cooking, dishwashing, laundering and bathing generate considerable amounts of<br />
water vapour that are released into the air in the house, increasing its humidity. Two<br />
mechanisms tend to drive this water vapour through the building shell:<br />
• vapour pressure, and<br />
• air movement<br />
When warm air leaks into construction assemblies, it can come in contact with cooler<br />
surfaces where condensation can occur. The buildup of moisture encourages mould<br />
growth, ruins insulation, and over time even compromises the structural elements of<br />
the home.<br />
Condensation can occur, regardless of construction materials, when warm moist air<br />
meets a cold surface at the air’s dew point. This could be a window, the surface of<br />
a wall, or even on a layer inside the wall (interstitial condensation). In mild cases,<br />
condensation can damage the decorative surface of a wall and lead to more frequent<br />
redecorating. More seriously, condensation may lead to the growth of mould and<br />
mildew and contribute to ill heath for the occupants. Everywhere that liquid water<br />
and heat are found occurring together in a home you will likely find a fungal growth.<br />
See figure 11.<br />
Photo: www.energystar.gov<br />
The dew point temperature is the temperature at which the air can no longer hold<br />
all of its water vapour, and some of the water vapour must condense into liquid<br />
water. Water in any cavity will trigger the growth of fungus and mould which may<br />
trigger adverse health effects. To reduce this problem, it is necessary to keep air with<br />
moisture away from the surface with a temperature that is below the dew point. This<br />
is usually done by installing a vapour retarder in or/on the wall surface where it will<br />
be above the dew point temperature for the air in the room.<br />
Since wetting of the structure, cladding and insulation is obviously undesirable,<br />
some means must be used to keep the water vapour from escaping into the building<br />
envelope. This is the function of the building component that has traditionally been<br />
called the vapour barrier (VB).
When the air pressure inside is greater then the outside, air will tend to flow outwards<br />
through any holes or cracks in the building envelope, carrying with it the water vapor<br />
it contains, figure 12 below. (Canadian Wood-Frame House Construction, CHMC).<br />
Photo: www.nrcan.gc.ca<br />
The major leakage areas in a house are the ceiling and the floor header area. Because<br />
air leaks in below the Neutral Pressure Plane (NPP) and out above the NPP is why<br />
there usually is condensation in the attic but very rarely any condensation at the floor<br />
header area.<br />
While the air barrier must be able to resist wind pressures that occasionally become<br />
very strong. Vapour pressure, on the other hand, is not as forceful and can be easily<br />
resisted. The air barrier can be placed at any location within the building envelope,<br />
while the vapour barrier must be placed on the warm (interior) side of the structure.<br />
A thermal bridge (see figure 10), also called a cold bridge, is created when materials<br />
that are poor thermal insulators come into contact, allowing heat to flow through the<br />
path created even though nearby layers of material separated by airspace allow little<br />
heat transfer. Insulation around a bridge is of little help in preventing heat loss or gain<br />
due to thermal bridging. The thermal bridging has to be eliminated by rebuilding<br />
with studs having a reduced cross-section or with materials that have better insulating<br />
properties, or with an additional insulating component, called a thermal break.<br />
(www.wikipedia.com)<br />
In cold climates, moisture or frost seen on windowpanes is an example of condensation<br />
of the moisture in the air upon a cold surface. Unfortunately, this same phenomenon<br />
is occurring inside the wall cavity, the inboard section of the wall. To prevent this, the<br />
warm moist air must be kept away from the cold surface. This can either be done by<br />
placing an air-vapour barrier and insulation on the warm side of the cold surface or<br />
by adding an air-vapour barrier and insulation to the exterior to warm the air space.<br />
The vapour barrier “must” always be on or in the warmer ¼ of the total insulation.<br />
Adding a rigid insulation (Expanded polystyrene sheathing) to the outside surface of<br />
the studs will minimize the thermal bridging as does spacing the studs at 24” rather<br />
than 16” where possible. As a consequence, the dew point will be moved somewhat<br />
outwards, see figure 13. A double-stud wall does not have the same problem with<br />
thermal bridging so exterior rigid insulation may not be needed. However; insufficient,<br />
improperly sealed or damaged vapour barrier will lead to moisture penetrating the<br />
wall from inside and out; when the condition for dew point is met a condensation<br />
problem will occur. The solution is not to drain water out of the wall; it is to prevent<br />
warm moist air from getting into the wall by the use of a GOOD air-vapour barrier<br />
on or near the inside of the wall. The dew point temperature in the wall is only a<br />
13<br />
Rem o t e PR e fa b Ho u s i n g<br />
Figure 12<br />
Diagram of leaky home illustrating<br />
locations to check: In typical homes,<br />
air leaks are often found at holes and<br />
penetrations for plumbing, wiring,<br />
lighting, and ductwork.
Rem o t e PR e fa b Ho u s i n g<br />
Figure 13<br />
Additional exterior insulation will<br />
move the location of the Dew<br />
point to the outboard part of the<br />
wall while minimizing the thermal<br />
bridging; however the most<br />
important factor is to place and<br />
seal the vapour barrier correctly.<br />
The outboard wall configuration<br />
includes the exterior finished wall<br />
(various options – here not<br />
illustrated).<br />
14<br />
problem if air from the house is allowed into the wall. In a well-built house the air<br />
in the wall should only be outside air where the dew point temperature is below the<br />
outside temperature, making dew point temperature irrelevant. The outside air leaks<br />
into the wall at the floor area (no effort to seal this location, and the stack effect on<br />
the house means air leaks in at the bottom and out at the top).<br />
• It is important to make sure that the vapour barrier is positioned<br />
and sealed correctly.<br />
The building codes recommend a minimum RSI (or R-value) ratio for various zones<br />
based on Celsius Heating Degree-days, between Outboard and Inboard thermal<br />
resistance to address the issue with the Dew point. See table 7 below and figure 1<br />
(on page 3) for climate zones.<br />
Outboard total RSI / Inboard total RSI = Minimum RSI Ratio<br />
Table 7<br />
Minimum RSI ratio values between<br />
Outboard and Inboard thermal resistance<br />
per Climate zone. This ratio is important<br />
in wall design to avoid moisture<br />
condensation inside the warm side of the<br />
wall as it indicates the insulation needed<br />
on the outboard section of a wall in<br />
relation to the inboard<br />
The reverse situation only occurs in very humid, hot climates with air conditioning<br />
turned on high. In this situation there is a good argument to place the VB in the wall<br />
(Prairie Double Wall) however the VB should be placed on the inside of the outer<br />
wall rather than the outside of the inner wall. The design of the house is important,<br />
and if well designed unnecessary cooling can be avoided.
Key points<br />
• The higher level of airtightness the better. In addition to protecting the building<br />
envelope, airtightness promotes energy efficiency, allows for better control<br />
of natural and mechanical ventilation, and reduces the transmission of outdoor<br />
noise.<br />
• Well dimensioned (and quiet operating) air ventilation for exhausting moist air<br />
in high humidity areas such as in kitchens and bathrooms is critical and also<br />
refreshes the air, removing particles and pollutants.<br />
• Design wall construction so that inboard and outboard insulation have the required<br />
insulation resistance (RSI) while at the same time keep the vapour barrier<br />
well sealed to avoid condensation problems within the wall.<br />
What’s next?<br />
Expanding, training, research<br />
Learn from research being done regarding:<br />
• Super insulated buildings, the walls are just parts in the over all house envelope.<br />
• Passive house refers to the rigorous, voluntary, Passivhaus standard for energy<br />
efficiency in a building, reducing its ecological footprint. It results in ultra-low<br />
energy buildings that require little energy for space heating or cooling<br />
• Selecting Residential Window Glazing for Optimum Energy Performance, 3-4<br />
glass panes. The very well insulated walls have to be accompanied by windows<br />
and doors with high insulating performance. Doors with and without a window<br />
have different thermal resistances. When comparing the U-value make sure it<br />
includes the whole construction including the frame (especially since the seal is<br />
a very weak point)<br />
• The Prefabricated House in the Twenty-First Century: What Can We Learn from<br />
Japan?<br />
Self help DIY: Websites, Who to talk to?<br />
• ............................................................... www.netzeroenergyhome.ca<br />
• ............................................................... www.nrc-cnrc.gc.ca<br />
• Information from ................................... www.fpinnovations.ca<br />
– Earthquake Resistant <strong>Housing</strong><br />
– Wood-frame Construction, Fire Resistance and Sound Transmission<br />
– Borate-Treated Wood for Construction<br />
– Combating Termites<br />
– Moisture and Durability<br />
– Discolorations on Wood Products: Causes and – Implications<br />
– Fire Safety<br />
– Properties of Lumber with Beetle-Transmitted Bluestain<br />
• Passive Buildings <strong>Canada</strong> ...................... www.passivebuildings.ca<br />
• Passive House..........................................<br />
www.passivehouse-international.org<br />
• A Case Study of the KST-Hokkaido House<br />
http://timber.ce.wsu.edu/Resources/papers/4-2-3.pdf<br />
• Low Energy House ................................ www.lowenergyhouse.com<br />
• ECO Insulating Glass ............................ www.ecoglass.ca<br />
• U-value for doors and windows ............ oee.nrcan.gc.ca<br />
• Attic ventilation ..................................... www.greenenergyact.ca<br />
• House envelope www.nrc-cnrc.gc.ca/obj/irc/doc/pubs/b-1239.2/b1239.2.pdf<br />
• Insulating existing homes www.uaf.edu/ces/publications-db/catalog/eeh/<br />
EEM-04452.pdf<br />
15<br />
Rem o t e PR e fa b Ho u s i n g
Rem o t e PR e fa b Ho u s i n g<br />
Acknowledgements<br />
The author appreciates the<br />
review of this report by:<br />
– Mr. Harold Orr,<br />
– Mr. Rob Dumont,<br />
– Mr. Dan Langford,<br />
– Mr. Peter Amerongen,<br />
– Mr. Andy Smith,<br />
– Mr. Gordon Howell and<br />
– Dr. Dalibor Houdek.<br />
Photo credit<br />
Gordon Howell<br />
– Howell Mayhew Engineering<br />
Peter Amerongen<br />
– Habitat Studio and Workshop<br />
For further information,<br />
please contact:<br />
Peter A. Åsman, Industry Advisor<br />
Northeastern Ontario<br />
Tel: 705 268-3964<br />
peter.asman@fpinnovations.ca<br />
16<br />
NOTES:<br />
This work has been done through the Northern Ontario Value-Added initiative with support from:<br />
Natural Resources <strong>Canada</strong><br />
Industry <strong>Canada</strong> – FedNor