ImageView 118328 - Bushnell
ImageView 118328 - Bushnell
ImageView 118328 - Bushnell

Create successful ePaper yourself
Turn your PDF publications into a flip-book with our unique Google optimized e-Paper software.
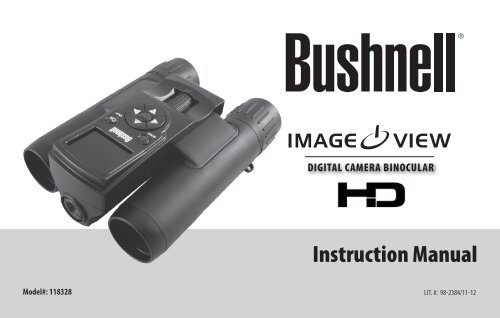
Model#: <strong>118328</strong><br />
DIgItal CaMera bInoCular<br />
Instruction Manual<br />
Lit. #: 98-2384/11-12
Section Index Page #<br />
Camera and Binocular Parts Guide 3<br />
LCD Display Icon Guide 4<br />
Basic Setup 5-6<br />
Taking Still Photos 7-8<br />
Shooting Videos 9<br />
Using the Capture (Still Photo) Menu 10-12<br />
The Video Output Menu 13<br />
The Play (Review) Menu 14-15<br />
The Setup Menu 16-17<br />
Transferring the Photos/Videos to Your PC 18-19<br />
Using the Binocular 20-21<br />
General Care and Cleaning 21-22
Camera and Binocular Parts Guide<br />
(F) Binocular<br />
Focus Knob<br />
(E) OK/SNAP<br />
Button<br />
(D) Up/Down/Left/Right<br />
arrow keys & MENU Button<br />
(C) POWER/MODE<br />
Button<br />
(K) Camera<br />
Lens<br />
(L) LCD Display<br />
(H) Remote<br />
Jack<br />
-<br />
+<br />
(I) USB<br />
Port<br />
(B) Card<br />
Slot (A) Battery<br />
Compartment<br />
-<br />
Battery polarity<br />
(G) Tripod<br />
Socket<br />
(J) Diopter Adjustment<br />
(right eyecup)<br />
Slide down to open<br />
3
4<br />
# Icon<br />
LCD Display Icon Guide<br />
1 Battery Indicator (full battery shown)<br />
2 Single Shot (Burst setting=Off)<br />
3 Scene Setting (Auto shown)<br />
4 Photo Quality setting (3 stars=Fine)<br />
5 Photo Resolution setting (5 Megapixels)<br />
6 SD Card Inserted<br />
7 # of Photos Remaining (based on unused card memory)<br />
8 Video Mode<br />
9 Video Resolution (HD)<br />
10 Elapsed Video Recording Time<br />
11 Playback (Review) Mode<br />
12 Video Clip<br />
13 File Number (Photo or Video #)<br />
14 Press Up Key to Play/Pause the Video clip<br />
Live Preview<br />
Screen (Still<br />
Photo Mode)<br />
Live Preview<br />
Screen (Video<br />
Mode)<br />
Playback/<br />
Review Screen<br />
(Video Clip)<br />
1<br />
2<br />
14<br />
HD<br />
3<br />
4<br />
6<br />
7<br />
5<br />
8<br />
9<br />
10<br />
11<br />
12<br />
13
BASIC SETUP<br />
Loading Batteries<br />
Slide the battery compartment cover (A) down, remove and set aside. Insert 3 AAA Alkaline or Lithium<br />
batteries into the compartment oriented as indicated by the polarity marks on the cover (both upper batteries<br />
“negative facing up”, lower battery “positive facing up”- see “Battery polarity” on pg. 3). Replace the cover, sliding<br />
it back into place until it clicks. Note: Rechargeable NiMh type batteries may also be used, but some may not<br />
deliver adequate current to power the camera and display. An indicator in the top left corner of the display (L)<br />
monitors the battery power level (pg. 4, #1). The batteries will need to be replaced soon after the level meter<br />
drops to the last segment.<br />
Inserting An SD Card<br />
The <strong>ImageView</strong> model <strong>118328</strong> requires an SD or SDHC (High Capacity) memory card, with 32GB or lower<br />
capacity (64GB or higher cards will not work), to store the photos and/or videos it captures. As there is no<br />
internal memory, the message “INSERT CARD” appears on the display after power on, and the <strong>ImageView</strong><br />
cannot be used until a card is inserted. Insert a compatible card (not included) into card slot (B), with the metal<br />
contacts on the card facing up, until it clicks into place. Press the POWER/MODE button (C) until the display<br />
comes on. The camera will automatically turn itself off after 3 minutes of inactivity (this can be changed in the<br />
“Auto Off” options in the Setup menu).<br />
If the SD card you inserted was previously used in other devices, format it before taking photos. Press the<br />
MENU button (D) to display the “Capture” menu, then press the RIGHT arrow key to select the “Setup” menu.<br />
5
6<br />
The first item in the Setup menu is “Format”. Press the OK/SNAP (E) button, then press the DOWN arrow key<br />
to select “Execute”. Note: formatting the card will erase all files-make sure you have backed up any files you<br />
wanted to keep. Press OK/SNAP again to format the card (the display reads “One Moment”). Press the LEFT key<br />
twice to select and then exit the Capture menu.<br />
Setting the Menu Language Preference (Optional-only necessary for non-English speakers)<br />
To set the menu language (default=English), press the MENU button (D) to display the “Capture” menu, then<br />
press the RIGHT arrow key to select the “Setup” menu. Press the DOWN arrow key twice to select “Language”,<br />
then press the OK/SNAP button. Select your preferred language using the UP or DOWN keys, then press OK/<br />
SNAP to set it. Press the LEFT key twice to exit the Setup and Capture menus.<br />
Setting the Date and Time (Optional-only necessary if you want to imprint date/time on photos)<br />
The Date/Time Stamp feature is turned off by default. If you want to use it, first set the date and time by<br />
pressing MENU. Press the Right arrow key to select the Setup menu, then press the UP arrow key to select<br />
“Date Input”, and press OK/SNAP. Select “set”, press OK, and use the LEFT/RIGHT arrow keys to select a field<br />
(format, day, month, year, hour, etc.) and use the UP/DOWN arrow keys to change the setting. When finished,<br />
press OK/SNAP, then press the LEFT arrow key to select the Capture menu. “Time Stamp” should already be<br />
highlighted. Press OK/SNAP, select the option you prefer, and press OK/SNAP again. Press the LEFT arrow key<br />
to exit the menu. Reset the date/time after you replace batteries.
TAKING STILL PHOTOS<br />
After completing the basic setup as described in the previous pages, you are ready to take a photo. To turn on<br />
the camera, press the POWER/MODE button until the <strong>Bushnell</strong> logo screen appears. The “live preview” display<br />
shows the battery condition, number of photos remaining on the SD card, and the current setting of various<br />
options, along with the image from the camera lens located between the binocular objective lenses. Please<br />
refer to “LCD Preview Display Icon Guide” for more details. Press the left arrow key (DSP) to turn off the display<br />
icons (to see only your photo subject). Press again to view the icons again. You may compose your photo while<br />
looking through the binocular. However, for the most accurate framing, checking the LCD preview display is<br />
recommended.<br />
The <strong>ImageView</strong> will default to high resolution and quality settings, as well as “everything on automatic” when<br />
it is turned on for the first time, so you’re ready to take photos under normal conditions with no need to<br />
change anything. If you’d like to explore the various available options, see the manual section titled “Using<br />
the Main Menu-Options and Settings” for directions regarding how to select and change settings such as<br />
resolution, image quality and exposure.<br />
Hold the camera steady with both hands and press the OK/SNAP button (E) to take a still photo. The binocular<br />
focus knob (F) does not affect the focus of the camera lens, which is preset to deliver sharp photos at all<br />
distances from “infinity” to about 50 ft. Attach the supplied mini tripod to the socket (G) to help avoid the<br />
effects of camera shake. The included remote shutter cable can be inserted into the remote jack (H) to reduce<br />
vibration, instead of using the OK/SNAP button.<br />
7
8<br />
The “remaining photos” indicator near the lower right corner of the display (see pg. 4, #7) will drop as photos<br />
are taken. Once you are out of memory (storage space on the SD card), you will need to download the photos<br />
you have taken so they can be deleted to make room on the card for new photos, or you may remove the filled<br />
up card and install another SD card if you are on a trip away from your computer.<br />
A digital zoom feature is available (up to 8.0x in addition to the normal 8 power optical magnification). Press<br />
the UP (+) arrow key to zoom in (you will see the result on the LCD, and the digital zoom indicator bar moves<br />
upwards). Press the DOWN (-) arrow key to zoom back out (the zoom indicator bar moves downwards). To turn<br />
off all digital zoom (returning to optical magnification only) keep pressing the DOWN (-) key until the zoom<br />
bar indicator goes all the way down (indicating “1.0” digital zoom).<br />
To review a photo after you take it, press the RIGHT arrow key. To see other photos taken previously, press<br />
the LEFT arrow key-each press takes you back one photo, and pressing the RIGHT arrow key moves forward<br />
to more recent photos. Press the MODE button to exit Review mode and return to the live preview. See the<br />
section “Play (Review) Menu” for details on how to use the menu functions for deleting photos, viewing a slide<br />
show of all images, and protecting important photos.<br />
NOTE: Use care during handling to avoid touching the camera lens (K), located in the center between the<br />
binocular lenses, to prevent degrading the image quality. Clean the camera lens only with dry lens tissue or<br />
microfiber cloth. DO NOT use liquids of any type.
SHOOTING VIDEOS (USING VIDEO MODE)<br />
To enter Video mode (from Photo mode), briefly press the POWER/MODE button (C). The red movie camera icon<br />
appears at the top right corner of the display (pg. 4, #8). Start shooting the video at any time by pressing the<br />
OK/SNAP button. The counter at the bottom of the display changes to red and shows the elapsed recording<br />
time. The recording time is limited only by the amount of internal or card memory currently available. You may<br />
record a single long video until you run out of memory or multiple shorter videos by stopping and starting<br />
recording whenever you wish by pressing OK/SNAP. Press OK/SNAP again to stop recording. Press POWER/<br />
MODE to switch back to still photo mode.<br />
The video quality/file size can be set by pressing MENU, select “Size” (if not already highlighted) and press OK/<br />
SNAP. You can the select your preferred video resolution from “HD” (highest quality, largest files) to “QVGA”<br />
(lowest quality, smallest files). Note: regardless of the resolution setting, all videos are recorded in at a 30 fps<br />
frame rate, in .avi format. The <strong>ImageView</strong> does not record audio.<br />
Press the RIGHT arrow key to review a video after you shoot it. Press the UP arrow key to begin playback, press<br />
it again to pause playback. During playback, the counter on the right displays elapsed time. When you are<br />
ready to return to the live preview display to shoot more videos (or stills), press the POWER/MODE button.<br />
9
10<br />
USING THE CAPTURE (STILL PHOTO MODE) MENU<br />
As mentioned earlier in this manual, your <strong>ImageView</strong> is already set for high resolution and quality right out of<br />
the box. Exposure, white balance, and other variables are set automatically. This means that you will get good<br />
results for most subjects and lighting without the need to go into the menu to change any settings. However,<br />
you should become familiar with the available options so that you can improve your photos if, for example,<br />
you decide they are coming out too dark (common in photos with snow or at the beach), or too green (under<br />
some fluorescent lights). Press the MENU button to enter the main menu. Use the UP/DOWN arrow keys to<br />
highlight an option within the menu, then press OK/SNAP if you wish to change the settings for that option.<br />
Use the UP/DOWN keys to select the setting you want, then press OK/SNAP to confirm and activate the new<br />
setting. Here are all the parameters and settings available in the CAPTURE (Still Photo Mode) menu, along with<br />
a description of their function:<br />
Parameter Settings<br />
(Bold=Default)<br />
Size 12M*, 8M*, 5M, 3M,<br />
2M, 1.5M<br />
* via software interpolation.<br />
Actual sensor<br />
resolution is 5MP.<br />
Function/Description<br />
Sets resolution for still photos in pixels/megapixels. Higher resolution settings produce sharper/<br />
larger prints but require more space on the SD card. Use lower settings to store more images on<br />
the SD card, or for email.
CAPTURE MENU<br />
Parameter Settings<br />
(Bold=Default)<br />
Quality Fine, Standard,<br />
Economy<br />
Scene Mode Auto, Sport, Night,<br />
Portrait, Landscape,<br />
Backlight<br />
EV +2.0~-2.0 in 0.5 EV<br />
steps, default=0<br />
White Balance Auto, Daylight, Cloudy,<br />
tungsten, Fluorescent<br />
Function/Description<br />
Sets the amount of .jpg file compression, which affects the quality of the photo and the size<br />
of the file it creates. this can be used independently of Size to store more photos (with lower<br />
quality) if you choose. “Fine” produces the highest quality, but also generates larger files that fill<br />
available card memory quicker.<br />
Leave on default “Auto” (auto exposure) for general purpose photos. “Sport” preset selects<br />
faster shutter speeds to help stop motion blur. “Night” preset selects slower shutter speeds to<br />
gather more light (use tripod). “Portrait” preset opens lens aperture to help blur background.<br />
“Landscape” preset closes lens aperture to help sharpen background. “Backlight” preset adds<br />
overexposure to avoid dark subject in center.<br />
Provides manual under/over exposure adjustment . Minus values produce darker photos, plus<br />
values lighter. When the background is very bright (for example, snow in winter scenes), you<br />
may need to add some “+” EV to prevent underexposure.<br />
Sets the reference for neutral white, so that colors are reproduced correctly. if “Auto” does not<br />
provide good results (colors appear too orange or blue), try the setting that matches the light<br />
source.<br />
11
12<br />
CAPTURE MENU<br />
Parameter Settings<br />
(Bold=Default)<br />
iSO Auto, 100, 200, 400,<br />
800<br />
Color Standard, Vivid,<br />
Sepia, Monochrome<br />
Function/Description<br />
Sets the sensor’s sensitivity to light. “Auto” will automatically select lower iSO in bright light,<br />
higher iSO in lower light. Lower iSO settings=better image quality<br />
Standard=normal colors, Vivid=extra rich colors, Sepia=”antique” photo effect,<br />
Monochrome=black & white photo effect.<br />
Saturation High, Normal, Low Selects amount of color saturation. High=deeper colors, Low=softer colors.<br />
Sharpness Hard, Normal, Soft Sets the amount of sharpening applied by the internal processor. You may want to select “Soft” if<br />
you prefer to add sharpening later using photo software on your PC.<br />
Preview On, Off “On”=captured image is briefly shown on display immediatly after snapping photo.<br />
time Stamp Off, Date Only,<br />
Select “Date Only” to imprint date on photos/videos. Select “Date & time” to imprint both date<br />
Date&time<br />
and time. Be sure correct date/time has been set, using “Date input” in the Setup Menu. Select<br />
Off (default) if you don’t want date or time imprinted on images.<br />
Burst On, Off When set to “On”, a rapid series of 3 photos will be taken with each press of the SNAP button.<br />
Noise Reduce On, Off “On”=software processing is automatically applied to help reduce appearance of digital noise<br />
(grain) in photos taken under low light and other difficult conditions.
THE VIDEO OUTPUT (VIDEO MODE) MENU<br />
Whenever the <strong>ImageView</strong> is switched to Video mode (see “Shooting Videos-Using Video Mode), pressing the<br />
MENU button will display the Video Output menu instead of the Capture menu. It is much shorter, providing<br />
only a Size (video resolution) option, along with EV and White Balance, which have the same functions as they<br />
do in the Capture menu. Use the UP/DOWN arrow keys and OK/SNAP button to select parameters, change<br />
settings, and confirm a new setting the same way as previously described in “Using the Capture Menu”. Press<br />
the LEFT arrow key to exit the menu.<br />
VIDEO OUTPUT MENU<br />
Parameter Settings<br />
(Bold=Default)<br />
Function/Description<br />
Size HD, D1, QVGA, VGA Selects video resolution. HD=1280x720 pixels per frame, D1=720x480, QVGA=320x240,<br />
VGA=640x480.<br />
EV +2.0~-2.0 in 0.5 EV<br />
steps, default=0<br />
White Balance Auto, Daylight, Cloudy,<br />
tungsten, Fluorescent<br />
Provides manual under/over exposure adjustment . Minus values produce darker videos, plus<br />
values lighter. When the background is very bright (for example, snow in winter scenes), you<br />
may need to add some “+” EV to prevent underexposure.<br />
Sets the reference for neutral white, so that colors are reproduced correctly. if “Auto” does not<br />
provide good results (colors appear too orange or blue), try the setting that matches the light<br />
source.<br />
13
14<br />
THE PLAY (REVIEW) MENU<br />
When you are in Still Photo or Video modes, pressing the RIGHT arrow key enters Play (Review) mode, which<br />
allows you to view previously captured photos or videos that are stored on the SD card. Once you are in Play<br />
(Review) mode, pressing the MENU button enters the Play menu, which offers the options shown below. Use<br />
the UP/DOWN arrow keys and OK/SNAP button to select parameters, change settings, and confirm a new<br />
setting the same way as previously described in “Using the Capture Menu”. Press the LEFT arrow key to exit<br />
the menu.<br />
PLAY (REVIEW) MENU<br />
Parameter Settings<br />
(Bold=Default)<br />
Function/Description<br />
Delete Single, All, Select Select “Single” then press OK to delete the currently displayed (last) photo or video. Select “All”<br />
then press OK to delete all photos/videos stored on the SD card. Select “Select” to choose from<br />
thumbnail images of all photos/videos stored on the card (use the arrow keys to highlight the<br />
image you want, then press MENU), then press OK to deleted the selected image only.<br />
Slide Show 3 Sec, 5 Sec, 10 Sec Select desired time per image and press OK to view a slide show of all images stored on the SD<br />
card.
PLAY (REVIEW) MENU<br />
Parameter Settings<br />
(Bold=Default)<br />
Function/Description<br />
Protect Single, All, Select Select “Single” then press OK to protect the currently displayed (last) photo or video from<br />
accidental deletion. Select “All” then press OK to protect all photos/videos stored on the SD card.<br />
Select “Select” to choose from thumbnail images of all photos/videos stored on the card (use the<br />
arrow keys to highlight the image you want, then press MENU), then press OK to protect the<br />
selected image only. Use this function a second time to “unprotect” a previously protected image<br />
if you decide you want to erase it.<br />
thumbnail Execute Select “Execute” then press OK to view all photos/videos stored on the SD card as thumbnails<br />
(multiple small images on one screen). Use the arrow keys to highlight the image you want,<br />
then press MENU to view it full screen.<br />
15
16<br />
THE SETUP MENU (available from Capture Menu, Video Output Menu or Play Menu)<br />
After you first enter any other menu screen, press the RIGHT arrow key to switch to the Setup menu. The Setup<br />
menu provides a variety of basic operating functions that are unrelated to capturing or reviewing photos and<br />
videos. The SETUP tab at the top right of the menu display will be highlighted after you select it. Use the UP/<br />
DOWN arrow keys and OK/SNAP button to select parameters, change settings, and confirm a new setting the<br />
same way as previously described in “Using the Capture Menu”. Press the LEFT arrow key once to return to the<br />
Capture menu, twice to exit all menus and return to the preview display and take photos or videos.<br />
SETUP MENU<br />
Parameter Settings<br />
(Bold=Default)<br />
Function/Description<br />
Format Cancel, Execute Press OK. Select “Execute” and press OK to format the inserted SD card. CAUTION: ALL FiLES<br />
WiLL BE DELEtED FROM tHE CARD ONCE YOU PRESS tHE OK BUttON. MAKE SURE YOU HAVE<br />
DOWNLOADED/BACKED UP ANY FiLES YOU WiSH tO KEEP BEFORE USiNG tHE FORMAt FUNCtiON.<br />
Beep On, Off On=confirmation beep sounds when any button is pressed. Off=no beep sound
SETUP MENU (Additional Menu Tab available from Capture Menu, Play Menu or Video Output Menu)<br />
Parameter Settings<br />
(Bold=Default)<br />
Language English, French,<br />
German, italian,<br />
Spanish, Portuguese,<br />
Chinese 1, Chinese 2,<br />
Japanese<br />
Auto Off 1 Min, 3 Min, 5<br />
Min, Off<br />
Function/Description<br />
Selects language used for all menu screens.<br />
Selects elapsed time after last button press before camera shuts off to conserve battery power.<br />
Select “Off” to cancel (power stays on unless camera is manually turned off by holding Mode/<br />
Power button)<br />
Sys. Reset Cancel, Execute Press OK. Select “Execute” and press OK to restore all settings for all options (in all menus) to<br />
their original factory default settings.<br />
Light Freq 60 Hz, 50 Hz Set to the AC line frequency used in your country. Primarily affects images shot under fluorescent<br />
lighting.<br />
Date input Off, Set Select “Set” and press OK to set the year, month, day and time. See “time Stamp” in the Capture<br />
Menu.<br />
17
TRANSFERRING THE PHOTOS & VIDEOS TO YOUR PC<br />
1. Make sure the <strong>ImageView</strong> is powered off. Connect the supplied cable to the USB port (I) above the SD card<br />
slot on the <strong>ImageView</strong>, then connect the other end directly to a main USB port on your computer-do not use<br />
front panel/keyboard USB ports or unpowered “hubs”.<br />
2. The <strong>ImageView</strong> will be recognized as a standard “USB Mass Storage” device by your PC or Mac computer.<br />
This means that the camera files can be easily viewed, edited, or copied to your hard drive, just as if they were<br />
stored on an external hard drive or flash drive.<br />
3. (This step is not required with some Windows operating systems, simply use the options in the pop-up window<br />
to view, copy or edit your photos). Open My Computer or Windows Explorer. The camera will be seen as a new<br />
“Removable Disk” with an unused drive letter assigned to it. Mac Users: the SD card will appear as a new disk<br />
drive icon on your desktop. Double click this new “Disk” icon, open the “DCIM” folder inside, then the folder(s)<br />
inside that (“100DSCIM” ,etc). Your photos/videos are the files inside-they have the prefix “PICT__” followed<br />
by a number, same as seen earlier on the camera’s display when you review photos. Still photos have a “.JPG”<br />
file extension, video files end with “.AVI”. Double click a file to view it full screen, or select the “Filmstrip” or<br />
“Thumbnail” options from the View menu of the open window.<br />
4. Click “Edit>Select All” in the Windows menu (or click on one photo, contol+click to select multiple photos),<br />
then “Edit>Copy to Folder” (in Windows menus). Select an existing folder on your hard drive, such as “My<br />
Pictures”, or create a new folder (“Hawaii Vacation”, etc), then click “OK” to transfer copies of the photo files you<br />
want. Mac Users: select the photos you want, then drag them into (user name)>Pictures, or any other folder.<br />
18
5. After the photos are transferred to your computer, you can disconnect the <strong>ImageView</strong>. (Mac Users: you<br />
should “eject” the “disk” that appeared on your desktop when the camera was connected-you can simply drag<br />
it to the Trash to eject it).<br />
6. You’re now ready to open the photo files in any photo editing software. Just use File>Open and go to the<br />
folder where you stored the photos earlier. It is also possible to open and work with your photos directly from<br />
the <strong>ImageView</strong> while it is still connected. If you choose to work this way, from a connected camera, be sure<br />
that you save the photo (when you are done editing) to your hard drive, and not the camera’s memory or card.<br />
7. If you are new to photo editing on a computer, consult your photo application’s “Help” menu or instruction<br />
manual. Along with adjusting the brightness, contrast, sharpness and color of your photos, you can resize<br />
the photo to fit the paper if you are printing, or save a smaller, low or medium resolution version for email<br />
or inserting into documents. When you are ready to save your edited file, you may want to use “Save As” and<br />
give it a more descriptive name than “PICT0001”, etc. Doing this also preserves the original file as a backup<br />
to reopen and re-edit later. Make sure you have successfully transferred all the photos/videos you wanted<br />
to save before using the “Format” on the <strong>ImageView</strong> to delete all the files previously stored on the SD card.<br />
NOTE: Photos/videos may also be downloaded by removing the SD card and using any USB card reader with<br />
an SD slot. Follow the directions supplied by the card reader manufacturer.<br />
Note: If your PC will not play the .avi movie files in Windows Media Player, you may need to download a newer<br />
version of Media Player or Direct X from Microsoft.com. The movie files can also be played back with the QuickTime<br />
Player, included with many computers, or available as a free download from www.apple.com.<br />
19
USING THE BINOCULAR<br />
Adjusting the Binocular IPD<br />
The distance between the eyes, called “interpupillary distance,” varies from person to person. To set the hinge<br />
to the right spacing for your eyes: Hold the binocular in the normal viewing position, with a firm grip on each<br />
side. Move the barrels closer together or further apart until you see a single circular field. Always re-set your<br />
binocular to this position before using.<br />
Eyecups<br />
The <strong>ImageView</strong> binocular is fitted with rubber roll-down eyecups designed for your comfort and to exclude<br />
extraneous light. If you wear glasses, roll down the eyecups. This will bring your eyes closer to the binocular<br />
lens so you can view the entire image without any cutoff.<br />
Setting the Diopter Adjustment<br />
1. Rotating the right eyecup (pg. 3, J) allows you to fine tune the binocular focus to your vision (diopter<br />
adjustment). Make sure the right eyecup is set to “zero” for now (arrow on the underside of the eyecup<br />
pointing to “0”). Keep both eyes open at all times.<br />
2. Using your hand, cover the objective (front) lens on the right side of the binocular as you look into the<br />
eyepieces.<br />
3. Turn the binocular focus knob (F), until a distant object with fine detail (e.g., brick wall, tree branches, etc)<br />
appears as sharp as possible through the left side of the binocular.<br />
4. Uncover the objective lens on the right side, and cover the left objective lens while continuing to view<br />
the same object.<br />
20
USING THE BINOCULAR-setting the diopter adjustment<br />
5. Rotate the right eyecup to bring the object into focus in the right side of the binocular. Avoid overturning<br />
or forcing the diopter adjustment. If you are unable to bring the object into focus in the right<br />
side by rotating the eyecup, make sure the left side is still focused and that the center focus knob was not<br />
moved from its original setting. The diopter adjustment only affects the right side.<br />
6. The <strong>ImageView</strong> binocular optics should now be adjusted for your individual eyesight. Focusing for any<br />
distance can now be done simply by turning the center focus knob.<br />
GENERAL CARE AND CLEANING<br />
Caring for the <strong>ImageView</strong><br />
Your <strong>Bushnell</strong> <strong>ImageView</strong> will provide years of trouble-free service if it receives the normal care you would<br />
give any fine optical instrument.<br />
• Avoid sharp impacts. Set the <strong>ImageView</strong> down gently on hard surfaces.<br />
• Tug on the strap after attaching it to make sure it is securely fastened to the binocular before placing it<br />
around your neck.<br />
• Store your <strong>ImageView</strong> in a cool, dry place whenever possible. Remove the batteries if the <strong>ImageView</strong> will<br />
be stored for a long period of time.<br />
Cleaning the Optics<br />
• Blow away any dust or debris on the lens (or use a soft lens brush).<br />
• To remove dirt or finger prints, clean with the supplied micro-fiber cloth rubbing in a circular motion. Use<br />
21
22<br />
of a coarse cloth or unnecessary rubbing may scratch the lens surface and eventually cause permanent<br />
damage. A washable “microfiber” cleaning cloth is ideal for the routine cleaning of your optics. Simply<br />
breathe lightly on the lens to provide a slight amount of moisture, then gently rub the lens with the<br />
microfiber cloth.<br />
• For a more thorough cleaning, photographic lens tissue and photographic-type lens cleaning fluid or<br />
isopropyl alcohol may be used. Always apply the fluid to the cleaning cloth – never directly on the lens.<br />
Specifications and designs are subject to change without any notice or obligation on the part of the manufacturer.<br />
Windows is a registered trademark of Microsoft Corporation in the United States and other countries.<br />
Mac and Mac OS are trademarks of Apple inc., registered in the U.S. and other countries.
TWO-Year LIMITeD WarraNTY<br />
Your <strong>Bushnell</strong> ® product is warranted to be free of defects in materials and workmanship for two years after the date of<br />
purchase. In the event of a defect under this warranty, we will, at our option, repair or replace the product, provided that<br />
you return the product postage prepaid. This warranty does not cover damages caused by misuse, improper handling,<br />
installation, or maintenance provided by someone other than a <strong>Bushnell</strong> Authorized Service Department.<br />
Any return made under this warranty must be accompanied by the items listed below:<br />
1) A check/money order in the amount of $10.00 to cover the cost of postage and handling<br />
2) Name and address for product return<br />
3) An explanation of the defect<br />
4) Proof of Date Purchased<br />
5) Product should be well packed in a sturdy outside shipping carton, to prevent<br />
damage in transit, with return postage prepaid to the address listed below:<br />
IN U.S.a. Send To: IN CaNaDa Send To:<br />
<strong>Bushnell</strong> Outdoor Products <strong>Bushnell</strong> Outdoor Products<br />
Attn.: Repairs Attn.: Repairs<br />
9200 Cody 25A East Pearce Street, Unit 1<br />
Overland Park, Kansas 66214 Richmond Hill, Ontario L4B 2M9<br />
For products purchased outside the United States or Canada please contact your local dealer for applicable warranty<br />
information. In Europe you may also contact <strong>Bushnell</strong> at:<br />
<strong>Bushnell</strong> Germany GmbH<br />
European Service Centre<br />
Mathias-Brüggen-Str. 80<br />
D-50827 Köln<br />
GERMANY<br />
Tel: +49 221 995568-0<br />
Fax: +49 221 995568-20<br />
This warranty gives you specific legal rights.<br />
You may have other rights which vary from country to country.<br />
©2012 <strong>Bushnell</strong> Outdoor Products<br />
FCC Compliance Statement:<br />
This equipment has been tested and found to comply with the limits<br />
for a Class B digital device, pursuant to part 15 of the FCC Rules.<br />
These limits are designed to provide reasonable protection against<br />
harmful interference in a residential installation.<br />
Operation is subject to the following two conditions: (1) This device<br />
may not cause harmful interference, and (2) this device must accept<br />
any interference received, including interference that may cause<br />
undesired operation.<br />
This equipment generates, uses and can radiate radio frequency energy<br />
and, if not installed and used in accordance with the instructions,<br />
may cause harmful interference to radio communications. However,<br />
there is no guarantee that interference will not occur in a particular<br />
installation. If this equipment does cause harmful interference to<br />
radio or television reception, which can be determined by turning the<br />
equipment off and on, the user is encouraged to try to correct the<br />
interference by one or more of the following measures:<br />
· Reorient or relocate the receiving antenna.<br />
· Increase the separation between the equipment and receiver.<br />
· Connect the equipment into an outlet on a circuit different from<br />
that to which the receiver is connected.<br />
· Consult the dealer or an experienced radio/TV technician for help.<br />
The device does not contain any user-serviceable parts. Repairs should<br />
only be made by an Authorized <strong>Bushnell</strong> repair center. Unauthorized<br />
repairs or modifications could result in permanent damage to the<br />
equipment, and will void your warranty and your authority to operate<br />
this device under Part 15 regulations.<br />
The shielded interface cable which is provided must be used with<br />
the equipment in order to comply with the limits for a digital device<br />
pursuant to Subpart B of Part 15 of FCC Rules.
For further questions or additional information please contact:<br />
<strong>Bushnell</strong> Outdoor Products<br />
9200 Cody, Overland Park, Kansas 66214<br />
(800) 423-3537 • www.bushnell.com<br />
©2012 <strong>Bushnell</strong> Outdoor Products