Truck and Bus Handbook A Guide to Safe Driving
Truck and Bus Handbook A Guide to Safe Driving
Truck and Bus Handbook A Guide to Safe Driving

You also want an ePaper? Increase the reach of your titles
YUMPU automatically turns print PDFs into web optimized ePapers that Google loves.
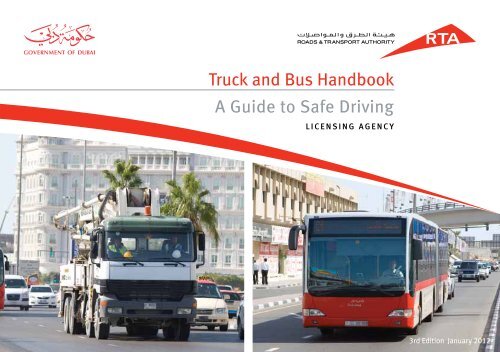
<strong>Truck</strong> <strong>and</strong> <strong>Bus</strong> H<strong>and</strong>book<br />
A <strong>Guide</strong> <strong>to</strong> <strong>Safe</strong> <strong>Driving</strong><br />
LICENSING AGENCY<br />
3rd Edition January 2012
<strong>Truck</strong> <strong>and</strong> <strong>Bus</strong> H<strong>and</strong>book A GuiDE To SAfE DrivinG<br />
Table of Contents<br />
introduction 7<br />
What This H<strong>and</strong>book is About <strong>and</strong> How <strong>to</strong> use it 7<br />
Why You Should read This H<strong>and</strong>book 7<br />
How <strong>to</strong> use This H<strong>and</strong>book 7<br />
Special needs of Heavy vehicle Drivers 8<br />
Some Technical Terms You Should Know 8<br />
Part 1 : <strong>Truck</strong> <strong>and</strong> <strong>Bus</strong> Driver Licences 11<br />
Categories of <strong>Truck</strong> <strong>and</strong> <strong>Bus</strong> Driver Licences 11<br />
Heavy <strong>Truck</strong> <strong>and</strong> <strong>Bus</strong> Training 13<br />
Part 2 : Driver Health <strong>and</strong> <strong>Safe</strong>ty 15<br />
Alertness 15<br />
Preventing Tiredness 15<br />
Personal <strong>Safe</strong>ty 18<br />
1
<strong>Truck</strong> <strong>and</strong> <strong>Bus</strong> H<strong>and</strong>book A GuiDE To SAfE DrivinG Section<br />
Part 3: vehicle Checks 21<br />
2<br />
Keeping Your vehicle in Good Condition 21<br />
Pre-trip inspection 21<br />
final Checks 27<br />
After Departure Checks 28<br />
Part 4: Coupling <strong>and</strong> uncoupling Trailers 31<br />
Coupling Semi-trailers 31<br />
uncoupling Semi-trailers 35<br />
Part 5: Dimensions <strong>and</strong> Load Limits 41<br />
Length 41<br />
Height 42<br />
Width 42<br />
Loading 43<br />
Mass (weight) 44<br />
Load Security 44<br />
Part 6: vehicle Control 51<br />
Accelerating 52<br />
Steering 53<br />
reversing 55<br />
Changing Gears 56<br />
Braking 58<br />
Part 7: Planning <strong>and</strong> observing While <strong>Driving</strong> 61<br />
Looking <strong>to</strong> the right Place at the right Time 61<br />
What <strong>to</strong> Look for on the road 61<br />
regular Mirror Checks 64<br />
What <strong>to</strong> Watch out for When reversing 66<br />
How <strong>to</strong> Make Space Around Your vehicle 67<br />
right Turns 70<br />
Left Turns 72<br />
3
<strong>Truck</strong> <strong>and</strong> <strong>Bus</strong> H<strong>and</strong>book A GuiDE To SAfE DrivinG Section<br />
Part 8: Sharing the road With others <strong>and</strong> Speed Management 77<br />
4<br />
Communicating Your Presence <strong>to</strong> other Drivers 78<br />
Signalling Your intentions 80<br />
Managing Speed 80<br />
Part 9: vehicle Emergencies 85<br />
Emergency Braking 85<br />
Skids 85<br />
Emergency Steering Techniques 87<br />
Leaving the road 88<br />
using the Horn 88<br />
Dangerous vehicle Emergencies 89<br />
Part 10: Crashes 95<br />
What You Must Do at a Crash 95<br />
Part 11: The Law 97<br />
Speed Limits 97<br />
Signs 98<br />
Seat Belts 100<br />
Parking 101<br />
Part 12: <strong>Driving</strong> a <strong>Bus</strong> 103<br />
Before Starting the Trip 103<br />
What You need <strong>to</strong> do Before Pulling in at a <strong>Bus</strong> S<strong>to</strong>p 103<br />
What You need <strong>to</strong> do Before Pulling out from a <strong>Bus</strong> S<strong>to</strong>p 104<br />
Passengers 104<br />
<strong>Driving</strong> a <strong>Bus</strong> 104<br />
Public Transport <strong>Bus</strong> 105<br />
Part 13: <strong>Safe</strong> <strong>Driving</strong> Tips 109<br />
5
<strong>Truck</strong> <strong>and</strong> <strong>Bus</strong> H<strong>and</strong>book A GuiDE To SAfE DrivinG<br />
6<br />
Introduction<br />
What This H<strong>and</strong>book is About <strong>and</strong> How <strong>to</strong> use it<br />
The aim of this h<strong>and</strong>book is <strong>to</strong> help you <strong>to</strong> become a safe <strong>and</strong> responsible heavy vehicle driver. You need <strong>to</strong><br />
keep in mind that getting your licence, even after all the training, does not make you an experienced <strong>and</strong><br />
safe heavy vehicle driver. it takes years of practice <strong>to</strong> learn all the skills <strong>and</strong> correct driving techniques. You<br />
need <strong>to</strong> keep this in mind when driving.<br />
Why You Should read This H<strong>and</strong>book<br />
This h<strong>and</strong>book tells you about some of the legal requirements for drivers of heavy vehicles in Dubai<br />
along with important road safety information. Before you read this h<strong>and</strong>book you need a general<br />
knowledge of road rules. road rule information is contained in the Light Mo<strong>to</strong>r vehicle H<strong>and</strong>book.<br />
You should have a copy of this book <strong>to</strong> refer <strong>to</strong>.<br />
The knowledge test that you must pass <strong>to</strong> get a heavy vehicle licence is based on the material in<br />
this h<strong>and</strong>book. You need <strong>to</strong> underst<strong>and</strong> the information in this h<strong>and</strong>book <strong>to</strong> pass your test.<br />
How <strong>to</strong> use This H<strong>and</strong>book<br />
This h<strong>and</strong>book is divided in<strong>to</strong> 13 parts. At the end of some parts there is a section called Test<br />
Yourself Questions, <strong>to</strong> help you check if you have unders<strong>to</strong>od important issues.<br />
7
<strong>Truck</strong> <strong>and</strong> <strong>Bus</strong> H<strong>and</strong>book A GuiDE To SAfE DrivinG<br />
Special needs of Heavy vehicle Drivers<br />
Heavy vehicle drivers are professionals, who spend most of their working hours on the road. <strong>Driving</strong> any vehicle is a challenge, but<br />
even more so for drivers of heavy vehicles, because their vehicles are heavier, bigger <strong>and</strong> longer <strong>and</strong> are more difficult <strong>to</strong> control.<br />
Professional drivers are likely <strong>to</strong> be on the road more often, for longer hours <strong>and</strong> at times when driving situations are most<br />
dangerous, particularly at night. it is at those times when crashes tend <strong>to</strong> occur. You need <strong>to</strong> take extra care. remember, driving<br />
is your profession. other drivers expect you <strong>to</strong> display safe driving practices at all times. Your reputation will be affected if you<br />
do not.<br />
Heavy vehicles accelerate more slowly than light mo<strong>to</strong>r vehicles <strong>and</strong> take longer <strong>to</strong> s<strong>to</strong>p, so more judgement <strong>and</strong> driving skill is<br />
required <strong>to</strong> drive them. Crashes involving heavy vehicles are more likely <strong>to</strong> cause severe injury <strong>and</strong> greater damage than crashes<br />
involving only light mo<strong>to</strong>r vehicles.<br />
Light mo<strong>to</strong>r vehicle drivers can make heavy vehicle driving more difficult when they do not know about the slower acceleration,<br />
braking <strong>and</strong> space needed by heavy vehicles. However, heavy vehicle drivers need <strong>to</strong> drive in a way which allows them <strong>to</strong> safely<br />
take action if car drivers do unexpected things. it is important that drivers are aware of the braking distances needed <strong>to</strong> s<strong>to</strong>p if<br />
unexpected things occur. This is particularly important if the vehicle is loaded or if the road surface is slippery. Braking techniques<br />
must be fully unders<strong>to</strong>od.<br />
Some Technical Terms You Should Know<br />
Articulated <strong>Truck</strong><br />
A vehicle consisting of a prime mover <strong>and</strong> a semi-trailer.<br />
Gates <strong>and</strong> Bulkheads<br />
vertical frames used at the front, sides <strong>and</strong> rear of load carrying platform <strong>to</strong> contain the load. The front gate is also known as a loading<br />
rack or headboard. The front rack must be strong enough <strong>to</strong> s<strong>to</strong>p the load shifting, such as in a crash or when you brake very hard.<br />
8<br />
introduction<br />
Gross Train Mass or Gross Combination Mass (GCM)<br />
The maximum of the sum, as specified by the manufacturer, of the loaded mass of the vehicle plus<br />
the axle loads of any vehicle being <strong>to</strong>wed as a semi-trailer or trailer. it can also mean the measured<br />
weighbridge mass or the road regulation limit.<br />
Gross Vehicle Mass (GVM)<br />
The maximum loaded mass specified by the manufacturer <strong>and</strong> given on the vehicle’s registration<br />
certificate. The <strong>to</strong>tal mass must never exceed the GvM.<br />
Height Detection Gantry<br />
Height Detection Gantries are early warning devices for high vehicles <strong>and</strong> are located on the approach <strong>to</strong><br />
bridges or tunnels. if the highest point of your vehicle comes in<strong>to</strong> contact with the gantry, it is <strong>to</strong>o high <strong>and</strong> you<br />
should not proceed.<br />
Prime Mover<br />
A mo<strong>to</strong>r vehicle which is constructed, designed or adapted for connecting <strong>to</strong> a semi-trailer.<br />
Semi-trailer<br />
An unpowered vehicle which is attached <strong>to</strong> a prime mover by a turntable, forward of the prime mover’s rear axle, for the<br />
purpose of being <strong>to</strong>wed by that vehicle.<br />
Trailer Combinations<br />
A trailer with a moveable front axle or a trailer with a fixed front axle.<br />
9
<strong>Truck</strong> <strong>and</strong> <strong>Bus</strong> H<strong>and</strong>book A GuiDE To SAfE DrivinG<br />
14<br />
Part 2: Driver Health <strong>and</strong> <strong>Safe</strong>ty<br />
This section will help <strong>to</strong> ensure that you are fit <strong>to</strong> drive <strong>and</strong> give you tips about keeping alert while you are driving.<br />
Alertness<br />
<strong>Driving</strong> a heavy vehicle is hard work. Professional drivers are often required <strong>to</strong> be on the road for long<br />
periods, which is very tiring. You will become less alert. There are many things that good drivers do <strong>to</strong><br />
prevent becoming tired. if you are drowsy <strong>and</strong> are not alert, the consequences may be severe. You may fall<br />
asleep <strong>and</strong> drive in<strong>to</strong> the path of other vehicles, causing serious injury or even death, <strong>to</strong> both yourself <strong>and</strong><br />
others. remember that you are driving a very heavy vehicle that can cause a lot of damage.<br />
Preventing Tiredness<br />
The best way <strong>to</strong> be alert <strong>and</strong> avoid dozing at the wheel is <strong>to</strong> not get tired in the first place. Here are<br />
some suggestions.<br />
1. Get Plenty of Sleep<br />
if you have a long trip <strong>to</strong> make, be sure that you get a good night’s sleep before you go. never<br />
start a long trip if you are already tired.<br />
2. Timing Your Trip<br />
Your body gets used <strong>to</strong> sleeping during certain hours. if you drive during these hours, you<br />
will be tired. if possible, try <strong>to</strong> make long trips during the hours when you would normally<br />
be awake. This will not always be possible because of traffic restrictions that limit heavy<br />
vehicles <strong>to</strong> driving at night in some parts of Dubai. if you need <strong>to</strong> drive at night you need<br />
<strong>to</strong> be extra careful.<br />
15
<strong>Truck</strong> <strong>and</strong> <strong>Bus</strong> H<strong>and</strong>book A GuiDE To SAfE DrivinG<br />
3. Avoid Medicines<br />
Some medicines may cause drowsiness. Always ask your doc<strong>to</strong>r or pharmacist about possible effects on driving while on medication,<br />
whether the medication is prescribed by your doc<strong>to</strong>r or bought over the counter.<br />
Common medicines that may cause drowsiness are cold tablets, hay-fever <strong>and</strong> allergy medicines. if you have <strong>to</strong> drive while you have<br />
a cold, hay fever or allergy, it is much safer <strong>to</strong> drive with these symp<strong>to</strong>ms than <strong>to</strong> take medicines which will cause drowsiness at the<br />
wheel.<br />
4. Do Not Use Drugs<br />
There are no known drugs that can overcome your feeling of tiredness. Some substances may keep you awake for a while, but will not<br />
make you alert. Later on, you may be even more tired than if you had not taken them at all! Sleep is the only thing that can overcome<br />
tiredness, so if you have started driving <strong>and</strong> begin <strong>to</strong> feel tired, s<strong>to</strong>p <strong>and</strong> sleep. You will know when you are getting tired. You may<br />
start <strong>to</strong> yawn or find that you are blinking more often, finding it difficult <strong>to</strong> keep your eyes open.<br />
5. Do Not Drink Alcohol <strong>and</strong> Drive<br />
Alcohol affects your judgement <strong>and</strong> makes it more difficult <strong>to</strong> judge risks, such as speed of your own vehicle as well as the speed of<br />
others. it makes it difficult <strong>to</strong> assess distance. Alcohol also gives you a false sense of confidence, which may encourage you <strong>to</strong> take<br />
risks that you would not otherwise take. it makes it difficult <strong>to</strong> concentrate <strong>and</strong> do more than one thing at a time, slows your reaction<br />
time <strong>and</strong> makes you more likely <strong>to</strong> crash.<br />
Some drivers actually think that they are better drivers when in<strong>to</strong>xicated. This is absolutely wrong. Alcohol is a major cause of fatal<br />
road crashes.<br />
6. Take Breaks<br />
Short breaks keep you alert. Take them before you become tired. never drive for more than 10 hours in any 24 hour period.<br />
Walk around <strong>and</strong> inspect the vehicle. it also helps <strong>to</strong> do some simple physical exercises, such as running on the spot, <strong>to</strong>uching your<br />
<strong>to</strong>es or knee-bends.<br />
16<br />
Part 2: Driver Health <strong>and</strong> <strong>Safe</strong>ty<br />
7. Keep Your Mind on the Road<br />
You can also do many things <strong>to</strong> keep your mind alert, like counting cars with different number<br />
plates or noting l<strong>and</strong>marks as you approach them. invent your own ways of keeping your mind on<br />
the road <strong>and</strong> on the job. Long, straight roads can become very boring, especially at night.<br />
8. Watch Your Food<br />
fresh fruit <strong>and</strong> vegetables are much better for you at any time. Eating these foods on a trip will s<strong>to</strong>p you<br />
from being tired after a meal. Do not eat foods such as bread, pasta, pota<strong>to</strong>es, pies, <strong>and</strong> french fries while<br />
you are on a long trip. Do not eat a heavy meal before you begin driving because big meals will make you<br />
tired. Eating smaller quantities of food more frequently will help you <strong>to</strong> stay alert.<br />
9. Keep Comfortable<br />
Adjusting the driving seat is very important for drivers. if you are uncomfortable, you get tired more quickly<br />
<strong>and</strong> you spend less time looking at the road.<br />
if you can adjust your seat, this is what you should do:<br />
1. Sit in the seat with your back <strong>and</strong> shoulders against the back rest.<br />
2. Put your feet flat on the floor in front of the seat.<br />
3. Sit comfortably so your feet can reach the pedals.<br />
4. Adjust your seat forward <strong>and</strong> back so that your foot can push the clutch pedal completely <strong>to</strong> the floor while your leg still<br />
has a small bend at the knee (about 15 <strong>to</strong> 20 degrees).<br />
10. Keep Cool<br />
Try <strong>to</strong> keep as cool as possible. Depending on the weather, keep the windows <strong>and</strong> vents open <strong>to</strong> get fresh air in<strong>to</strong> the cabin.<br />
use the air conditioner if the vehicle is fitted with one.<br />
17
<strong>Truck</strong> <strong>and</strong> <strong>Bus</strong> H<strong>and</strong>book A GuiDE To SAfE DrivinG<br />
Personal <strong>Safe</strong>ty<br />
Make sure you follow these basic safety steps.<br />
Before driving, always make sure that there are no loose objects in the cabin like drink cans or clip-boards. Be careful about loose<br />
things on the floor of the cab that could get in the way of your foot connecting with the brake, clutch <strong>and</strong> accelera<strong>to</strong>r pedal. Make sure<br />
you can push the clutch, brake <strong>and</strong> accelera<strong>to</strong>r pedals all the way <strong>to</strong> the floor.<br />
if your vehicle is parked on the road,<br />
approach the vehicle from the front so<br />
that you are facing the oncoming traffic.<br />
As you leave the cab, climb out facing it,<br />
but watch for oncoming traffic.<br />
Be careful when you are climbing in<strong>to</strong><br />
or leaving the cab. it is easy <strong>to</strong> injure<br />
yourself. Always use the vehicle steps,<br />
foot-holds <strong>and</strong> grab h<strong>and</strong>les. When you<br />
climb down from or up in<strong>to</strong> the cab, make<br />
sure that you face <strong>to</strong>wards the vehicle.<br />
Never Jump Out of a Vehicle<br />
if you have <strong>to</strong> step on a tyre <strong>to</strong> get in<strong>to</strong> or<br />
out of the cab, be careful if the tyre is wet.<br />
Tyres can get very slippery. You might fall<br />
<strong>and</strong> hurt yourself or fall in<strong>to</strong> the path of<br />
moving vehicles.<br />
18<br />
Part 2: Driver Health <strong>and</strong> <strong>Safe</strong>ty<br />
Changing Wheels<br />
if you have <strong>to</strong> change wheels, move as far off the road as possible. Be very careful changing<br />
a wheel on the left side of the vehicle if you are near <strong>to</strong> traffic on the road. use hazard warning<br />
lights <strong>and</strong> warning triangles if there is any risk <strong>to</strong> you or <strong>to</strong> other road users.<br />
Lifting any Heavy Object<br />
Learn how <strong>to</strong> lift properly. When you start <strong>to</strong> lift heavy objects, have your back straight <strong>and</strong> your knees<br />
bent.<br />
Incorrect Correct<br />
19
<strong>Truck</strong> <strong>and</strong> <strong>Bus</strong> H<strong>and</strong>book A GuiDE To SAfE DrivinG<br />
20<br />
Part 3: Vehicle Checks<br />
Keeping Your vehicle in Good Condition<br />
As a heavy vehicle driver, you should carry out daily inspections of your vehicle before you drive it. The time<br />
you spend checking your vehicle is an investment in your own safety as well as that of other drivers.<br />
remember that as the driver you have final responsibility for your vehicle <strong>and</strong> what it does on the road.<br />
Pre-trip inspection<br />
You should carry out these checks every day before you drive.<br />
1. Around the Vehicle<br />
Walk around the vehicle <strong>and</strong> look for any of the following problems:<br />
A. Vehicle tilt. if the vehicle sags <strong>to</strong> one side, look for a flat tyre. The problem could be overloading<br />
or incorrect loading. There could also be something wrong with the suspension.<br />
B. Load. Check that the trailer doors or load doors are closed <strong>and</strong> locked. Check that all lashings<br />
are secure.<br />
C. Load security. Check <strong>to</strong> see that the load is well packed <strong>and</strong> evenly distributed.<br />
A shifting load is dangerous. Check all lashings. Make sure all area load doors are locked.<br />
Check that tailgate, liftgate, sliding ramp <strong>and</strong> other equipment are put away ready for<br />
travel. on an open trailer, the load may be covered. Make sure the cover is fastened down.<br />
unsecured tarpaulins <strong>and</strong> loads can fall off <strong>and</strong> cause crashes.<br />
21
<strong>Truck</strong> <strong>and</strong> <strong>Bus</strong> H<strong>and</strong>book A GuiDE To SAfE DrivinG<br />
D. Load height. Make sure you know what the highest point of your vehicle is from road level. You need <strong>to</strong> know your height when you<br />
plan your route so you can avoid low bridges.<br />
E. Vehicle damage. Check for cracks, <strong>and</strong> missing or loose parts.<br />
F. Leaks. Check under the vehicle for signs of any leaks of oil, coolant, grease or fuel.<br />
G. Wheels <strong>and</strong> rims. Check for rim damage on each wheel. A bent or damaged rim might let a tyre lose pressure or come off the rim.<br />
H. Check wheel nuts. if some are missing, the others have <strong>to</strong> take extra strain <strong>and</strong> may fail. Check for rust streaks around the wheel<br />
nuts. This is a possible sign that the wheel nuts are loose. Also check the wheels for signs of leaks from wheel bearings <strong>and</strong> seals.<br />
Spilled or leaking grease can cause a fire or a wheel <strong>to</strong> lock. if any nut is missing or if they break off while being tightened, do not<br />
drive the vehicle.<br />
I. Tyres. Check all tyres for tread wear, damage <strong>and</strong> proper fit. Worn tyres can cause loss of steering control. never drive the vehicle if<br />
there are any signs of damage or excessive wear, such as bulges or bald spots. These might cause the tyre <strong>to</strong> blow out. This applies<br />
<strong>to</strong> all tyres. Just because heavy vehicles have more wheels <strong>and</strong> more tyres than smaller vehicles, does not mean that problems with<br />
one or two tyres can be ignored. A blow out of any tyre can create a dangerous situation. All tyres must be roadworthy.<br />
J. Tyre pressure. Check the tyre pressure with a gauge. Low pressure in tyres on steering axles makes steering harder <strong>and</strong> causes heat<br />
build-up in tyres. Low pressure in dual tyres can cause them <strong>to</strong> rub <strong>to</strong>gether at the bot<strong>to</strong>m <strong>and</strong> start a tyre fire or cause a blow-out.<br />
The vehicle also will not brake or corner as safely as it should. if the pressure is <strong>to</strong>o high the tyre will wear more quickly than it should.<br />
K. Spacing between dual wheels. Check the space between dual wheels. rocks or mud caught between the wheels can unbalance a<br />
wheel <strong>and</strong> damage the tyre side walls <strong>and</strong> wheel bearings.<br />
L. Spacing between brake drum <strong>and</strong> wheel. Check the space between the brake drum <strong>and</strong> the wheel. Things caught in there may<br />
damage the brakes <strong>and</strong> the tyre.<br />
M. Fuel system. Check that fuel tanks are firmly attached. Test fuel caps by h<strong>and</strong> <strong>to</strong> make sure they are properly closed. Check for<br />
leaking fuel.<br />
22<br />
Part 3: vehicle Checks<br />
A<br />
L<br />
K<br />
B<br />
C<br />
K<br />
G<br />
H<br />
I<br />
J<br />
M<br />
F<br />
D<br />
E<br />
23
<strong>Truck</strong> <strong>and</strong> <strong>Bus</strong> H<strong>and</strong>book A GuiDE To SAfE DrivinG<br />
2. Engine Checks<br />
visually check the engine area for any signs of damage,<br />
particularly <strong>to</strong> the steering mechanism or suspension.<br />
Then go through the following checklist:<br />
• Fluid levels. Check crank case oil, radia<strong>to</strong>r coolant,<br />
battery fluid <strong>and</strong> windscreen washer fluid. Check<br />
au<strong>to</strong>matic transmission <strong>and</strong> the oil make-up tank, if<br />
fitted. Check the power steering fluid reservoir. Top<br />
up all fluids.<br />
• Leaks. Look for signs of oil leaks, water or brake fluid.<br />
if there are leaks, have them checked before you leave.<br />
• Electrical system. Check for loose electrical wires <strong>and</strong><br />
get them fixed before you leave.<br />
• Belts <strong>and</strong> pulleys. Check the belts on the genera<strong>to</strong>r,<br />
alterna<strong>to</strong>r, water pump, air conditioner <strong>and</strong> air<br />
compressor. Make sure they are intact <strong>and</strong> are not<br />
frayed or cracked. if you need <strong>to</strong> adjust them, look at the vehicle manufacturer’s h<strong>and</strong>book.<br />
• Finally. Securely close the bonnet or lower the cab, locking it in position. failure <strong>to</strong> undertake these checks may result in fluid levels<br />
becoming so low that steering, brakes or transmission fail.<br />
24<br />
Part 3: vehicle Checks<br />
3. Checking Driver’s Controls<br />
vehicle entry. Check that everything is safe. for trucks, check the ladder, grab h<strong>and</strong>les <strong>and</strong> door<br />
h<strong>and</strong>les. for buses, check h<strong>and</strong> rails <strong>and</strong> operation of door(s).<br />
A. Emergency <strong>and</strong> safety equipment. Make sure you have all the proper equipment. This should<br />
include:<br />
• fully charged fire extinguisher<br />
• first-aid kit<br />
• at least three, two-faced reflective triangles<br />
• spare fuses<br />
• seat belts.<br />
B. Mirrors <strong>and</strong> glass. Clean all windows <strong>and</strong><br />
mirrors <strong>and</strong> make sure they are not cracked.<br />
Check that the windscreen wipers <strong>and</strong> washers<br />
work. replace worn wiper blades <strong>and</strong> clear<br />
blocked washer jets. Check that mirrors are<br />
adjusted properly.<br />
C. Engine start-up. Before starting up the<br />
engine, check that the parking brake is on.<br />
Start the engine <strong>and</strong> let it idle until full oil<br />
pressure shows on the dashboard gauge.<br />
increase the engine revs slightly until the water<br />
temperature gauge starts <strong>to</strong> rise.<br />
D. Instruments <strong>and</strong> gauges. With the engine<br />
running, check that all instruments <strong>and</strong> gauges<br />
are working.<br />
25
<strong>Truck</strong> <strong>and</strong> <strong>Bus</strong> H<strong>and</strong>book A GuiDE To SAfE DrivinG<br />
in the case of oil levels, the dipstick will tell you the level. Always make sure that the oil level as shown on the dipstick is just under<br />
‘MAX’. As far as other levels are concerned, make sure that the levels are maintained at the required level as shown on the reservoir.<br />
if these levels are not maintained, serious damage can be done <strong>to</strong> the operating systems of the vehicle – transmission, steering, <strong>and</strong><br />
electrical equipment – resulting in loss of control <strong>and</strong> increased risk of serious crash.<br />
E. Primary controls<br />
With the engine still running, check the following:<br />
• steering wheel for any slackness<br />
• press the clutch until you feel a slight resistance (some free play is normal)<br />
• that the accelera<strong>to</strong>r <strong>and</strong> brake are operating properly.<br />
F. Secondary controls<br />
Check the following:<br />
• switches <strong>and</strong> signal lamps<br />
• interior <strong>and</strong> dashboard lights<br />
• horn<br />
• indica<strong>to</strong>r lights for left <strong>and</strong> right turn signals<br />
• that the cabin is clear of rubbish <strong>and</strong> loose equipment is s<strong>to</strong>wed away<br />
• that all lights are working including, low <strong>and</strong> high beam, hazard warning lights, number plate <strong>and</strong> running lights<br />
• the brake lights<br />
• reflec<strong>to</strong>rs.<br />
You will need <strong>to</strong> get out of the vehicle <strong>to</strong> check external lights. Wipe any dust <strong>and</strong> grease from all lights <strong>and</strong> reflec<strong>to</strong>rs.<br />
26<br />
Part 3: vehicle Checks<br />
final Checks<br />
These are the checks you need <strong>to</strong> make for different vehicle types.<br />
1. Air Brake Vehicles<br />
Check the following:<br />
Air intake filter is not clogged. open the air tank taps <strong>and</strong> if there is oil in the air that comes out, there<br />
may be a problem with the compressor. This must be checked by a mechanic. Do not forget <strong>to</strong> close the<br />
taps afterwards.<br />
Low air pressure warning gauge works. The gauge should show a steady increase after the engine has<br />
been turned on. This should take less than 3 minutes. if it takes longer, adjustments are needed. note the<br />
air pressure loss since the last s<strong>to</strong>p. if the loss is more than 70kpa, there may be a problem. Seek help from<br />
a mechanic.<br />
Low pressure emergency systems. S<strong>to</strong>p the engine <strong>and</strong> reduce air pressure by pressing the brake pedal.<br />
Trailer brake check. Apply trailer brakes only <strong>and</strong> try <strong>to</strong> move forward gently. The vehicle should not move. Check<br />
that air hoses are not damaged or leaking <strong>and</strong> are properly connected <strong>to</strong> the <strong>to</strong>wing vehicle.<br />
2. Hydraulic Brake Vehicles<br />
Pump the brake pedal 3 times. Push the pedal firmly <strong>and</strong> hold it down for 5 seconds. if, after 5 seconds, you feel the brake<br />
pedal sinking, there is a leak in the system. You must have these leaks fixed before driving.<br />
27
<strong>Truck</strong> <strong>and</strong> <strong>Bus</strong> H<strong>and</strong>book A GuiDE To SAfE DrivinG<br />
3. All vehicles<br />
for all vehicles you must check the following:<br />
• Parking brake check. Try <strong>to</strong> drive forward in low gear while the parking brake is on. The vehicle should not move.<br />
• Full brake check. in first gear move forward at no more than 5 km/h. Apply the brakes firmly. if the brakes feel slow <strong>to</strong> respond or if<br />
the vehicle pulls <strong>to</strong> one side, the brakes need attention from a mechanic.<br />
• Final steering check. Pay close attention <strong>to</strong> steering performance as you move off.<br />
4. Prime Movers <strong>and</strong> Semi-trailers<br />
Check for slack in the coupling by moving gently forward <strong>and</strong> back. for all prime movers <strong>and</strong> trailers it is important <strong>to</strong> check that<br />
there is no turntable slack. With the trailer brake on, gently pull forward <strong>and</strong> reverse <strong>to</strong> make sure there is no slack in the turntable<br />
connection.<br />
Make sure that the trailer legs are wound up <strong>and</strong> that the winding h<strong>and</strong>le is put away.<br />
Check that all electrical leads are connected properly <strong>and</strong> that trailer lights <strong>and</strong> indica<strong>to</strong>rs are working.<br />
28<br />
Part 3: vehicle Checks<br />
After Departure Checks<br />
visually check that your load is secure, using all your mirrors. At your next s<strong>to</strong>p do a quick check<br />
around the vehicle. With your h<strong>and</strong>, check the temperatures of tyres <strong>and</strong> brake drums. Look for<br />
smoke or feel for excessive heat radiating from brake drums. Be careful not <strong>to</strong> burn yourself. You<br />
will be able <strong>to</strong> feel heat coming from the brake drums without <strong>to</strong>uching them. Look for under-inflated<br />
tyres <strong>and</strong> over-heated brakes. Look for any liquid leaks which may have become visible. Each time you<br />
s<strong>to</strong>p, repeat these checks.<br />
IMPORTANT REMINDER!<br />
Before driving always ask yourself, “Have I carried out my:<br />
- pre-trip inspection<br />
- engine checks<br />
- driver’s control checks<br />
- brake checks?”<br />
After you have departed make sure that you regularly check that your load is secure.<br />
29
<strong>Truck</strong> <strong>and</strong> <strong>Bus</strong> H<strong>and</strong>book A GuiDE To SAfE DrivinG<br />
50<br />
Part 6: Vehicle Control<br />
<strong>Safe</strong> operation of a heavy vehicle requires special skills in the following areas:<br />
• accelerating<br />
• steering<br />
• reversing<br />
• gear shifting<br />
• braking<br />
Most of these skills are required in virtually every driving situation, whether it be turning, approaching<br />
an intersection, driving down a hill or along a freeway. Master these skills <strong>and</strong> you are on your way <strong>to</strong><br />
becoming a good driver.<br />
remember, whatever vehicle you drive, all its h<strong>and</strong>ling characteristics are affected by the load you<br />
carry, including passengers.<br />
51
<strong>Truck</strong> <strong>and</strong> <strong>Bus</strong> H<strong>and</strong>book A GuiDE To SAfE DrivinG<br />
Accelerating<br />
Accelerate smoothly <strong>and</strong> gradually so that the vehicle does not jerk <strong>to</strong>o much. rough or rapid acceleration may cause the load <strong>to</strong> shift<br />
on your truck <strong>and</strong> damage the vehicle. When pulling a trailer, the king pin or its coupling could be damaged by rough acceleration.<br />
S<strong>and</strong> or Gravel<br />
You should accelerate more slowly whenever you drive on s<strong>and</strong> or gravel. if you over accelerate, the wheels will spin, <strong>and</strong> if you are<br />
pulling a trailer, it could slide sideways.<br />
Rain<br />
rain makes road surfaces slippery, especially as the first drops fall <strong>and</strong> particularly after a long period of dry weather. oil <strong>and</strong> dirt<br />
accumulate on the road <strong>and</strong> when mixed with water create a very slippery surface.<br />
if there is <strong>to</strong>o much water, or if you are going <strong>to</strong>o fast, your tyres may ride on the <strong>to</strong>p of the water like water skis. This is called<br />
aquaplaning. When this happens, control of the vehicle becomes very difficult. Make sure you have good tyres with deep tread <strong>and</strong><br />
slow down when the road is wet.<br />
52<br />
Part 6: vehicle Control<br />
Steering<br />
Steering a large vehicle requires more knowledge <strong>and</strong> skill than driving a light vehicle such as a<br />
car, so follow these tips.<br />
Holding the Wheel<br />
Hold the steering wheel firmly with both h<strong>and</strong>s. When you<br />
hit a curb or pot hole, you could lose control of the steering<br />
wheel unless you are holding it with two h<strong>and</strong>s.<br />
Cut-in<br />
When any vehicle goes around a curve or turn, the rear<br />
wheels usually follow a shorter path than the front ones.<br />
This is called cut-in. The greater the length of the vehicle <strong>and</strong><br />
the sharper the turn, the greater the cut-in will be. on your<br />
approach <strong>to</strong> a left bend, steer close <strong>to</strong> the right side of the<br />
lane <strong>to</strong> reduce interference with oncoming traffic.<br />
on your approach <strong>to</strong> a right bend, steer close <strong>to</strong> the left side<br />
of your lane <strong>to</strong> make sure that your right wheels stay on the<br />
road surface.<br />
Cut-out<br />
The tracking of rear wheels of semi-trailers will vary with the<br />
vehicle’s speed:<br />
• at low speeds, the rear wheels track inside those of the<br />
prime mover<br />
• at high speeds, the rear wheels can track outwards.<br />
53
<strong>Truck</strong> <strong>and</strong> <strong>Bus</strong> H<strong>and</strong>book A GuiDE To SAfE DrivinG<br />
Where the bend has a curb,<br />
the rear wheels may strike<br />
the curb, causing the vehicle<br />
<strong>to</strong> roll over.<br />
The turning radius of all<br />
heavy vehicles will be<br />
different. Make sure you<br />
underst<strong>and</strong> the space<br />
required <strong>to</strong> make the<br />
sharpest turn for the vehicle<br />
that you are driving <strong>and</strong><br />
make your turns accordingly.<br />
54<br />
30m<br />
20m<br />
10m<br />
0m<br />
10m<br />
1:250 scale @A3<br />
20m 30m<br />
15m radius<br />
Semi Trailer<br />
30˚<br />
180˚<br />
60˚<br />
150˚<br />
90˚<br />
120˚<br />
Part 6: vehicle Control<br />
reversing<br />
When reversing an articulated vehicle you must use the correct technique. remember that the<br />
trailer moves contrary <strong>to</strong> the direction of the steering. Your driving instruc<strong>to</strong>r will advise you of the<br />
correct driving technique for the type of vehicle you are driving. reversing in<strong>to</strong> tight spaces, such as<br />
at a depot, at a construction site or in<strong>to</strong> a loading bay, may require repositioning the vehicle several<br />
times. Do not be concerned about this. You are driving a large vehicle which has more limited turning<br />
capabilities than a small vehicle.<br />
Tips for Reversing with a Trailer<br />
1. Set up your vehicle so that the trailer is directly behind it, with all wheels pointing straight ahead.<br />
2. Avoid sharp turns.<br />
3. reverse slowly. This allows you <strong>to</strong> make small corrections as you go, so that you stay on course.<br />
4. use all your mirrors which help you <strong>to</strong> see that the trailer is correctly positioned.<br />
5. Correct any drifting off-course immediately by turning the steering wheel in<strong>to</strong> the direction of the drift.<br />
6. if necessary pull up, move forward <strong>and</strong> try again.<br />
55
<strong>Truck</strong> <strong>and</strong> <strong>Bus</strong> H<strong>and</strong>book A GuiDE To SAfE DrivinG<br />
Changing Gears<br />
Changing gears smoothly <strong>and</strong> at the right time will help you <strong>to</strong> keep a steady speed <strong>and</strong> keep your vehicle as close as possible <strong>to</strong> the<br />
speed of surrounding traffic. if you make gear changes at the wrong engine speeds, you will waste fuel <strong>and</strong> you could damage the<br />
engine by causing it <strong>to</strong> “labour” or over-rev. Gear changes made at the wrong engine speeds are bad for the clutch. Changing gears<br />
without using the clutch properly (“crunching” them) will also damage the transmission.<br />
Double-clutching<br />
Some vehicles with gear boxes need <strong>to</strong> be double-clutched <strong>to</strong> change gears. With most manual transmissions gear shifts are quicker<br />
<strong>and</strong> smoother if you double-clutch. To double-clutch, check that you do what the vehicle manufacturer’s h<strong>and</strong>book suggests on gear<br />
changes, <strong>and</strong>/or go through the following sequences:<br />
• press the clutch<br />
• shift <strong>to</strong> neutral<br />
• release the clutch<br />
• adjust engine rPM (revolutions Per Minute or revs) <strong>to</strong> vehicle speed needed for the change <strong>to</strong> next gear.<br />
After a little while you will be able <strong>to</strong> hear what the correct revs are for each gear change. Either let the revs die down or press the<br />
accelera<strong>to</strong>r pedal <strong>to</strong> get the revs correct, then:<br />
• press the clutch again<br />
• shift <strong>to</strong> the gear you want<br />
• release clutch<br />
• accelerate <strong>to</strong> required speed.<br />
Double-clutching requires practice. if you have trouble engaging your new gear, do not force it. return <strong>to</strong> neutral, re-adjust your revs<br />
with the clutch pedal out, press the clutch pedal <strong>and</strong> try again.<br />
56<br />
Part 6: vehicle Control<br />
Knowing When <strong>to</strong> Shift Gears<br />
There are two ways of knowing when <strong>to</strong> shift gear. You could use either or both.<br />
Engine speed (RPM). The vehicle manufacturer’s h<strong>and</strong>book will specify maximum <strong>and</strong> minimum<br />
revs <strong>and</strong> road speed for each gear. Your vehicle may have a tachometer, which measures engine<br />
revs. if so use it.<br />
Engine sound. After a while you will recognise, from the sound of the engine, when <strong>to</strong> change gear.<br />
Changing down gears<br />
There are special times when you should change down gears:<br />
• going up hills<br />
• slowing or s<strong>to</strong>pping<br />
• before entering a bend<br />
• before turning<br />
• before starting down a hill.<br />
57
<strong>Truck</strong> <strong>and</strong> <strong>Bus</strong> H<strong>and</strong>book A GuiDE To SAfE DrivinG<br />
Braking<br />
You must be familiar with all braking devices <strong>and</strong> how they work for your vehicle. You should know what sort of braking system your<br />
vehicle has; whether it has hydraulic brakes or air brakes. You should also know the height, weight <strong>and</strong> width of your vehicle. Your<br />
instruc<strong>to</strong>r will give you further training as part of the vehicle training you have <strong>to</strong> undertake.<br />
How Brakes Work<br />
Most heavy vehicle brakes are designed <strong>to</strong> operate most effectively when the vehicle is loaded. When the vehicle is unloaded or only<br />
partially loaded, the braking performance is very different. So, take care <strong>and</strong> be sure you know how <strong>to</strong> control the different behaviours<br />
of the vehicle, whether it is loaded or unloaded.<br />
Most heavy vehicles use air brakes rather than the hydraulic type brakes fitted <strong>to</strong> passenger cars. But some rigid vehicles do use<br />
hydraulic brakes.<br />
All Brakes<br />
Brakes should be applied with steady pressure at the beginning of a s<strong>to</strong>p, <strong>and</strong> then eased off as the vehicle slows. Just before the<br />
vehicle comes <strong>to</strong> a complete s<strong>to</strong>p, brakes should be released enough <strong>to</strong> avoid a jerk <strong>and</strong> rebound, then applied again <strong>to</strong> hold the<br />
vehicle.<br />
Effect of load. The heavier your load, the harder it is <strong>to</strong> s<strong>to</strong>p <strong>and</strong> the more distance you need <strong>to</strong> s<strong>to</strong>p. With a heavy load, you must<br />
brake earlier <strong>and</strong> harder.<br />
Air Brakes<br />
Air brakes are often used in heavier <strong>and</strong> multi–axle vehicles, <strong>and</strong> will feel different from hydraulic brakes. There is a delay of up <strong>to</strong><br />
one second for air <strong>to</strong> reach the brakes after you push the pedal, <strong>and</strong> then it will take a further time for the vehicle <strong>to</strong> s<strong>to</strong>p. This means<br />
that you need <strong>to</strong> think well ahead <strong>and</strong> brake much earlier than you would in a light vehicle.<br />
58<br />
Part 6: vehicle Control<br />
Braking on Hills<br />
Continuous heavy braking on a long hill will cause brake linings <strong>to</strong> heat up. After a while the<br />
brakes will no longer slow the vehicle. This is called “brake fade”. To help reduce brake fade, shift<br />
in<strong>to</strong> a lower gear before starting down a hill. This will slow the vehicle down so that the brakes do<br />
not have <strong>to</strong> be used as much. However, it will not reduce the need <strong>to</strong> use the brakes al<strong>to</strong>gether, so<br />
you need <strong>to</strong> be careful. When you reach the bot<strong>to</strong>m of the hill you should shift back in<strong>to</strong> a higher gear.<br />
Brakes should not be fanned (alternately applied <strong>and</strong> released) except on slippery pavement where this<br />
type of braking gives better control, reduces danger of skidding <strong>and</strong> gives a shorter s<strong>to</strong>p. fanning reduces<br />
air pressure <strong>and</strong> serves no useful purpose on dry pavement <strong>and</strong> fanning on a long downhill grade may<br />
reduce air pressure below the minimum pressure needed for proper brake operation.<br />
Braking With an Empty Vehicle<br />
An empty vehicle, or one with a light load, is very different <strong>to</strong> h<strong>and</strong>le. You notice this most when braking, steering<br />
<strong>and</strong> going up hills. You may need <strong>to</strong> adjust your braking if your vehicle is empty.<br />
59
<strong>Truck</strong> <strong>and</strong> <strong>Bus</strong> H<strong>and</strong>book A GuiDE To SAfE DrivinG<br />
60<br />
Part 7: Planning <strong>and</strong> Observing<br />
While <strong>Driving</strong><br />
Looking <strong>to</strong> the right Place at the right Time<br />
Because you share the road with other drivers, you need <strong>to</strong> be looking around you all the time <strong>to</strong> know what<br />
other traffic is doing. You need <strong>to</strong> know the size of your vehicle <strong>and</strong> how it h<strong>and</strong>les, so you can always<br />
have enough space between your vehicle <strong>and</strong> other vehicles that can accelerate <strong>and</strong> brake more quickly<br />
than you can.<br />
You need <strong>to</strong> be observant <strong>and</strong> <strong>to</strong> look ahead.<br />
Check in all directions around your lane. failure <strong>to</strong> do so is a major cause of crashes. We all look<br />
ahead on the road as we drive. Heavy vehicle drivers need <strong>to</strong> look further ahead because s<strong>to</strong>pping,<br />
changing lanes <strong>and</strong> turning takes more time in a heavy vehicle. You need more time <strong>to</strong> get ready <strong>to</strong><br />
s<strong>to</strong>p or move left or right.<br />
What <strong>to</strong> Look for on the road<br />
How Far Ahead You Should Look<br />
Because large vehicles take a longer time <strong>to</strong> slow down <strong>and</strong> s<strong>to</strong>p, you should know what is on<br />
the road ahead, where you will be in the next 12 <strong>to</strong> 15 seconds. if you are not planning that<br />
far ahead, you may have <strong>to</strong> s<strong>to</strong>p quickly or change lanes suddenly.<br />
You also have <strong>to</strong> notice things closer <strong>to</strong> you, on each side <strong>and</strong> behind you. Check both<br />
sides, in your side mirrors <strong>and</strong> near <strong>and</strong> far ahead of your vehicle all the time.<br />
61
<strong>Truck</strong> <strong>and</strong> <strong>Bus</strong> H<strong>and</strong>book A GuiDE To SAfE DrivinG<br />
What <strong>to</strong> Look For<br />
in heavy vehicles you have the advantage of being higher, so you can see further down the road than the driver of a smaller vehicle.<br />
However, the height of your vehicle can also be a problem. Know how high your vehicle is <strong>and</strong> watch for low bridges, telephone <strong>and</strong><br />
electricity wires, or any low over-hanging objects.<br />
Traffic<br />
Watch for cars entering the road in front, changing lanes or turning. Look for the indica<strong>to</strong>rs <strong>and</strong> brakes lights of other vehicles or their<br />
unexpected movements. Keep a special watch for pedestrians crossing the road ahead. Be prepared <strong>to</strong> adjust your speed <strong>to</strong> avoid<br />
unexpected hazards.<br />
Road Conditions<br />
Watch for curves, merging lanes, potholes, slippery surfaces <strong>and</strong> loose s<strong>and</strong>. Always try <strong>to</strong> be aware of the road surface conditions<br />
<strong>and</strong> adjust your driving technique according <strong>to</strong> the conditions.<br />
Workers on the Road<br />
Be extra careful when driving through construction zones <strong>and</strong> areas where people are working on or near roads. When approaching a<br />
construction zone, slow down <strong>and</strong> obey all warning signs <strong>and</strong> people who are directing traffic through the area.<br />
Whilst in the construction zone, drive carefully <strong>and</strong> adjust your speed <strong>and</strong> driving <strong>to</strong> suit the conditions. obey posted speed limits,<br />
be ready for sudden s<strong>to</strong>ps <strong>and</strong> watch for workers <strong>and</strong> construction vehicles on the road. Give them more room <strong>to</strong> ensure everyone’s<br />
safety.<br />
Traffic control people are used at work zones <strong>to</strong> control traffic <strong>and</strong> prevent conflicts between construction activity <strong>and</strong> traffic. Whether<br />
you are driving at night or during the day, watch for traffic control people <strong>and</strong> follow their instructions.<br />
Treat people working on roads with respect <strong>and</strong> be patient if traffic is delayed. Sometimes traffic in one direction must wait while<br />
vehicles from the other lanes pass through a de<strong>to</strong>ur. When the way is clear, move slowly <strong>and</strong> carefully around the obstacle.<br />
62<br />
Part 7: Planning <strong>and</strong> observing While <strong>Driving</strong><br />
Check for Road Signs <strong>and</strong><br />
Traffic Signals<br />
if a traffic light has been green for a<br />
long time, slow down <strong>and</strong> prepare<br />
<strong>to</strong> s<strong>to</strong>p in case it changes <strong>to</strong> amber,<br />
then red before you get <strong>to</strong> it. At some<br />
intersections in Dubai the green<br />
light will start flashing <strong>to</strong> warn you<br />
that it is about <strong>to</strong> change <strong>to</strong> amber.<br />
Prepare <strong>to</strong> s<strong>to</strong>p as soon as you see<br />
this happening.<br />
Where there are parked vehicles,<br />
keep a special lookout for:<br />
• vehicles leaving the curb<br />
• vehicles leaving driveways<br />
• pedestrians crossing from between parked vehicles.<br />
other road users do not know how long it takes you <strong>to</strong> s<strong>to</strong>p. They misjudge your speed, so you have <strong>to</strong> make allowances<br />
for other drivers’ mistakes. Good professional drivers see hazards <strong>and</strong> underst<strong>and</strong> how <strong>to</strong> act in time <strong>to</strong> prevent a crash. You<br />
are on the road for much longer periods than other drivers <strong>and</strong> so should be much more aware of what is going on around<br />
you. Keep scanning the road for anything unusual ahead of you. You should be able <strong>to</strong> identify hazards early <strong>and</strong> underst<strong>and</strong><br />
the need <strong>to</strong> adjust your driving.<br />
remember that you are driving a large, heavy vehicle <strong>and</strong> you must take responsibility for driving in a way that protects both your<br />
safety <strong>and</strong> the safety of those around you.<br />
63
<strong>Truck</strong> <strong>and</strong> <strong>Bus</strong> H<strong>and</strong>book A GuiDE To SAfE DrivinG<br />
regular Mirror Checks<br />
Using Your Mirrors<br />
use all mirrors <strong>to</strong> check traffic beside <strong>and</strong> behind you. Glance in your mirrors often. When you are looking<br />
in a mirror, you are not looking ahead. Do not glance in mirrors for more than one second at a time. When<br />
you are travelling at 60 km/h, you will have travelled nearly 17 metres in one second. At 90 km/h, you will<br />
travel 25 metres in one second. So glance quickly at all mirrors <strong>and</strong> back at the road ahead. Make sure that<br />
you underst<strong>and</strong> what you see in your mirrors.<br />
use your mirrors <strong>to</strong> keep a check on your tyres. Especially watch out for tyre fires. You can use mirrors <strong>to</strong><br />
check on your trailer. Also use the mirrors <strong>to</strong> check that your trailer is straight behind you, not drifting <strong>to</strong><br />
one side.<br />
Blind Spots<br />
You need <strong>to</strong> check your mirrors often for overtaking vehicles, but there are some blind<br />
spots where the mirrors cannot help you. There are also other areas beyond the range of<br />
your mirrors. Smaller vehicles right behind you <strong>and</strong> level with the cab beside you are hard<br />
<strong>to</strong> see.<br />
if you use your mirrors all the time, you may see them before they move in<strong>to</strong> the blind<br />
spots. You will know that they are there.<br />
64<br />
Blind<br />
Spot<br />
Blind Spot<br />
Blind<br />
Spot<br />
Blind<br />
Spot<br />
Part 7: Planning <strong>and</strong> observing While <strong>Driving</strong><br />
When Changing Lanes, Turning or Merging<br />
There are also mirror checks you must make when you change lanes, turn, merge in<strong>to</strong> traffic <strong>and</strong><br />
go through tight spaces.<br />
Changing lanes. Before you change lanes, check your mirrors <strong>to</strong> make sure no-one is beside you or<br />
is about <strong>to</strong> overtake you. Check <strong>to</strong> be sure that:<br />
• there is enough space<br />
• your path is clear.<br />
Turns. As you make a left turn, check your mirrors <strong>to</strong> make sure you will not hit any stationary vehicles parked<br />
or s<strong>to</strong>pped close <strong>to</strong> the intersection of the street in<strong>to</strong> which you are turning. remember <strong>to</strong> allow space for the<br />
cutting-in of the rear end of your vehicle!<br />
As you make a right turn, use your right mirror. Check that your rear wheels do not mount the curb, strike a post or<br />
hit a parked vehicle. Also be very careful <strong>to</strong> check that a car is not trying <strong>to</strong> overtake you on the right side.<br />
Merge. When you are about <strong>to</strong> merge, use your mirrors <strong>to</strong> check that there is enough room for you <strong>to</strong> enter your new<br />
lane safely. Traffic behind may have sped up or changed lanes so that there is less room for your move.<br />
Tight spaces. When driving through a crowded intersection or narrow road, keep checking your mirrors. Make sure you<br />
can get the full length of your vehicle through without hitting anything.<br />
65
<strong>Truck</strong> <strong>and</strong> <strong>Bus</strong> H<strong>and</strong>book A GuiDE To SAfE DrivinG<br />
What <strong>to</strong> Watch out for When reversing<br />
Because you cannot see what is directly behind you, reversing is risky. if<br />
you reverse, make sure you do the following:<br />
Inspect your path. Check your line of travel before you begin. Make sure the<br />
road or surface will support the vehicle.<br />
Check your clearance. Check for low, over-hanging objects.<br />
Reverse slowly. This way you can easily correct steering errors <strong>and</strong> s<strong>to</strong>p<br />
quickly.<br />
Reverse <strong>and</strong> turn <strong>to</strong> driver’s side. Because you see more in the left mirror<br />
than the right mirror, it is safer <strong>to</strong> reverse in by reversing <strong>to</strong> the left<br />
(driver’s) side, where you can see more. reverse <strong>and</strong> turn <strong>to</strong> the driver’s<br />
side wherever you can. When turning <strong>to</strong>wards the driver’s side, you can<br />
watch the rear of your vehicle out the side window <strong>and</strong> in the left mirror.<br />
You cannot see as much in the right mirror. With a box trailer you will see<br />
nothing but the front right corner of the trailer in the right mirror.<br />
Use a person <strong>to</strong> help guide you. You cannot see directly behind your vehicle. There are other blind spots. So use a person <strong>to</strong> guide<br />
you wherever you can. The guiding person should st<strong>and</strong> where they get the clearest view of your vehicle <strong>and</strong> can signal <strong>to</strong> you. You<br />
probably will not be able <strong>to</strong> hear your guide properly, so work out some h<strong>and</strong> signals for communication before you start.<br />
A guide can see your blind spots <strong>and</strong> guide you through them.<br />
66<br />
Part 7: Planning <strong>and</strong> observing While <strong>Driving</strong><br />
How <strong>to</strong> Make Space Around Your vehicle<br />
To drive safely you need space all around your vehicle. Space gives you time <strong>to</strong> s<strong>to</strong>p. Space gives<br />
you time <strong>to</strong> check your mirror <strong>and</strong> make a lane change. Manage your space all the time.<br />
Space in Front<br />
it is important that drivers<br />
remember <strong>to</strong> keep a safe<br />
distance between themselves<br />
<strong>and</strong> the vehicle in front of<br />
them. Heavy vehicles require<br />
much more space <strong>to</strong> s<strong>to</strong>p than<br />
small vehicles. it is necessary<br />
<strong>to</strong> leave a space of at least<br />
three seconds in front of your<br />
vehicle when you are travelling<br />
at a low speed <strong>and</strong> over five seconds if you are travelling at 80km/h. Check the table above <strong>to</strong> see how much<br />
space you need <strong>to</strong> leave while travelling at different speeds.<br />
it is important <strong>to</strong> remember that the table gives space for vehicles:<br />
• with good tyres <strong>and</strong> brakes<br />
• driving on good quality, sealed roads<br />
• driving on dry roads.<br />
Counting time<br />
<strong>to</strong> create space<br />
in front of your<br />
vehicle<br />
Speed km/h – Seconds behind vehicle in front<br />
25 km/h gggggggggggg3.0 secs<br />
40 km/h gggggggggggg3.5 secs<br />
60 km/h gggggggggggg4.5 secs<br />
75 km/h gggggggggggg5.0 secs<br />
90 km/h gggggggggggg5.5 secs<br />
100 km/h gggggggg6.0 – 7.0 secs<br />
To count the seconds between you <strong>and</strong> the vehicle in front, count off the seconds from when they have passed a fixed object. S<strong>to</strong>p<br />
counting when the front of your vehicle reaches the same object. if you are not enough seconds behind the vehicle in front, ease<br />
off the accelera<strong>to</strong>r.<br />
67
<strong>Truck</strong> <strong>and</strong> <strong>Bus</strong> H<strong>and</strong>book A GuiDE To SAfE DrivinG<br />
Count the seconds required by saying these words slowly <strong>to</strong><br />
yourself:<br />
• one thous<strong>and</strong> <strong>and</strong> one<br />
• one thous<strong>and</strong> <strong>and</strong> two<br />
• one thous<strong>and</strong> <strong>and</strong> three <strong>and</strong> so on.<br />
Space Behind Your Vehicle<br />
You cannot force other vehicles <strong>to</strong> stay a safe distance behind<br />
you. But you can make sure that you do the best you can in<br />
managing space around your vehicle. Heavy vehicles are often<br />
“tailgated” when they cannot move as fast as other traffic, for<br />
example when going up a hill with a heavy load. Tailgating is<br />
when another vehicle drives <strong>to</strong>o closely behind you.<br />
H<strong>and</strong>le Tailgaters <strong>Safe</strong>ly<br />
When being tailgated, follow these tips:<br />
• Slow down gradually if safe <strong>to</strong> do so. This will encourage other drivers <strong>to</strong> overtake.<br />
• When turning, merging or changing lanes avoid quick changes of speed, slow down gradually <strong>and</strong> signal early.<br />
• increase your following distance – the distance between yourself <strong>and</strong> the vehicle you are following. opening up more room in front<br />
of you reduces the risk of having <strong>to</strong> make sudden changes <strong>to</strong> speed <strong>and</strong> direction.<br />
• Do not speed up. Tailgaters will tend <strong>to</strong> stay behind you <strong>and</strong> a slow speed is safer.<br />
68<br />
3 seconds<br />
Part 7: Planning <strong>and</strong> observing While <strong>Driving</strong><br />
Changing Lanes<br />
if you want <strong>to</strong> return <strong>to</strong> your lane after overtaking another vehicle, the extra length of your heavy<br />
vehicle makes it hard <strong>to</strong> judge whether you can change lanes safely. You should follow these tips:<br />
• when in doubt leave plenty of space <strong>and</strong> time<br />
• use your mirrors <strong>to</strong> check that you can see the vehicle behind you before moving back in<strong>to</strong> your<br />
original lane.<br />
Drive in the Centre of Your Lane<br />
To keep a margin of safety on both sides of your vehicle, drive in the centre of your lane.<br />
Space Above Your Vehicle<br />
Know the height of your vehicle <strong>and</strong> your load. Be cautious when going under trees, bridges, overhead signs,<br />
traffic lights, power lines <strong>and</strong> other wires.<br />
Space for Turns<br />
Space around a heavy vehicle is very important for turns. Because of cutting-in, heavy vehicles often sideswipe other<br />
vehicles <strong>and</strong> objects during turns.<br />
69
<strong>Truck</strong> <strong>and</strong> <strong>Bus</strong> H<strong>and</strong>book A GuiDE To SAfE DrivinG<br />
right Turns<br />
intersection markings are often <strong>to</strong>o tight for large vehicles. it is likely<br />
that you will have <strong>to</strong> approach the turn wide <strong>to</strong> make a right turn. Try <strong>to</strong><br />
place your vehicle so that others behind cannot overtake on your right.<br />
Make sure you have the best view possible of the road in<strong>to</strong> which you are<br />
turning. if you are <strong>to</strong>wing a trailer or are driving a semi-trailer, turn as wide<br />
as you need so that your trailer safely enters the right lane of the road in<strong>to</strong><br />
which you are turning.<br />
Heavy vehicle drivers need <strong>to</strong> start a right turn further in<strong>to</strong> an intersection<br />
than a car. This way, the back wheels do not run over the curb. The longer<br />
your vehicle, the further in<strong>to</strong> the intersection you have <strong>to</strong> drive before you<br />
start turning.<br />
if you are driving a vehicle that does not have power steering, you will need<br />
<strong>to</strong> start turning earlier <strong>and</strong> give yourself more room than if you are driving<br />
a vehicle with power steering. Make sure that you make the appropriate<br />
adjustments.<br />
Remember Your Vehicle’s Length<br />
Be careful of oncoming traffic in the street in<strong>to</strong> which you are turning. Watch<br />
the cut-in of the back of your vehicle. use your right mirror <strong>to</strong> check that you will clear poles <strong>and</strong> parked cars on your right.<br />
70<br />
Part 7: Planning <strong>and</strong> observing While <strong>Driving</strong><br />
Two Right Turning Lanes<br />
When there are two right turning lanes, always start your turn so you are mostly in the turning lane that is furthest <strong>to</strong> the right.<br />
if you only use the right turning lane that is closer <strong>to</strong> the centre of the road, a car may try <strong>to</strong> move in<strong>to</strong> the lane on your right.<br />
The car driver will not expect your vehicle’s rear <strong>to</strong> move in<strong>to</strong> their lane as the back of your vehicle cuts in. remember, vehicles<br />
on your right side are always harder <strong>to</strong> see in your mirrors.<br />
71
<strong>Truck</strong> <strong>and</strong> <strong>Bus</strong> H<strong>and</strong>book A GuiDE To SAfE DrivinG<br />
Left Turns<br />
Make sure your vehicle is close enough <strong>to</strong> the middle of the<br />
intersection before you start <strong>to</strong> turn <strong>to</strong> allow for the rear of your<br />
vehicle’s cut-in. The back of your vehicle could hit cars waiting at the<br />
intersection. The longer your vehicle, the more you have <strong>to</strong> allow for<br />
cut-in.<br />
Two Left Turning Lanes<br />
if there are two left turning lanes, always start your turn so you are<br />
in the left turning lane nearest <strong>to</strong> the right of the road. Check your<br />
right mirror for cars overtaking on your right side, which may turn <strong>to</strong><br />
the left in front of you.<br />
use your left mirror <strong>to</strong> check for traffic that might overtake on your<br />
left.<br />
Leaving Space When Turning Across Intersections<br />
You need <strong>to</strong> allow for the size <strong>and</strong> weight of your vehicle when you turn. remember:<br />
• Your acceleration is slower <strong>and</strong> you need a large amount of space. You must have a large gap in traffic <strong>to</strong> turn in<strong>to</strong> a new street.<br />
• if your vehicle is loaded, it will be slower than when it is empty.<br />
• You need <strong>to</strong> judge a gap in the traffic that is big enough for you. You need <strong>to</strong> get all of your vehicle safely through the intersection.<br />
72<br />
Part 7: Planning <strong>and</strong> observing While <strong>Driving</strong><br />
73
<strong>Truck</strong> <strong>and</strong> <strong>Bus</strong> H<strong>and</strong>book A GuiDE To SAfE DrivinG<br />
Test Yourself Questions<br />
(Answers <strong>to</strong> Test Yourself Questions are upside down at the bot<strong>to</strong>m of this page)<br />
Q1 Cut-in means that:<br />
74<br />
A the rear wheels follow a longer path than the front wheels.<br />
B both sets of wheels follow the same path.<br />
C the rear wheels follow a shorter path than the front wheels.<br />
Q2 The best way <strong>to</strong> use your mirrors is <strong>to</strong>:<br />
A look in each mirror for 1 second.<br />
B glance in your right mirror <strong>and</strong> then look over your shoulder.<br />
C glance quickly in all mirrors <strong>and</strong> then back at the road ahead.<br />
Q3 You should h<strong>and</strong>le tailgaters by:<br />
A gradually slowing <strong>to</strong> encourage them <strong>to</strong> overtake.<br />
B flashing on your brake lights <strong>to</strong> warn them they are <strong>to</strong>o close.<br />
C getting off the road on<strong>to</strong> the shoulder <strong>to</strong> let them overtake.<br />
Answers Q1C Q2C Q3A<br />
Part 7: Planning <strong>and</strong> observing While <strong>Driving</strong><br />
75
<strong>Truck</strong> <strong>and</strong> <strong>Bus</strong> H<strong>and</strong>book A GuiDE To SAfE DrivinG<br />
76<br />
Part 8: Sharing the Road With Others<br />
<strong>and</strong> Speed Management<br />
When you are driving, you know what you are about <strong>to</strong> do, for example change lanes or make a turn. other<br />
drivers do not know, unless you show them. if you make sure that other drivers know that you are there <strong>and</strong><br />
what your plans are, you can help <strong>to</strong> prevent crashes.<br />
<strong>Driving</strong> Courtesy<br />
The road is there for all road users. You should always show courtesy <strong>and</strong> patience <strong>to</strong> other road users.<br />
Your vehicle will obscure the view of drivers behind you. They may not see a red traffic light ahead. Give<br />
drivers behind you as much warning as possible of your intentions <strong>to</strong> slow down or s<strong>to</strong>p.<br />
You should never travel closely behind another vehicle, particularly a car, as it can be intimidating<br />
<strong>and</strong> viewed as aggressive behaviour.<br />
Maintaining a positive attitude whilst driving will help <strong>to</strong> reduce stress <strong>and</strong> enable you <strong>to</strong> remain<br />
focused on the road.<br />
<strong>Driving</strong> When Angry<br />
Drivers do not always do the right thing <strong>and</strong> often make mistakes on the road. Some people get<br />
angry because of a mistake or action of another driver <strong>and</strong> become violent.<br />
You can avoid becoming a victim of another driver’s anger easily by:<br />
• showing that you know you have made a mistake, if you have made one<br />
• keeping calm <strong>and</strong> keeping your distance from other vehicles – do not tailgate<br />
• driving cooperatively <strong>and</strong> considering other people on the road.<br />
77
<strong>Truck</strong> <strong>and</strong> <strong>Bus</strong> H<strong>and</strong>book A GuiDE To SAfE DrivinG<br />
remember, if you drive aggressively it is likely that you will intimidate other drivers simply because of the size of your vehicle.<br />
Most importantly, it is likely that you will get in<strong>to</strong> a situation that you will not be able <strong>to</strong> get out of. You will not have time <strong>to</strong> s<strong>to</strong>p or<br />
take evasive action, which might result in a major crash causing serious injury or even death.<br />
Communicating Your Presence <strong>to</strong> other Drivers<br />
Make sure other road users know where you are when things such as these happen:<br />
• Overtaking. if you are overtaking another vehicle, a cyclist or a pedestrian, assume that they do not realise where you are.<br />
if necessary, a light tap on the horn will warn them of your presence without scaring them. People who are suddenly scared may<br />
swerve out in<strong>to</strong> your path.<br />
• Another driver unexpectedly signals a turn or turns without signalling. Although this is bad driving practice, it does happen.<br />
So be prepared <strong>to</strong> react quickly. if necessary, sound your horn.<br />
• It is hard <strong>to</strong> see. At sunset or sunrise, in s<strong>and</strong> s<strong>to</strong>rms or rain, a heavy vehicle can be just as hard <strong>to</strong> see as any other vehicle.<br />
Also, keep a careful look-out for mo<strong>to</strong>rcyclists <strong>and</strong> cyclists at times when it is hard <strong>to</strong> see.<br />
• Parking at the side of the road. You should only park where your vehicle will not obstruct other traffic <strong>and</strong> where local regulations<br />
allow.<br />
• Parking requirements during the day. use hazard warning lights if you are s<strong>to</strong>pped <strong>and</strong> there may be a danger <strong>to</strong> traffic.<br />
• Parking requirements during the night. use all required parking lights <strong>and</strong> use hazard warning lights if there may be danger <strong>to</strong><br />
traffic.<br />
78<br />
Part 8: Sharing the road With others <strong>and</strong> Speed Management<br />
If your vehicle is disabled, there are guidelines <strong>to</strong> follow:<br />
• At all times. if possible, you should park your vehicle on the side of the road or a part<br />
of the road not used by the main body of traffic.<br />
• During the day. use reflective triangles <strong>and</strong> hazard warning lights if your vehicle could be a<br />
danger <strong>to</strong> other traffic.<br />
• At night. You should have all lights switched on <strong>and</strong>, if your vehicle could be a danger <strong>to</strong> other traffic,<br />
use your hazard warning lights.<br />
Reflective Triangles<br />
You must display reflective triangles if your vehicle, or any part of your load that has fallen on<strong>to</strong> the road,<br />
is not clearly visible for 200 metres in any direction. You should put one triangle between 50 metres <strong>and</strong><br />
150 metres in front of the vehicle or fallen load, one at least 50 metres <strong>to</strong> the rear of the vehicle <strong>and</strong> one on the<br />
side of the vehicle or fallen load in a position that gives sufficient warning <strong>to</strong> other road users.<br />
Clearance Lights<br />
if your vehicle is over 2.2 metres wide, all clearance <strong>and</strong> side-marker lights must always be on at night<br />
when s<strong>to</strong>pped or parked on a road, unless there is sufficient street lighting for you <strong>to</strong> be easily seen. if your<br />
vehicle is less than 2.2 metres wide, it must have its parking lights on. if any of the lights are not working, you<br />
must use reflective triangles.<br />
Yellow Load Lights<br />
<strong>Truck</strong>s are required <strong>to</strong> have revolving yellow lights on the roof of the cabin, which must be switched on when the<br />
truck is loaded <strong>and</strong> moving. They must be switched off when the truck is not loaded.<br />
79
<strong>Truck</strong> <strong>and</strong> <strong>Bus</strong> H<strong>and</strong>book A GuiDE To SAfE DrivinG<br />
Signalling Your intentions<br />
You are legally required <strong>to</strong> show other road users what you are going <strong>to</strong> do when making turns or lane changes:<br />
• Signal early. Make sure that it is safe <strong>to</strong> turn <strong>and</strong> then signal early <strong>to</strong> give sufficient warning <strong>to</strong> other road users before starting a<br />
turn or lane change.<br />
• Keep the signal going. Do not cancel the turn signal until you have completed your turn or lane change.<br />
Managing Speed<br />
Managing speed is one of the important parts of safe driving.<br />
in Dubai, overspeeding or excessive speed contributes <strong>to</strong> up <strong>to</strong> 80% of all injury crashes. There is a clear link between speed<br />
<strong>and</strong> crashes.<br />
Good drivers can reduce this risk by choosing <strong>to</strong>:<br />
• drive more slowly<br />
• scan the road ahead for possible hazards<br />
• increase the space between them <strong>and</strong> the car in front<br />
• stay behind rather than overtaking<br />
• always travel at a speed that will allow enough time for them <strong>to</strong> brake.<br />
The faster you are going, the more distance you will cover between seeing a situation where you need <strong>to</strong> use the brake <strong>and</strong> actually<br />
getting your foot on the pedal <strong>to</strong> start braking.<br />
Also, the faster you are going, the more distance you will cover while braking before you actually s<strong>to</strong>p. The following table gives some<br />
figures for a typical heavy vehicle on dry roads.<br />
80<br />
Part 8: Sharing the road With others <strong>and</strong> Speed Management<br />
S<strong>to</strong>pping distances for different speeds assuming – dry road, roadworthy tyres,<br />
fit <strong>and</strong> alert driver<br />
Speed<br />
Kilometres per<br />
hour – kmh)<br />
Distance<br />
travelled<br />
(Metres per<br />
second – m/s)<br />
Metres (m) travelled<br />
when you see you<br />
have <strong>to</strong> s<strong>to</strong>p until<br />
vehicle begins <strong>to</strong><br />
slow down<br />
Metres<br />
travelled while<br />
braking<br />
Total s<strong>to</strong>pping<br />
distance in<br />
metres (m)<br />
20 kmh 5.6 m/s 14 9 23<br />
40 kmh 11.1 m/s 26 27 56<br />
60 kmh 16.7 m/s 42 56 97<br />
80 kmh 22.2 m/s 56 102 156<br />
100 kmh 27.8 m/s 69 145 214<br />
These figures are based on research in<strong>to</strong> the capabilities of an average driver. The distance travelled while braking<br />
<strong>and</strong> the <strong>to</strong>tal s<strong>to</strong>pping distance will vary according <strong>to</strong> conditions. What this means for you is that the faster you are<br />
travelling, the more time <strong>and</strong> distance you have <strong>to</strong> allow before you can s<strong>to</strong>p.<br />
Adjusting Speed<br />
There is no single safe speed. You must adjust your speed for the road surface. Be careful with slippery surfaces.<br />
it takes much longer <strong>to</strong> s<strong>to</strong>p or turn on slippery roads. if the road is s<strong>and</strong>y or wet, reduce your speed by 15-30 km/h.<br />
Bends<br />
The faster you are travelling, the harder it is <strong>to</strong> turn <strong>and</strong> the more distance it takes <strong>to</strong> turn. if you turn <strong>to</strong>o fast, you may<br />
end up in a skid.<br />
Adjusting your speed before taking a bend is important in a heavy vehicle because of its high centre of gravity. if you take a<br />
bend <strong>to</strong>o fast your wheels could skid, the vehicle could roll over or the load could move or even roll off the vehicle. Ease off<br />
the accelera<strong>to</strong>r <strong>and</strong> change down your gears before entering the bend.<br />
81
<strong>Truck</strong> <strong>and</strong> <strong>Bus</strong> H<strong>and</strong>book A GuiDE To SAfE DrivinG<br />
How Far Can You See?<br />
Adjust your speed according <strong>to</strong> how<br />
far you can see. Look at the table<br />
on the previous page <strong>to</strong> see the<br />
difference between seeing distance<br />
<strong>and</strong> s<strong>to</strong>pping distance. You should<br />
drive at the speed that will let you<br />
s<strong>to</strong>p within the distance you can see<br />
ahead of you.<br />
82<br />
Part 8: Sharing the road With others <strong>and</strong> Speed Management<br />
Test Yourself Questions<br />
(Answers <strong>to</strong> Test Yourself Questions are upside down at the bot<strong>to</strong>m of this page)<br />
Q1 When s<strong>to</strong>pped in a dangerous position on a road, you should:<br />
A sound your horn.<br />
B switch on your hazard warning lights.<br />
C st<strong>and</strong> well clear of the vehicle.<br />
Q2 When the road is slippery, you should:<br />
A drive slowly <strong>and</strong> carefully.<br />
B watch out for road speed sign warnings.<br />
C change up your gears.<br />
Q3 Reflective triangles should be used:<br />
A at night when it rains.<br />
B if your vehicle cannot be seen from a distance of 200 metres in any direction.<br />
C if your vehicle is parked more than 100 metres from a corner.<br />
Answers Q1B Q2A Q3B<br />
83
<strong>Truck</strong> <strong>and</strong> <strong>Bus</strong> H<strong>and</strong>book A GuiDE To SAfE DrivinG<br />
96<br />
Part 11: The Law<br />
This part tells you about laws for owners <strong>and</strong> drivers of all categories of heavy vehicles. In addition <strong>to</strong> these<br />
laws, drivers of heavy vehicles must comply with all road laws. A summary of these road laws can be found in<br />
the Light Mo<strong>to</strong>r Vehicle H<strong>and</strong>book. You should have a copy of it <strong>to</strong> read <strong>to</strong>gether with this h<strong>and</strong>book.<br />
Speed Limits<br />
All heavy vehicles must travel at speeds no greater than the speed displayed on a speed limit sign. Some<br />
signs have two speeds listed, one for light mo<strong>to</strong>r vehicles <strong>and</strong> one for heavy trucks.<br />
Drivers of heavy trucks must take note of the lower speed limit that applies on these roads. You will find<br />
these signs on major highways <strong>and</strong> freeways. They are intended <strong>to</strong> make sure that heavy vehicles are<br />
travelling at a safe maximum speed, given their larger size.<br />
120<br />
80<br />
remember, the speed limit may not always be the safe speed for a heavy vehicle because of<br />
the vehicle’s different h<strong>and</strong>ling, higher centre of gravity <strong>and</strong> performance. Drivers should<br />
always travel at a speed which is safe for the conditions.<br />
97
<strong>Truck</strong> <strong>and</strong> <strong>Bus</strong> H<strong>and</strong>book A GuiDE To SAfE DrivinG<br />
Signs<br />
There are a number of signs that are specially for drivers of heavy vehicles. These include the ones shown below.<br />
98<br />
Drivers of goods vehicles must not proceed beyond this point. These signs are often placed in<br />
residential or narrow streets, where it is not appropriate for trucks or large vans <strong>to</strong> be travelling.<br />
Drivers of vehicles above 4.2 metres are warned there are low structures ahead that their vehicle<br />
will not fit under. You will come <strong>to</strong> this sign before you come <strong>to</strong> the one below.<br />
vehicles above 4.2 metres must not proceed beyond this point. This sign indicates that there is a<br />
low bridge or other structure ahead <strong>and</strong> that you must not proceed if your vehicle is higher than<br />
the limit shown. vehicles will not fit under these structures if they proceed.<br />
only designated delivery vehicles may park here. These signs are placed outside buildings where<br />
frequent deliveries are made.<br />
Part 11: The Law<br />
This area of road is reserved for the s<strong>to</strong>pping of Public<br />
Transport buses only.<br />
The loading <strong>and</strong> unloading of vehicles is allowed for 1 hour only. These<br />
signs are placed in areas such as shopping or commercial business<br />
areas where short deliveries are required.<br />
Goods vehicles are prohibited from using these lanes. These signs are intended <strong>to</strong><br />
regulate the movements of heavy vehicles including buses, making sure that they<br />
stay in the slow lanes <strong>and</strong> do not impede the flow of faster moving traffic.<br />
vehicles wider than 2.4 metres must not proceed beyond this sign. These signs will be<br />
found at the entrance <strong>to</strong> narrow streets.<br />
99
<strong>Truck</strong> <strong>and</strong> <strong>Bus</strong> H<strong>and</strong>book A GuiDE To SAfE DrivinG<br />
Seat Belts<br />
100<br />
Heavy trucks must not use roads displaying this sign during the times shown.<br />
in Dubai it is a legal requirement that drivers of vehicles must wear a properly adjusted seat belt. Passengers in trucks are also<br />
required <strong>to</strong> wear seat belts. Passengers in buses should also wear seat belts if they are fitted.<br />
Seat belts hold you securely in place. if you are the driver, this helps you <strong>to</strong> control the vehicle in a crash. They protect everyone in the<br />
vehicle. if a seat belt is not worn, people inside the vehicle continue <strong>to</strong> move around at the speed of travel before the crash. Serious<br />
injuries often result when people are thrown in<strong>to</strong> each other or parts of the vehicle such as the steering wheel, gear lever, windscreen<br />
or, in the case of a bus, the seats in front of passengers. Seat belts give you a greater chance of escaping serious injury. if you are not<br />
wearing one you could be thrown from your vehicle which will increase your chance of being killed or more seriously injured.<br />
Part 11: The Law<br />
Parking<br />
As a professional driver you will need <strong>to</strong> park your vehicle in a range of different places. When<br />
parking a heavy vehicle for any length of time, park away from houses, shops <strong>and</strong> schools, <strong>and</strong> as<br />
far away from moving traffic as possible. Always park your vehicle in a safe position where it can be<br />
seen by other vehicles <strong>and</strong> traffic is not forced <strong>to</strong> divert around the vehicle.<br />
Be aware of where you can <strong>and</strong> cannot park, <strong>and</strong> how long you can park. There are a number of places<br />
where you must not s<strong>to</strong>p or park your vehicle. You must comply with all parking signs that apply <strong>to</strong> the<br />
area. if you do park in these areas, you could be a hazard <strong>to</strong> other road users <strong>and</strong> you will be fined. See<br />
details of parking signs earlier in this section.<br />
101
<strong>Truck</strong> <strong>and</strong> <strong>Bus</strong> H<strong>and</strong>book A GuiDE To SAfE DrivinG<br />
108<br />
Part 13: <strong>Safe</strong> <strong>Driving</strong> Tips<br />
The aim of this h<strong>and</strong>book is <strong>to</strong> help you become a safe <strong>and</strong> responsible heavy vehicle driver. <strong>Driving</strong> a heavy<br />
vehicle is not easy <strong>and</strong> it takes a lot of time <strong>and</strong> practice <strong>to</strong> become a good driver.<br />
The list below identifies some important driving tips for you <strong>to</strong> remember:<br />
• Know your vehicle - height, weight, <strong>and</strong> load limit.<br />
• Do not exceed vehicle load limits. Ensure that the vehicle you are driving is suitable for the load.<br />
• Restrain the load so that it can not move, or fall, whilst driving.<br />
• Keep your vehicle in good mechanical condition. Conduct a daily vehicle inspection.<br />
• Plan your trip in advance. Allow sufficient time <strong>to</strong> reach your destination - do not rush.<br />
• Fasten your seatbelt (every trip).<br />
• Alter driving <strong>to</strong> suit weather conditions.<br />
• Do not be under the influence of drugs <strong>and</strong> alcohol.<br />
• Learn <strong>to</strong> recognise driving situations that can be hazardous. Utilise the height of your<br />
vehicle <strong>to</strong> see further ahead. Take note of improper driving actions of others <strong>and</strong> do not<br />
repeat them.<br />
• Allow sufficient space between you <strong>and</strong> the vehicle in front – do not tailgate.<br />
• Do not exceed the speed limit for heavy vehicles. This is displayed as the lower speed<br />
limit on a speed sign.<br />
• The faster you go the more likely you are <strong>to</strong> have a crash. Speed is a contributing<br />
fac<strong>to</strong>r in 80% of all crashes in Dubai.<br />
• Obey all traffic signs <strong>and</strong> markings. Never try <strong>to</strong> beat traffic lights.<br />
• Watch for cars entering the road ahead, changing lanes or turning.<br />
109
<strong>Truck</strong> <strong>and</strong> <strong>Bus</strong> H<strong>and</strong>book A GuiDE To SAfE DrivinG<br />
• Plan <strong>and</strong> signal well ahead when you want <strong>to</strong> change lanes or overtake.<br />
• if you are not sure that you have enough time <strong>to</strong> turn safely or change lanes, just wait. A few seconds or minutes could save your life.<br />
• Concentrate, keep your mind on the road.<br />
• Stay alert. Take rest breaks whenever possible.<br />
• Expect the unexpected from drivers.<br />
• Watch for pedestrians. in 2007, pedestrians accounted for 43.7% of fatalities <strong>and</strong> 26.3% of all injuries that occurred on<br />
Dubai roads.<br />
• Whenever practical, pull over <strong>and</strong> check the load remains securely stacked.<br />
• if possible avoid driving at night. During 2006, 45% of crashes occurred during the night.<br />
110<br />
Part 13: <strong>Safe</strong> <strong>Driving</strong> Tips<br />
111