aXsGUARD Gatekeeper - Vasco
aXsGUARD Gatekeeper - Vasco
aXsGUARD Gatekeeper - Vasco

You also want an ePaper? Increase the reach of your titles
YUMPU automatically turns print PDFs into web optimized ePapers that Google loves.
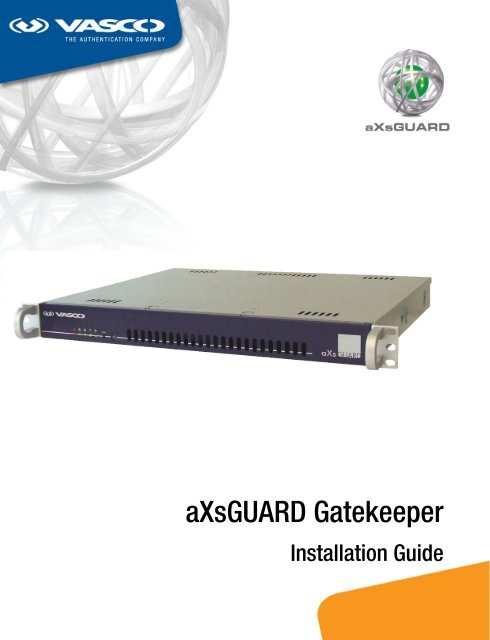
<strong>aXsGUARD</strong> <strong>Gatekeeper</strong><br />
Installation Guide
<strong>aXsGUARD</strong> <strong>Gatekeeper</strong> Installation Guide v2.7<br />
Legal Notice<br />
VASCO Products<br />
VASCO Data Security, Inc. and/or VASCO Data Security International GmbH are referred to in this document as<br />
'VASCO'. VASCO Products comprise Hardware, Software, Services and Documentation. This document<br />
addresses potential and existing VASCO customers and has been provided to you and your organization for the<br />
sole purpose of helping you to use and evaluate VASCO Products. As such, it does not constitute a license to<br />
use VASCO Software or a contractual agreement to use VASCO Products.<br />
Disclaimer of Warranties and Limitations of Liabilities<br />
VASCO Products are provided ‘as is’ without warranty or conditions of any kind, whether implied, statutory, or<br />
related to trade use or dealership, including but not limited to implied warranties of satisfactory quality,<br />
merchantability, title, non-infringement or fitness for a particular purpose.<br />
VASCO, VASCO DISTRIBUTORS, RESELLERS AND SUPPLIERS HAVE NO LIABILITY UNDER ANY<br />
CIRCUMSTANCES FOR ANY LOSS, DAMAGE OR EXPENSE INCURRED BY YOU, YOUR ORGANIZATION OR ANY<br />
THIRD PARTY (INCLUDING, WITHOUT LIMITATION, DAMAGES FOR LOSS OF PROFITS, BUSINESS<br />
INTERRUPTION OR LOSS OF DATA) ARISING DIRECTLY OR INDIRECTLY FROM THE USE, OR INABILITY TO USE<br />
VASCO SOFTWARE, HARDWARE, SERVICES OR DOCUMENTATION, REGARDLESS OF THE CAUSE OF THE<br />
LOSS, INCLUDING NEGLIGENCE, EVEN IF VASCO HAS BEEN ADVISED OF THE POSSIBILITY OF SUCH<br />
DAMAGES, OR IF THEY WERE FORESEEABLE. OUR MAXIMUM AGGREGATE LIABILITY TO YOU, AND THAT OF<br />
OUR DISTRIBUTORS, RESELLERS AND SUPPLIERS SHALL NOT EXCEED THE AMOUNT PAID BY YOU FOR THE<br />
PRODUCT. THE LIMITATIONS IN THIS SECTION SHALL APPLY WHETHER OR NOT THE ALLEGED BREACH OR<br />
DEFAULT IS A BREACH OF A FUNDAMENTAL CONDITION OR TERM, OR A FUNDAMENTAL BREACH. THIS<br />
SECTION WILL NOT APPLY ONLY WHEN AND TO THE EXTENT THAT APPLICABLE LAW SPECIFICALLY<br />
REQUIRES LIABILITY DESPITE THE FOREGOING EXCLUSIONS AND LIMITATIONS.<br />
Intellectual Property and Copyright<br />
VASCO Products contain proprietary and confidential information. VASCO Data Security, Inc. and/or VASCO<br />
Data Security International GmbH own or are licensed under all title, rights and interest in VASCO Products,<br />
updates and upgrades thereof, including copyrights, patent rights, trade secret rights, mask work rights,<br />
database rights and all other intellectual and industrial property rights. No part of these Products may be<br />
transferred, disclosed, reproduced or transmitted in any form or by any means, electronic, mechanical or<br />
otherwise, for any purpose, except as expressly permitted by VASCO or its authorized licensee in writing.<br />
This document is protected under US and international copyright law as an unpublished work of authorship. No<br />
part of it may be transferred, disclosed, reproduced or transmitted in any form or by any means, electronic,<br />
mechanical or otherwise, for any purpose, except as expressly permitted in writing by VASCO or its authorized<br />
licensee.<br />
Trademarks<br />
VASCO®, VACMAN®, IDENTIKEY®, <strong>aXsGUARD</strong>, DIGIPASS®, DIGIPASS as a Service and the ®<br />
logo are registered or unregistered trademarks of VASCO Data Security, Inc. and/or VASCO Data Security<br />
International GmbH in the U.S. and other countries. Other company brand or product names or other<br />
designations, denominations, labels and/or other tags, titles, as well as all URLs (Internet addresses) linked to<br />
such designations or communications (irrespective of whether protected by intellectual property law or not),<br />
mentioned in VASCO Products may be the trademarks or registered trademarks or be part of any other<br />
entitlement of their respective owners.<br />
Radius Disclaimer<br />
Information on the RADIUS server provided in this document relates to its operation in the <strong>aXsGUARD</strong><br />
<strong>Gatekeeper</strong> environment. We recommend that you contact your NAS/RAS vendor for further information.<br />
Copyright © 2010 VASCO Data Security, Inc, VASCO Data Security International GmbH. All rights reserved.<br />
© August 2010 - VASCO Data Security 2
<strong>aXsGUARD</strong> <strong>Gatekeeper</strong> Installation Guide v2.7 Table of Contents<br />
Table of Contents<br />
1 Introduction............................................................................................................................................... 8<br />
1.1 Audience and Purpose of this Document............................................................................................. 8<br />
1.2 What is the <strong>aXsGUARD</strong> <strong>Gatekeeper</strong>?................................................................................................. 10<br />
1.3 VASCO........................................................................................................................................... 10<br />
2 Safety and Environmental Information...................................................................................................... 11<br />
2.1 Overview........................................................................................................................................ 11<br />
2.2 Electrical Safety............................................................................................................................... 11<br />
2.3 Personal, Environmental and <strong>aXsGUARD</strong> <strong>Gatekeeper</strong> Safety............................................................... 11<br />
2.4 Temperature, Power and Humidity.................................................................................................... 12<br />
2.5 Dimensions..................................................................................................................................... 12<br />
2.6 Chassis Rails.................................................................................................................................. 12<br />
3 Before you Begin...................................................................................................................................... 13<br />
4 Connecting the <strong>aXsGUARD</strong> <strong>Gatekeeper</strong> to a Network................................................................................ 14<br />
4.1 Overview........................................................................................................................................ 14<br />
4.2 Powering on the <strong>aXsGUARD</strong> <strong>Gatekeeper</strong>........................................................................................... 14<br />
4.3 Connecting to your Network............................................................................................................. 16<br />
4.4 Workstation TCP/IP Settings............................................................................................................. 16<br />
5 Installation steps: an overview................................................................................................................. 18<br />
6 Logging into the Administrator Tool.......................................................................................................... 19<br />
7 Changing the sysadmin password............................................................................................................ 21<br />
8 Licensing................................................................................................................................................. 22<br />
8.1 Overview........................................................................................................................................ 22<br />
8.2 Downloading a System Info file......................................................................................................... 22<br />
8.3 Acquiring a VASCO License file........................................................................................................ 23<br />
8.3.1 Downloading a Commercial License File....................................................................................... 23<br />
8.3.2 Downloading an Evaluation License File....................................................................................... 26<br />
8.4 Uploading the License file to the <strong>aXsGUARD</strong> <strong>Gatekeeper</strong>.................................................................... 29<br />
9 <strong>aXsGUARD</strong> <strong>Gatekeeper</strong> Configuration....................................................................................................... 30<br />
9.1 Overview........................................................................................................................................ 30<br />
9.2 Creating an Administrator with full administrator rights....................................................................... 30<br />
9.3 Customer Information...................................................................................................................... 33<br />
9.3.1 Overview.................................................................................................................................... 33<br />
9.3.2 Entering Customer Information.................................................................................................... 34<br />
© August 2010 - VASCO Data Security 3
<strong>aXsGUARD</strong> <strong>Gatekeeper</strong> Installation Guide v2.7 Table of Contents<br />
9.4 Menu Structure and Navigation........................................................................................................ 35<br />
9.5 Entering the System Information....................................................................................................... 36<br />
9.6 Network Device Settings.................................................................................................................. 38<br />
9.6.1 Setting up the Ethernet Secure LAN Device.................................................................................. 38<br />
9.6.2 Setting up an Ethernet Internet Device......................................................................................... 41<br />
9.7 General Network Settings................................................................................................................. 43<br />
9.8 General E-mail Settings .................................................................................................................. 45<br />
9.8.1 Content Scanning and E-mail Server Features Active.................................................................... 45<br />
9.8.2 Content Scanning Feature Active, E-mail Server Feature Inactive................................................... 47<br />
9.8.3 Content Scanning and E-mail Server Features both Inactive........................................................... 48<br />
10 What's Next............................................................................................................................................. 49<br />
11 <strong>aXsGUARD</strong> <strong>Gatekeeper</strong> Security Concepts................................................................................................ 50<br />
11.1 Overview........................................................................................................................................ 50<br />
11.2 Security Policies and Levels............................................................................................................. 50<br />
11.3 Groups........................................................................................................................................... 53<br />
11.4 Users.............................................................................................................................................. 53<br />
11.5 Computers and Servers................................................................................................................... 54<br />
11.6 System........................................................................................................................................... 55<br />
12 Support.................................................................................................................................................... 56<br />
12.1 Overview........................................................................................................................................ 56<br />
12.2 If you encounter a problem............................................................................................................... 56<br />
12.3 Return procedure if you have a hardware failure................................................................................ 56<br />
© August 2010 - VASCO Data Security 4
<strong>aXsGUARD</strong> <strong>Gatekeeper</strong> Installation Guide v2.7 Table of Contents<br />
Illustration Index<br />
Image 1: <strong>aXsGUARD</strong> <strong>Gatekeeper</strong> AG-3XXX.................................................................................................................................................................. 8<br />
Image 2: <strong>aXsGUARD</strong> <strong>Gatekeeper</strong> AG-5XXX.................................................................................................................................................................. 8<br />
Image 3: Back of a Typical <strong>aXsGUARD</strong> <strong>Gatekeeper</strong>..................................................................................................................................................... 14<br />
Image 4: Example Stickers Labeling Interfaces on the <strong>aXsGUARD</strong> <strong>Gatekeeper</strong> AG-3XX3................................................................................................ 15<br />
Image 5: Example Stickers Labeling Interfaces on the <strong>aXsGUARD</strong> <strong>Gatekeeper</strong> AG-3XX4................................................................................................ 15<br />
Image 6: Example Stickers Labeling Interfaces on the <strong>aXsGUARD</strong> <strong>Gatekeeper</strong> AG-5XX6................................................................................................ 15<br />
Image 7: Example Stickers Labeling Interfaces on the <strong>aXsGUARD</strong> <strong>Gatekeeper</strong> AG-7XXX................................................................................................ 15<br />
Image 8: Power Button and Power LED..................................................................................................................................................................... 16<br />
Image 9: Command Prompt and Testing TCP/IP Settings............................................................................................................................................ 17<br />
Image 10: Certificate Screen.................................................................................................................................................................................... 19<br />
Image 11: <strong>aXsGUARD</strong> <strong>Gatekeeper</strong> Login Screen........................................................................................................................................................ 20<br />
Image 12: Screen on sysadmin first-time logon.......................................................................................................................................................... 20<br />
Image 13: Changing the System Administrator Password............................................................................................................................................ 21<br />
Image 14: Changing the System Administrator Password: Password entry.................................................................................................................... 21<br />
Image 15: Downloading the System Info file............................................................................................................................................................... 22<br />
Image 16: VASCO's Product Registration Website...................................................................................................................................................... 23<br />
Image 17: VASCO Terms and Conditions................................................................................................................................................................... 24<br />
Image 18: Registration Menu................................................................................................................................................................................... 24<br />
Image 19: Uploading the System Info file................................................................................................................................................................... 25<br />
Image 20: Downloading the License file.................................................................................................................................................................... 25<br />
Image 21: VASCO Product Registration Website......................................................................................................................................................... 26<br />
Image 22: Product Selection.................................................................................................................................................................................... 26<br />
Image 23: VASCO Terms and Conditions................................................................................................................................................................... 27<br />
Image 24: Uploading the System Info file................................................................................................................................................................... 28<br />
Image 25: Downloading the License file.................................................................................................................................................................... 28<br />
Image 26: Uploading the License file in the Administrator Tool.................................................................................................................................... 29<br />
Image 27: Confirmation of successful License importation.......................................................................................................................................... 29<br />
Image 28: Creating a System Administrator User....................................................................................................................................................... 31<br />
Image 29: Configuration possibilities with full administrator rights................................................................................................................................ 32<br />
Image 30: Customer Information............................................................................................................................................................................... 33<br />
Image 31: System > General Screen........................................................................................................................................................................ 35<br />
Image 32: System > General Screen........................................................................................................................................................................ 36<br />
Image 33: Network > Devices > Eth......................................................................................................................................................................... 38<br />
Image 34: Network > Devices > Eth > eth0.............................................................................................................................................................. 38<br />
© August 2010 - VASCO Data Security 5
<strong>aXsGUARD</strong> <strong>Gatekeeper</strong> Installation Guide v2.7 Table of Contents<br />
Image 35: Fixed IP Configuration IP Settings.............................................................................................................................................................. 39<br />
Image 36: Network > Devices > Eth >eth1............................................................................................................................................................... 41<br />
Image 37: PPPoE Configuration Account Settings....................................................................................................................................................... 43<br />
Image 38: Fixed IP Configuration IP Settings.............................................................................................................................................................. 43<br />
Image 39: Network > General.................................................................................................................................................................................. 44<br />
Image 40: E-mail > Domains > Add New: with SMTP and E-mail Server Features........................................................................................................ 46<br />
Image 41: E-mail > Domain > Add New: SMTP Only.................................................................................................................................................. 47<br />
Image 42: E-mail>General: SMTP and E-mail Disabled............................................................................................................................................... 48<br />
Image 43: Rules, Policies and Application Levels....................................................................................................................................................... 50<br />
Image 44: Policy Application to Security Levels.......................................................................................................................................................... 51<br />
Image 45: Restrictive powers and broadness of application......................................................................................................................................... 52<br />
© August 2010 - VASCO Data Security 6
<strong>aXsGUARD</strong> <strong>Gatekeeper</strong> Installation Guide v2.7 Table of Contents<br />
Index of Tables<br />
Table 1: System General Fields............................................................................................................................................................. 37<br />
Table 2: Network > Devices > Eth > eth0 Fields....................................................................................................................................39<br />
Table 3: Network > Devices > Eth > eth1 Fields....................................................................................................................................42<br />
© August 2010 - VASCO Data Security 7
<strong>aXsGUARD</strong> <strong>Gatekeeper</strong> Installation Guide v2.7 Introduction<br />
1 Introduction<br />
1.1 Audience and Purpose of this Document<br />
This Installation Guide explains how to set up the <strong>aXsGUARD</strong> TM <strong>Gatekeeper</strong> AG-3XXX, AG-5XXX (see images<br />
below), and AG-7XXX models, and is intended for technical personnel and / or system administrators within an<br />
organization, who are installing and configuring an <strong>aXsGUARD</strong> <strong>Gatekeeper</strong>.<br />
If the <strong>aXsGUARD</strong> <strong>Gatekeeper</strong> you are configuring is a spare or replacement appliance, please refer to the<br />
<strong>aXsGUARD</strong> <strong>Gatekeeper</strong> Replacement How To.<br />
If the <strong>aXsGUARD</strong> <strong>Gatekeeper</strong> serves exclusively as an authentication server in your Local Area Network, please<br />
refer to the <strong>aXsGUARD</strong> <strong>Gatekeeper</strong> Authentication Quick Install guide.<br />
Image 1: <strong>aXsGUARD</strong> <strong>Gatekeeper</strong> AG-3XXX<br />
Image 2: <strong>aXsGUARD</strong> <strong>Gatekeeper</strong> AG-5XXX<br />
In sections 1.2 and 1.3, we introduce the <strong>aXsGUARD</strong> <strong>Gatekeeper</strong> and VASCO ® .<br />
In section 2, we provide safety and environmental information. This section must be read before installing your<br />
<strong>aXsGUARD</strong> <strong>Gatekeeper</strong>.<br />
In section 3 , we list the information you need to collect in preparation for installation.<br />
In section 4 we explain how to physically connect the <strong>aXsGUARD</strong> <strong>Gatekeeper</strong> to your network. Following<br />
successful connection, the <strong>aXsGUARD</strong> <strong>Gatekeeper</strong>'s settings can be adjusted by accessing the Administrator<br />
Tool.<br />
In section 5 , we explain the two levels of functionality available with the <strong>aXsGUARD</strong> <strong>Gatekeeper</strong>, and the main<br />
© August 2010 - VASCO Data Security 8
<strong>aXsGUARD</strong> <strong>Gatekeeper</strong> Installation Guide v2.7 Introduction<br />
installation and configuration steps required for full operation.<br />
In section 6, we explain how to access the <strong>aXsGUARD</strong> <strong>Gatekeeper</strong> Administrator Tool.<br />
In section 7, we explain how to change the default sysadmin user password.<br />
In section 8, we explain how to acquire and upload a VASCO License for your <strong>aXsGUARD</strong> <strong>Gatekeeper</strong>, to<br />
support full functionality.<br />
In section 9 , we provide step by step instructions for the minimal configurations required to get started.<br />
In section 10, we list the next configurations required, and where you can read more information about these<br />
tasks. We also recommend that you read section 11 on Security Concepts before continuing with configuration.<br />
In section 11 we explain the security concepts to help you to implement the security policy to meet your<br />
organization's needs.<br />
In section 12,<br />
we explain how to request support, and return hardware for replacement.<br />
An index at the end of the document will help you to find specific information you are searching for.<br />
Other documents in the set of <strong>aXsGUARD</strong> <strong>Gatekeeper</strong> documentation include:<br />
The <strong>aXsGUARD</strong> <strong>Gatekeeper</strong> System Administration How To guide, which provides detailed information<br />
about configuration using the Administrator Tool.<br />
How To guides, which provide detailed information on configuration of each of the features available as<br />
'add-on' modules (explained in the next section). These guides cover specific features, examples of which<br />
are:<br />
<strong>aXsGUARD</strong> <strong>Gatekeeper</strong> Authentication<br />
<strong>aXsGUARD</strong> <strong>Gatekeeper</strong> Firewall<br />
<strong>aXsGUARD</strong> <strong>Gatekeeper</strong> Single Sign-On<br />
<strong>aXsGUARD</strong> <strong>Gatekeeper</strong> VPN<br />
<strong>aXsGUARD</strong> <strong>Gatekeeper</strong> Reverse Proxy<br />
<strong>aXsGUARD</strong> <strong>Gatekeeper</strong> Directory Services<br />
Access to <strong>aXsGUARD</strong> <strong>Gatekeeper</strong> guides is provided through the Documentation button in the <strong>aXsGUARD</strong><br />
<strong>Gatekeeper</strong> Administrator Tool. A paper copy of the <strong>aXsGUARD</strong> <strong>Gatekeeper</strong> Installation Guide is also provided<br />
with delivery of the <strong>aXsGUARD</strong> <strong>Gatekeeper</strong>.<br />
Further resources available include:<br />
Context-sensitive help, which is accessible in the <strong>aXsGUARD</strong> <strong>Gatekeeper</strong> Administrator Tool through the<br />
Help button. This button is permanently available and displays information related to the current screen.<br />
Training courses covering features in detail can be organized on demand. These courses address all levels<br />
of expertise. Please see www.vasco.com for further information.<br />
Welcome to <strong>aXsGUARD</strong> <strong>Gatekeeper</strong> security.<br />
© August 2010 - VASCO Data Security 9
<strong>aXsGUARD</strong> <strong>Gatekeeper</strong> Installation Guide v2.7 Introduction<br />
1.2 What is the <strong>aXsGUARD</strong> <strong>Gatekeeper</strong>?<br />
1.3 VASCO<br />
The <strong>aXsGUARD</strong> <strong>Gatekeeper</strong> is an authentication appliance, intended for small and medium sized enterprises. In<br />
addition to strong authentication, the <strong>aXsGUARD</strong> <strong>Gatekeeper</strong> has the potential to manage all of your Internet<br />
security needs. Its modular design means that optional features can be purchased at any time to support, for<br />
example, e-mail, Web access and VPN management. The <strong>aXsGUARD</strong> <strong>Gatekeeper</strong> can easily be integrated into<br />
existing IT infrastructures as a stand-alone authentication appliance or as a gateway providing both<br />
authentication services and Internet Security.<br />
Authentication and other features such as firewall, e-mail and Web access, are managed by security policies,<br />
which implement a combination of rules, for example, whether a user must use a DIGIPASS ® One-Time<br />
Password in combination with a static password for authentication. Rules can be further adjusted with<br />
restrictions. Security Policies are applied to specific users or groups of users and can also be applied to<br />
specific computers and the entire system.<br />
VASCO is a leading supplier of strong authentication and e-signature solutions and services specializing in<br />
Internet security applications and transactions. VASCO has positioned itself as global software company for<br />
Internet security serving a customer base of approximately 10,000 companies in more than 100 countries,<br />
including approximately 1,500 international financial institutions. VASCO’s prime markets are the financial<br />
sector, enterprise security, e-commerce and e-government.<br />
For further information, please see www.vasco.com.<br />
© August 2010 - VASCO Data Security 10
<strong>aXsGUARD</strong> <strong>Gatekeeper</strong> Installation Guide v2.7 Safety and Environmental Information<br />
2 Safety and Environmental Information<br />
2.1 Overview<br />
In this section we provide details important both for the safe use of the <strong>aXsGUARD</strong> <strong>Gatekeeper</strong> and also to help<br />
maintain the device in a safe environment to keep it fully operational.<br />
2.2 Electrical Safety<br />
Caution<br />
Please read all of this section before starting to install your <strong>aXsGUARD</strong> <strong>Gatekeeper</strong>.<br />
Caution<br />
Never disconnect the power supply (power cord) while the appliance is booting up or active,<br />
as this may cause system or hardware damage.<br />
Use the exact type of power cord recommended:<br />
only use a power cord which is certified in compliance with safety regulations<br />
only use a power cord which is compliant with the AC voltage requirements in your region<br />
Before turning on the power, plug the power cord(s) into a socket which is properly grounded<br />
Before disconnecting the power supply, turn the system off.<br />
Use the exact type of network cable recommended:<br />
to conform to certification restrictions, only use a network cable with maximum length of 3.0 meters.<br />
2.3 Personal, Environmental and <strong>aXsGUARD</strong> <strong>Gatekeeper</strong> Safety<br />
To avoid back injuries: when lifting the <strong>aXsGUARD</strong> <strong>Gatekeeper</strong>, avoid injuries to your back by using your<br />
leg muscles. Keep your back straight and bend your knees when lifting the device.<br />
Protecting the environment: producing the <strong>aXsGUARD</strong> <strong>Gatekeeper</strong> involves the extraction and use of<br />
natural resources. The product may contain substances which are hazardous for human health and the<br />
environment. To reduce the risk of any hazardous substances being released into the environment and to<br />
reduce the depletion of natural resources, we encourage you to use appropriate recycling systems. Such<br />
systems reuse or recycle most end-of-life materials in a safe way. The 'crossed-bin symbol' invites you to<br />
use such systems.<br />
© August 2010 - VASCO Data Security 11
<strong>aXsGUARD</strong> <strong>Gatekeeper</strong> Installation Guide v2.7 Safety and Environmental Information<br />
Further information on collection, reuse and recycling is available from your local or regional refuse<br />
administration center.<br />
For further information on the <strong>aXsGUARD</strong> <strong>Gatekeeper</strong> and the environment, please contact your supplier<br />
(see section 12).<br />
To avoid dropping the <strong>aXsGUARD</strong> <strong>Gatekeeper</strong>: do not lift the device by the chassis handles. These<br />
handles are for sliding the <strong>aXsGUARD</strong> <strong>Gatekeeper</strong> in and out of the chassis rails only (see section 2.6). Do<br />
not carry the <strong>aXsGUARD</strong> <strong>Gatekeeper</strong> by these handles.<br />
2.4 Temperature, Power and Humidity<br />
2.5 Dimensions<br />
VASCO recommends installing the <strong>aXsGUARD</strong> <strong>Gatekeeper</strong> in a 'server room' with air conditioning and UPS<br />
(Uninterrupted Power Supply). If the equipment is built into a server cupboard, make sure there is sufficient<br />
ventilation. Environmental requirements are:<br />
2.6 Chassis Rails<br />
Operating Temperature Range: 10 to 35 degrees Celsius (50 to 95 degrees Fahrenheit)<br />
Non-Operating Temperature Range: -40 to +70 degrees Celsius (-40 to 158 degrees Fahrenheit)<br />
Operating Humidity Range: 8% to 90% non-condensing<br />
Humidity Range: 5% to 95% non-condensing<br />
Power Supply: Thermal control 260 W AC power supply with PFC [24-pin, 4-pin=12V, (2) 4-pin]<br />
AG-3XXX AG-5XXX AG-7XXX<br />
Height 1.7'' (43mm) 1.7'' (43mm) 3.5'' (89mm)<br />
Width 16.8'' (426mm) 16.8'' (426mm) 17.2'' (437mm)<br />
Depth 10'' (253mm) 14'' (356mm) 17.7'' (450mm)<br />
Chassis rails for storing the <strong>aXsGUARD</strong> <strong>Gatekeeper</strong> on a sliding shelf are available for the AG-5XXX model only.<br />
These are not included in the VASCO price list. Please consult www.supermicro.com for compatible chassis<br />
rails (part number CSE-PT08).<br />
© August 2010 - VASCO Data Security 12
<strong>aXsGUARD</strong> <strong>Gatekeeper</strong> Installation Guide v2.7 Before you Begin<br />
3 Before you Begin<br />
Collecting the following information before you start will help to speed up your installation:<br />
an unused IP address in your network<br />
the Default Gateway setting in your network<br />
DNS Server IP address(es) for your network<br />
DNS Suffix(es) (optional)<br />
the Maintenance Reference provided by VASCO for licensing your appliance<br />
the Serial Number provided by VASCO for licensing your appliance<br />
an appropriate network cable, with maximum length of 3.0 meters (see section 2.2)<br />
© August 2010 - VASCO Data Security 13
<strong>aXsGUARD</strong> <strong>Gatekeeper</strong> Installation Guide v2.7 Connecting the <strong>aXsGUARD</strong> <strong>Gatekeeper</strong> to a Network<br />
4 Connecting the <strong>aXsGUARD</strong> <strong>Gatekeeper</strong> to a Network<br />
4.1 Overview<br />
In this section we provide step by step instructions to connect the <strong>aXsGUARD</strong> <strong>Gatekeeper</strong> to your network.<br />
Important:<br />
Please first read the safety information in section 2, check that all the package contents you<br />
need (listed on a separate sheet supplied with the <strong>aXsGUARD</strong> <strong>Gatekeeper</strong>) have been<br />
supplied, and that you have all the information you need for installation (listed in section 3).<br />
4.2 Powering on the <strong>aXsGUARD</strong> <strong>Gatekeeper</strong><br />
Powering the <strong>aXsGUARD</strong> <strong>Gatekeeper</strong> on requires the following four steps:<br />
1. Connect the eth0 interface to the network's hub or switch with an appropriate network cable. The<br />
<strong>aXsGUARD</strong> <strong>Gatekeeper</strong> has two or more LAN Ethernet interface(s), depending on the chosen<br />
configuration and type (AG-3, AG-5 or AG-7 series). For all models, the default LAN interface is labeled<br />
as eth0 (example stickers are shown in the images below: please check the sticker labeling the<br />
interfaces on your <strong>aXsGUARD</strong> <strong>Gatekeeper</strong> to identify the correct socket).<br />
Image 3: Back of a Typical <strong>aXsGUARD</strong> <strong>Gatekeeper</strong><br />
© August 2010 - VASCO Data Security 14
<strong>aXsGUARD</strong> <strong>Gatekeeper</strong> Installation Guide v2.7 Connecting the <strong>aXsGUARD</strong> <strong>Gatekeeper</strong> to a Network<br />
Image 4: Example Stickers Labeling Interfaces on the <strong>aXsGUARD</strong> <strong>Gatekeeper</strong> AG-3XX3<br />
Image 5: Example Stickers Labeling Interfaces on the <strong>aXsGUARD</strong> <strong>Gatekeeper</strong> AG-3XX4<br />
Image 6: Example Stickers Labeling Interfaces on the <strong>aXsGUARD</strong> <strong>Gatekeeper</strong> AG-5XX6<br />
Image 7: Example Stickers Labeling Interfaces on the <strong>aXsGUARD</strong> <strong>Gatekeeper</strong> AG-7XXX<br />
© August 2010 - VASCO Data Security 15
<strong>aXsGUARD</strong> <strong>Gatekeeper</strong> Installation Guide v2.7 Connecting the <strong>aXsGUARD</strong> <strong>Gatekeeper</strong> to a Network<br />
2. Connect the <strong>aXsGUARD</strong> <strong>Gatekeeper</strong> via the power cable to a supply. The AG-7XXX models have two<br />
power units, each with a separate power cable. These power cables need to be connected to separate<br />
power circuits. The second (redundant) supply provides backup in case the fuse for the supplying power<br />
circuit fails.<br />
3. Power up the <strong>aXsGUARD</strong> <strong>Gatekeeper</strong> by pressing the power switch once (see image below). A green LED<br />
lights up.<br />
4. To check the network is correctly connected, you can verify whether a green light shows at the socket<br />
where the network cable is plugged in. If a green light is not visible, check that the network cable is in<br />
good working order and correctly plugged into the device labeled as 'eth0' on the <strong>aXsGUARD</strong> <strong>Gatekeeper</strong><br />
and your network hub or switch.<br />
4.3 Connecting to your Network<br />
Installation of the <strong>aXsGUARD</strong> <strong>Gatekeeper</strong> requires temporarily isolating a client workstation from the network<br />
and linking it to the <strong>aXsGUARD</strong> <strong>Gatekeeper</strong>. This involves changing a client workstation IP address to within the<br />
specified IP address range for the <strong>aXsGUARD</strong> <strong>Gatekeeper</strong>. During the first-time configuration, the <strong>aXsGUARD</strong><br />
<strong>Gatekeeper</strong> IP address is modified to within the range of your network (we explain how to do this in section<br />
9.6.1). The client workstation network settings can then be restored.<br />
The <strong>aXsGUARD</strong> <strong>Gatekeeper</strong> is delivered with a default LAN configuration as follows:<br />
IP address / Netmask 192.168.250.254/24<br />
Network Host Name axsguard<br />
Domain Name domain.be<br />
DHCP Server Disabled<br />
4.4 Workstation TCP/IP Settings<br />
Image 8: Power Button and Power LED<br />
To access the <strong>aXsGUARD</strong> <strong>Gatekeeper</strong>, a workstation needs to be temporarily configured with the same TCP/IP<br />
settings as the <strong>aXsGUARD</strong> <strong>Gatekeeper</strong>.<br />
1. Configure a workstation with the following settings:<br />
IP address 192.168.250.1<br />
Subnet Mask 255.255.255.0<br />
Gateway 192.168.250.254<br />
DNS Server 192.168.250.254<br />
© August 2010 - VASCO Data Security 16
<strong>aXsGUARD</strong> <strong>Gatekeeper</strong> Installation Guide v2.7 Connecting the <strong>aXsGUARD</strong> <strong>Gatekeeper</strong> to a Network<br />
2. Once the TCP/IP settings (listed above) are active on a workstation, open a command prompt (Microsoft<br />
Windows) or Terminal (Linux) and run the following command:<br />
ping 192.168.250.254<br />
If a reply is received as shown in the image above, everything is OK.<br />
If a Request Timed Out or Destination Host Unreachable response is received, please check the following:<br />
check that the workstation's TCP/IP settings have been entered correctly (see above)<br />
check that the network cable is in good working order and correctly plugged into the device labeled 'eth0'<br />
on the <strong>aXsGUARD</strong> <strong>Gatekeeper</strong> and your network hub or switch (see section 4.2).<br />
Once the workstation is correctly configured, the <strong>aXsGUARD</strong> <strong>Gatekeeper</strong> Administrator Tool can be accessed<br />
through a browser on the workstation, as explained in the following section.<br />
Note<br />
Image 9: Command Prompt and Testing TCP/IP Settings<br />
Once the network settings on the <strong>aXsGUARD</strong> <strong>Gatekeeper</strong> have been configured appropriately,<br />
(explained in section 9.6.1), the workstation IP address can be reconfigured onto the<br />
network, and the <strong>aXsGUARD</strong> <strong>Gatekeeper</strong> can be accessed from any browser on the network.<br />
© August 2010 - VASCO Data Security 17
<strong>aXsGUARD</strong> <strong>Gatekeeper</strong> Installation Guide v2.7 Installation steps: an overview<br />
5 Installation steps: an overview<br />
<strong>aXsGUARD</strong> <strong>Gatekeeper</strong> installation steps require an understanding of its two levels of functioanlity, the spare<br />
unit level, and fully licensed and operational 'in-service' level, which we explain here.<br />
A spare unit is an unlicensed appliance, with limited configuration possible. It can be configured to act as a<br />
reserve appliance for fast replacement, if needed, or licensed to full functionality as a new appliance in an<br />
organization. All appliances are spare units until they are licensed.<br />
The default sysadmin user can log on to a spare unit with access rights to:<br />
connect the appliance to a network<br />
upgrade the appliance to keep it up-to-date<br />
configure a Web proxy for connection to the VASCO Support Center, sc.vasco.com<br />
backup and restore configurations<br />
import licenses<br />
For instructions on how to configure a spare unit, please refer to the <strong>aXsGUARD</strong> <strong>Gatekeeper</strong> Replacement How<br />
To.<br />
With a licensed appliance, configurations for all purchased options are possible for a user with full<br />
administration rights.<br />
The default sysadmin user can log on to modify some general system parameters and add or modify users.<br />
This allows the sysadmin user to create a user with full administrator rights to configure all features of the<br />
appliance.<br />
The newly created user with full administrator rights can configure all available features of the <strong>aXsGUARD</strong><br />
<strong>Gatekeeper</strong>.<br />
The instructions in this guide are for the complete installation, licensing and configuration of an appliance to<br />
fully operational 'in-service' status. This requires the following steps:<br />
1. Logging on to the <strong>aXsGUARD</strong> <strong>Gatekeeper</strong> as the default sysadmin user, as explained in section 6.<br />
2. Changing the sysadmin password for security, as explained in section 7.<br />
3. Licensing the appliance, as explained in section 8.<br />
4. Creating a new user with full administration rights, to configure the <strong>aXsGUARD</strong> <strong>Gatekeeper</strong>, as explained<br />
in section 9.<br />
© August 2010 - VASCO Data Security 18
<strong>aXsGUARD</strong> <strong>Gatekeeper</strong> Installation Guide v2.7 Logging into the Administrator Tool<br />
6 Logging into the Administrator Tool<br />
Accessing the <strong>aXsGUARD</strong> <strong>Gatekeeper</strong> Administrator Tool is possible from any workstation in the same network<br />
using a standard Web browser, providing the browser does not have a proxy setup in its browser settings.<br />
Access is secured by SSL (Secure Socket Layer) encryption over the HTTPS protocol.<br />
To log into the Administrator Tool:<br />
1. Enter the URL for the Administrator Tool into the browser:<br />
https://192.168.250.254:82<br />
Note<br />
1) Remember to include the port number (:82) after the IP address or the connection will fail.<br />
2) If the <strong>aXsGUARD</strong> <strong>Gatekeeper</strong> is configured as the browser's proxy, 'tool' may be used,<br />
rather than the IP address and port number mentioned above (see the <strong>aXsGUARD</strong><br />
<strong>Gatekeeper</strong> System Administration How To guide).<br />
2. As you are accessing a website secured with a self-signed certificate, the browser presents a warning<br />
asking you to accept the certificate (see image below) to continue. After the certificate has been<br />
accepted, the <strong>aXsGUARD</strong> <strong>Gatekeeper</strong> login screen appears (see image 10).<br />
Note<br />
The procedure for accepting a certificate varies between browsers.<br />
Image 10: Certificate Screen<br />
© August 2010 - VASCO Data Security 19
<strong>aXsGUARD</strong> <strong>Gatekeeper</strong> Installation Guide v2.7 Logging into the Administrator Tool<br />
Image 11: <strong>aXsGUARD</strong> <strong>Gatekeeper</strong> Login Screen<br />
3. Enter the default system administrator's Username and Password (use lower case only):<br />
Username: sysadmin<br />
Password: sysadmin<br />
Press Enter or click on Log in (see image above) to proceed. The screen below displays.<br />
Image 12: Screen on sysadmin first-time logon<br />
© August 2010 - VASCO Data Security 20
<strong>aXsGUARD</strong> <strong>Gatekeeper</strong> Installation Guide v2.7 Changing the sysadmin password<br />
7 Changing the sysadmin password<br />
Caution<br />
The default System Administrator (sysadmin) password must be changed as soon as you log<br />
on; otherwise the appliance can be accessed by non-authorized users.<br />
After logging in to the <strong>aXsGUARD</strong> <strong>Gatekeeper</strong>, as explained in section 6, to change the default user (sysadmin)<br />
password:<br />
1. Click on Change (see image below).<br />
Image 13: Changing the System Administrator Password<br />
2. Enter and confirm the System Administrator Password fields shown in the image below. The password<br />
should consist of at least 6 characters, some of which are digits. For more information on secure<br />
passwords, please refer to the document, <strong>aXsGUARD</strong> <strong>Gatekeeper</strong> System Administration How To, which<br />
is available via the Documentation button in the Administrator Tool.<br />
Image 14: Changing the System Administrator Password: Password entry<br />
Note:<br />
Changing the sysadmin password is possible at any time in the Administrator Tool, by<br />
navigating to the System > General screen.<br />
© August 2010 - VASCO Data Security 21
<strong>aXsGUARD</strong> <strong>Gatekeeper</strong> Installation Guide v2.7 Licensing<br />
8 Licensing<br />
8.1 Overview<br />
Licensing your <strong>aXsGUARD</strong> <strong>Gatekeeper</strong> to make all features operational requires three steps:<br />
1. Downloading a System Info file from your <strong>aXsGUARD</strong> <strong>Gatekeeper</strong>.<br />
2. Acquiring a License file from VASCO's Product Registration website (https://sc.vasco.com/registration)<br />
using the:<br />
System Info file<br />
Maintenance Reference (for a commercial license only)<br />
Serial Number (for a commercial license only)<br />
details of your organization<br />
3. Uploading the License file to the <strong>aXsGUARD</strong> <strong>Gatekeeper</strong>.<br />
8.2 Downloading a System Info file<br />
To download the <strong>aXsGUARD</strong> <strong>Gatekeeper</strong> System Info file:<br />
1. Access the Administrator Tool as explained in section 5 .<br />
2. Navigate to System > Status > System Info (see image below).<br />
3. Click on the Export button (see image below).<br />
Image 15: Downloading the System Info file<br />
© August 2010 - VASCO Data Security 22
<strong>aXsGUARD</strong> <strong>Gatekeeper</strong> Installation Guide v2.7 Licensing<br />
4. Download and save the System Info ('.txt') file. You will need this file to acquire a License file from the<br />
VASCO Product Registration website (explained next).<br />
8.3 Acquiring a VASCO License file<br />
To acquire a VASCO License file for your <strong>aXsGUARD</strong> <strong>Gatekeeper</strong>, you need to upload the System Info file<br />
(downloaded in the previous section) to the VASCO Product Registration website. This file identifies your<br />
appliance to VASCO, for the issue of a License file.<br />
Two types of License file can be downloaded:<br />
a commercial License file, which remains valid indefinitely: this is explained in section 8.3.1.<br />
an evaluation License file, which is only valid for 30 days: this is described in section 8.3.2.<br />
8.3.1 Downloading a Commercial License File<br />
To identify your <strong>aXsGUARD</strong> <strong>Gatekeeper</strong> to VASCO for a License file to be issued, you need to :<br />
1. Browse to VASCO’s Registration website: https://sc.vasco.com/registration (see image below). Enter the<br />
Maintenance Reference and Serial Number provided by VASCO for your <strong>aXsGUARD</strong> <strong>Gatekeeper</strong> and click<br />
on Login.<br />
Image 16: VASCO's Product Registration Website<br />
2. If you have read and agree with VASCO's Terms and Conditions, tick the checkbox and click on I AGREE<br />
(see image below).<br />
© August 2010 - VASCO Data Security 23
<strong>aXsGUARD</strong> <strong>Gatekeeper</strong> Installation Guide v2.7 Licensing<br />
3. Click on Product Registration (see image below). If you have already used the same Maintenance<br />
Reference to register a product, the menu option to select will be Register Additional Component.<br />
Tip:<br />
If VASCO does not have full contact details on file, you may be asked to complete a form<br />
providing details, before proceeding with registration. In this case, after completion and<br />
submission of the form, an email will be sent to you with a link for validation. You need to click<br />
on the link to confirm receipt of the email, before you can proceed with product registration.<br />
4. Optionally enter a Description (see image below).<br />
5. In the Component field, select <strong>Gatekeeper</strong>.<br />
Image 17: VASCO Terms and Conditions<br />
Image 18: Registration Menu<br />
© August 2010 - VASCO Data Security 24
<strong>aXsGUARD</strong> <strong>Gatekeeper</strong> Installation Guide v2.7 Licensing<br />
6. Enter or browse to the System Info file downloaded in section 8.2.<br />
7. Click on Next to continue.<br />
Image 19: Uploading the System Info file<br />
8. Right click to download and save the License file (see image below).<br />
Image 20: Downloading the License file<br />
© August 2010 - VASCO Data Security 25
<strong>aXsGUARD</strong> <strong>Gatekeeper</strong> Installation Guide v2.7 Licensing<br />
8.3.2 Downloading an Evaluation License File<br />
To request an evaluation License file to be issued, you need to:<br />
1. Browse to VASCO’s Registration website: https://sc.vasco.com/registration (see image below). Select<br />
Click here for an evaluation license (see image below).<br />
Image 21: VASCO Product Registration Website<br />
2. Select <strong>Gatekeeper</strong> registration (see image below).<br />
Image 22: Product Selection<br />
© August 2010 - VASCO Data Security 26
<strong>aXsGUARD</strong> <strong>Gatekeeper</strong> Installation Guide v2.7 Licensing<br />
3. If you have read and agree with VASCO's Terms and Conditions, tick the checkbox and click on I AGREE<br />
(see image below).<br />
4. Enter the names of a contact and of your organization, and (optionally) a description (see image below).<br />
5. Enter or Browse to the System Info file downloaded in section 8.2.<br />
6. In the Component field, select <strong>Gatekeeper</strong>.<br />
Image 23: VASCO Terms and Conditions<br />
7. Click on Create Evaluation License (see image below).<br />
© August 2010 - VASCO Data Security 27
<strong>aXsGUARD</strong> <strong>Gatekeeper</strong> Installation Guide v2.7 Licensing<br />
Image 24: Uploading the System Info file<br />
8. Right click to download and save the evaluation License file (see image below).<br />
Image 25: Downloading the License file<br />
© August 2010 - VASCO Data Security 28
<strong>aXsGUARD</strong> <strong>Gatekeeper</strong> Installation Guide v2.7 Licensing<br />
8.4 Uploading the License file to the <strong>aXsGUARD</strong> <strong>Gatekeeper</strong><br />
To import the <strong>aXsGUARD</strong> <strong>Gatekeeper</strong> License ('.dat') file acquired from the VASCO Product Registration<br />
website (as explained in section 8.3):<br />
1. Access the Administrator Tool as explained in section 5.<br />
2. Navigate to System > Licence > Import.<br />
3. Enter or browse to the License file (see image below). Click on Update.<br />
4. Successful License importation is confirmed (see image below).<br />
Note:<br />
Image 26: Uploading the License file in the Administrator Tool<br />
Image 27: Confirmation of successful License importation<br />
After successful Licensing, the User 'sysadmin' will only be able to create or modify Users<br />
(see image above). It is then necessary to create a User with full administrative rights and log<br />
on as that User (explained in section 9.2).<br />
© August 2010 - VASCO Data Security 29
<strong>aXsGUARD</strong> <strong>Gatekeeper</strong> Installation Guide v2.7 <strong>aXsGUARD</strong> <strong>Gatekeeper</strong> Configuration<br />
9 <strong>aXsGUARD</strong> <strong>Gatekeeper</strong> Configuration<br />
9.1 Overview<br />
This section explains configuration of the <strong>aXsGUARD</strong> <strong>Gatekeeper</strong> to implement the required network security,<br />
providing instructions on how to:<br />
create a System Administrator with full administrator rights (section 9.2)<br />
enter customer information (section 9.3.1)<br />
navigate through the Administrator Tool (section 9.4)<br />
enter system information (section 9.5)<br />
configure network devices settings (section 9.6.1)<br />
configure email settings (section 9.8)<br />
9.2 Creating an Administrator with full administrator rights<br />
Caution<br />
The default System Administrator (sysadmin) password must be changed as soon as you log on;<br />
otherwise the appliance can be accessed by non-authorized users (see section 7).<br />
The sysadmin user (see section 5) has limited access. This default user can only modify some general system<br />
parameters and add/remove or modify users. The first step is to add a new user with full administration<br />
privileges to further configure the <strong>aXsGUARD</strong> <strong>Gatekeeper</strong>. This also facilitates troubleshooting, since all actions<br />
performed by administrators in the Administrator Tool are logged by user name, a useful feature when multiple<br />
system administrators exist.<br />
To create a System Administrator user with full administration rights:<br />
1. Access the Administrator Tool as explained in section 5.<br />
2. Navigate to Users & Groups > Users and click on Add new. The screen below is displayed. Fields with a<br />
description in bold are mandatory (cannot be left blank).<br />
© August 2010 - VASCO Data Security 30
<strong>aXsGUARD</strong> <strong>Gatekeeper</strong> Installation Guide v2.7 <strong>aXsGUARD</strong> <strong>Gatekeeper</strong> Configuration<br />
3. Enter a user name.<br />
4. Enter the user's full name (optional).<br />
5. Enter and confirm the user's password. The password should consist of at least 6 characters, some of<br />
which are digits. For more information on secure passwords, please refer to the document, <strong>aXsGUARD</strong><br />
<strong>Gatekeeper</strong> System Administration How To, which is available via the Documentation button in the<br />
Administrator Tool.<br />
6. Under the <strong>aXsGUARD</strong> <strong>Gatekeeper</strong> Administration tab, select Full Administration (see image above).<br />
7. Click on Update / Save.<br />
8. Log off and log on with the newly created administrator credentials. All purchased features can be<br />
configured by the new user with full administrative rights (see image below).<br />
Tip<br />
Mandatory fields are highlighted in bold on screen.<br />
Note<br />
Image 28: Creating a System Administrator User<br />
A log of the actions performed in the <strong>aXsGUARD</strong> <strong>Gatekeeper</strong> Administrator Tool is available<br />
under System > Logs > Admin Tool.<br />
© August 2010 - VASCO Data Security 31
<strong>aXsGUARD</strong> <strong>Gatekeeper</strong> Installation Guide v2.7 <strong>aXsGUARD</strong> <strong>Gatekeeper</strong> Configuration<br />
Image 29: Configuration possibilities with full administrator rights<br />
© August 2010 - VASCO Data Security 32
<strong>aXsGUARD</strong> <strong>Gatekeeper</strong> Installation Guide v2.7 <strong>aXsGUARD</strong> <strong>Gatekeeper</strong> Configuration<br />
9.3 Customer Information<br />
9.3.1 Overview<br />
When a User with full administrative rights first logs on to a licensed <strong>aXsGUARD</strong> <strong>Gatekeeper</strong>, the Customer<br />
information screen is presented (see image below). The Customer Information screen continues to display on<br />
logon until the information has been entered (and submitted by clicking on Update).<br />
Customer information is sent to VASCO back-up servers and automatically entered into the support database.<br />
Keeping this information up-to-date helps VASCO to inform you about the latest product updates, features and<br />
developments.<br />
Image 30: Customer Information<br />
© August 2010 - VASCO Data Security 33
<strong>aXsGUARD</strong> <strong>Gatekeeper</strong> Installation Guide v2.7 <strong>aXsGUARD</strong> <strong>Gatekeeper</strong> Configuration<br />
9.3.2 Entering Customer Information<br />
To supply VASCO with your contact information and define preferences:<br />
1. After logging on as a System Administrator with full administration rights, enter the contact information<br />
as requested (see image above).<br />
2. To enter information about your Dealer (which is preferable), you need to select dealer or both for The<br />
<strong>aXsGUARD</strong> <strong>Gatekeeper</strong> is managed by field. The Dealer contact tab is then displayed for data entry.<br />
3. If you prefer not to receive any mailings from VASCO, uncheck the checkbox shown on the above screen<br />
to specify which information to receive. This presents check boxes for the information types, so you can<br />
select which if any you prefer to receive.<br />
To update contact information and preferences later:<br />
1. Navigate to System >Customer, where the customer information screen is displayed.<br />
2. Enter or modify contact information and preferences as described above.<br />
Caution:<br />
E-mail addresses must be entered accurately as they are needed to deliver system-critical<br />
information.<br />
© August 2010 - VASCO Data Security 34
<strong>aXsGUARD</strong> <strong>Gatekeeper</strong> Installation Guide v2.7 <strong>aXsGUARD</strong> <strong>Gatekeeper</strong> Configuration<br />
9.4 Menu Structure and Navigation<br />
The Administrator Tool interface has three panes (highlighted orange in the image below). The pane across<br />
the top is permanently visible; the left pane displays the menu. Selecting a menu or sub menu item displays<br />
the corresponding configuration pane to the right for viewing and modifying settings (see image below).<br />
Image 31: System > General Screen<br />
Navigating the tree menu structure is possible using the following buttons:<br />
Clicking on Collapse closes all sub menus, returning the menu to its original state.<br />
Clicking on the plus sign displays (expands) the sub menu of the selected item.<br />
Clicking on the menu item while the sub menu is collapsed also displays the sub<br />
menu. (Some menu items, such as Computers, do not have sub menus.)<br />
Clicking on the minus sign closes (collapses) the sub menu of the selected item.<br />
Clicking on the menu item while the sub menu is displayed also closes the sub menu.<br />
Tip<br />
In the Administrator Tool, a selectable item can be identified by moving the cursor over it. The<br />
cursor changes to a hand-pointing symbol:<br />
For more information on the Administrator Tool menu, please refer to the <strong>aXsGUARD</strong> <strong>Gatekeeper</strong> System<br />
Administration How To, available through the Documentation button in the Administrator Tool.<br />
Navigation instructions in the rest of this manual use the following format:<br />
Navigate to Users & Groups > General<br />
This example indicates that you need to expand the main menu topic 'Users & Groups' and click on the<br />
subtopic 'General'.<br />
© August 2010 - VASCO Data Security 35
<strong>aXsGUARD</strong> <strong>Gatekeeper</strong> Installation Guide v2.7 <strong>aXsGUARD</strong> <strong>Gatekeeper</strong> Configuration<br />
9.5 Entering the System Information<br />
To enter system information:<br />
1. Navigate to System > General. The screen below is displayed.<br />
2. Configure the fields as explained in the table below.<br />
3. Click on Update to finish.<br />
Caution<br />
1) Changing the default System Administrator (sysadmin) password is critical for security. It<br />
should be changed as soon as you log on; otherwise the appliance could be accessed by<br />
non-authorized users.<br />
2) The Domain Name is not necessarily the Windows Domain Name (see also the Domain<br />
Name field explanation in the table below).<br />
Note<br />
Image 32: System > General Screen<br />
1) Fields with a description in bold are mandatory (cannot be left blank).<br />
2) With the Content Filtering feature operational, the <strong>aXsGUARD</strong> <strong>Gatekeeper</strong> domain must be<br />
added in E-mail > Domains (see section 9.8)<br />
, as e-mails originating from non-registered<br />
domains are rejected.<br />
© August 2010 - VASCO Data Security 36
<strong>aXsGUARD</strong> <strong>Gatekeeper</strong> Installation Guide v2.7 <strong>aXsGUARD</strong> <strong>Gatekeeper</strong> Configuration<br />
Table 1: System General Fields<br />
Field Description<br />
Hostname This is the internal (DNS) name of the <strong>aXsGUARD</strong> <strong>Gatekeeper</strong> appliance. The name axsguard is<br />
used by default. VASCO does not recommended changing this, unless absolutely necessary, in<br />
which case no upper cases, special characters or spaces may be used. Changing the hostname<br />
requires Advanced Administrator access (see section 9.2)<br />
.<br />
Domain Name Enter your organization's name. No upper cases, special characters or spaces may be used. If<br />
more than one domain name exists, enter the main Domain Name. This domain becomes the<br />
primary domain for the internal DNS server and is used whenever the <strong>aXsGUARD</strong> <strong>Gatekeeper</strong><br />
sends an e-mail to the administrator or the outside world. For more information on the <strong>aXsGUARD</strong><br />
<strong>Gatekeeper</strong> DNS, please refer to the document, <strong>aXsGUARD</strong> <strong>Gatekeeper</strong> System Administration<br />
How To, which is available via the Documentation button in the Administrator Tool.<br />
Time Zone Select the applicable time zone from the drop-down list.<br />
System Administrator<br />
E-mail address<br />
System Administrator<br />
Password<br />
Enter the System Administrator's e-mail address. All <strong>aXsGUARD</strong> <strong>Gatekeeper</strong>-generated reports<br />
are sent to this e-mail address. More than one e-mail address may be entered.<br />
The System Administrator password can be modified here (see section 9.2)<br />
. The new password<br />
should be entered twice. VASCO recommends changing this password immediately after<br />
installation, to prevent further use of the default system password.<br />
© August 2010 - VASCO Data Security 37
<strong>aXsGUARD</strong> <strong>Gatekeeper</strong> Installation Guide v2.7 <strong>aXsGUARD</strong> <strong>Gatekeeper</strong> Configuration<br />
9.6 Network Device Settings<br />
The next step in configuring the <strong>aXsGUARD</strong> <strong>Gatekeeper</strong> is the configuration of the network devices. The default<br />
secure LAN device is shown in section 4.2.<br />
9.6.1 Setting up the Ethernet Secure LAN Device<br />
To set up the Ethernet Secure LAN Device:<br />
1. Navigate to Network > Devices > Eth.<br />
2. Click on eth0 (secure LAN). The screen below is displayed.<br />
3. Configure the fields as explained in the table below.<br />
4. Click on Update to finish.<br />
Image 33: Network > Devices > Eth<br />
Image 34: Network > Devices > Eth > eth0<br />
© August 2010 - VASCO Data Security 38
<strong>aXsGUARD</strong> <strong>Gatekeeper</strong> Installation Guide v2.7 <strong>aXsGUARD</strong> <strong>Gatekeeper</strong> Configuration<br />
Table 2: Network > Devices > Eth > eth0 Fields<br />
Field Description<br />
Description (optional) Enter the description of your choice for the selected device.<br />
Alias Names Enter additional names for the selected device. A DNS entry will be added in the <strong>aXsGUARD</strong><br />
<strong>Gatekeeper</strong> DNS server database for each alias. For more information on the <strong>aXsGUARD</strong><br />
<strong>Gatekeeper</strong> DNS, please refer to the document, <strong>aXsGUARD</strong> <strong>Gatekeeper</strong> System Administration<br />
How To, which is available via the Documentation button in the Administrator Tool.<br />
Interface Type The following interface types are offered:<br />
Not in use<br />
Internet: An insecure zone with official IP-addresses. This is the <strong>aXsGUARD</strong> <strong>Gatekeeper</strong><br />
device that connects to the Internet.<br />
Secure: A secure zone with non-official IP-addresses. This is most often where all your<br />
company PCs are, secured from hackers by the <strong>aXsGUARD</strong> <strong>Gatekeeper</strong> firewall.<br />
DMZ: An insecure zone in your company with official or non-official IP-addresses. This is<br />
where you would place any servers you wish to be accessible from the Internet.<br />
If your <strong>aXsGUARD</strong> <strong>Gatekeeper</strong> is serving exclusively as an authentication appliance, and not as a<br />
gateway to the Internet, select Secure.<br />
Upstream /<br />
Downstream<br />
Bandwidth<br />
These settings should only be modified when using the Bandwidth Management feature.<br />
Connection Settings Select the applicable option for your network:<br />
If DHCP Client is selected, no extra configuration is required.<br />
If Fixed IP Configuration is selected, additional IP settings need to be added in the IP<br />
Settings tab (see image below). The <strong>aXsGUARD</strong> <strong>Gatekeeper</strong>'s IP address (as seen by a<br />
network segment connected to the Ethernet device) needs to be entered.<br />
Image 35: Fixed IP Configuration IP Settings<br />
Notes<br />
1) Fields with a description in bold are mandatory (cannot be left blank).<br />
2) If no Internet connectivity is required, the eth1 device Interface Type (see next section) can<br />
be set to Not in use.<br />
© August 2010 - VASCO Data Security 39
<strong>aXsGUARD</strong> <strong>Gatekeeper</strong> Installation Guide v2.7 <strong>aXsGUARD</strong> <strong>Gatekeeper</strong> Configuration<br />
9.6.2 Setting up an Ethernet Internet Device<br />
Caution<br />
If your <strong>aXsGUARD</strong> <strong>Gatekeeper</strong> serves exclusively for authentication and not as a gateway<br />
between your LAN and the Internet, the instructions in this section are not relevant to your<br />
setup. If your <strong>aXsGUARD</strong> <strong>Gatekeeper</strong> acts as a gateway between your LAN and the Internet,<br />
configuring the Internet device as instructed in this section is essential.<br />
To set up the Ethernet Internet Device:<br />
1. Navigate to Network > Devices > Eth (see section 9.6.1).<br />
2. Click on the Internet device, eth1. The screen below is displayed.<br />
3. Configure the fields as explained in the table below.<br />
4. Click on Update to finish.<br />
Image 36: Network > Devices > Eth >eth1<br />
© August 2010 - VASCO Data Security 40
<strong>aXsGUARD</strong> <strong>Gatekeeper</strong> Installation Guide v2.7 <strong>aXsGUARD</strong> <strong>Gatekeeper</strong> Configuration<br />
Table 3: Network > Devices > Eth > eth1 Fields<br />
Field Description<br />
Description (optional) Enter the description of your choice for the selected device.<br />
Alias Names Enter additional names for the selected device. A DNS entry will be added in the <strong>aXsGUARD</strong><br />
<strong>Gatekeeper</strong> DNS server database for each alias. For more information on the <strong>aXsGUARD</strong><br />
<strong>Gatekeeper</strong> DNS, please refer to the document, <strong>aXsGUARD</strong> <strong>Gatekeeper</strong> System Administration<br />
How To, which is available via the Documentation button in the Administrator Tool.<br />
Interface Type The following interface types are offered:<br />
Not in use<br />
Internet: An insecure zone with official IP-addresses. This is the <strong>aXsGUARD</strong> <strong>Gatekeeper</strong><br />
device that connects to the Internet.<br />
Secure: A secure zone with non-official IP-addresses. This is most often where all your<br />
company PCs are, secured from hackers by the <strong>aXsGUARD</strong> <strong>Gatekeeper</strong> firewall.<br />
DMZ: An insecure zone in your company with official or non-official IP-addresses. This is<br />
where you would place any servers you wish to be accessible from the Internet.<br />
Select Internet.<br />
Upstream /<br />
Downstream<br />
Bandwidth<br />
These settings should only be modified when using the Bandwidth Management feature. Please<br />
contact your Internet Service Provider (ISP) for the correct settings.<br />
Connection Settings Select the applicable option for your network:<br />
If DHCP Client is selected, no extra configuration is required.<br />
If PPP over Ethernet (PPPoE) is selected, the adequate ISP account information should be<br />
added under the Account Settings tab (see first image below).<br />
If Fixed IP Configuration is selected, additional IP settings need to be added under the IP<br />
Settings tab (see second image below). These data are available from your Internet Service<br />
Provider.<br />
If PPTP Client is selected, settings should be modified appropriately under both the<br />
Account and IP Settings tabs.<br />
Image 37: PPPoE Configuration Account Settings<br />
© August 2010 - VASCO Data Security 41
<strong>aXsGUARD</strong> <strong>Gatekeeper</strong> Installation Guide v2.7 <strong>aXsGUARD</strong> <strong>Gatekeeper</strong> Configuration<br />
9.7 General Network Settings<br />
To configure a Domain Name Server (DNS) on the <strong>aXsGUARD</strong> <strong>Gatekeeper</strong>:<br />
1. Navigate to Network > General. The screen shown below appears.<br />
2. Enter the name of the appropriate DNS server:<br />
If you are using the <strong>aXsGUARD</strong> <strong>Gatekeeper</strong> as a gateway to the Internet, the Domain Name Server<br />
(DNS) to be entered here is the the name provided by your Internet Service Provider (ISP). If<br />
necessary, contact your ISP for the correct settings.<br />
If you are using the <strong>aXsGUARD</strong> <strong>Gatekeeper</strong> exclusively for authentication on your LAN, the name to<br />
be entered here is the name of the DNS server on your LAN.<br />
3. Click on Add and Update to finish.<br />
Image 38: Fixed IP Configuration IP Settings<br />
Image 39: Network > General<br />
© August 2010 - VASCO Data Security 42
<strong>aXsGUARD</strong> <strong>Gatekeeper</strong> Installation Guide v2.7 <strong>aXsGUARD</strong> <strong>Gatekeeper</strong> Configuration<br />
9.8 General E-mail Settings<br />
If the <strong>aXsGUARD</strong> <strong>Gatekeeper</strong> Content Scanning and E-mail Server features are both inactive, please skip to<br />
section 9.8.3.<br />
Note<br />
If the e-mail is handled by a server within your secure LAN, use the procedure explained in<br />
section 9.8.2.<br />
9.8.1 Content Scanning and E-mail Server Features Active<br />
Some company-wide e-mail settings need to be configured for the <strong>aXsGUARD</strong> <strong>Gatekeeper</strong> e-mail system to<br />
operate. More information on these settings is available in the documentation about e-mail concepts, which<br />
can be accessed by clicking on the Documentation button in the <strong>aXsGUARD</strong> <strong>Gatekeeper</strong> Administrator Tool.<br />
To configure the <strong>aXsGUARD</strong> <strong>Gatekeeper</strong> e-mail system:<br />
1. Navigate to E-mail > Domains and click on Add New.<br />
2. Enter in lower case the same System Domain as entered under System > General (see section 9.5).<br />
3. Enter a description (optional) for the domain.<br />
4. Select local as the type.<br />
5. Save the settings by clicking on Update (see image below).<br />
Image 40: E-mail > Domains > Add New: with SMTP and E-mail Server Features<br />
© August 2010 - VASCO Data Security 43
<strong>aXsGUARD</strong> <strong>Gatekeeper</strong> Installation Guide v2.7 <strong>aXsGUARD</strong> <strong>Gatekeeper</strong> Configuration<br />
9.8.2 Content Scanning Feature Active, E-mail Server Feature Inactive<br />
The following instructions only apply when the <strong>aXsGUARD</strong> <strong>Gatekeeper</strong> Content Scanning Feature is active and<br />
the E-mail Server Feature is inactive (i.e. when a separate e-mail server is available in your secure LAN, e.g. a<br />
Microsoft Exchange Server).<br />
To configure this setup:<br />
1. Navigate to E-mail > Domains and click on Add New (see image 41).<br />
2. Enter the system domain as entered under System > General (see section 9.5).<br />
3. Enter a description (optional) for the domain.<br />
4. Select Forwarded as the type.<br />
5. Select Unlisted computer in the Server Settings.<br />
6. Enter the DNS name or IP address of the e-mail server in your secure LAN.<br />
7. Enter the port number (Forward Port).<br />
Image 41: E-mail > Domain > Add New: SMTP Only<br />
8. Save the settings by clicking on the Save button.<br />
© August 2010 - VASCO Data Security 44
<strong>aXsGUARD</strong> <strong>Gatekeeper</strong> Installation Guide v2.7 <strong>aXsGUARD</strong> <strong>Gatekeeper</strong> Configuration<br />
9.8.3 Content Scanning and E-mail Server Features both Inactive<br />
The following instructions only apply if both the <strong>aXsGUARD</strong> <strong>Gatekeeper</strong> Content Scanning and E-mail Server<br />
Features are both inactive. This scenario allows system e-mails to be transmitted to another system in the<br />
secure LAN, or to the ISP SMTP relay server if no mail system is available in the secure LAN, without<br />
<strong>aXsGUARD</strong> <strong>Gatekeeper</strong> intervention.<br />
To configure for this setup:<br />
1. Navigate to E-mail > General.<br />
2. Enter the DNS name or IP address of the SMTP relay server used in your network (see image 42).<br />
3. Click on Update to save the settings.<br />
Image 42: E-mail>General: SMTP and E-mail Disabled<br />
© August 2010 - VASCO Data Security 45
<strong>aXsGUARD</strong> <strong>Gatekeeper</strong> Installation Guide v2.7 What's Next<br />
10 What's Next<br />
Before configuring your <strong>aXsGUARD</strong> <strong>Gatekeeper</strong>, you need to define your organization's security needs. To help<br />
you with this, we describe in the following section the <strong>aXsGUARD</strong> <strong>Gatekeeper</strong> Policies and the levels at which<br />
they can be applied.<br />
After reading section 11, the next steps to configure your <strong>aXsGUARD</strong> <strong>Gatekeeper</strong> are to:<br />
1. Create users and groups (manually, or automatically using the directory service feature).<br />
2. Register servers on the <strong>aXsGUARD</strong> <strong>Gatekeeper</strong> (if needed).<br />
3. Set up authentication.<br />
4. Configure each service in the <strong>aXsGUARD</strong> <strong>Gatekeeper</strong>.<br />
Further information is available through the Documentation button in the Administrator Tool:<br />
For more information on the above tasks, please refer to the document <strong>aXsGUARD</strong> <strong>Gatekeeper</strong> System<br />
Administration How To. This document also explains the structure of the Administrator Tool, backup &<br />
restore and update infrastructures and network functions such as DHCP, NAT, DNS and Routing.<br />
For more information on setting up authentication, please refer to the <strong>aXsGUARD</strong> <strong>Gatekeeper</strong><br />
Authentication How To guide. This document explains how to set up local and back-end authentication<br />
using policies, rules and restrictions. It also provides detailed instructions on how to configure and use the<br />
<strong>aXsGUARD</strong> <strong>Gatekeeper</strong> RADIUS Server.<br />
For in depth information on each of the features offered with the <strong>aXsGUARD</strong> <strong>Gatekeeper</strong>, such as Firewall,<br />
Reverse Proxy etc., please also refer to the appropriate How To guides.<br />
© August 2010 - VASCO Data Security 46
<strong>aXsGUARD</strong> <strong>Gatekeeper</strong> Installation Guide v2.7 <strong>aXsGUARD</strong> <strong>Gatekeeper</strong> Security Concepts<br />
11 <strong>aXsGUARD</strong> <strong>Gatekeeper</strong> Security Concepts<br />
11.1 Overview<br />
To help you define your organization's security needs, we describe here the <strong>aXsGUARD</strong> <strong>Gatekeeper</strong> Policies<br />
and the levels at which they can be applied.<br />
Explanations are included for an <strong>aXsGUARD</strong> <strong>Gatekeeper</strong> serving exclusively for authentication, and for an<br />
<strong>aXsGUARD</strong> <strong>Gatekeeper</strong> also serving as a gateway to the Internet with features such as firewall, e-mail server,<br />
Web access, etc. Configurations vary, therefore, depending on the features enabled with your appliance (see<br />
section 1.2).<br />
11.2 Security Policies and Levels<br />
Caution<br />
The <strong>aXsGUARD</strong> <strong>Gatekeeper</strong> system-wide policy (system level) should enforce the strictest<br />
security!<br />
Authentication and other features such as firewall, e-mail and Web access, are managed by Security Policies,<br />
which implement a combination of rules, for example, whether a user must use a DIGIPASS One-Time<br />
Password in combination with a static password for authentication. The <strong>aXsGUARD</strong> <strong>Gatekeeper</strong> applies Policies<br />
at 4 levels: system, computer, group and user levels (see illustration below).<br />
Image 43: Rules, Policies and Application Levels<br />
© August 2010 - VASCO Data Security 47
<strong>aXsGUARD</strong> <strong>Gatekeeper</strong> Installation Guide v2.7 <strong>aXsGUARD</strong> <strong>Gatekeeper</strong> Security Concepts<br />
Security Policies define rights for authentication and for data transmission related to e-mail, Web access and<br />
the firewall. For more information on how security policies are assigned to the system, computer, group and<br />
user levels, and the relations between the policies assigned at different levels, please refer to:<br />
the <strong>aXsGUARD</strong> <strong>Gatekeeper</strong> System Administrator How To<br />
the <strong>aXsGUARD</strong> <strong>Gatekeeper</strong> Authentication How To, and<br />
the feature-specific How To guides.<br />
These documents are all available through the permanently on-screen Documentation button.<br />
The <strong>aXsGUARD</strong> <strong>Gatekeeper</strong> system-wide security policy is valid for all users who are connected to the network,<br />
i.e. guests, visitors, etc., (see image below). This policy should therefore enforce the strictest rules.<br />
Image 44: Policy Application to Security Levels<br />
© August 2010 - VASCO Data Security 48
<strong>aXsGUARD</strong> <strong>Gatekeeper</strong> Installation Guide v2.7 <strong>aXsGUARD</strong> <strong>Gatekeeper</strong> Security Concepts<br />
VASCO recommends the implementation of a security policy which enforces user authentication. User<br />
authentication should be widely implemented as more permissions (specific access) can be given at the user<br />
level. The image below shows the optimal implementation, with the levels (system, computer, groups and<br />
users) varying in terms of broadness of application (e.g. from everybody to a specific user) and restrictive<br />
powers (from very restrictive to less restrictive). Restrictions are high for a large number of people, but can be<br />
reduced for a single authenticated user.<br />
For more information on Policies and security levels please refer to the document, <strong>aXsGUARD</strong> <strong>Gatekeeper</strong><br />
System Administration How To, which is available via the Documentation button in the Administrator Tool.<br />
Note<br />
Image 45: Restrictive powers and broadness of application<br />
With the Web access feature, a security policy is referred to as Access Control List (ACL).<br />
© August 2010 - VASCO Data Security 49
<strong>aXsGUARD</strong> <strong>Gatekeeper</strong> Installation Guide v2.7 <strong>aXsGUARD</strong> <strong>Gatekeeper</strong> Security Concepts<br />
11.3 Groups<br />
11.4 Users<br />
A group is a set of users who are grouped together based on their location (department), access rights (e.g.<br />
allowed Internet sites, e-mail rights, rights to use FTP, etc.) or position within the organization (e.g.<br />
accountants, HR, managers, etc.).<br />
Users automatically adopt the access rights which are configured for their group, unless overruled at the user<br />
level.<br />
The <strong>aXsGUARD</strong> <strong>Gatekeeper</strong> is preconfigured with a default group. The following policies are applied to the<br />
default group, depending on the modules enabled on your <strong>aXsGUARD</strong> <strong>Gatekeeper</strong> (see section 1.2):<br />
Website Access rights: the default group is assigned the Web access filter predef-no-porn, which allows<br />
access to all Internet sites, except for pornographic sites.<br />
E-mail rights: the default group is assigned the default e-mail policy, which allows users to send and<br />
receive all e-mails, except those with dangerous executable attachments or those which are identified as<br />
spam. If the <strong>aXsGUARD</strong> <strong>Gatekeeper</strong> spam detection system identifies a message with a sufficiently high<br />
spam-rate, the message is deleted. If not, the message is labeled as spam, but still delivered.<br />
Firewall rights: the default group is assigned the sys-base firewall policy, which allows access to the<br />
<strong>aXsGUARD</strong> <strong>Gatekeeper</strong> DNS and Proxy services.<br />
A user is a person who:<br />
is registered and may authenticate with the <strong>aXsGUARD</strong> <strong>Gatekeeper</strong>.<br />
has certain access rights depending on the applicable security policy.<br />
(if the e-mail server feature is enabled) has an <strong>aXsGUARD</strong> <strong>Gatekeeper</strong> mailbox (see section 9.8.1).<br />
Users first need to be registered on the <strong>aXsGUARD</strong> <strong>Gatekeeper</strong> and assigned to a group before they can<br />
authenticate and be granted firewall and Web access rights. The user automatically adopts the access rights<br />
defined for his/her group, unless these rights are overruled and customized at the user level.<br />
© August 2010 - VASCO Data Security 50
<strong>aXsGUARD</strong> <strong>Gatekeeper</strong> Installation Guide v2.7 <strong>aXsGUARD</strong> <strong>Gatekeeper</strong> Security Concepts<br />
11.5 Computers and Servers<br />
Caution<br />
A security policy without user authentication is not as secure as a policy with user<br />
authentication. Without user authentication, anyone with physical access to a computer in<br />
your network can (ab)use the Web access and firewall policies which are assigned to it (i.e.<br />
abuse your public IP address).<br />
Even if user- and group specific policies have been configured for Web and firewall access,<br />
they cannot be applied without user authentication; system or computer level policies are<br />
applied instead.<br />
VASCO strongly recommends application of Policies with user authentication, rather than<br />
Computer registration.<br />
Computers from which users authenticate do not need to be registered on the <strong>aXsGUARD</strong> <strong>Gatekeeper</strong>.<br />
Registering a computer on the <strong>aXsGUARD</strong> <strong>Gatekeeper</strong> allows a policy to be applied to the computer. An<br />
unauthenticated user on a registered computer is assigned computer-level Web access and firewall policies,<br />
based the computer's IP address.<br />
Servers are dedicated computers which handle requests for data, e-mail, file transfers and other network<br />
services coming from other computer or hosts in a network. Server configuration for the <strong>aXsGUARD</strong> <strong>Gatekeeper</strong><br />
varies according to whether you are using the appliance as a gateway with firewall or exclusively as an<br />
authentication appliance on your LAN.<br />
If you are using the <strong>aXsGUARD</strong> <strong>Gatekeeper</strong> as a gateway, firewall and Web access policies need to be<br />
configured to allow servers to access specific services in another network, on the <strong>aXsGUARD</strong> <strong>Gatekeeper</strong> or on<br />
the Internet, for instance a Microsoft updates server on the Internet.<br />
If you are using the <strong>aXsGUARD</strong> <strong>Gatekeeper</strong> exclusively for authentication on your LAN, a server record needs to<br />
be registered for each server in your network which needs to use the RADIUS server on the <strong>aXsGUARD</strong><br />
<strong>Gatekeeper</strong>.<br />
© August 2010 - VASCO Data Security 51
<strong>aXsGUARD</strong> <strong>Gatekeeper</strong> Installation Guide v2.7 <strong>aXsGUARD</strong> <strong>Gatekeeper</strong> Security Concepts<br />
11.6 System<br />
For more information on Computer and Server registration, please refer to the document, <strong>aXsGUARD</strong><br />
<strong>Gatekeeper</strong> System Administration How To, which is available via the Documentation button in the<br />
Administrator Tool.<br />
Note<br />
1) If a computer is not registered, the <strong>aXsGUARD</strong> <strong>Gatekeeper</strong> system-wide policy is applied.<br />
2) Access from one server to another within the same LAN (subnet) does not require any<br />
configuration of extra access rights on the <strong>aXsGUARD</strong> <strong>Gatekeeper</strong>. Servers within the same<br />
subnet communicate directly, without <strong>aXsGUARD</strong> <strong>Gatekeeper</strong> intervention.<br />
Caution<br />
The <strong>aXsGUARD</strong> <strong>Gatekeeper</strong> system-wide policy (system level) should always enforce the<br />
strictest security!<br />
Any user<br />
physically connected to the network<br />
not registered on the <strong>aXsGUARD</strong> <strong>Gatekeeper</strong> (not authenticating)<br />
whose computer is not registered on the <strong>aXsGUARD</strong> <strong>Gatekeeper</strong> is subject to the system-wide policy. It is<br />
therefore imperative that the <strong>aXsGUARD</strong> <strong>Gatekeeper</strong> system-wide policy enforces the strictest security.<br />
© August 2010 - VASCO Data Security 52
<strong>aXsGUARD</strong> <strong>Gatekeeper</strong> Installation Guide v2.7 Support<br />
12 Support<br />
12.1 Overview<br />
In this section we provide instructions on what to do if you have a problem, or experience a hardware failure.<br />
12.2 If you encounter a problem<br />
If you encounter a problem with a VASCO product, please follow the steps below:<br />
1. Check whether your problem has already been solved and reported in the Knowledge Base at the<br />
following URL: http://www.vasco.com/support.<br />
2. If there is no solution in the Knowledge Base, please contact the company which supplied you with the<br />
VASCO product.<br />
3. If your supplier is unable to solve your problem, they will automatically contact the appropriate VASCO<br />
expert. If necessary, VASCO experts can access your <strong>aXsGUARD</strong> <strong>Gatekeeper</strong> remotely to solve any<br />
problems.<br />
12.3 Return procedure if you have a hardware failure<br />
If you experience a hardware failure, please contact your VASCO supplier.<br />
© August 2010 - VASCO Data Security 53
<strong>aXsGUARD</strong> <strong>Gatekeeper</strong> Installation Guide v2.7<br />
Alphabetical Index<br />
Administrator Password........................................................... 20, 30, 37<br />
Administrator Tool................................................................... 18, 35, 49<br />
AG-3XXX, AG-5XXX and AG-7XXX Models............................................. 12<br />
<strong>aXsGUARD</strong> <strong>Gatekeeper</strong>........................................................................ 10<br />
Chassis Rails...................................................................................... 12<br />
Configuration Instructions.................................................................... 30<br />
Connecting to your Network................................................................. 16<br />
Content Filtering.................................................................................. 36<br />
Customer Information.......................................................................... 33<br />
Dimensions........................................................................................ 12<br />
Documents..................................................................................... 9, 49<br />
Domain Name..................................................................................... 36<br />
Domain Name Server........................................................................... 43<br />
E-mail Addresses................................................................................ 37<br />
E-mail Server................................................................................ 45, 48<br />
E-mail Server Feature.......................................................................... 47<br />
E-mail Settings................................................................................... 45<br />
Electrical Safety.................................................................................. 11<br />
Environmental Requirements & Protection....................................... 11, 12<br />
Ethernet Internet Device....................................................................... 41<br />
Ethernet Secure LAN Device................................................................. 38<br />
Further Configuration........................................................................... 49<br />
General Network Settings..................................................................... 43<br />
Humidity............................................................................................. 12<br />
Knowledge Base................................................................................. 56<br />
LAN Interface...................................................................................... 14<br />
Licensing............................................................................................ 22<br />
Index<br />
Logs.................................................................................................. 31<br />
Mailings from VASCO.......................................................................... 34<br />
Menu Structure................................................................................... 35<br />
Navigation.......................................................................................... 35<br />
Network Cable.................................................................................... 11<br />
Network Device Settings...................................................................... 38<br />
Personal Safety................................................................................... 11<br />
Power.................................................................................... 11, 12, 14<br />
Pre-installation.................................................................................... 13<br />
Return Procedure................................................................................ 56<br />
Safety ............................................................................................... 11<br />
Security Concepts...................................................................................<br />
Computers................................................................................... 54<br />
Security Levels............................................................................. 50<br />
Security Policies........................................................................... 50<br />
System........................................................................................ 55<br />
Users........................................................................................... 53<br />
Self-signed Certificate......................................................................... 19<br />
SMTP Feature............................................................................... 45, 47<br />
Support.............................................................................................. 56<br />
Sysadmin Password............................................................................ 36<br />
System Information............................................................................. 36<br />
Temperature....................................................................................... 12<br />
Testing TCP/IP Settings....................................................................... 17<br />
Training................................................................................................ 9<br />
VASCO............................................................................................... 10<br />
Workstation TCP/IP Settings................................................................. 16<br />
© August 2010 - VASCO Data Security 54