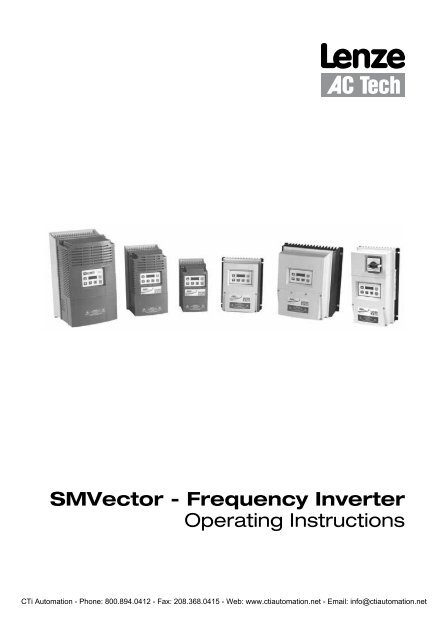
Lenze SMVector Frequency Inverter Operating ... - CTi Automation
Lenze SMVector Frequency Inverter Operating ... - CTi Automation
Lenze SMVector Frequency Inverter Operating ... - CTi Automation

Create successful ePaper yourself
Turn your PDF publications into a flip-book with our unique Google optimized e-Paper software.
<strong>SMVector</strong> - <strong>Frequency</strong> <strong>Inverter</strong><br />
<strong>Operating</strong> Instructions<br />
<strong>CTi</strong> <strong>Automation</strong> - Phone: 800.894.0412 - Fax: 208.368.0415 - Web: www.ctiautomation.net - Email: info@ctiautomation.net
SV01M<br />
Contents<br />
1 Safety Information....................................................................................................3<br />
2 Technical Data..........................................................................................................6<br />
2.1 Standards and Application Conditions..................................................................................6<br />
2.2 SMV Type Number Designation ............................................................................................7<br />
2.3 Ratings...................................................................................................................................8<br />
3 Installation ..............................................................................................................11<br />
3.1 Dimensions and Mounting...................................................................................................11<br />
3.1.1 NEMA 1 (IP31) Models < 30HP (22kW)...............................................................11<br />
3.1.2 NEMA 1 (IP31) Models > 30HP (22kW)...............................................................12<br />
3.1.3 NEMA 4X (IP65) Models ......................................................................................13<br />
3.1.4 NEMA 4X (IP65) Models with Disconnect Switch................................................14<br />
3.2 Electrical Installation............................................................................................................15<br />
3.2.1 Power Connections..............................................................................................15<br />
3.2.1.1 Mains Connection to 120VAC Single-Phase Supply ...........................15<br />
3.2.1.2 Mains Connection to 240VAC Single-Phase Supply ...........................16<br />
3.2.1.3 Mains Connection to Three-Phase Supply ..........................................16<br />
3.2.1.4 Motor Connection ................................................................................16<br />
3.2.1.5 Installation Recommendations for EMC Compliance..........................17<br />
3.2.1.6 NEMA 4X (IP65) Input Terminal Block.................................................17<br />
3.2.1.7 Dynamic Brake Connections...............................................................18<br />
3.2.2 Fuses/Cable Cross-Sections ...............................................................................19<br />
3.2.3 Control Terminals.................................................................................................20<br />
4 Commissioning ......................................................................................................22<br />
4.1 Local Keypad & Display ......................................................................................................22<br />
4.2 Drive Display and Modes of Operation ...............................................................................24<br />
4.3 Parameter Setting ................................................................................................................25<br />
4.4 Electronic Programming Module (EPM) ..............................................................................25<br />
4.5 Parameter Menu ..................................................................................................................26<br />
4.5.1 Basic Setup Parameters......................................................................................26<br />
4.5.2 I/O Setup Parameters ..........................................................................................30<br />
4.5.3 Advanced Setup Parameters ..............................................................................34<br />
4.5.4 PID Parameters....................................................................................................38<br />
4.5.5 Vector Parameters...............................................................................................40<br />
4.5.6 Network Parameters ............................................................................................42<br />
4.5.7 Diagnostic Parameters ........................................................................................43<br />
4.5.7.1 Terminal & Protection Status Display ......................................................44<br />
4.5.7.2 Keypad Status Display ............................................................................44<br />
4.5.8 Onboard Communications Parameters 15-60HP (11-45kW) ..............................45<br />
4.5.9 Sequencer Parameters........................................................................................46<br />
4.5.9.1 Sequencer Flow Diagram Left.............................................................54<br />
4.5.9.2 Sequencer Flow Diagram Right ..........................................................55<br />
4.5.9.3 Sequencer Status ................................................................................56<br />
5 Troubleshooting and Diagnostics ........................................................................57<br />
5.1 Status/Warning Messages...................................................................................................57<br />
5.2 Drive Configuration Messages ............................................................................................58<br />
5.3 Fault Messages....................................................................................................................58<br />
Appendix A.......................................................................................................................61<br />
A.1 Permissable Cable Lengths.................................................................................................61<br />
<strong>CTi</strong> <strong>Automation</strong> - Phone: 800.894.0412 - Fax: 208.368.0415 - Web: www.ctiautomation.net - Email: info@ctiautomation.net<br />
1
This documentation applies to the SMV frequency inverter and contains important technical data regarding the<br />
installation, operation, and commissioning of the inverter.<br />
These instructions are only valid for SMV frequency inverters with software revision 4.23 or higher<br />
For version 4.23 software, the drive nameplate illustrated below would show “42” in the “F” location.<br />
Please read these instructions in their entirety before commissioning the drive.<br />
A B C<br />
D E F<br />
Type:<br />
ESV751N04TXB<br />
Id-No: 00000000<br />
INPUT: 3 (3/PE)<br />
400/480 V<br />
2.9/2.5 A<br />
50-60 HZ<br />
2 SV01M<br />
OUTPUT: 3 (3/PE)<br />
0 - 400/460 V<br />
2.4/2.1 A<br />
0.75 KW/1HP<br />
0 - 500 HZ<br />
TYPE-4X INDOOR USE ONLY<br />
For detailed information<br />
refer to instruction<br />
Manual: SV01<br />
000000000000000000<br />
ESV751N04TXB000XX## ##<br />
A B C D E F<br />
Certifications Type Input Ratings Output Ratings Hardware Version Software Version<br />
Scope of delivery Important<br />
• 1 SMV <strong>Inverter</strong><br />
with EPM installed (see Section 4.4)<br />
• 1 <strong>Operating</strong> Instructions manual<br />
About These Instructions<br />
After receipt of the delivery, check immediately whether the items delivered match<br />
the accompanying papers. <strong>Lenze</strong> AC Tech does not accept any liability for deficiencies<br />
claimed subsequently.<br />
Claim:<br />
• visible transport damage immediately to the forwarder.<br />
•<br />
Document # Description<br />
CMVINS01 <strong>SMVector</strong> Communications Module Installation Instruction<br />
CMVMB401 <strong>SMVector</strong> ModBus RTU over RS485 Communications Reference Guide<br />
CMVLC401 <strong>SMVector</strong> Lecom Communications Reference Guide<br />
CMVCAN01 <strong>SMVector</strong> CANopen Communications Reference Guide<br />
CMVDVN01 <strong>SMVector</strong> DeviceNet Communications Reference Guide<br />
CMVETH01 <strong>SMVector</strong> EtherNet/IP Communications Reference Guide<br />
CMVPFB01 <strong>SMVector</strong> PROFIBUS Communications Reference Guide<br />
ALSV01 <strong>SMVector</strong> Additional I/O Module Installation and Operation Manual<br />
DBV01 <strong>SMVector</strong> Dynamic Braking<br />
PTV01 <strong>SMVector</strong> Potentiometer Install Instructions<br />
RKV01 <strong>SMVector</strong> ESVZXK1 Remote Keypad<br />
RKVU01 <strong>SMVector</strong> ESVZXH0 Remote Keypad (for NEMA 1 15-60HP (11-45kW) Drives)<br />
Copyright © 2006 <strong>Lenze</strong> AC Tech Corporation<br />
All rights reserved. No part of this manual may be reproduced or transmitted in any form without written permission from <strong>Lenze</strong> AC Tech<br />
Corporation. The information and technical data in this manual are subject to change without notice. <strong>Lenze</strong> AC Tech Corporation makes no<br />
warranty of any kind with respect to this material, including, but not limited to, the implied warranties of its merchantability and fitness for a<br />
given purpose. <strong>Lenze</strong> AC Tech Corporation assumes no responsibility for any errors that may appear in this manual.<br />
All information given in this documentation has been carefully selected and tested for compliance with the hardware and software described.<br />
Nevertheless, discrepancies cannot be ruled out. <strong>Lenze</strong> AC Tech does not accept any responsibility nor liability for damages that may occur.<br />
Any necessary corrections will be implemented in subsequent editions. This document is printed in the United States
1 Safety Information<br />
Safety Information<br />
General<br />
Some parts of <strong>Lenze</strong> AC Tech controllers can be electrically live and some surfaces can be hot. Non-authorized removal<br />
of the required cover, inappropriate use, and incorrect installation or operation creates the risk of severe injury to<br />
personnel and/or damage to equipment.<br />
All operations concerning transport, installation, and commissioning as well as maintenance must be carried out by<br />
qualified, skilled personnel who are familiar with the installation, assembly, commissioning, and operation of variable<br />
frequency drives and the application for which it is being used.<br />
Installation<br />
Ensure proper handling and avoid excessive mechanical stress. Do not bend any components and do not change any<br />
insulation distances during transport, handling, installation or maintenance. Do not touch any electronic components<br />
or contacts. This drive contains electrostatically sensitive components, which can easily be damaged by inappropriate<br />
handling. Static control precautions must be adhered to during installation, testing, servicing and repairing of this drive<br />
and associated options. Component damage may result if proper procedures are not followed.<br />
To ensure proper operation, do not install the drive where it is subjected to adverse environmental conditions such as<br />
combustible, oily, or hazardous vapors; corrosive chemicals; excessive dust, moisture or vibration; direct sunlight or<br />
extreme temperatures.<br />
This drive has been tested by Underwriters Laboratory (UL) and is UL Listed in compliance with the UL508C Safety<br />
Standard. This drive must be installed and configured in accordance with both national and international standards.<br />
Local codes and regulations take precedence over recommendations provided in this and other <strong>Lenze</strong> AC Tech<br />
documentation.<br />
The <strong>SMVector</strong> drive is considered a component for integration into a machine or process. It is neither a machine nor<br />
a device ready for use in accordance with European directives (reference machinery directive and electromagnetic<br />
compatibility directive). It is the responsibility of the end user to ensure that the machine meets the applicable<br />
standards.<br />
Electrical Connection<br />
When working on live drive controllers, applicable national safety regulations must be observed. The electrical<br />
installation must be carried out according to the appropriate regulations (e.g. cable cross-sections, fuses, protective<br />
earth [PE] connection). While this document does make recommendations in regards to these items, national and local<br />
codes must be adhered to.<br />
The documentation contains information about installation in compliance with EMC (shielding, grounding, filters and<br />
cables). These notes must also be observed for CE-marked controllers. The manufacturer of the system or machine is<br />
responsible for compliance with the required limit values demanded by EMC legislation.<br />
Application<br />
The drive must not be used as a safety device for machines where there is a risk of personal injury or material damage.<br />
Emergency Stops, over-speed protection, acceleration and deceleration limits, etc must be made by other devices to<br />
ensure operation under all conditions.<br />
The drive does feature many protection devices that work to protect the drive and the driven equipment by generating<br />
a fault and shutting the drive and motor down. Mains power variances can also result in shutdown of the drive. When<br />
the fault condition disappears or is cleared, the drive can be configured to automatically restart, it is the responsibility<br />
of the user, OEM and/or integrator to ensure that the drive is configured for safe operation.<br />
<strong>CTi</strong> <strong>Automation</strong> - Phone: 800.894.0412 - Fax: 208.368.0415 - Web: www.ctiautomation.net - Email: info@ctiautomation.net<br />
SV01M<br />
3
Safety Information<br />
Explosion Proof Applications<br />
Explosion proof motors that are not rated for inverter use lose their certification when used for variable speed. Due to<br />
the many areas of liability that may be encountered when dealing with these applications, the following statement of<br />
policy applies:<br />
<strong>Lenze</strong> AC Tech Corporation inverter products are sold with no warranty of fitness for a particular purpose or warranty<br />
of suitability for use with explosion proof motors. <strong>Lenze</strong> AC Tech Corporation accepts no responsibility for any direct,<br />
incidental or consequential loss, cost or damage that may arise through the use of AC inverter products in these<br />
applications. The purchaser expressly agrees to assume all risk of any loss, cost or damage that may arise from such<br />
application.<br />
Operation<br />
Systems including controllers must be equipped with additional monitoring and protection devices according to the<br />
corresponding standards (e.g. technical equipment, regulations for prevention of accidents, etc.). The controller may be<br />
adapted to your application as described in this documentation.<br />
Safety Notifications<br />
DANGER!<br />
• After the controller has been disconnected from the supply voltage, live components and power connection<br />
must not be touched immediately, since capacitors could be charged. Please observe the corresponding notes<br />
on the controller.<br />
• Close all protective covers and doors prior to and during operation.<br />
• Do not cycle input power to the controller more than once every two minutes.<br />
• For <strong>SMVector</strong> models that are equipped with a Disconnect Switch (11th character in model number is L or M),<br />
the Disconnect Switch is intended as a motor service disconnect and does not provide branch circuit protection<br />
to the inverter or motor. When servicing the motor, it is necessary to wait 3 minutes after turning this switch<br />
to the off position before working on motor power wiring as the inverter stores electrical power. To service the<br />
inverter, it is necessary to remove mains ahead of the drive and wait 3 minutes.<br />
All safety information given in these <strong>Operating</strong> Instructions includes a visual icon, a bold signal word and a<br />
description.<br />
Signal Word! (characterizes the severity of the danger)<br />
NOTE (describes the danger and informs on how to proceed)<br />
Icon Signal Word Meaning Consequences if ignored<br />
DANGER! Warns of hazardous electrical voltage. Death or severe injuries.<br />
WARNING! Warns of potential, very hazardous<br />
situations.<br />
WARNING!<br />
Hot Surface<br />
Warns of hot surface and risk of burns.<br />
Labels may be on or inside the equipment<br />
to alert people that surfaces may reach<br />
dangerous temperatures.<br />
STOP! Warns of potential damage to material and<br />
equipment.<br />
4 SV01M<br />
Risk of severe injury to personnel and/or<br />
damage to equipment.<br />
Risk of severe injury to personnel.<br />
Damage to the controller/drive or its<br />
environment.<br />
NOTE Designates a general, useful note. None. If observed, then using the controller/<br />
drive system is made easier.<br />
<strong>CTi</strong> <strong>Automation</strong> - Phone: 800.894.0412 - Fax: 208.368.0415 - Web: www.ctiautomation.net - Email: info@ctiautomation.net
Safety Information<br />
Harmonics Notification in accordance with EN 61000-3-2, EN 61000-3-12:<br />
Operation in public supply networks (Limitation of harmonic currents i.a.w. EN 61000-3-2, Electromagnetic Compatibility<br />
(EMC) Limits). Limits for harmonic current emissions (equipment input current up to 16A/phase).<br />
Directive Total Power<br />
connected to Mains<br />
(public supply)<br />
SV01M<br />
Additional Measures Required for Compliance (2)<br />
< 0.5kW with mains choke<br />
EN 61000-3-2 0.5 ... 1kW with active filter<br />
> 1kW complies without additional measures<br />
EN 61000-3-12 16 ... 75amp Additional measures are required for compliance with the standard<br />
(1) For compliance with EMC regulations, the permissable cable lengths may change.<br />
(2) The additional measures described only ensure that the controller meets the requirements of the EN 61000-3-2.<br />
The machine/system manufacturer is responsible for the machine’s compliance with the regulations.<br />
Safety Information in accordance with EN 61800-5-1:<br />
DANGER! Hazard of Electrical Shock<br />
Capacitors retain charge for approximately 180 seconds after power is removed. Allow at least<br />
3 minutes for discharge of residual charge before touching the drive.<br />
WARNING!<br />
• This product can cause a d.c. current in the PE conductor. Where a residual current-operated (RCD) or<br />
monitoring (RCM) device is used for protection in case of direct or indirect contact, only an RCD or RCM<br />
Type B is allowed on the supply side of this product.<br />
• Leakage Current may exceed 3.5mA AC. The minimum size of the PE conductor shall comply with local<br />
safety regulations for high leakage current equipment.<br />
• In a domestic environment, this product may cause radio interference in which case supplementary<br />
mitigation measures may be required.<br />
NOTE<br />
Control and communications terminals provide reinforced insulation (i.e. considered SELV or PELV, providing<br />
protection in case of direct contact) when the drive is connected to a power system rated up to 300VAC between<br />
phase to ground (PE) and the applied voltage on Terminals 16 and 17 is less than 150VAC between phase to<br />
ground. Otherwise, control and communications terminals provide basic insulation.<br />
Safety Information in accordance with UL:<br />
Note for UL approved system with integrated controllers: UL warnings are notes which apply to UL systems. The<br />
documentation contains special information about UL.<br />
Warnings!<br />
• Suitable for use on a circuit capable of delivering not more than 200,000 rms symmetrical amperes, at<br />
the maximum voltage rating marked on the drive.<br />
• Use minimum 75 °C copper wire only.<br />
• Shall be installed in a pollution degree 2 macro-environment.<br />
• NEMA 1 (IP31) models shall be installed in a pollution degree 2 macro-environment.<br />
• All models are suitable for installation in a compartment handling Conditioned Air (i.e., plenum rated).<br />
Torque Requirements (in accordance with UL) are listed in section 3.2.1, Power Connections.<br />
<strong>CTi</strong> <strong>Automation</strong> - Phone: 800.894.0412 - Fax: 208.368.0415 - Web: www.ctiautomation.net - Email: info@ctiautomation.net<br />
5
Technical Data<br />
2 Technical Data<br />
2.1 Standards and Application Conditions<br />
Conformity CE Low Voltage (2006/95/EC) & EMC (2004/108/EC) Directives<br />
Approvals UL508C Underwriters Laboratories -Power Conversion Equipment<br />
Input voltage phase imbalance < 2%<br />
Supported Power Systems<br />
TT<br />
TN<br />
Humidity < 95% non-condensing<br />
6 SV01M<br />
− For central grounded systems, operation is permitted<br />
without restrictions.<br />
− For corner grounded 400/500V systems, operation is<br />
possible but reinforced insulation to control circuits is<br />
compromised.<br />
Transport -25 … +70°C<br />
Temperature range<br />
Storage -20 … +70°C<br />
Operation -10 … +55°C (with 2.5%/°C current derating above +40°C)<br />
Installation height 0 - 4000m a.m.s.l. (with 5%/1000 m current derating above 1000m a.m.s.l.)<br />
Vibration resistance acceleration resistant up to 1.0g<br />
Earth leakage current > 3.5 mA to PE<br />
Max Permissable Cable Length (1)<br />
5.0 Hp (3.7 kW) 50 meters shielded, 100 meters un-shielded.<br />
IP31/NEMA 1 IP65/NEMA 4X<br />
Enclosure<br />
NEMA 1 and NEMA 4X model enclosures are plenun rated in accordance with UL<br />
508C and are suitable for installation in a compartment handling conditioned air.<br />
Protection measures against<br />
short circuit, earth fault, phase loss, over voltage, under voltage,<br />
motor stalling, over temperature, motor overload<br />
Compliance with EN 61000-3-2<br />
Requirements (2)<br />
< 0.5kW with mains choke<br />
0.5 ... 1kW with active filter<br />
> 1kW without additional measures<br />
Compliance with EN 61000-3-12<br />
Requirements (2) 16 ... 75amp Additional measures required for compliance with EN 61000-3-12<br />
Operation in public supply networks (Limitation of harmonic currents i.a.w. EN 61000-3-2, Electromagnetic Compatibility<br />
(EMC) Limits). Limits for harmonic current emissions (equipment input current up to 16A/phase).<br />
(1) The stated cable lengths are permissible at default carrier frequencies (refer to parameter P166).<br />
(2) The additional measures described only ensure that the controller meets the requirements of the EN 61000-3-2.<br />
The machine/system manufacturer is responsible for the machine’s compliance with the regulations.<br />
<strong>CTi</strong> <strong>Automation</strong> - Phone: 800.894.0412 - Fax: 208.368.0415 - Web: www.ctiautomation.net - Email: info@ctiautomation.net
2.2 SMV Type Number Designation<br />
SV01M<br />
Technical Data<br />
The table herein describes the Type numbering designation for the <strong>SMVector</strong> <strong>Inverter</strong> models.<br />
ESV 152 N0 2 T X B<br />
Electrical Products in the <strong>SMVector</strong> Series<br />
Power Rating in kW:<br />
251 = 0.25kW (0.33HP) 113 = 11.0kW (15HP)<br />
371 = 0.37kW (0.5HP) 153 = 15.0kW (20HP)<br />
751 = 0.75kW (1HP) 183 = 18.5kW (25HP)<br />
112 = 1.1kW (1.5HP) 223 = 22.0kW (30HP)<br />
152 = 1.5kW (2HP) 303 = 30.0kW (40HP)<br />
222 = 2.2kW (3HP) 373 = 37.5kW (50HP)<br />
302 = 3.0kW (4HP)<br />
402 = 4.0kW (5HP)<br />
552 = 5.5kW (7.5HP)<br />
752 = 7.5kW (10HP)<br />
Installed I/O & Communication Module(s):<br />
453 = 45.0kW (60HP)<br />
C_ = CANopen (Available all models) The “_” blank can be:<br />
D_ = DeviceNet (Available all models)<br />
E_ = Ethernet/IP, (Available all models)<br />
R_ = RS-485 / ModBus /Lecom (Avail all models)<br />
P_ = ProfiBus-DP (Available all models)<br />
N_ = No Communications installed<br />
Input Voltage:<br />
1 = 120 VAC (doubler output) or 240 VAC<br />
2 = 240 VAC<br />
4 = 400/480 VAC<br />
6 = 600 VAC<br />
Input Phase:<br />
S = Single Phase Input only<br />
Y = Single or Three Phase Input<br />
T = Three Phase Input only<br />
Input Line Filter<br />
F = Integral EMC Filter<br />
0 = Standard Keypad<br />
L = Integral EMC Filter and Integrated Disconnect Switch (NEMA 4X/IP65 Models only)<br />
M = Integrated Disconnect Switch (NEMA 4X/IP65 Models only)<br />
X = No EMC Filter/ No Disconnect Switch<br />
Enclosure:<br />
B = NEMA 1/IP31; Indoor only<br />
C = NEMA 4X/IP65; Indoor only; Convection cooled<br />
D = NEMA 4X/IP65; Indoor only; Fan cooled<br />
E = NEMA 4X/IP65; Indoor/Outdoor; Convection cooled<br />
F = NEMA 4X/IP65; Indoor/Outdoor; Fan cooled<br />
NOTE<br />
Prior to installation make sure the enclosure is suitable for the end-use environment<br />
Variables that influence enclosure suitability include (but are not limited to) temperature, airborne<br />
contaminates, chemical concentration, mechanical stress and duration of exposure (sunlight,<br />
wind, precipitation).<br />
<strong>CTi</strong> <strong>Automation</strong> - Phone: 800.894.0412 - Fax: 208.368.0415 - Web: www.ctiautomation.net - Email: info@ctiautomation.net<br />
7
2.3 Ratings<br />
120V / 240VAC Models<br />
Technical Data<br />
Mains = 120V Single Phase (1/N/PE) (90...132V), 240V Single Phase (2/PE) (170...264V); 48...62Hz<br />
Type Power Mains Current Output Current Heat Loss (Watts)<br />
Hp kW<br />
120V<br />
A<br />
240V<br />
A<br />
Cont (I ) n<br />
A<br />
Max I<br />
%<br />
N1/IP31 N4X/IP65<br />
No filter<br />
N4X/IP65<br />
W/ filter<br />
ESV251--1S-- 0.33 0.25 6.8 3.4 1.7 200 24<br />
ESV371--1S-- 0.5 0.37 9.2 4.6 2.4 200 32 32<br />
ESV751--1S-- 1 0.75 16.6 8.3 4.2 200 52 41<br />
ESV112--1S--<br />
NOTES:<br />
1.5 1.1 20 10.0 6.0 200 74 74<br />
Output Current: The Output Current Maximum (%) is a percentage of the Output Current Continuous Amps (In) rating<br />
and is adjustable in parameter P171.<br />
240VAC Models<br />
Mains = 240V Single Phase (2/PE) (170...264V); 48...62Hz<br />
Type Power Mains Current Output Current Heat Loss (Watts)<br />
Hp kW<br />
240V<br />
A<br />
Cont (I ) n<br />
A<br />
Max I<br />
%<br />
N1/IP31 N4X/IP65<br />
No filter<br />
N4X/IP65<br />
W/ filter<br />
ESV251--2S-- 0.33 0.25 3.4 1.7 200 20<br />
ESV371--2S-- 0.5 0.37 5.1 2.4 200 30<br />
ESV751--2S-- 1 0.75 8.8 4.2 200 42<br />
ESV112--2S-- 1.5 1.1 12.0 6.0 200 63<br />
ESV152--2S-- 2 1.5 13.3 7.0 200 73<br />
ESV222--2S-- 3 2.2 17.1 9.6 200 97<br />
240V Single Phase (2/PE) (170...264V), 240V Three Phase (3/PE) (170...264V); 48...62Hz<br />
Type Power Mains Current Output Current Heat Loss (Watts)<br />
Hp kW<br />
1~ (2/PE)<br />
A<br />
3~ (3/PE)<br />
A<br />
Cont (I ) n<br />
A<br />
Max I<br />
%<br />
N1/IP31 N4X/IP65<br />
No filter<br />
N4X/IP65<br />
W/ filter<br />
ESV371--2Y-- 0.5 0.37 5.1 2.9 2.4 200 27 26<br />
ESV751--2Y-- 1 0.75 8.8 5.0 4.2 200 41 38<br />
ESV112--2Y-- 1.5 1.1 12.0 6.9 6.0 200 64 59<br />
ESV152--2Y-- 2 1.5 13.3 8.1 7.0 200 75 69<br />
ESV222--2Y-- 3 2.2 17.1 10.8 9.6 200 103 93<br />
<strong>CTi</strong> <strong>Automation</strong> - Phone: 800.894.0412 - Fax: 208.368.0415 - Web: www.ctiautomation.net - Email: info@ctiautomation.net<br />
8 SV01M
SV01M<br />
Technical Data<br />
240V Three Phase (3/PE) (170...264V); 48...62Hz<br />
Type Power Mains Current Output Current Heat Loss (Watts)<br />
Hp kW<br />
240V<br />
A<br />
Cont (I n )<br />
A<br />
Max I<br />
%<br />
ESV112--2T-- 1.5 1.1 6.9 6 200 64<br />
ESV152--2T-- 2 1.5 8.1 7 200 75<br />
N1/IP31 N4X/IP65<br />
No filter<br />
N4X/IP65<br />
W/ filter<br />
ESV222--2T-- 3 2.2 10.8 9.6 200 103<br />
ESV402--2T-- 5 4.0 18.6 16.5 200 154 139<br />
ESV552--2T-- 7.5 5.5 26 23 200 225 167<br />
ESV752--2T-- 10 7.5 33 29 200 274 242<br />
ESV113--2T-- 15 11 48 42 180 485 468<br />
ESV153--2T--<br />
NOTES:<br />
20 15 59 54 180 614 591<br />
Output Current: The Output Current Maximum (%) is a percentage of the Output Current Continuous Amps (In) rating<br />
and is adjustable in parameter P171.<br />
400...480VAC Models<br />
400 ... 480V Three Phase (3/PE) (400V: 340...440V), (480V: 340...528V); 48...62Hz<br />
Type Power Mains Current Output Current Heat Loss (Watts)<br />
Hp kW<br />
400V<br />
A<br />
480V<br />
A<br />
Cont (I ) n<br />
A<br />
Max I<br />
%<br />
N1/IP31 N4X/IP65<br />
No filter<br />
N4X/IP65<br />
W/ filter<br />
400V 480V 400V 480V<br />
ESV371--4T-- 0.5 0.37 1.7 1.5 1.3 1.1 175 200 23 21 25<br />
ESV751--4T-- 1 0.75 2.9 2.5 2.4 2.1 175 200 37 33 37<br />
ESV112--4T-- 1.5 1.1 4.2 3.6 3.5 3.0 175 200 48 42 46<br />
ESV152--4T-- 2 1.5 4.7 4.1 4.0 3.5 175 200 57 50 54<br />
ESV222--4T-- 3 2.2 6.1 5.4 5.5 4.8 175 200 87 78 82<br />
ESV302--4T-- 4 3.0 8.3 7.0 7.6 6.3 175 200 95<br />
ESV402--4T-- 5 4.0 10.6 9.3 9.4 8.2 175 200 128 103 111<br />
ESV552--4T-- 7.5 5.5 14.2 12.4 12.6 11.0 175 200 178 157 165<br />
ESV752--4T-- 10 7.5 18.1 15.8 16.1 14.0 175 200 208 190 198<br />
ESV113--4T-- 15 11 27 24 24 21 155 180 418 388 398<br />
ESV153--4T-- 20 15 35 31 31 27 155 180 493 449 459<br />
ESV183--4T-- 25 18.5 44 38 39 34 155 180 645 589 600<br />
ESV223--4T-- 30 22 52 45 46 40 155 180 709 637 647<br />
ESV303--4T-- 40 30 68 59 60 52 155 180 1020<br />
ESV373--4T-- 50 37.5 85 74 75 65 155 180 1275<br />
ESV453--4T--<br />
NOTES:<br />
60 45 100 87 88 77 155 180 1530<br />
Output Current: The Output Current Maximum (%) is a percentage of the Output Current Continuous Amps (In) rating<br />
and is adjustable in parameter P171.<br />
For 400...480 VAC models, the output current maximum (%) in the 400V column is used when P107 = 0<br />
For 400...480 VAC models, the output current maximum (%) in the 480V column is used when P107 = 1<br />
9
600VAC Models<br />
Technical Data<br />
600V Three Phase (3/PE) (425...660V); 48...62Hz<br />
Type Power Mains Current Output Current Heat Loss (Watts)<br />
Hp kW A<br />
10 SV01M<br />
Cont (I n )<br />
A<br />
Max I<br />
%<br />
N1/IP31 N4X/IP65<br />
No filter<br />
ESV751--6T-- 1 0.75 2 1.7 200 37 31<br />
ESV152--6T-- 2 1.5 3.2 2.7 200 51 43<br />
ESV222--6T-- 3 2.2 4.4 3.9 200 68 57<br />
ESV402--6T-- 5 4 6.8 6.1 200 101 67<br />
ESV552--6T-- 7.5 5.5 10.2 9 200 148 116<br />
N4X/IP65<br />
W/ filter<br />
ESV752--6T-- 10 7.5 12.4 11 200 172 152<br />
ESV113--6T-- 15 11 19.7 17 180 380 356<br />
ESV153--6T-- 20 15 25 22 180 463 431<br />
ESV183--6T-- 25 18.5 31 27 180 560 519<br />
ESV223--6T-- 30 22 36 32 180 640 592<br />
ESV303--6T-- 40 30 47 41 180 930<br />
ESV373--6T-- 50 37.5 59 52 180 1163<br />
ESV453--6T--<br />
NOTES:<br />
60 45 71 62 180 1395<br />
Output Current: The Output Current Maximum (%) is a percentage of the Output Current Continuous Amps (In) rating<br />
and is adjustable in parameter P171.<br />
STOP!<br />
• For installations above 1000m a.m.s.l., derate I n by 5% per 1000m, do not<br />
exceed 4000m a.m.s.l.<br />
• Operation above 40°C, derate I n by 2.5% per °C, do not exceed 55°C.<br />
Output Current (In) derating for Carrier <strong>Frequency</strong> (P166) for NEMA 1 (IP31) Models:<br />
- If P166=2 (8 kHz), derate I n to 92% of drive rating<br />
- If P166=3 (10 kHz), derate I n to 84% of drive rating<br />
Output Current (In) derating for Carrier <strong>Frequency</strong> (P166) for NEMA 4X (IP65) Models:<br />
- If P166=1 (6 kHz), derate I n to 92% of drive rating<br />
- If P166=2 (8 kHz), derate I n to 84% of drive rating<br />
- If P166=3 (10 kHz), derate I n to 76% of drive rating<br />
<strong>CTi</strong> <strong>Automation</strong> - Phone: 800.894.0412 - Fax: 208.368.0415 - Web: www.ctiautomation.net - Email: info@ctiautomation.net
3 Installation<br />
3.1 Dimensions and Mounting<br />
SV01M<br />
Installation<br />
WARNING!<br />
Drives must not be installed where subjected to adverse environmental conditions such as: combustible, oily, or<br />
hazardous vapors; corrosive chemicals; excessive dust, moisture or vibration; direct sunlight or extreme temperatures.<br />
3.1.1 NEMA 1 (IP31) Models < 30HP (22kW)<br />
Mounting Screws<br />
4 x #10<br />
18 lb-in<br />
4 x M5<br />
( 20 Nm)<br />
G1<br />
G2<br />
Type<br />
ESV251~~~~~B; ESV371~~~~~B<br />
ESV751~~~~~B<br />
ESV112~~~~~B; ESV152~~~~~B<br />
ESV222~~~~~B<br />
a1<br />
a<br />
a<br />
in (mm)<br />
b2<br />
b1 b<br />
a1<br />
in (mm)<br />
b<br />
in (mm)<br />
c<br />
b1<br />
in (mm)<br />
b2<br />
in (mm)<br />
c<br />
in (mm)<br />
s2<br />
s1 s1<br />
s1<br />
in (mm)<br />
s2<br />
s2<br />
in (mm)<br />
m<br />
lb (kg)<br />
3.90 (99) 3.12 (79) 7.48 (190) 7.00 (178) 0.24 (6) 4.35 (111) 0.6 (15) 2.0 (50) 2.0 (0.9)<br />
3.90 (99) 3.12 (79) 7.52 (191) 7.00 (178) 0.26 (7) 5.45 (138) 0.6 (15) 2.0 (50) 2.8 (1.3)<br />
G3 ESV402~~~~~B 3.90 (99) 3.12 (79) 7.52 (191) 7.00 (178) 0.30 (8) 5.80 (147) 0.6 (15) 2.0 (50) 3.2 (1.5)<br />
H1 ESV552~~~~~B; ESV752~~~~~B 5.12 (130) 4.25 (108) 9.83 (250) 9.30 (236) 0.26 (7) 6.30 (160) 0.6 (15) 2.0 (50) 6.0 (2.0)<br />
J1<br />
ESV113~~~~~B; ESV153~~~~~B<br />
ESV183~~~~~B; ESV223~~~~~B<br />
P1<br />
P<br />
6.92 (176) 5.75 (146) 12.50 (318) 11.88 (302) 0.31 (8) 8.09 (205) 0.6 (15) 2.0 (50) 13.55 (6.15)<br />
Conduit Hole Dimensions Type<br />
N<br />
Q<br />
Q<br />
S<br />
N<br />
in (mm)<br />
P<br />
in (mm)<br />
P1<br />
in (mm)<br />
Q<br />
in (mm)<br />
S<br />
in (mm)<br />
G1 1.84 (47) 1.93 (49) .70 (18) 1.00 (25) .88 (22)<br />
G2 1.84 (47) 3.03 (77) .70 (18) 1.00 (25) .88 (22)<br />
G3 1.84 (47) 3.38 (86) .70 (18) 1.00 (25) .88 (22)<br />
H1 2.46 (62) 3.55 (90) .13 (3) 1.38 (35)<br />
J1 3.32 (84) 4.62 (117) .73 (19) 1.40 (36)<br />
<strong>CTi</strong> <strong>Automation</strong> - Phone: 800.894.0412 - Fax: 208.368.0415 - Web: www.ctiautomation.net - Email: info@ctiautomation.net<br />
1.13 (29)<br />
.88 (22)<br />
1.31 (33)<br />
.88 (22)<br />
11
Installation<br />
3.1.2 NEMA 1 (IP31) Models > 30HP (22kW)<br />
b2<br />
b1<br />
Type<br />
K1 ESV303~~4~~B;<br />
ESV303~~6~~B<br />
K2 ESV373~~4~~B;<br />
ESV373~~6~~B<br />
K3 ESV453~~4~~B<br />
ESV453~~6~~b<br />
S<br />
C<br />
a1<br />
a<br />
12 SV01M<br />
b<br />
SMV SMV<br />
a<br />
in (mm)<br />
a1<br />
in (mm)<br />
b<br />
in (mm)<br />
c<br />
b1<br />
in (mm)<br />
b2<br />
in (mm)<br />
c<br />
in (mm)<br />
s1<br />
s1<br />
in (mm)<br />
s2<br />
s2<br />
s2<br />
in (mm)<br />
s1<br />
m<br />
lb (kg)<br />
8.72 (221) 7.50 (190) 14.19 (360) 13.30 (338) 0.45 (11.4) 10.07 (256) 0.6 (15) 2.0 (50) 24 (10.9)<br />
8.72 (221) 7.50 (190) 17.19 (436) 16.30 (414) 0.45 (11.4) 10.07 (256) 0.6 (15) 2.0 (50) 31 (14.1)<br />
8.72 (221) 7.50 (190) 20.19 (513) 19.30 (490) 0.45 (11.4) 10.07 (256) 0.6 (15) 2.0 (50) 35 (15.9)<br />
Conduit Hole Dimensions Type<br />
N<br />
Q<br />
Q<br />
N<br />
S1<br />
P1<br />
P<br />
N<br />
in (mm)<br />
P<br />
in (mm)<br />
P1<br />
in (mm)<br />
Q<br />
in (mm)<br />
S<br />
in (mm)<br />
S1<br />
in (mm)<br />
K1 3.75 (95) 5.42 (137) 1.50 (38.1) 1.75 (44.4) 1.75 (44.4) 0.875 (22.2)<br />
K2 3.75 (95) 5.42 (137) 1.50 (38.1) 1.75 (44.4) 1.75 (44.4) 0.875 (22.2)<br />
K3 3.75 (95) 5.42 (137) 1.50 (38.1) 1.75 (44.4) 1.75 (44.4) 0.875 (22.2)<br />
<strong>CTi</strong> <strong>Automation</strong> - Phone: 800.894.0412 - Fax: 208.368.0415 - Web: www.ctiautomation.net - Email: info@ctiautomation.net
3.1.3 NEMA 4X (IP65) Models<br />
Mounting Screws<br />
4 x #8 32<br />
10 lb in<br />
4 x M4<br />
( 1 2 Nm)<br />
a1<br />
a<br />
b2<br />
b1 b<br />
SV01M<br />
c<br />
Installation<br />
Type<br />
ESV371N01SX_; ESV751N01SX_;<br />
ESV371N02YX_; ESV751N02YX_;<br />
a<br />
in (mm)<br />
a1<br />
in (mm)<br />
b<br />
in (mm)<br />
b1<br />
in (mm)<br />
b2<br />
in (mm)<br />
c<br />
in (mm)<br />
s1<br />
in (mm)<br />
s2<br />
in (mm)<br />
m<br />
lb (kg)<br />
ESV371N04TX_; ESV751N04TX_;<br />
R1<br />
ESV751N06TX_; ESV371N02SF_;<br />
ESV751N02SF_; ESV371N04TF_;<br />
ESV751N04TF_;<br />
ESV112N01SX_; ESV112N02YX_;<br />
ESV152N02YX_; ESV112N04TX_;<br />
ESV152N04TX_; ESV222N04TX_;<br />
6.28 (160) 5.90 (150) 8.00 (203) 6.56 (167) 0.66 (17) 4.47 (114) 2.00 (51) 2.00 (51) 3.6 (1.63)<br />
R2 ESV152N06TX_; ESV222N06TX_;<br />
ESV112N02SF_; ESV152N02SF_;<br />
ESV112N04TF_; ESV152N04TF_;<br />
ESV222N04TF_; ESV302N04TF_;<br />
6.28 (160) 5.90 (150) 8.00 (203) 6.56 (167) 0.66 (17) 6.31 (160) 2.00 (51) 2.00 (51) 5.9 (2.68)<br />
S1 ESV222N02YX_; ESV222N02SF_ 7.12 (181) 6.74 (171) 8.00 (203) 6.56 (167) 0.66 (17) 6.77 (172) 2.00 (51) 2.00 (51) 7.1 (3.24)<br />
ESV552N02TX~; ESV752N02TX~<br />
T1 ESV752N04TX~; ESV752N06TX~;<br />
ESV752N04TF~<br />
ESV402N02TX_; ESV402N04TX_;<br />
8.04 (204) 7.56 (192) 10.00 (254) 8.04 (204) 0.92 (23) 8.00 (203) 4.00 (102) 4.00 (102) 10.98 (4.98)<br />
ESV552N04TX_; ESV402N06TX_<br />
V1<br />
ESV552N06TX_; ESV402N04TF_;<br />
ESV552N04TF_<br />
ESV113N02TX~; ESV153N02TX~<br />
ESV113N04TX~; ESV153N04TX~<br />
8.96 (228) 8.48 (215) 10.00 (254) 8.04 (204) 0.92 (23) 8.00 (203) 4.00 (102) 4.00 (102) 11.58 (5.25)<br />
ESV113N04TF~; ESV153N04TF~<br />
W1<br />
ESV113N06TX~; ESV153N06TX~<br />
ESV183N04TX~; ESV183N04TF~<br />
ESV183N06TX~<br />
9.42 (240) 8.94 (228) 14.50 (368) 12.54 (319) 0.92 (24) 9.45 (241) 4.00 (102) 4.00 (102) 22.0 (10.0)<br />
ESV223N04TX~; ESV223N04TF~<br />
X1<br />
ESV223N06TX~<br />
9.42 (240) 8.94 (228) 18.5 (470) 16.54 (420) 0.92 (24) 9.45 (241) 4.00 (102) 4.00 (102) 25.5 (11.6)<br />
_ = Last digit of part number: C = N4X Indoor (convection cooled) ~ = Last digit of part number: D = N4X Indoor (fan cooled)<br />
E = N4X In/Outdoor (convection cooled) F = N4X In/Outdoor (fan cooled)<br />
P<br />
N<br />
Q Q<br />
Conduit Hole Dimensions Type<br />
S<br />
P<br />
N<br />
Q Q<br />
S<br />
S1<br />
N<br />
in (mm)<br />
s1<br />
P<br />
in (mm)<br />
s2<br />
s2<br />
Q<br />
in (mm)<br />
s1<br />
S<br />
in (mm)<br />
S1<br />
in (mm)<br />
R1 3.14 (80) 2.33 (59) 1.50 (38) .88 (22) n/a<br />
R2 3.14 (80) 4.18 (106) 1.50 (38) .88 (22) n/a<br />
S1 3.56 (90) 4.63 (118) 1.50 (38) .88 (22) n/a<br />
T1 4.02 (102) 5.00 (127) 1.85 (47) 1.06 (27) n/a<br />
V1 4.48 (114) 5.00 (127) 1.85 (47) 1.06 (27) n/a<br />
W1 4.71 (120) 5.70 (145) 2.00 (51) 1.375 (35) 1.125 (28)<br />
X1 4.71 (120) 5.70 (145) 2.00 (51) 1.375 (35) 1.125 (28)<br />
<strong>CTi</strong> <strong>Automation</strong> - Phone: 800.894.0412 - Fax: 208.368.0415 - Web: www.ctiautomation.net - Email: info@ctiautomation.net<br />
13
Installation<br />
3.1.4 NEMA 4X (IP65) Models with Disconnect Switch<br />
AA1<br />
AA2<br />
Mounting Screws<br />
4 x #8 32<br />
10 lb in<br />
4 x M4<br />
( 1 2 Nm)<br />
Type<br />
ESV371N01SM_; ESV371N02YM_;<br />
ESV371N02SL_; ESV371N04TM_;<br />
ESV371N04TL_; ESV371N06TM_;<br />
ESV751N01SM_; ESV751N02YM_;<br />
ESV751N02SL_; ESV751N04TM_;<br />
ESV751N04TL_; ESV751N06TM_;<br />
ESV112N01SM_; ESV112N02YM_;<br />
ESV112N02SL_; ESV112N04TM_;<br />
ESV112N04TL_; ESV152N02YM_;<br />
ESV152N02SL_; ESV152N04TM_;<br />
ESV152N04TL_; ESV152N06TM_;<br />
ESV222N04TM_; ESV222N04TL_;<br />
ESV222N06TM_; ESV302N04TL_;<br />
AD1 ESV222N02SL_; ESV222N02YM_;<br />
AB1<br />
AC1<br />
AE1<br />
AF1<br />
ESV552N02TM~; ESV752N02TM~<br />
ESV752N04TM~; ESV752N06TM~;<br />
ESV752N04TL~<br />
ESV402N02TM_; ESV402N04TM_;<br />
ESV552N04TM_; ESV402N06TM_;<br />
ESV552N06TM_; ESV402N04TL_;<br />
ESV552N04TL_<br />
ESV113N04TM~; ESV153N04TM~,<br />
ESV113N06TM~; ESV153N06TM~<br />
ESV113N02TM~; ESV153N02TM~<br />
ESV113N04TL~; ESV153N04TL~<br />
ESV183N04TL~; ESV223N04TL~<br />
ESV183N04TM~; ESV223N04TM~<br />
ESV183N06TM~; ESV223N06TM~<br />
14 SV01M<br />
a1<br />
a<br />
a<br />
in<br />
(mm)<br />
6.28<br />
(160)<br />
6.28<br />
(160)<br />
7.12<br />
(181)<br />
8.04<br />
(204)<br />
8.96<br />
(228)<br />
9.42<br />
(240)<br />
9.42<br />
(240)<br />
a1<br />
in<br />
(mm)<br />
5.90<br />
(150)<br />
5.90<br />
(150)<br />
6.74<br />
(171)<br />
7.56<br />
(192)<br />
8.48<br />
(215)<br />
8.94<br />
(228)<br />
8.94<br />
(228)<br />
b2<br />
b1<br />
b<br />
b<br />
in<br />
(mm)<br />
10.99<br />
(279)<br />
10.99<br />
(279)<br />
10.99<br />
(279)<br />
13.00<br />
(330)<br />
13.00<br />
(330)<br />
14.50<br />
(368)<br />
18.5<br />
(470)<br />
c1<br />
b1<br />
in<br />
(mm)<br />
9.54<br />
(242)<br />
9.54<br />
(242)<br />
9.54<br />
(242)<br />
11.04<br />
(280)<br />
11.04<br />
(280)<br />
12.54<br />
(319)<br />
c<br />
b2<br />
in<br />
(mm)<br />
0.66<br />
(17)<br />
0.66<br />
(17)<br />
0.66<br />
(17)<br />
0.92<br />
(23)<br />
0.92<br />
(23)<br />
0.92<br />
(24)<br />
c<br />
in<br />
(mm)<br />
4.47<br />
(114)<br />
6.31<br />
(160)<br />
6.77<br />
(172)<br />
8.00<br />
(203)<br />
8.04<br />
204)<br />
9.45<br />
(241)<br />
s1<br />
c1<br />
in<br />
(mm)<br />
.86<br />
(22)<br />
.86<br />
(22)<br />
.86<br />
(22)<br />
.86<br />
(22)<br />
.86<br />
(22)<br />
0.73<br />
(19)<br />
s2<br />
s2<br />
s1<br />
in<br />
(mm)<br />
2.00<br />
(51)<br />
2.00<br />
(51)<br />
2.00<br />
(51)<br />
4.00<br />
(102)<br />
4.00<br />
(102)<br />
4.00<br />
(102)<br />
s1<br />
s2<br />
in<br />
(mm)<br />
_ = Last digit of part number: C = N4X Indoor (convection cooled) ~ = Last digit of part number: D = N4X Indoor (fan cooled)<br />
P<br />
N<br />
Q Q<br />
16.54<br />
(420)<br />
Conduit Hole Dimensions Type<br />
S<br />
P<br />
N<br />
Q<br />
Q<br />
S<br />
S1<br />
0.92<br />
(24)<br />
N<br />
in (mm)<br />
9.45<br />
(241)<br />
0.73<br />
(19)<br />
P<br />
in (mm)<br />
4.00<br />
(102)<br />
Q<br />
in (mm)<br />
2.00<br />
(51)<br />
2.00<br />
(51)<br />
2.00<br />
(51)<br />
4.00<br />
(102)<br />
4.00<br />
(102)<br />
4.00<br />
(102)<br />
4.00<br />
(102)<br />
S<br />
in (mm)<br />
m<br />
lb<br />
(kg)<br />
4.7<br />
(2.13)<br />
7.9<br />
(3.58)<br />
9.0<br />
(4.08)<br />
13.9<br />
(6.32)<br />
14.7<br />
(6.66)<br />
23.0<br />
(10.4)<br />
28.5<br />
(12.9)<br />
S1<br />
in (mm)<br />
AA1 3.14 (80) 2.33 (59) 1.50 (38) .88 (22) n/a<br />
AA2 3.14 (80) 4.18 (106) 1.50 (38) .88 (22) n/a<br />
AD1 3.56 (90) 4.63 (118) 1.50 (38) .88 (22) n/a<br />
AB1 4.02 (102) 5.00 (127) 1.85 (47) 1.06 (27) n/a<br />
AC1 4.48 (114) 5.00 (127) 1.85 (47) 1.06 (27) n/a<br />
AE1 4.71 (120) 5.70 (145) 2.00 (51) 1.375 (35) 1.125 (28)<br />
AF1 4.71 (120) 5.70 (145) 2.00 (51) 1.375 (35) 1.125 (28)
3.2 Electrical Installation<br />
Installation After a Long Period of Storage<br />
SV01M<br />
Installation<br />
STOP!<br />
Severe damage to the drive can result if it is operated after a long period of storage or inactivity<br />
without reforming the DC bus capacitors.<br />
If input power has not been applied to the drive for a period of time exceeding three years (due to<br />
storage, etc), the electrolytic DC bus capacitors within the drive can change internally, resulting<br />
in excessive leakage current. This can result in premature failure of the capacitors if the drive is<br />
operated after such a long period of inactivity or storage.<br />
In order to reform the capacitors and prepare the drive for operation after a long period of inactivity,<br />
apply input power to the drive for 8 hours prior to actually operating the motor.<br />
3.2.1 Power Connections<br />
STOP!<br />
If the kVA rating of the AC supply transformer is greater than 10 times the input kVA<br />
rating of the drive(s), an isolation transformer or 2-3% input line reactor must be added<br />
to the line side of the drive(s).<br />
DANGER! Hazard of electrical shock!<br />
Circuit potentials up to 600 VAC are possible. Capacitors retain charge after power is<br />
removed. Disconnect power and wait at least three minutes before servicing the drive.<br />
STOP!<br />
• Verify mains voltage before connecting to drive.<br />
• Do not connect mains power to the output terminals (U,V,W)! Severe damage to the drive will result.<br />
• Do not cycle mains power more than once every two minutes. Damage to the drive may result.<br />
Mains and Motor Terminations<br />
Type Torque Strip Length<br />
Installation<br />
3.2.1.2 Mains Connection to 240VAC Single-Phase Supply<br />
ESV...N01S...<br />
ESV...N02Y...<br />
(2/PE AC)<br />
ESV...N02S...<br />
(2/PE AC)<br />
PE L1 L2 N<br />
PE L1 L2<br />
PE L1 L2 L3<br />
PE L1 L2<br />
PE L1 L2<br />
PE L1 L2<br />
3.2.1.3 Mains Connection to Three-Phase Supply<br />
ESV...N02Y...<br />
ESV...N02T...<br />
ESV...N04T...<br />
ESV...N06T...<br />
(3/PE AC)<br />
3.2.1.4 Motor Connection<br />
PES<br />
PES<br />
PES<br />
PES<br />
PES<br />
U/ T1 V/ T2 W/ T3 PE<br />
M<br />
3~<br />
PE<br />
PE L1 L2 L3<br />
PE L1 L2 L3<br />
16 SV01M<br />
PE<br />
PES = Protective Earth Shielding<br />
ESV...N01S...<br />
ESV...N02Y...<br />
(1/N/PE AC)<br />
ESV...N02S...<br />
(1/N/PE AC)<br />
PE L1 L2 N<br />
PE L1 N<br />
PE L1 L2 L3<br />
PE L1 N<br />
PE L1 L2<br />
PE L1 N<br />
WARNING!<br />
If the cable connection between the drive and the motor has an in-line contactor or<br />
circuit breaker then the drive must be stopped prior to opening/closing the contacts.<br />
Failure to do so may result in 0vercurrent trips and/or damage to the inverter.<br />
WARNING!<br />
Leakage current may exceed 3.5 mA AC. The minimum size of the protective<br />
earth (PE) conductor shall comply with local safety regulations for high leakage<br />
current equipment.<br />
STOP!<br />
In the case of a Spinning Motor:<br />
To bring free-wheeling loads such as fans to a rest before starting the drive, use the DC injection<br />
braking function. Starting a drive into a freewheeling motor creates a direct short-circuit and may<br />
result in damage to the drive.<br />
Confirm motor suitability for use with DC injection braking.<br />
Consult parameter P110 for starting / restarting into spinning motors.<br />
<strong>CTi</strong> <strong>Automation</strong> - Phone: 800.894.0412 - Fax: 208.368.0415 - Web: www.ctiautomation.net - Email: info@ctiautomation.net
SV01M<br />
Installation<br />
3.2.1.5 Installation Recommendations for EMC Compliance<br />
For compliance with EN 61800-3 or other EMC standards, motor cables, line cables and control or communications<br />
cables must be shielded with each shield/screen clamped to the drive chassis. This clamp is typically located at the<br />
conduit mounting plate.<br />
The EMC requirements apply to the final installation in its entirety, not to the individual components used. Because<br />
every installation is different, the recommended installation should follow these guidelines as a minimum. Additional<br />
equipment (such as ferrite core absorbers on power conductors) or alternative practices may be required to meet<br />
conformance in some installations.<br />
Motor cable should be low<br />
capacitance (core/core
Installation<br />
3.2.1.7 Dynamic Brake Connections<br />
For NEMA 1 and NEMA 4X Drives rated up to 30HP (22kW) the Dynamic Brake connections are made as illustrated<br />
herein. Refer to the SMV Dynamic Brake Instructions (DBV01) for complete information.<br />
NEMA 1 (IP31) up to 30HP (22kW) NEMA 4X (IP65) up to 30HP (22kW)<br />
The SMV 40...60Hp (30...45kW) models include a dynamic brake transistor as standard and only require the connection<br />
of an external resistor kit for dynamic braking operation. The dynamic brake resistor connections for 40...60 Hp<br />
(30...45kW) drives are standard built-in connections as illustrated in the diagram below. In the 40Hp (30kW) model<br />
drives, the dynamic brake connector is on the right-hand side of the drive and the terminals from top to bottom are B-,<br />
BRAKE and B+. In the 50/60HP (37.5/45 kW) model drives, the dynamic brake connector is on the left-hand side of the<br />
drive and the terminals from top to bottom are B+, BRAKE and B-.<br />
B<br />
BRAKE<br />
B+<br />
40HP (30kW) 50/60HP (37.5/45kW)<br />
External resistor kits must be connected to terminals B+ and BRAKE (no connection to B-). Refer to the table herein<br />
for external resistor kit selection. Refer to parameter P189 for enabling the dynamic brake function in the 40...60Hp<br />
(30...45kW) models.<br />
18 SV01M<br />
+<br />
-<br />
B+<br />
BRAKE<br />
B<br />
400/480 VAC SMV <strong>Inverter</strong> Resistor Kit<br />
Type Hp kW Resistance (W) Power (W) Catalog # SAP#<br />
ESV303**4T** 40 30 23.5 1020 841-013 13317724<br />
ESV373**4T** 50 37 17 1400 841-015 13317626<br />
ESV453**4T** 60 45 17 1400 841-015 13317626<br />
600 VAC SMV <strong>Inverter</strong> Resistor Kit<br />
Type Hp kW Resistance (W) Power (W) Catalog # SAP#<br />
ESV303**6T** 40 30 35 1070 841-014 13317624<br />
ESV373**6T** 50 37 24 1560 841-016 13317628<br />
ESV453**6T** 60 45 24 1560 841-016 13317628
3.2.2 Fuses/Cable Cross-Sections<br />
120V<br />
1~<br />
(1/N/PE)<br />
240V<br />
1~<br />
(2/PE)<br />
240V<br />
3~<br />
(3/PE)<br />
400V<br />
or 480V<br />
3~(3/PE)<br />
400V<br />
or 480V<br />
3~(3/PE)<br />
600V<br />
3~(3/PE)<br />
SV01M<br />
Installation<br />
NOTE: Observe local regulations. Local codes may supersede these recommendations<br />
Type<br />
Fuse<br />
Miniature circuit<br />
breaker (1)<br />
Recommendations<br />
Fuse (2) or<br />
Breaker (3)<br />
(N. America)<br />
Input Power Wiring<br />
(L1, L2, L3, PE)<br />
[mm²] [AWG]<br />
ESV251N01SXB M10 A C10 A 10 A 1.5 14<br />
ESV371N01SXB, ESV371N01SX* M16 A C16 A 15 A 2.5 14<br />
ESV751N01SXB, ESV751N01SX* M25 A C25 A 25 A 4 10<br />
ESV112N01SXB, ESV112N01SX* M32 A C32 A 30A 4 10<br />
ESV251N01SXB, ESV251N02SXB, ESV371N01SXB,<br />
ESV371N02YXB, ESV371N02SF*<br />
M10 A C10 A 10 A 1.5 14<br />
ESV751N01SXB, ESV751N02YXB, ESV751N02SF* M16 A C16 A 15 A 2.5 14<br />
ESV112N02YXB, ESV112N02SFC, ESV112N01SXB<br />
ESV112N01SX*<br />
M20 A C20 A 20 A 2.5 12<br />
ESV152N02YXB, ESV152N02SF* M25 A C25 A 25 A 2.5 12<br />
ESV222N02YXB, ESV222N02SF* M32 A C32A 30 A 4 10<br />
ESV371N02YXB, ESV751N02YXB, ESV371N02Y_*,<br />
ESV751N02Y_*<br />
M10 A C10 A 10 A 1.5 14<br />
ESV112N02YXB, ESV152N02YXB, ESV112N02TXB,<br />
ESV152N02TXB, ESV112N02Y *, ESV152N02Y *<br />
M16 A C16 A 12 A 1.5 14<br />
ESV222N02YXB, ESV222N02TXB, ESV222N02YX* M20 A C20 A 20 A 2.5 12<br />
ESV402N02TXB, ESV402N02T_* M32 A C32 A 30 A 4.0 10<br />
ESV552N02TXB, ESV552N02T_~ M40 A C40 A 35 A 6.0 8<br />
ESV752N02TXB, ESV752N02T_~ M50 A C50 A 45 A 10 8<br />
ESV113N02TXB, ESV113N02TX~, ESV113N02TM~ M80 A C80 A 80 A 16 6<br />
ESV153N02TXB, ESV153N02TX~, ESV153N02TM~<br />
ESV371N04TXB ...ESV222N04TXB<br />
M100 A C100 A 90 A 16 4<br />
ESV371N04T_* ...ESV222N04T_*<br />
ESV371N04TF* ...ESV222N04TF*<br />
M10 A C10 A 10 A 1.5 14<br />
ESV302N04T_* M16 A C16 A 15 A 2.5 14<br />
ESV402N04TXB, ESV402N04T_* M16 A C16 A 20 A 2.5 14<br />
ESV552N04TXB, ESV552N04T_* M20 A C20 A 20 A 2.5 14<br />
ESV752N04TXB, ESV752N04T_~ M25 A C25 A 25 A 4.0 10<br />
ESV113N04TXB, ESV113N04T_~ M40 A C40 A 40 A 4 8<br />
ESV153N04TXB, ESV153N04T_~ M50 A C50 A 50 A 10 8<br />
ESV183N04TXB, ESV183N04T_~ M63 A C63A 70 A 10 6<br />
ESV223N04TXB, ESV223N04T_~ M80 A C80 A 80 A 16 6<br />
ESV303N04TXB M100 A C100 A 100 A 25 4<br />
ESV373N04TXB M125 A C125 A 125 A 35 2<br />
ESV453N04TXB M160 A C160 A 150 A 35 1<br />
ESV751N06TXB ...ESV222N06TXB<br />
ESV751N06T * ...ESV222N06T *<br />
M10 A C10 A 10 A 1.5 14<br />
ESV402N06TXB, ESV402N06T_* M16 A C16 A 12 A 1.5 14<br />
ESV552N06TXB, ESV552N06T_* M16 A C16 A 15 A 2.5 14<br />
ESV752N06TXB, ESV752N06T_~ M20 A C20 A 20 A 2.5 12<br />
ESV113N06TXB, ESV113N06TX~, ESV113N06TM~ M32 A C32 A 30 A 4 10<br />
ESV153N06TXB, ESV153N06TX~, ESV153N06TM~ M40 A C40 A 40 A 4 8<br />
ESV183N06TXB, ESV183N06TX~, ESV183N06TM~ M50 A C50 A 50 A 6 8<br />
ESV223N06TXB, ESV223N06TX~, ESV223N06TM~ M63 A C63 A 60 A 10 8<br />
ESV303N06TXB M80 A C80 A 70 A 16 6<br />
ESV373N06TXB M100 A C100 A 90 A 16 4<br />
ESV453N06TXB M125 A C125 A 110 A 25 2<br />
<strong>CTi</strong> <strong>Automation</strong> - Phone: 800.894.0412 - Fax: 208.368.0415 - Web: www.ctiautomation.net - Email: info@ctiautomation.net<br />
19
Installation<br />
Notes for Fuse and Cable Table:<br />
(1) Installations with high fault current due to large supply mains may require a type D circuit breaker.<br />
(2) UL Class CC or T fast-acting current-limiting type fuses, 200,000 AIC, preferred. Bussman KTK-R, JJN or JJS or equivalent.<br />
(3) Thermomagnetic type breakers preferred.<br />
_ 11th digit of part number: F = Integral EMC Filter<br />
L = Integral EMC Filter and Integrated Disconnect Switch (NEMA 4X/IP65 Models only)<br />
M = Integrated Disconnect Switch (NEMA 4X/IP65 Models only)<br />
X = No EMC Filter/ No Disconnect Switch<br />
* = Last digit of part number: C = N4X Indoor only (convection cooled)<br />
E = N4X Indoor/Outdoor (convection cooled)<br />
~ = Last digit of part number: D = N4X Indoor only (fan cooled)<br />
F = N4X Indoor/Outdoor (fan cooled)<br />
Observe the following when using Ground Fault Circuit Interrupters (GFCIs):<br />
• Installation of GFCI only between supplying mains and controller.<br />
• The GFCI can be activated by:<br />
- capacitive leakage currents between the cable screens during operation (especially with long, screened motor cables)<br />
- connecting several controllers to the mains at the same time<br />
- RFI filters<br />
3.2.3 Control Terminals<br />
Control Terminal Strip for 0.33 - 10 HP (0.25 - 7.5 kW):<br />
4.5 lb-in<br />
(0.5 Nm)<br />
0.25 in (6 mm)<br />
AWG 26…16<br />
(
Control Terminal Strip Descriptions<br />
Terminal Description Important<br />
SV01M<br />
Installation<br />
1 Digital Input: Start/Stop input resistance = 4.3kW<br />
2 Analog Common<br />
5 Analog Input: 0...10 VDC input resistance: >50 kW<br />
6 Internal DC supply for speed pot +10 VDC, max. 10 mA<br />
25 Analog Input: 4...20 mA input resistance: 250W<br />
4 Digital Reference/Common +15 VDC / 0 VDC, depending on assertion level<br />
11 Internal DC supply for external devices +12 VDC, max. 50 mA<br />
13A Digital Input: Configurable with P121<br />
13B Digital Input: Configurable with P122<br />
13C Digital Input: Configurable with P123<br />
13D* Digital Input: Configurable with P124<br />
input resistance = 4.3kW<br />
14 Digital Output: Configurable with P142, P144 DC 24 V / 50 mA; NPN<br />
30 Analog Output: Configurable with P150…P155 0…10 VDC, max. 20 mA<br />
2* Analog Common<br />
TXA* RS485 TxA<br />
TXB* RS485 TxB<br />
16<br />
17<br />
Relay output: Configurable with P140, P144<br />
AC 250 V / 3 A<br />
DC 24 V / 2 A … 240 V / 0.22 A, non-inductive<br />
* = Terminal is part of the terminal strip for the 15HP (11kW) and higher models only.<br />
Assertion level of digital inputs<br />
The digital inputs can be configured for active-high or active-low by setting the Assertion Level Switch (ALsw) and P120.<br />
If wiring to the drive inputs with dry contacts or with PNP solid state switches, set the switch and P120 to “High” (+). If<br />
using NPN devices for inputs, set both to “Low” (-). Active-high (+) is the default setting.<br />
HIGH = +12 … +30 V<br />
LOW = 0 … +3 V<br />
NOTE<br />
An F L fault will occur if the Assertion Level switch (ALsw) position does not match the parameter<br />
P120 setting and P100 or any of the digital inputs (P121...P124) is set to a value other than 0.<br />
<strong>CTi</strong> <strong>Automation</strong> - Phone: 800.894.0412 - Fax: 208.368.0415 - Web: www.ctiautomation.net - Email: info@ctiautomation.net<br />
21
Commissioning<br />
4 Commissioning<br />
4.1 Local Keypad & Display<br />
SMV Models: 0.33-10HP (0.25-7.5kW) SMV Models: 15HP (11kW) and greater<br />
AUTO<br />
Display START BUTTON<br />
RUN<br />
STOP<br />
22 SV01M<br />
FWD<br />
REV<br />
RUN AUTO<br />
FWD<br />
STOP<br />
CTRL<br />
REMOTE<br />
LOCAL<br />
MAN<br />
AUTO<br />
4-Character Display 4-Character plus CTRL Display<br />
In Local Mode (P100 = 0, 4, 6), this button will start the drive.<br />
STOP BUTTON<br />
Stops the drive, regardless of which mode the drive is in.<br />
WARNING!<br />
When JOG is active, the STOP button will not stop the drive!<br />
ROTATION<br />
In Local Mode (P100 = 0, 4, 6), this selects the motor rotation direction:<br />
- The LED for the present rotation direction (FWD or REV) will be on<br />
- Press R/F; the LED for the opposite rotation direction will blink<br />
- Press M within 4 seconds to confirm the change<br />
- The blinking direction LED will turn on, and the other LED will turn off<br />
When rotation direction is changed while the drive is running, the commanded direction LED will blink until the<br />
drive is controlling the motor in the selected direction.<br />
Rotation is set in P112. When P112 = 0, rotation is forward only. When P112 = 1 rotation is forward and reverse.<br />
MODE<br />
REV<br />
Hz<br />
%<br />
RPM<br />
AMPS<br />
/UNITS<br />
Used to enter/exit the Parameter Menu when programming the drive and to enter a changed parameter value.<br />
UP AND DOWN BUTTONS<br />
Used for programming and can also be used as a reference for speed, PID setpoint, or torque setpoint.<br />
When the s and t buttons are the active reference, the middle LED on the left side of the display will be on.<br />
RUN<br />
STOP
Display INDICATING LEDs (on 4-character display)<br />
FWD<br />
REV<br />
SV01M<br />
Commissioning<br />
FWD LED: Indicate the present rotation direction is forward. Refer to ROTATION description above.<br />
REV LED: Indicate the present rotation direction is reverse. Refer to ROTATION description above.<br />
AUTO AUTO LED: Indicates that the drive has been put into Auto mode from one of the TB13 inputs (P121…P124 set<br />
to 1…7). Indicates that PID mode is active (if PID mode is enabled). Indicates that sequencer mode is active (if<br />
sequencer mode is enabled).<br />
RUN<br />
RUN LED: Indicates that the drive is running.<br />
▲ ▼ s t LED: Indicates that the s t are the active reference.<br />
CTRL<br />
NOTE<br />
If the keypad is selected as the auto reference (P121…P124 is 6) and the corresponding<br />
TB-13 input is closed, the AUTO LED and s t LEDs will both be on.<br />
FUNCTIONS THAT FOLLOW ARE APPLICABLE TO SMV DRIVES 15HP (11kW) AND HIGHER<br />
CTRL<br />
The CTRL pushbutton selects the start and speed reference control sources for the drive.<br />
Press [ ] mode button to accept the new control mode selection.<br />
CTRL LEDs START CONTROL REFERENCE CONTROL<br />
REMOTE<br />
LOCAL<br />
REMOTE<br />
LOCAL<br />
REMOTE<br />
LOCAL<br />
REMOTE<br />
LOCAL<br />
MAN<br />
AUTO [LOCAL] [MAN] Keypad P101 Settings<br />
MAN<br />
AUTO [LOCAL] [AUTO] Keypad Terminal 13x Settings<br />
MAN<br />
AUTO [REMOTE] [MAN] Terminal Strip P101 Settings<br />
MAN<br />
AUTO [REMOTE] [AUTO] Terminal Strip Terminal 13x Settings<br />
If P100 = 6 the CTRL button is used to toggle<br />
start control between the terminal strip [REMOTE]<br />
and the keypad [LOCAL]<br />
If P113 = 1 the CTRL button is used to toggle<br />
reference control between the TB-13x setup<br />
[AUTO] and P101 [MANUAL]<br />
If P100 = 6 and P113 = 1, it is possible to<br />
change the start and reference control sources at<br />
the same time<br />
- REM/LOC LED indicating the present start control source is ON<br />
- Press [CTRL]; the LED for other start control source will blink<br />
- Press [M] within 4 sec to confirm the change<br />
- Blinking LED will turn ON (the other LED will turn OFF)<br />
- AUT/MAN LED indicating present reference control is ON<br />
- Press [CTRL]; the other reference control will blink<br />
- Press [M] within 4 sec to confirm change<br />
- Blinking LED will turn ON (the other LED will turn OFF)<br />
<strong>CTi</strong> <strong>Automation</strong> - Phone: 800.894.0412 - Fax: 208.368.0415 - Web: www.ctiautomation.net - Email: info@ctiautomation.net<br />
23
Display START CONTROL<br />
Commissioning<br />
The REMOTE/LOCAL LEDs indicate the current start control source. If the start control source is a remote keypad<br />
or the network, then both LEDs will be OFF.<br />
REFERENCE CONTROL<br />
The AUTO/MANUAL LEDs indicate the current reference control source.<br />
IF P113 = 0 or 2, the AUTO/MANUAL LEDs will match the AUTO LED on the 4-character display. IF P113 = 0<br />
and no AUTO reference has been setup on the terminal strip, the MANUAL LED will turn ON and the AUTO LED<br />
will turn OFF.<br />
IF P113 = 1, the AUTO/MANUAL LEDS show the commanded reference control source as selected by the [CTRL]<br />
button. If the [CTRL] button is used to set the reference control source to AUTO but no AUTO reference has been<br />
setup on the terminal strip, reference control will follow P101 but the AUTO LED will remain ON.<br />
UNITS LEDs<br />
HZ: current display value is in Hz In Speed mode, if P178 = 0 then HZ LED will be ON. If<br />
%: current display value is in %<br />
RPM: current display value is in RPM<br />
AMPS: current display value is in Amps<br />
/UNITS current display value is a per unit (i.e./sec,<br />
/min, /hr, etc.)<br />
4.2 Drive Display and Modes of Operation<br />
24 SV01M<br />
P178 > 0, the Units LEDs follow the setting of P177 when<br />
the drive is in run (non-programming) mode.<br />
In Torque mode, the HZ LED will be ON when the drive is<br />
in run (non-programming) mode.<br />
In Pid mode, the Units LEDs follow the setting of P203<br />
when the drive is in run (non-programming) mode.<br />
If P179 > 0, the Units LEDs will show the unit of the<br />
diagnostic parameter that is being displayed.<br />
Speed Mode Display<br />
In the standard mode of operation, the drive frequency output is set directly by the selected reference (keypad, analog<br />
reference, etc.). In this mode, the drive display will show the drive’s output frequency.<br />
PID Mode Display<br />
When the PID mode is enabled and active, the normal run display shows the actual PID setpoint. When PID mode is not<br />
active, the display returns to showing the drive’s output frequency.<br />
Torque Mode Display<br />
When the drive is operating in Vector Torque mode, the normal run display shows the drive’s output frequency.<br />
Alternate (Run-Screen) Display<br />
When P179 (Run Screen Display) is set to a value other than 0, one of the diagnostic parameters (P501…P599) is<br />
displayed. Example: if P179 is set to 1, then diagnostic parameter P501 (Software version) is displayed. If P179 =2,<br />
then P502 (Drive ID) is displayed.<br />
<strong>CTi</strong> <strong>Automation</strong> - Phone: 800.894.0412 - Fax: 208.368.0415 - Web: www.ctiautomation.net - Email: info@ctiautomation.net
4.3 Parameter Setting<br />
SV01M<br />
Commissioning<br />
Status/Fault messages Change Parameters<br />
StoP<br />
60.0<br />
CL<br />
Err<br />
F.AF<br />
F.UF<br />
PASS<br />
0225<br />
P194 = 0000<br />
60 s<br />
p100<br />
p104<br />
p541<br />
4.4 Electronic Programming Module (EPM)<br />
The EPM contains the drives operational memory. Parameter settings are stored in the<br />
EPM and setting changes are made to the “User settings” in the EPM.<br />
An optional EPM Programmer (model EEPM1RA) is available that allows:<br />
• An EPM to be copied directly to another EPM.<br />
• An EPM to be copied to the memory of the EPM Programmer.<br />
• Stored files can be modified in the EPM Programmer.<br />
• Stored files can be copied to another EPM.<br />
M<br />
M<br />
M<br />
15 s<br />
20.0<br />
12.0<br />
M<br />
V0106<br />
EPM Module<br />
in SMV Drive<br />
As the EPM Programmer is battery operated, parameter settings can be copied to an EPM and inserted into a drive<br />
without power being applied to the drive. This means that the drive will be fully operational with the new settings on<br />
the next application of power.<br />
Additionally, when the drives parameter settings are burned into an EPM with the EPM Programmer, the settings are<br />
saved in two distinct locations; the “User settings” and the “OEM default settings”. While the User settings can be<br />
modified in the drive, the OEM settings cannot. Thus, the drive can be reset not only to the “factory” drive default<br />
settings (shown in this manual), but can be set to the Original Machine settings as programmed by the OEM.<br />
The user area contents of the EPM are what are copied into the OEM space by the EPM programmer. When parameter<br />
modifications are made to the drive and then a copy made via the EPM Programmer, these are the settings that will<br />
be available by the OEM selections from P199. The EPM Programmer is the only way to load the OEM area of the EPM.<br />
While the EPM can be removed for copying or to use in another drive, it must be installed for the drive to operate (a<br />
missing EPM will trigger an 1 fault)<br />
<strong>CTi</strong> <strong>Automation</strong> - Phone: 800.894.0412 - Fax: 208.368.0415 - Web: www.ctiautomation.net - Email: info@ctiautomation.net<br />
25
4.5 Parameter Menu<br />
Commissioning<br />
4.5.1 Basic Setup Parameters<br />
Code<br />
No. Name<br />
Possible Settings<br />
Default Selection<br />
IMPORTANT<br />
Start Control Source 0 0 Local Keypad Use RUN button on front of drive to start<br />
1 Terminal Strip Use start/stop circuit wired into the terminal strip.<br />
Refer to section 3.2.3<br />
2 Remote Keypad Only Use RUN button on optional Remote Keypad to start<br />
3 Network Only • Start command must come from network<br />
(Modbus, CANopen, etc)<br />
• SMV models
Code Possible Settings<br />
No. Name Default Selection<br />
SV01M<br />
Commissioning<br />
IMPORTANT<br />
0 Minimum <strong>Frequency</strong> 0.0 0.0 {Hz} P103 • P102, P103 are active for all speed<br />
Maximum <strong>Frequency</strong> 60.0 7.5 {Hz} 500<br />
references<br />
• When using an analog speed<br />
reference, also see P160, P161<br />
NOTE<br />
• P103 cannot be set below Minimum <strong>Frequency</strong> (P102)<br />
• To set P103 above 120 Hz:<br />
- Scroll up to 120 Hz; display shows<br />
- Release s button and wait one second.<br />
(flashing).<br />
- Press s button again to continue increasing P103.<br />
WARNING!<br />
Consult motor/machine manufacturer before operating above rated frequency. Overspeeding the motor/machine may cause<br />
damage to equipment and injury to personnel!<br />
Acceleration Time 1 20.0 0.0 {s} 3600 • P104 = time of frequency change from 0 Hz to<br />
P167 (base frequency)<br />
• P105 = time of frequency change from P167<br />
Deceleration Time 1 20.0 0.0 {s} 3600 to 0 Hz<br />
• For S-ramp accel/decel, adjust P106<br />
EXAMPLE: IF P103 = 120 Hz, P104 = 20.0 s and P167 (base frequency) = 60 Hz; then the rate of frequency change from 0<br />
Hz to 120 Hz = 40.0 s<br />
S-Ramp Integration<br />
Time<br />
0.0 0.0 {s} 50.0 • P106 = 0.0: Linear accel/decel ramp<br />
• P106 > 0.0: Adjusts S-ramp curve for smoother<br />
ramp<br />
7 (1) Line Voltage Selection 1* 0 Low (120, 200, 400, 480VAC) * The default setting is 1 for all drives except<br />
when using “Reset to 50Hz default settings”<br />
1 High (120, 240, 480, 600VAC)<br />
(Parameter P199, selection 4) with 480V<br />
models. In this case, the default setting is 0.<br />
Motor Overload 100 30 {%} 100 P108 = motor current rating x 100<br />
SMV output rating<br />
Example: if motor = 3amps and SMV = 4amps,<br />
then P108 = 75%<br />
NOTE<br />
Do not set above rated motor current as listed on the motor dataplate. The motor thermal<br />
overload function of the SMV is UL approved as a motor protection device. Cycling power after<br />
an overload fault could result in significantly reducing the motor life.<br />
Motor Overload Type 0 0 Speed Compensation Ir<br />
100%<br />
1 No Speed Compensation<br />
Example: Motor is cooled by forced<br />
ventilation as apposed to shaft mounted,<br />
self cooling fans.<br />
(1) Any changes to this parameter will not take effect until the drive is stopped.<br />
60%<br />
1<br />
0<br />
30 f<br />
V0108<br />
27
Commissioning<br />
Code<br />
No. Name<br />
Possible Settings<br />
Default Selection<br />
IMPORTANT<br />
1 Start Method 0 0 Normal<br />
1 Start on Power-up Drive will automatically start when power is<br />
applied.<br />
2 Start with DC Brake When start command is applied, drive will apply<br />
DC braking according to P174, P175 prior to<br />
starting the motor<br />
3 Auto Restart Drive will automatically restart after faults, or when<br />
power is applied.<br />
4 Auto Restart with DC Brake Combines settings 2 and 3<br />
5 Flying Start/Restart - Type 1 • Drive will automatically restart after faults, or<br />
when power is applied.<br />
• After 3 failed attempts, drive will Auto Restart<br />
6 Flying Start/Restart - Type 1<br />
with DC brake.<br />
• P110 = 5, 7: Performs speed search, starting<br />
at Max <strong>Frequency</strong> (P103)<br />
• P110 = 6, 8: Performs speed search, starting<br />
7 Flying Start /Restart - Type 2 at the last output frequency prior to faulting<br />
for 2-pole motors requiring a flying or power loss<br />
restart<br />
• If P111 = 0, a flying START is performed when<br />
8 Flying Start/Restart - Type 2<br />
a start command is applied.<br />
for 2-pole motors requiring a flying<br />
• P110 = 7,8: Utilizes P280/281 to set Max<br />
restart<br />
Current Level and Decel Time for restart<br />
NOTE<br />
• P110 = 0, 2: Start command must be applied at least 2 seconds after power-up;<br />
fault will occur if start command is applied too soon.<br />
• P110 = 1, 3…6: For automatic start/restart, the start source must be the terminal strip<br />
and the start command must be present.<br />
• P110 = 2, 4…6: If P175=999.9, dc braking will be applied for 15s.<br />
• P110 = 3…6: Drive will attempt 5 restarts; if all restart attempts fail, drive displays<br />
(fault lockout) and requires manual reset.<br />
• P110 = 5, 6: If drive cannot catch the spinning motor, drive will trip into . fault.<br />
• P110 = 5, 6: If drive trips into . fault, try P110 = 7 or 8.<br />
WARNING!<br />
Automatic starting/restarting may cause damage to equipment and/or injury to personnel! Automatic starting/restarting should<br />
only be used on equipment that is inaccessible to personnel.<br />
P 1 Stop Method 0 0 Coast Drive’s output will shut off immediately upon a stop<br />
command, allowing the motor to coast to a stop<br />
1 Coast with DC Brake The drive’s output will shut off and then the DC<br />
Brake will activate (refer to P174, P175)<br />
2 Ramp The drive will ramp the motor to a stop according<br />
to P105 or P126.<br />
3 Ramp with DC Brake The drive will ramp the motor to 0 Hz and then<br />
the DC Brake will activate (refer to P174, P175)<br />
1 Rotation 0 0 Forward Only If PID mode is enabled, reverse direction is disabled<br />
1 Forward and Reverse<br />
(except for Jog).<br />
<strong>CTi</strong> <strong>Automation</strong> - Phone: 800.894.0412 - Fax: 208.368.0415 - Web: www.ctiautomation.net - Email: info@ctiautomation.net<br />
28 SV01M
Code Possible Settings<br />
No. Name Default Selection<br />
SV01M<br />
Commissioning<br />
IMPORTANT<br />
1 Auto/Manual Control 0 0 Terminal Strip Control The reference is dictated by the settings and state<br />
of the TB-13x terminals. If no AUTO reference has<br />
been setup on the terminal strip then reference<br />
control is dictated by P101.<br />
1 Auto/Manual (CTRL button select) Allows the reference to be switched between auto<br />
and manual using the CTRL pushbutton on the<br />
drive keypad. If the CTRL pushbutton has selected<br />
AUTO reference but no AUTO reference has been<br />
setup on the terminal strip, then reference control<br />
is dictated by P101.<br />
2 Manual Control Only Reference is dictated by P101 regardless of any<br />
AUTO source that may be selected by the TB-13x<br />
terminals.<br />
NOTE<br />
P113 is applicable to SMV 15HP (11kW) and higher models only.<br />
1 MOP Speed<br />
Initialization at<br />
Power-Up<br />
0 0 Set to last MOP speed at power up Output frequency at power-up = last MOP speed<br />
1 Set to 0.0Hz at power up Output frequency at power-up = 0Hz<br />
2 Set to Preset #3 (P133) at power up Output frequency at power-up = P133<br />
<strong>CTi</strong> <strong>Automation</strong> - Phone: 800.894.0412 - Fax: 208.368.0415 - Web: www.ctiautomation.net - Email: info@ctiautomation.net<br />
29
Commissioning<br />
4.5.2 I/O Setup Parameters<br />
Code<br />
No. Name<br />
Possible Settings<br />
Default Selection<br />
IMPORTANT<br />
Assertion Level 2 1 Low P120 and the Assertion Level switch must both<br />
match the desired assertion level unless P100,<br />
2 High<br />
P121…P124 are all set to 0. Otherwise an F.AL<br />
fault will occur.<br />
2<br />
TB-13A Digital Input<br />
TB-13B Digital Input<br />
(Priority > TB13A)<br />
Same as TB13A except:<br />
3 = Preset #2<br />
23 = Seq Seg, #2<br />
TB-13C Digital Input<br />
(Priority > TB13B, A)<br />
Same as TB13A except:<br />
3 = Preset #3<br />
23 = Seq Seg, #4<br />
TB-13D* Digital Input<br />
(Priority > TB13C, B, A)<br />
Same as TB13A except:<br />
3 = Preset #4<br />
23 = Seq Seg, #8<br />
NOTE: P124 is<br />
applicable to SMV<br />
15HP (11kW) and<br />
higher models only<br />
0 0 None Disables input<br />
1 AUTO Reference: 0-10 VDC For frequency mode, see P160...P161,<br />
2 AUTO Reference: 4-20 mA For PID mode, see P204…P205,<br />
For vector torque mode, see P330<br />
3 AUTO Reference: Preset #1 For frequency mode see P131...P137,<br />
For PID mode, see P231…P233,<br />
* 13D: 3 = Reserved<br />
For torque mode see, P331…P333<br />
4 AUTO Reference: MOP Up • Normally open: Close input to increase or<br />
5 AUTO Reference: MOP Down<br />
6 AUTO Reference: Keypad<br />
7 AUTO Reference: Network<br />
decrease speed, PID or torque setpoint.<br />
• MOP Up is not active while in STOP<br />
8 Control Select Use when P100 = 4, 5 to switch between terminal<br />
strip control and local or remote keypad control.<br />
9 Network Enable Required to start the drive through the network.<br />
10 Reverse Rotation Open = Forward Closed = Reverse<br />
11 Start Forward<br />
12 Start Reverse<br />
Refer to Note for typical circuit<br />
13 Run Forward<br />
14 Run Reverse<br />
Refer to Note for typical circuit<br />
15 Jog Forward Jog Forward speed = P134<br />
16 Jog Reverse Jog Reverse speed = P135<br />
Active even if P112 = 0<br />
17 Accel/Decel #2 Refer to P125, P126<br />
18 DC Brake Refer to P174; close input to override P175<br />
19 Auxiliary Ramp to Stop Normally closed: Opening input will ramp drive<br />
to STOP according to P127, even if P111 is set<br />
to Coast (0 or 1).<br />
20 Clear Fault Close to reset fault<br />
21 External Fault .<br />
Normally closed circuit; open to trip<br />
22 Inverse External Fault . Normally open circuit; close to trip<br />
23 AUTO Ref: Sequence Segment #1<br />
24 Start Sequence<br />
Works in Speed Mode only<br />
25 Step Sequence<br />
26 Suspend Sequence<br />
Transition from non-asserted to asserted state<br />
WARNING<br />
Jog overrides all STOP commands! To stop the drive while in Jog mode, the Jog input must be deactivated or a<br />
fault condition induced.<br />
WARNING<br />
If the input defined to “Start Sequence” is opened during a sequence, the drive will exit sequencer mode and will run<br />
at the specified standard or alternate speed source (dependent on drive configuration).<br />
30 SV01M
SV01M<br />
Commissioning<br />
Code Possible Settings<br />
IMPORTANT<br />
No. Name Default Selection<br />
NOTE<br />
• When input is activated, settings 1...7 override P101<br />
• When TB-13A...TB-13D are configured for Auto References other than MOP, TB-13D overrides TB-13C, TB-13C overrides<br />
TB-13B and TB-13B overrides TB-13A. Any other Auto Reference will have priority over MOP.<br />
• Settings 10...14 are only valid in Terminal Strip mode (P100 = 1, 4, 5, 6)<br />
• If Start/Run/Jog Forward and Start/Run/Jog Reverse are both activated, drive will STOP<br />
• If Jog input is activated while drive is running, the drive will enter Jog mode; when Jog input is deactivated, drive will STOP<br />
• An fault will occur if the Assertion Level switch (ALsw) position does not match the P120 setting and any of the digital<br />
inputs (P121...P124) are set to a value other than 0.<br />
• An I fault will occur under the following conditions:<br />
- TB-13A...TB-13D settings are duplicated (each setting, except 0, 3 and 23, can only be used once)<br />
- One input is set to “MOP Up” and another is not set to “MOP Down”, or vice-versa.<br />
- One input is set to 10 and another input is set to 11…14.<br />
- One input is set to 11 or 12 and another input is set for 13 or 14.<br />
• Typical control circuits are shown below:<br />
- If any input is set to 10, 12 or 14, P112 must be set to 1 for Reverse action to function.<br />
Run / Stop<br />
with Direction<br />
P121 = 10<br />
1 4 13A<br />
STOP<br />
RUN<br />
FWD<br />
REV<br />
Start Forward /<br />
Start Reverse<br />
P121 = 11, P122 = 12<br />
1 4 13A 13B<br />
STOP<br />
FWD<br />
REV<br />
Run Forward /<br />
Run Reverse<br />
P121 = 13, P122 = 14<br />
1 4 13A 13B<br />
Acceleration Time 2 20.0 0.0 {s} 3600 • Selected using TB-13A...TB-13D (P121...<br />
P 26 Deceleration Time 2 20.0 0.0 {s} 3600<br />
P124 = 17)<br />
• For S-ramp accel/decel, adjust P106<br />
7 Deceleration Time<br />
for Auxiliary Ramp<br />
to Stop<br />
Automatic Accel/<br />
Decel rate switch<br />
threshold<br />
20.0 0.0 {s} 3600 • Selected using TB-13A...TB-13D (P121...<br />
P124 = 19).<br />
• For S-ramp accel/decel, adjust P106<br />
• Once executed, this ramp time has priority over<br />
P105 and P126.<br />
0.0 0.0 {Hz} 1000 If Actual <strong>Frequency</strong> < P129 Use Accel/decel time<br />
#2 (P125/P126)<br />
If Actual <strong>Frequency</strong> > P129 Use Accel/decel time<br />
#1 (P104/P105)<br />
Preset Speed #1 0.0 0.0 {Hz} 500 PRESET<br />
SPEED<br />
13A 13B 13C 13D<br />
Preset Speed #2 0.0 0.0 {Hz} 500<br />
1 X -- -- --<br />
2 -- X -- --<br />
Preset Speed #3 0.0 0.0 {Hz} 500<br />
3 -- -- X --<br />
Preset Speed #4 0.0 0.0 {Hz} 500<br />
4<br />
4 (alternate)<br />
X<br />
--<br />
X<br />
--<br />
--<br />
--<br />
--<br />
X<br />
Preset Speed #5 0.0 0.0 {Hz} 500<br />
5<br />
6<br />
X<br />
--<br />
--<br />
X<br />
X<br />
X<br />
--<br />
--<br />
Preset Speed #6 0.0 0.0 {Hz} 500<br />
7 X X X --<br />
8 (alternate) -- X -- X<br />
7 Preset Speed #7 0.0 0.0 {Hz} 500 8 (alternate -- -- X X<br />
Preset Speed #8 0.0 0.0 {Hz} 500<br />
RUN<br />
FWD<br />
RUN<br />
REV<br />
• Speed setting is used by P158<br />
• 13D available on 15HP (11kW) & higher drives.<br />
31
Commissioning<br />
Code<br />
No. Name<br />
Possible Settings<br />
Default Selection<br />
IMPORTANT<br />
Relay Output<br />
0 0 None Disables the output<br />
TB-16, 17<br />
1 Run Energizes when the drive is running<br />
2 Reverse Energizes when reverse rotation is active<br />
3 Fault De-energizes when the drive trips, or power is<br />
removed<br />
4 Inverse Fault Energizes when the drive trips<br />
5 Fault Lockout P110 = 3...6: De-energizes if all restart attempts<br />
fail<br />
6 At Speed Energizes when output frequency = commanded<br />
frequency<br />
7 Above Preset Speed #6 Energizes when output frequency > P136<br />
8 Current Limit Energizes when motor current = P171<br />
9 Follower Loss (4-20 mA) Energizes when 4-20 mA signal is < P164<br />
10 Loss of Load<br />
11 Local Keypad Control Active<br />
Energizes when motor load drops below P145;<br />
Refer to P146 also<br />
12 Terminal Strip Control Active Energizes when the selected source is active for<br />
13 Remote Keypad Control Active<br />
14 Network Control Active<br />
start control<br />
15 Standard Reference Active Energizes when P101 reference is active<br />
16 Auto Reference Active Energizes when Auto Reference is activated using<br />
TB-13 input; refer to P121...P124<br />
17 Sleep Mode Active Refer to P240...P242<br />
18 PID Feedback < Min. Alarm Energizes when PID feedback signal < P214<br />
19 Inverse PID Feedback < Min. Alarm De-energizes when PID feedback signal < P214<br />
20 PID Feedback > Max Alarm Energizes when PID feedback signal > P215<br />
21 Inverse PID Feedback > Max Alarm De-energizes when PID feedback signal > P215<br />
22 PID Feedback within<br />
Energizes when PID feedback signal is within the<br />
Min/Max Alarm range<br />
Min/Max Alarm range; refer to P214, P215<br />
23 PID Feedback outside<br />
Energizes when PID feedback signal is outside the<br />
Min/Max Alarm range<br />
24 Reserved<br />
Min/Max Alarm range; refer to P214, P215<br />
25 Network Controlled SMV models < 15HP (11kW) require an optional<br />
communication module (refer to the network<br />
module documentation).<br />
26 Loss of 0-10V Input Energizes when 0-10V signal is < P158<br />
27 Sequencer Controlled<br />
28 Sequencer Active<br />
29 Sequencer Suspended<br />
State set in individual sequencer segments<br />
30 Sequence Done End Sequence<br />
31 Output <strong>Frequency</strong> = 0.0Hz Output inactive<br />
TB-14 Output 0 0...23 (same as P140)<br />
24 Dynamic Braking<br />
25...31 (same as P140)<br />
For use with Dynamic Braking option<br />
<strong>CTi</strong> <strong>Automation</strong> - Phone: 800.894.0412 - Fax: 208.368.0415 - Web: www.ctiautomation.net - Email: info@ctiautomation.net<br />
32 SV01M
Code Possible Settings<br />
No. Name Default Selection<br />
Digital Output<br />
Inversion<br />
P144<br />
Invert<br />
P142<br />
Invert<br />
P140<br />
0 NO NO<br />
1 NO YES<br />
2 YES NO<br />
3 YES YES<br />
Loss of Load<br />
Threshold<br />
SV01M<br />
Commissioning<br />
IMPORTANT<br />
Used to invert the selections for P140 (Relay Output)<br />
and P142 (TB-14 Output).<br />
EXAMPLE: When P140 = 6 (AT SPEED), the relay is<br />
energized when output frequency = commanded<br />
frequency. IF P144=1 or 3, then P140 is inverted<br />
(INVERSE AT SPEED) and the relay is energized<br />
when the output frequency does not equal the<br />
command frequency.<br />
NOTE<br />
Inverting P140 or P142 when the parameter is set to NONE (0) will result in the output being<br />
energized continuously.<br />
NOTE<br />
For <strong>SMVector</strong> drives rated at 0.33 to 10 HP (0.25 to 7.5 kW), P144 is only available with<br />
software versions 3.0 and higher (refer to P501).<br />
0 0 {%} 200 P140, P142 = 10: Output will energize if motor<br />
load falls below the P145 value longer than the<br />
P146 time<br />
Loss of Load Delay 0.0 0.0 {s} 240.0<br />
Analog Output Offset 0.0 0 {%} 100 Scaled value. Example: P149 = 10%, Scaled<br />
variable = freq, P150 = 1, P152 = 60Hz; then<br />
TB30 = 0VDC below 6Hz<br />
TB-30 Output 0 0 None 2-10 VDC signal can be converted to 4-20 mA with<br />
a total circuit impedance of 500 W<br />
1 0-10 VDC Output <strong>Frequency</strong><br />
2 2-10 VDC Output <strong>Frequency</strong><br />
3 0-10 VDC Load<br />
4 2-10 VDC Load<br />
5 0-10 VDC Torque<br />
6 2-10 VDC Torque<br />
7 0-10 VDC Power (kW)<br />
8 2-10 VDC Power (kW)<br />
9 Network Controlled SMV models < 15HP (11kW) require an optional<br />
communication module (refer to the network<br />
module documentation).<br />
10 Sequencer Controlled Value set in individual sequencer segments<br />
TB-30 Scaling:<br />
<strong>Frequency</strong><br />
60.0 3.0 {Hz} 2000 If P150 = 1 or 2, sets the frequency at which output<br />
equals 10 VDC<br />
TB-30 Scaling: Load 200 10 {%} 500 If P150 = 3 or 4, sets the Load (as a percent of<br />
drive current rating) at which output equals 10 VDC.<br />
TB-30 Scaling:<br />
Torque<br />
TB-30 Scaling:<br />
Power (kW)<br />
100 10 {%} 1000 If P150 = 5 or 6, sets the Torque (as a percent of<br />
motor rated torque) at which output equals 10 VDC<br />
1.0 0.1 {kW} 200.0 If P150 = 7 or 8, sets the power at which output<br />
equals 10 VDC<br />
<strong>CTi</strong> <strong>Automation</strong> - Phone: 800.894.0412 - Fax: 208.368.0415 - Web: www.ctiautomation.net - Email: info@ctiautomation.net<br />
33
Commissioning<br />
4.5.3 Advanced Setup Parameters<br />
Code<br />
No. Name<br />
Possible Settings<br />
Default Selection<br />
IMPORTANT<br />
Analog Inputs 0 0 TB5: (0-10 VDC); TB25: (4-20mA)<br />
Configuration<br />
1 TB5: (0 - 5 VDC); TB25: (4-20mA)<br />
2 TB5: (2 - 10 VDC); TB25: (4-20mA)<br />
4 TB5: (0-10 VDC); TB25: (0-20mA)<br />
5 TB5: (0 - 5 VDC); TB25: (0-20mA)<br />
6 TB5: (2 - 10 VDC); TB25: (0-20mA)<br />
7 TB5 (0-10V) Analog 0 0 No Action Selects the reaction to a loss of the 0-10V signal<br />
Input Monitoring<br />
Action<br />
1 If TB5 < P158 - Trip Fault F.FAU<br />
2 If TB5 < P158 - Run Preset #8<br />
at TB5<br />
500ms is the minimum time above/below<br />
3 If TB5 < P158 - Run Preset Seg. #16 Monitoring Level (P158) before triggering the<br />
4 If TB5 > P158 - Trip Fault F.FAU<br />
drive to trip or run at a preset speed.<br />
5 If TB5 > P158 - Run Preset #8 For P157 = 3 or 6, the accel/decel time is set<br />
in P786.<br />
6 If TB5 > P158 - Run Preset Seg. #16<br />
NOTE: P157 has priority over P163 and TB-13<br />
presets/auto references (P121-P124)<br />
TB5 (0-10V) Analog<br />
Input Monitoring<br />
Level (ML)<br />
0.0 -10.0 {VDC} 10.0 Negative input voltage is not currently supported.<br />
0-10V Analog Input<br />
Deadband<br />
0.0 0 {VDC} 10.0 Not active if [-10 to +10 VDC] option is selected.<br />
P Speed at Minimum<br />
Signal<br />
0.0 -999.0 {Hz} 1000 f<br />
P161<br />
P1<br />
Speed at Maximum<br />
Signal<br />
60.0 -999.0 {Hz} 1000<br />
V0111<br />
NOTE<br />
• P160 sets the output frequency at 0% analog input<br />
• P161 sets the output frequency at 100% analog input<br />
• P160 or P161 < 0.0 Hz: For scaling purposes only; does not indicate opposite direction!<br />
• P160 > P161: Drive will react inversely to analog input signal<br />
p1 Analog Input Filter 0.01 0.00 {s} 10.00 • Adjusts the filter on the analog inputs (TB-5<br />
and TB-25) to reduce the effect of signal noise<br />
• The P162 delay time will affect the response<br />
time of diagnostic parameters (P520-P523).<br />
P TB-25 (4-20mA) 0 0 No Action • Selects the reaction to a loss of the 4-20 mA<br />
Analog Input<br />
Monitoring Action<br />
1 If TB25 < P164 - Trip Fault<br />
signal at TB-25.<br />
• Signal is considered lost if it falls below the<br />
2 If TB25 < P164 - Run Preset #7<br />
value set in P164<br />
3 If TB25 < P164 - Run Preset Seg. #15 • Digital outputs can also indicate a loss of 4-20<br />
4 If TB25 > P164 - Trip Fault<br />
mA signal; see P140, P142<br />
5 If TB25 > P164 - Run Preset #7 • For P163 = 3 or 6, the accel/decel time is<br />
set in P781.<br />
6 If TB25 > P164 - Run Preset Seg. #15<br />
NOTE: P163 has priority over TB-13 presets/auto<br />
references (P121-P124)<br />
34 SV01M<br />
P160<br />
0V<br />
(4mA)<br />
10V<br />
(20mA)<br />
ref
SV01M<br />
Commissioning<br />
Code<br />
No. Name<br />
Possible Settings<br />
Default Selection<br />
IMPORTANT<br />
P1 TB-25 (4-20mA)<br />
Analog Input<br />
Monitoring Level<br />
2.0 0.0 {mA} 20.0<br />
P1 Base Voltage 15 {V} 1000 Valid for V/Hz mode only.<br />
Set voltage for bus compensation in V/Hz mode<br />
Carrier <strong>Frequency</strong> See 0 4 kHz • As carrier frequency is increased, motor noise<br />
Notes 1 6 kHz<br />
2 8 kHz<br />
3 10 kHz<br />
is decreased<br />
• Observe derating in section 2.3<br />
• Automatic shift to 4 kHz at 120% load<br />
• NEMA 4X (IP65) Models: Default = 0 (4kHz)<br />
• NEMA 1 (IP31) Models: Default = 1 (6kHz)<br />
p<br />
(1) Base <strong>Frequency</strong> 60.0 10.0 {Hz} 1500<br />
p Fixed Boost 0.0 {%} 40.0<br />
V0112<br />
NOTE<br />
• P167 = rated motor frequency for standard applications<br />
• P165, P168 = default setting depends on drive rating<br />
Accel Boost 0.0 0.0 {%} 20.0 Accel Boost is only active during acceleration<br />
P 7 Slip Compensation 0.0 0.0 {%} 40.0 Increase P170 until the motor speed no longer<br />
changes between no load and full load conditions.<br />
(1) Current Limit Max I 30 {%} Max I • When the limit is reached, the drive displays<br />
(Current Limit), and either the acceleration<br />
time increases or the output frequency<br />
decreases.<br />
• Digital outputs can also indicate when the limit<br />
is reached; see P140, P142.<br />
• Refer to section 2.3 for the maximum output<br />
current Max I (%)<br />
7 Current Limit 0 0 Current Limit Reduction Active - In field weakening, the Current Limit is inversely<br />
Reduction<br />
Normal response<br />
1 Current Limit Reduction Active - Fast<br />
response<br />
2 Current Limit Reduction Disabled -<br />
Normal response<br />
3 Current Limit Reduction Disabled -<br />
Fast response<br />
proportional to the speed.<br />
Decel Override Time 2.0 0.0 {s} 60.0 Maximum time before drive trips into HF fault.<br />
P17 DC Brake Voltage 0.0 0.0 {%} 50.0 Setting is a percent of the nominal DC bus voltage.<br />
(1) Any changes to this parameter will not take effect until the drive is stopped.<br />
35
Commissioning<br />
Code Possible Settings<br />
No. Name Default Selection<br />
36 SV01M<br />
IMPORTANT<br />
p17 DC Brake Time 0.0 0.0 {s} 999.9<br />
NOTE: CONFIRM MOTOR SUITABILITY FOR USE WITH DC BRAKING<br />
DC Brake voltage (P174) is applied for the time specified by P175 with the following exceptions:<br />
• If P111=1, 3 and P175=999.9 the brake voltage will be applied continuously until a run<br />
or fault condition occurs.<br />
• If P110=2, 4…6 and P175=999.9, brake voltage will be applied for 15s<br />
• If P121…P124=18 and the corresponding TB-13 input is CLOSED, brake voltage will be<br />
applied until the TB-13 input is OPENED or a fault condition occurs.<br />
p<br />
p17<br />
Keypad Setpoint<br />
Single Press<br />
Increment<br />
0.1 0.1 100.0 Used for run screen setpoint editing only.<br />
If P176 >0.1 then scrolling of keypad setpoint<br />
is disabled.<br />
77 ) Speed Units 0 0 Hz Select the UNITS LED that will be illuminated when<br />
Display <strong>Frequency</strong><br />
Multiplier<br />
1 RPM<br />
2 %<br />
3 /UNITS<br />
4 NONE<br />
the drive is running in speed control mode. For this<br />
parameter to be used, P178 must be set to a value<br />
other than 0. IF P178 is set to 0, the Hz LED will<br />
be illuminated regardless of the value set in P177.<br />
0.00 0.00 650.00 • Allows frequency display to be scaled<br />
• P178 = 0.00: Scaling disabled<br />
• P178 > 0.00: Display = Actual <strong>Frequency</strong><br />
X P178<br />
EXAMPLE<br />
If P178 = 29.17 and actual frequency = 60 Hz, then Drive displays 1750 (rpm)<br />
p Run Screen Display 0 0 {Parameter Number} 599 • 0 = Normal Run Screen, this display depends<br />
on mode of operation. Refer to section 4.2.<br />
• Other selections choose a diagnostic parameter<br />
to display (P501…P599).<br />
• Parameters P560 - P564 are selectable if<br />
the sequencer is enabled (P700 is not 0).<br />
P560-P564 are not visible until P700 is<br />
enabled.<br />
Oscillation Damping<br />
Control<br />
0 0 80 0 = Damping disabled<br />
Compensation for resonances within drive<br />
Skip frequency 1 0.0 0.0 {Hz} 500 • Drive will not run in the defined skip range;<br />
p Skip frequency 2<br />
Skip frequency<br />
bandwidth<br />
0.0<br />
0.0<br />
0.0<br />
0.0<br />
NOTE<br />
{Hz}<br />
{Hz}<br />
500<br />
10.0<br />
used to skip over frequencies that cause<br />
mechanical vibration<br />
• P181 and P182 define the start of the skip<br />
ranges<br />
• P184 > 0 defines the bandwidth of both ranges.<br />
Bandwidth (Hz) = f (Hz) + P184 (Hz) f = P181 or P182<br />
s s<br />
EXAMPLE: P181 = 18 Hz and P184 = 4 Hz; skip range is from 18 to 22 Hz<br />
Voltage Midpoint 0 0.0 {V} P165 Valid only when P300 = 0 or 2.<br />
V/Hz characteristic<br />
Use with P187 to define midpoint on V/Hz curve.<br />
<strong>Frequency</strong> Midpoint 0.0 0.0 {Hz} P167 Valid only when P300 = 0 or 2.<br />
V/Hz characteristic<br />
Use with P185 to define midpoint on V/Hz curve.<br />
Integrated Dynamic 0 Disabled<br />
Brake<br />
1 Enabled<br />
(2) Parameter applicable to SMV models 15HP (11kW) and higher.<br />
(3) Parameter applicable to SMV models 40HP (30kW) and higher.
SV01M<br />
Commissioning<br />
Code<br />
No. Name<br />
Possible Settings<br />
Default Selection<br />
IMPORTANT<br />
Motor Braking 0 Disabled Flux brake OFF.<br />
1 Braking with BUS threshold<br />
When drive is in deceleration and V > V (114% of<br />
bus dece e a ion freeze<br />
the rated V ), the flux brake will be turned ON.<br />
bus<br />
2 Braking always on with deceleration As long as drive is in deceleration, the flux brake will be ON.<br />
3 Braking with bus regulator<br />
When drive is in deceleration and V > V (114%<br />
bus dece e a ion freeze<br />
of the rated V ), the motor speed will be increased to reduce<br />
bus<br />
the bus voltage. Determined by the value in P191, the speed<br />
increment = slip speed * P191(%) / 37.<br />
4 Special<br />
WARNING<br />
(Consult factory before using)<br />
Flux braking can cause heat in the motor. To avoid damage to the motor, use a PTC to<br />
protect the motor. If the flux brake is used too frequently, the drive will trip fault “F_PF”.<br />
Motor Brake Level 0 0 {%} 75 Active when P190 > 0 and drive is in deceleration<br />
(flux<br />
mode. Use to reduce deceleration time on high<br />
braking<br />
inertia loads.<br />
disabled)<br />
NOTE: Over usage of P190 can cause frequent<br />
‘overload’ trips “F.PF”<br />
Not active for P300 = 5 (Torque mode)<br />
9 Motor Braking 0.0 0 P167 Active when P190 > 0 and P192 > 0.0, Drive is<br />
Deceleration<br />
(base freq) in deceleration mode. Use to reduce deceleration<br />
Reduction Level<br />
time on high inertia loads.<br />
Raising the value of P191 reduces the NOTE: Usage of P192 can cause the drive to<br />
drive deceleration rate during flux braking. decelerate faster than settings in P105/P127.<br />
Not active for P300 = 5 (Torque mode)<br />
P Password 0 0000 9999 • Must enter password to access parameters<br />
• P194 = 0000: Disables password<br />
P1 Clear Fault History 0 0 No Action<br />
p Program Selection<br />
1 Clear Fault History<br />
0 Operate from User settings<br />
1 Operate from OEM settings Refer to Notes 1, 2 and 3<br />
2 Reset to OEM default settings Refer to Note 1<br />
3 Reset to 60 Hz default settings • Refer to Note 4<br />
• Parameters are reset to the defaults listed in<br />
this manual.<br />
• For P199=4, the following exceptions apply:<br />
- P103, P152, P161, P167 = 50.0 Hz<br />
4 Reset to 50 Hz default settings - P165 = 400V (400/480V drives only)<br />
- P304 = 50 Hz<br />
- P305 = 1450 RPM<br />
- P107 = 0 (480 V drives only)<br />
5 Translate<br />
WARNING!<br />
Refer to Note 5<br />
Modification of P199 can affect drive functionality! STOP and EXTERNAL FAULT circuitry may<br />
be disabled! Check P100 and P121...P124<br />
NOTE 1<br />
If the EPM does not contain valid OEM settings, a flashing GF will be displayed when P199<br />
is set to 1 or 2.<br />
NOTE 2<br />
When P199 is set to 1, the drive operates from the OEM settings stored in the EPM Module<br />
and no other parameters can be changed (<br />
NOTE 3<br />
will be displayed if attempted).<br />
Auto Calibration is not possible when operating from OEM Settings.<br />
NOTES 4 and 5 - on next page.<br />
37
Commissioning<br />
Code<br />
No. Name<br />
Possible Settings<br />
Default Selection<br />
IMPORTANT<br />
p1 Program Selection NOTE 4<br />
Resetting to 50 and 60 Hz default settings will set the Assertion Level (P120) to “2” (High).<br />
P120 may need to be reset for the digital input devices being used. An<br />
if P120 and the Assertion switch are not set identically.<br />
NOTE 5<br />
fault may occur<br />
If an EPM that contains data from a previous compatible software version is installed:<br />
• The drive will operate according to the previous data, but parameters cannot be changed<br />
( will be displayed if attempted)<br />
• To update the EPM to the current software version, set P199 = 5. The parameters can now<br />
be changed but the EPM is incompatible with previous software revisions.<br />
4.5.4 PID Parameters<br />
Code<br />
No. Name<br />
Possible Settings<br />
Default Selection<br />
IMPORTANT<br />
PID Mode 0 0 Disabled • Normal-acting: As feedback increases, motor<br />
1<br />
2<br />
3<br />
Normal-acting<br />
Reverse-acting<br />
Normal-acting, Bi-directional<br />
speed decreases<br />
• Reverse-acting: As feedback increases, motor<br />
speed increases<br />
• PID mode is disabled in Vector Torque mode<br />
4 Reverse-acting, Bi-directional (P300 = 5)<br />
• Selections 3, 4: If P112=1, PID controller output<br />
sets the speed, (range -max freq to +max freq)<br />
NOTE<br />
To activate PID mode, one of the TB-13 inputs (P121...P124) must be used to select the<br />
Auto Reference that matches the desired PID setpoint reference. If the selected PID setpoint<br />
reference uses the same analog signal as the PID feedback (P201), an I fault will occur.<br />
Example: The desired PID setpoint reference is the keypad (s and t). Set TB-13x = 6<br />
(Auto Reference: Keypad):<br />
• TB-13x = closed: PID mode is active<br />
• TB-13x = open: PID mode is disabled and the drive speed will be controlled by the<br />
reference selected in P101.<br />
p PID Feedback Source 0 0 4-20 mA (TB-25)<br />
1 0-10 VDC (TB-5)<br />
2 Drive Load (P507)<br />
3 Feedback from Network<br />
Must be set to match the PID feedback signal<br />
p PID Decimal Point 1 0 PID Display = XXXX Applies to P204, P205, P214, P215, P231...P233,<br />
1 PID Display = XXX.X<br />
2 PID Display = XX.XX<br />
3 PID Display = X.XXX<br />
4 PID Display = .XXXX<br />
P242, P522, P523<br />
PID Units 0 0 % Select the UNITS LED that will be illuminated when<br />
1 /UNITS<br />
2 AMPS<br />
3 NONE<br />
the drive is running in PID control mode<br />
p Feedback at 0.0 -99.9 3100.0 Set to match the range of the feedback signal<br />
Minimum Signal<br />
being used<br />
p Feedback at<br />
Maximum Signal<br />
100.0 -99.9 3100.0 Example: Feedback signal is 0 - 300 PSI; P204 =<br />
0.0, P205 = 300.0<br />
(2) Parameter applicable to SMV models 15HP (11kW) and higher.<br />
38 SV01M
Code Possible Settings<br />
No. Name Default Selection<br />
SV01M<br />
Commissioning<br />
IMPORTANT<br />
p Proportional Gain 5.0 0.0 {%} 1000.0 Used to tune the PID loop:<br />
p Integral Gain 0.0 0.0 {s} 20.0<br />
Derivative Gain 0.0 0.0 {s} 20.0<br />
• Increase P207 until system becomes unstable,<br />
then decrease P207 by 10-15%<br />
• Next, increase P208 until feedback matches<br />
setpoint<br />
• If required, increase P209 to compensate for<br />
sudden changes in feedback<br />
NOTE<br />
• Derivative Gain is very sensitive to noise on the feedback signal. Use with care.<br />
• Derivative Gain is not normally required in pump and fan applications<br />
PID Setpoint Ramp 20.0 0.0 {s} 100.0 • time of setpoint change from P204 to P205<br />
or vice versa.<br />
• Used to smooth the transition from one PID<br />
setpoint to another, such as when using the<br />
Preset PID Setpoints (P231...P233)<br />
p Minimum Alarm 0.0 P204 P205 Use with P140, P142 = 18...23<br />
P Maximum Alarm 0.0 P204 P205<br />
Preset PID Setpoint #1 0.0 P204 P205 TB-13A activated; P121 = 3 and P200 = 1 or 2<br />
P Preset PID Setpoint #2 0.0 P204 P205 TB-13B activated; P122 = 3 and P200 = 1 or 2<br />
Preset PID Setpoint #3 0.0 P204 P205 TB-13C activated; P123 = 3 and P200 = 1 or 2<br />
Preset PID Setpoint #4 0.0 P204 P205 TB-13D activated; P124 = 3 and P200 = 1 or 2<br />
P Sleep Threshold 0.0 0.0 {Hz} 500.0 • If drive speed < P240 for longer than P241,<br />
P<br />
Sleep Delay<br />
Sleep Bandwidth<br />
30.0<br />
0.0<br />
0.0<br />
0.0<br />
{s} 300.0<br />
Bmax output frequency = 0.0 Hz; drive display =<br />
• P240 = 0.0: Sleep mode is disabled.<br />
• P200 = 0…2: Drive will start again when speed<br />
command is above P240<br />
Where: B = |(P205 - P204)|<br />
max • P242 > 0.0: Drive will restart when the PID<br />
feedback differs from the setpoint by more<br />
than the value of P242 or when the PID loop<br />
requires a speed above P240.<br />
43 Feedback Sleep<br />
Entry Threshold<br />
0.0 P204 P205 Active only when P244 = 1 or 2<br />
44 Sleep Entry Mode 0 0 Enter SLEEP if Drive Speed P243 For time longer than P241 or same as Sel 0<br />
2 Enter SLEEP if Feedback P240<br />
or if PID feedback differs from setpoint<br />
by more than P242<br />
1 Recovery only if Feedback < P246<br />
2 Recovery only if Feedback > P246<br />
(2) Parameter applicable to SMV models 15HP (11kW) and higher.<br />
39
Commissioning<br />
<strong>Frequency</strong><br />
Output<br />
Code<br />
No. Name<br />
Possible Settings<br />
Default Selection<br />
IMPORTANT<br />
Auto Rinse in Sleep 0 0 Disabled Activated in sleep mode only.<br />
Mode<br />
1 Enabled<br />
Sleep Recovery cancels Auto Rinse<br />
5 Time Delay between<br />
Auto Rinses<br />
30.0 0.0 {min} 6553.5 Time delay reset by re/entering sleep mode<br />
Auto Rinse Speed 0.0 -500.0 {Hz} 500.0 If P112 = 1, negative sign = reverse direction<br />
53 Auto Rinse Time 0.0 0.0 {sec} 6553.5 Does not include time to decel back to speed<br />
Auto Pump Rinse Setup:<br />
P250=1 (Enabled)<br />
P251=# minutes between each<br />
PumpRinse<br />
P252=Hz speed of Pump Rinse<br />
P253=# seconds Pump Rinse duration<br />
Pump Rinse Speed<br />
P252<br />
P104/<br />
P125<br />
De ay Time<br />
between each<br />
Pump Rinse<br />
Pump Rinse Time<br />
P251<br />
P253<br />
P105/<br />
P126<br />
Time<br />
Current Level: Flying 70.0 0.0 {%} P171 Maximum current during Type 2 flying restart<br />
Restart Type 2<br />
operation<br />
Decel Time: Flying 3.0 0.0 {sec} 3600.0 Deceleration rate used during Type 2 flying<br />
Restart Type 2<br />
restart operation<br />
4.5.5 Vector Parameters<br />
Code Possible Settings<br />
40 SV01M<br />
IMPORTANT<br />
No. Name Default Selection<br />
3 (1) Drive Mode 0 0 Constant V/Hz Constant torque V/Hz control for general applications<br />
1 Variable V/Hz Variable torque V/Hz control for centrifugal pump<br />
and fan applications<br />
2 Enhanced Constant V/Hz For single or multiple motor applications that require<br />
3 Enhanced Variable V/Hz better performance than settings 0 or 1, but cannot<br />
use Vector mode, due to:<br />
• Missing required motor data<br />
• Vector mode causing unstable motor operation<br />
4 Vector Speed For single-motor applications requiring higher<br />
starting torque and speed regulation<br />
5 Vector Torque<br />
NOTE<br />
For single-motor applications requiring torque control<br />
independent of speed<br />
To configure the drive for either Vector mode or Enhanced V/Hz mode:<br />
• P300 = 4, 5:<br />
- Set P302...P306 according to motor nameplate<br />
- Set P399 = 1 or 2 (if option 1 failed or in case of non-standard motor)<br />
- Make sure motor is cold (20° - 25° C) and apply a Start command<br />
- Display will indicate for about 40 seconds<br />
- Once the calibration is complete, the display will indicate<br />
command to actually start the motor<br />
; apply another Start<br />
- If an attempt is made to start the drive in Vector or Enhanced V/Hz mode before<br />
performing the Motor Calibration, the drive will display 1 and will not operate<br />
• P300 = 2, 3: Same as above but only need to set P302…P304<br />
3 (1) Motor Rated Voltage 0 {V} 600 • Default setting = drive rating<br />
3 3 • Set to motor nameplate data<br />
(1) Motor Rated Current 0.1 {A} 500.0<br />
(1) Any changes to this parameter will not take effect until the drive is stopped.
SV01M<br />
Commissioning<br />
Code<br />
No. Name<br />
Possible Settings<br />
Default Selection<br />
IMPORTANT<br />
3 4 (1) Motor Rated<br />
60 0 {Hz} 1000<br />
3 5<br />
<strong>Frequency</strong><br />
Set to motor nameplate data<br />
(1) Motor Rated Speed 1750 300 {RPM} 65000<br />
3 (1) Motor Cosine Phi 0.80 0.40 0.99<br />
NOTE If motor cosine phi is not known, use one of the following formulas:<br />
cos phi = motor Watts / (motor efficiency X P302 X P303 X 1.732)<br />
cos phi = cos [ sin 1 (magnetizing current / motor current) ]<br />
3 (1) Motor Stator<br />
0.00 {W} 64.00 • P310, 311 default setting depends on drive rating<br />
Resistance<br />
• Will be automatically programmed by P399<br />
3 • Changing these settings can adversely affect<br />
performance. Contact factory technical support<br />
prior to changing<br />
(1) Motor Stator<br />
Inductance<br />
0.0 {mH} 2000<br />
Dead Time<br />
0.0 -50.0 {%} +50.0 • Adjust dead time correction from internal default<br />
Compensation Factor<br />
• Takes effect when P399 = 3.<br />
0 Torque Limit 100 0 {%} 400 When P300 = 5, sets the maximum output torque.<br />
1 Preset Torque<br />
Setpoint #1<br />
100 0 {%} 400 TB-13A activated; P121 = 3 and P300 = 5<br />
2 Preset Torque<br />
Setpoint #2<br />
100 0 {%} 400 TB-13B activated; P122 = 3 and P300 = 5<br />
Preset Torque<br />
Setpoint #3<br />
100 0 {%} 400 TB-13C activated; P123 = 3 and P300 = 5<br />
(2) Preset Torque<br />
Setpoint #4<br />
100 0 {%} 400 TB-13D activated; P124 = 3 and P300 = 5<br />
3 (1) Current Loop P Gain 0.25 0.00 16.0 Changing these settings can adversely affect<br />
performance. Contact factory technical support<br />
prior to changing.<br />
(1) Current Loop I Gain 65 12 {ms} 9990<br />
(1) Speed Loop Adjust 0.0 0.0 {%} 20.0<br />
3 3 Slip Compensation 99 90 {ms} 9999 Low pass filter time constant for varying the slip<br />
Response Filter<br />
compensation response to changes in the motor<br />
current.<br />
Motor Auto-<br />
0 0 Calibration Not Done • If P300 = 4 or 5, motor calibration must be<br />
calibration<br />
1 Standard Calibration Enabled performed if P399 is not set to 3 (bypass<br />
2 Advanced Calibration Enabled calibration).<br />
3 Bypass Calibration, enable<br />
• If P300=2 or 3, motor calibration is<br />
operation in vector mode w/o Auto<br />
recommended.<br />
Calibration<br />
• Use option 2 if option 1 failed or in case of nonstandard<br />
motors<br />
4 Standard Calibration Complete<br />
• An alternating / will occur if:<br />
5 Advanced Calibration Complete<br />
- attempt motor calibration with P300 = 0 or 1<br />
- motor calibration is attempted before<br />
programming motor data<br />
NOTE: To run the Auto Calibration:<br />
− Set P302...P306 according to motor nameplate<br />
− Set P399 = 1 or 2 (if option 1 failed or in case of non-standard motor)<br />
− Make sure motor is cold (20° - 25° C)<br />
− Apply a Start command<br />
− Display will indicate for about 40 seconds<br />
− Once the calibration is complete, the display will indicate<br />
Start command to actually start the motor<br />
; apply another<br />
− Parameter P399 will now be set to 4 or 5.<br />
(1) Any changes to this parameter will not take effect until the drive is stopped.<br />
(2) Parameter applicable to SMV models 15HP (11kW) and higher.<br />
41
Commissioning<br />
4.5.6 Network Parameters<br />
Code<br />
No. Name<br />
Possible Settings<br />
Default Selection<br />
IMPORTANT<br />
Network Protocol 0 Not Active This parameter setting is based upon the network<br />
1 Remote Keypad<br />
2 Modbus RTU<br />
3 CANopen<br />
4 DeviceNet<br />
5 Ethernet<br />
6 Profibus<br />
7 Lecom-B<br />
8 I/O Module<br />
or I/O module that is installed.<br />
Module Type Installed 0 0 No Module Installed Module type format: 0xAABC; Drive Display:<br />
1 Basic I/O (0x0100, 1.0.0) AA.B.C<br />
2 RS485/Rem. Keypad (0x0200, 2.0.0) AA = Module Type<br />
3 CANopen (0x0300, 3.0.0) B = Major revision<br />
11 PROFIBUS (0x1100, 11.0.0)<br />
12 Ethernet (0x1200, 12.0.0)<br />
C = minor revision<br />
Module Status 0 0 Not Initialized<br />
1 Initialization: Module to EPM<br />
2 Initialization: EPM to Module<br />
3 Online<br />
4 Failed Initialization Error<br />
5 Time-out Error<br />
6 Initialization Failed Module type mismatch P401<br />
7 Initialization Error Protocol selection mismatch P400<br />
Module Reset 0 0 No Action Returns module parameters 401…499 to the<br />
1 Reset parameters to default values default values shown in the manual<br />
Module Timeout Action 3 0 No Fault Action to be taken in the event of a Module/<br />
1 STOP (see P111)<br />
Drive Time-out.<br />
2 Quick Stop<br />
Time is fixed at 200ms<br />
3 Fault (F_ntF)<br />
STOP is by the method selected in P111.<br />
Current Network Fault 0 No Fault<br />
1 F.nF1 NetIdle Mode<br />
2 F.nF2 Loss of Ethernet I/O connection<br />
3 F.nF3 Network Fault<br />
4 F.nF4 Explicit Message Timeout<br />
5 F.nF5 Overall Network Timeout<br />
6 F.nF6 Overall Explicit Timeout<br />
7 F.nF7 Overall I/O Message Timeout<br />
Proprietary Manufacturer specific<br />
7 … Module Specific Parameters<br />
Refer to the Communications Reference Guide<br />
specific to the network or I/O module installed.<br />
<strong>CTi</strong> <strong>Automation</strong> - Phone: 800.894.0412 - Fax: 208.368.0415 - Web: www.ctiautomation.net - Email: info@ctiautomation.net<br />
42 SV01M
4.5.7 Diagnostic Parameters<br />
SV01M<br />
Commissioning<br />
Code<br />
No. Name<br />
Display Range (READ ONLY) IMPORTANT<br />
Fault History • Displays the last 8 faults<br />
• Format: n.xxx where: n = 1..8,<br />
1 is the newest fault; xxx = fault message (w/o the .)<br />
• Refer to section 5.3<br />
Software Version Format: x.yz<br />
Drive ID A flashing display indicates that the Drive ID stored in the EPM<br />
does not match the drive model it is plugged into.<br />
P Internal Code Alternating Display: xxx-; -yy<br />
DC Bus Voltage 0 {VDC} 1500<br />
Motor Voltage 0 {VAC} 1000<br />
P Load 0 {%} 255 Motor load as % of drive’s output current rating.<br />
Refer to section 2.3.<br />
Motor Current 0.0 {A} 1000 Actual motor current<br />
Torque 0 {%} 500 Torque as % of motor rated torque (vector mode only)<br />
P Output Power kW 0.00 {kW} 650.0<br />
Total kWh 0.0 {kWh} 9999999 Alternating display: xxx-; yyyy when value exceeds 9999<br />
P Heatsink Temp 0 {°C} 150 Heatsink temperature<br />
0-10 VDC Input 0.0 {VDC} 10.0 Actual value of signal at TB-5 (See P162)<br />
4-20 mA Input 0.0 {mA} 20.0 Actual value of signal at TB-25 (See P162)<br />
TB-5 Feedback P204 P205 TB-5 signal value scaled to PID feedback units (See P162)<br />
TB-25 Feedback P204 P205 TB-25 signal value scaled to PID feedback units (See P162)<br />
Network Feedback P204 P205 Network signal value scaled to PID feedback units<br />
Analog Output 0 {VDC} 10.0 Refer to P150…P155<br />
Actual Output<br />
<strong>Frequency</strong><br />
0 {Hz} 500.0<br />
Network Speed 0 {Hz} 500.0 Command speed if (Auto: Network) is selected as the speed<br />
Command<br />
source<br />
Terminal and<br />
Indicates terminal status using segments of the LED display.<br />
Protection Status<br />
(Refer to section 4.5.7.1)<br />
Keypad Status Indicates keypad button status using segments of the LED<br />
display. (Refer to section 4.5.7.2)<br />
Total Run Time 0 {h} 9999999 Alternating display: xxx-; yyyy when value exceeds 9999<br />
Total Power On Time 0 {h} 9999999<br />
Fault History 1 8 • Displays the last 8 faults<br />
• Format: n.xxx where: n = 1..8,<br />
1 is the newest fault; xxx = fault message (w/o the .)<br />
• Refer to section 5.3<br />
P Fault History Time 0 {h} 999999 Display: “n.hh-” “hhhh” “mm.ss” = fault #, hours, seconds<br />
The “hhhh” screen is displayed after hours exceed 999.<br />
Fault History Counter 0 255 Number of sequential occurrences of a fault.<br />
For example: 3 external faults occur over a period of time<br />
with no other errors occurring. Then P552 will indicate 3,<br />
P550 will indicate the error EF and P551 will indicate the<br />
time of the first fault occurrence.<br />
43
Commissioning<br />
Code<br />
No. Name<br />
Display Range (READ ONLY) IMPORTANT<br />
Sequencer: Currently 0<br />
Active Segment<br />
17<br />
Sequencer: Time 0.0 {P708} 6553.5 Unit depends on P708 (0.1sec, sec or minutes)<br />
since Start of Active<br />
Segment<br />
0 {P708} 65535<br />
Sequencer: Time 0.0 {P708} 6553.5 Unit depends on P708 (0.1sec, sec or minutes)<br />
Remaining in Active<br />
Segment<br />
0 {P708} 65535<br />
Sequencer: Number<br />
of cycles since start<br />
0 65535<br />
Sequencer: Number<br />
of cycles remaining<br />
0 65535<br />
4.5.7.1 Terminal & Protection Status Display<br />
Parameter P530 allows monitoring of the control terminal<br />
points and common drive conditions:<br />
An illuminated LED segment indicates:<br />
• the protective circuit is active (LED 1)<br />
• the Logic Assertion Switch is set to High (+)<br />
• input terminal is asserted (LED 2)<br />
• output terminal is energized (LED 4)<br />
• the Charge Relay is not a terminal, this segment will<br />
be illuminated when the Charge Relay is energized<br />
44 SV01M<br />
NOTE: Parameters P560-P564 are visible only when P700 > 0 (i.e. the sequencer is enabled)<br />
Current Limit Diagnostic<br />
Logic Assertion Switch<br />
Input 1<br />
Input 13B<br />
Relay<br />
Output 14<br />
Input 13D*<br />
LED # 1 2 3 4<br />
(LED 4). Input 13C<br />
Input 13A<br />
Factory Reserved<br />
Protective Diagnostic<br />
4.5.7.2 Keypad Status Display<br />
Parameter P531 allows monitoring of the keypad pushbuttons:<br />
An illuminated LED segment indicates when the button is depressed.<br />
LED 1 and LED 2 are used to indicate pushbutton presses on a remote<br />
keypad that is attached to the drive. LED 3 and LED 4 indicate button<br />
presses on the local drive keypad.<br />
Charge<br />
Relay<br />
Additional I/O Module only<br />
Auxiliary Relay<br />
Input 13F<br />
Input 13E<br />
* Input 13D available on 15-60HP (11-45kW) models only<br />
<strong>CTi</strong> <strong>Automation</strong> - Phone: 800.894.0412 - Fax: 208.368.0415 - Web: www.ctiautomation.net - Email: info@ctiautomation.net<br />
CTRL
SV01M<br />
Commissioning<br />
4.5.8 Onboard Communications Parameters 15-60HP (11-45kW)<br />
The P6xx Onboard Communication parameters are applicable to the 15HP (11kW) and higher models only.<br />
Code Possible Settings<br />
No. Name Default Selection<br />
IMPORTANT<br />
p 0 Network Enable 0 Disabled This parameter enables the onboard network<br />
1 Remote Keypad<br />
2 Modbus<br />
7 Lecom<br />
NOTE: Onboard Communications will be<br />
communications.<br />
disabled if:<br />
If the onboard communications are disabled,<br />
- P600 = 0, or<br />
the user will not have access to any of the other<br />
- P600 = 1 and P400 = 1, or<br />
P6xx parameters.<br />
- P600 = 2 and P400 = 2, 3, 4, 5, 6 or 7<br />
- P600 = 7 and P400 = 2, 3, 4, 5, 6 or 7<br />
P 0 Network Address 1 - 247 Modbus<br />
1 - 99 Lecom<br />
P 1 Network Baud Rate 0 2400 bps 2 9600 bps Modbus<br />
1 4800 bps 3 19200 bps<br />
0 9600 bps<br />
1 4800 bps<br />
2 2400 bps<br />
3 1200 bps<br />
4 19200 bps<br />
Lecom<br />
P 2 Network Data Format 0 8, N, 2<br />
1 8, N, 1<br />
2 8, E, 1<br />
3 8, O, 1<br />
Modbus Only<br />
P 0 Network Control<br />
Level<br />
P<br />
Network Powerup<br />
Start Status<br />
0 Monitor Only<br />
1 Parameter Programming<br />
2 Programming and Setpoint Control<br />
3 Full Control<br />
Lecom Only<br />
0 0 Quick Stop<br />
1 Controller Inhibit<br />
Lecom Only<br />
Network Timeout 0.0 - 300.0 seconds Modbus<br />
0 - 65000 milliseconds Lecom<br />
Network Timeout<br />
Action<br />
P 7 Network Messages<br />
Received<br />
4 0 No action<br />
1 Stop (P111)<br />
2 Quick Stop<br />
3 Controller Inhibit<br />
4 Trip Fault, F.nF1<br />
Modbus<br />
0 0 No action<br />
1 Controller Inhibit<br />
2 Quick Stop<br />
3 Trip Fault, F.nF1<br />
Lecom<br />
Read-Only: 0 - 9999 Valid network messages received<br />
NOTE: When the number of messages exceeds 9999, the counter resets and resumes<br />
counting from 0.<br />
45
Commissioning<br />
4.5.9 Sequencer Parameters<br />
The P700 Sequencer parameters are listed herein. Refer to section 4.5.7 for P56x Sequencer Diagnostic Parameters.<br />
The sequencer function consists of 16 step segments, each individual step segment can have its own ramp time, time<br />
spent in individual segment and output frequency entered. The sequencer has 3 different modes to control how the<br />
drive moves through each individual step segment: Timer Transition, Step Sequence or Timer and Step Sequence.<br />
P700= 1 (Timer Transition)<br />
Starting at the segment number entered in the “Start Segment” parameter, the drive will automatically move through<br />
each of the segments. The time spent in each segment is determined by the values set in the individual “Time in<br />
Current Step” parameters.<br />
P700= 2 (Step Sequence)<br />
Starting at the segment number entered in the “Start Segment” parameter the sequencer will only move to the next<br />
segment when a rising edge is applied to the highest priority digital input which is programmed to “Step Sequence”<br />
selection “24”.<br />
P700= 3 (Timer Transition or Step Sequence)<br />
Starting at the segment number entered in the “Start Segment” parameter, the drive will automatically move through<br />
each of the segments. The time spent in each segment is determined by the values set in the individual “Time in<br />
Current Step” parameters, however if a rising edge is applied to the highest priority digital input which is programmed<br />
to “Step Sequence” selection “24” it will force the sequencer to step into the next segment.<br />
NOTE: A value of ”0” in the “Time in current step” parameter (ex: P712), will result in the segment being skipped.<br />
Code<br />
No. Name<br />
Possible Settings<br />
Default Selection<br />
IMPORTANT<br />
0 Sequencer Mode 0 0 Disabled If P700 = 0 and no reference (P121, P101)<br />
1 Enabled: transition on timer only<br />
2 Enabled: transition on rising edge (P121,<br />
122, 123 = 25 step sequence)<br />
3 Enabled: transition on timer or rising<br />
edge<br />
points to any of the sequence segments,<br />
then P701-P799 will not be displayed on the<br />
local keypad.<br />
1 Sequencer: TB13A 1 1 - 16<br />
Asserting TB13A with selection #24 (Start<br />
Trigger Segment<br />
Sequence), starts the sequence operation from<br />
TB13A = lowest priority<br />
the segment specified in this parameter.<br />
Sequencer: TB13B 1 1 - 16<br />
Asserting TB13B with selection #24 (Start<br />
Trigger Segment<br />
Sequence), starts the sequence operation from<br />
TB13B: higher priority than TB13A the segment specified in this parameter.<br />
Sequencer: TB13C 1 1 - 16<br />
Asserting TB13C with selection #24 (Start<br />
Trigger Segment<br />
Sequence), starts the sequence operation from<br />
TB13C: higher priority thanTB13B, A the segment specified in this parameter.<br />
7 (2) Sequencer: TB13D 1 1 - 16<br />
Asserting TB13D with selection #24 (Start<br />
Trigger Segment<br />
Sequence), starts the sequence operation from<br />
TB13D: higher priority than TB13C, B, A the segment specified in this parameter.<br />
Sequencer: Action 0 0 Restart at beginning of sequence Pointed by TB13x<br />
after Stop/Start<br />
transition or Fault<br />
Restart<br />
1 Restart at beginning of current seg<br />
2 Start at beginning of prior segment<br />
3 Start at beginning of next segment<br />
7 Sequencer: Number<br />
of cycles<br />
1 1 65535 1 = single scan; 65535 = continuous loop<br />
(2) Parameter applicable to SMV models 15HP (11kW) and higher.<br />
46 SV01M
Code Possible Settings<br />
No. Name Default Selection<br />
Sequencer: Time<br />
units/scaling<br />
Segment #1<br />
Segment #1<br />
<strong>Frequency</strong> Setpoint<br />
1 Segment #1<br />
Accel/Decel Time<br />
Segment #1<br />
Time in current step<br />
Segment #1<br />
Digital Output State<br />
Segment #1 TB30<br />
Analog Output<br />
Value<br />
Segment #2<br />
Segment #2<br />
<strong>Frequency</strong> Setpoint<br />
Segment #2<br />
Accel/Decel Time<br />
7 Segment #2<br />
Time in current step<br />
Segment #2<br />
Digital Output State<br />
Segment #2 TB30<br />
Analog Output<br />
Value<br />
SV01M<br />
Commissioning<br />
IMPORTANT<br />
0 0 0.1 {sec} 6553.5 Setup units/scaling for all sequencer time<br />
1 1 {sec} 65535<br />
related parameters<br />
2 1<br />
NOTE:<br />
{min} 65535<br />
P708 rescales the following sequencer related parameters:<br />
- Segment Times in current step: P712, P717, P722, P727, P732, P737, P742, P747,<br />
P752, P757, P762, P767, P772, P777, P782, P787, P792<br />
- Sequence diagnostic/status: P561, P562<br />
0.0 -500.0 {Hz} 500.0 If P112 = 1, negative sign forces reverse<br />
direction<br />
20.0 0.0 {sec} 3600.0<br />
0.0<br />
0<br />
0.0 {P708} 6553.5<br />
0 {P708} 65535<br />
0 Value set in P713 0 1 2 3 4 5 6 7<br />
Relay (Bit 0) 0 1 0 1 0 1 0 1<br />
TB14 (Bit 1) 0 0 1 1 0 0 1 1<br />
I/O option Relay (Bit 2) 0 0 0 0 1 1 1 1<br />
NOTE: P441 is the Relay Output (TB-19, 20, 21) of the<br />
optional Digital I/O module (ESVZAL0, ESVZAL1).<br />
Scaling/units depend on P708<br />
Skip segment if time = 0<br />
bit = 0: OFF (De-energized)<br />
bit = 1: ON (Energized)<br />
The corresponding digital output/relay must be<br />
set to accept data from the sequencer: P140,<br />
P142, P441 = 27<br />
0.00 0.00 {VDC} 10.00 TB30 configuration parameter must be set to<br />
accept this value: P150 = 10<br />
0.0 -500.0 {Hz} 500.0 If P112 = 1, negative sign forces reverse<br />
direction<br />
20.0 0.0 {sec} 3600.0<br />
0.0<br />
0<br />
0.0 {P708} 6553.5<br />
0 {P708} 65535<br />
0 Value set in P718 0 1 2 3 4 5 6 7<br />
Relay (Bit 0) 0 1 0 1 0 1 0 1<br />
TB14 (Bit 1) 0 0 1 1 0 0 1 1<br />
I/O option Relay (Bit 2) 0 0 0 0 1 1 1 1<br />
NOTE: P441 is the Relay Output (TB-19, 20, 21) of the<br />
optional Digital I/O module (ESVZAL0, ESVZAL1).<br />
Scaling/units depend on P708<br />
Skip segment if time = 0<br />
bit = 0: OFF (De-energized)<br />
bit = 1: ON (Energized)<br />
The corresponding digital output/relay must be<br />
set to accept data from the sequencer: P140,<br />
P142, P441 = 27<br />
0.00 0.00 {VDC} 10.00 TB30 configuration parameter must be set to<br />
accept this value: P150 = 10<br />
<strong>CTi</strong> <strong>Automation</strong> - Phone: 800.894.0412 - Fax: 208.368.0415 - Web: www.ctiautomation.net - Email: info@ctiautomation.net<br />
47
Commissioning<br />
Code Possible Settings<br />
No. Name Default Selection<br />
Segment #3<br />
Segment #3<br />
<strong>Frequency</strong> Setpoint<br />
1 Segment #3<br />
Accel/Decel Time<br />
2 Segment #3<br />
Time in current step<br />
Segment #3<br />
Digital Output State<br />
Segment #3 TB30<br />
Analog Output<br />
Value<br />
Segment #4<br />
Segment #4<br />
<strong>Frequency</strong> Setpoint<br />
Segment #4<br />
Accel/Decel Time<br />
7 Segment #4<br />
Time in current step<br />
Segment #4<br />
Digital Output State<br />
Segment #4 TB30<br />
Analog Output<br />
Value<br />
Segment #5<br />
Segment #5<br />
<strong>Frequency</strong> Setpoint<br />
1 Segment #5<br />
Accel/Decel Time<br />
Segment #5<br />
Time in current step<br />
Segment #5<br />
Digital Output State<br />
Segment #5 TB30<br />
Analog Output<br />
Value<br />
48 SV01M<br />
IMPORTANT<br />
0.0 -500.0 {Hz} 500.0 If P112 = 1, negative sign forces reverse<br />
direction<br />
20.0 0.0 {sec} 3600.0<br />
0.0<br />
0<br />
0.0 {P708} 6553.5<br />
0 {P708} 65535<br />
0 Value set in P723 0 1 2 3 4 5 6 7<br />
Relay (Bit 0) 0 1 0 1 0 1 0 1<br />
TB14 (Bit 1) 0 0 1 1 0 0 1 1<br />
I/O option Relay (Bit 2) 0 0 0 0 1 1 1 1<br />
NOTE: P441 is the Relay Output (TB-19, 20, 21) of the<br />
optional Digital I/O module (ESVZAL0, ESVZAL1).<br />
Scaling/units depend on P708<br />
Skip segment if time = 0<br />
bit = 0: OFF (De-energized)<br />
bit = 1: ON (Energized)<br />
The corresponding digital output/relay must be<br />
set to accept data from the sequencer: P140,<br />
P142, P441 = 27<br />
0.00 0.00 {VDC} 10.00 TB30 configuration parameter must be set to<br />
accept this value: P150 = 10<br />
0.0 -500.0 {Hz} 500.0 If P112 = 1, negative sign forces reverse<br />
direction<br />
20.0 0.0 {sec} 3600.0<br />
0.0<br />
0<br />
0.0 {P708} 6553.5<br />
0 {P708} 65535<br />
0 Value set in P728 0 1 2 3 4 5 6 7<br />
Relay (Bit 0) 0 1 0 1 0 1 0 1<br />
TB14 (Bit 1) 0 0 1 1 0 0 1 1<br />
I/O option Relay (Bit 2) 0 0 0 0 1 1 1 1<br />
NOTE: P441 is the Relay Output (TB-19, 20, 21) of the<br />
optional Digital I/O module (ESVZAL0, ESVZAL1).<br />
Scaling/units depend on P708<br />
Skip segment if time = 0<br />
bit = 0: OFF (De-energized)<br />
bit = 1: ON (Energized)<br />
The corresponding digital output/relay must be<br />
set to accept data from the sequencer: P140,<br />
P142, P441 = 27<br />
0.00 0.00 {VDC} 10.00 TB30 configuration parameter must be set to<br />
accept this value: P150 = 10<br />
0.0 -500.0 {Hz} 500.0 If P112 = 1, negative sign forces reverse<br />
direction<br />
20.0 0.0 {sec} 3600.0<br />
0.0<br />
0<br />
0.0 {P708} 6553.5<br />
0 {P708} 65535<br />
0 Value set in P733 0 1 2 3 4 5 6 7<br />
Relay (Bit 0) 0 1 0 1 0 1 0 1<br />
TB14 (Bit 1) 0 0 1 1 0 0 1 1<br />
I/O option Relay (Bit 2) 0 0 0 0 1 1 1 1<br />
NOTE: P441 is the Relay Output (TB-19, 20, 21) of the<br />
optional Digital I/O module (ESVZAL0, ESVZAL1).<br />
Scaling/units depend on P708<br />
Skip segment if time = 0<br />
bit = 0: OFF (De-energized)<br />
bit = 1: ON (Energized)<br />
The corresponding digital output/relay must be<br />
set to accept data from the sequencer: P140,<br />
P142, P441 = 27<br />
0.00 0.00 {VDC} 10.00 TB30 configuration parameter must be set to<br />
accept this value: P150 = 10<br />
<strong>CTi</strong> <strong>Automation</strong> - Phone: 800.894.0412 - Fax: 208.368.0415 - Web: www.ctiautomation.net - Email: info@ctiautomation.net
Code Possible Settings<br />
No. Name Default Selection<br />
Segment #6<br />
Segment #6<br />
<strong>Frequency</strong> Setpoint<br />
Segment #6<br />
Accel/Decel Time<br />
7 Segment #6<br />
Time in current step<br />
Segment #6<br />
Digital Output State<br />
Segment #6 TB30<br />
Analog Output<br />
Value<br />
Segment #7<br />
Segment #7<br />
<strong>Frequency</strong> Setpoint<br />
1 Segment #7<br />
Accel/Decel Time<br />
Segment #7<br />
Time in current step<br />
Segment #7<br />
Digital Output State<br />
Segment #7 TB30<br />
Analog Output<br />
Value<br />
Segment #8<br />
Segment #8<br />
<strong>Frequency</strong> Setpoint<br />
Segment #8<br />
Accel/Decel Time<br />
7 Segment #8<br />
Time in current step<br />
Segment #8<br />
Digital Output State<br />
Segment #8 TB30<br />
Analog Output<br />
Value<br />
SV01M<br />
Commissioning<br />
IMPORTANT<br />
0.0 -500.0 {Hz} 500.0 If P112 = 1, negative sign forces reverse<br />
direction<br />
20.0 0.0 {sec} 3600.0<br />
0.0<br />
0<br />
0.0 {P708} 6553.5<br />
0 {P708} 65535<br />
0 Value set in P738 0 1 2 3 4 5 6 7<br />
Relay (Bit 0) 0 1 0 1 0 1 0 1<br />
TB14 (Bit 1) 0 0 1 1 0 0 1 1<br />
I/O option Relay (Bit 2) 0 0 0 0 1 1 1 1<br />
NOTE: P441 is the Relay Output (TB-19, 20, 21) of the<br />
optional Digital I/O module (ESVZAL0, ESVZAL1).<br />
Scaling/units depend on P708<br />
Skip segment if time = 0<br />
bit = 0: OFF (De-energized)<br />
bit = 1: ON (Energized)<br />
The corresponding digital output/relay must be<br />
set to accept data from the sequencer: P140,<br />
P142, P441 = 27<br />
0.00 0.00 {VDC} 10.00 TB30 configuration parameter must be set to<br />
accept this value: P150 = 10<br />
0.0 -500.0 {Hz} 500.0 If P112 = 1, negative sign forces reverse<br />
direction<br />
20.0 0.0 {sec} 3600.0<br />
0.0<br />
0<br />
0.0 {P708} 6553.5<br />
0 {P708} 65535<br />
0 Value set in P743 0 1 2 3 4 5 6 7<br />
Relay (Bit 0) 0 1 0 1 0 1 0 1<br />
TB14 (Bit 1) 0 0 1 1 0 0 1 1<br />
I/O option Relay (Bit 2) 0 0 0 0 1 1 1 1<br />
NOTE: P441 is the Relay Output (TB-19, 20, 21) of the<br />
optional Digital I/O module (ESVZAL0, ESVZAL1).<br />
Scaling/units depend on P708<br />
Skip segment if time = 0<br />
bit = 0: OFF (De-energized)<br />
bit = 1: ON (Energized)<br />
The corresponding digital output/relay must be<br />
set to accept data from the sequencer: P140,<br />
P142, P441 = 27<br />
0.00 0.00 {VDC} 10.00 TB30 configuration parameter must be set to<br />
accept this value: P150 = 10<br />
0.0 -500.0 {Hz} 500.0 If P112 = 1, negative sign forces reverse<br />
direction<br />
20.0 0.0 {sec} 3600.0<br />
0.0<br />
0<br />
0.0 {P708} 6553.5<br />
0 {P708} 65535<br />
0 Value set in P748 0 1 2 3 4 5 6 7<br />
Relay (Bit 0) 0 1 0 1 0 1 0 1<br />
TB14 (Bit 1) 0 0 1 1 0 0 1 1<br />
I/O option Relay (Bit 2) 0 0 0 0 1 1 1 1<br />
NOTE: P441 is the Relay Output (TB-19, 20, 21) of the<br />
optional Digital I/O module (ESVZAL0, ESVZAL1).<br />
Scaling/units depend on P708<br />
Skip segment if time = 0<br />
bit = 0: OFF (De-energized)<br />
bit = 1: ON (Energized)<br />
The corresponding digital output/relay must be<br />
set to accept data from the sequencer: P140,<br />
P142, P441 = 27<br />
0.00 0.00 {VDC} 10.00 TB30 configuration parameter must be set to<br />
accept this value: P150 = 10<br />
<strong>CTi</strong> <strong>Automation</strong> - Phone: 800.894.0412 - Fax: 208.368.0415 - Web: www.ctiautomation.net - Email: info@ctiautomation.net<br />
49
Commissioning<br />
Code Possible Settings<br />
No. Name Default Selection<br />
Segment #9<br />
Segment #9<br />
<strong>Frequency</strong> Setpoint<br />
1 Segment #9<br />
Accel/Decel Time<br />
2 Segment #9<br />
Time in current step<br />
Segment #9<br />
Digital Output State<br />
Segment #9 TB30<br />
Analog Output<br />
Value<br />
Segment #10<br />
Segment #10<br />
<strong>Frequency</strong> Setpoint<br />
Segment #10<br />
Accel/Decel Time<br />
7 Segment #10<br />
Time in current step<br />
Segment #10<br />
Digital Output State<br />
Segment #10 TB30<br />
Analog Output<br />
Value<br />
Segment #11<br />
Segment #11<br />
<strong>Frequency</strong> Setpoint<br />
1 Segment #11<br />
Accel/Decel Time<br />
Segment #11<br />
Time in current step<br />
Segment #11<br />
Digital Output State<br />
Segment #11 TB30<br />
Analog Output<br />
Value<br />
50 SV01M<br />
IMPORTANT<br />
0.0 -500.0 {Hz} 500.0 If P112 = 1, negative sign forces reverse<br />
direction<br />
20.0 0.0 {sec} 3600.0<br />
0.0<br />
0<br />
0.0 {P708} 6553.5<br />
0 {P708} 65535<br />
0 Value set in P753 0 1 2 3 4 5 6 7<br />
Relay (Bit 0) 0 1 0 1 0 1 0 1<br />
TB14 (Bit 1) 0 0 1 1 0 0 1 1<br />
I/O option Relay (Bit 2) 0 0 0 0 1 1 1 1<br />
NOTE: P441 is the Relay Output (TB-19, 20, 21) of the<br />
optional Digital I/O module (ESVZAL0, ESVZAL1).<br />
Scaling/units depend on P708<br />
Skip segment if time = 0<br />
bit = 0: OFF (De-energized)<br />
bit = 1: ON (Energized)<br />
The corresponding digital output/relay must be<br />
set to accept data from the sequencer: P140,<br />
P142, P441 = 27<br />
0.00 0.00 {VDC} 10.00 TB30 configuration parameter must be set to<br />
accept this value: P150 = 10<br />
0.0 -500.0 {Hz} 500.0 If P112 = 1, negative sign forces reverse<br />
direction<br />
20.0 0.0 {sec} 3600.0<br />
0.0<br />
0<br />
0.0 {P708} 6553.5<br />
0 {P708} 65535<br />
0 Value set in P758 0 1 2 3 4 5 6 7<br />
Relay (Bit 0) 0 1 0 1 0 1 0 1<br />
TB14 (Bit 1) 0 0 1 1 0 0 1 1<br />
I/O option Relay (Bit 2) 0 0 0 0 1 1 1 1<br />
NOTE: P441 is the Relay Output (TB-19, 20, 21) of the<br />
optional Digital I/O module (ESVZAL0, ESVZAL1).<br />
Scaling/units depend on P708<br />
Skip segment if time = 0<br />
bit = 0: OFF (De-energized)<br />
bit = 1: ON (Energized)<br />
The corresponding digital output/relay must<br />
be set to accept data from the sequencer:<br />
P140, P142, P441 = 27<br />
0.00 0.00 {VDC} 10.00 TB30 configuration parameter must be set to<br />
accept this value: P150 = 10<br />
0.0 -500.0 {Hz} 500.0 If P112 = 1, negative sign forces reverse<br />
direction<br />
20.0 0.0 {sec} 3600.0<br />
0.0<br />
0<br />
0.0 {P708} 6553.5<br />
0 {P708} 65535<br />
0 Value set in P763 0 1 2 3 4 5 6 7<br />
Relay (Bit 0) 0 1 0 1 0 1 0 1<br />
TB14 (Bit 1) 0 0 1 1 0 0 1 1<br />
I/O option Relay (Bit 2) 0 0 0 0 1 1 1 1<br />
NOTE: P441 is the Relay Output (TB-19, 20, 21) of the<br />
optional Digital I/O module (ESVZAL0, ESVZAL1).<br />
Scaling/units depend on P708<br />
Skip segment if time = 0<br />
bit = 0: OFF (De-energized)<br />
bit = 1: ON (Energized)<br />
The corresponding digital output/relay must be<br />
set to accept data from the sequencer: P140,<br />
P142, P441 = 27<br />
0.00 0.00 {VDC} 10.00 TB30 configuration parameter must be set to<br />
accept this value: P150 = 10<br />
<strong>CTi</strong> <strong>Automation</strong> - Phone: 800.894.0412 - Fax: 208.368.0415 - Web: www.ctiautomation.net - Email: info@ctiautomation.net
Code Possible Settings<br />
No. Name Default Selection<br />
Segment #12<br />
Segment #12<br />
<strong>Frequency</strong> Setpoint<br />
Segment #12<br />
Accel/Decel Time<br />
7 Segment #12<br />
Time in current step<br />
Segment #12<br />
Digital Output State<br />
Segment #12 TB30<br />
Analog Output<br />
Value<br />
Segment #13<br />
Segment #13<br />
<strong>Frequency</strong> Setpoint<br />
1 Segment #13<br />
Accel/Decel Time<br />
Segment #13<br />
Time in current step<br />
Segment #13<br />
Digital Output State<br />
Segment #13 TB30<br />
Analog Output<br />
Value<br />
Segment #14<br />
Segment #14<br />
<strong>Frequency</strong> Setpoint<br />
Segment #14<br />
Accel/Decel Time<br />
7 Segment #14<br />
Time in current step<br />
Segment #14<br />
Digital Output State<br />
Segment #14 TB30<br />
Analog Output<br />
Value<br />
SV01M<br />
Commissioning<br />
IMPORTANT<br />
0.0 -500.0 {Hz} 500.0 If P112 = 1, negative sign forces reverse<br />
direction<br />
20.0 0.0 {sec} 3600.0<br />
0.0<br />
0<br />
0.0 {P708} 6553.5<br />
0 {P708} 65535<br />
0 Value set in P768 0 1 2 3 4 5 6 7<br />
Relay (Bit 0) 0 1 0 1 0 1 0 1<br />
TB14 (Bit 1) 0 0 1 1 0 0 1 1<br />
I/O option Relay (Bit 2) 0 0 0 0 1 1 1 1<br />
NOTE: P441 is the Relay Output (TB-19, 20, 21) of the<br />
optional Digital I/O module (ESVZAL0, ESVZAL1).<br />
Scaling/units depend on P708<br />
Skip segment if time = 0<br />
bit = 0: OFF (De-energized)<br />
bit = 1: ON (Energized)<br />
The corresponding digital output/relay must be<br />
set to accept data from the sequencer: P140,<br />
P142, P441 = 27<br />
0.00 0.00 {VDC} 10.00 TB30 configuration parameter must be set to<br />
accept this value: P150 = 10<br />
0.0 -500.0 {Hz} 500.0 If P112 = 1, negative sign forces reverse<br />
direction<br />
20.0 0.0 {sec} 3600.0<br />
0.0<br />
0<br />
0.0 {P708} 6553.5<br />
0 {P708} 65535<br />
0 Value set in P773 0 1 2 3 4 5 6 7<br />
Relay (Bit 0) 0 1 0 1 0 1 0 1<br />
TB14 (Bit 1) 0 0 1 1 0 0 1 1<br />
I/O option Relay (Bit 2) 0 0 0 0 1 1 1 1<br />
NOTE: P441 is the Relay Output (TB-19, 20, 21) of the<br />
optional Digital I/O module (ESVZAL0, ESVZAL1).<br />
Scaling/units depend on P708<br />
Skip segment if time = 0<br />
bit = 0: OFF (De-energized)<br />
bit = 1: ON (Energized)<br />
The corresponding digital output/relay must be<br />
set to accept data from the sequencer: P140,<br />
P142, P441 = 27<br />
0.00 0.00 {VDC} 10.00 TB30 configuration parameter must be set to<br />
accept this value: P150 = 10<br />
0.0 -500.0 {Hz} 500.0 If P112 = 1, negative sign forces reverse<br />
direction<br />
20.0 0.0 {sec} 3600.0<br />
0.0<br />
0<br />
0.0 {P708} 6553.5<br />
0 {P708} 65535<br />
0 Value set in P778 0 1 2 3 4 5 6 7<br />
Relay (Bit 0) 0 1 0 1 0 1 0 1<br />
TB14 (Bit 1) 0 0 1 1 0 0 1 1<br />
I/O option Relay (Bit 2) 0 0 0 0 1 1 1 1<br />
NOTE: P441 is the Relay Output (TB-19, 20, 21) of the<br />
optional Digital I/O module (ESVZAL0, ESVZAL1).<br />
Scaling/units depend on P708<br />
Skip segment if time = 0<br />
bit = 0: OFF (De-energized)<br />
bit = 1: ON (Energized)<br />
The corresponding digital output/relay must be<br />
set to accept data from the sequencer: P140,<br />
P142, P441 = 27<br />
0.00 0.00 {VDC} 10.00 TB30 configuration parameter must be set to<br />
accept this value: P150 = 10<br />
<strong>CTi</strong> <strong>Automation</strong> - Phone: 800.894.0412 - Fax: 208.368.0415 - Web: www.ctiautomation.net - Email: info@ctiautomation.net<br />
51
Commissioning<br />
Code Possible Settings<br />
No. Name Default Selection<br />
Segment #15<br />
Segment #15<br />
<strong>Frequency</strong> Setpoint<br />
1 Segment #15<br />
Accel/Decel Time<br />
2 Segment #15<br />
Time in current step<br />
Segment #15<br />
Digital Output State<br />
Segment #15 TB30<br />
Analog Output<br />
Value<br />
Segment #16<br />
Segment #16<br />
<strong>Frequency</strong> Setpoint<br />
Segment #16<br />
Accel/Decel Time<br />
7 Segment #16<br />
Time in current step<br />
Segment #16<br />
Digital Output State<br />
Segment #16 TB30<br />
Analog Output<br />
Value<br />
End Segment<br />
End Segment:<br />
<strong>Frequency</strong> Setpoint<br />
1 End Segment:<br />
Accel/Decel Time<br />
End Segment: Delay<br />
before P793, 794 &<br />
795 activation<br />
End Segment:<br />
Digital Output State<br />
52 SV01M<br />
IMPORTANT<br />
0.0 -500.0 {Hz} 500.0 If P112 = 1, negative sign forces reverse<br />
direction<br />
20.0 0.0 {sec} 3600.0<br />
0.0<br />
0<br />
0.0 {P708} 6553.5<br />
0 {P708} 65535<br />
0 Value set in P783 0 1 2 3 4 5 6 7<br />
Relay (Bit 0) 0 1 0 1 0 1 0 1<br />
TB14 (Bit 1) 0 0 1 1 0 0 1 1<br />
I/O option Relay (Bit 2) 0 0 0 0 1 1 1 1<br />
NOTE: P441 is the Relay Output (TB-19, 20, 21) of the<br />
optional Digital I/O module (ESVZAL0, ESVZAL1).<br />
Scaling/units depend on P708<br />
Skip segment if time = 0<br />
bit = 0: OFF (De-energized)<br />
bit = 1: ON (Energized)<br />
The corresponding digital output/relay must be<br />
set to accept data from the sequencer: P140,<br />
P142, P441 = 27<br />
0.00 0.00 {VDC} 10.00 TB30 configuration parameter must be set to<br />
accept this value: P150 = 10<br />
0.0 -500.0 {Hz} 500.0 If P112 = 1, negative sign forces reverse<br />
direction<br />
20.0 0.0 {sec} 3600.0<br />
0.0<br />
0<br />
0.0 {P708} 6553.5<br />
0 {P708} 65535<br />
0 Value set in P788 0 1 2 3 4 5 6 7<br />
Relay (Bit 0) 0 1 0 1 0 1 0 1<br />
TB14 (Bit 1) 0 0 1 1 0 0 1 1<br />
I/O option Relay (Bit 2) 0 0 0 0 1 1 1 1<br />
NOTE: P441 is the Relay Output (TB-19, 20, 21) of the<br />
optional Digital I/O module (ESVZAL0, ESVZAL1).<br />
Scaling/units depend on P708<br />
Skip segment if time = 0<br />
bit = 0: OFF (De-energized)<br />
bit = 1: ON (Energized)<br />
The corresponding digital output/relay must be<br />
set to accept data from the sequencer: P140,<br />
P142, P441 = 27<br />
0.00 0.00 {VDC} 10.00 TB30 configuration parameter must be set to<br />
accept this value: P150 = 10<br />
0.0 -500.0 {Hz} 500.0 If P112 = 1, negative sign forces reverse<br />
direction<br />
5.0 0.0 {sec} 3600.0<br />
0.0 {P708} 6553.5<br />
0 {P708} 65535<br />
Value set in P793 0 1 2 3 4 5 6 7<br />
Relay (Bit 0) 0 1 0 1 0 1 0 1<br />
TB14 (Bit 1) 0 0 1 1 0 0 1 1<br />
I/O option Relay (Bit 2) 0 0 0 0 1 1 1 1<br />
NOTE: P441 is the Relay Output (TB-19, 20, 21) of the<br />
optional Digital I/O module (ESVZAL0, ESVZAL1).<br />
Scaling/units depend on P708<br />
bit = 0: OFF (De-energized)<br />
bit = 1: ON (Energized)<br />
The corresponding digital output/relay must be<br />
set to accept data from the sequencer: P140,<br />
P142, P441 = 27<br />
<strong>CTi</strong> <strong>Automation</strong> - Phone: 800.894.0412 - Fax: 208.368.0415 - Web: www.ctiautomation.net - Email: info@ctiautomation.net
Code Possible Settings<br />
No. Name Default Selection<br />
End Segment: TB30<br />
Analog Output<br />
Value<br />
End Segment:<br />
Drive Action<br />
SV01M<br />
Commissioning<br />
IMPORTANT<br />
0.00 0.00 {VDC} 10.00 TB30 configuration parameter must be set to<br />
accept this value: P150 = 10<br />
0 0 Keep Running Recovery: Toggling the START SEQUENCE will<br />
1 Stop (based on P111)<br />
2 Coast to Stop<br />
3 Quick Stop (per P127)<br />
4 Coast with DC Brake<br />
5 Ramp with DC Brake<br />
WARNING!<br />
start the cycle from ‘end segment Stop’ or ‘end<br />
segment DC Brake’.<br />
If P795 = 0 then toggling the start sequence input will also restart the sequencer cycle but<br />
in the interim where TB13X is open the drive will ramp to the standard or specified alternate<br />
speed source depending on the drive configuration.<br />
WARNING<br />
If the input defined to “Start Sequence” is opened during a sequence, the drive will exit sequencer mode<br />
and will run at the specified standard or alternate speed source (dependent on drive configuration).<br />
<strong>CTi</strong> <strong>Automation</strong> - Phone: 800.894.0412 - Fax: 208.368.0415 - Web: www.ctiautomation.net - Email: info@ctiautomation.net<br />
53
Commissioning<br />
4.5.9.1 Sequencer Flow Diagram Left<br />
Drive Stop/Start Control<br />
Start from<br />
Local Keypad<br />
Start from<br />
Terminal Strip<br />
Start from<br />
Remote Keypad 3<br />
(1)<br />
Start from Network<br />
(SMV communications<br />
module)<br />
0<br />
1<br />
2<br />
(2) P100<br />
Sequencer Flow Diagram<br />
Digital Input priority:<br />
TB-13A - Lowest<br />
TB-13B<br />
TB-13C<br />
(3)<br />
TB-13D - Highest<br />
P700<br />
P121<br />
54 SV01M<br />
0<br />
1<br />
2<br />
3<br />
Sequencer<br />
mode<br />
disabled<br />
“Start Segment” number selection<br />
TB-13A<br />
24<br />
P122<br />
WARNING<br />
If none of the digital inputs (TB-13A,B,C or D) are asserted<br />
but a start signal is given from the Start/Stop source (P100)<br />
then the drive will run at the output frequency value governed by<br />
the frequency reference source (P101).<br />
Notes<br />
(1)<br />
Refer to relevant communications module user guide for starting from a<br />
communications network, RS485 etc..<br />
(2) Refer to P100 description in the SMV <strong>Operating</strong> instructions for further<br />
combinations of start sources.<br />
(3)<br />
TB-13D available on SMV models rated 15HP (11kW) or greater.<br />
> Selections shown as default values<br />
TB-13B<br />
24<br />
P123<br />
TB-13C<br />
24<br />
P124<br />
TB-13D 24<br />
Start<br />
Segment<br />
P701<br />
Start<br />
Segment<br />
P702<br />
Start<br />
Segment<br />
P703<br />
Start<br />
Segment<br />
P704<br />
WARNING<br />
If the input defined to “Start Sequence” is opened during a sequence, the drive will exit sequencer<br />
mode and will run at the specified standard or alternate speed source (dependent on drive<br />
configuration).<br />
<strong>CTi</strong> <strong>Automation</strong> - Phone: 800.894.0412 - Fax: 208.368.0415 - Web: www.ctiautomation.net - Email: info@ctiautomation.net<br />
1<br />
2<br />
3<br />
4<br />
5 6<br />
7<br />
8<br />
9<br />
10<br />
11<br />
12<br />
13<br />
14<br />
15<br />
16<br />
1<br />
2<br />
3<br />
4<br />
5<br />
6<br />
7<br />
8<br />
9<br />
10<br />
11<br />
12<br />
13<br />
14<br />
15<br />
16<br />
1<br />
2<br />
3 4<br />
5<br />
6<br />
7 8<br />
9<br />
10<br />
11<br />
12<br />
13<br />
14<br />
15<br />
16<br />
1<br />
2<br />
3 4<br />
5<br />
6<br />
7 8<br />
9<br />
10<br />
11<br />
12<br />
13<br />
14<br />
15<br />
16
4.5.9.2 Sequencer Flow Diagram Right<br />
1<br />
P711<br />
P710<br />
P712<br />
P716<br />
2<br />
P715<br />
P717<br />
P121/2/3/4<br />
3<br />
P721<br />
P720<br />
P722<br />
4<br />
P726<br />
P725<br />
P727<br />
5<br />
P731<br />
P730<br />
P732<br />
6<br />
P736<br />
P735<br />
P737<br />
SUSPEND SEQUENCE<br />
Asserting input will suspend<br />
sequencer in the currently active<br />
segment, and when un-asserted<br />
sequencer will continue to complete<br />
the time remaining in the segment<br />
TB-13x<br />
26<br />
Suspend Sequencer<br />
7<br />
P741<br />
P740<br />
P742<br />
8<br />
P746<br />
P745<br />
P747<br />
SV01M<br />
Commissioning<br />
Action after Stop/Start (P100) transition/digital input (if setup for<br />
sequencer mode) transition or restart after trip.<br />
P706 Action<br />
0 Restart at beginning of sequence (pointed by TB13x)<br />
1 Restart at beginning of current segment<br />
2 Start at beginning of prior segment<br />
3 Start at beginning of next segment<br />
9<br />
P751<br />
P750<br />
P752<br />
10<br />
P756<br />
P755<br />
P757<br />
Number of repeat Cycles P707<br />
11<br />
P761<br />
P760<br />
P762<br />
12<br />
P766<br />
P765<br />
P767<br />
13<br />
Ramp with DC Brake (See P174/P175)<br />
Coast with DC Brake (See P174/P175)<br />
Quick Stop (based on P128)<br />
Coast to Stop<br />
Stop (based on P111)<br />
Keep running (based on P790)<br />
P771<br />
P770<br />
P772<br />
5<br />
4<br />
3<br />
2<br />
1<br />
0<br />
14<br />
P776<br />
P775<br />
P777<br />
No<br />
15<br />
(4) End<br />
Segment<br />
P781<br />
P780<br />
P782<br />
P791<br />
P795<br />
16<br />
P786<br />
P792<br />
P785<br />
P787<br />
Number of<br />
cycles set<br />
in P707<br />
completed<br />
?<br />
Notes<br />
(4)<br />
The end segment is entered once the highest number segment with a non-zero value in the<br />
“time in current segment” (P712/P711 etc..) parameter has completed and the number of<br />
repeat cycles P707 has completed.<br />
> A value of “0” in the segment time (P712 etc.) will result in the segment being skipped.<br />
> Segment time and Accel/Decel (P712/P711 etc.) scaling is seconds as default.<br />
> The sequencer will start from the segment pointed to by the digital input with the highest priority.<br />
> Selections shown as default values.<br />
<strong>CTi</strong> <strong>Automation</strong> - Phone: 800.894.0412 - Fax: 208.368.0415 - Web: www.ctiautomation.net - Email: info@ctiautomation.net<br />
Yes<br />
P790<br />
55
4.5.9.3 Sequencer Status<br />
Internal 0-10V reference<br />
Commissioning<br />
P150 = 10<br />
Segment 1 active<br />
Segment 2 active<br />
Segment 3 active<br />
Segment 4 active<br />
Segment 5 active<br />
Segment 6 active<br />
Segment 7 active<br />
Segment 8 active<br />
Segment 9 active<br />
Segment 10 active<br />
Segment 11 active<br />
Segment 12 active<br />
Segment 13 active<br />
Segment 14 active<br />
Segment 15 active<br />
Segment 16 active<br />
End Segment active<br />
56 SV01M<br />
Output Voltage<br />
P714<br />
Output Voltage<br />
P719<br />
Output Voltage<br />
P724<br />
Output Voltage<br />
P729<br />
Output Voltage<br />
P734<br />
Output Voltage<br />
P739<br />
Output Voltage<br />
P744<br />
Output Voltage<br />
P749<br />
Output Voltage<br />
P754<br />
Output Voltage<br />
P759<br />
Output Voltage<br />
P764<br />
Output Voltage<br />
P769<br />
Output Voltage<br />
P774<br />
Output Voltage<br />
P779<br />
Output Voltage<br />
P784<br />
Output Voltage<br />
P789<br />
End<br />
Segment Delay Output Voltage<br />
P792 P794<br />
NOTE<br />
On the “End Segment”, the output voltage is not present until after the end segment delay P792<br />
has expired. On the other segments the output voltage is present on entry to the segment. The<br />
same is true for the digital outputs.<br />
(1) The drive can only be restarted if the error message has been reset.<br />
TB30
Troubleshooting and Diagnostics<br />
5 Troubleshooting and Diagnostics<br />
5.1 Status/Warning Messages<br />
Status / Warning Cause Remedy<br />
DC-injection brake active DC-injection brake activated<br />
• activation of digital input<br />
(P121...P124 = 18)<br />
• automatically (P110 = 2, 4...6)<br />
• automatically (P111 = 1, 3)<br />
Drive ID warning The Drive ID (P502) stored on the EPM<br />
does not match the drive model.<br />
SV01M<br />
Deactivate DC-injection brake<br />
• deactivate digital input<br />
• automatically after P175 time has<br />
expired<br />
• Verify motor data (P302…P306) and<br />
perform Auto Calibration.<br />
• Set drive mode (P300) to 0 or 1<br />
• Reset the drive (P199 to 3 or 4) and<br />
reprogram.<br />
L Motor Auto-calibration active Refer to P300, P399 Motor Auto-calibration is being performed<br />
An EPM that contains valid data from<br />
a previous software version has been<br />
installed<br />
An attempt was made to change<br />
parameter settings<br />
Parameter settings can only be changed after<br />
the EPM data is converted to the current<br />
version (P199 = 5)<br />
L Current Limit (P171) reached Motor overload • Increase P171<br />
• Verify drive/motor are proper size for<br />
application<br />
Decel Override The drive has stopped decelerating If drive trips into fault:<br />
to avoid tripping into H fault, due to • Increase P105, P126<br />
excessive motor regen (2 sec max). • Install Dynamic Braking option<br />
Error Invalid data was entered, or an invalid<br />
command was attempted<br />
L Fast Current Limit Overload Verify drive/motor are proper size for<br />
application<br />
Flying Restart Attempt after Fault P110 = 5,6<br />
OEM Settings Operation warning An attempt was made to change<br />
parameter settings while the drive is<br />
operating in OEM Settings mode.<br />
In OEM Settings mode (P199 = 1), making<br />
changes to parameters is not permitted.<br />
OEM Defaults data warning An attempt was made to use (or reset to) Install an EPM containing valid OEM Defaults<br />
the OEM default settings (P199 = 1 or 2) data<br />
using an EPM without valid OEM data.<br />
L Fault Lockout The drive attempted 5 restarts after a • Drive requires manual reset<br />
fault but all attempts were unsuccessful • Check Fault History (P500) and correct<br />
(P110 = 3...6)<br />
fault condition<br />
PID Deceleration Status PID setpoint has finished its ramp but<br />
the drive is still decelerating to a stop.<br />
PID Mode Active Drive has been put into PID Mode. Refer to P200<br />
Sleep Mode is active Refer to P240...P242<br />
P Start Pending The drive has tripped into a fault and To disable Auto-Restart, set P110 = 0...2<br />
will automatically restart (P110 = 3...6)<br />
PID Mode disabled. Drive has been taken out of PID Mode.<br />
Refer to P200.<br />
Output frequency = 0 Hz<br />
(outputs U, V, W inhibited)<br />
Stop has been commanded from the<br />
keypad, terminal strip, or network<br />
(1) The drive can only be restarted if the error message has been reset.<br />
Apply Start command (Start Control source<br />
depends on P100)<br />
57
Troubleshooting and Diagnostics<br />
5.2 Drive Configuration Messages<br />
When the Mode button is pressed and held, the drive’s display will provide a 4-digit code that indicates how the<br />
drive is configured. If the drive is in a Stop state when this is done, the display will also indicate which control source<br />
commanded the drive to Stop (the two displays will alternate every second).<br />
Format = x.y.zz x = Control Source:<br />
= Local Keypad<br />
t = Terminal Strip<br />
= Remote Keypad<br />
n = Network<br />
Configuration Display<br />
y = Mode:<br />
= Speed mode<br />
P = PID mode<br />
= Torque mode<br />
= Sequencer mode<br />
58 SV01M<br />
zz = Reference:<br />
P = Keypad s t<br />
EU = 0-10 VDC (TB-5)<br />
1 = 4-20 mA (TB-25)<br />
= Jog<br />
= Network<br />
P = MOP<br />
P1 7 = Preset 1...7<br />
1 = Sequencer Segment<br />
Example:<br />
= Local Keypad Start control, Speed mode, Keypad speed reference<br />
p = Terminal Strip Start control, PID mode, 0-10 VDC setpoint reference<br />
1 = Terminal Strip Start control, Sequencer Operation (Speed mode), Segment #12<br />
n .p = Network Start control, Vector Torque mode, Preset Torque #2 reference<br />
= Network Start control, Speed mode, Speed reference from Sequencer segment #03<br />
Stop Source Display<br />
Format = x p = Stop command came from Local Keypad<br />
= Stop command came from Terminal Strip<br />
p = Stop command came from Remote Keypad<br />
s p = Stop command came from Network<br />
5.3 Fault Messages<br />
The messages below show how they will appear on the display when the drive trips. When looking at the Fault History<br />
(P500), the F_ will not appear in the fault message.<br />
Fault Cause Remedy (1)<br />
A High Temperature fault Drive is too hot inside • Reduce drive load<br />
• Improve cooling<br />
L Assertion Level fault • Assertion Level switch is changed<br />
during operation<br />
• P120 is changed during operation<br />
• P100 or P121...P124 are set to a value<br />
other than 0 and P120 does not match<br />
the Assertion Level Switch.<br />
b Personality fault Drive Hardware • Cycle Power<br />
C Control fault An EPM has been installed that is either<br />
blank or corrupted<br />
Incompatible EPM fault An EPM has been installed that contains<br />
data from an incompatible parameter<br />
version<br />
Forced Translation fault An EPM from an old drive put in new drive<br />
causes drive to trip F_cFT fault.<br />
• Make sure the Assertion Level switch and<br />
P120 are both set for the type of input<br />
devices being used, prior to setting P100 or<br />
P121...P124.<br />
Refer to 3.2.3 and P120.<br />
• Power down and install EPM with valid data<br />
• Reset the drive back to defaults (P199 = 3, 4)<br />
and then re-program<br />
• If problem persists, contact factory technical<br />
support<br />
Press [M] (mode button) twice to reset<br />
<strong>CTi</strong> <strong>Automation</strong> - Phone: 800.894.0412 - Fax: 208.368.0415 - Web: www.ctiautomation.net - Email: info@ctiautomation.net
Troubleshooting and Diagnostics<br />
Fault Cause Remedy (1)<br />
Dynamic Braking fault Dynamic braking resistors are overheating • Increase active decel time<br />
(P105, P126, P127).<br />
• Check mains voltage and P107<br />
External fault • P121…P124 = 21 and that digital input • Correct the external fault condition<br />
has been opened.<br />
• Make sure digital input is set properly for NC<br />
• P121…P124 = 22 and that digital input<br />
has been closed.<br />
or NO circuit<br />
1 EPM fault EPM missing or defective Power down and replace EPM<br />
F Internal faults Contact factory technical support<br />
1<br />
Control Configuration Fault The drive is setup for REMOTE KEYPAD<br />
control (P100=2 or 5) but is not setup to<br />
communicate with a remote keypad<br />
The drive is setup for NETWORK ONLY<br />
control (P100=3) but is not setup for<br />
network communications<br />
L TB25 (4-20 mA signal)<br />
Threshold fault<br />
4-20 mA signal (at TB-25) drops below the<br />
value set in P164.<br />
G OEM Defaults data fault Drive is powered up with P199 =1 and<br />
OEM settings in the EPM are not valid.<br />
SV01M<br />
Set P400 = 1, or P600 = 1<br />
Set P400 or P600 to a valid network<br />
communications protocol selection<br />
• Check signal/signal wire<br />
• Refer to parameters P163 and P164.<br />
Install an EPM containing valid OEM Defaults<br />
data or change P199 to 0.<br />
f HF High DC Bus Voltage fault Mains voltage is too high Check mains voltage and P107<br />
Decel time is too short, or too much regen<br />
from motor<br />
Increase active decel time (P105, P126, P127)<br />
or install Dynamic Braking option<br />
1L Digital Input<br />
More than one digital input set for the same Each setting can only be used once (except<br />
Configuration fault (P121... function<br />
P124)<br />
settings 0 and 3)<br />
Only one digital input configured for MOP<br />
function (Up, Down)<br />
PID mode is entered with setpoint<br />
reference and feedback source set to the<br />
same analog signal<br />
One of the digital inputs (P121…P124) is<br />
set to 10 and another is set to 11…14.<br />
One of the digital inputs (P121…P124)<br />
is set to 11 or 12 and another is set to<br />
13 or 14.<br />
PID enabled in Vector Torque mode (P200<br />
= 1 or 2 and P300 = 5)<br />
One input must be set to MOP Up, another must<br />
be set to MOP Down<br />
Change PID setpoint reference (P121…P124) or<br />
feedback source (P201).<br />
Reconfigure digital inputs<br />
PID cannot be used in Vector Torque mode<br />
J Remote keypad fault Remote keypad disconnected Check remote keypad connections<br />
Low DC Bus Voltage fault Mains voltage too low Check mains voltage<br />
1 No Motor ID fault An attempt was made to start the drive<br />
in Vector or Enhanced V/Hz mode prior to<br />
performing the Motor Auto-calibration<br />
Module communication<br />
fault<br />
Communication failure between drive and<br />
Network Module.<br />
Network Faults Refer to the module documentation. for<br />
Causes and Remedies.<br />
Refer to parameters P300…P399 for Drive Mode<br />
setup and calibration.<br />
Check module connections<br />
<strong>CTi</strong> <strong>Automation</strong> - Phone: 800.894.0412 - Fax: 208.368.0415 - Web: www.ctiautomation.net - Email: info@ctiautomation.net<br />
59
Troubleshooting and Diagnostics<br />
Fault Cause Remedy (1)<br />
O Output fault:<br />
Output short circuit Check motor/motor cable<br />
Transistor fault<br />
Acceleration time too short Increase P104, P125<br />
Severe motor overload, due to:<br />
• Check machine / system<br />
• Mechanical problem<br />
• Verify drive/motor are proper size for<br />
• Drive/motor too small for application application<br />
Boost values too high Decrease P168, P169<br />
Excessive capacitive charging current of • Use shorter motor cables with lower charging<br />
the motor cable<br />
current<br />
• Use low capacitance motor cables<br />
• Install reactor between motor and drive.<br />
Failed output transistor Contact factory technical support<br />
Output fault: Ground fault Grounded motor phase Check motor and motor cable<br />
Excessive capacitive charging current of Use shorter motor cables with lower charging<br />
the motor cable<br />
current<br />
P Motor Overload fault Excessive motor load for too long • Verify proper setting of P108<br />
• Verify drive and motor are proper size for<br />
application<br />
Flying Restart fault Controller was unable to synchronize with<br />
the motor during restart attempt; (P110<br />
= 5 or 6)<br />
Check motor / load<br />
Single-Phase fault A mains phase has been lost Check mains voltage<br />
U Start fault Start command was present when power • Must wait at least 2 seconds after power-up<br />
was applied (P110 = 0 or 2).<br />
to apply Start command<br />
• Consider alternate starting method (P110).<br />
TB5 (0-10V signal) 0-10V signal (at TB5) drops below the value • Check signal/signal wire<br />
Threshold fault set in P158.<br />
• Refer to parameters P157 and P158<br />
(1) The drive can only be restarted if the error message has been reset.<br />
<strong>CTi</strong> <strong>Automation</strong> - Phone: 800.894.0412 - Fax: 208.368.0415 - Web: www.ctiautomation.net - Email: info@ctiautomation.net<br />
60 SV01M
Appendix A<br />
A.1 Permissable Cable Lengths<br />
SV01M<br />
Appendix<br />
The table herein lists the permissable cable lengths for use with an SMV inverter with an internal EMC filter.<br />
NOTE<br />
This table is intended as a reference guideline only; application results may vary. The values in this<br />
table are based on testing with commonly available low-capacitance shielded cable and commonly<br />
available AC induction motors. Testing is conducted at worst case speeds and loads.<br />
Maximum Permissible Cable Lengths (Meters) for SMV Model with Internal EMC Filters<br />
Mains Model 4 kHz Carrier<br />
(P166 = 0)<br />
240 V, 1-phase<br />
(2/PE)<br />
400/480 V,3-phase<br />
(3/PE)<br />
6 kHz Carrier<br />
(P166 = 1)<br />
8 kHz Carrier<br />
(P166 = 2)<br />
10 kHz Carrier<br />
(P166 = 3)<br />
Class A Class B Class A Class B Class A Class B Class A Class B<br />
ESV251GG2SFG 38 12 35 10 33 5 30 N/A<br />
ESV371GG2SFG 38 12 35 10 33 5 30 N/A<br />
ESV751GG2SFG 38 12 35 10 33 5 30 N/A<br />
ESV112GG2SFG 38 12 35 10 33 5 30 N/A<br />
ESV152GG2SFG 38 12 35 10 33 5 30 N/A<br />
ESV222GG2SFG 38 12 35 10 33 5 30 N/A<br />
ESV371GG4TFG 30 4 25 2 20 N/A 10 N/A<br />
ESV751GG4TFG 30 4 25 2 20 N/A 10 N/A<br />
ESV112GG4TFG 30 4 25 2 20 N/A 10 N/A<br />
ESV152GG4TFG 30 4 25 2 20 N/A 10 N/A<br />
ESV222GG4TFG 30 4 25 2 20 N/A 10 N/A<br />
ESV302GG4TFG 30 4 25 2 20 N/A 10 N/A<br />
ESV402GG4TFG 54 5 48 3 42 2 N/A N/A<br />
ESV552GG4TFG 54 5 48 3 42 2 N/A N/A<br />
ESV752GG4TFG 54 5 48 3 42 2 N/A N/A<br />
NOTE: The “GG” and “G” symbols are place holders in the Model part number that contain different information depending on<br />
the specific configuration of the model. Refer to the SMV Type Number Designation table in section 2.2 for more information.<br />
<strong>CTi</strong> <strong>Automation</strong> - Phone: 800.894.0412 - Fax: 208.368.0415 - Web: www.ctiautomation.net - Email: info@ctiautomation.net<br />
61