MK2 ADIABATIC (SPRAY) COOLING SYSTEMS
MK2 ADIABATIC (SPRAY) COOLING SYSTEMS
MK2 ADIABATIC (SPRAY) COOLING SYSTEMS

You also want an ePaper? Increase the reach of your titles
YUMPU automatically turns print PDFs into web optimized ePapers that Google loves.
1. HEALTH AND SAFETY<br />
Refer to instructions for unit.<br />
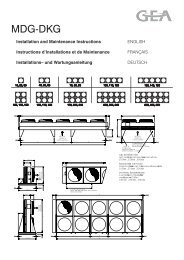
Installation and Maintenance Instructions<br />
2. LEGIONELLA<br />
An ultraviolet disinfection lamp is fitted as standard to<br />
the unit and will kill any Legionella in the supply<br />
water.<br />
(IT IS MANDATORY THAT THE UV LAMP IS<br />
CHANGED ONCE A YEAR. UNDER NO<br />
CIRCUMSTANCE SHOULD THIS SYSTEM BE RUN<br />
WITHOUT A FULLY FUCTIONING DISINFECTION<br />
LAMP.)<br />
The system is designed to drain daily, so as to not<br />
harbour bacteria. Note, if the supply water<br />
temperature is lower than 20°C then multiplication of<br />
Legionella is inhibited. For this reason it is<br />
recommended that the unit is supplied directly from a<br />
cold mains whenever possible.<br />
To reduce the possibility of supply water<br />
exceeding 20°C and Legionella being in the supply<br />
water it is necessary to loop the supply, rather than<br />
create a “dead leg” in which water can stagnate.<br />
3. GENERAL<br />
The MKII adiabatic spray system has three models in<br />
the range, two pumped and one non-pumped. The<br />
pumped systems are available with two sizes of<br />
single phase pump. All units are fitted with an<br />
ultraviolet disinfection lamp.<br />
The adiabatic system is housed in a steel IP55<br />
enclosure and is available as a factory fitted option to<br />
all of International Cooling Group’s condenser and<br />
dry cooler models. It can also be supplied as a retrofit<br />
kit for existing installations and can be remote<br />
mounted.<br />
Factory fitted units are supplied with the adiabatic<br />
box fitted to the opposite end to the inlet/outlet<br />
headers. DVG/DVH/MVH/MVG units are supplied<br />
with the sparge pipes fully assembled; MDG/DKG<br />
units are supplied with the sparge assemblies loose<br />
for fitting on site. This is because they would interfere<br />
with lifting the unit.<br />
Installation Clearances<br />
Installation clearances for particular condenser/dry<br />
cooler model should be adhered to. In addition to<br />
these clearances, provision for opening the adiabatic<br />
door should be made (min 1025mm from door face).<br />
A clearance below the coil face on flat bed units is<br />
also required (min 250mm).<br />
<strong>MK2</strong> <strong>ADIABATIC</strong><br />
(<strong>SPRAY</strong>) <strong>COOLING</strong><br />
<strong>SYSTEMS</strong><br />
Flat Bed Units<br />
Locate the sparge support beams under the coil at<br />
the specified pitches (refer to unit drawing) and<br />
secure to the side plates using clamps provided (note<br />
locate the channels in descending hole positions to<br />
enable a sufficient drop for draining). Fit the pipe<br />
clamps into the channels and locate the sparge pipes<br />
into the clamps, join using fittings supplied. The spray<br />
nozzles should be pointing away from the coil face.<br />
Make the connection with the adiabatic box. Ensure<br />
that the drain solenoid is at the lowest point of the<br />
system. The drain solenoid is normally fitted onto the<br />
lowest point on the inlet of the sparge assembly (if<br />
the unit is raised on steels and the adiabatic box<br />
is remote then it may be necessary to reposition<br />
the solenoid to avoid water trapping in the pipe work).<br />
V Bank Units<br />
Rivet the sparge support brackets to the support beams on<br />
the coil face using the holes provided. Fit pipe clamp<br />
arrangement to appropriate fixing positions on sparge<br />
support brackets. Follow diagram for relevant positions to<br />
provide a drop that allows good drainage. The spray<br />
nozzles should be pointing across the coil face with all 3<br />
rows pointing up at an angle of approximately 30° to the<br />
vertical. Make the connection with the adiabatic box<br />
ensuring that the lime scale inhibitor is fitted inline (if<br />
supplied loose). Ensure that the drain solenoid is at the<br />
lowest point of the system and non-return assembly at the<br />
highest. The drain solenoid is normally fitted onto the<br />
lowest point on the inlet of the sparge assembly. (If the<br />
unit is raised on steels and the adiabatic box is remote<br />
then it may be necessary to reposition the solenoid to<br />
avoid water trapping in the pipe work).<br />
All components must be handled with care during<br />
assembly.<br />
Water Supply and Drainage<br />
Ensure that the method of supply complies with local<br />
water regulations. The supply water must be clean<br />
and free from particles. Although the unit is fitted with<br />
an inline filter and some nozzle types have separate<br />
filters it is the responsibility of the end user to ensure<br />
a clean supply; no liability will be accepted for<br />
blockage of nozzles. The minimum supply pressure<br />
required is 2 bar.<br />
Ensure that the supply pipe work does not transmit<br />
any load or vibration to the unit pipe work. Supply<br />
pressure at the control valve must be positive before<br />
and during operation.<br />
A significant proportion of the delivered water is<br />
lost by evaporation, but there will be some over-spray<br />
and provision should be made for drainage.<br />
1
Under no circumstances should over spray<br />
water be recycled back to the spray nozzles.<br />
Units Fitted With Pumps<br />
The maximum pump flows at 3 bar are 23l/m for<br />
2HM4T and 46l/m for 2HM5T. For exact flow rates for<br />
individual units refer to Searle quoting the operating<br />
conditions required.<br />
PUMPS ARE NOT SELF PRIMING AND REQUIRE<br />
A MINIMUM OF 2 BAR AT THE INLET.<br />
Pump ratings:<br />
2HM4 (1 phase) Input Power 0.66Kw<br />
Input Current 220-240V 2.92A<br />
2HM5 (1 phase) Input Power 0.85Kw<br />
Input Current 220-240V 3.72A<br />
Frost Protection<br />
The pump and spray system are self-draining so frost<br />
protection is not necessary. However, frost protection is<br />
required for the supply pipes up to the mains solenoid.<br />
4. MILLENIUM CONTROLLER<br />
Both pumped and non-pumped units are fitted with a<br />
Millenium SA12 24V Controller, the controller is factory set<br />
using a laptop and these settings cannot be altered by the<br />
customer without a laptop and millenium software. Two<br />
programs are available to download to the controller and<br />
have the following strategies.<br />
2<br />
Standard Settings Pumped: -<br />
On enable, the UV lamp is energised, after a 1 minute<br />
delay the mains solenoid is energised allowing water to fill<br />
the pump. A pressure switch is incorporated which has a 1<br />
minute delay starting when the mains solenoid is opened;<br />
this should be set between 1 and 1.5 bar. After a delay of<br />
60 seconds the pump is energised. The pressure switch<br />
will shut down the adiabatic system in the event of water<br />
supply failure. To reset, interrupt the enable signal.<br />
Standard Settings Non-Pumped: -<br />
On enable, the UV lamp is energised, after a 1 minute<br />
delay the mains solenoid is energised allowing water<br />
directly to the nozzles. A pressure switch is incorporated<br />
with a 1 minute delay after the mains solenoid is opened,<br />
this should be set to between 1 and 1.5 bar. The pressure<br />
switch will shut down the adiabatic system in the event of<br />
water supply failure. To reset interrupt the enable signal.<br />
Both adiabatic systems will shut down under fault<br />
conditions due to the following:<br />
• If the UV lamp fails<br />
• If the pump delivery pressure falls below 1 bar<br />
The controller will display its start and run functions as<br />
below, "If the unit suffers a low pressure fault, then the<br />
controller will store the event even when the power is<br />
turned off. When the fault has been rectified press the ESC<br />
button to reset the controller. To employ the Back Light<br />
function press and hold any other button.<br />
UNDER NO CIRCUMSTANCES SHOULD ANY OF THE<br />
ABOVE SAFTEY FEATURES BE OVERRIDDEN.
UV Warm Up<br />
Water On<br />
Del Time 60<br />
Yes<br />
SEARLE <strong>ADIABATIC</strong> SYSTEM V1.2<br />
Ultra Violet<br />
Tube Warm<br />
Up Delay<br />
60 Seconds<br />
Drain & Vent Solenoids<br />
Close<br />
Main Solenoid Opens<br />
Yes<br />
System Fills for 60<br />
Seconds<br />
SEARLE<br />
Adiabatic<br />
Control V1.2<br />
(Off Line)<br />
UV Dry Contact Closes within 18 Seconds<br />
and Closed During Normal Operation<br />
System Fill<br />
Sol Energise<br />
Pump Hold<br />
Off Delay 60<br />
Adiabatic<br />
Pump Run<br />
System<br />
Pressurising<br />
Pressure Switch Closes within 60 Seconds and<br />
Closed during normal running<br />
Adiabatic<br />
System<br />
Pressure<br />
Healthy Fail<br />
No<br />
Pump Runs to Pressurise<br />
the Pipe Work<br />
Adiabatic Sprays<br />
On<br />
No<br />
UV Fail<br />
Alternating Flashing Display<br />
Check<br />
Pump<br />
Press Switch<br />
Water Supply<br />
3
5 COMMISSIONING INSTRUCTIONS<br />
The adiabatic control system can be linked a number<br />
of different control systems; refer to the unit controller<br />
instructions to check the settings and to initiate the<br />
system.<br />
Before running the unit for the first time, check that<br />
all pipe joints are secure. Supply pressure at the<br />
control valve must be positive before and during<br />
operation and is recommended to be no less than 2<br />
bar. The unit will not run unless an adequate supply<br />
is present.<br />
With condenser fans running, initiate the adiabatic<br />
system. Set the system pressure / flow rate using the<br />
flow regulator and pump bypass (pump models only).<br />
The discharge pressure should be set between 3.7<br />
and 5 bar depending on the unit water flow<br />
requirements. Check the spray coverage is even and<br />
if necessary adjust the spray direction by rotating the<br />
sparge pipes.<br />
A pressure switch is incorporated with up to 8<br />
minute monitoring timer (dependant on unit type) and this<br />
4<br />
Adiabatic flow rates @ 5 Bar<br />
is factory set to close at 1-1.5 bar, this will shut down<br />
the adiabatic system in the event of water supply<br />
failure.<br />
The adiabatic system will shut down under fault<br />
conditions due to the following:<br />
1. If the UV lamp fails<br />
2. If the water pressure falls below 1 bar.<br />
3. There is a monitoring timer that overrides the<br />
pressure switch for up to 8 minutes from the<br />
time the unit is enabled (factory set at 1<br />
minute). This allows the water flow to<br />
stabilize. If the UV lamp or water supply has<br />
failed, after the set delay the timer will lock<br />
out all functions. To reset interrupt the enable<br />
signal.<br />
UNDER NO CIRCUMSTANCES SHOULD ANY OF<br />
THE ABOVE SAFETY FEATURES BE<br />
OVERRIDDEN.<br />
1FAN 2FAN 3FAN 4FAN 5FAN<br />
MODEL l/m l/m l/m l/m l/m<br />
Vee bank<br />
n/a 6.5 9.8 13.1 16.3<br />
Flat bed<br />
1.1 2.2 3.3 4.4 5.4<br />
2x2 FAN 2x3 FAN 2x4 FAN 2x5 FAN 2x6 FAN<br />
MODEL l/m l/m l/m l/m l/m<br />
Vee bank<br />
6.5 9.8 13.1 16.3 19.6<br />
Flat bed<br />
4.4 6.5 8.7 10.9 13.1<br />
Note that maximum flow rate is based on 6 and 8 Pole requirements.<br />
For 12 and 16 pole fans, the flow can be reduced to 85% of max flow- this is achieved at approx 3.7<br />
bar.
6. MAINTENANCE<br />
The following routine maintenance is required:<br />
When the system is in standby over the winter<br />
months it is important to initiate the system and allow<br />
the pump to run for a period of 5 minutes every 2<br />
months to the prevent bearings drying up.<br />
Every 3 Months of use:<br />
1. Remove and wipe clean the quartz sleeve of the<br />
UV lamp.<br />
2. Remove and clean the strainer.<br />
3. Check the drain tubes are clear.<br />
4. Check for blocked nozzles and replace filters if<br />
necessary<br />
Additionally, every 12 months, in the spring:<br />
1. Dismantle and clean nozzles, replace nozzle<br />
filters where applicable.<br />
2. Check the coil for limescale deposition. If this is<br />
significant it is necessary to further soften the<br />
water supply.<br />
3. It mandatory to remove and replace the UV<br />
lamp element and clean the quartz sleeve<br />
every 12 months. A lamp change record sheet is<br />
fitted inside the adiabatic box, this must be<br />
updated and the next due date recorded every<br />
time the lamp is changed.<br />
4. Check that the pump rotates freely.<br />
5. Run the spray system, check it functions correctly<br />
and also check the pipelines for damage / leaks<br />
and that the spray nozzles are not blocked.<br />
6. Ensure that the system drains completely when<br />
UV lamp deactivates.<br />
Additionally, every 3 years, in the spring:<br />
1. Upon removing UV lamp sleeve/element, both<br />
the UV lamp element and the quartz sleeve<br />
should be replaced.<br />
Lamp and sleeve can only be<br />
removed from the reactor<br />
chamber as 1 piece ensuring<br />
the user is aware of any build<br />
up of minerals on the quartz<br />
sleeve.<br />
The lamp is easily removed<br />
and replaced for annual<br />
maintenance<br />
Lamp/Sleeve Combination<br />
Instructions for UV Lamp replacement<br />
Shut Down<br />
1. Shut off mains solenoid and allow system to drain.<br />
2. Unplug the power supply and let the lamp cool for<br />
5 minutes.<br />
3. Squeeze the sides of the safety cap in the area<br />
opposite the tabs (do not squeeze tabs), and remove<br />
the cap.<br />
4. Pull the lamp plug off the lamp end. Do not pull on<br />
the cord when removing the plug.<br />
Lamp Removal<br />
1. Unscrew the lamp/sleeve assembly and carefully<br />
remove it from the reactor. Handle assembly by ends<br />
only. If required, a wrench can be placed on the two<br />
flat sides of the sleeve bolt.<br />
Do not apply the wrench to the lamp end, which sits<br />
within the sleeve bolt and protrudes 1/4”.<br />
2. To remove the lamp from its sleeve, use a glove or<br />
cloth to support and hold on to the sleeve. Holding<br />
the sleeve bolt tight, unscrew the lamp end, the top of<br />
which protrudes 1/4”above the sleeve bolt. Be<br />
careful not to drop the sleeve. If required, place an<br />
adjustable wrench on the two flat sides of the lamp<br />
end.<br />
Cleaning<br />
1. Remove first O-ring, sleeve bolt and second O-ring<br />
from lamp sleeve.<br />
2. Clean lamp sleeve and sleeve bolt using a soft,<br />
lint-free cotton cloth and a chemical scale-remover<br />
such as Lime-a-WayTM or CLRTM (follow<br />
manufacturer’s directions). Alternatively, use spirit<br />
vinegar or hydrofluoric acid followed by mild<br />
detergent. Remove all traces of cleaning solution by<br />
thoroughly rinsing.<br />
Lamp Installation<br />
1. Each lamp and sleeve comes with two new Orings.<br />
Place the new O-rings and the original sleeve<br />
bolt on the lamp sleeve. Caution: Do not lubricate<br />
any of the O-rings.<br />
2. Put the lamp completely into the sleeve. Maintain it<br />
in that position and screw the sleeve bolt into the<br />
lamp end until solidly hand-tight. Caution: Over<br />
tightening will break the quartz lamp sleeve.<br />
3. Carefully place the lamp/sleeve assembly into the<br />
reactor, making sure it is centered. Apply pressure to<br />
the assembly and screw it into the reactor until solidly<br />
hand-tight. Caution: Over tightening will break the<br />
quartz lamp sleeve.<br />
4. Push the plug onto the end of the lamp while<br />
ensuring that the male<br />
tab on the lamp end meets with the female tab on the<br />
plug.<br />
5. Push the safety cap on while ensuring that the<br />
grounding wires are<br />
under the cap and not in the way of the tabs.<br />
Restarting<br />
1. Press and hold the push-button on UV controller.<br />
2. Connect the power supply to the outlet while<br />
continuing to press the push-button. The indicator<br />
light will flash green.<br />
3. Continue to hold the push-button until the indicator<br />
light flashes red, then release immediately.<br />
4. If timer does not reset, unplug power supply, wait<br />
15 seconds and then repeat steps 1-3 of “Restarting”.<br />
5. Enable adiabatic system (force adiabatic system<br />
on). After system has filled, check for leaks.<br />
5
6<br />
7. INVALIDATION OF GUARANTEE<br />
Searle accepts no liability according to Searle's terms<br />
and conditions of sale, or for loss or damage arising<br />
as a result of:<br />
(i) Failure to install, set up or put to work any part of<br />
equipment in the manner specified in the I&M<br />
instructions, or<br />
(ii) Failure to maintain the equipment in the manner<br />
specified in the I&M instructions, or<br />
(iii) Replacement parts, additional parts or<br />
accessories manufactured by persons other than<br />
Searle having been incorporated into, or attached to<br />
the equipment, or<br />
(iv) The equipment having been adapted for use,<br />
operated or used in such a way as does not conform<br />
to Searle's recommendations.<br />
8. SPARES LISTS<br />
2HM4 Pump 1 Phase 291-400-007<br />
2HM5 Pump 1 Phase 291-400-008<br />
Strainer c/w Ball Valve 265-117-004<br />
Spray Tip 301AF1.6-100 296-100-185<br />
Spray Tip Filter 301AF1.6-100 296-100-186<br />
Solenoid Valve 1/4” N/O 264-632-101<br />
Solenoid Valve 1/2” N/C 264-632-100<br />
Solenoid Coil 291-600-142<br />
Trojan UV Max D C/W Volt Free Contacts<br />
249-600-004<br />
Replacement UV Bulb Trojan UV Max D<br />
249-600-005<br />
Replacement Quartz Sleeve Trojan UV Max D<br />
249-600-006<br />
Pressure Gauge 0-6 bar 265-115-002<br />
Inline scale inhibitor (blue)- pre spring 2005<br />
265-127-026<br />
Inline magnetic scale inhibitor- post spring 2005<br />
265-127-027<br />
0-6 bar Pressure Regulator 266-104-001<br />
Rapid Pipe Clamp (7/8”) 200-200-622<br />
Restrictor 264-624-701<br />
½” Non Return Valve 264-624-700<br />
Pressure Switch 216-152-103<br />
Millenium Controller 200-800-453<br />
Pushfit 22mm Cu Straight Conn 261-152-206<br />
Pushfit 22mm Cu Equal Tee 261-152-207<br />
Pushfit 22mm Cu Elbow 261-152-208<br />
Pushfit Release Tool 261-152-209<br />
Number 272-000-012 Issue Sep05/02