

VW MKII A2 MK2 Golf Jetta Fox Service Manual - VAGLinks.com
VW MKII A2 MK2 Golf Jetta Fox Service Manual - VAGLinks.com
VW MKII A2 MK2 Golf Jetta Fox Service Manual - VAGLinks.com

You also want an ePaper? Increase the reach of your titles
YUMPU automatically turns print PDFs into web optimized ePapers that Google loves.
1•20 Every 10 000 miles or 12 months<br />
gripping the track rod. If the wheel is now<br />
rocked, movement will be felt at the inner joint<br />
if wear has taken place.<br />
4 With the vehicle standing on its wheels,<br />
have an assistant turn the steering wheel back<br />
and forth about an eighth of a turn each way.<br />
There should be very little, if any, lost<br />
movement between the steering wheel and<br />
the roadwheels. If this is not the case, closely<br />
observe the joints and mountings previously<br />
described, but in addition check for wear of<br />
the steering column universal joint and the<br />
steering gear itself.<br />
29 Suspension check<br />
1<br />
1 Raise and support each end of the vehicle<br />
in turn and inspect the suspension<br />
<strong>com</strong>ponents for signs of excessive wear or<br />
damage as follows.<br />
2 Inspect the suspension balljoints for wear<br />
and the dust covers for any signs of splits or<br />
deterioration. Renew if necessary.<br />
3 Check the track control arm (wishbone) and<br />
anti-roll bar mounting/pivot bushes for signs<br />
of excessive wear and/or deterioration and<br />
again renew if necessary.<br />
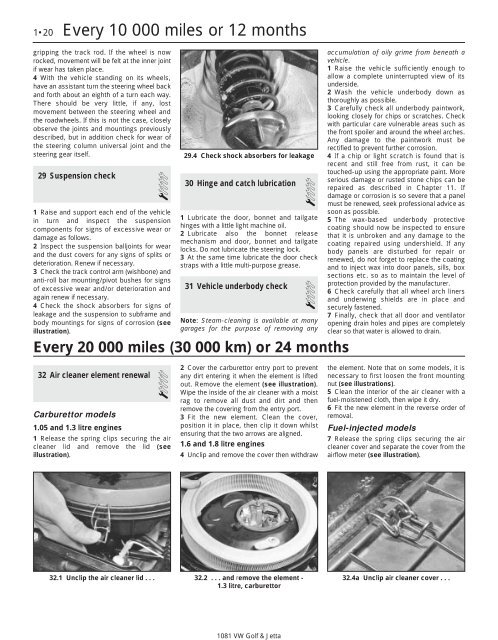
4 Check the shock absorbers for signs of<br />
leakage and the suspension to subframe and<br />
body mountings for signs of corrosion (see<br />
illustration).<br />
32 Air cleaner element renewal<br />
Carburettor models<br />
1.05 and 1.3 litre engines<br />
1<br />
1 Release the spring clips securing the air<br />
cleaner lid and remove the lid (see<br />
illustration).<br />
29.4 Check shock absorbers for leakage<br />
30 Hinge and catch lubrication<br />
1<br />
1 Lubricate the door, bonnet and tailgate<br />
hinges with a little light machine oil.<br />
2 Lubricate also the bonnet release<br />
mechanism and door, bonnet and tailgate<br />
locks. Do not lubricate the steering lock.<br />
3 At the same time lubricate the door check<br />
straps with a little multi-purpose grease.<br />
31 Vehicle underbody check<br />
1<br />
Note: Steam-cleaning is available at many<br />
garages for the purpose of removing any<br />
Every 20 000 miles (30 000 km) or 24 months<br />
2 Cover the carburettor entry port to prevent<br />
any dirt entering it when the element is lifted<br />
out. Remove the element (see illustration).<br />
Wipe the inside of the air cleaner with a moist<br />
rag to remove all dust and dirt and then<br />
remove the covering from the entry port.<br />
3 Fit the new element. Clean the cover,<br />
position it in place, then clip it down whilst<br />
ensuring that the two arrows are aligned.<br />
1.6 and 1.8 litre engines<br />
4 Unclip and remove the cover then withdraw<br />
32.1 Unclip the air cleaner lid . . . 32.2 . . . and remove the element -<br />
1.3 litre, carburettor<br />
1081 <strong>VW</strong> <strong>Golf</strong> & <strong>Jetta</strong><br />
accumulation of oily grime from beneath a<br />
vehicle.<br />
1 Raise the vehicle sufficiently enough to<br />
allow a <strong>com</strong>plete uninterrupted view of its<br />
underside.<br />
2 Wash the vehicle underbody down as<br />
thoroughly as possible.<br />
3 Carefully check all underbody paintwork,<br />
looking closely for chips or scratches. Check<br />
with particular care vulnerable areas such as<br />
the front spoiler and around the wheel arches.<br />
Any damage to the paintwork must be<br />
rectified to prevent further corrosion.<br />
4 If a chip or light scratch is found that is<br />
recent and still free from rust, it can be<br />
touched-up using the appropriate paint. More<br />
serious damage or rusted stone chips can be<br />
repaired as described in Chapter 11. If<br />
damage or corrosion is so severe that a panel<br />
must be renewed, seek professional advice as<br />
soon as possible.<br />
5 The wax-based underbody protective<br />
coating should now be inspected to ensure<br />
that it is unbroken and any damage to the<br />
coating repaired using undershield. If any<br />
body panels are disturbed for repair or<br />
renewed, do not forget to replace the coating<br />
and to inject wax into door panels, sills, box<br />
sections etc. so as to maintain the level of<br />
protection provided by the manufacturer.<br />
6 Check carefully that all wheel arch liners<br />
and underwing shields are in place and<br />
securely fastened.<br />
7 Finally, check that all door and ventilator<br />
opening drain holes and pipes are <strong>com</strong>pletely<br />
clear so that water is allowed to drain.<br />
the element. Note that on some models, it is<br />
necessary to first loosen the front mounting<br />
nut (see illustrations).<br />
5 Clean the interior of the air cleaner with a<br />
fuel-moistened cloth, then wipe it dry.<br />
6 Fit the new element in the reverse order of<br />
removal.<br />
Fuel-injected models<br />
7 Release the spring clips securing the air<br />
cleaner cover and separate the cover from the<br />
airflow meter (see illustration).<br />
32.4a Unclip air cleaner cover . . .


