

VW MKII A2 MK2 Golf Jetta Fox Service Manual - VAGLinks.com
VW MKII A2 MK2 Golf Jetta Fox Service Manual - VAGLinks.com
VW MKII A2 MK2 Golf Jetta Fox Service Manual - VAGLinks.com

Create successful ePaper yourself
Turn your PDF publications into a flip-book with our unique Google optimized e-Paper software.
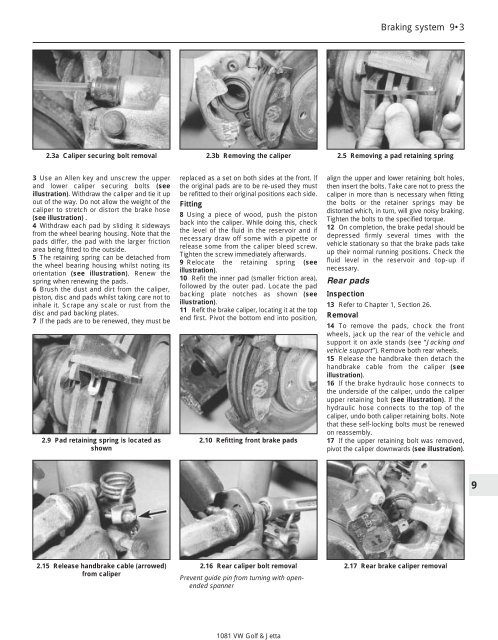
3 Use an Allen key and unscrew the upper<br />
and lower caliper securing bolts (see<br />
illustration). Withdraw the caliper and tie it up<br />
out of the way. Do not allow the weight of the<br />
caliper to stretch or distort the brake hose<br />
(see illustration) .<br />
4 Withdraw each pad by sliding it sideways<br />
from the wheel bearing housing. Note that the<br />
pads differ, the pad with the larger friction<br />
area being fitted to the outside.<br />
5 The retaining spring can be detached from<br />
the wheel bearing housing whilst noting its<br />
orientation (see illustration). Renew the<br />
spring when renewing the pads.<br />
6 Brush the dust and dirt from the caliper,<br />
piston, disc and pads whilst taking care not to<br />
inhale it. Scrape any scale or rust from the<br />
disc and pad backing plates.<br />
7 If the pads are to be renewed, they must be<br />
replaced as a set on both sides at the front. If<br />
the original pads are to be re-used they must<br />
be refitted to their original positions each side.<br />
Fitting<br />
8 Using a piece of wood, push the piston<br />
back into the caliper. While doing this, check<br />
the level of the fluid in the reservoir and if<br />
necessary draw off some with a pipette or<br />
release some from the caliper bleed screw.<br />
Tighten the screw immediately afterwards.<br />
9 Relocate the retaining spring (see<br />
illustration).<br />
10 Refit the inner pad (smaller friction area),<br />
followed by the outer pad. Locate the pad<br />
backing plate notches as shown (see<br />
illustration).<br />
11 Refit the brake caliper, locating it at the top<br />
end first. Pivot the bottom end into position,<br />
Braking system 9•3<br />
2.3a Caliper securing bolt removal 2.3b Removing the caliper 2.5 Removing a pad retaining spring<br />
2.9 Pad retaining spring is located as<br />
shown<br />
2.15 Release handbrake cable (arrowed)<br />
from caliper<br />
2.10 Refitting front brake pads<br />
2.16 Rear caliper bolt removal<br />
Prevent guide pin from turning with openended<br />
spanner<br />
1081 <strong>VW</strong> <strong>Golf</strong> & <strong>Jetta</strong><br />
align the upper and lower retaining bolt holes,<br />
then insert the bolts. Take care not to press the<br />
caliper in more than is necessary when fitting<br />
the bolts or the retainer springs may be<br />
distorted which, in turn, will give noisy braking.<br />
Tighten the bolts to the specified torque.<br />
12 On <strong>com</strong>pletion, the brake pedal should be<br />
depressed firmly several times with the<br />
vehicle stationary so that the brake pads take<br />
up their normal running positions. Check the<br />
fluid level in the reservoir and top-up if<br />
necessary.<br />
Rear pads<br />
Inspection<br />
13 Refer to Chapter 1, Section 26.<br />
Removal<br />
14 To remove the pads, chock the front<br />
wheels, jack up the rear of the vehicle and<br />
support it on axle stands (see “Jacking and<br />
vehicle support”). Remove both rear wheels.<br />
15 Release the handbrake then detach the<br />
handbrake cable from the caliper (see<br />
illustration).<br />
16 If the brake hydraulic hose connects to<br />
the underside of the caliper, undo the caliper<br />
upper retaining bolt (see illustration). If the<br />
hydraulic hose connects to the top of the<br />
caliper, undo both caliper retaining bolts. Note<br />
that these self-locking bolts must be renewed<br />
on reassembly.<br />
17 If the upper retaining bolt was removed,<br />
pivot the caliper downwards (see illustration).<br />
2.17 Rear brake caliper removal<br />
9


