Users Manual - Yokogawa
Users Manual - Yokogawa
Users Manual - Yokogawa

You also want an ePaper? Increase the reach of your titles
YUMPU automatically turns print PDFs into web optimized ePapers that Google loves.
<strong>Users</strong><br />
<strong>Manual</strong><br />
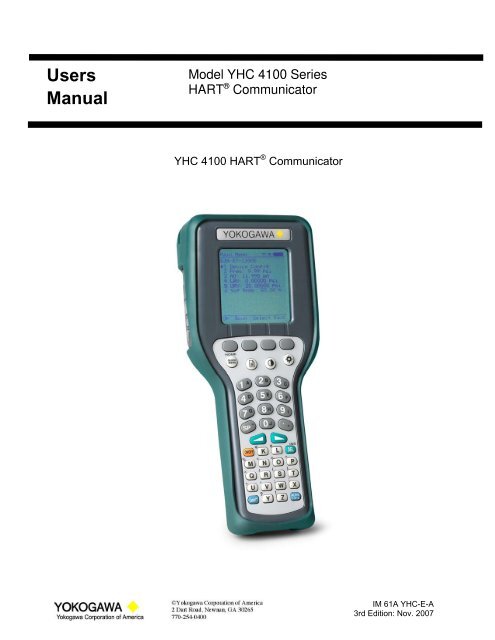
Model YHC 4100 Series<br />
HART ® Communicator<br />
YHC 4100 HART ® Communicator<br />
IM 61A YHC-E-A<br />
3rd Edition: Nov. 2007
IMPORTANT NOTICE<br />
ASSISTANCE<br />
Model<br />
YHC 4100 HART ® Communicator<br />
Important information on the product is contained in this manual.<br />
Read this manual carefully and completely before operating the<br />
product. For the safety of the operator and the system, a<br />
thorough understanding of this manual is necessary before<br />
commissioning, using or maintaining the product.<br />
For customer assistance please contact the local <strong>Yokogawa</strong> Representative or <strong>Yokogawa</strong> Corporation of<br />
America directly. For a geographic listing of Representatives and their contact information, visit our web site at<br />
www.us.yokogawa.com/mi . Contact <strong>Yokogawa</strong> Corporation of America directly by phone at (770) 254-0400 or<br />
by e-mail at info@us.yokogawa.com. Direct all assistance inquiries to the Meter & Instrument group.<br />
HART ® is a registered trademark of the HART Communication Foundation.<br />
<strong>Yokogawa</strong> Corporation of America<br />
2 Dart Rd.<br />
Newnan, GA 30265<br />
TELEPHONE: (770) 254-0400<br />
FAX: (770) 254-2088<br />
E-mail: info@us.yokogawa.com<br />
Web Site: www.us.yokogawa.com/mi<br />
IM 61A YHC-E-A<br />
3rd Edition: Nov. 2007
YHC 4100 HART Communicator<br />
USER’S MANUAL<br />
TABLE OF CONTENTS<br />
Subject Page<br />
YHC 4100 Communicator Overview......................................................................................................... 1<br />
Display Overview....................................................................................................................................... 1<br />
Header Line Symbols ........................................................................................................................... 2<br />
Keypad Overview....................................................................................................................................... 2<br />
Alphanumeric / Symbol Entry............................................................................................................... 3<br />
Left / Right Arrow Keys ....................................................................................................................... 4<br />
Soft Keys............................................................................................................................................... 4<br />
Thumb Operated Keys .......................................................................................................................... 5<br />
General Operation ...................................................................................................................................... 5<br />
Power Options....................................................................................................................................... 5<br />
Navigating Menus on the YHC display ................................................................................................ 5<br />
Turning on YHC ................................................................................................................................... 6<br />
YHC Main Display ............................................................................................................................... 7<br />
YHC Configurations Settings................................................................................................................ 7<br />
1 <strong>Users</strong>............................................................................................................................................. 7<br />
2 Applications ................................................................................................................................. 7<br />
3 Lockouts (Lockout, PV Prompt setting, View Lockout Details) ................................................. 7<br />
Lockout Code............................................................................................................................. 8<br />
Disable Lockout ......................................................................................................................... 8<br />
Changing Lockout Code............................................................................................................. 8<br />
4 Clock / Timers.............................................................................................................................. 8<br />
1 Clock Edit............................................................................................................................... 8<br />
2 Backlight (off timer)............................................................................................................... 9<br />
3 Off Timer (master) ................................................................................................................. 9<br />
5 Other............................................................................................................................................ 9<br />
1 Model Information ................................................................................................................. 9<br />
2 Battery Type selection............................................................................................................ 9<br />
3 HART Communication Mode selection................................................................................. 9<br />
4 Enter PC Comm. Mode .......................................................................................................... 9<br />
5 Polling Type: Auto (default to address 0) or Digital (default poll for addresses 0 – 15)..... 10<br />
Battery Installation & Removal (all YHC models)..................................................................................11<br />
External Connections to YHC.................................................................................................................. 11<br />
AC Adapter ......................................................................................................................................... 11<br />
HART jacks / lead set ......................................................................................................................... 11<br />
DB-9 (Serial) Connection Port............................................................................................................ 11<br />
Hazardous Area Use................................................................................................................................. 12<br />
Intrinsically Safe Operation ................................................................................................................ 12<br />
HART ® Communications with YHC 4100 ...............................................................................................13<br />
IM 61A YHC-E-A<br />
3rd Edition: Nov. 2007
HART Commands.................................................................................................................................13<br />
HART Connections...............................................................................................................................13<br />
HART Communications........................................................................................................................14<br />
Initial Screens / Online Mode........................................................................................................14<br />
Multidrop Poll (addresses 1 – 15) .................................................................................................15<br />
Digital Poll (addresses 0 – 15) for One Power Cycle....................................................................15<br />
Auto and Digital Poll Default Settings..........................................................................................15<br />
<strong>Manual</strong> Launch of Device 0 Poll...................................................................................................16<br />
Offline Menu Mode.......................................................................................................................16<br />
1 List / Show DOFs................................................................................................................16<br />
2 List / Edit Configurations....................................................................................................16<br />
3 Create Configurations .........................................................................................................17<br />
4 Delete All Configurations ...................................................................................................17<br />
Delete Individual Configurations / Clearing Configuration Memory ..........................................17<br />
Online Setup Mode ......................................................................................................................18<br />
Communications Trouble Shooting .............................................................................................19<br />
More Status Message ...................................................................................................................19<br />
Save / Send Configuration Functions...........................................................................................19<br />
DOF Memory Maintenance ......................................................................................................................20<br />
Documenting HART Configurations with DMS Software .......................................................................21<br />
YHC 4100 Device Specific & Generic HART Communication...............................................................21<br />
Using Generic HART Communications ..............................................................................................21<br />
Updating YHC 4100 Firmware and DOFs................................................................................................22<br />
Overview...............................................................................................................................................22<br />
Who has access to the Download Site...............................................................................................22<br />
PC Requirements for Download Operation ......................................................................................22<br />
Preparing the YHC............................................................................................................................22<br />
Using DPC Manager Utility to Update a YHC .....................................................................................22<br />
Using the DOF Download Site Directly ...............................................................................................24<br />
Downloading from the DOF Download Site and Using DPC Manager to Update a YHC...................24<br />
Returning the YHC for Repair ..................................................................................................................26<br />
APPENDIX<br />
Product Specifications Overview..........................................................................................................27<br />
YHC Models, Options, Ordering Information ......................................................................................28<br />
YHC Accessories List ..................................................................................................................... 28-29<br />
Intrinsically Safe Control Document.....................................................................................................30<br />
HART Command Structure Menu Trees ........................................................................................ 31-34<br />
Generic (HART 5) ..........................................................................................................................31<br />
1151 Rev 5 ......................................................................................................................................32<br />
3051C Rev 2....................................................................................................................................33<br />
EJA Rev 2 .......................................................................................................................................34<br />
IM 61A YHC-E-A<br />
3rd Edition: Nov. 2007
YHC 4100 HART COMMUNICATOR OVERVIEW<br />
The YHC 4100 HART Communicator is a full function HART Communicator supporting Universal,<br />
Common Practice and Device Specific commands for commissioning, configuration and maintenance<br />
operations. HART field devices can be configured, polled, and trimmed using the YHC with HART<br />
communications.<br />
Lanyard<br />
pins (2x)<br />
AC Adaptor<br />
jack<br />
Up / Select /<br />
Down thumb<br />
keys<br />
Hand<br />
strap<br />
Battery<br />
door<br />
Side View<br />
Note: For Intrinsically Safe YHC models, consult the Hazardous Area Use section of this manual for<br />
specific details on use of approved YHCs and applicable restrictions.<br />
DISPLAY OVERVIEW<br />
Thumb<br />
keys<br />
Front View<br />
Display<br />
Soft keys<br />
Feature keys<br />
Alpha numeric<br />
and edit keys<br />
Top View<br />
DB-9 Serial<br />
connection<br />
Bottom View<br />
The display of the YHC 4100 is a 128 x 128 pixel graphic display with backlight. Viewable area is 2.6” x<br />
2.6” for 13 viewable message lines. The display provides three types of information: 1) header information<br />
including display titles, HART communication status indicator, SHIFT indicator, alpha or numeric entry<br />
mode indicator and battery gauge, 2) main data display section for display of YHC operating menus, HART<br />
menus, and device information, and 3) footer information defining the display’s soft key functionality.<br />
IM 61A YHC-E-A<br />
3rd Edition: Nov. 2007<br />
Page 1 of 34<br />
HART<br />
connection
The following photo depicts the YHC<br />
Configuration display and Soft keys:<br />
HEADER LINE SYMBOLS<br />
heart symbol indicates active HART<br />
communication<br />
� up arrow indicates SHIFT key is on<br />
# number sign indicates numeric / symbol entry<br />
is the present entry mode for all dual functions<br />
keys<br />
A letter indicates alpha entry is the present<br />
entry mode for all dual function keys<br />
BUSY<br />
battery symbol indicates YHC under battery<br />
power; filled portion indicates remaining<br />
battery<br />
electrical plug symbol indicates the AC adapter<br />
is connected and powering the YHC<br />
BUSY text box replaces either power symbol<br />
when the microprocessor is busy executing a<br />
previously requested task. Do not press keys<br />
when this status symbol is displayed.<br />
KEY PAD OVERVIEW<br />
The YHC keypad has three basic key types: single<br />
function keys, dual-function keys, and soft keys<br />
with changing definitions.<br />
Single function keys control a dedicated YHC<br />
function.<br />
Dual function keys, through the use of the Alpha<br />
Lock or Shift keys, toggle between two separate<br />
functions as needed to facilitate data entry.<br />
Soft key functions change depending on the<br />
operating mode. Soft key definitions are<br />
displayed at the bottom of the LCD, just above<br />
their respective gray soft keys.<br />
The left hand thumb keys can be used to scroll<br />
up, scroll down, and to select menu items.<br />
IM 61A YHC-E-A<br />
3rd Edition: Nov. 2007<br />
Page 2 of 34
ON/OFF<br />
Home<br />
QUICK<br />
MENU<br />
#<br />
QUICK<br />
MENU<br />
2 B<br />
L<br />
SHIFT<br />
On/Off<br />
Pressing the ON/OFF key powers up or turns off the YHC. As the unit powers up, an internal<br />
diagnostic check is performed. Any abnormalities are posted on the display. The unit will briefly<br />
display the YHC model number and then check for a HART device with address of zero. If a device<br />
with zero address is found, the YHC immediately goes into online status and displays information<br />
about the device. If no device is found, the YHC enters the YHC Main navigation screen. To turn the<br />
YHC off, press and hold the ON/OFF key for approximately .5 seconds. Unit will power down<br />
provided a critical HART operation is not in process.<br />
Quick Menu<br />
The Quick Menu key initiates HART communications and then displays ten (10) HART menu<br />
choices for the connected device. These menus are used to short cut the traditional HART menus to<br />
enable the user to arrive quickly at desired functions. Typical Quick Menu options include: Main<br />
Menu, Config Menu, Rerange, Basic Info, Construction Materials, Display, Sensors, Signal<br />
Conditioning, Self Test. Quick Menu is disabled while critical HART operations are in process.<br />
Home<br />
The key sequence SHIFT, Home returns the user to the initial or “home” HART menu for the<br />
connected device. The Home function is disabled while critical HART operations are in process.<br />
Document<br />
This key provides rapid access to HART communication Save/Send Configs options, List/Edit<br />
Configs, and Create Configs functions for all YHC models. For Documenting operations this key also<br />
provides documenting functions used with the <strong>Yokogawa</strong> Device Management System software.<br />
Access to this key is disabled while critical HART communications are in process.<br />
Display Contrast<br />
This key allows the user to adjust the contrast of the LCD display for ambient lighting and user<br />
preferences at any time and in any operating mode. Pressing and holding this key cycles through all<br />
available contrast settings. After adjusting Display Contrast, wait five (5) seconds before turning unit<br />
off to insure storage of new contrast setting. Compensated for ambient temperature.<br />
Backlight<br />
This key toggles the backlight feature between Off / Low intensity / High intensity to<br />
illuminate the display for ambient light conditions. Battery life is impacted by use of the<br />
backlight feature; High intensity is the most aggressive. An automatic shut-off timer is<br />
available by pressing the Cfg soft key from the main menu.<br />
Alphanumeric / Symbol Entry<br />
The alphanumeric keys have the heaviest population on the keyboard and are the method of entering<br />
data into the YHC. Each YHC display has a default alpha or numeric / symbol entry mode based on<br />
the most likely used mode for the display’s function. Pressing the ALPHA LOCK key activates the<br />
other entry mode for alphanumeric keys. Pressing the SHIFT key converts the next key stroke to the<br />
inactive entry mode and then automatically reverts back to the active mode. The letter “A” in the<br />
display header line indicates the alpha input is active while a # sign in the display header indicates the<br />
numeric / symbol input is active.<br />
SHIFT<br />
The SHIFT key is used to activate the secondary functions of the YHC’s dual function keys for the<br />
next keystroke only. When the SHIFT key is active, an up arrow � is displayed at the top of the<br />
display to the left of the battery power (or AC wall plug) symbol. SHIFT is also used to activate the<br />
IM 61A YHC-E-A<br />
3rd Edition: Nov. 2007<br />
Page 3 of 34
ALPHA<br />
LOCK<br />
DEL<br />
DEL<br />
INS<br />
Page Up and Page Down soft key functions while viewing lists of information (installed DOFs,<br />
stored configs, etc…).<br />
Alpha Lock<br />
This key changes the keypads dual function keys from numeric/symbol entry mode to alpha<br />
character entry mode and back. The active entry mode is indicated in the display header line next to<br />
the power supply indicator on the upper right of the screen. The letter “A” in the display header line<br />
indicates that alpha entry is active while a # sign in the display header indicates that numeric /<br />
symbol entry is active.<br />
Left / Right Arrow keys<br />
These keys support cursor movement forward and backward for text / numeric editing needs. The<br />
default edit mode is “overwrite.” For navigating functions, the left arrow emulates the Back soft key<br />
and the right arrow emulates the Select soft key.<br />
Delete<br />
This editing key will delete the character located above the cursor in a text / numeric string.<br />
Insert<br />
The Insert text edit function is activated by pressing the Shift, INS key sequence. Once activated,<br />
the next alpha or numeric / symbol keystroke will be inserted into the open text field. The<br />
“overwrite” default mode is restored upon completion of the insert operation.<br />
Soft Keys (unlabeled)<br />
The four gray keys located immediately below the display are Soft Keys. The specific functions of<br />
these keys change depending on the operating mode of the YHC. Present definitions are displayed at<br />
the bottom of the YHC display. Whenever possible the two Soft Keys on left are used for navigation<br />
functions, the third from the left for action functions, and the right most for back function.<br />
The following are examples of Soft Key definitions and their uses:<br />
Up – moves indicator arrow up one line in a menu list<br />
Down – moves indicator arrow down one line in a menu list<br />
Select – selects the indicated menu item<br />
Cfg – provides access to YHC configuration settings (<strong>Users</strong>, Applications, Lockouts,<br />
Clock / Timers, Other)<br />
Back – returns to prior display<br />
Inc – Increment the value shown above the cursor<br />
Dec – Decrement the value shown above the cursor<br />
Next / Prev – these keys move to Next or Previous item within the list function accessed.<br />
Next and Prev are for navigation only.<br />
Done – Ends data entry session and proceeds with the selected operation<br />
Edit – activate edit function for displayed parameter<br />
Abort – aborts present operation without affecting prior settings or values<br />
Save – saves the present value<br />
Store – stores the present value<br />
Yes – affirmative response to question presented<br />
No – negative response to question presented<br />
Trim – executes the trim function called for by the HART menu option selected<br />
Chng – change the present menu setting<br />
IM 61A YHC-E-A<br />
3rd Edition: Nov. 2007<br />
Page 4 of 34
Thumb operated keys<br />
Up, Select, and Down side keys provide convenient alternate methods of menu navigation. Use these in<br />
addition to Soft keys and numbered HART menu lines to make menu navigation fast and easy.<br />
= Up = Prev<br />
= Select, Edit<br />
= Down = Next<br />
BUSY<br />
Do not use these keys when the symbol is displayed.<br />
GENERAL OPERATION<br />
Power options<br />
The YHC 4100 can be powered for portable operation by two each 9-volt alkaline, Lithium or NiMH<br />
batteries. Alkaline batteries are standard with the YHC shipment. <strong>Yokogawa</strong> offers NiMH batteries and<br />
charger cradles (external charge only) as an option. For bench top operations and download operations, an<br />
AC adapter (P/N A37003) is recommended.<br />
Located in the upper right corner of the display, this icon displays the<br />
remaining battery power. Fresh batteries produce a full black cell body. As the power<br />
drains, the black segment retreats indicating remaining power.<br />
When the YHC is used with the optional AC adapter (P/N 9B000007), the battery circuit is<br />
bypassed and a wall plug icon replaces the battery icon on the display header. The AC adapter jack<br />
is located on the left side of the YHC.<br />
NOTE: Power icons may temporarily disappear during certain HART Communication operations<br />
Navigating Menus on the YHC display<br />
Several methods of navigating through the YHC menus are available to the user for maximum convenience<br />
and utility.<br />
1. Soft keys: Use Up and Down Soft Keys to move cursor arrow to the desired menu option. Then use<br />
the Select soft key to accept the indicated choice. Soft key navigating tools are found throughout<br />
the YHC Main displays and HART communication displays.<br />
2. Side keys: Up, Down and Select keys are also provided on the left hand side of the YHC. These<br />
keys are thumb operated and provide a convenient alternative to the Soft Key navigation buttons.<br />
Side key functionality is not always available in the HART communication displays.<br />
3. Multi-page lists: Multi-page lists have a and/or symbol along the right hand side of the<br />
display indicating the existence of information on the previous or next page(s). Several pages of<br />
information may need to be viewed when reviewing lists of installed DOFs, stored configuration<br />
files or finding a specific device in Offline Mode to create a configuration for. While in these list<br />
areas, pressing the SHIFT key changes soft key definitions Select and Back to PgUp and PgDn,<br />
respectively. To quickly advance to the next page of a list, press SHIFT and then the PgDn soft<br />
key. To retreat to the prior page, press SHIFT and then PgUp. PgUp and PgDn soft keys remain<br />
active until the Up or Down soft key is used or until SHIFT is pressed again.<br />
IM 61A YHC-E-A<br />
3rd Edition: Nov. 2007<br />
Page 5 of 34
4. Numbered HART menus: All HART displays have numbered menu lines when needed. This<br />
gives fast access directly to the desired menu line. YHC displays also have numbered menus with<br />
the exception of multi-page list screens.<br />
5. HART menu HOME key: To quickly retreat from any location in the HART menu to the initial<br />
HART menu screen for a device, press the SHIFT, HOME key sequence. This will return the<br />
display to the initial HART screen. The Home function will be disallowed if a critical HART task is<br />
in process.<br />
6. Left / Right Arrow keys: Emulate Back and Select soft keys, respectively<br />
Turning on the YHC<br />
Use the dedicated ON/OFF key to power up the YHC. A brief diagnostic runs while the <strong>Yokogawa</strong> logo,<br />
YHC model number, and YHC firmware version is displayed. A message is displayed indicating the YHC is<br />
scanning for a HART device at address zero. The following scenarios are possible.<br />
1. If the YHC is connected to a HART device with address = 0<br />
(and there is sufficient loop resistance), the YHC immediately<br />
establishes HART communication with the device. A display<br />
similar to the example at right appears. The numbered menus<br />
and Soft Keys are then used to commission, re-configure, or<br />
maintain the connected device.<br />
2. If no HART device is connected, if a HART device with<br />
address ≠ 0 is connected, or if a connected device is not found<br />
due to wiring or loop resistance problem, the YHC will enter the<br />
YHC Main navigation display depicted at right.<br />
2.1 Select Online Setup once a HART device is connected<br />
or once the wiring problem is resolved. A proper<br />
connection will be indicated when line three changes<br />
to “Device 0: *Online*”.<br />
2.2 Select Online Setup if properly connected HART device<br />
is setup for Multidrop loop or Burst Mode operation<br />
(device address ≠ 0). The YHC will respond with a<br />
statement and the Soft Key options shown at right. To<br />
initiate a Multidrop poll, press the Multi soft key. To<br />
retry the address 0 poll after rechecking connections,<br />
press the Retry soft key. Press the Exit soft key enter<br />
Offline mode.<br />
Online #<br />
3051 : PT-1012D<br />
1 Device setup<br />
2 Pres: 0.01 inH2O<br />
3 AO: 4.001 mA<br />
4 LRV: 0.00 inH2O<br />
5 URV: 250.00 inH2O<br />
Up Down Select Back<br />
Communicator #<br />
1 Online Setup<br />
2 Offline Menu<br />
Device 0: Not Found<br />
Up Down Select Cfg<br />
Communicator #<br />
No device found:<br />
Press Multi to begin<br />
multidrop polling.<br />
Retry to poll addr 0,<br />
or Exit to go Offline.<br />
Multi Retry Exit<br />
IM 61A YHC-E-A<br />
3rd Edition: Nov. 2007<br />
Page 6 of 34
YHC Main display<br />
The YHC Main display provides access to Online Setup, Offline Menu<br />
and to YHC configuration settings via the right hand Soft Key (Cfg).<br />
1. Online Setup is described above in Turning On the YHC.<br />
2. Offline Menu is selected to provide access to Offline Utilities<br />
such as List / Show DOFs, List / Edit Configurations, and<br />
Create Configurations. The number of DOFs installed (HART<br />
device profiles) and the number of device Configurations stored<br />
are also available on Offline Utilities screen. See the Offline<br />
section of this manual for more information.<br />
3. Cfg Soft Key is selected to configure YHC settings and view<br />
YHC information such as Model, Serial, and Firmware<br />
numbers, DOFs installed and Configurations stored.<br />
YHC Configurations Settings<br />
Communicator #<br />
1 Online Setup<br />
2 Offline Menu<br />
Device 0: *On-Line*<br />
<strong>Yokogawa</strong><br />
EJA<br />
Fld Dev Rev 02<br />
Dof Name 37040213<br />
Up Down Select Cfg<br />
Configuration #<br />
Current Settings<br />
1 <strong>Users</strong><br />
2 Applications<br />
3 Lockouts<br />
4 Clock/Timers<br />
5 Other<br />
Up Down Chng Back<br />
1 <strong>Users</strong><br />
This menu item is only active for 21CFR Part 11 documenting versions. See separate 21CFR<br />
Part 11 instructions in this case.<br />
2 Applications<br />
Various applications are available here including Digital Poll (polling device addresses 0 – 15) and<br />
other user and factory applications.<br />
3 Lockouts<br />
The YHC HART Communicator can be programmed to lockout certain standard functions that a supervisor<br />
may wish to control. The functions included are used to set up the YHC for normal use, change online<br />
HART device configurations, create offline HART device configurations, update the installed DOFs list<br />
(HART device profiles), or to update the YHC’s operating firmware. For example, locking out the Configs<br />
feature turns the YHC into a read only HART communicator while locking out DOFs and Firmware prevents<br />
unauthorized updates. The lockout can be limited to individual Lockout Details items or all Lockout Details<br />
items can be locked out at one time.<br />
To enable the lockout feature, press the “3” key or move the selection cursor to the Lockouts menu<br />
option on the Configuration screen (see below). Choose the Lockouts selection by pressing the Chng soft<br />
key. The YHC will enter the Lockout Enable / Disable Screen. The current status is shown and three<br />
choices are provided:<br />
Configuration #<br />
Configuration #<br />
Lockout : Disabled<br />
Lockout Details<br />
1 Lockout Disable<br />
1 All : Disabled<br />
2 PV Prompt Disable<br />
2 Setting : Enabled<br />
3 View Details<br />
3 DOFs : Disabled<br />
4 Configs : Disabled<br />
5 Firmware : Disabled<br />
Up Down Chng Back<br />
6 PV Prompt: Enabled<br />
Up Down Chng Back<br />
Lockout Enable / Disable Screen Lockout View Details Screen<br />
IM 61A YHC-E-A<br />
3rd Edition: Nov. 2007<br />
Page 7 of 34
1 Lockout: Indicates Enable / Disable status of Master Lockout feature.<br />
2 PV Prompt: In addition to the primary variable, multivariable HART devices have<br />
secondary, tertiary, and sometimes more variables. When PV Prompt on the Lockout screen<br />
is “Disabled” and a Save command is issued by the YHC, the handheld saves only the<br />
primary variable. When PV Prompt is “Enabled” and a Save command is issued, the<br />
handheld saves the HART parameter information for all variables present. The factory<br />
default for PV Prompt on the Lockout screen is “Disabled”.<br />
3 View Details: This option takes the user to the Lockout Details screen listing all YHC parameters<br />
that can be protected by lockout (see above right). Individual functions can be locked or, if preferred,<br />
the lockout can be set to deny unauthorized access to all parameters. Press the number of the desired<br />
menu item to toggle between Enabled and Disabled. Once satisfied with the setting, press the Back<br />
soft key to return to the Lockouts screen.<br />
To enable the lockout option, be sure the display reads “1 Lockout Enabled”. If not, press the Chng soft<br />
key to toggle from “Disabled” to “Enabled”. Then press the “1” key, which corresponds to the Lockout<br />
menu line number. The Lockout Enter Code screen is displayed.<br />
Lockout Code<br />
At this point the user will be prompted to enter a 3-digit lockout code. This code will be required to gain<br />
access and change any parameter previously locked out. The number keys of the YHC will not work here.<br />
Use the Increment, Decrement and Next Soft Keys to input a lockout code value. Alternatively you may use<br />
the green keys for Increment and Decrement functions. When you are satisfied with the<br />
lockout code value, press Store. Note: the YHC is shipped with a factory lockout code of 3 2 1. The user<br />
must enter this code the first time Lockout is used.<br />
IMPORTANT: After the code is entered, the user must cycle the power to activate the lockout mechanism!<br />
BE SURE TO SAVE THIS CODE IN A SAFE PLACE IN THE EVENT YOU FORGET THE NUMBER. ACCESS TO<br />
LOCKED-OUT FEATURES WILL BE DENIED WITHOUT THE PROPER CODE.<br />
Disable Lockout<br />
When you wish to use a function or edit a value that is protected by the lockout code, enter the three digit<br />
Lockout code when prompted and press Save. You will now be able to use the function or edit the setting as<br />
normal. Entering an incorrect code will display the message “Incorrect Code” and allow you to try again.<br />
Changing the Lockout Code<br />
To change the lockout code, disable the lockout function for all the parameters selected, shut the unit off, and<br />
follow the procedures outlined above.<br />
4 Clock / Timers<br />
Clock Edit<br />
The Clock Edit option allows the user to correct the date and time of the YHC’s internal clock. To edit the<br />
clock, press the “4” key or scroll Down to Clock Edit and press the Chng soft key.<br />
Choose a clock or date option to adjust by scrolling Up or Down. Press Chng to choose that option. Enter<br />
the correct value using the numeric keypad. You will be asked if you wish to save the new data. Press Yes to<br />
accept the new value. Pressing No will take you back to the previous menu without making any changes to<br />
the YHC clock. When all the changes are complete, press Chng to save the new value.<br />
IM 61A YHC-E-A<br />
3rd Edition: Nov. 2007<br />
Page 8 of 34
NOTE: When replacing the batteries, the date and time will remain active. Date & time information is<br />
continuously powered by an internal, 10-year life back-up battery. This battery is not serviceable by the<br />
user.<br />
Backlight (off timer)<br />
To conserve battery life, the YHC 4100 series allows the user to set the backlight to shut off after a certain<br />
period of keypad inactivity. To change the backlight off timer on the unit, scroll Down to Backlight and<br />
press Chng repeatedly until the desired value is displayed.<br />
The shutoff timer can be disabled or set to shut off after time periods of from 1 minute up to 30 minutes.<br />
NOTE: The Backlight Off Timer is disabled when the optional AC Adapter (P/N 9B000007) is powering the<br />
YHC.<br />
Off Timer (master)<br />
To conserve battery life, the YHC 4100 series allows the user to set the unit to shut off after a certain period<br />
of keypad inactivity. To change the off timer on the unit, scroll Down to Off Timer and press Chng<br />
repeatedly until the desired value is displayed.<br />
The shutoff timer can be disabled or set to shut off after time periods of from 1 minute up to 2 hours.<br />
NOTE: The Off Timer is disabled when the optional AC Adapter (P/N 9B000007) is powering the YHC.<br />
5 Other<br />
Model information and special settings are available from this menu item. Press number key “5” or arrow<br />
to this menu line and press Chng to select. This reveals menu options for the following:<br />
1 Model Info – select to view model number, serial number, firmware revision, last update date,<br />
number of DOFs loaded and corresponding free memory space, and number of HART<br />
configurations saved and corresponding free memory space.<br />
2 Battery – shows present battery setting and optimizes the battery life indicator for the battery type<br />
entered. Press number key “2” to scroll through Alkaline (factory default), NiMH and Lithium<br />
battery options or arrow down to this menu item and press Chng soft key repeatedly until the<br />
desired value is displayed.<br />
3 HART – shows present HART ® communication setting. The YHC is a HART ® secondary master.<br />
“Compatible” setting means the handheld will inform the user if another secondary master is on<br />
line. Such situations will require the removal of the other secondary master before HART<br />
communication can occur. “Fast” setting results in faster communications but will cause<br />
interference if a HART ® primary master is on line (example: a HART ® Multiplexer or I/O). In<br />
normal operation the YHC automatically selects the best setting.<br />
4 Enter PC Comm. Mode - When the YHC is connected to a PC for updates via DPC Manager (see<br />
DPC Manager Utility section in this manual), a DB-9 serial cable is used. Occasionally a DB-9<br />
Serial cable is encountered that does not have a DTR line. The DTR line is important to the<br />
update process because it is used to initiate and confirm communication between the two<br />
machines. If a DB-9 cable without a DTR line is used, the YHC must be manually placed in the<br />
Enter PC Comm. Mode. Go to the YHC Main display and select Cfg. Select menu option 5<br />
Other. Select the Enter PC Comm. Mode. Proceed with update and cycle YHC power when the<br />
update is complete. It is recommended to use fresh batteries or an AC adaptor during update<br />
procedures. This mode will automatically time-out after approx. 1 minute of inactivity and return<br />
to the main display.<br />
IM 61A YHC-E-A<br />
3rd Edition: Nov. 2007<br />
Page 9 of 34
5 Polling Type – Two user selectable options are available.<br />
Auto polling directs the YHC to always poll for HART device address 0 (zero) first. When found,<br />
communications begin automatically. If address 0 is not found, the YHC automatically asks for<br />
direction; select Multi soft key to start a multi-drop poll from address 1 – 15 or select Retry soft<br />
key to try to find address 0 again (for more details see the HART Communications section)<br />
Digital polling directs the YHC to always poll for HART device addresses 0 – 15. This polling<br />
method is best for 4 – 20 mA loops where one device with address 0 is present and another device<br />
with a non-zero address is on the same loop.<br />
IM 61A YHC-E-A<br />
3rd Edition: Nov. 2007<br />
Page 10 of 34
Battery Installation & Removal – all YHC models<br />
The YHC monitors battery condition and displays a “REPLACE BATTERY” notice when the batteries get<br />
low. The YHC will function for a short period of time after the notice is posted.<br />
To install or remove the batteries, remove any soft case or protective boot and turn the YHC face down on a<br />
work surface. Use a flat screwdriver to loosen the captive screw holding the battery door closed and remove<br />
door. Replace batteries and make sure all connections are firmly secured. Replace door, tighten screw and<br />
replace the soft case or boot.<br />
Note: Replace both 9-volt batteries at once with all alkaline, all lithium or all NiMH cells. Do not mix<br />
alkaline, lithium or NiMH batteries with each other or with other battery types. Battery replacement is<br />
recommended when the “Replace Batteries” notice is posted on the display; however, the YHC will<br />
function for a time after the notice is posted.<br />
Note: For Intrinsically Safe YHC models, replace batteries only in Non-Hazardous Areas. Replace<br />
batteries with approved types only. See the YHC Intrinsic Safety Control Document shipped with the<br />
handheld for approved battery details.<br />
External Connections to YHC<br />
1. AC Adapter – The YHC 4100 can be powered by an external AC Adapter connected to the jack located<br />
on the left side of the YHC. P/N 9B000007 bypasses the battery circuit to power the unit. The battery<br />
symbol in the display header is replaced by a wall plug symbol.<br />
WARNING: Serious injury or death may result from explosions. Do not make connection to the AC<br />
adapter jack in a hazardous area. Use the AC adapter only in non-hazardous areas.<br />
2. HART lead set – All YHC models are equipped with a standard size banana jack on 0.75” center. The<br />
lead set supplied with the YHC has a standard banana plug on one end and mini-grabbers on the other for<br />
convenient connections.<br />
Note: For Intrinsically Safe YHC models, verify the instruments in the loop are installed in accordance<br />
with intrinsically safe field wiring practices before making connection from the field device to the YHC’s<br />
HART jack. See Hazardous Area Use Section of this manual for Intrinsically Safe guidelines /<br />
restrictions.<br />
3. DB-9 Connection Port – All YHC models are equipped with a standard DB-9 connection for RS-232<br />
communications. The DB-9 provides the hardware interface to facilitate download / upload operations from a<br />
host PC. This connection port facilitates download of YHC firmware improvements, HART ® Device Object<br />
Files (DOFs) and documenting operations. All YHC upgrades are available via the <strong>Yokogawa</strong> Download<br />
Site accessible from www.us.yokogawa.com/mi . The YHC will not need to be returned to <strong>Yokogawa</strong> for<br />
firmware updates or for the addition of DOF files.<br />
Note: Do not use the DB-9 connection port in Hazardous Areas. Use in non-hazardous areas only. See<br />
Intrinsic Safety Control Document shipped with the handheld for more details on Intrinsically Safe YHC<br />
units.<br />
IM 61A YHC-E-A<br />
3rd Edition: Nov. 2007<br />
Page 11 of 34
HAZARDOUS AREA USE<br />
Intrinsically Safe Operation<br />
The YHC 4100 HART Communicator is available with Intrinsically Safe Certification for use in Class I,<br />
Division I, Groups A, B, C, and D, T5 hazardous areas. Refer to the Intrinsically Safe Control Document in<br />
the Appendix of this User’s <strong>Manual</strong> for more details. The certification is to CAN /CSA-22.2 No.1010.1 &<br />
157-92 and UL913 Fifth Edition Rev 2/21/97.<br />
The following table identifies Intrinsically Safe YHC model numbers and areas of acceptable use.<br />
Model Number Non-hazardous Area Hazardous Area<br />
YHC 4100-01-1-01-0-01-1-01 √ √<br />
YHCs with Intrinsically Safe certification can be identified by model number (see table above or the<br />
Intrinsically Safe Control Document in the Appendix) or by a special label on the unit. A sample of the label<br />
is shown below.<br />
WARNING: Serious injury or death may result from explosions. Do not make connection to the DB – 9<br />
connection port or to the AC adapter jack while in a hazardous area.<br />
WARNING: Serious injury or death may result from explosions. Before making electrical connections to<br />
an Intrinsically Safe YHC at the HART jacks, verify the instruments in the loop are installed in<br />
accordance with intrinsically safe field wiring practices.<br />
Note: Restrictions apply to the use of Intrinsically Safe YHC units in hazardous areas. Refer to the<br />
Intrinsically Safe Control Document shipped with the handheld for exact details. The Appendix of this<br />
manual contains an uncontrolled copy of this document. <strong>Yokogawa</strong> reserves the right to revise the Control<br />
Document without notice. Contact <strong>Yokogawa</strong> (phone 800-356-9464) for the current Intrinsically Safe<br />
Control Document.<br />
For Intrinsically Safe YHC models, consult the Hazardous Area Use section of this manual for<br />
restrictions, for special instructions in use, and for electrical connections.<br />
IM 61A YHC-E-A<br />
3rd Edition: Nov. 2007<br />
Page 12 of 34
HART ® Communications with the YHC 4100<br />
Overview<br />
The YHC 4100 HART communicator provides device specific HART communication functions that<br />
allow the user to poll, configure and maintain supported HART field devices. The YHC 4100 uses<br />
Universal, Common Practice and Device Specific commands to facilitate communication with a HART<br />
field device. Use the YHC to commission devices, for operational re-configuration needs, or maintain<br />
devices through analog and sensor trim adjustments and many other features.<br />
The YHC 4100 will communicate with any HART device through Universal and Common Practice<br />
Commands using the standard Generic DOF (Device Object File) but must have the DOF for a specific<br />
HART device installed before it can execute Device Specific Commands. Consult the large and growing list<br />
of available DOFs at www.us.yokogawa.com/mi for an up to date list of HART devices with device specific<br />
support. The list is found under “Available DOFs” link on the YHC / YPC page. When HART device<br />
support for new devices becomes available, the YHC can be easily field updated via Internet downloads.<br />
HART Commands<br />
Three HART command types are used by the YHC 4100 to communicate with HART field devices. First,<br />
Universal Commands are primarily used to identify a field device by its model number and tag number and<br />
to read process data from the device. This communication is referred to as “polling”. The YHC 4100 can poll<br />
any Hart Device. Second, Common Practice Commands are used for calibration and maintenance functions<br />
that are common to many devices. An example of this would be trims or adjustments for the devices’ analog<br />
outputs. Third, Device Specific Commands are used to handle functions that are unique to a particular device<br />
or manufacturer. Examples of these commands include sensor zero, sensor trim, calibration curve<br />
characterization, density inputs required for calculations made by the HART device or other configuration<br />
functions unique to the specific device.<br />
HART Connections<br />
HART connections are made using two standard banana jacks (3/4” center) located at the top end of the<br />
YHC 4100. Refer to the following diagram. Polarity is not a concern for HART connections so both jack<br />
collars are black. <strong>Yokogawa</strong> supplies a HART lead kit (P/N A900529-00014) complete with mini-grabber<br />
connections and a 250 Ω load resistor with each model YHC 4100.<br />
YHC 4100 with HART ®<br />
HART ® connections are standard banana jacks (3/4” center)<br />
For low load loops (less than 250 Ω), a 250 Ω resistor will need to be added to the loop to insure reliable<br />
HART communications. <strong>Yokogawa</strong> supplies a 250 Ω load resistor in the form of a standard adaptor (P/N<br />
A36821). Refer to the following diagram for connection details.<br />
IM 61A YHC-E-A<br />
3rd Edition: Nov. 2007<br />
Page 13 of 34
When connecting the YHC 4100 to a loop with a resistive load greater than 250 Ωs, the HART jacks may be<br />
connected across the loop + and – or to the HART device communication terminals. Refer to the following<br />
diagram for connecting across the loop + and -.<br />
HART ® Communications<br />
Initial Screens / Online Mode<br />
Upon power up the YHC automatically detects if a field device is connected and attempts to establish HART<br />
communications; this is the factory default “Auto” poll function. When a device with address zero is found,<br />
the YHC provides feedback to the user and starts the initial HART display for the connected device. See an<br />
example of Online Mode below.<br />
Communicator #<br />
1 Online Setup<br />
2 Offline Menu<br />
Connecting to the YHC communication terminals<br />
Device 0: *On-Line*<br />
Rosemount<br />
3051C<br />
Fld Dev Rev 03<br />
Dof Name 26060309<br />
Up Down Select Cfg<br />
YHC Main Navigation Screen<br />
Auto Poll Launch; Device “0” found<br />
Online #<br />
3051 : PT-1012D<br />
1 Device setup<br />
2 Pres: 0.01 inH2O<br />
3 AO: 4.001 mA<br />
4 LRV: 0.00 inH2O<br />
5 URV: 250.00 inH2O<br />
Up Down Select Back<br />
Initial HART Screen / Online Mode<br />
IM 61A YHC-E-A<br />
3rd Edition: Nov. 2007<br />
Page 14 of 34
When no device connection is detected the YHC enters the YHC Main navigation screen and the message<br />
Device 0: Not Found is displayed. Upon selecting the “1 Online Setup” option, the YHC checks again for<br />
Device address 0 and if not found displays the YHC Multidrop / Retry 0 screen. This screen allows<br />
selection of either of three options: launch Multidrop poll by selecting the Multi soft key, retry Device 0<br />
communication after re-checking physical connections to the device by the selecting Retry soft key, or exit<br />
to Offline mode by selecting the Exit soft key.<br />
Communicator #<br />
1 Online Setup<br />
2 Offline Menu<br />
Device 0: Not Found<br />
Up Down Select Cfg<br />
YHC Main Navigation Screen<br />
No device or Non-zero address found<br />
Communicator #<br />
No device found:<br />
Press Multi to begin<br />
multidrop polling.<br />
Retry to poll addr 0,<br />
or Exit to go Offline.<br />
Multi Retry Exit<br />
YHC Multidrop / Retry 0 Screen<br />
No device or Non-zero address found<br />
Communicator #<br />
Multidrop Polling…<br />
Multidrop Poll (addresses 1 – 15)<br />
To initiate a Multidrop Poll, select the Online Setup option from the YHC Main screen when the Device 0:<br />
Not Found message is displayed. Then select Multi soft key from the YHC Multidrop / Retry 0 screen.<br />
This function polls for all non-zero addresses (1 – 15). Located addresses are listed on the display as the<br />
remaining addresses are checked. When polling is complete, or upon pressing Stop after the address of<br />
interest is found, use the soft key controls to select the address of interest. The initial HART menu for the<br />
selected device will be displayed.<br />
Digital Poll (addresses 0 – 15) for One Power Cycle Only<br />
Digital Polling is a special feature accessible through the YHC’s Main navigation screen and the Cfg soft<br />
key. Press the Cfg soft key and then select the “2 Applications” menu option. Select the “1 Digital Poll”<br />
menu option to launch a polling operation that starts with address 0 and ends with address 15. All<br />
addresses on the loop will be displayed on the YHC’s screen. The address of interest can be selected from<br />
the list to launch HART communication with that device. This Digital Poll is for one power cycle only<br />
and can only be launched from this location in the handheld’s menu structure. Turning the YHC power<br />
off will return the unit to the YHC’s default HART poll setting.<br />
Auto and Digital Poll (addresses 0 – 15) Default Setting Options<br />
Auto Poll is the factory default setting. To set Digital Polling or re-set Auto Polling as the YHC’s default<br />
poll setting, press the Cfg soft key and then select the “5 Other” menu option. Select “5 Polling Type.”<br />
Two user selectable options are available.<br />
Auto polling directs the YHC to always poll for HART device address 0 (zero) first. When found,<br />
communications begin automatically. If address 0 is not found, the YHC automatically asks for<br />
direction; select “Multi” from soft key to start a multi-drop poll from address 1 – 15 or select the<br />
“Retry” soft key to try to find address 0 again.<br />
Digital polling directs the YHC to always poll for HART devices addresses 0 – 15. This polling<br />
method is best for 4 – 20 mA loops where a device with address 0 is present and another device<br />
with a non-zero address is on the same loop. Selecting Digital Polling here sets it as the YHC’s<br />
default poll setting.<br />
1<br />
3<br />
4<br />
Scanning Address # 7<br />
Stop Abort<br />
Multdrop Polling Screen<br />
Multidrop & Burst Mode Support<br />
IM 61A YHC-E-A<br />
3rd Edition: Nov. 2007<br />
Page 15 of 34
<strong>Manual</strong> Launch of Device 0 Poll<br />
When the message Device 0: *On-line* is displayed on the YHC Main<br />
navigation screen, selecting Online Setup will launch HART<br />
communication with the device. The message indicates that a HART<br />
device with address 0 has been detected at the HART connection and the<br />
YHC is standing by to initiate communications. The Device 0: *On-line*<br />
message is shown 1) if a physical connection is made to a HART device<br />
after the YHC power is turned on or 2) if the user exits from a HART<br />
communication session without disconnecting the lead wire by using the<br />
soft key controls provided.<br />
Offline Menu Mode<br />
The Offline Menu gives the user access to lists and functions that can be<br />
viewed or performed in Offline Mode at the user’s convenience for the<br />
purposes of reviewing the YHC’s DOF list, reviewing stored device<br />
configurations or creating HART configurations. Stored configurations can<br />
also be edited and then applied later to a connected HART device. When the<br />
Offline Menu is selected from the YHC Main navigation screen, the<br />
display at right is shown.<br />
HART Offline Menu Screen<br />
1 List / Show DOFs:<br />
Provides a list of installed DOFs (Device Object Files) used by the YHC to communicate with HART<br />
devices. Lists can be viewed by Manufacturer, by Device Name or by stepping through all Devices one at a<br />
time. Use the soft key controls to move through the list. Pressing the SHIFT key changes soft key<br />
definitions Down and Up to PgUp and PgDn. To quickly advance to the next page of a list, press the PgDn<br />
soft key. To retreat to the prior page, press the PgUp soft key. Once engaged the PgUp and PgDn soft keys<br />
remain active until the Up or Down soft keys or SHIFT is pressed again.<br />
2 List / Edit Configs:<br />
This screen lists all stored HART configurations by Tag Number. The<br />
configurations stored enable fast commissioning of replacement devices,<br />
cloning of existing systems, or re-configuring for changes in process<br />
conditions or batch runs. Any configuration in the list can be sent to<br />
another HART device of the same manufacture and model. The display<br />
can show 20 character tag numbers. Truncated tags are listed if more than<br />
20 characters are used. Moving the cursor down to the tag of interest and<br />
pressing the Select soft key will provide a detailed information screen,<br />
including full tag number up to 28 characters, for the tag of interest (see<br />
example below, right).<br />
Communicator #<br />
1 Online Setup<br />
2 Offline Menu<br />
Device 0: *On-Line*<br />
Up Down Select Cfg<br />
YHC Main Navigation Screen<br />
<strong>Manual</strong>ly launch polling on device 0.<br />
Offline #<br />
Utilities<br />
1 List/Show DOFs<br />
2 List/Edit Configs<br />
3 Create Configs<br />
4 Delete All Configs<br />
DOFs: 401 Free: 20%<br />
Configs: 3 Free: 99%<br />
Up Down Select Back<br />
Offline #<br />
List/Edit Configs<br />
PT-105A<br />
PT-105B<br />
DPT-201C<br />
TT-312A<br />
TT-312A<br />
FE-201<br />
FE-201<br />
PT-6174<br />
Up Down Select Back<br />
Offline List / Edit<br />
Configs Screen<br />
IM 61A YHC-E-A<br />
3rd Edition: Nov. 2007<br />
Page 16 of 34
The editing function allows review of all HART parameters in a config-<br />
uration and modification of editable parameters. The edit function can be<br />
locked out if desired (see the Lockout section of this manual for more<br />
information). To view detailed information of a stored configuration, move<br />
the cursor to the desired tag number and press the Select soft key. The<br />
Config Detail screen (see example at right) provides information to help<br />
the user confirm the identity, origin, and save date/time of the configuration.<br />
Pressing Select again opens the configuration for review or offline editing.<br />
New configurations saved are added to the bottom of the List / Edit Config<br />
list. If multiple entries for one device are shown, the most recently saved<br />
configuration is always shown at the bottom.<br />
Entries in the List / Edit Config list may have been saved or created from<br />
various sources. Possible sources include the save command from a<br />
connected HART device, created in the YHC using the Create Configs<br />
function, copied from another configuration and renamed, or created by editing an existing file. The YHC<br />
will also list configurations downloaded from the separately available Device Management System software<br />
from <strong>Yokogawa</strong> (see http://www.yokogawa.com/us/mi/pdf/DMS%20USA.pdf for more information). Tag<br />
numbers, date / time of save, type of configuration stored, and other information are displayed under<br />
List/Edit Configs. Configuration types are:<br />
Complete Config = saved from connected device in Online mode, or a complete config that was<br />
downloaded from DMS<br />
Default Config = created by YHC in Offline mode, or created in DMS and downloaded to<br />
YHC<br />
Edit Vars Only = created by editing an existing configuration and includes only the edited parameters<br />
MVar Primary Cfg = for multivariable devices – Primary Variable configuration<br />
MVar Sub Config = for multivariable devices – Sub-configuration (secondary, tertiary, fourth, etc<br />
variables)<br />
3 Create Configs:<br />
The Create Configs function allows the user to configure a HART device file in Offline Mode for sending<br />
to the intended device later when connected in the Online Mode. Use the soft key controls to move through<br />
the list and select the device model number required. The menus prompt the user to make the necessary<br />
configuration selections, tag the file for later retrieval and use, and edit configuration lines as required. This<br />
function can be locked out. See the Lockout Section of this manual for more information.<br />
4 Delete All Configs:<br />
The Delete All Configs function clears all configurations from memory (including active and hidden<br />
configs). When this menu option is selected, the YHC will ask “Delete ALL Configs… ARE YOU<br />
SURE???” Select Yes to clear all stored configurations from memory.<br />
Delete Individual Configs / Clearing Configuration Memory:<br />
Individual stored Configurations may be deleted with YHC Del soft key<br />
function (see example at right). When this menu option is selected, the YHC<br />
will ask “Delete CURRENT Config… ARE YOU SURE???” Select Yes to<br />
clear only the selected configuration from memory.<br />
The Del key only hides the record from the YHC screen; it does not clear<br />
memory space. This function can be locked out. See the Lockout Section of<br />
this manual for more information.<br />
Offline #<br />
List/Edit Configs<br />
Tag: PT-105A<br />
Device ID 1365<br />
PV: Pressure<br />
Endress + Hauser<br />
Cerabar S<br />
Complete Config<br />
Uses DOF 11070702<br />
51 Variables<br />
12/18/03 4:58 PM<br />
Copy Del Select Back<br />
Offline List / Edit<br />
Configs Detail Screen<br />
Offline #<br />
List/Edit Configs<br />
Tag: PT-105A<br />
Device ID 1365<br />
PV: Pressure<br />
Endress + Hauser<br />
Cerabar S<br />
Complete Config<br />
Uses DOF 11070702<br />
51 Variables<br />
12/18/03 4:58 PM<br />
Copy Del Select Back<br />
Offline List / Edit<br />
IM Configs 61A YHC-E-A Detail Screen<br />
3rd Edition: Nov. 2007<br />
Page 17 of 34
Online Setup Mode<br />
Online Setup is the normal HART communication mode for the YHC. This<br />
mode enables communication with HART field devices at the Universal,<br />
Common Practice and Device Specific Command levels for full device setup<br />
and functionality.<br />
Menus displayed for the connected device follow the HART device<br />
manufacturer’s menu structure for the connected device. Consult the device<br />
manual for menu structure details.<br />
YHC features two unique online features for added convenience to the<br />
user.<br />
1. Live HART connection monitor: YHC display lets you<br />
know from the Main navigation screen when a device is<br />
* On-line * and ready for communication.<br />
2. Review/Edit: this menu option allows the user to review<br />
configurations line-by-line. YHC supports editing of the<br />
configuration once the parameter of interest is located.<br />
Device Setup #<br />
3051 :PT-1012D<br />
1 Process variables<br />
2 Diag/Service<br />
3 Basic setup<br />
4 Detailed setup<br />
5 Save/Send<br />
6 Review/Edit<br />
Up Down Select Back<br />
Online Device Setup Screen<br />
IM 61A YHC-E-A<br />
3rd Edition: Nov. 2007<br />
Page 18 of 34
Communications Trouble Shooting<br />
If an operating HART device is connected to the YHC but the “Device 0: Not Found” notification is<br />
received, a Multidrop Poll may be executed to determine if the connected device has a non-zero address.<br />
Select Online Setup from the YHC Main navigation screen and then select the Multi soft key to initiate the<br />
Multidrop poll. If the “No Devices Found” message is received, then the loop connections to the YHC<br />
should be carefully checked.<br />
If an operating HART device with address zero (0) is connected to the YHC but the “Device 0: Not Found”<br />
notification is received, the loop connections to the YHC should be carefully checked.<br />
Make sure all connections are correct and secure. Check for shorts, open circuits and multiple grounds.<br />
Determine if the loop resistance is greater than 250Ω and less than 1100Ωs. If less than 250 Ω then use the<br />
supplied 250 Ω load resistor in series with the loop (see diagram HART Connections section).<br />
If communication is still not established, check the List / Show DOFs menu under Offline Menu. Check<br />
the list for the presence of the “Generic” DOF under the manufacturer name “<strong>Yokogawa</strong>.” If “Generic” is<br />
found, then HART communication is possible when the device is properly wired and connected to the YHC<br />
(see connection troubleshooting details above).<br />
When the message “Generic” is displayed after connecting to a HART device there are two possible causes:<br />
1) No device specific DOF for that device is currently installed in YHC memory. Check for<br />
availability of the DOF needed by going to the Available DOFs site at<br />
http://dpcupdates.1911mptdofs.com/customers/past.asp . Sort the list by clicking on any column<br />
header. For download instructions, see the DOF / Firmware Download Site section of this manual.<br />
2) The connected HART device supports only HART Universal and Common Practice commands (i.e.<br />
generic commands). There are several such devices on the market, particularly level type devices.<br />
More Status Message<br />
HART device events (diagnostic flags) cause the YHC to display a “More Status Message” at the bottom<br />
of the display. This message is a notice to the user that one or more diagnostic warnings are available in<br />
the Review Status menu option of the connected device. Upon receipt of this message, enter the HART<br />
mode and select Detailed Setup / Diagnostics – Service / Test – Status / View Status to retrieve the<br />
diagnostic information.<br />
Save / Send Configuration Functions<br />
HART device configurations may be saved to YHC memory or sent from YHC memory to a HART<br />
device. These functions are useful for cloning a device configuration for use in another transmitter of the<br />
same configuration, for recording as-found and as-left configurations for later review, for returning<br />
HART devices to previously used configurations, etc…<br />
The Save / Send function may be accessed in one of two ways:<br />
1. Press the Document key on the YHC for the screen shown at<br />
right. Then select the Save/Send Configs” menu option to launch a<br />
HART communication poll and use the Save / Send options.<br />
2. Use the Save / Send menu option within the HART device’s<br />
standard menu. The YHC would be in Online mode in this case.<br />
Save / Send is normally found under the “Device Setup” menu<br />
option on the initial HART display for the device.<br />
Offline #<br />
Utilities<br />
1 Save/Send Configs<br />
2 List/Edit Configs<br />
3 Create Configs<br />
4 Delete All Configs<br />
DOFs: 401 Free: 20%<br />
Configs: 3 Free: 99%<br />
Up Down Select Back<br />
Document Key Menu Screen<br />
IM 61A YHC-E-A<br />
3rd Edition: Nov. 2007<br />
Page 19 of 34
DOF Memory Maintenance<br />
DOF flash memory will become fragmented after many DOF download sessions to add new or update<br />
existing DOFs. Fragmentation reduces the total number of DOFs that can be saved in memory. 600 DOFs<br />
is the nominal capacity of the flash memory). When fragmentation becomes extreme, the YHC will not<br />
accept additional DOF downloads. Periodic DOF memory maintenance will be needed to optimize DOF<br />
memory.<br />
The Offline screen indicates the number of DOF files stored in memory<br />
and the percentage of free memory available for additional files. 401<br />
DOFs ideally use about 72% of the available memory, so 28% of DOF<br />
memory should be free... The example at right indicates that only 20% of<br />
DOF memory is free. This indicates fragmentation.<br />
To optimize DOF flash memory, it is necessary to delete all DOFs and<br />
then reload them all in one session. Connect the YHC to a host PC that<br />
has DPC Manager installed (see the DPC Manager Utility section of this<br />
manual for more information). Launch DPC Manager and select the<br />
“Manage DPC Device Driver and Firmware Updates” option. Go to the<br />
Tool Bar and click on “Settings”, then click on the “Advanced” option.<br />
The following screen will appear.<br />
Offline #<br />
Utilities<br />
1 List/Show DOFs<br />
2 List/Edit Configs<br />
3 Create Configs<br />
4 Delete All Configs<br />
DOFs: 401 Free: 20%<br />
Configs: 3 Free: 99%<br />
Up Down Select Back<br />
HART Offline Menu Screen<br />
Under “Update DOFs on DPC” section on left<br />
side, click on the “Auto” button. An Auto<br />
Install dialog box will appear.<br />
Select the “Yes” response to the “DOF<br />
Update Options? question to erase all<br />
existing DOFs and re-load DOFs from the<br />
default DOF directory.<br />
401 DOFs will take approximately 112<br />
minutes to load.<br />
IM 61A YHC-E-A<br />
3rd Edition: Nov. 2007<br />
Page 20 of 34
Documenting HART Configurations with <strong>Yokogawa</strong> DMS Software<br />
The documentation functions of the YHC 4100 provide additional<br />
functionality for use with the <strong>Yokogawa</strong> Device Management System<br />
(DMS) software. DMS is a database product for complete device<br />
management services including calibration documentation with the<br />
<strong>Yokogawa</strong> YPC 4000 Series of multifunction calibrators and HART<br />
configuration documentation with the YHC 4100. Complete device<br />
histories are maintained in the database. For HART devices these histories<br />
can include as-found and as-left HART configuration data to complete this<br />
important part of a<br />
device’s history.<br />
YHC 4100 with <strong>Yokogawa</strong> Device<br />
Management System<br />
YHC 4100 Device Specific & Generic HART ® Communications<br />
<strong>Yokogawa</strong> supports a large and growing number of Device Specific DOFs (Device Object Files). For a current<br />
listing of HART ® devices with full Device Specific communication support, go to www.us.yokogawa.com/mi<br />
and select the YHC / YPC page. The list is found under “Available DOFs” link. Information found there can<br />
be sorted by clicking on the column headers (manufacturer name, model number, etc…).<br />
To facilitate communication with HART devices that are not yet supported with Device Specific DOF files or<br />
that do not require DOF files, the YHC 4100 includes Generic HART Communication capability. This allows<br />
the user to communicate with any HART device using Universal and Common Practice commands to poll,<br />
configure, and maintain HART devices. Specific functions supported include most polling, tagging, device<br />
configuration and trim operations for analog outputs. Generic communications do not support Device Specific<br />
commands for higher order HART functions (see the HART ® Commands section of this manual or the User’s<br />
<strong>Manual</strong> for the HART device of interest for more information on the three command levels).<br />
Using Generic HART Communication<br />
Document #<br />
Utilities<br />
1 Save/Send Configs<br />
2 List/Edit Configs<br />
3 Create Configs<br />
4 Delete All Configs<br />
DOFs: 401 Free: 20%<br />
Configs: 3 Free: 99%<br />
Up Down Select Back<br />
Document Key Menu Screen<br />
The Document key on the YHC 4100 models will save<br />
configurations in as-found or as-left categories as selected by<br />
the user. These configuration files can be uploaded later to<br />
DMS. When the Save/Send Configs menu option is selected<br />
the YHC automatically polls for an Online device for<br />
subsequent user selections.<br />
DMS can also be used as a configuration repository ready to<br />
download stored device configurations for batch runs or<br />
changes in operating requirements. New configurations can<br />
be downloaded to YHC memory for later recall and use in the<br />
field.<br />
The YHC 4100’s Generic HART Communication mode starts automatically when HART communication is<br />
initiated with a device for which no Device Specific DOF (device object file) is stored in the handhelds flash<br />
memory. When this occurs, line two of the display will indicate “Generic” and the device tag number.<br />
IM 61A YHC-E-A<br />
3rd Edition: Nov. 2007<br />
Page 21 of 34
In general, the Generic HART mode operates similarly to its device specific DOF counterpart (see HART<br />
Communication section of this manual for more details). However, the YHC does not display Device Specific<br />
related communication menus or options when in the Generic communication mode. For example, the Zero and<br />
Sensor trim menu options (normally executed by Device Specific commands) are not displayed for pressure<br />
transmitters without DOF support. Please see the Download Site section of this manual for information on<br />
downloading the latest Device Specific DOF files to your YHC.<br />
Updating the YHC 4100 Firmware and DOFs<br />
Overview<br />
Firmware upgrades and new DOFs can be downloaded via the Internet in either of two ways. The first way is<br />
to use the DPC Manager utility (shipped with each YHC or downloaded from the DOF Download Site) on a<br />
PC with Internet access to download files from the DOF Download Site automatically and then update the<br />
YHC. The second way is to use the DOF Download Site to download the needed files to the host PC and<br />
then use the DPC Manager utility to coordinate the update of the YHC . The Download Site enables users to<br />
stay current as new DOF’s or revisions of existing ones are posted. Automatic email notices of new DOF<br />
postings are sent to all users who have logged on to the Download Site and registered their email address<br />
under “Subscriber Options.” Firmware updates are free of charge. DOFs are available by subscription.<br />
A list of currently available DOF’s for HART device communication can be viewed at the<br />
http://www.yokogawa.com/us/mi/MetersandInstruments/us-ykgw-yhcypc.htm . Sort the list by clicking on<br />
any column header.<br />
Who has access to the Download Site?<br />
All YHC customers can purchase a subscription to the DOF Download Site. These customers may<br />
download any published file from the site to their host PC upon entry of the proper authenticating<br />
codes (shipped with unit). Contact <strong>Yokogawa</strong> at 770-254-0400 or Info@us.yokogawa.com for more<br />
information and to purchase subscriptions.<br />
PC Requirements for Download Operations<br />
<strong>Yokogawa</strong> recommends IBM compatible Pentium I PCs or higher for download operations. The PC<br />
should have an available RS-232 port, minimum modem speed of 28K and access to Internet service.<br />
USB ports can be used with USB to serial adapters as well.<br />
Preparing the YHC<br />
All YHC models come ready to connect to an IBM compatible PC using a standard DB-9 socket<br />
located at the bottom of the YHC enclosure. A six-foot male DB-9 to female DB-9 cable (P/N<br />
A90047-00052) is shipped with each handheld. Similar cables are acceptable. Connect the YHC to<br />
the PC and power up the YHC using fresh internal batteries or the optional AC Adapter (P/N<br />
9B000007). The YHC is ready for download operations.<br />
Using DPC Manager Utility to Update a YHC<br />
DPC Manager Utility should be installed on the host PC from the User’s <strong>Manual</strong> CD (included with YHC<br />
shipment) or from the DOF Download Site where it can be found at the bottom of the File Download Area<br />
page. DPC Manager coordinates the download operations from the DOF Download Site to the host PC and<br />
from the host PC to the YHC. Periodic improvements may be incorporated into this Utility. Therefore,<br />
<strong>Yokogawa</strong> recommends periodic comparison of the DPC Manager version installed on the host PC (see<br />
“Help” topic in Tool Bar and “About”) to the latest available version listed on the Download Site to insure<br />
IM 61A YHC-E-A<br />
3rd Edition: Nov. 2007<br />
Page 22 of 34
use of the most up to date utility tool. Directions for using DPC Manager are found under the Help Tool Bar<br />
selection.<br />
Prerequisites:<br />
A. DPC Manager is installed on a computer that has Internet access. DPC Manager software is<br />
shipped with each YHC on a CD.<br />
B. The correct PC COM port has been configured (see “Settings” topic in Tool Bar, then<br />
“Communications” and then “Port” to select COM port).<br />
C. A standard RS-232 Cable is connected to the YHC and the unit is turned on. Note: HART<br />
communication cannot occur while communicating using the RS-232 connection.<br />
D. It is highly recommended that the AC power adapter is used while performing any RS-232<br />
communications.<br />
1. Open the DPC Manager Utility and<br />
select the “Manage DPC Device Driver<br />
and Firmware Updates” button.<br />
2. Click on “Settings” in the toolbar and<br />
make sure the “Advance Settings” option is<br />
unchecked.<br />
3. Click the “Register DPC” button and the<br />
Model Number, Serial Number, Expiration<br />
Date and Firmware version of your YHC<br />
will be retrieved and registered.<br />
4. Click on “Internet Check for Updates”<br />
button and DPC Manager will<br />
automatically download all firmware and<br />
DOF files to your computer. NOTE:<br />
Problems here may be due to firewall<br />
settings. See “Downloading from the DOF<br />
Download Site and Using DPC Manager to<br />
Update an YHC” section below for<br />
alternative approach.<br />
5. Click on the “Update Handhelds” button<br />
and DPC Manager will automatically<br />
update your YHC from the computer. The<br />
latest firmware and DOFs will be<br />
downloaded from the computer to your<br />
handheld. First the YHC firmware will be<br />
updated (if needed), then the device<br />
object files (DOFs) will be updated.<br />
6. The “DPC Listing” button provides a<br />
list of all YHC’s that have been<br />
registered with DPC Manager on the host<br />
computer.<br />
IM 61A YHC-E-A<br />
3rd Edition: Nov. 2007<br />
Page 23 of 34
Using the DOF Download Site Directly<br />
Establish connection to the Download Site by going to the <strong>Yokogawa</strong> website www.us.yokogawa.com/mi .<br />
Click on the “Download Site” link on the home page navigation bar to access all download functions. The<br />
log in page of the Download Site requires the user to enter a valid User Name and Password to authenticate<br />
user identity and permit entry to the Site. These two codes are initially assigned by <strong>Yokogawa</strong> and can be<br />
found on a card included with shipment. Locate the card and place in a safe place for future reference.<br />
The Latest Release Notes screen appears first listing and describing the firmware and DOF releases<br />
posted since the user’s last download session. Individual files can be downloaded by clicking on the<br />
desired hyperlink and then clicking on the hyperlinked file name that appears on the detailed<br />
description page of each DOF or firmware file. Also available on this screen are the navigation<br />
buttons for Current Release Notes, File Download Area, and Subscriber Options.<br />
The Current Release Notes screen describes all DOF and firmware releases available and dates<br />
posted. Five (5) columns are shown on this page: Date, Title, Description, Manufacturer, Model.<br />
These categories will assist the user in finding the release descriptions of the DOF, DPC Manager or<br />
YHC Firmware releases of interest. Each column can be sorted to assist searches of the release<br />
database. Individual files can be downloaded from the detailed description page of each DOF or<br />
firmware file listed. Also available on this screen are the navigation buttons for Latest Release<br />
Notes, File Download Area, and Subscriber Options.<br />
The File Download Area screen is the download page for bulk downloads. Select individual files<br />
for downloading from a list of downloadable files (including DPC Manager Utility, YHC Firmware,<br />
and DOF’s) by locating the file name of interest with the PC mouse and clicking on the<br />
corresponding selection box. All files can be marked for download by clicking on the “Check All<br />
Files” button. Start the download process by scrolling to the bottom of the page and clicking on the<br />
“Download Checked Files” button. Dialog boxes guide the user through the process. Also<br />
available on this screen are the navigation buttons for Latest Release Notes, Current Release<br />
Notes, and Subscriber Options.<br />
Subscriber Options<br />
The Subscriber Options screen provides useful account information and is displayed immediately<br />
upon first log in. The user should provide contact information and e-mail address that allows<br />
<strong>Yokogawa</strong> to provide automatic notification of new firmware updates, DOF releases, and<br />
subscription period expiration. User Name and Password for the account are listed, as well as the<br />
subscription expiration date. In addition, this screen allows the user to change the account Password.<br />
Press the “Update Subscriber Options” button to save all Subscriber Options changes.<br />
Downloading from the DOF Download Site and Using DPC Manager to Update a YHC<br />
1. Establish connection to the DOF Download Site (described above) and go to the File Download Area for<br />
bulk downloads.<br />
2. Select individual files for downloading from the list of downloadable files (including DPC Manager<br />
Utility, YHC Firmware, and DOF’s) by locating the file name(s) of interest with the PC mouse and clicking<br />
on the corresponding selection box(es). Alternatively, all files can be marked for download by clicking on<br />
the “Check All Files” button at the top of the page.<br />
3. Start the download process by scrolling to the bottom of the page and clicking on the “Download Checked<br />
Files” button.<br />
IM 61A YHC-E-A<br />
3rd Edition: Nov. 2007<br />
Page 24 of 34
4. Follow the dialog boxes to save the downloaded file to a directory on the host PC. Remember the directory<br />
location.<br />
5. Once the download is completed, open the file and use the unzip application to extract the individual files.<br />
6. Open DPC Manager and select the “Manage DPC Device Driver and Firmware Updates” button.<br />
7. Click on “Settings” in the toolbar and select “Advance Settings.”<br />
8. Use the browser button to navigate to<br />
the location of the DOF files on the host<br />
PC.<br />
9. Start a Firmware update by clicking<br />
on the “Update Firmware” button under<br />
the “Update DPC” header.<br />
10. Start a DOF update by clicking on<br />
the “Auto” button under the “Update<br />
DOFs on DPC” header.<br />
a. Answer YES to erase all DOFs on<br />
the YHC and re-install all DOFs.<br />
b. Answer NO to add any new or<br />
revised DOFs to the existing YHC<br />
memory.<br />
12. DPC Manager will provide updates<br />
as firmware or DOFs are being loaded.<br />
To report any difficulties with downloading operations, please contact <strong>Yokogawa</strong> at 770-254-0400 or<br />
Info@us.yokogawa.com<br />
IM 61A YHC-E-A<br />
3rd Edition: Nov. 2007<br />
Page 25 of 34
RETURNING THE YHC FOR REPAIR<br />
In the event that a YHC requires service and must be returned for repair, please contact <strong>Yokogawa</strong> at the<br />
numbers listed below.<br />
DO NOT send any unit in for repair without first contacting <strong>Yokogawa</strong> for a Return Material<br />
Authorization (RMA) number. If this number has not been obtained and clearly marked on the<br />
package being shipped back, the unit will be returned at the shipper’s expense. This number will be<br />
provided by the <strong>Yokogawa</strong> Repair Department when you call, fax or e-mail your information. An RMA<br />
number must accompany all incoming packages to insure proper tracking, processing and repair work.<br />
To assist us in processing your repair request, please have the Model & Serial Number of the unit available<br />
when you call. This information is located on the YHC label. This information can also be obtained directly<br />
from the YHC display by pressing the Cfg soft key from the YHC Main display, then “5 Other” and then “1<br />
Model Info”. See the YHC Main display section in this manual for more details.<br />
<strong>Yokogawa</strong> Corporation of America<br />
2 Dart Rd.<br />
Newnan, GA 30265<br />
TELEPHONE: (770) 254-0400<br />
FAX: (770) 254-2088<br />
E-mail: info@us.yokogawa.com<br />
Web Site: www.us.yokogawa.com/mi<br />
IM 61A YHC-E-A<br />
3rd Edition: Nov. 2007<br />
Page 26 of 34
PRODUCT SPECIFICATIONS OVERVIEW<br />
APPENDIX<br />
BASE UNIT: 10" L x 4.25" W x 1.65"D ABS plastic case with optional shock absorbing boot, 19ozs. including<br />
batteries<br />
DISPLAY: 128 x 128 pixel graphic display, 2.6” x 2.6” viewable area, backlight<br />
POWER: two (2) 9-volt alkaline batteries, two (2) 9-volt Lithium batteries, two (2) 9-volt NiMH batteries or optional<br />
100 – 240 Vac power adapter (P/N A36742)<br />
TEMPERATURE SPECIFICATIONS:<br />
Storage: -40° F to 140° F (-40° C to 60° C)<br />
Operating: 23° F to 122° F (-5° C to 50° C)<br />
CONNECTIONS: HART: Standard banana jacks (¾” center)<br />
PC Data transfer: DB-9 serial connector<br />
Power: AC Adapter jack<br />
AUTO SHUT-OFF - occurs after user-selected period of keypad inactivity or can be disabled, both YHC and backlight<br />
DIAGNOSTICS – YHC 4100 self-tests upon power up. Advisories are posted on the display.<br />
APPROVALS: Class I, Div I, Groups A, B, C, D, T5 certified by MET Laboratories, Inc per UL3111-1, CAN/CSA-<br />
22.2 No. 1010.1 & 157-92 and UL913, Fifth Edition, Rev. 2/21/97<br />
CONTRAST – direct adjustment of display contrast in any mode; automatic compensation for ambient temperature<br />
changes<br />
SECURITY LOCKOUT – YHC 4100 Settings can be locked out entirely or by specific feature.<br />
CE compliance<br />
MEMORY – separate, dedicated, non-volatile flash memory for YHC firmware, DOFs, and Configurations<br />
DOF Memory: 600 HART devices (based on average DOF size)<br />
Configuration Memory: 200 HART devices (based on average configuration size)<br />
IM 61A YHC-E-A<br />
3rd Edition: Nov. 2007<br />
Page 27 of 34
YHC MODELS, OPTIONS, ORDERING INFORMATION<br />
YHC 4100 HART<br />
Adapter, protective boot)<br />
Code Reserved<br />
-01 Always -01<br />
Code Documenting Options<br />
-0 No documenting (configuration save/send is supported with memory for 200 configs)<br />
-1 Standard documenting (as-found & as-left, requires DMS database software sold separately)<br />
-2<br />
Code Certification Options<br />
-00 CE Mark (Standard on all units)<br />
-01 CE Mark, Intrinsically Safe unit by MET Laboratories.<br />
MET Laboratories is a Nationally Recognized Test Lab (NRTL). This unit is certified by MET<br />
Laboratories to comply with standards CSA C22.2 No. 1010.1-92, C22.2 No. 157, and UL913, Fifth<br />
Code Carrying Case and Strap Options<br />
-0 Rear Hand Strap (Standard on all units)<br />
-2 Fitted, use-in-place, soft carrying case with adj shoulder strap & pocket for HART leads<br />
-4 Larger soft carrying case with adjustable shoulder strap & pocket for HART leads (A37230)<br />
-5 Larger soft carrying case (w/ adj shoulder strap & pocket for HART leads) + YHC hanging strap<br />
Code User's <strong>Manual</strong> Language options<br />
-01 English language<br />
-02 German language (Pending)<br />
-03 French language (Pending)<br />
-04 Spanish language (Pending)<br />
-05 Chinese (Standard) language (Pending)<br />
-06 Italian language (Pending)<br />
-07 Japanese language (Pending)<br />
Code Download Subscription (DLS) Fee options<br />
-0 No DownLoad Subscription (DLS)<br />
-1 Standard 3-year DOF Download Subscription<br />
® Communicator (Includes CE Mark, HART leads Kit, Batteries, RS-232 Serial Cable, User's <strong>Manual</strong>, Universal Power<br />
21CFR Part 11 documenting for FDA electronic signature compliance (as-found & as left, requires DMS<br />
database software sold separately)<br />
Edition Rev. 2/21/97 for Class I, Div I, Groups A, B, C and D<br />
YHC 4100 -01 -1 -01 -2 -01 -0 Full Model ID: YHC 4100-01-1-01-2-01-0<br />
Hart Communicator<br />
Always<br />
Standard Documenting<br />
Intrinsic Safety<br />
Fitted U.I.P. Soft case<br />
English User's <strong>Manual</strong><br />
Standard 3 Year DLS<br />
Note: Only YHC 4100-01-1-01 portion of the model number is tracked by<br />
DPC Manger and DMS Software<br />
YHC ACCESSORIES LIST<br />
A37049 Protective boot provides degree of protection against drop related damage; slip on<br />
A900529-00014 HART Test Lead Kit (inc'd w/ YHC) - std banana plugs, mini-grabbers, 250 Ω<br />
resistor<br />
A36821 Std size 250 Ω shunt resistor (inc'd w/ YHC) - req'd for HART low resistance loops<br />
A900447-00052 DB-9 cable, Male x Female, 6 ft length (incl’d w/YHC);<br />
Required for updates / communication<br />
A36875 YHC carrying case (inc'd w/ YHC) - custom soft case with adjustable shoulder strap<br />
and HART lead compartment<br />
A36937 Adjustable, detachable hanging strap (inc'd w/ YHC) clips directly to YHC attach<br />
points<br />
A900614-00006 9 Volt Alkaline Battery (inc'd w/ YHC) (2 req'd)<br />
A900614-00009 9 Volt Lithium Battery (2 req'd), approx 3x life of alkaline batteries, best for cold<br />
service<br />
A900614-00015 9 Volt NiMH Batteries (2 req'd)<br />
IM 61A YHC-E-A<br />
3rd Edition: Nov. 2007<br />
Page 28 of 34
YHC ACCESSORIES LIST, con’t<br />
A37134 NiMH battery charger, 100 – 240 vac, 50/60 Hz, universal plug kit<br />
9B000007 Power adapter, 100 Vac to 240 Vac, 50-60 Hz universal plug kit (incl’d w/ YHC)<br />
F/N YHC 4100:440 Paper instructions for YHC 4100 (PDF instructions sent with each YHC on CD)<br />
IM 61A YHC-E-A<br />
3rd Edition: Nov. 2007<br />
Page 29 of 34
Intrinsic Safety Document – Uncontrolled<br />
For Controlled document see drawing shipped with actual handheld<br />
IM 61A YHC-E-A<br />
3rd Edition: Nov. 2007<br />
Page 30 of 34
“Main Menu”<br />
Device Config<br />
PV<br />
AO<br />
LRV<br />
URV<br />
%Range<br />
Generic DOF (HART 5 devices)<br />
“Config Menu”<br />
Process Vars<br />
Sensors<br />
Analog Trim<br />
Basic Info<br />
Hart Output<br />
Diagnostics<br />
Save Send<br />
Review Edit<br />
“Process Vars Menu”<br />
PV<br />
% Range<br />
AO<br />
“Sensor Menu”<br />
Rerange<br />
Signal Conditioning<br />
“Analog Trim Menu”<br />
4mA Analog Trim<br />
20mA Analog Trim<br />
DAC Trim<br />
Loop Test<br />
Scaled DAC Trim<br />
“Basic Info”<br />
Tag<br />
Date<br />
Descriptor<br />
Message<br />
Private Label<br />
Revisions<br />
“HART Output”<br />
Polling Address<br />
Burst Mode Select<br />
Burst Command Number<br />
Device ID<br />
Preambles<br />
Diagnostic Menu”<br />
Self Test<br />
Loop Test<br />
“Rerange Menu”<br />
LRV (edit)<br />
URV (edit)<br />
Set 4mA Range<br />
Set 20mA Range<br />
LSL<br />
USL<br />
“Signal Conditioning”<br />
Transfer Function<br />
Damping Value<br />
Units<br />
Analog Alarm<br />
“Revisions”<br />
HART Revision<br />
Device Revision<br />
Software Revision<br />
Final Assbly Number<br />
IM 61A YHC-E-A<br />
3rd Edition: Nov. 2007<br />
Page 31 of 34
Device Setup<br />
PV<br />
AO<br />
URV<br />
LRV<br />
% of Range<br />
1151 Rev. 5 Menu Tree<br />
Process Vars<br />
Sensors<br />
Analog Trim<br />
Basic Info<br />
Hart Output<br />
Diagnostics<br />
Save / Send<br />
Review / Edit<br />
Pressure Value<br />
Pressure Percent Range<br />
Analog Output<br />
Pressure Trim<br />
Re Range<br />
Signal Cond<br />
Pressure Output Transfer Function<br />
Pressure Damping Value<br />
Pressure Units<br />
Analog Output Alarm Select<br />
Trim 4mA<br />
Trim 20mA<br />
Loop Test<br />
Tag<br />
Date<br />
Descriptor<br />
Message<br />
Private Label<br />
Revisions<br />
Const Mats<br />
Polling Address<br />
Burst Mode Select<br />
Burst Com Number<br />
Device ID<br />
Preambles<br />
Self Test<br />
Loop Test<br />
Save<br />
Send<br />
Variables<br />
HART Revision<br />
Device Revision<br />
Software Revision<br />
Final Assembly Number<br />
Perform Test<br />
Test Results<br />
Zero Trim<br />
Lower Sensor Trim<br />
Upper Sensor Trim<br />
Lower Sensor Trim Point<br />
Upper Sensor Trim Point<br />
Pressure Lower Range Value<br />
Pressure Upper Range Value<br />
Set 4mA Range<br />
Set 20mA Range<br />
Pressure Lower Range Limit<br />
Pressure Upper Range Limit<br />
Module Isolator Material<br />
Module Fill Fluid<br />
Gasket Material<br />
Flange Material<br />
Drain Vent Material<br />
Flange Type<br />
Remote Seal Isolator<br />
Material<br />
Flange Size<br />
Number of Remote Seals<br />
Remote Seal Fill Fluid<br />
Remote Seal Type<br />
IM 61A YHC-E-A<br />
3rd Edition: Nov. 2007<br />
Page 32 of 34
Device Setup<br />
Press<br />
AO<br />
URV<br />
LRV<br />
3051C Rev. 2 Menu Tree<br />
Process Vars<br />
Sensors<br />
Analog Trim<br />
Basic Info<br />
Hart Output<br />
Diagnostics<br />
Save Send<br />
Review Edit<br />
Pressure Value<br />
Pressure Percent Range<br />
Analog Output<br />
Temperature Value<br />
Sensor Trim<br />
Re Range<br />
Signal Cond<br />
Units<br />
Pressure Units<br />
Temperature Units<br />
Trim 4mA<br />
Trim 20mA<br />
Loop Test<br />
Tag<br />
Date<br />
Descriptor<br />
Message<br />
Revisions<br />
Const Mats<br />
Device ID<br />
Polling Address<br />
Request Preambles<br />
Burst Mode Select<br />
Burst Command Number<br />
Self Test<br />
Loop Test<br />
Save<br />
Send<br />
Variables<br />
Pressure Lower Range Value<br />
Pressure Upper Range Value<br />
Set 4mA Range<br />
Set 20mA Range<br />
Pressure Lower Range Limit<br />
Pressure Upper Range Limit<br />
Pressure Units<br />
Pressure Output Transfer Function<br />
Pressure Damping Value<br />
Analog Output Alarm Select<br />
Universal Revision<br />
Transmitter Revision<br />
Software Revision<br />
Final Assbly Number<br />
Self Test<br />
Status Display<br />
Zero Trim<br />
Lower Sensor Trim<br />
Upper Sensor Trim<br />
Lower Sensor Trim Point<br />
Upper Sensor Trim Point<br />
Module Isolator Material<br />
Module Fill Fluid<br />
Gasket Material<br />
Flange Material<br />
Drain Vent Material<br />
Flange Type<br />
Remote Seal Isolator<br />
Material<br />
Flange Size<br />
Number of Remote Seals<br />
Remote Seal Fill Fluid<br />
Remote Seal Type<br />
IM 61A YHC-E-A<br />
3rd Edition: Nov. 2007<br />
Page 33 of 34
Device Setup<br />
Press<br />
AO<br />
URV<br />
LRV<br />
EJA Rev. 2 Menu Tree<br />
Process<br />
Vars<br />
Sensors<br />
Analog<br />
Trim<br />
Basic Info<br />
Hart Output<br />
Display<br />
Cond<br />
Write<br />
Protect<br />
Diagnostics<br />
Save Send<br />
Review<br />
/Edit<br />
Pressure Value<br />
Pressure Percent Range<br />
Analog Output<br />
Temperature Value<br />
Static Pressure Value<br />
Engr Display Unit<br />
Engr Display Value<br />
Sensor Trim<br />
Re Range<br />
Signal Cond<br />
Units<br />
Pressure Units<br />
H20 Unit Select<br />
Temperature<br />
Units<br />
Trim 4mA<br />
Trim 20mA<br />
Loop Test<br />
Tag<br />
Date<br />
Descriptor<br />
Message<br />
ASC Model<br />
Ext SW<br />
Mode<br />
Revisions<br />
Const Mats<br />
Device ID<br />
Polling Address<br />
Request Preambles<br />
Burst Mode Select<br />
Burst Command Number<br />
Disp Mode<br />
Disp Func<br />
Engr Disp<br />
Write Protect<br />
Write Enable 10min<br />
New Password<br />
Self Test<br />
Loop<br />
Save<br />
Send<br />
Variables<br />
Universal<br />
Revision<br />
Transmitter<br />
Revision<br />
Software<br />
Self Test<br />
Status Display<br />
Zero Trim<br />
Lower Sensor Trim<br />
Upper Sensor Trim<br />
Lower Sensor Trim Point<br />
Upper Sensor Trim Point<br />
Pressure Lower Range Value<br />
Pressure Upper Range Value<br />
Set 4mA Range<br />
Set 20mA Range<br />
Pressure Lower Range Limit<br />
Pressure Upper Range Limit<br />
Pressure Units<br />
H2O Unit Select<br />
Low Cut Point<br />
Low Cut Mode<br />
Bi Dir Mode<br />
Pressure Output Transfer Function<br />
Pressure Damping Value<br />
Analog Output Alarm Select<br />
Engr Display Unit<br />
Engr Disp LRV<br />
Engr Disp URV<br />
Engr Disp Point<br />
Module Isolator<br />
Material<br />
Module Fill Fluid<br />
Gasket Material<br />
Flange Material<br />
Drain Vent<br />
Material<br />
Flange Type<br />
Remote Seal<br />
Isolator Material<br />
Flange Size<br />
Number of Remote<br />
IM 61A YHC-E-A<br />
3rd Edition: Nov. 2007<br />
Page 34 of 34