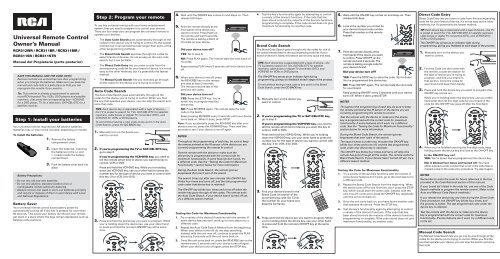
Universal Remote Control Owner's Manual - Audiovox
Universal Remote Control Owner's Manual - Audiovox
Universal Remote Control Owner's Manual - Audiovox

Create successful ePaper yourself
Turn your PDF publications into a flip-book with our unique Google optimized e-Paper software.
<strong>Universal</strong> <strong>Remote</strong> <strong>Control</strong><br />
Owner’s <strong>Manual</strong><br />
RCR312WR / RCR311BR / RCR311BIR /<br />
RCR311SR / RCR311STR<br />
<strong>Manual</strong> del Propietario (parte posterior)<br />
SAVE THIS MANUAL AND THE CODE LISTS!<br />
<strong>Remote</strong> controls can sometimes lose their programming<br />
when you change the batteries. Make sure you keep the<br />
manual and code lists in a safe place so that you can<br />
reprogram the remote if you need to.<br />
Tip: This remote is already programmed to operate<br />
most RCA-branded TVs, VCRs, DVD players and satellite<br />
receivers. Just press the corresponding key—VCR DVD<br />
for a DVD player, TV for a television, SAT CBL DTC for a<br />
satellite receiver.<br />
Step 1: Install your batteries<br />
Your universal remote requires two AA alkaline batteries<br />
(batteries may or may not be included, depending on model).<br />
To install the batteries:<br />
1. Remove the battery<br />
compartment cover.<br />
2. Insert the batteries, matching<br />
the batteries to the (+) and<br />
(–) marks inside the battery<br />
compartment.<br />
3. Push the battery cover back into<br />
place.<br />
Battery Precautions:<br />
Do not mix old and new batteries.<br />
Do not mix alkaline, standard (carbon-zinc) or<br />
rechargeable (nickel-cadmium) batteries.<br />
Always remove old, weak or worn-out batteries promptly<br />
and recycle or dispose of them in accordance with Local<br />
and National Regulations.<br />
Battery Saver<br />
Your universal remote control saves battery power by<br />
automatically turning off if any key is pressed for more than<br />
60 seconds. This saves your battery life should your remote<br />
get stuck in a place where the keys remain depressed, such as<br />
between sofa cushions.<br />
Step 2: Program your remote<br />
To use this universal remote with your home entertainment<br />
system, fi rst you need to program it to control your devices.<br />
There are four ways you can program the universal remote to<br />
operate your devices:<br />
The Auto Code Search goes automatically through all the<br />
codes for the device you’re trying to control. It’s the easiest<br />
method, but it can sometimes take longer than some of the<br />
other programming methods.<br />
The Brand Code Search searches through the codes for<br />
select brands of devices. It’s not as easy as the auto code<br />
search, but it can be faster.<br />
The Direct Code Entry lets you enter a code from the<br />
accompanying code list for your brand of device. It’s not as<br />
easy as the other methods, but it’s potentially the fastest<br />
method.<br />
The <strong>Manual</strong> Code Search lets you manually go through<br />
all the codes for the device you’re trying to control.<br />
Auto Code Search<br />
The Auto Code Search goes automatically through all the<br />
codes for the device you’re trying to control. When you fi nd<br />
the one that operates your device, you can stop the search and<br />
store that code.<br />
TIPS: Each device key is associated with a type of device—<br />
the TV is preset to search for TVs, SAT CBL DTC for satellite<br />
receivers, cable boxes or digital TV converters (DTC), and<br />
VCR DVD for VCRs or DVD players.<br />
To exit without saving a new code at any point in the Auto<br />
Code Search, press the GO BACK key.<br />
1. <strong>Manual</strong>ly turn on the device you<br />
want to control.<br />
2. If you’re programming the TV or SAT CBL DTC key,<br />
go to step 3.<br />
If you’re programming the VCR DVD key, you need to<br />
tell the remote which kind of device you want this key to<br />
control, VCR or DVD.<br />
Press and hold the VCR DVD key. While you’re holding<br />
down the VCR DVD key, use your other hand to press the<br />
number key for the type of device you want to control with<br />
this key: 2 for VCR, 3 for DVD.<br />
3. Press and hold the device key you want to program. While<br />
you’re holding down the device key, use your other hand<br />
to press and hold the remote’s ON OFF key at the same<br />
time.<br />
4. Wait until the ON OFF key comes on and stays on. Then<br />
release both keys.<br />
5. Point the remote directly at the<br />
front panel of the device you<br />
want to control. Press PLAY on<br />
the remote and wait 5 seconds.<br />
The remote is testing a batch of<br />
10 codes on your device.<br />
Did your device turn off?<br />
YES: Go to step 6.<br />
NO: Press PLAY again. The remote tests the next batch of<br />
10 codes.<br />
Keep pressing PLAY every 5 seconds until your device turns<br />
off.<br />
6. When your device turns off, press<br />
the REVERSE key on the remote<br />
and wait at least 2 seconds.<br />
The remote tries the last of the<br />
previous ten codes.<br />
Did your device turn on?<br />
YES: Press the STOP key. You’re<br />
done! You’ve programmed this<br />
device key.<br />
NO: Press REVERSE again. The remote tests the next<br />
code in the batch.<br />
Keep pressing REVERSE every 2 seconds until your device<br />
turns back on. When it does, press STOP.<br />
Note: If you accidentally press the REVERSE key after your<br />
device turns on, press the FORWARD key. Then, wait two<br />
seconds to see if your device turns off again.<br />
NOTES<br />
Throughout the programming of each key, be sure to keep<br />
the remote pointed at the IR sensor of the device you are<br />
currently programming the remote to control.<br />
Test the remote with the device to make sure the<br />
device key is programmed with the correct code for<br />
maximum functionality. If some features don’t work, try<br />
a different code. See the “Testing the Code for Maximum<br />
Functionality” section below for more information.<br />
During the Auto Code Search, the remote ignores<br />
keypresses that aren’t part of the search.<br />
The search times out after two minutes (the ON OFF key<br />
blinks four times and turns off, and the last programmed<br />
code under that device key is retained).<br />
The ON OFF key blinks four times and turns off when the<br />
remote has gone through all the codes. The remote exits<br />
the Auto Code Search. If your device hasn’t turned off yet,<br />
try a different search method.<br />
Testing the Code for Maximum Functionality<br />
1. Try a variety of the device’s functions with the remote. If<br />
some device features don’t work, go to next step to try a<br />
different code.<br />
2. Repeat the Auto Code Search Method from the beginning.<br />
When your device turns off, do not stop searching.<br />
Instead, with the unit now off, continue to press the PLAY<br />
key every 5 seconds until the unit turns back on.<br />
3. Once the unit turns back on, press the REVERSE key on the<br />
remote every 2 seconds until your device turns off again.<br />
When your device turns off again, press the STOP key.<br />
4. Test the key’s functionality again by attempting to control<br />
a variety of the device’s functions. If the code that has<br />
been stored controls the majority of the device’s functions,<br />
programming is complete. If the code stored does not give<br />
maximum functionality, try another code.<br />
Brand Code Search<br />
The Brand Code Search goes through only the codes for one of<br />
the select brands listed in the accompanying code list. If your<br />
brand of device is listed, this search can be very quick and easy.<br />
TIPS: Each device key is associated with a type of device—the<br />
TV is preset to search for TVs, SAT CBL DTC for satellite<br />
receivers, cable boxes or digital TV converters (DTC), and<br />
VCR DVD for VCRs or DVD players.<br />
The ON OFF key serves as an indicator light during<br />
programming, giving you feedback at each stage of the process.<br />
To exit without saving a new code at any point in the Brand<br />
Code Search, press the GO BACK key.<br />
1. <strong>Manual</strong>ly turn on the device you<br />
want to control.<br />
2. If you’re programming the TV or SAT CBL DTC key,<br />
go to step 3.<br />
If you’re programming the VCR DVD key, you need to<br />
tell the remote which kind of device you want this key to<br />
control, VCR or DVD.<br />
Press and hold the VCR DVD key. While you’re holding<br />
down the VCR DVD key, use your other hand to press the<br />
number key for the type of device you want to control with<br />
this key: 2 for VCR, 3 for DVD.<br />
3. Find your device’s brand in the<br />
Brand Code list section of the<br />
accompanying code list. Circle<br />
the number for your brand and<br />
keep the list handy.<br />
4. Press and hold the device key you want to program. While<br />
you’re holding down the device key, use your other hand<br />
to press and hold the remote’s ON OFF key at the same<br />
time.<br />
Code Lists<br />
Lista de Códigos<br />
Brand Codes are used for programming using the Brand Code Search<br />
Admiral .................................<br />
and Entry method outlined in the User’s Guide.<br />
Advent ...........................................<br />
Aiko ..........................................................<br />
Akai ............................. 10812, 11675, 10060, 1<br />
Albatron .....................................................................<br />
Los códigos de las marcas son utilizados para programar utilizando<br />
America Action ..........................................................<br />
los métodos de búsqueda y entrada de códigos de marcas, resaltado<br />
Anam ........................................................................<br />
en la guía del usuario.<br />
AOC ........................................................................<br />
Apex Digital ........................................ 10156, 107<br />
<strong>Audiovox</strong> ............................... 10451, 10180, 100<br />
............................................................. 10875, 1<br />
Aventura .........................................................<br />
Axion .............................................................<br />
Bell & Howell ..............................................<br />
BenQ ..........................................................<br />
Bradford ...................................................<br />
Broksonic ...............................................<br />
Candle ..................................................<br />
Carnivale ............................................<br />
Carver ................................................<br />
Celera ..............................................<br />
Changhong ...................................<br />
Citizen .........................................<br />
Clarion .......................................<br />
Commercial Solutions ............<br />
Concerto ................................<br />
Contec ..................................<br />
Craig ...................................<br />
Crosley .............................<br />
Crown ............................<br />
Curtis Mathes ...............<br />
.....................................<br />
...................................<br />
CXC ..........................<br />
Cytron ...................<br />
Daewoo ..............<br />
Dell .....................<br />
Denon ..............<br />
Diamond Visio<br />
Dumont ........<br />
Durabrand .<br />
Dwin ..........<br />
Dynex ......<br />
Electrogra<br />
Electroh<br />
Emerso<br />
.........<br />
Empr<br />
Envi<br />
ESA<br />
Fi<br />
F<br />
TV<br />
Brand Code List/Lista de Códigos de Marcas<br />
RCA<br />
Magnavox<br />
GE Insignia JVC<br />
Panasonic Samsung Sharp Sony Toshiba Vizio<br />
Philips<br />
PROSCAN<br />
VCR<br />
0 1 2 3 4 5 6 7 8 9<br />
Magnavox<br />
Samsung<br />
Mitsubishi Panasonic Sharp Sony Toshiba<br />
Philips RCA<br />
GE<br />
JVC Symphonic<br />
PROSCAN<br />
DVD<br />
0 1 2 3 4 5 6 7 8 9<br />
RCA<br />
Magnavox<br />
GE Apex JVC<br />
Panasonic Pioneer Samsung Sharp Sony Toshiba<br />
Philips<br />
PROSCAN<br />
0 1 2 3 4 5 6 7 8 9<br />
SAT/CABLE<br />
Dish Network<br />
Systems/<br />
Echostar<br />
RCA<br />
GE Motorola DirecTV<br />
PROSCAN<br />
General<br />
Hughes<br />
Instruments Network<br />
Scientific Magnavox<br />
Atlanta<br />
Systems Philips<br />
AMNIO<br />
ADB<br />
Panasonic<br />
0 1 2 3 4 5 6 7 8 9<br />
5. Wait until the ON OFF key comes on and stays on. Then<br />
release both keys.<br />
6. Look at the number you circled for<br />
your device’s brand code number.<br />
Press that number on the remote<br />
keypad.<br />
7. Point the remote directly at the<br />
front panel of the device you want<br />
to control. Press ON OFF on the<br />
remote and wait 2 seconds. The<br />
remote is testing a single code for<br />
your device’s brand.<br />
Did your device turn off?<br />
YES: Press the STOP key to store the code. You’re done!<br />
You’ve programmed this device key.<br />
NO: Press ON OFF again. The remote tests the next code<br />
for your brand.<br />
Keep pressing ON OFF every 2 seconds until your device<br />
turns off. When it does, press STOP.<br />
NOTES<br />
Throughout the programming of each key, be sure to keep<br />
the remote pointed at the IR sensor of the device you are<br />
currently programming the remote to control.<br />
Test the remote with the device to make sure the device<br />
key is programmed with the correct code for maximum<br />
functionality. If some features don’t work, try a different<br />
code. See the “Testing the Code for Maximum Functionality”<br />
section below for more information.<br />
During the Brand Code Search, the remote ignores<br />
keypresses that aren’t part of the search.<br />
The search times out after two minutes (the ON OFF key<br />
blinks four times and turns off, and the last programmed<br />
code under that device key is retained).<br />
The ON OFF key blinks four times and turns off when the<br />
remote has gone through all the codes. The remote exits the<br />
Brand Code Search. If your device hasn’t turned off yet, try a<br />
different search method.<br />
Testing the Code for Maximum Functionality<br />
1. Try a variety of the device’s functions with the remote. If<br />
some device features don’t work, go to the next step to try<br />
a different code.<br />
2. Repeat the Brand Code Search from the beginning. When<br />
the device turns off for the fi rst time, don’t press the STOP<br />
key, which would store the same code. Instead, with the<br />
unit now off, continue to press the ON OFF key repeatedly<br />
until the unit turns back on.<br />
3. Once the unit turns back on, you have found another code<br />
that operates the device. Press the STOP key.<br />
4. Test the key’s functionality again by attempting to control<br />
a variety of the device’s functions. If the code that has<br />
been stored controls the majority of the device’s functions,<br />
programming is complete. If the code stored does not give<br />
maximum functionality, try another code.<br />
Direct Code Entry<br />
Direct Code Entry lets you enter a code from the accompanying<br />
code list for your brand of device. It’s not as easy as the other<br />
methods, but it’s potentially the fastest method.<br />
TIP: Each device key is associated with a type of device—the TV<br />
is preset to search for TVs, SAT CBL DTC for satellite receivers,<br />
cable boxes or digital TV converters (DTC), and VCR DVD for<br />
VCRs or DVD players.<br />
The ON OFF key serves as an indicator light during<br />
programming, giving you feedback at each stage of the process.<br />
1. <strong>Manual</strong>ly turn on the device you<br />
want to control.<br />
2. Find the Code List that came with<br />
the remote. Locate the section for<br />
the type of device you’re trying to<br />
program, and fi nd your brand in<br />
that section. Circle the codes for<br />
your brand and keep them handy.<br />
Code Lists<br />
Lista de Códigos<br />
Brand Codes are used for programming using the Brand Code Search<br />
Admiral .................................<br />
and Entry method outlined in the User’s Guide.<br />
Advent ...........................................<br />
Aiko ..........................................................<br />
Akai ............................. 10812, 11675, 10060, 1<br />
Albatron .....................................................................<br />
Los códigos de las marcas son utilizados para programar utilizando<br />
America Action ..........................................................<br />
los métodos de búsqueda y entrada de códigos de marcas, resaltado<br />
Anam ........................................................................<br />
en la guía del usuario.<br />
AOC ........................................................................<br />
Apex Digital ........................................ 10156, 107<br />
<strong>Audiovox</strong> ............................... 10451, 10180, 100<br />
............................................................. 10875, 1<br />
Aventura .........................................................<br />
Axion .............................................................<br />
Bell & Howell ..............................................<br />
BenQ ..........................................................<br />
Bradford ...................................................<br />
Broksonic ...............................................<br />
Candle ..................................................<br />
Carnivale ............................................<br />
Carver ................................................<br />
Celera ..............................................<br />
Changhong ...................................<br />
Citizen .........................................<br />
Clarion .......................................<br />
Commercial Solutions ............<br />
Concerto ................................<br />
Contec ..................................<br />
Craig ...................................<br />
Crosley .............................<br />
Crown ............................<br />
Curtis Mathes ...............<br />
.....................................<br />
...................................<br />
CXC ..........................<br />
Cytron ...................<br />
Daewoo ..............<br />
Dell .....................<br />
Denon ..............<br />
Diamond Visio<br />
Dumont ........<br />
Durabrand .<br />
Dwin ..........<br />
Dynex ......<br />
Electrogra<br />
Electroh<br />
Emerso<br />
..........<br />
Empr<br />
Envi<br />
ESA<br />
Fi<br />
F<br />
RCA<br />
Magnavox<br />
GE Insignia JVC<br />
Panasonic Samsung Sharp Sony Toshiba Vizio<br />
Philips<br />
PROSCAN<br />
0 1 2 3 4 5 6 7 8 9<br />
3. Press and hold the device key you want to program (the<br />
ON OFF key comes on).<br />
While you’re holding down the device key, use your other<br />
hand enter the fi rst fi ve-digit code for your brand in the<br />
code list (the ON OFF key goes off after the fi rst digit).<br />
TV<br />
Brand Code List/Lista de Códigos de Marcas<br />
VCR<br />
Magnavox<br />
Samsung<br />
Mitsubishi Panasonic Sharp Sony Toshiba<br />
Philips<br />
0 1 2 3 4 5 6 7 8 9<br />
RCA<br />
GE<br />
JVC Symphonic<br />
PROSCAN<br />
DVD<br />
RCA<br />
Magnavox<br />
GE Apex JVC<br />
Panasonic Pioneer Samsung Sharp Sony Toshiba<br />
Philips<br />
PROSCAN<br />
0 1 2 3 4 5 6 7 8 9<br />
RCA<br />
GE Motorola DirecTV<br />
PROSCAN<br />
0 1 2 3 4 5 6 7 8 9<br />
General<br />
Hughes<br />
Instruments Network<br />
Scientific Magnavox<br />
Atlanta<br />
Systems Philips<br />
AMNIO<br />
ADB<br />
Panasonic<br />
4. When you’ve fi nished entering the fi ve-digit code, keep<br />
holding down the device key and look at the ON OFF key.<br />
Is the ON OFF key on?<br />
YES: You’re done! You’ve programmed this device key.<br />
NO, it blinked four times and turned off: You have<br />
either entered a code number that is not in the code lists or<br />
missed a step in the code entry procedure. Try step 3 again.<br />
NOTES<br />
Remember to enter the code for future reference in the box<br />
provided in the Code Retrieval section of this manual.<br />
If your brand isn’t listed in the code list, use one of the Code<br />
Search methods to program the remote control. (Refer to the<br />
Auto and <strong>Manual</strong> Code Search methods.)<br />
If you release the device key any time during the Direct Code<br />
Entry procedure, the ON OFF key blinks four times, and<br />
the process is exited. The last programmed code under the<br />
device key is retained.<br />
Test the remote with the device to make sure the device<br />
key is programmed with the correct code for maximum<br />
functionality. If some features don’t work, try a different code<br />
in the list.<br />
<strong>Manual</strong> Code Search<br />
The <strong>Manual</strong> Code Search lets you go one-by-one through all the<br />
codes for the device you’re trying to control. When you fi nd the<br />
one that operates your device, you can stop the search and store<br />
that code.<br />
SAT/CABLE<br />
Dish Network<br />
Systems/<br />
Echostar
TIPS: Each device key is associated with a type of device—the<br />
TV is preset to search for TVs, SAT CBL DTC for satellite<br />
receivers, cable boxes or digital TV converters (DTC), and<br />
VCR DVD for VCRs or DVD players.<br />
The ON OFF key serves as an indicator light during<br />
programming, giving you feedback at each stage of the process.<br />
The <strong>Manual</strong> Code Search method may take a long time because<br />
the remote searches through all of the codes in its memory<br />
one-by-one. If your brand is listed in the Brand Codes or the<br />
Code Lists, fi rst try the Brand Code Search or the Direct Code<br />
Entry method.<br />
To exit without saving a new code at any point in the <strong>Manual</strong><br />
Code Search, press the GO BACK key.<br />
1. <strong>Manual</strong>ly turn on the device you<br />
want to control.<br />
2. If you’re programming the TV or SAT CBL DTC key,<br />
go to step 3.<br />
If you’re programming the VCR DVD key, you need to<br />
tell the remote which kind of device you want this key to<br />
control, VCR or DVD.<br />
Press and hold the VCR DVD key. While you’re holding<br />
down the VCR DVD key, use your other hand to press the<br />
number key for the type of device you want to control with<br />
this key: 2 for VCR, 3 for DVD.<br />
3. Press and hold the device key you want to program. While<br />
you’re holding down the device key, use your other hand to<br />
press and hold the remote’s ON OFF key at the same time.<br />
4. Wait until the ON OFF key comes on and stays on. Then<br />
release both keys.<br />
5. Point the remote directly at the front panel of the device you<br />
want to control. Press ON OFF on the remote and wait 2<br />
seconds. The remote is testing a single code for your device.<br />
Did your device turn off?<br />
YES: Press the STOP key to store<br />
the code. You’re done! You’ve<br />
programmed this device key.<br />
NO: Press ON OFF again. The<br />
remote tests the next code for<br />
your device.<br />
Keep pressing ON OFF every 2<br />
seconds until your device turns back<br />
on. When it does, press STOP.<br />
TIP: Because there are so many codes, you may have to press<br />
the ON OFF key many times—possibly hundreds of times.<br />
NOTES<br />
Throughout the programming of each key, keep the remote<br />
pointed at the IR sensor of the device you are programming<br />
the remote to control.<br />
Test the remote with the device to make sure the device<br />
key is programmed with the correct code for maximum<br />
functionality. If some features don’t work, try a different<br />
code. See the “Testing the Code for Maximum Functionality”<br />
section below for more information.<br />
During the <strong>Manual</strong> Code Search, the remote ignores<br />
keypresses that aren’t part of the search.<br />
The search times out after two minutes (the ON OFF key<br />
blinks four times and turns off, and the last programmed<br />
code under that device key is retained).<br />
The ON OFF key blinks four times and turns off when the<br />
remote has gone through all the codes. The remote exits the<br />
<strong>Manual</strong> Code Search. If your device hasn’t turned off yet, try<br />
a different search method.<br />
Testing the Code for Maximum Functionality<br />
1. Try a variety of the device’s functions with the remote. If<br />
some features of your devices don’t work, go to the next<br />
step to try a different code.<br />
2. Repeat the <strong>Manual</strong> Code Search from the beginning. When<br />
the device turns off for the fi rst time, don’t press the STOP<br />
key, which would store the same code. Instead, with the<br />
unit now off, continue to press the ON OFF key repeatedly<br />
until the unit turns back on.<br />
3. Once the unit turns back on, you have found another code<br />
that operates the device. Press the STOP key.<br />
4. Test the key’s functionality again by trying a variety of<br />
functions. If the code controls the majority of the device’s<br />
functions, programming is complete. If the code stored<br />
does not give maximum functionality, try another code.<br />
Tour of the <strong>Remote</strong><br />
In most cases, the keys on<br />
this remote perform the same<br />
functions as the keys on your<br />
original remotes once you’ve<br />
programmed this remote to<br />
operate your components.<br />
Many keys on this remote<br />
have other functions as well.<br />
Illuminated ON OFF key<br />
serves as an indicator light to<br />
provide feedback.<br />
Device keys (TV,<br />
SAT CBL DTC, VCR DVD) put<br />
the remote in the right mode<br />
to control your device.<br />
Backlight key ( ) turns<br />
backlighting on/off.<br />
GUIDE and MENU put the<br />
remote in menu/guide mode,<br />
which makes the CH/VOL<br />
keys serve as arrow keys;<br />
they also access the same<br />
features as the keys on your<br />
original remotes.<br />
Actual model may vary<br />
from illustration<br />
CH and VOL keys have dual functions: they can act as<br />
navigation keys in menu systems as well as channel and<br />
volume controllers outside the menus. The CH keys also<br />
provide skip forward and skip back control for DVD players and<br />
DVRs that support this functionality.<br />
GO BACK exits remote programming; it also performs the<br />
same functions as on your original remotes<br />
The INPUT and — (dash) key has three functions: (1) it toggles<br />
through all the video sources connected to your TV; (2) when<br />
the remote is in VCR mode, this button toggles between VCR<br />
and the TV input; (3) when you’re entering digital channel<br />
numbers directly, this button lets you separate the main<br />
channel number from the sub-channel number (such as 59.1)<br />
IMPORTANT<br />
Because this remote controls more than one device, you<br />
must fi rst “tell” the remote which device you wish to<br />
operate. That means, if you wish to operate your TV, you<br />
must fi rst press the TV key to put the remote in the TV<br />
Mode. The remote stays in that device mode until you press<br />
a different device key. For example, if your remote is in TV<br />
Mode and you want to operate the DVD player, you must<br />
press the VCR DVD key to change device modes.<br />
Backlighting<br />
Backlight illumination helps you see the remote control keys<br />
better in the dark. You can turn backlight illumination on or off<br />
by pressing the backlight key ( ). Backlighting stays on as<br />
long as keys are being pressed and turns off six seconds after<br />
the last keypress. Once the backlight time has timed out, any<br />
keypress will reactivate it. If the backlight illumination is on,<br />
and you press the backlight key, the backlight turns off.<br />
Accessing Device Menus and Guides<br />
Many devices use on-screen menus and guides to help you<br />
navigate through all their features and programming. While<br />
this remote may not access every menu or guide system<br />
of every device model, it does offer some menu and guide<br />
functionality.<br />
To use a device’s on-screen menu or guide system, you fi rst<br />
have to put the remote in Menu or Guide Mode.<br />
1. Make sure your devices are turned on and your TV is set<br />
to the correct device input (use the INPUT key to toggle<br />
through inputs when in TV Mode.)<br />
2. Press the device key whose menu you want to access.<br />
3. To access menus, press the MENU key. To access guides,<br />
press the GUIDE key. The ON OFF key starts blinking,<br />
indicating you are in Menu or Guide Mode.<br />
4. Use the VOL+/- and CH+/- keys to<br />
navigate through the on-screen<br />
menu system or guide. To select the<br />
highlighted item, press the OK key.<br />
TIP: If the remote doesn’t respond,<br />
check to see that the ON OFF key is<br />
still blinking. The ON OFF key times<br />
out after 20 seconds. If this happens,<br />
just press the MENU key again, and<br />
then retry your selection.<br />
Exiting Menu/Guide Mode<br />
The remote automatically times out of Menu or Guide Mode<br />
after 20 seconds of inactivity (no keys being pressed). At that<br />
time, the remote clears the displayed menu from the TV.<br />
If you want to exit the Menu Mode yourself, press the<br />
corresponding device key on the remote (TV, SAT CBL DTC,<br />
VCR DVD). The ON OFF key turns off.<br />
Advanced Functions Troubleshooting<br />
Code Retrieval<br />
Once you’ve programmed the remote to control your devices,<br />
you may want to record the codes for future reference. If<br />
you used the Direct Code Entry method, this is easy. Just<br />
fi nd the codes you entered and make a note of them in the<br />
boxes below. If you used one of the Code Search methods to<br />
program your remote or if you used the Direct Entry method<br />
but don’t remember the code, you will need to retrieve each<br />
device’s fi ve-digit code. Retrieving the actual code and writing<br />
it down will save you time if you ever need to program the<br />
remote again (e.g., if programming is lost when you change<br />
the batteries). If the codes are recorded, you can use the<br />
Direct Entry method to reprogram your remote to control your<br />
devices, which is quick and easy.<br />
1<br />
ON OFF key<br />
1. Press and hold the device key<br />
(TV, SAT CBL DTC, VCR DVD)<br />
whose code you wish to retrieve.<br />
The ON OFF key turns on. Keep<br />
pressing the device key.<br />
2. While holding the device key down, press and hold the<br />
INFO key. The ON OFF key turns off. After holding down<br />
both keys for three seconds, the ON OFF key turns back<br />
on.<br />
3. Release both keys. The ON OFF key remains on.<br />
4. Starting with the number 1 key, press and release each<br />
number key on the keypad in the following order: 1-9, then<br />
0. The number that causes the ON OFF key to blink is the<br />
fi rst number of the code. As you fi nd each number of the<br />
code, write it down for future reference.<br />
Note: All TV codes begin with the number 1; all VCR and DVR<br />
codes begin with the number 2; all DVDs, the number 3; and<br />
all satellite receivers, cable boxes and DTV converters, the<br />
number 5.<br />
5. Repeat step 4 until you have retrieved all fi ve numbers in<br />
the code. After the fi fth number is retrieved, the ON OFF<br />
key blinks briefl y, then turns off.<br />
TIP: To exit the Code Retrieval Mode at any time, press the<br />
GO BACK key.<br />
Note: If you press an invalid key during the Code Retrieval<br />
process, the remote will not respond. If you do not press a<br />
valid Code Retrieval key (TV, SAT CBL DTC, VCR DVD, INFO,<br />
GO BACK), Code Retrieval times out after 15 seconds. The<br />
ON OFF key blinks four times, and then turns off.<br />
TV CODE<br />
5<br />
VCR•DVD CODE<br />
DVD VCR<br />
SAT•CBL•DTC CODE<br />
SAT CABLE DTV CONVERTER<br />
Problem: The remote does not operate your device.<br />
Make sure the remote is in the correct mode by pressing the<br />
corresponding device key (TV, SAT CBL DTC, VCR DVD). This<br />
tells the remote which device to operate.<br />
Remove any obstacles between the remote and the device. Make<br />
sure you’re aiming the remote at the device’s IR sensor.<br />
Make sure the batteries are fresh and are properly installed.<br />
Replace the batteries with two new AA batteries, if necessary<br />
(see the Battery Installation section).<br />
Problem: The remote can’t be programmed to operate your<br />
device.<br />
If you are testing the remote while programming it, you may be<br />
too far away from the device or at a wrong angle. There must be<br />
an unobstructed path between the remote and the IR sensor on<br />
the device. Move closer and make sure you point the remote at<br />
the device you’re trying to control.<br />
If you’re using the Direct Entry programming method to enter<br />
the codes for your brand and the unit is still not functioning<br />
properly, try the auto, brand, or manual search method.<br />
To control combo units, like TV/VCRs or TV/DVDs, you must<br />
program the individual corresponding device keys to control<br />
each part of the combo unit. Once programmed successfully, the<br />
TV key controls the TV functions, and the VCR DVD key controls<br />
the VCR or DVD functions.<br />
Make sure the batteries are fresh and are properly installed.<br />
Problem: The remote doesn’t perform commands properly.<br />
Make sure the remote is in the correct mode by pressing the<br />
corresponding device key (TV, SAT CBL DTC, VCR DVD). This<br />
tells the remote which device to operate.<br />
Make sure device is ready (for example, the DVD player has a<br />
disc loaded).<br />
You may have pressed an invalid key for the mode the remote is in.<br />
If you’re trying to enter a channel number directly, try pressing<br />
the ENTER key after entering the channel number as this is a<br />
requirement of certain models and brands.<br />
There is a possibility that a programmed code may only be<br />
able to control some of your device features (for example, only<br />
turns a device on and off). To confi rm that the device key is<br />
programmed with the correct code for maximum functionality,<br />
test the device. Attempt to control a variety of the device’s<br />
functions with the remote. If some of the features of your<br />
devices don’t work, try programming the remote with a different<br />
code in the list using the Direct Code Entry Method, until you<br />
fi nd the code that allows the remote to control the majority of<br />
your device’s functions. Different codes can provide different<br />
levels of functionality.<br />
Problem: The ON OFF key does not light when you press a key.<br />
You may have pressed an invalid key for the mode the remote is<br />
in.<br />
Make sure the remote is in the correct mode by pressing the<br />
corresponding device key (TV, SAT CBL DTC, VCR DVD). This<br />
tells the remote which device to operate.<br />
Make sure the batteries are fresh and are properly installed.<br />
Replace the batteries with two new AA batteries, if necessary<br />
(see the Battery Installation section).<br />
Problem: The remote will not change channels on device.<br />
Make sure the remote is in the correct mode by pressing the<br />
corresponding device key (TV, SAT CBL DTC, VCR DVD). This<br />
tells the remote which device to operate.<br />
Press the ENTER key after you enter a channel number.<br />
Remove any obstacles between the remote and the device. Make<br />
sure to aim the remote at the IR sensor on the device.<br />
Problem: The device’s menu does not appear on the TV screen.<br />
Make sure you have connected the device to your TV properly and<br />
selected the correct input. (See your devices’ Owner’s <strong>Manual</strong>s for<br />
proper connection procedures.)<br />
Make sure the remote is in the correct mode by pressing the<br />
corresponding device key (TV, SAT CBL DTC, VCR DVD). This<br />
tells the remote which device to operate.<br />
Menu access isn’t supported for all brands. You may need to use<br />
your original remote control to access menu functions for some<br />
devices.<br />
For more information, please visit www.rcaaccessories.com<br />
Consumer Help Line: 1-800-420-7968<br />
Care and Maintenance<br />
Keep the remote dry. If it gets wet, wipe it dry immediately.<br />
Use and store the remote only in normal temperature<br />
environments.<br />
Handle the remote gently and carefully. Don’t drop it.<br />
Keep the remote away from dust and dirt.<br />
Wipe the remote with a damp cloth occasionally to keep it<br />
looking new.<br />
Modifying or tampering with the remote’s internal devices can<br />
cause malfunction and invalidate its warranty.<br />
Limited Lifetime Warranty<br />
<strong>Audiovox</strong> Electronics Corporation (the “Company”) warrants to you the<br />
original retail purchaser of this product that should it, under normal use<br />
and conditions, be proven defective in material or workmanship during<br />
its lifetime while you own it, such defect(s) will be repaired or replaced<br />
(at the Company’s option) without charge for parts and repair labor. To<br />
obtain repair or replacement within the terms of this Warranty, the product<br />
is to be delivered with proof of warranty coverage (e.g. dated bill of sale),<br />
specifi cation of defect(s), transportation prepaid, to the Company at the<br />
address shown below.<br />
This Warranty does not cover product purchased, serviced or used outside<br />
the United States or Canada. This Warranty is not transferable and does<br />
not extend to costs incurred for installation, removal or reinstallation of<br />
the product. This Warranty does not apply if in the Company’s opinion,<br />
the product has been damaged through alteration, improper installation,<br />
mishandling, misuse, neglect, accident, or the simultaneous use of different<br />
battery types (e.g. alkaline, standard or rechargeable).<br />
THE EXTENT OF THE COMPANY’S LIABILITY UNDER THIS WARRANTY IS<br />
LIMITED TO THE REPAIR OR REPLACEMENT PROVIDED ABOVE AND, IN NO<br />
EVENT, SHALL THE COMPANY’S LIABILITY EXCEED THE PURCHASE PRICE<br />
PAID BY PURCHASER FOR THE PRODUCT.<br />
This Warranty is in lieu of all other express warranties or liabilities. ANY<br />
IMPLIED WARRANTIES, INCLUDING ANY IMPLIED WARRANTY OF<br />
MERCHANTABILITY OR FITNESS FOR A PARTICULAR PURPOSE SHALL<br />
BE LIMITED TO DURATION OF THIS WARRANTY. IN NO CASE SHALL<br />
THE COMPANY BE LIABLE FOR ANY CONSEQUENTIAL OR INCIDENTAL<br />
DAMAGES WHATSOEVER. No person or representative is authorized<br />
to assume for the Company any liability other than expressed herein in<br />
connection with the sale of this product.<br />
Some states/provinces do not allow limitations on how long an implied<br />
warranty lasts or the exclusion or limitation of incidental or consequential<br />
damage so the above limitations or exclusions may not apply to you. This<br />
Warranty gives you specifi c legal rights and you may also have other rights,<br />
which vary from state/province to state/province.<br />
U.S.A.: <strong>Audiovox</strong> Electronics Corporation, 150 Marcus Blvd., Hauppauge,<br />
New York 11788<br />
CANADA: <strong>Audiovox</strong> Return Center, c/o Genco, 6685 Kennedy Road,<br />
Unit 3, Door 16, Mississauga, Ontario L5T 3A5<br />
©2010 <strong>Audiovox</strong> Accessories Corporation<br />
111 Congressional Blvd., Suite 350<br />
Carmel, IN 46032<br />
Trademark(s) ® Registered<br />
RCR312WR US 06