5 - Training Registration System - VDL Bus & Coach
5 - Training Registration System - VDL Bus & Coach
5 - Training Registration System - VDL Bus & Coach

You also want an ePaper? Increase the reach of your titles
YUMPU automatically turns print PDFs into web optimized ePapers that Google loves.
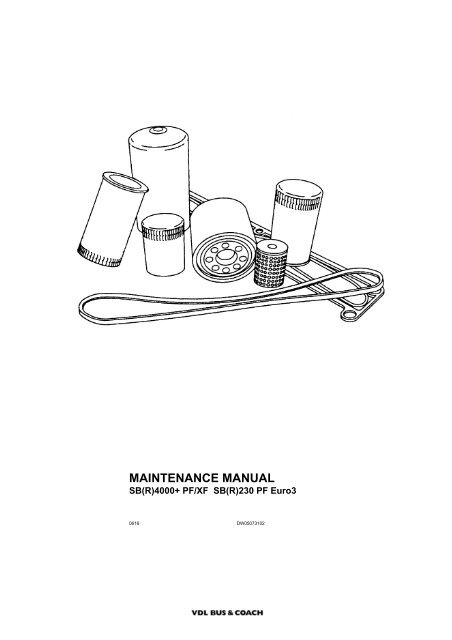
MAINTENANCE MANUAL<br />
SB(R)4000+ PF/XF SB(R)230 PF Euro3<br />
0616 DW05073102
SB(R)4000+ PF/XF SB(R)230 PF Euro3<br />
Introduction<br />
This maintenance manual contains all the relevant maintenance<br />
work. It also contains safety regulations, which<br />
must be strictly observed.<br />
Work which is not described in this maintenance manual,<br />
such as revision, fault finding, etc., is described in the<br />
<strong>VDL</strong> <strong>Bus</strong> & <strong>Coach</strong> Workshop Instruction Manual or the<br />
Workshop Instructions for the component concerned.<br />
Experienced mechanic<br />
The technical information and the explanation of the<br />
maintenance work given in this maintenance manual<br />
have been compiled with the utmost care.<br />
Whilst compiling this maintenance manual, it has been<br />
assumed that the mechanic has the necessary experience<br />
and has had the required education or training to be<br />
able to carry out the maintenance work in a responsible<br />
and safe manner.<br />
Vehicle type<br />
The information in this maintenance manual has been<br />
updated until the time of printing and only relates to the<br />
vehicle series:<br />
SB(R) 4000+ PF/XF Euro3<br />
SB(R) 230 PF Euro3<br />
0616
SB(R)4000+ PF/XF SB(R)230 PF Euro3<br />
� Technical information<br />
0616<br />
PE/XE engine................................................. 1-1<br />
General information ........................................ 1-1<br />
Tightening torques .......................................... 1-3<br />
Filling quantities .............................................. 1-4<br />
Gearbox ......................................................... 2-1<br />
General ........................................................... 2-1<br />
Tightening torques .......................................... 2-2<br />
Filling quantities .............................................. 2-4<br />
Retarder ......................................................... 3-1<br />
Tightening torques .......................................... 3-1<br />
Filling quantities .............................................. 3-2<br />
Rear axle ........................................................ 4-1<br />
General information ........................................ 4-1<br />
Tightening torques .......................................... 4-1<br />
Filling quantities .............................................. 4-2<br />
Brakes ............................................................ 5-1<br />
General information ........................................ 5-1<br />
Tightening torques .......................................... 5-2<br />
Steering mechanism/fan drive..................... 6-1<br />
General information ........................................ 6-1<br />
Tightening torques .......................................... 6-1<br />
Filling quantities .............................................. 6-2<br />
Front axle/trailing axle.................................. 7-1<br />
General information ........................................ 7-1<br />
Tightening torques .......................................... 7-2<br />
General information...................................... 8-1<br />
Specifications.................................................. 8-1<br />
� Special tools<br />
Special tools.................................................. 1-1<br />
� Threaded connections<br />
Threaded connections.................................. 1-1<br />
General information ........................................ 1-1<br />
� Liquids, oils and lubricants<br />
Specifications................................................ 1-1<br />
General information ........................................ 1-1<br />
Engine............................................................. 1-2<br />
Gearbox and retarder...................................... 1-4<br />
Axles and hubs ............................................... 1-7<br />
Hydraulic fluids and greases........................... 1-9<br />
Fuel system................................................... 1-10<br />
Coolant specification..................................... 1-12<br />
� maintenance schedule<br />
CONTENTS<br />
Maintenance intervals ...................................1-1<br />
The Maintenance schedule .............................1-1<br />
Explanation of the maintenance schedule.......1-2<br />
Influence of diesel on the maintenance<br />
intervals ...........................................................1-5<br />
Service intervals for difficult conditions............1-6<br />
First service .....................................................1-6<br />
Maintenance activities .................................2-1<br />
First service .....................................................2-1<br />
Intermediate service ........................................2-3<br />
Mileage dependent service..............................2-4<br />
Annual service .................................................2-6<br />
� Explanation of the<br />
maintenance work<br />
Safety regulations .........................................1-1<br />
General information ......................................2-1<br />
Introduction......................................................2-1<br />
Technical information ......................................2-1<br />
Warning symbol...............................................2-2<br />
Environment ....................................................2-2<br />
Spare Parts and Components .........................2-3<br />
Maintenance guidelines...................................2-3<br />
Inspection and adjustment ...........................3-1<br />
Inspecting the pedal rubbers ...........................3-1<br />
Inspecting the adjustability of the<br />
steering column ...............................................3-1<br />
Inspecting the battery ......................................3-2<br />
Inspecting the battery connections ..................3-4<br />
Checking the battery box attachment ..............3-5<br />
Checking the earth and positive<br />
feed-through on the chassis ............................3-6<br />
Inspecting the anti-chip coating .......................3-8<br />
Anti-corrosion treatment ..................................3-9<br />
Fault analysis.................................................3-10<br />
Inspecting the engine oil level .......................3-12<br />
Checking for fuel leaks ..................................3-14<br />
Inspecting the fuel tank<br />
clamping straps .............................................3-15<br />
Inspecting and adjusting the valve clearance 3-16<br />
Inspecting the compressor line......................3-18<br />
Inspecting the v-belts.....................................3-19<br />
Inspecting the poly v-belt...............................3-21<br />
Checking the automatic poly v-belt<br />
tensioner........................................................3-21<br />
Checking the air conditioning v-belt...............3-22<br />
Inspecting the air filter blockage indicator .....3-23<br />
Checking the air inlet<br />
dust trapping valve ........................................3-24<br />
Inspecting the air intake system for<br />
leaks, damage and attachment .....................3-25<br />
Inspecting the exhaust system ......................3-26<br />
DW05073102<br />
0<br />
1<br />
2<br />
3<br />
4<br />
5
0<br />
1<br />
2<br />
3<br />
4<br />
5<br />
CONTENTS<br />
Inspecting the Eminox ESI............................ 3-27<br />
Checking the exhaust back pressure............ 3-29<br />
Inspecting the catalyser ................................ 3-31<br />
Inspecting the hydraulic fan drive fluid level . 3-32<br />
Checking the hydraulic fan lines/hoses......... 3-33<br />
Checking the cooling system’s antifreeze<br />
concentration ................................................ 3-34<br />
Inspecting/topping up the coolant level......... 3-35<br />
Checking the cooling system for leaks and<br />
damage ......................................................... 3-36<br />
Checking the radiator and intercooler for<br />
contamination................................................ 3-39<br />
Checking the steering oil level ...................... 3-40<br />
Inspecting the steering mechanism’s<br />
lines/hoses/connections................................ 3-41<br />
Inspecting the steering<br />
mechanism’s bevel box................................. 3-42<br />
Inspecting the pivot points of the steering<br />
mechanism.................................................... 3-43<br />
Inspecting the swivel axle play...................... 3-46<br />
Inspecting the blocking cylinders of the<br />
3rd axle ......................................................... 3-47<br />
Inspecting the maximum wheel turning angle3-49<br />
Inspecting the brake components and<br />
brake lines..................................................... 3-50<br />
Inspecting the brake calliper play.................. 3-51<br />
Checking the thickness of the brake pads .... 3-54<br />
Checking the automatic slack adjuster ......... 3-55<br />
Inspecting the brake discs ............................ 3-57<br />
Greasing guide bushes and bearing bushes 3-58<br />
Inspecting the brake<br />
deceleration .................................................. 3-59<br />
Inspecting the oil separator........................... 3-60<br />
Checking the attachment of the shock<br />
absorbers and checking them for damage.... 3-61<br />
Inspecting the U-bolts ................................... 3-61<br />
Checking the pivot points of the axle<br />
suspension and the pneumatic suspension .. 3-61<br />
Inspecting the pneumatic suspension’s<br />
air bellows ..................................................... 3-62<br />
Inspecting the chassis’ pneumatic<br />
suspension.................................................... 3-63<br />
Checking the driving height........................... 3-64<br />
Checking the differential ............................... 3-65<br />
Inspecting the drive shafts,<br />
sliding joints and universal joints for wear..... 3-67<br />
Inspecting the grease lubricated wheel hubs 3-68<br />
Inspecting and adjusting the wheel<br />
bearing play (ZF hubs).................................. 3-69<br />
Inspecting the tyres and wheel rims.............. 3-70<br />
Checking the attachment of the wheels<br />
(retightening)................................................. 3-72<br />
Changing wheels .......................................... 3-73<br />
Checking the tyre pressure (including the<br />
spare tyre)..................................................... 3-76<br />
Checking the gearbox oil level ...................... 3-77<br />
Checking the SGS setting............................. 3-79<br />
Checking the clutch system for leaks............ 3-81<br />
DW05073102<br />
SB(R)4000+ PF/XF SB(R)230 PF Euro3<br />
Inspecting/topping up the hydraulic<br />
clutch fluid......................................................3-82<br />
Checking the clutch plate for wear ................3-83<br />
Checking the oil level of the R115E retarder .3-84<br />
Checking the operation of all the driving and<br />
braking functions ...........................................3-85<br />
Checking the operation of the retarder ..........3-85<br />
Checking the instruments and inspection<br />
lights ..............................................................3-86<br />
Inspecting the gearbox and the gear<br />
changing pattern............................................3-86<br />
Removal and installation ..............................4-1<br />
Removing and installing the main fuse(s)........4-1<br />
Removing and installing the engine oil filter ....4-2<br />
Removing and installing the<br />
centrifugal filter rotor........................................4-3<br />
Removing and installing the fuel filter..............4-4<br />
Removing and installing the cylinder head<br />
cover................................................................4-5<br />
Removing and installing the air filter element..4-6<br />
Removing and installing the CRT<br />
filter/catalyser ..................................................4-7<br />
Removing and installing the hydraulic fan<br />
filter................................................................4-10<br />
Removing and installing the steering<br />
mechanism’s filter..........................................4-11<br />
Removing and installing the air dryer<br />
filter element ..................................................4-12<br />
Removing and installing the brake pads........4-13<br />
Removing and installing the (Spring)<br />
brake cylinder ................................................4-17<br />
Removing and installing the brake calliper ....4-19<br />
Removing and installing the brake<br />
calliper bracket ..............................................4-22<br />
Removing and installing the wheel hub .........4-23<br />
Removing and installing the<br />
v-belts ............................................................4-26<br />
Removal and installation gearbox oil filter<br />
element .........................................................4-29<br />
Draining and filling ........................................5-1<br />
Topping up the battery fluid .............................5-1<br />
Draining and filling the engine oil.....................5-2<br />
Draining the water separator ...........................5-3<br />
Draining and filling the hydraulic fan drive.......5-4<br />
Draining and filling the coolant ........................5-5<br />
Draining and filling the steering oil...................5-7<br />
Draining the condensation from the<br />
air reservoirs....................................................5-9<br />
Draining and filling the differential oil.............5-10<br />
Draining and filling the gearbox oil and<br />
replacing the filter ..........................................5-11<br />
Draining and filling the hydraulic clutch fluid..5-15<br />
Bleeding the clutch system............................5-16<br />
Draining and filling the retarder OIl................5-18<br />
Bleeding the fuel system ...............................5-20<br />
0616
SB(R)4000+ PF/XF SB(R)230 PF Euro3<br />
0616<br />
Cleaning......................................................... 6-1<br />
Cleaning the battery terminals ........................ 6-1<br />
Cleaning the water separator.......................... 6-2<br />
Cleaning the coarse fuel filter element ........... 6-3<br />
Cleaning the CRT filter.................................... 6-4<br />
Cleaning the catalyser .................................... 6-5<br />
Cleaning the radiator and the intercooler<br />
element .......................................................... 6-6<br />
Cleaning the rear axle breather ...................... 6-9<br />
Cleaning the gearbox breather(s) ................. 6-10<br />
Cleaning the vehicle...................................... 6-11<br />
Lubrication .................................................... 7-1<br />
Lubricating according to the lubrication<br />
schedule.......................................................... 7-1<br />
Lubrication diagram ........................................ 7-3<br />
Jacking and lifting instructions................... 8-1<br />
Jacking instructions......................................... 8-1<br />
Lifting instructions ........................................... 8-3<br />
supporting the vehicle ..................................... 8-6<br />
CONTENTS<br />
DW05073102<br />
0<br />
1<br />
2<br />
3<br />
4<br />
5
SB(R)4000+ PF/XF SB(R)230 PF Euro3<br />
Maindisclaimer<br />
© 0616 <strong>VDL</strong> <strong>Bus</strong> & <strong>Coach</strong> bv, Eindhoven,<br />
The Netherlands.<br />
In the interest of continuous product development <strong>VDL</strong><br />
<strong>Bus</strong> & <strong>Coach</strong> reserves the right to change specifications<br />
or products at any time without prior notice.<br />
No part of this publication may be reproduced and/or<br />
published by printing, by photocopying, in digital format<br />
or in any way whatsoever without the prior consent in<br />
writing of <strong>VDL</strong> <strong>Bus</strong> & <strong>Coach</strong>.<br />
This manual shall be governed by and applied in accordance<br />
with the laws of the Netherlands.<br />
Any dispute here under shall be referred to the decision<br />
of the District Court of ‘s-Gravenhage in the Netherlands<br />
0616
SB(R)4000+ PF/XF SB(R)230 PF Euro3<br />
TECHNICAL INFORMATION<br />
0616<br />
TECHNICAL INFORMATION<br />
0
0<br />
TECHNICAL INFORMATION<br />
SB(R)4000+ PF/XF SB(R)230 PF Euro3<br />
0616
SB(R)4000+ PF/XF SB(R)230 PF Euro3<br />
1. PE/XE ENGINE<br />
1.1 GENERAL INFORMATION<br />
1.1.1 VALVE CLEARANCE<br />
Cold valve clearance adjustment inspection<br />
Inlet 0.45 mm<br />
Outlet 0.45 mm<br />
1.1.2 V-BELT TENSION<br />
AVX open flank V-belt tension (N)<br />
New V-belt<br />
Adjustment tension 650 ± 10%<br />
Inspection tension ≤ 400<br />
Run-in V-belt<br />
Lowest tension ≤ 300<br />
Correction tension 350<br />
Explanation:<br />
1. V-belts with an open flank can be recognized by the fact<br />
that there is no fabric in the rubber on the flanks and the<br />
inside of the V-belt, with the exception of the top of the<br />
belt flank (ground belt flank).<br />
Type: with or without teeth.<br />
2. After fitting the new V-belt, adjust the pre-tension to the<br />
adjustment tension and, after taking a test drive, check<br />
the pre-tension against the inspection tension.<br />
If the measured inspection tension is less than the value<br />
given in the table, adjust the V-belt to the minimum<br />
inspection tension.<br />
3. If the belt tension is less than the lowest tension, then it<br />
should be adjusted to the correction tension.<br />
0616<br />
TECHNICAL INFORMATION<br />
PE/XE engine<br />
00842b<br />
1 - 1<br />
0
0<br />
TECHNICAL INFORMATION<br />
PE/XE engine<br />
1.1.3 AUTOMATIC POLY V-BELT TENSIONER<br />
Torque from (0) to close to 17 mm rotation (A): 19 - 37 Nm<br />
1.1.4 EXPANSION TANK PRESSURE CAP<br />
Opening pressure of pressure relief<br />
valve<br />
1 - 1.2 bar<br />
Opening pressure of vacuum valve 0.1 - 0.02 bar<br />
Pressure-testing the cooling system<br />
Pressurization pressure 0.7 - 0.9 bar<br />
SB(R)4000+ PF/XF SB(R)230 PF Euro3<br />
1 - 2 0616
SB(R)4000+ PF/XF SB(R)230 PF Euro3<br />
1.2 TIGHTENING TORQUES<br />
Lubrication system<br />
Drain plug 60 Nm<br />
Oil filter screw cap 40 Nm<br />
Centrifugal oil filter central bolt 20 Nm<br />
Fuel system<br />
Fuel filter screw cap 25 Nm<br />
Fuel tank clamping strap attachment nuts 20 Nm<br />
Cylinder head cover<br />
Cylinder head cover attachment bolts 25 Nm<br />
0616<br />
TECHNICAL INFORMATION<br />
PE/XE engine<br />
1 - 3<br />
0
0<br />
TECHNICAL INFORMATION<br />
PE/XE engine<br />
1.3 FILLING QUANTITIES<br />
PE engine lubrication system<br />
Engine contents (including filter<br />
and oil cooler)<br />
Approx. 33 litres<br />
Sump, minimum level Approx. 18 litres<br />
Sump, maximum level Approx. 26 litres<br />
XE engine lubrication system<br />
Engine contents (including filter<br />
and oil cooler)<br />
Approx. 39.5 litres<br />
Sump, minimum level Approx. 25 litres<br />
Sump, maximum level Approx. 33 litres<br />
Cooling system<br />
Engine cooling system Approx. 25 litres<br />
Total cooling system (excluding Approx. 70 litres<br />
heating)<br />
Total cooling system (including Approx. 100 - 140 litres<br />
heating)<br />
SB(R)4000+ PF/XF SB(R)230 PF Euro3<br />
1 - 4 0616
SB(R)4000+ PF/XF SB(R)230 PF Euro3<br />
2. GEARBOX<br />
2.1 GENERAL<br />
ZF gearbox type<br />
Each gearbox has a type-plate attached to it, indicating the<br />
type of gearbox. This data is also stated on the identity card<br />
of the relevant vehicle.<br />
0616<br />
TECHNICAL INFORMATION<br />
Gearbox<br />
ZF gearbox type-plate<br />
1. Type of gearbox<br />
2. Series no. (ZF)<br />
3. Parts list (ZF)<br />
4. Specification no.<br />
5. Pulse generator ratio<br />
6. Gearbox ratio<br />
7. Engine speed using PTO<br />
8. PTO speed<br />
9. Gearbox oil capacity<br />
10. Oil specification<br />
2 - 1<br />
0
0<br />
TECHNICAL INFORMATION<br />
Gearbox<br />
2.2 TIGHTENING TORQUES<br />
ZF Ecomat 2<br />
Oil filter cover (A) 25 Nm<br />
Oil drain plug (B) 50 Nm<br />
ZF AS Tronic with integrated retarder<br />
Oil spill plug/Oil filler plug (A) 60 Nm<br />
Oil drain plug gear box (B) 60 Nm<br />
Oil drain plug retarder (C) 60 Nm<br />
Oil filter attachment bolt (1) 23 Nm<br />
SB(R)4000+ PF/XF SB(R)230 PF Euro3<br />
2 - 2 0616<br />
03902B
SB(R)4000+ PF/XF SB(R)230 PF Euro3<br />
GO170/190/210<br />
Oil spill plug/Oil filler plug (A) 47 Nm<br />
Oil sieve plug (B) 60 Nm<br />
Oil drain plug (C and D) 47 Nm<br />
GO170/190/210 gearbox bleed unit<br />
Bleed bolt (A) 20 Nm<br />
0616<br />
TECHNICAL INFORMATION<br />
Gearbox<br />
03900B<br />
03901B<br />
2 - 3<br />
0
0<br />
TECHNICAL INFORMATION<br />
Gearbox<br />
2.3 FILLING QUANTITIES<br />
ZF Ecomat 2 (6HP592C/6HP602C)<br />
Volume: When changing the oil<br />
1st filling Approx. 10 litres<br />
2nd filling whilst idlingthe Approx. 4 litres<br />
engine<br />
ZF AS Tronic<br />
Volume: When changing the oil Approx. 12.0 litres<br />
GO 170/190/210<br />
Volume: When changing the oil Approx. 12.5 litres<br />
Comment<br />
If the oil volume is indicated on the type plate, then this is<br />
decisive.<br />
SB(R)4000+ PF/XF SB(R)230 PF Euro3<br />
2 - 4 0616
SB(R)4000+ PF/XF SB(R)230 PF Euro3<br />
3. RETARDER<br />
3.1 TIGHTENING TORQUES<br />
R115E<br />
Oil filler plug (A) 100 Nm<br />
Oil spill plug (B) 65 Nm<br />
Oil drain plug (C and D) 65 Nm<br />
Oil sieve plug (E) 100 Nm<br />
0616<br />
TECHNICAL INFORMATION<br />
Retarder<br />
03903B<br />
3 - 1<br />
0
0<br />
TECHNICAL INFORMATION<br />
Retarder<br />
3.2 FILLING QUANTITIES<br />
R115E<br />
Volume: When changing the oil Approx. 7 litres<br />
1st filling Approx. 7.8 litres<br />
Comment<br />
If the oil volume is indicated on the type plate, then this is<br />
decisive.<br />
SB(R)4000+ PF/XF SB(R)230 PF Euro3<br />
3 - 2 0616
SB(R)4000+ PF/XF SB(R)230 PF Euro3<br />
4. REAR AXLE<br />
4.1 GENERAL INFORMATION<br />
Driving height<br />
Front axle 435 ± 5 mm (with calibration blocks)<br />
Rear axle 510 ± 5 mm (with calibration blocks)<br />
4.2 TIGHTENING TORQUES<br />
1347 HAS<br />
0616<br />
03898B<br />
A. Axle shaft attachment bolts 260 Nm<br />
B. Wheel nuts 700 Nm (retighten after 100 km)<br />
C. Differential oil drain plug 85 Nm<br />
D. Differential oil spill plug/oil filler plug 85 Nm<br />
E. Brake calliper bracket attachment bolts 300 - 330 Nm<br />
F. Differential attachment bolts 260 Nm a<br />
G. Drive flange attachment nut 1,250 Nm b<br />
a. Secure with Loctite 572<br />
b. Secure with Loctite 262<br />
ABS sensor ring<br />
Axial oscillation Max. 0.25 mm<br />
TECHNICAL INFORMATION<br />
Rear axle<br />
4 - 1<br />
0
0<br />
TECHNICAL INFORMATION<br />
Rear axle<br />
Rear axle suspension<br />
4.3 FILLING QUANTITIES<br />
Differential<br />
Volume when changing the oil Approx. 21 litres<br />
03899B<br />
Wheel hub<br />
The wheel bearings of the wheel hub unit are grease-lubricated<br />
and maintenance-free.<br />
SB(R)4000+ PF/XF SB(R)230 PF Euro3<br />
A. Shock absorber nut M16 X 1.5 100 Nm<br />
B. Air bellows attachment bolt M16 8.8 Max. 170 Nm<br />
C. Air bellows nut M10 Max. 45 Nm<br />
D. Torque rod nut M20 8.8 395 ± 30 Nm<br />
E. Torque rod nut M20 8.8 395 ± 30 Nm<br />
F. Stabiliser shackle nut M12 8.8 79 ± 6 Nm<br />
G. Stabiliser nut M18 8.8 235 ± 35 Nm<br />
H. Torque rod nut M20 8.8 395 ± 30 Nm<br />
I. Stabiliser nut M16 10.9 260 ± 20 Nm<br />
J. Rubber axle bumper bolt M12 10.9 110 ± 8 Nm<br />
K. Leaf-spring clip nut M24 10.9 615 ± 50 Nm a<br />
a. Tighten both leaf-spring clip nuts evenly in turn in 3 or 4 steps<br />
4 - 2 0616
SB(R)4000+ PF/XF SB(R)230 PF Euro3<br />
5. BRAKES<br />
5.1 GENERAL INFORMATION<br />
Brake pads<br />
Max. brake pad thickness (C). 30 mm<br />
Minimum lining thickness (E). 2 mm (at the thinnest<br />
place)<br />
Minimum brake pad thickness 11 mm (at the thinnest<br />
(F)<br />
place) for a 9 mm rear<br />
plate thickness (D)<br />
Replacement Replace all the brake pads<br />
on the same axle at the<br />
same time and only use<br />
brake pads of the specified<br />
lining quality<br />
Brake pad/brake disc play 0.6 - 1.1 mm<br />
Brake disc<br />
Max. brake disc thickness (A). 45 mm<br />
Minimum brake disc thickness 37 mm (wear limit, disc<br />
(B).<br />
must be replaced)<br />
Minimum thickness, turning 40 mm<br />
size<br />
Comment<br />
If the brake disc thickness is £39 mm at the time the brake<br />
pads are replaced, then the brake disc must also be<br />
replaced.<br />
Wear patterns below are permissible:<br />
A1 Network of heat cracks.<br />
B1 Cracks which run to the middle and which are less than<br />
1.5 mm wide and 1.5 mm deep.<br />
Max. 0.75 x width of the friction surface (a).<br />
C1 Irregularities in the disc surface up to 1.5 mm.<br />
D1 Not permitted: Through-cracks.<br />
0616<br />
TECHNICAL INFORMATION<br />
Brakes<br />
5 - 1<br />
2
2<br />
TECHNICAL INFORMATION<br />
Brakes<br />
Axial brake calliper play in direction (A)0.6 - 1.1 mm<br />
Sliding over the guide pins minimum 25 mm<br />
Brake calliper play on the guide maximum 2.0 mm<br />
bushes (Y - X)<br />
5.2 TIGHTENING TORQUES<br />
SB(R)4000+ PF/XF SB(R)230 PF Euro3<br />
Brake calliper<br />
Brake calliper attachment bolts 180 Nm +90° extra angular rotation<br />
Brake calliper bracket on the wheel hub unit (<strong>VDL</strong> axle) 440 Nm<br />
Brake calliper bracket on the wheel hub unit (ZF axle) 275 Nm (guide bolt)<br />
300 Nm (hexagonal bolt M16 x 1.5 10.9)<br />
Brake disc<br />
Locking plate attachment bolts (<strong>VDL</strong> axle) 30 Nm<br />
5 - 2 0616
SB(R)4000+ PF/XF SB(R)230 PF Euro3<br />
6. STEERING MECHANISM/FAN DRIVE<br />
6.1 GENERAL INFORMATION<br />
0616<br />
TECHNICAL INFORMATION<br />
Steering mechanism/fan drive<br />
Maximum axial track rod/steering rod ball play 2.0 mm (for an axial force of approx. 1,800 N)<br />
Maximum pitman arm play 0 - 0.02 mm<br />
6.2 TIGHTENING TORQUES<br />
Steering mechanism<br />
03905B<br />
A Steering rod coupling lock nut M10 10.9 52 ± 4 Nm<br />
B Steering box bolt M20 10.9 600 ± 30 Nm<br />
C Pitman arm nut 850 ± 42 Nm<br />
D Auxiliary pitman arm bracket bolt M20 10.9 520 ± 20 Nm<br />
E Track rod/steering rod lock nut M18 10.9 250 ± 10<br />
F Track rod/steering rod castellated nut M24 10.9 290 ± 10 Nm a<br />
G Track rod arm bolt M24 10.9 1,100 Nm<br />
H Steering wheel nut 65 ± 5 Nm<br />
a. Continue to tighten until the split pin fits (max. 30°)<br />
6 - 1<br />
0
0<br />
TECHNICAL INFORMATION<br />
Steering mechanism/fan drive<br />
04117B<br />
Fan drive<br />
Fan driver filter element attachment bolt 21.2 Nm<br />
6.3 FILLING QUANTITIES<br />
SB(R)4000+ PF/XF SB(R)230 PF Euro3<br />
A Steering cylinder bracket bolt M14 10.9 170 ± 15 Nm<br />
B Steering arm bolt M24 10.9 1,100 Nm<br />
C Track rod arm bolt M24 10.9 1,100 Nm<br />
D Steering shock absorber castellated nut M14 80* Nm<br />
E Track rod castellated nut M24 10.9 265 ± 15 Nm a<br />
F Steering shock absorber bracket bolt M20 10.9 620 Nm<br />
G Steering shock absorber bolt M14 12.9 90 ± 13 Nm<br />
H Wheel nut M22 10.9 600 Nm<br />
I Steering cylinder fork lock nut M22 100 ± 10 Nm<br />
J Steering rod clamping bow lock nut 170 ± 10 Nm<br />
a. Continue to tighten until the split pin fits (max. 60°).<br />
Fan drive oil reservoir Approx. 10 litres<br />
Steering mechanism oil reservoir Approx. 7.5 litres<br />
6 - 2 0616
SB(R)4000+ PF/XF SB(R)230 PF Euro3<br />
7. FRONT AXLE/TRAILING AXLE<br />
7.1 GENERAL INFORMATION<br />
Wheel bearings<br />
Play 0.02 - 0.04 mm<br />
Swivel axle play<br />
Axial 0.01 - 0.15 mm<br />
Wheel speed sensor ring<br />
Axial oscillation Max. 0.25 mm<br />
Driving height<br />
Front axle 435 ± 5 mm (with adjustment<br />
gauge)<br />
Rear axle 510 ± 5 mm (with adjustment<br />
gauge)<br />
0616<br />
TECHNICAL INFORMATION<br />
Front axle/trailing axle<br />
Wheel turning angle<br />
Front axle Inner wheel Outer wheel<br />
56° 46° For tyre size 275/70R22,5<br />
52° 43.7° For tyre size 295/80R22.5<br />
52° 43.7° For tyre size 315/70R22.5<br />
51° 41.5° For tyre size 315/80R22.5<br />
Trailing axle Inner wheel Outer wheel<br />
15° 13.2°<br />
7 - 1<br />
0
0<br />
TECHNICAL INFORMATION<br />
Front axle/trailing axle<br />
7.2 TIGHTENING TORQUES<br />
The tightening torques only apply to wax-dipped threaded<br />
connections.<br />
7.2.1 WHEEL HUB UNIT<br />
A Hub cap attachment bolt 25 Nm<br />
B Hub nut 240 Nm<br />
C Hub nut lock bolt 65 Nm<br />
SB(R)4000+ PF/XF SB(R)230 PF Euro3<br />
7 - 2 0616<br />
03906B
SB(R)4000+ PF/XF SB(R)230 PF Euro3<br />
7.2.2 FRONT WHEEL SUSPENSION<br />
0616<br />
1151577<br />
A Air bellows nut M10 8.8 Max. 45 Nm<br />
B Air bellows bolt M16 10.9 Max. 170 Nm<br />
C Shock absorber nut M16 10.9 100 ± 10 Nm<br />
D Brake calliper guide bolt 275 Nm<br />
Brake calliper bolt M16 10.9 300 Nm<br />
E Stop bolt 300 Nm<br />
F Wheel nut M22 10.9 600 Nm (1)<br />
G Supporting arm attachment bolt 1,000 Nm<br />
H Supporting arm attachment bolt 1,000 Nm<br />
I Upper supporting arm bolt M18 10.9 360 ± 30 Nm<br />
J Lower supporting arm bolt M24 10.9 880 ± 60 Nm<br />
Spacer disc Allen screw M8 8.8 23 ± 2 Nm (2)<br />
TECHNICAL INFORMATION<br />
Front axle/trailing axle<br />
7 - 3<br />
0
0<br />
TECHNICAL INFORMATION<br />
Front axle/trailing axle<br />
7.2.3 TRAILING AXLE SUSPENSION<br />
04117B<br />
Comments<br />
1. Retighten after 100 km. If new wheel bolts are fitted, retighten again after 500 km.<br />
2. Secure bolt with Loctite 2701 or a similar product.<br />
3. Continue to tighten until the split pin fits (max. 30°).<br />
4. Continue to tighten until the split pin fits (max. 60°).<br />
SB(R)4000+ PF/XF SB(R)230 PF Euro3<br />
A Steering cylinder bracket bolt M14 10.9 170 ± 15 Nm<br />
B Steering arm bolt M24 10.9 1,100 Nm<br />
C Track rod arm bolt M24 10.9 1,100 Nm<br />
D Steering shock absorber castellated nut M14 80 Nm(3)<br />
E Track rod castellated nut M24 10.9 265 ± 15 Nm (4)<br />
F Steering shock absorber bracket bolt M20 10.9 620 Nm<br />
G Steering shock absorber bolt M14 12.9 90 ± 13 Nm<br />
H Wheel nut M22 10.9 600 Nm (1)<br />
I Steering cylinder fork lock nut M22 100 ± 10 Nm<br />
J Steering rod clamping bow lock nut 170 ± 10 Nm<br />
7 - 4 0616
SB(R)4000+ PF/XF SB(R)230 PF Euro3<br />
8. GENERAL INFORMATION<br />
8.1 SPECIFICATIONS<br />
8.1.1 FUEL SYSTEM<br />
Fuel tank clamping strap attachment nuts 20 Nm<br />
8.1.2 AIR INTAKE SYSTEM<br />
PE engine intake vacuum pressure<br />
Clean air filter (at maximum loaded engine speed) 25 - 35 mbar<br />
Contaminated air filter (at maximum loaded engine speed) 54 - 64 mbar<br />
XE engine intake vacuum pressure<br />
Clean air filter (at maximum loaded engine speed) 50 mbar<br />
Contaminated air filter (at maximum loaded engine speed) 75 mbar<br />
Maximum intake vacuum pressure<br />
Air filter blockage indicator RX00-2275 75 mbar<br />
Air filter blockage indicator AE-36501-00332 80 mbar<br />
8.1.3 CRT EXHAUST SYSTEM<br />
Exhaust gas back pressure<br />
For maximum loaded engine speed 105 mbar<br />
Tightening torques<br />
V-clamp 14 Nm*<br />
Shock absorber clamping brace 14 Nm*<br />
Exhaust pipe clamping brace 11 Nm*<br />
TorcTite clamping brace 80 Nm*<br />
* Fit using heat-resistant grease. Silicon-free heat-resistant grease must be used on vehicles<br />
with a CRT filter.<br />
8.1.4 BRAKE SYSTEM<br />
0616<br />
TECHNICAL INFORMATION<br />
General information<br />
Air compressor<br />
Cut-out pressure 9.6 - 10.0 bar<br />
Cut-in pressure 0.6 - 1.2 bar below the cut-out pressure<br />
8.1.5 DRIVE SHAFT<br />
Play must not be felt on the universal joints or the sliding joint.<br />
Radial universal joint play 0.01 - 0.05 mm<br />
Maximum permitted axial universal joint play 0.3 mm<br />
Maximum permitted axial sliding joint play 0.2 mm<br />
8 - 1<br />
0
0<br />
TECHNICAL INFORMATION<br />
General information<br />
Drive flange attachment bolt tightening torque<br />
M14 10.9 170 Nm<br />
SB(R)4000+ PF/XF SB(R)230 PF Euro3<br />
8 - 2 0616
SB(R)4000+ PF/XF SB(R)230 PF Euro3<br />
SPECIAL TOOLS<br />
0616<br />
SPECIAL TOOLS<br />
1
1<br />
SPECIAL TOOLS<br />
SB(R)4000+ PF/XF SB(R)230 PF Euro3<br />
0616
SB(R)4000+ PF/XF SB(R)230 PF Euro3<br />
1. SPECIAL TOOLS<br />
Boost pressure pressurization cap, DAF part<br />
no. 0694831<br />
V-belt tension gauge, DAF part no. 1240443<br />
Oil filter key, DAF part no. 1240115<br />
0616<br />
SPECIAL TOOLS<br />
Special tools<br />
Boost pressure pressurization cap, DAF part<br />
no. 1329310<br />
Hose and two hoses clips for the pressurization cap,<br />
DAF part no. 1329310 and 1329311<br />
Hydraulic fluid pressure gauge for measuring TRW and<br />
ZF steering box control pressures, DAF part no<br />
0535653<br />
1 - 1<br />
1
1<br />
SPECIAL TOOLS<br />
Special tools<br />
Crankshaft cranking tool, DAF part no. 1310477<br />
Pitcat, <strong>VDL</strong> <strong>Bus</strong> & <strong>Coach</strong> part no. 1194535<br />
SGS system adjusting plate, <strong>VDL</strong> <strong>Bus</strong> & <strong>Coach</strong> part no.<br />
1152234<br />
SB(R)4000+ PF/XF SB(R)230 PF Euro3<br />
DCI diagnosis tool, <strong>VDL</strong> <strong>Bus</strong> & <strong>Coach</strong> part no. 1149133<br />
1 - 2 0616
SB(R)4000+ PF/XF SB(R)230 PF Euro3<br />
Wheel hub assembly and removal tool, ZF<br />
no. 5870 000 090<br />
Break Out Box, <strong>VDL</strong> <strong>Bus</strong> & <strong>Coach</strong> part no. 1152266<br />
0616<br />
03969B<br />
Adjustment gauge (<strong>VDL</strong> <strong>Bus</strong> & <strong>Coach</strong> part no. 1152749) for<br />
adjusting the driving height of the pneumatically suspended<br />
front wheel suspension.<br />
This special tool must be used to calibrate the height of the<br />
chassis and can be easily made using the diagram opposite.<br />
The tool, therefore, cannot be ordered from <strong>VDL</strong> <strong>Bus</strong> &<br />
<strong>Coach</strong>.<br />
SPECIAL TOOLS<br />
Special tools<br />
Dial gauge and dial gauge holder,<br />
ZF no. 5870 200 057 and 5870 200 055<br />
Adjustment gauge 1152749<br />
03970B<br />
1 - 3<br />
1
1<br />
SPECIAL TOOLS<br />
Special tools<br />
Gauge (<strong>VDL</strong> <strong>Bus</strong> & <strong>Coach</strong> part no. 1198824) for adjusting<br />
the driving height of the pneumatically suspended rear axle.<br />
This special tool must be used to calibrate the height of the<br />
chassis and can be easily made using the diagram below.<br />
The tool, therefore, cannot be ordered from <strong>VDL</strong> <strong>Bus</strong> &<br />
<strong>Coach</strong>.<br />
1198824<br />
SB(R)4000+ PF/XF SB(R)230 PF Euro3<br />
1 - 4 0616
SB(R)4000+ PF/XF SB(R)230 PF Euro3<br />
THREADED CONNECTIONS<br />
0616<br />
THREADED CONNECTIONS<br />
2
2<br />
THREADED CONNECTIONS<br />
SB(R)4000+ PF/XF SB(R)230 PF Euro3<br />
0616
SB(R)4000+ PF/XF SB(R)230 PF Euro3<br />
1. THREADED CONNECTIONS<br />
1.1 GENERAL INFORMATION<br />
The components may have threaded connections that have<br />
been treated with lubricant (dipped threaded connection).<br />
Galvanised bolts and nuts are wax dipped in the factory.<br />
Black annealed and phosphatised bolts and nuts are oil<br />
dipped.<br />
The advantage of using dipped nuts and bolts is that friction<br />
during tightening is reduced, so that the specified pre-tension<br />
force can be accurately obtained. The tightening torque can<br />
be reduced while the pre-tension force remains the same.<br />
To achieve a small spread in the pre-tension force, the<br />
dipped threaded connection must be tightened accurately.<br />
Therefore, always use a reliable torque wrench that provides<br />
a high degree of accuracy.<br />
Note:<br />
Have torque wrenches regularly inspected and calibrated.<br />
Re-use of fasteners (bolt/nut/threaded end)<br />
1. Clean the thread (take particular care to remove locking<br />
compound residues) and the clamping faces.<br />
2. Check the thread for damage.<br />
To do so, manually screw a new nut/bolt onto the thread<br />
to be checked.<br />
If the new nut/bolt cannot be fully hand-screwed onto the<br />
entire thread of the fastener to be checked, the fastener<br />
is not allowed to be re-used.<br />
3. Apply one drop of engine oil to the upper turn of the bolt<br />
(threaded end)/lower turn of the nut and one drop to the<br />
clamping faces (other lubricants are not allowed).<br />
4. If a locking compound has been specified, oil should not<br />
be applied to the thread.<br />
The following applies to all threaded connections (for<br />
both new and used vehicles):<br />
– in case of standard connections, apply the lubricant before<br />
fitting, and (re)tighten in accordance with the standard for<br />
dipped bolts;<br />
– in the case of special connections, apply the lubricant<br />
before fitting, and (re)tighten in accordance with the values<br />
specified in the instructions.<br />
The instructions for using lubricants also apply to new bolts<br />
from the warehouse. Dry threaded connections may not be<br />
used because of their highly variable friction coefficients.<br />
See the workshop instructions for the standard tightening torques.<br />
If one of these threaded connections must be tightened<br />
to a different tightening torque, then this will be stated in the<br />
“Technical information”.<br />
0616<br />
THREADED CONNECTIONS<br />
Threaded connections<br />
1 - 1<br />
2
2<br />
THREADED CONNECTIONS<br />
Threaded connections<br />
Applying locking compounds<br />
– Clean both the internal and external screw thread.<br />
– Remove any grease from the screw thread using a suitable<br />
degreasing agent which leaves no residue that could<br />
reduce the effectiveness of the locking compound.<br />
– Depending on the diameter, apply one or more drops of<br />
locking compound to the screw thread. Never dip the bolt<br />
or stud into the locking compound.<br />
– Apply a drop of oil under the bolt head. Locking compounds<br />
also reduce the frictional resistance, so that no oil has to be<br />
applied to the screw thread.<br />
– Tighten the connection to the specified torque.<br />
SB(R)4000+ PF/XF SB(R)230 PF Euro3<br />
1 - 2 0616
SB(R)4000+ PF/XF SB(R)230 PF Euro3<br />
LIQUIDS, OILS AND LUBRICANTS<br />
0616<br />
LIQUIDS, OILS AND LUBRICANTS<br />
3
3<br />
LIQUIDS, OILS AND LUBRICANTS<br />
SB(R)4000+ PF/XF SB(R)230 PF Euro3<br />
0616
SB(R)4000+ PF/XF SB(R)230 PF Euro3<br />
1. SPECIFICATIONS<br />
1.1 GENERAL INFORMATION<br />
Comment<br />
See the corresponding technical information for an up-todate<br />
summary of the specified liquid, oil and lubricant specifications.<br />
In order to comply with the warranty terms and to guarantee<br />
the durability of <strong>VDL</strong> <strong>Bus</strong> & <strong>Coach</strong> products, it is<br />
essential that the correct lubricants, coolant and fuel are<br />
used and that they are changed in accordance with the<br />
intervals specified.<br />
Lubricant, fuel and coolant additives of any type whatsoever<br />
are not permitted, except in the cases specified by<br />
<strong>VDL</strong> <strong>Bus</strong> & <strong>Coach</strong>.<br />
Always follow the safety information issued by <strong>VDL</strong> <strong>Bus</strong><br />
& <strong>Coach</strong> or by the supplier.<br />
Ask your lubricant and fuel supplier(s) whether the products<br />
they supply comply with <strong>VDL</strong> <strong>Bus</strong> & <strong>Coach</strong> specifications.<br />
<strong>VDL</strong> <strong>Bus</strong> & <strong>Coach</strong> is not responsible for any damage resulting<br />
from the following:<br />
1. Using oil of a lower quality than specified.<br />
2. Using oil of a lower/higher viscosity than specified.<br />
3. Exceeding the changing interval.<br />
4. Using a lubricant, fuel, coolant or brake fluid which does<br />
not meet the requirements set by <strong>VDL</strong> <strong>Bus</strong> & <strong>Coach</strong>.<br />
0616<br />
Avoid skin contact with:<br />
- Fuel<br />
- Lubricants<br />
- Coolant<br />
- Battery acid<br />
In the event of skin contact: Remove with a paper towel or a cloth, wash with water<br />
and soap. Contact a doctor if irritation continues.<br />
In the event of contact: with<br />
the eye<br />
Remove substance with a soft cloth and rinse with<br />
plenty of water. Contact a doctor in the event of persistent<br />
irritation.<br />
If any is swallowed: Do NOT induce vomiting. Rinse mouth, drink two<br />
glasses of water and contact a doctor.<br />
In the event of inhalation: Get some fresh air and take a rest.<br />
LIQUIDS, OILS AND LUBRICANTS<br />
Specifications<br />
1 - 1<br />
3
3<br />
LIQUIDS, OILS AND LUBRICANTS<br />
Specifications<br />
1.2 ENGINE<br />
Never mix oil of different specifications.<br />
This has a negative effect on the quality<br />
of the oil.<br />
DAF Engines<br />
The engine oil specification overview is related to the maintenance<br />
schedules as stated in the maintenance manuals.<br />
DAF specification list refer to international standards such as<br />
ACEA and API.<br />
In addition, requirements are made as to viscosity.<br />
If necessary, the engine oil can be subjected to additional<br />
requirements. These are listed in the DAF HP (High Performance)<br />
specification.<br />
If the engine oil must meet the DAF HP specification, it is<br />
listed as such in the overview.<br />
On the oil specification sheet pertaining to the specific oil<br />
company and on the packaging, there is an indication as to<br />
whether the DAF HP specifications are met. This means that<br />
the oil may be used for the relevant application.<br />
DAF HP (High Performance) specification for diesel<br />
engines<br />
– HP1: low-viscosity oil ..W30 E4/E5<br />
– HP2: low-viscosity oil ..W40 E4/E5<br />
Additional information:<br />
ACEA E2 and E3: mineral oil<br />
Explanation of overview<br />
V = may be used<br />
HP... = may be used if listed specifications have been met.<br />
SB(R)4000+ PF/XF SB(R)230 PF Euro3<br />
ACEA E5: further developed ACEA E3 oil, geared to possible higher requirements on Euro<br />
3 engines.<br />
ACEA E4: partially or entirely synthetic oil, specially developed for extended oil-change<br />
intervals and/or highly loaded engines.<br />
Engine type ACEA E3<br />
..W-40<br />
PE<br />
Standard changing<br />
interval<br />
PE<br />
Extended changing<br />
interval<br />
ACEA E4<br />
..W-40<br />
ACEA E4<br />
..W-30<br />
ACEA E5<br />
..W-40<br />
ACEA E5<br />
..W-30<br />
V HP1 V HP1<br />
V HP2 HP2 HP2<br />
1 - 2 0616
SB(R)4000+ PF/XF SB(R)230 PF Euro3<br />
Engine type ACEA E3<br />
..W-40<br />
XE<br />
Standard changing<br />
interval<br />
XE<br />
Extended changing<br />
interval<br />
Prescribed oil grade after an engine repair/overhaul<br />
For engine repair/overhaul during which short block, piston<br />
rings and/or cylinder linings are replaced, the engine must be<br />
filled with SAE 30 or 15W-30 grade oil.<br />
Replace this oil after 7,500-10,000 km with the specified oil.<br />
0616<br />
ACEA E4<br />
..W-40<br />
ACEA E4<br />
..W-30<br />
LIQUIDS, OILS AND LUBRICANTS<br />
Specifications<br />
ACEA E5<br />
..W-40<br />
ACEA E5<br />
..W-30<br />
V V HP1 V HP1<br />
V HP2 HP2 HP2<br />
1 - 3<br />
3
3<br />
LIQUIDS, OILS AND LUBRICANTS<br />
Specifications<br />
1.3 GEARBOX AND RETARDER<br />
1.3.1 GEARBOX OIL FOR GO GEARBOXES<br />
The oil specification overview is related to the maintenance<br />
schedule as stated in the maintenance manual.<br />
Type of gearbox Type of oil<br />
GO170/190/210<br />
1.3.2 GEARBOX OIL FOR ZF GEARBOXES<br />
The oil specification overview is related to the maintenance<br />
schedule as stated in the maintenance manual.<br />
For a summary of all the oil products that can be used in the<br />
ZF AS Tronic and ZF automatic gearbox, please refer to the<br />
up-to-date ZF lubricant list TE-ML-02 and TE-ML14 which is<br />
available from ZF on request, or consult the ZF-website<br />
www.ZF.com.<br />
Explanation of overview<br />
V = may be used<br />
1. Lubricant class 02D can only be used after a total transmission<br />
mileage of:<br />
540 000 km/3 years (long-haul/coach operation) or<br />
360 000 km/3 years (local/distribution/service route operation,<br />
heavy-duty operation).<br />
2. Use of class 02D or 02H oil is advised against as there<br />
may be an increase in the required gear-changing forces<br />
at low temperatures.<br />
Low temperatures limits<br />
Veedol Synmesh-AT<br />
Castrol Syntrans-AT<br />
BP Energear SHX 30<br />
Deagear Synth<br />
Shell Transmission MA<br />
Type of gearbox Lubricant classification<br />
02D (1)(2) 02E 02H (2) 02L<br />
ZF AS Tronic V V V V<br />
SB(R)4000+ PF/XF SB(R)230 PF Euro3<br />
Lubricant class Oil type/SAE viscosity grade Use at oil sump temperatures<br />
02D/02E/02L 75W/75W-80/75W-85 75W-90/ATF above -40°C<br />
02H 80W/80W-85/80W-90 above -25°C<br />
1 - 4 0616
SB(R)4000+ PF/XF SB(R)230 PF Euro3<br />
1.3.3 GEARBOX OIL FOR VOITH GEARBOXES<br />
The oil specification overview is related to the maintenance<br />
schedule as stated in the maintenance manual.<br />
For a summary of all the oil products that can be used in the<br />
Voith Diwa automatic gearbox, please refer to the up-to-date<br />
Voith lubricant list which can be requested from Voith, or consult<br />
the Voith website www.voithturbo.com.<br />
0616<br />
LIQUIDS, OILS AND LUBRICANTS<br />
Specifications<br />
Type of gearbox Oil type Viscosity Lubricant class<br />
ZF AS Tronic<br />
Shell Transmission ZFLD<br />
Total Transmission TI<br />
Mobiltrans SHC 30<br />
75W-80 02D<br />
Castrol Syntrans Z MAX<br />
ZF-Ecofluid M<br />
75W-80 02E<br />
TUTELA TRUCK ZC 90<br />
BP Energear SHX 30<br />
80W-90 02H<br />
Castrol Syntrans<br />
Veedol Synmesh<br />
75W-80/75W-85 02L<br />
Type of gearbox Lubricant classification<br />
14A 14B 14C 14E<br />
ZF Ecomat2 V V V<br />
Type of gearbox Oil type Lubricant class<br />
ZF Ecomat2<br />
Shell donax TX<br />
Shell ATF XS<br />
Shell donax TZ<br />
14B<br />
14C<br />
14E a<br />
a. ZF Ecomat II plus transmissions with oil sump temperatures above 100°C may only<br />
be operated with fluids from the 14E lubricants category. Always use fluids according<br />
to 14E in borderline cases or in the case of uncertainty with reference to transmission<br />
operation temperature<br />
Service interval 60,000km/every 2 years: lubricant list 55.6335.xx<br />
Service interval 120,000km/every 2 years: lubricant list 55.6336.xx<br />
1 - 5<br />
3
3<br />
LIQUIDS, OILS AND LUBRICANTS<br />
Specifications<br />
1.3.4 RETARDEROIL VOITH RETARDERS<br />
SB(R)4000+ PF/XF SB(R)230 PF Euro3<br />
Type Viscosity Oil grade / Supplier<br />
Voith<br />
R115E<br />
mineral oil:<br />
(semi-) synthetic oil<br />
SAE-20W20 or 10W or SAE-<br />
30W<br />
SAE 0W40<br />
SAE 5W30<br />
SAE 5W40<br />
SAE 5W50<br />
SAE 10W30<br />
SAE 10W40<br />
API-CC/SF or higher<br />
API-CC/SF or higher<br />
synthetic oil SAE 75W/80W Emgard MTF Henkel<br />
1 - 6 0616
SB(R)4000+ PF/XF SB(R)230 PF Euro3<br />
1.4 AXLES AND HUBS<br />
Rear axles<br />
DAF<br />
The oil specification overview is related to the maintenance<br />
schedule as stated in the maintenance manual.<br />
ZF<br />
The oil specification overview is related to the maintenance<br />
schedule as stated in the maintenance manual.<br />
Explanation of overview<br />
For a summary of all the oil products that can be used in the<br />
ZF A132 rear axle, please refer to the up-to-date ZF lubricant<br />
list TE-ML-12 which is available from ZF on request, or consult<br />
the ZF-website www.ZF.com.<br />
0616<br />
LIQUIDS, OILS AND LUBRICANTS<br />
Specifications<br />
Type of axle Type of oil Viscosity Ambient<br />
temperature<br />
Oil grade<br />
1347<br />
Standard changing<br />
Mineral<br />
see graphic see graphic API-GL5<br />
interval<br />
1347<br />
Synthetic see graphic see graphic API-GL5 or GL4/GL5<br />
Extended changing<br />
interval<br />
Synthetic see graphic see graphic API-GL5 or GL4/GL5<br />
V = may be used<br />
Type of axle Lubricant classification<br />
A132<br />
12B 12C 12D 12E<br />
V(2) V V V<br />
Type of axle Type of oil Viscosity Lubricant class<br />
A132<br />
Shell spirax ASX 75W-90 12B<br />
Mobilube LS 80W-90 12C<br />
Castrol SAF-XLS 75W90 12D<br />
Castrol EPX 80W-90 12E<br />
1 - 7<br />
3
3<br />
LIQUIDS, OILS AND LUBRICANTS<br />
Specifications<br />
Hubs<br />
Rear wheel hubs<br />
Grease-lubricated ZF hubs<br />
Grease-lubricated DAF hubs<br />
Front wheel hubs<br />
Grease-lubricated ZF hubs<br />
SB(R)4000+ PF/XF SB(R)230 PF Euro3<br />
Fuchs Renolit LX-PEP2<br />
Fuchs Renolit LX-N EP2,<br />
please refer to the up-to-date ZF lubricant list<br />
TE-ML12 which is available from ZF on request,<br />
or consult the ZF-website www.ZF.com.<br />
Lithium-base grease with EP additive, NLGI<br />
class 2<br />
(or better), such as:<br />
Castrol LMX<br />
ELF MULTIPLEX EP2<br />
BP ENERGREASE LC2<br />
MOBILGREASE HP2<br />
Q8 RUBENS<br />
SHELL RETINAX LX<br />
TEXACO STARPLEX EP2<br />
FUCHS RENOLIT LX PEP 2B<br />
TOTAL MULTIS COMPLEX EP2<br />
or equivalent<br />
Saponified lithium mineral oil-based multi grade<br />
grease, NLGI class 2 (grease code KP2K-30 in<br />
according to DIN 51825), please refer to the upto-date<br />
ZF lubricant list TE-ML12 which is available<br />
from ZF on request, or consult the ZF-website<br />
www.ZF.com.<br />
1 - 8 0616
SB(R)4000+ PF/XF SB(R)230 PF Euro3<br />
1.5 HYDRAULIC FLUIDS AND GREASES<br />
HYDRAULIC fluids<br />
Hydraulic power steering DEXRON III with valid approval number<br />
Hydraulic cooling fan drive DEXRON III with valid approval number<br />
Hydraulically-operated clutch Brake fluid DOT 4<br />
Greases<br />
Automatic greasing system: NLGI class 2 EP quality<br />
0616<br />
LIQUIDS, OILS AND LUBRICANTS<br />
Specifications<br />
Lubricating grease general: Lithiumbase grease with EP additive, NLGI class 2<br />
Dry plate clutch:<br />
- Clutch plate - prise-as connection:<br />
- Thrust bearings without plastic coating:<br />
- Thrust bearings with plastic coating:<br />
- Clutch lever with bearing bush (manual<br />
gearbox)<br />
- Clutch lever without bearing bush (AS-<br />
Tronic gearbox)<br />
Grease on lithium base NLGI 3<br />
Grease on lithium base NLGI 3<br />
No grease permitted, dry mounting<br />
No grease permitted, dry mounting<br />
Lithium-based grease, NLGI 3<br />
Brake claw guide sleeves Fuchs Renolit HLT2 (white), Syntheso GL EP1 (green)<br />
Auxiliary pitman arm Fuchs Renolit LX-OS3, FAG Arcanol L260<br />
Swivel king pin and control arms ZF RL-75 A/<br />
EC<br />
Steering box<br />
-Space behind the output shaft dirt and water<br />
seal<br />
Saponified lithium mineral oil-based multi grade grease,<br />
NLGI class 2, grease code KP2K-30 in accordance with<br />
DIN51825). Please refer to the up-to-date ZF lubricant list<br />
TE-ML12 which is available from ZF on request, or consult<br />
the ZF-website www.ZF.com.<br />
Lithium-based grease with EP additive, NLGI class 2<br />
(or better), such as:<br />
Exxon Unirex EP2<br />
Drive shaft Shell Retinax LX2, Fuchs Renolit LX PEP 2B<br />
Aluminium rims Freylube Prema or equivalent<br />
1 - 9<br />
3
3<br />
LIQUIDS, OILS AND LUBRICANTS<br />
Specifications<br />
1.6 FUEL SYSTEM<br />
Diesel fuel must comply with the requirements stipulated in<br />
EN 590. Only non-foaming diesel may be used for highspeed<br />
fuelling systems.<br />
DAF Trucks engines<br />
1.6.1 SULPHUR CONTENT OF DIESEL FUEL<br />
Vehicles equipped with a CRT filter<br />
• The sulphur content of fuels used for vehicles equipped<br />
with a CRT filter may not exceed 50 ppm (0.005%).<br />
• Lubricant oils may not be added to diesel fuel for vehicles<br />
equipped with a CRT filter. The use of diesel fuel containing<br />
lubricant oil will cause damage to the catalyser, in turn<br />
resulting in non-compliance with the stipulated emission<br />
requirements.<br />
Vehicles equipped without a CRT filter<br />
• The sulphur content of fuels used for vehicles that are not<br />
equipped with a CRT filter may not exceed 0.2%. If the content<br />
is higher act according to table below.<br />
Sulphur content Engine oil changing interval<br />
> 0.2%<br />
At extremely low temperatures, exclusively in an emergency<br />
(for example, breakdown), may a quantity (depending on the<br />
outside temperature) of petroleum (maximum 20%) or a flow<br />
improver (follow product instructions) be added.<br />
However should THE STATUTORY REGULATIONS NOT<br />
PERMIT the use of the above then a maximum of 20%<br />
unleaded petrol may be added.<br />
The fuel should possess a lubricative effect in accordance<br />
with the following requirement (lubricity standard):<br />
1.6.2 BIODIESEL APPLICATION<br />
Half the interval with a maximum of<br />
25,000 km.<br />
Test method: HFRR, in accordance with CEC-F-<br />
06-A96 standard<br />
Test value: < 460 mm<br />
• There may be no negative (destructive) chemical reaction<br />
of the fuel on any of the engine or fuel system components.<br />
• Biodiesel is only permitted for the DAF PE and XE engines<br />
with a biodiesel modification-kit.<br />
• All EN590 fuel standard requirements must be met (for<br />
100% Biodiesel EN14214).<br />
• Only official produced diesel or blends with alternative fuel<br />
up to 5% Biodiesel is allowed for PE engines up to engine<br />
number S-09839 and for XE engines up to engine number<br />
T-78817.<br />
• Only official produced diesel or blends of standard diesel<br />
fuel with up to 100% Bio-diesel/FAME is allowed for PE<br />
SB(R)4000+ PF/XF SB(R)230 PF Euro3<br />
1 - 10 0616
SB(R)4000+ PF/XF SB(R)230 PF Euro3<br />
engines from engine number S-09839 and XE engines<br />
from engine number T-78817 onwards.<br />
• Blends of standard diesel fuel with up to 100% Bio-diesel/<br />
FAME is allowed if following additional conditions are met:<br />
– the oil- and fuel filter change interval period must be<br />
diminished by half.<br />
– extended oil service intervals are not allowed.<br />
Comment<br />
Biodiesel has dissolving characteristics so that the change<br />
from diesel to biodiesel may cause deposits in the fuel system<br />
to dissolve and thereby clogging the filter. When changing<br />
from diesel to biodiesel it is wise to check the filters after<br />
1 or 2 tank fillings and to replace any clogged filters. At low<br />
temperatures biodiesel may cause problems such as clogging<br />
of filters.<br />
0616<br />
LIQUIDS, OILS AND LUBRICANTS<br />
Specifications<br />
1 - 11<br />
3
3<br />
LIQUIDS, OILS AND LUBRICANTS<br />
Specifications<br />
1.7 COOLANT SPECIFICATION<br />
Coolant is a toxic liquid. Protect the skin<br />
and eyes.<br />
Coolant is harmful for the environment, and<br />
must be processed as industrial waste.<br />
Use solely TEXACO HAVOLINE Extended Life Antifreeze<br />
Coolant (XLC).<br />
Follow the coolant manufacturer's directions for use.<br />
These <strong>VDL</strong> <strong>Bus</strong> & <strong>Coach</strong> vehicles are filled during their manufacture<br />
with:<br />
– TEXACO HAVOLINE XLC, this has a bright orange colour .<br />
Texaco Havoline XLC satisfies the VAG specification TL 774<br />
D.<br />
– The standard mixing ratio of Texaco Havoline xlc is 1 op 1,<br />
or 50% Texaco Havoline xlc and 50% water which satisfies<br />
the specifications opposite. This offers protection against<br />
corrosion and frost up to -40° C.<br />
– When using Texaco Havoline xlc coolant or equivalent,<br />
only mineralised water or water which satisfies the specifications<br />
opposite may be used.<br />
– No other coolant, additive or antifreeze may be added to<br />
the mixture. This may affect the corrosion protection, silt up<br />
lines and cause blockages.<br />
– The anti-freeze mixture may be left in the cooling system<br />
during the summer months. The concentration of antifreeze<br />
should be maintained in order to protect against<br />
damage such as corrosion, for example.<br />
When due regard is taken of all the<br />
requirements applicable to Texaco<br />
Havoline xlc the coolant may be used for<br />
up to 5 years and a maximum of 650,000<br />
km before being replaced<br />
Coolant water quality requirements<br />
SB(R)4000+ PF/XF SB(R)230 PF Euro3<br />
- pH 7.0 - 9.0<br />
- Total fixed content ≤ 340 ppm (< 340 mg/litre)<br />
- Hardness* ≤ 140 ppm (calcium and/or magnesium carbonate)<br />
- Chloride ≤ 40 ppm (< 40 mg/litre) (sodium chloride)<br />
- Sulphate ≤ 100 ppm (< 100 mg/litre) (magnesium and/or sodium sulphate)<br />
*Hardness: 140 ppm = 8.0° German hardness /14° French hardness /10° British hardness.<br />
1 - 12 0616
SB(R)4000+ PF/XF SB(R)230 PF Euro3<br />
MAINTENANCE SCHEDULE<br />
0616<br />
MAINTENANCE SCHEDULE<br />
4
4<br />
MAINTENANCE SCHEDULE<br />
SB(R)4000+ PF/XF SB(R)230 PF Euro3<br />
0616
SB(R)4000+ PF/XF SB(R)230 PF Euro3<br />
1. MAINTENANCE INTERVALS<br />
1.1 THE MAINTENANCE SCHEDULE<br />
The maintenance intervals stated in the maintenance schedule<br />
are based on the oil specifications specified by<br />
<strong>VDL</strong> <strong>Bus</strong> &<strong>Coach</strong>.<br />
1. Only applicable to the XE engine. For the PE engine, a<br />
maximum of 75,000 km with an intermediate inspection<br />
after 37,500 km.<br />
2. Only applicable to the XE engine. For the PE engine, a<br />
maximum of 100,000 km with an intermediate inspection<br />
after 50,000 km.<br />
3. Deviating oil changing intervals apply to the VOITH<br />
R115E retarder, ZF AS Tronic and the ZF automatic<br />
gearbox (see the service schedule for further information).<br />
0616<br />
MAINTENANCE SCHEDULE<br />
Maintenance intervals<br />
1 - 1<br />
4
4<br />
MAINTENANCE SCHEDULE<br />
Maintenance intervals<br />
1.2 EXPLANATION OF THE MAINTENANCE<br />
SCHEDULE<br />
Vehicle use<br />
The use of the vehicle will determine whether it is classified<br />
as being in service group I, II or III.<br />
Service group I<br />
Local traffic<br />
– Airport transportation<br />
– Transport up to a maximum of 30,000 km per year<br />
Service group II<br />
Urban and regional traffic<br />
– Regional bus services<br />
– Transportation between villages and towns located close<br />
to each other<br />
Service group III<br />
National/International traffic<br />
– Transportation over long to very long distances<br />
STANDARD OIL-CHANGE INTERVAL<br />
This is the symbol for the standard oil-change interval.<br />
Please refer to the latest <strong>VDL</strong> <strong>Bus</strong> “Fluids and Lubricants<br />
specifications” information sheet for the stipulated specifications<br />
of the oil.<br />
EXTENDED OIL-CHANGE INTERVAL<br />
This is the symbol for the extended oil-change interval. If the<br />
prescribed oil specification and any additional conditions<br />
(please refer to the latest <strong>VDL</strong> <strong>Bus</strong> “Fluids and Lubricants<br />
specifications”) have to be complied with, an extended<br />
changing interval may be applied.<br />
Note:<br />
An extended changing interval for engine oil may be subject<br />
to additional conditions. The additional conditions are<br />
included in the <strong>VDL</strong> <strong>Bus</strong> “Fluids and Lubricants” specifications.<br />
INTERMEDIATE INSPECTION<br />
This is the symbol for an intermediate inspection. Intermediate<br />
inspections are based on several visual inspections.<br />
When an extended changing interval is applicable to the<br />
engine oil (X-service) an intermediate inspection should be<br />
carried out.<br />
SB(R)4000+ PF/XF SB(R)230 PF Euro3<br />
G000230<br />
G000229<br />
G000088<br />
1 - 2 0616
SB(R)4000+ PF/XF SB(R)230 PF Euro3<br />
X SERVICE<br />
This is the symbol to indicate an X service. An X-service is a<br />
service which depends on the number of kilometres driven<br />
and consists of changing the engine oil and a number of<br />
inspections.<br />
Notes:<br />
– If the prescribed oil specification and any additional conditions<br />
(please refer to the latest <strong>VDL</strong> <strong>Bus</strong> “Fluids and Lubricants<br />
specifications”) have to be complied with, an<br />
extended changing interval (X-service) may be applied.<br />
– An X service must be carried out at least once a year.<br />
Y SERVICE<br />
This is the symbol for a Y service.<br />
A Y service is an annual service comprised of specific maintenance<br />
work and, where applicable, supplemented with an<br />
oil-change for the gearbox and the rear axle.<br />
Notes:<br />
– If the prescribed oil specification and any additional conditions<br />
(please refer to the latest <strong>VDL</strong> <strong>Bus</strong> “Fluids and Lubricants<br />
specifications”) have to be complied with, an<br />
extended changing interval (X-service) may be applied.<br />
– The Voith retarder R115E, ZF AS Tronic and the automatic<br />
gearboxes are subjected to alternative changing intervals.<br />
ZF AUTOMATIC GEARBOX MAINTENANCE INTERVALS<br />
Maintenance groups I - II<br />
Maintenance groups III<br />
Note:<br />
In case of initial oil change transition from an ATF of the lubricants<br />
category 14A or 14B to an ATF featuring extended oil<br />
change intervals, an interim oil change interval after < 60.000<br />
km/max. 2 years is required.<br />
0616<br />
Oils according to ZF lubrication<br />
list TE-ML14 class 14B<br />
Oils according to ZF lubrication<br />
list TE-ML14 class 14C<br />
Oils according to ZF lubrication<br />
list TE-ML14 class 14E<br />
Oils according to ZF lubrication<br />
list TE-ML14 class 14B<br />
Oils according to ZF lubrication<br />
list TE-ML14 class 14C<br />
Oils according to ZF lubrication<br />
list TE-ML14 class 14E<br />
MAINTENANCE SCHEDULE<br />
Maintenance intervals<br />
2 years/maximum of 45,000 km<br />
2 years/maximum of 90,000 km<br />
3 years/maximum of 120,000 km<br />
2 years/maximum of 60,000 km<br />
2 years/maximum of 120,000 km<br />
3 years/maximum of 150,000 km<br />
G000086<br />
G000087<br />
1 - 3<br />
4
4<br />
MAINTENANCE SCHEDULE<br />
Maintenance intervals<br />
ZF AS TRONIC GEARBOX WITH INTARDER MAINTENANCE INTERVALS<br />
Maintenance groups I - II<br />
Maintenance groups III<br />
Heavy use<br />
Heavy use means:<br />
– Use in areas with a high outside temperature (for example,<br />
Saudi Arabia).<br />
– Frequent mountainous routes.<br />
– Extremely short routes with a large number of inclines.<br />
General information<br />
The oil changing interval must be reduced if frequent use is<br />
made of the retarder (more than 10% of the duration of the<br />
daily use of the vehicle).<br />
If in doubt, contact <strong>VDL</strong> <strong>Bus</strong> & <strong>Coach</strong>.<br />
Oils according to ZF lubrication list<br />
TE-ML 02 class 02H<br />
Oils according to ZF lubrication list<br />
TE-ML 02 class 02D/02L<br />
Oils according to ZF lubrication list<br />
TE-ML 02 class 02E<br />
Oils according to ZF lubrication list<br />
TE-ML 02 class 02H<br />
Oils according to ZF lubrication list<br />
TE-ML 02 class 02D/02L<br />
Oils according to ZF lubrication list<br />
TE-ML 02 class 02E<br />
VOITH R115E RETARDER MAINTENANCE INTERVALS<br />
Normal use<br />
Service groups I,II,III<br />
Heavy use<br />
SB(R)4000+ PF/XF SB(R)230 PF Euro3<br />
1 year/maximum of 120,000 km<br />
2 years/maximum of 240,000 km<br />
3 years/maximum of 360,000 km<br />
1 year/maximum of 160,000 km<br />
2 years/maximum of 300,000 km<br />
3 years/maximum of 540,000 km<br />
Mineral oil 1 year/maximum of 135,000 km<br />
Semi-synthetic oil 2 years/maximum of 180,000 km<br />
Synthetic oil 2 years/maximum of 300,000 km<br />
Mineral oil 1 year/maximum of 60,000 km<br />
Semi-synthetic oil 1 year/maximum of 60,000 km<br />
Synthetic oil 2 years/maximum of 300,000 km<br />
1 - 4 0616
SB(R)4000+ PF/XF SB(R)230 PF Euro3<br />
1.3 INFLUENCE OF DIESEL ON THE<br />
MAINTENANCE INTERVALS<br />
1.3.1 DIESEL FUELS<br />
Sulphur content Engine oil changing interval<br />
> 0.2% Half the interval with a maximum of<br />
25,000 km.<br />
1.3.2 BIODIESEL APPLICATION<br />
• There may be no negative (destructive) chemical reaction<br />
of the fuel on any of the engine or fuel system components.<br />
• All EN590 fuel standard requirements must be met (for<br />
100% Biodiesel EN14214).<br />
• Only official produced diesel or blends of standard diesel<br />
fuel with up to 100% Bio-diesel/FAME is allowed for PE<br />
engines from engine number S-09839 and XE engines<br />
from engine number T-78817 onwards.<br />
• Blends of standard diesel fuel with up to 100% Bio-diesel/<br />
FAME is allowed if following additional conditions are met:<br />
– the oil- and fuel filter change interval period must be<br />
diminished by half.<br />
– extended oil service intervals are not allowed.<br />
0616<br />
MAINTENANCE SCHEDULE<br />
Maintenance intervals<br />
1 - 5<br />
4
4<br />
MAINTENANCE SCHEDULE<br />
Maintenance intervals<br />
1.4 SERVICE INTERVALS FOR DIFFICULT<br />
CONDITIONS<br />
If the vehicle is used under very specific, difficult conditions,<br />
the dealer or importer must be contacted and, if necessary,<br />
the maintenance intervals and the maintenance work to be<br />
carried out during the service must be changed.<br />
1.5 FIRST SERVICE<br />
The first service should be carried out between the first<br />
7,500 km and 10,000 km or a maximum of 8 weeks after<br />
delivery of the vehicle, which ever comes first.<br />
SB(R)4000+ PF/XF SB(R)230 PF Euro3<br />
1 - 6 0616
SB(R)4000+ PF/XF SB(R)230 PF Euro3<br />
2. MAINTENANCE ACTIVITIES<br />
2.1 FIRST SERVICE<br />
First Service to be carried out between the first 7.500 and<br />
10.000 km. For registration apply the latest version of the<br />
First Service forms with document number DW050719.<br />
2.1.1 SB(R)4000+ PF/XF AND SB(R)230 PF EURO_3<br />
First Service<br />
BODY-WORK, ELECTRICAL SYSTEM<br />
O Check/top up the battery liquid level<br />
O Inspect/clean battery connections and cables<br />
O Read out and erase the error messages of the diagnostic tools<br />
LUBRICATION SYSTEM<br />
O Change the engine oil<br />
O Replace the engine-oil filter(s)<br />
O Inspect the oil lubrication system for leaks<br />
FUEL SYSTEM<br />
O Drain/clean fuel-system water separator<br />
O Replace fuel filter<br />
O Inspect the fuel system for leaks<br />
ENGINE<br />
O Inspect V-belt(s) and tension/replace, if necessary<br />
AIR INTAKE SYSTEM<br />
O Inspect the air-intake system mountings, inspect for leaks and damage<br />
COOLING SYSTEM<br />
O Hydraulic fan: replace filter<br />
O Hydraulic fan: inspect pipes/hoses for damage and leaks<br />
O Inspect the entire cooling system for leaks and damage<br />
STEERING-MECHANISM<br />
O Hydraulic steering-mechanism: replace filter<br />
O Hydraulic steering-mechanism: check/top up fluid level<br />
O Hydraulic steering-mechanism: check hoses/tubes for damage and leaks<br />
O Grease kingpin bearing (without load)<br />
BRAKE SYSTEM AND PNEUMATIC SYSTEM<br />
O Inspect the mountings of the brake pipes and components, inspect for leaks and wear<br />
WHEEL SUSPENSION<br />
O Tighten spring U-bolt nuts<br />
TRANSMISSION AND CHASSIS<br />
O Check all accessible chassis bolts and nuts<br />
O Change the differential oil<br />
O Grease driveshaft, tighten the bolts<br />
O Grease spare-wheel winch cable and pivoting points<br />
O Inspect the wheelnuts (tighten)<br />
GEARBOX<br />
O Inspect the gearbox for leaks<br />
0616<br />
MAINTENANCE SCHEDULE<br />
Maintenance activities<br />
2 - 1<br />
4
4<br />
MAINTENANCE SCHEDULE<br />
Maintenance activities<br />
First Service<br />
O Check/top up the hydraulic-clutch fluid level<br />
RETARDER<br />
O Check the retarder oil level, top up as necessary<br />
TEST DRIVE<br />
O Test drive<br />
SB(R)4000+ PF/XF SB(R)230 PF Euro3<br />
2 - 2 0616
SB(R)4000+ PF/XF SB(R)230 PF Euro3<br />
2.2 INTERMEDIATE SERVICE<br />
Within the maintenance activities the intermediate service is<br />
represented by the T-Service symbol.<br />
2.2.1 SB(R)4000+ PF/XF AND SB(R)230 PF EURO_3<br />
The intermediate maintenance activities are listed in the table.<br />
For registration apply the latest version of the Maintenance<br />
Forms with document number DW050725.<br />
T-Service = Intermediate Maintenance Activities<br />
LUBRICATION SYSTEM<br />
O Check the engine-oil level<br />
FUEL SYSTEM<br />
O Drain/clean fuel-system water separator<br />
O Replace fuel filter (see note 29)<br />
O Inspect the fuel system for leaks<br />
ENGINE<br />
O Inspect V-belt(s) and tension/replace, if necessary<br />
O Inspect poly V-belt and replace if necessary<br />
AIR INTAKE SYSTEM<br />
O Inspect the air-intake system mountings, inspect for leaks and damage<br />
EXHAUST SYSTEM<br />
O Inspect the exhaust system mountings, inspect for leaks<br />
O CRT filter: check exhaust gas back-pressure (see note 25)<br />
COOLING SYSTEM<br />
O Inspect the entire cooling system for leaks and damage<br />
STEERING-MECHANISM<br />
O Inspect all steering-mechanism pivoting points for wear and leakage<br />
BRAKE SYSTEM AND PNEUMATIC SYSTEM<br />
O Inspect the thickness of the brake linings/brake pads<br />
TRANSMISSION AND CHASSIS<br />
O Inspect the rear axle for leaks<br />
O Check oil/grease-lubricated hubs for leaks<br />
GEARBOX<br />
O Check/top up the gearbox oil level<br />
O Check/top up the hydraulic-clutch fluid level<br />
O Inspect the wear of the clutch disc<br />
RETARDER<br />
O Check the retarder oil level, top up as necessary<br />
NOTES<br />
25 Every 1-2 months<br />
29 Every T-maintenance if year kilometrage exceeds 100,000 km.<br />
0616<br />
MAINTENANCE SCHEDULE<br />
Maintenance activities<br />
2 - 3<br />
4
4<br />
MAINTENANCE SCHEDULE<br />
Maintenance activities<br />
2.3 MILEAGE DEPENDENT SERVICE<br />
Within the maintenance activities the mileage dependent<br />
service is represented by the X-Service symbol.<br />
2.3.1 SB(R)4000+ PF/XF AND SB(R)230 PF EURO_3<br />
The mileage dependent maintenance activities are listed in<br />
the table. For registration apply the latest version of the Maintenance<br />
Forms with document number DW050725.<br />
SB(R)4000+ PF/XF SB(R)230 PF Euro3<br />
X-Service = Mileage Dependent Maintenance Activities<br />
BODY-WORK, ELECTRICAL SYSTEM<br />
O Check/top up the battery liquid level<br />
O Inspect/clean battery connections and cables<br />
O Inspect the ground terminals and the positive feed-throughs<br />
O Replace the main fuses (see note 20)<br />
O Read out and erase the error messages of the diagnostic tools<br />
LUBRICATION SYSTEM<br />
O Change the engine oil (see note 04)<br />
O Replace the engine-oil filter(s)<br />
O Replace the rotor of the centrifugal oil filter<br />
O Inspect the oil lubrication system for leaks<br />
O Grease all grease nipples in accordance with the lubrication chart<br />
O Check the engine-oil level<br />
FUEL SYSTEM<br />
O Drain/clean fuel-system water separator<br />
O Replace fuel filter<br />
O Inspect the fuel system for leaks<br />
ENGINE<br />
O Inspect V-belt(s) and tension/replace, if necessary<br />
O Inspect poly V-belt and replace if necessary<br />
AIR INTAKE SYSTEM<br />
O Inspect the air-filter blockage indicator, and replace the air-filter element if necessary<br />
O Inspect the air-intake system mountings, inspect for leaks and damage<br />
EXHAUST SYSTEM<br />
O Inspect the exhaust system mountings, inspect for leaks<br />
COOLING SYSTEM<br />
O Hydraulic fan: check/top up fluid level<br />
O Hydraulic fan: inspect pipes/hoses for damage and leaks<br />
O Check/top up the level of the coolant in the cooling system<br />
O Inspect the entire cooling system for leaks and damage<br />
O Inspect the radiator/intercooler element for fouling, clean if necessary<br />
STEERING-MECHANISM<br />
O Hydraulic steering-mechanism: check/top up fluid level<br />
O Hydraulic steering-mechanism: check hoses/tubes for damage and leaks<br />
O Inspect the steering-mechanism's angular transmission for wear and leaks<br />
O Inspect all steering-mechanism pivoting points for wear and leakage<br />
BRAKE SYSTEM AND PNEUMATIC SYSTEM<br />
O Drain the condensation in the air tanks<br />
2 - 4 0616
SB(R)4000+ PF/XF SB(R)230 PF Euro3<br />
X-Service = Mileage Dependent Maintenance Activities<br />
O Inspect the mountings of the brake pipes and components, inspect for leaks and wear<br />
O Inspect the thickness of the brake linings/brake pads<br />
O Inspect the brake discs for wear, inspect the thickness<br />
WHEEL SUSPENSION<br />
O Inspect the mountings of the shock-absorbers, inspect for leaks<br />
O Inspect the mountings and the condition of the U-bolts<br />
O Inspect the axle mounting points (and pneumatic suspension)<br />
O Inspect the bellows of the pneumatic suspension<br />
O Inspect the operation of the chassis-pneumatic suspension<br />
O Check driving height<br />
TRANSMISSION AND CHASSIS<br />
O Inspect the rear axle for leaks<br />
O Check/top up differential oil level<br />
O Clean the differential's bleeder<br />
O Grease driveshaft (see note 21)<br />
O Visually inspect the nuts of the driveshaft and the rear axle<br />
O Check oil/grease-lubricated hubs for leaks<br />
O Inspect the tyres and wheel rims for wear and damage<br />
O Inspect the wheelnuts (tighten)<br />
O Check the tyre pressures (including the spare wheel)<br />
GEARBOX<br />
O Check/top up the gearbox oil level<br />
O Clean gearbox breather<br />
O ZF Astronic gearbox: change gearbox oil and replace oil filter ( see note 04)<br />
O Automatic gearbox: change gearbox oil and replace oil filter (see note 01)<br />
O Inspect the hydraulic clutch mechanism for leaks<br />
O Check/top up the hydraulic-clutch fluid level<br />
O Inspect the wear of the clutch disc<br />
RETARDER<br />
O Check the retarder oil level, top up as necessary<br />
NOTES<br />
4 For changing interval see maintenance schedule in Maintenance Manual<br />
20 Every 300,000 km<br />
21 Grease drive shaft every 50,000 km or every 6 months<br />
0616<br />
MAINTENANCE SCHEDULE<br />
Maintenance activities<br />
2 - 5<br />
4
4<br />
MAINTENANCE SCHEDULE<br />
Maintenance activities<br />
2.4 ANNUAL SERVICE<br />
Within the maintenance activities the annual service is represented<br />
by the Y-Service symbol.<br />
2.4.1 SB(R)4000+ PF/XF AND SB(R)230 PF EURO_3<br />
The annual maintenance activities are listed in the table. For<br />
registration apply the latest version of the Maintenance<br />
Forms with document number DW050725.<br />
SB(R)4000+ PF/XF SB(R)230 PF Euro3<br />
Y-Service = Annual Maintenance Activities<br />
BODY-WORK, ELECTRICAL SYSTEM<br />
O Check pedal rubbers for wear<br />
O Check the adjustability of the steering-column<br />
O Check battery compartment locking<br />
O Inspect the coating on the body work, repair if necessary, repeat treatment every 5 years.<br />
O Repeat the anti-corrosion treatment every 3 years<br />
FUEL SYSTEM<br />
O Clean feed pump coarse fuel filter<br />
O Tighten fuel tank tension straps<br />
O Check fuel tank bleed valve<br />
ENGINE<br />
O Inspect/adjust the valve clearance (see note 12)<br />
O Inspect compressor tubes<br />
O Inspect the condition of the alternator (see note 07)<br />
O Inspect the condition of the starter motor (see note 07)<br />
AIR INTAKE SYSTEM<br />
O Check air inlet dust trapping valve<br />
EXHAUST SYSTEM<br />
O Clean and inspect Catalyst<br />
COOLING SYSTEM<br />
O Hydraulic fan: replace filter (see note 08)<br />
O Hydraulic fan: change oil (see note 08)<br />
O Check the concentration of the antifreeze in the cooling system (for the winter)<br />
O Replace coolant in the cooling system (see note 24)<br />
STEERING-MECHANISM<br />
O Hydraulic steering-mechanism: replace filter (see note 08)<br />
O Hydraulic steering-mechanism: change oil (see note 08)<br />
O Inspect the play in the steering-knuckle<br />
O Check steering damper on 3rd axle for leakage<br />
O Check steering collar and function of blocking cylinder on 3rd axle<br />
O Check maximum wheel deflection on 3rd axle<br />
O Grease auxiliary pitmanarms<br />
BRAKE SYSTEM AND PNEUMATIC SYSTEM<br />
O Replace air-dryer filter element<br />
O Inspect the automatic-adjusters of the brake callipers<br />
O Lubricate the bushes and sleeves of the brake callipers<br />
O Inspect brake deceleration<br />
O Check (Haldex) oil separator (see note 26)<br />
2 - 6 0616
SB(R)4000+ PF/XF SB(R)230 PF Euro3<br />
0616<br />
MAINTENANCE SCHEDULE<br />
Maintenance activities<br />
Y-Service = Annual Maintenance Activities<br />
WHEEL SUSPENSION<br />
O Inspect the condition of the axle and wheel suspensions and inspect its mountings<br />
O Grease all swivel king pins and control arms (see note 26)<br />
TRANSMISSION AND CHASSIS<br />
O Change the differential oil (see note 04)<br />
O Inspect the differential lock<br />
O Inspect the driveshafts, sleeve yokes and universal joints for wear<br />
O Change the grease of grease-lubricated hubs (see note 02)<br />
O Check the wheel bearing clearance<br />
GEARBOX<br />
O Manual gearbox: change gear box oil / clean oil strainer (see note 17)<br />
O Check SGS system<br />
O Change hydraulic fluid of the hydraulic-clutch system (see note 08)<br />
RETARDER<br />
O Change retarder oil / clean oil strainer (see note 04)<br />
NOTES<br />
2 Every 2 years with maximum mileage of 500,000 km (ZF RL75)<br />
4 For changing interval see maintenance schedule in Maintenance Manual<br />
7 Every 250,000 km.<br />
8 Every 2 years.<br />
12 Check the valve clearance on the 1st and 2nd Y-service, and subsequently check and adjust, where necessary,<br />
every second year<br />
17 Every two years, maximum interval of 300,000 km when using the following synthetic oil<br />
- Veedol Synmesh AT; Castrol Syntrans AT; - Deagear Synth;- Shell Transmission MA; BP Energear SHX30<br />
24 Every 4 years, maximum interval of 400,000 km<br />
26 Every year, with a maximum kilometrage of 90,000 km<br />
2 - 7<br />
0
0<br />
MAINTENANCE SCHEDULE<br />
Maintenance activities<br />
SB(R)4000+ PF/XF SB(R)230 PF Euro3<br />
2 - 8 0616
EXPLANATION OF THE MAINTENANCE WORK<br />
SB(R)4000+ PF/XF SB(R)230 PF Euro3<br />
EXPLANATION OF THE MAINTENANCE WORK<br />
0616<br />
5
5<br />
EXPLANATION OF THE MAINTENANCE WORK<br />
SB(R)4000+ PF/XF SB(R)230 PF Euro3<br />
0616
EXPLANATION OF THE MAINTENANCE WORK<br />
SB(R)4000+ PF/XF SB(R)230 PF Euro3<br />
Safety regulations<br />
1. SAFETY REGULATIONS<br />
The work described in this maintenance manual must<br />
only be carried out by trained and competent personnel.<br />
Always observe the locally applicable legal safety and<br />
environmental regulations.<br />
Comply with all warnings and safety regulations given in<br />
this maintenance manual. Always read and observe the<br />
instructions and warnings given on labels and stickers fitted<br />
to the vehicle’s components. These have been fitted<br />
for your health and safety. Do not ignore them!<br />
Wear clean, well-fitting clothing and, if necessary, apply<br />
protective cream to the body.<br />
Always wear clean protective clothing, dust goggles and<br />
a dust mask when working with the brake lining, brake<br />
pads or friction material.<br />
Always read the manufacturer’s safety instructions when<br />
replacing the clutch plate, brake lining and brake pads.<br />
Avoid inhaling dust from the clutch plate or brake lining.<br />
Always make sure there is good dust extraction when<br />
working on these components.<br />
Do not run the engine unnecessarily in a closed or<br />
unventilated area. In other words, make sure the exhaust<br />
fumes are properly extracted.<br />
Remain a safe distance from rotating and/or moving<br />
components.<br />
Never remove the cooling system’s filler cap when the<br />
engine is at the operating temperature.<br />
Be careful when changing the oil. Hot oil can cause serious<br />
injury.<br />
Avoid unnecessary contact with the drained oil. Regular<br />
contact causes skin damage.<br />
Various oils and other lubricants used on the vehicle can<br />
damage your health. This also applies to engine coolant,<br />
screen wash fluid, coolant in air conditioning systems,<br />
battery acid and diesel. Avoid internal and external bodily<br />
contact.<br />
To prevent the risk of fire, the engine and the area surrounding<br />
it must be free of highly inflammable liquids.<br />
When working on the engine encapsulation, the engine<br />
compartment including the encapsulation and the engine<br />
must be thoroughly cleaned, if necessary, after every<br />
0616<br />
maintenance service because there is a risk of fire if the<br />
encapsulation, engine or engine compartment is dirty<br />
Always disconnect the earth cable from<br />
the battery before working on the<br />
vehicle’s electrical system.<br />
Always use hoisting sheers when working under the<br />
vehicle (see “Lifting instructions”).<br />
When using lifting columns, check whether they are suitable<br />
for the vehicle’s wheel size. Refer to the manufacturer’s<br />
instruction manual for instructions on how to use<br />
lifting columns and for any safety instructions. If necessary,<br />
use wheel adaptors to prevent damage to the wheel<br />
bolts.<br />
Place the vehicle in the unconditional<br />
kneeling position before hoisting the<br />
vehicle. This will turn off the pneumatic<br />
suspension system.<br />
When charging the batteries, make sure there is good<br />
ventilation and avoid sparks or a naked flame. Only use<br />
a quick-charger if absolutely necessary. The positive and<br />
negative cables must be removed from the battery when<br />
using a quick-charger.<br />
1 - 1<br />
5
5<br />
EXPLANATION OF THE MAINTENANCE WORK<br />
Safety regulations<br />
SB(R)4000+ PF/XF SB(R)230 PF Euro3<br />
1 - 2 0616
EXPLANATION OF THE MAINTENANCE WORK<br />
SB(R)4000+ PF/XF SB(R)230 PF Euro3<br />
General information<br />
2. GENERAL INFORMATION<br />
2.1 INTRODUCTION<br />
This maintenance manual contains all the relevant maintenance<br />
work. It also contains safety regulations, which<br />
must be strictly observed.<br />
Work which is not described in this maintenance manual,<br />
such as revision, fault finding, etc., is described in the<br />
<strong>VDL</strong> <strong>Bus</strong> & <strong>Coach</strong> Workshop Instruction Manual or the<br />
Workshop Instructions for the component concerned.<br />
Whilst compiling this maintenance manual, it has been<br />
assumed that the mechanic has the necessary experience<br />
and has had the required education or training to be<br />
able to carry out the maintenance work in a responsible<br />
and safe manner.<br />
The technical information and the explanation of the<br />
maintenance work described in this maintenance manual<br />
have been compiled with the utmost care. The information<br />
in this maintenance manual only relates to the vehicle<br />
series:<br />
SB(R) 4000+ PF/XF Euro3<br />
SB(R) 230 PF Euro3<br />
0616<br />
2.2 TECHNICAL INFORMATION<br />
The technical information in this maintenance manual,<br />
such as the explanation of the maintenance work and the<br />
technical information required in order to carry out the<br />
maintenance work in a responsible manner, has been<br />
updated until the time of printing.<br />
<strong>VDL</strong> <strong>Bus</strong> & <strong>Coach</strong> maintains the right to make changes<br />
to the information given in this maintenance manual without<br />
prior notification.<br />
Comment<br />
Important alterations concerning technical information<br />
which have not/could not have been included in the<br />
maintenance manual will be passed on to you by means<br />
of a TI (Technical Information) sheet.<br />
2 - 1<br />
5
5<br />
EXPLANATION OF THE MAINTENANCE WORK<br />
General information<br />
SB(R)4000+ PF/XF SB(R)230 PF Euro3<br />
2.3 WARNING SYMBOL<br />
When text is accompanied by a warning symbol shown<br />
here, the information given is essential for the health and<br />
personal safety of the mechanic.<br />
This warning symbol is also shown if there are circumstances<br />
which could affect the safety of the vehicle or<br />
which could damage the vehicle.<br />
An overview of symbols is given below:<br />
This symbol gives useful tips to simplify<br />
operations.<br />
This symbol indicates that extra care is<br />
required.<br />
This symbol indicates a situation which<br />
might result in damage to the vehicle.<br />
This symbol indicates a situation which<br />
might result in personal injury.<br />
This symbol indicates a situation which<br />
might result in a harmful situation for the<br />
environment.<br />
2.4 ENVIRONMENT<br />
Carrying out maintenance work regularly, on time and<br />
with the necessary skill helps to reduce pollution of the<br />
environment.<br />
This can be achieved by noticing and repairing any leaks<br />
in time and by keeping the engine in an optimal condition<br />
(adjusting the valves, replacing the air filter element,<br />
etc.), so that there is a smaller emission of harmful<br />
gases.<br />
It should also be mentioned that oils and fluids contain<br />
harmful elements which pollute the environment.Therefore,<br />
make sure the drained oils and coolants, as well as<br />
used oil filters and fuel filters, are collected in the appropriate<br />
separate containers.<br />
Always be conscious of the environment<br />
when carrying out maintenance work.<br />
2 - 2 0616
EXPLANATION OF THE MAINTENANCE WORK<br />
SB(R)4000+ PF/XF SB(R)230 PF Euro3<br />
General information<br />
2.5 SPARE PARTS AND COMPONENTS<br />
All <strong>VDL</strong> <strong>Bus</strong> & <strong>Coach</strong> parts and components are accurately<br />
tuned to each other, which helps to determine the<br />
original <strong>VDL</strong> <strong>Bus</strong> & <strong>Coach</strong> quality.<br />
Logically, this quality can best be maintained when<br />
replacing components by using original <strong>VDL</strong> <strong>Bus</strong> &<br />
<strong>Coach</strong> parts and components.<br />
From a maintenance point of view, this applies to components<br />
such as the air drier element, gaskets, V-belts and<br />
filters.<br />
If, for example, non-original <strong>VDL</strong> <strong>Bus</strong> & <strong>Coach</strong> filters are<br />
used, insufficient protection may be provided against<br />
microscopic dust particles in the air, hardly noticeable<br />
metal shavings in the oil and contamination in the fuel.<br />
This will result in:<br />
– The early replacement of cylinders, pistons, bearings,<br />
valves, the injection pump and other moving parts.<br />
– A reduction in the engine performance.<br />
– An increase in fuel consumption.<br />
0616<br />
Therefore, always use original <strong>VDL</strong> <strong>Bus</strong> &<br />
<strong>Coach</strong> parts and components.<br />
2.6 MAINTENANCE GUIDELINES<br />
– When carrying out maintenance activities on the vehicle,<br />
it is important that the work is performed under the<br />
cleanest possible conditions. Filler caps, lubrication<br />
points, filler and drain plugs should be cleaned before<br />
and after maintenance activities.<br />
– When excessive leakage has been detected at oil<br />
seals and/or components, or in case of an excessive<br />
drop in the oil level, a report should be made and the<br />
cause should be remedied.<br />
– It is important to regularly check the bleed openings on<br />
the gearbox and rear axle for contamination and blockages.<br />
If the bleed openings are blocked by dirt, then the<br />
excess pressure may cause a leak.<br />
– Depending on the circumstances in which the vehicle<br />
is used, for example very poor roads, important bolt<br />
connections, such as the front/rear axle suspension,<br />
steering box attachment, bodywork attachment, etc.,<br />
must be checked more often and, if necessary, retightened.<br />
– It is important to carry out a visual inspection and to<br />
take a test run following the maintenance activities.<br />
When doing so, particular attention should be paid to<br />
components directly related to driving safety.<br />
– Refer to the <strong>VDL</strong> <strong>Bus</strong> & <strong>Coach</strong> Workshop Instruction<br />
Manual when welding on or drilling in the chassis.<br />
Welding and/or drilling in the wrong places on or in the<br />
chassis will weaken the material.<br />
– Whilst carrying out welding work on the vehicle, make<br />
sure the wiring of the alternator and the positive and<br />
negative battery connections are disconnected. Place<br />
the earth clamp as close as possible to the place to be<br />
welded, but never on a rotating component, such as<br />
the drive shaft, hub, fan, etc., nor on an independently<br />
operating component which contains rotating components,<br />
such as the turbo compressor, etc.<br />
2 - 3<br />
5
0<br />
EXPLANATION OF THE MAINTENANCE WORK<br />
General information<br />
SB(R)4000+ PF/XF SB(R)230 PF Euro3<br />
2 - 4 0616
EXPLANATION OF THE MAINTENANCE WORK<br />
SB(R)4000+ PF/XF SB(R)230 PF Euro3<br />
Inspection and adjustment<br />
3. INSPECTION AND ADJUSTMENT<br />
3.1 INSPECTING THE PEDAL RUBBERS<br />
1. Check whether the pedal rubbers are securely attached<br />
to the pedals.<br />
2. Check whether the pedal rubbers are worm and whether<br />
there is still sufficient grip on them.<br />
3.2 INSPECTING THE ADJUSTABILITY OF<br />
THE STEERING COLUMN<br />
Pneumatically adjustable steering column<br />
1. Turn on the vehicle’s contact switch and apply the parking<br />
brake.<br />
Unlock the steering column using the switch on the floor.<br />
2. Move the steering wheel in the directions indicated. It<br />
must be easy to move the steering wheel. It must be possible<br />
to adjust the height of the steering wheel by 80 mm<br />
and by an angle of 20° - 31°.<br />
3. Release the switch on the floor. The steering wheel<br />
should now be locked and it should no longer be possible<br />
to adjust the steering wheel.<br />
Comment<br />
When driving the vehicle, it is not possible to adjust the pneumatic<br />
steering column using the foot-operated switch. It is<br />
only possible to adjust the steering column if:<br />
– The vehicle is stationary.<br />
– The contact switch has been turned on.<br />
– The parking brake has been applied.<br />
0616<br />
03847B<br />
3 - 1<br />
5
5<br />
EXPLANATION OF THE MAINTENANCE WORK<br />
Inspection and adjustment<br />
SB(R)4000+ PF/XF SB(R)230 PF Euro3<br />
3.3 INSPECTING THE BATTERY<br />
Avoid sparks and naked flames near the<br />
batteries.<br />
Battery acid is an aggressive liquid.<br />
In the case of skin contact: neutralize the<br />
skin immediately with sodium carbonate<br />
or soapsuds and wash the affected area<br />
thoroughly with plenty of water.<br />
Contact a doctor if the affected area<br />
remains red or painful. Remove affected<br />
clothing and wash with plenty of water.<br />
In the case of eye contact: wash with<br />
clean, flowing water for at least 15<br />
minutes and contact a doctor.<br />
If swallowed: DO NOT instigate vomiting.<br />
Rinse your mouth, drink plenty of water<br />
and contact a doctor.<br />
If inhaled: get some fresh air, take a rest<br />
and contact a doctor.<br />
Checking the fluid level<br />
1. Check the electrolyte level. This must be approx. 10 mm<br />
above the plates or, if present, up to the level indicator.<br />
If necessary, top up the batteries (see “Draining and filling”).<br />
2. Check the battery housing for leaks.<br />
Comment<br />
– A visible white dividing line at 1/3 of the plate’s height indicates<br />
that a battery has been left standing in a highly discharged<br />
condition.<br />
– If the electrolyte is brown and the battery consumes a large<br />
amount of water, the battery has been overcharged.<br />
– If the electrolyte is murky or milky and the cells have a<br />
white deposit, the battery has been damaged by insufficient<br />
charging (highly discharged).<br />
In the above-mentioned cases, the battery must be replaced<br />
and the cause of the problem traced.<br />
Avoid quick-charging the battery. This<br />
will place an excessive load on the<br />
battery and reduce its life span.<br />
3 - 2 0616
EXPLANATION OF THE MAINTENANCE WORK<br />
SB(R)4000+ PF/XF SB(R)230 PF Euro3<br />
Inspection and adjustment<br />
Checking the battery charge<br />
1. With a battery acid weigher<br />
– If there are any doubts regarding the battery’s charge,<br />
check it using a battery acid weigher.<br />
– The specific weight of the battery acid at 27° C in kg/<br />
0616<br />
dm 3 is:<br />
Charged battery 28<br />
Half-charged battery 1.20<br />
Discharged battery 1.10<br />
– Measurement corrections are necessary for strongly<br />
deviating temperatures. For each 10° C lower, 0.007<br />
points must be deducted from the measured reading.<br />
For each 10° C higher, 0.007 points must be added to<br />
the measured reading.<br />
– When a battery is in good condition, the specific weight<br />
will be the same in all the cells. The maximum difference<br />
between the highest and lowest specific weight<br />
may be 0.03 kg/dm3.<br />
2. With a digital voltmeter<br />
– This method can only be used 1 to 2 hours after the termination<br />
of charging or discharging. Measure the<br />
absolute voltage at rest (the battery’s positive and negative<br />
terminals must have been disconnected).<br />
– For a 12 V battery, the voltage should be:<br />
Charged battery 12.24 V<br />
Half-charged battery Approx. 12.24 V<br />
Discharged battery Approx. 11.75 V<br />
3. With a battery tester<br />
– The general condition of the battery can be tested<br />
quickly by using a battery tester.<br />
In this test, the battery is subjected to a load and then<br />
the discharge voltage across the battery poles is measured.<br />
The load placed on the battery must be at least<br />
three times the capacity of the battery.<br />
– As a rule of thumb, the test must be carried out when<br />
the battery is sufficiently charged (specific weight 1.25<br />
- 1.28 kg/dm3). At a normal temperature (10 - 20° C),<br />
the load voltage of a well-charged battery should be 10<br />
V after 10 seconds. At least 9 V must be measured for<br />
a partially discharged battery (specific mass 1.25 kg/<br />
dm3). It is important that the voltage is measured<br />
directly across the battery poles.<br />
– Always follow the instructions issued by the manufacturer<br />
of the battery tester.<br />
3 - 3<br />
5
5<br />
EXPLANATION OF THE MAINTENANCE WORK<br />
Inspection and adjustment<br />
SB(R)4000+ PF/XF SB(R)230 PF Euro3<br />
3.4 INSPECTING THE BATTERY<br />
CONNECTIONS<br />
Avoid sparks and naked flames near the<br />
batteries.<br />
Battery acid is an aggressive liquid.<br />
Always apply insulated VDE tools whilst<br />
working on the batteries.<br />
1. Check for cracked or broken battery cables and clamps.<br />
If necessary, replace them.<br />
2. Visually check the battery terminals for corrosion. If necessary,<br />
clean the battery terminals (see “Cleaning”).<br />
3. Check the attachment of the battery clamps. If necessary,<br />
tighten them.<br />
3 - 4 0616
EXPLANATION OF THE MAINTENANCE WORK<br />
SB(R)4000+ PF/XF SB(R)230 PF Euro3<br />
Inspection and adjustment<br />
3.5 CHECKING THE BATTERY BOX<br />
ATTACHMENT<br />
1. Check whether the hook (4) of the battery box (5) locks<br />
firmly and without any play. If necessary, adjust the hook.<br />
Adjusting the hook (4)<br />
– Unscrew the lock nut (3).<br />
– Rotate the hook in steps of 180°.<br />
– Tighten the lock nut after adjusting the hook.<br />
2. Check whether the battery box rubs on the battery box<br />
frame when opening and closing the box. If necessary,<br />
adjust the battery box.<br />
Adjusting the battery box<br />
– Remove the batteries.<br />
– Close the battery box so that it rests against the rubber<br />
stop.<br />
DO NOT lock the battery box.<br />
– Only unscrew the nut/bolt (7) of the top hinge point.<br />
– Place a 6 mm thick adjusting plate under the sliding<br />
plate A.<br />
– Place a 9 mm thick adjusting plate under the sliding<br />
plate B.<br />
– Check whether the battery box rests against both<br />
adjustment plates and tighten the nut/bolt (7).<br />
– Open the battery box. Remove the adjusting plates and<br />
reinstall the batteries.<br />
– Check again whether the battery box opens and closes<br />
smoothly.<br />
– Lock the battery box and fit the lock pin (1).<br />
3. Check the attachment of the batteries.<br />
0616<br />
1151341<br />
3 - 5<br />
5
5<br />
EXPLANATION OF THE MAINTENANCE WORK<br />
Inspection and adjustment<br />
SB(R)4000+ PF/XF SB(R)230 PF Euro3<br />
3.6 CHECKING THE EARTH AND POSITIVE<br />
FEED-THROUGH ON THE CHASSIS<br />
It is not permitted to disconnect the<br />
battery clamps whilst the engine is<br />
running.<br />
It is not permitted to use a voltage higher<br />
than 24 V.<br />
1. Check whether the connection points have become oxidized.<br />
2. Check whether there are any splits in the cables.<br />
3. Check whether these points are securely attached to the<br />
chassis.<br />
4. This is carried out as follows:<br />
Hold the bolt head in place using a suitable spanner. Use<br />
a different spanner to check whether the nuts are secure.<br />
3 - 6 0616
EXPLANATION OF THE MAINTENANCE WORK<br />
SB(R)4000+ PF/XF SB(R)230 PF Euro3<br />
Inspection and adjustment<br />
0616<br />
1151413<br />
3 - 7<br />
5
5<br />
EXPLANATION OF THE MAINTENANCE WORK<br />
Inspection and adjustment<br />
SB(R)4000+ PF/XF SB(R)230 PF Euro3<br />
3.7 INSPECTING THE ANTI-CHIP COATING<br />
The underside of the chassis is treated with an anti-chip coating<br />
at the factory.<br />
This coating should be checked for damage every year.<br />
The underside of the chassis should be re-treated every five<br />
years.<br />
If the anti-chip coating becomes damaged, it should be<br />
treated as follows:<br />
Re-treatment/repair<br />
1. Remove all the loose dirt.<br />
2. Check the layer of paint for damage and, if necessary,<br />
repair it.<br />
3. Apply the anti-chip coating according to the manufacturer’s<br />
instructions.<br />
4. The layer thickness should be at least 60 - 80 microns<br />
when dry.<br />
Comment<br />
Cracks may appear after a time in the corners where the<br />
coating has been applied.<br />
The corners can be treated with a wax coating to prevent this<br />
from happening or to repair the cracks.<br />
The anti-chip coating should be re-applied if any large cracks<br />
appear.<br />
3 - 8 0616
EXPLANATION OF THE MAINTENANCE WORK<br />
SB(R)4000+ PF/XF SB(R)230 PF Euro3<br />
Inspection and adjustment<br />
3.8 ANTI-CORROSION TREATMENT<br />
Hollow cavities and the inside of beams should be checked<br />
every year for faults.<br />
They should be re-treated after 1, 3 and 6 years and then<br />
every 3 years.<br />
Hollow cavities and the inside of beams should be treated for<br />
corrosion after repair to prevent them from rusting.<br />
Re-treatment<br />
1. Remove all the loose dirt.<br />
2. Apply wax according to the manufacturer’s instructions<br />
using a flexible tube.<br />
3. The required layer thickness is 40-50 µm when dry.<br />
0616<br />
3 - 9<br />
5
5<br />
EXPLANATION OF THE MAINTENANCE WORK<br />
Inspection and adjustment<br />
SB(R)4000+ PF/XF SB(R)230 PF Euro3<br />
3.9 FAULT ANALYSIS<br />
3.9.1 DIAGNOSTIC TOOLS<br />
You can read in the schematic survey below with which diagnostic<br />
tool a certain system is to be diagnosed.<br />
Check the systems for faults. Note any faults and delete the<br />
fault memory.<br />
Repair any faults and repeat this procedure until all the faults<br />
have been rectified.<br />
How to operate the diagnostic tool, we refer to the documentation<br />
of the manufacturer.<br />
<strong>System</strong> Diagnostic tool<br />
ZF EST146C Pitcat ZF-Testman<br />
ZF AS Tronic Self diagnosis<br />
ZF EST42 DAVIE XD<br />
Voith R115E Pitcat Digiprop<br />
UPEC Pitcat+DCI DAVIE XD<br />
ABS/ASR Pitcat DAVIE XD<br />
ECAS CAN<br />
EGAS Pitcat DAVIE-XD<br />
ICM (CIPA) Pitcat 1.70 ><br />
Multibus+VFC Pitcat 1.70 ><br />
3 - 10 0616
EXPLANATION OF THE MAINTENANCE WORK<br />
SB(R)4000+ PF/XF SB(R)230 PF Euro3<br />
Inspection and adjustment<br />
3.9.2 READING ERROR MESSAGES ZF AS TRONIC<br />
1. Engine “OFF”.<br />
2. Turn ON the main switch and the contact switch.<br />
3. Turn rotary switch in position N and apply simultaneously<br />
the brake pedal.<br />
4. With applied brake pedal, push the tip lever forward (+)<br />
and hold the tip lever in this position.<br />
5. The stored error messages appear on the display.<br />
Note:<br />
If 4 bars are displayed in addition to the figures; this means:<br />
Add 100 to the displayed error code<br />
e.g.: Displayed error code no 74<br />
Read as code no 174<br />
If, in addition 4 bars and 2 arrows are displayed, this means:<br />
Add 200 to the displayed error code<br />
e.g.: Displayed error code no 27<br />
Read as code no 227<br />
Erase error codes ZF-AS Tronic<br />
1. Engine and contact switch “OFF”.<br />
2. Push the tip lever forward (+) and hold the tip lever in this<br />
position.<br />
3. Contact switch “ON”.<br />
4. Release the tip lever after 3 sec. (lever automatically<br />
returns in the mid-position).<br />
5. Push, after 3 sec., the tip lever forward (+) and hold the<br />
tip lever in this position.<br />
6. Switch after 2-3 sec. the contact switch “OFF”.<br />
7. The error codes are now erased.<br />
Note:<br />
Check after the test drive again for possible error codes.<br />
Repair any faults and repeat this procedure until all error<br />
codes have been rectified.<br />
0616<br />
03909B<br />
3 - 11<br />
5
5<br />
EXPLANATION OF THE MAINTENANCE WORK<br />
Inspection and adjustment<br />
SB(R)4000+ PF/XF SB(R)230 PF Euro3<br />
3.10 INSPECTING THE ENGINE OIL LEVEL<br />
3.10.1 PE ENGINE<br />
Inspecting the engine oil level<br />
1. Place the vehicle on a flat, horizontal surface. Check<br />
whether the vehicle is level both longways and crossways.<br />
2. Make sure the engine has not been running for at least 5<br />
minutes before checking the engine oil level.<br />
3. Remove the dipstick (2) from its holder.<br />
4. Clean the dipstick (2) with a lint-free cloth.<br />
5. Place the dipstick (2) back in the holder.<br />
6. Remove the dipstick again and read the oil level.<br />
7. Add oil via the filler opening with the red cap (1) until the<br />
oil level is at the maximum mark. Always use the specified<br />
oil (see “Liquids, oils and lubricants specifications”).<br />
Comment<br />
See “Technical information” for the difference between the<br />
maximum and minimum engine oil levels.<br />
8. Wait for 1 minute and then check the oil level again.<br />
3 - 12 0616<br />
1<br />
03570B
EXPLANATION OF THE MAINTENANCE WORK<br />
SB(R)4000+ PF/XF SB(R)230 PF Euro3<br />
Inspection and adjustment<br />
3.10.2 XE ENGINE<br />
Inspecting the engine oil level<br />
1. Place the vehicle on a flat, horizontal surface. Check<br />
whether the vehicle is level both longways and crossways.<br />
2. Make sure the engine has not been running for at least 5<br />
minutes before checking the engine oil level.<br />
3. Remove the dipstick (2) from its holder.<br />
4. Clean the dipstick (2) with a lint-free cloth.<br />
5. Place the dipstick (2) back in the holder.<br />
6. Remove the dipstick again and read the oil level.<br />
7. Add oil via the filler opening with the red cap (1) until the<br />
oil level is at the maximum mark. Always use the specified<br />
oil (see “Liquids, oils and lubricants specifications”).<br />
Comment<br />
See “Technical information” for the difference between the<br />
maximum and minimum engine oil levels.<br />
8. Wait for 1 minute and then check the oil level again.<br />
0616<br />
1<br />
03569B<br />
3 - 13<br />
5
5<br />
EXPLANATION OF THE MAINTENANCE WORK<br />
Inspection and adjustment<br />
SB(R)4000+ PF/XF SB(R)230 PF Euro3<br />
3.11 CHECKING FOR FUEL LEAKS<br />
1. Visually check all the fuel system’s hose/line connections<br />
and components for leaks.<br />
2. Pay extra attention to the flexible fuel hoses on vehicles<br />
which use biodiesel (EN14214). If perspiration or leakage<br />
is observed, the flexible fuel hoses must be<br />
replaced.<br />
1 Fuel tank<br />
2 Water separator<br />
3 Delivery pump / coarse filter<br />
4 Fine filter<br />
1147422<br />
3 - 14 0616
EXPLANATION OF THE MAINTENANCE WORK<br />
SB(R)4000+ PF/XF SB(R)230 PF Euro3<br />
Inspection and adjustment<br />
3.12 INSPECTING THE FUEL TANK<br />
CLAMPING STRAPS<br />
1. Visually check the attachment of the fuel tank for faults.<br />
2. Tighten the clamping straps to the specified torque (see<br />
“Technical information”).<br />
0616<br />
1151108<br />
3 - 15<br />
5
5<br />
EXPLANATION OF THE MAINTENANCE WORK<br />
Inspection and adjustment<br />
SB(R)4000+ PF/XF SB(R)230 PF Euro3<br />
3.13 INSPECTING AND ADJUSTING THE<br />
VALVE CLEARANCE<br />
1. Remove the cylinder head covers (see “Removal and<br />
installation”).<br />
2. Remove the protective plate from the flywheel housing<br />
and fit the special tool (A) (DAF no. 1310477) to the<br />
recess in the flywheel.<br />
3. Use the special tool (A) to crank the crankshaft clockwise<br />
as viewed from the distribution side (this is the same<br />
direction as the engine’s direction of rotation) until the<br />
valves of cylinder 1 start to tumble. The pistons of cylinder<br />
1 and 6 are now in the top dead centre position.<br />
Comment<br />
”Tumble” is understood to mean the moment when the inlet<br />
valve starts to open and the outlet valve finishes closing.<br />
4. Check and correct the valve clearance of cylinder 6. Set<br />
the correct valve clearance by loosening the lock nut and<br />
rotating the adjusting screw in the correct direction.<br />
(see “Technical information” for the correct valve clearance).<br />
3 - 16 0616
EXPLANATION OF THE MAINTENANCE WORK<br />
SB(R)4000+ PF/XF SB(R)230 PF Euro3<br />
Inspection and adjustment<br />
5. By rotating the crankshaft 1/3 of a turn, each time, using<br />
the special tool (DAF no. 1310477), the valves can be set<br />
according to the injection sequence 1-5-3-6-2-4.<br />
Valves of cylinder X Adjust valves of cylinder<br />
tumble<br />
1 6<br />
5 2<br />
3 4<br />
6 1<br />
2 5<br />
4 3<br />
6. Fit the cylinder head covers (see “Removal and installation”).<br />
7. Remove the special tool and fit the flywheel housing’s<br />
protective plate.<br />
0616<br />
3 - 17<br />
5
5<br />
EXPLANATION OF THE MAINTENANCE WORK<br />
Inspection and adjustment<br />
SB(R)4000+ PF/XF SB(R)230 PF Euro3<br />
3.14 INSPECTING THE COMPRESSOR LINE<br />
Remain a safe distance from rotating and/<br />
or moving components.<br />
Comment<br />
Measuring a value which is too high, the inside of the air<br />
dryer housing and the silencer on the bleed opening should<br />
first be cleaned.<br />
Next, carry out the inspection again.<br />
Inspection<br />
1. Bring the engine to the operating temperature.<br />
2. Blow off the brake system to below the pressure regulator’s<br />
cut-in pressure.<br />
3. Remove the compressor line which is connected to port<br />
23 on the air dryer.<br />
Plug the opening of port 23.<br />
4. Pressurize the brake system (pressure regulator should<br />
cut in).<br />
5. When the engine is not running, remove the safety valve<br />
from the compressor line and replace it with a test nipple.<br />
6. Connect a pressure gauge (range 0 - 16 bar) to the test<br />
nipple.<br />
7. Start the engine and run it at the maximum speed.<br />
8. Check whether the pressure gauge indicates a pressure<br />
of less than 2 bar when the pressure regulator has cut<br />
out.<br />
If the measured pressure is higher than the given value,<br />
clean or replace the line between the compressor and<br />
the air dryer.<br />
Comment<br />
If the measured value is too high, then that means there is an<br />
excessive carbon deposit in the compressor line. This may<br />
be because the compressor is in a bad condition (oil consumption).<br />
The oil consumption can be checked by carrying out an oil<br />
consumption test (special tool Wabco 884.013.124.0).<br />
9. Idle the engine.<br />
10. Blow off the brake system until the cut-in pressure of the<br />
pressure regulator is reached and then turn off the<br />
engine. The pressure gauge’s needle must not drop<br />
quickly. If necessary, check the system for air leaks.<br />
Pay particular attention to the compressor line and the<br />
compressor.<br />
11. Fit the safety valve.<br />
12. Fit the compressor line to port 23 on the air dryer.<br />
3 - 18 0616
EXPLANATION OF THE MAINTENANCE WORK<br />
SB(R)4000+ PF/XF SB(R)230 PF Euro3<br />
Inspection and adjustment<br />
3.15 INSPECTING THE V-BELTS<br />
3.15.1 INSPECTING THE V-BELTS<br />
– Check whether the V-belts are worn or damaged. If necessary,<br />
replace them. Also pay attention to hairline cracks.<br />
– Check the V-belt tension using a tension gauge.<br />
3.15.2 CHECKING THE V-BELT TENSION<br />
Checking instruction<br />
1. Check the V-belt tension using the special tool (DAF no.<br />
1240443).<br />
2. Zero the gauge by pressing the measuring arm (1).<br />
3. Place the V-belt tension gauge on the V-belt in the middle<br />
position between the two pulleys.<br />
4. Slowly push the V-belt using the V-belt tension gauge<br />
until the gauge makes a clicking noise. Next, carefully<br />
remove the tension gauge.<br />
Make sure the measuring arm does not move.<br />
0616<br />
PE engine<br />
XE engine<br />
03928B<br />
03929B<br />
3 - 19<br />
5
5<br />
EXPLANATION OF THE MAINTENANCE WORK<br />
Inspection and adjustment<br />
SB(R)4000+ PF/XF SB(R)230 PF Euro3<br />
5. Read the value by viewing the position of the measuring<br />
arm on the scale. Compare the value with the recommended<br />
tension (see “Technical information”).<br />
3.15.3 ADJUSTING THE V-BELT TENSION<br />
Adjusting instruction<br />
1. Unscrew the threaded spindle’s counter nut (4).<br />
2. Unscrew the threaded spindle’s attachment bolt (5).<br />
3. Unscrew the alternator’s bottom attachment bolt (3).<br />
4. Loosen the threaded bush’s (1) counter nut (2).<br />
5. Move the alternator by turning the threaded bush (1) until<br />
the correct V-belt tension is obtained (see “Technical<br />
information”).<br />
6. Tighten the alternator’s bottom attachment bolt (3).<br />
7. Tighten the threaded spindle’s counter nuts (2 and 4).<br />
8. Tighten the threaded spindle’s attachment bolt (5) which<br />
is attached to the water pump.<br />
PE engine<br />
XE engine<br />
3 - 20 0616
EXPLANATION OF THE MAINTENANCE WORK<br />
SB(R)4000+ PF/XF SB(R)230 PF Euro3<br />
Inspection and adjustment<br />
3.16 INSPECTING THE POLY V-BELT<br />
Inspecting the poly V-belt<br />
1. Check the poly V-belt for damage and wear patterns.<br />
3.17 CHECKING THE AUTOMATIC<br />
POLY V-BELT TENSIONER<br />
1. Remove the poly V-belt (see “Removal and installation”)<br />
and place the automatic tensioner in the rest position (0).<br />
2. Place a torque spanner on the automatic tensioner’s hexagon.<br />
3. The torque must be of a certain value for the indicated<br />
rotation (A) (see “Technical information). The automatic<br />
tensioner must be replaced if the measured value is not<br />
the same as the inspection value.<br />
4. Fit the poly V-belt (see “Removal and installation”).<br />
0616<br />
3 - 21<br />
5
5<br />
EXPLANATION OF THE MAINTENANCE WORK<br />
Inspection and adjustment<br />
SB(R)4000+ PF/XF SB(R)230 PF Euro3<br />
3.18 CHECKING THE AIR CONDITIONING<br />
V-BELT<br />
Inspecting the V-belts<br />
– Check whether the V-belts are worn or damaged. If necessary,<br />
replace them. Also pay attention to hairline cracks.<br />
Checking the V-belt tension<br />
1. Check the V-belt tension according to the instructions<br />
provided by the manufacturer.<br />
Adjusting the V-belt tension<br />
1. Unscrew the quick-release coupling on the air cylinder’s<br />
bottom port (2).<br />
2. Check the running behaviour of the V-belts with an<br />
untensioned belt tensioner (pressureless) and a running<br />
engine. If the V-belts run irregularly, increase the belt<br />
tensioner’s spring tension using the adjusting ring (1).<br />
3. Reconnect the quick-release coupling on the air cylinder’s<br />
bottom port (2).<br />
Basic setting of the pneumatic belt tensioner:<br />
Adjust the belt tensioner so that it is in the middle of the 50<br />
mm stroke (with full air pressure and the belts fitted).<br />
The compressor’s shackle will then be almost horizontal.<br />
1145785<br />
3 - 22 0616
EXPLANATION OF THE MAINTENANCE WORK<br />
SB(R)4000+ PF/XF SB(R)230 PF Euro3<br />
Inspection and adjustment<br />
3.19 INSPECTING THE AIR FILTER BLOCK-<br />
AGE INDICATOR<br />
1. Check whether the yellow piston (2) has reached the<br />
maximum vacuum pressure (contamination limit) (see<br />
“Technical information”). The service indicator window<br />
will turn red when the maximum contamination limit has<br />
been reached. Note the vacuum pressure and compare<br />
this to the previous inspection.<br />
A sudden increase in the vacuum pressure may be an<br />
indication of a temporary blockage caused by snow or<br />
moisture.<br />
2. Press the reset button (1) to check the operation of the<br />
indicator.<br />
Check the vacuum hose and its connection for faults.<br />
3. Replace the air filter element if the indicator has reached<br />
the maximum contamination limit.<br />
4. After replacing the air filter element, the blockage indicator<br />
must be reset by pressing the yellow reset button (1).<br />
0616<br />
Indicator type RX00-2275<br />
A Normal, clean filter<br />
B Filter with maximum contamination<br />
Replace the air filter element<br />
03915B<br />
03920B<br />
Indicator type AE-36501-00332<br />
A Normal, clean filter 0%<br />
B Filter with maximum contamination 75%<br />
Replace the air filter element<br />
3 - 23<br />
5
5<br />
EXPLANATION OF THE MAINTENANCE WORK<br />
Inspection and adjustment<br />
SB(R)4000+ PF/XF SB(R)230 PF Euro3<br />
3.20 CHECKING THE AIR INLET<br />
DUST TRAPPING VALVE<br />
Check the condition of the rubber valve.<br />
Replace the valve when he:<br />
– doesn’t seals properly;<br />
– is damaged;<br />
– is turned inside out;<br />
– is missing.<br />
03925B<br />
3 - 24 0616
EXPLANATION OF THE MAINTENANCE WORK<br />
SB(R)4000+ PF/XF SB(R)230 PF Euro3<br />
Inspection and adjustment<br />
3.21 INSPECTING THE AIR INTAKE SYSTEM<br />
FOR LEAKS, DAMAGE AND ATTACH-<br />
MENT<br />
– Check the condition and attachment of the air inlet ducts,<br />
hoses and hose clips of the air intake system.<br />
– Check the air intake system for leaks by carrying out a<br />
pressure test if in doubt about whether the air intake system<br />
is airtight. This may be recognized by:<br />
The loss of power.<br />
High fuel consumption.<br />
Unusual sounds.<br />
Pressure-testing the air intake system<br />
1. Remove the air intake line (1) between the intercooler<br />
and the inlet manifold from the inlet manifold.<br />
2. Fit the special tool (DAF no. 0694831) to the air intake<br />
hose (2).<br />
3. Remove the air inlet hose (3) between the air filter housing<br />
and the suction side of the turbo.<br />
4. Fit the special tools (DAF no. 1329310 and DAF no.<br />
1329311) to the suction side of the turbo.<br />
5. Connect an air hose with a pressure reduction valve to<br />
the sealing cap (A) and pressurize the system to approximately<br />
1.0 bar.<br />
6. Use soapsuds to check the entire air intake system for air<br />
leaks.<br />
Check whether the pressure reduction valve’s pressure<br />
gauge drops.<br />
7. Remove the special tools.<br />
8. Fit the inlet hose between the air filter housing and the<br />
suction side of the turbo.<br />
9. Fit the inlet line (1) between the intercooler and the inlet<br />
manifold.<br />
0616<br />
Plugs may spring off if they are not<br />
properly secured. For this reason, and<br />
because of the risk of damage to the air<br />
intake system, the pressure must never<br />
be greater than 1.0 bar.<br />
1145799<br />
3 - 25<br />
5
5<br />
EXPLANATION OF THE MAINTENANCE WORK<br />
Inspection and adjustment<br />
SB(R)4000+ PF/XF SB(R)230 PF Euro3<br />
3.22 INSPECTING THE EXHAUST SYSTEM<br />
Exhaust fumes contain carbon<br />
monoxide. Carbon monoxide is a deadly,<br />
colourless and odourless gas which,<br />
when inhaled, deprives the body of<br />
oxygen, leading to asphyxiation. Serious<br />
carbon monoxide poisoning can result in<br />
brain damage or death.<br />
– Check the attachment of the exhaust system for faults.<br />
– Check the exhaust system for leaks.<br />
1 Silencer<br />
2 Clamp<br />
3 Vibration damper<br />
4 Flexible exhaust pipe<br />
6 Vibration damper<br />
7 Outlet<br />
1151915-1<br />
3 - 26 0616
EXPLANATION OF THE MAINTENANCE WORK<br />
SB(R)4000+ PF/XF SB(R)230 PF Euro3<br />
Inspection and adjustment<br />
3.23 INSPECTING THE EMINOX ESI<br />
Error code table<br />
Code Meaning Action<br />
Green LED lit ESI system active, BP below maximum<br />
permitted value.<br />
None.<br />
Orange LED lit BP above max. permitted value.<br />
CRT filter may have to be cleaned.<br />
Comments<br />
1. Checking the engine<br />
• Check the exhaust back pressure (BP).<br />
• Carry out a soot measurement.<br />
• Check for oil leaks.<br />
2. CRT filter<br />
• The service indicator indicates that an extra service<br />
interval is necessary.<br />
The normal service interval must be maintained.<br />
3. ECI unit power supply<br />
• The warranty for the ECI unit and the CRT system will<br />
become invalid if this warning is not observed.<br />
4. Exceeding the temperature range<br />
If the surrounding temperature exceeds 80° C, then the<br />
display of the ESI unit is turned off automatically in order<br />
to protect the electronic components. If the temperature<br />
then falls below 80° C, the display will be turned back on<br />
0616<br />
Check the max. static BP<br />
Check the engine (1)<br />
Red LED lit CRT filter must be cleaned immediately. Service the CRT filter (2)<br />
Display is not lit ESI unit does not have a power supply.<br />
Connect the ESI unit(3)<br />
Display is not lit<br />
Blue LED is lit<br />
The operating temperature is greater than<br />
80°C. The display has turned itself off.<br />
LEDs flash ESI sensor has not measured a pressure<br />
for 12 hours whilst the contact switch has<br />
been turned on.<br />
Check the wiring.<br />
Allow the ESI unit to cool down. Move the<br />
unit to a cooler location (4).<br />
Check the lines of the ESI system (5). Idle<br />
the engine for approx. 5 minutes (6).<br />
LEDs flash ESI sensor is not connected to the CPU. Check the wiring. Connect the sensor.<br />
Reset the ESI unit.<br />
Do not hold the reset magnet in the<br />
RESET position when connecting the<br />
power supply<br />
3 - 27<br />
5
5<br />
EXPLANATION OF THE MAINTENANCE WORK<br />
Inspection and adjustment<br />
SB(R)4000+ PF/XF SB(R)230 PF Euro3<br />
again. The fact that the display is turned off does not<br />
have an adverse effect on the operation of the ESI unit.<br />
5. Checking the CRT system<br />
If the ESI unit is turned on and a pressure is not measured<br />
for a period of 12 hours, the LEDs will start to flash<br />
in the order green and red alternating with amber.<br />
If the LEDs flash after the engine has been running, then<br />
there is a leak or blockage in a line.<br />
After the leak or blockage has been rectified, the engine<br />
must be run for approx. 5 minutes in order to reset the<br />
system.<br />
6. Contact switch on and engine off<br />
This error code also occurs if the vehicle has been stationary<br />
for more than 12 hours with the contact switch<br />
turned on. The sensor will then not register a pressure.<br />
The ESI system is reset by running the engine for 5 minutes.<br />
7. ESI sensor not connected<br />
All the LEDs will flash together if the sensor is not connected.<br />
If the sensor is then connected, the red LED will<br />
be lit and a higher exhaust back pressure than normal will<br />
be indicated. Use the magnet to reset the ESI unit.<br />
If the air line has been connected to the wrong connection<br />
port, then the 3 LEDs will flash simultaneously (when<br />
the engine is running).<br />
3 - 28 0616
EXPLANATION OF THE MAINTENANCE WORK<br />
SB(R)4000+ PF/XF SB(R)230 PF Euro3<br />
Inspection and adjustment<br />
3.24 CHECKING THE EXHAUST BACK<br />
PRESSURE<br />
0616<br />
Exhaust gases contain carbon monoxide.<br />
Carbon monoxide is a deadly, colourless<br />
and odourless gas which, when inhaled,<br />
deprives the body of oxygen, leading to<br />
asphyxiation. Serious carbon monoxide<br />
poisoning can result in brain damage or<br />
death.<br />
Always observe the safety instructions<br />
when working on the CRT filter.<br />
After turning off the engine, allow the<br />
CRT filter to cool down for a long time in<br />
order to prevent burns if the CRT filter is<br />
touched.<br />
Always wear well-fitting clothing, gloves,<br />
safety glasses and a dust mask when<br />
working on the CRT filter.<br />
Before starting work on the CRT filter,<br />
read the Health and Safety Data Sheet<br />
which is available from Eminox or see the<br />
Eminox website (www.eminox.com).<br />
The exhaust back pressure can be checked in two different<br />
ways when the engine is stationary.<br />
1153798<br />
1. Green LED<br />
2. Amber LED<br />
3. Red LED<br />
4. Blue LED<br />
5. Mxxx maximum exhaust back pressure<br />
Cxxx current exhaust back pressure<br />
6. ESI unit<br />
7. Magnet<br />
A. Reset position of the magnet<br />
3 - 29<br />
5
5<br />
EXPLANATION OF THE MAINTENANCE WORK<br />
Inspection and adjustment<br />
SB(R)4000+ PF/XF SB(R)230 PF Euro3<br />
3.24.1 IF THE VEHICLE HAS A SERVICE INDICATOR<br />
1. Turn the engine off.<br />
2. Reset the display of the service indicator so that it displays<br />
M000.<br />
To do so, place the magnet in position A.<br />
• All the LEDs, including the blue LED, will be lit for a<br />
short period of time.<br />
• The green LED will be lit.<br />
3. Place the gearbox in neutral N and apply the parking<br />
brake.<br />
4. Bring the engine to the operating temperature.<br />
5. Run the engine at the maximum speed for 15 seconds.<br />
6. Stop the engine.<br />
7. The display shows the maximum static exhaust back<br />
pressure (Mxxx).<br />
Record this value on the CRT filter maintenance form.<br />
8. When the contact switch is turned on and the engine is<br />
running, the display alternately shows the current<br />
exhaust back pressure (Cxx) and the maximum exhaust<br />
back pressure (Mxxx).<br />
9. Measure the exhaust back pressure at the maximum<br />
engine speed and compare the value with the maximum<br />
permitted value (see “Technical information”).<br />
10. If the maximum permitted value is exceeded, the CRT filter<br />
must be cleaned (see “Cleaning”).<br />
11. Carry out a soot measurement.<br />
3.24.2 BY CONNECTING A PRESSURE GAUGE<br />
1. Bring the engine to the operating temperature.<br />
2. Remove the plug and the sealing ring from the silencer<br />
and fit a suitable coupling with a line. Due to the high<br />
exhaust temperature, the first section of the line should<br />
be made of metal.<br />
3. Connect a pressure gauge with a range of up to approx.<br />
0.1 - 0.3 bar (10 - 30 Kpa) to the coupling.<br />
Connect a soot meter.<br />
Comment<br />
To prevent strong vibrations of the gauge’s needle, a dampened<br />
gauge should be used.<br />
4. Measure the exhaust back pressure at the maximum<br />
engine speed and compare the value with the maximum<br />
permitted value (see “Technical information”).<br />
5. If the maximum permitted value is exceeded, the CRT filter<br />
must be cleaned (see “Cleaning”).<br />
6. Carry out a soot measurement.<br />
1 Plug M10x1<br />
2 Copper sealing ring M10<br />
C Plug 11/4” BSP<br />
3 - 30 0616<br />
03922B
EXPLANATION OF THE MAINTENANCE WORK<br />
SB(R)4000+ PF/XF SB(R)230 PF Euro3<br />
Inspection and adjustment<br />
3.25 INSPECTING THE CATALYSER<br />
1. Remove the catalyser (see “Removal and installation”).<br />
2. Check the catalyser for blockages caused by soot and<br />
ash particles. Use a soft brush to remove any accumulated<br />
soot and ash particles (see “Cleaning”).<br />
3. Check the visible sections of the catalyser for cracks or<br />
indentations and check whether the ceramic bracket is<br />
firmly secured in the housing.<br />
Check the catalyser module if any faults are observed.<br />
0616<br />
3 - 31<br />
5
5<br />
EXPLANATION OF THE MAINTENANCE WORK<br />
Inspection and adjustment<br />
SB(R)4000+ PF/XF SB(R)230 PF Euro3<br />
3.26 INSPECTING THE HYDRAULIC FAN<br />
DRIVE FLUID LEVEL<br />
1. Check the oil level when the engine is idling. The oil level<br />
must be between the maximum and minimum marks.<br />
2. If necessary, top up the oil to the maximum mark.<br />
Clean the area around the filler cap before removing it.<br />
3. Check the bleed opening in the cap.<br />
1145788<br />
3 - 32 0616
EXPLANATION OF THE MAINTENANCE WORK<br />
SB(R)4000+ PF/XF SB(R)230 PF Euro3<br />
Inspection and adjustment<br />
3.27 CHECKING THE HYDRAULIC FAN<br />
LINES/HOSES<br />
1. Check the lines and hoses<br />
– Check all the lines and hoses for wear and leaks.<br />
In particular, porous suction lines with a vacuum pressure<br />
will cause a problem (air in the system).<br />
– If in doubt, always replace the lines and/or hoses.<br />
Comment<br />
The supply and return lines of the hydraulic motor manufactured<br />
since 1/1/2005 have “Texsleeve” protective sleeves.<br />
2. Line and hose connections<br />
– Check each line and hose connection for leaks.<br />
3. Path of the lines and hoses<br />
– The lines and hoses must not be twisted.<br />
To make it easier to check this, a mark may be drawn<br />
on the lines (sometimes text).<br />
– The lines and hoses must lay freely (think of the possibility<br />
of them rubbing through).<br />
– The hoses must not make any sharp turns, especially<br />
not the flexible suction line and the return line.<br />
– The hoses must not be pinched closed by other components.<br />
0616<br />
1145385-1<br />
3 - 33<br />
5
5<br />
EXPLANATION OF THE MAINTENANCE WORK<br />
Inspection and adjustment<br />
SB(R)4000+ PF/XF SB(R)230 PF Euro3<br />
3.28 CHECKING THE COOLING SYSTEM’S<br />
ANTIFREEZE CONCENTRATION<br />
There is excess pressure in the cooling<br />
system when the coolant becomes hot.<br />
Carefully remove the filler cap to remove<br />
the excess pressure.<br />
Coolant is a harmful liquid.<br />
Therefore, avoid skin contact to prevent<br />
poisoning.<br />
1. Check the antifreeze concentration of the coolant.<br />
2. Only fill the cooling system with demineralised water or<br />
coolant which meets the <strong>VDL</strong> <strong>Bus</strong> & <strong>Coach</strong> specifications<br />
(see “Liquids, oils and lubricants specifications”).<br />
No other coolant, additive or antifreeze<br />
may be added to the mixture.<br />
To prevent damage to the engine block,<br />
do not add cold coolant whilst the engine<br />
is warm.<br />
3 - 34 0616
EXPLANATION OF THE MAINTENANCE WORK<br />
SB(R)4000+ PF/XF SB(R)230 PF Euro3<br />
Inspection and adjustment<br />
3.29 INSPECTING/TOPPING UP THE<br />
COOLANT LEVEL<br />
1. Turn the heater’s rotary switch to “warm”.<br />
2. Start the engine and allow it to idle for a couple of minutes.<br />
0616<br />
Coolant is a harmful liquid.<br />
Therefore, avoid skin contact to prevent<br />
poisoning.<br />
There is excess pressure in the cooling<br />
system when the coolant becomes hot.<br />
Carefully remove the filler cap to remove<br />
the excess pressure.<br />
3. Turn off the engine and check the coolant level.<br />
4. The coolant level must be between the maximum and<br />
minimum levels. If necessary, top up the coolant to the<br />
maximum level via the filler cap (1).<br />
Only fill the cooling system with coolant which meets the<br />
<strong>VDL</strong> <strong>Bus</strong> specifications (see “Liquids, oils and lubricants<br />
specifications”)<br />
If the coolant level is below the minimum<br />
level, the cooling system should be filled<br />
and bled.<br />
To prevent damage to the engine block,<br />
do not add cold coolant whilst the engine<br />
is warm.<br />
No other coolant, additive or antifreeze<br />
may be added to the mixture.<br />
Comment<br />
The coolant reservoir has a minimum level sensor. If the<br />
coolant level is too low, the symbol shown opposite will be<br />
displayed on the main display of the dashboard.<br />
The symbol will disappear approximately 1 minute after the<br />
coolant has been topped up to the correct level.<br />
03411B<br />
03939B<br />
3 - 35<br />
5
5<br />
EXPLANATION OF THE MAINTENANCE WORK<br />
Inspection and adjustment<br />
SB(R)4000+ PF/XF SB(R)230 PF Euro3<br />
3.30 CHECKING THE COOLING SYSTEM FOR<br />
LEAKS AND DAMAGE<br />
Coolant is a harmful liquid.<br />
Therefore, avoid skin contact to prevent<br />
poisoning.<br />
The cooling system can be checked for leaks using a pressurization<br />
pump. Any leaks can be spotted more quickly if<br />
this is carried out whilst the engine is warm.<br />
3.30.1 CHECKING FOR LEAKS<br />
1. Fill the cooling system to the maximum level.<br />
To prevent damage to the engine block,<br />
do not add cold coolant whilst the engine<br />
is warm.<br />
2. Increase the engine temperature (the engine does not<br />
have to be at the operating temperature).<br />
There is excess pressure in the cooling<br />
system when the coolant becomes hot.<br />
Carefully remove the filler cap to remove<br />
the excess pressure.<br />
3. Remove the filler cap from the expansion tank.<br />
4. Fit the pressurization pump.<br />
5. Comment<br />
The pressure cap will also be checked by fitting the pressurization<br />
pump to the filler port on the expansion tank.<br />
See “Technical information” for the opening pressure of<br />
the pressure relief valve and vacuum valve.<br />
Pressurize the system to the specified pressure (see<br />
“Technical information”). The pressure must remain constant<br />
for at least 10 minutes.<br />
6. Check the cooling system for leaks.<br />
3 - 36 0616
EXPLANATION OF THE MAINTENANCE WORK<br />
SB(R)4000+ PF/XF SB(R)230 PF Euro3<br />
Inspection and adjustment<br />
3.30.2 CHECKING THE COOLING UNIT<br />
1. Check the suspension brackets and vibration damper of<br />
the cooling unit for faults.<br />
2. Check whether all the line clamps and suspension straps<br />
are present and check their attachment.<br />
3. Check the fan blade for damage.<br />
4. Check whether there is at least 3 mm of play between the<br />
fan blades and the wind tunnel.<br />
5. Check the bearings of the hydraulic motor for play.<br />
0616<br />
03917B<br />
3 - 37<br />
5
5<br />
EXPLANATION OF THE MAINTENANCE WORK<br />
Inspection and adjustment<br />
SB(R)4000+ PF/XF SB(R)230 PF Euro3<br />
3.30.3<br />
Instructions for assembling and disassembling the<br />
Oetiker hose clamp<br />
Assembly<br />
1. Open the hose clamp as far as possible (make sure the<br />
bolt (1) is not screwed out of the D nut (5)).<br />
2. Place the hose clamp over the hose. If necessary, open<br />
the hose clamp further.<br />
3. Set the hose clamp to the smallest possible diameter,<br />
making sure the tongue (3) and the hooks (4) fall into the<br />
correct recesses.<br />
4. Tighten the bolt until the coils of the spring (2) touch each<br />
other and then tighten the bolt a further 3 x 360° to obtain<br />
the correct pre-tension.<br />
5. The opening (A) between the D nuts must now be at least<br />
3 mm.<br />
Max. tightening torque of the hose clamp bolt:<br />
Colourless spring: 90 -100 Ncm<br />
Green spring: 135 - 200 Ncm<br />
Disassembly<br />
1. Unscrew the hose clamp by turning the bolt anticlockwise.<br />
2. Make sure the bolt is not screwed out of the D nut.<br />
If necessary, open the hose clamp further.<br />
1 Bolt<br />
2 Spring<br />
3 Tongue<br />
4 Hook<br />
5 D nut<br />
3 - 38 0616<br />
03921B
EXPLANATION OF THE MAINTENANCE WORK<br />
SB(R)4000+ PF/XF SB(R)230 PF Euro3<br />
Inspection and adjustment<br />
3.31 CHECKING THE RADIATOR AND INTER-<br />
COOLER FOR CONTAMINATION<br />
1. Visually check the wire screen for contamination.<br />
If necessary, clean the wire screen (see “Cleaning”).<br />
2. If the wire screen is very contaminated, visually check<br />
the oil cooler, the intercooler and the radiator for contamination.<br />
If necessary, clean them (see “Cleaning”).<br />
0616<br />
03913B<br />
3 - 39<br />
5
5<br />
EXPLANATION OF THE MAINTENANCE WORK<br />
Inspection and adjustment<br />
SB(R)4000+ PF/XF SB(R)230 PF Euro3<br />
3.32 CHECKING THE STEERING OIL LEVEL<br />
Clean the top of the reservoir, so dirt will<br />
not enter the reservoir.<br />
1. Check the fluid level in the reservoir using the dipstick<br />
(2).<br />
2. When the engine is running, the fluid level must reach the<br />
maximum mark on the dipstick. The fluid level will be<br />
approximately 2 cm higher if the engine is not running.<br />
3. If necessary, top up the oil via the filler cap (3).<br />
3 - 40 0616
EXPLANATION OF THE MAINTENANCE WORK<br />
SB(R)4000+ PF/XF SB(R)230 PF Euro3<br />
Inspection and adjustment<br />
3.33 INSPECTING THE STEERING MECHA-<br />
NISM’S LINES/HOSES/CONNECTIONS<br />
Hydraulic lines/hoses/connections<br />
1. Condition of the lines and hoses<br />
– Check all the hydraulic lines and hoses for wear and<br />
leaks.<br />
In particular, porous suction hoses with a vacuum pressure<br />
will cause a problem (air in the system).<br />
– If in doubt, always replace the lines and/or hoses.<br />
2. Line and hose connections<br />
– Check each line and hose connection for leaks.<br />
3. Path of the hoses<br />
– The hoses must not be twisted. To make it easier to<br />
check this, a mark may be drawn on the lines (sometimes<br />
text).<br />
– The lines and hoses must lay freely (think of the possibility<br />
of them rubbing through and noises that can be<br />
heard in the vehicle).<br />
– The hoses must not make any sharp turns, especially<br />
not the flexible suction line and the return line.<br />
– The hoses must not be pinched closed by other components.<br />
Attachment<br />
1. Make sure the weight of the vehicle rests on the front<br />
wheels.<br />
2. Idle the engine.<br />
3. Jerk the steering wheel a couple of times and visually<br />
check the attachment of the steering box and the steering<br />
bracket. Pay attention to any marks on the attachment<br />
(corrosion, paint damage).<br />
Comment<br />
If there is any doubt regarding the attachment, the bolts may<br />
only be tightened in accordance with the Workshop Instruction<br />
Manual.<br />
0616<br />
3 - 41<br />
5
5<br />
EXPLANATION OF THE MAINTENANCE WORK<br />
Inspection and adjustment<br />
SB(R)4000+ PF/XF SB(R)230 PF Euro3<br />
3.34 INSPECTING THE STEERING<br />
MECHANISM’S BEVEL BOX<br />
1. Block the steering axle (2) and turn the steering wheel<br />
(1). No play must be felt.<br />
2. Check the bevel box (3) for leaks. The bevel box must be<br />
replaced if there are any leaks.<br />
1151104<br />
3 - 42 0616
EXPLANATION OF THE MAINTENANCE WORK<br />
SB(R)4000+ PF/XF SB(R)230 PF Euro3<br />
Inspection and adjustment<br />
3.35 INSPECTING THE PIVOT POINTS OF<br />
THE STEERING MECHANISM<br />
General points of attention<br />
1. Check whether all the locks of the pitman arm, steering<br />
rod and track rod are present and undamaged.<br />
2. Check whether there is any play on the spider of the<br />
steering box’s input shaft.<br />
3.35.1 CHECKING THE STEERING ROD BALLS AND<br />
TRACK ROD BALLS<br />
• The checks must be made in the operational condition with<br />
a loaded axle.<br />
• Clean the steering rod balls and track rod balls with a dry<br />
cloth (do not use a cleaning product or a solvent).<br />
• Visually check the steering rod balls and the track rod balls<br />
for:<br />
– Corrosion<br />
The steering rod, track rod, bearing housing, stud bolt and<br />
cover must not have any grooves deeper than 1 mm.<br />
– Bellows/dust cover<br />
Check whether grease escapes via the wall of the bellows<br />
by squeezing the bellows by hand. It is permitted for grease<br />
to escape through the bottom bellows opening. The bellows<br />
must not have any holes, cracks or wear.<br />
– Diaphragm spring and clamping ring<br />
The diaphragm spring and clamping ring push the bellows<br />
against the steering ball housing and the coupling ball.<br />
Check whether the diaphragm spring and the clamping ring<br />
lay correctly in the recesses.<br />
It must not be possible to rotate the bellows/dust cover by<br />
hand.<br />
– Castellated nut and split pin<br />
Check the attachment of the castellated nut and the split<br />
pin. Check the castellated nut and the split pin for excessive<br />
corrosion.<br />
– Steering rod and track rod clamped connection<br />
* The clamping screw must be correctly fitted. The nut<br />
must be flush against the saddle clamp. The screw<br />
must not be visibly deformed. Pitting caused by corrosion<br />
with a depth greater than 0.5 mm is not permitted.<br />
If it is observed that the clamped connection is loose or<br />
has been loose, the steering rod and track rod must be<br />
replaced as a precaution. Replace excessively corroded<br />
screws and nuts.<br />
* Place a finger on the clamped connection, turn the<br />
steering wheel from left to right and check whether the<br />
clamped connection moves. If movement is observed,<br />
the steering rod and the track rod must be replaced.<br />
* Visually check the steering rod and the track rod for<br />
damage. If serious damage is observed, the steering<br />
rod and the track rod must be replaced.<br />
0616<br />
1. Cover<br />
2. Top bearing shell<br />
3. Housing<br />
4. Compression spring<br />
5. Stud bolt<br />
6. Coupling ball<br />
7. Diaphragm spring<br />
8. Bottom bearing shell<br />
9. Bellows<br />
10. Clamping ring<br />
03927B<br />
3 - 43<br />
5
5<br />
EXPLANATION OF THE MAINTENANCE WORK<br />
Inspection and adjustment<br />
SB(R)4000+ PF/XF SB(R)230 PF Euro3<br />
3.35.2 RADIAL STEERING BALL JOINT PLAY<br />
1. Check the pivot points whilst the engine is not running.<br />
2. Turn the wheels to the straight ahead position.<br />
3. Make sure the weight of the vehicle rests on the front<br />
wheels.<br />
4. Push and pull the steering rods by hand in the direction<br />
of the steering ball joints. Do not use any tools to apply<br />
force, because this may damage the components.<br />
The steering ball joints must be replaced if any radial play<br />
can be felt.<br />
3.35.3 AXIAL (UPWARD) STEERING BALL JOINT PLAY<br />
1. Check the pivot points whilst the engine is not running<br />
with a load placed on the axles.<br />
2. Turn the steering wheel to the left and the right.<br />
3. Check the compression of the steering ball joint. Compare<br />
the reading with the maximum permissible steering<br />
ball joint play (see “Technical information”).<br />
If necessary, replace the steering ball joint.<br />
4. If in doubt, disassemble the steering ball joint and check<br />
the play using a suitable gauge.<br />
3 - 44 0616
EXPLANATION OF THE MAINTENANCE WORK<br />
SB(R)4000+ PF/XF SB(R)230 PF Euro3<br />
Inspection and adjustment<br />
3.35.4 CHECKING THE AXLE PLAY WITH SPECIAL TOOL DAF NO. 1329426<br />
1. Jack up the axle until the wheels come off of the ground<br />
and put the axle on hoisting sheers.<br />
2. Make sure the split pin of the castellated nut (if fitted)<br />
does not come into contact with the head of the stud bolt.<br />
3. Screw the thrust nut (8) onto the threaded spindle.<br />
4. Fit the spring retainer (3), spring (4) and thrust bush (6)<br />
into the bracket (1).<br />
Fit the lock screw (5). The thrust bush must move freely.<br />
Comment<br />
Fit the correct thrust bush (6). The thrust bush (6) must touch<br />
the outside edge of the steering ball joint (7).<br />
5. Screw back the thrust bolt (2) until the thrust bush (6) and<br />
its flange lay against the bracket (A = 0 mm).<br />
6. Fit the special tool over the steering ball joint (7) and turn<br />
the threaded spindle (9) by hand until the special tool<br />
clamps onto the steering ball joint (7).<br />
7. Tighten the thrust bolt (2) until its head lays against the<br />
bracket (1).<br />
8. Using a feeler gauge, measure the clearance “A” created<br />
between the pressure sleeve and the bracket.<br />
Compare the reading with the maximum permissible<br />
steering ball joint play (see “Technical information”).<br />
If necessary, replace the steering ball joint<br />
0616<br />
3 - 45<br />
5
5<br />
EXPLANATION OF THE MAINTENANCE WORK<br />
Inspection and adjustment<br />
SB(R)4000+ PF/XF SB(R)230 PF Euro3<br />
3.36 INSPECTING THE SWIVEL AXLE PLAY<br />
1. The vehicle should stand with the wheels on the ground.<br />
2. Measure the distance (A) between the swivel axle and<br />
the spacer ring around the entire circumference at the<br />
top of the axle end using a feeler gauge.<br />
Compare the measured value to the specified tolerance<br />
(see “Technical information”).<br />
Comment<br />
The play must be approximately the same around the entire<br />
circumference of the axle end. If the play is not equal, then<br />
this is an indication of radial play in the needle bearings. If the<br />
radial play of one of the needle bearings measured around<br />
the circumference of the axle end exceeds the permitted<br />
axial play tolerance, the needle bearings must be replaced.<br />
If too much axle play is measured around the entire circumference<br />
of the axle end, then the swivel axle’s thrust bearing<br />
is probably worn.<br />
3 - 46 0616
EXPLANATION OF THE MAINTENANCE WORK<br />
SB(R)4000+ PF/XF SB(R)230 PF Euro3<br />
Inspection and adjustment<br />
3.37 INSPECTING THE BLOCKING<br />
CYLINDERS OF THE 3RD AXLE<br />
1. Raise the vehicle.<br />
– Bleed the air bellows.<br />
Disconnect the ECAS unit’s connector.<br />
Apply the vehicle’s parking brake.<br />
– Jack up the vehicle using lifting columns.<br />
Place the lifting columns under the front axle and the<br />
trailing axle.<br />
– Place trestles under the vehicle’s trestle points.<br />
– Lower the vehicle onto the trestles, making sure the<br />
front wheels and trailing axle wheels can rotate freely.<br />
2. Connect pressure gauges to the blocking cylinder test<br />
port.<br />
3. Turn on the main switch and the contact switch.<br />
Both blocking cylinders should now be bled. Check<br />
whether both wheels can rotate freely.<br />
4. Turn off the main switch and the contact switch.<br />
Both blocking cylinders should now be aerated. Check<br />
whether both wheels are blocked.<br />
Play must not be felt. If necessary, remove any play (see<br />
workshop instruction manual).<br />
5. Check whether the blocking cylinders are bled/aerated<br />
when the steering wheel is rotated between 60° and 120°<br />
to the left and right (see table).<br />
6. Check the setting of the approach sensors if the blocking<br />
cylinders are NOT bled/aerated when the steering wheel<br />
is rotated between 60° and 120°.<br />
7. Simulate the driving speed using the MTCO tachograph.<br />
See the driver’s manual for instructions on how to operate<br />
the 3rd axle.<br />
– Up to a speed of 30 km/h, the “Block steered 3rd axle”<br />
switch on the dashboard can be used to block the 3rd<br />
axle.<br />
Both blocking cylinders will be aerated, so that both<br />
wheels are blocked.<br />
– The axle will always be blocked at a speed greater than<br />
30 km/h.<br />
8. Check the attachment of the dust covers and check the<br />
dust covers for cracks.<br />
0616<br />
1. Fork<br />
2. Hose clip<br />
3. Lock nut<br />
4. Dust cover<br />
5. Hose clip<br />
6. Piston rod<br />
7. Piston<br />
03911B<br />
3 - 47<br />
5
5<br />
EXPLANATION OF THE MAINTENANCE WORK<br />
Inspection and adjustment<br />
SB(R)4000+ PF/XF SB(R)230 PF Euro3<br />
Situation Main switch Switch for<br />
blocking the<br />
trailing axle<br />
Steering wheel<br />
rotation (in °)<br />
03935B<br />
Condition of the blocking cylinder<br />
A B<br />
1. OFF OFF All positions Aerated Aerated<br />
2. ON OFF 60° - 120° to the right Aerated Bled<br />
3. ON OFF 60° - 120° to the left Aerated<br />
4. ON ON All positions Aerated Aerated<br />
Right-hand bend<br />
A Left-hand blocking cylinder<br />
B Right-hand blocking cylinder<br />
C Approach sensor<br />
Left-hand bend<br />
A Left-hand blocking cylinder<br />
B Right-hand blocking cylinder<br />
C Approach sensor<br />
3 - 48 0616<br />
03934B
EXPLANATION OF THE MAINTENANCE WORK<br />
SB(R)4000+ PF/XF SB(R)230 PF Euro3<br />
Inspection and adjustment<br />
3.38 INSPECTING THE MAXIMUM WHEEL<br />
TURNING ANGLE<br />
Inspecting the wheel turning angle<br />
1. Apply the vehicle’s parking brake and place chocks in<br />
front of and behind the rear wheels of the driven axle.<br />
2. Turn off the main switch and the contact switch.<br />
3. Jack up the vehicle (only place the jack on the permitted<br />
jack points) and place turntables under the centre of the<br />
wheels of the front module, rear axle and trailing axle.<br />
Only use turntables which allow for wheel displacement<br />
caused by the wheel roll radius.<br />
4. Lower the wheels onto the turning plates. Zero the turning<br />
plates.<br />
5. Fit the alignment tool.<br />
Turn on the main switch so that the wheels can rotate<br />
freely.<br />
6. Check the wheel turning angle (see “Technical information)<br />
and, if necessary, adjust it.<br />
0616<br />
Work safely and block the vehicle so that<br />
it cannot slide off of the turntables.<br />
Adjusting the wheel turning angle<br />
1. The wheel turning angle is adjusted by changing the<br />
length of the stop bolt on the swivel axle. After the adjustment,<br />
secure the bolt using the lock nut.<br />
2. After finishing the adjustment, make sure the tyre does<br />
not come into contact with other components.<br />
03930B<br />
3 - 49<br />
5
5<br />
EXPLANATION OF THE MAINTENANCE WORK<br />
Inspection and adjustment<br />
SB(R)4000+ PF/XF SB(R)230 PF Euro3<br />
3.39 INSPECTING THE BRAKE COMPO-<br />
NENTS AND BRAKE LINES<br />
1. If the vehicle’s brake system has been charged to the<br />
maximum pressure and the vehicle has been standing<br />
stationary for 16 hours, it should generally be possible to<br />
drive the vehicle away without having to first bring the<br />
brake system to a sufficient operating pressure. This<br />
amounts to a maximum pressure drop of approximately<br />
0.4 bar per hour at the normal system pressure.<br />
2. Check whether all the brake components are securely<br />
attached using the correct fixing or locking compounds.<br />
3. Check all the brake components for damage and cracked<br />
or broken parts.<br />
4. Check the operation of the air compressor and pressure<br />
regulator as follows:<br />
– Visually check the cut-in and cut-out pressure of the air<br />
compressor and the pressure regulator using the pressure<br />
gauges on the dashboard by pressing the brake<br />
pedal a number of times whilst the engine is running<br />
(see “Technical information”).<br />
– Check the capacity of the air compressor.<br />
The compressor must be able to bring an empty system<br />
to the operating pressure within the indicated time<br />
whilst the engine is running at the maximum speed.<br />
Vehicle type Cut-out pressure Filling time Air reservoir volume<br />
SB 8.6 bar ≤ 6 min. 70 l<br />
SBR 8.9 ≤ 6 min. 95 l<br />
5. Check for air leaks:<br />
– Bring the pneumatic brake system to the operating<br />
pressure (cut-out pressure of the pressure regulator).<br />
– Apply the foot brake and keep it depressed.<br />
– A leak must not be heard in the entire pneumatic brake<br />
system.<br />
6. Check the brake hoses for deformation and ageing.<br />
7. Check whether the brake hoses and brake components<br />
touch any moving parts.<br />
8. Check whether the wheels can rotate freely in both directions<br />
without the brake pads rubbing.<br />
9. Check whether the brake cylinders move whilst the service<br />
brake is applied.<br />
3 - 50 0616
EXPLANATION OF THE MAINTENANCE WORK<br />
SB(R)4000+ PF/XF SB(R)230 PF Euro3<br />
Inspection and adjustment<br />
3.40 INSPECTING THE BRAKE CALLIPER<br />
PLAY<br />
An inspection of the movement of the brake calliper guide is<br />
the most important thing to do.<br />
Therefore, a simple inspection of the axial movement of the<br />
brake calliper whilst it is assembled is carried out first on the<br />
vehicle.<br />
3.40.1 GENERAL INSPECTION<br />
1. Push and pull the brake calliper in the axial direction (A)<br />
a couple of times. Considerable force is necessary to do<br />
this.<br />
2. Check the axial brake calliper play (A) (see “Technical<br />
information”).<br />
If the measured play is incorrect or if there is no movement<br />
at all along the guide bushes, the brake calliper must be<br />
more accurately inspected as follows.<br />
3.40.2 INSPECTING THE MOVABILITY<br />
1. Remove the brake pads.<br />
2. Use the adjusting bolt and the adapter to set the thrust<br />
pieces as far back as possible.<br />
3. Clean the guide bushes in the accessible areas.<br />
4. Check whether the brake calliper can be slid along the<br />
entire length (more than 25 mm) by hand (therefore, without<br />
the aid of tools).<br />
If this is not the case, apply grease to the guide bushes<br />
and bearing bushes, see chapter “Greasing guide buses<br />
and bearing bushes”.<br />
0616<br />
3 - 51<br />
5
5<br />
EXPLANATION OF THE MAINTENANCE WORK<br />
Inspection and adjustment<br />
SB(R)4000+ PF/XF SB(R)230 PF Euro3<br />
3.40.3 CHECK THE PLAY OF GUIDE PIN 4 AND RUBBER BUSH 6<br />
Method A<br />
1. Remove the brake pads.<br />
2. Use the adjusting bolt and the adapter to set the thrust<br />
pieces as far back as possible.<br />
3. Pull the brake calliper as far as possible towards the outside<br />
of the vehicle (B).<br />
4. Push the brake calliper as far as possible in the direction<br />
of the brake calliper bracket (C).<br />
5. Measure the distance X.<br />
03924B<br />
3 - 52 0616
EXPLANATION OF THE MAINTENANCE WORK<br />
SB(R)4000+ PF/XF SB(R)230 PF Euro3<br />
Inspection and adjustment<br />
6. Push the brake calliper as far as possible in the opposite<br />
direction in the direction of the brake calliper bracket (D).<br />
7. Measure the distance Y.<br />
8. Determine the difference between the measured distances<br />
Y - X (see “Technical information”).<br />
9. Assemble the brake pads.<br />
Method B<br />
1. Remove the wheels.<br />
2. Remove the retainer (11), but DO NOT remove the brake<br />
pads from the brake calliper.<br />
3. Place the magnetic foot of the dial gauge on the brake<br />
calliper bracket on the same side as the rubber bush (6)<br />
(short bearing side).<br />
4. Position the needle of the dial gauge as shown.<br />
5. Push the brake calliper (1) in the direction of the bracket<br />
(2) and zero the dial gauge.<br />
6. Place a suitable tool (for example, a screw driver)<br />
between the bracket and the brake calliper and push the<br />
brake calliper in the opposite direction.<br />
7. Compare the measured value to the permitted play (see<br />
“Technical information”).<br />
If the measured play is greater than the permitted value,<br />
then the rubber bush (6) must be replaced<br />
8. Fit the retainer (11).<br />
9. Fit the wheels.<br />
0616<br />
FD00221<br />
3 - 53<br />
5
5<br />
EXPLANATION OF THE MAINTENANCE WORK<br />
Inspection and adjustment<br />
SB(R)4000+ PF/XF SB(R)230 PF Euro3<br />
3.41 CHECKING THE THICKNESS OF THE<br />
BRAKE PADS<br />
1. The thickness of the brake pads can be checked whilst<br />
the wheels are still fitted by the position of the guide bush<br />
in relation to the rubber bush.<br />
2. The rubber sleeve is stretched when the brake pad is at<br />
the maximum thickness. The rubber sleeve will roll up as<br />
a result of wear to the brake pads and the brake calliper<br />
sliding over the guide bushes.<br />
3. The wheels must be removed and the thickness of the<br />
brake pads and the thickness of the brake discs must be<br />
checked once the transfer from the ribbed section of the<br />
rubber sleeve to the smooth section (A) starts to roll<br />
inwards (see “Technical information”).<br />
Checking whether the brake pads rub<br />
Check whether the brake pads come free from the brake disc<br />
once the brakes have been released.<br />
3 - 54 0616
EXPLANATION OF THE MAINTENANCE WORK<br />
SB(R)4000+ PF/XF SB(R)230 PF Euro3<br />
Inspection and adjustment<br />
3.42 CHECKING THE AUTOMATIC SLACK<br />
ADJUSTER<br />
1. Release the parking brake/door-operated brake.<br />
2. Remove the wheels.<br />
3. Press the brake calliper towards the vehicle. Push the<br />
inner brake pad away from the thrust pieces.<br />
4. Check the air gap between the thrust pieces and the rear<br />
of the brake pad.<br />
This air gap should be 0.6 - 1.1 mm.<br />
If the air gap falls outside the tolerance, the slack<br />
adjuster must be checked as follows.<br />
5. Remove the cover (37).<br />
0616<br />
To avoid damaging the sealing surface, never use a<br />
screw driver to remove the cover.<br />
Never rotate the adjusting hexagon<br />
without an adapter (61). The adapter<br />
forms a torque safety device. If the torque<br />
becomes too great, the adapter will no<br />
longer grip the adjusting hexagon.<br />
Without an adapter, the mechanics in the<br />
brake calliper may become damaged as a<br />
result of a too great torque, so that it will<br />
be necessary to replace the brake<br />
calliper.<br />
6. Turn the slack adjuster anticlockwise using a box spanner<br />
and an adapter until the slack adjuster clicks 2 or 3<br />
times (the play will be reduced).<br />
7. Operate the service brake 5 to 10 times and check<br />
whether the box spanner can rotate freely in the clockwise<br />
direction.<br />
The box spanner will turn clockwise in jerks if the slack<br />
adjuster works correctly.<br />
Comment<br />
When the clicks increase, the spanner’s angular displacement/rotation<br />
will become smaller/less.<br />
The slack adjuster works correctly if the spanner turns back<br />
as described.<br />
The brake calliper should be replaced if the following faults<br />
occur:<br />
The slack adjuster or box spanner turns:<br />
a. Not at all.<br />
b. Only the first time the brakes are applied.<br />
c. Back and forth each time the brakes are applied.<br />
3 - 55<br />
5
5<br />
EXPLANATION OF THE MAINTENANCE WORK<br />
Inspection and adjustment<br />
SB(R)4000+ PF/XF SB(R)230 PF Euro3<br />
8. Remove the box spanner.<br />
9. Replace the cover (37). Apply a small amount of Renolit<br />
HLT2 (white) to the new cover and then fit it.<br />
Check whether the cover is properly sealed.<br />
3 - 56 0616
EXPLANATION OF THE MAINTENANCE WORK<br />
SB(R)4000+ PF/XF SB(R)230 PF Euro3<br />
Inspection and adjustment<br />
3.43 INSPECTING THE BRAKE DISCS<br />
1. Remove the wheels.<br />
2. Measure the thickness of the brake discs. When doing<br />
so, measure the thickness in a number of places so as to<br />
find the thinnest measurement. Compare the measured<br />
value with the specified value (see “Technical information”).<br />
3. Check the brake discs for wear patterns (see “Technical<br />
information”).<br />
Comment<br />
The brake discs may be turned (see “Technical information”).<br />
0616<br />
3 - 57<br />
5
5<br />
EXPLANATION OF THE MAINTENANCE WORK<br />
Inspection and adjustment<br />
SB(R)4000+ PF/XF SB(R)230 PF Euro3<br />
3.44 GREASING GUIDE BUSHES AND BEAR-<br />
ING BUSHES<br />
Do not use a cleaning product which<br />
contains mineral oil.<br />
Do not use metal tools with sharp edges.<br />
1. Remove the brake calliper (see “Removal and installation”).<br />
2. Remove the ring (58).<br />
3. Remove the guide bush (5).<br />
Do not remove the brass bearing bush (7).<br />
4. Grease the inside of the bearing bush (7) (see “Liquids,<br />
oils and lubricants specifications”).<br />
5. Lightly grease the guide bush (5) (see “Liquids, oils and<br />
lubricants”).<br />
6. Fit the guide bush (5).<br />
7. Push the ring (58) onto the guide bush (5) until it clicks<br />
into place.<br />
8. Remove the guide bush (4).<br />
Do not remove the rubber bearing bush<br />
(6)<br />
9. Grease the inside of the bearing bush (6) (see “Liquids,<br />
oils and lubricants”).<br />
10. Lightly grease the guide bush (4) (see “Liquids, oils and<br />
lubricants”).<br />
11. Fit the guide bush (4) into the guide bush (4) from the<br />
inside of the brake calliper.<br />
12. Fit the brake calliper.<br />
3 - 58 0616
EXPLANATION OF THE MAINTENANCE WORK<br />
SB(R)4000+ PF/XF SB(R)230 PF Euro3<br />
Inspection and adjustment<br />
3.45 INSPECTING THE BRAKE<br />
DECELERATION<br />
Preferably check the brake deceleration on a plate brake<br />
tester or a roller test bench.<br />
The brake deceleration on a dry or almost dry and approximately<br />
horizontal road must be at least 4.5 m/s2 for a maximum<br />
pedal force of 70 kg.<br />
Comment<br />
If a roller test bench is used, the difference in braking force<br />
between the wheels on the rear axle must not be greater than<br />
30% of the highest measured braking force (highest value)<br />
where the wheels do not lock.<br />
The difference in braking force between the wheels on the<br />
front axle must not be greater than 20% of the highest measured<br />
braking force.<br />
0616<br />
3 - 59<br />
5
5<br />
EXPLANATION OF THE MAINTENANCE WORK<br />
Inspection and adjustment<br />
SB(R)4000+ PF/XF SB(R)230 PF Euro3<br />
3.46 INSPECTING THE OIL SEPARATOR<br />
1. When the compressor is in operation, check the connections<br />
and seals for air leaks using a soap solution.<br />
2. Idle the engine.<br />
Apply the foot brake once the compressor is in operation<br />
and then release the foot brake.<br />
Every time the foot brake is applied, a click will be heard<br />
from the electronic separator and air will be blown off<br />
(soft hissing sound) via the blow-off valve/collection<br />
cover.<br />
If the blow-off valve does not work, check the electrical<br />
unit.<br />
If the blow-off valve does not work, even though there is<br />
nothing wrong with the electrical unit, then the oil separator<br />
must be disassembled and inspected.<br />
3. Check all the components for carbon deposits, corrosion<br />
and contamination. Clean or replace the components<br />
concerned.<br />
Use compressed air to blow the blow-off valve’s filter dry<br />
before assembly.<br />
03914B<br />
3 - 60 0616
EXPLANATION OF THE MAINTENANCE WORK<br />
SB(R)4000+ PF/XF SB(R)230 PF Euro3<br />
Inspection and adjustment<br />
3.47 CHECKING THE ATTACHMENT OF THE<br />
SHOCK ABSORBERS AND CHECKING<br />
THEM FOR DAMAGE<br />
1. Visually check the shock absorbers for leaks and visually<br />
check the attachment.<br />
3.48 INSPECTING THE U-BOLTS<br />
Inspecting the U-bolts<br />
1. Visually inspect the attachment and condition of the Ubolts.<br />
2. When retightening the nuts of the U-bolts, the attachment<br />
nut must not first be loosened and then retightened to the<br />
specified torque (see “Technical information”).<br />
3.49 CHECKING THE PIVOT POINTS OF THE<br />
AXLE SUSPENSION AND THE<br />
PNEUMATIC SUSPENSION<br />
Torque rod<br />
1. Check the attachment of the torque rods and the torque<br />
rod brackets.<br />
2. Check the pivot points of the torque rods for wear and<br />
play.<br />
Stabilizer rod<br />
1. Check the attachment of the stabilizer rods and stabilizer<br />
rod brackets.<br />
2. Check the pivot points of the stabilizer rods for wear and<br />
play.<br />
0616<br />
3 - 61<br />
5
5<br />
EXPLANATION OF THE MAINTENANCE WORK<br />
Inspection and adjustment<br />
SB(R)4000+ PF/XF SB(R)230 PF Euro3<br />
3.50 INSPECTING THE PNEUMATIC<br />
SUSPENSION’S AIR BELLOWS<br />
The air bellows are not resistant to<br />
solvents, hydraulic oil and grease.<br />
1. Fully pressurize the system and place the pneumatic<br />
suspension in the highest position.<br />
2. Thoroughly clean the air bellows with soapy water.<br />
3. Remove the dirt on the outside of the seat using a rag or<br />
a brush.<br />
4. Check the air bellows for cracks and damage. The air<br />
bellows must be replaced if there are any cracks or damage<br />
where the fabric is visible.<br />
5. Check the air bellows, the bellows seats and the air connections<br />
for leaks.<br />
Replace the bellows seats if there is any deformation.<br />
Check whether the air bellows rub along components,<br />
such as air lines, etc., when in the highest position and at<br />
the highest driving height.<br />
6. Check the position of the rubber bumper stops and check<br />
them for damage.<br />
7. Return the vehicle to the driving height after completing<br />
all the checks.<br />
3 - 62 0616
EXPLANATION OF THE MAINTENANCE WORK<br />
SB(R)4000+ PF/XF SB(R)230 PF Euro3<br />
Inspection and adjustment<br />
3.51 INSPECTING THE CHASSIS’ PNEU-<br />
MATIC SUSPENSION<br />
1. Use the Kneel/Ferry Lift switch (see driver’s manual) to<br />
place the vehicle in the ferry lift position.<br />
The information symbol (vehicle not at driving height) will<br />
be lit to indicate that the vehicle is not at the driving<br />
height.<br />
0616<br />
The information symbol shown opposite will be lit when<br />
the vehicle is in the ferry lift position.<br />
2. Use the Kneel/Ferry Lift switch (see driver’s manual) to<br />
place the vehicle in the kneeling position. The information<br />
symbol (vehicle not at driving height) will be lit to indicate<br />
that the vehicle is not at the driving height.<br />
The information symbol shown opposite will be lit when<br />
the vehicle is in the kneeling position.<br />
3. Operate the “standard driving height pneumatic suspension”<br />
switch. The vehicle must then return to the normal<br />
driving height and the information symbol (vehicle not at<br />
driving height) must be extinguished.<br />
4. If necessary, check the driving height and the ECAS unit.<br />
03937B<br />
03938B<br />
3 - 63<br />
5
5<br />
EXPLANATION OF THE MAINTENANCE WORK<br />
Inspection and adjustment<br />
SB(R)4000+ PF/XF SB(R)230 PF Euro3<br />
3.52 CHECKING THE DRIVING HEIGHT<br />
Mechanical<br />
1. Place the vehicle on a level surface.<br />
2. Use the Kneel/Ferry Lift switch (see driver’s manual) to<br />
place the vehicle in the ferry lift position.<br />
Be careful, there is a danger of becoming<br />
trapped!<br />
3. Turn off the contact switch.<br />
4. Place the special tool (1) (<strong>VDL</strong> <strong>Bus</strong> no. 1152749)<br />
between the shock absorber brackets. Use a tie-rap to<br />
keep the special tool in position. Do this on both sides of<br />
the vehicle.<br />
5. Place the special tool (2) (<strong>VDL</strong> <strong>Bus</strong> no. 1198824)<br />
between the chassis beam and over the bumper stop.<br />
The word “VOORKANT” should point towards the front of<br />
the vehicle. Do this on both sides of the rear axle.<br />
6. Turn on the contact switch.<br />
7. Use the Kneel/Ferry Lift switch (see driver’s manual) to<br />
lower the vehicle until it rests on the adjustment gauges.<br />
8. Turn off the contact switch.<br />
9. Next, adjust the height control rods (3) and (4) so that the<br />
centring holes A and B are aligned (check this using a 4<br />
mm pin).<br />
10. The vehicle has now been mechanically calibrated.<br />
11. Turn on the contact switch.<br />
Use the Kneel/Ferry Lift switch (see driver’s manual) to<br />
place the vehicle in the ferry lift position.<br />
12. Turn off the contact switch.<br />
13. Remove the adjustment gauges.<br />
14. Turn on the contact switch and return the vehicle to the<br />
driving height.<br />
03912B<br />
3 - 64 0616
EXPLANATION OF THE MAINTENANCE WORK<br />
SB(R)4000+ PF/XF SB(R)230 PF Euro3<br />
Inspection and adjustment<br />
3.53 CHECKING THE DIFFERENTIAL<br />
3.53.1 CHECKING THE DIFFERENTIAL FOR LEAKS<br />
1. Visually check the differential for leaks.<br />
3.53.2 CHECKING THE DIFFERENTIAL OIL LEVEL<br />
Comment<br />
Do not check the oil level immediately after a journey. Allow<br />
the oil to settle and cool down for approximately half an hour.<br />
1. Place the vehicle on a flat, horizontal surface. Check<br />
whether the vehicle is level both longways and crossways.<br />
2. Check the oil level via the oil spill plug (A).<br />
3. The oil level must reach the edge of the oil spill plug<br />
opening.<br />
4. If necessary, top up the oil via the hole in the oil spill plug<br />
(A) to the required level.<br />
5. Fit the oil spill plug (A) using the special Torx spanner<br />
(DAF no. 1329422) and tighten it to the specified torque<br />
(see “Technical information”).<br />
3.53.3 INSPECTING THE DIFFERENTIAL LOCK<br />
1. Jack up the rear axle and support it using hoisting<br />
sheers.<br />
2. Pressurize the pneumatic system to the operating pressure<br />
(8.6 – 9.6 bar).<br />
3. Turn on the differential lock.<br />
The warning light should come on.<br />
0616<br />
To prevent skin damage, avoid<br />
unnecessary contact with the drained oil.<br />
Note! There is a danger of being burnt by<br />
hot oil.<br />
IC6_WC5<br />
3 - 65<br />
5
5<br />
EXPLANATION OF THE MAINTENANCE WORK<br />
Inspection and adjustment<br />
SB(R)4000+ PF/XF SB(R)230 PF Euro3<br />
4. Check whether there is a rigid connection between the<br />
driven wheels.<br />
5. Turn off the differential lock. The warning light should go<br />
out and there should no longer be a rigid connection<br />
between the driven wheels.<br />
Comment<br />
If the differential lock does not function correctly, check:<br />
– The command pressure.<br />
– The inside of the blocking cylinder for contamination.<br />
– The electrical system.<br />
00068B<br />
3 - 66 0616
EXPLANATION OF THE MAINTENANCE WORK<br />
SB(R)4000+ PF/XF SB(R)230 PF Euro3<br />
Inspection and adjustment<br />
3.54 INSPECTING THE DRIVE SHAFTS,<br />
SLIDING JOINTS AND UNIVERSAL<br />
JOINTS FOR WEAR<br />
1. Inspect the universal joints for play and damage.<br />
2. Inspect the sliding joint for axial and radial play.<br />
3. Play must not be felt on the universal joints nor on the<br />
sliding joint.<br />
4. Check the radial play of the sliding joint by hand.<br />
5. Check the drive shaft for damage and twisting/deformation.<br />
6. Check whether all the retaining rings are still in place and<br />
whether they are fitted correctly.<br />
7. If there is excessive noise or jerky movements when driving<br />
at a certain speed, check the balance plates on the<br />
drive shaft (unbalanced).<br />
8. Place the removed drive shaft on a flat workbench and<br />
support the shaft in positions A and B.<br />
9. Slide out the sliding joint approximately 45 mm.<br />
10. Place the universal measuring tool at position C on the<br />
drive shaft.<br />
11. Place the dial gauge at position D on the drive shaft<br />
(directly next to the weld).<br />
12. Move the centre of gravity of the drive shaft (see arrows)<br />
upwards and measure the radial play of the sliding joint.<br />
See “Technical information” for the maximum permitted<br />
play.<br />
0616<br />
If radial play of the sliding joint is<br />
observed, then it must be checked to<br />
make sure that this is not the result of<br />
play of the universal joint.The drive shaft<br />
must be removed and inspected in order<br />
to be sure that the observed play is within<br />
the maximum permitted value.<br />
3 - 67<br />
5
5<br />
EXPLANATION OF THE MAINTENANCE WORK<br />
Inspection and adjustment<br />
SB(R)4000+ PF/XF SB(R)230 PF Euro3<br />
3.55 INSPECTING THE GREASE LUBRI-<br />
CATED WHEEL HUBS<br />
1. Check the wheel hubs for leaks.<br />
ZF hubs<br />
– If serious traces of grease are observed on new or recently<br />
fitted wheel hubs, then this may indicate excessive use of<br />
assembly grease.<br />
– If the wheel hubs were not recently fitted, serious traces of<br />
grease may indicate a leak from the gasket (3) or oil seal<br />
(4). Replace the gasket/oil seal.<br />
DAF hubs<br />
– If serious traces of grease are observed on new or recently<br />
fitted wheel hubs, then this may indicate excessive use of<br />
assembly grease.<br />
– If the wheel hubs were not recently fitted, serious traces of<br />
grease may indicate a leak from the oil seal (1). This<br />
means that the entire wheel hub unit must be replaced.<br />
– If a serious oil leak is observed, then this may indicate that<br />
O-ring (2) is not properly sealed.In this case, the hub unit<br />
must be disassembled in order to rectify the problem. 03936B<br />
ZF wheel hub<br />
1. Oil seal<br />
2. O-ring<br />
DAF wheel hub<br />
1. Oil seal<br />
2. O-ring<br />
G000196<br />
3 - 68 0616
EXPLANATION OF THE MAINTENANCE WORK<br />
SB(R)4000+ PF/XF SB(R)230 PF Euro3<br />
Inspection and adjustment<br />
3.56 INSPECTING AND ADJUSTING THE<br />
WHEEL BEARING PLAY (ZF HUBS)<br />
Checking the wheel bearing play<br />
1. Use the special tool (ZF no. 5870 200 055 and 5870 200<br />
057) to get a reliable measurement of the wheel bearing<br />
play.<br />
2. Remove the hub cap.<br />
3. Fit the magnetic dial gauge holder to the hub.<br />
4. Place the dial gauge in the dial gauge holder (3) so that<br />
the dial applies some pressure against the swivel axle.<br />
5. Determine the bearing play by pulling and pushing the<br />
hub.<br />
6. Take the dial gauge reading and compare it to the specified<br />
value (see “Technical information”).<br />
If the measured value falls outside the tolerance, the<br />
wheel bearing play should be adjusted.<br />
7. Fit the hub cap and the gasket. Tighten the bolts to the<br />
specified torque (see “Technical information”).<br />
Adjusting the wheel bearing play<br />
1. Unscrew the clamping nut’s lock screw.<br />
2. Rotate the clamping nut until the correct bearing play is<br />
reached.<br />
Tighten the clamping nut’s lock screw to the specified<br />
torque (see “Technical information”).<br />
3. Check the wheel bearing play again and, if necessary,<br />
correct it.<br />
0616<br />
03931B<br />
3 - 69<br />
5
5<br />
EXPLANATION OF THE MAINTENANCE WORK<br />
Inspection and adjustment<br />
SB(R)4000+ PF/XF SB(R)230 PF Euro3<br />
3.57 INSPECTING THE TYRES AND WHEEL<br />
RIMS<br />
Checking the tyres<br />
– Check the depth of the tread. The advised minimum depth<br />
for traffic safety is 1 mm.<br />
The wear indicator in the tyre is for 1.6 mm. (The legally<br />
permitted tread depth may vary per country.)<br />
– Check the side walls for incisions, damage (caused by<br />
manhole covers, pavements, etc.), wear caused by rubbing,<br />
and abnormal deformation.<br />
– Check the tread for incisions, local deformation and foreign<br />
objects (stones, nails, etc.).<br />
– Check whether the wear pattern of the tread is evenly distributed<br />
over the entire surface.<br />
Comment<br />
Possible causes of uneven wear are:<br />
– Incorrect tyre pressure.<br />
– Play in the spring suspension, swivel axles, steering ball<br />
joints and reaction arms.<br />
– The axles of the vehicle not being in line.<br />
– Deviating wheel positions, etc.<br />
It is important to trace the cause of abnormal tyre wear, for<br />
example, by aligning the vehicle.<br />
Checking the wheel rims<br />
1. Inspect the wheel rims for the following:<br />
– Deformation of the edges of the rims and the wheel<br />
disc. For a double assembly, also inspect the inside<br />
wheel.<br />
– Deformation of or cracks in the wheel bolt holes.<br />
– Corrosion, including on the tyre side of the rim and the<br />
rim ring.<br />
2. Cracked or damaged wheel rims or wheel rims with torn<br />
or deformed wheel bolt holes must be replaced. It is not<br />
permitted to weld wheel rims or to repair them in any<br />
other way. In time, the dynamic load placed on them will<br />
cause the weld to crack again.<br />
When removing a damaged wheel rim from<br />
the vehicle, deflate the tyre (remove the tyre<br />
valve) to remove any tension in the wheel<br />
rim.<br />
3. Only use original wheel rims permitted for the vehicle<br />
concerned, as stated in Overview combination of tyres<br />
and rim sizes (�3 -71)<br />
3 - 70 0616
EXPLANATION OF THE MAINTENANCE WORK<br />
SB(R)4000+ PF/XF SB(R)230 PF Euro3<br />
Inspection and adjustment<br />
4. To prevent damage to the tyre and/or indirect tension<br />
cracks (notching) due to corrosion, the anti-corrosion<br />
treatment of the wheel rim should stay fully intact. When<br />
respraying, the old layer of paint must be removed in<br />
order to prevent the total layer of paint from becoming too<br />
thick. The total paint thickness must not exceed 50<br />
microns.<br />
Overview combination of tyres and rim sizes<br />
Table 1<br />
Tyre size<br />
0616<br />
With a total paint layer thickness (wash<br />
primer and finishing paint) of more than 50<br />
microns, the pre-tension of the wheel bolts<br />
might be reduced if this layer is crushed.<br />
This could result in the wheel nuts coming<br />
loose.<br />
SB230 SB 4000+<br />
275/70<br />
R22,5<br />
295/80<br />
R22,5<br />
315/80<br />
R22,5<br />
SBR 230<br />
Single deck<br />
275/70<br />
R22,5<br />
295/80<br />
R22,5<br />
SBR 4000+<br />
single deck<br />
315/80<br />
R22,5<br />
SBR 4000+<br />
double deck<br />
315/70<br />
R22,5<br />
Rim size 7.50x22.5 8.25x22.5 9.00x22.5 7.50x22.5 8.25x22.5 9.00x22.5 9.00x22.5<br />
Additional<br />
parts a<br />
Spacer disc<br />
Extended<br />
bolts<br />
Spacer disc<br />
Extended<br />
bolts<br />
Spacer disc<br />
Extended<br />
bolts<br />
a. Spacer discs are necessary when fitting 9.00"x22.5" rims on the front axle (IFS). The thickness of the spacer discs for steel rim is 15 mm and for<br />
aluminium rims is 10 mm. Also fit the extended wheel bolts.<br />
3 - 71<br />
5
5<br />
EXPLANATION OF THE MAINTENANCE WORK<br />
Inspection and adjustment<br />
SB(R)4000+ PF/XF SB(R)230 PF Euro3<br />
3.58 CHECKING THE ATTACHMENT OF THE<br />
WHEELS (RETIGHTENING)<br />
When fitting new wheel bolts, the wheel<br />
nuts must be retightened twice. The first<br />
time after 100 km and the second time<br />
after 500 km.<br />
Comments<br />
The rims and wheel nuts used on the vehicle are of the wheel<br />
hub centring type.<br />
Only use original wheel rims permitted for the vehicle concerned<br />
Characteristics of wheel hub centring are:<br />
– Wheels with cylindrical holes.<br />
– Wheel nuts with a loose, non-removable, flat thrust<br />
washer.<br />
– The rim lies tight against the cams of the wheel hub.<br />
For aluminium wheels, check whether the correct Allen<br />
screws are used (recognizable by three circles on the<br />
flange). Two different types are used:<br />
– The short shaft type for single assembly (A = 12 mm).<br />
– The long shaft type for double assembly (B = 34 mm).<br />
Tightening the wheel nuts<br />
1. Remove the plastic cap from each wheel nut.<br />
2. Tighten the wheel nuts in the order shown in the diagram<br />
to the correct torque (see “Technical information”) using<br />
a torque spanner.<br />
3. Refit the plastic caps.<br />
3 - 72 0616<br />
03933B<br />
03932B
EXPLANATION OF THE MAINTENANCE WORK<br />
SB(R)4000+ PF/XF SB(R)230 PF Euro3<br />
Inspection and adjustment<br />
3.59 CHANGING WHEELS<br />
Wheels and tyres are increasingly being changed as a complete<br />
unit when the seasons change. A number of things<br />
must be taken into consideration when changing the wheel<br />
and tyre as a unit.<br />
0616<br />
When removing a wheel with a cracked or<br />
damaged wheel rim, always deflate the tyre<br />
first (remove the tyre valve) to remove any<br />
possible tension in the wheel rim.<br />
Aluminium wheels may not be heated by,<br />
for example, welding or direct heating. Fit a<br />
new wheel!<br />
Comments<br />
– Only fit tyres and wheel rims that are permitted for use on<br />
the vehicle concerned see Table , “Overview combination<br />
of tyres and rim sizes,” on page 71<br />
– Mark the position of the wheel and tyre that are being<br />
removed so that the new wheel and tyre can be fitted in the<br />
same position.<br />
– Take into consideration the driving direction/direction of<br />
rotation if this is indicated on the tyre.<br />
– Make sure the same type of tyres and rims are fitted on<br />
both sides of the axle.<br />
– Cleaning contact surfaces sufficient and tighten the wheel<br />
nuts even to prevent vibrations during driving or braking.<br />
– Replace all wheel bolts on the wheel concerned when one<br />
must be replaced.<br />
A. Spacer washer<br />
B. Wheel bolt<br />
C. Wheel bolt<br />
03862B<br />
3 - 73<br />
5
5<br />
EXPLANATION OF THE MAINTENANCE WORK<br />
Inspection and adjustment<br />
SB(R)4000+ PF/XF SB(R)230 PF Euro3<br />
Changing the size of the tyre<br />
Spacer discs and longer wheel bolts must<br />
be used on the front axle if 315/70 or 315/80<br />
tyres are fitted instead of 295/80 tyres.<br />
The workshop must also check the<br />
maximum wheel turning angle and, if<br />
necessary, correct it. The corrections must<br />
be made according to the instructions given<br />
in the workshop manual.<br />
The spacer discs must be removed and<br />
shorter wheel bolts must be used on the<br />
front axle if 295/80 tyres are fitted instead of<br />
315/70 or 315/80 tyres.<br />
If the load capacity of the 295/80 tyre is less<br />
than that stated on the type plate, then the<br />
workshop must order and fit a new type<br />
plate.<br />
Removing the wheels<br />
1. Clean the screw thread of the wheel bolts using a wire<br />
brush.<br />
2. Lightly lubricate the screw thread of the wheel nuts with<br />
oil.<br />
3. Unscrew the wheel nuts.<br />
4. Place a jack as close as possible to the wheel which is<br />
going to be replaced. Only use the jack point intended for<br />
this purpose.<br />
5. Jack up the vehicle and place a trestle under the vehicle.<br />
Only use a trestle point intended for this purpose.<br />
6. Remove the wheel nuts and take the wheel off of the hub.<br />
Fitting the wheels<br />
1. Clean the fitting edge of the rim and the cams on the<br />
wheel hubs by scraping off any dirt and corrosion from<br />
the edge using a scraper.Rub the fitting edges clean and<br />
dry. If necessary, apply a new layer of paint.<br />
Comment<br />
For aluminium wheels, only use Freylube or an equivalent<br />
assembly grease. Assembly grease with a water base or with<br />
heavy metals may cause corrosion and is, therefore, unsuitable.<br />
3 - 74 0616
EXPLANATION OF THE MAINTENANCE WORK<br />
SB(R)4000+ PF/XF SB(R)230 PF Euro3<br />
Inspection and adjustment<br />
2. Apply a thin layer of grease to the fitting edge of the<br />
wheel hub and the top of the wheel hub cams<br />
3. Also apply a thin layer of grease to the fitting edge of the<br />
wheel rim. This grease layer should prevent the wheel<br />
rim and the wheel hub from rusting together.<br />
4. Check whether the contact surfaces of the wheel rim and<br />
the wheel hub are clean. If necessary, clean them.<br />
5. Clean the wheel nuts and then apply one drop of oil<br />
between the thrust washer and the nut.<br />
6. Also apply one drop of oil to the first turn of the wheel<br />
bolts’ screw thread.<br />
7. Fit the wheel nuts and tighten them evenly in the<br />
sequence shown in the diagram.<br />
A pneumatic spanner may be used, but the torque is not<br />
very reliable.<br />
It will, therefore, be necessary to retighten the wheel nuts<br />
to the specified torque using a torque spanner. See<br />
“Technical information” for the correct torque.<br />
0616<br />
Use of COPASLIP or MOLYKOTE is not<br />
permitted.<br />
The wheel nuts should always be<br />
tightened and retightened when cold.<br />
However, tightening wheel bolts in<br />
extreme cold should be avoided.<br />
8. Check the tyre pressure.<br />
9. Use a torque spanner to retighten the wheel nuts after<br />
100 km. If new wheel bolts have been fitted, retighten the<br />
wheel nuts again after 500 km.<br />
3 - 75<br />
5
5<br />
EXPLANATION OF THE MAINTENANCE WORK<br />
Inspection and adjustment<br />
SB(R)4000+ PF/XF SB(R)230 PF Euro3<br />
3.60 CHECKING THE TYRE PRESSURE<br />
(INCLUDING THE SPARE TYRE)<br />
The driving comfort and fuel consumption are influenced by<br />
the tyre pressure. The required tyre pressures depends on<br />
the position of the tyre on the vehicle, the axle load and the<br />
size of the tyre.<br />
Comments according to the tyre pressure table 1<br />
1. The required tyre pressures are for cold tyres.<br />
2. Unnecessary tyre wear is frequently caused by vehicle<br />
operation with tyre pressures which do not match the<br />
axle load.<br />
3. In case of double assembly:<br />
– The tyres pressure of both tyres must be the same.<br />
– The depth of tread must be near enough the same.<br />
4. A too high or too low tyre pressure causes the tyres to<br />
wear quickly and may have an adverse effect on the<br />
vehicle’s steering and suspension.<br />
5. Vehicles equipped with ABS: the following faults in the<br />
tyres may cause the vehicle’s ABS braking system to<br />
partially or completely stop operating:<br />
– Excessive tyre wear.<br />
– Too low tyre pressure.<br />
– Tyres which do not match or which are incorrectly fitted.<br />
6. Use an accurate tyre pressure gauge to check the tyre<br />
pressure of every tyre on the vehicle and, if necessary,<br />
change the tyre pressure to the value stated in the tyre<br />
pressure table.<br />
7. Make sure all the tyre valves are in good condition and<br />
have a valve cap.<br />
Tyre pressure table<br />
SB230 SB 4000+<br />
275/70<br />
R22,5<br />
295/80<br />
R22,5<br />
315/80<br />
R22,5<br />
SBR 230<br />
Single deck<br />
275/70<br />
R22,5<br />
295/80<br />
R22,5<br />
1. The required tyre pressures in the tables are for vehicles used under normal operating conditions.<br />
SBR 4000+<br />
single deck<br />
315/80<br />
R22,5<br />
SBR 4000+<br />
double deck<br />
315/70 R22,5<br />
Front axle 9.0 8.5 8.0 9.0 8.5 8.0 9.0<br />
Rear axle 9.0 7.75 6.75 8.0 6.75 6.0 7.75<br />
Trailer axle 8.0 6.75 6.0 9.0<br />
3 - 76 0616
EXPLANATION OF THE MAINTENANCE WORK<br />
SB(R)4000+ PF/XF SB(R)230 PF Euro3<br />
Inspection and adjustment<br />
3.61 CHECKING THE GEARBOX OIL LEVEL<br />
3.61.1 GO-170/190/210<br />
1. Check the gearbox oil when it is at the operating temperature.<br />
2. Make sure the vehicle is horizontal, both longways and<br />
crossways.<br />
3. Wait a couple of minutes so that the oil can flow back.<br />
4. Remove the oil spill/filler plug (1) and the sealing ring (2).<br />
The oil level must reach the edge of the oil spill/filler<br />
opening. If necessary, top up the oil.<br />
5. If there is excessive oil loss, check the gearbox for leaks.<br />
6. After the inspection, refit the oil spill/filler plug (1) using a<br />
new sealing ring (2).<br />
Tighten the oil spill/filler plug to the specified torque (see<br />
“Technical information”).<br />
3.61.2 ZF-AS TRONIC<br />
1. Switch OFF the retarder foot control function by activating<br />
the rocker switch on the dashboard. Do not activate<br />
the retarder by using the right-hand combination switch<br />
on steering column before checking the oil level.<br />
2. Position the vehicle on a horizontal surface, both longways<br />
and crossways.<br />
3. Turn OFF the engine.<br />
4. Check the oil level after the gearbox oil has cooled down<br />
to
5<br />
EXPLANATION OF THE MAINTENANCE WORK<br />
Inspection and adjustment<br />
SB(R)4000+ PF/XF SB(R)230 PF Euro3<br />
6. Fit the level check plug (A), tightening it to the specified<br />
torque (see “Technical information”).<br />
3.61.3 ZF ECOMAT<br />
To prevent skin damage, avoid<br />
unnecessary contact with the drained oil.<br />
There is a danger of being burnt by hot<br />
oil.<br />
1. Check the oil level at the operating temperature (80 - 90°<br />
C).<br />
2. Make sure the vehicle is horizontal, both longways and<br />
crossways.<br />
3. Select neutral gear.<br />
4. Idle the engine.<br />
5. Wait approximately 2 minutes and then use the dipstick<br />
to check the oil level. When at the operating temperature<br />
(80 - 90° C), the oil level must be between the marks (A).<br />
6. If necessary, top up the oil.<br />
3 - 78 0616<br />
A<br />
00736B
EXPLANATION OF THE MAINTENANCE WORK<br />
SB(R)4000+ PF/XF SB(R)230 PF Euro3<br />
Inspection and adjustment<br />
3.62 CHECKING THE SGS SETTING<br />
1. Check whether the sealing wax of both lock nuts is still<br />
intact. If this is not the case, check the distance A and, if<br />
necessary, adjust it.<br />
Adjustment distance A:<br />
– Unscrew the lock nuts (2).<br />
– Rotate the adjusting nut (1) so that A = 260 mm.<br />
– Tighten the lock nuts (2) so that the valve (3) is upright<br />
and does not touch the bolt (4) when changing gears.<br />
– Lock the lock nuts (2) with yellow sealing wax.<br />
2. Check the cable ball joints. Replace them if:<br />
– The spring force has been lost.<br />
– The play is so large that it effects the gear changing<br />
characteristics.<br />
– The clamping force is insufficient.<br />
3. Check whether the gear lever knob is in the middle position<br />
(when the cables are fitted).<br />
If the gear lever knob is not in the middle position or if a<br />
clear centre point cannot be felt, then the middle position<br />
of the gear lever must be adjusted.<br />
0616<br />
1. Adjusting nut<br />
2. Lock nut<br />
3. Valve<br />
4. Bolt<br />
A. Adjustment distance 260 mm<br />
03907B<br />
03916B<br />
3 - 79<br />
5
5<br />
EXPLANATION OF THE MAINTENANCE WORK<br />
Inspection and adjustment<br />
SB(R)4000+ PF/XF SB(R)230 PF Euro3<br />
4. Adjusting the middle position of the gear lever:<br />
– Remove the gear lever cover at the bottom and pull it<br />
inside out over the gear lever.-Remove the Philips<br />
screws (5) and the two Allen screws (6) on the side of<br />
the gear change pattern symbol.<br />
– Pull the casing forwards and then remove it by pulling<br />
it over the gear lever knob.<br />
– Disconnect both cables from the balls.<br />
– To do so, insert a 11 mm open-ended spanner<br />
between the ball joint and the ball and remove the ball<br />
joint.<br />
– Fit the adjusting plate (see “Special tools”) to the console<br />
using the standard Allen screws (6).<br />
– Use the nuts (7 and 10) to adjust the cables so that the<br />
ball joint of the cable can be pressed onto the ball without<br />
moving the gear lever.<br />
– Remove the adjusting plate.<br />
– Fit the casing and secure it in position using the Philips<br />
screws (5) and the two Allen screws (6).<br />
– Fit the gear lever cover.<br />
5. Check the dust covers (11 and 12) of the lift cylinder and<br />
operating cables for cracks and check whether they have<br />
been fitted without being twisted.<br />
3 - 80 0616<br />
03908B<br />
03926B
EXPLANATION OF THE MAINTENANCE WORK<br />
SB(R)4000+ PF/XF SB(R)230 PF Euro3<br />
Inspection and adjustment<br />
3.63 CHECKING THE CLUTCH SYSTEM FOR<br />
LEAKS<br />
1. Pressurize the pneumatic system to the operating pressure<br />
(8.6 - 9.6 bar).<br />
2. Check whether there is a leak via the clutch booster ventilation<br />
opening.<br />
3. Press the clutch pedal and check whether there is an air<br />
leak via the clutch booster bleed opening.<br />
Comment<br />
When the clutch pedal is moving upwards, the clutch booster<br />
should be bled via the bleed opening.<br />
4. Press the clutch pedal and check whether there is a fluid<br />
leak via the clutch booster bleed opening.<br />
5. Check whether there is an oil leak via the clutch booster<br />
ventilation opening.<br />
Comment<br />
A drop of oil at the ventilation opening is normal and is not a<br />
reason to replace the clutch booster.<br />
If there is a constant leak, the clutch booster must be<br />
repaired or replaced.<br />
If in doubt as to whether it is a normal situation or if there is<br />
a leak in the clutch booster, the fluid level in the clutch reservoir<br />
can be checked.<br />
6. Press the clutch pedal and check whether there is an air<br />
leak via the clutch booster ventilation opening.<br />
7. Press the clutch pedal and check whether there is an air<br />
leak via the pin feed-through of the clutch booster wear<br />
indicator.<br />
0616<br />
3 - 81<br />
5
5<br />
EXPLANATION OF THE MAINTENANCE WORK<br />
Inspection and adjustment<br />
SB(R)4000+ PF/XF SB(R)230 PF Euro3<br />
3.64 INSPECTING/TOPPING UP THE<br />
HYDRAULIC CLUTCH FLUID<br />
Hydraulic fluid is poisonous and harmful<br />
to your health.<br />
Therefore, avoid direct or indirect skin<br />
contact.<br />
Hydraulic fluid reacts aggressively with<br />
the vehicle’s paint. Therefore, avoid<br />
hydraulic fluid coming into contact with<br />
the paint of the vehicle.<br />
Always use new, clean hydraulic fluid<br />
from a closed container which meets the<br />
specifications.<br />
Hydraulic fluid which has absorbed water<br />
(from the atmosphere) can have an<br />
adverse effect on the operation of the<br />
clutch system.<br />
Avoid contact with mineral oil. One drop<br />
of mineral oil in the system will affect the<br />
seals.<br />
1. Check whether the fluid level lies between the maximum<br />
and minimum marks.<br />
If necessary, top up with the specified hydraulic brake<br />
fluid (see “Liquids, oils and lubricants”).<br />
2. Check the bleed opening in the cap.<br />
Comment<br />
If the bleed opening is closed, a residual pressure will start to<br />
build up in the system.<br />
1151127<br />
3 - 82 0616
EXPLANATION OF THE MAINTENANCE WORK<br />
SB(R)4000+ PF/XF SB(R)230 PF Euro3<br />
Inspection and adjustment<br />
3.65 CHECKING THE CLUTCH PLATE FOR<br />
WEAR<br />
The clutch plate lining is worn when the front of the pin (4)<br />
and the front of the sleeve (2) are flush.<br />
0616<br />
Clutch wear indicator<br />
1. Dust cover<br />
2. Sleeve<br />
3. Adjusting bolt<br />
4. Pin<br />
5. Lock nut<br />
03919B<br />
03918B<br />
3 - 83<br />
5
5<br />
EXPLANATION OF THE MAINTENANCE WORK<br />
Inspection and adjustment<br />
SB(R)4000+ PF/XF SB(R)230 PF Euro3<br />
3.66 CHECKING THE OIL LEVEL OF THE<br />
R115E RETARDER<br />
1. Check the retarder’s oil level when it is at the operating<br />
temperature.<br />
2. Place the vehicle on a flat, horizontal surface. Check<br />
whether the vehicle is level both longways and crossways.<br />
3. Turn off the contact switch and then turn it back on again.<br />
4. When stationary, place the right-hand combination<br />
switch in retarder position A for approximately 5 seconds<br />
and then return the combination switch to the rest position<br />
E (retarder turned off). Repeat this procedure twice.<br />
5. Turn off the retarder and the contact switch.<br />
Wait approximately 5 minutes before checking the oil<br />
level.<br />
The oil spill/filler plugs are hot (oil<br />
temperature).<br />
The retarder oil may only be topped up<br />
via the oil filler plug.<br />
6. Remove the oil spill plug (1).<br />
The oil level must reach the edge of the spill opening. If<br />
necessary, slowly top up the oil via the oil filler plug (2)<br />
with oil which meets the oil specifications (see “Liquids,<br />
oils and lubricants”).<br />
7. If there is excessive oil loss, check the retarder for leaks.<br />
8. Clean the oil spill plug and oil filler plug (1 and 2). Check<br />
the sealing ring and, if necessary, replace it.<br />
9. Tighten the plugs to the specified torque (see “Technical<br />
information”).<br />
Checking the retarder for leaks<br />
1. Check the heat exchanger’s attachment screws.<br />
2. Check the attachment of all the plugs and check them for<br />
leaks.<br />
3. Visually check the retarder for damage and leaks.<br />
03923B<br />
3 - 84 0616
EXPLANATION OF THE MAINTENANCE WORK<br />
SB(R)4000+ PF/XF SB(R)230 PF Euro3<br />
Inspection and adjustment<br />
3.67 CHECKING THE OPERATION OF ALL<br />
THE DRIVING AND BRAKING<br />
FUNCTIONS<br />
0616<br />
Consider traffic safety during a test drive.<br />
– When checking the brakes, braking must not cause the<br />
vehicle to make any unexpected movements on the road.<br />
– Check whether the vehicle can remain on the intended<br />
path when driving in a straight line.<br />
– Check the correct operation of the inspection lights and<br />
gauges on the instrument panel.<br />
3.68 CHECKING THE OPERATION OF THE<br />
RETARDER<br />
Check the operation of the retarder whilst driving by lightly<br />
pressing the brake pedal or by operating the control switch<br />
(see Driver’s instruction Manual). It must be possible to hear<br />
and notice the retarder working.<br />
3 - 85<br />
5
5<br />
EXPLANATION OF THE MAINTENANCE WORK<br />
Inspection and adjustment<br />
SB(R)4000+ PF/XF SB(R)230 PF Euro3<br />
3.69 CHECKING THE INSTRUMENTS AND<br />
INSPECTION LIGHTS<br />
The instrument panel will perform a self-test when the main<br />
switch (20) is turned on.<br />
The operation of the following can be checked:<br />
– The lights of the warning indicators (10) will be lit.<br />
– The buzzer will sound briefly.<br />
– The needles of the speedometer, rev counter, fuel gauge<br />
and temperature gauge will go to the maximum position<br />
and then return to the rest position.<br />
– The main display (11) will be black for a couple of seconds<br />
and then turn grey to indicate that the display works correctly.<br />
The air pressure gauges will become visible.<br />
See the driver’s manual for further information.<br />
3.70 INSPECTING THE GEARBOX AND THE<br />
GEAR CHANGING PATTERN<br />
GO-gearbox<br />
1. Move the gear lever through the gears. There should be<br />
almost no play and it must be possible to change gears<br />
in a H-pattern.<br />
The servo-cylinder should be felt changing gears when<br />
changing gear.<br />
Check whether the gear lever centres itself.<br />
2. Check whether the engine will only start when the gearbox<br />
is in neutral.<br />
ZF Ecomat 2<br />
1. Apply the foot brake pedal.<br />
2. Apply the parking brake.<br />
3. Put the gearbox lever in position “D” or “R”.<br />
4. Check in both positions that the engine can not be<br />
started.<br />
5. The engine can only be started if the gearbox lever is in<br />
the “N” position.<br />
03910B<br />
3 - 86 0616
EXPLANATION OF THE MAINTENANCE WORK<br />
SB(R)4000+ PF/XF SB(R)230 PF Euro3<br />
Removal and installation<br />
4. REMOVAL AND INSTALLATION<br />
4.1 REMOVING AND INSTALLING THE MAIN<br />
FUSE(S)<br />
Mega fuses<br />
1. Remove the earth cable (-v) from the battery terminal.<br />
2. Remove the cover from the main switch box near the battery<br />
box.<br />
3. Remove the attachment nuts for the fuses.<br />
4. Replace the fuses.<br />
5. Fit new fuses. Tighten the attachment nuts.<br />
6. Fit the cover to the main switch box and connect the<br />
earth cable (-v) to the battery terminal.<br />
Maxi fuse (bodywork builder)<br />
1. Remove the earth cable (-v) from the battery terminal.<br />
2. Remove the cover from the main switch box near the battery<br />
box.<br />
3. Replace the fuse.<br />
4. Fit the cover to the main switch box and connect the<br />
earth cable (-v) to the battery terminal.<br />
0616<br />
E223 Mega fuse 100A<br />
E224 Mega fuse 100A<br />
E353 Maxi fusebody-builder<br />
max. 250A<br />
1151702<br />
4 - 1<br />
5
5<br />
EXPLANATION OF THE MAINTENANCE WORK<br />
Removal and installation<br />
SB(R)4000+ PF/XF SB(R)230 PF Euro3<br />
4.2 REMOVING AND INSTALLING THE<br />
ENGINE OIL FILTER<br />
To prevent skin damage, avoid<br />
unnecessary contact with the drained oil.<br />
Dispose of the engine oil filter.<br />
Removal<br />
1. Place a container under the engine oil filter.<br />
2. Clean the filter housing (1) and the surrounding area.<br />
3. Unscrew the screw cap (2) a couple of turns until the<br />
lubricating oil flows out of the filter and allow the filter<br />
housing to drain dry.<br />
4. Remove the screw cap (2) once the oil filter is empty.<br />
5. Remove the filter element (3) from the filter housing (1).<br />
Installation<br />
1. Replace the sealing rubber in the cap (2).<br />
2. Lightly lubricate the sealing rubber with engine oil.<br />
3. Place the new filter element (3) in the filter housing (1).<br />
4. Fit the screw cap (2) and tighten it to the specified torque<br />
(see “Technical information”).<br />
5. Start the engine and check for leaks.<br />
6. Check the engine oil level.<br />
4 - 2 0616
EXPLANATION OF THE MAINTENANCE WORK<br />
SB(R)4000+ PF/XF SB(R)230 PF Euro3<br />
Removal and installation<br />
4.3 REMOVING AND INSTALLING THE<br />
CENTRIFUGAL FILTER ROTOR<br />
Removal<br />
1. Clean the cap (3) and the surrounding area.<br />
2. Remove the central bolt (4) and remove the cap (3).<br />
3. Remove the rotor (2) from the cap (3).<br />
Installation<br />
1. Clean the inside of the cap (3).<br />
2. Check the central bolt (4) for damage.<br />
3. Replace the sealing ring (5).<br />
4. Fit the rotor (2) in the cap (3).<br />
5. Lightly lubricate the sealing ring (5) with engine oil and fit<br />
the cap (3).<br />
6. Tighten the central bolt (4) to the specified torque (see<br />
“Technical information”).<br />
7. Start the engine and check for leaks.<br />
8. Check the engine oil level.<br />
0616<br />
To prevent skin damage, avoid<br />
unnecessary contact with the drained oil.<br />
4 - 3<br />
5
5<br />
EXPLANATION OF THE MAINTENANCE WORK<br />
Removal and installation<br />
SB(R)4000+ PF/XF SB(R)230 PF Euro3<br />
4.4 REMOVING AND INSTALLING THE FUEL<br />
FILTER<br />
A quantity of fuel may be released when<br />
removing the fuel filter. Collect this fuel<br />
and be aware of the fire risk.<br />
Removal<br />
1. Unscrew the cover from the filter housing and remove the<br />
cover, together with the filter element, from the filter<br />
housing.<br />
Comment<br />
The fuel filter element is a disposable filter and may not be<br />
cleaned and reused. Dispose of the filter as if it is chemical<br />
waste.<br />
2. Remove the filter element from the cover.<br />
Installation<br />
1. Replace the cover’s O-ring.<br />
2. Lightly lubricate the sealing rubber with engine oil.<br />
3. Fit a new fuel filter element in the cover.<br />
4. Fit the filter cover with the fuel filter element onto the filter<br />
housing.<br />
5. Tighten the filter cover to the specified torque (see “Technical<br />
information”).<br />
6. Pump for approximately 1 minute using the hand pump<br />
so that the filter housing is partially filled with fuel.<br />
7. Start the engine and idle it for a couple of minutes to<br />
allow any air to escape from the filter housing.<br />
8. If the engine does not start or runs irregularly, the fuel<br />
system must be bled (see “Draining and filling”).<br />
9. Check the fuel system for leaks<br />
4 - 4 0616
EXPLANATION OF THE MAINTENANCE WORK<br />
SB(R)4000+ PF/XF SB(R)230 PF Euro3<br />
Removal and installation<br />
4.5 REMOVING AND INSTALLING THE<br />
CYLINDER HEAD COVER<br />
Removal<br />
1. Clean the area around the cylinder head cover.<br />
2. Remove the cylinder head cover’s attachment bolts.<br />
3. Remove the cylinder head cover and the cylinder head<br />
cover’s gasket.<br />
Installation<br />
1. Clean the sealing surfaces of the valve sleeve and the<br />
cylinder head cover.<br />
2. Fit the cylinder head cover using a new cylinder head<br />
cover gasket.<br />
3. Tighten the cylinder head cover’s attachment bolts to the<br />
specified torque (see “Technical information”).<br />
0616<br />
When opening the engine or parts of the<br />
engine, dirt may enter the engine, which<br />
may cause serious damage. Therefore,<br />
clean the engine before it is opened.<br />
4 - 5<br />
5
5<br />
EXPLANATION OF THE MAINTENANCE WORK<br />
Removal and installation<br />
SB(R)4000+ PF/XF SB(R)230 PF Euro3<br />
4.6 REMOVING AND INSTALLING THE AIR<br />
FILTER ELEMENT<br />
Removal<br />
1. Remove the clamps from the dust collector (1).<br />
2. Remove the dust collector (1) from the air filter housing<br />
(2).<br />
3. Use a rotating movement to remove the air filter element<br />
(3).<br />
4. Clean the inside of the air filter housing, the air intake<br />
duct and the cover.<br />
Clean the sealing surface of the air filter with the air<br />
intake duct.<br />
5. Check the cover for deformation. A damaged cover will<br />
not produce a good seal.<br />
Installation<br />
1. Replace the air filter element (3). Check the new air filter<br />
element for damage.<br />
Never fit a damaged filter element.<br />
Lightly lubricate the ring (A) with Vaseline.<br />
2. Fit the new air filter element in the air filter housing.<br />
Check whether the filter element is flush.<br />
3. Fit the dust collector (1) to the air filter housing (2) and<br />
secure it in place using the clamps.<br />
4. Reset the contamination indicator by pressing the reset<br />
button.<br />
1145804<br />
4 - 6 0616
EXPLANATION OF THE MAINTENANCE WORK<br />
SB(R)4000+ PF/XF SB(R)230 PF Euro3<br />
Removal and installation<br />
4.7 REMOVING AND INSTALLING THE CRT<br />
FILTER/CATALYSER<br />
Removal<br />
1. Before removing any exhaust components, mark their<br />
position with regard to each other and with regard to the<br />
exhaust elbow piece of the turbo compressor.<br />
2. Remove the exhaust pipe between the exhaust elbow<br />
piece and the exhaust silencer. Remove the silencer and<br />
the end pipe.<br />
3. Loosen the exhaust silencer’s clamping straps and<br />
remove the silencer.<br />
4. Remove the V-clamp (1) and remove the end cover (4).<br />
5. Remove the V-clamp (2) and remove the filter holder (5).<br />
6. Remove the CRT filter (6) and the catalyser (7).<br />
7. Clean the catalyser/CRT filter (see “Cleaning”).<br />
0616<br />
Exhaust gases contain carbon monoxide.<br />
Carbon monoxide is a deadly, colourless<br />
and odourless gas which, when inhaled,<br />
deprives the body of oxygen, leading to<br />
asphyxiation. Serious carbon monoxide<br />
poisoning can result in brain damage or<br />
death.<br />
Inhalation of smoke and dust particles<br />
may have serious consequences for your<br />
health. Therefore, take necessary<br />
precautions, such as wearing protective<br />
goggles or a dust mask.<br />
1151915<br />
4 - 7<br />
5
5<br />
EXPLANATION OF THE MAINTENANCE WORK<br />
Removal and installation<br />
SB(R)4000+ PF/XF SB(R)230 PF Euro3<br />
Installation filter module<br />
Pay attention to the following when installing the filter<br />
module.<br />
1. Always use new gaskets (B and C) when servicing the filter<br />
module.<br />
2. Check whether the connecting rings (A) and gaskets (B<br />
and C) have been fitted correctly.<br />
3. Make sure the type plate is always readable.<br />
4. Tighten the V-clamps (1 and 2) to the specified torque<br />
(see “Technical information”).<br />
Fit the exhaust silencer’s clamping straps through the<br />
suspension brackets.<br />
Installation exhaust silencer/CRT filter and exhaust pipes<br />
Pay attention to the following points when installing the<br />
exhaust silencer/CRT filter and the exhaust pipes.<br />
1. Replace the gasket before fitting the elbow piece.<br />
2. Fit the original expansion ring.<br />
3. Clean the thread of the attachment bolts and studs and<br />
apply heat-resistant grease.<br />
4. Fit all the exhaust system’s components free from tension.<br />
1151915<br />
4 - 8 0616
EXPLANATION OF THE MAINTENANCE WORK<br />
SB(R)4000+ PF/XF SB(R)230 PF Euro3<br />
Removal and installation<br />
5. Check whether the pipes (1 and 3) between which the<br />
flexible exhaust pipe (2) is fitted are aligned. The flexible<br />
pipe (2) must not be bent.<br />
6. Fit the flexible exhaust pipe (2) between the fixed pipes<br />
(1 and 3) so that the flow of the exhaust gases is in the<br />
same direction as the arrow.<br />
7. Push the flexible exhaust pipe (2) together and then pull<br />
the flexible exhaust pipe (2) apart as far as possible.<br />
Secure the flexible exhaust pipe (2) in the middle position<br />
to that it can expand and shrink.<br />
8. Fit the clamp (4) in the position indicated.<br />
9. Apply heat-resistant grease to the bolts.<br />
Tighten one of the bolts to a torque of 35 Nm.<br />
Tighten the other bolt to a torque of 70 Nm.<br />
Tighten both bolts to the specified torque (see “Technical<br />
information”).<br />
10. Bring the engine to the operating temperature.<br />
Idle the engine for 5 minutes and then gradually increase<br />
the speed of the engine to the maximum speed. Next,<br />
turn off the engine. Check the exhaust system and the<br />
catalyser/CRT filter for leaks.<br />
White smoke may escape from the exhaust pipe for<br />
some time after turning over/cleaning the CRT filter. This<br />
is normal. For this reason, it is best to not carry out a<br />
smoke test for at least 4 weeks.<br />
11. Measure the back pressure and record the measurement<br />
on the maintenance form.<br />
12. Take a test drive and retighten all the nuts, bolts, clamping<br />
straps and V-clamps.<br />
0616<br />
03865B<br />
03864B<br />
4 - 9<br />
5
5<br />
EXPLANATION OF THE MAINTENANCE WORK<br />
Removal and installation<br />
SB(R)4000+ PF/XF SB(R)230 PF Euro3<br />
4.8 REMOVING AND INSTALLING THE<br />
HYDRAULIC FAN FILTER<br />
To prevent skin damage, avoid<br />
unnecessary contact with the drained oil.<br />
Comment<br />
The oil should be changed, the filter element should be<br />
replaced and the reservoir should be cleaned if there is<br />
serious damage to the hydraulic pump or hydraulic motor.<br />
Removal<br />
1. Clean the cover (1), the reservoir and the surrounding<br />
area.<br />
2. Remove the cover.<br />
Unscrew the attachment bolt and slowly remove the filter<br />
holder (2) together with the filter element (3) from the reservoir<br />
so that no dirt falls out of the filter element into the<br />
reservoir.<br />
3. Replace the filter element.<br />
Installation<br />
1. Fit the filter holder and the new filter element into the reservoir.<br />
2. Tighten the attachment bolt to the specified torque (see<br />
“Technical information”).<br />
03947B<br />
4 - 10 0616
EXPLANATION OF THE MAINTENANCE WORK<br />
SB(R)4000+ PF/XF SB(R)230 PF Euro3<br />
Removal and installation<br />
4.9 REMOVING AND INSTALLING THE<br />
STEERING MECHANISM’S FILTER<br />
Removal<br />
1. Clean the cover and its surrounding area so that no dirt<br />
can enter the reservoir.<br />
2. Remove the cover (3).<br />
3. Unscrew the filter holder (5) a quarter of a turn.<br />
Slowly remove the filter holder and the filter element (6)<br />
from the reservoir so that not dirt from the filter element<br />
can fall into the reservoir.<br />
4. Disassemble the filter element (6) from the filter holder<br />
(5).<br />
Installation<br />
1. Fit a new filter element (6) to the filter holder (5).<br />
2. Fit the filter holder (5) and the filter element into the reservoir<br />
(1). Make sure the filter holder falls into the lock.<br />
3. Check the cover’s (3) sealing ring (4) and fit the cover.<br />
4. Use the dipstick (2) to check the fluid level (see “Inspection<br />
and adjustment”).<br />
0616<br />
To prevent skin damage, avoid<br />
unnecessary contact with the drained oil.<br />
4 - 11<br />
5
5<br />
EXPLANATION OF THE MAINTENANCE WORK<br />
Removal and installation<br />
SB(R)4000+ PF/XF SB(R)230 PF Euro3<br />
4.10 REMOVING AND INSTALLING THE AIR<br />
DRYER FILTER ELEMENT<br />
Comment<br />
In order to be sure the air dryer works correctly, the air reservoirs<br />
must be regularly checked for condensation. If more<br />
water is regularly drained than is to be expected, then the air<br />
dryer’s filter element must be replaced.<br />
Under normal circumstances, the filter element must be<br />
replaced at least once EVERY year.<br />
Removal<br />
1. Bleed the air dryer by regenerating it or by disconnecting<br />
the compressor line, so that the inside of the air dryer<br />
becomes pressureless.<br />
2. Remove the filter element by turning it anticlockwise<br />
using a strap spanner.<br />
Dispose of the filter element as if it was an oil filter.<br />
Always observe the instructions<br />
provided with the new filter element.<br />
Comment<br />
If an excessive amount of oil is observed in the air dryer or<br />
the supply line whilst removing the filter element, then check<br />
the condition of the compressor and check for carbon deposits<br />
in the compressor line.<br />
3. Clean the inside of the air dryer.<br />
4. Check the screw thread (2) of the air dryer for damage.<br />
Lightly lubricate the screw thread with grease.<br />
Installation<br />
1. Lightly lubricate the new filter element’s sealing ring with<br />
grease.<br />
2. Fit the filter element by tightening it by hand until it<br />
touches the seal. Next, tighten the filter element further<br />
by hand (maximum of one full revolution).<br />
3. Pressurize the system and check the air dryer for leaks.<br />
4. Use an indelible marker to write on the sticker the date<br />
that the filter element must be replaced by (maximum 1<br />
year after assembly).<br />
4 - 12 0616
EXPLANATION OF THE MAINTENANCE WORK<br />
SB(R)4000+ PF/XF SB(R)230 PF Euro3<br />
Removal and installation<br />
4.11 REMOVING AND INSTALLING THE<br />
BRAKE PADS<br />
4.11.1 SAFETY INSTRUCTIONS<br />
The following safety precautions must be observed before<br />
commencing work on the brakes:<br />
0616<br />
Always wear protective clothing, a face<br />
mask and safety goggles.<br />
DO NOT breathe in dust from the brake<br />
pads/lining or blow it away. Before<br />
starting work on the brakes, clean them<br />
using the appropriate equipment and<br />
follow the manufacturer’s instructions.<br />
Remove any dust using a damp cloth or a<br />
vacuum cleaner and dispose of all used,<br />
damp cloths in accordance with the<br />
appropriate legal regulations.<br />
Only hold the brake calliper by the edges,<br />
never between the brake calliper and the<br />
brake carrier. DANGER OF BECOMING<br />
TRAPPED.<br />
The brake pads/lining must NOT be<br />
drilled or turned unless otherwise stated.<br />
ALWAYS follow the manufacturer’s<br />
safety instructions when grinding the<br />
brake linings.<br />
ALWAYS follow the manufacturer’s<br />
safety instructions when replacing the<br />
brake pads/lining.<br />
If a cleaning agent is necessary, only use<br />
methylated spirits.<br />
4 - 13<br />
5
5<br />
EXPLANATION OF THE MAINTENANCE WORK<br />
Removal and installation<br />
SB(R)4000+ PF/XF SB(R)230 PF Euro3<br />
4.11.2 REMOVING THE BRAKE PADS<br />
If one brake pad needs replacing, then all<br />
the brake pads on the same axle must be<br />
replaced.<br />
The brake lining wear indicators must<br />
always be replaced when the brake pads<br />
are replaced.<br />
Always install the same type of brake<br />
pads to a vehicle.<br />
When replacing brake components, only<br />
use components which have been<br />
approved by the vehicle manufacturer.<br />
1. Jack up the vehicle according to the instructions.<br />
2. Remove the wheels.<br />
3. Check the operation of the automatic slack adjuster (see<br />
“Inspection and adjustment”).<br />
4. Remove the retaining clip (26) and washer (45).<br />
5. Push the pad retainer (11) backwards with a screwdriver<br />
and remove the locking pin (44) and the pad retainer<br />
(11).<br />
6. Check the pad retainer (11). If it is rusty or deformed,<br />
then it must be replaced.<br />
7. Remove the cover (37).<br />
To avoid damaging the surface of the sealing ring, never<br />
use a screw driver to remove the cover.<br />
Never rotate the adjusting hexagon<br />
without an adapter (61). The adapter<br />
forms a torque safety device and if the<br />
torque is too great, it will no longer grip<br />
the adjusting hexagon. If the adjusting<br />
hexagon (23) cannot be turned again<br />
using a new adapter, the brake calliper<br />
must be replaced.<br />
8. Turn the adjusting hexagon anticlockwise using a suitable<br />
spanner (SW-8) until the outer brake pad can be<br />
removed.<br />
FD00221<br />
4 - 14 0616
EXPLANATION OF THE MAINTENANCE WORK<br />
SB(R)4000+ PF/XF SB(R)230 PF Euro3<br />
Removal and installation<br />
Comment<br />
Turning any further than the stop will activate the slack<br />
adjuster’s overrunning clutch and a clicking noise will be<br />
heard.<br />
9. Push the brake calliper inwards and remove the inner<br />
brake pad.<br />
10. Clean the parts of the brake calliper and brake carrier<br />
that come into contact with the brake pad and apply<br />
Copaslip to these areas.<br />
4.11.3 FITTING THE BRAKE PADS<br />
1. Check the brake calliper play (see “Inspection and<br />
adjustment”).<br />
2. Clean the parts of the brake calliper and brake carrier<br />
that come into contact with the brake pad and apply<br />
Copaslip to the rear of the brake pad holder and the contact<br />
surfaces.<br />
3. Use the adapter (61) to rotate the thrust pieces anticlockwise<br />
as far as possible.<br />
4. Carefully push the brake calliper (1) to the outside of the<br />
vehicle and fit the outer brake pad (12) into place.<br />
5. Carefully push the brake calliper to the inside of the vehicle<br />
and fit the inner brake pad into place.<br />
6. Turn the slack adjuster’s adjusting hexagon clockwise<br />
using a suitable spanner (SW-8) until the brake pads lie<br />
against the brake disc.<br />
7. Next, turn the slack adjuster back 2 clicks.<br />
8. Depress the brake pedal a couple of times to give the<br />
slack adjuster a chance to set the brake’s optimal operating<br />
play.<br />
9. Check whether the wheel hub can rotate freely.<br />
If necessary, increase the play.<br />
0616<br />
FD002231<br />
FD00223<br />
4 - 15<br />
5
5<br />
EXPLANATION OF THE MAINTENANCE WORK<br />
Removal and installation<br />
SB(R)4000+ PF/XF SB(R)230 PF Euro3<br />
10. Lightly grease the new cover (37) with Renoliet HLT2<br />
(white) and then fit the cover as shown in the diagram.<br />
Check whether the cover is properly sealed.<br />
11. Assemble the brake pad retainer (11) and fit the locking<br />
pin (44). Next, fit the washer (45) and the retaining clip<br />
(26).<br />
12. Fit the wheels.<br />
13. Take a test drive.<br />
Brake carefully when using new brake<br />
pads.<br />
Avoid repeated, long-lasting braking and<br />
emergency stops.<br />
4 - 16 0616<br />
03944B<br />
FD00221
EXPLANATION OF THE MAINTENANCE WORK<br />
SB(R)4000+ PF/XF SB(R)230 PF Euro3<br />
Removal and installation<br />
4.12 REMOVING AND INSTALLING THE<br />
(SPRING) BRAKE CYLINDER<br />
Removing the brake cylinder<br />
1. Remove the air line on the brake cylinder (line must be<br />
pressureless).<br />
2. Remove the attachment nuts from the brake cylinder and<br />
remove the brake cylinder.<br />
Installing the brake cylinder<br />
Comment<br />
For a new brake cylinder, only remove the lowest drain plug<br />
(A). All other drain holes must be plugged.<br />
1. Clean the assembly surface of the brake cylinder and<br />
lubricate the ball joint (19) with Renoliet HLT2 (white).<br />
2. Clean the brake calliper’s assembly surface.<br />
The assembly surface must not be damaged.<br />
3. Check whether the seal (A) and the thrust pin (B) are<br />
clean and dry.<br />
4. Check the thickness of the sealing ring (A).<br />
Replace the brake cylinder if the thickness is less than 3<br />
mm.<br />
5. Replace the attachment nuts. Place the brake cylinder on<br />
the bracket and tighten the attachment nuts to the specified<br />
torque (see “Technical information”).<br />
6. Connect the air line.<br />
0616<br />
A Seal<br />
B Thrust pin<br />
C 3 mm<br />
FD00229<br />
FD00231<br />
FD00350<br />
4 - 17<br />
5
5<br />
EXPLANATION OF THE MAINTENANCE WORK<br />
Removal and installation<br />
SB(R)4000+ PF/XF SB(R)230 PF Euro3<br />
Removing the spring brake cylinder<br />
1. Place chocks in front of and behind the wheels and make<br />
sure there is sufficient system pressure (> 7.5 bar).<br />
2. Place the parking brake valve in the “Drive” position<br />
(make sure there is sufficient system pressure: approx. 6<br />
bar). Using a 24 mm spanner, unscrew the release bolt<br />
as far as possible out of the spring brake cylinder (anticlockwise).<br />
3. Place the parking brake valve in the “Park” position.<br />
4. Disconnect the two air lines from the spring brake cylinder<br />
(the lines must be pressureless).<br />
5. Remove the attachment nuts and remove the spring<br />
brake cylinder from the bracket.<br />
Installing the spring brake cylinder<br />
Comment<br />
For a new spring brake cylinder, only remove the lowest<br />
drain plug (A). All other drain holes must be plugged.<br />
1. Clean the assembly surface of the spring brake cylinder<br />
and lubricate the ball joint (19) with Renoliet HLT2<br />
(white).<br />
2. Clean the brake calliper’s assembly surface.<br />
The assembly surface must not be damaged.<br />
3. Check whether the seal (A) and the thrust pin (B) are<br />
clean and dry.<br />
4. Check the thickness of the sealing ring (A). Replace the<br />
brake cylinder if the thickness is less than 3 mm.<br />
5. Place the spring brake cylinder on the bracket and<br />
tighten the attachment nuts to the specified torque (see<br />
“Technical information”).<br />
6. Connect the air lines.<br />
7. Place the parking brake valve in the “Drive” position<br />
(make sure there is sufficient system pressure: approx. 6<br />
bar). Fully screw in the release bolt and tighten it to the<br />
specified torque (see “Technical information”).<br />
8. Check the connections for leaks.<br />
4 - 18 0616
EXPLANATION OF THE MAINTENANCE WORK<br />
SB(R)4000+ PF/XF SB(R)230 PF Euro3<br />
Removal and installation<br />
4.13 REMOVING AND INSTALLING THE<br />
BRAKE CALLIPER<br />
Removing the brake calliper<br />
1. Remove the brake pads.<br />
2. Remove the (spring) brake cylinder.<br />
3. Disconnect the plug of the brake pad wear indicator.<br />
To avoid an electric shock, do not touch the electrical<br />
contacts.<br />
4. Remove the steel cap (10) from the brake calliper. To do<br />
so, use a screw driver (or another suitable tool) to hit a<br />
hole in the middle of the cap (10). When doing so, the cap<br />
can move 10 mm inside the bore.<br />
0616<br />
Do not insert your fingers between the<br />
brake calliper and the brake calliper<br />
carrier on a new brake calliper when or<br />
after removing the brake pads (danger of<br />
becoming trapped). Only hold the brake<br />
calliper by the outside.<br />
To avoid damage, do not attach any<br />
hoisting tools to the brake pad retainer.<br />
To prevent damage, do not drive any tools between the<br />
cap and the brake calliper bore. Damage to the bore can<br />
lead to the brake calliper becoming stuck.<br />
5. Use a suitable tool to remove the cap (68). Make sure the<br />
rubber boot (6a) does not become damaged.<br />
4 - 19<br />
5
5<br />
EXPLANATION OF THE MAINTENANCE WORK<br />
Removal and installation<br />
SB(R)4000+ PF/XF SB(R)230 PF Euro3<br />
6. Remove the Allen screws (39 and 40).<br />
7. Remove the brake calliper.<br />
Installing the brake calliper<br />
1. Clean all the components and check them for damage. In<br />
particular, the sliding surfaces of the moving parts must<br />
be clean and free of damage.<br />
2. Make sure the guide pin in the brass bearing bush is<br />
positioned so that the inside of the collapsible rubber<br />
boot is pushed together.<br />
3. Place the brake calliper on the brake calliper bracket.<br />
4. Fit the two Allen screws (39 and 40) and tighten them to<br />
the specified torque (see “Technical information”). These<br />
bolts must never be reused. Always use new bolts and<br />
apply a locking compound.<br />
5. Check whether the brake calliper slides easily.<br />
6. Check the position of the collapsible boot (9) on the guide<br />
bush (5) and check the position of the ring (58).<br />
7. Check whether the automatic adjustment device functions<br />
correctly.<br />
4 - 20 0616
EXPLANATION OF THE MAINTENANCE WORK<br />
SB(R)4000+ PF/XF SB(R)230 PF Euro3<br />
Removal and installation<br />
8. Make the driving tool (H) using T2 (only the handle) and<br />
T17 from the special tool set (<strong>VDL</strong> no. 1329495).<br />
9. Clean the bore in the brake calliper. The bore and steel<br />
cap (10) must be clean and free of grease.<br />
10. Push the brake calliper to one side so that the collapsible<br />
boot (9) is pushed fully together. Hold the brake calliper<br />
in this position whilst assembling the steel cap (10) in<br />
order to prevent air from becoming trapped.<br />
0616<br />
Hit the driving tool (H) with a hammer until the steel cap<br />
(10) lies against the stop in the brake calliper.<br />
11. Use a hammer and the driving tool T11 (part of the special<br />
tool set <strong>VDL</strong> no. 1329495) to hit the cap (68) into the<br />
guide pin (4) until it touches the Allen screw (39).<br />
12. Assemble the brake pads.<br />
13. Connect the plug of the brake pad wear indicator.<br />
14. Fit the (spring) brake cylinder.<br />
4 - 21<br />
5
5<br />
EXPLANATION OF THE MAINTENANCE WORK<br />
Removal and installation<br />
SB(R)4000+ PF/XF SB(R)230 PF Euro3<br />
4.14 REMOVING AND INSTALLING THE<br />
BRAKE CALLIPER BRACKET<br />
Removing the brake calliper bracket<br />
1. Remove the brake calliper.<br />
2. Remove the brake calliper bracket’s (2) attachment bolts.<br />
3. Remove the brake calliper bracket. Replace the attachment<br />
bolts.<br />
Installing the brake calliper bracket<br />
1. Clean the brake calliper bracket and the contact surfaces<br />
of the swivel axle or brake anchor plate. Give special<br />
attention to the screw thread holes and the sliding surfaces<br />
of the brake pads.<br />
2. Fit the brake calliper bracket against the swivel axle or<br />
the brake anchor plate.<br />
3. Fit new attachment bolts and tighten them to the specified<br />
torque (see “Technical information”).<br />
4. Assemble the brake calliper.<br />
4 - 22 0616
EXPLANATION OF THE MAINTENANCE WORK<br />
SB(R)4000+ PF/XF SB(R)230 PF Euro3<br />
Removal and installation<br />
4.15 REMOVING AND INSTALLING THE<br />
WHEEL HUB<br />
0616<br />
03948B<br />
Removing the wheel hub<br />
1. Jack up the vehicle according to the instructions.<br />
2. Remove the wheel.<br />
3. Remove the brake calliper and the brake calliper bracket.<br />
4. Remove the bolts (6) and remove the hub cap (4) and the<br />
gasket (5) from the wheel hub (12).<br />
5. Unscrew the lock bolt (3). Remove the lock nut (2) and<br />
the thrust washer (1).<br />
6. Attach a suitable hoisting tool to the wheel hub (12).<br />
7. Use the special tool (A) (ZF no. 5870 000 090) to pull the<br />
wheel hub (12) from the axle stub.<br />
Pay attention to any wheel bearings which may be<br />
released.<br />
8. Remove the wheel bearings from the wheel hub.<br />
03942B<br />
4 - 23<br />
5
5<br />
EXPLANATION OF THE MAINTENANCE WORK<br />
Removal and installation<br />
SB(R)4000+ PF/XF SB(R)230 PF Euro3<br />
9. Remove the sealing rings (15 and 16) from the wheel hub<br />
(12).<br />
Comment<br />
If the bearings are removed from both wheels, the bearings<br />
should be marked.<br />
Each bearing should be reinstalled in its original hub.<br />
10. Remove the wheel hub and the wheel from the axle stub.<br />
11. Remove the grease from the wheel hub (12) and clean<br />
the wheel hub.<br />
12. Thoroughly clean the bearings cages of the wheel bearings<br />
(13 and 14) using a cleaning liquid.<br />
Installing the wheel hub<br />
1. Check the hub, the wheel bearings and the inner and<br />
outer bearing races for wear and damage. If necessary,<br />
replace them.<br />
The wheel bearings and the inner and outer races must<br />
be replaced as pairs.<br />
2. Use compressed air to blow the bearing cages of the<br />
wheel bearings (13 and 14) dry.<br />
Comment<br />
A liquid gasket must be applied to the outer circumference of<br />
the sealing rings without a vulcanized rubber outer ring.<br />
3. Fit a new sealing ring (15) in the bearing (14) using the<br />
special tool (ZF no. 5870 053 017).<br />
4. Fill the wheel bearings with the specified wheel bearing<br />
grease (see “Fluids and lubricants”). Also apply a layer of<br />
grease to the circumference of the wheel bearing<br />
5. Fit the wheel bearing (14) in the hub (12).<br />
Comment<br />
A liquid gasket must be applied to the outer circumference of<br />
the sealing rings which do not have a vulcanized rubber outer<br />
ring.<br />
6. Fit a new sealing ring (16) in the wheel hub (12) using the<br />
special tool (ZF no. 5870 053 017).<br />
7. Fill the wheel hub with 90 grams of wheel bearing grease<br />
(see “Fluids and lubricants”).<br />
8. Apply a small amount of grease to the sealing lips of the<br />
sealing ring (16).<br />
9. Check whether the wheel speed sensor is clamped in the<br />
swivel axle.<br />
If necessary, replace the sensor’s clamping bush.<br />
4 - 24 0616<br />
03950B<br />
03951B
EXPLANATION OF THE MAINTENANCE WORK<br />
SB(R)4000+ PF/XF SB(R)230 PF Euro3<br />
Removal and installation<br />
10. Fit the spindle (A) of the special tool (ZF no. 5870 000<br />
090) to the axle stub.<br />
11. Fit the brace (B) of the special tool (ZF no. 5870 000 090)<br />
to the wheel hub.<br />
12. Position the wheel hub (12) and the brace (B) over the<br />
spindle (A).<br />
Screw the wheel hub over the axle stub as far as the<br />
stop.<br />
Remove the special tool.<br />
13. Place the outer wheel bearing (13) in the hub.<br />
14. Fit the thrust washer (1) and the lock nut (2).<br />
15. Tighten the lock nut to a torque of 240 Nm.<br />
Whilst gradually tightening the lock nut, rotate the hub so<br />
that the wheel bearings can settle.<br />
16. Check the wheel bearing play (see “Inspection and<br />
adjustment”).<br />
17. Use the lock bolt (3) to lock the lock nut after adjusting<br />
the wheel bearing play. Tighten the lock bolt to the specified<br />
torque (see “Technical information”).<br />
18. Fit the hub cap (4) with a new gasket (5). Tighten the<br />
bolts (6) to the specified torque (see “Technical information”).<br />
19. Fit the brake calliper and the brake calliper bracket.<br />
20. Fit the wheel.<br />
0616<br />
03941B<br />
03942B<br />
03949B<br />
4 - 25<br />
5
5<br />
EXPLANATION OF THE MAINTENANCE WORK<br />
Removal and installation<br />
SB(R)4000+ PF/XF SB(R)230 PF Euro3<br />
4.16 REMOVING AND INSTALLING THE<br />
V-BELTS<br />
4.16.1 ALTERNATOR V-BELT<br />
Always fit the same type of V-belt. V- belts<br />
which lay next to each other over the<br />
same pulley must always be replaced<br />
together.<br />
Removal<br />
1. Unscrew the threaded spindle’s counter nut (4).<br />
2. Unscrew the threaded spindle’s attachment bolt (5).<br />
3. Loosen the alternator’s bottom attachment bolt (3).<br />
4. Loosen the threaded bush’s (1) counter nut (2).<br />
5. Move the alternator by rotating the threaded bush (1)<br />
until the V-belts can be removed.<br />
Installation<br />
1. Inspect the pulleys for damage, rust and grease deposits.<br />
2. Assemble the new V-belt(s).<br />
3. Move the alternator by rotating the threaded bush (1)<br />
until the correct V-belt tension is obtained (see “Technical<br />
information”).<br />
4. Tighten the alternator’s bottom attachment bolt (3).<br />
5. Tighten the threaded spindle’s counter nuts (2 and 4).<br />
6. Tighten the attachment bolt (5) of the threaded spindle<br />
which is attached to the water pump.<br />
PE engine<br />
XE engine<br />
4 - 26 0616
EXPLANATION OF THE MAINTENANCE WORK<br />
SB(R)4000+ PF/XF SB(R)230 PF Euro3<br />
Removal and installation<br />
4.16.2 POLY V-BELT<br />
Removal<br />
1. Remove the V-belt(s) from the extra alternator.<br />
2. Push the tension pulley (1) against the spring force and<br />
block the tension pulley using a 4 to 5 mm thick pin (drill<br />
bit).<br />
3. Remove the poly V-belt from the pulleys.<br />
4. Check the automatic slack adjuster (see “Inspection and<br />
adjustment”).<br />
Installation<br />
1. Check the pulleys for damage, rust and grease deposits.<br />
2. Fit the poly V-belt.<br />
3. Push the tension pulley against the spring force so that<br />
the blocking pin can be removed. Allow the tension pulley<br />
to be tensioned against the belt.<br />
4. Check to see whether the poly V-belt lies in all the<br />
grooves on all the pulleys.<br />
5. Fit the V-belt(s) of the extra alternator.<br />
0616<br />
Always fit the same type of poly V-belts.<br />
1 2 3<br />
03028B<br />
4 - 27<br />
5
5<br />
EXPLANATION OF THE MAINTENANCE WORK<br />
Removal and installation<br />
SB(R)4000+ PF/XF SB(R)230 PF Euro3<br />
4.16.3 AIR CONDITIONING COMPRESSOR V-BELTS<br />
Removal<br />
1. Loosen the quick-release coupling on the air cylinder’s<br />
bottom connection (2).<br />
2. Slacken the V-belts by connecting the air line to the air<br />
cylinder’s top connection (3).<br />
The air conditioning compressor will tilt<br />
when slackening the V-belts. There is a<br />
danger of becoming trapped!<br />
3. The V-belts can now be removed.<br />
Installation<br />
1. Inspect the pulleys for damage, rust and grease deposits.<br />
2. Assemble the new V-belt(s).<br />
3. Loosen the quick-release coupling on the air cylinder’s<br />
top connection (3).<br />
4. Check the running behaviour of the V-belts with an<br />
untensioned belt tensioner (pressureless) and the<br />
engine running. If the V-belts run irregularly, then<br />
increase the belt tensioner’s spring tension using the<br />
adjusting ring (1).<br />
5. Connect the air line to the belt tensioner’s bottom connection<br />
to tighten the belts.<br />
1145785<br />
4 - 28 0616
EXPLANATION OF THE MAINTENANCE WORK<br />
SB(R)4000+ PF/XF SB(R)230 PF Euro3<br />
Removal and installation<br />
4.17 REMOVAL AND INSTALLATION GEAR-<br />
BOX OIL FILTER ELEMENT<br />
4.17.1 ZF ECOMAT2<br />
Removing the oil filter element<br />
1. Remove the oil filter cover (1).<br />
2. Pull the oil filter cartridge out. Check whether the oil filter<br />
is seriously contaminated. Replace the oil filter cartridge.<br />
Note:<br />
Do not clean the oil filter. The oil filter element must always<br />
be replaced.<br />
Installing the oil filter element<br />
1. If suction pipe was pulled out with old filter, remove Oring<br />
from suction pipe.<br />
Insert new O-ring into transmission housing and push in<br />
suction pipe.<br />
2. Check whether the O-ring in the new filter cartridge is<br />
damaged and, if necessary, replace it. Lightly lubricate<br />
the O-ring with gear oil and fit the new filter cartridge.<br />
3. Replace the filter cover’s O-ring and fit the cover. Tighten<br />
the attachment bolts to the specified torque (see “Technical<br />
information”).<br />
0616<br />
To prevent skin damage, avoid<br />
unnecessary contact with the drained oil.<br />
Discharge the oil filter element<br />
4 - 29<br />
5
5<br />
EXPLANATION OF THE MAINTENANCE WORK<br />
Removal and installation<br />
SB(R)4000+ PF/XF SB(R)230 PF Euro3<br />
4.17.2 ZF AS TRONIC WITH INTARDER<br />
To prevent skin damage, avoid<br />
unnecessary contact with the drained oil.<br />
Discharge the oil filter element.<br />
Removing the oil filter element<br />
1. Remove the attachment bolt (1) of the oil filter.<br />
2. Pull the oil filter cover with the oil filter from the oil filter<br />
housing.<br />
3. Remove the oil filter (3) from the filter cover (2). Do not<br />
clean the filter. The filter must always be replaced.<br />
Note:<br />
If the magnetic disk is still attached to the back of the filter,<br />
separate it from the filter element and fit it on the new filter<br />
element.<br />
4 - 30 0616
EXPLANATION OF THE MAINTENANCE WORK<br />
SB(R)4000+ PF/XF SB(R)230 PF Euro3<br />
Removal and installation<br />
Installing the oil filter element<br />
1. Check the O-ring of the oil filter cover (2) for damage. If<br />
necessary, replace the O-ring. Grease the O-ring.<br />
2. Grease the O-ring of the new oil filter (3) and place the oil<br />
filter on the oil filter cover.<br />
3. The insert the oil filter and the oil filter cover into the oil<br />
filter housing.<br />
4. Use a plastic mallet to tap the oil filter cover into the oil<br />
filter housing.<br />
5. Tighten the attachment bolt (1) to the specified tightening<br />
torque, see main group “Technical data”.<br />
0616<br />
4 - 31<br />
5
5<br />
EXPLANATION OF THE MAINTENANCE WORK<br />
Removal and installation<br />
SB(R)4000+ PF/XF SB(R)230 PF Euro3<br />
4 - 32 0616
EXPLANATION OF THE MAINTENANCE WORK<br />
SB(R)4000+ PF/XF SB(R)230 PF Euro3<br />
Draining and filling<br />
5. DRAINING AND FILLING<br />
5.1 TOPPING UP THE BATTERY FLUID<br />
Topping up the battery fluid<br />
1. Clean the top of the battery. If the top of the battery is<br />
contaminated with acid, then it should be rinsed with<br />
water.<br />
2. Remove the plugs and fill the batteries with distilled water<br />
until approximately 10 mm above the plates or until the<br />
“Max.” level indicator (never fill the batteries to the top).<br />
3. Refit the plugs.<br />
0616<br />
Avoid sparks and naked flames near the<br />
batteries.<br />
Battery acid is an aggressive liquid.<br />
For skin contact: wash the affected area<br />
thoroughly with plenty of water. Contact<br />
a doctor if the affected area remains red<br />
or painful. Remove affected clothing and<br />
rinse with water.<br />
For eye contact: wash for at least 15<br />
minutes with plenty of water and visit a<br />
doctor.<br />
If swallowed: DO NOT instigate vomiting,<br />
rinse your mouth, drink two glasses of<br />
water and visit a doctor.<br />
After inhaling: get some fresh air, take a<br />
rest and contact a doctor.<br />
5 - 1<br />
5
5<br />
EXPLANATION OF THE MAINTENANCE WORK<br />
Draining and filling<br />
SB(R)4000+ PF/XF SB(R)230 PF Euro3<br />
5.2 DRAINING AND FILLING THE ENGINE<br />
OIL<br />
To prevent skin damage, avoid<br />
unnecessary contact with the drained oil.<br />
Extreme care must be taken when<br />
draining engine oil. Hot engine oil can<br />
cause serious personal injury.<br />
Draining<br />
– Preferably drain the engine oil when the engine is at the<br />
operating temperature.<br />
1. Place the vehicle on a flat, horizontal surface. Check<br />
whether the vehicle is level both longways and crossways.<br />
2. Place a suitable container under the engine’s oil sump.<br />
3. Drain the oil via the sump’s drain plug.<br />
4. Replace the drain plug’s sealing ring and tighten the<br />
drain plug to the specified torque (see “Technical information”).<br />
Filling<br />
1. Fill the engine via the filler opening with the red cap (1)<br />
with the specified quantity of engine oil (see “Technical<br />
information”).<br />
PE engine<br />
XE engine<br />
5 - 2 0616<br />
1<br />
1<br />
03570B<br />
03569B
EXPLANATION OF THE MAINTENANCE WORK<br />
SB(R)4000+ PF/XF SB(R)230 PF Euro3<br />
Draining and filling<br />
5.3 DRAINING THE WATER SEPARATOR<br />
1. Place a container under the water separator.<br />
2. Unscrew the bleed nipple (1) on the top of the water separator<br />
to allow some air to enter.<br />
3. Unscrew the drain plug (2) a couple of turns.<br />
4. Allow liquid to flow out of the water separator until clean<br />
diesel escapes.<br />
5. Tighten the drain plug and the bleed nipple.<br />
0616<br />
01518B<br />
2<br />
1<br />
5 - 3<br />
5
5<br />
EXPLANATION OF THE MAINTENANCE WORK<br />
Draining and filling<br />
SB(R)4000+ PF/XF SB(R)230 PF Euro3<br />
5.4 DRAINING AND FILLING THE<br />
HYDRAULIC FAN DRIVE<br />
To prevent skin damage, avoid<br />
unnecessary contact with the drained oil.<br />
Drain off all the hydraulic oil if there is<br />
excessive foaming.<br />
Trace and repair the leak. The system<br />
should then be refilled and bled.<br />
Draining<br />
1. Clean the filler cap (5), the line connections (1, 2, 3 and<br />
4) and the surrounding area.<br />
2. Place a container under the line connections (1, 2, 3 and<br />
4).<br />
3. Remove the filler cap (5) on the oil reservoir.<br />
4. Remove the lines (1, 2, 3 and 4).<br />
The drained hydraulic oil must not be<br />
reused. Keep the hydraulic oil separate<br />
from other oil which has been drained and<br />
hand it over for processing to a body that is<br />
authorised to dispose of it correctly.<br />
When filling and bleeding, make sure the<br />
reservoir is always filled with oil to prevent<br />
both pumps from sucking in air and causing<br />
the oil to foam.<br />
Air in the hydraulic system can seriously<br />
damage the tandem pump. It can also cause<br />
the steering mechanism to become stuck,<br />
either constantly or occasionally.<br />
If a shrieking noise can be heard when the<br />
steering wheel is turned or when the fan is<br />
in operation there is air in the system.<br />
Filling<br />
1. After draining the oil, reconnect the lines (1, 2, 3 and 4).<br />
2. Fill the system to the maximum level with the specified oil<br />
(see “Fluids and lubricants”).<br />
3. Fit the filler cap.<br />
Bleeding<br />
1. Idle the engine.<br />
2. The hydraulic system is self-bleeding.<br />
3. Check the oil level and, if necessary, top it up to the maximum<br />
level.<br />
5 - 4 0616<br />
03952B
EXPLANATION OF THE MAINTENANCE WORK<br />
SB(R)4000+ PF/XF SB(R)230 PF Euro3<br />
Draining and filling<br />
5.5 DRAINING AND FILLING THE COOLANT<br />
General<br />
– Preferably fill the cooling system with a ready-mixed coolant<br />
containing antifreeze and anti-corrosion additives.<br />
– The coolant must satisfy the specifications specified by<br />
<strong>VDL</strong> <strong>Bus</strong> & <strong>Coach</strong> (see lubricant specifications).<br />
Draining the cooling system<br />
1. Set the temperature setting to maximum. This will fully<br />
open the heater tap.<br />
2. Remove the filler cap from the coolant reservoir.<br />
3. Collect the coolant by placing a suitable container under<br />
the drain ports.<br />
0616<br />
There is excess pressure in the cooling<br />
system when the coolant becomes hot.<br />
Carefully remove the filler cap to remove<br />
the excess pressure.<br />
Coolant is a harmful liquid.<br />
Therefore, avoid skin contact to prevent<br />
poisoning.<br />
Coolant is harmful to the environment<br />
and must be processed as industrial<br />
waste after use.<br />
Collect the coolant in a suitable<br />
container.<br />
Coolant is harmful to the environment<br />
and must be processed as industrial<br />
waste after use.<br />
4. Drain the engine block.<br />
PE engine<br />
Drain the engine block via the drain tap (B) on the oil cooler.<br />
XE engine<br />
Drain the engine block by disconnecting the water hose (A)<br />
on the oil cooler.<br />
A<br />
03571B<br />
03954B<br />
5 - 5<br />
5
5<br />
EXPLANATION OF THE MAINTENANCE WORK<br />
Draining and filling<br />
SB(R)4000+ PF/XF SB(R)230 PF Euro3<br />
5. Drain the radiator by opening the radiator’s drain tap (C).<br />
6. Drain the gearbox oil cooler.<br />
GO -170/190/210<br />
Remove the drain plug from the heat exchanger’s bottom<br />
coolant connection and drain the remaining coolant.<br />
ZF Ecomat2 and ZF AS Tronic<br />
The oil cooler cooling circuit can only be drained by disconnecting<br />
the supply and return hose.<br />
7. See the bodywork builder’s documentation for instructions<br />
on how to drain the heating system.<br />
Pressure-filling the cooling system<br />
1. Remove the filler cap from the coolant reservoir.<br />
Check whether the drain ports are closed again.<br />
2. Connect the filler hose to the quick-filling nipple and start<br />
the pump.<br />
3. Fill the system (whilst the engine is not running) with the<br />
specified coolant (see “Fluids and lubricants”) up to the<br />
maximum mark on the gauge glass.<br />
4. Turn off the pump and disconnect the filling hose (fit the<br />
cap onto the quick-filling nipple).<br />
5. Idle the engine for one minute (with an open expansion<br />
tank) so that the cooling system bleeds itself and then<br />
turn the engine off for one minute. Repeat this procedure<br />
five times.<br />
6. Check the coolant level and, if necessary, top it up to the<br />
maximum level.<br />
7. Check the cooling system for leaks (see “Inspection and<br />
adjustment”).<br />
5 - 6 0616<br />
C<br />
03572B<br />
03953B<br />
03956B
EXPLANATION OF THE MAINTENANCE WORK<br />
SB(R)4000+ PF/XF SB(R)230 PF Euro3<br />
Draining and filling<br />
5.6 DRAINING AND FILLING THE STEERING<br />
OIL<br />
Draining<br />
1. Clean the line connections on the steering box and the<br />
reservoir.<br />
2. Jack up the front axle.<br />
3. Place a container under the steering box. Remove the<br />
return line from the steering box.<br />
4. Remove the filter from the steering oil reservoir.<br />
5. Without running the engine, slowly turn the steering<br />
wheel from one axle stop to the other until no more oil<br />
flows out of the steering box line connection.<br />
6. Reconnect the return line.<br />
7. Fit a new filter in the reservoir.<br />
Filling and bleeding<br />
0616<br />
To prevent skin damage, avoid<br />
unnecessary contact with the drained oil.<br />
Drain off all the hydraulic oil if there is<br />
excessive foaming.<br />
Trace and repair the leak. The system<br />
should then be refilled and bled.<br />
The drained hydraulic oil must not be<br />
reused. Keep the hydraulic oil separate<br />
from other oil which has been drained<br />
and hand it over for processing to a body<br />
that is authorised to dispose of it<br />
correctly.<br />
When filling and bleeding, make sure the<br />
reservoir is always filled with oil to<br />
prevent both pumps from sucking in air<br />
and causing the oil to foam.<br />
Air in the hydraulic system can seriously<br />
damage the tandem pump. It can also<br />
cause the steering mechanism to become<br />
stuck, either constantly or occasionally.<br />
If a shrieking noise can be heard when<br />
the steering wheel is turned or when the<br />
fan is in operation there is air in the<br />
system.<br />
The steering box is equipped with an automatic bleeding system.<br />
This only works if the system is at the circulation pressure.<br />
5 - 7<br />
5
5<br />
EXPLANATION OF THE MAINTENANCE WORK<br />
Draining and filling<br />
SB(R)4000+ PF/XF SB(R)230 PF Euro3<br />
1. Fill the reservoir to the rim with clean steering oil which<br />
meets the specifications. Wait and then fill the reservoir<br />
to the rim again.<br />
2. Turn the engine over for a few seconds using the starter<br />
motor. Make sure the reservoir does not run empty. Stop<br />
turning the engine over immediately if the level threatens<br />
to become too low. Top up the steering oil.<br />
3. Turn the engine over for approximately 10 seconds using<br />
the starter motor. Make sure the reservoir does not run<br />
empty. Stop turning the engine over immediately if the<br />
level threatens to become too low.<br />
4. Top up the steering oil to the max. mark.<br />
5. Repeat points 3 and 4 until the steering oil level no longer<br />
falls.<br />
6. Jack up the front axle until the wheels come off of the<br />
ground.<br />
Comment<br />
If there is a possibility that the poppet valves are incorrectly<br />
set, e.g. because the maximum wheel turning angle has<br />
been increased, these valves should be correctly set first<br />
(see the workshop instructions).<br />
7. Start the engine and slowly turn the steering wheel<br />
(approximately 1/2 a turn of the steering wheel per second)<br />
to the left and right axle stops whilst the engine<br />
idles. Continue doing this until the oil level no longer falls.<br />
Make sure the reservoir does not run empty.<br />
8. Idle the engine for a further 2 minutes. Do not turn the<br />
steering wheel during this time.<br />
9. Check the steering oil level whilst the engine idles. If necessary,<br />
top up the oil to the top mark on the dipstick.<br />
10. Stop the engine. The steering oil level must not rise more<br />
than 2 cm above the maximum mark (A in the diagram).<br />
If the steering oil level rises more than 2 cm, then there<br />
is still some air in the system.<br />
11. Refit the filler cap to the reservoir and lower the front<br />
axle.<br />
12. Check the line connections for leaks.<br />
13. Take a test drive. After the test drive, check the oil level<br />
and check the line connections for leaks.<br />
5 - 8 0616
EXPLANATION OF THE MAINTENANCE WORK<br />
SB(R)4000+ PF/XF SB(R)230 PF Euro3<br />
Draining and filling<br />
5.7 DRAINING THE CONDENSATION FROM<br />
THE AIR RESERVOIRS<br />
1. Check all the air reservoirs for condensation and oil by<br />
pulling the ring on the drain valve.<br />
2. Use your hand to feel the air flow. It must feel dry and be<br />
free of oil.<br />
3. The air drier’s cartridge must be replaced if the air flow<br />
contains moisture or oil mist. Also check the regeneration.<br />
Oil mist in the air flow may mean that the air compressor<br />
is damaged.<br />
Checking the regeneration of the air drier<br />
1. Pressurize the pneumatic brake system (pressure regulator<br />
must cut out).<br />
2. Turn the engine off.<br />
3. The regeneration air should escape for some time via the<br />
air drier’s bleed opening.<br />
0616<br />
Damp air in the pneumatic brake system<br />
is a great danger, because it may cause<br />
the brake pressure to be lost if the brake<br />
valves freeze during cold weather.<br />
5 - 9<br />
5
5<br />
EXPLANATION OF THE MAINTENANCE WORK<br />
Draining and filling<br />
SB(R)4000+ PF/XF SB(R)230 PF Euro3<br />
5.8 DRAINING AND FILLING THE<br />
DIFFERENTIAL OIL<br />
To prevent skin damage, avoid<br />
unnecessary contact with the drained oil.<br />
There is a danger of being burnt by hot<br />
oil.<br />
Draining<br />
1. Place the vehicle on a flat, horizontal surface. Check<br />
whether the vehicle is level both longways and crossways.<br />
2. Remove the oil filler/spill plug (A) and the oil drain plug<br />
(B). Drain the oil (preferably whilst the oil is warm).<br />
3. Clean the oil drain plug. Fit the drain plug (B) using the<br />
special Torx spanner (DAF no. 1329422) and tighten it to<br />
the specified torque (see “Technical information”).<br />
Filling<br />
1. Fill the differential with the specified quantity of oil via the<br />
oil spill/filler plug (A) (see “Technical information”).<br />
2. Check the oil level after approximately 5 minutes (see<br />
“Inspection and adjustment”).<br />
3. Clean the oil spill/filler plug (A). Fit it using the special<br />
Torx spanner (DAF no. 1329422) and tighten it to the<br />
specified torque (see “Technical information”).<br />
5 - 10 0616
EXPLANATION OF THE MAINTENANCE WORK<br />
SB(R)4000+ PF/XF SB(R)230 PF Euro3<br />
Draining and filling<br />
5.9 DRAINING AND FILLING THE GEARBOX<br />
OIL AND REPLACING THE FILTER<br />
5.9.1 ZF ECOMAT 2<br />
Draining<br />
1. Bring the gearbox to the operating temperature (80 - 90°<br />
C).<br />
2. Place the vehicle on a flat, horizontal surface. Check<br />
whether the vehicle is level both longways and crossways.<br />
3. Turn off the engine.<br />
4. Remove the oil drain plug (2) and drain the oil.<br />
5. Replace the oil filter element, see “Removal and installation”.<br />
Filling<br />
1. Clean the oil drain plug (2). Fit a new sealing ring to the<br />
drain plug and tighten the drain plug to the specified<br />
torque (see “Technical information”).<br />
2. Remove the dipstick.<br />
Fill the gearbox with no more than 10 litres of oil via the<br />
dipstick holder.<br />
3. Place the gearbox in neutral (N), idle the engine and<br />
slowly add another 4 litres of oil immediately.<br />
0616<br />
To prevent skin damage, avoid<br />
unnecessary contact with the drained oil.<br />
Note! There is a danger of being burnt by<br />
hot oil.<br />
5 - 11<br />
5
5<br />
EXPLANATION OF THE MAINTENANCE WORK<br />
Draining and filling<br />
SB(R)4000+ PF/XF SB(R)230 PF Euro3<br />
4. Check the oil level.<br />
After 3 to 5 minutes, the oil level must be in area B or<br />
higher on the dipstick.<br />
If necessary, top up the oil.<br />
DO NOT drain the oil if the level is higher.<br />
5. Bring the gearbox to the operating temperature (80 - 90°<br />
C).<br />
Place the gearbox in the neutral (N) and idle the engine.<br />
6. Wait approximately 2 minutes and then use the dipstick<br />
to check the oil level.<br />
When at the operating temperature (80 - 90° C), the oil<br />
level must be between the marks (A).<br />
7. If necessary, top up the oil.<br />
Comment<br />
It is very important for an automatic gearbox that the oil level<br />
is correct.<br />
A too low oil level may lead to poor operation or damage to<br />
the gearbox.<br />
A too high level may lead to the gearbox overheating.<br />
The oil level reading at the operating<br />
temperature (80 - 90° C) is decisive.<br />
5.9.2 GO 170/190/210<br />
To prevent skin damage, avoid<br />
unnecessary contact with the drained oil.<br />
1. Place the vehicle on a flat, horizontal surface. Check<br />
whether the vehicle is level both longways and crossways.<br />
2. Drain the gearbox whilst it is at the operating temperature.<br />
The oil spill/filler plugs are hot (oil<br />
temperature).<br />
5 - 12 0616<br />
A<br />
B<br />
C<br />
01681B
EXPLANATION OF THE MAINTENANCE WORK<br />
SB(R)4000+ PF/XF SB(R)230 PF Euro3<br />
Draining and filling<br />
3. Remove the drain plugs (1) and the sealing rings (2).<br />
Drain the oil.<br />
4. Clean the drain plugs (1) and fit them using new sealing<br />
rings.<br />
Tighten the plugs to the specified torque (see “Technical<br />
information”).<br />
5. Remove the plug (3) and the sealing ring (4), the oil sieve<br />
(5) and the spring (6).<br />
6. Clean the oil sieve (5) using cleaning spirit or another<br />
suitable cleaning product.<br />
Blow the oil sieve dry using compressed air.<br />
Check the oil sieve for damage. If necessary, replace it.<br />
7. Fit the spring (6), the oil sieve (5) and the plug (3) using<br />
a new sealing ring (4).<br />
Tighten the plug to the specified torque (see “Technical<br />
information”).<br />
8. Remove the oil spill/filler plug (7) and the sealing ring (8).<br />
9. Slowly fill the gearbox with the specified oil (see “Technical<br />
information”) until the oil reaches the edge of the filler<br />
opening.<br />
10. Fit a new sealing ring (2) and tighten the oil filler/spill plug<br />
(1) to the specified torque (see “Technical information”).<br />
5.9.3 ZF AS TRONIC WITH INTARDER<br />
Draining<br />
1. Before draining take a short test drive.<br />
Switch OFF the retarder foot control function by activating<br />
the rocker switch on the dashboard. Do not activate<br />
the retarder during the test drive or to slow down the vehicle.<br />
2. Place the vehicle on a flat, horizontal surface. Check<br />
whether the vehicle is level both longways and crossways.<br />
3. Drain the gearbox at operating temperature.<br />
0616<br />
To prevent skin damage, avoid<br />
unnecessary contact with the drained oil.<br />
Before draining, DO NOT activate the<br />
retarder.<br />
03957B<br />
5 - 13<br />
5
5<br />
EXPLANATION OF THE MAINTENANCE WORK<br />
Draining and filling<br />
SB(R)4000+ PF/XF SB(R)230 PF Euro3<br />
4. Remove the drain plugs (B) and (C) and the check/filler<br />
plug (A) and drain the oil.<br />
5. Replace the filter element in the gearbox, see “Removal<br />
and installation”.<br />
Filling<br />
1. Clean the drain plugs (B) and (C) and tighten them to the<br />
specified torque, see “Technical data”.<br />
2. Top up oil through the level check/filling opening (A) until<br />
the oil reaches the rim of the filling opening.<br />
3. Fit the level check/filler plug (A), tightening it to the specified<br />
torque, see “Technical data”.<br />
4. After filling take a short test drive.<br />
Switch OFF the retarder foot control function by activating<br />
the rocker switch on the dashboard. Do not activate<br />
the retarder by using the right-hand combination switch<br />
on steering column during the test drive.<br />
5. Check the oil level after having taken the test drive. The<br />
oil level must reach the rim of the level check/filling opening<br />
(A).<br />
6. Fit the level check/filler plug (A), tightening it to the specified<br />
torque, see “Technical data”.<br />
5 - 14 0616
EXPLANATION OF THE MAINTENANCE WORK<br />
SB(R)4000+ PF/XF SB(R)230 PF Euro3<br />
Draining and filling<br />
5.10 DRAINING AND FILLING THE<br />
HYDRAULIC CLUTCH FLUID<br />
Draining the clutch system<br />
1. Place a container under the clutch booster.<br />
2. Disconnect the supply line from the clutch booster and<br />
drain the oil from the reservoir by depressing and releasing<br />
the clutch pedal.<br />
3. Reconnect the supply line.<br />
0616<br />
Hydraulic fluid is poisonous and harmful<br />
to your health. Therefore, avoid direct or<br />
indirect skin contact.<br />
Hydraulic fluid reacts aggressively with<br />
the vehicle’s paint.<br />
Therefore, avoid hydraulic fluid coming<br />
into contact with the vehicle.<br />
Always use new, clean hydraulic fluid<br />
from a closed container which meets the<br />
specifications. Hydraulic fluid which has<br />
absorbed water (from the atmosphere)<br />
can have an adverse effect on the<br />
operation of the clutch system.<br />
Avoid contact with mineral oil. Just one<br />
drop of mineral oil in the system will<br />
affect the seals.<br />
Filling the clutch system<br />
1. Fill the clutch system with the specified liquid (see “Fluids<br />
and lubricants”).<br />
2. Bleed the clutch system.<br />
5 - 15<br />
5
5<br />
EXPLANATION OF THE MAINTENANCE WORK<br />
Draining and filling<br />
SB(R)4000+ PF/XF SB(R)230 PF Euro3<br />
5.11 BLEEDING THE CLUTCH SYSTEM<br />
Bleeding the clutch system using the “servo” bleed tank<br />
1. Connect the “servo” bleed tank to the reservoir.<br />
Comment<br />
When the reservoir is filled too quickly, foam will be formed<br />
and bleeding will be almost impossible.<br />
2. Fill the system via the “servo” bleed tank.<br />
3. Connect a transparent hose to the clutch booster’s bleed<br />
nipple. Hang the hose in a container.<br />
4. Unscrew the bleed nipple two full rotations.<br />
Close the bleed nipple when no more air bubbles can be<br />
seen through the transparent hose.<br />
5. Check the fluid level in the reservoir.<br />
Bleeding the clutch system using the clutch pedal<br />
1. Fill the system with the specified liquid (see “Liquids, oils<br />
and lubricants”).<br />
2. Connect a transparent hose to the clutch booster’s bleed<br />
nipple.<br />
Hang the hose in a container containing the specified<br />
fluid. Make sure the end of the hose is under the surface<br />
of the liquid.<br />
3. Open the bleed nipple.<br />
4. Slowly depress the clutch pedal and close the bleed nipple.<br />
Allow the clutch pedal to move slowly upwards.<br />
Repeat this procedure. The fluid in the reservoir must be<br />
topped up each time.<br />
5. Repeat pumping the clutch pedal and topping up the fluid<br />
until no more air bubbles can be seen through the transparent<br />
hose.<br />
6. Check the fluid level in the reservoir (see “Inspection and<br />
adjustment”).<br />
Bleeding the clutch system via the clutch booster<br />
Comment<br />
It may be difficult to bleed the system using the method given<br />
above.<br />
If that is the case, the clutch system can also be bled via the<br />
bleed nipple on the clutch booster using a hand pump. Make<br />
sure the inside of the hand pump is clean.<br />
5 - 16 0616
EXPLANATION OF THE MAINTENANCE WORK<br />
SB(R)4000+ PF/XF SB(R)230 PF Euro3<br />
Draining and filling<br />
1. Fit a transparent hose to the hand pump (you may use an<br />
oil can) and fill the hand pump with the specified fluid.<br />
2. Pump using the hand pump until the fluid coming out of<br />
the hose no longer contains air bubbles.<br />
3. Next, fit the hose to the bleed nipple on the clutch booster<br />
and open the bleed nipple.<br />
4. Pump fluid into the system using the hand pump.<br />
Pay attention to the following:<br />
– Do not use the clutch pedal.<br />
– Make sure no more air bubbles enter the system.<br />
– Pay attention to the fluid level in the hand pump.<br />
– Pay attention to the fluid level in the clutch reservoir.<br />
0616<br />
03955B<br />
5 - 17<br />
5
5<br />
EXPLANATION OF THE MAINTENANCE WORK<br />
Draining and filling<br />
SB(R)4000+ PF/XF SB(R)230 PF Euro3<br />
5.12 DRAINING AND FILLING THE<br />
RETARDER OIL<br />
1. Place the vehicle on a flat, horizontal surface. Check<br />
whether the vehicle is level both longways and crossways.<br />
2. Drain the retarder whilst it is at the operating temperature.<br />
3. Turn the retarder and the contact switch off.<br />
The oil spill/filler plugs are hot (oil<br />
temperature). There is a danger of being<br />
burnt.<br />
4. Remove the oil drain plugs (1) and (2).<br />
5. Clean the oil drain plugs (1 and 2) and clean the sealing<br />
ring and, if necessary, replace them.<br />
6. Tighten the oil drain plugs to the specified torque (see<br />
“Technical information”).<br />
7. Remove the plug (3) together with the sieve.<br />
8. Clean the sieve using cleaning spirit or another suitable<br />
cleaning product. Blow the sieve clean and dry using<br />
compressed air.<br />
9. Check the plug’s (3) sealing ring for damage. If necessary,<br />
replace it.<br />
10. Tighten the plug (3) to the specified torque (see “Technical<br />
information”).<br />
11. Remove the oil filler plug (4).<br />
12. Top up the oil via the filler plug opening to the specified<br />
quantity of oil (see “Technical information”).<br />
Top up the oil slowly (this should take longer than 3 minutes)<br />
to ensure that the retarder is bled correctly.<br />
The retarder oil may only be topped up<br />
via the oil filler plug.<br />
13. Check the oil filler plug’s (4) sealing ring for damage. If<br />
necessary, replace it.<br />
5 - 18 0616<br />
03945B<br />
03958B
EXPLANATION OF THE MAINTENANCE WORK<br />
SB(R)4000+ PF/XF SB(R)230 PF Euro3<br />
Draining and filling<br />
14. Tighten the oil filler plug to the specified torque (see<br />
“Technical information”).<br />
15. Take a test drive. Operate the retarder handle at a speed<br />
of at least 50 km/h and place it in position 1. Return the<br />
handle to position 0 (retarder off) after approximately 5<br />
seconds. Repeat this procedure at least five times.<br />
16. Check the oil level again after the test drive.<br />
0616<br />
5 - 19<br />
5
5<br />
EXPLANATION OF THE MAINTENANCE WORK<br />
Draining and filling<br />
SB(R)4000+ PF/XF SB(R)230 PF Euro3<br />
5.13 BLEEDING THE FUEL SYSTEM<br />
The engine will only fire after several<br />
lengthy starting attempts.<br />
Failure to follow the starting instructions<br />
below may cause damage to the starter<br />
motor or the batteries.<br />
1. Bleed the fuel system using the hand pump (1).<br />
First, unscrew the button on the hand pump by turning it<br />
anticlockwise.<br />
2. Operate the hand pump until a build-up of pressure can<br />
be clearly felt.<br />
3. Wait a couple of minutes and then pump again until a<br />
pressure can be clearly felt. Tighten the button on the<br />
hand pump by turning it clockwise.<br />
4. Continuously operate the starter motor until the engine<br />
starts. The maximum time that the starter motor can be<br />
used is 1 minute.<br />
If the engine does not start during this time, allow the<br />
starter motor to cool down for 2 minutes.<br />
5. Continuously operate the starter motor again until the<br />
engine starts. The maximum time that the starter motor<br />
can be continuously used is 1 minute. If the engine does<br />
not start during this minute, allow the starter motor to cool<br />
for at least 30 minutes before repeating the start procedure<br />
described above.<br />
6. The engine will run erratically for some time after it has<br />
been started.<br />
Next, tighten the hand pump’s black button (1).<br />
5 - 20 0616
EXPLANATION OF THE MAINTENANCE WORK<br />
SB(R)4000+ PF/XF SB(R)230 PF Euro3<br />
Cleaning<br />
6. CLEANING<br />
6.1 CLEANING THE BATTERY TERMINALS<br />
1. Remove the earth cable (-) from the battery terminal.<br />
2. Remove the positive cable (+) from the battery terminal.<br />
3. Clean the battery terminals, the battery cables and the<br />
top of the battery (oxide and dirt will cause the battery to<br />
discharge).<br />
4. If the top of the battery is contaminated with acid, then<br />
this should be rinsed with water.<br />
Dry the battery after cleaning<br />
5. Grease the terminals with acid-free Vaseline.<br />
6. Check the earth cable connection on the chassis and<br />
lubricate it using Vaseline.<br />
7. Fit the positive cable (+) to the battery terminal.<br />
8. Fit the earth cable (-) to the battery terminal.<br />
9. Check the position and attachment of the battery cables.<br />
0616<br />
Avoid sparks and naked flames near the<br />
batteries.<br />
Battery acid is an aggressive liquid.<br />
For skin contact: wash the affected area<br />
thoroughly with plenty of water. Contact<br />
a doctor if the affected area remains red<br />
or painful. Remove affected clothing and<br />
rinse with water.<br />
For eye contact: wash for at least 15<br />
minutes with plenty of water and visit a<br />
doctor.<br />
If swallowed: DO NOT instigate vomiting,<br />
rinse your mouth, drink two glasses of<br />
water and visit a doctor.<br />
After inhaling: get some fresh air, take a<br />
rest and contact a doctor.<br />
6 - 1<br />
5
5<br />
EXPLANATION OF THE MAINTENANCE WORK<br />
Cleaning<br />
SB(R)4000+ PF/XF SB(R)230 PF Euro3<br />
6.2 CLEANING THE WATER SEPARATOR<br />
1. Place a container under the water separator.<br />
2. Unscrew the bleed nipple (1) and the drain plug (2) a couple<br />
of turns and allow the water separator to drain.<br />
3. Remove the fuel filter bowl (3) by rotating it anticlockwise.<br />
4. Disconnect the fuel lines and remove the housing (4).<br />
5. Thoroughly clean all the water separator’s components<br />
in clean diesel.<br />
6. Assemble the housing (4) and the fuel lines.<br />
7. Lightly lubricate the new sealing ring (5) with engine oil or<br />
diesel.<br />
8. Fit the fuel filter bowl (3) with a new sealing ring and<br />
tighten the fuel filter bowl by hand.<br />
9. Bleed the fuel system using the hand pump. Operate the<br />
pump until the resistance increases.<br />
01518B<br />
6 - 2 0616<br />
2<br />
1
EXPLANATION OF THE MAINTENANCE WORK<br />
SB(R)4000+ PF/XF SB(R)230 PF Euro3<br />
Cleaning<br />
6.3 CLEANING THE COARSE FUEL FILTER<br />
ELEMENT<br />
1. Place a sufficiently large container under the coarse fuel<br />
filter.<br />
2. Unscrew the cap (4) by turning it anticlockwise and<br />
remove it from the housing.<br />
3. Remove the filter element (2) from the cap (4).<br />
4. Rinse the filter element (2) in clean diesel and blow it<br />
clean using compressed air.<br />
5. Check the O-ring and the filter element for damage. If<br />
necessary, replace them.<br />
6. Lightly lubricate the O-ring (3) with engine oil.<br />
7. Fit the filter element and the O-ring in the cap (4).<br />
8. Screw the cap (4) clockwise to fit it to the filter housing<br />
(1).<br />
Tighten the cap by hand.<br />
9. First, unscrew the button on the hand pump (A) by turning<br />
it anticlockwise.<br />
10. Pump the cap (4) full with fuel.<br />
11. Tighten the button (A) on the hand pump by turning it<br />
clockwise.<br />
12. Start the engine and check for leaks. If necessary,<br />
tighten the cap (4) by hand.<br />
0616<br />
Diesel is an inflammable liquid and must<br />
not be exposed to a naked flame or other<br />
heat sources. Collect any drained fuel in<br />
a suitable container.<br />
6 - 3<br />
5
5<br />
EXPLANATION OF THE MAINTENANCE WORK<br />
Cleaning<br />
SB(R)4000+ PF/XF SB(R)230 PF Euro3<br />
6.4 CLEANING THE CRT FILTER<br />
Wear suitable protective clothing and a<br />
face mask to prevent the inhalation of<br />
soot or soot particles.<br />
Use an industrial vacuum cleaner to<br />
remove soot particles from the filter.<br />
Follow the manufacturer’s instructions<br />
when doing so.<br />
The following tools are required to clean the CRT filter.<br />
– An enclosed area with an extraction unit which is separate<br />
from the rest of the workshop.<br />
– A compressor (7 bar - 100 psi) with a special spray head<br />
for blowing the compressed air directly into the filter’s<br />
ducts.<br />
– An industrial vacuum cleaner which is suitable for harmful<br />
materials and which has a suction strength of at least 400<br />
litres per minute.<br />
See the Eminox website for a summary of suitable cleaning<br />
equipment.<br />
www.eminox.com<br />
It is not permitted to clean the CRT filter<br />
with a steam cleaner or a high-pressure<br />
hose. As a result, the soot and ash<br />
particles will clot in the filter.<br />
Checking the CRT filter<br />
1. A large quantity of soot and ash particles on the inlet section<br />
of the filter may indicate overheating. Overheating<br />
may cause serious internal damage to the filter. Black<br />
spots or individual black cells on the outlet side of the filter<br />
are an indication of overheating.<br />
2. Replace the CRT filter if any of the above are observed.<br />
3. Check the visible surfaces of the catalyser and the filter<br />
module for cracks and dents and check whether the filter<br />
module is securely fitted into the housing.<br />
4. Check whether the seal of the inlet module and the catalyser<br />
module are broken.<br />
5. If no faults are observed on the filter module, then it must<br />
be refitted in the opposite order to which it was removed.<br />
Normal appearance<br />
Local internal damage<br />
Extensive internal damage<br />
03883B1<br />
03883B2<br />
03883B3<br />
6 - 4 0616
EXPLANATION OF THE MAINTENANCE WORK<br />
SB(R)4000+ PF/XF SB(R)230 PF Euro3<br />
Cleaning<br />
6.5 CLEANING THE CATALYSER<br />
1. Use a soft brush to clean the surface of the catalyser.<br />
2. Check the various components for external damage, in<br />
particular the assembly flanges.<br />
A deep dent in the catalyser or CRT filter may have damaged<br />
the ceramic section.<br />
3. Check the visible sections of the catalyser for cracks or<br />
indentations and check whether the ceramic bracket is<br />
firmly secured in the housing.<br />
0616<br />
Wear suitable protective clothing and a<br />
face mask to prevent the inhalation of<br />
soot or soot particles.<br />
1145116<br />
6 - 5<br />
5
5<br />
EXPLANATION OF THE MAINTENANCE WORK<br />
Cleaning<br />
SB(R)4000+ PF/XF SB(R)230 PF Euro3<br />
6.6 CLEANING THE RADIATOR AND THE<br />
INTERCOOLER ELEMENT<br />
Inhalation of dust may serious harm your<br />
health.<br />
Therefore, take necessary precautions,<br />
such as wearing dust goggles or a dust<br />
mask.<br />
6.6.1 CLEANING THE WIRE SCREEN<br />
1. Remove the wire screen.<br />
2. Use a hard brush to clean the wire screen and blow it<br />
clean with compressed air.<br />
1. Oil cooler<br />
2. Radiator<br />
3. Intercooler<br />
P. Compressed air<br />
6 - 6 0616<br />
03913B
EXPLANATION OF THE MAINTENANCE WORK<br />
SB(R)4000+ PF/XF SB(R)230 PF Euro3<br />
Cleaning<br />
6.6.2 CLEANING THE RADIATOR/INTERCOOLER/OIL COOLER ELEMENT<br />
1. Use compressed air to blow the radiator element clean<br />
from the back of the cooling unit until no more dirt<br />
escapes.<br />
When doing so, protect the rear of the oil cooler/intercooler<br />
from dirt penetrating.<br />
2. Once finished, clean the oil cooler and intercooler with a<br />
tool you have made yourself.<br />
Place to tool between the radiator and the oil cooler and<br />
then between the radiator and the intercooler and blow<br />
the oil cooler/intercooler clean until no more dirt escapes.<br />
6.6.3 WITH A STEAM CLEANER<br />
If it is difficult to clean the radiator/intercooler element and<br />
the oil cooler using compressed air, the radiator/intercooler<br />
element and the oil cooler must be disassembled and<br />
cleaned with a steam cleaner.<br />
0616<br />
Avoid using a too high pressure, because<br />
this may damage the lamellae.<br />
A general car paint cleaner can be added to<br />
the water. Do not use any aggressive<br />
cleaning agents.<br />
Follow the manufacturer’s instructions<br />
when using cleaning products.<br />
6.6.4 INSIDE OF THE RADIATOR<br />
Advice<br />
If the specifications for the coolant and additives are<br />
observed, then the inside of the radiator will only be polluted<br />
in exceptional circumstances.<br />
• Light pollution<br />
– Rinse with hot water. If necessary, add a mild cleaning<br />
agent.<br />
• Surface contaminated with minerals, such as lime.<br />
– Fill the radiator with water and add a slightly alkaline<br />
cleaning agent for limestone, such as diluted acetic<br />
acid or a mild household cleaning product.<br />
• Heavy pollution<br />
– Heavy pollution on the inside is difficult to remove. If<br />
heavily polluted, the radiator should be cleaned by a<br />
specialized company.<br />
After using a cleaning agent, rinse the<br />
radiator using plenty of water until all the<br />
cleaning agent has been removed.<br />
03959B<br />
6 - 7<br />
5
5<br />
EXPLANATION OF THE MAINTENANCE WORK<br />
Cleaning<br />
SB(R)4000+ PF/XF SB(R)230 PF Euro3<br />
6.6.5 INSIDE OF THE INTERCOOLER ELEMENT<br />
• Light pollution<br />
– Rinse with hot water. If necessary, add a mild cleaning<br />
agent.<br />
– Neutral to light alkaline cleaning agents and additives,<br />
such as wetting agents, improve the cleaning process.<br />
– The temperature and concentration may be altered<br />
according to the manufacturer’s instructions<br />
• Heavy pollution<br />
– Heavy pollution on the inside is difficult to remove. If<br />
heavily polluted, the radiator should be cleaned by a<br />
specialized company.<br />
Before assembling the intercooler element,<br />
it is vitally important that the internal<br />
surface of the intercooler element is free of<br />
liquids and cleaning agent residue.<br />
6 - 8 0616
EXPLANATION OF THE MAINTENANCE WORK<br />
SB(R)4000+ PF/XF SB(R)230 PF Euro3<br />
Cleaning<br />
6.7 CLEANING THE REAR AXLE BREATHER<br />
1. Clean the breather and the surrounding area.<br />
2. Remove the breather from the rear axle.<br />
3. Rinse the breather and breather hose in a cleaning fluid.<br />
4. Blow the breather and hose dry from the inside using<br />
compressed air.<br />
5. Install the breather with hose on the rear axle.<br />
0616<br />
1437467<br />
6 - 9<br />
5
5<br />
EXPLANATION OF THE MAINTENANCE WORK<br />
Cleaning<br />
SB(R)4000+ PF/XF SB(R)230 PF Euro3<br />
6.8 CLEANING THE GEARBOX<br />
BREATHER(S)<br />
1. Clean the breather(s) and the surrounding area.<br />
2. Remove the breather(s) from the gearbox.<br />
3. Rinse the breather(s) and breather hose(s) in a cleaning<br />
fluid.<br />
4. Blow the breather(s) and breather hose(s) dry from the<br />
inside using compressed air.<br />
5. Install the breather with hose on the gearbox.<br />
03901B<br />
6 - 10 0616
EXPLANATION OF THE MAINTENANCE WORK<br />
SB(R)4000+ PF/XF SB(R)230 PF Euro3<br />
Cleaning<br />
6.9 CLEANING THE VEHICLE<br />
Before cleaning the vehicle, check whether there are any<br />
leaks from the engine, axles, gearbox, etc., because this will<br />
no longer be possible during the maintenance work after the<br />
vehicle has been cleaned.<br />
– Make sure that doors, windows and roof hatches are<br />
securely closed when using a high-pressure hose.<br />
– Never direct the jet of the high-pressure hose/steam<br />
cleaner directly at the steering box.<br />
– When cleaning the universal joint on the steering box, the<br />
spider seals may be forced open by the high-pressure jet<br />
of water, so that the grease behind them will be flushed<br />
away. As a result, the spider may get stuck and cause the<br />
steering mechanism to jam.<br />
– A bleed valve is fitted to the steering mechanism’s powersteering<br />
reservoir. Water may enter the reservoir through<br />
this valve, causing damage to the steering mechanism.<br />
– Be careful not to damage the lamellae when cleaning the<br />
radiator/intercooler element.<br />
– Do not direct the jet of the high-pressure hose too long at<br />
the air conditioning system’s condenser. As a result of the<br />
high temperature, excessive pressure will build up in the<br />
system, which may cause damage to the system.<br />
– Ensure that no water can enter the differential or the gearbox<br />
via the bleed openings.<br />
– The engine and engine compartment can be cleaned with<br />
a high-pressure hose. Make sure, in this case, not to spray<br />
directly onto the oil seals/seals and the electrical components,<br />
such as the starter motor, alternator, etc.<br />
– When cleaning a UPEC engine with a high-pressure hose,<br />
do not aim the hose directly at the pump units. Water may<br />
enter the protection caps via the bleed openings, which<br />
may cause faults with the electrical connections of the<br />
pump units.<br />
– The encapsulation must be thoroughly cleaned after every<br />
maintenance service, because there is a risk of fire if the<br />
inside of the encapsulation is dirty. When spraying the<br />
engine encapsulation, maintain a minimum distance of 50<br />
cm between the engine encapsulation and the spray nozzle<br />
to prevent damage to the engine encapsulation.<br />
– Do not aim the jet directly at electrical connections, such as<br />
connectors, lighting feed-through connections, etc.<br />
– Make sure no water can enter the air intake system via the<br />
air inlet or the flexible seals when cleaning the vehicle.<br />
– Do not direct the jet of the high pressure hose directly onto<br />
the seals on the drive shaft, such as the seals in the spider,<br />
the intermediate bearing and the slip joint.<br />
– Lubricate the vehicle after it has been cleaned using a<br />
grease gun or via the central lubrication system. This is<br />
important, because it prevents the penetration of moisture<br />
and dirt at the various pivot points.<br />
0616<br />
6 - 11<br />
5
5<br />
EXPLANATION OF THE MAINTENANCE WORK<br />
Cleaning<br />
SB(R)4000+ PF/XF SB(R)230 PF Euro3<br />
6 - 12 0616
EXPLANATION OF THE MAINTENANCE WORK<br />
SB(R)4000+ PF/XF SB(R)230 PF Euro3<br />
Lubrication<br />
7. LUBRICATION<br />
7.1 LUBRICATING ACCORDING TO THE<br />
LUBRICATION SCHEDULE<br />
– Lubricate according to the lubrication schedules. Clean the<br />
grease nipples before and after lubricating.<br />
– Remove any excess grease after lubricating.<br />
Grease quality<br />
See the lubrication specifications.<br />
Front axle suspension<br />
1. Lubricate the front axle suspension (see “Fluids and<br />
lubricants” for the grease specifications) until grease<br />
escapes.<br />
Swivel axle<br />
1. Lubricate the swivel axle (see “Fluids and lubricants” for<br />
the grease specifications) until grease escapes.<br />
Auxiliary pitman arm<br />
1. Lubricate the intermediate arm (see “Fluids and lubricants”<br />
for the grease specifications) until grease escapes<br />
from the seal (C).<br />
Steering box<br />
1. Check whether there is any grease in the space behind<br />
the dust rings A and B.<br />
2. If necessary, fill the space behind the dust rings with<br />
grease which has a melting point > 130° C (see “Fluids<br />
and lubricants” for the grease specifications).<br />
0616<br />
1150189<br />
1149413a<br />
7 - 1<br />
5
5<br />
EXPLANATION OF THE MAINTENANCE WORK<br />
Lubrication<br />
SB(R)4000+ PF/XF SB(R)230 PF Euro3<br />
Drive shaft (SB version)<br />
1. Clean the grease nipples before and after lubricating.<br />
Remove any excess grease after lubricating.<br />
2. Lubricate the universal joints and sliding joint of the drive<br />
shaft until grease escapes. See “Fluids and lubricants”<br />
for the grease specifications.<br />
3. The maximum lubrication pressure must not exceed 15<br />
bar.<br />
7 - 2 0616
EXPLANATION OF THE MAINTENANCE WORK<br />
SB(R)4000+ PF/XF SB(R)230 PF Euro3<br />
Lubrication<br />
7.2 LUBRICATION DIAGRAM<br />
1 Clutch control reservoir<br />
2 Spare wheel<br />
3 Steering box<br />
4 Auxiliary pitman arm<br />
5 Lower supporting arm<br />
6 Kingpin (top and bottom)<br />
7 Wheel bearings<br />
8 Upper supporting arm<br />
9 Differential<br />
10 Drive shaft (SB-only)<br />
11 Kingpin (top and bottom)<br />
12 Wheel bearings<br />
13 Retarder<br />
14 Gearbox<br />
15 Engine<br />
16 Fan drive reservoir<br />
17 Power steering reservoir<br />
0616<br />
03960B<br />
Multi-purpose grease<br />
Engine oil<br />
Transmission fluid<br />
Hypoid oil<br />
Automatic transmission fluid<br />
C= CHECK<br />
S = SYMMETRICAL<br />
V = CHANGE/REPLACE<br />
7 - 3<br />
5
5<br />
EXPLANATION OF THE MAINTENANCE WORK<br />
Lubrication<br />
SB(R)4000+ PF/XF SB(R)230 PF Euro3<br />
7 - 4 0616
EXPLANATION OF THE MAINTENANCE WORK<br />
SB(R)4000+ PF/XF SB(R)230 PF Euro3<br />
Jacking and lifting instructions<br />
8. JACKING AND LIFTING INSTRUCTIONS<br />
8.1 JACKING INSTRUCTIONS<br />
0616<br />
Turn off the ECAS system by turning off<br />
the main switch, because the ECAS<br />
system will otherwise try to correct the<br />
angle of the vehicle<br />
Always observe the manufacturer’s<br />
instructions when using a jack.<br />
Only place the jack at the indicated<br />
jacking points.<br />
Jacking up the front wheels<br />
When jacking up the front wheels, place the jack under the<br />
steering swivel as indicated.<br />
Place the jack under the steering swivel so that the vehicle<br />
cannot slide off of the jack.<br />
In order to prevent damage to the wheel suspension/chassis,<br />
the jack must never be placed in the region between the two<br />
steering swivels.<br />
Jacking up the driven axle<br />
To jack up the driven axle, place the jack under the yoke in<br />
the middle of the four leaf-spring clips, as indicated.<br />
In order to prevent deformation of the axle beam, the jack<br />
must not be placed directly under the axle beam or differential<br />
housing.<br />
03968B<br />
03965B<br />
8 - 1<br />
5
5<br />
EXPLANATION OF THE MAINTENANCE WORK<br />
Jacking and lifting instructions<br />
SB(R)4000+ PF/XF SB(R)230 PF Euro3<br />
Jacking up the trailing axle<br />
When jacking up the trailing axle, place the jack under the<br />
axle beam as indicated.<br />
03967B<br />
8 - 2 0616
EXPLANATION OF THE MAINTENANCE WORK<br />
SB(R)4000+ PF/XF SB(R)230 PF Euro3<br />
Jacking and lifting instructions<br />
8.2 LIFTING INSTRUCTIONS<br />
General information<br />
These instructions are only intended as a guide to increase<br />
safety when raising and/or jacking up the vehicle.<br />
Following these instructions does not relieve the user of his<br />
responsibilities for carrying out his duties safely. <strong>VDL</strong> <strong>Bus</strong> &<br />
<strong>Coach</strong> cannot be held responsible for any consequential<br />
damage caused as a result of lifting and/or supporting the<br />
vehicle, regardless of whether this is carried out in accordance<br />
with these instructions or not.<br />
Kneeling on the bumper stops<br />
A function (EFREQ1 on IOU2) is offered to the bodywork<br />
builder. This function make it possible to kneel the vehicle on<br />
the bumper stops around the vehicle.<br />
If this function is not present, manually bleed the air bellows.<br />
Next, disconnect the ECAS unit’s connector and apply the<br />
vehicle’s parking brake.<br />
Aids when raising the vehicle<br />
When using wheel jacks<br />
If necessary, place a wheel adapter on each wheel jack so<br />
that if there is a a puncture, the wheel rim cannot get between<br />
the support bracket.<br />
Tools for lifting columns<br />
Use the specified supports with the appropriate separate<br />
tools for the axles and slide them sufficiently far enough onto<br />
the lifting column’s fixed support (see the instruction manual<br />
provided by the manufacturer of the lifting columns).<br />
Lifting columns<br />
0616<br />
Always place trestles under the chassis<br />
when carrying out work under a raised<br />
vehicle.<br />
Make sure the bodywork does not<br />
become damaged when lifting the<br />
vehicle.<br />
Always read the instruction manual and<br />
the supplier’s instructions before using<br />
the lifting columns and the accessories.<br />
1. Place the appropriate supports for the axles in the correct<br />
positions on the lifting column and, if necessary, use a<br />
locking compound (see the supplier’s instructions).<br />
2. With the vehicle at the highest driving height, drive it as<br />
straight as possible between the lifting columns.<br />
8 - 3<br />
5
5<br />
EXPLANATION OF THE MAINTENANCE WORK<br />
Jacking and lifting instructions<br />
SB(R)4000+ PF/XF SB(R)230 PF Euro3<br />
3. First, place the lifting column correctly under the rear axle<br />
and raise it until the tyres come off of the ground.<br />
4. For an SBR, place the lifting columns under the trailing<br />
axle.<br />
5. Place the lifting column correctly under the steering<br />
swivel and raise it until the tyres come off of the ground.<br />
Make sure the shock absorber/shock absorber attachment or<br />
other components do not become damaged.<br />
6. Lower the vehicle onto the bumper stops.<br />
Warn people in the immediate vicinity<br />
before lifting the vehicle and stand in a<br />
convenient and safe location.<br />
8 - 4 0616<br />
03965B<br />
03967B<br />
03968B
EXPLANATION OF THE MAINTENANCE WORK<br />
SB(R)4000+ PF/XF SB(R)230 PF Euro3<br />
Jacking and lifting instructions<br />
Wheel jacks<br />
1. Drive the vehicle as straight as possible to the middle of<br />
the workshop.<br />
2. Lower the vehicle onto the bumper stops. Pay attention<br />
to avoid damage to the bodywork.<br />
3. If necessary, place wheel adapters on the wheel jacks<br />
(see the supplier’s instructions).<br />
0616<br />
Always read the instruction manual and<br />
the supplier’s instructions before using<br />
the wheel jacks and any accessories.<br />
For an SBR, place the wheel jacks under the front axle and<br />
the trailing axle.<br />
4. Use the wheel jacks to lift the vehicle until all the tyres<br />
just come off of the ground. Check the position of the<br />
wheels in the wheel jacks and pay attention to avoid<br />
damage to the bodywork.<br />
Warn people in the immediate vicinity<br />
before lifting the vehicle and, if possible,<br />
stand in a convenient and safe location.<br />
5. Use all the columns simultaneously to lift the vehicle to<br />
the desired height.<br />
8 - 5<br />
5
5<br />
EXPLANATION OF THE MAINTENANCE WORK<br />
Jacking and lifting instructions<br />
SB(R)4000+ PF/XF SB(R)230 PF Euro3<br />
8.3 SUPPORTING THE VEHICLE<br />
First read the instructions concerning:<br />
- Kneeling on the bumper stops<br />
- Lifting instructions (lifting columns/<br />
wheel jacks)<br />
When the vehicle has been lifted to the correct height, always<br />
place 6 trestles in the support points.<br />
1. Under the flat, horizontal areas at the ends of the crossbeam<br />
just behind the front wheels<br />
2. Under the steering swivels. This will prevent damage to<br />
the shock absorber suspension caused by the shock<br />
absorbers hanging.<br />
3. Under the flat, horizontal areas at the ends of the crossbeam<br />
just in front of the rear wheels.<br />
8 - 6 0616<br />
03964B<br />
03963B<br />
03961B
EXPLANATION OF THE MAINTENANCE WORK<br />
SB(R)4000+ PF/XF SB(R)230 PF Euro3<br />
Jacking and lifting instructions<br />
4. Under the longitudinal beams in the same place as the<br />
gearbox.<br />
Points of attention when carrying out work on the front<br />
axle, rear axle or trailing axle:<br />
0616<br />
First read the instructions concerning:<br />
- Kneeling on the bumper stops<br />
- Lifting instructions (lifting columns/<br />
wheel jacks)<br />
Front axle<br />
If the chassis is supported when carrying out work on the<br />
front axle, the wheel jacks or lifting column under the front<br />
axle can be safely moved into a lower position or removed.<br />
See the supplier’s instructions.<br />
Rear axle/trailing axle<br />
If the chassis is supported when carrying out work on the rear<br />
axle/trailing axle, the wheel jacks or lifting column under the<br />
rear axle/trailing axle can be safely moved into a lower position<br />
or removed. See the supplier’s instructions.<br />
1. The lifting column or wheel jacks must be replaced in the<br />
opposite order to which they were removed. Attention<br />
must be given to make sure the rear axle/trailing axle<br />
returns to the correct position.<br />
– Raise the lifting column or the wheel jacks until they<br />
just touch the vehicle. Make sure that the support of the<br />
lifting column falls between the nuts of the leaf-spring<br />
clips.<br />
– Make sure the air bellows are placed correctly on the<br />
centring.<br />
03962B<br />
8 - 7<br />
5
5<br />
EXPLANATION OF THE MAINTENANCE WORK<br />
Jacking and lifting instructions<br />
SB(R)4000+ PF/XF SB(R)230 PF Euro3<br />
8 - 8 0616
SB(R)4000+ PF/XF SB(R)230 PF Euro3<br />
DOCUMENTATION REPLY FORM<br />
Documentation Reply Form<br />
If you have any suggestions and/or comments concerning<br />
this manual or if you find any faults, please fill out this<br />
form and send it to:<br />
<strong>VDL</strong> <strong>Bus</strong> & <strong>Coach</strong><br />
<strong>Training</strong> and Documentation<br />
Company name : ........................ ..................................................<br />
P.O. box 5<br />
Name : .............................................................<br />
5550 AA Valkenswaard<br />
Die Niederlande<br />
Signature : ...........................................................................<br />
Fax: +31 (0)40 2019477<br />
Chassis number .........................................................<br />
Applicable<br />
dokument ordernumber: ............................................... Version: .........................................<br />
Type of dokument:<br />
(set marker id applicable)<br />
Kind of inaccurracy<br />
(set marker id applicable)<br />
Additional information<br />
(text, page number, etc.)<br />
<strong>VDL</strong> <strong>Bus</strong> & <strong>Coach</strong> will take your report seriously and, if<br />
necessary, we directly make an update in the document.<br />
Driver Climate<br />
Maintenance Electrical diagrams<br />
Workshop <strong>Training</strong><br />
Parts Übriges<br />
Linguistic (Definition) not correct Mistake in technical data (values) Images<br />
............................................................................................................................................<br />
............................................................................................................................................<br />
............................................................................................................................................<br />
............................................................................................................................................<br />
9 - 1
SB(R)4000+ PF/XF SB(R)230 PF Euro3<br />
Documentation Reply Form<br />
9 - 2