uPD789871 Subseries 8-Bit Single-Chip Microcontrollers PUM
uPD789871 Subseries 8-Bit Single-Chip Microcontrollers PUM
uPD789871 Subseries 8-Bit Single-Chip Microcontrollers PUM

Create successful ePaper yourself
Turn your PDF publications into a flip-book with our unique Google optimized e-Paper software.
To our customers,<br />
Old Company Name in Catalogs and Other Documents<br />
On April 1 st , 2010, NEC Electronics Corporation merged with Renesas Technology<br />
Corporation, and Renesas Electronics Corporation took over all the business of both<br />
companies. Therefore, although the old company name remains in this document, it is a valid<br />
Renesas Electronics document. We appreciate your understanding.<br />
Renesas Electronics website: http://www.renesas.com<br />
Issued by: Renesas Electronics Corporation (http://www.renesas.com)<br />
Send any inquiries to http://www.renesas.com/inquiry.<br />
April 1 st , 2010<br />
Renesas Electronics Corporation
Notice<br />
1. All information included in this document is current as of the date this document is issued. Such information, however, is<br />
subject to change without any prior notice. Before purchasing or using any Renesas Electronics products listed herein, please<br />
confirm the latest product information with a Renesas Electronics sales office. Also, please pay regular and careful attention to<br />
additional and different information to be disclosed by Renesas Electronics such as that disclosed through our website.<br />
2. Renesas Electronics does not assume any liability for infringement of patents, copyrights, or other intellectual property rights<br />
of third parties by or arising from the use of Renesas Electronics products or technical information described in this document.<br />
No license, express, implied or otherwise, is granted hereby under any patents, copyrights or other intellectual property rights<br />
of Renesas Electronics or others.<br />
3. You should not alter, modify, copy, or otherwise misappropriate any Renesas Electronics product, whether in whole or in part.<br />
4. Descriptions of circuits, software and other related information in this document are provided only to illustrate the operation of<br />
semiconductor products and application examples. You are fully responsible for the incorporation of these circuits, software,<br />
and information in the design of your equipment. Renesas Electronics assumes no responsibility for any losses incurred by<br />
you or third parties arising from the use of these circuits, software, or information.<br />
5. When exporting the products or technology described in this document, you should comply with the applicable export control<br />
laws and regulations and follow the procedures required by such laws and regulations. You should not use Renesas<br />
Electronics products or the technology described in this document for any purpose relating to military applications or use by<br />
the military, including but not limited to the development of weapons of mass destruction. Renesas Electronics products and<br />
technology may not be used for or incorporated into any products or systems whose manufacture, use, or sale is prohibited<br />
under any applicable domestic or foreign laws or regulations.<br />
6. Renesas Electronics has used reasonable care in preparing the information included in this document, but Renesas Electronics<br />
does not warrant that such information is error free. Renesas Electronics assumes no liability whatsoever for any damages<br />
incurred by you resulting from errors in or omissions from the information included herein.<br />
7. Renesas Electronics products are classified according to the following three quality grades: “Standard”, “High Quality”, and<br />
“Specific”. The recommended applications for each Renesas Electronics product depends on the product’s quality grade, as<br />
indicated below. You must check the quality grade of each Renesas Electronics product before using it in a particular<br />
application. You may not use any Renesas Electronics product for any application categorized as “Specific” without the prior<br />
written consent of Renesas Electronics. Further, you may not use any Renesas Electronics product for any application for<br />
which it is not intended without the prior written consent of Renesas Electronics. Renesas Electronics shall not be in any way<br />
liable for any damages or losses incurred by you or third parties arising from the use of any Renesas Electronics product for an<br />
application categorized as “Specific” or for which the product is not intended where you have failed to obtain the prior written<br />
consent of Renesas Electronics. The quality grade of each Renesas Electronics product is “Standard” unless otherwise<br />
expressly specified in a Renesas Electronics data sheets or data books, etc.<br />
“Standard”: Computers; office equipment; communications equipment; test and measurement equipment; audio and visual<br />
equipment; home electronic appliances; machine tools; personal electronic equipment; and industrial robots.<br />
“High Quality”: Transportation equipment (automobiles, trains, ships, etc.); traffic control systems; anti-disaster systems; anticrime<br />
systems; safety equipment; and medical equipment not specifically designed for life support.<br />
“Specific”: Aircraft; aerospace equipment; submersible repeaters; nuclear reactor control systems; medical equipment or<br />
systems for life support (e.g. artificial life support devices or systems), surgical implantations, or healthcare<br />
intervention (e.g. excision, etc.), and any other applications or purposes that pose a direct threat to human life.<br />
8. You should use the Renesas Electronics products described in this document within the range specified by Renesas Electronics,<br />
especially with respect to the maximum rating, operating supply voltage range, movement power voltage range, heat radiation<br />
characteristics, installation and other product characteristics. Renesas Electronics shall have no liability for malfunctions or<br />
damages arising out of the use of Renesas Electronics products beyond such specified ranges.<br />
9. Although Renesas Electronics endeavors to improve the quality and reliability of its products, semiconductor products have<br />
specific characteristics such as the occurrence of failure at a certain rate and malfunctions under certain use conditions. Further,<br />
Renesas Electronics products are not subject to radiation resistance design. Please be sure to implement safety measures to<br />
guard them against the possibility of physical injury, and injury or damage caused by fire in the event of the failure of a<br />
Renesas Electronics product, such as safety design for hardware and software including but not limited to redundancy, fire<br />
control and malfunction prevention, appropriate treatment for aging degradation or any other appropriate measures. Because<br />
the evaluation of microcomputer software alone is very difficult, please evaluate the safety of the final products or system<br />
manufactured by you.<br />
10. Please contact a Renesas Electronics sales office for details as to environmental matters such as the environmental<br />
compatibility of each Renesas Electronics product. Please use Renesas Electronics products in compliance with all applicable<br />
laws and regulations that regulate the inclusion or use of controlled substances, including without limitation, the EU RoHS<br />
Directive. Renesas Electronics assumes no liability for damages or losses occurring as a result of your noncompliance with<br />
applicable laws and regulations.<br />
11. This document may not be reproduced or duplicated, in any form, in whole or in part, without prior written consent of Renesas<br />
Electronics.<br />
12. Please contact a Renesas Electronics sales office if you have any questions regarding the information contained in this<br />
document or Renesas Electronics products, or if you have any other inquiries.<br />
(Note 1) “Renesas Electronics” as used in this document means Renesas Electronics Corporation and also includes its majorityowned<br />
subsidiaries.<br />
(Note 2) “Renesas Electronics product(s)” means any product developed or manufactured by or for Renesas Electronics.
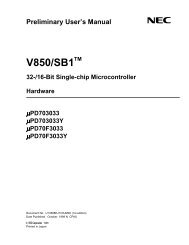
Preliminary User’s Manual<br />
µPD789871 <strong>Subseries</strong><br />
8-<strong>Bit</strong> <strong>Single</strong>-<strong>Chip</strong> <strong>Microcontrollers</strong><br />
µPD789870<br />
µPD789871<br />
µPD78F9872<br />
Document No. U14938EJ1V0UM00 (1st edition)<br />
Date Published January 2001 N CP(K)<br />
© 2001<br />
Printed in Japan
[MEMO]<br />
2 Preliminary User’s Manual U14938EJ1V0UM
1<br />
NOTES FOR CMOS DEVICES<br />
PRECAUTION AGAINST ESD FOR SEMICONDUCTORS<br />
Note:<br />
Strong electric field, when exposed to a MOS device, can cause destruction of the gate oxide and<br />
ultimately degrade the device operation. Steps must be taken to stop generation of static electricity<br />
as much as possible, and quickly dissipate it once, when it has occurred. Environmental control<br />
must be adequate. When it is dry, humidifier should be used. It is recommended to avoid using<br />
insulators that easily build static electricity. Semiconductor devices must be stored and transported<br />
in an anti-static container, static shielding bag or conductive material. All test and measurement<br />
tools including work bench and floor should be grounded. The operator should be grounded using<br />
wrist strap. Semiconductor devices must not be touched with bare hands. Similar precautions need<br />
to be taken for PW boards with semiconductor devices on it.<br />
2 HANDLING OF UNUSED INPUT PINS FOR CMOS<br />
Note:<br />
No connection for CMOS device inputs can be cause of malfunction. If no connection is provided<br />
to the input pins, it is possible that an internal input level may be generated due to noise, etc., hence<br />
causing malfunction. CMOS devices behave differently than Bipolar or NMOS devices. Input levels<br />
of CMOS devices must be fixed high or low by using a pull-up or pull-down circuitry. Each unused<br />
pin should be connected to VDD or GND with a resistor, if it is considered to have a possibility of<br />
being an output pin. All handling related to the unused pins must be judged device by device and<br />
related specifications governing the devices.<br />
3 STATUS BEFORE INITIALIZATION OF MOS DEVICES<br />
Note:<br />
Power-on does not necessarily define initial status of MOS device. Production process of MOS<br />
does not define the initial operation status of the device. Immediately after the power source is<br />
turned ON, the devices with reset function have not yet been initialized. Hence, power-on does<br />
not guarantee out-pin levels, I/O settings or contents of registers. Device is not initialized until the<br />
reset signal is received. Reset operation must be executed immediately after power-on for devices<br />
having reset function.<br />
EEPROM is a trademark of NEC Corporation.<br />
Windows and Windows NT are either registered trademarks or trademarks of Microsoft Corporation in<br />
the United States and/or other countries.<br />
PC/AT is a trademark of International Business Machines Corporation.<br />
HP9000 series 700 and HP-UX are trademarks of Hewlett-Packard Company.<br />
SPARCstation is a trademark of SPARC International, Inc.<br />
Solaris and SunOS are trademarks of Sun-Microsystems, Inc.<br />
OSF/Motif is a trademark of Open Software Foundation, Inc.<br />
NEWS and NEWS-OS are trademarks of Sony Corporation.<br />
TRON is an abbreviation of The Realtime Operating System Nucleus.<br />
ITRON is an abbreviation of Industrial TRON.<br />
Preliminary User’s Manual U14938EJ1V0UM 3
The export of these products from Japan is regulated by the Japanese government. The export of some or all of these<br />
products may be prohibited without governmental license. To export or re-export some or all of these products from a<br />
country other than Japan may also be prohibited without a license from that country. Please call an NEC sales<br />
representative.<br />
Licence not needed: µPD78F9872<br />
The customer must judge the need for license: µPD789870, 789871<br />
• The information contained in this document is being issued in advance of the production cycle for the<br />
device. The parameters for the device may change before final production or NEC Corporation, at its own<br />
discretion, may withdraw the device prior to its production.<br />
• Not all devices/types available in every country. Please check with local NEC representative for availability<br />
and additional information.<br />
• No part of this document may be copied or reproduced in any form or by any means without the prior written<br />
consent of NEC Corporation. NEC Corporation assumes no responsibility for any errors which may appear in<br />
this document.<br />
• NEC Corporation does not assume any liability for infringement of patents, copyrights or other intellectual property<br />
rights of third parties by or arising from use of a device described herein or any other liability arising from use<br />
of such device. No license, either express, implied or otherwise, is granted under any patents, copyrights or other<br />
intellectual property rights of NEC Corporation or others.<br />
• Descriptions of circuits, software, and other related information in this document are provided for illustrative<br />
purposes in semiconductor product operation and application examples. The incorporation of these circuits,<br />
software, and information in the design of the customer's equipment shall be done under the full responsibility<br />
of the customer. NEC Corporation assumes no responsibility for any losses incurred by the customer or third<br />
parties arising from the use of these circuits, software, and information.<br />
• While NEC Corporation has been making continuous effort to enhance the reliability of its semiconductor devices,<br />
the possibility of defects cannot be eliminated entirely. To minimize risks of damage or injury to persons or<br />
property arising from a defect in an NEC semiconductor device, customers must incorporate sufficient safety<br />
measures in its design, such as redundancy, fire-containment, and anti-failure features.<br />
• NEC devices are classified into the following three quality grades:<br />
"Standard", "Special", and "Specific". The Specific quality grade applies only to devices developed based on a<br />
customer designated "quality assurance program" for a specific application. The recommended applications of<br />
a device depend on its quality grade, as indicated below. Customers must check the quality grade of each device<br />
before using it in a particular application.<br />
Standard: Computers, office equipment, communications equipment, test and measurement equipment,<br />
audio and visual equipment, home electronic appliances, machine tools, personal electronic<br />
equipment and industrial robots<br />
Special: Transportation equipment (automobiles, trains, ships, etc.), traffic control systems, anti-disaster<br />
systems, anti-crime systems, safety equipment and medical equipment (not specifically designed<br />
for life support)<br />
Specific: Aircraft, aerospace equipment, submersible repeaters, nuclear reactor control systems, life<br />
support systems or medical equipment for life support, etc.<br />
The quality grade of NEC devices is "Standard" unless otherwise specified in NEC's Data Sheets or Data Books.<br />
If customers intend to use NEC devices for applications other than those specified for Standard quality grade,<br />
they should contact an NEC sales representative in advance.<br />
4 Preliminary User’s Manual U14938EJ1V0UM<br />
M5D 98. 12
Regional Information<br />
Some information contained in this document may vary from country to country. Before using any NEC<br />
product in your application, pIease contact the NEC office in your country to obtain a list of authorized<br />
representatives and distributors. They will verify:<br />
• Device availability<br />
• Ordering information<br />
• Product release schedule<br />
• Availability of related technical literature<br />
• Development environment specifications (for example, specifications for third-party tools and<br />
components, host computers, power plugs, AC supply voltages, and so forth)<br />
• Network requirements<br />
In addition, trademarks, registered trademarks, export restrictions, and other legal issues may also vary<br />
from country to country.<br />
NEC Electronics Inc. (U.S.)<br />
Santa Clara, California<br />
Tel: 408-588-6000<br />
800-366-9782<br />
Fax: 408-588-6130<br />
800-729-9288<br />
NEC Electronics (Germany) GmbH<br />
Duesseldorf, Germany<br />
Tel: 0211-65 03 02<br />
Fax: 0211-65 03 490<br />
NEC Electronics (UK) Ltd.<br />
Milton Keynes, UK<br />
Tel: 01908-691-133<br />
Fax: 01908-670-290<br />
NEC Electronics Italiana s.r.l.<br />
Milano, Italy<br />
Tel: 02-66 75 41<br />
Fax: 02-66 75 42 99<br />
NEC Electronics (Germany) GmbH<br />
Benelux Office<br />
Eindhoven, The Netherlands<br />
Tel: 040-2445845<br />
Fax: 040-2444580<br />
NEC Electronics (France) S.A.<br />
Velizy-Villacoublay, France<br />
Tel: 01-30-67 58 00<br />
Fax: 01-30-67 58 99<br />
NEC Electronics (France) S.A.<br />
Madrid Office<br />
Madrid, Spain<br />
Tel: 91-504-2787<br />
Fax: 91-504-2860<br />
NEC Electronics (Germany) GmbH<br />
Scandinavia Office<br />
Taeby, Sweden<br />
Tel: 08-63 80 820<br />
Fax: 08-63 80 388<br />
NEC Electronics Hong Kong Ltd.<br />
Hong Kong<br />
Tel: 2886-9318<br />
Fax: 2886-9022/9044<br />
NEC Electronics Hong Kong Ltd.<br />
Seoul Branch<br />
Seoul, Korea<br />
Tel: 02-528-0303<br />
Fax: 02-528-4411<br />
NEC Electronics Singapore Pte. Ltd.<br />
United Square, Singapore<br />
Tel: 65-253-8311<br />
Fax: 65-250-3583<br />
NEC Electronics Taiwan Ltd.<br />
Taipei, Taiwan<br />
Tel: 02-2719-2377<br />
Fax: 02-2719-5951<br />
NEC do Brasil S.A.<br />
Electron Devices Division<br />
Guarulhos-SP Brasil<br />
Tel: 55-11-6462-6810<br />
Fax: 55-11-6462-6829<br />
J00.7<br />
Preliminary User’s Manual U14938EJ1V0UM 5
INTRODUCTION<br />
Target Readers This manual is intended for users who wish to understand the functions of the<br />
µPD789871 <strong>Subseries</strong> and to design and develop application systems and programs<br />
using these microcontrollers.<br />
Purpose This manual is intended for users to understand the functions described in the<br />
organization below.<br />
Organization The µPD789871 <strong>Subseries</strong> User's Manual is divided into two parts: this manual and<br />
instructions (common to the 78K/0S Series).<br />
µPD789871 78K/0S Series<br />
<strong>Subseries</strong> User’s Manual<br />
User’s Manual (This manual) Instructions<br />
• Pin functions • CPU function<br />
• Internal block functions • Instruction set<br />
• Interrupt<br />
• Other internal peripheral functions<br />
• Instruction description<br />
How to Read This Manual It is assumed that the readers of this manual have general knowledge in the fields<br />
of electrical engineering, logic circuits, and microcontrollers.<br />
To understand the overall functions in general<br />
→ Read this manual in the order of the CONTENTS.<br />
How to interpret register formats<br />
→ The name of a bit whose number is encircled is reserved for the assembler and<br />
is defined for the C compiler by the header file sfrbit.h.<br />
To learn the detailed functions of a register whose register name is known<br />
→ Refer to APPENDIX C REGISTER INDEX.<br />
To learn the details of the instruction functions of the 78K/0S Series<br />
→ Refer to 78K/0S Series User’s Manual Instructions (U11047E).<br />
Conventions Data significance: Higher digits on the left and lower digits on the right<br />
Active low representation: ××× (overscore over pin or signal name)<br />
Note: Footnote for item marked with Note in the text<br />
Caution: Information requiring particular attention<br />
Remark: Supplementary information<br />
Numerical representation: Binary ... ×××× or ××××B<br />
Decimal ... ××××<br />
Hexadecimal ... ××××H<br />
Related Documents The related documents indicated in this publication may include preliminary versions.<br />
However, preliminary versions are not marked as such.<br />
6 Preliminary User’s Manual U14938EJ1V0UM
Documents Related to Devices<br />
Document Name Document No.<br />
µPD789870, 789871 Preliminary Product Information U14916E<br />
µPD78F9872 Preliminary Product Information U14880E<br />
Preliminary User’s Manual U14938EJ1V0UM<br />
English<br />
µPD789871 <strong>Subseries</strong> User’s Manual This manual<br />
78K/0S Series User’s Manual Instruction U11047E<br />
78K/0, 78K/0S Series Application Note Flash Memory Write U14458E<br />
Documents Related to Development Tools (User’s Manuals)<br />
Document Name Document No.<br />
RA78K0S Assembler Package Operation U11622E<br />
English<br />
Assembly Language U11599E<br />
Structured Assembly Language U11623E<br />
CC78K0S C Compiler Operation U11816E<br />
Language U11817E<br />
SM78K0S System Simulator Windows TM Based Reference U11489E<br />
SM78K Series System Simulator External components user open<br />
interface specification<br />
U10092E<br />
ID78K0S-NS Integrated Debugger<br />
Windows Based<br />
Reference U12901E<br />
IE-78K0S-NS In-Circuit Emulator U13549E<br />
IE-789872-NS-EM1 Emulation Board To be prepared<br />
Caution The related documents listed above are subject to change without notice. Be sure to use the latest<br />
version of each document for designing.<br />
7
Document Related to Embedded Software (User’s Manual)<br />
Document Name Document No.<br />
78K/0S Series OS MX78K0S Basics U12938E<br />
Other Documents<br />
8 Preliminary User’s Manual U14938EJ1V0UM<br />
English<br />
Document Name Document No.<br />
English<br />
SEMICONDUCTOR SELECTION GUIDE Products & Packages (CD-ROM) X13769X<br />
Semiconductor Device Mounting Technology Manual C10535E<br />
Quality Grades on NEC Semiconductor Devices C11531E<br />
NEC Semiconductor Device Reliability/Quality Control System C10983E<br />
Guide to Prevent Damage for Semiconductor Devices by Electrostatic Discharge (ESD) C11892E<br />
Caution The related documents listed above are subject to change without notice. Be sure to use<br />
the latest version of each document for designing.
CONTENTS<br />
CHAPTER 1 GENERAL .................................................................................................................... 18<br />
1.1 Features ............................................................................................................................... 18<br />
1.2 Applications ........................................................................................................................ 18<br />
1.3 Ordering Information ......................................................................................................... 18<br />
1.4 Pin Configuration (Top View) ........................................................................................... 19<br />
1.5 78K/0S Series Lineup ........................................................................................................ 20<br />
1.6 Block Diagram .................................................................................................................... 22<br />
1.7 Overview of Functions ...................................................................................................... 23<br />
CHAPTER 2 PIN FUNCTIONS ......................................................................................................... 24<br />
2.1 List of Pin Functions ......................................................................................................... 24<br />
2.2 Description of Pin Functions ........................................................................................... 26<br />
2.2.1 P00 to P07 (Port 0) .................................................................................................................. 26<br />
2.2.2 P10 to P12 (Port 1) .................................................................................................................. 26<br />
2.2.3 P20 to P25 (Port 2) .................................................................................................................. 26<br />
2.2.4 P80 to P87 (Port 8) .................................................................................................................. 26<br />
2.2.5 P90 to P97 (Port 9) .................................................................................................................. 27<br />
2.2.6 FIP0 to FIP8 ............................................................................................................................. 27<br />
2.2.7 RESET ...................................................................................................................................... 27<br />
2.2.8 X1, X2 ....................................................................................................................................... 27<br />
2.2.9 XT1, XT2 ................................................................................................................................... 27<br />
2.2.10 VDD0 ......................................................................................................................................... 27<br />
2.2.11 VDD1 ......................................................................................................................................... 27<br />
2.2.12 VLOAD ....................................................................................................................................... 27<br />
2.2.13 VSS0 ......................................................................................................................................... 27<br />
2.2.14 VPP (µPD78F9872 only) ......................................................................................................... 27<br />
2.2.15 IC (mask ROM version only) ................................................................................................. 28<br />
2.3 Pin I/O Circuits and Recommended Connection of Unused Pins .............................. 29<br />
CHAPTER 3 CPU ARCHITECTURE ................................................................................................ 31<br />
3.1 Memory Space .................................................................................................................... 31<br />
3.1.1 Internal program memory space .............................................................................................. 34<br />
3.1.2 Internal data memory (internal high-speed RAM) space........................................................ 35<br />
3.1.3 Special function register (SFR) area ....................................................................................... 35<br />
3.1.4 Data memory addressing ......................................................................................................... 35<br />
3.2 Processor Registers .......................................................................................................... 39<br />
3.2.1 Control registers ....................................................................................................................... 39<br />
3.2.2 General-purpose registers ....................................................................................................... 42<br />
3.2.3 Special function registers (SFRs) ............................................................................................ 43<br />
3.3 Instruction Address Addressing ...................................................................................... 45<br />
3.3.1 Relative addressing .................................................................................................................. 45<br />
3.3.2 Immediate addressing .............................................................................................................. 46<br />
3.3.3 Table indirect addressing ......................................................................................................... 47<br />
3.3.4 Register addressing ................................................................................................................. 47<br />
3.4 Operand Address Addressing .......................................................................................... 48<br />
Preliminary User’s Manual U14938EJ1V0UM 9
10<br />
3.4.1 Direct addressing ..................................................................................................................... 48<br />
3.4.2 Short direct addressing ............................................................................................................ 49<br />
3.4.3 Special function register (SFR) addressing ............................................................................ 50<br />
3.4.4 Register addressing ................................................................................................................. 51<br />
3.4.5 Register indirect addressing .................................................................................................... 52<br />
3.4.6 Based addressing ..................................................................................................................... 53<br />
3.4.7 Stack addressing ...................................................................................................................... 53<br />
CHAPTER 4 PORT FUNCTIONS ..................................................................................................... 54<br />
4.1 Functions of Ports ............................................................................................................. 54<br />
4.2 Port Configuration ............................................................................................................. 56<br />
4.2.1 Port 0 ........................................................................................................................................ 56<br />
4.2.2 Port 1 ........................................................................................................................................ 57<br />
4.2.3 Port 2 ........................................................................................................................................ 58<br />
4.2.4 Port 8 ........................................................................................................................................ 61<br />
4.2.5 Port 9 ........................................................................................................................................ 62<br />
4.3 Port Function Control Registers...................................................................................... 63<br />
4.4 Operation of Port Functions ............................................................................................. 65<br />
4.4.1 Writing to I/O port ..................................................................................................................... 65<br />
4.4.2 Reading from I/O port .............................................................................................................. 65<br />
4.4.3 Arithmetic operation of I/O port................................................................................................ 65<br />
CHAPTER 5 CLOCK GENERATOR ................................................................................................ 66<br />
5.1 Clock Generator Functions .............................................................................................. 66<br />
5.2 Clock Generator Configuration ........................................................................................ 66<br />
5.3 Register Controlling Clock Generator ............................................................................ 68<br />
5.4 System Clock Oscillators ................................................................................................. 70<br />
5.4.1 Main system clock oscillator .................................................................................................... 70<br />
5.4.2 Subsystem clock oscillator ........................................................................................................ 70<br />
5.4.3 Frequency divider ..................................................................................................................... 72<br />
5.4.4 When no subsystem clock is used .......................................................................................... 72<br />
5.5 Clock Generator Operation ............................................................................................... 73<br />
5.6 Changing Setting of System Clock and CPU Clock...................................................... 74<br />
5.6.1 Time required for switching between system clock and CPU clock ...................................... 74<br />
5.6.2 Switching between system clock and CPU clock ................................................................... 75<br />
CHAPTER 6 8-BIT REMOTE CONTROL TIMER ............................................................................. 76<br />
6.1 8-<strong>Bit</strong> Remote Control Timer Functions ........................................................................... 76<br />
6.2 8-<strong>Bit</strong> Remote Control Timer Configuration .................................................................... 76<br />
6.3 Registers Controlling 8-<strong>Bit</strong> Remote Control Timer ....................................................... 77<br />
6.4 Operation of 8-<strong>Bit</strong> Remote Control Timer....................................................................... 78<br />
CHAPTER 7 8-BIT TIMER ................................................................................................................ 80<br />
7.1 8-<strong>Bit</strong> Timer Functions ........................................................................................................ 80<br />
7.2 8-<strong>Bit</strong> Timer Configuration ................................................................................................. 81<br />
7.3 Registers Controlling 8-<strong>Bit</strong> Timer .................................................................................... 83<br />
7.4 8-<strong>Bit</strong> Timer Operation ........................................................................................................ 85<br />
7.4.1 Operation as interval timer....................................................................................................... 85<br />
Preliminary User’s Manual U14938EJ1V0UM
CHAPTER 8 WATCH TIMER .......................................................................................................... 87<br />
8.1 Watch Timer Functions ..................................................................................................... 87<br />
8.2 Watch Timer Configuration............................................................................................... 88<br />
8.3 Register Controlling Watch Timer ................................................................................... 88<br />
8.4 Watch Timer Operation ..................................................................................................... 89<br />
8.4.1 Operation as watch timer ......................................................................................................... 89<br />
8.4.2 Operation as interval timer....................................................................................................... 90<br />
CHAPTER 9 WATCHDOG TIMER .................................................................................................... 91<br />
9.1 Watchdog Timer Functions............................................................................................... 91<br />
9.2 Watchdog Timer Configuration ........................................................................................ 92<br />
9.3 Registers Controlling Watchdog Timer .......................................................................... 93<br />
9.4 Watchdog Timer Operation ............................................................................................... 95<br />
9.4.1 Operation as watchdog timer ................................................................................................... 95<br />
9.4.2 Operation as interval timer....................................................................................................... 96<br />
CHAPTER 10 SERIAL INTERFACE 10 ...................................................................................... 97<br />
10.1 Serial Interface 10 Functions ......................................................................................... 97<br />
10.2 Serial Interface 10 Configuration ................................................................................... 97<br />
10.3 Register Controlling Serial Interface 10 ....................................................................... 99<br />
10.4 Serial Interface 10 Operation ......................................................................................... 101<br />
10.4.1 Operation stop mode .............................................................................................................. 101<br />
10.4.2 3-wire serial I/O mode ............................................................................................................ 102<br />
CHAPTER 11 VFD CONTROLLER/DRIVER .................................................................................... 104<br />
11.1 VFD Controller/Driver Functions.................................................................................... 104<br />
11.2 VFD Controller/Driver Configuration ............................................................................. 105<br />
11.3 Registers Controlling VFD Controller/Driver ............................................................... 106<br />
11.3.1 Control registers ..................................................................................................................... 106<br />
11.3.2 One display period and blanking width ................................................................................. 109<br />
11.4 Display Data Memory ....................................................................................................... 110<br />
11.5 Key Scan Flag and Key Scan Data ................................................................................ 112<br />
11.5.1 Key scan flag .......................................................................................................................... 112<br />
11.5.2 Key scan data ......................................................................................................................... 112<br />
11.6 Leakage Emission of Fluorescent Indicator Panel ..................................................... 113<br />
11.7 Calculation of Total Power Dissipation......................................................................... 116<br />
CHAPTER 12 INTERRUPT FUNCTIONS ........................................................................................ 119<br />
12.1 Interrupt Function Types................................................................................................. 119<br />
12.2 Interrupt Sources and Configuration ............................................................................ 119<br />
12.3 Interrupt Function Control Registers ............................................................................ 123<br />
12.4 Interrupt Processing Operation ..................................................................................... 128<br />
12.4.1 Non-maskable interrupt request acknowledgement operation ............................................. 128<br />
12.4.2 Maskable interrupt request acknowledgement operation ..................................................... 130<br />
12.4.3 Multiple interrupt processing .................................................................................................. 132<br />
12.4.4 Interrupt request pending ....................................................................................................... 134<br />
CHAPTER 13 STANDBY FUNCTION .............................................................................................. 135<br />
13.1 Standby Function and Configuration ............................................................................ 135<br />
Preliminary User’s Manual U14938EJ1V0UM 11
12<br />
13.1.1 Standby function ..................................................................................................................... 135<br />
13.1.2 Register controlling standby function .................................................................................... 136<br />
13.2 Operation of Standby Function...................................................................................... 137<br />
13.2.1 HALT mode ............................................................................................................................. 137<br />
13.2.2 STOP mode ............................................................................................................................ 140<br />
CHAPTER 14 RESET FUNCTION ................................................................................................... 143<br />
CHAPTER 15 µPD78F9872 .............................................................................................................. 146<br />
15.1 Flash Memory Programming .......................................................................................... 147<br />
15.1.1 Selecting communication mode ............................................................................................. 147<br />
15.1.2 Function of flash memory programming................................................................................ 148<br />
15.1.3 Flashpro III connection example ........................................................................................... 148<br />
15.1.4 Example of settings for Flashpro III (PG-FP3) ....................................................................... 149<br />
CHAPTER 16 MASK OPTION (MASK ROM VERSION) ................................................................ 150<br />
CHAPTER 17 INSTRUCTION SET .................................................................................................. 151<br />
17.1 Operation........................................................................................................................... 151<br />
17.1.1 Operand identifiers and description methods ....................................................................... 151<br />
17.1.2 Description of “operation” column ......................................................................................... 152<br />
17.1.3 Description of “flag operation” column .................................................................................. 152<br />
17.2 Operation List ................................................................................................................... 153<br />
17.3 Instructions Listed by Addressing Type....................................................................... 158<br />
APPENDIX A DEVELOPMENT TOOLS ........................................................................................... 161<br />
A.1 Language Processing Software ...................................................................................... 163<br />
A.2 Flash Memory Writing Tools ............................................................................................ 164<br />
A.3 Debugging Tools................................................................................................................ 164<br />
A.3.1 Hardware .................................................................................................................................. 164<br />
A.3.2 Software ................................................................................................................................... 165<br />
APPENDIX B EMBEDDED SOFTWARE ......................................................................................... 166<br />
APPENDIX C REGISTER INDEX ...................................................................................................... 167<br />
C.1 Register Name Index (Alphabetic Order) ....................................................................... 167<br />
C.2 Register Symbol Index (Alphabetic Order) .................................................................... 169<br />
Preliminary User’s Manual U14938EJ1V0UM
LIST OF FIGURES (1/3)<br />
Figure No. Title Page<br />
2-1 Pin I/O Circuits ...................................................................................................................................... 30<br />
3-1 Memory Map (µPD789870) .................................................................................................................. 31<br />
3-2 Memory Map (µPD789871) .................................................................................................................. 32<br />
3-3 Memory Map (µPD78F9872) ................................................................................................................ 33<br />
3-4 Data Memory Addressing (µPD789870) .............................................................................................. 36<br />
3-5 Data Memory Addressing (µPD789871) .............................................................................................. 37<br />
3-6 Data Memory Addressing (µPD78F9872) ............................................................................................ 38<br />
3-7 Program Counter Configuration ........................................................................................................... 39<br />
3-8 Program Status Word Configuration .................................................................................................... 39<br />
3-9 Stack Pointer Configuration .................................................................................................................. 41<br />
3-10 Data to Be Saved to Stack Memory ..................................................................................................... 41<br />
3-11 Data to Be Restored from Stack Memory ............................................................................................ 41<br />
3-12 General-Purpose Register Configuration ............................................................................................. 42<br />
4-1 Port Types ............................................................................................................................................. 54<br />
4-2 Block Diagram of P00 to P07 ............................................................................................................... 56<br />
4-3 Block Diagram of P10 to P12 ............................................................................................................... 57<br />
4-4 Block Diagram of P20 ........................................................................................................................... 58<br />
4-5 Block Diagram of P21 ........................................................................................................................... 59<br />
4-6 Block Diagram of P22 to P25 ............................................................................................................... 60<br />
4-7 Block Diagram of P80 to P87 (µPD789870, 789871) ......................................................................... 61<br />
4-8 Block Diagram of P80 to P87 (µPD78F9872) ...................................................................................... 61<br />
4-9 Block Diagram of P90 to P97 (µPD789870, 789871) ......................................................................... 62<br />
4-10 Block Diagram of P90 to P97 (µPD78F9872) ...................................................................................... 62<br />
4-11 Port Mode Register Format .................................................................................................................. 64<br />
4-12 Pull-Up Resistor Option Register 0 Format ......................................................................................... 64<br />
4-13 Pull-Up Resistor Option Register B2 Format ....................................................................................... 64<br />
5-1 Block Diagram of Clock Generator....................................................................................................... 67<br />
5-2 Processor Clock Control Register Format ........................................................................................... 68<br />
5-3 Suboscillation Mode Register Format .................................................................................................. 69<br />
5-4 Subclock Control Register Format ....................................................................................................... 69<br />
5-5 External Circuit of Main System Clock Oscillator ................................................................................ 70<br />
5-6 External Circuit of Subsystem Clock Oscillator ................................................................................... 70<br />
5-7 Examples of Incorrect Resonator Connection ..................................................................................... 71<br />
5-8 Switching Between System Clock and CPU Clock ............................................................................. 75<br />
6-1 Block Diagram of 8-<strong>Bit</strong> Remote Control Timer .................................................................................... 76<br />
6-2 Remote Control Timer Control Register 50 Format............................................................................. 77<br />
6-3 Pulse Width Measurement Timing........................................................................................................ 78<br />
7-1 Block Diagram of 8-<strong>Bit</strong> Timer 80 .......................................................................................................... 81<br />
7-2 Block Diagram of 8-<strong>Bit</strong> Timer 81 .......................................................................................................... 82<br />
Preliminary User’s Manual U14938EJ1V0UM 13
14<br />
LIST OF FIGURES (2/3)<br />
Figure No. Title Page<br />
7-3 8-<strong>Bit</strong> Timer Mode Control Register 80 Format ..................................................................................... 83<br />
7-4 8-<strong>Bit</strong> Timer Mode Control Register 81 Format ..................................................................................... 84<br />
7-5 Interval Timer Operation Timing ........................................................................................................... 86<br />
8-1 Block Diagram of Watch Timer ............................................................................................................. 87<br />
8-2 Watch Timer Mode Control Register Format ....................................................................................... 89<br />
8-3 Watch Timer/Interval Timer Operation Timing ..................................................................................... 90<br />
9-1 Block Diagram of Watchdog Timer ....................................................................................................... 92<br />
9-2 Watchdog Timer Clock Select Register Format ................................................................................... 93<br />
9-3 Watchdog Timer Mode Register Format .............................................................................................. 94<br />
10-1 Block Diagram of Serial Interface 10 ................................................................................................... 98<br />
10-2 Serial Operation Mode Register 10 Format ......................................................................................... 99<br />
10-3 3-Wire Serial I/O Mode Timing ............................................................................................................. 103<br />
11-1 Block Diagram of VFD Controller/Driver .............................................................................................. 105<br />
11-2 Display Mode Register 0 Format .......................................................................................................... 106<br />
11-3 Display Mode Register 1 Format .......................................................................................................... 107<br />
11-4 Display Mode Register 2 Format .......................................................................................................... 108<br />
11-5 Blanking Width of VFD Output Signal .................................................................................................. 109<br />
11-6 Relationship Between Address Location of Display Data Memory and VFD Output<br />
(with 25 VFD Output Pins and 16 Patterns) ........................................................................................ 110<br />
11-7 Relationship Between Address Location of Display Data Memory and VFD Output<br />
(with 20 VFD Output Pins and 9 Patterns) .......................................................................................... 111<br />
11-8 Leakage Emission Because of Short Blanking Time........................................................................... 113<br />
11-9 Leakage Emission Caused by CSG....................................................................................................... 114<br />
11-10 Leakage Emission Caused by CSG....................................................................................................... 115<br />
11-11 Total Power Dissipation PT (TA = –40 to +85°C) .................................................................................. 116<br />
11-12 Relationship Between Display Data Memory Contents and VFD Output with<br />
10 Segments-11 Digits Displayed ........................................................................................................ 118<br />
12-1 Basic Configuration of Interrupt Function ............................................................................................ 121<br />
12-2 Interrupt Request Flag Register Format .............................................................................................. 124<br />
12-3 Interrupt Mask Flag Register Format ................................................................................................... 125<br />
12-4 External Interrupt Mode Register 0 Format ......................................................................................... 126<br />
12-5 Program Status Word Configuration .................................................................................................... 127<br />
12-6 Flowchart from Non-Maskable Interrupt Request Generation to Acknowledgement ......................... 129<br />
12-7 Timing of Non-Maskable Interrupt Request Acknowledgement .......................................................... 129<br />
12-8 Acknowledging Non-Maskable Interrupt Request ............................................................................... 129<br />
12-9 Interrupt Acknowledgement Program Algorithm .................................................................................. 131<br />
12-10 Interrupt Request Acknowledgement Timing (Example of MOV A,r) .................................................. 132<br />
12-11 Interrupt Request Acknowledgement Timing<br />
(When Interrupt Request Flag Is Generated at the Last Clock During Instruction Execution) ......... 132<br />
Preliminary User’s Manual U14938EJ1V0UM
LIST OF FIGURES (3/3)<br />
Figure No. Title Page<br />
12-12 Example of Multiple Interrupts .............................................................................................................. 133<br />
13-1 Oscillation Stabilization Time Select Register Format ........................................................................ 136<br />
13-2 Releasing HALT Mode by Interrupt ...................................................................................................... 138<br />
13-3 Releasing HALT Mode by RESET Input .............................................................................................. 139<br />
13-4 Releasing STOP Mode by Interrupt ..................................................................................................... 141<br />
13-5 Releasing STOP Mode by RESET Input.............................................................................................. 142<br />
14-1 Block Diagram of Reset Function......................................................................................................... 143<br />
14-2 Reset Timing by RESET Input .............................................................................................................. 144<br />
14-3 Reset Timing by Overflow in Watchdog Timer..................................................................................... 144<br />
14-4 Reset Timing by RESET Input in STOP Mode .................................................................................... 144<br />
15-1 Communication Mode Selection Format .............................................................................................. 147<br />
15-2 Flashpro III Connection in 3-Wire Serial I/O Mode ............................................................................. 148<br />
A-1 Development Tool Configuration .......................................................................................................... 162<br />
Preliminary User’s Manual U14938EJ1V0UM 15
16<br />
LIST OF TABLES (1/2)<br />
Table No. Title Page<br />
2-1 Types of Pin I/O Circuits ....................................................................................................................... 29<br />
3-1 Internal ROM Capacity ......................................................................................................................... 34<br />
3-2 Vector Table ........................................................................................................................................... 34<br />
3-3 Special Function Register List .............................................................................................................. 44<br />
4-1 Port Functions ....................................................................................................................................... 55<br />
4-2 Configuration of Port ............................................................................................................................. 56<br />
4-3 Port Mode Register and Output Latch Settings When Using Alternate Functions ............................ 63<br />
5-1 Configuration of Clock Generator ......................................................................................................... 66<br />
5-2 Maximum Time Required for Switching CPU Clock ............................................................................ 74<br />
6-1 Configuration of 8-<strong>Bit</strong> Remote Control Timer ...................................................................................... 76<br />
7-1 Interval Time of 8-<strong>Bit</strong> Timer 80 ............................................................................................................. 80<br />
7-2 Interval Time of 8-<strong>Bit</strong> Timer 81 ............................................................................................................. 80<br />
7-3 Configuration of 8-<strong>Bit</strong> Timer .................................................................................................................. 81<br />
7-4 Interval Time of 8-<strong>Bit</strong> Timer 80 ............................................................................................................. 85<br />
7-5 Interval Time of 8-<strong>Bit</strong> Timer 81 ............................................................................................................. 85<br />
8-1 Interval Time of Interval Timer .............................................................................................................. 88<br />
8-2 Configuration of Watch Timer ............................................................................................................... 88<br />
8-3 Interval Time of Interval Timer .............................................................................................................. 90<br />
9-1 Runaway Detection Time of Watchdog Timer...................................................................................... 91<br />
9-2 Interval Time .......................................................................................................................................... 91<br />
9-3 Configuration of Watchdog Timer ......................................................................................................... 92<br />
9-4 Runaway Detection Time of Watchdog Timer...................................................................................... 95<br />
9-5 Interval Time of Interval Timer .............................................................................................................. 96<br />
10-1 Configuration of Serial Interface 10 ..................................................................................................... 97<br />
10-2 Settings of Serial Interface 10 Operation Mode .................................................................................. 100<br />
11-1 VFD Output Pins and Alternate-Function Pins for Ports ..................................................................... 104<br />
11-2 Configuration of VFD Controller/Driver ................................................................................................ 105<br />
12-1 Interrupt Source List ............................................................................................................................. 120<br />
12-2 Flags Corresponding to Interrupt Request Signal ............................................................................... 123<br />
12-3 Time from Generation of Maskable Interrupt Request to Processing ................................................ 130<br />
13-1 HALT Mode Operating Status ............................................................................................................... 137<br />
13-2 Operation After Release of HALT Mode............................................................................................... 139<br />
Preliminary User’s Manual U14938EJ1V0UM
LIST OF TABLES (2/2)<br />
Table No. Title Page<br />
13-3 STOP Mode Operating Status .............................................................................................................. 140<br />
13-4 Operation After Release of STOP Mode .............................................................................................. 142<br />
14-1 Hardware Status After Reset ................................................................................................................ 145<br />
15-1 Differences Between Flash Memory and Mask ROM Versions .......................................................... 146<br />
15-2 Communication Mode ........................................................................................................................... 147<br />
15-3 Functions of Flash Memory Programming ........................................................................................... 148<br />
15-4 Example of Settings for PG-FP3 .......................................................................................................... 149<br />
17-1 Operand Identifiers and Description Methods ..................................................................................... 151<br />
Preliminary User’s Manual U14938EJ1V0UM 17
1.1 Features<br />
• ROM and RAM capacities<br />
CHAPTER 1 GENERAL<br />
Item Program Memory Data Memory<br />
(ROM) Internal High-Speed LCD Display RAM<br />
Part Number RAM<br />
µPD789870 ROM 4 KB 512 bytes 96 bytes<br />
µPD789871 8 KB<br />
µPD78F9872 Flash memory 16 KB<br />
• Minimum instruction execution time can be changed from high-speed (0.4 µs: @ 5.0 MHz operation with main<br />
system clock) to ultra-low-speed (122 µs: @ 32.768 kHz operation with subsystem clock)<br />
• I/O ports: 33<br />
• Timer: 5 channels<br />
• 8-bit remote control timer: 1 channel<br />
• 8-bit timer: 2 channels<br />
• Watch timer: 1 channel<br />
• Watchdog timer: 1 channel<br />
• Serial interface: 1 channel<br />
• VFD controller/driver: Display output total 25<br />
• Vectored interrupt sources: 12<br />
• Power supply voltage: VDD = 2.7 to 5.5 V (in normal operation)<br />
VDD = 4.5 to 5.5 V (in VFD operation)<br />
• Operating ambient temperature: TA = –40 to +85°C<br />
1.2 Applications<br />
Products with a front panel such as DVD, VCD, and S-VCD.<br />
1.3 Ordering Information<br />
Part Number Package Internal ROM<br />
µPD789870GB-×××-8ET 52-pin plastic LQFP (10 × 10) Mask ROM<br />
µPD789871GB-×××-8ET 52-pin plastic LQFP (10 × 10) Mask ROM<br />
µPD78F9872GB-8ET 52-pin plastic LQFP (10 × 10) Flash memory<br />
Remark ××× indicates ROM code suffix.<br />
18 Preliminary User’s Manual U14938EJ1V0UM
1.4 Pin Configuration (Top View)<br />
• 52-pin plastic LQFP (10 × 10)<br />
µPD789870GB-×××-8ET<br />
µPD789871GB-×××-8ET<br />
µPD78F9872GB-8ET<br />
VDD0<br />
XT1<br />
XT2<br />
RESET<br />
P10<br />
P11<br />
P12<br />
P20/SCK10<br />
P21/SO10<br />
P22/SI10<br />
P23/INTP0<br />
P24/INTP1<br />
P25/TI<br />
CHAPTER 1 GENERAL<br />
Caution Connect the IC (Internally Connected) pin directly to VSS0.<br />
Remark The parenthesized values apply to µPD78F9872.<br />
FIP0 to FIP24: Fluorescent Indicator Panel<br />
IC: Internally Connected<br />
INTP0, INTP1: Interrupt from Peripherals<br />
P00 to P07: Port 0<br />
P10 to P12: Port 1<br />
P20 to P25: Port 2<br />
P80 to P87: Port 8<br />
P90 to P97: Port 9<br />
RESET: Reset<br />
SCK10: Serial Clock<br />
VSS0<br />
X1<br />
X2<br />
IC (VPP)<br />
52 51 50 49 48 47 46 45 44 43 42 41 40<br />
1<br />
39<br />
2<br />
38<br />
3<br />
37<br />
4<br />
36<br />
5<br />
35<br />
6<br />
34<br />
7<br />
33<br />
8<br />
32<br />
9<br />
31<br />
10<br />
30<br />
11<br />
29<br />
12<br />
28<br />
13<br />
27<br />
14 15 16 17 18 19 20 21 22 23 24 25 26<br />
FIP0<br />
FIP1<br />
FIP2<br />
FIP3<br />
P07<br />
P06<br />
P05<br />
P04<br />
P03<br />
P02<br />
P01<br />
P00<br />
P80/FIP24<br />
FIP4<br />
FIP5<br />
FIP6<br />
FIP7<br />
FIP8<br />
P97/FIP9<br />
P96/FIP10<br />
P95/FIP11<br />
Preliminary User’s Manual U14938EJ1V0UM<br />
P94/FIP12<br />
P81/FIP23<br />
P82/FIP22<br />
P83/FIP21<br />
P84/FIP20<br />
P85/FIP19<br />
P86/FIP18<br />
P87/FIP17<br />
P90/FIP16<br />
P91/FIP15<br />
P92/FIP14<br />
P93/FIP13<br />
VLOAD<br />
VDD1<br />
SI10: Serial Input<br />
SO10: Serial Output<br />
TI: Remote Control Timer Input<br />
VDD0,VDD1 : Power Supply<br />
VLOAD: Negative Power Supply<br />
VPP: Programming Power Supply<br />
VSS0: Ground<br />
X1, X2: Crystal (Main System Clock)<br />
XT1, XT2: Crystal (Subsystem Clock)<br />
19
1.5 78K/0S Series Lineup<br />
20<br />
CHAPTER 1 GENERAL<br />
The products in the 78K/0S Series are listed below. The names enclosed in boxes are subseries names.<br />
78K/0S<br />
Series<br />
Small-scale package, general-purpose applications<br />
Preliminary User’s Manual U14938EJ1V0UM<br />
Products in mass production<br />
Products under development<br />
44-pin µ PD789046<br />
µ PD789074 with subsystem clock<br />
42/44-pin µ PD789026<br />
µ PD789014 with enhanced timer, expanded ROM, RAM<br />
30-pin µ PD789074<br />
µ PD789026 with enhanced timer<br />
28-pin<br />
µ PD789014<br />
On-chip UART and capable of low voltage (1.8 V) operation<br />
44-pin<br />
44-pin<br />
30-pin<br />
30-pin<br />
30-pin<br />
30-pin<br />
30-pin<br />
30-pin<br />
Small-scale package, general-purpose applications<br />
and A/D converter<br />
Inverter control<br />
44-pin µ PD789842 On-chip Inverter controller and UART<br />
80-pin<br />
80-pin<br />
64-pin<br />
64-pin<br />
64-pin<br />
64-pin<br />
64-pin<br />
64-pin<br />
µ PD789177 µ PD789177Y µ PD789167 with enhanced A/D converter<br />
µ PD789167 µ PD789167Y µ PD789104A with enhanced timer<br />
µ PD789156<br />
µ PD789146 with enhanced A/D converter<br />
µ PD789146<br />
µ PD789104A with EEPROM<br />
µ PD789134A<br />
µ PD789124A with enhanced A/D converter<br />
µ PD789124A<br />
RC oscillation version of the µ PD789104A<br />
µ PD789114A<br />
µ PD789104A with enhanced A/D converter<br />
µ PD789104A<br />
µ PD789026 with A/D converter and multiplier<br />
VFD drive<br />
LCD drive<br />
µ PD789417A<br />
µ PD789407A<br />
µ PD789456<br />
µ PD789446<br />
µ PD789436<br />
µ PD789426<br />
µ PD789316<br />
µ PD789306<br />
Dot LCD drive<br />
144-pin<br />
µ PD789835<br />
88-pin µ<br />
PD789830<br />
ASSP<br />
44-pin µ PD789800<br />
44-pin<br />
µ PD789840<br />
20-pin µ PD789861<br />
20-pin µ PD789860<br />
Y <strong>Subseries</strong> products support SMB.<br />
52-pin µ PD789871 Display output total: 25<br />
µ PD789407A with enhanced A/D converter<br />
µ PD789456 with enhanced I/O<br />
µ PD789446 with enhanced A/D converter<br />
µ PD789426 with enhanced display output<br />
µ PD789426 with enhanced A/D converter<br />
µ PD789306 with A/D converter<br />
RC oscillation version of the µ PD789306<br />
Basic subseries for LCD drive<br />
Segment/common output: 96<br />
Segments: 40, commons: 16<br />
52-pin<br />
µ PD789467<br />
µ PD789327 with A/D converter<br />
52-pin µ PD789327<br />
For remote controller, on-chip LCD controller/driver<br />
For keyboard, on-chip USB function<br />
For keypad, on-chip POC<br />
RC oscillation version of the µ PD789860<br />
For keyless entry, on-chip POC and key return circuit
CHAPTER 1 GENERAL<br />
The major functional differences among the subseries are listed below.<br />
<strong>Subseries</strong> Name<br />
ROM<br />
Capacity<br />
Small-scale µ PD789046 16 K<br />
package<br />
general-<br />
µ PD789026 4 K to 16 K<br />
purpose µ PD789074 2 K to 8 K<br />
applications µ PD789014 2 K to 4 K<br />
Inverter<br />
control<br />
For LCD<br />
driving<br />
For Dot<br />
LCD<br />
driving<br />
ASSP<br />
Function<br />
Small-scale µ PD789177<br />
package µ PD789167<br />
generalpurpose<br />
µ PD789156<br />
applications µ PD789146<br />
and A/D µ PD789134A<br />
converter<br />
µ PD789124A<br />
µ PD789114A<br />
µ PD789104A<br />
µ PD789842<br />
µ PD789871<br />
µ PD789417A<br />
µ PD789407A<br />
µ PD789456<br />
µ PD789446<br />
µ PD789436<br />
µ PD789426<br />
µ PD789316<br />
µ PD789306<br />
µ PD789835<br />
µ PD789830<br />
µ PD789467<br />
µ PD789327<br />
µ PD789800<br />
µ PD789840<br />
µ PD789861<br />
µ<br />
PD789860<br />
16 K to 24 K<br />
8 K to 16 K<br />
2 K to 8 K<br />
8 K to 16 K<br />
4 K to 8 K<br />
12K to<br />
24 K<br />
12K to<br />
16 K<br />
8 K to 16 K<br />
12K to<br />
60 K<br />
24 K<br />
4 K to 24 K<br />
8 K<br />
4 K<br />
Note 10-bit timer: 1 channel<br />
1 ch<br />
1 ch 1 ch 1 ch – – 1 ch (UART: 34 1.8 V –<br />
–<br />
1 ch)<br />
2 ch –<br />
22<br />
–<br />
1 ch<br />
–<br />
–<br />
–<br />
–<br />
8 ch<br />
Preliminary User’s Manual U14938EJ1V0UM<br />
–<br />
–<br />
–<br />
–<br />
–<br />
–<br />
–<br />
–<br />
–<br />
1 ch (UART:<br />
1 ch)<br />
1 ch (UART:<br />
1 ch)<br />
1 ch<br />
2 ch (UART:<br />
1 ch)<br />
1 ch (UART:<br />
1 ch)<br />
1 ch<br />
2 ch (USB:<br />
1 ch)<br />
1 ch<br />
24<br />
VDD<br />
8-<strong>Bit</strong> 10-<strong>Bit</strong> Serial<br />
8-<strong>Bit</strong> 16-<strong>Bit</strong> Watch WDT<br />
A/D A/D Interface I/O MIN.<br />
Value<br />
3 ch 1 ch<br />
1 ch<br />
3 ch Note<br />
3 ch<br />
3 ch<br />
2 ch<br />
6 ch<br />
1 ch<br />
2 ch<br />
1 ch<br />
1 ch<br />
1 ch<br />
1 ch<br />
1 ch<br />
1 ch<br />
1 ch<br />
–<br />
4 ch<br />
4 ch<br />
4 ch<br />
1 ch 8 ch<br />
1 ch<br />
1 ch<br />
7 ch<br />
6 ch<br />
6 ch<br />
1 ch 3 ch<br />
1 ch 1 ch<br />
–<br />
4 ch<br />
–<br />
8 ch<br />
–<br />
4 ch<br />
–<br />
4 ch<br />
–<br />
4 ch<br />
–<br />
–<br />
–<br />
7 ch 1 ch (UART:<br />
–<br />
1 ch)<br />
6 ch<br />
–<br />
6 ch<br />
–<br />
–<br />
–<br />
–<br />
–<br />
31<br />
20<br />
30<br />
33<br />
43<br />
30<br />
40<br />
23<br />
28<br />
30<br />
18<br />
21<br />
29<br />
4.0 V<br />
2.7 V<br />
1.8 V<br />
1.8 V<br />
2.7 V<br />
1.8 V<br />
31 4.0 V<br />
2.8 V<br />
14 1.8 V<br />
Remarks<br />
–<br />
On-chip<br />
EEPROM<br />
RC-oscillation<br />
version<br />
–<br />
–<br />
–<br />
–<br />
RC-oscillation<br />
version<br />
–<br />
–<br />
On-chip LCD<br />
–<br />
RC-oscillation<br />
version,<br />
on-chip<br />
EEPROM<br />
On-chip<br />
EEPROM<br />
21
1.6 Block Diagram<br />
22<br />
TI/P25<br />
SO10/P21<br />
SI10/P22<br />
SCK10/P20<br />
INTP0/P23<br />
INTP1/P24<br />
8-bit remote<br />
control<br />
timer 50<br />
8-bit timer 80<br />
8-bit timer 81<br />
Watch timer<br />
Watchdog timer<br />
Serial<br />
interface10<br />
Interrupt<br />
control<br />
CHAPTER 1 GENERAL<br />
78K/0S<br />
CPU core<br />
RAM<br />
512 bytes<br />
ROM<br />
VDD0 VSS0 IC<br />
(VPP)<br />
Remarks 1. The internal ROM capacity varies depending on the product.<br />
2. The parenthesized values apply to µPD78F9872.<br />
Preliminary User’s Manual U14938EJ1V0UM<br />
Port0<br />
Port1<br />
Port2<br />
Port8<br />
Port9<br />
VFD<br />
controller/<br />
driver<br />
System<br />
control<br />
P00 to P07<br />
P10 to P12<br />
P20 to P25<br />
P80 to P87<br />
P90 to P97<br />
FIP0 to FIP8<br />
FIP9/P97 to<br />
FIP16/P90<br />
FIP17/P87 to<br />
FIP24/P80<br />
VLOAD<br />
VDD1<br />
RESET<br />
X1<br />
X2<br />
XT1<br />
XT2
An outline of the timer is shown below.<br />
CHAPTER 1 GENERAL<br />
Preliminary User’s Manual U14938EJ1V0UM<br />
8-<strong>Bit</strong> Watch Timer Watchdog<br />
Timer Timer<br />
Operation mode Interval timer – 1 channel 1 channelNote 1 1 channelNote 2<br />
Function Pulse width 1 input – – –<br />
measurement<br />
Interrupt<br />
sources<br />
3 2 1 1<br />
Notes 1. The watch timer can perform both watch timer and interval timer functions at the same time.<br />
2. The watchdog timer has the watchdog timer and interval timer function. However, use the watchdog<br />
timer by selecting either the watchdog timer function or interval timer function.<br />
1.7 Overview of Functions<br />
8-<strong>Bit</strong> Remote<br />
Control Timer<br />
Item µPD789870 µPD789871 µPD78F9872<br />
Internal memory ROM Mask ROM Flash memory<br />
High-speed RAM 512 bytes<br />
VFD display RAM 96 bytes<br />
4 KB 8 KB 16 KB<br />
Minimum instruction execution time • 0.4 µs/1.6 µs (@ 5.0 MHz operation with main system clock)<br />
•122 µs (@ 32.768 kHz operation with subsystem clock)<br />
General-purpose registers 8 bits × 8 registers<br />
Instruction set • 16-bit operations<br />
• <strong>Bit</strong> manipulations (such as set, reset, and test)<br />
I/O ports Total: 33<br />
• CMOS I/O: 17<br />
• P-ch open-drain I/O: 8<br />
• P-ch open-drain output: 8<br />
VFD controller/driver Display output total: 25<br />
Serial interfaces 3-wire serial I/O: 1 channel<br />
Timers • 8-bit remote control timer: 1 channel<br />
• 8-bit timer: 2 channels<br />
• Watch timer: 1 channel<br />
• Watchdog timer: 1 channel<br />
Vectored interrupt Maskable Internal: 8, external: 4<br />
sources Non-maskable Internal: 1<br />
Power supply voltage VDD = 2.7 to 5.5 V (in normal operation)<br />
Operating ambient temperature TA = –40 to +85°C<br />
VDD = 4.5 to 5.5 V (in VFD operation)<br />
Package 52-pin plastic LQFP (10 × 10)<br />
23
2.1 List of Pin Functions<br />
24<br />
(1) Port pins<br />
CHAPTER 2 PIN FUNCTIONS<br />
Pin Name I/O Function After Reset Alternate Function<br />
P00 to P07 I/O Port 0.<br />
8-bit I/O port.<br />
Input/output can be specified in 1-bit units.<br />
When used as an input port, an on-chip pull-up<br />
resistor can be specified by means of pull-up resistor<br />
option register 0 (PU0).<br />
Input —<br />
P10 to P12 I/O Port 1.<br />
3-bit I/O port.<br />
Input/output can be specified in 1-bit units.<br />
When used as an input port, an on-chip pull-up<br />
resistor can be specified by means of pull-up resistor<br />
option register 0 (PU0).<br />
Input —<br />
P20 I/O Port 2.<br />
Input SCK10<br />
P21 6-bit I/O port.<br />
SO10<br />
P22<br />
Input/output can be specified in 1-bit units.<br />
When used as an input port, an on-chip pull-up<br />
SI10<br />
P23 resistor can be specified by means of pull-up resistor<br />
INTP0<br />
P24 option register B2 (PUB2).<br />
INTP1<br />
P25 TI<br />
P80 to P87 I/O Port 8.<br />
P-ch open-drain 8-bit high-tolerance I/O port.<br />
For mask ROM versions, use of a pull-down resistor<br />
for VLOAD can be specified in 1-bit units by a mask<br />
option (when used as a general-purpose I/O port, the<br />
pull-down resistor is connected to VSS0).<br />
Output FIP24 to FIP17<br />
P90 to P97 Output Port 9<br />
P-ch open-drain 8-bit high-tolerance output port.<br />
Mask ROM versions include an on-chip pull-down<br />
resistor (connected to VLOAD).<br />
Output FIP16 to FIP9<br />
Preliminary User’s Manual U14938EJ1V0UM
(2) Non-port pins<br />
CHAPTER 2 PIN FUNCTIONS<br />
Pin Name I/O Function After Reset Alternate Function<br />
INTP0 Input External interrupt input for which the valid edge (rising edge, Input P23<br />
INTP1<br />
falling edge, or both rising and falling edges) can be specified<br />
P24<br />
SI10 Input Serial interface serial data input Input P22<br />
SO10 Output Serial interface serial data output Input P21<br />
SCK10 I/O Serial interface serial clock input/output Input P20<br />
TI Input Timer input to 8-bit remote control timer Input P25<br />
FIP0 to FIP8 Output VFD controller/driver high-tolerance high current Output —<br />
FIP9 to FIP16<br />
output<br />
P97 to P90<br />
FIP17 to FIP24 Note P87 to P80<br />
X1 Input Connecting crystal resonator for main system clock — —<br />
X2 — oscillation — —<br />
XT1 Input Connecting crystal resonator for Subsystem clock — —<br />
XT2 — oscillation — —<br />
VLOAD — Connecting pull-down resistor of VFD controller/driver — —<br />
VDD0 — Positive power supply for ports — —<br />
VDD1 — Positive power supply for VFD controller/driver — —<br />
VSS0 — Ground potential — —<br />
RESET Input System reset input Input —<br />
IC — Internally connected. Connect directly to VSS0. — —<br />
VPP — Sets flash memory programming mode. Applies high<br />
voltage when a program is written or verified. Connect<br />
directly to VSS0 in normal operation mode.<br />
— —<br />
Note Pins set as P-ch open-drain I/O port by a mask option cannot be used as VFD controller/driver.<br />
Preliminary User’s Manual U14938EJ1V0UM<br />
25
2.2 Description of Pin Functions<br />
26<br />
CHAPTER 2 PIN FUNCTIONS<br />
2.2.1 P00 to P07 (Port 0)<br />
These pins constitute an 8-bit I/O port and can be set in input or output port mode in 1-bit units by using port mode<br />
register 0 (PM0). When used as an input port, use of an on-chip pull-up resistor can be specified by pull-up resistor<br />
option register 0 (PU0) in port units.<br />
2.2.2 P10 to P12 (Port 1)<br />
These pins constitute a 3-bit I/O port and can be set in input or output port mode in 1-bit units by port mode register<br />
1 (PM1). When used as an input port, use of an on-chip pull-up resistor can be specified by pull-up resistor option<br />
register 0 (PU0) in port units.<br />
2.2.3 P20 to P25 (Port 2)<br />
These pins constitute a 6-bit I/O port. In addition, these pins enable timer input serial interface data I/O, and external<br />
interrupt input.<br />
Port 2 can be specified in the following operation modes in 1-bit units.<br />
(1) Port mode<br />
In this mode, port 2 functions as a 6-bit I/O port. Port 2 can be set in the input or output mode in 1-bit units<br />
by port mode register 2 (PM2). When used as an input port, use of an on-chip pull-up resist can be specified<br />
by pull-up resistor option register B2 (PUB2) in 1-bit units.<br />
(2) Control mode<br />
In this mode, P20 to P25 function as the timer input, serial interface data I/O, and external interrupt input.<br />
(a) TI<br />
This is the timer input pin of 8-bit remote control timer.<br />
(b) SI10, SO10<br />
These are the serial data I/O pins of the serial interface.<br />
(c) SCK10<br />
This is the serial clock I/O pin of the serial interface.<br />
(d) INTP0, INTP1<br />
These are the external interrupt input pins for which the valid edge (rising edge, falling edge, or both rising<br />
and falling edges) can be specified.<br />
2.2.4 P80 to P87 (Port 8)<br />
These pins constitute an 8-bit P-ch open-drain I/O port. In addition, they also function as VFD controller/driver<br />
outputs. Port 8 can be specified in the following operation mode in 1-bit units.<br />
(1) Port mode<br />
In this mode, port 8 functions as an 8-bit P-ch open-drain I/O Port. Port 8 can be set in the input or output<br />
port mode in 1-bit units by port mode register 8 (PM8).<br />
(2) Control mode<br />
In this mode, these pins function as VFD controller/driver outputs (FIP17 to FIP24). For mask ROM versions,<br />
use of a pull-down resistor for VLOAD can be specified by a mask option.<br />
Preliminary User’s Manual U14938EJ1V0UM
CHAPTER 2 PIN FUNCTIONS<br />
2.2.5 P90 to P97 (Port 9)<br />
These pins constitute an 8-bit P-ch open-drain I/O port. In addition, they also function as VFD controller/driver<br />
outputs. Port 9 can be specified in the following operation modes in 1-bit units.<br />
(1) Port mode<br />
In this mode, port 9 functions as a P-ch open-drain I/O port. Port 9 can be set in the input or output port mode<br />
in 1-bit units by port mode register 9 (PM9).<br />
(2) Control mode<br />
In this mode, these pins function as VFD controller/driver outputs (FIP9 to FIP16). Mask ROM versions include<br />
an on-chip pull-down resistor (connected to VLOAD).<br />
2.2.6 FIP0 to FIP8<br />
These pins are output pins for the VFD controller/driver.<br />
2.2.7 RESET<br />
This pin inputs an active-low system reset signal.<br />
2.2.8 X1, X2<br />
These pins are used to connect a crystal resonator for main system clock oscillation.<br />
2.2.9 XT1, XT2<br />
These pins are used to connect a crystal resonator for subsystem clock oscillation.<br />
2.2.10 VDD0<br />
This is the positive power supply pin.<br />
2.2.11 VDD1<br />
This is the positive power supply pin for VFD controller/driver.<br />
2.2.12 VLOAD<br />
This pin is used to connect a pull-down resistor of VFD controller/driver.<br />
2.2.13 VSS0<br />
This is the ground pin.<br />
2.2.14 VPP (µPD78F9872 only)<br />
A high voltage should be applied to this pin when the flash memory programming mode is set and when the program<br />
is written or verified.<br />
Directly connect this pin to VSS0 in the normal operation mode.<br />
Preliminary User’s Manual U14938EJ1V0UM<br />
27
28<br />
CHAPTER 2 PIN FUNCTIONS<br />
2.2.15 IC (mask ROM version only)<br />
The IC (Internally Connected) pin is used to set the µPD789870 and µPD789871 in the test mode before shipment.<br />
In the normal operation mode, directly connect this pin to the VSS0 pin with as short a wiring length as possible.<br />
If a potential difference is generated between the IC pin and VSS0 pin due to a long wiring length, or an external<br />
noise superimposed on the IC pin, the user program may not run correctly.<br />
Directly connect the IC pin to the VSS0 pin.<br />
VSS0 IC<br />
Keep short<br />
Preliminary User’s Manual U14938EJ1V0UM
CHAPTER 2 PIN FUNCTIONS<br />
2.3 Pin I/O Circuits and Recommended Connection of Unused Pins<br />
The I/O circuit type for each pin and recommended connection of unused pins are shown in Table 2-1.<br />
For the input/output circuit configuration of each type, see Figure 2-1.<br />
Table 2-1. Types of Pin I/O Circuits<br />
Pin Name I/O Circuit Type I/O Recommended Connection of Unused Pins<br />
P00 to P07 5-H I/O Input: Independently connect to VDD0 or VSS0 via a resistor.<br />
P10 to P12 Output: Leave open.<br />
P20/SCK10 8-C<br />
P21/SO10 5-H<br />
P22/SI10 8-C<br />
P23/INTP0<br />
P24/INTP1<br />
P25/TI<br />
FIP0 to FIP8 14-F Output Leave open.<br />
FIP9/P97 to FIP16/P90<br />
FIP17/P87 to FIP24/P80<br />
(Mask ROM version)<br />
15-G I/O<br />
FIP17/P87 to FIP24/P80 15-H<br />
(Flash memory version)<br />
RESET 2 Input —<br />
IC — — Connect directly to VSS0.<br />
VPP — —<br />
Preliminary User’s Manual U14938EJ1V0UM<br />
29
30<br />
Type 2<br />
IN<br />
Schmitt-triggered input with hysteresis characteristics.<br />
Type 8-C<br />
P-ch<br />
CHAPTER 2 PIN FUNCTIONS<br />
Figure 2-1. Pin I/O Circuits<br />
Type 5-H VDD0<br />
Type 15-G<br />
Pull-up<br />
enable<br />
Data<br />
Output<br />
disable<br />
Input<br />
enable<br />
Pull-up<br />
enable<br />
Data<br />
Output<br />
disable<br />
VSS0<br />
VSS0<br />
VDD0<br />
VDD0<br />
N-ch<br />
P-ch<br />
N-ch<br />
P-ch<br />
VDD0<br />
P-ch<br />
IN/OUT<br />
IN/OUT<br />
Type 14-F<br />
data<br />
Type 15-H<br />
Data<br />
VSS0<br />
RD<br />
VSS0<br />
Preliminary User’s Manual U14938EJ1V0UM<br />
VDD0<br />
P-ch<br />
N-ch<br />
VDD0<br />
P-ch<br />
N-ch<br />
VSS0<br />
P-ch<br />
VDD1<br />
P-ch<br />
VDD1<br />
P-ch<br />
OUT<br />
VLOAD<br />
Remark µ<br />
PD78F9872 does not include an on-chip pull-down<br />
resistor at FIP9/P97 to FIP16/P90.<br />
Data<br />
VDD0<br />
P-ch<br />
N-ch<br />
VSS0<br />
VSS0<br />
VDD1<br />
R3<br />
P-ch<br />
(Mask option)<br />
VLOAD<br />
IN/OUT<br />
IN/OUT<br />
High-voltage transistor
3.1 Memory Space<br />
CHAPTER 3 CPU ARCHITECTURE<br />
The µPD789871 <strong>Subseries</strong> can access 64 KB of memory space. Figures 3-1 to 3-3 show the memory maps.<br />
Data<br />
memory space<br />
Program<br />
memory space<br />
FFFFH<br />
FF00H<br />
FEFFH<br />
FD00H<br />
FCFFH<br />
FA60H<br />
FA5FH<br />
FA00H<br />
F9FFH<br />
1000H<br />
0FFFH<br />
0000H<br />
Figure 3-1. Memory Map (µPD789870)<br />
Special function registers<br />
256 × 8 bits<br />
Internal high-speed RAM<br />
512 × 8 bits<br />
Reserved<br />
VFD display RAM<br />
96 × 8 bits<br />
Reserved<br />
Internal ROM<br />
4,096 × 8 bits<br />
0FFFH<br />
0080H<br />
007FH<br />
0040H<br />
003FH<br />
001CH<br />
001BH<br />
0000H<br />
Program area<br />
CALLT table area<br />
Program area<br />
Vector table area<br />
Preliminary User’s Manual U14938EJ1V0UM 31
32<br />
Data<br />
memory space<br />
Program<br />
memory space<br />
FFFFH<br />
FF00H<br />
FEFFH<br />
FD00H<br />
FCFFH<br />
FA60H<br />
FA5FH<br />
FA00H<br />
F9FFH<br />
2000H<br />
1FFFH<br />
0000H<br />
CHAPTER 3 CPU ARCHITECTURE<br />
Figure 3-2. Memory Map (µPD789871)<br />
Special function registers<br />
256 × 8 bits<br />
Internal high-speed RAM<br />
512 × 8 bits<br />
Reserved<br />
VFD display RAM<br />
96 × 8 bits<br />
Reserved<br />
Internal ROM<br />
8,192 × 8 bits<br />
Preliminary User’s Manual U14938EJ1V0UM<br />
1FFFH<br />
0080H<br />
007FH<br />
0040H<br />
003FH<br />
001CH<br />
001BH<br />
0000H<br />
Program area<br />
CALLT table area<br />
Program area<br />
Vector table area
Data<br />
memory space<br />
Program<br />
memory space<br />
FFFFH<br />
FF00H<br />
FEFFH<br />
FD00H<br />
FCFFH<br />
FA60H<br />
FA5FH<br />
FA00H<br />
F9FFH<br />
4000H<br />
3FFFH<br />
0000H<br />
CHAPTER 3 CPU ARCHITECTURE<br />
Figure 3-3. Memory Map (µPD78F9872)<br />
Special function registers<br />
256 × 8 bits<br />
Internal high-speed RAM<br />
512 × 8 bits<br />
Reserved<br />
VFD display RAM<br />
96 × 8 bits<br />
Reserved<br />
Flash memory<br />
16,384 × 8 bits<br />
3FFFH<br />
0080H<br />
007FH<br />
0040H<br />
003FH<br />
001CH<br />
001BH<br />
0000H<br />
Program area<br />
CALLT table area<br />
Program area<br />
Vector table area<br />
Preliminary User’s Manual U14938EJ1V0UM 33
34<br />
CHAPTER 3 CPU ARCHITECTURE<br />
3.1.1 Internal program memory space<br />
The internal program memory space stores programs and table data. This space is usually addressed by the<br />
program counter (PC).<br />
The µPD789871 <strong>Subseries</strong> provides the following internal ROMs (or flash memory) containing the following<br />
capacities.<br />
Table 3-1. Internal ROM Capacity<br />
Part Number Internal ROM<br />
Preliminary User’s Manual U14938EJ1V0UM<br />
Structure Capacity<br />
µPD789870 Mask ROM 4,096 × 8 bits<br />
µPD789871 8,192 × 8 bits<br />
µPD78F9872 Flash memory 16,384 × 8 bits<br />
The following areas are allocated to the internal program memory space:<br />
(1) Vector table area<br />
A 28-byte area of addresses 0000H to 001BH is reserved as a vector table area. This area stores program<br />
start addresses to be used when branching by the RESET input or an interrupt request generation. Of a 16bit<br />
program address, the lower 8 bits are stored in an even address, and the higher 8 bits are stored in an<br />
odd address.<br />
Table 3-2. Vector Table<br />
Vector Table Address Interrupt Request Vector Table Address Interrupt Request<br />
0000H RESET input 0010H INTKS<br />
0004H INTWDT 0012H INTCSI10<br />
0006H INTP0 0014H INTTM80<br />
0008H INTP1 0016H INTTM81<br />
000AH INTTM50 0018H INTWT<br />
000CH INTTM51 001AH INTWTI<br />
000EH INTTM52<br />
(2) CALLT instruction table area<br />
In a 64-byte area of addresses 0040H to 007FH, the subroutine entry address of a 1-byte call instruction<br />
(CALLT) can be stored.
CHAPTER 3 CPU ARCHITECTURE<br />
3.1.2 Internal data memory (internal high-speed RAM) space<br />
The µPD789871 <strong>Subseries</strong> provides following internal RAMs.<br />
(1) Internal high-speed RAM<br />
An Internal high-speed RAM is incorporated in the area of FD00H to FEFFH. This RAM can also be used<br />
as a stack.<br />
(2) VFD display RAM<br />
A VFD display RAM is allocated to the area of FA00H to FA5FH (96 bytes). This RAM can also be used as<br />
an ordinary RAM.<br />
3.1.3 Special function register (SFR) area<br />
Special function registers (SFRs) of on-chip peripheral hardware are allocated to the area of FF00H to FFFFH (refer<br />
to Table 3-3).<br />
3.1.4 Data memory addressing<br />
The µPD789871 <strong>Subseries</strong> provides a variety of addressing modes which take account of memory manipulability,<br />
etc. Especially at addresses corresponding to data memory area (FE00H to FEFFH), particular addressing modes<br />
are possible to meet the functions of the special function registers (SFRs) and general-purpose registers. Figures<br />
3-4 to 3-6 show the data memory addressing modes.<br />
Preliminary User’s Manual U14938EJ1V0UM 35
36<br />
FFFFH<br />
FF20H<br />
FF1FH<br />
FF00H<br />
FEFFH<br />
FE20H<br />
FE1FH<br />
FD00H<br />
FCFFH<br />
FA60H<br />
FA5FH<br />
FA00H<br />
F9FFH<br />
1000H<br />
0FFFH<br />
0000H<br />
CHAPTER 3 CPU ARCHITECTURE<br />
Figure 3-4. Data Memory Addressing (µPD789870)<br />
Special function registers (SFRs)<br />
256 × 8 bits<br />
Internal high-speed RAM<br />
512 × 8 bits<br />
Reserved<br />
VFD display RAM<br />
96 × 8 bits<br />
Reserved<br />
Internal ROM<br />
4,096 × 8 bits<br />
SFR addressing<br />
Preliminary User’s Manual U14938EJ1V0UM<br />
Short direct<br />
addressing<br />
Direct addressing<br />
Register indirect<br />
addressing<br />
Based addressing
FFFFH<br />
FF20H<br />
FF1FH<br />
FF00H<br />
FEFFH<br />
FE20H<br />
FE1FH<br />
FD00H<br />
FCFFH<br />
FA60H<br />
FA5FH<br />
FA00H<br />
F9FFH<br />
2000H<br />
1FFFH<br />
0000H<br />
CHAPTER 3 CPU ARCHITECTURE<br />
Figure 3-5. Data Memory Addressing (µPD789871)<br />
Special function registers (SFRs)<br />
256 × 8 bits<br />
Internal high-speed RAM<br />
512 × 8 bits<br />
Reserved<br />
VFD display RAM<br />
96 × 8 bits<br />
Reserved<br />
Internal ROM<br />
8,192 × 8 bits<br />
SFR addressing<br />
Short direct<br />
addressing<br />
Direct addressing<br />
Register indirect<br />
addressing<br />
Based addressing<br />
Preliminary User’s Manual U14938EJ1V0UM 37
38<br />
FFFFH<br />
FF20H<br />
FF1FH<br />
FF00H<br />
FEFFH<br />
FE20H<br />
FE1FH<br />
FD00H<br />
FCFFH<br />
FA60H<br />
FA5FH<br />
FA00H<br />
F9FFH<br />
4000H<br />
3FFFH<br />
0000H<br />
CHAPTER 3 CPU ARCHITECTURE<br />
Figure 3-6. Data Memory Addressing (µPD78F9872)<br />
Special function registers (SFRs)<br />
256 × 8 bits<br />
Internal high-speed RAM<br />
512 × 8 bits<br />
Reserved<br />
VFD display RAM<br />
96 × 8 bits<br />
Reserved<br />
Flash memory<br />
16,384 × 8 bits<br />
SFR addressing<br />
Preliminary User’s Manual U14938EJ1V0UM<br />
Short direct<br />
addressing<br />
Direct addressing<br />
Register indirect<br />
addressing<br />
Based addressing
3.2 Processor Registers<br />
CHAPTER 3 CPU ARCHITECTURE<br />
The µPD789871 <strong>Subseries</strong> provides the following on-chip processor registers:<br />
3.2.1 Control registers<br />
The control registers contain special functions to control the program sequence statuses and stack memory. The<br />
program counter, program status word, and stack pointer are control registers.<br />
(1) Program counter (PC)<br />
The program counter is a 16-bit register which holds the address information of the next program to be<br />
executed.<br />
In normal operation, the PC is automatically incremented according to the number of bytes of the instruction<br />
to be fetched. When a branch instruction is executed, immediate data or register contents is set.<br />
RESET input sets the reset vector table values at addresses 0000H and 0001H to the program counter.<br />
Figure 3-7. Program Counter Configuration<br />
15<br />
0<br />
PC PC15 PC14 PC13 PC12 PC11 PC10 PC9 PC8 PC7 PC6 PC5 PC4 PC3 PC2 PC1 PC0<br />
(2) Program status word (PSW)<br />
The program status word is an 8-bit register consisting of various flags to be set/reset by instruction execution.<br />
Program status word contents are automatically stacked upon interrupt request generation or PUSH PSW<br />
instruction execution and are automatically restored upon execution of the RETI and POP PSW instructions.<br />
RESET input sets the PSW to 02H.<br />
PSW<br />
Figure 3-8. Program Status Word Configuration<br />
7 0<br />
IE Z 0 AC 0 0 1 CY<br />
Preliminary User’s Manual U14938EJ1V0UM 39
40<br />
CHAPTER 3 CPU ARCHITECTURE<br />
(a) Interrupt enable flag (IE)<br />
This flag controls interrupt request acknowledge operations of CPU.<br />
When IE = 0, the IE is set to interrupt disabled (DI) status. All interrupt requests except non-maskable<br />
interrupt are disabled.<br />
When IE = 1, the IE is set to interrupt enabled (EI) status and interrupt request acknowledgement is<br />
controlled with an interrupt mask flag for various interrupt sources.<br />
This flag is reset (0) upon DI instruction execution or interrupt acknowledgment and is set (1) upon EI<br />
instruction execution.<br />
(b) Zero flag (Z)<br />
When the operation result is zero, this flag is set (1). It is reset (0) in all other cases.<br />
(c) Auxiliary carry flag (AC)<br />
If the operation result has a carry from bit 3 or a borrow at bit 3, this flag is set to (1). It is reset (0) in<br />
all other cases.<br />
(d) Carry flag (CY)<br />
This flag stores overflow and underflow upon add/subtract instruction execution. It stores the shift-out<br />
value upon rotate instruction execution and functions as a bit accumulator during bit manipulation<br />
instruction execution.<br />
Preliminary User’s Manual U14938EJ1V0UM
CHAPTER 3 CPU ARCHITECTURE<br />
(3) Stack pointer (SP)<br />
This is a 16-bit register to hold the start address of the memory stack area. Only the internal high-speed RAM<br />
area can be set as the stack area.<br />
Figure 3-9. Stack Pointer Configuration<br />
15<br />
0<br />
SP SP15 SP14 SP13 SP12 SP11 SP10 SP9 SP8 SP7 SP6 SP5 SP4 SP3 SP2 SP1 SP0<br />
The SP is decremented ahead of write (save) to the stack memory and is incremented after read (restore)<br />
from the stack memory.<br />
Each stack operation saves/restores data as shown in Figures 3-10 and 3-11.<br />
Caution Since RESET input makes the SP contents undefined, be sure to initialize the SP before<br />
instruction execution.<br />
SP SP _ 2<br />
SP _ 2<br />
SP _ 1<br />
SP<br />
PUSH rp<br />
instruction<br />
Register pair<br />
lower<br />
Register pair<br />
higher<br />
POP rp<br />
instruction<br />
Figure 3-10. Data to Be Saved to Stack Memory<br />
SP SP _ 2<br />
SP _ 2<br />
SP _ 1<br />
SP<br />
CALL, CALLT<br />
instructions<br />
PC7 to PC0<br />
PC15 to PC8<br />
SP SP _ 3<br />
SP _ 3<br />
SP _ 2<br />
SP _ 1<br />
Figure 3-11. Data to Be Restored from Stack Memory<br />
RET instruction<br />
PC15 to PC8<br />
Interrupt<br />
PC7 to PC0<br />
PC15 to PC8<br />
PSW<br />
Preliminary User’s Manual U14938EJ1V0UM 41<br />
SP<br />
RETI instruction<br />
Register pair<br />
SP SP PC7 to PC0<br />
SP<br />
lower<br />
PC7 to PC0<br />
SP + 1<br />
SP SP + 2<br />
Register pair<br />
higher<br />
SP + 1<br />
SP SP + 2<br />
SP + 1<br />
SP + 2<br />
SP SP + 3<br />
PC15 to PC8<br />
PSW
42<br />
CHAPTER 3 CPU ARCHITECTURE<br />
3.2.2 General-purpose registers<br />
The general-purpose registers consist of eight 8-bit registers (X, A, C, B, E, D, L, and H).<br />
Each register can be used as an 8-bit register, and in addition, two 8-bit registers in pairs can be used as a 16bit<br />
register (AX, BC, DE, and HL).<br />
They can be described in terms of functional names (X, A, C, B, E, D, L, H, AX, BC, DE, and HL) and absolute<br />
names (R0 to R7 and RP0 to RP3).<br />
Figure 3-12. General-Purpose Register Configuration<br />
(a) Absolute names<br />
16-bit processing 8-bit processing<br />
RP3<br />
RP2<br />
RP1<br />
RP0<br />
15 0 7 0<br />
(b) Functional names<br />
16-bit processing 8-bit processing<br />
HL<br />
DE<br />
BC<br />
AX<br />
15 0 7 0<br />
Preliminary User’s Manual U14938EJ1V0UM<br />
R7<br />
R6<br />
R5<br />
R4<br />
R3<br />
R2<br />
R1<br />
R0<br />
H<br />
L<br />
D<br />
E<br />
B<br />
C<br />
A<br />
X
CHAPTER 3 CPU ARCHITECTURE<br />
3.2.3 Special function registers (SFRs)<br />
Unlike general-purpose registers, special function registers have their own functions and are allocated to the 256byte<br />
area FF00H to FFFFH.<br />
Special function registers can be manipulated, like general-purpose registers, with operation, transfer, and bit<br />
manipulation instructions. The bit units in which one register can be manipulated (1, 8, and 16) differ depending on<br />
the special function register type.<br />
Each bit unit for manipulation can be specified as follows.<br />
• 1-bit manipulation<br />
A symbol reserved by assembler is described as the operand (sfr.bit) of a 1-bit manipulation instruction. This<br />
manipulation can also be specified with an address.<br />
• 8-bit manipulation<br />
A symbol reserved by assembler is described as the operand (sfr) of an 8-bit manipulation instruction. This<br />
manipulation can also be specified with an address.<br />
• 16-bit manipulation<br />
A symbol reserved by assembler is described as the operand of a 16-bit manipulation instruction. When<br />
specifying an address, describe an even address.<br />
Table 3-3 lists the special function registers. The meanings of the symbols in this table are as follows:<br />
• Symbol<br />
Indicates the addresses of the implemented special function registers. The symbols shown in this column are<br />
the reserved words of the assembler, and have already been defined in the header file called “sfrbit.h” of the<br />
C compiler. Therefore, these symbols can be used as instruction operands if assembler or integrated debugger<br />
is used.<br />
• R/W<br />
Indicates whether the special function register in question can be read or written.<br />
R/W: Read/write<br />
R: Read only<br />
W: Write only<br />
• <strong>Bit</strong> units for manipulation<br />
Indicates the bit units (1, 8, and 16) in which the special function register in question can be manipulated.<br />
• After reset<br />
Indicates the status of the special function register when the RESET signal is input.<br />
Preliminary User’s Manual U14938EJ1V0UM 43
44<br />
CHAPTER 3 CPU ARCHITECTURE<br />
Table 3-3. Special Function Register List<br />
Address Special Function Register (SFR) Name Symbol R/W <strong>Bit</strong> Units for Manipulation After Reset<br />
Preliminary User’s Manual U14938EJ1V0UM<br />
1 <strong>Bit</strong> 8 <strong>Bit</strong>s 16 <strong>Bit</strong>s<br />
FF00H Port 0 P0 R/W √ √ — 00H<br />
FF01H Port 1 P1 √ √ —<br />
FF02H Port 2 P2 √ √ —<br />
FF08H Port 8 P8 √ √ —<br />
FF09H Port 9 P9 √ √ —<br />
FF20H Port mode register 0 PM0 √ √ — FFH<br />
FF21H Port mode register 1 PM1 √ √ —<br />
FF22H Port mode register 2 PM2 √ √ —<br />
FF32H Pull-up register option register B2 PUB2 √ √ — 00H<br />
FF42H Watchdog time clock select register WDCS — √ —<br />
FF4AH Watch time mode control register WTM √ √ —<br />
FF50H 8-bit compare register 80 CR80 W — √ — Undefined<br />
FF51H 8-bit timer counter 80 TM80 R — √ — 00H<br />
FF53H 8-bit timer mode control register 80 TMC80 R/W √ √ —<br />
FF54H 8-bit compare register 81 CR81 W — √ — Undefined<br />
FF55H 8-bit timer counter 81 TM81 R — √ — 00H<br />
FF57H 8-bit timer mode control register 81 TMC81 R/W √ √ —<br />
FF58H Remote control timer control register 50 TMC50 √ √ —<br />
FF5AH Remote control timer capture register 50 CP50 R — √ —<br />
FF5BH Remote control timer capture register 51 CP51 — √ —<br />
FF72H Serial operation mode register 11 CSIM10 R/W √ √ —<br />
FF74H Transmit/receive shift register 10 SIO10 — √ — Undefined<br />
FFA0H Display mode register 0 DSPM0 √ √ — 10H<br />
FFA1H Display mode register 1 DSPM1 √ √ — 01H<br />
FFA2H Display mode register 2 DSPM2 √ √ — 00H<br />
FFE0H Interrupt request flag register 0 IF0 √ √ —<br />
FFE1H Interrupt request flag register 1 IF1 √ √ —<br />
FFE4H Interrupt mask flag register 0 MK0 √ √ — FFH<br />
FFE5H Interrupt mask flag register 1 MK1 √ √ —<br />
FFECH External interrupt mode register 0 INTM0 — √ — 00H<br />
FFF0H Suboscillation mode register SCKM √ √ —<br />
FFF2H Subclock control register CSS √ √ —<br />
FFF7H Pull-up register option register 0 PU0 √ √ —<br />
FFF9H Watchdog timer mode register WDTM √ √ —<br />
FFFAH Oscillation stabilization timer select register OSTS — √ — 04H<br />
FFFBH Processor clock control register PCC √ √ — 02H
3.3 Instruction Address Addressing<br />
CHAPTER 3 CPU ARCHITECTURE<br />
An instruction address is determined by the program counter (PC) contents. The PC contents are normally<br />
incremented (+1 for each byte) automatically according to the number of bytes of an instruction to be fetched each<br />
time another instruction is executed. When a branch instruction is executed, the branch destination information is<br />
set to the PC and branched by the following addressing (For details of each instruction, refer to 78K/0S Series User’s<br />
Manual Instruction (U11047E)).<br />
3.3.1 Relative addressing<br />
[Function]<br />
The value obtained by adding 8-bit immediate data (displacement value: jdisp8) of an instruction code to the<br />
start address of the following instruction is transferred to the program counter (PC) and branched. The<br />
displacement value is treated as signed two’s complement data (–128 to +127) and bit 7 becomes a sign bit.<br />
In other words, the range of branch in relative addressing is between –128 and +127 of the start address of<br />
the following instruction.<br />
This function is carried out when the “BR $addr16” instruction or a conditional branch instruction is executed.<br />
[Illustration]<br />
PC<br />
15 0<br />
PC<br />
15 8 7 6<br />
0<br />
α<br />
+<br />
15 0<br />
When S = 0, α indicates all bits “0”.<br />
When S = 1, α indicates all bits “1”.<br />
S<br />
jdisp8<br />
... PC is the start address of<br />
the next instruction of<br />
a BR instruction.<br />
Preliminary User’s Manual U14938EJ1V0UM 45
3.3.2 Immediate addressing<br />
46<br />
CHAPTER 3 CPU ARCHITECTURE<br />
[Function]<br />
Immediate data in the instruction word is transferred to the program counter (PC) and branched.<br />
This function is carried out when the “CALL !addr16 and BR !addr16” instructions are executed.<br />
CALL !addr16 and BR !addr16 instructions can branch to all the memory spaces.<br />
[Illustration]<br />
In case of CALL !addr16, BR !addr16 instruction<br />
PC<br />
7 0<br />
CALL or BR<br />
Low Addr.<br />
High Addr.<br />
15 8 7<br />
0<br />
Preliminary User’s Manual U14938EJ1V0UM
3.3.3 Table indirect addressing<br />
CHAPTER 3 CPU ARCHITECTURE<br />
[Function]<br />
Table contents (branch destination address) of the particular location to be addressed by the lower 5-bit<br />
immediate data of an instruction code from bit 1 to bit 5 are transferred to the program counter (PC) and<br />
branched.<br />
Table indirect addressing is carried out when the CALLT [addr5] instruction is executed. This instruction can<br />
refer to the address stored in the memory table 40H to 7FH and branch to all the memory spaces.<br />
[Illustration]<br />
3.3.4 Register addressing<br />
[Function]<br />
Register pair (AX) contents to be specified with an instruction word are transferred to the program counter (PC)<br />
and branched.<br />
This function is carried out when the “BR AX” instruction is executed.<br />
[Illustration]<br />
Instruction code<br />
Effective address + 1<br />
PC<br />
15 8 7 6 5 1 0<br />
Effective address 0 0 0 0 0 0 0 0 0 1<br />
rp<br />
PC<br />
7 6 5 1 0<br />
1 1<br />
ta4–0<br />
7 Memory (Table) 0<br />
Low Addr.<br />
High Addr.<br />
1<br />
15 8 7<br />
0<br />
7 0 7<br />
0<br />
A X<br />
15 8 7<br />
0<br />
Preliminary User’s Manual U14938EJ1V0UM 47<br />
0
3.4 Operand Address Addressing<br />
48<br />
CHAPTER 3 CPU ARCHITECTURE<br />
The following various methods are available to specify the register and memory (addressing) which undergo<br />
manipulation during instruction execution.<br />
3.4.1 Direct addressing<br />
[Function]<br />
The memory indicated by immediate data in an instruction word is directly addressed.<br />
[Operand format]<br />
Identifier Description<br />
addr16 Label or 16-bit immediate data<br />
[Description example]<br />
MOV A, !FE00H; When setting !addr16 to FE00H<br />
[Illustration]<br />
Instruction code 0 0 1 0 1 0 0 1 OP code<br />
7 0<br />
OP code<br />
addr16 (low)<br />
addr16 (high)<br />
0 0 0 0 0 0 0 0 00H<br />
1 1 1 1 1 1 1 0 FEH<br />
Memory<br />
Preliminary User’s Manual U14938EJ1V0UM
3.4.2 Short direct addressing<br />
CHAPTER 3 CPU ARCHITECTURE<br />
[Function]<br />
The memory to be manipulated in the fixed space is directly addressed with 8-bit data in an instruction word.<br />
The fixed space where this addressing is applied to is the 256-byte space FE20H to FF1FH. An internal highspeed<br />
RAM and a special function register (SFR) are mapped at FE20H to FEFFH and FF00H to FF1FH,<br />
respectively.<br />
The SFR area (FF00H to FF1FH) where short direct addressing is applied is a part of all SFR areas. In this<br />
area, ports which are frequently accessed in a program and a compare register of the timer/event counter are<br />
mapped, and these SFRs can be manipulated with a small number of bytes and clocks.<br />
When 8-bit immediate data is at 20H to FFH, bit 8 of an effective address is set to 0. When it is at 00H to<br />
1FH, bit 8 is set to 1. Refer to [Illustration].<br />
[Operand format]<br />
Identifier Description<br />
saddr Label or FE20H to FF1FH immediate data<br />
saddrp Label or FE20H to FF1FH immediate data (even address only)<br />
[Description example]<br />
MOV FE90H, #50H; When setting saddr to FE90H and the immediate data to 50H<br />
[Illustration]<br />
Effective<br />
address<br />
7<br />
Instruction code 1 1 1 1 0 1 0 1 OP code<br />
OP code<br />
saddr-offset<br />
1 0 0 1 0 0 0 0 90H (saddr-offset)<br />
0 1 0 1 0 0 0 0 50H (immediate data)<br />
15 8<br />
0<br />
1 1 1 1 1 1 1<br />
When 8-bit immediate data is 20H to FFH, α = 0.<br />
When 8-bit immediate data is 00H to 1FH, α<br />
= 1.<br />
0<br />
α<br />
Short direct memory<br />
Preliminary User’s Manual U14938EJ1V0UM 49
3.4.3 Special function register (SFR) addressing<br />
50<br />
CHAPTER 3 CPU ARCHITECTURE<br />
[Function]<br />
Memory-mapped special function registers (SFRs) are addressed with 8-bit immediate data in an instruction<br />
word.<br />
This addressing is applied to the 240-byte spaces FF00H to FFCFH and FFE0H to FFFFH. However, SFRs<br />
mapped at FF00H to FF1FH can be accessed with short direct addressing.<br />
[Operand format]<br />
Identifier Description<br />
sfr Special function register name<br />
[Description example]<br />
MOV PM0, A; When selecting PM0 for sfr<br />
[Illustration]<br />
Effective<br />
address<br />
7<br />
OP code<br />
sfr-offset<br />
Instruction code 1 1 1 0 0 1 1 1<br />
0 0 1 0 0 0 0 0<br />
15 8 7<br />
0<br />
1 1 1 1 1 1 1<br />
0<br />
1<br />
Preliminary User’s Manual U14938EJ1V0UM<br />
SFR
3.4.4 Register addressing<br />
CHAPTER 3 CPU ARCHITECTURE<br />
[Function]<br />
General-purpose registers are accessed as operands. The general-purpose register to be accessed is<br />
specified with the register specify code and functional name in the instruction code.<br />
Register addressing is carried out when an instruction with the following operand format is executed. When<br />
an 8-bit register is specified, one of the eight registers is specified with 3 bits in the instruction code.<br />
[Operand format]<br />
Identifier Description<br />
r X, A, C, B, E, D, L, H<br />
rp AX, BC, DE, HL<br />
‘r’ and ‘rp’ can be described with absolute names (R0 to R7 and RP0 to RP3) as well as function names (X,<br />
A, C, B, E, D, L, H, AX, BC, DE, and HL).<br />
[Description example]<br />
MOV A, C; When selecting the C register for r<br />
Instruction code 0 0 0 0 1 0 1 0<br />
0 0 1 0 0 1 0 1<br />
INCW DE; When selecting the DE register pair for rp<br />
Instruction code 1 0 0 0 1 0 0 0<br />
Register specify code<br />
Register specify code<br />
Preliminary User’s Manual U14938EJ1V0UM 51
3.4.5 Register indirect addressing<br />
52<br />
CHAPTER 3 CPU ARCHITECTURE<br />
[Function]<br />
The memory is addressed with the contents of the register pair specified as an operand. The register pair<br />
to be accessed is specified with the register pair specify code in the instruction code. This addressing can<br />
be carried out for all the memory spaces.<br />
[Operand format]<br />
Identifier Description<br />
— [DE], [HL]<br />
[Description example]<br />
MOV A, [DE]; When selecting register pair [DE]<br />
[Illustration]<br />
DE<br />
Instruction code 0 0 1 0 1 0 1 1<br />
15 8 7<br />
0<br />
The contents of addressed<br />
memory are transferred<br />
A<br />
D<br />
7 0<br />
7<br />
Preliminary User’s Manual U14938EJ1V0UM<br />
E<br />
0<br />
Memory address specified<br />
by register pair DE
3.4.6 Based addressing<br />
CHAPTER 3 CPU ARCHITECTURE<br />
[Function]<br />
8-bit immediate data is added to the contents of the base register, that is, the HL register pair, and the sum<br />
is used to address the memory. Addition is performed by expanding the offset data as a positive number to<br />
16 bits. A carry from the 16th bit is ignored. This addressing can be carried out for all the memory spaces.<br />
[Operand format]<br />
Identifier Description<br />
— [HL+byte]<br />
[Description example]<br />
MOV A, [HL+10H]; When setting byte to 10H<br />
3.4.7 Stack addressing<br />
Instruction code 0 0 1 0 1 1 0 1<br />
0 0 0 1 0 0 0 0<br />
[Function]<br />
The stack area is indirectly addressed with the stack pointer (SP) contents.<br />
This addressing method is automatically employed when the PUSH, POP, subroutine call, and RETURN<br />
instructions are executed or the register is saved/reset upon generation of an interrupt request.<br />
Stack addressing enables to address the internal high-speed RAM area only.<br />
[Description example]<br />
In the case of PUSH DE<br />
Instruction code 1 0 1 0 1 0 1 0<br />
Preliminary User’s Manual U14938EJ1V0UM 53
4.1 Functions of Ports<br />
54<br />
CHAPTER 4 PORT FUNCTIONS<br />
The µPD789871 <strong>Subseries</strong> provides the ports shown in Figure 4-1, enabling various methods of control.<br />
Numerous other functions are provided that can be used in addition to the digital I/O port function. For more<br />
information on these additional functions, refer to CHAPTER 2 PIN FUNCTIONS.<br />
Port 8<br />
Port 9<br />
P80<br />
P87<br />
P90<br />
P97<br />
Figure 4-1. Port Types<br />
P00<br />
P07<br />
P10<br />
P12<br />
P20<br />
P25<br />
Preliminary User’s Manual U14938EJ1V0UM<br />
Port 0<br />
Port 1<br />
Port 2
CHAPTER 4 PORT FUNCTIONS<br />
Table 4-1. Port Functions<br />
Pin Name I/O Function After Reset Alternate Function<br />
P00 to P07 I/O Port 0.<br />
8-bit I/O port.<br />
Input/output can be specified in 1-bit units.<br />
When used as an input port, an on-chip pull-up<br />
resistor can be specified by means of pull-up resistor<br />
option register 0 (PU0).<br />
Input —<br />
P10 to P12 I/O Port 1.<br />
3-bit I/O port.<br />
Input/output can be specified in 1-bit units.<br />
When used as an input port, an on-chip pull-up<br />
resistor can be specified by means of pull-up resistor<br />
option register 0 (PU0).<br />
Input —<br />
P20 I/O Port 2.<br />
Input SCK10<br />
P21 6-bit I/O port.<br />
SO10<br />
P22<br />
Input/output can be specified in 1-bit units.<br />
When used as an input port, an on-chip pull-up<br />
SI10<br />
P23 resistor can be specified by means of pull-up resistor<br />
INTP0<br />
P24 option register B2 (PUB2).<br />
INTP1<br />
P25 TI<br />
P80 to P87 I/O Port 8.<br />
P-ch open-drain 8-bit high-tolerance I/O port.<br />
For mask ROM versions, use of a pull-down resistor<br />
for VLOAD can be specified in 1-bit units by a mask<br />
option (when used as a general-purpose I/O port, the<br />
pull-down resistor is connected to VSS0).<br />
Output FIP24 to FIP17<br />
P90 to P97 Output Port 9<br />
P-ch open-drain 8-bit high-tolerance output port.<br />
Mask ROM versions include an on-chip pull-down<br />
resistor (connected to VLOAD).<br />
Output FIP16 to FIP9<br />
Preliminary User’s Manual U14938EJ1V0UM 55
4.2 Port Configuration<br />
56<br />
A port consists of the following hardware.<br />
CHAPTER 4 PORT FUNCTIONS<br />
Table 4-2. Configuration of Port<br />
Parameter Configuration<br />
Control register Port mode register (PMm: m = 0 to 2)<br />
Pull-up resistor option register 0 (PU0)<br />
Pull-up option register B2 (PUB2)<br />
Port Total: 33<br />
CMOS I/O: 17<br />
P-ch open-drain I/O: 8<br />
P-ch open-drain output: 8<br />
Pull-up resistor 17 (software control)<br />
Pull-down resistor • Mask ROM versions: 16 (8 of these can be specified by the mask option)<br />
• Flash memory versions: None<br />
4.2.1 Port 0<br />
This is a 8-bit I/O port with output latches. Port 0 can be specified as input or output mode in 1-bit units by using<br />
port mode register 0 (PM0). When pins P00 to P07 are used as input port pins, on-chip pull-up resistors can be<br />
connected in 8-bit units by using pull-up resistor option register 0 (PU0).<br />
RESET input sets port 0 to input mode.<br />
Figure 4-2 shows the block diagram of port 0.<br />
Internal bus<br />
WRPU0<br />
RD<br />
WRPORT<br />
WRPM<br />
PU0: Pull-up resistor option register 0<br />
PM: Port mode register<br />
RD: Port 0 read signal<br />
WR: Port 0 write signal<br />
Figure 4-2. Block Diagram of P00 to P07<br />
PU00<br />
Output latch<br />
(P00 to P07)<br />
PM00 to PM07<br />
Selector<br />
Preliminary User’s Manual U14938EJ1V0UM<br />
VDD0<br />
P-ch<br />
P00 to P07
CHAPTER 4 PORT FUNCTIONS<br />
4.2.2 Port 1<br />
This is a 3-bit I/O port with output latches. Port 1 can be specified as input or output mode in 1-bit units by using<br />
port mode register 1 (PM1). When pins P10 to P12 are used as input port pins, on-chip pull-up resistors can be<br />
connected in 3-bit units by using pull-up resistor option register 0 (PU0).<br />
RESET input sets port 1 to input mode.<br />
Figure 4-3 shows the block diagram of port 1.<br />
Internal bus<br />
WRPU0<br />
RD<br />
WRPORT<br />
WRPM<br />
PU0: Pull-up resistor option register 0<br />
PM: Port mode register<br />
RD: Port 1 read signal<br />
WR: Port 1 write signal<br />
Figure 4-3. Block Diagram of P10 to P12<br />
PU01<br />
Output latch<br />
(P10 to P12)<br />
PM10 to PM12<br />
Selector<br />
Preliminary User’s Manual U14938EJ1V0UM 57<br />
VDD0<br />
P-ch<br />
P10 to P12
58<br />
CHAPTER 4 PORT FUNCTIONS<br />
4.2.3 Port 2<br />
This is a 6-bit I/O port with output latches. Port 2 can be specified as input or output mode in 1-bit units by using<br />
port mode register 2 (PM2). Use of on-chip pull-up resistors can be specified for pins P20 to P25 in 1-bit units by<br />
using pull-up resistor option register B2 (PUB2).<br />
The port is also used as a serial interface I/O, remote control timer input, and external interrupt input.<br />
RESET input sets port 2 to input mode.<br />
Figures 4-4 to 4-6 show block diagrams of port 2.<br />
Caution When using the pins of port 2 as the serial interface, the I/O or output latch must be set according<br />
to the function to be used. For how to set the latches, see Table 10-2 Serial Interface 10 Operating<br />
Mode Settings.<br />
Internal bus<br />
WRPUB2<br />
RD<br />
WRPORT<br />
WRPM<br />
PUB20<br />
Alternate<br />
function<br />
Output latch<br />
(P20)<br />
PM20<br />
Alternate<br />
function<br />
PUB2: Pull-up resistor option register B2<br />
PM: Port mode register<br />
RD: Port 2 read signal<br />
WR: Port 2 write signal<br />
Figure 4-4. Block Diagram of P20<br />
Selector<br />
Preliminary User’s Manual U14938EJ1V0UM<br />
VDD0<br />
P-ch<br />
P20/SCK10
Internal bus<br />
WRPUB2<br />
RD<br />
WRPORT<br />
WRPM<br />
PUB21<br />
Output latch<br />
(P21)<br />
PM21<br />
Alternate<br />
function<br />
PUB2: Pull-up resistor option register B2<br />
PM: Port mode register<br />
RD: Port 2 read signal<br />
WR: Port 2 write signal<br />
CHAPTER 4 PORT FUNCTIONS<br />
Figure 4-5. Block Diagram of P21<br />
Selector<br />
P21/SO10<br />
Preliminary User’s Manual U14938EJ1V0UM 59<br />
VDD0<br />
P-ch
60<br />
Internal bus<br />
WRPUB2<br />
RD<br />
WRPORT<br />
WRPM<br />
PUB22 to PUB25<br />
Alternate<br />
function<br />
Output latch<br />
(P22 to P25)<br />
PM22 to PM25<br />
PUB2: Pull-up resistor option register B2<br />
PM: Port mode register<br />
RD: Port 2 read signal<br />
WR: Port 2 write signal<br />
CHAPTER 4 PORT FUNCTIONS<br />
Figure 4-6. Block Diagram of P22 to P25<br />
Selector<br />
Preliminary User’s Manual U14938EJ1V0UM<br />
VDD0<br />
P-ch<br />
P22/SI10,<br />
P23/INTP0,<br />
P24/INTP1,<br />
P25/TI
CHAPTER 4 PORT FUNCTIONS<br />
4.2.4 Port 8<br />
This is an 8-bit P-ch open-drain I/O port with output latches. For mask ROM versions, use of a pull-down resistor<br />
for VLOAD can be specified by a mask option.<br />
RESET input sets port 8 to input mode.<br />
Figures 4-7 and 4-8 show block diagrams of port 8.<br />
Internal bus<br />
Internal bus<br />
WRPORT<br />
RDPORT<br />
PM: Port mode register<br />
RD: Port 8 read signal<br />
WR: Port 8 write signal<br />
WRPORT<br />
RDPORT<br />
PM: Port mode register<br />
RD: Port 8 read signal<br />
WR: Port 8 write signal<br />
Figure 4-7. Block Diagram of P80 to P87 (µPD789870, 789871)<br />
Output latch<br />
(P80 to P87)<br />
Alternate<br />
function<br />
Output latch<br />
(P80 to P87)<br />
Alternate<br />
function<br />
Mask option<br />
switch<br />
Figure 4-8. Block Diagram of P80 to P87 (µPD78F9872)<br />
P-ch<br />
P80/FIP24 to<br />
P87/FIP17<br />
Preliminary User’s Manual U14938EJ1V0UM 61<br />
VDD1<br />
VDD1<br />
P-ch<br />
P-ch<br />
VLOAD<br />
P80/FIP24 to<br />
P87/FIP17
62<br />
CHAPTER 4 PORT FUNCTIONS<br />
4.2.5 Port 9<br />
This is an 8-bit P-ch open-drain output port. Mask ROM versions include an on-chip pull-down resistor (connected<br />
to VLOAD).<br />
Internal bus<br />
Internal bus<br />
RESET input sets port 9 to output mode.<br />
Figures 4-9 and 4-10 show block diagrams of port 9.<br />
WRPORT<br />
RDPORT<br />
WRPORT<br />
RDPORT<br />
Figure 4-9. Block Diagram of P90 to P97 (µPD789870, 789871)<br />
Output latch<br />
(P90 to P97)<br />
Alternate<br />
function<br />
Output latch<br />
(P90 to P97)<br />
Alternate<br />
function<br />
Figure 4-10. Block Diagram of P90 to P97 (µPD78F9872)<br />
Preliminary User’s Manual U14938EJ1V0UM<br />
VDD1<br />
VDD1<br />
P-ch<br />
P-ch<br />
P90/FIP16 to<br />
P97/FIP9<br />
VLOAD<br />
P90/FIP16 to<br />
P97/FIP9
4.3 Port Function Control Registers<br />
CHAPTER 4 PORT FUNCTIONS<br />
The following three types of registers control the ports.<br />
• Port mode registers (PM0 to PM2)<br />
• Pull-up resistor option register 0 (PU0)<br />
• Pull-up resistor option register B2 (PUB2)<br />
(1) Port mode registers (PM0 to PM2)<br />
These registers are used to set port input/output in 1-bit units.<br />
Port mode registers are independently set with a 1-bit or 8-bit memory manipulation instruction.<br />
RESET input sets these registers to FFH.<br />
When port pins are used as alternate-function pins, set the port mode register and output latch according to<br />
Table 4-3.<br />
Caution As port 2 has an alternate function as external interrupt input, when the port function output<br />
mode is specified and the output level is changed, the interrupt request flag is set. When<br />
the output mode is used, therefore, the interrupt mask flag should be set to 1 beforehand.<br />
Table 4-3. Port Mode Register and Output Latch Settings When Using Alternate Functions<br />
Pin Name Alternate Function PM×× P××<br />
Name Input/Output<br />
P23 INTP0 Input 1 ×<br />
P24 INTP1 Input 1 ×<br />
P25 TI Input 1 ×<br />
Caution When Port 2 is used for serial interface pin, the I/O latch or output latch must be set according<br />
to its function. For the setting method, refer to Table 10-2 Serial Interface 10 Operating Mode<br />
Settings.<br />
Remark ×: don’t care<br />
PM××: Port mode register<br />
P××: Port output latch<br />
Preliminary User’s Manual U14938EJ1V0UM 63
64<br />
CHAPTER 4 PORT FUNCTIONS<br />
Figure 4-11. Port Mode Register Format<br />
Symbol 7 6 5 4 3 2 1 0 Address After reset R/W<br />
PM0<br />
PM1<br />
PM2<br />
PM07<br />
1<br />
1<br />
PMmn<br />
0 Output mode (output buffer ON)<br />
1<br />
(2) Pull-up resistor option register 0 (PU0)<br />
Pull-up resistor option register (PU0) sets whether to use an on-chip pull-up resistor at each port or not.<br />
At a port where use of on-chip pull-up resistors has been specified by PU0, a pull-up resistor can be internally<br />
used only for the bits set in input mode. On-chip pull-up resistors cannot be used for the bits set in output<br />
mode, regardless of setting of PU0, or when the pins are used as alternate-function output pins.<br />
PU0 is set with a 1-bit or 8-bit memory manipulation instruction.<br />
RESET input clears PU0 to 00H.<br />
Figure 4-12. Pull-Up Resistor Option Register 0 Format<br />
Symbol 7 6 5 4 3 2 Address After reset R/W<br />
PU0 0 0 0 0 0 0 PU01 PU00 FFF7H 00H R/W<br />
PU0m<br />
0<br />
1<br />
On-chip pull-up resistor not used<br />
On-chip pull-up resistor used<br />
Pm on-chip pull-up resistor selection (m = 0, 1)<br />
(3) Pull-up resistor option register B2 (PUB2)<br />
Pull-up register option register B2 (PUB2) sets whether to use an on-chip resistor at each pin of port 2. At<br />
a pin for which use of on-chip pull-up resistors has been specified by PUB2, a pull-up resistor can be internally<br />
used only for the bits set in input mode. On-chip pull-up resistors cannot be used for the bits set in output<br />
mode, regardless of the setting of PUB2, or when the pins are used as alternate-function output pins.<br />
PUB2 is set with a 1-bit or 8-bit manipulation instruction.<br />
RESET input clears PUB2 to 00H.<br />
PUB2n<br />
0<br />
1<br />
PM06<br />
1<br />
1<br />
PM05<br />
1<br />
PM25<br />
PM04<br />
Input mode (output buffer OFF)<br />
Figure 4-13. Pull-Up Resistor Option Register B2 Format<br />
Symbol 7 6 Address After reset R/W<br />
PUB2 0 0 PUB25 PUB24 PUB23 PUB22 PUB21 PUB20 FF32H 00H R/W<br />
On-chip pull-up resistor not used<br />
On-chip pull-up resistor used<br />
1<br />
PM24<br />
PM03<br />
1<br />
PM23<br />
PM02<br />
PM12<br />
PM22<br />
PM01<br />
PM11<br />
PM00<br />
PM10<br />
PM21 PM20<br />
FF20H<br />
FF21H<br />
FF22H<br />
P2n on-chip pull-up resistor selection (n = 0 to 5)<br />
Preliminary User’s Manual U14938EJ1V0UM<br />
FFH<br />
FFH<br />
FFH<br />
Pmn pin I/O mode selection (m = 0 to 2, n = 0 to 7)<br />
R/W<br />
R/W<br />
R/W
4.4 Operation of Port Functions<br />
CHAPTER 4 PORT FUNCTIONS<br />
The operation of a port differs depending on whether the port is set in input or output mode, as described below.<br />
4.4.1 Writing to I/O port<br />
(1) In output mode<br />
A value can be written to the output latch of a port by using a transfer instruction. The contents of the output<br />
latch can be output from the pins of the port.<br />
The data once written to the output latch is retained until new data is written to the output latch.<br />
(2) In input mode<br />
A value can be written to the output latch by using a transfer instruction. However, the status of the port pin<br />
is not changed because the output buffer is OFF.<br />
The data once written to the output latch is retained until new data is written to the output latch.<br />
Caution A 1-bit memory manipulation instruction is executed to manipulate 1 bit of a port. However,<br />
this instruction accesses the port in 8-bit units. When this instruction is executed to<br />
manipulate a bit of an input/output port, therefore, the contents of the output latch of the pin<br />
that is set in the input mode and not subject to manipulation become undefined.<br />
4.4.2 Reading from I/O port<br />
(1) In output mode<br />
The contents of the output latch can be read by using a transfer instruction. The contents of the output latch<br />
are not changed.<br />
(2) In input mode<br />
The status of a pin can be read by using a transfer instruction. The contents of the output latch are not changed.<br />
4.4.3 Arithmetic operation of I/O port<br />
(1) In output mode<br />
An arithmetic operation can be performed with the contents of the output latch. The result of the operation<br />
is written to the output latch. The contents of the output latch are output from the port pins.<br />
The data once written to the output latch is retained until new data is written to the output latch.<br />
(2) In input mode<br />
The contents of the output latch become undefined. However, the status of the pin is not changed because<br />
the output buffer is OFF.<br />
Caution A 1-bit memory manipulation instruction is executed to manipulate 1 bit of a port. However,<br />
this instruction accesses the port in 8-bit units. When this instruction is executed to<br />
manipulate a bit of an input/output port, therefore, the contents of the output latch of the pin<br />
that is set in the input mode and not subject to manipulation become undefined.<br />
Preliminary User’s Manual U14938EJ1V0UM 65
5.1 Clock Generator Functions<br />
66<br />
CHAPTER 5 CLOCK GENERATOR<br />
The clock generator generates the clock to be supplied to the CPU and peripheral hardware.<br />
The following two types of system clock oscillators are used.<br />
• Main system clock (ceramic/crystal) oscillator<br />
This circuit oscillates at 1.0 to 5.0 MHz. Oscillation can be stopped by executing the STOP instruction or setting<br />
the processor clock control register (PCC).<br />
• Subsystem clock oscillator<br />
This circuit oscillates at 32.768 kHz. Oscillation can be stopped by the suboscillation mode register (SCKM).<br />
5.2 Clock Generator Configuration<br />
The clock generator includes the following hardware.<br />
Table 5-1. Configuration of Clock Generator<br />
Item Configuration<br />
Control registers Processor clock control register (PCC)<br />
Suboscillation mode register (SCKM)<br />
Subclock control register (CSS)<br />
Oscillators Main system clock oscillator<br />
Subsystem clock oscillator<br />
Preliminary User’s Manual U14938EJ1V0UM
XT1<br />
XT2<br />
X1<br />
X2<br />
Internal bus<br />
FRC SCC<br />
Subsystem<br />
clock<br />
oscillator<br />
Main system<br />
clock<br />
oscillator<br />
STOP<br />
fXT<br />
CHAPTER 5 CLOCK GENERATOR<br />
Figure 5-1. Block Diagram of Clock Generator<br />
Suboscillation mode register<br />
(SCKM)<br />
fX<br />
Prescaler<br />
fX<br />
2 2<br />
Processor<br />
control register<br />
(PCC)<br />
1/2<br />
fXT<br />
2<br />
Selector<br />
MCC PCC1 CLS CSS0<br />
Internal bus<br />
Prescaler<br />
Standby<br />
controller<br />
Subclock control<br />
register (CSS)<br />
Wait<br />
controller<br />
Watch timer<br />
Clock to<br />
peripheral<br />
hardware<br />
CPU clock<br />
(fCPU)<br />
Preliminary User’s Manual U14938EJ1V0UM 67
5.3 Register Controlling Clock Generator<br />
68<br />
CHAPTER 5 CLOCK GENERATOR<br />
The clock generator is controlled by the following registers.<br />
• Processor clock control register (PCC)<br />
• Suboscillation mode register (SCKM)<br />
• Subclock control register (CSS)<br />
(1) Processor clock control register (PCC)<br />
PCC sets the CPU clock selection and the division ratio.<br />
PCC is set with a 1-bit or 8-bit memory manipulation instruction.<br />
RESET input sets the PCC to 02H.<br />
Figure 5-2. Processor Clock Control Register Format<br />
Symbol 7 6 5 4 3 2 1 0 Address After reset R/W<br />
PCC<br />
MCC 0 0 0 0 0 PCC1 0<br />
MCC<br />
0<br />
1<br />
CSS0<br />
0<br />
0<br />
1<br />
1<br />
Operation enabled<br />
Operation stopped<br />
PCC1<br />
0<br />
1<br />
0<br />
1<br />
fX (0.2 µ s)<br />
fX/22 (0.8 µ<br />
s)<br />
fXT/2 (61 µ s)<br />
Note The CPU clock is selected according to a combination of the PCC1 flag in the processor clock control<br />
register (PCC and the CSS0 flag in the subclock control register (CSS) (refer to 5.3 (3) subclock<br />
control register (CSS)).<br />
Cautions 1. <strong>Bit</strong> 0 and 2 to 6 must be set to 0.<br />
2. The MCC can be set only when the subsystem clock has been selected as the CPU clock.<br />
Remarks 1. fX: Main system clock oscillation frequency<br />
2. fXT: Subsystem clock oscillation frequency<br />
3. The parenthesized values apply to operation at fX = 5.0 MHz or fXT = 32.768 kHz.<br />
4. Minimum instruction execution time: 2fCPU<br />
• fCPU = 0.2 µs: 0.4 µs<br />
• fCPU = 0.8 µs: 1.6 µs<br />
• fCPU = 61 µs: 122 µs<br />
Control of main system clock oscillator operation<br />
Preliminary User’s Manual U14938EJ1V0UM<br />
FFFBH 02H R/W<br />
CPU clock (fCPU) selection Note
CHAPTER 5 CLOCK GENERATOR<br />
(2) Suboscillation mode register (SCKM)<br />
SCKM selects a the feedback resistor for the subsystem clock, and controls the oscillation of the clock.<br />
SCKM is set with a 1-bit or 8-bit memory manipulation instruction.<br />
RESET input clears SCKM to 00H.<br />
Caution <strong>Bit</strong> 2 to 7 must be set to 0.<br />
Figure 5-3. Suboscillation Mode Register Format<br />
Symbol 7 6 5 4 3 2 1 0 Address After reset R/W<br />
SCKM<br />
(3) Subclock control register (CSS)<br />
CSS specifies whether the main system or subsystem clock oscillator is to be selected. It also specifies the<br />
CPU clock operation status.<br />
CSS is set with a 1-bit or 8-bit memory manipulation instruction.<br />
RESET input clears CSS to 00H.<br />
Symbol<br />
CSS<br />
0 0 0 0 0 0 FRC SCC<br />
FRC<br />
0<br />
1<br />
SCC<br />
0<br />
1<br />
On-chip feedback resistor used<br />
On-chip feedback resistor not used<br />
Operation enabled<br />
Operation stopped<br />
Note <strong>Bit</strong> 5 read only.<br />
Figure 5-4. Subclock Control Register Format<br />
7 6 5 4 3 2 1 0<br />
0 0 CLS CSS0 0 0 0 0<br />
CLS<br />
0<br />
1<br />
CSS0<br />
0<br />
1<br />
Caution <strong>Bit</strong>s 0 to 3, 6, and 7 must be set to 0.<br />
Feedback resistor selection<br />
FFF0H 00H R/W<br />
Control of subsystem clock oscillator operation<br />
CPU clock operation status<br />
Operation based on the divided main system clock output<br />
Operation based on the subsystem clock output<br />
Address After reset R/W<br />
FFF2H 00H R/W<br />
Selection of the main system or subsystem clock oscillator<br />
Divided output from the main system clock oscillator<br />
Output from the subsystem clock oscillator<br />
Preliminary User’s Manual U14938EJ1V0UM 69<br />
Note
5.4 System Clock Oscillators<br />
70<br />
CHAPTER 5 CLOCK GENERATOR<br />
5.4.1 Main system clock oscillator<br />
The main system clock oscillator is oscillated by the crystal or ceramic resonator (5.0 MHz TYP.) connected across<br />
the X1 and X2 pins.<br />
Figure 5-5 shows the external circuit of the main system clock oscillator.<br />
Figure 5-5. External Circuit of Main System Clock Oscillator<br />
Crystal<br />
or<br />
ceramic resonator<br />
5.4.2 Subsystem clock oscillator<br />
The subsystem clock oscillator by the crystal resonator (32.768 kHz TYP.) connected across the XT1 and XT2<br />
pins.<br />
Figure 5-6 shows the external circuit of the subsystem clock oscillator.<br />
Figure 5-6. External Circuit of Subsystem Clock Oscillator<br />
32.768<br />
kHz<br />
Crystal resonator<br />
Caution When using the main system or subsystem clock oscillator, wire as follows in the area enclosed<br />
by the broken lines in Figures 5-5 and 5-6 to avoid an adverse effect from wiring capacitance.<br />
• Keep the wiring length as short as possible.<br />
• Do not cross the wiring with the other signal lines. Do not route the wiring near a signal<br />
line through which a high fluctuating current flows.<br />
• Always make the ground point of the oscillator capacitor the same potential as VSS0. Do<br />
not ground the capacitor to a ground pattern through which a high current flows.<br />
• Do not fetch signals from the oscillator.<br />
When using the subsystem clock, particular care is required because the subsystem clock oscillator is designed<br />
as a low-amplitude circuit for reducing current consumption.<br />
Figure 5-7 shows examples of incorrect resonator connection.<br />
VSS0<br />
X1<br />
X2<br />
VSS0<br />
XT1<br />
XT2<br />
Preliminary User’s Manual U14938EJ1V0UM
CHAPTER 5 CLOCK GENERATOR<br />
Figure 5-7. Examples of Incorrect Resonator Connection (1/2)<br />
(a) Tool long wiring (b) Crossed signal line<br />
VSS0 X1 X2 VSS0 X1 X2<br />
(c) Wiring near high fluctuating current (d) Current flowing through ground line of oscillator<br />
(potential at points A, B, and C fluctuates)<br />
VSS0 X1 X2<br />
High current<br />
VSS0 X1 X2<br />
PORTn<br />
(n = 0 to 2, 8, 9)<br />
Remark When using the subsystem clock, read X1 and X2 as XT1 and XT2, respectively, and connect a resistor<br />
to the XT2 in series.<br />
Preliminary User’s Manual U14938EJ1V0UM 71<br />
Pmn<br />
A B C<br />
High current<br />
VDD
72<br />
CHAPTER 5 CLOCK GENERATOR<br />
Figure 5-7. Examples of Incorrect Resonator Connection (2/2)<br />
(e) Signal is fetched (f) Parallel and near signal lines of main<br />
system clock and subsystem clock<br />
Remark When using the subsystem clock, read X1 and X2 as XT1 and XT2, respectively, and connect a<br />
resistor to the XT2 in series.<br />
Caution If the X1 wire is in parallel with the XT2 wire, crosstalk noise may occur between the X1 and<br />
XT2, resulting in a malfunction.<br />
To avoid this, do not lay the X1 and XT2 wires in parallel.<br />
5.4.3 Frequency divider<br />
The frequency divider divides the output of the main system clock oscillator (fX) to generate various clocks.<br />
5.4.4 When no subsystem clock is used<br />
If a subsystem clock is not necessary, for example, for low-power consumption operation or clock operation, handle<br />
the XT1 and XT2 pins as follows:<br />
XT1: Connect to VSS0<br />
XT2: Leave open<br />
VSS0 X1 X2 VSS0 X2 X1 XT2 XT1<br />
In this case, however, a small leakage current flows via the on-chip feedback resistor in the subsystem clock<br />
oscillator when the main system clock is stopped. To avoid this, set bit 1 (FRC) of the suboscillation mode register<br />
(SCKM) so that the on-chip feedback resistor will not be used. Also in this case, handle the XT1 and XT2 pins as<br />
stated above.<br />
Preliminary User’s Manual U14938EJ1V0UM<br />
XT2 is wired parallel to X1.
5.5 Clock Generator Operation<br />
CHAPTER 5 CLOCK GENERATOR<br />
The clock generator generates the following clocks and controls the operating modes of the CPU, such as the<br />
standby mode:<br />
• Main System clock fX<br />
• Subsystem clock fXT<br />
• CPU clock fCPU<br />
• Clock to peripheral hardware<br />
The operation and function of the clock generator is determined by the processor clock control register (PCC),<br />
suboscillation mode register (SCKM), and subclock control register (CSS), as follows.<br />
(a) The low-speed mode 2fCPU (1.6 µs : at 5.0 MHz operation) of the main system clock is selected when the<br />
RESET signal is generated (PCC = 02H). While a low level is input to the RESET pin, oscillation of the<br />
main system clock is stopped.<br />
(b) Three types of CPU clocks fCPU (0.2 µs and 0.8 µs: main system clock (at 5.0 MHz operation), 61 µs:<br />
subsystem clock (at 32.768 kHz operation)) can be selected by the PCC, SCKM, and CSS settings.<br />
(c) Two standby modes, STOP and HALT, can be used with the main system clock selected. In a system where<br />
no subsystem clock is used, setting SCKM bit 1 (FRC) so that the on-chip feedback resistor cannot be used<br />
reduces current consumption in STOP mode. In a system where a subsystem clock is used, setting SCKM<br />
bit 0 to 1 can cause the subsystem clock to stop oscillation.<br />
(d) CSS bit 4 (CSS0) can be used to select the subsystem clock so that low current consumption operation<br />
is used (122 µs : at 32.768 kHz operation).<br />
(e) With the subsystem clock selected, it is possible to cause the main system clock to stop oscillating using<br />
bit 7 (MCC) of PCC. The HALT mode can be used, but the STOP mode cannot.<br />
(f) The clock pulse for the peripheral hardware is generated by dividing the frequency of the main system clock,<br />
but the subsystem clock pulse is only supplied to the watch timer. The watch timer can therefore keep<br />
running even during standby. The other hardware stops when the main system clock stops because if runs<br />
based on the main system clock (except for the external input clock operations).<br />
Preliminary User’s Manual U14938EJ1V0UM 73
74<br />
CHAPTER 5 CLOCK GENERATOR<br />
5.6 Changing Setting of System Clock and CPU Clock<br />
5.6.1 Time required for switching between system clock and CPU clock<br />
The CPU clock can be selected by using bit 1 (PCC1) of the processor clock control register (PCC) and bit 4 (CSS0)<br />
of the subclock control register (CSS).<br />
Actually, the specified clock is not selected immediately after the setting of PCC has been changed, and the old<br />
clock is used for the duration of several instructions after that (see Table 5-2).<br />
Table 5-2. Maximum Time Required for Switching CPU Clock<br />
Set Value Before Switching Set Value After Switching<br />
CSS0 PCC1 CSS0 PCC1 CSS0 PCC1 CSS0 PCC1<br />
0 0 0 1 1 ×<br />
0 0 4 clocks 2fX/fXT clocks<br />
(306 clocks)<br />
1 2 clocks fX/2fXT clocks<br />
(76 clocks)<br />
1 × 2 clocks 2 clocks<br />
Remarks 1. Two clocks are the minimum instruction execution time of the CPU clock before switching.<br />
2. The parenthesized values apply to operation at fX = 5.0 MHz or fXT = 32.768 kHz.<br />
3. ×: don't care<br />
Preliminary User’s Manual U14938EJ1V0UM
CHAPTER 5 CLOCK GENERATOR<br />
5.6.2 Switching between system clock and CPU clock<br />
The following figure illustrates how the CPU clock and system clock switch.<br />
VDD<br />
RESET<br />
Interrupt request signal<br />
System clock<br />
CPU clock<br />
Figure 5-8. Switching Between System Clock and CPU Clock<br />
fX fX fXT fX<br />
Low-speed<br />
operation<br />
High-speed<br />
operation<br />
Wait (6.55 ms: 5.0 MHz operation)<br />
Internal reset operation<br />
Subsystem clock<br />
operation<br />
High-speed operation<br />
The CPU is reset when the RESET pin is made low on power application. The reset state is released when<br />
the RESET pin is made high, and the main system clock starts oscillating. At this time, the oscillation<br />
stabilization time (215 /fX) is automatically secured.<br />
After that, the CPU starts instruction execution at the low speed of the main system clock (1.6 µs: at 5.0 MHz<br />
operation).<br />
After the time required for the VDD voltage to rise to the level at which the CPU can operate at high speed<br />
has elapsed, bit 1 (PCC1) of the processor clock control register (PCC) and bit 4 (CSS0) of the subclock<br />
control register (CSS) are rewritten so that high-speed operation can be selected.<br />
A drop of the VDD voltage is detected with an interrupt request signal. The clock is switched to the subsystem<br />
clock (at this moment, the subsystem clock must be in the oscillation stabilization state).<br />
A recover of the VDD voltage is detected with an interrupt request signal. <strong>Bit</strong> 7 (MCC) of PCC is set to 0,<br />
and then the main system clock starts oscillating. After the time required for the oscillation to stabilize has<br />
elapsed, PCC1 and CSS0 are rewritten so that high-speed operation can be selected again.<br />
Caution When the main system clock is stopped and the device is operating on the subsystem clock,<br />
wait until the oscillation stabilization time has been secured by the program before switching<br />
back to the main system clock.<br />
Preliminary User’s Manual U14938EJ1V0UM 75
6.1 8-<strong>Bit</strong> Remote Control Timer Functions<br />
CHAPTER 6 8-BIT REMOTE CONTROL TIMER<br />
The 8-bit remote control timer has a pulse width measurement function with a resolution of 8 bits.<br />
Pulse width is measured from a difference in count value when the valid edge has been detected while the timer<br />
operates in the free-running mode.<br />
6.2 8-<strong>Bit</strong> Remote Control Timer Configuration<br />
The 8-bit remote control timer consists of the following hardware.<br />
TI/P25<br />
fX/2 6<br />
fX/2 7<br />
fX/2 8<br />
fX/2 9<br />
Selector<br />
Table 6-1. Configuration of 8-<strong>Bit</strong> Remote Control Timer<br />
Item Configuration<br />
Timer counter 8-bit timer (TM50)<br />
Register Remote control timer capture register: × 2 (CP50 and CP51)<br />
Control register Remote control timer control register 50 (TMC50)<br />
Figure 6-1. Block Diagram of 8-<strong>Bit</strong> Remote Control Timer<br />
Noise rejection<br />
Rising edge<br />
detection<br />
Noise rejection<br />
Falling edge<br />
detection<br />
1/2<br />
Internal bus<br />
Remote control timer<br />
capture register 50<br />
(CP50)<br />
8-bit timer counter 50<br />
(TM50)<br />
Remote control timer<br />
capture register 51<br />
(CP51)<br />
Internal bus<br />
Clear<br />
76 Preliminary User’s Manual U14938EJ1V0UM<br />
INTTM50<br />
TCE50 TCL52 TCL51<br />
INTTM52<br />
INTTM51<br />
Remote control timer<br />
control register 50 (TMC50)
CHAPTER 6 8-BIT REMOTE CONTROL TIMER<br />
(1) Remote control timer capture registers (CP50 and CP51)<br />
These 8-bit registers capture the contents of the 8-bit timer counter 50 (TM50).<br />
The capture operation is performed in synchronization with the valid edge input to the TI pin (capture trigger).<br />
The contents of CP50 are retained until the next rising edge of the TI pin is detected. The contents of CP51<br />
are retained until the next falling edge of the TI pin is detected.<br />
CP50 and CP51 can be read by using an 8-bit memory manipulation instruction.<br />
RESET input clears CP50 and CP51 to 00H.<br />
(2) 8-bit timer counter 50 (TM50)<br />
This 8-bit register counts the count pulse.<br />
RESET input or clearing the TCE50 bit clears TM50 to 00H.<br />
6.3 Registers Controlling 8-<strong>Bit</strong> Remote Control Timer<br />
The following register controls the 8-bit remote control timer.<br />
(1) Remote control timer control register 50 (TMC50)<br />
This register enables or disables the operation of the 8-bit timer counter 50 (TM50), and sets the count clock.<br />
TMC50 is set by using a 1-bit or 8-bit memory manipulation instruction.<br />
RESET input clears TMC50 to 00H.<br />
Symbol<br />
TMC50<br />
< 7 ><br />
TCE50<br />
6<br />
0<br />
Figure 6-2. Remote Control Timer Control Register 50 Format<br />
5<br />
0<br />
TCE50 TM50 count operation control<br />
0 Clears counter to 0 and stops operation<br />
1 Starts count operation<br />
TCL52 TCL51 Count clock selection<br />
0 0 fX/29 (9.8 kHz)<br />
0 1 fX/28 (19.5 kHz)<br />
1 0 fX/27 (39.1 kHz)<br />
1 1 fX/26 (78.1 kHz)<br />
Caution Be sure to clear bits 2 to 6 to 0.<br />
4<br />
0<br />
3<br />
0<br />
Remarks 1. fX: Main system clock oscillation frequency<br />
2. The parenthesized values apply to operation at fX = 5.0 MHz<br />
2<br />
0<br />
Preliminary User’s Manual U14938EJ1V0UM<br />
1<br />
TCL52<br />
0<br />
TCL51<br />
Address<br />
FF58H<br />
After reset<br />
00H<br />
R/W<br />
R/W<br />
77
6.4 Operation of 8-<strong>Bit</strong> Remote Control Timer<br />
78<br />
CHAPTER 6 8-BIT REMOTE CONTROL TIMER<br />
The 8-bit remote control timer operates as a pulse width measuring circuit.<br />
The width of a high-level or low-level external pulse input to the TI pin is measured by operating the 8-bit timer<br />
counter 50 (TM50) in the free-running mode.<br />
Noise with short pulse width can be detected since the detection of the valid edge is sampled every 2 cycles of<br />
the count clock selected by TCL51 and TCL52, and the capture operation is not performed until the valid level has<br />
been detected two times. Therefore, the pulse width input to the TI pin must be 5 or more of the count clock set by<br />
TCL51 and TCL52, regardless of whether the level is high or low. If the pulse width is less than 5 clocks, it cannot<br />
be detected, and the capture operation is not performed.<br />
The value of timer register 50 (TM50) being counted is loaded to and retained in the capture registers (CP50 and<br />
CP51) in synchronization with the valid edge of the pulse input to the TI pin, as shown in Figure 6-3.<br />
Figure 6-3 shows the timing of pulse width measurement.<br />
Figure 6-3. Pulse Width Measurement Timing (1/2)<br />
(1) To measure pulse width in synchronization with rising edge<br />
Count value<br />
of TM50<br />
INTTM50<br />
Remark t0 = (D1 – D0) × 1/fCOUNT<br />
D0<br />
0H<br />
Count starts Capture Capture<br />
TCE50 = 1<br />
TI<br />
CP50<br />
INTTM52<br />
t1 = (100H – D1 + D2) × 1/fCOUNT<br />
FFH<br />
fCOUNT: Count clock frequency set by TCL51 and TCL52<br />
D1<br />
Preliminary User’s Manual U14938EJ1V0UM<br />
FFH<br />
00H D0 D1 D2 D3<br />
t0 t1<br />
D2<br />
D3<br />
Capture Capture
CHAPTER 6 8-BIT REMOTE CONTROL TIMER<br />
Figure 6-3. Pulse Width Measurement Timing (2/2)<br />
(2) Measure pulse width in synchronization with both rising and falling edges<br />
Count value<br />
of TM50<br />
0H<br />
Remark t0 = (D2 – D1) × 1/fCOUNT<br />
TI<br />
INTTM50<br />
INTTM51<br />
CP51<br />
INTTM52<br />
Count starts<br />
TCE50 = 1<br />
D0<br />
t1 = (100H – D2 + D3) × 1/fCOUNT<br />
FFH<br />
00H D1 D3<br />
t0 t1<br />
fCOUNT: Count clock frequency set by TCL51 and TCL52<br />
D1<br />
D2 D3<br />
Capture Capture Capture Capture<br />
CP50 00H D0 D2<br />
Preliminary User’s Manual U14938EJ1V0UM<br />
FFH<br />
79
7.1 8-<strong>Bit</strong> Timer Functions<br />
80<br />
CHAPTER 7 8-BIT TIMER<br />
The 8-bit timers (TM80 and TM81) enable to use the interval function.<br />
(1) 8-bit interval timer<br />
(1) 8-bit interval timer<br />
When the 8-bit timer is used as an interval timer, it generates an interrupt at any time intervals<br />
set in advance.<br />
Table 7-1. Interval Time of 8-<strong>Bit</strong> Timer 80<br />
Minimum Interval Time Maximum Interval Time Resolution<br />
2 2 /fX (0.8 µs) 2 10 /fX (204.8 µs) 2 2 /fX (0.8 µs)<br />
2 4 /fX (3.2 µs) 2 12 /fX (819.2 µs) 2 4 /fX (3.2 µs)<br />
2 6 /fX (12.8 µs) 2 4 /fX (3.28 ms) 2 6 /fX (12.8 µs)<br />
Remarks 1. fX: Main system clock oscillation frequency<br />
2. The parenthesized values apply to operation at fX = 5.0 MHz.<br />
Table 7-2. Interval Time of 8-<strong>Bit</strong> Timer 81<br />
Minimum Interval Time Maximum Interval Time Resolution<br />
2/fX (0.4 µs) 2 8 /fX (51.2 µs) 2/fX (0.4 µs)<br />
2 5 /fX (6.4 µs) 2 13 /fX (1.64 ms) 2 5 /fX (6.4 µs)<br />
2 7 /fX (25.6 µs) 2 15 /fX (6.55 ms) 2 7 /fX (25.6 µs)<br />
Remarks 1. fX: Main system clock oscillation frequency<br />
2. The parenthesized values apply to operation at fX = 5.0 MHz.<br />
Preliminary User’s Manual U14938EJ1V0UM
7.2 8-<strong>Bit</strong> Timer Configuration<br />
The 8-bit timer consists of the following hardware.<br />
CHAPTER 7 8-BIT TIMER<br />
Table 7-3. Configuration of 8-<strong>Bit</strong> Timer<br />
Item Configuration<br />
Timer counter 8 bits × 2 (TM80 and TM81)<br />
Register Compare register: 8 bits × 2 (CR80 and CR81)<br />
Control register 8-bit timer mode control registers 80 and 81 (TMC80 and TMC81)<br />
fX/22 fX/26 fX/24 Selector<br />
2<br />
Figure 7-1. Block Diagram of 8-<strong>Bit</strong> Timer 80<br />
8-bit compare register 80<br />
(CR80)<br />
Match<br />
8-bit timer counter 80<br />
(TM80)<br />
Clear<br />
Selector<br />
Internal bus<br />
TCE80 TCL801 TCL800<br />
Internal bus<br />
8-bit timer mode control register 80 (TMC80)<br />
INTTM80<br />
Preliminary User’s Manual U14938EJ1V0UM 81
82<br />
fX/2<br />
fX/2 5<br />
fX/2 7<br />
Selector<br />
2<br />
CHAPTER 7 8-BIT TIMER<br />
Figure 7-2. Block Diagram of 8-<strong>Bit</strong> Timer 81<br />
(1) 8-bit compare register 8n (CR8n)<br />
This is an 8-bit register to compare the value set to CR8n with 8-bit timer counter 8n (TM8n) count value, and<br />
if they match, generates an interrupt request (INTTM8n).<br />
CR8n is set with an 8-bit memory manipulation instruction. The 00H to FFH values can be set.<br />
RESET input makes CR8n undefined.<br />
Caution Be sure to set CR8n after the timer operation is stopped.<br />
Remark n = 0 or 1<br />
(2) 8-bit timer counter 8n (TM8n)<br />
This is an 8-bit register to count pulses.<br />
TM8n is read with an 8-bit memory manipulation instruction.<br />
RESET input clears TM8n to 00H.<br />
Remark n = 0 or 1<br />
8-bit compare register 81<br />
(CR81)<br />
Match<br />
8-bit timer counter 81<br />
(TM81)<br />
Clear<br />
Selector<br />
Internal bus<br />
TCE81 TCL811 TCL810<br />
Internal bus<br />
Preliminary User’s Manual U14938EJ1V0UM<br />
INTTM81<br />
8-bit timer mode control register 81 (TMC81)
7.3 Registers Controlling 8-<strong>Bit</strong> Timer<br />
CHAPTER 7 8-BIT TIMER<br />
The following register is used to control the 8-bit timer.<br />
• 8-bit timer mode control registers 80 and 81 (TMC80 and TMC81)<br />
(1) 8-bit timer mode control register 80 (TMC80)<br />
This register enables/stops operation of 8-bit timer counter 80 (TM80) and sets the counter clock of 8-bit timer<br />
80.<br />
TMC80 is set with a 1-bit or 8-bit memory manipulation instruction.<br />
RESET input clears TMC80 to 00H.<br />
Figure 7-3. 8-<strong>Bit</strong> Timer Mode Control Register 80 Format<br />
Symbol 6 5 4 3 2 1 0 Address After reset R/W<br />
TMC80 TCE80 0 0 0 0 TCL801TCL800 0 FF53H 00H R/W<br />
TCE80<br />
0<br />
1<br />
TCL801 TCL800<br />
0<br />
0<br />
1<br />
1<br />
Operation stopped (TM80 cleared to 0)<br />
Operation enabled<br />
0<br />
1<br />
0<br />
1<br />
fX/2 2 (1.25 MHz)<br />
fX/2 4 (312.5 kHz)<br />
fX/2 6 (78.1 kHz)<br />
Setting prohibited<br />
8-bit timer counter 80 operation control<br />
8-bit timer 80 count clock selection<br />
Caution Be sure to set the count clock after the timer operation is stopped (TCE80 = 0).<br />
Refer to 7.4 8-<strong>Bit</strong> Timer Operation for details.<br />
Remarks 1. fX: Main system clock oscillation frequency<br />
2. The parenthesized values apply to operation at fX = 5.0 MHz.<br />
Preliminary User’s Manual U14938EJ1V0UM 83
84<br />
CHAPTER 7 8-BIT TIMER<br />
(2) 8-bit timer mode control register 81 (TMC81)<br />
This register enables/stops operation of 8-bit timer counter 81 (TM81), sets the count clock of 8-bit timer 81,<br />
and controls the operation of the output control circuit.<br />
TMC81 is set with a 1-bit or 8-bit memory manipulation instruction.<br />
RESET input clears TMC81 to 00H.<br />
TMC81<br />
Figure 7-4. 8-<strong>Bit</strong> Timer Mode Control Register 81 Format<br />
Symbol 6 5 4 3 2 1 0 Address After reset R/W<br />
TCE81 0 0 0 0 TCL811TCL810 0<br />
TCE81<br />
0<br />
1<br />
TCL811TCL810<br />
0<br />
0<br />
1<br />
1<br />
Operation stopped (TM81 cleared to 0)<br />
Operation enabled<br />
0<br />
1<br />
0<br />
1<br />
fX/2<br />
fX/2 5<br />
(2.5 MHz)<br />
(156.3 kHz)<br />
fX/27 (39.1 kHz)<br />
Setting prohibited<br />
Caution Be sure to set the count clock after the timer operation is stopped (TCE81 = 0).<br />
Refer to 7.4 8-<strong>Bit</strong> Timer Operation for details.<br />
Remarks 1. fX: Main system clock oscillation frequency<br />
2. The parenthesized values apply to operation at fX = 5.0 MHz.<br />
Preliminary User’s Manual U14938EJ1V0UM<br />
FF57H 00H R/W<br />
8-bit timer counter 81 operation control<br />
8-bit timer 81 count clock selection
7.4 8-<strong>Bit</strong> Timer Operation<br />
CHAPTER 7 8-BIT TIMER<br />
7.4.1 Operation as interval timer<br />
Interval timer repeatedly generates an interrupt at time intervals specified by the count value set to 8-bit compare<br />
register 8n (CR8n) in advance.<br />
To operate 8-bit timer counter as an interval timer, the following settings are required.<br />
Disable operation of the 8-bit timer counter 8n (TM8n) by setting TCE8n (bit 7 of the 8-bit timer mode control<br />
register 8n (TMC8n)) to 0.<br />
Set the count clock of the 8-bit timer 8n (see Tables 7-5 and 7-6).<br />
Set count values to CR8n.<br />
Enable operation of TM8n by setting TCE0n to 1.<br />
When the count value of 8-bit timer counter 8n (TM8n) matches the value set to CR8n, the value of TM8n is cleared<br />
to 0 and TM8n continues counting. At the same time, an interrupt request signal (INTTM8n) is generated.<br />
Tables 7-5 and 7-6 show interval time, and Figures 7-6 and 7-7 show the interval timer operation timing.<br />
Caution When the TMC8n count clock is set and the operation of TM8n is enabled simultaneously<br />
by an 8-bit memory manipulation instruction, an error of more than 1 clock may occur in 1<br />
cycle after the timer has been started. Therefore, be sure to follow the settings above when<br />
the 8-bit timer is operating as an internal timer.<br />
Remark n = 0 or 1<br />
Table 7-4. Interval Time of 8-<strong>Bit</strong> Timer 80<br />
TCL801 TCL800 Minimum Interval Time Maximum Interval Time Resolution<br />
0 0 2 2 /fX (0.8 µs) 2 10 /fX (204.8 µs) 2 2 /fX (0.8 µs)<br />
0 1 2 4 /fX (3.2 µs) 2 12 /fX (819.2 µs) 2 4 /fX (3.2 µs)<br />
1 0 2 6 /fX (12.8 µs) 2 14 /fX (3.28 ms) 2 6 /fX (12.8 µs)<br />
1 1 Setting prohibited<br />
Remarks 1. fX: Main system clock oscillation frequency<br />
2. The parenthesized values apply to operation at fX = 5.0 MHz.<br />
Table 7-5. Interval Time of 8-<strong>Bit</strong> Timer 81<br />
TCL811 TCL810 Minimum Interval Time Maximum Interval Time Resolution<br />
0 0 2/fX (0.4 µs) 2 8 /fX (51.2 µs) 2/fX (0.4 µs)<br />
0 1 2 5 /fX (6.4 µs) 2 13 /fX (1.64 ms) 2 5 /fX (6.4 µs)<br />
1 0 2 7 /fX (25.6 µs) 2 15 /fX (6.55 ms) 2 7 /fX (25.6 µs)<br />
1 1 Setting prohibited<br />
Remarks 1. fX: Main system clock oscillation frequency<br />
2. The parenthesized values apply to operation at fX = 5.0 MHz.<br />
Preliminary User’s Manual U14938EJ1V0UM 85
86<br />
Count clock<br />
TM8n count value<br />
CR8n<br />
TCE8n<br />
INTTM8n<br />
t<br />
00 01<br />
Count starts<br />
CHAPTER 7 8-BIT TIMER<br />
Figure 7-5. Interval Timer Operation Timing<br />
Clear Clear<br />
Caution An error of up to 1 clock may occur in the period until the match signal is generated after<br />
the timer starts.<br />
This is because 8-bit timer counter 8n (TM8n) starts operation asynchronously with the count<br />
pulse.<br />
Remarks 1. Interval time = (N + 1) × t where N = 00H to FFH<br />
2. n = 0 or 1<br />
N<br />
00<br />
01<br />
N N N N<br />
Interrupt acknowledged Interrupt acknowledged<br />
Interval time Interval time Interval time<br />
Preliminary User’s Manual U14938EJ1V0UM<br />
N<br />
00<br />
01<br />
N
8.1 Watch Timer Functions<br />
The watch timer has the following functions.<br />
• Watch timer<br />
• Interval timer<br />
CHAPTER 8 WATCH TIMER<br />
The watch and interval timers can be used at the same time.<br />
Figure 8-1 shows a block diagram of the watch timer.<br />
fX/2 7<br />
fXT<br />
Selector<br />
fW<br />
fW<br />
2 4<br />
fW<br />
2 5<br />
Figure 8-1. Watch Timer Block Diagram<br />
fW<br />
2 6<br />
Clear<br />
9-bit prescaler<br />
fW<br />
2 7<br />
fW<br />
2 8<br />
fW<br />
2 9<br />
Selector<br />
WTM7 WTM6 WTM5 WTM4 WTM1 WTM0<br />
Watch timer mode<br />
control register (WTM)<br />
Internal bus<br />
5-bit counter INTWT<br />
Clear<br />
INTWTI<br />
Preliminary User’s Manual U14938EJ1V0UM 87
88<br />
CHAPTER 8 WATCH TIMER<br />
(1) Watch timer<br />
The 4.19 MHz main system clock or 32.768 kHz subsystem clock is used to generate an interrupt request<br />
(INTWT) at 0.5-second intervals.<br />
Caution When the main system clock is operating at 5.0 MHz, it cannot be used to generate a 0.5second<br />
interval. In this case, the subsystem clock, which operates at 32.768 kHz, should<br />
be used instead.<br />
(2) Interval timer<br />
The interval timer is used to generate an interrupt request (INTWT) at specified intervals.<br />
Table 8-1. Interval Time of Interval Timer<br />
Interval During fX = 5.0 MHz Operation During fX = 4.19 MHz Operation During fXT = 32.768 kHz Operation<br />
2 4 × 1/fW 409.6 µs 489 µs 488 µs<br />
2 5 × 1/fW 819.2 µs 978 µs 977 µs<br />
2 6 × 1/fW 1.64 ms 1.96 ms 1.95 ms<br />
2 7 × 1/fW 3.28 ms 3.91 ms 3.91 ms<br />
2 8 × 1/fW 6.55 ms 7.82 ms 7.81 ms<br />
2 9 × 1/fW 13.1 ms 15.6 ms 15.6 ms<br />
Remarks 1. fW: Watch timer clock frequency (fX/27 or fXT)<br />
2. fX: Main system clock oscillation frequency<br />
3. fXT: Subsystem clock oscillation frequency<br />
8.2 Watch Timer Configuration<br />
The watch timer includes the following hardware.<br />
Table 8-2. Configuration of Watch Timer<br />
Item Configuration<br />
Counter 5 bits × 1<br />
Prescaler 9 bits × 1<br />
Control register Watch timer mode control register (WTM)<br />
8.3 Register Controlling Watch Timer<br />
The watch timer mode control register (WTM) is used to control the watch timer.<br />
• Watch timer mode control register (WTM)<br />
WTM selects a count clock for the watch timer and specifies whether to enable clocking of the timer. It also<br />
specifies the prescaler interval and how the 5-bit counter is controlled.<br />
WTM is set with a 1-bit or 8-bit memory manipulation instruction.<br />
RESET input clears WTM to 00H.<br />
Preliminary User’s Manual U14938EJ1V0UM
WTM<br />
CHAPTER 8 WATCH TIMER<br />
Figure 8-2. Watch Timer Mode Control Register Format<br />
Symbol 7 6 5 4 3 2 1 0 Address After reset R/W<br />
WTM7 WTM6 WTM5 WTM4 0 0 WTM1 WTM0<br />
WTM7<br />
0<br />
1<br />
WTM6 WTM5 WTM4<br />
0<br />
0<br />
0<br />
0<br />
1<br />
1 0 1<br />
Other than above<br />
WTM1<br />
0<br />
1<br />
WTM0<br />
0<br />
1<br />
fX/2 7<br />
fXT<br />
Remarks 1. fW: Watch timer clock frequency (fX/27 or fXT)<br />
2. fX: Main system clock oscillation frequency<br />
3. fXT: Subsystem clock oscillation frequency<br />
4. The parenthesized values apply to operation at fX = 5.0 MHz or at fXT = fW = 32.768 kHz.<br />
8.4 Watch Timer Operation<br />
8.4.1 Operation as watch timer<br />
0<br />
0<br />
1<br />
1<br />
0<br />
0<br />
1<br />
0<br />
1<br />
0<br />
24 /fW (488 µ s)<br />
25 /fW (977 µ<br />
s)<br />
2 6 /fW (1.95 ms)<br />
2 7 /fW (3.91 ms)<br />
2 8 /fW (7.81 ms)<br />
2 9 /fW (15.6 ms)<br />
Cleared after operation stop<br />
Started<br />
(39.1 kHz)<br />
(32.768 kHz)<br />
Operation stopped (both prescaler and timer cleared)<br />
Operation enabled<br />
Setting prohibited<br />
FF4AH 00H R/W<br />
Watch timer count clock selection<br />
Prescaler interval selection<br />
Control of 5-bit counter operation<br />
Watch timer operation<br />
The main system clock (4.19 MHz) or subsystem clock (32.768 kHz) is used as a watch timer with 0.5-second<br />
intervals.<br />
The watch timer is used to generate an interrupt request at specified intervals.<br />
By setting bits 0 and 1 (WTM0 and WTM1) of the watch timer mode control register (WTM) to 1, the watch timer<br />
starts counting. By setting them to 0, the 5-bit counter is cleared and the watch timer stops counting.<br />
When the interval timer also operates at the same time, only the watch timer can be started from 0 seconds by<br />
setting WTM1 to 0. However, an error of up to 29 × 1/fW seconds may occur for the first overflow of the watch timer<br />
(INTWT) after a 0-second start because the 9-bit prescaler is not cleared in this case.<br />
Preliminary User’s Manual U14938EJ1V0UM 89
90<br />
CHAPTER 8 WATCH TIMER<br />
8.4.2 Operation as interval timer<br />
The interval timer is used to repeatedly generate an interrupt request at the interval specified by a preset count<br />
value.<br />
The interval time can be selected by bits 4 to 6 (WTM4 to WTM6) of the watch timer mode control register (WTM).<br />
Table 8-3. Interval Time of Interval Timer<br />
WTM6 WTM5 WTM4 Interval During fX = 5.0 MHz Operation During fX = 4.19 MHz Operation During fXT = 32.768 kHz Operation<br />
0 0 0 2 4 × 1/fW 409.6 µs 489 µs 488 µs<br />
0 0 1 2 5 × 1/fW 819.2 µs 978 µs 977 µs<br />
0 1 0 2 6 × 1/fW 1.64 ms 1.96 ms 1.95 ms<br />
0 1 1 2 7 × 1/fW 3.28 ms 3.91 ms 3.91 ms<br />
1 0 0 2 8 × 1/fW 6.55 ms 7.82 ms 7.81 ms<br />
1 0 1 2 9 × 1/fW 13.1 ms 15.6 ms 15.6 ms<br />
Other than above Setting prohibited<br />
Remark fX: Main system clock oscillation frequency<br />
fXT: Subsystem clock oscillation frequency<br />
fW: Watch timer clock frequency<br />
5-bit counter<br />
Count clock<br />
fW/29 Watch timer<br />
interrupt<br />
INTWT<br />
Interval timer<br />
interrupt<br />
INTWTI<br />
Figure 8-3. Watch Timer/Interval Timer Operation Timing<br />
0H<br />
Start<br />
Caution When operation of the watch timer and 5-bit counter has been enabled by setting the watch<br />
timer mode control register (WTM) (setting WTM0 (bit 0 of WTM) to 1), the time until the first<br />
interrupt request after this setting will not be exactly the same as the time set by WTM3 (bit<br />
3 of WTM). This is because the 5-bit counter starts counting one cycle after the output of<br />
the 9-bit prescaler. The INTWT signal will be generated at the set time from its second<br />
generation.<br />
Remarks 1. fW: Watch timer clock frequency<br />
2. The parenthesized values apply to operation at fW = 32.768 kHz.<br />
Preliminary User’s Manual U14938EJ1V0UM<br />
Overflow Overflow<br />
Watch timer interrupt time (0.5 s) Watch timer interrupt time (0.5 s)<br />
Interval<br />
timer (T)<br />
T
CHAPTER 9 WATCHDOG TIMER<br />
The watchdog timer can generate non-maskable interrupts, maskable interrupts and RESET with arbitrary preset<br />
intervals.<br />
9.1 Watchdog Timer Functions<br />
The watchdog timer has the following functions:<br />
• Watchdog timer<br />
• Interval timer<br />
Caution Select the watchdog timer mode or interval timer mode by using the watchdog timer mode<br />
register (WDTM).<br />
(1) Watchdog timer<br />
The watchdog timer is used to detect program runaway. When a runaway is detected, a non-maskable interrupt<br />
or the RESET signal can be generated.<br />
Table 9-1. Runaway Detection Time of Watchdog Timer<br />
Runaway<br />
Detection Time<br />
2 11 × 1/fX 410 µs<br />
2 13 × 1/fX 1.64 ms<br />
2 15 × 1/fX 6.55 ms<br />
2 17 × 1/fX 26.2 ms<br />
At fX = 5.0 MHz Operation<br />
fX: Main system clock oscillation frequency<br />
(2) Interval timer<br />
The interval timer generates an interrupt at a given interval set in advance.<br />
Table 9-2. Interval Time<br />
Interval Time At fX = 5.0 MHz Operation<br />
2 11 × 1/fX 410 µs<br />
2 13 × 1/fX 1.64 ms<br />
2 15 × 1/fX 6.55 ms<br />
2 17 × 1/fX 26.2 ms<br />
fX: Main system clock oscillation frequency<br />
Preliminary User’s Manual U14938EJ1V0UM 91
9.2 Watchdog Timer Configuration<br />
92<br />
CHAPTER 9 WATCHDOG TIMER<br />
The watchdog timer consists of the following hardware.<br />
fX<br />
2 4<br />
fX<br />
2 6<br />
Table 9-3. Configuration of Watchdog Timer<br />
Item Configuration<br />
Control register Watchdog timer clock select register (WDCS)<br />
Watchdog timer mode register (WDTM)<br />
Prescaler<br />
fX<br />
2 8<br />
fX<br />
2 10<br />
Watchdog timer clock<br />
select register<br />
(WDCS)<br />
Figure 9-1. Block Diagram of Watchdog Timer<br />
Selector<br />
2<br />
7-bit counter<br />
Clear<br />
Internal bus<br />
Control<br />
circuit<br />
WDCS2 WDCS1 RUN WDTM4 WDTM3<br />
Preliminary User’s Manual U14938EJ1V0UM<br />
Internal bus<br />
WDTIF<br />
WDTMK<br />
Watchdog timer mode register (WDTM)<br />
INTWDT<br />
maskable<br />
interrupt request<br />
RESET<br />
INTWDT<br />
non-maskable<br />
interrupt request
9.3 Registers Controlling Watchdog Timer<br />
CHAPTER 9 WATCHDOG TIMER<br />
The following two types of registers are used to control the watchdog timer.<br />
• Watchdog timer clock select register (WDCS)<br />
• Watchdog timer mode register (WDTM)<br />
(1) Watchdog timer clock select register (WDCS)<br />
This register sets the watchdog timer count clock.<br />
TCL2 is set with an 8-bit memory manipulation instruction.<br />
RESET input clears TCL2 to 00H.<br />
WDCS2<br />
0<br />
0<br />
1<br />
1<br />
Figure 9-2. Watchdog Timer Clock Select Register Format<br />
Symbol 7 6 5 4 3 2 1 0 Address After reset<br />
WDCS 0 0 0 0 0 WDCS2 WDCS1 0 FF42H 00H<br />
WDCS1<br />
0<br />
1<br />
0<br />
1<br />
Other than above<br />
fX/2 4<br />
fX/2 6<br />
fX/2 8<br />
fX/2 10<br />
Watchdog timer count clock selection<br />
(312.5 kHz)<br />
(78.1 kHz)<br />
(19.5 kHz)<br />
(4.88 kHz)<br />
Setting prohibited<br />
Remark fX: Main system clock oscillation frequency<br />
2 11 /fX<br />
2 13 /fX<br />
2 15 /fX<br />
2 17 /fX<br />
(410 µ<br />
s)<br />
(1.64 ms)<br />
(6.55 ms)<br />
(26.2 ms)<br />
R/W<br />
R/W<br />
Interval time<br />
Preliminary User’s Manual U14938EJ1V0UM 93
94<br />
CHAPTER 9 WATCHDOG TIMER<br />
(2) Watchdog timer mode register (WDTM)<br />
This register sets an operation mode of the watchdog timer, and enables/disables counting of the watchdog<br />
timer.<br />
WDTM is set with a 1-bit or 8-bit memory manipulation instruction.<br />
RESET input clears WDTM to 00H.<br />
Figure 9-3. Watchdog Timer Mode Register Format<br />
Symbol 6 5 4 3 2 1 0 Address After reset R/W<br />
WDTM<br />
RUN 0 0 WDTM4 WDTM3 0 0 0<br />
RUN<br />
0<br />
1<br />
Stops counting<br />
Clears counter and starts counting<br />
Note 1<br />
Watchdog timer operation selection<br />
Notes 1. Once RUN has been set (1), it cannot be cleared (0) by software. Therefore, when counting is<br />
started, it cannot be stopped by any means other than RESET input.<br />
2. Once WDTM3 and WDTM4 have been set (1), they cannot be cleared (0) by software.<br />
3. The watchdog timer starts operations as an interval timer when RUN is set to 1.<br />
Cautions 1. When the watchdog timer is cleared by setting RUN to 1, the actual overflow time is up<br />
to 0.8% shorter than the time set by watchdog timer clock select register (WDCS).<br />
2. In watchdog timer mode 1 or 2, set WDTM4 to 1 after confirming WDTIF (bit 0 of interrupt<br />
request flag 0) has been set to 0. When watchdog timer mode 1 or 2 is selected under<br />
the condition where WDTIF is 1, a non-maskable interrupt occurs at the completion of<br />
rewriting.<br />
Preliminary User’s Manual U14938EJ1V0UM<br />
FFF9H 00H R/W<br />
Note 2<br />
WDTM4 WDTM3<br />
Watchdog timer operation mode selection<br />
0 0<br />
0 1<br />
1 0<br />
1 1<br />
Operation stop<br />
Note 3<br />
Interval timer mode (overflow and maskable interrupt occur)<br />
Watchdog timer mode 1 (overflow and non-maskable interrupt occur)<br />
Watchdog timer mode 2 (overflow occurs and reset operation started)
9.4 Watchdog Timer Operation<br />
CHAPTER 9 WATCHDOG TIMER<br />
9.4.1 Operation as watchdog timer<br />
The watchdog timer operates to detect a runaway when bit 4 (WDTM4) of the watchdog timer mode register<br />
(WDTM) is set to 1.<br />
The count clock (runaway detection time interval) of the watchdog timer can be selected by bits 1 and 2 (WDCS1<br />
and WDCS2) of watchdog timer clock select register (WDCS). By setting bit 7 (RUN) of WDTM to 1, the watchdog<br />
timer is started. Set RUN to 1 within the set runaway detection time interval after the watchdog timer has been started.<br />
By setting RUN to 1, the watchdog timer can be cleared and start counting. If RUN is not set to 1, and the runaway<br />
detection time is exceeded, the system is reset or a non-maskable interrupt is generated by the value of bit 3 (WDTM3)<br />
of WDTM.<br />
The watchdog timer continues operation in the HALT mode, but stops in the STOP mode. Therefore, set RUN<br />
to 1 before entering the STOP mode to clear the watchdog timer, and then execute the STOP instruction.<br />
Cautions 1. The actual runaway detection time may be up to 0.8% shorter than the set time.<br />
2. When the subsystem clock is specified as the CPU clock, the count operation of the watchdog<br />
timer stops. Therefore, even if the main system clock is oscillating at that time, watchdog<br />
timer operation stops.<br />
Table 9-4. Runaway Detection Time of Watchdog Timer<br />
WDCS2 WDCS1 At fX = 5.0 MHz Operation<br />
0 0 410 µs<br />
0 1 1.64 ms<br />
1 0 6.55 ms<br />
1 1 26.2 ms<br />
fX: Main system clock oscillation frequency<br />
Preliminary User’s Manual U14938EJ1V0UM 95
96<br />
CHAPTER 9 WATCHDOG TIMER<br />
9.4.2 Operation as interval timer<br />
When bits 4 and 3 (WDTM4, WDTM3) of watchdog timer mode register (WDTM) are set to 1, the watchdog timer<br />
also operates as an interval timer that repeatedly generates an interrupt at time intervals specified by a count value<br />
set in advance.<br />
Select a count clock (or interval time) by setting bits 1 and 2 (WDCS1 and WDCS2) of watchdog timer clock select<br />
register (WDCS). The watchdog timer starts operation as an interval timer when the RUN bit (bit 7 of WDTM) is set<br />
to 1.<br />
In the interval timer mode, the interrupt mask flag (WDTMK) is valid, and a maskable interrupt (INTWDT) can be<br />
generated. The priority of INTWDT is set as the highest of all the maskable interrupts.<br />
The interval timer continues operation in the HALT mode, but stops in the STOP mode. Therefore, set RUN to<br />
1 before entering the STOP mode to clear the interval timer, and then execute the STOP instruction.<br />
Cautions 1. Once bit 4 (WDTM4) of WDTM is set to 1 (when the watchdog timer mode is selected),<br />
the interval timer mode is not set, unless the RESET signal is input.<br />
2. The interval time immediately after the setting by WDTM may be up to 0.8% shorter than<br />
the set time.<br />
Table 9-5. Interval Time of Interval Timer<br />
WDCS2 WDCS1 At fX = 5.0 MHz Operation<br />
0 0 410 µs<br />
0 1 1.64 ms<br />
1 0 6.55 ms<br />
1 1 26.2 ms<br />
fX: Main system clock oscillation frequency<br />
Preliminary User’s Manual U14938EJ1V0UM
10.1 Serial Interface 10 Functions<br />
The serial interface 10 has the following two modes.<br />
• Operation stop mode<br />
• 3-wire serial I/O mode<br />
CHAPTER 10 SERIAL INTERFACE 10<br />
(1) Operation stop mode<br />
This mode is used when serial transfer is not carried out. It reduces power consumption.<br />
(2) 3-wire serial I/O mode (MSB first/LSB first selectable)<br />
In this mode, 8-bit data transfer is carried out with three lines, one for serial clock (SCK10) and two for serial<br />
data (SI10 and SO10).<br />
The 3-wire serial I/O mode supports simultaneous transmit and receive operation, reducing data transfer<br />
processing time.<br />
It is possible to select the start bit of 8-bit data to be transmitted between the MSB and the LSB, thus allowing<br />
connection to devices with either start bit.<br />
The 3-wire serial I/O mode is effective for connecting display controllers and peripheral I/Os such as the 75XL<br />
Series, 78K Series, and 17K Series that have internal conventional clock synchronous serial interface.<br />
10.2 Serial Interface 10 Configuration<br />
Serial interface 10 has the following hardware configuration.<br />
Table 10-1. Configuration of Serial Interface 10<br />
Item Configuration<br />
Register Transmit/receive shift register 10 (SIO10)<br />
Control register Serial operating mode register 10 (CSIM10)<br />
(1) Transmit/receive shift register 10 (SIO10)<br />
This is an 8-bit register used for parallel-to-serial conversion and to perform serial data transmission/reception<br />
in synchronization with serial clocks.<br />
SIO10 is set with an 8-bit memory manipulation instruction.<br />
RESET input makes SIO10 undefined.<br />
Preliminary User’s Manual U14938EJ1V0UM 97
98<br />
Preliminary User’s Manual U14938EJ1V0UM<br />
SI10/P22<br />
SO10/P21<br />
SCK10/P20<br />
Figure 10-1. Block Diagram of Serial Interface 10<br />
CSIE10 TPS100 TPS101 DIR10<br />
Internal bus<br />
Serial operation mode<br />
register 10 (CSIM10)<br />
CSCK10<br />
Clock control<br />
circuit<br />
Transmit/receive shift register 10<br />
(SIO10)<br />
Serial clock counter<br />
F/F<br />
Selector<br />
Selector<br />
Interrupt<br />
request<br />
generator<br />
fX/2 2<br />
fX/2 3<br />
fX/2 4<br />
fX/2 5<br />
INTCSI10<br />
CHAPTER 10 SERIAL INTERFACE 10
10.3 Register Controlling Serial Interface 10<br />
CHAPTER 10 SERIAL INTERFACE 10<br />
The following register is used to control serial interface 10.<br />
• Serial operation mode register 10 (CSIM10)<br />
(1) Serial operation mode register 10 (CSIM10)<br />
This register is used to control serial interface 10 operation and set the serial clock and start bit.<br />
CSIM10 is set with a 1-bit or 8-bit memory manipulation instruction.<br />
RESET input clears CSIM10 to 00H.<br />
Figure 10-2. Serial Operation Mode Register 10 Format<br />
Symbol 6 5 4 3 2 1 0 Address After reset R/W<br />
CSIM10<br />
CSIE10 0 TPS101TPS100 0 DIR10 CSCK10 0<br />
CSIE10<br />
0<br />
1<br />
TPS101 TPS100<br />
0<br />
0<br />
1<br />
1<br />
DIR10<br />
0<br />
1<br />
CSCK10<br />
0<br />
1<br />
Operation stopped<br />
Operation enabled<br />
0<br />
1<br />
0<br />
1<br />
MSB<br />
LSB<br />
fX/2 2 (1.25 MHz)<br />
fX/2 3 (625 kHz)<br />
fX/2 4 (313 kHz)<br />
fX/2 5 (157 kHz)<br />
Input clock to SCK10 pin from external<br />
Caution <strong>Bit</strong>s 0, 3, and 6 must be set to 0.<br />
Operation control in 3-wire serial I/O mode<br />
FF72H 00H R/W<br />
Count clock selection during operation enable in 3-wire serial I/O mode<br />
Internal clock selected by TPS100, TPS101<br />
Start bit specification<br />
Clock selection in 3-wire serial I/O mode<br />
Remarks 1. fX: Main system clock oscillation frequency<br />
2. The parenthesized values apply to operation at fX = 50 MHz.<br />
Preliminary User’s Manual U14938EJ1V0UM 99
100<br />
(1) Operation stop mode<br />
CHAPTER 10 SERIAL INTERFACE 10<br />
Table 10-2. Settings of Serial Interface 10 Operation Mode<br />
CSIM10 PM22 P22 PM21 P21 PM20 P20 Start Shift P22/SI10 P21/SO10 P20/SCK10<br />
CSIE10 DIR10 CSCK10 <strong>Bit</strong> Clock Pin Function Pin Function Pin Function<br />
0 × × × Note 1 × Note 1 × Note 1 × Note 1 × Note 1 × Note 1 – – P22 P21 P20<br />
Other than above Setting prohibited<br />
(2) 3-wire serial I/O mode<br />
CSIM10 PM22 P22 PM21 P21 PM20 P20 Start Shift P22/SI10 P21/SO10 P20/SCK10<br />
CSIE10 DIR10 CSCK10 <strong>Bit</strong> Clock Pin Function Pin Function Pin Function<br />
1 0 0 1 Note 2 × Note 2 0 1 1 × MSB External SI10 Note 2 SO10 SCK10 input<br />
Preliminary User’s Manual U14938EJ1V0UM<br />
clock (CMOS output)<br />
1 0 1 External SCK10 output<br />
1 1 0 1 × LSB External SCK10 input<br />
1 0 1 External<br />
clock<br />
SCK10 output<br />
clock<br />
clock<br />
Other than above Setting prohibited<br />
Notes 1. Can be used as port function.<br />
2. If used only for transmission, can be used as P22 (CMOS I/O port).<br />
Remark ×: don’t care
10.4 Serial Interface 10 Operation<br />
CHAPTER 10 SERIAL INTERFACE 10<br />
Serial interface 10 provides the following two types of modes.<br />
• Operation stop mode<br />
• 3-wire serial I/O mode<br />
10.4.1 Operation stop mode<br />
In the operation stop mode, serial transfer is not executed; therefore, the power consumption can be reduced.<br />
P20/SCK10, P21/SO10, and P22/SI10 pins can be used as normal I/O ports.<br />
(1) Register setting<br />
Operation stop mode is set by serial operation mode register 10 (CSIM10).<br />
Serial operation mode register 10 (CSIM10)<br />
CSIM10 is set with a 1-bit or 8-bit memory manipulation instruction.<br />
RESET input clears CSIM10 to 00H.<br />
Symbol 6 5 4 3 2 1 0 Address After reset R/W<br />
CSIM10<br />
CSIE10 0 TPS101 TPS100 0 DIR10 CSCK10 0<br />
CSIE10<br />
0<br />
1<br />
Operation stopped<br />
Operation enabled<br />
Caution <strong>Bit</strong>s 0, 3, and 6 must be set to 0.<br />
Operation control in 3-wire serial I/O mode<br />
FF72H 00H R/W<br />
Preliminary User’s Manual U14938EJ1V0UM 101
102<br />
CHAPTER 10 SERIAL INTERFACE 10<br />
10.4.2 3-wire serial I/O mode<br />
The 3-wire serial I/O mode is useful for connection of peripheral I/Os and display controllers, etc., which incorporate<br />
a conventional clocked serial interface, such as the 75XL Series, 78K Series, 17K Series, etc.<br />
Communication is performed using three lines: the serial clock (SCK10), serial output (SO10), and serial input<br />
(SI10).<br />
(1) Register setting<br />
3-wire serial I/O mode settings are performed using serial operation mode register 10 (CSIM10).<br />
(a) Serial operation mode register 10 (CSIM10)<br />
CSIM10 is set with a 1-bit or 8-bit memory manipulation instruction.<br />
RESET input clears CSIM10 to 00H.<br />
Symbol 6 5 4 3 2 1 0 Address After reset R/W<br />
CSIM10<br />
CSIE10 0 TPS101TPS100 0 DIR10 CSCK10 0<br />
CSIE10<br />
0<br />
1<br />
TPS101 TPS100<br />
0<br />
0<br />
1<br />
1<br />
DIR10<br />
0<br />
1<br />
CSCK10<br />
0<br />
1<br />
Operation stopped<br />
Operation enabled<br />
0<br />
1<br />
0<br />
1<br />
MSB<br />
LSB<br />
fX/2 2 (1.25 MHz)<br />
fX/2 3 (625 kHz)<br />
fX/2 4 (313 kHz)<br />
fX/2 5 (157 kHz)<br />
Caution <strong>Bit</strong>s 0, 3, and 6 must be set to 0.<br />
Operation control in 3-wire serial I/O mode<br />
Remarks 1. fX: Main system clock oscillation frequency<br />
2. The parenthesized values apply to operation at fX = 5.0 MHz.<br />
Preliminary User’s Manual U14938EJ1V0UM<br />
FF72H 00H R/W<br />
Count clock selection during operation enabled in 3-wire serial I/O mode<br />
Input clock to SCK10 pin from external<br />
Count clock selected by TPS100, TPS101<br />
Start bit specification<br />
Clock selection in 3-wire serial I/O mode
CHAPTER 10 SERIAL INTERFACE 10<br />
(2) Communication operation<br />
In the 3-wire serial I/O mode, data transmission/reception is performed in 8-bit units. Data is transmitted/<br />
received in 1-bit units in synchronization with the serial clock.<br />
Transmit/receive shift register 10 (SIO10) shift operations are performed in synchronization with the fall of the<br />
serial clock (SCK10). Then transmit data is held in the SO10 latch and output from the SO10 pin. Also, receive<br />
data input to the SI10 pin is latched in input bits of SIO10 on the rise of SCK10.<br />
At the end of an 8-bit transfer, the operation of SIO10 stops automatically, and the interrupt request signal<br />
(INTCSI10) is generated.<br />
SCK10<br />
SI10<br />
SO10<br />
INTCSI10<br />
Figure 10-3. 3-Wire Serial I/O Mode Timing<br />
1 2 3 4 5 6 7 8<br />
DI7 DI6 DI5 DI4 DI3 DI2 DI1 DI0<br />
DO7 DO6 DO5 DO4 DO3 DO2 DO1 DO0<br />
Transfer start at the falling edge of SCK10<br />
Cautions 1. When data is written to SIO10 in the serial operation disabled status (CSIE10 = 0), the<br />
data cannot be transmitted or received.<br />
2. When data is written to SIO10 in the serial operation disabled status (CSIE10 = 0) and<br />
then serial operation is enabled (CSIE10 = 1), the data cannot be transmitted or received.<br />
3. Once data has been written to SIO10 with the serial clock selected (CSCK10 = 0),<br />
overwriting the data does not update the contents of SIO10.<br />
4. When CSIM10 is operated during data transmission/reception, data cannot be transmitted<br />
or received normally.<br />
5. When SIO10 is operated during data transmission/reception, the data cannot be transmitted<br />
or received normally.<br />
(3) Transfer start<br />
Serial transfer is started by setting transfer data to the transmit/receive shift register 10 (SIO10) when the<br />
following two conditions are satisfied.<br />
• <strong>Bit</strong> 7 (CSIE10) of serial operation mode register 10 (CSIM10) = 1<br />
• Internal serial clock is stopped or SCK10 is a high level after 8-bit serial transfer.<br />
End of transfer<br />
An end of 8-bit transfer stops the serial transfer automatically and generates the interrupt request signal<br />
(INTCSI10).<br />
Preliminary User’s Manual U14938EJ1V0UM 103
11.1 VFD Controller/Driver Functions<br />
CHAPTER 11 VFD CONTROLLER/DRIVER<br />
The on-chip VFD controller/driver of the µPD789871 <strong>Subseries</strong> has the following functions.<br />
(1) Can output display signals (DMA operation) by automatically reading display data.<br />
(2) The pins not used for VFD display can be used as I/O port or output port pins (FIP9 to FIP24 pins only).<br />
(3) Luminance can be adjusted in 8 steps by VFD display mode register 1 (DSPM1).<br />
(4) Hardware for key scan application<br />
• Generates an interrupt signal (INTKS) indicating key scan timing.<br />
• Timing in which key scan data is output can be detected by key scan flag (KSF).<br />
• Whether key scan timing is inserted or not can be selected.<br />
(5) High-tolerance output buffer that can directly drive VFD<br />
(6) The FIP17 to FIP24 pins can be connected to pull-down resistors (connected to VLOAD) using mask option (mask<br />
ROM version only). The µPD78F9872 does not have on-chip pull-down resistors).<br />
Of the 25 VFD output pins of the µPD789871 <strong>Subseries</strong>, FIP9 to FIP24 are alternate function pins with port function.<br />
FIP0 to FIP8 are output-only pins.<br />
FIP9 to FIP24 can be used as port pins when VFD display is disabled by bit 7 (DSPEN) of the display mode register<br />
0 (DSPM0). Even when VFD display is enabled, the VFD output pins not used for display signal output can be used<br />
as port pins.<br />
Table 11-1. VFD Output Pins and Alternate-Function Pins for Ports<br />
FIP Pin Name Multiplexed Port Name I/O<br />
FIP9 to FIP16 P97 to P90 Output-only port<br />
FIP17 to FIP24 P87 to P80 I/O port<br />
104 Preliminary User’s Manual U14938EJ1V0UM
11.2 VFD Controller/Driver Configuration<br />
CHAPTER 11 VFD CONTROLLER/DRIVER<br />
The VFD controller/driver consists of the following hardware.<br />
Table 11-2. Configuration of VFD Controller/Driver<br />
Item Configuration<br />
Display 25<br />
Control register Display mode register 0 (DSPM0)<br />
Display mode register 1 (DSPM1)<br />
Display mode register 2 (DSPM2)<br />
Figure 11-1. Block Diagram of VFD Controller/Driver<br />
Internal bus<br />
Display data memory<br />
Display data selector<br />
Display data latch<br />
Port output latch<br />
High-voltage buffer<br />
FIP0 FIP9/P97 FIP24/P80<br />
Preliminary User’s Manual U14938EJ1V0UM<br />
105
106<br />
CHAPTER 11 VFD CONTROLLER/DRIVER<br />
11.3 Registers Controlling VFD Controller/Driver<br />
11.3.1 Control registers<br />
The following three types of registers control the VFD controller/driver.<br />
• Display mode register 0 (DSPM0)<br />
• Display mode register 1 (DSPM1)<br />
• Display mode register 2 (DSPM2)<br />
(1) Display mode register 0 (DSPM0)<br />
DSPM0 performs the following setting.<br />
Symbol<br />
DSPM0<br />
• Enables or disables display<br />
• Number of VFD output pins<br />
DSPM0 is set with a 1-bit or 8-bit memory manipulation instruction.<br />
RESET input sets DSPM0 to 10H.<br />
< 7 ><br />
DSPEN<br />
6<br />
0<br />
Figure 11-2. Display Mode Register 0 Format<br />
DSPEN Enables or disables VFD display<br />
0 Disables<br />
1 Enables<br />
5<br />
FOUT5<br />
4<br />
FOUT4<br />
3<br />
FOUT3<br />
2<br />
FOUT2<br />
FOUT5 FOUT4 FOUT3 FOUT2 FOUT1 FOUT0 Number of VFD output pins<br />
0 1 0 0 0 0 17<br />
0 1 0 0 0 1 18<br />
0 1 0 0 1 0 19<br />
0 1 0 0 1 1 20<br />
0 1 0 1 0 0 21<br />
0 1 0 1 0 1 22<br />
0 1 0 1 1 0 23<br />
0 1 0 1 1 1 24<br />
0 1 1 0 0 0 25<br />
Other than above Setting prohibited<br />
Cautions 1. Be sure to set bit 6 to 0.<br />
2. Do not write data to the bits other than DSPEN when bit 7 (DSPEN) = 1.<br />
3. Be sure to set the output latch of the alternate-function port of a pin used for VFD output<br />
to 0.<br />
Preliminary User’s Manual U14938EJ1V0UM<br />
1<br />
FOUT1<br />
0<br />
FOUT0<br />
Address<br />
FFA0H<br />
After reset<br />
10H<br />
R/W<br />
R/W
(2) Display mode register 1 (DSPM1)<br />
DSPM1 performs the following setting.<br />
Symbol<br />
DSPM1<br />
• Blanking width of VFD output signal<br />
• Number of display patterns<br />
CHAPTER 11 VFD CONTROLLER/DRIVER<br />
DSPM1 is set with a 1-bit or 8-bit memory manipulation instruction.<br />
RESET input sets DSPM1 to 01H.<br />
7<br />
FBLK2<br />
6<br />
FBLK1<br />
Figure 11-3. Display Mode Register 1 Format<br />
FBLK2 FBLK1 FBLK0 Blanking width of VFD output signal<br />
0 0 0 1/16<br />
0 0 1 2/16<br />
0 1 0 4/16<br />
0 1 1 6/16<br />
1 0 0 8/16<br />
1 0 1 10/16<br />
1 1 0 12/16<br />
1 1 1 14/16<br />
5<br />
FBLK0<br />
4<br />
FPAT4<br />
3<br />
FPAT3<br />
FPAT4 FPAT3 FPAT2 FPAT1 FPAT0 Number of display patterns<br />
0 0 0 0 1 2<br />
0 0 0 1 0 3<br />
0 0 0 1 1 4<br />
0 0 1 0 0 5<br />
0 0 1 0 1 6<br />
0 0 1 1 0 7<br />
0 0 1 1 1 8<br />
0 1 0 0 0 9<br />
0 1 0 0 1 10<br />
0 1 0 1 0 11<br />
0 1 0 1 1 12<br />
0 1 1 0 0 13<br />
0 1 1 0 1 14<br />
0 1 1 1 0 15<br />
0 1 1 1 1 16<br />
Other than above Setting prohibited<br />
2<br />
FPAT2<br />
Caution Do not write data to the display mode register 1 (DSPM1) when bit 7 (DSPEN) of the display<br />
mode register 0 (DSPM0) is 1.<br />
Preliminary User’s Manual U14938EJ1V0UM<br />
1<br />
FPAT1<br />
0<br />
FPAT0<br />
Address<br />
FFA1H<br />
After reset<br />
01H<br />
R/W<br />
R/W<br />
107
108<br />
CHAPTER 11 VFD CONTROLLER/DRIVER<br />
(3) Display mode register 2 (DSPM2)<br />
DSPM2 performs the following setting. It also indicates the status of the display timing/key scan.<br />
Symbol<br />
DSPM2<br />
• Insertion of key scan timing<br />
• Display cycle (TDSP)<br />
DSPM2 is set with a 1-bit or 8-bit memory manipulation instruction. However, only bit 7 (KSF) can be read by<br />
a 1-bit memory manipulation instruction.<br />
RESET input clears DSPM2 to 00H.<br />
7<br />
KSF<br />
6<br />
KSM<br />
Figure 11-4. Display Mode Register 2 Format<br />
KSF Status of key scan cycle<br />
0 Other than key scan cycle<br />
1 Key scan cycle<br />
5<br />
0<br />
4<br />
0<br />
KSM Key scan cycle insertion selection<br />
0 Not inserted<br />
1 Inserted<br />
FCYC1 FCYC0 Display cycle<br />
0 0 212 /fX (819 µs)<br />
0 1 211 /fX (410 µs)<br />
1 0 210 /fX (205 µs)<br />
1 1 Setting prohibited<br />
3<br />
0<br />
Cautions 1. Be sure to set bits 2 to 5 to 0.<br />
2. Do not write data to the display mode register 2 (DSPM2) when bit 7 (DSPEN) of the<br />
display mode register 0 (DSPM0) is 1.<br />
Remarks 1. fX: Main system clock oscillation frequency<br />
2. The parenthesized values apply to operation at fX = 5.0 MHz.<br />
2<br />
0<br />
Preliminary User’s Manual U14938EJ1V0UM<br />
1<br />
FCYC1<br />
0<br />
FCYC0<br />
Address<br />
FFA2H<br />
After reset<br />
00H<br />
R/W<br />
R/W
CHAPTER 11 VFD CONTROLLER/DRIVER<br />
11.3.2 One display period and blanking width<br />
The VFD output signals are blanked equally at the beginning and end of the display period by the blanking width<br />
set by bits 0 to 2 (FBLK0 to FBLK2) of the display mode register 1 (DSPM1).<br />
VFD output signal<br />
(blanking width: 1/16)<br />
VFD output signal<br />
(blanking width: 2/16)<br />
VFD output signal<br />
(blanking width: 4/16)<br />
Figure 11-5. Blanking Width of VFD Output Signal<br />
1/16<br />
1/8<br />
1/4<br />
1 display period = TDSP<br />
Preliminary User’s Manual U14938EJ1V0UM<br />
1/16<br />
1/8<br />
1/4<br />
109
11.4 Display Data Memory<br />
110<br />
CHAPTER 11 VFD CONTROLLER/DRIVER<br />
The display data memory is a 96-byte RAM area that stores data to be displayed, and is mapped to addresses<br />
FA00H to FA5FH.<br />
The VFD controller reads the data stored in the display data memory independently of the CPU operation for VFD<br />
display (DMA operation).<br />
The area of the display data memory not used for display can be used as a normal RAM area.<br />
At key scan timing (TKS), all the VFD output pins are cleared to 0, and the data of the output latches of ports 8 and<br />
9 are output to FIP9/P97 to FIP24/P80.<br />
The address location of the display data memory is as follows:<br />
(1) With 25 VFD output pins and 16 patterns<br />
The addresses of the display data memory corresponding to the data output at each display timing (T0 to T15)<br />
are as shown in Figure 11-6 (for example, T0 = FA00H to FA03H, and T1 = FA04H to FA07H). When 25 VFD<br />
output pins (FIP0 to FIP24) are used, one block of display data consists of 4 bytes. VFD output pins 0 (FIP0)<br />
to 24 (FIP24) correspond to one block of display data sequentially, starting from the least significant bit toward<br />
the most significant bit.<br />
Figure 11-6. Relationship Between Address Location of Display Data Memory and VFD Output<br />
(with 25 VFD Output Pins and 16 Patterns)<br />
Address<br />
FA3CH to FA3FH<br />
FA38H to FA3BH<br />
FA0CH to FA0FH<br />
FA08H to FA0BH<br />
FA04H to FA07H<br />
FA00H to FA03H<br />
3FH<br />
3BH<br />
0FH<br />
0BH<br />
07H<br />
03H<br />
3EH<br />
3AH<br />
0EH<br />
0AH<br />
06H<br />
02H<br />
3DH<br />
39H<br />
0DH<br />
09H<br />
05H<br />
01H<br />
3CH<br />
38H<br />
0CH<br />
08H<br />
04H<br />
00H<br />
7<br />
24 0<br />
(VFD output pins)<br />
Preliminary User’s Manual U14938EJ1V0UM<br />
Display timing<br />
TKS<br />
T15<br />
T14<br />
T3<br />
T2<br />
T1<br />
T0
CHAPTER 11 VFD CONTROLLER/DRIVER<br />
(2) With 20 VFD output pins and 9 patterns<br />
The addresses of the display data memory corresponding to the data output at each display timing (T0 to T8)<br />
are as shown in Figure 11-7 (for example, T0 = FA00H to FA02H, and T1 = FA03H to FA05H). When 20 VFD<br />
output pins (FIP0 to FIP19) are used, one block of display data consists of 3 bytes. VFD output pins 0 (FIP0)<br />
to 19 (FIP19) correspond to one block of display data sequentially, starting from the least significant bit toward<br />
the most significant bit.<br />
Figure 11-7. Relationship Between Address Location of Display Data Memory and VFD Output<br />
(with 20 VFD Output Pins and 9 Patterns)<br />
Address<br />
FA18H to FA1AH<br />
FA15H to FA17H<br />
FA09H to FA0BH<br />
FA06H to FA08H<br />
FA03H to FA05H<br />
FA00H to FA02H<br />
6BH<br />
64H<br />
17H<br />
10H<br />
09H<br />
02H<br />
19 16<br />
6AH<br />
63H<br />
16H<br />
0FH<br />
08H<br />
01H<br />
69H<br />
62H<br />
15H<br />
0EH<br />
07H<br />
00H<br />
7 0<br />
(VFD output pins)<br />
Preliminary User’s Manual U14938EJ1V0UM<br />
Display timing<br />
TKS<br />
T8<br />
T7<br />
T3<br />
T2<br />
T1<br />
T0<br />
111
11.5 Key Scan Flag and Key Scan Data<br />
112<br />
CHAPTER 11 VFD CONTROLLER/DRIVER<br />
11.5.1 Key scan flag<br />
The key scan flag (KSF) is set to 1 during key scan timing, and is automatically reset to 0 at display timing.<br />
KSF is mapped to bit 7 of the display mode register 2 (DSPM2) and can be tested in 1-bit units. It cannot be written,<br />
however.<br />
By testing KSF, it can be determined whether key scan timing is in progress, and whether key input data is correct<br />
can be checked.<br />
Whether key scan timing is inserted or not can be selected by using the key scan timing insertion specification flag<br />
(KSM) (bit 6 of the display mode register 2 (DSPM2)).<br />
11.5.2 Key scan data<br />
Data stored in ports 8 and 9 are output from the FIP9 to FIP24 pins during key scan timing.<br />
Caution If scanning is performed in such a manner that both a segment and a digit turn ON during key<br />
scan timing, the display may flicker.<br />
Preliminary User’s Manual U14938EJ1V0UM
CHAPTER 11 VFD CONTROLLER/DRIVER<br />
11.6 Leakage Emission of Fluorescent Indicator Panel<br />
Leakage emission may take place when a fluorescent indicator panel is driven by the µPD789871 <strong>Subseries</strong>. The<br />
possible causes of this leakage emission are as follows.<br />
(1) Short blanking time<br />
Figure 11-8 shows the signal waveforms of a 2-digit display where the first digit T0 lights and the second digit<br />
T1 remains dark. If the blanking time is too short as shown in this figure, the T1 signal rises before the segment<br />
signal is deasserted, causing leakage emission. Generally, the blanking time must be about 20 µs. Determine<br />
the set value of the display mode register 1 (DSPM1), taking this into consideration.<br />
Figure 11-8. Leakage Emission Because of Short Blanking Time<br />
T0<br />
T1<br />
S0<br />
;;<br />
Blanking width<br />
Leakage emission<br />
occurs<br />
Preliminary User’s Manual U14938EJ1V0UM<br />
113
114<br />
CHAPTER 11 VFD CONTROLLER/DRIVER<br />
(2) Segment-grid capacitance of fluorescent indicator panel<br />
Even if a sufficiently long blanking time is ensured as shown in Figure 11-10, leakage emission may still occur.<br />
This is because the fluorescent indicator panel has a capacitance between the grid and segment, as indicated<br />
by CSG in Figure 11-9, and the timing signal pin is raised via CSG when segment signal turns on. If the voltage<br />
of the timing signal rises beyond the cutoff voltage (EK) as shown in Figure 11-10, leakage emission occurs.<br />
This whisker-like voltage changes with the values of CSG and internal pull-down resistor (RL). The greater the<br />
value of CSG, and the greater the value of RL, the higher this voltage, increasing the possibility of the occurrence<br />
of leakage emission.<br />
The value of CSG differs depending on the display area of the fluorescent indicator panel. The larger the area,<br />
the higher the CSG.<br />
Therefore, the value of the pull-down resistor differs depending on the size of the fluorescent indicator panel,<br />
in order to prevent leakage emission.<br />
Because the value of the pull-down resistor that can be connected by mask option is relatively high, the leakage<br />
emission may not be suppressed by the internal pull-down resistor alone.<br />
In case sufficient display quality cannot be obtained, deepen the back bias (increase EK), attach a filter to the<br />
fluorescent indicator panel, or connect an external pull-down resistor of several 10 kΩ to the timing signal pin.<br />
The likelihood of leakage emission caused by CSG occurring changes depending on the duty cycle of the<br />
whisker voltage vis-a-vis the total display cycle. The fewer the number of display digits, the greater the<br />
likelihood of occurrence of leakage emission.<br />
Lowering the display luminance also has an effect of suppressing the leakage emission.<br />
RL<br />
µ<br />
PD789871<br />
RL<br />
EK : Cutoff voltage<br />
Figure 11-9. Leakage Emission Caused by CSG<br />
RL : On-chip pull-down resistor<br />
VDD<br />
S0–<br />
T0–<br />
EK<br />
VLOAD<br />
+5 V<br />
CSG<br />
–30 V<br />
Preliminary User’s Manual U14938EJ1V0UM<br />
VFD<br />
Segment<br />
grid filament
T0<br />
T1<br />
S0<br />
CHAPTER 11 VFD CONTROLLER/DRIVER<br />
Figure 11-10. Leakage Emission Caused by CSG<br />
Preliminary User’s Manual U14938EJ1V0UM<br />
EK<br />
115
11.7 Calculation of Total Power Dissipation<br />
116<br />
CHAPTER 11 VFD CONTROLLER/DRIVER<br />
The following three power consumption are available for the µPD789871 <strong>Subseries</strong>. The sum of the three power<br />
consumption should be less than the total power dissipation PT (refer to Figure 11-11) (80% or less of ratings is<br />
recommended).<br />
CPU power consumption: Calculate VDD (MAX.) × IDD (MAX.).<br />
Output pin power consumption: Power consumption when maximum current flows into each VFD<br />
output pin.<br />
Pull-down resistor power consumption: Power consumption by pull-down resistor incorporated in VFD<br />
output pin.<br />
Total power dissipation PT [mW]<br />
800<br />
600<br />
400<br />
200<br />
Figure 11-11. Total Power Dissipation PT (TA = –40 to +85°C)<br />
–40 0 +40 +80<br />
Temperature [°C]<br />
The following is how to calculate total power dissipation for the example in Figure 11-12.<br />
Example Assume the following conditions:<br />
VDD = 5.5 V, 5.0 MHz oscillation<br />
Supply current (IDD) = 15 mA<br />
VFD output: 11 grids × 10 segments (Blanking width = 1/16: when FBLK0 to FBLK2 = 000B)<br />
Maximum current at the grid pin is 15 mA.<br />
Maximum current at the segment pin is 5 mA.<br />
At the key scan timing, VFD output pin is OFF.<br />
VFD output voltage: grid VOD = VDD – 2 V (voltage drop of 2 V)<br />
segments VOD = VDD – 0.5 V (voltage drop of 0.5 V)<br />
Fluorescent indicator panel voltage (VLOAD) = –35 V<br />
Mask option pull-down resistor = 30 kΩ<br />
Preliminary User’s Manual U14938EJ1V0UM
CHAPTER 11 VFD CONTROLLER/DRIVER<br />
By placing the above conditions in calculation to , the total dissipation can be worked out.<br />
CPU power consumption: 5.5 V × 15 mA = 82.5 mW<br />
Output pin power consumption:<br />
Grid (VDD – VOD) × Total current value of each grid × (1 – Blanking width) =<br />
Number of grids + 1<br />
2 V × 15 mA × 11 grids × (1 – 1 ) = 25.8 mW<br />
11 grids + 1 16<br />
Segment (VDD – VOD) × Total segment current value of illuminated dots × (1 – Blanking width) =<br />
Number of grids + 1<br />
0.5 V × 5 mA × 31 dots × (1 – 1 ) = 6.1 mW<br />
11 grids + 1 16<br />
Pull-down resistor power consumption:<br />
Grid<br />
(VDD – VLOAD) 2<br />
× Number of grids × (1 – Blanking width)<br />
Pull-down resistor value Number of grids + 1<br />
=<br />
(5.5 V – 2 V – (–35 V)) 2<br />
×<br />
11 grids<br />
× (1 – 1 30 kΩ<br />
)<br />
11 grids + 1 16<br />
= 42.5 mW<br />
(VOD – VLOAD) 2<br />
Segment<br />
× Number of illuminated dots × (1 – Blanking width)=<br />
Pull-down resistor value Number of grids + 1<br />
(5.5 V – 2 V – (–35 V)) 2 ×<br />
31 dots<br />
× (1 – 1 30 kΩ<br />
)<br />
11 grids + 1 16<br />
= 129.2 mW<br />
Total power consumption = + + = 82.5 + 25.8 + 6.1 + 42.5 + 129.2 = 286.1 mW<br />
In this example, the total power consumption do not exceed the rating of the total power dissipation,<br />
so there is no problem in power consumption.<br />
However, when the total power consumption exceeds the rating of the total power dissipation, it is<br />
necessary to lower the power consumption. To reduce power consumption, reduce the number of pulldown<br />
resistors.<br />
Preliminary User’s Manual U14938EJ1V0UM<br />
117
118<br />
CHAPTER 11 VFD CONTROLLER/DRIVER<br />
Figure 11-12. Relationship Between Display Data Memory Contents and VFD Output with<br />
10 Segments-11 Digits Displayed<br />
F A 0 2 H,<br />
F A 0 1 H,<br />
F A 0 0 H,<br />
F A 0 9 H,<br />
F A 0 8 H,<br />
F A 0 7 H,<br />
F A 1 0 H,<br />
F A 0 F H,<br />
F A 0 E H,<br />
F A 1 7 H,<br />
F A 1 6 H,<br />
F A 1 5 H,<br />
F A 1 E H,<br />
F A 1 D H,<br />
F A 1 C H,<br />
F A 2 5 H,<br />
F A 2 4 H,<br />
F A 2 3 H,<br />
F A 2 C H,<br />
F A 2 B H,<br />
F A 2 A H,<br />
F A 3 3 H,<br />
F A 3 2 H,<br />
F A 3 1 H,<br />
F A 3 A H,<br />
F A 3 9 H,<br />
F A 3 8 H,<br />
F A 4 1 H,<br />
F A 4 0 H,<br />
F A 3 F H,<br />
F A 4 8 H,<br />
F A 4 7 H,<br />
F A 4 6 H,<br />
(VFD output pins :<br />
FIP0 to FIP20)<br />
0<br />
0<br />
0<br />
0<br />
0<br />
0<br />
0<br />
1<br />
0<br />
0<br />
0<br />
0<br />
0<br />
0<br />
0<br />
0<br />
0<br />
0<br />
0<br />
1<br />
0<br />
1<br />
0<br />
0<br />
0<br />
0<br />
1<br />
0<br />
0<br />
0<br />
0<br />
0<br />
0<br />
1<br />
1<br />
1<br />
0<br />
0<br />
1<br />
1<br />
0<br />
0<br />
0<br />
0<br />
1<br />
0<br />
0<br />
0<br />
0<br />
1<br />
1<br />
0<br />
0<br />
0<br />
0<br />
1<br />
1<br />
0<br />
0<br />
0<br />
0<br />
0<br />
0<br />
0<br />
0<br />
0<br />
1<br />
1<br />
0<br />
0<br />
1<br />
0<br />
0<br />
0<br />
0<br />
1<br />
0<br />
1<br />
1<br />
0<br />
1<br />
1<br />
0<br />
1<br />
1<br />
0<br />
0<br />
1<br />
1<br />
0<br />
0<br />
1<br />
0<br />
1<br />
1<br />
0<br />
0<br />
1<br />
0<br />
0<br />
1<br />
0<br />
0<br />
0<br />
0<br />
20 19 18 17 16 15 14 13 12 11 10 9 8 7 6 5 4 3 2 1 0<br />
j i h g f e d c b a<br />
0<br />
0<br />
0<br />
Display data memory<br />
0<br />
AM i<br />
i<br />
SUN MON TUE<br />
j<br />
WED THU FRI SAT<br />
f<br />
a<br />
g b<br />
PM j<br />
j<br />
e d c<br />
h<br />
0 1 2 3 4 5 6 7 8 9 10<br />
0<br />
0<br />
0<br />
0<br />
0<br />
0<br />
0<br />
0<br />
0<br />
0<br />
0<br />
0<br />
0<br />
0<br />
0<br />
0<br />
0<br />
0<br />
0<br />
1<br />
0<br />
0<br />
0<br />
0<br />
0<br />
0<br />
0<br />
0<br />
1<br />
0<br />
Preliminary User’s Manual U14938EJ1V0UM<br />
0<br />
1<br />
0<br />
0<br />
0<br />
0<br />
0<br />
0<br />
0<br />
0<br />
0<br />
1<br />
0<br />
0<br />
0<br />
0<br />
0<br />
0<br />
0<br />
0<br />
0<br />
1<br />
0<br />
0<br />
0<br />
0<br />
0<br />
0<br />
0<br />
0<br />
0<br />
1<br />
0<br />
0<br />
0<br />
0<br />
0<br />
0<br />
0<br />
0<br />
0<br />
1<br />
0<br />
0<br />
0<br />
0<br />
0<br />
0<br />
0<br />
0<br />
0<br />
1<br />
0<br />
0<br />
0<br />
0<br />
0<br />
0<br />
0<br />
0<br />
0<br />
1<br />
0<br />
0<br />
0<br />
0<br />
0<br />
0<br />
0<br />
0<br />
0<br />
1<br />
0<br />
0<br />
0<br />
0<br />
0<br />
0<br />
0<br />
0<br />
0<br />
1<br />
0<br />
0<br />
0<br />
0<br />
0<br />
0<br />
0<br />
0<br />
0<br />
0<br />
T0<br />
T1<br />
T2<br />
T3<br />
T4<br />
T5<br />
T6<br />
T7<br />
T8<br />
T9<br />
T10
12.1 Interrupt Function Types<br />
CHAPTER 12 INTERRUPT FUNCTIONS<br />
The following two types of interrupt functions are used.<br />
(1) Non-maskable interrupt<br />
This interrupt is acknowledged unconditionally. It does not undergo interrupt priority control and is given top<br />
priority over all other interrupt requests.<br />
A standby release signal is generated.<br />
The non-maskable interrupt has one source of interrupt from the watchdog timer.<br />
(2) Maskable interrupt<br />
These interrupts undergo mask control. If two or more interrupts with the same priority are simultaneously<br />
generated, each interrupt has a predetermined priority as shown in Table 12-1.<br />
A standby release signal is generated.<br />
The maskable interrupt has four sources of external interrupts and seven sources of internal interrupts.<br />
12.2 Interrupt Sources and Configuration<br />
There are total of 12 non-maskable and maskable interrupts in the interrupt sources (see Table 12-1).<br />
Preliminary User’s Manual U14938EJ1V0UM 119
Note 1<br />
Interrupt Type Priority<br />
120<br />
CHAPTER 12 INTERRUPT FUNCTIONS<br />
Table 12-1. Interrupt Source List<br />
Interrupt Source Internal Vector Basic<br />
/External Table Configuration<br />
Name Trigger Address Note 2 Type<br />
Non-maskable — INTWDT Watchdog timer overflow (watchdog timer Internal 0004H (A)<br />
mode 1 selected)<br />
Maskable 0 INTWDT Watchdog timer overflow (interval timer<br />
mode selected)<br />
(B)<br />
1 INTP0 Pin input edge detection External 0006H (C)<br />
2 INTP1 0008H<br />
3 INTTM50 TI pin input rising edge detection 000AH (D)<br />
4 INTTM51 TI pin input falling edge detection 000CH<br />
5 INTTM52 8-bit remote control timer over flow signal Internal 000EH (B)<br />
6 INTKS Key scan timing 0010H<br />
7 INTCSI10 End of serial interface 10 transmission/<br />
reception<br />
0012H<br />
8 INTTM80 Generation of 8-bit timer 80 match signal 0014H<br />
9 INTTM81 Generation of 8-bit timer 81 match signal 0016H<br />
10 INTWT Watch timer interrupt 0018H<br />
11 INTWTI Watch timer interval timer interrupt 001AH<br />
Notes 1. Priority is the priority applicable when two or more maskable interrupts are simultaneously generated.<br />
0 is the highest priority and 11 is the lowest priority.<br />
2. Basic configuration types A to C correspond to A to C in Figure 12-1.<br />
Remark As the interrupt source of the watchdog timer (INTWDT), either a non-maskable interrupt or a maskable<br />
interrupt (internal) can be selected.<br />
Preliminary User’s Manual U14938EJ1V0UM
(A) Internal non-maskable interrupt<br />
(B) Internal maskable interrupt<br />
Interrupt request<br />
CHAPTER 12 INTERRUPT FUNCTIONS<br />
Figure 12-1. Basic Configuration of Interrupt Function<br />
(C) External maskable interrupt (INTP0, INTP1)<br />
Interrupt<br />
request<br />
Interrupt request<br />
IF: Interrupt request flag<br />
IE: Interrupt enable flag<br />
MK: Interrupt mask flag<br />
IF<br />
MK<br />
External interrupt mode<br />
register (INTM0)<br />
Edge<br />
detector<br />
IF<br />
MK<br />
Internal bus<br />
IE<br />
Internal bus<br />
Internal bus<br />
Vector table<br />
address generator<br />
IE<br />
Standby release signal<br />
Vector table<br />
address generator<br />
Standby release signal<br />
Vector table<br />
address generator<br />
Standby<br />
release signal<br />
Preliminary User’s Manual U14938EJ1V0UM 121
122<br />
CHAPTER 12 INTERRUPT FUNCTIONS<br />
(D) External maskable interrupt (INTTM50, INTTM51)<br />
Interrupt<br />
request<br />
Edge<br />
detector<br />
IF: Interrupt request flag<br />
IE: Interrupt enable flag<br />
MK: Interrupt mask flag<br />
IF<br />
MK<br />
Internal bus<br />
IE<br />
Preliminary User’s Manual U14938EJ1V0UM<br />
Vector table<br />
address generator<br />
Standby<br />
release signal
12.3 Interrupt Function Control Registers<br />
CHAPTER 12 INTERRUPT FUNCTIONS<br />
The following four registers are used to control the interrupt functions.<br />
• Interrupt request flag registers (IF0, IF1)<br />
• Interrupt mask flag registers (MK0, MK1)<br />
• External interrupt mode register (INTM0)<br />
• Program status word (PSW)<br />
Table 12-2 gives a listing of interrupt request flag and interrupt mask flag names corresponding to interrupt<br />
requests.<br />
Table 12-2. Flags Corresponding to Interrupt Request Signal<br />
Interrupt Request Signal Name Interrupt Request Flag Interrupt Mask Flag<br />
INTWDT WDTIF WDTMK<br />
INTP0 PIF0 PMK0<br />
INTP1 PIF1 PMK1<br />
INTTM50 TMIF50 TMMK50<br />
INTTM51 TMIF51 TMMK51<br />
INTTM52 TMIF52 TMMK52<br />
INTKS KSIF KSMK<br />
INTCSI10 CSIIF10 CSIMK10<br />
INTTM80 TMIF80 TMMK80<br />
INTTM81 TMIF81 TMMK81<br />
INTWT WTIF WTMK<br />
INTWTI WTIIF WTIMK<br />
Preliminary User’s Manual U14938EJ1V0UM 123
124<br />
CHAPTER 12 INTERRUPT FUNCTIONS<br />
(1) Interrupt request flag registers (IF0, IF1)<br />
The interrupt request flag is set to 1 when the corresponding interrupt request is generated or an instruction<br />
is executed. It is cleared to 0 when an instruction is executed upon acknowledgement of an interrupt request<br />
or upon RESET input.<br />
IF0 and IF1 are set with a 1-bit or 8-bit memory manipulation instruction.<br />
RESET input clears these registers to 00H.<br />
0<br />
1<br />
Figure 12-2. Interrupt Request Flag Register Format<br />
Symbol Address After reset R/W<br />
IF0 CSIIF10 KSIF TMIF52 TMIF51 TMIF50 PIF1 PIF0 WDTIF FFE0H 00H R/W<br />
Symbol 7 6 5 4 <br />
Address After reset<br />
IF1<br />
0 0 0 0 WTIIF WTIF TMIF81 TMIF80<br />
××IF×<br />
No interrupt request signal is generated<br />
Interrupt request flag<br />
Interrupt request signal is generated; Interrupt request state<br />
Cautions 1. WDTIF flag is R/W enabled only when the watchdog timer is used as an interval timer.<br />
If the watchdog timer mode 1 and 2 are used, set the WDTIF flag to 0.<br />
2. Because port 2 has an alternate function as the external interrupt input, when the output<br />
level is changed by specifying the output mode of the port function, an interrupt request<br />
flag is set. Therefore, the interrupt mask flag should be set to 1 before using the output<br />
mode.<br />
Preliminary User’s Manual U14938EJ1V0UM<br />
R/W<br />
FFE1H 00H R/W
CHAPTER 12 INTERRUPT FUNCTIONS<br />
(2) Interrupt mask flag registers (MK0, MK1)<br />
The interrupt mask flag is used to enable/disable the corresponding maskable interrupt service.<br />
MK0 and MK1 are set with a 1-bit or 8-bit memory manipulation instruction.<br />
RESET input sets these registers to FFH.<br />
0<br />
1<br />
Figure 12-3. Interrupt Mask Flag Register Format<br />
Symbol Address After reset R/W<br />
MK0 CSIMK10 KSMK TMMK52 TMMK51 TMMK50 PMK1 PMK0 WDTMK FFE4H FFH R/W<br />
Symbol 7 6 5 4 <br />
Address After reset R/W<br />
MK1 1 1 1 1 WTIMK WTMK TMMK81 TMMK80 FFE5H FFH R/W<br />
××MK×<br />
Interrupt servicing enabled<br />
Interrupt servicing disabled<br />
Interrupt servicing control<br />
Cautions 1. If the WDTMK flag is read when the watchdog timer is used in watchdog timer mode 1<br />
and 2, its value becomes undefined.<br />
2. Because port 2 has an alternate function as the external interrupt input, when the output<br />
level is changed by specifying the output mode of the port function, an interrupt request<br />
flag is set. Therefore, the interrupt mask flag should be set to 1 before using the output<br />
mode.<br />
Preliminary User’s Manual U14938EJ1V0UM 125
126<br />
CHAPTER 12 INTERRUPT FUNCTIONS<br />
(3) External interrupt mode register 0 (INTM0)<br />
This register is used to set the valid edge of INTP0 and INTP1.<br />
INTM0 is set with an 8-bit memory manipulation instruction.<br />
RESET input clears INTM0 to 00H.<br />
0<br />
0<br />
1<br />
1<br />
Figure 12-4. External Interrupt Mode Register 0 Format<br />
Symbol 7 6 5 4 3 2 1 0 Address After reset R/W<br />
INTM0 0 0 ES11 ES10 ES01 ES00 0 0 FFECH 00H R/W<br />
ES11 ES10<br />
0<br />
0<br />
1<br />
1<br />
ES01<br />
0<br />
1<br />
0<br />
1<br />
ES00<br />
0<br />
1<br />
0<br />
1<br />
Falling edge<br />
Rising edge<br />
Setting prohibited<br />
Both rising and falling edges<br />
Falling edge<br />
Rising edge<br />
Setting prohibited<br />
Both rising and falling edges<br />
INTP1 valid edge selection<br />
INTP0 valid edge selection<br />
Cautions 1. Be sure to set bits 0, 1, 6, and 7 to 0.<br />
2. Before setting the INTM0 register, be sure to set the corresponding interrupt mask flag<br />
(××MK× = 1) to disable interrupts. After setting the INTM0 register, clear the interrupt<br />
request flag (××IF× = 0), then clear the interrupt mask flag (××MK× = 0), which will enable<br />
interrupts.<br />
Preliminary User’s Manual U14938EJ1V0UM
CHAPTER 12 INTERRUPT FUNCTIONS<br />
(4) Program status word (PSW)<br />
The program status word is a register used to hold the instruction execution result and the current status for<br />
interrupt requests. The IE flag to set maskable interrupt enable/disable is mapped.<br />
This register can be read/written in 8-bit units and can carry out operations using a bit manipulation and<br />
dedicated instructions (EI, DI). When a vectored interrupt request is acknowledged, PSW is automatically<br />
saved into a stack, and the IE flag is reset to 0. It is reset from the stack by the RETI and POP PSW instructions.<br />
RESET input sets PSW to 02H.<br />
Symbol<br />
PSW<br />
Figure 12-5. Program Status Word Configuration<br />
7 6 5 4 3 2 1 0<br />
IE Z 0 AC 0 0 1 CY<br />
IE<br />
0<br />
1<br />
Disable<br />
Enable<br />
After reset<br />
02H<br />
Interrupt acknowledge enable/disable<br />
R/W<br />
R/W<br />
Used when normal instruction is executed<br />
Preliminary User’s Manual U14938EJ1V0UM 127
12.4 Interrupt Processing Operation<br />
128<br />
CHAPTER 12 INTERRUPT FUNCTIONS<br />
12.4.1 Non-maskable interrupt request acknowledgement operation<br />
The non-maskable interrupt request is unconditionally acknowledged even when interrupts are disabled. It is not<br />
subject to interrupt priority control and takes precedence over all other interrupts.<br />
When the non-maskable interrupt request is acknowledged, PSW and PC are saved to the stack in that order, the<br />
IE flag is reset to 0, the contents of the vector table are loaded to the PC, and then program execution branches.<br />
Figure 12-6 shows the flowchart from non-maskable interrupt request generation to acknowledgement. Figure<br />
12-7 shows the timing of non-maskable interrupt request acknowledgement. Figure 12-8 shows the acknowledgement<br />
operation if multiple non-maskable interrupts are generated.<br />
Caution During a non-maskable interrupt service program execution, do not input another non-maskable<br />
interrupt request; if it is input, the service program will be interrupted and the new interrupt<br />
request will be acknowledged.<br />
Preliminary User’s Manual U14938EJ1V0UM
CHAPTER 12 INTERRUPT FUNCTIONS<br />
Figure 12-6. Flowchart from Non-Maskable Interrupt Request Generation to Acknowledgement<br />
CPU processing<br />
WDTIF<br />
NMI request<br />
(first)<br />
Start<br />
WDTM4 = 1<br />
(watchdog timer mode<br />
is selected)<br />
Yes<br />
WDT<br />
overflows<br />
Yes<br />
WDTM3 = 0<br />
(non-maskable interrupt<br />
is selected)<br />
Yes<br />
Interrupt request is generated<br />
Interrupt processing is started<br />
WDTM: Watchdog timer mode register<br />
WDT: Watchdog timer<br />
Interval timer<br />
Figure 12-7. Timing of Non-Maskable Interrupt Request Acknowledgement<br />
Figure 12-8. Acknowledging Non-Maskable Interrupt Request<br />
No<br />
No<br />
No<br />
Instruction Instruction<br />
Main routine<br />
NMI request<br />
(second)<br />
Reset processing<br />
First interrupt processing<br />
Save PSW and PC, and<br />
jump to interrupt processing<br />
Interrupt processing<br />
program<br />
Second interrupt processing<br />
Preliminary User’s Manual U14938EJ1V0UM 129
130<br />
CHAPTER 12 INTERRUPT FUNCTIONS<br />
12.4.2 Maskable interrupt request acknowledgement operation<br />
A maskable interrupt request can be acknowledged when the interrupt request flag is set to 1 and the corresponding<br />
interrupt mask flag is cleared to 0. A vectored interrupt request is acknowledged in the interrupt enabled status (when<br />
the IE flag is set to 1).<br />
The time required to start the interrupt processing after a maskable interrupt request has been generated is shown<br />
in Table 12-3.<br />
Refer to Figures 12-10 and 12-11 for the interrupt request acknowledgement timing.<br />
Table 12-3. Time from Generation of Maskable Interrupt Request to Processing<br />
Minimum Time Maximum Time Note<br />
9 clocks 19 clocks<br />
Note The wait time is maximum when an<br />
interrupt request is generated immediately<br />
before BT and BF instruction.<br />
1<br />
Remark 1 clock: (fCPU: CPU clock)<br />
fCPU<br />
When two or more maskable interrupt requests are generated at the same time, they are acknowledged starting<br />
from the interrupt request assigned the highest priority.<br />
A pending interrupt is acknowledged when the status where it can be acknowledged is set.<br />
Figure 12-9 shows the algorithm of acknowledging interrupt requests.<br />
When a maskable interrupt request is acknowledged, the contents of PSW and PC are saved to the stack in that<br />
order, the IE flag is reset to 0, and the data in the vector table determined for each interrupt request is loaded to the<br />
PC, and execution branches.<br />
To return from interrupt processing, use the RETI instruction.<br />
Preliminary User’s Manual U14938EJ1V0UM
CHAPTER 12 INTERRUPT FUNCTIONS<br />
Figure 12-9. Interrupt Acknowledgement Program Algorithm<br />
No<br />
Start<br />
××IF = 1 ?<br />
××MK = 0 ?<br />
IE = 1 ?<br />
Vectored interrupt<br />
processing<br />
Yes (Interrupt request generated)<br />
Yes<br />
Yes<br />
No<br />
No<br />
Interrupt request pending<br />
Interrupt request pending<br />
××IF: Interrupt request flag<br />
××MK: Interrupt mask flag<br />
IE: Flag to control maskable interrupt request acknowledgement (1 = enable, 0 = disable)<br />
Preliminary User’s Manual U14938EJ1V0UM 131
132<br />
CHAPTER 12 INTERRUPT FUNCTIONS<br />
Figure 12-10. Interrupt Request Acknowledgement Timing (Example of MOV A,r)<br />
If an interrupt request flag (××IF) is set before an instruction clock n (n = 4 to 10) under execution becomes n–<br />
1, the interrupt is acknowledged after the instruction under execution is complete. Figure 12-10 shows an example<br />
of the interrupt request acknowledgement timing for an 8-bit data transfer instruction MOV A,r. Since this instruction<br />
is executed for 4 clocks, if an interrupt occurs for 3 clocks after the execution starts, the interrupt acknowledgement<br />
processing is performed after the MOV A,r instruction is completed.<br />
Clock<br />
Clock<br />
CPU<br />
Interrupt<br />
CPU<br />
Interrupt<br />
MOV A,r<br />
Figure 12-11. Interrupt Request Acknowledgement Timing<br />
(When Interrupt Request Flag Is Generated at the<br />
Last Clock During Instruction Execution)<br />
NOP MOV A,r<br />
8 clocks<br />
Save PSW and PC, jump<br />
to interrupt processing<br />
If an interrupt request flag (××IF) is set at the last clock of the instruction, the interrupt acknowledgement processing<br />
starts after the next instruction is executed.<br />
Figure 12-11 shows an example of the interrupt acknowledgement timing for an interrupt request flag that is set<br />
at the second clock of NOP (2-clock instruction). In this case, the MOV A,r instruction after the NOP instruction is<br />
executed, and then the interrupt acknowledgement processing is performed.<br />
Caution Interrupt requests are kept pending while the interrupt request flag register (IF0, IF1) or the<br />
interrupt mask flag register (MK0, MK1) is being accessed.<br />
12.4.3 Multiple interrupt processing<br />
Multiple interrupt processing in which another interrupt is acknowledged while an interrupt is being processed can<br />
be processed by priority. When the priority is controlled by the default priority and two or more interrupts are generated<br />
at once, interrupt processing is performed according to the priority assigned to each interrupt request in advance (refer<br />
to Table 12-1).<br />
Preliminary User’s Manual U14938EJ1V0UM<br />
Interrupt processing program<br />
8 clocks<br />
Save PSW and PC, jump<br />
to interrupt processing<br />
Interrupt<br />
processing<br />
program
INTxx<br />
CHAPTER 12 INTERRUPT FUNCTIONS<br />
Figure 12-12. Example of Multiple Interrupts<br />
Example 1. Multiple interrupts are acknowledged<br />
During interrupt INTxx servicing, interrupt request INTyy is acknowledged, and a multiple interrupt is generated.<br />
An EI instruction is issued before each interrupt request acknowledgement, and the interrupt request acknowledgement<br />
enable state is set.<br />
Example 2. A multiple interrupt is not generated because interrupts are not enabled<br />
INTxx<br />
Main processing<br />
EI<br />
Main processing<br />
EI<br />
IE = 0<br />
IE = 0<br />
INTyy<br />
INTyy<br />
Because interrupts are not enabled in interrupt INTxx servicing (an EI instruction is not issued), interrupt request<br />
INTyy is not acknowledged, and a multiple interrupt is not generated. The INTyy request is kept pending and<br />
acknowledged after the INTxx processing is performed.<br />
IE = 0: Interrupt request acknowledgement disabled<br />
INTxx processing<br />
EI<br />
RETI<br />
INTxx processing<br />
IE = 0<br />
RETI<br />
IE = 0<br />
INTyy processing<br />
RETI<br />
INTyy processing<br />
INTyy is kept pending<br />
RETI<br />
Preliminary User’s Manual U14938EJ1V0UM 133
134<br />
CHAPTER 12 INTERRUPT FUNCTIONS<br />
12.4.4 Interrupt request pending<br />
Some instructions may hold pending the acknowledgement of an instruction request until the completion of the<br />
execution of the next instruction even if the interrupt request (maskable interrupt, non-maskable interrupt, and external<br />
interrupt) is generated during the execution. The following shows such instructions.<br />
• Manipulation instruction for the interrupt request flag register (IF0, IF1)<br />
• Manipulation instruction for the interrupt mask flag register (MK0, MK1)<br />
Preliminary User’s Manual U14938EJ1V0UM
13.1 Standby Function and Configuration<br />
CHAPTER 13 STANDBY FUNCTION<br />
13.1.1 Standby function<br />
The standby function is to reduce the power consumption of the system and can be effected in the following two<br />
modes:<br />
(1) HALT mode<br />
This mode is set when the HALT instruction is executed. The HALT mode stops the operation clock of the<br />
CPU. The system clock oscillation circuit continues oscillating. This mode does not reduce the power<br />
consumption as much as the STOP mode, but is useful for resuming processing immediately when an interrupt<br />
request is generated, or for intermittent operations.<br />
(2) STOP mode<br />
This mode is set when the STOP instruction is executed. The STOP mode stops the main system clock<br />
oscillation circuit and stops the entire system. The power consumption of the CPU can be substantially reduced<br />
in this mode.<br />
The low voltage (VDD = 1.8 V) of the data memory can be retained. Therefore, this mode is useful for retaining<br />
the contents of the data memory at an extremely low current.<br />
The STOP mode can be released by an interrupt request, so that this mode can be used for intermittent<br />
operation. However, some time is required until the system clock oscillation circuit stabilizes after the STOP<br />
mode has been released. If processing must be resumed immediately by using an interrupt request, therefore,<br />
use the HALT mode.<br />
In both modes, the previous contents of the registers, flags, and data memory before setting the standby mode<br />
are all retained. In addition, the statuses of the output latch of the I/O ports and output buffer are also retained.<br />
Caution To set the STOP mode, be sure to stop the operations of the peripheral hardware, and then<br />
execute the STOP instruction.<br />
Preliminary User’s Manual U14938EJ1V0UM 135
136<br />
CHAPTER 13 STANDBY FUNCTION<br />
13.1.2 Register controlling standby function<br />
The wait time after the STOP mode is released upon interrupt request until the oscillation stabilizes is controlled<br />
with the oscillation stabilization time select register (OSTS).<br />
OSTS is set with an 8-bit memory manipulation instruction.<br />
RESET input sets OSTS to 04H. However, the oscillation stabilization time after RESET input is 215 /fX, instead<br />
of 217 /fX.<br />
OSTS2 OSTS1 OSTS0<br />
0<br />
0<br />
1<br />
Figure 13-1. Oscillation Stabilization Time Select Register Format<br />
Symbol 7 6 5 4 3 2 1 0 Address After reset R/W<br />
OSTS 0 0 0 0 0 OSTS2 OSTS1 OSTS0 FFFAH 04H R/W<br />
0<br />
1<br />
0<br />
0<br />
0<br />
0<br />
Other than above<br />
212 /fX (819 µ s)<br />
215 /fX (6.55 ms)<br />
217 /fX (26.2 ms)<br />
Setting prohibited<br />
Oscillation stabilization time selection<br />
Caution The wait time after the STOP mode is released does not include the time from STOP mode<br />
release to clock oscillation start (“a” in the figure below), regardless of release by RESET<br />
input or by interrupt generation.<br />
X1 pin voltage<br />
waveform<br />
VSS<br />
STOP mode release<br />
Remarks 1. fX: Main system clock oscillation frequency<br />
2. Values in parentheses apply to operation with fX = 5.0 MHz.<br />
Preliminary User’s Manual U14938EJ1V0UM<br />
a
13.2 Operation of Standby Function<br />
13.2.1 HALT mode<br />
CHAPTER 13 STANDBY FUNCTION<br />
(1) HALT mode<br />
The HALT mode is set by executing the HALT instruction.<br />
The operation status in the HALT mode is shown in the following table.<br />
Table 13-1. HALT Mode Operating Status<br />
Item Operating Status in HALT Mode Operating Status in HALT Mode<br />
During Main System Clock Operation During Subsystem Clock Operation<br />
Subsystem Clock Subsystem Main System Main System Clock<br />
Operating Clock Stopped Clock<br />
Operating<br />
Stopped<br />
Main system clock Oscillation enabled Oscillation stopped<br />
CPU Operation stopped<br />
Port (output latch) Retains the status before setting the HALT mode<br />
8-bit remote control timer 50 Operable Operation stopped<br />
8-bit timer 80 Operable Operation stopped<br />
8-bit timer 81 Operable Operation stopped<br />
Watch timer Operable OperableNote 1 Operable OperableNote 2<br />
Watchdog timer Operable Operation stopped<br />
Serial interface 10 Operable OperableNote 3<br />
VFD controller/driver Operation stopped (retains output data)<br />
External interrupt OperableNote 4<br />
Notes 1. Operable when the main system clock is selected.<br />
2. Operable when the subsystem clock is selected.<br />
3. Operable only when the external clock is selected.<br />
4. Maskable interrupt that is not masked.<br />
Preliminary User’s Manual U14938EJ1V0UM 137
138<br />
CHAPTER 13 STANDBY FUNCTION<br />
(2) Releasing HALT mode<br />
The HALT mode can be released by the following three types of sources.<br />
(a) Releasing by unmasked interrupt request<br />
The HALT mode is released by an unmasked interrupt request. In this case, if the interrupt request is<br />
able to be acknowledged, vectored interrupt processing is performed. If the interrupt is disabled, the<br />
instruction at the next address is executed.<br />
Standby<br />
release signal<br />
Clock<br />
Operating<br />
mode<br />
Figure 13-2. Releasing HALT Mode by Interrupt<br />
HALT<br />
instruction<br />
HALT mode<br />
Oscillation<br />
Remarks 1. The broken lines indicate the case where the interrupt request that has released the<br />
standby mode is acknowledged.<br />
2. The wait time is as follows:<br />
• When vectored interrupt processing is performed: 9 to 10 clocks<br />
• When vectored interrupt processing is not performed: 1 to 2 clocks<br />
(b) Releasing by non-maskable interrupt request<br />
The HALT mode is released regardless of whether the interrupt is enabled or disabled, and vectored<br />
interrupt processing is performed.<br />
Wait<br />
Wait<br />
Preliminary User’s Manual U14938EJ1V0UM<br />
Operating mode
CHAPTER 13 STANDBY FUNCTION<br />
(c) Releasing by RESET input<br />
When the HALT mode is released by the RESET signal, execution branches to the reset vector address<br />
in the same manner as the ordinary reset operation, and program execution is started.<br />
Figure 13-3. Releasing HALT Mode by RESET Input<br />
Remark fX: Main system clock oscillation frequency<br />
Table 13-2. Operation After Release of HALT Mode<br />
Releasing Source MK×× IE Operation<br />
Maskable interrupt request 0 0 Executes next address instruction<br />
0 1 Executes interrupt processing<br />
1 × Retains HALT mode<br />
Non-maskable interrupt request — × Executes interrupt processing<br />
RESET input — — Reset processing<br />
×: don’t care<br />
RESET<br />
signal<br />
Clock<br />
Operating<br />
mode<br />
HALT<br />
instruction<br />
HALT mode<br />
Reset<br />
period<br />
Wait<br />
Oscillation<br />
stabilization<br />
wait status<br />
Oscillation<br />
stop<br />
Oscillation Oscillation<br />
Operating<br />
mode<br />
Preliminary User’s Manual U14938EJ1V0UM 139
13.2.2 STOP mode<br />
140<br />
CHAPTER 13 STANDBY FUNCTION<br />
(1) Setting and operation status of STOP mode<br />
The STOP mode is set by executing the STOP instruction.<br />
Cautions 1. When the STOP mode is set, the X2 or CL2 pin is internally pulled up to VDD to suppress<br />
the current leakage of the oscillation circuit block. Therefore, do not use the STOP mode<br />
in a system where the external clock is used as the system clock.<br />
2. Because the standby mode can be released by an interrupt request signal, the standby<br />
mode is released as soon as it is set if there is an interrupt source whose interrupt request<br />
flag is set and interrupt mask flag is reset. When the STOP mode is set, therefore, the<br />
HALT mode is set immediately after the STOP instruction has been executed, the wait<br />
time set by the oscillation stabilization time select register (OSTS) elapses, and then an<br />
operation mode is set.<br />
The operation status in the STOP mode is shown in the following table.<br />
Table 13-3. STOP Mode Operating Status<br />
Item Operating Status in STOP Mode During Main System Clock Operation<br />
Main system clock Oscillation stopped<br />
CPU Operation stopped<br />
Subsystem Clock Operating Subsystem Clock Stopped<br />
Port (output latch) Retains the status before setting the STOP mode<br />
8-bit remote control timer 50 Operation stopped<br />
8-bit timer 80 Operation stopped<br />
8-bit timer 81 Operation stopped<br />
Watch timer Operable Note 1 Operation stopped<br />
Watchdog timer Operation stopped<br />
Serial interface 10 OperableNote 2<br />
VFD controller/driver Operation stopped (retains output data)<br />
External interrupt OperableNote 3<br />
Notes 1. Operable when the subsystem clock is selected.<br />
2. Operable only when the external clock is selected.<br />
3. Maskable interrupt that is not masked.<br />
Preliminary User’s Manual U14938EJ1V0UM
CHAPTER 13 STANDBY FUNCTION<br />
(2) Releasing STOP mode<br />
The STOP mode can be released by the following two types of sources.<br />
(a) Releasing by unmasked interrupt request<br />
The STOP mode can be released by an unmasked interrupt request. In this case, if the interrupt is able<br />
to be acknowledged, vectored interrupt processing is performed, after the oscillation stabilization time<br />
has elapsed. If the interrupt is disabled, the instruction at the next address is executed.<br />
Standby<br />
release signal<br />
Clock<br />
Operating<br />
mode<br />
Oscillation<br />
Figure 13-4. Releasing STOP Mode by Interrupt<br />
STOP<br />
instruction<br />
STOP mode<br />
Wait<br />
(set time by OSTS)<br />
Oscillation stabilization<br />
wait status<br />
Oscillation<br />
stop Oscillation<br />
Operating<br />
mode<br />
Remark The broken lines indicate the case where the interrupt request that has released the standby<br />
mode is acknowledged.<br />
Preliminary User’s Manual U14938EJ1V0UM 141
142<br />
CHAPTER 13 STANDBY FUNCTION<br />
(b) Releasing by RESET input<br />
When the STOP mode is released by the RESET signal, the reset operation is performed after the<br />
oscillation stabilization time has elapsed.<br />
Figure 13-5. Releasing STOP Mode by RESET Input<br />
Remark fX: Main system clock oscillation frequency<br />
Table 13-4. Operation After Release of STOP Mode<br />
Releasing Source MK×× IE Operation<br />
Maskable interrupt request 0 0 Executes next address instruction<br />
0 1 Executes interrupt processing<br />
1 × Retains STOP mode<br />
RESET input — — Reset processing<br />
×: don’t care<br />
RESET<br />
signal<br />
Clock<br />
Operating<br />
mode<br />
Oscillation<br />
STOP<br />
instruction<br />
STOP mode<br />
Reset<br />
period<br />
Preliminary User’s Manual U14938EJ1V0UM<br />
Wait<br />
Oscillation<br />
stabilization<br />
wait status<br />
Oscillation<br />
stop Oscillation<br />
Operating<br />
mode
CHAPTER 14 RESET FUNCTION<br />
The following two operations are available to generate reset signals.<br />
(1) External reset input with RESET pin<br />
(2) Internal reset by program runaway time detection with watchdog timer<br />
External and internal reset have no functional differences. In both cases, program execution starts at the addresses<br />
0000H and 0001H by reset signal input.<br />
When a low level is input to the RESET pin or the watchdog timer overflows, a reset is applied and each hardware<br />
item is set to the status shown in Table 14-1. Each pin has a high impedance during reset input or during the oscillation<br />
stabilization time just after reset clear.<br />
When a high level is input to the RESET pin, the reset is cleared and program execution is started after the oscillation<br />
stabilization time has elapsed. The reset applied by the watchdog timer overflow is automatically cleared after reset,<br />
and program execution is started after the oscillation stabilization time has elapsed (see Figures 14-2 to 14-4).<br />
Cautions 1. For an external reset, input a low level for 10 µs or more to the RESET pin.<br />
2. When the STOP mode is cleared by reset, the STOP mode contents are held during reset input.<br />
However, the port pins become high impedance.<br />
RESET<br />
Count clock<br />
Figure 14-1. Block Diagram of Reset Function<br />
Reset control circuit<br />
Watchdog timer<br />
Stop<br />
Overflow<br />
Reset signal<br />
Interrupt function<br />
Preliminary User’s Manual U14938EJ1V0UM 143
144<br />
X1, CL1<br />
RESET<br />
Internal<br />
reset signal<br />
Port pin<br />
X1, CL1<br />
Overflow in<br />
watchdog timer<br />
Internal<br />
reset signal<br />
Port pin<br />
X1, CL1<br />
RESET<br />
Internal<br />
reset signal<br />
Port pin<br />
During normal<br />
operation<br />
During normal operation<br />
CHAPTER 14 RESET FUNCTION<br />
Figure 14-2. Reset Timing by RESET Input<br />
Reset period<br />
(oscillation<br />
stops)<br />
Delay Delay<br />
Oscillation<br />
stabilization<br />
time wait<br />
Figure 14-3. Reset Timing by Overflow in Watchdog Timer<br />
Reset period<br />
(oscillation<br />
continues)<br />
Figure 14-4. Reset Timing by RESET Input in STOP Mode<br />
STOP instruction execution<br />
Stop status<br />
During normal operation (oscillation<br />
stops)<br />
Reset period<br />
(oscillation<br />
stops)<br />
Delay Delay<br />
Preliminary User’s Manual U14938EJ1V0UM<br />
Hi-Z<br />
Oscillation<br />
stabilization<br />
time wait<br />
Hi-Z<br />
Oscillation<br />
stabilization<br />
time wait<br />
Hi-Z<br />
Normal operation<br />
(reset processing)<br />
Normal operation<br />
(reset processing)<br />
Normal operation<br />
(reset processing)
CHAPTER 14 RESET FUNCTION<br />
Table 14-1. Hardware Status After Reset<br />
Hardware Status after Reset<br />
Program counter (PC) Note 1 The contents of reset<br />
vector tables (0000H and<br />
0001H) are set.<br />
Stack pointer (SP) Undefined<br />
Program status word (PSW) 02H<br />
RAM Data memory UndefinedNote 2<br />
General-purpose register UndefinedNote 2<br />
Port (P0 to P2, P8, P9) (Output latch) 00H<br />
Port mode register (PM0 to PM2) FFH<br />
Pull-up resistor option register 0 (PU0) 00H<br />
Pull-up resistor option register B2 (PUB2) 00H<br />
Processor clock control register (PCC) 02H<br />
Oscillation stabilization time select register (OSTS) 04H<br />
8-bit remote control timer Control register (TMC50) 00H<br />
Capture register (CP50, CP51) 00H<br />
8-bit timer Timer counter (TM80, TM81) 00H<br />
Compare register (CR80, CR81) 00H<br />
Mode control register (TMC80, TMC81) 00H<br />
Watch timer Mode control register (WTM) 00H<br />
Watchdog timer Timer clock select register (WDCS) 00H<br />
Mode register (WDTM) 00H<br />
Serial interface 10 Mode register (CSIM10) 00H<br />
Transmit/receive shift register 10 (SIO10) Undefined<br />
VFD controller/driver Display mode register 0 (DSPM0) 10H<br />
Display mode register 1 (DSPM1) 01H<br />
Display mode register 2 (DSPM2) 00H<br />
Interrupt Request flag register (IF0, IF1) 00H<br />
Mask flag register (MK0, MK1) FFH<br />
External Interrupt mode register (INTM0) 00H<br />
Notes 1. During reset input and oscillation stabilization time wait, only the PC contents among the hardware<br />
statuses become undefined.<br />
All other hardware remains unchanged after reset.<br />
2. If the reset signal is input in the standby mode, the status before reset is retained even after reset.<br />
Preliminary User’s Manual U14938EJ1V0UM 145
146<br />
CHAPTER 15 µPD78F9872<br />
The µPD78F9872 is a version with flash memory instead of the internal ROM of the mask ROM version in the<br />
µPD789871 <strong>Subseries</strong>. The differences between the flash memory and the mask ROM versions are shown in Table<br />
15-1.<br />
Table 15-1. Differences Between Flash Memory and Mask ROM Versions<br />
Item Flash Memory Mask ROM<br />
µPD78F9872 µPD789870 µPD789871<br />
Internal ROM 16 KB 4 KB 8 KB<br />
memory (flash memory)<br />
High-speed RAM 512 bytes<br />
VFD display RAM 96 bytes<br />
IC pin Not provided Provided<br />
VPP pin Provided Not provided<br />
Pull-down resister of FIP0 to FIP8 Provided<br />
On-chip pull-down resister of<br />
P80/FIP24 to P87/FIP17<br />
(connected to VLOAD using mask<br />
option)<br />
Not provided Provided<br />
Pull-down resister of P90/FIP16 to<br />
P97/FIP9<br />
Not provided Provided<br />
Electrical specifications There are differences between flash memory versions and mask ROM<br />
versions.<br />
Caution There are differences in noise immunity and noise radiation between the flash memory versions<br />
and mask ROM versions. When pre-producing an application set with the flash memory version<br />
and then mass-producing it with the mask ROM version, be sure to conduct sufficient evaluations<br />
for the commercial samples (not engineering samples) of the mask ROM versions.<br />
Preliminary User’s Manual U14938EJ1V0UM
15.1 Flash Memory Programming<br />
VPP<br />
RESET<br />
10 V<br />
VDD<br />
VSS<br />
VDD<br />
VSS<br />
CHAPTER 15 µPD78F9872<br />
The on-chip program memory in the µPD78F9872 is flash memory.<br />
The flash memory can be written with the µPD78F9116A mounted on the target system (on-board). Connect the<br />
dedicated flash programmer (Flashpro III (part number: FL-PR3, PG-FP3)) to the host machine and target system<br />
to write the flash memory.<br />
Remark FL-PR3 is made by Naito Densei Machida Mfg. Co., Ltd.<br />
15.1.1 Selecting communication mode<br />
The flash memory is written by using Flashpro III and by means of serial communication. Select a communication<br />
mode from those listed in Table 15-2. To select a communication mode, the format shown in Figure 15-1 is used.<br />
Each communication mode is selected by the number of VPP pulses shown in Table 15-2.<br />
Table 15-2. Communication Mode<br />
Communication Mode Pins Used Number of VPP Pulses<br />
3-wire serial I/O SCK10/P20<br />
SO10/P21<br />
SI10/P22<br />
0<br />
Caution Be sure to select a communication mode based on the VPP pulse number shown in Table 15-2.<br />
Figure 15-1. Communication Mode Selection Format<br />
1 2 n<br />
Preliminary User’s Manual U14938EJ1V0UM 147
148<br />
CHAPTER 15 µPD78F9872<br />
15.1.2 Function of flash memory programming<br />
By transmitting/receiving commands and data in the selected communication mode, operations such as writing<br />
to the flash memory are performed. Table 15-3 shows the major functions of flash memory programming.<br />
Table 15-3. Functions of Flash Memory Programming<br />
Function Description<br />
Batch erase Erases all contents of memory<br />
Batch blank check Checks erased state of entire memory<br />
Data write Write to flash memory based on write start address and number of data written (number of bytes)<br />
Batch verify Compares all contents of memory with input data<br />
15.1.3 Flashpro III connection example<br />
A connection example between the Flashpro III and the µPD78F9872 is shown in Figure 15-2.<br />
Figure 15-2. Flashpro III Connection in 3-Wire Serial I/O Mode<br />
Flashpro III µ<br />
PD78F9872<br />
Note n = 1, 2<br />
VPPn Note<br />
VDD<br />
RESET<br />
SCK<br />
SO<br />
SI<br />
GND<br />
VPP<br />
CLK X1<br />
Preliminary User’s Manual U14938EJ1V0UM<br />
VDD0, VDD1<br />
RESET<br />
SCK10<br />
SI10<br />
SO10<br />
VSS0
CHAPTER 15 µPD78F9872<br />
15.1.4 Example of settings for Flashpro III (PG-FP3)<br />
Make the following setting when writing to flash memory using Flashpro III (PG-FP3).<br />
Load the parameter file.<br />
Select serial mode and serial clock using the type command.<br />
An example of the settings for the PG-FP3 is shown below.<br />
Table 15-4. Example of Settings for PG-FP3<br />
Communication Mode Example of Setting for PG-FP3 Number of VPP Pulses Note<br />
3-wire serial I/O COMM PORT SIO-ch0 0<br />
CPU CLK On Target Board<br />
In Flashpro<br />
On Target Board 4.1943 MHz<br />
SIO CLK 1.0 MHz<br />
In Flashpro 4.0 MHz<br />
SIO CLK 1.0 MHz<br />
Note The number of VPP pulses supplied from Flashpro III when serial communication is initialized. The pins<br />
to be used for communication are determined according to the number of these pulses.<br />
Remark COMM PORT: Selection of serial port<br />
SIO CLK: Selection of serial clock frequency<br />
CPU CLK: Selection of source of CPU clock to be input<br />
Preliminary User’s Manual U14938EJ1V0UM 149
150<br />
CHAPTER 16 MASK OPTION (MASK ROM VERSION)<br />
• Mask option of FIP17/P87 to FIP24/P80<br />
An on-chip pull-down resistor for VLOAD can be specified by a mask option.<br />
Caution The flash memory versions do not provide the on-chip pull-down resistor of P80 to P87.<br />
Preliminary User’s Manual U14938EJ1V0UM
CHAPTER 17 INSTRUCTION SET<br />
This chapter lists the instruction set of the µPD789871 <strong>Subseries</strong>. For the details of the operation and machine<br />
language (instruction code) of each instruction, refer to 78K/0S Series User’s Manual Instruction (U11047E).<br />
17.1 Operation<br />
17.1.1 Operand identifiers and description methods<br />
Operands are described in “Operand” column of each instruction in accordance with the description method of the<br />
instruction operand identifier (refer to the assembler specifications for detail). When there are two or more description<br />
methods, select one of them. Alphabetic letters in capitals and symbols, #, !, $, and [ ] are key words and are described<br />
as they are. Each symbol has the following meaning.<br />
• #: Immediate data specification • $: Relative address specification<br />
• !: Absolute address specification • [ ]: Indirect address specification<br />
In the case of immediate data, describe an appropriate numeric value or a label. When using a label, be sure to<br />
describe the #, !, $ and [ ] symbols.<br />
For operand register identifiers, r and rp, either function names (X, A, C, etc.) or absolute names (names in<br />
parenthesis in the table below, R0, R1, R2, etc.) can be used for description.<br />
Table 17-1. Operand Identifiers and Description Methods<br />
Identifier Description Method<br />
r X (R0), A (R1), C (R2), B (R3), E (R4), D (R5), L (R6), H (R7)<br />
rp AX (RP0), BC (RP1), DE (RP2), HL (RP3)<br />
sfr Special-function register symbol<br />
saddr FE20H to FF1FH Immediate data or labels<br />
saddrp FE20H to FF1FH Immediate data or labels (even addresses only)<br />
addr16 0000H to FFFFH Immediate data or labels (only even addresses for 16-bit data transfer instructions)<br />
addr5 0040H to 007FH Immediate data or labels (even addresses only)<br />
word 16-bit immediate data or label<br />
byte 8-bit immediate data or label<br />
bit 3-bit immediate data or label<br />
Remark Refer to Table 3-3 Special Function Register List for symbols of special function registers.<br />
Preliminary User’s Manual U14938EJ1V0UM 151
17.1.2 Description of “operation” column<br />
152<br />
CHAPTER 17 INSTRUCTION SET<br />
A: A register; 8-bit accumulator<br />
X: X register<br />
B: B register<br />
C: C register<br />
D: D register<br />
E: E register<br />
H: H register<br />
L: L register<br />
AX: AX register pair; 16-bit accumulator<br />
BC: BC register pair<br />
DE: DE register pair<br />
HL: HL register pair<br />
PC: Program counter<br />
SP: Stack pointer<br />
PSW: Program status word<br />
CY: Carry flag<br />
AC: Auxiliary carry flag<br />
Z: Zero flag<br />
IE: Interrupt request enable flag<br />
NMIS: Flag indicating non-maskable interrupt servicing in progress<br />
( ): Memory contents indicated by address or register contents in parenthesis<br />
×H, ×L: Higher 8 bits and lower 8 bits of 16-bit register<br />
∧: Logical product (AND)<br />
∨: Logical sum (OR)<br />
∨: Exclusive logical sum (exclusive OR)<br />
: Inverted data<br />
addr16: 16-bit immediate data or label<br />
jdisp8: Signed 8-bit data (displacement value)<br />
17.1.3 Description of “flag operation” column<br />
(Blank): Unchanged<br />
0: Cleared to 0<br />
1: Set to 1<br />
×: Set/cleared according to the result<br />
R: Previously saved value is restored<br />
Preliminary User’s Manual U14938EJ1V0UM
17.2 Operation List<br />
CHAPTER 17 INSTRUCTION SET<br />
Mnemonic Operands Byte Clock Operation<br />
MOV r,#byte 3 6 r ← byte<br />
saddr,#byte 3 6 (saddr) ← byte<br />
sfr,#byte 3 6 sfr ← byte<br />
A,r Note 1 2 4 A ← r<br />
r,A Note 1 2 4 r ← A<br />
A,saddr 2 4 A ← (saddr)<br />
saddr,A 2 4 (saddr) ← A<br />
A,sfr 2 4 A ← sfr<br />
sfr,A 2 4 sfr ← A<br />
A,!addr16 3 8 A ← (addr16)<br />
!addr16,A 3 8 (addr16) ← A<br />
Flag<br />
Z ACCY<br />
PSW,#byte 3 6 PSW ← byte × × ×<br />
A,PSW 2 4 A ← PSW<br />
PSW,A 2 4 PSW ← A × × ×<br />
A,[DE] 1 6 A ← (DE)<br />
[DE],A 1 6 (DE) ← A<br />
A,[HL] 1 6 A ← (HL)<br />
[HL],A 1 6 (HL) ← A<br />
A,[HL+byte] 2 6 A ← (HL+byte)<br />
[HL+byte],A 2 6 (HL+byte) ← A<br />
XCH A,X 1 4 A ↔ X<br />
A,r Note 2 2 6 A ↔ r<br />
A,saddr 2 6 A ↔ (saddr)<br />
A,sfr 2 6 A ↔ sfr<br />
A,[DE] 1 8 A ↔ (DE)<br />
A,[HL] 1 8 A ↔ (HL)<br />
A,[HL+byte] 2 8 A ↔ (HL+byte)<br />
Notes 1. Except r = A.<br />
2. Except r = A, X.<br />
Remark One instruction clock cycle is one CPU clock cycle (fCPU) selected by the Processor Clock Control<br />
Register (PCC).<br />
Preliminary User’s Manual U14938EJ1V0UM 153
154<br />
CHAPTER 17 INSTRUCTION SET<br />
Mnemonic Operands Byte Clock Operation<br />
MOVW rp,#word 3 6 rp ← word<br />
AX,saddrp 2 6 AX ← (saddrp)<br />
saddrp,AX 2 8 (saddrp) ← AX<br />
AX,rp Note 1 4 AX ← rp<br />
rp,AX Note 1 4 rp ← AX<br />
XCHW AX,rp Note 1 8 AX ↔ rp<br />
Preliminary User’s Manual U14938EJ1V0UM<br />
Flag<br />
Z ACCY<br />
ADD A,#byte 2 4 A,CY ← A + byte × × ×<br />
saddr,#byte 3 6 (saddr),CY ← (saddr) + byte × × ×<br />
A,r 2 4 A,CY ← A + r × × ×<br />
A,saddr 2 4 A,CY ← A + (saddr) × × ×<br />
A,!addr16 3 8 A,CY ← A + (addr16) × × ×<br />
A,[HL] 1 6 A,CY ← A + (HL) × × ×<br />
A,[HL+byte] 2 6 A,CY ← A + (HL+byte) × × ×<br />
ADDC A,#byte 2 4 A,CY ← A+ byte + CY × × ×<br />
saddr,#byte 3 6 (saddr),CY ← (saddr) + byte + CY × × ×<br />
A,r 2 4 A,CY ← A + r + CY × × ×<br />
A,saddr 2 4 A,CY ← A + (saddr) + CY × × ×<br />
A,!addr16 3 8 A,CY ← A + (addr16) + CY × × ×<br />
A,[HL] 1 6 A,CY ← A + (HL) + CY × × ×<br />
A,[HL+byte] 2 6 A,CY ← A + (HL+byte) + CY × × ×<br />
SUB A,#byte 2 4 A,CY ← A – byte × × ×<br />
saddr,#byte 3 6 (saddr), CY ← (saddr) – byte × × ×<br />
A,r 2 4 A,CY ← A – r × × ×<br />
A,saddr 2 4 A,CY ← A – (saddr) × × ×<br />
A,!addr16 3 8 A,CY ← A – (addr16) × × ×<br />
A,[HL] 1 6 A,CY ← A – (HL) × × ×<br />
A,[HL+byte] 2 6 A,CY ← A – (HL+byte) × × ×<br />
Note Only when rp = BC, DE, or HL.<br />
Remark One instruction clock cycle is one CPU clock cycle (fCPU) selected by the Processor Clock Control<br />
Register (PCC).
CHAPTER 17 INSTRUCTION SET<br />
Mnemonic Operands Byte Clock Operation<br />
Flag<br />
Z ACCY<br />
SUBC A,#byte 2 4 A,CY ← A – byte – CY × × ×<br />
saddr,#byte 3 6 (saddr),CY ← (saddr) – byte – CY × × ×<br />
A,r 2 4 A,CY ← A – r – CY × × ×<br />
A,saddr 2 4 A,CY ← A – (saddr) – CY × × ×<br />
A,!addr16 3 8 A,CY ← A – (addr16) – CY × × ×<br />
A,[HL] 1 6 A,CY ← A – (HL) – CY × × ×<br />
A,[HL+byte] 2 6 A,CY ← A – (HL+byte) – CY × × ×<br />
AND A,#byte 2 4 A ← A ∧ byte ×<br />
saddr,#byte 3 6 (saddr) ← (saddr) ∧ byte ×<br />
A,r 2 4 A ← A ∧ r ×<br />
A,saddr 2 4 A ← A ∧ (saddr) ×<br />
A,!addr16 3 8 A ← A ∧ (addr16) ×<br />
A,[HL] 1 6 A ← A ∧ (HL) ×<br />
A,[HL+byte] 2 6 A ← A ∧ (HL+byte) ×<br />
OR A,#byte 2 4 A ← A ∨ byte ×<br />
saddr,#byte 3 6 (saddr) ← (saddr) ∨ byte ×<br />
A,r 2 4 A ← A ∨ r ×<br />
A,saddr 2 4 A ← A ∨ (saddr) ×<br />
A,!addr16 3 8 A ← A ∨ (addr16) ×<br />
A,[HL] 1 6 A ← A ∨ (HL) ×<br />
A,[HL+byte] 2 6 A ← A ∨ (HL+byte) ×<br />
XOR A,#byte 2 4 A ← A ∨ byte ×<br />
saddr,#byte 3 6 (saddr) ← (saddr) ∨ byte ×<br />
A,r 2 4 A ← A ∨ r ×<br />
A,saddr 2 4 A ← A ∨ (saddr) ×<br />
A,!addr16 3 8 A ← A ∨ (addr16) ×<br />
A,[HL] 1 6 A ← A ∨ (HL) ×<br />
A,[HL+byte] 2 6 A ← A ∨ (HL+byte) ×<br />
Remark One instruction clock cycle is one CPU clock cycle (fCPU) selected by the Processor Clock Control<br />
Register (PCC).<br />
Preliminary User’s Manual U14938EJ1V0UM 155
156<br />
CHAPTER 17 INSTRUCTION SET<br />
Mnemonic Operands Byte Clock Operation<br />
Preliminary User’s Manual U14938EJ1V0UM<br />
Flag<br />
Z ACCY<br />
CMP A,#byte 2 4 A – byte × × ×<br />
saddr,#byte 3 6 (saddr) – byte × × ×<br />
A,r 2 4 A – r × × ×<br />
A,saddr 2 4 A – (saddr) × × ×<br />
A,!addr16 3 8 A – (addr16) × × ×<br />
A,[HL] 1 6 A – (HL) × × ×<br />
A,[HL+byte] 2 6 A – (HL+byte) × × ×<br />
ADDW AX,#word 3 6 AX,CY ← AX + word × × ×<br />
SUBW AX,#word 3 6 AX,CY ← AX – word × × ×<br />
CMPW AX,#word 3 6 AX – word × × ×<br />
INC r 2 4 r ← r + 1 × ×<br />
saddr 2 4 (saddr) ← (saddr) + 1 × ×<br />
DEC r 2 4 r ← r – 1 × ×<br />
saddr 2 4 (saddr) ← (saddr) – 1 × ×<br />
INCW rp 1 4 rp ← rp + 1<br />
DECW rp 1 4 rp ← rp – 1<br />
ROR A,1 1 2 (CY,A7 ← A0, Am–1 ← Am) × 1 ×<br />
ROL A,1 1 2 (CY,A0 ← A7, Am+1 ← Am) × 1 ×<br />
RORC A,1 1 2 (CY ← A0, A7 ← CY, Am–1 ← Am) × 1 ×<br />
ROLC A,1 1 2 (CY ← A7, A0 ← CY, Am+1 ← Am) × 1 ×<br />
SET1 saddr.bit 3 6 (saddr.bit) ← 1<br />
sfr.bit 3 6 sfr.bit ← 1<br />
A.bit 2 4 A.bit ← 1<br />
PSW.bit 3 6 PSW.bit ← 1 × × ×<br />
[HL].bit 2 10 (HL).bit ← 1<br />
CLR1 saddr.bit 3 6 (saddr.bit) ← 0<br />
sfr.bit 3 6 sfr.bit ← 0<br />
A.bit 2 4 A.bit ← 0<br />
PSW.bit 3 6 PSW.bit ← 0 × × ×<br />
[HL].bit 2 10 (HL).bit ← 0<br />
SET1 CY 1 2 CY ← 1 1<br />
CLR1 CY 1 2 CY ← 0 0<br />
NOT1 CY 1 2 CY ← CY ×<br />
Remark One instruction clock cycle is one CPU clock cycle (fCPU) selected by the Processor Clock Control<br />
Register (PCC).
CHAPTER 17 INSTRUCTION SET<br />
Mnemonic Operands Byte Clock Operation<br />
CALL !addr16 3 6 (SP – 1) ← (PC + 3)H, (SP – 2) ← (PC + 3)L,<br />
PC ← addr16, SP ← SP – 2<br />
CALLT [addr5] 1 8 (SP – 1) ← (PC + 1)H, (SP – 2) ← (PC + 1)L,<br />
PCH ← (00000000, addr5 + 1),<br />
PCL ← (00000000, addr5), SP ← SP – 2<br />
Flag<br />
Z ACCY<br />
RET 1 6 PCH ← (SP + 1), PCL ← (SP), SP ← SP + 2<br />
RETI 1 8 PCH ← (SP + 1), PCL ← (SP),<br />
PSW ← (SP + 2), SP ← SP + 3, NMIS ← 0<br />
R R R<br />
PUSH PSW 1 2 (SP – 1) ← PSW, SP ← SP – 1<br />
rp 1 4 (SP – 1) ← rpH, (SP – 2) ← rpL, SP ← SP – 2<br />
POP PSW 1 4 PSW ← (SP), SP ← SP + 1 R R R<br />
rp 1 6 rpH ← (SP + 1), rpL ← (SP), SP ← SP + 2<br />
MOVW SP, AX 2 8 SP ← AX<br />
AX, SP 2 6 AX ← SP<br />
BR !addr16 3 6 PC ← addr16<br />
$addr16 2 6 PC ← PC + 2 + jdisp8<br />
AX 1 6 PCH ← A, PCL ← X<br />
BC $addr16 2 6 PC ← PC + 2 + jdisp8 if CY = 1<br />
BNC $addr16 2 6 PC ← PC + 2 + jdisp8 if CY = 0<br />
BZ $saddr16 2 6 PC ← PC + 2 + jdisp8 if Z = 1<br />
BNZ $saddr16 2 6 PC ← PC + 2 + jdisp8 if Z = 0<br />
BT saddr.bit,$addr16 4 10 PC ← PC + 4 + jdisp8 if (saddr.bit) = 1<br />
sfr.bit,$addr16 4 10 PC ← PC + 4 + jdisp8 if sfr.bit = 1<br />
A.bit,$addr16 3 8 PC ← PC + 3 + jdisp8 if A.bit = 1<br />
PSW.bit,$addr16 4 10 PC ← PC + 4 + jdisp8 if PSW.bit = 1<br />
BF saddr.bit,$addr16 4 10 PC ← PC + 4 + jdisp8 if (saddr.bit) = 0<br />
sfr.bit,$addr16 4 10 PC ← PC + 4 + jdisp8 if sfr.bit = 0<br />
A.bit,$addr16 3 8 PC ← PC + 3 + jdisp8 if A.bit = 0<br />
PSW.bit,$addr16 4 10 PC ← PC + 4 + jdisp8 if PSW.bit = 0<br />
DBNZ B,$addr16 2 6 B ← B – 1, then PC ← PC + 2 + jdisp8 if B ≠ 0<br />
C,$addr16 2 6 C ← C – 1, then PC ← PC + 2 + jdisp8 if C ≠ 0<br />
saddr,$addr16 3 8 (saddr) ← (saddr) – 1, then<br />
PC ← PC + 3 + jdisp8 if (saddr) ≠ 0<br />
NOP 1 2 No Operation<br />
EI 3 6 IE ← 1 (Enable Interrupt)<br />
DI 3 6 IE ← 0 (Disable Interrupt)<br />
HALT 1 2 Set HALT Mode<br />
STOP 1 2 Set STOP Mode<br />
Remark One instruction clock cycle is one CPU clock cycle (fCPU) selected by the Processor Clock Control<br />
Register (PCC).<br />
Preliminary User’s Manual U14938EJ1V0UM 157
17.3 Instructions Listed by Addressing Type<br />
158<br />
CHAPTER 17 INSTRUCTION SET<br />
(1) 8-bit instructions<br />
MOV, XCH, ADD, ADDC, SUB, SUBC, AND, OR, XOR, CMP, INC, DEC, ROR, ROL, RORC, ROLC, PUSH,<br />
POP, DBNZ<br />
1st Operand<br />
2nd Operand<br />
#byte A r sfr saddr !addr16 PSW [DE] [HL] [HL+byte] $addr16 1 None<br />
A ADD MOVNote MOV MOV MOV MOV MOV MOV MOV ROR<br />
ADDC XCHNote XCH XCH XCH XCH XCH ROL<br />
SUB ADD ADD ADD ADD ADD RORC<br />
SUBC ADDC ADDC ADDC ADDC ADDC ROLC<br />
AND SUB SUB SUB SUB SUB<br />
OR SUBC SUBC SUBC SUBC SUBC<br />
XOR AND AND AND AND AND<br />
CMP OR OR OR OR OR<br />
XOR XOR XOR XOR XOR<br />
CMP CMP CMP CMP CMP<br />
r MOV MOV INC<br />
B, C DBNZ<br />
sfr MOV MOV<br />
saddr MOV MOV DBNZ INC<br />
ADD<br />
ADDC<br />
SUB<br />
SUBC<br />
AND<br />
OR<br />
XOR<br />
CMP<br />
DEC<br />
!addr16 MOV<br />
PSW MOV MOV PUSH<br />
[DE] MOV<br />
[HL] MOV<br />
[HL+byte] MOV<br />
Note Except r = A.<br />
Preliminary User’s Manual U14938EJ1V0UM<br />
DEC<br />
POP
CHAPTER 17 INSTRUCTION SET<br />
(2) 16-bit instructions<br />
MOVW, XCHW, ADDW, SUBW, CMPW, PUSH, POP, INCW, DECW<br />
1st Operand<br />
2nd Operand<br />
#word AX rp Note saddrp SP None<br />
AX ADDW MOVW MOVW MOVW<br />
SUBW<br />
CMPW<br />
XCHW<br />
rp MOVW MOVWNote INCW<br />
DECW<br />
PUSH<br />
POP<br />
saddrp MOVW<br />
SP MOVW<br />
Note Only when rp = BC, DE, or HL.<br />
(3) <strong>Bit</strong> manipulation instructions<br />
SET1, CLR1, NOT1, BT, BF<br />
1st Operand<br />
2nd Operand<br />
$addr16 None<br />
A.bit BT SET1<br />
BF CLR1<br />
sfr.bit BT SET1<br />
BF CLR1<br />
saddr.bit BT SET1<br />
BF CLR1<br />
PSW.bit BT SET1<br />
BF CLR1<br />
[HL].bit SET1<br />
CLR1<br />
CY SET1<br />
CLR1<br />
NOT1<br />
Preliminary User’s Manual U14938EJ1V0UM 159
160<br />
(4) Call instructions/branch instructions<br />
CALL, CALLT, BR, BC, BNC, BZ, BNZ, DBNZ<br />
1st Operand<br />
2nd Operand<br />
CHAPTER 17 INSTRUCTION SET<br />
AX !addr16 [addr5] $addr16<br />
Basic Instructions BR CALL CALLT BR<br />
BR BC<br />
BNC<br />
BZ<br />
BNZ<br />
Compound Instructions DBNZ<br />
(5) Other instructions<br />
RET, RETI, NOP, EI, DI, HALT, STOP<br />
Preliminary User’s Manual U14938EJ1V0UM
APPENDIX A DEVELOPMENT TOOLS<br />
The following development tools are available for the development of systems that employ the µPD789871<br />
<strong>Subseries</strong>.<br />
Figure A-1 shows the development tool configuration.<br />
• Support of the PC98-NX Series<br />
Unless otherwise specified, the µPD789104A/114A/124A/134A <strong>Subseries</strong> supported by IBM PC/AT and<br />
compatibles can be used for the PC98-NX Series. When using the PC98-NX Series, refer to the descriptions<br />
of the IBM PC/AT and compatibles.<br />
• Windows<br />
Unless otherwise specified, “Windows” indicates the following OSs.<br />
Windows 3.1<br />
Windows 95<br />
Windows NT Ver. 4.0<br />
Preliminary User’s Manual U14938EJ1V0UM 161
162<br />
Language processing software<br />
• Assembler package<br />
• C compiler package<br />
• System simulator<br />
• Device file<br />
• C compiler source file<br />
• Integrated debugger<br />
Flash memory<br />
write environment<br />
Flash programmer<br />
Flash memory<br />
write adapter<br />
Flash memory<br />
APPENDIX A DEVELOPMENT TOOLS<br />
Figure A-1. Development Tool Configuration<br />
Host machine (PC or EWS)<br />
Interface adapter<br />
Conversion socket<br />
Target system<br />
Preliminary User’s Manual U14938EJ1V0UM<br />
Embedded software<br />
• OS<br />
In-circuit emulator<br />
Emulation board<br />
Emulation probe<br />
Power supply unit
A.1 Language Processing Software<br />
APPENDIX A DEVELOPMENT TOOLS<br />
RA78K0S A program that converts a program written in mnemonic into object codes that can<br />
Assembler package be executed by microcontrollers.<br />
In addition, automatic functions to generate symbol tables and optimize branch<br />
instructions are also provided.<br />
Used in combination with a device file (DF789872) (sold separately).<br />
<br />
The assembler package is a DOS-based application but may be used in the Windows<br />
environment by using the Project Manager of Windows (included in the assembler<br />
package).<br />
Part number: µS××××RA78K0S<br />
CC78K0S A program that converts a program written in C language into object codes that can<br />
C compiler package be executed by microcontrollers.<br />
Used in combination with an assembler package (RA78K0S) and device file<br />
(DF789872) (both sold separately).<br />
<br />
The C compiler package is a DOS-based application but may be used in the Windows<br />
environment by using the Project Manager of Windows (included in the assembler<br />
package).<br />
Part number: µS××××CC78K0S<br />
DF789872Note File containing the information inherent to the device.<br />
Device file Used in combination with RA78K0S, CC78K0S, and SM78K0S (all sold separately).<br />
Part number: µS××××DF789872<br />
CC78K0S-L Source file of functions for generating the object library included in the C compiler<br />
C compiler source file package.<br />
Necessary for changing the object library included in the C compiler package<br />
according to customer's specifications. Since this is a source file, its working<br />
environment does not depend on any particular operating system.<br />
Part number: µS××××CC78K0S-L<br />
Note DF789872 is a common file that can be used with RA78K0S, CC78K0S, and SM78K0S.<br />
Remark ×××× in the part number differs depending on the host machine and operating system to be used.<br />
µS××××RA78K0S<br />
µS××××CC78K0S<br />
µS××××DF789872<br />
µS××××CC78K0S-L<br />
×××× Host Machine OS Supply Media<br />
AA13 PC-9800 Series Japanese Windows Note 3.5" 2HD FD<br />
AB13 IBM PC/AT and compatibles Japanese Windows Note 3.5" 2HC FD<br />
3P16 HP9000 Series 700 HP-UX (Rel.10.10) DAT (DDS)<br />
3K13 SPARCstation SunOS (Rel.4.1.1) 3.5" 2HC FD<br />
3K15 Solaris (Rel.2.5.1) 1/4" CGMT<br />
3R13 NEWS (RISC) NEWS-OS (Rel.6.1) 3.5" 2HC FD<br />
Note Also operates in the DOS environment<br />
Preliminary User’s Manual U14938EJ1V0UM 163
A.2 Flash Memory Writing Tools<br />
164<br />
APPENDIX A DEVELOPMENT TOOLS<br />
Flashpro III Dedicated flash programmer for microcontrollers incorporating flash memory<br />
(Part No. FL-PR3, PG-FP3)<br />
Flash programmer<br />
FA-52GB Adapter for writing to flash memory and connected to Flashpro III.<br />
Flash memory writing adapter<br />
Remark The FL-PR3 and FA-52GB are products made by Naito Densei Machida Mfg. Co., Ltd.<br />
(TEL +81-44-822-3813).<br />
A.3 Debugging Tools<br />
A.3.1 Hardware<br />
IE-78K0S-NS<br />
In-circuit emulator<br />
IE-70000-MC-PS-B<br />
AC adapter<br />
IE-70000-98-IF-C<br />
Interface adapter<br />
IE-70000-CD-IF-A<br />
PC card interface<br />
IE-70000-PC-IF-C<br />
Interface adapter<br />
IE-70000-PCI-IF<br />
Interface adapter<br />
IE-789872-NS-EM1<br />
Emulation board<br />
NP-52GB<br />
Emulation probe<br />
NGS-30<br />
Conversion socket<br />
In-circuit emulator for debugging the hardware and software of an application system using<br />
the 78K/0S Series. Supports an integrated debugger (ID78K0S-NS). Used in combination<br />
with an AC adapter, emulation probe, and interface adapter for connecting the host machine.<br />
Adapter for supplying power from an AC 100 to 240 V outlet.<br />
Adapter necessary when using a PC-9800 series PC (except notebook type) as the host<br />
machine of the IE-78K0S-NS (C bus supported)<br />
PC card and interface cable necessary when using a notebook PC as the host machine of<br />
the IE-78K0S-NS (PCMCIA socket supported)<br />
Interface adapter necessary when using an IBM PC/AT or compatible as the host machine<br />
of the IE-78K0S-NS (ISA bus supported)<br />
Adapter necessary when using a personal computer incorporating the PCI bus as the host<br />
machine of the IE-78K0S-NS<br />
Board for emulating the peripheral hardware inherent to the device. Used in combination with<br />
an in-circuit emulator.<br />
Probe for connecting the in-circuit emulator and target system.<br />
This is for a 30-pin plastic SSOP (MC-5A4 type).<br />
Conversion socket to connect the NP-36GS and a target system board on which a 30-pin<br />
plastic SSOP (MC-5A4 type) can be mounted.<br />
Remark The NP-52GB, and NGS-30 are products made by Naito Densei Machida Mfg. Co., Ltd. For details of<br />
these products, contact Naito Densei Machida Mfg. Co., Ltd. (TEL +81-44-822-3813).<br />
Preliminary User’s Manual U14938EJ1V0UM
A.3.2 Software<br />
ID78K0S-NS<br />
Integrated debugger<br />
(Supports in-circuit emulator<br />
IE-78K0S-NS)<br />
APPENDIX A DEVELOPMENT TOOLS<br />
Control program for debugging the 78K/0S Series.<br />
This program provides a graphical user interface. It runs on Windows for personal computer<br />
users and on OSF/Motif for engineering work station users, and has visual designs and<br />
operationability that comply with these operating systems. In addition, it has a powerful debug<br />
function that supports C language. Therefore, trace results can be displayed at a C language<br />
level by the window integration function that links the source program, disassembled display,<br />
and memory display, to the trace result. This software also allows users to add other function<br />
extension modules such as a task debugger and system performance analyzer to improve<br />
the debug efficiency for programs using a real-time operating system.<br />
Used in combination with a device file (DF789872) (sold separately).<br />
Part number: µS××××ID78K0S-NS<br />
Remark ×××× in the part number differs depending on the host machine and operating system to be used.<br />
µS××××ID78K0S-NS<br />
×××× Host Machine OS Supply Media<br />
AA13 PC-9800 Series Japanese Windows Note 3.5" 2HD FD<br />
AB13 IBM PC/AT compatibles Japanese Windows Note 3.5" 2HC FD<br />
Note Also operates in the DOS environment.<br />
SM78K0S Debugs the program at C source level or assembler level while simulating operation of the<br />
System simulator target system on the host machine.<br />
SM78K0S runs in Windows.<br />
By using SM78K0S, the logic and performance of an application can be verified independently<br />
of hardware development even when the in-circuit emulator is not used. This enhances<br />
development efficiency and improves software quality.<br />
Used in combination with a device file (DF789872) (sold separately).<br />
Part number: µS××××SM78K0S<br />
DF789872Note File containing the information inherent to the device.<br />
Device file Used in combination with the RA78K0S, CC78K0S, and SM78K0S (all sold separately).<br />
Part number: µS××××DF789872<br />
Note DF789872 is a common file that can be used with the RA78K0S, CC78K0S, and SM78K0S.<br />
Remark ×××× in the part number differs depending on the host machine and operating system to be used.<br />
µS××××SM78K0S<br />
×××× Host Machine OS Supply Media<br />
AA13 PC-9800 Series Japanese WindowsNote 3.5" 2HD FD<br />
AB13 IBM PC/AT compatibles Japanese WindowsNote 3.5" 2HC FD<br />
Note Also operates in the DOS environment.<br />
Preliminary User’s Manual U14938EJ1V0UM 165
APPENDIX B EMBEDDED SOFTWARE<br />
The following embedded software products are available for efficient program development and maintenance of<br />
the µPD789871 <strong>Subseries</strong>.<br />
MX78K0S<br />
OS<br />
MX78K0S is a subset OS that is based on the µITRON specification. Supplied with the MX78K0S<br />
nucleus. The MX78K0S OS controls tasks, events, and time. In task control, the MX78K0S OS<br />
controls task execution order, and then perform the switching process to a task to be executed.<br />
<br />
The MX78K0S is a DOS-based application. Use this software in the DOS pane when running it on<br />
Windows.<br />
Part number: µS××××MX78K0S<br />
Remark ×××× in the part number differ depending on the host machine and OS used.<br />
µS××××MX78K0S<br />
×××× Host Machine OS Supply Media<br />
AA13 PC-9800 Series Japanese Windows Note 3.5" 2HD FD<br />
AB13 IBM PC/AT compatibles Japanese WindowsNote 3.5" 2HD FD<br />
BB13 English WindowsNote Note Can also be operated in the DOS environment.<br />
166 Preliminary User’s Manual U14938EJ1V0UM
C.1 Register Name Index (Alphabetic Order)<br />
[E]<br />
[I]<br />
[O]<br />
[P]<br />
[R]<br />
[S]<br />
APPENDIX C REGISTER INDEX<br />
8-bit compare registers 80, 81 (CR80, CR81) .............................................................................................. 82<br />
8-bit timer mode control registers 80, 81 (TMC80, TMC81)......................................................................... 83<br />
8-bit timer counters 80, 81 (TM80, TM81) ..................................................................................................... 82<br />
External interrupt mode register 0 (INTM0) ................................................................................................. 126<br />
Interrupt mask flag register 0 (MK0) ............................................................................................................ 125<br />
Interrupt mask flag register 1 (MK1) ............................................................................................................ 125<br />
Interrupt request flag register 0 (IF0) ........................................................................................................... 124<br />
Interrupt request flag register 1 (IF1) ........................................................................................................... 124<br />
Oscillation stabilization time select register (OSTS) ................................................................................... 136<br />
Port 0 (P0) ....................................................................................................................................................... 56<br />
Port 1 (P1) ....................................................................................................................................................... 57<br />
Port 2 (P2) ....................................................................................................................................................... 58<br />
Port 8 (P8) ....................................................................................................................................................... 61<br />
Port 9 (P9) ....................................................................................................................................................... 62<br />
Port mode register 0 (PM0) ............................................................................................................................ 63<br />
Port mode register 1 (PM1) ............................................................................................................................ 63<br />
Port mode register 2 (PM2) ............................................................................................................................ 63<br />
Processor clock control register (PCC) ......................................................................................................... 68<br />
Pull-up resistor option register 0 (PU0) ......................................................................................................... 64<br />
Pull-up resistor option register B2 (PUB2) .................................................................................................... 64<br />
Remote control timer capture registers 50, 51 (CP50, CP51) ..................................................................... 77<br />
Remote control timer control register 50 (TMC50) ....................................................................................... 77<br />
Serial operating mode register 10 (CSIM10) ................................................................................................. 99<br />
Subclock control resistor (CSS) ..................................................................................................................... 69<br />
Suboscillation mode resistor (SCKM) ............................................................................................................ 69<br />
[T]<br />
Transmit/receive shift register 10 (TXS10) .................................................................................................... 97<br />
Preliminary User’s Manual U14938EJ1V0UM 167
168<br />
[V]<br />
APPENDIX C REGISTER INDEX<br />
VFD display mode register 0 (DSPM0) ....................................................................................................... 106<br />
VFD display mode register 1 (DSPM1) ....................................................................................................... 107<br />
VFD display mode register 2 (DSPM2) ....................................................................................................... 108<br />
[W]<br />
Watchdog timer clock select register (WDCS) .............................................................................................. 93<br />
Watchdog timer mode register (WDTM) ........................................................................................................ 94<br />
Watch timer mode control register (WTM) .................................................................................................... 88<br />
Preliminary User’s Manual U14938EJ1V0UM
C.2 Register Symbol Index (Alphabetic Order)<br />
[C]<br />
[D]<br />
[I]<br />
APPENDIX C REGISTER INDEX<br />
CSS: Subclock control register.............................................................................................................. 69<br />
CP50: Remote control timer capture register 50 ................................................................................... 77<br />
CP51: Remote control timer capture register 51 ................................................................................... 77<br />
CR80: 8-bit compare register 80 ............................................................................................................. 82<br />
CR81: 8-bit compare register 81 ............................................................................................................. 82<br />
CSIM10: Serial operating mode register 10 ............................................................................................... 99<br />
DSPM0: VFD display mode register 0 ..................................................................................................... 106<br />
DSPM1: VFD display mode register 1 ..................................................................................................... 107<br />
DSPM2: VFD display mode register 2 ..................................................................................................... 108<br />
IF0: Interrupt request flag register 0 ................................................................................................. 124<br />
IF1: Interrupt request flag register 1 ................................................................................................. 124<br />
INTM0: External interrupt mode register 0 ............................................................................................. 126<br />
[M]<br />
MK0: Interrupt mask flag register 0 ..................................................................................................... 125<br />
MK1: Interrupt mask flag register 1 ..................................................................................................... 125<br />
[O]<br />
[P]<br />
[S]<br />
OSTS: Oscillation stabilization time select register .............................................................................. 136<br />
P0: Port 0 ............................................................................................................................................ 56<br />
P1: Port 1 ............................................................................................................................................ 57<br />
P2: Port 2 ............................................................................................................................................ 58<br />
P8: Port 8 ............................................................................................................................................ 61<br />
P9: Port 9 ............................................................................................................................................ 62<br />
PCC: Processor clock control register .................................................................................................. 68<br />
PM0: Port mode register 0 .................................................................................................................... 63<br />
PM1: Port mode register 1 .................................................................................................................... 63<br />
PM2: Port mode register 2 .................................................................................................................... 63<br />
PU0: Pull-up resistor option register 0 ................................................................................................. 64<br />
PUB2: Pull-up resistor option register B2 ............................................................................................... 64<br />
SCKM: Suboscillation mode register ........................................................................................................ 69<br />
[T]<br />
TM80: 16-bit timer counter 80 ................................................................................................................. 82<br />
TM81: 8-bit timer counter 81 ................................................................................................................... 82<br />
TMC50: Remote control timer control register 50..................................................................................... 77<br />
TMC80: 8-bit timer mode control register 80 ............................................................................................ 83<br />
Preliminary User’s Manual U14938EJ1V0UM 169
170<br />
APPENDIX C REGISTER INDEX<br />
TMC81: 8-bit timer mode control register 81 ............................................................................................ 83<br />
TXS10: Transmit/receive shift register 10 ................................................................................................ 97<br />
[W]<br />
WDCS: Watchdog timer clock select register .......................................................................................... 93<br />
WDTM: Watchdog timer mode register .................................................................................................... 94<br />
WTM: Watch timer mode control register .............................................................................................. 88<br />
Preliminary User’s Manual U14938EJ1V0UM
Facsimile Message<br />
From:<br />
Name<br />
Company<br />
Tel. FAX<br />
Address<br />
North America<br />
NEC Electronics Inc.<br />
Corporate Communications Dept.<br />
Fax: 1-800-729-9288<br />
1-408-588-6130<br />
Europe<br />
NEC Electronics (Europe) GmbH<br />
Technical Documentation Dept.<br />
Fax: +49-211-6503-274<br />
South America<br />
NEC do Brasil S.A.<br />
Fax: +55-11-6462-6829<br />
Hong Kong, Philippines, Oceania<br />
NEC Electronics Hong Kong Ltd.<br />
Fax: +852-2886-9022/9044<br />
Korea<br />
NEC Electronics Hong Kong Ltd.<br />
Seoul Branch<br />
Fax: 02-528-4411<br />
Taiwan<br />
NEC Electronics Taiwan Ltd.<br />
Fax: 02-2719-5951<br />
I would like to report the following error/make the following suggestion:<br />
Document title:<br />
Although NEC has taken all possible steps<br />
to ensure that the documentation supplied<br />
to our customers is complete, bug free<br />
and up-to-date, we readily accept that<br />
errors may occur. Despite all the care and<br />
precautions we've taken, you may<br />
encounter problems in the documentation.<br />
Please complete this form whenever<br />
you'd like to report errors or suggest<br />
improvements to us.<br />
Asian Nations except Philippines<br />
NEC Electronics Singapore Pte. Ltd.<br />
Fax: +65-250-3583<br />
Japan<br />
NEC Semiconductor Technical Hotline<br />
Fax: 044-435-9608<br />
Document number: Page number:<br />
If possible, please fax the referenced page or drawing.<br />
Document Rating<br />
Clarity<br />
Technical Accuracy<br />
Organization<br />
Thank you for your kind support.<br />
Excellent Good Acceptable Poor<br />
CS 00.6