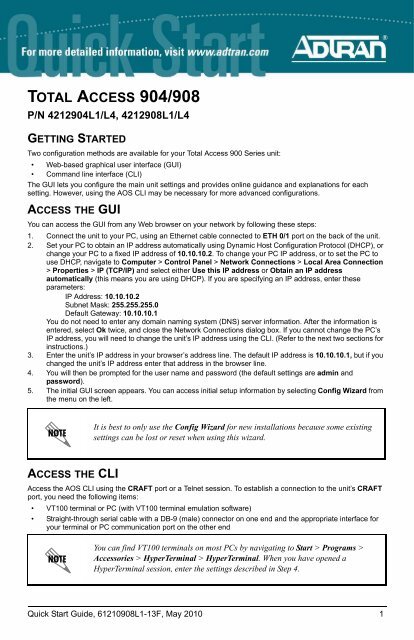
Total Access 904/908 Quick Start Guide - Adtran
Total Access 904/908 Quick Start Guide - Adtran
Total Access 904/908 Quick Start Guide - Adtran
- TAGS
- access
- quick
- guide
- adtran
- www.adtran.com

Create successful ePaper yourself
Turn your PDF publications into a flip-book with our unique Google optimized e-Paper software.
TOTAL ACCESS <strong>904</strong>/<strong>908</strong><br />
P/N 4212<strong>904</strong>L1/L4, 4212<strong>908</strong>L1/L4<br />
GETTING STARTED<br />
Two configuration methods are available for your <strong>Total</strong> <strong>Access</strong> 900 Series unit:<br />
• Web-based graphical user interface (GUI)<br />
• Command line interface (CLI)<br />
The GUI lets you configure the main unit settings and provides online guidance and explanations for each<br />
setting. However, using the AOS CLI may be necessary for more advanced configurations.<br />
ACCESS THE GUI<br />
You can access the GUI from any Web browser on your network by following these steps:<br />
1. Connect the unit to your PC, using an Ethernet cable connected to ETH 0/1 port on the back of the unit.<br />
2. Set your PC to obtain an IP address automatically using Dynamic Host Configuration Protocol (DHCP), or<br />
change your PC to a fixed IP address of 10.10.10.2. To change your PC IP address, or to set the PC to<br />
use DHCP, navigate to Computer > Control Panel > Network Connections > Local Area Connection<br />
> Properties > IP (TCP/IP) and select either Use this IP address or Obtain an IP address<br />
automatically (this means you are using DHCP). If you are specifying an IP address, enter these<br />
parameters:<br />
IP Address: 10.10.10.2<br />
Subnet Mask: 255.255.255.0<br />
Default Gateway: 10.10.10.1<br />
You do not need to enter any domain naming system (DNS) server information. After the information is<br />
entered, select Ok twice, and close the Network Connections dialog box. If you cannot change the PC’s<br />
IP address, you will need to change the unit’s IP address using the CLI. (Refer to the next two sections for<br />
instructions.)<br />
3. Enter the unit’s IP address in your browser’s address line. The default IP address is 10.10.10.1, but if you<br />
changed the unit’s IP address enter that address in the browser line.<br />
4. You will then be prompted for the user name and password (the default settings are admin and<br />
password).<br />
5. The initial GUI screen appears. You can access initial setup information by selecting Config Wizard from<br />
the menu on the left.<br />
ACCESS THE CLI<br />
It is best to only use the Config Wizard for new installations because some existing<br />
settings can be lost or reset when using this wizard.<br />
<strong>Access</strong> the AOS CLI using the CRAFT port or a Telnet session. To establish a connection to the unit’s CRAFT<br />
port, you need the following items:<br />
• VT100 terminal or PC (with VT100 terminal emulation software)<br />
• Straight-through serial cable with a DB-9 (male) connector on one end and the appropriate interface for<br />
your terminal or PC communication port on the other end<br />
You can find VT100 terminals on most PCs by navigating to <strong>Start</strong> > Programs ><br />
<strong>Access</strong>ories > HyperTerminal > HyperTerminal. When you have opened a<br />
HyperTerminal session, enter the settings described in Step 4.<br />
<strong>Quick</strong> <strong>Start</strong> <strong>Guide</strong>, 61210<strong>908</strong>L1-13F, May 2010 1
1. Connect the DB-9 (male) connector of your serial cable to the CRAFT port on the rear panel of the unit.<br />
2. Connect the other end of the serial cable to the terminal or PC.<br />
Many PCs do not come with a standard serial port. A universal serial bus (USB) to<br />
serial adapter can be used instead. The drivers for the USB to serial adapter must be<br />
installed according to the manufacturer’s instructions. If the USB to serial adapter is<br />
not properly installed on your PC, you will not be able to communicate with the AOS<br />
unit and you should seek support from the USB to serial adapter manufacturer.<br />
3. Insert the connector of the provided power cord into the power interface on the rear panel of the unit, and<br />
plug the cord into a standard electrical outlet. Refer to the <strong>Total</strong> <strong>Access</strong> 900 Series Hardware Installation<br />
<strong>Guide</strong> provided on the AOS Documentation CD or available online at http://kb.adtran.com (article number<br />
2649) for more details.<br />
4. Once the unit is powered up, open a VT100 terminal session using the following settings: 9600 baud,<br />
8 data bits, no parity bits, and 1 stop bit. Press to activate the AOS CLI.<br />
5. Enter enable at the > prompt. Enter the enable password when prompted. The default password is<br />
password.<br />
You can also access the CLI from a Telnet client. In order to do this, you must know the IP address of the AOS<br />
device. If you do not know the unit’s IP address, you must use the CRAFT port to access the CLI. To access the<br />
CLI using a Telnet client, follow these steps:<br />
1. Connect the unit to your PC, using an Ethernet cable connected to ETH 0/1 port on the back of the unit.<br />
2. Open a Telnet client on your computer. You can access the Telnet client by navigating to <strong>Start</strong> > Run and<br />
entering telnet 10.10.10.1 (Windows® XP). If you are running Windows Vista, you will need to turn on the<br />
Telnet client before you access it. To do this, navigate to <strong>Start</strong> > Control Panel > Programs and<br />
Features > Turn Windows features on or off > Telnet Client Option and select OK. 10.10.10.1 is the<br />
default unit IP address. If you have changed your unit’s IP address, you will need to enter that address.<br />
3. Enter enable at the > prompt and enter the enable password when prompted. The default password is<br />
password.<br />
COMMON CLI COMMANDS<br />
The following are common CLI commands and tips for getting started with the CLI.<br />
• Entering a question mark (?) shows contextual help and options. For example, entering ? at the prompt<br />
will show all commands available from that prompt.<br />
• To view interface statistics, enter show interface .<br />
• To view the current configuration, enter show running-config.<br />
• To view all the IP addresses currently configured, enter show ip interface brief.<br />
• To view the AOS version, serial number, and other information, enter show version.<br />
• To save the current configuration, enter write.<br />
CONFIGURE THE UNIT’S IP ADDRESS<br />
The configuration parameters used in the examples outlined in this document are for<br />
instructional purposes only. Replace all underlined entries (example) with your<br />
specific parameters to configure your application.<br />
The following steps create an IP address and subnet mask for ETH 0/1.<br />
1. At the # prompt, enter config terminal.<br />
2. At the (config)# prompt, enter interface eth 0/1 to access the configuration parameters for the Ethernet<br />
port located on the rear of the unit.<br />
3. Enter ip address 10.10.10.1 255.255.255.0 to assign an IP address to the Ethernet port using a 24-bit<br />
subnet mask.<br />
4. Enter no shutdown to activate the interface to pass data.<br />
2 Copyright © 2010 ADTRAN, Inc. All Rights Reserved.
5. Enter exit to exit the Ethernet interface commands and return to the Global Configuration mode.<br />
6. Enter ip route 0.0.0.0 0.0.0.0 192.168.1.254 to add a default route to the route table. 0.0.0.0 is the default<br />
route and the default subnet mask, and 192.168.1.254 is the next-hop IP address to which the AOS unit<br />
should send all of its traffic. You will need to enter the proper route, subnet mask, and gateway for your<br />
network. This information is typically provided by an Internet service provider (ISP) or local network<br />
administrator.<br />
7. Enter do write memory to save the current configuration.<br />
ENABLE TELNET USER LOGIN ACCESS<br />
The following steps enable user login parameters for Telnet access by changing the password from the default<br />
(password) and enabling security login on Telnet lines.<br />
1. Verify that the prompt of your unit displays (config)#.<br />
2. Enter line telnet 0 4 to change the configuration parameters for the Telnet sessions.<br />
3. Enter login to prompt users with a login prompt for Telnet access.<br />
4. Enter password adtran to change the login password for the Telnet sessions.<br />
5. Enter exit to return to the Global Configuration mode.<br />
6. Verify that the prompt of your unit displays (config)#.<br />
7. Enter do write memory to save the current configuration.<br />
CONFIGURE YOUR APPLICATION<br />
The applications you will need to configure vary by product and by network. Review the list of defaults for your<br />
unit before deciding what applications to configure. The following are some common applications that should be<br />
configured on startup. These are all available online at http://kb.adtran.com.<br />
Configuring T1 <strong>Access</strong> to a Remote Site Using<br />
PPP in AOS (video article 2003)<br />
Configuring Port Forwarding in AOS<br />
(video article 2291)<br />
Configuring Internet <strong>Access</strong> (Many to One NAT) with<br />
the Firewall Wizard in AOS (video article 2185)<br />
Configuring QoS for VoIP in AOS<br />
(video article 3091)<br />
Configuring PPP in AOS (article 2523) Configuring HDLC in AOS (article 2152)<br />
Configuring Frame Relay in AOS<br />
(article 2350)<br />
Configuring DHCP Server in AOS<br />
(article 2149)<br />
Configuring a VPN Using Aggressive Mode in<br />
AOS (article 1926)<br />
Configuring Switchboards and Dial Plans in<br />
AOS (article 2130)<br />
Configuring Enhanced ANI/DNIS Substitution<br />
in AOS (article 2509)<br />
Configuring QoS in AOS<br />
(article 1617)<br />
Configuring a VPN Using Main Mode in AOS<br />
(article 1925)<br />
Configuring Voice Traffic over SIP Trunks in AOS<br />
(article 3395)<br />
Configuring PRI Signaling for DSX-1 in AOS<br />
(article 3396)<br />
Configuring Source and ANI Based Routing in AOS<br />
(article 2510)<br />
Important: For additional details on product features, specifications, installation,<br />
and safety, refer to the appropriate hardware installation guide available on the AOS<br />
Documentation CD shipped with the base unit and online at http://kb.adtran.com.<br />
<strong>Quick</strong> <strong>Start</strong> <strong>Guide</strong>, 61210<strong>908</strong>L1-13F, May 2010 3
TOTAL ACCESS 900 SERIES DEFAULTS<br />
RESTORING FACTORY DEFAULTS<br />
On units that have a console port, you cannot restore the factory defaults, but must rather erase the device’s<br />
configuration and then reconfigure the unit to operate correctly for your network. To erase the unit’s current<br />
configuration, follow these steps:<br />
1. <strong>Access</strong> the unit’s CLI and enter enable at the > prompt.<br />
2. Enter erase startup-config at the # prompt. The device will have a blank configuration upon reboot.<br />
3. Enter reload at the # prompt to begin restarting the device. When prompted to save configuration, enter<br />
no. When prompted to reboot, enter yes.<br />
4. Upon reboot, you will have to reconfigure the unit using the CONSOLE port. Follow the steps outlined<br />
here or in the technical note, <strong>Access</strong>ing the Web Interface in AOS, available online at http://kb.adtran.com<br />
(article number 1788).<br />
VOICE CONNECTION<br />
Feature Default Value<br />
IP Address 10.10.10.1<br />
User Name admin<br />
Password password<br />
HTTP Server Enabled<br />
Event History On<br />
IP Routing Enabled<br />
A single 50-pin female amphenol connector provides the interconnect wiring for the analog circuits (FXS). Refer<br />
to the <strong>Total</strong> <strong>Access</strong> 900 Series Hardware Installation <strong>Guide</strong> provided on the AOS Documentation CD or<br />
available online at http://kb.adtran.com (article number 2649) for detailed pinouts.<br />
BATTERY BACKUP CONNECTION<br />
An optional battery backup system (P/N 1200641L1) is available for the <strong>Total</strong> <strong>Access</strong> <strong>904</strong>/<strong>908</strong>. Refer to the<br />
<strong>Total</strong> <strong>Access</strong> 900 Series Hardware Installation <strong>Guide</strong> provided on the AOS Documentation CD or available<br />
online at http://kb.adtran.com (article number 2649) and to the documentation shipped with the battery backup<br />
system for more information on this connection.<br />
4 Copyright © 2010 ADTRAN, Inc. All Rights Reserved.