USER MANUAL PowerNAS 2011 V1.2 - HFX
USER MANUAL PowerNAS 2011 V1.2 - HFX
USER MANUAL PowerNAS 2011 V1.2 - HFX
- TAGS
- manual
- powernas
- www.hfx.at

Create successful ePaper yourself
Turn your PDF publications into a flip-book with our unique Google optimized e-Paper software.
Delivery Content:<br />
• Windows Installation CD and Driver CD<br />
• External Power Supply<br />
<strong>USER</strong> <strong>MANUAL</strong><br />
<strong>PowerNAS</strong> <strong>2011</strong><br />
<strong>V1.2</strong><br />
<strong>PowerNAS</strong> is a trademark of <strong>HFX</strong> Austria, Windows Home Server a trademark of Microsoft.<br />
<strong>PowerNAS</strong> is marked with the above symbol to indicate at the end of the equipments life time, you must<br />
dispose of it separately at an appropriate collection point (local recycling center) and not place with<br />
normal domestic unsorted waste. This will benefit the environment for all. [EU Directive 2002/96/EC<br />
and EN50419]<br />
<strong>V1.2</strong> [1]
1. <strong>PowerNAS</strong> - Quick Start<br />
<strong>PowerNAS</strong> is configured ready to work right out of the box:<br />
• Unpack <strong>PowerNAS</strong>: consider where <strong>PowerNAS</strong> will be placed. Being a passive<br />
cooled system (no fans) ideally do not place <strong>PowerNAS</strong> in an enclosed cabinet, in<br />
direct sunlight and never near sources of water. Ensure the vents on the top are left<br />
uncovered, it is normal for the sides of <strong>PowerNAS</strong> to get warm to the touch when<br />
<strong>PowerNAS</strong> is working hard.<br />
• Connecting <strong>PowerNAS</strong> to your Network: <strong>PowerNAS</strong> requires a wired connection to<br />
your wireless or broadband router, Gigabit LAN preferred.<br />
• Plug <strong>PowerNAS</strong> into the mains: connect the mains power ‘brick’ to <strong>PowerNAS</strong><br />
before switching on at the mains. <strong>PowerNAS</strong> only requires a mains & network<br />
connection, no keyboard, mouse or screen required. Tap the <strong>PowerNAS</strong> On / Off<br />
switch at the front lower right side to power on,<br />
• Check <strong>PowerNAS</strong> is operating: after switching on the blue power light should<br />
illuminate on the front, occasionally the hard drive activity light will flash, also the<br />
network lights on the back (yellow) should illuminate to show a good Ethernet<br />
connection. <strong>PowerNAS</strong> takes approximately 60 seconds to startup.<br />
Should you wish to switch off <strong>PowerNAS</strong>, tap the On / Off button and wait for the power<br />
lights to extinguish. <strong>PowerNAS</strong> is designed as a server for 24 / 7 operation with low power<br />
usage.<br />
Warnings:<br />
• Do not cover the venting holes<br />
• Do not touch when running hot (heatsinks can get up to 60°C)<br />
• Do not open the <strong>PowerNAS</strong>, this might lead to a loss of warrenty<br />
<strong>V1.2</strong> [2]
<strong>V1.2</strong> [3]
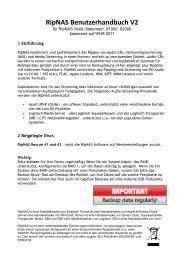
System Disk is HDD0. As internal System Disk you can use only 2.5” disks.<br />
As standard removable disks you can use 3.5” disks only.<br />
Please watch this video of how to add or remove the hard drives.<br />
http://www.youtube.com/watch?v=160uWqnnY9I<br />
<strong>V1.2</strong> [4]
2. Remote-Access to the <strong>PowerNAS</strong><br />
You have 5 different methods to access the <strong>PowerNAS</strong> from another PC:<br />
1. with WHS Console: the WHS console needs to be installed on your PC.<br />
2. Access with remote desktop: this works only with VISTA, WIN7 or XP Professional<br />
PCs (username: Administrator pw: hfx=[serial])<br />
3. Accessing Files / Folders on <strong>PowerNAS</strong> (username: sonos pw: sonos)<br />
4. Access via Web Browser: this is the quickest method to access to the <strong>PowerNAS</strong>. All<br />
devices (Windows PC, Apple, iPhone) who have network access and an internet<br />
explorer can do that. (username: Administrator pw: powernas)<br />
5. Access via VNC (username: Administrator pw: powernas)<br />
To access the <strong>PowerNAS</strong> with Webbrowser or Remote Desktop should be done only by<br />
professional users, because you can easily destroy WHS and then you need to reinstall<br />
WHS.<br />
To access the <strong>PowerNAS</strong> with WHS console is recommended, since you can see only<br />
settings, which you are allowed to change. WHS console also takes over the backup of your<br />
PC.<br />
<strong>V1.2</strong> [5]
2.1. Connecting through WHS Connector<br />
Windows based PCs connect to <strong>PowerNAS</strong> through Connector to:<br />
• Windows PC backups nightly to <strong>PowerNAS</strong>,<br />
• Report any issues facing the <strong>PowerNAS</strong> system (such as a failing hard disk drive),<br />
WHS Connector is installed on a PC by double-click on the <strong>PowerNAS</strong> in the network<br />
environment. Also for Apple users. After installing WHS onto a PC an icon is placed in the<br />
tray area of Windows:<br />
Right clicking on this icon allows access to the connector.<br />
On connection specify password as: hfx=[serial] (ie hfx=123456)<br />
After restore the password is by standard hfx=000000<br />
Download the WHS connector for Windows or MAC directly from the <strong>PowerNAS</strong> (network<br />
neihbourhood, double-click).<br />
2.2. Connecting by Remote Desktop<br />
Remote desktop is preinstalled on most Windows<br />
PCs (start >> Programs >> Accessories >> Remote<br />
Desktop Connection), Apple users install remote<br />
desktop using the Connector Disc (detailed later).<br />
Type the computer name as powernas (mac users:<br />
powernas.local or powernas.localdomain), if<br />
presented with a domain entry box type: powernas<br />
On connection specify the username: Administrator<br />
pass: hfx=[serial] (ie hfx=123456), after restore it is hfx=000000<br />
<strong>V1.2</strong> [6]
If you cannot access the <strong>PowerNAS</strong> with “Powernas”, you can<br />
also directly use the IP address. You find the IP address of the<br />
<strong>PowerNAS</strong>:<br />
→ go to network neighbourhood<br />
→ right click on the <strong>PowerNAS</strong> symbol<br />
2.3. Accessing Files / Folders on <strong>PowerNAS</strong><br />
<strong>PowerNAS</strong> shares the folder \\powernas\ it is possible to access audio tracks on <strong>PowerNAS</strong><br />
directly through this folder, delete, edit or copying files from your PC to <strong>PowerNAS</strong>. This<br />
folder is password protected, it can be accessed through user: sonos password: sonos<br />
2.4. Web Browser access<br />
Type into the web browser: http://powernas:5800/ note that your firewall must have port<br />
5800 allowed for the web browser and Java script be enabled. On connection type the<br />
password as PowerNas and click the Send Ctl+Alt+Del button to log into <strong>PowerNAS</strong> as<br />
username: Administrator pw: powernas, once connected the <strong>PowerNAS</strong> desktop is<br />
shown, open Windows Home Server Console to access settings and view <strong>PowerNAS</strong> status.<br />
2.5. VNC access<br />
Type into the VNC: powernas<br />
username: Administrator pw: powernas<br />
3. Remote help and support<br />
With Team Viewer you can ask any friend to logon over the<br />
internet into the <strong>PowerNAS</strong> and help you to configure.<br />
4. WHS Preconfigured Accounts<br />
<strong>PowerNAS</strong> is supplied with the account preconfigured:<br />
User: Administrator Pass: ripnas=[serial] (example ripnas=123456)<br />
Where [serial] is replaced with the serial number of your machine. The full password is<br />
shown on a label on the backpanel the <strong>PowerNAS</strong> below the WHS COA sticker. The<br />
username and password are required when performing various actions with WHS (such as<br />
installing Connector onto a PC, etc).<br />
<strong>V1.2</strong> [7]
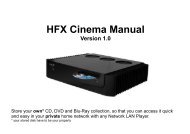
5. How to set up RAID<br />
Please login and double-click on the Intel RAID Storage Manager Icon:<br />
Select your RAID mode. Please note, that in RAID mode the HDDs will never sleep. You<br />
need to use Server HDDs, which are designed for 24/7 use.<br />
For RAID 1 and RAID 0 you need at leats 2 HDDs, for RAID 5 you need at least 3 HDDs.<br />
Please consider also NOT to use RAID mode and to install all HDDs without RAID and to use<br />
Software RAID like Stablebit DrivePool<br />
After creating the RAID, you still need to partition the new RAID drive using the Windows Disk Management.<br />
Mehr Infos zum Intel RAID Storage Manager in der Intel RAID Doku.<br />
http://www.hfx.at/ftp/manuals/intel-raid.pd<br />
<strong>V1.2</strong> [8]
6. LCD Configuration<br />
To configure the LCD you need to close first other connections on the COM-Port (close LCD<br />
Smarti). You can change the welcome message of the display.<br />
You can change the settings of the fan controller. If you add or substract a value in the curve<br />
mode, you can make the temperature curve earlier or later (starting to activate the fan at<br />
lower or higher temperatures)<br />
<strong>V1.2</strong> [9]
7. More Information<br />
You have to select the right Com-Port.<br />
You can update the firmware.<br />
http://www.mswhs.com/documentation/ WHS Documentation<br />
http://www.hfx.at/ftp/manuals/intel-raid.pdf Intel RAID Storage Manager Documentation<br />
<strong>V1.2</strong> [10]