AT32UC3C datasheet
AT32UC3C datasheet
AT32UC3C datasheet
- TAGS
- datasheet
- www.atmel.com

You also want an ePaper? Increase the reach of your titles
YUMPU automatically turns print PDFs into web optimized ePapers that Google loves.
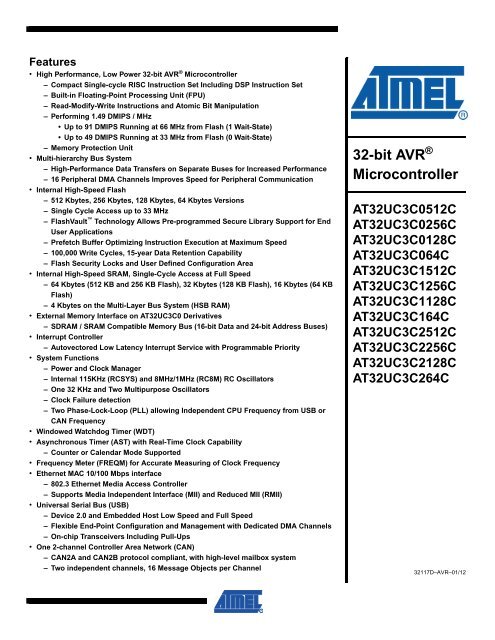
Features<br />
• High Performance, Low Power 32-bit AVR ® Microcontroller<br />
– Compact Single-cycle RISC Instruction Set Including DSP Instruction Set<br />
– Built-in Floating-Point Processing Unit (FPU)<br />
– Read-Modify-Write Instructions and Atomic Bit Manipulation<br />
– Performing 1.49 DMIPS / MHz<br />
Up to 91 DMIPS Running at 66 MHz from Flash (1 Wait-State)<br />
Up to 49 DMIPS Running at 33 MHz from Flash (0 Wait-State)<br />
– Memory Protection Unit<br />
Multi-hierarchy Bus System<br />
– High-Performance Data Transfers on Separate Buses for Increased Performance<br />
– 16 Peripheral DMA Channels Improves Speed for Peripheral Communication<br />
Internal High-Speed Flash<br />
– 512 Kbytes, 256 Kbytes, 128 Kbytes, 64 Kbytes Versions<br />
– Single Cycle Access up to 33 MHz<br />
–FlashVault Technology Allows Pre-programmed Secure Library Support for End<br />
User Applications<br />
– Prefetch Buffer Optimizing Instruction Execution at Maximum Speed<br />
– 100,000 Write Cycles, 15-year Data Retention Capability<br />
– Flash Security Locks and User Defined Configuration Area<br />
Internal High-Speed SRAM, Single-Cycle Access at Full Speed<br />
– 64 Kbytes (512 KB and 256 KB Flash), 32 Kbytes (128 KB Flash), 16 Kbytes (64 KB<br />
Flash)<br />
– 4 Kbytes on the Multi-Layer Bus System (HSB RAM)<br />
External Memory Interface on <strong>AT32UC3C</strong>0 Derivatives<br />
– SDRAM / SRAM Compatible Memory Bus (16-bit Data and 24-bit Address Buses)<br />
Interrupt Controller<br />
– Autovectored Low Latency Interrupt Service with Programmable Priority<br />
System Functions<br />
– Power and Clock Manager<br />
– Internal 115KHz (RCSYS) and 8MHz/1MHz (RC8M) RC Oscillators<br />
– One 32 KHz and Two Multipurpose Oscillators<br />
– Clock Failure detection<br />
– Two Phase-Lock-Loop (PLL) allowing Independent CPU Frequency from USB or<br />
CAN Frequency<br />
Windowed Watchdog Timer (WDT)<br />
Asynchronous Timer (AST) with Real-Time Clock Capability<br />
– Counter or Calendar Mode Supported<br />
Frequency Meter (FREQM) for Accurate Measuring of Clock Frequency<br />
Ethernet MAC 10/100 Mbps interface<br />
– 802.3 Ethernet Media Access Controller<br />
– Supports Media Independent Interface (MII) and Reduced MII (RMII)<br />
Universal Serial Bus (USB)<br />
– Device 2.0 and Embedded Host Low Speed and Full Speed<br />
– Flexible End-Point Configuration and Management with Dedicated DMA Channels<br />
– On-chip Transceivers Including Pull-Ups<br />
One 2-channel Controller Area Network (CAN)<br />
– CAN2A and CAN2B protocol compliant, with high-level mailbox system<br />
– Two independent channels, 16 Message Objects per Channel<br />
32-bit AVR ®<br />
Microcontroller<br />
<strong>AT32UC3C</strong>0512C<br />
<strong>AT32UC3C</strong>0256C<br />
<strong>AT32UC3C</strong>0128C<br />
<strong>AT32UC3C</strong>064C<br />
<strong>AT32UC3C</strong>1512C<br />
<strong>AT32UC3C</strong>1256C<br />
<strong>AT32UC3C</strong>1128C<br />
<strong>AT32UC3C</strong>164C<br />
<strong>AT32UC3C</strong>2512C<br />
<strong>AT32UC3C</strong>2256C<br />
<strong>AT32UC3C</strong>2128C<br />
<strong>AT32UC3C</strong>264C<br />
32117D–AVR–01/12
One 4-Channel 20-bit Pulse Width Modulation Controller (PWM)<br />
– Complementary outputs, with Dead Time Insertion<br />
– Output Override and Fault Protection<br />
Two Quadrature Decoders<br />
One 16-channel 12-bit Pipelined Analog-To-Digital Converter (ADC)<br />
– Dual Sample and Hold Capability Allowing 2 Synchronous Conversions<br />
– Single-Ended and Differential Channels, Window Function<br />
Two 12-bit Digital-To-Analog Converters (DAC), with Dual Output Sample System<br />
Four Analog Comparators<br />
Six 16-bit Timer/Counter (TC) Channels<br />
– External Clock Inputs, PWM, Capture and Various Counting Capabilities<br />
One Peripheral Event Controller<br />
– Trigger Actions in Peripherals Depending on Events Generated from Peripherals or from Input Pins<br />
– Deterministic Trigger<br />
– 34 Events and 22 Event Actions<br />
Five Universal Synchronous/Asynchronous Receiver/Transmitters (USART)<br />
– Independent Baudrate Generator, Support for SPI, LIN, IrDA and ISO7816 interfaces<br />
– Support for Hardware Handshaking, RS485 Interfaces and Modem Line<br />
Two Master/Slave Serial Peripheral Interfaces (SPI) with Chip Select Signals<br />
One Inter-IC Sound (I2S) Controller<br />
– Compliant with I2S Bus Specification<br />
– Time Division Multiplexed mode<br />
Three Master and Three Slave Two-Wire Interfaces (TWI), 400kbit/s I 2 C-compatible<br />
QTouch ® Library Support<br />
– Capacitive Touch Buttons, Sliders, and Wheels<br />
–QTouch ® and QMatrix ® Acquisition<br />
On-Chip Non-intrusive Debug System<br />
– Nexus Class 2+, Runtime Control, Non-Intrusive Data and Program Trace<br />
–aWire single-pin programming trace and debug interface muxed with reset pin<br />
– NanoTrace provides trace capabilities through JTAG or aWire interface<br />
3 package options<br />
– 64-pin QFN/TQFP (45 GPIO pins)<br />
– 100-pin TQFP (81 GPIO pins)<br />
– 144-pin LQFP (123 GPIO pins)<br />
Two operating voltage ranges:<br />
– Single 5V Power Supply<br />
– Single 3.3V Power Supply<br />
32117D–AVR-01/12<br />
<strong>AT32UC3C</strong><br />
2
1. Description<br />
32117D–AVR-01/12<br />
<strong>AT32UC3C</strong><br />
The <strong>AT32UC3C</strong> is a complete System-On-Chip microcontroller based on the AVR32UC RISC<br />
processor running at frequencies up to 66 MHz. AVR32UC is a high-performance 32-bit RISC<br />
microprocessor core, designed for cost-sensitive embedded applications, with particular emphasis<br />
on low power consumption, high code density and high performance.<br />
The processor implements a Memory Protection Unit (MPU) and a fast and flexible interrupt controller<br />
for supporting modern operating systems and real-time operating systems. Using the<br />
Secure Access Unit (SAU) together with the MPU provides the required security and integrity.<br />
Higher computation capabilities are achievable either using a rich set of DSP instructions or<br />
using the floating-point instructions.<br />
The <strong>AT32UC3C</strong> incorporates on-chip Flash and SRAM memories for secure and fast access.<br />
For applications requiring additional memory, an external memory interface is provided on<br />
<strong>AT32UC3C</strong>0 derivatives.<br />
The Memory Direct Memory Access controller (MDMA) enables transfers of block of data from<br />
memories to memories without processor involvement.<br />
The Peripheral Direct Memory Access (PDCA) controller enables data transfers between peripherals<br />
and memories without processor involvement. The PDCA drastically reduces processing<br />
overhead when transferring continuous and large data streams.<br />
The <strong>AT32UC3C</strong> incorporates on-chip Flash and SRAM memories for secure and fast access.<br />
The FlashVault technology allows secure libraries to be programmed into the device. The secure<br />
libraries can be executed while the CPU is in Secure State, but not read by non-secure software<br />
in the device. The device can thus be shipped to end custumers, who are able to program their<br />
own code into the device, accessing the secure libraries, without any risk of compromising the<br />
proprietary secure code.<br />
The Power Manager improves design flexibility and security. Power monitoring is supported by<br />
on-chip Power-On Reset (POR), Brown-Out Detectors (BOD18, BOD33, BOD50). The CPU<br />
runs from the on-chip RC oscillators, the PLLs, or the Multipurpose Oscillators. The Asynchronous<br />
Timer (AST) combined with the 32 KHz oscillator keeps track of the time. The AST can<br />
operate in counter or calendar mode.<br />
The device includes six identical 16-bit Timer/Counter (TC) channels. Each channel can be independently<br />
programmed to perform frequency measurement, event counting, interval<br />
measurement, pulse generation, delay timing, and pulse width modulation.<br />
The PWM module provides four channels with many configuration options including polarity,<br />
edge alignment and waveform non overlap control. The PWM channels can operate independently,<br />
with duty cycles set independently from each other, or in interlinked mode, with multiple<br />
channels updated at the same time. It also includes safety feature with fault inputs and the ability<br />
to lock the PWM configuration registers and the PWM pin assignment.<br />
The <strong>AT32UC3C</strong> also features many communication interfaces for communication intensive<br />
applications. In addition to standard serial interfaces like UART, SPI or TWI, other interfaces like<br />
flexible CAN, USB and Ethernet MAC are available. The USART supports different communication<br />
modes, like SPI mode and LIN mode.<br />
The Inter-IC Sound Controller (I2SC) provides a 5-bit wide, bidirectional, synchronous, digital<br />
audio link with off-chip audio devices. The controller is compliant with the I2S bus specification.<br />
3
32117D–AVR-01/12<br />
<strong>AT32UC3C</strong><br />
The Full-Speed USB 2.0 Device interface supports several USB Classes at the same time<br />
thanks to the rich End-Point configuration. The On-The-GO (OTG) Host interface allows device<br />
like a USB Flash disk or a USB printer to be directly connected to the processor.<br />
The media-independent interface (MII) and reduced MII (RMII) 10/100 Ethernet MAC module<br />
provides on-chip solutions for network-connected devices.<br />
The Peripheral Event Controller (PEVC) allows to redirect events from one peripheral or from<br />
input pins to another peripheral. It can then trigger, in a deterministic time, an action inside a<br />
peripheral without the need of CPU. For instance a PWM waveform can directly trigger an ADC<br />
capture, hence avoiding delays due to software interrupt processing.<br />
The <strong>AT32UC3C</strong> features analog functions like ADC, DAC, Analog comparators. The ADC interface<br />
is built around a 12-bit pipelined ADC core and is able to control two independent 8-channel<br />
or one 16-channel. The ADC block is able to measure two different voltages sampled at the<br />
same time. The analog comparators can be paired to detect when the sensing voltage is within<br />
or outside the defined reference window.<br />
Atmel offers the QTouch library for embedding capacitive touch buttons, sliders, and wheels<br />
functionality into AVR microcontrollers. The patented charge-transfer signal acquisition offers<br />
robust sensing and included fully debounced reporting of touch keys and includes Adjacent Key<br />
Suppression ® (AKS ® ) technology for unambiguous detection of key events. The easy-to-use<br />
QTouch Suite toolchain allows you to explore, develop, and debug your own touch applications.<br />
<strong>AT32UC3C</strong> integrates a class 2+ Nexus 2.0 On-Chip Debug (OCD) System, with non-intrusive<br />
real-time trace, full-speed read/write memory access in addition to basic runtime control. The<br />
Nanotrace interface enables trace feature for aWire- or JTAG-based debuggers. The single-pin<br />
aWire interface allows all features available through the JTAG interface to be accessed through<br />
the RESET pin, allowing the JTAG pins to be used for GPIO or peripherals.<br />
4
2. Overview<br />
2.1 Block diagram<br />
32117D–AVR-01/12<br />
Figure 2-1. Block diagram<br />
PA<br />
PB<br />
PC<br />
PD<br />
RESET_N<br />
GENERAL PURPOSE IOs<br />
TDO<br />
TCK<br />
TDI<br />
TMS<br />
VBUS<br />
D+<br />
D-<br />
ID<br />
VBOF<br />
512/<br />
256/<br />
128/64<br />
KB<br />
Flash<br />
RXLINE[0]<br />
TXLINE[0]<br />
RXLINE[1]<br />
TXCAN[1]<br />
JTAG<br />
INTERFACE<br />
MCKO<br />
MDO[5..0]<br />
MSEO[1..0]<br />
EVTI_N<br />
EVTO_N<br />
USB<br />
INTERFACE<br />
4 KB<br />
HSB<br />
RAM<br />
CANIF<br />
DSR, DTR, DCD, RI<br />
RTS, CTS<br />
CLK<br />
TXD<br />
RXD<br />
RTS, CTS<br />
CLK<br />
TXD<br />
RXD<br />
ADCREF0/1<br />
ADCIN[15..0]<br />
ADCVREFP/N<br />
XIN[1:0]<br />
XOUT[1:0]<br />
SCK<br />
MISO, MOSI<br />
NPCS[3..0]<br />
XIN32<br />
XOUT32<br />
CLK[2..0]<br />
A[2..0]<br />
B[2..0]<br />
TWCK<br />
TWD<br />
aWire<br />
Flash<br />
Controller<br />
EXTINT[8:1]<br />
NMI<br />
GCLK[1..0]<br />
RCSYS<br />
OSC0 / OSC1<br />
PLL0 / PLL1<br />
32 KHz OSC<br />
M<br />
S<br />
M<br />
S<br />
HSB<br />
HSB-PB<br />
BRIDGE C<br />
PB<br />
NEXUS<br />
CLASS 2+<br />
OCD<br />
supplied by VDDANA<br />
ANALOG TO<br />
DIGITAL<br />
CONVERTER 0/1<br />
INSTR<br />
INTERFACE<br />
M M M<br />
PBB<br />
M<br />
PERIPHERAL<br />
DMA<br />
CONTROLLER<br />
TIMER/COUNTER 0<br />
CLOCK<br />
CONTROLLER<br />
RC8M<br />
RC120M<br />
BODs (1.8V,<br />
3.3V, 5V)<br />
S<br />
USART1<br />
USART4<br />
SERIAL<br />
PERIPHERAL<br />
INTERFACE 0<br />
TWO-WIRE<br />
INTERFACE 2<br />
POWER MANAGER<br />
DMA<br />
DMA<br />
DMA<br />
DMA<br />
DMA<br />
External Interrupt<br />
Controller<br />
SLEEP<br />
CONTROLLER<br />
RESET<br />
CONTROLLER<br />
SYSTEM CONTROL<br />
INTERFACE<br />
WATCHDOG<br />
TIMER<br />
AVR32UC CPU<br />
MEMORY PROTECTION UNIT<br />
HIGH SPEED<br />
BUS MATRIX<br />
INTERFACE<br />
DATA<br />
INTERFACE MEMORY<br />
S<br />
CONFIGURATION REGISTERS BUS<br />
HSB-PB<br />
BRIDGE A<br />
PBC<br />
HSB HSB<br />
PB<br />
PBA<br />
DMA<br />
DMA<br />
DMA<br />
DMA<br />
DMA<br />
DMA<br />
S<br />
LOCAL BUS<br />
INTERFACE<br />
64/32/16<br />
KB SRAM<br />
S<br />
S<br />
M<br />
M<br />
M<br />
PB<br />
HSB-PB<br />
BRIDGE B<br />
PERIPHERAL EVENT<br />
CONTROLLER<br />
USART0<br />
USART2<br />
USART3<br />
SERIAL<br />
PERIPHERAL<br />
INTERFACE 1<br />
I2S INTERFACE<br />
TWO-WIRE<br />
INTERFACE 0/1<br />
PULSE WIDTH<br />
MODULATION<br />
CONTROLLER<br />
supplied by VDDANA<br />
DIGITAL TO<br />
ANALOG<br />
CONVERTER 0/1<br />
ANALOG<br />
COMPARATOR<br />
0A/0B/1A/1B<br />
TIMER/COUNTER 1<br />
QUADRATURE<br />
DECODER<br />
0/1<br />
ASYNCHRONOUS<br />
TIMER<br />
FREQUENCY METER<br />
W<br />
R<br />
EXTERNAL BUS INTERFACE<br />
(SDRAM & STATIC MEMORY<br />
CONTROLLER)<br />
Memory<br />
DMA<br />
DMA<br />
LOCAL BUS<br />
ETHERNET<br />
MAC<br />
<strong>AT32UC3C</strong><br />
DATA[15..0]<br />
ADDR[23..0]<br />
NCS[3..0]<br />
NRD<br />
NWAIT<br />
NWE0<br />
NWE1<br />
RAS<br />
CAS<br />
SDA10<br />
SDCK<br />
SDCKE<br />
SDWE<br />
PAD_EVT<br />
RXD<br />
TXD<br />
CLK<br />
RTS, CTS<br />
SCK<br />
MISO, MOSI<br />
NPCS[3..0]<br />
BCLK<br />
IWS<br />
ISDI<br />
ISDO<br />
MCLK<br />
TWCK<br />
TWD<br />
TWALM<br />
PWMH[3..0]<br />
PWML[3..0]<br />
EXT_FAULTS[1:0]<br />
DAC0A/B<br />
DAC1A/B<br />
DACREF<br />
AC0AP/N AC0BP/N<br />
AC1AP/N AC1BP/N<br />
AC0AOUT/AC0BOUT<br />
AC1AOUT/AC1BOUT<br />
A[2..0]<br />
B[2..0]<br />
CLK[2..0]<br />
QEPA<br />
QEPB<br />
QEPI<br />
COL,<br />
CRS,<br />
RXD[3..0],<br />
RX_CLK,<br />
RX_DV,<br />
RX_ER,<br />
TX_CLK<br />
MDC,<br />
TXD[3..0],<br />
TX_EN,<br />
TX_ER,<br />
SPEED<br />
MDIO<br />
GENERAL PURPOSE IOs<br />
PA<br />
PB<br />
PC<br />
PD<br />
5
2.2 Configuration Summary<br />
32117D–AVR-01/12<br />
Table 2-1. Configuration Summary<br />
Feature<br />
<strong>AT32UC3C</strong>0512C/<br />
<strong>AT32UC3C</strong>0256C/<br />
<strong>AT32UC3C</strong>0128C/<br />
<strong>AT32UC3C</strong>064C<br />
<strong>AT32UC3C</strong>1512C/<br />
<strong>AT32UC3C</strong>1256C/<br />
<strong>AT32UC3C</strong>1128C/<br />
<strong>AT32UC3C</strong>164C<br />
<strong>AT32UC3C</strong><br />
<strong>AT32UC3C</strong>2512C/<br />
<strong>AT32UC3C</strong>2256C/<br />
<strong>AT32UC3C</strong>2128C/<br />
<strong>AT32UC3C</strong>264C<br />
Flash 512/256/128/64 KB 512/256/128/64 KB 512/256/128/64 KB<br />
SRAM 64/64/32/16KB 64/64/32/16KB 64/64/32/16KB<br />
HSB RAM 4 KB<br />
EBI 1 0 0<br />
GPIO 123 81 45<br />
External Interrupts 8 8 8<br />
TWI 3 3 2<br />
USART 5 5 4<br />
Peripheral DMA Channels 16 16 16<br />
Peripheral Event System 1 1 1<br />
SPI 2 2 1<br />
CAN channels 2 2 2<br />
USB 1 1 1<br />
Ethernet MAC 10/100<br />
1<br />
RMII/MII<br />
1<br />
RMII/MII<br />
1<br />
RMII only<br />
I2S 1 1 1<br />
Asynchronous Timers 1 1 1<br />
Timer/Counter Channels 6 6 3<br />
PWM channels 4x2<br />
QDEC 2 2 1<br />
Frequency Meter 1<br />
Watchdog Timer 1<br />
Power Manager 1<br />
Oscillators<br />
12-bit ADC<br />
number of channels<br />
12-bit DAC<br />
number of channels<br />
1<br />
16<br />
1<br />
4<br />
PLL 80-240 MHz (PLL0/PLL1)<br />
Crystal Oscillator 0.4-20 MHz (OSC0)<br />
Crystal Oscillator 32 KHz (OSC32K)<br />
RC Oscillator 115 kHz (RCSYS)<br />
RC Oscillator 8 MHz (RC8M)<br />
RC Oscillator 120 MHz (RC120M)<br />
0.4-20 MHz (OSC1) -<br />
1<br />
16<br />
1<br />
4<br />
1<br />
11<br />
1<br />
2<br />
6
32117D–AVR-01/12<br />
Table 2-1. Configuration Summary<br />
Feature<br />
<strong>AT32UC3C</strong>0512C/<br />
<strong>AT32UC3C</strong>0256C/<br />
<strong>AT32UC3C</strong>0128C/<br />
<strong>AT32UC3C</strong>064C<br />
<strong>AT32UC3C</strong>1512C/<br />
<strong>AT32UC3C</strong>1256C/<br />
<strong>AT32UC3C</strong>1128C/<br />
<strong>AT32UC3C</strong>164C<br />
Analog Comparators 4 4 2<br />
JTAG 1<br />
aWire 1<br />
Max Frequency 66 MHz<br />
<strong>AT32UC3C</strong><br />
<strong>AT32UC3C</strong>2512C/<br />
<strong>AT32UC3C</strong>2256C/<br />
<strong>AT32UC3C</strong>2128C/<br />
<strong>AT32UC3C</strong>264C<br />
Package LQFP144 TQFP100 TQFP64/QFN64<br />
7
3. Package and Pinout<br />
3.1 Package<br />
The device pins are multiplexed with peripheral functions as described in Table 3-1 on page 11.<br />
Figure 3-1. QFN64/TQFP64 Pinout<br />
32117D–AVR-01/12<br />
PD02 49<br />
PD03 50<br />
VDDIO3 51<br />
GNDIO3 52<br />
PD11 53<br />
PD12 54<br />
PD13 55<br />
PD14 56<br />
PD21 57<br />
PD27 58<br />
PD28 59<br />
PD29 60<br />
PD30 61<br />
PB00 62<br />
PB01 63<br />
RESET_N 64<br />
PD01<br />
PD00<br />
PC22<br />
PC21<br />
PC20<br />
PC19<br />
PC18<br />
PC17<br />
PC16<br />
PC15<br />
PC05<br />
PC04<br />
GNDIO2<br />
VDDIO2<br />
PC03<br />
PC02<br />
48<br />
47<br />
46<br />
45<br />
44<br />
43<br />
42<br />
41<br />
40<br />
39<br />
38<br />
37<br />
36<br />
35<br />
34<br />
33<br />
16<br />
15<br />
14<br />
13<br />
12<br />
11<br />
10<br />
9<br />
8<br />
7<br />
6<br />
5<br />
4<br />
3<br />
2<br />
1<br />
PA19<br />
ADCVREFN<br />
ADCVREFP<br />
PA16<br />
PA09<br />
PA08<br />
PA07<br />
PA06<br />
PA05<br />
PA04<br />
GNDIO1<br />
VDDIO1<br />
PA03<br />
PA02<br />
PA01<br />
PA00<br />
Note: on QFN packages, the exposed pad is unconnected.<br />
32<br />
31<br />
30<br />
29<br />
28<br />
27<br />
26<br />
25<br />
24<br />
23<br />
22<br />
21<br />
20<br />
19<br />
18<br />
17<br />
PB31<br />
PB30<br />
GNDCORE<br />
VDDCORE<br />
VDDIN_33<br />
VDDIN_5<br />
GNDPLL<br />
DP<br />
DM<br />
VBUS<br />
PA23<br />
PA22<br />
PA21<br />
PA20<br />
VDDANA<br />
GNDANA<br />
<strong>AT32UC3C</strong><br />
8
Figure 3-2. TQFP100 Pinout<br />
32117D–AVR-01/12<br />
PD02 76<br />
PD03 77<br />
PD07 78<br />
PD08 79<br />
PD09 80<br />
PD10 81<br />
VDDIO3 82<br />
GNDIO3 83<br />
PD11 84<br />
PD12 85<br />
PD13 86<br />
PD14 87<br />
PD21 88<br />
PD22 89<br />
PD23 90<br />
PD24 91<br />
PD27 92<br />
PD28 93<br />
PD29 94<br />
PD30 95<br />
PB00 96<br />
PB01 97<br />
RESET_N 98<br />
PB02 99<br />
PB03 100<br />
PD01<br />
PD00<br />
PC31<br />
PC24<br />
PC23<br />
PC22<br />
PC21<br />
PC20<br />
PC19<br />
PC18<br />
PC17<br />
PC16<br />
PC15<br />
PC14<br />
PC13<br />
PC12<br />
PC11<br />
PC07<br />
PC06<br />
PC05<br />
PC04<br />
GNDIO2<br />
VDDIO2<br />
PC03<br />
PC02<br />
75<br />
74<br />
73<br />
72<br />
71<br />
70<br />
69<br />
68<br />
67<br />
66<br />
65<br />
64<br />
63<br />
62<br />
61<br />
60<br />
59<br />
58<br />
57<br />
56<br />
55<br />
54<br />
53<br />
52<br />
51<br />
25<br />
24<br />
23<br />
22<br />
21<br />
20<br />
19<br />
18<br />
17<br />
16<br />
15<br />
14<br />
13<br />
12<br />
11<br />
10<br />
9<br />
8<br />
7<br />
6<br />
5<br />
4<br />
3<br />
2<br />
1<br />
PA19<br />
ADCVREFN<br />
ADCVREFP<br />
PA16<br />
PA15<br />
PA14<br />
PA13<br />
PA12<br />
PA11<br />
PA10<br />
PA09<br />
PA08<br />
PA07<br />
PA06<br />
PA05<br />
PA04<br />
PB06<br />
PB05<br />
PB04<br />
GNDIO1<br />
VDDIO1<br />
PA03<br />
PA02<br />
PA01<br />
PA00<br />
50<br />
49<br />
48<br />
47<br />
46<br />
45<br />
44<br />
43<br />
42<br />
41<br />
40<br />
39<br />
38<br />
37<br />
36<br />
35<br />
34<br />
33<br />
32<br />
31<br />
30<br />
29<br />
28<br />
27<br />
26<br />
PC01<br />
PC00<br />
PB31<br />
PB30<br />
PB23<br />
PB22<br />
PB21<br />
PB20<br />
PB19<br />
GNDCORE<br />
VDDCORE<br />
VDDIN_33<br />
VDDIN_5<br />
GNDPLL<br />
DP<br />
DM<br />
VBUS<br />
PA25<br />
PA24<br />
PA23<br />
PA22<br />
PA21<br />
PA20<br />
VDDANA<br />
GNDANA<br />
<strong>AT32UC3C</strong><br />
9
Figure 3-3. LQFP144 Pinout<br />
32117D–AVR-01/12<br />
PD02 109<br />
PD03 110<br />
PD04 111<br />
PD05 112<br />
PD06 113<br />
PD07 114<br />
PD08 115<br />
PD09 116<br />
PD10 117<br />
VDDIO3 118<br />
GNDIO3 119<br />
PD11 120<br />
PD12 121<br />
PD13 122<br />
PD14 123<br />
PD15 124<br />
PD16 125<br />
PD17 126<br />
PD18 127<br />
PD19 128<br />
PD20 129<br />
PD21 130<br />
PD22 131<br />
PD23 132<br />
PD24 133<br />
PD25 134<br />
PD26 135<br />
PD27 136<br />
PD28 137<br />
PD29 138<br />
PD30 139<br />
PB00 140<br />
PB01 141<br />
RESET_N 142<br />
PB02 143<br />
PB03 144<br />
PD01<br />
PD00<br />
PC31<br />
PC30<br />
GNDIO3<br />
VDDIO3<br />
PC29<br />
PC28<br />
PC27<br />
PC26<br />
PC25<br />
PC24<br />
PC23<br />
PC22<br />
PC21<br />
PC20<br />
PC19<br />
PC18<br />
PC17<br />
PC16<br />
PC15<br />
PC14<br />
PC13<br />
PC12<br />
PC11<br />
PC10<br />
PC09<br />
PC08<br />
PC07<br />
PC06<br />
PC05<br />
PC04<br />
GNDIO2<br />
VDDIO2<br />
PC03<br />
PC02<br />
108<br />
107<br />
106<br />
105<br />
104<br />
103<br />
102<br />
101<br />
100<br />
99<br />
98<br />
97<br />
96<br />
95<br />
94<br />
93<br />
92<br />
91<br />
90<br />
89<br />
88<br />
87<br />
86<br />
85<br />
84<br />
83<br />
82<br />
81<br />
80<br />
79<br />
78<br />
77<br />
76<br />
75<br />
74<br />
73<br />
36<br />
35<br />
34<br />
33<br />
32<br />
31<br />
30<br />
29<br />
28<br />
27<br />
26<br />
25<br />
24<br />
23<br />
22<br />
21<br />
20<br />
19<br />
18<br />
17<br />
16<br />
15<br />
14<br />
13<br />
12<br />
11<br />
10<br />
9<br />
8<br />
7<br />
6<br />
5<br />
4<br />
3<br />
2<br />
1<br />
PA19<br />
ADCVREFN<br />
ADCVREFP<br />
PA16<br />
PA15<br />
PA14<br />
PA13<br />
PA12<br />
PA11<br />
PA10<br />
PA09<br />
PA08<br />
PA07<br />
PA06<br />
PA05<br />
PA04<br />
PB17<br />
PB16<br />
PB15<br />
PB14<br />
PB13<br />
PB12<br />
PB11<br />
PB10<br />
PB09<br />
PB08<br />
PB07<br />
PB06<br />
PB05<br />
PB04<br />
GNDIO1<br />
VDDIO1<br />
PA03<br />
PA02<br />
PA01<br />
PA00<br />
72<br />
71<br />
70<br />
69<br />
68<br />
67<br />
66<br />
65<br />
64<br />
63<br />
62<br />
61<br />
60<br />
59<br />
58<br />
57<br />
56<br />
55<br />
54<br />
53<br />
52<br />
51<br />
50<br />
49<br />
48<br />
47<br />
46<br />
45<br />
44<br />
43<br />
42<br />
41<br />
40<br />
39<br />
38<br />
37<br />
<strong>AT32UC3C</strong><br />
PC01<br />
PC00<br />
PB31<br />
PB30<br />
PB29<br />
PB28<br />
PB27<br />
PB26<br />
PB25<br />
PB24<br />
PB23<br />
PB22<br />
PB21<br />
PB20<br />
PB19<br />
PB18<br />
GNDCORE<br />
VDDCORE<br />
VDDIN_33<br />
VDDIN_5<br />
GNDPLL<br />
DP<br />
DM<br />
VBUS<br />
PA29<br />
PA28<br />
PA27<br />
PA26<br />
PA25<br />
PA24<br />
PA23<br />
PA22<br />
PA21<br />
PA20<br />
VDDANA<br />
GNDANA<br />
10
3.2 Peripheral Multiplexing on I/O lines<br />
3.2.1 Multiplexed Signals<br />
32117D–AVR-01/12<br />
<strong>AT32UC3C</strong><br />
Each GPIO line can be assigned to one of the peripheral functions. The following table<br />
describes the peripheral signals multiplexed to the GPIO lines.<br />
Table 3-1. GPIO Controller Function Multiplexing<br />
TQFP<br />
/<br />
QFN<br />
64<br />
1<br />
TQFP<br />
100<br />
LQFP<br />
144 PIN<br />
G<br />
P<br />
I<br />
O Supply<br />
Pin<br />
Type<br />
1 1 PA00 0 VDDIO1 x1/x2<br />
2 2 2 PA01 1<br />
3 3 3 PA02 2<br />
4 4 4 PA03 3<br />
VDDIO1<br />
VDDIO1<br />
VDDIO1<br />
(1)<br />
x1/x2<br />
x1/x2<br />
x1/x2<br />
GPIO function<br />
A B C D E F<br />
SCIF -<br />
GCLK[0]<br />
SCIF -<br />
GCLK[1]<br />
CANIF -<br />
TXLINE[1]<br />
CANIF -<br />
RXLINE[1]<br />
EIC -<br />
EXTINT[1]<br />
7 10 21 PA04 4 VDDANA x1/x2 ADCIN0 USBC - ID<br />
8 11 22 PA05 5 VDDANA x1/x2 ADCIN1<br />
USBC -<br />
VBOF<br />
9 12 23 PA06 6 VDDANA x1/x2 ADCIN2 AC1AP1<br />
10 13 24 PA07 7 VDDANA x1/x2 ADCIN3 AC1AN1<br />
11 14 25 PA08 8 VDDANA x1/x2 ADCIN4 AC1BP1<br />
12 15 26 PA09 9 VDDANA x1/x2 ADCIN5 AC1BN1<br />
16 27 PA10 10 VDDANA x1/x2 ADCIN6<br />
EIC -<br />
EXTINT[4]<br />
17 28 PA11 11 VDDANA x1/x2 ADCIN7 ADCREF1<br />
18 29 PA12 12 VDDANA x1/x2 AC1AP0<br />
19 30 PA13 13 VDDANA x1/x2 AC1AN0<br />
20 31 PA14 14 VDDANA x1/x2 AC1BP0<br />
21 32 PA15 15 VDDANA x1/x2 AC1BN0<br />
SPI0 -<br />
NPCS[0]<br />
PEVC -<br />
PAD_EVT<br />
[0]<br />
PEVC -<br />
PAD_EVT<br />
[1]<br />
ACIFA0 -<br />
ACAOUT<br />
ACIFA0 -<br />
ACBOUT<br />
PEVC -<br />
PAD_EVT<br />
[2]<br />
PEVC -<br />
PAD_EVT<br />
[3]<br />
EIC -<br />
EXTINT[2]<br />
PEVC -<br />
PAD_EVT<br />
[13]<br />
PEVC -<br />
PAD_EVT<br />
[14]<br />
AC1AP0 or<br />
DAC1A<br />
SPI0 -<br />
NPCS[1] ADCIN15<br />
SPI1 -<br />
NPCS[0]<br />
SPI1 -<br />
NPCS[1]<br />
AC1BN0 or<br />
DAC1B<br />
13 22 33 PA16 16 VDDANA x1/x2 ADCREF0 DACREF<br />
14 23 34<br />
15 24 35<br />
ADC<br />
REFP<br />
ADC<br />
REFN<br />
11
Table 3-1. GPIO Controller Function Multiplexing<br />
TQFP<br />
/<br />
QFN<br />
64<br />
TQFP<br />
100<br />
16 25 36 PA19 19 VDDANA x1/x2 ADCIN8<br />
32117D–AVR-01/12<br />
LQFP<br />
144 PIN<br />
G<br />
P<br />
I<br />
O Supply<br />
Pin<br />
Type<br />
(1)<br />
EIC -<br />
EXTINT[1]<br />
19 28 39 PA20 20 VDDANA x1/x2 ADCIN9 AC0AP0<br />
20 29 40 PA21 21 VDDANA x1/x2 ADCIN10 AC0BN0<br />
21 30 41 PA22 22 VDDANA x1/x2 ADCIN11 AC0AN0<br />
22 31 42 PA23 23 VDDANA x1/x2 ADCIN12 AC0BP0<br />
32 43 PA24 24 VDDANA x1/x2 ADCIN13<br />
33 44 PA25 25 VDDANA x1/x2 ADCIN14<br />
45 PA26 26 VDDANA x1/x2 AC0AP1<br />
46 PA27 27 VDDANA x1/x2 AC0AN1<br />
47 PA28 28 VDDANA x1/x2 AC0BP1<br />
48 PA29 29 VDDANA x1/x2 AC0BN1<br />
62 96 140 PB00 32 VDDIO1 x1<br />
63 97 141 PB01 33 VDDIO1 x1<br />
USART0 -<br />
CLK<br />
SPI1 -<br />
NPCS[2]<br />
SPI1 -<br />
NPCS[3]<br />
EIC -<br />
EXTINT[1]<br />
EIC -<br />
EXTINT[2]<br />
EIC -<br />
EXTINT[3]<br />
EIC -<br />
EXTINT[0]<br />
CANIF -<br />
RXLINE[1]<br />
CANIF -<br />
TXLINE[1]<br />
99 143 PB02 34 VDDIO1 x1 USBC - ID<br />
100 144 PB03 35 VDDIO1 x1<br />
7 7 PB04 36 VDDIO1 x1/x2<br />
8 8 PB05 37 VDDIO1 x1/x2<br />
9 9 PB06 38 VDDIO1 x2/x4<br />
10 PB07 39 VDDIO1 x1/x2<br />
11 PB08 40 VDDIO1 x1/x2<br />
12 PB09 41 VDDIO1 x1/x2<br />
13 PB10 42 VDDIO1 x1/x2<br />
SPI1 -<br />
MOSI<br />
SPI1 -<br />
MISO<br />
SPI1 -<br />
SCK<br />
SPI1 -<br />
NPCS[0]<br />
SPI1 -<br />
NPCS[1]<br />
SPI1 -<br />
NPCS[2]<br />
USART1 -<br />
DTR<br />
USBC -<br />
VBOF<br />
CANIF -<br />
RXLINE[0]<br />
CANIF -<br />
TXLINE[0]<br />
EIC -<br />
EXTINT[2]<br />
PEVC -<br />
PAD_EVT<br />
[1]<br />
SPI0 -<br />
MOSI<br />
GPIO function<br />
A B C D E F<br />
AC0AP0 or<br />
DAC0A<br />
AC0BN0 or<br />
DAC0B<br />
PEVC -<br />
PAD_EVT<br />
[4]<br />
PEVC -<br />
PAD_EVT<br />
[5]<br />
EIC -<br />
EXTINT[0]<br />
EIC -<br />
EXTINT[8]<br />
PEVC -<br />
PAD_EVT<br />
[10]<br />
PEVC -<br />
PAD_EVT<br />
[11]<br />
PEVC -<br />
PAD_EVT<br />
[6] TC1 - A1<br />
PEVC -<br />
PAD_EVT<br />
[7]<br />
QDEC1 -<br />
QEPI<br />
PEVC -<br />
PAD_EVT<br />
[12]<br />
QDEC1 -<br />
QEPA<br />
QDEC1 -<br />
QEPB<br />
PWM -<br />
PWML[0]<br />
PWM -<br />
PWMH[0]<br />
PWM -<br />
PWML[1]<br />
USART3 -<br />
CLK<br />
USART1 -<br />
CLK<br />
MACB -<br />
SPEED<br />
MACB -<br />
WOL<br />
MACB -<br />
TXD[2]<br />
MACB -<br />
TXD[3]<br />
MACB -<br />
TX_ER<br />
MACB -<br />
RX_DV<br />
MACB -<br />
RXD[0]<br />
MACB -<br />
RXD[1]<br />
<strong>AT32UC3C</strong><br />
12
Table 3-1. GPIO Controller Function Multiplexing<br />
TQFP<br />
/<br />
QFN<br />
64<br />
TQFP<br />
100<br />
32117D–AVR-01/12<br />
LQFP<br />
144 PIN<br />
G<br />
P<br />
I<br />
O Supply<br />
Pin<br />
Type<br />
(1)<br />
14 PB11 43 VDDIO1 x1/x2<br />
15 PB12 44 VDDIO1 x1/x2<br />
16 PB13 45 VDDIO1 x1/x2<br />
17 PB14 46 VDDIO1 x1/x2<br />
18 PB15 47 VDDIO1 x1/x2<br />
19 PB16 48 VDDIO1 x1/x2<br />
20 PB17 49 VDDIO1 x1/x2<br />
57 PB18 50 VDDIO2 x1/x2<br />
USART1 -<br />
DSR<br />
USART1 -<br />
DCD<br />
USART1 -<br />
RI<br />
USART1 -<br />
RTS<br />
USART1 -<br />
CTS<br />
USART1 -<br />
RXD<br />
USART1 -<br />
TXD<br />
TC0 -<br />
CLK2<br />
42 58 PB19 51 VDDIO2 x1/x2 TC0 - A0<br />
43 59 PB20 52 VDDIO2 x1/x2 TC0 - B0<br />
44 60 PB21 53 VDDIO2 x2/x4<br />
TC0 -<br />
CLK1<br />
45 61 PB22 54 VDDIO2 x1/x2 TC0 - A1<br />
46 62 PB23 55 VDDIO2 x1/x2 TC0 - B1<br />
63 PB24 56 VDDIO2 x1/x2<br />
TC0 -<br />
CLK0<br />
64 PB25 57 VDDIO2 x1/x2 TC0 - A2<br />
65 PB26 58 VDDIO2 x2/x4 TC0 - B2<br />
66 PB27 59 VDDIO2 x1/x2<br />
67 PB28 60 VDDIO2 x1/x2<br />
68 PB29 61 VDDIO2 x1/x2<br />
31 47 69 PB30 62 VDDIO2 x1<br />
32 48 70 PB31 63 VDDIO2 x1<br />
QDEC0 -<br />
QEPA<br />
QDEC0 -<br />
QEPB<br />
QDEC0 -<br />
QEPI<br />
49 71 PC00 64 VDDIO2 x1/x2 USBC - ID<br />
50 72 PC01 65 VDDIO2 x1/x2<br />
USBC -<br />
VBOF<br />
SPI0 -<br />
MISO<br />
SPI0 -<br />
SCK<br />
SPI0 -<br />
NPCS[0]<br />
SPI0 -<br />
NPCS[1]<br />
USART1 -<br />
CLK<br />
SPI0 -<br />
NPCS[2]<br />
SPI0 -<br />
NPCS[3]<br />
SPI1 -<br />
MOSI<br />
PWM -<br />
PWMH[1]<br />
PWM -<br />
PWML[2]<br />
PWM -<br />
PWMH[2]<br />
PWM -<br />
PWML[3]<br />
PWM -<br />
PWMH[3]<br />
PWM -<br />
EXT_<br />
FAULTS[0]<br />
PWM -<br />
EXT_<br />
FAULTS[1]<br />
EIC -<br />
EXTINT[4]<br />
IISC -<br />
ISDO<br />
SPI1 -<br />
MISO IISC - ISDI<br />
SPI1 -<br />
SCK<br />
SPI1 -<br />
NPCS[3]<br />
IISC -<br />
IMCK<br />
IISC -<br />
ISCK<br />
SPI1 -<br />
NPCS[2] IISC - IWS<br />
SPI1 -<br />
NPCS[1]<br />
SPI1 -<br />
NPCS[0]<br />
SPI1 -<br />
SCK<br />
SPI1 -<br />
MISO<br />
SPI1 -<br />
MOSI<br />
SPI0 -<br />
NPCS[0]<br />
SPI0 -<br />
NPCS[1]<br />
SPI0 -<br />
NPCS[2]<br />
GPIO function<br />
A B C D E F<br />
PEVC -<br />
PAD_EVT<br />
[8]<br />
PEVC -<br />
PAD_EVT<br />
[9]<br />
PEVC -<br />
PAD_EVT<br />
[10]<br />
ACIFA1 -<br />
ACAOUT<br />
ACIFA1 -<br />
ACBOUT<br />
SCIF -<br />
GCLK[0]<br />
SCIF -<br />
GCLK[1]<br />
TC1 -<br />
CLK0<br />
PEVC -<br />
PAD_EVT<br />
[11] TC1 - B0<br />
PEVC -<br />
PAD_EVT<br />
[12] TC1 - A0<br />
USART2 -<br />
CTS TC1 - B2<br />
USART2 -<br />
RTS TC1 - A2<br />
MACB -<br />
RX_ER<br />
MACB -<br />
MDC<br />
MACB -<br />
MDIO<br />
CANIF -<br />
RXLINE[0]<br />
CANIF -<br />
TXLINE[0]<br />
MACB -<br />
CRS<br />
MACB -<br />
COL<br />
MACB -<br />
RXD[2]<br />
MACB -<br />
RXD[3]<br />
MACB -<br />
RX_CLK<br />
MACB -<br />
TX_EN<br />
MACB -<br />
TXD[0]<br />
MACB -<br />
TXD[1]<br />
CANIF -<br />
TXLINE[1]<br />
CANIF -<br />
RXLINE[1]<br />
<strong>AT32UC3C</strong><br />
13
Table 3-1. GPIO Controller Function Multiplexing<br />
TQFP<br />
/<br />
QFN<br />
64<br />
TQFP<br />
100<br />
33 51 73 PC02 66 VDDIO2 x1<br />
34 52 74 PC03 67 VDDIO2 x1<br />
32117D–AVR-01/12<br />
LQFP<br />
144 PIN<br />
G<br />
P<br />
I<br />
O Supply<br />
Pin<br />
Type<br />
(1)<br />
37 55 77 PC04 68 VDDIO2 x1<br />
38 56 78 PC05 69 VDDIO2 x1<br />
57 79 PC06 70 VDDIO2 x1<br />
58 80 PC07 71 VDDIO2 x1<br />
81 PC08 72 VDDIO2 x1/x2<br />
82 PC09 73 VDDIO2 x1/x2<br />
83 PC10 74 VDDIO2 x1/x2<br />
59 84 PC11 75 VDDIO2 x1/x2<br />
60 85 PC12 76 VDDIO2 x1/x2<br />
61 86 PC13 77 VDDIO2 x1/x2<br />
62 87 PC14 78 VDDIO2 x1/x2<br />
39 63 88 PC15 79 VDDIO2 x1/x2<br />
40 64 89 PC16 80 VDDIO2 x1/x2<br />
41 65 90 PC17 81 VDDIO2 x1/x2<br />
42 66 91 PC18 82 VDDIO2 x1/x2<br />
43 67 92 PC19 83 VDDIO3 x1/x2<br />
44 68 93 PC20 84 VDDIO3 x1/x2<br />
45 69 94 PC21 85 VDDIO3 x1/x2<br />
46 70 95 PC22 86 VDDIO3 x1/x2<br />
71 96 PC23 87 VDDIO3 x1/x2<br />
TWIMS0 -<br />
TWD<br />
TWIMS0 -<br />
TWCK<br />
TWIMS1 -<br />
TWD<br />
TWIMS1 -<br />
TWCK<br />
PEVC -<br />
PAD_EVT<br />
[15]<br />
PEVC -<br />
PAD_EVT<br />
[2]<br />
PEVC -<br />
PAD_EVT<br />
[13]<br />
PEVC -<br />
PAD_EVT<br />
[14]<br />
PEVC -<br />
PAD_EVT<br />
[15]<br />
PWM -<br />
PWMH[3]<br />
PWM -<br />
PWML[3]<br />
PWM -<br />
PWMH[2]<br />
PWM -<br />
PWML[2]<br />
PWM -<br />
PWMH[1]<br />
PWM -<br />
PWML[1]<br />
PWM -<br />
PWMH[0]<br />
PWM -<br />
PWML[0]<br />
PWM -<br />
PWML[2]<br />
PWM -<br />
PWMH[2]<br />
PWM -<br />
EXT_<br />
FAULTS[0]<br />
PWM -<br />
EXT_<br />
FAULTS[1]<br />
QDEC1 -<br />
QEPB<br />
SPI0 -<br />
NPCS[3]<br />
EIC -<br />
EXTINT[1]<br />
EIC -<br />
EXTINT[3]<br />
EIC -<br />
EXTINT[4]<br />
USART2 -<br />
CLK<br />
EBI -<br />
NCS[3]<br />
SPI1 -<br />
NPCS[1]<br />
SPI1 -<br />
NPCS[2]<br />
SPI1 -<br />
NPCS[3]<br />
CANIF -<br />
RXLINE[1]<br />
CANIF -<br />
TXLINE[1]<br />
EIC -<br />
EXTINT[7]<br />
USART0 -<br />
CLK<br />
SPI0 -<br />
NPCS[0]<br />
USART2 -<br />
RXD<br />
TC1 -<br />
CLK1<br />
USART2 -<br />
TXD TC1 - B1<br />
USART2 -<br />
TXD TC0 - B1<br />
USART2 -<br />
RXD TC0 - A2<br />
USART2 -<br />
CTS<br />
TC0 -<br />
CLK2<br />
USART2 -<br />
RTS TC0 - B2<br />
EBI -<br />
NCS[0]<br />
EBI -<br />
ADDR[23]<br />
EBI -<br />
ADDR[22]<br />
EBI -<br />
ADDR[21]<br />
EBI -<br />
ADDR[20]<br />
EBI -<br />
SDCKE<br />
EBI -<br />
SDWE<br />
SPI0 -<br />
NPCS[1] EBI - CAS<br />
SPI0 -<br />
NPCS[2] EBI - RAS<br />
EIC -<br />
EXTINT[5]<br />
SCIF -<br />
GCLK[0]<br />
SCIF -<br />
GCLK[1]<br />
CANIF -<br />
RXLINE[0]<br />
CANIF -<br />
TXLINE[0]<br />
CANIF -<br />
RXLINE[1]<br />
GPIO function<br />
A B C D E F<br />
EBI -<br />
SDA10<br />
EBI -<br />
DATA[0]<br />
EBI -<br />
DATA[1]<br />
TC0 -<br />
CLK0<br />
USART2 -<br />
CLK<br />
USART0 -<br />
RTS<br />
USART0 -<br />
CTS<br />
USART0 -<br />
RXD<br />
USART0 -<br />
TXD<br />
IISC -<br />
ISDO<br />
IISC -<br />
ISDI<br />
IISC -<br />
IMCK<br />
IISC -<br />
ISCK<br />
EBI -<br />
DATA[2] IISC - IWS<br />
EBI -<br />
DATA[3]<br />
EBI -<br />
DATA[4]<br />
PEVC -<br />
PAD_EVT<br />
[3]<br />
MACB -<br />
MDC<br />
MACB -<br />
MDIO<br />
TWIMS2 -<br />
TWD<br />
TWIMS2 -<br />
TWCK<br />
USART4 -<br />
TXD<br />
USART4 -<br />
RXD<br />
CANIF -<br />
RXLINE[1]<br />
CANIF -<br />
TXLINE[1]<br />
USART3 -<br />
CLK<br />
<strong>AT32UC3C</strong><br />
TWIMS0 -<br />
TWALM<br />
TWIMS1 -<br />
TWALM<br />
USART3 -<br />
TXD<br />
USART3 -<br />
RXD<br />
USART3 -<br />
CTS<br />
USART3 -<br />
RTS<br />
14
Table 3-1. GPIO Controller Function Multiplexing<br />
TQFP<br />
/<br />
QFN<br />
64<br />
TQFP<br />
100<br />
32117D–AVR-01/12<br />
LQFP<br />
144 PIN<br />
G<br />
P<br />
I<br />
O Supply<br />
Pin<br />
Type<br />
(1)<br />
72 97 PC24 88 VDDIO3 x1/x2<br />
98 PC25 89 VDDIO3 x1/x2<br />
99 PC26 90 VDDIO3 x1/x2<br />
QDEC1 -<br />
QEPA<br />
CANIF -<br />
TXLINE[1]<br />
TC1 -<br />
CLK2<br />
QDEC1 -<br />
QEPI TC1 - B2<br />
100 PC27 91 VDDIO3 x1/x2 TC1 - A2<br />
101 PC28 92 VDDIO3 x1/x2<br />
102 PC29 93 VDDIO3 x1/x2<br />
105 PC30 94 VDDIO3 x1/x2<br />
73 106 PC31 95 VDDIO3 x1/x2<br />
47 74 107 PD00 96 VDDIO3 x1/x2<br />
48 75 108 PD01 97 VDDIO3 x1/x2<br />
49 76 109 PD02 98 VDDIO3 x2/x4<br />
50 77 110 PD03 99 VDDIO3 x1/x2<br />
111 PD04 100 VDDIO3 x1/x2<br />
112 PD05 101 VDDIO3 x1/x2<br />
113 PD06 102 VDDIO3 x2/x4<br />
78 114 PD07 103 VDDIO3 x1/x2<br />
79 115 PD08 104 VDDIO3 x1/x2<br />
80 116 PD09 105 VDDIO3 x1/x2<br />
81 117 PD10 106 VDDIO3 x1/x2<br />
53 84 120 PD11 107 VDDIO3 x1/x2<br />
54 85 121 PD12 108 VDDIO3 x1/x2<br />
55 86 122 PD13 109 VDDIO3 x2/x4<br />
56 87 123 PD14 110 VDDIO3 x1/x2<br />
SPI1 -<br />
NPCS[3]<br />
TC1 -<br />
CLK1<br />
SPI0 -<br />
NPCS[1] TC1 - B1<br />
SPI0 -<br />
NPCS[2] TC1 - A1<br />
SPI0 -<br />
NPCS[3] TC1 - B0<br />
SPI0 -<br />
MOSI<br />
TC1 -<br />
CLK0<br />
SPI0 -<br />
MISO TC1 - A0<br />
SPI0 -<br />
SCK<br />
TC0 -<br />
CLK2<br />
SPI0 -<br />
NPCS[0] TC0 - B2<br />
SPI0 -<br />
MOSI<br />
SPI0 -<br />
MISO<br />
SPI0 -<br />
SCK<br />
USART1 -<br />
DTR<br />
USART1 -<br />
DSR<br />
USART1 -<br />
DCD<br />
USART1 -<br />
RI<br />
EIC -<br />
EXTINT[5]<br />
EIC -<br />
EXTINT[6]<br />
CANIF -<br />
RXLINE[0]<br />
CANIF -<br />
TXLINE[0]<br />
USART1 -<br />
TXD USBC - ID<br />
USART1 -<br />
RXD<br />
USART1 -<br />
CTS<br />
USART1 -<br />
RTS<br />
USBC -<br />
VBOF<br />
USART1 -<br />
CLK<br />
EIC -<br />
EXTINT[7]<br />
GPIO function<br />
A B C D E F<br />
EBI -<br />
DATA[5]<br />
EBI -<br />
DATA[6]<br />
EBI -<br />
DATA[7]<br />
EBI -<br />
DATA[8]<br />
EBI -<br />
DATA[9]<br />
EBI -<br />
DATA[10]<br />
EBI -<br />
DATA[11]<br />
EBI -<br />
DATA[12]<br />
EBI -<br />
DATA[13]<br />
EBI -<br />
DATA[14]<br />
EBI -<br />
DATA[15]<br />
EBI -<br />
ADDR[0]<br />
EBI -<br />
ADDR[1]<br />
EBI -<br />
ADDR[2]<br />
EBI -<br />
ADDR[3]<br />
EBI -<br />
ADDR[4]<br />
EBI -<br />
ADDR[5]<br />
EBI -<br />
ADDR[6]<br />
EBI -<br />
ADDR[7]<br />
EBI -<br />
ADDR[8]<br />
EBI -<br />
ADDR[9]<br />
EBI -<br />
SDCK<br />
EBI -<br />
ADDR[10]<br />
PEVC -<br />
PAD_EVT<br />
[4]<br />
SCIF -<br />
GCLK[0]<br />
SCIF -<br />
GCLK[1]<br />
EIC -<br />
EXTINT[0]<br />
PEVC -<br />
PAD_EVT<br />
[5]<br />
QDEC0 -<br />
QEPI<br />
TC0 -<br />
CLK1<br />
QDEC0 -<br />
QEPA<br />
QDEC0 -<br />
QEPB<br />
QDEC0 -<br />
QEPI<br />
TC1 -<br />
CLK2<br />
QDEC0 -<br />
QEPA<br />
QDEC0 -<br />
QEPB<br />
PEVC -<br />
PAD_EVT<br />
[6]<br />
PEVC -<br />
PAD_EVT<br />
[7]<br />
PEVC -<br />
PAD_EVT<br />
[8]<br />
PEVC -<br />
PAD_EVT<br />
[9]<br />
USART4 -<br />
TXD<br />
USART4 -<br />
RXD<br />
USART4 -<br />
CTS<br />
USART4 -<br />
RTS<br />
USART4 -<br />
CLK<br />
USART0 -<br />
TXD<br />
USART0 -<br />
RXD<br />
USART4 -<br />
TXD<br />
USART4 -<br />
RXD<br />
USART4 -<br />
CTS<br />
USART4 -<br />
RTS<br />
MACB -<br />
TXD[0]<br />
MACB -<br />
TXD[1]<br />
MACB -<br />
RXD[0]<br />
MACB -<br />
RXD[1]<br />
<strong>AT32UC3C</strong><br />
15
Table 3-1. GPIO Controller Function Multiplexing<br />
TQFP<br />
/<br />
QFN<br />
64<br />
TQFP<br />
100<br />
32117D–AVR-01/12<br />
LQFP<br />
144 PIN<br />
G<br />
P<br />
I<br />
O Supply<br />
Pin<br />
Type<br />
(1)<br />
124 PD15 111 VDDIO3 x1/x2 TC0 - A0<br />
125 PD16 112 VDDIO3 x1/x2 TC0 - B0<br />
126 PD17 113 VDDIO3 x1/x2 TC0 - A1<br />
127 PD18 114 VDDIO3 x1/x2 TC0 - B1<br />
128 PD19 115 VDDIO3 x1/x2 TC0 - A2<br />
129 PD20 116 VDDIO3 x1/x2 TC0 - B2<br />
57 88 130 PD21 117 VDDIO3 x1/x2<br />
89 131 PD22 118 VDDIO1 x1/x2<br />
90 132 PD23 119 VDDIO1 x1/x2<br />
91 133 PD24 120 VDDIO1 x1/x2<br />
134 PD25 121 VDDIO1 x1/x2<br />
135 PD26 122 VDDIO1 x1/x2<br />
58 92 136 PD27 123 VDDIO1 x1/x2<br />
59 93 137 PD28 124 VDDIO1 x1/x2<br />
60 94 138 PD29 125 VDDIO1 x1/x2<br />
61 95 139 PD30 126 VDDIO1 x1/x2<br />
USART3 -<br />
TXD<br />
<strong>AT32UC3C</strong><br />
Note: 1. Refer to ”Electrical Characteristics” on page 1248 for a description of the electrical properties of the pin types used.<br />
See Section 3.3 for a description of the various peripheral signals.<br />
3.2.2 Peripheral Functions<br />
Each GPIO line can be assigned to one of several peripheral functions. The following table<br />
describes how the various peripheral functions are selected. The last listed function has priority<br />
in case multiple functions are enabled on the same pin.<br />
USART3 -<br />
TXD<br />
USART3 -<br />
RXD<br />
USART3 -<br />
CTS<br />
USART3 -<br />
RTS<br />
EIC -<br />
EXTINT[0]<br />
USART3 -<br />
RXD TC0 - A2<br />
USART3 -<br />
CTS<br />
USART3 -<br />
RTS<br />
USART3 -<br />
CLK<br />
EIC -<br />
EXTINT[8]<br />
TC0 -<br />
CLK0 USBC - ID<br />
TC0 -<br />
CLK1<br />
USART0 -<br />
TXD<br />
USART0 -<br />
RXD<br />
USART0 -<br />
CTS<br />
USART0 -<br />
RTS<br />
Table 3-2. Peripheral Functions<br />
EBI -<br />
ADDR[11]<br />
EBI -<br />
ADDR[12]<br />
EBI -<br />
ADDR[13]<br />
EBI -<br />
ADDR[14]<br />
EBI -<br />
ADDR[15]<br />
EBI -<br />
ADDR[16]<br />
EBI -<br />
ADDR[17]<br />
EBI -<br />
ADDR[18]<br />
EBI -<br />
ADDR[19]<br />
EBI -<br />
NWE1<br />
EBI -<br />
NWE0<br />
USBC -<br />
VBOF EBI - NRD<br />
CANIF -<br />
RXLINE[0]<br />
CANIF -<br />
TXLINE[0]<br />
EIC -<br />
EXTINT[6]<br />
EIC -<br />
EXTINT[3]<br />
GPIO function<br />
A B C D E F<br />
USART3 -<br />
CLK<br />
QDEC1 -<br />
QEPI<br />
SCIF -<br />
GCLK[0]<br />
QDEC1 -<br />
QEPA<br />
QDEC1 -<br />
QEPB<br />
EBI -<br />
NCS[1] TC0 - A0<br />
EBI -<br />
NCS[2] TC0 - B0<br />
USART0 -<br />
CLK<br />
TC0 -<br />
CLK0<br />
EBI -<br />
NWAIT TC0 - A1<br />
Function Description<br />
USART4 -<br />
CLK<br />
MACB -<br />
RX_ER<br />
MACB -<br />
RX_DV<br />
MACB -<br />
TX_CLK<br />
MACB -<br />
TX_EN<br />
GPIO Controller Function multiplexing GPIO and GPIO peripheral selection A to F<br />
Nexus OCD AUX port connections OCD trace system<br />
16
32117D–AVR-01/12<br />
Table 3-2. Peripheral Functions<br />
Function Description<br />
aWire DATAOUT aWire output in two-pin mode<br />
JTAG port connections JTAG debug port<br />
Oscillators OSC0, OSC32<br />
<strong>AT32UC3C</strong><br />
3.2.3 Oscillator Pinout<br />
The oscillators are not mapped to the normal GPIO functions and their muxings are controlled<br />
by registers in the System Control Interface (SCIF). Please refer to the SCIF chapter for more<br />
information about this.<br />
Table 3-3. Oscillator pinout<br />
QFN64/<br />
TQFP64 pin TQFP100 pin LQFP144 pin Pad Oscillator pin<br />
31 47 69 PB30 xin0<br />
99 143 PB02 xin1<br />
62 96 140 PB00 xin32<br />
32 48 70 PB31 xout0<br />
100 144 PB03 xout1<br />
63 97 141 PB01 xout32<br />
3.2.4 JTAG port connections<br />
If the JTAG is enabled, the JTAG will take control over a number of pins, irrespectively of the I/O<br />
Controller configuration.<br />
Table 3-4. JTAG pinout<br />
QFN64/<br />
TQFP64 pin TQFP100 pin LQFP144 pin Pin name JTAG pin<br />
2 2 2 PA01 TDI<br />
3 3 3 PA02 TDO<br />
4 4 4 PA03 TMS<br />
1 1 1 PA00 TCK<br />
3.2.5 Nexus OCD AUX port connections<br />
If the OCD trace system is enabled, the trace system will take control over a number of pins, irrespectively<br />
of the GPIO configuration. Three different OCD trace pin mappings are possible,<br />
17
32117D–AVR-01/12<br />
<strong>AT32UC3C</strong><br />
depending on the configuration of the OCD AXS register. For details, see the AVR32UC Technical<br />
Reference Manual.<br />
3.2.6 Other Functions<br />
The functions listed in Table 3-6 are not mapped to the normal GPIO functions. The aWire DATA<br />
pin will only be active after the aWire is enabled. The aWire DATAOUT pin will only be active<br />
after the aWire is enabled and the 2_PIN_MODE command has been sent.<br />
3.3 Signals Description<br />
The following table give details on the signal name classified by peripherals.<br />
Table 3-7. Signal Description List<br />
Table 3-5. Nexus OCD AUX port connections<br />
Pin AXS=0 AXS=1 AXS=2<br />
EVTI_N PA08 PB19 PA10<br />
MDO[5] PC05 PC31 PB06<br />
MDO[4] PC04 PC12 PB15<br />
MDO[3] PA23 PC11 PB14<br />
MDO[2] PA22 PB23 PA27<br />
MDO[1] PA19 PB22 PA26<br />
MDO[0] PA09 PB20 PA19<br />
EVTO_N PD29 PD29 PD29<br />
MCKO PD13 PB21 PB26<br />
MSEO[1] PD30 PD08 PB25<br />
MSEO[0] PD14 PD07 PB18<br />
Table 3-6. Other Functions<br />
QFN64/<br />
TQFP64 pin TQFP100 pin LQFP144 pin Pad Oscillator pin<br />
64 98 142 RESET_N aWire DATA<br />
3 3 3 PA02 aWire DATAOUT<br />
Signal Name Function Type<br />
VDDIO1<br />
VDDIO2<br />
VDDIO3<br />
I/O Power Supply<br />
VDDANA Analog Power Supply<br />
Power<br />
Power<br />
Input<br />
Power<br />
Input<br />
Active<br />
Level Comments<br />
4.5V to 5.5V<br />
or<br />
3.0V to 3.6 V<br />
4.5V to 5.5V<br />
or<br />
3.0V to 3.6 V<br />
18
Table 3-7. Signal Description List<br />
Signal Name Function Type<br />
VDDIN_5 1.8V Voltage Regulator Input<br />
VDDIN_33 USB I/O power supply<br />
VDDCORE 1.8V Voltage Regulator Output<br />
GNDIO1<br />
GNDIO2<br />
GNDIO3<br />
32117D–AVR-01/12<br />
Power<br />
Input<br />
Power<br />
Output/<br />
Input<br />
Power<br />
output<br />
I/O Ground Ground<br />
GNDANA Analog Ground Ground<br />
GNDCORE Ground of the core Ground<br />
GNDPLL Ground of the PLLs Ground<br />
Analog Comparator Interface - ACIFA0/1<br />
AC0AN1/AC0AN0 Negative inputs for comparator AC0A Analog<br />
AC0AP1/AC0AP0 Positive inputs for comparator AC0A Analog<br />
AC0BN1/AC0BN0 Negative inputs for comparator AC0B Analog<br />
AC0BP1/AC0BP0 Positive inputs for comparator AC0B Analog<br />
AC1AN1/AC1AN0 Negative inputs for comparator AC1A Analog<br />
AC1AP1/AC1AP0 Positive inputs for comparator AC1A Analog<br />
AC1BN1/AC1BN0 Negative inputs for comparator AC1B Analog<br />
AC1BP1/AC1BP0 Positive inputs for comparator AC1B Analog<br />
ACAOUT/ACBOUT analog comparator outputs output<br />
ADC Interface - ADCIFA<br />
ADCIN[15:0] ADC input pins Analog<br />
ADCREF0 Analog positive reference 0 voltage input Analog<br />
ADCREF1 Analog positive reference 1 voltage input Analog<br />
ADCVREFP<br />
Analog positive reference connected to external<br />
capacitor<br />
Analog<br />
Active<br />
Level Comments<br />
Power Supply:<br />
4.5V to 5.5V<br />
or<br />
3.0V to 3.6 V<br />
<strong>AT32UC3C</strong><br />
Capacitor Connection for the 3.3V<br />
voltage regulator<br />
or power supply:<br />
3.0V to 3.6 V<br />
Capacitor Connection for the 1.8V<br />
voltage regulator<br />
19
Table 3-7. Signal Description List<br />
Signal Name Function Type<br />
ADCVREFN<br />
32117D–AVR-01/12<br />
Analog negative reference connected to<br />
external capacitor<br />
Auxiliary Port - AUX<br />
Analog<br />
MCKO Trace Data Output Clock Output<br />
MDO[5:0] Trace Data Output Output<br />
MSEO[1:0] Trace Frame Control Output<br />
EVTI_N Event In Output Low<br />
EVTO_N Event Out Output Low<br />
aWire - AW<br />
DATA aWire data I/O<br />
DATAOUT aWire data output for 2-pin mode I/O<br />
Controller Area Network Interface - CANIF<br />
RXLINE[1:0] CAN channel rxline I/O<br />
TXLINE[1:0] CAN channel txline I/O<br />
DAC Interface - DACIFB0/1<br />
DAC0A, DAC0B DAC0 output pins of S/H A Analog<br />
DAC1A, DAC1B DAC output pins of S/H B Analog<br />
DACREF Analog reference voltage input Analog<br />
External Bus Interface - EBI<br />
ADDR[23:0] Address Bus Output<br />
CAS Column Signal Output Low<br />
DATA[15:0] Data Bus I/O<br />
NCS[3:0] Chip Select Output Low<br />
NRD Read Signal Output Low<br />
NWAIT External Wait Signal Input Low<br />
NWE0 Write Enable 0 Output Low<br />
NWE1 Write Enable 1 Output Low<br />
RAS Row Signal Output Low<br />
SDA10 SDRAM Address 10 Line Output<br />
Active<br />
Level Comments<br />
<strong>AT32UC3C</strong><br />
20
Table 3-7. Signal Description List<br />
Signal Name Function Type<br />
SDCK SDRAM Clock Output<br />
SDCKE SDRAM Clock Enable Output<br />
SDWE SDRAM Write Enable Output Low<br />
32117D–AVR-01/12<br />
External Interrupt Controller - EIC<br />
EXTINT[8:1] External Interrupt Pins Input<br />
NMI_N = EXTINT[0] Non-Maskable Interrupt Pin Input Low<br />
General Purpose Input/Output - GPIOA, GPIOB, GPIOC, GPIOD<br />
PA[29:19] - PA[16:0] Parallel I/O Controller GPIOA I/O<br />
PB[31:0] Parallel I/O Controller GPIOB I/O<br />
PC[31:0] Parallel I/O Controller GPIOC I/O<br />
PD[30:0] Parallel I/O Controller GPIOD I/O<br />
Inter-IC Sound (I2S) Controller - IISC<br />
IMCK I2S Master Clock Output<br />
ISCK I2S Serial Clock I/O<br />
ISDI I2S Serial Data In Input<br />
ISDO I2S Serial Data Out Output<br />
IWS I2S Word Select I/O<br />
JTAG<br />
TCK Test Clock Input<br />
TDI Test Data In Input<br />
TDO Test Data Out Output<br />
TMS Test Mode Select Input<br />
Ethernet MAC - MACB<br />
COL Collision Detect Input<br />
CRS Carrier Sense and Data Valid Input<br />
MDC Management Data Clock Output<br />
MDIO Management Data Input/Output I/O<br />
RXD[3:0] Receive Data Input<br />
Active<br />
Level Comments<br />
<strong>AT32UC3C</strong><br />
21
Table 3-7. Signal Description List<br />
Signal Name Function Type<br />
RX_CLK Receive Clock Input<br />
RX_DV Receive Data Valid Input<br />
RX_ER Receive Coding Error Input<br />
SPEED Speed Output<br />
TXD[3:0] Transmit Data Output<br />
TX_CLK Transmit Clock or Reference Clock Input<br />
TX_EN Transmit Enable Output<br />
TX_ER Transmit Coding Error Output<br />
WOL Wake-On-LAN Output<br />
32117D–AVR-01/12<br />
Peripheral Event Controller - PEVC<br />
PAD_EVT[15:0] Event Input Pins Input<br />
Power Manager - PM<br />
RESET_N Reset Pin Input Low<br />
PWMH[3:0]<br />
PWML[3:0]<br />
Pulse Width Modulator - PWM<br />
PWM Output Pins Output<br />
EXT_FAULT[1:0] PWM Fault Input Pins Input<br />
Quadrature Decoder- QDEC0/QDEC1<br />
QEPA QEPA quadrature input Input<br />
QEPB QEPB quadrature input Input<br />
QEPI Index input Input<br />
System Controller Interface- SCIF<br />
XIN0, XIN1, XIN32 Crystal 0, 1, 32K Inputs Analog<br />
XOUT0, XOUT1,<br />
XOUT32<br />
Crystal 0, 1, 32K Output Analog<br />
GCLK0 - GCLK1 Generic Clock Pins Output<br />
Serial Peripheral Interface - SPI0, SPI1<br />
MISO Master In Slave Out I/O<br />
MOSI Master Out Slave In I/O<br />
Active<br />
Level Comments<br />
<strong>AT32UC3C</strong><br />
22
Table 3-7. Signal Description List<br />
Signal Name Function Type<br />
NPCS[3:0] SPI Peripheral Chip Select I/O Low<br />
SCK Clock Output<br />
32117D–AVR-01/12<br />
Timer/Counter - TC0, TC1<br />
A0 Channel 0 Line A I/O<br />
A1 Channel 1 Line A I/O<br />
A2 Channel 2 Line A I/O<br />
B0 Channel 0 Line B I/O<br />
B1 Channel 1 Line B I/O<br />
B2 Channel 2 Line B I/O<br />
CLK0 Channel 0 External Clock Input Input<br />
CLK1 Channel 1 External Clock Input Input<br />
CLK2 Channel 2 External Clock Input Input<br />
Two-wire Interface - TWIMS0, TWIMS1, TWIMS2<br />
<strong>AT32UC3C</strong><br />
TWALM SMBus SMBALERT I/O Low Only on TWIMS0, TWIMS1<br />
TWCK Serial Clock I/O<br />
TWD Serial Data I/O<br />
Universal Synchronous Asynchronous Receiver Transmitter - USART0, USART1, USART2, USART3, USART4<br />
CLK Clock I/O<br />
CTS Clear To Send Input Low<br />
DCD Data Carrier Detect Input Low Only USART1<br />
DSR Data Set Ready Input Low Only USART1<br />
DTR Data Terminal Ready Output Low Only USART1<br />
RI Ring Indicator Input Low Only USART1<br />
RTS Request To Send Output Low<br />
RXD Receive Data Input<br />
TXD Transmit Data Output<br />
Universal Serial Bus Device - USB<br />
DM USB Device Port Data - Analog<br />
Active<br />
Level Comments<br />
23
Table 3-7. Signal Description List<br />
Signal Name Function Type<br />
DP USB Device Port Data + Analog<br />
VBUS USB VBUS Monitor and OTG Negociation<br />
3.4 I/O Line Considerations<br />
3.4.1 JTAG pins<br />
3.4.2 RESET_N pin<br />
3.4.3 TWI pins<br />
3.4.4 GPIO pins<br />
32117D–AVR-01/12<br />
Analog<br />
Input<br />
ID ID Pin of the USB Bus Input<br />
VBOF USB VBUS On/off: bus power control port output<br />
Active<br />
Level Comments<br />
<strong>AT32UC3C</strong><br />
The JTAG is enabled if TCK is low while the RESET_N pin is released. The TCK, TMS, and TDI<br />
pins have pull-up resistors when JTAG is enabled. The TCK pin always have pull-up enabled<br />
during reset. The TDO pin is an output, driven at VDDIO1, and has no pull-up resistor. The<br />
JTAG pins can be used as GPIO pins and muxed with peripherals when the JTAG is disabled.<br />
Please refer to Section 3.2.4 for the JTAG port connections.<br />
The RESET_N pin integrates a pull-up resistor to VDDIO1. As the product integrates a power-on<br />
reset cell, the RESET_N pin can be left unconnected in case no reset from the system needs to<br />
be applied to the product.<br />
The RESET_N pin is also used for the aWire debug protocol. When the pin is used for debugging,<br />
it must not be driven by external circuitry.<br />
When these pins are used for TWI, the pins are open-drain outputs with slew-rate limitation and<br />
inputs with inputs with spike-filtering. When used as GPIO-pins or used for other peripherals, the<br />
pins have the same characteristics as GPIO pins.<br />
All I/O lines integrate programmable pull-up and pull-down resistors. Most I/O lines integrate<br />
drive strength control, see Table 3-1. Programming of this pull-up and pull-down resistor or this<br />
drive strength is performed independently for each I/O line through the GPIO Controllers.<br />
After reset, I/O lines default as inputs with pull-up/pull-down resistors disabled. After reset, output<br />
drive strength is configured to the lowest value to reduce global EMI of the device.<br />
When the I/O line is configured as analog function (ADC I/O, AC inputs, DAC I/O), the pull-up<br />
and pull-down resistors are automatically disabled.<br />
24
4. Processor and Architecture<br />
4.1 Features<br />
32117D–AVR-01/12<br />
Rev: 2.1.2.0<br />
<strong>AT32UC3C</strong><br />
This chapter gives an overview of the AVR32UC CPU. AVR32UC is an implementation of the<br />
AVR32 architecture. A summary of the programming model, instruction set, and MPU is presented.<br />
For further details, see the AVR32 Architecture Manual and the AVR32UC Technical<br />
Reference Manual.<br />
32-bit load/store AVR32A RISC architecture<br />
– 15 general-purpose 32-bit registers<br />
– 32-bit Stack Pointer, Program Counter and Link Register reside in register file<br />
– Fully orthogonal instruction set<br />
– Privileged and unprivileged modes enabling efficient and secure operating systems<br />
– Innovative instruction set together with variable instruction length ensuring industry leading<br />
code density<br />
– DSP extension with saturating arithmetic, and a wide variety of multiply instructions<br />
3-stage pipeline allowing one instruction per clock cycle for most instructions<br />
– Byte, halfword, word, and double word memory access<br />
– Multiple interrupt priority levels<br />
MPU allows for operating systems with memory protection<br />
FPU enables hardware accelerated floating point calculations<br />
Secure State for supporting FlashVault technology<br />
4.2 AVR32 Architecture<br />
AVR32 is a new, high-performance 32-bit RISC microprocessor architecture, designed for costsensitive<br />
embedded applications, with particular emphasis on low power consumption and high<br />
code density. In addition, the instruction set architecture has been tuned to allow a variety of<br />
microarchitectures, enabling the AVR32 to be implemented as low-, mid-, or high-performance<br />
processors. AVR32 extends the AVR family into the world of 32- and 64-bit applications.<br />
Through a quantitative approach, a large set of industry recognized benchmarks has been compiled<br />
and analyzed to achieve the best code density in its class. In addition to lowering the<br />
memory requirements, a compact code size also contributes to the core’s low power characteristics.<br />
The processor supports byte and halfword data types without penalty in code size and<br />
performance.<br />
Memory load and store operations are provided for byte, halfword, word, and double word data<br />
with automatic sign- or zero extension of halfword and byte data. The C-compiler is closely<br />
linked to the architecture and is able to exploit code optimization features, both for size and<br />
speed.<br />
In order to reduce code size to a minimum, some instructions have multiple addressing modes.<br />
As an example, instructions with immediates often have a compact format with a smaller immediate,<br />
and an extended format with a larger immediate. In this way, the compiler is able to use<br />
the format giving the smallest code size.<br />
Another feature of the instruction set is that frequently used instructions, like add, have a compact<br />
format with two operands as well as an extended format with three operands. The larger<br />
format increases performance, allowing an addition and a data move in the same instruction in a<br />
25
32117D–AVR-01/12<br />
<strong>AT32UC3C</strong><br />
single cycle. Load and store instructions have several different formats in order to reduce code<br />
size and speed up execution.<br />
The register file is organized as sixteen 32-bit registers and includes the Program Counter, the<br />
Link Register, and the Stack Pointer. In addition, register R12 is designed to hold return values<br />
from function calls and is used implicitly by some instructions.<br />
4.3 The AVR32UC CPU<br />
The AVR32UC CPU targets low- and medium-performance applications, and provides an<br />
advanced On-Chip Debug (OCD) system, no caches, and a Memory Protection Unit (MPU). A<br />
hardware Floating Point Unit (FPU) is also provided through the coprocessor instruction space.<br />
Java acceleration hardware is not implemented.<br />
AVR32UC provides three memory interfaces, one High Speed Bus master for instruction fetch,<br />
one High Speed Bus master for data access, and one High Speed Bus slave interface allowing<br />
other bus masters to access data RAMs internal to the CPU. Keeping data RAMs internal to the<br />
CPU allows fast access to the RAMs, reduces latency, and guarantees deterministic timing.<br />
Also, power consumption is reduced by not needing a full High Speed Bus access for memory<br />
accesses. A dedicated data RAM interface is provided for communicating with the internal data<br />
RAMs.<br />
A local bus interface is provided for connecting the CPU to device-specific high-speed systems,<br />
such as floating-point units and I/O controller ports. This local bus has to be enabled by writing a<br />
one to the LOCEN bit in the CPUCR system register. The local bus is able to transfer data<br />
between the CPU and the local bus slave in a single clock cycle. The local bus has a dedicated<br />
memory range allocated to it, and data transfers are performed using regular load and store<br />
instructions. Details on which devices that are mapped into the local bus space is given in the<br />
CPU Local Bus section in the Memories chapter.<br />
Figure 4-1 on page 27 displays the contents of AVR32UC.<br />
26
32117D–AVR-01/12<br />
Figure 4-1. Overview of the AVR32UC CPU<br />
Interrupt controller interface<br />
Instruction memory controller<br />
High Speed Bus<br />
OCD interface<br />
OCD<br />
system<br />
High Speed Bus master<br />
AVR32UC CPU pipeline<br />
<strong>AT32UC3C</strong><br />
4.3.1 Pipeline Overview<br />
AVR32UC has three pipeline stages, Instruction Fetch (IF), Instruction Decode (ID), and Instruction<br />
Execute (EX). The EX stage is split into three parallel subsections, one arithmetic/logic<br />
(ALU) section, one multiply (MUL) section, and one load/store (LS) section.<br />
MPU<br />
High Speed<br />
Bus master<br />
Instructions are issued and complete in order. Certain operations require several clock cycles to<br />
complete, and in this case, the instruction resides in the ID and EX stages for the required number<br />
of clock cycles. Since there is only three pipeline stages, no internal data forwarding is<br />
required, and no data dependencies can arise in the pipeline.<br />
Figure 4-2 on page 28 shows an overview of the AVR32UC pipeline stages.<br />
High Speed Bus<br />
High<br />
Speed<br />
Bus slave<br />
High Speed Bus<br />
Reset interface<br />
Power/<br />
Reset<br />
control<br />
Data memory controller<br />
CPU Local<br />
Bus<br />
master<br />
CPU Local Bus<br />
CPU RAM<br />
27
32117D–AVR-01/12<br />
Figure 4-2. The AVR32UC Pipeline<br />
Regfile<br />
IF ID ALU<br />
Read<br />
Prefetch unit Decode unit<br />
<strong>AT32UC3C</strong><br />
4.3.2 AVR32A Microarchitecture Compliance<br />
AVR32UC implements an AVR32A microarchitecture. The AVR32A microarchitecture is targeted<br />
at cost-sensitive, lower-end applications like smaller microcontrollers. This<br />
microarchitecture does not provide dedicated hardware registers for shadowing of register file<br />
registers in interrupt contexts. Additionally, it does not provide hardware registers for the return<br />
address registers and return status registers. Instead, all this information is stored on the system<br />
stack. This saves chip area at the expense of slower interrupt handling.<br />
4.3.2.1 Interrupt Handling<br />
Upon interrupt initiation, registers R8-R12 are automatically pushed to the system stack. These<br />
registers are pushed regardless of the priority level of the pending interrupt. The return address<br />
and status register are also automatically pushed to stack. The interrupt handler can therefore<br />
use R8-R12 freely. Upon interrupt completion, the old R8-R12 registers and status register are<br />
restored, and execution continues at the return address stored popped from stack.<br />
The stack is also used to store the status register and return address for exceptions and scall.<br />
Executing the rete or rets instruction at the completion of an exception or system call will pop<br />
this status register and continue execution at the popped return address.<br />
4.3.2.2 Java Support<br />
AVR32UC does not provide Java hardware acceleration.<br />
4.3.2.3 Floating Point Support<br />
A fused multiply-accumulate Floating Point Unit (FPU), performaing a multiply and accumulate<br />
as a single operation with no intermediate rounding, therby increasing precision is provided. The<br />
floating point hardware conforms to the requirements of the C standard, which is based on the<br />
IEEE 754 floating point standard.<br />
4.3.2.4 Memory Protection<br />
The MPU allows the user to check all memory accesses for privilege violations. If an access is<br />
attempted to an illegal memory address, the access is aborted and an exception is taken. The<br />
MPU in AVR32UC is specified in the AVR32UC Technical Reference manual.<br />
MUL<br />
LS<br />
Regfile<br />
write<br />
Multiply unit<br />
ALU unit<br />
Load-store<br />
unit<br />
28
32117D–AVR-01/12<br />
<strong>AT32UC3C</strong><br />
4.3.2.5 Unaligned Reference Handling<br />
AVR32UC does not support unaligned accesses, except for doubleword accesses. AVR32UC is<br />
able to perform word-aligned st.d and ld.d. Any other unaligned memory access will cause an<br />
address exception. Doubleword-sized accesses with word-aligned pointers will automatically be<br />
performed as two word-sized accesses.<br />
The following table shows the instructions with support for unaligned addresses. All other<br />
instructions require aligned addresses.<br />
Table 4-1. Instructions with Unaligned Reference Support<br />
Instruction Supported Alignment<br />
ld.d Word<br />
st.d Word<br />
4.3.2.6 Unimplemented Instructions<br />
The following instructions are unimplemented in AVR32UC, and will cause an Unimplemented<br />
Instruction Exception if executed:<br />
All SIMD instructions<br />
All coprocessor instructions if no coprocessors are present<br />
retj, incjosp, popjc, pushjc<br />
tlbr, tlbs, tlbw<br />
cache<br />
4.3.2.7 CPU and Architecture Revision<br />
Three major revisions of the AVR32UC CPU currently exist. The device described in this<br />
<strong>datasheet</strong> uses CPU revision 3.<br />
The Architecture Revision field in the CONFIG0 system register identifies which architecture<br />
revision is implemented in a specific device.<br />
AVR32UC CPU revision 3 is fully backward-compatible with revisions 1 and 2, ie. code compiled<br />
for revision 1 or 2 is binary-compatible with revision 3 CPUs.<br />
29
4.4 Programming Model<br />
4.4.1 Register File Configuration<br />
The AVR32UC register file is shown below.<br />
32117D–AVR-01/12<br />
Figure 4-3. The AVR32UC Register File<br />
Application<br />
Bit 31<br />
SR<br />
Bit 0<br />
Supervisor<br />
Bit 31<br />
Bit 0<br />
PC<br />
PC<br />
LR<br />
LR<br />
SP_APP SP_SYS<br />
R12<br />
R12<br />
R11<br />
R11<br />
R10<br />
R10<br />
R9<br />
R9<br />
R8<br />
R8<br />
INT0PC R7<br />
INT0PC R7<br />
INT1PC R6<br />
INT1PC R6<br />
FINTPC R5<br />
FINTPC R5<br />
SMPC R4<br />
SMPC R4<br />
R3<br />
R3<br />
R2<br />
R2<br />
R1<br />
R1<br />
R0<br />
R0<br />
SR<br />
INT0<br />
Bit 31<br />
INT1 INT2 INT3<br />
<strong>AT32UC3C</strong><br />
4.4.2 Status Register Configuration<br />
The Status Register (SR) is split into two halfwords, one upper and one lower, see Figure 4-4<br />
and Figure 4-5. The lower word contains the C, Z, N, V, and Q condition code flags and the R, T,<br />
and L bits, while the upper halfword contains information about the mode and state the processor<br />
executes in. Refer to the AVR32 Architecture Manual for details.<br />
Figure 4-4. The Status Register High Halfword<br />
Bit 31<br />
Bit 0<br />
PC<br />
LR<br />
SP_SYS<br />
R12<br />
R11<br />
R10<br />
R9<br />
R8<br />
INT0PC R7<br />
INT1PC R6<br />
FINTPC R5<br />
SMPC R4<br />
R3<br />
R2<br />
R1<br />
R0<br />
SR<br />
Bit 31<br />
Bit 0<br />
PC<br />
LR<br />
SP_SYS<br />
R12<br />
R11<br />
R10<br />
R9<br />
R8<br />
INT0PC R7<br />
INT1PC R6<br />
FINTPC R5<br />
SMPC R4<br />
R3<br />
R2<br />
R1<br />
R0<br />
SR<br />
Bit 31<br />
Bit 0<br />
PC<br />
LR<br />
SP_SYS<br />
R12<br />
R11<br />
R10<br />
R9<br />
R8<br />
INT0PC R7<br />
INT1PC R6<br />
FINTPC R5<br />
SMPC R4<br />
R3<br />
R2<br />
R1<br />
R0<br />
SR<br />
Bit 31<br />
SS_STATUS<br />
SS_ADRF<br />
SS_ADRR<br />
SS_ADR0<br />
SS_ADR1<br />
SS_SP_SYS<br />
SS_SP_APP<br />
SS_RAR<br />
SS_RSR<br />
Bit 0<br />
PC<br />
LR<br />
SP_SYS<br />
R12<br />
R11<br />
R10<br />
R9<br />
R8<br />
INT0PC R7<br />
INT1PC R6<br />
FINTPC R5<br />
SMPC R4<br />
R3<br />
R2<br />
R1<br />
R0<br />
SR<br />
Exception NMI<br />
Bit 31<br />
Bit 0<br />
PC<br />
LR<br />
SP_SYS<br />
R12<br />
R11<br />
R10<br />
R9<br />
R8<br />
INT0PC R7<br />
INT1PC R6<br />
FINTPC R5<br />
SMPC R4<br />
R3<br />
R2<br />
R1<br />
R0<br />
SR<br />
Bit 31<br />
Bit 0<br />
PC<br />
LR<br />
SP_SYS<br />
R12<br />
R11<br />
R10<br />
R9<br />
R8<br />
INT0PC R7<br />
INT1PC R6<br />
FINTPC R5<br />
SMPC R4<br />
R3<br />
R2<br />
R1<br />
R0<br />
SS<br />
LC<br />
-<br />
1<br />
- - DM D - M2 M1 M0 EM I3M I2M FE I1M I0M<br />
Bit 16<br />
GM Bit name<br />
0 0 0 0 0 0 0 0 0 1 1 0 0 0 0 1 Initial value<br />
SR<br />
Secure<br />
Bit 31<br />
Bit 0<br />
PC<br />
LR<br />
SP_SEC<br />
R12<br />
R11<br />
R10<br />
R9<br />
R8<br />
INT0PC R7<br />
INT1PC R6<br />
FINTPC R5<br />
SMPC R4<br />
R3<br />
R2<br />
R1<br />
R0<br />
SR<br />
Global Interrupt Mask<br />
Interrupt Level 0 Mask<br />
Interrupt Level 1 Mask<br />
Interrupt Level 2 Mask<br />
Interrupt Level 3 Mask<br />
Exception Mask<br />
Mode Bit 0<br />
Mode Bit 1<br />
Mode Bit 2<br />
Reserved<br />
Debug State<br />
Debug State Mask<br />
Reserved<br />
Secure State<br />
30
4.4.3 Processor States<br />
32117D–AVR-01/12<br />
Figure 4-5. The Status Register Low Halfword<br />
Bit 15 Bit 0<br />
- T - - - - - - - - L Q V N Z C Bit name<br />
0<br />
0<br />
0<br />
0<br />
0<br />
0<br />
0<br />
0<br />
0 0 0 0<br />
<strong>AT32UC3C</strong><br />
Carry<br />
Zero<br />
Sign<br />
Overflow<br />
Saturation<br />
Lock<br />
Reserved<br />
Scratch<br />
Reserved<br />
4.4.3.1 Normal RISC State<br />
The AVR32 processor supports several different execution contexts as shown in Table 4-2.<br />
Mode changes can be made under software control, or can be caused by external interrupts or<br />
exception processing. A mode can be interrupted by a higher priority mode, but never by one<br />
with lower priority. Nested exceptions can be supported with a minimal software overhead.<br />
When running an operating system on the AVR32, user processes will typically execute in the<br />
application mode. The programs executed in this mode are restricted from executing certain<br />
instructions. Furthermore, most system registers together with the upper halfword of the status<br />
register cannot be accessed. Protected memory areas are also not available. All other operating<br />
modes are privileged and are collectively called System Modes. They have full access to all privileged<br />
and unprivileged resources. After a reset, the processor will be in supervisor mode.<br />
4.4.3.2 Debug State<br />
The AVR32 can be set in a debug state, which allows implementation of software monitor routines<br />
that can read out and alter system information for use during application development. This<br />
implies that all system and application registers, including the status registers and program<br />
counters, are accessible in debug state. The privileged instructions are also available.<br />
0<br />
0<br />
0 0<br />
Initial value<br />
Table 4-2. Overview of Execution Modes, their Priorities and Privilege Levels.<br />
Priority Mode Security Description<br />
1 Non Maskable Interrupt Privileged Non Maskable high priority interrupt mode<br />
2 Exception Privileged Execute exceptions<br />
3 Interrupt 3 Privileged General purpose interrupt mode<br />
4 Interrupt 2 Privileged General purpose interrupt mode<br />
5 Interrupt 1 Privileged General purpose interrupt mode<br />
6 Interrupt 0 Privileged General purpose interrupt mode<br />
N/A Supervisor Privileged Runs supervisor calls<br />
N/A Application Unprivileged Normal program execution mode<br />
All interrupt levels are by default disabled when debug state is entered, but they can individually<br />
be switched on by the monitor routine by clearing the respective mask bit in the status register.<br />
31
32117D–AVR-01/12<br />
<strong>AT32UC3C</strong><br />
Debug state can be entered as described in the AVR32UC Technical Reference Manual.<br />
Debug state is exited by the retd instruction.<br />
4.4.3.3 Secure State<br />
The AVR32 can be set in a secure state, that allows a part of the code to execute in a state with<br />
higher security levels. The rest of the code can not access resources reserved for this secure<br />
code. Secure State is used to implement FlashVault technology. Refer to the AVR32UC Technical<br />
Reference Manual for details.<br />
4.4.4 System Registers<br />
The system registers are placed outside of the virtual memory space, and are only accessible<br />
using the privileged mfsr and mtsr instructions. The table below lists the system registers specified<br />
in the AVR32 architecture, some of which are unused in AVR32UC. The programmer is<br />
responsible for maintaining correct sequencing of any instructions following a mtsr instruction.<br />
For detail on the system registers, refer to the AVR32UC Technical Reference Manual.<br />
Table 4-3. System Registers<br />
Reg # Address Name Function<br />
0 0 SR Status Register<br />
1 4 EVBA Exception Vector Base Address<br />
2 8 ACBA Application Call Base Address<br />
3 12 CPUCR CPU Control Register<br />
4 16 ECR Exception Cause Register<br />
5 20 RSR_SUP Unused in AVR32UC<br />
6 24 RSR_INT0 Unused in AVR32UC<br />
7 28 RSR_INT1 Unused in AVR32UC<br />
8 32 RSR_INT2 Unused in AVR32UC<br />
9 36 RSR_INT3 Unused in AVR32UC<br />
10 40 RSR_EX Unused in AVR32UC<br />
11 44 RSR_NMI Unused in AVR32UC<br />
12 48 RSR_DBG Return Status Register for Debug mode<br />
13 52 RAR_SUP Unused in AVR32UC<br />
14 56 RAR_INT0 Unused in AVR32UC<br />
15 60 RAR_INT1 Unused in AVR32UC<br />
16 64 RAR_INT2 Unused in AVR32UC<br />
17 68 RAR_INT3 Unused in AVR32UC<br />
18 72 RAR_EX Unused in AVR32UC<br />
19 76 RAR_NMI Unused in AVR32UC<br />
20 80 RAR_DBG Return Address Register for Debug mode<br />
21 84 JECR Unused in AVR32UC<br />
22 88 JOSP Unused in AVR32UC<br />
23 92 JAVA_LV0 Unused in AVR32UC<br />
32
32117D–AVR-01/12<br />
Table 4-3. System Registers (Continued)<br />
Reg # Address Name Function<br />
24 96 JAVA_LV1 Unused in AVR32UC<br />
25 100 JAVA_LV2 Unused in AVR32UC<br />
26 104 JAVA_LV3 Unused in AVR32UC<br />
27 108 JAVA_LV4 Unused in AVR32UC<br />
28 112 JAVA_LV5 Unused in AVR32UC<br />
29 116 JAVA_LV6 Unused in AVR32UC<br />
30 120 JAVA_LV7 Unused in AVR32UC<br />
31 124 JTBA Unused in AVR32UC<br />
32 128 JBCR Unused in AVR32UC<br />
33-63 132-252 Reserved Reserved for future use<br />
64 256 CONFIG0 Configuration register 0<br />
65 260 CONFIG1 Configuration register 1<br />
66 264 COUNT Cycle Counter register<br />
67 268 COMPARE Compare register<br />
68 272 TLBEHI Unused in AVR32UC<br />
69 276 TLBELO Unused in AVR32UC<br />
70 280 PTBR Unused in AVR32UC<br />
71 284 TLBEAR Unused in AVR32UC<br />
72 288 MMUCR Unused in AVR32UC<br />
73 292 TLBARLO Unused in AVR32UC<br />
74 296 TLBARHI Unused in AVR32UC<br />
75 300 PCCNT Unused in AVR32UC<br />
76 304 PCNT0 Unused in AVR32UC<br />
77 308 PCNT1 Unused in AVR32UC<br />
78 312 PCCR Unused in AVR32UC<br />
79 316 BEAR Bus Error Address Register<br />
80 320 MPUAR0 MPU Address Register region 0<br />
81 324 MPUAR1 MPU Address Register region 1<br />
82 328 MPUAR2 MPU Address Register region 2<br />
83 332 MPUAR3 MPU Address Register region 3<br />
84 336 MPUAR4 MPU Address Register region 4<br />
85 340 MPUAR5 MPU Address Register region 5<br />
86 344 MPUAR6 MPU Address Register region 6<br />
87 348 MPUAR7 MPU Address Register region 7<br />
88 352 MPUPSR0 MPU Privilege Select Register region 0<br />
89 356 MPUPSR1 MPU Privilege Select Register region 1<br />
<strong>AT32UC3C</strong><br />
33
32117D–AVR-01/12<br />
Table 4-3. System Registers (Continued)<br />
Reg # Address Name Function<br />
90 360 MPUPSR2 MPU Privilege Select Register region 2<br />
91 364 MPUPSR3 MPU Privilege Select Register region 3<br />
92 368 MPUPSR4 MPU Privilege Select Register region 4<br />
93 372 MPUPSR5 MPU Privilege Select Register region 5<br />
94 376 MPUPSR6 MPU Privilege Select Register region 6<br />
95 380 MPUPSR7 MPU Privilege Select Register region 7<br />
96 384 MPUCRA Unused in this version of AVR32UC<br />
97 388 MPUCRB Unused in this version of AVR32UC<br />
98 392 MPUBRA Unused in this version of AVR32UC<br />
99 396 MPUBRB Unused in this version of AVR32UC<br />
100 400 MPUAPRA MPU Access Permission Register A<br />
101 404 MPUAPRB MPU Access Permission Register B<br />
102 408 MPUCR MPU Control Register<br />
103 412 SS_STATUS Secure State Status Register<br />
104 416 SS_ADRF Secure State Address Flash Register<br />
105 420 SS_ADRR Secure State Address RAM Register<br />
106 424 SS_ADR0 Secure State Address 0 Register<br />
107 428 SS_ADR1 Secure State Address 1 Register<br />
108 432 SS_SP_SYS Secure State Stack Pointer System Register<br />
<strong>AT32UC3C</strong><br />
109 436 SS_SP_APP Secure State Stack Pointer Application Register<br />
110 440 SS_RAR Secure State Return Address Register<br />
111 444 SS_RSR Secure State Return Status Register<br />
112-191 448-764 Reserved Reserved for future use<br />
192-255 768-1020 IMPL IMPLEMENTATION DEFINED<br />
4.5 Exceptions and Interrupts<br />
In the AVR32 architecture, events are used as a common term for exceptions and interrupts.<br />
AVR32UC incorporates a powerful event handling scheme. The different event sources, like Illegal<br />
Op-code and interrupt requests, have different priority levels, ensuring a well-defined<br />
behavior when multiple events are received simultaneously. Additionally, pending events of a<br />
higher priority class may preempt handling of ongoing events of a lower priority class.<br />
When an event occurs, the execution of the instruction stream is halted, and execution is passed<br />
to an event handler at an address specified in Table 4-4 on page 38. Most of the handlers are<br />
placed sequentially in the code space starting at the address specified by EVBA, with four bytes<br />
between each handler. This gives ample space for a jump instruction to be placed there, jumping<br />
to the event routine itself. A few critical handlers have larger spacing between them, allowing<br />
the entire event routine to be placed directly at the address specified by the EVBA-relative offset<br />
generated by hardware. All interrupt sources have autovectored interrupt service routine (ISR)<br />
addresses. This allows the interrupt controller to directly specify the ISR address as an address<br />
34
32117D–AVR-01/12<br />
<strong>AT32UC3C</strong><br />
relative to EVBA. The autovector offset has 14 address bits, giving an offset of maximum 16384<br />
bytes. The target address of the event handler is calculated as (EVBA | event_handler_offset),<br />
not (EVBA + event_handler_offset), so EVBA and exception code segments must be set up<br />
appropriately. The same mechanisms are used to service all different types of events, including<br />
interrupt requests, yielding a uniform event handling scheme.<br />
An interrupt controller does the priority handling of the interrupts and provides the autovector offset<br />
to the CPU.<br />
4.5.1 System Stack Issues<br />
Event handling in AVR32UC uses the system stack pointed to by the system stack pointer,<br />
SP_SYS, for pushing and popping R8-R12, LR, status register, and return address. Since event<br />
code may be timing-critical, SP_SYS should point to memory addresses in the IRAM section,<br />
since the timing of accesses to this memory section is both fast and deterministic.<br />
The user must also make sure that the system stack is large enough so that any event is able to<br />
push the required registers to stack. If the system stack is full, and an event occurs, the system<br />
will enter an UNDEFINED state.<br />
4.5.2 Exceptions and Interrupt Requests<br />
When an event other than scall or debug request is received by the core, the following actions<br />
are performed atomically:<br />
1. The pending event will not be accepted if it is masked. The I3M, I2M, I1M, I0M, EM, and<br />
GM bits in the Status Register are used to mask different events. Not all events can be<br />
masked. A few critical events (NMI, Unrecoverable Exception, TLB Multiple Hit, and<br />
Bus Error) can not be masked. When an event is accepted, hardware automatically<br />
sets the mask bits corresponding to all sources with equal or lower priority. This inhibits<br />
acceptance of other events of the same or lower priority, except for the critical events<br />
listed above. Software may choose to clear some or all of these bits after saving the<br />
necessary state if other priority schemes are desired. It is the event source’s responsability<br />
to ensure that their events are left pending until accepted by the CPU.<br />
2. When a request is accepted, the Status Register and Program Counter of the current<br />
context is stored to the system stack. If the event is an INT0, INT1, INT2, or INT3, registers<br />
R8-R12 and LR are also automatically stored to stack. Storing the Status<br />
Register ensures that the core is returned to the previous execution mode when the<br />
current event handling is completed. When exceptions occur, both the EM and GM bits<br />
are set, and the application may manually enable nested exceptions if desired by clearing<br />
the appropriate bit. Each exception handler has a dedicated handler address, and<br />
this address uniquely identifies the exception source.<br />
3. The Mode bits are set to reflect the priority of the accepted event, and the correct register<br />
file bank is selected. The address of the event handler, as shown in Table 4-4 on<br />
page 38, is loaded into the Program Counter.<br />
The execution of the event handler routine then continues from the effective address calculated.<br />
The rete instruction signals the end of the event. When encountered, the Return Status Register<br />
and Return Address Register are popped from the system stack and restored to the Status Register<br />
and Program Counter. If the rete instruction returns from INT0, INT1, INT2, or INT3,<br />
registers R8-R12 and LR are also popped from the system stack. The restored Status Register<br />
contains information allowing the core to resume operation in the previous execution mode. This<br />
concludes the event handling.<br />
35
32117D–AVR-01/12<br />
<strong>AT32UC3C</strong><br />
4.5.3 Supervisor Calls<br />
The AVR32 instruction set provides a supervisor mode call instruction. The scall instruction is<br />
designed so that privileged routines can be called from any context. This facilitates sharing of<br />
code between different execution modes. The scall mechanism is designed so that a minimal<br />
execution cycle overhead is experienced when performing supervisor routine calls from timecritical<br />
event handlers.<br />
The scall instruction behaves differently depending on which mode it is called from. The behaviour<br />
is detailed in the instruction set reference. In order to allow the scall routine to return to the<br />
correct context, a return from supervisor call instruction, rets, is implemented. In the AVR32UC<br />
CPU, scall and rets uses the system stack to store the return address and the status register.<br />
4.5.4 Debug Requests<br />
The AVR32 architecture defines a dedicated Debug mode. When a debug request is received by<br />
the core, Debug mode is entered. Entry into Debug mode can be masked by the DM bit in the<br />
status register. Upon entry into Debug mode, hardware sets the SR.D bit and jumps to the<br />
Debug Exception handler. By default, Debug mode executes in the exception context, but with<br />
dedicated Return Address Register and Return Status Register. These dedicated registers<br />
remove the need for storing this data to the system stack, thereby improving debuggability. The<br />
Mode bits in the Status Register can freely be manipulated in Debug mode, to observe registers<br />
in all contexts, while retaining full privileges.<br />
Debug mode is exited by executing the retd instruction. This returns to the previous context.<br />
4.5.5 Entry Points for Events<br />
Several different event handler entry points exist. In AVR32UC, the reset address is<br />
0x80000000. This places the reset address in the boot flash memory area.<br />
TLB miss exceptions and scall have a dedicated space relative to EVBA where their event handler<br />
can be placed. This speeds up execution by removing the need for a jump instruction placed<br />
at the program address jumped to by the event hardware. All other exceptions have a dedicated<br />
event routine entry point located relative to EVBA. The handler routine address identifies the<br />
exception source directly.<br />
AVR32UC uses the ITLB and DTLB protection exceptions to signal a MPU protection violation.<br />
ITLB and DTLB miss exceptions are used to signal that an access address did not map to any of<br />
the entries in the MPU. TLB multiple hit exception indicates that an access address did map to<br />
multiple TLB entries, signalling an error.<br />
All interrupt requests have entry points located at an offset relative to EVBA. This autovector offset<br />
is specified by an interrupt controller. The programmer must make sure that none of the<br />
autovector offsets interfere with the placement of other code. The autovector offset has 14<br />
address bits, giving an offset of maximum 16384 bytes.<br />
Special considerations should be made when loading EVBA with a pointer. Due to security considerations,<br />
the event handlers should be located in non-writeable flash memory, or optionally in<br />
a privileged memory protection region if an MPU is present.<br />
If several events occur on the same instruction, they are handled in a prioritized way. The priority<br />
ordering is presented in Table 4-4 on page 38. If events occur on several instructions at different<br />
locations in the pipeline, the events on the oldest instruction are always handled before any<br />
events on any younger instruction, even if the younger instruction has events of higher priority<br />
36
32117D–AVR-01/12<br />
<strong>AT32UC3C</strong><br />
than the oldest instruction. An instruction B is younger than an instruction A if it was sent down<br />
the pipeline later than A.<br />
The addresses and priority of simultaneous events are shown in Table 4-4 on page 38. Some of<br />
the exceptions are unused in AVR32UC since it has no MMU, coprocessor interface, or floatingpoint<br />
unit.<br />
37
Table 4-4. Priority and Handler Addresses for Events<br />
Priority Handler Address Name Event source Stored Return Address<br />
1 0x80000000 Reset External input Undefined<br />
32117D–AVR-01/12<br />
<strong>AT32UC3C</strong><br />
2 Provided by OCD system OCD Stop CPU OCD system First non-completed instruction<br />
3 EVBA+0x00 Unrecoverable exception Internal PC of offending instruction<br />
4 EVBA+0x04 TLB multiple hit MPU PC of offending instruction<br />
5 EVBA+0x08 Bus error data fetch Data bus First non-completed instruction<br />
6 EVBA+0x0C Bus error instruction fetch Data bus First non-completed instruction<br />
7 EVBA+0x10 NMI External input First non-completed instruction<br />
8 Autovectored Interrupt 3 request External input First non-completed instruction<br />
9 Autovectored Interrupt 2 request External input First non-completed instruction<br />
10 Autovectored Interrupt 1 request External input First non-completed instruction<br />
11 Autovectored Interrupt 0 request External input First non-completed instruction<br />
12 EVBA+0x14 Instruction Address CPU PC of offending instruction<br />
13 EVBA+0x50 ITLB Miss MPU PC of offending instruction<br />
14 EVBA+0x18 ITLB Protection MPU PC of offending instruction<br />
15 EVBA+0x1C Breakpoint OCD system First non-completed instruction<br />
16 EVBA+0x20 Illegal Opcode Instruction PC of offending instruction<br />
17 EVBA+0x24 Unimplemented instruction Instruction PC of offending instruction<br />
18 EVBA+0x28 Privilege violation Instruction PC of offending instruction<br />
19 EVBA+0x2C Floating-point UNUSED<br />
20 EVBA+0x30 Coprocessor absent Instruction PC of offending instruction<br />
21 EVBA+0x100 Supervisor call Instruction PC(Supervisor Call) +2<br />
22 EVBA+0x34 Data Address (Read) CPU PC of offending instruction<br />
23 EVBA+0x38 Data Address (Write) CPU PC of offending instruction<br />
24 EVBA+0x60 DTLB Miss (Read) MPU PC of offending instruction<br />
25 EVBA+0x70 DTLB Miss (Write) MPU PC of offending instruction<br />
26 EVBA+0x3C DTLB Protection (Read) MPU PC of offending instruction<br />
27 EVBA+0x40 DTLB Protection (Write) MPU PC of offending instruction<br />
28 EVBA+0x44 DTLB Modified UNUSED<br />
38
5. Memories<br />
32117D–AVR-01/12<br />
<strong>AT32UC3C</strong><br />
5.1 Embedded Memories<br />
Internal High-Speed Flash (See Table 5-1 on page 40)<br />
– 512 Kbytes<br />
– 256 Kbytes<br />
– 128 Kbytes<br />
– 64 Kbytes<br />
0 Wait State Access at up to 33 MHz in Worst Case Conditions<br />
1 Wait State Access at up to 66 MHz in Worst Case Conditions<br />
Pipelined Flash Architecture, allowing burst reads from sequential Flash locations, hiding<br />
penalty of 1 wait state access<br />
Pipelined Flash Architecture typically reduces the cycle penalty of 1 wait state operation<br />
to only 15% compared to 0 wait state operation<br />
100 000 Write Cycles, 15-year Data Retention Capability<br />
Sector Lock Capabilities, Bootloader Protection, Security Bit<br />
32 Fuses, Erased During Chip Erase<br />
User Page For Data To Be Preserved During Chip Erase<br />
Internal High-Speed SRAM, Single-cycle access at full speed (See Table 5-1 on page 40)<br />
– 64 Kbytes<br />
– 32 Kbytes<br />
– 16 Kbytes<br />
Supplementary Internal High-Speed System SRAM (HSB RAM), Single-cycle access at full speed<br />
– Memory space available on System Bus for peripherals data.<br />
– 4 Kbytes<br />
39
32117D–AVR-01/12<br />
<strong>AT32UC3C</strong><br />
5.2 Physical Memory Map<br />
The system bus is implemented as a bus matrix. All system bus addresses are fixed, and they<br />
are never remapped in any way, not even in boot. Note that AVR32UC CPU uses unsegmented<br />
translation, as described in the AVR32 Architecture Manual. The 32-bit physical address space<br />
is mapped as follows:<br />
Table 5-1. <strong>AT32UC3C</strong> Physical Memory Map<br />
Device<br />
Start Address<br />
C0512C C1512C<br />
C2512C<br />
C0256C<br />
AT32UC3 Derivatives<br />
C1256C<br />
C2256C<br />
C0128C<br />
C1128C<br />
C2128C<br />
C064C<br />
C164C<br />
C264C<br />
Embedded<br />
SRAM<br />
0x0000_0000 64 KB 64 KB 64 KB 64 KB 32 KB 32 KB 16 KB 16 KB<br />
Embedded<br />
Flash<br />
0x8000_0000 512 KB 512 KB 256 KB 256 KB 128 KB 128 KB 64 KB 64 KB<br />
SAU 0x9000_0000 1 KB 1 KB 1 KB 1 KB 1 KB 1 KB 1 KB 1 KB<br />
HSB<br />
SRAM<br />
EBI SRAM<br />
CS0<br />
EBI SRAM<br />
CS2<br />
EBI SRAM<br />
CS3<br />
EBI SRAM<br />
/SDRAM<br />
CS1<br />
HSB-PB<br />
Bridge C<br />
HSB-PB<br />
Bridge B<br />
HSB-PB<br />
Bridge A<br />
0xA000_0000 4 KB 4 KB 4 KB 4 KB 4 KB 4 KB 4 KB 4 KB<br />
0xC000_0000 16 MB - 16 MB - 16 MB - 16 MB -<br />
0xC800_0000 16 MB - 16 MB - 16 MB - 16 MB -<br />
0xCC00_0000 16 MB - 16 MB - 16 MB - 16 MB -<br />
0xD000_0000 128 MB - 128 MB - 128 MB - 128 MB -<br />
0xFFFD_0000 64 KB 64 KB 64 KB 64 KB 64 KB 64 KB 64 KB 64 KB<br />
0xFFFE_0000 64 KB 64 KB 64 KB 64 KB 64 KB 64 KB 64 KB 64 KB<br />
0xFFFF_0000 64 KB 64 KB 64 KB 64 KB 64 KB 64 KB 64 KB 64 KB<br />
40
5.3 Peripheral Address Map<br />
32117D–AVR-01/12<br />
Table 5-2. Flash Memory Parameters<br />
Part Number<br />
<strong>AT32UC3C</strong>0512C<br />
<strong>AT32UC3C</strong>1512C<br />
<strong>AT32UC3C</strong>2512C<br />
<strong>AT32UC3C</strong>0256C<br />
<strong>AT32UC3C</strong>1256C<br />
<strong>AT32UC3C</strong>2256C<br />
<strong>AT32UC3C</strong>0128C<br />
<strong>AT32UC3C</strong>1128C<br />
<strong>AT32UC3C</strong>2128C<br />
<strong>AT32UC3C</strong>064C<br />
<strong>AT32UC3C</strong>164C<br />
<strong>AT32UC3C</strong>264C<br />
Table 5-3. Peripheral Address Mapping<br />
Flash Size<br />
(FLASH_PW)<br />
Address Peripheral Name<br />
0xFFFD0000<br />
0xFFFD1000<br />
0xFFFD1400<br />
0xFFFD1800<br />
0xFFFD1C00<br />
0xFFFD2000<br />
0xFFFD2400<br />
0xFFFD2800<br />
0xFFFD2C00<br />
0xFFFD3000<br />
Number of<br />
pages<br />
(FLASH_P)<br />
Page size<br />
(FLASH_W)<br />
512 Kbytes 1024 128 words<br />
256 Kbytes 512 128 words<br />
128 Kbytes 256 128 words<br />
64 Kbytes 128 128 words<br />
PDCA Peripheral DMA Controller - PDCA<br />
MDMA Memory DMA - MDMA<br />
USART1<br />
Universal Synchronous/Asynchronous<br />
Receiver/Transmitter - USART1<br />
SPI0 Serial Peripheral Interface - SPI0<br />
CANIF Control Area Network interface - CANIF<br />
TC0 Timer/Counter - TC0<br />
ADCIFA<br />
USART4<br />
ADC controller interface with Touch Screen functionality<br />
- ADCIFA<br />
Universal Synchronous/Asynchronous<br />
Receiver/Transmitter - USART4<br />
TWIM2 Two-wire Master Interface - TWIM2<br />
TWIS2 Two-wire Slave Interface - TWIS2<br />
<strong>AT32UC3C</strong><br />
41
Table 5-3. Peripheral Address Mapping<br />
32117D–AVR-01/12<br />
0xFFFE0000<br />
0xFFFE1000<br />
0xFFFE2000<br />
0xFFFE2400<br />
0xFFFE2800<br />
0xFFFE2C00<br />
0xFFFE3000<br />
0xFFFF0000<br />
0xFFFF0400<br />
0xFFFF0800<br />
0xFFFF0C00<br />
0xFFFF1000<br />
0xFFFF1400<br />
0xFFFF1800<br />
0xFFFF2000<br />
0xFFFF2800<br />
0xFFFF2C00<br />
0xFFFF3000<br />
0xFFFF3400<br />
HFLASHC Flash Controller - HFLASHC<br />
USBC USB 2.0 OTG Interface - USBC<br />
HMATRIX HSB Matrix - HMATRIX<br />
SAU Secure Access Unit - SAU<br />
SMC Static Memory Controller - SMC<br />
SDRAMC SDRAM Controller - SDRAMC<br />
MACB Ethernet MAC - MACB<br />
INTC Interrupt controller - INTC<br />
PM Power Manager - PM<br />
SCIF System Control Interface - SCIF<br />
AST Asynchronous Timer - AST<br />
WDT Watchdog Timer - WDT<br />
EIC External Interrupt Controller - EIC<br />
FREQM Frequency Meter - FREQM<br />
GPIO General Purpose Input/Output Controller - GPIO<br />
USART0<br />
USART2<br />
USART3<br />
Universal Synchronous/Asynchronous<br />
Receiver/Transmitter - USART0<br />
Universal Synchronous/Asynchronous<br />
Receiver/Transmitter - USART2<br />
Universal Synchronous/Asynchronous<br />
Receiver/Transmitter - USART3<br />
SPI1 Serial Peripheral Interface - SPI1<br />
<strong>AT32UC3C</strong><br />
42
Table 5-3. Peripheral Address Mapping<br />
32117D–AVR-01/12<br />
0xFFFF3800<br />
0xFFFF3C00<br />
0xFFFF4000<br />
0xFFFF4400<br />
0xFFFF4800<br />
0xFFFF4C00<br />
0xFFFF5000<br />
0xFFFF5400<br />
0xFFFF5800<br />
0xFFFF5C00<br />
0xFFFF6000<br />
0xFFFF6400<br />
0xFFFF6800<br />
0xFFFF6C00<br />
0xFFFF7000<br />
TWIM0 Two-wire Master Interface - TWIM0<br />
TWIM1 Two-wire Master Interface - TWIM1<br />
TWIS0 Two-wire Slave Interface - TWIS0<br />
TWIS1 Two-wire Slave Interface - TWIS1<br />
IISC Inter-IC Sound (I2S) Controller - IISC<br />
PWM Pulse Width Modulation Controller - PWM<br />
QDEC0 Quadrature Decoder - QDEC0<br />
QDEC1 Quadrature Decoder - QDEC1<br />
TC1 Timer/Counter - TC1<br />
PEVC Peripheral Event Controller - PEVC<br />
ACIFA0 Analog Comparators Interface - ACIFA0<br />
ACIFA1 Analog Comparators Interface - ACIFA1<br />
DACIFB0 DAC interface - DACIFB0<br />
DACIFB1 DAC interface - DACIFB1<br />
AW aWire - AW<br />
<strong>AT32UC3C</strong><br />
5.4 CPU Local Bus Mapping<br />
Some of the registers in the GPIO module are mapped onto the CPU local bus, in addition to<br />
being mapped on the Peripheral Bus. These registers can therefore be reached both by<br />
accesses on the Peripheral Bus, and by accesses on the local bus.<br />
Mapping these registers on the local bus allows cycle-deterministic toggling of GPIO pins since<br />
the CPU and GPIO are the only modules connected to this bus. Also, since the local bus runs at<br />
CPU speed, one write or read operation can be performed per clock cycle to the local busmapped<br />
GPIO registers.<br />
43
32117D–AVR-01/12<br />
The following GPIO registers are mapped on the local bus:<br />
Table 5-4. Local bus mapped GPIO registers<br />
Port Register Mode<br />
<strong>AT32UC3C</strong><br />
Local Bus<br />
Address Access<br />
A Output Driver Enable Register (ODER) WRITE 0x40000040 Write-only<br />
SET 0x40000044 Write-only<br />
CLEAR 0x40000048 Write-only<br />
TOGGLE 0x4000004C Write-only<br />
Output Value Register (OVR) WRITE 0x40000050 Write-only<br />
SET 0x40000054 Write-only<br />
CLEAR 0x40000058 Write-only<br />
TOGGLE 0x4000005C Write-only<br />
Pin Value Register (PVR) - 0x40000060 Read-only<br />
B Output Driver Enable Register (ODER) WRITE 0x40000140 Write-only<br />
SET 0x40000144 Write-only<br />
CLEAR 0x40000148 Write-only<br />
TOGGLE 0x4000014C Write-only<br />
Output Value Register (OVR) WRITE 0x40000150 Write-only<br />
SET 0x40000154 Write-only<br />
CLEAR 0x40000158 Write-only<br />
TOGGLE 0x4000015C Write-only<br />
Pin Value Register (PVR) - 0x40000160 Read-only<br />
C Output Driver Enable Register (ODER) WRITE 0x40000240 Write-only<br />
SET 0x40000244 Write-only<br />
CLEAR 0x40000248 Write-only<br />
TOGGLE 0x4000024C Write-only<br />
Output Value Register (OVR) WRITE 0x40000250 Write-only<br />
SET 0x40000254 Write-only<br />
CLEAR 0x40000258 Write-only<br />
TOGGLE 0x4000025C Write-only<br />
Pin Value Register (PVR) - 0x40000260 Read-only<br />
44
32117D–AVR-01/12<br />
Table 5-4. Local bus mapped GPIO registers<br />
Port Register Mode<br />
<strong>AT32UC3C</strong><br />
Local Bus<br />
Address Access<br />
D Output Driver Enable Register (ODER) WRITE 0x40000340 Write-only<br />
SET 0x40000344 Write-only<br />
CLEAR 0x40000348 Write-only<br />
TOGGLE 0x4000034C Write-only<br />
Output Value Register (OVR) WRITE 0x40000350 Write-only<br />
SET 0x40000354 Write-only<br />
CLEAR 0x40000358 Write-only<br />
TOGGLE 0x4000035C Write-only<br />
Pin Value Register (PVR) - 0x40000360 Read-only<br />
45
6. Supply and Startup Considerations<br />
6.1 Supply Considerations<br />
6.1.1 Power Supplies<br />
The <strong>AT32UC3C</strong> has several types of power supply pins:<br />
32117D–AVR-01/12<br />
<strong>AT32UC3C</strong><br />
VDDIO pins (VDDIO1, VDDIO2, VDDIO3): Power I/O lines. Two voltage ranges are available: 5V or<br />
3.3V nominal. The VDDIO pins should be connected together.<br />
VDDANA: Powers the Analog part of the device (Analog I/Os, ADC, ACs, DACs). 2 voltage ranges<br />
available: 5V or 3.3V nominal.<br />
VDDIN_5: Input voltage for the 1.8V and 3.3V regulators. Two Voltage ranges are available: 5V or<br />
3.3V nominal.<br />
VDDIN_33:<br />
– USB I/O power supply<br />
– if the device is 3.3V powered: Input voltage, voltage is 3.3V nominal.<br />
– if the device is 5V powered: stabilization for the 3.3V voltage regulator, requires external<br />
capacitors<br />
VDDCORE: Stabilization for the 1.8V voltage regulator, requires external capacitors.<br />
GNDCORE: Ground pins for the voltage regulators and the core.<br />
GNDANA: Ground pin for Analog part of the design<br />
GNDPLL: Ground pin for the PLLs<br />
GNDIO pins (GNDIO1, GNDIO2, GNDIO3): Ground pins for the I/O lines. The GNDIO pins should be<br />
connected together.<br />
See ”Electrical Characteristics” on page 1248 for power consumption on the various supply pins.<br />
For decoupling recommendations for the different power supplies, please refer to the schematic<br />
checklist.<br />
6.1.2 Voltage Regulators<br />
The <strong>AT32UC3C</strong> embeds two voltage regulators:<br />
One 1.8V internal regulator that converts from VDDIN_5 to 1.8V. The regulator supplies the<br />
output voltage on VDDCORE.<br />
One 3.3V internal regulator that converts from VDDIN_5 to 3.3V. The regulator supplies the<br />
USB pads on VDDIN_33. If the USB is not used or if VDDIN_5 is within the 3V range, the<br />
3.3V regulator can be disabled through the VREG33CTL field of the VREGCTRL SCIF<br />
register.<br />
6.1.3 Regulators Connection<br />
The <strong>AT32UC3C</strong> supports two power supply configurations.<br />
5V single supply mode<br />
3.3V single supply mode<br />
6.1.3.1 5V Single Supply Mode<br />
In 5V single supply mode, the 1.8V internal regulator is connected to the 5V source (VDDIN_5<br />
pin) and its output feeds VDDCORE.<br />
46
32117D–AVR-01/12<br />
<strong>AT32UC3C</strong><br />
The 3.3V regulator is connected to the 5V source (VDDIN_5 pin) and its output feeds the USB<br />
pads. If the USB is not used, the 3.3V regulator can be disabled through the VREG33CTL field<br />
of the VREGCTRL SCIF register.<br />
Figure 6-1 on page 47 shows the power schematics to be used for 5V single supply mode. All<br />
I/O lines and analog blocks will be powered by the same power (VDDIN_5 = VDDIO1 = VDDIO2<br />
= VDDIO3 = VDDANA).<br />
Figure 6-1. 5V Single Power Supply mode<br />
CIN2<br />
COUT2<br />
+<br />
4.5-<br />
5.5V<br />
-<br />
VDDCORE<br />
COUT2<br />
CIN1<br />
VDDIN_33<br />
COUT1<br />
COUT1<br />
GNDCORE<br />
VDDIO1<br />
VDDIO2<br />
VDDIO3<br />
BOD33<br />
BOD50<br />
BOD18<br />
POR<br />
VDDIN_5 VDDANA GNDANA<br />
CPU<br />
Peripherals<br />
Memories<br />
SCIF, BOD,<br />
RCSYS<br />
6.1.3.2 3.3V Single Supply Mode<br />
In 3.3V single supply mode, the VDDIN_5 and VDDIN_33 pins should be connected together<br />
externally. The 1.8V internal regulator is connected to the 3.3V source (VDDIN_5 pin) and its<br />
output feeds VDDCORE.<br />
3.3V<br />
Reg<br />
1.8V<br />
Reg<br />
Analog: ADC, AC, DAC, ...<br />
GNDPLL<br />
The 3.3V regulator should be disabled once the circuit is running through the VREG33CTL field<br />
of the VREGCTRL SCIF register.<br />
Figure 6-2 on page 48 shows the power schematics to be used for 3.3V single supply mode. All<br />
I/O lines and analog blocks will be powered by the same power (VDDIN_5 = VDDIN_33 =<br />
VDDIO1 = VDDIO2 = VDDIO3 = VDDANA).<br />
PLL<br />
GNDIO1<br />
GNDIO2<br />
GNDIO3<br />
47
6.1.4 Power-up Sequence<br />
32117D–AVR-01/12<br />
Figure 6-2. 3 Single Power Supply Mode<br />
CIN2<br />
CIN1<br />
VDDIN_33<br />
VDDCORE<br />
COUT2<br />
+<br />
3.0-<br />
3.6V<br />
-<br />
COUT1<br />
GNDCORE<br />
VDDIO1<br />
VDDIO2<br />
VDDIO3<br />
BOD33<br />
BOD50<br />
BOD18<br />
POR<br />
VDDIN_5 VDDANA GNDANA<br />
<strong>AT32UC3C</strong><br />
6.1.4.1 Maximum Rise Rate<br />
To avoid risk of latch-up, the rise rate of the power supplies must not exceed the values<br />
described in Table 40-2 on page 1249 .<br />
Recommended order for power supplies is also described in this table.<br />
6.1.4.2 Minimum Rise Rate<br />
The integrated Power-Reset circuitry monitoring the powering supply requires a minimum rise<br />
rate for the VDDIN_5 power supply.<br />
3.3V<br />
Reg<br />
1.8V<br />
Reg<br />
See Table 40-2 on page 1249 for the minimum rise rate value.<br />
Analog: ADC, AC, DAC, ...<br />
CPU<br />
Peripherals<br />
Memories<br />
SCIF, BOD,<br />
RCSYS<br />
If the application can not ensure that the minimum rise rate condition for the VDDIN power supply<br />
is met, the following configuration can be used:<br />
PLL<br />
A logic “0” value is applied during power-up on pin RESET_N until:<br />
– VDDIN_5 rises above 4.5V in 5V single supply mode.<br />
– VDDIN_33 rises above 3V in 3.3V single supply mode.<br />
GNDIO1<br />
GNDIO2<br />
GNDIO3<br />
GNDPLL<br />
48
32117D–AVR-01/12<br />
<strong>AT32UC3C</strong><br />
6.2 Startup Considerations<br />
This chapter summarizes the boot sequence of the <strong>AT32UC3C</strong>. The behavior after power-up is<br />
controlled by the Power Manager. For specific details, refer to the Power Manager chapter.<br />
6.2.1 Starting of clocks<br />
At power-up, the BOD33 and the BOD18 are enabled. The device will be held in a reset state by<br />
the power-up circuitry, until the VDDIN_33 (resp. VDDCORE) has reached the reset threshold of<br />
the BOD33 (resp BOD18). Refer to the Electrical Characteristics for the BOD thresholds. Once<br />
the power has stabilized, the device will use the System RC Oscillator (RCSYS, 115KHz typical<br />
frequency) as clock source. The BOD18 and BOD33 are kept enabled or are disabled according<br />
to the fuse settings (See the Fuse Setting section in the Flash Controller chapter).<br />
On system start-up, the PLLs are disabled. All clocks to all modules are running. No clocks have<br />
a divided frequency, all parts of the system receive a clock with the same frequency as the internal<br />
RC Oscillator.<br />
6.2.2 Fetching of initial instructions<br />
After reset has been released, the AVR32UC CPU starts fetching instructions from the reset<br />
address, which is 0x8000_0000. This address points to the first address in the internal Flash.<br />
The internal Flash uses VDDIO voltage during read and write operations. It is recommended to<br />
use the BOD33 to monitor this voltage and make sure the VDDIO is above the minimum level<br />
(3.0V).<br />
The code read from the internal Flash is free to configure the system to use for example the<br />
PLLs, to divide the frequency of the clock routed to some of the peripherals, and to gate the<br />
clocks to unused peripherals.<br />
49
7. Power Manager (PM)<br />
7.1 Features<br />
7.2 Overview<br />
32117D–AVR-01/12<br />
Rev: 4.1.2.4<br />
Generates clocks and resets for digital logic<br />
On-the-fly frequency change of CPU, HSB and PBx clocks<br />
Sleep modes allow simple disabling of logic clocks and clock sources<br />
Module-level clock gating through maskable peripheral clocks<br />
Wake-up from internal or external interrupts<br />
Automatic identification of reset sources<br />
<strong>AT32UC3C</strong><br />
The Power Manager (PM) provides synchronous clocks used to clock the main digital logic in the<br />
device, namely the CPU, and the modules and peripherals connected to the High Speed Bus<br />
(HSB) and the Peripheral Buses (PBx).<br />
The PM contains advanced power-saving features, allowing the user to optimize the power consumption<br />
for an application. The synchronous clocks are divided into a number of clock<br />
domains, one for the CPU and HSB, and one for each PBx. The clocks can run at different<br />
speeds, allowing the user to save power by running peripherals relatively slow, whilst maintaining<br />
high CPU performance. The clocks can be independently changed on-the-fly, without halting<br />
any peripherals. The user may adjust CPU and memory speeds according to the dynamic application<br />
load, without disturbing or re-configuring active peripherals.<br />
Each module has a separate clock, enabling the user to save power by switching off clocks to<br />
inactive modules. Clocks and oscillators can be automatically switched off during idle periods by<br />
the CPU sleep instruction. The system will return to normal operation when interrupts occur.<br />
The Power Manager also contains a Reset Controller, which collects all possible reset sources,<br />
generates hard and soft resets, and allows the reset source to be identified by software.<br />
50
7.3 Block Diagram<br />
Figure 7-1. PM Block Diagram<br />
7.4 I/O Lines Description<br />
7.5 Product Dependencies<br />
7.5.1 Interrupt<br />
32117D–AVR-01/12<br />
Power-on Reset<br />
Detector(s)<br />
External Reset Pin<br />
Table 7-1. I/O Lines Description<br />
Main Clock Sources<br />
Interrupts<br />
Reset Sources<br />
Synchronous<br />
Clock Generator<br />
Sleep Controller<br />
Reset Controller<br />
Name Description Type Active Level<br />
RESET_N Reset Input Low<br />
Synchronous<br />
clocks<br />
CPU, HSB,<br />
PBx<br />
Sleep<br />
Instruction<br />
Resets<br />
<strong>AT32UC3C</strong><br />
The PM interrupt line is connected to one of the interrupt controllers internal sources. Using the<br />
PM interrupt requires the interrupt controller to be configured first.<br />
7.5.2 Clock Implementation<br />
In <strong>AT32UC3C</strong>, the HSB shares source clock with the CPU. Write attempts to the HSB Clock<br />
Select register (HSBSEL) will be ignored, and it will always read the same as the CPU Clock<br />
Select register (CPUSEL).<br />
The PM bus interface clock (CLK_PM) is generated by the Power Manager. This clock is<br />
enabled at reset, and can be disabled in the Power Manager. If disabled it can only be reenabled<br />
by a reset.<br />
51
7.6 Functional Description<br />
32117D–AVR-01/12<br />
<strong>AT32UC3C</strong><br />
7.6.1 Synchronous Clocks<br />
The System RC Oscillator (RCSYS) and a selection of other clock sources can provide the<br />
source for the main clock, which is the origin for the synchronous CPU/HSB and PBx module<br />
clocks. For details about the other main clock sources, please refer to the Main Clock Control<br />
(MCCTRL) register description. The synchronous clocks can run of the main clock and all the 8bit<br />
prescaler settings as long as f CPU ≥ f PBx, . The synchronous clock source can be changed onthe<br />
fly, according to variations in application load. The clock domains can be shut down in sleep<br />
mode, as described in Section 7.6.3. The module clocks in every synchronous clock domain can<br />
be individually masked to minimize power consumption in inactive modules.<br />
Figure 7-2. Synchronous Clock Generation<br />
Main Clock<br />
Sources<br />
MCSEL<br />
Sleep<br />
Instruction<br />
Prescaler<br />
CPUSEL<br />
7.6.1.1 Selecting the main clock source<br />
The common main clock can be connected to RCSYS or a selection of other clock sources. For<br />
details about the other main clock sources, please refer to the MCCTRL register description. By<br />
default, the main clock will be connected to RCSYS. The user can connect the main clock to<br />
another source by writing to the Main Clock Select (MCCTRL.MCSEL) field. The user must first<br />
assure that the source is enabled and ready in order to avoid a deadlock. Care should also be<br />
taken so that the new synchronous clock frequencies do not exceed the maximum frequency for<br />
each clock domain.<br />
7.6.1.2 Selecting synchronous clock division ratio<br />
The main clock feeds an 8-bit prescaler, which can be used to generate the synchronous clocks.<br />
By default, the synchronous clocks run on the undivided main clock. The user can select a prescaler<br />
division for the CPU clock by writing a one to the CPU Division bit in the CPU Clock Select<br />
register (CPUSEL.CPUDIV), and a value to the CPU Clock Select field (CPUSEL.CPUSEL),<br />
resulting in a CPU clock frequency:<br />
f CPU = f main / 2 (CPUSEL+1)<br />
0<br />
1<br />
CPUDIV<br />
Sleep<br />
Controller<br />
Main Clock<br />
Mask<br />
CPUMASK<br />
CPU Clocks<br />
HSB Clocks<br />
PBx Clocks<br />
52
32117D–AVR-01/12<br />
<strong>AT32UC3C</strong><br />
Similarly, the PBx clocks can be divided by writing their respective Clock Select (PBxSEL) registers<br />
to get the divided PBx frequency:<br />
f PBx = f main / 2 (PBSEL+1)<br />
The PBx clock frequency can not exceed the CPU clock frequency. The user must select a PBx-<br />
SEL.PBSEL value greater than or equal to the CPUSEL.CPUSEL value, so that f CPU ≥ f PBx. If the<br />
user selects division factors that will result in f CPU < f PBx , the Power Manager will automatically<br />
change the PBxSEL.PBSEL/PBDIV values to ensure correct operation (f CPU ≥ f PBx ).<br />
The HSB clock will always be forced to the same division as the CPU clock.<br />
To ensure correct operation, the frequencies must never exceed the specified maximum frequency<br />
for each clock domain.<br />
For modules connected to the HSB bus, the PB clock frequency must be the same as the CPU<br />
clock frequency.<br />
7.6.1.3 Clock Ready flag<br />
There is a slight delay from CPUSEL and PBxSEL being written to the new clock setting taking<br />
effect. During this interval, the Clock Ready bit in the Status Register (SR.CKRDY) will read as<br />
zero. When the clock settings change is completed, the bit will read as one. The Clock Select<br />
registers (CPUSEL, PBxSEL) must not be written to while SR.CKRDY is zero, or the system<br />
may become unstable or hang.<br />
The Clock Ready bit in the Interrupt Status Register (ISR.CKRDY) is set on a SR.CKRDY zeroto-one<br />
transition. If the Clock Ready bit in the Interrupt Mask Register (IMR.CKRDY) is set, an<br />
interrupt request is generated. IMR.CKRDY is set by writing a one to the corresponding bit in the<br />
Interrupt Enable Register (IER.CKRDY).<br />
7.6.2 Peripheral Clock Masking<br />
By default, the clocks for all modules are enabled, regardless of which modules are actually<br />
being used. It is possible to disable the clock for a module in the CPU, HSB, or PBx clock<br />
domain by writing a zero to the corresponding bit in the corresponding Clock Mask (CPU-<br />
MASK/HSBMASK/PBxMASK) register. When a module is not clocked, it will cease operation,<br />
and its registers cannot be read nor written. The module can be re-enabled later by writing a one<br />
to the corresponding mask bit. A module may be connected to several clock domains, in which<br />
case it will have several mask bits. The Maskable Module Clocks table in the Clock Mask register<br />
description contains a list of implemented maskable clocks.<br />
7.6.2.1 Cautionary note<br />
Note that clocks should only be switched off if it is certain that the module will not be used.<br />
Switching off the clock for the Flash Controller will cause a problem if the CPU needs to read<br />
from the flash. Switching off the clock to the Power Manager, which contains the mask registers,<br />
or the corresponding PBx bridge, will make it impossible to write to the mask registers again. In<br />
this case, they can only be re-enabled by a system reset.<br />
7.6.3 Sleep Modes<br />
In normal operation, all clock domains are active, allowing software execution and peripheral<br />
operation. When the CPU is idle, it is possible to switch it and other (optional) clock domains off<br />
to save power. This is done by the sleep instruction, which takes the sleep mode index number<br />
from Table 7-2 on page 54 as argument.<br />
53
32117D–AVR-01/12<br />
<strong>AT32UC3C</strong><br />
7.6.3.1 Entering and exiting sleep modes<br />
The sleep instruction will halt the CPU and all modules belonging to the stopped clock domains.<br />
The modules will be halted regardless of the bit settings in the mask registers.<br />
Clock sources can also be switched off to save power. Some of these have a relatively long<br />
start-up time, and are only switched off when very low power consumption is required.<br />
The CPU and affected modules are restarted when the sleep mode is exited. This occurs when<br />
an interrupt triggers. Note that even if an interrupt is enabled in sleep mode, it may not trigger if<br />
the source module is not clocked.<br />
7.6.3.2 Supported sleep modes<br />
The following sleep modes are supported. These are detailed in Table 7-2 on page 54.<br />
Table 7-2. Sleep Modes<br />
Index (1)<br />
Sleep Mode CPU HSB<br />
Idle: The CPU is stopped, the rest of the device is operational.<br />
Frozen: The CPU and HSB modules are stopped, peripherals are operational.<br />
Standby: All synchronous clocks are stopped, and the clock sources are running, allowing for<br />
a quick wake-up to normal mode.<br />
Stop: As Standby, but oscillators, and other clock sources are also stopped. 32KHz Oscillator<br />
OSC32K (2) , RCSYS, AST, and WDT will remain operational.<br />
DeepStop: All synchronous clocks and clock sources are stopped. Bandgap voltage<br />
reference and BOD are turned off. OSC32K (2) and RCSYS remain operational.<br />
Static: All clock sources, including RCSYS are stopped. Bandgap voltage reference and BOD<br />
are turned off. OSC32K (2) remains operational. (2)<br />
PBx,<br />
GCLK<br />
Clock Sources (3) ,<br />
SYSTIMER (4)<br />
OSC32K (2)<br />
RCSYS<br />
BOD &<br />
Bandgap<br />
Voltage<br />
Regulator<br />
0 Idle Stop Run Run Run Run Run On Normal mode<br />
1 Frozen Stop Stop Run Run Run Run On Normal mode<br />
2 Standby Stop Stop Stop Run Run Run On Normal mode<br />
3 Stop Stop Stop Stop Stop Run Run On Low power mode<br />
4 DeepStop Stop Stop Stop Stop Run Run Off Low power mode<br />
5 Static Stop Stop Stop Stop Run Stop Off Low power mode<br />
Notes: 1. The sleep mode index is used as argument for the sleep instruction.<br />
2. OSC32K will only remain operational if pre-enabled.<br />
3. Clock sources other than those specifically listed in the table.<br />
4. SYSTIMER is the clock for the CPU COUNT and COMPARE registers.<br />
The internal voltage regulator is also adjusted according to the sleep mode in order to reduce its<br />
power consumption.<br />
7.6.3.3 Waking from sleep modes<br />
There are two types of wake-up sources from sleep mode, synchronous and asynchronous.<br />
Synchronous wake-up sources are all non-masked interrupts. Asynchronous wake-up sources<br />
are AST, WDT, external interrupts from EIC, external reset, and all asynchronous wake-ups<br />
enabled in the Asynchronous Wake Up Enable (AWEN) register. The valid wake-up sources for<br />
each sleep mode are detailed in Table 7-3 on page 55.<br />
54
32117D–AVR-01/12<br />
Table 7-3. Wake-up Sources<br />
Index (1)<br />
Sleep Mode Wake-up Sources<br />
0 Idle Synchronous, Asynchronous<br />
1 Frozen Synchronous (2) , Asynchronous<br />
2 Standby Asynchronous<br />
3 Stop Asynchronous<br />
4 DeepStop Asynchronous<br />
5 Static Asynchronous (3)<br />
Notes: 1. The sleep mode index is used as argument for the sleep instruction.<br />
2. Only PB modules operational, as HSB module clocks are stopped.<br />
3. WDT only available if clocked from pre-enabled OSC32K.<br />
<strong>AT32UC3C</strong><br />
7.6.3.4 Precautions when entering sleep mode<br />
Modules communicating with external circuits should normally be disabled before entering a<br />
sleep mode that will stop the module operation. This will prevent erratic behavior caused by<br />
entering or exiting sleep modes. Please refer to the relevant module documentation for recommended<br />
actions.<br />
Communication between the synchronous clock domains is disturbed when entering and exiting<br />
sleep modes. Bus transactions over clock domains affected by the sleep mode are therefore not<br />
recommended. The system may hang if the bus clocks are stopped during a bus transaction.<br />
The CPU is automatically stopped in a safe state to ensure that all CPU bus operations are complete<br />
when the sleep mode goes into effect. Thus, when entering Idle mode, no further action is<br />
necessary.<br />
When entering a sleep mode (except Idle mode), all HSB masters must be stopped before<br />
entering the sleep mode. In order to let potential PBx write operations complete, the user should<br />
let the CPU perform a PBx register read operation before issuing the sleep instruction. This will<br />
stall the CPU until pending PBx operations have completed.<br />
7.6.4 Divided PB Clocks<br />
The clock generator in the Power Manager provides divided PBx clocks for use by peripherals<br />
that require a prescaled PBx clock. This is described in the documentation for the relevant modules.<br />
The divided clocks are directly maskable, and are stopped in sleep modes where the PBx<br />
clocks are stopped.<br />
7.6.5 Reset Controller<br />
The Reset Controller collects the various reset sources in the system and generates hard and<br />
soft resets for the digital logic.<br />
The device contains a Power-on Reset (POR) detector, which keeps the system reset until<br />
power is stable. This eliminates the need for external reset circuitry to guarantee stable operation<br />
when powering up the device.<br />
55
32117D–AVR-01/12<br />
<strong>AT32UC3C</strong><br />
It is also possible to reset the device by pulling the RESET_N pin low. This pin has an internal<br />
pull-up, and does not need to be driven externally during normal operation. Table 7-4 on page<br />
56 lists these and other reset sources supported by the Reset Controller.<br />
Figure 7-3. Reset Controller Block Diagram<br />
In addition to the listed reset types, the JTAG & aWire can keep parts of the device statically<br />
reset. See JTAG and aWire documentation for details.<br />
Table 7-4. Reset Description<br />
Reset Source Description<br />
Power-on Reset<br />
Supply voltage below the Power-on Reset detector threshold<br />
voltage V POT<br />
External Reset RESET_N pin asserted<br />
Brown-out Reset<br />
CPU Error<br />
RESET_N<br />
Power-on Reset<br />
Detector(s)<br />
Brown-out<br />
Detector<br />
JTAG<br />
AWIRE<br />
OCD<br />
Watchdog Reset<br />
RCAUSE<br />
Reset<br />
Controller<br />
VDDCORE supply voltage below the Brown-out detector<br />
threshold voltage<br />
Caused by an illegal CPU access to external memory while<br />
in Supervisor mode<br />
Watchdog Timer See Watchdog Timer documentation<br />
OCD See On-Chip Debug documentation<br />
CPU, HSB, PBx<br />
OCD, AST, WDT,<br />
Clock Generator<br />
Depending on the reset source, when a reset occurs, some parts of the device are not always<br />
reset. Only the Power-on Reset (POR) will force a whole device reset. Refer to the table in the<br />
Module Configuration section at the end of this chapter for further details. The latest reset cause<br />
can be read in the RCAUSE register, and can be read during the applications boot sequence in<br />
order to determine proper action.<br />
56
32117D–AVR-01/12<br />
<strong>AT32UC3C</strong><br />
7.6.5.1 Power-on Reset Detector<br />
The Power-on Reset 1.8V (POR18) detector monitors the VDDCORE supply pin and generates<br />
a Power-on Reset (POR) when the device is powered on. The POR is active until the<br />
VDDCORE voltage is above the power-on threshold level (V POT). The POR will be re-generated<br />
if the voltage drops below the power-on threshold level. See Electrical Characteristics for parametric<br />
details.<br />
7.6.5.2 External Reset<br />
The external reset detector monitors the RESET_N pin state. By default, a low level on this pin<br />
will generate a reset.<br />
7.6.6 Clock Failure Detector<br />
This mechanism automatically switches the main clock source to the safe RCSYS clock when<br />
the main clock source fails. This may happen when an external crystal is selected as a source<br />
for the main clock and the crystal is not mounted on the board. The main clock is compared with<br />
RCSYS, and if no rising edge of the main clock is detected during one RCSYS period, the clock<br />
is considered to have failed.<br />
7.6.7 Interrupts<br />
The detector is enabled by writing a one to the Clock Failure Detection Enable bit in the Clock<br />
Failure Detector Control Register (CFDCTRL.CFDEN). As soon as the detector is enabled, the<br />
clock failure detector will monitor the divided main clock. Note that the detector does not monitor<br />
the main clock if RCSYS is the source of the main clock, or if the main clock is temporarily not<br />
available (startup-time after a wake-up, switching timing etc.), or in sleep mode where the main<br />
clock is driven by the RCSYS (Stop and DeepStop mode). When a clock failure is detected, the<br />
main clock automatically switches to the RCSYS clock and the Clock Failure Detected (CFD)<br />
interrupt is generated if enabled. The MCCTRL register is also changed by hardware to indicate<br />
that the main clock comes from RCSYS.<br />
The PM has a number of interrupt sources:<br />
AE - Access Error,<br />
– A lock protected register is written to without first being unlocked.<br />
CKRDY - Clock Ready:<br />
– New Clock Select settings in the CPUSEL/PBxSEL registers have taken effect. (A<br />
zero-to-one transition on SR.CKRDY is detected).<br />
CFD - Clock Failure Detected:<br />
– The system detects that the main clock is not running.<br />
The Interrupt Status Register contains one bit for each interrupt source. A bit in this register is<br />
set on a zero-to-one transition of the corresponding bit in the Status Register (SR), and cleared<br />
by writing a one to the corresponding bit in the Interrupt Clear Register (ICR). The interrupt<br />
sources will generate an interrupt request if the corresponding bit in the Interrupt Mask Register<br />
is set. The interrupt sources are ORed together to form one interrupt request. The Power Manager<br />
will generate an interrupt request if at least one of the bits in the Interrupt Mask Register<br />
(IMR) is set. Bits in IMR are set by writing a one to the corresponding bit in the Interrupt Enable<br />
Register (IER), and cleared by writing a one to the corresponding bit in the Interrupt Disable<br />
Register (IDR). The interrupt request remains active until the corresponding bit in the Interrupt<br />
Status Register (ISR) is cleared by writing a one to the corresponding bit in the Interrupt Clear<br />
57
32117D–AVR-01/12<br />
<strong>AT32UC3C</strong><br />
Register (ICR). Because all the interrupt sources are ORed together, the interrupt request from<br />
the Power Manager will remain active until all the bits in ISR are cleared.<br />
58
7.7 User Interface<br />
Table 7-5. PM Register Memory Map<br />
32117D–AVR-01/12<br />
<strong>AT32UC3C</strong><br />
Offset Register Name Access Reset State<br />
0x0000 Main Clock Control MCCTRL Read/Write 0x00000000<br />
0x0004 CPU Clock Select CPUSEL Read/Write 0x00000000<br />
0x0008 HSB Clock Select HSBSEL Read Only 0x00000000<br />
0x000C PBA Clock Select PBASEL Read/Write 0x00000000<br />
0x00010 PBB Clock Select PBBSEL Read/Write 0x00000000<br />
0x0014 PBC Clock Select PBCSEL Read/Write 0x00000000<br />
0x0020 CPU Mask CPUMASK Read/Write 0x00000003<br />
0x0024 HSB Mask HSBMASK Read/Write 0x00003FFF<br />
0x0028 PBA Mask PBAMASK Read/Write 0x07FFFFFF<br />
0x002C PBB Mask PBBMASK Read/Write 0x0000007F<br />
0x0030 PBC Mask PBCMASK Read/Write 0x000003FF<br />
0x0040 PBA Divided Mask PBADIVMASK Read/Write 0x0000007F<br />
0x0044 PBB Divided Mask PBBDIVMASK Read/Write 0x0000007F<br />
0x0048 PBC Divided Mask PBCDIVMASK Read/Write 0x0000007F<br />
0x0054 Clock Failure Detector Control CFDCTRL Read/Write 0x00000000<br />
0x0058 Unlock Register UNLOCK Write Only -<br />
0x00C0 PM Interrupt Enable Register IER Write Only 0x00000000<br />
0x00C4 PM Interrupt Disable Register IDR Write Only 0x00000000<br />
0x00C8 PM Interrupt Mask Register IMR Read Only 0x00000000<br />
0x00CC PM Interrupt Status Register ISR Read Only 0x00000000<br />
0x00D0 PM Interrupt Clear Register ICR Write Only 0x00000000<br />
0x00D4 Status Register SR Read Only 0x00000020<br />
0x0180 Reset Cause Register RCAUSE Read Only Latest Reset Source<br />
0x0184 Wake Cause Register WCAUSE Read Only Latest Wake Source<br />
0x0188 Asynchronous Wake Enable AWEN Read/Write 0x00000000<br />
0x03F8 Configuration Register CONFIG Read Only - (1)<br />
0x03FC Version Register VERSION Read Only - (1)<br />
Note: 1. The reset value is device specific. Please refer to the Module Configuration section at the end<br />
of this chapter.<br />
59
7.7.1 Main Clock Control<br />
Name: MCCTRL<br />
Access Type: Read/Write<br />
Offset: 0x0000<br />
Reset Value: 0x00000000<br />
32117D–AVR-01/12<br />
<strong>AT32UC3C</strong><br />
31 30 29 28 27 26 25 24<br />
- - - - - - - -<br />
23 22 21 20 19 18 17 16<br />
- - - - - - - -<br />
15 14 13 12 11 10 9 8<br />
- - - - - - - -<br />
7 6 5 4 3 2 1 0<br />
- - - - - MCSEL<br />
MCSEL: Main Clock Select<br />
Table 7-6. Main clocks in <strong>AT32UC3C</strong>.<br />
MCSEL[1:0] Main clock source<br />
0 System RC oscillator (RCSYS)<br />
1 Oscillator 0<br />
2 Oscillator 1<br />
3 PLL0<br />
4 PLL1<br />
5 8 MHz RC oscillator (RC8M)<br />
6 reserved<br />
7 120 MHz RC oscillator (RC120M)<br />
others reserved<br />
Note that this register is protected by a lock. To write to this register the UNLOCK register has to be written first. Please<br />
refer to the UNLOCK register description for details.<br />
60
7.7.2 CPU Clock Select<br />
Name: CPUSEL<br />
Access Type: Read/Write<br />
Offset: 0x0004<br />
Reset Value: 0x00000000<br />
CPUDIV, CPUSEL: CPU Division and Clock Select<br />
CPUDIV = 0: CPU clock equals main clock.<br />
CPUDIV = 1: CPU clock equals main clock divided by 2 (CPUSEL+1) .<br />
Note that if CPUDIV is written to 0, CPUSEL should also be written to 0 to ensure correct operation.<br />
32117D–AVR-01/12<br />
<strong>AT32UC3C</strong><br />
31 30 29 28 27 26 25 24<br />
- - - - - - - -<br />
23 22 21 20 19 18 17 16<br />
- - - - - - - -<br />
15 14 13 12 11 10 9 8<br />
- - - - - - - -<br />
7 6 5 4 3 2 1 0<br />
CPUDIV - - - - CPUSEL<br />
Also note that writing this register clears SR:CKRDY. The register must not be re-written until CKRDY goes high.<br />
Note that this register is protected by a lock. To write to this register the UNLOCK register has to be written first. Please<br />
refer to the UNLOCK register description for details.<br />
61
7.7.3 HSB Clock Select<br />
Name: HSBSEL<br />
Access Type: Read Only<br />
Offset: 0x0008<br />
Reset Value: 0x00000000<br />
32117D–AVR-01/12<br />
<strong>AT32UC3C</strong><br />
31 30 29 28 27 26 25 24<br />
- - - - - - - -<br />
23 22 21 20 19 18 17 16<br />
- - - - - - - -<br />
15 14 13 12 11 10 9 8<br />
- - - - - - - -<br />
7 6 5 4 3 2 1 0<br />
HSBDIV - - - - HSBSEL<br />
This register is read-only and its content is always equal to CPU_SEL<br />
62
7.7.4 PBx Clock Select<br />
Name: PBxSEL<br />
Access Type: Read/Write<br />
Offset: 0x000C, 0x0010, 0x0014<br />
Reset Value: 0x00000000<br />
PBDIV, PBSEL: PBx Division and Clock Select<br />
PBDIV = 0: PBx clock equals main clock.<br />
PBDIV = 1: PBx clock equals main clock divided by 2 (PBSEL+1) .<br />
Note that if PBDIV is written to 0, PBSEL should also be written to 0 to ensure correct operation.<br />
32117D–AVR-01/12<br />
<strong>AT32UC3C</strong><br />
31 30 29 28 27 26 25 24<br />
- - - - - - - -<br />
23 22 21 20 19 18 17 16<br />
- - - - - - - -<br />
15 14 13 12 11 10 9 8<br />
- - - - - - - -<br />
7 6 5 4 3 2 1 0<br />
PBDIV - - - - PBSEL<br />
Also note that writing this register clears SR:CKRDY. The register must not be re-written until CKRDY goes high.<br />
Note that this register is protected by a lock. To write to this register the UNLOCK register has to be written first. Please<br />
refer to the UNLOCK register description for details.<br />
63
7.7.5 Clock Mask<br />
Name: CPU/HSB/PBA/PBBMASK<br />
Access Type: Read/Write<br />
Offset: 0x0020, 0x0024, 0x0028, 0x002C, 0x0030<br />
Reset Value: -<br />
32117D–AVR-01/12<br />
<strong>AT32UC3C</strong><br />
31 30 29 28 27 26 25 24<br />
MASK[31:24]<br />
23 22 21 20 19 18 17 16<br />
MASK[23:16]<br />
15 14 13 12 11 10 9 8<br />
MASK[15:8]<br />
7 6 5 4 3 2 1 0<br />
MASK: Clock Mask<br />
If bit n is cleared, the clock for module n is stopped. If bit n is set, the clock for module n is enabled according to the current<br />
power mode. The number of implemented bits in each mask register, as well as which module clock is controlled by each bit,<br />
is shown in Table 7-7.<br />
Table 7-7. Maskable module clocks in <strong>AT32UC3C</strong>.<br />
MASK[7:0]<br />
Bit CPUMASK HSBMASK PBAMASK PBBMASK PBCMASK<br />
0 - SAU INTC FLASHC PDCA<br />
1 OCD PDCA PM USBC MDMA<br />
2 - MDMA SCIF HMATRIX USART1<br />
3 - USBC AST SAU SPI0<br />
4 - CANIF WDT SMC CANIF<br />
5 - HFLASHC EIC SDRAMC TC0<br />
6 - PBA Bridge FREQM MACB ADCIFA<br />
7 - PBB Bridge GPIO - USART4<br />
8 - PBC Bridge USART0 - TWIM2<br />
9 - HSB RAM USART2 - TWIS2<br />
10 - EBI USART3 - -<br />
11 - MACB SPI1 - -<br />
12 - PEVC TWIM0 - -<br />
64
Table 7-7. Maskable module clocks in <strong>AT32UC3C</strong>.<br />
32117D–AVR-01/12<br />
<strong>AT32UC3C</strong><br />
Bit CPUMASK HSBMASK PBAMASK PBBMASK PBCMASK<br />
13 - - TWIM1 - -<br />
14 - - TWIS0 - -<br />
15 - - TWIS1 - -<br />
16 - - IISC - -<br />
17 - - PWM - -<br />
18 - - QDEC0 - -<br />
19 - - QDEC1 - -<br />
20 - - TC1 - -<br />
21 - - - - -<br />
22 - - ACIFA0 - -<br />
23 - - ACIFA1 - -<br />
24 - - DACIFB0 - -<br />
25 - - DACIFB1 - -<br />
26 - - AW - -<br />
31:27 - - - - -<br />
Note that this register is protected by a lock. To write to this register the UNLOCK register has to be written first. Please<br />
refer to the UNLOCK register description for details.<br />
65
7.7.6 Divided Clock Mask<br />
Name: PBADIVMASK/PBBDIVMASK/PBCDIVMASK<br />
Access Type: Read/Write<br />
Offset: 0x0040, 0x0044, 0x0048<br />
Reset Value: -<br />
32117D–AVR-01/12<br />
<strong>AT32UC3C</strong><br />
31 30 29 28 27 26 25 24<br />
- - - - - - - -<br />
23 22 21 20 19 18 17 16<br />
- - - - - - -<br />
15 14 13 12 11 10 9 8<br />
- - - - - - - -<br />
7 6 5 4 3 2 1 0<br />
- MASK[6:0]<br />
MASK: Clock Mask<br />
If bit n is written to zero, the clock divided by 2 (n+1) is stopped. If bit n is written to one, the clock divided by 2 (n+1) is enabled<br />
according to the current power mode. Table 7-8 and Table 7-9 show what clocks are affected by the different MASK bits.<br />
Table 7-8. PBA Divided Clock Mask<br />
Bit USART0 USART2 USART3 TC1<br />
0 - TIMER1_CLOCK2<br />
1 - -<br />
2 CLK_PBA_USART_DIV TIMER1_CLOCK3<br />
3 - -<br />
4 - TIMER1_CLOCK4<br />
5 - -<br />
6 - TIMER1_CLOCK5<br />
Table 7-9. PBC Divided Clock Mask<br />
Bit USART1 USART4 TC0<br />
0 - TIMER0_CLOCK2<br />
1 - -<br />
2 CLK_PBC_USART_DIV TIMER0_CLOCK3<br />
3 - -<br />
66
32117D–AVR-01/12<br />
Table 7-9. PBC Divided Clock Mask<br />
Bit USART1 USART4 TC0<br />
4 - TIMER0_CLOCK4<br />
5 - -<br />
6 - TIMER0_CLOCK5<br />
<strong>AT32UC3C</strong><br />
Note that this register is protected by a lock. To write to this register the UNLOCK register has to be written first. Please<br />
refer to the UNLOCK register description for details.<br />
67
7.7.7 Clock Failure Detector Control Register<br />
Name: CFDCTRL<br />
Access Type: Read/Write<br />
Offset: 0x0054<br />
Reset Value: 0x00000000<br />
32117D–AVR-01/12<br />
<strong>AT32UC3C</strong><br />
31 30 29 28 27 26 25 24<br />
SFV - - - - - - -<br />
23 22 21 20 19 18 17 16<br />
- - - - - - - -<br />
15 14 13 12 11 10 9 8<br />
- - - - - - - -<br />
7 6 5 4 3 2 1 0<br />
- - - - - - CFDEN<br />
SFV: Store Final Value<br />
0: The register is read/write<br />
1: The register is read-only, to protect against further accidental writes.<br />
CFDEN: Clock Failure Detection Enable<br />
0: Clock Failure Detector is disabled<br />
1: Clock Failure Detector is enabled<br />
Note that this register is protected by a lock. To write to this register the UNLOCK register has to be written first. Please<br />
refer to the UNLOCK register description for details.<br />
68
7.7.8 PM Unlock Register<br />
Name: UNLOCK<br />
Access Type: Write-Only<br />
Offset: 0x0058<br />
Reset Value: -<br />
32117D–AVR-01/12<br />
<strong>AT32UC3C</strong><br />
31 30 29 28 27 26 25 24<br />
KEY<br />
23 22 21 20 19 18 17 16<br />
- - - - - - - -<br />
15 14 13 12 11 10 9 8<br />
- - - - - - ADDR[9:8]<br />
7 6 5 4 3 2 1 0<br />
ADDR[7:0]<br />
To unlock a write protected register, first write to the UNLOCK register with the address of the register to unlock in the<br />
ADDR field and 0xAA in the KEY field. Then, in the next PB access write to the register specified in the ADDR field.<br />
KEY: Unlock Key<br />
Write this bit field to 0xAA to enable unlock.<br />
ADDR: Unlock Address<br />
Write the address of the register to unlock to this bit field.<br />
69
7.7.9 Interrupt Enable Register<br />
Name: IER<br />
Access Type: Write-only<br />
Offset: 0x0C0<br />
Reset Value: 0x00000000<br />
32117D–AVR-01/12<br />
<strong>AT32UC3C</strong><br />
31 30 29 28 27 26 25 24<br />
AE - - - - - - -<br />
23 22 21 20 19 18 17 16<br />
- - - - - - - -<br />
15 14 13 12 11 10 9 8<br />
- - - - - - - -<br />
7 6 5 4 3 2 1 0<br />
- - CKRDY - - - - CFD<br />
Writing a zero to a bit in this register has no effect.<br />
Writing a one to a bit in this register will set the corresponding bit in IMR.<br />
70
7.7.10 Interrupt Disable Register<br />
Name: IDR<br />
Access Type: Write-only<br />
Offset: 0x0C4<br />
Reset Value: 0x00000000<br />
32117D–AVR-01/12<br />
<strong>AT32UC3C</strong><br />
31 30 29 28 27 26 25 24<br />
AE - - - - - - -<br />
23 22 21 20 19 18 17 16<br />
- - - - - - - -<br />
15 14 13 12 11 10 9 8<br />
- - - - - - - -<br />
7 6 5 4 3 2 1 0<br />
- - CKRDY - - - - CFD<br />
Writing a zero to a bit in this register has no effect.<br />
Writing a one to a bit in this register will clear the corresponding bit in IMR.<br />
71
7.7.11 Interrupt Mask Register<br />
Name: IMR<br />
Access Type: Read-only<br />
Offset: 0x0C8<br />
Reset Value: 0x00000000<br />
32117D–AVR-01/12<br />
<strong>AT32UC3C</strong><br />
31 30 29 28 27 26 25 24<br />
AE - - - - - - -<br />
23 22 21 20 19 18 17 16<br />
- - - - - - - -<br />
15 14 13 12 11 10 9 8<br />
- - - - - - - -<br />
7 6 5 4 3 2 1 0<br />
- - CKRDY - - - - CFD<br />
0: The corresponding interrupt is disabled.<br />
1: The corresponding interrupt is enabled.<br />
This bit is cleared when the corresponding bit in IDR is written to one.<br />
This bit is set when the corresponding bit in IER is written to one.<br />
72
7.7.12 Interrupt Status Register<br />
Name: ISR<br />
Access Type: Read-only<br />
Offset: 0x0CC<br />
Reset Value: 0x00000000<br />
32117D–AVR-01/12<br />
<strong>AT32UC3C</strong><br />
31 30 29 28 27 26 25 24<br />
AE - - - - - - -<br />
23 22 21 20 19 18 17 16<br />
- - - - - - - -<br />
15 14 13 12 11 10 9 8<br />
- - - - - - - -<br />
7 6 5 4 3 2 1 0<br />
- - CKRDY - - - - CFD<br />
0: The corresponding interrupt is cleared.<br />
1: The corresponding interrupt is pending.<br />
This bit is cleared when the corresponding bit in ICR is written to one.<br />
This bit is set when the corresponding interrupt occurs.<br />
73
7.7.13 Interrupt Clear Register<br />
Name: ICR<br />
Access Type: Write-only<br />
Offset: 0x0D0<br />
Reset Value: 0x00000000<br />
32117D–AVR-01/12<br />
<strong>AT32UC3C</strong><br />
31 30 29 28 27 26 25 24<br />
AE - - - - - - -<br />
23 22 21 20 19 18 17 16<br />
- - - - - - - -<br />
15 14 13 12 11 10 9 8<br />
- - - - - - - -<br />
7 6 5 4 3 2 1 0<br />
- - CKRDY - - - - CFD<br />
Writing a zero to a bit in this register has no effect.<br />
Writing a one to a bit in this register will clear the corresponding bit in ISR.<br />
74
7.7.14 Status Register<br />
Name: SR<br />
Access Type: Read-only<br />
Offset: 0x0D4<br />
Reset Value: 0x00000020<br />
32117D–AVR-01/12<br />
<strong>AT32UC3C</strong><br />
31 30 29 28 27 26 25 24<br />
AE - - - - - - -<br />
23 22 21 20 19 18 17 16<br />
- - - - - - - -<br />
15 14 13 12 11 10 9 8<br />
- - - - - - - -<br />
7 6 5 4 3 2 1 0<br />
- - CKRDY - - - - CFD<br />
AE: Access Error<br />
0: No access error has occured.<br />
1: A write to lock protected register without unlocking it has occured.<br />
CKRDY: Clock Ready<br />
0: The CKSEL register has been written, and the new clock setting is not yet effective.<br />
1: The synchronous clocks have frequencies as indicated in the CKSEL register.<br />
CFD: Clock Failure Detected<br />
0: Main clock is running correctly.<br />
1: Failure on main clock detected. Main clock is now running on RC osc.<br />
75
7.7.15 Reset Cause<br />
Name: RCAUSE<br />
Access Type: Read-only<br />
Offset: 0x0180<br />
Reset Value: Latest Reset Source<br />
32117D–AVR-01/12<br />
<strong>AT32UC3C</strong><br />
31 30 29 28 27 26 25 24<br />
- - - - - - - -<br />
23 22 21 20 19 18 17 16<br />
- - - - - - - -<br />
15 14 13 12 11 10 9 8<br />
- - BOD33 - AWIRE - - OCDRST<br />
7 6 5 4 3 2 1 0<br />
CPUERR - JTAG WDT EXT BOD POR<br />
BOD33: Brown-out 3.3V reset<br />
The CPU was reset due to the supply voltage being lower than the 3.3V Supply Monitor (BOD33) threshold level.<br />
AWIRE: AWIRE Reset<br />
The CPU was reset by the AWIRE<br />
OCDRST: OCD Reset<br />
The CPU was reset because the RES strobe in the OCD Development Control register has been written to one.<br />
CPUERR: CPU Error<br />
The CPU was reset because had detected an illegal access.<br />
JTAG: JTAG Reset<br />
The chip was reset by the JTAG system reset.<br />
WDT: Watchdog Reset<br />
The CPU was reset because of a watchdog time-out.<br />
EXT: External Reset Pin<br />
The CPU was reset due to the RESET pin being asserted.<br />
BOD: Brown-out Reset<br />
The CPU was reset due to the core supply voltage being lower than the brown-out threshold level.<br />
POR: Power-on Reset<br />
The CPU was reset due to the core supply voltage being lower than the power-on threshold level, or due to the input voltage<br />
being lower than the minimum required input voltage for the voltage regulator.<br />
76
7.7.16 Wake Cause Register<br />
Register name WCAUSE<br />
Register access Read-only<br />
Offset: 0x0184<br />
Reset Value: Latest Reset Source<br />
32117D–AVR-01/12<br />
<strong>AT32UC3C</strong><br />
31 30 29 28 27 26 25 24<br />
- - - - - - - -<br />
23 22 21 20 19 18 17 16<br />
- - - - - - WCAUSE[17:16]<br />
15 14 13 12 11 10 9 8<br />
WCAUSE[15:8]<br />
7 6 5 4 3 2 1 0<br />
A bit in this register is set on wake up caused by the peripheral referred to in Table 7-10.<br />
Table 7-10. Wake Cause<br />
Bit Wake Cause<br />
1 USBC<br />
1 CANIF-RXLINE[0]<br />
2 CANIF-RXLINE[1]<br />
3 -<br />
4 TWI Slave 0<br />
5 TWI Slave 1<br />
6 TWI Slave 2<br />
15:7 -<br />
16 EIC<br />
17 AST<br />
31:18 -<br />
WCAUSE[7:0]<br />
77
7.7.17 Asynchronous Wake Up Enable Register<br />
Register name AWEN<br />
Register access Read/Write<br />
Offset: 0x0188<br />
Reset Value: 0x00000000<br />
32117D–AVR-01/12<br />
<strong>AT32UC3C</strong><br />
31 30 29 28 27 26 25 24<br />
AWEN[31:24]<br />
23 22 21 20 19 18 17 16<br />
AWEN[23:16]<br />
15 14 13 12 11 10 9 8<br />
AWEN[15:8]<br />
7 6 5 4 3 2 1 0<br />
Each bit in this register corresponds to an asynchronous wake up, according to Table 7-11.<br />
0: The corresponding wake up is disabled.<br />
1: The corresponding wake up is enabled<br />
Table 7-11. Asynchronous Wake Up<br />
Bit Asynchronous Wake Up<br />
0 USBWEN<br />
1 CANIF0WEN<br />
2 CANIF1WEN<br />
3 -<br />
4 TWIS0WEN<br />
5 TWIS1WEN<br />
6 TWIS2WEN<br />
31:7 -<br />
AWEN[7:0]<br />
78
7.7.18 Configuration Register<br />
Name: CONFIG<br />
Access Type: Read-Only<br />
Offset: 0x03F8<br />
Reset Value: 0x000000C3<br />
32117D–AVR-01/12<br />
<strong>AT32UC3C</strong><br />
31 30 29 28 27 26 25 24<br />
- - - - - - - -<br />
23 22 21 20 19 18 17 16<br />
- - - - - - - -<br />
15 14 13 12 11 10 9 8<br />
- - - - - - - -<br />
7 6 5 4 3 2 1 0<br />
HSBPEVC - - PBD PBC PBB PBA<br />
This register shows the configuration of the PM.<br />
HSBPEVC:HSB PEVC Clock Implemented<br />
0: HSBPEVC not implemented.<br />
1: HSBPEVC implemented.<br />
PBD: PBD Implemented<br />
0: PBD not implemented.<br />
1: PBD implemented.<br />
PBC: PBC Implemented<br />
0: PBC not implemented.<br />
1: PBC implemented.<br />
PBB: PBB Implemented<br />
0: PBB not implemented.<br />
1: PBB implemented.<br />
PBA: PBA Implemented<br />
0: PBA not implemented.<br />
1: PBA implemented.<br />
79
7.7.19 Version Register<br />
Name: VERSION<br />
Access Type: Read-Only<br />
Offset: 0x03FC<br />
Reset Value: 0x00000410<br />
32117D–AVR-01/12<br />
<strong>AT32UC3C</strong><br />
31 30 29 28 27 26 25 24<br />
- - - - - - - -<br />
23 22 21 20 19 18 17 16<br />
- - - - VARIANT<br />
15 14 13 12 11 10 9 8<br />
- - - - VERSION[11:8]<br />
7 6 5 4 3 2 1 0<br />
VERSION[7:0]<br />
VARIANT: Variant Number<br />
Reserved. No functionality associated.<br />
VERSION: Version Number<br />
Version number of the module. No functionality associated.<br />
80
32117D–AVR-01/12<br />
<strong>AT32UC3C</strong><br />
7.8 Module Configuration<br />
The specific configuration for each PM instance is listed in the following tables. The module bus<br />
clocks listed here are connected to the system bus clocks. Please refer to the Power Manager<br />
chapter for details.<br />
Table 7-12. Module clock name<br />
Module name Clock name Description<br />
PM CLK_PM Peripheral Bus clock from the PBA clock domain<br />
Table 7-13. Register Reset Values<br />
Register Reset Value<br />
CONFIG 0x00000087<br />
VERSION 0x00000412<br />
Table 7-14. Effect of the different Reset Events<br />
Power-On<br />
Reset<br />
External<br />
Reset<br />
Watchdog<br />
Reset<br />
1.8V<br />
BOD<br />
Reset<br />
3.3V<br />
BOD<br />
Reset<br />
CPU<br />
Error<br />
Reset<br />
OCD<br />
Reset<br />
JTAG<br />
Reset<br />
CPU/HSB/PBx<br />
(excluding Power Manager)<br />
Y Y Y Y Y Y Y Y Y<br />
32 KHz oscillator Y N N N N N N N N<br />
AST registers, except interrupt<br />
registers<br />
Y N N N N N N N N<br />
GPLP registers Y N N N N N N N N<br />
Watchdog control register Y Y N Y Y Y Y Y Y<br />
Voltage Regulator Calibration<br />
register<br />
Y N N N N N N N N<br />
RCSYS Calibration register Y N N N N N N N N<br />
1.8V BOD control register Y Y Y N Y Y Y Y Y<br />
3.3V BOD control register Y Y Y Y N Y Y Y Y<br />
Bandgap control register Y Y Y N Y Y Y Y Y<br />
Clock control registers Y Y Y Y Y Y Y Y Y<br />
OSC control registers Y Y Y Y Y Y Y Y Y<br />
OCD system and OCD registers Y Y N Y Y Y N Y Y<br />
Awire<br />
Reset<br />
81
8. System Control Interface (SCIF)<br />
8.1 Features<br />
8.2 Description<br />
32117D–AVR-01/12<br />
Rev: 1.0.2.0<br />
8.3 I/O Lines Description<br />
8.4 Product Dependencies<br />
8.4.1 I/O Lines<br />
Controls integrated oscillators and PLLs<br />
Supports 2x General Purpose crystal oscillators, 0.4MHz-20MHz<br />
Supports 2x Phase-Locked-Loop, 80-240 MHz<br />
Supports 32 KHz low power oscillator (OSC32K)<br />
Integrated 115KHz RC Oscillator (RCSYS)<br />
Controls 8 MHz / 1 MHz integrated RC oscillator (RC8M)<br />
Controls 120 MHz integrated RC oscillator (RC120M)<br />
Generic clocks with wide frequency range provided<br />
Controls bandgap voltage reference through control and calibration registers<br />
Controls Brown-out detectors and supply monitors<br />
Controls Voltage Regulator behavior and calibration<br />
Two 32-bit general purpose low power registers<br />
<strong>AT32UC3C</strong><br />
The System Control Interface (SCIF) controls the Oscillators, PLL, Generic Clocks, BODs, the<br />
voltage regulators and general purpose low power registers.<br />
Table 8-1. I/O Lines Description<br />
Pin Name Pin Description Type<br />
XIN0 Crystal 0 Input Analog/Digital<br />
XIN1 Crystal 1 Input Analog/Digital<br />
XIN32 Crystal 32 Input Analog/Digital<br />
XOUT0 Crystal 0 Output Analog<br />
XOUT1 Crystal 1 Output Analog<br />
XOUT32 Crystal 32 Output Analog<br />
GCLK[1:0] Generic Clock Output Digital<br />
The SCIF provides a number of generic clock outputs, which can be connected to output pins,<br />
multiplexed with GPIO lines. The programmer must first program the GPIO controller to assign<br />
these pins to their peripheral function. If the I/O pins of the SCIF are not used by the application,<br />
they can be used for other purposes by the GPIO controller. Oscillators pins are also multiplexed<br />
with GPIO. When oscillators are used, the related pins are controlled directly by the SCIF, overriding<br />
GPIO settings.<br />
82
8.4.2 Interrupt<br />
32117D–AVR-01/12<br />
<strong>AT32UC3C</strong><br />
The SCIF interrupt line is connected to one of the internal sources of the interrupt controller.<br />
Using the SCIF interrupt requires the interrupt controller to be programmed first.<br />
8.4.3 Debug Operation<br />
The SCIF module does not interact with debug operations.<br />
8.4.4 Clocks<br />
8.5 Functional Description<br />
The SCIF controls all oscillators on the part. Those oscillators can then be used as sources for<br />
for generic clocks (handled by the SCIF) and for the CPU and peripherals (in this case, selection<br />
of source is done by the Power Manager).<br />
8.5.1 Oscillator Operation<br />
The main oscillator is designed to be used with an external 0.4 to 20MHz crystal and two biasing<br />
capacitors, as shown in Figure 8-1. The oscillator can be used for the main clock in the device,<br />
as described in the Power Manager chapter. The oscillator can be used as source for the<br />
generic clocks, as described in ”Generic Clocks” on page 85.<br />
The oscillator is disabled by default after reset. When the oscillator is disabled, the XIN and<br />
XOUT pins can be used as general purpose I/Os. When the oscillator is enabled, the XIN and<br />
XOUT pins are controlled directly by the SCIF. When the oscillator is configured to use an external<br />
clock, the clock must be applied to the XIN pin while the XOUT pin can be used as a general<br />
purpose I/O.<br />
The oscillator can be enabled by writing a one to the OSCEN bit in OSCCTRLn. Operation mode<br />
(external clock or crystal) is chosen by writing to the MODE field in OSCCTRLn. The oscillator is<br />
automatically switched off in certain sleep modes to reduce power consumption, as described in<br />
the Power Manager chapter.<br />
After a hard reset, or when waking up from a sleep mode that disabled the oscillator, the oscillator<br />
may need a certain amount of time to stabilize on the correct frequency. This start-up time<br />
can be set in the OSCCTRLn register.<br />
The SCIF masks the oscillator outputs during the start-up time, to ensure that no unstable clocks<br />
propagate to the digital logic. The OSCnRDY bits in PCLKSR are automatically set and cleared<br />
according to the status of the oscillators. A zero to one transition on these bits can also be configured<br />
to generate an interrupt, as described in ”Interrupts” on page 89.<br />
83
32117D–AVR-01/12<br />
Figure 8-1. Oscillator connections<br />
UC3C<br />
C i<br />
XOUT<br />
XIN<br />
C L<br />
<strong>AT32UC3C</strong><br />
8.5.2 32KHz Oscillator (OSC32K) Operation<br />
The 32KHz oscillator (OSC32K) operates as described for the Oscillator above. The 32KHz<br />
oscillator is used as source clock for the Asynchronous Timer and the Watchdog Timer. The<br />
32KHz oscillator can be used as source for the generic clocks, as described in ”Generic Clocks”<br />
on page 85.<br />
The oscillator is disabled by default, but can be enabled by writing a one to the OSC32EN bit in<br />
OSCCTRL32. The oscillator is an ultra-low power design and remains enabled in all sleep<br />
modes.<br />
While the 32KHz oscillator is disabled, the XIN32 and XOUT32 pins are available as general<br />
purpose I/Os. When the oscillator is enabled, the XIN32 and XOUT32 pins are controlled directly<br />
by the SCIF. When the oscillator is configured to work with an external clock (MODE field in<br />
OSCCTRL32 register), the external clock must be connected to XIN32 while the XOUT32 pin<br />
can be used as a general purpose I/O.<br />
The startup time of the 32KHz oscillator can be set in the OSCCTRL32, after which OSC32RDY<br />
in PCLKSR is set. An interrupt can be generated on a zero to one transition of OSC32RDY.<br />
As a crystal oscillator usually requires a very long startup time (up to 1 second), the 32 KHz<br />
oscillator will keep running across resets, except Power-On-Reset.<br />
The 32KHz oscillator is not controlled by the sleep controller, and will run in all sleep modes if<br />
enabled.<br />
8.5.3 PLL Operation<br />
The device contains two PLLs, PLL0 and PLL1. These are disabled by default, but can be<br />
enabled to provide high frequency source clocks for synchronous or generic clocks. The PLLs<br />
can take either Oscillator 0, Oscillator 1 or 8MHz RC Oscillator (RC8M) as reference clock. The<br />
PLL output is divided by a multiplication factor, and the PLL compares the resulting clock to the<br />
reference clock. The PLL will adjust its output frequency until the two compared clocks are<br />
equal, thus locking the output frequency to a multiple of the reference clock frequency.<br />
CLEXT<br />
C LEXT<br />
When the PLL is switched on, or when changing the clock source or multiplication factor for the<br />
PLL, the PLL is unlocked and the output frequency is undefined. The PLL clock for the digital<br />
84
32117D–AVR-01/12<br />
Osc0 clock<br />
Osc1 clock<br />
0<br />
1<br />
<strong>AT32UC3C</strong><br />
logic is automatically masked when the PLL is unlocked, to prevent connected digital logic from<br />
receiving a too high frequency and thus becoming unstable.<br />
Figure 8-2. PLL with control logic and filters<br />
PLLOSC<br />
Input<br />
Divider<br />
PLLDIV<br />
fIN<br />
PLLMUL<br />
Output<br />
Divider<br />
8.5.3.1 Enabling the PLL<br />
PLLn is enabled by writing a one to the PLLEN bit in the PLLn register. PLLOSC selects Oscillator<br />
0 or 1 as clock source. The PLLMUL and PLLDIV bit fields must be written with the<br />
multiplication and division factors.<br />
The PLLn.PLLOPT field should be set to proper values according to the PLL operating frequency.<br />
The PLLOPT field can also be set to divide the output frequency of the PLLs by 2.<br />
The lock signal for each PLL is available as a LOCKn flag in POSCSR. An interrupt can be generated<br />
on a 0 to 1 transition of these bits.<br />
8.5.4 Generic Clocks<br />
Timers, communication modules, and other modules connected to external circuitry may require<br />
specific clock frequencies to operate correctly. The SCIF contains an implementation defined<br />
number of generic clocks that can provide a wide range of accurate clock frequencies.<br />
PLL<br />
PLLEN<br />
PLLOPT<br />
Mask<br />
LOCK<br />
PLL clock<br />
Each generic clock module runs from either clock source listed in ”Generic Clock Source” on<br />
page 119. The selected source can optionally be divided by any even integer up to 512. Each<br />
clock can be independently enabled and disabled, and is also automatically disabled along with<br />
peripheral clocks by the Sleep Controller in the Power Manager.<br />
85
32117D–AVR-01/12<br />
Figure 8-3. Generic clock generation<br />
OSCSEL<br />
Divider<br />
DIV<br />
<strong>AT32UC3C</strong><br />
8.5.4.1 Enabling a generic clock<br />
A generic clock is enabled by writing a one to the CEN bit in GCCTRL to one. Each generic clock<br />
can individually select a clock source by setting the OSCSEL bits. The source clock can optionally<br />
be divided by writing a one to DIVEN and the division factor to DIV, resulting in the output<br />
frequency:<br />
f GCLK = f SRC / (2*(DIV+1))<br />
8.5.4.2 Disabling a generic clock<br />
The generic clock can be disabled by writing a zero to CEN or entering a sleep mode that disables<br />
the PB clocks. In either case, the generic clock will be switched off on the first falling edge<br />
after the disabling event, to ensure that no glitches occur. If CEN is written to zero, the bit will still<br />
read as one until the next falling edge occurs, and the clock is actually switched off. When writing<br />
a zero to CEN, the other bits in GCCTRL should not be changed until CEN reads as zero, to<br />
avoid glitches on the generic clock.<br />
When the clock is disabled, both the prescaler and output are reset.<br />
Generic Clock<br />
8.5.4.3 Changing clock frequency<br />
When changing generic clock frequency by writing GCCTRL, the clock should be switched off by<br />
the procedure above, before being re-enabled with the new clock source or division setting. This<br />
prevents glitches during the transition.<br />
8.5.4.4 Generic clock implementation<br />
In <strong>AT32UC3C</strong>, the generic clocks are allocated to different functions as shown in Table 8-2.<br />
Table 8-2. Generic clock allocation<br />
0<br />
1<br />
DIVEN<br />
Sleep Controller<br />
Mask<br />
CEN<br />
Clock number Function Name<br />
0 USB clock (48 MHz) GCLK_USBC<br />
1 CANIF GCLK_CANIF<br />
2 AST GCLK_AST<br />
86
32117D–AVR-01/12<br />
Table 8-2. Generic clock allocation<br />
Clock number Function Name<br />
3 -<br />
4 PWM GCLK_PWM<br />
5 QDEC0 GCLK_QDEC0<br />
6 QDEC1 GCLK_QDEC1<br />
7<br />
8<br />
GCLK event, mapped to event number 16.<br />
See the Module Configuration of PEVC for<br />
more details.<br />
GCLK event, mapped to event number 17.<br />
See the Module Configuration of PEVC for<br />
more details.<br />
9 GCLK[0] output pin<br />
10 GCLK[1] output pin<br />
11 IISC GCLK_IISC<br />
<strong>AT32UC3C</strong><br />
8.5.5 1.8V Brown Out Detection (BOD18)<br />
The 1.8V Brown-Out Detector (BOD18) monitors the VDDCORE supply pin and compares the<br />
supply voltage to the brown-out detection level, as set in BOD.LEVEL. The BOD18 is disabled<br />
by default, but can be enabled either by software or by flash fuses. The 1.8V Brown-Out Detector<br />
can either generate an interrupt or a reset when the supply voltage is below the brown-out<br />
detection level. In any case, the BOD18 output value is given by the PCLKSR.BODDET bit.<br />
Note that any change to the BOD.LEVEL field of the BOD register should be done with the<br />
BOD18 deactivated to avoid spurious reset or interrupt. When turned-on, the BOD18 output will<br />
be masked during one half of a RCSYS clock cycle and two main clocks cycles to avoid false<br />
results.<br />
If the JTAG or the AWIRE is enabled, the BOD18 reset and interrupt will be masked.<br />
See Electrical Characteristics for parametric details.<br />
Although it is not recommended, it is still possible to override the default factory settings by writing<br />
to those registers. To prevent unexpected writes due to software bugs, write access to this<br />
register is protected by a locking mechanism, for details please refer to the UNLOCK register<br />
description.<br />
8.5.6 3.3V Brown Out Detection (BOD33)<br />
The 3.3V Brown-Out Detector (BOD33) monitors the VDDIN_5 supply pin and compares the<br />
supply voltage to the brown-out detection level, as set in BOD33.LEVEL. The BOD33 is disabled<br />
by default, but can be enabled by software or by flash fuses. The 3.3V Brown-Out Detector can<br />
generate an interrupt or a reset when the supply voltage is below the brown-out detection level.<br />
In any case, the BOD33 value is given by the PCLKSR.BOD33DET bit.<br />
Note that any change to the BOD33.LEVEL field of the BOD33 register should be done with the<br />
BOD33 deactivated to avoid spurious interrupt. When turned-on, the BOD33 output will be<br />
masked during one half of a RCSYS clock cycle and two main clocks cycles to avoid false<br />
results.<br />
87
32117D–AVR-01/12<br />
If the JTAG or the AWIRE is enabled, the BOD33 reset and interrupt will be masked.<br />
See Electrical Characteristics for parametric details.<br />
<strong>AT32UC3C</strong><br />
To prevent unexpected writes due to software bugs, write access to this register is protected by<br />
a locking mechanism, for details please refer to the UNLOCK register description.<br />
8.5.7 5V Brown Out Detection (BOD50)<br />
The 5V Brown-Out Detector (BOD50) monitors the VDDIN_5 supply pin and compares the supply<br />
voltage to the brown-out detection level, as set in BOD50.LEVEL. The BOD50 is disabled by<br />
default, but can be enabled by software. The 5V Brown-Out Detector can generate an interrupt<br />
when the supply voltage is below the brown-out detection level. In any case, the BOD50 output<br />
value is given by the PCLKSR.BOD50DET bit.<br />
8.5.8 Bandgap<br />
Note that any change to the BOD50.LEVEL field of the BOD50 register should be done with the<br />
BOD50 deactivated to avoid spurious interrupt. When turned-on, the BOD50 output will be<br />
masked during one half of a RCSYS clock cycle and two main clocks cycles to avoid false<br />
results.<br />
If the JTAG or the AWIRE is enabled, the BOD50 interrupt will be masked.<br />
See Electrical Characteristics for parametric details.<br />
To prevent unexpected writes due to software bugs, write access to this register is protected by<br />
a locking mechanism, for details please refer to the UNLOCK register description.<br />
The Flash memory, the Brown-Out Detectors need a stable voltage reference to operate. This<br />
reference voltage is provided by an internal Bandgap voltage reference. This reference is automatically<br />
turned on at startup and turned off during DEEPSTOP and STATIC sleep modes to<br />
save power.<br />
The Bandgap voltage reference is calibrated through the BGCR.CALIB field. This field is loaded<br />
after a Power On Reset with default values stored in factory-programmed flash fuses.<br />
It is not recommended to override default factory settings as it may prevent correct operation of<br />
the Flash and BODs. To prevent unexpected writes due to software bugs, write access to this<br />
register is protected by a locking mechanism, for details please refer to the UNLOCK register<br />
description.<br />
8.5.9 Voltage Regulators<br />
The embedded 1.8V regulator provides the core supply. The embedded 3.3V voltage regulator<br />
is used to supply the USB pads. Both regulators are turned on at startup.<br />
If the application is supplied with a voltage range around 3.3V or the application does not use<br />
the USB interface, the 3.3V voltage regulator has to be turned off by writing 11 binary to<br />
VREGCTRL.VREG33CTL.<br />
The 1.8V voltage regulator has its own voltage reference that is calibrated through the<br />
VREGCR.CALIB field. This field is loaded after a Power On Reset with default values stored in<br />
factory-programmed flash fuses.<br />
Although it is not recommended, it is still possible to override the default factory settings by writing<br />
to those registers. To prevent unexpected writes due to software bugs, write access to this<br />
register is protected by a locking mechanism, for details please refer to the UNLOCK register<br />
description.<br />
88
32117D–AVR-01/12<br />
<strong>AT32UC3C</strong><br />
8.5.10 System RC Oscillator (RCSYS)<br />
The system RC oscillator (RCSYS) has a 3 cycles startup time, and is always available except in<br />
the STATIC sleep mode. The system RC oscillator operates at a nominal frequency of 115 kHz,<br />
and is calibrated using the RCCR.CALIB Calibration field. After a Power On Reset, the<br />
RCCR.CALIB field is loaded with a factory defined value stored in the Flash fuses.<br />
Although it is not recommended, it is still possible to override the default factory settings by writing<br />
to the RCCR.CALIB field. To prevent unexpected writes due to software bugs, write access<br />
to this register is protected by a locking mechanism, for details please refer to the UNLOCK register<br />
description.<br />
8.5.11 8MHz / 1MHz RC Oscillator (RC8M)<br />
The 8MHz / 1MHz RC oscillator (RC8M) operates at a nominal frequency of 8MHz or 1 MHz<br />
according to RCCR8.FREQMODE bit. It is calibrated using the RCCR8.CALIB Calibration field.<br />
After a Power On Reset, the RCCR8.CALIB field is automatically loaded with the RC8M_CALIB<br />
field of the Oscillator Calibration register, a factory defined value stored in the factory page of the<br />
Flash.<br />
8.5.12 RC120M<br />
If the user wants to run the oscillator at 1MHz or if the device operates at VDDIN_5 within the 5V<br />
range, it has to write the RCCR8.CALIB field with the corresponding field from the Oscillator Calibration<br />
register.<br />
Although it is not recommended, it is still possible to override the default factory settings by writing<br />
to the RCCR8.CALIB field. To prevent unexpected writes due to software bugs, write access<br />
to this register is protected by a locking mechanism, for details please refer to the UNLOCK register<br />
description.<br />
The 120MHz RC Oscillator can be used for the main clock in the device, as described in the<br />
Power Manager chapter. To enable the clock, the user must write a one to the EN bit in the<br />
RC120MCR register, and read back the RC120MCR register until the EN bit reads one. The<br />
clock is disabled by writing a zero to the EN bit.<br />
The oscillator is automatically switched off in certain sleep modes to reduce power consumption,<br />
as described in the Power Manager chapter.<br />
8.5.13 General Purpose Low Power Registers (GPLP)<br />
The GPLP registers are 32-bit registers that are reset only by power-on-reset. User software can<br />
use these registers to save context variables in a very low power mode.<br />
8.5.14 Interrupts<br />
The SCIF has separate interrupt requests:<br />
AE - Access Error:<br />
– Set when a protected SCIF register was accessed without first being correctly<br />
unlocked.<br />
PLL1LOCKLOST - PLL1 lock lost:<br />
– Set when a 0 to 1 transition on the PCLKSR.PLL1LOCKLOST bit is detected.<br />
PLL0LOCKLOST - PLL0 lock lost:<br />
– Set when a 0 to 1 transition on the PCLKSR.PLL0LOCKLOST bit is detected.<br />
89
32117D–AVR-01/12<br />
<strong>AT32UC3C</strong><br />
BOD50DET - 5V Brown out detection:<br />
– Set when a 0 to 1 transition on the PCLKSR.BOD50DET bit is detected.<br />
BOD33DET - 3.3V Brown out detection:<br />
– Set when a 0 to 1 transition on the PCLKSR.BOD33DET bit is detected.<br />
BODDET - 1.8V Brown out detection:<br />
– Set when a 0 to 1 transition on the PCLKSR.BODDET bit is detected.<br />
PLL1LOCK - PLL1 locked:<br />
– Set when a 0 to 1 transition on the PCLKSR.PLL1LOCK bit is detected.<br />
PLL0LOCK - PLL0 locked:<br />
– Set when an 0 to 1 transition on the PCLKSR.PLL0LOCK bit is detected.<br />
RCOSC8MRDY - 8MHz / 1MHz RCOSC Ready:<br />
– Set when a 0 to 1 transition on the PCLKSR.RCOSC8MRDY bit is detected.<br />
OSC32RDY - 32KHz Oscillator Ready:<br />
– Set when a 0 to 1 transition on the PCLKSR.OSC32RDY bit is detected.<br />
OSCR1DY - OSC1 Ready:<br />
– Set when a 0 to 1 transition on the PCLKSR.OSC1RDY bit is detected.<br />
OSCR0DY - OSC0 Ready:<br />
– Set when a 0 to 1 transition on the PCLKSR.OSC0RDY bit is detected.<br />
This allows the user to allocate separate handlers and priorities to the different interrupt types.<br />
The interrupt request will be generated if the corresponding bit in the Interrupt Mask Register<br />
(IMR) is set. Bits in IMR are set by writing a one to the corresponding bit in the Interrupt Enable<br />
Register (IER), and cleared by writing a one to the corresponding bit in the Interrupt Disable<br />
Register (IDR). The interrupt request remains active until the corresponding bit in the Interrupt<br />
Status Register (ISR) is cleared by writing a one to the corresponding bit in the Interrupt Clear<br />
Register (ICR).<br />
90
8.6 User Interface<br />
Table 8-3. SCIF Register Memory Map<br />
32117D–AVR-01/12<br />
<strong>AT32UC3C</strong><br />
Offset Register Register Name Access Reset<br />
0x0000 Interrupt Enable Register IER Write-Only 0x00000000<br />
0x0004 Interrupt Disable Register IDR Write-Only 0x00000000<br />
0x0008 Interrupt Mask Register IMR Read-Only 0x00000000<br />
0x000C Interrupt Status Register ISR Read-Only 0x00000000<br />
0x0010 Interrupt Clear Register ICR Write-Only 0x00000000<br />
0x0014 Power and Clocks Status Register PCLKSR Read-Only 0x00000000<br />
0x0018 Unlock Register UNLOCK Write-Only 0x00000000<br />
0x001C PLL0 Control Register PLL0 Read/Write 0x00000000<br />
0x0020 PLL1 Control Register PLL1 Read/Write 0x00000000<br />
0x0024 Oscillator0 Control Register OSCCTRL0 Read/Write 0x00000000<br />
0x0028 Oscillator1 Control Register OSCCTRL1 Read/Write 0x00000000<br />
0x002C 1.8V BOD Control Register BOD Read/Write 0x00000000<br />
0x0030 Bandgap Calibration Register BGCR Read/Write 0x00000000<br />
0x0034 3.3V BOD Control Register BOD33 Read/Write 0x00000000<br />
0x0038 5V BOD Control Register BOD50 Read/Write 0x00000000<br />
0x003C Voltage Regulator Calibration Register VREGCR Read/Write 0x00000000<br />
0x0040 Voltage Regulator Control Register VREGCTRL Read/Write 0x00000000<br />
0x0044 RCSYS Calibration Register RCCR Read/Write 0x00000000<br />
0x0048 8MHz / 1 MHz RC Oscillator Control Register RCCR8 Read/Write 0x00000000<br />
0x004C Oscillator 32 Control Register OSCCTRL32 Read/Write 0x00000000<br />
0x0058 120MHz RC Oscillator Control Register RC120MCR Read/Write 0x00000000<br />
0x005C General Purpose Low Power Register 0 GPLP0 Read/Write 0x00000000<br />
0x0060 General Purpose Low Power Register 1 GPLP1 Read/Write 0x00000000<br />
0x0064-0x008C Generic Clock Control GCCTRL Read/Write 0x00000000<br />
0x03C8 PLL interface Version Register PLLVERSION Read-Only - (1)<br />
0x03CC Oscillator 0/1 Interface Version Register OSCVERSION Read-Only - (1)<br />
0x03D0 1.8V BOD Interface Version Register BODVERSION Read-Only - (1)<br />
0x03D4 3.3/5.0V BOD Interface Version Register BODBVERSION Read-Only - (1)<br />
0x03D8 Voltage Regulator interface Version Register VREGVERSION Read-Only - (1)<br />
0x03DC RCSYS Interface Version Register RCCRVERSION Read-Only - (1)<br />
0x03E0 8MHz/1MHz RCOSC Interface Version Register RCCR8VERSION Read-Only - (1)<br />
0x03E4 32 KHz Oscillator Interface Version Register OSC32VERSION Read-Only - (1)<br />
0x03F0<br />
120MHz RC Oscillator Interface Version<br />
Register<br />
RC120MVERSION Read-Only - (1)<br />
91
Table 8-3. SCIF Register Memory Map<br />
32117D–AVR-01/12<br />
<strong>AT32UC3C</strong><br />
Offset Register Register Name Access Reset<br />
0x03F4 GPLP Version Register GPLPVERSION Read-Only - (1)<br />
0x03F8 Generic Clock Version Register GCLKVERSION Read-Only - (1)<br />
0x03FC SCIF Version Register VERSION Read-Only - (1)<br />
Note: 1. The reset value is device specific. Please refer to the Module Configuration section at the end<br />
of this chapter.<br />
92
8.6.1 Interrupt Enable Register<br />
Name: IER<br />
Access Type: Write-only<br />
Offset: 0x0000<br />
Reset Value: 0x00000000<br />
32117D–AVR-01/12<br />
<strong>AT32UC3C</strong><br />
31 30 29 28 27 26 25 24<br />
AE - - - - - - -<br />
23 22 21 20 19 18 17 16<br />
- - - - - - - -<br />
15 14 13 12 11 10 9 8<br />
- - - - -<br />
Writing a zero to a bit in this register has no effect.<br />
Writing a one to a bit in this register will set the corresponding bit in IMR.<br />
PLL1_LOCK<br />
LOST<br />
PLL0_LOCK<br />
LOST<br />
BOD50DET<br />
7 6 5 4 3 2 1 0<br />
BOD33DET BODDET PLL1_LOCK PLL0_LOCK RCOSC8MRDY OSC32RDY OSC1RDY OSC0RDY<br />
93
8.6.2 Interrupt Disable Register<br />
Name: IDR<br />
Access Type: Write-only<br />
Offset: 0x0004<br />
Reset Value: 0x00000000<br />
32117D–AVR-01/12<br />
<strong>AT32UC3C</strong><br />
31 30 29 28 27 26 25 24<br />
AE - - - - - - -<br />
23 22 21 20 19 18 17 16<br />
- - - - - - - -<br />
15 14 13 12 11 10 9 8<br />
- - - - -<br />
Writing a zero to a bit in this register has no effect.<br />
Writing a one to a bit in this register will clear the corresponding bit in IMR.<br />
PLL1_LOCK<br />
LOST<br />
PLL0_LOCK<br />
LOST<br />
BOD50DET<br />
7 6 5 4 3 2 1 0<br />
BOD33DET BODDET PLL1_LOCK PLL0_LOCK<br />
RCOSC8MR<br />
DY<br />
OSC32RDY OSC1RDY OSC0RDY<br />
94
8.6.3 Interrupt Mask Register<br />
Name: IMR<br />
Access Type: Read-only<br />
Offset: 0x0008<br />
Reset Value: 0x00000000<br />
32117D–AVR-01/12<br />
<strong>AT32UC3C</strong><br />
31 30 29 28 27 26 25 24<br />
AE - - - - - - -<br />
23 22 21 20 19 18 17 16<br />
- - - - - - - -<br />
15 14 13 12 11 10 9 8<br />
- - - - -<br />
0: The corresponding interrupt is disabled.<br />
1: The corresponding interrupt is enabled.<br />
This bit is cleared when the corresponding bit in IDR is written to one.<br />
This bit is set when the corresponding bit in IER is written to one.<br />
PLL1_LOCK<br />
LOST<br />
PLL0_LOCK<br />
LOST<br />
BOD50DET<br />
7 6 5 4 3 2 1 0<br />
BOD33DET BODDET PLL1_LOCK PLL0_LOCK<br />
RCOSC8MR<br />
DY<br />
OSC32RDY OSC1RDY OSC0RDY<br />
95
8.6.4 Interrupt Status Register<br />
Name: ISR<br />
Access Type: Read-only<br />
Offset: 0x000C<br />
Reset Value: 0x00000000<br />
32117D–AVR-01/12<br />
<strong>AT32UC3C</strong><br />
31 30 29 28 27 26 25 24<br />
AE - - - - - - -<br />
23 22 21 20 19 18 17 16<br />
- - - - - - - -<br />
15 14 13 12 11 10 9 8<br />
- - - - -<br />
0: The corresponding interrupt is cleared.<br />
1: The corresponding interrupt is pending.<br />
This bit is cleared when the corresponding bit in ICR is written to one.<br />
This bit is set when the corresponding interrupt occurs.<br />
PLL1_LOCK<br />
LOST<br />
PLL0_LOCK<br />
LOST<br />
BOD50DET<br />
7 6 5 4 3 2 1 0<br />
BOD33DET BODDET PLL1_LOCK PLL0_LOCK<br />
RCOSC8MR<br />
DY<br />
OSC32RDY OSC1RDY OSC0RDY<br />
96
8.6.5 Interrupt Clear Register<br />
Name: ICR<br />
Access Type: Write-only<br />
Offset: 0x0010<br />
Reset Value: 0x00000000<br />
32117D–AVR-01/12<br />
<strong>AT32UC3C</strong><br />
31 30 29 28 27 26 25 24<br />
AE - - - - - - -<br />
23 22 21 20 19 18 17 16<br />
- - - - - - - -<br />
15 14 13 12 11 10 9 8<br />
- - - - -<br />
Writing a zero to a bit in this register has no effect.<br />
Writing a one to a bit in this register will clear the corresponding bit in ISR.<br />
PLL1_LOCK<br />
LOST<br />
PLL0_LOCK<br />
LOST<br />
BOD50DET<br />
7 6 5 4 3 2 1 0<br />
BOD33DET BODDET PLL1_LOCK PLL0_LOCK<br />
RCOSC8MR<br />
DY<br />
OSC32RDY OSC1RDY OSC0RDY<br />
97
8.6.6 Power and Clocks Status Register<br />
Name: PCLKSR<br />
Access Type: Read-Only<br />
Offset: 0x0014<br />
Reset Value: 0x00000000<br />
32117D–AVR-01/12<br />
<strong>AT32UC3C</strong><br />
31 30 29 28 27 26 25 24<br />
AE - - - - - - -<br />
23 22 21 20 19 18 17 16<br />
- - - - - - - -<br />
15 14 13 12 11 10 9 8<br />
- - - - -<br />
PLL1_LOCK<br />
LOST<br />
PLL0_LOCK<br />
LOST<br />
AE: SCIF Access Error<br />
0: No access error has occurred on the SCIF.<br />
1: An access error has occurred on the SCIF.<br />
PLLL1_LOCKLOST: PLL1 lock lost value<br />
0: PLL1 has not lost its lock or has never been enabled.<br />
1: PLL1 has lost its lock, either by disabling the PLL1 or due to faulty operation.<br />
PLLL0_LOCKLOST: PLL0 lock lost value<br />
0: PLL0 has not lost its lock or has never been enabled.<br />
1: PLL0 has lost its lock, either by disabling the PLL0 or due to faulty operation.<br />
BOD50DET: 5.0V Brown out detection<br />
0: BOD50 not enabled or the 5.0V power supply is above the BOD50 threshold.<br />
1: BOD50 enabled and the 5.0V power supply is going below BOD50 threshold.<br />
BOD33DET: 3.3V Brown out detection<br />
0: BOD33 not enabled or the 3.3V power supply is above the BOD33 threshold.<br />
1: BOD33 enabled and the 3.3V power supply is going below BOD33 threshold.<br />
BODDET: 1.8V Brown out detection<br />
0: BOD18 not enabled or the 1.8V power supply is above the BOD18 threshold.<br />
1: BOD18 enabled and the 1.8V power supply is going below BOD18 threshold.<br />
PLL1_LOCK: PLL1 Locked on Accurate value<br />
0: PLL1 is unlocked on accurate value.<br />
1: PLL1 is locked on accurate value, and is ready to be selected as clock source with an accurate output clock.<br />
PLL0_LOCK: PLL0 Locked on Accurate value<br />
0: PLL0 is unlocked on accurate value.<br />
1: PLL0 is locked on accurate value, and is ready to be selected as clock source with an accurate output clock.<br />
BOD50DET<br />
7 6 5 4 3 2 1 0<br />
BOD33DET BODDET PLL1_LOCK PLL0_LOCK<br />
RCOSC8MR<br />
DY<br />
OSC32RDY OSC1RDY OSC0RDY<br />
98
RCOSC8MRDY: 8MHz / 1MHz RCOSC Ready<br />
0: 8MHz / 1MHz RC Oscillator not enabled or not ready.<br />
1: 8MHz / 1MHz RC Oscillator is stable and ready to be used as clock source.<br />
OSC32RDY: 32 KHz oscillator Ready<br />
0: Oscillator 32 not enabled or not ready.<br />
1: Oscillator 32 is stable and ready to be used as clock source.<br />
OSC1RDY: OSC1Ready<br />
0: Oscillator not enabled or not ready.<br />
1: Oscillator is stable and ready to be used as clock source.<br />
OSC0RDY: OSC0Ready<br />
0: Oscillator not enabled or not ready.<br />
1: Oscillator is stable and ready to be used as clock source.<br />
32117D–AVR-01/12<br />
<strong>AT32UC3C</strong><br />
99
8.6.7 Unlock Register<br />
Name: UNLOCK<br />
Access Type: Write-Only<br />
Offset: 0x0018<br />
Reset Value: 0x00000000<br />
32117D–AVR-01/12<br />
<strong>AT32UC3C</strong><br />
31 30 29 28 27 26 25 24<br />
KEY<br />
23 22 21 20 19 18 17 16<br />
- - - - - - - -<br />
15 14 13 12 11 10 9 8<br />
- - - - - - ADDR[9:8]<br />
7 6 5 4 3 2 1 0<br />
ADDR[7:0]<br />
To unlock a write protected register, first write to the UNLOCK register with the address of the register to unlock in the ADDR<br />
field and 0xAA in the KEY field. Then, in the next PB access write to the register specified in the ADDR field.<br />
KEY: Unlock Key<br />
Write this bit field to 0xAA to enable unlock.<br />
ADDR: Unlock Address<br />
Write the address of the register to unlock to this field.<br />
100
8.6.8 PLL Control Register<br />
Name: PLL0,1<br />
Access Type: Read/Write<br />
Offset: 0x001C,0x0020<br />
Reset Value: 0x00000000<br />
32117D–AVR-01/12<br />
<strong>AT32UC3C</strong><br />
31 30 29 28 27 26 25 24<br />
- - PLLCOUNT<br />
23 22 21 20 19 18 17 16<br />
- - - - PLLMUL<br />
15 14 13 12 11 10 9 8<br />
- - - - PLLDIV<br />
7 6 5 4 3 2 1 0<br />
- - PLLOPT PLLOSC PLLEN<br />
PLLCOUNT: PLL Count<br />
Specifies the number of slow clock cycles before ISR.LOCKn is set after PLLn has been written, or after PLLn has been<br />
automatically re-enabled after exiting a sleep mode.<br />
PLLMUL: PLL Multiply Factor<br />
PLLDIV: PLL Division Factor<br />
These fields determine the ratio of the output frequency of the internal VCO of the PLL (f vco) to the source oscillator frequency:<br />
f vco = (PLLMUL+1) / (PLLDIV) * f osc if PLLDIV > 0<br />
f vco = 2 * (PLLMUL+1) * f osc if PLLDIV = 0<br />
According to PLLOPT[1] bit, it gives the following PLL frequency value f PLL:<br />
if the PLLOPT[1] bit is set to 0: f PLL = f VCO<br />
if the PLLOPT[1] bit is set to 1: f PLL = f VCO / 2<br />
Note that the PLLMUL field cannot be equal to 0 or 1, or the behavior of the PLL will be undefined.<br />
PLLDIV gives also the input frequency of the PLL (f IN ):<br />
if the PLLDIV field is set to 0: f IN= f OSC<br />
if the PLLDIV field is greater than 0: f IN = f OSC / (2 * PLLDIV)<br />
PLLOPT: PLL Option<br />
Select the operating range for the PLL.<br />
PLLOPT[0]: Select the VCO frequency range.<br />
PLLOPT[1]: Enable the extra output divider.<br />
PLLOPT[2]: Disable the Wide-Bandwidth mode (Wide-Bandwidth mode allows a faster startup time and out-of-lock time).<br />
101
32117D–AVR-01/12<br />
Table 8-4. PLLOPT Fields Description<br />
PLLOPT[0]: VCO frequency<br />
PLLOPT[1]: Output divider<br />
PLLOPT[2]<br />
Description<br />
0 80MHz
8.6.9 Oscillator Control Register<br />
Name: OSCCTRL0,1<br />
Access Type: Read/Write<br />
Offset: 0x0024,0x0028<br />
Reset Value: 0x00000000<br />
32117D–AVR-01/12<br />
<strong>AT32UC3C</strong><br />
31 30 29 28 27 26 25 24<br />
- - - - - - - -<br />
23 22 21 20 19 18 17 16<br />
- - - - - - - OSCEN<br />
15 14 13 12 11 10 9 8<br />
- - - - STARTUP<br />
7 6 5 4 3 2 1 0<br />
- - - - AGC GAIN MODE<br />
OSCEN<br />
0: Disable the Oscillator.<br />
1: Enable the Oscillator.<br />
STARTUP: Oscillator Startup Time<br />
Select startup time for the oscillator.<br />
Table 8-5. Startup time for oscillators 0 and 1<br />
STARTUP<br />
Number of RC oscillator clock<br />
cycle<br />
0 0 0<br />
1 64 560 us<br />
2 128 1.1 ms<br />
3 2048 18 ms<br />
4 4096 36 ms<br />
5 8192 71 ms<br />
6 16384 142 ms<br />
7 32768 285 ms<br />
8 4 35 us<br />
9 8 70 us<br />
10 16 140 us<br />
11 32 280 us<br />
12 256 2.2 ms<br />
Approximative Equivalent time<br />
(RCSYS = 115 kHz)<br />
103
Table 8-5. Startup time for oscillators 0 and 1<br />
STARTUP<br />
13 512 4.5 ms<br />
14 1024 9 ms<br />
15 Reserved Reserved<br />
AGC: Automatic Gain Control<br />
0: Disable the automatic gain control of the Oscillator.<br />
1: Enable the automatic gain control of the Oscillator.<br />
GAIN: Oscillator Gain<br />
Set the gain of the Oscillator.<br />
Table 8-6. Gain value for oscillators 0 and 1<br />
GAIN crystal frequency<br />
0 < 2 MHz<br />
1 between 2 and 10 MHz<br />
2 between 10 and 16 MHz<br />
3 > 16 MHz<br />
32117D–AVR-01/12<br />
Number of RC oscillator clock<br />
cycle<br />
Approximative Equivalent time<br />
(RCSYS = 115 kHz)<br />
<strong>AT32UC3C</strong><br />
MODE: Oscillator Mode<br />
0: External clock connected on XIN, XOUT can be used as an I/O (no crystal), Disable the Oscillator.<br />
1: Enable the Oscillator.<br />
Note that this register is protected by a lock. To write to this register the UNLOCK register has to be written first. Please<br />
refer to the UNLOCK register description for details.<br />
104
8.6.10 1.8V BOD Control Register<br />
Name: BOD<br />
Access Type: Read/Write<br />
Offset: 0x002C<br />
Reset Value: 0x00000000<br />
32117D–AVR-01/12<br />
<strong>AT32UC3C</strong><br />
31 30 29 28 27 26 25 24<br />
SFV - - - - - - -<br />
23 22 21 20 19 18 17 16<br />
- - - - - - - FCD<br />
15 14 13 12 11 10 9 8<br />
- - - - - - CTRL<br />
7 6 5 4 3 2 1 0<br />
- HYST LEVEL<br />
SFV: Store Final Value<br />
0: The register is read/write.<br />
1: The register is read-only, to protect against further accidental writes.<br />
FCD: BOD18 Fuse Calibration Done<br />
Set to 1 when the CTRL, HYST and LEVEL fields have been updated by the Flash fuses after a reset.<br />
0: The flash calibration will be redone after any reset.<br />
1: The flash calibration will not be redone after a BOD18 reset.<br />
CTRL: BOD18 Control<br />
Table 8-7. Operation mode for BOD18<br />
CTRL Description<br />
0x0 BOD18 is off<br />
0x1 BOD18 is enabled and can reset the chip<br />
0x2<br />
0x3 Reserved<br />
HYST: BOD18 Hysteresis<br />
0: No hysteresis.<br />
1: Hysteresis on.<br />
BOD18 is enabled, but cannot reset the chip. Only interrupt will be sent to interrupt controller, if enabled in<br />
the IMR register.<br />
105
32117D–AVR-01/12<br />
<strong>AT32UC3C</strong><br />
LEVEL: BOD18 Level<br />
This field sets the triggering threshold of the BOD18. See Electrical Characteristics for actual voltage levels.<br />
Note that any change to the LEVEL field of the BOD register should be done with the BOD18 deactivated to avoid spurious reset<br />
or interrupt.<br />
Note that this register is protected by a lock. To write to this register the UNLOCK register has to be written first. Please<br />
refer to the UNLOCK register description for details.<br />
106
8.6.11 Bandgap Calibration Register<br />
Name: BGCR<br />
Access Type: Read/Write<br />
Offset: 0x0030<br />
Reset Value: 0x00000000<br />
SFV: Store Final Value<br />
0: The register is read/write.<br />
1: The register is read-only, to protect against further accidental writes.<br />
FCD: Flash Calibration Done<br />
Set to 1 when the CALIB field has been updated by the Flash fuses after a reset.<br />
0: The flash calibration will be redone after any reset.<br />
1: The flash calibration will not be redone after a BOD18 reset.<br />
CALIB: Calibration value<br />
Calibration value for Bandgap. See Electrical Characteristics for voltage values.<br />
32117D–AVR-01/12<br />
<strong>AT32UC3C</strong><br />
31 30 29 28 27 26 25 24<br />
SFV - - - - - - -<br />
23 22 21 20 19 18 17 16<br />
- - - - - - - FCD<br />
15 14 13 12 11 10 9 8<br />
- - - - - - - -<br />
7 6 5 4 3 2 1<br />
- - - - - CALIB<br />
Note that this register is protected by a lock. To write to this register the UNLOCK register has to be written first. Please<br />
refer to the UNLOCK register description for details.<br />
0<br />
107
8.6.12 3.3V BOD Control Register<br />
Name: BOD33<br />
Access Type: Read/Write<br />
Offset: 0x0034<br />
Reset Value: 0x00000000<br />
32117D–AVR-01/12<br />
<strong>AT32UC3C</strong><br />
31 30 29 28 27 26 25 24<br />
SFV - - - - - - -<br />
23 22 21 20 19 18 17 16<br />
- - - - - - - FCD<br />
15 14 13 12 11 10 9 8<br />
- - - - - - CTRL<br />
7 6 5 4 3 2 1 0<br />
- HYST LEVEL<br />
SFV: Store Final Value<br />
0: The register is read/write.<br />
1: The register is read-only, to protect against further accidental writes.<br />
FCD: Flash Calibration Done<br />
Set to 1 when the CTRL field has been updated by the Flash fuses after a reset.<br />
0: The flash calibration will be redone after any reset.<br />
1: The flash calibration will not be redone after a BOD33 reset.<br />
CTRL: BOD33 Control<br />
Table 8-8. Operation mode for BOD33<br />
CTRL Description<br />
0x0 BOD33 is off<br />
0x1 BOD33 is enabled and can reset the chip<br />
0x2<br />
0x3 Reserved<br />
HYST: BOD33 Hysteresis<br />
0: No hysteresis.<br />
1: Hysteresis on.<br />
BOD33 is enabled, but cannot reset the chip. Only interrupt will be sent to interrupt controller, if enabled in<br />
the IMR register.<br />
108
32117D–AVR-01/12<br />
<strong>AT32UC3C</strong><br />
LEVEL: BOD33 Level<br />
This field sets the triggering threshold of the BOD33. See Electrical Characteristics for actual voltage levels.<br />
Note that any change to the LEVEL field of the BOD33 register should be done with the BOD33 deactivated to avoid spurious<br />
reset or interrupt.<br />
Note that this register is protected by a lock. To write to this register the UNLOCK register has to be written first. Please<br />
refer to the UNLOCK register description for details.<br />
109
8.6.13 5V BOD Control Register<br />
Name: BOD50<br />
Access Type: Read/Write<br />
Offset: 0x0038<br />
Reset Value: 0x00000000<br />
32117D–AVR-01/12<br />
<strong>AT32UC3C</strong><br />
31 30 29 28 27 26 25 24<br />
SFV - - - - - - -<br />
23 22 21 20 19 18 17 16<br />
- - - - - - - -<br />
15 14 13 12 11 10 9 8<br />
- - - - - - - CTRL<br />
7 6 5 4 3 2 1 0<br />
- HYST LEVEL<br />
SFV: Store Final Value<br />
0: The register is read/write.<br />
1: The register is read-only, to protect against further accidental writes.<br />
CTRL: BOD50 Control<br />
0: BOD50 is off.<br />
1: BOD50 is enabled.<br />
HYST: BOD50 Hysteresis<br />
0: No hysteresis.<br />
1: Hysteresis on.<br />
LEVEL: BOD50 Level<br />
This field sets the triggering threshold of the BOD50. See Electrical Characteristics for actual voltage levels.<br />
Note that any change to the LEVEL field of the BOD50 register should be done with the BOD50 deactivated to avoid spurious<br />
reset or interrupt.<br />
Note that this register is protected by a lock. To write to this register the UNLOCK register has to be written first. Please<br />
refer to the UNLOCK register description for details.<br />
110
8.6.14 Voltage Regulator Calibration Register<br />
Name: VREGCR<br />
Access Type: Read/Write<br />
Offset: 0x003C<br />
Reset Value: 0x00000000<br />
32117D–AVR-01/12<br />
<strong>AT32UC3C</strong><br />
31 30 29 28 27 26 25 24<br />
SFV - - - - - - -<br />
23 22 21 20 19 18 17 16<br />
- - - - - - - FCD<br />
15 14 13 12 11 10 9 8<br />
- - - - - - - -<br />
7 6 5 4 3 2 1 0<br />
- - - - - CALIB<br />
SFV: Store Final Value<br />
0: The register is read/write.<br />
1: The register is read-only, to protect against further accidental writes.<br />
FCD: Flash Calibration Done<br />
Set to 1 when the CALIB field has been updated by the Flash fuses after a reset.<br />
0: The flash calibration will be redone after any reset.<br />
1: The flash calibration will only be redone after a power-on reset.<br />
CALIB: Calibration value<br />
Calibration value for voltage reference of the 1.8V voltage regulator.<br />
Note that this register is protected by a lock. To write to this register the UNLOCK register has to be written first. Please<br />
refer to the UNLOCK register description for details.<br />
111
8.6.15 Voltage Regulator Control Register<br />
Name: VREGCTRL<br />
Access Type: Read/Write<br />
Offset: 0x0040<br />
Reset Value: 0x00000000<br />
32117D–AVR-01/12<br />
<strong>AT32UC3C</strong><br />
31 30 29 28 27 26 25 24<br />
SFV - - - - - - -<br />
23 22 21 20 19 18 17 16<br />
- - - - - - - -<br />
15 14 13 12 11 10 9 8<br />
- - - - - - - -<br />
7 6 5 4 3 2 1 0<br />
- - - - VREG33CTL -<br />
SFV: Store Final Value<br />
0: The register is read/write.<br />
1: The register is read-only, to protect against further accidental writes.<br />
VREG33CTL: 3.3 Voltage Regulator Control<br />
Table 8-9. Operation mode of 3.3V Voltage Regulator<br />
VREG33CTL Description<br />
0x0 3.3V Regulator is ON<br />
0x1 Reserved<br />
0x2 Reserved<br />
0x3 3.3V Regulator is OFF<br />
Note that this register is protected by a lock. To write to this register the UNLOCK register has to be written first. Please<br />
refer to the UNLOCK register description for details.<br />
112
8.6.16 RCSYS Calibration Register<br />
Name: RCCR<br />
Access Type: Read/Write<br />
Offset: 0x0044<br />
Reset Value: 0x00000000<br />
32117D–AVR-01/12<br />
<strong>AT32UC3C</strong><br />
31 30 29 28 27 26 25 24<br />
- - - - - - - -<br />
23 22 21 20 19 18 17 16<br />
- - - - - - - FCD<br />
15 14 13 12 11 10 9 8<br />
- - - - - - CALIB[9:8]<br />
7 6 5 4 3 2 1 0<br />
CALIB[7:0]<br />
FCD: Flash Calibration Done<br />
Set to 1 when CALIB field has been updated by the Flash fuses after a reset.<br />
0: The flash calibration will be redone after any reset.<br />
1: The flash calibration will only be redone after a power-on reset.<br />
CALIB: Calibration Value<br />
Calibration Value for the RC oscillator.<br />
Note that this register is protected by a lock. To write to this register the UNLOCK register has to be written first. Please<br />
refer to the UNLOCK register description for details.<br />
113
8.6.17 8MHz / 1MHz RC Oscillator Control Register<br />
Name: RCCR8<br />
Access Type: Read/Write<br />
Offset: 0x0048<br />
Reset Value: 0x00000000<br />
32117D–AVR-01/12<br />
<strong>AT32UC3C</strong><br />
31 30 29 28 27 26 25 24<br />
- - - - - - FREQMODE RCOSC8_EN<br />
23 22 21 20 19 18 17 16<br />
- - - - - - - FCD<br />
15 14 13 12 11 10 9 8<br />
- - - - - - - -<br />
7 6 5 4 3 2 1 0<br />
CALIB[7:0]<br />
FREQMODE: Frequency Mode<br />
0: the RC8M RC oscillator will run at 8 MHz.<br />
1: the RC8M RC oscillator will run at 1 MHz.<br />
RCOSC8_EN: RCOSC Enable<br />
0: the RC8M RC oscillator is disabled.<br />
1: the RC8M RC oscillator is enabled.<br />
FCD: Flash Calibration Done<br />
Set to 1 when CALIB field has been updated by the Flash fuses after a reset.<br />
0: The flash calibration will be redone after any reset.<br />
1: The flash calibration will only be redone after a power-on reset.<br />
CALIB: Calibration Value<br />
Calibration Value for the RC8M RC oscillator.<br />
Note that this register is protected by a lock. To write to this register the UNLOCK register has to be written first. Please<br />
refer to the UNLOCK register description for details.<br />
114
8.6.18 32KHz Oscillator Control Register<br />
Name: OSCCTRL32<br />
Access Type: Read/Write<br />
Offset: 0x004C<br />
Reset Value: 0x00000000<br />
32117D–AVR-01/12<br />
<strong>AT32UC3C</strong><br />
31 30 29 28 27 26 25 24<br />
- - - - - - - -<br />
23 22 21 20 19 18 17 16<br />
- - - - - STARTUP<br />
15 14 13 12 11 10 9 8<br />
- - - - - - MODE<br />
7 6 5 4 3 2 1 0<br />
- - - - - - - OSC32EN<br />
Note: This register is only reset by Power-On Reset.<br />
STARTUP: Oscillator Startup Time<br />
Select startup time for 32 KHz oscillator.<br />
Table 8-10. Startup time for 32 KHz oscillator<br />
STARTUP<br />
Number of RC oscillator<br />
clock cycle<br />
0 0 0<br />
1 128 1.1 ms<br />
2 8192 72.3 ms<br />
3 16384 143 ms<br />
4 65536 570 ms<br />
5 131072 1.1 s<br />
6 262144 2.3 s<br />
7 524288 4.6 s<br />
Approximative Equivalent time<br />
(RCSYS = 115 kHz)<br />
115
MODE: Oscillator Mode<br />
Table 8-11. Operation mode for 32 KHz oscillator<br />
MODE Description<br />
0 External clock connected to XIN32, XOUT32 can be used as I/O (no crystal)<br />
1 2-pin crystal mode. Crystal is connected to XIN32/XOUT32<br />
2 2-pin crystal and I-Current mode. Crystal is connected to XIN32/XOUT32<br />
3 Reserved<br />
32117D–AVR-01/12<br />
<strong>AT32UC3C</strong><br />
OSC32EN: Enable the 32 KHz oscillator<br />
0: 32 KHz Oscillator is disabled.<br />
1: 32 KHz Oscillator is enabled.<br />
Note that this register is protected by a lock. To write to this register the UNLOCK register has to be written first. Please<br />
refer to the UNLOCK register description for details.<br />
116
8.6.19 120MHz RC Oscillator Control Register<br />
Name: RC120MCR<br />
Access Type: Read/Write<br />
Offset: 0x0058<br />
Reset Value: 0x00000000<br />
32117D–AVR-01/12<br />
<strong>AT32UC3C</strong><br />
31 30 29 28 27 26 25 24<br />
- - - - - - - -<br />
23 22 21 20 19 18 17 16<br />
- - - - - - - -<br />
15 14 13 12 11 10 9 8<br />
- - - - - - - -<br />
7 6 5 4 3 2 1 0<br />
- - - - - - - EN<br />
EN: RC120M Enable<br />
0: Clock is stopped.<br />
1: Clock is running.<br />
Note that this register is protected by a lock. To write to this register the UNLOCK register has to be written first. Please<br />
refer to the UNLOCK register description for details.<br />
117
8.6.20 General Purpose Low-power Register 0/1<br />
Name: GPLP0,1<br />
Access Type: Read/Write<br />
Offset: 0x005C,0x0060<br />
Reset Value: 0x00000000<br />
32117D–AVR-01/12<br />
<strong>AT32UC3C</strong><br />
31 30 29 28 27 26 25 24<br />
DATA[31:24]<br />
23 22 21 20 19 18 17 16<br />
DATA[23:16]<br />
15 14 13 12 11 10 9 8<br />
DATA[15:8]<br />
7 6 5 4 3 2 1 0<br />
DATA[7:0]<br />
These registers are general purpose 32-bit registers that are reset only by power-on-reset. Any other reset will keep the<br />
bits of these registers untouched.<br />
Note that this registers are protected by a lock. To write to these registers the UNLOCK register has to be written first.<br />
Please refer to the UNLOCK register description for details.<br />
118
8.6.21 Generic Clock Control<br />
Name: GCCTRL<br />
Access Type: Read/Write<br />
Offset: 0x0064-0x008C<br />
Reset Value: 0x00000000<br />
32117D–AVR-01/12<br />
<strong>AT32UC3C</strong><br />
31 30 29 28 27 26 25 24<br />
- - - - - - - -<br />
23 22 21 20 19 18 17 16<br />
There is one GCCTRL register per generic clock in the device.<br />
DIV: Division Factor<br />
OSCSEL: Oscillator Select<br />
DIV<br />
15 14 13 12 11 10 9 8<br />
OSCSEL<br />
7 6 5 4 3 2 1 0<br />
- - - - - - DIVEN CEN<br />
Table 8-12. Generic Clock Source<br />
OSCSEL Clock Description<br />
0 RCSYS System RC oscillator clock<br />
1 OSC32K Output clock from OSC32K<br />
2 8MHz / 1MHz RCOSC Output clock from RC8M<br />
3 OSC0 out Output clock from Oscillator 0<br />
4 OSC1 out Output clock from Oscillator 1<br />
5 PLL0 out Output from PLL 0<br />
6 PLL1 out Output from PLL 1<br />
7 CPU clock The clock the CPU runs on<br />
8 HSB clock High Speed Bus clock<br />
9 PBA clock Peripheral Bus A clock<br />
10 PBB clock Peripheral Bus B clock<br />
11 PBC clock Peripheral Bus C clock<br />
12-15 Reserved<br />
119
DIVEN: Divide Enable<br />
0: The generic clock equals the undivided source clock.<br />
1: The generic clock equals the source clock divided by 2*(DIV+1).<br />
CEN: Clock Enable<br />
0: Clock is stopped.<br />
1: Clock is running.<br />
32117D–AVR-01/12<br />
<strong>AT32UC3C</strong><br />
120
8.6.22 PLL Interface Version Register<br />
Name: PLLVERSION<br />
Access Type: Read-Only<br />
Offset: 0x03C8<br />
Reset Value: -<br />
32117D–AVR-01/12<br />
<strong>AT32UC3C</strong><br />
31 30 29 28 27 26 25 24<br />
- - - - - - - -<br />
23 22 21 20 19 18 17 16<br />
- - - - VARIANT<br />
15 14 13 12 11 10 9 8<br />
- - - - VERSION[11:8]<br />
7 6 5 4 3 2 1 0<br />
VERSION[7:0]<br />
VARIANT: Variant number<br />
Reserved. No functionality associated.<br />
VERSION: Version number<br />
Version number of the module. No functionality associated.<br />
121
8.6.23 Oscillator Interface Version Register<br />
Name: OSCVERSION<br />
Access Type: Read-Only<br />
Offset: 0x03CC<br />
Reset Value: -<br />
32117D–AVR-01/12<br />
<strong>AT32UC3C</strong><br />
31 30 29 28 27 26 25 24<br />
- - - - - - - -<br />
23 22 21 20 19 18 17 16<br />
- - - - VARIANT<br />
15 14 13 12 11 10 9 8<br />
- - - - VERSION[11:8]<br />
7 6 5 4 3 2 1 0<br />
VERSION[7:0]<br />
VARIANT: Variant number<br />
Reserved. No functionality associated.<br />
VERSION: Version number<br />
Version number of the module. No functionality associated.<br />
122
8.6.24 1.8V BOD Interface Version Register<br />
Name: BODVERSION<br />
Access Type: Read-Only<br />
Offset: 0x03D0<br />
Reset Value: -<br />
32117D–AVR-01/12<br />
<strong>AT32UC3C</strong><br />
31 30 29 28 27 26 25 24<br />
- - - - - - - -<br />
23 22 21 20 19 18 17 16<br />
- - - - VARIANT<br />
15 14 13 12 11 10 9 8<br />
- - - - VERSION[11:8]<br />
7 6 5 4 3 2 1 0<br />
VERSION[7:0]<br />
VARIANT: Variant number<br />
Reserved. No functionality associated.<br />
VERSION: Version number<br />
Version number of the module. No functionality associated.<br />
123
8.6.25 3.3V / 5V BOD Interface Version Register<br />
Name: BODBVERSION<br />
Access Type: Read-Only<br />
Offset: 0x03D4<br />
Reset Value: -<br />
32117D–AVR-01/12<br />
<strong>AT32UC3C</strong><br />
31 30 29 28 27 26 25 24<br />
- - - - - - - -<br />
23 22 21 20 19 18 17 16<br />
- - - - VARIANT<br />
15 14 13 12 11 10 9 8<br />
- - - - VERSION[11:8]<br />
7 6 5 4 3 2 1 0<br />
VERSION[7:0]<br />
VARIANT: Variant number<br />
Reserved. No functionality associated.<br />
VERSION: Version number<br />
Version number of the module. No functionality associated.<br />
124
8.6.26 Voltage Regulator Interface Version Register<br />
Name: VREGVERSION<br />
Access Type: Read-Only<br />
Offset: 0x03D8<br />
Reset Value: -<br />
32117D–AVR-01/12<br />
<strong>AT32UC3C</strong><br />
31 30 29 28 27 26 25 24<br />
- - - - - - - -<br />
23 22 21 20 19 18 17 16<br />
- - - - VARIANT<br />
15 14 13 12 11 10 9 8<br />
- - - - VERSION[11:8]<br />
7 6 5 4 3 2 1 0<br />
VERSION[7:0]<br />
VARIANT: Variant number<br />
Reserved. No functionality associated.<br />
VERSION: Version number<br />
Version number of the module. No functionality associated.<br />
125
8.6.27 RCSYS Interface Version Register<br />
Name: RCCRVERSION<br />
Access Type: Read-Only<br />
Offset: 0x03DC<br />
Reset Value: -<br />
32117D–AVR-01/12<br />
<strong>AT32UC3C</strong><br />
31 30 29 28 27 26 25 24<br />
- - - - - - - -<br />
23 22 21 20 19 18 17 16<br />
- - - - VARIANT<br />
15 14 13 12 11 10 9 8<br />
- - - - VERSION[11:8]<br />
7 6 5 4 3 2 1 0<br />
VERSION[7:0]<br />
VARIANT: Variant number<br />
Reserved. No functionality associated.<br />
VERSION: Version number<br />
Version number of the module. No functionality associated.<br />
126
8.6.28 8MHz / 1MHz RCOSC Interface Version Register<br />
Name: RCCR8VERSION<br />
Access Type: Read-Only<br />
Offset: 0x03E0<br />
Reset Value: -<br />
32117D–AVR-01/12<br />
<strong>AT32UC3C</strong><br />
31 30 29 28 27 26 25 24<br />
- - - - - - - -<br />
23 22 21 20 19 18 17 16<br />
- - - - VARIANT<br />
15 14 13 12 11 10 9 8<br />
- - - - VERSION[11:8]<br />
7 6 5 4 3 2 1 0<br />
VERSION[7:0]<br />
VARIANT: Variant number<br />
Reserved. No functionality associated.<br />
VERSION: Version number<br />
Version number of the module. No functionality associated.<br />
127
8.6.29 32KHz Oscillator Interface Version Register<br />
Name: OSC32VERSION<br />
Access Type: Read-Only<br />
Offset: 0x03E4<br />
Reset Value: -<br />
32117D–AVR-01/12<br />
<strong>AT32UC3C</strong><br />
31 30 29 28 27 26 25 24<br />
- - - - - - - -<br />
23 22 21 20 19 18 17 16<br />
- - - - VARIANT<br />
15 14 13 12 11 10 9 8<br />
- - - - VERSION[11:8]<br />
7 6 5 4 3 2 1 0<br />
VERSION[7:0]<br />
VARIANT: Variant number<br />
Reserved. No functionality associated.<br />
VERSION: Version number<br />
Version number of the module. No functionality associated.<br />
128
8.6.30 120MHz RC Oscillator Version Register<br />
Name: RC120MVERSION<br />
Access Type: Read-Only<br />
Offset: 0x03F0<br />
Reset Value: -<br />
32117D–AVR-01/12<br />
<strong>AT32UC3C</strong><br />
31 30 29 28 27 26 25 24<br />
- - - - - - - -<br />
23 22 21 20 19 18 17 16<br />
- - - - VARIANT<br />
15 14 13 12 11 10 9 8<br />
- - - - VERSION[11:8]<br />
7 6 5 4 3 2 1 0<br />
VERSION[7:0]<br />
VARIANT: Variant number<br />
Reserved. No functionality associated.<br />
VERSION: Version number<br />
Version number of the module. No functionality associated.<br />
129
8.6.31 GPLP Version Register<br />
Name: GPLPVERSION<br />
Access Type: Read-Only<br />
Offset: 0x03F4<br />
Reset Value: -<br />
32117D–AVR-01/12<br />
<strong>AT32UC3C</strong><br />
31 30 29 28 27 26 25 24<br />
- - - - - - - -<br />
23 22 21 20 19 18 17 16<br />
- - - - VARIANT<br />
15 14 13 12 11 10 9 8<br />
- - - - VERSION[11:8]<br />
7 6 5 4 3 2 1 0<br />
VERSION[7:0]<br />
VARIANT: Variant number<br />
Reserved. No functionality associated.<br />
VERSION: Version number<br />
Version number of the module. No functionality associated.<br />
130
8.6.32 Generic Clock Version Register<br />
Name: GCLKVERSION<br />
Access Type: Read-Only<br />
Offset: 0x03F8<br />
Reset Value: -<br />
32117D–AVR-01/12<br />
<strong>AT32UC3C</strong><br />
31 30 29 28 27 26 25 24<br />
- - - - - - - -<br />
23 22 21 20 19 18 17 16<br />
- - - - VARIANT<br />
15 14 13 12 11 10 9 8<br />
- - - - VERSION[11:8]<br />
7 6 5 4 3 2 1 0<br />
VERSION[7:0]<br />
VARIANT: Variant number<br />
Reserved. No functionality associated.<br />
VERSION: Version number<br />
Version number of the module. No functionality associated.<br />
131
8.6.33 SCIF Version Register<br />
Name: VERSION<br />
Access Type: Read-Only<br />
Offset: 0x03FC<br />
Reset Value: -<br />
32117D–AVR-01/12<br />
<strong>AT32UC3C</strong><br />
31 30 29 28 27 26 25 24<br />
- - - - - - - -<br />
23 22 21 20 19 18 17 16<br />
- - - - VARIANT<br />
15 14 13 12 11 10 9 8<br />
- - - - VERSION[11:0]<br />
7 6 5 4 3 2 1 0<br />
VERSION[7:0]<br />
VARIANT: Variant number<br />
Reserved. No functionality associated.<br />
VERSION: Version number<br />
Version number of the module. No functionality associated.<br />
132
32117D–AVR-01/12<br />
<strong>AT32UC3C</strong><br />
8.7 Module Configuration<br />
The specific configuration for each SCIF instance is listed in the following tables. The module<br />
bus clocks listed here are connected to the system bus clocks. Please refer to the Power Manager<br />
chapter for details.<br />
Table 8-13. SCIF Clock Name<br />
Module name Clock Name Description<br />
SCIF CLK_SCIF Peripheral Bus clock from the PBA clock domain<br />
Table 8-14. Register Reset Values<br />
Register Reset Value<br />
PLLVERSION 0x00000100<br />
OSCVERSION 0x00000101<br />
BODVERSION 0x00000101<br />
BODBVERSION 0x00000100<br />
VREGVERSION 0x00000100<br />
RCCRVERSION 0x00000100<br />
RCCR8VERSION 0x00000100<br />
OSC32VERSION 0x00000100<br />
TSENSVERSION 0x00000100<br />
RC120MIFAVERSION 0x00000100<br />
GPLPVERSION 0x00000110<br />
GCLKVERSION 0x00000100<br />
VERSION 0x00000101<br />
133
9. Asynchronous Timer (AST)<br />
9.1 Features<br />
9.2 Overview<br />
32117D–AVR-01/12<br />
Rev: 2.0.0.1<br />
32-bit counter with 32-bit prescaler<br />
Clocked Source<br />
– System RC oscillator (RCSYS)<br />
– 32KHz crystal oscillator (OSC32K)<br />
–PB clock<br />
– Generic clock (GCLK)<br />
– 1KHz clock from 32KHz oscillator<br />
Optional calendar mode supported<br />
Digital prescaler tuning for increased accuracy<br />
Periodic interrupt(s) and peripheral event(s) supported<br />
Alarm interrupt(s) and peripheral event(s) supported<br />
– Optional clear on alarm<br />
<strong>AT32UC3C</strong><br />
The Asynchronous Timer (AST) enables periodic interrupts and periodic peripheral events, as<br />
well as interrupts and peripheral events at a specified time in the future. The AST consists of a<br />
32-bit prescaler which feeds a 32-bit up-counter. The prescaler can be clocked from four different<br />
clock sources, including the low-power 32KHz clock, which allows the AST to be used as a<br />
real-time timer with a maximum timeout of more than 100 years. Also, the PB clock or a generic<br />
clock can be used for high-speed operation, allowing the AST to be used as a general timer.<br />
The AST can generate periodic interrupts and peripheral events from output from the prescaler,<br />
as well as alarm interrupts and peripheral events, which can trigger at any counter value. Additionally,<br />
the timer can trigger an overflow interrupt and peripheral event, and be reset on the<br />
occurrence of any alarm. This allows periodic interrupts and peripheral events at very long and<br />
accurate intervals.<br />
The AST has been designed to meet the system tick and Real Time Clock requirements of most<br />
embedded operating systems.<br />
134
9.3 Block Diagram<br />
Figure 9-1. Asynchronous Timer block diagram<br />
32 KHz<br />
32117D–AVR-01/12<br />
RC OSC<br />
PB clock<br />
CLK_AST_PRSC<br />
CLK_AST_CNT<br />
32-bit<br />
GCLK<br />
CLK_AST<br />
DIGITAL<br />
TUNER<br />
REGISTER<br />
<strong>AT32UC3C</strong><br />
9.4 Product Dependencies<br />
In order to use this module, other parts of the system must be configured correctly, as described<br />
below.<br />
9.4.1 Power Management<br />
When the AST is enabled, it will remain clocked as long as its selected clock source is running. It<br />
can also wake the CPU from the currently active sleep mode. Refer to the Power Manager chapter<br />
for details on the different sleep modes.<br />
9.4.2 Clocks<br />
CONTROL REGISTER<br />
CSSEL<br />
EN<br />
PSEL<br />
32-bit<br />
Prescaler<br />
Periodic<br />
Interrupts<br />
PERIODIC<br />
INTERVAL<br />
REGISTER<br />
CLK_AST<br />
COUNTER<br />
VALUE<br />
The clock for the AST bus interface (CLK_AST) is generated by the Power Manager. This clock<br />
is turned on by default, and can be enabled and disabled in the Power Manager.<br />
A number of clocks can be selected as source for the internal prescaler clock CLK_AST_PRSC.<br />
The prescaler, counter, and interrupt will function as long as this selected clock source is active.<br />
The selected clock must be enabled in the System Control Interface (SCIF).<br />
The following clock sources are available:<br />
counter<br />
Alarm<br />
Interrupts<br />
ALARM<br />
REGISTER<br />
CLK_AST<br />
System RC oscillator (RCSYS). This oscillator is always enabled, except in some sleep<br />
modes. Please refer to the Electrical Characteristics chapter for the characteristic frequency<br />
of this oscillator.<br />
32KHz crystal oscillator (OSC32K). This oscillator must be enabled before use.<br />
OVF<br />
WAKE ENABLE<br />
REGISTER<br />
Wake<br />
Control<br />
Interrupt<br />
Control<br />
Wake<br />
IRQs<br />
Events<br />
135
9.4.3 Interrupt<br />
32117D–AVR-01/12<br />
<strong>AT32UC3C</strong><br />
Peripheral Bus clock (PB clock). This is the clock of the peripheral bus the AST is connected<br />
to.<br />
Generic clock (GCLK). One of the generic clocks is connected to the AST. This clock must be<br />
enabled before use, and remains enabled in sleep modes when the PB clock is active.<br />
The AST interrupt request lines are connected to the interrupt controller. Using the AST interrupts<br />
requires the interrupt controller to be programmed first.<br />
9.4.4 Peripheral Events<br />
The AST peripheral events are connected via the Peripheral Event System. Refer to the Peripheral<br />
Event System chapter for details.<br />
9.4.5 Debug Operation<br />
The AST prescaler and counter is frozen during debug operation, unless the Run In Debug bit in<br />
the Development Control Register is set and the bit corresponding to the AST is set in the<br />
Peripheral Debug Register (PDBG). Please refer to the On-Chip Debug chapter in the<br />
AVR32UC Technical Reference Manual, and the OCD Module Configuration section, for details.<br />
9.5 Functional Description<br />
9.5.1 Initialization<br />
If the AST is configured in a way that requires it to be periodically serviced by the CPU through<br />
interrupts or similar, improper operation or data loss may result during debugging.<br />
Before enabling the AST, the internal AST clock CLK_AST_PRSC must be enabled, following<br />
the procedure specified in Section 9.5.1.1. The Clock Source Select field in the Clock register<br />
(CLOCK.CSSEL) selects the source for this clock. The Clock Enable bit in the Clock register<br />
(CLOCK.CEN) enables the CLK_AST_PRSC.<br />
When CLK_AST_PRSC is enabled, the AST can be enabled by writing a one to the Enable bit in<br />
the Control Register (CR.EN).<br />
9.5.1.1 Enabling and disabling the AST clock<br />
The Clock Source Selection field (CLOCK.CSSEL) and the Clock Enable bit (CLOCK.CEN) cannot<br />
be changed simultaneously. Special procedures must be followed for enabling and disabling<br />
the CLK_AST_PRSC and for changing the source for this clock.<br />
To enable CLK_AST_PRSC:<br />
Write the selected value to CLOCK.CSSEL<br />
Wait until SR.CLKBUSY reads as zero<br />
Write a one to CLOCK.CEN, without changing CLOCK.CSSEL<br />
Wait until SR.CLKBUSY reads as zero<br />
To disable the clock:<br />
Write a zero to CLOCK.CEN to disable the clock, without changing CLOCK.CSSEL<br />
Wait until SR.CLKBUSY reads as zero<br />
136
32117D–AVR-01/12<br />
<strong>AT32UC3C</strong><br />
9.5.1.2 Changing the source clock<br />
The CLK_AST_PRSC must be disabled before switching to another source clock. The Clock<br />
Busy bit in the Status Register (SR.CLKBUSY) indicates whether the clock is busy or not. This<br />
bit is set when the CEN bit in the CLOCK register is changed, and cleared when the CLOCK register<br />
can be changed.<br />
9.5.2 Basic Operation<br />
9.5.2.1 Prescaler<br />
To change the clock:<br />
Write a zero to CLOCK.CEN to disable the clock, without changing CLOCK.CSSEL<br />
Wait until SR.CLKBUSY reads as zero<br />
Write the selected value to CLOCK.CSSEL<br />
Wait until SR.CLKBUSY reads as zero<br />
Write a one to CLOCK.CEN to enable the clock, without changing CLOCK.CSSEL<br />
Wait until SR.CLKBUSY reads as zero<br />
When the AST is enabled, the 32-bit prescaler will increment on the rising edge of<br />
CLK_AST_PRSC. The prescaler value cannot be read or written, but it can be reset by writing a<br />
one to the Prescaler Clear bit in the Control Register (CR.PCLR).<br />
The Prescaler Select field in the Control Register (CR.PSEL) selects the prescaler bit PSEL as<br />
source clock for the counter (CLK_AST_CNT). This results in a counter frequency of:<br />
fPRSC fCNT PSEL 1<br />
2 +<br />
=<br />
----------------------<br />
where f PRSC is the frequency of the internal prescaler clock CLK_AST_PRSC.<br />
9.5.2.2 Counter operation<br />
When enabled, the AST will increment on every 0-to-1 transition of the selected prescaler<br />
tapping. When the Calender bit in the Control Register (CR.CAL) is zero, the counter operates<br />
in counter mode. It will increment until it reaches the top value of 0xFFFFFFFF, and<br />
then wrap to 0x00000000. This sets the status bit Overflow in the Status Register (SR.OVF).<br />
Optionally, the counter can also be reset when a timer alarm occurs (see Section 9.5.3.2),<br />
which will also set the OVF bit.<br />
The AST counter value can be read from or written to the Counter Value (CV) register. Note that<br />
due to synchronization, continuous reading of the CV register with the lowest prescaler setting<br />
will skip every third value. In addition, if CLK_AST_PRSC is as fast as, or faster than, the<br />
CLK_AST, the prescaler value must be 3 or higher to be able to read the CV without skipping<br />
values.<br />
137
32117D–AVR-01/12<br />
<strong>AT32UC3C</strong><br />
9.5.2.3 Calendar operation<br />
When the CAL bit in the Control Register is one, the counter operates in calendar mode.<br />
Before this mode is enabled, the prescaler should be set up to give a pulse every second.<br />
The date and time can then be read from or written to the Calendar Value (CALV) register.<br />
9.5.3 Interrupts<br />
Time is reported as seconds, minutes, and hours according to the 24-hour clock format.<br />
Date is the numeral date of month (starting on 1). Month is the numeral month of the year (1<br />
= January, 2 = February, etc). Year is a 6-bit field counting the offset from a software-defined<br />
leap year (e.g. 2000). The date is automatically compensated for leap years, assuming<br />
every year divisible by 4 is a leap year.<br />
All peripheral events and interrupts work the same way in calendar mode as in counter<br />
mode. However, the Alarm Register (AR) must be written in time/date format for the alarm to<br />
trigger correctly.<br />
The AST can generate five separate interrupt requests:<br />
OVF: OVF<br />
PER: PER0, PER1<br />
ALARM: ALARM0, ALARM1<br />
CLKREADY<br />
READY<br />
This allows the user to allocate separate handlers and priorities to the different interrupt types.<br />
The generation of the PER interrupt is described in Section 9.5.3.1., and the generation of the<br />
ALARM interrupt is described in Section 9.5.3.2. The OVF interrupt is generated when the counter<br />
overflows, or when the alarm value is reached, if the Clear on Alarm bit in the Control<br />
Register is one. The CLKREADY interrupt is generated when SR.CLKBUSY has a 1-to-0 transition,<br />
and indicates that the clock synchronization is completed. The READY interrupt is<br />
generated when SR.BUSY has a 1-to-0 transition, and indicates that the synchronization<br />
described in Section 9.5.7 is completed.<br />
An interrupt request will be generated if the corresponding bit in the Interrupt Mask Register<br />
(IMR) is set. Bits in IMR are set by writing a one to the corresponding bit in the Interrupt Enable<br />
Register (IER), and cleared by writing a one to the corresponding bit in the Interrupt Disable<br />
Register (IDR). The interrupt request remains active until the corresponding bit in SR is cleared<br />
by writing a one to the corresponding bit in the Status Clear Register (SCR).<br />
The AST interrupts can wake the CPU from any sleep mode where the source clock and the<br />
interrupt controller is active.<br />
9.5.3.1 Periodic interrupt<br />
The AST can generate periodic interrupts. If the PERn bit in the Interrupt Mask Register (IMR) is<br />
one, the AST will generate an interrupt request on the 0-to-1 transition of the selected bit in the<br />
138
32117D–AVR-01/12<br />
<strong>AT32UC3C</strong><br />
prescaler when the AST is enabled. The bit is selected by the Interval Select field in the corresponding<br />
Periodic Interval Register (PIRn.INSEL), resulting in a periodic interrupt frequency of<br />
fCS fPA INSEL 1<br />
2 +<br />
=<br />
------------------------<br />
where f CS is the frequency of the selected clock source.<br />
The corresponding PERn bit in the Status Register (SR) will be set when the selected bit in the<br />
prescaler has a 0-to-1 transition.<br />
Because of synchronization, the transfer of the INSEL value will not happen immediately. When<br />
changing/setting the INSEL value, the user must make sure that the prescaler bit number INSEL<br />
will not have a 0-to-1 transition before the INSEL value is transferred to the register. In that case,<br />
the first periodic interrupt after the change will not be triggered.<br />
9.5.3.2 Alarm interrupt<br />
The AST can also generate alarm interrupts. If the ALARMn bit in IMR is one, the AST will generate<br />
an interrupt request when the counter value matches the selected alarm value, when the<br />
AST is enabled. The alarm value is selected by writing the value to the VALUE field in the corresponding<br />
Alarm Register (ARn.VALUE).<br />
The corresponding ALARMn bit in SR will be set when the counter reaches the selected alarm<br />
value.<br />
Because of synchronization, the transfer of the alarm value will not happen immediately. When<br />
changing/setting the alarm value, the user must make sure that the counter will not count the<br />
selected alarm value before the value is transferred to the register. In that case, the first alarm<br />
interrupt after the change will not be triggered.<br />
If the Clear on Alarm bit in the Control Register (CR.CAn) is one, the corresponding alarm interrupt<br />
will clear the counter and set the OVF bit in the Status Register. This will generate an<br />
overflow interrupt if the OVF bit in IMR is set.<br />
9.5.4 Peripheral events<br />
The AST can generate a number of peripheral events:<br />
OVF<br />
PER0<br />
PER1<br />
ALARM0<br />
•ALARM1<br />
The PERn peripheral event(s) is generated the same way as the PER interrupt, as described in<br />
Section 9.5.3.1. The ALARMn peripheral event(s) is generated the same way as the ALARM<br />
interrupt, as described in Section 9.5.3.2. The OVF peripheral event is generated the same way<br />
as the OVF interrupt, as described in Section 9.5.3-<br />
139
9.5.5 AST wakeup<br />
9.5.6 Digital tuner<br />
32117D–AVR-01/12<br />
<strong>AT32UC3C</strong><br />
The peripheral event will be generated if the corresponding bit in the Event Mask (EVM) register<br />
is set. Bits in EVM register are set by writing a one to the corresponding bit in the Event Enable<br />
(EVE) register, and cleared by writing a one to the corresponding bit in the Event Disable (EVD)<br />
register.<br />
The AST can wake up the CPU directly, without the need to trigger an interrupt. A wakeup can<br />
be generated when the counter overflows, when the counter reaches the selected alarm value,<br />
or when the selected prescaler bit has a 0-to-1 transition. In this case, the CPU will continue<br />
executing from the instruction following the sleep instruction.<br />
The AST wakeup is enabled by writing a one to the corresponding bit in the Wake Enable Register<br />
(WER). When the CPU wakes from sleep, the wake signal must be cleared by writing a one<br />
to the corresponding bit in SCR to clear the internal wake signal to the sleep controller. If the<br />
wake signal is not cleared after waking from sleep, the next sleep instruction will have not effect<br />
because the CPU will wake immediately after this sleep instruction.<br />
The AST wakeup can wake the CPU from any sleep mode where the source clock is active. The<br />
AST wakeup can be configured independently of the interrupt masking.<br />
The digital tuner adds the possibility to compensate for a too slow or a too fast input clock. The<br />
ADD bit in the Digital Tuner Register (DTR.ADD) selects if the tuned frequency should be<br />
reduced or increased. If ADD is ‘0’, the prescaler frequency is reduced:<br />
Where fTUNED is the tuned frequency, f0 is the original prescaler frequency, and VALUE and<br />
EXP are the corresponding fields to be programmed in DTR. Note that DTR.EXP must be<br />
greater than zero. Frequency tuning is disabled by programming DTR.VALUE as zero.<br />
If ADD is ‘1’, the prescaler frequency is increased:<br />
1<br />
fTUNED f0 1<br />
256<br />
roundup⎛-------------------<br />
⎞ 2<br />
⎝VALUE⎠ EXP<br />
⎛ ⎞<br />
⎜ ⎟<br />
= ⎜ – -------------------------------------------------------------------------------- ⎟<br />
⎜ ⎟<br />
⎝ ⋅ ( ) + 1⎠<br />
1<br />
fTUNED f0 1<br />
256<br />
roundup⎛-------------------<br />
⎞ 2<br />
⎝VALUE⎠ EXP<br />
⎛ ⎞<br />
⎜ ⎟<br />
=<br />
⎜ + ------------------------------------------------------------------------------- ⎟<br />
⎜ ⎟<br />
⎝ ⋅ ( ) – 1⎠<br />
Note that these formulas to be within an error of 0.01%, it is recommended that the prescaler bit<br />
that is used as the clock for the counter (selected by CR.PSEL) or to trigger the periodic interrupt<br />
(selected by PIRn.INSEL) be bit 6 or higher.<br />
140
32117D–AVR-01/12<br />
<strong>AT32UC3C</strong><br />
9.5.7 Synchronization<br />
As the prescaler and counter operate asynchronously from the user interface, the AST needs a<br />
few clock cycles to synchronize values written to the CR, CV, SCR, WER, EVE, EVD, PIRx, ARx<br />
and DTR registers. The Busy bit in the Status Register (SR.BUSY) indicates that the synchronization<br />
is ongoing. During this time, writes to these registers will be discarded.<br />
Note that synchronization takes place also if the prescaler is clocked from CLK_AST.<br />
141
9.6 User Interface<br />
Table 9-1. AST Register Memory Map<br />
32117D–AVR-01/12<br />
<strong>AT32UC3C</strong><br />
Offset Register Register Name Access Reset<br />
0x00 Control Register CR Read/Write 0x00000000<br />
0x04 Counter Value CV Read/Write 0x00000000<br />
0x08 Status Register SR Read-only 0x00000000<br />
0x0C Status Clear Register SCR Write-only 0x00000000<br />
0x10 Interrupt Enable Register IER Write-only 0x00000000<br />
0x14 Interrupt Disable Register IDR Write-only 0x00000000<br />
0x18 Interrupt Mask Register IMR Read-only 0x00000000<br />
0x1C Wake Enable Register WER Read/write 0x00000000<br />
0x20 Alarm Register 0 (2)<br />
AR0 Read/Write 0x00000000<br />
0x24 Alarm Register 1 (2)<br />
AR1 Read/Write 0x00000000<br />
0x30 Periodic Interval Register 0 (2)<br />
PIR0 Read/Write 0x00000000<br />
0x34 Periodic Interval Register 1 (2)<br />
PIR1 Read/Write 0x00000000<br />
0x40 Clock Control Register CLOCK Read/Write 0x00000000<br />
0x44 Digital Tuner Register DTR Read/Write 0x00000000<br />
0x48 Event Enable EVE Write-only 0x00000000<br />
0x4C Event Disable EVD Write-only 0x00000000<br />
0x50 Event Mask EVM Read-only 0x00000000<br />
0x54 Calendar Value CALV Read/Write 0x00000000<br />
0xF0 Parameter Register PARAMETER Read-only - (1)<br />
0xFC Version Register VERSION Read-only - (1)<br />
Note: 1. The reset values are device specific. Please refer to the Module Configuration section at the end of this chapter.<br />
2. The number of Alarm and Periodic Interval registers are device specific. Please refer to the Module Configuration section at<br />
the end of this chapter.<br />
142
9.6.1 Control Register<br />
Name: CR<br />
Access Type: Read/Write<br />
Offset: 0x00<br />
Reset Value: 0x00000000<br />
32117D–AVR-01/12<br />
<strong>AT32UC3C</strong><br />
31 30 29 28 27 26 25 24<br />
- - - - - - - -<br />
23 22 21 20 19 18 17 16<br />
- - - PSEL<br />
15 14 13 12 11 10 9 8<br />
- - - - - - CA1 CA0<br />
7 6 5 4 3 2 1 0<br />
- - - - CAL PCLR EN<br />
When the SR.BUSY bit is set, writes to this register will be discarded and this register will read as zero.<br />
PSEL: Prescaler Select<br />
Selects prescaler bit PSEL as source clock for the counter.<br />
CAn: Clear on Alarm n<br />
0: The corresponding alarm will not clear the counter.<br />
1: The corresponding alarm will clear the counter.<br />
CAL: Calendar Mode<br />
0: The AST operates in counter mode.<br />
1: The AST operates in calendar mode.<br />
PCLR: Prescaler Clear<br />
Writing a zero to this bit has no effect.<br />
Writing a one to this bit clears the prescaler.<br />
This bit always reads as zero.<br />
EN: Enable<br />
0: The AST is disabled.<br />
1: The AST is enabled.<br />
143
9.6.2 Counter Value<br />
Name: CV<br />
Access Type: Read/Write<br />
Offset: 0x04<br />
Reset Value: 0x00000000<br />
32117D–AVR-01/12<br />
<strong>AT32UC3C</strong><br />
31 30 29 28 27 26 25 24<br />
When the SR.BUSY bit is set, writes to this register will be discarded and this register will read as zero.<br />
VALUE: AST Value<br />
The current value of the AST counter.<br />
VALUE[31:24]<br />
23 22 21 20 19 18 17 16<br />
VALUE[23:16]<br />
15 14 13 12 11 10 9 8<br />
VALUE[15:8]<br />
7 6 5 4 3 2 1 0<br />
VALUE[7:0]<br />
144
9.6.3 Status Register<br />
Name: SR<br />
Access Type: Read-only<br />
Offset: 0x08<br />
Reset Value: 0x00000000<br />
32117D–AVR-01/12<br />
<strong>AT32UC3C</strong><br />
31 30 29 28 27 26 25 24<br />
- - CLKREADY CLKBUSY - - READY BUSY<br />
23 22 21 20 19 18 17 16<br />
- - - - - - PER1 PER0<br />
15 14 13 12 11 10 9 8<br />
- - - - - - ALARM1 ALARM0<br />
7 6 5 4 3 2 1 0<br />
- - - - - - - OVF<br />
CLKREADY: Clock ready<br />
This bit is cleared when the corresponding bit in SCR is written to one.<br />
This bit is set when the SR.CLKBUSY bit has a 1-to-0 transition.<br />
CLKBUSY: Clock busy<br />
0: The clock is ready and can be changed.<br />
1: CLOCK.CEN has been written and the clock is busy.<br />
READY: AST ready<br />
This bit is cleared when the corresponding bit in SCR is written to one.<br />
This bit is set when the SR.BUSY bit has a 1-to-0 transition.<br />
BUSY: AST busy<br />
0: The AST accepts writes to CR, CV, SCR, WER, EVE, EVD, ARn, and PIRn, and DTR.<br />
1: The AST is busy and will discard writes to CR, CV, SCR, WER, EVE, EVD, ARn, and PIRn, and DTR.<br />
PERn: Periodic n<br />
This bit is cleared when the corresponding bit in SCR is written to one.<br />
This bit is set when the selected bit in the prescaler has a 0-to-1 transition.<br />
ALARMn: Alarm n<br />
This bit is cleared when the corresponding bit in SCR is written to one.<br />
This bit is set when the counter reaches the selected alarm value.<br />
OVF: Overflow<br />
This bit is cleared when the corresponding bit in SCR is written to one.<br />
This bit is set when an overflow has occurred.<br />
145
9.6.4 Status Clear Register<br />
Name: SCR<br />
Access Type: Write-only<br />
Offset: 0x0C<br />
Reset Value: 0x00000000<br />
32117D–AVR-01/12<br />
<strong>AT32UC3C</strong><br />
31 30 29 28 27 26 25 24<br />
- - CLKREADY - - - READY -<br />
23 22 21 20 19 18 17 16<br />
- - - - - - PER1 PER0<br />
15 14 13 12 11 10 9 8<br />
- - - - - - ALARM1 ALARM0<br />
7 6 5 4 3 2 1 0<br />
- - - - - - - OVF<br />
When the SR.BUSY bit is set, writes to this register will be discarded.<br />
Writing a zero to a bit in this register has no effect.<br />
Writing a one to a bit in this register will clear the corresponding bit in SR and the corresponding interrupt request.<br />
146
9.6.5 Interrupt Enable Register<br />
Name: IER<br />
Access Type: Write-only<br />
Offset: 0x10<br />
Reset Value: 0x00000000<br />
32117D–AVR-01/12<br />
<strong>AT32UC3C</strong><br />
31 30 29 28 27 26 25 24<br />
- - CLKREADY - - - READY -<br />
23 22 21 20 19 18 17 16<br />
- - - - - - PER1 PER0<br />
15 14 13 12 11 10 9 8<br />
- - - - - - ALARM1 ALARM0<br />
7 6 5 4 3 2 1 0<br />
- - - - - - - OVF<br />
Writing a zero to a bit in this register has no effect.<br />
Writing a one to a bit in this register will set the corresponding bit in IMR.<br />
147
9.6.6 Interrupt Disable Register<br />
Name: IDR<br />
Access Type: Write-only<br />
Offset: 0x14<br />
Reset Value: 0x00000000<br />
32117D–AVR-01/12<br />
<strong>AT32UC3C</strong><br />
31 30 29 28 27 26 25 24<br />
- - CLKREADY - - - READY -<br />
23 22 21 20 19 18 17 16<br />
- - - - - - PER1 PER0<br />
15 14 13 12 11 10 9 8<br />
- - - - - - ALARM1 ALARM0<br />
7 6 5 4 3 2 1 0<br />
- - - - - - - OVF<br />
Writing a zero to a bit in this register has no effect.<br />
Writing a one to a bit in this register will clear the corresponding bit in IMR.<br />
148
9.6.7 Interrupt Mask Register<br />
Name: IMR<br />
Access Type: Read-only<br />
Offset: 0x18<br />
Reset Value: 0x00000000<br />
32117D–AVR-01/12<br />
<strong>AT32UC3C</strong><br />
31 30 29 28 27 26 25 24<br />
- - CLKREADY - - - READY -<br />
23 22 21 20 19 18 17 16<br />
- - - - - - PER1 PER0<br />
15 14 13 12 11 10 9 8<br />
- - - - - - ALARM1 ALARM0<br />
7 6 5 4 3 2 1 0<br />
- - - - - - - OVF<br />
0: The corresponding interrupt is disabled.<br />
1: The corresponding interrupt is enabled.<br />
A bit in this register is cleared when the corresponding bit in IDR is written to one.<br />
A bit in this register is set when the corresponding bit in IER is written to one.<br />
149
9.6.8 Wake Enable Register<br />
Name: WER<br />
Access Type: Read/Write<br />
Offset: 0x1C<br />
Reset Value: 0x00000000<br />
32117D–AVR-01/12<br />
<strong>AT32UC3C</strong><br />
31 30 29 28 27 26 25 24<br />
- - - - - - - -<br />
23 22 21 20 19 18 17 16<br />
- - - - - - PER1 PER0<br />
15 14 13 12 11 10 9 8<br />
- - - - - - ALARM1 ALARM0<br />
7 6 5 4 3 2 1 0<br />
- - - - - - - OVF<br />
When the SR.BUSY bit is set writes to this register will be discarded and this register will read as zero.<br />
This register enables the wakeup signal from the AST.<br />
PERn: Periodic n<br />
0: The CPU will not wake up from sleep mode when the selected bit in the prescaler has a 0-to-1 transition.<br />
1: The CPU will wake up from sleep mode when the selected bit in the prescaler has a 0-to-1 transition.<br />
ALARMn: Alarm n<br />
0: The CPU will not wake up from sleep mode when the counter reaches the selected alarm value.<br />
1: The CPU will wake up from sleep mode when the counter reaches the selected alarm value.<br />
OVF: Overflow<br />
0: A counter overflow will not wake up the CPU from sleep mode.<br />
1: A counter overflow will wake up the CPU from sleep mode.<br />
150
9.6.9 Alarm Register<br />
Name: AR0/1<br />
Access Type: Read/Write<br />
Offset: 0x20/0x24<br />
Reset Value: 0x00000000<br />
32117D–AVR-01/12<br />
<strong>AT32UC3C</strong><br />
31 30 29 28 27 26 25 24<br />
VALUE[31:24]<br />
23 22 21 20 19 18 17 16<br />
VALUE[23:16]<br />
15 14 13 12 11 10 9 8<br />
VALUE[15:8]<br />
7 6 5 4 3 2 1 0<br />
VALUE[7:0]<br />
When the SR.BUSY bit is set writes to this register will be discarded and this register will read as zero.<br />
VALUE: Alarm Value<br />
When the counter reaches this value, an alarm is generated.<br />
151
9.6.10 Periodic Interval Register<br />
Name: PIR0/1<br />
Access Type: Read/Write<br />
Offset: 0x30/0x34<br />
Reset Value: 0x00000000<br />
32117D–AVR-01/12<br />
<strong>AT32UC3C</strong><br />
31 30 29 28 27 26 25 24<br />
- - - - - - - -<br />
23 22 21 20 19 18 17 16<br />
- - - - - - - -<br />
15 14 13 12 11 10 9 8<br />
- - - - - - - -<br />
7 6 5 4 3 2 1 0<br />
- - - INSEL<br />
When the SR.BUSY bit is set writes to this register will be discarded and this register will read as zero.<br />
INSEL: Interval Select<br />
The PERn bit in SR will be set when the INSEL bit in the prescaler has a 0-to-1 transition.<br />
152
9.6.11 Clock Control Register<br />
Name: CLOCK<br />
Access Type: Read/Write<br />
Offset: 0x40<br />
Reset Value: 0x00000000<br />
32117D–AVR-01/12<br />
<strong>AT32UC3C</strong><br />
31 30 29 28 27 26 25 24<br />
- - - - - - - -<br />
23 22 21 20 19 18 17 16<br />
- - - - - - - -<br />
15 14 13 12 11 10 9 8<br />
- - - - - CSSEL<br />
7 6 5 4 3 2 1 0<br />
- - - - - - - CEN<br />
When writing to this register, follow the sequence in Section 9.5.1.<br />
CSSEL: Clock Source Selection<br />
This field defines the clock source CLK_AST_PRSC for the prescaler:<br />
Table 9-2. Clock Source Selection<br />
CSSEL Clock Source<br />
0 System RC oscillator (RCSYS)<br />
1 32KHz oscillator (OSC32K)<br />
2 PB clock<br />
3 Generic clock (GCLK)<br />
CEN: Clock Enable<br />
0: CLK_AST_PRSC is disabled.<br />
1: CLK_AST_PRSC is enabled.<br />
153
9.6.12 Digital Tuner Register<br />
Name: DTR<br />
Access Type: Read/Write<br />
Offset: 0x44<br />
Reset Value: 0x00000000<br />
When the SR.BUSY bit is set writes to this register will be discarded and this register will read as zero.<br />
VALUE:<br />
0: The frequency is unchanged.<br />
1-255: The frequency will be adjusted according to the formula below.<br />
⎛ ⎞<br />
⎜ 1<br />
⎟<br />
1: The resulting frequency = is f0⎜1 + ------------------------------------------------------------------------------ ⎟<br />
for VALUE ><br />
0 .<br />
⎜ 256<br />
roundup⎛-------------------<br />
⎞ 2( EXP)<br />
⎟<br />
⎝ ⋅ – 1<br />
⎝VALUE⎠ ⎠<br />
EXP:<br />
The frequency will be adjusted according to the formula above.<br />
32117D–AVR-01/12<br />
<strong>AT32UC3C</strong><br />
31 30 29 28 27 26 25 24<br />
- - - - - - - -<br />
23 22 21 20 19 18 17 16<br />
- - - - - - - -<br />
15 14 13 12 11 10 9 8<br />
VALUE<br />
7 6 5 4 3 2 1 0<br />
- - ADD EXP<br />
⎛ ⎞<br />
ADD:<br />
⎜ 1<br />
⎟<br />
0: The resulting frequency is = f0⎜1 – ------------------------------------------------------------------------------- ⎟<br />
for VALUE > 0 .<br />
⎜ 256<br />
roundup⎛-------------------<br />
⎞ ⋅ 2( EXP)<br />
⎟<br />
⎝ + 1<br />
⎝VALUE⎠ ⎠<br />
154
9.6.13 Event Enable Register<br />
Name: EVE<br />
Access Type: Write-only<br />
Offset: 0x48<br />
Reset Value: 0x00000000<br />
32117D–AVR-01/12<br />
<strong>AT32UC3C</strong><br />
31 30 29 28 27 26 25 24<br />
- - - - - - - -<br />
23 22 21 20 19 18 17 16<br />
- - - - - - PER1 PER0<br />
15 14 13 12 11 10 9 8<br />
- - - - - - ALARM1 ALARM0<br />
7 6 5 4 3 2 1 0<br />
- - - - - - - OVF<br />
When the SR.BUSY bit is set writes to this register will be discarded and this register will read as zero.<br />
Writing a zero to a bit in this register has no effect.<br />
Writing a one to a bit in this register will set the corresponding bit in EVM.<br />
155
9.6.14 Event Disable Register<br />
Name: EVD<br />
Access Type: Write-only<br />
Offset: 0x4C<br />
Reset Value: 0x00000000<br />
32117D–AVR-01/12<br />
<strong>AT32UC3C</strong><br />
31 30 29 28 27 26 25 24<br />
- - - - - - - -<br />
23 22 21 20 19 18 17 16<br />
- - - - - - PER1 PER0<br />
15 14 13 12 11 10 9 8<br />
- - - - - - ALARM1 ALARM0<br />
7 6 5 4 3 2 1 0<br />
- - - - - - - OVF<br />
When the SR.BUSY bit is set writes to this register will be discarded and this register will read as zero.<br />
Writing a zero to a bit in this register has no effect.<br />
Writing a one to a bit in this register will clear the corresponding bit in EVM.<br />
156
9.6.15 Event Mask Register<br />
Name: EVM<br />
Access Type: Read-only<br />
Offset: 0x50<br />
Reset Value: 0x00000000<br />
32117D–AVR-01/12<br />
<strong>AT32UC3C</strong><br />
31 30 29 28 27 26 25 24<br />
- - - - - - - -<br />
23 22 21 20 19 18 17 16<br />
- - - - - - PER1 PER0<br />
15 14 13 12 11 10 9 8<br />
- - - - - - ALARM1 ALARM0<br />
7 6 5 4 3 2 1 0<br />
- - - - - - - OVF<br />
0: The corresponding peripheral event is disabled.<br />
1: The corresponding peripheral event is enabled.<br />
This bit is cleared when the corresponding bit in EVD is written to one.<br />
This bit is set when the corresponding bit in EVE is written to one.<br />
157
9.6.16 Calendar Value<br />
Name: CALV<br />
Access Type: Read/Write<br />
Offset: 0x54<br />
Reset Value: 0x00000000<br />
32117D–AVR-01/12<br />
<strong>AT32UC3C</strong><br />
31 30 29 28 27 26 25 24<br />
When the SR.BUSY bit is set writes to this register will be discarded and this register will read as zero.<br />
YEAR: Year<br />
Current year. The year is considered a leap year if YEAR[1:0] = 0.<br />
MONTH: Month<br />
1 = January<br />
2 = February<br />
...<br />
12 = December<br />
DAY: Day<br />
Day of month, starting with 1.<br />
HOUR: Hour<br />
Hour of day, in 24-hour clock format.<br />
Legal values are 0 through 23.<br />
MIN: Minute<br />
Minutes, 0 through 59.<br />
SEC: Second<br />
Seconds, 0 through 59.<br />
YEAR MONTH[3:2]<br />
23 22 21 20 19 18 17 16<br />
MONTH[1:0] DAY HOUR[4]<br />
15 14 13 12 11 10 9 8<br />
HOUR[3:0] MIN[5:2]<br />
7 6 5 4 3 2 1 0<br />
MIN[1:0] SEC<br />
158
9.6.17 Parameter Register<br />
Name: PARAMETER<br />
Access Type: Read-only<br />
Offset: 0xF0<br />
Reset Value: -<br />
32117D–AVR-01/12<br />
<strong>AT32UC3C</strong><br />
31 30 29 28 27 26 25 24<br />
- - - PER1VALUE<br />
23 22 21 20 19 18 17 16<br />
- - - PER0VALUE<br />
15 14 13 12 11 10 9 8<br />
PIR1WA PIR0WA - NUMPIR NUMAR<br />
7 6 5 4 3 2 1 0<br />
- DTEXPVALUE DTEXPWA DT<br />
This register gives the configuration used in the specific device. Also refer to the Module Configuration section.<br />
DT: Digital Tuner<br />
0: Digital tuner off<br />
1: Digital tuner on<br />
DTREXPWA: Digital Tuner Exponent Writeable<br />
0: Digital tuner exponent is a constant value. Writes to EXP bitfield in DTR will be discarded.<br />
1: Digital tuner exponent is chosen by writing to EXP bitfield in DTR<br />
DTREXPVALUE: Digital Tuner Exponent Value<br />
Digital tuner exponent value if DT_EXP_WA is zero<br />
NUMAR: Number of Alarm Comparators<br />
0: Zero alarm comparators.<br />
1: One alarm comparator.<br />
2: Two alarm comparators.<br />
NUMPIR: Number of Periodic Comparators<br />
0: One periodic comparator.<br />
1: Two periodic comparator.<br />
PIRnWA: Periodic Interval n Writeable<br />
0: Periodic interval n prescaler tapping is a constant value. Writes to INSEL field in PIRn register will be discarded.<br />
1: Periodic interval n prescaler tapping is chosen by writing to INSEL field in PIRn register.<br />
PERnVALUE: Periodic Interval n Value<br />
Periodic interval prescaler n tapping if PIRnWA is zero.<br />
159
9.6.18 Version Register<br />
Name: VERSION<br />
Access Type: Read-only<br />
Offset: 0xFC<br />
Reset Value: 0x00000300<br />
32117D–AVR-01/12<br />
<strong>AT32UC3C</strong><br />
31 30 29 28 27 26 25 24<br />
- - - - - - - -<br />
23 22 21 20 19 18 17 16<br />
- - - - VARIANT<br />
15 14 13 12 11 10 9 8<br />
- - - - VERSION[11:8]<br />
7 6 5 4 3 2 1 0<br />
VARIANT: Variant number<br />
Reserved. No functionality associated.<br />
VERSION: Version number<br />
Version of the module. No functionality associated.<br />
VERSION[7:0]<br />
160
32117D–AVR-01/12<br />
<strong>AT32UC3C</strong><br />
9.7 Module configuration<br />
The specific configuration for each AST instance is listed in the following tables. The module bus<br />
clocks listed here are connected to the system bus clocks according to the table in the System<br />
Bus Clock Connections section.<br />
Table 9-3. Module configuration<br />
Feature AST<br />
Number of timer alarms 2<br />
Number of periodic alarms 2<br />
Digital tuner On<br />
Table 9-4. Module clock name<br />
Module name Clock name Description<br />
AST<br />
Table 9-5. Register Reset Values<br />
Module name Clock name<br />
VERSION 0x00000200<br />
PARAMETER 0x0000D203<br />
CLK_AST Peripheral Bus clock from the PBA clock domain<br />
GCLK The generic clock used for the AST is GCLK2<br />
PB clock Peripheral Bus clock from the PBA clock domain<br />
161
10. Watchdog Timer (WDT)<br />
10.1 Features<br />
10.2 Overview<br />
10.3 Block Diagram<br />
32117D–AVR-01/12<br />
Rev: 4.1.0.0<br />
Figure 10-1. WDT Block Diagram<br />
RCSYS<br />
OSC32K<br />
0<br />
1<br />
CSSEL<br />
CEN<br />
Watchdog Timer counter with 32-bit counter<br />
Timing window watchdog<br />
Clocked from system RC oscillator or the 32 KHz crystal oscillator<br />
Configuration lock<br />
WDT may be enabled at reset by a fuse<br />
<strong>AT32UC3C</strong><br />
The Watchdog Timer (WDT) will reset the device unless it is periodically serviced by the software.<br />
This allows the device to recover from a condition that has caused the system to be<br />
unstable.<br />
The WDT has an internal counter clocked from the system RC oscillator or the 32 KHz crystal<br />
oscillator.<br />
The WDT counter must be periodically cleared by software to avoid a watchdog reset. If the<br />
WDT timer is not cleared correctly, the device will reset and start executing from the boot vector.<br />
PB<br />
CLK_CNT<br />
PB Clock Domain<br />
32-bit Counter<br />
CLK_CNT Domain<br />
CLR SR<br />
WDTCLR<br />
SYNC<br />
WINDOW,<br />
CLEARED<br />
Watchdog<br />
Detector<br />
EN, MODE,<br />
PSEL, TBAN<br />
Watchdog<br />
Reset<br />
10.4 Product Dependencies<br />
In order to use this module, other parts of the system must be configured correctly, as described<br />
below.<br />
CTRL<br />
162
32117D–AVR-01/12<br />
<strong>AT32UC3C</strong><br />
10.4.1 Power Management<br />
When the WDT is enabled, the WDT remains clocked in all sleep modes. It is not possible to<br />
enter sleep modes where the source clock of CLK_CNT is stopped. Attempting to do so will<br />
result in the device entering the lowest sleep mode where the source clock is running, leaving<br />
the WDT operational. Please refer to the Power Manager chapter for details about sleep modes.<br />
10.4.2 Clocks<br />
After a watchdog reset the WDT bit in the Reset Cause Register (RCAUSE) in the Power Manager<br />
will be set.<br />
The clock for the WDT bus interface (CLK_WDT) is generated by the Power Manager. This<br />
clock is enabled at reset, and can be disabled in the Power Manager. It is recommended to disable<br />
the WDT before disabling the clock, to avoid freezing the WDT in an undefined state.<br />
There are two possible clock sources for the Watchdog Timer (CLK_CNT):<br />
System RC oscillator (RCSYS): This oscillator is always enabled when selected as clock<br />
source for the WDT. Please refer to the Power Manager chapter for details about the RCSYS<br />
and sleep modes. Please refer to the Electrical Characteristics chapter for the characteristic<br />
frequency of this oscillator.<br />
32 KHz crystal oscillator (OSC32K): This oscillator has to be enabled in the System Control<br />
Interface before using it as clock source for the WDT. The WDT will not be able to detect if<br />
this clock is stopped.<br />
10.4.3 Debug Operation<br />
The WDT counter is frozen during debug operation, unless the Run In Debug bit in the Development<br />
Control Register is set and the bit corresponding to the WDT is set in the Peripheral Debug<br />
Register (PDBG). Please refer to the On-Chip Debug chapter in the AVR32UC Technical Reference<br />
Manual, and the OCD Module Configuration section, for details. If the WDT counter is not<br />
frozen during debug operation it will need periodically clearing to avoid a watchdog reset.<br />
10.4.4 Fuses<br />
10.5 Functional Description<br />
10.5.1 Basic Mode<br />
The WDT can be enabled at reset. This is controlled by the WDTAUTO fuse, see Section 10.5.4<br />
for details. Please refer to the Fuse Settings section in the Flash Controller chapter for details<br />
about WDTAUTO and how to program the fuses.<br />
10.5.1.1 WDT Control Register Access<br />
To avoid accidental disabling of the watchdog, the Control Register (CTRL) must be written<br />
twice, first with the KEY field set to 0x55, then 0xAA without changing the other bits. Failure to<br />
do so will cause the write operation to be ignored, and the value in the CTRL Register will not be<br />
changed.<br />
10.5.1.2 Changing CLK_CNT Clock Source<br />
After any reset, except for watchdog reset, CLK_CNT will be enabled with the RCSYS as<br />
source.<br />
163
32117D–AVR-01/12<br />
<strong>AT32UC3C</strong><br />
To change the clock for the WDT the following steps need to be taken. Note that the WDT<br />
should always be disabled before changing the CLK_CNT source:<br />
1. Write a zero to the Clock Enable (CEN) bit in the CTRL Register, leaving the other bits as they<br />
are in the CTRL Register. This will stop CLK_CNT.<br />
2. Read back the CTRL Register until the CEN bit reads zero. The clock has now been stopped.<br />
3. Modify the Clock Source Select (CSSEL) bit in the CTRL Register with your new clock selection<br />
and write it to the CTRL Register.<br />
4. Write a one to the CEN bit, leaving the other bits as they are in the CTRL Register. This will<br />
enable the clock.<br />
5. Read back the CTRL Register until the CEN bit reads one. The clock has now been enabled.<br />
10.5.1.3 Configuring the WDT<br />
If the MODE bit in the CTRL Register is zero, the WDT is in basic mode. The Time Out Prescale<br />
Select (PSEL) field in the CTRL Register selects the WDT timeout period:<br />
T timeout = T psel = 2 (PSEL+1) / f clk_cnt<br />
10.5.1.4 Enabling the WDT<br />
To enable the WDT write a one to the Enable (EN) bit in the CTRL Register. Due to internal synchronization,<br />
it will take some time for the CTRL.EN bit to read back as one.<br />
10.5.1.5 Clearing the WDT Counter<br />
The WDT counter is cleared by writing a one to the Watchdog Clear (WDTCLR) bit in the Clear<br />
(CLR) Register, at any correct write to the CTRL Register, or when the counter reaches T timeout<br />
and the device is reset. In basic mode the CLR.WDTCLR can be written at any time when the<br />
WDT Counter Cleared (CLEARED) bit in the Status Register (SR) is one. Due to internal synchronization,<br />
clearing the WDT counter takes some time. The SR.CLEARED bit is cleared when<br />
writing to CLR.WDTCLR bit and set when the clearing is done. Any write to the CLR.WDTCLR<br />
bit while SR.CLEARED is zero will not clear the counter.<br />
Writing to the CLR.WDTCLR bit has to be done in a particular sequence to be valid. The CLR<br />
Register must be written twice, first with the KEY field set to 0x55 and WDTCLR set to one, then<br />
a second write with the KEY set to 0xAA without changing the WDTCLR bit. Writing to the CLR<br />
Register without the correct sequence has no effect.<br />
If the WDT counter is periodically cleared within T psel no watchdog reset will be issued, see Figure<br />
10-2 on page 165.<br />
164
Figure 10-2. Basic Mode WDT Timing Diagram, normal operation.<br />
t=t0<br />
Write one to<br />
CLR.WDTCLR<br />
Watchdog reset<br />
32117D–AVR-01/12<br />
<strong>AT32UC3C</strong><br />
If the WDT counter is not cleared within T psel a watchdog reset will be issued at the end of T psel ,<br />
see Figure 10-3 on page 165.<br />
Figure 10-3. Basic Mode WDT Timing Diagram, no clear within T psel .<br />
t=t0<br />
Write one to<br />
CLR.WDTCLR<br />
Watchdog reset<br />
10.5.1.6 Watchdog Reset<br />
A watchdog reset will result in a reset and the code will start executing from the boot vector,<br />
please refer to the Power Manager chapter for details. If the Disable After Reset (DAR) bit in the<br />
CTRL Register is zero, the WDT counter will restart counting from zero when the watchdog reset<br />
is released.<br />
10.5.2 Window Mode<br />
T psel<br />
T psel<br />
Timeout<br />
Timeout<br />
If the CTRL.DAR bit is one the WDT will be disabled after a watchdog reset. Only the CTRL.EN<br />
bit will be changed after the watchdog reset. However, if WDTAUTO fuse is configured to enable<br />
the WDT after a watchdog reset, and the CTRL.FCD bit is zero, writing a one to the CTRL.DAR<br />
bit will have no effect.<br />
The window mode can protect against tight loops of runaway code. This is obtained by adding a<br />
ban period to timeout period. During the ban period clearing the WDT counter is not allowed.<br />
If the WDT Mode (MODE) bit in the CTRL Register is one, the WDT is in window mode. Note<br />
that the CTRL.MODE bit can only be changed when the WDT is disabled (CTRL.EN=0).<br />
165
32117D–AVR-01/12<br />
<strong>AT32UC3C</strong><br />
The PSEL and Time Ban Prescale Select (TBAN) fields in the CTRL Register selects the WDT<br />
timeout period<br />
Ttimeout = Ttban + Tpsel = (2 (TBAN+1) + 2 (PSEL+1) ) / fclk_cnt where Ttban sets the time period when clearing the WDT counter by writing to the CLR.WDTCLR<br />
bit is not allowed. Doing so will result in a watchdog reset, the device will receive a reset and the<br />
code will start executing form the boot vector, see Figure 10-5 on page 166. The WDT counter<br />
will be cleared.<br />
Figure 10-4. Window Mode WDT Timing Diagram<br />
t=t0<br />
Write one to<br />
CLR.WDTCLR<br />
Watchdog reset<br />
Writing a one to the CLR.WDTCLR bit within the T psel period will clear the WDT counter and the<br />
counter starts counting from zero (t=t 0 ), entering T tban , see Figure 10-4 on page 166.<br />
If the value in the CTRL Register is changed, the WDT counter will be cleared without a watchdog<br />
reset, regardless of if the value in the WDT counter and the TBAN value.<br />
If the WDT counter reaches T timeout , the counter will be cleared, the device will receive a reset<br />
and the code will start executing form the boot vector.<br />
T tban T psel Timeout<br />
Figure 10-5. Window Mode WDT Timing Diagram, clearing within T tban , resulting in watchdog reset.<br />
t=t0<br />
Write one to<br />
CLR.WDTCLR<br />
Watchdog reset<br />
T tban T psel Timeout<br />
166
32117D–AVR-01/12<br />
<strong>AT32UC3C</strong><br />
10.5.3 Disabling the WDT<br />
The WDT is disabled by writing a zero to the CTRL.EN bit. When disabling the WDT no other<br />
bits in the CTRL Register should be changed until the CTRL.EN bit reads back as zero. If the<br />
CTRL.CEN bit is written to zero, the CTRL.EN bit will never read back as zero if changing the<br />
value from one to zero.<br />
10.5.4 Flash Calibration<br />
The WDT can be enabled at reset. This is controlled by the WDTAUTO fuse. The WDT will be<br />
set in basic mode, RCSYS is set as source for CLK_CNT, and PSEL will be set to a value giving<br />
T psel above 100 ms. Please refer to the Fuse Settings chapter for details about WDTAUTO and<br />
how to program the fuses.<br />
If the Flash Calibration Done (FCD) bit in the CTRL Register is zero at a watchdog reset the<br />
flash calibration will be redone, and the CTRL.FCD bit will be set when the calibration is done. If<br />
CTRL.FCD is one at a watchdog reset, the configuration of the WDT will not be changed during<br />
flash calibration. After any other reset the flash calibration will always be done, and the<br />
CTRL.FCD bit will be set when the calibration is done.<br />
10.5.5 Special Considerations<br />
Care must be taken when selecting the PSEL/TBAN values so that the timeout period is greater<br />
than the startup time of the device. Otherwise a watchdog reset will reset the device before any<br />
code has been run. This can also be avoided by writing the CTRL.DAR bit to one when configuring<br />
the WDT.<br />
If the Store Final Value (SFV) bit in the CTRL Register is one, the CTRL Register is locked for<br />
further write accesses. All writes to the CTRL Register will be ignored. Once the CTRL Register<br />
is locked, it can only be unlocked by a reset (e.g. POR, OCD, and WDT).<br />
The CTRL.MODE bit can only be changed when the WDT is disabled (CTRL.EN=0).<br />
167
10.6 User Interface<br />
Table 10-1. WDT Register Memory Map<br />
32117D–AVR-01/12<br />
<strong>AT32UC3C</strong><br />
Offset Register Register Name Access Reset<br />
0x000 Control Register CTRL Read/Write 0x00010080<br />
0x004 Clear Register CLR Write-only 0x00000000<br />
0x008 Status Register SR Read-only 0x00000003<br />
0x3FC Version Register VERSION Read-only - (1)<br />
Note: 1. The reset value for this register is device specific. Please refer to the Module Configuration section at the end of this chapter.<br />
168
10.6.1 Control Register<br />
Name: CTRL<br />
Access Type: Read/Write<br />
Offset: 0x000<br />
Reset Value: 0x00010080<br />
32117D–AVR-01/12<br />
<strong>AT32UC3C</strong><br />
31 30 29 28 27 26 25 24<br />
KEY<br />
23 22 21 20 19 18 17 16<br />
- TBAN CSSEL CEN<br />
15 14 13 12 11 10 9 8<br />
- - - PSEL<br />
7 6 5 4 3 2 1 0<br />
FCD - - - SFV MODE DAR EN<br />
KEY<br />
This field must be written twice, first with key value 0x55, then 0xAA, for a write operation to be effective. This field always reads<br />
as zero.<br />
TBAN: Time Ban Prescale Select<br />
Counter bit TBAN is used as watchdog “banned” time frame. In this time frame clearing the WDT timer is forbidden, otherwise a<br />
watchdog reset is generated and the WDT timer is cleared.<br />
CSSEL: Clock Source Select<br />
0: Select the system RC oscillator (RCSYS) as clock source.<br />
1: Select the 32KHz crystal oscillator (OSC32K) as clock source.<br />
CEN: Clock Enable<br />
0: The WDT clock is disabled.<br />
1: The WDT clock is enabled.<br />
PSEL: Time Out Prescale Select<br />
Counter bit PSEL is used as watchdog timeout period.<br />
FCD: Flash Calibration Done<br />
This bit is set after any reset.<br />
0: The flash calibration will be redone after a watchdog reset.<br />
1: The flash calibration will not be redone after a watchdog reset.<br />
SFV: WDT Control Register Store Final Value<br />
0: WDT Control Register is not locked.<br />
1: WDT Control Register is locked.<br />
Once locked, the Control Register can not be re-written, only a reset unlocks the SFV bit.<br />
MODE: WDT Mode<br />
0: The WDT is in basic mode, only PSEL time is used.<br />
1: The WDT is in window mode. Total timeout period is now TBAN+PSEL.<br />
Writing to this bit when the WDT is enabled has no effect.<br />
169
DAR: WDT Disable After Reset<br />
0: After a watchdog reset, the WDT will still be enabled.<br />
1: After a watchdog reset, the WDT will be disabled.<br />
EN: WDT Enable<br />
0: WDT is disabled.<br />
1: WDT is enabled.<br />
After writing to this bit the read back value will not change until the WDT is enabled/disabled. This due to internal<br />
synchronization.<br />
32117D–AVR-01/12<br />
<strong>AT32UC3C</strong><br />
170
10.6.2 Clear Register<br />
Name: CLR<br />
Access Type: Write-only<br />
Offset: 0x004<br />
Reset Value: 0x00000000<br />
32117D–AVR-01/12<br />
<strong>AT32UC3C</strong><br />
31 30 29 28 27 26 25 24<br />
When the Watchdog Timer is enabled, this Register must be periodically written within the window time frame or within the<br />
watchdog timeout period, to prevent a watchdog reset.<br />
KEY<br />
This field must be written twice, first with key value 0x55, then 0xAA, for a write operation to be effective.<br />
WDTCLR: Watchdog Clear<br />
Writing a zero to this bit has no effect.<br />
Writing a one to this bit clears the WDT counter.<br />
KEY<br />
23 22 21 20 19 18 17 16<br />
- - - - - - - -<br />
15 14 13 12 11 10 9 8<br />
- - - - - - - -<br />
7 6 5 4 3 2 1 0<br />
- - - - - - - WDTCLR<br />
171
10.6.3 Status Register<br />
Name: SR<br />
Access Type: Read-only<br />
Offset: 0x008<br />
Reset Value: 0x00000003<br />
32117D–AVR-01/12<br />
<strong>AT32UC3C</strong><br />
31 30 29 28 27 26 25 24<br />
- - - - - - - -<br />
23 22 21 20 19 18 17 16<br />
- - - - - - - -<br />
15 14 13 12 11 10 9 8<br />
- - - - - - - -<br />
7 6 5 4 3 2 1 0<br />
- - - - - - CLEARED WINDOW<br />
CLEARED: WDT Counter Cleared<br />
This bit is cleared when writing a one to the CLR.WDTCLR bit.<br />
This bit is set when clearing the WDT counter is done.<br />
WINDOW: Within Window<br />
This bit is cleared when the WDT counter is inside the TBAN period.<br />
This bit is set when the WDT counter is inside the PSEL period.<br />
172
10.6.4 Version Register<br />
Name: VERSION<br />
Access Type: Read-only<br />
Offset: 0x3FC<br />
Reset Value: -<br />
32117D–AVR-01/12<br />
<strong>AT32UC3C</strong><br />
31 30 29 28 27 26 25 24<br />
- - - - - - - -<br />
23 22 21 20 19 18 17 16<br />
- - - - VARIANT<br />
15 14 13 12 11 10 9 8<br />
- - - - VERSION[11:8]<br />
7 6 5 4 3 2 1 0<br />
VERSION[7:0]<br />
VARIANT: Variant number<br />
Reserved. No functionality associated.<br />
VERSION: Version number<br />
Version number of the module. No functionality associated.<br />
173
32117D–AVR-01/12<br />
<strong>AT32UC3C</strong><br />
10.7 Module Configuration<br />
The specific configuration for each WDT instance is listed in the following tables. The module<br />
bus clocks listed here are connected to the system bus clocks. Please refer to the Power Manager<br />
chapter for details.<br />
Table 10-2. Module clock name<br />
Module name Clock name Description<br />
WDT CLK_WDT Peripheral Bus clock from the PBA clock domain<br />
Table 10-3. Register Reset Values<br />
Register Reset Value<br />
VERSION 0x00000410<br />
174
11. Interrupt Controller (INTC)<br />
11.1 Features<br />
11.2 Overview<br />
32117D–AVR-01/12<br />
Rev: 1.0.2.5<br />
Autovectored low latency interrupt service with programmable priority<br />
– 4 priority levels for regular, maskable interrupts<br />
– One Non-Maskable Interrupt<br />
Up to 64 groups of interrupts with up to 32 interrupt requests in each group<br />
<strong>AT32UC3C</strong><br />
The INTC collects interrupt requests from the peripherals, prioritizes them, and delivers an interrupt<br />
request and an autovector to the CPU. The AVR32 architecture supports 4 priority levels for<br />
regular, maskable interrupts, and a Non-Maskable Interrupt (NMI).<br />
The INTC supports up to 64 groups of interrupts. Each group can have up to 32 interrupt request<br />
lines, these lines are connected to the peripherals. Each group has an Interrupt Priority Register<br />
(IPR) and an Interrupt Request Register (IRR). The IPRs are used to assign a priority level and<br />
an autovector to each group, and the IRRs are used to identify the active interrupt request within<br />
each group. If a group has only one interrupt request line, an active interrupt group uniquely<br />
identifies the active interrupt request line, and the corresponding IRR is not needed. The INTC<br />
also provides one Interrupt Cause Register (ICR) per priority level. These registers identify the<br />
group that has a pending interrupt of the corresponding priority level. If several groups have a<br />
pending interrupt of the same level, the group with the lowest number takes priority.<br />
11.3 Block Diagram<br />
Figure 11-1 gives an overview of the INTC. The grey boxes represent registers that can be<br />
accessed via the user interface. The interrupt requests from the peripherals (IREQn) and the<br />
NMI are input on the left side of the figure. Signals to and from the CPU are on the right side of<br />
the figure.<br />
175
32117D–AVR-01/12<br />
Figure 11-1. INTC Block Diagram<br />
<strong>AT32UC3C</strong><br />
11.4 Product Dependencies<br />
In order to use this module, other parts of the system must be configured correctly, as described<br />
below.<br />
11.4.1 Power Management<br />
If the CPU enters a sleep mode that disables CLK_SYNC, the INTC will stop functioning and<br />
resume operation after the system wakes up from sleep mode.<br />
11.4.2 Clocks<br />
NMIREQ<br />
IREQ63<br />
IREQ34<br />
IREQ33<br />
IREQ32<br />
IREQ31<br />
IREQ2<br />
IREQ1<br />
IREQ0<br />
Interrupt Controller<br />
OR GrpReqN<br />
IRRn<br />
OR<br />
IRR1<br />
OR<br />
IRR0<br />
.<br />
.<br />
.<br />
GrpReq1<br />
GrpReq0<br />
Request<br />
Masking<br />
ValReqN<br />
IPRn<br />
.<br />
.<br />
.<br />
ValReq1<br />
IRR Registers IPR Registers ICR Registers<br />
Masks SREG<br />
Masks<br />
I[3-0]M<br />
GM<br />
INTLEVEL<br />
AUTOVECTOR<br />
The clock for the INTC bus interface (CLK_INTC) is generated by the Power Manager. This<br />
clock is enabled at reset, and can be disabled in the Power Manager.<br />
The INTC sampling logic runs on a clock which is stopped in any of the sleep modes where the<br />
system RC oscillator is not running. This clock is referred to as CLK_SYNC. This clock is<br />
enabled at reset, and only turned off in sleep modes where the system RC oscillator is stopped.<br />
11.4.3 Debug Operation<br />
When an external debugger forces the CPU into debug mode, the INTC continues normal<br />
operation.<br />
11.5 Functional Description<br />
All of the incoming interrupt requests (IREQs) are sampled into the corresponding Interrupt<br />
Request Register (IRR). The IRRs must be accessed to identify which IREQ within a group that<br />
is active. If several IREQs within the same group are active, the interrupt service routine must<br />
prioritize between them. All of the input lines in each group are logically ORed together to form<br />
the GrpReqN lines, indicating if there is a pending interrupt in the corresponding group.<br />
IPR1<br />
ValReq0<br />
IPR0<br />
INT_level,<br />
offset<br />
INT_level,<br />
offset<br />
INT_level,<br />
offset<br />
The Request Masking hardware maps each of the GrpReq lines to a priority level from INT0 to<br />
INT3 by associating each group with the Interrupt Level (INTLEVEL) field in the corresponding<br />
.<br />
.<br />
.<br />
Prioritizer<br />
CPU<br />
176
32117D–AVR-01/12<br />
<strong>AT32UC3C</strong><br />
Interrupt Priority Register (IPR). The GrpReq inputs are then masked by the mask bits from the<br />
CPU status register. Any interrupt group that has a pending interrupt of a priority level that is not<br />
masked by the CPU status register, gets its corresponding ValReq line asserted.<br />
Masking of the interrupt requests is done based on five interrupt mask bits of the CPU status<br />
register, namely Interrupt Level 3 Mask (I3M) to Interrupt Level 0 Mask (I0M), and Global Interrupt<br />
Mask (GM). An interrupt request is masked if either the GM or the corresponding interrupt<br />
level mask bit is set.<br />
The Prioritizer hardware uses the ValReq lines and the INTLEVEL field in the IPRs to select the<br />
pending interrupt of the highest priority. If an NMI interrupt request is pending, it automatically<br />
gets the highest priority of any pending interrupt. If several interrupt groups of the highest pending<br />
interrupt level have pending interrupts, the interrupt group with the lowest number is<br />
selected.<br />
The INTLEVEL and handler autovector offset (AUTOVECTOR) of the selected interrupt are<br />
transmitted to the CPU for interrupt handling and context switching. The CPU does not need to<br />
know which interrupt is requesting handling, but only the level and the offset of the handler<br />
address. The IRR registers contain the interrupt request lines of the groups and can be read via<br />
user interface registers for checking which interrupts of the group are actually active.<br />
The delay through the INTC from the peripheral interrupt request is set until the interrupt request<br />
to the CPU is set is three cycles of CLK_SYNC.<br />
11.5.1 Non-Maskable Interrupts<br />
A NMI request has priority over all other interrupt requests. NMI has a dedicated exception vector<br />
address defined by the AVR32 architecture, so AUTOVECTOR is undefined when<br />
INTLEVEL indicates that an NMI is pending.<br />
11.5.2 CPU Response<br />
When the CPU receives an interrupt request it checks if any other exceptions are pending. If no<br />
exceptions of higher priority are pending, interrupt handling is initiated. When initiating interrupt<br />
handling, the corresponding interrupt mask bit is set automatically for this and lower levels in status<br />
register. E.g, if an interrupt of level 3 is approved for handling, the interrupt mask bits I3M,<br />
I2M, I1M, and I0M are set in status register. If an interrupt of level 1 is approved, the masking<br />
bits I1M and I0M are set in status register. The handler address is calculated by logical OR of<br />
the AUTOVECTOR to the CPU system register Exception Vector Base Address (EVBA). The<br />
CPU will then jump to the calculated address and start executing the interrupt handler.<br />
Setting the interrupt mask bits prevents the interrupts from the same and lower levels to be<br />
passed through the interrupt controller. Setting of the same level mask bit prevents also multiple<br />
requests of the same interrupt to happen.<br />
It is the responsibility of the handler software to clear the interrupt request that caused the interrupt<br />
before returning from the interrupt handler. If the conditions that caused the interrupt are not<br />
cleared, the interrupt request remains active.<br />
11.5.3 Clearing an Interrupt Request<br />
Clearing of the interrupt request is done by writing to registers in the corresponding peripheral<br />
module, which then clears the corresponding NMIREQ/IREQ signal.<br />
The recommended way of clearing an interrupt request is a store operation to the controlling<br />
peripheral register, followed by a dummy load operation from the same register. This causes a<br />
177
32117D–AVR-01/12<br />
<strong>AT32UC3C</strong><br />
pipeline stall, which prevents the interrupt from accidentally re-triggering in case the handler is<br />
exited and the interrupt mask is cleared before the interrupt request is cleared.<br />
178
11.6 User Interface<br />
Table 11-1. INTC Register Memory Map<br />
32117D–AVR-01/12<br />
<strong>AT32UC3C</strong><br />
Offset Register Register Name Access Reset<br />
0x000 Interrupt Priority Register 0 IPR0 Read/Write 0x00000000<br />
0x004 Interrupt Priority Register 1 IPR1 Read/Write 0x00000000<br />
... ... ... ... ...<br />
0x0FC Interrupt Priority Register 63 IPR63 Read/Write 0x00000000<br />
0x100 Interrupt Request Register 0 IRR0 Read-only N/A<br />
0x104 Interrupt Request Register 1 IRR1 Read-only N/A<br />
... ... ... ... ...<br />
0x1FC Interrupt Request Register 63 IRR63 Read-only N/A<br />
0x200 Interrupt Cause Register 3 ICR3 Read-only N/A<br />
0x204 Interrupt Cause Register 2 ICR2 Read-only N/A<br />
0x208 Interrupt Cause Register 1 ICR1 Read-only N/A<br />
0x20C Interrupt Cause Register 0 ICR0 Read-only N/A<br />
179
11.6.1 Interrupt Priority Registers<br />
Name: IPR0...IPR63<br />
Access Type: Read/Write<br />
Offset: 0x000 - 0x0FC<br />
Reset Value: 0x00000000<br />
32117D–AVR-01/12<br />
<strong>AT32UC3C</strong><br />
31 30 29 28 27 26 25 24<br />
INTLEVEL - - - - - -<br />
23 22 21 20 19 18 17 16<br />
- - - - - - - -<br />
15 14 13 12 11 10 9 8<br />
- - AUTOVECTOR[13:8]<br />
7 6 5 4 3 2 1 0<br />
AUTOVECTOR[7:0]<br />
INTLEVEL: Interrupt Level<br />
Indicates the EVBA-relative offset of the interrupt handler of the corresponding group:<br />
00: INT0: Lowest priority<br />
01: INT1<br />
10: INT2<br />
11: INT3: Highest priority<br />
AUTOVECTOR: Autovector Address<br />
Handler offset is used to give the address of the interrupt handler. The least significant bit should be written to zero to give<br />
halfword alignment.<br />
180
11.6.2 Interrupt Request Registers<br />
Name: IRR0...IRR63<br />
Access Type: Read-only<br />
Offset: 0x0FF - 0x1FC<br />
Reset Value: N/A<br />
32117D–AVR-01/12<br />
<strong>AT32UC3C</strong><br />
31 30 29 28 27 26 25 24<br />
IRR[32*x+31] IRR[32*x+30] IRR[32*x+29] IRR[32*x+28] IRR[32*x+27] IRR[32*x+26] IRR[32*x+25] IRR[32*x+24]<br />
23 22 21 20 19 18 17 16<br />
IRR[32*x+23] IRR[32*x+22] IRR[32*x+21] IRR[32*x+20] IRR[32*x+19] IRR[32*x+18] IRR[32*x+17] IRR[32*x+16]<br />
15 14 13 12 11 10 9 8<br />
IRR[32*x+15] IRR[32*x+14] IRR[32*x+13] IRR[32*x+12] IRR[32*x+11] IRR[32*x+10] IRR[32*x+9] IRR[32*x+8]<br />
7 6 5 4 3 2 1 0<br />
IRR[32*x+7] IRR[32*x+6] IRR[32*x+5] IRR[32*x+4] IRR[32*x+3] IRR[32*x+2] IRR[32*x+1] IRR[32*x+0]<br />
IRR: Interrupt Request line<br />
This bit is cleared when no interrupt request is pending on this input request line.<br />
This bit is set when an interrupt request is pending on this input request line.<br />
The are 64 IRRs, one for each group. Each IRR has 32 bits, one for each possible interrupt request, for a total of 2048 possible<br />
input lines. The IRRs are read by the software interrupt handler in order to determine which interrupt request is pending. The<br />
IRRs are sampled continuously, and are read-only.<br />
181
11.6.3 Interrupt Cause Registers<br />
Name: ICR0...ICR3<br />
Access Type: Read-only<br />
Offset: 0x200 - 0x20C<br />
Reset Value: N/A<br />
32117D–AVR-01/12<br />
<strong>AT32UC3C</strong><br />
31 30 29 28 27 26 25 24<br />
- - - - - - - -<br />
23 22 21 20 19 18 17 16<br />
- - - - - - - -<br />
15 14 13 12 11 10 9 8<br />
- - - - - - - -<br />
7 6 5 4 3 2 1 0<br />
- - CAUSE<br />
CAUSE: Interrupt Group Causing Interrupt of Priority n<br />
ICRn identifies the group with the highest priority that has a pending interrupt of level n. This value is only defined when at least<br />
one interrupt of level n is pending.<br />
182
32117D–AVR-01/12<br />
<strong>AT32UC3C</strong><br />
11.7 Interrupt Request Signal Map<br />
The various modules may output Interrupt request signals. These signals are routed to the Interrupt<br />
Controller (INTC), described in a later chapter. The Interrupt Controller supports up to 64<br />
groups of interrupt requests. Each group can have up to 32 interrupt request signals. All interrupt<br />
signals in the same group share the same autovector address and priority level. Refer to the<br />
documentation for the individual submodules for a description of the semantics of the different<br />
interrupt requests.<br />
The interrupt request signals are connected to the INTC as follows.<br />
Table 11-2. Interrupt Request Signal Map<br />
Group Line Module Signal<br />
0 0 AVR32UC3 CPU<br />
1<br />
SYSBLOCK<br />
COMPARE<br />
0 AVR32UC3 CPU OCD DCEMU DIRTY<br />
1 AVR32UC3 CPU OCD DCCPU READ<br />
2 0 Secure Access Unit SAU<br />
3<br />
4<br />
5<br />
6<br />
0 Peripheral DMA Controller PDCA 0<br />
1 Peripheral DMA Controller PDCA 1<br />
2 Peripheral DMA Controller PDCA 2<br />
3 Peripheral DMA Controller PDCA 3<br />
0 Peripheral DMA Controller PDCA 4<br />
1 Peripheral DMA Controller PDCA 5<br />
2 Peripheral DMA Controller PDCA 6<br />
3 Peripheral DMA Controller PDCA 7<br />
0 Peripheral DMA Controller PDCA 8<br />
1 Peripheral DMA Controller PDCA 9<br />
2 Peripheral DMA Controller PDCA 10<br />
3 Peripheral DMA Controller PDCA 11<br />
0 Peripheral DMA Controller PDCA 12<br />
1 Peripheral DMA Controller PDCA 13<br />
2 Peripheral DMA Controller PDCA 14<br />
3 Peripheral DMA Controller PDCA 15<br />
7 0 Memory DMA MDMA<br />
8 0 USB 2.0 OTG Interface USBC<br />
183
32117D–AVR-01/12<br />
Table 11-2. Interrupt Request Signal Map<br />
9<br />
<strong>AT32UC3C</strong><br />
0 Control Area Network interface CANIF BOFF 0<br />
1 Control Area Network interface CANIF ERROR 0<br />
2 Control Area Network interface CANIF RXOK 0<br />
3 Control Area Network interface CANIF TXOK 0<br />
4 Control Area Network interface CANIF WAKEUP 0<br />
5 Control Area Network interface CANIF BOFF 1<br />
6 Control Area Network interface CANIF ERROR 1<br />
7 Control Area Network interface CANIF RXOK 1<br />
8 Control Area Network interface CANIF TXOK 1<br />
9 Control Area Network interface CANIF WAKEUP 1<br />
10 0 Flash Controller HFLASHC<br />
11 0 SDRAM Controller SDRAMC<br />
12 0 Power Manager PM<br />
13 0 System Control Interface SCIF<br />
14<br />
15<br />
16<br />
0 Asynchronous Timer AST ALARM<br />
1 Asynchronous Timer AST CLKREADY<br />
2 Asynchronous Timer AST OVF<br />
3 Asynchronous Timer AST PER<br />
4 Asynchronous Timer AST READY<br />
0 External Interrupt Controller EIC 1<br />
1 External Interrupt Controller EIC 2<br />
2 External Interrupt Controller EIC 3<br />
3 External Interrupt Controller EIC 4<br />
0 External Interrupt Controller EIC 5<br />
1 External Interrupt Controller EIC 6<br />
2 External Interrupt Controller EIC 7<br />
3 External Interrupt Controller EIC 8<br />
17 0 Frequency Meter FREQM<br />
184
32117D–AVR-01/12<br />
Table 11-2. Interrupt Request Signal Map<br />
18<br />
19 0<br />
20 0<br />
21 0<br />
<strong>AT32UC3C</strong><br />
0 General Purpose Input/Output Controller GPIO 0<br />
1 General Purpose Input/Output Controller GPIO 1<br />
2 General Purpose Input/Output Controller GPIO 2<br />
3 General Purpose Input/Output Controller GPIO 3<br />
4 General Purpose Input/Output Controller GPIO 4<br />
5 General Purpose Input/Output Controller GPIO 5<br />
6 General Purpose Input/Output Controller GPIO 6<br />
7 General Purpose Input/Output Controller GPIO 7<br />
8 General Purpose Input/Output Controller GPIO 8<br />
9 General Purpose Input/Output Controller GPIO 9<br />
10 General Purpose Input/Output Controller GPIO 10<br />
11 General Purpose Input/Output Controller GPIO 11<br />
12 General Purpose Input/Output Controller GPIO 12<br />
13 General Purpose Input/Output Controller GPIO 13<br />
14 General Purpose Input/Output Controller GPIO 14<br />
15 General Purpose Input/Output Controller GPIO 15<br />
Universal Synchronous/Asynchronous<br />
Receiver/Transmitter<br />
Universal Synchronous/Asynchronous<br />
Receiver/Transmitter<br />
Universal Synchronous/Asynchronous<br />
Receiver/Transmitter<br />
USART0<br />
USART1<br />
USART2<br />
22 0<br />
Universal Synchronous/Asynchronous<br />
Receiver/Transmitter<br />
USART3<br />
23 0 Serial Peripheral Interface SPI0<br />
24 0 Serial Peripheral Interface SPI1<br />
25 0 Two-wire Master Interface TWIM0<br />
26 0 Two-wire Master Interface TWIM1<br />
27 0 Two-wire Slave Interface TWIS0<br />
28 0 Two-wire Slave Interface TWIS1<br />
29 0 Inter-IC Sound (I2S) Controller IISC<br />
30 0 Pulse Width Modulation Controller PWM<br />
31 0 Quadrature Decoder QDEC0<br />
32 0 Quadrature Decoder QDEC1<br />
33<br />
0 Timer/Counter TC00<br />
1 Timer/Counter TC01<br />
2 Timer/Counter TC02<br />
185
32117D–AVR-01/12<br />
Table 11-2. Interrupt Request Signal Map<br />
34<br />
35<br />
36<br />
<strong>AT32UC3C</strong><br />
0 Timer/Counter TC10<br />
1 Timer/Counter TC11<br />
2 Timer/Counter TC12<br />
0 Peripheral Event Controller PEVC TR<br />
1 Peripheral Event Controller PEVC OV<br />
0<br />
1<br />
2<br />
3<br />
4<br />
ADC controller interface with Touch<br />
Screen functionality<br />
ADC controller interface with Touch<br />
Screen functionality<br />
ADC controller interface with Touch<br />
Screen functionality<br />
ADC controller interface with Touch<br />
Screen functionality<br />
ADC controller interface with Touch<br />
Screen functionality<br />
ADCIFA SEQ0<br />
ADCIFA SEQ1<br />
ADCIFA SUTD<br />
ADCIFA WINDOW<br />
ADCIFA AWAKEUP<br />
5<br />
ADC controller interface with Touch<br />
Screen functionality<br />
ADCIFA PENDET<br />
37 0 Analog Comparators Interface ACIFA0<br />
38 0 Analog Comparators Interface ACIFA1<br />
39<br />
40<br />
0 DAC interface<br />
1 DAC interface<br />
2 DAC interface<br />
3 DAC interface<br />
4 DAC interface<br />
5 DAC interface<br />
0 DAC interface<br />
1 DAC interface<br />
2 DAC interface<br />
3 DAC interface<br />
4 DAC interface<br />
5 DAC interface<br />
DACIFB0 CHB<br />
UNDERRUN<br />
DACIFB0 CHB<br />
OVERRUN<br />
DACIFB0 CHB DATA<br />
EMPTY<br />
DACIFB0 CHA<br />
UNDERRUN<br />
DACIFB0 CHA<br />
OVERRUN<br />
DACIFB0 CHA DATA<br />
EMPTY<br />
DACIFB1 CHA DATA<br />
EMPTY<br />
DACIFB1 CHA<br />
OVERRUN<br />
DACIFB1 CHA<br />
UNDERRUN<br />
DACIFB1 CHB DATA<br />
EMPTY<br />
DACIFB1 CHB<br />
OVERRUN<br />
DACIFB1 CHB<br />
UNDERRUN<br />
186
32117D–AVR-01/12<br />
Table 11-2. Interrupt Request Signal Map<br />
<strong>AT32UC3C</strong><br />
41 0 aWire AW<br />
42 0 Ethernet MAC MACB<br />
44 0<br />
Universal Synchronous/Asynchronous<br />
Receiver/Transmitter<br />
USART4<br />
45 0 Two-wire Master Interface TWIM2<br />
46 0 Two-wire Slave Interface TWIS2<br />
187
12. External Interrupt Controller (EIC)<br />
12.1 Features<br />
12.2 Overview<br />
12.3 Block Diagram<br />
32117D–AVR-01/12<br />
Rev: 3.0.2.0<br />
Figure 12-1. EIC Block Diagram<br />
EXTINTn<br />
NMI<br />
EN<br />
DIS<br />
Enable<br />
CTRL<br />
CLK_SYNC<br />
Dedicated interrupt request for each interrupt<br />
Individually maskable interrupts<br />
Interrupt on rising or falling edge<br />
Interrupt on high or low level<br />
Asynchronous interrupts for sleep modes without clock<br />
Filtering of interrupt lines<br />
Non-Maskable NMI interrupt<br />
<strong>AT32UC3C</strong><br />
The External Interrupt Controller (EIC) allows pins to be configured as external interrupts. Each<br />
external interrupt has its own interrupt request and can be individually masked. Each external<br />
interrupt can generate an interrupt on rising or falling edge, or high or low level. Every interrupt<br />
input has a configurable filter to remove spikes from the interrupt source. Every interrupt pin can<br />
also be configured to be asynchronous in order to wake up the part from sleep modes where the<br />
CLK_SYNC clock has been disabled.<br />
A Non-Maskable Interrupt (NMI) is also supported. This has the same properties as the other<br />
external interrupts, but is connected to the NMI request of the CPU, enabling it to interrupt any<br />
other interrupt mode.<br />
The EIC can wake up the part from sleep modes without triggering an interrupt. In this mode,<br />
code execution starts from the instruction following the sleep instruction.<br />
LEVEL<br />
MODE<br />
EDGE<br />
Polarity<br />
control<br />
FILTER<br />
Filter<br />
LEVEL<br />
MODE<br />
EDGE<br />
ASYNC<br />
Asynchronus<br />
detector<br />
Edge/Level<br />
Detector<br />
ICR<br />
CTRL<br />
INTn<br />
IER<br />
IDR<br />
ISR IMR<br />
Mask IRQn<br />
Wake<br />
detect<br />
EIC_WAKE<br />
188
12.4 I/O Lines Description<br />
32117D–AVR-01/12<br />
<strong>AT32UC3C</strong><br />
12.5 Product Dependencies<br />
In order to use this module, other parts of the system must be configured correctly, as described<br />
below.<br />
12.5.1 I/O Lines<br />
The external interrupt pins (EXTINTn and NMI) may be multiplexed with I/O Controller lines. The<br />
programmer must first program the I/O Controller to assign the desired EIC pins to their peripheral<br />
function. If I/O lines of the EIC are not used by the application, they can be used for other<br />
purposes by the I/O Controller.<br />
It is only required to enable the EIC inputs actually in use. If an application requires two external<br />
interrupts, then only two I/O lines will be assigned to EIC inputs.<br />
12.5.2 Power Management<br />
All interrupts are available in all sleep modes as long as the EIC module is powered. However, in<br />
sleep modes where CLK_SYNC is stopped, the interrupt must be configured to asynchronous<br />
mode.<br />
12.5.3 Clocks<br />
12.5.4 Interrupts<br />
12.5.5 Debug Operation<br />
12.6 Functional Description<br />
Table 12-1. I/O Lines Description<br />
Pin Name Pin Description Type<br />
NMI Non-Maskable Interrupt Input<br />
EXTINTn External Interrupt Input<br />
The clock for the EIC bus interface (CLK_EIC) is generated by the Power Manager. This clock is<br />
enabled at reset, and can be disabled in the Power Manager.<br />
The filter and synchronous edge/level detector runs on a clock which is stopped in any of the<br />
sleep modes where the system RC oscillator (RCSYS) is not running. This clock is referred to as<br />
CLK_SYNC.<br />
The external interrupt request lines are connected to the interrupt controller. Using the external<br />
interrupts requires the interrupt controller to be programmed first.<br />
Using the Non-Maskable Interrupt does not require the interrupt controller to be programmed.<br />
When an external debugger forces the CPU into debug mode, the EIC continues normal operation.<br />
If the EIC is configured in a way that requires it to be periodically serviced by the CPU<br />
through interrupts or similar, improper operation or data loss may result during debugging.<br />
12.6.1 External Interrupts<br />
The external interrupts are not enabled by default, allowing the proper interrupt vectors to be set<br />
up by the CPU before the interrupts are enabled.<br />
189
32117D–AVR-01/12<br />
<strong>AT32UC3C</strong><br />
Each external interrupt INTn can be configured to produce an interrupt on rising or falling edge,<br />
or high or low level. External interrupts are configured by the MODE, EDGE, and LEVEL registers.<br />
Each interrupt has a bit INTn in each of these registers. Writing a zero to the INTn bit in the<br />
MODE register enables edge triggered interrupts, while writing a one to the bit enables level triggered<br />
interrupts.<br />
If INTn is configured as an edge triggered interrupt, writing a zero to the INTn bit in the EDGE<br />
register will cause the interrupt to be triggered on a falling edge on EXTINTn, while writing a one<br />
to the bit will cause the interrupt to be triggered on a rising edge on EXTINTn.<br />
If INTn is configured as a level triggered interrupt, writing a zero to the INTn bit in the LEVEL<br />
register will cause the interrupt to be triggered on a low level on EXTINTn, while writing a one to<br />
the bit will cause the interrupt to be triggered on a high level on EXTINTn.<br />
Each interrupt has a corresponding bit in each of the interrupt control and status registers. Writing<br />
a one to the INTn bit in the Interrupt Enable Register (IER) enables the external interrupt<br />
from pin EXTINTn to propagate from the EIC to the interrupt controller, while writing a one to<br />
INTn bit in the Interrupt Disable Register (IDR) disables this propagation. The Interrupt Mask<br />
Register (IMR) can be read to check which interrupts are enabled. When an interrupt triggers,<br />
the corresponding bit in the Interrupt Status Register (ISR) will be set. This bit remains set until a<br />
one is written to the corresponding bit in the Interrupt Clear Register (ICR) or the interrupt is<br />
disabled.<br />
Writing a one to the INTn bit in the Enable Register (EN) enables the external interrupt on pin<br />
EXTINTn, while writing a one to INTn bit in the Disable Register (DIS) disables the external interrupt.<br />
The Control Register (CTRL) can be read to check which interrupts are enabled. If a bit in<br />
the CTRL register is set, but the corresponding bit in IMR is not set, an interrupt will not propagate<br />
to the interrupt controller. However, the corresponding bit in ISR will be set, and<br />
EIC_WAKE will be set. Note that an external interrupt should not be enabled before it has been<br />
configured correctly.<br />
If the CTRL.INTn bit is zero, the corresponding bit in ISR will always be zero. Disabling an external<br />
interrupt by writing a one to the DIS.INTn bit will clear the corresponding bit in ISR.<br />
Please refer to the Module Configuration section for the number of external interrupts.<br />
12.6.2 Synchronization and Filtering of External Interrupts<br />
In synchronous mode the pin value of the EXTINTn pin is synchronized to CLK_SYNC, so<br />
spikes shorter than one CLK_SYNC cycle are not guaranteed to produce an interrupt. The synchronization<br />
of the EXTINTn to CLK_SYNC will delay the propagation of the interrupt to the<br />
interrupt controller by two cycles of CLK_SYNC, see Figure 12-2 and Figure 12-3 for examples<br />
(FILTER off).<br />
It is also possible to apply a filter on EXTINTn by writing a one to the INTn bit in the FILTER register.<br />
This filter is a majority voter, if the condition for an interrupt is true for more than one of the<br />
latest three cycles of CLK_SYNC the interrupt will be set. This will additionally delay the propagation<br />
of the interrupt to the interrupt controller by one or two cycles of CLK_SYNC, see Figure<br />
12-2 and Figure 12-3 for examples (FILTER on).<br />
190
Figure 12-2. Timing Diagram, Synchronous Interrupts, High Level or Rising Edge<br />
32117D–AVR-01/12<br />
CLK_SYNC<br />
EXTINTn/NMI<br />
ISR.INTn:<br />
FILTER off<br />
ISR.INTn:<br />
FILTER on<br />
Figure 12-3. Timing Diagram, Synchronous Interrupts, Low Level or Falling Edge<br />
CLK_SYNC<br />
EXTINTn/NMI<br />
ISR.INTn:<br />
FILTER off<br />
ISR.INTn:<br />
FILTER on<br />
<strong>AT32UC3C</strong><br />
12.6.3 Non-Maskable Interrupt<br />
The NMI supports the same features as the external interrupts, and is accessed through the<br />
same registers. The description in Section 12.6.1 should be followed, accessing the NMI bit<br />
instead of the INTn bits.<br />
The NMI is non-maskable within the CPU in the sense that it can interrupt any other execution<br />
mode. Still, as for the other external interrupts, the actual NMI input can be enabled and disabled<br />
by accessing the registers in the EIC.<br />
12.6.4 Asynchronous Interrupts<br />
Each external interrupt can be made asynchronous by writing a one to INTn in the ASYNC register.<br />
This will route the interrupt signal through the asynchronous path of the module. All edge<br />
interrupts will be interpreted as level interrupts and the filter is disabled. If an interrupt is configured<br />
as edge triggered interrupt in asynchronous mode, a zero in EDGE.INTn will be interpreted<br />
as low level, and a one in EDGE.INTn will be interpreted as high level.<br />
EIC_WAKE will be set immediately after the source triggers the interrupt, while the corresponding<br />
bit in ISR and the interrupt to the interrupt controller will be set on the next rising edge of<br />
CLK_SYNC. Please refer to Figure 12-4 on page 192 for details.<br />
191
32117D–AVR-01/12<br />
<strong>AT32UC3C</strong><br />
When CLK_SYNC is stopped only asynchronous interrupts remain active, and any short spike<br />
on this interrupt will wake up the device. EIC_WAKE will restart CLK_SYNC and ISR will be<br />
updated on the first rising edge of CLK_SYNC.<br />
Figure 12-4. Timing Diagram, Asynchronous Interrupts<br />
12.6.5 Wakeup<br />
CLK_SYNC<br />
EXTINTn/NMI<br />
ISR .IN Tn:<br />
rising EDGE or high<br />
LEVEL<br />
EIC_WAKE:<br />
rising EDGE or high<br />
LEVEL<br />
CLK_SYNC<br />
EXTINTn/NMI<br />
ISR .IN Tn:<br />
rising EDGE or high<br />
LEVEL<br />
EIC_WAKE:<br />
rising EDGE or high<br />
LEVEL<br />
The external interrupts can be used to wake up the part from sleep modes. The wakeup can be<br />
interpreted in two ways. If the corresponding bit in IMR is one, then the execution starts at the<br />
interrupt handler for this interrupt. If the bit in IMR is zero, then the execution starts from the next<br />
instruction after the sleep instruction.<br />
192
12.7 User Interface<br />
Table 12-2. EIC Register Memory Map<br />
Note: 1. The reset value is device specific. Please refer to the Module Configuration section at the end of this chapter.<br />
32117D–AVR-01/12<br />
<strong>AT32UC3C</strong><br />
Offset Register Register Name Access Reset<br />
0x000 Interrupt Enable Register IER Write-only 0x00000000<br />
0x004 Interrupt Disable Register IDR Write-only 0x00000000<br />
0x008 Interrupt Mask Register IMR Read-only 0x00000000<br />
0x00C Interrupt Status Register ISR Read-only 0x00000000<br />
0x010 Interrupt Clear Register ICR Write-only 0x00000000<br />
0x014 Mode Register MODE Read/Write 0x00000000<br />
0x018 Edge Register EDGE Read/Write 0x00000000<br />
0x01C Level Register LEVEL Read/Write 0x00000000<br />
0x020 Filter Register FILTER Read/Write 0x00000000<br />
0x024 Test Register TEST Read/Write 0x00000000<br />
0x028 Asynchronous Register ASYNC Read/Write 0x00000000<br />
0x030 Enable Register EN Write-only 0x00000000<br />
0x034 Disable Register DIS Write-only 0x00000000<br />
0x038 Control Register CTRL Read-only 0x00000000<br />
0x3FC Version Register VERSION Read-only - (1)<br />
193
12.7.1 Interrupt Enable Register<br />
Name: IER<br />
Access Type: Write-only<br />
Offset: 0x000<br />
Reset Value: 0x00000000<br />
32117D–AVR-01/12<br />
<strong>AT32UC3C</strong><br />
31 30 29 28 27 26 25 24<br />
- INT30 INT29 INT28 INT27 INT26 INT25 INT24<br />
23 22 21 20 19 18 17 16<br />
INT23 INT22 INT21 INT20 INT19 INT18 INT17 INT16<br />
15 14 13 12 11 10 9 8<br />
INT15 INT14 INT13 INT12 INT11 INT10 INT9 INT8<br />
7 6 5 4 3 2 1 0<br />
INT7 INT6 INT5 INT4 INT3 INT2 INT1 NMI<br />
INTn: External Interrupt n<br />
Writing a zero to this bit has no effect.<br />
Writing a one to this bit will set the corresponding bit in IMR.<br />
Please refer to the Module Configuration section for the number of external interrupts.<br />
NMI: Non-Maskable Interrupt<br />
Writing a zero to this bit has no effect.<br />
Wrting a one to this bit will set the corresponding bit in IMR.<br />
194
12.7.2 Interrupt Disable Register<br />
Name: IDR<br />
Access Type: Write-only<br />
Offset: 0x004<br />
Reset Value: 0x00000000<br />
32117D–AVR-01/12<br />
<strong>AT32UC3C</strong><br />
31 30 29 28 27 26 25 24<br />
- INT30 INT29 INT28 INT27 INT26 INT25 INT24<br />
23 22 21 20 19 18 17 16<br />
INT23 INT22 INT21 INT20 INT19 INT18 INT17 INT16<br />
15 14 13 12 11 10 9 8<br />
INT15 INT14 INT13 INT12 INT11 INT10 INT9 INT8<br />
7 6 5 4 3 2 1 0<br />
INT7 INT6 INT5 INT4 INT3 INT2 INT1 NMI<br />
INTn: External Interrupt n<br />
Writing a zero to this bit has no effect.<br />
Writing a one to this bit will clear the corresponding bit in IMR.<br />
Please refer to the Module Configuration section for the number of external interrupts.<br />
NMI: Non-Maskable Interrupt<br />
Writing a zero to this bit has no effect.<br />
Writing a one to this bit will clear the corresponding bit in IMR.<br />
195
12.7.3 Interrupt Mask Register<br />
Name: IMR<br />
Access Type: Read-only<br />
Offset: 0x008<br />
Reset Value: 0x00000000<br />
32117D–AVR-01/12<br />
<strong>AT32UC3C</strong><br />
31 30 29 28 27 26 25 24<br />
- INT30 INT29 INT28 INT27 INT26 INT25 INT24<br />
23 22 21 20 19 18 17 16<br />
INT23 INT22 INT21 INT20 INT19 INT18 INT17 INT16<br />
15 14 13 12 11 10 9 8<br />
INT15 INT14 INT13 INT12 INT11 INT10 INT9 INT8<br />
7 6 5 4 3 2 1 0<br />
INT7 INT6 INT5 INT4 INT3 INT2 INT1 NMI<br />
INTn: External Interrupt n<br />
0: The corresponding interrupt is disabled.<br />
1: The corresponding interrupt is enabled.<br />
This bit is cleared when the corresponding bit in IDR is written to one.<br />
This bit is set when the corresponding bit in IER is written to one.<br />
Please refer to the Module Configuration section for the number of external interrupts.<br />
NMI: Non-Maskable Interrupt<br />
0: The Non-Maskable Interrupt is disabled.<br />
1: The Non-Maskable Interrupt is enabled.<br />
This bit is cleared when the corresponding bit in IDR is written to one.<br />
This bit is set when the corresponding bit in IER is written to one.<br />
196
12.7.4 Interrupt Status Register<br />
Name: ISR<br />
Access Type: Read-only<br />
Offset: 0x00C<br />
Reset Value: 0x00000000<br />
32117D–AVR-01/12<br />
<strong>AT32UC3C</strong><br />
31 30 29 28 27 26 25 24<br />
- INT30 INT29 INT28 INT27 INT26 INT25 INT24<br />
23 22 21 20 19 18 17 16<br />
INT23 INT22 INT21 INT20 INT19 INT18 INT17 INT16<br />
15 14 13 12 11 10 9 8<br />
INT15 INT14 INT13 INT12 INT11 INT10 INT9 INT8<br />
7 6 5 4 3 2 1 0<br />
INT7 INT6 INT5 INT4 INT3 INT2 INT1 NMI<br />
INTn: External Interrupt n<br />
0: An interrupt event has not occurred.<br />
1: An interrupt event has occurred.<br />
This bit is cleared by writing a one to the corresponding bit in ICR.<br />
Please refer to the Module Configuration section for the number of external interrupts.<br />
NMI: Non-Maskable Interrupt<br />
0: An interrupt event has not occurred.<br />
1: An interrupt event has occurred.<br />
This bit is cleared by writing a one to the corresponding bit in ICR.<br />
197
12.7.5 Interrupt Clear Register<br />
Name: ICR<br />
Access Type: Write-only<br />
Offset: 0x010<br />
Reset Value: 0x00000000<br />
32117D–AVR-01/12<br />
<strong>AT32UC3C</strong><br />
31 30 29 28 27 26 25 24<br />
- INT30 INT29 INT28 INT27 INT26 INT25 INT24<br />
23 22 21 20 19 18 17 16<br />
INT23 INT22 INT21 INT20 INT19 INT18 INT17 INT16<br />
15 14 13 12 11 10 9 8<br />
INT15 INT14 INT13 INT12 INT11 INT10 INT9 INT8<br />
7 6 5 4 3 2 1 0<br />
INT7 INT6 INT5 INT4 INT3 INT2 INT1 NMI<br />
INTn: External Interrupt n<br />
Writing a zero to this bit has no effect.<br />
Writing a one to this bit will clear the corresponding bit in ISR.<br />
Please refer to the Module Configuration section for the number of external interrupts.<br />
NMI: Non-Maskable Interrupt<br />
Writing a zero to this bit has no effect.<br />
Writing a one to this bit will clear the corresponding bit in ISR.<br />
198
12.7.6 Mode Register<br />
Name: MODE<br />
Access Type: Read/Write<br />
Offset: 0x014<br />
Reset Value: 0x00000000<br />
32117D–AVR-01/12<br />
<strong>AT32UC3C</strong><br />
31 30 29 28 27 26 25 24<br />
- INT30 INT29 INT28 INT27 INT26 INT25 INT24<br />
23 22 21 20 19 18 17 16<br />
INT23 INT22 INT21 INT20 INT19 INT18 INT17 INT16<br />
15 14 13 12 11 10 9 8<br />
INT15 INT14 INT13 INT12 INT11 INT10 INT9 INT8<br />
7 6 5 4 3 2 1 0<br />
INT7 INT6 INT5 INT4 INT3 INT2 INT1 NMI<br />
INTn: External Interrupt n<br />
0: The external interrupt is edge triggered.<br />
1: The external interrupt is level triggered.<br />
Please refer to the Module Configuration section for the number of external interrupts.<br />
NMI: Non-Maskable Interrupt<br />
0: The Non-Maskable Interrupt is edge triggered.<br />
1: The Non-Maskable Interrupt is level triggered.<br />
199
12.7.7 Edge Register<br />
Name: EDGE<br />
Access Type: Read/Write<br />
Offset: 0x018<br />
Reset Value: 0x00000000<br />
32117D–AVR-01/12<br />
<strong>AT32UC3C</strong><br />
31 30 29 28 27 26 25 24<br />
- INT30 INT29 INT28 INT27 INT26 INT25 INT24<br />
23 22 21 20 19 18 17 16<br />
INT23 INT22 INT21 INT20 INT19 INT18 INT17 INT16<br />
15 14 13 12 11 10 9 8<br />
INT15 INT14 INT13 INT12 INT11 INT10 INT9 INT8<br />
7 6 5 4 3 2 1 0<br />
INT7 INT6 INT5 INT4 INT3 INT2 INT1 NMI<br />
INTn: External Interrupt n<br />
0: The external interrupt triggers on falling edge.<br />
1: The external interrupt triggers on rising edge.<br />
Please refer to the Module Configuration section for the number of external interrupts.<br />
NMI: Non-Maskable Interrupt<br />
0: The Non-Maskable Interrupt triggers on falling edge.<br />
1: The Non-Maskable Interrupt triggers on rising edge.<br />
200
12.7.8 Level Register<br />
Name: LEVEL<br />
Access Type: Read/Write<br />
Offset: 0x01C<br />
Reset Value: 0x00000000<br />
32117D–AVR-01/12<br />
<strong>AT32UC3C</strong><br />
31 30 29 28 27 26 25 24<br />
- INT30 INT29 INT28 INT27 INT26 INT25 INT24<br />
23 22 21 20 19 18 17 16<br />
INT23 INT22 INT21 INT20 INT19 INT18 INT17 INT16<br />
15 14 13 12 11 10 9 8<br />
INT15 INT14 INT13 INT12 INT11 INT10 INT9 INT8<br />
7 6 5 4 3 2 1 0<br />
INT7 INT6 INT5 INT4 INT3 INT2 INT1 NMI<br />
INTn: External Interrupt n<br />
0: The external interrupt triggers on low level.<br />
1: The external interrupt triggers on high level.<br />
Please refer to the Module Configuration section for the number of external interrupts.<br />
NMI: Non-Maskable Interrupt<br />
0: The Non-Maskable Interrupt triggers on low level.<br />
1: The Non-Maskable Interrupt triggers on high level.<br />
201
12.7.9 Filter Register<br />
Name: FILTER<br />
Access Type: Read/Write<br />
Offset: 0x020<br />
Reset Value: 0x00000000<br />
32117D–AVR-01/12<br />
<strong>AT32UC3C</strong><br />
31 30 29 28 27 26 25 24<br />
- INT30 INT29 INT28 INT27 INT26 INT25 INT24<br />
23 22 21 20 19 18 17 16<br />
INT23 INT22 INT21 INT20 INT19 INT18 INT17 INT16<br />
15 14 13 12 11 10 9 8<br />
INT15 INT14 INT13 INT12 INT11 INT10 INT9 INT8<br />
7 6 5 4 3 2 1 0<br />
INT7 INT6 INT5 INT4 INT3 INT2 INT1 NMI<br />
INTn: External Interrupt n<br />
0: The external interrupt is not filtered.<br />
1: The external interrupt is filtered.<br />
Please refer to the Module Configuration section for the number of external interrupts.<br />
NMI: Non-Maskable Interrupt<br />
0: The Non-Maskable Interrupt is not filtered.<br />
1: The Non-Maskable Interrupt is filtered.<br />
202
12.7.10 Test Register<br />
Name: TEST<br />
Access Type: Read/Write<br />
Offset: 0x024<br />
Reset Value: 0x00000000<br />
32117D–AVR-01/12<br />
<strong>AT32UC3C</strong><br />
31 30 29 28 27 26 25 24<br />
TESTEN INT30 INT29 INT28 INT27 INT26 INT25 INT24<br />
23 22 21 20 19 18 17 16<br />
INT23 INT22 INT21 INT20 INT19 INT18 INT17 INT16<br />
15 14 13 12 11 10 9 8<br />
INT15 INT14 INT13 INT12 INT11 INT10 INT9 INT8<br />
7 6 5 4 3 2 1 0<br />
INT7 INT6 INT5 INT4 INT3 INT2 INT1 NMI<br />
TESTEN: Test Enable<br />
0: This bit disables external interrupt test mode.<br />
1: This bit enables external interrupt test mode.<br />
INTn: External Interrupt n<br />
Writing a zero to this bit will set the input value to INTn to zero, if test mode is enabled.<br />
Writing a one to this bit will set the input value to INTn to one, if test mode is enabled.<br />
Please refer to the Module Configuration section for the number of external interrupts.<br />
NMI: Non-Maskable Interrupt<br />
Writing a zero to this bit will set the input value to NMI to zero, if test mode is enabled.<br />
Writing a one to this bit will set the input value to NMI to one, if test mode is enabled.<br />
If TESTEN is 1, the value written to this bit will be the value to the interrupt detector and the value on the pad will be ignored.<br />
203
12.7.11 Asynchronous Register<br />
Name: ASYNC<br />
Access Type: Read/Write<br />
Offset: 0x028<br />
Reset Value: 0x00000000<br />
32117D–AVR-01/12<br />
<strong>AT32UC3C</strong><br />
31 30 29 28 27 26 25 24<br />
- INT30 INT29 INT28 INT27 INT26 INT25 INT24<br />
23 22 21 20 19 18 17 16<br />
INT23 INT22 INT21 INT20 INT19 INT18 INT17 INT16<br />
15 14 13 12 11 10 9 8<br />
INT15 INT14 INT13 INT12 INT11 INT10 INT9 INT8<br />
7 6 5 4 3 2 1 0<br />
INT7 INT6 INT5 INT4 INT3 INT2 INT1 NMI<br />
INTn: External Interrupt n<br />
0: The external interrupt is synchronized to CLK_SYNC.<br />
1: The external interrupt is asynchronous.<br />
Please refer to the Module Configuration section for the number of external interrupts.<br />
NMI: Non-Maskable Interrupt<br />
0: The Non-Maskable Interrupt is synchronized to CLK_SYNC.<br />
1: The Non-Maskable Interrupt is asynchronous.<br />
204
12.7.12 Enable Register<br />
Name: EN<br />
Access Type: Write-only<br />
Offset: 0x030<br />
Reset Value: 0x00000000<br />
32117D–AVR-01/12<br />
<strong>AT32UC3C</strong><br />
31 30 29 28 27 26 25 24<br />
- INT30 INT29 INT28 INT27 INT26 INT25 INT24<br />
23 22 21 20 19 18 17 16<br />
INT23 INT22 INT21 INT20 INT19 INT18 INT17 INT16<br />
15 14 13 12 11 10 9 8<br />
INT15 INT14 INT13 INT12 INT11 INT10 INT9 INT8<br />
7 6 5 4 3 2 1 0<br />
INT7 INT6 INT5 INT4 INT3 INT2 INT1 NMI<br />
INTn: External Interrupt n<br />
Writing a zero to this bit has no effect.<br />
Writing a one to this bit will enable the corresponding external interrupt.<br />
Please refer to the Module Configuration section for the number of external interrupts.<br />
NMI: Non-Maskable Interrupt<br />
Writing a zero to this bit has no effect.<br />
Writing a one to this bit will enable the Non-Maskable Interrupt.<br />
205
12.7.13 Disable Register<br />
Name: DIS<br />
Access Type: Write-only<br />
Offset: 0x034<br />
Reset Value: 0x00000000<br />
32117D–AVR-01/12<br />
<strong>AT32UC3C</strong><br />
31 30 29 28 27 26 25 24<br />
- INT30 INT29 INT28 INT27 INT26 INT25 INT24<br />
23 22 21 20 19 18 17 16<br />
INT23 INT22 INT21 INT20 INT19 INT18 INT17 INT16<br />
15 14 13 12 11 10 9 8<br />
INT15 INT14 INT13 INT12 INT11 INT10 INT9 INT8<br />
7 6 5 4 3 2 1 0<br />
INT7 INT6 INT5 INT4 INT3 INT2 INT1 NMI<br />
INTn: External Interrupt n<br />
Writing a zero to this bit has no effect.<br />
Writing a one to this bit will disable the corresponding external interrupt.<br />
Please refer to the Module Configuration section for the number of external interrupts.<br />
NMI: Non-Maskable Interrupt<br />
Writing a zero to this bit has no effect.<br />
Writing a one to this bit will disable the Non-Maskable Interrupt.<br />
206
12.7.14 Control Register<br />
Name: CTRL<br />
Access Type: Read-only<br />
Offset: 0x038<br />
Reset Value: 0x00000000<br />
32117D–AVR-01/12<br />
<strong>AT32UC3C</strong><br />
31 30 29 28 27 26 25 24<br />
- INT30 INT29 INT28 INT27 INT26 INT25 INT24<br />
23 22 21 20 19 18 17 16<br />
INT23 INT22 INT21 INT20 INT19 INT18 INT17 INT16<br />
15 14 13 12 11 10 9 8<br />
INT15 INT14 INT13 INT12 INT11 INT10 INT9 INT8<br />
7 6 5 4 3 2 1 0<br />
INT7 INT6 INT5 INT4 INT3 INT2 INT1 NMI<br />
INTn: External Interrupt n<br />
0: The corresponding external interrupt is disabled.<br />
1: The corresponding external interrupt is enabled.<br />
Please refer to the Module Configuration section for the number of external interrupts.<br />
NMI: Non-Maskable Interrupt<br />
0: The Non-Maskable Interrupt is disabled.<br />
1: The Non-Maskable Interrupt is enabled.<br />
207
12.7.15 Version Register<br />
Name: VERSION<br />
Access Type: Read-only<br />
Offset: 0x3FC<br />
Reset Value: -<br />
32117D–AVR-01/12<br />
<strong>AT32UC3C</strong><br />
31 30 29 28 27 26 25 24<br />
- - - - - - - -<br />
23 22 21 20 19 18 17 16<br />
- - - - - - - -<br />
15 14 13 12 11 10 9 8<br />
- - - - VERSION[11:8]<br />
7 6 5 4 3 2 1 0<br />
VERSION[7:0]<br />
VERSION: Version number<br />
Version number of the module. No functionality associated.<br />
208
32117D–AVR-01/12<br />
<strong>AT32UC3C</strong><br />
12.8 Module Configuration<br />
The specific configuration for each EIC instance is listed in the following tables. The module bus<br />
clocks listed here are connected to the system bus clocks. Please refer to the Power Manager<br />
chapter for details.<br />
Table 12-3. Module Configuration<br />
Feature EIC<br />
Number of external interrupts, including NMI 9<br />
Table 12-4. Module Clock Name<br />
Module name Clock Name Description<br />
EIC CLK_EIC Peripheral Bus clock from the PBA clock domain<br />
Table 12-5. Register Reset Values<br />
Register Reset Value<br />
VERSION 0x00000302<br />
209
13. Frequency Meter (FREQM)<br />
13.1 Features<br />
13.2 Overview<br />
13.3 Block Diagram<br />
32117D–AVR-01/12<br />
Rev: 3.1.0.1<br />
Figure 13-1. Frequency Meter Block Diagram<br />
Accurately measures a clock frequency<br />
Selectable reference clock<br />
A selectable clock can be measured<br />
Ratio can be measured with 24-bit accuracy<br />
<strong>AT32UC3C</strong><br />
The Frequency Meter (FREQM) can be used to accurately measure the frequency of a clock by<br />
comparing it to a known reference clock.<br />
CLKSEL<br />
REFSEL<br />
CLK_MSR<br />
CLK_REF<br />
START<br />
Counter<br />
REFNUM,<br />
START<br />
VALUE<br />
Timer Trigger ISR<br />
13.4 Product Dependencies<br />
In order to use this module, other parts of the system must be configured correctly, as described<br />
below.<br />
13.4.1 Power Management<br />
The device can enter a sleep mode while a measurement is ongoing. However, make sure that<br />
neither CLK_MSR nor CLK_REF is stopped in the actual sleep mode. FREQM interrupts can<br />
wake up the device from sleep modes when the measurement is done, but only from sleep<br />
modes where CLK_FREQM is running. Please refer to the Power Manager chapter for details.<br />
210
13.4.2 Clocks<br />
32117D–AVR-01/12<br />
<strong>AT32UC3C</strong><br />
The clock for the FREQM bus interface (CLK_FREQM) is generated by the Power Manager.<br />
This clock is enabled at reset, and can be disabled in the Power Manager. It is recommended to<br />
disable the FREQM before disabling the clock, to avoid freezing the FREQM ia an undefined<br />
state.<br />
A set of clocks can be selected as reference (CLK_REF) and another set of clocks can be<br />
selected for measurement (CLK_MSR). Please refer to the CLKSEL and REFSEL tables in the<br />
Module Configuration section for details.<br />
13.4.3 Debug Operation<br />
When an external debugger forces the CPU into debug mode, the FREQM continues normal<br />
operation. If the FREQM is configured in a way that requires it to be periodically serviced by the<br />
CPU through interrupts or similar, improper operation or data loss may result during debugging.<br />
13.4.4 Interrupts<br />
The FREQM interrupt request line is connected to the internal source of the interrupt controller.<br />
Using the FREQM interrupt requires the interrupt controller to be programmed first.<br />
13.5 Functional Description<br />
The FREQM accuratly measures the frequency of a clock by comparing the frequency to a<br />
known frequency:<br />
f CLK_MSR = (VALUE/REFNUM)*f CLK_REF<br />
13.5.1 Reference Clock<br />
The Reference Clock Selection (REFSEL) field in the Mode Register (MODE) selects the clock<br />
source for CLK_REF. The reference clock is enabled by writing a one to the Reference Clock<br />
Enable (REFCEN) bit in the Mode Register. This clock should have a known frequency.<br />
CLK_REF needs to be disabled before switching to another clock. The RCLKBUSY bit in the<br />
Status Register (SR) indicates whether the clock is busy or not. This bit is set when the<br />
MODE.REFCEN bit is written.<br />
To change CLK_REF:<br />
Write a zero to the MODE.REFCEN bit to disable the clock, without changing the other<br />
bits/fields in the Mode Register.<br />
Wait until the SR.RCLKBUSY bit reads as zero.<br />
Change the MODE.REFSEL field.<br />
Write a one to the MODE.REFCEN bit to enable the clock, without changing the other<br />
bits/fields in the Mode Register.<br />
Wait until the SR.RCLKBUSY bit reads as zero.<br />
To enable CLK_REF:<br />
Write the correct value to the MODE.REFSEL field.<br />
Write a one to the MODE.REFCEN to enable the clock, without changing the other bits/fields<br />
in the Mode Register.<br />
Wait until the SR.RCLKBUSY bit reads as zero.<br />
To disable CLK_REF:<br />
211
32117D–AVR-01/12<br />
<strong>AT32UC3C</strong><br />
Write a zero to the MODE.REFCEN to disable he clock, without changing the other bits/fields<br />
in the Mode register.<br />
Wait until the SR.RCLKBUSY bit reads as zero.<br />
13.5.1.1 Cautionary note<br />
Note that if clock selected as source for CLK_REF is stopped during a measurement, this will<br />
not be detected by the FREQM. The BUSY bit in the STATUS register will never be cleared, and<br />
the DONE interrupt will never be triggered. If the clock selected as soruce for CLK_REF is<br />
stopped, it will not be possible to change the source for the reference clock as long as the<br />
selected source is not running.<br />
13.5.2 Measurement<br />
13.5.3 Interrupts<br />
In the Mode Register the Clock Source Selection (CLKSEL) field selects CLK_MSR and the<br />
Number of Reference Clock Cycles (REFNUM) field selects the duration of the measurement.<br />
The duration is given in number of CLK_REF periodes.<br />
Writing a one to the START bit in the Control Register (CTRL) starts the measurement. The<br />
BUSY bit in SR is cleared when the measurement is done.<br />
The result of the measurement can be read from the Value Register (VALUE). The frequency of<br />
the measured clock CLK_MSR is then:<br />
f CLK_MSR = (VALUE/REFNUM)*f CLK_REF<br />
The FREQM has two interrupt sources:<br />
DONE: A frequency measurement is done<br />
RCLKRDY: The reference clock is ready<br />
These will generate an interrupt request if the corresponding bit in the Interrupt Mask Register<br />
(IMR) is set. The interrupt sources are ORed together to form one interrupt request. The FREQM<br />
will generate an interrupt request if at least one of the bits in the Interrupt Mask Register (IMR) is<br />
set. Bits in IMR are set by writing a one to the corresponding bit in the Interrupt Enable Register<br />
(IER) and cleared by writing a one to this bit in the Interrupt Disable Register (IDR). The interrupt<br />
request remains active until the corresponding bit in the Interrupt Status Register (ISR) is<br />
cleared by writing a one to this bit in the Interrupt Clear Register (ICR). Because all the interrupt<br />
sources are ORed together, the interrupt request from the FREQM will remain active until all the<br />
bits in ISR are cleared.<br />
212
13.6 User Interface<br />
Table 13-1. FREQM Register Memory Map<br />
32117D–AVR-01/12<br />
<strong>AT32UC3C</strong><br />
Offset Register Register Name Access Reset<br />
0x000 Control Register CTRL Write-only 0x00000000<br />
0x004 Mode Register MODE Read/Write 0x00000000<br />
0x008 Status Register STATUS Read-only 0x00000000<br />
0x00C Value Register VALUE Read-only 0x00000000<br />
0x010 Interrupt Enable Register IER Write-only 0x00000000<br />
0x014 Interrupt Disable Register IDR Write-only 0x00000000<br />
0x018 Interrupt Mask Register IMR Read-only 0x00000000<br />
0x01C Interrupt Status Register ISR Read-only 0x00000000<br />
0x020 Interrupt Clear Register ICR Write-only 0x00000000<br />
0x3FC Version Register VERSION Read-only - (1)<br />
Note: 1. The reset value for this register is device specific. Please refer to the Module Configuration section at the end of this chapter.<br />
213
13.6.1 Control Register<br />
Name: CTRL<br />
Access Type: Write-only<br />
Offset: 0x000<br />
Reset Value: 0x00000000<br />
32117D–AVR-01/12<br />
<strong>AT32UC3C</strong><br />
31 30 29 28 27 26 25 24<br />
- - - - - - - -<br />
23 22 21 20 19 18 17 16<br />
- - - - - - - -<br />
15 14 13 12 11 10 9 8<br />
- - - - - - - -<br />
7 6 5 4 3 2 1 0<br />
- - - - - - - START<br />
START<br />
Writing a zero to this bit has no effect.<br />
Writing a one to this bit will start a measurement.<br />
214
13.6.2 Mode Register<br />
Name: MODE<br />
Access Type: Read/Write<br />
Offset: 0x004<br />
Reset Value: 0x00000000<br />
32117D–AVR-01/12<br />
<strong>AT32UC3C</strong><br />
31 30 29 28 27 26 25 24<br />
REFCEN - - - - - - -<br />
23 22 21 20 19 18 17 16<br />
- - - CLKSEL<br />
15 14 13 12 11 10 9 8<br />
REFNUM<br />
7 6 5 4 3 2 1 0<br />
- - - - - REFSEL<br />
REFCEN: Reference Clock Enable<br />
0: The reference clock is disabled<br />
1: The reference clock is enabled<br />
CLKSEL: Clock Source Selection<br />
Selects the source for CLK_MSR. See table in Module Configuration chapter for details.<br />
REFNUM: Number of Reference Clock Cycles<br />
Selects the duration of a measurement, given in number of CLK_REF cycles.<br />
REFSEL: Reference Clock Selection<br />
Selects the source for CLK_REF. See table in Module Configuration chapter for details.<br />
215
13.6.3 Status Register<br />
Name: STATUS<br />
Access Type: Read-only<br />
Offset: 0x008<br />
Reset Value: 0x00000000<br />
32117D–AVR-01/12<br />
<strong>AT32UC3C</strong><br />
31 30 29 28 27 26 25 24<br />
- - - - - - - -<br />
23 22 21 20 19 18 17 16<br />
- - - - - - - -<br />
15 14 13 12 11 10 9 8<br />
- - - - - - - -<br />
7 6 5 4 3 2 1 0<br />
- - - - - - RCLKBUSY BUSY<br />
RCLKBUSY: FREQM Reference Clock Status<br />
0: The FREQM ref clk is ready, so a measurement can start.<br />
1: The FREQM ref clk is not ready, so a measurement should not be started.<br />
BUSY: FREQM Status<br />
0: The Frequency Meter is idle.<br />
1: Frequency measurement is on-going.<br />
216
13.6.4 Value Register<br />
Name: VALUE<br />
Access Type: Read-only<br />
Offset: 0x00C<br />
Reset Value: 0x00000000<br />
32117D–AVR-01/12<br />
<strong>AT32UC3C</strong><br />
31 30 29 28 27 26 25 24<br />
- - - - - - - -<br />
23 22 21 20 19 18 17 16<br />
VALUE:<br />
Result from measurement.<br />
VALUE[23:16]<br />
15 14 13 12 11 10 9 8<br />
VALUE[15:8]<br />
7 6 5 4 3 2 1 0<br />
VALUE[7:0]<br />
217
13.6.5 Interrupt Enable Register<br />
Name: IER<br />
Access Type: Write-only<br />
Offset: 0x010<br />
Reset Value: 0x00000000<br />
32117D–AVR-01/12<br />
<strong>AT32UC3C</strong><br />
31 30 29 28 27 26 25 24<br />
- - - - - - - -<br />
23 22 21 20 19 18 17 16<br />
- - - - - - - -<br />
15 14 13 12 11 10 9 8<br />
- - - - - - - -<br />
7 6 5 4 3 2 1 0<br />
- - - - - - RCLKRDY DONE<br />
Writing a zero to a bit in this register has no effect.<br />
Writing a one to a bit in this register will set the corresponding bit in IMR.<br />
218
13.6.6 Interrupt Disable Register<br />
Name: IDR<br />
Access Type: Write-only<br />
Offset: 0x014<br />
Reset Value: 0x00000000<br />
32117D–AVR-01/12<br />
<strong>AT32UC3C</strong><br />
31 30 29 28 27 26 25 24<br />
- - - - - - - -<br />
23 22 21 20 19 18 17 16<br />
- - - - - - - -<br />
15 14 13 12 11 10 9 8<br />
- - - - - - - -<br />
7 6 5 4 3 2 1 0<br />
- - - - - - RCLKRDY DONE<br />
Writing a zero to a bit in this register has no effect.<br />
Writing a one to a bit in this register will clear the corresponding bit in IMR.<br />
219
13.6.7 Interrupt Mask Register<br />
Name: IMR<br />
Access Type: Read-only<br />
Offset: 0x018<br />
Reset Value: 0x00000000<br />
32117D–AVR-01/12<br />
<strong>AT32UC3C</strong><br />
31 30 29 28 27 26 25 24<br />
- - - - - - - -<br />
23 22 21 20 19 18 17 16<br />
- - - - - - - -<br />
15 14 13 12 11 10 9 8<br />
- - - - - - - -<br />
7 6 5 4 3 2 1 0<br />
- - - - - - RCLKRDY DONE<br />
0: The corresponding interrupt is disabled.<br />
1: The corresponding interrupt is enabled.<br />
A bit in this register is cleared when the corresponding bit in IDR is written to one.<br />
A bit in this register is set when the corresponding bit in IER is written to one.<br />
220
13.6.8 Interrupt Status Register<br />
Name: ISR<br />
Access Type: Read-only<br />
Offset: 0x01C<br />
Reset Value: 0x00000000<br />
32117D–AVR-01/12<br />
<strong>AT32UC3C</strong><br />
31 30 29 28 27 26 25 24<br />
- - - - - - - -<br />
23 22 21 20 19 18 17 16<br />
- - - - - - - -<br />
15 14 13 12 11 10 9 8<br />
- - - - - - - -<br />
7 6 5 4 3 2 1 0<br />
- - - - - - RCLKRDY DONE<br />
0: The corresponding interrupt is cleared.<br />
1: The corresponding interrupt is pending.<br />
A bit in this register is set when the corresponding bit in STATUS has a one to zero transition.<br />
A bit in this register is cleared when the corresponding bit in ICR is written to one.<br />
221
13.6.9 Interrupt Clear Register<br />
Name: ICR<br />
Access Type: Write-only<br />
Offset: 0x020<br />
Reset Value: 0x00000000<br />
32117D–AVR-01/12<br />
<strong>AT32UC3C</strong><br />
31 30 29 28 27 26 25 24<br />
- - - - - - - -<br />
23 22 21 20 19 18 17 16<br />
- - - - - - - -<br />
15 14 13 12 11 10 9 8<br />
- - - - - - - -<br />
7 6 5 4 3 2 1 0<br />
- - - - - - RCLKRDY DONE<br />
Writing a zero to a bit in this register has no effect.<br />
Writing a one to a bit in this register will clear the corresponding bit in ISR and the corresponding interrupt request.<br />
222
13.6.10 Version Register<br />
Name: VERSION<br />
Access Type: Read-only<br />
Offset: 0x3FC<br />
Reset Value: -<br />
32117D–AVR-01/12<br />
<strong>AT32UC3C</strong><br />
31 30 29 28 27 26 25 24<br />
- - - - - - - -<br />
23 22 21 20 19 18 17 16<br />
- - - - VARIANT<br />
15 14 13 12 11 10 9 8<br />
- - - - VERSION[11:8]<br />
7 6 5 4 3 2 1 0<br />
VERSION[7:0]<br />
VARIANT: Variant number<br />
Reserved. No functionality associated.<br />
VERSION: Version number<br />
Version number of the module. No functionality associated.<br />
223
32117D–AVR-01/12<br />
<strong>AT32UC3C</strong><br />
13.7 Module Configuration<br />
The specific configuration for each FREQM instance is listed in the following tables. The module<br />
bus clocks listed here are connected to the system bus clocks. Please refer to the Power Manager<br />
chapter for details.<br />
Table 13-2. Module Clock Name<br />
Module Name Clock Name Description<br />
FREQM<br />
CLK_FREQM Peripheral Bus clock from the PBA clock domain<br />
CLK_MSR Measured clock<br />
CLK_REF Reference clock<br />
Table 13-3. Register Reset Values<br />
Register Reset Value<br />
VERSION 0x00000310<br />
Table 13-4. Clock Sources for CLK_MSR<br />
CLKS<br />
EL Clock/Oscillator Description<br />
0 CLK_CPU The clock the CPU runs on<br />
1 CLK_HSB High Speed Bus clock<br />
2 CLK_PBA Peripheral Bus A clock<br />
3 CLK_PBB Peripheral Bus B clock<br />
4 CLK_PBC Peripheral Bus C clock<br />
5 OSC0 Output clock from Oscillator 0<br />
6 OSC1 Output clock from Oscillator 1<br />
7 OSC32K Output clock from OSC32K<br />
8 RCSYS Output clock from RCSYS Oscillator<br />
9 RC8M Output clock from 8MHz / 1MHz RC Oscillator<br />
13-24 GCLK0-11 Generic clock 0 through 11<br />
25 RC120M Output clock from RC120M<br />
26-31 Reserved<br />
Table 13-5. Clock Sources for CLK_REF<br />
REFSEL Clock/Oscillator Description<br />
0 RCSYS System 115 KHz RC oscillator clock<br />
1 OSC32K Output clock from OSC32K<br />
2 OSC0 Output clock from Oscillator 0<br />
224
32117D–AVR-01/12<br />
Table 13-5. Clock Sources for CLK_REF<br />
REFSEL Clock/Oscillator Description<br />
3 OSC1 Output clock from Oscillator 1<br />
4 RC8M Output clock from 8MHz / 1MHz RC Oscillator<br />
5 GCLK9 Generic Clock 9<br />
6-7 Reserved<br />
<strong>AT32UC3C</strong><br />
225
14. Peripheral Event Controller (PEVC)<br />
14.1 Features<br />
14.2 Overview<br />
32117D–AVR-01/12<br />
Rev: 1.0.0.0<br />
<strong>AT32UC3C</strong><br />
Direct peripheral to peripheral communication system<br />
Allows peripherals to receive, react to, and send peripheral events without CPU intervention<br />
Cycle deterministic event communication<br />
Asynchronous interrupts allow advanced peripheral operation in low power sleep modes<br />
Many peripheral modules can be configured to emit or respond to signals known as peripheral<br />
events. The exact condition to trigger a peripheral event, or the action taken upon receiving a<br />
peripheral event, is specific to each module. Peripherals that respond to events are called users<br />
and peripherals that emit events are called generators. A module may be both a generator and<br />
user.<br />
The peripheral event generators and users are interconnected by a network known as the<br />
Peripheral Event System. The Peripheral Event Controller (PEVC) controls the interconnection<br />
parameters, such as generator-to-user multiplexing and peripheral event enable/disable.<br />
The Peripheral Event System allows low latency peripheral-to-peripheral signalling without CPU<br />
intervention, and without consuming system resources such as bus or RAM bandwidth. This<br />
offloads the CPU and system resources compared to a traditional interrupt-based software<br />
driven system.<br />
Figure 14-1. Peripheral Event System Overview<br />
Generator<br />
Generator<br />
Peripheral<br />
Event System<br />
User<br />
Generator/<br />
User<br />
226
14.3 Block Diagram<br />
The main building blocks of the PEVC are:<br />
32117D–AVR-01/12<br />
<strong>AT32UC3C</strong><br />
Event Shapers (EVS): Instantiated for some generators, in case filtering and/or rising/falling<br />
edge detection is needed prior to peripheral event propagation<br />
Channels: One channel per user, to propagate events and follow-up the user status<br />
To help distinguish the different signalling stages, these naming conventions are used:<br />
Generators generate events<br />
PEVC multiplexes these incoming events<br />
PEVC outputs Triggers to users<br />
Figure 14-2. PEVC Block Diagram<br />
Generator<br />
0<br />
Generator<br />
...<br />
Generator<br />
...<br />
Generator<br />
...<br />
Generator<br />
m<br />
EVT0<br />
EVT...<br />
EVT...<br />
EVT...<br />
EVTm<br />
EVS<br />
0<br />
EVS<br />
...<br />
PEVC<br />
SEV CHMX<br />
RCSYS CLK_PEVC<br />
Channel<br />
0<br />
Channel<br />
...<br />
Channel<br />
n<br />
TRIG0<br />
TRIG...<br />
TRIGn<br />
The maximum number of generators, Event Shapers, channels, and users supported by the<br />
Peripheral Event Controller is 64. Please refer to the Module Configuration section at the end of<br />
this chapter for the device-specific configuration.<br />
RDY0<br />
RDY...<br />
RDYn<br />
User<br />
0<br />
User<br />
...<br />
User<br />
n<br />
227
14.4 I/O Lines Description<br />
32117D–AVR-01/12<br />
<strong>AT32UC3C</strong><br />
14.5 Product Dependencies<br />
In order to use this module, other parts of the system must be configured correctly, as described<br />
below.<br />
14.5.1 I/O Lines<br />
Multiplexed I/O lines can be used as event generators. To generate a peripheral event from an<br />
external source the source pin must be configured as an input pin by the I/O Controller. It is also<br />
possible to trigger a peripheral event by driving these pins from registers in the I/O Controller, or<br />
another peripheral output connected to the same pin.<br />
14.5.2 Power Management<br />
If the CPU enters a sleep mode that disables clocks used by the PEVC, the PEVC will stop functioning<br />
and resume operation after the system wakes up from sleep mode. Peripheral events do<br />
not require CPU intervention, and are therefore available in sleep modes where the CPU sleeps.<br />
14.5.3 Clocks<br />
14.5.4 Interrupts<br />
Table 14-1. I/O Lines Description<br />
Pin Name Pin Description Type<br />
PAD_EVT[n] External Event Inputs Input<br />
The PEVC has two bus clocks connected: One Peripheral Bus clock (CLK_PEVC) and the system<br />
RC oscillator clock (CLK_RCSYS). These clocks are generated by the Power Manager.<br />
Both clocks are enabled at reset, and can be disabled by writing to the Power Manager.<br />
CLK_RCSYS is used for glitch filtering.<br />
PEVC can generate an interrupt request in case of trigger generation or trigger overrun. The<br />
PEVC interrupt request lines are connected to the interrupt controller. Using the PEVC interrupts<br />
requires the interrupt controller to be programmed first.<br />
14.5.5 Debug Operation<br />
PEVC is frozen during debug operation, unless the Run In Debug bit in the Development Control<br />
Register is set and the bit corresponding to the PEVC is set in the Peripheral Debug Register<br />
(PDBG). Please refer to the On-Chip Debug chapter in the AVR32UC Technical Reference Manual,<br />
and the OCD Module Configuration section, for details.<br />
228
14.6 Functional Description<br />
32117D–AVR-01/12<br />
<strong>AT32UC3C</strong><br />
14.6.1 PEVC Channel Operation<br />
PEVC routes incoming events to users by means of one channel per user. Channels operate in<br />
parallel, allowing multiple users to listen to the same generator.<br />
14.6.1.1 Channel Setup<br />
The Channel Multiplexer Register (CHMXn) is written to allocate a generator to a given channel.<br />
The Event Multiplexer field (EVMX) selects between the different generators, while the Software<br />
Event Multiplexer bit (SMX) selects Software Events.<br />
The channel is then enabled by writing a one to the appropriate bit in the Channel Enable Register<br />
(CHER). It is disabled by writing a one to the appropriate bit in the Channel Disable Register<br />
(CHDR).<br />
To safely program a channel, user software must:<br />
disable the channel by writing a one to CHDR<br />
program CHMXn<br />
enable the channel by writing a one to CHER<br />
14.6.1.2 Channel Operation<br />
When the channel is enabled, the user signals its busy/ready state to the channel, to determine<br />
how an incoming event will be handled:<br />
If the user is ready, an incoming event is forwarded. The corresponding Trigger Status<br />
Register (TRISR) flag is set allowing an interrupt to be generated for tracking PEVC<br />
operations.<br />
If the user is busy (because of a previous event, or for some other cause), the new event is<br />
not forwarded. The corresponding Overrun Status Register (OVSR) flag is set allowing an<br />
interrupt to be generated.<br />
The Busy Register (BUSY) is used to determine the current activity of a channel/user. A busy<br />
status has one of two causes:<br />
A peripheral event is being relayed by the channel and handled by the user,<br />
No event relayed, but user is not ready (e.g. not initialized, or handling some other request).<br />
14.6.1.3 Software Event<br />
A Software Event can be initiated by software writing to the Software Event Register (SEV). This<br />
is intended for application debugging.<br />
The channel must first be programmed by writing a one to the Software Event Multiplexer bit<br />
(SMX) of CHMXn.<br />
Writing a one to the appropriate bit of SEV will then trigger a Software Event on the channel.<br />
229
14.6.2 Event Shaper (EVS) Operation<br />
PEVC contains Event Shapers (EVS) for certain types of generators:<br />
32117D–AVR-01/12<br />
<strong>AT32UC3C</strong><br />
Asynchronous generators and/or external input<br />
General-purpose waveforms like timer outputs or Generic Clocks<br />
Each Event Shaper is responsible of shaping one input, prior to going through a PEVC channel:<br />
Synchronize asynchronous external inputs<br />
Apply any additional glich-filtering<br />
Detect rise, fall, or both edges of the incoming signal<br />
14.6.2.1 Input Glitch Filter (IGF)<br />
Input Glitch Filtering can be turned on or off by writing to the Input Glitch Filter (IGF) field of the<br />
corresponding Event Shaper Register (EVS).<br />
When IGF is on, the incoming event is sampled periodically. The sampling clock is divided from<br />
CLK_RCSYS by the value of the Input Glitch Filter Divider Register (IGFDR). IGF will filter out<br />
spikes and propagate only incoming events that respect one of the following two conditions :<br />
rise event : 2 samples low, followed by 0+ changes, followed by 2 samples high<br />
fall event : 2 samples high, followed by 0+ changes, followed by 2 samples low<br />
Both CLK_RCSYS and CLK_PEVC must be enabled to use Input Glitch Filtering.<br />
14.6.3 Event Propagation Latency<br />
Once a channel is setup, incoming peripheral events are relayed by hardware. Event progation<br />
latency is therefore cycle deterministic. However, its value depends on the exact settings that<br />
apply to a given channel.<br />
When the channel multiplexer CHMXn.EVMX selects a generator without Event Shaper, event<br />
propagation latency is 0 cycle. Software event is a particular case of 0 cycle propagation.<br />
When the channel multiplexer CHMXn.EVMX selects a generator with Event Shaper, event<br />
propagation latency depends on Input Glitch Filter setting EVSm.IGF :<br />
IGF off : event propagation latency is lesser or equal to 2 CLK_PEVC cycles<br />
IGF on : event propagation latency is lesser or equal to 3 * 2 IGFDR+1 * CLK_RCSYS cycles<br />
Table 14-2. Event Propagation Latency<br />
Generator<br />
CHMXn.EVMX<br />
Input Glitch Filter<br />
EVSm.IGF<br />
Latency Clock<br />
Generator without Event Shaper - 0 -<br />
Software event - 0 -<br />
Generator with Event Shaper Off 2 CLK_PEVC<br />
Generator with Event Shaper On 3 * 2 IGFDR+1 CLK_RCSYS<br />
Please refer to the Module Configuration section at the end of this chapter for the list of generators<br />
implementing Event Shapers.<br />
230
14.7 User Interface<br />
PEVC Register Memory Map<br />
32117D–AVR-01/12<br />
<strong>AT32UC3C</strong><br />
Offset Register Register Name Access Reset<br />
0x000 Version VERSION Read-only - (1)<br />
0x004 Parameter PARAMETER Read-only - (1)<br />
0x008 Input Glitch Filter Divider Register IGFDR Read/Write 0x00000000<br />
0x010 - 0x014 Channel Status Register CHSRi (2)<br />
Read-only 0x00000000<br />
0x020 - 0x024 Channel Enable Register CHERi (2)<br />
Write-only -<br />
0x030 - 0x034 Channel Disable Register CHDRi (2)<br />
Write-only -<br />
0x040 - 0x044 Software Event SEVi (2)<br />
Write-only -<br />
0x050 - 0x054 Channel / User Busy BUSYi (2)<br />
Read-only - (1)<br />
0x060 - 0x064 Trigger Status Register TRSRi (2)<br />
0x070 - 0x074 Trigger Status Clear Register TRSCRi (2)<br />
0x080 - 0x084 Trigger Interrupt Mask Register TRIMRi (2)<br />
0x090 - 0x094 Trigger Interrupt Mask Enable Register TRIERi (2)<br />
0x0A0 - 0x0A4 Trigger Interrupt Mask Disable Register TRIDRi (2)<br />
0x0B0 - 0x0B4 Overrun Status Register OVSRi (2)<br />
0x0C0 - 0x0C4 Overrun Status Clear Register OVSCRi (2)<br />
0x0D0 - 0x0D4 Overrun Interrupt Mask Register OVIMRi (2)<br />
0x0E0 - 0x0E4 Overrun Interrupt Mask Enable Register OVIERi (2)<br />
0x0F0 - 0x0F4 Overrun Interrupt Mask Disable Register OVIDRi (2)<br />
Read-only 0x00000000<br />
Write-only -<br />
Read-only 0x00000000<br />
Write-only -<br />
Write-only -<br />
Read-only 0x00000000<br />
Write-only -<br />
Read-only 0x00000000<br />
Write-only -<br />
Write-only -<br />
0x100 Channel Multiplexer 0 CHMX0 Read/Write 0x00000000<br />
0x100 + n*0x004 Channel Multiplexer n CHMXn Read/Write 0x00000000<br />
0x1FC Channel Multiplexer 63 CHMX63 Read/Write 0x00000000<br />
0x200 Event Shaper 0 EVS0 Read/Write 0x00000000<br />
0x200 + m*0x004 Event Shaper m EVSm Read/Write 0x00000000<br />
0x2FC Event Shaper 63 EVS63 Read/Write 0x00000000<br />
Notes: 1. The reset values for these registers are device specific. Please refer to the Module Configuration section at the end of this<br />
chapter.<br />
2. i={0,1}, where i=0 contains the lowest 32 channels, and i=1 contains the highest 32 channels. The lowest address contains<br />
register 0, the highest address contains register 1. Register 1 is only implemented if the device has more than 32 channels<br />
implemented. Please refer to the Module Configuration section at the end of this chapter for details.<br />
231
14.7.1 Version Register<br />
Name: VERSION<br />
Access Type: Read-only<br />
Offset: 0x000<br />
Reset Value: -<br />
32117D–AVR-01/12<br />
<strong>AT32UC3C</strong><br />
31 30 29 28 27 26 25 24<br />
- - - - - - - -<br />
23 22 21 20 19 18 17 16<br />
- - - - VARIANT<br />
15 14 13 12 11 10 9 8<br />
- - - - VERSION[11:8]<br />
7 6 5 4 3 2 1 0<br />
VERSION[7:0]<br />
VARIANT: Variant Number<br />
Variant number of the module. No functionality associated.<br />
VERSION: Version Number<br />
Version number of the module. No functionality associated.<br />
232
14.7.2 Parameter Register<br />
Name: PARAMETER<br />
Access Type: Read-only<br />
Offset: 0x004<br />
Reset Value: -<br />
32117D–AVR-01/12<br />
<strong>AT32UC3C</strong><br />
31 30 29 28 27 26 25 24<br />
TRIGOUT<br />
23 22 21 20 19 18 17 16<br />
EVMX<br />
15 14 13 12 11 10 9 8<br />
EVS<br />
7 6 5 4 3 2 1 0<br />
EVIN<br />
TRIGOUT: Number of Trigger Outputs / Channels / Users<br />
Number of trigger outputs / channels implemented. No functionality associated.<br />
EVMX: Number of Bits to control EVMX field in CHMXn Registers<br />
Number of Multiplexers control bits, derived from EVIN. No functionality associated.<br />
EVS: Number of Event Shapers<br />
Number of Event Shapers implemented. No functionality associated.<br />
EVIN: Number of Event Inputs / Generators<br />
Number of event inputs. No functionality associated.<br />
233
14.7.3 Input Glitch Filter Divider Register<br />
Name: IGFDR<br />
Access Type: Read/Write<br />
Offset: 0x008<br />
Reset Value: 0x00000000<br />
IGFDR: Input Glitch Filter Divider<br />
Selects prescaler division ratio for the system RC clock used for glitch filtering.<br />
32117D–AVR-01/12<br />
<strong>AT32UC3C</strong><br />
31 30 29 28 27 26 25 24<br />
- - - - - - - -<br />
23 22 21 20 19 18 17 16<br />
- - - - - - - -<br />
15 14 13 12 11 10 9 8<br />
- - - - - - - -<br />
7 6 5 4 3 2 1 0<br />
- - - - IGFDR<br />
IGFDR Division Ratio<br />
0x0 2<br />
0x1 4<br />
0x2 8<br />
0xn 2 n+1<br />
0xF 65536<br />
234
14.7.4 Channel Status Register<br />
Name: CHSR0 - CHSR1<br />
Access Type: Read-only<br />
Offset: 0x010 - 0x014<br />
Reset Value: 0x00000000<br />
32117D–AVR-01/12<br />
<strong>AT32UC3C</strong><br />
31 30 29 28 27 26 25 24<br />
CHS<br />
23 22 21 20 19 18 17 16<br />
CHS<br />
15 14 13 12 11 10 9 8<br />
CHS<br />
7 6 5 4 3 2 1 0<br />
CHS<br />
CHS: Channel Status<br />
0: The corresponding channel is disabled.<br />
1: The corresponding channel is enabled.<br />
This bit is cleared when the corresponding bit in CHDR is written to one.<br />
This bit is set when the corresponding bit in CHER is written to one.<br />
Note:<br />
Channels 0 to 31 are controlled by CHSR0.<br />
Channels 32 to 63 are controlled by CHSR1.<br />
Please refer to the Module Configuration section at the end of this Chapter for device-specific channel mapping information.<br />
235
14.7.5 Channel Enable Register<br />
Name: CHER0 - CHER1<br />
Access Type: Write-only<br />
Offset: 0x020 - 0x024<br />
Reset Value: -<br />
32117D–AVR-01/12<br />
<strong>AT32UC3C</strong><br />
31 30 29 28 27 26 25 24<br />
CHE<br />
23 22 21 20 19 18 17 16<br />
CHE<br />
15 14 13 12 11 10 9 8<br />
CHE<br />
7 6 5 4 3 2 1 0<br />
CHE<br />
CHE: Channel Enable<br />
Writing a zero to this bit has no effect.<br />
Writing a one to this bit will set the corresponding bit in CHSR.<br />
Note:<br />
Channels 0 to 31 are controlled by CHER0.<br />
Channels 32 to 63 are controlled by CHER1.<br />
Please refer to the Module Configuration section at the end of this Chapter for device-specific channel mapping information.<br />
236
14.7.6 Channel Disable Register<br />
Name: CHDR0 - CHDR1<br />
Access Type: Write-only<br />
Offset: 0x030 - 0x034<br />
Reset Value: -<br />
32117D–AVR-01/12<br />
<strong>AT32UC3C</strong><br />
31 30 29 28 27 26 25 24<br />
CHD<br />
23 22 21 20 19 18 17 16<br />
CHD<br />
15 14 13 12 11 10 9 8<br />
CHD<br />
7 6 5 4 3 2 1 0<br />
CHD<br />
CHD: Channel Disable<br />
Writing a zero to this bit has no effect.<br />
Writing a one to this bit will clear the corresponding bit in CHSR.<br />
Note:<br />
Channels 0 to 31 are controlled by CHER0.<br />
Channels 32 to 63 are controlled by CHER1.<br />
Please refer to the Module Configuration section at the end of this Chapter for device-specific channel mapping information.<br />
237
14.7.7 Software Event Register<br />
Name: SEV0 - SEV1<br />
Access Type: Write-only<br />
Offset: 0x040 - 0x044<br />
Reset Value: -<br />
32117D–AVR-01/12<br />
<strong>AT32UC3C</strong><br />
31 30 29 28 27 26 25 24<br />
SEV<br />
23 22 21 20 19 18 17 16<br />
SEV<br />
15 14 13 12 11 10 9 8<br />
SEV<br />
7 6 5 4 3 2 1 0<br />
SEV<br />
SEV: Software Event<br />
Writing a zero to this bit has no effect.<br />
Writing a one to this bit will trigger a Software Event for the corresponding channel.<br />
Note:<br />
Channels 0 to 31 are controlled by SEV0.<br />
Channels 32 to 63 are controlled by SEV1.<br />
Please refer to the Module Configuration section at the end of this Chapter for device-specific channel mapping information.<br />
238
14.7.8 Channel / User Busy<br />
Name: BUSY0 - BUSY1<br />
Access Type: Read-only<br />
Offset: 0x050 - 0x054<br />
Reset Value: -<br />
32117D–AVR-01/12<br />
<strong>AT32UC3C</strong><br />
31 30 29 28 27 26 25 24<br />
BUSY: Channel Status<br />
0: The corresponding channel and user are idle.<br />
1: The corresponding channel and user are busy.<br />
BUSY<br />
23 22 21 20 19 18 17 16<br />
BUSY<br />
15 14 13 12 11 10 9 8<br />
BUSY<br />
7 6 5 4 3 2 1 0<br />
BUSY<br />
Note:<br />
Channels 0 to 31 are controlled by BUSY0.<br />
Channels 32 to 63 are controlled by BUSY1.<br />
Please refer to the Module Configuration section at the end of this Chapter for device-specific channel mapping information.<br />
239
14.7.9 Trigger Status Register<br />
Name: TRSR0 - TRSR1<br />
Access Type: Read-only<br />
Offset: 0x060 - 0x064<br />
Reset Value: 0x00000000<br />
32117D–AVR-01/12<br />
<strong>AT32UC3C</strong><br />
31 30 29 28 27 26 25 24<br />
TRS<br />
23 22 21 20 19 18 17 16<br />
TRS<br />
15 14 13 12 11 10 9 8<br />
TRS<br />
7 6 5 4 3 2 1 0<br />
TRS<br />
TRS: Trigger Interrupt Status<br />
0: An interrupt event has not occurred<br />
1: An interrupt event has occurred<br />
This bit is cleared by writing a one to the corresponding bit in TRSCR.<br />
Note:<br />
Channels 0 to 31 are controlled by TRSR0.<br />
Channels 32 to 63 are controlled by TRSR1.<br />
Please refer to the Module Configuration section at the end of this Chapter for device-specific channel mapping information.<br />
240
14.7.10 Trigger Status Clear Register<br />
Name: TRSCR0 - TRSCR1<br />
Access Type: Write-only<br />
Offset: 0x070 - 0x074<br />
Reset Value: -<br />
32117D–AVR-01/12<br />
<strong>AT32UC3C</strong><br />
31 30 29 28 27 26 25 24<br />
TRSC<br />
23 22 21 20 19 18 17 16<br />
TRSC<br />
15 14 13 12 11 10 9 8<br />
TRSC<br />
7 6 5 4 3 2 1 0<br />
TRSC<br />
TRSC: Trigger Interrupt Status Clear<br />
Writing a zero to this bit has no effect.<br />
Writing a one to this bit will clear the corresponding bit in TRSR.<br />
Note:<br />
Channels 0 to 31 are controlled by TRSCR0.<br />
Channels 32 to 63 are controlled by TRSCR1.<br />
Please refer to the Module Configuration section at the end of this Chapter for device-specific channel mapping information.<br />
241
14.7.11 Trigger Interrupt Mask Register<br />
Name: TRIMR0 - TRIMR1<br />
Access Type: Read-only<br />
Offset: 0x080 - 0x084<br />
Reset Value: 0x00000000<br />
32117D–AVR-01/12<br />
<strong>AT32UC3C</strong><br />
31 30 29 28 27 26 25 24<br />
TRIM<br />
23 22 21 20 19 18 17 16<br />
TRIM<br />
15 14 13 12 11 10 9 8<br />
TRIM<br />
7 6 5 4 3 2 1 0<br />
TRIM<br />
TRIM: Trigger Interrupt Mask<br />
0: The corresponding interrupt is disabled.<br />
1: The corresponding interrupt is enabled.<br />
This bit is cleared when the corresponding bit in TRIDR is written to one.<br />
This bit is set when the corresponding bit in TRIER is written to one.<br />
Note:<br />
Channels 0 to 31 are controlled by TRIMR0.<br />
Channels 32 to 63 are controlled by TRIMR1.<br />
Please refer to the Module Configuration section at the end of this Chapter for device-specific channel mapping information.<br />
242
14.7.12 Trigger Interrupt Enable Register<br />
Name: TRIER0 - TRIER1<br />
Access Type: Write-only<br />
Offset: 0x090 - 0x094<br />
Reset Value: -<br />
32117D–AVR-01/12<br />
<strong>AT32UC3C</strong><br />
31 30 29 28 27 26 25 24<br />
TRIE<br />
23 22 21 20 19 18 17 16<br />
TRIE<br />
15 14 13 12 11 10 9 8<br />
TRIE<br />
7 6 5 4 3 2 1 0<br />
TRIE<br />
TRIE: Trigger Interrupt Enable<br />
Writing a zero to this bit has no effect.<br />
Writing a one to this bit will set the corresponding bit in TRIMR.<br />
Note:<br />
Channels 0 to 31 are controlled by TRIER0.<br />
Channels 32 to 63 are controlled by TRIER1.<br />
Please refer to the Module Configuration section at the end of this Chapter for device-specific channel mapping information.<br />
243
14.7.13 Trigger Interrupt Disable Register<br />
Name: TRIDR0 - TRIDR1<br />
Access Type: Write-only<br />
Offset: 0x0A0 - 0x0A4<br />
Reset Value: -<br />
32117D–AVR-01/12<br />
<strong>AT32UC3C</strong><br />
31 30 29 28 27 26 25 24<br />
TRID<br />
23 22 21 20 19 18 17 16<br />
TRID<br />
15 14 13 12 11 10 9 8<br />
TRID<br />
7 6 5 4 3 2 1 0<br />
TRID<br />
TRID: Trigger Interrupt Disable<br />
Writing a zero to this bit has no effect.<br />
Writing a one to this bit will clear the corresponding bit in IMR.<br />
Note:<br />
Channels 0 to 31 are controlled by TRIDR0.<br />
Channels 32 to 63 are controlled by TRIDR1.<br />
Please refer to the Module Configuration section at the end of this Chapter for device-specific channel mapping information.<br />
244
14.7.14 Overrun Status Register<br />
Name: OVSR0 - OVSR1<br />
Access Type: Read-only<br />
Offset: 0x0B0 - 0x0B4<br />
Reset Value: 0x00000000<br />
32117D–AVR-01/12<br />
<strong>AT32UC3C</strong><br />
31 30 29 28 27 26 25 24<br />
OVS<br />
23 22 21 20 19 18 17 16<br />
OVS<br />
15 14 13 12 11 10 9 8<br />
OVS<br />
7 6 5 4 3 2 1 0<br />
OVS<br />
OVS: Overrun Interrupt Status<br />
0: An interrupt event has not occurred<br />
1: An interrupt event has occurred<br />
This bit is cleared by writing a one to the corresponding bit in OVSCR.<br />
Note:<br />
Channels 0 to 31 are controlled by OVSR0.<br />
Channels 32 to 63 are controlled by OVSR1.<br />
Please refer to the Module Configuration section at the end of this Chapter for device-specific channel mapping information.<br />
245
14.7.15 Overrun Status Clear Register<br />
Name: OVSCR0 - OVSCR1<br />
Access Type: Write-only<br />
Offset: 0x0C0 - 0x0C4<br />
Reset Value: -<br />
32117D–AVR-01/12<br />
<strong>AT32UC3C</strong><br />
31 30 29 28 27 26 25 24<br />
OVSC<br />
23 22 21 20 19 18 17 16<br />
OVSC<br />
15 14 13 12 11 10 9 8<br />
OVSC<br />
7 6 5 4 3 2 1 0<br />
OVSC<br />
OVSC: Overrun Interrupt Status Clear<br />
Writing a zero to this bit has no effect.<br />
Writing a one to this bit will clear the corresponding bit in OVSR.<br />
Note:<br />
Channels 0 to 31 are controlled by OVSCR0.<br />
Channels 32 to 63 are controlled by OVSCR1.<br />
Please refer to the Module Configuration section at the end of this Chapter for device-specific channel mapping information.<br />
246
14.7.16 Overrun Interrupt Mask Register<br />
Name: OVIMR0 - OVIMR1<br />
Access Type: Read-only<br />
Offset: 0x0D0 - 0x0D4<br />
Reset Value: 0x00000000<br />
32117D–AVR-01/12<br />
<strong>AT32UC3C</strong><br />
31 30 29 28 27 26 25 24<br />
OVIM<br />
23 22 21 20 19 18 17 16<br />
OVIM<br />
15 14 13 12 11 10 9 8<br />
OVIM<br />
7 6 5 4 3 2 1 0<br />
OVIM<br />
OVIM: Overrun Interrupt Mask<br />
0: The corresponding interrupt is disabled.<br />
1: The corresponding interrupt is enabled.<br />
This bit is cleared when the corresponding bit in OVIDR is written to one.<br />
This bit is set when the corresponding bit in OVIER is written to one.<br />
Note:<br />
Channels 0 to 31 are controlled by OVIMR0.<br />
Channels 32 to 63 are controlled by OVIMR1.<br />
Please refer to the Module Configuration section at the end of this Chapter for device-specific channel mapping information.<br />
247
14.7.17 Overrun Interrupt Enable Register<br />
Name: OVIER0 - OVIER1<br />
Access Type: Write-only<br />
Offset: 0x0E0 - 0x0E4<br />
Reset Value: -<br />
32117D–AVR-01/12<br />
<strong>AT32UC3C</strong><br />
31 30 29 28 27 26 25 24<br />
OVIE<br />
23 22 21 20 19 18 17 16<br />
OVIE<br />
15 14 13 12 11 10 9 8<br />
OVIE<br />
7 6 5 4 3 2 1 0<br />
OVIE<br />
OVIE: Overrun Interrupt Enable<br />
Writing a zero to this bit has no effect.<br />
Writing a one to this bit will set the corresponding bit in OVIMR.<br />
Note:<br />
Channels 0 to 31 are controlled by OVIER0.<br />
Channels 32 to 63 are controlled by OVIER1.<br />
Please refer to the Module Configuration section at the end of this Chapter for device-specific channel mapping information.<br />
248
14.7.18 Overrun Interrupt Disable Register<br />
Name: OVIDR0 - OVIDR1<br />
Access Type: Write-only<br />
Offset: 0x0F0 - 0x0F4<br />
Reset Value: -<br />
32117D–AVR-01/12<br />
<strong>AT32UC3C</strong><br />
31 30 29 28 27 26 25 24<br />
OVID<br />
23 22 21 20 19 18 17 16<br />
OVID<br />
15 14 13 12 11 10 9 8<br />
OVID<br />
7 6 5 4 3 2 1 0<br />
OVID<br />
OVID: Overrun Interrupt Disable<br />
Writing a zero to this bit has no effect.<br />
Writing a one to this bit will clear the corresponding bit in IMR.<br />
Note:<br />
Channels 0 to 31 are controlled by OVIDR0.<br />
Channels 32 to 63 are controlled by OVIDR1.<br />
Please refer to the Module Configuration section at the end of this Chapter for device-specific channel mapping information.<br />
249
14.7.19 Channel Multiplexer Register<br />
Name: CHMXn<br />
Access Type: Read/Write<br />
Offset: 0x100 + n*0x004<br />
Reset Value: 0x00000000<br />
32117D–AVR-01/12<br />
<strong>AT32UC3C</strong><br />
31 30 29 28 27 26 25 24<br />
- - - - - - - -<br />
23 22 21 20 19 18 17 16<br />
- - - - - - - -<br />
15 14 13 12 11 10 9 8<br />
- - - - - - - SMX<br />
7 6 5 4 3 2 1 0<br />
- - EVMX<br />
EVMX: Event Multiplexer<br />
Select input event / generator.<br />
SMX: Software Event Multiplexer<br />
0: The Software Event is not selected. Event / generator is selected by EVMX.<br />
1: The Software Event is selected. EVMX is not considered.<br />
EVMX SMX Channel Input<br />
0x00 0 EVT0<br />
0x01 0 EVT1<br />
0xm 0 EVTm<br />
> TRIGOUT 0 None<br />
Any 1 Software Event<br />
250
14.7.20 Event Shaper Register<br />
Name: EVSm<br />
Access Type: Read/Write<br />
Offset: 0x200 + m*0x004<br />
Reset Value: 0x00000000<br />
32117D–AVR-01/12<br />
<strong>AT32UC3C</strong><br />
31 30 29 28 27 26 25 24<br />
- - - - - - - -<br />
23 22 21 20 19 18 17 16<br />
- - - - - - - -<br />
15 14 13 12 11 10 9 8<br />
- - - - - - - -<br />
7 6 5 4 3 2 1 0<br />
- - - - - IGF EVF EVR<br />
EVR: Event Rise<br />
0: No event detection on rising edge.<br />
1: Event detection on rising edge.<br />
EVF: Event Fall<br />
0: No event detection on falling edge.<br />
1: Event detection on falling edge.<br />
IGF: Input Glitch Filter<br />
0: Input glitch filter is off.<br />
1: Input glitch filter is on.<br />
251
32117D–AVR-01/12<br />
<strong>AT32UC3C</strong><br />
14.8 Module Configuration<br />
The specific configuration for each PEVC instance is listed in the following tables. The module<br />
bus clocks listed here are connected to the system bus clocks. Refer to the Power Manager<br />
chapter for details.<br />
Table 14-3. Module Configuration<br />
Feature Parameter PEVC<br />
Number of Generators EVIN 34<br />
Number of Event Shapers EVS 24<br />
Number of Channels / Users TRIGOUT 22<br />
Table 14-4. Module Clock Name<br />
Module name Clock name Description<br />
PEVC CLK_PEVC HSB clock<br />
Table 14-5. Register Reset Values<br />
Register Reset Value<br />
BUSY0 0x0000FFFF<br />
VERSION 0x00000100<br />
PARAMETER Refer to Table 14-3<br />
The BUSY0[21:16] field will always be read as 0x3F.<br />
The PEVC routes events from event generator to trigger an action in the event user. The following<br />
tables defines the corresponding input event generator in EVMx registers and if an event<br />
shaper is implemented for this generator.<br />
Table 14-6. PEVC event numbers<br />
Event Number (EVMx) Event Generator - Event source Event Shaper<br />
[15:0]<br />
PAD_EVT[15:0] - change on input<br />
pins<br />
Yes<br />
16 the generic clock GCLK7 Yes<br />
17 the generic clock GCLK8 Yes<br />
18 TC0 - A0 rising edge Yes<br />
19 TC0 - A1 rising edge Yes<br />
20 TC0 - A2 rising edge Yes<br />
21 TC0 - B0 rising edge Yes<br />
22 TC0 - B1 rising edge Yes<br />
23 TC0 - B2 rising edge Yes<br />
24 ACIFA0 - event 0<br />
25 ACIFA0 - event 1<br />
252
32117D–AVR-01/12<br />
Table 14-6. PEVC event numbers<br />
Event Number (EVMx) Event Generator - Event source Event Shaper<br />
26 ACIFA1 - event 0<br />
27 ACIFA1 - event 1<br />
28 AST - alarm event 0<br />
29 AST - period event 0<br />
30 PWM - compare match on event 0<br />
31 PWM - compare match on event 1<br />
32 QDEC0 - compare match<br />
33 QDEC1 - compare match<br />
The following tables defines the triggered action for each PEVC channel.<br />
Table 14-7. PEVC channel<br />
channel Number Event User - Triggered Event<br />
0 ADCIFA - sequencer 0 start of conversion<br />
1 ADCIFA - sequencer 1 start of conversion<br />
2 DACIFB0 - start of conversion chA<br />
3 DACIFB0 - start of conversion chB<br />
4 DACIFB1 - start of conversion chA<br />
5 DACIFB1 - start of conversion chB<br />
6 PDCA - start of transfer channel 0<br />
7 PDCA - start of transfer channel 1<br />
8 PWM - fault input 0<br />
9 PWM - fault input 1<br />
10 QDEC0 - capture<br />
11 QDEC0 - toggle direction of counting<br />
12 QDEC0- trigger<br />
13 QDEC1 - capture<br />
14 QDEC1 - toggle direction of counting<br />
15 QDEC1- trigger<br />
16 TC0 - input capture A0<br />
17 TC0 - input capture A1<br />
18 TC0 - input capture A2<br />
19 TC0 - input capture B0<br />
20 TC0 - input capture B1<br />
21 TC0 - input capture B2<br />
<strong>AT32UC3C</strong><br />
253
15. Flash Controller (FLASHC)<br />
15.1 Features<br />
15.2 Overview<br />
32117D–AVR-01/12<br />
Rev: 3.0.2.2<br />
<strong>AT32UC3C</strong><br />
Controls flash block with dual read ports allowing staggered reads.<br />
Supports 0 and 1 wait state bus access.<br />
Allows interleaved burst reads for systems with one wait state, outputting one 32-bit word per<br />
clock cycle.<br />
32-bit HSB interface for reads from flash array and writes to page buffer.<br />
32-bit PB interface for issuing commands to and configuration of the controller.<br />
16 lock bits, each protecting a region consisting of (total number of pages in the flash block / 16)<br />
pages.<br />
Regions can be individually protected or unprotected.<br />
Additional protection of the Boot Loader pages.<br />
Supports reads and writes of general-purpose NVM bits.<br />
Supports reads and writes of additional NVM pages.<br />
Supports device protection through a security bit.<br />
Dedicated command for chip-erase, first erasing all on-chip volatile memories before erasing<br />
flash and clearing security bit.<br />
The Flash Controller (FLASHC) interfaces the on-chip flash memory with the 32-bit internal HSB<br />
bus. The controller manages the reading, writing, erasing, locking, and unlocking sequences.<br />
15.3 Product Dependencies<br />
In order to use this module, other parts of the system must be configured correctly, as described<br />
below.<br />
15.3.1 Power Management<br />
If the CPU enters a sleep mode that disables clocks used by the FLASHC, the FLASHC will stop<br />
functioning and resume operation after the system wakes up from sleep mode.<br />
15.3.2 Clocks<br />
15.3.3 Interrupt<br />
The FLASHC has two bus clocks connected: One High Speed Bus clock (CLK_FLASHC_HSB)<br />
and one Peripheral Bus clock (CLK_FLASHC_PB). These clocks are generated by the Power<br />
Manager. Both clocks are enabled at reset, and can be disabled by writing to the Power Manager.<br />
The user has to ensure that CLK_FLASHC_HSB is not turned off before reading the flash<br />
or writing the pagebuffer and that CLK_FLASHC_PB is not turned off before accessing the<br />
FLASHC configuration and control registers. Failing to do so may deadlock the bus.<br />
The FLASHC interrupt request lines are connected to the interrupt controller. Using the FLASHC<br />
interrupts requires the interrupt controller to be programmed first.<br />
254
32117D–AVR-01/12<br />
<strong>AT32UC3C</strong><br />
15.3.4 Debug Operation<br />
When an external debugger forces the CPU into debug mode, the FLASHC continues normal<br />
operation. If the FLASHC is configured in a way that requires it to be periodically serviced by the<br />
CPU through interrupts or similar, improper operation or data loss may result during debugging.<br />
15.4 Functional description<br />
15.4.1 Bus Interfaces<br />
The FLASHC has two bus interfaces, one High-Speed Bus (HSB) interface for reads from the<br />
flash memory and writes to the page buffer, and one Peripheral Bus (PB) interface for issuing<br />
commands and reading status from the controller.<br />
15.4.2 Memory Organization<br />
The flash memory is divided into a set of pages. A page is the basic unit addressed when programming<br />
the flash. A page consists of several words. The pages are grouped into 16 regions of<br />
equal size. Each of these regions can be locked by a dedicated fuse bit, protecting it from accidental<br />
modification.<br />
15.4.3 User Page<br />
15.4.4 Factory page<br />
p pages (FLASH_P)<br />
w bytes in each page and in the page buffer (FLASH_W)<br />
pw bytes in total (FLASH_PW)<br />
f general-purpose fuse bits (FLASH_F), used as region lock bits and for other device-specific<br />
purposes<br />
1 security fuse bit<br />
1 Factory Page<br />
1 User Page<br />
The User page is an additional page, outside the regular flash array, that can be used to store<br />
various data, such as calibration data and serial numbers. This page is not erased by regular<br />
chip erase. The User page can only be written and erased by a special set of commands. Read<br />
accesses to the User page are performed just as any other read accesses to the flash. The<br />
address map of the User page is given in Figure 15-1.<br />
The Factory page is an additional page, outside the regular flash array, that can be used to store<br />
various data, such as calibration data and serial numbers. This page is not erased by regular<br />
chip erase. Read accesses to the Factory page is performed just as any other read access to the<br />
flash. The address map of the Factory page is given in Figure 15-1.<br />
15.4.5 Read Operations<br />
The on-chip flash memory is typically used for storing instructions to be executed by the CPU.<br />
The CPU will address instructions using the HSB bus, and the FLASHC will access the flash<br />
memory and return the addressed 32-bit word.<br />
In systems where the HSB clock period is slower than the access time of the flash memory, the<br />
FLASHC can operate in 0 wait state mode, and output one 32-bit word on the bus per clock<br />
cycle. If the clock frequency allows, the user should use 0 wait state mode, because this gives<br />
the highest performance as no stall cycles are encountered.<br />
255
32117D–AVR-01/12<br />
<strong>AT32UC3C</strong><br />
The FLASHC can also operate in systems where the HSB bus clock period is faster than the<br />
access speed of the flash memory. Wait state support and a read granularity of 64 bits ensure<br />
efficiency in such systems.<br />
Performance for systems with high clock frequency is increased since the flash internally is configured<br />
as two separate banks of 32 bits. Each bank has its own read port. In 0ws mode, only<br />
one of the two flash read ports is accessed. The other flash read port is idle. In 1ws mode, both<br />
flash read ports are active. One read port reading the addressed word, and the other reading the<br />
next sequential word.<br />
The programmer can select the wait states required by writing to the FWS field in the Flash Control<br />
Register (FCR). It is the responsibility of the programmer to select a number of wait states<br />
compatible with the clock frequency and timing characteristics of the flash memory.<br />
In 0ws mode, no wait states are encountered on any flash read operations. In 1 ws mode, one<br />
stall cycle is encountered on the first access in a single or burst transfer.<br />
If the clock frequency allows, the user should use 0ws mode, because this gives the lowest<br />
power consumption for low-frequency systems as only one flash read port is read. Using 1ws<br />
mode has a power/performance ratio approaching 0ws mode as the clock frequency<br />
approaches twice the max frequency of 0ws mode. Using two flash read ports use twice the<br />
power, but also give twice the performance.<br />
The Flash Controller address space is displayed in Figure 15-1. The memory space between<br />
address pw and the User page is reserved, and reading addresses in this space returns an<br />
undefined result. The User page is permanently mapped to an offset of 0x0080 0000 from the<br />
start address of the flash memory. The Factory page is permanently mapped to an offset of<br />
0x0080 0200 from the start address of the flash memory.<br />
Table 15-1. User page Addresses<br />
Memory type Start address, byte sized Size<br />
Main array 0 pw bytes<br />
User 0x0080 0000 w bytes<br />
Factory Page 0x0080 0200 w bytes<br />
256
32117D–AVR-01/12<br />
Figure 15-1. Memory Map for the Flash Memories2<br />
Offset from<br />
base address<br />
0x0080 0200<br />
0x0080 0000<br />
<strong>AT32UC3C</strong><br />
15.4.6 High Speed Read Mode<br />
The flash provides a High Speed Read Mode, offering slightly higher flash read speed at the<br />
cost of higher power consumption. Two dedicated commands, High Speed Read Mode Enable<br />
(HSEN) and High Speed Read Mode Disable (HSDIS) control the speed mode. The High Speed<br />
Mode (HSMODE) in Flash Status Register (FSR) shows which mode the flash is in. After reset,<br />
the High Speed Mode is disabled, and must be manually enabled if the user wants to.<br />
pw<br />
0<br />
REserved<br />
Flash data array<br />
Factory Page<br />
User Page<br />
Flash with extra pages<br />
All addresses are byte addresses<br />
Flash base address<br />
Refer to the Electrical Characteristics chapter at the end of this <strong>datasheet</strong> for details on the maximum<br />
clock frequencies in Normal and High Speed Read Mode.<br />
257
32117D–AVR-01/12<br />
Figure 15-2. High Speed Mode<br />
Frequency<br />
Normal<br />
<strong>AT32UC3C</strong><br />
15.4.7 Quick Page Read<br />
A dedicated command, Quick Page Read (QPR), is provided to read all words in an addressed<br />
page. All bits in all words in this page are AND’ed together, returning a 1-bit result. This result is<br />
placed in the Quick Page Read Result (QPRR) bit in Flash Status Register (FSR). The QPR<br />
command is useful to check that a page is in an erased state. The QPR instruction is much<br />
faster than performing the erased-page check using a regular software subroutine.<br />
15.4.8 Page Buffer Operations<br />
The flash memory has a write and erase granularity of one page; data are written and erased in<br />
chunks of one page. When programming a page, the user must first write the new data into the<br />
Page Buffer. The contents of the entire Page Buffer is copied into the desired page in flash<br />
memory when the user issues the Write Page command, See Section “15.5.1” on page 260.<br />
High<br />
1 wait state<br />
0 wait state<br />
Frequency limit<br />
for 0 wait state<br />
operation<br />
Speed mode<br />
In order to program data into flash page Y, write the desired data to locations Y0 to 63 in the regular<br />
flash memory map. Writing to an address A in the flash memory map will not update the<br />
flash memory, but will instead update location A%64 in the page buffer. The PAGEN field in the<br />
Flash Command (FCMD) register will at the same time be updated with the value A/64.<br />
258
32117D–AVR-01/12<br />
Figure 15-3. Mapping from Page Buffer to Flash<br />
All locations are word locations<br />
Page Buffer<br />
32-bit data<br />
63 62 61 60<br />
59 58 57 56<br />
55 54 53 52<br />
51 50 49 48<br />
47 46 45 44<br />
43 42 41 40<br />
39 38 37 36<br />
35 34 33 32<br />
31 30 29 28<br />
27 26 25 24<br />
23 22 21 20<br />
19 18 17 16<br />
15 14 13 12<br />
11 10 9 8<br />
7 6 5 4<br />
3 2 1 0<br />
<strong>AT32UC3C</strong><br />
The page buffer is word-addressable and should only be written with aligned word transfers,<br />
never with byte or halfword transfers. The page buffer can not be read.<br />
The page buffer is also used for writes to the User page.<br />
Page buffer write operations are performed with 4 wait states. Any accesses attempted to the<br />
FLASHC on the HSB bus during these cycles will be automatically stalled.<br />
Writing to the page buffer can only change page buffer bits from one to zero, i.e. writing<br />
0xAAAAAAAA to a page buffer location that has the value 0x00000000 will not change the page<br />
buffer value. The only way to change a bit from zero to one is to erase the entire page buffer with<br />
the Clear Page Buffer command.<br />
The page buffer is not automatically reset after a page write. The programmer should do this<br />
manually by issuing the Clear Page Buffer flash command. This can be done after a page write,<br />
or before the page buffer is loaded with data to be stored to the flash page.<br />
15.4.9 Writing Words to a Page that is not Completely Erased<br />
This can be used for EEPROM emulation, i.e. writes with granularity of one word instead of an<br />
entire page. Only words that are in an completely erased state (0xFFFFFFFF) can be changed.<br />
The procedure is as follows:<br />
Flash<br />
Y63 Y62 Y61 Y60<br />
Y59 Y58 Y57 Y56<br />
Y55 Y54 Y53 Y52<br />
Y51 Y50 Y49 Y48<br />
Y47 Y46 Y45 Y44<br />
Y43 Y42 Y41 Y40<br />
Y39 Y38 Y37 Y36<br />
Y35<br />
Y31<br />
Y34 Y33<br />
Page Y<br />
Y30 Y29<br />
Y32<br />
Y28<br />
Y27 Y26 Y25 Y24<br />
Y23 Y22 Y21 Y20<br />
Y19 Y18 Y17 Y16<br />
Y15 Y14 Y13 Y12<br />
Y11 Y10 Y9 Y8<br />
Y7 Y6 Y5 Y4<br />
Y3 Y2 Y1 Y0<br />
X63 X62 X61 X60<br />
X59 X58 X57 X56<br />
X55 X54 X53 X52<br />
X51 X50 X49 X48<br />
X47 X46 X45 X44<br />
X43 X42 X41 X40<br />
X39 X38 X37 X36<br />
X35<br />
X31<br />
X34 X33<br />
Page X<br />
X30 X29<br />
X32<br />
X28<br />
X27 X26 X25 X24<br />
X23 X22 X21 X20<br />
X19 X18 X17 X16<br />
X15 X14 X13 X12<br />
X11 X10 X9 X8<br />
X7 X6 X5 X4<br />
X3 X2 X1 X0<br />
259
32117D–AVR-01/12<br />
<strong>AT32UC3C</strong><br />
1. Clear page buffer<br />
2. Write to the page buffer the result of the logical bitwise AND operation between the<br />
contents of the flash page and the new data to write. Only bits that were in an erased<br />
state can be changed from the original page.<br />
3. Write Page.<br />
15.5 Flash Commands<br />
The FLASHC offers a command set to manage programming of the flash memory, locking and<br />
unlocking of regions, and full flash erasing. See Section 15.8.2 for a complete list of commands.<br />
To run a command, the field CMD of the Flash Command Register (FCMD) has to be written<br />
with the command number. As soon as the FCMD register is written, the FRDY bit is automatically<br />
cleared. Once the current command is complete, the FRDY bit is automatically set. If an<br />
interrupt has been enabled by writing a one to FCR.FRDY, the interrupt request line of the Flash<br />
Controller is activated. All flash commands except for Quick Page Read (QPR) will generate an<br />
interrupt request upon completion if FRDY is written to one.<br />
Any HSB bus transfers attempting to read flash memory when the FLASHC is busy executing a<br />
flash command will be stalled, and allowed to continue when the flash command is complete.<br />
After a command has been written to FCMD, the programming algorithm should wait until the<br />
command has been executed before attempting to read instructions or data from the flash or<br />
writing to the page buffer, as the flash will be busy. The waiting can be performed either by polling<br />
the Flash Status Register (FSR) or by waiting for the flash ready interrupt. The command<br />
written to FCMD is initiated on the first clock cycle where the HSB bus interface in FLASHC is<br />
IDLE. The user must make sure that the access pattern to the FLASHC HSB interface contains<br />
an IDLE cycle so that the command is allowed to start. Make sure that no bus masters such as<br />
DMA controllers are performing endless burst transfers from the flash. Also, make sure that the<br />
CPU does not perform endless burst transfers from flash. This is done by letting the CPU enter<br />
sleep mode after writing to FCMD, or by polling FSR for command completion. This polling will<br />
result in an access pattern with IDLE HSB cycles.<br />
All the commands are protected by the same keyword, which has to be written in the eight highest<br />
bits of the FCMD register. Writing FCMD with data that does not contain the correct key<br />
and/or with an invalid command has no effect on the flash memory; however, the PROGE bit is<br />
set in the Flash Status Register (FSR). This bit is automatically cleared by a read access to the<br />
FSR register.<br />
Writing a command to FCMD while another command is being executed has no effect on the<br />
flash memory; however, the PROGE bit is set in the Flash Status Register (FSR). This bit is<br />
automatically cleared by a read access to the FSR register.<br />
If the current command writes or erases a page in a locked region, or a page protected by the<br />
BOOTPROT fuses, the command has no effect on the flash memory; however, the LOCKE bit is<br />
set in the FSR register. This bit is automatically cleared by a read access to the FSR register.<br />
15.5.1 Write/Erase Page Operation<br />
Flash technology requires that an erase must be done before programming. The entire flash can<br />
be erased by an Erase All command. Alternatively, pages can be individually erased by the<br />
Erase Page command.<br />
The User page can be written and erased using the mechanisms described in this chapter.<br />
260
32117D–AVR-01/12<br />
<strong>AT32UC3C</strong><br />
After programming, the page can be locked to prevent miscellaneous write or erase sequences.<br />
Locking is performed on a per-region basis, so locking a region locks all pages inside the region.<br />
Additional protection is provided for the lowermost address space of the flash. This address<br />
space is allocated for the Boot Loader, and is protected both by the lock bit(s) corresponding to<br />
this address space, and the BOOTPROT[2:0] fuses.<br />
Data to be written are stored in an internal buffer called page buffer. The page buffer contains w<br />
words. The page buffer wraps around within the internal memory area address space and<br />
appears to be repeated by the number of pages in it. Writing of 8-bit and 16-bit data to the page<br />
buffer is not allowed and may lead to unpredictable data corruption.<br />
Data must be written to the page buffer before the programming command is written to the Flash<br />
Command Register FCMD. The sequence is as follows:<br />
Reset the page buffer with the Clear Page Buffer command.<br />
Fill the page buffer with the desired contents as described in Section 15.4.8 on page 258.<br />
Programming starts as soon as the programming key and the programming command are<br />
written to the Flash Command Register. The PAGEN field in the Flash Command Register<br />
(FCMD) must contain the address of the page to write. PAGEN is automatically updated<br />
when writing to the page buffer, but can also be written to directly. The FRDY bit in the Flash<br />
Status Register (FSR) is automatically cleared when the page write operation starts.<br />
When programming is completed, the bit FRDY in the Flash Status Register (FSR) is set. If<br />
an interrupt was enabled by writing a one to FCR.FRDY, the interrupt line of the Flash<br />
Controller is set.<br />
Two errors can be detected in the FSR register after a programming sequence:<br />
Programming Error: A bad keyword and/or an invalid command have been written in the<br />
FCMD register.<br />
Lock Error: Can have two different causes:<br />
– The page to be programmed belongs to a locked region. A command must be<br />
executed to unlock the corresponding region before programming can start.<br />
– A bus master without secure status attempted to program a page requiring secure<br />
privileges.<br />
15.5.2 Erase All Operation<br />
The entire memory is erased if the Erase All command (EA) is written to the Flash Command<br />
Register (FCMD). Erase All erases all bits in the flash array. The User page is not erased. All<br />
flash memory locations, the general-purpose fuse bits, and the security bit are erased (reset to<br />
0xFF) after an Erase All.<br />
The EA command also ensures that all volatile memories, such as register file and RAMs, are<br />
erased before the security bit is erased.<br />
Erase All operation is allowed only if no regions are locked, and the BOOTPROT fuses are configured<br />
with a BOOTPROT region size of 0. Thus, if at least one region is locked, the bit LOCKE<br />
in FSR is set and the command is cancelled. If the bit LOCKE has been written to 1 in FCR, the<br />
interrupt request line is set.<br />
When the command is complete, the FRDY bit in the Flash Status Register (FSR) is set. If an<br />
interrupt has been enabled by writing a one to FCR.FRDY, the interrupt line of the Flash Controller<br />
is set. Two errors can be detected in the FSR register after issuing the command:<br />
261
32117D–AVR-01/12<br />
<strong>AT32UC3C</strong><br />
Programming Error: A bad keyword and/or an invalid command have been written in the<br />
FCMD register.<br />
Lock Error: At least one lock region is protected, or BOOTPROT is different from 0. The erase<br />
command has been aborted and no page has been erased. A “Unlock region containing<br />
given page” (UP) command must be executed to unlock any locked regions.<br />
15.5.3 Region Lock Bits<br />
The flash memory has p pages, and these pages are grouped into 16 lock regions, each region<br />
containing p/16 pages. Each region has a dedicated lock bit preventing writing and erasing<br />
pages in the region. After production, the device may have some regions locked. These locked<br />
regions are reserved for a boot or default application. Locked regions can be unlocked to be<br />
erased and then programmed with another application or other data.<br />
To lock or unlock a region, the commands Lock Region Containing Page (LP) and Unlock<br />
Region Containing Page (UP) are provided. Writing one of these commands, together with the<br />
number of the page whose region should be locked/unlocked, performs the desired operation.<br />
One error can be detected in the FSR register after issuing the command:<br />
Programming Error: A bad keyword and/or an invalid command have been written in the<br />
FCMD register.<br />
The lock bits are implemented using the lowest 16 general-purpose fuse bits. This means that<br />
lock bits can also be set/cleared using the commands for writing/erasing general-purpose fuse<br />
bits, see Section 15.6. The general-purpose bit being in an erased (1) state means that the<br />
region is unlocked.<br />
The lowermost pages in the Flash can additionally be protected by the BOOTPROT fuses, see<br />
Section 15.6.<br />
15.6 General-purpose fuse bits<br />
The flash memory has a number of general-purpose fuse bits that the application programmer<br />
can use freely. The fuse bits can be written and erased using dedicated commands, and read<br />
262
32117D–AVR-01/12<br />
<strong>AT32UC3C</strong><br />
through a dedicated Peripheral Bus address. Some of the general-purpose fuse bits are<br />
reserved for special purposes, and should not be used for other functions.:<br />
Table 15-2. General-purpose Fuses with Special Functions<br />
Generalpurpose<br />
fuse<br />
number Name Usage<br />
15:0 LOCK Region lock bits.<br />
16 EPFL<br />
19:17 BOOTPROT<br />
21:20 SECURE<br />
22 UPROT<br />
External Privileged Fetch Lock. Used to prevent the CPU from<br />
fetching instructions from external memories when in privileged<br />
mode. This bit can only be changed when the security bit is<br />
cleared. The address range corresponding to external<br />
memories is device-specific, and not known to the Flash<br />
Controller. This fuse bit is simply routed out of the CPU or bus<br />
system, the Flash Controller does not treat this fuse in any<br />
special way, except that it can not be altered when the security<br />
bit is set.<br />
If the security bit is set, only an external JTAG Chip Erase can<br />
clear EPFL. No internal commands can alter EPFL if the<br />
security bit is set.<br />
When the fuse is erased (i.e. "1"), the CPU can execute<br />
instructions fetched from external memories. When the fuse is<br />
programmed (i.e. "0"), instructions can not be executed from<br />
external memories.<br />
This fuse has no effect in devices with no External Memory<br />
Interface (EBI).<br />
Used to select one of eight different bootloader sizes. Pages<br />
included in the bootloader area can not be erased or<br />
programmed except by a JTAG chip erase. BOOTPROT can<br />
only be changed when the security bit is cleared.<br />
If the security bit is set, only an external JTAG Chip Erase can<br />
clear BOOTPROT, and thereby allow the pages protected by<br />
BOOTPROT to be programmed. No internal commands can<br />
alter BOOTPROT or the pages protected by BOOTPROT if the<br />
security bit is set.<br />
Used to configure secure state and secure state debug<br />
capabilities. Refer to the AVR32 Architecture Manual and the<br />
AVR32UC Technical Reference Manual for more details.<br />
If programmed (i.e. “1”), the JTAG USER PROTECTION<br />
feature is enabled. If this fuse is programmed some HSB<br />
addresses will be accessible by JTAG access even if the flash<br />
security fuse is programmed. Refer to the JTAG documentation<br />
for more information on this functionality. This bit can only be<br />
changed when the security bit is cleared.<br />
263
32117D–AVR-01/12<br />
The BOOTPROT fuses protects the following address space for the Boot Loader:<br />
Table 15-3. Boot Loader Area Specified by BOOTPROT<br />
BOOTPROT<br />
Pages protected by<br />
BOOTPROT<br />
7 None 0<br />
6 0-1 1kByte<br />
5 0-3 2kByte<br />
4 0-7 4kByte<br />
3 0-15 8kByte<br />
2 0-31 16kByte<br />
1 0-63 32kByte<br />
0 0-127 64kByte<br />
Size of protected<br />
memory<br />
The SECURE fuses have the following functionality:<br />
Table 15-4. Secure state configuration<br />
SECURE Functionality<br />
00 Secure state disabled<br />
01 Secure enabled, secure state debug enabled<br />
10 Secure enabled, secure state debug disabled<br />
11 Secure state disabled<br />
<strong>AT32UC3C</strong><br />
To erase or write a general-purpose fuse bit, the commands Write General-Purpose Fuse Bit<br />
(WGPB) and Erase General-Purpose Fuse Bit (EGPB) are provided. Writing one of these commands,<br />
together with the number of the fuse to write/erase, performs the desired operation.<br />
An entire general-purpose fuse byte can be written at a time by using the Program GP Fuse<br />
Byte (PGPFB) instruction. A PGPFB to GP fuse byte 2 is not allowed if the flash is locked by the<br />
security bit. The PFB command is issued with a parameter in the PAGEN field:<br />
PAGEN[2:0] - byte to write<br />
PAGEN[10:3] - Fuse value to write<br />
All general-purpose fuses can be erased by the Erase All General-Purpose fuses (EAGP) command.<br />
An EAGP command is not allowed if the flash is locked by the security bit.<br />
Two errors can be detected in the FSR register after issuing these commands:<br />
Programming Error: A bad keyword and/or an invalid command have been written in the<br />
FCMD register.<br />
Lock Error:<br />
– A write or erase of the BOOTPROT or EPFL or UPROT fuse bits was attempted<br />
while the flash is locked by the security bit.<br />
– A write or erase of the SECURE fuse bits was attempted when SECURE mode was<br />
enabled.<br />
264
15.7 Security bit<br />
32117D–AVR-01/12<br />
<strong>AT32UC3C</strong><br />
The lock bits are implemented using the lowest 16 general-purpose fuse bits. This means that<br />
the 16 lowest general-purpose fuse bits can also be written/erased using the commands for<br />
locking/unlocking regions, see Section 15.5.3.<br />
The security bit allows the entire chip to be locked from external JTAG or other debug access for<br />
code security. The security bit can be written by a dedicated command, Set Security Bit (SSB).<br />
Once set, the only way to clear the security bit is through the JTAG Chip Erase command.<br />
Once the Security bit is set, the following Flash controller commands will be unavailable and<br />
return a lock error if attempted:<br />
Write General-Purpose Fuse Bit (WGPB) to BOOTPROT or EPFL fuses<br />
Erase General-Purpose Fuse Bit (EGPB) to BOOTPROT or EPFL fuses<br />
Program General-Purpose Fuse Byte (PGPFB) of fuse byte 2<br />
Erase All General-Purpose Fuses (EAGPF)<br />
One error can be detected in the FSR register after issuing the command:<br />
Programming Error: A bad keyword and/or an invalid command have been written in the<br />
FCMD register.<br />
265
15.8 User interface<br />
Table 15-5. FLASHC Register Memory Map<br />
Offset Register Register Name Access Reset<br />
32117D–AVR-01/12<br />
<strong>AT32UC3C</strong><br />
0x0 Flash Control Register FCR Read/Write 0x00000000<br />
0x4 Flash Command Register FCMD Read/Write 0x00000000<br />
0x8 Flash Status Register FSR Read/Write 0 (1)<br />
0xc Flash Parameter Register PR Read-only 0 (2)<br />
0x10 Flash Version Register VR Read-only 0 (2)<br />
0x14 Flash General Purpose Fuse Register Hi FGPFRHI Read-only NA (1)<br />
0x18 Flash General Purpose Fuse Register Lo FGPFRLO Read-only NA (1)<br />
Note: 1. The value of the Lock bits is dependent of their programmed state. All other bits in FSR are 0. All bits in FGPFR are dependent<br />
on the programmed state of the fuses they map to. Any bits in these registers not mapped to a fuse read 0.<br />
2. The reset values for these registers are device specific. Please refer to the Module Configuration section at the end of this<br />
chapter.<br />
266
15.8.1 Flash Control Register<br />
Name: FCR<br />
Access Type: Read/Write<br />
Offset: 0x00<br />
Reset Value: 0x00000000<br />
32117D–AVR-01/12<br />
<strong>AT32UC3C</strong><br />
31 30 29 28 27 26 25 24<br />
- - - - - - - -<br />
23 22 21 20 19 18 17 16<br />
- - - - - - - -<br />
15 14 13 12 11 10 9 8<br />
- - - - - - - -<br />
7 6 5 4 3 2 1 0<br />
- FWS - - PROGE LOCKE - FRDY<br />
FWS: Flash Wait State<br />
0: The flash is read with 0 wait states.<br />
1: The flash is read with 1 wait state.<br />
PROGE: Programming Error Interrupt Enable<br />
0: Programming Error does not generate an interrupt.<br />
1: Programming Error generates an interrupt.<br />
LOCKE: Lock Error Interrupt Enable<br />
0: Lock Error does not generate an interrupt.<br />
1: Lock Error generates an interrupt.<br />
FRDY: Flash Ready Interrupt Enable<br />
0: Flash Ready does not generate an interrupt.<br />
1: Flash Ready generates an interrupt.<br />
267
15.8.2 Flash Command Register<br />
Name: FCMD<br />
Access Type: Read/Write<br />
Offset: 0x04<br />
Reset Value: 0x00000000<br />
32117D–AVR-01/12<br />
<strong>AT32UC3C</strong><br />
The FCMD can not be written if the flash is in the process of performing a flash command. Doing<br />
so will cause the FCR write to be ignored, and the PROGE bit to be set.<br />
31 30 29 28 27 26 25 24<br />
KEY<br />
23 22 21 20 19 18 17 16<br />
PAGEN [15:8]<br />
15 14 13 12 11 10 9 8<br />
PAGEN [7:0]<br />
7 6 5 4 3 2 1 0<br />
- - CMD<br />
KEY: Write Protection Key<br />
This field should be written with the value 0xA5 to enable the command defined by the bits of the register. If the field is written<br />
with a different value, the write is not performed and no action is started.<br />
This field always reads as 0.<br />
PAGEN: Page Number<br />
The PAGEN field is used to address a page or fuse bit for certain operations. In order to simplify programming, the PAGEN field<br />
is automatically updated every time the page buffer is written to. For every page buffer write, the PAGEN field is updated with the<br />
page number of the address being written to. Hardware automatically masks writes to the PAGEN field so that only bits<br />
representing valid page numbers can be written, all other bits in PAGEN are always 0. As an example, in a flash with 1024<br />
pages (page 0 - page 1023), bits 15:10 will always be 0.<br />
Table 15-6. Semantic of PAGEN Field in Different Commands<br />
Command PAGEN description<br />
No operation Not used<br />
Write Page The number of the page to write<br />
Clear Page Buffer Not used<br />
Lock region containing given Page Page number whose region should be locked<br />
Unlock region containing given Page Page number whose region should be unlocked<br />
Erase All Not used<br />
Write General-Purpose Fuse Bit GPFUSE #<br />
Erase General-Purpose Fuse Bit GPFUSE #<br />
Set Security Bit Not used<br />
268
Table 15-6. Semantic of PAGEN Field in Different Commands<br />
Command PAGEN description<br />
Program GP Fuse Byte WriteData[7:0], ByteAddress[2:0]<br />
Erase All GP Fuses Not used<br />
Quick Page Read Page number<br />
Write User Page Not used<br />
Erase User Page Not used<br />
Quick Page Read User Page Not used<br />
High Speed Mode Enable Not used<br />
High Speed Mode Disable Not used<br />
32117D–AVR-01/12<br />
<strong>AT32UC3C</strong><br />
CMD: Command<br />
This field defines the flash command. Issuing any unused command will cause the Programming Error bit to be set, and the<br />
corresponding interrupt to be requested if the PROGE bit in FCR is set.<br />
Table 15-7. Set of Commands<br />
Command Value Mnemonic<br />
No operation 0 NOP<br />
Write Page 1 WP<br />
Erase Page 2 EP<br />
Clear Page Buffer 3 CPB<br />
Lock region containing given Page 4 LP<br />
Unlock region containing given Page 5 UP<br />
Erase All 6 EA<br />
Write General-Purpose Fuse Bit 7 WGPB<br />
Erase General-Purpose Fuse Bit 8 EGPB<br />
Set Security Bit 9 SSB<br />
Program GP Fuse Byte 10 PGPFB<br />
Erase All GPFuses 11 EAGPF<br />
Quick Page Read 12 QPR<br />
Write User Page 13 WUP<br />
Erase User Page 14 EUP<br />
Quick Page Read User Page 15 QPRUP<br />
High Speed Mode Enable 16 HSEN<br />
High Speed Mode Disable 17 HSDIS<br />
269
15.8.3 Flash Status Register<br />
Name: FSR<br />
Access Type: Read-only<br />
Offset: 0x08<br />
Reset Value: 0x00000000<br />
32117D–AVR-01/12<br />
<strong>AT32UC3C</strong><br />
31 30 29 28 27 26 25 24<br />
LOCK15 LOCK14 LOCK13 LOCK12 LOCK11 LOCK10 LOCK9 LOCK8<br />
23 22 21 20 19 18 17 16<br />
LOCK7 LOCK6 LOCK5 LOCK4 LOCK3 LOCK2 LOCK1 LOCK0<br />
15 14 13 12 11 10 9 8<br />
- - - - - - - -<br />
7 6 5 4 3 2 1 0<br />
- HSMODE QPRR SECURITY PROGE LOCKE - FRDY<br />
LOCKx: Lock Region x Lock Status<br />
0: The corresponding lock region is not locked.<br />
1: The corresponding lock region is locked.<br />
HSMODE: High-Speed Mode<br />
0: High-speed mode disabled.<br />
1: High-speed mode enabled.<br />
QPRR: Quick Page Read Result<br />
0: The result is zero, i.e. the page is not erased.<br />
1: The result is one, i.e. the page is erased.<br />
SECURITY: Security Bit Status<br />
0: The security bit is inactive.<br />
1: The security bit is active.<br />
PROGE: Programming Error Status<br />
Automatically cleared when FSR is read.<br />
0: No invalid commands and no bad keywords were written in the Flash Command Register FCMD.<br />
1: An invalid command and/or a bad keyword was/were written in the Flash Command Register FCMD.<br />
LOCKE: Lock Error Status<br />
Automatically cleared when FSR is read.<br />
0: No programming of at least one locked lock region has happened since the last read of FSR.<br />
1: Programming of at least one locked lock region has happened since the last read of FSR.<br />
FRDY: Flash Ready Status<br />
0: The Flash Controller is busy and the application must wait before running a new command.<br />
1: The Flash Controller is ready to run a new command.<br />
270
15.8.4 Parameter Register<br />
Name: PR<br />
Access Type: Read-only<br />
Offset: 0x0C<br />
Reset Value: 0x00000000(*)<br />
32117D–AVR-01/12<br />
<strong>AT32UC3C</strong><br />
31 30 29 28 27 26 25 24<br />
- - - - - - - -<br />
23 22 21 20 19 18 17 16<br />
- - - - - - - -<br />
15 14 13 12 11 10 9 8<br />
- - - - - PSZ<br />
7 6 5 4 3 2 1 0<br />
- - - - FSZ<br />
FSZ: Flash Size<br />
The size of the flash. Not all device families will provide all flash sizes indicated in the table.<br />
Table 15-8. Flash size<br />
FSZ Flash Size FSZ Flash Size<br />
0 4 Kbyte 8 192 Kbyte<br />
1 8 Kbyte 9 256 Kbyte<br />
2 16 Kbyte 10 384 Kbyte<br />
3 32 Kbyte 11 512 Kbyte<br />
4 48 Kbyte 12 768 Kbyte<br />
5 64 Kbyte 13 1024 Kbyte<br />
6 96 Kbyte 14 2048 Kbyte<br />
7 128 Kbyte 15 RESERVED<br />
271
PSZ: Page Size<br />
The size of a flash page.<br />
Table 15-9. Flash page size<br />
PSZ Page Size<br />
0 32 words<br />
1 64 words<br />
2 128 words<br />
3 256 words<br />
4 512 words<br />
5 1024 words<br />
6 2048 words<br />
7 4096 words<br />
32117D–AVR-01/12<br />
<strong>AT32UC3C</strong><br />
272
15.8.5 Version Register<br />
Name: VR<br />
Access Type: Read-only<br />
Offset: 0x10<br />
Reset Value: 0x00000000(*)<br />
32117D–AVR-01/12<br />
<strong>AT32UC3C</strong><br />
31 30 29 28 27 26 25 24<br />
- - - - - - - -<br />
23 22 21 20 19 18 17 16<br />
- - - - VARIANT<br />
15 14 13 12 11 10 9 8<br />
- - - - VERSION[11:8]-<br />
7 6 5 4 3 2 1 0<br />
VERSION[7:0]<br />
VARIANT: Variant Number<br />
Reserved. No functionality associated.<br />
VERSION: Version Number<br />
Version number of the module. No functionality associated.<br />
273
15.8.6 Flash General Purpose Fuse Register High<br />
Name: FGPFRHI<br />
Access Type: Read-only<br />
Offset: 0x14<br />
Reset Value: NA(*)<br />
32117D–AVR-01/12<br />
<strong>AT32UC3C</strong><br />
31 30 29 28 27 26 25 24<br />
GPF63 GPF62 GPF61 GPF60 GPF59 GPF58 GPF57 GPF56<br />
23 22 21 20 19 18 17 16<br />
GPF55 GPF54 GPF53 GPF52 GPF51 GPF50 GPF49 GPF48<br />
15 14 13 12 11 10 9 8<br />
GPF47 GPF46 GPF45 GPF44 GPF43 GPF42 GPF41 GPF40<br />
7 6 5 4 3 2 1 0<br />
GPF39 GPF38 GPF37 GPF36 GPF35 GPF34 GPF33 GPF32<br />
This register is only used in systems with more than 32 GP fuses.<br />
GPFxx: General Purpose Fuse xx<br />
0: The fuse has a written/programmed state.<br />
1: The fuse has an erased state.<br />
274
15.8.7 Flash General Purpose Fuse Register Low<br />
Name: FGPFRLO<br />
Access Type: Read-only<br />
Offset: 0x18<br />
Reset Value: NA(*)<br />
32117D–AVR-01/12<br />
<strong>AT32UC3C</strong><br />
31 30 29 28 27 26 25 24<br />
GPF31 GPF30 GPF29 GPF28 GPF27 GPF26 GPF25 GPF24<br />
23 22 21 20 19 18 17 16<br />
GPF23 GPF22 GPF21 GPF20 GPF19 GPF18 GPF17 GPF16<br />
15 14 13 12 11 10 9 8<br />
GPF15 GPF14 GPF13 GPF12 GPF11 GPF10 GPF09 GPF08<br />
7 6 5 4 3 2 1 0<br />
GPF07 GPF06 GPF05 GPF04 GPF03 GPF02 GPF01 GPF00<br />
GPFxx: General Purpose Fuse xx<br />
0: The fuse has a written/programmed state.<br />
1: The fuse has an erased state.<br />
275
32117D–AVR-01/12<br />
<strong>AT32UC3C</strong><br />
15.9 Fuses Settings<br />
The flash block contains 32 general purpose fuses. These 32 fuses can be found in the Flash<br />
General Purpose Fuse Register Low. Some of these fuses have defined meanings outside the<br />
flash controller and are described in this section.<br />
In addition to the General Purpose fuses parts of the Flash, user page can have a defined meaning<br />
outside the flash controller and are described in this section. Note that after writing the user<br />
page, values will not be propagated to other modules internally on the device. Other modules<br />
will load these values after resetting the chip.<br />
The general purpose fuses are erased by a JTAG or aWire chip erase.<br />
15.9.1 Flash General Purpose Fuse Register (FGPFRLO)<br />
Table 15-10. FGPFR Register Description<br />
31 30 29 28 27 26 25 24<br />
BOD33EN BODEN BODHYST BODLEVEL[3:1]<br />
23 22 21 20 19 18 17 16<br />
BODLEVEL[0] UPROT SECURE BOOTPROT EPFL<br />
15 14 13 12 11 10 9 8<br />
BOD33EN: 3.3V Brown Out Detector Enable<br />
BODEN: 1.8V Brown Out Detector Enable<br />
LOCK[15:8]<br />
7 6 5 4 3 2 1 0<br />
Table 15-11. BOD33EN Field Description<br />
BOD33EN Description<br />
0x0 BOD33 disabled<br />
0x1 BOD33 enabled, BOD33 reset enabled<br />
0x2 BOD33 enabled, BOD33 reset disabled<br />
0x3 BOD33 disabled<br />
Table 15-12. BODEN Field Description<br />
BODEN Description<br />
0x0 BOD18 disabled<br />
0x1 BOD18 enabled, BOD18 reset enabled<br />
0x2 BOD18 enabled, BOD18 reset disabled<br />
0x3 BOD18 disabled<br />
LOCK[7:0]<br />
276
BODHYST: 1.8V Brown Out Detector Hysteresis<br />
0: The BOD18 hysteresis is disabled.<br />
1: The BOD18 hysteresis is enabled.<br />
BODLEVEL: 1.8V Brown Out Detector Trigger Level<br />
This controls the voltage trigger level for the BOD18.<br />
When the flash fuse calibration is done (SCIF.BOD.FCD is set):<br />
SCIF.BOD.LEVEL is loaded to 0x28 if the BODLEVEL fuses are greater than 0xA.<br />
SCIF.BOD.LEVEL is loaded to (BODLEVEL x 4) if the BODLEVEL fuses are lower or equal to 0xA.<br />
Refer to See ”Electrical Characteristics” on page 1248.<br />
UPROT, SECURE, BOOTPROT, EPFL, LOCK<br />
These are Flash controller fuses and are described in the FLASHC section.<br />
15.9.2 Default Fuse Value<br />
The devices are shipped with the FGPFRLO register value: 0xF877FFFF:<br />
32117D–AVR-01/12<br />
BOD33EN fuses set to 11. BOD33 is disabled.<br />
BODEN fuses set to 11. BOD18 is disabled.<br />
BODHYST fuse set to 1. The BOD18 hysteresis is enabled.<br />
BODLEVEL fuses set to 0000. This is the minimum voltage level for BOD18.<br />
UPROT fuse set to 1<br />
SECURE fuses set to 11<br />
BOOTPROT fuses set to 011. The bootloader protected size is 8 KBytes.<br />
EPFL fuse set to 1. External privileged fetch is not locked.<br />
LOCK fuses set to 1111111111111111. No region locked.<br />
See also the <strong>AT32UC3C</strong> Bootloader user guide document.<br />
<strong>AT32UC3C</strong><br />
After the JTAG or aWire chip erase command, the FGPFRLO register value is 0xFFFFFFFF.<br />
277
15.9.3 Fuses in User Page (address 0x80800000)<br />
15.9.3.1 First word (address 0x80800000)<br />
Table 15-13. User Page Fuse Description<br />
32117D–AVR-01/12<br />
<strong>AT32UC3C</strong><br />
31 30 29 28 27 26 25 24<br />
WDTDISRV SS_ADRR[14:8]<br />
23 22 21 20 19 18 17 16<br />
SS_ADRR[7:0]<br />
15 14 13 12 11 10 9 8<br />
SS_ADRF[15:8]<br />
7 6 5 4 3 2 1 0<br />
SS_ADRF[7:0]<br />
SS_ADRR: Size of the CPU RAM controlled by the Secure State<br />
The section of the CPU RAM controlled by the Secure State is from address 0x00000000 to address (SS_ADRR
32117D–AVR-01/12<br />
<strong>AT32UC3C</strong><br />
15.10 Calibration Settings<br />
Some analog blocks require to be calibrated. The recommended calibration settings are written<br />
in the factory page. The base address of the factory page is 0x80800200.<br />
Table 15-14. Calibration Register Map<br />
Offset Register<br />
0x0000 Oscillator Calibration<br />
0x0004 ADC Core Calibration<br />
0x0008 ADC S/H Calibration<br />
0x000C DAC0A Channel Calibration<br />
0x0010 DAC0B Channel Calibration<br />
0x0014 DAC1A Channel Calibration<br />
0x0018 DAC1B Channel Calibration<br />
279
15.10.0.1 Oscillator Calibration (offset 0x0000)<br />
Table 15-15. Oscillator Calibration<br />
32117D–AVR-01/12<br />
<strong>AT32UC3C</strong><br />
31 30 29 28 27 26 25 24<br />
RC1M_CALIB_5V[7:0]<br />
23 22 21 20 19 18 17 16<br />
RC8M_CALIB_5V[7:0]<br />
15 14 13 12 11 10 9 8<br />
RC1M_CALIB[7:0]<br />
7 6 5 4 3 2 1 0<br />
RC8M_CALIB[7:0]<br />
RC1M_CALIB_5V: Calibration of RC8M operating at 1MHz and at 5V<br />
This calibration should be used when the RC8M is used at a frequency of 1 MHz and when the voltage of the VDDIN_5 pin is<br />
within [4.5V:5.5V]. This value should be written to RCCR8.CALIB field of the SCIF module.<br />
RC8M_CALIB_5V: Calibration of RC8M operating at 8MHz and at 5V<br />
This calibration should be used when the RC8M is used at a frequency of 8 MHz and when the voltage of the VDDIN_5 pin is<br />
within [4.5V:5.5V]. This value should be written to RCCR8.CALIB.<br />
RC1M_CALIB: Calibration of RC8M operating at 1MHz and at 3.3V<br />
This calibration should be used when the RC8M is used at a frequency of 1 MHz and when the voltage of the VDDIN_5 pin is<br />
within [3.0V:3.6V]. This value should be written to RCCR8.CALIB.<br />
RC8M_CALIB: Calibration of RC8M operating at 8MHz and at 3.3V<br />
This calibration should be used when the RC8M is used at a frequency of 8 MHz and when the voltage of the VDDIN_5 pin is<br />
within [3.0V:3.6V]. This value is automatically loaded in RCCR8.CALIB at power-up.<br />
280
15.10.0.2 ADC Core Calibration (offset 0x0004)<br />
Table 15-16. ADC Core Calibration<br />
ADC_OCAL: Offset Calibration of the ADC core<br />
This value should be written to the ADCCAL.OCAL field of the ADCIFA module.<br />
ADC_GCAL: Gain Calibration of the ADC core<br />
This value should be written to the ADCCAL.GCAL field of the ADCIFA module.<br />
32117D–AVR-01/12<br />
<strong>AT32UC3C</strong><br />
31 30 29 28 27 26 25 24<br />
- - ADC_OCAL[5:0]<br />
23 22 21 20 19 18 17 16<br />
- - - - - - - -<br />
15 14 13 12 11 10 9 8<br />
ADC_GCAL[14:8]<br />
7 6 5 4 3 2 1 0<br />
ADC_GCAL[7:0]<br />
281
15.10.0.3 ADC S/H Calibration (offset 0x0008)<br />
Table 15-17. ADC S/H Calibration<br />
ADC_GAIN1: Gain Calibration of the ADC S/H1<br />
This value should be written to the SHCAL.GAIN1 field of the ADCIFA module.<br />
ADC_GAIN0: Gain Calibration of the ADC S/H0<br />
This value should be written to the SHCAL.GAIN0 field of the ADCIFA module.<br />
32117D–AVR-01/12<br />
<strong>AT32UC3C</strong><br />
31 30 29 28 27 26 25 24<br />
- - - - - - ADC_GAIN1[9:8]<br />
23 22 21 20 19 18 17 16<br />
ADC_GAIN1[7:0]<br />
15 14 13 12 11 10 9 8<br />
- - - - - - ADC_GAIN0[9:8]<br />
7 6 5 4 3 2 1 0<br />
ADC_GAIN0[7:0]<br />
282
15.10.0.4 DAC0 Channel Calibration (offset 0x000C (DAC0 Channel A), 0x0010 (DAC0 Channel B)),<br />
Table 15-18. DAC0A and DAC0B Channel Calibration<br />
DAC_GCAL: Gain Calibration of the DAC Channel<br />
This value should be written to the GOC.GCR field of the DACIFB0 module.<br />
DAC_OCAL: Offset Calibration of the DAC Channel<br />
This value should be written to GOC.OCR field of the DACIFB0 module.<br />
32117D–AVR-01/12<br />
<strong>AT32UC3C</strong><br />
31 30 29 28 27 26 25 24<br />
- - - - - - - DAC_GCAL[8]<br />
23 22 21 20 19 18 17 16<br />
DAC_GCAL[7:0]<br />
15 14 13 12 11 10 9 8<br />
- - - - - - - DAC_OCAL[8]<br />
7 6 5 4 3 2 1 0<br />
DAC_OCAL[7:0]<br />
283
15.10.0.5 DAC1 Channel Calibration (offset 0x0014 (DAC1 Channel A), 0x0018 (DAC1 Channel B)),<br />
Table 15-19. DAC1A and DAC1B Channel Calibration<br />
DAC_GCAL: Gain Calibration of the DAC Channel<br />
This value should be written to the GOC.GCR field of the DACIFB1 module.<br />
DAC_OCAL: Offset Calibration of the DAC Channel<br />
This value should be written to GOC.OCR field of the DACIFB1 module.<br />
32117D–AVR-01/12<br />
<strong>AT32UC3C</strong><br />
31 30 29 28 27 26 25 24<br />
- - - - - - - DAC_GCAL[8]<br />
23 22 21 20 19 18 17 16<br />
DAC_GCAL1[7:0]<br />
15 14 13 12 11 10 9 8<br />
- - - - - - - DAC_OCAL[8]<br />
7 6 5 4 3 2 1 0<br />
DAC_OCAL[7:0]<br />
284
15.11 Serial Number<br />
32117D–AVR-01/12<br />
<strong>AT32UC3C</strong><br />
Each device has a unique 120 bits serial number readable from address 0x80800284 to<br />
0x80800292.<br />
15.12 Module Configuration<br />
The specific configuration for each FLASHC instance is listed in the following tables. The module<br />
bus clocks listed here are connected to the system bus clocks. Please refer to the Power<br />
Manager chapter for details.<br />
Table 15-20. Module Configuration<br />
<strong>AT32UC3C</strong>0512C<br />
<strong>AT32UC3C</strong>1512C<br />
<strong>AT32UC3C</strong>2512C<br />
<strong>AT32UC3C</strong>0256C<br />
<strong>AT32UC3C</strong>1256C<br />
<strong>AT32UC3C</strong>2256C<br />
<strong>AT32UC3C</strong>0128C<br />
<strong>AT32UC3C</strong>1128C<br />
<strong>AT32UC3C</strong>2128C<br />
<strong>AT32UC3C</strong>064C<br />
<strong>AT32UC3C</strong>164C<br />
<strong>AT32UC3C</strong>264C<br />
Table 15-21. Module Clock Name<br />
Flash Size Number of pages Page size<br />
512Kbytes 1024 128 words<br />
256Kbytes 512 128 words<br />
128Kbytes 256 128 words<br />
Module name Clock Name Description<br />
FLASHC<br />
Table 15-22. Register Reset Values<br />
Register Reset Value<br />
PR Refer to Table 15-20<br />
VR 0x00000302<br />
64Kbytes 128 128 words<br />
CLK_FLASHC_HSB HSB clock<br />
CLK_FLASHC_PB Peripheral Bus clock from the PBB clock domain<br />
285
16. HSB Bus Matrix (HMATRIXB)<br />
16.1 Features<br />
16.2 Overview<br />
32117D–AVR-01/12<br />
Rev: 1.3.0.3<br />
User Interface on peripheral bus<br />
Configurable number of masters (up to 16)<br />
Configurable number of slaves (up to 16)<br />
One decoder for each master<br />
Programmable arbitration for each slave<br />
– Round-Robin<br />
– Fixed priority<br />
Programmable default master for each slave<br />
– No default master<br />
– Last accessed default master<br />
– Fixed default master<br />
One cycle latency for the first access of a burst<br />
Zero cycle latency for default master<br />
One special function register for each slave (not dedicated)<br />
<strong>AT32UC3C</strong><br />
The Bus Matrix implements a multi-layer bus structure, that enables parallel access paths<br />
between multiple High Speed Bus (HSB) masters and slaves in a system, thus increasing the<br />
overall bandwidth. The Bus Matrix interconnects up to 16 HSB Masters to up to 16 HSB Slaves.<br />
The normal latency to connect a master to a slave is one cycle except for the default master of<br />
the accessed slave which is connected directly (zero cycle latency). The Bus Matrix provides 16<br />
Special Function Registers (SFR) that allow the Bus Matrix to support application specific<br />
features.<br />
16.3 Product Dependencies<br />
In order to configure this module by accessing the user registers, other parts of the system must<br />
be configured correctly, as described below.<br />
16.3.1 Clocks<br />
16.4 Functional Description<br />
The clock for the HMATRIX bus interface (CLK_HMATRIX) is generated by the Power Manager.<br />
This clock is enabled at reset, and can be disabled in the Power Manager.<br />
16.4.1 Special Bus Granting Mechanism<br />
The Bus Matrix provides some speculative bus granting techniques in order to anticipate access<br />
requests from some masters. This mechanism reduces latency at first access of a burst or single<br />
transfer. This bus granting mechanism sets a different default master for every slave.<br />
At the end of the current access, if no other request is pending, the slave remains connected to<br />
its associated default master. A slave can be associated with three kinds of default masters: no<br />
default master, last access master, and fixed default master.<br />
286
32117D–AVR-01/12<br />
<strong>AT32UC3C</strong><br />
To change from one kind of default master to another, the Bus Matrix user interface provides the<br />
Slave Configuration Registers, one for each slave, that set a default master for each slave. The<br />
Slave Configuration Register contains two fields: DEFMSTR_TYPE and FIXED_DEFMSTR. The<br />
2-bit DEFMSTR_TYPE field selects the default master type (no default, last access master, fixed<br />
default master), whereas the 4-bit FIXED_DEFMSTR field selects a fixed default master provided<br />
that DEFMSTR_TYPE is set to fixed default master. Please refer to the Bus Matrix user<br />
interface description.<br />
16.4.1.1 No Default Master<br />
At the end of the current access, if no other request is pending, the slave is disconnected from<br />
all masters. No Default Master suits low-power mode.<br />
16.4.1.2 Last Access Master<br />
At the end of the current access, if no other request is pending, the slave remains connected to<br />
the last master that performed an access request.<br />
16.4.1.3 Fixed Default Master<br />
At the end of the current access, if no other request is pending, the slave connects to its fixed<br />
default master. Unlike last access master, the fixed master does not change unless the user<br />
modifies it by a software action (field FIXED_DEFMSTR of the related SCFG).<br />
16.4.2 Arbitration<br />
The Bus Matrix provides an arbitration mechanism that reduces latency when conflict cases<br />
occur, i.e. when two or more masters try to access the same slave at the same time. One arbiter<br />
per HSB slave is provided, thus arbitrating each slave differently.<br />
The Bus Matrix provides the user with the possibility of choosing between 2 arbitration types for<br />
each slave:<br />
1. Round-Robin Arbitration (default)<br />
2. Fixed Priority Arbitration<br />
This is selected by the ARBT field in the Slave Configuration Registers (SCFG).<br />
Each algorithm may be complemented by selecting a default master configuration for each<br />
slave.<br />
When a re-arbitration must be done, specific conditions apply. This is described in “Arbitration<br />
Rules” .<br />
16.4.2.1 Arbitration Rules<br />
Each arbiter has the ability to arbitrate between two or more different master requests. In order<br />
to avoid burst breaking and also to provide the maximum throughput for slave interfaces, arbitration<br />
may only take place during the following cycles:<br />
1. Idle Cycles: When a slave is not connected to any master or is connected to a master<br />
which is not currently accessing it.<br />
2. Single Cycles: When a slave is currently doing a single access.<br />
3. End of Burst Cycles: When the current cycle is the last cycle of a burst transfer. For<br />
defined length burst, predicted end of burst matches the size of the transfer but is managed<br />
differently for undefined length burst. This is described below.<br />
4. Slot Cycle Limit: When the slot cycle counter has reached the limit value indicating that<br />
the current master access is too long and must be broken. This is described below.<br />
287
32117D–AVR-01/12<br />
<strong>AT32UC3C</strong><br />
Undefined Length Burst Arbitration<br />
In order to avoid long slave handling during undefined length bursts (INCR), the Bus Matrix provides<br />
specific logic in order to re-arbitrate before the end of the INCR transfer. A predicted end<br />
of burst is used as a defined length burst transfer and can be selected among the following five<br />
possibilities:<br />
1. Infinite: No predicted end of burst is generated and therefore INCR burst transfer will<br />
never be broken.<br />
2. One beat bursts: Predicted end of burst is generated at each single transfer inside the<br />
INCP transfer.<br />
3. Four beat bursts: Predicted end of burst is generated at the end of each four beat<br />
boundary inside INCR transfer.<br />
4. Eight beat bursts: Predicted end of burst is generated at the end of each eight beat<br />
boundary inside INCR transfer.<br />
5. Sixteen beat bursts: Predicted end of burst is generated at the end of each sixteen beat<br />
boundary inside INCR transfer.<br />
This selection can be done through the ULBT field in the Master Configuration Registers<br />
(MCFG).<br />
Slot Cycle Limit Arbitration<br />
The Bus Matrix contains specific logic to break long accesses, such as very long bursts on a<br />
very slow slave (e.g., an external low speed memory). At the beginning of the burst access, a<br />
counter is loaded with the value previously written in the SLOT_CYCLE field of the related Slave<br />
Configuration Register (SCFG) and decreased at each clock cycle. When the counter reaches<br />
zero, the arbiter has the ability to re-arbitrate at the end of the current byte, halfword, or word<br />
transfer.<br />
16.4.2.2 Round-Robin Arbitration<br />
This algorithm allows the Bus Matrix arbiters to dispatch the requests from different masters to<br />
the same slave in a round-robin manner. If two or more master requests arise at the same time,<br />
the master with the lowest number is first serviced, then the others are serviced in a round-robin<br />
manner.<br />
There are three round-robin algorithms implemented:<br />
1. Round-Robin arbitration without default master<br />
2. Round-Robin arbitration with last default master<br />
3. Round-Robin arbitration with fixed default master<br />
Round-Robin Arbitration without Default Master<br />
This is the main algorithm used by Bus Matrix arbiters. It allows the Bus Matrix to dispatch<br />
requests from different masters to the same slave in a pure round-robin manner. At the end of<br />
the current access, if no other request is pending, the slave is disconnected from all masters.<br />
This configuration incurs one latency cycle for the first access of a burst. Arbitration without<br />
default master can be used for masters that perform significant bursts.<br />
Round-Robin Arbitration with Last Default Master<br />
This is a biased round-robin algorithm used by Bus Matrix arbiters. It allows the Bus Matrix to<br />
remove the one latency cycle for the last master that accessed the slave. At the end of the cur-<br />
288
32117D–AVR-01/12<br />
<strong>AT32UC3C</strong><br />
rent transfer, if no other master request is pending, the slave remains connected to the last<br />
master that performed the access. Other non privileged masters still get one latency cycle if they<br />
want to access the same slave. This technique can be used for masters that mainly perform single<br />
accesses.<br />
Round-Robin Arbitration with Fixed Default Master<br />
This is another biased round-robin algorithm. It allows the Bus Matrix arbiters to remove the one<br />
latency cycle for the fixed default master per slave. At the end of the current access, the slave<br />
remains connected to its fixed default master. Every request attempted by this fixed default master<br />
will not cause any latency whereas other non privileged masters will still get one latency<br />
cycle. This technique can be used for masters that mainly perform single accesses.<br />
16.4.2.3 Fixed Priority Arbitration<br />
This algorithm allows the Bus Matrix arbiters to dispatch the requests from different masters to<br />
the same slave by using the fixed priority defined by the user. If two or more master requests are<br />
active at the same time, the master with the highest priority number is serviced first. If two or<br />
more master requests with the same priority are active at the same time, the master with the<br />
highest number is serviced first.<br />
For each slave, the priority of each master may be defined through the Priority Registers for<br />
Slaves (PRAS and PRBS).<br />
16.4.3 Slave and Master assignation<br />
The index number assigned to Bus Matrix slaves and masters are described in the Module Configuration<br />
section at the end of this chapter.<br />
289
16.5 User Interface<br />
Table 16-1. HMATRIX Register Memory Map<br />
32117D–AVR-01/12<br />
<strong>AT32UC3C</strong><br />
Offset Register Name Access Reset Value<br />
0x0000 Master Configuration Register 0 MCFG0 Read/Write 0x00000002<br />
0x0004 Master Configuration Register 1 MCFG1 Read/Write 0x00000002<br />
0x0008 Master Configuration Register 2 MCFG2 Read/Write 0x00000002<br />
0x000C Master Configuration Register 3 MCFG3 Read/Write 0x00000002<br />
0x0010 Master Configuration Register 4 MCFG4 Read/Write 0x00000002<br />
0x0014 Master Configuration Register 5 MCFG5 Read/Write 0x00000002<br />
0x0018 Master Configuration Register 6 MCFG6 Read/Write 0x00000002<br />
0x001C Master Configuration Register 7 MCFG7 Read/Write 0x00000002<br />
0x0020 Master Configuration Register 8 MCFG8 Read/Write 0x00000002<br />
0x0024 Master Configuration Register 9 MCFG9 Read/Write 0x00000002<br />
0x0028 Master Configuration Register 10 MCFG10 Read/Write 0x00000002<br />
0x002C Master Configuration Register 11 MCFG11 Read/Write 0x00000002<br />
0x0030 Master Configuration Register 12 MCFG12 Read/Write 0x00000002<br />
0x0034 Master Configuration Register 13 MCFG13 Read/Write 0x00000002<br />
0x0038 Master Configuration Register 14 MCFG14 Read/Write 0x00000002<br />
0x003C Master Configuration Register 15 MCFG15 Read/Write 0x00000002<br />
0x0040 Slave Configuration Register 0 SCFG0 Read/Write 0x00000010<br />
0x0044 Slave Configuration Register 1 SCFG1 Read/Write 0x00000010<br />
0x0048 Slave Configuration Register 2 SCFG2 Read/Write 0x00000010<br />
0x004C Slave Configuration Register 3 SCFG3 Read/Write 0x00000010<br />
0x0050 Slave Configuration Register 4 SCFG4 Read/Write 0x00000010<br />
0x0054 Slave Configuration Register 5 SCFG5 Read/Write 0x00000010<br />
0x0058 Slave Configuration Register 6 SCFG6 Read/Write 0x00000010<br />
0x005C Slave Configuration Register 7 SCFG7 Read/Write 0x00000010<br />
0x0060 Slave Configuration Register 8 SCFG8 Read/Write 0x00000010<br />
0x0064 Slave Configuration Register 9 SCFG9 Read/Write 0x00000010<br />
0x0068 Slave Configuration Register 10 SCFG10 Read/Write 0x00000010<br />
0x006C Slave Configuration Register 11 SCFG11 Read/Write 0x00000010<br />
0x0070 Slave Configuration Register 12 SCFG12 Read/Write 0x00000010<br />
0x0074 Slave Configuration Register 13 SCFG13 Read/Write 0x00000010<br />
0x0078 Slave Configuration Register 14 SCFG14 Read/Write 0x00000010<br />
0x007C Slave Configuration Register 15 SCFG15 Read/Write 0x00000010<br />
0x0080 Priority Register A for Slave 0 PRAS0 Read/Write 0x00000000<br />
0x0084 Priority Register B for Slave 0 PRBS0 Read/Write 0x00000000<br />
0x0088 Priority Register A for Slave 1 PRAS1 Read/Write 0x00000000<br />
290
Table 16-1. HMATRIX Register Memory Map (Continued)<br />
32117D–AVR-01/12<br />
<strong>AT32UC3C</strong><br />
Offset Register Name Access Reset Value<br />
0x008C Priority Register B for Slave 1 PRBS1 Read/Write 0x00000000<br />
0x0090 Priority Register A for Slave 2 PRAS2 Read/Write 0x00000000<br />
0x0094 Priority Register B for Slave 2 PRBS2 Read/Write 0x00000000<br />
0x0098 Priority Register A for Slave 3 PRAS3 Read/Write 0x00000000<br />
0x009C Priority Register B for Slave 3 PRBS3 Read/Write 0x00000000<br />
0x00A0 Priority Register A for Slave 4 PRAS4 Read/Write 0x00000000<br />
0x00A4 Priority Register B for Slave 4 PRBS4 Read/Write 0x00000000<br />
0x00A8 Priority Register A for Slave 5 PRAS5 Read/Write 0x00000000<br />
0x00AC Priority Register B for Slave 5 PRBS5 Read/Write 0x00000000<br />
0x00B0 Priority Register A for Slave 6 PRAS6 Read/Write 0x00000000<br />
0x00B4 Priority Register B for Slave 6 PRBS6 Read/Write 0x00000000<br />
0x00B8 Priority Register A for Slave 7 PRAS7 Read/Write 0x00000000<br />
0x00BC Priority Register B for Slave 7 PRBS7 Read/Write 0x00000000<br />
0x00C0 Priority Register A for Slave 8 PRAS8 Read/Write 0x00000000<br />
0x00C4 Priority Register B for Slave 8 PRBS8 Read/Write 0x00000000<br />
0x00C8 Priority Register A for Slave 9 PRAS9 Read/Write 0x00000000<br />
0x00CC Priority Register B for Slave 9 PRBS9 Read/Write 0x00000000<br />
0x00D0 Priority Register A for Slave 10 PRAS10 Read/Write 0x00000000<br />
0x00D4 Priority Register B for Slave 10 PRBS10 Read/Write 0x00000000<br />
0x00D8 Priority Register A for Slave 11 PRAS11 Read/Write 0x00000000<br />
0x00DC Priority Register B for Slave 11 PRBS11 Read/Write 0x00000000<br />
0x00E0 Priority Register A for Slave 12 PRAS12 Read/Write 0x00000000<br />
0x00E4 Priority Register B for Slave 12 PRBS12 Read/Write 0x00000000<br />
0x00E8 Priority Register A for Slave 13 PRAS13 Read/Write 0x00000000<br />
0x00EC Priority Register B for Slave 13 PRBS13 Read/Write 0x00000000<br />
0x00F0 Priority Register A for Slave 14 PRAS14 Read/Write 0x00000000<br />
0x00F4 Priority Register B for Slave 14 PRBS14 Read/Write 0x00000000<br />
0x00F8 Priority Register A for Slave 15 PRAS15 Read/Write 0x00000000<br />
0x00FC Priority Register B for Slave 15 PRBS15 Read/Write 0x00000000<br />
0x0110 Special Function Register 0 SFR0 Read/Write –<br />
0x0114 Special Function Register 1 SFR1 Read/Write –<br />
0x0118 Special Function Register 2 SFR2 Read/Write –<br />
0x011C Special Function Register 3 SFR3 Read/Write –<br />
0x0120 Special Function Register 4 SFR4 Read/Write –<br />
0x0124 Special Function Register 5 SFR5 Read/Write –<br />
0x0128 Special Function Register 6 SFR6 Read/Write –<br />
291
Table 16-1. HMATRIX Register Memory Map (Continued)<br />
32117D–AVR-01/12<br />
<strong>AT32UC3C</strong><br />
Offset Register Name Access Reset Value<br />
0x012C Special Function Register 7 SFR7 Read/Write –<br />
0x0130 Special Function Register 8 SFR8 Read/Write –<br />
0x0134 Special Function Register 9 SFR9 Read/Write –<br />
0x0138 Special Function Register 10 SFR10 Read/Write –<br />
0x013C Special Function Register 11 SFR11 Read/Write –<br />
0x0140 Special Function Register 12 SFR12 Read/Write –<br />
0x0144 Special Function Register 13 SFR13 Read/Write –<br />
0x0148 Special Function Register 14 SFR14 Read/Write –<br />
0x014C Special Function Register 15 SFR15 Read/Write –<br />
292
16.5.1 Master Configuration Registers<br />
Name: MCFG0...MCFG15<br />
Access Type: Read/Write<br />
Offset: 0x00 - 0x3C<br />
Reset Value: 0x00000002<br />
ULBT: Undefined Length Burst Type<br />
32117D–AVR-01/12<br />
<strong>AT32UC3C</strong><br />
31 30 29 28 27 26 25 24<br />
– – – – – – – –<br />
23 22 21 20 19 18 17 16<br />
– – – – – – – –<br />
15 14 13 12 11 10 9 8<br />
– – – – – – – –<br />
7 6 5 4 3 2 1 0<br />
– – – – – ULBT<br />
Table 16-2. Undefined Length Burst Type<br />
ULBT Undefined Length Burst Type Description<br />
000 Inifinite Length Burst No predicted end of burst is generated and therefore INCR bursts coming from this<br />
master cannot be broken.<br />
001 Single-Access The undefined length burst is treated as a succession of single accesses, allowing rearbitration<br />
at each beat of the INCR burst.<br />
010 4 Beat Burst The undefined length burst is split into a four-beat burst, allowing re-arbitration at each<br />
four-beat burst end.<br />
011 8 Beat Burst The undefined length burst is split into an eight-beat burst, allowing re-arbitration at<br />
each eight-beat burst end.<br />
100 16 Beat Burst The undefined length burst is split into a sixteen-beat burst, allowing re-arbitration at<br />
each sixteen-beat burst end.<br />
293
16.5.2 Slave Configuration Registers<br />
Name: SCFG0...SCFG15<br />
Access Type: Read/Write<br />
Offset: 0x40 - 0x7C<br />
Reset Value: 0x00000010<br />
32117D–AVR-01/12<br />
<strong>AT32UC3C</strong><br />
31 30 29 28 27 26 25 24<br />
– – – – – – – ARBT<br />
23 22 21 20 19 18 17 16<br />
– – FIXED_DEFMSTR DEFMSTR_TYPE<br />
15 14 13 12 11 10 9 8<br />
– – – – – – – –<br />
7 6 5 4 3 2 1 0<br />
SLOT_CYCLE<br />
ARBT: Arbitration Type<br />
0: Round-Robin Arbitration<br />
1: Fixed Priority Arbitration<br />
FIXED_DEFMSTR: Fixed Default Master<br />
This is the number of the Default Master for this slave. Only used if DEFMSTR_TYPE is 2. Specifying the number of a master<br />
which is not connected to the selected slave is equivalent to setting DEFMSTR_TYPE to 0.<br />
DEFMSTR_TYPE: Default Master Type<br />
0: No Default Master<br />
At the end of the current slave access, if no other master request is pending, the slave is disconnected from all masters.<br />
This results in a one cycle latency for the first access of a burst transfer or for a single access.<br />
1: Last Default Master<br />
At the end of the current slave access, if no other master request is pending, the slave stays connected to the last master having<br />
accessed it.<br />
This results in not having one cycle latency when the last master tries to access the slave again.<br />
2: Fixed Default Master<br />
At the end of the current slave access, if no other master request is pending, the slave connects to the fixed master the number<br />
that has been written in the FIXED_DEFMSTR field.<br />
This results in not having one cycle latency when the fixed master tries to access the slave again.<br />
SLOT_CYCLE: Maximum Number of Allowed Cycles for a Burst<br />
When the SLOT_CYCLE limit is reached for a burst, it may be broken by another master trying to access this slave.<br />
This limit has been placed to avoid locking a very slow slave when very long bursts are used.<br />
This limit must not be very small. Unreasonably small values break every burst and the Bus Matrix arbitrates without performing<br />
any data transfer. 16 cycles is a reasonable value for SLOT_CYCLE.<br />
294
16.5.3 Bus Matrix Priority Registers A For Slaves<br />
Register Name: PRAS0...PRAS15<br />
Access Type: Read/Write<br />
Offset: -<br />
Reset Value: 0x00000000<br />
MxPR: Master x Priority<br />
Fixed priority of Master x for accessing the selected slave. The higher the number, the higher the priority.<br />
32117D–AVR-01/12<br />
<strong>AT32UC3C</strong><br />
31 30 29 28 27 26 25 24<br />
- - M7PR - - M6PR<br />
23 22 21 20 19 18 17 16<br />
- - M5PR - - M4PR<br />
15 14 13 12 11 10 9 8<br />
- - M3PR - - M2PR<br />
7 6 5 4 3 2 1 0<br />
- - M1PR - - M0PR<br />
295
16.5.4 Priority Registers B For Slaves<br />
Name: PRBS0...PRBS15<br />
Access Type: Read/Write<br />
Offset: -<br />
Reset Value: 0x00000000<br />
MxPR: Master x Priority<br />
Fixed priority of Master x for accessing the selected slave. The higher the number, the higher the priority.<br />
32117D–AVR-01/12<br />
<strong>AT32UC3C</strong><br />
31 30 29 28 27 26 25 24<br />
- - M15PR - - M14PR<br />
23 22 21 20 19 18 17 16<br />
- - M13PR - - M12PR<br />
15 14 13 12 11 10 9 8<br />
- - M11PR - - M10PR<br />
7 6 5 4 3 2 1 0<br />
- - M9PR - - M8PR<br />
296
16.5.5 Special Function Registers<br />
Name: SFR0...SFR15<br />
Access Type: Read/Write<br />
Offset: 0x110 - 0x14C<br />
Reset Value: -<br />
SFR: Special Function Register Fields<br />
Those registers are not a HMATRIX specific register. The field of those will be defined where they are used.<br />
32117D–AVR-01/12<br />
<strong>AT32UC3C</strong><br />
31 30 29 28 27 26 25 24<br />
SFR<br />
23 22 21 20 19 18 17 16<br />
SFR<br />
15 14 13 12 11 10 9 8<br />
SFR<br />
7 6 5 4 3 2 1 0<br />
SFR<br />
297
32117D–AVR-01/12<br />
<strong>AT32UC3C</strong><br />
16.6 Bus Matrix Connections<br />
Accesses to unused areas returns an error result to the master requesting such an access.<br />
The bus matrix has the several masters and slaves. Each master has its own bus and its own<br />
decoder, thus allowing a different memory mapping per master. The master number in the table<br />
below can be used to index the HMATRIX control registers. For example, MCFG0 is associated<br />
with the CPU Data master interface.<br />
Table 16-3. High Speed Bus masters<br />
Master 0 CPU Data<br />
Master 1 CPU Instruction<br />
Master 2 CPU SAB<br />
Master 3 SAU<br />
Master 4 PDCA<br />
Master 5 MDMA Read<br />
Master 6 MDMA write<br />
Master 7 USBC<br />
Master 8 CANIF<br />
Master 9 MACB<br />
Each slave has its own arbiter, thus allowing a different arbitration per slave. The slave number<br />
in the table below can be used to index the HMATRIX control registers. For example, SCFG3 is<br />
associated with the Internal SRAM Slave Interface.<br />
Table 16-4. High Speed Bus slaves<br />
Slave 0 Internal Flash<br />
Slave 1 HSB-PB Bridge A<br />
Slave 2 HSB-PB Bridge B<br />
Slave 3 HSB-PB Bridge C<br />
Slave 4 Internal SRAM<br />
Slave 5 HSB RAM<br />
Slave 6 EBI<br />
Slave 7 SAU<br />
298
32117D–AVR-01/12<br />
Figure 16-1. HMatrix Master / Slave Connections<br />
HMATRIX MASTERS<br />
CPU Data 0<br />
CPU<br />
Instruction<br />
1<br />
CPU SAB 2<br />
SAU 3<br />
PDCA 4<br />
MDMA Read 5<br />
MDMA Write 6<br />
USBC 7<br />
CANIF 8<br />
MACB 9<br />
Internal Flash<br />
HSB-PB<br />
Bridge A<br />
0 1<br />
HSB-PB<br />
Bridge B<br />
2<br />
HSB-PB<br />
Bridge C<br />
3<br />
Internal SRAM<br />
4<br />
HSB SRAM<br />
5<br />
EBI<br />
6<br />
<strong>AT32UC3C</strong><br />
SAU<br />
7<br />
299
17. External Bus Interface (EBI)<br />
17.1 Features<br />
17.2 Overview<br />
32117D–AVR-01/12<br />
Rev.: 1.7.0.2<br />
Optimized for application memory space support<br />
Integrates two external memory controllers:<br />
– Static Memory Controller (SMC)<br />
– SDRAM Controller (SDRAMC)<br />
Optimized external bus:16(or 8)-bit data bus<br />
– Up to 24-bit Address Bus, Up to 16-Mbytes Addressable<br />
– Optimized pin multiplexing to reduce latencies on external memories<br />
Up to 4 Chip Selects, Configurable Assignment:<br />
– Static Memory Controller on Chip Select 0<br />
– SDRAM Controller or Static Memory Controller on Chip Select 1<br />
– Static Memory Controller on Chip Select 2<br />
– Static Memory Controller on Chip Select 3<br />
<strong>AT32UC3C</strong><br />
The External Bus Interface (EBI) is designed to ensure the successful data transfer between<br />
several external devices and the embedded memory controller of a 32-bit AVR device. The<br />
Static Memory and SDRAM Controllers are all featured external memory controllers on the EBI.<br />
These external memory controllers are capable of handling several types of external memory<br />
and peripheral devices, such as SRAM, PROM, EPROM, EEPROM, Flash, and SDRAM.<br />
The EBI handles data transfers with up to four external devices, each assigned to four address<br />
spaces defined by the embedded memory controller. Data transfers are performed through a 16-<br />
8)-bit data bus, an address bus of up to 24 bits, up to four chip select lines (NCS[3:0]), and several<br />
control pins that are generally multiplexed between the different external memory<br />
controllers.<br />
300
17.3 Block Diagram<br />
32117D–AVR-01/12<br />
Figure 17-1. EBI Block Diagram<br />
HMATRIX<br />
SFR<br />
registers<br />
Address<br />
Decoders<br />
17.4 I/O Lines Description<br />
HSB<br />
HSB-PB<br />
Bridge<br />
SDRAMC_irq<br />
Peripheral Bus<br />
SDRAM<br />
Controller<br />
Static<br />
Memory<br />
Controller<br />
Chip Select<br />
Assignor<br />
INTC<br />
EBI<br />
MUX<br />
Logic<br />
I/O<br />
Controller<br />
<strong>AT32UC3C</strong><br />
DATA[15:0]<br />
NWE1<br />
NWE0<br />
NRD<br />
NCS[3:0]<br />
ADDR[23:0]<br />
CAS<br />
RAS<br />
SDA10<br />
SDWE<br />
SDCK<br />
SDCKE<br />
NWAIT<br />
301
32117D–AVR-01/12<br />
Table 17-1. EBI I/O Lines Description<br />
Pin Name<br />
Alternate<br />
Name Pin Description Type<br />
EBI common lines<br />
DATA[15:0] Data Bus I/O<br />
SMC dedicated lines<br />
ADDR[1] SMC Address Bus Line 1 Output<br />
ADDR[12] SMC Address Bus Line 12 Output<br />
ADDR[15] SMC Address Bus Line 15 Output<br />
ADDR[23:18] SMC Address Bus Line [23:18] Output<br />
<strong>AT32UC3C</strong><br />
Active<br />
Level<br />
NCS[0] SMC Chip Select Line 0 Output Low<br />
NCS[2] SMC Chip Select Line 2 Output Low<br />
NCS[3] SMC Chip Select Line 3 Output Low<br />
NRD SMC Read Signal Output Low<br />
NWAIT SMC External Wait Signal Input Low<br />
NWE0 NWE0-NWE SMC Write Enable1 or Write enable Output Low<br />
SDRAMC dedicated lines<br />
SDCK SDRAM Clock Output<br />
SDCKE SDRAM Clock Enable Output High<br />
SDWE SDRAM Write Enable Output Low<br />
SDA10 SDRAM Address Bus Line 10 Output Low<br />
RAS - CAS Row and Column Signal Output Low<br />
ADDR[0]<br />
ADDR[11:2]<br />
ADDR[14:13]<br />
ADDR[16]<br />
ADDR[17]<br />
NCS[1]<br />
NWE1<br />
DQM0<br />
ADDR[0]-NBS0<br />
ADDR[9:0]<br />
ADDR[11:2]<br />
ADDR[9:0]<br />
ADDR[14:13]<br />
BA0<br />
ADDR[16]<br />
BA1<br />
ADDR[17]<br />
NCS[1]<br />
SDCS<br />
DQM1<br />
NWE1-NBS1<br />
SMC/SDRAMC shared lines<br />
SDRAMC DQM1<br />
SMC Address Bus Line 0 or Byte Select 0<br />
SDRAMC Address Bus Lines [9:0]<br />
SMC Address Bus Lines [11:2]<br />
SDRAMC Address Bus Lines [12:11]<br />
SMC Address Bus Lines [14:13]<br />
SDRAMC Bank 0<br />
SMC Address Bus Line 16<br />
SDRAMC Bank 1<br />
SMCAddress Bus Line 17<br />
SMC Chip Select Line 1<br />
SDRAMC Chip Select<br />
SDRAMC DQM1<br />
SMC Write Enable1 or Byte Select 1<br />
Output<br />
Output<br />
Output<br />
Output<br />
Output<br />
Output Low<br />
Output<br />
302
32117D–AVR-01/12<br />
<strong>AT32UC3C</strong><br />
17.5 Product Dependencies<br />
In order to use this module, other parts of the system must be configured correctly, as described<br />
below.<br />
17.5.1 I/O Lines<br />
The pins used for interfacing the compliant external devices may be multiplexed with I/O Controller<br />
lines. The user must first configure the I/O Controller to assign the EBI pins to their<br />
peripheral functions.<br />
17.5.2 Power Management<br />
To prevent bus errors EBI operation must be terminated before entering sleep mode.<br />
17.5.3 Clocks<br />
17.5.4 Interrupts<br />
17.5.5 HMATRIX<br />
According to the external devices addressed, the following table gives the clocks that should be<br />
enabled by the Power Manager.<br />
Table 17-2. EBI Clocks Configuration<br />
Clocks name Clocks type<br />
Type of the Interfaced Device<br />
SDRAM<br />
CLK_EBI<br />
HSB (clock reference, data sampling<br />
and data transfer through HSB)<br />
X X<br />
CLK_SDRAMC PB (Register access) X<br />
CLK_SMC PB (Register access) X<br />
The EBI interface has one interrupt line connected to the Interrupt Controller:<br />
SRAM, PROM,<br />
EPROM,<br />
EEPROM, Flash<br />
SDRAMC_IRQ: Interrupt signal coming from the SDRAMC<br />
Handling the EBI interrupt requires configuring the interrupt controller before configuring the EBI.<br />
The EBI interface is connected to the HMATRIX Special Function Register 6 (SFR6). The user<br />
must first write to this HMATRIX.SFR6 to configure the EBI correctly.<br />
Table 17-3. EBI Special Function Register Fields Description<br />
SFR6 Bit<br />
Number Bit name Description<br />
[31:2] Reserved<br />
1 CS1A<br />
0 Reserved<br />
0 = Chip Select 1 (NCS[1]) is connected to a Static Memory device. For each<br />
access to the NCS[1] memory space, all related pins act as SMC pins<br />
1 = Chip Select 1 (NCS[1]) is connected to a SDRAM device. For each access<br />
to the NCS[1] memory space, all related pins act as SDRAM pins (SDCS)<br />
303
32117D–AVR-01/12<br />
<strong>AT32UC3C</strong><br />
17.6 Functional Description<br />
The EBI transfers data between the internal HSB bus (handled by the HMATRIX) and the external<br />
memories or peripheral devices. It controls the waveforms and the parameters of the<br />
external address, data and control busses and is composed of the following elements:<br />
The Static Memory Controller (SMC)<br />
The SDRAM Controller (SDRAMC)<br />
A chip select assignment feature that assigns an HSB address space to the external devices<br />
A multiplex controller circuit that shares the pins between the different memory controllers<br />
17.6.1 Bus Multiplexing<br />
The EBI offers a complete set of control signals that share the 16(8)-bit data lines, the address<br />
lines of up to 24 bits and the control signals through a multiplex logic operating in function of the<br />
memory area requests.<br />
Multiplexing is specifically organized in order to guarantee the maintenance of the address and<br />
output control lines at a stable state while no external access is being performed. Multiplexing is<br />
also designed to respect the data float times defined in the Memory Controllers. Furthermore,<br />
refresh cycles of the SDRAM are executed independently by the SDRAMC without delaying the<br />
other external memory controller accesses.<br />
17.6.2 Static Memory Controller<br />
For information on the Static Memory Controller, refer to the Static Memory Controller Section.<br />
17.6.3 SDRAM Controller<br />
Writing a one to the HMATRIX.SFR6.CS1A bit enables the SDRAM logic.<br />
17.7 Application Example<br />
17.7.1 Hardware Interface<br />
For information on the SDRAM Controller, refer to the SDRAM Section.<br />
Table 17-4. EBI Pins and External Static Devices Connections<br />
Pins of the Interfaced Device<br />
Pins name<br />
8-bit Static<br />
Device<br />
2 x 8-bit<br />
Static<br />
Devices<br />
16-bit Static<br />
Device<br />
Controller SMC<br />
DATA[7:0] D[7:0] D[7:0] D[7:0]<br />
DATA[15:0] – D[15:8] D[15:8]<br />
ADDR[0] A[0] – NBS0 (2)<br />
ADDR[1] A[1] A[0] A[0]<br />
ADDR[23:2] A[23:2] A[22:1] A[22:1]<br />
NCS[0] - NCS[3] CS CS CS<br />
304
32117D–AVR-01/12<br />
Table 17-4. EBI Pins and External Static Devices Connections (Continued)<br />
Pins of the Interfaced Device<br />
Pins name<br />
8-bit Static<br />
Device<br />
2 x 8-bit<br />
Static<br />
Devices<br />
Controller SMC<br />
Note: 1. NWE1 enables upper byte writes. NWE0 enables lower byte writes.<br />
2. NBS1 enables upper byte writes. NBS0 enables lower byte writes.<br />
<strong>AT32UC3C</strong><br />
NRD OE OE OE<br />
NWE0 WE WE (1) WE<br />
NWE1 – WE (1)<br />
Table 17-5. EBI Pins and External Devices Connections<br />
Pins name<br />
Pins of the<br />
Interfaced<br />
Device<br />
SDRAM<br />
Controller SDRAMC<br />
DATA[7:0] D[7:0]<br />
DATA[15:8] D[15:8]<br />
ADDR[0] DQM0<br />
ADDR[10:2] A[8:0]<br />
ADDR[11] A[9]<br />
SDA10 A[10]<br />
ADDR[14:13] A[12:11]<br />
ADDR[16] BA0<br />
ADDR[17] BA1<br />
NCS[1] CS<br />
NWE1 DQM1<br />
SDCK CLK<br />
SDCKE CKE<br />
RAS RAS<br />
CAS CAS<br />
SDWE WE<br />
16-bit Static<br />
Device<br />
NBS1 (2)<br />
305
32117D–AVR-01/12<br />
<strong>AT32UC3C</strong><br />
17.7.2 Connection Examples<br />
Figure 17-2 on page 306shows an example of connections between the EBI and external<br />
devices.<br />
Figure 17-2. EBI Connections to Memory Devices<br />
EBI<br />
DATA[15:0]<br />
RAS<br />
CAS<br />
SDCK<br />
SDCKE<br />
SDWE<br />
ADDR[0]<br />
NWE1<br />
NRD<br />
NWE0<br />
SDA10<br />
ADDR[17:1]<br />
NCS[1]<br />
NCS[0]<br />
SDRAM<br />
2Mx8<br />
DATA[7:0]<br />
D[7:0]<br />
DATA[15:8]<br />
SDCK<br />
SDCKE<br />
SDWE<br />
RAS<br />
CAS<br />
ADDR[0]<br />
CS<br />
CLK<br />
CKE<br />
WE<br />
RAS<br />
CAS<br />
DQM<br />
ADDR[11:2]<br />
A[9:0]<br />
SDA10<br />
A[10]<br />
ADDR[13]<br />
A[11]<br />
ADDR[16]<br />
BA0<br />
ADDR[17]<br />
BA1<br />
SDCK<br />
SDCKE<br />
SDWE<br />
RAS<br />
CAS<br />
NWE1<br />
CS<br />
CLK<br />
CKE<br />
WE<br />
RAS<br />
CAS<br />
DQM<br />
DATA[7:0]<br />
SRAM<br />
128Kx8<br />
D[7:0] A[16:0]<br />
NCS[0]<br />
CS<br />
NCS[0]<br />
CS<br />
NRD<br />
NWE0<br />
OE<br />
WE<br />
NRD<br />
NWE1<br />
OE<br />
WE<br />
DATA[15:8]<br />
SDRAM<br />
2Mx8<br />
D[7:0]<br />
SRAM<br />
128Kx8<br />
ADDR[11:2]<br />
A[9:0]<br />
SDA10<br />
A[10]<br />
ADDR[13]<br />
A[11]<br />
ADDR[16]<br />
BA0<br />
ADDR[17]<br />
BA1<br />
ADDR[17:1] D[7:0] A[16:0] ADDR[17:1]<br />
306
18. Static Memory Controller (SMC)<br />
18.1 Features<br />
18.2 Overview<br />
32117D–AVR-01/12<br />
Rev. 1.0.6.5<br />
4 chip selects available<br />
16-Mbytes address space per chip select<br />
8- or 16-bit data bus<br />
Word, halfword, byte transfers<br />
Byte write or byte select lines<br />
Programmable setup, pulse and hold time for read signals per chip select<br />
Programmable setup, pulse and hold time for write signals per chip select<br />
Programmable data float time per chip select<br />
Compliant with LCD module<br />
External wait request<br />
Automatic switch to slow clock mode<br />
Asynchronous read in page mode supported: page size ranges from 4 to 32 bytes<br />
<strong>AT32UC3C</strong><br />
The Static Memory Controller (SMC) generates the signals that control the access to the external<br />
memory devices or peripheral devices. It has 4 chip selects and a 24-bit address bus. The<br />
16-bit data bus can be configured to interface with 8-16-bit external devices. Separate read and<br />
write control signals allow for direct memory and peripheral interfacing. Read and write signal<br />
waveforms are fully parametrizable.<br />
The SMC can manage wait requests from external devices to extend the current access. The<br />
SMC is provided with an automatic slow clock mode. In slow clock mode, it switches from userprogrammed<br />
waveforms to slow-rate specific waveforms on read and write signals. The SMC<br />
supports asynchronous burst read in page mode access for page size up to 32 bytes.<br />
307
18.3 Block Diagram<br />
Figure 18-1. SMC Block Diagram (AD_MSB=23)<br />
18.4 I/O Lines Description<br />
32117D–AVR-01/12<br />
HMatrix<br />
Power<br />
Manager<br />
SMC<br />
Chip Select<br />
CLK_SMC<br />
Peripheral Bus<br />
SMC<br />
User Interface<br />
NCS[5:0]<br />
NRD<br />
NWR0/NWE<br />
A0/NBS0<br />
NWR1/NBS1<br />
A1/NWR2/NBS2<br />
A[AD_MSB:2]<br />
D[15:0]<br />
NWAIT<br />
Table 18-1. I/O Lines Description<br />
EBI<br />
Mux Logic<br />
I/O<br />
Controller<br />
NCS[5:0]<br />
NRD<br />
NWE0<br />
ADDR[0]<br />
<strong>AT32UC3C</strong><br />
18.5 Product Dependencies<br />
In order to use this module, other parts of the system must be configured correctly, as described<br />
below.<br />
NWE1<br />
ADDR[1]<br />
ADDR[AD_MSB:2]<br />
DATA[15:0]<br />
NWAIT<br />
Pin Name Pin Description Type Active Level<br />
NCS[3:0] Chip Select Lines Output Low<br />
NRD Read Signal Output Low<br />
NWR0/NWE Write 0/Write Enable Signal Output Low<br />
A0/NBS0 Address Bit 0/Byte 0 Select Signal Output Low<br />
NWR1/NBS1 Write 1/Byte 1 Select Signal Output Low<br />
A[23:2] Address Bus Output<br />
D[15:0] Data Bus Input/Output<br />
NWAIT External Wait Signal Input Low<br />
308
18.5.1 I/O Lines<br />
18.5.2 Clocks<br />
18.6 Functional Description<br />
18.6.1 Application Example<br />
32117D–AVR-01/12<br />
<strong>AT32UC3C</strong><br />
The SMC signals pass through the External Bus Interface (EBI) module where they are multiplexed.<br />
The user must first configure the I/O Controller to assign the EBI pins corresponding to<br />
SMC signals to their peripheral function. If the I/O lines of the EBI corresponding to SMC signals<br />
are not used by the application, they can be used for other purposes by the I/O Controller.<br />
The clock for the SMC bus interface (CLK_SMC) is generated by the Power Manager. This clock<br />
is enabled at reset, and can be disabled in the Power Manager. It is recommended to disable the<br />
SMC before disabling the clock, to avoid freezing the SMC in an undefined state.<br />
Figure 18-2. SMC Connections to Static Memory Devices<br />
D0-D15<br />
A0/NBS0<br />
NWR0/NWE<br />
NWR1/NBS1<br />
Static Memory<br />
Controller<br />
NCS0<br />
NCS1<br />
NCS2<br />
NCS3<br />
NCS4<br />
NCS5<br />
A2-A18<br />
D0-D7<br />
128K x 8<br />
SRAM<br />
D0-D7<br />
CS<br />
A0-A16<br />
NRD<br />
OE<br />
NRD<br />
NWR0/NWE<br />
WE<br />
NWR1/NBS1<br />
128K x 8<br />
SRAM<br />
D0-D7<br />
18.6.2 External Memory Mapping<br />
The SMC provides up to 24 address lines, A[23:0]. This allows each chip select line to address<br />
up to 16Mbytes of memory.<br />
A2-A18<br />
D8-D15<br />
If the physical memory device connected on one chip select is smaller than 16Mbytes, it wraps<br />
around and appears to be repeated within this space. The SMC correctly handles any valid<br />
access to the memory device within the page (see Figure 18-3 on page 310).<br />
A[23:0] is only significant for 8-bit memory, A[23:1] is used for 16-bit memory23.<br />
CS<br />
OE<br />
WE<br />
A0-A16<br />
A2-A18<br />
309
Figure 18-3. Memory Connections for Six External Devices<br />
SMC<br />
18.6.3 Connection to External Devices<br />
32117D–AVR-01/12<br />
NCS[0] - NCS[5]<br />
NRD<br />
NWE<br />
A[AD_MSB:0]<br />
D[15:0]<br />
<strong>AT32UC3C</strong><br />
18.6.3.1 Data bus width<br />
A data bus width of 8 or 16 bits can be selected for each chip select. This option is controlled by<br />
the Data Bus Width field in the Mode Register (MODE.DBW) for the corresponding chip select.<br />
Figure 18-4 on page 310 shows how to connect a 512K x 8-bit memory on NCS2. Figure 18-5 on<br />
page 311 shows how to connect a 512K x 16-bit memory on NCS2.<br />
18.6.3.2 Byte write or byte select access<br />
Each chip select with a 16-bit data bus can operate with one of two different types of write<br />
access: byte write or byte select access. This is controlled by the Byte Access Type bit in the<br />
MODE register (MODE.BAT) for the corresponding chip select.<br />
Figure 18-4. Memory Connection for an 8-bit Data Bus<br />
SMC<br />
A0<br />
NWE<br />
NRD<br />
NCS[2]<br />
NCS5<br />
Memory Enable<br />
NCS4<br />
Memory Enable<br />
NCS3<br />
Memory Enable<br />
NCS2<br />
Memory Enable<br />
NCS1<br />
Memory Enable<br />
NCS0<br />
Memory Enable<br />
Output Enable<br />
8 or 16<br />
Write Enable<br />
A[AD_MSB:0]<br />
D[15:0] or D[7:0]<br />
D[7:0] D[7:0]<br />
A[18:2]<br />
A1<br />
A[18:2]<br />
A0<br />
A1<br />
Write Enable<br />
Output Enable<br />
Memory Enable<br />
310
32117D–AVR-01/12<br />
•Byte write access<br />
Figure 18-5. Memory Connection for a 16-bit Data Bus<br />
<strong>AT32UC3C</strong><br />
The byte write access mode supports one byte write signal per byte of the data bus and a single<br />
read signal.<br />
Note that the SMC does not allow boot in byte write access mode.<br />
For 16-bit devices: the SMC provides NWR0 and NWR1 write signals for respectively byte0<br />
(lower byte) and byte1 (upper byte) of a 16-bit bus. One single read signal (NRD) is provided.<br />
The byte write access mode is used to connect two 8-bit devices as a 16-bit memory.<br />
Byte select access<br />
SMC<br />
D[15:0] D[15:0]<br />
A[19:2] A[18:1]<br />
NBS0<br />
Low Byte Enable<br />
NBS1 High Byte Enable<br />
NWE<br />
NRD<br />
NCS[2]<br />
The byte write option is illustrated on Figure 18-6 on page 312.<br />
A1<br />
Write Enable<br />
Output Enable<br />
Memory Enable<br />
In this mode, read/write operations can be enabled/disabled at a byte level. One byte select line<br />
per byte of the data bus is provided. One NRD and one NWE signal control read and write.<br />
For 16-bit devices: the SMC provides NBS0 and NBS1 selection signals for respectively<br />
byte0 (lower byte) and byte1 (upper byte) of a 16-bit bus. The byte select access is used to<br />
connect one 16-bit device.<br />
A[0]<br />
311
32117D–AVR-01/12<br />
Signal multiplexing<br />
Figure 18-6. Connection of two 8-bit Devices on a 16-bit Bus: Byte Write Option<br />
SMC<br />
D[7:0] D[7:0]<br />
D[15:8]<br />
A[24:2]<br />
A1<br />
NWR0<br />
NWR1<br />
NRD<br />
NCS[3]<br />
<strong>AT32UC3C</strong><br />
Depending on the MODE.BAT bit, only the write signals or the byte select signals are used. To<br />
save I/Os at the external bus interface, control signals at the SMC interface are multiplexed.<br />
For 16-bit devices, bit A0 of address is unused. When byte select option is selected, NWR1 is<br />
unused. When byte write option is selected, NBS0 to NBS1 are unused.<br />
Table 18-3. SMC Multiplexed Signal Translation<br />
A[23:1]<br />
A[0]<br />
Write Enable<br />
Read Enable<br />
Memory Enable<br />
Write Enable<br />
Read Enable<br />
Memory Enable<br />
18.6.4 Standard Read and Write Protocols<br />
In the following sections, the byte access type is not considered. Byte select lines (NBS0 to<br />
NBS1) always have the same timing as the address bus (A). NWE represents either the NWE<br />
signal in byte select access type or one of the byte write lines (NWR0 to NWR1) in byte write<br />
D[15:8]<br />
A[23:1]<br />
A[0]<br />
Signal Name 16-bit Bus 8-bit Bus<br />
Device Type 1 x 16-bit 2 x 8-bit 1 x 8-bit<br />
Byte Access Type (BAT) Byte Select Byte Write<br />
NBS0_A0 NBS0 A0<br />
NWE_NWR0 NWE NWR0 NWE<br />
NBS1_NWR1 NBS1 NWR1<br />
NBS2_NWR2_A1 A1 A1 A1<br />
312
32117D–AVR-01/12<br />
<strong>AT32UC3C</strong><br />
access type. NWR0 to NWR1 have the same timings and protocol as NWE. In the same way,<br />
NCS represents one of the NCS[0..3] chip select lines.<br />
18.6.4.1 Read waveforms<br />
The read cycle is shown on Figure 18-7 on page 313.<br />
NRD waveform<br />
NCS waveform<br />
The read cycle starts with the address setting on the memory address bus, i.e.:<br />
{A[23:2], A1, A0} for 8-bit devices<br />
{A[23:2], A1} for 16-bit devices<br />
Figure 18-7. Standard Read Cycle<br />
CLK_SMC<br />
A[AD_MSB:2]<br />
NBS0, NBS1,<br />
A0, A1<br />
NRD<br />
NCS<br />
D[15:0]<br />
NCSRDSETUP<br />
NRDSETUP NRDPULSE<br />
NCSRDPULSE<br />
NRDCYCLE<br />
NRDHOLD<br />
NCSRDHOLD<br />
The NRD signal is characterized by a setup timing, a pulse width, and a hold timing.<br />
1. NRDSETUP: the NRD setup time is defined as the setup of address before the NRD<br />
falling edge.<br />
2. NRDPULSE: the NRD pulse length is the time between NRD falling edge and NRD rising<br />
edge.<br />
3. NRDHOLD: the NRD hold time is defined as the hold time of address after the NRD rising<br />
edge.<br />
Similarly, the NCS signal can be divided into a setup time, pulse length and hold time.<br />
313
32117D–AVR-01/12<br />
Read cycle<br />
<strong>AT32UC3C</strong><br />
1. NCSRDSETUP: the NCS setup time is defined as the setup time of address before the<br />
NCS falling edge.<br />
2. NCSRDPULSE: the NCS pulse length is the time between NCS falling edge and NCS<br />
rising edge.<br />
3. NCSRDHOLD: the NCS hold time is defined as the hold time of address after the NCS<br />
rising edge.<br />
The NRDCYCLE time is defined as the total duration of the read cycle, i.e., from the time where<br />
address is set on the address bus to the point where address may change. The total read cycle<br />
time is equal to:<br />
Similarly,<br />
All NRD and NCS timings are defined separately for each chip select as an integer number of<br />
CLK_SMC cycles. To ensure that the NRD and NCS timings are coherent, the user must define<br />
the total read cycle instead of the hold timing. NRDCYCLE implicitly defines the NRD hold time<br />
and NCS hold time as:<br />
And,<br />
Null delay setup and hold<br />
NRDCYCLE = NRDSETUP + NRDPULSE + NRDHOLD<br />
NRDCYCLE = NCSRDSETUP + NCSRDPULSE + NCSRDHOLD<br />
NRDHOLD = NRDCYCLE – NRDSETUP – NRDPULSE<br />
NCSRDHOLD =<br />
NRDCYCLE – NCSRDSETUP – NCSRDPULSE<br />
If null setup and hold parameters are programmed for NRD and/or NCS, NRD and NCS remain<br />
active continuously in case of consecutive read cycles in the same memory (see Figure 18-8 on<br />
page 315).<br />
314
18.6.4.2 Read mode<br />
32117D–AVR-01/12<br />
Figure 18-8. No Setup, No Hold on NRD, and NCS Read Signals<br />
CLK_SMC<br />
A[AD_MSB:2]<br />
NBS0, NBS1,<br />
A0, A1<br />
NRD<br />
NCS<br />
D[15:0]<br />
NRDSETUP NRDPULSE<br />
NCSRDPULSE<br />
NRDCYCLE NRDCYCLE<br />
<strong>AT32UC3C</strong><br />
Null Pulse<br />
Programming null pulse is not permitted. Pulse must be at least written to one. A null value leads<br />
to unpredictable behavior.<br />
As NCS and NRD waveforms are defined independently of one other, the SMC needs to know<br />
when the read data is available on the data bus. The SMC does not compare NCS and NRD timings<br />
to know which signal rises first. The Read Mode bit in the MODE register<br />
(MODE.READMODE) of the corresponding chip select indicates which signal of NRD and NCS<br />
controls the read operation.<br />
Read is controlled by NRD (MODE.READMODE = 1)<br />
NRDPULSE<br />
NCSRDPULSE NCSRDPULSE<br />
NRDCYCLE<br />
Figure 18-9 on page 316 shows the waveforms of a read operation of a typical asynchronous<br />
RAM. The read data is available t PACC after the falling edge of NRD, and turns to ‘Z’ after the rising<br />
edge of NRD. In this case, the MODE.READMODE bit must be written to one (read is<br />
controlled by NRD), to indicate that data is available with the rising edge of NRD. The SMC samples<br />
the read data internally on the rising edge of CLK_SMC that generates the rising edge of<br />
NRD, whatever the programmed waveform of NCS may be.<br />
315
32117D–AVR-01/12<br />
<strong>AT32UC3C</strong><br />
Figure 18-9. READMODE = 1: Data Is Sampled by SMC Before the Rising Edge of NRD<br />
CLK_SMC<br />
A[AD_MSB:2]<br />
NBS0, NBS1,<br />
A0, A1<br />
NRD<br />
NCS<br />
D[15:0]<br />
Read is controlled by NCS (MODE.READMODE = 0)<br />
tPACC<br />
Data Sampling<br />
Figure 18-10 on page 317 shows the typical read cycle of an LCD module. The read data is valid<br />
t PACC after the falling edge of the NCS signal and remains valid until the rising edge of NCS. Data<br />
must be sampled when NCS is raised. In that case, the MODE.READMODE bit must be written<br />
to zero (read is controlled by NCS): the SMC internally samples the data on the rising edge of<br />
CML_SMC that generates the rising edge of NCS, whatever the programmed waveform of NRD<br />
may be.<br />
316
32117D–AVR-01/12<br />
<strong>AT32UC3C</strong><br />
Figure 18-10. READMODE = 0: Data Is Sampled by SMC Before the Rising Edge of NCS<br />
18.6.4.3 Write waveforms<br />
The write protocol is similar to the read protocol. It is depicted in Figure 18-11 on page 318. The<br />
write cycle starts with the address setting on the memory address bus.<br />
NWE waveforms<br />
CLK_SMC<br />
A[AD_MSB:2]<br />
NBS0, NBS1,<br />
A0, A1<br />
NRD<br />
NCS<br />
D[15:0]<br />
The NWE signal is characterized by a setup timing, a pulse width and a hold timing.<br />
1. NWESETUP: the NWE setup time is defined as the setup of address and data before<br />
the NWE falling edge.<br />
2. NWEPULSE: the NWE pulse length is the time between NWE falling edge and NWE<br />
rising edge.<br />
3. NWEHOLD: the NWE hold time is defined as the hold time of address and data after<br />
the NWE rising edge.<br />
The NWE waveforms apply to all byte-write lines in byte write access mode: NWR0 to NWR3.<br />
18.6.4.4 NCS waveforms<br />
The NCS signal waveforms in write operation are not the same that those applied in read operations,<br />
but are separately defined.<br />
tPACC<br />
Data Sampling<br />
1. NCSWRSETUP: the NCS setup time is defined as the setup time of address before the<br />
NCS falling edge.<br />
2. NCSWRPULSE: the NCS pulse length is the time between NCS falling edge and NCS<br />
rising edge;<br />
3. NCSWRHOLD: the NCS hold time is defined as the hold time of address after the NCS<br />
rising edge.<br />
317
32117D–AVR-01/12<br />
Write cycle<br />
Figure 18-11. Write Cycle<br />
<strong>AT32UC3C</strong><br />
The write cycle time is defined as the total duration of the write cycle, that is, from the time where<br />
address is set on the address bus to the point where address may change. The total write cycle<br />
time is equal to:<br />
Similarly,<br />
All NWE and NCS (write) timings are defined separately for each chip select as an integer number<br />
of CLK_SMC cycles. To ensure that the NWE and NCS timings are coherent, the user must<br />
define the total write cycle instead of the hold timing. This implicitly defines the NWE hold time<br />
and NCS (write) hold times as:<br />
And,<br />
CLK_SMC<br />
A[AD_MSB:2]<br />
NBS0, NBS1,<br />
A0, A1<br />
NWE<br />
NCS<br />
NWESETUP<br />
NCSWRSETUP<br />
NWEPULSE<br />
NCSWRPULSE<br />
NWECYCLE<br />
NWEHOLD<br />
NWECYCLE = NWESETUP + NWEPULSE + NWEHOLD<br />
NCSWRHOLD<br />
NWECYCLE = NCSWRSETUP + NCSWRPULSE + NCSWRHOLD<br />
NWEHOLD = NWECYCLE – NWESETUP – NWEPULSE<br />
NCSWRHOLD =<br />
NWECYCLE – NCSWRSETUP – NCSWRPULSE<br />
318
32117D–AVR-01/12<br />
Null delay setup and hold<br />
Null pulse<br />
18.6.4.5 Write mode<br />
<strong>AT32UC3C</strong><br />
If null setup parameters are programmed for NWE and/or NCS, NWE and/or NCS remain active<br />
continuously in case of consecutive write cycles in the same memory (see Figure 18-12 on page<br />
319). However, for devices that perform write operations on the rising edge of NWE or NCS,<br />
such as SRAM, either a setup or a hold must be programmed.<br />
Figure 18-12. Null Setup and Hold Values of NCS and NWE in Write Cycle<br />
CLK_SMC<br />
A[AD_MSB:2]<br />
NBS0, NBS1,<br />
A0, A1<br />
NWE,<br />
NWE0, NWE1<br />
NCS<br />
D[15:0]<br />
NWESETUP NWEPULSE<br />
NCSWRSETUP<br />
NWECYCLE<br />
Programming null pulse is not permitted. Pulse must be at least written to one. A null value leads<br />
to unpredictable behavior.<br />
The Write Mode bit in the MODE register (MODE.WRITEMODE) of the corresponding chip<br />
select indicates which signal controls the write operation.<br />
Write is controlled by NWE (MODE.WRITEMODE = 1)<br />
NCSWRPULSE<br />
NWECYCLE<br />
NWEPULSE<br />
NCSWRPULSE<br />
NWECYCLE<br />
Figure 18-13 on page 320 shows the waveforms of a write operation with MODE.WRITEMODE<br />
equal to one. The data is put on the bus during the pulse and hold steps of the NWE signal. The<br />
internal data buffers are turned out after the NWESETUP time, and until the end of the write<br />
cycle, regardless of the programmed waveform on NCS.<br />
319
32117D–AVR-01/12<br />
Figure 18-13. WRITEMODE = 1. The Write Operation Is Controlled by NWE<br />
CLK_SMC<br />
A[AD_MSB:2]<br />
NBS0, NBS1,<br />
A0, A1<br />
NWE,<br />
NWR0, NWR1<br />
NCS<br />
D[15:0]<br />
Write is controlled by NCS (MODE.WRITEMODE = 0)<br />
<strong>AT32UC3C</strong><br />
Figure 18-14 on page 320 shows the waveforms of a write operation with MODE.WRITEMODE<br />
written to zero. The data is put on the bus during the pulse and hold steps of the NCS signal.<br />
The internal data buffers are turned out after the NCSWRSETUP time, and until the end of the<br />
write cycle, regardless of the programmed waveform on NWE.<br />
Figure 18-14. WRITEMODE = 0. The Write Operation Is Controlled by NCS<br />
CLK_SMC<br />
A[AD_MSB:2]<br />
NBS0, NBS1,<br />
A0, A1<br />
NWE,<br />
NWR0, NWR1<br />
NCS<br />
D[15:0]<br />
320
32117D–AVR-01/12<br />
<strong>AT32UC3C</strong><br />
18.6.4.6 Coding timing parameters<br />
All timing parameters are defined for one chip select and are grouped together in one register<br />
according to their type.<br />
The Setup register (SETUP) groups the definition of all setup parameters:<br />
NRDSETUP, NCSRDSETUP, NWESETUP, and NCSWRSETUP.<br />
The Pulse register (PULSE) groups the definition of all pulse parameters:<br />
NRDPULSE, NCSRDPULSE, NWEPULSE, and NCSWRPULSE.<br />
The Cycle register (CYCLE) groups the definition of all cycle parameters:<br />
NRDCYCLE, NWECYCLE.<br />
Table 18-4 on page 321 shows how the timing parameters are coded and their permitted range.<br />
Table 18-4. Coding and Range of Timing Parameters<br />
Coded Value Number of Bits Effective Value<br />
setup [5:0] 6 128 x setup[5] + setup[4:0]<br />
pulse [6:0] 7 256 x pulse[6] + pulse[5:0]<br />
cycle [8:0] 9 256 x cycle[8:7] + cycle[6:0]<br />
18.6.4.7 Usage restriction<br />
The SMC does not check the validity of the user-programmed parameters. If the sum of SETUP<br />
and PULSE parameters is larger than the corresponding CYCLE parameter, this leads to unpredictable<br />
behavior of the SMC.<br />
For read operations:<br />
Null but positive setup and hold of address and NRD and/or NCS can not be guaranteed at the<br />
memory interface because of the propagation delay of theses signals through external logic and<br />
pads. If positive setup and hold values must be verified, then it is strictly recommended to program<br />
non-null values so as to cover possible skews between address, NCS and NRD signals.<br />
For write operations:<br />
Permitted Range<br />
Coded Value Effective Value<br />
0 ≤ value ≤ 31<br />
32 ≤ value ≤ 63<br />
0 ≤ value ≤ 63<br />
64≤ value ≤ 127<br />
0 ≤ value ≤ 127<br />
128 ≤ value ≤ 255<br />
256 ≤ value ≤ 383<br />
384 ≤ value ≤ 511<br />
0 ≤ value ≤ 31<br />
128 ≤ value ≤ 128+31<br />
0 ≤ value ≤ 63<br />
256 ≤ value ≤ 256+63<br />
0 ≤ value ≤ 127<br />
256 ≤ value ≤ 256+127<br />
512 ≤ value ≤ 512+127<br />
768 ≤ value ≤ 768+127<br />
If a null hold value is programmed on NWE, the SMC can guarantee a positive hold of address,<br />
byte select lines, and NCS signal after the rising edge of NWE. This is true if the MODE.WRITE-<br />
MODE bit is written to one. See Section 18.6.5.2.<br />
For read and write operations: a null value for pulse parameters is forbidden and may lead to<br />
unpredictable behavior.<br />
In read and write cycles, the setup and hold time parameters are defined in reference to the<br />
address bus. For external devices that require setup and hold time between NCS and NRD signals<br />
(read), or between NCS and NWE signals (write), these setup and hold times must be<br />
converted into setup and hold times in reference to the address bus.<br />
321
32117D–AVR-01/12<br />
<strong>AT32UC3C</strong><br />
18.6.5 Automatic Wait States<br />
Under certain circumstances, the SMC automatically inserts idle cycles between accesses to<br />
avoid bus contention or operation conflict.<br />
18.6.5.1 Chip select wait states<br />
The SMC always inserts an idle cycle between two transfers on separate chip selects. This idle<br />
cycle ensures that there is no bus contention between the deactivation of one device and the<br />
activation of the next one.<br />
During chip select wait state, all control lines are turned inactive: NBS0 to NBS3, NWR0 to<br />
NWR3, NCS[0..5], NRD lines are all set to high level.<br />
Figure 18-15 on page 322 illustrates a chip select wait state between access on Chip Select 0<br />
(NCS0) and Chip Select 2 (NCS2).<br />
Figure 18-15. Chip Select Wait State Between a Read Access on NCS0 and a Write Access on<br />
NCS2<br />
CLK_SMC<br />
_MSB:2]<br />
, NBS1,<br />
, A1<br />
NRD<br />
NWE<br />
NCS0<br />
NCS2<br />
D[15:0]<br />
NRDCYCLE<br />
Read to Write<br />
Wait State<br />
Chip Select<br />
Wait State<br />
NWECYCLE<br />
18.6.5.2 Early read wait state<br />
In some cases, the SMC inserts a wait state cycle between a write access and a read access to<br />
allow time for the write cycle to end before the subsequent read cycle begins. This wait state is<br />
not generated in addition to a chip select wait state. The early read cycle thus only occurs<br />
between a write and read access to the same memory device (same chip select).<br />
322
32117D–AVR-01/12<br />
<strong>AT32UC3C</strong><br />
An early read wait state is automatically inserted if at least one of the following conditions is<br />
valid:<br />
if the write controlling signal has no hold time and the read controlling signal has no setup<br />
time (Figure 18-16 on page 323).<br />
in NCS write controlled mode (MODE.WRITEMODE = 0), if there is no hold timing on the<br />
NCS signal and the NCSRDSETUP parameter is set to zero, regardless of the read mode<br />
(Figure 18-17 on page 324). The write operation must end with a NCS rising edge. Without<br />
an early read wait state, the write operation could not complete properly.<br />
in NWE controlled mode (MODE.WRITEMODE = 1) and if there is no hold timing<br />
(NWEHOLD = 0), the feedback of the write control signal is used to control address, data,<br />
chip select, and byte select lines. If the external write control signal is not inactivated as<br />
expected due to load capacitances, an early read wait state is inserted and address, data<br />
and control signals are maintained one more cycle. See Figure 18-18 on page 325.<br />
Figure 18-16. Early Read Wait State: Write with No Hold Followed by Read with No Setup.<br />
CLK_SMC<br />
A[AD_MSB:2]<br />
NBS0, NBS1,<br />
A0, A1<br />
NWE<br />
NRD<br />
D[15:0]<br />
No hold<br />
Write cycle<br />
Early Read<br />
Wait state<br />
No setup<br />
Read cycle<br />
323
32117D–AVR-01/12<br />
<strong>AT32UC3C</strong><br />
Figure 18-17. Early Read Wait State: NCS Controlled Write with No Hold Followed by a Read<br />
with No Setup.<br />
CLK_SMC<br />
A[AD_MSB:2]<br />
NBS0, NBS1,<br />
A0, A1<br />
NWE<br />
NRD<br />
D[15:0]<br />
No hold<br />
Write cycle<br />
(WRITEMODE=0)<br />
Early Read<br />
Wait State<br />
No setup<br />
Read cycle<br />
(READMODE=0 or READMODE=1)<br />
324
32117D–AVR-01/12<br />
<strong>AT32UC3C</strong><br />
Figure 18-18. Early Read Wait State: NWE-controlled Write with No Hold Followed by a Read<br />
with one Set-up Cycle.<br />
18.6.5.3 Reload user configuration wait state<br />
The user may change any of the configuration parameters by writing the SMC user interface.<br />
User procedure<br />
CLK_SMC<br />
A[AD_MSB:2]<br />
NBS0, NBS1,<br />
A0, A1<br />
Internal write controlling signal<br />
external write controlling<br />
signal(NWE)<br />
NRD<br />
D[15:0]<br />
Write cycle<br />
(WRITEMODE = 1)<br />
No hold Read setup=1<br />
Early Read<br />
Wait State<br />
Read cycle<br />
(READMODE=0 or READMODE=1)<br />
When detecting that a new user configuration has been written in the user interface, the SMC<br />
inserts a wait state before starting the next access. The so called “reload user configuration wait<br />
state” is used by the SMC to load the new set of parameters to apply to next accesses.<br />
The reload configuration wait state is not applied in addition to the chip select wait state. If<br />
accesses before and after reprogramming the user interface are made to different devices (different<br />
chip selects), then one single chip select wait state is applied.<br />
On the other hand, if accesses before and after writing the user interface are made to the same<br />
device, a reload configuration wait state is inserted, even if the change does not concern the current<br />
chip select.<br />
To insert a reload configuration wait state, the SMC detects a write access to any MODE register<br />
of the user interface. If the user only modifies timing registers (SETUP, PULSE, CYCLE registers)<br />
in the user interface, he must validate the modification by writing the MODE register, even<br />
if no change was made on the mode parameters.<br />
325
32117D–AVR-01/12<br />
Slow clock mode transition<br />
<strong>AT32UC3C</strong><br />
A reload configuration wait state is also inserted when the slow clock mode is entered or exited,<br />
after the end of the current transfer (see Section 18.6.8).<br />
18.6.5.4 Read to write wait state<br />
Due to an internal mechanism, a wait cycle is always inserted between consecutive read and<br />
write SMC accesses.<br />
This wait cycle is referred to as a read to write wait state in this document.<br />
This wait cycle is applied in addition to chip select and reload user configuration wait states<br />
when they are to be inserted. See Figure 18-15 on page 322.<br />
18.6.6 Data Float Wait States<br />
Some memory devices are slow to release the external bus. For such devices, it is necessary to<br />
add wait states (data float wait states) after a read access:<br />
18.6.6.1 Read mode<br />
before starting a read access to a different external memory.<br />
before starting a write access to the same device or to a different external one.<br />
The Data Float Output Time (tDF) for each external memory device is programmed in the Data<br />
Float Time field of the MODE register (MODE.TDFCYCLES) for the corresponding chip select.<br />
The value of MODE.TDFCYCLES indicates the number of data float wait cycles (between 0 and<br />
15) before the external device releases the bus, and represents the time allowed for the data<br />
output to go to high impedance after the memory is disabled.<br />
Data float wait states do not delay internal memory accesses. Hence, a single access to an<br />
external memory with long t DF will not slow down the execution of a program from internal<br />
memory.<br />
The data float wait states management depends on the MODE.READMODE bit and the TDF<br />
Optimization bit of the MODE register (MODE.TDFMODE) for the corresponding chip select.<br />
Writing a one to the MODE.READMODE bit indicates to the SMC that the NRD signal is responsible<br />
for turning off the tri-state buffers of the external memory device. The data float period then<br />
begins after the rising edge of the NRD signal and lasts MODE.TDFCYCLES cycles of the<br />
CLK_SMC clock.<br />
When the read operation is controlled by the NCS signal (MODE.READMODE = 0), the<br />
MODE.TDFCYCLES field gives the number of CLK_SMC cycles during which the data bus<br />
remains busy after the rising edge of NCS.<br />
Figure 18-19 on page 327 illustrates the data float period in NRD-controlled mode<br />
(MODE.READMODE =1), assuming a data float period of two cycles (MODE.TDFCYCLES = 2).<br />
Figure 18-20 on page 327 shows the read operation when controlled by NCS (MODE.READ-<br />
MODE = 0) and the MODE.TDFCYCLES field equals to three.<br />
326
32117D–AVR-01/12<br />
Figure 18-19. TDF Period in NRD Controlled Read Access (TDFCYCLES = 2)<br />
CLK_SMC<br />
A[AD_MSB:2]<br />
NBS0, NBS1,<br />
A0, A1<br />
NRD<br />
NCS<br />
D[15:0]<br />
Figure 18-20. TDF Period in NCS Controlled Read Operation (TDFCYCLES = 3)<br />
CLK_SMC<br />
A[AD_MSB:2]<br />
NBS0, NBS1,<br />
A0, A1<br />
NRD<br />
NCS<br />
D[15:0]<br />
tPACC<br />
NRD controlled read operation<br />
tPACC<br />
NCS controlled read operation<br />
TDF = 2 clock cycles<br />
TDF = 3 clock cycles<br />
<strong>AT32UC3C</strong><br />
327
32117D–AVR-01/12<br />
<strong>AT32UC3C</strong><br />
18.6.6.2 TDF optimization enabled (MODE.TDFMODE = 1)<br />
When the MODE.TDFMODE bit is written to one (TDF optimization is enabled), the SMC takes<br />
advantage of the setup period of the next access to optimize the number of wait states cycle to<br />
insert.<br />
Figure 18-21 on page 328 shows a read access controlled by NRD, followed by a write access<br />
controlled by NWE, on Chip Select 0. Chip Select 0 has been programmed with:<br />
NRDHOLD = 4; READMODE = 1 (NRD controlled)<br />
NWESETUP = 3; WRITEMODE = 1 (NWE controlled)<br />
TDFCYCLES = 6; TDFMODE = 1 (optimization enabled).<br />
Figure 18-21. TDF Optimization: No TDF Wait States Are Inserted if the TDF Period Is over when the Next Access Begins<br />
CLK_SMC<br />
A[AD_MSB:2]<br />
NRD<br />
NWE<br />
NCS0<br />
D[15:0]<br />
NRDHOLD = 4<br />
Read access on NCS0 (NRD controlled)<br />
TDFCYCLES = 6<br />
Read to Write<br />
Wait State<br />
NWESETUP = 3<br />
18.6.6.3 TDF optimization disabled (MODE.TDFMODE = 0)<br />
When optimization is disabled, data float wait states are inserted at the end of the read transfer,<br />
so that the data float period is ended when the second access begins. If the hold period of the<br />
read1 controlling signal overlaps the data float period, no additional data float wait states will be<br />
inserted.<br />
Figure 18-22 on page 329, Figure 18-23 on page 329 and Figure 18-24 on page 330 illustrate<br />
the cases:<br />
read access followed by a read access on another chip select.<br />
read access followed by a write access on another chip select.<br />
Write access on NCS0 (NWE controlled)<br />
328
32117D–AVR-01/12<br />
read access followed by a write access on the same chip select.<br />
with no TDF optimization.<br />
<strong>AT32UC3C</strong><br />
Figure 18-22. TDF Optimization Disabled (MODE.TDFMODE = 0). TDF Wait States between Two Read Accesses on Different<br />
Chip Selects.<br />
CLK_SMC<br />
A[AD_MSB:2]<br />
NBS0, NBS1,<br />
A0, A1<br />
Read1 controlling<br />
signal(NRD)<br />
Read2 controlling<br />
signal(NRD)<br />
D[15:0]<br />
Figure 18-23. TDF Optimization Disabled (MODE.TDFMODE= 0). TDF Wait States between a Read and a Write Access<br />
on Different Chip Selects.<br />
CLK_SMC<br />
A[AD_MSB:2]<br />
NBS0, NBS1,<br />
A0, A1<br />
Read1 controlling<br />
signal(NRD)<br />
Write2 controlling<br />
signal(NWE)<br />
D[15:0]<br />
Read1 cycle<br />
TDFCYCLES = 6<br />
Read1 cycle<br />
TDFCYCLES = 4<br />
Read1 hold = 1<br />
Chip Select Wait State<br />
Read1 hold = 1<br />
TDFCYCLES = 4<br />
Read to Write<br />
Wait State<br />
TDFCYCLES = 6<br />
Chip Select<br />
Wait State<br />
5 TDF WAIT STATES<br />
2 TDF WAIT STATES<br />
Write2 setup = 1<br />
Write 2 cycle<br />
TDFMODE=0<br />
(optimization disabled)<br />
Read2 setup = 1<br />
Read 2 cycle<br />
TDFMODE=0<br />
(optimization disabled)<br />
329
32117D–AVR-01/12<br />
<strong>AT32UC3C</strong><br />
Figure 18-24. TDF Optimization Disabled (MODE.TDFMODE = 0). TDF Wait States between Read and Write accesses on<br />
the Same Chip Select.<br />
CLK_SMC<br />
A[AD_MSB:2]<br />
NBS0, NBS1,<br />
A0, A1<br />
Read1 controlling<br />
signal(NRD)<br />
Write2 controlling<br />
signal(NWE)<br />
D[15:0]<br />
18.6.7 External Wait<br />
18.6.7.1 Restriction<br />
Read1 cycle<br />
TDFCYCLES = 5<br />
Read1 hold = 1<br />
Read to Write<br />
Wait State<br />
TDFCYCLES = 5<br />
4 TDF WAIT STATES<br />
Write2 setup = 1<br />
Write 2 cycle<br />
TDFMODE=0<br />
(optimization disabled)<br />
Any access can be extended by an external device using the NWAIT input signal of the SMC.<br />
The External Wait Mode field of the MODE register (MODE.EXNWMODE) on the corresponding<br />
chip select must be written to either two (frozen mode) or three (ready mode). When the<br />
MODE.EXNWMODE field is written to zero (disabled), the NWAIT signal is simply ignored on<br />
the corresponding chip select. The NWAIT signal delays the read or write operation in regards to<br />
the read or write controlling signal, depending on the read and write modes of the corresponding<br />
chip select.<br />
When one of the MODE.EXNWMODE is enabled, it is mandatory to program at least one hold<br />
cycle for the read/write controlling signal. For that reason, the NWAIT signal cannot be used in<br />
Page Mode (Section 18.6.9), or in Slow Clock Mode (Section 18.6.8).<br />
The NWAIT signal is assumed to be a response of the external device to the read/write request<br />
of the SMC. Then NWAIT is examined by the SMC only in the pulse state of the read or write<br />
controlling signal. The assertion of the NWAIT signal outside the expected period has no impact<br />
on SMC behavior.<br />
18.6.7.2 Frozen mode<br />
When the external device asserts the NWAIT signal (active low), and after internal synchronization<br />
of this signal, the SMC state is frozen, i.e., SMC internal counters are frozen, and all control<br />
signals remain unchanged. When the synchronized NWAIT signal is deasserted, the SMC completes<br />
the access, resuming the access from the point where it was stopped. See Figure 18-25<br />
on page 331. This mode must be selected when the external device uses the NWAIT signal to<br />
delay the access and to freeze the SMC.<br />
330
32117D–AVR-01/12<br />
<strong>AT32UC3C</strong><br />
The assertion of the NWAIT signal outside the expected period is ignored as illustrated in Figure<br />
18-26 on page 332.<br />
Figure 18-25. Write Access with NWAIT Assertion in Frozen Mode (MODE.EXNWMODE = 2).<br />
CLK_SMC<br />
A[AD_MSB:2]<br />
NBS0, NBS1,<br />
A0, A1<br />
NWE<br />
NCS<br />
D[15:0]<br />
NWAIT<br />
Internally synchronized<br />
NWAIT signal<br />
4<br />
6 5 4<br />
3<br />
3<br />
2 1 1<br />
2<br />
2<br />
Write cycle<br />
FROZEN STATE<br />
1<br />
1<br />
2 2<br />
EXNWMODE = 2 (Frozen)<br />
WRITEMODE = 1 (NWE controlled)<br />
NWEPULSE = 5<br />
NCSWRPULSE = 7<br />
0<br />
0<br />
331
Figure 18-26. Read Access with NWAIT Assertion in Frozen Mode (MODE.EXNWMODE = 2).<br />
CLK_SMC<br />
A[AD_MSB:2]<br />
NBS0, NBS1,<br />
A0, A1<br />
32117D–AVR-01/12<br />
NCS<br />
NRD<br />
NWAIT<br />
Internally synchronized<br />
NWAIT signal<br />
4 3 2 2 2<br />
1 0<br />
1 0<br />
FROZEN STATE<br />
5 5 5<br />
Read cycle<br />
EXNWMODE = 2 (Frozen)<br />
READMODE = 0 (NCS controlled)<br />
NRDPULSE = 2, NRDHOLD = 6<br />
NCSRDPULSE = 5, NCSRDHOLD = 3<br />
4<br />
3<br />
2<br />
2 1<br />
Assertion is ignored<br />
<strong>AT32UC3C</strong><br />
1 0<br />
0<br />
332
32117D–AVR-01/12<br />
<strong>AT32UC3C</strong><br />
18.6.7.3 Ready mode<br />
In Ready mode (MODE.EXNWMODE = 3), the SMC behaves differently. Normally, the SMC<br />
begins the access by down counting the setup and pulse counters of the read/write controlling<br />
signal. In the last cycle of the pulse phase, the resynchronized NWAIT signal is examined.<br />
If asserted, the SMC suspends the access as shown in Figure 18-27 on page 333 and Figure<br />
18-28 on page 334. After deassertion, the access is completed: the hold step of the access is<br />
performed.<br />
This mode must be selected when the external device uses deassertion of the NWAIT signal to<br />
indicate its ability to complete the read or write operation.<br />
If the NWAIT signal is deasserted before the end of the pulse, or asserted after the end of the<br />
pulse of the controlling read/write signal, it has no impact on the access length as shown in Figure<br />
18-28 on page 334.<br />
Figure 18-27. NWAIT Assertion in Write Access: Ready Mode (MODE.EXNWMODE = 3).<br />
CLK_SMC<br />
A[AD_MSB:2]<br />
NBS0, NBS1,<br />
A0, A1<br />
NWE<br />
NCS<br />
D[15:0]<br />
NWAIT<br />
Internally synchronized<br />
NWAIT signal<br />
4<br />
6 5 4<br />
3<br />
3<br />
2 1 0<br />
2<br />
1<br />
Write cycle<br />
FROZEN STATE<br />
0<br />
0<br />
1 1<br />
EXNWMODE = 3 (Ready mode)<br />
WRITEMODE = 1 (NWE_controlled)<br />
NWEPULSE = 5<br />
NCSWRPULSE = 7<br />
0<br />
333
Figure 18-28. NWAIT Assertion in Read Access: Ready Mode (EXNWMODE = 3).<br />
CLK_SMC<br />
A[AD_MSB:2]<br />
NBS0, NBS1,<br />
A0, A1<br />
32117D–AVR-01/12<br />
NCS<br />
NRD<br />
NWAIT<br />
Internally synchronized<br />
NWAIT signal<br />
6<br />
5<br />
6<br />
5<br />
Assertion is ignored<br />
4 3 2<br />
4<br />
3<br />
Read cycle<br />
1<br />
0<br />
2 1<br />
EXNWMODE = 3 (Ready mode)<br />
READMODE = 0 (NCS_controlled)<br />
NRDPULSE = 7<br />
NCSRDPULSE = 7<br />
Wait STATE<br />
0<br />
1<br />
<strong>AT32UC3C</strong><br />
0<br />
Assertion is ignored<br />
334
32117D–AVR-01/12<br />
<strong>AT32UC3C</strong><br />
18.6.7.4 NWAIT latency and read/write timings<br />
There may be a latency between the assertion of the read/write controlling signal and the assertion<br />
of the NWAIT signal by the device. The programmed pulse length of the read/write<br />
controlling signal must be at least equal to this latency plus the two cycles of resynchronization<br />
plus one cycle. Otherwise, the SMC may enter the hold state of the access without detecting the<br />
NWAIT signal assertion. This is true in frozen mode as well as in ready mode. This is illustrated<br />
on Figure 18-29 on page 335.<br />
Figure 18-29. NWAIT Latency<br />
CLK_SMC<br />
A[AD_MSB:2]<br />
NBS0, NBS1,<br />
A0, A1<br />
NRD<br />
NWAIT<br />
nternally synchronized<br />
NWAIT signal<br />
When the MODE.EXNWMODE field is enabled (ready or frozen), the user must program a pulse<br />
length of the read and write controlling signal of at least:<br />
4<br />
minimal pulse length = NWAIT latency + 2 synchronization cycles + 1 cycle<br />
3<br />
2<br />
1<br />
Minimal pulse length<br />
NWAIT latency 2 cycle resynchronization<br />
Read cycle<br />
EXNWMODE = 2 or 3<br />
READMODE = 1 (NRD controlled)<br />
NRDPULSE = 5<br />
0<br />
0<br />
Wait STATE<br />
0<br />
335
32117D–AVR-01/12<br />
<strong>AT32UC3C</strong><br />
18.6.8 Slow Clock Mode<br />
The SMC is able to automatically apply a set of “slow clock mode” read/write waveforms when<br />
an internal signal driven by the SMC’s Power Management Controller is asserted because<br />
CLK_SMC has been turned to a very slow clock rate (typically 32 kHz clock rate). In this mode,<br />
the user-programmed waveforms are ignored and the slow clock mode waveforms are applied.<br />
This mode is provided so as to avoid reprogramming the User Interface with appropriate waveforms<br />
at very slow clock rate. When activated, the slow mode is active on all chip selects.<br />
18.6.8.1 Slow clock mode waveforms<br />
Figure 18-30 on page 336 illustrates the read and write operations in slow clock mode. They are<br />
valid on all chip selects. Table 18-5 on page 336 indicates the value of read and write parameters<br />
in slow clock mode.<br />
Figure 18-30. Read and Write Cycles in Slow Clock Mode<br />
CLK_SMC<br />
A[AD_MSB:2]<br />
NBS0, NBS1,<br />
A0, A1<br />
NWE<br />
NCS<br />
1<br />
1<br />
NWECYCLES = 3<br />
SLOW CLOCK MODE WRITE<br />
1<br />
CLK_SMC<br />
A[AD_MSB:2]<br />
NBS0, NBS1,<br />
A0, A1<br />
NRD<br />
NCS<br />
Table 18-5. Read and Write Timing Parameters in Slow Clock Mode<br />
1<br />
NRDCYCLES = 2<br />
SLOW CLOCK MODE READ<br />
Read Parameters Duration (cycles) Write Parameters Duration (cycles)<br />
NRDSETUP 1 NWESETUP 1<br />
NRDPULSE 1 NWEPULSE 1<br />
NCSRDSETUP 0 NCSWRSETUP 0<br />
NCSRDPULSE 2 NCSWRPULSE 3<br />
NRDCYCLE 2 NWECYCLE 3<br />
1<br />
336
32117D–AVR-01/12<br />
<strong>AT32UC3C</strong><br />
18.6.8.2 Switching from (to) slow clock mode to (from) normal mode<br />
When switching from slow clock mode to the normal mode, the current slow clock mode transfer<br />
is completed at high clock rate, with the set of slow clock mode parameters. See Figure 18-31<br />
on page 337. The external device may not be fast enough to support such timings.<br />
Figure 18-32 on page 338 illustrates the recommended procedure to properly switch from one<br />
mode to the other.<br />
Figure 18-31. Clock Rate Transition Occurs while the SMC is Performing a Write Operation<br />
Slow Clock Mode<br />
Internal signal from PM<br />
CLK_SMC<br />
A[AD_MSB:2]<br />
NBS0, NBS1,<br />
A0, A1<br />
NWE<br />
NCS<br />
1 1 1 1 1 1 2 3 2<br />
NWECYCLE = 3<br />
SLOW CLOCK MODE WRITE SLOW CLOCK MODE WRITE<br />
This write cycle finishes with the slow clock mode set<br />
of parameters after the clock rate transition<br />
NWECYCLE = 7<br />
NORMAL MODE WRITE<br />
Slow clock mode transition is detected:<br />
Reload Configuration Wait State<br />
337
32117D–AVR-01/12<br />
<strong>AT32UC3C</strong><br />
Figure 18-32. Recommended Procedure to Switch from Slow Clock Mode to Normal Mode or from Normal Mode to Slow<br />
Clock Mode<br />
Slow Clock Mode<br />
Internal signal from PM<br />
CLK_SMC<br />
A[AD_MSB:2]<br />
NBS0, NBS1,<br />
A0, A1<br />
NWE<br />
NCS<br />
1 1<br />
SLOW CLOCK MODE WRITE<br />
1<br />
IDLE STATE<br />
18.6.9 Asynchronous Page Mode<br />
The SMC supports asynchronous burst reads in page mode, providing that the Page Mode<br />
Enabled bit is written to one in the MODE register (MODE.PMEN). The page size must be configured<br />
in the Page Size field in the MODE register (MODE.PS) to 4, 8, 16, or 32 bytes.<br />
The page defines a set of consecutive bytes into memory. A 4-byte page (resp. 8-, 16-, 32-byte<br />
page) is always aligned to 4-byte boundaries (resp. 8-, 16-, 32-byte boundaries) of memory. The<br />
MSB of data address defines the address of the page in memory, the LSB of address define the<br />
address of the data in the page as detailed in Table 18-6 on page 338.<br />
With page mode memory devices, the first access to one page (t pa ) takes longer than the subsequent<br />
accesses to the page (t sa) as shown in Figure 18-33 on page 339. When in page mode,<br />
the SMC enables the user to define different read timings for the first access within one page,<br />
and next accesses within the page.<br />
Notes: 1. A denotes the address bus of the memory device<br />
2. For 16-bit devices, the bit 0 of address is ignored.<br />
Reload Configuration<br />
Wait State<br />
Table 18-6. Page Address and Data Address within a Page<br />
Page Size Page Address (1)<br />
4 bytes A[23:2] A[1:0]<br />
8 bytes A[23:3] A[2:0]<br />
16 bytes A[23:4] A[3:0]<br />
32 bytes A[23:5] A[4:0]<br />
2 3 2<br />
NORMAL MODE WRITE<br />
Data Address in the Page (2)<br />
18.6.9.1 Protocol and timings in page mode<br />
Figure 18-33 on page 339 shows the NRD and NCS timings in page mode access.<br />
338
Figure 18-33. Page Mode Read Protocol (Address MSB and LSB Are Defined in Table 18-6 on page 338)<br />
CLK_SMC<br />
A[MSB]<br />
A[LSB]<br />
NRD<br />
NCS<br />
D[15:0]<br />
32117D–AVR-01/12<br />
tpa<br />
NCSRDPULSE<br />
<strong>AT32UC3C</strong><br />
The NRD and NCS signals are held low during all read transfers, whatever the programmed values<br />
of the setup and hold timings in the User Interface may be. Moreover, the NRD and NCS<br />
timings are identical. The pulse length of the first access to the page is defined with the<br />
PULSE.NCSRDPULSE field value. The pulse length of subsequent accesses within the page<br />
are defined using the PULSE.NRDPULSE field value.<br />
In page mode, the programming of the read timings is described in Table 18-7 on page 339:<br />
The SMC does not check the coherency of timings. It will always apply the NCSRDPULSE timings<br />
as page access timing (t pa ) and the NRDPULSE for accesses to the page (t sa ), even if the<br />
programmed value for t pa is shorter than the programmed value for t sa .<br />
18.6.9.2 Byte access type in page mode<br />
The byte access type configuration remains active in page mode. For 16-bit or 32-bit page mode<br />
devices that require byte selection signals, configure the MODE.BAT bit to zero (byte select<br />
access type).<br />
tsa<br />
NRDPULSE NRDPULSE<br />
Table 18-7. Programming of Read Timings in Page Mode<br />
Parameter Value Definition<br />
READMODE ‘x’ No impact<br />
NCSRDSETUP ‘x’ No impact<br />
NCSRDPULSE t pa Access time of first access to the page<br />
NRDSETUP ‘x’ No impact<br />
NRDPULSE t sa Access time of subsequent accesses in the page<br />
NRDCYCLE ‘x’ No impact<br />
tsa<br />
339
32117D–AVR-01/12<br />
<strong>AT32UC3C</strong><br />
18.6.9.3 Page mode restriction<br />
The page mode is not compatible with the use of the NWAIT signal. Using the page mode and<br />
the NWAIT signal may lead to unpredictable behavior.<br />
18.6.9.4 Sequential and non-sequential accesses<br />
If the chip select and the MSB of addresses as defined in Table 18-6 on page 338 are identical,<br />
then the current access lies in the same page as the previous one, and no page break occurs.<br />
Using this information, all data within the same page, sequential or not sequential, are accessed<br />
with a minimum access time (t sa ). Figure 18-34 on page 340 illustrates access to an 8-bit memory<br />
device in page mode, with 8-byte pages. Access to D1 causes a page access with a long<br />
access time (t pa ). Accesses to D3 and D7, though they are not sequential accesses, only require<br />
a short access time (t sa ).<br />
If the MSB of addresses are different, the SMC performs the access of a new page. In the same<br />
way, if the chip select is different from the previous access, a page break occurs. If two sequential<br />
accesses are made to the page mode memory, but separated by an other internal or external<br />
peripheral access, a page break occurs on the second access because the chip select of the<br />
device was deasserted between both accesses.<br />
Figure 18-34. Access to Non-sequential Data within the Same Page<br />
CLK_SMC<br />
A[AD_MSB:3]<br />
A[2], A1, A0<br />
NRD<br />
NCS<br />
D[7:0]<br />
A1<br />
Page address<br />
A3 A7<br />
D1 D3 D7<br />
NCSRDPULSE NRDPULSE NRDPULSE<br />
340
32117D–AVR-01/12<br />
<strong>AT32UC3C</strong><br />
18.7 User Interface<br />
The SMC is programmed using the registers listed in Table 18-8 on page 341. For each chip select, a set of four registers<br />
is used to program the parameters of the external device connected on it. In Table 18-8 on page 341, “CS_number”<br />
denotes the chip select number. Sixteen bytes (0x10) are required per chip select.<br />
The user must complete writing the configuration by writing anyone of the Mode Registers.<br />
Table 18-8. SMC Register Memory Map<br />
Offset Register Register Name Access Reset<br />
0x00 + CS_number*0x10 Setup Register SETUP Read/Write 0x01010101<br />
0x04 + CS_number*0x10 Pulse Register PULSE Read/Write 0x01010101<br />
0x08 + CS_number*0x10 Cycle Register CYCLE Read/Write 0x00030003<br />
0x0C + CS_number*0x10 Mode Register MODE Read/Write 0x10002103<br />
341
18.7.1 Setup Register<br />
Register Name: SETUP<br />
Access Type: Read/Write<br />
Offset: 0x00 + CS_number*0x10<br />
Reset Value: 0x01010101<br />
NCSRDSETUP: NCS Setup Length in READ Access<br />
In read access, the NCS signal setup length is defined as:<br />
NRDSETUP: NRD Setup Length<br />
The NRD signal setup length is defined in clock cycles as:<br />
NCSWRSETUP: NCS Setup Length in WRITE Access<br />
In write access, the NCS signal setup length is defined as:<br />
NWESETUP: NWE Setup Length<br />
The NWE signal setup length is defined as:<br />
32117D–AVR-01/12<br />
<strong>AT32UC3C</strong><br />
31 30 29 28 27 26 25 24<br />
– – NCSRDSETUP<br />
23 22 21 20 19 18 17 16<br />
– – NRDSETUP<br />
15 14 13 12 11 10 9 8<br />
– – NCSWRSETUP<br />
7 6 5 4 3 2 1 0<br />
– – NWESETUP<br />
NCS Setup Length in read access = ( 128 × NCSRDSETUP[ 5]<br />
+ NCSRDSETUP[ 4:0]<br />
) clock cycles<br />
NRD Setup Length = ( 128 × NRDSETUP[ 5]<br />
+ NRDSETUP[ 4:0]<br />
) clock cycles<br />
NCS Setup Length in write access = ( 128 × NCSWRSETUP[ 5]<br />
+ NCSWRSETUP[ 4:0]<br />
) clock cycles<br />
NWE Setup Length =<br />
( 128 × NWESETUP[ 5]<br />
+ NWESETUP[ 4:0]<br />
) clock cycles<br />
342
18.7.2 Pulse Register<br />
Register Name: PULSE<br />
Access Type: Read/Write<br />
Offset: 0x04 + CS_number*0x10<br />
Reset Value: 0x01010101<br />
NCSRDPULSE: NCS Pulse Length in READ Access<br />
In standard read access, the NCS signal pulse length is defined as:<br />
The NCS pulse length must be at least one clock cycle.<br />
In page mode read access, the NCSRDPULSE field defines the duration of the first access to one page.<br />
NRDPULSE: NRD Pulse Length<br />
In standard read access, the NRD signal pulse length is defined in clock cycles as:<br />
The NRD pulse length must be at least one clock cycle.<br />
In page mode read access, the NRDPULSE field defines the duration of the subsequent accesses in the page.<br />
NCSWRPULSE: NCS Pulse Length in WRITE Access<br />
In write access, the NCS signal pulse length is defined as:<br />
The NCS pulse length must be at least one clock cycle.<br />
NWEPULSE: NWE Pulse Length<br />
The NWE signal pulse length is defined as:<br />
32117D–AVR-01/12<br />
The NWE pulse length must be at least one clock cycle.<br />
<strong>AT32UC3C</strong><br />
31 30 29 28 27 26 25 24<br />
– NCSRDPULSE<br />
23 22 21 20 19 18 17 16<br />
– NRDPULSE<br />
15 14 13 12 11 10 9 8<br />
– NCSWRPULSE<br />
7 6 5 4 3 2 1 0<br />
– NWEPULSE<br />
NCS Pulse Length in read access = ( 256 × NCSRDPULSE[ 6]<br />
+ NCSRDPULSE[ 5:0]<br />
) clock cycles<br />
NRD Pulse Length = ( 256 × NRDPULSE[ 6]<br />
+ NRDPULSE[ 5:0]<br />
) clock cycles<br />
NCS Pulse Length in write access = ( 256 × NCSWRPULSE[ 6]<br />
+ NCSWRPULSE[ 5:0]<br />
) clock cycles<br />
NWE Pulse Length =<br />
( 256 × NWEPULSE[ 6]<br />
+ NWEPULSE[ 5:0]<br />
) clock cycles<br />
343
18.7.3 Cycle Register<br />
Register Name: CYCLE<br />
Access Type: Read/Write<br />
Offset: 0x08 + CS_number*0x10<br />
Reset Value: 0x00030003<br />
32117D–AVR-01/12<br />
<strong>AT32UC3C</strong><br />
31 30 29 28 27 26 25 24<br />
– – – – – – – NRDCYCLE[8]<br />
23 22 21 20 19 18 17 16<br />
NRDCYCLE[7:0]<br />
15 14 13 12 11 10 9 8<br />
– – – – – – – NWECYCLE[8]<br />
7 6 5 4 3 2 1 0<br />
NWECYCLE[7:0]<br />
NRDCYCLE[8:0]: Total Read Cycle Length<br />
The total read cycle length is the total duration in clock cycles of the read cycle. It is equal to the sum of the setup, pulse and<br />
hold steps of the NRD and NCS signals. It is defined as:<br />
Read Cycle Length = ( 256 × NRDCYCLE[ 8:7]<br />
+ NRDCYCLE[ 6:0]<br />
) clock cycles<br />
NWECYCLE[8:0]: Total Write Cycle Length<br />
The total write cycle length is the total duration in clock cycles of the write cycle. It is equal to the sum of the setup, pulse and<br />
hold steps of the NWE and NCS signals. It is defined as:<br />
Write Cycle Length =<br />
( 256 × NWECYCLE[ 8:7]<br />
+ NWECYCLE[ 6:0]<br />
) clock cycles<br />
344
18.7.4 Mode Register<br />
Register Name: MODE<br />
Access Type: Read/Write<br />
Offset: 0x0C + CS_number*0x10<br />
Reset Value: 0x10002103<br />
32117D–AVR-01/12<br />
<strong>AT32UC3C</strong><br />
31 30 29 28 27 26 25 24<br />
– – PS – – – PMEN<br />
23 22 21 20 19 18 17 16<br />
– – – TDFMODE TDFCYCLES<br />
15 14 13 12 11 10 9 8<br />
– – DBW – – – BAT<br />
7 6 5 4 3 2 1 0<br />
– – EXNWMODE – – WRITEMODE READMODE<br />
PS: Page Size<br />
If page mode is enabled, this field indicates the size of the page in bytes.<br />
PS Page Size<br />
0 4-byte page<br />
1 8-byte page<br />
2 16-byte page<br />
3 32-byte page<br />
PMEN: Page Mode Enabled<br />
1: Asynchronous burst read in page mode is applied on the corresponding chip select.<br />
0: Standard read is applied.<br />
TDFMODE: TDF Optimization<br />
1: TDF optimization is enabled. The number of TDF wait states is optimized using the setup period of the next read/write<br />
access.<br />
0: TDF optimization is disabled.The number of TDF wait states is inserted before the next access begins.<br />
TDFCYCLES: Data Float Time<br />
This field gives the integer number of clock cycles required by the external device to release the data after the rising edge of the<br />
read controlling signal. The SMC always provide one full cycle of bus turnaround after the TDFCYCLES period. The external<br />
bus cannot be used by another chip select during TDFCYCLES plus one cycles. From 0 up to 15 TDFCYCLES can be set.<br />
345
DBW: Data Bus Width<br />
DBW Data Bus Width<br />
32117D–AVR-01/12<br />
0 8-bit bus<br />
1 16-bit bus<br />
2 Reserved<br />
3 Reserved<br />
BAT: Byte Access Type<br />
This field is used only if DBW defines a 16-bit data bus.<br />
BAT Byte Access Type<br />
0<br />
1<br />
Byte select access type:<br />
Write operation is controlled using NCS, NWE, NBS0, NBS1<br />
Read operation is controlled using NCS, NRD, NBS0, NBS1<br />
Byte write access type:<br />
Write operation is controlled using NCS, NWR0, NWR1<br />
Read operation is controlled using NCS and NRD<br />
<strong>AT32UC3C</strong><br />
EXNWMODE: External WAIT Mode<br />
The NWAIT signal is used to extend the current read or write signal. It is only taken into account during the pulse phase of the<br />
read and write controlling signal. When the use of NWAIT is enabled, at least one cycle hold duration must be programmed for<br />
the read and write controlling signal.<br />
EXNWMODE External NWAIT Mode<br />
0<br />
1 Reserved<br />
2<br />
3<br />
Disabled:<br />
the NWAIT input signal is ignored on the corresponding chip select.<br />
Frozen Mode:<br />
if asserted, the NWAIT signal freezes the current read or write cycle. after deassertion, the read or write cycle<br />
is resumed from the point where it was stopped.<br />
Ready Mode:<br />
the NWAIT signal indicates the availability of the external device at the end of the pulse of the controlling read<br />
or write signal, to complete the access. If high, the access normally completes. If low, the access is extended<br />
until NWAIT returns high.<br />
WRITEMODE: Write Mode<br />
1: The write operation is controlled by the NWE signal. If TDF optimization is enabled (TDFMODE =1), TDF wait states will be<br />
inserted after the setup of NWE.<br />
0: The write operation is controlled by the NCS signal. If TDF optimization is enabled (TDFMODE =1), TDF wait states will be<br />
inserted after the setup of NCS.<br />
346
READMODE: Read Mode<br />
READMODE Read Access Mode<br />
0<br />
1<br />
32117D–AVR-01/12<br />
The read operation is controlled by the NCS signal.<br />
If TDF are programmed, the external bus is marked busy after the rising edge of NCS.<br />
If TDF optimization is enabled (TDFMODE = 1), TDF wait states are inserted after the setup of NCS.<br />
The read operation is controlled by the NRD signal.<br />
If TDF cycles are programmed, the external bus is marked busy after the rising edge of NRD.<br />
If TDF optimization is enabled (TDFMODE =1), TDF wait states are inserted after the setup of NRD.<br />
<strong>AT32UC3C</strong><br />
347
19. SDRAM Controller (SDRAMC)<br />
19.1 Features<br />
19.2 Overview<br />
32117D–AVR-01/12<br />
Rev: 2.2.0.4<br />
128-Mbytes address space<br />
Numerous configurations supported<br />
– 2K, 4K, 8K row address memory parts<br />
– SDRAM with two or four internal banks<br />
– SDRAM with 16-bit data path<br />
Programming facilities<br />
– Word, halfword, byte access<br />
– Automatic page break when memory boundary has been reached<br />
– Multibank ping-pong access<br />
– Timing parameters specified by software<br />
– Automatic refresh operation, refresh rate is programmable<br />
– Automatic update of DS, TCR and PASR parameters (mobile SDRAM devices)<br />
Energy-saving capabilities<br />
– Self-refresh, power-down, and deep power-down modes supported<br />
– Supports mobile SDRAM devices<br />
Error detection<br />
– Refresh error interrupt<br />
SDRAM power-up initialization by software<br />
CAS latency of one, two, and three supported<br />
Auto Precharge command not used<br />
<strong>AT32UC3C</strong><br />
The SDRAM Controller (SDRAMC) extends the memory capabilities of a chip by providing the<br />
interface to an external 16-bit SDRAM device. The page size supports ranges from 2048 to 8192<br />
and the number of columns from 256 to 2048. It supports byte (8-bit) and halfword (16-bit)<br />
accesses.<br />
The SDRAMC supports a read or write burst length of one location. It keeps track of the active<br />
row in each bank, thus maximizing SDRAM performance, e.g., the application may be placed in<br />
one bank and data in the other banks. So as to optimize performance, it is advisable to avoid<br />
accessing different rows in the same bank.<br />
The SDRAMC supports a CAS latency of one, two, or three and optimizes the read access<br />
depending on the frequency.<br />
The different modes available (self refresh, power-down, and deep power-down modes) minimize<br />
power consumption on the SDRAM device.<br />
348
19.3 Block Diagram<br />
Figure 19-1. SDRAM Controller Block Diagram<br />
Memory<br />
Controller<br />
Power<br />
Manager<br />
19.4 I/O Lines Description<br />
32117D–AVR-01/12<br />
SDRAMC<br />
Chip Select<br />
SDRAMC<br />
Interrupt<br />
CLK_SDRAMC<br />
Peripheral Bus<br />
SDRAMC<br />
User Interface<br />
Table 19-1. I/O Lines Description<br />
SDCK<br />
SDCKE<br />
SDCS<br />
BA[1:0]<br />
RAS<br />
CAS<br />
SDWE<br />
DQM[0]<br />
DQM[1]<br />
SDRAMC_A[9:0]<br />
SDRAMC_A[10]<br />
SDRAMC_A[12:11]<br />
D[15:0]<br />
EBI<br />
MUX Logic<br />
I/O<br />
Controller<br />
<strong>AT32UC3C</strong><br />
SDCK<br />
SDCKE<br />
NCS[1]<br />
ADDR[17:16]<br />
RAS<br />
CAS<br />
SDWE<br />
ADDR[0]<br />
NWE1<br />
ADDR[11:2]<br />
SDA10<br />
ADDR[13:14]<br />
DATA[15:0]<br />
Name Description Type Active Level<br />
SDCK SDRAM Clock Output<br />
SDCKE SDRAM Clock Enable Output High<br />
SDCS SDRAM Chip Select Output Low<br />
BA[1:0] Bank Select Signals Output<br />
RAS Row Signal Output Low<br />
CAS Column Signal Output Low<br />
SDWE SDRAM Write Enable Output Low<br />
349
19.5 Application Example<br />
32117D–AVR-01/12<br />
Table 19-1. I/O Lines Description<br />
DQM[1:0] Data Mask Enable Signals Output High<br />
SDRAMC_A[12:0] Address Bus Output<br />
D[15:0] Data Bus Input/Output<br />
<strong>AT32UC3C</strong><br />
Name Description Type Active Level<br />
19.5.1 Hardware Interface<br />
Figure 19-2 on page 350 shows an example of SDRAM device connection using a 16-bit data<br />
bus width. It is important to note that this example is given for a direct connection of the devices<br />
to the SDRAMC, without External Bus Interface or I/O Controller multiplexing.<br />
Figure 19-2. SDRAM Controller Connections to SDRAM Devices: 16-bit Data Bus Width<br />
D0-D31<br />
RAS<br />
CAS<br />
SDCK<br />
SDCKE<br />
SDWE<br />
DQM[0-1]<br />
SDRAM<br />
Controller<br />
SDRAMC_A[0-12]<br />
BA0<br />
BA1<br />
SDCS<br />
2Mx8<br />
SDRAM<br />
D0-D7<br />
D0-D7<br />
D8-D15<br />
DQM0<br />
CS<br />
CLK<br />
CKE<br />
WE<br />
RAS<br />
CAS<br />
DQM<br />
A0-A9 A11<br />
SDRAMC_A10<br />
A10<br />
BA0<br />
BA0<br />
BA1<br />
BA1<br />
DQM1<br />
CS<br />
CLK<br />
CKE<br />
WE<br />
RAS<br />
CAS<br />
DQM<br />
2Mx8<br />
SDRAM<br />
D0-D7<br />
A0-A9 A11<br />
SDRAMC_A10<br />
A10<br />
BA0<br />
BA0<br />
BA1<br />
BA1<br />
19.5.2 Software Interface<br />
The SDRAM address space is organized into banks, rows, and columns. The SDRAMC allows<br />
mapping different memory types according to the values set in the SDRAMC Configuration Register<br />
(CR).<br />
The SDRAMC’s function is to make the SDRAM device access protocol transparent to the user.<br />
Table 19-2 on page 351 to Table 19-4 on page 351 illustrate the SDRAM device memory mapping<br />
seen by the user in correlation with the device structure. Various configurations are<br />
illustrated.<br />
350
19.5.2.1 16-bit memory data bus width<br />
Table 19-2. SDRAM Configuration Mapping: 2K Rows, 256/512/1024/2048 Columns<br />
Notes: 1. M0 is the byte address inside a 16-bit halfword.<br />
32117D–AVR-01/12<br />
<strong>AT32UC3C</strong><br />
19.6 Product Dependencies<br />
In order to use this module, other parts of the system must be configured correctly, as described<br />
below.<br />
19.6.1 I/O Lines<br />
CPU Address Line<br />
27 26 25 24 23 22 21 20 19 18 17 16 15 14 13 12 11 10 9 8 7 6 5 4 3 2 1 0<br />
BA[1:0] Row[10:0] Column[7:0] M0<br />
BA[1:0] Row[10:0] Column[8:0] M0<br />
BA[1:0] Row[10:0] Column[9:0] M0<br />
BA[1:0] Row[10:0] Column[10:0] M0<br />
Table 19-3. SDRAM Configuration Mapping: 4K Rows, 256/512/1024/2048 Columns<br />
CPU Address Line<br />
27 26 25 24 23 22 21 20 19 18 17 16 15 14 13 12 11 10 9 8 7 6 5 4 3 2 1 0<br />
BA[1:0] Row[11:0] Column[7:0] M0<br />
BA[1:0] Row[11:0] Column[8:0] M0<br />
BA[1:0] Row[11:0] Column[9:0] M0<br />
BA[1:0] Row[11:0] Column[10:0] M0<br />
Table 19-4. SDRAM Configuration Mapping: 8K Rows, 256/512/1024/2048 Columns<br />
CPU Address Line<br />
27 26 25 24 23 22 21 20 19 18 17 16 15 14 13 12 11 10 9 8 7 6 5 4 3 2 1 0<br />
BA[1:0] Row[12:0] Column[7:0] M0<br />
BA[1:0] Row[12:0] Column[8:0] M0<br />
BA[1:0] Row[12:0] Column[9:0] M0<br />
BA[1:0] Row[12:0] Column[10:0] M0<br />
The SDRAMC module signals pass through the External Bus Interface (EBI) module where they<br />
are multiplexed. The user must first configure the I/O controller to assign the EBI pins corresponding<br />
to SDRAMC signals to their peripheral function. If I/O lines of the EBI corresponding to<br />
SDRAMC signals are not used by the application, they can be used for other purposes by the<br />
I/O Controller.<br />
19.6.2 Power Management<br />
The SDRAMC must be properly stopped before entering in reset mode, i.e., the user must issue<br />
a Deep power mode command in the Mode (MD) register and wait for the command to be<br />
completed.<br />
351
19.6.3 Clocks<br />
19.6.4 Interrupts<br />
19.7 Functional Description<br />
32117D–AVR-01/12<br />
<strong>AT32UC3C</strong><br />
The clock for the SDRAMC bus interface (CLK_SDRAMC) is generated by the Power Manager.<br />
This clock is enabled at reset, and can be disabled in the Power Manager. It is recommended to<br />
disable the SDRAMC before disabling the clock, to avoid freezing the SDRAMC in an undefined<br />
state.<br />
The SDRAMC interrupt request line is connected to the interrupt controller. Using the SDRAMC<br />
interrupt requires the interrupt controller to be programmed first.<br />
19.7.1 SDRAM Device Initialization<br />
The initialization sequence is generated by software. The SDRAM devices are initialized by the<br />
following sequence:<br />
1. SDRAM features must be defined in the CR register by writing the following fields with<br />
the desired value: asynchronous timings (TXSR, TRAS, TRCD, TRP, TRC, and TWR),<br />
Number of Columns (NC), Number of Rows (NR), Number of Banks (NB), CAS Latency<br />
(CAS), and the Data Bus Width (DBW).<br />
2. For mobile SDRAM devices, Temperature Compensated Self Refresh (TCSR), Drive<br />
Strength (DS) and Partial Array Self Refresh (PASR) fields must be defined in the Low<br />
Power Register (LPR).<br />
3. The Memory Device Type field must be defined in the Memory Device Register<br />
(MDR.MD).<br />
4. A No Operation (NOP) command must be issued to the SDRAM devices to start the<br />
SDRAM clock. The user must write the value one to the Command Mode field in the<br />
SDRAMC Mode Register (MR.MODE) and perform a write access to any SDRAM<br />
address.<br />
5. A minimum pause of 200µs is provided to precede any signal toggle.<br />
6. An All Banks Precharge command must be issued to the SDRAM devices. The user<br />
must write the value two to the MR.MODE field and perform a write access to any<br />
SDRAM address.<br />
7. Eight Auto Refresh commands are provided. The user must write the value four to the<br />
MR.MODE field and performs a write access to any SDRAM location eight times.<br />
8. A Load Mode Register command must be issued to program the parameters of the<br />
SDRAM devices in its Mode Register, in particular CAS latency, burst type, and burst<br />
length. The user must write the value three to the MR.MODE field and perform a write<br />
access to the SDRAM. The write address must be chosen so that BA[1:0] are set to<br />
zero. See Section 19.8.1 for details about Load Mode Register command.<br />
9. For mobile SDRAM initialization, an Extended Load Mode Register command must be<br />
issued to program the SDRAM devices parameters (TCSR, PASR, DS). The user must<br />
write the value five to the MR.MODE field and perform a write access to the SDRAM.<br />
The write address must be chosen so that BA[1] or BA[0] are equal to one. See Section<br />
19.8.1 for details about Extended Load Mode Register command.<br />
10. The user must go into Normal Mode, writing the value 0 to the MR.MODE field and performing<br />
a write access at any location in the SDRAM.<br />
11. Write the refresh rate into the Refresh Timer Count field in the Refresh Timer Register<br />
(TR.COUNT). The refresh rate is the delay between two successive refresh cycles. The<br />
SDRAM device requires a refresh every 15.625µs or 7.81µs. With a 100MHz fre-<br />
352
32117D–AVR-01/12<br />
<strong>AT32UC3C</strong><br />
quency, the TR register must be written with the value 1562 (15.625 µs x 100 MHz) or<br />
781 (7.81 µs x 100 MHz).<br />
After initialization, the SDRAM devices are fully functional.<br />
Figure 19-3. SDRAM Device Initialization Sequence<br />
SDCKE<br />
SDCK<br />
SDRAMC_A[9:0]<br />
A10<br />
SDRAMC_A[12:11]<br />
SDCS<br />
RAS<br />
CAS<br />
SDWE<br />
DQM<br />
Inputs Stable for<br />
200 usec<br />
tRP<br />
Precharge All Banks 1st Auto Refresh 8th Auto Refresh LMR Command<br />
Valid Command<br />
19.7.2 SDRAM Controller Write Cycle<br />
The SDRAMC allows burst access or single access. In both cases, the SDRAMC keeps track of<br />
the active row in each bank, thus maximizing performance. To initiate a burst access, the<br />
SDRAMC uses the transfer type signal provided by the master requesting the access. If the next<br />
access is a sequential write access, writing to the SDRAM device is carried out. If the next<br />
access is a write-sequential access, but the current access is to a boundary page, or if the next<br />
access is in another row, then the SDRAMC generates a precharge command, activates the<br />
new row and initiates a write command. To comply with SDRAM timing parameters, additional<br />
clock cycles are inserted between precharge and active (t RP ) commands and between active<br />
and write (t RCD) commands. For definition of these timing parameters, refer to the Section<br />
19.8.3. This is described in Figure 19-4 on page 354.<br />
tRC<br />
tMRD<br />
353
Figure 19-4. Write Burst, 16-bit SDRAM Access<br />
SDCS<br />
SDCK<br />
SDRAMC_A[12:0]<br />
RAS<br />
CAS<br />
SDWE<br />
32117D–AVR-01/12<br />
tRCD = 3<br />
<strong>AT32UC3C</strong><br />
Row n Col a<br />
Col b Col c Col d Col e Col f Col g Col h Col i Col j Col k Col l<br />
D[15:0] Dna Dnb Dnc Dnd Dne Dnf Dng Dnh Dni Dnj Dnk Dnl<br />
19.7.3 SDRAM Controller Read Cycle<br />
The SDRAMC allows burst access, incremental burst of unspecified length or single access. In<br />
all cases, the SDRAMC keeps track of the active row in each bank, thus maximizing performance<br />
of the SDRAM. If row and bank addresses do not match the previous row/bank address,<br />
then the SDRAMC automatically generates a precharge command, activates the new row and<br />
starts the read command. To comply with the SDRAM timing parameters, additional clock cycles<br />
on SDCK are inserted between precharge and active (t RP ) commands and between active and<br />
read (t RCD) commands. These two parameters are set in the CR register of the SDRAMC. After a<br />
read command, additional wait states are generated to comply with the CAS latency (one, two,<br />
or three clock delays specified in the CR register).<br />
For a single access or an incremented burst of unspecified length, the SDRAMC anticipates the<br />
next access. While the last value of the column is returned by the SDRAMC on the bus, the<br />
SDRAMC anticipates the read to the next column and thus anticipates the CAS latency. This<br />
reduces the effect of the CAS latency on the internal bus.<br />
For burst access of specified length (4, 8, 16 words), access is not anticipated. This case leads<br />
to the best performance. If the burst is broken (border, busy mode, etc.), the next access is handled<br />
as an incrementing burst of unspecified length.<br />
354
Figure 19-5. Read Burst, 16-bit SDRAM Access<br />
32117D–AVR-01/12<br />
SDCS<br />
SDCK<br />
SDRAMC_A[12:0]<br />
RAS<br />
CAS<br />
SDWE<br />
D[15:0]<br />
(Input)<br />
Row n<br />
tRCD = 3<br />
CAS = 2<br />
Col a Col b Col c Col d Col e Col f<br />
Dna Dnb Dnc Dnd Dne Dnf<br />
<strong>AT32UC3C</strong><br />
19.7.4 Border Management<br />
When the memory row boundary has been reached, an automatic page break is inserted. In this<br />
case, the SDRAMC generates a precharge command, activates the new row and initiates a read<br />
or write command. To comply with SDRAM timing parameters, an additional clock cycle is<br />
inserted between the precharge and active (t RP ) commands and between the active and read<br />
(t RCD ) commands. This is described in Figure 19-6 on page 356.<br />
355
Figure 19-6. Read Burst with Boundary Row Access<br />
SDCS<br />
SDCK<br />
SDRAMC_A[12:0]<br />
RAS<br />
CAS<br />
SDWE<br />
32117D–AVR-01/12<br />
Row n<br />
Col a Col b Col c Col d<br />
TRP = 3<br />
TRCD = 3<br />
CAS = 2<br />
Row m Col a Col b Col c Col d Col e<br />
<strong>AT32UC3C</strong><br />
D[15:0] Dna Dnb Dnc Dnd Dma Dmb Dmc Dmd Dme<br />
19.7.5 SDRAM Controller Refresh Cycles<br />
An auto refresh command is used to refresh the SDRAM device. Refresh addresses are generated<br />
internally by the SDRAM device and incremented after each auto refresh automatically.<br />
The SDRAMC generates these auto refresh commands periodically. An internal timer is loaded<br />
with the value in the Refresh Timer Register (TR) that indicates the number of clock cycles<br />
between successive refresh cycles.<br />
A refresh error interrupt is generated when the previous auto refresh command did not perform.<br />
In this case a Refresh Error Status bit is set in the Interrupt Status Register (ISR.RES). It is<br />
cleared by reading the ISR register.<br />
When the SDRAMC initiates a refresh of the SDRAM device, internal memory accesses are not<br />
delayed. However, if the CPU tries to access the SDRAM, the slave indicates that the device is<br />
busy and the master is held by a wait signal. See Figure 19-7 on page 357.<br />
356
Figure 19-7. Refresh Cycle Followed by a Read Access<br />
SDCS<br />
SDCK<br />
SDRAMC_A[12:0]<br />
RAS<br />
CAS<br />
SDWE<br />
D[15:0]<br />
(input)<br />
19.7.6 Power Management<br />
Three low power modes are available:<br />
32117D–AVR-01/12<br />
Row n<br />
Col c Col d<br />
tRP = 3<br />
<strong>AT32UC3C</strong><br />
Self refresh mode: the SDRAM executes its own auto refresh cycles without control of the<br />
SDRAMC. Current drained by the SDRAM is very low.<br />
Power-down mode: auto refresh cycles are controlled by the SDRAMC. Between auto refresh<br />
cycles, the SDRAM is in power-down. Current drained in power-down mode is higher than in<br />
self refresh mode.<br />
Deep power-down mode (only available with mobile SDRAM): the SDRAM contents are lost,<br />
but the SDRAM does not drain any current.<br />
The SDRAMC activates one low power mode as soon as the SDRAM device is not selected. It is<br />
possible to delay the entry in self refresh and power-down mode after the last access by configuring<br />
the Timeout field in the Low Power Register (LPR.TIMEOUT).<br />
19.7.6.1 Self refresh mode<br />
This mode is selected by writing the value one to the Low Power Configuration Bits field in the<br />
SDRAMC Low Power Register (LPR.LPCB). In self refresh mode, the SDRAM device retains<br />
data without external clocking and provides its own internal clocking, thus performing its own<br />
auto refresh cycles. All the inputs to the SDRAM device become “don’t care” except SDCKE,<br />
which remains low. As soon as the SDRAM device is selected, the SDRAMC provides a<br />
sequence of commands and exits self refresh mode.<br />
tRC = 8<br />
Row m<br />
tRCD = 3<br />
Dnb Dnc Dnd Dma<br />
Some low power SDRAMs (e.g., mobile SDRAM) can refresh only one quarter or a half quarter<br />
or all banks of the SDRAM array. This feature reduces the self refresh current. To configure this<br />
feature, Temperature Compensated Self Refresh (TCSR), Partial Array Self Refresh (PASR)<br />
Col a<br />
CAS = 2<br />
357
Figure 19-8. Self Refresh Mode Behavior<br />
SDRAMC_A[12:0]<br />
SDCK<br />
SDCKE<br />
SDCS<br />
RAS<br />
CAS<br />
SDWE<br />
32117D–AVR-01/12<br />
<strong>AT32UC3C</strong><br />
and Drive Strength (DS) parameters must be set by writing the corresponding fields in the LPR<br />
register, and transmitted to the low power SDRAM device during initialization.<br />
After initialization, as soon as the LPR.PASR, LPR.DS, or LPR.TCSR fields are modified and<br />
self refresh mode is activated, the SDRAMC issues an Extended Load Mode Register command<br />
to the SDRAM and the Extended Mode Register of the SDRAM device is accessed automatically.<br />
The PASR/DS/TCSR parameters values are therefore updated before entry into self<br />
refresh mode.<br />
The SDRAM device must remain in self refresh mode for a minimum period of t RAS and may<br />
remain in self refresh mode for an indefinite period. This is described in Figure 19-8 on page<br />
358.<br />
Self Refresh Mode<br />
19.7.6.2 Low power mode<br />
This mode is selected by writing the value two to the LPR.LPCB field. Power consumption is<br />
greater than in self refresh mode. All the input and output buffers of the SDRAM device are<br />
deactivated except SDCKE, which remains low. In contrast to self refresh mode, the SDRAM<br />
device cannot remain in low power mode longer than the refresh period (64ms for a whole<br />
device refresh operation). As no auto refresh operations are performed by the SDRAM itself, the<br />
SDRAMC carries out the refresh operation. The exit procedure is faster than in self refresh<br />
mode.<br />
This is described in Figure 19-9 on page 359.<br />
Access Request<br />
To the SDRAM Controller<br />
TXSR = 3<br />
Row<br />
358
Figure 19-9. Low Power Mode Behavior<br />
SDCS<br />
SDCK<br />
SDRAMC_A[12:0]<br />
RAS<br />
CAS<br />
SDCKE<br />
D[15:0]<br />
(input)<br />
32117D–AVR-01/12<br />
Row n<br />
TRCD = 3<br />
Col a<br />
CAS = 2<br />
Col b<br />
Col c<br />
<strong>AT32UC3C</strong><br />
19.7.6.3 Deep power-down mode<br />
This mode is selected by writing the value three to the LPR.LPCB field. When this mode is activated,<br />
all internal voltage generators inside the SDRAM are stopped and all data is lost.<br />
Col d<br />
When this mode is enabled, the user must not access to the SDRAM until a new initialization<br />
sequence is done (See Section 19.7.1).<br />
This is described in Figure 19-10 on page 360.<br />
Col e<br />
Col f<br />
Dna Dnb Dnc Dnd Dne Dnf<br />
Low Power Mode<br />
359
32117D–AVR-01/12<br />
Figure 19-10. Deep Power-down Mode Behavior<br />
SDCS<br />
SDCK<br />
SDRAMC_A[12:0]<br />
RAS<br />
CAS<br />
SDWE<br />
SCKE<br />
D[15:0]<br />
(Input)<br />
Row n<br />
Col c<br />
Col d<br />
Dnb Dnc Dnd<br />
tRP = 3<br />
<strong>AT32UC3C</strong><br />
360
19.8 User Interface<br />
Table 19-5. SDRAMC Register Memory Map<br />
32117D–AVR-01/12<br />
<strong>AT32UC3C</strong><br />
Offset Register Register Name Access Reset<br />
0x00 Mode Register MR Read/Write 0x00000000<br />
0x04 Refresh Timer Register TR Read/Write 0x00000000<br />
0x08 Configuration Register CR Read/Write 0x852372C0<br />
0x0C High Speed Register HSR Read/Write 0x00000000<br />
0x10 Low Power Register LPR Read/Write 0x00000000<br />
0x14 Interrupt Enable Register IER Write-only 0x00000000<br />
0x18 Interrupt Disable Register IDR Write-only 0x00000000<br />
0x1C Interrupt Mask Register IMR Read-only 0x00000000<br />
0x20 Interrupt Status Register ISR Read-only 0x00000000<br />
0x24 Memory Device Register MDR Read/Write 0x00000000<br />
0xFC Version Register VERSION Read-only - (1)<br />
1. The reset values for these fields are device specific. Please refer to the Module Configuration section at the end of this chapter.<br />
361
19.8.1 Mode Register<br />
Register Name: MR<br />
Access Type: Read/Write<br />
Offset: 0x00<br />
Reset Value: 0x00000000<br />
32117D–AVR-01/12<br />
<strong>AT32UC3C</strong><br />
31 30 29 28 27 26 25 24<br />
- - - - - - - -<br />
23 22 21 20 19 18 17 16<br />
- - - - - - - -<br />
15 14 13 12 11 10 9 8<br />
- - - - - - - -<br />
7 6 5 4 3 2 1 0<br />
- - - - - MODE<br />
MODE: Command Mode<br />
This field defines the command issued by the SDRAMC when the SDRAM device is accessed.<br />
MODE Description<br />
0 Normal mode. Any access to the SDRAM is decoded normally.<br />
1 The SDRAMC issues a “NOP” command when the SDRAM device is accessed regardless of the cycle.<br />
2<br />
3<br />
4<br />
5<br />
The SDRAMC issues an “All Banks Precharge” command when the SDRAM device is accessed regardless of<br />
the cycle.<br />
The SDRAMC issues a “Load Mode Register” command when the SDRAM device is accessed regardless of the<br />
cycle. This command will load the CR.CAS field into the SDRAM device Mode Register. All the other parameters<br />
of the SDRAM device Mode Register will be set to zero (burst length, burst type, operating mode, write burst<br />
mode...).<br />
The SDRAMC issues an “Auto Refresh” command when the SDRAM device is accessed regardless of the cycle.<br />
Previously, an “All Banks Precharge” command must be issued.<br />
The SDRAMC issues an “Extended Load Mode Register” command when the SDRAM device is accessed<br />
regardless of the cycle. This command will load the LPR.PASR, LPR.DS, and LPR.TCR fields into the SDRAM<br />
device Extended Mode Register. All the other bits of the SDRAM device Extended Mode Register will be set to<br />
zero.<br />
6 Deep power-down mode. Enters deep power-down mode.<br />
362
19.8.2 Refresh Timer Register<br />
Register Name: TR<br />
Access Type: Read/Write<br />
Offset: 0x04<br />
Reset Value: 0x00000000<br />
32117D–AVR-01/12<br />
<strong>AT32UC3C</strong><br />
31 30 29 28 27 26 25 24<br />
- - - - - - - -<br />
23 22 21 20 19 18 17 16<br />
- - - - - - - -<br />
15 14 13 12 11 10 9 8<br />
- - - - COUNT[11:8]<br />
7 6 5 4 3 2 1 0<br />
COUNT[7:0]<br />
COUNT[11:0]: Refresh Timer Count<br />
This 12-bit field is loaded into a timer that generates the refresh pulse. Each time the refresh pulse is generated, a refresh burst<br />
is initiated.<br />
The value to be loaded depends on the SDRAMC clock frequency (CLK_SDRAMC), the refresh rate of the SDRAM device and<br />
the refresh burst length where 15.6µs per row is a typical value for a burst of length one.<br />
To refresh the SDRAM device, this 12-bit field must be written. If this condition is not satisfied, no refresh command is issued<br />
and no refresh of the SDRAM device is carried out.<br />
363
19.8.3 Configuration Register<br />
Register Name: CR<br />
Access Type: Read/Write<br />
Offset: 0x08<br />
Reset Value: 0x852372C0<br />
32117D–AVR-01/12<br />
<strong>AT32UC3C</strong><br />
31 30 29 28 27 26 25 24<br />
TXSR TRAS<br />
23 22 21 20 19 18 17 16<br />
TRCD TRP<br />
15 14 13 12 11 10 9 8<br />
TRC TWR<br />
7 6 5 4 3 2 1 0<br />
DBW CAS NB NR NC<br />
TXSR: Exit Self Refresh to Active Delay<br />
Reset value is eight cycles.<br />
This field defines the delay between SCKE set high and an Activate command in number of cycles. Number of cycles is between<br />
0 and 15.<br />
TRAS: Active to Precharge Delay<br />
Reset value is five cycles.<br />
This field defines the delay between an Activate command and a Precharge command in number of cycles. Number of cycles is<br />
between 0 and 15.<br />
TRCD: Row to Column Delay<br />
Reset value is two cycles.<br />
This field defines the delay between an Activate command and a Read/Write command in number of cycles. Number of cycles<br />
is between 0 and 15.<br />
TRP: Row Precharge Delay<br />
Reset value is three cycles.<br />
This field defines the delay between a Precharge command and another command in number of cycles. Number of cycles is<br />
between 0 and 15.<br />
TRC: Row Cycle Delay<br />
Reset value is seven cycles.<br />
This field defines the delay between a Refresh and an Activate Command in number of cycles. Number of cycles is between 0<br />
and 15.<br />
TWR: Write Recovery Delay<br />
Reset value is two cycles.<br />
This field defines the Write Recovery Time in number of cycles. Number of cycles is between 0 and 15.<br />
DBW: Data Bus Width<br />
Reset value is 16 bits.<br />
0: Reserved.<br />
1: Data bus width is 16 bits.<br />
364
CAS: CAS Latency<br />
Reset value is two cycles.<br />
In the SDRAMC, only a CAS latency of one, two and three cycles is managed.<br />
CAS CAS Latency (Cycles)<br />
0 Reserved<br />
1 1<br />
2 2<br />
3 3<br />
NB: Number of Banks<br />
Reset value is two banks.<br />
NB Number of Banks<br />
0 2<br />
1 4<br />
NR: Number of Row Bits<br />
Reset value is 11 row bits.<br />
NR Row Bits<br />
0 11<br />
1 12<br />
2 13<br />
3 Reserved<br />
NC: Number of Column Bits<br />
Reset value is 8 column bits.<br />
NC Column Bits<br />
0 8<br />
1 9<br />
2 10<br />
3 11<br />
32117D–AVR-01/12<br />
<strong>AT32UC3C</strong><br />
365
19.8.4 High Speed Register<br />
Register Name: HSR<br />
Access Type: Read/Write<br />
Offset: 0x0C<br />
Reset Value: 0x00000000<br />
32117D–AVR-01/12<br />
<strong>AT32UC3C</strong><br />
31 30 29 28 27 26 25 24<br />
- - - - - - - -<br />
23 22 21 20 19 18 17 16<br />
- - - - - - - -<br />
15 14 13 12 11 10 9 8<br />
- - - - - - - -<br />
7 6 5 4 3 2 1 0<br />
- - - - - - - DA<br />
DA: Decode Cycle Enable<br />
A decode cycle can be added on the addresses as soon as a non-sequential access is performed on the HSB bus.<br />
The addition of the decode cycle allows the SDRAMC to gain time to access the SDRAM memory.<br />
1: Decode cycle is enabled.<br />
0: Decode cycle is disabled.<br />
366
19.8.5 Low Power Register<br />
Register Name: LPR<br />
Access Type: Read/Write<br />
Offset: 0x10<br />
Reset Value: 0x00000000<br />
32117D–AVR-01/12<br />
<strong>AT32UC3C</strong><br />
31 30 29 28 27 26 25 24<br />
- - - - - - - -<br />
23 22 21 20 19 18 17 16<br />
- - - - - - - -<br />
15 14 13 12 11 10 9 8<br />
- - TIMEOUT DS TCSR<br />
7 6 5 4 3 2 1 0<br />
- PASR - - LPCB<br />
TIMEOUT: Time to Define when Low Power Mode Is Enabled<br />
TIMEOUT Time to Define when Low Power Mode Is Enabled<br />
0 The SDRAMC activates the SDRAM low power mode immediately after the end of the last transfer.<br />
1 The SDRAMC activates the SDRAM low power mode 64 clock cycles after the end of the last transfer.<br />
2 The SDRAMC activates the SDRAM low power mode 128 clock cycles after the end of the last transfer.<br />
3 Reserved.<br />
DS: Drive Strength (only for low power SDRAM)<br />
This field is transmitted to the SDRAM during initialization to select the SDRAM strength of data output. This parameter must be<br />
set according to the SDRAM device specification.<br />
After initialization, as soon as this field is modified and self refresh mode is activated, the Extended Mode Register of the<br />
SDRAM device is accessed automatically and its DS parameter value is updated before entry in self refresh mode.<br />
TCSR: Temperature Compensated Self Refresh (only for low power SDRAM)<br />
This field is transmitted to the SDRAM during initialization to set the refresh interval during self refresh mode depending on the<br />
temperature of the low power SDRAM. This parameter must be set according to the SDRAM device specification.<br />
After initialization, as soon as this field is modified and self refresh mode is activated, the Extended Mode Register of the<br />
SDRAM device is accessed automatically and its TCSR parameter value is updated before entry in self refresh mode.<br />
PASR: Partial Array Self Refresh (only for low power SDRAM)<br />
This field is transmitted to the SDRAM during initialization to specify whether only one quarter, one half or all banks of the<br />
SDRAM array are enabled. Disabled banks are not refreshed in self refresh mode. This parameter must be set according to the<br />
SDRAM device specification.<br />
After initialization, as soon as this field is modified and self refresh mode is activated, the Extended Mode Register of the<br />
SDRAM device is accessed automatically and its PASR parameter value is updated before entry in self refresh mode.<br />
367
LPCB: Low Power Configuration Bits<br />
LPCB Low Power Configuration<br />
0<br />
1<br />
2<br />
3<br />
32117D–AVR-01/12<br />
Low power feature is inhibited: no power-down, self refresh or deep power-down command is issued to<br />
the SDRAM device.<br />
The SDRAMC issues a self refresh command to the SDRAM device, the SDCLK clock is deactivated and<br />
the SDCKE signal is set low. The SDRAM device leaves the self refresh mode when accessed and<br />
enters it after the access.<br />
The SDRAMC issues a power-down command to the SDRAM device after each access, the SDCKE<br />
signal is set to low. The SDRAM device leaves the power-down mode when accessed and enters it after<br />
the access.<br />
The SDRAMC issues a deep power-down command to the SDRAM device. This mode is unique to lowpower<br />
SDRAM.<br />
<strong>AT32UC3C</strong><br />
368
19.8.6 Interrupt Enable Register<br />
Register Name: IER<br />
Access Type: Write-only<br />
Offset: 0x14<br />
Reset Value: 0x00000000<br />
32117D–AVR-01/12<br />
<strong>AT32UC3C</strong><br />
31 30 29 28 27 26 25 24<br />
- - - - - - - -<br />
23 22 21 20 19 18 17 16<br />
- - - - - - - -<br />
15 14 13 12 11 10 9 8<br />
- - - - - - - -<br />
7 6 5 4 3 2 1 0<br />
- - - - - - - RES<br />
Writing a zero to a bit in this register has no effect.<br />
Writing a one to a bit in this register will set the corresponding bit in IMR.<br />
369
19.8.7 Interrupt Disable Register<br />
Register Name: IDR<br />
Access Type: Write-only<br />
Offset: 0x18<br />
Reset Value: 0x00000000<br />
32117D–AVR-01/12<br />
<strong>AT32UC3C</strong><br />
31 30 29 28 27 26 25 24<br />
- - - - - - - -<br />
23 22 21 20 19 18 17 16<br />
- - - - - - - -<br />
15 14 13 12 11 10 9 8<br />
- - - - - - - -<br />
7 6 5 4 3 2 1 0<br />
- - - - - - - RES<br />
Writing a zero to a bit in this register has no effect.<br />
Writing a one to a bit in this register will clear the corresponding bit in IMR.<br />
370
19.8.8 Interrupt Mask Register<br />
Register Name: IMR<br />
Access Type: Read-only<br />
Offset: 0x1C<br />
Reset Value: 0x00000000<br />
32117D–AVR-01/12<br />
<strong>AT32UC3C</strong><br />
31 30 29 28 27 26 25 24<br />
- - - - - - - -<br />
23 22 21 20 19 18 17 16<br />
- - - - - - - -<br />
15 14 13 12 11 10 9 8<br />
- - - - - - - -<br />
7 6 5 4 3 2 1 0<br />
- - - - - - - RES<br />
0: The corresponding interrupt is disabled.<br />
1: The corresponding interrupt is enabled.<br />
A bit in this register is cleared when the corresponding bit in IDR is written to one.<br />
A bit in this register is set when the corresponding bit in IER is written to one.<br />
371
19.8.9 Interrupt Status Register<br />
Register Name: ISR<br />
Access Type: Read-only<br />
Offset: 0x20<br />
Reset Value: 0x00000000<br />
32117D–AVR-01/12<br />
<strong>AT32UC3C</strong><br />
31 30 29 28 27 26 25 24<br />
- - - - - - - -<br />
23 22 21 20 19 18 17 16<br />
- - - - - - - -<br />
15 14 13 12 11 10 9 8<br />
- - - - - - - -<br />
7 6 5 4 3 2 1 0<br />
- - - - - - - RES<br />
RES: Refresh Error Status<br />
This bit is set when a refresh error is detected.<br />
This bit is cleared when the register is read.<br />
372
19.8.10 Memory Device Register<br />
Register Name: MDR<br />
Access Type: Read/Write<br />
Offset: 0x24<br />
Reset Value: 0x00000000<br />
32117D–AVR-01/12<br />
<strong>AT32UC3C</strong><br />
31 30 29 28 27 26 25 24<br />
- - - - - - - -<br />
23 22 21 20 19 18 17 16<br />
- - - - - - - -<br />
15 14 13 12 11 10 9 8<br />
- - - - - - - -<br />
7 6 5 4 3 2 1 0<br />
- - - - - - MD<br />
MD: Memory Device Type<br />
MD Device Type<br />
0 SDRAM<br />
1 Low power SDRAM<br />
Other Reserved<br />
373
19.8.11 Version Register<br />
Register Name: VERSION<br />
Access Type: Read-only<br />
Offset: 0xFC<br />
Reset Value: -<br />
32117D–AVR-01/12<br />
<strong>AT32UC3C</strong><br />
31 30 29 28 27 26 25 24<br />
- - - - - - - -<br />
23 22 21 20 19 18 17 16<br />
- - - - VARIANT<br />
15 14 13 12 11 10 9 8<br />
- - - - VERSION<br />
7 6 5 4 3 2 1 0<br />
Variant: Variant Number<br />
Reserved. No functionality associated.<br />
VERSION<br />
Version: Version Number<br />
Version number of the module.No functionality associated.<br />
374
20. Peripheral DMA Controller (PDCA)<br />
20.1 Features<br />
20.2 Overview<br />
32117D–AVR-01/12<br />
Rev: 1.2.3.1<br />
Multiple channels<br />
Generates transfers between memories and peripherals such as USART and SPI<br />
Two address pointers/counters per channel allowing double buffering<br />
Performance monitors to measure average and maximum transfer latency<br />
Optional synchronizing of data transfers with extenal peripheral events<br />
Ring buffer functionality<br />
<strong>AT32UC3C</strong><br />
The Peripheral DMA Controller (PDCA) transfers data between on-chip peripheral modules such<br />
as USART, SPI and memories (those memories may be on- and off-chip memories). Using the<br />
PDCA avoids CPU intervention for data transfers, improving the performance of the microcontroller.<br />
The PDCA can transfer data from memory to a peripheral or from a peripheral to memory.<br />
The PDCA consists of multiple DMA channels. Each channel has:<br />
A Peripheral Select Register<br />
A 32-bit memory pointer<br />
A 16-bit transfer counter<br />
A 32-bit memory pointer reload value<br />
A 16-bit transfer counter reload value<br />
The PDCA communicates with the peripheral modules over a set of handshake interfaces. The<br />
peripheral signals the PDCA when it is ready to receive or transmit data. The PDCA acknowledges<br />
the request when the transmission has started.<br />
When a transmit buffer is empty or a receive buffer is full, an optional interrupt request can be<br />
generated.<br />
375
20.3 Block Diagram<br />
32117D–AVR-01/12<br />
Figure 20-1. PDCA Block Diagram<br />
<strong>AT32UC3C</strong><br />
20.4 Product Dependencies<br />
In order to use this module, other parts of the system must be configured correctly, as described<br />
below.<br />
20.4.1 Power Management<br />
If the CPU enters a sleep mode that disables the PDCA clocks, the PDCA will stop functioning<br />
and resume operation after the system wakes up from sleep mode.<br />
20.4.2 Clocks<br />
20.4.3 Interrupts<br />
Memory<br />
HSB<br />
High Speed<br />
Bus Matrix<br />
Interrupt<br />
Controller<br />
HSB<br />
HSB<br />
IRQ<br />
HSB to PB<br />
Bridge<br />
Peripheral DMA<br />
Controller<br />
(PDCA)<br />
Peripheral<br />
0<br />
Handshake Interfaces<br />
The PDCA has two bus clocks connected: One High Speed Bus clock (CLK_PDCA_HSB) and<br />
one Peripheral Bus clock (CLK_PDCA_PB). These clocks are generated by the Power Manager.<br />
Both clocks are enabled at reset, and can be disabled in the Power Manager. It is<br />
recommended to disable the PDCA before disabling the clocks, to avoid freezing the PDCA in<br />
an undefined state.<br />
The PDCA interrupt request lines are connected to the interrupt controller. Using the PDCA<br />
interrupts requires the interrupt controller to be programmed first.<br />
Peripheral Bus<br />
Peripheral<br />
1<br />
Peripheral<br />
2<br />
...<br />
Peripheral<br />
(n-1)<br />
376
32117D–AVR-01/12<br />
<strong>AT32UC3C</strong><br />
20.4.4 Peripheral Events<br />
The PDCA peripheral events are connected via the Peripheral Event System. Refer to the<br />
Peripheral Event System chapter for details.<br />
20.5 Functional Description<br />
20.5.1 Basic Operation<br />
The PDCA consists of multiple independent PDCA channels, each capable of handling DMA<br />
requests in parallel. Each PDCA channels contains a set of configuration registers which must<br />
be configured to start a DMA transfer.<br />
In this section the steps necessary to configure one PDCA channel is outlined.<br />
The peripheral to transfer data to or from must be configured correctly in the Peripheral Select<br />
Register (PSR). This is performed by writing the Peripheral Identity (PID) value for the corresponding<br />
peripheral to the PID field in the PSR register. The PID also encodes the transfer<br />
direction, i.e. memory to peripheral or peripheral to memory. See Section 20.5.6.<br />
The transfer size must be written to the Transfer Size field in the Mode Register (MR.SIZE). The<br />
size must match the data size produced or consumed by the selected peripheral. See Section<br />
20.5.7.<br />
The memory address to transfer to or from, depending on the PSR, must be written to the Memory<br />
Address Register (MAR). For each transfer the memory address is increased by either a<br />
one, two or four, depending on the size set in MR. See Section 20.5.2.<br />
The number of data items to transfer is written to the TCR register. If the PDCA channel is<br />
enabled, a transfer will start immediately after writing a non-zero value to TCR or the reload version<br />
of TCR, TCRR. After each transfer the TCR value is decreased by one. Both MAR and TCR<br />
can be read while the PDCA channel is active to monitor the DMA progress. See Section 20.5.3.<br />
The channel must be enabled for a transfer to start. A channel is enable by writing a one to the<br />
EN bit in the Control Register (CR).<br />
20.5.2 Memory Pointer<br />
Each channel has a 32-bit Memory Address Register (MAR). This register holds the memory<br />
address for the next transfer to be performed. The register is automatically updated after each<br />
transfer. The address will be increased by either one, two or four depending on the size of the<br />
DMA transfer (byte, halfword or word). The MAR can be read at any time during transfer.<br />
20.5.3 Transfer Counter<br />
Each channel has a 16-bit Transfer Counter Register (TCR). This register must be written with<br />
the number of transfers to be performed. The TCR register should contain the number of data<br />
items to be transferred independently of the transfer size. The TCR can be read at any time during<br />
transfer to see the number of remaining transfers.<br />
20.5.4 Reload Registers<br />
Both the MAR and the TCR have a reload register, respectively Memory Address Reload Register<br />
(MARR) and Transfer Counter Reload Register (TCRR). These registers provide the<br />
possibility for the PDCA to work on two memory buffers for each channel. When one buffer has<br />
completed, MAR and TCR will be reloaded with the values in MARR and TCRR. The reload logic<br />
is always enabled and will trigger if the TCR reaches zero while TCRR holds a non-zero value.<br />
After reload, the MARR and TCRR registers are cleared.<br />
377
20.5.5 Ring Buffer<br />
32117D–AVR-01/12<br />
<strong>AT32UC3C</strong><br />
If TCR is zero when writing to TCRR, the TCR and MAR are automatically updated with the<br />
value written in TCRR and MARR.<br />
When Ring Buffer mode is enabled the TCRR and MARR registers will not be cleared when<br />
TCR and MAR registers reload. This allows the PDCA to read or write to the same memory<br />
region over and over again until the transfer is actively stopped by the user. Ring Buffer mode is<br />
enabled by writing a one to the Ring Buffer bit in the Mode Register (MR.RING).<br />
20.5.6 Peripheral Selection<br />
The Peripheral Select Register (PSR) decides which peripheral should be connected to the<br />
PDCA channel. A peripheral is selected by writing the corresponding Peripheral Identity (PID) to<br />
the PID field in the PSR register. Writing the PID will both select the direction of the transfer<br />
(memory to peripheral or peripheral to memory), which handshake interface to use, and the<br />
address of the peripheral holding register. Refer to the Peripheral Identity (PID) table in the Module<br />
Configuration section for the peripheral PID values.<br />
20.5.7 Transfer Size<br />
The transfer size can be set individually for each channel to be either byte, halfword or word (8bit,<br />
16-bit or 32-bit respectively). Transfer size is set by writing the desired value to the Transfer<br />
Size field in the Mode Register (MR.SIZE).<br />
When the PDCA moves data between peripherals and memory, data is automatically sized and<br />
aligned. When memory is accessed, the size specified in MR.SIZE and system alignment is<br />
used. When a peripheral register is accessed the data to be transferred is converted to a word<br />
where bit n in the data corresponds to bit n in the peripheral register. If the transfer size is byte or<br />
halfword, bits greater than 8 and16 respectively are set to zero.<br />
Refer to the Module Configuration section for information regarding what peripheral registers are<br />
used for the different peripherals and then to the peripheral specific chapter for information<br />
about the size option available for the different registers.<br />
20.5.8 Enabling and Disabling<br />
Each DMA channel is enabled by writing a one to the Transfer Enable bit in the Control Register<br />
(CR.TEN) and disabled by writing a one to the Transfer Disable bit (CR.TDIS). The current status<br />
can be read from the Status Register (SR).<br />
20.5.9 Interrupts<br />
While the PDCA channel is enabled all DMA request will be handled as long the TCR and TCRR<br />
is not zero.<br />
Interrupts can be enabled by writing a one to the corresponding bit in the Interrupt Enable Register<br />
(IER) and disabled by writing a one to the corresponding bit in the Interrupt Disable Register<br />
(IDR). The Interrupt Mask Register (IMR) can be read to see whether an interrupt is enabled or<br />
not. The current status of an interrupt source can be read through the Interrupt Status Register<br />
(ISR).<br />
The PDCA has three interrupt sources:<br />
Reload Counter Zero - The TCRR register is zero.<br />
Transfer Finished - Both the TCR and TCRR registers are zero.<br />
Transfer Error - An error has occurred in accessing memory.<br />
378
20.5.10 Priority<br />
32117D–AVR-01/12<br />
<strong>AT32UC3C</strong><br />
If more than one PDCA channel is requesting transfer at a given time, the PDCA channels are<br />
prioritized by their channel number. Channels with lower numbers have priority over channels<br />
with higher numbers, giving channel zero the highest priority.<br />
20.5.11 Error Handling<br />
If the Memory Address Register (MAR) is set to point to an invalid location in memory, an error<br />
will occur when the PDCA tries to perform a transfer. When an error occurs, the Transfer Error<br />
bit in the Interrupt Status Register (ISR.TERR) will be set and the DMA channel that caused the<br />
error will be stopped. In order to restart the channel, the user must program the Memory<br />
Address Register to a valid address and then write a one to the Error Clear bit in the Control<br />
Register (CR.ECLR). If the Transfer Error interrupt is enabled, an interrupt request will be generated<br />
when a transfer error occurs.<br />
20.5.12 Peripheral Event Trigger<br />
Peripheral events can be used to trigger PDCA channel transfers. Peripheral Event synchronizations<br />
are enabled by writing a one to the Event Trigger bit in the Mode Register (MR.ETRIG).<br />
When set, all DMA requests will be blocked until a peripheral event is received. For each peripheral<br />
event received, only one data item is transferred. If no DMA requests are pending when a<br />
peripheral event is received, the PDCA will start a transfer as soon as a peripheral event is<br />
detected. If multiple events are received while the PDCA channel is busy transferring data, an<br />
overflow condition will be signaled in the Peripheral Event System. Refer to the Peripheral Event<br />
System chapter for more information.<br />
20.6 Performance Monitors<br />
Up to two performance monitors allow the user to measure the activity and stall cycles for PDCA<br />
transfers. To monitor a PDCA channel, the corresponding channel number must be written to<br />
one of the MON0/1CH fields in the Performance Control Register (PCONTROL) and a one must<br />
be written to the corresponding CH0/1EN bit in the same register.<br />
Due to performance monitor hardware resource sharing, the two monitor channels should NOT<br />
be programmed to monitor the same PDCA channel. This may result in UNDEFINED performance<br />
monitor behavior.<br />
20.6.1 Measuring mechanisms<br />
Three different parameters can be measured by each channel:<br />
The number of data transfer cycles since last channel reset, both for read and write<br />
The number of stall cycles since last channel reset, both for read and write<br />
The maximum latency since last channel reset, both for read and write<br />
These measurements can be extracted by software and used to generate indicators for bus<br />
latency, bus load, and maximum bus latency.<br />
Each of the counters has a fixed width, and may therefore overflow. When an overflow is<br />
encountered in either the Performance Channel Data Read/Write Cycle registers (PRDATA0/1<br />
and PWDATA0/1) or the Performance Channel Read/Write Stall Cycles registers (PRSTALL0/1<br />
and PWSTALL0/1) of a channel, all registers in the channel are reset. This behavior is altered if<br />
the Channel Overflow Freeze bit is one in the Performance Control register (PCON-<br />
TROL.CH0/1OVF). If this bit is one, the channel registers are frozen when either DATA or<br />
STALL reaches its maximum value. This simplifies one-shot readout of the counter values.<br />
379
32117D–AVR-01/12<br />
<strong>AT32UC3C</strong><br />
The registers can also be manually reset by writing a one to the Channel Reset bit in the PCON-<br />
TROL register (PCONTROL.CH0/1RES). The Performance Channel Read/Write Latency<br />
registers (PRLAT0/1 and PWLAT0/1) are saturating when their maximum count value is<br />
reached. The PRLAT0/1 and PWLAT0/1 registers can only be reset by writing a one to the corresponding<br />
reset bit in PCONTROL (PCONTROL.CH0/1RES).<br />
A counter is enabled by writing a one to the Channel Enable bit in the Performance Control Register<br />
(PCONTROL.CH0/1EN).<br />
380
20.7 User Interface<br />
20.7.1 Memory Map Overview<br />
Table 20-1. PDCA Register Memory Map<br />
32117D–AVR-01/12<br />
Address Range Contents<br />
0x000 - 0x03F DMA channel 0 configuration registers<br />
0x040 - 0x07F DMA channel 1 configuration registers<br />
... ...<br />
(0x000 - 0x03F)+m*0x040 DMA channel m configuration registers<br />
0x800-0x830 Performance Monitor registers<br />
0x834 Version register<br />
20.7.2 Channel Memory Map<br />
<strong>AT32UC3C</strong><br />
The channels are mapped as shown in Table 20-1. Each channel has a set of configuration registers,<br />
shown in Table 20-2, where n is the channel number.<br />
Table 20-2. PDCA Channel Configuration Registers<br />
Offset Register Register Name Access Reset<br />
0x000 + n*0x040 Memory Address Register MAR Read/Write 0x00000000<br />
0x004 + n*0x040 Peripheral Select Register PSR Read/Write - (1)<br />
0x008 + n*0x040 Transfer Counter Register TCR Read/Write 0x00000000<br />
0x00C + n*0x040 Memory Address Reload Register MARR Read/Write 0x00000000<br />
0x010 + n*0x040 Transfer Counter Reload Register TCRR Read/Write 0x00000000<br />
0x014 + n*0x040 Control Register CR Write-only 0x00000000<br />
0x018 + n*0x040 Mode Register MR Read/Write 0x00000000<br />
0x01C + n*0x040 Status Register SR Read-only 0x00000000<br />
0x020 + n*0x040 Interrupt Enable Register IER Write-only 0x00000000<br />
0x024 + n*0x040 Interrupt Disable Register IDR Write-only 0x00000000<br />
0x028 + n*0x040 Interrupt Mask Register IMR Read-only 0x00000000<br />
0x02C + n*0x040 Interrupt Status Register ISR Read-only 0x00000000<br />
Note: 1. The reset values are device specific. Please refer to the Module Configuration section at the<br />
end of this chapter.<br />
381
20.7.3 Performance Monitor Memory Map<br />
Table 20-3. PDCA Performance Monitor Registers (1)<br />
20.7.4 Version Register Memory Map<br />
32117D–AVR-01/12<br />
<strong>AT32UC3C</strong><br />
Offset Register Register Name Access Reset<br />
0x800 Performance Control Register PCONTROL Read/Write 0x00000000<br />
0x804 Channel0 Read Data Cycles PRDATA0 Read-only 0x00000000<br />
0x808 Channel0 Read Stall Cycles PRSTALL0 Read-only 0x00000000<br />
0x80C Channel0 Read Max Latency PRLAT0 Read-only 0x00000000<br />
0x810 Channel0 Write Data Cycles PWDATA0 Read-only 0x00000000<br />
0x814 Channel0 Write Stall Cycles PWSTALL0 Read-only 0x00000000<br />
0x818 Channel0 Write Max Latency PWLAT0 Read-only 0x00000000<br />
0x81C Channel1 Read Data Cycles PRDATA1 Read-only 0x00000000<br />
0x820 Channel1 Read Stall Cycles PRSTALL1 Read-only 0x00000000<br />
0x824 Channel1 Read Max Latency PRLAT1 Read-only 0x00000000<br />
0x828 Channel1 Write Data Cycles PWDATA1 Read-only 0x00000000<br />
0x82C Channel1 Write Stall Cycles PWSTALL1 Read-only 0x00000000<br />
0x830 Channel1 Write Max Latency PWLAT1 Read-only 0x00000000<br />
Table 20-4. PDCA Version Register Memory Map<br />
Note: 1. The number of performance monitors is device specific. If the device has only one performance<br />
monitor, the Channel1 registers are not available. Please refer to the Module<br />
Configuration section at the end of this chapter for the number of performance monitors on this<br />
device.<br />
Offset Register Register Name Access Reset<br />
0x834 Version Register VERSION Read-only - (1)<br />
Note: 1. The reset values are device specific. Please refer to the Module Configuration section at the end of this chapter.<br />
382
20.7.5 Memory Address Register<br />
Name: MAR<br />
Access Type: Read/Write<br />
Offset: 0x000 + n*0x040<br />
Reset Value: 0x00000000<br />
32117D–AVR-01/12<br />
<strong>AT32UC3C</strong><br />
31 30 29 28 27 26 25 24<br />
MADDR[31:24]<br />
23 22 21 20 19 18 17 16<br />
MADDR[23:16]<br />
15 14 13 12 11 10 9 8<br />
MADDR[15:8]<br />
7 6 5 4 3 2 1 0<br />
MADDR[7:0]<br />
MADDR: Memory Address<br />
Address of memory buffer. MADDR should be programmed to point to the start of the memory buffer when configuring the<br />
PDCA. During transfer, MADDR will point to the next memory location to be read/written.<br />
383
20.7.6 Peripheral Select Register<br />
Name: PSR<br />
Access Type: Read/Write<br />
Offset: 0x004 + n*0x040<br />
Reset Value: -<br />
32117D–AVR-01/12<br />
<strong>AT32UC3C</strong><br />
31 30 29 28 27 26 25 24<br />
- - - - - - - -<br />
23 22 21 20 19 18 17 16<br />
- - - - - - - -<br />
15 14 13 12 11 10 9 8<br />
- - - - - - - -<br />
7 6 5 4 3 2 1 0<br />
PID<br />
PID: Peripheral Identifier<br />
The Peripheral Identifier selects which peripheral should be connected to the DMA channel. Writing a PID will select both which<br />
handshake interface to use, the direction of the transfer and also the address of the Receive/Transfer Holding Register for the<br />
peripheral. See the Module Configuration section of PDCA for details. The width of the PID field is device specific and<br />
dependent on the number of peripheral modules in the device.<br />
384
20.7.7 Transfer Counter Register<br />
Name: TCR<br />
Access Type: Read/Write<br />
Offset: 0x008 + n*0x040<br />
Reset Value: 0x00000000<br />
32117D–AVR-01/12<br />
<strong>AT32UC3C</strong><br />
31 30 29 28 27 26 25 24<br />
- - - - - - - -<br />
23 22 21 20 19 18 17 16<br />
- - - - - - - -<br />
15 14 13 12 11 10 9 8<br />
TCV[15:8]<br />
7 6 5 4 3 2 1 0<br />
TCV[7:0]<br />
TCV: Transfer Counter Value<br />
Number of data items to be transferred by the PDCA. TCV must be programmed with the total number of transfers to be made.<br />
During transfer, TCV contains the number of remaining transfers to be done.<br />
385
20.7.8 Memory Address Reload Register<br />
Name: MARR<br />
Access Type: Read/Write<br />
Offset: 0x00C + n*0x040<br />
Reset Value: 0x00000000<br />
32117D–AVR-01/12<br />
<strong>AT32UC3C</strong><br />
31 30 29 28 27 26 25 24<br />
MARV[31:24]<br />
23 22 21 20 19 18 17 16<br />
MARV[23:16]<br />
15 14 13 12 11 10 9 8<br />
MARV[15:8]<br />
7 6 5 4 3 2 1 0<br />
MARV[7:0]<br />
MARV: Memory Address Reload Value<br />
Reload Value for the MAR register. This value will be loaded into MAR when TCR reaches zero if the TCRR register has a nonzero<br />
value.<br />
386
20.7.9 Transfer Counter Reload Register<br />
Name: TCRR<br />
Access Type: Read/Write<br />
Offset: 0x010 + n*0x040<br />
Reset Value: 0x00000000<br />
32117D–AVR-01/12<br />
<strong>AT32UC3C</strong><br />
31 30 29 28 27 26 25 24<br />
- - - - - - - -<br />
23 22 21 20 19 18 17 16<br />
- - - - - - - -<br />
15 14 13 12 11 10 9 8<br />
TCRV[15:8]<br />
7 6 5 4 3 2 1 0<br />
TCRV[7:0]<br />
TCRV: Transfer Counter Reload Value<br />
Reload value for the TCR register. When TCR reaches zero, it will be reloaded with TCRV if TCRV has a positive value. If TCRV<br />
is zero, no more transfers will be performed for the channel. When TCR is reloaded, the TCRR register is cleared.<br />
387
20.7.10 Control Register<br />
Name: CR<br />
Access Type: Write-only<br />
Offset: 0x014 + n*0x040<br />
Reset Value: 0x00000000<br />
32117D–AVR-01/12<br />
<strong>AT32UC3C</strong><br />
31 30 29 28 27 26 25 24<br />
- - - - - - - -<br />
23 22 21 20 19 18 17 16<br />
- - - - - - - -<br />
15 14 13 12 11 10 9 8<br />
- - - - - - - ECLR<br />
7 6 5 4 3 2 1 0<br />
- - - - - - TDIS TEN<br />
ECLR: Transfer Error Clear<br />
Writing a zero to this bit has no effect.<br />
Writing a one to this bit will clear the Transfer Error bit in the Status Register (SR.TERR). Clearing the SR.TERR bit will allow the<br />
channel to transmit data. The memory address must first be set to point to a valid location.<br />
TDIS: Transfer Disable<br />
Writing a zero to this bit has no effect.<br />
Writing a one to this bit will disable transfer for the DMA channel.<br />
TEN: Transfer Enable<br />
Writing a zero to this bit has no effect.<br />
Writing a one to this bit will enable transfer for the DMA channel.<br />
388
20.7.11 Mode Register<br />
Name: MR<br />
Access Type: Read/Write<br />
Offset: 0x018 + n*0x040<br />
Reset Value: 0x00000000<br />
32117D–AVR-01/12<br />
<strong>AT32UC3C</strong><br />
31 30 29 28 27 26 25 24<br />
- - - - - - - -<br />
23 22 21 20 19 18 17 16<br />
- - - - - - - -<br />
15 14 13 12 11 10 9 8<br />
- - - - - - - -<br />
7 6 5 4 3 2 1 0<br />
- - - - RING ETRIG SIZE<br />
RING: Ring Buffer<br />
0:The Ring buffer functionality is disabled.<br />
1:The Ring buffer functionality is enabled. When enabled, the reload registers, MARR and TCRR will not be cleared after reload.<br />
ETRIG: Event Trigger<br />
0:Start transfer when the peripheral selected in Peripheral Select Register (PSR) requests a transfer.<br />
1:Start transfer only when or after a peripheral event is received.<br />
SIZE: Size of Transfer<br />
Table 20-5. Size of Transfer<br />
SIZE Size of Transfer<br />
0 Byte<br />
1 Halfword<br />
2 Word<br />
3 Reserved<br />
389
20.7.12 Status Register<br />
Name: SR<br />
Access Type: Read-only<br />
Offset: 0x01C + n*0x040<br />
Reset Value: 0x00000000<br />
32117D–AVR-01/12<br />
<strong>AT32UC3C</strong><br />
31 30 29 28 27 26 25 24<br />
- - - - - - - -<br />
23 22 21 20 19 18 17 16<br />
- - - - - - - -<br />
15 14 13 12 11 10 9 8<br />
- - - - - - - -<br />
7 6 5 4 3 2 1 0<br />
- - - - - - - TEN<br />
TEN: Transfer Enabled<br />
This bit is cleared when the TDIS bit in CR is written to one.<br />
This bit is set when the TEN bit in CR is written to one.<br />
0: Transfer is disabled for the DMA channel.<br />
1: Transfer is enabled for the DMA channel.<br />
390
20.7.13 Interrupt Enable Register<br />
Name: IER<br />
Access Type: Write-only<br />
Offset: 0x020 + n*0x040<br />
Reset Value: 0x00000000<br />
32117D–AVR-01/12<br />
<strong>AT32UC3C</strong><br />
31 30 29 28 27 26 25 24<br />
- - - - - - - -<br />
23 22 21 20 19 18 17 16<br />
- - - - - - - -<br />
15 14 13 12 11 10 9 8<br />
- - - - - - - -<br />
7 6 5 4 3 2 1 0<br />
- - - - - TERR TRC RCZ<br />
Writing a zero to a bit in this register has no effect.<br />
Writing a one to a bit in this register will set the corresponding bit in IMR.<br />
391
20.7.14 Interrupt Disable Register<br />
Name: IDR<br />
Access Type: Write-only<br />
Offset: 0x024 + n*0x040<br />
Reset Value: 0x00000000<br />
32117D–AVR-01/12<br />
<strong>AT32UC3C</strong><br />
31 30 29 28 27 26 25 24<br />
- - - - - - - -<br />
23 22 21 20 19 18 17 16<br />
- - - - - - - -<br />
15 14 13 12 11 10 9 8<br />
- - - - - - - -<br />
7 6 5 4 3 2 1 0<br />
- - - - - TERR TRC RCZ<br />
Writing a zero to a bit in this register has no effect.<br />
Writing a one to a bit in this register will clear the corresponding bit in IMR.<br />
392
20.7.15 Interrupt Mask Register<br />
Name: IMR<br />
Access Type: Read-only<br />
Offset: 0x028 + n*0x040<br />
Reset Value: 0x00000000<br />
32117D–AVR-01/12<br />
<strong>AT32UC3C</strong><br />
31 30 29 28 27 26 25 24<br />
- - - - - - - -<br />
23 22 21 20 19 18 17 16<br />
- - - - - - - -<br />
15 14 13 12 11 10 9 8<br />
- - - - - - - -<br />
7 6 5 4 3 2 1 0<br />
- - - - - TERR TRC RCZ<br />
0: The corresponding interrupt is disabled.<br />
1: The corresponding interrupt is enabled.<br />
A bit in this register is cleared when the corresponding bit in IDR is written to one.<br />
A bit in this register is set when the corresponding bit in IER is written to one.<br />
393
20.7.16 Interrupt Status Register<br />
Name: ISR<br />
Access Type: Read-only<br />
Offset: 0x02C + n*0x040<br />
Reset Value: 0x00000000<br />
32117D–AVR-01/12<br />
<strong>AT32UC3C</strong><br />
31 30 29 28 27 26 25 24<br />
- - - - - - - -<br />
23 22 21 20 19 18 17 16<br />
- - - - - - - -<br />
15 14 13 12 11 10 9 8<br />
- - - - - - - -<br />
7 6 5 4 3 2 1 0<br />
- - - - - TERR TRC RCZ<br />
TERR: Transfer Error<br />
This bit is cleared when no transfer errors have occurred since the last write to CR.ECLR.<br />
This bit is set when one or more transfer errors has occurred since reset or the last write to CR.ECLR.<br />
TRC: Transfer Complete<br />
This bit is cleared when the TCR and/or the TCRR holds a non-zero value.<br />
This bit is set when both the TCR and the TCRR are zero.<br />
RCZ: Reload Counter Zero<br />
This bit is cleared when the TCRR holds a non-zero value.<br />
This bit is set when TCRR is zero.<br />
394
20.7.17 Performance Control Register<br />
Name: PCONTROL<br />
Access Type: Read/Write<br />
Offset: 0x800<br />
Reset Value: 0x00000000<br />
32117D–AVR-01/12<br />
<strong>AT32UC3C</strong><br />
31 30 29 28 27 26 25 24<br />
- - MON1CH<br />
23 22 21 20 19 18 17 16<br />
- - MON0CH<br />
15 14 13 12 11 10 9 8<br />
- - - - - - CH1RES CH0RES<br />
7 6 5 4 3 2 1 0<br />
- - CH1OF CH0OF - - CH1EN CH0EN<br />
MON1CH: Performance Monitor Channel 1<br />
MON0CH: Performance Monitor Channel 0<br />
The PDCA channel number to monitor with counter n<br />
Due to performance monitor hardware resource sharing, the two performance monitor channels should NOT be programmed to<br />
monitor the same PDCA channel. This may result in UNDEFINED monitor behavior.<br />
CH1RES: Performance Channel 1 Counter Reset<br />
Writing a zero to this bit has no effect.<br />
Writing a one to this bit will reset the counter in the channel specified in MON1CH.<br />
This bit always reads as zero.<br />
CH0RES: Performance Channel 0 Counter Reset<br />
Writing a zero to this bit has no effect.<br />
Writing a one to this bit will reset the counter in the channel specified in MON0CH.<br />
This bit always reads as zero.<br />
CH1OF: Channel 1 Overflow Freeze<br />
0: The performance channel registers are reset if DATA or STALL overflows.<br />
1: All performance channel registers are frozen just before DATA or STALL overflows.<br />
CH1OF: Channel 0 Overflow Freeze<br />
0: The performance channel registers are reset if DATA or STALL overflows.<br />
1: All performance channel registers are frozen just before DATA or STALL overflows.<br />
CH1EN: Performance Channel 1 Enable<br />
0: Performance channel 1 is disabled.<br />
1: Performance channel 1 is enabled.<br />
CH0EN: Performance Channel 0 Enable<br />
0: Performance channel 0 is disabled.<br />
1: Performance channel 0 is enabled.<br />
395
20.7.18 Performance Channel 0 Read Data Cycles<br />
Name: PRDATA0<br />
Access Type: Read-only<br />
Offset: 0x804<br />
Reset Value: 0x00000000<br />
32117D–AVR-01/12<br />
<strong>AT32UC3C</strong><br />
31 30 29 28 27 26 25 24<br />
DATA[31:24]<br />
23 22 21 20 19 18 17 16<br />
DATA[23:16]<br />
15 14 13 12 11 10 9 8<br />
DATA[15:8]<br />
7 6 5 4 3 2 1 0<br />
DATA[7:0]<br />
DATA: Data Cycles Counted Since Last Reset<br />
Clock cycles are counted using the CLK_PDCA_HSB clock<br />
396
20.7.19 Performance Channel 0 Read Stall Cycles<br />
Name: PRSTALL0<br />
Access Type: Read-only<br />
Offset: 0x808<br />
Reset Value: 0x00000000<br />
32117D–AVR-01/12<br />
<strong>AT32UC3C</strong><br />
31 30 29 28 27 26 25 24<br />
STALL[31:24]<br />
23 22 21 20 19 18 17 16<br />
STALL[23:16]<br />
15 14 13 12 11 10 9 8<br />
STALL[15:8]<br />
7 6 5 4 3 2 1 0<br />
STALL[7:0]<br />
STALL: Stall Cycles Counted Since Last Reset<br />
Clock cycles are counted using the CLK_PDCA_HSB clock<br />
397
20.7.20 Performance Channel 0 Read Max Latency<br />
Name: PRLAT0<br />
Access Type: Read/Write<br />
Offset: 0x80C<br />
Reset Value: 0x00000000<br />
32117D–AVR-01/12<br />
<strong>AT32UC3C</strong><br />
31 30 29 28 27 26 25 24<br />
- - - - - - - -<br />
23 22 21 20 19 18 17 16<br />
- - - - - - - -<br />
15 14 13 12 11 10 9 8<br />
LAT[15:8]<br />
7 6 5 4 3 2 1 0<br />
LAT[7:0]<br />
LAT: Maximum Transfer Initiation Cycles Counted Since Last Reset<br />
Clock cycles are counted using the CLK_PDCA_HSB clock<br />
This counter is saturating. The register is reset only when PCONTROL.CH0RES is written to one.<br />
398
20.7.21 Performance Channel 0 Write Data Cycles<br />
Name: PWDATA0<br />
Access Type: Read-only<br />
Offset: 0x810<br />
Reset Value: 0x00000000<br />
32117D–AVR-01/12<br />
<strong>AT32UC3C</strong><br />
31 30 29 28 27 26 25 24<br />
DATA[31:24]<br />
23 22 21 20 19 18 17 16<br />
DATA[23:16]<br />
15 14 13 12 11 10 9 8<br />
DATA[15:8]<br />
7 6 5 4 3 2 1 0<br />
DATA[7:0]<br />
DATA: Data Cycles Counted Since Last Reset<br />
Clock cycles are counted using the CLK_PDCA_HSB clock<br />
399
20.7.22 Performance Channel 0 Write Stall Cycles<br />
Name: PWSTALL0<br />
Access Type: Read-only<br />
Offset: 0x814<br />
Reset Value: 0x00000000<br />
32117D–AVR-01/12<br />
<strong>AT32UC3C</strong><br />
31 30 29 28 27 26 25 24<br />
STALL[31:24]<br />
23 22 21 20 19 18 17 16<br />
STALL[23:16]<br />
15 14 13 12 11 10 9 8<br />
STALL[15:8]<br />
7 6 5 4 3 2 1 0<br />
STALL[7:0]<br />
STALL: Stall Cycles Counted Since Last Reset<br />
Clock cycles are counted using the CLK_PDCA_HSB clock<br />
400
20.7.23 Performance Channel 0 Write Max Latency<br />
Name: PWLAT0<br />
Access Type: Read/Write<br />
Offset: 0x818<br />
Reset Value: 0x00000000<br />
32117D–AVR-01/12<br />
<strong>AT32UC3C</strong><br />
31 30 29 28 27 26 25 24<br />
- - - - - - - -<br />
23 22 21 20 19 18 17 16<br />
- - - - - - - -<br />
15 14 13 12 11 10 9 8<br />
LAT[15:8]<br />
7 6 5 4 3 2 1 0<br />
LAT[7:0]<br />
LAT: Maximum Transfer Initiation Cycles Counted Since Last Reset<br />
Clock cycles are counted using the CLK_PDCA_HSB clock<br />
This counter is saturating. The register is reset only when PCONTROL.CH0RES is written to one.<br />
401
20.7.24 Performance Channel 1 Read Data Cycles<br />
Name: PRDATA1<br />
Access Type: Read-only<br />
Offset: 0x81C<br />
Reset Value: 0x00000000<br />
32117D–AVR-01/12<br />
<strong>AT32UC3C</strong><br />
31 30 29 28 27 26 25 24<br />
DATA[31:24]<br />
23 22 21 20 19 18 17 16<br />
DATA[23:16]<br />
15 14 13 12 11 10 9 8<br />
DATA[15:8]<br />
7 6 5 4 3 2 1 0<br />
DATA[7:0]<br />
DATA: Data Cycles Counted Since Last Reset<br />
Clock cycles are counted using the CLK_PDCA_HSB clock<br />
402
20.7.25 Performance Channel 1 Read Stall Cycles<br />
Name: PRSTALL1<br />
Access Type: Read-only<br />
Offset: 0x820<br />
Reset Value: 0x00000000<br />
32117D–AVR-01/12<br />
<strong>AT32UC3C</strong><br />
31 30 29 28 27 26 25 24<br />
STALL[31:24]<br />
23 22 21 20 19 18 17 16<br />
STALL[23:16]<br />
15 14 13 12 11 10 9 8<br />
STALL[15:8]<br />
7 6 5 4 3 2 1 0<br />
STALL[7:0]<br />
STALL: Stall Cycles Counted Since Last Reset<br />
Clock cycles are counted using the CLK_PDCA_HSB clock<br />
403
20.7.26 Performance Channel 1 Read Max Latency<br />
Name: PRLAT1<br />
Access Type: Read/Write<br />
Offset: 0x824<br />
Reset Value: 0x00000000<br />
32117D–AVR-01/12<br />
<strong>AT32UC3C</strong><br />
31 30 29 28 27 26 25 24<br />
- - - - - - - -<br />
23 22 21 20 19 18 17 16<br />
- - - - - - - -<br />
15 14 13 12 11 10 9 8<br />
LAT[15:8]<br />
7 6 5 4 3 2 1 0<br />
LAT[7:0]<br />
LAT: Maximum Transfer Initiation Cycles Counted Since Last Reset<br />
Clock cycles are counted using the CLK_PDCA_HSB clock<br />
This counter is saturating. The register is reset only when PCONTROL.CH1RES is written to one.<br />
404
20.7.27 Performance Channel 1 Write Data Cycles<br />
Name: PWDATA1<br />
Access Type: Read-only<br />
Offset: 0x828<br />
Reset Value: 0x00000000<br />
32117D–AVR-01/12<br />
<strong>AT32UC3C</strong><br />
31 30 29 28 27 26 25 24<br />
DATA[31:24]<br />
23 22 21 20 19 18 17 16<br />
DATA[23:16]<br />
15 14 13 12 11 10 9 8<br />
DATA[15:8]<br />
7 6 5 4 3 2 1 0<br />
DATA[7:0]<br />
DATA: Data Cycles Counted Since Last Reset<br />
Clock cycles are counted using the CLK_PDCA_HSB clock<br />
405
20.7.28 Performance Channel 1 Write Stall Cycles<br />
Name: PWSTALL1<br />
Access Type: Read-only<br />
Offset: 0x82C<br />
Reset Value: 0x00000000<br />
32117D–AVR-01/12<br />
<strong>AT32UC3C</strong><br />
31 30 29 28 27 26 25 24<br />
STALL[31:24]<br />
23 22 21 20 19 18 17 16<br />
STALL[23:16]<br />
15 14 13 12 11 10 9 8<br />
STALL[15:8]<br />
7 6 5 4 3 2 1 0<br />
STALL[7:0]<br />
STALL: Stall Cycles Counted Since Last Reset<br />
Clock cycles are counted using the CLK_PDCA_HSB clock<br />
406
20.7.29 Performance Channel 1 Write Max Latency<br />
Name: PWLAT1<br />
Access Type: Read/Write<br />
Offset: 0x830<br />
Reset Value: 0x00000000<br />
32117D–AVR-01/12<br />
<strong>AT32UC3C</strong><br />
31 30 29 28 27 26 25 24<br />
- - - - - - - -<br />
23 22 21 20 19 18 17 16<br />
- - - - - - - -<br />
15 14 13 12 11 10 9 8<br />
LAT[15:8]<br />
7 6 5 4 3 2 1 0<br />
LAT[7:0]<br />
LAT: Maximum Transfer Initiation Cycles Counted Since Last Reset<br />
Clock cycles are counted using the CLK_PDCA_HSB clock<br />
This counter is saturating. The register is reset only when PCONTROL.CH1RES is written to one.<br />
407
20.7.30 PDCA Version Register<br />
Name: VERSION<br />
Access Type: Read-only<br />
Offset: 0x834<br />
Reset Value: -<br />
32117D–AVR-01/12<br />
<strong>AT32UC3C</strong><br />
31 30 29 28 27 26 25 24<br />
- - - - - - - -<br />
23 22 21 20 19 18 17 16<br />
- - - - VARIANT<br />
15 14 13 12 11 10 9 8<br />
- - - - VERSION[11:8]<br />
7 6 5 4 3 2 1 0<br />
VERSION[7:0]<br />
VARIANT: Variant Number<br />
Reserved. No functionality associated.<br />
VERSION: Version Number<br />
Version number of the module. No functionality associated.<br />
408
20.8 Module Configuration<br />
The specific configuration for the PDCA instance is listed in the following tables.<br />
32117D–AVR-01/12<br />
Table 20-6. PDCA Configuration<br />
Features PDCA<br />
Number of channels 16<br />
Number of performance monitors 1<br />
Table 20-7. Module Clock Name<br />
Module name Clock name Description<br />
PDCA<br />
CLK_PDCA_HSB HSB clock<br />
Table 20-8. Register Reset Values<br />
Register Reset Value<br />
PSRn n<br />
VERSION 0x123<br />
<strong>AT32UC3C</strong><br />
CLK_PDCA_PB Peripheral Bus clock from the PBC clock domain<br />
The table below defines the valid Peripheral Identifiers (PIDs). The direction is specified as<br />
observed from the memory, so RX means transfers from peripheral to memory and TX means<br />
from memory to peripheral.<br />
Table 20-9. Peripheral Identity Values<br />
PID Direction Peripheral Instance Peripheral Register<br />
0 RX ADCIFA LCV0<br />
1 RX ADCIFA LCV1<br />
2 RX USART0 RHR<br />
3 RX USART1 RHR<br />
4 RX USART2 RHR<br />
5 RX USART3 RHR<br />
6 RX TWIM0 RHR<br />
7 RX TWIM1 RHR<br />
8 RX TWIS0 RHR<br />
9 RX TWIS1 RHR<br />
10 RX SPI0 RDR<br />
11 RX SPI1 RDR<br />
12 RX AW RHR<br />
13 TX USART0 THR<br />
14 TX USART1 THR<br />
15 TX USART2 THR<br />
16 TX USART3 THR<br />
409
32117D–AVR-01/12<br />
Table 20-9. Peripheral Identity Values<br />
PID Direction Peripheral Instance Peripheral Register<br />
17 TX TWIM0 THR<br />
18 TX TWIM1 THR<br />
19 TX TWIS0 THR<br />
20 TX TWIS1 THR<br />
21 TX SPI0 TDR<br />
22 TX SPI1 TDR<br />
23 TX DACIFB0 DR0<br />
24 TX DACIFB0 DR1<br />
25 TX DACIFB1 DR0<br />
26 TX DACIFB1 DR1<br />
27 TX PWM PWM PDCA register<br />
28 TX AW THR<br />
31 RX USART4 RHR<br />
32 RX TWIM2 RHR<br />
33 RX TWIS2 RHR<br />
34 TX USART4 THR<br />
35 TX TWIM2 THR<br />
36 TX TWIS2 THR<br />
[44:37] RX IISC RHR<br />
[52:45] TX IISC THR<br />
<strong>AT32UC3C</strong><br />
410
21. Memory DMA Controller (MDMA)<br />
21.1 Features<br />
21.2 Overview<br />
32117D–AVR-01/12<br />
Rev 1.0.1.1<br />
1-4 DMA channels, depending on implementation<br />
Chained (descriptor-list controlled) or unchained (single) transfers<br />
Descriptor read and writeback support<br />
Descriptors are placed in circular buffers of programmable length<br />
Programmable fixed or round-robin priority between channels<br />
Programmable burst size (1, 4, 8, or 16-beat)<br />
Byte/halfword/word transfers<br />
Optional endianess-conversion on transferred data<br />
Interrupt on transfer complete<br />
<strong>AT32UC3C</strong><br />
The purpose of the MDMA is to perform memory-to-memory transfers. For peripheral-to-memory<br />
transfers, the Peripheral DMA Controller should be used instead.<br />
The MDMA has two HSB master interfaces. One interface is dedicated to reading data while the<br />
other is dedicated to writing. The MDMA is configured through a Peripheral Bus (PB) interface.<br />
A DMA transfer on a channel can be started manually by writing the MDMA configuration registers<br />
for that channel. This transfer mode is referred to as Single Transfer Mode.<br />
MDMA channels can also be controlled by a descriptor list in memory. The descriptor list contains<br />
all information needed to control a transfer. Once a transfer has been completed, the<br />
MDMA automatically reads the next descriptor, and if this descriptor is valid, starts the next DMA<br />
transfer. This transfer mode is referred to Descriptor Mode.<br />
21.3 Product Dependencies<br />
In order to use this module, other parts of the system must be configured correctly, as described<br />
below.<br />
21.3.1 Power Management<br />
If the CPU enters a sleep mode that disables clocks used by the MDMA, the MDMA will stop<br />
functioning and resume operation after the system wakes up from sleep mode.<br />
21.3.2 Clocks<br />
21.3.3 Interrupts<br />
The MDMA has two bus clocks connected: One High Speed Bus clock (CLK_MDMA_HSB) and<br />
one Peripheral Bus clock (CLK_MDMA_PB). These clocks are generated by the Power Manager.<br />
Both clocks are enabled at reset, and can be disabled in the Power Manager. The user<br />
has to ensure that CLK_MDMA_HSB is not turned off while performing MDMA transfers. Failing<br />
to do so may deadlock the HSB.<br />
The MDMA interrupt request lines are connected to the interrupt controller. Using the MDMA<br />
interrupts requires the interrupt controller to be programmed first.<br />
411
32117D–AVR-01/12<br />
<strong>AT32UC3C</strong><br />
21.3.4 Debug Operation<br />
When an external debugger forces the CPU into debug mode, the MDMA continues normal<br />
operation. If the MDMA is configured in a way that requires it to be periodically serviced by the<br />
CPU through interrupts or similar, improper operation or data loss may result during debugging.<br />
21.4 Functional Description<br />
21.4.1 Bus Interfaces<br />
The MDMA has three bus interfaces, two High-Speed Bus interfaces for data and descriptor<br />
transfer, and one Peripheral Bus interface for writing control information to and reading status<br />
information from the controller.<br />
21.4.2 Transferring Data<br />
Once a channel (x) is selected by the arbiter, data of the size given by the SIZE field in the<br />
Channel Control Register (CCRx.SIZE) will be transferred from consecutive addresses starting<br />
as specified in the Read Address Register (RARx) to consecutive addresses starting as specified<br />
in the Write Address Register (WARx). The number of data to be transferred is given by the<br />
Transfer Count field (CCRx.TCNT). The MDMA will try to transfer data in bursts with burst size<br />
given by CCRx.BURST. The MDMA is free to use bursts of smaller size if this is required by the<br />
bus semantics or if TCNT is not perfectly divisible by BURST.<br />
21.4.3 Arbitration<br />
During transfers, TCNT is continuously decremented until it reaches zero, indicating that the<br />
transfer has completed. RARx and WARx are not changed by hardware during transfers.<br />
Data read from the bus is put into a FIFO before being written to the bus. The FIFO has wordsized<br />
entries, so any halfwords or bytes transferred from the bus will be zero-extended before<br />
being put in the FIFO. Words are not extended in any way. The Byte Swap (BSWP) field in<br />
CCRx determines if any modifications are to be performed on the read data from the zero-extension<br />
unit. This allows data reformatting such as endianness-conversion.<br />
Figure 21-1. Byte Swapping the FIFO Inputs<br />
Write data<br />
FIFO<br />
Byte<br />
swap<br />
Zeroextend<br />
Read data<br />
Arbitration between the channels is performed at the end of each burst. If no other channels<br />
have pending transfers, the current channel continues uninterrupted.<br />
In Fixed Priority Mode, if a channel of higher priority is enabled when another channel is transferring<br />
data, the channel of higher priority will preempt the other channel. When the preempting<br />
channel has completed, the arbiter will grant control to the original channel so it can complete its<br />
transfer.<br />
412
32117D–AVR-01/12<br />
<strong>AT32UC3C</strong><br />
In Round-Robin Mode, other channels with transfers pending will preempt the current channel in<br />
a round-robin fashion. This eliminates the possibility of starvation.<br />
21.4.4 Aborting Transfers<br />
Transfers on any channel can be gracefully aborted by writing a one to the corresponding Channel<br />
Disable bit in the Control Register (CR.CHxDIS). Note that in order to successfully write to<br />
CHxDIS, the same write operation must also write a one to the corresponding Channel Enable<br />
bit (CR.CHxEN). Successfully writing to CHxDIS will result in both CHxEN and CHxDIS being<br />
cleared. CHxEN can not be cleared by simply writing a zero to it.<br />
21.4.5 Interrupts<br />
21.4.6 Bus Errors<br />
The hardware will disable the transfer as soon as possible. Since the transfer must terminate<br />
gracefully, the CHxEN bits may not be cleared immediately after writing CHxDIS. The user could<br />
poll CHxDIS to check when the channel has been disabled.<br />
The MDMA can generate an interrupts when a channel has completed a transfer or when a DMA<br />
transfer causes a bus error. Interrupts are only generated if enabled in the Interrupt Mask Register<br />
(IMR). IMR is read-only, but can be modified through the write-only Interrupt Enable Register<br />
(IER) and Interrupt Disable Register (IDR). An interrupt is enabled by writing a one to the corresponding<br />
bit in the IER. An interrupt is disabled by writing a one to the corresponding bit in the<br />
IDR. If an interrupt occurs, the corresponding bit in the Interrupt Status Register (ISR) is set and<br />
an interrupt request is generated. Bits in ISR and their corresponding interrupt request can be<br />
cleared by writing to the appropriate bits in the Interrupt Clear Register (ICR).<br />
Any bus errors from transfers on a channel will automatically disable the channel. Other channels<br />
will not be affected by this. An interrupt is generated if not masked by the Interrupt Mask<br />
Register (IMR).<br />
21.5 Single Transfer Mode<br />
The Single Transfer Mode (STM) is the simplest transfer mode. The software programs the registers<br />
controlling the channel, writes the correct enable bit (CR.CHxEN), and the transfer starts.<br />
The transfer can be preempted if a channel with higher priority is enabled before the transfer<br />
completes, or if we use Round-Robin Mode.<br />
When the transfer completes, the CR.CHxEN bit is automatically cleared. If the Channel Complete<br />
interrupt is enabled in IMR (IMR.CHxC is one), an interrupt request is generated.<br />
In order to perform a transfer in STM, the following steps must be performed:<br />
1. Make sure that the channel is free by checking the CR.CHxEN bit, or by waiting for a<br />
Transfer Complete interrupt from the channel.<br />
2. Set up the Read Address Register (RARx), Write Address Register (WARx) and Channel<br />
Control Register (CCRx) associated with the channel.<br />
3. Enable the desired interrupts by writing a one to the corresponding bits in the Interrupt<br />
Enable Register (IER).<br />
4. Write a one to CR.CHxEN to start the transfer. Make sure the Channel Mode bit<br />
(CR.CHxM) for the channel is zero (channel is in Single Transfer Mode)<br />
5. When the transfer completes, the CHxEN bit is automatically cleared. If the Channel<br />
Complete interrupt for the channel is enabled, the corresponding bit in the Interrupt Status<br />
Register (ISR.CHxC) is set.<br />
413
32117D–AVR-01/12<br />
<strong>AT32UC3C</strong><br />
21.6 Descriptor Mode<br />
The Descriptor Mode (DM) performs a series of single transfers. Data describing the transfers to<br />
be performed are written to memory by software, forming a queue of descriptors, each descriptor<br />
describing a transfer to be performed.<br />
21.6.1 Setting Up and Using the Descriptors<br />
Before being able to use the Descriptor Mode, the channel’s Descriptor Start Address (DSARx)<br />
register must be initialized to point to the first descriptor in the queue. Thereafter, the Current<br />
Descriptor Address Register (CDARx) must be initialized to the same value.<br />
When the CR.CHxEN bit is written to one, hardware will read the first descriptor in the queue,<br />
and perform the transfer described therein. When this transfer has finished, the hardware will<br />
update the descriptor associated with the transfer, clearing the V bit in the descriptor data structure<br />
located in memory. Thereafter, the hardware will read the next descriptor in the queue. The<br />
address of this descriptor is dependent on the L bit of the descriptor that just completed, see<br />
Section 21.6.2.<br />
If the new descriptor has its V bit set, the transfer described by this descriptor will be performed.<br />
When the transfer is complete, the descriptor will be written back to memory, with the V bit<br />
cleared. Thereafter, the next descriptor will be read. This continues until a descriptor with a<br />
cleared V bit is read. The queue is then empty, and all transfers described in the queue have<br />
been performed. The CR.CHxEN bit will then be cleared, and the channel will become idle.<br />
In order to restart the channel, the descriptor pointed to by the Current Descriptor Address Register<br />
(CDARx) for the channel must be updated by writing to the appropriate memory locations.<br />
Thereafter, the CHxEN bit must be written to one. This will cause the descriptor to be read into<br />
the MDMA, and the transfer will start.<br />
21.6.2 Descriptor Organization<br />
The descriptor list is implemented as a ring of descriptors placed in memory. The length of the<br />
descriptor ring is programmable; the last descriptor in the ring has its L bit set, indicating that the<br />
next element in the ring is at the address pointed to by the Descriptor Start Address Register<br />
(DSARx).<br />
Each descriptor consists of four words. When a descriptor is loaded into the MDMA, the first<br />
three of these words are read into the appropriate registers, while the fourth word is discarded.<br />
414
32117D–AVR-01/12<br />
Figure 21-2. Descriptors in Memory<br />
Growing Memory Addresses<br />
Descriptor 0 Descriptor 1 Descriptor n<br />
D0 RAR<br />
D0 WAR<br />
D0 CCR<br />
UNUSED<br />
D1 RAR<br />
D1 WAR<br />
D1 CCR<br />
UNUSED<br />
Dn RAR<br />
Dn WAR<br />
Dn CCR<br />
UNUSED<br />
DSAR<br />
21.6.3 Adding Descriptors to a List<br />
In order to add descriptors to a list, the following actions must be performed:<br />
<strong>AT32UC3C</strong><br />
1. Check if there are free entries in the list for the desired channel. Any entry with the V bit<br />
cleared is free. If no entries are free, wait until an entry becomes free.<br />
2. Find the first free entry in the list. This can be done by scanning the descriptor list from<br />
the entry pointed to by CDARx downto the first descriptor with the V bit cleared.<br />
3. Update the free entry by writing the desired values to the correct memory locations.<br />
4. Make sure the CHxM bit for the channel is one (channel is in Descriptor Mode), and<br />
write a one to the CHxEN bit. Writing a one to CHxEN when the CHxEN bit is one has<br />
no effect, so the user does not need to check the state of CHxEN before adding<br />
descriptors to the list.<br />
21.6.4 Interrupts in Descriptor Mode<br />
Interrupt on transfer complete and bus error can be enabled as described in Section 21.4.5.<br />
Wrapping Addresses<br />
Last bit set<br />
415
21.7 User interface<br />
Table 21-1. MDMA Register Memory Map<br />
32117D–AVR-01/12<br />
<strong>AT32UC3C</strong><br />
Offset Register Register Name Channel Access Reset<br />
0x00 Control Register CR - Read/Write 0x00000000<br />
0x04 Interrupt Enable Register IER - Write-only 0x00000000<br />
0x08 Interrupt Disable Register IDR - Write-only 0x00000000<br />
0x0C Interrupt Mask Register IMR - Read-only 0x00000000<br />
0x10 Interrupt Status Register ISR - Read-only 0x00000000<br />
0x14 Interrupt Clear Register ICR - Write-only 0x00000000<br />
0x18 Parameter Register PR - Read-only - (1)<br />
0x1C Version Register VR - Read-only - (1)<br />
0x20 Descriptor Start Address 0 DSAR0 0 Read/Write 0x00000000<br />
0x24 Descriptor Start Address 1 DSAR1 1 Read/Write 0x00000000<br />
0x28 Descriptor Start Address 2 DSAR2 2 Read/Write 0x00000000<br />
0x2C Descriptor Start Address 3 DSAR3 3 Read/Write 0x00000000<br />
0x30-3C RESERVED - - Read-only 0x00000000<br />
0x40 Current Descriptor Address Register 0 CDAR0 0 Read/Write 0x00000000<br />
0x44 Read Address Register 0 RAR0 0 Read/Write 0x00000000<br />
0x48 Write Address Register 0 WAR0 0 Read/Write 0x00000000<br />
0x4C Channel Control Register 0 CCR0 0 Read/Write 0x00000000<br />
0x50 Current Descriptor Address Register 1 CDAR1 1 Read/Write 0x00000000<br />
0x54 Read Address Register 1 RAR1 1 Read/Write 0x00000000<br />
0x58 Write Address Register 1 WAR1 1 Read/Write 0x00000000<br />
0x5C Channel Control Register 1 CCR1 1 Read/Write 0x00000000<br />
0x60 Current Descriptor Address Register 2 CDAR2 2 Read/Write 0x00000000<br />
0x64 Read Address Register 2 RAR2 2 Read/Write 0x00000000<br />
0x68 Write Address Register 2 WAR2 2 Read/Write 0x00000000<br />
0x6C Channel Control Register 2 CCR2 2 Read/Write 0x00000000<br />
0x70 Current Descriptor Address Register 3 CDAR3 3 Read/Write 0x00000000<br />
0x74 Read Address Register 3 RAR3 3 Read/Write 0x00000000<br />
0x78 Write Address Register 3 WAR3 3 Read/Write 0x00000000<br />
0x7C Channel Control Register 3 CCR3 3 Read/Write 0x00000000<br />
1. The reset values for these registers are device specific. Please refer to the Module Configuration section at the end of this<br />
chapter.<br />
Note: The number of DMA channels is device-specific. Not all devices will implement all four channels. These devices will not implement<br />
all user interface registers. Unimplemented registers will always read as 0.<br />
416
21.7.1 Control Register<br />
Name: CR<br />
Access Type : Read/Write<br />
Offset: 0x00<br />
Reset Value: 0x000000000<br />
32117D–AVR-01/12<br />
<strong>AT32UC3C</strong><br />
31 30 29 28 27 26 25 24<br />
- - - - - - - ARB<br />
23 22 21 20 19 18 17 16<br />
- - - - CH3DIS CH2DIS CH1DIS CH0DIS<br />
15 14 13 12 11 10 9 8<br />
- - - - CH3M CH2M CH1M CH0M<br />
7 6 5 4 3 2 1 0<br />
- - - - CH3EN CH2EN CH1EN CH0EN<br />
ARB: Arbitration Mode<br />
0: The MDMA is in Fixed Priority Mode.<br />
1: The MDMA is in Round-Robin Mode.<br />
CHxDIS: Channel Disable<br />
Writing a zero to this bit has no effect.<br />
Writing a one to this bit disables the MDMA channel after the current transfer has completed.<br />
To avoid hazards, CHxDIS bits can only be changed by writing a value to CR where the corresponding CHxEN bit is set.<br />
This bit is automatically cleared by hardware when the corresponding channel has been disabled.<br />
CHxM: Channel Mode<br />
0: The channel is in Single Transfer Mode.<br />
1: The channel is in Descriptor Mode.<br />
To avoid hazards, CHxM bits can only be changed by writing a value to CR where the corresponding CHxEN bit is set.<br />
CHxEN: Channel Enable<br />
Writing a zero to this bit this bit has no effect.<br />
Writing a one to this bit enables the channel for DMA transfer.<br />
This bit is automatically cleared if the transfer completes when the channel is in single transfer mode.<br />
This bit is automatically cleared if the transfer completes when the channel is in descriptor mode, and the next descriptor read in<br />
has a cleared Valid bit.<br />
This bit is automatically cleared when the corresponding channel has been disabled by writing a one to CHxDIS.<br />
417
21.7.2 Interrupt Enable Register<br />
Name: IER<br />
Access Type: Write-only<br />
Offset: 0x04<br />
Reset Value: 0x000000000<br />
32117D–AVR-01/12<br />
<strong>AT32UC3C</strong><br />
31 30 29 28 27 26 25 24<br />
- - - - - - - -<br />
23 22 21 20 19 18 17 16<br />
- - - - - - - -<br />
15 14 13 12 11 10 9 8<br />
- - - - BERR3 BERR2 BERR1 BERR0<br />
7 6 5 4 3 2 1 0<br />
- - - - CH3C CH2C CH1C CH0C<br />
Writing a zero to a bit in this register has no effect.<br />
Writing a one to a bit in this register will set the corresponding bit in the Interrupt Mask Register (IMR).<br />
418
21.7.3 Interrupt Disable Register<br />
Name: IDR<br />
Access Type: Write-only<br />
Offset: 0x08<br />
Reset Value: 0x000000000<br />
32117D–AVR-01/12<br />
<strong>AT32UC3C</strong><br />
31 30 29 28 27 26 25 24<br />
- - - - - - - -<br />
23 22 21 20 19 18 17 16<br />
- - - - - - - -<br />
15 14 13 12 11 10 9 8<br />
- - - - BERR3 BERR2 BERR1 BERR0<br />
7 6 5 4 3 2 1 0<br />
- - - - CH3C CH2C CH1C CH0C<br />
Writing a zero to a bit in this register has no effect.<br />
Writing a one to a bit in this register will clear the corresponding bit in the Interrupt Mask Register (IMR).<br />
419
21.7.4 Interrupt Mask Register<br />
Name: IMR<br />
Access Type: Read-only<br />
Offset: 0x0C<br />
Reset Value: 0x000000000<br />
32117D–AVR-01/12<br />
<strong>AT32UC3C</strong><br />
31 30 29 28 27 26 25 24<br />
- - - - - - - -<br />
23 22 21 20 19 18 17 16<br />
- - - - - - - -<br />
15 14 13 12 11 10 9 8<br />
- - - - BERR3 BERR2 BERR1 BERR0<br />
7 6 5 4 3 2 1 0<br />
- - - - CH3C CH2C CH1C CH0C<br />
0: The corresponding interrupt is disabled.<br />
1: The corresponding interrupt is enabled.<br />
A bit in this register is cleared when the corresponding bit in IDR is written to one.<br />
A bit in this register is set when the corresponding bit in IER is written to one.<br />
420
21.7.5 Interrupt Status Register<br />
Name: ISR<br />
Access Type: Read-only<br />
Offset: 0x10<br />
Reset Value: 0x000000000<br />
32117D–AVR-01/12<br />
<strong>AT32UC3C</strong><br />
31 30 29 28 27 26 25 24<br />
- - - - - - - -<br />
23 22 21 20 19 18 17 16<br />
- - - - - - - -<br />
15 14 13 12 11 10 9 8<br />
- - - - BERR3 BERR2 BERR1 BERR0<br />
7 6 5 4 3 2 1 0<br />
- - - - CH3C CH2C CH1C CH0C<br />
BERRx: Channel Bus Error<br />
This bit is cleared when the corresponding bit in ICR is written to one.<br />
This bit is set when the channel has encountered a bus error and has an interrupt request pending. Upon receiving a bus error,<br />
the affected channel is automatically disabled.<br />
CHxC: Channel Complete<br />
This bit is cleared when the corresponding bit in ICR is written to one.<br />
This bit is set when the channel has completed a transfer and has an interrupt request pending.<br />
421
21.7.6 Interrupt Clear Register<br />
Name: ICR<br />
Access Type: Write-only<br />
Offset: 0x14<br />
Reset Value: 0x000000000<br />
32117D–AVR-01/12<br />
<strong>AT32UC3C</strong><br />
31 30 29 28 27 26 25 24<br />
- - - - - - - -<br />
23 22 21 20 19 18 17 16<br />
- - - - - - - -<br />
15 14 13 12 11 10 9 8<br />
- - - - BERR3 BERR2 BERR1 BERR0<br />
7 6 5 4 3 2 1 0<br />
- - - - CH3C CH2C CH1C CH0C<br />
Writing a zero to a bit in this register has no effect.<br />
Writing a one to a bit in this register clears the corresponding bit in ISR and the corresponding interrupt request.<br />
422
21.7.7 Parameter Register<br />
Name: PR<br />
Access Type: Read-only<br />
Offset: 0x18<br />
Reset Value: -<br />
32117D–AVR-01/12<br />
<strong>AT32UC3C</strong><br />
31 30 29 28 27 26 25 24<br />
- - - - - - - -<br />
23 22 21 20 19 18 17 16<br />
- - - - - - - -<br />
15 14 13 12 11 10 9 8<br />
- - - - - - BURST<br />
7 6 5 4 3 2 1 0<br />
- - - - CH3I CH2I CH1I CH0I<br />
BURST: Maximum Burst Size<br />
The maximum burst size that can be used is a function of the FIFO size, which can be different in different devices. This field<br />
gives the largest burst size that is supported by the device:<br />
Table 21-2. Maximum Burst Size<br />
BURST Maximum Burst Size<br />
0 Single transfer<br />
1 4-beat burst<br />
2 8-beat burst<br />
3 16-beat burst<br />
CHxI: Channel Implemented<br />
0: The channel is not implemented in the current device, and cannot be used.<br />
1: The channel is implemented in the current device.<br />
423
21.7.8 Version Register<br />
Name: VR<br />
Access Type: Read-only<br />
Offset: 0x1C<br />
Reset Value: -<br />
32117D–AVR-01/12<br />
<strong>AT32UC3C</strong><br />
31 30 29 28 27 26 25 24<br />
- - - - - - - -<br />
23 22 21 20 19 18 17 16<br />
- - - - - - - -<br />
15 14 13 12 11 10 9 8<br />
- - - - VERSION[11:8]<br />
7 6 5 4 3 2 1 0<br />
VERSION[7:0]<br />
VERSION: Version Number<br />
Version number of the module. No functionality associated.<br />
424
21.7.9 Descriptor Start Address Register x<br />
Name: DSAR0, DSAR1, DSAR2, DSAR3<br />
Access Type: Read/Write<br />
Offset: 0x20, 0x24, 0x28, 0x2C<br />
Reset Value: 0x000000000<br />
32117D–AVR-01/12<br />
<strong>AT32UC3C</strong><br />
31 30 29 28 27 26 25 24<br />
DSAR[31:24]<br />
23 22 21 20 19 18 17 16<br />
DSAR[23:16]<br />
15 14 13 12 11 10 9 8<br />
DSAR[15:8]<br />
7 6 5 4 3 2 1 0<br />
DSAR[7:0]<br />
DSAR: Descriptor Start Address Register<br />
The address of the first descriptor in the chain. When the hardware has read a descriptor with the CCRx.L bit set, the next<br />
descriptor will be read from the address in DSAR. Must be aligned to word size.<br />
425
21.7.10 Current Descriptor Address Register x<br />
Name: CDAR0, CDAR1, CDAR2, CDAR3<br />
Access Type: Read/Write<br />
Offset: 0x40, 0x50, 0x60, 0x70<br />
Reset Value: 0x000000000<br />
32117D–AVR-01/12<br />
<strong>AT32UC3C</strong><br />
31 30 29 28 27 26 25 24<br />
CDAR[31:24]<br />
23 22 21 20 19 18 17 16<br />
CDAR[23:16]<br />
15 14 13 12 11 10 9 8<br />
CDAR[15:8]<br />
7 6 5 4 3 2 1 0<br />
CDAR[7:0]<br />
CDAR: Current Descriptor Address Register<br />
The memory address pointing to the currently active descriptor. This is either the descriptor of the current access if the channel<br />
is enabled, or the address of the descriptor that will be loaded if the channel is not enabled.<br />
Must be word-aligned.<br />
Not used if the channel is not in Descriptor Mode.<br />
426
21.7.11 Read Address Register x<br />
Name: RAR0, RAR1, RAR2, RAR3<br />
Access Type: Read/Write<br />
Offset: 0x44, 0x54, 0x64, 0x74<br />
Reset Value: 0x000000000<br />
32117D–AVR-01/12<br />
<strong>AT32UC3C</strong><br />
31 30 29 28 27 26 25 24<br />
RAR[31:24]<br />
23 22 21 20 19 18 17 16<br />
RAR[23:16]<br />
15 14 13 12 11 10 9 8<br />
RAR[15:8]<br />
7 6 5 4 3 2 1 0<br />
RAR[7:0]<br />
RAR: Read Address Register<br />
The memory address that the next read access will be done from. Must be aligned according to the transfer size.<br />
427
21.7.12 Write Address Register x<br />
Name: WAR0, WAR1, WAR2, WAR3<br />
Access Type: Read/Write<br />
Offset: 0x48, 0x58, 0x68, 0x78<br />
Reset Value: 0x000000000<br />
32117D–AVR-01/12<br />
<strong>AT32UC3C</strong><br />
31 30 29 28 27 26 25 24<br />
WAR[31:24]<br />
23 22 21 20 19 18 17 16<br />
WAR[23:16]<br />
15 14 13 12 11 10 9 8<br />
WAR[15:8]<br />
7 6 5 4 3 2 1 0<br />
WAR[7:0]<br />
WAR: Write Address Register<br />
The memory address that the next write access will be done to. Must be aligned according to the transfer size.<br />
428
21.7.13 Channel Control Register x<br />
Name: CCR0, CCR1, CCR2, CCR3<br />
Access Type: Read/Write<br />
Offset: 0x4C, 0x5C, 0x6C, 0x7C<br />
Reset Value: 0x000000000<br />
32117D–AVR-01/12<br />
<strong>AT32UC3C</strong><br />
31 30 29 28 27 26 25 24<br />
- - - - - - BSWP<br />
23 22 21 20 19 18 17 16<br />
- L V TCIE BURST SIZE<br />
15 14 13 12 11 10 9 8<br />
TCNT[15:8]<br />
7 6 5 4 3 2 1 0<br />
BSWP: Byte Swap<br />
Allows swapping of the transferred bytes. See Section 21.4.2 for additional details. Assuming the word output from the zeroextension<br />
module contains the bytes {a, b, c, d}, the following will be put into the FIFO for transmission:<br />
Table 21-3. Byte Swap<br />
BSWP Byte Swap<br />
0 {a, b, c, d}<br />
1 {d, c, b, a}<br />
2 {c, d, a, b}<br />
3 {b, a, d, c}<br />
TCNT[7:0]<br />
L: Last Descriptor in Chain<br />
Used only if the channel is in Descriptor Mode.<br />
0: The descriptor read in is not the last descriptor in the chain. The next descriptor to be read is located at the address of the<br />
previously read descriptor + 4 words.<br />
1: The descriptor read in is the last descriptor in the chain. The next descriptor to be read is located at the address in the<br />
Descriptor Start Address Register (DSARx) for the channel.<br />
V: Descriptor Valid<br />
Used only if the channel is in Descriptor Mode.<br />
0: The descriptor read in is not valid.<br />
1: The descriptor read in is valid.<br />
TCIE: Transfer Complete Interrupt Enable<br />
0: Transfer Complete does not set the ISR.CHxC bit.<br />
1: Transfer Complete sets the ISR.CHxC bit.<br />
429
32117D–AVR-01/12<br />
<strong>AT32UC3C</strong><br />
BURST: Transfer Burst Size<br />
Indicates the size of the burst used for data transfer. The MDMA will always try to use this burst size to perform transfers, but<br />
may be forced to use smaller sizes since the transfer count may not be perfectly divisible by the transfer data size:<br />
Table 21-4. Transfer Burst Size<br />
BURST Transfer Burst Size<br />
0 Single transfer<br />
1 4-beat burst<br />
2 8-beat burst<br />
3 16-beat burst<br />
SIZE: Transfer Data Size<br />
Indicates the size of data to transfer:<br />
Table 21-5.<br />
SIZE Transfer Data Size<br />
0 Byte<br />
1 Halfword<br />
2 Word<br />
3 Unused<br />
TCNT: Transfer Count<br />
The number of data to transfer. The size of each data is given in the SIZE field.<br />
Configuring a transfer with a TCNT of 0 is illegal, and may result in UNDEFINED behavior.<br />
430
32117D–AVR-01/12<br />
<strong>AT32UC3C</strong><br />
21.8 Module Configuration<br />
The specific configuration for each MDMA instance is listed in the following tables. The module<br />
bus clocks listed here are connected to the system bus clocks. Refer to the Power Manager<br />
chapter for details.<br />
Table 21-6. Module Configuration<br />
Feature MDMA<br />
Channels 1<br />
Maximum burst size Single Transfer<br />
Table 21-7. Module Clock Name<br />
Module name Clock name Description<br />
MDMA<br />
Table 21-8. Register Reset Values<br />
Register Reset Value<br />
VR 0x00000101<br />
PR 0x00000001<br />
CLK_MDMA_HSB HSB clock<br />
CLK_MDMA_PB Peripheral Bus clock from the PBC clock domain<br />
431
22. Secure Access Unit (SAU)<br />
22.1 Features<br />
22.2 Overview<br />
32117D–AVR-01/12<br />
Rev: 1.1.1.3<br />
<strong>AT32UC3C</strong><br />
Remaps registers in memory regions protected by the MPU to regions not protected by the MPU<br />
Programmable physical address for each channel<br />
Two modes of operation: Locked and Open<br />
– In Locked Mode, access to a channel must be preceded by an unlock action<br />
An unlocked channel remains open only for a specific amount of time, if no access is<br />
performed during this time, the channel is relocked<br />
Only one channel can be open at a time, opening a channel while another one is open<br />
locks the first one<br />
Access to a locked channel is denied, a bus error and optionally an interrupt is returned<br />
If a channel is relocked due to an unlock timeout, an interrupt can optionally be<br />
generated<br />
– In Open Mode, all channels are permanently unlocked<br />
In many systems, erroneous access to peripherals can lead to catastrophic failure. An example<br />
of such a peripheral is the Pulse Width Modulator (PWM) used to control electric motors. The<br />
PWM outputs a pulse train that controls the motor. If the control registers of the PWM module<br />
are inadvertently updated with wrong values, the motor can start operating out of control, possibly<br />
causing damage to the application and the surrounding environment. However, sometimes<br />
the PWM control registers must be updated with new values, for example when modifying the<br />
pulse train to accelerate the motor. A mechanism must be used to protect the PWM control registers<br />
from inadvertent access caused by for example:<br />
Errors in the software code<br />
Transient errors in the CPU caused by for example electrical noise altering the execution path<br />
of the program<br />
To improve the security in a computer system, the AVR32UC implements a Memory Protection<br />
Unit (MPU). The MPU can be set up to limit the accesses that can be performed to specific<br />
memory addresses. The MPU divides the memory space into regions, and assigns a set of<br />
access restrictions on each region. Access restrictions can for example be read/write if the CPU<br />
is in supervisor mode, and read-only if the CPU is in application mode. The regions can be of different<br />
size, but each region is usually quite large, e.g. protecting 1 kilobyte of address space or<br />
more. Furthermore, access to each region is often controlled by the execution state of the CPU,<br />
i.e. supervisor or application mode. Such a simple control mechanism is often too inflexible (too<br />
coarse-grained chunks) and with too much overhead (often requiring system calls to access protected<br />
memory locations) for simple or real-time systems such as embedded microcontrollers.<br />
Usually, the Secure Access Unit (SAU) is used together with the MPU to provide the required<br />
security and integrity. The MPU is set up to protect regions of memory, while the SAU is set up<br />
to provide a secure channel into specific memory locations that are protected by the MPU.<br />
These specific locations can be thought of as fine-grained overrides of the general coarsegrained<br />
protection provided by the MPU.<br />
432
32117D–AVR-01/12<br />
<strong>AT32UC3C</strong><br />
22.3 Block Diagram<br />
Figure 22-1 presents the SAU integrated in an example system with a CPU, some memories,<br />
some peripherals, and a bus system. The SAU is connected to both the Peripheral Bus (PB) and<br />
the High Speed Bus (HSB). Configuration of the SAU is done via the PB, while memory<br />
accesses are done via the HSB. The SAU receives an access on its HSB slave interface,<br />
remaps it, checks that the channel is unlocked, and if so, initiates a transfer on its HSB master<br />
interface to the remapped address.<br />
The thin arrows in Figure 22-1 exemplifies control flow when using the SAU. The CPU wants to<br />
read the RX Buffer in the USART. The MPU has been configured to protect all registers in the<br />
USART from user mode access, while the SAU has been configured to remap the RX Buffer into<br />
a memory space that is not protected by the MPU. This unprotected memory space is mapped<br />
into the SAU HSB slave space. When the CPU reads the appropriate address in the SAU, the<br />
SAU will perform an access to the desired RX buffer register in the USART, and thereafter return<br />
the read results to the CPU. The return data flow will follow the opposite direction of the control<br />
flow arrows in Figure 22-1.<br />
Figure 22-1. SAU Block Diagram<br />
CPU<br />
MPU<br />
Bus master<br />
Bus slave Bus master<br />
Interrupt<br />
request<br />
SAU Channel<br />
SAU Configuration<br />
SAU<br />
Flash<br />
Bus slave<br />
Bus slave<br />
High Speed Bus<br />
USART<br />
PWM<br />
RAM<br />
Bus slave<br />
Bus bridge<br />
Peripheral Bus<br />
433
32117D–AVR-01/12<br />
<strong>AT32UC3C</strong><br />
22.4 Product Dependencies<br />
In order to use this module, other parts of the system must be configured correctly, as described<br />
below.<br />
22.4.1 Power Management<br />
If the CPU enters a sleep mode that disables clocks used by the SAU, the SAU will stop functioning<br />
and resume operation after the system wakes up from sleep mode.<br />
22.4.2 Clocks<br />
22.4.3 Interrupt<br />
The SAU has two bus clocks connected: One High Speed Bus clock (CLK_SAU_HSB) and one<br />
Peripheral Bus clock (CLK_SAU_PB). These clocks are generated by the Power Manager. Both<br />
clocks are enabled at reset, and can be disabled by writing to the Power Manager. The user has<br />
to ensure that CLK_SAU_HSB is not turned off before accessing the SAU. Likewise, the user<br />
must ensure that no bus access is pending in the SAU before disabling CLK_SAU_HSB. Failing<br />
to do so may deadlock the High Speed Bus.<br />
The SAU interrupt request line is connected to the interrupt controller. Using the SAU interrupt<br />
requires the interrupt controller to be programmed first.<br />
22.4.4 Debug Operation<br />
When an external debugger forces the CPU into debug mode, the SAU continues normal operation.<br />
If the SAU is configured in a way that requires it to be periodically serviced by the CPU<br />
through interrupts or similar, improper operation or data loss may result during debugging.<br />
22.5 Functional Description<br />
22.5.1 Enabling the SAU<br />
The SAU is enabled by writing a one to the Enable (EN) bit in the Control Register (CR). This will<br />
set the SAU Enabled (EN) bit in the Status Register (SR).<br />
22.5.2 Configuring the SAU Channels<br />
The SAU has a set of channels, mapped in the HSB memory space. These channels can be<br />
configured by a Remap Target Register (RTR), located at the same memory address. When the<br />
SAU is in normal mode, the SAU channel is addressed, and when the SAU is in setup mode, the<br />
RTR can be addressed.<br />
Before the SAU can be used, the channels must be configured and enabled. To configure a<br />
channel, the corresponding RTR must be programmed with the Remap Target Address. To do<br />
this, make sure the SAU is in setup mode by writing a one to the Setup Mode Enable (SEN) bit<br />
in CR. This makes sure that a write to the RTR address accesses the RTR, not the SAU channel.<br />
Thereafter, the RTR is written with the address to remap to, typically the address of a<br />
specific PB register. When all channels have been configured, return to normal mode by writing<br />
a one to the Setup Mode Disable (SDIS) in CR. The channels can now be enabled by writing<br />
ones to the corresponding bits in the Channel Enable Registers (CERH/L).<br />
The SAU is only able to remap addresses above 0xFFFC0000.<br />
434
32117D–AVR-01/12<br />
<strong>AT32UC3C</strong><br />
22.5.2.1 Protecting SAU configuration registers<br />
In order to prevent the SAU configuration registers to be changed by malicious or runaway code,<br />
they should be protected by the MPU as soon as they have been configured. Maximum security<br />
is provided in the system if program memory does not contain any code to unprotect the configuration<br />
registers in the MPU. This guarantees that runaway code can not accidentally unprotect<br />
and thereafter change the SAU configuration registers.<br />
22.5.3 Lock Mechanism<br />
The SAU can be configured to use two different access mechanisms: Open and Locked. In<br />
Open Mode, SAU channels can be accessed freely after they have been configured and<br />
enabled. In order to prevent accidental accesses to remapped addresses, it is possible to configure<br />
the SAU in Locked Mode. Writing a one to the Open Mode bit in the CONFIG register<br />
(CONFIG.OPEN) will enable Open Mode. Writing a zero to CONFIG.OPEN will enable Locked<br />
Mode.<br />
When using Locked Mode, the lock mechanism must be configured by writing a user defined key<br />
value to the Unlock Key (UKEY) field in the Configuration Register (CONFIG). The number of<br />
CLK_SAU_HSB cycles the channel remains unlocked must be written to the Unlock Number of<br />
Clock Cycles (UCYC) field in CONFIG.<br />
Access control to the SAU channels is enabled by means of the Unlock Register (UR), which<br />
resides in the same address space as the SAU channels. Before a channel can be accessed,<br />
the unlock register must be written with th correct key and channel number (single write access).<br />
Access to the channel is then permitted for the next CONFIG.UCYC clock cycles, or until a successful<br />
access to the unlocked channel has been made.<br />
Only one channel can be unlocked at a time. If any other channel is unlocked at the time of writing<br />
UR, this channel will be automatically locked before the channel addressed by the UR write<br />
is unlocked.<br />
An attempted access to a locked channel will be aborted, and the Channel Access Unsuccessful<br />
bit (SR.CAU) will be set.<br />
Any pending errors bits in SR must be cleared before it is possible to access UR. The following<br />
SR bits are defined as error bits: EXP, CAU, URREAD, URKEY, URES, MBERROR, RTRADR.<br />
If any of these bits are set while writing to UR, the write is aborted and the Unlock Register Error<br />
Status (URES) bit in SR is set.<br />
22.5.4 Normal Operation<br />
The following sequence must be used in order to access a SAU channel in normal operation<br />
(CR.SEN=0):<br />
1. If not in Open Mode, write the unlock key to UR.KEY and the channel number to<br />
UR.CHANNEL.<br />
2. Perform the read or write operation to the SAU channel. If not in Open Mode, this must<br />
be done within CONFIG.UCYC clock cycles of unlocking the channel. The SAU will use<br />
its HSB master interface to remap the access to the target address pointed to by the<br />
corresponding RTR.<br />
3. To confirm that the access was successful, wait for the IDLE transfer status bit<br />
(SR.IDLE) to indicate the operation is completed. Then check SR for possible error conditions.<br />
The SAU can be configured to generate interrupt requests or a Bus Error<br />
Exception if the access failed.<br />
435
32117D–AVR-01/12<br />
<strong>AT32UC3C</strong><br />
22.5.4.1 Operation example<br />
Figure 22-2 shows a typical memory map, consisting of some memories, some simple peripherals,<br />
and a SAU with multiple channels and an Unlock Register (UR). Imagine that the MPU has<br />
been set up to disallow all accesses from the CPU to the grey modules. Thus the CPU has no<br />
way of accessing for example the Transmit Holding register in the UART, present on address X<br />
on the bus. Note that the SAU RTRs are not protected by the MPU, thus the RTRs can be<br />
accessed. If for example RTR0 is configured to point to address X, an access to RTR0 will be<br />
remapped by the SAU to address X according to the algorithm presented above. By programming<br />
the SAU RTRs, specific addresses in modules that have generally been protected by the<br />
MPU can be performed.<br />
22.5.5 Interrupts<br />
Figure 22-2. Example Memory Map for a System with SAU<br />
SAU<br />
CONFIG<br />
UART<br />
SAU<br />
CHANNEL<br />
Receive Holding<br />
Transmit Holding<br />
Baudrate<br />
Control<br />
UR<br />
RTR62<br />
Channel RTR1 1<br />
RTR0<br />
The SAU can generate an interrupt request to signal different events. All events that can generate<br />
an interrupt request have dedicated bits in the Status Register (SR). An interrupt request will<br />
be generated if the corresponding bit in the Interrupt Mask Register (IMR) is set. Bits in IMR are<br />
set by writing a one to the corresponding bit in the Interrupt Enable Register (IER), and cleared<br />
by writing a one to the corresponding bit in the Interrupt Disable Register (IDR). The interrupt<br />
request remains active until the corresponding bit in SR is cleared by writing a one to the corresponding<br />
bit in the Interrupt Clear Register (ICR).<br />
The following SR bits are used for signalling the result of SAU accesses:<br />
Address X<br />
Address Z<br />
RTR Address Error (RTRADR) is set if an illegal address is written to the RTRs. Only<br />
addresses in the range 0xFFFC0000-0xFFFFFFFF are allowed.<br />
Master Interface Bus Error (MBERROR) is set if any of the conditions listed in Section 22.5.7<br />
occurred.<br />
...<br />
436
22.5.6 Error bits<br />
32117D–AVR-01/12<br />
<strong>AT32UC3C</strong><br />
Unlock Register Error Status (URES) is set if an attempt was made to unlock a channel by<br />
writing to the Unlock Register while one or more error bits in SR were set (see Section<br />
22.5.6). The unlock operation was aborted.<br />
Unlock Register Key Error (URKEY) is set if the Unlock Register was attempted written with<br />
an invalid key.<br />
Unlock Register Read (URREAD) is set if the Unlock Register was attempted read.<br />
Channel Access Unsuccessful (CAU) is set if the channel access was unsuccessful.<br />
Channel Access Successful (CAS) is set if the channel access was successful.<br />
Channel Unlock Expired (EXP) is set if the channel lock expired, with no channel being<br />
accessed after the channel was unlocked.<br />
If error bits are set when attempting to unlock a channel, SR.URES will be set. The following SR<br />
bits are considered error bits:<br />
EXP<br />
CAU<br />
URREAD<br />
URKEY<br />
URES<br />
MBERROR<br />
RTRADR<br />
22.5.7 Bus Error Responses<br />
By writing a one to the Bus Error Response Enable bit (CR.BERREN), serious access errors will<br />
be configured to return a bus error to the CPU. This will cause the CPU to execute its Bus Error<br />
Data Fetch exception routine.<br />
The conditions that can generate a bus error response are:<br />
Reading the Unlock Register<br />
Trying to access a locked channel<br />
The SAU HSB master receiving a bus error response from its addressed slave<br />
22.5.8 Disabling the SAU<br />
To disable the SAU, the user must first ensure that no SAU bus operations are pending. This<br />
can be done by checking that the SR.IDLE bit is set.<br />
The SAU may then be disabled by writing a one to the Disable (DIS) bit in CR.<br />
437
32117D–AVR-01/12<br />
<strong>AT32UC3C</strong><br />
22.6 User Interface<br />
The following addresses are used by SAU channel configuration registers. All offsets are relative to the SAU’s PB base<br />
address.<br />
Table 22-1. SAU Configuration Register Memory Map<br />
Offset Register Register Name Access Reset<br />
0x00 Control Register CR Write-only 0x00000000<br />
0x04 Configuration Register CONFIG Write-only 0x00000000<br />
0x08 Channel Enable Register High CERH Read/Write 0x00000000<br />
0x0C Channel Enable Register Low CERL Read/Write 0x00000000<br />
0x10 Status Register SR Read-only 0x00000400<br />
0x14 Interrupt Enable Register IER Write-only 0x00000000<br />
0x18 Interrupt Disable Register IDR Write-only 0x00000000<br />
0x1C Interrupt Mask Register IMR Read-only 0x00000000<br />
0x20 Interrupt Clear Register ICR Write-only 0x00000000<br />
0x24 Parameter Register PARAMETER Read-only - (1)<br />
0x28 Version Register VERSION Read-only - (1)<br />
Note: 1. The reset values are device specific. Please refer to the Module Configuration section at the end of this chapter.<br />
The following addresses are used by SAU channel registers. All offsets are relative to the SAU’s HSB base address. The<br />
number of channels implemented is device specific, refer to the Module Configuration section at the end of this chapter.<br />
Table 22-2. SAU Channel Register Memory Map<br />
Offset Register Register Name Access Reset<br />
0x00 Remap Target Register 0 RTR0 Read/Write N/A<br />
0x04 Remap Target Register 1 RTR1 Read/Write N/A<br />
0x08 Remap Target Register 2 RTR2 Read/Write N/A<br />
... ... ... ... ...<br />
0x04*n Remap Target Register n RTRn Read/Write N/A<br />
0xFC Unlock Register UR Write-only N/A<br />
438
22.6.1 Control Register<br />
Name: CR<br />
Access Type: Write-only<br />
Offset: 0x00<br />
Reset Value: 0x00000000<br />
32117D–AVR-01/12<br />
<strong>AT32UC3C</strong><br />
31 30 29 28 27 26 25 24<br />
- - - - - - - -<br />
23 22 21 20 19 18 17 16<br />
- - - - - - - -<br />
15 14 13 12 11 10 9 8<br />
- - - - - - - -<br />
7 6 5 4 3 2 1 0<br />
- - BERRDIS BERREN SDIS SEN DIS EN<br />
BERRDIS: Bus Error Response Disable<br />
Writing a zero to this bit has no effect.<br />
Writing a one to this bit disables Bus Error Response from the SAU.<br />
BERREN: Bus Error Response Enable<br />
Writing a zero to this bit has no effect.<br />
Writing a one to this bit enables Bus Error Response from the SAU.<br />
SDIS: Setup Mode Disable<br />
Writing a zero to this bit has no effect.<br />
Writing a one to this bit exits setup mode.<br />
SEN: Setup Mode Enable<br />
Writing a zero to this bit has no effect.<br />
Writing a one to this bit enters setup mode.<br />
DIS: SAU Disable<br />
Writing a zero to this bit has no effect.<br />
Writing a one to this bit disables the SAU.<br />
EN: SAU Enable<br />
Writing a zero to this bit has no effect.<br />
Writing a one to this bit enables the SAU.<br />
439
22.6.2 Configuration Register<br />
Name: CONFIG<br />
Access Type: Write-only<br />
Offset: 0x04<br />
Reset Value: 0x00000000<br />
32117D–AVR-01/12<br />
<strong>AT32UC3C</strong><br />
31 30 29 28 27 26 25 24<br />
- - - - - - - -<br />
23 22 21 20 19 18 17 16<br />
- - - - - - - OPEN<br />
15 14 13 12 11 10 9 8<br />
UCYC<br />
7 6 5 4 3 2 1 0<br />
UKEY<br />
OPEN: Open Mode Enable<br />
Writing a zero to this bit disables open mode.<br />
Writing a one to this bit enables open mode.<br />
UCYC: Unlock Number of Clock Cycles<br />
Once a channel has been unlocked, it remains unlocked for this amount of CLK_SAU_HSB clock cycles or until one access to a<br />
channel has been made.<br />
UKEY: Unlock Key<br />
The value in this field must be written to UR.KEY to unlock a channel.<br />
440
22.6.3 Channel Enable Register High<br />
Name: CERH<br />
Access Type: Read/Write<br />
Offset: 0x08<br />
Reset Value: 0x00000000<br />
32117D–AVR-01/12<br />
<strong>AT32UC3C</strong><br />
31 30 29 28 27 26 25 24<br />
- CERH[30:24]<br />
23 22 21 20 19 18 17 16<br />
CERH[n]: Channel Enable Register High<br />
0: Channel (n+32) is not enabled.<br />
1: Channel (n+32) is enabled.<br />
CERH[23:16]<br />
15 14 13 12 11 10 9 8<br />
CERH[15:8]<br />
7 6 5 4 3 2 1 0<br />
CERH[7:0]<br />
441
22.6.4 Channel Enable Register Low<br />
Name: CERL<br />
Access Type: Read/Write<br />
Offset: 0x0C<br />
Reset Value: 0x00000000<br />
32117D–AVR-01/12<br />
<strong>AT32UC3C</strong><br />
31 30 29 28 27 26 25 24<br />
CERL[n]: Channel Enable Register Low<br />
0: Channel n is not enabled.<br />
1: Channel n is enabled.<br />
CERL[31:24]<br />
23 22 21 20 19 18 17 16<br />
CERL[23:16]<br />
15 14 13 12 11 10 9 8<br />
CERL[15:8]<br />
7 6 5 4 3 2 1 0<br />
CERL[7:0]<br />
442
22.6.5 Status Register<br />
Name: SR<br />
Access Type: Read-only<br />
Offset: 0x10<br />
Reset Value: 0x00000400<br />
32117D–AVR-01/12<br />
<strong>AT32UC3C</strong><br />
31 30 29 28 27 26 25 24<br />
- - - - - - - -<br />
23 22 21 20 19 18 17 16<br />
- - - - - - - -<br />
15 14 13 12 11 10 9 8<br />
- - - - - IDLE SEN EN<br />
7 6 5 4 3 2 1 0<br />
RTRADR MBERROR URES URKEY URREAD CAU CAS EXP<br />
IDLE<br />
This bit is cleared when a read or write operation to the SAU channel is started.<br />
This bit is set when the operation is completed and no SAU bus operations are pending.<br />
SEN: SAU Setup Mode Enable<br />
This bit is cleared when the SAU exits setup mode.<br />
This bit is set when the SAU enters setup mode.<br />
EN: SAU Enabled<br />
This bit is cleared when the SAU is disabled.<br />
This bit is set when the SAU is enabled.<br />
RTRADR: RTR Address Error<br />
This bit is cleared when the corresponding bit in ICR is written to one.<br />
This bit is set if, in the configuration phase, an RTR was written with an illegal address, i.e. the upper 16 bits in the address were<br />
different from 0xFFFC, 0xFFFD, 0xFFFE or 0xFFFF.<br />
MBERROR: Master Interface Bus Error<br />
This bit is cleared when the corresponding bit in ICR is written to one.<br />
This bit is set if a channel access generated a transfer on the master interface that received a bus error response from the<br />
addressed slave.<br />
URES: Unlock Register Error Status<br />
This bit is cleared when the corresponding bit in ICR is written to one.<br />
This bit is set if an attempt was made to unlock a channel by writing to the Unlock Register while one or more error bits were set<br />
in SR. The unlock operation was aborted.<br />
URKEY: Unlock Register Key Error<br />
This bit is cleared when the corresponding bit in ICR is written to one.<br />
This bit is set if the Unlock Register was attempted written with an invalid key.<br />
URREAD: Unlock Register Read<br />
This bit is cleared when the corresponding bit in ICR is written to one.<br />
This bit is set if the Unlock Register was read.<br />
443
CAU: Channel Access Unsuccessful<br />
This bit is cleared when the corresponding bit in ICR is written to one.<br />
This bit is set if channel access was unsuccessful, i.e. an access was attempted to a locked or disabled channel.<br />
CAS: Channel Access Successful<br />
This bit is cleared when the corresponding bit in ICR is written to one.<br />
This bit is set if channel access successful, i.e. one access was made after the channel was unlocked.<br />
EXP: Channel Unlock Expired<br />
This bit is cleared when the corresponding bit in ICR is written to one.<br />
This bit is set if channel unlock has expired, i.e. no access being made after the channel was unlocked.<br />
32117D–AVR-01/12<br />
<strong>AT32UC3C</strong><br />
444
22.6.6 Interrupt Enable Register<br />
Name: IER<br />
Access Type: Write-only<br />
Offset: 0x14<br />
Reset Value: 0x00000000<br />
32117D–AVR-01/12<br />
<strong>AT32UC3C</strong><br />
31 30 29 28 27 26 25 24<br />
- - - - - - - -<br />
23 22 21 20 19 18 17 16<br />
- - - - - - - -<br />
15 14 13 12 11 10 9 8<br />
- - - - - - - -<br />
7 6 5 4 3 2 1 0<br />
RTRADR MBERROR URES URKEY URREAD CAU CAS EXP<br />
Writing a zero to a bit in this register has no effect.<br />
Writing a one to a bit in this register will set the corresponding bit in IMR.<br />
445
22.6.7 Interrupt Disable Register<br />
Name: IDR<br />
Access Type: Write-only<br />
Offset: 0x18<br />
Reset Value: 0x00000000<br />
32117D–AVR-01/12<br />
<strong>AT32UC3C</strong><br />
31 30 29 28 27 26 25 24<br />
- - - - - - - -<br />
23 22 21 20 19 18 17 16<br />
- - - - - - - -<br />
15 14 13 12 11 10 9 8<br />
- - - - - - - -<br />
7 6 5 4 3 2 1 0<br />
RTRADR MBERROR URES URKEY URREAD CAU CAS EXP<br />
Writing a zero to a bit in this register has no effect.<br />
Writing a one to a bit in this register will clear the corresponding bit in IMR.<br />
446
22.6.8 Interrupt Mask Register<br />
Name: IMR<br />
Access Type: Read-only<br />
Offset: 0x1C<br />
Reset Value: 0x00000000<br />
32117D–AVR-01/12<br />
<strong>AT32UC3C</strong><br />
31 30 29 28 27 26 25 24<br />
- - - - - - - -<br />
23 22 21 20 19 18 17 16<br />
- - - - - - - -<br />
15 14 13 12 11 10 9 8<br />
- - - - - - - -<br />
7 6 5 4 3 2 1 0<br />
RTRADR MBERROR URES URKEY URREAD CAU CAS EXP<br />
0: The corresponding interrupt is disabled.<br />
1: The corresponding interrupt is enabled.<br />
A bit in this register is cleared when the corresponding bit in IDR is written to one.<br />
A bit in this register is set when the corresponding bit in IER is written to one.<br />
447
22.6.9 Interrupt Clear Register<br />
Name: ICR<br />
Access Type: Write-only<br />
Offset: 0x20<br />
Reset Value: 0x00000000<br />
32117D–AVR-01/12<br />
<strong>AT32UC3C</strong><br />
31 30 29 28 27 26 25 24<br />
- - - - - - - -<br />
23 22 21 20 19 18 17 16<br />
- - - - - - - -<br />
15 14 13 12 11 10 9 8<br />
- - - - - - - -<br />
7 6 5 4 3 2 1 0<br />
RTRADR MBERROR URES URKEY URREAD CAU CAS EXP<br />
Writing a zero to a bit in this register has no effect.<br />
Writing a one to a bit in this register will clear the corresponding bit in SR and any corresponding interrupt request.<br />
448
22.6.10 Parameter Register<br />
Name: PARAMETER<br />
Access Type: Read-only<br />
Offset: 0x24<br />
Reset Value: -<br />
32117D–AVR-01/12<br />
<strong>AT32UC3C</strong><br />
31 30 29 28 27 26 25 24<br />
- - - - - - - -<br />
23 22 21 20 19 18 17 16<br />
- - - - - - - -<br />
15 14 13 12 11 10 9 8<br />
- - - - - - - -<br />
7 6 5 4 3 2 1 0<br />
- - CHANNELS<br />
CHANNELS:<br />
Number of channels implemented.<br />
449
22.6.11 Version Register<br />
Name: VERSION<br />
Access Type: Write-only<br />
Offset: 0x28<br />
Reset Value: -<br />
32117D–AVR-01/12<br />
<strong>AT32UC3C</strong><br />
31 30 29 28 27 26 25 24<br />
- - - - - - - -<br />
23 22 21 20 19 18 17 16<br />
- - - - VARIANT<br />
15 14 13 12 11 10 9 8<br />
- - - - VERSION[11:8]<br />
7 6 5 4 3 2 1 0<br />
VERSION[7:0]<br />
VARIANT: Variant Number<br />
Reserved. No functionality associated.<br />
VERSION: Version Number<br />
Version number of the module. No functionality associated.<br />
450
22.6.12 Remap Target Register n<br />
Name: RTRn<br />
Access Type: Read/Write<br />
Offset: n*4<br />
Reset Value: 0x00000000<br />
32117D–AVR-01/12<br />
<strong>AT32UC3C</strong><br />
31 30 29 28 27 26 25 24<br />
RTR[31:24]<br />
23 22 21 20 19 18 17 16<br />
RTR[23:16]<br />
15 14 13 12 11 10 9 8<br />
RTR[15:8]<br />
7 6 5 4 3 2 1 0<br />
RTR[7:0]<br />
RTR: Remap Target Address for Channel n<br />
RTR[31:16] must have one of the following values, any other value will result in UNDEFINED behavior:<br />
0xFFFC<br />
0xFFFD<br />
0xFFFE<br />
0xFFFF<br />
RTR[1:0] must be written to 00, any other value will result in UNDEFINED behavior.<br />
451
22.6.13 Unlock Register<br />
Name: UR<br />
Access Type : Write-only<br />
Offset: 0xFC<br />
Reset Value: 0x00000000<br />
32117D–AVR-01/12<br />
<strong>AT32UC3C</strong><br />
31 30 29 28 27 26 25 24<br />
- - - - - - - -<br />
23 22 21 20 19 18 17 16<br />
- - - - - - - -<br />
15 14 13 12 11 10 9 8<br />
KEY<br />
7 6 5 4 3 2 1 0<br />
- - CHANNEL<br />
KEY: Unlock Key<br />
The correct key must be written in order to unlock a channel. The key value written must correspond to the key value defined in<br />
CONFIG.UKEY.<br />
CHANNEL: Channel Number<br />
Number of the channel to unlock.<br />
452
32117D–AVR-01/12<br />
<strong>AT32UC3C</strong><br />
22.7 Module configuration<br />
The specific configuration for each SAU instance is listed in the following tables. The module<br />
bus clocks listed here are connected to the system bus clocks. Refer to the Power Manager<br />
chapter for details.<br />
Table 22-3. Module configuration<br />
Feature SAU<br />
SAU Channels 16<br />
Table 22-4. Module clock name<br />
Module name Clock name Description<br />
SAU<br />
Table 22-5. Register Reset Values<br />
Register Reset Value<br />
VERSION 0x111<br />
PARAMETER 0x010<br />
CLK_SAU_HSB HSB clock<br />
CLK_SAU_PB Peripheral Bus clock from the PBB clock domain<br />
453
23. General-Purpose Input/Output Controller (GPIO)<br />
23.1 Features<br />
23.2 Overview<br />
23.3 Block Diagram<br />
32117D–AVR-01/12<br />
Rev: 2.1.2.5<br />
Configurable pin-change, rising-edge, or falling-edge interrupt<br />
Glitch filter providing rejection of pulses shorter than one clock cycle<br />
Input visibility and output control<br />
Multiplexing of peripheral functions on I/O pins<br />
Programmable internal pull-up resistor<br />
Programmable internal pull-down resistor<br />
Programmable output driver strength<br />
Optional locking of configuration to avoid accidental reconfiguration<br />
<strong>AT32UC3C</strong><br />
The General Purpose Input/Output Controller (GPIO) controls the I/O pins of the microcontroller.<br />
Each GPIO pin may be used as a general-purpose I/O or be assigned to a function of an embedded<br />
peripheral.<br />
The GPIO is configured using the Peripheral Bus (PB). Some registers can also be configured<br />
using the low latency CPU Local Bus. See Section 23.6.2.8 for details.<br />
Figure 23-1. GPIO Block Diagram<br />
Interrupt<br />
Controller<br />
Power Manager<br />
Embedded<br />
Peripheral<br />
Configuration<br />
Interface<br />
GPIO Interrupt<br />
Request<br />
CLK_GPIO<br />
Pin Control<br />
Signals<br />
General Purpose<br />
Input/Output - GPIO<br />
PIN<br />
PIN<br />
PIN<br />
PIN<br />
PIN<br />
MCU<br />
I/O<br />
Pins<br />
454
23.4 I/O Lines Description<br />
Pin Name Description Type<br />
GPIOn GPIO pin n Digital<br />
32117D–AVR-01/12<br />
<strong>AT32UC3C</strong><br />
23.5 Product Dependencies<br />
In order to use this module, other parts of the system must be configured correctly, as described<br />
below.<br />
23.5.1 Power Management<br />
If the CPU enters a sleep mode that disables clocks used by the GPIO, the GPIO will stop functioning<br />
and resume operation after the system wakes up from sleep mode.<br />
23.5.2 Clocks<br />
23.5.3 Interrupts<br />
If a peripheral function is configured for a GPIO pin, the peripheral will be able to control the<br />
GPIO pin even if the GPIO clock is stopped.<br />
The GPIO is connected to a Peripheral Bus clock (CLK_GPIO). This clock is generated by the<br />
Power Manager. CLK_GPIO is enabled at reset, and can be disabled by writing to the Power<br />
Manager. CLK_GPIO must be enabled in order to access the configuration registers of the GPIO<br />
or to use the GPIO interrupts. After configuring the GPIO, the CLK_GPIO can be disabled by<br />
writing to the Power Manager if interrupts are not used.<br />
If the CPU Local Bus is used to access the configuration interface of the GPIO, the CLK_GPIO<br />
must be equal to the CPU clock to avoid data loss.<br />
The GPIO interrupt request lines are connected to the interrupt controller. Using the GPIO interrupts<br />
requires the interrupt controller to be programmed first.<br />
23.5.4 Debug Operation<br />
When an external debugger forces the CPU into debug mode, the GPIO continues normal operation.<br />
If the GPIO is configured in a way that requires it to be periodically serviced by the CPU<br />
through interrupts or similar, improper operation or data loss may result during debugging.<br />
455
32117D–AVR-01/12<br />
<strong>AT32UC3C</strong><br />
23.6 Functional Description<br />
The GPIO controls the I/O pins of the microcontroller. The control logic associated with each pin<br />
is shown in the figure below.<br />
Figure 23-2. Overview of the GPIO<br />
Periph. Func. A<br />
Periph.Func. B<br />
Periph. Func. C<br />
....<br />
PMRn<br />
ODER<br />
Output<br />
Output<br />
Enable<br />
Input<br />
GPER<br />
OVR<br />
PVR<br />
Glitch Filter<br />
1<br />
0<br />
0<br />
1<br />
PUER*<br />
GPIO_ODMER<br />
OSRRn* Drive strength and slew rate control<br />
ODCRn*<br />
GFER<br />
0<br />
1<br />
STER*<br />
Edge Detector<br />
*) Register value is overrided if a peripheral function that<br />
support this function is enabled<br />
IMR1<br />
IMR0<br />
PDER*<br />
IER<br />
0<br />
1<br />
0<br />
1<br />
Schmitt trigger<br />
1<br />
0<br />
IFR<br />
Pullup,<br />
Pulldown and<br />
buskeeper<br />
PIN<br />
Interrupt Request<br />
456
23.6.1 Basic Operation<br />
32117D–AVR-01/12<br />
<strong>AT32UC3C</strong><br />
23.6.1.1 Module Configuration<br />
The GPIO user interface registers are organized into ports and each port controls 32 different<br />
GPIO pins. Most of the registers supports bit wise access operations such as set, clear and toggle<br />
in addition to the standard word access. For details regarding interface registers, refer to<br />
Section 23.7.<br />
23.6.1.2 Available Features<br />
The GPIO features implemented are device dependent, and not all functions are implemented<br />
on all pins. The user must refer to the Module Configuration section and the GPIO Function Multiplexing<br />
section in the Package and Pinout chapter for the device specific settings used in the<br />
<strong>AT32UC3C</strong>.<br />
23.6.1.3 Inputs<br />
Device specific settings includes:<br />
Number of GPIO pins<br />
Functions implemented on each pin<br />
Peripheral function(s) multiplexed on each GPIO pin<br />
Reset state of registers<br />
The level on each GPIO pin can be read through the Pin Value Register (PVR). This register<br />
indicates the level of the GPIO pins regardless of the pins being driven by the GPIO or by an<br />
external component. Note that due to power saving measures, the PVR register will only be<br />
updated when the corresponding bit in GPER is one or if an interrupt is enabled for the pin, i.e.<br />
IER is one for the corresponding pin.<br />
23.6.1.4 Output Control<br />
When the GPIO pin is assigned to a peripheral function, i.e. the corresponding bit in GPER is<br />
zero, the peripheral determines whether the pin is driven or not.<br />
When the GPIO pin is controlled by the GPIO, the value of Output Driver Enable Register<br />
(ODER) determines whether the pin is driven or not. When a bit in this register is one, the corresponding<br />
GPIO pin is driven by the GPIO. When the bit is zero, the GPIO does not drive the pin.<br />
The level driven on a GPIO pin can be determined by writing the value to the corresponding bit<br />
in the Output Value Register (OVR).<br />
23.6.1.5 Peripheral Muxing<br />
The GPIO allows a single GPIO pin to be shared by multiple peripheral pins and the GPIO itself.<br />
Peripheral pins sharing the same GPIO pin are arranged into peripheral functions that can be<br />
selected one at a time. Peripheral functions are configured by writing the selected function value<br />
to the Peripheral Mux Registers (PMRn). To allow a peripheral pin access to the shared GPIO<br />
pin, GPIO control must be disabled for that pin, i.e. the corresponding bit in GPER must read<br />
zero.<br />
A peripheral function value is set by writing bit zero to PMR0 and bit one to the same index position<br />
in PMR1 and so on. In a system with 4 peripheral functions A,B,C, and D, peripheral<br />
function C for GPIO pin four is selected by writing a zero to bit four in PMR0 and a one to the<br />
same bit index in PMR1. Refer to the GPIO Function Multiplexing chapter for details regarding<br />
pin function configuration for each GPIO pin.<br />
457
23.6.2 Advanced Operation<br />
32117D–AVR-01/12<br />
<strong>AT32UC3C</strong><br />
23.6.2.1 Peripheral I/O Pin Control<br />
When a GPIO pin is assigned to a peripheral function, i.e. the corresponding bit in GPER is zero,<br />
output and output enable is controlled by the selected peripheral pin. In addition the peripheral<br />
may control some or all of the other GPIO pin functions listed in Table 23-1, if the peripheral supports<br />
those features. All pin features not controlled by the selected peripheral is controlled by the<br />
GPIO.<br />
Refer to the Module Configuration section for details regarding implemented GPIO pin functions<br />
and to the Peripheral chapter for details regarding I/O pin function control.<br />
Table 23-1. I/O Pin function Control<br />
Function name GPIO mode Peripheral mode<br />
Output OVR Peripheral<br />
Output enable ODER Peripheral<br />
Pull-up PUER Peripheral if supported, else GPIO<br />
Pull-down PDER Peripheral if supported, else GPIO<br />
Drive strength ODCRn Peripheral if supported, else GPIO<br />
23.6.2.2 Pull-up Resistor, Pull-down Resistor Control<br />
Pull-up and pull-down can be configured for each GPIO pin. Pull-up allows the pin and any connected<br />
net to be pulled up to VDD if the net is not driven. Pull-down pulls the net to GND.<br />
Pull-up and pull-down are useful for detecting if a pin is unconnected or if a mechanical button is<br />
pressed, for various communication protocols and to keep unconnected pins from floating.<br />
Pull-up can be enabled and disabled by writing a one and a zero respectively to the corresponding<br />
bit in the Pull-up Enable Register (PUER). Pull-down can be enabled and disabled by writing<br />
a one and a zero respectively to the corresponding bit in the Pull-down Enable Register (PDER).<br />
23.6.2.3 Output Pin Timings<br />
Figure 23-3 shows the timing of the GPIO pin when writing to the Output Value Register (OVR).<br />
The same timing applies when performing a ‘set’ or ‘clear’ access, i.e. writing to OVRS or<br />
OVRC. The timing of PVR is also shown.<br />
Figure 23-3. Output Pin Timings<br />
CLK_GPIO<br />
Write OVR to 1<br />
Write OVR to 0<br />
OVR / I/O Line<br />
PVR<br />
PB Access<br />
PB Access<br />
458
32117D–AVR-01/12<br />
<strong>AT32UC3C</strong><br />
23.6.2.4 Pin Output Driver Control<br />
The GPIO has registers for controlling output drive properties of each pin, such as output driving<br />
capability.<br />
23.6.2.5 Interrupts<br />
The driving capability is controlled by the Output Driving Capability Registers (ODCRn).<br />
The GPIO can be configured to generate an interrupt when it detects a change on a GPIO pin.<br />
Interrupts on a pin are enabled by writing a one to the corresponding bit in the Interrupt Enable<br />
Register (IER). The module can be configured to generate an interrupt whenever a pin changes<br />
value, or only on rising or falling edges. This is controlled by the Interrupt Mode Registers<br />
(IMRn). Interrupts on a pin can be enabled regardless of the GPIO pin being controlled by the<br />
GPIO or assigned to a peripheral function.<br />
An interrupt can be generated on each GPIO pin. These interrupt generators are further grouped<br />
into groups of eight and connected to the interrupt controller. An interrupt request from any of the<br />
GPIO pin generators in the group will result in an interrupt request from that group to the interrupt<br />
controller if the corresponding bit for the GPIO pin in the IER is set. By grouping interrupt<br />
generators into groups of eight, four different interrupt handlers can be installed for each GPIO<br />
port.<br />
The Interrupt Flag Register (IFR) can be read by software to determine which pin(s) caused the<br />
interrupt. The interrupt flag must be manually cleared by writing a zero to the corresponding bit<br />
in IFR.<br />
GPIO interrupts will only be generated when CLK_GPIO is enabled.<br />
23.6.2.6 Input Glitch Filter<br />
Input glitch filters can be enabled on each GPIO pin. When the glitch filter is enabled, a glitch<br />
with duration of less than 1 CLK_GPIO cycle is automatically rejected, while a pulse with duration<br />
of 2 CLK_GPIO cycles or more is accepted. For pulse durations between 1 and 2<br />
CLK_GPIO cycles, the pulse may or may not be taken into account, depending on the precise<br />
timing of its occurrence. Thus for a pulse to be guaranteed visible it must exceed 2 CLK_GPIO<br />
cycles, whereas for a glitch to be reliably filtered out, its duration must not exceed 1 CLK_GPIO<br />
cycle. The filter introduces 2 clock cycles latency.<br />
The glitch filters are controlled by the Glitch Filter Enable Register (GFER). When a bit in GFER<br />
is one, the glitch filter on the corresponding pin is enabled. The glitch filter affects only interrupt<br />
inputs. Inputs to peripherals or the value read through PVR are not affected by the glitch filters.<br />
23.6.2.7 Interrupt Timings<br />
Figure 23-4 shows the timing for rising edge (or pin-change) interrupts when the glitch filter is<br />
disabled. For the pulse to be registered, it must be sampled at the rising edge of the clock. In this<br />
example, this is not the case for the first pulse. The second pulse is sampled on a rising edge<br />
and will trigger an interrupt request.<br />
459
32117D–AVR-01/12<br />
Figure 23-4. Interrupt Timing with Glitch Filter Disabled<br />
CLK_GPIO<br />
Pin Level<br />
IFR<br />
<strong>AT32UC3C</strong><br />
Figure 23-5 shows the timing for rising edge (or pin-change) interrupts when the glitch filter is<br />
enabled. For the pulse to be registered, it must be sampled on two subsequent rising edges. In<br />
the example, the first pulse is rejected while the second pulse is accepted and causes an interrupt<br />
request.<br />
Figure 23-5. Interrupt Timing with Glitch Filter Enabled<br />
CLK_GPIO<br />
Pin Level<br />
IFR<br />
23.6.2.8 CPU Local Bus<br />
The CPU Local Bus can be used for application where low latency read and write access to the<br />
Output Value Register (OVR) and Output Drive Enable Register (ODER) is required. The CPU<br />
Local Bus allows the CPU to configure the mentioned GPIO registers directly, bypassing the<br />
shared Peripheral Bus (PB).<br />
To avoid data loss when using the CPU Local Bus, the CLK_GPIO must run at the same frequency<br />
as the CLK_CPU. See Section 23.5.2 for details.<br />
The CPU Local Bus is mapped to a different base address than the GPIO but the OVER and<br />
ODER offsets are the same. See the CPU Local Bus Mapping section in the Memories chapter<br />
for details.<br />
460
32117D–AVR-01/12<br />
<strong>AT32UC3C</strong><br />
23.7 User Interface<br />
The GPIO controller manages all the GPIO pins on the 32-bit AVR microcontroller. The pins are<br />
managed as 32-bit ports that are configurable through a Peripheral Bus (PB) interface. Each<br />
port has a set of configuration registers. The overall memory map of the GPIO is shown below.<br />
The number of pins and hence the number of ports is product specific.<br />
23.7.1 Access Types<br />
Figure 23-6. Port Configuration Registers<br />
Port 0 Configuration Registers<br />
Port 1 Configuration Registers<br />
Port 2 Configuration Registers<br />
….<br />
Port n Configuration Registers<br />
In the peripheral muxing table in the Package and Pinout chapter each GPIO pin has a unique<br />
number. Note that the PA, PB, PC, and PX ports do not necessarily directly correspond to the<br />
GPIO ports. To find the corresponding port and pin the following formulas can be used:<br />
GPIO port = floor((GPIO number) / 32), example: floor((36)/32) = 1<br />
GPIO pin = GPIO number % 32, example: 36 % 32 = 4<br />
0x0000<br />
0x0200<br />
0x0400<br />
n*0x200<br />
Table 23-2 shows the configuration registers for one port. Addresses shown are relative to the<br />
port address offset. The specific address of a configuration register is found by adding the register<br />
offset and the port offset to the GPIO start address. One bit in each of the configuration<br />
registers corresponds to a GPIO pin.<br />
Most configuration register can be accessed in four different ways. The first address location can<br />
be used to write the register directly. This address can also be used to read the register value.<br />
The following addresses facilitate three different types of write access to the register. Performing<br />
a “set” access, all bits written to one will be set. Bits written to zero will be unchanged by the<br />
operation. Performing a “clear” access, all bits written to one will be cleared. Bits written to zero<br />
will be unchanged by the operation. Finally, a toggle access will toggle the value of all bits writ-<br />
461
32117D–AVR-01/12<br />
<strong>AT32UC3C</strong><br />
ten to one. Again all bits written to zero remain unchanged. Note that for some registers (e.g.<br />
IFR), not all access methods are permitted.<br />
Note that for ports with less than 32 bits, the corresponding control registers will have unused<br />
bits. This is also the case for features that are not implemented for a specific pin. Writing to an<br />
unused bit will have no effect. Reading unused bits will always return 0.<br />
23.7.2 Configuration Protection<br />
In order to protect the configuration of individual GPIO pins from software failure, configuration<br />
bits for individual GPIO pins may be locked by writing a one to the corresponding bit in the LOCK<br />
register. While this bit is one, any write to the same bit position in any lockable GPIO register<br />
using the Peripheral Bus (PB) will not have an effect. The CPU Local Bus is not checked and<br />
thus allowed to write to all bits in a CPU Local Bus mapped register no mather the LOCK value.<br />
The registers required to clear bits in the LOCK register are protected by the access protection<br />
mechanism described in Section 23.7.3, ensuring the LOCK mechanism itself is robust against<br />
software failure.<br />
23.7.3 Access Protection<br />
In order to protect critical registers from software failure, some registers are protected by a key<br />
protection mechanism. These registers can only be changed by first writing the UNLOCK register,<br />
then the protected register. Protected registers are indicated in Table 23-2. The UNLOCK<br />
register contains a key field which must always be written to 0xAA, and an OFFSET field corresponding<br />
to the offset of the register to be modified.<br />
Table 23-2. GPIO Register Memory Map<br />
The next write operation resets the UNLOCK register, so if the register is to be modified again,<br />
the UNLOCK register must be written again.<br />
Attempting to write to a protected register without first writing the UNLOCK register results in the<br />
write operation being discarded, and the Access Error bit in the Access Status Register<br />
(ASR.AE) will be set.<br />
Offset Register Function Register Name Access Reset<br />
0x000 GPIO Enable Register Read/Write GPER Read/Write - (1)<br />
Config.<br />
Protection<br />
Access<br />
Protection<br />
Y N<br />
0x004 GPIO Enable Register Set GPERS Write-only Y N<br />
0x008 GPIO Enable Register Clear GPERC Write-only Y N<br />
0x00C GPIO Enable Register Toggle GPERT Write-only Y N<br />
0x010 Peripheral Mux Register 0 Read/Write PMR0 Read/Write - (1)<br />
Y N<br />
0x014 Peripheral Mux Register 0 Set PMR0S Write-only Y N<br />
0x018 Peripheral Mux Register 0 Clear PMR0C Write-only Y N<br />
0x01C Peripheral Mux Register 0 Toggle PMR0T Write-only Y N<br />
0x020 Peripheral Mux Register 1 Read/Write PMR1 Read/Write - (1) Y N<br />
0x024 Peripheral Mux Register 1 Set PMR1S Write-only Y N<br />
0x028 Peripheral Mux Register 1 Clear PMR1C Write-only Y N<br />
462
Table 23-2. GPIO Register Memory Map<br />
Offset Register Function Register Name Access Reset<br />
32117D–AVR-01/12<br />
<strong>AT32UC3C</strong><br />
0x02C Peripheral Mux Register 1 Toggle PMR1T Write-only Y N<br />
0x030 Peripheral Mux Register 2 Read/Write PMR2 Read/Write - (1)<br />
Y N<br />
0x034 Peripheral Mux Register 2 Set PMR2S Write-only Y N<br />
0x038 Peripheral Mux Register 2 Clear PMR2C Write-only Y N<br />
0x03C Peripheral Mux Register 2 Toggle PMR2T Write-only Y N<br />
0x040 Output Driver Enable Register Read/Write ODER Read/Write - (1)<br />
Y N<br />
0x044 Output Driver Enable Register Set ODERS Write-only Y N<br />
0x048 Output Driver Enable Register Clear ODERC Write-only Y N<br />
0x04C Output Driver Enable Register Toggle ODERT Write-only Y N<br />
0x050 Output Value Register Read/Write OVR Read/Write - (1)<br />
N N<br />
0x054 Output Value Register Set OVRS Write-only N N<br />
0x058 Output Value Register Clear OVRC Write-only N N<br />
0x05c Output Value Register Toggle OVRT Write-only N N<br />
0x060 Pin Value Register Read PVR Read-only<br />
Depe<br />
nding<br />
on pin<br />
states<br />
Config.<br />
Protection<br />
Access<br />
Protection<br />
N N<br />
0x064 Pin Value Register - - - N N<br />
0x068 Pin Value Register - - - N N<br />
0x06c Pin Value Register - - - N N<br />
0x070 Pull-up Enable Register Read/Write PUER Read/Write - (1)<br />
Y N<br />
0x074 Pull-up Enable Register Set PUERS Write-only Y N<br />
0x078 Pull-up Enable Register Clear PUERC Write-only Y N<br />
0x07C Pull-up Enable Register Toggle PUERT Write-only Y N<br />
0x080 Pull-down Enable Register Read/Write PDER Read/Write (1) Y N<br />
0x084 Pull-down Enable Register Set PDERS Write-only Y N<br />
0x088 Pull-down Enable Register Clear PDERC Write-only Y N<br />
0x08C Pull-down Enable Register Toggle PDERT Write-only Y N<br />
0x090 Interrupt Enable Register Read/Write IER Read/Write - (1) N N<br />
0x094 Interrupt Enable Register Set IERS Write-only N N<br />
0x098 Interrupt Enable Register Clear IERC Write-only N N<br />
0x09C Interrupt Enable Register Toggle IERT Write-only N N<br />
0x0A0 Interrupt Mode Register 0 Read/Write IMR0 Read/Write - (1) N N<br />
0x0A4 Interrupt Mode Register 0 Set IMR0S Write-only N N<br />
0x0A8 Interrupt Mode Register 0 Clear IMR0C Write-only N N<br />
0x0AC Interrupt Mode Register 0 Toggle IMR0T Write-only N N<br />
463
Table 23-2. GPIO Register Memory Map<br />
Offset Register Function Register Name Access Reset<br />
0x0B0 Interrupt Mode Register 1 Read/Write IMR1 Read/Write - (1)<br />
32117D–AVR-01/12<br />
<strong>AT32UC3C</strong><br />
N N<br />
0x0B4 Interrupt Mode Register 1 Set IMR1S Write-only N N<br />
0x0B8 Interrupt Mode Register 1 Clear IMR1C Write-only N N<br />
0x0BC Interrupt Mode Register 1 Toggle IMR1T Write-only N N<br />
0x0C0 Glitch Filter Enable Register Read/Write GFER Read/Write - (1)<br />
N N<br />
0x0C4 Glitch Filter Enable Register Set GFERS Write-only N N<br />
0x0C8 Glitch Filter Enable Register Clear GFERC Write-only N N<br />
0x0CC Glitch Filter Enable Register Toggle GFERT Write-only N N<br />
0x0D0 Interrupt Flag Register Read IFR Read-only - (1)<br />
N N<br />
0x0D4 Interrupt Flag Register - - - N N<br />
0x0D8 Interrupt Flag Register Clear IFRC Write-only N N<br />
0x0DC Interrupt Flag Register - - - N N<br />
0x100 Output Driving Capability Register 0 Read/Write ODCR0 Read/Write - (1)<br />
Y N<br />
0x104 Output Driving Capability Register 0 Set ODCR0S Write-only Y N<br />
0x108 Output Driving Capability Register 0 Clear ODCR0C Write-only Y N<br />
0x10C Output Driving Capability Register 0 Toggle ODCR0T Write-only Y N<br />
0x110 Output Driving Capability Register 1 Read ODCR1 Read/Write - (1)<br />
Y N<br />
0x114 Output Driving Capability Register 1 Set ODCR1S Write-only Y N<br />
0x118 Output Driving Capability Register 1 Clear ODCR1C Write-only Y N<br />
0x11C Output Driving Capability Register 1 Toggle ODCR1T Write-only Y N<br />
0x1A0 Lock Register Read/Write LOCK Read/Write - (1)<br />
N Y<br />
0x1A4 Lock Register Set LOCKS Write-only N N<br />
0x1A8 Lock Register Clear LOCKC Write-only N Y<br />
0x1AC Lock Register Toggle LOCKT Write-only N Y<br />
0x1E0 Unlock Register Read/Write UNLOCK Write-only N N<br />
0x1E4 Access Status Register Read/Write ASR Read/Write N<br />
0x1F8 Parameter Register Read PARAMETER Read-only - (1) N N<br />
0x1FC Version Register Read VERSION Read-only - (1)<br />
Config.<br />
Protection<br />
Access<br />
Protection<br />
N N<br />
Note: 1. The reset values for these registers are device specific. Please refer to the Module Configuration section at the end of this<br />
chapter.<br />
464
23.7.4 GPIO Enable Register<br />
Name: GPER<br />
Access: Read/Write, Set, Clear, Toggle<br />
Offset: 0x000, 0x004, 0x008, 0x00C<br />
Reset Value: -<br />
32117D–AVR-01/12<br />
<strong>AT32UC3C</strong><br />
31 30 29 28 27 26 25 24<br />
P31 P30 P29 P28 P27 P26 P25 P24<br />
23 22 21 20 19 18 17 16<br />
P23 P22 P21 P20 P19 P18 P17 P16<br />
15 14 13 12 11 10 9 8<br />
P15 P14 P13 P12 P11 P10 P9 P8<br />
7 6 5 4 3 2 1 0<br />
P7 P6 P5 P4 P3 P2 P1 P0<br />
P0-P31: GPIO Enable<br />
0: A peripheral function controls the corresponding pin.<br />
1: The GPIO controls the corresponding pin.<br />
465
23.7.5 Peripheral Mux Register 0<br />
Name: PMR0<br />
Access: Read/Write, Set, Clear, Toggle<br />
Offset: 0x010, 0x014, 0x018, 0x01C<br />
Reset Value: -<br />
32117D–AVR-01/12<br />
<strong>AT32UC3C</strong><br />
31 30 29 28 27 26 25 24<br />
P31 P30 P29 P28 P27 P26 P25 P24<br />
23 22 21 20 19 18 17 16<br />
P23 P22 P21 P20 P19 P18 P17 P16<br />
15 14 13 12 11 10 9 8<br />
P15 P14 P13 P12 P11 P10 P9 P8<br />
7 6 5 4 3 2 1 0<br />
P7 P6 P5 P4 P3 P2 P1 P0<br />
P0-31: Peripheral Multiplexer Select bit 0<br />
466
23.7.6 Peripheral Mux Register 1<br />
Name: PMR1<br />
Access: Read/Write, Set, Clear, Toggle<br />
Offset: 0x020, 0x024, 0x028, 0x02C<br />
Reset Value: -<br />
32117D–AVR-01/12<br />
<strong>AT32UC3C</strong><br />
31 30 29 28 27 26 25 24<br />
P31 P30 P29 P28 P27 P26 P25 P24<br />
23 22 21 20 19 18 17 16<br />
P23 P22 P21 P20 P19 P18 P17 P16<br />
15 14 13 12 11 10 9 8<br />
P15 P14 P13 P12 P11 P10 P9 P8<br />
7 6 5 4 3 2 1 0<br />
P7 P6 P5 P4 P3 P2 P1 P0<br />
P0-31: Peripheral Multiplexer Select bit 1<br />
467
23.7.7 Peripheral Mux Register 2<br />
Name: PMR2<br />
Access: Read/Write, Set, Clear, Toggle<br />
Offset: 0x030, 0x034, 0x038, 0x03C<br />
Reset Value: -<br />
32117D–AVR-01/12<br />
<strong>AT32UC3C</strong><br />
31 30 29 28 27 26 25 24<br />
P31 P30 P29 P28 P27 P26 P25 P24<br />
23 22 21 20 19 18 17 16<br />
P23 P22 P21 P20 P19 P18 P17 P16<br />
15 14 13 12 11 10 9 8<br />
P15 P14 P13 P12 P11 P10 P9 P8<br />
7 6 5 4 3 2 1 0<br />
P7 P6 P5 P4 P3 P2 P1 P0<br />
P0-31: Peripheral Multiplexer Select bit 2<br />
{PMR2, PMR1, PMR0} Selected Peripheral Function<br />
000 A<br />
001 B<br />
010 C<br />
011 D<br />
100 E<br />
101 F<br />
110 G<br />
111 H<br />
468
23.7.8 Output Driver Enable Register<br />
Name: ODER<br />
Access: Read/Write, Set, Clear, Toggle<br />
Offset: 0x040, 0x044, 0x048, 0x04C<br />
Reset Value: -<br />
32117D–AVR-01/12<br />
<strong>AT32UC3C</strong><br />
31 30 29 28 27 26 25 24<br />
P31 P30 P29 P28 P27 P26 P25 P24<br />
23 22 21 20 19 18 17 16<br />
P23 P22 P21 P20 P19 P18 P17 P16<br />
15 14 13 12 11 10 9 8<br />
P15 P14 P13 P12 P11 P10 P9 P8<br />
7 6 5 4 3 2 1 0<br />
P7 P6 P5 P4 P3 P2 P1 P0<br />
P0-31: Output Driver Enable<br />
0: The output driver is disabled for the corresponding pin.<br />
1: The output driver is enabled for the corresponding pin.<br />
469
23.7.9 Output Value Register<br />
Name: OVR<br />
Access: Read/Write, Set, Clear, Toggle<br />
Offset: 0x050, 0x054, 0x058, 0x05C<br />
Reset Value: -<br />
32117D–AVR-01/12<br />
<strong>AT32UC3C</strong><br />
31 30 29 28 27 26 25 24<br />
P31 P30 P29 P28 P27 P26 P25 P24<br />
23 22 21 20 19 18 17 16<br />
P23 P22 P21 P20 P19 P18 P17 P16<br />
15 14 13 12 11 10 9 8<br />
P15 P14 P13 P12 P11 P10 P9 P8<br />
7 6 5 4 3 2 1 0<br />
P7 P6 P5 P4 P3 P2 P1 P0<br />
P0-31: Output Value<br />
0: The value to be driven on the GPIO pin is 0.<br />
1: The value to be driven on the GPIO pin is 1.<br />
470
23.7.10 Pin Value Register<br />
Name: PVR<br />
Access: Read-only<br />
Offset: 0x060, 0x064, 0x068, 0x06C<br />
Reset Value: Depending on pin states<br />
32117D–AVR-01/12<br />
<strong>AT32UC3C</strong><br />
31 30 29 28 27 26 25 24<br />
P31 P30 P29 P28 P27 P26 P25 P24<br />
23 22 21 20 19 18 17 16<br />
P23 P22 P21 P20 P19 P18 P17 P16<br />
15 14 13 12 11 10 9 8<br />
P15 P14 P13 P12 P11 P10 P9 P8<br />
7 6 5 4 3 2 1 0<br />
P7 P6 P5 P4 P3 P2 P1 P0<br />
P0-31: Pin Value<br />
0: The GPIO pin is at level zero.<br />
1: The GPIO pin is at level one.<br />
Note that the level of a pin can only be read when the corresponding pin in GPER is one or interrupt is enabled for the pin.<br />
471
23.7.11 Pull-up Enable Register<br />
Name: PUER<br />
Access: Read/Write, Set, Clear, Toggle<br />
Offset: 0x070, 0x074, 0x078, 0x07C<br />
Reset Value: -<br />
32117D–AVR-01/12<br />
<strong>AT32UC3C</strong><br />
31 30 29 28 27 26 25 24<br />
P31 P30 P29 P28 P27 P26 P25 P24<br />
23 22 21 20 19 18 17 16<br />
P23 P22 P21 P20 P19 P18 P17 P16<br />
15 14 13 12 11 10 9 8<br />
P15 P14 P13 P12 P11 P10 P9 P8<br />
7 6 5 4 3 2 1 0<br />
P7 P6 P5 P4 P3 P2 P1 P0<br />
P0-31: Pull-up Enable<br />
Writing a zero to a bit in this register will disable pull-up on the corresponding pin.<br />
Writing a one to a bit in this register will enable pull-up on the corresponding pin.<br />
472
23.7.12 Pull-down Enable Register<br />
Name: PDER<br />
Access: Read/Write, Set, Clear, Toggle<br />
Offset: 0x080, 0x084, 0x088, 0x08C<br />
Reset Value: -<br />
32117D–AVR-01/12<br />
<strong>AT32UC3C</strong><br />
31 30 29 28 27 26 25 24<br />
P31 P30 P29 P28 P27 P26 P25 P24<br />
23 22 21 20 19 18 17 16<br />
P23 P22 P21 P20 P19 P18 P17 P16<br />
15 14 13 12 11 10 9 8<br />
P15 P14 P13 P12 P11 P10 P9 P8<br />
7 6 5 4 3 2 1 0<br />
P7 P6 P5 P4 P3 P2 P1 P0<br />
P0-31: Pull-down Enable<br />
{PUER, PDER} Selected Function<br />
00 Disabled<br />
01 Pull-down enabled<br />
10 Pull-up enabled<br />
11 Buskeeper enabled<br />
473
23.7.13 Interrupt Enable Register<br />
Name: IER<br />
Access: Read/Write, Set, Clear, Toggle<br />
Offset: 0x090, 0x094, 0x098, 0x09C<br />
Reset Value: -<br />
32117D–AVR-01/12<br />
<strong>AT32UC3C</strong><br />
31 30 29 28 27 26 25 24<br />
P31 P30 P29 P28 P27 P26 P25 P24<br />
23 22 21 20 19 18 17 16<br />
P23 P22 P21 P20 P19 P18 P17 P16<br />
15 14 13 12 11 10 9 8<br />
P15 P14 P13 P12 P11 P10 P9 P8<br />
7 6 5 4 3 2 1 0<br />
P7 P6 P5 P4 P3 P2 P1 P0<br />
P0-31: Interrupt Enable<br />
0: Interrupt is disabled for the corresponding pin.<br />
1; Interrupt is enabled for the corresponding pin.<br />
474
23.7.14 Interrupt Mode Register 0<br />
Name: IMR0<br />
Access: Read/Write, Set, Clear, Toggle<br />
Offset: 0x0A0, 0x0A4, 0x0A8, 0x0AC<br />
Reset Value: -<br />
32117D–AVR-01/12<br />
<strong>AT32UC3C</strong><br />
31 30 29 28 27 26 25 24<br />
P31 P30 P29 P28 P27 P26 P25 P24<br />
23 22 21 20 19 18 17 16<br />
P23 P22 P21 P20 P19 P18 P17 P16<br />
15 14 13 12 11 10 9 8<br />
P15 P14 P13 P12 P11 P10 P9 P8<br />
7 6 5 4 3 2 1 0<br />
P7 P6 P5 P4 P3 P2 P1 P0<br />
P0-31: Interrupt Mode Bit 0<br />
475
23.7.15 Interrupt Mode Register 1<br />
Name: IMR1<br />
Access: Read/Write, Set, Clear, Toggle<br />
Offset: 0x0B0, 0x0B4, 0x0B8, 0x0BC<br />
Reset Value: -<br />
32117D–AVR-01/12<br />
<strong>AT32UC3C</strong><br />
31 30 29 28 27 26 25 24<br />
P31 P30 P29 P28 P27 P26 P25 P24<br />
23 22 21 20 19 18 17 16<br />
P23 P22 P21 P20 P19 P18 P17 P16<br />
15 14 13 12 11 10 9 8<br />
P15 P14 P13 P12 P11 P10 P9 P8<br />
7 6 5 4 3 2 1 0<br />
P7 P6 P5 P4 P3 P2 P1 P0<br />
P0-31: Interrupt Mode Bit 1<br />
{IMR1, IMR0} Interrupt Mode<br />
00 Pin Change<br />
01 Rising Edge<br />
10 Falling Edge<br />
11 Reserved<br />
476
23.7.16 Glitch Filter Enable Register<br />
Name: GFER<br />
Access: Read/Write, Set, Clear, Toggle<br />
Offset: 0x0C0, 0x0C4, 0x0C8, 0x0CC<br />
Reset Value: -<br />
32117D–AVR-01/12<br />
<strong>AT32UC3C</strong><br />
31 30 29 28 27 26 25 24<br />
P31 P30 P29 P28 P27 P26 P25 P24<br />
23 22 21 20 19 18 17 16<br />
P23 P22 P21 P20 P19 P18 P17 P16<br />
15 14 13 12 11 10 9 8<br />
P15 P14 P13 P12 P11 P10 P9 P8<br />
7 6 5 4 3 2 1 0<br />
P7 P6 P5 P4 P3 P2 P1 P0<br />
P0-31: Glitch Filter Enable<br />
0: Glitch filter is disabled for the corresponding pin.<br />
1: Glitch filter is enabled for the corresponding pin.<br />
NOTE! The value of this register should only be changed when the corresponding bit in IER is zero. Updating GFER while<br />
interrupt on the corresponding pin is enabled can cause an unintentional interrupt to be triggered.<br />
477
23.7.17 Interrupt Flag Register<br />
Name: IFR<br />
Access: Read, Clear<br />
Offset: 0x0D0, 0x0D8<br />
Reset Value: -<br />
32117D–AVR-01/12<br />
<strong>AT32UC3C</strong><br />
31 30 29 28 27 26 25 24<br />
P31 P30 P29 P28 P27 P26 P25 P24<br />
23 22 21 20 19 18 17 16<br />
P23 P22 P21 P20 P19 P18 P17 P16<br />
15 14 13 12 11 10 9 8<br />
P15 P14 P13 P12 P11 P10 P9 P8<br />
7 6 5 4 3 2 1 0<br />
P7 P6 P5 P4 P3 P2 P1 P0<br />
P0-31: Interrupt Flag<br />
0: No interrupt condition has been detected on the corresponding pin.<br />
1: An interrupt condition has been detected on the corresponding pin.<br />
The number of interrupt request lines depends on the number of GPIO pins on the MCU. Refer to the product specific data for<br />
details. Note also that a bit in the Interrupt Flag register is only valid if the corresponding bit in IER is one.<br />
478
23.7.18 Output Driving Capability Register 0<br />
Name: ODCR0<br />
Access: Read/Write, Set, Clear, Toggle<br />
Offset: 0x100, 0x104, 0x108, 0x10C<br />
Reset Value: -<br />
32117D–AVR-01/12<br />
<strong>AT32UC3C</strong><br />
31 30 29 28 27 26 25 24<br />
P31 P30 P29 P28 P27 P26 P25 P24<br />
23 22 21 20 19 18 17 16<br />
P23 P22 P21 P20 P19 P18 P17 P16<br />
15 14 13 12 11 10 9 8<br />
P15 P14 P13 P12 P11 P10 P9 P8<br />
7 6 5 4 3 2 1 0<br />
P7 P6 P5 P4 P3 P2 P1 P0<br />
P0-31: Output Driving Capability Register Bit 0<br />
479
23.7.19 Output Driving Capability Register 1<br />
Name: ODCR1<br />
Access: Read/Write, Set, Clear, Toggle<br />
Offset: 0x110, 0x114, 0x118, 0x11C<br />
Reset Value: -<br />
32117D–AVR-01/12<br />
<strong>AT32UC3C</strong><br />
31 30 29 28 27 26 25 24<br />
P31 P30 P29 P28 P27 P26 P25 P24<br />
23 22 21 20 19 18 17 16<br />
P23 P22 P21 P20 P19 P18 P17 P16<br />
15 14 13 12 11 10 9 8<br />
P15 P14 P13 P12 P11 P10 P9 P8<br />
7 6 5 4 3 2 1 0<br />
P7 P6 P5 P4 P3 P2 P1 P0<br />
P0-31: Output Driving Capability Bit 1<br />
{ODCR1, ODCR0} Interrupt Mode<br />
00 Lowest drive strength<br />
01 ...<br />
10 ...<br />
11 Highest drive strength<br />
For the actual drive strength of the pin, please refer to the Electrical Characteristics chapter.<br />
480
23.7.20 Lock Register<br />
Name: LOCK<br />
Access: Read/Write, Set, Clear, Toggle<br />
Offset: 0x1A0, 0x1A4, 0x1A8, 0x1AC<br />
Reset Value: -<br />
32117D–AVR-01/12<br />
<strong>AT32UC3C</strong><br />
31 30 29 28 27 26 25 24<br />
P31 P30 P29 P28 P27 P26 P25 P24<br />
23 22 21 20 19 18 17 16<br />
P23 P22 P21 P20 P19 P18 P17 P16<br />
15 14 13 12 11 10 9 8<br />
P15 P14 P13 P12 P11 P10 P9 P8<br />
7 6 5 4 3 2 1 0<br />
P7 P6 P5 P4 P3 P2 P1 P0<br />
P0-31: Lock State<br />
0: Pin is unlocked. The corresponding bit can be changed in any GPIO register for this port.<br />
1: Pin is locked. The corresponding bit can not be changed in any GPIO register for this port.<br />
The value of LOCK determines which bits are locked in the lockable registers.<br />
The LOCK, LOCKC, and LOCKT registers are protected, which means they can only be written immediately after a write to the<br />
UNLOCK register with the proper KEY and OFFSET.<br />
LOCKS is not protected, and can be written at any time.<br />
481
23.7.21 Unlock Register<br />
Name: UNLOCK<br />
Access: Write-only<br />
Offset: 0x1E0<br />
Reset Value: -<br />
32117D–AVR-01/12<br />
<strong>AT32UC3C</strong><br />
31 30 29 28 27 26 25 24<br />
KEY<br />
23 22 21 20 19 18 17 16<br />
- - - - - - - -<br />
15 14 13 12 11 10 9 8<br />
- - - - - - OFFSET<br />
7 6 5 4 3 2 1 0<br />
OFFSET<br />
OFFSET: Register Offset<br />
This field must be written with the offset value of the LOCK, LOCKC or LOCKT register to unlock. This offset must also include<br />
the port offset for the register to unlock. LOCKS can not be locked so no unlock is required before writing to this register.<br />
KEY: Unlocking Key<br />
This bitfield must be written to 0xAA for a write to this register to have an effect.<br />
This register always reads as zero.<br />
482
23.7.22 Access Status Register<br />
Name: ASR<br />
Access: Read/Write<br />
Offset: 0x1E4<br />
Reset Value: -<br />
32117D–AVR-01/12<br />
<strong>AT32UC3C</strong><br />
31 30 29 28 27 26 25 24<br />
- - - - - - - -<br />
23 22 21 20 19 18 17 16<br />
- - - - - - - -<br />
15 14 13 12 11 10 9 8<br />
- - - - - - - -<br />
7 6 5 4 3 2 1 0<br />
- - - - - - - AE<br />
AE: Access Error<br />
This bit is set when a write to a locked register occurs.<br />
This bit can be written to 0 by software.<br />
483
23.7.23 Parameter Register<br />
Name: PARAMETER<br />
Access Type: Read-only<br />
Offset: 0x1F8<br />
Reset Value: -<br />
32117D–AVR-01/12<br />
<strong>AT32UC3C</strong><br />
31 30 29 28 27 26 25 24<br />
PARAMETER<br />
23 22 21 20 19 18 17 16<br />
PARAMETER<br />
15 14 13 12 11 10 9 8<br />
PARAMETER<br />
7 6 5 4 3 2 1 0<br />
PARAMETER<br />
PARAMETER:<br />
0: The corresponding pin is not implemented in this GPIO port.<br />
1: The corresponding pin is implemented in this GPIO port.<br />
There is one PARAMETER register per GPIO port. Each bit in the Parameter Register indicates whether the corresponding<br />
GPER bit is implemented.<br />
484
23.7.24 Version Register<br />
Name: VERSION<br />
Access Type: Read-only<br />
Offset: 0x1FC<br />
Reset Value: -<br />
32117D–AVR-01/12<br />
<strong>AT32UC3C</strong><br />
31 30 29 28 27 26 25 24<br />
- - - - - - - -<br />
23 22 21 20 19 18 17 16<br />
- - - - VARIANT<br />
15 14 13 12 11 10 9 8<br />
- - - - VERSION[11:8]<br />
7 6 5 4 3 2 1 0<br />
VERSION[7:0]<br />
VARIANT: Variant Number<br />
Reserved. No functionality associated.<br />
VERSION: Version Number<br />
Version number of the module. No functionality associated.<br />
485
32117D–AVR-01/12<br />
<strong>AT32UC3C</strong><br />
23.8 Module Configuration<br />
The specific configuration for each GPIO instance is listed in the following tables. The module<br />
bus clocks listed here are connected to the system bus clocks. Refer to the Power Manager<br />
chapter for details.<br />
Table 23-3. Module Configuration<br />
Feature GPIO<br />
Number of GPIO ports 4<br />
Number of peripheral functions 4<br />
Table 23-4. Implemented Pin Functions<br />
Pin Function Implemented Notes<br />
Pull-up Yes Controlled by PUER or peripheral<br />
Pull-down Yes Controlled by PDER<br />
Drive strength Yes Writing to ODCR0 control the drive strength of the pads<br />
Writing to ODCR1 has no effect<br />
Slew rate No OSRRn registers are not implemented<br />
Open Drain No ODMERn registers are not implemented<br />
Bus keeper No Setting {PUER, PDER} to 0x3 in a pin does not enable<br />
the bus keeper on this pin<br />
Table 23-5. Module Clock Name<br />
Module name Clock Name Description<br />
GPIO CLK_GPIO Peripheral Bus clock from the PBA clock domain<br />
The reset values for all GPIO registers are zero, with the following exceptions:<br />
Table 23-6. Register Reset Values<br />
Port Register Reset Value<br />
0 GPER 0x3FF9FFFF<br />
0 PMR0 0x00000001<br />
0 PMR1 - PMR2 0x00000000<br />
0 ODER - OVR 0x00000000<br />
0 PUER 0x00000001<br />
0 PDER 0x00000000<br />
0 IER - IMR0 - IMR1 - IFR 0x00000000<br />
0 GFER 0x3FF9FFFF<br />
0 ODCR0 0x00000000<br />
0 LOCK 0x00000000<br />
0 PARAMETER 0x3FF9FFFF<br />
486
32117D–AVR-01/12<br />
Table 23-6. Register Reset Values<br />
Port Register Reset Value<br />
0 VERSION 0x00000212<br />
1 GPER 0xFFFFFFFF<br />
1 PMR0 0x00000002<br />
1 PMR1 - PMR2 0x00000000<br />
1 ODER - OVR 0x00000000<br />
1 PUER - PDER 0x00000000<br />
1 IER - IMR0 - IMR1 - IFR 0x00000000<br />
1 GFER 0xFFFFFFFF<br />
1 ODCR0 0x00000000<br />
1 LOCK 0x00000000<br />
1 PARAMETER 0x3FFFFFFF<br />
1 VERSION 0x00000212<br />
2 GPER 0xFFFFFFFF<br />
2 PMR0 - PMR1 - PMR2 0x00000000<br />
2 ODER - OVR 0x00000000<br />
2 PUER - PDER 0x00000000<br />
2 IER - IMR0 - IMR1 - IFR 0x00000000<br />
2 GFER 0xFFFFFFFF<br />
2 ODCR0 0x00000000<br />
2 LOCK 0x00000000<br />
2 PARAMETER 0xFFFFFFFF<br />
2 VERSION 0x00000212<br />
3 GPER 0x7FFFFFFF<br />
3 PMR0 - PMR1 - PMR2 0x00000000<br />
3 ODER - OVR 0x00000000<br />
3 PUER - PDER 0x00000000<br />
3 IER - IMR0 - IMR1 - IFR 0x00000000<br />
3 GFER 0x7FFFFFFF<br />
3 ODCR0 0x00000000<br />
3 LOCK 0x00000000<br />
3 PARAMETER 0x7FFFFFFF<br />
3 VERSION 0x00000212<br />
<strong>AT32UC3C</strong><br />
487
24. Ethernet MAC (MACB)<br />
24.1 Features<br />
24.2 Overview<br />
32117D–AVR-01/12<br />
Rev: 1.1.2.6<br />
<strong>AT32UC3C</strong><br />
Compatible with IEEE Standard 802.3<br />
10 and 100 Mbit/s Operation<br />
Full- and Half-duplex Operation<br />
Statistics Counter Registers<br />
MII/RMII Interface to the Physical Layer<br />
Interrupt Generation to Signal Receive and Transmit Completion<br />
DMA Master on Receive and Transmit Channels<br />
Transmit and Receive FIFOs<br />
Automatic Pad and CRC Generation on Transmitted Frames<br />
Automatic Discard of Frames Received with Errors<br />
Address Checking Logic Supports Up to Four Specific 48-bit Addresses<br />
Supports Promiscuous Mode Where All Valid Received Frames are Copied to Memory<br />
Hash Matching of Unicast and Multicast Destination Addresses<br />
External Address Matching of Received Frames<br />
Physical Layer Management through MDIO Interface<br />
Half-duplex Flow Control by Forcing Collisions on Incoming Frames<br />
Full-duplex Flow Control with Recognition of Incoming Pause Frames and Hardware Generation<br />
of Transmitted Pause Frames<br />
Support for 802.1Q VLAN Tagging with Recognition of Incoming VLAN and Priority Tagged<br />
Frames<br />
Multiple Buffers per Receive and Transmit Frame<br />
Wake-on-LAN Support<br />
Jumbo Frames Up to 10240 bytes Supported<br />
The MACB module implements a 10/100 Ethernet MAC compatible with the IEEE 802.3 standard<br />
using an address checker, statistics and control registers, receive and transmit submodules,<br />
and a DMA interface.<br />
The address checker recognizes four specific 48-bit addresses and contains a 64-bit hash register<br />
for matching multicast and unicast addresses. It can recognize the broadcast address of all<br />
ones, copy all frames, and act on an external address match signal.<br />
The statistics register sub-module contains registers for counting various types of events associated<br />
with transmit and receive operations. These registers, along with the status words stored in<br />
the receive buffer list, enable software to generate network management statistics compatible<br />
with IEEE 802.3.<br />
488
24.3 Block Diagram<br />
32117D–AVR-01/12<br />
Figure 24-1. MACB Block Diagram<br />
<strong>AT32UC3C</strong><br />
24.4 Product Dependencies<br />
In order to use this module, other parts of the system must be configured correctly, as described<br />
below.<br />
24.4.1 I/O Lines<br />
The pins used for interfacing the MACB may be multiplexed with the I/O Controller lines. The<br />
programmer must first program the I/O Controller to assign the desired MACB pins to their<br />
peripheral function. If I/O lines of the MACB are not used by the application, they can be used for<br />
other purposes by the I/O Controller.<br />
24.4.2 Power Management<br />
If the CPU enters a sleep mode that disables clocks used by the MACB, the MACB will stop<br />
functioning and resume operation after the system wakes up from sleep mode.<br />
24.4.3 Clocks<br />
Peripheral Bus<br />
Slave<br />
High Speed Bus<br />
Master<br />
Register Interface<br />
DMA Interface<br />
RX FIFO TX FIFO<br />
Address Checker<br />
Statistics Registers<br />
Control Registers<br />
Ethernet Receive<br />
Ethernet Transmit<br />
To prevent bus errors the MACB operation must be terminated before entering sleep mode.<br />
MDIO<br />
MII/RMII<br />
The clocks for the MACB bus interface (CLK_MACB_PB/CLK_MACB_HSB) are generated by<br />
the Power Manager. These clocks are enabled at reset, and can be disabled in the Power Man-<br />
489
24.4.4 Interrupt<br />
32117D–AVR-01/12<br />
<strong>AT32UC3C</strong><br />
ager. It is recommended to disable the MACB before disabling the clocks, to avoid freezing the<br />
MACB in an undefined state.<br />
The synchronization module in the MACB requires that the bus clock (CLK_MACB_HSB) runs<br />
on at least the speed of the macb_tx/RX_CLK, which is 25MHz in 100Mbps, and 2.5MHZ in<br />
10Mbps in MII mode and 50MHz in 100Mbps, and 5MHZ in 10Mbps in RMII mode.<br />
The MACB interrupt request line is connected to the interrupt controller. Using the MACB interrupt<br />
requires the interrupt controller to be programmed first.<br />
24.4.5 Debug Operation<br />
When an external debugger forces the CPU into debug mode, the MACB continues normal<br />
operation. If the MACB is configured in a way that requires it to be periodically serviced by the<br />
CPU through interrupts or similar, improper operation or data loss may result during debugging.<br />
24.5 Functional Description<br />
The control registers drive the MDIO interface, setup DMA activity, start frame transmission and<br />
select modes of operation such as full or half-duplex.<br />
The receive sub-module checks for valid preamble, Frame Check Sequence (FCS), alignment<br />
and length, and presents received frames to the address checking sub-module and DMA<br />
interface.<br />
The transmit sub-module takes data from the DMA interface, adds preamble and, if necessary,<br />
pad and FCS, and transmits data according to the Carrier Sense Multiple Access with Collision<br />
Detect (CSMA/CD) protocol. The start of transmission is deferred if Carrier Sense (CRS) is<br />
active.<br />
If Collision (COL) becomes active during transmission, a jam sequence is asserted and the<br />
transmission is retried after a random back off. CRS and COL have no effect in full duplex mode.<br />
The DMA interface can access external memory through its High Speed Bus (HSB). It contains<br />
receive and transmit FIFOs for buffering frame data. It loads the transmit FIFO and empties the<br />
receive FIFO using HSB bus master operations. Received data is not sent to memory until the<br />
address checking logic has determined that the frame should be copied. Received or transmitted<br />
frames are stored in one or more buffers. Receive buffers have a fixed length of 128 bytes.<br />
Transmit buffers range in length between 0 and 2047 bytes, and up to 128 buffers are allowed<br />
per frame. The DMA interface manages the transmit and receive frame buffer queues. These<br />
queues can hold multiple frames.<br />
24.5.1 Memory Interface<br />
Frame data is transferred to and from the MACB by the DMA interface. All transfers are 32-bit<br />
words and may be single accesses or bursts of 2, 3 or 4 words. Burst accesses do not cross sixteen-byte<br />
boundaries. Bursts of 4 words are the default data transfer; single accesses or bursts<br />
of less than four words may be used to transfer data at the beginning or the end of a buffer.<br />
The DMA interface performs six types of operation on the bus. In order of priority, these are:<br />
1. Receive buffer manager write<br />
2. Receive buffer manager read<br />
490
24.5.2 FIFO<br />
32117D–AVR-01/12<br />
3. Transmit data DMA read<br />
4. Receive data DMA write<br />
5. Transmit buffer manager read<br />
6. Transmit buffer manager write<br />
FIFO depths are 124 bytes.<br />
<strong>AT32UC3C</strong><br />
Data is typically transferred in and out of the FIFOs in bursts of four words. In reception, a bus<br />
request is asserted when the FIFO contains four words and has space for three more. For transmission,<br />
a bus request is generated when there is space for four words, or when there is space<br />
for two words if the next transfer is only one or two words.<br />
Thus the bus latency is less than the time it takes to load the FIFO and transmit or receive three<br />
words (12 bytes) of data.<br />
At 100 Mbit/s, it takes 960 ns to transmit or receive 12 bytes of data. In addition, six PB clock<br />
cycles should be allowed for data to be loaded from the bus and to propagate through the<br />
FIFOs. For a 60 MHz PB clock this takes 100 ns, making the bus latency requirement 860 ns.<br />
24.5.3 Receive Buffers<br />
Received frames, optionally including CRC/FCS, are written to receive buffers stored in memory.<br />
Each receive buffer size is 128 bytes. The start location for each receive buffer is stored in<br />
memory in a list of receive buffer descriptors at a location pointed to by the receive buffer queue<br />
pointer register. The receive buffer start location is a word address. For the first buffer of a<br />
frame, the start location can be offset by up to three bytes depending on the value written to bits<br />
14 and 15 of the network configuration register. If the start location of the buffer is offset the<br />
available length of the first buffer of a frame is reduced by the corresponding number of bytes.<br />
Table 24-1. Receive Buffer Descriptor Entry<br />
Each list entry consists of two words, the first being the address of the receive buffer and the<br />
second being the receive status. If the length of a receive frame exceeds the buffer length, the<br />
status word for the used buffer is written with zeroes except for the “start of frame” bit and the<br />
offset field, if appropriate. Bit zero of the address field is written to one to show the buffer has<br />
been used. The receive buffer manager then reads the location of the next receive buffer and<br />
fills that with receive frame data. The final buffer descriptor status word contains the complete<br />
frame status. Refer to Table 24-1 for details of the receive buffer descriptor list.<br />
Bit Function<br />
31:2 Address of beginning of buffer<br />
Word 0<br />
1 Wrap - marks last descriptor in receive buffer descriptor list.<br />
0<br />
Ownership - needs to be zero for the MACB to write data to the receive buffer. The MACB sets this to one once it has<br />
successfully written a frame to memory.<br />
Software has to clear this bit before the buffer can be used again.<br />
31 Global all ones broadcast address detected<br />
30 Multicast hash match<br />
29 Unicast hash match<br />
Word 1<br />
491
Table 24-1. Receive Buffer Descriptor Entry (Continued)<br />
Bit Function<br />
28 External address match<br />
27 Reserved for future use<br />
26 Specific address register 1 match<br />
25 Specific address register 2 match<br />
24 Specific address register 3 match<br />
23 Specific address register 4 match<br />
22 Type ID match<br />
21 VLAN tag detected (i.e., type id of 0x8100)<br />
20 Priority tag detected (i.e., type id of 0x8100 and null VLAN identifier)<br />
19:17 VLAN priority (only valid if bit 21 is set)<br />
16 Concatenation format indicator (CFI) bit (only valid if bit 21 is set)<br />
15<br />
14<br />
13:12<br />
32117D–AVR-01/12<br />
<strong>AT32UC3C</strong><br />
End of frame - when set the buffer contains the end of a frame. If end of frame is not set, then the only other valid status<br />
are bits 12, 13 and 14.<br />
Start of frame - when set the buffer contains the start of a frame. If both bits 15 and 14 are set, then the buffer contains a<br />
whole frame.<br />
Receive buffer offset - indicates the number of bytes by which the data in the first buffer is offset from the word address.<br />
Updated with the current values of the network configuration register. If jumbo frame mode is enabled through bit 3 of the<br />
network configuration register, then bits 12 and 13 of the receive buffer descriptor entry are used to indicate bits 12 and 13<br />
of the frame length.<br />
11:0 Length of frame including FCS (if selected). Bits 12 and 13 are also used if jumbo frame mode is selected.<br />
To receive frames, the buffer descriptors must be initialized by writing the right address to bits 2<br />
through 31in the first word of each list entry. Bit zero must be written with zero. Bit one is the<br />
wrap bit and indicates the last entry in the list.<br />
The start location of the receive buffer descriptor list must be written to the receive buffer queue<br />
pointer register before setting the receive enable bit in the network control register to enable<br />
receive. As soon as the receive sub-module starts writing received frame data to the receive<br />
FIFO, the receive buffer manager reads the first receive buffer location pointed to by the receive<br />
buffer queue pointer register.<br />
If the filter sub-module indicates that the frame should be copied to memory, the receive data<br />
DMA operation starts writing data into the receive buffer. If an error occurs, the buffer is recovered.<br />
If the current buffer pointer has its wrap bit set or is the 1024 th descriptor, the next receive<br />
buffer location is read from the beginning of the receive descriptor list. Otherwise, the next<br />
receive buffer location is read from the next word in memory.<br />
There is an 11-bit counter to count out the 2048 word locations of a maximum length, receive<br />
buffer descriptor list. This is added with the value originally written to the receive buffer queue<br />
pointer register to produce a pointer into the list. A read of the receive buffer queue pointer register<br />
returns the pointer value, which is the queue entry currently being accessed. The counter is<br />
reset after receive status is written to a descriptor that has its wrap bit set or rolls over to zero<br />
after 1024 descriptors have been accessed. The value written to the receive buffer pointer register<br />
may be any word-aligned address, provided that there are at least 2048 word locations<br />
available between the pointer and the top of the memory.<br />
492
32117D–AVR-01/12<br />
<strong>AT32UC3C</strong><br />
The System Bus specification requires that bursts should not cross 1K boundaries. As receive<br />
buffer manager writes are bursts of two words, to ensure that this does not occur, it is best to<br />
write the pointer register with the least three significant bits set to zero. As receive buffers are<br />
used, the receive buffer manager sets bit zero of the first word of the descriptor to indicate used.<br />
If a receive error is detected the receive buffer currently being written is recovered. Previous buffers<br />
are not recovered. Software should search through the used bits in the buffer descriptors to<br />
find out how many frames have been received. It should be checking the start-of-frame and endof-frame<br />
bits, and not rely on the value returned by the receive buffer queue pointer register<br />
which changes continuously as more buffers are used.<br />
For CRC errored frames, excessive length frames or length field mismatched frames, all of<br />
which are counted in the statistics registers, it is possible that a frame fragment might be stored<br />
in a sequence of receive buffers. Software can detect this by looking for start of frame bit set in a<br />
buffer following a buffer with no end of frame bit set.<br />
For a properly working Ethernet system, there should be no excessively long frames or frames<br />
greater than 128 bytes with CRC/FCS errors. Collision fragments are less than 128 bytes long.<br />
Therefore, it is a rare occurrence to find a frame fragment in a receive buffer.<br />
If bit zero is set when the receive buffer manager reads the location of the receive buffer, then<br />
the buffer has already been used and cannot be used again until software has processed the<br />
frame and cleared bit zero. In this case, the DMA interface sets the buffer not available bit in the<br />
receive status register and triggers an interrupt.<br />
If bit zero is set when the receive buffer manager reads the location of the receive buffer and a<br />
frame is being received, the frame is discarded and the receive resource error statistics register<br />
is incremented.<br />
A receive overrun condition occurs when bus was not granted in time or because HRESP was<br />
not OK (bus error). In a receive overrun condition, the receive overrun interrupt is asserted and<br />
the buffer currently being written is recovered. The next frame received with an address that is<br />
recognized reuses the buffer.<br />
If bit 17 of the network configuration register is set, the FCS of received frames shall not be copied<br />
to memory. The frame length indicated in the receive status field shall be reduced by four<br />
bytes in this case.<br />
24.5.4 Transmit Buffer<br />
Frames to be transmitted are stored in one or more transmit buffers. Transmit buffers can be<br />
between 0 and 2047 bytes long, so it is possible to transmit frames longer than the maximum<br />
length specified in IEEE Standard 802.3. Zero length buffers are allowed. The maximum number<br />
of buffers permitted for each transmit frame is 128.<br />
The start location for each transmit buffer is stored in memory in a list of transmit buffer descriptors<br />
at a location pointed to by the transmit buffer queue pointer register. Each list entry consists<br />
of two words, the first being the byte address of the transmit buffer and the second containing<br />
the transmit control and status. Frames can be transmitted with or without automatic CRC generation.<br />
If CRC is automatically generated, padding is also automatically generated to take<br />
frames to a minimum length of 64 bytes. Table 24-2 on page 494 defines an entry in the transmit<br />
buffer descriptor list. To transmit frames, the buffer descriptors must be initialized by writing the<br />
right byte address to bits 0 through 31 in the first word of each list entry. The second transmit<br />
buffer descriptor is initialized with control information that indicates the length of the buffer,<br />
493
Table 24-2. Transmit Buffer Descriptor Entry<br />
32117D–AVR-01/12<br />
<strong>AT32UC3C</strong><br />
whether or not it is to be transmitted with CRC and whether the buffer is the last buffer in the<br />
frame.<br />
After transmission, the control bits are written back to the second word of the first buffer along<br />
with the “used” bit and other status information. Before a transmission, bit 31 is the “used” bit<br />
which must be zero when the control word is read. It is written to one when a frame has been<br />
transmitted. Bits 27, 28 and 29 indicate various transmit error conditions. Bit 30 is the “wrap” bit<br />
which can be set for any buffer within a frame. If no wrap bit is encountered after 1024 descriptors,<br />
the queue pointer rolls over to the start.<br />
The transmit buffer queue pointer register must not be written while transmit is active. If a new<br />
value is written to the transmit buffer queue pointer register, the queue pointer resets itself to<br />
point to the beginning of the new queue. If transmit is disabled by writing to bit 3 of the network<br />
control, the transmit buffer queue pointer register resets to point to the beginning of the transmit<br />
queue. Note that disabling receive does not have the same effect on the receive queue pointer.<br />
Once the transmit queue is initialized, transmit is activated by writing to bit 9, the Transmit Start<br />
bit of the network control register. Transmit is halted when a buffer descriptor with its used bit set<br />
is read, or if a transmit error occurs, or by writing to the transmit halt bit of the network control<br />
register. (Transmission is suspended if a pause frame is received while the pause enable bit is<br />
set in the network configuration register.) Rewriting the start bit while transmission is active is<br />
allowed.<br />
Transmission control is implemented with a Tx_go variable which is readable in the transmit status<br />
register at bit location 3. The Tx_go variable is reset when:<br />
– transmit is disabled<br />
– a buffer descriptor with its ownership bit set is read<br />
– a new value is written to the transmit buffer queue pointer register<br />
– bit 10, tx_halt, of the network control register is written<br />
– there is a transmit error such as too many retries or a transmit underrun.<br />
To set tx_go, write to bit 9, tx_start, of the network control register. Transmit halt does not take<br />
effect until any ongoing transmit finishes. If a collision occurs during transmission of a multi-buffer<br />
frame, transmission automatically restarts from the first buffer of the frame. If a “used” bit is<br />
read midway through transmission of a multi-buffer frame, this is treated as a transmit error.<br />
Transmission stops, TX_ER is asserted and the FCS is bad.<br />
If transmission stops due to a transmit error, the transmit queue pointer resets to point to the<br />
beginning of the transmit queue. Software needs to re-initialize the transmit queue after a transmit<br />
error.<br />
If transmission stops due to a “used” bit being read at the start of the frame, the transmission<br />
queue pointer is not reset and transmit starts from the same transmit buffer descriptor when the<br />
transmit start bit is written<br />
Bit Function<br />
31:0 Byte Address of buffer<br />
Word 0<br />
Word 1<br />
494
Table 24-2. Transmit Buffer Descriptor Entry (Continued)<br />
Bit Function<br />
31<br />
32117D–AVR-01/12<br />
<strong>AT32UC3C</strong><br />
Used. Needs to be zero for the MACB to read data from the transmit buffer. The MACB sets this to one for the first buffer<br />
of a frame once it has been successfully transmitted.<br />
Software has to clear this bit before the buffer can be used again.<br />
Note: This bit is only set for the first buffer in a frame unlike receive where all buffers have the Used bit set once used.<br />
30 Wrap. Marks last descriptor in transmit buffer descriptor list.<br />
29 Retry limit exceeded, transmit error detected<br />
28<br />
Transmit underrun, occurs either when hresp is not OK (bus error) or the transmit data could not be fetched in time or<br />
when buffers are exhausted in mid frame.<br />
27 Buffers exhausted in mid frame<br />
26:17 Reserved<br />
16 No CRC. When set, no CRC is appended to the current frame. This bit only needs to be set for the last buffer of a frame.<br />
15 Last buffer. When set, this bit indicates the last buffer in the current frame has been reached.<br />
14:11 Reserved<br />
10:0 Length of buffer<br />
24.5.5 Transmit Sub-module<br />
This sub-module transmits frames in accordance with the Ethernet IEEE 802.3 CSMA/CD protocol.<br />
Frame assembly starts by adding preamble and the start frame delimiter. Data is taken from<br />
the transmit FIFO a word at a time. Data is transmitted least significant nibble first. If necessary,<br />
padding is added to increase the frame length to 60 bytes. CRC is calculated as a 32-bit polynomial.<br />
This is inverted and appended to the end of the frame, taking the frame length to a<br />
minimum of 64 bytes. If the No CRC bit is set in the second word of the last buffer descriptor of a<br />
transmit frame, neither pad nor CRC are appended.<br />
In full-duplex mode, frames are transmitted immediately. Back-to-back frames are transmitted at<br />
least 96 bit times apart to guarantee the interframe gap.<br />
In half-duplex mode, the transmitter checks carrier sense. If asserted, it waits for it to de-assert<br />
and then starts transmission after the interframe gap of 96 bit times. If the collision signal is<br />
asserted during transmission, the transmitter transmits a jam sequence of 32 bits taken from the<br />
data register and retries transmission after the back off time has elapsed.<br />
The back-off time is based on an XOR of the 10 least significant bits of the data coming from the<br />
transmit FIFO and a 10-bit pseudo random number. The number of bits used depends on the<br />
number of collisions seen. After the first collision, 1 bit is used, after the second 2, and so on up<br />
to 10. Above 10, all 10 bits are used. An error is indicated and no further attempts are made if 16<br />
attempts cause collisions.<br />
If transmit DMA underruns, bad CRC is automatically appended using the same mechanism as<br />
jam insertion and TX_ER is asserted. In a properly configured system, this should never<br />
happen.<br />
If the back pressure bit is set in the network control register in half duplex mode, the transmit<br />
sub-module transmits 64 bits of data, which can consist of 16 nibbles of 1011 or in bit-rate mode<br />
495
32117D–AVR-01/12<br />
<strong>AT32UC3C</strong><br />
64 1s, whenever it sees an incoming frame to force a collision. This provides a way of implementing<br />
flow control in half-duplex mode.<br />
24.5.6 Pause Frame Support<br />
The start of an 802.3 pause frame is as follows:<br />
Table 24-3. Start of an 802.3 Pause Frame<br />
Destination Address<br />
Source<br />
Address<br />
Type<br />
(Mac Control Frame)<br />
The network configuration register contains a receive pause enable bit (13). If a valid pause<br />
frame is received, the pause time register is updated with the frame’s pause time, regardless of<br />
its current contents and regardless of the state of the configuration register bit 13. An interrupt<br />
(12) is triggered when a pause frame is received, assuming it is enabled in the interrupt mask<br />
register. If bit 13 is set in the network configuration register and the value of the pause time register<br />
is non-zero, no new frame is transmitted until the pause time register has decremented to<br />
zero.<br />
The loading of a new pause time, and hence the pausing of transmission, only occurs when the<br />
MACB is configured for full-duplex operation. If the MACB is configured for half-duplex, there is<br />
no transmission pause, but the pause frame received interrupt is still triggered.<br />
A valid pause frame is defined as having a destination address that matches either the address<br />
stored in specific address register 1 or matches 0x0180C2000001 and has the MAC control<br />
frame type ID of 0x8808 and the pause opcode of 0x0001. Pause frames that have FCS or other<br />
errors are treated as invalid and are discarded. Valid pause frames received increment the<br />
Pause Frame Received statistic register.<br />
The pause time register decrements every 512 bit times (i.e., 128 RX_CLK in nibble mode) once<br />
transmission has stopped. For test purposes, the register decrements every RX_CLK cycle once<br />
transmission has stopped if bit 12 (retry test) is set in the network configuration register. If the<br />
pause enable bit (13) is not set in the network configuration register, then the decrementing<br />
occurs regardless of whether transmission has stopped or not.<br />
An interrupt (13) is asserted whenever the pause time register decrements to zero (assuming it<br />
is enabled in the interrupt mask register). Automatic transmission of pause frames is supported<br />
through the transmit pause frame bits of the network control register and the tx_pause and<br />
tx_pause_zero inputs. If either bit 11 or bit 12 of the network control register is written to with a 1,<br />
or if the input signal tx_pause is toggled, a pause frame is transmitted only if full duplex is<br />
selected in the network configuration register and transmit is enabled in the network control<br />
register.<br />
Pause frame transmission occurs immediately if transmit is inactive or if transmit is active<br />
between the current frame and the next frame due to be transmitted. The transmitted pause<br />
frame is comprised of the items in the following list:<br />
a destination address of 01-80-C2-00-00-01<br />
a source address taken from the specific address 1 register<br />
a type ID of 88-08 (MAC control frame)<br />
a pause opcode of 00-01<br />
a pause quantum<br />
Pause<br />
Opcode Pause Time<br />
0x0180C2000001 6 bytes 0x8808 0x0001 2 bytes<br />
496
32117D–AVR-01/12<br />
<strong>AT32UC3C</strong><br />
fill of 00 to take the frame to minimum frame length<br />
valid FCS<br />
The pause quantum used in the generated frame depends on the trigger source for the frame as<br />
follows:<br />
1. If bit 11 is written with a one, the pause quantum comes from the transmit pause quantum<br />
register. The Transmit Pause Quantum register resets to a value of 0xFFFF giving<br />
a maximum pause quantum as a default.<br />
2. If bit 12 is written with a one, the pause quantum is zero.<br />
3. If the tx_pause input is toggled and the tx_pause_zero input is held low until the next<br />
toggle, the pause quantum comes from the transmit pause quantum register.<br />
4. If the tx_pause input is toggled and the tx_pause_zero input is held high until the next<br />
toggle, the pause quantum is zero.<br />
After transmission, no interrupts are generated and the only statistics register that is incremented<br />
is the pause frames transmitted register.<br />
24.5.7 Receive Sub-module<br />
The receive sub-module checks for valid preamble, FCS, alignment and length, presents<br />
received frames to the DMA interface and stores the frames destination address for use by the<br />
address checking sub-module. If, during frame reception, the frame is found to be too long or<br />
RX_ER is asserted, a bad frame indication is sent to the DMA interface. The DMA interface then<br />
stops sending data to memory. At the end of frame reception, the receive sub-module indicates<br />
to the DMA interface whether the frame is good or bad. The DMA interface recovers the current<br />
receive buffer if the frame was bad. The receive sub-module signals the register sub-module to<br />
increment the alignment error, the CRC (FCS) error, the short frame, long frame, jabber error,<br />
the receive symbol error statistics and the length field mismatch statistics.<br />
The enable bit for jumbo frames in the network configuration register allows the MACB to receive<br />
jumbo frames of up to 10240 bytes in size. This operation does not form part of the IEEE802.3<br />
specification and is disabled by default. When jumbo frames are enabled, frames received with a<br />
frame size greater than 10240 bytes are discarded.<br />
24.5.8 Address Checking Sub-module<br />
The address checking (or filter) sub-module indicates to the DMA interface which receive frames<br />
should be copied to memory. Whether a frame is copied depends on what is enabled in the network<br />
configuration register, the state of the external match pin, the contents of the specific<br />
address and hash registers and the frame’s destination address. In this implementation of the<br />
MACB, the frame’s source address is not checked. If bit 18 of the Network Configuration register<br />
is not set, a frame is not copied to memory if the MACB is transmitting in half duplex mode at the<br />
time a destination address is received. If bit 18 of the Network Configuration register is set,<br />
frames can be received while transmitting in half-duplex mode.<br />
Ethernet frames are transmitted a byte at a time, least significant bit first. The first six bytes (48<br />
bits) of an Ethernet frame make up the destination address. The first bit of the destination<br />
address, the LSB of the first byte of the frame, is the group/individual bit: this is One for multicast<br />
addresses and Zero for unicast. The All Ones address is the broadcast address, and a special<br />
case of multicast.<br />
The MACB supports recognition of four specific addresses. Each specific address requires two<br />
registers, specific address register bottom and specific address register top. Specific address<br />
497
32117D–AVR-01/12<br />
<strong>AT32UC3C</strong><br />
register bottom stores the first four bytes of the destination address and specific address register<br />
top contains the last two bytes. The addresses stored can be specific, group, local or universal.<br />
The destination address of received frames is compared against the data stored in the specific<br />
address registers once they have been activated. The addresses are deactivated at reset or<br />
when their corresponding specific address register bottom is written. They are activated when<br />
specific address register top is written. If a receive frame address matches an active address,<br />
the frame is copied to memory.<br />
The following example illustrates the use of the address match registers for a MAC address of<br />
21:43:65:87:A9:CB.<br />
Preamble 55<br />
SFD D5<br />
DA (Octet0 - LSB) 21<br />
DA(Octet 1) 43<br />
DA(Octet 2) 65<br />
DA(Octet 3) 87<br />
DA(Octet 4) A9<br />
DA (Octet5 - MSB) CB<br />
SA (LSB) 00<br />
SA 00<br />
SA 00<br />
SA 00<br />
SA 00<br />
SA (MSB) 43<br />
SA (LSB) 21<br />
The sequence above shows the beginning of an Ethernet frame. Byte order of transmission is<br />
from top to bottom as shown. For a successful match to specific address 1, the following<br />
address matching registers must be set up:<br />
Base address + 0x98 0x87654321 (Bottom)<br />
Base address + 0x9C 0x0000CBA9 (Top)<br />
And for a successful match to the Type ID register, the following should be set up:<br />
Base address + 0xB8 0x00004321<br />
24.5.9 Broadcast Address<br />
The broadcast address of 0xFFFFFFFFFFFF is recognized unless the ‘no broadcast’ bit in the<br />
network configuration register is set.<br />
24.5.10 Hash Addressing<br />
The hash address register is 64 bits long and takes up two locations in the memory map. The<br />
least significant bits are stored in hash register bottom and the most significant bits in hash register<br />
top.<br />
498
32117D–AVR-01/12<br />
<strong>AT32UC3C</strong><br />
The unicast hash enable and the multicast hash enable bits in the network configuration register<br />
enable the reception of hash matched frames. The destination address is reduced to a 6-bit<br />
index into the 64-bit hash register using the following hash function. The hash function is an<br />
exclusive or of every sixth bit of the destination address.<br />
hash_index[5] = da[5] ^ da[11] ^ da[17] ^ da[23] ^ da[29] ^ da[35] ^ da[41] ^ da[47]<br />
hash_index[4] = da[4] ^ da[10] ^ da[16] ^ da[22] ^ da[28] ^ da[34] ^ da[40] ^ da[46]<br />
hash_index[3] = da[3] ^ da[09] ^ da[15] ^ da[21] ^ da[27] ^ da[33] ^ da[39] ^ da[45]<br />
hash_index[2] = da[2] ^ da[08] ^ da[14] ^ da[20] ^ da[26] ^ da[32] ^ da[38] ^ da[44]<br />
hash_index[1] = da[1] ^ da[07] ^ da[13] ^ da[19] ^ da[25] ^ da[31] ^ da[37] ^ da[43]<br />
hash_index[0] = da[0] ^ da[06] ^ da[12] ^ da[18] ^ da[24] ^ da[30] ^ da[36] ^ da[42]<br />
da[0] represents the least significant bit of the first byte received, that is, the multicast/unicast<br />
indicator, and da[47] represents the most significant bit of the last byte received.<br />
If the hash index points to a bit that is set in the hash register, then the frame is matched according<br />
to whether the frame is multicast or unicast.<br />
A multicast match is signalled if the multicast hash enable bit is set. da[0] is 1 and the hash index<br />
points to a bit set in the hash register.<br />
A unicast match is signalled if the unicast hash enable bit is set. da[0] is 0 and the hash index<br />
points to a bit set in the hash register.<br />
To receive all multicast frames, the hash register should be set with all ones and the multicast<br />
hash enable bit should be set in the network configuration register.<br />
24.5.11 External Address Matching<br />
The external address signal (eam) is enabled by bit 9 in the network configuration register.<br />
When enabled, the filter sub-module sends the store frame and the external address match status<br />
signal to the DMA interface if the external address match signal is asserted (from a source<br />
external to the MACB) and the destination address has been received and the frame has not<br />
completed.<br />
For the DMA interface to be able to copy the frame to memory, the external address signal must<br />
be asserted before four words have been loaded into the receive FIFO.<br />
24.5.12 Copy All Frames (or Promiscuous Mode)<br />
If the copy all frames bit is set in the network configuration register, then all non-errored frames<br />
are copied to memory. For example, frames that are too long, too short, or have FCS errors or<br />
RX_ER asserted during reception are discarded and all others are received. Frames with FCS<br />
errors are copied to memory if bit 19 in the network configuration register is set.<br />
24.5.13 Type ID Checking<br />
The contents of the type_id register are compared against the length/type ID of received frames<br />
(i.e., bytes 13 and 14). Bit 22 in the receive buffer descriptor status is set if there is a match. The<br />
reset state of this register is zero which is unlikely to match the length/type ID of any valid Ethernet<br />
frame.<br />
Note: A type ID match does not affect whether a frame is copied to memory.<br />
499
24.5.14 VLAN Support<br />
An Ethernet encoded 802.1Q VLAN tag looks like this:<br />
32117D–AVR-01/12<br />
Table 24-4. 802.1Q VLAN Tag<br />
<strong>AT32UC3C</strong><br />
TPID (Tag Protocol Identifier) 16 bits TCI (Tag Control Information) 16 bits<br />
0x8100 First 3 bits priority, then CFI bit, last 12 bits VID<br />
The VLAN tag is inserted at the 13 th byte of the frame, adding an extra four bytes to the frame. If<br />
the VID (VLAN identifier) is null (0x000), this indicates a priority-tagged frame. The MAC can<br />
support frame lengths up to 1536 bytes, 18 bytes more than the original Ethernet maximum<br />
frame length of 1518 bytes. This is achieved by setting bit 8 in the network configuration register.<br />
The following bits in the receive buffer descriptor status word give information about VLAN<br />
tagged frames:<br />
Bit 21 set if receive frame is VLAN tagged (i.e. type id of 0x8100)<br />
Bit 20 set if receive frame is priority tagged (i.e. type id of 0x8100 and null VID). (If bit 20 is<br />
set bit 21 is set also.)<br />
Bit 19, 18 and 17 set to priority if bit 21 is set<br />
Bit 16 set to CFI if bit 21 is set<br />
24.5.15 Wake-on LAN Support<br />
The receive module supports wake-on LAN by detecting the following events on incoming<br />
receive frames:<br />
Magic packet<br />
ARP request to the device IP address<br />
Specific address 1 filter match<br />
Multicast hash filter match<br />
If one of these events occurs wake-on LAN detection is indicated by asserting WOL output pin<br />
for 64 RX_CLK cycles. These events can be individually enabled by bits MAG, ARP, SA1 & MTI<br />
in wake-on LAN register (WOL). Also, for wake-on LAN detection to occur, receive enable must<br />
be set in the network control register (NCR), however a receive buffer does not have to be<br />
available.<br />
WOL assertion due to ARP request, specific address 1 or multicast filter events will occur even if<br />
the frame is errored. For magic packet event, the frame must be correctly formed and error free.<br />
A magic packet event is detected if all of the following are true:<br />
magic packet events are enabled by WOL.MAG bit<br />
the frame’s destination address matches specific address 1<br />
the frame is correctly formed with no errors<br />
the frame contains at least 6 bytes of 0xFF for synchronization<br />
there are 16 repetitions of the contents of specific address 1 register immediately following<br />
the synchronization<br />
An ARP packet event is detected if all of the following are true:<br />
ARP request are enabled by WOL.ARP bit<br />
broadcasts are allowed by NCFG.CAF<br />
500
32117D–AVR-01/12<br />
<strong>AT32UC3C</strong><br />
the frame has a broadcast destination address (bytes 1 to 6)<br />
the frame has a typeID field of 0x0806 (bytes 13 and 14)<br />
the frame has an ARP operation field of 0x0001 (bytes 21 and 22)<br />
the least significant 16 bits of the frame ARP target protocol (bytes 41 and 42) match the<br />
value written in WOL.IP.<br />
The decoding of the ARP fields adjusts automatically if a VLAN tag is detected within the frame.<br />
The reserved value of 0x0000 for wake-on LAN target address value will not cause an ARP<br />
request event, even if matched by the frame.<br />
A specific address 1 filter match event will occur if all of the following are true:<br />
specific address 1 events are enabled by WOL.SA1 bit<br />
the frame destination address matches the value programmed in the specific address 1<br />
registers<br />
A multicast filter match event will occur if all of the following are true:<br />
multicast hash events are enabled by WOL.MTI bit<br />
multicast hash filtering is enabled by NCFG.MTI bit<br />
the frame destination address matches against the multicast hash filter<br />
the frame destination address is not a broadcast<br />
24.5.16 PHY Maintenance<br />
The register MAN enables the MACB to communicate with a PHY by means of the MDIO interface.<br />
It is used during auto-negotiation to ensure that the MACB and the PHY are configured for<br />
the same speed and duplex configuration.<br />
The PHY maintenance register is implemented as a shift register. Writing to the register starts a<br />
shift operation which is signalled as complete when bit two is set in the network status register<br />
(about 2000 CLK_MACB_PB) cycles later when bit ten is set to zero, and bit eleven is set to one<br />
in the network configuration register). An interrupt is generated as this bit is set. During this time,<br />
the MSB of the register is output on the MDIO pin and the LSB updated from the MDIO pin with<br />
each Divided PB Clock (DPC) cycle. This causes transmission of a PHY management frame on<br />
MDIO.<br />
Reading during the shift operation returns the current contents of the shift register. At the end of<br />
management operation, the bits have shifted back to their original locations. For a read operation,<br />
the data bits are updated with data read from the PHY. It is important to write the correct<br />
values to the register to ensure a valid PHY management frame is produced.<br />
The MDIO interface can read IEEE 802.3 clause 45 PHYs as well as clause 22 PHYs. To read<br />
clause 45 PHYs, bits [31:28] should be written to 0x0011. For a description of DPC generation,<br />
see the network configuration register in section ”Network Configuration Register” on page 510.<br />
24.5.17 Media Independent Interface<br />
The Ethernet MAC is capable of interfacing to both RMII and MII Interfaces. The RMII bit in the<br />
USRIO register controls the interface that is selected. When this bit is set, the MII interface is<br />
selected, else the RMII interface is selected.<br />
501
Table 24-5. Pin Configuration<br />
32117D–AVR-01/12<br />
<strong>AT32UC3C</strong><br />
The MII and RMII interface are capable of both 10Mb/s and 100Mb/s data rates as described in<br />
the IEEE 802.3u standard. The signals used by the MII and RMII interfaces are described in<br />
Table 24-5.<br />
Pin Name MII RMII<br />
TX_CLK Transmit Clock Reference Clock<br />
CRS Carrier Sense<br />
COL Collision Detect<br />
RX_DV Data Valid Carrier Sense/Data Valid<br />
RXD[3:0] RXS[3:0] 4-bit Receive Data RXD[1:0] 2-bit Receive Data<br />
RX_ER Receive Error Receive Error<br />
RX_CLK Receive Clock<br />
TX_EN Transmit Enable Transmit Enable<br />
TXD[3:0] TXD[3:0] 4-bit Transmit Data TXD[1:0] 2-bit Transmit Data<br />
TX_ER Transmit Error<br />
The intent of the RMII is to provide a reduced pin count alternative to the IEEE 802.3u MII. It<br />
uses 2 bits for transmission (TXD[1:0]) and two bits for reception (RXD[1:0]). There are Transmit<br />
Enable (TX_EN), a Receive Error (RX_ER), a Carrier Sense (CRS), and a 50 MHz Reference<br />
Clock (TX_CLK) for 100Mb/s data rate.<br />
24.5.17.1 RMII Transmit and Receive Operation<br />
The same signals are used internally for both the RMII and the MII operations. The RMII maps<br />
these signals in a more pin-efficient manner. The transmit and receive bits are converted from a<br />
4-bit parallel format to a 2-bit parallel scheme that is clocked at twice the rate. The carrier sense<br />
and data valid signals are combined into the RX_DV signal. This signal contains information on<br />
carrier sense, FIFO status, and validity of the data. Transmit error bit (TX_ER) and collision<br />
detect (COL) are not used in RMII mode.<br />
502
24.6 Programming Interface<br />
24.6.1 Configuration<br />
32117D–AVR-01/12<br />
<strong>AT32UC3C</strong><br />
Initialization of the MACB configuration (e.g. frequency ratios) must be done while the transmit<br />
and receive circuits are disabled. Network control register and network configuration register are<br />
described below.<br />
24.6.2 Receive Buffer List<br />
Receive data is written to areas of data (i.e., buffers) in system memory. These buffers are listed<br />
in another data structure that also resides in main memory. This data structure (receive buffer<br />
queue) is a sequence of descriptor entries as defined in ”Receive Buffer Descriptor Entry” on<br />
page 491. It points to this data structure.<br />
Figure 24-2. Receive Buffer List<br />
Receive Buffer Queue Pointer<br />
(MAC Register)<br />
To create the list of buffers:<br />
Receive Buffer<br />
Description List<br />
(In Memory)<br />
Receive Buffer 0<br />
Receive Buffer 1<br />
Receive Buffer N<br />
(In Memory)<br />
1. Allocate a number (n) of buffers of 128 bytes in system memory.<br />
2. Allocate an area 2n words for the receive buffer descriptor entry in system memory and<br />
create n entries in this list. Mark all entries in this list as owned by MACB, i.e., bit 0 of<br />
word 0 set to 0.<br />
3. If less than 1024 buffers are defined, the last descriptor must be marked with the wrap<br />
bit (bit 1 in word 0 set to 1).<br />
4. Write address of receive buffer descriptor entry to MACB register receive buffer queue<br />
pointer.<br />
5. The receive circuits can then be enabled by writing to the address recognition registers<br />
and then to the network control register.<br />
503
32117D–AVR-01/12<br />
<strong>AT32UC3C</strong><br />
24.6.3 Transmit Buffer List<br />
Transmit data is read from the system memory These buffers are listed in another data structure<br />
that also resides in main memory. This data structure (Transmit Buffer Queue) is a sequence of<br />
descriptor entries (as defined in Table 24-2 on page 494) that points to this data structure.<br />
To create this list of buffers:<br />
1. Allocate a number (n) of buffers of between 1 and 2047 bytes of data to be transmitted<br />
in system memory. Up to 128 buffers per frame are allowed.<br />
2. Allocate an area 2n words for the transmit buffer descriptor entry in system memory<br />
and create N entries in this list. Mark all entries in this list as owned by MACB, i.e. bit 31<br />
of word 1 set to 0.<br />
3. If fewer than 1024 buffers are defined, the last descriptor must be marked with the wrap<br />
bit (bit 30 in word 1 set to 1).<br />
4. Write address of transmit buffer descriptor entry to MACB register transmit buffer queue<br />
pointer.<br />
5. The transmit circuits can then be enabled by writing to the network control register.<br />
24.6.4 Address Matching<br />
The MACB register-pair hash address and the four specific address register-pairs must be written<br />
with the required values. Each register-pair comprises a bottom register and top register,<br />
with the bottom register being written first. The address matching is disabled for a particular register-pair<br />
after the bottom-register has been written and re-enabled when the top register is<br />
written. See Section “24.5.8” on page 497. for details of address matching. Each register-pair<br />
may be written at any time, regardless of whether the receive circuits are enabled or disabled.<br />
24.6.5 Interrupts<br />
There are 14 interrupt conditions that are detected within the MACB. These are ORed to make a<br />
single interrupt. This interrupt is handled by the interrupt controller. On receipt of the interrupt<br />
signal, the CPU enters the interrupt handler. To ascertain which interrupt has been generated,<br />
read the interrupt status register. Note that this register clears itself when read. At reset, all interrupts<br />
are disabled. To enable an interrupt, write to interrupt enable register with the pertinent<br />
interrupt bit set to 1. To disable an interrupt, write to interrupt disable register with the pertinent<br />
interrupt bit set to 1. To check whether an interrupt is enabled or disabled, read interrupt mask<br />
register: if the bit is set to 1, the interrupt is disabled.<br />
24.6.6 Transmitting Frames<br />
To set up a frame for transmission:<br />
1. Enable transmit in the network control register.<br />
2. Allocate an area of system memory for transmit data. This does not have to be contiguous,<br />
varying byte lengths can be used as long as they conclude on byte borders.<br />
3. Set-up the transmit buffer list.<br />
4. Set the network control register to enable transmission and enable interrupts.<br />
5. Write data for transmission into these buffers.<br />
6. Write the address to transmit buffer descriptor queue pointer.<br />
7. Write control and length to word one of the transmit buffer descriptor entry.<br />
8. Write to the transmit start bit in the network control register.<br />
504
32117D–AVR-01/12<br />
<strong>AT32UC3C</strong><br />
24.6.7 Receiving Frames<br />
When a frame is received and the receive circuits are enabled, the MACB checks the address<br />
and, in the following cases, the frame is written to system memory:<br />
if it matches one of the four specific address registers.<br />
if it matches the hash address function.<br />
if it is a broadcast address (0xFFFFFFFFFFFF) and broadcasts are allowed.<br />
if the MACB is configured to copy all frames.<br />
if the EAM is asserted before four words have been loaded into the receive FIFO.<br />
The register receive buffer queue pointer points to the next entry (see Table 24-1 on page 491)<br />
and the MACB uses this as the address in system memory to write the frame to. Once the frame<br />
has been completely and successfully received and written to system memory, the MACB then<br />
updates the receive buffer descriptor entry with the reason for the address match and marks the<br />
area as being owned by software. Once this is complete an interrupt receive complete is set.<br />
Software is then responsible for handling the data in the buffer and then releasing the buffer by<br />
writing the ownership bit back to 0.<br />
If the MACB is unable to write the data at a rate to match the incoming frame, then an interrupt<br />
receive overrun is set. If there is no receive buffer available, i.e., the next buffer is still owned by<br />
software, the interrupt receive buffer not available is set. If the frame is not successfully<br />
received, a statistic register is incremented and the frame is discarded without informing<br />
software.<br />
505
24.7 User Interface<br />
Table 24-6. MACB Register Memory Map<br />
32117D–AVR-01/12<br />
<strong>AT32UC3C</strong><br />
Offset Register Register Name Access Reset<br />
0x00 Network Control Register NCR Read/Write 0x00000000<br />
0x04 Network Configuration Register NCFG Read/Write 0x00008000<br />
0x08 Network Status Register NSR Read-only -<br />
0x14 Transmit Status Register TSR Read/Write 0x00000000<br />
0x18 Receive Buffer Queue Pointer Register RBQP Read/Write 0x00000000<br />
0x1C Transmit Buffer Queue Pointer Register TBQP Read/Write 0x00000000<br />
0x20 Receive Status Register RSR Read/Write 0x00000000<br />
0x24 Interrupt Status Register ISR Read/Write 0x00000000<br />
0x28 Interrupt Enable Register IER Write-only 0x00000000<br />
0x2C Interrupt Disable Register IDR Write-only 0x00000000<br />
0x30 Interrupt Mask Register IMR Read-only 0x00003FFF<br />
0x34 Phy Maintenance Register MAN Read/Write 0x00000000<br />
0x38 Pause Time Register PTR Read/Write 0x00000000<br />
0x3C Pause Frames Received Register PFR Read/Write 0x00000000<br />
0x40 Frames Transmitted Ok Register FTO Read/Write 0x00000000<br />
0x44 Single Collision Frames Register SCF Read/Write 0x00000000<br />
0x48 Multiple Collision Frames Register MCF Read/Write 0x00000000<br />
0x4C Frames Received Ok Register FRO Read/Write 0x00000000<br />
0x50 Frame Check Sequence Errors Register FCSE Read/Write 0x00000000<br />
0x54 Alignment Errors Register ALE Read/Write 0x00000000<br />
0x58 Deferred Transmission Frames Register DTF Read/Write 0x00000000<br />
0x5C Late Collisions Register LCOL Read/Write 0x00000000<br />
0x60 Excessive Collisions Register EXCOL Read/Write 0x00000000<br />
0x64 Transmit Underrun Errors Register TUND Read/Write 0x00000000<br />
0x68 Carrier Sense Errors Register CSE Read/Write 0x00000000<br />
0x6C Receive Resource Errors Register RRE Read/Write 0x00000000<br />
0x70 Receive Overrun Errors Register ROV Read/Write 0x00000000<br />
0x74 Receive Symbol Errors Register RSE Read/Write 0x00000000<br />
0x78 Excessive Length Errors Register ELE Read/Write 0x00000000<br />
0x7C Receive Jabbers Register RJA Read/Write 0x00000000<br />
0x80 Undersize Frames Register USF Read/Write 0x00000000<br />
0x84 SQE Test Errors Register STE Read/Write 0x00000000<br />
0x88 Received Length Field Mismatch Register RLE Read/Write 0x00000000<br />
0x8C Transmitted Pause Frames Register TPF Read/Write 0x00000000<br />
0x90 Hash Register Bottom HRB Read/Write 0x00000000<br />
506
Table 24-6. MACB Register Memory Map (Continued)<br />
32117D–AVR-01/12<br />
<strong>AT32UC3C</strong><br />
Offset Register Register Name Access Reset<br />
0x94 Hash Register Top HRT Read/Write 0x00000000<br />
0x98 Specific Address 1 Bottom Register SA1B Read/Write 0x00000000<br />
0x9C Specific Address 1 Top Register SA1T Read/Write 0x00000000<br />
0xA0 Specific Address 2 Bottom Register SA2B Read/Write 0x00000000<br />
0xA4 Specific Address 2 Top Register SA2T Read/Write 0x00000000<br />
0xA8 Specific Address 3 Bottom Register SA3B Read/Write 0x00000000<br />
0xAC Specific Address 3 Top Register SA3T Read/Write 0x00000000<br />
0xB0 Specific Address 4 Bottom Register SA4B Read/Write 0x00000000<br />
0xB4 Specific Address 4 Top Register SA4T Read/Write 0x00000000<br />
0xB8 Type ID Checking Register TID Read/Write 0x00000000<br />
0xBC Transmit Pause Quantum Register TPQ Read/Write 0x0000FFFF<br />
0xC0 User Input/output Register USRIO Read/Write 0x00000000<br />
0xC4 Wake on LAN Register WOL Read/Write 0x00000000<br />
0xFC Version Register VERSION Read-only - (1)<br />
1. The reset values are device specific. Please refer to the Module Configuration section at the end of this chapter.<br />
Statistics registers (PFR to TPF) should be read frequently enough to prevent loss of data. The<br />
receive statistics registers are only incremented when the receive enable bit is set in the network<br />
control register (NCR.RE). Write access to statistics registers is allowed if NCR.WESTAT is set.<br />
Statistic registers are cleared on a read and stick at all ones when they count to their maximum<br />
value.<br />
507
24.7.1 Network Control Register<br />
Name: NCR<br />
Access Type: Read/Write<br />
Offset: 0x00<br />
Reset Value: 0x00000000<br />
32117D–AVR-01/12<br />
<strong>AT32UC3C</strong><br />
31 30 29 28 27 26 25 24<br />
- - - - - - - -<br />
23 22 21 20 19 18 17 16<br />
- - - - - - - -<br />
15 14 13 12 11 10 9 8<br />
- - - TZQ TPF THALT TSTART BP<br />
7 6 5 4 3 2 1 0<br />
WESTAT INCSTAT CLRSTAT MPE TE RE LLB LB<br />
TZQ: Transmit Zero Quantum Pause Frame<br />
Writing a one to this bit sends a pause frame with zero pause quantum at the next available transmitter idle time.<br />
TPF: Transmit Pause Frame<br />
Writing a one to this bit sends a pause frame with the pause quantum from the transmit pause quantum register at the next<br />
available transmitter idle time.<br />
THALT: Transmit Halt<br />
Writing a one to this bit halts transmission as soon as any ongoing frame transmission ends.<br />
TSTART: Start Transmission<br />
Writing a one to this bit starts transmission.<br />
BP: Back Pressure<br />
0: No collision are forced.<br />
1: In half duplex mode, forces collisions on all received frames.<br />
WESTAT: Write Enable for Statistics Registers<br />
0: Statistics registers are read-only.<br />
1: Statistics registers are writable for functional test purposes.<br />
INCSTAT: Increment Statistics Registers<br />
Writing a one increments all the statistics registers by one for test purposes.<br />
CLRSTAT: Clear ¨Statistics Registers<br />
Writing a one clears the statistics registers.<br />
MPE: Management Port Enable<br />
0: Forces MDIO to high impedance state and DPC low.<br />
1: Enables the management port.<br />
TE: Transmit Enable<br />
0: Transmission stops immediately, the transmit FIFO and control registers are cleared and the transmit queue pointer register<br />
resets to point to the start of the transmit descriptor list.<br />
1: Enables the Ethernet transmitter to send data.<br />
508
32117D–AVR-01/12<br />
<strong>AT32UC3C</strong><br />
RE: Receive Enable<br />
0: Frame reception stops immediately and the receive FIFO is cleared. The receive queue pointer register is unaffected.<br />
1: Enables the MACB to receive data.<br />
LLB: Local Loopback<br />
0: Local loopback is disabled.<br />
1: Local loopback is enabled. It connects TXD to RXD, TX_EN to RX_DV, forces full duplex and drives RX_CLK and TX_CLK<br />
with CLK_MACB_PB divided by 4. RX_CLK and TX_CLK may glitch as the MACB is switched into and out of internal loop back.<br />
It is important that receive and transmit circuits have already been disabled when making the switch into and out of internal loop<br />
back. This function may not be supported by some instantiations of the MACB.<br />
LB: Loopback<br />
0: Loopback is disabled.<br />
1: Loopback is enabled. Asserts the loopback signal to the PHY.<br />
509
24.7.2 Network Configuration Register<br />
Name: NCFGR<br />
Access Type: Read/Write<br />
Offset: 0x04<br />
Reset Value: 0x00008000<br />
32117D–AVR-01/12<br />
<strong>AT32UC3C</strong><br />
31 30 29 28 27 26 25 24<br />
- - - - - - - -<br />
23 22 21 20 19 18 17 16<br />
- - - - IRXFCS EFRHD DRFCS RLCE<br />
15 14 13 12 11 10 9 8<br />
RBOF PAE RTY CLK EAE FS<br />
7 6 5 4 3 2 1 0<br />
UNI MTI NBC CAF JFRAME BR FD SPD<br />
IRXFCS: Ignore RX FCS<br />
0: Normal operation.<br />
1: Frames with FCS/CRC errors are not rejected and no FCS error statistics are counted.<br />
EFRHD: Enable Frames to be Received in Half-Duplex mode<br />
0: Disabled.<br />
1: Enabled (while transmitting).<br />
DRFCS: Discard Receive FCS<br />
0: FCS field of received frames are copied to memory.<br />
1: FCS field of received frames are not copied to memory.<br />
RLCE: Receive Length field Checking Enable<br />
0: Disabled.<br />
1: Frames with measured lengths shorter than their length fields are discarded. Frames containing a type ID in bytes 13 and 14<br />
(length/type ID = 0600) are not be counted as length errors.<br />
RBOF: Receive Buffer Offset<br />
Indicates the number of bytes by which the received data is offset from the start of the first receive buffer.<br />
RBOF Offset<br />
00 No offset from start of receive buffer<br />
01 One-byte offset from start of receive buffer<br />
10 Two-byte offset from start of receive buffer<br />
11 Three-byte offset from start of receive buffer<br />
PAE: Pause Enable<br />
0: Pause disabled.<br />
1: Pause enabled. Transmission pauses when a valid pause frame is received.<br />
510
32117D–AVR-01/12<br />
<strong>AT32UC3C</strong><br />
RTY: Retry Test<br />
0: Normal operation.<br />
1: The back off between collisions is always one slot time. It helps testing the too many retries condition. Also used in the pause<br />
frame tests to reduce the pause counters decrement time from 512 bit times, to every RX_CLK cycle.<br />
CLK: PB Clock Divider<br />
Determines by what number system clock is divided to generate Divided PB Clock (DPC). For conformance with 802.3, DPC<br />
must not exceed 2.5MHz (DPC is only active during MDIO read and write operations).<br />
CLK DPC<br />
00 PB clock divided by 8 (PB clock up to 20 MHz)<br />
01 PB clock divided by 16 (PB clock up to 40 MHz)<br />
10 PB clock divided by 32 (PB clock up to 80 MHz)<br />
11 PB clock divided by 64 (PB clock up to 160 MHz)<br />
EAE: External Address Match Enable<br />
0: External address match is disabled.<br />
1: External address match is enabled. Eam pin can be used to copy frames to memory.<br />
FS: Frame Size<br />
0: Reject any frames above 1518 bytes.<br />
1: Accept frames up to 1536 bytes.<br />
UNI: Unicast Hash Enable<br />
0: Unicast hash is disabled.<br />
1: Unicast hash is enabled. Unicast frames are received when the 6-bit hash function of the destination address points to a bit<br />
that is set in the hash register.<br />
MTI: Multicast Hash Enable<br />
0: Multicast hash is disabled.<br />
1: Multicast hash is enabled. Multicast frames are received when the 6-bit hash function of the destination address points to a bit<br />
that is set in the hash register.<br />
NBC: No Broadcast<br />
0: Frames addressed to the broadcast address of all ones are received.<br />
1: Frames addressed to the broadcast address of all ones are not received.<br />
JFRAME: Jumbo Frames<br />
0: Jumbo frames are disabled.<br />
1: Enable jumbo frames of up to 10240 bytes to be accepted.<br />
CAF: Copy All Frames<br />
0: Copy all frames is disabled.<br />
1: All valid frames are received.<br />
BR: Bitrate<br />
0: Data is transmitted least significant nibble first.<br />
1: Data is serialized and transmitted least significant bit first (10Mbps). Must be written before receive and transmit enable in the<br />
network control register. Serial interface is configured with transmit and receive data being driven out on TXD[0] and received on<br />
RXD[0] serially. Also the CRS and RX_DV are logically ORed together so either may be used as the data valid signal.<br />
FD: Full Duplex<br />
0: Full duplex mode is disabled.<br />
1: Full duplex mode is enabled. Transmit sub-module ignores the state of collision and carrier sense and allows receive while<br />
transmitting. Also controls the half duplex pin.<br />
SPD: Speed<br />
0: 10 Mbit/s speed.<br />
1: 100 Mbit/s speed. Bit value is reflected on the SPEED pin.<br />
511
24.7.3 Network Status Register<br />
Name: NSR<br />
Access Type: Read-only<br />
Offset: 0x08<br />
Reset Value: -<br />
32117D–AVR-01/12<br />
<strong>AT32UC3C</strong><br />
31 30 29 28 27 26 25 24<br />
- - - - - - - -<br />
23 22 21 20 19 18 17 16<br />
- - - - - - - -<br />
15 14 13 12 11 10 9 8<br />
- - - - - - - -<br />
7 6 5 4 3 2 1 0<br />
- - - - - IDLE MDIO -<br />
IDLE: IDLE Status<br />
0: PHY management logic is idle (i.e., has completed).<br />
1: PHY management logic is running.<br />
MDIO: MDIO Pin Status<br />
Use the PHY maintenance register for reading managed frames rather than this bit.<br />
512
24.7.4 Transmit Status Register<br />
Name: TSR<br />
Access Type: Read/Write<br />
Offset: 0x14<br />
Reset Value: 0x00000000<br />
32117D–AVR-01/12<br />
<strong>AT32UC3C</strong><br />
31 30 29 28 27 26 25 24<br />
- - - - - - - -<br />
23 22 21 20 19 18 17 16<br />
- - - - - - - -<br />
15 14 13 12 11 10 9 8<br />
- - - - - - - -<br />
7 6 5 4 3 2 1 0<br />
- UND COMP BEX TGO RLE COL UBR<br />
This register, when read, returns details of the status of a transmit. Once read, individual bits may be cleared by writing a<br />
one to them. It is not possible to write a bit to one by writing to the register.<br />
UND: Transmit Underrun<br />
This bit is set when transmit DMA was not able to read data from memory, either because the bus was not granted in time or<br />
because a used bit was read midway through frame transmission. If this occurs, the transmitter forces bad CRC.<br />
Write a one to clear this bit.<br />
0: No transmit underrun.<br />
1: Transmit underrun.<br />
COMP: Transmit Complete<br />
This bit is set when a frame has been transmitted.<br />
Write a one to clear this bit.<br />
0: Transmit is not completed.<br />
1: Transmit is completed.<br />
BEX: Buffers Exhausted Mid Frame<br />
This bit is set if the buffers run out during transmission of a frame. Then transmission stops, FCS shall be bad and TX_ER is<br />
asserted.<br />
Write a one to clear to this bit.<br />
0: Buffer is not exhausted.<br />
1: Buffer is exhausted.<br />
TGO: Transmit Go<br />
0: Transmit is inactive.<br />
1: Transmit is active.<br />
RLE: Retry Limit Exceeded<br />
This bit is set when retry limit has exceeded.<br />
Write a one to clear this bit.<br />
0: Retry limit is not exceeded.<br />
513
1: Retry limit is exceeded.<br />
COL: Collision Occurred<br />
This bit is set by the assertion of collision.<br />
Write a one to clear this bit.<br />
0: No collision detected.<br />
1: Collision detected.<br />
UBR: Used Bit Read<br />
This bit is set when a transmit buffer descriptor is read with its used bit set.<br />
Write a one to clear this bit.<br />
0: Used bit is not set.<br />
1: Used bit set.<br />
32117D–AVR-01/12<br />
<strong>AT32UC3C</strong><br />
514
24.7.5 Receive Buffer Queue Pointer Register<br />
Name: RBQP<br />
Access Type: Read/Write<br />
Offset: 0x18<br />
Reset Value: 0x00000000<br />
32117D–AVR-01/12<br />
<strong>AT32UC3C</strong><br />
31 30 29 28 27 26 25 24<br />
ADDR[29:22]<br />
23 22 21 20 19 18 17 16<br />
ADDR[21:14]<br />
15 14 13 12 11 10 9 8<br />
ADDR[13:6]<br />
7 6 5 4 3 2 1 0<br />
This register points to the entry in the receive buffer queue (descriptor list) currently being used. It is written with the start<br />
location of the receive buffer descriptor list. The lower order bits increment as buffers are used up and wrap to their original<br />
values after either 1024 buffers or when the wrap bit of the entry is set.<br />
Reading this register returns the location of the descriptor currently being accessed. This value is incremented as buffers<br />
are used. User should not use this register to determine where to remove received frames from the queue as it constantly<br />
changes when new frames are received. User should instead use the buffer descriptor queue checking the used bits.<br />
Receive buffer writes can be bursts of two words and, as with transmit buffer reads, it is recommended that bit 2 is always<br />
written to zero to prevent a burst crossing a 1K boundary, in violation of the System Bus specification.<br />
ADDR: Receive Buffer Queue Pointer Address<br />
Write this field to set the start address of the receive queue.<br />
Read this field to get the address of the current buffer being used.<br />
ADDR[5:0] - -<br />
515
24.7.6 Transmit Buffer Queue Pointer Register<br />
Name: TBQP<br />
Access Type: Read/Write<br />
Offset: 0x1C<br />
Reset Value: 0x00000000<br />
32117D–AVR-01/12<br />
<strong>AT32UC3C</strong><br />
31 30 29 28 27 26 25 24<br />
ADDR[29:22]<br />
23 22 21 20 19 18 17 16<br />
ADDR[21:14]<br />
15 14 13 12 11 10 9 8<br />
ADDR[13:6]<br />
7 6 5 4 3 2 1 0<br />
ADDR[5:0] - -<br />
This register points to the entry in the transmit buffer queue (descriptor list) currently being used. It is written with the start<br />
location of the transmit buffer descriptor list. The lower order bits increment as buffers are used up and wrap to their original<br />
values after either 1024 buffers or when the wrap bit of the entry is set. This register can only be written when bit TSR.TGO<br />
is low.<br />
As transmit buffer reads can be bursts of two words, it is recommended that bit 2 is always written to zero to prevent a burst<br />
crossing a 1K boundary, in violation of the System Bus specification.<br />
ADDR: Transmit buffer queue pointer address<br />
Write this field to set the start address of the transmit queue.<br />
Read this field to get the address of the first buffer of the frame being transmitted or about to be transmitted.<br />
516
24.7.7 Receive Status Register<br />
Name: RSR<br />
Access Type: Read/Write<br />
Offset: 0x20<br />
Reset Value: 0x00000000<br />
32117D–AVR-01/12<br />
<strong>AT32UC3C</strong><br />
31 30 29 28 27 26 25 24<br />
- - - - - - - -<br />
23 22 21 20 19 18 17 16<br />
- - - - - - - -<br />
15 14 13 12 11 10 9 8<br />
- - - - - - - -<br />
7 6 5 4 3 2 1 0<br />
- - - - - OVR REC BNA<br />
This register, when read, returns details of the status of a receive. Once read, individual bits may be cleared by writing a<br />
one to them. It is not possible to write a bit to one by writing to the register.<br />
OVR: Receive Overrun<br />
This bit is set when the DMA interface is unable to store the receive frame to memory, either because the bus was not granted in<br />
time or because a bus error was returned. The buffer is recovered if this happens.<br />
Write a one to clear this bit.<br />
0: No receive overrun detected.<br />
1: Receive overrun detected.<br />
REC: Frame Received<br />
This bit is set when one or more frames have been received and placed in memory.<br />
Write a one to clear this bit.<br />
0: No frame received.<br />
1: Frame received.<br />
BNA: Buffer Not Available<br />
The DMA reads the pointer each time a new frame starts, until a valid pointer is found. This bit is set at each attempt that fails<br />
even if it has not had a successful pointer read since it has been cleared.<br />
Write a one to clear this bit.<br />
0: Buffer is available.<br />
1: Buffer is not available because an attempt was made to get a new buffer and the pointer indicated that it was owned by the<br />
processor.<br />
517
24.7.8 Interrupt Status Register<br />
Name: ISR<br />
Access Type: Read/Write<br />
Offset: 0x24<br />
Reset Value: 0x00000000<br />
32117D–AVR-01/12<br />
<strong>AT32UC3C</strong><br />
31 30 29 28 27 26 25 24<br />
- - - - - - - -<br />
23 22 21 20 19 18 17 16<br />
- - - - - - - -<br />
15 14 13 12 11 10 9 8<br />
- - PTZ PFR HRESP ROVR - -<br />
7 6 5 4 3 2 1 0<br />
TCOMP TXERR RLE TUND TXUBR RXUBR RCOMP MFD<br />
PTZ: Pause Time Zero<br />
This bit is set when the pause time register (PTR) decrements to zero.<br />
This bit is cleared after read.<br />
0: PTR > 0.<br />
1: PTR = 0.<br />
PFR: Pause Frame Received<br />
This bit is cleared after read.<br />
0: No valid pause frame received.<br />
1: Valid pause frame received.<br />
HRESP: Hresp Not OK<br />
This bit is set when the DMA interface detects a bus error.<br />
This bit is cleared after read.<br />
0: HRESP is OK.<br />
1: HRESP is not OK.<br />
ROVR: Receive Overrun<br />
This bit is set when the receive overrun status bit is set (RSR.OVR).<br />
This bit is cleared after read.<br />
0: RSR.OVR is not set.<br />
1: RSR.OVR has been set.<br />
TCOMP: Transmit Complete<br />
This bit is set when a frame has been transmitted.<br />
This bit is cleared after read.<br />
0: Transmit is not completed.<br />
1: Transmit is completed.<br />
TXERR: Transmit Error<br />
This bit is set when transmit buffers exhausted in mid-frame.<br />
518
32117D–AVR-01/12<br />
<strong>AT32UC3C</strong><br />
This bit is cleared after read.<br />
0: No transmit error.<br />
1: Transmit error detected.<br />
RLE: Retry Limit Exceeded<br />
This bit is cleared after read.<br />
0: Retry limit is not exceeded.<br />
1: Retry limit is exceeded.<br />
TUND: Ethernet Transmit Buffer Underrun<br />
This bit is set if the DMA did not fetch frame data to transmit in time or HRESP returned not OK. It is also set if a used bit is read<br />
mid-frame or when a new transmit queue pointer is written.<br />
This bit is cleared after read.<br />
0: No underrun detected for transmit buffer.<br />
1: Underrun detected for transmit buffer.<br />
TXUBR: Transmit Used Bit Read<br />
This bit is cleared after read.<br />
0: Normal operation.<br />
1: Transmit buffer descriptor is read with its used bit set.<br />
RXUBR: Receive Used Bit Read<br />
This bit is cleared after read.<br />
0: Normal operation.<br />
1: Receive buffer descriptor is read with its used bit set.<br />
RCOMP: Receive Complete<br />
This bit is set when a frame has been stored in memory.<br />
This bit is cleared after read.<br />
0: Receive is not completed.<br />
1: Receive is completed.<br />
MFD: Management Frame Done<br />
This bit is cleared after read.<br />
0: Management frame is not done.<br />
1: Management frame is done. PHY maintenance register has completed its operation.<br />
519
24.7.9 Interrupt Enable Register<br />
Name: IER<br />
Access Type: Write-only<br />
Offset: 0x28<br />
Reset Value: 0x00000000<br />
32117D–AVR-01/12<br />
<strong>AT32UC3C</strong><br />
31 30 29 28 27 26 25 24<br />
- - - - - - - -<br />
23 22 21 20 19 18 17 16<br />
- - - - - - - -<br />
15 14 13 12 11 10 9 8<br />
- - PTZ PFR HRESP ROVR - -<br />
7 6 5 4 3 2 1 0<br />
TCOMP TXERR RLE TUND TXUBR RXUBR RCOMP MFD<br />
Writing a zero to a bit in this register has no effect.<br />
Writing a one to a bit in this register will clear the corresponding bit in IMR.<br />
520
24.7.10 Interrupt Disable Register<br />
Name: IDR<br />
Access Type: Write-only<br />
Offset: 0x2C<br />
Reset Value: 0x00000000<br />
32117D–AVR-01/12<br />
<strong>AT32UC3C</strong><br />
31 30 29 28 27 26 25 24<br />
- - - - - - - -<br />
23 22 21 20 19 18 17 16<br />
- - - - - - - -<br />
15 14 13 12 11 10 9 8<br />
- - PTZ PFR HRESP ROVR - -<br />
7 6 5 4 3 2 1 0<br />
TCOMP TXERR RLE TUND TXUBR RXUBR RCOMP MFD<br />
Writing a zero to a bit in this register has no effect.<br />
Writing a one to a bit in this register will set the corresponding bit in IMR.<br />
521
24.7.11 Interrupt Mask Register<br />
Name: IMR<br />
Access Type: Read-only<br />
Offset: 0x30<br />
Reset Value: 0x00003FFF<br />
32117D–AVR-01/12<br />
<strong>AT32UC3C</strong><br />
31 30 29 28 27 26 25 24<br />
- - - - - - - -<br />
23 22 21 20 19 18 17 16<br />
- - - - - - - -<br />
15 14 13 12 11 10 9 8<br />
- - PTZ PFR HRESP ROVR - -<br />
7 6 5 4 3 2 1 0<br />
TCOMP TXERR RLE TUND TXUBR RXUBR RCOMP MFD<br />
0: The corresponding interrupt is enabled.<br />
1: The corresponding interrupt is disabled.<br />
A bit in this register is set when the corresponding bit in IDR is written to one.<br />
A bit in this register is cleared when the corresponding bit in IER is written to one.<br />
522
24.7.12 PHY Maintenance Register<br />
Name: MAN<br />
Access Type: Read/Write<br />
Offset: 0x34<br />
Reset Value: 0x00000000<br />
32117D–AVR-01/12<br />
<strong>AT32UC3C</strong><br />
31 30 29 28 27 26 25 24<br />
SOF RW PHYA[4:1]<br />
23 22 21 20 19 18 17 16<br />
PHYA REGA CODE<br />
15 14 13 12 11 10 9 8<br />
DATA[15:8]<br />
7 6 5 4 3 2 1 0<br />
DATA[7:0]<br />
SOF: Start Of Frame<br />
Must be written to 01 for a valid frame.<br />
RW: Read/Write<br />
10: Read operation<br />
01: Write operation.<br />
Any other value is an invalid PHY management frame<br />
PHYA: PHY Address<br />
PHY address.<br />
REGA: Register Address<br />
PHY register address to access.<br />
CODE: Code value<br />
Must be written to 10.<br />
DATA: PHY Data<br />
For a write operation, write the data to be written to the PHY.<br />
After a read operation, contains the data read from the PHY.<br />
523
24.7.13 Pause Time Register<br />
Name: PTR<br />
Access Type: Read/Write<br />
Offset: 0x38<br />
Reset Value: 0x00000000<br />
32117D–AVR-01/12<br />
<strong>AT32UC3C</strong><br />
31 30 29 28 27 26 25 24<br />
- - - - - - - -<br />
23 22 21 20 19 18 17 16<br />
- - - - - - - -<br />
15 14 13 12 11 10 9 8<br />
PTIME[15:8]<br />
7 6 5 4 3 2 1 0<br />
PTIME[7:0]<br />
PTIME: Pause Time<br />
Current value of the pause time register which is decremented every 512 bit times.<br />
524
24.7.14 Pause Frames Received Register<br />
Name: PFR<br />
Access Type: Read/Write<br />
Offset: 0x3C<br />
Reset Value: 0x00000000<br />
32117D–AVR-01/12<br />
<strong>AT32UC3C</strong><br />
31 30 29 28 27 26 25 24<br />
- - - - - - - -<br />
23 22 21 20 19 18 17 16<br />
- - - - - - - -<br />
15 14 13 12 11 10 9 8<br />
PFROK[15:8]<br />
7 6 5 4 3 2 1 0<br />
PFROK[7:0]<br />
PFROK: Pauses Frames Received OK<br />
Number of good pause frames received. A good frame has a length of 64 to 1518 bytes (1536 if bit NCFGR.FS is set, 10240 if<br />
bit NCFGR.JFRAME is set) and has no FCS, alignment or receive symbol errors.<br />
525
24.7.15 Frames Transmitted OK Register<br />
Name: FTO<br />
Access Type: Read/Write<br />
Offset: 0x40<br />
Reset Value: 0x00000000<br />
32117D–AVR-01/12<br />
<strong>AT32UC3C</strong><br />
31 30 29 28 27 26 25 24<br />
- - - - - - - -<br />
23 22 21 20 19 18 17 16<br />
FTOK[23:16]<br />
15 14 13 12 11 10 9 8<br />
FTOK[15:8]<br />
7 6 5 4 3 2 1 0<br />
FTOK[7:0]<br />
FTOK: Frames Transmitted OK<br />
Number of frames successfully transmitted, i.e., no underrun and not too many retries.<br />
526
24.7.16 Single Collision Frames Register<br />
Name: SCF<br />
Access Type: Read/Write<br />
Offset: 0x44<br />
Reset Value: 0x00000000<br />
32117D–AVR-01/12<br />
<strong>AT32UC3C</strong><br />
31 30 29 28 27 26 25 24<br />
- - - - - - - -<br />
23 22 21 20 19 18 17 16<br />
- - - - - - - -<br />
15 14 13 12 11 10 9 8<br />
SCF[15:8]<br />
7 6 5 4 3 2 1 0<br />
SCF[7:0]<br />
SCF: Single Collision Frames<br />
Number of frames experiencing a single collision before being successfully transmitted, i.e., no underrun.<br />
527
24.7.17 Multicollision Frames Register<br />
Name: MCF<br />
Access Type: Read/Write<br />
Offset: 0x48<br />
Reset Value: 0x00000000<br />
32117D–AVR-01/12<br />
<strong>AT32UC3C</strong><br />
31 30 29 28 27 26 25 24<br />
- - - - - - - -<br />
23 22 21 20 19 18 17 16<br />
- - - - - - - -<br />
15 14 13 12 11 10 9 8<br />
MCF[15:8]<br />
7 6 5 4 3 2 1 0<br />
MCF[7:0]<br />
MCF: Multicollision Frames<br />
Number of frames experiencing between 2 and 15 collisions prior to being successfully transmitted, i.e., no underrun and not<br />
too many retries.<br />
528
24.7.18 Frames Received OK Register<br />
Name: FRO<br />
Access Type: Read/Write<br />
Offset: 0x4C<br />
Reset Value: 0x00000000<br />
32117D–AVR-01/12<br />
<strong>AT32UC3C</strong><br />
31 30 29 28 27 26 25 24<br />
- - - - - - - -<br />
23 22 21 20 19 18 17 16<br />
FROK[23:16]<br />
15 14 13 12 11 10 9 8<br />
FROK[15:8]<br />
7 6 5 4 3 2 1 0<br />
FROK[7:0]<br />
FROK: Frames Received OK<br />
Number of frames successfully received, i.e., address recognized and successfully copied to memory. A good frame has a<br />
length of 64 to 1518 bytes (1536 if bit NCFGR.FS is set, 10240 if bit NCFGR.JFRAME is set) and has no FCS, alignment or<br />
receive symbol errors.<br />
529
24.7.19 Frames Check Sequence Errors Register<br />
Name: FCSE<br />
Access Type: Read/Write<br />
Offset: 0x50<br />
Reset Value: 0x00000000<br />
32117D–AVR-01/12<br />
<strong>AT32UC3C</strong><br />
31 30 29 28 27 26 25 24<br />
- - - - - - - -<br />
23 22 21 20 19 18 17 16<br />
- - - - - - - -<br />
15 14 13 12 11 10 9 8<br />
- - - - - - - -<br />
7 6 5 4 3 2 1 0<br />
FCSE<br />
FCSE: Frame Check Sequence Errors<br />
Number of frames which have an integral number of bytes, have bad CRC and are between 64 and 1518 bytes in length (1536<br />
if bit NCFGR.FS is set, 10240 if bit NCFGR.JFRAME is set). This register is also incremented if a symbol error is detected and<br />
the frame is of valid length and has an integral number of bytes.<br />
530
24.7.20 Alignment Errors Register<br />
Name: ALE<br />
Access Type: Read/Write<br />
Offset: 0x54<br />
Reset Value: 0x00000000<br />
32117D–AVR-01/12<br />
<strong>AT32UC3C</strong><br />
31 30 29 28 27 26 25 24<br />
- - - - - - - -<br />
23 22 21 20 19 18 17 16<br />
- - - - - - - -<br />
15 14 13 12 11 10 9 8<br />
- - - - - - - -<br />
7 6 5 4 3 2 1 0<br />
ALE<br />
ALE: Alignment Errors<br />
Number of frames which have not an integral number of bytes and have bad CRC when their length is truncated to an integral<br />
number of bytes and are between 64 and 1518 bytes in length (1536 if bit NCFGR.FS is set, 10240 if bit NCFGR.JFRAME is<br />
set). This register is also incremented if a symbol error is detected and the frame is of valid length and does not have an integral<br />
number of bytes.<br />
531
24.7.21 Deferred Transmission Frames Register<br />
Name: DTF<br />
Access Type: Read/Write<br />
Offset: 0x58<br />
Reset Value: 0x00000000<br />
32117D–AVR-01/12<br />
<strong>AT32UC3C</strong><br />
31 30 29 28 27 26 25 24<br />
- - - - - - - -<br />
23 22 21 20 19 18 17 16<br />
- - - - - - - -<br />
15 14 13 12 11 10 9 8<br />
DTF[15:8]<br />
7 6 5 4 3 2 1 0<br />
DTF[7:0]<br />
DTF: Deferred Transmission Frames<br />
Number of frames experiencing deferral due to carrier sense being active on their first attempt at transmission. Frames involved<br />
in any collision are not counted nor are frames that experienced a transmit underrun.<br />
532
24.7.22 Late Collisions Register<br />
Name: LCOL<br />
Access Type: Read/Write<br />
Offset: 0x5C<br />
Reset Value: 0x00000000<br />
32117D–AVR-01/12<br />
<strong>AT32UC3C</strong><br />
31 30 29 28 27 26 25 24<br />
- - - - - - - -<br />
23 22 21 20 19 18 17 16<br />
- - - - - - - -<br />
15 14 13 12 11 10 9 8<br />
- - - - - - - -<br />
7 6 5 4 3 2 1 0<br />
LCOL<br />
LCOL: Late Collisions<br />
Number of frames that experience a collision after the slot time (512 bits) has expired. A late collision is counted twice; i.e., both<br />
as a collision and a late collision.<br />
533
24.7.23 Excessive Collisions Register<br />
Name: EXCOL<br />
Access Type: Read/Write<br />
Offset: 0x60<br />
Reset Value: 0x00000000<br />
32117D–AVR-01/12<br />
<strong>AT32UC3C</strong><br />
31 30 29 28 27 26 25 24<br />
- - - - - - - -<br />
23 22 21 20 19 18 17 16<br />
- - - - - - - -<br />
15 14 13 12 11 10 9 8<br />
- - - - - - - -<br />
7 6 5 4 3 2 1 0<br />
EXCOL<br />
EXCOL: Excessive Collisions<br />
Number of frames that failed to be transmitted because they experienced 16 collisions.<br />
534
24.7.24 Transmit Underrun Errors Register<br />
Name: TUND<br />
Access Type: Read/Write<br />
Offset: 0x64<br />
Reset Value: 0x00000000<br />
32117D–AVR-01/12<br />
<strong>AT32UC3C</strong><br />
31 30 29 28 27 26 25 24<br />
- - - - - - - -<br />
23 22 21 20 19 18 17 16<br />
- - - - - - - -<br />
15 14 13 12 11 10 9 8<br />
- - - - - - - -<br />
7 6 5 4 3 2 1 0<br />
TUND<br />
TUND: Transmit Underruns<br />
Number of frames not transmitted due to a transmit DMA underrun. If this register is incremented, then no other statistics<br />
register is incremented.<br />
535
24.7.25 Carrier Sense Errors Register<br />
Name: CSE<br />
Access Type: Read/Write<br />
Offset: 0x68<br />
Reset Value: 0x00000000<br />
32117D–AVR-01/12<br />
<strong>AT32UC3C</strong><br />
31 30 29 28 27 26 25 24<br />
- - - - - - - -<br />
23 22 21 20 19 18 17 16<br />
- - - - - - - -<br />
15 14 13 12 11 10 9 8<br />
- - - - - - - -<br />
7 6 5 4 3 2 1 0<br />
CSE<br />
CSE: Carrier Sense Errors<br />
Number of frames transmitted where carrier sense was not seen during transmission or where carrier sense was deasserted<br />
after being asserted in a transmit frame without collision (no underrun). Only incremented in half-duplex mode. The only effect<br />
of a carrier sense error is to increment this register. The behavior of the other statistics registers is unaffected by the detection<br />
of a carrier sense error.<br />
536
24.7.26 Received Resource Errors Register<br />
Name: RRE<br />
Access Type: Read/Write<br />
Offset: 0x6C<br />
Reset Value: 0x00000000<br />
32117D–AVR-01/12<br />
<strong>AT32UC3C</strong><br />
31 30 29 28 27 26 25 24<br />
- - - - - - - -<br />
23 22 21 20 19 18 17 16<br />
- - - - - - - -<br />
15 14 13 12 11 10 9 8<br />
RRE[15:8]<br />
7 6 5 4 3 2 1 0<br />
RRE[7:0]<br />
RRE: Received Resource Errors<br />
Number of frames that address matched but could not be copied to memory because no receive buffer was available.<br />
537
24.7.27 Received Overrun Errors Register<br />
Name: ROVR<br />
Access Type: Read/Write<br />
Offset: 0x70<br />
Reset Value: 0x00000000<br />
32117D–AVR-01/12<br />
<strong>AT32UC3C</strong><br />
31 30 29 28 27 26 25 24<br />
- - - - - - - -<br />
23 22 21 20 19 18 17 16<br />
- - - - - - - -<br />
15 14 13 12 11 10 9 8<br />
- - - - - - - -<br />
7 6 5 4 3 2 1 0<br />
ROVR<br />
ROVR: Received Overrun Errors<br />
Number of frames that are address recognized but were not copied to memory because of receive DMA overrun.<br />
538
24.7.28 Received Symbol Errors Register<br />
Name: RSE<br />
Access Type: Read/Write<br />
Offset: 0x74<br />
Reset Value: 0x00000000<br />
32117D–AVR-01/12<br />
<strong>AT32UC3C</strong><br />
31 30 29 28 27 26 25 24<br />
- - - - - - - -<br />
23 22 21 20 19 18 17 16<br />
- - - - - - - -<br />
15 14 13 12 11 10 9 8<br />
- - - - - - - -<br />
7 6 5 4 3 2 1 0<br />
RSE<br />
RSE: Received Symbol Errors<br />
Number of frames that had RX_ER asserted during reception. Receive symbol errors are also counted as an FCS or alignment<br />
error if the frame length is between 64 and 1518 bytes (1536 if bit NCFGR.FS is set, 10240 if bit NCFGR.JFRAME is set). If the<br />
frame is larger, it is recorded as a jabber error.<br />
539
24.7.29 Excessive Length Errors Register<br />
Name: ELE<br />
Access Type: Read/Write<br />
Offset: 0x78<br />
Reset Value: 0x00000000<br />
32117D–AVR-01/12<br />
<strong>AT32UC3C</strong><br />
31 30 29 28 27 26 25 24<br />
- - - - - - - -<br />
23 22 21 20 19 18 17 16<br />
- - - - - - - -<br />
15 14 13 12 11 10 9 8<br />
- - - - - - - -<br />
7 6 5 4 3 2 1 0<br />
EXL<br />
EXL: Excessive Length Errors<br />
Number of frames received exceeding 1518 bytes (1536 if bit NCFGR.FS is set, 10240 if bit NCFGR.JFRAME is set) in length<br />
but do not have either a CRC error, an alignment error nor a receive symbol error.<br />
540
24.7.30 Receive Jabbers Register<br />
Name: RJA<br />
Access Type: Read/Write<br />
Offset: 0x7C<br />
Reset Value: 0x00000000<br />
32117D–AVR-01/12<br />
<strong>AT32UC3C</strong><br />
31 30 29 28 27 26 25 24<br />
- - - - - - - -<br />
23 22 21 20 19 18 17 16<br />
- - - - - - - -<br />
15 14 13 12 11 10 9 8<br />
- - - - - - - -<br />
7 6 5 4 3 2 1 0<br />
RJB<br />
RJB: Receive Jabbers<br />
Number of frames received exceeding 1518 bytes (1536 if bit NCFGR.FS is set, 10240 if bit NCFGR.JFRAME is set) in length<br />
and have either a CRC error, an alignment error or a receive symbol error.<br />
541
24.7.31 Undersize Frames Register<br />
Name: USF<br />
Access Type: Read/Write<br />
Offset: 0x80<br />
Reset Value: 0x00000000<br />
32117D–AVR-01/12<br />
<strong>AT32UC3C</strong><br />
31 30 29 28 27 26 25 24<br />
- - - - - - - -<br />
23 22 21 20 19 18 17 16<br />
- - - - - - - -<br />
15 14 13 12 11 10 9 8<br />
- - - - - - - -<br />
7 6 5 4 3 2 1 0<br />
USF<br />
USF: Undersize Frames<br />
Number of frames received less than 64 bytes in length but do not have either a CRC error, an alignment error or a receive<br />
symbol error.<br />
542
24.7.32 SQE Test Errors Register<br />
Name: STE<br />
Access Type: Read/Write<br />
Offset: 0x84<br />
Reset Value: 0x00000000<br />
32117D–AVR-01/12<br />
<strong>AT32UC3C</strong><br />
31 30 29 28 27 26 25 24<br />
- - - - - - - -<br />
23 22 21 20 19 18 17 16<br />
- - - - - - - -<br />
15 14 13 12 11 10 9 8<br />
- - - - - - - -<br />
7 6 5 4 3 2 1 0<br />
SQER<br />
SQER: SQE Test Errors<br />
Number of frames where COL was not asserted within 96 bit times (interframe gap) of TX_EN being deasserted in half duplex<br />
mode.<br />
543
24.7.33 Received Length Field Mismatch Register<br />
Name: RLE<br />
Access Type: Read/Write<br />
Offset: 0x88<br />
Reset Value: 0x00000000<br />
32117D–AVR-01/12<br />
<strong>AT32UC3C</strong><br />
31 30 29 28 27 26 25 24<br />
- - - - - - - -<br />
23 22 21 20 19 18 17 16<br />
- - - - - - - -<br />
15 14 13 12 11 10 9 8<br />
- - - - - - - -<br />
7 6 5 4 3 2 1 0<br />
RLFM<br />
RLFM: Receive Length Field Mismatch<br />
Number of frames received that have a measured length shorter than extracted from its length field. Checking is enabled by bit<br />
NCFGR.RLCE. Frames containing a type ID in bytes 13 and 14 (i.e., length/type ID 0x0600) are not counted as length field<br />
errors, neither are excessive length frames.<br />
544
24.7.34 Transmitted Pause Frames Register<br />
Name: TPF<br />
Access Type: Read/Write<br />
Offset: 0x8C<br />
Reset Value: 0x00000000<br />
32117D–AVR-01/12<br />
<strong>AT32UC3C</strong><br />
31 30 29 28 27 26 25 24<br />
- - - - - - - -<br />
23 22 21 20 19 18 17 16<br />
- - - - - - - -<br />
15 14 13 12 11 10 9 8<br />
TPF: Transmitted Pause Frames<br />
Number of pause frames transmitted.<br />
TPF[15:8]<br />
7 6 5 4 3 2 1 0<br />
TPF[7:0]<br />
545
24.7.35 Hash Register Bottom<br />
Name: HRB<br />
Access Type: Read/Write<br />
Offset: 0x90<br />
Reset Value: 0x00000000<br />
32117D–AVR-01/12<br />
<strong>AT32UC3C</strong><br />
31 30 29 28 27 26 25 24<br />
ADDR[31:24]<br />
23 22 21 20 19 18 17 16<br />
ADDR[23:16]<br />
15 14 13 12 11 10 9 8<br />
ADDR[15:8]<br />
7 6 5 4 3 2 1 0<br />
ADDR[7:0]<br />
ADDR: Hash Address Low<br />
Low value of the hash address register. See ”Hash Addressing” on page 498.<br />
546
24.7.36 Hash Register Top<br />
Name: HRT<br />
Access Type: Read/Write<br />
Offset: 0x94<br />
Reset Value: 0x00000000<br />
32117D–AVR-01/12<br />
<strong>AT32UC3C</strong><br />
31 30 29 28 27 26 25 24<br />
ADDR[31:24]<br />
23 22 21 20 19 18 17 16<br />
ADDR[23:16]<br />
15 14 13 12 11 10 9 8<br />
ADDR[15:8]<br />
7 6 5 4 3 2 1 0<br />
ADDR[7:0]<br />
ADDR: Hash Address High<br />
High value of the hash address register. See ”Hash Addressing” on page 498.<br />
547
24.7.37 Specific Address 1 Bottom Register<br />
Name: SA1B<br />
Access Type: Read/Write<br />
Offset: 0x98<br />
Reset Value: 0x00000000<br />
32117D–AVR-01/12<br />
<strong>AT32UC3C</strong><br />
31 30 29 28 27 26 25 24<br />
ADDR[31:24]<br />
23 22 21 20 19 18 17 16<br />
ADDR[23:16]<br />
15 14 13 12 11 10 9 8<br />
ADDR[15:8]<br />
7 6 5 4 3 2 1 0<br />
ADDR[7:0]<br />
ADDR: Destination Address Low<br />
Low value of the destination address. Bit zero indicates whether the address is multicast or unicast and corresponds to the least<br />
significant bit of the first byte received.<br />
548
24.7.38 Specific Address 1 Top Register<br />
Name: SA1T<br />
Access Type: Read/Write<br />
Offset: 0x9C<br />
Reset Value: 0x00000000<br />
32117D–AVR-01/12<br />
<strong>AT32UC3C</strong><br />
31 30 29 28 27 26 25 24<br />
- - - - - - - -<br />
23 22 21 20 19 18 17 16<br />
- - - - - - - -<br />
15 14 13 12 11 10 9 8<br />
ADDR: Destination Address High<br />
High value of the destination address (bits 32 to 47).<br />
ADDR[15:8]<br />
7 6 5 4 3 2 1 0<br />
ADDR[7:0]<br />
549
24.7.39 Specific Address 2 Bottom Register<br />
Name: SA2B<br />
Access Type: Read/Write<br />
Offset: 0xA0<br />
Reset Value: 0x00000000<br />
32117D–AVR-01/12<br />
<strong>AT32UC3C</strong><br />
31 30 29 28 27 26 25 24<br />
ADDR[31:24]<br />
23 22 21 20 19 18 17 16<br />
ADDR[23:16]<br />
15 14 13 12 11 10 9 8<br />
ADDR[15:8]<br />
7 6 5 4 3 2 1 0<br />
ADDR[7:0]<br />
ADDR: Destination Address Low<br />
Low value of the destination address. Bit zero indicates whether the address is multicast or unicast and corresponds to the least<br />
significant bit of the first byte received.<br />
550
24.7.40 Specific Address 2 Top Register<br />
Name: SA2T<br />
Access Type: Read/Write<br />
Offset: 0xA4<br />
Reset Value: 0x00000000<br />
32117D–AVR-01/12<br />
<strong>AT32UC3C</strong><br />
31 30 29 28 27 26 25 24<br />
- - - - - - - -<br />
23 22 21 20 19 18 17 16<br />
- - - - - - - -<br />
15 14 13 12 11 10 9 8<br />
ADDR: Destination Address High<br />
High value of the destination address (bits 32 to 47).<br />
ADDR[15:8]<br />
7 6 5 4 3 2 1 0<br />
ADDR[7:0]<br />
551
24.7.41 Specific Address 3 Bottom Register<br />
Name: SA3B<br />
Access Type: Read/Write<br />
Offset: 0xA8<br />
Reset Value: 0x00000000<br />
32117D–AVR-01/12<br />
<strong>AT32UC3C</strong><br />
31 30 29 28 27 26 25 24<br />
ADDR[31:24]<br />
23 22 21 20 19 18 17 16<br />
ADDR[23:16]<br />
15 14 13 12 11 10 9 8<br />
ADDR[15:8]<br />
7 6 5 4 3 2 1 0<br />
ADDR[7:0]<br />
ADDR: Destination Address Low<br />
Low value of the destination address. Bit zero indicates whether the address is multicast or unicast and corresponds to the least<br />
significant bit of the first byte received.<br />
552
24.7.42 Specific Address 3 Top Register<br />
Name: SA3T<br />
Access Type: Read/Write<br />
Offset: 0xAC<br />
Reset Value: 0x00000000<br />
32117D–AVR-01/12<br />
<strong>AT32UC3C</strong><br />
31 30 29 28 27 26 25 24<br />
- - - - - - - -<br />
23 22 21 20 19 18 17 16<br />
- - - - - - - -<br />
15 14 13 12 11 10 9 8<br />
ADDR: Destination Address High<br />
High value of the destination address (bits 32 to 47).<br />
ADDR[15:8]<br />
7 6 5 4 3 2 1 0<br />
ADDR[7:0]<br />
553
24.7.43 Specific Address 4 Bottom Register<br />
Name: SA4B<br />
Access Type: Read/Write<br />
Offset: 0xB0<br />
Reset Value: 0x00000000<br />
32117D–AVR-01/12<br />
<strong>AT32UC3C</strong><br />
31 30 29 28 27 26 25 24<br />
ADDR[31:24]<br />
23 22 21 20 19 18 17 16<br />
ADDR[23:16]<br />
15 14 13 12 11 10 9 8<br />
ADDR[15:8]<br />
7 6 5 4 3 2 1 0<br />
ADDR[7:0]<br />
ADDR: Destination Address Low<br />
Low value of the destination address. Bit zero indicates whether the address is multicast or unicast and corresponds to the least<br />
significant bit of the first byte received.<br />
554
24.7.44 Specific Address 4 Top Register<br />
Name: SA4T<br />
Access Type: Read/Write<br />
Offset: 0xB4<br />
Reset Value: 0x00000000<br />
32117D–AVR-01/12<br />
<strong>AT32UC3C</strong><br />
31 30 29 28 27 26 25 24<br />
- - - - - - - -<br />
23 22 21 20 19 18 17 16<br />
- - - - - - - -<br />
15 14 13 12 11 10 9 8<br />
ADDR: Destination Address High<br />
High value of the destination address (bits 32 to 47).<br />
ADDR[15:8]<br />
7 6 5 4 3 2 1 0<br />
ADDR[7:0]<br />
555
24.7.45 Type ID Checking Register<br />
Name: TID<br />
Access Type: Read/Write<br />
Offset: 0xB8<br />
Reset Value: 0x00000000<br />
32117D–AVR-01/12<br />
<strong>AT32UC3C</strong><br />
31 30 29 28 27 26 25 24<br />
- - - - - - - -<br />
23 22 21 20 19 18 17 16<br />
- - - - - - - -<br />
15 14 13 12 11 10 9 8<br />
TID[15:8]<br />
7 6 5 4 3 2 1 0<br />
TID[7:0]<br />
TID: Type ID Checking<br />
Comparison value for received frames (TypeID/Length field).<br />
556
24.7.46 Transmit Pause Quantum Register<br />
Name: TPQ<br />
Access Type: Read/Write<br />
Offset: 0xBC<br />
Reset Value: 0x0000FFFF<br />
32117D–AVR-01/12<br />
<strong>AT32UC3C</strong><br />
31 30 29 28 27 26 25 24<br />
- - - - - - - -<br />
23 22 21 20 19 18 17 16<br />
- - - - - - - -<br />
15 14 13 12 11 10 9 8<br />
TPQ[15:8]<br />
7 6 5 4 3 2 1 0<br />
TPQ[7:0]<br />
TPQ: Transmit Pause Quantum<br />
Used in hardware generation of transmitted pause frames as value for pause quantum.<br />
557
24.7.47 User Input/Output Register<br />
Name: USRIO<br />
Access Type: Read/Write<br />
Offset: 0xC0<br />
Reset Value: 0x00000000<br />
32117D–AVR-01/12<br />
<strong>AT32UC3C</strong><br />
31 30 29 28 27 26 25 24<br />
- - - - - - - -<br />
23 22 21 20 19 18 17 16<br />
- - - WOL SPD BR HD LB<br />
15 14 13 12 11 10 9 8<br />
- - - - - - - -<br />
7 6 5 4 3 2 1 0<br />
- - - - TPZ TP EAM RMII<br />
This register, when read, returns details of the status of a receive. Once read, individual bits 0 to 3 may be cleared by writing<br />
a one to them. It is not possible to write a bit to one by writing to the register.<br />
WOL: Wake-On LAN<br />
0: Wake-on LAN not detected.<br />
1: Wake-on LAN detected (read-only).<br />
SPD: Speed<br />
Image of NCFGR.SPD bit (read-only).<br />
BR: Bitrate<br />
Image of NCFGR.BR bit (read-only).<br />
HD: Half Duplex<br />
Inversion of NCFGR.FD bit (read-only).<br />
LB: Loopback<br />
Image of NCR.LB bit (read-only).<br />
TPZ: Transmit Pause Frame Zero Quantum<br />
0: Pause frame is TPQ register value quantum length.<br />
1: Pause frame is zero quantum length.<br />
TP: Transmit Pause Frame<br />
Toggle this bit to send a Pause frame.<br />
EAM: External Address Match<br />
0: No frame is copied to memory.<br />
1: Frame is copied to memory if NCFGR.EAE is set.<br />
RMII: RMII mode<br />
0: RMII operation mode.<br />
1: MII operation mode.<br />
558
24.7.48 Wake-On-LAN Register<br />
Name: WOL<br />
Access Type: Read/Write<br />
Offset: 0xC4<br />
Reset Value: 0x0000FFFF<br />
32117D–AVR-01/12<br />
<strong>AT32UC3C</strong><br />
31 30 29 28 27 26 25 24<br />
- - - - - - - -<br />
23 22 21 20 19 18 17 16<br />
- - - - MTI SA1 ARP MAG<br />
15 14 13 12 11 10 9 8<br />
IP[15:8]<br />
7 6 5 4 3 2 1 0<br />
IP[7:0]<br />
MTI: Multicast Hash Event Enable<br />
0: Multicast hash events are disabled.<br />
1:Multicast hash events assert WOL pin.<br />
SA1: Specific Address Register 1 Event Enable<br />
0: SAR1 events are disabled.<br />
1: SAR1 events assert WOL pin.<br />
ARP: ARP Request Event Enable<br />
0: ARP request events are disabled.<br />
1: ARP request events assert WOL pin.<br />
MAG: Magic Packet Event Enable<br />
0: Magic packet events are disabled.<br />
1: Magic packet events assert WOL pin.<br />
IP: ARP request IP address<br />
16 LSB bits of target IP. When matched, a wake-on-LAN event is generated. Zero value does not generate an event, even if it is<br />
matched by the received frame.<br />
559
24.7.49 Version Register<br />
Name: VERSION<br />
Access Type: Read-only<br />
Offset: 0xFC<br />
Reset Value: -<br />
32117D–AVR-01/12<br />
<strong>AT32UC3C</strong><br />
31 30 29 28 27 26 25 24<br />
PR[15:8]<br />
23 22 21 20 19 18 17 16<br />
PR[7:0]<br />
15 14 13 12 11 10 9 8<br />
VERSION[15:8]<br />
7 6 5 4 3 2 1 0<br />
VERSION[7:0]<br />
PR: Part Reference<br />
Reserved. No functionality associated.<br />
VERSION: Version Number<br />
Version number of the module. No functionality associated.<br />
560
32117D–AVR-01/12<br />
<strong>AT32UC3C</strong><br />
24.8 Module Configuration<br />
The specific configuration for each MACB instance is listed in the following tables. The module<br />
bus clocks listed here are connected to the system bus clocks. Please refer to the Power Manager<br />
chapter for details.<br />
Table 24-7. Module Clock Name<br />
Module name Clock Name Description<br />
MACB<br />
CLK_MACB_HSB HSB clock<br />
CLK_MACB_PB Peripheral Bus clock from the PBB clock domain<br />
Table 24-8. Register Reset Values<br />
Module name Clock name<br />
VERSION 0x0000101D<br />
561
25. Universal Synchronous Asynchronous Receiver Transmitter (USART)<br />
25.1 Features<br />
25.2 Overview<br />
32117D–AVR-01/12<br />
Rev: 6.0.2.1<br />
<strong>AT32UC3C</strong><br />
Programmable Baud Rate Generator<br />
5- to 9-bit Full-duplex Synchronous or Asynchronous Serial Communications<br />
– 1, 1.5 or 2 Stop Bits in Asynchronous Mode or 1 or 2 Stop Bits in Synchronous Mode<br />
– Parity Generation and Error Detection<br />
– Framing Error Detection, Overrun Error Detection<br />
– MSB- or LSB-first<br />
– Optional Break Generation and Detection<br />
– By 8 or by 16 Over-sampling Receiver Frequency<br />
– Optional Hardware Handshaking RTS-CTS<br />
– Optional Modem Signal Management DTR-DSR-DCD-RI<br />
– Receiver Time-out and Transmitter Timeguard<br />
– Optional Multidrop Mode with Address Generation and Detection<br />
RS485 with Driver Control Signal<br />
ISO7816, T = 0 or T = 1 Protocols for Interfacing with Smart Cards<br />
– NACK Handling, Error Counter with Repetition and Iteration Limit<br />
IrDA Modulation and Demodulation<br />
– Communication at up to 115.2 Kbps<br />
SPI Mode<br />
– Master or Slave<br />
– Serial Clock Programmable Phase and Polarity<br />
– SPI Serial Clock (CLK) Frequency up to Internal Clock Frequency CLK_USART/4<br />
LIN Mode<br />
– Compliant with LIN 1.3 and LIN 2.0 specifications<br />
– Master or Slave<br />
– Processing of frames with up to 256 data bytes<br />
– Response Data length can be configurable or defined automatically by the Identifier<br />
– Self synchronization in Slave node configuration<br />
– Automatic processing and verification of the “Synch Break” and the “Synch Field”<br />
– The “Synch Break” is detected even if it is partially superimposed with a data byte<br />
– Automatic Identifier parity calculation/sending and verification<br />
– Parity sending and verification can be disabled<br />
– Automatic Checksum calculation/sending and verification<br />
– Checksum sending and verification can be disabled<br />
– Support both “Classic” and “Enhanced” checksum types<br />
– Full LIN error checking and reporting<br />
– Frame Slot Mode: the Master allocates slots to the scheduled frames automatically.<br />
– Generation of the Wakeup signal<br />
Test Modes<br />
– Remote Loopback, Local Loopback, Automatic Echo<br />
Supports Connection of Two Peripheral DMA Controller Channels (PDCA)<br />
– Offers Buffer Transfer without Processor Intervention<br />
The Universal Synchronous Asynchronous Receiver Transceiver (USART) provides one full<br />
duplex universal synchronous asynchronous serial link. Data frame format is widely programma-<br />
562
32117D–AVR-01/12<br />
<strong>AT32UC3C</strong><br />
ble (data length, parity, number of stop bits) to support a maximum of standards. The receiver<br />
implements parity error, framing error and overrun error detection. The receiver time-out enables<br />
handling variable-length frames and the transmitter timeguard facilitates communications with<br />
slow remote devices. Multidrop communications are also supported through address bit handling<br />
in reception and transmission.<br />
The USART features three test modes: remote loopback, local loopback and automatic echo.<br />
The USART supports specific operating modes providing interfaces on RS485, LIN and SPI<br />
buses, with ISO7816 T = 0 or T = 1 smart card slots, infrared transceivers and connection to<br />
modem ports. The hardware handshaking feature enables an out-of-band flow control by automatic<br />
management of the pins RTS and CTS.<br />
The USART supports the connection to the Peripheral DMA Controller, which enables data<br />
transfers to the transmitter and from the receiver. The Peripheral DMA Controller provides<br />
chained buffer management without any intervention of the processor.<br />
563
25.3 Block Diagram<br />
Figure 25-1. USART Block Diagram<br />
32117D–AVR-01/12<br />
INTC<br />
Power<br />
Manager<br />
USART<br />
Interrupt<br />
CLK_USART<br />
DIV<br />
USART<br />
CLK_USART/DIV<br />
Peripheral bus<br />
Table 25-1. SPI Operating Mode<br />
Peripheral DMA<br />
Controller<br />
Channel Channel<br />
User<br />
Interface<br />
Receiver<br />
Transmitter<br />
Modem<br />
Signals<br />
Control<br />
BaudRate<br />
Generator<br />
I/O<br />
Controller<br />
PIN USART SPI Slave SPI Master<br />
RXD RXD MOSI MISO<br />
TXD TXD MISO MOSI<br />
RTS RTS – CS<br />
CTS CTS CS –<br />
<strong>AT32UC3C</strong><br />
RXD<br />
RTS<br />
TXD<br />
CTS<br />
DTR<br />
DSR<br />
DCD<br />
RI<br />
CLK<br />
564
25.4 I/O Lines Description<br />
Table 25-2. I/O Lines Description<br />
32117D–AVR-01/12<br />
<strong>AT32UC3C</strong><br />
Name Description Type Active Level<br />
CLK Serial Clock I/O<br />
TXD<br />
RXD<br />
Transmit Serial Data<br />
or Master Out Slave In (MOSI) in SPI Master Mode<br />
or Master In Slave Out (MISO) in SPI Slave Mode<br />
Receive Serial Data<br />
or Master In Slave Out (MISO) in SPI Master Mode<br />
or Master Out Slave In (MOSI) in SPI Slave Mode<br />
Output<br />
RI Ring Indicator Input Low<br />
DSR Data Set Ready Input Low<br />
DCD Data Carrier Detect Input Low<br />
DTR Data Terminal Ready Output Low<br />
CTS<br />
RTS<br />
Clear to Send<br />
or Slave Select (NSS) in SPI Slave Mode<br />
Request to Send<br />
or Slave Select (NSS) in SPI Master Mode<br />
Input<br />
Input Low<br />
Output Low<br />
565
25.5 Product Dependencies<br />
25.5.1 I/O Lines<br />
25.5.2 Clocks<br />
25.5.3 Interrupts<br />
32117D–AVR-01/12<br />
<strong>AT32UC3C</strong><br />
The pins used for interfacing the USART may be multiplexed with the I/O Controller lines. The<br />
programmer must first program the I/O Controller to assign the desired USART pins to their<br />
peripheral function. If I/O lines of the USART are not used by the application, they can be used<br />
for other purposes by the I/O Controller.<br />
To prevent the TXD line from falling when the USART is disabled, the use of an internal pull up<br />
is mandatory. If the hardware handshaking feature or Modem mode is used, the internal pull up<br />
on TXD must also be enabled.<br />
All the pins of the modems may or may not be implemented on the USART. On USARTs not<br />
equipped with the corresponding pins, the associated control bits and statuses have no effect on<br />
the behavior of the USART.<br />
The clock for the USART bus interface (CLK_USART) is generated by the Power Manager. This<br />
clock is enabled at reset, and can be disabled in the Power Manager. It is recommended to disable<br />
the USART before disabling the clock, to avoid freezing the USART in an undefined state.<br />
The USART interrupt request line is connected to the interrupt controller. Using the USART<br />
interrupt requires the interrupt controller to be programmed first.<br />
566
32117D–AVR-01/12<br />
<strong>AT32UC3C</strong><br />
25.6 Functional Description<br />
The USART is capable of managing several types of serial synchronous or asynchronous<br />
communications.<br />
It supports the following communication modes:<br />
5- to 9-bit full-duplex asynchronous serial communication<br />
– MSB- or LSB-first<br />
– 1, 1.5 or 2 stop bits<br />
– Parity even, odd, marked, space or none<br />
– By 8 or by 16 over-sampling receiver frequency<br />
– Optional hardware handshaking<br />
– Optional modem signals management<br />
– Optional break management<br />
– Optional multidrop serial communication<br />
High-speed 5- to 9-bit full-duplex synchronous serial communication<br />
– MSB- or LSB-first<br />
– 1 or 2 stop bits<br />
– Parity even, odd, marked, space or none<br />
– By 8 or by 16 over-sampling frequency<br />
– Optional hardware handshaking<br />
– Optional modem signals management<br />
– Optional break management<br />
– Optional multidrop serial communication<br />
RS485 with driver control signal<br />
ISO7816, T0 or T1 protocols for interfacing with smart cards<br />
– NACK handling, error counter with repetition and iteration limit, inverted data<br />
InfraRed IrDA Modulation and Demodulation<br />
SPI Mode<br />
–Master or Slave<br />
– Serial Clock Programmable Phase and Polarity<br />
– SPI Serial Clock (CLK) Frequency up to Internal Clock Frequency CLK_USART/4<br />
LIN Mode<br />
– Compliant with LIN 1.3 and LIN 2.0 specifications<br />
–Master or Slave<br />
– Processing of frames with up to 256 data bytes<br />
– Response Data length can be configurable or defined automatically by the Identifier<br />
– Self synchronization in Slave node configuration<br />
– Automatic processing and verification of the “Synch Break” and the “Synch Field”<br />
– The “Synch Break” is detected even if it is partially superimposed with a data byte<br />
– Automatic Identifier parity calculation/sending and verification<br />
– Parity sending and verification can be disabled<br />
– Automatic Checksum calculation/sending and verification<br />
– Checksum sending and verification can be disabled<br />
– Support both “Classic” and “Enhanced” checksum types<br />
567
32117D–AVR-01/12<br />
– Full LIN error checking and reporting<br />
– Frame Slot Mode: the Master allocates slots to the scheduled frames automatically.<br />
– Generation of the Wakeup signal<br />
Test modes<br />
– Remote loopback, local loopback, automatic echo<br />
<strong>AT32UC3C</strong><br />
25.6.1 Baud Rate Generator<br />
The Baud Rate Generator provides the bit period clock named the Baud Rate Clock to both the<br />
receiver and the transmitter.<br />
Figure 25-2. Baud Rate Generator<br />
USCLKS<br />
CLK_USART<br />
CLK_USART/DIV<br />
Reserved<br />
CLK<br />
The Baud Rate Generator clock source can be selected by setting the USCLKS field in the Mode<br />
Register (MR) between:<br />
CLK_USART<br />
a division of CLK_USART, the divider being product dependent, but generally set to 8<br />
the external clock, available on the CLK pin<br />
The Baud Rate Generator is based upon a 16-bit divider, which is programmed with the CD field<br />
of the Baud Rate Generator Register (BRGR). If CD is programmed at 0, the Baud Rate Generator<br />
does not generate any clock. If CD is programmed at 1, the divider is bypassed and<br />
becomes inactive.<br />
If the external CLK clock is selected, the duration of the low and high levels of the signal provided<br />
on the CLK pin must be longer than a CLK_USART period. The frequency of the signal<br />
provided on CLK must be at least 4.5 times lower than CLK_USART.<br />
0<br />
1<br />
2<br />
3<br />
CD<br />
16-bit Counter<br />
0<br />
SYNC<br />
USCLKS= 3<br />
25.6.1.1 Baud Rate in Asynchronous Mode<br />
If the USART is programmed to operate in asynchronous mode, the selected clock is first<br />
divided by CD, which is field programmed in the Baud Rate Generator Register (BRGR). The<br />
resulting clock is provided to the receiver as a sampling clock and then divided by 16 or 8,<br />
depending on the programming of the OVER bit in MR.<br />
CD<br />
>1<br />
1<br />
0<br />
0<br />
1<br />
OVER<br />
SYNC<br />
If OVER is set to 1, the receiver sampling is 8 times higher than the baud rate clock. If OVER is<br />
cleared, the sampling is performed at 16 times the baud rate clock.<br />
FIDI<br />
Sampling<br />
Divider<br />
0<br />
1<br />
CLK<br />
BaudRate<br />
Clock<br />
Sampling<br />
Clock<br />
568
32117D–AVR-01/12<br />
The following formula performs the calculation of the Baud Rate.<br />
Baudrate = --------------------------------------------<br />
SelectedClock<br />
( 82 ( – Over)CD)<br />
<strong>AT32UC3C</strong><br />
This gives a maximum baud rate of CLK_USART divided by 8, assuming that CLK_USART is<br />
the highest possible clock and that OVER is programmed at 1.<br />
25.6.1.2 Baud Rate Calculation Example<br />
Table 25-3 shows calculations of CD to obtain a baud rate at 38400 bauds for different source<br />
clock frequencies. This table also shows the actual resulting baud rate and the error.<br />
Table 25-3. Baud Rate Example (OVER = 0)<br />
Source Clock<br />
Expected Baud<br />
Rate Calculation Result CD Actual Baud Rate Error<br />
MHz Bit/s Bit/s<br />
3 686 400 38 400 6.00 6 38 400.00 0.00%<br />
4 915 200 38 400 8.00 8 38 400.00 0.00%<br />
5 000 000 38 400 8.14 8 39 062.50 1.70%<br />
7 372 800 38 400 12.00 12 38 400.00 0.00%<br />
8 000 000 38 400 13.02 13 38 461.54 0.16%<br />
12 000 000 38 400 19.53 20 37 500.00 2.40%<br />
12 288 000 38 400 20.00 20 38 400.00 0.00%<br />
14 318 180 38 400 23.30 23 38 908.10 1.31%<br />
14 745 600 38 400 24.00 24 38 400.00 0.00%<br />
18 432 000 38 400 30.00 30 38 400.00 0.00%<br />
24 000 000 38 400 39.06 39 38 461.54 0.16%<br />
24 576 000 38 400 40.00 40 38 400.00 0.00%<br />
25 000 000 38 400 40.69 40 38 109.76 0.76%<br />
32 000 000 38 400 52.08 52 38 461.54 0.16%<br />
32 768 000 38 400 53.33 53 38 641.51 0.63%<br />
33 000 000 38 400 53.71 54 38 194.44 0.54%<br />
40 000 000 38 400 65.10 65 38 461.54 0.16%<br />
50 000 000 38 400 81.38 81 38 580.25 0.47%<br />
60 000 000 38 400 97.66 98 38 265.31 0.35%<br />
The baud rate is calculated with the following formula:<br />
BaudRate =<br />
( CLKUSART)<br />
⁄ ( CD × 16)<br />
The baud rate error is calculated with the following formula. It is not recommended to work with<br />
an error higher than 5%.<br />
569
32117D–AVR-01/12<br />
<strong>AT32UC3C</strong><br />
25.6.1.3 Fractional Baud Rate in Asynchronous Mode<br />
The Baud Rate generator previously defined is subject to the following limitation: the output frequency<br />
changes by only integer multiples of the reference frequency. An approach to this<br />
problem is to integrate a fractional N clock generator that has a high resolution. The generator<br />
architecture is modified to obtain Baud Rate changes by a fraction of the reference source clock.<br />
This fractional part is programmed with the FP field in the Baud Rate Generator Register<br />
(BRGR). If FP is not 0, the fractional part is activated. The resolution is one eighth of the clock<br />
divider. This feature is only available when using USART normal mode. The fractional Baud<br />
Rate is calculated using the following formula:<br />
Figure 25-3. Fractional Baud Rate Generator<br />
FP<br />
CLK_USART<br />
CLK_USART/DIV<br />
Reserved<br />
CLK<br />
USCLKS<br />
0<br />
1<br />
2<br />
3<br />
ExpectedBaudRate<br />
Error = 1 – ⎛-------------------------------------------------- ⎞<br />
⎝ ActualBaudRate ⎠<br />
Baudrate<br />
SelectedClock<br />
82 ( – Over)<br />
CD FP<br />
= ----------------------------------------------------------------<br />
⎛ ⎛ + ------ ⎞⎞<br />
⎝ ⎝ 8 ⎠⎠<br />
The modified architecture is presented below:<br />
CD<br />
16-bit Counter<br />
Modulus<br />
Control<br />
FP<br />
glitch-free<br />
logic<br />
25.6.1.4 Baud Rate in Synchronous Mode or SPI Mode<br />
If the USART is programmed to operate in synchronous mode, the selected clock is simply<br />
divided by the field CD in BRGR.<br />
BaudRate =<br />
SelectedClock<br />
-------------------------------------<br />
CD<br />
0<br />
SYNC<br />
USCLKS = 3<br />
CD<br />
>1<br />
1<br />
0<br />
0<br />
1<br />
OVER<br />
FIDI<br />
Sampling<br />
Divider<br />
0<br />
1<br />
SYNC<br />
CLK<br />
BaudRate<br />
Clock<br />
Sampling<br />
Clock<br />
570
32117D–AVR-01/12<br />
<strong>AT32UC3C</strong><br />
In synchronous mode, if the external clock is selected (USCLKS = 3), the clock is provided<br />
directly by the signal on the USART CLK pin. No division is active. The value written in BRGR<br />
has no effect. The external clock frequency must be at least 4.5 times lower than the system<br />
clock.<br />
When either the external clock CLK or the internal clock divided (CLK_USART/DIV) is selected,<br />
the value programmed in CD must be even if the user has to ensure a 50:50 mark/space ratio on<br />
the CLK pin. If the internal clock CLK_USART is selected, the Baud Rate Generator ensures a<br />
50:50 duty cycle on the CLK pin, even if the value programmed in CD is odd.<br />
25.6.1.5 Baud Rate in ISO 7816 Mode<br />
The ISO7816 specification defines the bit rate with the following formula:<br />
where:<br />
B =<br />
Table 25-4. Binary and Decimal Values for Di<br />
Di<br />
----- × f<br />
Fi<br />
B is the bit rate<br />
Di is the bit-rate adjustment factor<br />
Fi is the clock frequency division factor<br />
f is the ISO7816 clock frequency (Hz)<br />
Di is a binary value encoded on a 4-bit field, named DI, as represented in Table 25-4.<br />
DI field 0001 0010 0011 0100 0101 0110 1000 1001<br />
Di (decimal) 1 2 4 8 16 32 12 20<br />
Table 25-5. Binary and Decimal Values for Fi<br />
Fi is a binary value encoded on a 4-bit field, named FI, as represented in Table 25-5.<br />
FI field 0000 0001 0010 0011 0100 0101 0110 1001 1010 1011 1100 1101<br />
Fi (decimal 372 372 558 744 1116 1488 1860 512 768 1024 1536 2048<br />
Table 25-6. Possible Values for the Fi/Di Ratio<br />
Table 25-6 shows the resulting Fi/Di Ratio, which is the ratio between the ISO7816 clock and the<br />
baud rate clock.<br />
Fi/Di 372 558 774 1116 1488 1806 512 768 1024 1536 2048<br />
1 372 558 744 1116 1488 1860 512 768 1024 1536 2048<br />
2 186 279 372 558 744 930 256 384 512 768 1024<br />
4 93 139.5 186 279 372 465 128 192 256 384 512<br />
8 46.5 69.75 93 139.5 186 232.5 64 96 128 192 256<br />
16 23.25 34.87 46.5 69.75 93 116.2 32 48 64 96 128<br />
32 11.62 17.43 23.25 34.87 46.5 58.13 16 24 32 48 64<br />
12 31 46.5 62 93 124 155 42.66 64 85.33 128 170.6<br />
20 18.6 27.9 37.2 55.8 74.4 93 25.6 38.4 51.2 76.8 102.4<br />
If the USART is configured in ISO7816 Mode, the clock selected by the USCLKS field in the<br />
Mode Register (MR) is first divided by the value programmed in the field CD in the Baud Rate<br />
571
32117D–AVR-01/12<br />
<strong>AT32UC3C</strong><br />
Generator Register (BRGR). The resulting clock can be provided to the CLK pin to feed the<br />
smart card clock inputs. This means that the CLKO bit can be set in MR.<br />
This clock is then divided by the value programmed in the FI_DI_RATIO field in the FI_DI_Ratio<br />
register (FIDI). This is performed by the Sampling Divider, which performs a division by up to<br />
2047 in ISO7816 Mode. The non-integer values of the Fi/Di Ratio are not supported and the user<br />
must program the FI_DI_RATIO field to a value as close as possible to the expected value.<br />
The FI_DI_RATIO field resets to the value 0x174 (372 in decimal) and is the most common<br />
divider between the ISO7816 clock and the bit rate (Fi = 372, Di = 1).<br />
Figure 25-4 shows the relation between the Elementary Time Unit, corresponding to a bit time,<br />
and the ISO 7816 clock.<br />
Figure 25-4. Elementary Time Unit (ETU)<br />
ISO7816 Clock<br />
on CLK<br />
ISO7816 I/O Line<br />
on TXD<br />
FI_DI_RATIO<br />
ISO7816 Clock Cycles<br />
25.6.2 Receiver and Transmitter Control<br />
After reset, the receiver is disabled. The user must enable the receiver by setting the RXEN bit<br />
in the Control Register (CR). However, the receiver registers can be programmed before the<br />
receiver clock is enabled.<br />
1 ETU<br />
After reset, the transmitter is disabled. The user must enable it by setting the TXEN bit in the<br />
Control Register (CR). However, the transmitter registers can be programmed before being<br />
enabled.<br />
The Receiver and the Transmitter can be enabled together or independently.<br />
At any time, the software can perform a reset on the receiver or the transmitter of the USART by<br />
setting the corresponding bit, RSTRX and RSTTX respectively, in the Control Register (CR).<br />
The software resets clear the status flag and reset internal state machines but the user interface<br />
configuration registers hold the value configured prior to software reset. Regardless of what the<br />
receiver or the transmitter is performing, the communication is immediately stopped.<br />
The user can also independently disable the receiver or the transmitter by setting RXDIS and<br />
TXDIS respectively in CR. If the receiver is disabled during a character reception, the USART<br />
waits until the end of reception of the current character, then the reception is stopped. If the<br />
transmitter is disabled while it is operating, the USART waits the end of transmission of both the<br />
current character and character being stored in the Transmit Holding Register (THR). If a timeguard<br />
is programmed, it is handled normally.<br />
572
25.6.3 Synchronous and Asynchronous Modes<br />
32117D–AVR-01/12<br />
<strong>AT32UC3C</strong><br />
25.6.3.1 Transmitter Operations<br />
The transmitter performs the same in both synchronous and asynchronous operating modes<br />
(SYNC = 0 or SYNC = 1). One start bit, up to 9 data bits, one optional parity bit and up to two<br />
stop bits are successively shifted out on the TXD pin at each falling edge of the programmed<br />
serial clock.<br />
The number of data bits is selected by the CHRL field and the MODE 9 bit in the Mode Register<br />
(MR). Nine bits are selected by setting the MODE 9 bit regardless of the CHRL field. The parity<br />
bit is set according to the PAR field in MR. The even, odd, space, marked or none parity bit can<br />
be configured. The MSBF field in MR configures which data bit is sent first. If written at 1, the<br />
most significant bit is sent first. At 0, the less significant bit is sent first. The number of stop bits is<br />
selected by the NBSTOP field in MR. The 1.5 stop bit is supported in asynchronous mode only.<br />
Figure 25-5. Character Transmit<br />
Example: 8-bit, Parity Enabled One Stop<br />
Baud Rate<br />
Clock<br />
TXD<br />
Start<br />
Bit<br />
The characters are sent by writing in the Transmit Holding Register (THR). The transmitter<br />
reports two status bits in the Channel Status Register (CSR): TXRDY (Transmitter Ready),<br />
which indicates that THR is empty and TXEMPTY, which indicates that all the characters written<br />
in THR have been processed. When the current character processing is completed, the last<br />
character written in THR is transferred into the Shift Register of the transmitter and THR<br />
becomes empty, thus TXRDY rises.<br />
Both TXRDY and TXEMPTY bits are low when the transmitter is disabled. Writing a character in<br />
THR while TXRDY is low has no effect and the written character is lost.<br />
Figure 25-6. Transmitter Status<br />
Baud Rate<br />
Clock<br />
TXD<br />
Write<br />
THR<br />
TXRDY<br />
TXEMPTY<br />
Start<br />
Bit<br />
D0 D1 D2 D3 D4 D5 D6 D7<br />
D0 D1 D2 D3 D4 D5 D6 D7<br />
Parity<br />
Bit<br />
Stop<br />
Bit<br />
Start<br />
Bit<br />
Parity<br />
Bit<br />
Stop<br />
Bit<br />
D0 D1 D2 D3 D4 D5 D6 D7 ParityStop<br />
Bit Bit<br />
573
32117D–AVR-01/12<br />
<strong>AT32UC3C</strong><br />
25.6.3.2 Manchester Encoder<br />
When the Manchester encoder is in use, characters transmitted through the USART are<br />
encoded based on biphase Manchester II format. To enable this mode, set the MAN field in the<br />
MR register to 1. Depending on polarity configuration, a logic level (zero or one), is transmitted<br />
as a coded signal one-to-zero or zero-to-one. Thus, a transition always occurs at the midpoint of<br />
each bit time. It consumes more bandwidth than the original NRZ signal (2x) but the receiver has<br />
more error control since the expected input must show a change at the center of a bit cell. An<br />
example of Manchester encoded sequence is: the byte 0xB1 or 10110001 encodes to 10 01 10<br />
10 01 01 01 10, assuming the default polarity of the encoder. Figure 25-7 illustrates this coding<br />
scheme.<br />
Figure 25-7. NRZ to Manchester Encoding<br />
NRZ<br />
encoded<br />
data<br />
Manchester<br />
encoded<br />
data<br />
Txd<br />
1 0 1 1 0 0 0 1<br />
The Manchester encoded character can also be encapsulated by adding both a configurable<br />
preamble and a start frame delimiter pattern. Depending on the configuration, the preamble is a<br />
training sequence, composed of a pre-defined pattern with a programmable length from 1 to 15<br />
bit times. If the preamble length is set to 0, the preamble waveform is not generated prior to any<br />
character. The preamble pattern is chosen among the following sequences: ALL_ONE,<br />
ALL_ZERO, ONE_ZERO or ZERO_ONE, writing the field TX_PP in the MAN register, the field<br />
TX_PL is used to configure the preamble length. Figure 25-8 illustrates and defines the valid<br />
patterns. To improve flexibility, the encoding scheme can be configured using the TX_MPOL<br />
field in the MAN register. If the TX_MPOL field is set to zero (default), a logic zero is encoded<br />
with a zero-to-one transition and a logic one is encoded with a one-to-zero transition. If the<br />
TX_MPOL field is set to one, a logic one is encoded with a one-to-zero transition and a logic<br />
zero is encoded with a zero-to-one transition.<br />
574
32117D–AVR-01/12<br />
Figure 25-8. Preamble Patterns, Default Polarity Assumed<br />
Manchester<br />
encoded<br />
data<br />
Manchester<br />
encoded<br />
data<br />
Manchester<br />
encoded<br />
data<br />
Manchester<br />
encoded<br />
data<br />
Txd<br />
Txd<br />
Txd<br />
Txd<br />
8 bit width "ALL_ONE" Preamble<br />
8 bit width "ALL_ZERO" Preamble<br />
8 bit width "ZERO_ONE" Preamble<br />
8 bit width "ONE_ZERO" Preamble<br />
<strong>AT32UC3C</strong><br />
SFD DATA<br />
A start frame delimiter is to be configured using the ONEBIT field in the MR register. It consists<br />
of a user-defined pattern that indicates the beginning of a valid data. Figure 25-9 illustrates<br />
these patterns. If the start frame delimiter, also known as start bit, is one bit, (ONEBIT at 1), a<br />
logic zero is Manchester encoded and indicates that a new character is being sent serially on the<br />
line. If the start frame delimiter is a synchronization pattern also referred to as sync (ONEBIT at<br />
0), a sequence of 3 bit times is sent serially on the line to indicate the start of a new character.<br />
The sync waveform is in itself an invalid Manchester waveform as the transition occurs at the<br />
middle of the second bit time. Two distinct sync patterns are used: the command sync and the<br />
data sync. The command sync has a logic one level for one and a half bit times, then a transition<br />
to logic zero for the second one and a half bit times. If the MODSYNC field in the MR register is<br />
set to 1, the next character is a command. If it is set to 0, the next character is a data. When<br />
direct memory access is used, the MODSYNC field can be immediately updated with a modified<br />
character located in memory. To enable this mode, VAR_SYNC field in MR register must be set<br />
to 1. In this case, the MODSYNC field in MR is bypassed and the sync configuration is held in<br />
the TXSYNH in the THR register. The USART character format is modified and includes sync<br />
information.<br />
SFD<br />
DATA<br />
SFD DATA<br />
SFD<br />
DATA<br />
575
32117D–AVR-01/12<br />
Figure 25-9. Start Frame Delimiter<br />
Drift Compensation<br />
<strong>AT32UC3C</strong><br />
Drift compensation is available only in 16X oversampling mode. An hardware recovery system<br />
allows a larger clock drift. To enable the hardware system, the bit in the MAN register must be<br />
set. If the RXD edge is one 16X clock cycle from the expected edge, this is considered as normal<br />
jitter and no corrective actions is taken. If the RXD event is between 4 and 2 clock cycles<br />
before the expected edge, then the current period is shortened by one clock cycle. If the RXD<br />
event is between 2 and 3 clock cycles after the expected edge, then the current period is lengthened<br />
by one clock cycle. These intervals are considered to be drift and so corrective actions are<br />
automatically taken.<br />
Figure 25-10. Bit Resynchronization<br />
Oversampling<br />
16x Clock<br />
RXD<br />
Sampling<br />
point<br />
Manchester<br />
encoded<br />
data<br />
Manchester<br />
encoded<br />
data<br />
Manchester<br />
encoded<br />
data<br />
Preamble Length<br />
is set to 0<br />
Txd<br />
Txd<br />
Txd<br />
Synchro.<br />
Error<br />
25.6.3.3 Asynchronous Receiver<br />
If the USART is programmed in asynchronous operating mode (SYNC = 0), the receiver oversamples<br />
the RXD input line. The oversampling is either 16 or 8 times the Baud Rate clock,<br />
depending on the OVER bit in the Mode Register (MR).<br />
SFD<br />
SFD<br />
SFD<br />
Synchro.<br />
Jump<br />
DATA<br />
One bit start frame delimiter<br />
Expected edge<br />
Tolerance<br />
DATA<br />
Command Sync<br />
start frame delimiter<br />
DATA<br />
Data Sync<br />
start frame delimiter<br />
Sync<br />
Jump<br />
Synchro.<br />
Error<br />
576
32117D–AVR-01/12<br />
<strong>AT32UC3C</strong><br />
The receiver samples the RXD line. If the line is sampled during one half of a bit time at 0, a start<br />
bit is detected and data, parity and stop bits are successively sampled on the bit rate clock.<br />
If the oversampling is 16, (OVER at 0), a start is detected at the eighth sample at 0. Then, data<br />
bits, parity bit and stop bit are sampled on each 16 sampling clock cycle. If the oversampling is 8<br />
(OVER at 1), a start bit is detected at the fourth sample at 0. Then, data bits, parity bit and stop<br />
bit are sampled on each 8 sampling clock cycle.<br />
The number of data bits, first bit sent and parity mode are selected by the same fields and bits<br />
as the transmitter, i.e. respectively CHRL, MODE9, MSBF and PAR. For the synchronization<br />
mechanism only, the number of stop bits has no effect on the receiver as it considers only one<br />
stop bit, regardless of the field NBSTOP, so that resynchronization between the receiver and the<br />
transmitter can occur. Moreover, as soon as the stop bit is sampled, the receiver starts looking<br />
for a new start bit so that resynchronization can also be accomplished when the transmitter is<br />
operating with one stop bit.<br />
Figure 25-11 and Figure 25-12 illustrate start detection and character reception when USART<br />
operates in asynchronous mode.<br />
Figure 25-11. Asynchronous Start Detection<br />
Baud Rate<br />
Clock<br />
Sampling<br />
Clock (x16)<br />
RXD<br />
Sampling<br />
RXD<br />
Sampling<br />
1 2 3 4 5 6 7 8 1 2 3 4 5 6 7 8 9 10 11 12 13 14 15 16<br />
D0<br />
Start<br />
Sampling<br />
Detection<br />
1 2 3 4 5 6 7 0<br />
Start<br />
1 2 3 4<br />
Rejection<br />
Figure 25-12. Asynchronous Character Reception<br />
Example: 8-bit, Parity Enabled<br />
Baud Rate<br />
Clock<br />
RXD<br />
Start<br />
Detection<br />
16<br />
samples<br />
16<br />
samples<br />
16<br />
samples<br />
16<br />
samples<br />
16<br />
samples<br />
16<br />
samples<br />
16<br />
samples<br />
16<br />
samples<br />
D0 D1 D2 D3 D4 D5 D6 D7<br />
16<br />
samples<br />
16<br />
samples<br />
Parity<br />
Bit<br />
Stop<br />
Bit<br />
577
32117D–AVR-01/12<br />
<strong>AT32UC3C</strong><br />
25.6.3.4 Manchester Decoder<br />
When the MAN field in MR register is set to 1, the Manchester decoder is enabled. The decoder<br />
performs both preamble and start frame delimiter detection. One input line is dedicated to Manchester<br />
encoded input data.<br />
An optional preamble sequence can be defined, its length is user-defined and totally independent<br />
of the emitter side. Use RX_PL in MAN register to configure the length of the preamble<br />
sequence. If the length is set to 0, no preamble is detected and the function is disabled. In addition,<br />
the polarity of the input stream is programmable with RX_MPOL field in MAN register.<br />
Depending on the desired application the preamble pattern matching is to be defined via the<br />
RX_PP field in MAN. See Figure 25-8 for available preamble patterns.<br />
Unlike preamble, the start frame delimiter is shared between Manchester Encoder and Decoder.<br />
So, if ONEBIT field is set to 1, only a zero encoded Manchester can be detected as a valid start<br />
frame delimiter. If ONEBIT is set to 0, only a sync pattern is detected as a valid start frame<br />
delimiter. Decoder operates by detecting transition on incoming stream. If RXD is sampled during<br />
one quarter of a bit time at zero, a start bit is detected. See Figure 25-13. The sample pulse<br />
rejection mechanism applies.<br />
Figure 25-13. Asynchronous Start Bit Detection<br />
Sampling<br />
Clock<br />
(16 x)<br />
Manchester<br />
encoded<br />
data<br />
Txd<br />
1 2 3 4<br />
Start<br />
Detection<br />
The receiver is activated and starts Preamble and Frame Delimiter detection, sampling the data<br />
at one quarter and then three quarters. If a valid preamble pattern or start frame delimiter is<br />
detected, the receiver continues decoding with the same synchronization. If the stream does not<br />
match a valid pattern or a valid start frame delimiter, the receiver re-synchronizes on the next<br />
valid edge.The minimum time threshold to estimate the bit value is three quarters of a bit time.<br />
If a valid preamble (if used) followed with a valid start frame delimiter is detected, the incoming<br />
stream is decoded into NRZ data and passed to USART for processing. Figure 25-14 illustrates<br />
Manchester pattern mismatch. When incoming data stream is passed to the USART, the<br />
receiver is also able to detect Manchester code violation. A code violation is a lack of transition<br />
in the middle of a bit cell. In this case, MANE flag in CSR register is raised. It is cleared by writing<br />
the Control Register (CR) with the RSTSTA bit at 1. See Figure 25-15 for an example of Manchester<br />
error detection during data phase.<br />
578
32117D–AVR-01/12<br />
Figure 25-14. Preamble Pattern Mismatch<br />
Manchester<br />
encoded<br />
data<br />
Figure 25-15. Manchester Error Flag<br />
Manchester<br />
encoded<br />
data<br />
Txd<br />
Txd<br />
sampling points<br />
Preamble Mismatch<br />
Manchester coding error<br />
Preamble Length is set to 8<br />
Preamble Length<br />
is set to 4<br />
Preamble Mismatch<br />
invalid pattern<br />
<strong>AT32UC3C</strong><br />
SFD DATA<br />
When the start frame delimiter is a sync pattern (ONEBIT field at 0), both command and data<br />
delimiter are supported. If a valid sync is detected, the received character is written as RXCHR<br />
field in the RHR register and the RXSYNH is updated. RXCHR is set to 1 when the received<br />
character is a command, and it is set to 0 if the received character is a data. This mechanism<br />
alleviates and simplifies the direct memory access as the character contains its own sync field in<br />
the same register.<br />
As the decoder is setup to be used in unipolar mode, the first bit of the frame has to be a zero-toone<br />
transition.<br />
25.6.3.5 Radio Interface: Manchester Encoded USART Application<br />
This section describes low data rate RF transmission systems and their integration with a Manchester<br />
encoded USART. These systems are based on transmitter and receiver ICs that support<br />
ASK and FSK modulation schemes.<br />
The goal is to perform full duplex radio transmission of characters using two different frequency<br />
carriers. See the configuration in Figure 25-16.<br />
SFD<br />
Preamble subpacket<br />
and Start Frame Delimiter<br />
were successfully<br />
decoded<br />
Elementary character bit time<br />
Entering USART character area<br />
Manchester<br />
Coding Error<br />
detected<br />
579
Figure 25-16. Manchester Encoded Characters RF Transmission<br />
32117D–AVR-01/12<br />
Upstream<br />
Emitter<br />
Downstream<br />
Receiver<br />
Figure 25-17. ASK Modulator Output<br />
NRZ stream<br />
Manchester<br />
encoded<br />
data<br />
default polarity<br />
unipolar output<br />
ASK Modulator<br />
Output<br />
Uptstream Frequency F0<br />
Fup frequency Carrier<br />
Fdown frequency Carrier<br />
ASK/FSK<br />
Upstream Receiver<br />
LNA<br />
VCO<br />
RF filter<br />
Demod<br />
control<br />
PA<br />
RF filter<br />
Mod<br />
VCO<br />
control<br />
<strong>AT32UC3C</strong><br />
The USART module is configured as a Manchester encoder/decoder. Looking at the downstream<br />
communication channel, Manchester encoded characters are serially sent to the RF<br />
emitter. This may also include a user defined preamble and a start frame delimiter. Mostly, preamble<br />
is used in the RF receiver to distinguish between a valid data from a transmitter and<br />
signals due to noise. The Manchester stream is then modulated. See Figure 25-17 for an example<br />
of ASK modulation scheme. When a logic one is sent to the ASK modulator, the power<br />
amplifier, referred to as PA, is enabled and transmits an RF signal at downstream frequency.<br />
When a logic zero is transmitted, the RF signal is turned off. If the FSK modulator is activated,<br />
two different frequencies are used to transmit data. When a logic 1 is sent, the modulator outputs<br />
an RF signal at frequency F0 and switches to F1 if the data sent is a 0. See Figure 25-18.<br />
From the receiver side, another carrier frequency is used. The RF receiver performs a bit check<br />
operation examining demodulated data stream. If a valid pattern is detected, the receiver<br />
switches to receiving mode. The demodulated stream is sent to the Manchester decoder.<br />
Because of bit checking inside RF IC, the data transferred to the microcontroller is reduced by a<br />
user-defined number of bits. The Manchester preamble length is to be defined in accordance<br />
with the RF IC configuration.<br />
bi-dir<br />
line<br />
ASK/FSK<br />
downstream transmitter<br />
Serial<br />
Configuration<br />
Interface<br />
Manchester<br />
decoder<br />
Manchester<br />
encoder<br />
1 0 0 1<br />
Txd<br />
USART<br />
Receiver<br />
USART<br />
Emitter<br />
580
Figure 25-18. FSK Modulator Output<br />
32117D–AVR-01/12<br />
NRZ stream<br />
Manchester<br />
encoded<br />
data<br />
default polarity<br />
unipolar output<br />
FSK Modulator<br />
Output<br />
Uptstream Frequencies<br />
[F0, F0+offset]<br />
1 0 0 1<br />
Txd<br />
<strong>AT32UC3C</strong><br />
25.6.3.6 Synchronous Receiver<br />
In synchronous mode (SYNC = 1), the receiver samples the RXD signal on each rising edge of<br />
the Baud Rate Clock. If a low level is detected, it is considered as a start. All data bits, the parity<br />
bit and the stop bits are sampled and the receiver waits for the next start bit. Synchronous mode<br />
operations provide a high speed transfer capability.<br />
Configuration fields and bits are the same as in asynchronous mode.<br />
Figure 25-19 illustrates a character reception in synchronous mode.<br />
Figure 25-19. Synchronous Mode Character Reception<br />
Example: 8-bit, Parity Enabled 1 Stop<br />
Baud Rate<br />
Clock<br />
RXD<br />
Sampling<br />
Start<br />
D0 D1 D2 D3 D4 D5 D6 D7<br />
Parity Bit<br />
Stop Bit<br />
25.6.3.7 Receiver Operations<br />
When a character reception is completed, it is transferred to the Receive Holding Register<br />
(RHR) and the RXRDY bit in the Status Register (CSR) rises. If a character is completed while<br />
the RXRDY is set, the OVRE (Overrun Error) bit is set. The last character is transferred into<br />
RHR and overwrites the previous one. The OVRE bit is cleared by writing the Control Register<br />
(CR) with the RSTSTA (Reset Status) bit at 1.<br />
581
Figure 25-20. Receiver Status<br />
Baud Rate<br />
Clock<br />
32117D–AVR-01/12<br />
RXD<br />
Write<br />
CR<br />
Read<br />
RHR<br />
RXRDY<br />
OVRE<br />
Start<br />
Bit<br />
D0 D1 D2 D3 D4 D5 D6 D7<br />
Parity<br />
Bit<br />
Stop<br />
Bit<br />
Start<br />
Bit<br />
D0 D1 D2 D3 D4 D5 D6 D7<br />
ParityStop<br />
Bit Bit<br />
<strong>AT32UC3C</strong><br />
RSTSTA = 1<br />
582
25.6.3.8 Parity<br />
32117D–AVR-01/12<br />
<strong>AT32UC3C</strong><br />
The USART supports five parity modes selected by programming the PAR field in the Mode<br />
Register (MR). The PAR field also enables the Multidrop mode, see ”Multidrop Mode” on page<br />
584. Even and odd parity bit generation and error detection are supported.<br />
If even parity is selected, the parity generator of the transmitter drives the parity bit at 0 if a number<br />
of 1s in the character data bit is even, and at 1 if the number of 1s is odd. Accordingly, the<br />
receiver parity checker counts the number of received 1s and reports a parity error if the sampled<br />
parity bit does not correspond. If odd parity is selected, the parity generator of the<br />
transmitter drives the parity bit at 1 if a number of 1s in the character data bit is even, and at 0 if<br />
the number of 1s is odd. Accordingly, the receiver parity checker counts the number of received<br />
1s and reports a parity error if the sampled parity bit does not correspond. If the mark parity is<br />
used, the parity generator of the transmitter drives the parity bit at 1 for all characters. The<br />
receiver parity checker reports an error if the parity bit is sampled at 0. If the space parity is<br />
used, the parity generator of the transmitter drives the parity bit at 0 for all characters. The<br />
receiver parity checker reports an error if the parity bit is sampled at 1. If parity is disabled, the<br />
transmitter does not generate any parity bit and the receiver does not report any parity error.<br />
Table 25-7 shows an example of the parity bit for the character 0x41 (character ASCII “A”)<br />
depending on the configuration of the USART. Because there are two bits at 1, 1 bit is added<br />
when a parity is odd, or 0 is added when a parity is even.<br />
Table 25-7. Parity Bit Examples<br />
Character Hexa Binary Parity Bit Parity Mode<br />
A 0x41 0100 0001 1 Odd<br />
A 0x41 0100 0001 0 Even<br />
A 0x41 0100 0001 1 Mark<br />
A 0x41 0100 0001 0 Space<br />
A 0x41 0100 0001 None None<br />
When the receiver detects a parity error, it sets the PARE (Parity Error) bit in the Channel Status<br />
Register (CSR). The PARE bit can be cleared by writing the Control Register (CR) with the RST-<br />
STA bit at 1. Figure 25-21 illustrates the parity bit status setting and clearing.<br />
583
32117D–AVR-01/12<br />
Figure 25-21. Parity Error<br />
Baud Rate<br />
Clock<br />
RXD<br />
Write<br />
CR<br />
PARE<br />
RXRDY<br />
Start<br />
Bit<br />
D0 D1 D2 D3 D4 D5 D6 D7<br />
<strong>AT32UC3C</strong><br />
25.6.3.9 Multidrop Mode<br />
If the PAR field in the Mode Register (MR) is programmed to the value 0x6 or 0x07, the USART<br />
runs in Multidrop Mode. This mode differentiates the data characters and the address characters.<br />
Data is transmitted with the parity bit at 0 and addresses are transmitted with the parity bit<br />
at 1.<br />
If the USART is configured in multidrop mode, the receiver sets the PARE parity error bit when<br />
the parity bit is high and the transmitter is able to send a character with the parity bit high when<br />
the Control Register is written with the SENDA bit at 1.<br />
To handle parity error, the PARE bit is cleared when the Control Register is written with the bit<br />
RSTSTA at 1.<br />
The transmitter sends an address byte (parity bit set) when SENDA is written to CR. In this case,<br />
the next byte written to THR is transmitted as an address. Any character written in THR without<br />
having written the command SENDA is transmitted normally with the parity at 0.<br />
25.6.3.10 Transmitter Timeguard<br />
The timeguard feature enables the USART interface with slow remote devices.<br />
The timeguard function enables the transmitter to insert an idle state on the TXD line between<br />
two characters. This idle state actually acts as a long stop bit.<br />
The duration of the idle state is programmed in the TG field of the Transmitter Timeguard Register<br />
(TTGR). When this field is programmed at zero no timeguard is generated. Otherwise, the<br />
transmitter holds a high level on TXD after each transmitted byte during the number of bit periods<br />
programmed in TG in addition to the number of stop bits.<br />
As illustrated in Figure 25-22, the behavior of TXRDY and TXEMPTY status bits is modified by<br />
the programming of a timeguard. TXRDY rises only when the start bit of the next character is<br />
sent, and thus remains at 0 during the timeguard transmission if a character has been written in<br />
THR. TXEMPTY remains low until the timeguard transmission is completed as the timeguard is<br />
part of the current character being transmitted.<br />
Bad<br />
Parity<br />
Bit<br />
Stop<br />
Bit<br />
RSTSTA = 1<br />
584
Figure 25-22. Timeguard Operations<br />
Baud Rate<br />
Clock<br />
TXD<br />
Write<br />
THR<br />
TXRDY<br />
TXEMPTY<br />
32117D–AVR-01/12<br />
Start<br />
Bit<br />
D0 D1 D2 D3 D4 D5 D6 D7<br />
ParityStop<br />
Bit Bit<br />
TG = 4<br />
<strong>AT32UC3C</strong><br />
Table 25-8 indicates the maximum length of a timeguard period that the transmitter can handle<br />
in relation to the function of the Baud Rate.<br />
25.6.3.11 Receiver Time-out<br />
The Receiver Time-out provides support in handling variable-length frames. This feature detects<br />
an idle condition on the RXD line. When a time-out is detected, the bit TIMEOUT in the Channel<br />
Status Register (CSR) rises and can generate an interrupt, thus indicating to the driver an end of<br />
frame.<br />
Start<br />
Bit<br />
D0 D1 D2 D3 D4 D5 D6 D7 ParityStop<br />
Bit Bit<br />
Table 25-8. Maximum Timeguard Length Depending on Baud Rate<br />
TG = 4<br />
Baud Rate Bit time Timeguard<br />
Bit/sec µs ms<br />
1 200 833 212.50<br />
9 600 104 26.56<br />
14400 69.4 17.71<br />
19200 52.1 13.28<br />
28800 34.7 8.85<br />
33400 29.9 7.63<br />
56000 17.9 4.55<br />
57600 17.4 4.43<br />
115200 8.7 2.21<br />
The time-out delay period (during which the receiver waits for a new character) is programmed<br />
in the TO field of the Receiver Time-out Register (RTOR). If the TO field is programmed at 0, the<br />
Receiver Time-out is disabled and no time-out is detected. The TIMEOUT bit in CSR remains at<br />
0. Otherwise, the receiver loads a counter with the value programmed in TO. This counter is<br />
decremented at each bit period and reloaded each time a new character is received. If the counter<br />
reaches 0, the TIMEOUT bit in the Status Register rises. Then, the user can either:<br />
Stop the counter clock until a new character is received. This is performed by writing the<br />
Control Register (CR) with the STTTO (Start Time-out) bit at 1. In this case, the idle state on<br />
RXD before a new character is received will not provide a time-out. This prevents having to<br />
585
32117D–AVR-01/12<br />
<strong>AT32UC3C</strong><br />
handle an interrupt before a character is received and allows waiting for the next idle state on<br />
RXD after a frame is received.<br />
Obtain an interrupt while no character is received. This is performed by writing CR with the<br />
RETTO (Reload and Start Time-out) bit at 1. If RETTO is performed, the counter starts<br />
counting down immediately from the value TO. This enables generation of a periodic interrupt<br />
so that a user time-out can be handled, for example when no key is pressed on a keyboard.<br />
If STTTO is performed, the counter clock is stopped until a first character is received. The idle<br />
state on RXD before the start of the frame does not provide a time-out. This prevents having to<br />
obtain a periodic interrupt and enables a wait of the end of frame when the idle state on RXD is<br />
detected.<br />
If RETTO is performed, the counter starts counting down immediately from the value TO. This<br />
enables generation of a periodic interrupt so that a user time-out can be handled, for example<br />
when no key is pressed on a keyboard.<br />
Figure 25-23 shows the block diagram of the Receiver Time-out feature.<br />
Figure 25-23. Receiver Time-out Block Diagram<br />
STTTO<br />
Character<br />
Received<br />
RETTO<br />
1<br />
D Q<br />
Baud Rate<br />
Clock<br />
Clear<br />
Table 25-9 gives the maximum time-out period for some standard baud rates.<br />
Table 25-9. Maximum Time-out Period<br />
Clock<br />
16-bit Time-out<br />
Counter<br />
Baud Rate Bit Time Time-out<br />
bit/sec µs ms<br />
600 1 667 109 225<br />
1 200 833 54 613<br />
2 400 417 27 306<br />
4 800 208 13 653<br />
9 600 104 6 827<br />
14400 69 4 551<br />
19200 52 3 413<br />
28800 35 2 276<br />
33400 30 1 962<br />
TO<br />
Load<br />
16-bit<br />
Value<br />
0<br />
=<br />
TIMEOUT<br />
586
32117D–AVR-01/12<br />
Table 25-9. Maximum Time-out Period (Continued)<br />
Baud Rate Bit Time Time-out<br />
56000 18 1 170<br />
57600 17 1 138<br />
200000 5 328<br />
<strong>AT32UC3C</strong><br />
25.6.3.12 Framing Error<br />
The receiver is capable of detecting framing errors. A framing error happens when the stop bit of<br />
a received character is detected at level 0. This can occur if the receiver and the transmitter are<br />
fully desynchronized.<br />
A framing error is reported on the FRAME bit of the Channel Status Register (CSR). The<br />
FRAME bit is asserted in the middle of the stop bit as soon as the framing error is detected. It is<br />
cleared by writing the Control Register (CR) with the RSTSTA bit at 1.<br />
Figure 25-24. Framing Error Status<br />
Baud Rate<br />
Clock<br />
RXD<br />
Write<br />
CR<br />
FRAME<br />
RXRDY<br />
Start<br />
Bit<br />
D0 D1 D2 D3 D4 D5 D6 D7<br />
ParityStop<br />
Bit Bit<br />
RSTSTA = 1<br />
25.6.3.13 Transmit Break<br />
The user can request the transmitter to generate a break condition on the TXD line. A break condition<br />
drives the TXD line low during at least one complete character. It appears the same as a<br />
0x00 character sent with the parity and the stop bits at 0. However, the transmitter holds the<br />
TXD line at least during one character until the user requests the break condition to be removed.<br />
A break is transmitted by writing the Control Register (CR) with the STTBRK bit at 1. This can be<br />
performed at any time, either while the transmitter is empty (no character in either the Shift Register<br />
or in THR) or when a character is being transmitted. If a break is requested while a<br />
character is being shifted out, the character is first completed before the TXD line is held low.<br />
Once STTBRK command is requested further STTBRK commands are ignored until the end of<br />
the break is completed.<br />
The break condition is removed by writing CR with the STPBRK bit at 1. If the STPBRK is<br />
requested before the end of the minimum break duration (one character, including start, data,<br />
parity and stop bits), the transmitter ensures that the break condition completes.<br />
587
Figure 25-25. Break Transmission<br />
Baud Rate<br />
Clock<br />
TXD<br />
Write<br />
CR<br />
TXRDY<br />
TXEMPTY<br />
32117D–AVR-01/12<br />
Start<br />
Bit<br />
<strong>AT32UC3C</strong><br />
The transmitter considers the break as though it is a character, i.e. the STTBRK and STPBRK<br />
commands are taken into account only if the TXRDY bit in CSR is at 1 and the start of the break<br />
condition clears the TXRDY and TXEMPTY bits as if a character is processed.<br />
Writing CR with the both STTBRK and STPBRK bits at 1 can lead to an unpredictable result. All<br />
STPBRK commands requested without a previous STTBRK command are ignored. A byte written<br />
into the Transmit Holding Register while a break is pending, but not started, is ignored.<br />
After the break condition, the transmitter returns the TXD line to 1 for a minimum of 12 bit times.<br />
Thus, the transmitter ensures that the remote receiver detects correctly the end of break and the<br />
start of the next character. If the timeguard is programmed with a value higher than 12, the TXD<br />
line is held high for the timeguard period.<br />
After holding the TXD line for this period, the transmitter resumes normal operations.<br />
Figure 25-25 illustrates the effect of both the Start Break (STTBRK) and Stop Break (STPBRK)<br />
commands on the TXD line.<br />
D0 D1 D2 D3 D4 D5 D6 D7<br />
STTBRK = 1<br />
ParityStop<br />
Bit Bit<br />
Break Transmission End of Break<br />
STPBRK = 1<br />
25.6.3.14 Receive Break<br />
The receiver detects a break condition when all data, parity and stop bits are low. This corresponds<br />
to detecting a framing error with data at 0x00, but FRAME remains low.<br />
When the low stop bit is detected, the receiver asserts the RXBRK bit in CSR. This bit may be<br />
cleared by writing the Control Register (CR) with the bit RSTSTA at 1.<br />
An end of receive break is detected by a high level for at least 2/16 of a bit period in asynchronous<br />
operating mode or one sample at high level in synchronous operating mode. The end of<br />
break detection also asserts the RXBRK bit.<br />
25.6.3.15 Hardware Handshaking<br />
The USART features a hardware handshaking out-of-band flow control. The RTS and CTS pins<br />
are used to connect with the remote device, as shown in Figure 25-26.<br />
588
32117D–AVR-01/12<br />
Figure 25-26. Connection with a Remote Device for Hardware Handshaking<br />
<strong>AT32UC3C</strong><br />
Setting the USART to operate with hardware handshaking is performed by writing the MODE<br />
field in the Mode Register (MR) to the value 0x2.<br />
The USART behavior when hardware handshaking is enabled is the same as the behavior in<br />
standard synchronous or asynchronous mode, except that the receiver drives the RTS pin as<br />
described below and the level on the CTS pin modifies the behavior of the transmitter as<br />
described below. Using this mode requires using the Peripheral DMA Controller channel for<br />
reception. The transmitter can handle hardware handshaking in any case.<br />
Figure 25-27 shows how the receiver operates if hardware handshaking is enabled. The RTS<br />
pin is driven high if the receiver is disabled and if the status RXBUFF (Receive Buffer Full) coming<br />
from the Peripheral DMA Controller channel is high. Normally, the remote device does not<br />
start transmitting while its CTS pin (driven by RTS) is high. As soon as the Receiver is enabled,<br />
the RTS falls, indicating to the remote device that it can start transmitting. Defining a new buffer<br />
to the Peripheral DMA Controller clears the status bit RXBUFF and, as a result, asserts the pin<br />
RTS low.<br />
Figure 25-27. Receiver Behavior when Operating with Hardware Handshaking<br />
RXD<br />
RXEN = 1<br />
Write<br />
CR<br />
RTS<br />
RXBUFF<br />
USART<br />
TXD<br />
RXD<br />
CTS<br />
RTS<br />
Remote<br />
Device<br />
RXD<br />
Figure 25-28 shows how the transmitter operates if hardware handshaking is enabled. The CTS<br />
pin disables the transmitter. If a character is being processing, the transmitter is disabled only<br />
after the completion of the current character and transmission of the next character happens as<br />
soon as the pin CTS falls.<br />
TXD<br />
RTS<br />
CTS<br />
Figure 25-28. Transmitter Behavior when Operating with Hardware Handshaking<br />
CTS<br />
TXD<br />
RXDIS = 1<br />
589
32117D–AVR-01/12<br />
<strong>AT32UC3C</strong><br />
25.6.4 ISO7816 Mode<br />
The USART features an ISO7816-compatible operating mode. This mode permits interfacing<br />
with smart cards and Security Access Modules (SAM) communicating through an ISO7816 link.<br />
Both T = 0 and T = 1 protocols defined by the ISO7816 specification are supported.<br />
Setting the USART in ISO7816 mode is performed by writing the MODE field in the Mode Register<br />
(MR) to the value 0x4 for protocol T = 0 and to the value 0x6 for protocol T = 1.<br />
25.6.4.1 ISO7816 Mode Overview<br />
The ISO7816 is a half duplex communication on only one bidirectional line. The baud rate is<br />
determined by a division of the clock provided to the remote device (see ”Baud Rate Generator”<br />
on page 568).<br />
The USART connects to a smart card as shown in Figure 25-29. The TXD line becomes bidirectional<br />
and the Baud Rate Generator feeds the ISO7816 clock on the CLK pin. As the TXD pin<br />
becomes bidirectional, its output remains driven by the output of the transmitter but only when<br />
the transmitter is active while its input is directed to the input of the receiver. The USART is considered<br />
as the master of the communication as it generates the clock.<br />
Figure 25-29. Connection of a Smart Card to the USART<br />
USART<br />
CLK<br />
TXD<br />
When operating in ISO7816, either in T = 0 or T = 1 modes, the character format is fixed. The<br />
configuration is 8 data bits, even parity and 1 or 2 stop bits, regardless of the values programmed<br />
in the CHRL, MODE9, PAR and CHMODE fields. MSBF can be used to transmit LSB<br />
or MSB first. Parity Bit (PAR) can be used to transmit in normal or inverse mode. Refer to ”Mode<br />
Register” on page 628 and ”PAR: Parity Type” on page 630.<br />
The USART cannot operate concurrently in both receiver and transmitter modes as the communication<br />
is unidirectional at a time. It has to be configured according to the required mode by<br />
enabling or disabling either the receiver or the transmitter as desired. Enabling both the receiver<br />
and the transmitter at the same time in ISO7816 mode may lead to unpredictable results.<br />
The ISO7816 specification defines an inverse transmission format. Data bits of the character<br />
must be transmitted on the I/O line at their negative value. The USART does not support this format<br />
and the user has to perform an exclusive OR on the data before writing it in the Transmit<br />
Holding Register (THR) or after reading it in the Receive Holding Register (RHR).<br />
25.6.4.2 Protocol T = 0<br />
In T = 0 protocol, a character is made up of one start bit, eight data bits, one parity bit and one<br />
guard time, which lasts two bit times. The transmitter shifts out the bits and does not drive the<br />
I/O line during the guard time.<br />
If no parity error is detected, the I/O line remains at 1 during the guard time and the transmitter<br />
can continue with the transmission of the next character, as shown in Figure 25-30.<br />
CLK<br />
I/O<br />
Smart<br />
Card<br />
590
Figure 25-30. T = 0 Protocol without Parity Error<br />
Baud Rate<br />
Clock<br />
Figure 25-31. T = 0 Protocol with Parity Error<br />
Baud Rate<br />
Clock<br />
I/O<br />
RXD<br />
32117D–AVR-01/12<br />
Start<br />
Bit<br />
Start<br />
Bit<br />
<strong>AT32UC3C</strong><br />
If a parity error is detected by the receiver, it drives the I/O line at 0 during the guard time, as<br />
shown in Figure 25-31. This error bit is also named NACK, for Non Acknowledge. In this case,<br />
the character lasts 1 bit time more, as the guard time length is the same and is added to the<br />
error bit time which lasts 1 bit time.<br />
When the USART is the receiver and it detects an error, it does not load the erroneous character<br />
in the Receive Holding Register (RHR). It appropriately sets the PARE bit in the Status Register<br />
(SR) so that the software can handle the error.<br />
D0 D1 D2 D3 D4 D5 D6 D7<br />
D0 D1 D2 D3 D4 D5 D6 D7<br />
25.6.4.3 Receive Error Counter<br />
The USART receiver also records the total number of errors. This can be read in the Number of<br />
Error (NER) register. The NB_ERRORS field can record up to 255 errors. Reading NER automatically<br />
clears the NB_ERRORS field.<br />
25.6.4.4 Receive NACK Inhibit<br />
The USART can also be configured to inhibit an error. This can be achieved by setting the<br />
INACK bit in the Mode Register (MR). If INACK is at 1, no error signal is driven on the I/O line<br />
even if a parity bit is detected.<br />
Moreover, if INACK is set, the erroneous received character is stored in the Receive Holding<br />
Register, as if no error occurred. However, the RXRDY bit does raise.<br />
25.6.4.5 Transmit Character Repetition<br />
When the USART is transmitting a character and gets a NACK, it can automatically repeat the<br />
character before moving on to the next one. Repetition is enabled by writing the<br />
MAX_ITERATION field in the Mode Register (MR) at a value higher than 0. Each character can<br />
be transmitted up to eight times; the first transmission plus seven repetitions.<br />
If MAX_ITERATION does not equal zero, the USART repeats the character as many times as<br />
the value loaded in MAX_ITERATION.<br />
When the USART repetition number reaches MAX_ITERATION, the ITERATION bit is set in the<br />
Channel Status Register (CSR). If the repetition of the character is acknowledged by the<br />
receiver, the repetitions are stopped and the iteration counter is cleared.<br />
Parity<br />
Bit<br />
Parity<br />
Bit<br />
Guard<br />
Time 1<br />
Guard<br />
Time 1<br />
Error<br />
Guard<br />
Time 2<br />
Guard<br />
Time 2<br />
Next<br />
Start<br />
Bit<br />
Start<br />
Bit<br />
D0 D1<br />
Repetition<br />
591
32117D–AVR-01/12<br />
<strong>AT32UC3C</strong><br />
The ITERATION bit in CSR can be cleared by writing the Control Register with the RSIT bit at 1.<br />
25.6.4.6 Disable Successive Receive NACK<br />
The receiver can limit the number of successive NACKs sent back to the remote transmitter.<br />
This is programmed by setting the bit DSNACK in the Mode Register (MR). The maximum number<br />
of NACK transmitted is programmed in the MAX_ITERATION field. As soon as<br />
MAX_ITERATION is reached, the character is considered as correct, an acknowledge is sent on<br />
the line and the ITERATION bit in the Channel Status Register is set.<br />
25.6.4.7 Protocol T = 1<br />
When operating in ISO7816 protocol T = 1, the transmission is similar to an asynchronous format<br />
with only one stop bit. The parity is generated when transmitting and checked when<br />
receiving. Parity error detection sets the PARE bit in the Channel Status Register (CSR).<br />
25.6.5 IrDA Mode<br />
The USART features an IrDA mode supplying half-duplex point-to-point wireless communication.<br />
It embeds the modulator and demodulator which allows a glueless connection to the<br />
infrared transceivers, as shown in Figure 25-32. The modulator and demodulator are compliant<br />
with the IrDA specification version 1.1 and support data transfer speeds ranging from 2.4 Kb/s to<br />
115.2 Kb/s.<br />
The USART IrDA mode is enabled by setting the MODE field in the Mode Register (MR) to the<br />
value 0x8. The IrDA Filter Register (IFR) allows configuring the demodulator filter. The USART<br />
transmitter and receiver operate in a normal asynchronous mode and all parameters are accessible<br />
(except those fixed by IrDA specification: one start bit, 8 data bits and one stop bit). Note<br />
that the modulator and the demodulator are activated.<br />
Figure 25-32. Connection to IrDA Transceivers<br />
Receiver<br />
Transmitter<br />
USART<br />
Demodulator<br />
Modulator<br />
The receiver and the transmitter must be enabled or disabled according to the direction of the<br />
transmission to be managed.<br />
To receive IrDA signals, the following needs to be done:<br />
IrDA<br />
Transceivers<br />
RXD RX<br />
Disable TX and Enable RX<br />
Configure the TXD pin as I/O and set it as an output at 0 (to avoid LED emission). Disable the<br />
internal pull-up (better for power consumption).<br />
Receive data<br />
TXD<br />
TX<br />
592
32117D–AVR-01/12<br />
<strong>AT32UC3C</strong><br />
25.6.5.1 IrDA Modulation<br />
For baud rates up to and including 115.2 Kbits/sec, the RZI modulation scheme is used. “0” is<br />
represented by a light pulse of 3/16th of a bit time. Some examples of signal pulse duration are<br />
shown in Table 25-10.<br />
Table 25-10. IrDA Pulse Duration<br />
Baud Rate Pulse Duration (3/16)<br />
2.4 Kb/s 78.13 µs<br />
9.6 Kb/s 19.53 µs<br />
19.2 Kb/s 9.77 µs<br />
38.4 Kb/s 4.88 µs<br />
57.6 Kb/s 3.26 µs<br />
115.2 Kb/s 1.63 µs<br />
Figure 25-33 shows an example of character transmission.<br />
Figure 25-33. IrDA Modulation<br />
Transmitter<br />
Output<br />
TXD<br />
Start<br />
Bit<br />
Data Bits Stop<br />
Bit<br />
0 1 0 1 0 0 1 1 0 1<br />
Bit Period<br />
3<br />
16<br />
Bit Period<br />
25.6.5.2 IrDA Baud Rate<br />
Table 25-11 gives some examples of CD values, baud rate error and pulse duration. Note that<br />
the requirement on the maximum acceptable error of ±1.87% must be met.<br />
Table 25-11. IrDA Baud Rate Error<br />
Peripheral Clock Baud Rate CD Baud Rate Error Pulse Time<br />
3 686 400 115 200 2 0.00% 1.63<br />
20 000 000 115 200 11 1.38% 1.63<br />
32 768 000 115 200 18 1.25% 1.63<br />
40 000 000 115 200 22 1.38% 1.63<br />
3 686 400 57 600 4 0.00% 3.26<br />
20 000 000 57 600 22 1.38% 3.26<br />
32 768 000 57 600 36 1.25% 3.26<br />
40 000 000 57 600 43 0.93% 3.26<br />
3 686 400 38 400 6 0.00% 4.88<br />
20 000 000 38 400 33 1.38% 4.88<br />
593
32117D–AVR-01/12<br />
<strong>AT32UC3C</strong><br />
25.6.5.3 IrDA Demodulator<br />
The demodulator is based on the IrDA Receive filter comprised of an 8-bit down counter which is<br />
loaded with the value programmed in IFR. When a falling edge is detected on the RXD pin, the<br />
Filter Counter starts counting down at the CLK_USART speed. If a rising edge is detected on the<br />
RXD pin, the counter stops and is reloaded with IFR. If no rising edge is detected when the<br />
counter reaches 0, the input of the receiver is driven low during one bit time.<br />
Figure 25-34. IrDA Demodulator Operations<br />
CLK_USART<br />
RXD<br />
Counter<br />
Value<br />
Receiver<br />
Input<br />
Table 25-11. IrDA Baud Rate Error (Continued)<br />
Peripheral Clock Baud Rate CD Baud Rate Error Pulse Time<br />
32 768 000 38 400 53 0.63% 4.88<br />
40 000 000 38 400 65 0.16% 4.88<br />
3 686 400 19 200 12 0.00% 9.77<br />
20 000 000 19 200 65 0.16% 9.77<br />
32 768 000 19 200 107 0.31% 9.77<br />
40 000 000 19 200 130 0.16% 9.77<br />
3 686 400 9 600 24 0.00% 19.53<br />
20 000 000 9 600 130 0.16% 19.53<br />
32 768 000 9 600 213 0.16% 19.53<br />
40 000 000 9 600 260 0.16% 19.53<br />
3 686 400 2 400 96 0.00% 78.13<br />
20 000 000 2 400 521 0.03% 78.13<br />
32 768 000 2 400 853 0.04% 78.13<br />
Figure 25-34 illustrates the operations of the IrDA demodulator.<br />
6 5 4 3<br />
Pulse<br />
2 6 6 5 4 3 2 1 0<br />
Rejected<br />
Pulse<br />
Accepted<br />
Driven Low During 16 Baud Rate Clock Cycles<br />
As the IrDA mode uses the same logic as the ISO7816, note that the FI_DI_RATIO field in FIDI<br />
must be set to a value higher than 0 in order to assure IrDA communications operate correctly.<br />
594
25.6.6 RS485 Mode<br />
32117D–AVR-01/12<br />
<strong>AT32UC3C</strong><br />
The USART features the RS485 mode to enable line driver control. While operating in RS485<br />
mode, the USART behaves as though in asynchronous or synchronous mode and configuration<br />
of all the parameters is possible. The difference is that the RTS pin is driven high when the<br />
transmitter is operating. The behavior of the RTS pin is controlled by the TXEMPTY bit. A typical<br />
connection of the USART to a RS485 bus is shown in Figure 25-35.<br />
Figure 25-35. Typical Connection to a RS485 Bus<br />
The USART is set in RS485 mode by programming the MODE field in the Mode Register (MR)<br />
to the value 0x1.<br />
The RTS pin is at a level inverse to the TXEMPTY bit. Significantly, the RTS pin remains high<br />
when a timeguard is programmed so that the line can remain driven after the last character completion.<br />
Figure 25-36 gives an example of the RTS waveform during a character transmission<br />
when the timeguard is enabled.<br />
Figure 25-36. Example of RTS Drive with Timeguard<br />
Baud Rate<br />
Clock<br />
TXD<br />
Write<br />
THR<br />
TXRDY<br />
TXEMPTY<br />
RTS<br />
USART<br />
Start<br />
Bit<br />
RXD<br />
TXD<br />
RTS<br />
D0 D1 D2 D3 D4 D5 D6 D7<br />
ParityStop<br />
Bit Bit<br />
Differential<br />
Bus<br />
TG = 4<br />
595
25.6.7 Modem Mode<br />
32117D–AVR-01/12<br />
<strong>AT32UC3C</strong><br />
The USART features modem mode, which enables control of the signals: DTR (Data Terminal<br />
Ready), DSR (Data Set Ready), RTS (Request to Send), CTS (Clear to Send), DCD (Data Carrier<br />
Detect) and RI (Ring Indicator). While operating in modem mode, the USART behaves as a<br />
DTE (Data Terminal Equipment) as it drives DTR and RTS and can detect level change on DSR,<br />
DCD, CTS and RI.<br />
Setting the USART in modem mode is performed by writing the MODE field in the Mode Register<br />
(MR) to the value 0x3. While operating in modem mode the USART behaves as though in<br />
asynchronous mode and all the parameter configurations are available.<br />
Table 25-12 gives the correspondence of the USART signals with modem connection standards.<br />
Table 25-12. Circuit References<br />
USART Pin V24 CCITT Direction<br />
TXD 2 103 From terminal to modem<br />
RTS 4 105 From terminal to modem<br />
DTR 20 108.2 From terminal to modem<br />
RXD 3 104 From modem to terminal<br />
CTS 5 106 From terminal to modem<br />
DSR 6 107 From terminal to modem<br />
DCD 8 109 From terminal to modem<br />
RI 22 125 From terminal to modem<br />
The control of the DTR output pin is performed by writing the Control Register (CR) with the<br />
DTRDIS and DTREN bits respectively at 1. The disable command forces the corresponding pin<br />
to its inactive level, i.e. high. The enable command forces the corresponding pin to its active<br />
level, i.e. low. RTS output pin is automatically controlled in this mode<br />
The level changes are detected on the RI, DSR, DCD and CTS pins. If an input change is<br />
detected, the RIIC, DSRIC, DCDIC and CTSIC bits in the Channel Status Register (CSR) are set<br />
respectively and can trigger an interrupt. The status is automatically cleared when CSR is read.<br />
Furthermore, the CTS automatically disables the transmitter when it is detected at its inactive<br />
state. If a character is being transmitted when the CTS rises, the character transmission is completed<br />
before the transmitter is actually disabled.<br />
596
25.6.8 SPI Mode<br />
32117D–AVR-01/12<br />
<strong>AT32UC3C</strong><br />
The Serial Peripheral Interface (SPI) Mode is a synchronous serial data link that provides communication<br />
with external devices in Master or Slave Mode. It also enables communication<br />
between processors if an external processor is connected to the system.<br />
The Serial Peripheral Interface is essentially a shift register that serially transmits data bits to<br />
other SPIs. During a data transfer, one SPI system acts as the “master” which controls the data<br />
flow, while the other devices act as “slaves'' which have data shifted into and out by the master.<br />
Different CPUs can take turns being masters and one master may simultaneously shift data into<br />
multiple slaves. (Multiple Master Protocol is the opposite of Single Master Protocol, where one<br />
CPU is always the master while all of the others are always slaves.) However, only one slave<br />
may drive its output to write data back to the master at any given time.<br />
A slave device is selected when its NSS signal is asserted by the master. The USART in SPI<br />
Master mode can address only one SPI Slave because it can generate only one NSS signal.<br />
Nevertheless the user can use standard I/O lines to access more than one SPI slave.<br />
The SPI system consists of two data lines and two control lines:<br />
Master Out Slave In (MOSI): This data line supplies the output data from the master shifted<br />
into the input of the slave.<br />
Master In Slave Out (MISO): This data line supplies the output data from a slave to the input<br />
of the master.<br />
Serial Clock (CLK): This control line is driven by the master and regulates the flow of the data<br />
bits. The master may transmit data at a variety of baud rates. The CLK line cycles once for<br />
each bit that is transmitted.<br />
Slave Select (NSS): This control line allows the master to select or deselect the slave.<br />
25.6.8.1 Modes of Operation<br />
The USART can operate in Master Mode or in Slave Mode.<br />
Operation in SPI Master Mode is programmed by writing at 0xE the MODE field in the Mode<br />
Register. In this case the SPI lines must be connected as described below:<br />
the MOSI line is driven by the output pin TXD<br />
the MISO line drives the input pin RXD<br />
the CLK line is driven by the output pin CLK<br />
the NSS line is driven by the output pin RTS<br />
Operation in SPI Slave Mode is programmed by writing at 0xF the MODE field in the Mode Register.<br />
In this case the SPI lines must be connected as described below:<br />
the MOSI line drives the input pin RXD<br />
the MISO line is driven by the output pin TXD<br />
the CLK line drives the input pin CLK<br />
the NSS line drives the input pin CTS<br />
In order to avoid unpredicted behavior, any change of the SPI Mode must be followed by a software<br />
reset of the transmitter and of the receiver (except the initial configuration after a hardware<br />
reset).<br />
597
25.6.8.2 Baud Rate<br />
32117D–AVR-01/12<br />
<strong>AT32UC3C</strong><br />
In SPI Mode, the baudrate generator operates in the same way as in USART synchronous<br />
mode: See Section “25.6.1.4” on page 570. However, there are some restrictions:<br />
In SPI Master Mode:<br />
the external clock CLK must not be selected (USCLKS … 0x3), and the bit CLKO must be set<br />
to “1” in the Mode Register (MR), in order to generate correctly the serial clock on the CLK<br />
pin.<br />
to obtain correct behavior of the receiver and the transmitter, the value programmed in CD of<br />
must be superior or equal to 4.<br />
if the internal clock divided (CLK_USART/DIV) is selected, the value programmed in CD must<br />
be even to ensure a 50:50 mark/space ratio on the CLK pin, this value can be odd if the<br />
internal clock is selected (CLK_USART).<br />
In SPI Slave Mode:<br />
the external clock (CLK) selection is forced regardless of the value of the USCLKS field in the<br />
Mode Register (MR). Likewise, the value written in BRGR has no effect, because the clock is<br />
provided directly by the signal on the USART CLK pin.<br />
to obtain correct behavior of the receiver and the transmitter, the external clock (CLK)<br />
frequency must be at least 4 times lower than the system clock.<br />
598
32117D–AVR-01/12<br />
<strong>AT32UC3C</strong><br />
25.6.8.3 Data Transfer<br />
Up to 9 data bits are successively shifted out on the TXD pin at each rising or falling edge<br />
(depending of CPOL and CPHA) of the programmed serial clock. There is no Start bit, no Parity<br />
bit and no Stop bit.<br />
The number of data bits is selected by the CHRL field and the MODE 9 bit in the Mode Register<br />
(MR). The 9 bits are selected by setting the MODE 9 bit regardless of the CHRL field. The MSB<br />
data bit is always sent first in SPI Mode (Master or Slave).<br />
Four combinations of polarity and phase are available for data transfers. The clock polarity is<br />
programmed with the CPOL bit in the Mode Register. The clock phase is programmed with the<br />
CPHA bit. These two parameters determine the edges of the clock signal upon which data is<br />
driven and sampled. Each of the two parameters has two possible states, resulting in four possible<br />
combinations that are incompatible with one another. Thus, a master/slave pair must use the<br />
same parameter pair values to communicate. If multiple slaves are used and fixed in different<br />
configurations, the master must reconfigure itself each time it needs to communicate with a different<br />
slave.<br />
Table 25-13. SPI Bus Protocol Mode<br />
SPI Bus Protocol Mode CPOL CPHA<br />
0 0 1<br />
1 0 0<br />
2 1 1<br />
3 1 0<br />
599
Figure 25-37. SPI Transfer Format (CPHA=1, 8 bits per transfer)<br />
CLK cycle (for reference)<br />
CLK<br />
(CPOL= 0)<br />
CLK<br />
(CPOL= 1)<br />
MOSI<br />
SPI Master ->TXD<br />
SPI Slave ->RXD<br />
MISO<br />
SPI Master ->RXD<br />
SPI Slave ->TXD<br />
NSS<br />
SPI Master ->RTS<br />
SPI Slave ->CTS<br />
Figure 25-38. SPI Transfer Format (CPHA=0, 8 bits per transfer)<br />
CLK cycle (for reference)<br />
CLK<br />
(CPOL= 0)<br />
CLK<br />
(CPOL= 1)<br />
MOSI<br />
SPI Master -> TXD<br />
SPI Slave -> RXD<br />
MISO<br />
SPI Master -> RXD<br />
SPI Slave -> TXD<br />
NSS<br />
SPI Master -> RTS<br />
SPI Slave -> CTS<br />
32117D–AVR-01/12<br />
1<br />
MSB<br />
MSB<br />
1<br />
2 3 4<br />
5 6 7 8<br />
6 5<br />
6<br />
2<br />
MSB 6 5<br />
MSB 6 5<br />
4<br />
3<br />
2<br />
1<br />
<strong>AT32UC3C</strong><br />
LSB<br />
5 4 3 2 1 LSB<br />
3<br />
4<br />
4 3<br />
4<br />
5<br />
6<br />
3 2<br />
7<br />
2 1<br />
1<br />
8<br />
LSB<br />
LSB<br />
600
25.6.8.4 Receiver and Transmitter Control<br />
See Section “25.6.2” on page 572.<br />
32117D–AVR-01/12<br />
<strong>AT32UC3C</strong><br />
25.6.8.5 Character Transmission<br />
The characters are sent by writing in the Transmit Holding Register (THR). An additional condition<br />
for transmitting a character can be added when the USART is configured in SPI master<br />
mode. In the MR register, the value configured on INACK field can prevent any character transmission<br />
(even if THR has been written) while the receiver side is not ready (character not read).<br />
When INACK equals 0, the character is transmitted whatever the receiver status. If INACK is set<br />
to 1, the transmitter waits for the receiver holding register to be read before transmitting the<br />
character (RXRDY flag cleared), thus preventing any overflow (character loss) on the receiver<br />
side.<br />
The transmitter reports two status bits in the Channel Status Register (CSR): TXRDY (Transmitter<br />
Ready), which indicates that THR is empty and TXEMPTY, which indicates that all the<br />
characters written in THR have been processed. When the current character processing is completed,<br />
the last character written in THR is transferred into the Shift Register of the transmitter<br />
and THR becomes empty, thus TXRDY rises.<br />
Both TXRDY and TXEMPTY bits are low when the transmitter is disabled. Writing a character in<br />
THR while TXRDY is low has no effect and the written character is lost.<br />
If the USART is in SPI Slave Mode and if a character must be sent while the Transmit Holding<br />
Register (THR) is empty, the UNRE (Underrun Error) bit is set. The TXD transmission line stays<br />
at high level during all this time. The UNRE bit is cleared by writing the Control Register (CR)<br />
with the RSTSTA (Reset Status) bit at 1.<br />
In SPI Master Mode, the slave select line (NSS) is asserted at low level 1 Tbit before the transmission<br />
of the MSB bit and released at high level 1 Tbit after the transmission of the LSB bit. So,<br />
the slave select line (NSS) is always released between each character transmission and a minimum<br />
delay of 3 Tbits always inserted. However, in order to address slave devices supporting the<br />
CSAAT mode (Chip Select Active After Transfer), the slave select line (NSS) can be forced at<br />
low level by writing the Control Register (CR) with the RTSEN bit at 1. The slave select line<br />
(NSS) can be released at high level only by writing the Control Register (CR) with the RTSDIS<br />
bit at 1 (for example, when all data have been transferred to the slave device).<br />
In SPI Slave Mode, the transmitter does not require a falling edge of the slave select line (NSS)<br />
to initiate a character transmission but only a low level. However, this low level must be present<br />
on the slave select line (NSS) at least 1 Tbit before the first serial clock cycle corresponding to<br />
the MSB bit.<br />
25.6.8.6 Character Reception<br />
When a character reception is completed, it is transferred to the Receive Holding Register<br />
(RHR) and the RXRDY bit in the Status Register (CSR) rises. If a character is completed while<br />
RXRDY is set, the OVRE (Overrun Error) bit is set. The last character is transferred into RHR<br />
and overwrites the previous one. The OVRE bit is cleared by writing the Control Register (CR)<br />
with the RSTSTA (Reset Status) bit at 1.<br />
To ensure correct behavior of the receiver in SPI Slave Mode, the master device sending the<br />
frame must ensure a minimum delay of 1 Tbit between each character transmission. The<br />
receiver does not require a falling edge of the slave select line (NSS) to initiate a character<br />
reception but only a low level. However, this low level must be present on the slave select line<br />
(NSS) at least 1 Tbit before the first serial clock cycle corresponding to the MSB bit.<br />
601
32117D–AVR-01/12<br />
<strong>AT32UC3C</strong><br />
25.6.8.7 Receiver Time-out<br />
Because the receiver baudrate clock is active only during data transfers in SPI Mode, a receiver<br />
time-out is impossible in this mode, whatever the Time-out value is (field TO) in the Time-out<br />
Register (RTOR).<br />
602
25.6.9 LIN Mode<br />
32117D–AVR-01/12<br />
The LIN Mode provides Master node and Slave node connectivity on a LIN bus.<br />
<strong>AT32UC3C</strong><br />
The LIN (Local Interconnect Network) is a serial communication protocol which efficiently supports<br />
the control of mechatronic nodes in distributed automotive applications.<br />
The main properties of the LIN bus are:<br />
Single Master/Multiple Slaves concept<br />
Low cost silicon implementation based on common UART/SCI interface hardware, an<br />
equivalent in software, or as a pure state machine.<br />
Self synchronization without quartz or ceramic resonator in the slave nodes<br />
Deterministic signal transmission<br />
Low cost single-wire implementation<br />
Speed up to 20 Kbit/s<br />
LIN provides cost efficient bus communication where the bandwidth and versatility of CAN are<br />
not required.<br />
The LIN Mode enables processing LIN frames with a minimum of action from the<br />
microprocessor.<br />
25.6.9.1 Modes of operation<br />
The USART can act either as a LIN Master node or as a LIN Slave node.<br />
The node configuration is chosen by setting the MODE field in the Mode Register (MR):<br />
LIN Master Node (MODE=0xA)<br />
LIN Slave Node (MODE=0xB)<br />
In order to avoid unpredicted behavior, any change of the LIN node configuration must be followed<br />
by a software reset of the transmitter and of the receiver (except the initial node<br />
configuration after a hardware reset). (See Section 25.6.9.3)<br />
25.6.9.2 Baud Rate Configuration<br />
See Section “25.6.1.1” on page 568.<br />
LIN Master Node: the baud rate is configured in the Baud Rate Generator Register (BRGR).<br />
LIN Slave Node: the initial baud rate is configured in BRGR, this configuration is<br />
automatically copied in the LIN Baud Rate Register (LINBRR) when writing BRGR. After<br />
synchronization procedure, the baud rate is updated in LINBRR.<br />
25.6.9.3 Receiver and Transmitter Control<br />
See Section “25.6.2” on page 572.<br />
25.6.9.4 Character Transmission<br />
See Section “25.6.3.1” on page 573.<br />
25.6.9.5 Character Reception<br />
See Section “25.6.3.7” on page 581.<br />
603
32117D–AVR-01/12<br />
<strong>AT32UC3C</strong><br />
25.6.9.6 Header Transmission (Master Node Configuration)<br />
All the LIN Frames start with a header which is sent by the master node and consists of a Synch<br />
Break Field, Synch Field and Identifier Field.<br />
Figure 25-39. Header Transmission<br />
Baud Rate<br />
Clock<br />
TXD<br />
Write<br />
LINIR<br />
LINIR ID<br />
TXRDY<br />
So in Master node configuration, the frame handling starts with the sending of the header.<br />
The header is transmitted as soon as the identifier is written in the LIN Identifier register (LINIR).<br />
At this moment the flag TXRDY falls.<br />
The Break Field, the Synch Field and the Identifier Field are sent automatically one after the<br />
other.<br />
The Break Field consists of 13 dominant bits and 1 recessive bit, the Synch Field is the character<br />
0x55 and the Identifier corresponds to the character written in the LIN Identifier Register<br />
(LINIR). The Identifier parity bits can be automatically computed and sent (see Section<br />
25.6.9.9).<br />
The bit TXRDY is set when the identifier character is transferred into the Shift Register of the<br />
transmitter.<br />
Break Field<br />
13 dominant bits (at 0)<br />
Break<br />
Delimiter<br />
1 recessive bit<br />
(at 1)<br />
Start<br />
Bit<br />
1 0 1 0 1 0 1 0<br />
Synch Byte = 0x55<br />
Stop Start<br />
ID0 ID1 ID2 ID3 ID4 ID5 ID6 ID7<br />
Bit Bit<br />
Stop<br />
Bit<br />
604
32117D–AVR-01/12<br />
<strong>AT32UC3C</strong><br />
25.6.9.7 Header Reception (Slave Node Configuration)<br />
All the LIN Frames start with a header which is sent by the master node and consists of a Synch<br />
Break Field, Synch Field and Identifier Field.<br />
Figure 25-40. Header Reception<br />
Baud Rate<br />
Clock<br />
RXD<br />
LINID<br />
US_LINIR<br />
Write US_CR<br />
With RSTSTA=1<br />
In Slave node configuration, the frame handling starts with the reception of the header.<br />
The USART uses a break detection threshold of 11 nominal bit times at the actual baud rate. At<br />
any time, if 11 consecutive recessive bits are detected on the bus, the USART detects a Break<br />
Field. As long as a Break Field has not been detected, the USART stays idle and the received<br />
data are not taken in account.<br />
When a Break Field has been detected, the USART expects the Synch Field character to be<br />
0x55. This field is used to update the actual baud rate in order to stay synchronized (see Section<br />
25.6.9.8). If the received Synch character is not 0x55, an Inconsistent Synch Field error is generated<br />
(see Section 25.6.10).<br />
After receiving the Synch Field, the USART expects to receive the Identifier Field.<br />
When the Identifier has been received, the flag LINID is set to “1”. At this moment the field<br />
IDCHR in the LIN Identifier register (LINIR) is updated with the received character. The Identifier<br />
parity bits can be automatically computed and checked (see Section 25.6.9.9).<br />
If the header is not entirely received within the time given by the maximum length of the header<br />
THeader_Maximum, the error bit LINHTE in the Channel Status register (CSR) is set to 1.<br />
The bits LINID, LINBK and LINHTE are reset by writing the bit RSTSTA to 1 in the Control register<br />
(CR).<br />
Break Field<br />
13 dominant bits (at 0)<br />
Break<br />
Delimiter<br />
1 recessive bit<br />
(at 1)<br />
25.6.9.8 Slave Node Synchronization<br />
The synchronization is done only in Slave node configuration. The procedure is based on time<br />
measurement between falling edges of the Synch Field. The falling edges are available in distances<br />
of 2, 4, 6 and 8 bit times.<br />
Figure 25-41. Synch Field<br />
Start<br />
bit<br />
Start<br />
Bit<br />
1 0 1 0 1 0 1 0 Stop Start<br />
ID0 ID1 ID2 ID3<br />
Bit Bit<br />
ID4 ID5 ID6 ID7 Stop<br />
Bit<br />
Synch Byte = 0x55<br />
Synch Field<br />
8 Tbit<br />
2 Tbit 2 Tbit 2 Tbit 2 Tbit<br />
Stop<br />
bit<br />
605
Figure 25-42. Slave Node Synchronization<br />
Baud Rate<br />
Clock<br />
32117D–AVR-01/12<br />
RXD<br />
LINIDRX<br />
<strong>AT32UC3C</strong><br />
The time measurement is made by a 19-bit counter clocked by the sampling clock (see Section<br />
25.6.1).<br />
When the start bit of the Synch Field is detected the counter is reset. Then during the next 8<br />
Tbits of the Synch Field, the counter is incremented. At the end of these 8 Tbits, the counter is<br />
stopped. At this moment, the 16 most significant bits of the counter (value divided by 8) gives the<br />
new clock divider (LINCD) and the 3 least significant bits of this value (the remainder) gives the<br />
new fractional part (LINFP).<br />
Once the Synch Field has been entirely received, the clock divider (LINCD) and the fractional<br />
part (LINFP) are updated in the LIN Baud Rate register (LINBRR) with the computed values, if<br />
the synchronization is not disabled by the bit SYNCDIS in the LIN Mode register (LINMR).<br />
If after reception of the Synch Field, it appears that the computed baudrate deviation compared<br />
to the initial baud rate is superior to the maximum tolerance FToI_Unsynch (+/- 15%) then the<br />
clock divider (LINCD) and the fractional part (LINFP) are not updated and the error bit STE in the<br />
Channel Status register CSR is set to 1.<br />
If after reception of the Synch Field, it appears that the sampled Synch character is not equal to<br />
0x55 then the clock divider (LINCD) and the fractional part (LINFP) are not updated, and the<br />
error bit ISFE in the Channel Status register (CSR) is set to 1.<br />
The bits LINSTE and LINISFE are reset by writing the bit RSTSTA at 1 in the Control register<br />
(CR).<br />
Synchro Counter 000_0011_0001_0110_1101<br />
BRGR<br />
Clcok Divider (CD)<br />
BRGR<br />
Fractional Part (FP)<br />
Break Field<br />
13 dominant bits (at 0)<br />
Initial CD<br />
Initial FP<br />
Break<br />
Delimiter<br />
1 recessive bit<br />
(at 1)<br />
Reset<br />
Start<br />
Bit<br />
Stop Start<br />
1 0 1 0 1 0 1 0<br />
Bit Bit<br />
Synch Byte = 0x55<br />
The accuracy of the synchronization depends on several parameters:<br />
0000_0110_0010_1101<br />
The nominal clock frequency (FNom ) (the theoretical slave node clock frequency)<br />
The Baudrate<br />
The oversampling (Over=0 => 16X or Over=0 => 8X)<br />
The following formula is used to compute the deviation of the slave bit rate relative to the master<br />
bit rate after synchronization (F SLAVE is the real slave node clock frequency).<br />
101<br />
ID0 ID1 ID2 ID3 ID4 ID5 ID6 ID7<br />
[ α × 8 × ( 2 – Over)<br />
+ β]<br />
× Baudrate<br />
Baudrate_deviation =<br />
⎛100× -------------------------------------------------------------------------------------------- ⎞ %<br />
⎝ 8 × F ⎠<br />
SLAVE<br />
Stop<br />
Bit<br />
606
32117D–AVR-01/12<br />
<strong>AT32UC3C</strong><br />
F TOL_UNSYNCH is the deviation of the real slave node clock from the nominal clock frequency. The<br />
LIN Standard imposes that it must not exceed ±15%. The LIN Standard imposes also that for<br />
communication between two nodes, their bit rate must not differ by more than ±2%. This means<br />
that the Baudrate_deviation must not exceed ±1%.<br />
It follows from that, a minimum value for the nominal clock frequency:<br />
Examples:<br />
Baudrate = 20 kbit/s, Over=0 (Oversampling 16X) => FNom (min) = 2.64 MHz<br />
Baudrate = 20 kbit/s, Over=1 (Oversampling 8X) => FNom(min) = 1.47 MHz<br />
Baudrate = 1 kbit/s, Over=0 (Oversampling 16X) => FNom (min) = 132 kHz<br />
Baudrate = 1 kbit/s, Over=1 (Oversampling 8X) => FNom (min) = 74 kHz<br />
If the fractional baud rate is not used, the accuracy of the synchronization becomes much lower.<br />
When the counter is stopped, the 16 most significant bits of the counter (value divided by 8)<br />
gives the new clock divider (CD). This value is rounded by adding the first insignificant bit. The<br />
equation of the Baudrate deviation is the same as given above, but the constants are as follows:<br />
It follows from that, a minimum value for the nominal clock frequency:<br />
Examples:<br />
⎛ ⎞<br />
⎜ [ α × 8 × ( 2 – Over)<br />
+ β]<br />
× Baudrate⎟<br />
Baudrate_deviation = ⎜100× -------------------------------------------------------------------------------------------- ⎟%<br />
⎜ FTOL_UNSYNCH 8 × ⎛-------------------------------------- ⎞ ⎟<br />
⎝ xFNom<br />
⎝ 100 ⎠ ⎠<br />
– 0.5 ≤ α ≤ +0.5 -1 < β < +1<br />
⎛ ⎞<br />
⎜ [ 0.5 × 8 × ( 2 – Over)<br />
+ 1]<br />
× Baudrate⎟<br />
FNOM( min)<br />
= ⎜100 × ----------------------------------------------------------------------------------------------- ⎟Hz<br />
⎜ – 15<br />
8 × ⎛<br />
⎝<br />
--------- + 1⎞<br />
⎝ 100 ⎠<br />
× 1%<br />
⎟<br />
⎠<br />
– 4 ≤ α ≤ +4 -1 < β < +1<br />
⎛ ⎞<br />
⎜ [ 4 × 8 × ( 2 – Over)<br />
+ 1]<br />
× Baudrate⎟<br />
F (min) =<br />
100<br />
NOM<br />
⎜ × ------------------------------------------------------------------------------------------ ⎟Hz<br />
⎜ 8 × ⎛--------- – 15<br />
+ 1⎞<br />
⎝<br />
× 1% ⎟<br />
⎝100 ⎠<br />
⎠<br />
Baudrate = 20 kbit/s, Over=0 (Oversampling 16X) => FNom (min) = 19.12 MHz<br />
Baudrate = 20 kbit/s, Over=1 (Oversampling 8X) => FNom (min) = 9.71 MHz<br />
Baudrate = 1 kbit/s, Over=0 (Oversampling 16X) => FNom(min) = 956 kHz<br />
Baudrate = 1 kbit/s, Over=1 (Oversampling 8X) => FNom (min) = 485 kHz<br />
25.6.9.9 Identifier Parity<br />
A protected identifier consists of two sub-fields; the identifier and the identifier parity. Bits 0 to 5<br />
are assigned to the identifier and bits 6 and 7 are assigned to the parity.<br />
The USART interface can generate/check these parity bits, but this feature can also be disabled.<br />
The user can choose between two modes by the PARDIS bit of the LIN Mode register (LINMR):<br />
607
25.6.9.10 Node Action<br />
32117D–AVR-01/12<br />
<strong>AT32UC3C</strong><br />
PARDIS = 0:<br />
During header transmission, the parity bits are computed and sent with the 6 least significant<br />
bits of the IDCHR field of the LIN Identifier register (LINIR). The bits 6 and 7 of this register are<br />
discarded.<br />
During header reception, the parity bits of the identifier are checked. If the parity bits are wrong,<br />
an Identifier Parity error occurs (see Section 25.6.3.8). Only the 6 least significant bits of the<br />
IDCHR field are updated with the received Identifier. The bits 6 and 7 are stuck at 0.<br />
PARDIS = 1:<br />
During header transmission, all the bits of the IDCHR field of the LIN Identifier register (LINIR)<br />
are sent on the bus.<br />
During header reception, all the bits of the IDCHR field are updated with the received Identifier.<br />
In function of the identifier, the node is concerned, or not, by the LIN response. Consequently,<br />
after sending or receiving the identifier, the USART must be configured. There are three possible<br />
configurations:<br />
PUBLISH: the node sends the response.<br />
SUBSCRIBE: the node receives the response.<br />
IGNORE: the node is not concerned by the response, it does not send and does not receive<br />
the response.<br />
This configuration is made by the field, Node Action (NACT), in the LINMR register (see Section<br />
25.7.16).<br />
Example: a LIN cluster that contains a Master and two Slaves:<br />
Data transfer from the Master to the Slave 1 and to the Slave 2:<br />
NACT(Master)=PUBLISH<br />
NACT(Slave1)=SUBSCRIBE<br />
NACT(Slave2)=SUBSCRIBE<br />
Data transfer from the Master to the Slave 1 only:<br />
NACT(Master)=PUBLISH<br />
NACT(Slave1)=SUBSCRIBE<br />
NACT(Slave2)=IGNORE<br />
Data transfer from the Slave 1 to the Master:<br />
NACT(Master)=SUBSCRIBE<br />
NACT(Slave1)=PUBLISH<br />
NACT(Slave2)=IGNORE<br />
Data transfer from the Slave1 to the Slave2:<br />
NACT(Master)=IGNORE<br />
NACT(Slave1)=PUBLISH<br />
NACT(Slave2)=SUBSCRIBE<br />
608
32117D–AVR-01/12<br />
Data transfer from the Slave2 to the Master and to the Slave1:<br />
NACT(Master)=SUBSCRIBE<br />
NACT(Slave1)=SUBSCRIBE<br />
NACT(Slave2)=PUBLISH<br />
<strong>AT32UC3C</strong><br />
609
32117D–AVR-01/12<br />
<strong>AT32UC3C</strong><br />
25.6.9.11 Response Data Length<br />
The LIN response data length is the number of data fields (bytes) of the response excluding the<br />
checksum.<br />
Figure 25-43. Response Data Length<br />
Sync<br />
Break<br />
The response data length can either be configured by the user or be defined automatically by<br />
bits 4 and 5 of the Identifier (compatibility to LIN Specification 1.1). The user can choose<br />
between these two modes by the DLM bit of the LIN Mode register (LINMR):<br />
DLM = 0: the response data length is configured by the user via the DLC field of the LIN<br />
Mode register (LINMR). The response data length is equal to (DLC + 1) bytes. DLC can be<br />
programmed from 0 to 255, so the response can contain from 1 data byte up to 256 data<br />
bytes.<br />
DLM = 1: the response data length is defined by the Identifier (IDCHR in LINIR) according to<br />
the table below. The DLC field of the LIN Mode register (LINMR) is discarded. The response<br />
can contain 2 or 4 or 8 data bytes.<br />
Table 25-14. Response Data Length if DLM = 1<br />
Sync<br />
Field<br />
IDCHR[5] IDCHR[4] Response Data Length [bytes]<br />
Identifier<br />
Field<br />
0 0 2<br />
0 1 2<br />
1 0 4<br />
1 1 8<br />
Data<br />
Field<br />
User configuration: 1 - 256 data fields (DLC+1)<br />
Identifier configuration: 2/4/8 data fields<br />
Data<br />
Field<br />
Data<br />
Field<br />
Data<br />
Field<br />
Checksum<br />
Field<br />
610
25.6.9.12 Checksum<br />
32117D–AVR-01/12<br />
<strong>AT32UC3C</strong><br />
The last field of a frame is the checksum. The checksum contains the inverted 8- bit sum with<br />
carry, over all data bytes or all data bytes and the protected identifier. Checksum calculation<br />
over the data bytes only is called classic checksum and it is used for communication with LIN 1.3<br />
slaves. Checksum calculation over the data bytes and the protected identifier byte is called<br />
enhanced checksum and it is used for communication with LIN 2.0 slaves.<br />
The USART can be configured to:<br />
Send/Check an Enhanced checksum automatically (CHKDIS = 0 & CHKTYP = 0)<br />
Send/Check a Classic checksum automatically (CHKDIS = 0 & CHKTYP = 1)<br />
Not send/check a checksum (CHKDIS = 1)<br />
This configuration is made by the Checksum Type (CHKTYP) and Checksum Disable (CHKDIS)<br />
fields of the LIN Mode register (LINMR).<br />
If the checksum feature is disabled, the user can send it manually all the same, by considering<br />
the checksum as a normal data byte and by adding 1 to the response data length (see Section<br />
25.6.9.11).<br />
611
32117D–AVR-01/12<br />
<strong>AT32UC3C</strong><br />
25.6.9.13 Frame Slot Mode<br />
This mode is useful only for Master nodes. It respects the following rule: each frame slot shall be<br />
longer than or equal to TFrame_Maximum.<br />
Figure 25-44. Frame Slot Mode<br />
TXRDY<br />
Write<br />
LINID<br />
Write<br />
THR<br />
LINTC<br />
Header<br />
If the Frame Slot Mode is enabled (FSDIS = 0) and a frame transfer has been completed, the<br />
TXRDY flag is set again only after TFrame_Maximum delay, from the start of frame. So the Master<br />
node cannot send a new header if the frame slot duration of the previous frame is inferior to<br />
TFrame_Maximum.<br />
If the Frame Slot Mode is disabled (FSDIS = 1) and a frame transfer has been completed, the<br />
TXRDY flag is set again immediately.<br />
The TFrame_Maximum is calculated as below:<br />
If the Checksum is sent (CHKDIS = 0):<br />
THeader_Nominal = 34 x TBit<br />
TResponse_Nominal = 10 x (NData + 1) x TBit<br />
TFrame_Maximum = 1.4 x (THeader_Nominal + TResponse_Nominal + 1) (Note:)<br />
TFrame_Maximum = 1.4 x (34 + 10 x (DLC + 1 + 1) + 1) x TBIT<br />
TFrame_Maximum = (77 + 14 x DLC) x TBIT<br />
If the Checksum is not sent (CHKDIS = 1):<br />
THeader_Nominal = 34 x TBit<br />
TResponse_Nominal = 10 x NData x TBit<br />
TFrame_Maximum = 1.4 x (THeader_Nominal + TResponse_Nominal + 1 (Note:) )<br />
TFrame_Maximum = 1.4 x (34 + 10 x (DLC + 1) + 1) x TBIT<br />
TFrame_Maximum = (63 + 14 x DLC) x TBIT<br />
Note: The term “+1” leads to an integer result for TFrame_Max (LIN Specification 1.3)<br />
Data3<br />
Break Synch Protected<br />
Identifier<br />
Frame slot = TFrame_Maximum<br />
Response<br />
space<br />
Frame<br />
Data 1<br />
Data 1 Data 2 Data 3<br />
Data N<br />
Response<br />
Data N-1<br />
Data N Checksum<br />
Frame Slot Mode<br />
Disabled<br />
Interframe<br />
space<br />
Frame Slot Mode<br />
Enabled<br />
612
25.6.10 LIN Errors<br />
25.6.10.1 Bit Error<br />
32117D–AVR-01/12<br />
<strong>AT32UC3C</strong><br />
This error is generated when USART is transmitting and if the transmitted value on the Tx line is<br />
different from the value sampled on the Rx line. If a bit error is detected, the transmission is<br />
aborted at the next byte border.<br />
This error is reported by LINBE in the Channel Status Register (CSR).<br />
25.6.10.2 Inconsistent Synch Field Error<br />
This error is generated if the Synch Field character received is other than 0x55.<br />
This error is reported by CSR.LINISFE<br />
25.6.10.3 Identifier Parity Error<br />
This error is generated if the parity of the identifier is wrong. This error can be generated only if<br />
the parity feature is enabled (PARDIS = 0).<br />
This error is reported by CSR.LINIPE<br />
25.6.10.4 Checksum Error<br />
This error is generated if the received checksum is wrong. Error bit is set to 1 only if the checksum<br />
feature is enabled (CHKDIS = 0).<br />
This error is reported by CSR.LINCE<br />
25.6.10.5 Slave Not Responding Error<br />
This error is generated when the USART expects a response from another node (NACT = SUB-<br />
SCRIBE) but no valid message appears on the bus within the time frame given by the maximum<br />
length of the message frame, TFrame_Maximum (see Section 25.6.9.13). This error is disabled<br />
if the USART does not expect any message (NACT = PUBLISH or NACT = IGNORE).<br />
This error is reported by CSR.LINSNRE<br />
25.6.10.6 Synch Tolerance Error<br />
This error is generated if after the clock synchronization procedure it appears that the computed<br />
baudrate deviation compared to the initial baudrate is superior to the maximum tolerance<br />
FToI_Unsynch (+/- 15%).<br />
This error is reported by CSR.LINSTE<br />
25.6.10.7 Header Time-out Error<br />
This error is generated if the Header is not entirely received within the time given by the maximum<br />
length of the Header, THeader_Maximum.<br />
This error is reported by CSR.LINHTE<br />
613
25.6.11 LIN Frame Handling<br />
32117D–AVR-01/12<br />
<strong>AT32UC3C</strong><br />
25.6.11.1 Master Node Configuration<br />
Write TXEN and RXEN in CR to enable both the transmitter and the receiver.<br />
Write MODE in MR to select the LIN mode and the Master Node configuration.<br />
Write CD and FP in BRGR to configure the baud rate.<br />
Write NACT, PARDIS, CHKDIS, CHKTYPE, DLCM, FSDIS and DLC in LINMR to configure<br />
the frame transfer.<br />
Check that TXRDY in CSR is set to “1”<br />
Write IDCHR in LINIR to send the header<br />
What comes next depends on the NACT configuration:<br />
Case 1: NACT = PUBLISH, the USART sends the response<br />
– Wait until TXRDY in CSR rises<br />
– Write TCHR in THR to send a byte<br />
– If all the data have not been written, redo the two previous steps<br />
– Wait until LINTC in CSR rises<br />
– Check the LIN errors<br />
Case 2: NACT = SUBSCRIBE, the USART receives the response<br />
– Wait until RXRDY in CSR rises<br />
– Read RCHR in RHR<br />
– If all the data have not been read, redo the two previous steps<br />
– Wait until LINTC in CSR rises<br />
– Check the LIN errors<br />
Case 3: NACT = IGNORE, the USART is not concerned by the response<br />
– Wait until LINTC in CSR rises<br />
– Check the LIN errors<br />
614
Figure 25-45. Master Node Configuration, NACT = PUBLISH<br />
TXRDY<br />
RXRDY<br />
Write<br />
LINIR<br />
Write<br />
THR<br />
LINTC<br />
Figure 25-46. Master Node Configuration, NACT=SUBSCRIBE<br />
TXRDY<br />
RXRDY<br />
Write<br />
LINIR<br />
Read<br />
RHR<br />
LINTC<br />
32117D–AVR-01/12<br />
Header<br />
Break Synch Protected<br />
Identifier<br />
Header<br />
Data3<br />
Break Synch Protected<br />
Identifier<br />
Frame slot = TFrame_Maximum<br />
Response<br />
space<br />
Frame<br />
Data 1 Data 2 Data 3<br />
Response<br />
Data 1 Data N-1 Data N Checksum<br />
Frame slot = TFrame_Maximum<br />
Response<br />
space<br />
Data3<br />
Frame<br />
Data N<br />
Data 1 Data N-1 Data N Checksum<br />
Data 1<br />
Data N-2<br />
Response<br />
Data N-1<br />
Data N<br />
<strong>AT32UC3C</strong><br />
Interframe<br />
space<br />
FSDIS=1 FSDIS=0<br />
FSDIS=1<br />
Interframe<br />
space<br />
FSDIS=0<br />
615
Figure 25-47. Master Node Configuration, NACT=IGNORE<br />
TXRDY<br />
RXRDY<br />
Write<br />
LINIR<br />
LINTC<br />
32117D–AVR-01/12<br />
Header<br />
Break Synch Protected<br />
Identifier<br />
Response<br />
space<br />
Data3<br />
Frame slot = TFrame_Maximum<br />
Frame<br />
Response<br />
Data 1 Data N-1 Data N Checksum<br />
<strong>AT32UC3C</strong><br />
25.6.11.2 Slave Node Configuration<br />
Write TXEN and RXEN in CR to enable both the transmitter and the receiver.<br />
Write MODE in MR to select the LIN mode and the Slave Node configuration.<br />
Write CD and FP in BRGR to configure the baud rate.<br />
Wait until LINID in CSR rises<br />
Check LINISFE and LINPE errors<br />
Read IDCHR in RHR<br />
Write NACT, PARDIS, CHKDIS, CHKTYPE, DLCM and DLC in LINMR to configure the frame<br />
transfer.<br />
IMPORTANT: if the NACT configuration for this frame is PUBLISH, the US_LINMR register,<br />
must be write with NACT=PUBLISH even if this field is already correctly configured, that in order<br />
to set the TXREADY flag and the corresponding Peripheral DMA Controller write transfer<br />
request.<br />
What comes next depends on the NACT configuration:<br />
Case 1: NACT = PUBLISH, the USART sends the response<br />
– Wait until TXRDY in CSR rises<br />
– Write TCHR in THR to send a byte<br />
– If all the data have not been written, redo the two previous steps<br />
– Wait until LINTC in CSR rises<br />
– Check the LIN errors<br />
Case 2: NACT = SUBSCRIBE, the USART receives the response<br />
– Wait until RXRDY in CSR rises<br />
– Read RCHR in RHR<br />
– If all the data have not been read, redo the two previous steps<br />
– Wait until LINTC in CSR rises<br />
– Check the LIN errors<br />
Interframe<br />
space<br />
FSDIS=1 FSDIS=0<br />
616
32117D–AVR-01/12<br />
Case 3: NACT = IGNORE, the USART is not concerned by the response<br />
– Wait until LINTC in CSR rises<br />
– Check the LIN errors<br />
Figure 25-48. Slave Node Configuration, NACT = PUBLISH<br />
TXRDY<br />
RXRDY<br />
LINIDRX<br />
Read<br />
LINID<br />
Write<br />
THR<br />
LINTC<br />
Break Synch Protected<br />
Identifier<br />
Figure 25-49. Slave Node Configuration, NACT = SUBSCRIBE<br />
TXRDY<br />
RXRDY<br />
LINIDRX<br />
Read<br />
LINID<br />
Read<br />
RHR<br />
LINTC<br />
Figure 25-50. Slave Node Configuration, NACT = IGNORE<br />
TXRDY<br />
RXRDY<br />
LINIDRX<br />
Read<br />
LINID<br />
Read<br />
RHR<br />
LINTC<br />
Break Synch Protected<br />
Identifier<br />
Break Synch Protected<br />
Identifier<br />
Data 1 Data N-1 Data N Checksum<br />
Data 1 Data 2 Data 3<br />
Data N<br />
Data 1 Data N-1 Data N Checksum<br />
Data 1<br />
Data N-2<br />
Data N-1 Data N<br />
Data 1 Data N-1<br />
Data N Checksum<br />
<strong>AT32UC3C</strong><br />
617
32117D–AVR-01/12<br />
<strong>AT32UC3C</strong><br />
25.6.12 LIN Frame Handling With The Peripheral DMA Controller<br />
The USART can be used in association with the Peripheral DMA Controller in order to transfer<br />
data directly into/from the on- and off-chip memories without any processor intervention.<br />
The Peripheral DMA Controller uses the trigger flags, TXRDY and RXRDY, to write or read into<br />
the USART. The Peripheral DMA Controller always writes in the Transmit Holding register (THR)<br />
and it always reads in the Receive Holding register (RHR). The size of the data written or read by<br />
the Peripheral DMA Controller in the USART is always a byte.<br />
25.6.12.1 Master Node Configuration<br />
The user can choose between two Peripheral DMA Controller modes by the PDCM bit in the LIN<br />
Mode register (LINMR):<br />
PDCM = 1: the LIN configuration is stored in the WRITE buffer and it is written by the<br />
Peripheral DMA Controller in the Transmit Holding register THR (instead of the LIN Mode<br />
register LINMR). Because the Peripheral DMA Controller transfer size is limited to a byte, the<br />
transfer is split into two accesses. During the first access the bits, NACT, PARDIS, CHKDIS,<br />
CHKTYP, DLM and FSDIS are written. During the second access the 8-bit DLC field is<br />
written.<br />
PDCM = 0: the LIN configuration is not stored in the WRITE buffer and it must be written by<br />
the user in the LIN Mode register (LINMR).<br />
The WRITE buffer also contains the Identifier and the DATA, if the USART sends the response<br />
(NACT = PUBLISH).<br />
The READ buffer contains the DATA if the USART receives the response (NACT =<br />
SUBSCRIBE).<br />
Figure 25-51. Master Node with Peripheral DMA Controller (PDCM=1)<br />
WRITE BUFFER<br />
NACT<br />
PARDIS<br />
CHKDIS<br />
CHKTYP<br />
DLM<br />
FSDIS<br />
DLC<br />
IDENTIFIER<br />
DATA 0<br />
|<br />
|<br />
|<br />
|<br />
DATA N<br />
Peripheral DMA<br />
Controller<br />
Peripheral<br />
bus<br />
RXRDY<br />
DLC<br />
NODE ACTION = PUBLISH NODE ACTION = SUBSCRIBE<br />
IDENTIFIER<br />
Peripheral<br />
bus<br />
USART LIN<br />
CONTROLLER<br />
WRITE BUFFER<br />
NACT<br />
PARDIS<br />
CHKDIS<br />
CHKTYP<br />
DLM<br />
FSDIS<br />
READ BUFFER<br />
DATA 0<br />
|<br />
|<br />
|<br />
|<br />
DATA N<br />
Peripheral DMA<br />
Controller<br />
RXRDY<br />
TXRDY<br />
USART LIN<br />
CONTROLLER<br />
618
Figure 25-52. Master Node with Peripheral DMA Controller (PDCM=0)<br />
WRITE BUFFER<br />
DATA 0<br />
DATA 1<br />
|<br />
|<br />
|<br />
|<br />
DATA N<br />
32117D–AVR-01/12<br />
<strong>AT32UC3C</strong><br />
25.6.12.2 Slave Node Configuration<br />
In this configuration, the Peripheral DMA Controller transfers only the DATA. The Identifier must<br />
be read by the user in the LIN Identifier register (LINIR). The LIN mode must be written by the<br />
user in the LIN Mode register (LINMR).<br />
The WRITE buffer contains the DATA if the USART sends the response (NACT=PUBLISH).<br />
The READ buffer contains the DATA if the USART receives the response<br />
(NACT=SUBSCRIBE).<br />
IMPORTANT: if the NACT configuration for a frame is PUBLISH, the US_LINMR register, must<br />
be write with NACT=PUBLISH even if this field is already correctly configured, that in order to set<br />
the TXREADY flag and the corresponding Peripheral DMA Controller write transfer request.<br />
Figure 25-53. Slave Node with Peripheral DMA Controller<br />
WRITE BUFFER<br />
DATA 0<br />
|<br />
|<br />
|<br />
|<br />
DATA N<br />
Peripheral DMA<br />
Controller<br />
Peripheral DMA<br />
Controller<br />
Peripheral<br />
bus<br />
RXRDY<br />
Peripheral<br />
bus<br />
TXRDY<br />
NODE ACTION = PUBLISH NODE ACTION = SUBSCRIBE<br />
Peripheral<br />
bus<br />
USART LIN<br />
CONTROLLER<br />
USART LIN<br />
CONTROLLER<br />
READ BUFFER<br />
DATA 0<br />
|<br />
|<br />
|<br />
|<br />
DATA N<br />
DATA 0<br />
|<br />
|<br />
|<br />
|<br />
DATA N<br />
READ BUFFER<br />
Peripheral DMA<br />
Controller<br />
Peripheral DMA<br />
Controller<br />
RXRDY<br />
TXRDY<br />
Peripheral<br />
Bus<br />
RXRDY<br />
USART LIN<br />
CONTROLLER<br />
NACT = SUBSCRIBE<br />
USART LIN<br />
CONTROLLER<br />
619
25.6.13 Wake-up Request<br />
Any node in a sleeping LIN cluster may request a wake-up.<br />
32117D–AVR-01/12<br />
<strong>AT32UC3C</strong><br />
In the LIN 2.0 specification, the wakeup request is issued by forcing the bus to the dominant<br />
state from 250 µs to 5 ms. For this, it is necessary to send the character 0xF0 in order to impose<br />
5 successive dominant bits. Whatever the baud rate is, this character respects the specified<br />
timings.<br />
Baud rate min = 1 kbit/s -> Tbit = 1ms -> 5 Tbits = 5 ms<br />
Baud rate max = 20 kbit/s -> Tbi t= 50 µs -> 5 Tbits = 250 µs<br />
In the LIN 1.3 specification, the wakeup request should be generated with the character 0x80 in<br />
order to impose 8 successive dominant bits.<br />
The user can choose by the WKUPTYP bit in the LIN Mode register (LINMR) either to send a<br />
LIN 2.0 wakeup request (WKUPTYP=0) or to send a LIN 1.3 wakeup request (WKUPTYP=1).<br />
A wake-up request is transmitted by writing the Control Register (CR) with the LINWKUP bit at 1.<br />
Once the transfer is completed, the LINTC flag is asserted in the Status Register (SR). It is<br />
cleared by writing the Control Register (CR) with the RSTSTA bit at 1.<br />
620
32117D–AVR-01/12<br />
<strong>AT32UC3C</strong><br />
25.6.14 Bus Idle Time-out<br />
If the LIN bus is inactive for a certain duration, the slave nodes shall automatically enter in sleep<br />
mode. In the LIN 2.0 specification, this time-out is fixed at 4 seconds. In the LIN 1.3 specification,<br />
it is fixed at 25000 Tbits.<br />
In Slave Node configuration, the Receiver Time-out detects an idle condition on the RXD line.<br />
When a time-out is detected, the bit TIMEOUT in the Channel Status Register (CSR) rises and<br />
can generate an interrupt, thus indicating to the driver to go into sleep mode.<br />
The time-out delay period (during which the receiver waits for a new character) is programmed<br />
in the TO field of the Receiver Time-out Register (RTOR). If the TO field is programmed at 0, the<br />
Receiver Time-out is disabled and no time-out is detected. The TIMEOUT bit in CSR remains at<br />
0. Otherwise, the receiver loads a 17-bit counter with the value programmed in TO. This counter<br />
is decremented at each bit period and reloaded each time a new character is received. If the<br />
counter reaches 0, the TIMEOUT bit in the Status Register rises.<br />
If STTTO is performed, the counter clock is stopped until a first character is received.<br />
If RETTO is performed, the counter starts counting down immediately from the value TO.<br />
Table 25-15. Receiver Time-out programming<br />
LIN Specification Baud Rate Time-out period TO<br />
2.0<br />
1 000 bit/s<br />
4 000<br />
2 400 bit/s 9 600<br />
9 600 bit/s 4s<br />
38 400<br />
19 200 bit/s 76 800<br />
20 000 bit/s 80 000<br />
1.3 - 25 000 Tbits 25 000<br />
621
25.6.15 Test Modes<br />
32117D–AVR-01/12<br />
<strong>AT32UC3C</strong><br />
The USART can be programmed to operate in three different test modes. The internal loopback<br />
capability allows on-board diagnostics. In the loopback mode the USART interface pins are disconnected<br />
or not and reconfigured for loopback internally or externally.<br />
25.6.15.1 Normal Mode<br />
Normal mode connects the RXD pin on the receiver input and the transmitter output on the TXD<br />
pin.<br />
Figure 25-54. Normal Mode Configuration<br />
Receiver<br />
Transmitter<br />
25.6.15.2 Automatic Echo Mode<br />
Automatic echo mode allows bit-by-bit retransmission. When a bit is received on the RXD pin, it<br />
is sent to the TXD pin, as shown in Figure 25-55. Programming the transmitter has no effect on<br />
the TXD pin. The RXD pin is still connected to the receiver input, thus the receiver remains<br />
active.<br />
Figure 25-55. Automatic Echo Mode Configuration<br />
Receiver<br />
Transmitter<br />
25.6.15.3 Local Loopback Mode<br />
Local loopback mode connects the output of the transmitter directly to the input of the receiver,<br />
as shown in Figure 25-56. The TXD and RXD pins are not used. The RXD pin has no effect on<br />
the receiver and the TXD pin is continuously driven high, as in idle state.<br />
Figure 25-56. Local Loopback Mode Configuration<br />
Receiver<br />
Transmitter<br />
1<br />
RXD<br />
TXD<br />
RXD<br />
TXD<br />
RXD<br />
TXD<br />
622
32117D–AVR-01/12<br />
<strong>AT32UC3C</strong><br />
25.6.15.4 Remote Loopback Mode<br />
Remote loopback mode directly connects the RXD pin to the TXD pin, as shown in Figure 25-57.<br />
The transmitter and the receiver are disabled and have no effect. This mode allows bit-by-bit<br />
retransmission.<br />
Figure 25-57. Remote Loopback Mode Configuration<br />
Receiver<br />
Transmitter<br />
1<br />
RXD<br />
TXD<br />
623
32117D–AVR-01/12<br />
<strong>AT32UC3C</strong><br />
25.6.16 Write Protection Registers<br />
To prevent any single software error that may corrupt USART behavior, certain address spaces can be write-protected by<br />
setting the WPEN bit in the USART Write Protect Mode Register (WPMR).<br />
If a write access to the protected registers is detected, then the WPVS flag in the USART Write Protect Status Register<br />
(WPSR) is set and the field WPVSRC indicates in which register the write access has been attempted.<br />
The WPVS flag is reset by writing the USART Write Protect Mode Register (WPMR) with the appropriate access key,<br />
WPKEY.<br />
The protected registers are:<br />
”Mode Register” on page 628<br />
”Baud Rate Generator Register” on page 640<br />
”Receiver Time-out Register” on page 641<br />
”Transmitter Timeguard Register” on page 642<br />
”FI DI RATIO Register” on page 643<br />
”IrDA FILTER Register” on page 645<br />
”Manchester Configuration Register” on page 646<br />
624
25.7 User Interface<br />
Table 25-16. USART Register Memory Map<br />
32117D–AVR-01/12<br />
<strong>AT32UC3C</strong><br />
Offset Register Name Access Reset<br />
0x0000 Control Register CR Write-only –<br />
0x0004 Mode Register MR Read-write 0x00000000<br />
0x0008 Interrupt Enable Register IER Write-only –<br />
0x000C Interrupt Disable Register IDR Write-only –<br />
0x0010 Interrupt Mask Register IMR Read-only 0x00000000<br />
0x0014 Channel Status Register CSR Read-only 0x00000000<br />
0x0018 Receiver Holding Register RHR Read-only 0x00000000<br />
0x001C Transmitter Holding Register THR Write-only –<br />
0x0020 Baud Rate Generator Register BRGR Read-write 0x00000000<br />
0x0024 Receiver Time-out Register RTOR Read-write 0x00000000<br />
0x0028 Transmitter Timeguard Register TTGR Read-write 0x00000000<br />
0x0040 FI DI Ratio Register FIDI Read-write 0x00000174<br />
0x0044 Number of Errors Register NER Read-only 0x00000000<br />
0x004C IrDA Filter Register IFR Read-write 0x00000000<br />
0x0050 Manchester Encoder Decoder Register MAN Read-write 0x30011004<br />
0x0054 LIN Mode Register LINMR Read-write 0x00000000<br />
0x0058 LIN Identifier Register LINIR Read-write 0x00000000<br />
0x005C LIN Baud Rate Register LINBRR Read-only 0x00000000<br />
0x00E4 Write Protect Mode Register WPMR Read-write 0x00000000<br />
0x00E8 Write Protect Status Register WPSR Read-only 0x00000000<br />
0x00FC Version Register VERSION Read-only 0x– (1)<br />
Note: 1. Values in the Version Register vary with the version of the IP block implementation.<br />
625
25.7.1 Control Register<br />
Name: CR<br />
Access Type: Write-only<br />
Offset: 0x0<br />
Reset Value: -<br />
32117D–AVR-01/12<br />
<strong>AT32UC3C</strong><br />
31 30 29 28 27 26 25 24<br />
– – – – – – – –<br />
23 22 21 20 19 18 17 16<br />
– – LINWKUP LINABT RTSDIS/RCS RTSEN/FCS DTRDIS DTREN<br />
15 14 13 12 11 10 9 8<br />
RETTO RSTNACK RSTIT SENDA STTTO STPBRK STTBRK RSTSTA<br />
7 6 5 4 3 2 1 0<br />
TXDIS TXEN RXDIS RXEN RSTTX RSTRX – –<br />
LINWKUP: Send LIN Wakeup Signal<br />
0: No effect:<br />
1: Sends a wakeup signal on the LIN bus.<br />
LINABT: Abort LIN Transmission<br />
0: No effect.<br />
1: Abort the current LIN transmission.<br />
RTSDIS/RCS: Request to Send Disable/Release SPI Chip Select<br />
If USART does not operate in SPI Master Mode (MODE … 0xE):<br />
0: No effect.<br />
1: Drives the pin RTS to 1.<br />
If USART operates in SPI Master Mode (MODE = 0xE):<br />
RCS = 0: No effect.<br />
RCS = 1: Releases the Slave Select Line NSS (RTS pin).<br />
RTSEN/FCS: Request to Send Enable/Force SPI Chip Select<br />
If USART does not operate in SPI Master Mode (MODE … 0xE):<br />
0: No effect.<br />
1: Drives the pin RTS to 0.<br />
If USART operates in SPI Master Mode (MODE = 0xE):<br />
FCS = 0: No effect.<br />
FCS = 1: Forces the Slave Select Line NSS (RTS pin) to 0, even if USART is no transmitting, in order to address SPI slave<br />
devices supporting the CSAAT Mode (Chip Select Active After Transfer).<br />
DTRDIS: Data Terminal Ready Disable<br />
0: No effect.<br />
1: Drives the pin DTR to 1.<br />
DTREN: Data Terminal Ready Enable<br />
0: No effect.<br />
1: Drives the pin DTR at 0.<br />
RETTO: Rearm Time-out<br />
0: No effect<br />
1: Restart Time-out<br />
626
32117D–AVR-01/12<br />
<strong>AT32UC3C</strong><br />
RSTNACK: Reset Non Acknowledge<br />
0: No effect<br />
1: Resets NACK in CSR.<br />
RSTIT: Reset Iterations<br />
0: No effect.<br />
1: Resets ITERATION in CSR. No effect if the ISO7816 is not enabled.<br />
SENDA: Send Address<br />
0: No effect.<br />
1: In Multidrop Mode only, the next character written to the THR is sent with the address bit set.<br />
STTTO: Start Time-out<br />
0: No effect.<br />
1: Starts waiting for a character before clocking the time-out counter. Resets the status bit TIMEOUT in CSR.<br />
STPBRK: Stop Break<br />
0: No effect.<br />
1: Stops transmission of the break after a minimum of one character length and transmits a high level during 12-bit periods. No<br />
effect if no break is being transmitted.<br />
STTBRK: Start Break<br />
0: No effect.<br />
1: Starts transmission of a break after the characters present in THR and the Transmit Shift Register have been transmitted. No<br />
effect if a break is already being transmitted.<br />
RSTSTA: Reset Status Bits<br />
0: No effect.<br />
1: Resets the status bits PARE, FRAME, OVRE, MANERR, LINBE, LINSFE, LINIPE, LINCE, LINSNRE and RXBRK in CSR.<br />
TXDIS: Transmitter Disable<br />
0: No effect.<br />
1: Disables the transmitter.<br />
TXEN: Transmitter Enable<br />
0: No effect.<br />
1: Enables the transmitter if TXDIS is 0.<br />
RXDIS: Receiver Disable<br />
0: No effect.<br />
1: Disables the receiver.<br />
RXEN: Receiver Enable<br />
0: No effect.<br />
1: Enables the receiver, if RXDIS is 0.<br />
RSTTX: Reset Transmitter<br />
0: No effect.<br />
1: Resets the transmitter.<br />
RSTRX: Reset Receiver<br />
0: No effect.<br />
1: Resets the receiver.<br />
627
25.7.2 Mode Register<br />
Name: MR<br />
Access Type: Read-write<br />
Offset: 0x4<br />
Reset Value: -<br />
32117D–AVR-01/12<br />
<strong>AT32UC3C</strong><br />
31 30 29 28 27 26 25 24<br />
ONEBIT MODSYNC MAN FILTER – MAX_ITERATION<br />
23 22 21 20 19 18 17 16<br />
INVDATA VAR_SYNC DSNACK INACK OVER CLKO MODE9 MSBF/CPOL<br />
15 14 13 12 11 10 9 8<br />
CHMODE NBSTOP PAR SYNC/CPHA<br />
7 6 5 4 3 2 1 0<br />
CHRL USCLKS MODE<br />
This register can only be written if the WPEN bit is cleared in the Write Protect Mode Register (if exists).<br />
ONEBIT: Start Frame Delimiter Selector<br />
0: Start Frame delimiter is COMMAND or DATA SYNC.<br />
1: Start Frame delimiter is One Bit.<br />
MODSYNC: Manchester Synchronization Mode<br />
0:The Manchester Start bit is a 0 to 1 transition<br />
1: The Manchester Start bit is a 1 to 0 transition.<br />
MAN: Manchester Encoder/Decoder Enable<br />
0: Manchester Encoder/Decoder are disabled.<br />
1: Manchester Encoder/Decoder are enabled.<br />
FILTER: Infrared Receive Line Filter<br />
0: The USART does not filter the receive line.<br />
1: The USART filters the receive line using a three-sample filter (1/16-bit clock) (2 over 3 majority).<br />
MAX_ITERATION<br />
Defines the maximum number of iterations in mode ISO7816, protocol T= 0.<br />
INVDATA: Inverted Data<br />
0: The data field transmitted on TXD line is the same as the one written in THR register or the content read in RHR is the same<br />
as RXD line. Normal mode of operation.<br />
1: The data field transmitted on TXD line is inverted (voltage polarity) compared to the value written in THR register or the<br />
content read in RHR is inverted compared to RXD line (or ISO7816 IO line). Inverted Mode of operation, useful for contactless<br />
card application. To be used with configuration bit MSBF.<br />
VAR_SYNC: Variable Synchronization of Command/Data Sync Start Frame Delimiter<br />
0: User defined configuration of command or data sync field depending on SYNC value.<br />
1: The sync field is updated when a character is written into THR register.<br />
DSNACK: Disable Successive NACK<br />
0: NACK is sent on the ISO line as soon as a parity error occurs in the received character (unless INACK is set).<br />
1: Successive parity errors are counted up to the value specified in the MAX_ITERATION field. These parity errors generate a<br />
NACK on the ISO line. As soon as this value is reached, no additional NACK is sent on the ISO line. The flag ITERATION is<br />
asserted.<br />
628
32117D–AVR-01/12<br />
<strong>AT32UC3C</strong><br />
INACK: Inhibit Non Acknowledge<br />
0: The NACK is generated.<br />
1: The NACK is not generated.<br />
Note: in SPI master mode, if INACK = 0 the character transmission starts as soon as character is written into THR register<br />
(assuming TXRDY was set). When INACK = 1, an additional condition must be met. The character transmission starts when a<br />
character is written and only if RXRDY bit is cleared (RHR has been read).<br />
OVER: Oversampling Mode<br />
0: 16x Oversampling.<br />
1: 8x Oversampling.<br />
CLKO: Clock Output Select<br />
0: The USART does not drive the CLK pin.<br />
1: The USART drives the CLK pin if USCLKS does not select the external clock CLK.<br />
MODE9: 9-bit Character Length<br />
0: CHRL defines character length.<br />
1: 9-bit character length.<br />
MSBF/CPOL: Bit Order or SPI Clock Polarity<br />
If USART does not operate in SPI Mode (MODE … 0xE and 0xF):<br />
MSBF = 0: Least Significant Bit is sent/received first.<br />
MSBF = 1: Most Significant Bit is sent/received first.<br />
If USART operates in SPI Mode (Slave or Master, MODE = 0xE or 0xF):<br />
CPOL = 0: The inactive state value of SPCK is logic level zero.<br />
CPOL = 1: The inactive state value of SPCK is logic level one.<br />
CPOL is used to determine the inactive state value of the serial clock (SPCK). It is used with CPHA to produce the required<br />
clock/data relationship between master and slave devices.<br />
CHMODE: Channel Mode<br />
Table 25-17.<br />
CHMODE Mode Description<br />
0 0 Normal Mode<br />
0 1 Automatic Echo. Receiver input is connected to the TXD pin.<br />
1 0 Local Loopback. Transmitter output is connected to the Receiver Input.<br />
1 1 Remote Loopback. RXD pin is internally connected to the TXD pin.<br />
NBSTOP: Number of Stop Bits<br />
Table 25-18.<br />
NBSTOP Asynchronous (SYNC = 0) Synchronous (SYNC = 1)<br />
0 0 1 stop bit 1 stop bit<br />
0 1 1.5 stop bits Reserved<br />
1 0 2 stop bits 2 stop bits<br />
1 1 Reserved Reserved<br />
629
PAR: Parity Type<br />
Table 25-19.<br />
32117D–AVR-01/12<br />
<strong>AT32UC3C</strong><br />
SYNC/CPHA: Synchronous Mode Select or SPI Clock Phase<br />
If USART does not operate in SPI Mode (MODE is … 0xE and 0xF):<br />
SYNC = 0: USART operates in Asynchronous Mode.<br />
SYNC = 1: USART operates in Synchronous Mode.<br />
If USART operates in SPI Mode (MODE = 0xE or 0xF):<br />
CPHA = 0: Data is changed on the leading edge of SPCK and captured on the following edge of SPCK.<br />
CPHA = 1: Data is captured on the leading edge of SPCK and changed on the following edge of SPCK.<br />
CPHA determines which edge of SPCK causes data to change and which edge causes data to be captured. CPHA is used with<br />
CPOL to produce the required clock/data relationship between master and slave devices.<br />
CHRL: Character Length.<br />
USCLKS: Clock Selection<br />
PAR Parity Type<br />
0 0 0 Even parity<br />
0 0 1 Odd parity<br />
0 1 0 Parity forced to 0 (Space)<br />
0 1 1 Parity forced to 1 (Mark)<br />
1 0 x No parity<br />
1 1 x Multidrop mode<br />
Table 25-20.<br />
Table 25-21.<br />
CHRL Character Length<br />
0 0 5 bits<br />
0 1 6 bits<br />
1 0 7 bits<br />
1 1 8 bits<br />
USCLKS Selected Clock<br />
0 0 CLK_USART<br />
0 1 CLK_USART/DIV (1)<br />
1 0 Reserved<br />
1 1 CLK<br />
Note: 1. The value of DIV is device dependent. Please refer to the Module Configuration section at the<br />
end of this chapter.<br />
630
MODE<br />
Table 25-22.<br />
32117D–AVR-01/12<br />
MODE Mode of the USART<br />
0 0 0 0 Normal<br />
0 0 0 1 RS485<br />
0 0 1 0 Hardware Handshaking<br />
0 0 1 1 Modem<br />
0 1 0 0 IS07816 Protocol: T = 0<br />
0 1 1 0 IS07816 Protocol: T = 1<br />
1 0 0 0 IrDA<br />
1 0 1 0 LIN Master<br />
1 0 1 1 LIN Slave<br />
1 1 1 0 SPI Master<br />
1 1 1 1 SPI Slave<br />
Others Reserved<br />
<strong>AT32UC3C</strong><br />
631
25.7.3 Interrupt Enable Register<br />
Name: IER<br />
Access Type: Write-only<br />
Offset: 0x8<br />
Reset Value: -<br />
32117D–AVR-01/12<br />
<strong>AT32UC3C</strong><br />
31 30 29 28 27 26 25 24<br />
LINHTE LINSTE LINSNRE LINCE LINIPE LINISFE LINBE MANEA<br />
23 22 21 20 19 18 17 16<br />
– – – MANE CTSIC DCDIC DSRIC RIIC<br />
15 14 13 12 11 10 9 8<br />
LINTC LINID NACK/LINBK RXBUFF – ITER/UNRE TXEMPTY TIMEOUT<br />
7 6 5 4 3 2 1 0<br />
PARE FRAME OVRE – – RXBRK TXRDY RXRDY<br />
Writing a zero to a bit in this register has no effect.<br />
Writing a one to a bit in this register will set the corresponding bit in IMR.<br />
For backward compatibility the MANE bit has been duplicated to the MANEA bit position. Writing either one or the other has<br />
the same effect.<br />
632
25.7.4 Interrupt Disable Register<br />
Name: IDR<br />
Access Type: Write-only<br />
Offset: 0xC<br />
Reset Value: -<br />
32117D–AVR-01/12<br />
<strong>AT32UC3C</strong><br />
31 30 29 28 27 26 25 24<br />
LINHTE LINSTE LINSNRE LINCE LINIPE LINISFE LINBE MANEA<br />
23 22 21 20 19 18 17 16<br />
– – – MANE CTSIC DCDIC DSRIC RIIC<br />
15 14 13 12 11 10 9 8<br />
LINTC LINID NACK/LINBK RXBUFF – ITER/UNRE TXEMPTY TIMEOUT<br />
7 6 5 4 3 2 1 0<br />
PARE FRAME OVRE – – RXBRK TXRDY RXRDY<br />
Writing a zero to a bit in this register has no effect.<br />
Writing a one to a bit in this register will clear the corresponding bit in IMR.<br />
For backward compatibility the MANE bit has been duplicated to the MANEA bit position. Writing either one or the other has<br />
the same effect.<br />
633
25.7.5 Interrupt Mask Register<br />
Name: IMR<br />
Access Type: Read-only<br />
Offset: 0x10<br />
Reset Value: -<br />
32117D–AVR-01/12<br />
<strong>AT32UC3C</strong><br />
31 30 29 28 27 26 25 24<br />
LINHTE LINSTE LINSNRE LINCE LINIPE LINISFE LINBE MANEA<br />
23 22 21 20 19 18 17 16<br />
– – – MANE CTSIC DCDIC DSRIC RIIC<br />
15 14 13 12 11 10 9 8<br />
LINTC LINID NACK/LINBK RXBUFF – ITER/UNRE TXEMPTY TIMEOUT<br />
7 6 5 4 3 2 1 0<br />
PARE FRAME OVRE – – RXBRK TXRDY RXRDY<br />
0: The corresponding interrupt is disabled.<br />
1: The corresponding interrupt is enabled.<br />
A bit in this register is cleared when the corresponding bit in IDR is written to one.<br />
A bit in this register is set when the corresponding bit in IER is written to one.<br />
For backward compatibility the MANE bit has been duplicated to the MANEA bit position. Reading either one or the other<br />
has the same effect.<br />
634
25.7.6 Channel Status Register<br />
Name: CSR<br />
Access Type: Read-only<br />
Offset: 0x14<br />
Reset Value: -<br />
32117D–AVR-01/12<br />
<strong>AT32UC3C</strong><br />
31 30 29 28 27 26 25 24<br />
LINHTE LINSTE LINSNRE LINCE LINIPE LINISFE LINBE MANERR<br />
23 22 21 20 19 18 17 16<br />
CTS/LINBLS DCD DSR RI CTSIC DCDIC DSRIC RIIC<br />
15 14 13 12 11 10 9 8<br />
LINTC LINID NACK/LINBK RXBUFF – ITER/UNRE TXEMPTY TIMEOUT<br />
7 6 5 4 3 2 1 0<br />
PARE FRAME OVRE – – RXBRK TXRDY RXRDY<br />
LINHTE: LIN Header Time-out Error<br />
0: No LIN Header Time-out error has been detected since the last RSTSTA.<br />
1: A LIN Header Time-out error has been detected since the last RSTSTA.<br />
LINSTE: LIN Synch Tolerance Error<br />
0: No LIN Synch Tolerance error has been detected since the last RSTSTA.<br />
1: A LIN Synch Tolerance error has been detected since the last RSTSTA.<br />
LINSNRE: LIN Slave Not Responding Error<br />
0: No LIN Slave Not Responding Error has been detected since the last RSTSTA.<br />
1: A LIN Slave Not Responding Error has been detected since the last RSTSTA.<br />
LINCE: LIN Checksum Error<br />
0: No LIN Checksum Error has been detected since the last RSTSTA.<br />
1: A LIN Checksum Error has been detected since the last RSTSTA.<br />
LINIPE: LIN Identifier Parity Error<br />
0: No LIN Identifier Parity Error has been detected since the last RSTSTA.<br />
1: A LIN Identifier Parity Error has been detected since the last RSTSTA.<br />
LINISFE: LIN Inconsistent Synch Field Error<br />
0: No LIN Inconsistent Synch Field Error has been detected since the last RSTSTA<br />
1: The USART is configured as a Slave node and a LIN Inconsistent Synch Field Error has been detected since the last<br />
RSTSTA.<br />
LINBE: LIN Bit Error<br />
0: No Bit Error has been detected since the last RSTSTA.<br />
1: A Bit Error has been detected since the last RSTSTA.<br />
MANERR: Manchester Error<br />
0: No Manchester error has been detected since the last RSTSTA.<br />
1: At least one Manchester error has been detected since the last RSTSTA.<br />
CTS/LINBLS: Image of CTS Input or LIN Bus Line Status<br />
– If USART does not operate in LIN Mode (Master or Slave):<br />
0: CTS is at 0.<br />
1: CTS is at 1.<br />
– If USART operates in LIN Mode (Master or Slave):<br />
635
32117D–AVR-01/12<br />
<strong>AT32UC3C</strong><br />
0: LIN Bus Line is at 0.<br />
1: LIN Bus Line is at 1.<br />
DCD: Image of DCD Input<br />
0: DCD is at 0.<br />
1: DCD is at 1.<br />
DSR: Image of DSR Input<br />
0: DSR is at 0.<br />
1: DSR is at 1.<br />
RI: Image of RI Input<br />
0: RI is at 0.<br />
1: RI is at 1.<br />
CTSIC: Clear to Send Input Change Flag<br />
0: No input change has been detected on the CTS pin since the last read of CSR.<br />
1: At least one input change has been detected on the CTS pin since the last read of CSR.<br />
DCDIC: Data Carrier Detect Input Change Flag<br />
0: No input change has been detected on the DCD pin since the last read of CSR.<br />
1: At least one input change has been detected on the DCD pin since the last read of CSR.<br />
DSRIC: Data Set Ready Input Change Flag<br />
0: No input change has been detected on the DSR pin since the last read of CSR.<br />
1: At least one input change has been detected on the DSR pin since the last read of CSR.<br />
RIIC: Ring Indicator Input Change Flag<br />
0: No input change has been detected on the RI pin since the last read of CSR.<br />
1: At least one input change has been detected on the RI pin since the last read of CSR.<br />
LINTC: LIN Transfer Completed<br />
0: The USART is idle or a LIN transfer is ongoing.<br />
1: A LIN transfer has been completed since the last RSTSTA.<br />
LINID: LIN Identifier<br />
0: No LIN Identifier received or sent<br />
1: The USART is configured as a Slave node and a LIN Identifier has been received or the USART is configured as a Master<br />
node and a LIN Identifier has been sent since the last RSTSTA.<br />
NACK: Non Acknowledge<br />
0: No Non Acknowledge has not been detected since the last RSTNACK.<br />
1: At least one Non Acknowledge has been detected since the last RSTNACK.<br />
RXBUFF: Reception Buffer Full<br />
0: The signal Buffer Full from the Receive Peripheral DMA Controller channel is inactive.<br />
1: The signal Buffer Full from the Receive Peripheral DMA Controller channel is active.<br />
ITER/UNRE: Max number of Repetitions Reached or SPI Underrun Error<br />
If USART does not operate in SPI Slave Mode (MODE … 0xF):<br />
ITER = 0: Maximum number of repetitions has not been reached since the last RSTSTA.<br />
ITER = 1: Maximum number of repetitions has been reached since the last RSTSTA.<br />
If USART operates in SPI Slave Mode (MODE = 0xF):<br />
UNRE = 0: No SPI underrun error has occurred since the last RSTSTA.<br />
UNRE = 1: At least one SPI underrun error has occurred since the last RSTSTA.<br />
TXEMPTY: Transmitter Empty<br />
0: There are characters in either THR or the Transmit Shift Register, or the transmitter is disabled.<br />
1: There are no characters in THR, nor in the Transmit Shift Register.<br />
TIMEOUT: Receiver Time-out<br />
0: There has not been a time-out since the last Start Time-out command (STTTO in CR) or the Time-out Register is 0.<br />
1: There has been a time-out since the last Start Time-out command (STTTO in CR).<br />
PARE: Parity Error<br />
636
32117D–AVR-01/12<br />
<strong>AT32UC3C</strong><br />
0: No parity error has been detected since the last RSTSTA.<br />
1: At least one parity error has been detected since the last RSTSTA.<br />
FRAME: Framing Error<br />
0: No stop bit has been detected low since the last RSTSTA.<br />
1: At least one stop bit has been detected low since the last RSTSTA.<br />
OVRE: Overrun Error<br />
0: No overrun error has occurred since the last RSTSTA.<br />
1: At least one overrun error has occurred since the last RSTSTA.<br />
RXBRK: Break Received/End of Break<br />
0: No Break received or End of Break detected since the last RSTSTA.<br />
1: Break Received or End of Break detected since the last RSTSTA.<br />
TXRDY: Transmitter Ready<br />
0: A character is in the THR waiting to be transferred to the Transmit Shift Register, or an STTBRK command has been<br />
requested, or the transmitter is disabled. As soon as the transmitter is enabled, TXRDY becomes 1.<br />
1: There is no character in the THR.<br />
RXRDY: Receiver Ready<br />
0: No complete character has been received since the last read of RHR or the receiver is disabled. If characters were being<br />
received when the receiver was disabled, RXRDY changes to 1 when the receiver is enabled.<br />
1: At least one complete character has been received and RHR has not yet been read.<br />
637
25.7.7 Receive Holding Register<br />
Name: RHR<br />
Access Type: Read-only<br />
Offset: 0x18<br />
Reset Value: 0x00000000<br />
32117D–AVR-01/12<br />
<strong>AT32UC3C</strong><br />
31 30 29 28 27 26 25 24<br />
– – – – – – – –<br />
23 22 21 20 19 18 17 16<br />
– – – – – – – –<br />
15 14 13 12 11 10 9 8<br />
RXSYNH – – – – – – RXCHR<br />
7 6 5 4 3 2 1 0<br />
RXCHR<br />
RXSYNH: Received Sync<br />
0: Last Character received is a Data.<br />
1: Last Character received is a Command.<br />
RXCHR: Received Character<br />
Last character received if RXRDY is set.<br />
638
25.7.8 USART Transmit Holding Register<br />
Name: THR<br />
Access Type: Write-only<br />
Offset: 0x1C<br />
Reset Value: -<br />
32117D–AVR-01/12<br />
<strong>AT32UC3C</strong><br />
31 30 29 28 27 26 25 24<br />
– – – – – – – –<br />
23 22 21 20 19 18 17 16<br />
– – – – – – – –<br />
15 14 13 12 11 10 9 8<br />
TXSYNH – – – – – – TXCHR<br />
7 6 5 4 3 2 1 0<br />
TXCHR<br />
TXSYNH: Sync Field to be transmitted<br />
0: The next character sent is encoded as a data. Start Frame Delimiter is DATA SYNC.<br />
1: The next character sent is encoded as a command. Start Frame Delimiter is COMMAND SYNC.<br />
TXCHR: Character to be Transmitted<br />
Next character to be transmitted after the current character if TXRDY is not set.<br />
639
25.7.9 Baud Rate Generator Register<br />
Name: BRGR<br />
Access Type: Read-write<br />
Offset: 0x20<br />
Reset Value: 0x00000000<br />
This register can only be written if the WPEN bit is cleared in the Write Protect Mode Register.<br />
FP: Fractional Part<br />
0: Fractional divider is disabled.<br />
1 - 7: Baudrate resolution, defined by FP x 1/8.<br />
CD: Clock Divider<br />
Table 25-23.<br />
32117D–AVR-01/12<br />
<strong>AT32UC3C</strong><br />
31 30 29 28 27 26 25 24<br />
– – – – – – – –<br />
23 22 21 20 19 18 17 16<br />
– – – – – FP<br />
15 14 13 12 11 10 9 8<br />
CD<br />
7 6 5 4 3 2 1 0<br />
CD<br />
CD<br />
SYNC = 0<br />
MODE ≠ ISO7816<br />
OVER = 0 OVER = 1<br />
0 Baud Rate Clock Disabled<br />
1 to 65535<br />
Baud Rate =<br />
Selected Clock/16/CD<br />
Baud Rate =<br />
Selected Clock/8/CD<br />
SYNC = 1<br />
or<br />
MODE = SPI<br />
(Master or Slave)<br />
Baud Rate =<br />
Selected Clock /CD<br />
MODE = ISO7816<br />
Baud Rate = Selected<br />
Clock/CD/FI_DI_RATIO<br />
640
25.7.10 Receiver Time-out Register<br />
Name: RTOR<br />
Access Type: Read-write<br />
Offset: 0x24<br />
Reset Value: 0x00000000<br />
32117D–AVR-01/12<br />
<strong>AT32UC3C</strong><br />
31 30 29 28 27 26 25 24<br />
– – – – – – – –<br />
23 22 21 20 19 18 17 16<br />
– – – – – – – TO<br />
15 14 13 12 11 10 9 8<br />
TO<br />
7 6 5 4 3 2 1 0<br />
TO<br />
This register can only be written if the WPEN bit is cleared in the Write Protect Mode Register.<br />
TO: Time-out Value<br />
0: The Receiver Time-out is disabled.<br />
1 - 131071: The Receiver Time-out is enabled and the Time-out delay is TO x Bit Period.<br />
Note that the size of the TO counter can change depending of implementation. See the Module Configuration section.<br />
641
25.7.11 Transmitter Timeguard Register<br />
Name: TTGR<br />
Access Type: Read-write<br />
Offset: 0x28<br />
Reset Value: 0x00000000<br />
32117D–AVR-01/12<br />
<strong>AT32UC3C</strong><br />
31 30 29 28 27 26 25 24<br />
– – – – – – – –<br />
23 22 21 20 19 18 17 16<br />
– – – – – – – –<br />
15 14 13 12 11 10 9 8<br />
– – – – – – – –<br />
7 6 5 4 3 2 1 0<br />
TG<br />
This register can only be written if the WPEN bit is cleared in the Write Protect Mode Register.<br />
TG: Timeguard Value<br />
0: The Transmitter Timeguard is disabled.<br />
1 - 255: The Transmitter timeguard is enabled and the timeguard delay is TG x Bit Period.<br />
642
25.7.12 FI DI RATIO Register<br />
Name: FIDI<br />
Access Type: Read-write<br />
Offset: 0x40<br />
Reset Value: 0x00000174<br />
32117D–AVR-01/12<br />
<strong>AT32UC3C</strong><br />
31 30 29 28 27 26 25 24<br />
– – – – – – – –<br />
23 22 21 20 19 18 17 16<br />
– – – – – – – –<br />
15 14 13 12 11 10 9 8<br />
– – – – – FI_DI_RATIO<br />
7 6 5 4 3 2 1 0<br />
FI_DI_RATIO<br />
This register can only be written if the WPEN bit is cleared in the Write Protect Mode Register.<br />
FI_DI_RATIO: FI Over DI Ratio Value<br />
0: If ISO7816 mode is selected, the Baud Rate Generator generates no signal.<br />
1 - 2047: If ISO7816 mode is selected, the Baud Rate is the clock provided on CLK divided by FI_DI_RATIO.<br />
643
25.7.13 Number of Errors Register<br />
Name: NER<br />
Access Type: Read-only<br />
Offset: 0x44<br />
Reset Value: -<br />
32117D–AVR-01/12<br />
<strong>AT32UC3C</strong><br />
31 30 29 28 27 26 25 24<br />
– – – – – – – –<br />
23 22 21 20 19 18 17 16<br />
– – – – – – – –<br />
15 14 13 12 11 10 9 8<br />
– – – – – – – –<br />
7 6 5 4 3 2 1 0<br />
NB_ERRORS<br />
NB_ERRORS: Number of Errors<br />
Total number of errors that occurred during an ISO7816 transfer. This register automatically clears when read.<br />
644
25.7.14 IrDA FILTER Register<br />
Name: IFR<br />
Access Type: Read-write<br />
Offset: 0x4C<br />
Reset Value: 0x00000000<br />
32117D–AVR-01/12<br />
<strong>AT32UC3C</strong><br />
31 30 29 28 27 26 25 24<br />
– – – – – – – –<br />
23 22 21 20 19 18 17 16<br />
– – – – – – – –<br />
15 14 13 12 11 10 9 8<br />
– – – – – – – –<br />
7 6 5 4 3 2 1 0<br />
IRDA_FILTER<br />
This register can only be written if the WPEN bit is cleared in the Write Protect Mode Register (if exists).<br />
IRDA_FILTER: IrDA Filter<br />
Sets the filter of the IrDA demodulator.<br />
645
25.7.15 Manchester Configuration Register<br />
Name: MAN<br />
Access Type: Read-write<br />
Offset: 0x50<br />
Reset Value: 0x30011004<br />
This register can only be written if the WPEN bit is cleared in the Write Protect Mode Register (if exists).<br />
DRIFT: Drift compensation<br />
0: The USART can not recover from an important clock drift<br />
1: The USART can recover from clock drift. The 16X clock mode must be enabled.<br />
RX_MPOL: Receiver Manchester Polarity<br />
0: Logic Zero is coded as a zero-to-one transition, Logic One is coded as a one-to-zero transition.<br />
1: Logic Zero is coded as a one-to-zero transition, Logic One is coded as a zero-to-one transition.<br />
RX_PP: Receiver Preamble Pattern detected<br />
Table 25-24.<br />
RX_PL: Receiver Preamble Length<br />
0: The receiver preamble pattern detection is disabled<br />
1 - 15: The detected preamble length is RX_PL x Bit Period<br />
TX_MPOL: Transmitter Manchester Polarity<br />
0: Logic Zero is coded as a zero-to-one transition, Logic One is coded as a one-to-zero transition.<br />
1: Logic Zero is coded as a one-to-zero transition, Logic One is coded as a zero-to-one transition.<br />
32117D–AVR-01/12<br />
<strong>AT32UC3C</strong><br />
31 30 29 28 27 26 25 24<br />
– DRIFT 1 RX_MPOL – – RX_PP<br />
23 22 21 20 19 18 17 16<br />
– – – – RX_PL<br />
15 14 13 12 11 10 9 8<br />
– – – TX_MPOL – – TX_PP<br />
7 6 5 4 3 2 1 0<br />
– – – – TX_PL<br />
RX_PP Preamble Pattern default polarity assumed (RX_MPOL field not set)<br />
0 0 ALL_ONE<br />
0 1 ALL_ZERO<br />
1 0 ZERO_ONE<br />
1 1 ONE_ZERO<br />
646
TX_PP: Transmitter Preamble Pattern<br />
Table 25-25.<br />
32117D–AVR-01/12<br />
TX_PP Preamble Pattern default polarity assumed (TX_MPOL field not set)<br />
0 0 ALL_ONE<br />
0 1 ALL_ZERO<br />
1 0 ZERO_ONE<br />
1 1 ONE_ZERO<br />
TX_PL: Transmitter Preamble Length<br />
0: The Transmitter Preamble pattern generation is disabled<br />
1 - 15: The Preamble Length is TX_PL x Bit Period<br />
<strong>AT32UC3C</strong><br />
647
25.7.16 LIN Mode Register<br />
Name: LINMR<br />
Access Type: Read-write<br />
Offset: 0x54<br />
Reset Value: 0x00000000<br />
32117D–AVR-01/12<br />
<strong>AT32UC3C</strong><br />
31 30 29 28 27 26 25 24<br />
– – – – – – – –<br />
23 22 21 20 19 18 17 16<br />
– – – – – – SYNCDIS PDCM<br />
15 14 13 12 11 10 9 8<br />
DLC<br />
7 6 5 4 3 2 1 0<br />
WKUPTYP FSDIS DLM CHKTYP CHKDIS PARDIS NACT<br />
SYNCDIS: Synchronization Disable<br />
0: The Synchronization procedure is performed in LIN Slave node configuration.<br />
1: The Synchronization procedure is not performed.<br />
PDCM: Peripheral DMA Controller Mode<br />
0: The LIN mode register LINMR is not written by the Peripheral DMA Controller.<br />
1: The LIN mode register LINMR (excepting that bit) is written by the Peripheral DMA Controller.<br />
DLC: Data Length Control<br />
0 - 255: Defines the response data length if DLM=0,in that case the response data length is equal to DLC+1 bytes.<br />
WKUPTYP: Wakeup Signal Type<br />
0: setting the bit LINWKUP in the control register sends a LIN 2.0 wakeup signal.<br />
1: setting the bit LINWKUP in the control register sends a LIN 1.3 wakeup signal.<br />
FSDIS: Frame Slot Mode Disable<br />
0: The Frame Slot Mode is enabled.<br />
1: The Frame Slot Mode is disabled.<br />
DLM: Data Length Mode<br />
0: The response data length is defined by the field DLC of this register.<br />
1: The response data length is defined by the bits 4 and 5 of the Identifier (IDCHR in LINIR).<br />
CHKTYP: Checksum Type<br />
0: LIN 2.0 “Enhanced” Checksum<br />
1: LIN 1.3 “Classic” Checksum<br />
CHKDIS: Checksum Disable<br />
0: In Master node configuration, the checksum is computed and sent automatically. In Slave node configuration, the checksum<br />
is checked automatically.<br />
1: Whatever the node configuration is, the checksum is not computed/sent and it is not checked.<br />
PARDIS: Parity Disable<br />
0: In Master node configuration, the Identifier Parity is computed and sent automatically. In Master node and Slave node<br />
configuration, the parity is checked automatically.<br />
1:Whatever the node configuration is, the Identifier parity is not computed/sent and it is not checked.<br />
648
NACT: LIN Node Action<br />
Table 1.<br />
32117D–AVR-01/12<br />
NACT Mode Description<br />
0 0 PUBLISH: The USART transmits the response.<br />
0 1 SUBSCRIBE: The USART receives the response.<br />
1 0 IGNORE: The USART does not transmit and does not receive the response.<br />
1 1 Reserved<br />
<strong>AT32UC3C</strong><br />
649
25.7.17 LIN Identifier Register<br />
Name: LINIR<br />
Access Type: Read-write or Read-only<br />
Offset: 0x58<br />
Reset Value: 0x00000000<br />
32117D–AVR-01/12<br />
<strong>AT32UC3C</strong><br />
31 30 29 28 27 26 25 24<br />
– – – – – – – –<br />
23 22 21 20 19 18 17 16<br />
– – – – – – – –<br />
15 14 13 12 11 10 9 8<br />
– – – – – – – –<br />
7 6 5 4 3 2 1 0<br />
IDCHR<br />
IDCHR: Identifier Character<br />
If MODE=0xA (Master node configuration):<br />
IDCHR is Read-write and its value is the Identifier character to be transmitted.<br />
if MODE=0xB (Slave node configuration):<br />
IDCHR is Read-only and its value is the last Identifier character that has been received.<br />
650
25.7.18 LIN Baud Rate Register<br />
Name: LINBRR<br />
Access Type: Read-only<br />
Offset: 0x5C<br />
Reset Value: 0x00000000<br />
32117D–AVR-01/12<br />
<strong>AT32UC3C</strong><br />
31 30 29 28 27 26 25 24<br />
– – – – – – – –<br />
23 22 21 20 19 18 17 16<br />
– – – – – LINFP<br />
15 14 13 12 11 10 9 8<br />
LINCD<br />
7 6 5 4 3 2 1 0<br />
LINCD<br />
LINFP: LIN Fractional Part after Synchronization<br />
LINCD: LIN Clock Divider after Synchronization<br />
651
25.7.19 Write Protect Mode Register<br />
Register Name: WPMR<br />
Access Type: Read-write<br />
Offset: 0xE4<br />
Reset Value: See Table 25-16<br />
32117D–AVR-01/12<br />
<strong>AT32UC3C</strong><br />
31 30 29 28 27 26 25 24<br />
WPKEY<br />
23 22 21 20 19 18 17 16<br />
WPKEY<br />
15 14 13 12 11 10 9 8<br />
WPKEY<br />
7 6 5 4 3 2 1 0<br />
— — — — — — — WPEN<br />
WPKEY: Write Protect KEY<br />
Should be written at value 0x555341 ("USA" in ASCII). Writing any other value in this field aborts the write operation of the<br />
WPEN bit. Always reads as 0.<br />
WPEN: Write Protect Enable<br />
0 = Disables the Write Protect if WPKEY corresponds to 0x555341 ("USA" in ASCII).<br />
1 = Enables the Write Protect if WPKEY corresponds to 0x555341 ("USA" in ASCII).<br />
Protects the registers:<br />
”Mode Register” on page 628<br />
”Baud Rate Generator Register” on page 640<br />
”Receiver Time-out Register” on page 641<br />
”Transmitter Timeguard Register” on page 642<br />
”FI DI RATIO Register” on page 643<br />
”IrDA FILTER Register” on page 645<br />
”Manchester Configuration Register” on page 646<br />
652
25.7.20 Write Protect Status Register<br />
Register Name: WPSR<br />
Access Type: Read-only<br />
Offset: 0xE8<br />
Reset Value: See Table 25-16<br />
32117D–AVR-01/12<br />
<strong>AT32UC3C</strong><br />
31 30 29 28 27 26 25 24<br />
— — — — — — — —<br />
23 22 21 20 19 18 17 16<br />
WPVSRC<br />
15 14 13 12 11 10 9 8<br />
WPVSRC<br />
7 6 5 4 3 2 1 0<br />
— — — — — — — WPVS<br />
WPVSRC: Write Protect Violation Source<br />
When WPVS is active, this field indicates the write-protected register (through address offset or code) in which a write access<br />
has been attempted.<br />
WPVS: Write Protect Violation Status<br />
0 = No Write Protect Violation has occurred since the last read of the WPSR register.<br />
1 = A Write Protect Violation has occurred since the last read of the WPSR register. If this violation is an unauthorized attempt<br />
to write a protected register, the associated violation is reported into field WPVSRC.<br />
Note: Reading WPSR automatically clears all fields.<br />
653
25.7.21 Version Register<br />
Name: VERSION<br />
Access Type: Read-only<br />
Offset: 0xFC<br />
Reset Value: -<br />
MFN<br />
Reserved. No functionality associated.<br />
VERSION<br />
Version of the module. No functionality associated.<br />
32117D–AVR-01/12<br />
<strong>AT32UC3C</strong><br />
31 30 29 28 27 26 25 24<br />
– – – – – – – –<br />
23 22 21 20 19 18 17 16<br />
– – – – MFN<br />
15 14 13 12 11 10 9 8<br />
– – – – VERSION<br />
7 6 5 4 3 2 1 0<br />
VERSION<br />
654
32117D–AVR-01/12<br />
<strong>AT32UC3C</strong><br />
25.8 Module Configuration<br />
The specific configuration for each USART instance is listed in the following tables. The module<br />
bus clocks listed here are connected to the system bus clocks according to the table in the System<br />
Bus Clock Connections section.<br />
Table 25-26. Module Configuration<br />
Feature<br />
USART0<br />
USART2<br />
USART3<br />
USART4 USART1<br />
ISO7816 Not Implemented Implemented<br />
IRDA Logic Not Implemented Implemented<br />
RS485 Logic Not Implemented Implemented<br />
Modem Logic Not Implemented Implemented<br />
SPI Logic Implemented Implemented<br />
LIN Logic Implemented Implemented<br />
Manchester Logic Not Implemented Implemented<br />
Fractional Baudrate Implemented Implemented<br />
DIV value for divided CLK_USART 8 8<br />
Receiver Time-out Counter Size<br />
(Size of the RTOR.TO field)<br />
Table 25-27. Module Clock Name<br />
Module name Clock name Description<br />
17-bits 17-bits<br />
USART0 CLK_USART0 Peripheral Bus clock from the PBA clock domain<br />
USART1 CLK_USART1 Peripheral Bus clock from the PBC clock domain<br />
USART2 CLK_USART2 Peripheral Bus clock from the PBA clock domain<br />
USART3 CLK_USART3 Peripheral Bus clock from the PBA clock domain<br />
USART4 CLK_USART4 Peripheral Bus clock from the PBC clock domain<br />
25.8.1 Clock Connections<br />
Each USART can be connected to an internally divided clock:<br />
Table 25-28. USART Clock Connections<br />
USART Source Name Connection<br />
0<br />
PBA Clock / 8 (CLK_PBA_USART_DIV)<br />
1 PBC Clock / 8 (CLK_PBC_USART_DIV)<br />
2 Internal CLK_DIV PBA Clock / 8 (CLK_PBA_USART_DIV)<br />
3 PBA Clock / 8 (CLK_PBA_USART_DIV)<br />
4 PBC Clock / 8 (CLK_PBC_USART_DIV)<br />
655
25.8.2 Register Reset Values<br />
32117D–AVR-01/12<br />
Table 25-29. Register Reset Values<br />
Register Reset Value<br />
VERSION 0x00000602<br />
<strong>AT32UC3C</strong><br />
656
26. Serial Peripheral Interface (SPI)<br />
26.1 Features<br />
26.2 Overview<br />
32117D–AVR-01/12<br />
Rev: 2.1.1.3<br />
<strong>AT32UC3C</strong><br />
Compatible with an embedded 32-bit microcontroller<br />
Supports communication with serial external devices<br />
– Four chip selects with external decoder support allow communication with up to 15<br />
peripherals<br />
– Serial memories, such as DataFlash and 3-wire EEPROMs<br />
– Serial peripherals, such as ADCs, DACs, LCD controllers, CAN controllers and Sensors<br />
– External co-processors<br />
Master or Slave Serial Peripheral Bus Interface<br />
– 4 - to 16-bit programmable data length per chip select<br />
– Programmable phase and polarity per chip select<br />
– Programmable transfer delays between consecutive transfers and between clock and data<br />
per chip select<br />
– Programmable delay between consecutive transfers<br />
– Selectable mode fault detection<br />
Connection to Peripheral DMA Controller channel capabilities optimizes data transfers<br />
– One channel for the receiver, one channel for the transmitter<br />
– Next buffer support<br />
– Four character FIFO in reception<br />
The Serial Peripheral Interface (SPI) circuit is a synchronous serial data link that provides communication<br />
with external devices in Master or Slave mode. It also enables communication<br />
between processors if an external processor is connected to the system.<br />
The Serial Peripheral Interface is essentially a shift register that serially transmits data bits to<br />
other SPIs. During a data transfer, one SPI system acts as the “master”' which controls the data<br />
flow, while the other devices act as “slaves'' which have data shifted into and out by the master.<br />
Different CPUs can take turn being masters (Multiple Master Protocol opposite to Single Master<br />
Protocol where one CPU is always the master while all of the others are always slaves) and one<br />
master may simultaneously shift data into multiple slaves. However, only one slave may drive its<br />
output to write data back to the master at any given time.<br />
A slave device is selected when the master asserts its NSS signal. If multiple slave devices<br />
exist, the master generates a separate slave select signal for each slave (NPCS).<br />
The SPI system consists of two data lines and two control lines:<br />
Master Out Slave In (MOSI): this data line supplies the output data from the master shifted<br />
into the input(s) of the slave(s).<br />
Master In Slave Out (MISO): this data line supplies the output data from a slave to the input of<br />
the master. There may be no more than one slave transmitting data during any particular<br />
transfer.<br />
Serial Clock (SPCK): this control line is driven by the master and regulates the flow of the<br />
data bits. The master may transmit data at a variety of baud rates; the SPCK line cycles once<br />
for each bit that is transmitted.<br />
Slave Select (NSS): this control line allows slaves to be turned on and off by hardware.<br />
657
26.3 Block Diagram<br />
Figure 26-1. SPI Block Diagram<br />
32117D–AVR-01/12<br />
Peripheral Bus<br />
CLK_SPI<br />
26.4 Application Block Diagram<br />
Peripheral DMA<br />
Controller<br />
Spi Interface<br />
Interrupt Control<br />
I/O<br />
Controller<br />
Figure 26-2. Application Block Diagram: Single Master/Multiple Slave Implementation<br />
Spi Master<br />
SPCK<br />
MISO<br />
MOSI<br />
NPCS0<br />
NPCS1<br />
NPCS2<br />
NPCS3<br />
NC<br />
SPI Interrupt<br />
SPCK<br />
MISO<br />
MOSI<br />
NSS<br />
SPCK<br />
MISO<br />
MOSI<br />
NSS<br />
SPCK<br />
MISO<br />
MOSI<br />
NSS<br />
Slave 0<br />
Slave 1<br />
Slave 2<br />
SPCK<br />
MISO<br />
MOSI<br />
NPCS0/NSS<br />
NPCS1<br />
NPCS2<br />
NPCS3<br />
<strong>AT32UC3C</strong><br />
658
26.5 I/O Lines Description<br />
32117D–AVR-01/12<br />
<strong>AT32UC3C</strong><br />
26.6 Product Dependencies<br />
In order to use this module, other parts of the system must be configured correctly, as described<br />
below.<br />
26.6.1 I/O Lines<br />
26.6.2 Clocks<br />
26.6.3 Interrupts<br />
26.7 Functional Description<br />
Table 26-1. I/O Lines Description<br />
Pin Name Pin Description<br />
The pins used for interfacing the compliant external devices may be multiplexed with I/O lines.<br />
The user must first configure the I/O Controller to assign the SPI pins to their peripheral<br />
functions.<br />
The clock for the SPI bus interface (CLK_SPI) is generated by the Power Manager. This clock is<br />
enabled at reset, and can be disabled in the Power Manager. It is recommended to disable the<br />
SPI before disabling the clock, to avoid freezing the SPI in an undefined state.<br />
The SPI interrupt request line is connected to the interrupt controller. Using the SPI interrupt<br />
requires the interrupt controller to be programmed first.<br />
26.7.1 Modes of Operation<br />
The SPI operates in master mode or in slave mode.<br />
Operation in master mode is configured by writing a one to the Master/Slave Mode bit in the<br />
Mode Register (MR.MSTR). The pins NPCS0 to NPCS3 are all configured as outputs, the SPCK<br />
pin is driven, the MISO line is wired on the receiver input and the MOSI line driven as an output<br />
by the transmitter.<br />
If the MR.MSTR bit is written to zero, the SPI operates in slave mode. The MISO line is driven by<br />
the transmitter output, the MOSI line is wired on the receiver input, the SPCK pin is driven by the<br />
transmitter to synchronize the receiver. The NPCS0 pin becomes an input, and is used as a<br />
Slave Select signal (NSS). The pins NPCS1 to NPCS3 are not driven and can be used for other<br />
purposes.<br />
The data transfers are identically programmable for both modes of operations. The baud rate<br />
generator is activated only in master mode.<br />
Type<br />
Master Slave<br />
MISO Master In Slave Out Input Output<br />
MOSI Master Out Slave In Output Input<br />
SPCK Serial Clock Output Input<br />
NPCS1-NPCS3 Peripheral Chip Selects Output Unused<br />
NPCS0/NSS Peripheral Chip Select/Slave Select Output Input<br />
659
26.7.2 Data Transfer<br />
32117D–AVR-01/12<br />
<strong>AT32UC3C</strong><br />
Four combinations of polarity and phase are available for data transfers. The clock polarity is<br />
configured with the Clock Polarity bit in the Chip Select Registers (CSRn.CPOL). The clock<br />
phase is configured with the Clock Phase bit in the CSRn registers (CSRn.NCPHA). These two<br />
bits determine the edges of the clock signal on which data is driven and sampled. Each of the<br />
two bits has two possible states, resulting in four possible combinations that are incompatible<br />
with one another. Thus, a master/slave pair must use the same parameter pair values to communicate.<br />
If multiple slaves are used and fixed in different configurations, the master must<br />
reconfigure itself each time it needs to communicate with a different slave.<br />
Table 26-2 on page 660 shows the four modes and corresponding parameter settings.<br />
Table 26-2. SPI modes<br />
Figure 26-3 on page 660 and Figure 26-4 on page 661 show examples of data transfers.<br />
Figure 26-3. SPI Transfer Format (NCPHA = 1, 8 bits per transfer)<br />
SPCK cycle (for reference)<br />
SPCK<br />
(CPOL = 0)<br />
SPCK<br />
(CPOL = 1)<br />
MOSI<br />
(from master)<br />
MISO<br />
(from slave)<br />
NSS<br />
(to slave)<br />
SPI Mode CPOL NCPHA<br />
0 0 1<br />
1 0 0<br />
2 1 1<br />
3 1 0<br />
1 2 3<br />
4<br />
5 6<br />
7<br />
8<br />
MSB 6 5 4<br />
3<br />
2<br />
1 LSB<br />
MSB 6 5<br />
4<br />
3<br />
2<br />
1 LSB ***<br />
*** Not Defined, but normaly MSB of previous character received<br />
660
Figure 26-4. SPI Transfer Format (NCPHA = 0, 8 bits per transfer)<br />
32117D–AVR-01/12<br />
SPCK cycle (for reference)<br />
SPCK<br />
(CPOL = 0)<br />
SPCK<br />
(CPOL = 1)<br />
MOSI<br />
(from master)<br />
MISO<br />
(from slave)<br />
NSS<br />
(to slave)<br />
***<br />
1 2 3<br />
4<br />
5 6<br />
7<br />
8<br />
MSB 6 5 4<br />
3<br />
2<br />
1 LSB<br />
MSB<br />
6 5<br />
4<br />
3<br />
2<br />
1<br />
LSB<br />
*** Not Defined, but normaly LSB of previous character transmitted<br />
<strong>AT32UC3C</strong><br />
26.7.3 Master Mode Operations<br />
When configured in master mode, the SPI uses the internal programmable baud rate generator<br />
as clock source. It fully controls the data transfers to and from the slave(s) connected to the SPI<br />
bus. The SPI drives the chip select line to the slave and the serial clock signal (SPCK).<br />
The SPI features two holding registers, the Transmit Data Register (TDR) and the Receive Data<br />
Register (RDR), and a single Shift Register. The holding registers maintain the data flow at a<br />
constant rate.<br />
After enabling the SPI, a data transfer begins when the processor writes to the TDR register.<br />
The written data is immediately transferred in the Shift Register and transfer on the SPI bus<br />
starts. While the data in the Shift Register is shifted on the MOSI line, the MISO line is sampled<br />
and shifted in the Shift Register. Transmission cannot occur without reception.<br />
Before writing to the TDR, the Peripheral Chip Select field in TDR (TDR.PCS) must be written in<br />
order to select a slave.<br />
If new data is written to TDR during the transfer, it stays in it until the current transfer is completed.<br />
Then, the received data is transferred from the Shift Register to RDR, the data in TDR is<br />
loaded in the Shift Register and a new transfer starts.<br />
The transfer of a data written in TDR in the Shift Register is indicated by the Transmit Data Register<br />
Empty bit in the Status Register (SR.TDRE). When new data is written in TDR, this bit is<br />
cleared. The SR.TDRE bit is used to trigger the Transmit Peripheral DMA Controller channel.<br />
The end of transfer is indicated by the Transmission Registers Empty bit in the SR register<br />
(SR.TXEMPTY). If a transfer delay (CSRn.DLYBCT) is greater than zero for the last transfer,<br />
SR.TXEMPTY is set after the completion of said delay. The CLK_SPI can be switched off at this<br />
time.<br />
During reception, received data are transferred from the Shift Register to the reception FIFO.<br />
The FIFO can contain up to 4 characters (both Receive Data and Peripheral Chip Select fields).<br />
While a character of the FIFO is unread, the Receive Data Register Full bit in SR remains high<br />
(SR.RDRF). Characters are read through the RDR register. If the four characters stored in the<br />
FIFO are not read and if a new character is stored, this sets the Overrun Error Status bit in the<br />
SR register (SR.OVRES). The procedure to follow in such a case is described in Section<br />
26.7.3.8.<br />
661
26.7.3.1 Master mode block diagram<br />
Figure 26-5. Master Mode Block Diagram<br />
32117D–AVR-01/12<br />
CLK_SPI<br />
<strong>AT32UC3C</strong><br />
Figure 26-5 on page 662shows a block diagram of the SPI when operating in master mode. Figure<br />
26-6 on page 663 shows a flow chart describing how transfers are handled.<br />
Baud Rate Generator<br />
RXFIFOEN<br />
4 – Character FIFO<br />
LSB<br />
MISO Shift Register<br />
MSB<br />
MOSI<br />
MR<br />
TDR<br />
NPCS0<br />
PCS<br />
PCS<br />
MSTR<br />
CSR0..3<br />
SCBR<br />
CSR0..3<br />
PS<br />
0<br />
1<br />
BITS<br />
NCPHA<br />
CPOL<br />
SPI<br />
Clock<br />
CSR0..3<br />
PCSDEC<br />
TDR<br />
CSNAAT<br />
CSAAT<br />
TD<br />
RXFIFOEN<br />
0<br />
1<br />
Current<br />
Peripheral<br />
0<br />
1<br />
MODFDIS<br />
RDR<br />
RDR<br />
TDRE<br />
4 – Character FIFO<br />
MODF<br />
RD<br />
SPCK<br />
NPCS3<br />
NPCS2<br />
NPCS1<br />
NPCS0<br />
RDRF<br />
OVRES<br />
662
26.7.3.2 Master mode flow diagram<br />
Figure 26-6. Master Mode Flow Diagram<br />
32117D–AVR-01/12<br />
1<br />
SPI Enable<br />
TDRE ?<br />
0<br />
CSAAT ?<br />
0<br />
PS ?<br />
1<br />
NPCS = TDR(PCS) NPCS = MR(PCS)<br />
Delay DLYBS<br />
Serializer = TDR(TD)<br />
TDRE = 1<br />
Data Transfer<br />
RDR(RD) = Serializer<br />
RDRF = 1<br />
Delay DLYBCT<br />
TDRE ?<br />
1<br />
CSAAT ?<br />
0<br />
NPCS = 0xF<br />
Delay DLYBCS<br />
Variable<br />
peripheral<br />
1<br />
1<br />
0<br />
0<br />
Fixed<br />
peripheral<br />
- NPCS defines the current Chip Select<br />
- CSAAT, DLYBS, DLYBCT refer to the fields of the<br />
Chip Select Register corresponding to the Current Chip Select<br />
- When NPCS is 0xF, CSAAT is 0.<br />
PS ?<br />
1<br />
TDR(PCS)<br />
= NPCS ?<br />
no<br />
NPCS = 0xF<br />
Delay DLYBCS<br />
Variable<br />
peripheral<br />
NPCS = TDR(PCS)<br />
0<br />
yes<br />
Fixed<br />
peripheral<br />
MR(PCS)<br />
= NPCS ?<br />
no<br />
NPCS = 0xF<br />
Delay DLYBCS<br />
NPCS = MR(PCS),<br />
TDR(PCS)<br />
<strong>AT32UC3C</strong><br />
663
32117D–AVR-01/12<br />
<strong>AT32UC3C</strong><br />
26.7.3.3 Clock generation<br />
The SPI Baud rate clock is generated by dividing the CLK_SPI , by a value between 1 and 255.<br />
This allows a maximum operating baud rate at up to CLK_SPI and a minimum operating baud<br />
rate of CLK_SPI divided by 255.<br />
Writing the Serial Clock Baud Rate field in the CSRn registers (CSRn.SCBR) to zero is forbidden.<br />
Triggering a transfer while CSRn.SCBR is zero can lead to unpredictable results.<br />
At reset, CSRn.SCBR is zero and the user has to configure it at a valid value before performing<br />
the first transfer.<br />
The divisor can be defined independently for each chip select, as it has to be configured in the<br />
CSRn.SCBR field. This allows the SPI to automatically adapt the baud rate for each interfaced<br />
peripheral without reprogramming.<br />
26.7.3.4 Transfer delays<br />
Figure 26-7 on page 664 shows a chip select transfer change and consecutive transfers on the<br />
same chip select. Three delays can be configured to modify the transfer waveforms:<br />
Figure 26-7. Programmable Delays<br />
Chip Select 1<br />
Chip Select 2<br />
SPCK<br />
The delay between chip selects, programmable only once for all the chip selects by writing to<br />
the Delay Between Chip Selects field in the MR register (MR.DLYBCS). Allows insertion of a<br />
delay between release of one chip select and before assertion of a new one.<br />
The delay before SPCK, independently programmable for each chip select by writing the<br />
Delay Before SPCK field in the CSRn registers (CSRn.DLYBS). Allows the start of SPCK to<br />
be delayed after the chip select has been asserted.<br />
The delay between consecutive transfers, independently programmable for each chip select<br />
by writing the Delay Between Consecutive Transfers field in the CSRn registers<br />
(CSRn.DLYBCT). Allows insertion of a delay between two transfers occurring on the same<br />
chip select<br />
These delays allow the SPI to be adapted to the interfaced peripherals and their speed and bus<br />
release time.<br />
DLYBCS DLYBS DLYBCT DLYBCT<br />
664
32117D–AVR-01/12<br />
<strong>AT32UC3C</strong><br />
26.7.3.5 Peripheral selection<br />
The serial peripherals are selected through the assertion of the NPCS0 to NPCS3 signals. By<br />
default, all the NPCS signals are high before and after each transfer.<br />
The peripheral selection can be performed in two different ways:<br />
Fixed Peripheral Select: SPI exchanges data with only one peripheral<br />
Variable Peripheral Select: Data can be exchanged with more than one peripheral<br />
Fixed Peripheral Select is activated by writing a zero to the Peripheral Select bit in MR (MR.PS).<br />
In this case, the current peripheral is defined by the MR.PCS field and the TDR.PCS field has no<br />
effect.<br />
Variable Peripheral Select is activated by writing a one to the MR.PS bit . The TDR.PCS field is<br />
used to select the current peripheral. This means that the peripheral selection can be defined for<br />
each new data.<br />
The Fixed Peripheral Selection allows buffer transfers with a single peripheral. Using the Peripheral<br />
DMA Controller is an optimal means, as the size of the data transfer between the memory<br />
and the SPI is either 4 bits or 16 bits. However, changing the peripheral selection requires the<br />
Mode Register to be reprogrammed.<br />
The Variable Peripheral Selection allows buffer transfers with multiple peripherals without reprogramming<br />
the MR register. Data written to TDR is 32-bits wide and defines the real data to be<br />
transmitted and the peripheral it is destined to. Using the Peripheral DMA Controller in this mode<br />
requires 32-bit wide buffers, with the data in the LSBs and the PCS and LASTXFER fields in the<br />
MSBs, however the SPI still controls the number of bits (8 to16) to be transferred through MISO<br />
and MOSI lines with the CSRn registers. This is not the optimal means in term of memory size<br />
for the buffers, but it provides a very effective means to exchange data with several peripherals<br />
without any intervention of the processor.<br />
26.7.3.6 Peripheral chip select decoding<br />
The user can configure the SPI to operate with up to 15 peripherals by decoding the four Chip<br />
Select lines, NPCS0 to NPCS3 with an external logic. This can be enabled by writing a one to<br />
the Chip Select Decode bit in the MR register (MR.PCSDEC).<br />
When operating without decoding, the SPI makes sure that in any case only one chip select line<br />
is activated, i.e. driven low at a time. If two bits are defined low in a PCS field, only the lowest<br />
numbered chip select is driven low.<br />
When operating with decoding, the SPI directly outputs the value defined by the PCS field of<br />
either the MR register or the TDR register (depending on PS).<br />
As the SPI sets a default value of 0xF on the chip select lines (i.e. all chip select lines at one)<br />
when not processing any transfer, only 15 peripherals can be decoded.<br />
The SPI has only four Chip Select Registers, not 15. As a result, when decoding is activated,<br />
each chip select defines the characteristics of up to four peripherals. As an example, the CRS0<br />
register defines the characteristics of the externally decoded peripherals 0 to 3, corresponding to<br />
the PCS values 0x0 to 0x3. Thus, the user has to make sure to connect compatible peripherals<br />
on the decoded chip select lines 0 to 3, 4 to 7, 8 to 11 and 12 to 14.<br />
26.7.3.7 Peripheral deselection<br />
When operating normally, as soon as the transfer of the last data written in TDR is completed,<br />
the NPCS lines all rise. This might lead to runtime error if the processor is too long in responding<br />
665
32117D–AVR-01/12<br />
<strong>AT32UC3C</strong><br />
to an interrupt, and thus might lead to difficulties for interfacing with some serial peripherals<br />
requiring the chip select line to remain active during a full set of transfers.<br />
To facilitate interfacing with such devices, the CSRn registers can be configured with the Chip<br />
Select Active After Transfer bit written to one (CSRn.CSAAT) . This allows the chip select lines<br />
to remain in their current state (low = active) until transfer to another peripheral is required.<br />
When the CSRn.CSAAT bit is written to qero, the NPCS does not rise in all cases between two<br />
transfers on the same peripheral. During a transfer on a Chip Select, the SR.TDRE bit rises as<br />
soon as the content of the TDR is transferred into the internal shifter. When this bit is detected<br />
the TDR can be reloaded. If this reload occurs before the end of the current transfer and if the<br />
next transfer is performed on the same chip select as the current transfer, the Chip Select is not<br />
de-asserted between the two transfers. This might lead to difficulties for interfacing with some<br />
serial peripherals requiring the chip select to be de-asserted after each transfer. To facilitate<br />
interfacing with such devices, the CSRn registers can be configured with the Chip Select Not<br />
Active After Transfer bit (CSRn.CSNAAT) written to one. This allows to de-assert systematically<br />
the chip select lines during a time DLYBCS. (The value of the CSRn.CSNAAT bit is taken into<br />
account only if the CSRn.CSAAT bit is written to zero for the same Chip Select).<br />
Figure 26-8 on page 667 shows different peripheral deselection cases and the effect of the<br />
CSRn.CSAAT and CSRn.CSNAAT bits.<br />
26.7.3.8 FIFO management<br />
A FIFO has been implemented in Reception FIFO (both in master and in slave mode), in order to<br />
be able to store up to 4 characters without causing an overrun error. If an attempt is made to<br />
store a fifth character, an overrun error rises. If such an event occurs, the FIFO must be flushed.<br />
There are two ways to Flush the FIFO:<br />
By performing four read accesses of the RDR (the data read must be ignored)<br />
By writing a one to the Flush Fifo Command bit in the CR register (CR.FLUSHFIFO).<br />
After that, the SPI is able to receive new data.<br />
666
Figure 26-8. Peripheral Deselection<br />
TDRE<br />
NPCS[0..3]<br />
Write TDR<br />
TDRE<br />
NPCS[0..3]<br />
Write TDR<br />
TDRE<br />
NPCS[0..3]<br />
Write TDR<br />
TDRE<br />
NPCS[0..3]<br />
Write TDR<br />
32117D–AVR-01/12<br />
A<br />
A<br />
PCS = A<br />
CSAAT = 0 and CSNAAT = 0<br />
DLYBCT<br />
A A<br />
DLYBCT<br />
DLYBCT<br />
DLYBCS<br />
DLYBCS<br />
PCS=A<br />
DLYBCS<br />
PCS = B<br />
CSAAT = 0 and CSNAAT = 0<br />
DLYBCT<br />
A A<br />
PCS = A<br />
A<br />
B<br />
DLYBCT<br />
DLYBCS<br />
PCS = A<br />
DLYBCS<br />
<strong>AT32UC3C</strong><br />
Figure 26-8 on page 667 shows different peripheral deselection cases and the effect of the<br />
CSRn.CSAAT and CSRn.CSNAAT bits.<br />
26.7.3.9 Mode fault detection<br />
The SPI is capable of detecting a mode fault when it is configured in master mode and NPCS0,<br />
MOSI, MISO, and SPCK are configured as open drain through the I/O Controller with either<br />
internal or external pullup resistors. If the I/O Controller does not have open-drain capability,<br />
mode fault detection must be disabled by writing a one to the Mode Fault Detection bit in the MR<br />
A<br />
A<br />
CSAAT = 1 and CSNAAT= 0 / 1<br />
DLYBCT<br />
A A<br />
A<br />
PCS = A<br />
DLYBCT<br />
DLYBCT<br />
A<br />
DLYBCS<br />
PCS = A<br />
PCS = B<br />
CSAAT = 0 and CSNAAT = 1<br />
A A<br />
DLYBCS<br />
A<br />
B<br />
667
32117D–AVR-01/12<br />
<strong>AT32UC3C</strong><br />
register (MR.MODFDIS). In systems with open-drain I/O lines, a mode fault is detected when a<br />
low level is driven by an external master on the NPCS0/NSS signal.<br />
When a mode fault is detected, the Mode Fault Error bit in the SR (SR.MODF) is set until the SR<br />
is read and the SPI is automatically disabled until re-enabled by writing a one to the SPI Enable<br />
bit in the CR register (CR.SPIEN).<br />
By default, the mode fault detection circuitry is enabled. The user can disable mode fault detection<br />
by writing a one to the Mode Fault Detection bit in the MR register (MR.MODFDIS).<br />
26.7.4 SPI Slave Mode<br />
When operating in slave mode, the SPI processes data bits on the clock provided on the SPI<br />
clock pin (SPCK).<br />
The SPI waits for NSS to go active before receiving the serial clock from an external master.<br />
When NSS falls, the clock is validated on the serializer, which processes the number of bits<br />
defined by the Bits Per Transfer field of the Chip Select Register 0 (CSR0.BITS). These bits are<br />
processed following a phase and a polarity defined respectively by the CSR0.NCPHA and<br />
CSR0.CPOL bits. Note that the BITS, CPOL, and NCPHA bits of the other Chip Select Registers<br />
have no effect when the SPI is configured in Slave Mode.<br />
The bits are shifted out on the MISO line and sampled on the MOSI line.<br />
When all the bits are processed, the received data is transferred in the Receive Data Register<br />
and the SR.RDRF bit rises. If the RDR register has not been read before new data is received,<br />
the SR.OVRES bit is set. Data is loaded in RDR even if this flag is set. The user has to read the<br />
SR register to clear the SR.OVRES bit.<br />
When a transfer starts, the data shifted out is the data present in the Shift Register. If no data<br />
has been written in the TDR register, the last data received is transferred. If no data has been<br />
received since the last reset, all bits are transmitted low, as the Shift Register resets to zero.<br />
When a first data is written in TDR, it is transferred immediately in the Shift Register and the<br />
SR.TDRE bit rises. If new data is written, it remains in TDR until a transfer occurs, i.e. NSS falls<br />
and there is a valid clock on the SPCK pin. When the transfer occurs, the last data written in<br />
TDR is transferred in the Shift Register and the SR.TDRE bit rises. This enables frequent<br />
updates of critical variables with single transfers.<br />
Then, a new data is loaded in the Shift Register from the TDR. In case no character is ready to<br />
be transmitted, i.e. no character has been written in TDR since the last load from TDR to the<br />
Shift Register, the Shift Register is not modified and the last received character is retransmitted.<br />
In this case the Underrun Error Status bit is set in SR (SR.UNDES).<br />
Figure 26-9 on page 669 shows a block diagram of the SPI when operating in slave mode.<br />
668
Figure 26-9. Slave Mode Functional Block Diagram<br />
32117D–AVR-01/12<br />
SPCK<br />
NSS<br />
MOSI<br />
SPIEN<br />
SPIENS<br />
SPIDIS<br />
CSR0<br />
BITS<br />
NCPHA<br />
CPOL<br />
SPI<br />
Clock<br />
LSB<br />
Shift Register<br />
MSB<br />
TDR<br />
RXFIFOEN<br />
TD<br />
0<br />
1<br />
UNDES<br />
TDRE<br />
RDR<br />
RD<br />
4 - Character FIFO<br />
MISO<br />
<strong>AT32UC3C</strong><br />
RDRF<br />
OVRES<br />
669
26.8 User Interface<br />
Table 26-3. SPI Register Memory Map<br />
Note: 1. The reset values are device specific. Please refer to the Module Configuration section at the end of this chapter.<br />
32117D–AVR-01/12<br />
<strong>AT32UC3C</strong><br />
Offset Register Register Name Access Reset<br />
0x00 Control Register CR Write-only 0x00000000<br />
0x04 Mode Register MR Read/Write 0x00000000<br />
0x08 Receive Data Register RDR Read-only 0x00000000<br />
0x0C Transmit Data Register TDR Write-only 0x00000000<br />
0x10 Status Register SR Read-only 0x00000000<br />
0x14 Interrupt Enable Register IER Write-only 0x00000000<br />
0x18 Interrupt Disable Register IDR Write-only 0x00000000<br />
0x1C Interrupt Mask Register IMR Read-only 0x00000000<br />
0x30 Chip Select Register 0 CSR0 Read/Write 0x00000000<br />
0x34 Chip Select Register 1 CSR1 Read/Write 0x00000000<br />
0x38 Chip Select Register 2 CSR2 Read/Write 0x00000000<br />
0x3C Chip Select Register 3 CSR3 Read/Write 0x00000000<br />
0x E4 Write Protection Control Register WPCR Read/Write 0X00000000<br />
0xE8 Write Protection Status Register WPSR Read-only 0x00000000<br />
0xF8 Features Register FEATURES Read-only - (1)<br />
0xFC Version Register VERSION Read-only - (1)<br />
670
26.8.1 Control Register<br />
Name: CR<br />
Access Type: Write-only<br />
Offset: 0x00<br />
Reset Value: 0x00000000<br />
32117D–AVR-01/12<br />
<strong>AT32UC3C</strong><br />
31 30 29 28 27 26 25 24<br />
- - - - - - - LASTXFER<br />
23 22 21 20 19 18 17 16<br />
- - - - - - - -<br />
15 14 13 12 11 10 9 8<br />
- - - - - - - FLUSHFIFO<br />
7 6 5 4 3 2 1 0<br />
SWRST - - - - - SPIDIS SPIEN<br />
LASTXFER: Last Transfer<br />
1: The current NPCS will be deasserted after the character written in TD has been transferred. When CSRn.CSAAT is one, this<br />
allows to close the communication with the current serial peripheral by raising the corresponding NPCS line as soon as TD<br />
transfer has completed.<br />
0: Writing a zero to this bit has no effect.<br />
FLUSHFIFO: Flush Fifo Command<br />
1: If The FIFO Mode is enabled (MR.FIFOEN written to one) and if an overrun error has been detected, this command allows to<br />
empty the FIFO.<br />
0: Writing a zero to this bit has no effect.<br />
SWRST: SPI Software Reset<br />
1: Writing a one to this bit will reset the SPI. A software-triggered hardware reset of the SPI interface is performed. The SPI is in<br />
slave mode after software reset. Peripheral DMA Controller channels are not affected by software reset.<br />
0: Writing a zero to this bit has no effect.<br />
SPIDIS: SPI Disable<br />
1: Writing a one to this bit will disable the SPI. As soon as SPIDIS is written to one, the SPI finishes its transfer, all pins are set<br />
in input mode and no data is received or transmitted. If a transfer is in progress, the transfer is finished before the SPI is<br />
disabled. If both SPIEN and SPIDIS are equal to one when the CR register is written, the SPI is disabled.<br />
0: Writing a zero to this bit has no effect.<br />
SPIEN: SPI Enable<br />
1: Writing a one to this bit will enable the SPI to transfer and receive data.<br />
0: Writing a zero to this bit has no effect.<br />
671
26.8.2 Mode Register<br />
Name: MR<br />
Access Type: Read/Write<br />
Offset: 0x04<br />
Reset Value: 0x00000000<br />
32117D–AVR-01/12<br />
<strong>AT32UC3C</strong><br />
31 30 29 28 27 26 25 24<br />
DLYBCS<br />
23 22 21 20 19 18 17 16<br />
- - - - PCS<br />
15 14 13 12 11 10 9 8<br />
- - - - - - - -<br />
7 6 5 4 3 2 1 0<br />
LLB RXFIFOEN - MODFDIS - PCSDEC PS MSTR<br />
DLYBCS: Delay Between Chip Selects<br />
This field defines the delay from NPCS inactive to the activation of another NPCS. The DLYBCS time guarantees nonoverlapping<br />
chip selects and solves bus contentions in case of peripherals having long data float times.<br />
If DLYBCS is less than or equal to six, six CLK_SPI periods will be inserted by default.<br />
Otherwise, the following equation determines the delay:<br />
Delay Between Chip Selects<br />
=<br />
DLYBCS<br />
----------------------<br />
CLKSPI<br />
PCS: Peripheral Chip Select<br />
This field is only used if Fixed Peripheral Select is active (PS = 0).<br />
If PCSDEC = 0:<br />
PCS = xxx0NPCS[3:0] = 1110<br />
PCS = xx01NPCS[3:0] = 1101<br />
PCS = x011NPCS[3:0] = 1011<br />
PCS = 0111NPCS[3:0] = 0111<br />
PCS = 1111forbidden (no peripheral is selected)<br />
(x = don’t care)<br />
If PCSDEC = 1:<br />
NPCS[3:0] output signals = PCS.<br />
LLB: Local Loopback Enable<br />
1: Local loopback path enabled. LLB controls the local loopback on the data serializer for testing in master mode only (MISO is<br />
internally connected on MOSI).<br />
0: Local loopback path disabled.<br />
RXFIFOEN: FIFO in Reception Enable<br />
1: The FIFO is used in reception (four characters can be stored in the SPI).<br />
672
32117D–AVR-01/12<br />
<strong>AT32UC3C</strong><br />
0: The FIFO is not used in reception (only one character can be stored in the SPI).<br />
MODFDIS: Mode Fault Detection<br />
1: Mode fault detection is disabled. If the I/O controller does not have open-drain capability, mode fault detection must be<br />
disabled for proper operation of the SPI.<br />
0: Mode fault detection is enabled.<br />
PCSDEC: Chip Select Decode<br />
0: The chip selects are directly connected to a peripheral device.<br />
1: The four chip select lines are connected to a 4- to 16-bit decoder.<br />
When PCSDEC equals one, up to 15 Chip Select signals can be generated with the four lines using an external 4- to 16-bit<br />
decoder. The CSRn registers define the characteristics of the 15 chip selects according to the following rules:<br />
CSR0 defines peripheral chip select signals 0 to 3.<br />
CSR1 defines peripheral chip select signals 4 to 7.<br />
CSR2 defines peripheral chip select signals 8 to 11.<br />
CSR3 defines peripheral chip select signals 12 to 14.<br />
PS: Peripheral Select<br />
1: Variable Peripheral Select.<br />
0: Fixed Peripheral Select.<br />
MSTR: Master/Slave Mode<br />
1: SPI is in master mode.<br />
0: SPI is in slave mode.<br />
673
26.8.3 Receive Data Register<br />
Name: RDR<br />
Access Type: Read-only<br />
Offset: 0x08<br />
Reset Value: 0x00000000<br />
32117D–AVR-01/12<br />
<strong>AT32UC3C</strong><br />
31 30 29 28 27 26 25 24<br />
- - - - - - - -<br />
23 22 21 20 19 18 17 16<br />
- - - - - - - -<br />
15 14 13 12 11 10 9 8<br />
RD[15:8]<br />
7 6 5 4 3 2 1 0<br />
RD[7:0]<br />
RD: Receive Data<br />
Data received by the SPI Interface is stored in this register right-justified. Unused bits read zero.<br />
674
26.8.4 Transmit Data Register<br />
Name: TDR<br />
Access Type: Write-only<br />
Offset: 0x0C<br />
Reset Value: 0x00000000<br />
32117D–AVR-01/12<br />
<strong>AT32UC3C</strong><br />
31 30 29 28 27 26 25 24<br />
- - - - - - - LASTXFER<br />
23 22 21 20 19 18 17 16<br />
- - - - PCS<br />
15 14 13 12 11 10 9 8<br />
TD[15:8]<br />
7 6 5 4 3 2 1 0<br />
TD[7:0]<br />
LASTXFER: Last Transfer<br />
1: The current NPCS will be deasserted after the character written in TD has been transferred. When CSRn.CSAAT is one, this<br />
allows to close the communication with the current serial peripheral by raising the corresponding NPCS line as soon as TD<br />
transfer has completed.<br />
0: Writing a zero to this bit has no effect.<br />
This field is only used if Variable Peripheral Select is active (MR.PS = 1).<br />
PCS: Peripheral Chip Select<br />
If PCSDEC = 0:<br />
PCS = xxx0NPCS[3:0] = 1110<br />
PCS = xx01NPCS[3:0] = 1101<br />
PCS = x011NPCS[3:0] = 1011<br />
PCS = 0111NPCS[3:0] = 0111<br />
PCS = 1111forbidden (no peripheral is selected)<br />
(x = don’t care)<br />
If PCSDEC = 1:<br />
NPCS[3:0] output signals = PCS<br />
This field is only used if Variable Peripheral Select is active (MR.PS = 1).<br />
TD: Transmit Data<br />
Data to be transmitted by the SPI Interface is stored in this register. Information to be transmitted must be written to the TDR<br />
register in a right-justified format.<br />
675
26.8.5 Status Register<br />
Name: SR<br />
Access Type: Read-only<br />
Offset: 0x10<br />
Reset Value: 0x00000000<br />
32117D–AVR-01/12<br />
<strong>AT32UC3C</strong><br />
31 30 29 28 27 26 25 24<br />
- - - - - - - -<br />
23 22 21 20 19 18 17 16<br />
- - - - - - - SPIENS<br />
15 14 13 12 11 10 9 8<br />
- - - - - UNDES TXEMPTY NSSR<br />
7 6 5 4 3 2 1 0<br />
- - - - OVRES MODF TDRE RDRF<br />
SPIENS: SPI Enable Status<br />
1: This bit is set when the SPI is enabled.<br />
0: This bit is cleared when the SPI is disabled.<br />
UNDES: Underrun Error Status (Slave Mode Only)<br />
1: This bit is set when a transfer begins whereas no data has been loaded in the TDR register.<br />
0: This bit is cleared when the SR register is read.<br />
TXEMPTY: Transmission Registers Empty<br />
1: This bit is set when TDR and internal shifter are empty. If a transfer delay has been defined, TXEMPTY is set after the<br />
completion of such delay.<br />
0: This bit is cleared as soon as data is written in TDR.<br />
NSSR: NSS Rising<br />
1: A rising edge occurred on NSS pin since last read.<br />
0: This bit is cleared when the SR register is read.<br />
OVRES: Overrun Error Status<br />
1: This bit is set when an overrun has occurred. An overrun occurs when RDR is loaded at least twice from the serializer since<br />
the last read of the RDR.<br />
0: This bit is cleared when the SR register is read.<br />
MODF: Mode Fault Error<br />
1: This bit is set when a Mode Fault occurred.<br />
0: This bit is cleared when the SR register is read.<br />
TDRE: Transmit Data Register Empty<br />
1: This bit is set when the last data written in the TDR register has been transferred to the serializer.<br />
0: This bit is cleared when data has been written to TDR and not yet transferred to the serializer.<br />
TDRE equals zero when the SPI is disabled or at reset. The SPI enable command sets this bit to one.<br />
RDRF: Receive Data Register Full<br />
1: Data has been received and the received data has been transferred from the serializer to RDR since the last read of RDR.<br />
0: No data has been received since the last read of RDR<br />
676
26.8.6 Interrupt Enable Register<br />
Name: IER<br />
Access Type: Write-only<br />
Offset: 0x14<br />
Reset Value: 0x00000000<br />
32117D–AVR-01/12<br />
<strong>AT32UC3C</strong><br />
31 30 29 28 27 26 25 24<br />
- - - - - - - -<br />
23 22 21 20 19 18 17 16<br />
- - - - - - - -<br />
15 14 13 12 11 10 9 8<br />
- - - - - UNDES TXEMPTY NSSR<br />
7 6 5 4 3 2 1 0<br />
- - - - OVRES MODF TDRE RDRF<br />
Writing a zero to a bit in this register has no effect.<br />
Writing a one to a bit in this register will set the corresponding bit in IMR.<br />
677
26.8.7 Interrupt Disable Register<br />
Name: IDR<br />
Access Type: Write-only<br />
Offset: 0x18<br />
Reset Value: 0x00000000<br />
32117D–AVR-01/12<br />
<strong>AT32UC3C</strong><br />
31 30 29 28 27 26 25 24<br />
- - - - - - - -<br />
23 22 21 20 19 18 17 16<br />
- - - - - - - -<br />
15 14 13 12 11 10 9 8<br />
- - - - - UNDES TXEMPTY NSSR<br />
7 6 5 4 3 2 1 0<br />
- - - - OVRES MODF TDRE RDRF<br />
Writing a zero to a bit in this register has no effect.<br />
Writing a one to a bit in this register will clear the corresponding bit in IMR.<br />
678
26.8.8 Interrupt Mask Register<br />
Name: IMR<br />
Access Type: Read-only<br />
Offset: 0x1C<br />
Reset Value: 0x00000000<br />
32117D–AVR-01/12<br />
<strong>AT32UC3C</strong><br />
31 30 29 28 27 26 25 24<br />
- - - - - - - -<br />
23 22 21 20 19 18 17 16<br />
- - - - - - - -<br />
15 14 13 12 11 10 9 8<br />
- - - - - UNDES TXEMPTY NSSR<br />
7 6 5 4 3 2 1 0<br />
- - - - OVRES MODF TDRE RDRF<br />
0: The corresponding interrupt is disabled.<br />
1: The corresponding interrupt is enabled.<br />
A bit in this register is cleared when the corresponding bit in IDR is written to one.<br />
A bit in this register is set when the corresponding bit in IER is written to one.<br />
679
26.8.9 Chip Select Register 0<br />
Name: CSR0<br />
Access Type: Read/Write<br />
Offset: 0x30<br />
Reset Value: 0x00000000<br />
32117D–AVR-01/12<br />
<strong>AT32UC3C</strong><br />
31 30 29 28 27 26 25 24<br />
DLYBCT<br />
23 22 21 20 19 18 17 16<br />
DLYBS<br />
15 14 13 12 11 10 9 8<br />
SCBR<br />
7 6 5 4 3 2 1 0<br />
BITS CSAAT CSNAAT NCPHA CPOL<br />
DLYBCT: Delay Between Consecutive Transfers<br />
This field defines the delay between two consecutive transfers with the same peripheral without removing the chip select. The<br />
delay is always inserted after each transfer and before removing the chip select if needed.<br />
When DLYBCT equals zero, no delay between consecutive transfers is inserted and the clock keeps its duty cycle over the<br />
character transfers.<br />
Otherwise, the following equation determines the delay:<br />
Delay Between Consecutive Transfers<br />
DLYBS: Delay Before SPCK<br />
This field defines the delay from NPCS valid to the first valid SPCK transition.<br />
When DLYBS equals zero, the NPCS valid to SPCK transition is 1/2 the SPCK clock period.<br />
Otherwise, the following equations determine the delay:<br />
Delay Before SPCK<br />
=<br />
--------------------<br />
DLYBS<br />
CLKSPI<br />
32 × DLYBCT<br />
= -----------------------------------<br />
CLKSPI<br />
SCBR: Serial Clock Baud Rate<br />
In Master Mode, the SPI Interface uses a modulus counter to derive the SPCK baud rate from the CLK_SPI. The Baud rate is<br />
selected by writing a value from 1 to 255 in the SCBR field. The following equations determine the SPCK baud rate:<br />
CLKSPI<br />
SPCK Baudrate =<br />
---------------------<br />
SCBR<br />
Writing the SCBR field to zero is forbidden. Triggering a transfer while SCBR is zero can lead to unpredictable results.<br />
At reset, SCBR is zero and the user has to write it to a valid value before performing the first transfer.<br />
If a clock divider (SCBRn) field is set to one and the other SCBR fields differ from one, access on CSn is correct but no correct<br />
access will be possible on other CS.<br />
680
BITS: Bits Per Transfer<br />
The BITS field determines the number of data bits transferred. Reserved values should not be used.<br />
32117D–AVR-01/12<br />
BITS Bits Per Transfer<br />
0000 8<br />
0001 9<br />
0010 10<br />
0011 11<br />
0100 12<br />
0101 13<br />
0110 14<br />
0111 15<br />
1000 16<br />
1001 4<br />
1010 5<br />
1011 6<br />
1100 7<br />
1101 Reserved<br />
1110 Reserved<br />
1111 Reserved<br />
<strong>AT32UC3C</strong><br />
CSAAT: Chip Select Active After Transfer<br />
1: The Peripheral Chip Select does not rise after the last transfer is achieved. It remains active until a new transfer is requested<br />
on a different chip select.<br />
0: The Peripheral Chip Select Line rises as soon as the last transfer is achieved.<br />
CSNAAT: Chip Select Not Active After Transfer (Ignored if CSAAT = 1)<br />
0: The Peripheral Chip Select does not rise between two transfers if the TDR is reloaded before the end of the first transfer and<br />
if the two transfers occur on the same Chip Select.<br />
1: The Peripheral Chip Select rises systematically between each transfer performed on the same slave for a minimal duration of:<br />
DLYBCS<br />
---------------------- (if DLYBCT field is different from 0)<br />
CLKSPI<br />
DLYBCS<br />
--------------------------------<br />
+ 1 (if DLYBCT field equals 0)<br />
CLKSPI<br />
NCPHA: Clock Phase<br />
1: Data is captured after the leading (inactive-to-active) edge of SPCK and changed on the trailing (active-to-inactive) edge of<br />
SPCK.<br />
0: Data is changed on the leading (inactive-to-active) edge of SPCK and captured after the trailing (active-to-inactive) edge of<br />
SPCK.<br />
NCPHA determines which edge of SPCK causes data to change and which edge causes data to be captured. NCPHA is used<br />
with CPOL to produce the required clock/data relationship between master and slave devices.<br />
CPOL: Clock Polarity<br />
1: The inactive state value of SPCK is logic level one.<br />
0: The inactive state value of SPCK is logic level zero.<br />
681
32117D–AVR-01/12<br />
<strong>AT32UC3C</strong><br />
CPOL is used to determine the inactive state value of the serial clock (SPCK). It is used with NCPHA to produce the required<br />
clock/data relationship between master and slave devices.<br />
682
26.8.10 Chip Select Register 1<br />
Name: CSR1<br />
Access Type: Read/Write<br />
Offset: 0x34<br />
Reset Value: 0x00000000<br />
32117D–AVR-01/12<br />
<strong>AT32UC3C</strong><br />
31 30 29 28 27 26 25 24<br />
DLYBCT<br />
23 22 21 20 19 18 17 16<br />
DLYBS<br />
15 14 13 12 11 10 9 8<br />
SCBR<br />
7 6 5 4 3 2 1 0<br />
BITS CSAAT CSNAAT NCPHA CPOL<br />
DLYBCT: Delay Between Consecutive Transfers<br />
This field defines the delay between two consecutive transfers with the same peripheral without removing the chip select. The<br />
delay is always inserted after each transfer and before removing the chip select if needed.<br />
When DLYBCT equals zero, no delay between consecutive transfers is inserted and the clock keeps its duty cycle over the<br />
character transfers.<br />
Otherwise, the following equation determines the delay:<br />
Delay Between Consecutive Transfers<br />
DLYBS: Delay Before SPCK<br />
This field defines the delay from NPCS valid to the first valid SPCK transition.<br />
When DLYBS equals zero, the NPCS valid to SPCK transition is 1/2 the SPCK clock period.<br />
Otherwise, the following equations determine the delay:<br />
Delay Before SPCK<br />
=<br />
--------------------<br />
DLYBS<br />
CLKSPI<br />
32 × DLYBCT<br />
= -----------------------------------<br />
CLKSPI<br />
SCBR: Serial Clock Baud Rate<br />
In Master Mode, the SPI Interface uses a modulus counter to derive the SPCK baud rate from the CLK_SPI. The Baud rate is<br />
selected by writing a value from 1 to 255 in the SCBR field. The following equations determine the SPCK baud rate:<br />
CLKSPI<br />
SPCK Baudrate =<br />
---------------------<br />
SCBR<br />
Writing the SCBR field to zero is forbidden. Triggering a transfer while SCBR is zero can lead to unpredictable results.<br />
At reset, SCBR is zero and the user has to write it to a valid value before performing the first transfer.<br />
If a clock divider (SCBRn) field is set to one and the other SCBR fields differ from one, access on CSn is correct but no correct<br />
access will be possible on other CS.<br />
683
BITS: Bits Per Transfer<br />
The BITS field determines the number of data bits transferred. Reserved values should not be used.<br />
32117D–AVR-01/12<br />
BITS Bits Per Transfer<br />
0000 8<br />
0001 9<br />
0010 10<br />
0011 11<br />
0100 12<br />
0101 13<br />
0110 14<br />
0111 15<br />
1000 16<br />
1001 4<br />
1010 5<br />
1011 6<br />
1100 7<br />
1101 Reserved<br />
1110 Reserved<br />
1111 Reserved<br />
<strong>AT32UC3C</strong><br />
CSAAT: Chip Select Active After Transfer<br />
1: The Peripheral Chip Select does not rise after the last transfer is achieved. It remains active until a new transfer is requested<br />
on a different chip select.<br />
0: The Peripheral Chip Select Line rises as soon as the last transfer is achieved.<br />
CSNAAT: Chip Select Not Active After Transfer (Ignored if CSAAT = 1)<br />
0: The Peripheral Chip Select does not rise between two transfers if the TDR is reloaded before the end of the first transfer and<br />
if the two transfers occur on the same Chip Select.<br />
1: The Peripheral Chip Select rises systematically between each transfer performed on the same slave for a minimal duration of:<br />
DLYBCS<br />
---------------------- (if DLYBCT field is different from 0)<br />
CLKSPI<br />
DLYBCS<br />
--------------------------------<br />
+ 1 (if DLYBCT field equals 0)<br />
CLKSPI<br />
NCPHA: Clock Phase<br />
1: Data is captured after the leading (inactive-to-active) edge of SPCK and changed on the trailing (active-to-inactive) edge of<br />
SPCK.<br />
0: Data is changed on the leading (inactive-to-active) edge of SPCK and captured after the trailing (active-to-inactive) edge of<br />
SPCK.<br />
NCPHA determines which edge of SPCK causes data to change and which edge causes data to be captured. NCPHA is used<br />
with CPOL to produce the required clock/data relationship between master and slave devices.<br />
CPOL: Clock Polarity<br />
1: The inactive state value of SPCK is logic level one.<br />
0: The inactive state value of SPCK is logic level zero.<br />
684
32117D–AVR-01/12<br />
<strong>AT32UC3C</strong><br />
CPOL is used to determine the inactive state value of the serial clock (SPCK). It is used with NCPHA to produce the required<br />
clock/data relationship between master and slave devices.<br />
685
26.8.11 Chip Select Register 2<br />
Name: CSR2<br />
Access Type: Read/Write<br />
Offset: 0x38<br />
Reset Value: 0x00000000<br />
32117D–AVR-01/12<br />
<strong>AT32UC3C</strong><br />
31 30 29 28 27 26 25 24<br />
DLYBCT<br />
23 22 21 20 19 18 17 16<br />
DLYBS<br />
15 14 13 12 11 10 9 8<br />
SCBR<br />
7 6 5 4 3 2 1 0<br />
BITS CSAAT CSNAAT NCPHA CPOL<br />
DLYBCT: Delay Between Consecutive Transfers<br />
This field defines the delay between two consecutive transfers with the same peripheral without removing the chip select. The<br />
delay is always inserted after each transfer and before removing the chip select if needed.<br />
When DLYBCT equals zero, no delay between consecutive transfers is inserted and the clock keeps its duty cycle over the<br />
character transfers.<br />
Otherwise, the following equation determines the delay:<br />
Delay Between Consecutive Transfers<br />
DLYBS: Delay Before SPCK<br />
This field defines the delay from NPCS valid to the first valid SPCK transition.<br />
When DLYBS equals zero, the NPCS valid to SPCK transition is 1/2 the SPCK clock period.<br />
Otherwise, the following equations determine the delay:<br />
Delay Before SPCK<br />
=<br />
--------------------<br />
DLYBS<br />
CLKSPI<br />
32 × DLYBCT<br />
= -----------------------------------<br />
CLKSPI<br />
SCBR: Serial Clock Baud Rate<br />
In Master Mode, the SPI Interface uses a modulus counter to derive the SPCK baud rate from the CLK_SPI. The Baud rate is<br />
selected by writing a value from 1 to 255 in the SCBR field. The following equations determine the SPCK baud rate:<br />
CLKSPI<br />
SPCK Baudrate =<br />
---------------------<br />
SCBR<br />
Writing the SCBR field to zero is forbidden. Triggering a transfer while SCBR is zero can lead to unpredictable results.<br />
At reset, SCBR is zero and the user has to write it to a valid value before performing the first transfer.<br />
If a clock divider (SCBRn) field is set to one and the other SCBR fields differ from one, access on CSn is correct but no correct<br />
access will be possible on other CS.<br />
686
BITS: Bits Per Transfer<br />
The BITS field determines the number of data bits transferred. Reserved values should not be used.<br />
32117D–AVR-01/12<br />
BITS Bits Per Transfer<br />
0000 8<br />
0001 9<br />
0010 10<br />
0011 11<br />
0100 12<br />
0101 13<br />
0110 14<br />
0111 15<br />
1000 16<br />
1001 4<br />
1010 5<br />
1011 6<br />
1100 7<br />
1101 Reserved<br />
1110 Reserved<br />
1111 Reserved<br />
<strong>AT32UC3C</strong><br />
CSAAT: Chip Select Active After Transfer<br />
1: The Peripheral Chip Select does not rise after the last transfer is achieved. It remains active until a new transfer is requested<br />
on a different chip select.<br />
0: The Peripheral Chip Select Line rises as soon as the last transfer is achieved.<br />
CSNAAT: Chip Select Not Active After Transfer (Ignored if CSAAT = 1)<br />
0: The Peripheral Chip Select does not rise between two transfers if the TDR is reloaded before the end of the first transfer and<br />
if the two transfers occur on the same Chip Select.<br />
1: The Peripheral Chip Select rises systematically between each transfer performed on the same slave for a minimal duration of:<br />
DLYBCS<br />
---------------------- (if DLYBCT field is different from 0)<br />
CLKSPI<br />
DLYBCS<br />
--------------------------------<br />
+ 1 (if DLYBCT field equals 0)<br />
CLKSPI<br />
NCPHA: Clock Phase<br />
1: Data is captured after the leading (inactive-to-active) edge of SPCK and changed on the trailing (active-to-inactive) edge of<br />
SPCK.<br />
0: Data is changed on the leading (inactive-to-active) edge of SPCK and captured after the trailing (active-to-inactive) edge of<br />
SPCK.<br />
NCPHA determines which edge of SPCK causes data to change and which edge causes data to be captured. NCPHA is used<br />
with CPOL to produce the required clock/data relationship between master and slave devices.<br />
CPOL: Clock Polarity<br />
1: The inactive state value of SPCK is logic level one.<br />
0: The inactive state value of SPCK is logic level zero.<br />
687
32117D–AVR-01/12<br />
<strong>AT32UC3C</strong><br />
CPOL is used to determine the inactive state value of the serial clock (SPCK). It is used with NCPHA to produce the required<br />
clock/data relationship between master and slave devices.<br />
688
26.8.12 Chip Select Register 3<br />
Name: CSR3<br />
Access Type: Read/Write<br />
Offset: 0x3C<br />
Reset Value: 0x00000000<br />
32117D–AVR-01/12<br />
<strong>AT32UC3C</strong><br />
31 30 29 28 27 26 25 24<br />
DLYBCT<br />
23 22 21 20 19 18 17 16<br />
DLYBS<br />
15 14 13 12 11 10 9 8<br />
SCBR<br />
7 6 5 4 3 2 1 0<br />
BITS CSAAT CSNAAT NCPHA CPOL<br />
DLYBCT: Delay Between Consecutive Transfers<br />
This field defines the delay between two consecutive transfers with the same peripheral without removing the chip select. The<br />
delay is always inserted after each transfer and before removing the chip select if needed.<br />
When DLYBCT equals zero, no delay between consecutive transfers is inserted and the clock keeps its duty cycle over the<br />
character transfers.<br />
Otherwise, the following equation determines the delay:<br />
Delay Between Consecutive Transfers<br />
DLYBS: Delay Before SPCK<br />
This field defines the delay from NPCS valid to the first valid SPCK transition.<br />
When DLYBS equals zero, the NPCS valid to SPCK transition is 1/2 the SPCK clock period.<br />
Otherwise, the following equations determine the delay:<br />
Delay Before SPCK<br />
=<br />
--------------------<br />
DLYBS<br />
CLKSPI<br />
32 × DLYBCT<br />
= -----------------------------------<br />
CLKSPI<br />
SCBR: Serial Clock Baud Rate<br />
In Master Mode, the SPI Interface uses a modulus counter to derive the SPCK baud rate from the CLK_SPI. The Baud rate is<br />
selected by writing a value from 1 to 255 in the SCBR field. The following equations determine the SPCK baud rate:<br />
CLKSPI<br />
SPCK Baudrate =<br />
---------------------<br />
SCBR<br />
Writing the SCBR field to zero is forbidden. Triggering a transfer while SCBR is zero can lead to unpredictable results.<br />
At reset, SCBR is zero and the user has to write it to a valid value before performing the first transfer.<br />
If a clock divider (SCBRn) field is set to one and the other SCBR fields differ from one, access on CSn is correct but no correct<br />
access will be possible on other CS.<br />
689
BITS: Bits Per Transfer<br />
The BITS field determines the number of data bits transferred. Reserved values should not be used.<br />
32117D–AVR-01/12<br />
BITS Bits Per Transfer<br />
0000 8<br />
0001 9<br />
0010 10<br />
0011 11<br />
0100 12<br />
0101 13<br />
0110 14<br />
0111 15<br />
1000 16<br />
1001 4<br />
1010 5<br />
1011 6<br />
1100 7<br />
1101 Reserved<br />
1110 Reserved<br />
1111 Reserved<br />
<strong>AT32UC3C</strong><br />
CSAAT: Chip Select Active After Transfer<br />
1: The Peripheral Chip Select does not rise after the last transfer is achieved. It remains active until a new transfer is requested<br />
on a different chip select.<br />
0: The Peripheral Chip Select Line rises as soon as the last transfer is achieved.<br />
CSNAAT: Chip Select Not Active After Transfer (Ignored if CSAAT = 1)<br />
0: The Peripheral Chip Select does not rise between two transfers if the TDR is reloaded before the end of the first transfer and<br />
if the two transfers occur on the same Chip Select.<br />
1: The Peripheral Chip Select rises systematically between each transfer performed on the same slave for a minimal duration of:<br />
DLYBCS<br />
---------------------- (if DLYBCT field is different from 0)<br />
CLKSPI<br />
DLYBCS<br />
--------------------------------<br />
+ 1 (if DLYBCT field equals 0)<br />
CLKSPI<br />
NCPHA: Clock Phase<br />
1: Data is captured after the leading (inactive-to-active) edge of SPCK and changed on the trailing (active-to-inactive) edge of<br />
SPCK.<br />
0: Data is changed on the leading (inactive-to-active) edge of SPCK and captured after the trailing (active-to-inactive) edge of<br />
SPCK.<br />
NCPHA determines which edge of SPCK causes data to change and which edge causes data to be captured. NCPHA is used<br />
with CPOL to produce the required clock/data relationship between master and slave devices.<br />
CPOL: Clock Polarity<br />
1: The inactive state value of SPCK is logic level one.<br />
0: The inactive state value of SPCK is logic level zero.<br />
690
32117D–AVR-01/12<br />
<strong>AT32UC3C</strong><br />
CPOL is used to determine the inactive state value of the serial clock (SPCK). It is used with NCPHA to produce the required<br />
clock/data relationship between master and slave devices.<br />
691
26.8.13 Write Protection Control Register<br />
Register Name: WPCR<br />
Access Type: Read-write<br />
Offset: 0xE4<br />
Reset Value: 0x00000000<br />
32117D–AVR-01/12<br />
<strong>AT32UC3C</strong><br />
31 30 29 28 27 26 25 24<br />
SPIWPKEY[23:16]<br />
23 22 21 20 19 18 17 16<br />
SPIWPKEY[15:8]<br />
15 14 13 12 11 10 9 8<br />
SPIWPKEY[7:0]<br />
7 6 5 4 3 2 1 0<br />
- - - - - - - SPIWPEN<br />
SPIWPKEY: SPI Write Protection Key Password<br />
If a value is written in SPIWPEN, the value is taken into account only if SPIWPKEY is written with “SPI” (SPI written in ASCII<br />
Code, i.e. 0x535049 in hexadecimal).<br />
SPIWPEN: SPI Write Protection Enable<br />
1: The Write Protection is Enabled<br />
0: The Write Protection is Disabled<br />
692
26.8.14 Write Protection Status Register<br />
Register Name: WPSR<br />
Access Type: Read-only<br />
Offset: 0xE8<br />
Reset Value: 0x00000000<br />
32117D–AVR-01/12<br />
<strong>AT32UC3C</strong><br />
31 30 29 28 27 26 25 24<br />
- - - - - - - -<br />
23 22 21 20 19 18 17 16<br />
- - - - - - - -<br />
15 14 13 12 11 10 9 8<br />
SPIWPVSRC<br />
7 6 5 4 3 2 1 0<br />
- - - - - SPIWPVS<br />
SPIWPVSRC: SPI Write Protection Violation Source<br />
This Field indicates the Peripheral Bus Offset of the register concerned by the violation (MR or CSRx)<br />
SPIWPVS: SPI Write Protection Violation Status<br />
SPIWPVS value Violation Type<br />
1 The Write Protection has blocked a Write access to a protected register (since the last read).<br />
2<br />
3<br />
4<br />
5<br />
6<br />
7<br />
Software Reset has been performed while Write Protection was enabled (since the last read<br />
or since the last write access on MR, IER, IDR or CSRx).<br />
Both Write Protection violation and software reset with Write Protection enabled have<br />
occurred since the last read.<br />
Write accesses have been detected on MR (while a chip select was active) or on CSRi (while<br />
the Chip Select “i” was active) since the last read.<br />
The Write Protection has blocked a Write access to a protected register and write accesses<br />
have been detected on MR (while a chip select was active) or on CSRi (while the Chip Select<br />
“i” was active) since the last read.<br />
Software Reset has been performed while Write Protection was enabled (since the last read<br />
or since the last write access on MR, IER, IDR or CSRx) and some write accesses have been<br />
detected on MR (while a chip select was active) or on CSRi (while the Chip Select “i” was<br />
active) since the last read.<br />
- The Write Protection has blocked a Write access to a protected register.<br />
and<br />
- Software Reset has been performed while Write Protection was enabled.<br />
and<br />
- Write accesses have been detected on MR (while a chip select was active) or on CSRi<br />
(while the Chip Select “i” was active) since the last read.<br />
693
26.8.15 Features Register<br />
Register Name: FEATURES<br />
Access Type: Read-only<br />
Offset: 0xF8<br />
Reset Value: –<br />
32117D–AVR-01/12<br />
<strong>AT32UC3C</strong><br />
31 30 29 28 27 26 25 24<br />
- - - - - - - -<br />
23 22 21 20 19 18 17 16<br />
- - - SWIMPL FIFORIMPL BRPBHSB CSNAATIMPL EXTDEC<br />
15 14 13 12 11 10 9 8<br />
LENNCONF LENCONF<br />
7 6 5 4 3 2 1 0<br />
PHZNCONF PHCONF PPNCONF PCONF NCS<br />
SWIMPL: Spurious Write Protection Implemented<br />
0: Spurious write protection is not implemented.<br />
1: Spurious write protection is implemented.<br />
FIFORIMPL: FIFO in Reception Implemented<br />
0: FIFO in reception is not implemented.<br />
1: FIFO in reception is implemented.<br />
BRPBHSB: Bridge Type is PB to HSB<br />
0: Bridge type is not PB to HSB.<br />
1: Bridge type is PB to HSB.<br />
CSNAATIMPL: CSNAAT Features Implemented<br />
0: CSNAAT (Chip select not active after transfer) features are not implemented.<br />
1: CSNAAT features are implemented.<br />
EXTDEC: External Decoder True<br />
0: External decoder capability is not implemented.<br />
1: External decoder capability is implemented.<br />
LENNCONF: Character Length if not Configurable<br />
If the character length is not configurable, this field specifies the fixed character length.<br />
LENCONF: Character Length Configurable<br />
0: The character length is not configurable.<br />
1: The character length is configurable.<br />
PHZNCONF: Phase is Zero if Phase not Configurable<br />
0: If phase is not configurable, phase is non-zero.<br />
1: If phase is not configurable, phase is zero.<br />
PHCONF: Phase Configurable<br />
0: Phase is not configurable.<br />
1: Phase is configurable.<br />
694
PPNCONF: Polarity Positive if Polarity not Configurable<br />
0: If polarity is not configurable, polarity is negative.<br />
1: If polarity is not configurable, polarity is positive.<br />
PCONF: Polarity Configurable<br />
0: Polarity is not configurable.<br />
1: Polarity is configurable.<br />
NCS: Number of Chip Selects<br />
This field indicates the number of chip selects implemented.<br />
32117D–AVR-01/12<br />
<strong>AT32UC3C</strong><br />
695
26.8.16 Version Register<br />
Register Name: VERSION<br />
Access Type: Read-only<br />
Offset: 0xFC<br />
Reset Value: –<br />
MFN<br />
Reserved. No functionality associated.<br />
VERSION<br />
Version number of the module. No functionality associated.<br />
32117D–AVR-01/12<br />
<strong>AT32UC3C</strong><br />
31 30 29 28 27 26 25 24<br />
- - - - - - - -<br />
23 22 21 20 19 18 17 16<br />
- - - - MFN<br />
15 14 13 12 11 10 9 8<br />
VERSION[11:8]<br />
7 6 5 4 3 2 1 0<br />
VERSION[7:0]<br />
696
32117D–AVR-01/12<br />
<strong>AT32UC3C</strong><br />
26.9 Module Configuration<br />
The specific configuration for each SPI instance is listed in the following tables. The module bus<br />
clocks listed here are connected to the system bus clocks. Please refer to the Power Manager<br />
chapter for details.<br />
Table 26-4. SPI Clock Name<br />
Module Name Clock Name Description<br />
SPI0 CLK_SPI0 Peripheral Bus clock from the PBC clock domain<br />
SPI1 CLK_SPI1 Peripheral Bus clock from the PBA clock domain<br />
Table 26-5. Register Reset Values<br />
Register Reset Value<br />
FEATURES 0x001F0154<br />
VERSION 0x00000211<br />
697
27. Two-wire Master Interface (TWIM)<br />
27.1 Features<br />
27.2 Overview<br />
32117D–AVR-01/12<br />
Rev.: 1.1.0.1<br />
<strong>AT32UC3C</strong><br />
Compatible with I²C standard<br />
– Multi-master support<br />
– Transfer speeds of 100 and 400 kbit/s<br />
– 7- and 10-bit and General Call addressing<br />
Compatible with SMBus standard<br />
– Hardware Packet Error Checking (CRC) generation and verification with ACK control<br />
– SMBus ALERT interface<br />
– 25 ms clock low timeout delay<br />
– 10 ms master cumulative clock low extend time<br />
– 25 ms slave cumulative clock low extend time<br />
Compatible with PMBus<br />
Compatible with Atmel Two-wire Interface Serial Memories<br />
DMA interface for reducing CPU load<br />
Arbitrary transfer lengths, including 0 data bytes<br />
Optional clock stretching if transmit or receive buffers not ready for data transfer<br />
The Atmel Two-wire Master Interface (TWIM) interconnects components on a unique two-wire<br />
bus, made up of one clock line and one data line with speeds of up to 400 kbit/s, based on a<br />
byte-oriented transfer format. It can be used with any Atmel Two-wire Interface bus serial<br />
EEPROM and I²C compatible device such as a real time clock (RTC), dot matrix/graphic LCD<br />
controller, and temperature sensor, to name a few. The TWIM is always a bus master and can<br />
transfer sequential or single bytes. Multiple master capability is supported. Arbitration of the bus<br />
is performed internally and relinquishes the bus automatically if the bus arbitration is lost.<br />
A configurable baud rate generator permits the output data rate to be adapted to a wide range of<br />
core clock frequencies.Table 27-1 lists the compatibility level of the Atmel Two-wire Interface in<br />
Master Mode and a full I²C compatible device.<br />
Table 27-1. Atmel TWIM Compatibility with I²C Standard<br />
I²C Standard Atmel TWIM<br />
Standard-mode (100 kbit/s) Supported<br />
Fast-mode (400 kbit/s) Supported<br />
Fast-mode Plus (1 Mbit/s) Supported<br />
7- or 10-bits Slave Addressing Supported<br />
START BYTE (1) Not Supported<br />
Repeated Start (Sr) Condition Supported<br />
ACK and NACK Management Supported<br />
Slope Control and Input Filtering (Fast mode) Supported<br />
Clock Stretching Supported<br />
Note: 1. START + b000000001 + Ack + Sr<br />
698
27.3 List of Abbreviations<br />
27.4 Block Diagram<br />
32117D–AVR-01/12<br />
<strong>AT32UC3C</strong><br />
Table 27-2 lists the compatibility level of the Atmel Two-wire Master Interface and a full SMBus<br />
compatible master.<br />
Table 27-2. Atmel TWIM Compatibility with SMBus Standard<br />
SMBus Standard Atmel TWIM<br />
Bus Timeouts Supported<br />
Address Resolution Protocol Supported<br />
Alert Supported<br />
Host Functionality Supported<br />
Packet Error Checking Supported<br />
Table 27-3. Abbreviations<br />
Abbreviation Description<br />
TWI Two-wire Interface<br />
A Acknowledge<br />
NA Non Acknowledge<br />
P Stop<br />
S Start<br />
Sr Repeated Start<br />
SADR Slave Address<br />
ADR Any address except SADR<br />
R Read<br />
W Write<br />
Figure 27-1. Block Diagram<br />
Peripheral<br />
Bus Bridge<br />
Power<br />
Manager<br />
CLK_TWIM<br />
Two-wire<br />
Interface<br />
TWI Interrupt<br />
I/O Controller<br />
INTC<br />
TWCK<br />
TWD<br />
TWALM<br />
699
27.5 Application Block Diagram<br />
27.6 I/O Lines Description<br />
32117D–AVR-01/12<br />
Figure 27-2. Application Block Diagram<br />
<strong>AT32UC3C</strong><br />
27.7 Product Dependencies<br />
In order to use this module, other parts of the system must be configured correctly, as described<br />
below.<br />
27.7.1 I/O Lines<br />
TWI<br />
Master<br />
Table 27-4. I/O Lines Description<br />
TWD<br />
TWCK<br />
TWALM<br />
Atmel TWI<br />
serial EEPROM<br />
Slave 1<br />
I 2 C RTC<br />
Rp: pull-up value as given by the I2C Standard<br />
I 2 C LCD<br />
controller<br />
I 2 C temp<br />
sensor<br />
Slave 2 Slave 3 Slave 4<br />
TWD and TWCK are bidirectional lines, connected to a positive supply voltage via a current<br />
source or pull-up resistor (see Figure 27-4 on page 702). When the bus is free, both lines are<br />
high. The output stages of devices connected to the bus must have an open-drain or open-collector<br />
to perform the wired-AND function.<br />
TWALM is used to implement the optional SMBus SMBALERT signal.<br />
The TWALM, TWD, and TWCK pins may be multiplexed with I/O Controller lines. To enable the<br />
TWIM, the user must perform the following steps:<br />
Program the I/O Controller to:<br />
– Dedicate TWD, TWCK, and optionally TWALM as peripheral lines.<br />
– Define TWD, TWCK, and optionally TWALM as open-drain.<br />
27.7.2 Power Management<br />
If the CPU enters a sleep mode that disables clocks used by the TWIM, the TWIM will stop functioning<br />
and resume operation after the system wakes up from sleep mode.<br />
VDD<br />
Rp Rp Rp<br />
Pin Name Pin Description Type<br />
TWD Two-wire Serial Data Input/Output<br />
TWCK Two-wire Serial Clock Input/Output<br />
TWALM SMBus SMBALERT Input/Output<br />
700
27.7.3 Clocks<br />
27.7.4 DMA<br />
27.7.5 Interrupts<br />
32117D–AVR-01/12<br />
<strong>AT32UC3C</strong><br />
The clock for the TWIM bus interface (CLK_TWIM) is generated by the Power Manager. This<br />
clock is enabled at reset, and can be disabled in the Power Manager. It is recommended to disable<br />
the TWIM before disabling the clock, to avoid freezing the TWIM in an undefined state.<br />
The TWIM DMA handshake interface is connected to the Peripheral DMA Controller. Using the<br />
TWIM DMA functionality requires the Peripheral DMA Controller to be programmed after setting<br />
up the TWIM.<br />
The TWIM interrupt request lines are connected to the interrupt controller. Using the TWIM interrupts<br />
requires the interrupt controller to be programmed first.<br />
27.7.6 Debug Operation<br />
When an external debugger forces the CPU into debug mode, the TWIM continues normal operation.<br />
If the TWIM is configured in a way that requires it to be periodically serviced by the CPU<br />
through interrupts or similar, improper operation or data loss may result during debugging.<br />
701
27.8 Functional Description<br />
32117D–AVR-01/12<br />
<strong>AT32UC3C</strong><br />
27.8.1 Transfer Format<br />
The data put on the TWD line must be 8 bits long. Data is transferred MSB first; each byte must<br />
be followed by an acknowledgement. The number of bytes per transfer is unlimited (see Figure<br />
27-4).<br />
27.8.2 Operation<br />
Each transfer begins with a START condition and terminates with a STOP condition (see Figure<br />
27-4).<br />
A high-to-low transition on the TWD line while TWCK is high defines the START condition.<br />
A low-to-high transition on the TWD line while TWCK is high defines a STOP condition.<br />
Figure 27-3. START and STOP Conditions<br />
Figure 27-4. Transfer Format<br />
TWD<br />
TWCK<br />
TWD<br />
TWCK<br />
The TWIM has two modes of operation:<br />
Start Stop<br />
Start Address R/W Ack Data Ack Data Ack Stop<br />
Master transmitter mode<br />
Master receiver mode<br />
The master is the device which starts and stops a transfer and generates the TWCK clock.<br />
These modes are described in the following chapters.<br />
702
32117D–AVR-01/12<br />
<strong>AT32UC3C</strong><br />
27.8.2.1 Clock Generation<br />
The Clock Waveform Generator Register (CWGR) is used to control the waveform of the TWCK<br />
clock. CWGR must be written so that the desired TWI bus timings are generated. CWGR<br />
describes bus timings as a function of cycles of a prescaled clock. The clock prescaling can be<br />
selected through the Clock Prescaler field in CWGR (CWGR.EXP).<br />
CWGR has the following fields:<br />
LOW: Prescaled clock cycles in clock low count. Used to time T LOW and T BUF.<br />
HIGH: Prescaled clock cycles in clock high count. Used to time T HIGH .<br />
STASTO: Prescaled clock cycles in clock high count. Used to time T HD_STA , T SU_STA , T SU_STO .<br />
DATA: Prescaled clock cycles for data setup and hold count. Used to time T HD_DAT, T SU_DAT.<br />
EXP: Specifies the clock prescaler setting.<br />
Note that the total clock low time generated is the sum of T HD_DAT + T SU_DAT + T LOW .<br />
Any slave or other bus master taking part in the transfer may extend the TWCK low period at any<br />
time.<br />
The TWIM hardware monitors the state of the TWCK line as required by the I²C specification.<br />
The clock generation counters are started when a high/low level is detected on the TWCK line,<br />
not when the TWIM hardware releases/drives the TWCK line. This means that the CWGR settings<br />
alone do not determine the TWCK frequency. The CWGR settings determine the clock low<br />
time and the clock high time, but the TWCK rise and fall times are determined by the external circuitry<br />
(capacitive load, etc.).<br />
Figure 27-5. Bus Timing Diagram<br />
S<br />
t LOW<br />
t HD:STA<br />
t SU:DAT<br />
t HIGH<br />
f PRESCALER<br />
t HD:DAT<br />
t LOW<br />
=<br />
fCLK_TWIM EXP 1 +<br />
-------------------------<br />
( )<br />
2<br />
t SU:DAT<br />
t SU:STA<br />
Sr<br />
t SU:STO<br />
P<br />
703
32117D–AVR-01/12<br />
<strong>AT32UC3C</strong><br />
27.8.2.2 Setting up and Performing a Transfer<br />
Operation of the TWIM is mainly controlled by the Control Register (CR) and the Command Register<br />
(CMDR). TWIM status is provided in the Status Register (SR). The following list presents<br />
the main steps in a typical communication:<br />
1. Before any transfers can be performed, bus timings must be configured by writing to the<br />
Clock Waveform Generator Register (CWGR). If operating in SMBus mode, the SMBus<br />
Timing Register (SMBTR) register must also be configured.<br />
2. If the Peripheral DMA Controller is to be used for the transfers, it must be set up.<br />
3. CMDR or NCMDR must be written with a value describing the transfer to be performed.<br />
The interrupt system can be set up to give interrupt requests on specific events or error conditions<br />
in the SR, for example when the transfer is complete or if arbitration is lost. The Interrupt<br />
Enable Register (IER) and Interrupt Disable Register (IDR) can be written to specify which bits in<br />
the SR will generate interrupt requests.<br />
The SR.BUSFREE bit is set when activity is completed on the two-wire bus. The SR.CRDY bit is<br />
set when CMDR and/or NCMDR is ready to receive one or more commands.<br />
The controller will refuse to start a new transfer while ANAK, DNAK, or ARBLST in the Status<br />
Register (SR) is one. This is necessary to avoid a race when the software issues a continuation<br />
of the current transfer at the same time as one of these errors happen. Also, if ANAK or DNAK<br />
occurs, a STOP condition is sent automatically. The user will have to restart the transmission by<br />
clearing the error bits in SR after resolving the cause for the NACK.<br />
After a data or address NACK from the slave, a STOP will be transmitted automatically. Note<br />
that the VALID bit in CMDR is NOT cleared in this case. If this transfer is to be discarded, the<br />
VALID bit can be cleared manually allowing any command in NCMDR to be copied into CMDR.<br />
When a data or address NACK is returned by the slave while the master is transmitting, it is possible<br />
that new data has already been written to the THR register. This data will be transferred out<br />
as the first data byte of the next transfer. If this behavior is to be avoided, the safest approach is<br />
to perform a software reset of the TWIM.<br />
27.8.3 Master Transmitter Mode<br />
A START condition is transmitted and master transmitter mode is initiated when the bus is free<br />
and CMDR has been written with START=1 and READ=0. START and SADR+W will then be<br />
transmitted. During the address acknowledge clock pulse (9th pulse), the master releases the<br />
data line (HIGH), enabling the slave to pull it down in order to acknowledge the address. The<br />
master polls the data line during this clock pulse and sets the Address Not Acknowledged bit<br />
(ANAK) in the Status Register if no slave acknowledges the address.<br />
After the address phase, the following is repeated:<br />
while (NBYTES>0)<br />
1. Wait until THR contains a valid data byte, stretching low period of TWCK. SR.TXRDY<br />
indicates the state of THR. Software or the Peripheral DMA Controller must write the<br />
data byte to THR.<br />
2. Transmit this data byte<br />
3. Decrement NBYTES<br />
4. If (NBYTES==0) and STOP=1, transmit STOP condition<br />
Writing CMDR with START=STOP=1 and NBYTES=0 will generate a transmission with no data<br />
bytes, ie START, SADR+W, STOP.<br />
704
32117D–AVR-01/12<br />
<strong>AT32UC3C</strong><br />
TWI transfers require the slave to acknowledge each received data byte. During the acknowledge<br />
clock pulse (9th pulse), the master releases the data line (HIGH), enabling the slave to pull<br />
it down in order to generate the acknowledge. The master polls the data line during this clock<br />
pulse and sets the Data Acknowledge bit (DNACK) in the Status Register if the slave does not<br />
acknowledge the data byte. As with the other status bits, an interrupt can be generated if<br />
enabled in the Interrupt Enable Register (IER).<br />
TXRDY is used as Transmit Ready for the Peripheral DMA Controller transmit channel.<br />
The end of a command is marked when the TWIM sets the SR.CCOMP bit. See Figure 27-6 and<br />
Figure 27-7.<br />
Figure 27-6. Master Write with One Data Byte<br />
Figure 27-7. Master Write with Multiple Data Bytes<br />
TWD<br />
SR.IDLE<br />
TXRDY<br />
TWD<br />
SR.IDLE<br />
TXRDY<br />
27.8.4 Master Receiver Mode<br />
A START condition is transmitted and master receiver mode is initiated when the bus is free and<br />
CMDR has been written with START=1 and READ=1. START and SADR+R will then be transmitted.<br />
During the address acknowledge clock pulse (9th pulse), the master releases the data<br />
line (HIGH), enabling the slave to pull it down in order to acknowledge the address. The master<br />
polls the data line during this clock pulse and sets the Address Not Acknowledged bit (ANAK) in<br />
the Status Register if no slave acknowledges the address.<br />
After the address phase, the following is repeated:<br />
while (NBYTES>0)<br />
S DADR W A DATA A P<br />
Write THR (DATA)<br />
NBYTES set to 1<br />
STOP sent automatically<br />
(ACK received and NBYTES=0)<br />
S DADR W A DATAn A DATAn+5 A DATAn+m A P<br />
Write THR<br />
(DATAn)<br />
NBYTES set to n<br />
Write THR<br />
(DATAn+1)<br />
Write THR<br />
(DATAn+m)<br />
Last data sent<br />
STOP sent automatically<br />
(ACK received and NBYTES=0)<br />
705
32117D–AVR-01/12<br />
<strong>AT32UC3C</strong><br />
1. Wait until RHR is empty, stretching low period of TWCK. SR.RXRDY indicates the state<br />
of RHR. Software or the Peripheral DMA Controller must read any data byte present in<br />
RHR.<br />
2. Release TWCK generating a clock that the slave uses to transmit a data byte.<br />
3. Place the received data byte in RHR, set RXRDY.<br />
4. If NBYTES=0, generate a NAK after the data byte, otherwise generate an ACK.<br />
5. Decrement NBYTES<br />
6. If (NBYTES==0) and STOP=1, transmit STOP condition.<br />
Writing CMDR with START=STOP=1 and NBYTES=0 will generate a transmission with no data<br />
bytes, ie START, DADR+R, STOP<br />
The TWI transfers require the master to acknowledge each received data byte. During the<br />
acknowledge clock pulse (9th pulse), the slave releases the data line (HIGH), enabling the master<br />
to pull it down in order to generate the acknowledge. All data bytes except the last are<br />
acknowledged by the master. Not acknowledging the last byte informs the slave that the transfer<br />
is finished.<br />
RXRDY is used as Receive Ready for the Peripheral DMA Controller receive channel.<br />
Figure 27-8. Master Read with One Data Byte<br />
TWD<br />
SR.IDLE<br />
RXRDY<br />
Write START &<br />
STOP bit<br />
NBYTES set to 1<br />
Figure 27-9. Master Read with Multiple Data Bytes<br />
TWD<br />
SR.IDLE<br />
RXRDY<br />
Write START +<br />
STOP bit<br />
NBYTES set to m<br />
S DADR R A DATA N P<br />
Read RHR<br />
S DADR R A DATAn A DATAn+1 DATAn+m-1 A N<br />
Read RHR<br />
DATAn<br />
Read RHR<br />
DATAn+m-2<br />
Read RHR<br />
DATAn+m-1<br />
DATAn+m P<br />
Send STOP<br />
When NBYTES=0<br />
Read RHR<br />
DATAn+m<br />
706
32117D–AVR-01/12<br />
<strong>AT32UC3C</strong><br />
27.8.5 Using the Peripheral DMA Controller<br />
The use of the Peripheral DMA Controller significantly reduces the CPU load. The user can set<br />
up ring buffers for the Peripheral DMA Controller, containing data to transmit or free buffer space<br />
to place received data.<br />
To assure correct behavior, respect the following programming sequences:<br />
27.8.5.1 Data Transmit with the Peripheral DMA Controller<br />
1. Initialize the transmit Peripheral DMA Controller (memory pointers, size, etc.).<br />
2. Configure the TWIM (ADR, NBYTES, etc.).<br />
3. Start the transfer by enabling the Peripheral DMA Controller to transmit.<br />
4. Wait for the Peripheral DMA Controller end-of-transmit flag.<br />
5. Disable the Peripheral DMA Controller.<br />
27.8.5.2 Data Receive with the Peripheral DMA Controller<br />
1. Initialize the receive Peripheral DMA Controller (memory pointers, size, etc.).<br />
2. Configure the TWIM (ADR, NBYTES, etc.).<br />
3. Start the transfer by enabling the Peripheral DMA Controller to receive.<br />
4. Wait for the Peripheral DMA Controller end-of-receive flag.<br />
5. Disable the Peripheral DMA Controller.<br />
27.8.6 Multi-master Mode<br />
More than one master may access the bus at the same time without data corruption by using<br />
arbitration.<br />
Arbitration starts as soon as two or more masters place information on the bus at the same time,<br />
and stops (arbitration is lost) for the master that intends to send a logical one while the other<br />
master sends a logical zero.<br />
As soon as arbitration is lost by a master, it stops sending data and listens to the bus in order to<br />
detect a STOP. The SR.ARBLST flag will be set. When the STOP is detected, the master who<br />
lost arbitration may reinitiate the data transfer.<br />
Arbitration is illustrated in Figure 27-11.<br />
If the user starts a transfer and if the bus is busy, the TWIM automatically waits for a STOP condition<br />
on the bus before initiating the transfer (see Figure 27-10).<br />
Note: The state of the bus (busy or free) is not indicated in the user interface.<br />
707
Figure 27-10. User Sends Data While the Bus is Busy<br />
Figure 27-11. Arbitration Cases<br />
32117D–AVR-01/12<br />
TWCK<br />
TWI DATA transfer<br />
TWD DATA sent by a master<br />
Bus is busy<br />
STOP sent by the master START sent by the TWI<br />
Transfer is kept<br />
Bus is free<br />
A transfer is programmed<br />
Bus is considered as free<br />
(DADR + W + START + Write THR) Transfer is initiated<br />
TWCK<br />
Data from a Master<br />
Data from TWI S 1 0<br />
ARBLST<br />
TWI DATA transfer<br />
TWCK<br />
TWD<br />
A transfer is programmed<br />
(DADR + W + START + Write THR)<br />
S 1 0 0<br />
TWD S 0 0<br />
1<br />
1<br />
1 1<br />
1 1<br />
Arbitration is lost<br />
TWI stops sending data<br />
Bus is busy Bus is free<br />
Transfer is kept<br />
S 1 0<br />
S 1 0 0<br />
Bus is considered as free<br />
Transfer is initiated<br />
<strong>AT32UC3C</strong><br />
DATA sent by the TWI<br />
27.8.7 Combined Transfers<br />
CMDR and NCMDR may be used to generate longer sequences of connected transfers, since<br />
generation of START and/or STOP conditions is programmable on a per-command basis.<br />
P<br />
Writing NCMDR with START=1 when the previous transfer was written with STOP=0 will cause<br />
a REPEATED START on the bus. The ability to generate such connected transfers allows arbitrary<br />
transfer lengths, since it is legal to write CMDR with both START=0 and STOP=0. If this is<br />
done in master receiver mode, the CMDR.ACKLAST bit must also be controlled.<br />
1<br />
1 1<br />
P S 1 0 0 1 1<br />
Arbitration is lost<br />
The master stops sending data<br />
Data from the master Data from the TWI<br />
Transfer is stopped<br />
Transfer is programmed again<br />
(DADR + W + START + Write THR)<br />
708
32117D–AVR-01/12<br />
<strong>AT32UC3C</strong><br />
As for single data transfers, the TXRDY and RXRDY bits in the Status Register indicates when<br />
data to transmit can be written to THR, or when received data can be read from RHR. Transfer<br />
of data to THR and from RHR can also be done automatically by DMA, see Section 27.8.5<br />
27.8.7.1 Write Followed by Write<br />
Consider the following transfer:<br />
START, DADR+W, DATA+A, DATA+A, REPSTART, DADR+W, DATA+A, DATA+A, STOP.<br />
To generate this transfer:<br />
1. Write CMDR with START=1, STOP=0, DADR, NBYTES=2 and READ=0.<br />
2. Write NCMDR with START=1, STOP=1, DADR, NBYTES=2 and READ=0.<br />
3. Wait until SR.TXRDY==1, then write first data byte to transfer to THR.<br />
4. Wait until SR.TXRDY==1, then write second data byte to transfer to THR.<br />
5. Wait until SR.TXRDY==1, then write third data byte to transfer to THR.<br />
6. Wait until SR.TXRDY==1, then write fourth data byte to transfer to THR.<br />
27.8.7.2 Read Followed by Read<br />
Consider the following transfer:<br />
START, DADR+R, DATA+A, DATA+NA, REPSTART, DADR+R, DATA+A, DATA+NA, STOP.<br />
To generate this transfer:<br />
1. Write CMDR with START=1, STOP=0, DADR, NBYTES=2 and READ=1.<br />
2. Write NCMDR with START=1, STOP=1, DADR, NBYTES=2 and READ=1.<br />
3. Wait until SR.RXRDY==1, then read first data byte received from RHR.<br />
4. Wait until SR.RXRDY==1, then read second data byte received from RHR.<br />
5. Wait until SR.RXRDY==1, then read third data byte received from RHR.<br />
6. Wait until SR.RXRDY==1, then read fourth data byte received from RHR.<br />
If combining several transfers, without any STOP or REPEATED START between them, remember<br />
to write a one to the ACKLAST bit in CMDR to keep from ending each of the partial transfers<br />
with a NACK.<br />
27.8.7.3 Write Followed by Read<br />
Consider the following transfer:<br />
START, DADR+W, DATA+A, DATA+A, REPSTART, DADR+R, DATA+A, DATA+NA, STOP.<br />
709
Figure 27-12. Combining a Write and Read Transfer<br />
THR<br />
TWD<br />
SR.IDLE<br />
TXRDY<br />
32117D–AVR-01/12<br />
DATA0 DATA1<br />
To generate this transfer:<br />
1. Write CMDR with START=1, STOP=0, DADR, NBYTES=2 and READ=0.<br />
2. Write NCMDR with START=1, STOP=1, DADR, NBYTES=2 and READ=1.<br />
3. Wait until SR.TXRDY==1, then write first data byte to transfer to THR.<br />
4. Wait until SR.TXRDY==1, then write second data byte to transfer to THR.<br />
5. Wait until SR.RXRDY==1, then read first data byte received from RHR.<br />
6. Wait until SR.RXRDY==1, then read second data byte received from RHR.<br />
27.8.7.4 Read Followed by Write<br />
Consider the following transfer:<br />
Figure 27-13. Combining a Read and Write Transfer<br />
<strong>AT32UC3C</strong><br />
RHR DATA2<br />
DATA3<br />
RXRDY<br />
THR<br />
SR.IDLE<br />
TXRDY<br />
S DADR W A DATA0 A DATA1 NA Sr DADR R A DATA2 A DATA3 A P<br />
START, DADR+R, DATA+A, DATA+NA, REPSTART, DADR+W, DATA+A, DATA+A, STOP.<br />
RHR DATA0<br />
DATA3<br />
1<br />
TWD S SADR R A DATA0 A DATA1 A Sr DADR W A DATA2 A DATA3 NA P<br />
RXRDY<br />
Read<br />
TWI_RHR<br />
To generate this transfer:<br />
DATA2<br />
1. Write CMDR with START=1, STOP=0, DADR, NBYTES=2 and READ=1.<br />
2. Write NCMDR with START=1, STOP=1, DADR, NBYTES=2 and READ=0.<br />
3. Wait until SR.RXRDY==1, then read first data byte received from RHR.<br />
4. Wait until SR.RXRDY==1, then read second data byte received from RHR.<br />
5. Wait until SR.TXRDY==1, then write first data byte to transfer to THR.<br />
6. Wait until SR.TXRDY==1, then write second data byte to transfer to THR.<br />
DATA3<br />
1<br />
2<br />
710
32117D–AVR-01/12<br />
<strong>AT32UC3C</strong><br />
27.8.8 Ten Bit Addressing<br />
Writing a one to CMDR.TENBIT enables 10-bit addressing in hardware. Performing transfers<br />
with 10-bit addressing is similar to transfers with 7-bit addresses, except that bits 9:7 of<br />
CMDR.SADR must be written appropriately.<br />
In Figure 27-14 and Figure 27-15, the grey boxes represent signals driven by the master, the<br />
white boxes are driven by the slave.<br />
27.8.8.1 Master Transmitter<br />
To perform a master transmitter transfer:<br />
Figure 27-14. A Write Transfer with 10-bit Addressing<br />
1. Write CMDR with TENBIT=1, REPSAME=0, READ=0, START=1, STOP=1 and the<br />
desired address and NBYTES value.<br />
27.8.8.2 Master Receiver<br />
When using master receiver mode with 10-bit addressing, CMDR.REPSAME must also be controlled.<br />
CMDR.REPSAME must be written to one when the address phase of the transfer should<br />
consist of only 1 address byte (the 11110xx byte) and not 2 address bytes. The I²C standard<br />
specifies that such addressing is required when addressing a slave for reads using 10-bit<br />
addressing.<br />
To perform a master receiver transfer:<br />
Figure 27-15. A Read Transfer with 10-bit Addressing<br />
S<br />
1 1 1 1 0 X X 0<br />
27.8.9 SMBus Mode<br />
S<br />
SLAVE ADDRESS<br />
1st 7 bits<br />
1 1 1 1 0 X X 0<br />
SLAVE ADDRESS<br />
1st 7 bits<br />
SLAVE ADDRESS<br />
RW A1 A2<br />
2nd byte<br />
1. Write CMDR with TENBIT=1, REPSAME=0, READ=0, START=1, STOP=0,<br />
NBYTES=0 and the desired address.<br />
2. Write NCMDR with TENBIT=1, REPSAME=1, READ=1, START=1, STOP=1 and the<br />
desired address and NBYTES value.<br />
SLAVE ADDRESS<br />
RW A1 A2<br />
2nd byte<br />
Sr<br />
SMBus mode is enabled and disabled by writing to the SMEN and SMDIS bits in CR. SMBus<br />
mode operation is similar to I²C operation with the following exceptions:<br />
Only 7-bit addressing can be used.<br />
The SMBus standard describes a set of timeout values to ensure progress and throughput on<br />
the bus. These timeout values must be written into SMBTR.<br />
Transmissions can optionally include a CRC byte, called Packet Error Check (PEC).<br />
A dedicated bus line, SMBALERT, allows a slave to get a master’s attention.<br />
A set of addresses have been reserved for protocol handling, such as Alert Response<br />
Address (ARA) and Host Header (HH) Address.<br />
DATA<br />
1 1 1 1 0 X X 1<br />
SLAVE ADDRESS<br />
1st 7 bits<br />
RW A3<br />
A<br />
DATA<br />
DATA<br />
A<br />
AA<br />
P<br />
DATA<br />
A<br />
P<br />
711
32117D–AVR-01/12<br />
<strong>AT32UC3C</strong><br />
27.8.9.1 Packet Error Checking<br />
Each SMBus transfer can optionally end with a CRC byte, called the PEC byte. Writing a one to<br />
CMDR.PECEN enables automatic PEC handling in the current transfer. Transfers with and without<br />
PEC can freely be intermixed in the same system, since some slaves may not support PEC.<br />
The PEC LFSR is always updated on every bit transmitted or received, so that PEC handling on<br />
combined transfers will be correct.<br />
27.8.9.2 Timeouts<br />
In master transmitter mode, the master calculates a PEC value and transmits it to the slave after<br />
all data bytes have been transmitted. Upon reception of this PEC byte, the slave will compare it<br />
to the PEC value it has computed itself. If the values match, the data was received correctly, and<br />
the slave will return an ACK to the master. If the PEC values differ, data was corrupted, and the<br />
slave will return a NACK value. The DNAK bit in SR reflects the state of the last received<br />
ACK/NACK value. Some slaves may not be able to check the received PEC in time to return a<br />
NACK if an error occurred. In this case, the slave should always return an ACK after the PEC<br />
byte, and some other mechanism must be implemented to verify that the transmission was<br />
received correctly.<br />
In master receiver mode, the slave calculates a PEC value and transmits it to the master after all<br />
data bytes have been transmitted. Upon reception of this PEC byte, the master will compare it to<br />
the PEC value it has computed itself. If the values match, the data was received correctly. If the<br />
PEC values differ, data was corrupted, and SR.PECERR is set. In master receiver mode, the<br />
PEC byte is always followed by a NACK transmitted by the master, since it is the last byte in the<br />
transfer.<br />
The PEC byte is automatically inserted in a master transmitter transmission if PEC is enabled<br />
when NBYTES reaches zero. The PEC byte is identified in a master receiver transmission if<br />
PEC is enabled when NBYTES reaches zero. NBYTES must therefore be written with the total<br />
number of data bytes in the transmission, including the PEC byte.<br />
In combined transfers, the PECEN bit should only be written to one in the last of the combined<br />
transfers. Consider the following transfer:<br />
S, ADR+W, COMMAND_BYTE, ACK, SR, ADR+R, DATA_BYTE, ACK, PEC_BYTE, NACK, P<br />
This transfer is generated by writing two commands to the command registers. The first command<br />
is a write with NBYTES=1 and PECEN=0, and the second is a read with NBYTES=2 and<br />
PECEN=1.<br />
Writing a one to the STOP bit in CR will place a STOP condition on the bus after the current<br />
byte. No PEC byte will be sent in this case.<br />
The TLOWS and TLOWM fields in SMBTR configure the SMBus timeout values. If a timeout<br />
occurs, the master will transmit a STOP condition and leave the bus. The SR.TOUT bit is set.<br />
27.8.9.3 SMBus ALERT Signal<br />
A slave can get the master’s attention by pulling the TWALM line low. The TWIM will then set the<br />
SR.SMBALERT bit. This can be set up to trigger an interrupt, and software can then take the<br />
appropriate action, as defined in the SMBus standard.<br />
712
32117D–AVR-01/12<br />
<strong>AT32UC3C</strong><br />
27.8.10 Identifying Bus Events<br />
This chapter lists the different bus events, and how they affect bits in the TWIM registers. This is<br />
intended to help writing drivers for the TWIM.<br />
Table 27-5. Bus Events<br />
Event Effect<br />
Master transmitter has sent<br />
a data byte<br />
Master receiver has<br />
received a data byte<br />
Start+Sadr sent, no ack<br />
received from slave<br />
Data byte sent to slave, no<br />
ack received from slave<br />
Arbitration lost<br />
SR.THR is cleared.<br />
SR.RHR is set.<br />
SR.ANAK is set.<br />
SR.CCOMP not set.<br />
CMDR.VALID remains set.<br />
STOP automatically transmitted on bus.<br />
SR.DNAK is set.<br />
SR.CCOMP not set.<br />
CMDR.VALID remains set.<br />
STOP automatically transmitted on bus.<br />
SMBus Alert received SR.SMBALERT is set.<br />
SMBus timeout received<br />
Master transmitter receives<br />
SMBus PEC Error<br />
Master receiver discovers<br />
SMBus PEC Error<br />
CR.STOP is written by user<br />
SR.ARBLST is set.<br />
SR.CCOMP not set.<br />
CMDR.VALID remains set.<br />
TWCK and TWD immediately released to a pulled-up state.<br />
SR.SMBTOUT is set.<br />
SR.CCOMP not set.<br />
CMDR.VALID remains set.<br />
STOP automatically transmitted on bus.<br />
SR.DNAK is set.<br />
SR.CCOMP not set.<br />
CMDR.VALID remains set.<br />
STOP automatically transmitted on bus.<br />
SR.PECERR is set.<br />
SR.CCOMP not set.<br />
CMDR.VALID remains set.<br />
STOP automatically transmitted on bus.<br />
SR.STOP is set.<br />
SR.CCOMP set.<br />
CMDR.VALID remains set.<br />
STOP transmitted on bus after current byte transfer has finished.<br />
713
27.9 User Interface<br />
Table 27-6. TWIM Register Memory Map<br />
32117D–AVR-01/12<br />
<strong>AT32UC3C</strong><br />
Offset Register Register Name Access Reset<br />
0x00 Control Register CR Write-only 0x00000000<br />
0x04 Clock Waveform Generator Register CWGR Read/Write 0x00000000<br />
0x08 SMBus Timing Register SMBTR Read/Write 0x00000000<br />
0x0C Command Register CMDR Read/Write 0x00000000<br />
0x10 Next Command Register NCMDR Read/Write 0x00000000<br />
0x14 Receive Holding Register RHR Read-only 0x00000000<br />
0x18 Transmit Holding Register THR Write-only 0x00000000<br />
0x1C Status Register SR Read-only 0x00000002<br />
0x20 Interrupt Enable Register IER Write-only 0x00000000<br />
0x24 Interrupt Disable Register IDR Write-only 0x00000000<br />
0x28 Interrupt Mask Register IMR Read-only 0x00000000<br />
0x2C Status Clear Register SCR Write-only 0x00000000<br />
0x30 Parameter Register PR Read-only - (1)<br />
0x34 Version Register VR Read-only - (1)<br />
Note: 1. The reset values for these registers are device specific. Please refer to the Module Configuration section at the end of this<br />
chapter.<br />
714
27.9.1 Control Register<br />
Name: CR<br />
Access Type: Write-only<br />
Offset: 0x00<br />
Reset Value: 0x00000000<br />
32117D–AVR-01/12<br />
<strong>AT32UC3C</strong><br />
31 30 29 28 27 26 25 24<br />
- - - - - - - -<br />
23 22 21 20 19 18 17 16<br />
- - - - - - - -<br />
15 14 13 12 11 10 9 8<br />
- - - - - - - STOP<br />
7 6 5 4 3 2 1 0<br />
SWRST - SMDIS SMEN - - MDIS MEN<br />
STOP: Stop the Current Transfer<br />
Writing a one to this bit terminates the current transfer, sending a STOP condition after the shifter has become idle. If there are<br />
additional pending transfers, they will have to be explicitly restarted by software after the STOP condition has been successfully<br />
sent.<br />
Writing a zero to this bit has no effect.<br />
SWRST: Software Reset<br />
If the TWIM master interface is enabled, writing a one to this bit resets the TWIM. All transfers are halted immediately, possibly<br />
violating the bus semantics.<br />
If the TWIM master interface is not enabled, it must first be enabled before writing a one to this bit.<br />
Writing a zero to this bit has no effect.<br />
SMDIS: SMBus Disable<br />
Writing a one to this bit disables SMBus mode.<br />
Writing a zero to this bit has no effect.<br />
SMEN: SMBus Enable<br />
Writing a one to this bit enables SMBus mode.<br />
Writing a zero to this bit has no effect.<br />
MDIS: Master Disable<br />
Writing a one to this bit disables the master interface.<br />
Writing a zero to this bit has no effect.<br />
MEN: Master Enable<br />
Writing a one to this bit enables the master interface.<br />
Writing a zero to this bit has no effect.<br />
715
27.9.2 Clock Waveform Generator Register<br />
Name: CWGR<br />
Access Type: Read/Write<br />
Offset: 0x04<br />
Reset Value: 0x00000000<br />
DATA: Data Setup and Hold Cycles<br />
Clock cycles for data setup and hold count. Prescaled by CWGR.EXP. Used to time T HD_DAT, T SU_DAT.<br />
STASTO: START and STOP Cycles<br />
Clock cycles in clock high count. Prescaled by CWGR.EXP. Used to time T HD_STA, T SU_STA, T SU_STO<br />
HIGH: Clock High Cycles<br />
Clock cycles in clock high count. Prescaled by CWGR.EXP. Used to time T HIGH.<br />
LOW: Clock Low Cycles<br />
Clock cycles in clock low count. Prescaled by CWGR.EXP. Used to time T LOW, T BUF.<br />
32117D–AVR-01/12<br />
<strong>AT32UC3C</strong><br />
31 30 29 28 27 26 25 24<br />
- EXP DATA<br />
23 22 21 20 19 18 17 16<br />
STASTO<br />
15 14 13 12 11 10 9 8<br />
HIGH<br />
7 6 5 4 3 2 1 0<br />
EXP: Clock Prescaler<br />
Used to specify how to prescale the TWCK clock. Counters are prescaled according to the following formula<br />
fCLK_TWIM fPRESCALER EXP 1<br />
2 +<br />
=<br />
-------------------------<br />
( )<br />
LOW<br />
716
27.9.3 SMBus Timing Register<br />
Name: SMBTR<br />
Access Type: Read/Write<br />
Offset: 0x08<br />
Reset Value: 0x00000000<br />
32117D–AVR-01/12<br />
<strong>AT32UC3C</strong><br />
31 30 29 28 27 26 25 24<br />
EXP - - - -<br />
23 22 21 20 19 18 17 16<br />
THMAX<br />
15 14 13 12 11 10 9 8<br />
TLOWM<br />
7 6 5 4 3 2 1 0<br />
TLOWS<br />
EXP: SMBus Timeout Clock Prescaler<br />
Used to specify how to prescale the TIM and TLOWM counters in SMBTR. Counters are prescaled according to the following<br />
formula<br />
fprescaled, SMBus<br />
=<br />
2<br />
fCLKTWIM EXP 1 +<br />
------------------------<br />
( )<br />
THMAX: Clock High Maximum Cycles<br />
Clock cycles in clock high maximum count. Prescaled by SMBTR.EXP. Used for bus free detection. Used to time T HIGH:MAX .<br />
NOTE: Uses the prescaler specified by CWGR, NOT the prescaler specified by SMBTR.<br />
TLOWM: Master Clock Stretch Maximum Cycles<br />
Clock cycles in master maximum clock stretch count. Prescaled by SMBTR.EXP. Used to time T LOW:MEXT<br />
TLOWS: Slave Clock Stretch Maximum Cycles<br />
Clock cycles in slave maximum clock stretch count. Prescaled by SMBTR.EXP. Used to time T LOW:SEXT.<br />
717
27.9.4 Command Register<br />
Name: CMDR<br />
Access Type: Read/Write<br />
Offset: 0x0C<br />
Reset Value: 0x00000000<br />
32117D–AVR-01/12<br />
<strong>AT32UC3C</strong><br />
31 30 29 28 27 26 25 24<br />
- - - - ACKLAST PECEN<br />
23 22 21 20 19 18 17 16<br />
NBYTES<br />
15 14 13 12 11 10 9 8<br />
VALID STOP START REPSAME TENBIT SADR[9:7]<br />
7 6 5 4 3 2 1 0<br />
SADR[6:0] READ<br />
ACKLAST: ACK Last Master RX Byte<br />
0: Causes the last byte in master receive mode (when NBYTES has reached 0) to be NACKed. This is the standard way of<br />
ending a master receiver transfer.<br />
1: Causes the last byte in master receive mode (when NBYTES has reached 0) to be ACKed. Used for performing linked<br />
transfers in master receiver mode with no STOP or REPEATED START between the subtransfers. This is needed when more<br />
than 255 bytes are to be received in one single transmission.<br />
PECEN: Packet Error Checking Enable<br />
0: Causes the transfer not to use PEC byte verification. The PEC LFSR is still updated for every bit transmitted or received. Must<br />
be used if SMBus mode is disabled.<br />
1: Causes the transfer to use PEC. PEC byte generation (if master transmitter) or PEC byte verification (if master receiver) will<br />
be performed.<br />
NBYTES: Number of Data Bytes in Transfer<br />
The number of data bytes in the transfer. After the specified number of bytes have been transferred, a STOP condition is<br />
transmitted if CMDR.STOP is one. In SMBus mode, if PEC is used, NBYTES includes the PEC byte, i.e. there are NBYTES-1<br />
data bytes and a PEC byte.<br />
VALID: CMDR Valid<br />
0: Indicates that CMDR does not contain a valid command.<br />
1: Indicates that CMDR contains a valid command. This bit is cleared when the command is finished.<br />
STOP: Send STOP Condition<br />
0: Do not transmit a STOP condition after the data bytes have been transmitted.<br />
1: Transmit a STOP condition after the data bytes have been transmitted.<br />
START: Send START Condition<br />
0: The transfer in CMDR should not commence with a START or REPEATED START condition.<br />
1: The transfer in CMDR should commence with a START or REPEATED START condition. If the bus is free when the command<br />
is executed, a START condition is used. If the bus is busy, a REPEATED START is used.<br />
REPSAME: Transfer is to Same Address as Previous Address<br />
Only used in 10-bit addressing mode, always write to 0 in 7-bit addressing mode.<br />
718
32117D–AVR-01/12<br />
<strong>AT32UC3C</strong><br />
Write this bit to one if the command in CMDR performs a repeated start to the same slave address as addressed in the previous<br />
transfer in order to enter master receiver mode.<br />
Write this bit to zero otherwise.<br />
TENBIT: Ten Bit Addressing Mode<br />
0: Use 7-bit addressing mode.<br />
1: Use 10-bit addressing mode. Must not be used when the TWIM is in SMBus mode.<br />
SADR: Slave Address<br />
Address of the slave involved in the transfer. Bits 9-7 are don’t care if 7-bit addressing is used.<br />
READ: Transfer Direction<br />
0: Allow the master to transmit data.<br />
1: Allow the master to receive data.<br />
719
27.9.5 Next Command Register<br />
Name: NCMDR<br />
Access Type: Read/Write<br />
Offset: 0x10<br />
Reset Value: 0x00000000<br />
32117D–AVR-01/12<br />
<strong>AT32UC3C</strong><br />
31 30 29 28 27 26 25 24<br />
- - - - ACKLAST PECEN<br />
23 22 21 20 19 18 17 16<br />
NBYTES<br />
15 14 13 12 11 10 9 8<br />
VALID STOP START REPSAME TENBIT SADR[9:7]<br />
7 6 5 4 3 2 1 0<br />
SADR[6:0] READ<br />
This register is identical to CMDR. When the VALID bit in CMDR becomes 0, the content of NCMDR is copied into CMDR,<br />
clearing the VALID bit in NCMDR. If the VALID bit in CMDR is cleared when NCMDR is written, the content is copied<br />
immediately.<br />
720
27.9.6 Receive Holding Register<br />
Name: RHR<br />
Access Type: Read-only<br />
Offset: 0x14<br />
Reset Value: 0x00000000<br />
32117D–AVR-01/12<br />
<strong>AT32UC3C</strong><br />
31 30 29 28 27 26 25 24<br />
- - - - - - - -<br />
23 22 21 20 19 18 17 16<br />
- - - - - - - -<br />
15 14 13 12 11 10 9 8<br />
- - - - - - - -<br />
7 6 5 4 3 2 1 0<br />
RXDATA<br />
RXDATA: Received Data<br />
When the RXRDY bit in the Status Register (SR) is one, this field contains a byte received from the TWI bus.<br />
721
27.9.7 Transmit Holding Register<br />
Name: THR<br />
Access Type: Write-only<br />
Offset: 0x18<br />
Reset Value: 0x00000000<br />
32117D–AVR-01/12<br />
<strong>AT32UC3C</strong><br />
31 30 29 28 27 26 25 24<br />
- - - - - - - -<br />
23 22 21 20 19 18 17 16<br />
- - - - - - - -<br />
15 14 13 12 11 10 9 8<br />
- - - - - - - -<br />
7 6 5 4 3 2 1 0<br />
TXDATA: Data to Transmit<br />
Write data to be transferred on the TWI bus here.<br />
TXDATA<br />
722
27.9.8 Status Register<br />
Name: SR<br />
Access Type: Read-only<br />
Offset: 0x1C<br />
Reset Value: 0x00000002<br />
32117D–AVR-01/12<br />
<strong>AT32UC3C</strong><br />
31 30 29 28 27 26 25 24<br />
- - - - - - - -<br />
23 22 21 20 19 18 17 16<br />
- - - - - - - MENB<br />
15 14 13 12 11 10 9 8<br />
- STOP PECERR TOUT SMBALERT ARBLST DNAK ANAK<br />
7 6 5 4 3 2 1 0<br />
- - BUSFREE IDLE CCOMP CRDY TXRDY RXRDY<br />
MENB: Master Interface Enable<br />
0: Master interface is disabled.<br />
1: Master interface is enabled.<br />
STOP: Stop Request Accepted<br />
This bit is one when a STOP request caused by writing a one to CR.STOP has been accepted, and transfer has stopped.<br />
This bit is cleared by writing 1 to the corresponding bit in the Status Clear Register (SCR).<br />
PECERR: PEC Error<br />
This bit is one when a SMBus PEC error occurred.<br />
This bit is cleared by writing 1 to the corresponding bit in the Status Clear Register (SCR).<br />
TOUT: Timeout<br />
This bit is one when a SMBus timeout occurred.<br />
This bit is cleared by writing 1 to the corresponding bit in the Status Clear Register (SCR).<br />
SMBALERT: SMBus Alert<br />
This bit is one when an SMBus Alert was received.<br />
This bit is cleared by writing 1 to the corresponding bit in the Status Clear Register (SCR).<br />
ARBLST: Arbitration Lost<br />
This bit is one when the actual state of the SDA line did not correspond to the data driven onto it, indicating a higher-priority<br />
transmission in progress by a different master.<br />
This bit is cleared by writing 1 to the corresponding bit in the Status Clear Register (SCR).<br />
DNAK: NAK in Data Phase Received<br />
This bit is one when no ACK was received form slave during data transmission.<br />
This bit is cleared by writing 1 to the corresponding bit in the Status Clear Register (SCR).<br />
ANAK: NAK in Address Phase Received<br />
This bit is one when no ACK was received from slave during address phase<br />
This bit is cleared by writing 1 to the corresponding bit in the Status Clear Register (SCR).<br />
BUSFREE: Two-wire Bus is Free<br />
This bit is one when activity has completed on the two-wire bus.<br />
Otherwise, this bit is cleared.<br />
723
IDLE: Master Interface is Idle<br />
This bit is one when no command is in progress, and no command waiting to be issued.<br />
Otherwise, this bit is cleared.<br />
CCOMP: Command Complete<br />
This bit is one when the current command has completed successfully.<br />
This bit is zero if the command failed due to conditions such as a NAK receved from slave.<br />
This bit is cleared by writing 1 to the corresponding bit in the Status Clear Register (SCR).<br />
CRDY: Ready for More Commands<br />
This bit is one when CMDR and/or NCMDR is ready to receive one or more commands.<br />
This bit is cleared when this is no longer true.<br />
TXRDY: THR Data Ready<br />
This bit is one when THR is ready for one or more data bytes.<br />
This bit is cleared when this is no longer true (i.e. THR is full or transmission has stopped).<br />
RXRDY: RHR Data Ready<br />
This bit is one when RX data are ready to be read from RHR.<br />
This bit is cleared when this is no longer true.<br />
32117D–AVR-01/12<br />
<strong>AT32UC3C</strong><br />
724
27.9.9 Interrupt Enable Register<br />
Name: IER<br />
Access Type: Write-only<br />
Offset: 0x20<br />
Reset Value: 0x00000000<br />
32117D–AVR-01/12<br />
<strong>AT32UC3C</strong><br />
31 30 29 28 27 26 25 24<br />
- - - - - - - -<br />
23 22 21 20 19 18 17 16<br />
- - - - - - - -<br />
15 14 13 12 11 10 9 8<br />
- STOP PECERR TOUT SMBALERT ARBLST DNAK ANAK<br />
7 6 5 4 3 2 1 0<br />
- - BUSFREE IDLE CCOMP CRDY TXRDY RXRDY<br />
Writing a zero to a bit in this register has no effect.<br />
Writing a one to a bit in this register will set the corresponding bit in IMR<br />
725
27.9.10 Interrupt Disable Register<br />
Name: IDR<br />
Access Type: Write-only<br />
Offset: 0x24<br />
Reset Value: 0x00000000<br />
32117D–AVR-01/12<br />
<strong>AT32UC3C</strong><br />
31 30 29 28 27 26 25 24<br />
- - - - - - - -<br />
23 22 21 20 19 18 17 16<br />
- - - - - - - -<br />
15 14 13 12 11 10 9 8<br />
- STOP PECERR TOUT SMBALERT ARBLST DNAK ANAK<br />
7 6 5 4 3 2 1 0<br />
- - BUSFREE IDLE CCOMP CRDY TXRDY RXRDY<br />
Writing a zero to a bit in this register has no effect.<br />
Writing a one to a bit in this register will clear the corresponding bit in IMR<br />
726
27.9.11 Interrupt Mask Register<br />
Name: IMR<br />
Access Type: Read-only<br />
Offset: 0x28<br />
Reset Value: 0x00000000<br />
32117D–AVR-01/12<br />
<strong>AT32UC3C</strong><br />
31 30 29 28 27 26 25 24<br />
- - - - - - - -<br />
23 22 21 20 19 18 17 16<br />
- - - - - - - -<br />
15 14 13 12 11 10 9 8<br />
- STOP PECERR TOUT SMBALERT ARBLST DNAK ANAK<br />
7 6 5 4 3 2 1 0<br />
- - BUSFREE IDLE CCOMP CRDY TXRDY RXRDY<br />
0: The corresponding interrupt is disabled.<br />
1: The corresponding interrupt is enabled.<br />
This bit is cleared when the corresponding bit in IDR is written to one.<br />
This bit is set when the corresponding bit in IER is written to one.<br />
727
27.9.12 Status Clear Register<br />
Name: SCR<br />
Access Type : Write-only<br />
Offset: 0x2C<br />
Reset Value: 0x00000000<br />
32117D–AVR-01/12<br />
<strong>AT32UC3C</strong><br />
31 30 29 28 27 26 25 24<br />
- - - - - - - -<br />
23 22 21 20 19 18 17 16<br />
- - - - - - - -<br />
15 14 13 12 11 10 9 8<br />
- STOP PECERR TOUT SMBALERT ARBLST DNAK ANAK<br />
7 6 5 4 3 2 1 0<br />
- - - - CCOMP - - -<br />
Writing a zero to a bit in this register has no effect.<br />
Writing a one to a bit in this register will clear the corresponding bit in SR and the corresponding interrupt request.<br />
728
27.9.13 Parameter Register (PR)<br />
Name: PR<br />
Access Type: Read-only<br />
Offset: 0x30<br />
Reset Value: -<br />
32117D–AVR-01/12<br />
<strong>AT32UC3C</strong><br />
31 30 29 28 27 26 25 24<br />
- - - - - - - -<br />
23 22 21 20 19 18 17 16<br />
- - - - - - - -<br />
15 14 13 12 11 10 9 8<br />
- - - - - - - -<br />
7 6 5 4 3 2 1 0<br />
- - - - - - - -<br />
729
27.9.14 Version Register (VR)<br />
Name: VR<br />
Access Type: Read-only<br />
Offset: 0x34<br />
Reset Value: -<br />
32117D–AVR-01/12<br />
<strong>AT32UC3C</strong><br />
31 30 29 28 27 26 25 24<br />
- - - - - - - -<br />
23 22 21 20 19 18 17 16<br />
- - - - VARIANT<br />
15 14 13 12 11 10 9 8<br />
- - - - VERSION [11:8]<br />
7 6 5 4 3 2 1 0<br />
VERSION [7:0]<br />
VARIANT: Variant Number<br />
Reserved. No functionality associated.<br />
VERSION: Version Number<br />
Version number of the module. No functionality associated.<br />
730
32117D–AVR-01/12<br />
<strong>AT32UC3C</strong><br />
27.10 Module Configuration<br />
The specific configuration for each TWIM instance is listed in the following tables. The module<br />
bus clocks listed here are connected to the system bus clocks. Please refer to the Power Manager<br />
chapter for details.<br />
Table 27-7. Module Configuration<br />
Feature TWIM0 TWIM1 TWIM2<br />
SMBus ALERT interface Implemented Implemented Not Implemented<br />
Table 27-8. Module Clock Name<br />
Module Name Clock Name Description<br />
TWIM0 CLK_TWIM0 Peripheral Bus clock from the PBA clock domain<br />
TWIM1 CLK_TWIM1 Peripheral Bus clock from the PBA clock domain<br />
TWIM2 CLK_TWIM2 Peripheral Bus clock from the PBC clock domain<br />
Table 27-9. Register Reset Values<br />
Register Reset Value<br />
VR 0x0000 0101<br />
PR 0x0000 0000<br />
731
28. Two-wire Slave Interface (TWIS)<br />
28.1 Features<br />
28.2 Overview<br />
32117D–AVR-01/12<br />
Rev.: 1.2.0.1<br />
<strong>AT32UC3C</strong><br />
Compatible with I²C standard<br />
– Transfer speeds of 100 and 400 kbit/s<br />
– 7 and 10-bit and General Call addressing<br />
Compatible with SMBus standard<br />
– Hardware Packet Error Checking (CRC) generation and verification with ACK response<br />
– SMBALERT interface<br />
– 25 ms clock low timeout delay<br />
– 25 ms slave cumulative clock low extend time<br />
Compatible with PMBus<br />
DMA interface for reducing CPU load<br />
Arbitrary transfer lengths, including 0 data bytes<br />
Optional clock stretching if transmit or receive buffers not ready for data transfer<br />
32-bit Peripheral Bus interface for configuration of the interface<br />
The Atmel Two-wire Slave Interface (TWIS) interconnects components on a unique two-wire<br />
bus, made up of one clock line and one data line with speeds of up to 400 kbit/s, based on a<br />
byte-oriented transfer format. It can be used with any Atmel Two-wire Interface bus, I²C, or<br />
SMBus-compatible master. The TWIS is always a bus slave and can transfer sequential or single<br />
bytes.<br />
Below, Table 28-1 lists the compatibility level of the Atmel Two-wire Slave Interface and a full I²C<br />
compatible device.<br />
Table 28-1. Atmel TWIS Compatibility with I²C Standard<br />
I²C Standard Atmel TWIS<br />
Standard-mode (100 kbit/s) Supported<br />
Fast-mode (400 kbit/s) Supported<br />
7 or 10 bits Slave Addressing Supported<br />
START BYTE (1)<br />
Not Supported<br />
Repeated Start (Sr) Condition Supported<br />
ACK and NAK Management Supported<br />
Slope control and input filtering (Fast mode) Supported<br />
Clock stretching Supported<br />
Note: 1. START + b000000001 + Ack + Sr<br />
732
28.3 List of Abbreviations<br />
28.4 Block Diagram<br />
32117D–AVR-01/12<br />
<strong>AT32UC3C</strong><br />
Below, Table 28-2 lists the compatibility level of the Atmel Two-wire Slave Interface and a full<br />
SMBus compatible device.<br />
Table 28-2. Atmel TWIS Compatibility with SMBus Standard<br />
SMBus Standard Atmel TWIS<br />
Bus Timeouts Supported<br />
Address Resolution Protocol Supported<br />
Alert Supported<br />
Packet Error Checking Supported<br />
Table 28-3. Abbreviations<br />
Abbreviation Description<br />
TWI Two-wire Interface<br />
A Acknowledge<br />
NA Non Acknowledge<br />
P Stop<br />
S Start<br />
Sr Repeated Start<br />
SADR Slave Address<br />
ADR Any address except SADR<br />
R Read<br />
W Write<br />
Figure 28-1. Block Diagram<br />
Peripheral<br />
Bus Bridge<br />
Power<br />
Manager<br />
CLK_TWIS<br />
Two-wire<br />
Interface<br />
TWI Interrupt<br />
I/O Controller<br />
Interrupt<br />
Controller<br />
TWCK<br />
TWD<br />
TWALM<br />
733
28.5 Application Block Diagram<br />
28.6 I/O Lines Description<br />
32117D–AVR-01/12<br />
Figure 28-2. Application Block Diagram<br />
<strong>AT32UC3C</strong><br />
28.7 Product Dependencies<br />
In order to use this module, other parts of the system must be configured correctly, as described<br />
below.<br />
28.7.1 I/O Lines<br />
Host with<br />
TWI<br />
Interface<br />
Table 28-4. I/O Lines Description<br />
TWD<br />
TWCK<br />
Atmel TWI<br />
serial EEPROM<br />
Rp: Pull up value as given by the I²C Standard<br />
I²C RTC<br />
I²C LCD<br />
controller<br />
Slave 1 Slave 2 Slave 3<br />
I²C temp.<br />
sensor<br />
TWDand TWCK are bidirectional lines, connected to a positive supply voltage via a current<br />
source or pull-up resistor (see Figure 28-5 on page 736). When the bus is free, both lines are<br />
high. The output stages of devices connected to the bus must have an open-drain or open-collector<br />
to perform the wired-AND function.<br />
TWALM is used to implement the optional SMBus SMBALERT signal.<br />
Slave 4<br />
TWALM, TWD, and TWCK pins may be multiplexed with I/O Controller lines. To enable the<br />
TWIS, the user must perform the following steps:<br />
Program the I/O Controller to:<br />
– Dedicate TWD, TWCK, and optionally TWALM as peripheral lines.<br />
– Define TWD, TWCK, and optionally TWALM as open-drain.<br />
Rp Rp<br />
Pin Name Pin Description Type<br />
TWD Two-wire Serial Data Input/Output<br />
TWCK Two-wire Serial Clock Input/Output<br />
TWALM SMBus SMBALERT Input/Output<br />
VDD<br />
734
32117D–AVR-01/12<br />
<strong>AT32UC3C</strong><br />
28.7.2 Power Management<br />
If the CPU enters a sleep mode that disables clocks used by the TWIS, the TWIS will stop functioning<br />
and resume operation after the system wakes up from sleep mode. The TWIS is able to<br />
wake the system from sleep mode upon address match, see Section 28.8.8 on page 743.<br />
28.7.3 Clocks<br />
28.7.4 DMA<br />
28.7.5 Interrupts<br />
The clock for the TWIS bus interface (CLK_TWIS) is generated by the Power Manager. This<br />
clock is enabled at reset, and can be disabled in the Power Manager. It is recommended to disable<br />
the TWIS before disabling the clock, to avoid freezing the TWIS in an undefined state.<br />
The TWIS DMA handshake interface is connected to the Peripheral DMA Controller. Using the<br />
TWIS DMA functionality requires the Peripheral DMA Controller to be programmed after setting<br />
up the TWIS.<br />
The TWIS interrupt request lines are connected to the interrupt controller. Using the TWIS interrupts<br />
requires the interrupt controller to be programmed first.<br />
28.7.6 Debug Operation<br />
When an external debugger forces the CPU into debug mode, the TWIS continues normal operation.<br />
If the TWIS is configured in a way that requires it to be periodically serviced by the CPU<br />
through interrupts or similar, improper operation or data loss may result during debugging.<br />
28.8 Functional Description<br />
28.8.1 Transfer Format<br />
The data put on the TWD line must be 8 bits long. Data is transferred MSB first; each byte must<br />
be followed by an acknowledgement. The number of bytes per transfer is unlimited (see Figure<br />
28-4 on page 736).<br />
Each transfer begins with a START condition and terminates with a STOP condition (see Figure<br />
28-3).<br />
A high-to-low transition on the TWD line while TWCK is high defines the START condition.<br />
A low-to-high transition on the TWD line while TWCK is high defines a STOP condition.<br />
Figure 28-3. START and STOP Conditions<br />
TWD<br />
TWCK<br />
Start Stop<br />
735
28.8.2 Operation<br />
28.8.2.1 Bus Timing<br />
32117D–AVR-01/12<br />
Figure 28-4. Transfer Format<br />
TWD<br />
TWCK<br />
The TWIS has two modes of operation:<br />
<strong>AT32UC3C</strong><br />
Slave transmitter mode<br />
Slave receiver mode<br />
A master is a device which starts and stops a transfer and generates the TWCK clock. A slave is<br />
assigned an address and responds to requests from the master. These modes are described in<br />
the following chapters.<br />
Figure 28-5. Typical Application Block Diagram<br />
Host with<br />
TWI<br />
Interface<br />
TWD<br />
TWCK<br />
The Timing Register (TR) is used to control the timing of bus signals driven by the TWIS. TR<br />
describes bus timings as a function of cycles of the prescaled CLK_TWIS. The clock prescaling<br />
can be selected through TR.EXP.<br />
TR has the following fields:<br />
Start Address R/W Ack Data Ack Data Ack Stop<br />
Atmel TWI<br />
Serial EEPROM<br />
Rp: Pull up value as given by the I²C Standard<br />
I²C RTC<br />
I²C LCD<br />
Controller<br />
Slave 1 Slave 2 Slave 3<br />
f PRESCALED<br />
=<br />
2<br />
fCLK_TWIS EXP 1 +<br />
------------------------<br />
( )<br />
I²C Temp.<br />
Sensor<br />
Slave 4<br />
TLOWS: Prescaled clock cycles used to time SMBUS timeout T LOW:SEXT.<br />
Rp Rp<br />
VDD<br />
736
32117D–AVR-01/12<br />
TTOUT: Prescaled clock cycles used to time SMBUS timeout T TIMEOUT .<br />
<strong>AT32UC3C</strong><br />
SUDAT: Non-prescaled clock cycles for data setup and hold count. Used to time T SU_DAT.<br />
EXP: Specifies the clock prescaler setting used for the SMBUS timeouts.<br />
Figure 28-6. Bus Timing Diagram<br />
S<br />
t LOW<br />
t HD:STA<br />
t SU:DAT<br />
t HIGH<br />
t HD:DAT<br />
28.8.2.2 Setting Up and Performing a Transfer<br />
Operation of the TWIS is mainly controlled by the Control Register (CR). The following list presents<br />
the main steps in a typical communication:<br />
3. Before any transfers can be performed, bus timings must be configured by writing to the<br />
Timing Register (TR).If the Peripheral DMA Controller is to be used for the transfers, it<br />
must be set up.<br />
4. The Control Register (CR) must be configured with information such as the slave<br />
address, SMBus mode, Packet Error Checking (PEC), number of bytes to transfer, and<br />
which addresses to match.<br />
The interrupt system can be set up to generate interrupt request on specific events or error conditions,<br />
for example when a byte has been received.<br />
The NBYTES register is only used in SMBus mode, when PEC is enabled. In I²C mode or in<br />
SMBus mode when PEC is disabled, the NBYTES register is not used, and should be written to<br />
zero. NBYTES is updated by hardware, so in order to avoid hazards, software updates of<br />
NBYTES can only be done through writes to the NBYTES register.<br />
28.8.2.3 Address Matching<br />
The TWIS can be set up to match several different addresses. More than one address match<br />
may be enabled simultaneously, allowing the TWIS to be assigned to several addresses. The<br />
address matching phase is initiated after a START or REPEATED START condition. When the<br />
TWIS receives an address that generates an address match, an ACK is automatically returned<br />
to the master.<br />
t LOW<br />
t SU:DAT<br />
t SU:STA<br />
Sr<br />
t SU:STO<br />
P<br />
737
32117D–AVR-01/12<br />
In I²C mode:<br />
The address in CR.ADR is checked for address match if CR.SMATCH is one.<br />
The General Call address is checked for address match if CR.GCMATCH is one.<br />
In SMBus mode:<br />
The address in CR.ADR is checked for address match if CR.SMATCH is one.<br />
The Alert Response Address is checked for address match if CR.SMAL is one.<br />
The Default Address is checked for address match if CR.SMDA is one.<br />
The Host Header Address is checked for address match if CR.SMHH is one.<br />
<strong>AT32UC3C</strong><br />
28.8.2.4 Clock Stretching<br />
Any slave or bus master taking part in a transfer may extend the TWCK low period at any time.<br />
The TWIS may extend the TWCK low period after each byte transfer if CR.STREN is one and:<br />
28.8.2.5 Bus Errors<br />
Module is in slave transmitter mode, data should be transmitted, but THR is empty, or<br />
Module is in slave receiver mode, a byte has been received and placed into the internal<br />
shifter, but the Receive Holding Register (RHR) is full, or<br />
Stretch-on-address-match bit CR.SOAM=1 and slave was addressed. Bus clock remains<br />
stretched until all address match bits in the Status Register (SR) have been cleared.<br />
If CR.STREN is zero and:<br />
Module is in slave transmitter mode, data should be transmitted but THR is empty: Transmit<br />
the value present in THR (the last transmitted byte or reset value), and set SR.URUN.<br />
Module is in slave receiver mode, a byte has been received and placed into the internal<br />
shifter, but RHR is full: Discard the received byte and set SR.ORUN.<br />
If a bus error (misplaced START or STOP) condition is detected, the SR.BUSERR bit is set and<br />
the TWIS waits for a new START condition.<br />
28.8.3 Slave Transmitter Mode<br />
If the TWIS matches an address in which the R/W bit in the TWI address phase transfer is set, it<br />
will enter slave transmitter mode and set the SR.TRA bit (note that SR.TRA is set one<br />
CLK_TWIS cycle after the relevant address match bit in the same register is set).<br />
After the address phase, the following actions are performed:<br />
1. If SMBus mode and PEC is used, NBYTES must be set up with the number of bytes to<br />
transmit. This is necessary in order to know when to transmit the PEC byte. NBYTES<br />
can also be used to count the number of bytes received if using DMA.<br />
2. Byte to transmit depends on I²C/SMBus mode and CR.PEC:<br />
– If in I²C mode or CR.PEC is zero or NBYTES is non-zero: The TWIS waits until THR<br />
contains a valid data byte, possibly stretching the low period of TWCK. After THR<br />
contains a valid data byte, the data byte is transferred to a shifter, and then<br />
SR.TXRDY is changed to one because the THR is empty again.<br />
– SMBus mode and CR.PEC is one: If NBYTES is zero, the generated PEC byte is<br />
automatically transmitted instead of a data byte from THR. TWCK will not be<br />
stretched by the TWIS.<br />
3. The data byte in the shifter is transmitted.<br />
738
32117D–AVR-01/12<br />
<strong>AT32UC3C</strong><br />
4. NBYTES is updated. If CR.CUP is one, NBYTES is incremented, otherwise NBYTES is<br />
decremented.<br />
5. After each data byte has been transmitted, the master transmits an ACK (Acknowledge)<br />
or NAK (Not Acknowledge) bit. If a NAK bit is received by the TWIS, the SR.NAK bit is<br />
set. Note that this is done two CLK_TWIS cycles after TWCK has been sampled by the<br />
TWIS to be HIGH (see Figure 28-9). The NAK indicates that the transfer is finished, and<br />
the TWIS will wait for a STOP or REPEATED START. If an ACK bit is received, the<br />
SR.NAK bit remains LOW. The ACK indicates that more data should be transmitted,<br />
jump to step 2. At the end of the ACK/NAK clock cycle, the Byte Transfer Finished<br />
(SR.BTF) bit is set. Note that this is done two CLK_TWIS cycles after TWCK has been<br />
sampled by the TWIS to be LOW (see Figure 28-9). Also note that in the event that<br />
SR.NAK bit is set, it must not be cleared before the SR.BTF bit is set to ensure correct<br />
TWIS behavior.<br />
6. If STOP is received, SR.TCOMP and SR.STO will be set.<br />
7. If REPEATED START is received, SR.REP will be set.<br />
The TWI transfers require the receiver to acknowledge each received data byte. During the<br />
acknowledge clock pulse (9th pulse), the slave releases the data line (HIGH), enabling the master<br />
to pull it down in order to generate the acknowledge. The slave polls the data line during this<br />
clock pulse and sets the NAK bit in SR if the master does not acknowledge the data byte. A NAK<br />
means that the master does not wish to receive additional data bytes. As with the other status<br />
bits, an interrupt can be generated if enabled in the Interrupt Enable Register (IER).<br />
SR.TXRDY is used as Transmit Ready for the Peripheral DMA Controller transmit channel.<br />
The end of the complete transfer is marked by the SR.TCOMP bit changing from zero to one.<br />
See Figure 28-7 and Figure 28-8.<br />
Figure 28-7. Slave Transmitter with One Data Byte<br />
TWD S DADR R A DATA N P<br />
TCOMP<br />
TXRDY<br />
Write THR (DATA) STOP sent by master<br />
NBYTES set to 1<br />
739
Figure 28-8. Slave Transmitter with Multiple Data Bytes<br />
TWD<br />
TCOMP<br />
TXRDY<br />
Figure 28-9. Timing Relationship between TWCK, SR.NAK, and SR.BTF<br />
32117D–AVR-01/12<br />
<strong>AT32UC3C</strong><br />
S DADR R A DATA n A<br />
DATA n+5 A DATA n+m N P<br />
Write THR (Data n)<br />
NBYTES set to m<br />
TWD<br />
TWCK<br />
SR.NAK<br />
SR.BTF<br />
Write THR (Data n+1) Write THR (Data n+m)<br />
Last data sent<br />
DATA (LSB) N P<br />
t1: (CLK_TWIS period) x 2<br />
28.8.4 Slave Receiver Mode<br />
If the TWIS matches an address in which the R/W bit in the TWI address phase transfer is<br />
cleared, it will enter slave receiver mode and clear SR.TRA (note that SR.TRA is cleared one<br />
CLK_TWIS cycle after the relevant address match bit in the same register is set).<br />
After the address phase, the following is repeated:<br />
t1<br />
STOP sent by master<br />
1. If SMBus mode and PEC is used, NBYTES must be set up with the number of bytes to<br />
receive. This is necessary in order to know which of the received bytes is the PEC byte.<br />
NBYTES can also be used to count the number of bytes received if using DMA.<br />
2. Receive a byte. Set SR.BTF when done.<br />
3. Update NBYTES. If CR.CUP is written to one, NBYTES is incremented, otherwise<br />
NBYTES is decremented. NBYTES is usually configured to count downwards if PEC is<br />
used.<br />
4. After a data byte has been received, the slave transmits an ACK or NAK bit. For ordinary<br />
data bytes, the CR.ACK field controls if an ACK or NAK should be returned. If PEC<br />
is enabled and the last byte received was a PEC byte (indicated by NBYTES equal to<br />
zero), The TWIS will automatically return an ACK if the PEC value was correct, otherwise<br />
a NAK will be returned.<br />
5. If STOP is received, SR.TCOMP will be set.<br />
6. If REPEATED START is received, SR.REP will be set.<br />
The TWI transfers require the receiver to acknowledge each received data byte. During the<br />
acknowledge clock pulse (9th pulse), the master releases the data line (HIGH), enabling the<br />
t1<br />
740
32117D–AVR-01/12<br />
<strong>AT32UC3C</strong><br />
slave to pull it down in order to generate the acknowledge. The master polls the data line during<br />
this clock pulse.<br />
The SR.RXRDY bit indicates that a data byte is available in the RHR. The RXRDY bit is also<br />
used as Receive Ready for the Peripheral DMA Controller receive channel.<br />
Figure 28-10. Slave Receiver with One Data Byte<br />
Figure 28-11. Slave Receiver with Multiple Data Bytes<br />
TWD<br />
TCOMP<br />
RXRDY<br />
TWD<br />
TCOMP<br />
RXRDY<br />
S DADR W A DATA A P<br />
Read RHR<br />
S DADR W A DATA n A DATA (n+1) A DATA (n+m)-1 A DATA (n+m) A P<br />
Read RHR<br />
DATA n<br />
Read RHR<br />
DATA (n+1)<br />
Read RHR<br />
DAT A (n+m)-1<br />
Read RHR<br />
DATA (n+m)<br />
28.8.5 Interactive ACKing Received Data Bytes<br />
When implementing a register interface over TWI, it may sometimes be necessary or just useful<br />
to report reads and writes to invalid register addresses by sending a NAK to the host. To be able<br />
to do this, one must first receive the register address from the TWI bus, and then tell the TWIS<br />
whether to ACK or NAK it. In normal operation of the TWIS, this is not possible because the controller<br />
will automatically ACK the byte at about the same time as the RXRDY bit changes from<br />
zero to one. Writing a one to the Stretch on Data Byte Received bit (CR.SODR) will stretch the<br />
clock allowing the user to update CR.ACK bit before returning the desired value. After the last bit<br />
in the data byte is received, the TWI bus clock is stretched, the received data byte is transferred<br />
to the RHR register, and SR.BTF is set. At this time, the user can examine the received byte and<br />
write the desired ACK or NACK value to CR.ACK. When the user clears SR.BTF, the desired<br />
ACK value is transferred on the TWI bus. This makes it possible to look at the byte received,<br />
determine if it is valid, and then decide to ACK or NAK it.<br />
28.8.6 Using the Peripheral DMA Controller<br />
The use of the Peripheral DMA Controller significantly reduces the CPU load. The user can set<br />
up ring buffers for the Peripheral DMA Controller, containing data to transmit or free buffer space<br />
to place received data. By initializing NBYTES to zero before a transfer, and writing a one to<br />
CR.CUP, NBYTES is incremented by one each time a data has been transmitted or received.<br />
This allows the user to detect how much data was actually transferred by the DMA system.<br />
741
32117D–AVR-01/12<br />
To assure correct behavior, respect the following programming sequences:<br />
28.8.6.1 Data Transmit with the Peripheral DMA Controller<br />
1. Initialize the transmit Peripheral DMA Controller (memory pointers, size, etc.).<br />
2. Configure the TWIS (ADR, NBYTES, etc.).<br />
3. Start the transfer by enabling the Peripheral DMA Controller to transmit.<br />
4. Wait for the Peripheral DMA Controller end-of-transmit flag.<br />
5. Disable the Peripheral DMA Controller.<br />
<strong>AT32UC3C</strong><br />
28.8.6.2 Data Receive with the Peripheral DMA Controller<br />
1. Initialize the receive Peripheral DMA Controller (memory pointers, size - 1, etc.).<br />
2. Configure the TWIS (ADR, NBYTES, etc.).<br />
3. Start the transfer by enabling the Peripheral DMA Controller to receive.<br />
4. Wait for the Peripheral DMA Controller end-of-receive flag.<br />
5. Disable the Peripheral DMA Controller.<br />
28.8.7 SMBus Mode<br />
SMBus mode is enabled by writing a one to the SMBus Mode Enable (SMEN) bit in CR. SMBus<br />
mode operation is similar to I²C operation with the following exceptions:<br />
Only 7-bit addressing can be used.<br />
The SMBus standard describes a set of timeout values to ensure progress and throughput on<br />
the bus. These timeout values must be written to TR.<br />
Transmissions can optionally include a CRC byte, called Packet Error Check (PEC).<br />
A dedicated bus line, SMBALERT, allows a slave to get a master’s attention.<br />
A set of addresses have been reserved for protocol handling, such as Alert Response<br />
Address (ARA) and Host Header (HH) Address. Address matching on these addresses can<br />
be enabled by configuring CR appropriately.<br />
28.8.7.1 Packet Error Checking (PEC)<br />
Each SMBus transfer can optionally end with a CRC byte, called the PEC byte. Writing a one to<br />
the Packet Error Checking Enable (PECEN) bit in CR enables automatic PEC handling in the<br />
current transfer. The PEC generator is always updated on every bit transmitted or received, so<br />
that PEC handling on following linked transfers will be correct.<br />
In slave receiver mode, the master calculates a PEC value and transmits it to the slave after all<br />
data bytes have been transmitted. Upon reception of this PEC byte, the slave will compare it to<br />
the PEC value it has computed itself. If the values match, the data was received correctly, and<br />
the slave will return an ACK to the master. If the PEC values differ, data was corrupted, and the<br />
slave will return a NAK value. The SR.SMBPECERR bit is set automatically if a PEC error<br />
occurred.<br />
In slave transmitter mode, the slave calculates a PEC value and transmits it to the master after<br />
all data bytes have been transmitted. Upon reception of this PEC byte, the master will compare<br />
it to the PEC value it has computed itself. If the values match, the data was received correctly. If<br />
the PEC values differ, data was corrupted, and the master must take appropriate action.<br />
The PEC byte is automatically inserted in a slave transmitter transmission if PEC enabled when<br />
NBYTES reaches zero. The PEC byte is identified in a slave receiver transmission if PEC<br />
742
28.8.7.2 Timeouts<br />
28.8.7.3 SMBALERT<br />
32117D–AVR-01/12<br />
<strong>AT32UC3C</strong><br />
enabled when NBYTES reaches zero. NBYTES must therefore be set to the total number of<br />
data bytes in the transmission, including the PEC byte.<br />
The Timing Register (TR) configures the SMBus timeout values. If a timeout occurs, the slave<br />
will leave the bus. The SR.SMBTOUT bit is also set.<br />
A slave can get the master’s attention by pulling the SMBALERT line low. This is done by writing<br />
a one to the SMBus Alert (SMBALERT) bit in CR. This will also enable address match on the<br />
Alert Response Address (ARA).<br />
28.8.8 Wakeup from Sleep Modes by TWI Address Match<br />
The TWIS is able to wake the device up from a sleep mode upon an address match, including<br />
sleep modes where CLK_TWIS is stopped. After detecting the START condition on the bus, The<br />
TWIS will stretch TWCK until CLK_TWIS has started. The time required for starting CLK_TWIS<br />
depends on which sleep mode the device is in. After CLK_TWIS has started, the TWIS releases<br />
its TWCK stretching and receives one byte of data on the bus. At this time, only a limited part of<br />
the device, including the TWIS, receives a clock, thus saving power. The TWIS goes on to<br />
receive the slave address. If the address phase causes a TWIS address match, the entire<br />
device is wakened and normal TWIS address matching actions are performed. Normal TWI<br />
transfer then follows. If the TWIS is not addressed, CLK_TWIS is automatically stopped and the<br />
device returns to its original sleep mode.<br />
28.8.9 Identifying Bus Events<br />
This chapter lists the different bus events, and how these affects the bits in the TWIS registers.<br />
This is intended to help writing drivers for the TWIS.<br />
Table 28-5. Bus Events<br />
Event Effect<br />
Slave transmitter has sent a<br />
data byte<br />
Slave receiver has received<br />
a data byte<br />
Start+Sadr on bus, but<br />
address is to another slave<br />
Start+Sadr on bus, current<br />
slave is addressed, but<br />
address match enable bit in<br />
CR is not set<br />
Start+Sadr on bus, current<br />
slave is addressed,<br />
corresponding address<br />
match enable bit in CR set<br />
SR.THR is cleared.<br />
SR.BTF is set.<br />
The value of the ACK bit sent immediately after the data byte is given<br />
by CR.ACK.<br />
SR.RHR is set.<br />
SR.BTF is set.<br />
SR.NAK updated according to value of ACK bit received from master.<br />
None.<br />
None.<br />
Correct address match bit in SR is set.<br />
SR.TRA updated according to transfer direction (updating is done one<br />
CLK_TWIS cycle after address match bit is set)<br />
Slave enters appropriate transfer direction mode and data transfer<br />
can commence.<br />
743
32117D–AVR-01/12<br />
Table 28-5. Bus Events<br />
Event Effect<br />
Start+Sadr on bus, current<br />
slave is addressed,<br />
corresponding address<br />
match enable bit in CR set,<br />
SR.STREN and SR.SOAM<br />
are set.<br />
Repeated Start received<br />
after being addressed<br />
Stop received after being<br />
addressed<br />
Start, Repeated Start, or<br />
Stop received in illegal<br />
position on bus<br />
Data is to be received in<br />
slave receiver mode,<br />
SR.STREN is set, and RHR<br />
is full<br />
Data is to be transmitted in<br />
slave receiver mode,<br />
SR.STREN is set, and THR<br />
is empty<br />
Data is to be received in<br />
slave receiver mode,<br />
SR.STREN is cleared, and<br />
RHR is full<br />
Data is to be transmitted in<br />
slave receiver mode,<br />
SR.STREN is cleared, and<br />
THR is empty<br />
SMBus timeout received<br />
Slave transmitter in SMBus<br />
PEC mode has transmitted<br />
a PEC byte, that was not<br />
identical to the PEC<br />
calculated by the master<br />
receiver.<br />
Slave receiver discovers<br />
SMBus PEC Error<br />
<strong>AT32UC3C</strong><br />
Correct address match bit in SR is set.<br />
SR.TRA updated according to transfer direction (updating is done one<br />
CLK_TWIS cycle after address match bit is set).<br />
Slave stretches TWCK immediately after transmitting the address<br />
ACK bit. TWCK remains stretched until all address match bits in SR<br />
have been cleared.<br />
Slave enters appropriate transfer direction mode and data transfer<br />
can commence.<br />
SR.REP set.<br />
SR.TCOMP unchanged.<br />
SR.STO set.<br />
SR.TCOMP set.<br />
SR.BUSERR set.<br />
SR.STO and SR.TCOMP may or may not be set depending on the<br />
exact position of an illegal stop.<br />
TWCK is stretched until RHR has been read.<br />
TWCK is stretched until THR has been written.<br />
TWCK is not stretched, read data is discarded.<br />
SR.ORUN is set.<br />
TWCK is not stretched, previous contents of THR is written to bus.<br />
SR.URUN is set.<br />
SR.SMBTOUT is set.<br />
TWCK and TWD are immediately released.<br />
Master receiver will transmit a NAK as usual after the last byte of a<br />
master receiver transfer.<br />
Master receiver will retry the transfer at a later time.<br />
SR.SMBPECERR is set.<br />
NAK returned after the data byte.<br />
744
28.9 User Interface<br />
Table 28-6. TWIS Register Memory Map<br />
Offset Register Register Name Access Reset<br />
32117D–AVR-01/12<br />
<strong>AT32UC3C</strong><br />
0x00 Control Register CR Read/Write 0x00000000<br />
0x04 NBYTES Register NBYTES Read/Write 0x00000000<br />
0x08 Timing Register TR Read/Write 0x00000000<br />
0x0C Receive Holding Register RHR Read-only 0x00000000<br />
0x10 Transmit Holding Register THR Write-only 0x00000000<br />
0x14 Packet Error Check Register PECR Read-only 0x00000000<br />
0x18 Status Register SR Read-only 0x00000002<br />
0x1C Interrupt Enable Register IER Write-only 0x00000000<br />
0x20 Interrupt Disable Register IDR Write-only 0x00000000<br />
0x24 Interrupt Mask Register IMR Read-only 0x00000000<br />
0x28 Status Clear Register SCR Write-only 0x00000000<br />
0x2C Parameter Register PR Read-only - (1)<br />
0x30 Version Register VR Read-only - (1)<br />
Note: 1. The reset values for these registers are device specific. Please refer to the Module Configuration section at the end of this<br />
chapter.<br />
745
28.9.1 Control Register<br />
Name: CR<br />
Access Type: Read/Write<br />
Offset: 0x00<br />
Reset Value: 0x00000000<br />
32117D–AVR-01/12<br />
<strong>AT32UC3C</strong><br />
31 30 29 28 27 26 25 24<br />
- - - - - TENBIT ADR[9:8]<br />
23 22 21 20 19 18 17 16<br />
ADR[7:0]<br />
15 14 13 12 11 10 9 8<br />
SODR SOAM CUP ACK PECEN SMHH SMDA SMBALERT<br />
7 6 5 4 3 2 1 0<br />
SWRST - - STREN GCMATCH SMATCH SMEN SEN<br />
TENBIT: Ten Bit Address Match<br />
0: Disables Ten Bit Address Match.<br />
1: Enables Ten Bit Address Match.<br />
ADR: Slave Address<br />
Slave address used in slave address match. Bits 9:0 are used if in 10-bit mode, bits 6:0 otherwise.<br />
SODR: Stretch Clock on Data Byte Reception<br />
0: Does not stretch bus clock immediately before ACKing a received data byte.<br />
1: Stretches bus clock immediately before ACKing a received data byte.<br />
SOAM: Stretch Clock on Address Match<br />
0: Does not stretch bus clock after address match.<br />
1: Stretches bus clock after address match.<br />
CUP: NBYTES Count Up<br />
0: Causes NBYTES to count down (decrement) per byte transferred.<br />
1: Causes NBYTES to count up (increment) per byte transferred.<br />
ACK: Slave Receiver Data Phase ACK Value<br />
0: Causes a low value to be returned in the ACK cycle of the data phase in slave receiver mode.<br />
1: Causes a high value to be returned in the ACK cycle of the data phase in slave receiver mode.<br />
PECEN: Packet Error Checking Enable<br />
0: Disables SMBus PEC (CRC) generation and check.<br />
1: Enables SMBus PEC (CRC) generation and check.<br />
SMHH: SMBus Host Header<br />
0: Causes the TWIS not to acknowledge the SMBus Host Header.<br />
1: Causes the TWIS to acknowledge the SMBus Host Header.<br />
SMDA: SMBus Default Address<br />
0: Causes the TWIS not to acknowledge the SMBus Default Address.<br />
1: Causes the TWIS to acknowledge the SMBus Default Address.<br />
SMBALERT: SMBus Alert<br />
0: Causes the TWIS to release the SMBALERT line and not to acknowledge the SMBus Alert Response Address (ARA).<br />
1: Causes the TWIS to pull down the SMBALERT line and to acknowledge the SMBus Alert Response Address (ARA).<br />
746
SWRST: Software Reset<br />
This bit will always read as 0.<br />
Writing a zero to this bit has no effect.<br />
Writing a one to this bit resets the TWIS.<br />
STREN: Clock Stretch Enable<br />
0: Disables clock stretching if RHR/THR buffer full/empty. May cause over/underrun.<br />
1: Enables clock stretching if RHR/THR buffer full/empty.<br />
GCMATCH: General Call Address Match<br />
0: Causes the TWIS not to acknowledge the General Call Address.<br />
1: Causes the TWIS to acknowledge the General Call Address.<br />
SMATCH: Slave Address Match<br />
0: Causes the TWIS not to acknowledge the Slave Address.<br />
1: Causes the TWIS to acknowledge the Slave Address.<br />
SMEN: SMBus Mode Enable<br />
0: Disables SMBus mode.<br />
1: Enables SMBus mode.<br />
SEN: Slave Enable<br />
0: Disables the slave interface.<br />
1: Enables the slave interface.<br />
32117D–AVR-01/12<br />
<strong>AT32UC3C</strong><br />
747
28.9.2 NBYTES Register<br />
Name: NBYTES<br />
Access Type: Read/Write<br />
Offset: 0x04<br />
Reset Value: 0x00000000<br />
32117D–AVR-01/12<br />
<strong>AT32UC3C</strong><br />
31 30 29 28 27 26 25 24<br />
- - - - - - - -<br />
23 22 21 20 19 18 17 16<br />
- - - - - - - -<br />
15 14 13 12 11 10 9 8<br />
- - - - - - - -<br />
7 6 5 4 3 2 1 0<br />
NBYTES<br />
NBYTES: Number of Bytes to Transfer<br />
Writing to this field updates the NBYTES counter. The field can also be read to learn the progress of the transfer. NBYTES can<br />
be incremented or decremented automatically by hardware.<br />
748
28.9.3 Timing Register<br />
Name: TR<br />
Access Type: Read/Write<br />
Offset: 0x08<br />
Reset Value: 0x00000000<br />
32117D–AVR-01/12<br />
<strong>AT32UC3C</strong><br />
31 30 29 28 27 26 25 24<br />
EXP - - - -<br />
23 22 21 20 19 18 17 16<br />
SUDAT<br />
15 14 13 12 11 10 9 8<br />
TTOUT<br />
7 6 5 4 3 2 1 0<br />
TLOWS<br />
EXP: Clock Prescaler<br />
Used to specify how to prescale the SMBus TLOWS counter. The counter is prescaled according to the following formula:<br />
f PRESCALED<br />
=<br />
2<br />
fCLK_TWIS EXP 1 +<br />
------------------------<br />
( )<br />
SUDAT: Data Setup Cycles<br />
Non-prescaled clock cycles for data setup count. Used to time T SU_DAT. Data is driven SUDAT cycles after TWCK low detected.<br />
This timing is used for timing the ACK/NAK bits, and any data bits driven in slave transmitter mode.<br />
TTOUT: SMBus T TIMEOUT Cycles<br />
Prescaled clock cycles used to time SMBus T TIMEOUT .<br />
TLOWS: SMBus T LOW:SEXT Cycles<br />
Prescaled clock cycles used to time SMBus T LOW:SEXT .<br />
749
28.9.4 Receive Holding Register<br />
Name: RHR<br />
Access Type: Read-only<br />
Offset: 0x0C<br />
Reset Value: 0x00000000<br />
32117D–AVR-01/12<br />
<strong>AT32UC3C</strong><br />
31 30 29 28 27 26 25 24<br />
- - - - - - - -<br />
23 22 21 20 19 18 17 16<br />
- - - - - - - -<br />
15 14 13 12 11 10 9 8<br />
- - - - - - - -<br />
7 6 5 4 3 2 1 0<br />
RXDATA<br />
RXDATA: Received Data Byte<br />
When the RXRDY bit in the Status Register (SR) is one, this field contains a byte received from the TWI bus.<br />
750
28.9.5 Transmit Holding Register<br />
Name: THR<br />
Access Type: Write-only<br />
Offset: 0x10<br />
Reset Value: 0x00000000<br />
32117D–AVR-01/12<br />
<strong>AT32UC3C</strong><br />
31 30 29 28 27 26 25 24<br />
- - - - - - - -<br />
23 22 21 20 19 18 17 16<br />
- - - - - - - -<br />
15 14 13 12 11 10 9 8<br />
- - - - - - - -<br />
7 6 5 4 3 2 1 0<br />
TXDATA: Data Byte to Transmit<br />
Write data to be transferred on the TWI bus here.<br />
TXDATA<br />
751
28.9.6 Packet Error Check Register<br />
Name: PECR<br />
Access Type: Read-only<br />
Offset: 0x14<br />
Reset Value: 0x00000000<br />
32117D–AVR-01/12<br />
<strong>AT32UC3C</strong><br />
31 30 29 28 27 26 25 24<br />
- - - - - - - -<br />
23 22 21 20 19 18 17 16<br />
- - - - - - - -<br />
15 14 13 12 11 10 9 8<br />
- - - - - - - -<br />
7 6 5 4 3 2 1 0<br />
PEC<br />
PEC: Calculated PEC Value<br />
The calculated PEC value. Updated automatically by hardware after each byte has been transferred. Reset by hardware after a<br />
STOP condition. Provided if the user manually wishes to control when the PEC byte is transmitted, or wishes to access the PEC<br />
value for other reasons. In ordinary operation, the PEC handling is done automatically by hardware.<br />
752
28.9.7 Status Register<br />
Name: SR<br />
Access Type: Read-only<br />
Offset: 0x18<br />
Reset Value: 0x000000002<br />
32117D–AVR-01/12<br />
<strong>AT32UC3C</strong><br />
31 30 29 28 27 26 25 24<br />
- - - - - - - -<br />
23 22 21 20 19 18 17 16<br />
BTF REP STO SMBDAM SMBHHM SMBALERTM GCM SAM<br />
15 14 13 12 11 10 9 8<br />
- BUSERR SMBPECERR SMBTOUT - - - NAK<br />
7 6 5 4 3 2 1 0<br />
ORUN URUN TRA - TCOMP SEN TXRDY RXRDY<br />
BTF: Byte Transfer Finished<br />
This bit is cleared when the corresponding bit in SCR is written to one.<br />
This bit is set when byte transfer has completed.<br />
REP: Repeated Start Received<br />
This bit is cleared when the corresponding bit in SCR is written to one.<br />
This bit is set when a REPEATED START condition is received.<br />
STO: Stop Received<br />
This bit is cleared when the corresponding bit in SCR is written to one.<br />
This bit is set when the STOP condition is received.<br />
SMBDAM: SMBus Default Address Match<br />
This bit is cleared when the corresponding bit in SCR is written to one.<br />
This bit is set when the received address matched the SMBus Default Address.<br />
SMBHHM: SMBus Host Header Address Match<br />
This bit is cleared when the corresponding bit in SCR is written to one.<br />
This bit is set when the received address matched the SMBus Host Header Address.<br />
SMBALERTM: SMBus Alert Response Address Match<br />
This bit is cleared when the corresponding bit in SCR is written to one.<br />
This bit is set when the received address matched the SMBus Alert Response Address.<br />
GCM: General Call Match<br />
This bit is cleared when the corresponding bit in SCR is written to one.<br />
This bit is set when the received address matched the General Call Address.<br />
SAM: Slave Address Match<br />
This bit is cleared when the corresponding bit in SCR is written to one.<br />
This bit is set when the received address matched the Slave Address.<br />
BUSERR: Bus Error<br />
This bit is cleared when the corresponding bit in SCR is written to one.<br />
This bit is set when a misplaced START or STOP condition has occurred.<br />
753
SMBPECERR: SMBus PEC Error<br />
This bit is cleared when the corresponding bit in SCR is written to one.<br />
This bit is set when a SMBus PEC error has occurred.<br />
SMBTOUT: SMBus Timeout<br />
This bit is cleared when the corresponding bit in SCR is written to one.<br />
This bit is set when a SMBus timeout has occurred.<br />
NAK: NAK Received<br />
This bit is cleared when the corresponding bit in SCR is written to one.<br />
This bit is set when a NAK was received from the master during slave transmitter operation.<br />
ORUN: Overrun<br />
This bit is cleared when the corresponding bit in SCR is written to one.<br />
This bit is set when an overrun has occurred in slave receiver mode. Can only occur if CR.STREN is zero.<br />
URUN: Underrun<br />
This bit is cleared when the corresponding bit in SCR is written to one.<br />
This bit is set when an underrun has occurred in slave transmitter mode. Can only occur if CR.STREN is zero.<br />
TRA: Transmitter Mode<br />
0: The slave is in slave receiver mode.<br />
1: The slave is in slave transmitter mode.<br />
TCOMP: Transmission Complete<br />
This bit is cleared when the corresponding bit in SCR is written to one.<br />
This bit is set when transmission is complete. Set after receiving a STOP after being addressed.<br />
SEN: Slave Enabled<br />
0: The slave interface is disabled.<br />
1: The slave interface is enabled.<br />
TXRDY: TX Buffer Ready<br />
0: The TX buffer is full and should not be written to.<br />
1: The TX buffer is empty, and can accept new data.<br />
RXRDY: RX Buffer Ready<br />
0: No RX data ready in RHR.<br />
1: RX data is ready to be read from RHR.<br />
32117D–AVR-01/12<br />
<strong>AT32UC3C</strong><br />
754
28.9.8 Interrupt Enable Register<br />
Name: IER<br />
Access Type: Write-only<br />
Offset: 0x1C<br />
Reset Value: 0x00000000<br />
32117D–AVR-01/12<br />
<strong>AT32UC3C</strong><br />
31 30 29 28 27 26 25 24<br />
- - - - - - - -<br />
23 22 21 20 19 18 17 16<br />
BTF REP STO SMBDAM SMBHHM SMBALERTM GCM SAM<br />
15 14 13 12 11 10 9 8<br />
- BUSERR SMBPECERR SMBTOUT - - - NAK<br />
7 6 5 4 3 2 1 0<br />
ORUN URUN - - TCOMP - TXRDY RXRDY<br />
Writing a zero to a bit in this register has no effect.<br />
Writing a one to a bit in this register will write a one to the corresponding bit in IMR.<br />
755
28.9.9 Interrupt Disable Register<br />
Name: IDR<br />
Access Type: Write-only<br />
Offset: 0x20<br />
Reset Value: 0x00000000<br />
32117D–AVR-01/12<br />
<strong>AT32UC3C</strong><br />
31 30 29 28 27 26 25 24<br />
- - - - - - - -<br />
23 22 21 20 19 18 17 16<br />
BTF REP STO SMBDAM SMBHHM SMBALERTM GCM SAM<br />
15 14 13 12 11 10 9 8<br />
- BUSERR SMBPECERR SMBTOUT - - - NAK<br />
7 6 5 4 3 2 1 0<br />
ORUN URUN - - TCOMP - TXRDY RXRDY<br />
Writing a zero to a bit in this register has no effect.<br />
Writing a one to a bit in this register will clear the corresponding bit in IMR.<br />
756
28.9.10 Interrupt Mask Register<br />
Name: IMR<br />
Access Type: Read-only<br />
Offset: 0x24<br />
Reset Value: 0x00000000<br />
32117D–AVR-01/12<br />
<strong>AT32UC3C</strong><br />
31 30 29 28 27 26 25 24<br />
- - - - - - - -<br />
23 22 21 20 19 18 17 16<br />
BTF REP STO SMBDAM SMBHHM SMBALERTM GCM SAM<br />
15 14 13 12 11 10 9 8<br />
- BUSERR SMBPECERR SMBTOUT - - - NAK<br />
7 6 5 4 3 2 1 0<br />
ORUN URUN - - TCOMP - TXRDY RXRDY<br />
0: The corresponding interrupt is disabled.<br />
1: The corresponding interrupt is enabled.<br />
This bit is cleared when the corresponding bit in IDR is written to one.<br />
This bit is set when the corresponding bit in IER is written to one.<br />
757
28.9.11 Status Clear Register<br />
Name: SCR<br />
Access Type: Write-only<br />
Offset: 0x28<br />
Reset Value: 0x00000000<br />
32117D–AVR-01/12<br />
<strong>AT32UC3C</strong><br />
31 30 29 28 27 26 25 24<br />
- - - - - - - -<br />
23 22 21 20 19 18 17 16<br />
BTF REP STO SMBDAM SMBHHM SMBALERTM GCM SAM<br />
15 14 13 12 11 10 9 8<br />
- BUSERR SMBPECERR SMBTOUT - - - NAK<br />
7 6 5 4 3 2 1 0<br />
ORUN URUN - - TCOMP - - -<br />
Writing a zero to a bit in this register has no effect.<br />
Writing a one to a bit in this register will clear the corresponding bit in SR and the corresponding interrupt request.<br />
758
28.9.12 Parameter Register<br />
Name: PR<br />
Access Type: Read-only<br />
Offset: 0x2C<br />
Reset Value: -<br />
32117D–AVR-01/12<br />
<strong>AT32UC3C</strong><br />
31 30 29 28 27 26 25 24<br />
- - - - - - - -<br />
23 22 21 20 19 18 17 16<br />
- - - - - - - -<br />
15 14 13 12 11 10 9 8<br />
- - - - - - - -<br />
7 6 5 4 3 2 1 0<br />
- - - - - - - -<br />
759
28.9.13 Version Register (VR)<br />
Name: VR<br />
Access Type: Read-only<br />
Offset: 0x30<br />
Reset Value: -<br />
32117D–AVR-01/12<br />
<strong>AT32UC3C</strong><br />
31 30 29 28 27 26 25 24<br />
- - - - - - - -<br />
23 22 21 20 19 18 17 16<br />
- - - - VARIANT<br />
15 14 13 12 11 10 9 8<br />
- - - - VERSION [11:8]<br />
7 6 5 4 3 2 1 0<br />
VERSION [7:0]<br />
VARIANT: Variant Number<br />
Reserved. No functionality associated.<br />
VERSION: Version Number<br />
Version number of the module. No functionality associated.<br />
760
32117D–AVR-01/12<br />
<strong>AT32UC3C</strong><br />
28.10 Module Configuration<br />
The specific configuration for each TWIS instance is listed in the following tables. The module<br />
bus clocks listed here are connected to the system bus clocks. Please refer to the Power Manager<br />
chapter for details.<br />
Table 28-7. Module Configuration<br />
Feature TWIM0 TWIM1 TWIM2<br />
SMBus ALERT interface Implemented Implemented Not Implemented<br />
Table 28-8. Module Clock Name<br />
Module Name Clock Name Description<br />
TWIS0 CLK_TWIS0 Peripheral Bus clock from the PBA clock domain<br />
TWIS1 CLK_TWIS1 Peripheral Bus clock from the PBA clock domain<br />
TWIS2 CLK_TWIS2 Peripheral Bus clock from the PBC clock domain<br />
Table 28-9. Register Reset Values<br />
Register Reset Value<br />
VR 0x00000120<br />
PR 0x00000000<br />
761
29. CAN Interface (CANIF)<br />
29.1 Features<br />
29.2 Overview<br />
32117D–AVR-01/12<br />
Version 1.1.0.4<br />
Supports CAN 2.0A and 2.0B protocol specifications<br />
1 Mb/s maximum bitrate<br />
2 CAN channels<br />
16 Message Objects per CAN channel<br />
1 identifier (11 or 29 bits), 1 identifier mask and 8 bytes buffer per MOb<br />
Single shot and automatic transmit/receive modes<br />
Overrun mode<br />
Loop-back mode for bit rate detection<br />
Listen mode for bus monitoring<br />
System sleep mode support with wake-up on bus activity<br />
Programmable CAN clock source<br />
<strong>AT32UC3C</strong><br />
Control Area Network (CAN) is a serial communication protocol with high level of security. Each<br />
node is master on the bus but only one at a time is able to send a message.<br />
CANIF is a 32-bit interface for CAN channels. Each channel provides the following services:<br />
Message filtering<br />
Message and status handling<br />
Fault confinement<br />
Error detection and signalling<br />
Message validation and acknowledgement<br />
Bus arbitration<br />
Message framing<br />
Transfer rate and timing<br />
These services, with the exception of message filtering and message handling, are described in<br />
the CAN protocol, please refer to Bosch - CAN Specification for more details.<br />
762
29.3 Block Diagram<br />
29.4 I/O Lines Description<br />
32117D–AVR-01/12<br />
Figure 29-1. CANIF Block Diagram<br />
<strong>AT32UC3C</strong><br />
29.5 Product Dependencies<br />
In order to use this module, other parts of the system must be configured correctly, as described<br />
below.<br />
29.5.1 I/O Lines<br />
CANIF pins are multiplexed with other peripherals. User must first program the I/O Controller to<br />
give control of the pins to the CANIF.<br />
29.5.2 Power Management<br />
If the CPU enters a sleep mode that disables clocks used by CANIF, it will stop functioning and<br />
resume operation after the system wakes up from sleep mode.<br />
29.5.3 Clocks<br />
29.5.4 Memory<br />
RAM<br />
HSB<br />
PB<br />
Table 29-1. I/O Lines Description<br />
Msg Handling<br />
& Filtering<br />
Pin Name Pin Description Type<br />
CANIF<br />
TXLINE(n) Transmission line of channel n Output<br />
RXLINE(n) Reception line of channel n Input<br />
Protocol<br />
Engine<br />
TXLINE(0)<br />
RXLINE(0)<br />
.<br />
.<br />
.<br />
CANIF is connected to both the HSB and the PB, and therefore uses a HSB clock<br />
(CLK_CANIF_HSB) and a PB clock (CLK_CANIF_PB). These clocks are generated by the<br />
Power Manager. These clocks are enabled at reset, and can be disabled in the Power Manager.<br />
CANIF uses a GCLK as clock source (CAN clock) for the CAN bus communication<br />
(GCLK_CANIF). User must make sure this clock is running and frequency is correct before any<br />
operation.<br />
Messages can be stored in CPU or HSB RAM, so user must allocate RAM space for CAN<br />
messages.<br />
CAN<br />
clock<br />
TXLINE(n)<br />
RXLINE(n)<br />
763
29.5.5 Interrupts<br />
32117D–AVR-01/12<br />
<strong>AT32UC3C</strong><br />
CANIF interrupt request line is connected to the interrupt controller. Using the CANIF interrupt<br />
requires the interrupt controller to be programmed first.<br />
29.5.6 Debug Operation<br />
All CAN channels are disabled when the CPU enters Debug mode. Communication in progress<br />
is not stopped. Please refer to the On-Chip Debug chapter in the AVR32UC Technical Reference<br />
Manual, and the OCD Module Configuration section, for details.<br />
29.6 Functional Description<br />
29.6.1 Channel Configuration<br />
Channel configuration is done via the Configuration Register (CANCFG). This register is not<br />
write accessible once the channels have been enabled.<br />
29.6.1.1 Bit timing<br />
This section refers to chapter 8 (Bit timing requirements) of the CAN Specification.<br />
The CAN bit rate is defined by the nominal bit time. Nominal bit time is divided into 4 time<br />
segments.<br />
Figure 29-2. Partition of the Bit Time<br />
The duration of each time segment is divided into time quanta (TQ). The total number of TQ in a<br />
bit time must be in the range [8..25].<br />
The Time Quantum is a fixed unit of time derived from the GCLK_CANIF clock period:<br />
TQ = Prescaler x PGCLK_CANIF = (CANCFG.PRES+1) x PGCLK_CANIF<br />
Re-synchronization may lengthen or shorten the bit time, the upper bound is given by Synchronization<br />
Jump Width field in the Configuration Register (CANCFG.SJW).<br />
The value of all previous parameters are defined in CANCFG register.<br />
Table 29-2. CAN Parameter Settings<br />
Nominal bit time<br />
SYNC_SEG PROP_SEG PHASE_SEG1 PHASE_SEG2<br />
Parameter Range CANCFG field<br />
SYNC_SEG 1 -<br />
PROP_SEG [1..8]TQ PRS + 1<br />
PHASE_SEG1 [1..8]TQ PHS1 + 1<br />
Sample Point<br />
764
32117D–AVR-01/12<br />
Table 29-2. CAN Parameter Settings<br />
Parameter Range CANCFG field<br />
PHASE_SEG2 [1..8]TQ PHS2 + 1<br />
Prescaler [2..32] PRES + 1<br />
Sync Jump Width [1..4] SJW + 1<br />
The bit duration is given by the formula:<br />
Tbit = (PRS + PHS1 + PHS2 + 4) x (PRES + 1) x PGCLK_CANIF<br />
Note: PRES should not be set to 0, therefore CAN clock is at least divided by 2.<br />
<strong>AT32UC3C</strong><br />
29.6.1.2 Sampling method<br />
Bits are sampled between PHASE_SEG1 and PHASE_SEG2. By writing the Sampling Method<br />
bit (CANCFG.SM) to one, three samples are taken and a majority vote is performed.<br />
Figure 29-3. Sampling by Majority Voting<br />
CAN clock<br />
Bit<br />
Samples<br />
PHASE_SEG1 PHASE_SEG2<br />
S1 S2 SP<br />
Majority voting must not be used when the Prescaler field (CANCFG.PRES) is equal to zero.<br />
29.6.1.3 Operating modes<br />
CANIF has three operating modes, selectable by the Channel Mode field (CANCFG.CMODE):<br />
– Normal mode (CANCFG.CMODE=00)<br />
Default mode, TX and RX lines are connected to the transceiver. This mode is used<br />
to communicate with other nodes on the bus.<br />
– Listening mode (CANCFG.CMODE=01)<br />
The TX line is disconnected from the transceiver. The CAN channel cannot send any<br />
message nor acknowledge when a message has been received. The channel is in<br />
Error Passive mode and Transmit/Receive Error Counters (TEC/REC) are frozen.<br />
This mode is used to listen to CAN bus.<br />
– Loop back mode (CANCFG.CMODE=10)<br />
The TX line is internally connected to the RX line and disconnected from the<br />
transceiver. The CAN channel can only send messages or acknowledges to itself.<br />
The channel is in Error Passive mode and TEC/REC are frozen. This mode is used<br />
to detect the bit rate of the CAN bus by successive configuration of bit timing.<br />
29.6.1.4 Overrun mode<br />
When Overrun Mode is disabled, the MOb is disabled after successfully receiving a message.<br />
This prevents overwriting the received message if a second message is received. Overrun Mode<br />
is disabled by writing a zero to CANCFG.OVRM. Overrun Mode is disabled by default.<br />
765
32117D–AVR-01/12<br />
<strong>AT32UC3C</strong><br />
When Overrun Mode is enabled, the MOb is not disabled after a successful reception. Overrun<br />
Mode is enabled by writing a one to CANCFG.OVRM. The Overwrite bit in the MOb Status Register<br />
(MObSR.OVW) is set if a previously received message has been overwritten.<br />
The mode configured by CANCFG.OVRM is used by all MObs configured for reception.<br />
29.6.1.5 Memory pointer<br />
Each channel uses a section of RAM for storing messages. User must allocate RAM space for<br />
the channels and store the base address of this space into the Channel RAM Base Address<br />
Register (CANRAMB). Four words per MOb in use must be allocated.<br />
29.6.2 Channel Handling<br />
29.6.2.1 Initialization<br />
Channels operate independently so the allocated memory spaces do not need to be consecutive.<br />
Make sure that the memory spaces do not overlap.<br />
CAN channels are initialized by writing a one to the Initialization bit in the Control Register<br />
(CANCTRL.INIT).<br />
Initialization resets all internal state machines and clears all user interface registers except CAN-<br />
RAMB, CANCFG and CANCTRL.INIT.<br />
CANCTRL.INIT should not be cleared until the channel has been disabled. The channel is disabled<br />
by writing the Channel Enable bit (CANCTRL.CEN) to zero. When the Channel Enable<br />
status bit (CANSR.CEN) is zero, the channel has been disabled and CANCTRL.INIT can be<br />
written to zero. Thereafter the channel can be restarted by writing a one to CANCTRL.CEN. See<br />
Figure 29-4 for details.<br />
It is not possible to write to other CANCTRL bits when CANCTRL.INIT is one. User must write a<br />
zero to CANCTRL.INIT before writing a new value to CANCTRL.<br />
Figure 29-4. Initialization Sequence<br />
CANCTRL.INIT<br />
CANCTRL.CEN<br />
CANSR.CES<br />
init. request<br />
(user write)<br />
Note: Initialization requires all clocks to be running.<br />
release init.<br />
(user write)<br />
restart<br />
(user write)<br />
29.6.2.2 Enabling / Disabling<br />
A channel is enabled and ready to communicate on the bus when it has detected a bus idle condition<br />
(i.e. 11 consecutive recessive bits).<br />
The channel is enabled by writing a one to CANCTRL.CEN and disabled by writing a zero to this<br />
bit. The enable status of channel can be read in CANSR.CES bit.<br />
766
32117D–AVR-01/12<br />
<strong>AT32UC3C</strong><br />
The channel mode is not changed when the channel is disabled, i.e. the Fault Confinement Register<br />
(CANFC) is not cleared. Therefore, if the channel was in error passive mode before being<br />
disabled, it stays in error passive mode when re-enabled.<br />
Figure 29-5. Enable and Disable Sequences<br />
29.6.2.3 Overload frames<br />
The CAN protocol allows nodes to send overload frames to provide extra delay between two<br />
messages.<br />
User can at any time request to send overload frames by writing the Overload Request bit (CAN-<br />
CTRL.OVRQ) to one. A single overload frame will then be sent at the end of the next message.<br />
When transission of the overload frame starts, CANSR.OVS is set and CANCTRL.OVRQ is<br />
cleared. At this time, user can write CANCTRL.OVRQ to one again to send a second overload<br />
frame at the end of the first one. The CAN protocol specifies that maximum two overload frames<br />
can be sent.<br />
Figure 29-6. Overload Frame Request<br />
CAN bus<br />
CANSR.OVS<br />
CANCTRL.OVRQ<br />
CAN bus data frame bus idle data frame<br />
CANCTRL.CEN<br />
CANSR.CES<br />
enable request<br />
(user write)<br />
disable request<br />
(user write)<br />
data or remote frame overload frame 1 overload frame 2<br />
user write user write<br />
data or remote frame<br />
29.6.2.4 Errors and fault confinement<br />
This section refers to chapter 6 (Error handling) and chapter 7 (Fault confinement) of the CAN<br />
Specification.<br />
There are 5 different error types which are not mutually exclusive. Error status can be read in the<br />
Interrupt Status Register (CANISR). Error status bits are set by hardware and can only be<br />
cleared by user.<br />
When the channel enters bus off state, the Bus Off Status bit (CANISR.BOFF) is set. In this<br />
state the channel can no longer communicate on the bus. The channel can leave bus off state if<br />
it detects 128 occurrences of 11 consecutive recessive bits on the bus.<br />
The Last Selected MOb Status field (CANISR.LSMOB) identifies the MOb that was selected<br />
when the error occurred. For some error types, a MOb has not been selected yet when the error<br />
occurs. In this case, CANISR.LSMOB returns NONE.<br />
767
32117D–AVR-01/12<br />
<strong>AT32UC3C</strong><br />
According to the CAN specification, a channel can be in error active, error passive or bus off<br />
state. The bus state can be read in the CANFC.EMODE field:<br />
This state depends on both transmit and receive counters value (TEC/REC), also available in<br />
the CANFC register (see CAN specification for more details).<br />
29.6.2.5 Wake-up mode<br />
In this mode the CAN channel is a wake-up source for the CPU. Detection of a falling edge on<br />
the CAN bus is interpreted as the start of frame (SOF) bit of the wake-up frame and will wake the<br />
CPU.<br />
29.6.3 Message Handling<br />
Table 29-3. Bus State Coding<br />
EMODE State<br />
0 error active state<br />
1 error passive state<br />
2 or 3 bus off state<br />
In order to use this mode, execute the following steps:<br />
– Disable CAN channel by writing CANCTRL.CEN to zero<br />
– Wait for channel disabled (CANSR.CES is cleared)<br />
– Enable wake-up mode by writing CANCTRL.WKEN to one<br />
– Optionally mask wake-up interrupt source by writing CANIMR.WKUPIM<br />
– Enter sleep mode, stopping PB and CAN clocks<br />
–Sleep<br />
– Wake-up frame is detected, CANISR.WKUP is set and CPU is woken-up<br />
– Clear CANISR.WKUP by writing it to zero<br />
– Disable wake-up mode and enable CAN channel<br />
Note 1: when channel is disabled PB registers are not cleared, user can resume current application<br />
by enabling channel again.<br />
Note 2: wake-up frame cannot be received. Moreover next frames cannot be received until CPU<br />
is woken-up. Wake-up time depends on sleep modes (see sleep modes section).<br />
29.6.3.1 Message object structure<br />
Message Objects (MOb) are message descriptors, used to store and handle CAN frames. User<br />
configures and gets status of MObs via user interface registers and writing and reading frames<br />
into allocated RAM space (Section 29.6.1.5).<br />
MObs are independent and are allocated to one channel.<br />
768
32117D–AVR-01/12<br />
Figure 29-7. Message Object Structure<br />
Where:<br />
Registers<br />
(PB)<br />
RAM<br />
(HSB)<br />
<strong>AT32UC3C</strong><br />
RTR is the Remote Transmission Request, 0 means data frame and 1 remote frame<br />
IDE is the Identifier Extension Bit, 0 means standard format and 1 means extended format<br />
ID is the CAN identifier of message (11 bits in standard format and 29 bits in extended<br />
format)<br />
RTRM is the RTR bit Mask<br />
IDEM is the IDE bit Mask<br />
IDM are the ID bits Mask<br />
The length of the message (DLC) is stored in the MOb Control Register (MOBCTRL).<br />
The data stored in RAM should have the following format:<br />
Figure 29-8. Identifier Tag (IDT)<br />
MOb(i)<br />
CONTROL<br />
(6 bits)<br />
STATUS<br />
(4 bits)<br />
RTR + IDE + ID<br />
(31 bits)<br />
RTRM + IDEM + IDM<br />
(31 bits)<br />
DATA BYTES<br />
(64 bits)<br />
31 30 29 28 11 10<br />
0<br />
- RTR IDE -<br />
31 30 29 28 0<br />
- RTR IDE ID (29 bits)<br />
ID (11 bits)<br />
MOBCTRL<br />
MOBSCR/<br />
MOBSR<br />
IDT<br />
IDM<br />
Data[31:0]<br />
Data[63:32]<br />
Standard format<br />
Extended format<br />
769
32117D–AVR-01/12<br />
Figure 29-9. Identifier Mask (IDM)<br />
Figure 29-10. Data Fields (64 bits)<br />
<strong>AT32UC3C</strong><br />
29.6.3.2 Transmission<br />
Once a message has been written into RAM at the address corresponding to the selected MOb,<br />
user controls transmission through the MOBCTRL register:<br />
29.6.3.3 Reception<br />
31 30 29 28 11 10<br />
0<br />
- RTRM IDEM<br />
-<br />
31 30 29 28 0<br />
- RTRM IDEM<br />
IDM (29 bits)<br />
IDM (11 bits)<br />
31 24 23 16 15 8 7 0<br />
DB3 DB2 DB1 DB0<br />
DB7 DB6 DB5 DB4<br />
Standard format<br />
Extended format<br />
DLC[3:0] field: Data length code i.e. the number of byte to send, from 0 to 8<br />
DIR bit: MOb direction, 1 stands for transmission<br />
Once MOb is enabled (by writing to MOBER), transmission starts as soon as bus idle is detected<br />
on the CAN bus. User can check if channel is sending a frame by reading CANSR.TS bit.<br />
At the end of the successful transmission bit MOBESR.MENn is cleared and MOBSR.TXOK is<br />
set. To acknowledge interrupt and to free the MOb user must clear this status bit by writing a one<br />
to the associated bit in MOb Status Clear Register (MOBSCR).<br />
CAN errors detected during transmission are reported in CANISR. Message will not be transmitted<br />
but the MOb remains enabled. The message will be automatically re-transmitted until<br />
successfully transmitted.<br />
Several MObs can be enabled/disabled in one operation by writing to the MOBER/MOBDR<br />
registers:<br />
MOBER: Each bit correspond to an enable bit for a single MOb. Write 1 to set a bit and 0 to<br />
keep it unchanged.<br />
MOBDR: Each bit correspond to an enable bit for a single MOb. Write 1 to clear a bit and 0 to<br />
keep it unchanged.<br />
If several MObs are enabled, the MOb with the lowest number is transmitted first. This rule is<br />
also used in case of a re-transmission (due to transmission error or contention).<br />
Once the expected message has been written into RAM at the address corresponding to the<br />
selected MOb, user controls reception through the MOBCTRL register:<br />
DLC[3:0] field: Data length code i.e. the number of byte to receive, from 0 to 8<br />
@<br />
@+4<br />
770
32117D–AVR-01/12<br />
<strong>AT32UC3C</strong><br />
DIR bit: MOb direction, 0 stands for reception<br />
Once a MOb is enabled (by writing to MOBER), an incoming frame is compared (Section 29.6.4)<br />
with every MOb enabled for reception in order to select the MOb for storing the frame. User can<br />
check if the channel is receiving a frame by reading the CANSR.RS bit.<br />
At the end of the successful reception, the complete message (ID + RTR + IDE + DATA bits) is<br />
stored in RAM, the MOBESR.MENn bit is cleared and MOBSR.RXOK is set. To acknowledge<br />
any interrupt and to free the MOb user must clear this status bit by writing a one to the associated<br />
bit in MOBSCR. The MOBSR.DLCW bit indicates if the received DLC does not correspond<br />
to MOBCTRL.DLC. Any such status should also be cleared by user.<br />
CAN errors detected during reception are reported in CANISR register. A corrupted message is<br />
not stored to RAM but the selected MOb remains enabled.<br />
User can enable/disable several MObs in one operation, by writing to MOBER/MOBDR registers<br />
(Section 29.6.3.2).<br />
If several MObs are enabled, the MOb priority is given by the filtering order which is from low to<br />
high MOb number.<br />
29.6.3.4 Automatic mode<br />
All MObs are configured in automatic mode if the Automatic Mode (MOBCTRL.AM) bit is set.<br />
The main configurations are:<br />
Remote frame reception - Data frame transmission<br />
MOb configuration: MOBCTRL.AM = 1, MOBCTRL.DIR = 0, IDT.RTR = 1<br />
IDT/IDM can be set to receive any identifier but transmission will be done with identifier<br />
received.<br />
Remote frame transmission - Data frame reception<br />
MOb configuration: MOBCTRL.AM = 1, MOBCTRL.DIR = 1, IDT.RTR = 1<br />
Remote frame is sent with IDT value. Reception uses current IDT value but IDM can be set to<br />
filter data frame.<br />
Other configurations (IDT.RTR = 0) are possible but does not make sense.<br />
Properties:<br />
– MOb handling is identical to single configuration (priority, access,...) but:<br />
– Bits MOBCTRL.AM and IDT.RTR are inverted at the end of first<br />
reception/transmission<br />
– Bit MOBSR.TXOK (or RXOK) is only set at the end of the transmission (or reception)<br />
29.6.4 Message Filtering<br />
The filtering process uses the ID tag (IDT) and ID mask (IDM) values defined in RAM. Comparison<br />
is done on the bits IDENTIFIER, RTR and IDE. Messages can therefore be filtered<br />
according to the identifier value, frame type (remote or data frame) and the format (standard or<br />
extended).<br />
Each received bit is compared with the corresponding bit in the ID tag only if the corresponding<br />
bit in ID mask is set. Otherwise the received bit is considered as don’t care. The filtering result is<br />
true if all comparisons are true.<br />
Examples with 11 bits of identifier ( ‘-‘ means don’t care):<br />
771
32117D–AVR-01/12<br />
ID received: 000.0010.1001 b 000.0010.1001 b<br />
IDT: 000.0010.1010 b 000.0100.1000 b<br />
IDM: 111.1111.0000 b 111.1111.0000 b<br />
Comparison: 111.1111.- - - - b 111.1001.- - - - b<br />
Accepted: Y N<br />
<strong>AT32UC3C</strong><br />
The filtering process scans each MOb enabled and configured for reception, from MOb 0, in<br />
order to find the MOb that matches the conditions. The first MOb to match is selected for storing<br />
the message once received successfully. If no MOb matches, the message is discarded.<br />
29.6.5 Channel Interrupts<br />
There are several sources of interrupts and user can mask each of them. Some sources are<br />
grouped into a single interrupt request line. There are 5 interrupt request lines per channel.<br />
Wake-up interrupt: Wake-up condition detected<br />
Error interrupt: Any CAN error detected during a communication<br />
Bus off interrupt: The CAN protocol engine entered in bus off state<br />
Took interrupt: At least one MOb completed a transmission<br />
Waxed interrupt: At least one MOb completed a reception<br />
The CANIMR and MOBIMR are used for masking interrupts. These registers are read-only. In<br />
order to set or clear interrupt mask bits, user must write to the following registers:<br />
CANIER / MOBIER: Writing a bit to one sets the corresponding bit in CANIMR / MOBIMR.<br />
Writing a bit to 0 has no effect.<br />
CANIDR / MOBIDR: Writing a bit to one clears the corresponding bit in CANIMR / MOBIMR.<br />
Writing a bit to 0 has no effect.<br />
To acknowledge an interrupt request, user must clear the corresponding bit in the corresponding<br />
status register (CANISR, MTXISR or MRXISR). To clear status bits, user must access the following<br />
write-only registers:<br />
CANISCR / MTXISCR / MRXISCR: Writing a bit to one clears the corresponding bit in<br />
CANISR / MTXISR / MRXISR. Writing a bit to 0 has no effect.<br />
For each MOb, the bits TXOK and RXOK are also accessible in MOBSCR register for clear<br />
access and MOBSR register for read access.<br />
772
32117D–AVR-01/12<br />
Figure 29-11. Interrupt Channel Structure<br />
CANISR<br />
MTXISR<br />
MRXISR<br />
CANIMR WKUPIM<br />
WKUP<br />
AERR<br />
FERR<br />
CERR<br />
SERR<br />
BERR<br />
BOFF<br />
MOBIMR MIMi<br />
TXOKi<br />
...<br />
TXOK0<br />
RXOKi<br />
...<br />
RXOK0<br />
...<br />
BERRI<br />
M<br />
. . .<br />
. . .<br />
MIM0<br />
SERRIM<br />
CERRI<br />
M<br />
CANIMR TXOKIM RXOKIM<br />
. . .<br />
. . .<br />
FERRIM AERRIM<br />
OR<br />
OR<br />
BOFFIM<br />
OR<br />
<strong>AT32UC3C</strong><br />
TXOK IRQ<br />
RXOK IRQ<br />
WAKE-UP IRQ<br />
ERROR IRQ<br />
BUS OFF IRQ<br />
773
29.7 User Interface<br />
Offsets are relative to the base address allocated to CANIF and the channel number.<br />
32117D–AVR-01/12<br />
Figure 29-12. Address Map Overview<br />
offset<br />
0x00<br />
0x04<br />
0x08<br />
0x0C<br />
0x58<br />
0x5C<br />
0x60<br />
0x64<br />
(i*0xC)+0x5C<br />
(i*0xC)+0x60<br />
(i*0xC)+0x64<br />
0x208<br />
0x20C<br />
0x258<br />
Table 29-4. CANIF Register Memory Map<br />
PB registers<br />
VERSION<br />
PARAMETER<br />
CANRAMB<br />
CANCFG<br />
...<br />
MTXISR<br />
MOBCTRL<br />
MOBSCR<br />
MOBSR<br />
...<br />
MOBCTRL<br />
MOBSCR<br />
MOBSR<br />
...<br />
CANRAMB<br />
CANCFG<br />
...<br />
MTXISR<br />
...<br />
MOb0<br />
MOb(i)<br />
Common<br />
registers<br />
Channel 0<br />
Channel 1<br />
offset<br />
0x0<br />
0x4<br />
0x8<br />
0xC<br />
0x10<br />
0x14<br />
0x18<br />
0x1C<br />
(i*0x10)<br />
(i*0x10)+0x4<br />
(i*0x10)+0x8<br />
<strong>AT32UC3C</strong><br />
RAM space<br />
ID<br />
IDM<br />
Data[31:0]<br />
Data[63:32]<br />
ID<br />
IDM<br />
Data[31:0]<br />
Data[63:32]<br />
Offset Register Register Name Access Reset<br />
0x00 Version Register VERSION Read-only - (Note:)<br />
0x04 Parameter Register PARAMETER Read-only - (Note:)<br />
0x08 RAM Base Address Register CANRAMB Read/Write 0x00000000<br />
0x0C Configuration Register CANCFG Read/Write 0x00000001<br />
0x10 Control Register CANCTRL Read/Write 0x00000000<br />
0x14 Status Register CANSR Read-only 0x00000000<br />
0x18 Fault Confinement Register CANFC Read-only 0x00000000<br />
0x1C Interrupt Enable Register CANIER Write-only 0x00000000<br />
0x20 Interrupt Disable Register CANIDR Write-only 0x00000000<br />
...<br />
ID<br />
IDM<br />
...<br />
MOb0<br />
MOb1<br />
Mob(i)<br />
774
Table 29-4. CANIF Register Memory Map<br />
32117D–AVR-01/12<br />
<strong>AT32UC3C</strong><br />
0x24 Interrupt Mask Register CANIMR Read-only 0x00000000<br />
0x28 Interrupt Status Clear Register CANISCR Write-only 0x00200000<br />
0x2C Interrupt Status Register CANISR Read-only 0x00200000<br />
0x30 MOb Search Register MOBSCH Read-only 0x00202020<br />
0x34 MOb Enable Register MOBER Write-only 0x00000000<br />
0x38 MOb Disable Register MOBDR Write-only 0x00000000<br />
0x3C MOb Enable Status Register MOBESR Read-only 0x00000000<br />
0x40 MOb Interrupt Enable Register MOBIER Write-only 0x00000000<br />
0x44 MOb Interrupt Disable Register MOBIDR Write-only 0x00000000<br />
0x48 MOb Interrupt Mask Register MOBIMR Read-only 0x00000000<br />
0x4C MOb RX Interrupt Status Clear Register MRXISCR Write-only 0x00000000<br />
0x50 MOb RX Interrupt Status Register MRXISR Read-only 0x00000000<br />
0x54 MOb TX Interrupt Status Clear Register MTXISCR Write-only 0x00000000<br />
0x58 MOb TX Interrupt Status Register MTXISR Read-only 0x00000000<br />
0x5C MOb Control Register MOBCTRL Read/Write 0x00000000<br />
0x60 MOb Status Clear Register MOBSCR Write-only 0x00000000<br />
0x64 MOb Status Register MOBSR Read-only 0x00000000<br />
Note: The reset values for these registers are device specific. Please refer to the Module Configuration section at the end of this<br />
chapter.<br />
775
29.7.1 Version Register<br />
Name: VERSION<br />
Access type: Read-only<br />
Offset: 0x00<br />
Reset Value: -<br />
32117D–AVR-01/12<br />
<strong>AT32UC3C</strong><br />
31 30 29 28 27 26 25 24<br />
- - MNCH0<br />
23 22 21 20 19 18 17 16<br />
- CHNO VARIANT<br />
15 14 13 12 11 10 9 8<br />
- - - - VERSION[11:8]<br />
7 6 5 4 3 2 1 0<br />
VERSION[7:0]<br />
MNCH0: MOb Number Channel #0<br />
Number of MOb for channel 0 (1..32).<br />
CHNO: Channel Number<br />
Number of CAN channels (1..5).<br />
Variant: Variant Number<br />
Reserved. No functionality associated.<br />
VERSION: Version Number<br />
Version number of the module. No functionality associated.<br />
776
29.7.2 Parameter Register<br />
Name: PARAMETER<br />
Access type: Read-only<br />
Offset: 0x04<br />
Reset Value: -<br />
32117D–AVR-01/12<br />
<strong>AT32UC3C</strong><br />
31 30 29 28 27 26 25 24<br />
- - MNCH4<br />
23 22 21 20 19 18 17 16<br />
- - MNCH3<br />
15 14 13 12 11 10 9 8<br />
- - MNCH2<br />
7 6 5 4 3 2 1 0<br />
- - MNCH1<br />
MNCH4: MOb Number Channel #4<br />
Number of MOb for channel 4 (0..32).<br />
MNCH3: MOb Number Channel #3<br />
Number of MOb for channel 3 (0..32).<br />
MNCH2: MOb Number Channel #2<br />
Number of MOb for channel 2 (0..32).<br />
MNCH1: MOb Number Channel #1<br />
Number of MOb for channel 1 (0..32).<br />
777
29.7.3 RAM Base Address Register<br />
Name: CANRAMB<br />
Access type: Read/Write<br />
Offset: 0x08<br />
Reset Value: 0x00000000<br />
32117D–AVR-01/12<br />
<strong>AT32UC3C</strong><br />
31 30 29 28 27 26 25 24<br />
RAMBASE: RAM Base Address<br />
CAN channel RAM base address.<br />
RAMBASE[31:24]<br />
23 22 21 20 19 18 17 16<br />
RAMBASE[23:16]<br />
15 14 13 12 11 10 9 8<br />
RAMBASE[15:8]<br />
7 6 5 4 3 2 1 0<br />
RAMBASE[7:0]<br />
778
29.7.4 Configuration Register<br />
Name: CANCFG<br />
Access type: Read/Write<br />
Offset: 0x0C<br />
Reset Value: 0x00000001<br />
32117D–AVR-01/12<br />
<strong>AT32UC3C</strong><br />
31 30 29 28 27 26 25 24<br />
- - - - - OVRM CMODE<br />
23 22 21 20 19 18 17 16<br />
- - SM SJW PRS<br />
15 14 13 12 11 10 9 8<br />
- - PHS2 PHS1<br />
7 6 5 4 3 2 1 0<br />
- - PRES<br />
OVRM: Overrun Mode<br />
Overrun mode (MOb is not disabled after successful reception, therefore overwrite is possible).<br />
CMODE: Channel Mode<br />
00: Normal mode.<br />
01: Listening mode.<br />
10: Loop back mode.<br />
SM: Sampling Method<br />
0: Once.<br />
1: Three times.<br />
SJW: Synchronization Jump Width<br />
Maximum number of time quanta for resynchronization.<br />
PRS: Propagation Segment<br />
Number of time quanta for propagation segment.<br />
PHS2: Phase Segment 2<br />
Number of time quanta for phase segment 2.<br />
PHS1: Phase Segment 1<br />
Number of time quanta for phase segment 1.<br />
PRES: Prescaler<br />
CAN clock prescaler. Defines time quantum duration. Should not be set to 0.<br />
779
29.7.5 Control Register<br />
Name: CANCTRL<br />
Access type: Read/Write<br />
Offset: 0x10<br />
Reset Value: 0x00000000<br />
32117D–AVR-01/12<br />
<strong>AT32UC3C</strong><br />
31 30 29 28 27 26 25 24<br />
- - - - - - - -<br />
23 22 21 20 19 18 17 16<br />
- - - - - - - -<br />
15 14 13 12 11 10 9 8<br />
- - - - - - - -<br />
7 6 5 4 3 2 1 0<br />
- - - - WKEN OVRQ CEN INIT<br />
WKEN: Wake-up Enable<br />
0: Wake-up mode disabled.<br />
1: Wake-up mode enabled, any bus activity will set CANISR.WKUP.<br />
OVRQ: Overload Request<br />
0: No overload frame request pending.<br />
1: Overload frame request pending, overload frame will be sent at the end of next received frame.<br />
CEN: Channel Enable<br />
0: No CAN channel enable request pending.<br />
1: CAN channel enable request pending.<br />
INIT: Initialization<br />
0: CAN channel not initialized.<br />
1: Initialize CAN channel.<br />
780
29.7.6 Status Register<br />
Name: CANSR<br />
Access type: Read-only<br />
Offset: 0x14<br />
Reset Value: 0x00000000<br />
32117D–AVR-01/12<br />
<strong>AT32UC3C</strong><br />
31 30 29 28 27 26 25 24<br />
- - - - - - - -<br />
23 22 21 20 19 18 17 16<br />
- - - - - - - -<br />
15 14 13 12 11 10 9 8<br />
- - - - - - - -<br />
7 6 5 4 3 2 1 0<br />
- - - - RS TS OVS CES<br />
RS: Reception Status<br />
0: No frame is being received<br />
1: Frame is being received<br />
TS: Transmission Status<br />
0: No frame is being transmitted<br />
1: Frame is being transmitted<br />
OVS: Overload Status<br />
0: No overload frame is being transmitted<br />
1: Overload frame is being transmitted<br />
CES: Channel Enable Status<br />
0: Channel disabled<br />
1: Channel ready<br />
781
29.7.7 Fault Confinement Register<br />
Name: CANFC<br />
Access type: Read-only<br />
Offset: 0x18<br />
Reset Value: 0x00000000<br />
32117D–AVR-01/12<br />
<strong>AT32UC3C</strong><br />
31 30 29 28 27 26 25 24<br />
- - - - - - - -<br />
23 22 21 20 19 18 17 16<br />
- - - - - - EMODE<br />
15 14 13 12 11 10 9 8<br />
EMODE: Error Mode<br />
00: Error active<br />
01: Error passive<br />
1X: Bus off<br />
TEC: Transmit Error Counter<br />
REC: Reception Error Counter<br />
TEC<br />
7 6 5 4 3 2 1 0<br />
REC<br />
782
29.7.8 Interrupt Enable Register<br />
Name: CANIER<br />
Access type: Write-only<br />
Offset: 0x1C<br />
Reset Value: 0x00000000<br />
32117D–AVR-01/12<br />
<strong>AT32UC3C</strong><br />
31 30 29 28 27 26 25 24<br />
- - - - - - - -<br />
23 22 21 20 19 18 17 16<br />
- - - - - - - -<br />
15 14 13 12 11 10 9 8<br />
- - - - - - - TXOKIM<br />
7 6 5 4 3 2 1 0<br />
RXOKIM WKUPIM BERRIM SERRIM CERRIM FERRIM AERRIM BOFFIM<br />
Writing a zero to a bit in this register has no effect.<br />
Writing a one to a bit in this register will set the corresponding bit in IMR.<br />
783
29.7.9 Interrupt Disable Register<br />
Name: CANIDR<br />
Access type: Write-only<br />
Offset: 0x20<br />
Reset Value: 0x00000000<br />
32117D–AVR-01/12<br />
<strong>AT32UC3C</strong><br />
31 30 29 28 27 26 25 24<br />
- - - - - - - -<br />
23 22 21 20 19 18 17 16<br />
- - - - - - - -<br />
15 14 13 12 11 10 9 8<br />
- - - - - - - TXOKIM<br />
7 6 5 4 3 2 1 0<br />
RXOKIM WKUPIM BERRIM SERRIM CERRIM FERRIM AERRIM BOFFIM<br />
Writing a zero to a bit in this register has no effect.<br />
Writing a one to a bit in this register will clear the corresponding bit in IMR.<br />
784
29.7.10 Interrupt Mask Register<br />
Name: CANIMR<br />
Access type: Read-only<br />
Offset: 0x24<br />
Reset Value: 0x00000000<br />
32117D–AVR-01/12<br />
<strong>AT32UC3C</strong><br />
31 30 29 28 27 26 25 24<br />
- - - - - - - -<br />
23 22 21 20 19 18 17 16<br />
- - - - - - - -<br />
15 14 13 12 11 10 9 8<br />
- - - - - - - TXOKIM<br />
7 6 5 4 3 2 1 0<br />
RXOKIM WKUPIM BERRIM SERRIM CERRIM FERRIM AERRIM BOFFIM<br />
0: The corresponding interrupt is disabled.<br />
1: The corresponding interrupt is enabled.<br />
A bit in this register is cleared when the corresponding bit in IDR is written to one.<br />
A bit in this register is set when the corresponding bit in IER is written to one.<br />
785
29.7.11 Interrupt Status Clear Register<br />
Name: CANISCR<br />
Access type: Write-only<br />
Offset: 0x28<br />
Reset Value: 0x00200000<br />
32117D–AVR-01/12<br />
<strong>AT32UC3C</strong><br />
31 30 29 28 27 26 25 24<br />
- - - - - - - -<br />
23 22 21 20 19 18 17 16<br />
- - LSMOB<br />
15 14 13 12 11 10 9 8<br />
- - - - - - - -<br />
7 6 5 4 3 2 1 0<br />
- WKUP BERR SERR CERR FERR AERR BOFF<br />
LSMOB: Last Selected MOb Status Clear<br />
Write all bits to one to clear Last Selected MOb number.<br />
Writing these bits to any other value has no effect.<br />
WKUP: Wake-up Status Clear<br />
Write to one to clear Wake-up status.<br />
Writing this bit to zero has no effect.<br />
BERR: Bit Error Status Clear<br />
Write to one to clear Bit Error status.<br />
Writing this bit to zero has no effect.<br />
SERR: Stuff Error Status Clear<br />
Write to one to clear Stuffing Error status.<br />
Writing this bit to zero has no effect.<br />
CERR: CRC Error Status Clear<br />
Write to one to clear CRC Error status.<br />
Writing this bit to zero has no effect.<br />
FERR: Form Error Status Clear<br />
Write to one to clear Form Error status.<br />
Writing this bit to zero has no effect.<br />
AERR: Acknowledge Error Status Clear<br />
Write to one to clear Acknowledge Error status.<br />
Writing this bit to zero has no effect.<br />
BOFF: Bus Off Status Clear<br />
Write to one to clear Bus Off status.<br />
Writing this bit to zero has no effect.<br />
786
29.7.12 Interrupt Status Register<br />
Name: CANISR<br />
Access type: Read-only<br />
Offset: 0x2C<br />
Reset Value: 0x00200000<br />
32117D–AVR-01/12<br />
<strong>AT32UC3C</strong><br />
31 30 29 28 27 26 25 24<br />
- - - - - - - -<br />
23 22 21 20 19 18 17 16<br />
- - LSMOB<br />
15 14 13 12 11 10 9 8<br />
- - - - - - - -<br />
7 6 5 4 3 2 1 0<br />
- WKUP BERR SERR CERR FERR AERR BOFF<br />
LSMOB: Last Selected MOb Status<br />
Last selected MOB number (1X: none, 0X: MOb X selected).<br />
WKUP: Wake-up Status<br />
0: No wake-up request detected.<br />
1: Wake-up request (bus activity detected while CANCTRL.WKEN=1).<br />
BERR: Bit Error Status<br />
0: No bit error detected in current frame.<br />
1: Bit error detected in current frame.<br />
SERR: Stuff Error Status<br />
0: No stuffing error detected in current frame.<br />
1: Stuffing error detected in current frame.<br />
CERR: CRC ERror Status<br />
0: No CRC error detected in current frame.<br />
1: CRC error detected in current frame.<br />
FERR: Form Error Status<br />
0: No form error detected in current frame.<br />
1: Form error detected in current frame.<br />
AERR: Acknowledge Error Status<br />
0: No acknowledge error detected in current frame.<br />
1: Acknowledge error detected in current frame.<br />
BOFF: Bus Off Status<br />
0: CAN channel not in Bus Off state.<br />
1: CAN channel switched to Bus Off state.<br />
787
29.7.13 MOb Search Register<br />
Name: MOBSCH<br />
Access type: Read-only<br />
Offset: 0x30<br />
Reset Value: 0x00202020<br />
32117D–AVR-01/12<br />
<strong>AT32UC3C</strong><br />
31 30 29 28 27 26 25 24<br />
- - - - - - - -<br />
23 22 21 20 19 18 17 16<br />
- - MTXOK<br />
15 14 13 12 11 10 9 8<br />
- - MRXOK<br />
7 6 5 4 3 2 1 0<br />
- - MAV<br />
MTXOK: MOb TxOK<br />
MOB TXOK number, with highest priority<br />
1XXXXX: No MOb found<br />
0XXXXX: MOb X found<br />
MRXOK: MOb RxOK<br />
MOB RXOK number, with highest priority<br />
1XXXXX: No MOb found<br />
0XXXXX: MOb X found<br />
MAV: MOb Available<br />
MOB available number, with highest priority<br />
1XXXXX: No MOb found<br />
0XXXXX: MOb X found<br />
788
29.7.14 MOb Enable Register<br />
Name: MOBER<br />
Access type: Write-only<br />
Offset: 0x34<br />
Reset Value: 0x00000000<br />
32117D–AVR-01/12<br />
<strong>AT32UC3C</strong><br />
31 30 29 28 27 26 25 24<br />
MEN: MOb Enable<br />
Writing a bit to zero has no effect.<br />
Writing a bit to one will enable the corresponding MOb.<br />
MEN[31:24]<br />
23 22 21 20 19 18 17 16<br />
MEN[23:16]<br />
15 14 13 12 11 10 9 8<br />
MEN[15:8]<br />
7 6 5 4 3 2 1 0<br />
MEN[7:0]<br />
789
29.7.15 MOb Disable Register<br />
Name: MOBDR<br />
Access type: Write-only<br />
Offset: 0x38<br />
Reset Value: 0x00000000<br />
32117D–AVR-01/12<br />
<strong>AT32UC3C</strong><br />
31 30 29 28 27 26 25 24<br />
MDIS: MOb Disable<br />
Writing a bit to zero has no effect.<br />
Writing a bit to one will disable the corresponding MOb.<br />
MDIS[31:24]<br />
23 22 21 20 19 18 17 16<br />
MDIS[23:16]<br />
15 14 13 12 11 10 9 8<br />
MDIS[15:8]<br />
7 6 5 4 3 2 1 0<br />
MDIS[7:0]<br />
790
29.7.16 MOb Enable Status Register<br />
Name: MOBESR<br />
Access type: Read-only<br />
Offset: 0x3C<br />
Reset Value: 0x00000000<br />
32117D–AVR-01/12<br />
<strong>AT32UC3C</strong><br />
31 30 29 28 27 26 25 24<br />
MEN[31:24]<br />
23 22 21 20 19 18 17 16<br />
MEN[23:16]<br />
15 14 13 12 11 10 9 8<br />
MEN[15:8]<br />
7 6 5 4 3 2 1 0<br />
MEN[7:0]<br />
MEN: MOb Enable<br />
0: The corresponding MOb is disabled<br />
1: The corresponding MOb is enabled<br />
This bit is cleared when the corresponding bit in MOBDR is written to one.<br />
This bit is set when the corresponding bit in MOBER is written to one.<br />
791
29.7.17 MOb Interrupt Enable Register<br />
Name: MOBIER<br />
Access type: Write-only<br />
Offset: 0x40<br />
Reset Value: 0x00000000<br />
32117D–AVR-01/12<br />
<strong>AT32UC3C</strong><br />
31 30 29 28 27 26 25 24<br />
MIM[31:24]<br />
23 22 21 20 19 18 17 16<br />
MIM[23:16]<br />
15 14 13 12 11 10 9 8<br />
MIM[15:8]<br />
7 6 5 4 3 2 1 0<br />
MIM[7:0]<br />
MIM: MOb Interrupt Mask<br />
Writing a bit to zero has no effect.<br />
Writing a bit to one will set the corresponding bit in MOBIMR.<br />
792
29.7.18 MOb Interrupt Disable Register<br />
Name: MOBIDR<br />
Access type: Write-only<br />
Offset: 0x44<br />
Reset Value: 0x00000000<br />
32117D–AVR-01/12<br />
<strong>AT32UC3C</strong><br />
31 30 29 28 27 26 25 24<br />
MIM[31:24]<br />
23 22 21 20 19 18 17 16<br />
MIM[23:16]<br />
15 14 13 12 11 10 9 8<br />
MIM[15:8]<br />
7 6 5 4 3 2 1 0<br />
MIM[7:0]<br />
MIM: MOb Interrupt Mask<br />
Writing a bit to zero has no effect.<br />
Writing a bit to one will clear the corresponding bit in MOBIMR.<br />
793
29.7.19 MOb Interrupt Mask Register<br />
Name: MOBIMR<br />
Access type: Read-only<br />
Offset: 0x48<br />
Reset Value: 0x00000000<br />
32117D–AVR-01/12<br />
<strong>AT32UC3C</strong><br />
31 30 29 28 27 26 25 24<br />
MIM[31:24]<br />
23 22 21 20 19 18 17 16<br />
MIM[23:16]<br />
15 14 13 12 11 10 9 8<br />
MIM[15:8]<br />
7 6 5 4 3 2 1 0<br />
MIM[7:0]<br />
MIM: MOb Interrupt Mask<br />
0: The corresponding MOb interrupt is disabled.<br />
1: The corresponding MOb interrupt is enabled.<br />
This bit is cleared when the corresponding bit in MOBIDR is written to one.<br />
This bit is set when the corresponding bit in MOBIER is written to one.<br />
794
29.7.20 MOb RX Interrupt Status Clear Register<br />
Name: MRXISCR<br />
Access type: Write-only<br />
Offset: 0x4C<br />
Reset Value: 0x00000000<br />
32117D–AVR-01/12<br />
<strong>AT32UC3C</strong><br />
31 30 29 28 27 26 25 24<br />
RXOK[31:24]<br />
23 22 21 20 19 18 17 16<br />
RXOK[23:16]<br />
15 14 13 12 11 10 9 8<br />
RXOK[15:8]<br />
7 6 5 4 3 2 1 0<br />
RXOK[7:0]<br />
RXOK: Reception Successful<br />
Writing a bit to zero has no effect.<br />
Writing a bit to one will clear the corresponding bit in MRXISR.<br />
795
29.7.21 MOb RX Interrupt Status Register<br />
Name: MRXISR<br />
Access type: Read-only<br />
Offset: 0x50<br />
Reset Value: 0x00000000<br />
32117D–AVR-01/12<br />
<strong>AT32UC3C</strong><br />
31 30 29 28 27 26 25 24<br />
RXOK[31:24]<br />
23 22 21 20 19 18 17 16<br />
RXOK[23:16]<br />
15 14 13 12 11 10 9 8<br />
RXOK[15:8]<br />
7 6 5 4 3 2 1 0<br />
RXOK[7:0]<br />
RXOK: Reception Successful<br />
0: The corresponding MOb has not completed a reception.<br />
1: The corresponding MOb has completed a reception (same bit as MOBSRn.RXOK).<br />
This bit is cleared when the corresponding bit in MRXISCR is written to one.<br />
This bit is set when the corresponding MOb has completed a reception.<br />
796
29.7.22 MOb TX Interrupt Status Clear Register<br />
Name: MTXISCR<br />
Access type: Write-only<br />
Offset: 0x54<br />
Reset Value: 0x00000000<br />
32117D–AVR-01/12<br />
<strong>AT32UC3C</strong><br />
31 30 29 28 27 26 25 24<br />
TXOK[31:24]<br />
23 22 21 20 19 18 17 16<br />
TXOK[23:16]<br />
15 14 13 12 11 10 9 8<br />
TXOK[15:8]<br />
7 6 5 4 3 2 1 0<br />
TXOK[7:0]<br />
TXOK: Transmission successful<br />
Writing a bit to zero has no effect.<br />
Writing a bit to one will clear the corresponding bit in MTXISR.<br />
797
29.7.23 MOb TX Interrupt Status Register<br />
Name: MTXISR<br />
Access type: Read-only<br />
Offset: 0x58<br />
Reset Value: 0x00000000<br />
32117D–AVR-01/12<br />
<strong>AT32UC3C</strong><br />
31 30 29 28 27 26 25 24<br />
TXOK[31:24]<br />
23 22 21 20 19 18 17 16<br />
TXOK[23:16]<br />
15 14 13 12 11 10 9 8<br />
TXOK[15:8]<br />
7 6 5 4 3 2 1 0<br />
TXOK[7:0]<br />
TXOK: Transmission Successful<br />
0: The corresponding MOb has not completed a transmission.<br />
1: The corresponding MOb has completed a transmission (same bit as MOBSRn.TXOK).<br />
This bit is cleared when the corresponding bit in MTXISCR is written to one.<br />
This bit is set when the corresponding MOb has completed a transmission.<br />
798
29.7.24 MOb Control Register<br />
Name: MOBCTRLn<br />
Access type: Read/Write<br />
Offset: 0x5C + [n * 0xC]<br />
Reset Value: 0x00000000<br />
32117D–AVR-01/12<br />
<strong>AT32UC3C</strong><br />
31 30 29 28 27 26 25 24<br />
- - - - - - - -<br />
23 22 21 20 19 18 17 16<br />
- - - - - - - -<br />
15 14 13 12 11 10 9 8<br />
- - - - - - - -<br />
7 6 5 4 3 2 1 0<br />
- - AM DIR DLC<br />
AM: Automatic Mode<br />
0: Automatic transmit mode<br />
1: Automatic receive mode<br />
DIR: Transfer Direction<br />
0: Reception<br />
1: Transmission<br />
DLC: Data Length Code<br />
Valid data length code is from 0 to 8.<br />
799
29.7.25 MOb Status Clear Register<br />
Name: MOBSCRn<br />
Access type: Write-only<br />
Offset: 0x60 + [n * 0xC]<br />
Reset Value: 0x00000000<br />
32117D–AVR-01/12<br />
<strong>AT32UC3C</strong><br />
31 30 29 28 27 26 25 24<br />
- - - - - - - -<br />
23 22 21 20 19 18 17 16<br />
- - - - - - - -<br />
15 14 13 12 11 10 9 8<br />
- - - - - - - -<br />
7 6 5 4 3 2 1 0<br />
- - - - OVW DLCW TXOK RXOK<br />
OVW: Overwrite<br />
Writing this bit to zero has no effect.<br />
Writing this bit to one clears the OVW status in MOBSR.<br />
DLCW: DLC Warning<br />
Writing this bit to zero has no effect.<br />
Writing this bit to one clears DLCW status in MOBSR.<br />
TXOK: Transmission successful<br />
Writing this bit to zero has no effect.<br />
Writing this bit to one clears TXOK status in MOBSR.<br />
RXOK: Reception successful<br />
Writing this bit to zero has no effect.<br />
Writing this bit to one clears RXOK status in MOBSR.<br />
800
29.7.26 MOb Status Register<br />
Name: MOBSRn<br />
Access type: Read-only<br />
Offset: 0x64 + [n * 0xC]<br />
Reset Value: 0x00000000<br />
32117D–AVR-01/12<br />
<strong>AT32UC3C</strong><br />
31 30 29 28 27 26 25 24<br />
- - - - - - - -<br />
23 22 21 20 19 18 17 16<br />
- - - - - - - -<br />
15 14 13 12 11 10 9 8<br />
- - - - - - - -<br />
7 6 5 4 3 2 1 0<br />
- - - - OVW DLCW TXOK RXOK<br />
OVW: Overwrite<br />
0: Previous message has not been overwritten.<br />
1: A new message has been received and overwritten previous one (if CANCFG.OVRM is set).<br />
DLCW: DLC Warning<br />
0: Received DLC matches MOBCTRL.DLC.<br />
1: Received DLC is different from MOBCTRL.DLC.<br />
TXOK: Transmission Successful<br />
0: Transmission not completed or not successful.<br />
1: Transmission completed and successful.<br />
RXOK: Reception Successful<br />
0: Reception not completed or not successful.<br />
1: Reception completed and successful.<br />
801
32117D–AVR-01/12<br />
<strong>AT32UC3C</strong><br />
29.8 Module Configuration<br />
The specific configuration for each CANIF instance is listed in the following tables. The module<br />
bus clocks listed here are connected to the system bus clocks. Refer to the Power Manager<br />
chapter for details.<br />
Table 29-5. Module Configuration<br />
Feature CANIF<br />
CANIF channels 2<br />
Table 29-6. Module Clock Name<br />
Module name Clock name Description<br />
CANIF<br />
Table 29-7. Register Reset Values<br />
Register Reset Value<br />
VERSION 0x10200110<br />
PARAMETER 0x00000010<br />
CLK_CANIF_HSB HSB clock<br />
CLK_CANIF_PB Peripheral Bus clock from the PBC clock domain<br />
GCLK The generic clock used for the CANIF is GCLK1<br />
802
30. Inter-IC Sound Controller (IISC)<br />
30.1 Features<br />
30.2 Overview<br />
32117D–AVR-01/12<br />
Rev.: 2.0.0.0<br />
<strong>AT32UC3C</strong><br />
Compliant with Inter-IC Sound (I 2 S) bus specification<br />
Master, slave, and controller modes:<br />
– Slave: data received/transmitted<br />
– Master: data received/transmitted and clocks generated<br />
– Controller: clocks generated<br />
Individual enable and disable of receiver, transmitter, and clocks<br />
Configurable clock generator common to receiver and transmitter:<br />
– Suitable for a wide range of sample frequencies (fs), including 32kHz, 44.1kHz, 48kHz,<br />
88.2kHz, 96kHz, and 192kHz<br />
– 16fs to 1024fs Master Clock generated for external oversampling ADCs<br />
Several data formats supported:<br />
– 32-, 24-, 20-, 18-, 16-, and 8-bit mono or stereo format<br />
– 16- and 8-bit compact stereo format, with left and right samples packed in the same word to<br />
reduce data transfers<br />
Several data frame formats supported:<br />
– 2-channel I 2 S with Word Select<br />
– 1- to 8-channel Time Division Multiplexed (TDM) with Frame Sync<br />
DMA interfaces for receiver and transmitter to reduce processor overhead:<br />
– Either one DMA channel for all audio channels, or<br />
– One DMA channel per audio channel<br />
Smart holding registers management to avoid audio channels mix after overrun or underrun<br />
The Inter-IC Sound Controller (IISC) provides a 5-wire, bidirectional, synchronous, digital audio<br />
link with external audio devices: ISDI, ISDO, IWS, ISCK, and IMCK pins.<br />
This controller is compliant with the Inter-IC Sound (I 2 S) bus specification and supports TDM<br />
interface with external multi-channel audio codecs.<br />
The IISC consists of a Receiver, a Transmitter, and a common Clock Generator, that can be<br />
enabled separately, to provide Master, Slave, or Controller modes with Receiver, Transmitter, or<br />
both active.<br />
Peripheral DMA channels, separate for the Receiver and for the Transmitter, allow a continuous<br />
high bitrate data transfer without processor intervention to the following:<br />
Audio CODECs in Master, Slave, or Controller mode<br />
Stereo DAC or ADC through dedicated I 2 S serial interface<br />
Multi-channel or multiple stereo DACs or ADCs, using the TDM format<br />
The IISC can use either a single DMA channel for all audio channels or one DMA channel per<br />
audio channel.<br />
The 8- and 16-bit compact stereo format allows reducing the required DMA bandwidth by transferring<br />
the left and right samples within the same data word.<br />
In Master Mode, the IISC allows outputting a 16 fs to 1024fs Master Clock, in order to provide an<br />
oversampling clock to an external audio codec or digital signal processor (DSP).<br />
803
30.3 Block Diagram<br />
30.4 I/O Lines Description<br />
32117D–AVR-01/12<br />
Figure 30-1. IISC Block Diagram<br />
<strong>AT32UC3C</strong><br />
30.5 Product Dependencies<br />
In order to use this module, other parts of the system must be configured correctly, as described<br />
below.<br />
30.5.1 I/O lines<br />
SCIF<br />
Power<br />
Manager<br />
Peripheral<br />
Bus Bridge<br />
Peripheral<br />
DMA<br />
Controller<br />
Interrupt<br />
Controller<br />
PB clock<br />
PB<br />
IRQ<br />
Generic clock<br />
Peripheral Bus interface<br />
Table 30-1. I/O Lines Description<br />
Rx<br />
Tx<br />
Clocks<br />
Receiver<br />
Transmitter<br />
Pin Name Pin Description Type<br />
IMCK Master Clock Output<br />
ISCK Serial Clock Input/Output<br />
IWS I 2 S Word Select or TDM Frame Sync Input/Output<br />
ISDI Serial Data Input Input<br />
ISDO Serial Data Output Output<br />
The IISC pins may be multiplexed with I/O Controller lines. The user must first program the I/O<br />
Controller to assign the desired IISC pins to their peripheral function. If the IISC I/O lines are not<br />
used by the application, they can be used for other purposes by the I/O Controller. It is required<br />
to enable only the IISC inputs and outputs actually in use.<br />
30.5.2 Power Management<br />
If the CPU enters a sleep mode that disables clocks used by the IISC, the IISC will stop functioning<br />
and resume operation after the system wakes up from sleep mode.<br />
IISC<br />
I/O Controller<br />
IMCK<br />
ISCK<br />
IWS<br />
ISDI<br />
ISDO<br />
804
30.5.3 Clocks<br />
30.5.4 DMA<br />
30.5.5 Interrupts<br />
32117D–AVR-01/12<br />
<strong>AT32UC3C</strong><br />
The clock for the IISC bus interface (CLK_IISC) is generated by the Power Manager. This clock<br />
is enabled at reset, and can be disabled in the Power Manager. It is recommended to disable the<br />
IISC before disabling the clock, to avoid freezing the IISC in an undefined state.<br />
One of the generic clocks is connected to the IISC. The generic clock (GCLK_IISC) can be set to<br />
a wide range of frequencies and clock sources. The GCLK_IISC must be enabled and configured<br />
before use. Refer to the module configuration section for details on the GCLK_IISC used<br />
for the IISC. The frequency for this clock has to be set as described in Table.<br />
The IISC DMA handshake interfaces are connected to the Peripheral DMA Controller. Using the<br />
IISC DMA functionality requires the Peripheral DMA Controller to be programmed first.<br />
The IISC interrupt line is connected to the Interrupt Controller. Using the IISC interrupt requires<br />
the Interrupt Controller to be programmed first.<br />
30.5.6 Debug Operation<br />
When an external debugger forces the CPU into debug mode, the IISC continues normal operation.<br />
If this module is configured in a way that requires it to be periodically serviced by the CPU<br />
through interrupt requests or similar, improper operation or data loss may result during<br />
debugging.<br />
30.6 Functional Description<br />
30.6.1 Initialization<br />
The IISC features a Receiver, a Transmitter, and, for Master and Controller modes, a Clock<br />
Generator. Receiver and Transmitter share the same Serial Clock and Word Select.<br />
Before enabling the IISC, the chosen configuration must be written to the Mode Register (MR).<br />
The IMCKMODE, MODE, FORMAT, and DATALENGTH fields in the MR register must be written.<br />
If FORMAT is configured in one of the TDM formats, then the NBCHAN and TDMFS fields<br />
must also be written. If the IMCKMODE field is written as one, then the IMCKFS field should be<br />
written with the chosen ratio, as described in Section 30.6.6 ”Serial Clock and Word Select Generation”<br />
on page 807.<br />
Once the Mode Register has been written, the IISC Clock Generator, Receiver, and Transmitter<br />
can be enabled by writing a one to the CKEN, RXEN, and TXEN bits in the Control Register<br />
(CR). The Clock Generator can be enabled alone, in Controller Mode, to output clocks to the<br />
IMCK, ISCK, and IWS pins. The Clock Generator must also be enabled if the Receiver or the<br />
Transmitter is enabled.<br />
The Clock Generator, Receiver, and Transmitter can be disabled independently by writing a one<br />
to CR.CXDIS, CR.RXDIS and/or CR.TXDIS respectively. Once requested to stop, they will only<br />
stop when the transmission of the pending frame transmission will be completed.<br />
30.6.2 Basic Operation<br />
The Receiver can be operated by reading the Receiver Holding Register (RHR), whenever the<br />
Receive Ready (RXRDY) bit in the Status Register (SR) is set. Successive values read from<br />
RHR will correspond to the samples from the left and right audio channels, or from channels 0 to<br />
MR.NBCHAN in TDM mode, for the successive frames.<br />
805
32117D–AVR-01/12<br />
<strong>AT32UC3C</strong><br />
The Transmitter can be operated by writing to the Transmitter Holding Register (RHR), whenever<br />
the Transmit Ready (TXRDY) bit in the Status Register (SR) is set. Successive values<br />
written to THR should correspond to the samples from the left and right audio channels, or from<br />
channels 0 to MR.NBCHAN in TDM mode, for the successive frames.<br />
The Receive Ready and Transmit Ready bits can be polled by reading the Status Register.<br />
The IISC processor load can be reduced by enabling interrupt-driven operation. The RXRDY<br />
and/or TXRDY interrupt requests can be enabled by writing a one to the corresponding bit in the<br />
Interrupt Enable Register (IER). The interrupt service routine associated to the IISC interrupt<br />
request will then be executed whenever the Receive Ready or the Transmit Ready status bit is<br />
set.<br />
30.6.3 Master, Controller, and Slave Modes<br />
In Master and Controller modes, the IISC provides the Master Clock, the Serial Clock and the<br />
Word Select. IMCK, ISCK, and IWS pins are outputs.<br />
In Controller mode, the IISC Receiver and Transmitter are disabled. Only the clocks are enabled<br />
and used by an external receiver and/or transmitter.<br />
In Slave mode, the IISC receives the Serial Clock and the Word Select from an external master.<br />
ISCK and IWS pins are inputs.<br />
The mode is selected by writing the MODE field of the Mode Register (MR). Since the MODE<br />
field changes the direction of the IWS and ISCK pins, the Mode Register should only be written<br />
when the IISC is stopped, in order to avoid unwanted glitches on the IWS and ISCK pins.<br />
30.6.4 I 2 S Reception and Transmission Sequence<br />
As specified in the I 2 S protocol, data bits are left-adjusted in the Word Select time slot, with the<br />
MSB transmitted first, starting one clock period after the transition on the Word Select line.<br />
Figure 30-2. I 2 S Reception and Transmission Sequence<br />
Serial Clock ISCK<br />
Word Select IWS<br />
Data ISDI/ISDO MSB<br />
Left Channel<br />
LSB MSB<br />
Right Channel<br />
Data bits are sent on the falling edge of the Serial Clock and sampled on the rising edge of the<br />
Serial Clock. The Word Select line indicates the channel in transmission, a low level for the left<br />
channel and a high level for the right channel.<br />
The length of transmitted words can be chosen among 8, 16, 18, 20, 24, and 32 bits by writing<br />
the MR.DATALENGTH field.<br />
If the time slot allows for more data bits than written in the MR.DATALENGTH field, zeroes are<br />
appended to the transmitted data word or extra received bits are discarded. If the time slot<br />
allows for less data bits than written, the extra bits to be transmitted are not sent or the missing<br />
bits are set to zero in the received data word.<br />
806
32117D–AVR-01/12<br />
<strong>AT32UC3C</strong><br />
30.6.5 TDM Reception and Transmission Sequence<br />
In Time Division Multiplexed (TDM) format, 1 to 8 data words are sent or received within each<br />
frame, As in the I 2 S protocol, data bits are left-adjusted in the channel time slot, with the MSB<br />
transmitted first, starting one clock period after the transition on the Word Select line. Each time<br />
slot is 32-bit long.<br />
Figure 30-3. TDM Reception and Transmission Sequence<br />
Frame sync (IWS)<br />
Serial Clock (ISCK)<br />
Data (ISDI/ISDO)<br />
MSB LSB MSB LSB MSB LSB MSB LSB<br />
Channel 0<br />
Channel 1 Channel 2 Channel 3<br />
Data bits are sent on the falling edge of the Serial Clock and sampled on the rising edge of the<br />
Serial Clock. The IWS pin provides a frame synchronization signal, starting one ISCK period<br />
before the MSB of channel 0.<br />
The Time Division Multiplexed (TDM) format is selected by writing a one to the MR.FORMAT<br />
field.<br />
The Frame Sync pulse can be either one ISCK period or one 32-bit time slot. This selection is<br />
done by writing the MR.TDMFS bit.<br />
The number of channels is selected by writing the MR.CHANNELS field.<br />
The length of transmitted words can be chosen among 8, 16, 18, 20, 24, and 32 bits by writing<br />
the MR.DATALENGTH field.<br />
If the time slot allows for more data bits than programmed in the MR.DATALENGTH field, zeroes<br />
are appended to the transmitted data word or extra received bits are discarded. If the time slot<br />
allows for less data bits than programmed, the extra bits to be transmitted are not sent or the<br />
missing bits are set to zero in the right-adjusted received data word.<br />
30.6.6 Serial Clock and Word Select Generation<br />
The generation of clocks in the IISC is described in Figure 30-4 on page 809.<br />
In Slave mode, the Serial Clock and Word Select Clock are driven by an external master. ISCK<br />
and IWS pins are inputs and no generic clock is required by the IISC.<br />
In Master mode, the user can configure the Master Clock, Serial Clock, and Word Select Clock<br />
through the Mode Register (MR). IMCK, ISCK, and IWS pins are outputs and a generic clock is<br />
used to derive the IISC clocks.<br />
Audio codecs connected to the IISC pins may require a Master Clock signal with a frequency<br />
multiple of the audio sample frequency (fs), such as 256fs. When the IISC is in Master mode,<br />
writing a one to MR.IMCKMODE will output GCLK_IISC as Master Clock to the IMCK pin, and<br />
will divide GCLK_IISC to create the internal bit clock, output on the ISCK pin. The clock division<br />
factor is defined by writing to MR.IMCKFS and MR.DATALENGTH, as described ”IMCKFS:<br />
Master Clock to fs Ratio” on page 815.<br />
807
32117D–AVR-01/12<br />
<strong>AT32UC3C</strong><br />
The Master Clock (IMCK) frequency is 8*(NBCHAN+1)*(IMCKFS+1) times the sample frequency<br />
(fs), i.e. IWS frequency. The Serial Clock (ISCK) frequency is (NBCHAN+1)*Slot Length<br />
times the sample frequency (fs), where Slot Length is defined in Table 30-2 on page 808.<br />
Table 30-2. Slot Length<br />
MR.DATALENGTH Word Length Slot Length<br />
0 32 bits 32<br />
1 24 bits<br />
2 20 bits<br />
3 18 bits<br />
4 16 bits<br />
5 16 bits compact stereo<br />
6 8 bits<br />
7 8 bits compact stereo<br />
32 if MR.IWS24 is zero<br />
24 if MR.IWS24 is one<br />
Warning: MR.IMCKMODE should only be written as one if the Master Clock frequency is strictly<br />
higher than the Serial Clock.<br />
If a Master Clock output is not required, the GCLK_IISC generic clock is used as ISCK, by writing<br />
a zero to MR.IMCKMODE. Alternatively, if the frequency of the generic clock used is a<br />
multiple of the required ISCK frequency, the IMCK to ISCK divider can be used with the ratio<br />
defined by writing the MR.IMCKFS field.<br />
The IWS pin is used as Word Select in I2S format and as Frame Synchronization in TDM format,<br />
as described in Section 30.6.4 and Section 30.6.5 respectively.<br />
16<br />
8<br />
808
30.6.7 Mono<br />
32117D–AVR-01/12<br />
Figure 30-4. IISC Clocks Generation<br />
GCLK_IISC<br />
MR.IMCKMODE<br />
MR.MODE = SLAVE<br />
CR.CKEN/CKDIS MR.IMCKMODE<br />
ISCK pin input 1<br />
IWS pin input 1<br />
0<br />
1<br />
<strong>AT32UC3C</strong><br />
When the Transmit Mono (TXMONO) in the Mode Register is set, data written to the left channel<br />
is duplicated to the right output channel. In TDM mode with more than two channels, numbered<br />
from 0, data written to the even-numbered channels is duplicated to the following odd-numbered<br />
channel.<br />
When the Receive Mono (RXMONO) in the Mode Register is set, data received from the left<br />
channel is duplicated to the right channel. In TDM mode with more than two channels, numbered<br />
from 0, data received from the even-numbered channels is duplicated to the following<br />
odd-numbered channel.<br />
30.6.8 Holding Registers<br />
The IISC user interface includes a Receive Holding Register (RHR) and a Transmit Holding<br />
Register (THR). RHR and THR are used to access audio samples for all audio channels.<br />
Clock<br />
enable<br />
0<br />
0<br />
Clock<br />
divider<br />
CR.CKEN/CKDIS<br />
Clock<br />
enable<br />
MR.IMCKFS<br />
MR.DATALENGTH<br />
Clock<br />
divider<br />
IMCK pin output<br />
ISCK pin output<br />
Internal<br />
bit clock<br />
MR.DATALENGTH<br />
IWS pin output<br />
Internal<br />
word clock<br />
When a new data word is available in the RHR register, the Receive Ready bit (RXRDY) in the<br />
Status Register (SR) is set. Reading the RHR register will clear this bit.<br />
A receive overrun condition occurs if a new data word becomes available before the previous<br />
data word has been read from the RHR register. Then, the Receive Overrun bit in the Status<br />
Register will be set and bit i of the RXORCH field in the Status Register is set, where i is the current<br />
receive channel number.<br />
When the THR register is empty, the Transmit Ready bit (TXRDY) in the Status Register (SR) is<br />
set. Writing into the THR register will clear this bit.<br />
A transmit underrun condition occurs if a new data word needs to be transmitted before it has<br />
been written to the THR register. Then, the Transmit Underrun bit in the Status Register will be<br />
809
32117D–AVR-01/12<br />
<strong>AT32UC3C</strong><br />
set and bit i of the TXORCH field in the Status Register is set, where i is the current transmit<br />
channel number. If the TXSAME bit in the Mode Register is zero, then a zero data word is transmitted<br />
in case of underrun. If MR.TXSAME is one, then the previous data word for the current<br />
transmit channel number is transmitted.<br />
Data words are right-justified in the RHR and THR registers. For 16-bit compact stereo, the left<br />
sample uses bits 15 through 0 and the right sample uses bits 31 through 16 of the same data<br />
word. For 8-bit compact stereo, the left sample uses bits 7 through 0 and the right sample uses<br />
bits 15 through 8 of the same data word.<br />
30.6.9 DMA Operation<br />
The Receiver and the Transmitter can each be connected either to one single Peripheral DMA<br />
channel or to one Peripheral DMA channel per data channel. This is selected by writing to the<br />
MR.RXDMA and MR.TXDMA bits. If a single Peripheral DMA channel is selected, all data samples<br />
use IISC Receiver or Transmitter DMA channel 0.<br />
The Peripheral DMA reads from the RHR register and writes to the RHR register for all audio<br />
channels, successively.<br />
The Peripheral DMA transfers may use 32-bit word, 16-bit halfword, or 8-bit byte according to<br />
the value of the MR.DATALENGTH field.<br />
30.6.10 Loop-back Mode<br />
For debugging purposes, the IISC can be configured to loop back the Transmitter to the<br />
Receiver. Writing a one to the MR.LOOP bit will internally connect ISDO to ISDI, so that the<br />
transmitted data is also received. Writing a zero to MR.LOOP will restore the normal behavior<br />
with independent Receiver and Transmitter. As for other changes to the Receiver or Transmitter<br />
configuration, the IISC Receiver and Transmitter must be disabled before writing to the MR register<br />
to update MR.LOOP.<br />
30.6.11 Interrupts<br />
An IISC interrupt request can be triggered whenever one or several of the following bits are set<br />
in the Status Register (SR): Receive Ready (RXRDY), Receive Overrun (RXOR), Transmit<br />
Ready (TXRDY), or Transmit Underrun (TXOR).<br />
The interrupt request will be generated if the corresponding bit in the Interrupt Mask Register<br />
(IMR) is set. Bits in IMR are set by writing a one to the corresponding bit in the Interrupt Enable<br />
Register (IER), and cleared by writing a one to the corresponding bit in the Interrupt Disable<br />
Register (IDR). The interrupt request remains active until the corresponding bit in SR is cleared<br />
by writing a one the corresponding bit in the Status Clear Register (SCR).<br />
For debugging purposes, interrupt requests can be simulated by writing a one to the corresponding<br />
bit in the Status Set Register (SSR).<br />
810
32117D–AVR-01/12<br />
Figure 30-5. Interrupt Block Diagram<br />
<strong>AT32UC3C</strong><br />
30.7 IISC Application Examples<br />
The IISC can support several serial communication modes used in audio or high-speed serial<br />
links. Some standard applications are shown in the following figures. All serial link applications<br />
supported by the IISC are not listed here.<br />
Figure 30-6. Audio Application Block Diagram<br />
IISC<br />
ISCK<br />
IWS<br />
ISDO<br />
ISDI<br />
Transmitter<br />
Receiver<br />
Serial Clock<br />
Word Select<br />
Serial Data Out<br />
Set<br />
Clear<br />
IER IMR<br />
IDR<br />
TXRDY<br />
TXUR<br />
RXRDY<br />
RXOR<br />
Serial Clock<br />
Word Select<br />
Interrupt<br />
Control<br />
EXTERNAL<br />
I 2 S<br />
RECEIVER<br />
IISC Interrupt<br />
Request<br />
Serial Data Out MSB LSB MSB<br />
811
32117D–AVR-01/12<br />
Figure 30-7. Codec Application Block Diagram<br />
IISC<br />
Frame Sync<br />
Serial Data Out<br />
Serial Data In<br />
Serial Clock<br />
Frame Sync<br />
Serial Data Out<br />
Serial Data In<br />
Figure 30-8. Time Slot Application Block Diagram<br />
IISC<br />
IMCK<br />
ISCK<br />
IWS<br />
ISDO<br />
ISDI<br />
IMCK<br />
ISCK<br />
IWS<br />
ISDO<br />
ISDI<br />
Master Clock<br />
Serial Clock<br />
Master Clock<br />
Serial Clock<br />
Frame Sync<br />
Serial Data Out<br />
Serial Data In<br />
Serial Clock<br />
Frame Sync<br />
Serial Data Out<br />
Serial Data In<br />
EXTERNAL<br />
AUDIO<br />
CODEC<br />
First Time Slot<br />
Dstart Dend<br />
EXTERNAL<br />
AUDIO<br />
CODEC<br />
for First<br />
Time Slot<br />
EXTERNAL<br />
AUDIO<br />
CODEC<br />
for Second<br />
Time Slot<br />
<strong>AT32UC3C</strong><br />
First Time Slot Second Time Slot<br />
Dstart<br />
Dend<br />
812
30.8 User Interface<br />
Table 30-3. IISC Register Memory Map<br />
32117D–AVR-01/12<br />
<strong>AT32UC3C</strong><br />
Offset Register Register Name Access Reset<br />
0x00 Control Register CR Write-only 0x00000000<br />
0x04 Mode Register MR Read/Write 0x00000000<br />
0x08 Status Register SR Read-only 0x00000000<br />
0x0C Status Clear Register SCR Write-only 0x00000000<br />
0x10 Status Set Register SSR Write-only 0x00000000<br />
0x14 Interrupt Enable Register IER Write-only 0x00000000<br />
0x18 Interrupt Disable Register IDR Write-only 0x00000000<br />
0x1C Interrupt Mask Register IMR Read-only 0x00000000<br />
0x20 Receiver Holding Register RHR Read-only 0x00000000<br />
0x24 Transmitter Holding Register THR Write-only 0x00000000<br />
0x28 Version Register VERSION Read-only - (1)<br />
0x2C Parameter Register PARAMETER Read-only - (1)<br />
Note: 1. The reset values for these registers are device specific. Please refer to the Module Configuration section at the end of this<br />
chapter.<br />
813
30.8.1 Control Register<br />
Name: CR<br />
Access Type: Write-only<br />
Offset: 0x00<br />
Reset Value: 0x00000000<br />
32117D–AVR-01/12<br />
<strong>AT32UC3C</strong><br />
31 30 29 28 27 26 25 24<br />
- - - - - - - -<br />
23 22 21 20 19 18 17 16<br />
- - - - - - - -<br />
15 14 13 12 11 10 9 8<br />
- - - - - - - -<br />
7 6 5 4 3 2 1 0<br />
SWRST - TXDIS TXEN CKDIS CKEN RXDIS RXEN<br />
The Control Register should only be written to enable the IISC after the chosen configuration has been written to the Mode<br />
Register, in order to avoid unwanted glitches on the IWS, ISCK, and ISDO outputs. The proper sequence is to write the MR<br />
register, then write the CR register to enable the IISC, or to disable the IISC before writing a new value into MR.<br />
SWRST: Software Reset<br />
Writing a zero to this bit has no effect.<br />
Writing a one to this bit resets all the registers in the module. The module will be disabled after the reset.<br />
This bit always reads as zero.<br />
TXDIS: Transmitter Disable<br />
Writing a zero to this bit has no effect.<br />
Writing a one to this bit disables the IISC Transmitter. SR.TXEN will be cleared when the Transmitter is effectively stopped.<br />
TXEN: Transmitter Enable<br />
Writing a zero to this bit has no effect.<br />
Writing a one to this bit enables the IISC Transmitter, if TXDIS is not one. SR.TXEN will be set when the Transmitter is effectively<br />
started.<br />
CKDIS: Clocks Disable<br />
Writing a zero to this bit has no effect.<br />
Writing a one to this bit disables the IISC clocks generation.<br />
CKEN: Clocks Enable<br />
Writing a zero to this bit has no effect.<br />
Writing a one to this bit enables the IISC clocks generation, if CKDIS is not one.<br />
RXDIS: Receiver Disable<br />
Writing a zero to this bit has no effect.<br />
Writing a one to this bit disables the IISC Receiver. SR.TXEN will be cleared when the Transmitter is effectively stopped.<br />
RXEN: Receiver Enable<br />
Writing a zero to this bit has no effect.<br />
Writing a one to this bit enables the IISC Receiver, if RXDIS is not one. SR.RXEN will be set when the Receiver is effectively<br />
started.<br />
814
30.8.2 Mode Register<br />
Name: MR<br />
Access Type: Read/Write<br />
Offset: 0x04<br />
Reset Value: 0x00000000<br />
32117D–AVR-01/12<br />
<strong>AT32UC3C</strong><br />
31 30 29 28 27 26 25 24<br />
IWS24 IMCKMODE IMCKFS<br />
23 22 21 20 19 18 17 16<br />
TDMFS - - - NBCHAN<br />
15 14 13 12 11 10 9 8<br />
- TXSAME TXDMA TXMONO RXLOOP RXDMA RXMONO<br />
7 6 5 4 3 2 1 0<br />
FORMAT - DATALENGTH - MODE<br />
The Mode Register should only be written when the IISC is stopped, in order to avoid unwanted glitches on the IWS, ISCK,<br />
and ISDO outputs. The proper sequence is to write the MR register, then write the CR register to enable the IISC, or to disable<br />
the IISC before writing a new value into MR.<br />
IWS24: IWS TDM Slot Width<br />
0: IWS slot is 32-bit wide for DATALENGTH=18/20/24-bit<br />
1: IWS slot is 24-bit wide for DATALENGTH=18/20/24-bit<br />
Refer to Table 30-2, “Slot Length,” on page 808.<br />
IMCKMODE: Master Clock Mode<br />
0: No Master Clock generated (generic clock is used as ISCK output)<br />
1: Master Clock generated (generic clock is used as IMCK output)<br />
Warning: if IMCK frequency is the same as ISCK, IMCKMODE should not be written as one. Refer to Section 30.6.6 ”Serial<br />
Clock and Word Select Generation” on page 807 and Table 30-2, “Slot Length,” on page 808.<br />
IMCKFS: Master Clock to fs Ratio<br />
Master Clock frequency is 8*(NBCHAN+1)*(IMCKFS+1) times the sample rate, i.e. IWS frequency:<br />
Table 30-4. Master Clock to Sampling Frequency (fs) Ratio<br />
fs Ratio<br />
IMCKFS<br />
2 channels 4 channels 6 channels 8 channels<br />
16 fs 0 - - -<br />
32 fs 1 0 - -<br />
48fs 2 - 0 -<br />
64 fs 3 1 - 0<br />
96fs 5 2 1 -<br />
128 fs 7 3 - 1<br />
192fs 11 5 3 2<br />
815
Table 30-4. Master Clock to Sampling Frequency (fs) Ratio<br />
fs Ratio<br />
256 fs 15 7 - 3<br />
384 fs 23 11 7 5<br />
512 fs 31 15 - 7<br />
768 fs 47 23 15 11<br />
1024 fs 63 31 - 15<br />
TDMFS: TDM Frame Sync<br />
Table 30-5. TDM Frame Sync<br />
TDMFS Description<br />
0 SLOT IWS pulse is high for one time slot at beginning of frame<br />
1 HALF IWS pulse is high for half the time slots at beginning of frame, i.e. half the IWS period<br />
3 BIT IWS pulse is high for one bit period at beginning of frame, i.e. one ISCK period<br />
3 - Reserved<br />
NBCHAN: Number of TDM Channels - 1<br />
This field should be written with the number of TDM channels minus one<br />
TXSAME: Transmit Data when Underrun<br />
0: Zero sample transmitted when underrun<br />
1: Previous sample transmitted when underrun (in I2S mode only)<br />
TXDMA: Single or multiple DMA Channels for Transmitter<br />
0: Transmitter uses a single DMA channel for all audio channels<br />
1: Transmitter uses one DMA channel per audio channel<br />
TXMONO: Transmit Mono<br />
0: Stereo<br />
1: Mono, with left audio samples duplicated to right audio channel by the IISC<br />
RXLOOP: Loop-back Test Mode<br />
0: Normal mode<br />
1: ISDO output of IISC is internally connected to ISDI input<br />
RXMONO: Receive Mono<br />
0: Stereo<br />
1: Mono, with left audio samples duplicated to right audio channel by the IISC<br />
RXDMA: Single or multiple DMA Channels for Receiver<br />
0: Receiver uses a single DMA channel for all audio channels<br />
1: Receiver uses one DMA channel per audio channel-<br />
32117D–AVR-01/12<br />
IMCKFS<br />
2 channels 4 channels 6 channels 8 channels<br />
<strong>AT32UC3C</strong><br />
816
FORMAT: I2S or TDM Format<br />
Table 30-6. Frame Format<br />
FORMAT Description<br />
DATALENGTH: Data Word Length<br />
MODE: Mode<br />
32117D–AVR-01/12<br />
<strong>AT32UC3C</strong><br />
0 I2S I 2 S format, stereo with IWS low for left channel, and MSB of sample starting one ISCK period after IWS edge<br />
1 LJ Left-justified format, stereo with IWS high for left channel, and MSB of sample starting on IWS edge<br />
2 TDM<br />
3 TDMLJ<br />
TDM format, with (NBCHAN+1) channels, IWS high at beginning of first channel, and MSB of sample starting one ISCK<br />
period after IWS edge<br />
TDM format, left-justified, with (NBCHAN+1) channels, IWS high at beginning of first channel, and MSB of sample<br />
starting on IWS edge<br />
Table 30-7. Data Word Length<br />
DATALENGTH Word Length Comments<br />
0 32 bits<br />
1 24 bits<br />
2 20 bits<br />
3 18 bits<br />
4 16 bits<br />
5 16 bits compact stereo Left sample in bits 15 through 0 and right sample in bits 31 through 16 of the same word<br />
6 8 bits<br />
7 8 bits compact stereo Left sample in bits 7 through 0 and right sample in bits 15 through 8 of the same word<br />
Table 30-8. Mode<br />
MODE Comments<br />
0 SLAVE ISCK and IWS pin inputs used as Bit Clock and Word Select/Frame Sync.<br />
1 MASTER<br />
Bit Clock and Word Select/Frame Sync generated by IISC from GCLK_IISC and output to ISCK and IWS pins.<br />
GCLK_IISC is output as Master Clock on IMCK if MR.IMCKMODE is one.<br />
817
30.8.3 Status Register<br />
Name: SR<br />
Access Type: Read-only<br />
Offset: 0x08<br />
Reset Value: 0x00000000<br />
32117D–AVR-01/12<br />
<strong>AT32UC3C</strong><br />
31 30 29 28 27 26 25 24<br />
- - - - TXURCH[7:4]<br />
23 22 21 20 19 18 17 16<br />
TXURCH[3:0] - - - -<br />
15 14 13 12 11 10 9 8<br />
RXORCH<br />
7 6 5 4 3 2 1 0<br />
- TXUR TXRDY TXEN - RXOR RXRDY RXEN<br />
TXURCH: Transmit Underrun Channel<br />
This field is cleared when SCR.TXUR is written to one<br />
Bit i of this field is set when a transmit underrun error occurred in channel i (i=0 for first channel of the frame)<br />
RXORCH: Receive Overrun Channel<br />
This field is cleared when SCR.RXOR is written to one<br />
Bit i of this field is set when a receive overrun error occurred in channel i (i=0 for first channel of the frame)<br />
TXUR: Transmit Underrun<br />
This bit is cleared when the corresponding bit in SCR is written to one<br />
This bit is set when an underrun error occurs on the THR register or when the corresponding bit in SSR is written to one<br />
TXRDY: Transmit Ready<br />
This bit is cleared when data is written to THR<br />
This bit is set when the THR register is empty and can be written with new data to be transmitted<br />
TXEN: Transmitter Enabled<br />
This bit is cleared when the Transmitter is effectively disabled, following a CR.TXDIS or CR.SWRST request<br />
This bit is set when the Transmitter is effectively enabled, following a CR.TXEN request<br />
RXOR: Receive Overrun<br />
This bit is cleared when the corresponding bit in SCR is written to one<br />
This bit is set when an overrun error occurs on the RHR register or when the corresponding bit in SSR is written to one<br />
RXRDY: Receive Ready<br />
This bit is cleared when the RHR register is read<br />
This bit is set when received data is present in the RHR register<br />
RXEN: Receiver Enabled<br />
This bit is cleared when the Receiver is effectively disabled, following a CR.RXDIS or CR.SWRST request<br />
This bit is set when the Receiver is effectively enabled, following a CR.RXEN request<br />
818
30.8.4 Status Clear Register<br />
Name: SCR<br />
Access Type: Write-only<br />
Offset: 0x0C<br />
Reset Value: 0x00000000<br />
32117D–AVR-01/12<br />
<strong>AT32UC3C</strong><br />
31 30 29 28 27 26 25 24<br />
- - - - TXURCH[7:4]<br />
23 22 21 20 19 18 17 16<br />
TXURCH[3:0] - - - -<br />
15 14 13 12 11 10 9 8<br />
RXORCH<br />
7 6 5 4 3 2 1 0<br />
- TXUR - - - RXOR - -<br />
Writing a zero to a bit in this register has no effect.<br />
Writing a one to a bit in this register will clear the corresponding bit in SR and the corresponding interrupt request.<br />
819
30.8.5 Status Set Register<br />
Name: SSR<br />
Access Type: Write-only<br />
Offset: 0x10<br />
Reset Value: 0x00000000<br />
32117D–AVR-01/12<br />
<strong>AT32UC3C</strong><br />
31 30 29 28 27 26 25 24<br />
- - - - TXURCH[7:4]<br />
23 22 21 20 19 18 17 16<br />
TXURCH[3:0] - - - -<br />
15 14 13 12 11 10 9 8<br />
RXORCH<br />
7 6 5 4 3 2 1 0<br />
- TXUR - - - RXOR - -<br />
Writing a zero to a bit in this register has no effect.<br />
Writing a one to a bit in this register will set the corresponding bit in SR.<br />
820
30.8.6 Interrupt Enable Register<br />
Name: IER<br />
Access Type: Write-only<br />
Offset: 0x14<br />
Reset Value: 0x00000000<br />
32117D–AVR-01/12<br />
<strong>AT32UC3C</strong><br />
31 30 29 28 27 26 25 24<br />
- - - - - - - -<br />
23 22 21 20 19 18 17 16<br />
- - - - - - - -<br />
15 14 13 12 11 10 9 8<br />
- - - - - - - -<br />
7 6 5 4 3 2 1 0<br />
- TXUR TXRDY - - RXOR RXRDY -<br />
Writing a zero to a bit in this register has no effect.<br />
Writing a one to a bit in this register will set the corresponding bit in IMR.<br />
821
30.8.7 Interrupt Disable Register<br />
Name: IDR<br />
Access Type: Write-only<br />
Offset: 0x18<br />
Reset Value: 0x00000000<br />
32117D–AVR-01/12<br />
<strong>AT32UC3C</strong><br />
31 30 29 28 27 26 25 24<br />
- - - - - - - -<br />
23 22 21 20 19 18 17 16<br />
- - - - - - - -<br />
15 14 13 12 11 10 9 8<br />
- - - - - - - -<br />
7 6 5 4 3 2 1 0<br />
- TXUR TXRDY - - RXOR RXRDY -<br />
Writing a zero to a bit in this register has no effect.<br />
Writing a one to a bit in this register will clear the corresponding bit in IMR.<br />
822
30.8.8 Interrupt Mask Register<br />
Name: IMR<br />
Access Type: Read-only<br />
Offset: 0x1C<br />
Reset Value: 0x00000000<br />
32117D–AVR-01/12<br />
<strong>AT32UC3C</strong><br />
31 30 29 28 27 26 25 24<br />
- - - - - - - -<br />
23 22 21 20 19 18 17 16<br />
- - - - - - - -<br />
15 14 13 12 11 10 9 8<br />
- - - - - - - -<br />
7 6 5 4 3 2 1 0<br />
- TXUR TXRDY - - RXOR RXRDY -<br />
0: The corresponding interrupt is disabled.<br />
1: The corresponding interrupt is enabled.<br />
A bit in this register is cleared when the corresponding bit in IDR is written to one.<br />
A bit in this register is set when the corresponding bit in IER is written to one.<br />
823
30.8.9 Receive Holding Register<br />
Name: RHR<br />
Access Type: Read-only<br />
Offset: 0x20<br />
Reset Value: 0x00000000<br />
32117D–AVR-01/12<br />
<strong>AT32UC3C</strong><br />
31 30 29 28 27 26 25 24<br />
RHR[31:24]<br />
23 22 21 20 19 18 17 16<br />
RHR[23:16]<br />
15 14 13 12 11 10 9 8<br />
RHR[15:8]<br />
7 6 5 4 3 2 1 0<br />
RHR[7:0]<br />
RHR: Received Word<br />
This field is set by hardware to the last received data word. If MR.DATALENGTH specifies less than 32 bits, data shall be rightjustified<br />
into the RHR field.<br />
824
30.8.10 Transmit Holding Register<br />
Name: THR<br />
Access Type: Write-only<br />
Offset: 0x24<br />
Reset Value: 0x00000000<br />
32117D–AVR-01/12<br />
<strong>AT32UC3C</strong><br />
31 30 29 28 27 26 25 24<br />
THR[31:24]<br />
23 22 21 20 19 18 17 16<br />
THR[23:16]<br />
15 14 13 12 11 10 9 8<br />
THR[15:8]<br />
7 6 5 4 3 2 1 0<br />
THR[7:0]<br />
THR: Data Word to Be Transmitted<br />
Next data word to be transmitted after the current word if TXRDY is not set. If MR.DATALENGTH specifies less than 32 bits, data<br />
shall be right-justified into the THR field.<br />
825
30.8.11 Module Version<br />
Name: VERSION<br />
Access Type: Read-only<br />
Offset: 0x28<br />
Reset Value: -<br />
32117D–AVR-01/12<br />
<strong>AT32UC3C</strong><br />
31 30 29 28 27 26 25 24<br />
- - - - - - - -<br />
23 22 21 20 19 18 17 16<br />
- - - - VARIANT<br />
15 14 13 12 11 10 9 8<br />
- - - - VERSION[11:8]<br />
7 6 5 4 3 2 1 0<br />
VERSION[7:0]<br />
VARIANT: Variant Number<br />
Reserved. No functionality associated.<br />
VERSION: Version Number<br />
Version number of the module. No functionality associated.<br />
826
30.8.12 Module Parameters<br />
Name: PARAMETER<br />
Access Type: Read-only<br />
Offset: 0x2C<br />
Reset Value: -<br />
32117D–AVR-01/12<br />
<strong>AT32UC3C</strong><br />
31 30 29 28 27 26 25 24<br />
- - - - - - - -<br />
23 22 21 20 19 18 17 16<br />
- - - - - - - -<br />
15 14 13 12 11 10 9 8<br />
- - - - - - - -<br />
7 6 5 4 3 2 1 0<br />
- - - - - - - -<br />
Reserved. No functionality associated.<br />
827
32117D–AVR-01/12<br />
<strong>AT32UC3C</strong><br />
30.9 Module configuration<br />
The specific configuration for each IISC instance is listed in the following tables. The module bus<br />
clocks listed here are connected to the system bus clocks according to the table in the System<br />
Bus Clock Connections section.<br />
Table 30-9. Module configuration<br />
Feature IISC<br />
Number of TDM channels 8 channels<br />
Number of Peripheral DMA channels 8 channels<br />
Table 30-10. Module clock name<br />
Module name Clock name Clock name<br />
IISC<br />
CLK_IISC Peripheral Bus clock from the PBA clock domain<br />
GCLK The generic clock used for the IISC is GCLK11<br />
Table 30-11. Register Reset Values<br />
Register Reset Value<br />
VERSION 0x00000200<br />
828
31. Timer/Counter (TC)<br />
31.1 Features<br />
31.2 Overview<br />
32117D–AVR-01/12<br />
Rev: 2.2.3.3<br />
Three 16-bit Timer Counter channels<br />
A wide range of functions including:<br />
– Frequency measurement<br />
– Event counting<br />
– Interval measurement<br />
– Pulse generation<br />
–Delay timing<br />
– Pulse width modulation<br />
– Up/down capabilities<br />
Each channel is user-configurable and contains:<br />
– Three external clock inputs<br />
– Five internal clock inputs<br />
– Two multi-purpose input/output signals<br />
Internal interrupt signal<br />
Two global registers that act on all three TC channels<br />
Peripheral event input on all A/B lines in capture mode<br />
The Timer Counter (TC) includes three identical 16-bit Timer Counter channels.<br />
<strong>AT32UC3C</strong><br />
Each channel can be independently programmed to perform a wide range of functions including<br />
frequency measurement, event counting, interval measurement, pulse generation, delay timing,<br />
and pulse width modulation.<br />
Each channel has three external clock inputs, five internal clock inputs, and two multi-purpose<br />
input/output signals which can be configured by the user. Each channel drives an internal interrupt<br />
signal which can be programmed to generate processor interrupts.<br />
The TC block has two global registers which act upon all three TC channels.<br />
The Block Control Register (BCR) allows the three channels to be started simultaneously with<br />
the same instruction.<br />
The Block Mode Register (BMR) defines the external clock inputs for each channel, allowing<br />
them to be chained.<br />
829
31.3 Block Diagram<br />
31.4 I/O Lines Description<br />
32117D–AVR-01/12<br />
Figure 31-1. TC Block Diagram<br />
<strong>AT32UC3C</strong><br />
31.5 Product Dependencies<br />
In order to use this module, other parts of the system must be configured correctly, as described<br />
below.<br />
31.5.1 I/O Lines<br />
TIMER_CLOCK1<br />
TIMER_CLOCK2<br />
TIMER_CLOCK3<br />
TIMER_CLOCK4<br />
TIMER_CLOCK5<br />
TCLK0<br />
TCLK1<br />
TCLK2<br />
TCLK0<br />
TCLK1<br />
TCLK2<br />
TCLK0<br />
TCLK1<br />
TCLK2<br />
Timer Count er<br />
TIOA1<br />
TIOA2<br />
TIOA0<br />
TIOA2<br />
TIOA0<br />
TIOA1<br />
TC0XC0S<br />
TC1XC1S<br />
XC2<br />
TC2XC2S<br />
Table 31-1. I/O Lines Description<br />
XC0<br />
XC1<br />
XC0<br />
XC1<br />
XC2<br />
XC0<br />
XC1<br />
XC2<br />
Timer/Counter<br />
Channel 0<br />
I/O<br />
Con tr oller<br />
The pins used for interfacing the compliant external devices may be multiplexed with I/O lines.<br />
The user must first program the I/O Controller to assign the TC pins to their peripheral functions.<br />
SYNC<br />
Timer/Counter<br />
Channel 1<br />
SYNC<br />
Timer/Counter<br />
Channel 2<br />
SYNC<br />
TIOA<br />
TIOB<br />
TIOA<br />
TIOB<br />
TIOA<br />
TIOB<br />
INT0<br />
INT1<br />
INT2<br />
TIOA0<br />
TIOB0<br />
TIOA1<br />
TIOB1<br />
TIOA2<br />
TIOB2<br />
Interrupt<br />
Controller<br />
Pin Name Description Type<br />
CLK0-CLK2 External Clock Input Input<br />
A0-A2 I/O Line A Input/Output<br />
B0-B2 I/O Line B Input/Output<br />
CLK0<br />
CLK1<br />
CLK2<br />
A0<br />
B0<br />
A1<br />
B1<br />
A2<br />
B2<br />
830
32117D–AVR-01/12<br />
<strong>AT32UC3C</strong><br />
When using the TIOA/TIOB lines as inputs the user must make sure that no peripheral events<br />
are generated on the line. Refer to the Peripheral Event System chapter for details.<br />
31.5.2 Power Management<br />
If the CPU enters a sleep mode that disables clocks used by the TC, the TC will stop functioning<br />
and resume operation after the system wakes up from sleep mode.<br />
31.5.3 Clocks<br />
31.5.4 Interrupts<br />
The clock for the TC bus interface (CLK_TC) is generated by the Power Manager. This clock is<br />
enabled at reset, and can be disabled in the Power Manager. It is recommended to disable the<br />
TC before disabling the clock, to avoid freezing the TC in an undefined state.<br />
The TC interrupt request line is connected to the interrupt controller. Using the TC interrupt<br />
requires the interrupt controller to be programmed first.<br />
31.5.5 Peripheral Events<br />
The TC peripheral events are connected via the Peripheral Event System. Refer to the Peripheral<br />
Event System chapter for details.<br />
31.5.6 Debug Operation<br />
The Timer Counter clocks are frozen during debug operation, unless the OCD system keeps<br />
peripherals running in debug operation.<br />
31.6 Functional Description<br />
31.6.1 TC Description<br />
The three channels of the Timer Counter are independent and identical in operation. The registers<br />
for channel programming are listed in Figure 31-3 on page 846.<br />
31.6.1.1 Channel I/O Signals<br />
As described in Figure 31-1 on page 830, each Channel has the following I/O signals.<br />
Table 31-2. Channel I/O Signals Description<br />
Block/Channel Signal Name Description<br />
Channel Signal<br />
XC0, XC1, XC2 External Clock Inputs<br />
TIOA<br />
TIOB<br />
Capture mode: Timer Counter Input<br />
Waveform mode: Timer Counter Output<br />
Capture mode: Timer Counter Input<br />
Waveform mode: Timer Counter Input/Output<br />
INT Interrupt Signal Output<br />
SYNC Synchronization Input Signal<br />
31.6.1.2 16-bit counter<br />
Each channel is organized around a 16-bit counter. The value of the counter is incremented at<br />
each positive edge of the selected clock. When the counter has reached the value 0xFFFF and<br />
passes to 0x0000, an overflow occurs and the Counter Overflow Status bit in the Channel n Status<br />
Register (SRn.COVFS) is set.<br />
831
32117D–AVR-01/12<br />
<strong>AT32UC3C</strong><br />
The current value of the counter is accessible in real time by reading the Channel n Counter<br />
Value Register (CVn). The counter can be reset by a trigger. In this case, the counter value<br />
passes to 0x0000 on the next valid edge of the selected clock.<br />
31.6.1.3 Clock selection<br />
At block level, input clock signals of each channel can either be connected to the external inputs<br />
TCLK0, TCLK1 or TCLK2, or be connected to the configurable I/O signals A0, A1 or A2 for<br />
chaining by writing to the BMR register. See Figure 31-2 on page 832.<br />
Each channel can independently select an internal or external clock source for its counter:<br />
Internal clock signals: TIMER_CLOCK1, TIMER_CLOCK2, TIMER_CLOCK3,<br />
TIMER_CLOCK4, TIMER_CLOCK5. See the Module Configuration Chapter for details about<br />
the connection of these clock sources.<br />
External clock signals: XC0, XC1 or XC2. See the Module Configuration Chapter for details<br />
about the connection of these clock sources.<br />
This selection is made by the Clock Selection field in the Channel n Mode Register<br />
(CMRn.TCCLKS).<br />
The selected clock can be inverted with the Clock Invert bit in CMRn (CMRn.CLKI). This allows<br />
counting on the opposite edges of the clock.<br />
The burst function allows the clock to be validated when an external signal is high. The Burst<br />
Signal Selection field in the CMRn register (CMRn.BURST) defines this signal.<br />
Note: In all cases, if an external clock is used, the duration of each of its levels must be longer than the<br />
CLK_TC period. The external clock frequency must be at least 2.5 times lower than the CLK_TC.<br />
Figure 31-2. Clock Selection<br />
TIMER_CLOCK1<br />
TIMER_CLOCK2<br />
TIMER_CLOCK3<br />
TIMER_CLOCK4<br />
TIMER_CLOCK5<br />
XC0<br />
XC1<br />
XC2<br />
1<br />
TCCLKS<br />
BURST<br />
CLKI<br />
Selected<br />
Clock<br />
832
32117D–AVR-01/12<br />
<strong>AT32UC3C</strong><br />
31.6.1.4 Clock control<br />
The clock of each counter can be controlled in two different ways: it can be enabled/disabled<br />
and started/stopped. See Figure 31-3 on page 833.<br />
The clock can be enabled or disabled by the user by writing to the Counter Clock<br />
Enable/Disable Command bits in the Channel n Clock Control Register (CCRn.CLKEN and<br />
CCRn.CLKDIS). In Capture mode it can be disabled by an RB load event if the Counter Clock<br />
Disable with RB Loading bit in CMRn is written to one (CMRn.LDBDIS). In Waveform mode,<br />
it can be disabled by an RC Compare event if the Counter Clock Disable with RC Compare<br />
bit in CMRn is written to one (CMRn.CPCDIS). When disabled, the start or the stop actions<br />
have no effect: only a CLKEN command in CCRn can re-enable the clock. When the clock is<br />
enabled, the Clock Enabling Status bit is set in SRn (SRn.CLKSTA).<br />
The clock can also be started or stopped: a trigger (software, synchro, external or compare)<br />
always starts the clock. In Capture mode the clock can be stopped by an RB load event if the<br />
Counter Clock Stopped with RB Loading bit in CMRn is written to one (CMRn.LDBSTOP). In<br />
Waveform mode it can be stopped by an RC compare event if the Counter Clock Stopped<br />
with RC Compare bit in CMRn is written to one (CMRn.CPCSTOP). The start and the stop<br />
commands have effect only if the clock is enabled.<br />
Figure 31-3. Clock Control<br />
Selected<br />
Clock<br />
Counter<br />
Clock<br />
Q S<br />
R<br />
Trigger<br />
31.6.1.5 TC operating modes<br />
Each channel can independently operate in two different modes:<br />
Capture mode provides measurement on signals.<br />
Waveform mode provides wave generation.<br />
The TC operating mode selection is done by writing to the Wave bit in the CCRn register<br />
(CCRn.WAVE).<br />
In Capture mode, TIOA and TIOB are configured as inputs.<br />
CLKSTA CLKEN CLKDIS<br />
Q<br />
S<br />
R<br />
Stop<br />
Event<br />
Disable<br />
Event<br />
833
31.6.1.6 Trigger<br />
32117D–AVR-01/12<br />
<strong>AT32UC3C</strong><br />
In Waveform mode, TIOA is always configured to be an output and TIOB is an output if it is not<br />
selected to be the external trigger.<br />
A trigger resets the counter and starts the counter clock. Three types of triggers are common to<br />
both modes, and a fourth external trigger is available to each mode.<br />
The following triggers are common to both modes:<br />
Software Trigger: each channel has a software trigger, available by writing a one to the<br />
Software Trigger Command bit in CCRn (CCRn.SWTRG).<br />
SYNC: each channel has a synchronization signal SYNC. When asserted, this signal has the<br />
same effect as a software trigger. The SYNC signals of all channels are asserted<br />
simultaneously by writing a one to the Synchro Command bit in the BCR register<br />
(BCR.SYNC).<br />
Compare RC Trigger: RC is implemented in each channel and can provide a trigger when the<br />
counter value matches the RC value if the RC Compare Trigger Enable bit in CMRn<br />
(CMRn.CPCTRG) is written to one.<br />
The channel can also be configured to have an external trigger. In Capture mode, the external<br />
trigger signal can be selected between TIOA and TIOB. In Waveform mode, an external event<br />
can be programmed to be one of the following signals: TIOB, XC0, XC1, or XC2. This external<br />
event can then be programmed to perform a trigger by writing a one to the External Event Trigger<br />
Enable bit in CMRn (CMRn.ENETRG).<br />
If an external trigger is used, the duration of the pulses must be longer than the CLK_TC period<br />
in order to be detected.<br />
Regardless of the trigger used, it will be taken into account at the following active edge of the<br />
selected clock. This means that the counter value can be read differently from zero just after a<br />
trigger, especially when a low frequency signal is selected as the clock.<br />
31.6.1.7 Peripheral events on TIOA/TIOB inputs<br />
The TIOA/TIOB input lines are ored internally with peripheral events from the Peripheral Event<br />
System. To capture using events the user must ensure that the corresponding pin functions for<br />
the TIOA/TIOB line are disabled. When capturing on the external TIOA/TIOB pin the user must<br />
ensure that no peripheral events are generated on this pin.<br />
31.6.2 Capture Operating Mode<br />
This mode is entered by writing a zero to the CMRn.WAVE bit.<br />
Capture mode allows the TC channel to perform measurements such as pulse timing, frequency,<br />
period, duty cycle and phase on TIOA and TIOB signals which are considered as<br />
inputs.<br />
Figure 31-4 on page 836 shows the configuration of the TC channel when programmed in Capture<br />
mode.<br />
31.6.2.1 Capture registers A and B<br />
Registers A and B (RA and RB) are used as capture registers. This means that they can be<br />
loaded with the counter value when a programmable event occurs on the signal TIOA.<br />
834
32117D–AVR-01/12<br />
<strong>AT32UC3C</strong><br />
The RA Loading Selection field in CMRn (CMRn.LDRA) defines the TIOA edge for the loading of<br />
the RA register, and the RB Loading Selection field in CMRn (CMRn.LDRB) defines the TIOA<br />
edge for the loading of the RB register.<br />
RA is loaded only if it has not been loaded since the last trigger or if RB has been loaded since<br />
the last loading of RA.<br />
RB is loaded only if RA has been loaded since the last trigger or the last loading of RB.<br />
Loading RA or RB before the read of the last value loaded sets the Load Overrun Status bit in<br />
SRn (SRn.LOVRS). In this case, the old value is overwritten.<br />
31.6.2.2 Trigger conditions<br />
In addition to the SYNC signal, the software trigger and the RC compare trigger, an external trigger<br />
can be defined.<br />
The TIOA or TIOB External Trigger Selection bit in CMRn (CMRn.ABETRG) selects TIOA or<br />
TIOB input signal as an external trigger. The External Trigger Edge Selection bit in CMRn<br />
(CMRn.ETREDG) defines the edge (rising, falling or both) detected to generate an external trigger.<br />
If CMRn.ETRGEDG is zero (none), the external trigger is disabled.<br />
835
Figure 31-4. Capture Mode<br />
TCCLKS<br />
32117D–AVR-01/12<br />
CLKSTA CLKEN CLKDIS<br />
CLKI<br />
TIMER_CLOCK1<br />
S<br />
R<br />
Q<br />
Q S<br />
R<br />
TIMER_CLOCK2<br />
TIMER_CLOCK3<br />
TIMER_CLOCK4<br />
TIMER_CLOCK5<br />
XC0<br />
XC1<br />
XC2<br />
LDBDIS<br />
LDBSTOP<br />
BURST<br />
Register C<br />
Capture<br />
Capture<br />
Register A Register B Compare RC =<br />
1<br />
16-bit<br />
Counter<br />
SWTRG<br />
CLK<br />
OVF<br />
RESET<br />
SYNC<br />
Trig<br />
ABETRG<br />
CPCTRG<br />
ETRGEDG<br />
Edge<br />
Detect or<br />
MTIOB<br />
TIOB<br />
LOVRS<br />
COVFS<br />
LDRBS<br />
LDRAS<br />
ETRGS<br />
SR<br />
LDRB<br />
LDRA<br />
CPCS<br />
Edge<br />
Detector<br />
Edge<br />
Detector<br />
If RA is not Loaded<br />
or RB is Loaded If RA is Loaded<br />
MTIOA<br />
TIOA<br />
IMR<br />
<strong>AT32UC3C</strong><br />
Timer/Counter Channel<br />
INT<br />
836
31.6.3 Waveform Operating Mode<br />
Waveform operating mode is entered by writing a one to the CMRn.WAVE bit.<br />
32117D–AVR-01/12<br />
<strong>AT32UC3C</strong><br />
In Waveform operating mode the TC channel generates one or two PWM signals with the same<br />
frequency and independently programmable duty cycles, or generates different types of oneshot<br />
or repetitive pulses.<br />
In this mode, TIOA is configured as an output and TIOB is defined as an output if it is not used<br />
as an external event.<br />
Figure 31-5 on page 838 shows the configuration of the TC channel when programmed in<br />
Waveform operating mode.<br />
31.6.3.1 Waveform selection<br />
Depending on the Waveform Selection field in CMRn (CMRn.WAVSEL), the behavior of CVn<br />
varies.<br />
With any selection, RA, RB and RC can all be used as compare registers.<br />
RA Compare is used to control the TIOA output, RB Compare is used to control the TIOB output<br />
(if correctly configured) and RC Compare is used to control TIOA and/or TIOB outputs.<br />
837
32117D–AVR-01/12<br />
Figure 31-5. Waveform Mode<br />
TCCLKS<br />
CLKSTA CLKEN CLKDIS<br />
ACPC<br />
CLKI<br />
TIMER_CLOCK1<br />
S<br />
R<br />
Q<br />
MTIOA<br />
ACPA<br />
CPCDIS<br />
TIMER_CLOCK2<br />
TIMER_CLOCK3<br />
TIMER_CLOCK4<br />
TIMER_CLOCK5<br />
Q S<br />
R<br />
TIOA<br />
Output Controller<br />
CPCSTOP<br />
XC0<br />
XC1<br />
XC2<br />
AEEVT<br />
Register B Register C<br />
Register A<br />
BURST<br />
WAVSEL<br />
ASWTRG<br />
Compare RC =<br />
Compare RB =<br />
Compare RA =<br />
1<br />
16-bit<br />
Counter<br />
CLK<br />
OVF<br />
RESET<br />
SWTRG<br />
BCPC<br />
SYNC<br />
Tr ig<br />
MTIOB<br />
BCPB<br />
WAVSEL<br />
EEVT<br />
TIOB<br />
Output Controller<br />
BEEVT<br />
EEV TEDG<br />
CPCS<br />
CPBS<br />
CPAS<br />
COVFS<br />
ETRGS<br />
SR<br />
ENETRG<br />
BSWTRG<br />
Edge<br />
Detector<br />
<strong>AT32UC3C</strong><br />
TIOB<br />
IMR<br />
Timer/Counter Channel<br />
INT<br />
838
32117D–AVR-01/12<br />
<strong>AT32UC3C</strong><br />
31.6.3.2 WAVSEL = 0<br />
When CMRn.WAVSEL is zero, the value of CVn is incremented from 0 to 0xFFFF. Once<br />
0xFFFF has been reached, the value of CVn is reset. Incrementation of CVn starts again and<br />
the cycle continues. See Figure 31-6 on page 839.<br />
An external event trigger or a software trigger can reset the value of CVn. It is important to note<br />
that the trigger may occur at any time. See Figure 31-7 on page 840.<br />
RC Compare cannot be programmed to generate a trigger in this configuration. At the same<br />
time, RC Compare can stop the counter clock (CMRn.CPCSTOP = 1) and/or disable the counter<br />
clock (CMRn.CPCDIS = 1).<br />
Figure 31-6. WAVSEL= 0 Without Trigger<br />
0xFFFF<br />
Counter Value<br />
RC<br />
RB<br />
RA<br />
Waveform Examples<br />
TIOB<br />
TIOA<br />
Counter cleared by compare match with<br />
0xFFFF<br />
Time<br />
839
32117D–AVR-01/12<br />
Figure 31-7. WAVSEL= 0 With Trigger<br />
0xFFFF<br />
Counter Value<br />
RC<br />
RB<br />
RA<br />
Waveform Examples<br />
TIOB<br />
TIOA<br />
Counter cleared by compare match with 0xFFFF<br />
Counter cleared by trigger<br />
<strong>AT32UC3C</strong><br />
31.6.3.3 WAVSEL = 2<br />
When CMRn.WAVSEL is two, the value of CVn is incremented from zero to the value of RC,<br />
then automatically reset on a RC Compare. Once the value of CVn has been reset, it is then<br />
incremented and so on. See Figure 31-8 on page 841.<br />
It is important to note that CVn can be reset at any time by an external event or a software trigger<br />
if both are programmed correctly. See Figure 31-9 on page 841.<br />
In addition, RC Compare can stop the counter clock (CMRn.CPCSTOP) and/or disable the<br />
counter clock (CMRn.CPCDIS = 1).<br />
Time<br />
840
32117D–AVR-01/12<br />
Figure 31-8. WAVSEL = 2 Without Trigger<br />
Counter Value<br />
0xFFFF<br />
RC<br />
RB<br />
RA<br />
Waveform Examples<br />
Figure 31-9. WAVSEL = 2 With Trigger<br />
0xFFFF<br />
TIOB<br />
TIOA<br />
Counter Value<br />
R C<br />
R B<br />
R A<br />
Waveform Examples<br />
TIOB<br />
TIOA<br />
Counter cleared by compare match<br />
with RC<br />
Counter cleared by compare match with RC<br />
<strong>AT32UC3C</strong><br />
31.6.3.4 WAVSEL = 1<br />
When CMRn.WAVSEL is one, the value of CVn is incremented from 0 to 0xFFFF. Once 0xFFFF<br />
is reached, the value of CVn is decremented to 0, then re-incremented to 0xFFFF and so on.<br />
See Figure 31-10 on page 842.<br />
Time<br />
Counter cleared by trigger<br />
Time<br />
841
Figure 31-10. WAVSEL = 1 Without Trigger<br />
0xFFFF<br />
32117D–AVR-01/12<br />
Counter Value<br />
RC<br />
RB<br />
RA<br />
Waveform Examples<br />
TIOB<br />
TIOA<br />
Figure 31-11. WAVSEL = 1 With Trigger<br />
Counter Value<br />
0xFFFF<br />
RC<br />
RB<br />
RA<br />
Waveform Examples<br />
TIOB<br />
TIOA<br />
<strong>AT32UC3C</strong><br />
A trigger such as an external event or a software trigger can modify CVn at any time. If a trigger<br />
occurs while CVn is incrementing, CVn then decrements. If a trigger is received while CVn is<br />
decrementing, CVn then increments. See Figure 31-11 on page 842.<br />
RC Compare cannot be programmed to generate a trigger in this configuration.<br />
At the same time, RC Compare can stop the counter clock (CMRn.CPCSTOP = 1) and/or disable<br />
the counter clock (CMRn.CPCDIS = 1).<br />
Counter decremented by compare match<br />
with 0xFFFF<br />
Counter decremented by compare match with 0xFFFF<br />
Counter decremented by trigger<br />
Time<br />
Counter incremented by trigger<br />
Time<br />
842
32117D–AVR-01/12<br />
<strong>AT32UC3C</strong><br />
31.6.3.5 WAVSEL = 3<br />
When CMRn.WAVSEL is three, the value of CVn is incremented from zero to RC. Once RC is<br />
reached, the value of CVn is decremented to zero, then re-incremented to RC and so on. See<br />
Figure 31-12 on page 843.<br />
Figure 31-12. WAVSEL = 3 Without Trigger<br />
Counter Value<br />
0xFFFF<br />
RC<br />
RB<br />
RA<br />
Waveform Examples<br />
TIOB<br />
TIOA<br />
A trigger such as an external event or a software trigger can modify CVn at any time. If a trigger<br />
occurs while CVn is incrementing, CVn then decrements. If a trigger is received while CVn is<br />
decrementing, CVn then increments. See Figure 31-13 on page 844.<br />
RC Compare can stop the counter clock (CMRn.CPCSTOP = 1) and/or disable the counter clock<br />
(CMRn.CPCDIS = 1).<br />
Counter cleared by compare match with RC<br />
Time<br />
843
Figure 31-13. WAVSEL = 3 With Trigger<br />
32117D–AVR-01/12<br />
Counter Value<br />
0xFFFF<br />
RC<br />
RB<br />
RA<br />
Waveform Examples<br />
TIOB<br />
TIOA<br />
Counter decremented by compare match<br />
with RC<br />
<strong>AT32UC3C</strong><br />
31.6.3.6 External event/trigger conditions<br />
An external event can be programmed to be detected on one of the clock sources (XC0, XC1,<br />
XC2) or TIOB. The external event selected can then be used as a trigger.<br />
The External Event Selection field in CMRn (CMRn.EEVT) selects the external trigger. The<br />
External Event Edge Selection field in CMRn (CMRn.EEVTEDG) defines the trigger edge for<br />
each of the possible external triggers (rising, falling or both). If CMRn.EEVTEDG is written to<br />
zero, no external event is defined.<br />
If TIOB is defined as an external event signal (CMRn.EEVT = 0), TIOB is no longer used as an<br />
output and the compare register B is not used to generate waveforms and subsequently no<br />
IRQs. In this case the TC channel can only generate a waveform on TIOA.<br />
When an external event is defined, it can be used as a trigger by writing a one to the<br />
CMRn.ENETRG bit.<br />
As in Capture mode, the SYNC signal and the software trigger are also available as triggers. RC<br />
Compare can also be used as a trigger depending on the CMRn.WAVSEL field.<br />
31.6.3.7 Output controller<br />
The output controller defines the output level changes on TIOA and TIOB following an event.<br />
TIOB control is used only if TIOB is defined as output (not as an external event).<br />
The following events control TIOA and TIOB:<br />
software trigger<br />
external event<br />
RC compare<br />
RA compare controls TIOA and RB compare controls TIOB. Each of these events can be programmed<br />
to set, clear or toggle the output as defined in the following fields in CMRn:<br />
RC Compare Effect on TIOB (CMRn.BCPC)<br />
Counter decremented by trigger<br />
Counter incremented by trigger<br />
Time<br />
844
32117D–AVR-01/12<br />
RB Compare Effect on TIOB (CMRn.BCPB)<br />
RC Compare Effect on TIOA (CMRn.ACPC)<br />
RA Compare Effect on TIOA (CMRn.ACPA)<br />
<strong>AT32UC3C</strong><br />
845
31.7 User Interface<br />
Table 31-3. TC Register Memory Map<br />
32117D–AVR-01/12<br />
<strong>AT32UC3C</strong><br />
Offset Register Register Name Access Reset<br />
0x00 Channel 0 Control Register CCR0 Write-only 0x00000000<br />
0x04 Channel 0 Mode Register CMR0 Read/Write 0x00000000<br />
0x10 Channel 0 Counter Value CV0 Read-only 0x00000000<br />
0x14 Channel 0 Register A RA0 Read/Write (1)<br />
0x00000000<br />
0x18 Channel 0 Register B RB0 Read/Write (1)<br />
0x00000000<br />
0x1C Channel 0 Register C RC0 Read/Write 0x00000000<br />
0x20 Channel 0 Status Register SR0 Read-only 0x00000000<br />
0x24 Interrupt Enable Register IER0 Write-only 0x00000000<br />
0x28 Channel 0 Interrupt Disable Register IDR0 Write-only 0x00000000<br />
0x2C Channel 0 Interrupt Mask Register IMR0 Read-only 0x00000000<br />
0x40 Channel 1 Control Register CCR1 Write-only 0x00000000<br />
0x44 Channel 1 Mode Register CMR1 Read/Write 0x00000000<br />
0x50 Channel 1 Counter Value CV1 Read-only 0x00000000<br />
0x54 Channel 1 Register A RA1 Read/Write (1)<br />
0x00000000<br />
0x58 Channel 1 Register B RB1 Read/Write (1)<br />
0x00000000<br />
0x5C Channel 1 Register C RC1 Read/Write 0x00000000<br />
0x60 Channel 1 Status Register SR1 Read-only 0x00000000<br />
0x64 Channel 1 Interrupt Enable Register IER1 Write-only 0x00000000<br />
0x68 Channel 1 Interrupt Disable Register IDR1 Write-only 0x00000000<br />
0x6C Channel 1 Interrupt Mask Register IMR1 Read-only 0x00000000<br />
0x80 Channel 2 Control Register CCR2 Write-only 0x00000000<br />
0x84 Channel 2 Mode Register CMR2 Read/Write 0x00000000<br />
0x90 Channel 2 Counter Value CV2 Read-only 0x00000000<br />
0x94 Channel 2 Register A RA2 Read/Write (1) 0x00000000<br />
0x98 Channel 2 Register B RB2 Read/Write (1) 0x00000000<br />
0x9C Channel 2 Register C RC2 Read/Write 0x00000000<br />
0xA0 Channel 2 Status Register SR2 Read-only 0x00000000<br />
0xA4 Channel 2 Interrupt Enable Register IER2 Write-only 0x00000000<br />
0xA8 Channel 2 Interrupt Disable Register IDR2 Write-only 0x00000000<br />
0xAC Channel 2 Interrupt Mask Register IMR2 Read-only 0x00000000<br />
0xC0 Block Control Register BCR Write-only 0x00000000<br />
0xC4 Block Mode Register BMR Read/Write 0x00000000<br />
0xF8 Features Register FEATURES Read-only - (2)<br />
0xFC Version Register VERSION Read-only - (2)<br />
846
32117D–AVR-01/12<br />
<strong>AT32UC3C</strong><br />
Notes: 1. Read-only if CMRn.WAVE is zero.<br />
2. The reset values are device specific. Please refer to the Module Configuration section at the<br />
end of this chapter.<br />
847
31.7.1 Channel Control Register<br />
Name: CCR<br />
Access Type: Write-only<br />
Offset: 0x00 + n * 0x40<br />
Reset Value: 0x00000000<br />
32117D–AVR-01/12<br />
<strong>AT32UC3C</strong><br />
31 30 29 28 27 26 25 24<br />
- - - - - - - -<br />
23 22 21 20 19 18 17 16<br />
- - - - - - - -<br />
15 14 13 12 11 10 9 8<br />
- - - - - - - -<br />
7 6 5 4 3 2 1 0<br />
- - - - - SWTRG CLKDIS CLKEN<br />
SWTRG: Software Trigger Command<br />
1: Writing a one to this bit will perform a software trigger: the counter is reset and the clock is started.<br />
0: Writing a zero to this bit has no effect.<br />
CLKDIS: Counter Clock Disable Command<br />
1: Writing a one to this bit will disable the clock.<br />
0: Writing a zero to this bit has no effect.<br />
CLKEN: Counter Clock Enable Command<br />
1: Writing a one to this bit will enable the clock if CLKDIS is not one.<br />
0: Writing a zero to this bit has no effect.<br />
848
31.7.2 Channel Mode Register: Capture Mode<br />
Name: CMR<br />
Access Type: Read/Write<br />
Offset: 0x04 + n * 0x40<br />
Reset Value: 0x00000000<br />
32117D–AVR-01/12<br />
<strong>AT32UC3C</strong><br />
31 30 29 28 27 26 25 24<br />
- - - - - - - -<br />
23 22 21 20 19 18 17 16<br />
- - - - LDRB LDRA<br />
15 14 13 12 11 10 9 8<br />
WAVE CPCTRG - - - ABETRG ETRGEDG<br />
7 6 5 4 3 2 1 0<br />
LDBDIS LDBSTOP BURST CLKI TCCLKS<br />
LDRB: RB Loading Selection<br />
LDRB Edge<br />
0 none<br />
1 rising edge of TIOA<br />
2 falling edge of TIOA<br />
3 each edge of TIOA<br />
LDRA: RA Loading Selection<br />
LDRA Edge<br />
0 none<br />
1 rising edge of TIOA<br />
2 falling edge of TIOA<br />
3 each edge of TIOA<br />
WAVE<br />
1: Capture mode is disabled (Waveform mode is enabled).<br />
0: Capture mode is enabled.<br />
CPCTRG: RC Compare Trigger Enable<br />
1: RC Compare resets the counter and starts the counter clock.<br />
0: RC Compare has no effect on the counter and its clock.<br />
ABETRG: TIOA or TIOB External Trigger Selection<br />
1: TIOA is used as an external trigger.<br />
849
0: TIOB is used as an external trigger.<br />
ETRGEDG: External Trigger Edge Selection<br />
ETRGEDG Edge<br />
32117D–AVR-01/12<br />
0 none<br />
1 rising edge<br />
2 falling edge<br />
3 each edge<br />
LDBDIS: Counter Clock Disable with RB Loading<br />
1: Counter clock is disabled when RB loading occurs.<br />
0: Counter clock is not disabled when RB loading occurs.<br />
LDBSTOP: Counter Clock Stopped with RB Loading<br />
1: Counter clock is stopped when RB loading occurs.<br />
0: Counter clock is not stopped when RB loading occurs.<br />
BURST: Burst Signal Selection<br />
BURST Burst Signal Selection<br />
0 The clock is not gated by an external signal<br />
1 XC0 is ANDed with the selected clock<br />
2 XC1 is ANDed with the selected clock<br />
3 XC2 is ANDed with the selected clock<br />
CLKI: Clock Invert<br />
1: The counter is incremented on falling edge of the clock.<br />
0: The counter is incremented on rising edge of the clock.<br />
TCCLKS: Clock Selection<br />
TCCLKS Clock Selected<br />
0 TIMER_CLOCK1<br />
1 TIMER_CLOCK2<br />
2 TIMER_CLOCK3<br />
3 TIMER_CLOCK4<br />
4 TIMER_CLOCK5<br />
5 XC0<br />
6 XC1<br />
7 XC2<br />
<strong>AT32UC3C</strong><br />
850
31.7.3 Channel Mode Register: Waveform Mode<br />
Name: CMR<br />
Access Type: Read/Write<br />
Offset: 0x04 + n * 0x40<br />
Reset Value: 0x00000000<br />
32117D–AVR-01/12<br />
<strong>AT32UC3C</strong><br />
31 30 29 28 27 26 25 24<br />
BSWTRG BEEVT BCPC BCPB<br />
23 22 21 20 19 18 17 16<br />
ASWTRG AEEVT ACPC ACPA<br />
15 14 13 12 11 10 9 8<br />
WAVE WAVSEL ENETRG EEVT EEVTEDG<br />
7 6 5 4 3 2 1 0<br />
CPCDIS CPCSTOP BURST CLKI TCCLKS<br />
BSWTRG: Software Trigger Effect on TIOB<br />
BSWTRG Effect<br />
0 none<br />
1 set<br />
2 clear<br />
3 toggle<br />
BEEVT: External Event Effect on TIOB<br />
BEEVT Effect<br />
0 none<br />
1 set<br />
2 clear<br />
3 toggle<br />
851
BCPC: RC Compare Effect on TIOB<br />
BCPC Effect<br />
32117D–AVR-01/12<br />
0 none<br />
1 set<br />
2 clear<br />
3 toggle<br />
BCPB: RB Compare Effect on TIOB<br />
BCPB Effect<br />
0 none<br />
1 set<br />
2 clear<br />
3 toggle<br />
ASWTRG: Software Trigger Effect on TIOA<br />
ASWTRG Effect<br />
0 none<br />
1 set<br />
2 clear<br />
3 toggle<br />
AEEVT: External Event Effect on TIOA<br />
AEEVT Effect<br />
0 none<br />
1 set<br />
2 clear<br />
3 toggle<br />
ACPC: RC Compare Effect on TIOA<br />
ACPC Effect<br />
0 none<br />
1 set<br />
2 clear<br />
3 toggle<br />
<strong>AT32UC3C</strong><br />
852
ACPA: RA Compare Effect on TIOA<br />
ACPA Effect<br />
WAVE<br />
1: Waveform mode is enabled.<br />
0: Waveform mode is disabled (Capture mode is enabled).<br />
WAVSEL: Waveform Selection<br />
32117D–AVR-01/12<br />
0 none<br />
1 set<br />
2 clear<br />
3 toggle<br />
WAVSEL Effect<br />
0 UP mode without automatic trigger on RC Compare<br />
1 UPDOWN mode without automatic trigger on RC Compare<br />
2 UP mode with automatic trigger on RC Compare<br />
3 UPDOWN mode with automatic trigger on RC Compare<br />
<strong>AT32UC3C</strong><br />
ENETRG: External Event Trigger Enable<br />
1: The external event resets the counter and starts the counter clock.<br />
0: The external event has no effect on the counter and its clock. In this case, the selected external event only controls the TIOA<br />
output.<br />
EEVT: External Event Selection<br />
EEVT Signal selected as external event TIOB Direction<br />
0 TIOB input (1)<br />
1 XC0 output<br />
2 XC1 output<br />
3 XC2 output<br />
Note: 1. If TIOB is chosen as the external event signal, it is configured as an input and no longer generates waveforms and subsequently<br />
no IRQs.<br />
EEVTEDG: External Event Edge Selection<br />
EEVTEDG Edge<br />
0 none<br />
1 rising edge<br />
2 falling edge<br />
3 each edge<br />
CPCDIS: Counter Clock Disable with RC Compare<br />
1: Counter clock is disabled when counter reaches RC.<br />
0: Counter clock is not disabled when counter reaches RC.<br />
853
CPCSTOP: Counter Clock Stopped with RC Compare<br />
1: Counter clock is stopped when counter reaches RC.<br />
0: Counter clock is not stopped when counter reaches RC.<br />
BURST: Burst Signal Selection<br />
BURST Burst Signal Selection<br />
32117D–AVR-01/12<br />
0 The clock is not gated by an external signal.<br />
1 XC0 is ANDed with the selected clock.<br />
2 XC1 is ANDed with the selected clock.<br />
3 XC2 is ANDed with the selected clock.<br />
CLKI: Clock Invert<br />
1: Counter is incremented on falling edge of the clock.<br />
0: Counter is incremented on rising edge of the clock.<br />
TCCLKS: Clock Selection<br />
TCCLKS Clock Selected<br />
0 TIMER_CLOCK1<br />
1 TIMER_CLOCK2<br />
2 TIMER_CLOCK3<br />
3 TIMER_CLOCK4<br />
4 TIMER_CLOCK5<br />
5 XC0<br />
6 XC1<br />
7 XC2<br />
<strong>AT32UC3C</strong><br />
854
31.7.4 Channel Counter Value Register<br />
Name: CV<br />
Access Type: Read-only<br />
Offset: 0x10 + n * 0x40<br />
Reset Value: 0x00000000<br />
32117D–AVR-01/12<br />
<strong>AT32UC3C</strong><br />
31 30 29 28 27 26 25 24<br />
- - - - - - - -<br />
23 22 21 20 19 18 17 16<br />
- - - - - - - -<br />
15 14 13 12 11 10 9 8<br />
CV: Counter Value<br />
CV contains the counter value in real time.<br />
CV[15:8]<br />
7 6 5 4 3 2 1 0<br />
CV[7:0]<br />
855
31.7.5 Channel Register A<br />
Name: RA<br />
Access Type: Read-only if CMRn.WAVE = 0, Read/Write if CMRn.WAVE = 1<br />
Offset: 0x14 + n * 0X40<br />
Reset Value: 0x00000000<br />
32117D–AVR-01/12<br />
<strong>AT32UC3C</strong><br />
31 30 29 28 27 26 25 24<br />
- - - - - - - -<br />
23 22 21 20 19 18 17 16<br />
- - - - - - - -<br />
15 14 13 12 11 10 9 8<br />
RA: Register A<br />
RA contains the Register A value in real time.<br />
RA[15:8]<br />
7 6 5 4 3 2 1 0<br />
RA[7:0]<br />
856
31.7.6 Channel Register B<br />
Name: RB<br />
Access Type: Read-only if CMRn.WAVE = 0, Read/Write if CMRn.WAVE = 1<br />
Offset: 0x18 + n * 0x40<br />
Reset Value: 0x00000000<br />
32117D–AVR-01/12<br />
<strong>AT32UC3C</strong><br />
31 30 29 28 27 26 25 24<br />
- - - - - - - -<br />
23 22 21 20 19 18 17 16<br />
- - - - - - - -<br />
15 14 13 12 11 10 9 8<br />
RB: Register B<br />
RB contains the Register B value in real time.<br />
RB[15:8]<br />
7 6 5 4 3 2 1 0<br />
RB[7:0]<br />
857
31.7.7 Channel Register C<br />
Name: RC<br />
Access Type: Read/Write<br />
Offset: 0x1C + n * 0x40<br />
Reset Value: 0x00000000<br />
32117D–AVR-01/12<br />
<strong>AT32UC3C</strong><br />
31 30 29 28 27 26 25 24<br />
- - - - - - - -<br />
23 22 21 20 19 18 17 16<br />
- - - - - - - -<br />
15 14 13 12 11 10 9 8<br />
RC: Register C<br />
RC contains the Register C value in real time.<br />
RC[15:8]<br />
7 6 5 4 3 2 1 0<br />
RC[7:0]<br />
858
31.7.8 Channel Status Register<br />
Name: SR<br />
Access Type: Read-only<br />
Offset: 0x20 + n * 0x40<br />
Reset Value: 0x00000000<br />
32117D–AVR-01/12<br />
<strong>AT32UC3C</strong><br />
31 30 29 28 27 26 25 24<br />
- - - - - - - -<br />
23 22 21 20 19 18 17 16<br />
- - - - - MTIOB MTIOA CLKSTA<br />
15 14 13 12 11 10 9 8<br />
- - - - - - - -<br />
7 6 5 4 3 2 1 0<br />
ETRGS LDRBS LDRAS CPCS CPBS CPAS LOVRS COVFS<br />
Note: Reading the Status Register will also clear the interrupt bit for the corresponding interrupts.<br />
MTIOB: TIOB Mirror<br />
1: TIOB is high. If CMRn.WAVE is zero, this means that TIOB pin is high. If CMRn.WAVE is one, this means that TIOB is driven<br />
high.<br />
0: TIOB is low. If CMRn.WAVE is zero, this means that TIOB pin is low. If CMRn.WAVE is one, this means that TIOB is driven<br />
low.<br />
MTIOA: TIOA Mirror<br />
1: TIOA is high. If CMRn.WAVE is zero, this means that TIOA pin is high. If CMRn.WAVE is one, this means that TIOA is driven<br />
high.<br />
0: TIOA is low. If CMRn.WAVE is zero, this means that TIOA pin is low. If CMRn.WAVE is one, this means that TIOA is driven<br />
low.<br />
CLKSTA: Clock Enabling Status<br />
1: This bit is set when the clock is enabled.<br />
0: This bit is cleared when the clock is disabled.<br />
ETRGS: External Trigger Status<br />
1: This bit is set when an external trigger has occurred.<br />
0: This bit is cleared when the SR register is read.<br />
LDRBS: RB Loading Status<br />
1: This bit is set when an RB Load has occurred and CMRn.WAVE is zero.<br />
0: This bit is cleared when the SR register is read.<br />
LDRAS: RA Loading Status<br />
1: This bit is set when an RA Load has occurred and CMRn.WAVE is zero.<br />
0: This bit is cleared when the SR register is read.<br />
CPCS: RC Compare Status<br />
1: This bit is set when an RC Compare has occurred.<br />
0: This bit is cleared when the SR register is read.<br />
859
32117D–AVR-01/12<br />
<strong>AT32UC3C</strong><br />
CPBS: RB Compare Status<br />
1: This bit is set when an RB Compare has occurred and CMRn.WAVE is one.<br />
0: This bit is cleared when the SR register is read.<br />
CPAS: RA Compare Status<br />
1: This bit is set when an RA Compare has occurred and CMRn.WAVE is one.<br />
0: This bit is cleared when the SR register is read.<br />
LOVRS: Load Overrun Status<br />
1: This bit is set when RA or RB have been loaded at least twice without any read of the corresponding register and<br />
CMRn.WAVE is zero.<br />
0: This bit is cleared when the SR register is read.<br />
COVFS: Counter Overflow Status<br />
1: This bit is set when a counter overflow has occurred.<br />
0: This bit is cleared when the SR register is read.<br />
860
31.7.9 Channel Interrupt Enable Register<br />
Name: IER<br />
Access Type: Write-only<br />
Offset: 0x24 + n * 0x40<br />
Reset Value: 0x00000000<br />
32117D–AVR-01/12<br />
<strong>AT32UC3C</strong><br />
31 30 29 28 27 26 25 24<br />
- - - - - - - -<br />
23 22 21 20 19 18 17 16<br />
- - - - - - - -<br />
15 14 13 12 11 10 9 8<br />
- - - - - - - -<br />
7 6 5 4 3 2 1 0<br />
ETRGS LDRBS LDRAS CPCS CPBS CPAS LOVRS COVFS<br />
Writing a zero to a bit in this register has no effect.<br />
Writing a one to a bit in this register will set the corresponding bit in IMR.<br />
861
31.7.10 Channel Interrupt Disable Register<br />
Name: IDR<br />
Access Type: Write-only<br />
Offset: 0x28 + n * 0x40<br />
Reset Value: 0x00000000<br />
32117D–AVR-01/12<br />
<strong>AT32UC3C</strong><br />
31 30 29 28 27 26 25 24<br />
- - - - - - - -<br />
23 22 21 20 19 18 17 16<br />
- - - - - - - -<br />
15 14 13 12 11 10 9 8<br />
- - - - - - - -<br />
7 6 5 4 3 2 1 0<br />
ETRGS LDRBS LDRAS CPCS CPBS CPAS LOVRS COVFS<br />
Writing a zero to a bit in this register has no effect.<br />
Writing a one to a bit in this register will clear the corresponding bit in IMR.<br />
862
31.7.11 Channel Interrupt Mask Register<br />
Name: IMR<br />
Access Type: Read-only<br />
Offset: 0x2C + n * 0x40<br />
Reset Value: 0x00000000<br />
32117D–AVR-01/12<br />
<strong>AT32UC3C</strong><br />
31 30 29 28 27 26 25 24<br />
- - - - - - - -<br />
23 22 21 20 19 18 17 16<br />
- - - - - - - -<br />
15 14 13 12 11 10 9 8<br />
- - - - - - - -<br />
7 6 5 4 3 2 1 0<br />
ETRGS LDRBS LDRAS CPCS CPBS CPAS LOVRS COVFS<br />
0: The corresponding interrupt is disabled.<br />
1: The corresponding interrupt is enabled.<br />
A bit in this register is cleared when the corresponding bit in IDR is written to one.<br />
A bit in this register is set when the corresponding bit in IER is written to one.<br />
863
31.7.12 Block Control Register<br />
Name: BCR<br />
Access Type: Write-only<br />
Offset: 0xC0<br />
Reset Value: 0x00000000<br />
32117D–AVR-01/12<br />
<strong>AT32UC3C</strong><br />
31 30 29 28 27 26 25 24<br />
- - - - - - - -<br />
23 22 21 20 19 18 17 16<br />
- - - - - - - -<br />
15 14 13 12 11 10 9 8<br />
- - - - - - - -<br />
7 6 5 4 3 2 1 0<br />
- - - - - - - SYNC<br />
SYNC: Synchro Command<br />
1: Writing a one to this bit asserts the SYNC signal which generates a software trigger simultaneously for each of the channels.<br />
0: Writing a zero to this bit has no effect.<br />
864
31.7.13 Block Mode Register<br />
Name: BMR<br />
Access Type: Read/Write<br />
Offset: 0xC4<br />
Reset Value: 0x00000000<br />
32117D–AVR-01/12<br />
<strong>AT32UC3C</strong><br />
31 30 29 28 27 26 25 24<br />
- - - - - - - -<br />
23 22 21 20 19 18 17 16<br />
- - - - - - - -<br />
15 14 13 12 11 10 9 8<br />
- - - - - - - -<br />
7 6 5 4 3 2 1 0<br />
- - TC2XC2S TC1XC1S TC0XC0S<br />
TC2XC2S: External Clock Signal 2 Selection<br />
TC2XC2S Signal Connected to XC2<br />
0 TCLK2<br />
1 none<br />
2 TIOA0<br />
3 TIOA1<br />
TC1XC1S: External Clock Signal 1 Selection<br />
TC1XC1S Signal Connected to XC1<br />
0 TCLK1<br />
1 none<br />
2 TIOA0<br />
3 TIOA2<br />
865
TC0XC0S: External Clock Signal 0 Selection<br />
TC0XC0S Signal Connected to XC0<br />
32117D–AVR-01/12<br />
0 TCLK0<br />
1 none<br />
2 TIOA1<br />
3 TIOA2<br />
<strong>AT32UC3C</strong><br />
866
31.7.14 Features Register<br />
Name: FEATURES<br />
Access Type: Read-only<br />
Offset: 0xF8<br />
Reset Value: -<br />
32117D–AVR-01/12<br />
<strong>AT32UC3C</strong><br />
31 30 29 28 27 26 25 24<br />
- - - - - - - -<br />
23 22 21 20 19 18 17 16<br />
- - - - - - -<br />
15 14 13 12 11 10 9 8<br />
- - - - - - BRPBHSB UPDNIMPL<br />
7 6 5 4 3 2 1 0<br />
BRPBHSB: Bridge type is PB to HSB<br />
1: Bridge type is PB to HSB.<br />
0: Bridge type is not PB to HSB.<br />
UPDNIMPL: Up/down is implemented<br />
1: Up/down counter capability is implemented.<br />
0: Up/down counter capability is not implemented.<br />
CTRSIZE: Counter size<br />
This field indicates the size of the counter in bits.<br />
CTRSIZE<br />
867
31.7.15 Version Register<br />
Name: VERSION<br />
Access Type: Read-only<br />
Offset: 0xFC<br />
Reset Value: -<br />
32117D–AVR-01/12<br />
<strong>AT32UC3C</strong><br />
31 30 29 28 27 26 25 24<br />
- - - - - - - -<br />
23 22 21 20 19 18 17 16<br />
- - - - VARIANT<br />
15 14 13 12 11 10 9 8<br />
- - - - VERSION[11:8]<br />
7 6 5 4 3 2 1 0<br />
VERSION[7:0]<br />
VARIANT: Variant number<br />
Reserved. No functionality associated.<br />
VERSION: Version number<br />
Version number of the module. No functionality associated.<br />
868
32117D–AVR-01/12<br />
<strong>AT32UC3C</strong><br />
31.8 Module Configuration<br />
The specific configuration for each TC instance is listed in the following tables. The module bus<br />
clocks listed here are connected to the system bus clocks according to the table in the Power<br />
Manager section.<br />
Table 31-4. Module Clock Name<br />
Module name Clock name Description<br />
TC0 CLK_TC0 Peripheral Bus clock from the PBC clock domain<br />
TC1 CLK_TC1 Peripheral Bus clock from the PBA clock domain<br />
31.8.1 Clock Connections<br />
Each Timer/Counter channel can independently select an internal or external clock source for its<br />
counter:<br />
Table 31-5. Timer/Counter clock connections<br />
Module Source Name Connection<br />
TC0 Internal TIMER_CLOCK1 32 KHz oscillator clock (OSC32K)<br />
TIMER_CLOCK2 PBC clock / 2 (TIMER0_CLOCK2)<br />
TIMER_CLOCK3 PBC clock / 8 (TIMER0_CLOCK3)<br />
TIMER_CLOCK4 PBC clock / 32 (TIMER0_CLOCK4)<br />
TIMER_CLOCK5 PBC clock / 128 (TIMER0_CLOCK5)<br />
External TC0 - CLK0 See Peripheral Multiplexing on I/O line<br />
chapter<br />
TC0 - CLK1<br />
TC0 - CLK2<br />
TC1 Internal TIMER_CLOCK1 32 KHz oscillator clock (OSC32K)<br />
TIMER_CLOCK2 PBA clock / 2 (TIMER1_CLOCK2)<br />
TIMER_CLOCK3 PBA clock / 8 (TIMER1_CLOCK3)<br />
TIMER_CLOCK4 PBA clock / 32 (TIMER1_CLOCK4)<br />
TIMER_CLOCK5 PBA clock / 128 (TIMER1_CLOCK5)<br />
External TC1 - CLK0 See Peripheral Multiplexing on I/O line<br />
chapter<br />
TC1 - CLK1<br />
TC1 - CLK2<br />
869
32. USB Interface (USBC)<br />
32.1 Features<br />
32.2 Overview<br />
32117D–AVR-01/12<br />
Rev: 2.1.0.16<br />
Table 32-1. Description of USB pipes/endpoints<br />
<strong>AT32UC3C</strong><br />
Compatible with the USB 2.0 specification<br />
Supports full (12Mbit/s) and low (1.5Mbit/s) speed communication<br />
Supports Embedded Host<br />
7 physical pipes/endpoints in ping-pong mode<br />
Flexible pipe/endpoint configuration and reallocation of data buffers in embedded RAM<br />
Supports an infinite number of virtual pipes (alternate pipe)<br />
Up to two memory banks per pipe/endpoint<br />
Built-in DMA with multi-packet support through ping-pong mode<br />
On-chip transceivers with built-in pull-ups and pull-downs<br />
On-chip Embedded Host pad with a VBUS analog comparator<br />
The Universal Serial Bus interface (USBC) module complies with the Universal Serial Bus (USB)<br />
2.0 specification, .<br />
Each pipe/endpoint can be configured into one of several transfer types. It can be associated<br />
with one or more memory banks (located inside the embedded system or CPU RAM) used to<br />
store the current data payload. If two banks are used (“ping-pong” mode), then one bank is read<br />
or written by the CPU (or any other HSB master) while the other is read or written by the USBC<br />
core.<br />
Table 32-1 describes the hardware configuration of the USBC module.<br />
pipe/endpoint Mnemonic Max. size<br />
Number of<br />
available banks Type<br />
0 PEP0 1023 bytes 1 Control/Isochronous/Bulk/Interrupt<br />
1 PEP1 1023 bytes 2 Control/Isochronous/Bulk/Interrupt<br />
2 PEP2 1023 bytes 2 Control/Isochronous/Bulk/Interrupt<br />
... ... ... ... ...<br />
6 PEP6 1023 bytes 2 Control/Isochronous/Bulk/Interrupt<br />
32.3 Block Diagram<br />
The USBC interfaces a USB link with a data flow stored in the embedded ram (CPU or HSB).<br />
The USBC requires a 48MHz ± 0.25% reference clock, which is the USB generic clock. For<br />
more details see ”Clocks” on page 873. The 48MHz clock is used to generate either a 12MHz<br />
full-speed or a 1.5MHz low-speed bit clock from the received USB differential data, and to transmit<br />
data according to full- or low-speed USB device tolerances. Clock recovery is achieved by a<br />
digital phase-locked loop (a DPLL, not represented) in the USBC module, which complies with<br />
the USB jitter specifications.<br />
870
32117D–AVR-01/12<br />
The USBC module consists of:<br />
HSB master interface<br />
User interface<br />
USB Core<br />
Transceiver pads<br />
Figure 32-1. USBC Block Diagram<br />
HSB<br />
PB<br />
Interrupt<br />
Controller<br />
SCIF<br />
USB<br />
GCLK_USBC @ 48 MHz<br />
Note: The USB_VBUS pin is 5V tolerant<br />
HSB Master<br />
User Interface<br />
USB Interrupts<br />
System clock<br />
domain<br />
USB 2.0<br />
Core<br />
USB clock<br />
domain<br />
I/O<br />
Controller<br />
<strong>AT32UC3C</strong><br />
USB_VBUS (1<br />
DM<br />
DP<br />
USB_VBOF<br />
USB_ID<br />
871
32.4 I/O Lines Description<br />
Table 32-2. I/O Lines Description<br />
32117D–AVR-01/12<br />
<strong>AT32UC3C</strong><br />
PIn Name Pin Description Type Active Level<br />
USB_VBOF USB VBUS On/Off: Bus Power Control Port Output USBCON.VBUSPO<br />
USB_VBUS VBUS: Bus Power Measurement Port Input<br />
DM Data -: Differential Data Line - Port Input/Output<br />
DP Data +: Differential Data Line + Port Input/Output<br />
USB_ID USB Identification: Mini Connector Identification Port Input<br />
Low: Mini-A plug<br />
High Z: Mini-B plug<br />
872
32117D–AVR-01/12<br />
<strong>AT32UC3C</strong><br />
32.5 Product Dependencies<br />
In order to use this module, other parts of the system must be configured correctly, as described<br />
below.<br />
32.5.1 I/O Lines<br />
The USBC pins may be multiplexed with the I/O Controller lines. The user must first configure<br />
the I/O Controller to assign the desired USBC pins to their peripheral functions.<br />
If the USB_ID pin is used the user must also enable its internal pull-up resistor.<br />
32.5.2 Power Management<br />
If the CPU enters a sleep mode that disables clocks used by the USBC, the USBC will stop functioning<br />
and resume operation after the system wakes up from sleep mode.<br />
32.5.3 Clocks<br />
32.5.4 Interrupts<br />
The USBC has two bus clocks connected: One High Speed Bus clock (CLK_USBC_HSB) and<br />
one Peripheral Bus clock (CLK_USBC_PB). These clocks are generated by the Power Manager.<br />
Both clocks are enabled at reset, and can be disabled by the Power Manager. It is<br />
recommended to disable the USBC before disabling the clocks, to avoid freezing the USBC in<br />
an undefined state.<br />
The 48MHz USB clock is generated by a dedicated generic clock from the SCIF module. Before<br />
using the USB, the user must ensure that the USB generic clock (GCLK_USBC) is enabled at<br />
48MHz in the SCIF module.<br />
The USBC interrupt request line is connected to the interrupt controller. Using the USBC interrupt<br />
requires the interrupt controller to be programmed first.<br />
The USBC asynchronous interrupts can wake the CPU from any sleep mode:<br />
The ID Transition Interrupt (IDTI)<br />
The VBUS Transition Interrupt (VBUSTI) if the bandgap voltage reference is ON (Refer to the<br />
Power Manager chapter)<br />
The Wakeup Interrupt (WAKEUP)<br />
The Host Wakeup Interrupt (HWUPI)<br />
873
32.6 Functional Description<br />
32.6.1 USB General Operation<br />
32.6.1.1 Initialization<br />
32117D–AVR-01/12<br />
<strong>AT32UC3C</strong><br />
After a hardware reset, the USBC is disabled. When enabled, the USBC runs in either device<br />
mode or in host mode according to the ID detection.<br />
If the USB_ID pin is not connected to ground and the pull-up is enabled, the USB_ID state bit in<br />
the General Status register (USBSTA.ID) will be set and the device mode will be enabled.<br />
If a low level is detected on the USB_ID pin, the USBSTA.ID bit will be cleared and the host<br />
mode will be enabled.<br />
Figure 32-2. General states<br />
Macro off:<br />
USBE = 0<br />
Clock stopped:<br />
FRZCLK = 1<br />
Device<br />
USBE = 1<br />
ID = 1<br />
USBE = 0<br />
Reset<br />
USBE = 1<br />
ID = 0<br />
USBE = 0<br />
HW<br />
RESET<br />
USBE = 0<br />
After a hardware reset, the USBC is in the Reset state. In this state:<br />
The module is disabled. The USBC Enable bit in the General Control register<br />
(USBCON.USBE) is reset.<br />
The module clock is stopped in order to minimize power consumption. The Freeze USB Clock<br />
bit in USBCON (USBCON.FRZCLK) is set.<br />
The USB pad is in suspend mode.<br />
The internal states and registers of the device and host modes are reset.<br />
The USBSTA.ID bit and the VBUS Level bit (USBSTA.VBUS) reflect the states of the USB_ID<br />
and USB_VBUS input pins.<br />
The VBUS Level bit (USBSTA.VBUS) reflects the states of the USB_VBUS input pins.<br />
The OTG Pad Enable (OTGPADE), VBUS Polarity (VBUSPO), Freeze USB Clock (FRZCLK),<br />
USBC Enable (USBE), USB_ID Pin Enable (UIDE), USBC Mode (UIMOD) in USBCON, and<br />
the Low-Speed mode bit in the Device General Control register (UDCON.LS) can be written<br />
to by software, so that the user can configure pads and speed before enabling the module.<br />
These values are only taken into account once the module has been enabled and unfrozen.<br />
After writing a one to USBCON.USBE, the USBC enters device or host mode (according to the<br />
ID detection) in idle state.<br />
Refer to Section 32.6.2 for the basic operation of the device mode.<br />
Refer to Section 32.6.3 for the basic operation of the host mode.<br />
Host<br />
<br />
874
32.6.1.2 Interrupts<br />
32117D–AVR-01/12<br />
<strong>AT32UC3C</strong><br />
The USBC can be disabled at any time by writing a zero to USBCON.USBE, this acts as a hardware<br />
reset, except that the OTGPADE, VBUSPO, FRZCLK, UIDE, and UIMOD bits in USBCON,<br />
and the LS bits in UDCON are not reset.<br />
One interrupt vector is assigned to the USBC.<br />
See Section 32.6.2.18 and Section 32.6.3.16 for further details about device and host interrupts.<br />
There are two kinds of general interrupts: processing, i.e. their generation is part of the normal<br />
processing, and exception, i.e. errors (not related to CPU exceptions).<br />
The processing general interrupts are:<br />
The ID Transition Interrupt (IDTI)<br />
The VBUS Transition Interrupt (VBUSTI)<br />
The SRP Interrupt (SRPI)<br />
The Role Exchange Interrupt (ROLEEXI)<br />
The exception general interrupts are:<br />
The VBUS Error Interrupt (VBERRI)<br />
The B-Connection Error Interrupt (BCERRI)<br />
The HNP Error Interrupt (HNPERRI)<br />
The Suspend Time-Out Interrupt (STOI)<br />
See Section 32.5.4 for asynchronous interrupts.<br />
32.6.1.3 Frozen clock<br />
When the USB clock is frozen, it is still possible to access the following bits: OTGPADE,<br />
VBUSPO, UIDE, UIMOD, FRZCLK, and USBE in the USBCON register, and LS in the UDCON<br />
register.<br />
32.6.1.4 Speed control<br />
Device mode<br />
When FRZCLK is set, only the asynchronous interrupts can trigger a USB interrupt (see Section<br />
32.5.4).<br />
When the USBC interface is in device mode, the speed selection is done by the UDCON.LS bit,<br />
connecting an internal pull-up resistor to either DP (full-speed mode) or DM (low-speed mode).<br />
The LS bit shall be written before attaching the device, which can be simulated by clearing the<br />
UDCON.DETACH bit.<br />
875
32117D–AVR-01/12<br />
Host mode<br />
Figure 32-3. Speed Selection in device mode<br />
VBUS<br />
<strong>AT32UC3C</strong><br />
When the USBC interface is in host mode, internal pull-downs are enabled on both DP and DM.<br />
The interface detects the speed of the connected device and reflects this in the Speed Status<br />
field (USBSTA.SPEED).<br />
32.6.1.5 Data management<br />
Endpoints and pipe buffers can be allocated anywhere in the embedded memory (CPU RAM or<br />
HSB RAM).<br />
See ”RAM management” on page 882.<br />
32.6.1.6 Pad Suspend<br />
Figure 32-4 illustrates the behavior of the USB pad in device mode.<br />
DP<br />
DM<br />
Figure 32-4. Pad Behavior<br />
Idle<br />
In Idle state, the pad is in low power consumption mode.<br />
In Active state, the pad is working.<br />
Figure 32-5 illustrates the pad events leading to a PAD state change.<br />
R PU<br />
USBE = 0<br />
| DETACH = 1<br />
| Suspend<br />
UDCON.DETACH<br />
UDCON.LS<br />
USBE = 1<br />
& DETACH = 0<br />
& Suspend<br />
Active<br />
876
32117D–AVR-01/12<br />
Figure 32-5. Pad events<br />
SUSP Suspend detected Cleared on Wakeup<br />
WAKEUP<br />
<strong>AT32UC3C</strong><br />
The Suspend Interrupt bit in the Device Global Interrupt register (UDINT.SUSP) is set and the<br />
Wakeup Interrupt (UDINT.WAKEUP) bit is cleared when a USB Suspend state has been<br />
detected on the USB bus. This event automatically puts the USB pad in the Idle state. The<br />
detection of a non-idle event sets WAKEUP, clears SUSP, and wakes the USB pad.<br />
The pad goes to the Idle state if the module is disabled or if UDCON.DETACH is written to one.<br />
It returns to the Active state when USBCON.USBE is written to one and DETACH is written to<br />
zero.<br />
32.6.1.7 Customizing of Embedded Host timers<br />
It is possible to refine some timers thanks to the Timer Page (TIMPAGE) and Timer Value (TIM-<br />
VALUE) fields in USBCON, as shown in Table 32-3.<br />
Table 32-3. Customizing of Host Timers<br />
TIMVALUE<br />
0b00<br />
AWaitVrise Time-Out<br />
PAD state<br />
Active<br />
0b01<br />
VbBusPulsing Time-Out<br />
TIMPAGE<br />
Wakeup detected Cleared by software to acknowledge the interrupt<br />
TIMPAGE is used to select the timer to be accessed while TIMVALUE indicates the time-out<br />
value of the selected timer.<br />
TIMPAGE and TIMVALUE can be read and written. Before writing them, the user shall unlock<br />
write accesses by writing a one to the Timer Access Unlock (UNLOCK) bit in USBCON.<br />
32.6.1.8 Plug-in detection<br />
The USB connection is detected by the USB_VBUS pad. Figure 32-6 shows the architecture of<br />
the plug-in detector.<br />
Idle<br />
0b10<br />
PdTmOutCnt Time-Out<br />
Active<br />
0b11<br />
SRPDetTmOut Time-Out<br />
00 20 ms 15 ms 93 ms 10 µs<br />
01 50 ms 23 ms 105 ms 100 µs<br />
10 70 ms 31 ms 118 ms 1 ms<br />
11 100 ms 40 ms 131 ms 11 ms<br />
877
32117D–AVR-01/12<br />
Figure 32-6. Plug-in Detection Input Block Diagram<br />
USB_VBUS Logic VBUS<br />
The control logic of the USB_VBUS pad outputs two signals:<br />
<strong>AT32UC3C</strong><br />
The Session_valid signal is high when the voltage on the USB_VBUS pad is higher than or<br />
equal to 1.4V.<br />
The Va_Vbus_valid signal is high when the voltage on the USB_VBUS pad is higher than or<br />
equal to 4.4V.<br />
In device mode, the USBSTA.VBUS bit follows the Session_valid comparator output:<br />
It is set when the voltage on the USB_VBUS pad is higher than or equal to 1.4V.<br />
It is cleared when the voltage on the VBUS pad is lower than 1.4V.<br />
In host mode, the USBSTA.VBUS bit follows a hysteresis based on Session_valid and<br />
Va_Vbus_valid:<br />
It is set when the voltage on the USB_VBUS pad is higher than or equal to 4.4V.<br />
It is cleared when the voltage on the USB_VBUS pad is lower than 1.4V.<br />
The VBUS Transition Interrupt (VBUSTI) bit in USBSTA is set on each transition of the USB-<br />
STA.VBUS bit.<br />
The USBSTA.VBUS bit is operational regardless of whether the USBC is enabled or not.<br />
32.6.1.9 ID detection<br />
Figure 32-7 shows how the ID transitions are detected.<br />
Figure 32-7. ID Detection Input Block Diagram<br />
USB_ID<br />
VDD<br />
GND<br />
Pad Logic<br />
VDD<br />
R PU<br />
I/O Controller<br />
R PU<br />
R PD<br />
VBUS_pulsing<br />
Session_valid<br />
Va_Vbus_valid<br />
VBUS_discharge<br />
UIMOD<br />
USBCON<br />
1<br />
0<br />
UIDE<br />
USBCON<br />
ID<br />
USBSTA<br />
USBSTA<br />
VBUSTI<br />
IDTI<br />
USBSTA<br />
878
32117D–AVR-01/12<br />
<strong>AT32UC3C</strong><br />
The USBC mode (device or host) can be detected by the USB_ID pin or selected by writing to<br />
USBCON.UIMOD. This allows the USB_ID pin to be used as a general purpose I/O pin even<br />
when the USBC interface is enabled.<br />
The ID Transition Interrupt (IDTI) bit in USBSTA is set on each transition of the ID bit, i.e. when a<br />
Mini-A plug (host mode) is connected or disconnected. This does not occur when a Mini-B plug<br />
in device mode is connected or disconnected.<br />
The USBSTA.ID bit is operational regardless of whether the USBC is enabled or not.<br />
879
32.6.2 USBC Device Mode Operation<br />
32.6.2.1 Device Enabling<br />
In device mode, the USBC supports full- and low-speed data transfers.<br />
32.6.2.2 USB reset<br />
32117D–AVR-01/12<br />
<strong>AT32UC3C</strong><br />
Including the default control endpoint, a total of seven endpoints are provided. They can be configured<br />
as isochronous, bulk or interrupt types, as described in Table 32-1 on page 870<br />
After a hardware reset, the USBC device mode is in the reset state (see Section 32.6.1.1). In<br />
this state, the endpoint banks are disabled and neither DP nor DM are pulled up (DETACH is<br />
one).<br />
DP or DM will be pulled up according to the selected speed as soon as the DETACH bit is written<br />
to zero and VBUS is present. See “Device mode” for further details.<br />
When the USBC is enabled (USBE is one) in device mode, it enters the Idle state, minimizing<br />
power consumption. Being in Idle state does not require the USB clocks to be activated.<br />
The USBC device mode can be disabled or reset at any time by disabling the USBC (by writing<br />
a zero to USBE) or by enabling host mode (ID is zero).<br />
The USB bus reset is initiated by a connected host and managed by hardware.<br />
When a USB reset state is detected on the USB bus, the following operations are performed by<br />
the controller:<br />
UDCON register is reset except for the DETACH and SPDCONF bits.<br />
Device Frame Number Register (UDFNUM), Endpoint n Configuration Register (UECFGn),<br />
and Endpoint n Control Register (UECONn) registers are cleared.<br />
The data toggle sequencing in all the endpoints are cleared.<br />
At the end of the reset process, the End of Reset (EORST) bit in the UDINT register is set.<br />
32.6.2.3 Endpoint activation<br />
When an endpoint is disabled (UERST.EPENn = 0) the data toggle sequence, Endpoint n Status<br />
Set (UESTAn), and UECONn registers will be reset. The controller ignores all transactions to<br />
this endpoint as long as it is inactive.<br />
To complete an endpoint activation, the user should fill out the endpoint descriptor: see Figure<br />
32-8 on page 883.<br />
32.6.2.4 Data toggle sequence<br />
In order to respond to a CLEAR_FEATURE USB request without disabling the endpoint, the<br />
user can clear the data toggle sequence by writing a one to the Reset Data Toggle Set bit in the<br />
Endpoint n Control Set register (UECONnSET.RSTDTS)<br />
32.6.2.5 Busy bank enable<br />
In order to make an endpoint bank look busy regardless of its actual state, the user can write a<br />
one to the Busy Bank Enable bit in the Endpoint n Control Register (UECONnSET.BUSY0/1ES).<br />
If a BUSYnE bit is set, any transaction to this bank will be rejected with a NAK reply.<br />
32.6.2.6 Address setup<br />
The USB device address is set up according to the USB protocol.<br />
880
32117D–AVR-01/12<br />
<strong>AT32UC3C</strong><br />
After all kinds of resets, the USB device address is 0.<br />
The host starts a SETUP transaction with a SET_ADDRESS(addr) request.<br />
The user writes this address to the USB Address field (UDCON.UADD), and writes a zero to<br />
the Address Enable bit (UDCON.ADDEN), resulting in the address remaining zero.<br />
The user sends a zero-length IN packet from the control endpoint.<br />
The user enables the stored USB device address by writing a one to ADDEN.<br />
Once the USB device address is configured, the controller filters the packets to only accept<br />
those targeting the address stored in UADD.<br />
UADD and ADDEN should not be written to simultaneously. They should be written sequentially,<br />
UADD field first.<br />
If UADD or ADDEN is cleared, the default device address 0 is used. UADD and ADDEN are<br />
cleared:<br />
On a hardware reset.<br />
When the USBC is disabled (USBE written to zero).<br />
When a USB reset is detected.<br />
32.6.2.7 Suspend and Wakeup<br />
When an idle USB bus state has been detected for 3 ms, the controller sets the Suspend<br />
(SUSP) interrupt bit in UDINT. In this case, the transceiver is suspended, reducing power<br />
consumption.<br />
32.6.2.8 Detach<br />
To further reduce power consumption it is recommended to freeze the USB clock by writing a<br />
one to the Freeze USB Clock (FRZCLK) bit in USBCON when the USB bus is in suspend mode.<br />
The MCU can also enter the idle or frozen sleep mode to further lower power consumption.<br />
To recover from the suspend mode, the user shall wait for the Wakeup (WAKEUP) interrupt bit,<br />
which is set when a non-idle event is detected, and then write a zero to FRZCLK.<br />
As the WAKEUP interrupt bit in UDINT is set when a non-idle event is detected, it can occur<br />
regardless of whether the controller is in the suspend mode or not. The SUSP and WAKEUP<br />
interrupts are thus independent of each other except for that one bit is cleared when the other is<br />
set.<br />
The reset value of the DETACH bit located in the UDCON register, is one.<br />
It is possible to initiate a device re-enumeration simply by writing a one and then a zero to<br />
DETACH.<br />
DETACH acts on the pull-up connections of the DP and DM pads. See “Device mode” for further<br />
details.<br />
32.6.2.9 Remote wakeup<br />
The remote wakeup request (also known as upstream resume) is the only request the device<br />
may send on its own initiative. This should be preceded by a DEVICE_REMOTE_WAKEUP<br />
request from the host.<br />
First, the USBC must have detected a “Suspend” state on the bus, i.e. the remote wakeup<br />
request can only be sent after a SUSP interrupt has been set.<br />
881
32117D–AVR-01/12<br />
<strong>AT32UC3C</strong><br />
The user may then write a one to the remote wakeup (RMWKUP) bit in UDCON to send an<br />
Upstream Resume to the host initiating the wakeup. This will automatically be done by the<br />
controller after 5ms of inactivity on the USB bus.<br />
When the controller sends the Upstream Resume, the Upstream Resume (UPRSM) interrupt<br />
is set and SUSP is cleared.<br />
RMWKUP is cleared at the end of the transmitting Upstream Resume.<br />
In case of a rebroadcast resume initiated by the host, the End of Resume (EORSM) interrupt<br />
is set when the rebroadcast resume is completed.<br />
32.6.2.10 RAM management<br />
Endpoint data can be physically allocated anywhere in the embedded RAM. The USBC controller<br />
accesses these endpoints directly through the HSB master (built-in DMA).<br />
The USBC controller reads the USBC descriptors to know where each endpoint is located. The<br />
base address of the USBC descriptor (UDESC.UDESCA) needs to be written by the user. The<br />
descriptors can also be allocated anywhere in the embedded RAM.<br />
Before using an endpoint, the user should setup the endpoint address for each bank. Depending<br />
on the direction, the type, and the packet-mode (single or multi-packet), the user should also initialize<br />
the endpoint packet size, and the endpoint control and status fields, so that the USBC<br />
controller does not compute random values from the RAM.<br />
When using an endpoint the user should read the UESTAX.CURRBK field to know which bank<br />
is currently being processed.<br />
882
32117D–AVR-01/12<br />
Figure 32-8. Memory organization<br />
Descriptor EPn<br />
Descriptor EP1<br />
Descriptor EP0<br />
B a n k 1<br />
B a n k 0<br />
B a n k 1<br />
B a n k 0<br />
B a n k 1<br />
B a n k 0<br />
U S B B u f f e r s<br />
E P n B K 1<br />
E P n B K 0<br />
U S B d e s c r ip t o r s<br />
R e s e r v e d<br />
EPn_C TR _STA_BK1<br />
E P n _ P C K S IZ E _ B K 1<br />
EPn_ADDR_BK1<br />
R e s e r v e d<br />
EPn_CTR_STA_BK0<br />
E P n _ P C K S IZ E _ B K 0<br />
E P n _ A D D R _ B K 0<br />
E P 0 _ A D D R _ B K 0<br />
+0x03C<br />
+0x038<br />
+0x034<br />
+0x030<br />
+0x02C<br />
+0x028<br />
+0x024<br />
+0x020<br />
+0x01C<br />
+0x018<br />
+0x014<br />
+0x010<br />
+0x00C<br />
+0x008<br />
+0x004<br />
+0x000<br />
U D E S C A<br />
R e s e r v e d<br />
EP1_C TR _STA_BK1<br />
E P 1 _ P C K S IZ E _ B K 1<br />
EP1_ADDR_BK1<br />
R e s e r v e d<br />
EP1_CTR_STA_BK0<br />
E P 1 _ P C K S IZ E _ B K 0<br />
E P 1 _ A D D R _ B K 0<br />
R e s e r v e d<br />
EP0_C TR _STA_BK1<br />
E P 0 _ P C K S IZ E _ B K 1<br />
EP0_ADDR_BK1<br />
R e s e r v e d<br />
EP0_CTR_STA_BK0<br />
E P 0 _ P C K S IZ E _ B K 0<br />
Each descriptor of an endpoint n consists of four words.<br />
The address of the endpoint and the bank used (EPn_ADDR_BK0/1).<br />
The packet size information for the endpoint and bank (EPn_PCKSIZE_BK0/1):<br />
Table 32-4. EPn_PCKSIZE_BK0/1 structure<br />
31 30:16 15 14:0<br />
AUTO_ZLP MULTI_PACKET_SIZE - BYTE_COUNT<br />
<strong>AT32UC3C</strong><br />
– AUTO_ZLP: Auto zero length packet, see ”Multi packet mode for IN endpoints” on<br />
page 888.<br />
– MULTI_PACKET_SIZE: see ”Multi packet mode and single packet mode.” on page<br />
885.<br />
– BYTE_COUNT: see ”Multi packet mode and single packet mode.” on page 885.<br />
Growing Memory Addresses<br />
883
32117D–AVR-01/12<br />
The control and status fields for the endpoint and bank (EPn_CTR_STA_BK0/1):<br />
Table 32-5. EPn_CTR_STA_BK0/1 structure<br />
31:19 18 17 16 15:1 0<br />
<strong>AT32UC3C</strong><br />
– UNDERF: Underflow status for isochronous IN transfer. See ”Data flow error” on<br />
page 891.<br />
– OVERF: Overflow status for isochronous OUT transfer. See ”Data flow error” on<br />
page 891.<br />
– CRCERR: CRC error status for isochronous OUT transfer. See ”CRC error” on page<br />
891.<br />
– STALLRQ_NEXT: Stall request for the next transfer. See ”STALL request” on page<br />
884.<br />
32.6.2.11 STALL request<br />
For each endpoint, the STALL management is performed using:<br />
The STALL Request (STALLRQ) bit in UECONn is set to initiate a STALL request.<br />
The STALLed Interrupt (STALLEDI) bit in UESTAn is set when a STALL handshake has been<br />
sent.<br />
To answer requests with a STALL handshake, STALLRQ has to be set by writing a one to the<br />
STALL Request Set (STALLRQS) bit. All following requests will be discarded (RXOUTI, etc. will<br />
not be set) and handshaked with a STALL until the STALLRQ bit is cleared, by receiving a new<br />
SETUP packet (for control endpoints) or by writing a one to the STALL Request Clear (STALL-<br />
RQC) bit.<br />
Each time a STALL handshake is sent, the STALLEDI bit is set by the USBC and the EPnINT<br />
interrupt is set.<br />
The user can use the descriptor to manage STALL requests. The USBC controller reads the<br />
EPn_CTR_STA_BK0/1.STALLRQ_NEXT bit after successful transactions and if it is one the<br />
USBC controller will set UECON.STALLRQ. The STALL_NEXT bit will be cleared upon receiving<br />
a SETUP transaction and the USBC controller will then clear the STALLRQ bit.<br />
Special considerations for control endpoints<br />
If a SETUP packet is received at a control endpoint where a STALL request is active, the<br />
Received SETUP Interrupt (RXSTPI) bit in UESTAn is set, and the STALLRQ and STALLEDI<br />
bits are cleared. It allows the SETUP to be always ACKed as required by the USB standard.<br />
This management simplifies the enumeration process management. If a command is not supported<br />
or contains an error, the user requests a STALL and can return to the main task, waiting<br />
for the next SETUP request.<br />
STALL handshake and retry mechanism<br />
Status elements Control elements<br />
- UNDERF OVERF CRCERR - STALLRQ_NEXT<br />
The retry mechanism has priority over the STALL handshake. A STALL handshake is sent if the<br />
STALLRQ bit is set and if there is no retry required.<br />
884
32117D–AVR-01/12<br />
<strong>AT32UC3C</strong><br />
32.6.2.12 Multi packet mode and single packet mode.<br />
Single packet mode is the default mode where one USB packet is managed per bank.<br />
32.6.2.13 Management of control endpoints<br />
Overview<br />
Control write<br />
The multi-packet mode allows the user to manage data exceeding the maximum endpoint size<br />
(UECFGn.EPSIZE) for an endpoint bank across multiple packets without software intervention.<br />
This mode can also be coupled with the ping-pong mode.<br />
For an OUT endpoint, the EPn_PCKSIZE_BK0/1.MULTI_PACKET_SIZE field should be<br />
configured correctly to enable the multi-packet mode. See ”Multi packet mode for OUT<br />
endpoints” on page 890. For single packet mode, the MULTI_PACKET_SIZE should be<br />
initialized to 0.<br />
For an IN endpoint, the EPn_PCKSIZE_BK0/1.BYTE_COUNT field should be configured<br />
correctly to enable the multi-packet mode. See”Multi packet mode for IN endpoints” on page<br />
888. For single packet mode, the BYTE_COUNT should be less than EPSIZE.<br />
A SETUP request is always ACKed. When a new SETUP packet is received, the RXSTPI is set,<br />
but not the Received OUT Data Interrupt (RXOUTI) bit.<br />
The FIFO Control (FIFOCON) bit in UECONn is irrelevant for control endpoints. The user should<br />
therefore never use it for these endpoints. When read, this value is always zero.<br />
Control endpoints are managed using:<br />
The RXSTPI bit: is set when a new SETUP packet is received. This has to be cleared by<br />
firmware in order to acknowledge the packet and to free the bank.<br />
The RXOUTI bit: is set when a new OUT packet is received. This has to be cleared by<br />
firmware in order to acknowledge the packet and to free the bank.<br />
The Transmitted IN Data Interrupt (TXINI) bit: is set when the current bank is ready to accept<br />
a new IN packet. This has to be cleared by firmware in order to send the packet.<br />
Figure 32-9 on page 886 shows a control write transaction. During the status stage, the controller<br />
will not necessarily send a NAK on the first IN token:<br />
If the user knows the exact number of descriptor bytes that will be read, the status stage can<br />
be predicted, and a zero-length packet can be sent after the next IN token.<br />
Alternatively the bytes can be read until the NAKed IN Interrupt (NAKINI) is triggered,<br />
notifying that all bytes are sent by the host and that the transaction is now in the status stage.<br />
885
32117D–AVR-01/12<br />
USB Bus<br />
RXSTPI<br />
RXOUTI<br />
TXINI<br />
Control read<br />
USB Bus<br />
RXSTPI<br />
RXOUTI<br />
TXINI<br />
Wr Enable<br />
HOST<br />
Wr Enable<br />
CPU<br />
Figure 32-9. Control Write<br />
SETUP DATA<br />
STATUS<br />
SETUP<br />
HW SW<br />
<strong>AT32UC3C</strong><br />
Figure 32-10 on page 886 shows a control read transaction. The USBC has to manage the<br />
simultaneous write requests from the CPU and USB host.<br />
Figure 32-10. Control Read<br />
SETUP<br />
OUT<br />
HW SW<br />
OUT<br />
HW SW<br />
IN IN<br />
NAK<br />
SETUP DATA<br />
STATUS<br />
HW SW<br />
SW<br />
IN<br />
HW SW<br />
A NAK handshake is always generated as the first status stage command. The UESTAn.NAKINI<br />
bit is set. It allows the user to know that the host aborts the IN data stage. As a consequence,<br />
the user should stop processing the IN data stage and should prepare to receive the OUT status<br />
stage by checking the UESTAn.RXOUTI bit.<br />
The OUT retry is always ACKed. This OUT reception sets RXOUTI. Handle this with the following<br />
software algorithm:<br />
// process the IN data stage<br />
set TXINI<br />
wait for RXOUTI (rising) OR TXINI (falling)<br />
if RXOUTI is high, then process the OUT status stage<br />
if TXINI is low, then return to process the IN data stage<br />
Once the OUT status stage has been received, the USBC waits for a SETUP request. The<br />
SETUP request has priority over all other requests and will be ACKed.<br />
SW<br />
IN OUT<br />
NAK<br />
OUT<br />
HW<br />
SW<br />
886
32.6.2.14 Management of IN endpoints<br />
32117D–AVR-01/12<br />
Overview<br />
TXINI<br />
TXINI<br />
FIFOCON<br />
IN packets are sent by the USBC device controller upon IN requests from the host.<br />
<strong>AT32UC3C</strong><br />
The endpoint and its descriptor in RAM must be pre configured (see section ”RAM management”<br />
on page 882 for more details).<br />
When the current bank is clear, the TXINI and FIFO Control (UECONn.FIFOCON) bits will be set<br />
simultaneously. This triggers an EPnINT interrupt if the Transmitted IN Data Interrupt Enable<br />
(TXINE) bit in UECONn is one.<br />
TXINI shall be cleared by software (by writing a one to the Transmitted IN Data Interrupt Enable<br />
Clear bit in the Endpoint n Control Clear register (UECONnCLR.TXINIC)) to acknowledge the<br />
interrupt. This has no effect on the endpoint FIFO.<br />
The user writes the IN data to the bank referenced by the EPn descriptor and allows the USBC<br />
to send the data by writing a one to the FIFO Control Clear (UECONnCLR.FIFOCONC) bit. This<br />
will also cause a switch to the next bank if the IN endpoint is composed of multiple banks. The<br />
TXINI and FIFOCON bits will be updated accordingly.<br />
TXINI should always be cleared before clearing FIFOCON to avoid missing an TXINI event.<br />
Figure 32-11. Example of an IN endpoint with one data bank<br />
NAK<br />
write data to CPU<br />
BANK 0<br />
SW<br />
Figure 32-12. Example of an IN endpoint with two data banks<br />
IN<br />
DATA<br />
(bank 0)<br />
ACK<br />
SW SW<br />
IN<br />
SW SW<br />
FIFOCON write data to CPU<br />
BANK 0<br />
SW<br />
DATA<br />
(bank 0)<br />
write data to CPU<br />
BANK 1<br />
SW<br />
ACK<br />
HW<br />
HW<br />
SW<br />
IN<br />
write data to CPU<br />
BANK 0<br />
DATA<br />
(bank 1)<br />
write data to CPU<br />
BANK0<br />
SW<br />
IN<br />
ACK<br />
887
32117D–AVR-01/12<br />
Detailed description<br />
The data is written according to this sequence:<br />
<strong>AT32UC3C</strong><br />
When the bank is empty, TXINI and FIFOCON are set, which triggers an EPnINT interrupt if<br />
TXINE is one.<br />
The user acknowledges the interrupt by clearing TXINI.<br />
The user reads the UESTAX.CURRBK field to see which the current bank is.<br />
The user writes the data to the current bank, located in RAM as described by its descriptor:<br />
EPn_ADDR_BK0/1.<br />
The user should write the size of the IN packet into the USB descriptor:<br />
EPn_PCKSIZE_BK0/1.BYTE_COUNT.<br />
The user allows the controller to send the bank contents and switches to the next bank (if<br />
any) by clearing FIFOCON.<br />
If the endpoint uses several banks, the current one can be written while the previous one is<br />
being read by the host. When the user clears FIFOCON, the next current bank may already be<br />
clear and TXINI is set immediately.<br />
An “Abort” stage can be produced when a zero-length OUT packet is received during an IN<br />
stage of a control or isochronous IN transaction. The Kill IN Bank (KILLBK) bit in UECONn is<br />
used to kill the last written bank. The best way to manage this abort is to apply the algorithm represented<br />
on Figure 32-13 on page 888. See ”Endpoint n Control Register” on page 937 for more<br />
details about the KILLBK bit.<br />
Figure 32-13. Abort Algorithm<br />
Endpoint<br />
Abort<br />
TXINEC = 1<br />
NBUSYBK<br />
== 0?<br />
Yes<br />
EPRSTn = 1<br />
Abort Done<br />
Multi packet mode for IN endpoints<br />
No<br />
Yes<br />
KILLBKS = 1<br />
KILLBK<br />
== 1?<br />
No<br />
Disable the TXINI interrupt.<br />
Abort is based on the fact<br />
that no bank is busy, i.e.,<br />
that nothing has to be sent<br />
Kill the last written bank.<br />
Wait for the end of the<br />
procedure<br />
In multi packet mode, the user can prepare n USB packets in the bank to be sent on a multiple<br />
IN transaction. The packet sizes will equal UECFGn.EPSIZE unless the AUTO_ZLP option is<br />
888
32.6.2.15 Management of OUT endpoints<br />
OUT<br />
RXOUTI<br />
FIFOCON<br />
32117D–AVR-01/12<br />
Overview<br />
DATA<br />
(bank 0)<br />
<strong>AT32UC3C</strong><br />
set, or if the total byte count is not an integral multiple of EPSIZE, whereby the last packet<br />
should be short.<br />
To enable the multi packet mode, the user should configure the endpoint descriptor<br />
(EPn_PCKSIZE_BK0/1.BYTE_COUNT) to the total size of the multi packet, which should be<br />
larger than the endpoint size (EPSIZE).<br />
Since the EPn_PCKSIZE_BK0/1.MULTI_PACKET_SIZE is incremented (by the transmitted<br />
packet size) after each successful transaction, it should be set to zero when setting up a new<br />
multi packet transfer.<br />
The EPn_PCKSIZE_BK0/1.MULTI_PACKET_SIZE is cleared by hardware when all the bank<br />
contents have been sent. The bank is considered as ready and the TX_IN flag is set when:<br />
A short packet (smaller than EPSIZE) has been transmitted.<br />
A packet has been successfully transmitted, the updated MULTI_PACKET_SIZE equals the<br />
BYTE_COUNT, and the AUTO_ZLP field is not set.<br />
An extra zero length packet has been automatically sent for the last transfer of the current<br />
bank, if BYTE_COUNT is a multiple of EPSIZE and AUTO_ZLP is set.<br />
The endpoint and its descriptor in RAM must be pre configured, see section ”RAM management”<br />
on page 882 for more details.<br />
When the current bank is full, the RXOUTI and FIFO Control (UECONn.FIFOCON) bits will be<br />
set simultaneously. This triggers an EPnINT interrupt if the Received OUT Data Interrupt Enable<br />
(RXOUTE) bit in UECONn is one.<br />
RXOUTI shall be cleared by software (by writing a one to the Received OUT Data Interrupt Clear<br />
(RXOUTIC) bit) to acknowledge the interrupt. This has no effect on the endpoint FIFO.<br />
The user reads the OUT data from the RAM and clears the FIFOCON bit to free the bank. This<br />
will also cause a switch to the next bank if the OUT endpoint is composed of multiple banks.<br />
RXOUTI should always be cleared before clearing FIFOCON to avoid missing an RXOUTI<br />
event.<br />
Figure 32-14. Example of an OUT endpoint with one data bank<br />
ACK<br />
HW<br />
SW<br />
NAK<br />
read data from CPU<br />
BANK 0<br />
SW<br />
OUT<br />
DATA<br />
(bank 0)<br />
ACK<br />
HW<br />
SW<br />
read data from CPU<br />
BANK 0<br />
889
OUT<br />
RXOUTI<br />
FIFOCON<br />
32117D–AVR-01/12<br />
DATA<br />
(bank 0)<br />
Figure 32-15. Example of an OUT endpoint with two data banks<br />
Detailed description<br />
ACK<br />
HW<br />
SW<br />
OUT<br />
<strong>AT32UC3C</strong><br />
Before using the OUT endpoint, one should properly initialize its descriptor for each bank. See<br />
Figure 32-8 on page 883.<br />
The data is read, according to this sequence:<br />
When the bank is full, RXOUTI and FIFOCON are set, which triggers an EPnINT interrupt if<br />
RXOUTE is one.<br />
The user acknowledges the interrupt by writing a one to RXOUTIC in order to clear RXOUTI.<br />
The user reads the UESTAX.CURRBK field to know the current bank number.<br />
The user reads the byte count of the current bank from the descriptor in RAM<br />
(EPn_PCKSIZE_BK0/1.BYTE_COUNT) to know how many bytes to read.<br />
The user reads the data in the current bank, located in RAM as described by its descriptor:<br />
EPn_ADDR_BK0/1.<br />
The user frees the bank and switches to the next bank (if any) by clearing FIFOCON.<br />
If the endpoint uses several banks, the current one can be read while the next is being written by<br />
the host. When the user clears FIFOCON, the following bank may already be ready and RXOUTI<br />
will be immediately set.<br />
Multi packet mode for OUT endpoints<br />
DATA<br />
(bank 1)<br />
read data from CPU<br />
BANK 0<br />
In multi packet mode, the user can extend the size of the bank allowing the storage of n USB<br />
packets in the bank.<br />
To enable the multi packet mode, the user should configure the endpoint descriptor<br />
(EPn_PCKSIZE_BK0/1.MULTI_PACKET_SIZE) to match the size of the multi packet.This value<br />
should be a multiple of the endpoint size (UECFGn.EPSIZE).<br />
Since the EPn_PCKSIZE_BK0/1.BYTE_COUNT is incremented (by the received packet size)<br />
after each successful transaction, it should be set to zero when setting up a new multi packet<br />
transfer.<br />
As for single packet mode, the number of received data bytes is stored in the BYTE_CNT field.<br />
ACK<br />
The bank is considered as “valid” and the RX_OUT flag is set when:<br />
HW<br />
SW<br />
SW<br />
read data from CPU<br />
BANK 1<br />
890
32117D–AVR-01/12<br />
<strong>AT32UC3C</strong><br />
A packet has been successfully received and the updated BYTE_COUNT equals the<br />
MULTI_PACKET_SIZE.<br />
A short packet (smaller than EPSIZE) has been received.<br />
32.6.2.16 Data flow error<br />
This error exists only for isochronous IN/OUT endpoints. It sets the Errorflow Interrupt<br />
(ERRORFI) bit in UESTAn, which triggers an EPnINT interrupt if the Errorflow Interrupt Enable<br />
(ERRORFE) bit is one. The user can check the EPn_CTR_STA_BK0/1.UNDERF and OVERF<br />
bits in the endpoint descriptor to see which current bank has been affected.<br />
32.6.2.17 CRC error<br />
32.6.2.18 Interrupts<br />
An underflow can occur during IN stage if the host attempts to read from an empty bank. A<br />
zero-length packet is then automatically sent by the USBC. The endpoint descriptor<br />
EPn_CTR_STA_BK0/1.UNDERF points out the bank from which the IN data should have<br />
originated. If a new successful transaction occurs, the UNDERF bit is overwritten to 0 only if<br />
the UESTAn.ERRORFI is cleared.<br />
An overflow can occur during the OUT stage if the host tries to send a packet while the bank<br />
is full. Typically this occurs when a CPU is not fast enough. The packet data is not written to<br />
the bank and is lost. The endpoint descriptor EPn_CTR_STA_BK0/1.OVERF points out<br />
which bank the OUT data was destined to. If the UESTAn.ERRORFI bit is cleared and a new<br />
transaction is successful, the OVERF bit will be overwritten to zero.<br />
This error exists only for isochronous OUT endpoints. It sets the CRC Error Interrupt (CRCERRI)<br />
bit in UESTAn, which triggers an EPnINT interrupt if the CRC Error Interrupt Enable<br />
(CRCERRE) bit is one.<br />
A CRC error can occur during an isochronous OUT stage if the USBC detects a corrupted<br />
received packet. The OUT packet is stored in the bank as if no CRC error had occurred<br />
(RXOUTI is set).<br />
The user can also check the endpoint descriptor to see which current bank is impacted by the<br />
CRC error by reading EPn_CTR_STA_BK0/1.CRCERR.<br />
There are two kinds of device interrupts: processing, i.e. their generation is part of the normal<br />
processing, and exception, i.e. errors not related to CPU exceptions.<br />
Global interrupts<br />
The processing device global interrupts are:<br />
The Suspend (SUSP) interrupt<br />
The Start of Frame (SOF) interrupt with no frame number CRC error (the Frame Number<br />
CRC Error (FNCERR) bit in the Device Frame Number (UDFNUM) register is zero)<br />
The End of Reset (EORST) interrupt<br />
The Wakeup (WAKEUP) interrupt<br />
The End of Resume (EORSM) interrupt<br />
The Upstream Resume (UPRSM) interrupt<br />
The Endpoint n (EPnINT) interrupt<br />
The exception device global interrupts are:<br />
891
32117D–AVR-01/12<br />
Endpoint interrupts<br />
<strong>AT32UC3C</strong><br />
The Start of Frame (SOF) interrupt with a frame number CRC error (FNCERR is one)<br />
The processing device endpoint interrupts are:<br />
The Transmitted IN Data Interrupt (TXINI)<br />
The Received OUT Data Interrupt (RXOUTI)<br />
The Received SETUP Interrupt (RXSTPI)<br />
The Number of Busy Banks (NBUSYBK) interrupt<br />
The exception device endpoint interrupts are:<br />
The Errorflow Interrupt (ERRORFI)<br />
The NAKed OUT Interrupt (NAKOUTI)<br />
The NAKed IN Interrupt (NAKINI)<br />
The STALLed Interrupt (STALLEDI)<br />
The CRC Error Interrupt (CRCERRI)<br />
892
32.6.3 USB Host Operation<br />
32.6.3.1 Host Enabling<br />
Figure 32-16 on page 893 describes the USBC host mode main states.<br />
32117D–AVR-01/12<br />
Figure 32-16. Host mode states<br />
Macro off<br />
Clock stopped<br />
Ready<br />
<strong>AT32UC3C</strong><br />
After a hardware reset, the USBC host mode is in the Reset state (see Section 32.6.1.1).<br />
When the USBC is enabled (USBCON.USBE = 1) in host mode (USBSTA.ID = 0) it enters Idle<br />
state and waits for a device connection. Once a device is connected, the USBC enters the<br />
Ready state, which does not require the USB clock to be activated.<br />
In host mode the USBC will suspend the USB bus by not transmitting any Start Of Frame (SOF)<br />
packets (the Start of Frame Generation Enable bit in the Host Global Interrupt register<br />
UHCON.SOFE is zero). The USBC enters the Suspend state when the USB bus is suspended,<br />
and exits when SOF generation is resumed.<br />
32.6.3.2 Device detection<br />
A device is detected by the USBC in host mode when DP or DM are not tied low, i.e., when a<br />
device DP or DM pull-up resistor is connected. To enable this detection, the host controller has<br />
to supply the device with VBUS power, which is done when USBSTA.VBUSRQ is one.<br />
The device disconnection is detected by the host controller when both DP and DM are pulled<br />
down.<br />
32.6.3.3 Description of pipes<br />
In host mode, the term “pipe” is used instead of “endpoint”. A host pipe corresponds to a device<br />
endpoint, as illustrated by Figure 32-17 on page 894 from the USB specification.<br />
Idle<br />
Device<br />
Connection<br />
Device<br />
Disconnection<br />
SOFE = 0<br />
SOFE = 1<br />
Device<br />
Disconnection<br />
Suspend<br />
<br />
893
32.6.3.4 USB reset<br />
32117D–AVR-01/12<br />
Figure 32-17. USB Communication Flow<br />
<strong>AT32UC3C</strong><br />
In host mode, the USBC associates a pipe to a device endpoint, according to the device configuration<br />
descriptors.<br />
The USBC sends a USB reset signal when the user writes a one to the Send USB Reset bit<br />
(UHCON.RESET). When the USB reset has been sent, the USB Reset Sent Interrupt bit in the<br />
Host Global Interrupt register (UHINT.RSTI) is set and all the pipes will be disabled.<br />
If the bus was previously in a suspended state (UHCON.SOFE is zero) the USBC will switch it to<br />
the Resume state, causing the bus to asynchronously trigger the Host Wakeup Interrupt<br />
(UHINT.HWUPI). The SOFE bit will be set in order to generate SOF’s immediately after the USB<br />
reset.<br />
32.6.3.5 Pipe activation<br />
A disabled pipe is inactive, and will be reset along with its context registers (UPCONn, UPSTAn,<br />
UPINRQn, and UPCFGn). Enabling a pipe is done by writing a one to the Pipe n Enable bit in<br />
the Pipe Enable/Reset Register (UPRST.PENn).<br />
When starting an enumeration, the user gets the device descriptor by sending an<br />
GET_DESCRIPTOR USB request. This descriptor contains the maximal packet size of the<br />
device default control endpoint (bMaxPacketSize0) which the user should use to reconfigure the<br />
size of the default control pipe.<br />
32.6.3.6 Address setup<br />
Once the device has answered the first host requests with the default device address 0, the host<br />
assigns a new address to the device. The host controller has to send a USB reset to the device<br />
and a SET_ADDRESS(addr) SETUP request with the new address to be used by the device.<br />
Once this SETUP transaction is over, the user writes to the device address field in the “control<br />
and status 1 of endpoint n” word of the host’s pipe n in the USB descriptor<br />
(Pn_CTR_STA1.PDADDR). All following requests by this pipe will be performed using this new<br />
address.<br />
894
32117D–AVR-01/12<br />
<strong>AT32UC3C</strong><br />
32.6.3.7 Remote wakeup<br />
Writing UHCON.SOFE to zero when in host mode will cause the USBC to cease sending SOF’s<br />
on the USB bus and enter the Suspend state. The USB device will enter the Suspend state 3ms<br />
later.<br />
The device can awaken the host by sending an Upstream Resume (remote wakeup feature).<br />
When the host detects a non-idle state on the USB bus, it sets the Host Wakeup interrupt bit<br />
(UHINT.HWUPI). If the non-idle bus state corresponds to an Upstream Resume (K state), the<br />
Upstream Resume Received Interrupt bit (UHINT.RXRSMI) is set and the user has to generate<br />
a Downstream Resume within 1ms and for at least 20ms. It is required to first enter the Ready<br />
state by writing a one to UHCON.SOFEF and then writing a one to the Send USB Resume bit<br />
(UHCON.RESUME).<br />
32.6.3.8 RAM management<br />
Pipe data can be physically allocated anywhere in the embedded RAM. The USBC controller<br />
accesses the pipes directly through the HSB master (built-in DMA).<br />
The USBC controller reads the USBC descriptors to know the location of each pipe. The base<br />
address of this USBC descriptor (UDESC.UDESCA) needs to be written by the user. The<br />
descriptors can also be allocated anywhere in the embedded RAM.<br />
Before using a pipe, the user should setup the data address for each bank. Depending on the<br />
direction, pipe type, targeted device address, targeted endpoint number, and packet-mode (single<br />
or multi-packet), the user should also initialize the pipe packet size and the pipe control and<br />
status field, so that the USB controller does not compute random values from the RAM.<br />
When using a pipe, the user should read the UPSTAX.CURRBK field to know which bank is currently<br />
processed.<br />
895
32117D–AVR-01/12<br />
Figure 32-18. Memory organization<br />
Descriptor Pn<br />
Descriptor P1<br />
Descriptor P0<br />
B a n k 1<br />
B a n k 0<br />
B a n k 1<br />
B a n k 0<br />
B a n k 1<br />
B a n k 0<br />
U S B B u f f e r s<br />
P n B K 1<br />
P n B K 0<br />
U S B d e s c r ip t o r s<br />
R e s e r v e d<br />
Pn_CTR_STA_BK1<br />
P n _ P C K S IZ E _ B K 1<br />
P n _ A D D R _ B K 1<br />
Pn_CTR_STA1<br />
P n _ C T R _ S T A _ B K 0<br />
P n _ P C K S IZ E _ B K 0<br />
P n _ A D D R _ B K 0<br />
R e s e r v e d<br />
P1_CTR_STA_BK1<br />
P 1 _ P C K S IZ E _ B K 1<br />
P 1 _ A D D R _ B K 1<br />
P1_CTR_STA1<br />
P 1 _ C T R _ S T A _ B K 0<br />
P 1 _ P C K S IZ E _ B K 0<br />
P 1 _ A D D R _ B K 0<br />
R e s e r v e d<br />
P0_CTR_STA_BK1<br />
P 0 _ P C K S IZ E _ B K 1<br />
P 0 _ A D D R _ B K 1<br />
P0_CTR_STA1<br />
P 0 _ C T R _ S T A _ B K 0<br />
P 0 _ P C K S IZ E _ B K 0<br />
Each pipe n descriptor bank consists of four words.<br />
P 0 _ A D D R _ B K 0<br />
+0x03C<br />
+0x038<br />
+0x034<br />
+0x030<br />
+0x02C<br />
+0x028<br />
+0x024<br />
+0x020<br />
+0x01C<br />
+0x018<br />
+0x014<br />
+0x010<br />
+0x00C<br />
+0x008<br />
+0x004<br />
+0x000<br />
U D E S C A<br />
The address of the pipe and bank used (Pn_ADDR_BK0/1).<br />
The packet size information for the pipe and bank (Pn_PCKSIZE_BK0/1):<br />
Table 32-6. Pn_PCKSIZE_BK0/1 structure<br />
31 30:16 15 14:0<br />
AUTO_ZLP MULTI_PACKET_SIZE - BYTE_COUNT<br />
<strong>AT32UC3C</strong><br />
– AUTO_ZLP: Auto zero length packet, see ”Multi packet mode for OUT pipes” on<br />
page 901.<br />
– MULTI_PACKET_SIZE: see ”Multi packet mode and single packet mode.” on page<br />
885.<br />
– BYTE_COUNT: see ”Multi packet mode and single packet mode.” on page 885.<br />
Growing Memory Addresses<br />
896
32117D–AVR-01/12<br />
The control and status fields for the pipe and bank (Pn_CTR_STA_BK0/1):<br />
Table 32-7. Pn_CTR_STA_BK0/1 structure<br />
31:19 18 17 16 15:0<br />
Status Control<br />
- UNDERF OVERF CRCERR -<br />
<strong>AT32UC3C</strong><br />
– UNDERF: Underflow status for isochronous/Interrupt IN transfers. This status bit is<br />
set by hardware at the current bank (where the IN packet should have been stored).<br />
When a new successful transaction occurs this bit is overwritten to zero if<br />
UPSTAX.ERRORFI has previously been cleared by software. See ”Data flow error”<br />
on page 901.<br />
– OVERF: Overflow status for isochronous/interrupt OUT transfers. This status bit is<br />
set by hardware at the current bank (where the OUT packet should have been<br />
loaded). When a new successful transaction occurs this bit is overwritten to zero if<br />
UPSTAX.ERRORFI has previously been cleared by software. See ”Data flow error”<br />
on page 901.<br />
– CRCERR: CRC error status for isochronous IN transfers. See ”CRC error” on page<br />
901.<br />
The control and status 1 of endpoint n (Pn_CTR_STA1):<br />
Table 32-8. Pn_CTR_STA1 structure<br />
31:24 23:16 15:12 11:8 7 6:0<br />
Status Control<br />
- PERSTA PERMAX PEPNUM - PDADDR<br />
– PERSTA: Pipe Error Status. See “PERSTA structure” table.<br />
– PERMAX: Should be set by the user. If the Pipe Error Counter (see Figure 32-9 on<br />
page 897) is larger than PERMAX, the UPSTAX.PERRI bit is set.<br />
– PEPNUM: Should be set by the user. Endpoint number for this pipe.<br />
– PDADDR: Should be set by the user. Device address for this pipe.<br />
Table 32-9. PERSTA structure<br />
23:21 20 19 18 17 16<br />
ERCNT CRC16ER TOUTER PIDER DAPIDER DTGLER<br />
This field can be cleared by software. To avoid read-modify-write issues, the user should: freeze<br />
the pipe, wait until the UPSTAX.PFREEZE is one, clear the PERSTA field in memory, and then<br />
unfreeze the pipe.<br />
– ERCNT: Pipe Error Counter.<br />
– CRC16ER: Is set if a CRC16 error occurs during an isochronous IN transaction.<br />
– TOUTER: Is set if a Time-out error occurs during a USB transaction.<br />
– PIDER: Is set if a PID error occurs during a USB transaction.<br />
– DAPIDER: Is set if a Data PID error occurs during a USB transaction.<br />
897
32117D–AVR-01/12<br />
– DTGLER: Is set if a Data toggle error occurs during a USB transaction.<br />
<strong>AT32UC3C</strong><br />
32.6.3.9 Multi packet mode and single packet mode.<br />
See ”Multi packet mode and single packet mode.” on page 885 and just consider that an OUT<br />
pipe corresponds to an IN endpoint, and an IN pipe corresponds to an OUT endpoint.<br />
32.6.3.10 Management of control pipes<br />
A control transaction is composed of three stages:<br />
SETUP<br />
Data (IN or OUT)<br />
Status (OUT or IN)<br />
The user has to change the pipe token according to each stage.<br />
For control pipes only, the token is assigned a specific initial data toggle sequence:<br />
SETUP: Data0<br />
IN: Data1<br />
OUT: Data1<br />
32.6.3.11 Management of IN pipes<br />
Overview<br />
IN packets are sent by the USB device controller upon IN requests from the host. All the data<br />
can be read, acknowledging whether or not the bank is empty.<br />
Detailed description<br />
The pipe and its descriptor in RAM must be pre configured.<br />
The host can request data from the device in two modes, selected by writing to the IN Request<br />
Mode bit in the Pipe n IN Request register (UPINRQn.INMODE):<br />
When INMODE is written to zero, the USBC will perform INRQ IN requests before freezing<br />
the pipe.<br />
When INMODE is written to one, the USBC will perform IN requests as long as the pipe is not<br />
frozen by the user.<br />
The generation of IN requests starts when the pipe is unfrozen (UPCONn.PFREEZE is zero).<br />
When the current bank is full, the RXINI and FIFO Control (UPSTAn.FIFOCON) bits will be set<br />
simultaneously. This triggers a PnINT interrupt if the Received IN Data Interrupt Enable bit<br />
(UPCONn.RXINE) is one.<br />
RXINI shall be cleared by software to acknowledge the interrupt. This is done by writing a one to<br />
the Received IN Data Interrupt Clear bit in the Pipe n Control Clear register<br />
(UPCONnCLR.RXINIC), which does not affect the pipe FIFO.<br />
The user reads the byte count of the current bank from the descriptor in RAM<br />
(Pn_PCKSIZE_BK0/1.BYTE_COUNT) to know how many bytes should be read.<br />
The user reads the IN data from the RAM and clears the FIFOCON bit to free the bank. This will<br />
also cause a switch to the next bank if the IN endpoint is composed of multiple banks. The RXINI<br />
and FIFOCON bits will be updated accordingly.<br />
898
RXINI<br />
IN<br />
FIFOCON<br />
32117D–AVR-01/12<br />
DATA<br />
(bank 0)<br />
RXINI<br />
<strong>AT32UC3C</strong><br />
RXINI should always be cleared before clearing FIFOCON to avoid missing an RXINI event.<br />
Figure 32-19. Example of an IN pipe with one data bank<br />
Figure 32-20. Example of an IN pipe with two data banks<br />
Multi packet mode for IN pipes<br />
32.6.3.12 Management of OUT pipes<br />
Overview<br />
IN<br />
FIFOCON<br />
ACK<br />
HW<br />
See ”Multi packet mode for OUT endpoints” on page 890 and just replace OUT endpoints with<br />
IN pipe.<br />
OUT packets are sent by the host. All the data can be written, acknowledging whether or not the<br />
bank is full.<br />
Detailed description<br />
SW<br />
DATA<br />
(bank 0)<br />
read data from CPU<br />
BANK 0<br />
ACK<br />
HW<br />
SW<br />
SW<br />
The pipe and its descriptor in RAM must be pre configured.<br />
IN<br />
IN<br />
DATA<br />
(bank 0)<br />
DATA<br />
(bank 1)<br />
read data from CPU<br />
BANK 0<br />
When the current bank is clear, the Transmitted OUT Data Interrupt (TXOUTI) and FIFO Control<br />
(UPSTAn.FIFOCON) bits will be set simultaneously. This triggers a PnINT interrupt if the Transmitted<br />
OUT Data Interrupt Enable bit (UPCONn.TXOUTE) is one.<br />
SW<br />
ACK<br />
HW<br />
ACK<br />
HW<br />
SW<br />
read data from CPU<br />
BANK 0<br />
SW<br />
read data from CPU<br />
BANK 1<br />
899
32117D–AVR-01/12<br />
TXOUTI<br />
TXOUTI<br />
FIFOCON<br />
FIFOCON<br />
<strong>AT32UC3C</strong><br />
TXOUTI shall be cleared by software to acknowledge the interrupt. This is done by writing a one<br />
to the Transmitted OUT Data Interrupt Clear bit (UPCONnCLR.TXOUTIC), which does not affect<br />
the pipe FIFO.<br />
The user writes the OUT data to the bank referenced to by the PEPn descriptor and allows the<br />
USBC to send the data by writing a one to the FIFO Control Clear (UPCONnCLR.FIFOCONC)<br />
bit. This will also cause a switch to the next bank if the OUT pipe is composed of multiple banks.<br />
The TXOUTI and FIFOCON bits will be updated accordingly<br />
TXOUTI shall always be cleared before clearing FIFOCON to avoid missing an TXOUTI event.<br />
Note that if the user decides to switch to the Suspend state (by writing a zero to UHCON.SOFE)<br />
while a bank is ready to be sent, the USBC automatically exits this state and sends the data.<br />
Figure 32-21. Example of an OUT pipe with one data bank<br />
write data to CPU<br />
BANK 0<br />
SW<br />
OUT<br />
DATA<br />
(bank 0)<br />
Figure 32-22. Example of an OUT pipe with two data banks and no bank switching delay<br />
ACK<br />
SW SW<br />
OUT<br />
SW SW<br />
write data to CPU<br />
BANK 0<br />
SW<br />
DATA<br />
(bank 0) ACK<br />
HW<br />
write data to CPU<br />
BANK 1<br />
HW<br />
SW<br />
OUT<br />
write data to CPU<br />
BANK 0<br />
DATA<br />
(bank 1) ACK<br />
SW<br />
write data to CPU<br />
BANK0<br />
SW<br />
OUT<br />
900
TXOUTI<br />
32117D–AVR-01/12<br />
FIFOCON<br />
<strong>AT32UC3C</strong><br />
Figure 32-23. Example of an OUT pipe with two data banks and a bank switching delay<br />
Multi packet mode for OUT pipes<br />
See section ”Multi packet mode for IN endpoints” on page 888 and just replace IN endpoints with<br />
OUT pipe.<br />
32.6.3.13 Alternate pipe<br />
The user has the possibility to run sequentially several logical pipes on the same physical pipe.<br />
Before switching pipe, the user should save the pipe context (UPCFGn, UPCONn, UPSTAn,<br />
and the pipe descriptor table).<br />
After switching pipe, the user should restore the pipe context, current bank number, and the current<br />
data toggle by using the UPCONn.INITDTGL and UPCONn.INITBK bits.<br />
32.6.3.14 Data flow error<br />
This error exists only for isochronous and interrupt pipes for both IN and OUT directions. It sets<br />
the Errorflow Interrupt (ERRORFI) bit in UPSTAn, which triggers an PnINT interrupt if the Errorflow<br />
Interrupt Enable (ERRORFE) bit is one. The user can check the<br />
Pn_CTR_STA_BK0/1.UNDERF and OVERF bits in the pipe descriptor to see which current<br />
bank has been affected.<br />
32.6.3.15 CRC error<br />
OUT<br />
SW SW<br />
write data to CPU<br />
BANK 0<br />
SW<br />
DATA<br />
(bank 0)<br />
write data to CPU<br />
BANK 1<br />
An overflow can occur during an OUT stage if the host attempts to send data from an empty<br />
bank. The pipe descriptor Pn_CTR_STA_BK0/1.OVERF points out the bank from which the<br />
OUT data should have originated. If the UPSTAn.ERRORFI bit is cleared and a new<br />
transaction is successful, the Pn_CTR_STA_BK0/1.OVERF bit will be cleared.<br />
An underflow can occur during an IN stage if the device tries to send a packet while the bank<br />
is full. Typically this occurs when a CPU is not fast enough. The packet data is not written to<br />
the bank and is lost. The pipe descriptor Pn_CTR_STA_BK0/1.UNDERF points out which<br />
bank the OUT data was destined to. If UPSTAn.UNDERFI is zero and a new successful<br />
transaction occurs, Pn_CTR_STA_BK0/1.UNDERF will be cleared.<br />
This error exists only for isochronous IN pipes. It sets the CRC Error Interrupt bit (CRCERRI),<br />
which triggers a PnINT interrupt if the CRC Error Interrupt Enable bit (UPCONn.CRCERRE) is<br />
one.<br />
SW<br />
ACK<br />
HW<br />
OUT<br />
SW<br />
DATA<br />
(bank 1)<br />
write data to CPU<br />
BANK0<br />
ACK<br />
901
32.6.3.16 Interrupts<br />
32117D–AVR-01/12<br />
<strong>AT32UC3C</strong><br />
A CRC error can occur during the IN stage if the USBC detects a corrupted packet. The IN<br />
packet will remain stored in the bank and RXINI will be set.<br />
The user can check the Pn_CTR_STA_BK0/1.CRCERR bit in the pipe descriptor to see which<br />
current bank has been affected.<br />
There are two kinds of host interrupts: processing, i.e. their generation is part of the normal processing,<br />
and exception, i.e. errors not related to CPU exceptions.<br />
Global interrupts<br />
Pipe interrupts<br />
The processing host global interrupts are:<br />
The Device Connection Interrupt (DCONNI)<br />
The Device Disconnection Interrupt (DDISCI)<br />
The USB Reset Sent Interrupt (RSTI)<br />
The Downstream Resume Sent Interrupt (RSMEDI)<br />
The Upstream Resume Received Interrupt (RXRSMI)<br />
The Host Start of Frame Interrupt (HSOFI)<br />
The Host Wakeup Interrupt (HWUPI)<br />
The Pipe n Interrupt (PnINT)<br />
There is no exception host global interrupt.<br />
The processing host pipe interrupts are:<br />
The Received IN Data Interrupt (RXINI)<br />
The Transmitted OUT Data Interrupt (TXOUTI)<br />
The Transmitted SETUP Interrupt (TXSTPI)<br />
The Number of Busy Banks (NBUSYBK) interrupt<br />
The exception host pipe interrupts are:<br />
The Errorflow Interrupt (ERRORFI)<br />
The Pipe Error Interrupt (PERRI)<br />
The NAKed Interrupt (NAKEDI)<br />
The Received STALLed Interrupt (RXSTALLDI)<br />
The CRC Error Interrupt (CRCERRI)<br />
902
32.7 User Interface<br />
Table 32-10. USBC Register Memory Map<br />
32117D–AVR-01/12<br />
<strong>AT32UC3C</strong><br />
Offset Register Name Access Reset Value<br />
0x0000 Device General Control Register UDCON Read/Write 0x00000100<br />
0x0004 Device Global Interrupt Register UDINT Read-Only 0x00000000<br />
0x0008 Device Global Interrupt Clear Register UDINTCLR Write-Only 0x00000000<br />
0x000C Device Global Interrupt Set Register UDINTSET Write-Only 0x00000000<br />
0x0010 Device Global Interrupt Enable Register UDINTE Read-Only 0x00000000<br />
0x0014 Device Global Interrupt Enable Clear Register UDINTECLR Write-Only 0x00000000<br />
0x0018 Device Global Interrupt Enable Set Register UDINTESET Write-Only 0x00000000<br />
0x001C Endpoint Enable/Reset Register UERST Read/Write 0x00000000<br />
0x0020 Device Frame Number Register UDFNUM Read-Only 0x00000000<br />
0x0100 + n*4 Endpoint n Configuration Register UECFGn Read/Write 0x00000000<br />
0x0130 + n*4 Endpoint n Status Register UESTAn Read-Only 0x00000100<br />
0x0160 + n*4 Endpoint n Status Clear Register UESTAnCLR Write-Only 0x00000000<br />
0x0190 + n*4 Endpoint n Status Set Register UESTAnSET Write-Only 0x00000000<br />
0x01C0 + n*4 Endpoint n Control Register UECONn Read-Only 0x00000000<br />
0x01F0 + n*4 Endpoint n Control Set Register UECONnSET Write-Only 0x00000000<br />
0x0220 + n*4 Endpoint n Control Clear Register UECONnCLR Write-Only 0x00000000<br />
0x0400 Host General Control Register UHCON Read/Write 0x00000000<br />
0x0404 Host Global Interrupt Register UHINT Read-Only 0x00000000<br />
0x0408 Host Global Interrupt Clear Register UHINTCLR Write-Only 0x00000000<br />
0x040C Host Global Interrupt Set Register UHINTSET Write-Only 0x00000000<br />
0x0410 Host Global Interrupt Enable Register UHINTE Read-Only 0x00000000<br />
0x0414 Host Global Interrupt Enable Clear Register UHINTECLR Write-Only 0x00000000<br />
0x0418 Host Global Interrupt Enable Set Register UHINTESET Write-Only 0x00000000<br />
0x0041C Pipe Enable/Reset Register UPRST Read/Write 0x00000000<br />
0x0420 Host Frame Number Register UHFNUM Read/Write 0x00000000<br />
0x0500 + n*4 Pipe n Configuration Register UPCFGn Read/Write 0x00000000<br />
0x0530 + n*4 Pipe n Status Register UPSTAn Read-Only 0x00000000<br />
0x0560 + n*4 Pipe n Status Clear Register UPSTAnCLR Write-Only 0x00000000<br />
0x0590 + n*4 Pipe n Status Set Register UPSTAnSET Write-Only 0x00000000<br />
0x05C0 + n*4 Pipe n Control Register UPCONn Read-Only 0x00000000<br />
0x05F0 +n*4 Pipe n Control Set Register UPCONnSET Write-Only 0x00000000<br />
0x0620 + n*4 Pipe n Control Clear Register UPCONnCLR Write-Only 0x00000000<br />
0x0650 + n*4 Pipe n IN Request Register UPINRQn Read/Write 0x00000001<br />
0x0800 General Control Register USBCON Read/Write 0x03004000<br />
0x0804 General Status Register USBSTA Read-Only 0x00000000<br />
903
Table 32-10. USBC Register Memory Map<br />
Note: 1. The reset values are device specific. Please refer to the Module Configuration section at the end of this chapter.<br />
32117D–AVR-01/12<br />
<strong>AT32UC3C</strong><br />
Offset Register Name Access Reset Value<br />
0x0808 General Status Clear Register USBSTACLR Write-Only 0x00000000<br />
0x080C General Status Set Register USBSTASET Write-Only 0x00000000<br />
0x0818 IP Version Register UVERS Read-Only - (1)<br />
0x081C IP Features Register UFEATURES Read-Only - (1)<br />
0x0820 IP PB Address Size Register UADDRSIZE Read-Only - (1)<br />
0x0824 IP Name Register 1 UNAME1 Read-Only - (1)<br />
0x0828 IP Name Register 2 UNAME2 Read-Only - (1)<br />
0x082C USB Finite State Machine Status Register USBFSM Read-Only 0x00000009<br />
0x0830 USB Descriptor address UDESC Read/Write 0x00000000<br />
904
32.7.1 USB General Registers<br />
32.7.1.1 General Control Register<br />
Name: USBCON<br />
Access Type: Read/Write<br />
Offset: 0x0800<br />
Reset Value: 0x03004000<br />
32117D–AVR-01/12<br />
<strong>AT32UC3C</strong><br />
31 30 29 28 27 26 25 24<br />
- - - - - - UIMOD UIDE<br />
23 22 21 20 19 18 17 16<br />
- UNLOCK TIMPAGE - - TIMVALUE<br />
15 14 13 12 11 10 9 8<br />
USBE FRZCLK VBUSPO OTGPADE HNPREQ SRPREQ SRPSEL VBUSHWC<br />
7 6 5 4 3 2 1 0<br />
STOE HNPERRE ROLEEXE BCERRE VBERRE SRPE VBUSTE IDTE<br />
UIMOD: USBC Mode<br />
0: The module is in USB host mode.<br />
1: The module is in USB device mode.<br />
This bit has no effect when UIDE is one (USB_ID input pin activated).<br />
This bit can be written to even if USBE is zero or FRZCLK is one. Disabling the USBC (by writing a zero to the USBE bit) does<br />
not reset this bit.<br />
UIDE: USB_ID Pin Enable<br />
0: The USB mode (device/host) is selected from the UIMOD bit.<br />
1: The USB mode (device/host) is selected from the USB_ID input pin.<br />
This bit can be written to even if USBE is zero or FRZCLK is one. Disabling the USBC (by writing a zero to the USBE bit) does<br />
not reset this bit.<br />
UNLOCK: Timer Access Unlock<br />
0: The TIMPAGE and TIMVALUE fields are locked.<br />
1: The TIMPAGE and TIMVALUE fields are unlocked.<br />
The TIMPAGE and TIMVALUE fields can always be read, regardless of the UNLOCK value.<br />
TIMPAGE: Timer Page<br />
This field contains the page value to access a special timer register.<br />
TIMVALUE: Timer Value<br />
This field selects the timer value that is written to the special time register selected by TIMPAGE. See Section 32.6.1.7 for<br />
details.<br />
USBE: USBC Enable<br />
Writing a zero to this bit will disable the USBC, USB transceiver, and USB clock inputs. This will over-ride FRZCLK settings but<br />
not affect the value. Unless explicitly stated, all registers will become reset and read-only.<br />
Writing a one to this bit will enable the USBC.<br />
0: The USBC is disabled.<br />
905
32117D–AVR-01/12<br />
<strong>AT32UC3C</strong><br />
1: The USBC is enabled.<br />
This bit can be written to even if FRZCLK is one.<br />
FRZCLK: Freeze USB Clock<br />
Writing a zero to this bit will enable USB clock inputs.<br />
Writing a one to this bit will disable USB clock inputs. The resume detection will remain active. Unless explicitly stated, all<br />
registers will become read-only.<br />
0: The clock inputs are enabled.<br />
1: The clock inputs are disabled.<br />
This bit can be written to even if USBE is zero.<br />
VBUSPO: VBUS Polarity<br />
0: The USB_VBOF output signal is in its default mode (active high).<br />
1: The USB_VBOF output signal is inverted (active low).<br />
This bit can be written even if USBE is zero or FRZCLK is one. Disabling the USBC (by writing a zero to the USBE bit) does not<br />
reset this bit.<br />
OTGPADE: OTG Pad Enable<br />
0: The OTG pad is disabled.<br />
1: The OTG pad is enabled.<br />
This bit can be written even if USBE is zero or FRZCLK is one. Disabling the USBC (by writing a zero to the USBE bit) does not<br />
reset this bit.<br />
HNPREQ: HNP Request<br />
When the controller is in device mode:<br />
Writing a zero to this bit has no effect.<br />
Writing a one to this bit will initiate a HNP (Host Negotiation Protocol).<br />
This bit is cleared when the controller has initiated an HNP.<br />
When the controller is in host mode:<br />
Writing a zero to this bit will reject a HNP.<br />
Writing a one to this bit will accept a HNP.<br />
SRPREQ: SRP Request<br />
Writing a zero to this bit has no effect.<br />
Writing a one to this bit will initiate an SRP when the controller is in device mode.<br />
This bit is cleared when the controller has initiated an SRP.<br />
SRPSEL: SRP Selection<br />
0: Data line pulsing is selected as SRP method.<br />
1: VBUS pulsing is selected as SRP method.<br />
VBUSHWC: VBUS Hardware Control<br />
0: The hardware control over the USB_VBOF output pin is enabled. The USBC resets the USB_VBOF output pin when a VBUS<br />
problem occurs.<br />
1: The hardware control over the USB_VBOF output pin is disabled.<br />
STOE: Suspend Time-Out Interrupt Enable<br />
0: The Suspend Time-Out Interrupt (STOI) is disabled.<br />
1: The Suspend Time-Out Interrupt (STOI) is enabled.<br />
HNPERRE: HNP Error Interrupt Enable<br />
0: The HNP Error Interrupt (HNPERRI) is disabled.<br />
1: The HNP Error Interrupt (HNPERRI) is enabled.<br />
ROLEEXE: Role Exchange Interrupt Enable<br />
0: The Role Exchange Interrupt (ROLEEXI) is disabled.<br />
1: The Role Exchange Interrupt (ROLEEXI) is enabled.<br />
BCERRE: B-Connection Error Interrupt Enable<br />
0: The B-Connection Error Interrupt (BCERRI) is disabled.<br />
1: The B-Connection Error Interrupt (BCERRI) is enabled.<br />
VBERRE: VBUS Error Interrupt Enable<br />
0: The VBUS Error Interrupt (VBERRI) is disabled.<br />
906
1: The VBUS Error Interrupt (VBERRI) is enabled.<br />
SRPE: SRP Interrupt Enable<br />
0: The SRP Interrupt (SRPI) is disabled.<br />
1: The SRP Interrupt (SRPI) is enabled.<br />
VBUSTE: VBUS Transition Interrupt Enable<br />
0: The VBUS Transition Interrupt (VBUSTI) is disabled.<br />
1: The VBUS Transition Interrupt (VBUSTI) is enabled.<br />
IDTE: ID Transition Interrupt Enable<br />
0: The ID Transition interrupt (IDTI) is disabled.<br />
1: The ID Transition interrupt (IDTI) is enabled.<br />
32117D–AVR-01/12<br />
<strong>AT32UC3C</strong><br />
907
32.7.1.2 General Status Register<br />
Register Name: USBSTA<br />
Access Type: Read-Only<br />
Offset: 0x0804<br />
Reset Value: 0x00000000<br />
32117D–AVR-01/12<br />
<strong>AT32UC3C</strong><br />
31 30 29 28 27 26 25 24<br />
- - - - - - - -<br />
23 22 21 20 19 18 17 16<br />
- - - - - - - -<br />
15 14 13 12 11 10 9 8<br />
- CLKUSABLE SPEED VBUS ID VBUSRQ -<br />
7 6 5 4 3 2 1 0<br />
STOI HNPERRI ROLEEXI BCERRI VBERRI SRPI VBUSTI IDTI<br />
CLKUSABLE: Generic Clock Usable<br />
This bit is cleared when the USB generic clock is not usable.<br />
This bit is set when the USB generic clock (that should be 48 Mhz) is usable.<br />
SPEED: Speed Status<br />
This field is set according to the controller speed mode.<br />
SPEED Speed Status<br />
00 full-speed mode<br />
01 Reserved<br />
10 low-speed mode<br />
11 Reserved<br />
VBUS: VBUS Level<br />
This bit is cleared when the VBUS line level is low, even if USBE is zero.<br />
This bit is set when the VBUS line level is high, even if USBE is zero.<br />
This bit can be used in device mode to monitor the USB bus connection state of the application.<br />
ID: USB_ID Pin state<br />
This bit is cleared when the USB_ID level is low, even if USBE is zero.<br />
This bit is set when the USB_ID level is high, even if USBE is zero.<br />
VBUSRQ: VBUS Request<br />
0: The USB_VBOF output pin is driven low to disable the VBUS power supply generation.<br />
1: The USB_VBOF output pin is driven high to enable the VBUS power supply generation.<br />
This bit is cleared when USBSTACLR.VBUSRQC is written to one or when a VBUS error occurs while VBUSHWC is zero.<br />
This bit is set when USBSTASET.VBUSRQS is written to one.<br />
This bit should only be used in host mode.<br />
908
32117D–AVR-01/12<br />
<strong>AT32UC3C</strong><br />
STOI: Suspend Time-Out Interrupt<br />
This bit is cleared when the USBSTACLR.STOIC bit is written to one.<br />
This bit is set when a time-out error (more than 200ms) has been detected after a suspend. This triggers a USB interrupt if<br />
STOE is one.<br />
This bit should only be used in host mode.<br />
HNPERRI: HNP Error Interrupt<br />
This bit is cleared when the USBSTACLR.HNPERRIC bit is written to one.<br />
This bit is set when an error has been detected during a HNP negotiation. This triggers a USB interrupt if HNPERRE is one.<br />
This bit should only be used in device mode.<br />
ROLEEXI: Role Exchange Interrupt<br />
This bit is cleared when the USBSTACLR.ROLEEXIC bit is written to one.<br />
This bit is set when the USBC has successfully switched its mode because of an HNP negotiation (host to device or device to<br />
host). This triggers a USB interrupt if ROLEEXE is one.<br />
BCERRI: B-Connection Error Interrupt<br />
This bit is cleared when the USBSTACLR.BCERRIC bit is written to one.<br />
This bit is set when an error occurs during the B-connection. This triggers a USB interrupt if BCERRE is one.<br />
This bit should only be used in host mode.<br />
VBERRI: VBUS Error Interrupt<br />
This bit is cleared when the USBSTACLR.VBERRIC bit is written to one.<br />
This bit is set when a VBUS drop has been detected. This triggers a USB interrupt if VBERRE is one.<br />
This bit should only be used in host mode.<br />
SRPI: SRP Interrupt<br />
This bit is cleared when the USBSTACLR.SRPIC bit is written to one.<br />
This bit is set when an SRP has been detected. This triggers a USB interrupt if SRPE is one.<br />
This bit should only be used in host mode.<br />
VBUSTI: VBUS Transition Interrupt<br />
This bit is cleared when the USBSTACLR.VBUSTIC bit is written to one.<br />
This bit is set when a transition (high to low, low to high) has been detected on the USB_VBUS pad. This triggers a USB<br />
interrupt if VBUSTE is one.<br />
This interrupt is generated even if the clock is frozen by the FRZCLK bit.<br />
IDTI: ID Transition Interrupt<br />
This bit is cleared when the USBSTACLR.IDTIC bit is written to one.<br />
This bit is set when a transition (high to low, low to high) has been detected on the USB_ID input pin. This triggers a USB<br />
interrupt if IDTE is one.<br />
This interrupt is generated even if the clock is frozen by the FRZCLK bit.<br />
909
32.7.1.3 General Status Clear Register<br />
Register Name: USBSTACLR<br />
Access Type: Write-Only<br />
Offset: 0x0808<br />
Reset Value: 0x00000000<br />
32117D–AVR-01/12<br />
<strong>AT32UC3C</strong><br />
31 30 29 28 27 26 25 24<br />
- - - - - - - -<br />
23 22 21 20 19 18 17 16<br />
- - - - - - - -<br />
15 14 13 12 11 10 9 8<br />
- - - - - - VBUSRQC -<br />
7 6 5 4 3 2 1 0<br />
STOIC HNPERRIC ROLEEXIC BCERRIC VBERRIC SRPIC VBUSTIC IDTIC<br />
Writing a zero to a bit in this register has no effect.<br />
Writing a one to a bit in this register will clear the corresponding bit in USBSTA.<br />
These bits always read as zero.<br />
910
32.7.1.4 General Status Set Register<br />
Register Name: USBSTASET<br />
Access Type: Write-Only<br />
Offset: 0x080C<br />
Reset Value: 0x00000000<br />
32117D–AVR-01/12<br />
<strong>AT32UC3C</strong><br />
31 30 29 28 27 26 25 24<br />
- - - - - - - -<br />
23 22 21 20 19 18 17 16<br />
- - - - - - - -<br />
15 14 13 12 11 10 9 8<br />
- - - - - - VBUSRQS -<br />
7 6 5 4 3 2 1 0<br />
STOIS HNPERRIS ROLEEXIS BCERRIS VBERRIS SRPIS VBUSTIS IDTIS<br />
Writing a zero to a bit in this register has no effect.<br />
Writing a one to a bit in this register will set the corresponding bit in USBSTA.<br />
These bits always read as zero.<br />
911
32.7.1.5 Version Register<br />
Register Name: UVERS<br />
Access Type: Read-Only<br />
Offset: 0x0818<br />
Reset Value: -<br />
32117D–AVR-01/12<br />
<strong>AT32UC3C</strong><br />
31 30 29 28 27 26 25 24<br />
- - - - - - - -<br />
23 22 21 20 19 18 17 16<br />
- - - - VARIANT<br />
15 14 13 12 11 10 9 8<br />
- - - - VERSION[11:8]<br />
7 6 5 4 3 2 1 0<br />
VERSION[7:0]<br />
VARIANT: Variant Number<br />
Reserved. No functionality associated.<br />
VERSION: Version Number<br />
Version number of the module. No functionality associated.<br />
912
32.7.1.6 Features Register<br />
Register Name: UFEATURES<br />
Access Type: Read-Only<br />
Offset: 0x081C<br />
Reset Value: -<br />
32117D–AVR-01/12<br />
<strong>AT32UC3C</strong><br />
31 30 29 28 27 26 25 24<br />
- - - - - - - -<br />
23 22 21 20 19 18 17 16<br />
- - - - - - - -<br />
15 14 13 12 11 10 9 8<br />
- - - - - - - -<br />
7 6 5 4 3 2 1 0<br />
- - - - EPTNBRMAX<br />
EPTNBRMAX: Maximal Number of pipes/endpoints<br />
This field indicates the number of hardware-implemented pipes/endpoints:<br />
913
32.7.1.7 Address Size Register<br />
Register Name: UADDRSIZE<br />
Access Type: Read-Only<br />
Offset: 0x0820<br />
Reset Value: -<br />
32117D–AVR-01/12<br />
<strong>AT32UC3C</strong><br />
31 30 29 28 27 26 25 24<br />
UADDRSIZE[31:24]<br />
23 22 21 20 19 18 17 16<br />
UADDRSIZE[23:16]<br />
15 14 13 12 11 10 9 8<br />
UADDRSIZE[15:8]<br />
7 6 5 4 3 2 1 0<br />
UADDRSIZE[7:0]<br />
UADDRSIZE: IP PB Address Size<br />
This field indicates the size of the PB address space reserved for the USBC IP interface.<br />
914
32.7.1.8 IP Name Register 1<br />
Register Name: UNAME1<br />
Access Type: Read-Only<br />
Offset: 0x0824<br />
Reset Value: -<br />
32117D–AVR-01/12<br />
<strong>AT32UC3C</strong><br />
31 30 29 28 27 26 25 24<br />
UNAME1[31:24]<br />
23 22 21 20 19 18 17 16<br />
UNAME1[23:16]<br />
15 14 13 12 11 10 9 8<br />
UNAME1[15:8]<br />
7 6 5 4 3 2 1 0<br />
UNAME1[7:0]<br />
UNAME1: IP Name Part One<br />
This field indicates the first part of the ASCII-encoded name of the USBC IP.<br />
915
32.7.1.9 IP Name Register 2<br />
Register Name: UNAME2<br />
Access Type: Read-Only<br />
Offset: 0x0828<br />
Reset Value:<br />
32117D–AVR-01/12<br />
<strong>AT32UC3C</strong><br />
31 30 29 28 27 26 25 24<br />
UNAME2[31:24]<br />
23 22 21 20 19 18 17 16<br />
UNAME2[23:16]<br />
15 14 13 12 11 10 9 8<br />
UNAME2[15:8]<br />
7 6 5 4 3 2 1 0<br />
UNAME2[7:0]<br />
UNAME2: IP Name Part Two<br />
This field indicates the second part of the ASCII-encoded name of the USBC IP.<br />
916
32.7.1.10 Finite State Machine Status Register<br />
Register Name: USBFSM<br />
Access Type: Read-Only<br />
Offset: 0x082C<br />
Reset Value: 0x00000009<br />
32117D–AVR-01/12<br />
<strong>AT32UC3C</strong><br />
31 30 29 28 27 26 25 24<br />
- - - - - - - -<br />
23 22 21 20 19 18 17 16<br />
- - - - - - - -<br />
15 14 13 12 11 10 9 8<br />
- - - - - - - -<br />
7 6 5 4 3 2 1 0<br />
- - - - DRDSTATE<br />
DRDSTATE: Dual Role Device State<br />
This field indicates the state of the USBC.<br />
DRDSTATE Description<br />
0 a_idle state: this is the start state for A-devices (when the ID pin is 0)<br />
1<br />
a_wait_vrise: In this state, the A-device waits for the voltage on VBUS to rise above the Adevice<br />
VBUS Valid threshold (4.4 V).<br />
2 a_wait_bcon: In this state, the A-device waits for the B-device to signal a connection.<br />
3 a_host: In this state, the A-device that operates in host mode is operational.<br />
4 a_suspend: The A-device operating as a host is in the suspend mode.<br />
5 a_peripheral: The A-device operates as a peripheral.<br />
6<br />
7<br />
a_wait_vfall: In this state, the A-device waits for the voltage on VBUS to drop below the Adevice<br />
Session Valid threshold (1.4 V).<br />
a_vbus_err: In this state, the A-device waits for recovery of the over-current condition that<br />
caused it to enter this state.<br />
8 a_wait_discharge: In this state, the A-device waits for the data usb line to discharge (100 us).<br />
9<br />
b_idle: this is the start state for B-device (when the ID pin is 1).<br />
The USBC controller operates in device mode.<br />
10 b_peripheral: In this state, the B-device acts as the peripheral.<br />
11<br />
b_wait_begin_hnp: In this state, the B-device is in suspend mode and waits until 3 ms before<br />
initiating the HNP protocol if requested.<br />
917
DRDSTATE Description<br />
12<br />
13<br />
32117D–AVR-01/12<br />
b_wait_discharge: In this state, the B-device waits for the data usb line to discharge (100 us)<br />
before becoming Host.<br />
b_wait_acon: In this state, the B-device waits for the A-device to signal a connect before<br />
becoming B-Host.<br />
14 b_host: In this state, the B-device acts as the Host.<br />
15 b_srp_init: In this state, the B-device attempts to start a session using the SRP protocol.<br />
<strong>AT32UC3C</strong><br />
918
32.7.1.11 USB Descriptor Address<br />
Register Name: UDESC<br />
Access Type: Read-Write<br />
Offset: 0x0830<br />
Reset Value: -<br />
32117D–AVR-01/12<br />
<strong>AT32UC3C</strong><br />
31 30 29 28 27 26 25 24<br />
UDESCA[31:24]<br />
23 22 21 20 19 18 17 16<br />
UDESCA[23:16]<br />
15 14 13 12 11 10 9 8<br />
UDESCA[15:8]<br />
7 6 5 4 3 2 1 0<br />
UDESCA[7:0]<br />
UDESCA: USB Descriptor Address<br />
This field contains the address of the USB descriptor. The three least significant bits are always zero.<br />
919
32.7.2 USB Device Registers<br />
32.7.2.1 Device General Control Register<br />
Register Name: UDCON<br />
Access Type: Read/Write<br />
Offset: 0x0000<br />
Reset Value: 0x00000100<br />
32117D–AVR-01/12<br />
<strong>AT32UC3C</strong><br />
31 30 29 28 27 26 25 24<br />
- - - - - - - -<br />
23 22 21 20 19 18 17 16<br />
- - - - - - GNAK -<br />
15 14 13 12 11 10 9 8<br />
- - - LS - - RMWKUP DETACH<br />
7 6 5 4 3 2 1 0<br />
ADDEN UADD<br />
GNAK: Global NAK<br />
0: Normal mode.<br />
1: A NAK handshake is answered for each USB transaction regardless of the current endpoint memory bank status.<br />
LS: low-speed mode force<br />
0: The full-speed mode is active.<br />
1: The low-speed mode is active.<br />
This bit can be written to even if USBE is zero or FRZCLK is one. Disabling the USBC (by writing a zero to the USBE bit) does<br />
not reset this bit.<br />
RMWKUP: Remote wakeup<br />
Writing a zero to this bit has no effect.<br />
Writing a one to this bit will send an upstream resume to the host for a remote wakeup.<br />
This bit is cleared when the USBC receives a USB reset or once the upstream resume has been sent.<br />
DETACH: Detach<br />
Writing a zero to this bit will reconnect the device.<br />
Writing a one to this bit will physically detach the device (disconnect internal pull-up resistor from DP and DM).<br />
ADDEN: Address Enable<br />
Writing a zero to this bit has no effect.<br />
Writing a one to this bit will activate the UADD field (USB address).<br />
This bit is cleared when a USB reset is received.<br />
UADD: USB Address<br />
This field contains the device address.<br />
This field is cleared when a USB reset is received.<br />
920
32.7.2.2 Device Global Interrupt Register<br />
Register Name: UDINT<br />
Access Type: Read-Only<br />
Offset: 0x0004<br />
Reset Value: 0x00000000<br />
32117D–AVR-01/12<br />
<strong>AT32UC3C</strong><br />
31 30 29 28 27 26 25 24<br />
- - - - - - - -<br />
23 22 21 20 19 18 17 16<br />
- - - EP8INT (1)<br />
EP7INT (1)<br />
EP6INT (1)<br />
EP5INT (1)<br />
15 14 13 12 11 10 9 8<br />
EP3INT (1)<br />
EP2INT (1)<br />
EP1INT (1)<br />
EP4INT (1)<br />
EP0INT - - - -<br />
7 6 5 4 3 2 1 0<br />
- UPRSM EORSM WAKEUP EORST SOF - SUSP<br />
Note: 1. EPnINT bits are within the range from EP0INT to EP6INT.<br />
EPnINT: Endpoint n Interrupt<br />
This bit is cleared when the interrupt source is serviced.<br />
This bit is set when an interrupt is triggered by the endpoint n (UESTAn, UECONn). This triggers a USB interrupt if EPnINTE is<br />
one.<br />
UPRSM: Upstream Resume Interrupt<br />
This bit is cleared when the UDINTCLR.UPRSMC bit is written to one to acknowledge the interrupt (USB clock inputs must be<br />
enabled before).<br />
This bit is set when the USBC sends a resume signal called “Upstream Resume”. This triggers a USB interrupt if UPRSME is<br />
one.<br />
EORSM: End of Resume Interrupt<br />
This bit is cleared when the UDINTCLR.EORSMC bit is written to one to acknowledge the interrupt.<br />
This bit is set when the USBC detects a valid “End of Resume” signal initiated by the host. This triggers a USB interrupt if<br />
EORSME is one.<br />
WAKEUP: Wakeup Interrupt<br />
This bit is cleared when the UDINTCLR.WAKEUPC bit is written to one to acknowledge the interrupt (USB clock inputs must be<br />
enabled before) or when the Suspend (SUSP) interrupt bit is set.<br />
This bit is set when the USBC is reactivated by a filtered non-idle signal from the lines (not by an upstream resume). This<br />
triggers an interrupt if WAKEUPE is one.<br />
This interrupt is generated even if the clock is frozen by the FRZCLK bit.<br />
EORST: End of Reset Interrupt<br />
This bit is cleared when the UDINTCLR.EORSTC bit is written to one to acknowledge the interrupt.<br />
This bit is set when a USB “End of Reset” has been detected. This triggers a USB interrupt if EORSTE is one.<br />
SOF: Start of Frame Interrupt<br />
This bit is cleared when the UDINTCLR.SOFC bit is written to one to acknowledge the interrupt.<br />
This bit is set when a USB “Start of Frame” PID (SOF) has been detected (every 1 ms). This triggers a USB interrupt if SOFE is<br />
one. The FNUM field is updated.<br />
921
32117D–AVR-01/12<br />
<strong>AT32UC3C</strong><br />
SUSP: Suspend Interrupt<br />
This bit is cleared when the UDINTCLR.SUSPC bit is written to one to acknowledge the interrupt or when the Wakeup<br />
(WAKEUP) interrupt bit is set.<br />
This bit is set when a USB “Suspend” idle bus state has been detected for 3 frame periods (J state for 3 ms). This triggers a<br />
USB interrupt if SUSPE is one.<br />
922
32.7.2.3 Device Global Interrupt Clear Register<br />
Register Name: UDINTCLR<br />
Access Type: Write-Only<br />
Offset: 0x0008<br />
Reset Value: 0x00000000<br />
32117D–AVR-01/12<br />
<strong>AT32UC3C</strong><br />
31 30 29 28 27 26 25 24<br />
- - - - - - - -<br />
23 22 21 20 19 18 17 16<br />
- - - - - - - -<br />
15 14 13 12 11 10 9 8<br />
- - - - - - - -<br />
7 6 5 4 3 2 1 0<br />
- UPRSMC EORSMC WAKEUPC EORSTC SOFC - SUSPC<br />
Writing a zero to a bit in this register has no effect.<br />
Writing a one to a bit in this register will clear the corresponding bit in UDINT.<br />
These bits always read as zero.<br />
923
32.7.2.4 Device Global Interrupt Set Register<br />
Register Name: UDINTSET<br />
Access Type: Write-Only<br />
Offset: 0x000C<br />
Reset Value: 0x00000000<br />
32117D–AVR-01/12<br />
<strong>AT32UC3C</strong><br />
31 30 29 28 27 26 25 24<br />
- - - - - - - -<br />
23 22 21 20 19 18 17 16<br />
- - - - - - - -<br />
15 14 13 12 11 10 9 8<br />
- - - - - - - -<br />
7 6 5 4 3 2 1 0<br />
- UPRSMS EORSMS WAKEUPS EORSTS SOFS - SUSPS<br />
Writing a zero to a bit in this register has no effect.<br />
Writing a one to a bit in this register will set the corresponding bit in UDINT, which may be useful for test or debug purposes.<br />
These bits always read as zero.<br />
924
32.7.2.5 Device Global Interrupt Enable Register<br />
Register Name: UDINTE<br />
Access Type: Read-Only<br />
Offset: 0x0010<br />
Reset Value: 0x00000000<br />
Note: 1. EPnINTE bits are within the range from EP0INTE to EP6INTE.<br />
0: The corresponding interrupt is disabled.<br />
1: The corresponding interrupt is enabled.<br />
A bit in this register is cleared when the corresponding bit in UDINTECLR is written to one.<br />
A bit in this register is set when the corresponding bit in UDINTESET is written to one.<br />
32117D–AVR-01/12<br />
<strong>AT32UC3C</strong><br />
31 30 29 28 27 26 25 24<br />
- - - - - - - -<br />
23 22 21 20 19 18 17 16<br />
- - - EP8INTE (1)<br />
EP7INTE (1)<br />
EP6INTE (1)<br />
EP5INTE (1)<br />
EP4INTE (1)<br />
15 14 13 12 11 10 9 8<br />
EP3INTE (1)<br />
EP2INTE (1)<br />
EP1INTE (1)<br />
EP0INTE - - - -<br />
7 6 5 4 3 2 1 0<br />
- UPRSME EORSME WAKEUPE EORSTE SOFE - SUSPE<br />
925
32.7.2.6 Device Global Interrupt Enable Clear Register<br />
Register Name: UDINTECLR<br />
Access Type: Write-Only<br />
Offset: 0x0014<br />
Reset Value: 0x00000000<br />
Note: 1. EPnINTEC bits are within the range from EP0INTEC to EP6INTEC.<br />
Writing a zero to a bit in this register has no effect.<br />
Writing a one to a bit in this register will clear the corresponding bit in UDINTE.<br />
These bits always read as zero.<br />
32117D–AVR-01/12<br />
<strong>AT32UC3C</strong><br />
31 30 29 28 27 26 25 24<br />
- - - - - - - -<br />
23 22 21 20 19 18 17 16<br />
- - - EP8INTEC (1)<br />
EP7INTEC (1)<br />
EP6INTEC (1)<br />
EP5INTEC (1)<br />
EP4INTEC (1)<br />
15 14 13 12 11 10 9 8<br />
EP3INTEC (1)<br />
EP2INTEC (1)<br />
EP1INTEC (1)<br />
EP0INTEC - - - -<br />
7 6 5 4 3 2 1 0<br />
- UPRSMEC EORSMEC WAKEUPEC EORSTEC SOFEC - SUSPEC<br />
926
32.7.2.7 Device Global Interrupt Enable Set Register<br />
Register Name: UDINTESET<br />
Access Type: Write-Only<br />
Offset: 0x0018<br />
Reset Value: 0x00000000<br />
Note: 1. EPnINTES bits are within the range from EP0INTES to EP6INTES.<br />
Writing a zero to a bit in this register has no effect.<br />
Writing a one to a bit in this register will set the corresponding bit in UDINTE.<br />
These bits always read as zero.<br />
32117D–AVR-01/12<br />
<strong>AT32UC3C</strong><br />
31 30 29 28 27 26 25 24<br />
- - - - - - - -<br />
23 22 21 20 19 18 17 16<br />
- - - EP8INTES (1)<br />
EP7INTES (1)<br />
EP6INTES (1)<br />
EP5INTES (1)<br />
EP4INTES (1)<br />
15 14 13 12 11 10 9 8<br />
EP3INTES (1)<br />
EP2INTES (1)<br />
EP1INTES (1)<br />
EP0INTES - - - -<br />
7 6 5 4 3 2 1 0<br />
- UPRSMES EORSMES WAKEUPES EORSTES SOFES - SUSPES<br />
927
32.7.2.8 Endpoint Enable/Reset Register<br />
Register Name: UERST<br />
Access Type: Read/Write<br />
Offset: 0x001C<br />
Reset Value: 0x00000000<br />
32117D–AVR-01/12<br />
<strong>AT32UC3C</strong><br />
31 30 29 28 27 26 25 24<br />
- - - - - - - -<br />
23 22 21 20 19 18 17 16<br />
- - - - - - - -<br />
15 14 13 12 11 10 9 8<br />
- - - - - - - EPEN8 (1)<br />
7 6 5 4 3 2 1 0<br />
EPEN7 (1)<br />
EPEN6 (1)<br />
EPEN5 (1)<br />
EPEN4 (1)<br />
EPEN3 (1)<br />
EPEN2 (1)<br />
EPEN1 (1)<br />
EPEN0<br />
EPENn: Endpoint n Enable<br />
Note: 1. EPENn bits are within the range from EPEN0 to EPEN6.<br />
Writing a zero to this bit will disable the endpoint n (USB requests will be ignored), and resets the endpoints registers (UECFGn,<br />
UESTAn, UECONn), but not the endpoint configuration (EPBK, EPSIZE, EPDIR, EPTYPE).<br />
Writing a one to this bit will enable the endpoint n.<br />
0: The endpoint n is disabled.<br />
1: The endpoint n is enabled.<br />
928
32.7.2.9 Device Frame Number Register<br />
Register Name: UDFNUM<br />
Access Type: Read-Only<br />
Offset: 0x0020<br />
Reset Value: 0x00000000<br />
32117D–AVR-01/12<br />
<strong>AT32UC3C</strong><br />
31 30 29 28 27 26 25 24<br />
- - - - - - - -<br />
23 22 21 20 19 18 17 16<br />
- - - - - - - -<br />
15 14 13 12 11 10 9 8<br />
FNCERR - FNUM[10:5]<br />
7 6 5 4 3 2 1 0<br />
FNUM[4:0] - - -<br />
FNCERR: Frame Number CRC Error<br />
This bit is cleared upon receiving a USB reset.<br />
This bit is set when a corrupted frame number is received. This bit and the SOF interrupt bit are updated at the same time.<br />
FNUM: Frame Number<br />
This field is cleared upon receiving a USB reset.<br />
This field contains the 11-bit frame number information, as provided from the last SOF packet.<br />
FNUM is updated even if a corrupted SOF is received.<br />
929
32.7.2.10 Endpoint n Configuration Register<br />
Register Name: UECFGn, n in [0..6]<br />
Access Type: Read/Write<br />
Offset: 0x0100 + (n * 0x04)<br />
Reset Value: 0x00000000<br />
32117D–AVR-01/12<br />
<strong>AT32UC3C</strong><br />
31 30 29 28 27 26 25 24<br />
- - - - - - - -<br />
23 22 21 20 19 18 17 16<br />
- - - - - - - -<br />
15 14 13 12 11 10 9 8<br />
- - - EPTYPE - - EPDIR<br />
7 6 5 4 3 2 1 0<br />
- EPSIZE - EPBK - -<br />
EPTYPE: Endpoint Type<br />
This field selects the endpoint type:<br />
EPTYPE Endpoint Type<br />
0 0 Control<br />
0 1 Isochronous<br />
1 0 Bulk<br />
1 1 Interrupt<br />
This field is cleared upon receiving a USB reset.<br />
EPDIR: Endpoint Direction<br />
0: The endpoint direction is OUT.<br />
1: The endpoint direction is IN (nor for control endpoints).<br />
This bit is cleared upon receiving a USB reset.<br />
EPSIZE: Endpoint Size<br />
This field determines the size of each endpoint bank:<br />
EPSIZE Endpoint Size<br />
0 0 0 8 bytes<br />
0 0 1 16 bytes<br />
0 1 0 32 bytes<br />
0 1 1 64 bytes<br />
1 0 0 128 bytes<br />
930
32117D–AVR-01/12<br />
EPSIZE Endpoint Size<br />
1 0 1 256 bytes<br />
1 1 0 512 bytes<br />
1 1 1 1024 bytes<br />
This field is cleared upon receiving a USB reset (except for the endpoint 0).<br />
EPBK: Endpoint Banks<br />
This bit selects the number of banks for the endpoint:<br />
0: single-bank endpoint<br />
1: double-bank endpoint<br />
For control endpoints, a single-bank endpoint shall be selected.<br />
This field is cleared upon receiving a USB reset (except for the endpoint 0).<br />
<strong>AT32UC3C</strong><br />
931
32.7.2.11 Endpoint n Status Register<br />
Register Name: UESTAn, n in [0..6]<br />
Access Type: Read-Only 0x0100<br />
Offset: 0x0130 + (n * 0x04)<br />
Reset Value: 0x00000000<br />
32117D–AVR-01/12<br />
<strong>AT32UC3C</strong><br />
31 30 29 28 27 26 25 24<br />
- - - - - - - -<br />
23 22 21 20 19 18 17 16<br />
- - - - - - CTRLDIR -<br />
15 14 13 12 11 10 9 8<br />
CURRBK NBUSYBK RAMACERI - DTSEQ<br />
7 6 5 4 3 2 1 0<br />
-<br />
STALLEDI/<br />
CRCERRI<br />
CTRLDIR: Control Direction<br />
Writing a zero or a one to this bit has no effect.<br />
This bit is cleared after a SETUP packet to indicate that the following packet is an OUT packet.<br />
This bit is set after a SETUP packet to indicate that the following packet is an IN packet.<br />
CURRBK: Current Bank<br />
This bit is set for non-control endpoints, indicating the current bank:<br />
CURRBK Current Bank<br />
0 0 Bank0<br />
0 1 Bank1<br />
1 0 Reserved<br />
1 1 Reserved<br />
- NAKINI NAKOUTI<br />
RXSTPI/<br />
ERRORFI<br />
RXOUTI TXINI<br />
This field may be updated one clock cycle after the RWALL bit changes, so the user should not poll this field as an interrupt bit.<br />
NBUSYBK: Number of Busy Banks<br />
This field is set to indicate the number of busy banks:<br />
NBUSYBK Number of Busy Banks<br />
0 0 0 (all banks free)<br />
0 1 1<br />
1 0 2<br />
1 1 Reserved<br />
932
32117D–AVR-01/12<br />
<strong>AT32UC3C</strong><br />
For IN endpoints, this indicates the number of banks filled by the user and ready for IN transfers. When all banks are free an<br />
EPnINT interrupt will be triggered if NBUSYBKE is one.<br />
For OUT endpoints, this indicates the number of banks filled by OUT transactions from the host. When all banks are busy an<br />
EPnINT interrupt will be triggered if NBUSYBKE is one.<br />
RAMACERI: Ram Access Error Interrupt<br />
This bit is cleared when the RAMACERIC bit is written to one, acknowledging the interrupt.<br />
This bit is set when a RAM access underflow error occurs during an IN data stage.<br />
DTSEQ: Data Toggle Sequence<br />
This field is set to indicate the PID of the current bank:<br />
DTSEQ Data Toggle Sequence<br />
0 0 Data0<br />
0 1 Data1<br />
1 X Reserved<br />
For IN transfers, this indicates the data toggle sequence that will be used for the next packet to be sent.<br />
For OUT transfers, this value indicates the data toggle sequence of the data received in the current bank.<br />
STALLEDI: STALLed Interrupt<br />
This bit is cleared when the STALLEDIC bit is written to one, acknowledging the interrupt.<br />
This bit is set when a STALL handshake has been sent and triggers an EPnINT interrupt if STALLEDE is one.<br />
CRCERRI: CRC Error Interrupt<br />
This bit is cleared when the CRCERRIC bit is written to one, acknowledging the interrupt.<br />
This bit is set when a CRC error has been detected in an isochronous OUT endpoint bank, and triggers an EPnINT interrupt if<br />
CRCERRE is one.<br />
NAKINI: NAKed IN Interrupt<br />
This bit is cleared when the NAKINIC bit is written to one, acknowledging the interrupt.<br />
This bit is set when a NAK handshake has been sent in response to an IN request from the host, and triggers an EPnINT<br />
interrupt if NAKINE is one.<br />
NAKOUTI: NAKed OUT Interrupt<br />
This bit is cleared when the NAKOUTIC bit is written to one, acknowledging the interrupt.<br />
This bit is set when a NAK handshake has been sent in response to an OUT request from the host, and triggers an EPnINT<br />
interrupt if NAKOUTE is one.<br />
ERRORFI: Isochronous Error flow Interrupt<br />
This bit is cleared when the ERRORFIC bit is written to one, acknowledging the interrupt.<br />
This bit is set, for isochronous IN/OUT endpoints, when an errorflow (underflow or overflow) error occurs, and triggers an<br />
EPnINT interrupt if ERRORFE is one.<br />
An underflow can occur during IN stage if the host attempts to read from an empty bank. A zero-length packet is then<br />
automatically sent by the USBC.<br />
An overflow can also occur during OUT stage if the host sends a packet while the bank is already full, resulting in the packet<br />
being lost. This is typically due to a CPU not being fast enough.<br />
This bit is inactive (cleared) for bulk and interrupt IN/OUT endpoints and it means RXSTPI for control endpoints.<br />
RXSTPI: Received SETUP Interrupt<br />
This bit is cleared when the RXSTPIC bit is written to one, acknowledging the interrupt and freeing the bank.<br />
This bit is set, for control endpoints, to signal that the current bank contains a new valid SETUP packet, and triggers an EPnINT<br />
interrupt if RXSTPE is one.<br />
This bit is inactive (cleared) for bulk and interrupt IN/OUT endpoints and it means UNDERFI for isochronous IN/OUT endpoints.<br />
RXOUTI: Received OUT Data Interrupt<br />
This bit is cleared when the RXOUTIC bit is written to one, acknowledging the interrupt. For control endpoints, it releases the<br />
bank. For other endpoint types, the user should clear the FIFOCON bit to free the bank. RXOUTI shall always be cleared before<br />
clearing FIFOCON to avoid missing an interrupt.<br />
933
32117D–AVR-01/12<br />
<strong>AT32UC3C</strong><br />
This bit is set, for control endpoints, when the current bank contains a bulk OUT packet (data or status stage). This triggers an<br />
EPnINT interrupt if RXOUTE is one.<br />
This bit is set for isochronous, bulk and, interrupt OUT endpoints, at the same time as FIFOCON when the current bank is full.<br />
This triggers an EPnINT interrupt if RXOUTE is one.<br />
This bit is inactive (cleared) for isochronous, bulk and interrupt IN endpoints.<br />
TXINI: Transmitted IN Data Interrupt<br />
This bit is cleared when the TXINIC bit is written to one, acknowledging the interrupt. For control endpoints, this will send the<br />
packet. For other endpoint types, the user should clear the FIFOCON to allow the USBC to send the data. TXINI shall always be<br />
cleared before clearing FIFOCON to avoid missing an interrupt.<br />
This bit is set for control endpoints, when the current bank is ready to accept a new IN packet. This triggers an EPnINT interrupt<br />
if TXINE is one.<br />
This bit is set for isochronous, bulk and interrupt IN endpoints, at the same time as FIFOCON when the current bank is free.<br />
This triggers an EPnINT interrupt if TXINE is one.<br />
This bit is inactive (cleared) for isochronous, bulk and interrupt OUT endpoints.<br />
934
32.7.2.12 Endpoint n Status Clear Register<br />
Register Name: UESTAnCLR, n in [0..6]<br />
Access Type: Write-Only<br />
Offset: 0x0160 + (n * 0x04)<br />
Reset Value: 0x00000000<br />
32117D–AVR-01/12<br />
<strong>AT32UC3C</strong><br />
31 30 29 28 27 26 25 24<br />
- - - - - - - -<br />
23 22 21 20 19 18 17 16<br />
- - - - - - - -<br />
15 14 13 12 11 10 9 8<br />
- - - - RAMACERIC - - -<br />
7 6 5 4 3 2 1 0<br />
-<br />
STALLEDIC/<br />
CRCERRIC<br />
- NAKINIC NAKOUTIC<br />
Writing a zero to a bit in this register has no effect.<br />
Writing a one to a bit in this register will clear the corresponding bit in UESTA.<br />
These bits always read as zero.<br />
RXSTPIC/<br />
ERRORFIC<br />
RXOUTIC TXINIC<br />
935
32.7.2.13 Endpoint n Status Set Register<br />
Register Name: UESTAnSET, n in [0..6]<br />
Access Type: Write-Only<br />
Offset: 0x0190 + (n * 0x04)<br />
Reset Value: 0x00000000<br />
32117D–AVR-01/12<br />
<strong>AT32UC3C</strong><br />
31 30 29 28 27 26 25 24<br />
- - - - - - - -<br />
23 22 21 20 19 18 17 16<br />
- - - - - - - -<br />
15 14 13 12 11 10 9 8<br />
- - - NBUSYBKS RAMACERIS - -<br />
7 6 5 4 3 2 1 0<br />
-<br />
STALLEDIS/<br />
CRCERRIS<br />
- NAKINIS NAKOUTIS<br />
Writing a zero to a bit in this register has no effect.<br />
Writing a one to a bit in this register will set the corresponding bit in UESTA.<br />
These bits always read as zero.<br />
RXSTPIS/<br />
ERRORFIS<br />
RXOUTIS TXINIS<br />
936
32.7.2.14 Endpoint n Control Register<br />
Register Name: UECONn, n in [0..6]<br />
Access Type: Read-Only<br />
Offset: 0x01C0 + (n * 0x04)<br />
Reset Value: 0x00000000<br />
32117D–AVR-01/12<br />
<strong>AT32UC3C</strong><br />
31 30 29 28 27 26 25 24<br />
- - - - - - BUSY1E BUSY0E<br />
23 22 21 20 19 18 17 16<br />
- - - - STALLRQ RSTDT - -<br />
15 14 13 12 11 10 9 8<br />
- FIFOCON KILLBK NBUSYBKE RAMACERE - -<br />
7 6 5 4 3 2 1 0<br />
-<br />
STALLEDE/<br />
CRCERRE<br />
- NAKINE NAKOUTE<br />
RXSTPE/<br />
ERRORFE<br />
RXOUTE TXINE<br />
BUSY0E: Busy Bank0 Enable<br />
This bit is cleared when the BUSY0C bit is written to one.<br />
This bit is set when the BUSY0ES bit is written to one. This will set the bank 0 as “busy”. All transactions, except SETUP,<br />
destined to this bank will be rejected (i.e: NAK token will be answered).<br />
BUSY1E: Busy Bank1 Enable<br />
This bit is cleared when the BUSY1C bit is written to one.<br />
This bit is set when the BUSY1ES bit is written to one. This will set the bank 1 as “busy”. All transactions, except SETUP,<br />
destined to this bank will be rejected (i.e: NAK token will be answered).<br />
STALLRQ: STALL Request<br />
This bit is cleared when a new SETUP packet is received or when the STALLRQC bit is written to zero.<br />
This bit is set when the STALLRQS bit is written to one, requesting a STALL handshake to be sent to the host.<br />
RSTDT: Reset Data Toggle<br />
The data toggle sequence is cleared when the RSTDTS bit is written to one (i.e., Data0 data toggle sequence will be selected<br />
for the next sent (IN endpoints) or received (OUT endpoints) packet.<br />
This bit is always read as zero.<br />
FIFOCON: FIFO Control<br />
For control endpoints:<br />
The FIFOCON and RWALL bits are irrelevant. The software shall therefore never use them for these endpoints. When read,<br />
their value is always 0.<br />
For IN endpoints:<br />
This bit is cleared when the FIFOCONC bit is written to one, sending the FIFO data and switching to the next bank.<br />
This bit is set simultaneously to TXINI, when the current bank is free.<br />
For OUT endpoints:<br />
This bit is cleared when the FIFOCONC bit is written to one, freeing the current bank and switching to the next.<br />
This bit is set simultaneously to RXINI, when the current bank is full.<br />
937
32117D–AVR-01/12<br />
<strong>AT32UC3C</strong><br />
KILLBK: Kill IN Bank<br />
This bit is cleared by hardware after the completion of the “kill packet procedure”.<br />
This bit is set when the KILLBKS bit is written to one, killing the last written bank.<br />
The user shall wait for this bit to be cleared before trying to process another IN packet.<br />
Caution: The bank is cleared when the “kill packet” procedure is completed by the USBC core:<br />
If the bank is really killed, the NBUSYBK field is decremented.<br />
If the bank sent instead of killed (IN transfer), the NBUSYBK field is decremented and the TXINI flag is set. This specific case<br />
can occur if an IN token comes while the user tries to kill the bank.<br />
Note: If two banks are ready to be sent, the above specific case will not occur, since the first bank is sent (IN transfer) while the<br />
last bank is killed.<br />
NBUSYBKE: Number of Busy Banks Interrupt Enable<br />
This bit is cleared when the NBUSYBKEC bit is written to zero, disabling the Number of Busy Banks interrupt (NBUSYBK).<br />
This bit is set when the NBUSYBKES bit is written to one, enabling the Number of Busy Banks interrupt (NBUSYBK).<br />
RAMACERE: RAMACER Interrupt Enable<br />
This bit is cleared when the RAMACEREC bit is written to one, disabling the RAMACER interrupt (RAMACERI).<br />
This bit is set when the RAMACERES bit is written to one, enabling the RAMACER interrupt (RAMACERI).<br />
STALLEDE: STALLed Interrupt Enable<br />
This bit is cleared when the STALLEDEC bit is written to one, disabling the STALLed interrupt (STALLEDI).<br />
This bit is set when the STALLEDES bit is written to one, enabling the STALLed interrupt (STALLEDI).<br />
CRCERRE: CRC Error Interrupt Enable<br />
This bit is cleared when the CRCERREC bit is written to one, disabling the CRC Error interrupt (CRCERRI).<br />
This bit is set when the CRCERRES bit is written to one, enabling the CRC Error interrupt (CRCERRI).<br />
NAKINE: NAKed IN Interrupt Enable<br />
This bit is cleared when the NAKINEC bit is written to one, disabling the NAKed IN interrupt (NAKINI).<br />
This bit is set when the NAKINES bit is written to one, enabling the NAKed IN interrupt (NAKINI).<br />
NAKOUTE: NAKed OUT Interrupt Enable<br />
This bit is cleared when the NAKOUTEC bit is written to one, disabling the NAKed OUT interrupt (NAKOUTI).<br />
This bit is set when the NAKOUTES bit is written to one, enabling the NAKed OUT interrupt (NAKOUTI).<br />
RXSTPE: Received SETUP Interrupt Enable<br />
This bit is cleared when the RXSTPEC bit is written to one, disabling the Received SETUP interrupt (RXSTPI).<br />
This bit is set when the RXSTPES bit is written to one, enabling the Received SETUP interrupt (RXSTPI).<br />
ERRORFE: Errorflow Interrupt Enable<br />
This bit is cleared when the ERRORFEC bit is written to one, disabling the Underflow interrupt (ERRORFI).<br />
This bit is set when the ERRORFES bit is written to one, enabling the Underflow interrupt (ERRORFI).<br />
RXOUTE: Received OUT Data Interrupt Enable<br />
This bit is cleared when the RXOUTEC bit is written to one, disabling the Received OUT Data interrupt (RXOUT).<br />
This bit is set when the RXOUTES bit is written to one, enabling the Received OUT Data interrupt (RXOUT).<br />
TXINE: Transmitted IN Data Interrupt Enable<br />
This bit is cleared when the TXINEC bit is written to one, disabling the Transmitted IN Data interrupt (TXINI).<br />
This bit is set when the TXINES bit is written to one, enabling the Transmitted IN Data interrupt (TXINI).<br />
938
32.7.2.15 Endpoint n Control Clear Register<br />
Register Name: UECONnCLR, n in [0..6]<br />
Access Type: Write-Only<br />
Offset: 0x0220 + (n * 0x04)<br />
Reset Value: 0x00000000<br />
32117D–AVR-01/12<br />
<strong>AT32UC3C</strong><br />
31 30 29 28 27 26 25 24<br />
- - - - - - BUSY1EC BUSY0EC<br />
23 22 21 20 19 18 17 16<br />
- - - - STALLRQC - - -<br />
15 14 13 12 11 10 9 8<br />
- FIFOCONC - NBUSYBKEC RAMACEREC - - -<br />
7 6 5 4 3 2 1 0<br />
-<br />
STALLEDEC/<br />
CRCERREC<br />
- NAKINEC NAKOUTEC<br />
Writing a zero to a bit in this register has no effect.<br />
Writing a one to a bit in this register will clear the corresponding bit in UECONn.<br />
These bits always read as zero.<br />
RXSTPEC/<br />
ERRORFEC<br />
RXOUTEC TXINEC<br />
939
32.7.2.16 Endpoint n Control Set Register<br />
Register Name: UECONnSET, n in [0..6]<br />
Access Type: Write-Only<br />
Offset: 0x01F0 + (n * 0x04)<br />
Reset Value: 0x00000000<br />
32117D–AVR-01/12<br />
<strong>AT32UC3C</strong><br />
31 30 29 28 27 26 25 24<br />
- - - - - - BUSY1ES BUSY0ES<br />
23 22 21 20 19 18 17 16<br />
- - - - STALLRQS RSTDTS - -<br />
15 14 13 12 11 10 9 8<br />
- - KILLBKS NBUSYBKES RAMACERES - - -<br />
7 6 5 4 3 2 1 0<br />
-<br />
STALLEDES/<br />
CRCERRES<br />
- NAKINES NAKOUTES<br />
Writing a zero to a bit in this register has no effect.<br />
Writing a one to a bit in this register will set the corresponding bit in UECONn.<br />
These bits always read as zero.<br />
RXSTPES/<br />
ERRORFES<br />
RXOUTES TXINES<br />
940
32.7.3 USB Host Registers<br />
32.7.3.1 Host General Control Register<br />
Register Name: UHCON<br />
Access Type: Read/Write<br />
Offset: 0x0400<br />
Reset Value: 0x00000000<br />
32117D–AVR-01/12<br />
<strong>AT32UC3C</strong><br />
31 30 29 28 27 26 25 24<br />
- - - - - - - -<br />
23 22 21 20 19 18 17 16<br />
- - - - - - - -<br />
15 14 13 12 11 10 9 8<br />
- - - - - RESUME RESET SOFE<br />
7 6 5 4 3 2 1 0<br />
- - - - - - - -<br />
RESUME: Send USB Resume<br />
Writing a zero to this bit has no effect.<br />
Writing a one to this bit will generate a USB Resume on the USB bus. This bit should only be done when the start of frame<br />
generation is enabled (SOFE bit is one).<br />
This bit is cleared when the USB Resume has been sent or when a USB reset is requested.<br />
RESET: Send USB Reset<br />
Writing a zero to this bit might be useful when a device disconnection is detected (UHINT.DDISCI is one) while a USB Reset is<br />
being sent.<br />
Writing a one to this bit will generate a USB Reset on the USB bus.<br />
This bit is cleared when the USB Reset has been sent.<br />
SOFE: Start of Frame Generation Enable<br />
Writing a zero to this bit will disable the SOF generation and to leave the USB bus in idle state.<br />
Writing a one to this bit will generate SOF on the USB bus in full speed mode and keep it alive in low speed mode.<br />
This bit is set when a USB reset is requested or an upstream resume interrupt is detected (UHINT.RXRSMI).<br />
941
32.7.3.2 Host Global Interrupt Register<br />
Register Name: UHINT<br />
Access Type: Read-Only<br />
Offset: 0x0404<br />
Reset Value: 0x00000000<br />
32117D–AVR-01/12<br />
<strong>AT32UC3C</strong><br />
31 30 29 28 27 26 25 24<br />
- - - - - - - -<br />
23 22 21 20 19 18 17 16<br />
- - - - - - - P8INT (1)<br />
15 14 13 12 11 10 9 8<br />
P7INT (1)<br />
P6INT (1)<br />
P5INT (1)<br />
P4INT (1)<br />
P3INT (1)<br />
P2INT (1)<br />
P1INT (1)<br />
7 6 5 4 3 2 1 0<br />
Note: 1. PnINT bits are within the range from P0INT to P6INT.<br />
PnINT: Pipe n Interrupt<br />
This bit is cleared when the interrupt source is served.<br />
This bit is set when an interrupt is triggered by the endpoint n (UPSTAn). This triggers a USB interrupt if the corresponding pipe<br />
interrupt enable bit is one (UHINTE register).<br />
HWUPI: Host Wakeup Interrupt<br />
This bit is cleared when the HWUPIC bit is written to one.<br />
This bit is set when:<br />
- the host controller is in the suspend mode (SOFE is zero) and an upstream resume from the peripheral is detected.<br />
- the host controller is in the suspend mode (SOFE is zero) and a peripheral disconnection is detected.<br />
- the host controller is in the Idle state (VBUSRQ is zero, no VBUS is generated), and an SRP event initiated by the peripheral is<br />
detected (USBSTA.SRPI is one).<br />
This interrupt is generated even if the clock is frozen by the FRZCLK bit.<br />
HSOFI: Host Start of Frame Interrupt<br />
This bit is cleared when the HSOFIC bit is written to one.<br />
This bit is set when a SOF is issued by the Host controller. This triggers a USB interrupt when HSOFE is one. When using the<br />
host controller in low speed mode, this bit is also set when a keep-alive is sent.<br />
RXRSMI: Upstream Resume Received Interrupt<br />
This bit is set when an Upstream Resume has been received from the Device.<br />
This bit is cleared when the RXRSMIC is written to one.<br />
RSMEDI: Downstream Resume Sent Interrupt<br />
This bit is cleared when the RSMEDIC bit is written to one.<br />
This bit set when a Downstream Resume has been sent to the Device.<br />
RSTI: USB Reset Sent Interrupt<br />
This bit is cleared when the RSTIC bit is written to one.<br />
This bit is set when a USB Reset has been sent to the device.<br />
P0INT<br />
- HWUPI HSOFI RXRSMI RSMEDI RSTI DDISCI DCONNI<br />
942
DDISCI: Device Disconnection Interrupt<br />
This bit is cleared when the DDISCIC bit is written to one.<br />
This bit is set when the device has been removed from the USB bus.<br />
DCONNI: Device Connection Interrupt<br />
This bit is cleared when the DCONNIC bit is written to one.<br />
This bit is set when a new device has been connected to the USB bus.<br />
32117D–AVR-01/12<br />
<strong>AT32UC3C</strong><br />
943
32.7.3.3 Host Global Interrupt Clear Register<br />
Register Name: UHINTCLR<br />
Access Type: Write-Only<br />
Offset: 0x0408<br />
Reset Value: 0x00000000<br />
32117D–AVR-01/12<br />
<strong>AT32UC3C</strong><br />
31 30 29 28 27 26 25 24<br />
- - - - - - - -<br />
23 22 21 20 19 18 17 16<br />
- - - - - - - -<br />
15 14 13 12 11 10 9 8<br />
- - - - - - - -<br />
7 6 5 4 3 2 1 0<br />
- HWUPIC HSOFIC RXRSMIC RSMEDIC RSTIC DDISCIC DCONNIC<br />
Writing a zero to a bit in this register has no effect.<br />
Writing a one to a bit in this register will clear the corresponding bit in UHINT.<br />
These bits always read as zero.<br />
944
32.7.3.4 Host Global Interrupt Set Register<br />
Register Name: UHINTSET<br />
Access Type: Write-Only<br />
Offset: 0x040C<br />
Reset Value: 0x00000000<br />
32117D–AVR-01/12<br />
<strong>AT32UC3C</strong><br />
31 30 29 28 27 26 25 24<br />
- - - - - - -<br />
23 22 21 20 19 18 17 16<br />
- - - - - - - -<br />
15 14 13 12 11 10 9 8<br />
- - - - - - - -<br />
7 6 5 4 3 2 1 0<br />
- HWUPIS HSOFIS RXRSMIS RSMEDIS RSTIS DDISCIS DCONNIS<br />
Writing a zero to a bit in this register has no effect.<br />
Writing a one to a bit in this register will set the corresponding bit in UHINT.<br />
These bits always read as zero.<br />
945
32.7.3.5 Host Global Interrupt Enable Register<br />
Register Name: UHINTE<br />
Access Type: Read-Only<br />
Offset: 0x0410<br />
Reset Value: 0x00000000<br />
32117D–AVR-01/12<br />
<strong>AT32UC3C</strong><br />
31 30 29 28 27 26 25 24<br />
- - - - - - - -<br />
23 22 21 20 19 18 17 16<br />
- - - - - - - P8INTE (1)<br />
15 14 13 12 11 10 9 8<br />
P7INTE (1)<br />
P6INTE (1)<br />
P5INTE (1)<br />
P4INTE (1)<br />
P3INTE (1)<br />
P2INTE (1)<br />
P1INTE (1)<br />
7 6 5 4 3 2 1 0<br />
P0INTE<br />
- HWUPIE HSOFIE RXRSMIE RSMEDIE RSTIE DDISCIE DCONNIE<br />
Note: 1. PnINTE bits are within the range from P0INTE to P6INTE.<br />
PnINTE: Pipe n Interrupt Enable<br />
This bit is cleared when the PnINTEC bit is written to one. This will disable the Pipe n Interrupt (PnINT).<br />
This bit is set when the PnINTES bit is written to one. This will enable the Pipe n Interrupt (PnINT).<br />
HWUPIE: Host Wakeup Interrupt Enable<br />
This bit is cleared when the HWUPIEC bit is written to one. This will disable the Host Wakeup Interrupt (HWUPI).<br />
This bit is set when the HWUPIES bit is written to one. This will enable the Host Wakeup Interrupt (HWUPI).<br />
HSOFIE: Host Start of Frame Interrupt Enable<br />
This bit is cleared when the HSOFIEC bit is written to one. This will disable the Host Start of Frame interrupt (HSOFI).<br />
This bit is set when the HSOFIES bit is written to one. This will enable the Host Start of Frame interrupt (HSOFI).<br />
RXRSMIE: Upstream Resume Received Interrupt Enable<br />
This bit is cleared when the RXRSMIEC bit is written to one. This will disable the Downstream Resume interrupt (RXRSMI).<br />
This bit is set when the RXRSMIES bit is written to one. This will enable the Upstream Resume Received interrupt (RXRSMI).<br />
RSMEDIE: Downstream Resume Sent Interrupt Enable<br />
This bit is cleared when the RSMEDIEC bit is written to one. This will disable the Downstream Resume interrupt (RSMEDI).<br />
This bit is set when the RSMEDIES bit is written to one. This will enable the Downstream Resume interrupt (RSMEDI).<br />
RSTIE: USB Reset Sent Interrupt Enable<br />
This bit is cleared when the RSTIEC bit is written to one. This will disable the USB Reset Sent interrupt (RSTI).<br />
This bit is set when the RSTIES bit is written to one. This will enable the USB Reset Sent interrupt (RSTI).<br />
DDISCIE: Device Disconnection Interrupt Enable<br />
This bit is cleared when the DDISCIEC bit is written to one. This will disable the Device Disconnection interrupt (DDISCI).<br />
This bit is set when the DDISCIES bit is written to one. This will enable the Device Disconnection interrupt (DDISCI).<br />
DCONNIE: Device Connection Interrupt Enable<br />
This bit is cleared when the DCONNIEC bit is written to one. This will disable the Device Connection interrupt (DCONNI).<br />
This bit is set when the DCONNIES bit is written to one. This will enable the Device Connection interrupt (DCONNI).<br />
946
32.7.3.6 Host Global Interrupt Enable Clear Register<br />
Register Name: UHINTECLR<br />
Access Type: Write-Only<br />
Offset: 0x0414<br />
Reset Value: 0x00000000<br />
Note: 1. PnINTEC bits are within the range from P0INTEC to P6INTEC.<br />
Writing a zero to a bit in this register has no effect.<br />
Writing a one to a bit in this register will clear the corresponding bit in UHINTE.<br />
These bits always read as zero.<br />
32117D–AVR-01/12<br />
<strong>AT32UC3C</strong><br />
31 30 29 28 27 26 25 24<br />
- - - - - - - -<br />
23 22 21 20 19 18 17 16<br />
- - - - - - - P8INTEC (1)<br />
15 14 13 12 11 10 9 8<br />
P7INTEC (1)<br />
P6INTEC (1)<br />
P5INTEC (1)<br />
P4INTEC (1)<br />
P3INTEC (1)<br />
P2INTEC (1)<br />
P1INTEC (1)<br />
7 6 5 4 3 2 1 0<br />
P0INTEC<br />
- HWUPIEC HSOFIEC RXRSMIEC RSMEDIEC RSTIEC DDISCIEC DCONNIEC<br />
947
32.7.3.7 Host Global Interrupt Enable Set Register<br />
Register Name: UHINTESET<br />
Access Type: Write-Only<br />
Offset: 0x0418<br />
Reset Value: 0x00000000<br />
Note: 1. PnINTES bits are within the range from P0INTES to P6INTES.<br />
Writing a zero to a bit in this register has no effect.<br />
Writing a one to a bit in this register will set the corresponding bit in UHINT.<br />
These bits always read as zero.<br />
32117D–AVR-01/12<br />
<strong>AT32UC3C</strong><br />
31 30 29 28 27 26 25 24<br />
- - - - - - - -<br />
23 22 21 20 19 18 17 16<br />
- - - - - - - P8INTES (1)<br />
15 14 13 12 11 10 9 8<br />
P7INTES (1)<br />
P6INTES (1)<br />
P5INTES (1)<br />
P4INTES (1)<br />
P3INTES (1)<br />
P2INTES (1)<br />
P1INTES (1)<br />
7 6 5 4 3 2 1 0<br />
P0INTES<br />
- HWUPIES HSOFIES RXRSMIES RSMEDIES RSTIES DDISCIES DCONNIES<br />
948
32.7.3.8 Pipe Enable/Reset Register<br />
Register Name: UPRST<br />
Access Type: Read/Write<br />
Offset: 0x0041C<br />
Reset Value: 0x00000000<br />
32117D–AVR-01/12<br />
<strong>AT32UC3C</strong><br />
31 30 29 28 27 26 25 24<br />
- - - - - - - -<br />
23 22 21 20 19 18 17 16<br />
- - - - - - - -<br />
15 14 13 12 11 10 9 8<br />
- - - - - - - PEN8 (1)<br />
7 6 5 4 3 2 1 0<br />
PEN7 (1)<br />
PEN6 (1)<br />
PEN5 (1)<br />
PEN4 (1)<br />
PEN3 (1)<br />
PEN2 (1)<br />
PEN1 (1)<br />
PEN0<br />
Note: 1. PENn bits are within the range from PEN0 to PEN6.<br />
PENn: Pipe n Enable<br />
Writing a zero to this bit will disable the pipe n, forcing the pipe to an inactive state and resetting the pipe registers (UPCFGn,<br />
UPSTAn, and UPCONn).<br />
Writing a one to this bit will enable the pipe n.<br />
949
32.7.3.9 Host Frame Number Register<br />
Register Name: UHFNUM<br />
Access Type: Read/Write<br />
Offset: 0x0420<br />
Reset Value: 0x00000000<br />
32117D–AVR-01/12<br />
<strong>AT32UC3C</strong><br />
31 30 29 28 27 26 25 24<br />
- - - - - - - -<br />
23 22 21 20 19 18 17 16<br />
FLENHIGH<br />
15 14 13 12 11 10 9 8<br />
- - FNUM[10:5]<br />
7 6 5 4 3 2 1 0<br />
FNUM[4:0] - - -<br />
FLENHIGH: Frame Length<br />
This field contains the 8 high-order bits of the 14-bits internal frame counter (frame counter at 12MHz, counter length is 12000<br />
to ensure a SOF generation every 1 ms).<br />
FNUM: Frame Number<br />
This field contains the current SOF number.<br />
This field can be written by software to initialize a new frame number value. In this case, at the next SOF, the FNUM field takes<br />
its new value<br />
950
32.7.3.10 Pipe n Configuration Register<br />
Register Name: UPCFGn, n in [0..6]<br />
Access Type: Read/Write<br />
Offset: 0x0500 + (n * 0x04)<br />
Reset Value: 0x00000000<br />
32117D–AVR-01/12<br />
<strong>AT32UC3C</strong><br />
31 30 29 28 27 26 25 24<br />
BINTERVAL: bInterval parameter<br />
This field corresponds to the bus access period of the pipe.<br />
For Interrupt pipe, this field corresponds to the desired period from 1 ms to 255 ms.<br />
For isochronous pipe, this field corresponds to the desired period calculated as this: 2 (BInterval) * 1 ms.<br />
For bulk or control pipe, this field corresponds to the desired period from 1 ms to 255 ms.<br />
This field is cleared upon sending a USB reset.<br />
PTYPE: Pipe Type<br />
This field contains the pipe type.<br />
This field is cleared upon sending a USB reset.<br />
PTOKEN: Pipe Token<br />
This field contains the endpoint token.<br />
BINTERVAL<br />
23 22 21 20 19 18 17 16<br />
- - - - - - - -<br />
15 14 13 12 11 10 9 8<br />
- - PTYPE - - PTOKEN<br />
7 6 5 4 3 2 1 0<br />
- PSIZE - PBK - -<br />
PTYPE Pipe Type<br />
0 0 Control<br />
0 1 Isochronous<br />
1 0 Bulk<br />
1 1 Interrupt<br />
PTOKEN Endpoint Direction<br />
00 SETUP<br />
01 IN<br />
10 OUT<br />
11 reserved<br />
951
PSIZE: Pipe Size<br />
This field contains the size of each pipe bank.<br />
This field is cleared upon sending a USB reset.<br />
32117D–AVR-01/12<br />
PSIZE Endpoint Size<br />
0 0 0 8 bytes<br />
0 0 1 16 bytes<br />
0 1 0 32 bytes<br />
0 1 1 64 bytes<br />
1 0 0 128 bytes<br />
1 0 1 256 bytes<br />
1 1 0 512 bytes<br />
1 1 1 1024 bytes<br />
PBK: Pipe Banks<br />
This bit selects the number of banks for the pipe.<br />
0: single-bank pipe<br />
1: double bank pipe<br />
For control endpoints, a single-bank pipe should be selected.<br />
This field is cleared upon sending a USB reset.<br />
<strong>AT32UC3C</strong><br />
952
32.7.3.11 Pipe n Status Register<br />
Register Name: UPSTAn, n in [0..6]<br />
Access Type: Read-Only<br />
Offset: 0x0530 + (n * 0x04)<br />
Reset Value: 0x00000000<br />
32117D–AVR-01/12<br />
<strong>AT32UC3C</strong><br />
31 30 29 28 27 26 25 24<br />
- - - - - - - -<br />
23 22 21 20 19 18 17 16<br />
- - - - - - - -<br />
15 14 13 12 11 10 9 8<br />
- CURRBK NBUSYBK - RAMACERI DTSEQ<br />
7 6 5 4 3 2 1 0<br />
-<br />
RXSTALLDI/<br />
CRCERRI<br />
CURRBK: Current Bank<br />
For non-control pipe, this field indicates the number of the current bank.<br />
This field may be updated 1 clock cycle after the RWALL bit changes, so the user should not poll this field for an interrupt.<br />
CURRBK Current Bank<br />
0 0 Bank0<br />
0 1 Bank1<br />
ERRORFI NAKEDI PERRI TXSTPI TXOUTI RXINI<br />
NBUSYBK: Number of Busy Banks<br />
This field indicates the number of busy bank.<br />
For OUT pipe, this field indicates the number of busy bank(s), filled by the user, ready for OUT transfer. When all banks are<br />
busy, this triggers an PnINT interrupt if UPCONn.NBUSYBKE is one.<br />
For IN pipe, this field indicates the number of busy bank(s) filled by IN transaction from the Device. When all banks are free, this<br />
triggers an PnINT interrupt if UPCONn.NBUSYBKE is one.<br />
NBUSYBK Number of busy bank<br />
0 0 All banks are free.<br />
0 1 1 busy bank<br />
1 0 2 busy banks<br />
1 1 reserved<br />
RAMACERI: Ram Access Error Interrupt<br />
This bit is cleared when the RAMACERIC bit is written to one.<br />
This bit is set when a RAM access underflow error occurs during IN data stage.<br />
953
DTSEQ: Data Toggle Sequence<br />
This field indicates the data PID of the current bank.<br />
For OUT pipes, this field indicates the data toggle of the next packet that will be sent.<br />
For IN pipes, this field indicates the data toggle of the received packet stored in the current bank.<br />
32117D–AVR-01/12<br />
DTSEQ Data toggle sequence<br />
0 0 Data0<br />
0 1 Data1<br />
1 0 reserved<br />
1 1 reserved<br />
<strong>AT32UC3C</strong><br />
RXSTALLDI: Received STALLed Interrupt<br />
This bit is cleared when the RXSTALLDIC bit is written to one.<br />
This bit is set, for all endpoints (except isochronous), when a STALL handshake has been received on the current bank of the<br />
pipe. The pipe is automatically frozen. This triggers an interrupt if the RXSTALLE bit is one.<br />
CRCERRI: CRC Error Interrupt<br />
This bit is cleared when the CRCERRIC bit is written to one.<br />
This bit is set, for isochronous endpoint, when a CRC error occurs on the current bank of the pipe. This triggers an interrupt if<br />
the TXSTPE bit is one.<br />
ERRORFI: Errorflow Interrupt<br />
This bit is cleared when the ERRORFIC bit is written to one.<br />
This bit is set:<br />
- for isochronous and interrupt IN/OUT pipes, when an error flow occurs. This triggers an interrupt if the ERRORFIE bit is one.<br />
- for isochronous or interrupt OUT pipes, when a transaction underflow occurs in the current pipe. i.e, the pipe can’t send the<br />
OUT data packet in time because the current bank is not ready.<br />
- for isochronous or interrupt IN pipes, when a transaction flow error occurs in the current pipe. i.e, the current bank of the pipe<br />
is not free when a new IN USB packet is received. This packet is not stored in the bank. For interrupt pipes, the overflowed<br />
packet is ACKed to respect the USB standard.<br />
NAKEDI: NAKed Interrupt<br />
This bit is cleared when the NAKEDIC bit is written to one.<br />
This bit is set when a NAK has been received on the current bank of the pipe. This triggers an interrupt if the NAKEDE bit is one.<br />
PERRI: Pipe Error Interrupt<br />
This bit is cleared when the PERRIC bit is written to one.<br />
This bit is set when an error occurs on the current bank of the pipe. This triggers an interrupt if the PERRE bit is set. Refers to<br />
the PERSTA structure of the pipe descriptor (Figure 32-9) to determine the source of the error.<br />
TXSTPI: Transmitted SETUP Interrupt<br />
This bit is cleared when the TXSTPIC bit is written to one.<br />
This bit is set, for Control endpoints, when the current SETUP bank is free and can be filled. This triggers an interrupt if the<br />
TXSTPE bit is one.<br />
TXOUTI: Transmitted OUT Data Interrupt<br />
This bit is cleared when the TXOUTIC bit is written to one.<br />
This bit is set when the current OUT bank is free and can be filled. This triggers an interrupt if the TXOUTE bit is one.<br />
RXINI: Received IN Data Interrupt<br />
This bit is cleared when the RXINIC bit is written to one.<br />
This bit is set when a new USB message is stored in the current bank of the pipe. This triggers an interrupt if the RXINE bit is<br />
one.<br />
954
32.7.3.12 Pipe n Status Clear Register<br />
Register Name: UPSTAnCLR, n in [0..6]<br />
Access Type: Write-Only<br />
Offset: 0x0560 + (n * 0x04)<br />
Reset Value: 0x00000000<br />
32117D–AVR-01/12<br />
<strong>AT32UC3C</strong><br />
31 30 29 28 27 26 25 24<br />
- - - - - - - -<br />
23 22 21 20 19 18 17 16<br />
- - - - - - - -<br />
15 14 13 12 11 10 9 8<br />
- - - - - RAMACERIC - -<br />
7 6 5 4 3 2 1 0<br />
-<br />
RXSTALLDIC/<br />
CRCERRIC<br />
ERRORFIC NAKEDIC PERRIC TXSTPIC TXOUTIC RXINIC<br />
Writing a zero to a bit in this register has no effect.<br />
Writing a one to a bit in this register will clear the corresponding bit in UPSTAn.<br />
These bits always read as zero.<br />
955
32.7.3.13 Pipe n Status Set Register<br />
Register Name: UPSTAnSET, n in [0..6]<br />
Access Type: Write-Only<br />
Offset: 0x0590 + (n * 0x04)<br />
Reset Value: 0x00000000<br />
32117D–AVR-01/12<br />
<strong>AT32UC3C</strong><br />
31 30 29 28 27 26 25 24<br />
- - - - - - - -<br />
23 22 21 20 19 18 17 16<br />
- - - - - - - -<br />
15 14 13 12 11 10 9 8<br />
- - - - - RAMACERIS - -<br />
7 6 5 4 3 2 1 0<br />
-<br />
RXSTALLDIS/<br />
CRCERRIS<br />
ERRORFIC NAKEDIS PERRIS TXSTPIS TXOUTIS RXINIS<br />
Writing a zero to a bit in this register has no effect.<br />
Writing a one to a bit in this register will set the corresponding bit in UPSTAn.<br />
These bits always read as zero.<br />
956
32.7.3.14 Pipe n Control Register<br />
Register Name: UPCONn, n in [0..6]<br />
Access Type: Read-Only<br />
Offset: 0x05C0 + (n * 0x04)<br />
Reset Value: 0x00000000<br />
32117D–AVR-01/12<br />
<strong>AT32UC3C</strong><br />
31 30 29 28 27 26 25 24<br />
- - - - - - - -<br />
23 22 21 20 19 18 17 16<br />
- - - - INITBK INITDTGL PFREEZE -<br />
15 14 13 12 11 10 9 8<br />
- FIFOCON - NBUSYBKE - RAMACERE - -<br />
7 6 5 4 3 2 1 0<br />
-<br />
RXSTALLDE/<br />
CRCERRE<br />
ERRORFIE NAKEDE PERRE TXSTPE TXOUTE RXINE<br />
INITBK: Bank Initialization<br />
This bit is always read as zero.<br />
If the user writes a one to the INITBKC bit, this will set the current bank to Bank0 value for the current pipe.<br />
If the user writes a one to the INITBKS bit, this will set the current bank to Bank1 value for the current pipe.<br />
This may be useful to restore a pipe to manage alternate pipes on the same physical pipe.<br />
INITTGL: Data Toggle Initialization<br />
This bit is always read as zero.<br />
If the user writes a one to the INITTGLC bit, this will set the Data toggle to Data0 value for the current pipe.<br />
If the user writes a one to the INITTGLS bit, this will set the Data toggle to Data1 value for the current pipe.<br />
This may be useful to restore a pipe to manage alternate pipes on the same physical pipe.<br />
PFREEZE: Pipe Freeze<br />
This bit is cleared when the PFREEZEC bit is written to one. This will enable the pipe request generation.<br />
This bit is set when the PFREEZES bit is written to one or when the pipe is not configured or when a STALL handshake has<br />
been received on this pipe, or when INRQ In requests have been processed, or after a pipe Enable (UPRST.PEN rising). This<br />
will freeze the pipe requests generation.<br />
If the PFREEZES bit is written to one while a transaction is on going on the USB bus, the transaction will be properly completed<br />
and then the PFREEZE bit will be set. UPSTAn register should be checked to know this last transaction status.<br />
FIFOCON: FIFO Control<br />
For OUT and SETUP pipes:<br />
This bit is cleared when the FIFOCONC bit is written to one. This will send the FIFO data and switch the bank.<br />
This bit is set when the current bank is free, at the same time than TXOUTI or TXSTPI.<br />
For IN pipes:<br />
This bit is cleared when the FIFOCONC bit is written to one. This will free the current bank and switch to the next bank.<br />
This bit is set when a new IN message is stored in the current bank, at the same time than RXINI.<br />
NBUSYBKE: Number of Busy Banks Interrupt Enable<br />
This bit is cleared when the NBUSYBKEC bit is written to one. This will disable the Transmitted IN Data interrupt (NBUSYBKE).<br />
957
32117D–AVR-01/12<br />
<strong>AT32UC3C</strong><br />
This bit is set when the NBUSYBKES bit is written to one.This will enable the Transmitted IN Data interrupt (NBUSYBKE).<br />
RAMACERE: Ram Access Error Interrupt Enable<br />
This bit is cleared when the NBUSYBKEC bit is written to one. This will disable the Transmitted IN Data interrupt (NBUSYBKE).<br />
This bit is set when the NBUSYBKES bit is written to one.This will enable the Transmitted IN Data interrupt (NBUSYBKE).<br />
RXSTALLDE: Received STALLed Interrupt Enable<br />
This bit is cleared when the RXSTALLDEC bit is written to one. This will disable the Transmitted IN Data interrupt<br />
(RXSTALLDE).<br />
This bit is set when the RXSTALLDES bit is written to one. This will enable the Transmitted IN Data interrupt (RXSTALLDE).<br />
CRCERRE: CRC Error Interrupt Enable<br />
This bit is cleared when the CRCERREC bit is written to one. This will disable the Transmitted IN Data interrupt (CRCERRE).<br />
This bit is set when the CRCERRES bit is written to one. This will enable the Transmitted IN Data interrupt (CRCERRE).<br />
ERRORFIE: Errorflow Interrupt Enable<br />
This bit is cleared when the ERRORFIEC bit is written to one. This will disable the Transmitted IN Data interrupt (OVERFIE).<br />
This bit is set when the ERRORFIES bit is written to one. This will enable the Transmitted IN Data interrupt (OVERFIE).<br />
NAKEDE: NAKed Interrupt Enable<br />
This bit is cleared when the NAKEDEC bit is written to one. This will disable the Transmitted IN Data interrupt (NAKEDE).<br />
This bit is set when the NAKEDES bit is written to one. This will enable the Transmitted IN Data interrupt (NAKEDE).<br />
PERRE: Pipe Error Interrupt Enable<br />
This bit is cleared when the PERREC bit is written to one. This will disable the Transmitted IN Data interrupt (PERRE).<br />
This bit is set when the PERRES bit is written to one. This will enable the Transmitted IN Data interrupt (PERRE).<br />
TXSTPE: Transmitted SETUP Interrupt Enable<br />
This bit is cleared when the TXSTPEC bit is written to one. This will disable the Transmitted IN Data interrupt (TXSTPE).<br />
This bit is set when the TXSTPES bit is written to one. This will enable the Transmitted IN Data interrupt (TXSTPE).<br />
TXOUTE: Transmitted OUT Data Interrupt Enable<br />
This bit is cleared when the TXOUTEC bit is written to one. This will disable the Transmitted IN Data interrupt (TXOUTE).<br />
This bit is set when the TXOUTES bit is written to one. This will enable the Transmitted IN Data interrupt (TXOUTE).<br />
RXINE: Received IN Data Interrupt Enable<br />
This bit is cleared when the RXINEC bit is written to one. This will disable the Transmitted IN Data interrupt (RXINE).<br />
This bit is set when the RXINES bit is written to one. This will enable the Transmitted IN Data interrupt (RXINE).<br />
958
32.7.3.15 Pipe n Control Set Register<br />
Register Name: UPCONnSET, n in [0..6]<br />
Access Type: Write-Only<br />
Offset: 0x05F0 + (n * 0x04)<br />
Reset Value: 0x00000000<br />
32117D–AVR-01/12<br />
<strong>AT32UC3C</strong><br />
31 30 29 28 27 26 25 24<br />
- - - - - - - -<br />
23 22 21 20 19 18 17 16<br />
- - - - INITBKS INITDTGLS PFREEZES -<br />
15 14 13 12 11 10 9 8<br />
- - - NBUSYBKES - - - -<br />
7 6 5 4 3 2 1 0<br />
-<br />
RXSTALLDES/<br />
CRCERRES<br />
ERRORFIES NAKEDES PERRES TXSTPES TXOUTES RXINES<br />
Writing a zero to a bit in this register has no effect.<br />
Writing a one to a bit in this register will set the corresponding bit in UPCONn.<br />
These bits always read as zero.<br />
959
32.7.3.16 Pipe n Control Clear Register<br />
Register Name: UPCONnCLR, n in [0..6]<br />
Access Type: Write-Only<br />
Offset: 0x0620 + (n * 0x04)<br />
Reset Value: 0x00000000<br />
32117D–AVR-01/12<br />
<strong>AT32UC3C</strong><br />
31 30 29 28 27 26 25 24<br />
- - - - - - - -<br />
23 22 21 20 19 18 17 16<br />
- - - - INITBKC INITDTGLC PFREEZEC -<br />
15 14 13 12 11 10 9 8<br />
- FIFOCONC - NBUSYBKEC - - - -<br />
7 6 5 4 3 2 1 0<br />
-<br />
RXSTALLDEC/<br />
CRCERREC<br />
ERRORFIEC NAKEDEC PERREC TXSTPEC TXOUTEC RXINEC<br />
Writing a zero to a bit in this register has no effect.<br />
Writing a one to a bit in this register will clear the corresponding bit in UPCONn.<br />
These bits always read as zero.<br />
960
32.7.3.17 Pipe n IN Request Register<br />
Register Name: UPINRQn, n in [0..6]<br />
Access Type: Read/Write<br />
Offset: 0x0650 + (n * 0x04)<br />
Reset Value: 0x00000001<br />
32117D–AVR-01/12<br />
<strong>AT32UC3C</strong><br />
31 30 29 28 27 26 25 24<br />
- - - - - - - -<br />
23 22 21 20 19 18 17 16<br />
- - - - - - - -<br />
15 14 13 12 11 10 9 8<br />
- - - - - - - INMODE<br />
7 6 5 4 3 2 1 0<br />
INRQ<br />
INMODE: IN Request Mode<br />
Writing a zero to this bit will perform a pre-defined number of IN requests. This number is the INRQ field.<br />
Writing a one to this bit will allow the USBC to perform infinite IN requests when the pipe is not frozen.<br />
INRQ: IN Request Number before Freeze<br />
This field contains the number of IN transactions before the USBC freezes the pipe. The USBC will perform INRQ IN requests<br />
before freezing the pipe. This counter is automatically decreased by 1 each time an IN request has been successfully<br />
performed.<br />
This register has no effect when the INMODE bit is 1(infinite IN requests generation till the pipe is not frozen).<br />
961
32117D–AVR-01/12<br />
<strong>AT32UC3C</strong><br />
32.8 Module Configuration<br />
The specific configuration for each USBC instance is listed in the following tables. The module<br />
bus clocks listed here are connected to the system bus clocks. Please refer to the Power Manager<br />
chapter for details.<br />
Table 32-11. MODULE Clock Name<br />
Module name Clock Name Description<br />
USBC<br />
Table 32-12. Register Reset Values<br />
Register Reset Value<br />
UVERS 0x00000210<br />
UFEATURES 7<br />
UADDRSIZE 0x1000<br />
UNAME1 0x48555342<br />
UNAME2 0x004F5447<br />
CLK_USBC_HSB HSB clock<br />
CLK_USBC_PB Peripheral Bus clock from the PBB clock domain<br />
GCLK_USBC The generic clock used for the USBC is GCLK0<br />
962
33. Pulse Width Modulation Controller (PWM)<br />
33.1 Features<br />
33.2 Overview<br />
32117D–AVR-01/12<br />
Rev. 5.0.1.0<br />
<strong>AT32UC3C</strong><br />
4 channels<br />
Common clock generator providing thirteen different clocks<br />
– A modulo n counter providing eleven clocks<br />
– Two independent linear dividers working on modulo n counter outputs<br />
– High frequency asynchronous clocking mode<br />
Independent channels<br />
– Independent 20-bit counter for each channel<br />
– Independent complementary outputs with 16-bit dead-time generator (also called dead-band<br />
or non-overlapping time) for each channel<br />
– Independent enable disable command for each channel<br />
– Independent clock selection for each channel<br />
– Independent period, duty-cycle and dead-time for each channel<br />
– Independent double buffering of period, duty-cycle and dead-times for each channel<br />
– Independent programmable selection of the output waveform polarity for each channel<br />
– Independent programmable center or left aligned output waveform for each channel<br />
– Independent output override for each channel<br />
2 2-bit Gray up/down channels for stepper motor control<br />
Synchronous channel mode<br />
– Synchronous channels share the same counter<br />
– Mode to update the synchronous channels registers after a programmable number of periods<br />
– Synchronous channels supports connection with peripheral DMA controller which offers<br />
buffer transfer without processor intervention to update duty-cycle values<br />
2 independent events lines intended to synchonize ADC conversions<br />
8 comparison units intended to generate interrupts, pulses on event lines and PDC tranfer<br />
requests<br />
5 programmable fault inputs providing an asynchronous protection of PWM outputs<br />
Write-Protect registers<br />
The PWM Controller (PWM) controls 4 channels independently. Each channel controls two complementary<br />
square output waveforms. Characteristics of the output waveforms such as period,<br />
duty-cycle, polarity and dead-times (also called dead-bands or non-overlapping times) are configured<br />
through the user interface. Each channel selects and uses one of the clocks provided by<br />
the clock generator. The clock generator provides several clocks resulting from the division of<br />
the PWM internal clock (CCK). This internal clock can be driven either by the master clock<br />
(CLK_PWM) or by the generic clock (GCLK).<br />
All PWM accesses are made through registers mapped on the peripheral bus. All channels integrate<br />
a double buffering system in order to prevent an unexpected output waveform while<br />
modifying the period, the duty-cycle or the dead-times.<br />
Channels can be linked together as synchronous channels to be able to update their duty-cycle<br />
or dead-times at the same time.<br />
The update of duty-cycles of synchronous channels can be performed by the Peripheral DMA<br />
Controller Channel (PDCA) which offers buffer transfer without processor Intervention.<br />
963
32117D–AVR-01/12<br />
<strong>AT32UC3C</strong><br />
The PWM provides 8 independent comparison units capable to compare a programmed value to<br />
the counter of the synchronous channels (counter of channel 0). These comparisons are<br />
intended to generate software interrupts, to trigger pulses on the 2 independent event lines (in<br />
order to synchronize ADC conversions with a lot of flexibility independently of the PWM outputs),<br />
and to trigger PDCA transfer requests.<br />
The PWM outputs can be overridden synchronously or asynchronously to their channel counter.<br />
The PWM Controller provide a fault protection mechanism with 5 fault inputs, capable to detect a<br />
fault condition and to override the PWM outputs asynchronously.<br />
For safety usage, some control registers are write-protected.<br />
964
33.3 Block Diagram<br />
Figure 33-1. Pulse Width Modulation Controller Block Diagram<br />
32117D–AVR-01/12<br />
update<br />
period<br />
dutycycle<br />
counter<br />
channel x<br />
clock<br />
selector<br />
update<br />
period<br />
dutycycle<br />
counter<br />
channel y<br />
clock<br />
selector<br />
counter<br />
channel 0<br />
z=0 (x=0, y=1)<br />
z=1 (x=2, y=3)<br />
z=2 (x=4, y=5)<br />
Clock generator<br />
CLK_PWM GCLK<br />
MUX<br />
MUX<br />
comp<br />
arator<br />
comp<br />
arator<br />
2-bit gray<br />
counter z<br />
SYNCx<br />
SYNCy<br />
MUX<br />
User Interface<br />
PWM<br />
Channel x<br />
Channel y (=x+1)<br />
MUX<br />
OCx<br />
OCy<br />
dead-time<br />
generator<br />
dead-time<br />
generator<br />
Channel 0<br />
Peripheral Bus<br />
DTOHx OOOHx<br />
DTOLx<br />
Comparison<br />
Units<br />
PDCA<br />
output<br />
override<br />
EXT_<br />
FAULTS[i]<br />
DTOHy OOOHy<br />
DTOLy<br />
output<br />
override<br />
OOOLx<br />
OOOLy<br />
Event<br />
Generator<br />
fault<br />
protection<br />
fault<br />
protection<br />
event 0<br />
event 1<br />
I/O<br />
controller<br />
<strong>AT32UC3C</strong><br />
PEVC<br />
PWMH[x]<br />
PWML[x]<br />
EXT_<br />
FAULTS[i]<br />
PWMH[y]<br />
PWML[y]<br />
PWMH[0]<br />
PWML[0]<br />
965
33.4 I/O Lines Description<br />
Each channel outputs two complementary external I/O lines.<br />
32117D–AVR-01/12<br />
Table 33-1. I/O Line Description<br />
Name Description Type<br />
PWMHx PWM Waveform Output High for channel x Output<br />
PWMLx PWM Waveform Output Low for channel x Output<br />
EXT_FAULTSx PWM Fault Input x Input<br />
<strong>AT32UC3C</strong><br />
966
33.5 Product Dependencies<br />
33.5.1 I/O Lines<br />
33.5.2 Clocks<br />
33.5.3 Interrupts<br />
32117D–AVR-01/12<br />
<strong>AT32UC3C</strong><br />
The pins used for interfacing the PWM may be multiplexed with the I/O Controller lines. The programmer<br />
must first program the I/O controller to assign the desired PWM pins to their peripheral<br />
function. If I/O lines of the PWM are not used by the application, they can be used for other purposes<br />
by the I/O controller.<br />
The clock of the PWM (CLK_PWM) is generated by the Power Manager. This clock is enabled at<br />
reset, and can be disabled in the Power Manager. It is recommended to disable the PWM before<br />
disabling the clock, to avoid freezing the PWM in an undefined state.<br />
The PWM counters can be fed by a Generic Clock (GCLK). This is a high frequency clock which<br />
is asynchronous to CLK_PWM.<br />
The PWM interrupt line is connected to the Interrupt Controller. Using the PWM interrupt<br />
requires the interrupt controller to be programmed first.<br />
967
32117D–AVR-01/12<br />
<strong>AT32UC3C</strong><br />
33.6 Functional Description<br />
The PWM Controller is primarily composed of a clock generator module and 4 channels.<br />
33.6.1 PWM Clock Generator<br />
The clock generator module provides 13 clocks. Its source clock is chosen according to the<br />
CLKSEL bit in the Clock Register (CLK). It allows to select:<br />
– CLK_PWM: the master clock (clock of the peripheral bus to which the PWM is<br />
connected)<br />
– GCLK: the generic clock (high frequency clock which is asynchronous to<br />
CLK_PWM)<br />
Each channel can independently choose one of the clock generator outputs.<br />
Each channel generates an output waveform with attributes that can be defined<br />
independently for each channel through the user interface registers.<br />
Figure 33-2. Functional View of the Clock Generator Block Diagram<br />
CLK_PWM<br />
GCLK<br />
CLKSEL<br />
CCK<br />
modulo n counter<br />
CCK<br />
CCK/2<br />
CCK/4<br />
CCK/8<br />
CCK/16<br />
CCK/32<br />
CCK/64<br />
CCK/128<br />
CCK/256<br />
CCK/512<br />
CCK/1024<br />
Divider<br />
A<br />
PREA DIVA<br />
Divider<br />
B<br />
PREB DIVB<br />
clkA<br />
clkB<br />
968
32117D–AVR-01/12<br />
<strong>AT32UC3C</strong><br />
The PWM internal clock (named CCK and driven either by CLK_PWM or by GCLK) is divided in<br />
the clock generator module to provide different clocks available for all channels. Each channel<br />
can independently select one of the divided clocks.<br />
The selection of the source clock of the PWM counters is made by the CLKSEL bit in the CLK<br />
Register. In asynchronous clocking mode (CLKSEL=1, GCLK selected), the PWM counters and<br />
the prescaler allow running the CPU from any clock source while the prescaler is operating on a<br />
faster clock (GCLK).<br />
The clock generator is divided in three blocks:<br />
– a modulo n counter which provides 11 clocks: FCCK , FCCK /2, FCCK /4, FCCK /8, FCCK /16,<br />
FCCK /32, FCCK /64, FCCK /128, FCCK /256, FCCK /512, FCCK /1024<br />
– two linear dividers (1, 1/2, 1/3,... 1/255) that provide two separate clocks: clkA and<br />
clkB<br />
Each linear divider can independently divide one of the clocks of the modulo n counter. The<br />
selection of the clock to be divided is made according to the PREA (PREB) field of the PWM<br />
Clock register (PWM_CLK). The resulting clock clkA (clkB) is the clock selected divided by DIVA<br />
(DIVB) field value.<br />
After a reset of the PWM controller, DIVA (DIVB) and PREA (PREB) are set to 0. This implies<br />
that after reset clkA (clkB) are turned off.<br />
At reset, all clocks provided by the modulo n counter are turned off except clock “CCK”. This situation<br />
is also true when the PWM master clock is turned off through the Power Management<br />
Controller.<br />
CAUTION:<br />
Before using the PWM, the programmer must first enable the PWM clock in the Power<br />
Manager (PM).<br />
The master clock frequency (CLK_PWM) must be lower than half of the generic clock<br />
frequency (GCLK) due to the synchronization mechanism between both clock domains.<br />
After selecting a new PWM input clock (written CLKSEL to a new value), no write in any<br />
PWM registers must be attempted before a delay of 2 master clock periods (CLK_PWM).<br />
This is the time needed by the PWM to switch the source of the internal clock (CCK).<br />
969
33.6.2 PWM Channel<br />
33.6.2.1 Block Diagram<br />
Figure 33-3. Functional View of the Channel Block Diagram<br />
32117D–AVR-01/12<br />
update<br />
period<br />
dutycycle<br />
counter<br />
channel x<br />
clock<br />
selector<br />
MUX<br />
counter<br />
channel 0<br />
comp<br />
arator<br />
SYNCx<br />
MUX<br />
OCx<br />
2-bit gray<br />
counter z<br />
Channel x<br />
dead-time<br />
generator<br />
Each of the 4 channels is composed of six blocks:<br />
DTOHx OOOHx<br />
DTOLx<br />
z=0 (x=0, y=1)<br />
z=1 (x=2, y=3)<br />
z=2 (x=4, y=5)<br />
output<br />
override<br />
OOOLx<br />
fault<br />
protection<br />
<strong>AT32UC3C</strong><br />
PWMHx<br />
PWMLx<br />
A clock selector which selects one of the clocks provided by the clock generator (described in<br />
Section 33.6.1 on page 968).<br />
A counter clocked by the output of the clock selector. This counter is incremented or<br />
decremented according to the channel configuration and comparators matches. The size of<br />
the counter is 20 bits.<br />
A comparator used to compute the OCx output waveform according to the counter value and<br />
the configuration. The counter value can be the one of the channel counter or the one of the<br />
channel 0 counter according to SYNCx bit in the ”Sync Channels Mode Register” on page<br />
1006 (SCM).<br />
A 2-bit configurable gray counter enables the stepper motor driver. One gray counter drives 2<br />
channels.<br />
A dead-time generator providing two complementary outputs (DTOHx/DTOLx) which allows<br />
to drive external power control switches safely.<br />
An output override block that can force the two complementary outputs to a programmed<br />
value (OOOHx/OOOLx).<br />
An asynchronous fault protection mechanism that has the highest priority to override the two<br />
complementary outputs in case of fault detection (PWMHx/PWMLx).<br />
970
33.6.2.2 Comparator<br />
32117D–AVR-01/12<br />
<strong>AT32UC3C</strong><br />
The comparator continuously compares its counter value with the channel period defined by<br />
CPRD in the ”Channel Period Register” on page 1040 (CPRDx) and the duty-cycle defined by<br />
CDTY in the ”Channel Duty Cycle Register” on page 1038 (CDTYx) to generate an output signal<br />
OCx accordingly.<br />
The different properties of the waveform of the output OCx are:<br />
the clock selection. The channel counter is clocked by one of the clocks provided by the<br />
clock generator described in the previous section. This channel parameter is defined in the<br />
CPRE field of the ”Channel Mode Register” on page 1036 (CMRx). This field is reset at 0.<br />
the waveform period. This channel parameter is defined in the CPRD field of the CPRDx<br />
register.<br />
- If the waveform is left aligned, then the output waveform period depends on the counter<br />
source clock and can be calculated:<br />
By using the PWM internal clock (CCK) divided by an X given prescaler value (with X being 1,<br />
2, 4, 8, 16, 32, 64, 128, 256, 512, or 1024), the resulting period formula will be:<br />
(<br />
------------------------------<br />
X× CPRD)<br />
CCK<br />
By using the PWM internal clock (CCK) divided by one of both DIVA or DIVB divider, the<br />
formula becomes, respectively:<br />
(<br />
-----------------------------------------<br />
CRPD × DIVA)<br />
CCK<br />
or<br />
(<br />
-----------------------------------------<br />
CRPD × DIVB)<br />
CCK<br />
If the waveform is center aligned then the output waveform period depends on the counter<br />
source clock and can be calculated:<br />
By using the PWM internal clock (CCK) divided by an X given prescaler value<br />
(with X being 1, 2, 4, 8, 16, 32, 64, 128, 256, 512, or 1024). The resulting period formula will<br />
be:<br />
(<br />
----------------------------------------<br />
2 × X × CPRD)<br />
CCK<br />
By using the PWM internal clock (CCK) divided by one of both DIVA or DIVB divider, the<br />
formula becomes, respectively:<br />
(<br />
---------------------------------------------------<br />
2 × CPRD × DIVA)<br />
( 2 × CPRD × DIVB<br />
or ---------------------------------------------------<br />
)<br />
CCK<br />
CCK<br />
the waveform duty-cycle. This channel parameter is defined in the CDTY field of the CDTYx<br />
register.<br />
If the waveform is left aligned then:<br />
duty cycle<br />
( period – 1 ⁄ fchannel_x_clock × CDTY)<br />
= ------------------------------------------------------------------------------------------------------period<br />
If the waveform is center aligned, then:<br />
( ( period ⁄ 2)<br />
– 1 ⁄ fchannel_x_clock × CDTY))<br />
duty cycle =<br />
----------------------------------------------------------------------------------------------------------------------<br />
( period ⁄ 2)<br />
971
32117D–AVR-01/12<br />
<strong>AT32UC3C</strong><br />
the waveform polarity. At the beginning of the period, the signal can be at high or low level.<br />
This property is defined in the CPOL field of the CMRx register. By default the signal starts by<br />
a low level.<br />
the waveform alignment. The output waveform can be left or center aligned. Center aligned<br />
waveforms can be used to generate non overlapped waveforms. This property is defined in<br />
the CALG field of the CMRx register. The default mode is left aligned.<br />
Figure 33-4. Non Overlapped Center Aligned Waveforms<br />
OC0<br />
OC1<br />
No overlap<br />
Period<br />
Note: 1. See Figure 33-5 on page 973 for a detailed description of center aligned waveforms.<br />
When center aligned, the channel counter increases up to CPRD and decreases down to 0. This<br />
ends the period.<br />
When left aligned, the channel counter increases up to CPRD and is reset. This ends the period.<br />
Thus, for the same CPRD value, the period for a center aligned channel is twice the period for a<br />
left aligned channel.<br />
Waveforms are fixed at 0 when:<br />
CDTY = CPRD and CPOL = 0<br />
CDTY = 0 and CPOL = 1<br />
Waveforms are fixed at 1 (once the channel is enabled) when:<br />
CDTY = 0 and CPOL = 0<br />
CDTY = CPRD and CPOL = 1<br />
The waveform polarity must be written before enabling the channel. This immediately affects the<br />
channel output level. Changes on channel polarity are not taken into account while the channel<br />
is enabled.<br />
Besides generating output signals OCx, the comparator generates interrupts in function of the<br />
counter value. When the output waveform is left aligned, the interrupt occurs at the end of the<br />
counter period. When the output waveform is center aligned, the CES bit of the CMRx register<br />
defines when the channel counter interrupt occurs. If CES is set to 0, the interrupt occurs at the<br />
end of the counter period. If CES is set to 1, the interrupt occurs at the end of the counter period<br />
and at half of the counter period.<br />
Figure 33-5 on page 973 illustrates the counter interrupts in function of the configuration.<br />
972
Figure 33-5. Waveform Properties<br />
32117D–AVR-01/12<br />
Channel x<br />
slected clock<br />
CHIDx(PWM_SR)<br />
CHIDx(PWM_ENA)<br />
CHIDx(PWM_DIS)<br />
PWM_CCNTx<br />
CPRD(PWM_CPRDx)<br />
CDTY(PWM_CDTYx)<br />
Output Waveform OCx<br />
CPOL(PWM_CMRx) = 0<br />
Output Waveform OCx<br />
CPOL(PWM_CMRx) = 1<br />
Counter Event<br />
CHIDx(PWM_ISR)<br />
CES(PWM_CMRx) = 0<br />
Counter Event<br />
CHIDx(PWM_ISR)<br />
CES(PWM_CMRx) = 1<br />
PWM_CCNTx<br />
CPRD(PWM_CPRDx)<br />
CDTY(PWM_CDTYx)<br />
Output Waveform OCx<br />
CPOL(PWM_CMRx) = 0<br />
Output Waveform OCx<br />
CPOL(PWM_CMRx) = 1<br />
Counter Event<br />
CHIDx(PWM_ISR)<br />
Period<br />
Period<br />
Center Aligned<br />
CALG(PWM_CMRx) = 1<br />
Left Aligned<br />
CALG(PWM_CMRx) = 0<br />
<strong>AT32UC3C</strong><br />
973
32117D–AVR-01/12<br />
<strong>AT32UC3C</strong><br />
33.6.2.3 2-bit Gray Up/Down Counter for Stepper Motor<br />
It is possible to configure a couple of channels to provide a 2-bit gray count waveform on 2 outputs.<br />
Dead-Time generator and other downstream logic can be configured on these channels.<br />
Figure 33-6. 2-bit Gray Up/Down Counter<br />
PWMH0<br />
PWML0<br />
PWMH1<br />
PWML1<br />
DOWNx<br />
Up or down count mode can be configured on-the-fly by the SMMR register.<br />
When GCEN0 is written to 1, channels 0 and 1 outputs are driven with gray counter.<br />
GCEN0 = 1<br />
33.6.2.4 Dead-Time Generator<br />
The dead-time generator uses the comparator output OCx to provide the two complementary<br />
outputs DTOHx and DTOLx, which allows the PWM to drive external power control switches<br />
safely. When the dead-time generator is enabled by writing a one to the DTE bit in the ”Channel<br />
Mode Register” on page 1036 (CMRx), dead-times (also called dead-bands or non-overlapping<br />
times) are inserted between the edges of the two complementary outputs DTOHx and DTOLx.<br />
Note that enabling or disabling the dead-time generator is allowed only if the channel is<br />
disabled.<br />
The dead-time is adjustable by the ”Channel Dead Time Register” on page 1045 (DTx), both<br />
outputs of the dead-time generator can be adjusted separately by DTH and DTL. The dead-time<br />
values can be updated synchronously to the PWM period by using the ”Channel Dead Time<br />
Update Register” on page 1046 (DTUPDx).<br />
The dead-time is based on a specific counter which uses the same selected clock that feeds the<br />
channel counter of the comparator. Depending on the edge and the configuration of the deadtime,<br />
DTOHx and DTOLx are delayed until the counter has reached the value defined by DTH or<br />
DTL. An inverted configuration bit (DTHI and DTLI bits in the CMRx register) is provided for each<br />
outputs to invert the dead-times outputs. The following figure shows the waveform of the deadtime<br />
generator.<br />
974
32117D–AVR-01/12<br />
Figure 33-7. Complementary Output Waveforms<br />
output waveform OCx<br />
CPOLx = 0<br />
output waveform DTOHx<br />
DTHIx = 0<br />
output waveform DTOLx<br />
DTLIx = 0<br />
output waveform DTOHx<br />
DTHIx = 1<br />
output waveform DTOLx<br />
DTLIx = 1<br />
output waveform OCx<br />
CPOLx = 1<br />
output waveform DTOHx<br />
DTHIx = 0<br />
output waveform DTOLx<br />
DTLIx = 0<br />
output waveform DTOHx<br />
DTHIx = 1<br />
output waveform DTOLx<br />
DTLIx = 1<br />
DTHx DTLx<br />
DTHx DTLx<br />
<strong>AT32UC3C</strong><br />
975
32117D–AVR-01/12<br />
<strong>AT32UC3C</strong><br />
33.6.2.5 Output Override<br />
The two complementary outputs DTOHx and DTOLx of the dead-time generator can be forced<br />
to a value defined by the software.<br />
Figure 33-8. Override Output Selection<br />
DTOHx<br />
OOVHx<br />
DTOLx<br />
OOVLx<br />
OOOHx<br />
The OSHx and OSLx fields in the ”Output Selection Register” on page 1016 (OS) allow the outputs<br />
of the dead-time generator DTOHx and DTOLx to be overridden by the value defined in the<br />
OOVHx and OOVLx fields in the”Output Override Value Register” on page 1015 (OOV).<br />
The set registers ”Output Selection Set Register” on page 1017 and ”Output Selection Set<br />
Update Register” on page 1019 (OSS and OSSUPD) enable the override of the outputs of a<br />
channel regardless of other channels. In the same way, the clear registers ”Output Selection<br />
Clear Register” on page 1018 and ”Output Selection Clear Update Register” on page 1020<br />
(OSC and OSCUPD) disable the override of the outputs of a channel regardless of other<br />
channels.<br />
By using buffer OSSUPD and OSCUPD registers, the output selection of PWM outputs is done<br />
synchronously to the channel counter, at the beginning of the next PWM period.<br />
By using OSS and OSC registers, the output selection of PWM outputs is done asynchronously<br />
to the channel counter, as soon as the register is written.<br />
The value of the current output selection can be read in OS.<br />
While overriding PWM outputs, the channel counters continue to run, only the PWM outputs are<br />
forced to user defined values.<br />
0<br />
1<br />
OSHx<br />
0<br />
1<br />
OSLx<br />
OOOLx<br />
976
32117D–AVR-01/12<br />
<strong>AT32UC3C</strong><br />
33.6.2.6 Fault Protection<br />
5 inputs provide fault protection which can force any of the PWM output pair to a programmable<br />
value. This mechanism has priority over output overriding.<br />
Figure 33-9. Fault Protection<br />
fault input 0<br />
Glitch<br />
Filter<br />
0<br />
1<br />
FFIL0<br />
FIV0<br />
=<br />
The polarity level of the faults inputs are configured by the FPOL field in the ”Fault Mode Register”<br />
on page 1021 (FMR).<br />
The fault inputs can be glitch filtered or not in function of the FFIL field in the FMR register.<br />
When the filter is enabled, glitches on fault inputs with a width inferior to the PWM internal clock<br />
(CCK) period are rejected.<br />
A fault becomes active as soon as its corresponding fault input has a transition to the programmed<br />
polarity level. If the corresponding FMOD bit is written to zero in the FMR register, the<br />
fault remains active as long as the fault input is at this polarity level. If the corresponding bit<br />
FMOD is written to one, the fault remains active until the fault input is not at this polarity level<br />
anymore AND until it is cleared by writing the corresponding FCLR bit in the ”Fault Clear Register”<br />
on page 1023 (FSCR). By reading the ”Fault Status ReSister” on page 1022 (FSR), the user<br />
can read the current level of the fault inputs thanks to the FIV field, and can know which fault is<br />
currently active thanks to the FS field.<br />
Each fault can be taken into account or not by the fault protection mechanism in each channel.<br />
To be taken into account in the channel x, the fault y must be enabled by the FPEx[y] bit in the<br />
“PWM Fault Protection Enable Registers” (FPE1). However the synchronous channels (see<br />
Section 33.6.2.7 on page 979) don’t use their own fault enable bits, but those of the channel 0<br />
(FPE0[y] bits).<br />
The fault protection on a channel is triggered when this channel is enabled AND when any one<br />
of the faults that are enabled for this channel is active. It can be triggered even if the PWM internal<br />
clock (CCK) is not running but only by a fault input that is not glitch filtered.<br />
When the fault protection is triggered on a channel, the fault protection mechanism forces the<br />
channel outputs to the values defined by the FPVHx and FPVLx fields in the ”Fault Protection<br />
Value Register” on page 1024 (FPV) and leads to a reset of the counter of this channel. The output<br />
forcing is made asynchronously to the channel counter.<br />
CAUTION:<br />
FPOL0 Write FCLR0 at 1<br />
FMOD0<br />
0<br />
1<br />
Fault 0 Status<br />
FS0<br />
fault input 1<br />
Glitch<br />
Filter<br />
0<br />
1<br />
FIV1<br />
=<br />
FMOD1<br />
SET<br />
CLR<br />
OUT<br />
0<br />
1<br />
Fault 1 Status<br />
FS1<br />
FPEx[1]<br />
SYNCx<br />
0<br />
from fault 1<br />
From Output<br />
Override<br />
OOHx<br />
FPVHx<br />
0<br />
1<br />
FFIL1<br />
FPOL1<br />
Write FCLR1 at 1<br />
FMOD1<br />
FPE0[1]<br />
1<br />
Fault protection<br />
on PWM<br />
channel x<br />
fault input y<br />
FMOD0<br />
SET<br />
CLR<br />
OUT<br />
FPEx[0]<br />
FPE0[0]<br />
0<br />
1<br />
SYNCx<br />
from fault 0<br />
from fault y<br />
FPVLx<br />
OOLx<br />
From Output<br />
Override<br />
1<br />
0<br />
PWMHx<br />
PWMLx<br />
977
32117D–AVR-01/12<br />
<strong>AT32UC3C</strong><br />
To prevent an unexpected activation of the status FSy bit in the FSR register, the FMODy bit<br />
can be written to one only if the FPOLy bit has been previously configured to its final value.<br />
To prevent an unexpected activation of the Fault Protection on the channel x, the FPEx[y] bit<br />
can be written to one only if the FPOLy bit has been previously configured to its final value.<br />
If a comparison unit is enabled (see Section 33.6.3 on page 987) and if a fault is triggered in the<br />
channel 0, in this case the comparison cannot match.<br />
As soon as the fault protection is triggered on a channel, an interrupt (different from the interrupt<br />
generated at the end of the PWM period) can be generated but only if it is enabled and not<br />
masked. The interrupt is reset by reading the interrupt status register, even if the fault which has<br />
caused the trigger of the fault protection is kept active.<br />
978
32117D–AVR-01/12<br />
<strong>AT32UC3C</strong><br />
33.6.2.7 Synchronous Channels<br />
Some channels can be linked together as synchronous channels. They have the same source<br />
clock, the same period, the same alignment and are started together. In this way, their counters<br />
are synchronized together.<br />
The synchronous channels are defined by the SYNCx bits in the ”Sync Channels Mode Register”<br />
on page 1006 (SCM). Only one group of synchronous channels is allowed.<br />
When a channel is defined as a synchronous channel, the channel 0 is automatically defined as<br />
a synchronous channel too, because the channel 0 counter configuration is used by all the synchronous<br />
channels.<br />
If a channel x is defined as a synchronous channel, it uses the following configuration fields of<br />
the channel 0 instead of its own:<br />
CPRE0 field in CMR0 register instead of CPREx field in CMRx register (same source clock)<br />
CPRD0 field in CMR0 register instead of CPRDx field in CMRx register (same period)<br />
CALG0 field in CMR0 register instead of CALGx field in CMRx register (same alignment)<br />
Thus writing these fields of a synchronous channel has no effect on the output waveform of this<br />
channel (except channel 0 of course).<br />
Because counters of synchronous channels must start at the same time, they are all enabled<br />
together by enabling the channel 0 (by the CHID0 bit in the ENA register). In the same way, they<br />
are all disabled together by disabling the channel 0 (by the CHID0 bit in the DIS register). However,<br />
a synchronous channel x different from channel 0 can be enabled or disabled<br />
independently from others (by the CHIDx bit in the ENA and DIS registers).<br />
Defining a channel as a synchronous channel while it is an asynchronous channel (by writing the<br />
SYNCx bit to one while it was at zero) is allowed only if the channel is disabled at this time<br />
(CHIDx=0 in SR register). In the same way, defining a channel as an asynchronous channel while<br />
it is a synchronous channel (by writing the SYNCx bit to zero while it was at one) is allowed only<br />
if the channel is disabled at this time.<br />
The UPDM (Update Mode) field in the SCM register allow to select one of the three methods to<br />
update the registers of the synchronous channels:<br />
Method 1 (UPDM=0): the period value, the duty-cycle values and the dead-time values must<br />
be written by the CPU in their respective update registers (respectively CPRDUPDx,<br />
CDTYUPDx and DTUPDx).The update is triggered at the next PWM period as soon as the<br />
UPDULOCK bit in the ”Sync Channels Update Control Register” on page 1008 (SCUC) is set<br />
to 1 (see Section 33.6.2.8 on page 981).<br />
Method 2 (UPDM=1): the period value, the duty-cycle values, the dead-time values and the<br />
update period value must be written by the CPU in their respective update registers<br />
(respectively CPRDUPDx, CDTYUPDx and DTUPD). The update of the period value and of<br />
the dead-time values is triggered at the next PWM period as soon as the UPDULOCK bit in<br />
the ”Sync Channels Update Control Register” on page 1008 (SCUC) is set to 1. The update<br />
of the duty-cycle values and the update period value is triggered automatically after an<br />
update period defined by the UPR field in the ”Sync Channels Update Period Register” on<br />
page 1009 (SCUP) (see Section 33.6.2.9 on page 982).<br />
Method 3 (UPDM=2): same as Method 2 apart from the fact that the duty-cycle values of ALL<br />
synchronous channels are written by the Peripheral DMA Controller (PDCA) (see Section<br />
979
32117D–AVR-01/12<br />
<strong>AT32UC3C</strong><br />
33.6.2.10 on page 984). The user can choose to synchronize the PDCA transfer request with<br />
a comparison match (see Section 33.6.3 on page 987), by the PTRM and PTRCS fields in<br />
the SCM register.<br />
Table 33-2. Summary of the update of registers of Synchronous Channels<br />
Period Value<br />
(CPRDUPDx)<br />
Dead-Time Values<br />
(DTUPDx)<br />
Duty-Cycle Values<br />
(CDTYUPDx)<br />
Update Period Value<br />
(SCUPUPD)<br />
UPDM=0 UPDM=1 UPDM=2<br />
Write by the CPU<br />
Update is triggered at the<br />
next PWM period as soon as<br />
the UPDULOCK bit is set to 1<br />
Write by the CPU<br />
Update is triggered at the<br />
next PWM period as soon as<br />
the UPDULOCK bit is set to 1<br />
Write by the CPU Write by the CPU Write by the PDCA<br />
Update is triggered at the next<br />
PWM period as soon as the<br />
UPDULOCK bit is set to 1<br />
Update is triggered at the next<br />
PWM period as soon as the update period<br />
counter has reached the value UPR<br />
Not applicable Write by the CPU<br />
Not applicable<br />
Update is triggered at the next<br />
PWM period as soon as the update period<br />
counter has reached the value UPR<br />
980
32117D–AVR-01/12<br />
<strong>AT32UC3C</strong><br />
33.6.2.8 Method 1: Manual write of duty-cycle values and manual trigger of the update<br />
In this mode, the update of the period value, the duty-cycle values and the dead-time values<br />
must be made by writing in their respective update registers with the CPU (respectively CPR-<br />
DUPDx, CDTYUPDx and DTUPDx).<br />
Figure 33-10. Method 1 (UPDM=0)<br />
CCNT0<br />
To trigger the update, the user must use the UPDULOCK bit of the ”Sync Channels Update Control<br />
Register” on page 1008 (SCUC) which allows to update synchronously (at the same PWM<br />
period) the synchronous channels:<br />
If the UPDULOCK bit is set to 1, the update is done at the next PWM period of the<br />
synchronous channels.<br />
If the UPDULOCK bit is not set to 1, the update is locked and cannot be performed.<br />
After writing the UPDULOCK bit to 1, it is held at this value until the update occurs, then it is read<br />
0.<br />
Sequence for the Method 1:<br />
1. Select the manual write of duty-cycle values and the manual update by writing the<br />
UPDM field to zero in the SCM register<br />
2. Define the synchronous channels by the SYNCx bits in the SCM register.<br />
3. Enable the synchronous channels by writing CHID0 in the ENA register.<br />
4. If an update of the period value and/or the duty-cycle values and/or the dead-time values<br />
is required, write registers that need to be updated (CPRDUPDx, CDTYUPDx and<br />
DTUPDx).<br />
5. Write UPDULOCK to one in SCUC.<br />
6. The update of the registers will occur at the beginning of the next PWM period. At this<br />
time the UPDULOCK bit is reset, go to step 4) for new values.<br />
CDTYUPD 0x20 0x40 0x60<br />
UPDULOCK<br />
CDTY 0x20 0x40 0x60<br />
981
32117D–AVR-01/12<br />
<strong>AT32UC3C</strong><br />
33.6.2.9 Method 2: Manual write of duty-cycle values and automatic trigger of the update<br />
In this mode, the update of the period value, the duty-cycle values, the dead-time values and the<br />
update period value must be made by writing in their respective update registers with the CPU<br />
(respectively CPRDUPDx, CDTYUPDx, DTUPDx and SCUPUPD).<br />
To trigger the update of the period value and the dead-time values, the user must use the<br />
UPDULOCK bit of the ”Sync Channels Update Control Register” on page 1008 (SCUC) which<br />
allows to update synchronously (at the same PWM period) the synchronous channels:<br />
If the UPDULOCK bit is set to 1, the update is done at the next PWM period of the<br />
synchronous channels.<br />
If the UPDULOCK bit is not set to 1, the update is locked and cannot be performed.<br />
After writing the UPDULOCK bit to one, it is held at this value until the update occurs, then it is<br />
read 0.<br />
The update of the duty-cycle values and the update period is triggered automatically after an<br />
update period.<br />
To configure the automatic update, the user must define a value for the Update Period by the<br />
UPR field in the ”Sync Channels Update Period Register” on page 1009 (SCUP). The PWM controller<br />
waits UPR+1 periods of synchronous channels before updating automatically the duty<br />
values and the update period value.<br />
The status of the duty-cycle value write is reported in the ”Interrupt Status Register 2” on page<br />
1014 (ISR2) by the following bits:<br />
WRDY: this bit is set to 1 when the PWM Controller is ready to receive new duty-cycle values<br />
and a new update period value. It is reset to 0 when the ISR2 register is read.<br />
Depending on the interrupt mask in the IMR2 register, an interrupt can be generated by these<br />
bits.<br />
Sequence for the Method 2:<br />
1. Select the manual write of duty-cycle values and the automatic update by writing the<br />
UPDM field to one in the SCM register<br />
2. Define the synchronous channels by the SYNCx bits in the SCM register.<br />
3. Define the update period by the UPR field in the SCUP register.<br />
4. Enable the synchronous channels by writing CHID0 in the ENA register.<br />
5. If an update of the period value and/or of the dead-time values is required, write registers<br />
that need to be updated (CPRDUPDx, DTUPDx), else go to Step 8.<br />
6. Write UPDULOCK to one in SCUC.<br />
7. The update of these registers will occur at the beginning of the next PWM period. At<br />
this moment the UPDULOCK bit is reset, go to Step 5. for new values.<br />
8. If an update of the duty-cycle values and/or the update period is required, check first<br />
that write of new update values is possible by polling the WRDY bit (or by waiting for the<br />
corresponding interrupt) in the ISR2 register.<br />
9. Write registers that need to be updated (CDTYUPDx, SCUPUPD).<br />
10. The update of these registers will occur at the next PWM period of the synchronous<br />
channels when the Update Period is elapsed. Go to Step 8. for new values.<br />
982
Figure 33-11. Method 2 (UPDM=1)<br />
CCNT0<br />
CDTYUPD 0x20 0x40 0x60<br />
32117D–AVR-01/12<br />
UPRUPD 0x1 0x3<br />
UPR 0x1 0x3<br />
UPRCNT 0x0 0x1 0x0 0x1 0x0 0x1<br />
CDTY 0x20 0x40<br />
WRDY<br />
0x0 0x1 0x2 0x3 0x0 0x1 0x2<br />
0x60<br />
<strong>AT32UC3C</strong><br />
983
32117D–AVR-01/12<br />
<strong>AT32UC3C</strong><br />
33.6.2.10 Method 3: Automatic write of duty-cycle values and automatic trigger of the update<br />
In this mode, the update of the duty cycle values is made automatically by the Peripheral DMA<br />
Controller (PDCA). The update of the period value, the dead-time values and the update period<br />
value must be made by writing in their respective update registers with the CPU (respectively<br />
CPRDUPDx, DTUPDx and SCUPUPD).<br />
To trigger the update of the period value and the dead-time values, the user must use the<br />
UPDULOCK bit which allows to update synchronously (at the same PWM period) the synchronous<br />
channels:<br />
If the UPDULOCK bit is set to 1, the update is done at the next PWM period of the<br />
synchronous channels.<br />
If the UPDULOCK bit is not set to 1, the update is locked and cannot be performed.<br />
After writing the UPDULOCK bit to one, it is held at this value until the update occurs, then it is<br />
read 0.<br />
The update of the duty-cycle values and the update period value is triggered automatically after<br />
an update period.<br />
To configure the automatic update, the user must define a value for the Update Period by the<br />
UPR field in the ”Sync Channels Update Period Register” on page 1009 (SCUP). The PWM controller<br />
waits UPR+1 periods of synchronous channels before updating automatically the duty<br />
values and the update period value.<br />
Using the PDCA removes processor overhead by reducing its intervention during the transfer.<br />
This significantly reduces the number of clock cycles required for a data transfer, which<br />
improves micro controller performance.<br />
The PDCA must write the duty-cycle values in the synchronous channels index order. For example<br />
if the channels 0, 1 and 3 are synchronous channels, the PDCA must write the duty-cycle of<br />
the channel 0 first, then the duty-cycle of the channel 1, and finally the duty-cycle of the channel<br />
3.<br />
The following status are reported in the ”Interrupt Status Register 2” on page 1014 (ISR2):<br />
WRDY: this bit is set to 1 when the PWM Controller is ready to receive new duty-cycle values<br />
and a new update period value. It is reset to 0 when the ISR2 register is read. The user can<br />
choose to synchronize the WRDY bit and the PDCA transfer request with a comparison<br />
match (see Section 33.6.3 on page 987), by the PTRM and PTRCS fields in the SCM<br />
register.<br />
UNRE: this bit is set to 1 when the update period defined by the UPR field is elapsed while<br />
the whole data has not been written by the PDCA. It is reset to 0 when the ISR2 register is<br />
read.<br />
Depending on the interrupt mask in the IMR2 register, an interrupt can be generated by these<br />
bits.<br />
984
32117D–AVR-01/12<br />
Sequence for Method 3:<br />
<strong>AT32UC3C</strong><br />
1. Select the automatic write of duty-cycle values and automatically update by setting the<br />
UPDM field to 2 in the SCM register.<br />
2. Define the synchronous channels by the SYNCx bits in the SCM register.<br />
3. Define the update period by the UPR field in the SCUP register.<br />
4. Define when the WRDY bit and the corresponding PDCA transfer request must be set<br />
in the update period by the PTRM bit and the PTRCS field in the SCM register (at the<br />
end of the update period or when a comparison matches).<br />
5. Define the PDCA transfer settings for the duty-cycle values and enable it in the PDCA<br />
registers<br />
6. Enable the synchronous channels by writing CHID0 in the ENA register.<br />
7. If an update of the period value and/or of the dead-time values is required, write registers<br />
that need to be updated (CPRDUPDx, DTUPDx), else go to Step 10.<br />
8. Write UPDULOCK to one in SCUC.<br />
9. The update of these registers will occur at the beginning of the next PWM period. At<br />
this moment the UPDULOCK bit is reset, go to Step 7. for new values.<br />
10. If an update of the update period value is required, check first that write of a new update<br />
value is possible by polling the WRDY bit (or by waiting for the corresponding interrupt)<br />
in the ISR2 register, else go to Step 13.<br />
11. Write register that need to be updated (SCUPUPD).<br />
12. The update of this registers will occur at the next PWM period of the synchronous channels<br />
when the Update Period is elapsed. Go to Step 10. for new values.<br />
13. Check the end of the PDCA transfer with the Transfer Complete bit in the PDCA status<br />
register. If the transfer is ended define a new PDCA transfer in the PDCA registers, for<br />
new duty-cycle values. Go to Step 5.<br />
985
Figure 33-12. Method 3 (UPDM=2 and PTRM=0)<br />
32117D–AVR-01/12<br />
CCNT0<br />
CDTYUPD 0x20 0x40 0x60<br />
UPRCNT 0x0 0x1 0x0 0x1 0x0 0x1<br />
CDTY<br />
PDC transfer request<br />
WRDY<br />
UPRUPD 0x1 0x3<br />
UPR 0x1 0x3<br />
Figure 33-13. Method 3 (UPDM=2 and PTRM=1 and PTRCS=0)<br />
CCNT0<br />
<strong>AT32UC3C</strong><br />
0x80 0xA0 0xB0<br />
0x0 0x1 0x2 0x3 0x0 0x1 0x2<br />
0x20 0x40 0x60 0x80 0xA0<br />
CDTYUPD 0x20 0x40 0x60<br />
UPRCNT 0x0 0x1 0x0 0x1 0x0 0x1<br />
CDTY<br />
CMP0 match<br />
PDC transfer request<br />
WRDY<br />
UPRUPD 0x1 0x3<br />
UPR 0x1 0x3<br />
0x80 0xA0 0xB0<br />
0x0 0x1 0x2 0x3 0x0 0x1 0x2<br />
0x20 0x40 0x60 0x80 0xA0<br />
986
32117D–AVR-01/12<br />
<strong>AT32UC3C</strong><br />
33.6.3 PWM Comparison Units<br />
The PWM provides 8 independent comparison units able to compare a programmed value with<br />
the current value of the channel 0 counter (which is the channel counter of all synchronous<br />
channels, Section 33.6.2.7 on page 979). These comparisons are intended to generate pulses<br />
on the event lines (used to synchronize ADC, see Section 33.6.4 on page 989), to generate software<br />
interrupts and to trigger PDCA transfer requests for the synchronous channels (see<br />
Section 33.6.2.10 on page 984).<br />
Figure 33-14. Comparison Unit Block Diagram<br />
CEN [PWM_CMPxM]<br />
fault on channel 0<br />
CV [PWM_CMPxV]<br />
CNT [PWM_CCNT0]<br />
CNT [PWM_CCNT0] is decrementing<br />
CVM [PWM_CMPxV]<br />
CALG [PWM_CMR0]<br />
CPRCNT [PWM_CMPxM]<br />
CTR [PWM_CMPxM]<br />
=<br />
=<br />
=<br />
1<br />
The comparison x matches when it is enabled by the CEN bit in the ”Comparison x Mode Register”<br />
on page 1034 (CMPxM for the comparison x) and when the counter of the channel 0<br />
reaches the comparison value defined by the CV field in ”Comparison x Value Register” on page<br />
1032 (CMPxV for the comparison x). If the counter of the channel 0 is center aligned (CALG=1 in<br />
”Channel Mode Register” on page 1036), the CVM bit (in CMPxV) defines if the comparison is<br />
made when the counter is counting up or counting down (in left alignment mode CALG=0, this<br />
bit is useless).<br />
If a fault is active on the channel 0, the comparison is disabled and cannot match (see Section<br />
33.6.2.6 on page 977).<br />
The user can define the periodicity of the comparison x by the CTR and CPR fields (in CMPxV).<br />
The comparison is performed periodically once every CPR+1 periods of the counter of the channel<br />
0, when the value of the comparison period counter CPRCNT (in CMPxM) reaches the value<br />
defined by CTR. CPR is the maximum value of the comparison period counter CPRCNT. If<br />
CPR=CTR=0, the comparison is performed at each period of the counter of the channel 0.<br />
The comparison x configuration can be modified while the channel 0 is enabled by using the<br />
”PWM Comparison x Mode Update Register” on page 1035 (CMPxMUPD registers for the comparison<br />
x). In the same way, the comparison x value can be modified while the channel 0 is<br />
enabled by using the ”Comparison x Value Update Register” on page 1033 (CMPxVUPD registers<br />
for the comparison x).<br />
0<br />
1<br />
Comparison x<br />
987
Figure 33-15. Comparison Waveform<br />
32117D–AVR-01/12<br />
CCNT0<br />
<strong>AT32UC3C</strong><br />
The update of the comparison x configuration and the comparison x value is triggered periodically<br />
after the comparison x update period. It is defined by the CUPR field in the CMPxM. The<br />
comparison unit has an update period counter independent from the period counter to trigger<br />
this update. When the value of the comparison update period counter CUPRCNT (in CMPxM)<br />
reaches the value defined by CUPR, the update is triggered. The comparison x update period<br />
CUPR itself can be updated while the channel 0 is enabled by using the CMPxMUPD register.<br />
CAUTION: to be taken into account, writing in the CMPxVUPD register must be followed by a<br />
write in the CMPxMUPD register.<br />
The comparison match and the comparison update can be a source of an interrupt, but only if it<br />
is enabled and not masked. These interrupts can be enabled by the ”Interrupt Enable Register<br />
2” on page 1011 and disabled by the ”Interrupt Disable Register 2” on page 1012. The comparison<br />
match interrupt and the comparison update interrupt are reset by reading the ”Interrupt<br />
Status Register 2” on page 1014.<br />
CVUPD 0x6 0x2<br />
CVMVUPD<br />
CV 0x6 0x2<br />
CVM<br />
Comparison Update<br />
CMPU<br />
Comparison Match<br />
CMPM<br />
CTRUPD 0x1 0x2<br />
CPRUPD 0x1 0x3<br />
CUPRUPD 0x3 0x2<br />
CUPRCNT<br />
CPR 0x1 0x3<br />
CPRCNT<br />
CTR 0x1 0x2<br />
CUPR 0x3 0x2<br />
0x0 0x1 0x2 0x3 0x0 0x1 0x2 0x0 0x1 0x2 0x0 0x1<br />
0x0 0x1 0x0 0x1 0x0 0x1 0x2 0x3 0x0 0x1 0x2 0x3<br />
0x6<br />
0x6<br />
988
32117D–AVR-01/12<br />
<strong>AT32UC3C</strong><br />
33.6.4 PWM Event Lines<br />
The PWM provides 2 independent event lines intended to trigger actions in other peripherals (in<br />
particular for ADC (Analog to Digital Converter)).<br />
A pulse (one cycle of the master clock (CLK_PWM))is generated on an event line, when at least<br />
one of the selected comparisons is matching. The comparisons can be selected independently<br />
by the CSEL bits in the ”Event Line x Register” on page 1026 (ELxMR for the Event Line x).<br />
Figure 33-16. Event Line Block Diagram<br />
CMPS0 (PWM_ISR2)<br />
CSEL0 (PWM_ELxMR)<br />
CMPS1 (PWM_ISR2)<br />
CSEL1 (PWM_ELxMR)<br />
CMPS2 (PWM_ISR2)<br />
CSEL2 (PWM_ELxMR)<br />
CMPS7 (PWM_ISR2)<br />
CSEL7 (PWM_ELxMR)<br />
PULSE<br />
GENERATOR<br />
Event Line x<br />
989
33.6.5 PWM Controller Operations<br />
33.6.5.1 Initialization<br />
32117D–AVR-01/12<br />
<strong>AT32UC3C</strong><br />
Before enabling the channels, they must have been configured by the software application:<br />
Unlock user interface by writing the WPCMD field in the WPCR Register.<br />
Configuration of the clock generator (DIVA, PREA, DIVB, PREB, CLKSEL in the CLK register<br />
if required). After writing CLKSEL to a new value, no write in any PWM registers must be<br />
attempted before a delay of 2 master clock periods (CLK_PWM). This is the time needed by<br />
the PWM to switch the internal clock (CCK).<br />
Selection of the clock for each channel (CPRE field in the CMRx register)<br />
Configuration of the waveform alignment for each channel (CALG field in the CMRx register)<br />
Selection of the counter event selection (if CALG=1) for each channel (CES field in the CMRx<br />
register)<br />
Configuration of the output waveform polarity for each channel (CPOL in the CMRx register)<br />
Configuration of the period for each channel (CPRD in the CPRDx register). Writing in<br />
CPRDx register is possible while the channel is disabled. After validation of the channel, the<br />
user must use CPRDUPDx register to update CPRDx as explained below.<br />
Configuration of the duty-cycle for each channel (CDTY in the CDTYx register). Writing in<br />
CDTYx register is possible while the channel is disabled. After validation of the channel, the<br />
user must use CDTYUPDx register to update CDTYx as explained below.<br />
Configuration of the dead-time generator for each channel (DTH and DTL in DTx) if enabled<br />
(DTE bit in the CMRx register). Writing in the DTx register is possible while the channel is<br />
disabled. After validation of the channel, the user must use DTUPDx register to update DTx<br />
Selection of the synchronous channels (SYNCx in the SCM register)<br />
Selection of the moment when the WRDY bit and the corresponding PDCA transfer request<br />
are set (PTRM and PTRCS in the SCM register)<br />
Configuration of the update mode (UPDM in the SCM register)<br />
Configuration of the update period (UPR in the SCUP register) if needed.<br />
Configuration of the comparisons (CMPxV and CMPxM).<br />
Configuration of the event lines (ELxMR).<br />
Configuration of the fault inputs polarity (FPOL in FMR)<br />
Configuration of the fault protection (FMOD and FFIL in FMR, FPV and FPE1)<br />
Enable of the interrupts (writing CHIDx and FCHIDx in IER1 register, and writing WRDYE,<br />
UNRE, CMPMx and CMPUx in IER2 register)<br />
Enable of the channels (writing CHIDx in the ENA register)<br />
990
32117D–AVR-01/12<br />
<strong>AT32UC3C</strong><br />
33.6.5.2 Source Clock Selection Criteria<br />
The large number of source clocks can make selection difficult. The relationship between the<br />
value in the ”Channel Period Register” on page 1040 (CPRDx) and the ”Channel Duty Cycle<br />
Register” on page 1038 (CDTYx) can help the user. The event number written in the Period Register<br />
gives the PWM accuracy. The Duty-Cycle quantum cannot be lower than 1/CPRDx value.<br />
The higher the value of CPRDx, the greater the PWM accuracy.<br />
For example, if the user writes 15 (in decimal) in CPRDx, the user is able to write a value<br />
between 1 up to 14 in CDTYx Register. The resulting duty-cycle quantum cannot be lower than<br />
1/15 of the PWM period.<br />
33.6.5.3 Changing the Duty-Cycle, the Period and the Dead-Times<br />
It is possible to modulate the output waveform duty-cycle, period and dead-times.<br />
To prevent unexpected output waveform, the user must use the ”Channel Duty Cycle Update<br />
Register” on page 1039, the ”Channel Period Update Register” on page 1042 and the ”Channel<br />
Dead Time Update Register” on page 1046 (CDTYUPDx, CPRDUPDx and DTUPDx) to change<br />
waveform parameters while the channel is still enabled.<br />
If the channel is an asynchronous channel (SYNCx=0 in ”Sync Channels Mode Register” on<br />
page 1006 (SCM)), these registers hold the new period, duty-cycle and dead-times values<br />
until the end of the current PWM period and update the values for the next period.<br />
If the channel is a synchronous channel and update method 0 is selected (SYNCx=1 and<br />
UPDM=0 in SCM register), these registers hold the new period, duty-cycle and dead-times<br />
values until the UPDULOCK bit is written to one (in ”Sync Channels Update Control Register”<br />
on page 1008 (SCUC)) and the end of the current PWM period, then update the values for<br />
the next period.<br />
If the channel is a synchronous channel and update method 1 or 2 is selected (SYNCx=1 and<br />
UPDM=1 or 2 in SCM register):<br />
– these CPRDUPDx and DTUPDx registers hold the new period and dead-times<br />
values until the UPDULOCK bit is written to one (in SCUC register) and the end of<br />
the current PWM period, then update the values for the next period.<br />
– the CDTYUPDx register holds the new duty-cycle value until the end of the update<br />
period of synchronous channels (when UPRCNT is equal to UPR in ”Sync Channels<br />
Update Period Register” on page 1009 (SCUP)) and the end of the current PWM<br />
period, then updates the value for the next period<br />
Note: If the update registers (CDTYUPDx, CPRDUPDx and DTUPDx) are written several times between<br />
two updates, only the last written value is taken into account.<br />
33.6.5.4 Changing the Synchronous Channels Update Period<br />
It is possible to change the update period of synchronous channels (see Section 33.6.2.9 on<br />
page 982 and Section 33.6.2.10 on page 984) while they are enabled.<br />
To prevent an unexpected update of the synchronous channels registers, the user must use the<br />
”Sync Channels Update Period Update Register” on page 1010 (SCUPUPD) to change the<br />
update period of synchronous channels while they are still enabled. This register holds the new<br />
value until the end of the update period of synchronous channels (when UPRCNT is equal to<br />
991
32117D–AVR-01/12<br />
<strong>AT32UC3C</strong><br />
UPR in ”Sync Channels Update Period Register” on page 1009 (SCUP)) and the end of the current<br />
PWM period, then updates the value for the next period.<br />
Note: If the SCUPUPD update register is written several times between two updates, only the last written<br />
value is taken into account.<br />
Note: Changing the update period does make sense only if there is one or more synchronous channels<br />
and if the update method 1 or 2 is selected (UPDM=1 or 2 in ”Sync Channels Mode Register” on<br />
page 1006).<br />
33.6.5.5 Changing the Comparison Value and the Comparison Configuration<br />
It is possible to change the comparison values and the comparison configurations while the<br />
channel 0 is enabled (see Section 33.6.3 on page 987).<br />
33.6.5.6 Interrupts<br />
To prevent unexpected comparison match, the user must use the ”Comparison x Value Update<br />
Register” on page 1033 and the ”PWM Comparison x Mode Update Register” on page 1035<br />
(CMPxVUPD and CMPxMUPD) to change respectively the comparison values and the comparison<br />
configurations while the channel 0 is still enabled. These registers hold the new values until<br />
the end of the comparison update period (when CUPRCNT is equal to CUPR in ”Comparison x<br />
Mode Register” on page 1034 (CMPxM)) and the end of the current PWM period, then update<br />
the values for the next period.<br />
CAUTION: to be taken into account, the write of the CMPxVUPD register must be followed by a<br />
write of the CMPxMUPD register.<br />
Note: If the update registers CMPxVUPD and CMPxMUPD are written several times between two<br />
updates, only the last written value are taken into account.<br />
Depending on the interrupt mask in the IMR1 and IMR2 registers, an interrupt can be generated<br />
at the end of the corresponding channel period (CHIDx in the ISR1 register), after a fault event<br />
(FCHIDx in the ISR1 register), after a comparison match (CMPMx in the ISR2 register), after a<br />
comparison update (CMPUx in the ISR2 register) or according to the transfer mode of the synchronous<br />
channels (WRDY and UNRE in the ISR2 register).<br />
If the interrupt is generated by the CHIDx or FCHIDx bits, the interrupt remains active until a<br />
read operation in the ISR1 register occurs.<br />
If the interrupt is generated by the WRDY, UNRE, CMPMx or CMPUx bits, the interrupt remains<br />
active until a read operation in the ISR2 register occurs.<br />
A channel interrupt is enabled by setting the corresponding bit in the IER1 and IER2 registers. A<br />
channel interrupt is disabled by setting the corresponding bit in the IDR1 and IDR2 registers.<br />
992
32117D–AVR-01/12<br />
<strong>AT32UC3C</strong><br />
33.6.5.7 Write Protect Registers<br />
To prevent any single software error that may corrupt PWM behavior, the registers listed below<br />
can be write-protected by writing the WPCMD field in the ”Write Protect Control Register” on<br />
page 1028 (WPCR). They are divided into 6 groups:<br />
Register group 0:<br />
– ”Clock Register” on page 997<br />
Register group 1:<br />
– ”Disable Register” on page 1000<br />
Register group 2:<br />
– ”Sync Channels Mode Register” on page 1006<br />
– ”Channel Mode Register” on page 1036<br />
– ”Stepper Motor Mode Register” on page 1027<br />
Register group 3:<br />
– ”Channel Period Register” on page 1040<br />
– ”Channel Period Update Register” on page 1042<br />
Register group 4:<br />
– ”Channel Dead Time Register” on page 1045<br />
– ”Channel Dead Time Update Register” on page 1046<br />
Register group 5:<br />
– ”Fault Mode Register” on page 1021<br />
– ”Fault Protection Value Register” on page 1024<br />
There are two types of Write Protect:<br />
the Write Protect SW, which can be enabled or disabled.<br />
the Write Protect HW, which can just be enabled, only a hardware reset of the PWM<br />
controller can disable it.<br />
Both Write Protect can be applied independently to a particular register group thanks to the<br />
WPCMD and WPRG fields in WPCR register. If at least one of the Write Protect is active, the<br />
register group is write-protected. The WPCMD field allows to perform the following actions<br />
depending on its value:<br />
0: Disabling the Write Protect SW of the register groups of which the WPRG bit is at 1.<br />
1: Enabling the Write Protect SW of the register groups of which the WPRG bit is at 1.<br />
2: Enabling the Write Protect HW of the register groups of which the WPRG bit is at 1.<br />
At any time, the user can know which Write Protect is active in which register group by the<br />
WPSWS and WPHWS fields in the ”Write Protect Status Register” on page 1030 (WPSR).<br />
If a write access in a write-protected register is detected, then the WPVS bit in the WPSR register<br />
is set and the WPVSRC field indicates in which register the write access has been attempted,<br />
through its address offset without the two LSBs.<br />
The WPVS and WPSR fields are automatically reset after reading the WPSR register.<br />
993
33.7 User Interface<br />
Table 33-3. PWM Register Memory Map (2)<br />
Offset Register<br />
32117D–AVR-01/12<br />
<strong>AT32UC3C</strong><br />
Register<br />
Name Access Reset<br />
0x000 Clock Register CLK Read/write 0x00000000<br />
0x004 Enable Register ENA Write-only –<br />
0x008 Disable Register DIS Write-only –<br />
0x00C Status Register SR Read-only 0x00000000<br />
0x010 Interrupt Enable Register 1 IER1 Write-only –<br />
0x014 Interrupt Disable Register 1 IDR1 Write-only –<br />
0x018 Interrupt Mask Register 1 IMR1 Read-only 0x00000000<br />
0x01C Interrupt Status Register 1 ISR1 Read-only 0x00000000<br />
0x020 Sync Channels Mode Register SCM Read/write 0x00000000<br />
0x024 Reserved – – –<br />
0x028 Sync Channels Update Control Register SCUC Read/Write 0x00000000<br />
0x02C Sync Channels Update Period Register SCUP Read/Write 0x00000000<br />
0x030 Sync Channels Update Period Update Register SCUPUPD Write-only 0x00000000<br />
0x034 Interrupt Enable Register 2 IER2 Write-only –<br />
0x038 Interrupt Disable Register 2 IDR2 Write-only –<br />
0x03C Interrupt Mask Register 2 IMR2 Read-only 0x00000000<br />
0x040 Interrupt Status Register 2 ISR2 Read-only 0x00000000<br />
0x044 Output Override Value Register OOV Read/Write 0x00000000<br />
0x048 Output Selection Register OS Read/Write 0x00000000<br />
0x04C Output Selection Set Register OSS Write-only –<br />
0x050 Output Selection Clear Register OSC Write-only –<br />
0x054 Output Selection Set Update Register OSSUPD Write-only –<br />
0x058 Output Selection Clear Update Register OSCUPD Write-only –<br />
0x05C Fault Mode Register FMR Read/Write 0x00000000<br />
0x060 Fault Status Register FSR Read-only 0x00000000<br />
0x064 Fault Clear Register FCR Write-only –<br />
0x068 Fault Protection Value Register FPV Read/Write 0x00000000<br />
0x6C Fault Protection Enable Register FPE Read/Write 0x00000000<br />
0x070-0x078 Reserved – – –<br />
0x07C Event Line 0 Mode Register EL0MR Read/Write 0x00000000<br />
0x080 Event Line 1 Mode Register EL1MR Read/Write 0x00000000<br />
0x084 - 0x0E0 Reserved – – –<br />
0x0B0 PWM Stepper Motor Mode Register SMMR Read/Write 0x000000000<br />
0x0B4 - 0x0E0 Reserved – – –<br />
994
Table 33-3. PWM Register Memory Map (2)<br />
Offset Register<br />
32117D–AVR-01/12<br />
<strong>AT32UC3C</strong><br />
Register<br />
Name Access Reset<br />
0x0E4 Write Protect Control Register WPCR Write-only –<br />
0x0E8 Write Protect Status Register WPSR Read-only 0x000000000<br />
0x0EC - 0x0F8 Reserved – – –<br />
0x0FC Version Register VERSION Read-only 0x- (1)<br />
0x100 - 0x12C Reserved – – –<br />
0x130 Comparison 0 Value Register CMP0V Read/Write 0x000000000<br />
0x134 Comparison 0 Value Update Register CMP0VUPD Write-only –<br />
0x138 Comparison 0 Mode Register CMP0M Read/Write 0x000000000<br />
0x13C Comparison 0 Mode Update Register CMP0MUPD Write-only –<br />
0x140 Comparison 1 Value Register CMP1V Read/Write 0x000000000<br />
0x144 Comparison 1 Value Update Register CMP1VUPD Write-only –<br />
0x148 Comparison 1 Mode Register CMP1M Read/Write 0x000000000<br />
0x14C Comparison 1 Mode Update Register CMP1MUPD Write-only –<br />
0x150 Comparison 2 Value Register CMP2V Read/Write 0x000000000<br />
0x154 Comparison 2 Value Update Register CMP2VUPD Write-only –<br />
0x158 Comparison 2 Mode Register CMP2M Read/Write 0x000000000<br />
0x15C Comparison 2 Mode Update Register CMP2MUPD Write-only –<br />
0x160 Comparison 3 Value Register CMP3V Read/Write 0x000000000<br />
0x164 Comparison 3 Value Update Register CMP3VUPD Write-only –<br />
0x168 Comparison 3 Mode Register CMP3M Read/Write 0x000000000<br />
0x16C Comparison 3 Mode Update Register CMP3MUPD Write-only –<br />
0x170 Comparison 4 Value Register CMP4V Read/Write 0x000000000<br />
0x174 Comparison 4 Value Update Register CMP4VUPD Write-only –<br />
0x178 Comparison 4 Mode Register CMP4M Read/Write 0x000000000<br />
0x17C Comparison 4 Mode Update Register CMP4MUPD Write-only –<br />
0x180 Comparison 5 Value Register CMP5V Read/Write 0x000000000<br />
0x184 Comparison 5 Value Update Register CMP5VUPD Write-only –<br />
0x188 Comparison 5 Mode Register CMP5M Read/Write 0x000000000<br />
0x18C Comparison 5 Mode Update Register CMP5MUPD Write-only –<br />
0x190 Comparison 6 Value Register CMP6V Read/Write 0x000000000<br />
0x194 Comparison 6 Value Update Register CMP6VUPD Write-only –<br />
0x198 Comparison 6 Mode Register CMP6M Read/Write 0x000000000<br />
0x19C Comparison 6 Mode Update Register CMP6MUPD Write-only –<br />
0x1A0 Comparison 7 Value Register CMP7V Read/Write 0x000000000<br />
0x1A4 Comparison 7 Value Update Register CMP7VUPD Write-only –<br />
995
Table 33-3. PWM Register Memory Map (2)<br />
Offset Register<br />
32117D–AVR-01/12<br />
<strong>AT32UC3C</strong><br />
0x1A8 Comparison 7 Mode Register CMP7M Read/Write 0x000000000<br />
0x1AC Comparison 7 Mode Update Register CMP7MUPD Write-only –<br />
0x1B0 - 0x1FC Reserved – – –<br />
0x200 + ch_num *<br />
0x20 + 0x00<br />
0x200 + ch_num *<br />
0x20 + 0x04<br />
0x200 + ch_num *<br />
0x20 + 0x08<br />
0x200 + ch_num *<br />
0x20 + 0x0C<br />
0x200 + ch_num *<br />
0x20 + 0x10<br />
0x200 + ch_num *<br />
0x20 + 0x14<br />
0x200 + ch_num *<br />
0x20 + 0x18<br />
0x200 + ch_num *<br />
0x20 + 0x1C<br />
Register<br />
Name Access Reset<br />
Channel Mode Register CMR Read/Write 0x000000000<br />
Channel Duty Cycle Register CDTY Read/Write 0x000000000<br />
Channel Duty Cycle Update Register CDTYUPD Write-only –<br />
Channel Period Register CPRD Read/Write 0x000000000<br />
Channel Period Update Register CPRDUPD Write-only –<br />
Channel Counter Register CCNT Read-only 0x000000000<br />
Channel Dead Time Register DT Read/Write 0x000000000<br />
Channel Dead Time Update Register DTUPD Write-only –<br />
Note: 1. The reset values are device specific. Please refer to the Module Configuration section at the<br />
end of this chapter.<br />
2. Some registers are indexed with “ch_num” index ranging from 0 to 3.<br />
996
33.7.1 Clock Register<br />
Name: CLK<br />
Access Type: Read/Write<br />
Offset: 0x000<br />
Reset Value: 0x00000000<br />
32117D–AVR-01/12<br />
<strong>AT32UC3C</strong><br />
31 30 29 28 27 26 25 24<br />
CLKSEL - - - PREB<br />
23 22 21 20 19 18 17 16<br />
DIVB<br />
15 14 13 12 11 10 9 8<br />
- - - - PREA<br />
7 6 5 4 3 2 1 0<br />
DIVA<br />
This register can only be written if the WPSWS0 and WPHWS0 bits are cleared in ”Write Protect Status Register” on page<br />
1030.<br />
CLKSEL: CCK Source Clock Selection<br />
0: The PWM internal clock CCK is driven by the master clock CLK_PWM.<br />
1: The PWM internal clock CCK is driven by the generic clock GCLK.<br />
CAUTION: After writing CLKSEL to a new value, no write to any PWM registers must be attempted before a delay of 2<br />
master clock periods (CLK_PWM). This is the time needed by the PWM to switch the internal clock CCK.<br />
997
PREA, PREB: CLKA, CLKB Source Clock Selection<br />
Table 33-4. Source Clock Selection<br />
PREA, PREB Divider Input Clock<br />
0 CCK<br />
1 CCK/2<br />
2 CCK/4<br />
3 CCK/8<br />
4 CCK/16<br />
5 CCK/32<br />
6 CCK/64<br />
7 CCK/128<br />
8 CCK/256<br />
9 CCK/512<br />
10 CCK/1024<br />
Other Reserved<br />
DIVA, DIVB: CLKA, CLKB Divide Factor<br />
Table 33-5. Divide Factor<br />
DIVA/DIVB CLKA/CLKB<br />
0 CLKA/CLKB clock is turned off<br />
1 CLKA/CLKB clock is selected by PREA/PREB<br />
2 - 255 CLKA/CLKB clock is selected by PREA/PREB divided by DIVA/DIVB factor<br />
32117D–AVR-01/12<br />
<strong>AT32UC3C</strong><br />
998
33.7.2 Enable Register<br />
Name: ENA<br />
Access Type: Write-only<br />
Offset: 0x004<br />
Reset Value: -<br />
32117D–AVR-01/12<br />
<strong>AT32UC3C</strong><br />
31 30 29 28 27 26 25 24<br />
- - - - - - - -<br />
23 22 21 20 19 18 17 16<br />
- - - - - - - -<br />
15 14 13 12 11 10 9 8<br />
– – – – – – – –<br />
7 6 5 4 3 2 1 0<br />
– – – – CHID3 CHID2 CHID1 CHID0<br />
CHIDx: Channel ID<br />
Writing a zero to this bit has no effect.<br />
Writing a one to this bit will enable the PWM output for channel x.<br />
999
33.7.3 Disable Register<br />
Name: DIS<br />
Access Type: Write-only<br />
Offset: 0x008<br />
Reset Value: -<br />
32117D–AVR-01/12<br />
<strong>AT32UC3C</strong><br />
31 30 29 28 27 26 25 24<br />
- - - - - - - -<br />
23 22 21 20 19 18 17 16<br />
- - - - - - - -<br />
15 14 13 12 11 10 9 8<br />
– – – – – – – –<br />
7 6 5 4 3 2 1 0<br />
– – – – CHID3 CHID2 CHID1 CHID0<br />
This register can only be written if the WPSWS1 and WPHWS1 bits are cleared in ”Write Protect Status Register” on page<br />
1030.<br />
CHIDx: Channel ID<br />
Writing a zero to this bit has no effect.<br />
Writing a one to this bit will disable the PWM output for channel x.<br />
1000
33.7.4 Status Register<br />
Name: SR<br />
Access Type: Read-only<br />
Offset: 0x00C<br />
Reset Value: 0x00000000<br />
32117D–AVR-01/12<br />
<strong>AT32UC3C</strong><br />
31 30 29 28 27 26 25 24<br />
- - - - - - - -<br />
23 22 21 20 19 18 17 16<br />
- - - - - - - -<br />
15 14 13 12 11 10 9 8<br />
– – – – – – – –<br />
7 6 5 4 3 2 1 0<br />
– – – – CHID3 CHID2 CHID1 CHID0<br />
CHIDx: Channel ID<br />
0: PWM output for channel x is disabled.<br />
1: PWM output for channel x is enabled.<br />
1001
33.7.5 Interrupt Enable Register 1<br />
Name: IER1<br />
Access Type: Write-only<br />
Offset: 0x010<br />
Reset Value: -<br />
32117D–AVR-01/12<br />
<strong>AT32UC3C</strong><br />
31 30 29 28 27 26 25 24<br />
– – – – – – – –<br />
23 22 21 20 19 18 17 16<br />
– – – – FCHID3 FCHID2 FCHID1 FCHID0<br />
15 14 13 12 11 10 9 8<br />
– – – – – – – –<br />
7 6 5 4 3 2 1 0<br />
– – – – CHID3 CHID2 CHID1 CHID0<br />
Writing a zero to a bit in this register has no effect.<br />
Writing a one to a bit in this register will set the corresponding bit in IMR.<br />
1002
33.7.6 Interrupt Disable Register 1<br />
Name: IDR1<br />
Access Type: Write-only<br />
Offset: 0x014<br />
Reset Value: -<br />
32117D–AVR-01/12<br />
<strong>AT32UC3C</strong><br />
31 30 29 28 27 26 25 24<br />
– – – – – – – –<br />
23 22 21 20 19 18 17 16<br />
– – – – FCHID3 FCHID2 FCHID1 FCHID0<br />
15 14 13 12 11 10 9 8<br />
– – – – – – – –<br />
7 6 5 4 3 2 1 0<br />
– – – – CHID3 CHID2 CHID1 CHID0<br />
Writing a zero to a bit in this register has no effect.<br />
Writing a one to a bit in this register will clear the corresponding bit in IMR.<br />
1003
33.7.7 Interrupt Mask Register 1<br />
Name: IMR1<br />
Access Type: Read-only<br />
Offset: 0x018<br />
Reset Value: 0x00000000<br />
32117D–AVR-01/12<br />
<strong>AT32UC3C</strong><br />
31 30 29 28 27 26 25 24<br />
– – – – – – – –<br />
23 22 21 20 19 18 17 16<br />
– – – – FCHID3 FCHID2 FCHID1 FCHID0<br />
15 14 13 12 11 10 9 8<br />
– – – – – – – –<br />
7 6 5 4 3 2 1 0<br />
– – – – CHID3 CHID2 CHID1 CHID0<br />
0: The corresponding interrupt is disabled.<br />
1: The corresponding interrupt is enabled.<br />
A bit in this register is cleared when the corresponding bit in IDR is written to one.<br />
A bit in this register is set when the corresponding bit in IER is written to one.<br />
1004
33.7.8 Interrupt Status Register 1<br />
Name: ISR1<br />
Access Type: Read-only<br />
Offset: 0x01C<br />
Reset Value: 0x00000000<br />
32117D–AVR-01/12<br />
<strong>AT32UC3C</strong><br />
31 30 29 28 27 26 25 24<br />
– – – – – – – –<br />
23 22 21 20 19 18 17 16<br />
– – – – FCHID3 FCHID2 FCHID1 FCHID0<br />
15 14 13 12 11 10 9 8<br />
– – – – – – – –<br />
7 6 5 4 3 2 1 0<br />
– – – – CHID3 CHID2 CHID1 CHID0<br />
FCHIDx: Fault Protection Trigger on Channel x<br />
0: No new trigger of the fault protection since the last read of the ISR1 register.<br />
1: At least one trigger of the fault protection since the last read of the ISR1 register.<br />
CHIDx: Counter Event on Channel x<br />
0: No new counter event has occurred since the last read of the ISR1 register.<br />
1: At least one counter event has occurred since the last read of the ISR1 register.<br />
Note: Reading ISR1 automatically clears CHIDx and FCHIDx.<br />
1005
33.7.9 Sync Channels Mode Register<br />
Name: SCM<br />
Access Type: Read/Write<br />
Offset: 0x020<br />
Reset Value: 0x00000000<br />
32117D–AVR-01/12<br />
<strong>AT32UC3C</strong><br />
31 30 29 28 27 26 25 24<br />
- - - - - - - -<br />
23 22 21 20 19 18 17 16<br />
PTRCS PTRM - - UPDM<br />
15 14 13 12 11 10 9 8<br />
– – – – – – – –<br />
7 6 5 4 3 2 1 0<br />
– – – – SYNC3 SYNC2 SYNC1 SYNC0<br />
This register can only be written if the WPSWS2 and WPHWS2 bits are cleared in ”Write Protect Status Register” on page<br />
1030.<br />
PTRCS: PDCA Transfer Request Comparison Selection<br />
Selection of the comparison used to set the WRDY bit and the corresponding PDCA transfer request.<br />
PTRM: PDCA Transfer Request Mode<br />
Table 33-6. WRDY bit and PDCA Transfer Request<br />
UPDM PTRM WRDY bit and PDCA Transfer Request<br />
0 x<br />
1 x<br />
2<br />
0<br />
1<br />
The WRDY bit in ”Interrupt Status Register 2” on page 1014 and the PDCA transfer request are<br />
never set to 1.<br />
The WRDY bit in ”Interrupt Status Register 2” on page 1014 is set to 1 as soon as the update<br />
period is elapsed, the PDCA transfer is never requested.<br />
The WRDY bit in ”Interrupt Status Register 2” on page 1014 and the PDCA transfer is requested<br />
as soon as the update period is elapsed.<br />
The WRDY bit in ”Interrupt Status Register 2” on page 1014 and the PDCA transfer is requested<br />
as soon as the selected comparison matches.<br />
UPDM: Synchronous Channels Update Mode<br />
0: Manual write of double buffer registers and manual update of synchronous channels. The update occurs at the beginning of<br />
the next PWM period, when the UPDULOCK bit in ”Sync Channels Update Control Register” on page 1008 is set.<br />
1: Manual write of double buffer registers and automatic update of synchronous channels. The update occurs when the Update<br />
Period is elapsed.<br />
2: Automatic write of duty-cycle update registers by the PDCA and automatic update of synchronous channels. The update<br />
occurs when the Update Period is elapsed.<br />
3: Reserved.<br />
1006
SYNCx: Synchronous Channel x<br />
0: Channel x is not a synchronous channel.<br />
1: Channel x is a synchronous channel.<br />
32117D–AVR-01/12<br />
<strong>AT32UC3C</strong><br />
1007
33.7.10 Sync Channels Update Control Register<br />
Name: SCUC<br />
Access Type: Read/Write<br />
Offset: 0x028<br />
Reset Value: 0x00000000<br />
32117D–AVR-01/12<br />
<strong>AT32UC3C</strong><br />
31 30 29 28 27 26 25 24<br />
- - - - - - - -<br />
23 22 21 20 19 18 17 16<br />
- - - - - - - -<br />
15 14 13 12 11 10 9 8<br />
- - - - - - - -<br />
7 6 5 4 3 2 1 0<br />
- - - - - - - UPDULOCK<br />
UPDULOCK: Synchronous Channels Update Unlock<br />
0: No effect<br />
1: If the UPDM field is set to “0” in ”Sync Channels Mode Register” on page 1006, writing the UPDULOCK bit to one will trigger<br />
the update of the period value, the duty-cycle and the dead-time values of synchronous channels at the beginning of the next<br />
PWM period. If the UPDM field is set to “1” or “2”, writing the UPDULOCK bit to one will trigger only the update of the period<br />
value and the dead-time values of synchronous channels.<br />
This bit is automatically reset when the update is done.<br />
1008
33.7.11 Sync Channels Update Period Register<br />
Name: SCUP<br />
Access Type: Read/Write<br />
Offset: 0x02C<br />
Reset Value: 0x00000000<br />
32117D–AVR-01/12<br />
<strong>AT32UC3C</strong><br />
31 30 29 28 27 26 25 24<br />
- - - - - - - -<br />
23 22 21 20 19 18 17 16<br />
- - - - - - - -<br />
15 14 13 12 11 10 9 8<br />
- - - - - - - -<br />
7 6 5 4 3 2 1 0<br />
UPRCNT UPR<br />
UPRCNT: Update Period Counter<br />
Reports the value of the Update Period Counter.<br />
UPR: Update Period<br />
Defines the time between each update of the synchronous channels if automatic trigger of the update is activated (UPDM=1 of<br />
UPDM=2 in ”Sync Channels Mode Register” on page 1006). This time is equal to UPR+1 periods of the synchronous channels.<br />
1009
33.7.12 Sync Channels Update Period Update Register<br />
Name: SCUPUPD<br />
Access Type: Write-only<br />
Offset: 0x030<br />
Reset Value: -<br />
32117D–AVR-01/12<br />
<strong>AT32UC3C</strong><br />
31 30 29 28 27 26 25 24<br />
- - - - - - - -<br />
23 22 21 20 19 18 17 16<br />
- - - - - - - -<br />
15 14 13 12 11 10 9 8<br />
- - - - - - - -<br />
7 6 5 4 3 2 1 0<br />
- - - - UPRUPD<br />
This register acts as a double buffer for the UPR value. This prevents an unexpected automatic trigger of the update of synchronous<br />
channels.<br />
UPRUPD: Update Period Update<br />
Defines the requested time between each update of the synchronous channels if automatic trigger of the update is activated<br />
(UPDM=1 of UPDM=2 in ”Sync Channels Mode Register” on page 1006). This time is equal to UPR+1 periods of the<br />
synchronous channels.<br />
1010
33.7.13 Interrupt Enable Register 2<br />
Name: IER2<br />
Access Type: Write-only<br />
Offset: 0x034<br />
Reset Value: -<br />
32117D–AVR-01/12<br />
<strong>AT32UC3C</strong><br />
31 30 29 28 27 26 25 24<br />
- - - - - - - -<br />
23 22 21 20 19 18 17 16<br />
CMPU7 CMPU6 CMPU5 CMPU4 CMPU3 CMPU2 CMPU1 CMPU0<br />
15 14 13 12 11 10 9 8<br />
CMPM7 CMPM6 CMPM5 CMPM4 CMPM3 CMPM2 CMPM1 CMPM0<br />
7 6 5 4 3 2 1 0<br />
- - - - UNRE - - WRDY<br />
Writing a zero to a bit in this register has no effect.<br />
Writing a one to a bit in this register will set the corresponding bit in IMR.<br />
1011
33.7.14 Interrupt Disable Register 2<br />
Name: IDR2<br />
Access Type: Write-only<br />
Offset: 0x038<br />
Reset Value: -<br />
32117D–AVR-01/12<br />
<strong>AT32UC3C</strong><br />
31 30 29 28 27 26 25 24<br />
- - - - - - - -<br />
23 22 21 20 19 18 17 16<br />
CMPU7 CMPU6 CMPU5 CMPU4 CMPU3 CMPU2 CMPU1 CMPU0<br />
15 14 13 12 11 10 9 8<br />
CMPM7 CMPM6 CMPM5 CMPM4 CMPM3 CMPM2 CMPM1 CMPM0<br />
7 6 5 4 3 2 1 0<br />
- - - - UNRE - - WRDY<br />
Writing a zero to a bit in this register has no effect.<br />
Writing a one to a bit in this register will clear the corresponding bit in IMR.<br />
1012
33.7.15 Interrupt Mask Register 2<br />
Name: IMR2<br />
Access Type: Read-only<br />
Offset: 0x03C<br />
Reset Value: 0x00000000<br />
32117D–AVR-01/12<br />
<strong>AT32UC3C</strong><br />
31 30 29 28 27 26 25 24<br />
- - - - - - - -<br />
23 22 21 20 19 18 17 16<br />
CMPU7 CMPU6 CMPU5 CMPU4 CMPU3 CMPU2 CMPU1 CMPU0<br />
15 14 13 12 11 10 9 8<br />
CMPM7 CMPM6 CMPM5 CMPM4 CMPM3 CMPM2 CMPM1 CMPM0<br />
7 6 5 4 3 2 1 0<br />
- - - - UNRE - - WRDY<br />
0: The corresponding interrupt is disabled.<br />
1: The corresponding interrupt is enabled.<br />
A bit in this register is cleared when the corresponding bit in IDR is written to one.<br />
A bit in this register is set when the corresponding bit in IER is written to one.<br />
1013
33.7.16 Interrupt Status Register 2<br />
Name: ISR2<br />
Access Type: Read-only<br />
Offset: 0x040<br />
Reset Value: 0x00000000<br />
CMPUx: Comparison x Update<br />
0: The comparison x has not been updated since the last read of the ISR2 register.<br />
1: The comparison x has been updated at least one time since the last read of the ISR2 register.<br />
CMPMx: Comparison x Match<br />
0: The comparison x has not matched since the last read of the ISR2 register.<br />
1: The comparison x has matched at least one time since the last read of the ISR2 register.<br />
UNRE: Synchronous Channels Update Underrun Error<br />
0: No Synchronous Channels Update Underrun has occurred since the last read of the ISR2 register.<br />
1: At least one Synchronous Channels Update Underrun has occurred since the last read of the ISR2 register.<br />
WRDY: Write Ready for Synchronous Channels Update<br />
0: New duty-cycle and dead-time values for the synchronous channels cannot be written.<br />
1: New duty-cycle and dead-time values for the synchronous channels can be written.<br />
Note: Reading ISR2 automatically clears WRDY, UNRE and CMPSx.<br />
32117D–AVR-01/12<br />
<strong>AT32UC3C</strong><br />
31 30 29 28 27 26 25 24<br />
- - - - - - - -<br />
23 22 21 20 19 18 17 16<br />
CMPU7 CMPU6 CMPU5 CMPU4 CMPU3 CMPU2 CMPU1 CMPU0<br />
15 14 13 12 11 10 9 8<br />
CMPM7 CMPM6 CMPM5 CMPM4 CMPM3 CMPM2 CMPM1 CMPM0<br />
7 6 5 4 3 2 1 0<br />
- - - - UNRE - - WRDY<br />
1014
33.7.17 Output Override Value Register<br />
Name: OOV<br />
Access Type: Read/Write<br />
Offset: 0x044<br />
Reset Value: 0x00000000<br />
32117D–AVR-01/12<br />
<strong>AT32UC3C</strong><br />
31 30 29 28 27 26 25 24<br />
– – – – – – – –<br />
23 22 21 20 19 18 17 16<br />
– – – – OOVL3 OOVL2 OOVL1 OOVL0<br />
15 14 13 12 11 10 9 8<br />
– – – – – – – –<br />
7 6 5 4 3 2 1 0<br />
– – – – OOVH3 OOVH2 OOVH1 OOVH0<br />
OOVLx: Output Override Value for PWML output of the channel x<br />
0: Override value is 0 for PWML output of channel x.<br />
1: Override value is 1 for PWML output of channel x.<br />
OOVHx: Output Override Value for PWMH output of the channel x<br />
0: Override value is 0 for PWMH output of channel x.<br />
1: Override value is 1 for PWMH output of channel x.<br />
1015
33.7.18 Output Selection Register<br />
Name: OS<br />
Access Type: Read/Write<br />
Offset: 0x048<br />
Reset Value: 0x00000000<br />
32117D–AVR-01/12<br />
<strong>AT32UC3C</strong><br />
31 30 29 28 27 26 25 24<br />
– – – – – – – –<br />
23 22 21 20 19 18 17 16<br />
– – – – OSL3 OSL2 OSL1 OSL0<br />
15 14 13 12 11 10 9 8<br />
– – – – – – – –<br />
7 6 5 4 3 2 1 0<br />
– – – – OSH3 OSH2 OSH1 OSH0<br />
OSLx: Output Selection for PWML output of the channel x<br />
0: Dead-time generator output DTOLx selected as PWML output of channel x.<br />
1: Output override value OOVLx selected as PWML output of channel x.<br />
OSHx: Output Selection for PWMH output of the channel x<br />
0: Dead-time generator output DTOHx selected as PWMH output of channel x.<br />
1: Output override value OOVHx selected as PWMH output of channel x.<br />
1016
33.7.19 Output Selection Set Register<br />
Name: OSS<br />
Access Type: Write-only<br />
Offset: 0x04C<br />
Reset Value: -<br />
32117D–AVR-01/12<br />
<strong>AT32UC3C</strong><br />
31 30 29 28 27 26 25 24<br />
– – – – – – – –<br />
23 22 21 20 19 18 17 16<br />
– – – – OSSL3 OSSL2 OSSL1 OSSL0<br />
15 14 13 12 11 10 9 8<br />
– – – – – – – –<br />
7 6 5 4 3 2 1 0<br />
– – – – OSSH3 OSSH2 OSSH1 OSSH0<br />
OSSLx: Output Selection Set for PWML output of the channel x<br />
Writing a zero to this bit has no effect.<br />
Writing a one to this bit will override the PWML output of channel x with the OOVLx value.<br />
OSSHx: Output Selection Set for PWMH output of the channel x<br />
Writing a zero to this bit has no effect.<br />
Writing a one to this bit will override the PWMH output of channel x with the OOVHx value.<br />
1017
33.7.20 Output Selection Clear Register<br />
Name: OSC<br />
Access Type: Write-only<br />
Offset: 0x050<br />
Reset Value: -<br />
32117D–AVR-01/12<br />
<strong>AT32UC3C</strong><br />
31 30 29 28 27 26 25 24<br />
– – – – – – – –<br />
23 22 21 20 19 18 17 16<br />
– – – – OSCL3 OSCL2 OSCL1 OSCL0<br />
15 14 13 12 11 10 9 8<br />
– – – – – – – –<br />
7 6 5 4 3 2 1 0<br />
– – – – OSCH3 OSCH2 OSCH1 OSCH0<br />
OSCLx: Output Selection Clear for PWML output of the channel x<br />
Writing a zero to this bit has no effect.<br />
Writing a one to this bit will override the PWML output of channel x with the DTOLx value.<br />
OSCHx: Output Selection Clear for PWMH output of the channel x<br />
Writing a zero to this bit has no effect.<br />
Writing a one to this bit will override the PWMH output of channel x with the DTOHx value.<br />
1018
33.7.21 Output Selection Set Update Register<br />
Name: OSSUPD<br />
Access Type: Write-only<br />
Offset: 0x054<br />
Reset Value: -<br />
32117D–AVR-01/12<br />
<strong>AT32UC3C</strong><br />
31 30 29 28 27 26 25 24<br />
– – – – – – – –<br />
23 22 21 20 19 18 17 16<br />
– – – – OSSUPL3 OSSUPL2 OSSUPL1 OSSUPL0<br />
15 14 13 12 11 10 9 8<br />
– – – – – – – –<br />
7 6 5 4 3 2 1 0<br />
– – – – OSSUPH3 OSSUPH2 OSSUPH1 OSSUPH0<br />
OSSUPLx: Output Selection Set for PWML output of the channel x<br />
Writing a zero to this bit has no effect.<br />
Writing a one to this bit will override the PWML output of channel x with the OOVLx value at the beginning of the next channel x<br />
PWM period.<br />
OSSUPHx: Output Selection Set for PWMH output of the channel x<br />
Writing a zero to this bit has no effect.<br />
Writing a one to this bit will override the PWMH output of channel x with the OOVHx value at the beginning of the next channel x<br />
PWM period.<br />
1019
33.7.22 Output Selection Clear Update Register<br />
Name: OSCUPD<br />
Access Type: Write-only<br />
Offset: 0x058<br />
Reset Value: -<br />
32117D–AVR-01/12<br />
<strong>AT32UC3C</strong><br />
31 30 29 28 27 26 25 24<br />
– – – – – – – –<br />
23 22 21 20 19 18 17 16<br />
– – – – OSCUPL3 OSCUPL2 OSCUPL1 OSCUPL0<br />
15 14 13 12 11 10 9 8<br />
– – – – – – – –<br />
7 6 5 4 3 2 1 0<br />
– – – – OSCUPH3 OSCUPH2 OSCUPH1 OSCUPH0<br />
OSCUPLx: Output Selection Clear for PWML output of the channel x<br />
Writing a zero to this bit has no effect.<br />
Writing a one to this bit will override the PWML output of channel x with the DTOLx value at the beginning of the next channel x<br />
PWM period.<br />
OSCUPHx: Output Selection Clear for PWMH output of the channel x<br />
Writing a zero to this bit has no effect.<br />
Writing a one to this bit will override the PWMH output of channel x with the DTOHx value at the beginning of the next channel x<br />
PWM period.<br />
1020
33.7.23 Fault Mode Register<br />
Name: FMR<br />
Access Type: Read/Write<br />
Offset: 0x05C<br />
Reset Value: 0x00000000<br />
32117D–AVR-01/12<br />
<strong>AT32UC3C</strong><br />
31 30 29 28 27 26 25 24<br />
- - - - - - - -<br />
23 22 21 20 19 18 17 16<br />
FFIL7 FFIL6 FFIL5 FFIL4 FFIL3 FFIL2 FFIL1 FFIL0<br />
15 14 13 12 11 10 9 8<br />
FMOD7 FMOD6 FMOD5 FMOD4 FMOD3 FMOD2 FMOD1 FMOD0<br />
7 6 5 4 3 2 1 0<br />
FPOL7 FPOL6 FPOL5 FPOL4 FPOL3 FPOL2 FPOL1 FPOL0<br />
This register can only be written if the WPSWS5 and WPHWS5 bits are cleared in ”Write Protect Status Register” on page<br />
1030.<br />
FFILy: Fault y Filtering<br />
0: The fault input y is not filtered.<br />
1: The fault input y is filtered.<br />
FMODy: Fault y Activation Mode<br />
0: The fault y is active as long as the fault input x is at FPOLy.<br />
1: The fault y becomes active as soon as the fault input y is at FPOLy level. The fault y stays active until the fault input y is not at<br />
FPOLy level AND until it is cleared in ”Fault Clear Register” on page 1023.<br />
FPOLy: Fault y Polarity<br />
0: The fault y becomes active when the fault input y is set to 0.<br />
1: The fault y becomes active when the fault input y is set to 1.<br />
CAUTION: To prevent an unexpected activation of the FSy bit in the ”Fault Status ReSister” on page 1022, the FMODy bit<br />
can be set to one only if the FPOLy bit has been previously configured to its final value.<br />
1021
33.7.24 Fault Status ReSister<br />
Name: FMR<br />
Access Type: Read/Write<br />
Offset: 0x060<br />
Reset Value: 0x00000000<br />
32117D–AVR-01/12<br />
<strong>AT32UC3C</strong><br />
31 30 29 28 27 26 25 24<br />
- - - - - - - -<br />
23 22 21 20 19 18 17 16<br />
- - - - - - - -<br />
15 14 13 12 11 10 9 8<br />
FS7 FS6 FS5 FS4 FS3 FS2 FS1 FS0<br />
7 6 5 4 3 2 1 0<br />
FIV7 FIV6 FIV5 FIV4 FIV3 FIV2 FIV1 FIV0<br />
FSy: Fault y Status<br />
0: The fault y is not currently active.<br />
1: The fault y is currently active.<br />
FIVy: Fault Input y Value<br />
0: The current sampled value of the fault input y is zero (after filtering if enabled).<br />
1: The current sampled value of the fault input y is one (after filtering if enabled).<br />
1022
33.7.25 Fault Clear Register<br />
Name: FCR<br />
Access Type: Write-only<br />
Offset: 0x064<br />
Reset Value: -<br />
32117D–AVR-01/12<br />
<strong>AT32UC3C</strong><br />
31 30 29 28 27 26 25 24<br />
- - - - - - - -<br />
23 22 21 20 19 18 17 16<br />
- - - - - - - -<br />
15 14 13 12 11 10 9 8<br />
- - - - - - - -<br />
7 6 5 4 3 2 1 0<br />
FCLR7 FCLR6 FCLR5 FCLR4 FCLR3 FCLR2 FCLR1 FCLR0<br />
FCLRy: Fault y Clear<br />
Writing a zero to this bit has no effect.<br />
If the FMODy bit is set to one and if the fault input y is not at the level defined by the FPOLy bit, then writing a one to this bit will<br />
clear the fault and the fault becomes inactive (FMODy and FPOLy bits are located in ”Fault Mode Register” on page 1021), else<br />
writing a one to this bit has no effect.<br />
1023
33.7.26 Fault Protection Value Register<br />
Name: FPV<br />
Access Type: Read/Write<br />
Offset: 0x068<br />
Reset Value: 0x00000000<br />
32117D–AVR-01/12<br />
<strong>AT32UC3C</strong><br />
31 30 29 28 27 26 25 24<br />
– – – – – – – –<br />
23 22 21 20 19 18 17 16<br />
– – – – FPVL3 FPVL2 FPVL1 FPVL0<br />
15 14 13 12 11 10 9 8<br />
– – – – – – – –<br />
7 6 5 4 3 2 1 0<br />
– – – – FPVH3 FPVH2 FPVH1 FPVH0<br />
This register can only be written if the WPSWS5 and WPHWS5 bits are cleared in ”Write Protect Status Register” on page<br />
1030.<br />
FPVLx: Fault Protection Value for PWML output on channel x<br />
0: PWML output of channel x is forced to 0 when fault occurs.<br />
1: PWML output of channel x is forced to 1 when fault occurs.<br />
FPVHx: Fault Protection Value for PWMH output on channel x<br />
0: PWMH output of channel x is forced to 0 when fault occurs.<br />
1: PWMH output of channel x is forced to 1 when fault occurs.<br />
1024
33.7.27 Fault Protection Enable Register<br />
Name: FPE<br />
Access Type: Read/Write<br />
Offset: 0x06C<br />
Reset Value: 0x00000000<br />
32117D–AVR-01/12<br />
<strong>AT32UC3C</strong><br />
31 30 29 28 27 26 25 24<br />
FPE3<br />
23 22 21 20 19 18 17 16<br />
FPE2<br />
15 14 13 12 11 10 9 8<br />
FPE1<br />
7 6 5 4 3 2 1 0<br />
FPE0<br />
This register can only be written if the WPSWS5 and WPHWS5 bits are cleared in ”Write Protect Status Register” on page<br />
1030.<br />
Only the first 5 bits (number of fault input pins) of FPE0, FPE1, FPE2 and FPE3 are significant.<br />
FPEx[y]: Fault Protection Enable with Fault y for channel x<br />
0: Fault y is not used for the Fault Protection of the channel x.<br />
1: Fault y is used for the Fault Protection of the channel x.<br />
CAUTION: To prevent an unexpected activation of the Fault Protection, the FPEx[y] bit can be written to one only if the<br />
FPOLy bit has been previously configured to its final value in ”Fault Mode Register” on page 1021.<br />
1025
33.7.28 Event Line x Register<br />
Name: ELxMR<br />
Access Type: Read/Write<br />
Offset: 0x080 + [x * 0x04]<br />
Reset Value: 0x00000000<br />
32117D–AVR-01/12<br />
<strong>AT32UC3C</strong><br />
31 30 29 28 27 26 25 24<br />
- - - - - - - -<br />
23 22 21 20 19 18 17 16<br />
- - - - - - - -<br />
15 14 13 12 11 10 9 8<br />
- - - - - - - -<br />
7 6 5 4 3 2 1 0<br />
CSEL7 CSEL6 CSEL5 CSEL4 CSEL3 CSEL2 CSEL1 CSEL0<br />
CSELy: Comparison y Selection<br />
0: A pulse is not generated on the event line x when the comparison y matches.<br />
1: A pulse is generated on the event line x when the comparison y matches.<br />
1026
33.7.29 Stepper Motor Mode Register<br />
Name: SMMR<br />
Access Type: Read/Write<br />
Offset: 0x0B0<br />
Reset Value: 0x00000000<br />
32117D–AVR-01/12<br />
<strong>AT32UC3C</strong><br />
31 30 29 28 27 26 25 24<br />
- - - - - - - -<br />
23 22 21 20 19 18 17 16<br />
- - - - - - DOWN1 DOWN0<br />
15 14 13 12 11 10 9 8<br />
- - - - - - - -<br />
7 6 5 4 3 2 1 0<br />
- - - - - - GCEN1 GCEN0<br />
GCENx: Gray Count Enable<br />
0: Disable gray count on PWML[2*x], PWMH[2*x], PWML[2*x+1], PWMH[2*x+1].<br />
1: Enable gray count on PWML[2*x], PWMH[2*x], PWML[2*x+1], PWMH[2*x+1].<br />
DOWNx: Down Count<br />
0: Up counter.<br />
1: Down counter.<br />
1027
33.7.30 Write Protect Control Register<br />
Name: WPCR<br />
Access Type: Write-only<br />
Offset: 0x0E4<br />
Reset Value: -<br />
32117D–AVR-01/12<br />
<strong>AT32UC3C</strong><br />
31 30 29 28 27 26 25 24<br />
WPKEY: Write Protect Key<br />
Should be written at value 0x50574D (“PWM” in ASCII). Writing any other value in this field aborts the write operation of the<br />
WPCMD field. Always reads as 0.<br />
WPRGx: Write Protect Register Group x<br />
Writing a zero to this bit has no effect.<br />
Writing a one to this bit will allow to set the WPCMD command to the register group x.<br />
WPCMD: Write Protect Command<br />
This command is performed only if the WPKEY value is correct.<br />
0: Disable the Write Protect SW of the register groups of which the WPRGx bit is set to 1.<br />
1: Enable the Write Protect SW of the register groups of which the WPRGx bit is set to 1.<br />
2: Enable the Write Protect HW of the register groups of which the WPRGx bit is set to 1.<br />
3: No effect.<br />
Note: Only a hardware reset of the PWM controller can disable the Write Protect HW.<br />
List of register groups:<br />
• Register group 0:<br />
– ”Clock Register” on page 997<br />
• Register group 1:<br />
– ”Disable Register” on page 1000<br />
• Register group 2:<br />
– ”Sync Channels Mode Register” on page 1006<br />
– ”Channel Mode Register” on page 1036<br />
– ”Stepper Motor Mode Register” on page 1027<br />
• Register group 3:<br />
WPKEY<br />
23 22 21 20 19 18 17 16<br />
WPKEY<br />
15 14 13 12 11 10 9 8<br />
WPKEY<br />
7 6 5 4 3 2 1 0<br />
WPRG5 WPRG4 WPRG3 WPRG2 WPRG1 WPRG0 WPCMD<br />
1028
– ”Channel Period Register” on page 1040<br />
– ”Channel Period Update Register” on page 1042<br />
• Register group 4:<br />
– ”Channel Dead Time Register” on page 1045<br />
– ”Channel Dead Time Update Register” on page 1046<br />
• Register group 5:<br />
– ”Fault Mode Register” on page 1021<br />
– ”Fault Protection Value Register” on page 1024<br />
–<br />
32117D–AVR-01/12<br />
<strong>AT32UC3C</strong><br />
1029
33.7.31 Write Protect Status Register<br />
Name: WPSR<br />
Access Type: Read-only<br />
Offset: 0x0E8<br />
Reset Value: 0x00000000<br />
32117D–AVR-01/12<br />
<strong>AT32UC3C</strong><br />
31 30 29 28 27 26 25 24<br />
WPVSRC<br />
23 22 21 20 19 18 17 16<br />
WPVSRC<br />
15 14 13 12 11 10 9 8<br />
- - WPHWS5 WPHWS4 WPHWS3 WPHWS2 WPHWS1 WPHWS0<br />
7 6 5 4 3 2 1 0<br />
WPVS - WPSWS5 WPSWS4 WPSWS3 WPSWS2 WPSWS1 WPSWS0<br />
WPVSRC: Write Protect Violation Source<br />
When WPVS is active, this field indicates the write-protected register (through address offset divided by four) in which a write<br />
access has been attempted.<br />
WPHWSx: Write Protect HW Status<br />
0: The Write Protect HW x of the register group x is disabled.<br />
1: The Write Protect HW x of the register group x is enabled.<br />
WPVS: Write Protect Violation Status<br />
0: No Write Protect violation has occurred since the last read of the WPSR register.<br />
1: At least one Write Protect violation has occurred since the last read of the WPSR register. If this violation is an unauthorized<br />
attempt to write a protected register, the associated violation is reported into WPVSRC field.<br />
WPSWSx: Write Protect SW Status<br />
0: The Write Protect SW x of the register group x is disabled.<br />
1: The Write Protect SW x of the register group x is enabled.<br />
Note: Reading WPSR automatically clears WPVS and WPVSRC fields.<br />
1030
33.7.32 Version Register<br />
Register Name: VERSION<br />
Access Type: Read-only<br />
Offset: 0x0FC<br />
Reset Value: -<br />
MFN<br />
Reserved. No functionality associated.<br />
VERSION<br />
Version number of the module. No functionality associated.<br />
32117D–AVR-01/12<br />
<strong>AT32UC3C</strong><br />
31 30 29 28 27 26 25 24<br />
- - - - - - - -<br />
23 22 21 20 19 18 17 16<br />
- - - - - MFN<br />
15 14 13 12 11 10 9 8<br />
- - - - VERSION<br />
7 6 5 4 3 2 1 0<br />
VERSION<br />
1031
33.7.33 Comparison x Value Register<br />
Name: CMPxV<br />
Access Type: Read/Write<br />
Offset: 0x130 + [x * 0x10]<br />
Reset Value: 0x00000000<br />
Only the first 20 bits (channel counter size) of CV field are significant.<br />
32117D–AVR-01/12<br />
<strong>AT32UC3C</strong><br />
31 30 29 28 27 26 25 24<br />
- - - - - - - CVM<br />
23 22 21 20 19 18 17 16<br />
CVM: Comparison x Value Mode<br />
0: The comparison x between the counter of the channel 0 and the comparison x value is performed when this counter is<br />
incrementing.<br />
1: The comparison x between the counter of the channel 0 and the comparison x value is performed when this counter is<br />
decrementing.<br />
Note: This bit is useless if the counter of the channel 0 is left aligned (CALG=0 in ”Channel Mode Register” on page 1036)<br />
CV: Comparison x Value<br />
Defines the comparison x value to be compared with the counter of the channel 0.<br />
CV<br />
15 14 13 12 11 10 9 8<br />
CV<br />
7 6 5 4 3 2 1 0<br />
CV<br />
1032
33.7.34 Comparison x Value Update Register<br />
Name: CMPxVUPD<br />
Access Type: Write-only<br />
Offset: 0x134 + [x * 0x10]<br />
Reset Value: -<br />
32117D–AVR-01/12<br />
<strong>AT32UC3C</strong><br />
31 30 29 28 27 26 25 24<br />
- - - - - - - CVMUPD<br />
23 22 21 20 19 18 17 16<br />
CVUPD<br />
15 14 13 12 11 10 9 8<br />
CVUPD<br />
7 6 5 4 3 2 1 0<br />
CVUPD<br />
This register acts as a double buffer for the CV and CVM values. This prevents an unexpected comparison x match.<br />
Only the first 20 bits (channel counter size) of CVUPD field are significant.<br />
CVMUPD: Comparison x Value Mode Update<br />
0: The comparison x between the counter of the channel 0 and the comparison x value is performed when this counter is<br />
incrementing.<br />
1: The comparison x between the counter of the channel 0 and the comparison x value is performed when this counter is<br />
decremented.<br />
Note: This bit is useless if the counter of the channel 0 is left aligned (CALG=0 in ”Channel Mode Register” on page 1036)<br />
CVUPD: Comparison x Value Update<br />
Defines the comparison x value to be compared with the counter of the channel 0.<br />
CAUTION: to be taken into account, the write of the CMPxVUPD register must be followed by a write of the CMPxMUPD<br />
register.<br />
1033
33.7.35 Comparison x Mode Register<br />
Name: CMPxM<br />
Access Type: Read/Write<br />
Offset: 0x138 + [x * 0x10]<br />
Reset Value: 0x00000000<br />
CUPRCNT: Comparison x Update Period Counter<br />
Reports the value of the comparison x update period counter.<br />
Note: The CUPRCNT field is read-only.<br />
32117D–AVR-01/12<br />
<strong>AT32UC3C</strong><br />
31 30 29 28 27 26 25 24<br />
- - - - - - - -<br />
23 22 21 20 19 18 17 16<br />
CUPRCNT CUPR<br />
15 14 13 12 11 10 9 8<br />
CPRCNT CPR<br />
7 6 5 4 3 2 1 0<br />
CTR - - - CEN<br />
CUPR: Comparison x Update Period<br />
Defines the time between each update of the comparison x mode and the comparison x value. This time is equal to CUPR+1<br />
periods of the channel 0 counter.<br />
CPRCNT: Comparison x Period Counter<br />
Reports the value of the comparison x period counter.<br />
Note: The CPRCNT field is read-only.<br />
CPR: Comparison x Period<br />
Defines the maximum value of the comparison x period counter (CPRCNT). The comparison x value is performed periodically<br />
once every CPR+1 periods of the channel 0 counter.<br />
CTR: Comparison x Trigger<br />
The comparison x is performed when the value of the comparison x period counter (CPRCNT) reaches the value defined by<br />
CTR.<br />
CEN: Comparison x Enable<br />
0: The comparison x is disabled and can not match.<br />
1: The comparison x is enabled and can match.<br />
1034
33.7.36 PWM Comparison x Mode Update Register<br />
Name: CMPxMUPD<br />
Access Type: Write-only<br />
Offset: 0x13C + [x * 0x10]<br />
Reset Value: -<br />
32117D–AVR-01/12<br />
<strong>AT32UC3C</strong><br />
31 30 29 28 27 26 25 24<br />
- - - - - - - -<br />
23 22 21 20 19 18 17 16<br />
- - - - CUPRUPD<br />
15 14 13 12 11 10 9 8<br />
- - - - CPRUPD<br />
7 6 5 4 3 2 1 0<br />
CTRUPD - - - CENUPD<br />
This register acts as a double buffer for the CEN, CTR, CPR and CUPR values. This prevents an unexpected comparison<br />
x match.<br />
CUPRUPD: Comparison x Update Period Update<br />
Defines the time between each update of the comparison x mode and the comparison x value. This time is equal to CUPR+1<br />
periods of the channel 0 counter.<br />
CPRUPD: Comparison x Period Update<br />
Defines the maximum value of the comparison x period counter (CPRCNT). The comparison x value is performed periodically<br />
once every CPR+1 periods of the channel 0 counter.<br />
CTRUPD: Comparison x Trigger Update<br />
The comparison x is performed when the value of the comparison x period counter (CPRCNT) reaches the value defined by<br />
CTR.<br />
CENUPD: Comparison x Enable Update<br />
0: The comparison x is disabled and can not match.<br />
1: The comparison x is enabled and can match.<br />
1035
33.7.37 Channel Mode Register<br />
Name: CMR<br />
Access Type: Read/Write<br />
Offset: 0x200 + [ch_num * 0x20]<br />
Reset Value: 0x00000000<br />
32117D–AVR-01/12<br />
<strong>AT32UC3C</strong><br />
31 30 29 28 27 26 25 24<br />
- - - - - - - -<br />
23 22 21 20 19 18 17 16<br />
- - - - - DTLI DTHI DTE<br />
15 14 13 12 11 10 9 8<br />
- - - - - CES CPOL CALG<br />
7 6 5 4 3 2 1 0<br />
- - - - CPRE<br />
This register can only be written if the WPSWS2 and WPHWS2 bits are cleared in ”Write Protect Status Register” on page<br />
1030.<br />
DTLI: Dead-Time PWMLx Output Inverted<br />
0: The dead-time PWMLx output is not inverted.<br />
1: The dead-time PWMLx output is inverted.<br />
DTHI: Dead-Time PWMHx Output Inverted<br />
0: The dead-time PWMHx output is not inverted.<br />
1: The dead-time PWMHx output is inverted.<br />
DTE: Dead-Time Generator Enable<br />
0: The dead-time generator is disabled.<br />
1: The dead-time generator is enabled.<br />
CES: Counter Event Selection<br />
The CES bit defines when the channel counter event occurs when the period is center aligned (CHIDx in the ”Interrupt Status<br />
Register 1” on page 1005).<br />
CALG=0 (Left Alignment):<br />
0/1: The channel counter event occurs at the end of the PWM period.<br />
CALG=1 (Center Alignment):<br />
0: The channel counter event occurs at the end of the PWM period.<br />
1: The channel counter event occurs at the end of the PWM period and at half the PWM period.<br />
CPOL: Channel Polarity<br />
0: The OCx output waveform (output from the comparator) starts at a low level.<br />
1: The OCx output waveform (output from the comparator) starts at a high level.<br />
CALG: Channel Alignment<br />
0: The period is left aligned.<br />
1: The period is center aligned.<br />
1036
CPRE: Channel Pre-scaler<br />
Table 33-7. Channel Pre-scaler<br />
CPRE Channel Pre-scaler<br />
0 CCK<br />
1 CCK/2<br />
2 CCK/4<br />
3 CCK/8<br />
4 CCK/16<br />
5 CCK/32<br />
6 CCK/64<br />
7 CCK/128<br />
8 CCK/256<br />
9 CCK/512<br />
10 CCK/1024<br />
11 CLKA<br />
12 CLKB<br />
Other Reserved<br />
32117D–AVR-01/12<br />
<strong>AT32UC3C</strong><br />
1037
33.7.38 Channel Duty Cycle Register<br />
Name: CDTY<br />
Access Type: Read/Write<br />
Offset: 0x204 + [ch_num * 0x20]<br />
Reset Value: 0x00000000<br />
32117D–AVR-01/12<br />
<strong>AT32UC3C</strong><br />
31 30 29 28 27 26 25 24<br />
- - - - - - - -<br />
23 22 21 20 19 18 17 16<br />
Only the first 20 bits (channel counter size) are significant.<br />
CDTY<br />
15 14 13 12 11 10 9 8<br />
CDTY<br />
7 6 5 4 3 2 1 0<br />
CDTY<br />
CDTY: Channel Duty-Cycle<br />
Defines the waveform duty-cycle. This value must be defined between 0 and CPRD (CPRx).<br />
1038
33.7.39 Channel Duty Cycle Update Register<br />
Name: CDTYUPD<br />
Access Type: Write-only<br />
Offset: 0x208 + [ch_num * 0x20]<br />
Reset Value: -<br />
32117D–AVR-01/12<br />
<strong>AT32UC3C</strong><br />
31 30 29 28 27 26 25 24<br />
- - - - - - - -<br />
23 22 21 20 19 18 17 16<br />
This register acts as a double buffer for the CDTY value. This prevents an unexpected waveform when modifying the waveform<br />
duty-cycle.<br />
Only the first 20 bits (channel counter size) are significant.<br />
CDTYUPD<br />
15 14 13 12 11 10 9 8<br />
CDTYUPD<br />
7 6 5 4 3 2 1 0<br />
CDTYUPD<br />
CDTYUPD: Channel Duty-Cycle Update<br />
Defines the waveform duty-cycle. This value must be defined between 0 and CPRD (CPRx).<br />
1039
33.7.40 Channel Period Register<br />
Name: CPRD<br />
Access Type: Read/Write<br />
Offset: 0x20C + [ch_num * 0x20]<br />
Reset Value: 0x00000000<br />
32117D–AVR-01/12<br />
<strong>AT32UC3C</strong><br />
31 30 29 28 27 26 25 24<br />
- - - - - - - -<br />
23 22 21 20 19 18 17 16<br />
This register can only be written if the WPSWS3 and WPHWS3 bits are cleared in ”Write Protect Status Register” on page<br />
1030.<br />
Only the first 20 bits (channel counter size) are significant.<br />
CPRD: Channel Period<br />
If the waveform is left-aligned, then the output waveform period depends on the channel counter source clock and can be<br />
calculated:<br />
– By using the PWM internal clock (CCK) divided by an X given prescaler value (with X being 1, 2, 4, 8, 16, 32, 64, 128,<br />
256, 512, or 1024). The resulting period formula will be:<br />
– By using the PWM internal clock (CCK) divided by one of both DIVA or DIVB divider, the formula becomes,<br />
respectively:<br />
or<br />
CPRD<br />
15 14 13 12 11 10 9 8<br />
CPRD<br />
7 6 5 4 3 2 1 0<br />
(<br />
------------------------------<br />
X× CPRD)<br />
CCK<br />
(<br />
-----------------------------------------<br />
CRPD × DIVA)<br />
CCK<br />
(<br />
-----------------------------------------<br />
CRPD × DIVB)<br />
CCK<br />
CPRD<br />
If the waveform is center-aligned, then the output waveform period depends on the channel counter source clock and can<br />
be calculated:<br />
– By using the PWM internal clock (CCK) divided by an X given prescaler value (with X being 1, 2, 4, 8, 16, 32, 64, 128,<br />
256, 512, or 1024). The resulting period formula will be:<br />
(<br />
----------------------------------------<br />
2 × X × CPRD)<br />
CCK<br />
1040
– By using the PWM internal clock (CCK) divided by one of both DIVA or DIVB divider, the formula becomes,<br />
respectively:<br />
32117D–AVR-01/12<br />
(<br />
---------------------------------------------------<br />
2 × CPRD × DIVA)<br />
( 2 × CPRD × DIVB<br />
or ---------------------------------------------------<br />
)<br />
CCK<br />
CCK<br />
<strong>AT32UC3C</strong><br />
1041
33.7.41 Channel Period Update Register<br />
Name: CPRDUPD<br />
Access Type: Write-only<br />
Offset: 0x210 + [ch_num * 0x20]<br />
Reset Value: -<br />
32117D–AVR-01/12<br />
<strong>AT32UC3C</strong><br />
31 30 29 28 27 26 25 24<br />
- - - - - - - -<br />
23 22 21 20 19 18 17 16<br />
This register can only be written if the WPSWS3 and WPHWS3 bits are cleared in ”Write Protect Status Register” on page<br />
1030.<br />
This register acts as a double buffer for the CPRD value. This prevents an unexpected waveform when modifying the<br />
waveform period.<br />
Only the first 20 bits (channel counter size) are significant.<br />
CPRDUPD: Channel Period Update<br />
If the waveform is left-aligned, then the output waveform period depends on the channel counter source clock and can be<br />
calculated:<br />
– By using the PWM internal clock (CCK) divided by an X given prescaler value (with X being 1, 2, 4, 8, 16, 32, 64, 128,<br />
256, 512, or 1024). The resulting period formula will be:<br />
– By using the PWM internal clock (CCK) divided by one of both DIVA or DIVB divider, the formula becomes,<br />
respectively:<br />
( CRPDUPD × DIVB)<br />
or -------------------------------------------------------<br />
CCK<br />
CPRDUPD<br />
15 14 13 12 11 10 9 8<br />
CPRDUPD<br />
7 6 5 4 3 2 1 0<br />
(<br />
--------------------------------------------<br />
X × CPRDUPD)<br />
CCK<br />
-------------------------------------------------------<br />
( CRPDUPD × DIVA)<br />
CCK<br />
CPRDUPD<br />
If the waveform is center-aligned, then the output waveform period depends on the channel counter source clock and can<br />
be calculated:<br />
– By using the PWM internal clock (CCK) divided by an X given prescaler value (with X being 1, 2, 4, 8, 16, 32, 64, 128,<br />
256, 512, or 1024). The resulting period formula will be:<br />
1042
– By using the PWM internal clock (CCK) divided by one of both DIVA or DIVB divider, the formula becomes,<br />
respectively:<br />
32117D–AVR-01/12<br />
(<br />
-----------------------------------------------------<br />
2 × X × CPRDUPD)<br />
CCK<br />
(<br />
----------------------------------------------------------------<br />
2 × CPRDUPD × DIVA)<br />
( 2 × CPRDUPD × DIVB<br />
or ----------------------------------------------------------------<br />
)<br />
CCK<br />
CCK<br />
<strong>AT32UC3C</strong><br />
1043
33.7.42 Channel Counter Register<br />
Name: CCNT<br />
Access Type: Read-only<br />
Offset: 0x214 + [ch_num * 0x20]<br />
Reset Value: 0x00000000<br />
32117D–AVR-01/12<br />
<strong>AT32UC3C</strong><br />
31 30 29 28 27 26 25 24<br />
- - - - - - - -<br />
23 22 21 20 19 18 17 16<br />
Only the first 20 bits (channel counter size) are significant.<br />
CNT<br />
15 14 13 12 11 10 9 8<br />
CNT<br />
7 6 5 4 3 2 1 0<br />
CNT<br />
CNT: Channel Counter Register<br />
Gives the channel counter value. This register is reset when the channel counter reaches the CPRD value defined in the<br />
CPRDx register if the waveform is left aligned.<br />
1044
33.7.43 Channel Dead Time Register<br />
Name: DT<br />
Access Type: Read/Write<br />
Offset: 0x218 + [ch_num * 0x20]<br />
Reset Value: 0x00000000<br />
32117D–AVR-01/12<br />
<strong>AT32UC3C</strong><br />
31 30 29 28 27 26 25 24<br />
This register can only be written if the WPSWS4 and WPHWS4 bits are cleared in ”Write Protect Status Register” on page<br />
1030.<br />
Only the first 16 bits (dead-time counter size) of DTH and DTL fields are significant.<br />
DTL<br />
23 22 21 20 19 18 17 16<br />
DTL<br />
15 14 13 12 11 10 9 8<br />
DTH<br />
7 6 5 4 3 2 1 0<br />
DTH<br />
DTL: Dead-Time Value for PWMLx Output<br />
Defines the dead-time value for PWMLx output. This value must be defined between 0 and CDTY (CDTYx).<br />
DTH: Dead-Time Value for PWMHx Output<br />
Defines the dead-time value for PWMHx output. This value must be defined between 0 and CPRD-CDTY (CPRx and CDTYx).<br />
1045
33.7.44 Channel Dead Time Update Register<br />
Name: DTUPD<br />
Access Type: Write-only<br />
Offset: 0x21C + [ch_num * 0x20]<br />
Reset Value: -<br />
32117D–AVR-01/12<br />
<strong>AT32UC3C</strong><br />
31 30 29 28 27 26 25 24<br />
DTLUPD<br />
23 22 21 20 19 18 17 16<br />
DTLUPD<br />
15 14 13 12 11 10 9 8<br />
DTHUPD<br />
7 6 5 4 3 2 1 0<br />
DTHUPD<br />
This register can only be written if the WPSWS4 and WPHWS4 bits are cleared in ”Write Protect Status Register” on page<br />
1030.<br />
This register acts as a double buffer for the DTH and DTL values. This prevents an unexpected waveform when modifying<br />
the dead-time values.<br />
Only the first 16 bits (dead-time counter size) of DTHUPD and DTLUPD fields are significant.<br />
DTLUPD: Dead-Time Value Update for PWMLx Output<br />
Defines the dead-time value for PWMLx output. This value must be defined between 0 and CDTY (CDTYx). This value is<br />
applied only at the beginning of the next channel x PWM period.<br />
DTHUPD: Dead-Time Value Update for PWMHx Output<br />
Defines the dead-time value for PWMHx output. This value must be defined between 0 and CPRD-CDTY (CPRx and CDTYx).<br />
This value is applied only at the beginning of the next channel x PWM period.<br />
1046
32117D–AVR-01/12<br />
<strong>AT32UC3C</strong><br />
33.8 Module Configuration<br />
The specific configuration for each PWM instance is listed in the following tables. The module<br />
bus clocks listed here are connected to the system bus clocks. Please refer to the Power Manager<br />
chapter for details.<br />
Table 33-8. PWM Clock Name<br />
Module name Clock Name Description<br />
PWM CLK_PWM Peripheral Bus clock from the PBA clock domain<br />
GCLK The generic clock used for the PWM is GCLK4<br />
Table 33-9. Register Reset Values<br />
Register Reset Value<br />
VERSION 0x00000501<br />
33.8.1 PWM fault sources<br />
The following table define the mapping of the PWM fault sources. For details on PWM faults, see<br />
Fault Protection paragraph in the PWM chapter.<br />
Table 33-10. PWM fault sources<br />
fault input number Description<br />
0 PEVC channel output 8, this fault is only usable when the FMR.FMODy is set<br />
to 1.<br />
1 PEVC channel output 9, this fault is only usable when the FMR.FMODy is set<br />
to 1.<br />
2 EXT_FAULTS[0] input pin, See Peripheral Multiplexing on I/O line chapter.<br />
3 EXT_FAULTS[1] input pin, See Peripheral Multiplexing on I/O line chapter.<br />
4 clock failure detector of PM, See PM chapter for details.<br />
1047
34. Quadrature Decoder (QDEC)<br />
34.1 Features<br />
34.2 Overview<br />
32117D–AVR-01/12<br />
Rev.: 1.0.0.0<br />
Figure 34-1. Quadrature Signals Description<br />
Handles three input channels:<br />
– Two phase signals (QEPA, QEPB)<br />
– One index pulse (QEPI)<br />
Optional digital filter on inputs<br />
16-bit position counter and 16-bit revolution counter<br />
32-bit timer/counter mode<br />
Software trigger or peripheral event trigger<br />
Compare function with peripheral event generation<br />
Capture function on peripheral event<br />
<strong>AT32UC3C</strong><br />
The QDEC is used in rotating motion systems for position and speed detection. It decodes<br />
quadrature signals, normally two 90 degrees out-of-phases pulses, into count and direction<br />
informations. The quadrature signals are usually generated by a wheel with periodic transparent<br />
gaps (a.k.a. lines) and an optical system composed of one light source and 2 sensors.<br />
QEPA<br />
QEPB<br />
QEPI<br />
The phase signals are labelled QEPA and QEPB. If QEPA leads QEPB, the rotation direction is<br />
defined as positive. If QEPB leads QEPA, the rotation direction is defined as negative. Each<br />
time a line passes the sensor, a counter register (CNT.PC) is incremented or decremented<br />
depending of the rotation direction. A third input signal, QEPI, can be used to reset CNT.PC.<br />
QDEC can count the total number of revolutions. A top value of CNT.PC is written to the Position<br />
Counter Top Value in the Top Value register (TOP.PCTOP). When CNT.PC counts up to this<br />
value, it wraps around to zero and the Revolution Counter field (CNT.RC) is incremented.<br />
CNT.RC is decremented when CNT.PC counts down and crosses the zero value. CNT.PC will<br />
then be reset to the value in TOP.PCTOP.<br />
1048
34.3 Block Diagram<br />
Figure 34-2. QDEC Block Diagram<br />
32117D–AVR-01/12<br />
QEPI<br />
QEPA<br />
QEPB<br />
34.4 I/O Lines Description<br />
<strong>AT32UC3C</strong><br />
34.5 Product Dependencies<br />
In order to use this module, other parts of the system must be configured correctly, as described<br />
below.<br />
34.5.1 I/O Lines<br />
QCF.FILTEN<br />
Filter<br />
Filter<br />
Filter<br />
Advanced<br />
filter<br />
Clock<br />
Control<br />
CLK_QDEC_INT<br />
GCLK_QDEC<br />
quadrature<br />
decoder<br />
Table 34-1. I/O Lines Description<br />
compare event<br />
CMP<br />
register<br />
QPulse<br />
DIR<br />
CNT =<br />
position counter/<br />
revolution counter<br />
trigger event<br />
Pin Name Pin Description Type<br />
QEPA Quadrature phase signal A Input<br />
QEPB Quadrature phase signal B Input<br />
QEPI Quadrature index signal Input<br />
TOP register<br />
CAP<br />
register<br />
capture event<br />
The QDEC pins are multiplexed with other peripherals. The user must first program the I/O Controller<br />
to give control of the pins to the QDEC.<br />
PB<br />
1049
32117D–AVR-01/12<br />
<strong>AT32UC3C</strong><br />
34.5.2 Power Management<br />
If the CPU enters a sleep mode that disables clocks used by the QDEC, the QDEC will stop<br />
functioning and resume operation after the system wakes up from sleep mode.<br />
34.5.3 Clocks<br />
34.5.4 Interrupts<br />
The QDEC has two clocks connected: One Peripheral Bus clock (CLK_QDEC) and one generic<br />
clock (GCLK_QDEC). These clocks are generated by the Power Manager. CLK_QDEC is<br />
enabled at reset, and can be disabled in the Power Manager.<br />
GCLK_QDEC is used for filtering in QDEC mode and is the timer clock in Timer Mode. It is a<br />
generic clock generated by the Power Manager. The programmer must configure the Power<br />
Manager to enable GCLK_QDEC. The GCLK_QDEC frequency must less than half the<br />
CLK_QDEC clock frequency.<br />
The QDEC interrupt request line is connected to the interrupt controller. Using the QDEC interrupt<br />
requires the interrupt controller to be programmed first.<br />
34.5.5 Peripheral Events<br />
The QDEC peripheral events are connected via the Peripheral Event System. Refer to the<br />
Peripheral Event System chapter for details.<br />
34.5.6 Debug Operation<br />
When an external debugger forces the CPU into debug mode, the QDEC continues normal<br />
operation; the timer is not frozen, but peripheral events are masked.<br />
34.6 Functional Description<br />
34.6.1 Basic Operation<br />
In OCD mode, the timer is not frozen and the events are masked. Reading the CAP register<br />
does not clear the reminding of last capture event for the OVR interrupt.<br />
If the QDEC is configured in a way that requires it to be periodically serviced by the CPU through<br />
interrupts or similar, improper operation or data loss may result during debugging.<br />
The QDEC peripheral events are masked during debug operation, unless the Run In Debug bit<br />
in the Development Control Register is written to one and the bit corresponding to the QDEC is<br />
written to one in the Peripheral Debug Register (PDBG). Please refer to the On-Chip Debug<br />
chapter in the AVR32UC Technical Reference Manual, and the OCD Module Configuration section,<br />
for details.<br />
34.6.1.1 Enabling the QDEC<br />
The QDEC is enabled by writing a one to the Clock Enable bit in the Control Register<br />
(CTRL.CLKEN). This will also enable the internal CLK_QDEC_INT. This clock is generated from<br />
GCLK_QDEC.<br />
CLK_QDEC_INT is used in the filter blocks and for clocking the counter in Timer Mode. A software<br />
trigger or peripheral event trigger is needed for CLK_QDEC_INT to start. The Clock Enable<br />
bit in the Status Register (SR.CLKEN) indicates if the clock is running.<br />
1050
34.6.1.2 Trigger<br />
32117D–AVR-01/12<br />
Figure 34-3. Clock Control<br />
<strong>AT32UC3C</strong><br />
A trigger resets the QDEC counter and starts CLK_QDEC_INT. Two triggers are possible:<br />
• A software trigger, by writing a one to the Software Trigger bit in CTRL<br />
(CTRL.SWTRG).<br />
• Trigger peripheral event from the PEVC: If enabled by writing a one to the Event<br />
Trigger Enable bit in the Configuration Register (CF.EVTRGE).<br />
The QDEC counter is reset when the peripheral trigger event occurs.<br />
34.6.1.3 Quadrature decoder logic and digital filter<br />
{A,B} =<br />
QEPA<br />
QEPB<br />
PEVC trigger<br />
CTRL[CLKEN]= 1<br />
A<br />
N<br />
D<br />
CTRL[CLKEN]=0<br />
The quadrature decoder logic converts the 2-phase signals QEPA and QEPB in a count pulse<br />
signal (QPulse) for each transition and a DIR signal to indicate the rotation direction.<br />
Figure 34-4. Quadrature Description<br />
(0,0) (1,1)<br />
(0,1) (1,0)<br />
GCLK_QDEC<br />
Increment<br />
counter<br />
Increment<br />
counter<br />
CLK_QDEC_INT<br />
The QEPI signal may be used to detect a reference position once per revolution.<br />
The 3 inputs (QEPA/QEPB/QEPI) can be inverted by writing to appropriate bits in CF.<br />
Set<br />
Reset<br />
Q<br />
Decrement<br />
counter<br />
00<br />
Decrement<br />
counter<br />
SR[CLKEN]<br />
01<br />
10<br />
A<br />
N<br />
D<br />
Decrement<br />
counter<br />
11<br />
Decrement<br />
counter<br />
Increment<br />
counter<br />
Increment<br />
counter<br />
1051
32117D–AVR-01/12<br />
<strong>AT32UC3C</strong><br />
34.6.1.4 Position counter<br />
The 16-bit position counter is incremented or decremented on every count pulse, generated by<br />
the quadrature decoder module. The counting direction is displayed in SR.CNTDIR.<br />
If the position counter reaches the TOP.PCTOP value when counting up or the 0 value when<br />
counting down, the counter wraps around. The Position Counter Roll Over (PCRO) interrupt is<br />
generated.<br />
Usually, the TOP.PCTOP value should always be set to the total number of quadrature states<br />
minus one, which is (quadrature_encoder_lines_count *4) -1.<br />
34.6.1.5 Index detection<br />
The optional index signal QEPI may be used to correct the position counter if quadrature states<br />
have been missed due to noise. If the Index Enable bit (CF.IDXE) is written to one, detection of<br />
the QEPI signal will reset the position counter to 0 on a selected phase of quadrature signals.<br />
This selected phase is configured via the Detection Phase field (CF.IDXPHS).<br />
The Index Error (IDXERR) interrupt is triggered if the index detection occurs and the position<br />
counter value is not 0.<br />
34.6.1.6 Revolution counter<br />
The revolution counter is incremented/decremented each time the position counter rolls over. It<br />
rolls over when it reaches the TOP.RCTOP value.<br />
34.6.1.7 Waveforms<br />
Figure 34-5. Quadrature Clock and Direction Decoding (TOP.PCTOP = 4)<br />
QEPA<br />
QEPB<br />
CNTDIR<br />
QPulse<br />
PC<br />
RC<br />
0 1 2 3 4 0 1 2 1 0 4 3 2 1<br />
0 1 0<br />
1052
Figure 34-6. PC reset by QEPI signal (TOP.PCTOP = 79, CF.IDXPHS =”00”, CF.IDXE = “1”)<br />
32117D–AVR-01/12<br />
QEPA<br />
QEPB<br />
QEPI<br />
QPulse<br />
PC<br />
RC<br />
IDXERR<br />
<strong>AT32UC3C</strong><br />
34.6.1.8 Quadrature frequency<br />
The CLK_QDEC clock frequency must be at least two times the QEPA and QEPB frequency as<br />
these signals are synchronized to the CLK_QDEC clock. To get the maximum available frequency<br />
on QEPA/QEPB signals, the filter on inputs should be bypassed.<br />
For a 33 MHz peripheral bus clock the maximum QEPA frequency is 16.5 MHz. For a wheel with<br />
8192 lines the maximum rotational speed supported by QDEC is 16.5MHz / 8192 = 2014 rps =<br />
120 849 rpm.<br />
34.6.1.9 Disabling the QDEC<br />
The QDEC is disabled by writing a zero to CTRL.CLKEN.<br />
34.6.2 Advanced Operation<br />
72 73 74 75 0 1 2 3 2 1 0 79 78<br />
0 1 0<br />
34.6.2.1 Compare register<br />
The Compare register (CMP) is used to generate an interrupt and a peripheral event when the<br />
CNT register reaches the value defined in CMP.<br />
If RC compare is enabled (CF.RCCE is one), a compare match occurs when RC is equal to<br />
RCCMP. A peripheral event is generated and the CMP interrupt line is set if enabled.<br />
If the PC compare is enabled (CF.PCCE is one), a compare match occurs when the PC is equal<br />
to PCCMP. A peripheral event is generated and the CMP interrupt line is set if enabled.<br />
If both RC compare and PC compare are enabled, a compare match occurs when CNT is equal<br />
to CMP. A peripheral event is generated and the CMP interrupt line is set if enabled.<br />
The compare peripheral event should be mapped through the PEVC to another peripheral.<br />
77<br />
1053
34.6.2.2 Capture register<br />
34.6.2.3 Glitch filter<br />
32117D–AVR-01/12<br />
<strong>AT32UC3C</strong><br />
The capture function saves the QDEC counter value in the Capture register (CAP) when a capture<br />
event has occurred. The capture function is enabled if the QDEC counter is running.<br />
The CAP register will not be updated with a new value if the previous value has not been read. If<br />
a capture event occurs and the previous value has not been read, the SR.OVR bit is set.<br />
The QDEC inputs (QEPA/QEPB/QEPI) are passed through a glitch filter that is enabled by writing<br />
a one to the CF.FILTEN bit. The input sent to the QDEC counter will toggle if the input is<br />
stable for three CLK_QDEC_INT periods.<br />
34.6.2.4 Timer/Counter mode<br />
QDEC can be used as a 32-bit/counter with compare/capture capabilities. This timer includes an<br />
up/down (UPD) mode where the timer counts up or down according to a toggle direction event<br />
from the PEVC.<br />
The timer/counter is available by writing a zero to the CF.QDEC bit. Timer/Counter mode uses<br />
the same resources as QDEC mode:<br />
The CNT QDEC counter<br />
The TOP register to reload the CNT value<br />
The CMP register to generate a compare peripheral event/interrupt<br />
The CAP register to save the CNT value in case of a capture peripheral event occurs<br />
The clock selection<br />
The trigger mechanism<br />
It does not use the input filters and the index pulse control.<br />
The timer/counter includes an up/down mode that is enabled by writing a one to the CF.UPD bit.<br />
1054
34.6.3 Interrupts<br />
32117D–AVR-01/12<br />
Figure 34-7. Timer Block Diagram<br />
toggle direction event<br />
CF.UPD<br />
CF.TSDIR<br />
up/down<br />
control<br />
Clock Control<br />
GCLK_QDEC<br />
compare event<br />
<strong>AT32UC3C</strong><br />
The user can set the timer count direction by writing to the CF.TSDIR bit. The counting direction<br />
is taken into account when a trigger occurs. The counting direction is shown in SR.CNTDIR.<br />
The user has to set the initial direction of counting by writing to CF.TSDIR. When the timer is<br />
triggered, i.e. each time a toggle direction event occurs, the counter changes counting direction.<br />
If the counter reaches 0, it will be stuck at 0 as long as the counting direction is down.<br />
The QDEC has one interrupt request line connected to the interrupt controller. The sources of<br />
this interrupt are:<br />
The QEPI interrupt to detect the index signal.<br />
The CMP interrupt to detect a compare match.<br />
The CAP interrupt to detect that the QDEC counter value has been saved in the CAP register<br />
due to the capture event.<br />
The OVR interrupt to detect that a capture event was received without the CAP register<br />
having been read since the last capture event. In OCD mode, reading the CAP register does<br />
not clear the memory of the last capture event.<br />
The PCRO interrupt to detect a roll-over of the position counter. In Timer/Counter mode, the<br />
roll over occurs when (PC = 0xFFFF and RC != RCTOP), when PC = TOP.PCTOP or when<br />
RC = RCTOP.<br />
DIR<br />
CLK_QDEC_INT<br />
CMP TOP<br />
trigger event<br />
CNT<br />
CAP<br />
capture event<br />
PB<br />
1055
32117D–AVR-01/12<br />
<strong>AT32UC3C</strong><br />
The RCRO interrupt to detect a roll-over of the revolution counter.<br />
The IDXERR interrupt to detect that the index signal (QEPI) is detected and the position<br />
counter does not have the expected value (TOP.PCTOP if the counter counts up, 1 if the<br />
counter counts down).<br />
The DIRINV interrupt occurs when the count direction changes.<br />
The QDERR interrupt occurs when a bad transition in the quadrature signals is detected (for<br />
example, from “00” to “11”). This could be caused by erroneous programming of the<br />
GCLK_QDEC frequency.<br />
The TRIGGER interrupt occurs when a trigger event from PEVC is detected. It could be used<br />
by software to detect a reset of the counters.<br />
Each interrupt source can be enabled by writing a one to the corresponding bit in the Interrupt<br />
Enable Register (IER) and disabled by writing a one to the corresponding bit in the Interrupt Disable<br />
Register (IDR). The enable status can be read from the Interrupt Mask Register (IMR). The<br />
status of the interrupt sources, even if the interrupt is masked, can be read in SR. When an interrupt<br />
has occurred, it is reset by writing a one to the corresponding bit in the Status Clear<br />
Register (SCR).<br />
34.6.4 Peripheral Events<br />
The QDEC can receive three peripheral events from the Peripheral Event Controller (PEVC):<br />
The trigger peripheral event starts CLK_QDEC_INT and enables the counter.<br />
The capture peripheral event captures CNT in the Capture register (CAP).<br />
The toggle_dir peripheral event toggles the count direction when the QDEC works in Timer<br />
mode with UPD mode active.<br />
The QDEC can send one event to the PEVC:<br />
The compare peripheral event when the CNT register reaches the Compare register (CMP)<br />
value.<br />
The PEVC must be programmed to enable QDEC peripheral events.<br />
1056
34.7 User Interface<br />
Table 34-2. QDEC Register Memory Map<br />
32117D–AVR-01/12<br />
<strong>AT32UC3C</strong><br />
Offset Register Register Name Access Reset<br />
0x00 Control Register CTRL Read/Write 0x00000000<br />
0x04 Configuration Register CF Read/Write 0x00000000<br />
0x08 Counter Register CNT Read/Write 0x00000000<br />
0x0C Top Value Register TOP Read/Write 0x00000000<br />
0x10 Compare Register CMP Read/Write 0x00000000<br />
0x14 Capture Register CAP Read-only 0x00000000<br />
0x18 Status Register SR Read-only 0x00000000<br />
0x1C Status Clear Register SCR Write-only 0x00000000<br />
0x20 Interrupt Mask Register IMR Read-only 0x00000000<br />
0x24 Interrupt Enable Register IER Write-only 0x00000000<br />
0x28 Interrupt Disable Register IDR Write-only 0x00000000<br />
0x2C Parameter Register PARAMETER Read-only - (1)<br />
0x30 Version Register VERSION Read-only - (1)<br />
1. The reset values for this register is device specific. Please refer to the Module Configuration section at the end of this chapter.<br />
1057
34.7.1 Control Register<br />
Name: CTRL<br />
Access Type: Read/Write<br />
Offset: 0x00<br />
Reset Value: 0x00000000<br />
32117D–AVR-01/12<br />
<strong>AT32UC3C</strong><br />
31 30 29 28 27 26 25 24<br />
- - - - - - - -<br />
23 22 21 20 19 18 17 16<br />
- - - - - - - -<br />
15 14 13 12 11 10 9 8<br />
- - - - - - - -<br />
7 6 5 4 3 2 1 0<br />
- - - - - - SWTRG CLKEN<br />
SWTRG: Software Trigger<br />
Writing a one to this bit generates a software trigger if CTRL.CLKEN is one.<br />
This bit always reads as 0.<br />
CLKEN: QDEC Module and Clock Enable<br />
Writing a zero to this bit disables the QDEC and CLK_QDEC_INT clock.<br />
Writing a one to this bit enables the QDEC and CLK_QDEC_INT clock.<br />
1058
34.7.2 Configuration Register<br />
Name: CF<br />
Access Type: Read/Write<br />
Offset: 0x04<br />
Reset Value: 0x00000000<br />
32117D–AVR-01/12<br />
<strong>AT32UC3C</strong><br />
31 30 29 28 27 26 25 24<br />
- - - - - - - -<br />
23 22 21 20 19 18 17 16<br />
- - - - - - UPD TSDIR<br />
15 14 13 12 11 10 9 8<br />
- - FILTEN IDXPHS IDXINV PHSINVB PHSINVA<br />
7 6 5 4 3 2 1 0<br />
- - - EVTRGE RCCE PCCE IDXE QDEC<br />
UPD: Up/Down Timer Mode<br />
0: Up/Down functionality in Timer Mode is disabled<br />
1: Up/Down functionality in Timer Mode is ensabled<br />
TSDIR: Timer Set Direction<br />
0: The counters count up in Timer Mode<br />
1: The counters count down in Timer Mode<br />
The count direction is updated when a trigger (software or hardware) occurs<br />
FILTEN: Input Digital Filter Enable<br />
0: The input digital filter is disabled<br />
1: The input digital filter is enabled<br />
IDXPHS: QEPI Detection Phase<br />
0: QEPI detection enabled when QEPA signal equals 0 and QEPB signal equals 0<br />
1: QEPI detection enabled when QEPA signal equals 0 and QEPB signal equals 1<br />
2: QEPI detection enabled when QEPA signal equals 1 and QEPB signal equals 0<br />
3: QEPI detection enabled when QEPA signal equals 1 and QEPB signal equals 1<br />
IDXINV: QEPI Phase<br />
0: QEPI will not be inverted<br />
1: QEPI will be inverted<br />
PHSINVB: QEPB Phase<br />
0: QEPB will not be inverted<br />
1: QEPB will be inverted<br />
PHSINVA: QEPA Phase<br />
0: QEPA will not be inverted<br />
1: QEPA will be inverted<br />
EVTRGE: Event Trigger Enable<br />
0: The event trigger function is disabled<br />
1: The event trigger function is enabled<br />
1059
RCCE: Revolution Counter Compare Enable<br />
0: The revolution counter compare is disabled<br />
1: The revolution counter compare is enabled<br />
PCCE: Position Counter Compare Enable<br />
0: The position counter compare is disabled<br />
1: The position counter compare is enabled<br />
IDXE: Index Enable<br />
0: The index signal detection is disabled<br />
1: The index signal detection is enabled<br />
QDEC: QDEC Mode<br />
0: QDEC is in Timer Mode<br />
1: QDEC is in Quadrature Decoder Mode<br />
32117D–AVR-01/12<br />
<strong>AT32UC3C</strong><br />
1060
34.7.3 Counter Register<br />
Name: CNT<br />
Access Type: Read/Write<br />
Offset: 0x08<br />
Reset Value: 0x00000000<br />
32117D–AVR-01/12<br />
<strong>AT32UC3C</strong><br />
31 30 29 28 27 26 25 24<br />
RC: Revolution Counter<br />
The current value of the revolution counter<br />
PC: Position Counter<br />
The current value of the position counter<br />
RC[15:8]<br />
23 22 21 20 19 18 17 16<br />
RC[7:0]<br />
15 14 13 12 11 10 9 8<br />
PC[15:8]<br />
7 6 5 4 3 2 1 0<br />
PC[7:0]<br />
1061
34.7.4 Top Register<br />
Name: TOP<br />
Access Type: Read/Write<br />
Offset: 0x10<br />
Reset Value: 0x00000000<br />
32117D–AVR-01/12<br />
<strong>AT32UC3C</strong><br />
31 30 29 28 27 26 25 24<br />
RCTOP: Revolution Counter Top Value<br />
The top value of the revolution counter<br />
PCTOP: Position Counter Top Value<br />
The top value of the position counter<br />
RCTOP[15:8]<br />
23 22 21 20 19 18 17 16<br />
RCTOP[7:0]<br />
15 14 13 12 11 10 9 8<br />
PCTOP[15:8]<br />
7 6 5 4 3 2 1 0<br />
PCTOP[7:0]<br />
1062
34.7.5 Compare Register<br />
Name: CMP<br />
Access Type: Read/Write<br />
Offset: 0x14<br />
Reset Value: 0x00000000<br />
32117D–AVR-01/12<br />
<strong>AT32UC3C</strong><br />
31 30 29 28 27 26 25 24<br />
RCCMP[15:8]<br />
23 22 21 20 19 18 17 16<br />
RCCMP[7:0]<br />
15 14 13 12 11 10 9 8<br />
PCCMP[15:8]<br />
7 6 5 4 3 2 1 0<br />
PCCMP[7:0]<br />
RCCMP: Revolution Counter Compare Value<br />
The Revolution Counter value that generates a compare event<br />
PCCMP: Position Counter Compare Value<br />
The Position Counter value that generates a compare event<br />
1063
34.7.6 Capture Register<br />
Name: CAP<br />
Access Type: Read-only<br />
Offset: 0x18<br />
Reset Value: 0x00000000<br />
32117D–AVR-01/12<br />
<strong>AT32UC3C</strong><br />
31 30 29 28 27 26 25 24<br />
RCCAP: Revolution Capture<br />
The last capture value of the revolution counter<br />
PCCAP: Position Capture<br />
The last capture value of the position counter<br />
RCCAP[15:8]<br />
23 22 21 20 19 18 17 16<br />
RCCAP[7:0]<br />
15 14 13 12 11 10 9 8<br />
PCCAP[15:8]<br />
7 6 5 4 3 2 1 0<br />
PCCAP[7:0]<br />
1064
34.7.7 Status Register<br />
Name: SR<br />
Access Type: Read-only<br />
Offset: 0x1C<br />
Reset Value: 0x00000000<br />
32117D–AVR-01/12<br />
<strong>AT32UC3C</strong><br />
31 30 29 28 27 26 25 24<br />
- – – – – – – –<br />
23 22 21 20 19 18 17 16<br />
- - - - - - CLKEN CNTDIR<br />
15 14 13 12 11 10 9 8<br />
- - - - - - TRIGGER QDERR<br />
7 6 5 4 3 2 1 0<br />
OVR DIRINV IDXERR RCRO PCRO CAP CMP QEPI<br />
CLKEN: QDEC Counter Clock Status<br />
This bit is cleared when the QDEC and CLK_QDEC_INT has been disabled<br />
This bit is set when the QDEC and CLK_QDEC_INT has been enabled<br />
CNTDIR: Counter Direction<br />
This bit is cleared when the counter counts up<br />
This bit is set when the counter counts down<br />
TRIGGER: Trigger Event Occurrence<br />
This bit is cleared when the corresponding bit in SCR is written to one<br />
This bit is set when the trigger event has occurred<br />
QDERR: Illegal Quadrature Signals Transition<br />
This bit is cleared when the corresponding bit in SCR is written to one<br />
This bit is set when an illegal transition of quadrature signals has occurred<br />
OVR: Overrun Capture<br />
This bit is cleared when the corresponding bit in SCR is written to one<br />
This bit is set when the overrun capture event has occurred<br />
DIRINV: Count Direction Inversion<br />
This bit is cleared when the corresponding bit in SCR is written to one<br />
This bit is set when the count direction has changed<br />
IDXERR: Index Error<br />
This bit is cleared when the corresponding bit in SCR is written to one<br />
This bit is set when an index error has occurred<br />
RCRO: Revolution Counter Roll Over<br />
This bit is cleared when the corresponding bit in SCR is written to one<br />
This bit is set when the revolution counter has rolled over<br />
PCRO: Position Counter Roll Over<br />
This bit is cleared when the corresponding bit in SCR is written to one<br />
This bit is set when the position counter has rolled over<br />
1065
CAP: Counter Capture<br />
This bit is cleared when the corresponding bit in SCR is written to one<br />
This bit is set when a capture event has occurred<br />
CMP: Counter Compare<br />
This bit is cleared when the corresponding bit in SCR is written to one<br />
This bit is set when compare match occurred<br />
QEPI: Index Signal Detection<br />
This bit is cleared when the corresponding bit in SCR is written to one<br />
This bit is set when an index detection has occurred<br />
32117D–AVR-01/12<br />
<strong>AT32UC3C</strong><br />
1066
34.7.8 Status Clear Register<br />
Name: SCR<br />
Access Type: Write-only<br />
Offset: 0x20<br />
Reset Value: 0x00000000<br />
32117D–AVR-01/12<br />
<strong>AT32UC3C</strong><br />
31 30 29 28 27 26 25 24<br />
– – – – – – – –<br />
23 22 21 20 19 18 17 16<br />
– – – – – – – –<br />
15 14 13 12 11 10 9 8<br />
– – – – – – TRIGGER QDERR<br />
7 6 5 4 3 2 1 0<br />
OVR DIRINV IDXERR RCRO PCRO CAP CMP QEPI<br />
Writing a zero to a bit in this register has no effect.<br />
Writing a one to a bit in this register will clear the corresponding bit in SR and the corresponding interrupt request.<br />
1067
34.7.9 Interrupt Mask Register<br />
Name: IMR<br />
Access Type: Read-only<br />
Offset: 0x24<br />
Reset Value: 0x00000000<br />
32117D–AVR-01/12<br />
<strong>AT32UC3C</strong><br />
31 30 29 28 27 26 25 24<br />
– – – – – – – –<br />
23 22 21 20 19 18 17 16<br />
– – – – – – – –<br />
15 14 13 12 11 10 9 8<br />
– – – – – – TRIGGER QDERR<br />
7 6 5 4 3 2 1 0<br />
OVR DIRINV IDXERR RCRO PCRO CAP CMP QEPI<br />
0: The corresponding interrupt is disabled.<br />
1: The corresponding interrupt is enabled.<br />
A bit in this register is cleared when the corresponding bit in IDR is written to one.<br />
A bit in this register is set when the corresponding bit in IER is written to one.<br />
1068
34.7.10 Interrupt Enable Register<br />
Name: IER<br />
Access Type: Write-only<br />
Offset: 0x28<br />
Reset Value: 0x00000000<br />
32117D–AVR-01/12<br />
<strong>AT32UC3C</strong><br />
31 30 29 28 27 26 25 24<br />
– – – – – – – –<br />
23 22 21 20 19 18 17 16<br />
– – – – – – – –<br />
15 14 13 12 11 10 9 8<br />
– – – – – – TRIGGER QDERR<br />
7 6 5 4 3 2 1 0<br />
OVR DIRINV IDXERR RCRO PCRO CAP CMP QEPI<br />
Writing a zero to a bit in this register has no effect.<br />
Writing a one to a bit in this register will set the corresponding bit in IMR.<br />
1069
34.7.11 Interrupt Disable Register<br />
Name: IDR<br />
Access Type: Write-only<br />
Offset: 0x2C<br />
Reset Value: 0x00000000<br />
32117D–AVR-01/12<br />
<strong>AT32UC3C</strong><br />
31 30 29 28 27 26 25 24<br />
– – – – – – – –<br />
23 22 21 20 19 18 17 16<br />
– – – – – – – –<br />
15 14 13 12 11 10 9 8<br />
– – – – – – TRIGGER QDERR<br />
7 6 5 4 3 2 1 0<br />
OVR DIRINV IDXERR RCRO PCRO CAP CMP QEPI<br />
Writing a zero to a bit in this register has no effect.<br />
Writing a one to a bit in this register will clear the corresponding bit in IMR.<br />
1070
34.7.12 Parameter Register<br />
Name: PARAMETER<br />
Access Type: Read-only<br />
Offset: 0x30<br />
Reset Value: -<br />
32117D–AVR-01/12<br />
<strong>AT32UC3C</strong><br />
31 30 29 28 27 26 25 24<br />
– – – – – – – –<br />
23 22 21 20 19 18 17 16<br />
– – – – – – – –<br />
15 14 13 12 11 10 9 8<br />
– – – – – – – –<br />
7 6 5 4 3 2 1 0<br />
RCSIZE:<br />
Number of bits -1 in CNT.RC registers<br />
PCSIZE:<br />
Number of bits -1 in CNT.PC registers<br />
RCSIZE PCSIZE<br />
1071
34.7.13 Version Register<br />
Name: VERSION<br />
Access Type: Read-only<br />
Offset: 0x34<br />
Reset Value: -<br />
32117D–AVR-01/12<br />
<strong>AT32UC3C</strong><br />
31 30 29 28 27 26 25 24<br />
– – – – – – – –<br />
23 22 21 20 19 18 17 16<br />
– – – – VARIANT<br />
15 14 13 12 11 10 9 8<br />
– – – – VERSION[11:8]<br />
7 6 5 4 3 2 1 0<br />
VERSION[7:0]<br />
VARIANT: Variant number<br />
Reserved. No functionality associated.<br />
VERSION: Version number<br />
Version number of the module. No functionality associated.<br />
1072
32117D–AVR-01/12<br />
<strong>AT32UC3C</strong><br />
34.8 Module Configuration<br />
The specific configuration for each QDEC instance is listed in the following tables. The module<br />
bus clocks listed here are connected to the system bus clocks. Please refer to the Power Manager<br />
chapter for details.<br />
Table 34-3. QDEC Clock Name<br />
Module Name Clock Name Description<br />
QDEC0 CLK_QDEC0 Peripheral Bus clock from the PBA clock domain<br />
GCLK_QDEC0 The generic clock used for the QDEC0 is GCLK5<br />
QDEC1 CLK_QDEC1 Peripheral Bus clock from the PBA clock domain<br />
GCLK_QDEC1 The generic clock used for the QDEC1 is GCLK6<br />
Table 34-4. Register Reset Values<br />
Register Reset Value<br />
VERSION 0x00000100<br />
PARAMETER 0x000000FF<br />
1073
35. Analog Comparator Interface (ACIFA)<br />
35.1 Features<br />
35.2 Overview<br />
32117D–AVR-01/12<br />
Rev: 1.0.0.1<br />
Control one set of two analog comparators<br />
High speed option versus low power option<br />
– shortest propagation delay/highest current consumption<br />
– longest propagation delay/lowest current consumption<br />
Selectable input hysteresis:<br />
– 0mV, 20mV, 50mV<br />
Input selection between external input pin and internal inputs<br />
Window function<br />
Interrupt on:<br />
– Rising edge, Falling edge, toggle<br />
– Signal above/below window, signal inside/outside window<br />
– startup time<br />
Two Analog comparators interface events available on pin through PEVC<br />
<strong>AT32UC3C</strong><br />
The Analog Comparator Interface (ACIFA) is able to control two Analog Comparators (AC) with<br />
identical behavior. An Analog Comparator compares two voltages and gives a compare output<br />
depending on this comparison.<br />
The ACIFA can be configured in normal mode (see Figure 35-1 on page 1075) or in window<br />
mode (see Figure 35-2 on page 1075 ).<br />
The AC’s Inputs are programmable between internal inputs (DAC, voltage reference, ...) and<br />
external input pins.<br />
According to the comparison result, each comparator can trigger a separate interrupt in normal<br />
mode. In window function, an additional interrupt can be triggered, depending if the voltage to be<br />
compared is inside or outside the window.<br />
The ACIFA is able to generate two output events that can be used through PEVC to trigger a<br />
hardware process.<br />
1074
35.3 Block Diagram<br />
Figure 35-1. Analog Comparator Interface Overview in normal mode<br />
Figure 35-2. Analog Comparator Interface in window mode<br />
upper lim it of<br />
window VH<br />
common input<br />
voltage vcommon<br />
lower lim it of<br />
window VL<br />
32117D–AVR-01/12<br />
ACxAPi<br />
internal inputs<br />
ACxANi<br />
internal inputs<br />
Vcc Scale<br />
ACxBPi<br />
internal inputs<br />
Vcc Scale<br />
ACxBNi<br />
internal inputs<br />
ACxAPi<br />
internal inputs<br />
ACxANi<br />
internal inputs<br />
Vcc Scale<br />
ACxBPi<br />
WCONF.WINSEL<br />
ACxBNi<br />
internal inputs<br />
CONFA.INSELP<br />
vipA<br />
vinA<br />
CONFA.INSELN<br />
CONFA.INSELP<br />
vipB<br />
vinB<br />
CONFB.INSELN<br />
+<br />
ACA<br />
-<br />
+<br />
ACB<br />
-<br />
CONFA.INSELP<br />
vipA<br />
vinA<br />
vipB<br />
vinB<br />
CONFB.INSELN<br />
+<br />
ACA<br />
-<br />
+<br />
ACB<br />
-<br />
SR.ACACS<br />
acoutA<br />
acoutB<br />
SR.ACBCS<br />
interrupt<br />
generator<br />
SR.ACACS<br />
acoutA<br />
acoutB<br />
SR.ACBCS<br />
window<br />
function<br />
ACIFA<br />
EVSRC0.EVSRC]<br />
event generator 0<br />
event generator 1<br />
EVSRC1.EVSRC<br />
acwout<br />
SR.WFCS<br />
ACIFA<br />
EVSRC0.EVSRC<br />
event generator 0<br />
interrupt<br />
generator<br />
event generator 1<br />
EVSRC1.EVSRC<br />
<strong>AT32UC3C</strong><br />
PEVC<br />
Interrupt<br />
Controller<br />
ACAOUT<br />
ACBOUT<br />
ACAOUT<br />
Interrupt<br />
Controller<br />
PEVC<br />
ACBOUT<br />
1075
35.4 I/O Lines Description<br />
35.5 Product Dependencies<br />
35.5.1 I/O Lines<br />
32117D–AVR-01/12<br />
<strong>AT32UC3C</strong><br />
The pins used for interfacing the ACIFA may be multiplexed with the I/O Controller lines. The<br />
programmer must first program the I/O Controller to assign the desired ACIFA pins to their<br />
peripheral function. If I/O lines of the ACIFA are not used by the application, they can be used for<br />
other purposes by the I/O Controller.<br />
35.5.2 Power Management<br />
When the ACIFA is enabled it will remain clocked as long as its selected clock source is running.<br />
It can also wake the CPU from the currently active sleep mode. Refer to the Power Manager<br />
chapter for details on the different sleep modes.<br />
35.5.3 Clocks<br />
35.5.4 Interrupts<br />
The clock for the ACIFA bus interface (CLK_ACIFA) is generated by the Power Manager. this<br />
clock is turned on by default, and can be enabled and disabled in the Power Manager.<br />
The ACIFA interrupt request lines are connected to the interrupt controller. Using the ACIFA<br />
interrupts requires the Interrupt Controller to be programmed first.<br />
35.5.5 Peripheral Events<br />
The ACIFA peripheral events are connected via the Peripheral Event System. Refer to the<br />
Peripheral Event System chapter for details.<br />
35.5.6 Debug Operation<br />
The ACIFA is frozen during debug operation, unless the Run In Debug bit in the Development<br />
Control Register is set and the bit corresponding to the ACIFA is set in the Peripheral Debug<br />
Register (PDBG). Please refer to the On-Chip Debug chapter in the AVR32UC Technical Reference<br />
Manual, and the OCD Module Configuration section, for details.<br />
35.6 Functional Description<br />
35.6.1 Normal mode<br />
Table 35-1. I/O Lines Description<br />
Name Description<br />
ACAOUT Analog Comparator A output<br />
ACBOUT Analog Comparator B output<br />
ACxAPi Positive inputs for comparator ACxA<br />
ACxANi Negative inputs for comparator ACxA<br />
ACxBPi Positive inputs for comparator ACxB<br />
ACxBNi Negative inputs for comparator ACxB<br />
In normal mode, both analog comparators are independent.<br />
1076
32117D–AVR-01/12<br />
<strong>AT32UC3C</strong><br />
35.6.1.1 ACIFA Output<br />
An analog comparator generates one output acout x (with x = a or b) according to the input voltages<br />
vip x (AC positive input) and vin x (AC negative input):<br />
acoutx = 1 if vipx > vinx acoutx = 0 if vipx < vinx acoutx = 0 if the AC output is not available (ie. The AC Ready bit in the Status Register<br />
(SR.ACxRDY) is still zero)<br />
The ACIFA generates two independent events according to the configuration of the Event<br />
Source Selection field in the Event Configuration register (EVSRC0.EVSRC and<br />
EVSRC1.EVSRC):<br />
as soon as vipx > vinx or<br />
as soon as vipx < vinx or<br />
on toggle of the ACA output (acoutA ) or<br />
on toggle of the ACB output (acoutB )<br />
35.6.1.2 ACIFA Interrupt<br />
Each AC has one source of interrupt. The configuration of the source of the interruption is done<br />
by writing in the Interrupt Settings field in the Configuration Register (CONF0.IS and CONF1.IS).<br />
The interrupt can be triggered:<br />
35.6.2 Window Mode<br />
as soon as vipx > vinx as soon as vipx < vinx on toggle of the AC output (acoutx) In window mode, the two ACs are grouped. The negative input of ACA and the positive input of<br />
ACB are the same and are defined in the Window Common Input Selection field in the Window<br />
Configuration register (WCONF.WINSEL). The positive input of ACA and the negative input of<br />
ACB are still configured by CONF0.INSELP and CONF1.INSELN.<br />
35.6.2.1 ACIFA Output<br />
Like in normal mode, the ACs generate the acout x outputs according to the input voltages vip x<br />
(AC positive input) and vin x (AC negative input):<br />
acoutx = 1 if vipx > vinx acoutx = 0 if vipx < vinx acoutx = 0 if the AC output is not available (ie. SR.ACxRDY is still 0)<br />
The ACIFA generates a window function signal (acwout) according to the common input voltage<br />
to be compared:<br />
acwout = 1 if the common input voltage is inside the window, vinB < vcommon < vipA acwout = 0 if the common input voltage is outside the window, vcommon < vinB or vcommon > vipA 1077
32117D–AVR-01/12<br />
<strong>AT32UC3C</strong><br />
acwout = 0 if the window mode output is not available (ie. The Window Function Ready bit in<br />
the Status Register (SR.WFRDY) is still 0)<br />
The ACIFA generates two independent events (like in normal mode) according to the configuration<br />
of EVSRC0 and EVSRC1:<br />
as soon as vipx > vinx or<br />
as soon as vipx < vinx or<br />
as soon as vinB < vcommon < vipA or<br />
as soon as vcommon < vinB or vcommon > vipA or<br />
on toggle of the ACA output (acoutA ) or<br />
on toggle of the ACB output (acoutB ) or<br />
on toggle of the window compare output (acwout)<br />
35.6.2.2 ACIFA Interrupt<br />
Like in normal mode, each AC has one source of interrupt. The configuration of the source of<br />
interruption is set in CONF0.IS and CONF1.IS. The interrupt can be triggered:<br />
as soon as vipx > vinx as soon as vipx < vinx on toggle of the AC output (acoutx) An additional source of interrupt can be generated in window mode. Its configuration is set in the<br />
Window Interrupt Settings field in the Window Configuration register (WCONF.WIS). The source<br />
of interrupt can be triggered:<br />
as soon as the common input voltage is inside the window<br />
as soon as the common input voltage is outside the window<br />
on toggle of the window compare output (acwout)<br />
35.6.3 Input Channels<br />
Each Analog Comparator has one positive and one negative input. Each input may be chosen<br />
among one external input pin in addition to some internal signals. The user writes the input<br />
selection:<br />
in normal mode by writing in the Positive Input Selection field (CONFx.INSELP) and in the<br />
Negative Input Selection field in the Configuration register (CONFx.INSELN)<br />
in window mode by writing in the CONFA.INSELP, WCONF.WINSEL and CONFB.INSELN<br />
fields. In this case the WCONF.WINSEL field overrides the CONFA.INSELN and<br />
CONFB.INSELP fields.<br />
35.6.4 Internal Inputs<br />
Three internal inputs are available for the Analog Comparator.<br />
35.6.5 High-speed vs Low Power Modes<br />
It is possible to enable High-speed mode by writing a one to the Speed Selection bit in the<br />
CONF register (CONFx.SS) to get the shortest possible propagation delay. This mode consumes<br />
more power than the default low power mode (when CONFx.SS is written to zero) that<br />
has a longer propagation delay.<br />
1078
32117D–AVR-01/12<br />
<strong>AT32UC3C</strong><br />
35.6.6 Input Hysteresis<br />
The user can select between no, low, and high hysteresis, by writing in the Hysteresis Selection<br />
field in the CONF register (CONFx.HS). Adding hysteresis can avoid constant toggling of the<br />
compare output if the input signals are very close to each other.<br />
35.6.7 Startup Time<br />
After enabling an Analog Comparator, the comparison is available after a start-up time defined in<br />
the Start Up Time field in the Start Up Time register (SUT.SUT). During this time the AC output<br />
is not available. The status bit SR.ACxRDY gives the information that the ACx has its output<br />
available or not. In window mode the window mode output is available (SR.WFRDY is one) if<br />
both comparator outputs are available (SR.ACARDY and SR.ACBRDY are both one).<br />
When the start-up time is finished, the comparison can be disabled/enabled, by writing a one to<br />
the corresponding AC Comparison Enable bit in the Enable register (EN.ACCPEN), without<br />
waiting anymore.<br />
35.6.8 Starting Signal Compare<br />
In order to start a voltage comparison, the Analog Comparator must be configured with the preferred<br />
properties and the inputs to be used. After enabling the Analog Comparator, it should wait<br />
for the startup time. When the startup time is over, the result of the comparison is available. It<br />
can be read at all times in the SR register.<br />
1079
35.7 User Interface<br />
Table 35-2. ACIFA Register Memory Map<br />
32117D–AVR-01/12<br />
<strong>AT32UC3C</strong><br />
Offset Register Register Name Access Reset<br />
0x00 ACA Configuration Register CONFA Read/Write 0x80000000<br />
0x04 ACB Configuration Register CONFB Read/Write 0x80000000<br />
0x08 AC Window Function Configuration Register WCONF Read/Write 0x00000000<br />
0x0C AC Event 0 source Configuration EVSRC0 Read/Write 0x00000000<br />
0x10 AC Event 1 source Configuration EVSRC1 Read/Write 0x00000000<br />
0x14 ACA Scale factor selection SCFA Read/Write 0x00000000<br />
0x18 ACB Scale factor selection SCFB Read/Write 0x00000000<br />
0x1C AC Enable Register EN Write-only 0x00000000<br />
0x20 AC Disable Register DIS Write-only 0x00000000<br />
0x24 AC Startup Timer Register SUT Read/Write 0x00000000<br />
0x28 AC Interrupt Enable Register IER Write-Only 0x00000000<br />
0x2C AC Interrupt Disable Register IDR Write-Only 0x00000000<br />
0x30 AC Interrupt Mask Register IMR Read-Only 0x00000000<br />
0x34 AC Event Enable Register EVE Write-Only 0x00000000<br />
0x38 AC Event Disable Register EVD Write-Only 0x00000000<br />
0x3C AC Event Mask Register EVM Read-Only 0x00000000<br />
0x40 AC Status Register SR Read-Only 0x00000000<br />
0x44 AC Status Clear Register SCR Write-only 0x00000000<br />
0x48 Version Register VERSION Read-Only - (1)<br />
Notes: 1. The reset values for this register is device specific. Please refer to the Module Configuration section at the end of this<br />
chapter.<br />
1080
35.7.1 ACA Configuration Register<br />
Name: CONFA<br />
Access Type: Read/Write<br />
Offset: 0x00<br />
Reset Value: 0x80000000<br />
32117D–AVR-01/12<br />
<strong>AT32UC3C</strong><br />
31 30 29 28 27 26 25 24<br />
OEN - - SS - - HS<br />
23 22 21 20 19 18 17 16<br />
- - - - INSELN<br />
15 14 13 12 11 10 9 8<br />
- - - - INSELP<br />
7 6 5 4 3 2 1 0<br />
- - - - - - IS<br />
OEN: Output Enable<br />
“0”: Enable to map the ACA output (ACAOUT) to a pad<br />
“1”: Not able to map the ACA output (ACAOUT) to a pad<br />
SS: Speed select<br />
0: The low power mode is selected (longest propagation delay, lowest current consumption)<br />
1: The high-speed mode is selected (shortest propagation delay, highest current consumption)<br />
HS: Hysteresis select<br />
“00” or “11”: no hysteresis<br />
“01”: small hysteresis, 20 mV<br />
“10”: high hysteresis, 50 mv<br />
INSELN: Negative input select<br />
i: select the i th input of the mux<br />
INSELP: Positive input select<br />
i: select the i th input of the mux<br />
IS: Interrupt settings<br />
“00”: The comparator interrupt is set as soon as vip A > vin A<br />
“01”: The comparator interrupt is set as soon as vip A < vin A<br />
“10”: The comparator interrupt is set on toggle of analog comparator output<br />
1081
35.7.2 ACB Configuration Register<br />
Name: CONFB<br />
Access Type: Read/Write<br />
Offset: 0x04<br />
Reset Value: 0x80000000<br />
32117D–AVR-01/12<br />
<strong>AT32UC3C</strong><br />
31 30 29 28 27 26 25 24<br />
OEN - - SS - - HS<br />
23 22 21 20 19 18 17 16<br />
- - - - INSELN<br />
15 14 13 12 11 10 9 8<br />
- - - - INSELP<br />
7 6 5 4 3 2 1 0<br />
- - - - - - IS<br />
OEN: Output Enable<br />
“0”: Enable to map the ACB output (ACBOUT) to a pad<br />
“1”: Not able to map the ACB output (ACBOUT) to a pad<br />
SS: Speed select<br />
0: The low power mode is selected (longest propagation delay, lowest current consumption)<br />
1: The high-speed mode is selected (shortest propagation delay, highest current consumption)<br />
HS: Hysteresis select<br />
“00” or “11”: no hysteresis<br />
“01”: small hysteresis, 20 mV<br />
“10”: high hysteresis, 50 mv<br />
INSELN: Negative input select<br />
i: select the i th input of the mux<br />
INSELP: Positive input select<br />
i: select the i th input of the mux<br />
IS: Interrupt settings<br />
“00”: The comparator interrupt is set as soon as vip B > vin B<br />
“01”: The comparator interrupt is set as soon as vip B < vin B<br />
“10”: The comparator interrupt is set on toggle of analog comparator output<br />
1082
35.7.3 AC Window Function Configuration Register<br />
Name: WCONF<br />
Access Type: Read/Write<br />
Offset: 0x08<br />
Reset Value: 0x00000000<br />
32117D–AVR-01/12<br />
<strong>AT32UC3C</strong><br />
31 30 29 28 27 26 25 24<br />
- - - - - - - -<br />
23 22 21 20 19 18 17 16<br />
- - - - - - - -<br />
15 14 13 12 11 10 9 8<br />
- - - - WINSEL<br />
7 6 5 4 3 2 1 0<br />
- - - - - - WIS<br />
WINSEL: Window function common input select<br />
i: select the i th input of the mux<br />
WIS: Window mode Interrupt settings<br />
“00”: The window interrupt is set as soon as the input voltage is inside the window<br />
“01”: The window interrupt is set as soon as the input voltage is outside the window<br />
“10”: The window interrupt is set on toggle of window compare output<br />
1083
35.7.4 AC Event 0/1 Configuration Register<br />
Name: EVSRC0-EVSRC1<br />
Access Type: Read/Write<br />
Offset: 0x0C-0X10<br />
Reset Value: 0x00000000<br />
32117D–AVR-01/12<br />
<strong>AT32UC3C</strong><br />
31 30 29 28 27 26 25 24<br />
- - - - - - - -<br />
23 22 21 20 19 18 17 16<br />
- - - - - - - -<br />
15 14 13 12 11 10 9 8<br />
- - - - - - - -<br />
7 6 5 4 3 2 1 0<br />
- - - - EVSRC<br />
EVSRC: Event source selection<br />
“0000”: The event is set on ACA.acout A rising edge<br />
“0001”: The event is set on ACA.acout A falling edge<br />
“0010”: The event is set on ACA.acout A rising or falling edge<br />
“0011”: The event is set on ACB.acout B rising edge<br />
“0100”: The event is set on ACB.acout B falling edge<br />
“0101”: The event is set on ACB.acout B rising or falling edge<br />
“0110”: The event is set on acwout rising edge<br />
“0111”: The event is set on acwout falling edge<br />
“1000”: The event is set on acwout rising or falling edge<br />
“1001”,”1010”,”1011”,”1100”,”1101”,”1110”,”1111”: no effect<br />
1084
35.7.5 ACA/B Scale Factor Selection Register<br />
Name: SCFA-SCFB<br />
Access Type: Read/Write<br />
Offset: 0x14-0x18<br />
Reset Value: 0x00000000<br />
32117D–AVR-01/12<br />
<strong>AT32UC3C</strong><br />
31 30 29 28 27 26 25 24<br />
- - - - - - - -<br />
23 22 21 20 19 18 17 16<br />
- - - - - - - -<br />
15 14 13 12 11 10 9 8<br />
- - - - - - - -<br />
7 6 5 4 3 2 1 0<br />
- EN SCF<br />
SCF: Scale Factor selection for Supply divider<br />
VCC Scale = (64 -SCF) * VDDANA / 65<br />
EN : Supply divider enable<br />
0: The supply divider is disabled<br />
1: The supply divider is enabled<br />
1085
35.7.6 AC Enable Register<br />
Name: EN<br />
Access Type: Write-Only<br />
Offset: 0x1C<br />
Reset Value: 0x00000000<br />
32117D–AVR-01/12<br />
<strong>AT32UC3C</strong><br />
31 30 29 28 27 26 25 24<br />
- - - - - - - -<br />
23 22 21 20 19 18 17 16<br />
- - - - - - - -<br />
15 14 13 12 11 10 9 8<br />
- - - - - - - -<br />
7 6 5 4 3 2 1 0<br />
- - - ACBCPEN ACACPEN WFEN ACBEN ACAEN<br />
ACBCPEN: ACB Comparison enable<br />
Writing a zero to this bit has no effect<br />
Writing a one to this bit will enable the comparison of the Analog Comparator B<br />
ACACPEN: ACA Comparison enable<br />
Writing a zero to this bit has no effect<br />
Writing a one to this bit will enable the comparison of the Analog Comparator A<br />
WFEN: Window function enable<br />
Writing a zero to this bit has no effect<br />
Writing a one to this bit will enable the window function. Enabling the window function automatically enable both comparators if<br />
they are not already enabled, and also the two comparison (SR.ACAEN, SR.ACBEN, SR.ACACPEN,and SR.ACBCPEN are<br />
set)<br />
ACBEN: ACB enable<br />
Writing a zero to this bit will has no effect<br />
Writing a one to this bit will enable the Analog Comparator B<br />
ACAEN: ACA enable<br />
Writing a zero to this bit will has no effect<br />
Writing a one to this bit will enable the Analog Comparator A<br />
1086
35.7.7 AC Disable Register<br />
Name: DIS<br />
Access Type: Write-Only<br />
Offset: 0x20<br />
Reset Value: 0x00000000<br />
32117D–AVR-01/12<br />
<strong>AT32UC3C</strong><br />
31 30 29 28 27 26 25 24<br />
- - - - - - - -<br />
23 22 21 20 19 18 17 16<br />
- - - - - - - -<br />
15 14 13 12 11 10 9 8<br />
- - - - - - - -<br />
7 6 5 4 3 2 1 0<br />
- - - ACBCPDIS ACACPDIS WFDIS ACBDIS ACADIS<br />
ACBCPEN: ACB Comparison enable<br />
Writing a zero to this bit has no effect<br />
Writing a one to this bit will disable the comparison of the Analog Comparator B<br />
ACACPEN: ACA Comparison enable<br />
Writing a zero to this bit has no effect<br />
Writing a one to this bit will disable the comparison of the Analog Comparator A<br />
WFEN: Window function enable<br />
Writing a zero to this bit has no effect<br />
Writing a one to this bit will disable the window function. Disabling the window function automatically disable both comparison<br />
(ACACPEN and ACBCPEN are cleared)<br />
ACBEN: ACB enable<br />
Writing a zero to this bit has no effect<br />
Writing a one to this bit will disable the Analog Comparator B<br />
ACAEN: ACA enable<br />
Writing a zero to this bit has no effect<br />
Writing a one to this bit will disable the Analog Comparator A<br />
1087
35.7.8 AC Startup Time Register<br />
Name: SUT<br />
Access Type: Read/Write<br />
Offset: 0x24<br />
Reset Value: 0x00000000<br />
32117D–AVR-01/12<br />
<strong>AT32UC3C</strong><br />
31 30 29 28 27 26 25 24<br />
- - - - - - - -<br />
23 22 21 20 19 18 17 16<br />
- - - - - - - -<br />
15 14 13 12 11 10 9 8<br />
- - - - - - SUT<br />
7 6 5 4 3 2 1 0<br />
SUT<br />
SUT: Startup Time<br />
Analog comparator startup time = 1/freq(ACIFA) x SUT<br />
Each time, an AC is enabled, the AC comparison will be enabled after the startup time due to the startup time of the AC<br />
1088
35.7.9 AC Interrupt Enable Register<br />
Name: IER<br />
Access Type: Write-Only<br />
Offset: 0x28<br />
Reset Value: 0x00000000<br />
32117D–AVR-01/12<br />
<strong>AT32UC3C</strong><br />
31 30 29 28 27 26 25 24<br />
- - - - - - - -<br />
23 22 21 20 19 18 17 16<br />
- - - - - - - -<br />
15 14 13 12 11 10 9 8<br />
- - - - - - - -<br />
7 6 5 4 3 2 1 0<br />
- - - SUTBINT SUTAINT WFINT ACBINT ACAINT<br />
SUTBINT: ACB startup time interrupt enable<br />
writing a zero to this bit has no effect<br />
Writing a one to this bit will enable the ACB startup interrupt<br />
SUTAINT: ACA startup time interrupt enable<br />
writing a zero to this bit has no effect<br />
Writing a one to this bit will enable the ACA startup interrupt<br />
WFINT: Window function interrupt enable<br />
writing a zero to this bit has no effect<br />
Writing a one to this bit will enable the window function interrupt defined in the WCONF.WIS field<br />
ACBINT: ACB interrupt enable<br />
writing a zero to this bit has no effect<br />
Writing a one to this bit will enable the ACB interrupt defined in the CONFB.IS field<br />
ACAINT: ACA interrupt enable<br />
writing a zero to this bit has no effect<br />
Writing a one to this bit will enable the ACA interrupt defined in the CONFA.IS field<br />
1089
35.7.10 AC Interrupt Disable Register<br />
Name: IDR<br />
Access Type: Write-Only<br />
Offset: 0x2C<br />
Reset Value: 0x00000000<br />
32117D–AVR-01/12<br />
<strong>AT32UC3C</strong><br />
31 30 29 28 27 26 25 24<br />
- - - - - - - -<br />
23 22 21 20 19 18 17 16<br />
- - - - - - - -<br />
15 14 13 12 11 10 9 8<br />
- - - - - - - -<br />
7 6 5 4 3 2 1 0<br />
- - - SUTBINT SUTAINT WFINT ACBINT ACAINT<br />
SUTBINT: ACB startup time interrupt enable<br />
writing a zero to this bit has no effect<br />
Writing a one to this bit will disable the ACB startup interrupt<br />
SUTAINT: ACA startup time interrupt enable<br />
writing a zero to this bit has no effect<br />
Writing a one to this bit will disable the ACA startup interrupt<br />
WFINT: Window function interrupt enable<br />
writing a zero to this bit has no effect<br />
Writing a one to this bit will disable the window function interrupt defined in the WCONF.WIS field<br />
ACBINT: ACB interrupt enable<br />
writing a zero to this bit has no effect<br />
Writing a one to this bit will disable the ACB interrupt defined in the CONFB.IS field<br />
ACAINT: ACA interrupt enable<br />
writing a zero to this bit has no effect<br />
Writing a one to this bit will disable the ACA interrupt defined in the CONFA.IS field<br />
1090
35.7.11 AC Interrupt Mask Register<br />
Name: IMR<br />
Access Type: Read-Only<br />
Offset: 0x30<br />
Reset Value: 0x00000000<br />
32117D–AVR-01/12<br />
<strong>AT32UC3C</strong><br />
31 30 29 28 27 26 25 24<br />
- - - - - - - -<br />
23 22 21 20 19 18 17 16<br />
- - - - - - - -<br />
15 14 13 12 11 10 9 8<br />
- - - - - - - -<br />
7 6 5 4 3 2 1 0<br />
- - - SUTBINT SUTAINT WFINT ACBNT ACAINT<br />
0: The corresponding interrupt is disabled.<br />
1: The corresponding interrupt is enabled.<br />
A bit in this register is cleared when the corresponding bit in IDR is written to one.<br />
A bit in this register is set when the corresponding bit in IER is written to one.<br />
1091
35.7.12 AC Event Enable Register<br />
Name: EVE<br />
Access Type: Write-Only<br />
Offset: 0x34<br />
Reset Value: 0x00000000<br />
32117D–AVR-01/12<br />
<strong>AT32UC3C</strong><br />
31 30 29 28 27 26 25 24<br />
- - - - - - - -<br />
23 22 21 20 19 18 17 16<br />
- - - - - - - -<br />
15 14 13 12 11 10 9 8<br />
- - - - - - - -<br />
7 6 5 4 3 2 1 0<br />
- - - - - - ACEV1 ACEV0<br />
ACEV1: Event 1 enable<br />
Writing a zero to this bit has no effect<br />
Writing a one to this bit will enable the event zero defined in the EVSRC1.EVSCR field<br />
ACEV0: Event 0 enable<br />
Writing a zero to this bit has no effect<br />
Writing a one to this bit will enable the event one defined in the EVSRC0.EVSCR field<br />
1092
35.7.13 AC Event Disable Register<br />
Name: EVD<br />
Access Type: Write-Only<br />
Offset: 0x38<br />
Reset Value: 0x00000000<br />
32117D–AVR-01/12<br />
<strong>AT32UC3C</strong><br />
31 30 29 28 27 26 25 24<br />
- - - - - - - -<br />
23 22 21 20 19 18 17 16<br />
- - - - - - - -<br />
15 14 13 12 11 10 9 8<br />
- - - - - - - -<br />
7 6 5 4 3 2 1 0<br />
- - - - - - ACEV1 ACEV0<br />
ACEV1: Event 1 enable<br />
Writing a zero to this bit has no effect<br />
Writing a one to this bit will disable the event one defined in the EVSRC1.EVSCR field<br />
ACEV0: Event 0 enable<br />
Writing a zero to this bit has no effect<br />
Writing a one to this bit will disable the event one defined in the EVSRC0.EVSCR field<br />
1093
35.7.14 AC Event Mask Register<br />
Name: EVM<br />
Access Type: Read-Only<br />
Offset: 0x3C<br />
Reset Value: 0x00000000<br />
32117D–AVR-01/12<br />
<strong>AT32UC3C</strong><br />
31 30 29 28 27 26 25 24<br />
- - - - - - - -<br />
23 22 21 20 19 18 17 16<br />
- - - - - - - -<br />
15 14 13 12 11 10 9 8<br />
- - - - - - - -<br />
7 6 5 4 3 2 1 0<br />
- - - - - - ACEV1 ACEV0<br />
0: The corresponding peripheral event is disabled<br />
1: The corresponding peripheral event is enabled<br />
Theses bits are cleared when the corresponding bit in EVD is written to zero<br />
These bits are cleared when the corresponding bit in EVE is written to one<br />
1094
35.7.15 AC Status Register<br />
Name: SR<br />
Access Type: Read-Only<br />
Offset: 0x40<br />
Reset Value: 0x00000000<br />
32117D–AVR-01/12<br />
<strong>AT32UC3C</strong><br />
31 30 29 28 27 26 25 24<br />
- - - - - WFRDY ACBRDY ACARDY<br />
23 22 21 20 19 18 17 16<br />
- - - - - WFCS ACBCS ACACS<br />
15 14 13 12 11 10 9 8<br />
- - - ACBCPEN ACACPEN WFEN ACBEN ACAEN<br />
7 6 5 4 3 2 1 0<br />
- - - SUTBINT SUTAINT WFINT ACBNT ACAINT<br />
WFRDY: Window function ready<br />
this bit is cleared when the window function output (wout) is not ready (one or both ACA or ACB comparison outputs is not<br />
ready)<br />
This bit is set when the window function output (wout) is ready (both ACA and ACB comparison outputs are ready)<br />
ACBRDY: ACB ready<br />
This bit is cleared when the ACB output (acoutB) is not ready<br />
This bit is set when the ACB output (acoutB) is ready (ACB is enabled and its SUT is over)<br />
ACARDY: ACA ready<br />
This bit is cleared when the ACA output (acoutA) is not ready<br />
This bit is set when the ACA output (acoutA) is ready (ACA is enabled and its SUT is over)<br />
WFCS: Window function current status<br />
This bit is cleared when the common input voltage is currently outside the window<br />
This bit is set when the common input voltage is currently inside the window<br />
ACBCS: ACB current status of comparison<br />
This bit is cleared when v ipB is currently lower than v inB<br />
This bit is set when v ipB is currently greater than v inB<br />
ACACS: ACA current status of comparison<br />
This bit is cleared when v ipA is currently lower than v inA<br />
This bit is set when v ipA is currently greater than v inA<br />
ACBCPEN: ACB Comparison enable<br />
This bit is cleared when the ACB comparison is disabled<br />
This bit is set when the ACB comparison is enabled<br />
ACACPEN: ACA Comparison enable<br />
This bit is cleared when the ACA comparison is disabled<br />
This bit is set when the ACA comparison is enabled<br />
1095
32117D–AVR-01/12<br />
<strong>AT32UC3C</strong><br />
WFEN: Window function enable<br />
This bit is cleared when the window function is disabled<br />
This bit is set when the window function is enabled<br />
ACBEN: ACB enable<br />
This bit is cleared when the ACB is disabled<br />
This bit is set when the ACB is enabled<br />
ACAEN: ACA enable<br />
This bit is cleared when the ACA is disabled<br />
This bit is set when the ACA is enabled<br />
SUTBINT: ACB startup time interrupt status<br />
This bit is cleared when the ACB interrupt is not pending<br />
This bit is set when the ACB interrupt is pending ( the ACB has reached its startup time (SUT), the ACB comparison is valid)<br />
SUTAINT: ACA startup time interrupt status<br />
This bit is cleared when the ACA interrupt is not pending<br />
This bit is set when the ACA interrupt is pending ( the ACA has reached its startup time (SUT), the ACA comparison is valid)<br />
WFINT: Window function interrupt status<br />
This bit is cleared when the interrupt is not pending<br />
This bit is set when the interrupt is pending<br />
ACBINT: ACB Interrupt Status<br />
This bit is cleared when the interrupt is not pending<br />
This bit is set when the interrupt is pending<br />
ACAINT: ACA Interrupt Status<br />
This bit is cleared when the interrupt is not pending<br />
This bit is set when the interrupt is pending<br />
1096
35.7.16 AC Status Clear Register<br />
Name: SCR<br />
Access Type: Write-Only<br />
Offset: 0x44<br />
Reset Value: 0x00000000<br />
32117D–AVR-01/12<br />
<strong>AT32UC3C</strong><br />
31 30 29 28 27 26 25 24<br />
- - - - - - - -<br />
23 22 21 20 19 18 17 16<br />
- - - - - - - -<br />
15 14 13 12 11 10 9 8<br />
- - - - - - - -<br />
7 6 5 4 3 2 1 0<br />
- - - SUT1INT SUT0INT WFINT ACBNT ACAINT<br />
Writing a zero to a bit in this register has no effect.<br />
Writing a one to a bit in this register will clear the corresponding bit in SR and the corresponding interrupt request.<br />
1097
35.7.17 Version Register<br />
Name: VERSION<br />
Access Type: Read-Only<br />
Offset: 0x48<br />
Reset Value: 0x00000000<br />
32117D–AVR-01/12<br />
<strong>AT32UC3C</strong><br />
31 30 29 28 27 26 25 24<br />
- - - - - - - -<br />
23 22 21 20 19 18 17 16<br />
- - - - VARIANT<br />
15 14 13 12 11 10 9 8<br />
- - - - VERSION[11:8]<br />
7 6 5 4 3 2 1 0<br />
VERSION[7:0]<br />
VARIANT: Variant Number<br />
Reserved. No functionality associated.<br />
VERSION: Version Number<br />
Version number of the module. No functionality associated.<br />
1098
32117D–AVR-01/12<br />
<strong>AT32UC3C</strong><br />
35.8 Module configuration<br />
The specific configuration for each ACIFA instance is listed in the following tables. The module<br />
bus clocks listed here are connected to the system bus clocks according to the table in the System<br />
Bus Clock Connections section.<br />
Table 35-3. Module clock name<br />
Module name Clock name Description<br />
ACIFA0 CLK_ACIFA0 Peripheral Bus clock from the PBA clock domain<br />
ACIFA1 CLK_ACIFA1 Peripheral Bus clock from the PBA clock domain<br />
Table 35-4. Register Reset Values<br />
Register Reset Value<br />
VERSION 0x00000100<br />
The following table gives which ACIFA module controls the analog comparators.<br />
Table 35-5. Analog comparators controlled by ACIFA<br />
Module name Analog comparator name<br />
ACIFA0 AC0A and AC0B<br />
ACIFA1 AC1A and AC1B<br />
The inputs of the AC are configured through the CONFA and CONFB registers. The configuration<br />
allows to select pin or internal voltage from the DACs.<br />
The following table defines the valid settings for the CONFA and CONFB registers for each<br />
ACIFA instance. This setting defines the mapping of the AC input voltage.<br />
Table 35-6. v ip of AC0A selection<br />
CONFA[INSELP] Name Connection<br />
0 AC0AP0 See Peripheral Multiplexing on I/O line<br />
chapter<br />
1 AC0AP1<br />
2 DAC0_int Internal output of the DAC0<br />
1099
32117D–AVR-01/12<br />
Table 35-7. v in of AC0A selection<br />
CONFA[INSELN] Name Connection<br />
<strong>AT32UC3C</strong><br />
0 AC0AN0 See Peripheral Multiplexing on I/O line<br />
chapter<br />
1 AC0AN1<br />
2 AC0BP0<br />
3 AC0BP1<br />
4 V VDDANA scaled V VDDANA scaled<br />
5 DAC1_int Internal output of the DAC1<br />
Table 35-8. v ip of AC0B selection<br />
CONFB[INSELP] Name Connection<br />
0 AC0AN0 See Peripheral Multiplexing on I/O line<br />
chapter<br />
1 AC0AN1<br />
2 AC0BP0<br />
3 AC0BP1<br />
4 DAC0_int Internal output of the DAC0<br />
5 V VDDANA scaled V VDDANA scaled<br />
Table 35-9. v in of AC0B selection<br />
CONFB[INSELN] Description Connection<br />
0 AC0BN0 See Peripheral Multiplexing on I/O line<br />
chapter<br />
1 AC0BN1<br />
2 DAC1_int Internal output of the DAC1<br />
Table 35-10. v ip of AC1A selection<br />
CONFA[INSELP] Description Connection<br />
0 AC1AP0 See Peripheral Multiplexing on I/O line<br />
chapter<br />
1 AC1AP1<br />
2 DAC0_int Internal output of the DAC0<br />
Table 35-11. v in of AC1A selection<br />
CONFA[INSELN] Description Connection<br />
0 AC1AN0 See Peripheral Multiplexing on I/O line<br />
chapter<br />
1 AC1AN1<br />
2 AC1BP0<br />
3 AC1BP1<br />
4 V VDDANA scaled V VDDANA scaled<br />
5 DAC1_int Internal output of the DAC1<br />
1100
32117D–AVR-01/12<br />
Table 35-12. v ip of AC1B selection<br />
CONFB[INSELP] Description Connection<br />
In window mode, the window common input is configured through WCONF register.<br />
<strong>AT32UC3C</strong><br />
0 AC1AN0 See Peripheral Multiplexing on I/O line<br />
chapter<br />
1 AC1AN1<br />
2 AC1BP0<br />
3 AC1BP1<br />
4 DAC0_int Internal output of the DAC0<br />
5 V VDDANA scaled V VDDANA scaled<br />
Table 35-13. v in of AC1B selection<br />
CONFB[INSELN] Description Connection<br />
0 AC1BN0 See Peripheral Multiplexing on I/O<br />
line chapter<br />
1 AC1BN1<br />
2 DAC1_int Internal output of the DAC1<br />
Table 35-14. common input voltage of AC0 selection<br />
WCONF[WINSEL] Description Connection<br />
0 AC0AN0 See Peripheral Multiplexing on I/O line<br />
chapter<br />
1 AC0AN1<br />
2 AC0BP0<br />
3 AC0BP1<br />
Table 35-15. common input voltage of AC1 selection<br />
WCONF[WINSEL] Description Connection<br />
0 AC1AN0 See Peripheral Multiplexing on I/O line<br />
chapter<br />
1 AC1AN1<br />
2 AC1BP0<br />
3 AC1BP1<br />
1101
36. ADC Interface (ADCIFA)<br />
36.1 Features<br />
32117D–AVR-01/12<br />
Rev. 1.1.0.4<br />
<strong>AT32UC3C</strong><br />
8/10/12-bit ADC core with built-in dual sample and hold (S/H)<br />
16 channels<br />
Up to 1.5 mega-samples per second conversion rate for 12 bits resolution<br />
– Conversion time near to 5.3µs (12 bits resolution at 1.5 Msps)<br />
Up to 2 mega-samples per second conversion for lower resolution<br />
– Conversion time near to 3.5µs (10 bits resolution at 2 Msps)<br />
– Conversion time near to 3µs (8 bits resolution at 2 Msps)<br />
Multiple reference sources<br />
– 1V internal voltage reference<br />
– 0.6 * VDDANA internal<br />
– Two external reference voltage<br />
Direct measures or sampled with sample-and-hold<br />
Sample-and-hold (S/H) acquisition time window has separate prescale control (gain: 1, 2, 4, 8, 16,<br />
32, 64).<br />
Sequencer can be operated as two independent 8-state sequencers operating on its own S/H<br />
(dual sequencer mode) or as one large 16-state sequencer (single sequencer mode)<br />
16 result registers<br />
Source selection for the start-of-conversion (SOC)<br />
– Software<br />
– Embedded timer<br />
– Peripheral Event Controller<br />
– Continuous<br />
Two sequencer modes:<br />
– Run the whole sequence on a start-of-conversion<br />
– Run a single conversion on a start-of-conversion<br />
Flexible interrupt control allows interrupt request on every end-of-sequence or on every single<br />
conversion.<br />
Windowing mechanism, with selectable channel<br />
Free running mode<br />
2 PDCA channels (one per sequencer)<br />
Power reduction modes<br />
Programmable ADC timings<br />
1102
36.2 Overview<br />
32117D–AVR-01/12<br />
<strong>AT32UC3C</strong><br />
The Analog-to-Digital Converter (ADC) is fully differential and based on a 12-bit pipelined topology<br />
using switched capacitors circuitry. Two sample and hold (S/H) running simultaneously with<br />
1, 2, 4, 8, 16, 32, 64 gain factors are feeding a single ADC analog block so that the system acts<br />
as if there were two conversion running in parallel. It can be configured as a 8-bit 10-bit or 12-bit<br />
ADC and is capable of converting 1.5 million samples per second thanks to its pipeline topology.<br />
10-bit and 8-bit conversion resolution can be achieved at higher conversion rates. Note that<br />
results are always signed in 2's complement.<br />
Note: The pipelined topology implies a latency between the sampling event and the update of<br />
the result register of: (Resolution(SRES)/2 + 3 - SHD) · T(CkADC)<br />
The ADC has an internal defined conversion range of ±1.0V. An additional internal reference<br />
mode allows conversion range of ±0.6*VDDANA. In addition, the ADC may operate with external<br />
references for different conversion ranges.<br />
1103
36.3 Block Diagram<br />
32117D–AVR-01/12<br />
Figure 36-1. ADCIFA Block Diagram<br />
GNDANA<br />
VDDANA<br />
ADCINx<br />
ADCINx<br />
ADCREFP<br />
ADCREFN<br />
ADCREF0<br />
ADCREF1<br />
PREAMP0<br />
S/H<br />
PREAMP1<br />
S/H<br />
12-bit<br />
ADC<br />
CORE<br />
PB<br />
ADC<br />
result0<br />
RES0<br />
.<br />
.<br />
.<br />
RES7<br />
SEQUENCER0<br />
clkADC<br />
CKdiv<br />
CLK_ADCIFA<br />
PDC<br />
ADC<br />
Window0<br />
ADC<br />
Window1<br />
Arbiter<br />
ADC_Event_Ctrl<br />
ADC<br />
Timer<br />
<strong>AT32UC3C</strong><br />
PDC<br />
ADC<br />
result1<br />
RES8<br />
.<br />
.<br />
.<br />
RES15<br />
SEQUENCER1<br />
1104
36.4 I/O Lines Description<br />
36.5 Product Dependencies<br />
36.5.1 I/O Lines<br />
32117D–AVR-01/12<br />
<strong>AT32UC3C</strong><br />
The pins used for interfacing the ADCIFA may be multiplexed with the I/O Controller lines. The<br />
programmer must first program the I/O Controller to assign the desired ADCIFA pins to their<br />
peripheral function. If I/O lines of the ADCIFA are not used by the application, they can be used<br />
for other purposes by the I/O Controller.<br />
Not all ADCIFA inputs may be enabled. If an application requires only four channels, then only<br />
four ADCIFA lines need to be assigned to ADCIFA inputs.<br />
36.5.2 Power Management<br />
If the CPU enters a sleep mode that disables clocks used by the ADCIFA, the ADCIFA will stop<br />
functioning and resume operation after the system wakes up from sleep mode. Before entering a<br />
sleep mode where the clock to the ADCIFA is stopped, make sure the Analog-to-Digital Converter<br />
cell is put in an inactive state. Refer to Section 36.6.3 for more information.<br />
36.5.3 Clocks<br />
36.5.4 Interrupts<br />
36.5.5 Event System<br />
Table 36-1. I/O Lines Description<br />
Name Description<br />
ADCINx ADC analog input<br />
ADCREFP<br />
ADCREFN<br />
CFG.EXREF= 0: Normal operation, this pin is used to decouple ADC internal reference.<br />
ADCREFP should be connected to a 100nF external decoupling capacitor.<br />
CFG.EXREF= 1: Forcing reference using ADCREFP/ADCREFN differential pin pair voltage<br />
Please refer to the Section 36.6.10 for more information.<br />
CFG.EXREF= 0: Normal operation, this pin is used to decouple ADC internal reference.<br />
ADCREFN should be connected to a 100nF external decoupling capacitor.<br />
CFG.EXREF= 1: Forcing reference using ADCREFP/ADCREFN differential pin pair voltage<br />
Please refer to the Section 36.6.10 for more information.<br />
ADCREF0 External reference input (with respect to analog ground) bypassed when CFG.RS is enabled<br />
ADCREF1 External reference input (with respect to analog ground) bypassed when CFG.RS is enabled<br />
VDDANA Analog power supply<br />
GNDANA Analog ground<br />
The clock for the ADCIFA bus interface (CLK_ADICFA) is generated by the Power Manager.<br />
This clock is turned on by default, and can be enabled and disabled in the Power Manager. It is<br />
recommended to disable the ADCIFA before disabling the clock, to avoid freezing the ADCIFA in<br />
an undefined state.<br />
The ADCIFA interrupt line is connected to one of the internal sources of the Interrupt Controller<br />
(INTC). Using the ADCIFA requires the INTC to be configured first.<br />
The event controller provides the ADCIFA two trigger sources.<br />
1105
36.5.6 Debug Operation<br />
When an external debugger forces the CPU into debug mode:<br />
36.6 Functional Description<br />
32117D–AVR-01/12<br />
<strong>AT32UC3C</strong><br />
the ADCIFA continues normal operation if the bit related to ADCIFA in PDBG register is ‘0’.<br />
PDCA access continues normal operation and may interfere with debug operation.<br />
the ADCIFA is frozen if the bit related to ADCIFA in PDBG register is ‘1’. When the ADCIFA is<br />
frozen, ADCIFA PB registers can still be accessed. Then, reading registers may modify<br />
status bits (OVRx, LOVRx) like in normal operation. PDCA access are pending.<br />
36.6.1 ADC Resolution<br />
The ADC supports 8-bit, 10-bit or 12 bits resolutions. Precision can be set differently for each<br />
sequencer by setting the SRES bits in the SEQCFGx register. By default, after a reset, the resolution<br />
is set to 12 bits. To get full resolution, the user should first calibrate the ADC as detailed in<br />
Section 36.6.16.<br />
36.6.2 ADC Conversion Modes<br />
36.6.2.1 Differential / single ended<br />
The ADC is fully differential. To perform single ended measures, the user can perform pseudo<br />
unipolar conversions by connecting ground onto the negative input. User can connect it to an<br />
external ground through pads or internal ground depending on if there's one connected onto the<br />
negative input multiplexer. Since conversion results are always 12 bits in 2's complement representation,<br />
the sign bit will not change, and then the resulting resolution is 11 bits max.<br />
36.6.2.2 S/H versus DIRECT conversions<br />
By default S/H are enabled, to change that setting, set the Sample and Hold disable bit (SHD)<br />
located in the CFG register. Maximum accuracy is achieved when disabling S/H but setting this<br />
bit forbids dual sequencer mode, Sequencer 1 is then switched off. Furthermore, in this mode<br />
S/H are switched off to lower power consumption.<br />
Table 36-2. S/H versus DIRECT Conversions<br />
S/H<br />
Mode Characteristics<br />
DIRECT<br />
Pros<br />
Cons<br />
Pros<br />
Cons<br />
Gain setting (1, 2, 4, 8, 16, 32, 64)<br />
Dual sequencer mode<br />
Reduced accuracy<br />
Dynamic limitation (fixed with over-sampling)<br />
1 ADC clock period spent to propagate into S/H<br />
No dynamic limitation due to S/H<br />
Full accuracy<br />
Saves 1 ADC clock period compared to the features list timings<br />
No gain<br />
Single sequencer mode only<br />
1106
32117D–AVR-01/12<br />
<strong>AT32UC3C</strong><br />
36.6.3 Power Reduction Modes<br />
Configuration bits acting on the power consumption of the digital and analog blocks are ADC<br />
enable (ADCEN) and Sleep Mode Selection (SLEEP) bits located in the CFG register:<br />
Table 36-3. Power Reduction Mode over the ADCEN Setting<br />
36.6.4 ADC Sequencer Operating Modes<br />
36.6.4.1 General<br />
ADCEN Behavior<br />
Digital controller dynamic activity is stopped (gated clocks)<br />
0<br />
All analog is powered off (reference sources, ADC, sample & hold)<br />
1<br />
Digital controller enabled<br />
Analog references are switched on<br />
The ADC block is powered on depending on the SLEEP bit<br />
Table 36-4. Power Reduction Mode<br />
SLEEP Behavior<br />
0 Analog ADC block always powered on<br />
1 Analog ADC block powered off after each conversion<br />
Depending on the Start Of Conversion Behavior (SOCB) bit in the Sequencer Configuration<br />
(SEQCFGx) register, the HOT start-up sequence will be performed before each conversion or<br />
before each new conversion sequence. The ADC analog block is powered off when not used, it<br />
needs 24 ADC clock cycles to wake-up. If start of conversion frequency is lower than<br />
1/25.f(CkADC) then no conversion will be lost.<br />
The ADC sequencer consists in two independent 8-state sequencers (SEQ0 and SEQ1) that<br />
can also be cascaded together to form one 16-state sequencer (SEQ). The word “state” represents<br />
the number of auto-conversions that can be performed with the sequencer. In both cases,<br />
the ADC has the ability to auto-sequence a series of conversions. This means that each time a<br />
sequencer receives a start-of-conversion request, it can perform multiple conversions automatically.<br />
For every sequencer conversion in dual-sequencer mode, any one of the available<br />
sequencer 16 input channels can be selected through the analog MUX. In the same way, in single-sequencer<br />
mode, any of the SEQ0 input channels can be selected. After conversion, the<br />
digital value of the selected channel is stored in the appropriate result register (RESn). It is also<br />
possible to sample the same channel multiple times, allowing the user to perform “over-sampling”,<br />
which gives increased resolution over traditional single-sampled conversion results.<br />
36.6.4.2 Single-sequencer mode (cascaded mode)<br />
By setting the Single Sequencer Mode (SSMQ) bit in the CFG register, the two sequencers are<br />
cascaded allowing a maximum of 16 successive measures among the SEQ0 16 analog inputs.<br />
Figure 36-2 shows a sequence of 4 differential measures, initiated by the Start Of Conversion<br />
(SOC) request. The sequence of analog inputs to be measured is determined by the values of<br />
(INPSEL0x, INNSEL0x) and (INPSEL1x, INNSEL1x) couples of registers. Each analog input is<br />
selected by the analog multiplexer then sampled one by one every ADC clock cycle. In addition,<br />
the conversion lasts (SRES / 2 + 3 - SHD) ADC clock cycles due to the ADC pipelined topology.<br />
1107
32117D–AVR-01/12<br />
Figure 36-2. Single Sequencer Chronogram (assuming SRES=8, SHD=0)<br />
<strong>AT32UC3C</strong><br />
36.6.4.3 Dual-sequencer mode (simultaneous sampling)<br />
The ADC has the ability to sample two pairs of ADCINx inputs simultaneously (see Figure 36-3),<br />
provided that one pair is from the inputs available on the sequencer 0 and the other is from the<br />
inputs available on the sequencer 1 (see Figure 36-1). To put the ADC into simultaneous sampling<br />
mode, the SSMQ bit needs to be clear in the CFG register.<br />
Figure 36-3. Dual Sequencer Chronogram (assuming SRES=8, SHD=0)<br />
In this chronogram, ADCCONV signal represents the value being sampled by the ADC<br />
36.6.4.4 Sequencer behavior on a Start Of Conversion<br />
Thanks to the SOCB bit in the SEQCFGx register, 2 different sequencer behaviors are possible:<br />
Table 36-5. SOCB Behavior<br />
SOCB Comment<br />
0 All sequence conversions are performed on a SOC event.<br />
1 A single conversion belonging to the sequence is performed on a SOC event.<br />
1108
32117D–AVR-01/12<br />
<strong>AT32UC3C</strong><br />
36.6.4.5 Sequencer start/stop mode<br />
Thanks to the Software Acknowledge bit (SA) in the SEQCFGx register, the behavior of<br />
sequencer x at the end of a sequence can be configured.<br />
Table 36-6. Sequencer Start/Stop Mode<br />
SA Comment<br />
0<br />
1<br />
The sequencer waits for software acknowledge.<br />
Acknowledge is done by writing a 1 in the SEOSx bit of the SCR register.<br />
The sequencer will restart automatically a new sequence on a new SOC.<br />
Results will be overwritten if not processed.<br />
The Sequencer x Overrun Error bit (OVRx) in SR register indicates that an overrun error<br />
occurred in the sequencer x. This means that the RES0 register has not been read while a new<br />
sequence is starting. Events such as end-of-sequence or end-of-conversion can be caught by<br />
interrupt servicing or polling routines thanks to the SEOSx and SEOCx bits in the SR register.<br />
36.6.4.6 Sequencer free running-mode<br />
Only SEQ0 has the free-running mode capability. In free-running mode the ADC continuously<br />
converts analog values configured in the sequencer. In this mode, the sequence restarts automatically<br />
after each end of sequence without waiting for the last conversion to finish. This mode<br />
is configured by setting the Free Running Mode (FRM) bit in the CFG register. The conversion<br />
sequence will start on the first SOC defined by the Trigger Selection (TRGSEL) field in the<br />
SEQCFG0 register. In this mode only SEQ0 is running once triggered.<br />
When converting at full speed the sequencer always wait for the last conversion to be finished to<br />
rise the sequencer end of sequence status bit (EOS). Figure 36-4 shows a 3 conversions<br />
sequence running. When the third channel is sampled the sequencer has to wait for the pipeline<br />
to be flushed. This takes SRES/2+3-SHD clock cycles. To avoid this you can run that sequence<br />
in free running mode. Please refer to Figure 36-5. The sequencer will run the sequence without<br />
waiting for the pipeline to be flushed but the user will have to read the converted value before it<br />
is overwritten by a new conversion.<br />
Figure 36-4. Not Using FRM and Converting at Full Speed<br />
1109
32117D–AVR-01/12<br />
Figure 36-5. Using FRM and Converting at Full Speed<br />
<strong>AT32UC3C</strong><br />
36.6.5 ADC Clock Configuration (CKDIV)<br />
The clock frequency range for the ADC is [1.5 MHz - 32 KHz]. Since the ADC interface uses the<br />
system clock up to the PB maximum frequency, a clock downscale must be done if a higher frequency<br />
system clock is used. This scaling may also be done in order to slow down the ADC<br />
conversions or increase the S/H time, without affecting the system clock. The downscale is done<br />
by writing the maximum counter value in the Counter Value (CNT) field of the CKDIV register,<br />
with a possible division factor from 1 to 512 giving the following transfer function:<br />
T(CkADC)= T(CkPB) · ((CNT + 1) · 2). The divider is enabled as soon as the ADC is enabled by<br />
setting the ADCEN bit in the CFG register.<br />
Figure 36-6. Clock Generator Block Diagram<br />
CkPB ADCIFA<br />
[115 KHz - PB max<br />
frequency]<br />
36.6.6 ADC Multiplexers Settle Time<br />
CKDIV :<br />
DIVIDE BY CNT<br />
In addition when CKDIV is written, the internal counter is reset to avoid rollover phenomena: DO<br />
NOT WRITE CKDIV WHEN PERFORMING CONVERSIONS.<br />
F(CkPB) should at least be 4 times greater than F(CkADC) to make the ADC controller work<br />
properly.<br />
By default, channel multiplexers settle time is set to half a PB clock period. If operating with a<br />
high PB clock frequency, then MUX settle time can be increased to achieve a 1.5 PB clock periods<br />
settle time by writing a one in the MUXSET field in the CFG register. For more information,<br />
please refer to the ADC electrical characteristics.<br />
/2<br />
CkADC<br />
[32 KHz - 2 MHz]<br />
1110
32117D–AVR-01/12<br />
<strong>AT32UC3C</strong><br />
Figure 36-7. Multiplexers Settle Time Depending on the CFG.MUXSET Configuration Bit<br />
The chronogram above shows that for the same start of conversion (SOC) event, CkADC rises<br />
one PB clock period later. The ADC and S/H are sampling when CkADC is high, so setting the<br />
CFG.MUXSET bit will delay the sampling phase by one PB clock period.<br />
36.6.7 Oversampling Mode<br />
To improve conversion accuracy, it is recommended to perform oversampling. This is particularly<br />
useful for high impedance sources. This mode can be used whether the ADC is used in<br />
direct mode or not. Please note that it behaves as if a sequence of 2 consecutive conversions<br />
had been programmed with the first conversion ignored. The consequence is a conversion rate<br />
divided by 2. Also note that this mode cannot be used in conjonction with the Dynamic mode. If<br />
dynamic and oversampling modes are both enabled, dynamic mode will be applied.<br />
Figure 36-8. Oversampling<br />
1111
32117D–AVR-01/12<br />
<strong>AT32UC3C</strong><br />
36.6.8 Sample & Hold (S/H) with Gain<br />
The ADC preamplifiers are made of two cascaded switched-capacitors amplifiers stages. They<br />
are used to sample analog voltages and provide it to the ADC block when it has a time slot to<br />
make the conversion. It also amplifies the input voltage.<br />
1112
32117D–AVR-01/12<br />
<strong>AT32UC3C</strong><br />
36.6.8.1 Dynamic mode<br />
Dynamic mode aims at improving conversion accuracy when performing channel sweeping or<br />
measures on high frequency input signals. It is then recommended using the SHDYN (sample<br />
and hold dynamic mode) bit control in the SEQCFGx register. Doing this causes the insertion of<br />
a supplementary sampling cycle of one CkADC clock period used to reset the sample and hold.<br />
As a consequence, conversion rate is divided by two. Please note that it is useless performing<br />
oversampling when using that mode since the S/H are reseted before actually sampling.<br />
36.6.8.2 Gain factor<br />
Figure 36-9. SH Dynamic Mode<br />
S/H allows the amplification of very small signals or buffering of very high impedance signal<br />
sources. The gain factor may be configured from 1x to 64x by writing to the Sequencer Conversion<br />
n Sample and Hold Gain (GCNVn) field of the SHGx register. The gain can be changed<br />
from sample to sample by writing the SHGx registers.<br />
Table 36-7. Gain Factor<br />
GCNVn Gain<br />
0 0 0 1<br />
0 0 1 2<br />
0 1 0 4<br />
0 1 1 8<br />
1 0 0 16<br />
1 0 1 32<br />
1 1 0 64<br />
1 1 1 Reserved<br />
1113
32117D–AVR-01/12<br />
<strong>AT32UC3C</strong><br />
36.6.9 Power-up and Startup Time<br />
To convert correct values, both references and ADC have to be powered-up correctly, otherwise<br />
wrong values will be converted until the end of the start-up time.<br />
Cold start-up: References needs 1 ms max to establish.<br />
Hot start-up: Once references are up, 24 CkADC clock periods are needed.<br />
When in sleep mode, the HOT start-up sequence is performed each time a conversion or a<br />
sequence is triggered thanks to the SOCB bit in the SEQCFGx register. Indeed, the ADC analog<br />
block is powered off while not used.<br />
The end of the power-up sequence can be read from the Start-Up Time Done (SUTD) bit of the<br />
SR register. This bit is set by hardware at the end of the start-up sequence and cleared by software<br />
by writing a '1' in the SUTD bit of the SCR register. It is also cleared by hardware when the<br />
ADCIFA is turned off then on by clearing and setting the ADCEN bit of the CFG register.<br />
Figure 36-10. Power-Up Sequence<br />
No<br />
No<br />
No<br />
Yes<br />
START-UP not done<br />
ADC is enabled?<br />
Yes<br />
Wait for COLD start-up time<br />
DONE and Seq Request?<br />
Yes<br />
Wait for HOT start-up time<br />
Yes<br />
DONE?<br />
START-UP done<br />
No<br />
ADC turned off?<br />
SLEEP mode?<br />
Yes<br />
1114
32117D–AVR-01/12<br />
<strong>AT32UC3C</strong><br />
36.6.10 Analog Reference<br />
The following sources are available as analog reference (AREF) in the ADC. They are selected<br />
through the Reference Source (RS) field in the CFG register:<br />
1V internal voltage reference<br />
0.6*VDDANA internal voltage reference<br />
Two external reference voltage (ADCREF0 or ADCREF1 over chip analog ground)<br />
When using an internal reference, it is recommended inserting a decoupling capacitor between<br />
ADCREFP and ADCREFN externally (mandatory to get the full 12-bits precision). This means<br />
that two pins will be dedicated to reference decoupling. If the pins are needed for other purposes,<br />
the decoupling may be skipped giving a conversion accuracy of 10 bits.<br />
It is also possible to force a differential reference by setting the CFG.EXREF bit. This will bypass<br />
the CFG.RS selection setting and make the ADC use the differential ADCREFP/ADCREFN pin<br />
pair voltage as reference.<br />
36.6.11 Conversion Range<br />
The conversion amplitude range is given by the ADC acquisition mode and the reference<br />
source:<br />
Table 36-8. Conversion Range vs. Reference<br />
Reference Conversion range<br />
Internal reference 1 ±1V<br />
Internal reference 2 ±0.6 * VDDANA<br />
External reference 1 ± min(3.5 V, VDDANA - 0.7)<br />
External reference 2 ± min(3.5 V, VDDANA - 0.7)<br />
36.6.12 Conversion Results<br />
If the Half Word Left Adjust (HWLA) bit in the SEQCFGx register is set, then the result will be left<br />
adjusted on the 16 lower bits of the RESn register. Otherwise, results will be right-adjusted. The<br />
offset error can be digitally compensated using the ADCCAL.OCAL field. For more information<br />
refer to Section 36.6.16.2 ”ADC offset error calibration” on page 1117.<br />
ADC transfer function:<br />
Given the ISSTRICTNEG(x) function defined below<br />
ISSTRICTNEG(x) = 0 when x>0 or x=0<br />
ISSTRICTNEG(x) = 1 when x
32117D–AVR-01/12<br />
<strong>AT32UC3C</strong><br />
36.6.13 Start Of Conversion (SOC)<br />
ADC sequencers conversions can be triggered for each sequencer with the following sources:<br />
Table 36-9. Trigger of Start Of Conversion<br />
36.6.14 Internal Timer<br />
Source<br />
Sequencer<br />
Software<br />
trigger<br />
The sources must be configured through the Trigger Selection (TRGSEL) field of the<br />
SEQCFGxregister. Selecting the event controller source allows any event controller source to<br />
generate SOC but events must be synchronous with the module PB clock frequency. The event<br />
source event shaper must be configured accordingly (refer to the event controller section).<br />
The ADC can serve a maximum of one SOC per ADC clock cycle. Extra SOC will be ignored<br />
and the Missed Start-Of-Conversion (MSOCx) bit in the SR register will be set. If the SOC frequency<br />
provided by the event controller exceeds the ADC capability, the event controller will<br />
generate an underrun status.<br />
The ADCIFA embeds an internal timer used as a trigger source for SEQ0, SEQ1 and TSSEQ<br />
which can be configured by setting the ITMC fields of the ITIMER register.<br />
Internal Timer Trigger Period= (ITMC+1)*T(CkADC)<br />
The 17 bits counter allows SOC period up to 174ms when CkADC clock frequency is set to<br />
1.5 MHz.<br />
Once set as a SOC source, the internal timer as to be started by writing a '1' in the Internal Timer<br />
Start (TSTART) bit of the CR register. It can be stopped in the same way by writing a '1' in the<br />
TSTOP bit of the CR register. The current status of the internal timer can be read from the Running<br />
timer status (RUN) field of the SR register: 0 means stopped, 1 means running. In addition<br />
when the internal timer is running, if ITIMER register is written to change its frequency, the internal<br />
counter is cleared to avoid rollover phenomena.<br />
Note: It is possible to generate an internal timer event each CkADC time slot by writing 0x0 to<br />
the ITIMER register ITMC field and by selecting the internal timer as a SOC source.<br />
36.6.15 Peripheral DMA<br />
There are two Peripheral DMA Controller (PDC) channels corresponding to the maximum number<br />
of sequencers that can be run at the same time. The Sequencer x Last Converted Value<br />
(LCVx) register contains the last converted value of the sequencer x according to the conversion<br />
result format. The LCV register is updated each time the sequencer ends a conversion.<br />
If the last converted value has not been read when a new one is available, the previous data is<br />
overwritten. This overrun status is signalled by the Sequencer x Last Converted Value Overrun<br />
(LOVRx) bit in the SR register indicating that at least one overrun error occurred concerning<br />
sequencer x.<br />
The OVRx and LOVRx bits of the SR register are cleared by writing a ‘1’ respectively in the<br />
OVRx and LOVRx fields of the SCR register.<br />
Note: PDC transfers are 16 bits wide.<br />
Internal<br />
Timer<br />
Event<br />
controller Continuous<br />
SEQ0 Y Y Y Y<br />
SEQ1 Y Y Y Y<br />
1116
36.6.16 Calibration<br />
32117D–AVR-01/12<br />
<strong>AT32UC3C</strong><br />
Accuracy of the conversion is based on calibration of switched capacitors and operational amplifiers<br />
offset cancellation. Gain correction is done by writing a calibration word into the ADCCAL<br />
and SHCAL registers since it is temperature and operating voltage independent.<br />
36.6.16.1 ADC gain error calibration<br />
The ADC is gain-calibrated during production, but to take advantage of this the calibration value<br />
must be read from the factory page in flash and written to the Gain Calibration (GCAL) field of<br />
the ADCCAL register.<br />
36.6.16.2 ADC offset error calibration<br />
Offset cancellation has to be performed by the user due to temperature and operating voltage<br />
conditions dependence. The offset can be obtained by converting a null differential value. That<br />
offset has to be negated and written into the Offset Calibration (OCAL) field of the ADCCAL register.<br />
Then, for each conversion result, the controller will return the converted value added with<br />
the signed OCAL value. For instance, if the offset value obtained is 0x3, then the value 0xFD<br />
must be written to OCAL. Please note that OCAL is a 6 bits register, if the MSB is high then the<br />
value will be considered negative. A saturation mechanism avoids flipping phenomena. OCAL<br />
stores a signed number of LSB assuming the calibration has been performed in 12 bits resolution.<br />
If converting at a lower resolution, correction will only take into account the appropriate<br />
most significant bits.<br />
36.6.16.3 Sample and hold gain error calibration<br />
S/H are gain-calibrated during production, but to take advantage of this the calibration value<br />
must be read from the factory page in flash and written to the Sample and Hold Gain Calibration<br />
(GAIN0 and GAIN1) fields of the SHCAL register.<br />
36.6.17 Window Monitor<br />
There are 2 window monitors that allow to compare two of the result registers to some predefined<br />
threshold values. The Window Mode (WM) field in WCFGy register (see Table 36-10)<br />
allows the user to configure operating mode in order to generate interrupts. The High Threshold<br />
(HT) and Low Threshold (LT) fields in WCFGy register give the threshold voltage values of the<br />
comparators. The result register to monitor is selected by the Source (SRC) field in WCFGy<br />
register.<br />
Table 36-10. Window Modes<br />
WM Modes<br />
0 0 0 No window mode (default)<br />
0 0 1 Mode 1: active when result < HT<br />
0 1 0 Mode 2: active when result > LT<br />
0 1 1 Mode 3: active when LT < result < HT<br />
1 0 0 Mode 4: active when result >= LT or result >= HT<br />
1 0 1 reserved<br />
1 1 0 reserved<br />
1 1 1 reserved<br />
Note: Comparisons are performed regardless with the HWLA setting (half word left adjust).<br />
1117
36.6.18 Arbitration<br />
36.6.19 Interrupts<br />
32117D–AVR-01/12<br />
<strong>AT32UC3C</strong><br />
In dual sequencer mode, SEQ0 has priority over SEQ 1. Due to the ADC pipeline topology, the<br />
arbiter is implemented in order to allocate optimal time slots to each sequencer in order to pipe<br />
requests. When all analog voltages have been taken into account in the ADC pipeline, an other<br />
sequencer can drive the analog blocs without waiting for the end of the whole conversion process.<br />
The ADC result will be sampled by another process when getting the wanted precision.<br />
Table 36-11. ADCIFA Interrupt Group<br />
Line Line Description Related Status<br />
0 Sequencer 0<br />
1 Sequencer 1<br />
2 Start-up done Start-up done<br />
3 Window<br />
Sequencer 0 end of sequence<br />
Sequencer 0 end of conversion<br />
Sequencer 0 overrun<br />
Sequencer 0 (last converted value) overrun<br />
Sequencer 0 missed start-of-conversion<br />
Sequencer 1 end of sequence<br />
Sequencer 1 end of conversion<br />
Sequencer 1 overrun<br />
Sequencer 1 (last converted value) overrun<br />
Sequencer 1 missed start-of-conversion<br />
Window 0<br />
Window 1<br />
1118
36.7 User Interface<br />
Table 36-12. ADCIFA Register Memory Map<br />
Note: 1. The reset values are device specific. Please refer to the Modue Configuration section at the end of this chapter.<br />
32117D–AVR-01/12<br />
<strong>AT32UC3C</strong><br />
Offset Register Name Access Reset State<br />
0x0000 CR register CR Write-only 0x00000000<br />
0x0004 CFG register CFG Read/Write 0x00000000<br />
0x0008 SR register SR Read-only 0x00000000<br />
0x000C SCR register SCR Write-only 0x00000000<br />
0x0010 SSR register SSR Write-only 0x00000000<br />
0x0014 SEQCFG0 register SEQCFG0 Read/Write 0x00000000<br />
0x0018 SEQCFG1 register SEQCFG1 Read/Write 0x00000000<br />
0x001C SHG0 register SHG0 Read/Write 0x00000000<br />
0x0020 SHG1 register SHG1 Read/Write 0x00000000<br />
0x0024 INPSEL00 register INPSEL00 Read/Write 0x00000000<br />
0x0028 INPSEL01 register INPSEL01 Read/Write 0x00000000<br />
0x002C INPSEL10 register INPSEL10 Read/Write 0x00000000<br />
0x0030 INPSEL11 register INPSEL11 Read/Write 0x00000000<br />
0x0034 INNSEL00 register INNSEL00 Read/Write 0x00000000<br />
0x0038 INNSEL01 register INNSEL01 Read/Write 0x00000000<br />
0x003C INNSEL10 register INNSEL10 Read/Write 0x00000000<br />
0x0040 INNSEL11 register INNSEL11 Read/Write 0x00000000<br />
0x0044 CKDIV register CKDIV Read/Write 0x00000000<br />
0x0048 ITIMER register ITIMER Read/Write 0x00000000<br />
0x0058 WCFG0 register WCFG0 Read/Write 0x00000000<br />
0x005C WCFG1 register WCFG1 Read/Write 0x00000000<br />
0x0060 LCV0 register LCV0 Read-only 0x00000000<br />
0x0064 LCV1 register LCV1 Read-only 0x00000000<br />
0x0068 ADCCAL register ADCCAL Read/Write 0x00000000<br />
0x006C SHCAL register SHCAL Read/Write 0x00000000<br />
0x0070 IER register IER Write-only 0x00000000<br />
0x0074 IDR register IDR Write-only 0x00000000<br />
0x0078 IMR register IMR Read-only 0x00000000<br />
0x007C VERSION register VERSION Read-only - (1)<br />
0x0080 PARAMETER register PARAMETER Read-only - (1)<br />
0x0084 RES register RES Read-only -<br />
1119
36.7.1 Control Register<br />
Name: CR<br />
Access Type: Write-only<br />
Offset: 0x00<br />
Reset Value: 0x00000000<br />
32117D–AVR-01/12<br />
<strong>AT32UC3C</strong><br />
31 30 29 28 27 26 25 24<br />
- - - - - - - -<br />
23 22 21 20 19 18 17 16<br />
- - - - - - - -<br />
15 14 13 12 11 10 9 8<br />
- - - - - - - -<br />
7 6 5 4 3 2 1 0<br />
- - - - TSTART TSTOP SOC1 SOC0<br />
TSTART: Internal Timer Start Bit<br />
Writing a zero to this bit has no effect.<br />
Writing a one to this bit starts the internal timer.<br />
This bit always reads as zero.<br />
The internal timer status can be read in the RUNT field of the SR register.<br />
TSTOP: Internal Timer Stop Bit<br />
Writing a zero to this bit has no effect.<br />
Writing a one to this bit stops the internal timer.<br />
This bit always reads as zero.<br />
The internal timer status can be read in the RUNT field of the SR register.<br />
SOC1: Sequencer 1 Start of Conversion<br />
Writing a zero to this bit has no effect.<br />
Writing a one to this bit makes the sequencer 1 to start a conversion.<br />
This bit always reads as zero.<br />
SOC0: Sequencer 0 Start Of Conversion<br />
Writing a zero to this bit has no effect.<br />
Writing a one to this bit makes the sequencer 0 to start a conversion.<br />
This bit always reads as zero.<br />
1120
36.7.2 Configuration Register<br />
Name: CFG<br />
Access Type: Read/Write<br />
Offset: 0x04<br />
Reset Value: 0x00000000<br />
32117D–AVR-01/12<br />
<strong>AT32UC3C</strong><br />
31 30 29 28 27 26 25 24<br />
- - - - - - - -<br />
23 22 21 20 19 18 17 16<br />
- - SUT<br />
15 14 13 12 11 10 9 8<br />
- - - - - MUXSET EXREF -<br />
7 6 5 4 3 2 1 0<br />
SHD RS FRM SSMQ SLEEP - ADCEN<br />
It is adviced not changing the configuration once the module is enabled. In order to do so, first turn off the module by writting<br />
a 0 in CFG.ADCEN, then change the configuration.<br />
SUT: Start-up Time<br />
Number of ADC clock cycles to wait for: (STARTUP + 1) * 32.<br />
MUXSET: Mux Settle Time<br />
1: The multiplexers settle time is set to 1.5 PB clock periods.<br />
0: The multiplexers settle time is set to 0.5 PB clock periods.<br />
EXREF: External Reference<br />
1: The external forcing of references is enabled, ADC references are the ADCREFN and ADCREFP pads.<br />
0: The external forcing of references is disabled, ADC reference is given by the RS field.<br />
SHD: Sample-and-Hold Disabled<br />
1: The Sample and Hold is disabled.<br />
0: The Sample and Hold is enabled.<br />
note: when set to one, sequencer 1 is turned off, as a consequence the ADC pipeline latency is decreased by one ADC clock<br />
period.<br />
RS: Reference Source<br />
0: Internal 1V reference.<br />
1: Internal 0.6 *VDDANA reference.<br />
2: External reference ADCREF0 over chip analog ground.<br />
3: External reference ADCREF1 over chip analog ground.<br />
FRM: Free Running Mode<br />
1121
32117D–AVR-01/12<br />
1: The free running mode is enabled, sequencer 0 performs conversions continuously.<br />
0: The free running modeis disabled.<br />
note: once in this mode, sequencer 1 requests cannot be serviced.<br />
<strong>AT32UC3C</strong><br />
SSMQ: Single Sequencer Mode<br />
1: The single sequencer mode is enabled, sequencers 0 and 1 are merged, increasing the number of conversions per<br />
sequence.<br />
0: The single sequencer mode is disabled, SEQ0 and SEQ1 are in simultaneous mode.<br />
SLEEP: Sleep Mode Selection<br />
1: The power saving mode is enabled. The analog ADC block is powered off after each conversion.<br />
0: The power saving mode is disabled.<br />
note: when enabled, start-up time is required before each new conversion.<br />
ADCEN: ADC Enable<br />
1: The ADC controller is enabled, the analog ADC block is powered-on according to SLEEP mode.<br />
0: The ADC controller is disabled, the analog ADC block is powered-off.<br />
1122
36.7.3 Status Register<br />
Name: SR<br />
Access Type: Read-only<br />
Offset: 0x08<br />
Reset Value: 0x00000000<br />
32117D–AVR-01/12<br />
<strong>AT32UC3C</strong><br />
31 30 29 28 27 26 25 24<br />
- - - - STATE1<br />
23 22 21 20 19 18 17 16<br />
- - - STATE0<br />
15 14 13 12 11 10 9 8<br />
RUNT SUTD MSOC1 MSOC0 WM1 WM0 - -<br />
7 6 5 4 3 2 1 0<br />
LOVR1 OVR1 SEOC1 SEOS1 LOVR0 OVR0 SEOC0 SEOS0<br />
STATE1: Sequencer 1 State Register<br />
This field is set to the current conversion identifier.<br />
STATE0: Sequencer 0 State Register<br />
This field is set to the current conversion identifier.<br />
RUNT: Running Timer Status<br />
This bit is set when the internal timer is started.<br />
This bit is cleared when the internal timer is stopped.<br />
SUTD: Start-up Time Done<br />
This bit is set when a start-up done event occurs.<br />
This bit is cleared when the corresponding bit in SCR is written to one.<br />
MSOC1: Sequencer 1 Missed Start-Of-Conversion<br />
This bit is set when a start-of-conversion is missed.<br />
This bit is cleared when the corresponding bit in SCR is written to one.<br />
MSOC0: Sequencer 0 Missed Start-Of-Conversion<br />
This bit is set when a start-of-conversion is missed.<br />
This bit is cleared when the corresponding bit in SCR is written to one.<br />
WM1: Window Monitor 1<br />
This bit is set when the watched result value goes to the defined window.<br />
This bit is cleared when the corresponding bit in SCR is written to one.<br />
1123
WM0: Window Monitor 0<br />
This bit is set when the watched result value goes to the defined window.<br />
This bit is cleared when the corresponding bit in SCR is written to one.<br />
LOVR1: Sequencer 1 Last Converted Value Overrun<br />
This bit is set when an overrun error occurs on the LCV register.<br />
This bit is cleared when the corresponding bit in SCR is written to one.<br />
OVR1: Sequencer 1 Overrun Error<br />
This bit is set when an overrun error occurs.<br />
This bit is cleared when the corresponding bit in SCR is written to one.<br />
SEOC1: Sequencer 1 End Of Conversion<br />
This bit is set when an end of conversion occurs.<br />
This bit is cleared when the corresponding bit in SCR is written to one.<br />
SEOS1: Sequencer 1 End Of Sequence<br />
This bit is set when an end of sequence occurs.<br />
This bit is cleared when the corresponding bit in SCR is written to one.<br />
LOVR0: Sequencer 0 Last Converted Value Overrun<br />
This bit is set when an overrun error occurs on the LCV register.<br />
This bit is cleared when the corresponding bit in SCR is written to one.<br />
OVR0: Sequencer 0 Overrun Error<br />
This bit is set when an overrun error occurs.<br />
This bit is cleared when the corresponding bit in SCR is written to one.<br />
SEOC0: Sequencer 0 End Of Conversion<br />
This bit is set when an end of conversion occurs.<br />
This bit is cleared when the corresponding bit in SCR is written to one.<br />
SEOS0: Sequencer 0 End Of Sequence<br />
This bit is set when an end of sequence occurs.<br />
This bit is cleared when the corresponding bit in SCR is written to one.<br />
32117D–AVR-01/12<br />
<strong>AT32UC3C</strong><br />
1124
36.7.4 Status Clear Register<br />
Name: SCR<br />
Access Type: Write-only<br />
Offset: 0x0C<br />
Reset Value: 0x00000000<br />
32117D–AVR-01/12<br />
<strong>AT32UC3C</strong><br />
31 30 29 28 27 26 25 24<br />
- - - - - - - -<br />
23 22 21 20 19 18 17 16<br />
- - - - - - -<br />
15 14 13 12 11 10 9 8<br />
- SUTD MSOC1 MSOC0 WM1 WM0 - -<br />
7 6 5 4 3 2 1 0<br />
LOVR1 OVR1 SEOC1 SEOS1 LOVR0 OVR0 SEOC0 SEOS0<br />
Writing a zero to a bit in this register has no effect.<br />
Writing a one to a bit in this register clears the corresponding bit in SR.<br />
1125
36.7.5 Status Set Register<br />
Name: SSR<br />
Access Type: Write-only<br />
Offset: 0x10<br />
Reset Value: 0x00000000<br />
32117D–AVR-01/12<br />
<strong>AT32UC3C</strong><br />
31 30 29 28 27 26 25 24<br />
- - - - - - - -<br />
23 22 21 20 19 18 17 16<br />
- - - - - - -<br />
15 14 13 12 11 10 9 8<br />
- SUTD MSOC1 MSOC0 WM1 WM0 - -<br />
7 6 5 4 3 2 1 0<br />
LOVR1 OVR1 SEOC1 SEOS1 LOVR0 OVR0 SEOC0 SEOS0<br />
Writing a zero to a bit in this register has no effect.<br />
Writing a one to a bit in this register sets the corresponding bit in SR.<br />
1126
36.7.6 Sequencer n Configuration Register<br />
Name: SEQCFGn<br />
Access Type: Read/Write<br />
Offset: 0x14 + n * 0x04<br />
Reset Value: 0x00000000<br />
32117D–AVR-01/12<br />
<strong>AT32UC3C</strong><br />
31 30 29 28 27 26 25 24<br />
- - - - - - - -<br />
23 22 21 20 19 18 17 16<br />
- - - CNVNB<br />
15 14 13 12 11 10 9 8<br />
- - SRES - - TRGSEL<br />
7 6 5 4 3 2 1 0<br />
- - - SHDYN OVSX2 SOCB HWLA SA<br />
It is adviced not changing the configuration once the module is enabled. In order to do so, first turn off the module by writting<br />
a 0 in CFG.ADCEN, then change the configuration.<br />
CNVNB: Number of Conversions in a Sequence<br />
The number of conversions to perform in the sequence is (CNVNB+1).<br />
SRES: Resolution<br />
0: 12 bits.<br />
1: 10 bits.<br />
2: 8 bits.<br />
3: Reserved.<br />
TRGSEL: Trigger Selection<br />
0: Software.<br />
1: Internal ADC timer.<br />
2: Event controller source.<br />
3: Continuous.<br />
SHDYN: Sample and Hold Dynamic Mode<br />
1: The SH dynamic mode,is enabled, a conversion takes two ADC clock cycles, SH is reseted on the first cycle.<br />
0: The SH dynamic mode is disabled, a conversion takes a single ADC clock cycle.<br />
OVSX2: Oversampling X2<br />
1: The oversampling mode is enabled, a conversion takes two ADC clock cycles.<br />
0: The oversampling mode is disabled, a conversion takes a single ADC clock cycle.<br />
SOCB: Start of Conversion Behavior<br />
1127
32117D–AVR-01/12<br />
1: The SOCB mode is enabled, a single conversion is performed on a SOC event.<br />
0: The SOCB mode is disabled, a complete sequence is performed on a SOC event.<br />
HWLA: Half Word Left Adjust<br />
1: The HWLA mode is enabled.<br />
0: The HWLA mode is disabled.<br />
SA: Software Acknowledge<br />
1: The SA mode is enabled.<br />
0: The SA mode is disabled.<br />
<strong>AT32UC3C</strong><br />
1128
36.7.7 Sequencer n Sample and Hold Gain for Each Conversion<br />
Name: SHGn<br />
Access Type: Read/Write<br />
Offset: 0x1C+ n * 0x04<br />
Reset Value: 0x00000000<br />
32117D–AVR-01/12<br />
<strong>AT32UC3C</strong><br />
31 30 29 28 27 26 25 24<br />
- GCNV7 - GCNV6<br />
23 22 21 20 19 18 17 16<br />
- GCNV5 - GCNV4<br />
15 14 13 12 11 10 9 8<br />
- GCNV3 - GCNV2<br />
7 6 5 4 3 2 1 0<br />
- GCNV1 - GCNV0<br />
GCNV7: Sequencer n Conversion 7 Sample and Hold Gain<br />
GCNV6: Sequencer n Conversion 6 Sample and Hold Gain<br />
GCNV5: Sequencer n Conversion 5 Sample and Hold Gain<br />
GCNV4: Sequencer n Conversion 4 Sample and Hold Gain<br />
GCNV3: Sequencer n Conversion 3 Sample and Hold Gain<br />
GCNV2: Sequencer n Conversion 2 Sample and Hold Gain<br />
GCNV1: Sequencer n Conversion 1 Sample and Hold Gain<br />
GCNV0: Sequencer n Conversion 0 Sample and Hold Gain<br />
1129
36.7.8 Sequencer n INP Conversions 0 to 3 Selection<br />
Name: INPSEL0n<br />
Access Type: Read/Write<br />
Offset: 0x24+ n * 0x04<br />
Reset Value: 0x00000000<br />
32117D–AVR-01/12<br />
<strong>AT32UC3C</strong><br />
31 30 29 28 27 26 25 24<br />
- - - - CNV3<br />
23 22 21 20 19 18 17 16<br />
- - - - CNV2<br />
15 14 13 12 11 10 9 8<br />
- - - - CNV1<br />
7 6 5 4 3 2 1 0<br />
- - - - CNV0<br />
CNV3: Sequencer n INP Identifier of the 4th Conversion to Perform<br />
CNV2: Sequencer n INP Identifier of the 3rd Conversion to Perform<br />
CNV1: Sequencer n INP Identifier of the 2nd Conversion to Perform<br />
CNV0: Sequencer n INP Identifier of the 1st Conversion to Perform<br />
1130
36.7.9 Sequencer n INP Conversions 4 to 7 Selection<br />
Name: INPSEL1n<br />
Access Type: Read/Write<br />
Offset: 0x2C+ n * 0x04<br />
Reset Value: 0x00000000<br />
32117D–AVR-01/12<br />
<strong>AT32UC3C</strong><br />
31 30 29 28 27 26 25 24<br />
- - - - CNV7<br />
23 22 21 20 19 18 17 16<br />
- - - - CNV6<br />
15 14 13 12 11 10 9 8<br />
- - - - CNV5<br />
7 6 5 4 3 2 1 0<br />
- - - - CNV4<br />
CNV7: Sequencer 0 INP Identifier of the 8th Conversion to Perform<br />
CNV6: Sequencer 0 INP Identifier of the 7th Conversion to Perform<br />
CNV5: Sequencer 0 INP Identifier of the 6th Conversion to Perform<br />
CNV4: Sequencer 0 INP Identifier of the 5th Conversion to Perform<br />
1131
36.7.10 Sequencer n INN Conversions 0 to 3 Selection<br />
Name: INNSEL0n<br />
Access Type: Read/Write<br />
Offset: 0x34+ n * 0x04<br />
Reset Value: 0x00000000<br />
32117D–AVR-01/12<br />
<strong>AT32UC3C</strong><br />
31 30 29 28 27 26 25 24<br />
- - - - CNV3<br />
23 22 21 20 19 18 17 16<br />
- - - - CNV2<br />
15 14 13 12 11 10 9 8<br />
- - - - CNV1<br />
7 6 5 4 3 2 1 0<br />
- - - - CNV0<br />
CNV3: Sequencer n INN Identifier of the 4th Conversion to Perform<br />
CNV2: Sequencer n INN Identifier of the 3rd Conversion to Perform<br />
CNV1: Sequencer n INN Identifier of the 2nd Conversion to Perform<br />
CNV0: Sequencer n INN Identifier of the 1st Conversion to Perform<br />
1132
36.7.11 Sequencer n INN Conversions 4 to 7 Selection<br />
Name: INNSEL1n<br />
Access Type: Read/Write<br />
Offset: 0x3C+ n * 0x04<br />
Reset Value: 0x00000000<br />
32117D–AVR-01/12<br />
<strong>AT32UC3C</strong><br />
31 30 29 28 27 26 25 24<br />
- - - - CNV7<br />
23 22 21 20 19 18 17 16<br />
- - - - CNV6<br />
15 14 13 12 11 10 9 8<br />
- - - - CNV5<br />
7 6 5 4 3 2 1 0<br />
- - - - CNV4<br />
CNV7: Sequencer n INN Identifier of the 8th Conversion to Perform<br />
CNV6: Sequencer n INN Identifier of the 7th Conversion to Perform<br />
CNV5: Sequencer n INN Identifier of the 6th Conversion to Perform<br />
CNV4: Sequencer n INN Identifier of the 5th conversion to Perform<br />
1133
36.7.12 Clock Divider Register<br />
Name: CKDIV<br />
Access Type: Read/Write<br />
Offset: 0x44<br />
Reset Value: 0x00000000<br />
32117D–AVR-01/12<br />
<strong>AT32UC3C</strong><br />
31 30 29 28 27 26 25 24<br />
- - - - - - - -<br />
23 22 21 20 19 18 17 16<br />
- - - - - - - -<br />
15 14 13 12 11 10 9 8<br />
- - - - - - - CNT[8]<br />
7 6 5 4 3 2 1 0<br />
CNT: Max Counter Value<br />
Number of ADC clock cycles to count: (CNT + 1) * 2.<br />
CNT[7:0]<br />
1134
36.7.13 Internal Timer Register<br />
Name: ITIMER<br />
Access Type: Read/Write<br />
Offset: 0x48<br />
Reset Value: 0x00000000<br />
32117D–AVR-01/12<br />
<strong>AT32UC3C</strong><br />
31 30 29 28 27 26 25 24<br />
- - - - - - - -<br />
23 22 21 20 19 18 17 16<br />
- - - - - - - ITMC[16]<br />
15 14 13 12 11 10 9 8<br />
ITMC[15:8]<br />
7 6 5 4 3 2 1 0<br />
ITMC[7:0]<br />
ITMC: Internal Timer Max Counter<br />
Number of ADC clock cycles to wait for is (ITMC + 1).<br />
note: This allows SOC period up to 167 ms when CkADC clock is running at 1.5 MHz.<br />
1135
36.7.14 Window Monitor n Configuration Register<br />
Name: WCFGn<br />
Access Type: Read/Write<br />
Offset: 0x58+ n * 0x04<br />
Reset Value: 0x00000000<br />
32117D–AVR-01/12<br />
<strong>AT32UC3C</strong><br />
31 30 29 28 27 26 25 24<br />
- SRC WM<br />
23 22 21 20 19 18 17 16<br />
SRC:<br />
Index of the result register to monitor (0 to 16).<br />
WM: Window Mode<br />
0: No window mode.<br />
1: Mode 1: RES(SRC) < HT.<br />
2: Mode 2: RES(SRC) > LT.<br />
3: Mode 3: LT< RES(SRC) < HT.<br />
4: Mode 4: (LT >= RES(SRC)) || (RES(SRC) >= HT).<br />
5: Reserved.<br />
6: Reserved.<br />
7: Reserved.<br />
HT: High Threshold<br />
LT: Low Threshold<br />
HT[11:4]<br />
15 14 13 12 11 10 9 8<br />
HT[3:0] LT[11:8]<br />
7 6 5 4 3 2 1 0<br />
LT[7:0]<br />
1136
36.7.15 Sequencer n Last Converted Value<br />
Name: LCVn<br />
Access Type: Read-only<br />
Offset: 0x60+ n * 0x04<br />
Reset Value: 0x00000000<br />
32117D–AVR-01/12<br />
<strong>AT32UC3C</strong><br />
31 30 29 28 27 26 25 24<br />
LCV[31:24]<br />
23 22 21 20 19 18 17 16<br />
LCV[23:16]<br />
15 14 13 12 11 10 9 8<br />
LCV[15:8]<br />
7 6 5 4 3 2 1 0<br />
LCV[7:0]<br />
LCV: Last Converted Value<br />
This field is set by hardware to the last sequencer converted value. Depending on precision, the higher bits are padded with the<br />
sign bit.<br />
1137
36.7.16 ADC calibration register<br />
Name: ADCCAL<br />
Access Type: Read/Write<br />
Offset: 0x68<br />
Reset Value: 0x00000000<br />
32117D–AVR-01/12<br />
<strong>AT32UC3C</strong><br />
31 30 29 28 27 26 25 24<br />
- OCAL<br />
23 22 21 20 19 18 17 16<br />
- - - - - - - -<br />
15 14 13 12 11 10 9 8<br />
- GCAL[14:8]<br />
7 6 5 4 3 2 1 0<br />
OCAL: Offset Calibration<br />
GCAL: Gain Calibration<br />
GCAL[7:0]<br />
1138
36.7.17 SH Calibration Register<br />
Name: SHCAL<br />
Access Type: Read/Write<br />
Offset: 0x6C<br />
Reset Value: 0x00000000<br />
32117D–AVR-01/12<br />
<strong>AT32UC3C</strong><br />
31 30 29 28 27 26 25 24<br />
- - - - - GAIN1[9:8]<br />
23 22 21 20 19 18 17 16<br />
GAIN1: Sample and Hold 1 Gain Calibration<br />
GAIN0: Sample and Hold 0 Gain Calibration<br />
GAIN1[7:0]<br />
15 14 13 12 11 10 9 8<br />
- - GAIN0[9:8]<br />
7 6 5 4 3 2 1 0<br />
GAIN0[7:0]<br />
1139
36.7.18 Interrupt Enable Register<br />
Name: IER<br />
Access Type: Write-only<br />
Offset: 0x70<br />
Reset Value: 0x00000000<br />
32117D–AVR-01/12<br />
<strong>AT32UC3C</strong><br />
31 30 29 28 27 26 25 24<br />
- - - - - - - -<br />
23 22 21 20 19 18 17 16<br />
- - - - - - -<br />
15 14 13 12 11 10 9 8<br />
- SUTD MSOC1 MSOC0 WM1 WM0 - -<br />
7 6 5 4 3 2 1 0<br />
LOVR1 OVR1 SEOC1 SEOS1 LOVR0 OVR0 SEOC0 SEOS0<br />
Writing a zero to a bit in this register has no effect.<br />
Writing a one to a bit in this register will set the corresponding bit in IMR.<br />
1140
36.7.19 Interrupt Disable Register<br />
Name: IDR<br />
Access Type: Write-only<br />
Offset: 0x74<br />
Reset Value: 0x00000000<br />
32117D–AVR-01/12<br />
<strong>AT32UC3C</strong><br />
31 30 29 28 27 26 25 24<br />
- - - - - - - -<br />
23 22 21 20 19 18 17 16<br />
- - - - - - -<br />
15 14 13 12 11 10 9 8<br />
- SUTD MSOC1 MSOC0 WM1 WM0 - -<br />
7 6 5 4 3 2 1 0<br />
LOVR1 OVR1 SEOC1 SEOS1 LOVR0 OVR0 SEOC0 SEOS0<br />
Writing a zero to a bit in this register has no effect.<br />
Writing a one to a bit in this register will clear the corresponding bit in IMR.<br />
1141
36.7.20 Interrupt Mask Register<br />
Name: IMR<br />
Access Type: Read-only<br />
Offset: 0x78<br />
Reset Value: 0x00000000<br />
32117D–AVR-01/12<br />
<strong>AT32UC3C</strong><br />
31 30 29 28 27 26 25 24<br />
- - - - - - - -<br />
23 22 21 20 19 18 17 16<br />
- - - - - - -<br />
15 14 13 12 11 10 9 8<br />
- SUTD MSOC1 MSOC0 WM1 WM0 - -<br />
7 6 5 4 3 2 1 0<br />
LOVR1 OVR1 SEOC1 SEOS1 LOVR0 OVR0 SEOC0 SEOS0<br />
0: The corresponding interrupt is disabled.<br />
1: The corresponding interrupt is enabled.<br />
A bit in this register is cleared when the corresponding bit in IDR is written to one.<br />
A bit in this register is set when the corresponding bit in IER is written to one.<br />
1142
36.7.21 Version Register<br />
Name: VERSION<br />
Access Type: Read-only<br />
Offset: 0x7C<br />
Reset Value: -<br />
32117D–AVR-01/12<br />
<strong>AT32UC3C</strong><br />
31 30 29 28 27 26 25 24<br />
- - - - - - - -<br />
23 22 21 20 19 18 17 16<br />
- - - - VARIANT<br />
15 14 13 12 11 10 9 8<br />
- - - - VERSION[11:8]<br />
7 6 5 4 3 2 1 0<br />
VARIANT: Variant Number<br />
Reserved. No functionality associated.<br />
VERSION[7:0]<br />
VERSION: Version Number<br />
Version number of the module. No functionality associated.<br />
1143
36.7.22 Parameter Register<br />
Name: PARAMETER<br />
Access Type: Read-only<br />
Offset: 0x80<br />
Reset Value: 0x00000000<br />
32117D–AVR-01/12<br />
<strong>AT32UC3C</strong><br />
31 30 29 28 27 26 25 24<br />
- - - - - - - -<br />
23 22 21 20 19 18 17 16<br />
- - - - - - - -<br />
15 14 13 12 11 10 9 8<br />
N: Number of Channels<br />
M: Number of States per Sequencer<br />
N<br />
7 6 5 4 3 2 1 0<br />
M<br />
1144
36.7.23 Result Register<br />
Name: RESn<br />
Access Type: Read-only<br />
Offset: 0x84+ n * 0x04<br />
Reset Value: 0x00000000<br />
32117D–AVR-01/12<br />
<strong>AT32UC3C</strong><br />
31 30 29 28 27 26 25 24<br />
RES: Result register<br />
Contains value of conversion n.<br />
RES[31:24]<br />
23 22 21 20 19 18 17 16<br />
RES[23:16]<br />
15 14 13 12 11 10 9 8<br />
RES[15:8]<br />
7 6 5 4 3 2 1 0<br />
RES[7:0]<br />
1145
32117D–AVR-01/12<br />
<strong>AT32UC3C</strong><br />
36.8 Module configuration<br />
The specific configuration for each ADC instance is listed in the following tables. The module<br />
bus clocks listed here are connected to the system bus clocks according to the table in the System<br />
Bus Clock Connections section.<br />
Table 36-13. Module configuration<br />
Feature ADCIFA<br />
NBCONV 8<br />
Table 36-14. Module clock name<br />
Module name Clock name Description<br />
ADCIFA CLK_ADCIFA Peripheral Bus clock from the PBC clock domain<br />
Table 36-15. Register Reset Values<br />
Register Reset Value<br />
VERSION 0x00000110<br />
PARAMETER 0X00000808<br />
The differential inputs of the ADC are configured through the following registers of the ADCIFA:<br />
INPSEL00, INPSEL01, INNSEL00 and INNSEL01 for the sequencer 0<br />
INPSEL10, INPSEL11, INNSEL10 and INNSEL11 for the sequencer 1<br />
The configuration allows to select pin or internal voltage.<br />
The ADC voltage reference can be selected as external reference through the RS register of the<br />
ADCIFA.<br />
For detail, see the ADCIFA chapter.<br />
1146
32117D–AVR-01/12<br />
<strong>AT32UC3C</strong><br />
The following table defines the valid settings for the CONV field of the INPSELxy and INNSELxy<br />
registers in the ADCIFA. This setting defines the mapping of the ADC input voltage.<br />
Table 36-16. INP0/1 selection<br />
INPSEL00[CONVi],<br />
INPSEL10[CONVi],<br />
INPSEL01[CONVi],<br />
INPSEL11[CONVi] Name Connection<br />
0 ADCIN0 See Peripheral Multiplexing on I/O line<br />
chapter<br />
1 ADCIN1<br />
2 ADCIN2<br />
3 ADCIN3<br />
4 ADCIN4<br />
5 ADCIN5<br />
6 ADCIN6<br />
7 ADCIN7<br />
8 DAC0_int Internal output of the DAC0<br />
10 GNDANA Analog Ground<br />
Table 36-17. INN0/1 selection<br />
INNSEL00[CONVi],<br />
INNSEL10[CONVi],<br />
INNSEL01[CONVi],<br />
INNSEL11[CONVi] Name Connection<br />
0 ADCIN8 See Peripheral Multiplexing on I/O line<br />
chapter<br />
1 ADCIN9<br />
2 ADCIN10<br />
3 ADCIN11<br />
4 ADCIN12<br />
5 ADCIN13<br />
6 ADCIN14<br />
7 ADCIN15<br />
8 DAC1_int Internal output of the DAC1<br />
9 GNDANA Analog Ground<br />
Table 36-18. External Reference selection<br />
RS Name Connection<br />
0 Internal 1V reference<br />
1 Internal 0.6*VDDANA reference<br />
2 ADCREF0 See Peripheral Multiplexing<br />
on I/O line chapter<br />
3 ADCREF1<br />
1147
37. DACIFB Interface (DACIFB)<br />
37.1 Features<br />
37.2 Overview<br />
32117D–AVR-01/12<br />
Rev.: 1.1.0.1<br />
<strong>AT32UC3C</strong><br />
12-bit resolution<br />
Flexible conversion range<br />
1 continuous time or 2 Sample/Hold (S/H) outputs<br />
Multiple trigger sources for each channel<br />
Built-in offset and gain calibration<br />
Can be used as input to analog comparator or ADC (as an internal wire and without S/H stage)<br />
Two PDCA channels<br />
Low-power mode<br />
The DAC interface (DACIFB) controls a DAC that converts digital values to analog voltages with<br />
12-bit resolution. The output from the DAC can either be continuous to one pin, or fed to two different<br />
pins using a sample and hold circuitry. Options like low power mode and gain and offset<br />
calibration are available.<br />
The output signal swing is defined by the reference voltage AREF. The DAC operates in unipolar<br />
mode, i.e. output voltage shifts within the 0V to AREF range. The following sources are<br />
available as AREF reference voltage:<br />
VDDANA<br />
An external reference applied to the DACREF input pin.<br />
1148
37.3 Block Diagram<br />
Figure 37-1. DACIFB Block Diagram<br />
I<br />
N<br />
T<br />
C<br />
O<br />
N<br />
T<br />
R<br />
O<br />
L<br />
P<br />
D<br />
C<br />
A<br />
P<br />
B<br />
32117D–AVR-01/12<br />
Ch A data empty<br />
Ch B data empty<br />
Ch A data underrun<br />
Ch B data underrun<br />
Ch A data overrun<br />
Ch B data overrun<br />
Data Channel A<br />
Data Channel B<br />
DAC INTERFACE (DACIFB)<br />
DAC CTRL<br />
Enable<br />
Channel B<br />
Trigger MUX<br />
A/B Select<br />
Data Alignment<br />
16 bits<br />
16 bits<br />
DAC CALIBRATION<br />
CTRL<br />
Timer<br />
Channel B<br />
Trig select B<br />
Trig select A<br />
Prescaler<br />
Data<br />
Alignment<br />
Gain Calibration<br />
Offset Calibration<br />
Ch A<br />
12 bits<br />
Ch B<br />
12 bits<br />
Timer<br />
Channel A<br />
Channel A<br />
Trigger MUX<br />
Arbiter<br />
Peripheral Event<br />
Controller (PEVC)<br />
Analog DAC<br />
Output Control<br />
and Driver<br />
(S/H)<br />
DAC<br />
<strong>AT32UC3C</strong><br />
I/O<br />
Controller<br />
Internal Output to<br />
Analog Comparator or<br />
ADC<br />
DAC Channel A<br />
S/H Output<br />
DAC Channel B<br />
S/H Output<br />
1149
37.4 I/O Lines Description<br />
37.5 Product Dependencies<br />
37.5.1 I/O Lines<br />
32117D–AVR-01/12<br />
<strong>AT32UC3C</strong><br />
The pins used for interfacing the DAC may be multiplexed with GPIO lines. The programmer<br />
must first program the GPIO controller to assign the desired DAC pins to their peripheral function.<br />
If I/O lines of the DAC are not used by the application, they can be used for other purposes<br />
by the GPIO controller.<br />
37.5.2 Power Management<br />
If the CPU enters a sleep mode that disables CLK_DACIFB used by the DACIFB, the DACIFB<br />
will stop functioning and will resume operation after the system wakes up from sleep mode.<br />
37.5.3 Clocks<br />
37.5.4 Interrupts<br />
Table 37-1. I/O Lines Description<br />
Pin Name Pin Description Type Active Level<br />
DACA DAC channel A analog output Output N/A<br />
DACB DAC channel B analog output Output N/A<br />
DACREF DAC voltage reference Input N/A<br />
The DACIFB is clocked through the Power Manager (PM), therefore the programmer must first<br />
configure the PM to enable the CLK_DACIFB clock.<br />
This clock is enabled at reset, and can be disabled in the Power Manager. It is recommended to<br />
disable the DACIFB before disabling the clock, to avoid freezing the DACIFB in an undefined<br />
state.<br />
The DACIFB interrupt lines are connected to the internal sources of the interrupt controller.<br />
Using the DACIFB interrupts requires the interrupt controller to be programmed first.<br />
37.5.5 Peripheral Events<br />
The DACIFB peripheral events are connected via the Peripheral Event Controller. Refer to the<br />
Peripheral Event Controller chapter for details.<br />
37.5.6 Debug Operation<br />
The DACIFB is disabled during debug operation, unless the Run In Debug bit in the Development<br />
Control Register is set and the bit corresponding to the DACIFB is set in the Peripheral<br />
Debug Register (PDBG). Please refer to the On-Chip Debug chapter in the AVR32UC Technical<br />
Reference Manual, and the OCD Module Configuration section, for details.<br />
The DACIFB is debug-mode aware. When the CPU is in debug mode, all the incoming triggers<br />
are blocked, therefore all DMA based conversions are halted upon debug mode activation. The<br />
auto-refresh functionality is kept active so that the last converted value remains visible on both<br />
channels outputs.<br />
Apart from the auto-trig mode, it is possible to perform “one shot” conversions triggered by write<br />
accesses to the data register.<br />
1150
37.6 Functional Description<br />
37.6.1 Basic Operation<br />
32117D–AVR-01/12<br />
<strong>AT32UC3C</strong><br />
37.6.1.1 Output channels<br />
The output from the DAC can either be continuous to one pin (DAC channel A only), or fed to<br />
two different pins using a sample and hold circuitry (S/H). With S/H these two outputs can act<br />
independently and create two different analog signals, different in both voltage and frequency.<br />
The two S/H outputs have individual data and conversion control registers.<br />
The DAC output may be used as internal input signal to other peripherals, such as the Analog<br />
Comparator or the ADC. Only the DAC internal output can be used as internal input, the S/H outputs<br />
can not be used as such. Note that in this internal routing mode, both S/H modules must be<br />
deactivated in order to avoid disturbances on the internal channel.<br />
37.6.1.2 Timing constraints<br />
Some timing constraints must be observed in order to make sure the S/H circuitry operates correctly.<br />
These are relative to the frequency of the peripheral clock of the DACIFB, as this will<br />
affect the charging/discharging periods of the S/H circuitry. Not meeting these constraints will<br />
result in reducing the accuracy of the DAC conversions.<br />
The DAC sampling time is the time interval between two conversions. Without S/H operating,<br />
this figure should be equal or greater than the DAC minimum sampling period (corresponding to<br />
the DAC maximum sampling frequency). With S/H operating, this figure should be equal or<br />
greater than 1.5 times the DAC minimum sampling period.<br />
When the sampling frequency is too low, the S/H circuitry may let the output voltage drop significantly<br />
between two consecutive conversions. If enabled, the auto-refresh mode will<br />
automatically repeat continuously the conversion of the last channel data. This allows maintaining<br />
the voltage level on the S/H outputs, whenever the time elapsed between two data to be<br />
converted is too long. The DAC refresh time is the time interval between two channel data<br />
updates, it can not be smaller than the minimum sampling period.<br />
The analog DAC startup time is non-null, therefore a waiting period of a few CLK_DACIFB clock<br />
cycles must be observed before considering conversion of the first data.<br />
Note that if S/H is enabled, the actual sampling period will be 1.5 times greater than the programmed<br />
sampling period.<br />
37.6.1.3 Starting a conversion<br />
Conversions are either performed upon writes to the data registers or triggered by an incoming<br />
event (auto-trig mode). Both application software and the Peripheral DMA controller may write to<br />
the data registers.<br />
Using the Peripheral DMA Controller to write data to the DACIFB, together with an event input to<br />
trigger conversions, gives the most accurate timing for conversions.<br />
The Peripheral DMA Controller data transfer rate depends on the sampling frequency imposed<br />
by the event line. The DACIFB sends a request to the Peripheral DMA Controller, and once the<br />
request is granted (Peripheral DMA Controller acknowledge) the conversion is performed upon<br />
reception of a trigger event.<br />
1151
32117D–AVR-01/12<br />
<strong>AT32UC3C</strong><br />
37.6.1.4 Data Registers<br />
Data to be converted is taken from two registers, one for each channel: Data Register 0 (DR0)<br />
for channel A and Data Register 1 (DR1) for channel B.<br />
37.6.2 Advanced Operation<br />
37.6.2.1 Prescaler<br />
Alternatively both samples to be converted can be written to DR0 in a single write cycle, in this<br />
configuration the values for channel B and A are written to the upper and the lower half words of<br />
DR0, respectively. This operation is possible only if the DAC Dual Data in Data Register A bit of<br />
the Configuration register (CFR.DDA) is enabled.<br />
While the field reserved for the data to be converted is 16 bits wide, only the 12 lower bits are<br />
considered for conversion. In order to match the expected data alignment, rounded right and left<br />
shifts are programmable within a separate register for each data channel.<br />
A programmable prescaler generates a divided clock signal from the system clock. This signal is<br />
then fed to the following DACIFB programmable counters, as shown on Figure 37-2:<br />
The channel interval counter, which sets the minimum time interval between two samples, or<br />
in other words, the maximum sampling frequency (see CHI bitfield in the TCR register).<br />
The S/H refresh counter which, in refresh mode, counts a defined number of prescaled clock<br />
ticks (corresponding to the refresh time) before repeating the conversion of the last received<br />
data (see CHRA and CHRB bitfields in the TCR register).<br />
Trigger event timer counters for both channels which, in timer trigged mode, count a defined<br />
number of prescaled clock ticks before triggering a conversion (see the TRA and TRB<br />
registers).<br />
The limitations described in the “Timing constraints” paragraph must be taken into consideration<br />
when configuring these programmable counters.<br />
In addition to these constraints, when both channels are in use with auto-refresh mode enabled,<br />
the refresh rate should not be significantly higher than the sampling rate on the other channel as<br />
this might cause unexpected behavior on the latter channel.<br />
1152
32117D–AVR-01/12<br />
Figure 37-2. DAC Timing Counters<br />
<strong>AT32UC3C</strong><br />
37.6.2.2 Low Power mode<br />
In order to reduce the power consumption during DAC conversions, the DAC Low Power mode<br />
may be enabled. In low power mode, the DAC is turned off between each conversion.<br />
37.6.2.3 Calibration<br />
Prescaler<br />
TCR.PRESC[2:0]<br />
CLK_DACIFB<br />
PrescalerClock<br />
Timing Counter<br />
TRA.TCD[7:0]<br />
Timing Counter<br />
TRB.TCD[7:0]<br />
Conversion time will be longer if new conversions are started in this mode: a fourfold increase of<br />
the DAC’s output settling time should be expected.<br />
To achieve optimal accuracy, it is possible to calibrate both gain (GOC.GCR) and offset error<br />
(GOC.OCR) in the DAC. The MSB of the GCR and OCR fields is the sign bit.<br />
Gain and Offset are not calibrated automatically and this must be done by software. To perform<br />
this operation, the DAC must be enabled and AOE and BOE bits in the control register must be<br />
set to zero. These settings ensure that the DAC internal output is routed to the ADC.<br />
The test values converted by the DAC are sampled by the ADC which returns a measured value<br />
of the DAC output. Calculating the difference between a series of DACIFB channel input values<br />
and their respective effective levels after conversion makes it possible to deduce both DAC gain<br />
and offset biases.<br />
To get the best calibration result, it is recommended to use the same AREF voltage, output<br />
channel selection, sampling time, and refresh interval when calibrating as in normal DAC<br />
operation.<br />
Including errors, the DAC output value can be expressed as:<br />
Channel Interval<br />
Counter<br />
TCR.CHI[6:0]<br />
Refresh Counter<br />
TCR.CHRA[3:0]<br />
Refresh Counter<br />
TCR.CHRB[3:0]<br />
1153
37.6.3 Interrupts<br />
32117D–AVR-01/12<br />
V DACxX = gain x (DATA CHx / 0xFFF) + offset<br />
In an ideal DAC, gain is 1 and offset 0.<br />
<strong>AT32UC3C</strong><br />
An interrupt request will be generated if the corresponding bit in the Interrupt Mask Register<br />
(IMR) is set. Bits in IMR are set by writing a one to the corresponding bit in the Interrupt Enable<br />
Register (IER), and cleared by writing a one to the corresponding bit in the Interrupt Disable<br />
Register (IDR). The interrupt request remains active until the corresponding bit in SR is cleared<br />
by writing a one to the corresponding bit in the Status Clear Register (SCR).<br />
After processing a channel input data, if the data input buffer is empty, the DACIFB signals a<br />
data empty interrupt to the interrupt controller.<br />
An underrun interrupt will be generated if two consecutive trigger events are issued without any<br />
new channel data being fed to the DACIFB in the meantime.<br />
An overrun interrupt will be generated if an additional channel data is sent to the DACIFB while<br />
the input buffer is already full.<br />
37.6.4 Peripheral Events<br />
Channel conversions can be triggered by an independent event source. A simple arbiter prioritizes<br />
trigger event requests if the two channels are activated at the same time.<br />
Trigger events for both channels are taken either from the PEVC input or from the DACIFB internal<br />
trigger timers. These two timers are set up separately and both use PrescalerClock as their<br />
reference clock (see the TRA and TRB registers).<br />
1154
37.7 User Interface<br />
Table 37-2. DACIFB Register Memory Map<br />
Offset Register Register Name Access Reset<br />
32117D–AVR-01/12<br />
<strong>AT32UC3C</strong><br />
0x00 Control Register CR Read/Write 0x00000000<br />
0x04 Configuration Register CFR Read/Write 0x00000000<br />
0x08 Event Input Control Register ECR Read/Write 0x00000000<br />
0x0C Timing Control Register TCR Read/Write 0x00000000<br />
0x10 Interrupt Enable Register IER Write-only -<br />
0x14 Interrupt Disable Register IDR Write-only -<br />
0x18 Interrupt Mask Register IMR Read-only 0x00000000<br />
0x1C Status Register SR Read-only 0x00000000<br />
0x20 Status Clear Register SCR Write-only -<br />
0x24 Data Register Control Channel A DRCA Read/Write 0x00000001<br />
0x28 Data Register Control Channel B DRCB Read/Write 0x00000001<br />
0x2C Data Register 0 DR0 Read/Write 0x00000000<br />
0x30 Data Register 1 DR1 Read/Write 0x00000000<br />
0x34<br />
Gain and Offset Calibration<br />
Register<br />
GOC Read/Write 0x00000000<br />
0x38 Timer Register Channel A TRA Read/Write 0x00000000<br />
0x3C Timer Register Channel B TRB Read/Write 0x00000000<br />
0x40 Version Register VERSION Read-only - (1)<br />
1. The reset value for this register is device specific. Please refer to the Module Configuration section at the end of this chapter.<br />
1155
37.7.1 Control Register<br />
Name: CR<br />
Access Type: Read/Write<br />
Offset: 0x00<br />
Reset Value: 0x00000000<br />
32117D–AVR-01/12<br />
<strong>AT32UC3C</strong><br />
31 30 29 28 27 26 25 24<br />
- - - - ARBE ARAE TRBE TRAE<br />
23 22 21 20 19 18 17 16<br />
- - - - - - BOE AOE<br />
15 14 13 12 11 10 9 8<br />
- - - - - - - -<br />
7 6 5 4 3 2 1 0<br />
- - - - - - - EN<br />
ARBE: DAC Auto Refresh Channel B Enable<br />
0: auto-refresh on channel B is disabled.<br />
1: auto-refresh on channel B is enabled.<br />
ARAE: DAC Auto Refresh Channel A Enable<br />
0: auto-refresh on channel A is disabled.<br />
1: auto-refresh on channel A is enabled.<br />
TRBE: DAC Timer Register Channel B Enable<br />
0: the timer generating a clocked trigger on channel B is disabled.<br />
1: the timer generating a clocked trigger on channel B is enabled.<br />
TRAE: DAC Timer Register Channel A Enable<br />
0: the timer generating a clocked trigger on channel A is disabled.<br />
1: the timer generating a clocked trigger on channel A is enabled.<br />
BOE: DAC Channel B Output Enable<br />
0: channel B analog output is disabled.<br />
1: channel B analog output is enabled.<br />
AOE: DAC Channel A Output Enable<br />
0: channel A analog output is disabled.<br />
1: channel A analog output is enabled.<br />
EN: DAC Enable<br />
0: DAC is disabled.<br />
1: DAC is enabled.<br />
1156
37.7.2 Configuration Register<br />
Name: CFR<br />
Access Type: Read/Write<br />
Offset: 0x04<br />
Reset Value: 0x00000000<br />
32117D–AVR-01/12<br />
<strong>AT32UC3C</strong><br />
31 30 29 28 27 26 25 24<br />
- - - - - - CHC<br />
23 22 21 20 19 18 17 16<br />
- - - - - - ABE AAE<br />
15 14 13 12 11 10 9 8<br />
- - - - - - - REF<br />
7 6 5 4 3 2 1 0<br />
- - - - - DSE DDA LP<br />
CHC: DAC Channel Configuration<br />
These bits control whether the DAC should operate with sample and hold on outputs or not.<br />
CHC Description<br />
00 S/H modules on both channels are deactivated. Internal routing only.<br />
01 Single channel operation: conversions on channel A only (S/H module activated).<br />
10 Single channel operation: conversions on channel B only (S/H module activated).<br />
11 Dual channel operation: conversions on both channels with both S/H modules activated.<br />
ABE: DAC Auto Triggered Mode Enable Channel B<br />
0: The conversion is triggered by the data register write access.<br />
1: the incoming event (from the event line selected in the ECR Register) triggers the conversion.<br />
AAE: DAC Auto Triggered Mode Enable Channel A<br />
0: The conversion is triggered by the data register write access.<br />
1: the incoming event (from the event line selected in the ECR Register) triggers the conversion.<br />
REF: DAC Reference Selection<br />
This bit controls the voltage reference selection and therefore the output voltage range of the DAC.<br />
REF Voltage Reference Selection<br />
0 External Reference (VREF+ pin)<br />
1 VDDANA<br />
1157
32117D–AVR-01/12<br />
<strong>AT32UC3C</strong><br />
DSE: DAC Data Setup Extra Clock Cycle<br />
0: No extra clock latency.<br />
1: Add an extra clock cycle latency between data written and start of conversion. This may be useful when the DAC clock is<br />
running fast. Adding an extra clock cycle latency might help meeting the data setup time constraint.<br />
DDA: DAC Dual Data in Data Register A<br />
0:No dual data in DR0.<br />
1:Dual data in DR0. This allows writing two 16-bit wide data words in a single write operation to the DR0 register. In this case the<br />
16 upper bits are assigned to the channel B data word while the lower 16 bits remain assigned to the channel A data word.<br />
LP: DAC Low Power Reduction Mode<br />
0: DAC low power mode disabled.<br />
1: DAC low power mode enabled.<br />
1158
37.7.3 Event Input Control Register<br />
Name: ECR<br />
Access Type: Read/Write<br />
Offset: 0x08<br />
Reset Value: 0x00000000<br />
32117D–AVR-01/12<br />
<strong>AT32UC3C</strong><br />
31 30 29 28 27 26 25 24<br />
- - - - - - - -<br />
23 22 21 20 19 18 17 16<br />
- - - - - - - -<br />
15 14 13 12 11 10 9 8<br />
- - - - - - - ESLB<br />
7 6 5 4 3 2 1 0<br />
- - - - - - - ESLA<br />
ESLB: DAC Event Input Selection Channel B<br />
0: the channel B trigger timer is used<br />
1: the peripheral event controller input is used<br />
ESLA: DAC Event Input Selection Channel A<br />
0: the channel A trigger timer is used<br />
1: the peripheral event controller input is used<br />
1159
37.7.4 Timing Control Register<br />
Name: TCR<br />
Access Type: Read/Write<br />
Offset: 0x0C<br />
Reset Value: 0x00000000<br />
32117D–AVR-01/12<br />
<strong>AT32UC3C</strong><br />
31 30 29 28 27 26 25 24<br />
- - - - - PRESC<br />
23 22 21 20 19 18 17 16<br />
- CHI<br />
15 14 13 12 11 10 9 8<br />
- - - - CHRB<br />
7 6 5 4 3 2 1 0<br />
- - - - CHRA<br />
PRESC: DAC Timer Prescaler<br />
The prescaling ratio between PrescalerClock and CLK_DACIFB.<br />
PRESC Description<br />
000 clk_dacifb / 1<br />
001 clk_dacifb / 2<br />
010 clk_dacifb / 4<br />
011 clk_dacifb / 8<br />
100 clk_dacifb / 16<br />
101 clk_dacifb / 32<br />
110 clk_dacifb / 64<br />
111 clk_dacifb / 128<br />
CHI: DAC Channel Interval Control<br />
Number of PrescalerClock ticks counted as the minimum time gap between two consecutive conversions . This should not be<br />
lower than the minimum sampling period.<br />
1160
32117D–AVR-01/12<br />
<strong>AT32UC3C</strong><br />
CHRn : DAC Channel Refresh Timing Control Channel n<br />
The time interval between each channel output refresh. This interval avoids losing accuracy of the converted value between two<br />
consecutive conversions when the sampling rate is low.<br />
CHRn Description<br />
0000 PrescalerClock / 2<br />
0001 PrescalerClock / 4<br />
0010 PrescalerClock / 8<br />
0011 PrescalerClock / 16<br />
0100 PrescalerClock / 32<br />
0101 PrescalerClock / 64<br />
0110 PrescalerClock / 128<br />
0111 PrescalerClock / 256<br />
1000 PrescalerClock / 512<br />
1001 PrescalerClock / 1024<br />
others Reserved<br />
1161
37.7.5 Interrupt Enable Register<br />
Name: IER<br />
Access Type: Write-only<br />
Offset: 0x10<br />
Reset Value: -<br />
32117D–AVR-01/12<br />
<strong>AT32UC3C</strong><br />
31 30 29 28 27 26 25 24<br />
- - - - - - - -<br />
23 22 21 20 19 18 17 16<br />
- - - - - - DEB DEA<br />
15 14 13 12 11 10 9 8<br />
- - - - - - UA UA<br />
7 6 5 4 3 2 1 0<br />
- - - - - - OB OA<br />
Writing a zero to a bit in this register has no effect.<br />
Writing a one to a bit in this register will set the corresponding bit in IMR.<br />
1162
37.7.6 Interrupt Disable Register<br />
Name: IDR<br />
Access Type: Write-only<br />
Offset: 0x14<br />
Reset Value: -<br />
32117D–AVR-01/12<br />
<strong>AT32UC3C</strong><br />
31 30 29 28 27 26 25 24<br />
- - - - - - - -<br />
23 22 21 20 19 18 17 16<br />
- - - - - - DEB DEA<br />
15 14 13 12 11 10 9 8<br />
- - - - - - UB UA<br />
7 6 5 4 3 2 1 0<br />
- - - - - - OB OA<br />
Writing a zero to a bit in this register has no effect.<br />
Writing a one to a bit in this register will clear the corresponding bit in IMR.<br />
1163
37.7.7 Interrupt Mask Register<br />
Name: IMR<br />
Access Type: Read-only<br />
Offset: 0x18<br />
Reset Value: 0x00000000<br />
32117D–AVR-01/12<br />
<strong>AT32UC3C</strong><br />
31 30 29 28 27 26 25 24<br />
- - - - - - - -<br />
23 22 21 20 19 18 17 16<br />
- - - - - - DEB DEA<br />
15 14 13 12 11 10 9 8<br />
- - - - - - UB UA<br />
7 6 5 4 3 2 1 0<br />
- - - - - - OB OA<br />
0: The corresponding interrupt is disabled.<br />
1: The corresponding interrupt is enabled.<br />
A bit in this register is cleared when the corresponding bit in IDR is written to one.<br />
A bit in this register is set when the corresponding bit in IER is written to one.<br />
1164
37.7.8 Status Register<br />
Name: SR<br />
Access Type: Read-only<br />
Offset: 0x1C<br />
Reset Value: 0x00000000<br />
32117D–AVR-01/12<br />
<strong>AT32UC3C</strong><br />
31 30 29 28 27 26 25 24<br />
- - - - - - - -<br />
23 22 21 20 19 18 17 16<br />
- - - - - - DEB DEA<br />
15 14 13 12 11 10 9 8<br />
- - - - - - UB UA<br />
7 6 5 4 3 2 1 0<br />
- - - - - - OB OA<br />
DEB: DAC Data Register Empty Channel B Flag<br />
0: Data register not empty, writing to the data register may cause losing a conversion value.<br />
1: Data register for channel B is empty, meaning that a new channel input data may be written.<br />
DEA: DAC Data Register Empty Channel A Flag<br />
0: Data register not empty, writing to the data register may cause losing a conversion value.<br />
1: Data register for channel A is empty, meaning that a new channel input data may be written.<br />
UB: DAC Underrun Interrupt Channel B Flag<br />
0: No underrun in channel B has occurred.<br />
1: Underrun has occurred, at least two consecutive trigger events were received without any new incoming data on channel B in<br />
the meantime.<br />
UA: DAC Underrun Interrupt Channel A Flag<br />
0: No underrun in channel A has occurred.<br />
1: Underrun has occurred, at least two consecutive trigger events were received without any new incoming data on channel A in<br />
the meantime.<br />
OB: DAC Overrun Interrupt Channel B Flag<br />
0: No overrun in channel B has occurred.<br />
1: Overrun has occurred, a new input data was received on channel B while the input buffer was already full.<br />
OA: DAC Overrun Interrupt Channel A Flag<br />
0: No overrun in channel A has occurred.<br />
1: Overrun has occurred, a new input data was received on channel A while the input buffer was already full.<br />
1165
37.7.9 Status Clear Register<br />
Name: SCR<br />
Access Type: Write-only<br />
Offset: 0x20<br />
Reset Value: 0x00000000<br />
32117D–AVR-01/12<br />
<strong>AT32UC3C</strong><br />
31 30 29 28 27 26 25 24<br />
- - - - - - - -<br />
23 22 21 20 19 18 17 16<br />
- - - - - - DEB DEA<br />
15 14 13 12 11 10 9 8<br />
- - - - - - UB UA<br />
7 6 5 4 3 2 1 0<br />
- - - - - - OB OA<br />
Writing a bit to one will clear the corresponding bit in ISR.<br />
Writing a bit to zero has no effect.<br />
1166
37.7.10 Data Register Control Channel A<br />
Name: DRCA<br />
Access Type: Read/Write<br />
Offset: 0x24<br />
Reset Value: 0x00000001<br />
32117D–AVR-01/12<br />
<strong>AT32UC3C</strong><br />
31 30 29 28 27 26 25 24<br />
- - - - - - - -<br />
23 22 21 20 19 18 17 16<br />
- - - - - - - -<br />
15 14 13 12 11 10 9 8<br />
- - - - DSD DSV<br />
7 6 5 4 3 2 1 0<br />
- - - - - - - DRN<br />
DSD: DAC Data Shift Direction<br />
0: DAC input value to be converted is right aligned<br />
1: DAC input value to be converted is left aligned.<br />
DSV: DAC Data Shift Value<br />
The number of left or right shifts to be performed on the 16-bits data word before being fed to the DAC.<br />
Up to 4 left shifts and 4 right shifts are possible. Set bit 3 to obtain a left shift, leave it de-asserted to perform a right shift.<br />
DRN: DAC Data Rounding Enable<br />
0: No rounding<br />
1: Rounding with right shifting is enabled. This adds "1" to the LSB before the last right shift. This feature is enabled by default.<br />
1167
37.7.11 Data Register Control Channel B<br />
Name: DRCB<br />
Access Type: Read/Write<br />
Offset: 0x28<br />
Reset Value: 0x00000001<br />
32117D–AVR-01/12<br />
<strong>AT32UC3C</strong><br />
31 30 29 28 27 26 25 24<br />
- - - - - - - -<br />
23 22 21 20 19 18 17 16<br />
- - - - - - - -<br />
15 14 13 12 11 10 9 8<br />
- - - - DSD DSV<br />
7 6 5 4 3 2 1 0<br />
- - - - - - - DRN<br />
DSD: DAC Data Shift Direction<br />
0: DAC input value to be converted is right aligned<br />
1: DAC input value to be converted is left aligned.<br />
DSV: DAC Data Shift Value<br />
The number of left or right shifts to be performed on the 16-bits data word before being fed to the DAC.<br />
Up to 4 left shifts and 4 right shifts are possible. Set bit 3 to obtain a left shift, leave it de-asserted to perform a right shift.<br />
DRN: DAC Data Rounding Enable<br />
0: No rounding<br />
1: rounding with right shifting is enabled. This adds "1" to the LSB before the last right shift. This feature is enabled by default.<br />
1168
37.7.12 Data Register Channel 0<br />
Name: DR0<br />
Access Type: Read/Write<br />
Offset: 0x2C<br />
Reset Value: 0x00000000<br />
32117D–AVR-01/12<br />
<strong>AT32UC3C</strong><br />
31 30 29 28 27 26 25 24<br />
DCB<br />
23 22 21 20 19 18 17 16<br />
DCB<br />
15 14 13 12 11 10 9 8<br />
DCA<br />
7 6 5 4 3 2 1 0<br />
DCA<br />
DCB: DAC Data Channel B<br />
The right-aligned 12-bit value to be converted on channel B, when the DDA bit within the CFR register is activated. This allows<br />
conversions on both channels in a single register write cycle. When DDA is deactivated this field is ignored, and the data to be<br />
converted on channel B should then be written to the DR1 register.<br />
DCA: DAC Data Channel A<br />
The right-aligned 12-bit value to be converted on channel A.<br />
1169
37.7.13 Data Register Channel 1<br />
Name: DR1<br />
Access Type: Read/Write<br />
Offset: 0x30<br />
Reset Value: 0x00000000<br />
32117D–AVR-01/12<br />
<strong>AT32UC3C</strong><br />
31 30 29 28 27 26 25 24<br />
- - - - - - - -<br />
23 22 21 20 19 18 17 16<br />
- - - - - - - -<br />
15 14 13 12 11 10 9 8<br />
DCB<br />
7 6 5 4 3 2 1 0<br />
DCB<br />
DCB: DAC Data Channel B<br />
The right-aligned 12-bit value to be converted on channel B.<br />
1170
37.7.14 Gain and Offset Calibration Register<br />
Name: GOC<br />
Access Type: Read/Write<br />
Offset: 0x34<br />
Reset Value: 0x00000000<br />
32117D–AVR-01/12<br />
<strong>AT32UC3C</strong><br />
31 30 29 28 27 26 25 24<br />
GCR: DAC Gain Calibration Value<br />
These bits are used to compensate the gain error in the DAC. The MSB is the sign bit.<br />
Note that the size of the GCR field can change depending of implementation. See the Module Configuration section.<br />
OCR: DAC Offset Calibration Value<br />
These bits are used to compensate the offset error in the DAC. The MSB is the sign bit.<br />
Note that the size of the OCR field can change depending of implementation. See the Module Configuration section.<br />
GCR<br />
23 22 21 20 19 18 17 16<br />
GCR<br />
15 14 13 12 11 10 9 8<br />
OCR<br />
7 6 5 4 3 2 1 0<br />
OCR<br />
1171
37.7.15 Timer Register Channel A<br />
Name: TRA<br />
Access Type: Read/Write<br />
Offset: 0x38<br />
Reset Value: 0x00000000<br />
32117D–AVR-01/12<br />
<strong>AT32UC3C</strong><br />
31 30 29 28 27 26 25 24<br />
TRL - - - - - - -<br />
23 22 21 20 19 18 17 16<br />
- - - - - - - -<br />
15 14 13 12 11 10 9 8<br />
- - - - - - - -<br />
7 6 5 4 3 2 1 0<br />
TRL: DAC Timer Reload<br />
Write this bit to one to re-initialize the counter.<br />
TCD: DAC Timer Count Down Value<br />
These bits are used to program the timing counter countdown value.<br />
The timer counts from this value down to zero and then issues a trigger signal before reloading the count register.<br />
TCD<br />
1172
37.7.16 Timer Register Channel B<br />
Name: TRB<br />
Access Type: Read/Write<br />
Offset: 0x3C<br />
Reset Value: 0x00000000<br />
32117D–AVR-01/12<br />
<strong>AT32UC3C</strong><br />
31 30 29 28 27 26 25 24<br />
TRL - - - - - - -<br />
23 22 21 20 19 18 17 16<br />
- - - - - - - -<br />
15 14 13 12 11 10 9 8<br />
- - - - - - - -<br />
7 6 5 4 3 2 1 0<br />
TRL: DAC Timer Reload<br />
Write this bit to one to re-initialize the counter.<br />
TCD: DAC Timer Count Down Value<br />
These bits are used to program the timing counter countdown value.<br />
The timer counts from this value down to zero and then issues a trigger signal before reloading the count register.<br />
TCD<br />
1173
37.7.17 Version Register<br />
Name: VERSION<br />
Access Type: Read-only<br />
Offset: 0x40<br />
Reset Value: -<br />
32117D–AVR-01/12<br />
<strong>AT32UC3C</strong><br />
31 30 29 28 27 26 25 24<br />
- - - - - - - -<br />
23 22 21 20 19 18 17 16<br />
- - - - VARIANT<br />
15 14 13 12 11 10 9 8<br />
- - - - VERSION<br />
7 6 5 4 3 2 1 0<br />
VERSION<br />
VARIANT: Variant Number<br />
Reserved. No functionality associated.<br />
VERSION: Version Number<br />
Version number of the module. No functionality associated.<br />
1174
32117D–AVR-01/12<br />
<strong>AT32UC3C</strong><br />
37.8 Module Configuration<br />
The specific configuration for each DACIFB instance is listed in the following tables. The module<br />
bus clocks listed here are connected to the system bus clocks. Please refer to the Power Manager<br />
chapter for details.<br />
Table 37-3. DACIFB Configuration<br />
Feature DACIFB0 DACIFB1<br />
GOC.GCR size 8-bit 8-bit<br />
GOC.OCR size 9-bit 9-bit<br />
Table 37-4. DACIFB Clock Name<br />
Module Name Clock Name Description<br />
DACIFB0 CLK_DACIFB0 Peripheral Bus clock from the PBA clock domain<br />
DACIFB1 CLK_DACIFB1 Peripheral Bus clock from the PBA clock domain<br />
Table 37-5. Register Reset Values<br />
Register Reset Value<br />
VERSION 0x00000110<br />
1175
38. aWire UART (AW)<br />
38.1 Features<br />
38.2 Overview<br />
38.3 Block Diagram<br />
32117D–AVR-01/12<br />
Rev: 2.3.0.0<br />
<strong>AT32UC3C</strong><br />
Asynchronous receiver or transmitter when the aWire system is not used for debugging.<br />
One- or two-pin operation supported.<br />
If the AW is not used for debugging, the aWire UART can be used by the user to send or receive<br />
data with one start bit, eight data bits, no parity bits, and one stop bit. This can be controlled<br />
through the aWire UART user interface.<br />
This chapter only describes the aWire UART user interface. For a description of the aWire<br />
Debug Interface, please see the Programming and Debugging chapter.<br />
Figure 38-1. aWire Debug Interface Block Diagram<br />
PB<br />
AW User Interface<br />
AW CONTROL<br />
SAB interface<br />
RW SZ ADDR DATA<br />
SAB<br />
aWire Debug Interface<br />
CHIP_ERASE command<br />
HALT command<br />
RESET command<br />
AW_ENABLE<br />
Baudrate Detector<br />
UART<br />
CRC<br />
Flash<br />
Controller<br />
CPU<br />
Power<br />
Manager<br />
External reset<br />
Reset<br />
filter<br />
RESET_N<br />
1176
38.4 I/O Lines Description<br />
Table 38-1. I/O Lines Description<br />
Name Description Type<br />
32117D–AVR-01/12<br />
<strong>AT32UC3C</strong><br />
DATA aWire data multiplexed with the RESET_N pin. Input/Output<br />
38.5 Product Dependencies<br />
In order to use this module, other parts of the system must be configured correctly, as described<br />
below.<br />
38.5.1 I/O Lines<br />
The pin used by AW is multiplexed with the RESET_N pin. The reset functionality is the default<br />
function of this pin. To enable the aWire functionality on the RESET_N pin the user must enable<br />
the aWire UART user interface.<br />
38.5.2 Power Management<br />
If the CPU enters a sleep mode that disables clocks used by the aWire UART user interface, the<br />
aWire UART user interface will stop functioning and resume operation after the system wakes<br />
up from sleep mode.<br />
38.5.3 Clocks<br />
38.5.4 Interrupts<br />
The aWire UART uses the internal 120 MHz RC oscillator (RC120M) as clock source for its<br />
operation. When using the aWire UART user interface RC120M must enabled using the Clock<br />
Request Register (see Section 38.6.1).<br />
The clock for the aWire UART user interface (CLK_AW) is generated by the Power Manager.<br />
This clock is enabled at reset, and can be disabled in the Power Manager. It is recommended to<br />
disable the aWire UART user interface before disabling the clock, to avoid freezing the aWire<br />
UART user interface in an undefined state.<br />
The aWire UART user interface interrupt request line is connected to the interrupt controller.<br />
Using the aWire UART user interface interrupt requires the interrupt controller to be programmed<br />
first.<br />
38.5.5 Debug Operation<br />
If the AW is used for debugging the aWire UART user interface will not be usable.<br />
When an external debugger forces the CPU into debug mode, the aWire UART user interface<br />
continues normal operation. If the aWire UART user interface is configured in a way that<br />
requires it to be periodically serviced by the CPU through interrupts or similar, improper operation<br />
or data loss may result during debugging.<br />
38.6 Functional Description<br />
The aWire UART user interface can be used as a spare Asynchronous Receiver or Transmitter<br />
when AW is not used for debugging.<br />
1177
32117D–AVR-01/12<br />
<strong>AT32UC3C</strong><br />
38.6.1 How to Initialize The Module<br />
To initialize the aWire UART user interface the user must first enable the clock by writing a one<br />
to the Clock Enable bit in the Clock Request Register (CLKR.CLKEN) and wait for the Clock<br />
Enable bit in the Status Register (SR.CENABLED) to be set. After doing this either receive,<br />
transmit or receive with resync must be selected by writing the corresponding value into the<br />
Mode field of the Control (CTRL.MODE) Register. Due to the RC120M being asynchronous with<br />
the system clock values must be allowed to propagate in the system. During this time the aWire<br />
master will set the Busy bit in the Status Register (SR.BUSY).<br />
After the SR.BUSY bit is cleared the Baud Rate field in the Baud Rate Register (BRR.BR) can<br />
be written with the wanted baudrate ( fbr ) according to the following formula ( faw is the RC120M<br />
clock frequency):<br />
After this operation the user must wait until the SR.BUSY is cleared. The interface is now ready<br />
to be used.<br />
38.6.2 Basic Asynchronous Receiver Operation<br />
The aWire UART user interface must be initialized according to the sequence above, but the<br />
CTRL.MODE field must be written to one (Receive mode).<br />
When a data byte arrives the aWire UART user interface will indicate this by setting the Data<br />
Ready Interrupt bit in the Status Register (SR.DREADYINT). The user must read the Data in the<br />
Receive Holding Register (RHR.RXDATA) and clear the Interrupt bit by writing a one to the Data<br />
Ready Interrupt Clear bit in the Status Clear Register (SCR.DREADYINT). The interface is now<br />
ready to receive another byte.<br />
38.6.3 Basic Asynchronous Transmitter Operation<br />
The aWire UART user interface must be initialized according to the sequence above, but the<br />
CTRL.MODE field must be written to two (Transmit mode).<br />
To transmit a data byte the user must write the data to the Transmit Holding Register<br />
(THE.TXDATA). Before the next byte can be written the SR.BUSY must be cleared.<br />
38.6.4 Basic Asynchronous Receiver with Resynchronization<br />
By writing three into CTRL.MODE the aWire UART user interface will assume that the first byte<br />
it receives is a sync byte (0x55) and set BRR.BR according to this. All subsequent transfers will<br />
assume this baudrate, unless BRR.BR is rewritten by the user.<br />
38.6.5 Overrun<br />
8faw fbr =<br />
----------<br />
BR<br />
To make the aWire UART user interface accept a new sync resynchronization the aWire UART<br />
user interface must be disabled by writing zero to CTRL.MODE and then reenable the interface.<br />
In Receive mode an overrun can occur if the user has not read the previous received data from<br />
the RHR.RXDATA when the newest data should be placed there. Such a condition is flagged by<br />
setting the Overrun bit in the Status Register (SR.OVERRUN). If SR.OVERRUN is set the newest<br />
data received is placed in RHR.RXDATA and the data that was there before is overwritten.<br />
1178
38.6.6 Interrupts<br />
32117D–AVR-01/12<br />
<strong>AT32UC3C</strong><br />
To make the CPU able to do other things while waiting for the aWire UART user interface to finish<br />
its operations the aWire UART user interface supports generating interrupts. All status bits in<br />
the Status Register can be used as interrupt sources, except the SR.BUSY and SR.CENABLED<br />
bits.<br />
To enable an interrupt the user must write a one to the corresponding bit in the Interrupt Enable<br />
Register (IER). Upon the next zero to one transition of this SR bit the aWire UART user interface<br />
will flag this interrupt to the CPU. To clear the interrupt the user must write a one to the corresponding<br />
bit in the Status Clear Register (SCR).<br />
Interrupts can be disabled by writing a one to the corresponding bit in the Interrupt Disable Register<br />
(IDR). The interrupt Mask Register (IMR) can be read to check if an interrupt is enabled or<br />
disabled.<br />
38.6.7 Using the Peripheral DMA Controller<br />
To relieve the CPU of data transfers the aWire UART user interface support using the Peripheral<br />
DMA controller.<br />
To transmit using the Peripheral DMA Controller do the following:<br />
1. Setup the aWire UART user interface in transmit mode.<br />
2. Setup the Peripheral DMA Controller with buffer address and length, use byte as transfer<br />
size.<br />
3. Enable the Peripheral DMA Controller.<br />
4. Wait until the Peripheral DMA Controller is done.<br />
To receive using the Peripheral DMA Controller do the following:<br />
1. Setup the aWire UART user interface in receive mode<br />
2. Setup the Peripheral DMA Controller with buffer address and length, use byte as transfer<br />
size.<br />
3. Enable the Peripheral DMA Controller.<br />
4. Wait until the Peripheral DMA Controller is ready.<br />
1179
38.7 User Interface<br />
Table 38-2. aWire UART user interface Register Memory Map<br />
Note: 1. The reset values are device specific. Please refer to the Module Configuration section at the end of this chapter.<br />
32117D–AVR-01/12<br />
<strong>AT32UC3C</strong><br />
Offset Register Register Name Access Reset<br />
0x00 Control Register CTRL Read/Write 0x00000000<br />
0x04 Status Register SR Read-only 0x00000000<br />
0x08 Status Clear Register SCR Write-only -<br />
0x0C Interrupt Enable Register IER Write-only -<br />
0x10 Interrupt Disable Register IDR Write-only -<br />
0x14 Interrupt Mask Register IMR Read-only 0x00000000<br />
0x18 Receive Holding Register RHR Read-only 0x00000000<br />
0x1C Transmit Holding Register THR Read/Write 0x00000000<br />
0x20 Baud Rate Register BRR Read/Write 0x00000000<br />
0x24 Version Register VERSION Read-only - (1)<br />
0x28 Clock Request Register CLKR Read/Write 0x00000000<br />
1180
38.7.1 Control Register<br />
Name: CTRL<br />
Access Type: Read/Write<br />
Offset: 0x00<br />
Reset Value: 0x00000000<br />
MODE: aWire UART user interface mode<br />
32117D–AVR-01/12<br />
<strong>AT32UC3C</strong><br />
31 30 29 28 27 26 25 24<br />
- - - - - - - -<br />
23 22 21 20 19 18 17 16<br />
- - - - - - - -<br />
15 14 13 12 11 10 9 8<br />
- - - - - - - -<br />
7 6 5 4 3 2 1 0<br />
- - - - - - MODE<br />
Table 38-3. aWire UART user interface Modes<br />
MODE Mode Description<br />
0 Disabled<br />
1 Receive<br />
2 Transmit<br />
3 Receive with resync.<br />
1181
38.7.2 Status Register<br />
Name: SR<br />
Access Type: Read-only<br />
Offset: 0x04<br />
Reset Value: 0x00000000<br />
32117D–AVR-01/12<br />
<strong>AT32UC3C</strong><br />
31 30 29 28 27 26 25 24<br />
- - - - - - - -<br />
23 22 21 20 19 18 17 16<br />
- - - - - - - -<br />
15 14 13 12 11 10 9 8<br />
- - TRMIS - - OVERRUN DREADYINT READYINT<br />
7 6 5 4 3 2 1 0<br />
- - - - - CENABLED - BUSY<br />
TRMIS: Transmit Mismatch<br />
0: No transfers mismatches.<br />
1: The transceiver was active when receiving.<br />
This bit is set when the transceiver is active when receiving.<br />
This bit is cleared when corresponding bit in SCR is written to one.<br />
OVERRUN: Data Overrun<br />
0: No data overwritten in RHR.<br />
1: Data in RHR has been overwritten before it has been read.<br />
This bit is set when data in RHR is overwritten before it has been read.<br />
This bit is cleared when corresponding bit in SCR is written to one.<br />
DREADYINT: Data Ready Interrupt<br />
0: No new data in the RHR.<br />
1: New data received and placed in the RHR.<br />
This bit is set when new data is received and placed in the RHR.<br />
This bit is cleared when corresponding bit in SCR is written to one.<br />
READYINT: Ready Interrupt<br />
0: The interface has not generated an ready interrupt.<br />
1: The interface has had a transition from busy to not busy.<br />
This bit is set when the interface has transition from busy to not busy.<br />
This bit is cleared when corresponding bit in SCR is written to one.<br />
CENABLED: Clock Enabled<br />
0: The aWire clock is not enabled.<br />
1: The aWire clock is enabled.<br />
1182
This bit is set when the clock is disabled.<br />
This bit is cleared when the clock is enabled.<br />
BUSY: Synchronizer Busy<br />
0: The asynchronous interface is ready to accept more data.<br />
1: The asynchronous interface is busy and will block writes to CTRL, BRR, and THR.<br />
This bit is set when the asynchronous interface becomes busy.<br />
This bit is cleared when the asynchronous interface becomes ready.<br />
32117D–AVR-01/12<br />
<strong>AT32UC3C</strong><br />
1183
38.7.3 Status Clear Register<br />
Name: SCR<br />
Access Type: Write-only<br />
Offset: 0x08<br />
Reset Value: 0x00000000<br />
32117D–AVR-01/12<br />
<strong>AT32UC3C</strong><br />
31 30 29 28 27 26 25 24<br />
- - - - - - - -<br />
23 22 21 20 19 18 17 16<br />
- - - - - - - -<br />
15 14 13 12 11 10 9 8<br />
- - TRMIS - - OVERRUN DREADYINT READYINT<br />
7 6 5 4 3 2 1 0<br />
- - - - - - - -<br />
Writing a zero to a bit in this register has no effect.<br />
Writing a one to a bit in this register will clear the corresponding bit in SR and the corresponding interrupt request.<br />
1184
38.7.4 Interrupt Enable Register<br />
Name: IER<br />
Access Type: Write-only<br />
Offset: 0x0C<br />
Reset Value: 0x00000000<br />
32117D–AVR-01/12<br />
<strong>AT32UC3C</strong><br />
31 30 29 28 27 26 25 24<br />
- - - - - - - -<br />
23 22 21 20 19 18 17 16<br />
- - - - - - - -<br />
15 14 13 12 11 10 9 8<br />
- - TRMIS - - OVERRUN DREADYINT READYINT<br />
7 6 5 4 3 2 1 0<br />
- - - - - - - -<br />
Writing a zero to a bit in this register has no effect.<br />
Writing a one to a bit in this register will set the corresponding bit in IMR.<br />
1185
38.7.5 Interrupt Disable Register<br />
Name: IDR<br />
Access Type: Write-only<br />
Offset: 0x10<br />
Reset Value: 0x00000000<br />
32117D–AVR-01/12<br />
<strong>AT32UC3C</strong><br />
31 30 29 28 27 26 25 24<br />
- - - - - - - -<br />
23 22 21 20 19 18 17 16<br />
- - - - - - - -<br />
15 14 13 12 11 10 9 8<br />
- - TRMIS - - OVERRUN DREADYINT READYINT<br />
7 6 5 4 3 2 1 0<br />
- - - - - - - -<br />
Writing a zero to a bit in this register has no effect.<br />
Writing a one to a bit in this register will clear the corresponding bit in IMR.<br />
1186
38.7.6 Interrupt Mask Register<br />
Name: IMR<br />
Access Type: Read-only<br />
Offset: 0x14<br />
Reset Value: 0x00000000<br />
32117D–AVR-01/12<br />
<strong>AT32UC3C</strong><br />
31 30 29 28 27 26 25 24<br />
- - - - - - - -<br />
23 22 21 20 19 18 17 16<br />
- - - - - - - -<br />
15 14 13 12 11 10 9 8<br />
- - TRMIS - - OVERRUN DREADYINT READYINT<br />
7 6 5 4 3 2 1 0<br />
- - - - - - - -<br />
0: The corresponding interrupt is disabled.<br />
1: The corresponding interrupt is enabled.<br />
A bit in this register is cleared when the corresponding bit in IDR is written to one.<br />
A bit in this register is set when the corresponding bit in IER is written to one.<br />
1187
38.7.7 Receive Holding Register<br />
Name: RHR<br />
Access Type: Read-only<br />
Offset: 0x18<br />
Reset Value: 0x00000000<br />
32117D–AVR-01/12<br />
<strong>AT32UC3C</strong><br />
31 30 29 28 27 26 25 24<br />
- - - - - - - -<br />
23 22 21 20 19 18 17 16<br />
- - - - - - - -<br />
15 14 13 12 11 10 9 8<br />
- - - - - - - -<br />
7 6 5 4 3 2 1 0<br />
RXDATA: Received Data<br />
The last byte received.<br />
RXDATA<br />
1188
38.7.8 Transmit Holding Register<br />
Name: THR<br />
Access Type: Read/Write<br />
Offset: 0x1C<br />
Reset Value: 0x00000000<br />
32117D–AVR-01/12<br />
<strong>AT32UC3C</strong><br />
31 30 29 28 27 26 25 24<br />
- - - - - - - -<br />
23 22 21 20 19 18 17 16<br />
- - - - - - - -<br />
15 14 13 12 11 10 9 8<br />
- - - - - - - -<br />
7 6 5 4 3 2 1 0<br />
TXDATA: Transmit Data<br />
The data to send.<br />
TXDATA<br />
1189
38.7.9 Baud Rate Register<br />
Name: BRR<br />
Access Type: Read/Write<br />
Offset: 0x20<br />
Reset Value: 0x00000000<br />
BR: Baud Rate<br />
The baud rate ( ) of the transmission, calculated using the following formula ( is the RC120M frequency):<br />
32117D–AVR-01/12<br />
BR should not be set to a value smaller than 32.<br />
Writing a value to this field will update the baud rate of the transmission.<br />
Reading this field will give the current baud rate of the transmission.<br />
<strong>AT32UC3C</strong><br />
31 30 29 28 27 26 25 24<br />
- - - - - - - -<br />
23 22 21 20 19 18 17 16<br />
- - - - - - - -<br />
15 14 13 12 11 10 9 8<br />
BR[15:8]<br />
7 6 5 4 3 2 1 0<br />
f br<br />
BR[7:0]<br />
8faw fbr =<br />
----------<br />
BR<br />
f aw<br />
1190
38.7.10 Version Register<br />
Name: VERSION<br />
Access Type: Read-only<br />
Offset: 0x24<br />
Reset Value: 0x00000200<br />
32117D–AVR-01/12<br />
<strong>AT32UC3C</strong><br />
31 30 29 28 27 26 25 24<br />
- - - - - - - -<br />
23 22 21 20 19 18 17 16<br />
- - - - - - - -<br />
15 14 13 12 11 10 9 8<br />
- - - - VERSION[11:8]<br />
7 6 5 4 3 2 1 0<br />
VERSION[7:0]<br />
VERSION: Version Number<br />
Version number of the module. No functionality associated.<br />
1191
38.7.11 Clock Request Register<br />
Name: CLKR<br />
Access Type: Read/Write<br />
Offset: 0x28<br />
Reset Value: 0x00000000<br />
32117D–AVR-01/12<br />
<strong>AT32UC3C</strong><br />
31 30 29 28 27 26 25 24<br />
- - - - - - - -<br />
23 22 21 20 19 18 17 16<br />
- - - - - - - -<br />
15 14 13 12 11 10 9 8<br />
- - - - - - - -<br />
7 6 5 4 3 2 1 0<br />
- - - - - - - CLKEN<br />
CLKEN: Clock Enable<br />
0: The aWire clock is disabled.<br />
1: The aWire clock is enabled.<br />
Writing a zero to this bit will disable the aWire clock.<br />
Writing a one to this bit will enable the aWire clock.<br />
1192
32117D–AVR-01/12<br />
<strong>AT32UC3C</strong><br />
38.8 Module Configuration<br />
The specific configuration for each aWire instance is listed in the following tables. The module<br />
bus clocks listed here are connected to the system bus clocks. Please refer to the Power Manager<br />
chapter for details.<br />
Table 38-4. Module clock name<br />
Module name Clock name Description<br />
aWire CLK_AW Peripheral Bus clock from the PBA clock domain<br />
Table 38-5. Register Reset Values<br />
Register Reset Value<br />
VERSION 0x00000230<br />
1193
39. Programming and Debugging<br />
39.1 Overview<br />
32117D–AVR-01/12<br />
<strong>AT32UC3C</strong><br />
The <strong>AT32UC3C</strong> supports programming and debugging through two interfaces, JTAG or aWire .<br />
JTAG is an industry standard interface and allows boundary scan for PCB testing, as well as<br />
daisy-chaining of multiple devices on the PCB. aWire is an Atmel proprietary protocol which<br />
offers higher throughput and robust communication, and does not require application pins to be<br />
reserved. Either interface provides access to the internal Service Access Bus (SAB), which<br />
offers a bridge to the High Speed Bus, giving access to memories and peripherals in the device.<br />
By using this bridge to the bus system, the flash and fuses can thus be programmed by accessing<br />
the Flash Controller in the same manner as the CPU.<br />
The SAB also provides access to the Nexus-compliant On-Chip Debug (OCD) system in the<br />
device, which gives the user non-intrusive run-time control of the program execution. Additionally,<br />
trace information can be output on the Auxiliary (AUX) debug port or buffered in internal<br />
RAM for later retrieval by JTAG or aWire.<br />
39.2 Service Access Bus<br />
The AVR32 architecture offers a common interface for access to On-Chip Debug, programming,<br />
and test functions. These are mapped on a common bus called the Service Access Bus (SAB),<br />
which is linked to the JTAG and aWire port through a bus master module, which also handles<br />
synchronization between the debugger and SAB clocks.<br />
When accessing the SAB through the debugger there are no limitations on debugger frequency<br />
compared to chip frequency, although there must be an active system clock in order for the SAB<br />
accesses to complete. If the system clock is switched off in sleep mode, activity on the debugger<br />
will restart the system clock automatically, without waking the device from sleep. Debuggers<br />
may optimize the transfer rate by adjusting the frequency in relation to the system clock. This<br />
ratio can be measured with debug protocol specific instructions.<br />
The Service Access Bus uses 36 address bits to address memory or registers in any of the<br />
slaves on the bus. The bus supports sized accesses of bytes (8 bits), halfwords (16 bits), or<br />
words (32 bits). All accesses must be aligned to the size of the access, i.e. halfword accesses<br />
must have the lowest address bit cleared, and word accesses must have the two lowest address<br />
bits cleared.<br />
39.2.1 SAB address map<br />
The Service Access Bus (SAB) gives the user access to the internal address space and other<br />
features through a 36 bits address space. The 4 MSBs identify the slave number, while the 32<br />
LSBs are decoded within the slave’s address space. The SAB slaves are shown in Table 39-1<br />
on page 1194.<br />
Table 39-1. SAB Slaves, addresses and descriptions.<br />
Slave Address [35:32] Description<br />
Unallocated 0x0 Intentionally unallocated<br />
OCD 0x1 OCD registers<br />
HSB 0x4 HSB memory space, as seen by the CPU<br />
1194
32117D–AVR-01/12<br />
Table 39-1. SAB Slaves, addresses and descriptions.<br />
Slave Address [35:32] Description<br />
HSB 0x5<br />
<strong>AT32UC3C</strong><br />
Alternative mapping for HSB space, for compatibility with<br />
other 32-bit AVR devices.<br />
Memory Service<br />
Unit<br />
0x6 Memory Service Unit registers<br />
Reserved Other Unused<br />
39.2.2 SAB security restrictions<br />
The Service Access bus can be restricted by internal security measures. A short description of<br />
the security measures are found in the table below.<br />
39.2.2.1 Security measure and control location<br />
A security measure is a mechanism to either block or allow SAB access to a certain address or<br />
address range. A security measure is enabled or disabled by one or several control signals. This<br />
is called the control location for the security measure.<br />
These security measures can be used to prevent an end user from reading out the code programmed<br />
in the flash, for instance.<br />
Table 39-2. SAB Security Measures<br />
Security Measure Control Location Description<br />
Security bit<br />
User code<br />
programming<br />
FLASHC<br />
security bit set<br />
FLASHC<br />
UPROT + security<br />
bit set<br />
Programming and debugging not possible, very restricted<br />
access.<br />
Below follows a more in depth description of what locations are accessible when the security<br />
measures are active.<br />
Table 39-3. Security Bit SAB Restrictions<br />
Restricts all access except parts of the flash and the flash<br />
controller for programming user code. Debugging is not<br />
possible unless an OS running from the secure part of the<br />
flash supports it.<br />
Name Address start Address end Access<br />
OCD DCCPU,<br />
OCD DCEMU,<br />
OCD DCSR<br />
0x100000110 0x100000118 Read/Write<br />
User page 0x580800000 0x581000000 Read<br />
Other accesses - - Blocked<br />
1195
32117D–AVR-01/12<br />
Table 39-4. User Code Programming SAB Restrictions<br />
Name Address start Address end Access<br />
OCD DCCPU,<br />
OCD DCEMU,<br />
OCD DCSR<br />
0x100000110 0x100000118 Read/Write<br />
User page 0x580800000 0x581000000 Read<br />
FLASHCDW PB<br />
interface<br />
FLASH pages<br />
outside<br />
BOOTPROT<br />
0x5FFFE0000 0x5FFFE0400 Read/Write<br />
0x580000000 +<br />
BOOTPROT size<br />
0x580000000 + Flash size Read/Write<br />
Other accesses - - Blocked<br />
<strong>AT32UC3C</strong><br />
1196
39.3 On-Chip Debug<br />
Rev: 2.0.0.0<br />
39.3.1 Features<br />
39.3.2 Overview<br />
32117D–AVR-01/12<br />
Debug interface in compliance with IEEE-ISTO 5001-2003 (Nexus 2.0) Class 2+<br />
JTAG or aWire access to all on-chip debug functions<br />
Advanced Program, Data, Ownership, and Watchpoint trace supported<br />
NanoTrace aWire- or JTAG-based trace access<br />
Auxiliary port for high-speed trace information<br />
Hardware support for 6 Program and 2 Data breakpoints<br />
Unlimited number of software breakpoints supported<br />
Automatic CRC check of memory regions<br />
<strong>AT32UC3C</strong><br />
Debugging on the <strong>AT32UC3C</strong> is facilitated by a powerful On-Chip Debug (OCD) system. The<br />
user accesses this through an external debug tool which connects to the JTAG or aWire port<br />
and the Auxiliary (AUX) port if implemented. The AUX port is primarily used for trace functions,<br />
and an aWire- or JTAG-based debugger is sufficient for basic debugging.<br />
The debug system is based on the Nexus 2.0 standard, class 2+, which includes:<br />
Basic run-time control<br />
Program breakpoints<br />
Data breakpoints<br />
Program trace<br />
Ownership trace<br />
Data trace<br />
In addition to the mandatory Nexus debug features, the <strong>AT32UC3C</strong> implements several useful<br />
OCD features, such as:<br />
Debug Communication Channel between CPU and debugger<br />
Run-time PC monitoring<br />
CRC checking<br />
NanoTrace<br />
Software Quality Assurance (SQA) support<br />
The OCD features are controlled by OCD registers, which can be accessed by the debugger, for<br />
instance when the NEXUS_ACCESS JTAG instruction is loaded. The CPU can also access<br />
OCD registers directly using mtdr/mfdr instructions in any privileged mode. The OCD registers<br />
are implemented based on the recommendations in the Nexus 2.0 standard, and are detailed in<br />
the AVR32UC Technical Reference Manual.<br />
39.3.3 I/O Lines Description<br />
The OCD AUX trace port contains a number of pins, as shown in Table 39-5 on page 1198.<br />
These are multiplexed with I/O Controller lines, and must explicitly be enabled by writing OCD<br />
registers before the debug session starts. The AUX port is mapped to two different locations,<br />
1197
32117D–AVR-01/12<br />
<strong>AT32UC3C</strong><br />
selectable by OCD Registers, minimizing the chance that the AUX port will need to be shared<br />
with an application.<br />
39.3.4 Product Dependencies<br />
In order to use this module, other parts of the system must be configured correctly, as described<br />
below.<br />
39.3.4.1 Power Management<br />
The OCD clock operates independently of the CPU clock. If enabled in the Power Manager, the<br />
OCD clock (CLK_OCD) will continue running even if the CPU enters a sleep mode that disables<br />
the CPU clock.<br />
39.3.4.2 Clocks<br />
39.3.4.3 Interrupt<br />
Table 39-5. Auxiliary Port Signals<br />
Pin Name Pin Description Direction Active Level Type<br />
MCKO Trace data output clock Output Digital<br />
MDO[5:0] Trace data output Output Digital<br />
MSEO[1:0] Trace frame control Output Digital<br />
EVTI_N Event In Input Low Digital<br />
EVTO_N Event Out Output Low Digital<br />
The OCD has a clock (CLK_OCD) running synchronously with the CPU clock. This clock is generated<br />
by the Power Manager. The clock is enabled at reset, and can be disabled by writing to<br />
the Power Manager.<br />
The OCD system interrupt request lines are connected to the interrupt controller. Using the OCD<br />
interrupts requires the interrupt controller to be programmed first.<br />
1198
39.3.5 Block Diagram<br />
Figure 39-1. On-Chip Debug Block Diagram<br />
32117D–AVR-01/12<br />
On-Chip Debug<br />
Debug PC<br />
Debug<br />
Instruction<br />
aWire<br />
aWire<br />
Service Access Bus<br />
Breakpoints<br />
CPU<br />
JTAG<br />
JTAG<br />
Internal<br />
SRAM<br />
Memory<br />
Service<br />
Unit<br />
Transmit Queue<br />
Program<br />
Trace<br />
HSB Bus Matrix<br />
Data Trace<br />
<strong>AT32UC3C</strong><br />
39.3.6 SAB-based Debug Features<br />
A debugger can control all OCD features by writing OCD registers over the SAB interface. Many<br />
of these do not depend on output on the AUX port, allowing an aWire- or JTAG-based debugger<br />
to be used.<br />
A JTAG-based debugger should connect to the device through a standard 10-pin IDC connector<br />
as described in the AVR32UC Technical Reference Manual.<br />
An aWire-based debugger should connect to the device through the RESET_N pin.<br />
AUX<br />
Watchpoints<br />
Ownership<br />
Trace<br />
Memories and<br />
peripherals<br />
1199
32117D–AVR-01/12<br />
Figure 39-2. JTAG-based Debugger<br />
Figure 39-3. aWire-based Debugger<br />
<strong>AT32UC3C</strong><br />
39.3.6.1 Debug Communication Channel<br />
The Debug Communication Channel (DCC) consists of a pair OCD registers with associated<br />
handshake logic, accessible to both CPU and debugger. The registers can be used to exchange<br />
data between the CPU and the debugmaster, both runtime as well as in debug mode.<br />
PC<br />
JTAG-based<br />
debug tool<br />
10-pin IDC<br />
JTAG<br />
32-bit AVR<br />
PC<br />
aWire-based<br />
debug tool<br />
aWire<br />
32-bit AVR<br />
1200
39.3.6.2 Breakpoints<br />
39.3.6.3 OCD Mode<br />
32117D–AVR-01/12<br />
<strong>AT32UC3C</strong><br />
The OCD system can generate an interrupt to the CPU when DCCPU is read and when DCEMU<br />
is written. This enables the user to build a custum debug protocol using only these registers. The<br />
DCCPU and DCEMU registers are available even when the security bit in the flash is active.<br />
For more information refer to the AVR32UC Technical Reference Manual.<br />
One of the most fundamental debug features is the ability to halt the CPU, to examine registers<br />
and the state of the system. This is accomplished by breakpoints, of which many types are<br />
available:<br />
Unconditional breakpoints are set by writing OCD registers by the debugger, halting the CPU<br />
immediately.<br />
Program breakpoints halt the CPU when a specific address in the program is executed.<br />
Data breakpoints halt the CPU when a specific memory address is read or written, allowing<br />
variables to be watched.<br />
Software breakpoints halt the CPU when the breakpoint instruction is executed.<br />
When a breakpoint triggers, the CPU enters debug mode, and the D bit in the status register is<br />
set. This is a privileged mode with dedicated return address and return status registers. All privileged<br />
instructions are permitted. Debug mode can be entered as either OCD Mode, running<br />
instructions from the debugger, or Monitor Mode, running instructions from program memory.<br />
When a breakpoint triggers, the CPU enters OCD mode, and instructions are fetched from the<br />
Debug Instruction OCD register. Each time this register is written by the debugger, the instruction<br />
is executed, allowing the debugger to execute CPU instructions directly. The debug master<br />
can e.g. read out the register file by issuing mtdr instructions to the CPU, writing each register to<br />
the Debug Communication Channel OCD registers.<br />
39.3.6.4 Monitor Mode<br />
Since the OCD registers are directly accessible by the CPU, it is possible to build a softwarebased<br />
debugger that runs on the CPU itself. Setting the Monitor Mode bit in the Development<br />
Control register causes the CPU to enter Monitor Mode instead of OCD mode when a breakpoint<br />
triggers. Monitor Mode is similar to OCD mode, except that instructions are fetched from the<br />
debug exception vector in regular program memory, instead of issued by the debug master.<br />
39.3.6.5 Program Counter Monitoring<br />
Normally, the CPU would need to be halted for a debugger to examine the current PC value.<br />
However, the <strong>AT32UC3C</strong> also proves a Debug Program Counter OCD register, where the<br />
debugger can continuously read the current PC without affecting the CPU. This allows the<br />
debugger to generate a simple statistic of the time spent in various areas of the code, easing<br />
code optimization.<br />
39.3.7 Memory Service Unit<br />
The Memory Service Unit (MSU) is a block dedicated to test and debug functionality. It is controlled<br />
through a dedicated set of registers addressed through the Service Access Bus.<br />
1201
32117D–AVR-01/12<br />
<strong>AT32UC3C</strong><br />
39.3.7.1 Cyclic Redundancy Check (CRC)<br />
The MSU can be used to automatically calculate the CRC of a block of data in memory. The<br />
MSU will then read out each word in the specified memory block and report the CRC32-value in<br />
an MSU register.<br />
39.3.7.2 NanoTrace<br />
The MSU additionally supports NanoTrace. This is a 32-bit AVR-specific feature, in which trace<br />
data is output to memory instead of the AUX port. This allows the trace data to be extracted by<br />
the debugger through the SAB, enabling trace features for aWire- or JTAG-based debuggers.<br />
The user must write MSU registers to configure the address and size of the memory block to be<br />
used for NanoTrace. The NanoTrace buffer can be anywhere in the physical address range,<br />
including internal and external RAM, through an EBI, if present. This area may not be used by<br />
the application running on the CPU.<br />
39.3.8 AUX-based Debug Features<br />
Utilizing the Auxiliary (AUX) port gives access to a wide range of advanced debug features. Of<br />
prime importance are the trace features, which allow an external debugger to receive continuous<br />
information on the program execution in the CPU. Additionally, Event In and Event Out pins<br />
allow external events to be correlated with the program flow.<br />
Debug tools utilizing the AUX port should connect to the device through a Nexus-compliant Mictor-38<br />
connector, as described in the AVR32UC Technical Reference manual. This connector<br />
includes the JTAG signals and the RESET_N pin, giving full access to the programming and<br />
debug features in the device.<br />
1202
32117D–AVR-01/12<br />
Figure 39-4. AUX+JTAG Based Debugger<br />
<strong>AT32UC3C</strong><br />
39.3.8.1 Trace Operation<br />
Trace features are enabled by writing OCD registers by the debugger. The OCD extracts the<br />
trace information from the CPU, compresses this information and formats it into variable-length<br />
messages according to the Nexus standard. The messages are buffered in a 16-frame transmit<br />
queue, and are output on the AUX port one frame at a time.<br />
The trace features can be configured to be very selective, to reduce the bandwidth on the AUX<br />
port. In case the transmit queue overflows, error messages are produced to indicate loss of<br />
data. The transmit queue module can optionally be configured to halt the CPU when an overflow<br />
occurs, to prevent the loss of messages, at the expense of longer run-time for the program.<br />
39.3.8.2 Program Trace<br />
Program trace allows the debugger to continuously monitor the program execution in the CPU.<br />
Program trace messages are generated for every branch in the program, and contains compressed<br />
information, which allows the debugger to correlate the message with the source code<br />
to identify the branch instruction and target address.<br />
39.3.8.3 Data Trace<br />
Trace buffer<br />
AUX<br />
high speed<br />
PC<br />
Mictor38<br />
AVR32<br />
AUX+JTAG<br />
debug tool<br />
JTAG<br />
Data trace outputs a message every time a specific location is read or written. The message<br />
contains information about the type (read/write) and size of the access, as well as the address<br />
and data of the accessed location. The <strong>AT32UC3C</strong> contains two data trace channels, each of<br />
1203
32117D–AVR-01/12<br />
<strong>AT32UC3C</strong><br />
which are controlled by a pair of OCD registers which determine the range of addresses (or single<br />
address) which should produce data trace messages.<br />
39.3.8.4 Ownership Trace<br />
Program and data trace operate on virtual addresses. In cases where an operating system runs<br />
several processes in overlapping virtual memory segments, the Ownership Trace feature can be<br />
used to identify the process switch. When the O/S activates a process, it will write the process ID<br />
number to an OCD register, which produces an Ownership Trace Message, allowing the debugger<br />
to switch context for the subsequent program and data trace messages. As the use of this<br />
feature depends on the software running on the CPU, it can also be used to extract other types<br />
of information from the system.<br />
39.3.8.5 Watchpoint Messages<br />
The breakpoint modules normally used to generate program and data breakpoints can also be<br />
used to generate Watchpoint messages, allowing a debugger to monitor program and data<br />
events without halting the CPU. Watchpoints can be enabled independently of breakpoints, so a<br />
breakpoint module can optionally halt the CPU when the trigger condition occurs. Data trace<br />
modules can also be configured to produce watchpoint messages instead of regular data trace<br />
messages.<br />
39.3.8.6 Event In and Event Out Pins<br />
The AUX port also contains an Event In pin (EVTI_N) and an Event Out pin (EVTO_N). EVTI_N<br />
can be used to trigger a breakpoint when an external event occurs. It can also be used to trigger<br />
specific program and data trace synchronization messages, allowing an external event to be<br />
correlated to the program flow.<br />
When the CPU enters debug mode, a Debug Status message is transmitted on the trace port.<br />
All trace messages can be timestamped when they are received by the debug tool. However,<br />
due to the latency of the transmit queue buffering, the timestamp will not be 100% accurate. To<br />
improve this, EVTO_N can toggle every time a message is inserted into the transmit queue,<br />
allowing trace messages to be timestamped precisely. EVTO_N can also toggle when a breakpoint<br />
module triggers, or when the CPU enters debug mode, for any reason. This can be used to<br />
measure precisely when the respective internal event occurs.<br />
39.3.8.7 Software Quality Analysis (SQA)<br />
Software Quality Analysis (SQA) deals with two important issues regarding embedded software<br />
development. Code coverage involves identifying untested parts of the embedded code, to<br />
improve test procedures and thus the quality of the released software. Performance analysis<br />
allows the developer to precisely quantify the time spent in various parts of the code, allowing<br />
bottlenecks to be identified and optimized.<br />
Program trace must be used to accomplish these tasks without instrumenting (altering) the code<br />
to be examined. However, traditional program trace cannot reconstruct the current PC value<br />
without correlating the trace information with the source code, which cannot be done on-the-fly.<br />
This limits program trace to a relatively short time segment, determined by the size of the trace<br />
buffer in the debug tool.<br />
The OCD system in <strong>AT32UC3C</strong> extends program trace with SQA capabilities, allowing the<br />
debug tool to reconstruct the PC value on-the-fly. Code coverage and performance analysis can<br />
thus be reported for an unlimited execution sequence.<br />
1204
39.4 JTAG and Boundary-scan (JTAG)<br />
Rev: 2.3.0.4<br />
39.4.1 Features<br />
39.4.2 Overview<br />
32117D–AVR-01/12<br />
IEEE1149.1 compliant JTAG Interface<br />
Boundary-scan Chain for board-level testing<br />
Direct memory access and programming capabilities through JTAG Interface<br />
<strong>AT32UC3C</strong><br />
The JTAG Interface offers a four pin programming and debug solution, including boundary-scan<br />
support for board-level testing.<br />
Figure 39-5 on page 1206 shows how the JTAG is connected in an 32-bit AVR device. The TAP<br />
Controller is a state machine controlled by the TCK and TMS signals. The TAP Controller<br />
selects either the JTAG Instruction Register or one of several Data Registers as the scan chain<br />
(shift register) between the TDI-input and TDO-output.<br />
The Instruction Register holds JTAG instructions controlling the behavior of a Data Register. The<br />
Device Identification Register, Bypass Register, and the boundary-scan chain are the Data Registers<br />
used for board-level testing. The Reset Register can be used to keep the device reset<br />
during test or programming.<br />
The Service Access Bus (SAB) interface contains address and data registers for the Service<br />
Access Bus, which gives access to On-Chip Debug, programming, and other functions in the<br />
device. The SAB offers several modes of access to the address and data registers, as described<br />
in Section 39.4.11.<br />
Section 39.5 lists the supported JTAG instructions, with references to the description in this<br />
document.<br />
1205
39.4.3 Block Diagram<br />
Figure 39-5. JTAG and Boundary-scan Access<br />
39.4.4 I/O Lines Description<br />
Table 39-6. I/O Line Description<br />
32117D–AVR-01/12<br />
JTAG master<br />
TMS TCK<br />
TMS TCK<br />
TDO TDI<br />
TDO TDI<br />
2nd JTAG<br />
device<br />
JTAG Pins<br />
TCK<br />
TMS<br />
TDI<br />
TDO<br />
JTAG<br />
TAP<br />
Controller<br />
Instruction register<br />
scan enable<br />
Instruction Register<br />
32-bit AVR device<br />
Boundary scan enable<br />
Data register<br />
scan enable<br />
JTAG data registers<br />
Device Identification<br />
Register<br />
By-pass Register<br />
Reset Register<br />
Part specific registers<br />
...<br />
Service Access Bus<br />
interface<br />
<strong>AT32UC3C</strong><br />
Pin Name Pin Description Type Active Level<br />
RESET_N External reset pin. Used when enabling and disabling the JTAG. Input Low<br />
TCK Test Clock Input. Fully asynchronous to system clock frequency. Input<br />
TMS Test Mode Select, sampled on rising TCK. Input<br />
TDI Test Data In, sampled on rising TCK. Input<br />
TDO Test Data Out, driven on falling TCK. Output<br />
39.4.5 Product Dependencies<br />
In order to use this module, other parts of the system must be configured correctly, as described<br />
below.<br />
SAB<br />
Internal I/O<br />
lines<br />
Boundary Scan Chain<br />
Pins and analog blocks<br />
1206
39.4.5.1 I/O Lines<br />
32117D–AVR-01/12<br />
<strong>AT32UC3C</strong><br />
The TMS, TDI, TDO, and TCK pins are multiplexed with I/O lines. When the JTAG is used the<br />
associated pins must be enabled. To enable the JTAG pins, refer to Section 39.4.7.<br />
While using the multiplexed JTAG lines all normal peripheral activity on these lines is disabled.<br />
The user must make sure that no external peripheral is blocking the JTAG lines while<br />
debugging.<br />
39.4.5.2 Power Management<br />
When an instruction that accesses the SAB is loaded in the instruction register, before entering<br />
a sleep mode, the system clocks are not switched off to allow debugging in sleep modes. This<br />
can lead to a program behaving differently when debugging.<br />
39.4.5.3 Clocks<br />
The JTAG Interface uses the external TCK pin as clock source. This clock must be provided by<br />
the JTAG master.<br />
Instructions that use the SAB bus requires the internal main clock to be running.<br />
39.4.6 JTAG Interface<br />
The JTAG Interface is accessed through the dedicated JTAG pins shown in Table 39-6 on page<br />
1206. The TMS control line navigates the TAP controller, as shown in Figure 39-6 on page 1208.<br />
The TAP controller manages the serial access to the JTAG Instruction and Data registers. Data<br />
is scanned into the selected instruction or data register on TDI, and out of the register on TDO,<br />
in the Shift-IR and Shift-DR states, respectively. The LSB is shifted in and out first. TDO is high-<br />
Z in other states than Shift-IR and Shift-DR.<br />
The device implements a 5-bit Instruction Register (IR). A number of public JTAG instructions<br />
defined by the JTAG standard are supported, as described in Section 39.5.2, as well as a number<br />
of 32-bit AVR-specific private JTAG instructions described in Section 39.5.3. Each<br />
instruction selects a specific data register for the Shift-DR path, as described for each<br />
instruction.<br />
1207
Figure 39-6. TAP Controller State Diagram<br />
32117D–AVR-01/12<br />
1<br />
0<br />
Test-Logic-<br />
Reset<br />
0<br />
Run-Test/<br />
Idle<br />
Select-DR<br />
1 1<br />
Scan<br />
1<br />
0<br />
0<br />
Select-IR<br />
Scan<br />
Capture-DR Capture-IR<br />
1<br />
0<br />
Shift-DR 0<br />
Shift-IR<br />
1<br />
Exit1-DR Exit1-IR<br />
0<br />
Pause-DR 0 Pause-IR 0<br />
1<br />
Exit2-DR 0 Exit2-IR<br />
1<br />
1<br />
1 Update-DR 1 Update-IR<br />
0 0<br />
0<br />
0<br />
1<br />
0<br />
1<br />
1<br />
<strong>AT32UC3C</strong><br />
1<br />
0<br />
1<br />
1208
32117D–AVR-01/12<br />
<strong>AT32UC3C</strong><br />
39.4.7 How to Initialize the Module<br />
To enable the JTAG pins the TCK pin must be held low while the RESET_N pin is released.<br />
After enabling the JTAG interface the halt bit is set automatically to prevent the system from running<br />
code after the interface is enabled. To make the CPU run again set halt to zero using the<br />
HALT command..<br />
JTAG operation when RESET_N is pulled low is not possible.<br />
Independent of the initial state of the TAP Controller, the Test-Logic-Reset state can always be<br />
entered by holding TMS high for 5 TCK clock periods. This sequence should always be applied<br />
at the start of a JTAG session and after enabling the JTAG pins to bring the TAP Controller into<br />
a defined state before applying JTAG commands. Applying a 0 on TMS for 1 TCK period brings<br />
the TAP Controller to the Run-Test/Idle state, which is the starting point for JTAG operations.<br />
39.4.8 How to disable the module<br />
To disable the JTAG pins the TCK pin must be held high while RESET_N pin is released.<br />
39.4.9 Typical Sequence<br />
Assuming Run-Test/Idle is the present state, a typical scenario for using the JTAG Interface<br />
follows.<br />
39.4.9.1 Scanning in JTAG Instruction<br />
At the TMS input, apply the sequence 1, 1, 0, 0 at the rising edges of TCK to enter the Shift<br />
Instruction Register (Shift-IR) state. While in this state, shift the 5 bits of the JTAG instructions<br />
into the JTAG instruction register from the TDI input at the rising edge of TCK. During shifting,<br />
the JTAG outputs status bits on TDO, refer to Section 39.5 for a description of these. The TMS<br />
input must be held low during input of the 4 LSBs in order to remain in the Shift-IR state. The<br />
JTAG Instruction selects a particular Data Register as path between TDI and TDO and controls<br />
the circuitry surrounding the selected Data Register.<br />
Figure 39-7. Scanning in JTAG Instruction<br />
TCK<br />
Apply the TMS sequence 1, 1, 0 to re-enter the Run-Test/Idle state. The instruction is latched<br />
onto the parallel output from the shift register path in the Update-IR state. The Exit-IR, Pause-IR,<br />
and Exit2-IR states are only used for navigating the state machine.<br />
TAP State TLR RTI SelDR SelIR CapIR ShIR Ex1IR UpdIR RTI<br />
TMS<br />
TDI Instruction<br />
TDO ImplDefined<br />
39.4.9.2 Scanning in/out Data<br />
At the TMS input, apply the sequence 1, 0, 0 at the rising edges of TCK to enter the Shift Data<br />
Register (Shift-DR) state. While in this state, upload the selected Data Register (selected by the<br />
present JTAG instruction in the JTAG Instruction Register) from the TDI input at the rising edge<br />
1209
32117D–AVR-01/12<br />
<strong>AT32UC3C</strong><br />
of TCK. In order to remain in the Shift-DR state, the TMS input must be held low. While the Data<br />
Register is shifted in from the TDI pin, the parallel inputs to the Data Register captured in the<br />
Capture-DR state is shifted out on the TDO pin.<br />
Apply the TMS sequence 1, 1, 0 to re-enter the Run-Test/Idle state. If the selected Data Register<br />
has a latched parallel-output, the latching takes place in the Update-DR state. The Exit-DR,<br />
Pause-DR, and Exit2-DR states are only used for navigating the state machine.<br />
As shown in the state diagram, the Run-Test/Idle state need not be entered between selecting<br />
JTAG instruction and using Data Registers.<br />
39.4.10 Boundary-scan<br />
The boundary-scan chain has the capability of driving and observing the logic levels on the digital<br />
I/O pins, as well as the boundary between digital and analog logic for analog circuitry having<br />
off-chip connections. At system level, all ICs having JTAG capabilities are connected serially by<br />
the TDI/TDO signals to form a long shift register. An external controller sets up the devices to<br />
drive values at their output pins, and observe the input values received from other devices. The<br />
controller compares the received data with the expected result. In this way, boundary-scan provides<br />
a mechanism for testing interconnections and integrity of components on Printed Circuits<br />
Boards by using the 4 TAP signals only.<br />
The four IEEE 1149.1 defined mandatory JTAG instructions IDCODE, BYPASS, SAMPLE/PRE-<br />
LOAD, and EXTEST can be used for testing the Printed Circuit Board. Initial scanning of the<br />
data register path will show the ID-code of the device, since IDCODE is the default JTAG<br />
instruction. It may be desirable to have the 32-bit AVR device in reset during test mode. If not<br />
reset, inputs to the device may be determined by the scan operations, and the internal software<br />
may be in an undetermined state when exiting the test mode. If needed, the BYPASS instruction<br />
can be issued to make the shortest possible scan chain through the device. The device can be<br />
set in the reset state either by pulling the external RESETn pin low, or issuing the AVR_RESET<br />
instruction with appropriate setting of the Reset Data Register.<br />
The EXTEST instruction is used for sampling external pins and loading output pins with data.<br />
The data from the output latch will be driven out on the pins as soon as the EXTEST instruction<br />
is loaded into the JTAG IR-register. Therefore, the SAMPLE/PRELOAD should also be used for<br />
setting initial values to the scan ring, to avoid damaging the board when issuing the EXTEST<br />
instruction for the first time. SAMPLE/PRELOAD can also be used for taking a snapshot of the<br />
external pins during normal operation of the part.<br />
When using the JTAG Interface for boundary-scan, the JTAG TCK clock is independent of the<br />
internal chip clock. The internal chip clock is not required to run during boundary-scan<br />
operations.<br />
NOTE: For pins connected to 5V lines care should be taken to not drive the pins to a logic one<br />
using boundary-scan, as this will create a current flowing from the 3,3V driver to the 5V pull-up<br />
on the line. Optionally a series resistor can be added between the line and the pin to reduce the<br />
current.<br />
Details about the boundary-scan chain can be found in the BSDL file for the device. This can be<br />
found on the Atmel website.<br />
39.4.11 Service Access Bus<br />
The AVR32 architecture offers a common interface for access to On-Chip Debug, programming,<br />
and test functions. These are mapped on a common bus called the Service Access Bus (SAB),<br />
1210
32117D–AVR-01/12<br />
<strong>AT32UC3C</strong><br />
which is linked to the JTAG through a bus master module, which also handles synchronization<br />
between the TCK and SAB clocks.<br />
For more information about the SAB and a list of SAB slaves see the Service Access Bus<br />
chapter.<br />
39.4.11.1 SAB Address Mode<br />
The MEMORY_SIZED_ACCESS instruction allows a sized read or write to any 36-bit address<br />
on the bus. MEMORY_WORD_ACCESS is a shorthand instruction for 32-bit accesses to any<br />
36-bit address, while the NEXUS_ACCESS instruction is a Nexus-compliant shorthand instruction<br />
for accessing the 32-bit OCD registers in the 7-bit address space reserved for these. These<br />
instructions require two passes through the Shift-DR TAP state: one for the address and control<br />
information, and one for data.<br />
39.4.11.2 Block Transfer<br />
To increase the transfer rate, consecutive memory accesses can be accomplished by the<br />
MEMORY_BLOCK_ACCESS instruction, which only requires a single pass through Shift-DR for<br />
data transfer only. The address is automatically incremented according to the size of the last<br />
SAB transfer.<br />
39.4.11.3 Canceling a SAB Access<br />
It is possible to abort an ongoing SAB access by the CANCEL_ACCESS instruction, to avoid<br />
hanging the bus due to an extremely slow slave.<br />
39.4.11.4 Busy Reporting<br />
As the time taken to perform an access may vary depending on system activity and current chip<br />
frequency, all the SAB access JTAG instructions can return a busy indicator. This indicates<br />
whether a delay needs to be inserted, or an operation needs to be repeated in order to be successful.<br />
If a new access is requested while the SAB is busy, the request is ignored.<br />
The SAB becomes busy when:<br />
Entering Update-DR in the address phase of any read operation, e.g., after scanning in a<br />
NEXUS_ACCESS address with the read bit set.<br />
Entering Update-DR in the data phase of any write operation, e.g., after scanning in data for<br />
a NEXUS_ACCESS write.<br />
Entering Update-DR during a MEMORY_BLOCK_ACCESS.<br />
Entering Update-DR after scanning in a counter value for SYNC.<br />
Entering Update-IR after scanning in a MEMORY_BLOCK_ACCESS if the previous access<br />
was a read and data was scanned after scanning the address.<br />
The SAB becomes ready again when:<br />
A read or write operation completes.<br />
A SYNC countdown completed.<br />
A operation is cancelled by the CANCEL_ACCESS instruction.<br />
What to do if the busy bit is set:<br />
During Shift-IR: The new instruction is selected, but the previous operation has not yet<br />
completed and will continue (unless the new instruction is CANCEL_ACCESS). You may<br />
1211
32117D–AVR-01/12<br />
<strong>AT32UC3C</strong><br />
continue shifting the same instruction until the busy bit clears, or start shifting data. If shifting<br />
data, you must be prepared that the data shift may also report busy.<br />
During Shift-DR of an address: The new address is ignored. The SAB stays in address mode,<br />
so no data must be shifted. Repeat the address until the busy bit clears.<br />
During Shift-DR of read data: The read data is invalid. The SAB stays in data mode. Repeat<br />
scanning until the busy bit clears.<br />
During Shift-DR of write data: The write data is ignored. The SAB stays in data mode. Repeat<br />
scanning until the busy bit clears.<br />
39.4.11.5 Error Reporting<br />
The Service Access Bus may not be able to complete all accesses as requested. This may be<br />
because the address is invalid, the addressed area is read-only or cannot handle byte/halfword<br />
accesses, or because the chip is set in a protected mode where only limited accesses are<br />
allowed.<br />
The error bit is updated when an access completes, and is cleared when a new access starts.<br />
What to do if the error bit is set:<br />
During Shift-IR: The new instruction is selected. The last operation performed using the old<br />
instruction did not complete successfully.<br />
During Shift-DR of an address: The previous operation failed. The new address is accepted.<br />
If the read bit is set, a read operation is started.<br />
During Shift-DR of read data: The read operation failed, and the read data is invalid.<br />
During Shift-DR of write data: The previous write operation failed. The new data is accepted<br />
and a write operation started. This should only occur during block writes or stream writes. No<br />
error can occur between scanning a write address and the following write data.<br />
While polling with CANCEL_ACCESS: The previous access was cancelled. It may or may not<br />
have actually completed.<br />
After power-up: The error bit is set after power up, but there has been no previous SAB<br />
instruction so this error can be discarded.<br />
39.4.11.6 Protected Reporting<br />
A protected status may be reported during Shift-IR or Shift-DR. This indicates that the security<br />
bit in the Flash Controller is set and that the chip is locked for access, according to Section<br />
39.5.1.<br />
The protected state is reported when:<br />
The Flash Controller is under reset. This can be due to the AVR_RESET command or the<br />
RESET_N line.<br />
The Flash Controller has not read the security bit from the flash yet (This will take a a few<br />
ms). Happens after the Flash Controller reset has been released.<br />
The security bit in the Flash Controller is set.<br />
What to do if the protected bit is set:<br />
Release all active AVR_RESET domains, if any.<br />
Release the RESET_N line.<br />
Wait a few ms for the security bit to clear. It can be set temporarily due to a reset.<br />
1212
32117D–AVR-01/12<br />
<strong>AT32UC3C</strong><br />
Perform a CHIP_ERASE to clear the security bit. NOTE: This will erase all the contents of the<br />
non-volatile memory.<br />
39.5 JTAG Instruction Summary<br />
The implemented JTAG instructions in the 32-bit AVR are shown in the table below.<br />
Table 39-7. JTAG Instruction Summary<br />
Instruction<br />
OPCODE Instruction Description<br />
0x01 IDCODE Select the 32-bit Device Identification register as data register.<br />
0x02 SAMPLE_PRELOAD Take a snapshot of external pin values without affecting system operation.<br />
0x03 EXTEST<br />
Select boundary-scan chain as data register for testing circuitry external to<br />
the device.<br />
0x04 INTEST Select boundary-scan chain for internal testing of the device.<br />
0x06 CLAMP<br />
Bypass device through Bypass register, while driving outputs from boundaryscan<br />
register.<br />
0x0C AVR_RESET Apply or remove a static reset to the device<br />
0x0F CHIP_ERASE Erase the device<br />
0x10 NEXUS_ACCESS<br />
Select the SAB Address and Data registers as data register for the TAP. The<br />
registers are accessed in Nexus mode.<br />
0x11 MEMORY_WORD_ACCESS Select the SAB Address and Data registers as data register for the TAP.<br />
0x12 MEMORY_BLOCK_ACCESS<br />
Select the SAB Data register as data register for the TAP. The address is<br />
auto-incremented.<br />
0x13 CANCEL_ACCESS Cancel an ongoing Nexus or Memory access.<br />
0x14 MEMORY_SERVICE<br />
Select the SAB Address and Data registers as data register for the TAP. The<br />
registers are accessed in Memory Service mode.<br />
0x15 MEMORY_SIZED_ACCESS Select the SAB Address and Data registers as data register for the TAP.<br />
0x17 SYNC Synchronization counter<br />
0x1C HALT Halt the CPU for safe programming.<br />
0x1F BYPASS Bypass this device through the bypass register.<br />
Others N/A Acts as BYPASS<br />
39.5.1 Security Restrictions<br />
When the security fuse in the Flash is programmed, the following JTAG instructions are<br />
restricted:<br />
NEXUS_ACCESS<br />
MEMORY_WORD_ACCESS<br />
MEMORY_BLOCK_ACCESS<br />
MEMORY_SIZED_ACCESS<br />
For description of what memory locations remain accessible, please refer to the SAB address<br />
map.<br />
Full access to these instructions is re-enabled when the security fuse is erased by the<br />
CHIP_ERASE JTAG instruction.<br />
1213
39.5.1.1 Notation<br />
32117D–AVR-01/12<br />
<strong>AT32UC3C</strong><br />
Note that the security bit will read as programmed and block these instructions also if the Flash<br />
Controller is statically reset.<br />
Other security mechanisms can also restrict these functions. If such mechanisms are present<br />
they are listed in the SAB address map section.<br />
Table 39-9 on page 1214 shows bit patterns to be shifted in a format like "peb01". Each character<br />
corresponds to one bit, and eight bits are grouped together for readability. The least<br />
significantbit is always shifted first, and the most significant bit shifted last. The symbols used<br />
are shown in Table 39-8.<br />
Table 39-8. Symbol Description<br />
Symbol Description<br />
0 Constant low value - always reads as zero.<br />
1 Constant high value - always reads as one.<br />
a An address bit - always scanned with the least significant bit first<br />
b<br />
A busy bit. Reads as one if the SAB was busy, or zero if it was not. See Section 39.4.11.4 for<br />
details on how the busy reporting works.<br />
d A data bit - always scanned with the least significant bit first.<br />
e<br />
p<br />
An error bit. Reads as one if an error occurred, or zero if not. See Section 39.4.11.5 for<br />
details on how the error reporting works.<br />
The chip protected bit. Some devices may be set in a protected state where access to chip<br />
internals are severely restricted. See the documentation for the specific device for details.<br />
On devices without this possibility, this bit always reads as zero.<br />
r A direction bit. Set to one to request a read, set to zero to request a write.<br />
s A size bit. The size encoding is described where used.<br />
x A don’t care bit. Any value can be shifted in, and output data should be ignored.<br />
In many cases, it is not required to shift all bits through the data register. Bit patterns are shown<br />
using the full width of the shift register, but the suggested or required bits are emphasized using<br />
bold text. I.e. given the pattern "aaaaaaar xxxxxxxx xxxxxxxx xxxxxxxx xx", the shift register is<br />
34 bits, but the test or debug unit may choose to shift only 8 bits "aaaaaaar".<br />
The following describes how to interpret the fields in the instruction description tables:<br />
Table 39-9. Instruction Description<br />
Instruction Description<br />
IR input value<br />
IR output value<br />
Shows the bit pattern to shift into IR in the Shift-IR state in order to select this<br />
instruction. The pattern is show both in binary and in hexadecimal form for<br />
convenience.<br />
Example: 10000 (0x10)<br />
Shows the bit pattern shifted out of IR in the Shift-IR state when this instruction is<br />
active.<br />
Example: peb01<br />
1214
32117D–AVR-01/12<br />
<strong>AT32UC3C</strong><br />
39.5.2 Public JTAG Instructions<br />
The JTAG standard defines a number of public JTAG instructions. These instructions are<br />
described in the sections below.<br />
39.5.2.1 IDCODE<br />
Table 39-9. Instruction Description (Continued)<br />
Instruction Description<br />
DR Size<br />
DR input value<br />
DR output value<br />
Shows the number of bits in the data register chain when this instruction is active.<br />
Example: 34 bits<br />
Shows which bit pattern to shift into the data register in the Shift-DR state when this<br />
instruction is active. Multiple such lines may exist, e.g., to distinguish between<br />
reads and writes.<br />
Example: aaaaaaar xxxxxxxx xxxxxxxx xxxxxxxx xx<br />
This instruction selects the 32 bit Device Identification register (DID) as Data Register. The DID<br />
register consists of a version number, a device number, and the manufacturer code chosen by<br />
JEDEC. This is the default instruction after a JTAG reset. Details about the DID register can be<br />
found in the module configuration section at the end of this chapter.<br />
Starting in Run-Test/Idle, the Device Identification register is accessed in the following way:<br />
1. Select the IR Scan path.<br />
2. In Capture-IR: The IR output value is latched into the shift register.<br />
3. In Shift-IR: The instruction register is shifted by the TCK input.<br />
4. Return to Run-Test/Idle.<br />
5. Select the DR Scan path.<br />
6. In Capture-DR: The IDCODE value is latched into the shift register.<br />
7. In Shift-DR: The IDCODE scan chain is shifted by the TCK input.<br />
8. Return to Run-Test/Idle.<br />
Table 39-10. IDCODE Details<br />
Shows the bit pattern shifted out of the data register in the Shift-DR state when this<br />
instruction is active. Multiple such lines may exist, e.g., to distinguish between<br />
reads and writes.<br />
Example: xx xxxxxxxx xxxxxxxx xxxxxxxx xxxxxxeb<br />
Instructions Details<br />
IR input value 00001 (0x01)<br />
IR output value p0001<br />
DR Size 32<br />
DR input value xxxxxxxx xxxxxxxx xxxxxxxx xxxxxxxx<br />
DR output value Device Identification Register<br />
39.5.2.2 SAMPLE_PRELOAD<br />
This instruction takes a snap-shot of the input/output pins without affecting the system operation,<br />
and pre-loading the scan chain without updating the DR-latch. The boundary-scan chain is<br />
selected as Data Register.<br />
Starting in Run-Test/Idle, the Device Identification register is accessed in the following way:<br />
1215
39.5.2.3 EXTEST<br />
32117D–AVR-01/12<br />
<strong>AT32UC3C</strong><br />
1. Select the IR Scan path.<br />
2. In Capture-IR: The IR output value is latched into the shift register.<br />
3. In Shift-IR: The instruction register is shifted by the TCK input.<br />
4. Return to Run-Test/Idle.<br />
5. Select the DR Scan path.<br />
6. In Capture-DR: The Data on the external pins are sampled into the boundary-scan<br />
chain.<br />
7. In Shift-DR: The boundary-scan chain is shifted by the TCK input.<br />
8. Return to Run-Test/Idle.<br />
Table 39-11. SAMPLE_PRELOAD Details<br />
Instructions Details<br />
IR input value 00010 (0x02)<br />
IR output value p0001<br />
DR Size Depending on boundary-scan chain, see BSDL-file.<br />
DR input value Depending on boundary-scan chain, see BSDL-file.<br />
DR output value Depending on boundary-scan chain, see BSDL-file.<br />
This instruction selects the boundary-scan chain as Data Register for testing circuitry external to<br />
the 32-bit AVR package. The contents of the latched outputs of the boundary-scan chain is<br />
driven out as soon as the JTAG IR-register is loaded with the EXTEST instruction.<br />
Starting in Run-Test/Idle, the EXTEST instruction is accessed the following way:<br />
1. Select the IR Scan path.<br />
2. In Capture-IR: The IR output value is latched into the shift register.<br />
3. In Shift-IR: The instruction register is shifted by the TCK input.<br />
4. In Update-IR: The data from the boundary-scan chain is applied to the output pins.<br />
5. Return to Run-Test/Idle.<br />
6. Select the DR Scan path.<br />
7. In Capture-DR: The data on the external pins is sampled into the boundary-scan chain.<br />
8. In Shift-DR: The boundary-scan chain is shifted by the TCK input.<br />
9. In Update-DR: The data from the scan chain is applied to the output pins.<br />
10. Return to Run-Test/Idle.<br />
Table 39-12. EXTEST Details<br />
Instructions Details<br />
IR input value 00011 (0x03)<br />
IR output value p0001<br />
DR Size Depending on boundary-scan chain, see BSDL-file.<br />
DR input value Depending on boundary-scan chain, see BSDL-file.<br />
DR output value Depending on boundary-scan chain, see BSDL-file.<br />
1216
39.5.2.4 INTEST<br />
39.5.2.5 CLAMP<br />
32117D–AVR-01/12<br />
<strong>AT32UC3C</strong><br />
This instruction selects the boundary-scan chain as Data Register for testing internal logic in the<br />
device. The logic inputs are determined by the boundary-scan chain, and the logic outputs are<br />
captured by the boundary-scan chain. The device output pins are driven from the boundary-scan<br />
chain.<br />
Starting in Run-Test/Idle, the INTEST instruction is accessed the following way:<br />
1. Select the IR Scan path.<br />
2. In Capture-IR: The IR output value is latched into the shift register.<br />
3. In Shift-IR: The instruction register is shifted by the TCK input.<br />
4. In Update-IR: The data from the boundary-scan chain is applied to the internal logic<br />
inputs.<br />
5. Return to Run-Test/Idle.<br />
6. Select the DR Scan path.<br />
7. In Capture-DR: The data on the internal logic is sampled into the boundary-scan chain.<br />
8. In Shift-DR: The boundary-scan chain is shifted by the TCK input.<br />
9. In Update-DR: The data from the boundary-scan chain is applied to internal logic<br />
inputs.<br />
10. Return to Run-Test/Idle.<br />
Table 39-13. INTEST Details<br />
Instructions Details<br />
IR input value 00100 (0x04)<br />
IR output value p0001<br />
DR Size Depending on boundary-scan chain, see BSDL-file.<br />
DR input value Depending on boundary-scan chain, see BSDL-file.<br />
DR output value Depending on boundary-scan chain, see BSDL-file.<br />
This instruction selects the Bypass register as Data Register. The device output pins are driven<br />
from the boundary-scan chain.<br />
Starting in Run-Test/Idle, the CLAMP instruction is accessed the following way:<br />
1. Select the IR Scan path.<br />
2. In Capture-IR: The IR output value is latched into the shift register.<br />
3. In Shift-IR: The instruction register is shifted by the TCK input.<br />
4. In Update-IR: The data from the boundary-scan chain is applied to the output pins.<br />
5. Return to Run-Test/Idle.<br />
6. Select the DR Scan path.<br />
7. In Capture-DR: A logic ‘0’ is loaded into the Bypass Register.<br />
8. In Shift-DR: Data is scanned from TDI to TDO through the Bypass register.<br />
1217
39.5.2.6 BYPASS<br />
32117D–AVR-01/12<br />
9. Return to Run-Test/Idle.<br />
Table 39-14. CLAMP Details<br />
Instructions Details<br />
IR input value 00110 (0x06)<br />
IR output value p0001<br />
DR Size 1<br />
DR input value x<br />
DR output value x<br />
This instruction selects the 1-bit Bypass Register as Data Register.<br />
Starting in Run-Test/Idle, the CLAMP instruction is accessed the following way:<br />
1. Select the IR Scan path.<br />
2. In Capture-IR: The IR output value is latched into the shift register.<br />
3. In Shift-IR: The instruction register is shifted by the TCK input.<br />
4. Return to Run-Test/Idle.<br />
5. Select the DR Scan path.<br />
6. In Capture-DR: A logic ‘0’ is loaded into the Bypass Register.<br />
7. In Shift-DR: Data is scanned from TDI to TDO through the Bypass register.<br />
8. Return to Run-Test/Idle.<br />
Table 39-15. BYPASS Details<br />
Instructions Details<br />
IR input value 11111 (0x1F)<br />
IR output value p0001<br />
DR Size 1<br />
DR input value x<br />
DR output value x<br />
<strong>AT32UC3C</strong><br />
39.5.3 Private JTAG Instructions<br />
The 32-bit AVR defines a number of private JTAG instructions, not defined by the JTAG standard.<br />
Each instruction is briefly described in text, with details following in table form.<br />
39.5.3.1 NEXUS_ACCESS<br />
This instruction allows Nexus-compliant access to the On-Chip Debug registers through the<br />
SAB. The 7-bit register index, a read/write control bit, and the 32-bit data is accessed through<br />
the JTAG port.<br />
The data register is alternately interpreted by the SAB as an address register and a data register.<br />
The SAB starts in address mode after the NEXUS_ACCESS instruction is selected, and<br />
toggles between address and data mode each time a data scan completes with the busy bit<br />
cleared.<br />
NOTE: The polarity of the direction bit is inverse of the Nexus standard.<br />
1218
32117D–AVR-01/12<br />
Starting in Run-Test/Idle, OCD registers are accessed in the following way:<br />
<strong>AT32UC3C</strong><br />
1. Select the IR Scan path.<br />
2. In Capture-IR: The IR output value is latched into the shift register.<br />
3. In Shift-IR: The instruction register is shifted by the TCK input.<br />
4. Return to Run-Test/Idle.<br />
5. Select the DR Scan path.<br />
6. In Shift-DR: Scan in the direction bit (1=read, 0=write) and the 7-bit address for the<br />
OCD register.<br />
7. Go to Update-DR and re-enter Select-DR Scan.<br />
8. In Shift-DR: For a read operation, scan out the contents of the addressed register. For a<br />
write operation, scan in the new contents of the register.<br />
9. Return to Run-Test/Idle.<br />
For any operation, the full 7 bits of the address must be provided. For write operations, 32 data<br />
bits must be provided, or the result will be undefined. For read operations, shifting may be terminated<br />
once the required number of bits have been acquired.<br />
Table 39-16. NEXUS_ACCESS Details<br />
Instructions Details<br />
IR input value 10000 (0x10)<br />
IR output value peb01<br />
DR Size 34 bits<br />
DR input value (Address phase) aaaaaaar xxxxxxxx xxxxxxxx xxxxxxxx xx<br />
DR input value (Data read phase) xxxxxxxx xxxxxxxx xxxxxxxx xxxxxxxx xx<br />
DR input value (Data write phase) dddddddd dddddddd dddddddd dddddddd xx<br />
DR output value (Address phase) xx xxxxxxxx xxxxxxxx xxxxxxxx xxxxxxeb<br />
DR output value (Data read phase) eb dddddddd dddddddd dddddddd dddddddd<br />
DR output value (Data write phase) xx xxxxxxxx xxxxxxxx xxxxxxxx xxxxxxeb<br />
39.5.3.2 MEMORY_SERVICE<br />
This instruction allows access to registers in an optional Memory Service Unit. The 7-bit register<br />
index, a read/write control bit, and the 32-bit data is accessed through the JTAG port.<br />
The data register is alternately interpreted by the SAB as an address register and a data register.<br />
The SAB starts in address mode after the MEMORY_SERVICE instruction is selected, and<br />
toggles between address and data mode each time a data scan completes with the busy bit<br />
cleared.<br />
Starting in Run-Test/Idle, Memory Service registers are accessed in the following way:<br />
1. Select the IR Scan path.<br />
2. In Capture-IR: The IR output value is latched into the shift register.<br />
3. In Shift-IR: The instruction register is shifted by the TCK input.<br />
4. Return to Run-Test/Idle.<br />
5. Select the DR Scan path.<br />
6. In Shift-DR: Scan in the direction bit (1=read, 0=write) and the 7-bit address for the<br />
Memory Service register.<br />
1219
32117D–AVR-01/12<br />
<strong>AT32UC3C</strong><br />
7. Go to Update-DR and re-enter Select-DR Scan.<br />
8. In Shift-DR: For a read operation, scan out the contents of the addressed register. For a<br />
write operation, scan in the new contents of the register.<br />
9. Return to Run-Test/Idle.<br />
For any operation, the full 7 bits of the address must be provided. For write operations, 32 data<br />
bits must be provided, or the result will be undefined. For read operations, shifting may be terminated<br />
once the required number of bits have been acquired.<br />
Table 39-17. MEMORY_SERVICE Details<br />
Instructions Details<br />
IR input value 10100 (0x14)<br />
IR output value peb01<br />
DR Size 34 bits<br />
DR input value (Address phase) aaaaaaar xxxxxxxx xxxxxxxx xxxxxxxx xx<br />
DR input value (Data read phase) xxxxxxxx xxxxxxxx xxxxxxxx xxxxxxxx xx<br />
DR input value (Data write phase) dddddddd dddddddd dddddddd dddddddd xx<br />
DR output value (Address phase) xx xxxxxxxx xxxxxxxx xxxxxxxx xxxxxxeb<br />
DR output value (Data read phase) eb dddddddd dddddddd dddddddd dddddddd<br />
DR output value (Data write phase) xx xxxxxxxx xxxxxxxx xxxxxxxx xxxxxxeb<br />
39.5.3.3 MEMORY_SIZED_ACCESS<br />
This instruction allows access to the entire Service Access Bus data area. Data is accessed<br />
through a 36-bit byte index, a 2-bit size, a direction bit, and 8, 16, or 32 bits of data. Not all units<br />
mapped on the SAB bus may support all sizes of accesses, e.g., some may only support word<br />
accesses.<br />
The data register is alternately interpreted by the SAB as an address register and a data register.<br />
The SAB starts in address mode after the MEMORY_SIZED_ACCESS instruction is<br />
selected, and toggles between address and data mode each time a data scan completes with<br />
the busy bit cleared.<br />
1220
32117D–AVR-01/12<br />
The size field is encoded as i Table 39-18.<br />
Table 39-18. Size Field Semantics<br />
Size field value Access size Data alignment<br />
00 Byte (8 bits)<br />
01 Halfword (16 bits)<br />
10 Word (32 bits)<br />
11 Reserved N/A<br />
Address modulo 4 : data alignment<br />
0: dddddddd xxxxxxxx xxxxxxxx xxxxxxxx<br />
1: xxxxxxxx dddddddd xxxxxxxx xxxxxxxx<br />
2: xxxxxxxx xxxxxxxx dddddddd xxxxxxxx<br />
3: xxxxxxxx xxxxxxxx xxxxxxxx dddddddd<br />
Address modulo 4 : data alignment<br />
0: dddddddd dddddddd xxxxxxxx xxxxxxxx<br />
1: Not allowed<br />
2: xxxxxxxx xxxxxxxx dddddddd dddddddd<br />
3: Not allowed<br />
Address modulo 4 : data alignment<br />
0: dddddddd dddddddd dddddddd dddddddd<br />
1: Not allowed<br />
2: Not allowed<br />
3: Not allowed<br />
Starting in Run-Test/Idle, SAB data is accessed in the following way:<br />
<strong>AT32UC3C</strong><br />
1. Select the IR Scan path.<br />
2. In Capture-IR: The IR output value is latched into the shift register.<br />
3. In Shift-IR: The instruction register is shifted by the TCK input.<br />
4. Return to Run-Test/Idle.<br />
5. Select the DR Scan path.<br />
6. In Shift-DR: Scan in the direction bit (1=read, 0=write), 2-bit access size, and the 36-bit<br />
address of the data to access.<br />
7. Go to Update-DR and re-enter Select-DR Scan.<br />
8. In Shift-DR: For a read operation, scan out the contents of the addressed area. For a<br />
write operation, scan in the new contents of the area.<br />
9. Return to Run-Test/Idle.<br />
For any operation, the full 36 bits of the address must be provided. For write operations, 32 data<br />
bits must be provided, or the result will be undefined. For read operations, shifting may be terminated<br />
once the required number of bits have been acquired.<br />
Table 39-19. MEMORY_SIZED_ACCESS Details<br />
Instructions Details<br />
IR input value 10101 (0x15)<br />
IR output value peb01<br />
DR Size 39 bits<br />
DR input value (Address phase) aaaaaaaa aaaaaaaa aaaaaaaa aaaaaaaa aaaassr<br />
DR input value (Data read phase) xxxxxxxx xxxxxxxx xxxxxxxx xxxxxxxx xxxxxxx<br />
DR input value (Data write phase) dddddddd dddddddd dddddddd dddddddd xxxxxxx<br />
1221
32117D–AVR-01/12<br />
Table 39-19. MEMORY_SIZED_ACCESS Details (Continued)<br />
Instructions Details<br />
DR output value (Address phase) xxxxxxx xxxxxxxx xxxxxxxx xxxxxxxx xxxxxxeb<br />
<strong>AT32UC3C</strong><br />
DR output value (Data read phase) xxxxxeb dddddddd dddddddd dddddddd dddddddd<br />
DR output value (Data write phase) xxxxxxx xxxxxxxx xxxxxxxx xxxxxxxx xxxxxxeb<br />
39.5.3.4 MEMORY_WORD_ACCESS<br />
This instruction allows access to the entire Service Access Bus data area. Data is accessed<br />
through the 34 MSB of the SAB address, a direction bit, and 32 bits of data. This instruction is<br />
identical to MEMORY_SIZED_ACCESS except that it always does word sized accesses. The<br />
size field is implied, and the two lowest address bits are removed and not scanned in.<br />
Note: This instruction was previously known as MEMORY_ACCESS, and is provided for backwards<br />
compatibility.<br />
The data register is alternately interpreted by the SAB as an address register and a data register.<br />
The SAB starts in address mode after the MEMORY_WORD_ACCESS instruction is<br />
selected, and toggles between address and data mode each time a data scan completes with<br />
the busy bit cleared.<br />
Starting in Run-Test/Idle, SAB data is accessed in the following way:<br />
1. Select the IR Scan path.<br />
2. In Capture-IR: The IR output value is latched into the shift register.<br />
3. In Shift-IR: The instruction register is shifted by the TCK input.<br />
4. Return to Run-Test/Idle.<br />
5. Select the DR Scan path.<br />
6. In Shift-DR: Scan in the direction bit (1=read, 0=write) and the 34-bit address of the<br />
data to access.<br />
7. Go to Update-DR and re-enter Select-DR Scan.<br />
8. In Shift-DR: For a read operation, scan out the contents of the addressed area. For a<br />
write operation, scan in the new contents of the area.<br />
9. Return to Run-Test/Idle.<br />
For any operation, the full 34 bits of the address must be provided. For write operations, 32 data<br />
bits must be provided, or the result will be undefined. For read operations, shifting may be terminated<br />
once the required number of bits have been acquired.<br />
Table 39-20. MEMORY_WORD_ACCESS Details<br />
Instructions Details<br />
IR input value 10001 (0x11)<br />
IR output value peb01<br />
DR Size 35 bits<br />
DR input value (Address phase) aaaaaaaa aaaaaaaa aaaaaaaa aaaaaaaa aar<br />
DR input value (Data read phase) xxxxxxxx xxxxxxxx xxxxxxxx xxxxxxxx xxx<br />
DR input value (Data write phase) dddddddd dddddddd dddddddd dddddddd xxx<br />
1222
32117D–AVR-01/12<br />
Table 39-20. MEMORY_WORD_ACCESS Details (Continued)<br />
Instructions Details<br />
DR output value (Address phase) xxxxxxxx xxxxxxxx xxxxxxxx xxxxxxxx xeb<br />
DR output value (Data read phase) xeb dddddddd dddddddd dddddddd dddddddd<br />
DR output value (Data write phase) xxx xxxxxxxx xxxxxxxx xxxxxxxx xxxxxxeb<br />
<strong>AT32UC3C</strong><br />
39.5.3.5 MEMORY_BLOCK_ACCESS<br />
This instruction allows access to the entire SAB data area. Up to 32 bits of data is accessed at a<br />
time, while the address is sequentially incremented from the previously used address.<br />
In this mode, the SAB address, size, and access direction is not provided with each access.<br />
Instead, the previous address is auto-incremented depending on the specified size and the previous<br />
operation repeated. The address must be set up in advance with<br />
MEMORY_SIZE_ACCESS or MEMORY_WORD_ACCESS. It is allowed, but not required, to<br />
shift data after shifting the address.<br />
This instruction is primarily intended to speed up large quantities of sequential word accesses. It<br />
is possible to use it also for byte and halfword accesses, but the overhead in this is case much<br />
larger as 32 bits must still be shifted for each access.<br />
The following sequence should be used:<br />
1. Use the MEMORY_SIZE_ACCESS or MEMORY_WORD_ACCESS to read or write the<br />
first location.<br />
2. Return to Run-Test/Idle.<br />
3. Select the IR Scan path.<br />
4. In Capture-IR: The IR output value is latched into the shift register.<br />
5. In Shift-IR: The instruction register is shifted by the TCK input.<br />
6. Return to Run-Test/Idle.<br />
7. Select the DR Scan path. The address will now have incremented by 1, 2, or 4 (corresponding<br />
to the next byte, halfword, or word location).<br />
8. In Shift-DR: For a read operation, scan out the contents of the next addressed location.<br />
For a write operation, scan in the new contents of the next addressed location.<br />
9. Go to Update-DR.<br />
10. If the block access is not complete, return to Select-DR Scan and repeat the access.<br />
11. If the block access is complete, return to Run-Test/Idle.<br />
For write operations, 32 data bits must be provided, or the result will be undefined. For read<br />
operations, shifting may be terminated once the required number of bits have been acquired.<br />
Table 39-21. MEMORY_BLOCK_ACCESS Details<br />
Instructions Details<br />
IR input value 10010 (0x12)<br />
IR output value peb01<br />
DR Size 34 bits<br />
DR input value (Data read phase) xxxxxxxx xxxxxxxx xxxxxxxx xxxxxxxx xx<br />
1223
32117D–AVR-01/12<br />
<strong>AT32UC3C</strong><br />
The overhead using block word access is 4 cycles per 32 bits of data, resulting in an 88% transfer<br />
efficiency, or 2.1 MBytes per second with a 20 MHz TCK frequency.<br />
39.5.3.6 CANCEL_ACCESS<br />
If a very slow memory location is accessed during a SAB memory access, it could take a very<br />
long time until the busy bit is cleared, and the SAB becomes ready for the next operation. The<br />
CANCEL_ACCESS instruction provides a possibility to abort an ongoing transfer and report a<br />
timeout to the JTAG master.<br />
39.5.3.7 SYNC<br />
Table 39-21. MEMORY_BLOCK_ACCESS Details (Continued)<br />
Instructions Details<br />
DR input value (Data write phase) dddddddd dddddddd dddddddd dddddddd xx<br />
DR output value (Data read phase) eb dddddddd dddddddd dddddddd dddddddd<br />
DR output value (Data write phase) xx xxxxxxxx xxxxxxxx xxxxxxxx xxxxxxeb<br />
When the CANCEL_ACCESS instruction is selected, the current access will be terminated as<br />
soon as possible. There are no guarantees about how long this will take, as the hardware may<br />
not always be able to cancel the access immediately. The SAB is ready to respond to a new<br />
command when the busy bit clears.<br />
Starting in Run-Test/Idle, CANCEL_ACCESS is accessed in the following way:<br />
1. Select the IR Scan path.<br />
2. In Capture-IR: The IR output value is latched into the shift register.<br />
3. In Shift-IR: The instruction register is shifted by the TCK input.<br />
4. Return to Run-Test/Idle.<br />
Table 39-22. CANCEL_ACCESS Details<br />
Instructions Details<br />
IR input value 10011 (0x13)<br />
IR output value peb01<br />
DR Size 1<br />
DR input value x<br />
DR output value 0<br />
This instruction allows external debuggers and testers to measure the ratio between the external<br />
JTAG clock and the internal system clock. The SYNC data register is a 16-bit counter that<br />
counts down to zero using the internal system clock. The busy bit stays high until the counter<br />
reaches zero.<br />
Starting in Run-Test/Idle, SYNC instruction is used in the following way:<br />
1. Select the IR Scan path.<br />
2. In Capture-IR: The IR output value is latched into the shift register.<br />
3. In Shift-IR: The instruction register is shifted by the TCK input.<br />
4. Return to Run-Test/Idle.<br />
5. Select the DR Scan path.<br />
1224
32117D–AVR-01/12<br />
<strong>AT32UC3C</strong><br />
6. Scan in an 16-bit counter value.<br />
7. Go to Update-DR and re-enter Select-DR Scan.<br />
8. In Shift-DR: Scan out the busy bit, and until the busy bit clears goto 7.<br />
9. Calculate an approximation to the internal clock speed using the elapsed time and the<br />
counter value.<br />
10. Return to Run-Test/Idle.<br />
The full 16-bit counter value must be provided when starting the synch operation, or the result<br />
will be undefined. When reading status, shifting may be terminated once the required number of<br />
bits have been acquired.<br />
Table 39-23. SYNC_ACCESS Details<br />
Instructions Details<br />
IR input value 10111 (0x17)<br />
IR output value peb01<br />
DR Size 16 bits<br />
DR input value dddddddd dddddddd<br />
DR output value xxxxxxxx xxxxxxeb<br />
39.5.3.8 AVR_RESET<br />
This instruction allows a debugger or tester to directly control separate reset domains inside the<br />
chip. The shift register contains one bit for each controllable reset domain. Setting a bit to one<br />
resets that domain and holds it in reset. Setting a bit to zero releases the reset for that domain.<br />
The AVR_RESET instruction can be used in the following way:<br />
1. Select the IR Scan path.<br />
2. In Capture-IR: The IR output value is latched into the shift register.<br />
3. In Shift-IR: The instruction register is shifted by the TCK input.<br />
4. Return to Run-Test/Idle.<br />
5. Select the DR Scan path.<br />
6. In Shift-DR: Scan in the value corresponding to the reset domains the JTAG master<br />
wants to reset into the data register.<br />
7. Return to Run-Test/Idle.<br />
8. Stay in run test idle for at least 10 TCK clock cycles to let the reset propagate to the<br />
system.<br />
See the device specific documentation for the number of reset domains, and what these<br />
domains are.<br />
For any operation, all bits must be provided or the result will be undefined.<br />
Table 39-24. AVR_RESET Details<br />
Instructions Details<br />
IR input value 01100 (0x0C)<br />
IR output value p0001<br />
1225
32117D–AVR-01/12<br />
<strong>AT32UC3C</strong><br />
39.5.3.9 CHIP_ERASE<br />
This instruction allows a programmer to completely erase all nonvolatile memories in a chip.<br />
This will also clear any security bits that are set, so the device can be accessed normally. In<br />
devices without non-volatile memories this instruction does nothing, and appears to complete<br />
immediately.<br />
39.5.3.10 HALT<br />
Table 39-24. AVR_RESET Details (Continued)<br />
Instructions Details<br />
DR Size Device specific.<br />
DR input value Device specific.<br />
DR output value Device specific.<br />
The erasing of non-volatile memories starts as soon as the CHIP_ERASE instruction is selected.<br />
The CHIP_ERASE instruction selects a 1 bit bypass data register.<br />
A chip erase operation should be performed as:<br />
1. Reset the system and stop the CPU from executing.<br />
2. Select the IR Scan path.<br />
3. In Capture-IR: The IR output value is latched into the shift register.<br />
4. In Shift-IR: The instruction register is shifted by the TCK input.<br />
5. Check the busy bit that was scanned out during Shift-IR. If the busy bit was set goto 2.<br />
6. Return to Run-Test/Idle.<br />
Table 39-25. CHIP_ERASE Details<br />
Instructions Details<br />
IR input value 01111 (0x0F)<br />
IR output value<br />
DR Size 1 bit<br />
DR input value x<br />
DR output value 0<br />
p0b01<br />
Where b is the busy bit.<br />
This instruction allows a programmer to easily stop the CPU to ensure that it does not execute<br />
invalid code during programming.<br />
This instruction selects a 1-bit halt register. Setting this bit to one resets the device and halts the<br />
CPU. Setting this bit to zero resets the device and releases the CPU to run normally. The value<br />
shifted out from the data register is one if the CPU is halted.<br />
The HALT instruction can be used in the following way:<br />
1. Select the IR Scan path.<br />
2. In Capture-IR: The IR output value is latched into the shift register.<br />
3. In Shift-IR: The instruction register is shifted by the TCK input.<br />
4. Return to Run-Test/Idle.<br />
5. Select the DR Scan path.<br />
1226
32117D–AVR-01/12<br />
6. In Shift-DR: Scan in the value 1 to halt the CPU, 0 to start CPU execution.<br />
7. Return to Run-Test/Idle.<br />
Table 39-26. HALT Details<br />
Instructions Details<br />
IR input value 11100 (0x1C)<br />
IR output value p0001<br />
DR Size 1 bit<br />
DR input value d<br />
DR output value d<br />
<strong>AT32UC3C</strong><br />
1227
32117D–AVR-01/12<br />
<strong>AT32UC3C</strong><br />
39.5.4 JTAG Data Registers<br />
The following device specific registers can be selected as JTAG scan chain depending on the<br />
instruction loaded in the JTAG Instruction Register. Additional registers exist, but are implicitly<br />
described in the functional description of the relevant instructions.<br />
39.5.4.1 Device Identification Register<br />
The Device Identification Register contains a unique identifier for each product. The register is<br />
selected by the IDCODE instruction, which is the default instruction after a JTAG reset.<br />
Device specific ID codes<br />
MSB LSB<br />
Bit 31 28 27 12 11 1 0<br />
Device ID Revision Part Number Manufacturer ID 1<br />
4 bits 16 bits 11 bits 1 bit<br />
Revision This is a 4 bit number identifying the revision of the component.<br />
Rev A = 0x0, B = 0x1, etc.<br />
Part Number The part number is a 16 bit code identifying the component.<br />
Manufacturer ID The Manufacturer ID is a 11 bit code identifying the manufacturer.<br />
The JTAG manufacturer ID for ATMEL is 0x01F.<br />
The different device configurations have different JTAG ID codes, as shown in Table 39-27.<br />
Note that if the flash controller is statically reset, the ID code will be undefined.<br />
Table 39-27. Device and JTAG ID<br />
Device Name JTAG ID Code (R is the revision number)<br />
<strong>AT32UC3C</strong>0512C 0xr200003F<br />
<strong>AT32UC3C</strong>0256C 0xr200103F<br />
<strong>AT32UC3C</strong>0128C 0xr200203F<br />
<strong>AT32UC3C</strong>064C 0xr200303F<br />
<strong>AT32UC3C</strong>1512C 0xr200403F<br />
<strong>AT32UC3C</strong>1256C 0xr200503F<br />
<strong>AT32UC3C</strong>1128C 0xr200603F<br />
<strong>AT32UC3C</strong>164C 0xr200703F<br />
<strong>AT32UC3C</strong>2512C 0xr200803F<br />
<strong>AT32UC3C</strong>2256C 0xr200903F<br />
<strong>AT32UC3C</strong>2128C 0xr200A03F<br />
<strong>AT32UC3C</strong>264C 0xr200B03F<br />
1228
32117D–AVR-01/12<br />
<strong>AT32UC3C</strong><br />
39.5.4.2 Reset Register<br />
The reset register is selected by the AVR_RESET instruction and contains one bit for each reset<br />
domain in the device. Setting each bit to one will keep that domain reset until the bit is cleared.<br />
Bit 0<br />
Reset<br />
domain System<br />
System Resets the whole chip, except the JTAG itself.<br />
39.5.4.3 Boundary--scan Chain<br />
The boundary-scan chain has the capability of driving and observing the logic levels on the digital<br />
I/O pins, as well as driving and observing the logic levels between the digital I/O pins and the<br />
internal logic. Typically, output value, output enable, and input data are all available in the<br />
boundary-scan chain.<br />
The boundary-scan chain is described in the BSDL (Boundary Scan Description Language) file<br />
available at the Atmel web site.<br />
1229
39.6 aWire Debug Interface (AW)<br />
Rev.: 2.3.0.1<br />
39.6.1 Features<br />
39.6.2 Overview<br />
32117D–AVR-01/12<br />
<strong>AT32UC3C</strong><br />
Single pin debug system.<br />
Half Duplex asynchronous communication (UART compatible).<br />
Full duplex mode for direct UART connection.<br />
Compatible with JTAG functionality, except boundary scan.<br />
Failsafe packet-oriented protocol.<br />
Read and write on-chip memory and program on-chip flash and fuses through SAB interface.<br />
On-Chip Debug access through SAB interface.<br />
Asynchronous receiver or transmitter when the aWire system is not used for debugging.<br />
The aWire Debug Interface (AW) offers a single pin debug solution that is fully compatible with<br />
the functionality offered by the JTAG interface, except boundary scan. This functionality includes<br />
memory access, programming capabilities, and On-Chip Debug access.<br />
Figure 39-8 on page 1231 shows how the AW is connected in a 32-bit AVR device. The<br />
RESET_N pin is used both as reset and debug pin. A special sequence on RESET_N is needed<br />
to block the normal reset functionality and enable the AW.<br />
The Service Access Bus (SAB) interface contains address and data registers for the Service<br />
Access Bus, which gives access to On-Chip Debug, programming, and other functions in the<br />
device. The SAB offers several modes of access to the address and data registers, as discussed<br />
in Section 39.6.6.8.<br />
Section 39.6.7 lists the supported aWire commands and responses, with references to the<br />
description in this document.<br />
If the AW is not used for debugging, the aWire UART can be used by the user to send or receive<br />
data with one stop bit, eight data bits, no parity bits, and one stop bit. This can be controlled<br />
through the aWire user interface.<br />
1230
39.6.3 Block Diagram<br />
Figure 39-8. aWire Debug Interface Block Diagram<br />
32117D–AVR-01/12<br />
PB<br />
AW User Interface<br />
AW CONTROL<br />
SAB interface<br />
RW SZ ADDR DATA<br />
SAB<br />
39.6.4 I/O Lines Description<br />
Table 39-28. I/O Lines Description<br />
aWire Debug Interface<br />
CHIP_ERASE command<br />
HALT command<br />
RESET command<br />
AW_ENABLE<br />
Baudrate Detector<br />
UART<br />
External reset<br />
Name Description Type<br />
<strong>AT32UC3C</strong><br />
DATA aWire data multiplexed with the RESET_N pin. Input/Output<br />
DATAOUT aWire data output in 2-pin mode. Output<br />
39.6.5 Product Dependencies<br />
In order to use this module, other parts of the system must be configured correctly, as described<br />
below.<br />
CRC<br />
Flash<br />
Controller<br />
CPU<br />
Power<br />
Manager<br />
Reset<br />
filter<br />
RESET_N<br />
1231
39.6.5.1 I/O Lines<br />
32117D–AVR-01/12<br />
<strong>AT32UC3C</strong><br />
The pin used by AW is multiplexed with the RESET_N pin. The reset functionality is the default<br />
function of this pin. To enable the aWire functionality on the RESET_N pin the user must enable<br />
the AW either by sending the enable sequence over the RESET_N pin from an external aWire<br />
master or by enabling the aWire user interface.<br />
In 2-pin mode data is received on the RESET_N line, but transmitted on the DATAOUT line.<br />
After sending the 2_PIN_MODE command the DATAOUT line is automatically enabled. All other<br />
peripheral functions on this pin is disabled.<br />
39.6.5.2 Power Management<br />
When debugging through AW the system clocks are automatically turned on to allow debugging<br />
in sleep modes.<br />
39.6.5.3 Clocks<br />
39.6.6 Functional Description<br />
The aWire UART uses the internal 120 MHz RC oscillator (RC120M) as clock source for its<br />
operation. When enabling the AW the RC120M is automatically started.<br />
39.6.6.1 aWire Communication Protocol<br />
The AW is accessed through the RESET_N pin shown in Table 39-28 on page 1231. The AW<br />
communicates through a UART operating at variable baud rate (depending on a sync pattern)<br />
with one start bit, 8 data bits (LSB first), one stop bit, and no parity bits. The aWire protocol is<br />
based upon command packets from an externalmaster and response packets from the slave<br />
(AW). The master always initiates communication and decides the baud rate.<br />
Table 39-29. aWire Packet Format<br />
The packet contains a sync byte (0x55), a command/response byte, two length bytes (optional),<br />
a number of data bytes as defined in the length field (optional), and two CRC bytes. If the command/response<br />
has the most significant bit set, the command/response also carries the optional<br />
length and data fields. The CRC field is not checked if the CRC value transmitted is 0x0000.<br />
Field Number of bytes Description Comment Optional<br />
SYNC 1 Sync pattern (0x55).<br />
COMMAND/<br />
RESPONSE<br />
1<br />
LENGTH 2<br />
DATA LENGTH<br />
CRC 2<br />
Command from the master or<br />
response from the slave.<br />
The number of bytes in the DATA<br />
field.<br />
Data according to command/<br />
response.<br />
CRC calculated with the FCS16<br />
polynomial.<br />
CRC calculation<br />
Used by the receiver to set the baud rate<br />
clock.<br />
When the most significant bit is set the<br />
command/response has a length field. A<br />
response has the next most significant bit<br />
set. A command does not have this bit set.<br />
CRC value of 0x0000 makes the aWire<br />
disregard the CRC if the master does not<br />
support it.<br />
No<br />
No<br />
Yes<br />
Yes<br />
No<br />
1232
32117D–AVR-01/12<br />
<strong>AT32UC3C</strong><br />
The CRC is calculated from the command/response, length, and data fields. The polynomial<br />
used is the FCS16 (or CRC-16-CCIT) in reverse mode (0x8408) and the starting value is<br />
0x0000.<br />
Example command<br />
Below is an example command from the master with additional data.<br />
Figure 39-9. Example Command<br />
baud_rate_clk<br />
data_pin ...<br />
field sync(0x55) command(0x81) length(MSB) length(lsb)<br />
...<br />
Example response<br />
Below is an example response from the slave with additional data.<br />
Figure 39-10. Example Response<br />
baud_rate_clk<br />
data(MSB) data(LSB) CRC(MSB) CRC(lsb)<br />
data_pin ...<br />
field sync(0x55) response(0xC1) length(MSB) length(lsb)<br />
...<br />
data(MSB) data(LSB) CRC(MSB) CRC(lsb)<br />
Avoiding drive contention when changing direction<br />
The aWire debug protocol uses one dataline in both directions. To avoid both the master and the<br />
slave to drive this line when changing direction the AW has a built in guard time before it starts to<br />
drive the line. At reset this guard time is set to maximum (128 bit cycles), but can be lowered by<br />
the master upon command.<br />
The AW will release the line immediately after the stop character has been transmitted.<br />
1233
32117D–AVR-01/12<br />
<strong>AT32UC3C</strong><br />
39.6.6.2 During the direction change there can be a period when the line is not driven. The internal pullup of the<br />
RESET_N pin keeps the signal stable when neither master or slave is actively driving the line. The RESET_N<br />
pin<br />
Normal reset functionality on the RESET_N pin is disabled when using aWire. However, the<br />
user can reset the system through the RESET aWire command. During aWire operation the<br />
RESET_N pin should not be connected to an external reset circuitry, but disconnected via a<br />
switch or a jumper to avoid drive contention and speed problems.<br />
Figure 39-11. Reset Circuitry and aWire.<br />
39.6.6.3 Initializing the AW<br />
To enable AW, the user has to send a 0x55 pattern with a baudrate of 1 kHz on the RESET_N<br />
pin. The AW is enabled after transmitting this pattern and the user can start transmitting commands.<br />
This pattern is not the sync pattern for the first command.<br />
After enabling the aWire debug interface the halt bit is set automatically to prevent the system<br />
from running code after the interface is enabled. To make the CPU run again set halt to zero<br />
using the HALT command.<br />
39.6.6.4 Disabling the AW<br />
To disable AW, the user can keep the RESET_N pin low for 100 ms. This will disable the AW,<br />
return RESET_N to its normal function, and reset the device.<br />
An aWire master can also disable aWire by sending the DISABLE command. After acking the<br />
command the AW will be disabled and RESET_N returns to its normal function.<br />
39.6.6.5 Resetting the AW<br />
The aWire master can reset the AW slave by pulling the RESET_N pin low for 20 ms. This is<br />
equivalent to disabling and then enabling AW.<br />
39.6.6.6 2-pin Mode<br />
Board Reset<br />
Circuitry<br />
aWire master connector<br />
Jumper<br />
RESET_N<br />
AW Debug<br />
Interface<br />
To avoid using special hardware when using a normal UART device as aWire master, the aWire<br />
slave has a 2-pin mode where one pin is used as input and on pin is used as output. To enable<br />
this mode the 2_PIN_MODE command must be sent. After sending the command, all responses<br />
will be sent on the DATAOUT pin instead of the RESET_N pin. Commands are still received on<br />
the RESET_N pin.<br />
MCU<br />
Power Manager<br />
1234
32117D–AVR-01/12<br />
<strong>AT32UC3C</strong><br />
39.6.6.7 Baud Rate Clock<br />
The communication speed is set by the master in the sync field of the command. The AW will<br />
use this to resynchronize its baud rate clock and reply on this frequency. The minimum frequency<br />
of the communication is 1 kHz. The maximum frequency depends on the internal clock<br />
source for the AW (RC120M). The baud rate clock is generated by AW with the following<br />
formula:<br />
Where fbr is the baud rate frequency and faw is the frequency of the internal RC120M. TUNE is<br />
the value returned by the BAUD_RATE response.<br />
To find the max frequency the user can issue the TUNE command to the AW to make it return<br />
the TUNE value. This value can be used to compute the faw . The maximum operational frequency<br />
( ) is then:<br />
f brmax<br />
39.6.6.8 Service Access Bus<br />
The AVR32 architecture offers a common interface for access to On-Chip Debug, programming,<br />
and test functions. These are mapped on a common bus called the Service Access Bus (SAB),<br />
which is linked to the aWire through a bus master module, which also handles synchronization<br />
between the aWire and SAB clocks.<br />
For more information about the SAB and a list of SAB slaves see the Service Access Bus<br />
chapter.<br />
SAB Clock<br />
When accessing the SAB through the aWire there are no limitations on baud rate frequency<br />
compared to chip frequency, although there must be an active system clock in order for the SAB<br />
accesses to complete. If the system clock (CLK_SYS) is switched off in sleep mode, activity on<br />
the aWire pin will restart the CLK_SYS automatically, without waking the device from sleep.<br />
aWire masters may optimize the transfer rate by adjusting the baud rate frequency in relation to<br />
the CLK_SYS. This ratio can be measured with the MEMORY_SPEED_REQUEST command.<br />
When issuing the MEMORY_SPEED_REQUEST command a counter value CV is returned. CV<br />
can be used to calculate the SAB speed ( ) using this formula:<br />
SAB Address Mode<br />
f aw<br />
TUNE × fbr<br />
= ----------------------------<br />
8<br />
f brmax<br />
f sab<br />
The Service Access Bus uses 36 address bits to address memory or registers in any of the<br />
slaves on the bus. The bus supports sized accesses of bytes (8 bits), halfwords (16 bits), or<br />
words (32 bits). All accesses must be aligned to the size of the access, i.e. halfword accesses<br />
must have the lowest address bit cleared, and word accesses must have the two lowest address<br />
bits cleared.<br />
=<br />
faw -------<br />
4<br />
3faw fsab =<br />
----------------<br />
CV – 3<br />
1235
32117D–AVR-01/12<br />
<strong>AT32UC3C</strong><br />
Two instructions exist to access the SAB: MEMORY_WRITE and MEMORY_READ. These two<br />
instructions write and read words, halfwords, and bytes from the SAB.<br />
Busy Reporting<br />
If the aWire master, during a MEMORY_WRITE or a MEMORY_READ command, transmit<br />
another byte when the aWire is still busy sending the previous byte to the SAB, the AW will<br />
respond with a MEMORY_READ_WRITE_STATUS error. See chapter Section 39.6.8.5 for<br />
more details.<br />
The aWire master should adjust its baudrate or delay between bytes when doing SAB accesses<br />
to ensure that the SAB is not overwhelmed with data.<br />
Error Reporting<br />
If a write is performed on a non-existing memory location the SAB interface will respond with an<br />
error. If this happens, all further writes in this command will not be performed and the error and<br />
number of bytes written is reported in the MEMORY_READWRITE_STATUS message from the<br />
AW after the write.<br />
If a read is performed on a non-existing memory location, the SAB interface will respond with an<br />
error. If this happens, the data bytes read after this event are not valid. The AW will include three<br />
extra bytes at the end of the transfer to indicate if the transfer was successful, or in the case of<br />
an error, how many valid bytes were received.<br />
39.6.6.9 CRC Errors/NACK Response<br />
The AW will calculate a CRC value when receiving the command, length, and data fields of the<br />
command packets. If this value differs from the value from the CRC field of the packet, the AW<br />
will reply with a NACK response. Otherwise the command is carried out normally.<br />
An unknown command will be replied with a NACK response.<br />
In worst case a transmission error can happen in the length or command field of the packet. This<br />
can lead to the aWire slave trying to receive a command with or without length (opposite of what<br />
the master intended) or receive an incorrect number of bytes. The aWire slave will then either<br />
wait for more data when the master has finished or already have transmitted the NACK<br />
response in congestion with the master. The master can implement a timeout on every command<br />
and reset the slave if no response is returned after the timeout period has ended.<br />
39.6.7 aWire Command Summary<br />
The implemented aWire commands are shown in the table below. The responses from the AW<br />
are listed in Section 39.6.8.<br />
Table 39-30. aWire Command Summary<br />
COMMAND Instruction Description<br />
0x01 AYA “Are you alive”.<br />
0x02 JTAG_ID Asks AW to return the JTAG IDCODE.<br />
0x03 STATUS_REQUEST Request a status message from the AW.<br />
0x04 TUNE Tell the AW to report the current baud rate.<br />
0x05 MEMORY_SPEED_REQUEST<br />
Reports the speed difference between the aWire control and the SAB clock<br />
domains.<br />
0x06 CHIP_ERASE Erases the flash and all volatile memories.<br />
1236
Table 39-30. aWire Command Summary<br />
COMMAND Instruction Description<br />
0x07 DISABLE Disables the AW.<br />
0x08 2_PIN_MODE<br />
39.6.7.1 AYA<br />
39.6.7.2 JTAG_ID<br />
32117D–AVR-01/12<br />
All aWire commands are described below, with a summary in table form.<br />
<strong>AT32UC3C</strong><br />
Enables the DATAOUT pin and puts the aWire in 2-pin mode, where all<br />
responses are sent on the DATAOUT pin.<br />
0x80 MEMORY_WRITE Writes words, halfwords, or bytes to the SAB.<br />
0x81 MEMORY_READ Reads words, halfwords, or bytes from the SAB.<br />
0x82 HALT Issues a halt command to the device.<br />
0x83 RESET Issues a reset to the Reset Controller.<br />
0x84 SET_GUARD_TIME Sets the guard time for the AW.<br />
Table 39-31. Command/Response Description Notation<br />
Command/Response Description<br />
Command/Response value Shows the command/response value to put into the command/response field of the packet.<br />
Additional data Shows the format of the optional data field if applicable.<br />
Possible responses Shows the possible responses for this command.<br />
This command asks the AW: “Are you alive”, where the AW should respond with an<br />
acknowledge.<br />
Table 39-32. AYA Details<br />
Command Details<br />
Command value 0x01<br />
Additional data N/A<br />
Possible responses<br />
This command instructs the AW to output the JTAG idcode in the following response.<br />
Table 39-33. JTAG_ID Details<br />
Command Details<br />
Command value 0x02<br />
Additional data N/A<br />
Possible responses<br />
0x40: ACK (Section 39.6.8.1)<br />
0x41: NACK (Section 39.6.8.2)<br />
0xC0: IDCODE (Section 39.6.8.3)<br />
0x41: NACK (Section 39.6.8.2)<br />
1237
39.6.7.3 STATUS_REQUEST<br />
Asks the AW for a status message.<br />
39.6.7.4 TUNE<br />
32117D–AVR-01/12<br />
Table 39-34. STATUS_REQUEST Details<br />
Command Details<br />
Command value 0x03<br />
Additional data N/A<br />
Possible responses<br />
Asks the AW for the current baud rate counter value.<br />
Table 39-35. TUNE Details<br />
Command Details<br />
Command value 0x04<br />
Additional data N/A<br />
Possible responses<br />
0xC4: STATUS_INFO (Section 39.6.8.7)<br />
0x41: NACK (Section 39.6.8.2)<br />
<strong>AT32UC3C</strong><br />
39.6.7.5 MEMORY_SPEED_REQUEST<br />
Asks the AW for the relative speed between the aWire clock (RC120M) and the SAB interface.<br />
Table 39-36. MEMORY_SPEED_REQUEST Details<br />
Command Details<br />
Command value 0x05<br />
Additional data N/A<br />
Possible responses<br />
0xC3: BAUD_RATE (Section 39.6.8.6)<br />
0x41: NACK (Section 39.6.8.2)<br />
39.6.7.6 CHIP_ERASE<br />
This instruction allows a programmer to completely erase all nonvolatile memories in the chip.<br />
This will also clear any security bits that are set, so the device can be accessed normally. The<br />
command is acked immediately, but the status of the command can be monitored by checking<br />
the Chip Erase ongoing bit in the status bytes received after the STATUS_REQUEST<br />
command.<br />
Table 39-37. CHIP_ERASE Details<br />
Command Details<br />
Command value 0x06<br />
Additional data N/A<br />
Possible responses<br />
0xC5: MEMORY_SPEED (Section 39.6.8.8)<br />
0x41: NACK (Section 39.6.8.2)<br />
0x40: ACK (Section 39.6.8.1)<br />
0x41: NACK (Section 39.6.8.2)<br />
1238
39.6.7.7 DISABLE<br />
32117D–AVR-01/12<br />
Disables the AW. The AW will respond with an ACK response and then disable itself.<br />
Table 39-38. DISABLE Details<br />
Command Details<br />
Command value 0x07<br />
Additional data N/A<br />
Possible responses<br />
<strong>AT32UC3C</strong><br />
39.6.7.8 2_PIN_MODE<br />
Enables the DATAOUT pin as an output pin. All responses sent from the aWire slave will be sent<br />
on this pin, instead of the RESET_N pin, starting with the ACK for the 2_PIN_MODE command.<br />
Table 39-39. DISABLE Details<br />
Command Details<br />
Command value 0x07<br />
Additional data N/A<br />
Possible responses<br />
39.6.7.9 MEMORY_WRITE<br />
This command enables programming of memory/writing to registers on the SAB. The<br />
MEMORY_WRITE command allows words, halfwords, and bytes to be programmed to a continuous<br />
sequence of addresses in one operation. Before transferring the data, the user must<br />
supply:<br />
1. The number of data bytes to write + 5 (size and starting address) in the length field.<br />
2. The size of the transfer: words, halfwords, or bytes.<br />
3. The starting address of the transfer.<br />
The 4 MSB of the 36 bit SAB address are submitted together with the size field (2 bits). Then follows<br />
the 4 remaining address bytes and finally the data bytes. The size of the transfer is<br />
specified using the values from the following table:<br />
Table 39-40. Size Field Decoding<br />
Size field Description<br />
00 Byte transfer<br />
Below is an example write command:<br />
1. 0x55 (sync)<br />
2. 0x80 (command)<br />
3. 0x00 (length MSB)<br />
0x40: ACK (Section 39.6.8.1)<br />
0x41: NACK (Section 39.6.8.2)<br />
0x40: ACK (Section 39.6.8.1)<br />
0x41: NACK (Section 39.6.8.2)<br />
01 Halfword transfer<br />
10 Word transfer<br />
11 Reserved<br />
1239
32117D–AVR-01/12<br />
<strong>AT32UC3C</strong><br />
4. 0x09 (length LSB)<br />
5. 0x25 (size and address MSB, the two MSB of this byte are unused and set to zero)<br />
6. 0x00<br />
7. 0x00<br />
8. 0x00<br />
9. 0x04 (address LSB)<br />
10. 0xCA<br />
11. 0xFE<br />
12. 0xBA<br />
13. 0xBE<br />
14. 0xXX (CRC MSB)<br />
15. 0xXX (CRC LSB)<br />
The length field is set to 0x0009 because there are 9 bytes of additional data: 5 address and size<br />
bytes and 4 bytes of data. The address and size field indicates that words should be written to<br />
address 0x500000004. The data written to 0x500000004 is 0xCAFEBABE.<br />
Table 39-41. MEMORY_WRITE Details<br />
Command Details<br />
Command value 0x80<br />
Additional data Size, Address and Data<br />
Possible responses<br />
39.6.7.10 MEMORY_READ<br />
This command enables reading of memory/registers on the Service Access Bus (SAB). The<br />
MEMORY_READ command allows words, halfwords, and bytes to be read from a continuous<br />
sequence of addresses in one operation. The user must supply:<br />
1. The size of the data field: 7 (size and starting address + read length indicator) in the<br />
length field.<br />
2. The size of the transfer: Words, halfwords, or bytes.<br />
3. The starting address of the transfer.<br />
4. The number of bytes to read (max 65532).<br />
The 4 MSB of the 36 bit SAB address are submitted together with the size field (2 bits). The 4<br />
remaining address bytes are submitted before the number of bytes to read. The size of the<br />
transfer is specified using the values from the following table:<br />
Table 39-42. Size Field Decoding<br />
Size field Description<br />
00 Byte transfer<br />
01 Halfword transfer<br />
10 Word transfer<br />
11 Reserved<br />
Below is an example read command:<br />
0xC2: MEMORY_READWRITE_STATUS (Section 39.6.8.5)<br />
0x41: NACK (Section 39.6.8.2)<br />
1240
39.6.7.11 HALT<br />
39.6.7.12 RESET<br />
32117D–AVR-01/12<br />
<strong>AT32UC3C</strong><br />
1. 0x55 (sync)<br />
2. 0x81 (command)<br />
3. 0x00 (length MSB)<br />
4. 0x07 (length LSB)<br />
5. 0x25 (size and address MSB, the two MSB of this byte are unused and set to zero)<br />
6. 0x00<br />
7. 0x00<br />
8. 0x00<br />
9. 0x04 (address LSB)<br />
10. 0x00<br />
11. 0x04<br />
12. 0xXX (CRC MSB)<br />
13. 0xXX (CRC LSB)<br />
The length field is set to 0x0007 because there are 7 bytes of additional data: 5 bytes of address<br />
and size and 2 bytes with the number of bytes to read. The address and size field indicates one<br />
word (four bytes) should be read from address 0x500000004.<br />
Table 39-43. MEMORY_READ Details<br />
Command Details<br />
Command value 0x81<br />
Additional data Size, Address and Length<br />
Possible responses<br />
This command tells the CPU to halt code execution for safe programming. If the CPU is not<br />
halted during programming it can start executing partially loaded programs. To halt the processor,<br />
the aWire master should send 0x01 in the data field of the command. After programming the<br />
halting can be released by sending 0x00 in the data field of the command.<br />
Table 39-44. HALT Details<br />
Command Details<br />
Command value 0x82<br />
Additional data<br />
Possible responses<br />
0xC1: MEMDATA (Section 39.6.8.4)<br />
0xC2: MEMORY_READWRITE_STATUS (Section 39.6.8.5)<br />
0x41: NACK (Section 39.6.8.2)<br />
0x01 to halt the CPU 0x00 to release the halt and reset the<br />
device.<br />
0x40: ACK (Section 39.6.8.1)<br />
0x41: NACK (Section 39.6.8.2)<br />
This command resets different domains in the part. The aWire master sends a byte with the<br />
reset value. Each bit in the reset value byte corresponds to a reset domain in the chip. If a bit is<br />
set the reset is activated and if a bit is not set the reset is released. The number of reset domains<br />
1241
32117D–AVR-01/12<br />
<strong>AT32UC3C</strong><br />
and their destinations are identical to the resets described in the JTAG data registers chapter<br />
under reset register.<br />
Table 39-45. RESET Details<br />
Command Details<br />
Command value 0x83<br />
Additional data<br />
Possible responses<br />
39.6.7.13 SET_GUARD_TIME<br />
Sets the guard time value in the AW, i.e. how long the AW will wait before starting its transfer<br />
after the master has finished.<br />
The guard time can be either 0x00 (128 bit lengths), 0x01 (16 bit lengths), 0x2 (4 bit lengths) or<br />
0x3 (1 bit length).<br />
Table 39-46. SET_GUARD_TIME Details<br />
Command Details<br />
Command value 0x84<br />
Additional data Guard time<br />
Possible responses<br />
Reset value for each reset domain. The number of reset<br />
domains is part specific.<br />
0x40: ACK (Section 39.6.8.1)<br />
0x41: NACK (Section 39.6.8.2)<br />
39.6.8 aWire Response Summary<br />
The implemented aWire responses are shown in the table below.<br />
Table 39-47. aWire Response Summary<br />
RESPONSE Instruction Description<br />
0x40 ACK Acknowledge.<br />
0x40: ACK (Section 39.6.8.1)<br />
0x41: NACK (Section 39.6.8.2)<br />
0x41 NACK Not acknowledge. Sent after CRC errors and after unknown commands.<br />
0xC0 IDCODE The JTAG idcode.<br />
0xC1 MEMDATA Values read from memory.<br />
0xC2 MEMORY_READWRITE_STATUS<br />
0xC3 BAUD_RATE The current baudrate.<br />
0xC4 STATUS_INFO Status information.<br />
0xC5 MEMORY_SPEED SAB to aWire speed information.<br />
Status after a MEMORY_WRITE or a MEMORY_READ command. OK, busy,<br />
error.<br />
1242
39.6.8.1 ACK<br />
39.6.8.2 NACK<br />
39.6.8.3 IDCODE<br />
39.6.8.4 MEMDATA<br />
32117D–AVR-01/12<br />
The AW has received the command successfully and performed the operation.<br />
Table 39-48. ACK Details<br />
Response Details<br />
Response value 0x40<br />
Additional data N/A<br />
The AW has received the command, but got a CRC mismatch.<br />
Table 39-49. NACK Details<br />
Response Details<br />
Response value 0x41<br />
Additional data N/A<br />
The JTAG idcode for this device.<br />
Table 39-50. IDCODE Details<br />
Response Details<br />
Response value 0xC0<br />
Additional data JTAG idcode<br />
<strong>AT32UC3C</strong><br />
The data read from the address specified by the MEMORY_READ command. The last 3 bytes<br />
are status bytes from the read. The first status byte is the status of the command described in<br />
the table below. The last 2 bytes are the number of remaining data bytes to be sent in the data<br />
field of the packet when the error occurred. If the read was not successful all data bytes after the<br />
failure are undefined. A successful word read (4 bytes) will look like this:<br />
1. 0x55 (sync)<br />
2. 0xC1 (command)<br />
3. 0x00 (length MSB)<br />
4. 0x07 (length LSB)<br />
5. 0xCA (Data MSB)<br />
6. 0xFE<br />
7. 0xBA<br />
8. 0xBE (Data LSB)<br />
9. 0x00 (Status byte)<br />
10. 0x00 (Bytes remaining MSB)<br />
11. 0x00 (Bytes remaining LSB)<br />
12. 0xXX (CRC MSB)<br />
13. 0xXX (CRC LSB)<br />
The status is 0x00 and all data read are valid. An unsuccessful four byte read can look like this:<br />
1243
32117D–AVR-01/12<br />
<strong>AT32UC3C</strong><br />
1. 0x55 (sync)<br />
2. 0xC1 (command)<br />
3. 0x00 (length MSB)<br />
4. 0x07 (length LSB)<br />
5. 0xCA (Data MSB)<br />
6. 0xFE<br />
7. 0xXX (An error has occurred. Data read is undefined. 5 bytes remaining of the Data<br />
field)<br />
8. 0xXX (More undefined data)<br />
9. 0x02 (Status byte)<br />
10. 0x00 (Bytes remaining MSB)<br />
11. 0x05 (Bytes remaining LSB)<br />
12. 0xXX (CRC MSB)<br />
13. 0xXX (CRC LSB)<br />
The error occurred after reading 2 bytes on the SAB. The rest of the bytes read are undefined.<br />
The status byte indicates the error and the bytes remaining indicates how many bytes were<br />
remaining to be sent of the data field of the packet when the error occurred.<br />
Table 39-51. MEMDATA Status Byte<br />
status byte Description<br />
0x00 Read successful<br />
0x01 SAB busy<br />
0x02 Bus error (wrong address)<br />
Other Reserved<br />
Table 39-52. MEMDATA Details<br />
Response Details<br />
Response value 0xC1<br />
Additional data Data read, status byte, and byte count (2 bytes)<br />
39.6.8.5 MEMORY_READWRITE_STATUS<br />
After a MEMORY_WRITE command this response is sent by AW. The response can also be<br />
sent after a MEMORY_READ command if AW encountered an error when receiving the<br />
address. The response contains 3 bytes, where the first is the status of the command and the 2<br />
next contains the byte count when the first error occurred. The first byte is encoded this way:<br />
Table 39-53. MEMORY_READWRITE_STATUS Status Byte<br />
status byte Description<br />
0x00 Write successful<br />
0x01 SAB busy<br />
0x02 Bus error (wrong address)<br />
Other Reserved<br />
1244
39.6.8.6 BAUD_RATE<br />
The current baud rate in the AW. See Section 39.6.6.7 for more details.<br />
39.6.8.7 STATUS_INFO<br />
A status message from AW.<br />
Table 39-56. STATUS_INFO Contents<br />
32117D–AVR-01/12<br />
Table 39-54. MEMORY_READWRITE_STATUS Details<br />
Response Details<br />
Response value 0xC2<br />
Additional data Status byte and byte count (2 bytes)<br />
Table 39-55. BAUD_RATE Details<br />
Response Details<br />
Response value 0xC3<br />
Additional data Baud rate<br />
Bit number Name Description<br />
15-9 Reserved<br />
8 Protected<br />
7 SAB busy<br />
<strong>AT32UC3C</strong><br />
The protection bit in the internal flash is set. SAB access is restricted. This bit<br />
will read as one during reset.<br />
The SAB bus is busy with a previous transfer. This could indicate that the CPU<br />
is running on a very slow clock, the CPU clock has stopped for some reason<br />
or that the part is in constant reset.<br />
6 Chip erase ongoing The Chip erase operation has not finished.<br />
5 CPU halted This bit will be set if the CPU is halted. This bit will read as zero during reset.<br />
4-1 Reserved<br />
0 Reset status This bit will be set if AW has reset the CPU using the RESET command.<br />
Table 39-57. STATUS_INFO Details<br />
Response Details<br />
Response value 0xC4<br />
Additional data 2 status bytes<br />
39.6.8.8 MEMORY_SPEED<br />
Counts the number of RC120M clock cycles it takes to sync one message to the SAB interface<br />
and back again. The SAB clock speed ( ) can be calculated using the following formula:<br />
f sab<br />
3faw fsab =<br />
----------------<br />
CV – 3<br />
1245
32117D–AVR-01/12<br />
Table 39-58. MEMORY_SPEED Details<br />
Response Details<br />
Response value 0xC5<br />
Additional data Clock cycle count (MS)<br />
<strong>AT32UC3C</strong><br />
39.6.9 Security Restrictions<br />
When the security fuse in the Flash is programmed, the following aWire commands are limited:<br />
MEMORY_WRITE<br />
MEMORY_READ<br />
Unlimited access to these instructions is restored when the security fuse is erased by the<br />
CHIP_ERASE aWire command.<br />
Note that the security bit will read as programmed and block these instructions also if the Flash<br />
Controller is statically reset.<br />
1246
32117D–AVR-01/12<br />
<strong>AT32UC3C</strong><br />
39.7 Module Configuration<br />
The bit mapping of the Peripheral Debug Register (PDBG) is described in the following table.<br />
Please refer to the On-Chip Debug chapter in the AVR32UC Technical Reference Manual for<br />
details.<br />
Table 39-59. Bit mapping of the Peripheral Debug Register (PDBG)<br />
bit Peripheral<br />
0 AST<br />
1 WDT<br />
2 CANIF<br />
3 QDEC0<br />
4 QDEC1<br />
5 ADCIFA<br />
6 ACIFA0<br />
7 ACIFA1<br />
8 DACIFB0<br />
9 DACIFB1<br />
10 PEVC<br />
11-31 Reserved<br />
1247
40. Electrical Characteristics<br />
40.1 Absolute Maximum Ratings*<br />
32117D–AVR-01/12<br />
<strong>AT32UC3C</strong><br />
Operating temperature..................................... -40°C to +85°C *NOTICE: Stresses beyond those listed under “Absolute<br />
Storage temperature...................................... -60°C to +150°C<br />
Voltage on any pin except DM/DP/VBUS<br />
with respect to ground ............................-0.3V to V VDD (1) +0.3V<br />
Voltage on DM/DP with respect to ground.........-0.3V to +3.6V<br />
Voltage on VBUS with respect to ground...........-0.3V to +5.5V<br />
Maximum operating voltage (VDDIN_5) ........................... 5.5V<br />
Maximum operating voltage (VDDIO1, VDDIO2, VDDIO3,<br />
VDDANA).......................................................................... 5.5V<br />
Maximum operating voltage (VDDIN_33) ......................... 3.6V<br />
Total DC output current on all I/O pins- VDDIO1 ......... 120 mA<br />
Total DC output current on all I/O pins- VDDIO2 ......... 120 mA<br />
Total DC output current on all I/O pins- VDDIO3 ......... 120 mA<br />
Total DC output current on all I/O pins- VDDANA........ 120 mA<br />
Notes: 1. V VDD corresponds to either V VDDIO1 , V VDDIO2 , V VDDIO3 , or V VDDANA , depending on the supply for the pin. Refer to Section 3-1<br />
on page 11 for details.<br />
40.2 Supply Characteristics<br />
Maximum Ratings” may cause permanent damage<br />
to the device. This is a stress rating only and<br />
functional operation of the device at these or<br />
other conditions beyond those indicated in the<br />
operational sections of this specification is not<br />
implied. Exposure to absolute maximum rating<br />
conditions for extended periods may affect<br />
device reliability.<br />
The following characteristics are applicable to the operating temperature range: TA = -40°C to 85°C, unless otherwise specified<br />
and are valid for a junction temperature up to TJ = 100°C. Please refer to Section 6. ”Supply and Startup<br />
Considerations” on page 46.<br />
Table 40-1. Supply Characteristics<br />
Symbol Parameter Condition<br />
V VDDIN_5<br />
DC supply internal regulators<br />
Voltage<br />
Min Max Unit<br />
3V range 3.0 3.6<br />
5V range 4.5 5.5<br />
V VDDIN_33 DC supply USB I/O only in 3V range 3.0 3.6 V<br />
V VDDANA<br />
VVDDIO1 VVDDIO2 VVDDIO2 DC supply peripheral I/O and<br />
analog part<br />
DC supply peripheral I/O<br />
3V range 3.0 3.6<br />
5V range 4.5 5.5<br />
3V range 3.0 3.6<br />
5V range 4.5 5.5<br />
V<br />
V<br />
V<br />
1248
Table 40-2. Supply Rise Rates and Order<br />
Symbol Parameter<br />
V VDDIN_5 DC supply internal 3.3V regulator 0.01 V/ms 1.25 V/us<br />
V VDDIN_33 DC supply internal 1.8V regulator 0.01 V/ms 1.25 V/us<br />
VVDDIO1 VVDDIO2 VVDDIO3 V VDDANA<br />
40.3 Maximum Clock Frequencies<br />
32117D–AVR-01/12<br />
DC supply peripheral I/O 0.01 V/ms 1.25 V/us<br />
DC supply peripheral I/O and<br />
analog part<br />
Table 40-3. Clock Frequencies<br />
These parameters are given in the following conditions:<br />
VVDDCORE > 1.85V<br />
Temperature = -40°C to 85°C<br />
<strong>AT32UC3C</strong><br />
fGCLK11 GCLK11 clock frequency Generic clock for IISC 50<br />
Note: 1. These values are based on simulation and characterization of other AVR microcontrollers manufactured in the same process<br />
technology. These values are not covered by test limits in production.<br />
(1)<br />
MHz<br />
40.4 Power Consumption<br />
The values in Table 40-4 are measured values of power consumption under the following conditions,<br />
except where noted:<br />
Operating conditions core supply (Figure 40-1)<br />
–VVDDIN_5 = VVDDIN_33 = 3.3V<br />
–VVDDCORE = 1.85V, supplied by the internal regulator<br />
–VVDDIO1 = VVDDIO2 = VVDDIO3 = 3.3V<br />
–VVDDANA = 3.3V<br />
Rise Rate<br />
Min Max Comment<br />
0.01 V/ms 1.25 V/us<br />
Rise after or at the same time as<br />
VDDIN_5, VDDIN_33<br />
Rise after or at the same time as<br />
VDDIN_5, VDDIN_33<br />
Symbol Parameter Conditions Min Max Units<br />
f CPU CPU clock frequency 66 MHz<br />
f PBA PBA clock frequency 66 MHz<br />
f PBB PBB clock frequency 66 MHz<br />
fPBC PBC clock frequency 66 MHz<br />
fGCLK0 GCLK0 clock frequency Generic clock for USBC 50 (1)<br />
MHz<br />
fGCLK1 GCLK1 clock frequency Generic clock for CANIF 66 (1)<br />
MHz<br />
fGCLK2 GCLK2 clock frequency Generic clock for AST 80 (1)<br />
MHz<br />
f GCLK4 GCLK4 clock frequency Generic clock for PWM 133 (1) MHz<br />
1249
32117D–AVR-01/12<br />
– Internal 3.3V regulator is off<br />
TA = 25°C<br />
I/Os are configured as inputs, with internal pull-up enabled.<br />
Oscillators<br />
– OSC0/1 (crystal oscillator) stopped<br />
– OSC32K (32KHz crystal oscillator) stopped<br />
– PLL0 running<br />
– PLL1 stopped<br />
Clocks<br />
– External clock on XIN0 as main clock source (10MHz)<br />
– CPU, HSB, and PBB clocks undivided<br />
– PBA, PBC clock divided by 4<br />
– All peripheral clocks running<br />
Table 40-4. Power Consumption for Different Operating Modes<br />
Note: 1. These numbers are valid for the measured condition only and must not be extrapolated to other frequencies.<br />
<strong>AT32UC3C</strong><br />
Mode Conditions Measured on Consumption Typ Unit<br />
Active (1)<br />
Idle (1)<br />
Frozen (1)<br />
Standby (1)<br />
CPU running a recursive Fibonacci algorithm<br />
48<br />
Amp<br />
Stop 73<br />
DeepStop 43<br />
Static<br />
OSC32K and AST running 32<br />
AST and OSC32K stopped 31<br />
512<br />
258<br />
106<br />
µA/MHz<br />
µA<br />
1250
32117D–AVR-01/12<br />
Figure 40-1. Measurement Schematic<br />
<strong>AT32UC3C</strong><br />
40.4.1 Peripheral Power Consumption<br />
The values in Table 40-5 are measured values of power consumption under the following<br />
conditions.<br />
Operating conditions core supply (Figure 40-1)<br />
–VVDDIN_5 = VDDIN_33 = 3.3V<br />
–VVDDCORE = 1.85V , supplied by the internal regulator<br />
–VVDDIO1 = VVDDIO2 = VVDDIO3 = 3.3V<br />
–VVDDANA = 3.3V<br />
– Internal 3.3V regulator is off.<br />
TA = 25°C<br />
I/Os are configured as inputs, with internal pull-up enabled.<br />
Oscillators<br />
– OSC0/1 (crystal oscillator) stopped<br />
– OSC32K (32KHz crystal oscillator) stopped<br />
– PLL0 running<br />
Amp<br />
VDDANA<br />
VDDIO<br />
VDDIN_5<br />
VDDIN_33<br />
VDDCORE<br />
GNDCORE<br />
GNDPLL<br />
1251
32117D–AVR-01/12<br />
<strong>AT32UC3C</strong><br />
– PLL1 stopped<br />
Clocks<br />
– External clock on XIN0 as main clock source.<br />
– CPU, HSB, and PB clocks undivided<br />
Consumption active is the added current consumption when the module clock is turned on and<br />
when the module is doing a typical set of operations.<br />
Table 40-5. Typical Current Consumption by Peripheral (2)<br />
Peripheral Typ Consumption Active Unit<br />
ACIFA (1)<br />
ADCIFA (1)<br />
AST 3<br />
CANIF 25<br />
DACIFB (1)<br />
EBI 23<br />
EIC 0.5<br />
FREQM 0.5<br />
GPIO 37<br />
INTC 3<br />
MDMA 4<br />
PDCA 24<br />
PEVC 15<br />
PWM 40<br />
QDEC 3<br />
SAU 3<br />
SDRAMC 2<br />
SMC 9<br />
SPI 5<br />
TC 8<br />
TWIM 2<br />
TWIS 2<br />
USART 10<br />
USBC 5<br />
WDT 2<br />
Notes: 1. Includes the current consumption on VDDANA.<br />
2. These numbers are valid for the measured condition only and must not be extrapolated to<br />
other frequencies.<br />
3<br />
7<br />
3<br />
µA/MHz<br />
1252
40.5 I/O Pin Characteristics<br />
Table 40-6. Normal I/O Pin Characteristics (1)<br />
32117D–AVR-01/12<br />
<strong>AT32UC3C</strong><br />
Symbol Parameter Condition Min Typ Max Units<br />
R PULLUP<br />
Pull-up resistance<br />
V VDD = 3V 5 26 kOhm<br />
V VDD = 5V 5 16 kOhm<br />
R PULLDOWN Pull-down resistance 2 16 kOhm<br />
V IL<br />
V IH<br />
V OL<br />
V OH<br />
f MAX<br />
Input low-level<br />
voltage<br />
Input high-level<br />
voltage<br />
Output low-level<br />
voltage<br />
Output high-level<br />
voltage<br />
Output frequency (3)<br />
V VDD = 3V 0.3*V VDDIO<br />
V VDD = 4.5V 0.3*V VDDIO<br />
V VDD = 3.6V 0.7*V VDDIO<br />
V VDD = 5.5V 0.7*V VDDIO<br />
I OL = -3.5mA, pin drive x1 (2)<br />
I OL = -7mA, pin drive x2 (2)<br />
I OL = -14mA, pin drive x4 (2)<br />
I OH = 3.5mA, pin drive x1 (2)<br />
I OH = 7mA, pin drive x2 (2)<br />
I OH = 14mA, pin drive x4 (2)<br />
V VDD = 3.0V<br />
V VDD =4.5V<br />
load = 10pF, pin drive x1 (2)<br />
load = 10pF, pin drive x2 (2)<br />
load = 10pF, pin drive x4 (2)<br />
load = 30pF, pin drive x1 (2)<br />
load = 30pF, pin drive x2 (2)<br />
load = 30pF, pin drive x4 (2)<br />
load = 10pF, pin drive x1 (2)<br />
load = 10pF, pin drive x2 (2)<br />
V<br />
V<br />
0.45 V<br />
V VDD - 0.8 V<br />
load = 10pF, pin drive x4 (2) 95<br />
load = 30pF, pin drive x1 (2)<br />
25<br />
load = 30pF, pin drive x2 (2)<br />
40<br />
load = 30pF, pin drive x4 (2)<br />
65<br />
35<br />
55<br />
70<br />
15<br />
30<br />
45<br />
50<br />
80<br />
MHz<br />
1253
Table 40-6. Normal I/O Pin Characteristics (1)<br />
t RISE<br />
32117D–AVR-01/12<br />
Rise time (3)<br />
V VDD = 3.0V<br />
load = 10pF, pin drive x1 (2)<br />
load = 10pF, pin drive x2 (2)<br />
<strong>AT32UC3C</strong><br />
Symbol Parameter Condition Min Typ Max Units<br />
t FALL<br />
Fall time (3)<br />
V VDD = 4.5V<br />
V VDD = 3.0V<br />
V VDD = 4.5V<br />
Note: 1. VVDD corresponds to either VVDDIO1 , VVDDIO2 , VVDDIO3 , or VVDDANA , depending on the supply for the pin. Refer to Section 3-1<br />
on page 11 for details.<br />
2. drive x1 capability pins are: PB00, PB01, PB02, PB03, PB30, PB31, PC02, PC03, PC04, PC05, PC06, PC07 - drive x2 /x4<br />
capability pins are: PB06, PB21, PB26, PD02, PD06, PD13 - drive x1/x2 capability pins are the remaining PA, PB, PC, PD<br />
pins. The drive strength is programmable through ODCR0, ODCR0S, ODCR0C, ODCR0T registers of GPIO.<br />
3. These values are based on simulation and characterization of other AVR microcontrollers manufactured in the same process<br />
technology. These values are not covered by test limits in production.<br />
7.7<br />
3.4<br />
load = 10pF, pin drive x4 (2) 1.9<br />
load = 30pF, pin drive x1 (2)<br />
16<br />
load = 30pF, pin drive x2 (2)<br />
7.5<br />
load = 30pF, pin drive x4 (2)<br />
3.8<br />
load = 10pF, pin drive x1 (2)<br />
load = 10pF, pin drive x2 (2)<br />
load = 10pF, pin drive x4 (2)<br />
load = 30pF, pin drive x1 (2)<br />
load = 30pF, pin drive x2 (2)<br />
load = 30pF, pin drive x4 (2)<br />
load = 10pF, pin drive x1 (2)<br />
load = 10pF, pin drive x2 (2)<br />
load = 10pF, pin drive x4 (2)<br />
load = 30pF, pin drive x1 (2)<br />
load = 30pF, pin drive x2 (2)<br />
load = 30pF, pin drive x4 (2)<br />
load = 10pF, pin drive x1 (2)<br />
load = 10pF, pin drive x2 (2)<br />
load = 10pF, pin drive x4 (2)<br />
load = 30pF, pin drive x1 (2)<br />
load = 30pF, pin drive x2 (2)<br />
5.3<br />
2.4<br />
1.3<br />
11.1<br />
5.2<br />
2.7<br />
7.6<br />
3.5<br />
1.9<br />
15.8<br />
7.3<br />
3.8<br />
5.2<br />
2.4<br />
1.4<br />
10.9<br />
5.1<br />
load = 30pF, pin drive x4 (2) 2.7<br />
I LEAK Input leakage current Pull-up resistors disabled 1.0 µA<br />
C IN<br />
Input capacitance<br />
PA00-PA29, PB00-PB31, PC00-PC01,<br />
PC08-PC31, PD00-PD30<br />
PC02, PC03, PC04, PC05, PC06, PC07 2<br />
7.5<br />
ns<br />
ns<br />
pF<br />
1254
40.6 Oscillator Characteristics<br />
40.6.1 Oscillator (OSC0 and OSC1) Characteristics<br />
40.6.1.1 Digital Clock Characteristics<br />
Table 40-7. Digital Clock Characteristics<br />
40.6.1.2 Crystal Oscillator Characteristics<br />
32117D–AVR-01/12<br />
<strong>AT32UC3C</strong><br />
The following table describes the characteristics for the oscillator when a digital clock is applied<br />
on XIN0 or XIN1.<br />
Symbol Parameter Conditions Min Typ Max Units<br />
f CPXIN XIN clock frequency 50 MHz<br />
t CPXIN XIN clock period 20 ns<br />
t CHXIN XIN clock high half-priod 0.4 x t CPXIN 0.6 x t CPXIN ns<br />
t CLXIN XIN clock low half-priod 0.4 x t CPXIN 0.6 x t CPXIN ns<br />
C IN XIN input capacitance 2 pF<br />
The following table describes the characteristics for the oscillator when a crystal is connected<br />
between XIN and XOUT as shown in Figure 40-2. The user must choose a crystal oscillator<br />
where the crystal load capacitance CL is within the range given in the table. The exact value of CL can be found in the crystal <strong>datasheet</strong>. The capacitance of the external capacitors (CLEXT ) can<br />
then be computed as follows:<br />
CLEXT = 2C ( L – Ci) – CPCB where C PCB is the capacitance of the PCB and C i is the internal equivalent load capacitance.<br />
Figure 40-2. Oscillator Connection<br />
UC3C<br />
Ci<br />
XOUT<br />
XIN<br />
CL<br />
CLEXT<br />
CLEXT<br />
1255
Table 40-8. Crystal Oscillator Characteristics<br />
Notes: 1. Please refer to the SCIF chapter for details.<br />
40.6.2 32KHz Crystal Oscillator (OSC32K) Characteristics<br />
40.6.2.1 Digital Clock Characteristics<br />
40.6.2.2 Crystal Oscillator Characteristics<br />
32117D–AVR-01/12<br />
<strong>AT32UC3C</strong><br />
Symbol Parameter Conditions Min Typ Max Unit<br />
f OUT Crystal oscillator frequency 0.4 20 MHz<br />
C i Internal equivalent load capacitance 1.7 pF<br />
t STARTUP<br />
Startup time<br />
Table 40-9. Digital 32KHz Clock Characteristics<br />
fOUT = 8MHz<br />
SCIF.OSCCTRL.GAIN = 1 (1) 975 us<br />
fOUT = 16MHz<br />
SCIF.OSCCTRL.GAIN = 2 (1) 1100 us<br />
The following table describes the characteristics for the oscillator when a digital clock is applied<br />
on XIN32.<br />
Symbol Parameter Conditions Min Typ Max Units<br />
f CPXIN XIN32 clock frequency 32.768 5000 KHz<br />
t CPXIN XIN32 clock period 200 ns<br />
t CHXIN XIN32 clock high half-priod 0.4 x t CPXIN 0.6 x t CPXIN ns<br />
t CLXIN XIN32 clock low half-priod 0.4 x t CPXIN 0.6 x t CPXIN ns<br />
C IN XIN32 input capacitance 2 pF<br />
Figure 40-2 and the equation above also applies to the 32KHz oscillator connection. The user<br />
must choose a crystal oscillator where the crystal load capacitance C L is within the range given<br />
in the table. The exact value of C L can then be found in the crystal <strong>datasheet</strong>..<br />
Table 40-10. 32 KHz Crystal Oscillator Characteristics<br />
Symbol Parameter Conditions Min Typ Max Unit<br />
f OUT Crystal oscillator frequency 32 768 Hz<br />
t STARTUP Startup time R S = 50 kOhm, C L = 12.5pF 2 s<br />
CL Crystal load capacitance 6 15 pF<br />
Ci Internal equivalent load<br />
capacitance<br />
1.4 pF<br />
1256
40.6.3 Phase Lock Loop (PLL0 and PLL1) Characteristics<br />
Table 40-11. PLL Characteristics<br />
40.6.4 120MHz RC Oscillator (RC120M) Characteristics<br />
32117D–AVR-01/12<br />
<strong>AT32UC3C</strong><br />
Symbol Parameter Conditions Min Typ Max Unit<br />
f VCO Output frequency 80 240 MHz<br />
f IN Input frequency 4 16 MHz<br />
I PLL<br />
t STARTUP<br />
Current consumption<br />
Startup time, from enabling<br />
the PLL until the PLL is<br />
locked<br />
Table 40-12. Internal 120MHz RC Oscillator Characteristics<br />
Note: 1. These values are based on simulation and characterization of other AVR microcontrollers manufactured in the same process<br />
technology. These values are not covered by test limits in production.<br />
40.6.5 System RC Oscillator (RCSYS) Characteristics<br />
40.6.6 8MHz/1MHz RC Oscillator (RC8M) Characteristics<br />
Notes: 1. Please refer to the SCIF chapter for details.<br />
Active mode, f VCO = 80MHz 250<br />
Active mode, f VCO = 240MHz 600<br />
Wide Bandwidth mode disabled 15<br />
Wide Bandwidth mode enabled 45<br />
Symbol Parameter Conditions Min Typ Max Unit<br />
Output frequency (1)<br />
88 120 152 MHz<br />
f OUT<br />
I RC120M Current consumption 1.85 mA<br />
t STARTUP Startup time 3 µs<br />
Table 40-13. System RC Oscillator Characteristics<br />
Symbol Parameter Conditions Min Typ Max Unit<br />
f OUT<br />
Output frequency<br />
Table 40-14. 8MHz/1MHz RC Oscillator Characteristics<br />
Calibrated at T A = 85°C 110 115.2 120<br />
T A = 25°C 105 109 115<br />
T A = -40°C 100 104 108<br />
Symbol Parameter Conditions Min Typ Max Unit<br />
f OUT<br />
Output frequency<br />
SCIF.RCCR8.FREQMODE = 0 (1) 7.6 8 8.4<br />
SCIF.RCCR8.FREQMODE = 1 (1) 0.955 1 1.045<br />
t STARTUP Startup time 20 µs<br />
µA<br />
µs<br />
kHz<br />
MHz<br />
1257
40.7 Flash Characteristics<br />
Table 40-15. Maximum Operating Frequency<br />
32117D–AVR-01/12<br />
<strong>AT32UC3C</strong><br />
Table 40-15 gives the device maximum operating frequency depending on the number of flash<br />
wait states. The FSW bit in the FLASHC FSR register controls the number of wait states used<br />
when accessing the flash memory.<br />
Flash Wait States Read Mode Maximum Operating Frequency<br />
0 1 cycle 33MHz<br />
1 2 cycles 66MHz<br />
Table 40-16. Flash Characteristics<br />
Symbol Parameter Conditions Min Typ Max Unit<br />
tFPP Page programming time<br />
4.3<br />
tFPE tFFP Page erase time<br />
Fuse programming time<br />
fCLK_HSB = 66MHz<br />
4.3<br />
0.6<br />
ms<br />
t FEA Full chip erase time (EA) 4.9<br />
t FCE JTAG chip erase time (CHIP_ERASE) f CLK_HSB = 115kHz 640<br />
Table 40-17. Flash Endurance and Data Retention<br />
Symbol Parameter Conditions Min Typ Max Unit<br />
N FARRAY Array endurance (write/page) 100k cycles<br />
N FFUSE General Purpose fuses endurance (write/bit) 1k cycles<br />
t RET Data retention 15 years<br />
1258
40.8 Analog Characteristics<br />
40.8.1 1.8V Voltage Regulator Characteristics<br />
Table 40-18. 1.8V Voltage Regulator Electrical Characteristics<br />
40.8.2 3.3V Voltage Regulator Characteristics<br />
40.8.3 1.8V Brown Out Detector (BOD18) Characteristics<br />
32117D–AVR-01/12<br />
<strong>AT32UC3C</strong><br />
Symbol Parameter Condition Min Typ Max Units<br />
V VDDIN_5<br />
Input voltage range<br />
5V range 4.5 5.5<br />
3V range 3.0 3.6<br />
V VDDCORE Output voltage, calibrated value 1.85 V<br />
I OUT DC output current 80 mA<br />
Table 40-19. Decoupling Requirements<br />
Symbol Parameter Condition Typ Techno. Units<br />
C IN1 Input regulator capacitor 1 1 NPO nF<br />
C IN2 Input regulator capacitor 2 4.7 X7R uF<br />
C OUT1 Output regulator capacitor 1 470 NPO pf<br />
C OUT2 Output regulator capacitor 2 2.2 X7R uF<br />
Table 40-20. 3.3V Voltage Regulator Electrical Characteristics<br />
Symbol Parameter Condition Min Typ Max Units<br />
V VDDIN_5 Input voltage range 4.5 5.5 V<br />
V VDDIN_33 Output voltage, calibrated value 3.4 V<br />
I OUT DC output current 35 mA<br />
I VREG Static current of regulator Low power mode 10 µA<br />
The values in Table 40-21 describe the values of the BOD.LEVEL in the SCIF module.<br />
Table 40-21. BODLEVEL Values<br />
BODLEVEL Value Parameter Min Max Units<br />
0 1.29 1.58<br />
20 1.36 1.63<br />
26 threshold at power-up sequence 1.42 1.69<br />
28 1.43 1.72<br />
32 1.48 1.77<br />
36 1.53 1.82<br />
40 1.56 1.88<br />
V<br />
V<br />
1259
40.8.4 3.3V Brown Out Detector (BOD33) Characteristics<br />
32117D–AVR-01/12<br />
<strong>AT32UC3C</strong><br />
The values in Table 40-23 describe the values of the BOD33.LEVEL field in the SCIF module.<br />
Table 40-23. BOD33.LEVEL Values<br />
BOD33.LEVEL Value Parameter Min Max Units<br />
17 2.21 2.55<br />
22 2.30 2.64<br />
27 2.39 2.74<br />
31 threshold at power-up sequence 2.46 2.82<br />
33 2.50 2.86<br />
39 2.60 2.98<br />
44 2.69 3.08<br />
49 2.78 3.18<br />
53 2.85 3.27<br />
60 2.98 3.41<br />
40.8.5 5V Brown Out Detector (BOD50) Characteristics<br />
The values in Table 40-25 describe the values of the BOD50.LEVEL field in the SCIF module.<br />
Table 40-25. BOD50.LEVEL Values<br />
BOD50.LEVEL Value Parameter Min Max Units<br />
16 3.20 3.65<br />
25 3.42 3.92<br />
35 3.68 4.22<br />
44 3.91 4.48<br />
53 4.15 4.74<br />
61 4.36 4.97<br />
V<br />
V<br />
1260
40.8.6 Analog to Digital Converter (ADC) and sample and hold (S/H) Characteristics<br />
32117D–AVR-01/12<br />
<strong>AT32UC3C</strong><br />
Table 40-27. ADC and S/H characteristics<br />
Symbol Parameter Conditions Min Typ Max Units<br />
f ADC<br />
t STARTUP<br />
t CONV<br />
ADC clock<br />
frequency<br />
Startup time<br />
Conversion time<br />
(latency)<br />
Throughput rate<br />
Table 40-28. ADC Reference Voltage<br />
12-bit resolution mode, V VDDANA = 3V 1.2<br />
10-bit resolution mode, VVDDANA = 3V 1.6<br />
8-bit resolution mode, VVDDANA = 3V 2.2<br />
12-bit resolution mode, VVDDANA = 4.5V 1.5<br />
10-bit resolution mode, VVDDANA = 4.5V 2<br />
8-bit resolution mode, VVDDANA = 4.5V 2.4<br />
ADC cold start-up 1 ms<br />
ADC hot start-up 24<br />
(ADCIFA.SEQCFGn.SRES)/2 + 2,<br />
ADCIFA.CFG.SHD = 1<br />
(ADCIFA.SEQCFGn.SRES)/2 + 3,<br />
ADCIFA.CFG.SHD = 0<br />
12-bit resolution,<br />
ADC clock = 1.2 MHz, V VDDANA = 3V<br />
10-bit resolution,<br />
ADC clock = 1.6 MHz, VVDDANA = 3V<br />
12-bit resolution,<br />
ADC clock = 1.5 MHz, VVDDANA = 4.5V<br />
10-bit resolution,<br />
ADC clock = 2 MHz, VVDDANA = 4.5V<br />
6 8<br />
7 9<br />
Symbol Parameter Conditions Min Typ Max<br />
V ADCREF0<br />
V ADCREF1<br />
V ADCREFP<br />
V ADCREFN<br />
ADCREF0 input voltage range<br />
ADCREF1 input voltage range<br />
ADCREFP input voltage<br />
5V Range 1 3.5<br />
3V Range 1 V VDDANA -0.7<br />
5V Range 1 3.5<br />
3V Range 1 V VDDANA -0.7<br />
5V Range - Voltage reference<br />
applied on ADCREFP<br />
3V Range - Voltage reference<br />
applied on ADCREFP<br />
1.2<br />
1.6<br />
1.5<br />
1 3.5<br />
1 V VDDANA -0.7<br />
2<br />
MHz<br />
ADC clock<br />
cycles<br />
ADC clock<br />
cycles<br />
MSPS<br />
ADCREFN input voltage<br />
Voltage reference applied on<br />
ADCREFN<br />
GNDANA V<br />
Internal 1V reference 1.0 V<br />
Internal 0.6*VDDANA reference 0.6*VVDDANA V<br />
Unit<br />
s<br />
V<br />
V<br />
V<br />
1261
Table 40-29. ADC Decoupling requirements<br />
32117D–AVR-01/12<br />
Figure 40-3. ADC input<br />
<strong>AT32UC3C</strong><br />
Symbol Parameter Conditions Min Typ Max Units<br />
C ADCREFPN<br />
Table 40-30. ADC Inputs<br />
ADCREFP/ADCREFN capacitance<br />
No voltage reference appplied on<br />
ADCREFP/ADCREFN<br />
100 nF<br />
Symbol Parameter Conditions Min Typ Max Units<br />
VADCINn ADC input voltage range 0 VVDDANA V<br />
C ONCHIP<br />
R ONCHIP<br />
Internal Capacitance<br />
Switch resistance<br />
VIN<br />
ADC used without S/H 5<br />
ADC used with S/H 4<br />
ADC used without S/H 5.1<br />
ADC used with S/H 4.6<br />
RSOURCE ADCIN RONCHIP<br />
CSOURCE<br />
Table 40-31. ADC Transfer Characteristics 12-bit Resolution Mode (1)<br />
UC3C<br />
CONCHIP<br />
Symbol Parameter Conditions Min Typ Max Units<br />
RES Resolution<br />
Differential mode,<br />
12 Bit<br />
INL Integral Non-Linearity VVDDANA = 3V,<br />
5 LSB<br />
DNL Differential Non-Linearity VADCREF0 = 1V,<br />
3 LSB<br />
Offset error ADCFIA.SEQCFGn.SRES = 0 -7 7 mV<br />
Gain error<br />
(Fadc = 1.2MHz)<br />
-20 20 mV<br />
pF<br />
kΩ<br />
1262
Note: 1. The measures are done without any I/O activity on VDDANA/GNDANA power domain.<br />
Note: 1. The measures are done without any I/O activity on VDDANA/GNDANA power domain.<br />
Note: 1. The measures are done without any I/O activity on VDDANA/GNDANA power domain.<br />
32117D–AVR-01/12<br />
<strong>AT32UC3C</strong><br />
Table 40-31. ADC Transfer Characteristics (Continued)12-bit Resolution Mode (1)<br />
Symbol Parameter Conditions Min Typ Max Units<br />
RES Resolution<br />
Differential mode,<br />
12 Bit<br />
INL Integral Non-Linearity VVDDANA = 5V,<br />
4 LSB<br />
DNL Differential Non-Linearity VADCREF0 = 3V,<br />
3 LSB<br />
Offset error ADCFIA.SEQCFGn.SRES = 0 -15 15 mV<br />
Gain error<br />
(Fadc = 1.5MHz)<br />
-25 25 mV<br />
Table 40-32. ADC Transfer Characteristics 10-bit Resolution Mode (1)<br />
Symbol Parameter Conditions Min Typ Max Units<br />
RES Resolution<br />
Differential mode,<br />
10 Bit<br />
INL Integral Non-Linearity VVDDANA = 3V,<br />
1.25 LSB<br />
DNL Differential Non-Linearity VADCREF0 = 1V,<br />
1 LSB<br />
Offset error ADCFIA.SEQCFGn.SRES = 1 -10 10 mV<br />
Gain error<br />
(Fadc = 1.5MHz)<br />
-20 20 mV<br />
RES Resolution<br />
Differential mode,<br />
10 Bit<br />
INL Integral Non-Linearity VVDDANA = 5V,<br />
1.25 LSB<br />
DNL Differential Non-Linearity VADCREF0= 3V,<br />
1 LSB<br />
Offset error ADCFIA.SEQCFGn.SRES = 1 -15 15 mV<br />
Gain error<br />
(Fadc = 1.5MHz)<br />
-20 20 mV<br />
Table 40-33. ADC Transfer Characteristics 8-bit Resolution Mode (1)<br />
Symbol Parameter Conditions Min Typ Max Units<br />
RES Resolution Differential mode,<br />
8 Bit<br />
INL Integral Non-Linearity VVDDANA = 3V,<br />
0.3 LSB<br />
DNL Differential Non-Linearity<br />
Offset error<br />
Gain error<br />
VADCREF0 = 1V,<br />
ADCFIA.SEQCFGn.SRES = 2<br />
(Fadc =1.5MHz)<br />
-10<br />
-20<br />
0.25<br />
10<br />
20<br />
LSB<br />
mV<br />
mV<br />
RES Resolution Differential mode,<br />
8 Bit<br />
INL Integral Non-Linearity VVDDANA = 5V,<br />
0.2 LSB<br />
DNL Differential Non-Linearity<br />
Offset error<br />
Gain error<br />
VADCREF0 = 3V,<br />
ADCFIA.SEQCFGn.SRES = 2<br />
(Fadc = 1.5MHz)<br />
-20<br />
-20<br />
0.2<br />
20<br />
20<br />
LSB<br />
mV<br />
mV<br />
1263
Table 40-34. ADC and S/H Transfer Characteristics 12-bit Resolution Mode and S/H gain = 1 (1)<br />
Note: 1. The measures are done without any I/O activity on VDDANA/GNDANA power domain.<br />
Note: 1. The measures are done without any I/O activity on VDDANA/GNDANA power domain<br />
32117D–AVR-01/12<br />
<strong>AT32UC3C</strong><br />
Symbol Parameter Conditions Min Typ Max Units<br />
RES Resolution Differential mode,<br />
12 Bit<br />
INL Integral Non-Linearity VVDDANA = 3V,<br />
5 LSB<br />
DNL Differential Non-Linearity<br />
Offset error<br />
VADCREF0 = 1V,<br />
ADCFIA.SEQCFGn.SRES = 0,<br />
S/H gain = 1<br />
-5<br />
4<br />
5<br />
LSB<br />
mV<br />
Gain error (Fadc = 1.2MHz)<br />
-20 20 mV<br />
RES Resolution Differential mode,<br />
12 Bit<br />
INL Integral Non-Linearity VVDDANA = 5V,<br />
5 LSB<br />
DNL Differential Non-Linearity<br />
Offset error<br />
VADCREF0 = 3V,<br />
ADCFIA.SEQCFGn.SRES = 0,<br />
S/H gain = 1<br />
-10<br />
3<br />
10<br />
LSB<br />
mV<br />
Gain error (Fadc = 1.5MHz)<br />
-20 20 mV<br />
Table 40-35. ADC and S/H Transfer Characteristics 12-bit Resolution Mode and S/H gain from 1 to 8 (1)<br />
Symbol Parameter Conditions Min Typ Max Units<br />
RES Resolution Differential mode,<br />
12 Bit<br />
INL Integral Non-Linearity VVDDANA = 3V,<br />
25 LSB<br />
DNL Differential Non-Linearity<br />
Offset error<br />
VADCREF0 = 1V,<br />
ADCFIA.SEQCFGn.SRES = 0,<br />
S/H gain from 1 to 8<br />
-10<br />
25<br />
10<br />
LSB<br />
mV<br />
Gain error (Fadc = 1.2MHz)<br />
-20 20 mV<br />
RES Resolution Differential mode,<br />
12 Bit<br />
INL Integral Non-Linearity VVDDANA = 5V,<br />
9 LSB<br />
DNL Differential Non-Linearity<br />
Offset error<br />
VADCREF0 = 3V,<br />
ADCFIA.SEQCFGn.SRES = 0,<br />
S/H gain from 1 to 8<br />
-15<br />
10<br />
15<br />
LSB<br />
mV<br />
Gain error (Fadc = 1.5MHz)<br />
-20 20 mV<br />
Table 40-36. ADC and S/H Transfer Characteristics 10-bit Resolution Mode and S/H gain from 1 to 16 (1)<br />
Symbol Parameter Conditions Min Typ Max Units<br />
RES Resolution Differential mode,<br />
10 Bit<br />
INL Integral Non-Linearity VVDDANA = 3V,<br />
3 LSB<br />
DNL Differential Non-Linearity<br />
Offset error<br />
VADCREF0 = 1V,<br />
ADCFIA.SEQCFGn.SRES = 1,<br />
S/H gain from 1 to 16<br />
-15<br />
3<br />
15<br />
LSB<br />
mV<br />
Gain error (Fadc = 1.5MHz)<br />
-20 20 mV<br />
1264
Note: 1. The measures are done without any I/O activity on VDDANA/GNDANA power domain.<br />
40.8.7 Digital to Analog Converter (DAC) Characteristics<br />
32117D–AVR-01/12<br />
<strong>AT32UC3C</strong><br />
Table 40-36. ADC and S/H Transfer Characteristics (Continued)10-bit Resolution Mode and S/H gain from 1 to 16 (1)<br />
Symbol Parameter Conditions Min Typ Max Units<br />
RES Resolution Differential mode,<br />
10 Bit<br />
INL Integral Non-Linearity VVDDANA = 5V,<br />
1.5 LSB<br />
DNL Differential Non-Linearity<br />
Offset error<br />
VADCREF0 = 3V,<br />
ADCFIA.SEQCFGn.SRES = 1,<br />
S/H gain from 1 to 16<br />
-25<br />
1.5<br />
25<br />
LSB<br />
mV<br />
Gain error (Fadc = 1.5MHz)<br />
-15 15 mV<br />
Table 40-37. Channel Conversion Time and DAC Clock<br />
Symbol Parameter Conditions Min Typ Max Units<br />
fDAC DAC clock frequency 1 MHz<br />
tSTARTUP Startup time 3 µs<br />
t CONV<br />
No S/H enabled, internal DAC 1 µs<br />
Conversion time (latency) One S/H 1.5 µs<br />
Two S/H 2 µs<br />
Throughput rate 1/tCONV MSPS<br />
Table 40-38. External Voltage Reference Input<br />
Symbol Parameter Conditions Min Typ Max Units<br />
VDACREF DACREF input voltage range 1.2 VVDDANA-0.7 V<br />
Table 40-39. DAC Outputs<br />
Symbol Parameter Conditions Min Typ Max Units<br />
Output range<br />
with external DAC reference<br />
with internal DAC reference<br />
0.2<br />
0.2<br />
VDACREF VVDDANA-0.7 V<br />
CLOAD Output capacitance 0 100 pF<br />
RLOAD Output resitance 2 kΩ<br />
1265
32117D–AVR-01/12<br />
Figure 40-4. DAC output<br />
Table 40-40. Transfer Characteristics (1)<br />
CLOAD RLOAD<br />
DAC0A<br />
Note: 1. The measures are done without any I/O activity on VDDANA/GNDANA power domain.<br />
S/H DAC<br />
<strong>AT32UC3C</strong><br />
UC3C<br />
Symbol Parameter Conditions Min Typ Max Units<br />
RES Resolution<br />
12 Bit<br />
INL Integral Non-Linearity VVDDANA = 3V,<br />
8 LSB<br />
DNL Differential Non-linearity VDACREF = 2V,<br />
6 LSB<br />
Offset error One S/H<br />
-30 30 mV<br />
Gain error -30 30 mV<br />
RES Resolution<br />
12 Bit<br />
INL Integral Non-Linearity VVDDANA = 5V,<br />
12 LSB<br />
DNL Differential Non-linearity VDACREF = 3V,<br />
6 LSB<br />
Offset error One S/H<br />
-30 30 mV<br />
Gain error -30 30 mV<br />
1266
40.8.8 Analog Comparator Characteristics<br />
Table 40-41. Analog Comparator Characteristics (1)<br />
Note: 1. The measures are done without any I/O activity on VDDANA/GNDANA power domain.<br />
40.8.9 USB Transceiver Characteristics<br />
40.8.9.1 Electrical Characteristics<br />
32117D–AVR-01/12<br />
<strong>AT32UC3C</strong><br />
Symbol Parameter Conditions Min Typ Max Units<br />
Positive input voltage range 0 VVDDANA V<br />
Negative input voltage range 0 VVDDANA V<br />
V OFFSET<br />
V HYST<br />
Offset<br />
Hysteresis<br />
No hysteresis, Low Power mode -29 29 mV<br />
No hysteresis, High Speed mode -16 16 mV<br />
Low hysteresis, Low Power mode 7 44<br />
Low hysteresis, High Speed mode 5 34<br />
High hysteresis, Low Power mode 16 102<br />
High hysteresis, High Speed mode 12 69<br />
tDELAY Propagation delay<br />
Low Power mode<br />
High Speed mode<br />
2.9<br />
0.096<br />
us<br />
tSTARTUP Start-up time 20 µs<br />
Table 40-42. VDDANA scaled reference<br />
Symbol Parameter Min Typ Max Units<br />
SCF ACIFA.SCFi.SCF range 0 32<br />
VVDDANA scaled (64 - SCF) * VVDDANA / 65 V<br />
VVDDANA voltage accuracy 3.2 %<br />
Table 40-43. Electrical Parameters<br />
Symbol Parameter Conditions Min. Typ. Max. Unit<br />
R EXT<br />
Recommended external USB series<br />
resistor<br />
In series with each USB pin with<br />
±5%<br />
The USB on-chip buffers comply with the Universal Serial Bus (USB) v2.0 standard. All AC<br />
parameters related to these buffers can be found within the USB 2.0 electrical specifications.<br />
mV<br />
mV<br />
39 Ω<br />
1267
40.9 Timing Characteristics<br />
40.9.1 Startup, Reset, and Wake-up Timing<br />
32117D–AVR-01/12<br />
The startup, reset, and wake-up timings are calculated using the following formula:<br />
t = tCONST + NCPU × tCPU <strong>AT32UC3C</strong><br />
Where tCONST and NCPU are found in Table 40-44. tCONST is the delay relative to RCSYS,<br />
tCPU is the period of the CPU clock. If another clock source than RCSYS is selected as CPU<br />
clock the startup time of the oscillator, tOSCSTART , must be added to the wake-up time in the<br />
stop, deepstop, and static sleep modes. Please refer to the source for the CPU clock in the<br />
”Oscillator Characteristics” on page 1255 for more details about oscillator startup times.<br />
Table 40-44. Maximum Reset and Wake-up Timing<br />
Parameter Measuring Max tCONST (in µs) Max NCPU Startup time from power-up, using<br />
regulator<br />
Startup time from reset release<br />
Wake-up<br />
Idle<br />
VDDIN_5 rising (10 mV/ms)<br />
Time from V VDDIN_5 =0 to the first instruction entering<br />
the decode stage of CPU. VDDCORE is supplied by<br />
the internal regulator.<br />
Time from releasing a reset source (except POR,<br />
BOD18, and BOD33) to the first instruction entering<br />
the decode stage of CPU.<br />
2600 0<br />
1240 0<br />
0 19<br />
Frozen 268 209<br />
Standby From wake-up event to the first instruction entering<br />
268 209<br />
Stop the decode stage of the CPU.<br />
268+ tOSCSTART 212<br />
Deepstop 268+ tOSCSTART 212<br />
Static 268+ tOSCSTART 212<br />
1268
40.9.2 RESET_N characteristics<br />
32117D–AVR-01/12<br />
Voltage<br />
BOD33 threshold at power-up<br />
BOD18 threshold at power-up<br />
Figure 40-5. Startup and Reset Time<br />
Startup Time<br />
Internal<br />
Reset Time from reset<br />
Reset Decoding Stage<br />
Release<br />
Table 40-45. RESET_N Clock Waveform Parameters<br />
VDDIN_5, VDDIN_33<br />
VDDCORE<br />
Time<br />
<strong>AT32UC3C</strong><br />
Symbol Parameter Condition Min. Typ. Max. Units<br />
t RESET RESET_N minimum pulse length 2 * T RCSYS clock cycles<br />
1269
40.9.3 USART in SPI Mode Timing<br />
40.9.3.1 Master mode<br />
32117D–AVR-01/12<br />
<strong>AT32UC3C</strong><br />
Figure 40-6. USART in SPI Master Mode With (CPOL= CPHA= 0) or (CPOL= CPHA= 1)<br />
Figure 40-7. USART in SPI Master Mode With (CPOL= 0 and CPHA= 1) or (CPOL= 1 and<br />
CPHA= 0)<br />
Note: 1. These values are based on simulation and characterization of other AVR microcontrollers manufactured in the same process<br />
technology. These values are not covered by test limits in production.<br />
2. Where:<br />
SPCK<br />
MISO<br />
MOSI<br />
SPCK<br />
MISO<br />
MOSI<br />
USPI2<br />
USPI5<br />
Table 40-46. USART in SPI Mode Timing, Master Mode (1)<br />
USPI0 USPI1<br />
USPI3 USPI4<br />
Symbol Parameter Conditions Min Max Units<br />
USPI0 MISO setup time before SPCK rises<br />
26+ t SAMPLE (2) ns<br />
USPI1 MISO hold time after SPCK rises 0 ns<br />
USPI2<br />
USPI3<br />
SPCK rising to MOSI delay<br />
MISO setup time before SPCK falls<br />
external<br />
capacitor =<br />
40pF<br />
(2)<br />
26+ tSAMPLE 11 ns<br />
ns<br />
USPI4 MISO hold time after SPCK falls 0 ns<br />
USPI5 SPCK falling to MOSI delay 11.5 ns<br />
t SAMPLE<br />
=<br />
t SPCK<br />
t SPCK<br />
------------------------------------<br />
2 × tCLKUSART 1<br />
– ⎛ -- ⎞ × t<br />
⎝ 2⎠<br />
CLKUSART<br />
1270
32117D–AVR-01/12<br />
Maximum SPI Frequency, Master Output<br />
The maximum SPI master output frequency is given by the following formula:<br />
fSPCKMAX 1<br />
MIN f -----------<br />
PINMAX SPIn<br />
fCLKSPI 2 ×<br />
= ( , , ---------------------------- )<br />
9<br />
<strong>AT32UC3C</strong><br />
Where SPIn is the MOSI delay, USPI2 or USPI5 depending on CPOL and NCPHA. fPINMAX is<br />
the maximum frequency of the SPI pins. Please refer to the I/O Pin Characteristics section for<br />
the maximum frequency of the pins. fCLKSPI is the maximum frequency of the CLK_SPI. Refer<br />
to the SPI chapter for a description of this clock.<br />
Maximum SPI Frequency, Master Input<br />
The maximum SPI master input frequency is given by the following formula:<br />
f SPCKMAX<br />
1<br />
MIN -----------------------------------<br />
SPIn + tVALID fCLKSPI 2 ×<br />
= ( , ---------------------------- )<br />
9<br />
Where SPIn is the MISO setup and hold time, USPI0 + USPI1 or USPI3 + USPI4 depending<br />
on CPOL and NCPHA. TVALID is the SPI slave response time. Please refer to the SPI slave<br />
<strong>datasheet</strong> for TVALID . fCLKSPI is the maximum frequency of the CLK_SPI. Refer to the SPI<br />
chapter for a description of this clock.<br />
40.9.3.2 Slave mode<br />
Figure 40-8. USART in SPI Slave Mode With (CPOL= 0 and CPHA= 1) or (CPOL= 1 and<br />
CPHA= 0)<br />
SPCK<br />
MISO<br />
MOSI<br />
USPI6<br />
USPI7 USPI8<br />
1271
32117D–AVR-01/12<br />
SPCK, CPOL=0<br />
SPCK, CPOL=1<br />
<strong>AT32UC3C</strong><br />
Figure 40-9. USART in SPI Slave Mode With (CPOL= CPHA= 0) or (CPOL= CPHA= 1)<br />
Figure 40-10. USART in SPI Slave Mode NPCS Timing<br />
Note: 1. These values are based on simulation and characterization of other AVR microcontrollers manufactured in the same process<br />
technology. These values are not covered by test limits in production.<br />
2. Where:<br />
NSS<br />
USPI12<br />
USPI14<br />
SPCK<br />
MISO<br />
MOSI<br />
Table 40-47. USART in SPI mode Timing, Slave Mode (1)<br />
USPI9<br />
USPI10 USPI11<br />
USPI13<br />
USPI15<br />
Symbol Parameter Conditions Min Max Units<br />
USPI6 SPCK falling to MISO delay<br />
27 ns<br />
USPI7 MOSI setup time before SPCK rises t SAMPLE (2) + tCLK_USART ns<br />
USPI8 MOSI hold time after SPCK rises 0 ns<br />
USPI9 SPCK rising to MISO delay 28 ns<br />
USPI10<br />
USPI11<br />
MOSI setup time before SPCK falls<br />
MOSI hold time after SPCK falls<br />
external<br />
capacitor =<br />
40pF<br />
(2)<br />
tSAMPLE + tCLK_USART<br />
0<br />
ns<br />
ns<br />
USPI12 NSS setup time before SPCK rises 33 ns<br />
USPI13 NSS hold time after SPCK falls 0 ns<br />
USPI14 NSS setup time before SPCK falls 33 ns<br />
USPI15 NSS hold time after SPCK rises 0 ns<br />
t SAMPLE<br />
=<br />
t SPCK<br />
t SPCK<br />
1<br />
– ⎛<br />
------------------------------------ + -- ⎞ × t<br />
⎝ 2 × t 2⎠<br />
CLKUSART<br />
CLKUSART<br />
1272
40.9.4 SPI Timing<br />
40.9.4.1 Master mode<br />
32117D–AVR-01/12<br />
Maximum SPI Frequency, Slave Input Mode<br />
The maximum SPI slave input frequency is given by the following formula:<br />
fSPCKMAX MIN fCLKSPI 2 ×<br />
----------------------------<br />
9<br />
1<br />
= ( , ----------- )<br />
SPIn<br />
<strong>AT32UC3C</strong><br />
Where SPIn is the MOSI setup and hold time, USPI7 + USPI8 or USPI10 + USPI11 depending<br />
on CPOL and NCPHA. fCLKSPI is the maximum frequency of the CLK_SPI. Refer to the SPI<br />
chapter for a description of this clock.<br />
Maximum SPI Frequency, Slave Output Mode<br />
The maximum SPI slave output frequency is given by the following formula:<br />
fSPCKMAX MIN fCLKSPI 2 ×<br />
----------------------------<br />
1<br />
= ( , f<br />
9 PINMAX,<br />
------------------------------------ )<br />
SPIn + tSETUP Where SPIn is the MISO delay, USPI6 or USPI9 depending on CPOL and NCPHA. TSETUP is<br />
the SPI master setup time. Please refer to the SPI master<strong>datasheet</strong> for TSETUP . fCLKSPI is the<br />
maximum frequency of the CLK_SPI. Refer to the SPI chapter for a description of this<br />
clock. fPINMAX is the maximum frequency of the SPI pins. Please refer to the I/O Pin Characteristics<br />
section for the maximum frequency of the pins.<br />
Figure 40-11. SPI Master Mode With (CPOL= NCPHA= 0) or (CPOL= NCPHA= 1)<br />
SPCK<br />
MISO<br />
MOSI<br />
SPI2<br />
SPI0 SPI1<br />
1273
32117D–AVR-01/12<br />
<strong>AT32UC3C</strong><br />
Figure 40-12. SPI Master Mode With (CPOL= 0 and NCPHA= 1) or (CPOL= 1 and NCPHA= 0)<br />
SPCK<br />
MISO<br />
MOSI<br />
Table 40-48. SPI Timing, Master Mode (1)<br />
SPI5<br />
Note: 1. These values are based on simulation and characterization of other AVR microcontrollers manufactured in the same process<br />
technology. These values are not covered by test limits in production.<br />
Maximum SPI Frequency, Master Output<br />
The maximum SPI master output frequency is given by the following formula:<br />
Where SPIn is the MOSI delay, SPI2 or SPI5 depending on CPOL and NCPHA. fPINMAX is the<br />
maximum frequency of the SPI pins. Please refer to the I/O Pin Characteristics section for the<br />
maximum frequency of the pins.<br />
Maximum SPI Frequency, Master Input<br />
SPI3 SPI4<br />
Symbol Parameter Conditions Min Max Units<br />
SPI0 MISO setup time before SPCK rises<br />
28.5+ (t CLK_SPI)/2 ns<br />
SPI1 MISO hold time after SPCK rises 0 ns<br />
SPI2<br />
SPI3<br />
SPCK rising to MOSI delay<br />
MISO setup time before SPCK falls<br />
external<br />
capacitor =<br />
40pF 28.5 + (tCLK_SPI )/2<br />
10.5 ns<br />
ns<br />
SPI4 MISO hold time after SPCK falls 0 ns<br />
SPI5 SPCK falling to MOSI delay 10.5 ns<br />
f SPCKMAX<br />
MIN f<br />
1<br />
= ( PINMAX,<br />
----------- )<br />
SPIn<br />
The maximum SPI master input frequency is given by the following formula:<br />
f SPCKMAX<br />
1<br />
= -----------------------------------<br />
SPIn + tVALID Where SPIn is the MISO setup and hold time, SPI0 + SPI1 or SPI3 + SPI4 depending on<br />
CPOL and NCPHA. tVALID is the SPI slave response time. Please refer to the SPI slave<br />
<strong>datasheet</strong> for .<br />
t VALID<br />
1274
40.9.4.2 Slave mode<br />
32117D–AVR-01/12<br />
SPCK, CPOL=0<br />
SPCK, CPOL=1<br />
<strong>AT32UC3C</strong><br />
Figure 40-13. SPI Slave Mode With (CPOL= 0 and NCPHA= 1) or (CPOL= 1 and NCPHA= 0)<br />
SPCK<br />
MISO<br />
MOSI<br />
SPI6<br />
SPI7 SPI8<br />
Figure 40-14. SPI Slave Mode With (CPOL= NCPHA= 0) or (CPOL= NCPHA= 1)<br />
SPCK<br />
MISO<br />
MOSI<br />
SPI9<br />
SPI10 SPI11<br />
Figure 40-15. SPI Slave Mode NPCS Timing<br />
NPCS<br />
SPI12<br />
SPI14<br />
SPI13<br />
SPI15<br />
1275
Table 40-49. SPI Timing, Slave Mode (1)<br />
32117D–AVR-01/12<br />
<strong>AT32UC3C</strong><br />
Symbol Parameter Conditions Min Max Units<br />
SPI6 SPCK falling to MISO delay<br />
SPI10<br />
SPI11<br />
MOSI setup time before SPCK falls<br />
MOSI hold time after SPCK falls<br />
external<br />
capacitor =<br />
40pF<br />
0<br />
5<br />
ns<br />
ns<br />
SPI12 NPCS setup time before SPCK rises 0 ns<br />
Note: 1. These values are based on simulation and characterization of other AVR microcontrollers manufactured in the same process<br />
technology. These values are not covered by test limits in production.<br />
40.9.5 TWIM/TWIS Timing<br />
Maximum SPI Frequency, Slave Input Mode<br />
The maximum SPI slave input frequency is given by the following formula:<br />
Where SPIn is the MOSI setup and hold time, SPI7 + SPI8 or SPI10 + SPI11 depending on<br />
CPOL and NCPHA. fCLKSPI is the maximum frequency of the CLK_SPI. Refer to the SPI chapter<br />
for a description of this clock.<br />
Maximum SPI Frequency, Slave Output Mode<br />
The maximum SPI slave output frequency is given by the following formula:<br />
29 ns<br />
SPI7 MOSI setup time before SPCK rises 0 ns<br />
SPI8 MOSI hold time after SPCK rises 6.5 ns<br />
SPI9 SPCK rising to MISO delay 30 ns<br />
SPI13 NPCS hold time after SPCK falls 1.5 ns<br />
SPI14 NPCS setup time before SPCK falls 0 ns<br />
SPI15 NPCS hold time after SPCK rises 1.5 ns<br />
f SPCKMAX<br />
f SPCKMAX<br />
1<br />
= MIN( fCLKSPI, ----------- )<br />
SPIn<br />
1<br />
= MIN( fPINMAX, ------------------------------------ )<br />
SPIn + tSETUP Where SPIn is the MISO delay, SPI6 or SPI9 depending on CPOL and NCPHA. tSETUP is the<br />
SPI master setup time. Please refer to the SPI master<strong>datasheet</strong> for tSETUP . fPINMAX is the maximum<br />
frequency of the SPI pins. Please refer to the I/O Pin Characteristics section for the<br />
maximum frequency of the pins.<br />
Figure 40-50 shows the TWI-bus timing requirements and the compliance of the device with<br />
them. Some of these requirements (t r and t f ) are met by the device without requiring user intervention.<br />
Compliance with the other requirements (t HD-STA , t SU-STA , t SU-STO , t HD-DAT , t SU-DAT-I2C , t LOW-<br />
I2C, t HIGH, and f TWCK) requires user intervention through appropriate programming of the relevant<br />
1276
Table 40-50. TWI-Bus Timing Requirements<br />
Symbol Parameter Mode<br />
t r<br />
t f<br />
t HD-STA<br />
t SU-STA<br />
t SU-STO<br />
t HD-DAT<br />
32117D–AVR-01/12<br />
TWCK and TWD rise time<br />
TWCK and TWD fall time<br />
(Repeated) START hold time<br />
(Repeated) START set-up time<br />
STOP set-up time<br />
Data hold time<br />
t SU-DAT-I2C Data set-up time<br />
<strong>AT32UC3C</strong><br />
TWIM and TWIS user interface registers. Please refer to the TWIM and TWIS sections for more<br />
information.<br />
Notes: 1. Standard mode: fTWCK ≤ 100 kHz ; fast mode: fTWCK ><br />
100 kHz .<br />
2. A device must internally provide a hold time of at least 300 ns for TWD with reference to the falling edge of TWCK.<br />
Notations:<br />
Standard (1)<br />
Fast (1)<br />
Standard (1)<br />
Fast (1)<br />
Standard (1)<br />
Fast (1)<br />
Standard (1)<br />
Fast (1)<br />
Standard (1)<br />
Fast (1)<br />
Standard (1)<br />
Fast (1)<br />
Standard (1)<br />
Fast (1)<br />
Minimum Maximum<br />
Requirement Device Requirement Device<br />
4.0<br />
0.6<br />
4.7<br />
0.6<br />
4.0<br />
0.6<br />
0.3 (2)<br />
250<br />
100<br />
- 1000<br />
20 + 0.1 C b<br />
C b = total capacitance of one bus line in pF<br />
t clkpb = period of TWI peripheral bus clock<br />
t prescaled = period of TWI internal prescaled clock (see chapters on TWIM and TWIS)<br />
The maximum t HD;DAT has only to be met if the device does not stretch the LOW period (t LOW-I2C) of TWCK.<br />
300<br />
- 300<br />
20 + 0.1 C b<br />
300<br />
Unit<br />
t clkpb - μs<br />
t clkpb - μs<br />
4t clkpb - μs<br />
2t clkpb<br />
3.45<br />
0.9<br />
ns<br />
ns<br />
?? μs<br />
2t clkpb - ns<br />
t SU-DAT - - t clkpb - -<br />
t LOW-I2C<br />
TWCK LOW period<br />
Standard (1)<br />
Fast (1)<br />
4.7<br />
1.3<br />
4t clkpb - μs<br />
t LOW - - t clkpb - -<br />
t HIGH<br />
f TWCK<br />
TWCK HIGH period<br />
TWCK frequency<br />
Standard (1)<br />
Fast (1)<br />
Standard (1)<br />
4.0<br />
0.6<br />
100<br />
-<br />
Fast (1) 400<br />
8t clkpb - μs<br />
1<br />
-----------------------<br />
12t<br />
clkpb<br />
kHz<br />
1277
40.9.6 JTAG Timing<br />
Table 40-51. JTAG Timings (1)<br />
32117D–AVR-01/12<br />
Figure 40-16. JTAG Interface Signals<br />
TCK<br />
TMS/TDI<br />
TDO<br />
Boundary<br />
Scan Inputs<br />
Boundary<br />
Scan Outputs<br />
JTAG5<br />
JTAG9<br />
<strong>AT32UC3C</strong><br />
Note: 1. These values are based on simulation and characterization of other AVR microcontrollers manufactured in the same process<br />
technology. These values are not covered by test limits in production.<br />
JTAG0<br />
JTAG6<br />
JTAG10<br />
JTAG3<br />
JTAG2<br />
JTAG4<br />
JTAG7 JTAG8<br />
Symbol Parameter Conditions Min Max Units<br />
JTAG0 TCK Low Half-period<br />
JTAG4 TDI, TMS Hold after TCK High<br />
external<br />
0 ns<br />
JTAG5 TDO Hold Time capacitor = 12.5 ns<br />
JTAG6 TCK Low to TDO Valid<br />
40pF<br />
21.5 ns<br />
JTAG1<br />
21.5 ns<br />
JTAG1 TCK High Half-period 8.5 ns<br />
JTAG2 TCK Period 29 ns<br />
JTAG3 TDI, TMS Setup before TCK High 6.5 ns<br />
JTAG7 Boundary Scan Inputs Setup Time 0 ns<br />
JTAG8 Boundary Scan Inputs Hold Time 4.5 ns<br />
JTAG9 Boundary Scan Outputs Hold Time 11 ns<br />
JTAG10 TCK to Boundary Scan Outputs Valid 18 ns<br />
1278
40.9.7 EBI Timings<br />
Table 40-52. SMC Clock Signal.<br />
32117D–AVR-01/12<br />
See EBI I/O lines description for more details.<br />
Symbol Parameter Max (1)<br />
Note: 1. The maximum frequency of the SMC interface is the same as the max frequency for the HSB.<br />
<strong>AT32UC3C</strong><br />
1/(t CPSMC ) SMC Controller clock frequency f cpu MHz<br />
Table 40-53. SMC Read Signals with Hold Settings (1)<br />
Symbol Parameter Conditions Min Units<br />
SMC 1<br />
Data setup before NRD high<br />
NRD Controlled (READ_MODE = 1)<br />
SMC2 Data hold after NRD high 0<br />
SMC3 NRD high to NBS0/A0 change VVDD = 3.0V,<br />
drive strength of the<br />
pads set to the lowest,<br />
external capacitor =<br />
40pF<br />
(2)<br />
nrd hold length * tCPSMC - 1.5<br />
SMC4 NRD high to NBS1 change (2)<br />
nrd hold length * tCPSMC - 0<br />
SMC5 NRD high to NBS2/A1 change (2)<br />
nrd hold length * tCPSMC - 0<br />
SMC7 NRD high to A2 - A25 change (2)<br />
nrd hold length * tCPSMC - 5.6<br />
SMC8 NRD high to NCS inactive (2) (nrd hold length - ncs rd hold length) *<br />
tCPSMC - 1.3<br />
SMC 9 NRD pulse width nrd pulse length * tCPSMC - 0.6<br />
SMC 10<br />
Data setup before NCS high<br />
NRD Controlled (READ_MODE = 0)<br />
SMC 11 Data hold after NCS high 0<br />
SMC12 NCS high to NBS0/A0 change<br />
VVDD = 3.0V,<br />
drive strength of the<br />
pads set to the lowest,<br />
external capacitor =<br />
40pF<br />
(2)<br />
SMC13 NCS high to NBS0/A0 change<br />
ncs rd hold length * tCPSMC - 3<br />
(2)<br />
ncs rd hold length * tCPSMC - 2<br />
SMC14 NCS high to NBS2/A1 change (2) SMC16 NCS high to A2 - A25 change<br />
ncs rd hold length * tCPSMC - 1.1<br />
(2)<br />
ncs rd hold length * tCPSMC - 7.2<br />
SMC17 NCS high to NRD inactive (2) (ncs rd hold length - nrd hold length) *<br />
tCPSMC - 2.2<br />
SMC 18 NCS pulse width ncs rd pulse length * tCPSMC - 3<br />
Note: 1. These values are based on simulation and characterization of other AVR microcontrollers manufactured in the same process<br />
technology. These values are not covered by test limits in production.<br />
2. hold length = total cycle duration - setup duration - pulse duration. “hold length” is for “ncs rd hold length” or “nrd hold length”.<br />
32.5<br />
34.1<br />
Units<br />
ns<br />
ns<br />
1279
Table 40-54. SMC Read Signals with no Hold Settings (1)<br />
32117D–AVR-01/12<br />
<strong>AT32UC3C</strong><br />
Symbol Parameter Conditions Min Units<br />
NRD Controlled (READ_MODE = 1)<br />
SMC19 Data setup before NRD high VVDD = 3.0V,<br />
32.5<br />
drive strength of the pads set to the lowest,<br />
SMC20 Data hold after NRD high<br />
external capacitor = 40pF<br />
NRD Controlled (READ_MODE = 0)<br />
0<br />
SMC21 Data setup before NCS high VVDD = 3.0V,<br />
28.5<br />
drive strength of the pads set to the lowest,<br />
SMC22 Data hold after NCS high<br />
external capacitor = 40pF<br />
0<br />
Note: 1. These values are based on simulation and characterization of other AVR microcontrollers manufactured in the same process<br />
technology. These values are not covered by test limits in production.<br />
Table 40-55. SMC Write Signals with Hold Settings (1)<br />
Symbol Parameter Conditions Min Units<br />
SMC 23<br />
SMC 24<br />
Data Out valid before NWE high<br />
Data Out valid after NWE high (2)<br />
NRD Controlled (READ_MODE = 1)<br />
(nwe pulse length - 1) * tCPSMC - 1.4<br />
nwe pulse length * tCPSMC - 4.7<br />
SMC25 NWE high to NBS0/A0 change<br />
VVDD = 3.0V,<br />
drive strength of the pads set<br />
to the lowest,<br />
external capacitor = 40pF<br />
(2)<br />
nwe pulse length * tCPSMC - 2.7<br />
SMC29 NWE high to NBS2/A1 change (2)<br />
nwe pulse length * tCPSMC - 0.7<br />
SMC31 NWE high to A2 - A25 change (2)<br />
nwe pulse length * tCPSMC - 6.8<br />
SMC32 NWE high to NCS inactive (2) (nwe hold pulse - ncs wr hold length) *<br />
tCPSMC - 2.5<br />
SMC 33 NWE pulse width nwe pulse length * tCPSMC - 0.2<br />
NRD Controlled (READ_MODE = 0)<br />
SMC34 Data Out valid before NCS high<br />
VVDD = 3.0V,<br />
(ncs wr pulse length - 1) * tCPSMC - 2.2<br />
SMC35 Data Out valid after NCS high drive strength of the pads set<br />
to the lowest,<br />
external capacitor = 40pF<br />
(2) ncs wr hold length * tCPSMC - 5.1<br />
SMC36 NCS high to NWE inactive (2) (ncs wr hold length - nwe hold length) *<br />
tCPSMC - 2<br />
Note: 1. These values are based on simulation and characterization of other AVR microcontrollers manufactured in the same process<br />
technology. These values are not covered by test limits in production.<br />
2. hold length = total cycle duration - setup duration - pulse duration. “hold length” is for “ncs wr hold length” or “nwe hold<br />
length”<br />
ns<br />
ns<br />
ns<br />
ns<br />
1280
Table 40-56. SMC Write Signals with No Hold Settings (NWE Controlled only) (1)<br />
32117D–AVR-01/12<br />
<strong>AT32UC3C</strong><br />
Symbol Parameter Conditions Min Units<br />
SMC 37<br />
NWE rising to A2-A25 valid<br />
SMC 38 NWE rising to NBS0/A0 valid 7.6<br />
SMC40 NWE rising to A1/NBS2 change VVDD = 3.0V,<br />
8.7<br />
SMC42 NWE rising to NCS rising<br />
drive strength of the pads<br />
set to the lowest,<br />
8.4<br />
SMC43 Data Out valid before NWE rising external capacitor = 40pF (nwe pulse length - 1) * tCPSMC - 1.2<br />
SMC44 Data Out valid after NWE rising 8.4<br />
SMC 45 NWE pulse width nwe pulse length * tCPSMC - 0<br />
Note: 1. These values are based on simulation and characterization of other AVR microcontrollers manufactured in the same process<br />
technology. These values are not covered by test limits in production.<br />
Figure 40-17. SMC Signals for NCS Controlled Accesses<br />
A2-A25<br />
A0/A1/NBS[3:0]<br />
NRD<br />
NCS<br />
D0 - D15<br />
NWE<br />
SMC18<br />
SMC21<br />
SMC16<br />
SMC12<br />
SMC13<br />
SMC14<br />
SMC15<br />
SMC17<br />
SMC22<br />
SMC18<br />
SMC17<br />
SMC10 SMC11<br />
SMC16<br />
SMC12<br />
SMC13<br />
SMC14<br />
SMC15<br />
8.7<br />
SMC18<br />
SMC34 SMC35<br />
SMC36<br />
SMC16<br />
SMC12<br />
SMC13<br />
SMC14<br />
SMC15<br />
ns<br />
1281
Figure 40-18. SMC Signals for NRD and NRW Controlled Accesses (1)<br />
A2-A25<br />
A0/A1/NBS[3:0]<br />
NCS<br />
NRD<br />
D0 - D15<br />
NWE<br />
32117D–AVR-01/12<br />
<strong>AT32UC3C</strong><br />
Note: 1. These values are based on simulation and characterization of other AVR microcontrollers manufactured in the same process<br />
technology. These values are not covered by test limits in production.<br />
40.9.8 SDRAM Signals<br />
SMC9<br />
SMC7<br />
SMC3<br />
SMC4<br />
SMC5<br />
SMC6<br />
SMC8<br />
SMC19 SMC20 SMC43<br />
SMC45<br />
SMC37<br />
SMC38<br />
SMC39<br />
SMC40<br />
SMC41<br />
SMC42 SMC8<br />
SMC44<br />
Table 40-57. SDRAM Clock Signal<br />
SMC1 SMC2 SMC23 SMC24<br />
Symbol Parameter Max (1)<br />
SMC9<br />
Note: 1. The maximum frequency of the SDRAMC interface is the same as the max frequency for the<br />
HSB.<br />
SMC7<br />
SMC3<br />
SMC4<br />
SMC5<br />
SMC6<br />
SMC33<br />
SMC32<br />
SMC31<br />
SMC25<br />
SMC26<br />
SMC29<br />
SMC30<br />
Units<br />
1/(t CPSDCK ) SDRAM Controller clock frequency f cpu MHz<br />
1282
Table 40-58. SDRAM Signal (1)<br />
32117D–AVR-01/12<br />
<strong>AT32UC3C</strong><br />
Symbol Parameter Conditions Min Units<br />
SDRAMC 1<br />
SDCKE high before SDCK rising edge<br />
SDRAMC 2 SDCKE low after SDCK rising edge 7.3<br />
SDRAMC 3 SDCKE low before SDCK rising edge 6.8<br />
SDRAMC 4 SDCKE high after SDCK rising edge 8.3<br />
SDRAMC 5 SDCS low before SDCK rising edge 6.1<br />
SDRAMC 6 SDCS high after SDCK rising edge 8.4<br />
SDRAMC 7 RAS low before SDCK rising edge 7<br />
SDRAMC 8 RAS high after SDCK rising edge 7.7<br />
SDRAMC 9 SDA10 change before SDCK rising edge 6.4<br />
SDRAMC10 SDA10 change after SDCK rising edge 7.1<br />
SDRAMC11 SDRAMC12 Address change before SDCK rising edge<br />
Address change after SDCK rising edge<br />
VVDD = 3.0V,<br />
drive strength of the pads set to<br />
the highest,<br />
4.7<br />
4.4<br />
SDRAMC13 SDRAMC14 Bank change before SDCK rising edge<br />
Bank change after SDCK rising edge<br />
external capacitor = 40pF on<br />
SDRAM pins<br />
except 8 pF on SDCK pins<br />
6.2<br />
6.9<br />
SDRAMC15 CAS low before SDCK rising edge 6.6<br />
SDRAMC 16 CAS high after SDCK rising edge 7.8<br />
SDRAMC 17 DQM change before SDCK rising edge 6<br />
SDRAMC 18 DQM change after SDCK rising edge 6.7<br />
SDRAMC 19 D0-D15 in setup before SDCK rising edge 6.4<br />
SDRAMC 20 D0-D15 in hold after SDCK rising edge 0<br />
SDRAMC 23 SDWE low before SDCK rising edge 7<br />
SDRAMC 24 SDWE high after SDCK rising edge 7.4<br />
SDRAMC 25 D0-D15 Out valid before SDCK rising edge 5.2<br />
SDRAMC 26 D0-D15 Out valid after SDCK rising edge 5.6<br />
Note: 1. These values are based on simulation and characterization of other AVR microcontrollers manufactured in the same process<br />
technology. These values are not covered by test limits in production.<br />
5.6<br />
ns<br />
1283
Figure 40-19. SDRAMC Signals relative to SDCK.<br />
SDCK<br />
SDCKE<br />
SDCS<br />
RAS<br />
CAS<br />
SDWE<br />
SDA10<br />
A0 - A9,<br />
A11 - A13<br />
BA0/BA1<br />
DQM0 -<br />
DQM3<br />
D0 - D15<br />
Read<br />
D0 - D15<br />
to Write<br />
SDRAMC 1<br />
32117D–AVR-01/12<br />
SDRAMC 2 SDRAMC 3 SDRAMC 4<br />
SDRAMC 5 SDRAMC 6 SDRAMC 5 SDRAMC 6 SDRAMC 5 SDRAMC 6<br />
SDRAMC 7 SDRAMC 8<br />
SDRAMC 9 SDRAMC 10<br />
SDRAMC 15 SDRAMC 16 SDRAMC 15 SDRAMC 16<br />
SDRAMC 9 SDRAMC 10<br />
SDRAMC 23 SDRAMC 24<br />
SDRAMC 9 SDRAMC 10<br />
SDRAMC11 SDRAMC12 SDRAMC11 SDRAMC12 SDRAMC11 SDRAMC12 SDRAMC 13 SDRAMC 14 SDRAMC 13 SDRAMC 14 SDRAMC 13 SDRAMC 14<br />
SDRAMC 17 SDRAMC 18<br />
SDRAMC 19 SDRAMC 20<br />
SDRAMC 17 SDRAMC 18<br />
SDRAMC 25 SDRAMC 26<br />
<strong>AT32UC3C</strong><br />
1284
40.9.9 MACB Characteristics<br />
Table 40-59. Ethernet MAC Signals (1)<br />
32117D–AVR-01/12<br />
<strong>AT32UC3C</strong><br />
Symbol Parameter Conditions Min. Max. Unit<br />
MAC1 Setup for MDIO from MDC rising VVDD = 3.0V,<br />
0 2.5 ns<br />
MAC2 Hold for MDIO from MDC rising<br />
drive strength of the pads set to the<br />
highest,<br />
0 0.7 ns<br />
MAC3 MDIO toggling from MDC falling<br />
external capacitor = 10pF on MACB<br />
pins<br />
0 1.1 ns<br />
Note: 1. These values are based on simulation and characterization of other AVR microcontrollers manufactured in the same process<br />
technology. These values are not covered by test limits in production.<br />
Table 40-60. Ethernet MAC MII Specific Signals (1)<br />
Symbol Parameter Conditions Min. Max. Unit<br />
MAC 4<br />
Setup for COL from TX_CLK rising<br />
0 ns<br />
MAC 5 Hold for COL from TX_CLK rising 0 ns<br />
MAC 6 Setup for CRS from TX_CLK rising 0.5 ns<br />
MAC 7 Hold for CRS from TX_CLK rising 0.5 ns<br />
MAC8 MAC9 TX_ER toggling from TX_CLK rising<br />
TX_EN toggling from TX_CLK rising<br />
VVDD = 3.0V,<br />
drive strength of the pads set to the<br />
16.4<br />
14.5<br />
18.6<br />
15.3<br />
ns<br />
ns<br />
MAC10 TXD toggling from TX_CLK rising highest,<br />
13.9 18.2 ns<br />
MAC11 Setup for RXD from RX_CLK<br />
external capacitor = 10pF on MACB<br />
pins<br />
1.3 ns<br />
MAC12 Hold for RXD from RX_CLK 1.8 ns<br />
MAC 13 Setup for RX_ER from RX_CLK 3.4 ns<br />
MAC 14 Hold for RX_ER from RX_CLK 0 ns<br />
MAC 15 Setup for RX_DV from RX_CLK 0.7 ns<br />
MAC 16 Hold for RX_DV from RX_CLK 1.3n ns<br />
Note: 1. These values are based on simulation and characterization of other AVR microcontrollers manufactured in the same process<br />
technology. These values are not covered by test limits in production.<br />
1285
32117D–AVR-01/12<br />
Figure 40-20. Ethernet MAC MII Mode<br />
MDC<br />
MDIO<br />
COL<br />
CRS<br />
TX_CLK<br />
TX_ER<br />
TX_EN<br />
TXD[3:0]<br />
RX_CLK<br />
RXD[3:0]<br />
RX_ER<br />
RX_DV<br />
MAC1<br />
MAC4<br />
MAC6<br />
MAC11<br />
MAC13<br />
MAC15<br />
MAC2<br />
MAC5<br />
MAC7<br />
MAC12<br />
MAC14<br />
MAC16<br />
MAC3<br />
MAC8<br />
MAC9<br />
MAC10<br />
<strong>AT32UC3C</strong><br />
1286
Table 40-61. Ethernet MAC RMII Specific Signals (1)<br />
32117D–AVR-01/12<br />
<strong>AT32UC3C</strong><br />
Symbol Parameter Conditions Min. Max. Unit<br />
MAC 21<br />
TX_EN toggling from TX_CLK rising<br />
MAC23 Setup for RXD from TX_CLK VVDD = 3.0V,<br />
4.5 ns<br />
MAC24 MAC25 Hold for RXD from TX_CLK<br />
Setup for RX_ER from TX_CLK<br />
drive strength of the pads set to the<br />
highest,<br />
external capacitor = 10pF on MACB<br />
0<br />
3.4<br />
ns<br />
ns<br />
MAC26 Hold for RX_ER from TX_CLK pins<br />
0 ns<br />
Note: 1. These values are based on simulation and characterization of other AVR microcontrollers manufactured in the same process<br />
technology. These values are not covered by test limits in production.<br />
Figure 40-21. Ethernet MAC RMII Mode<br />
11.7 12.5 ns<br />
MAC 22 TXD toggling from TX_CLK rising 11.7 12.5 ns<br />
MAC 27 Setup for RX_DV from TX_CLK 4.4 ns<br />
MAC 28 Hold for RX_DV from TX_CLK 0 ns<br />
TX_CLK<br />
TX_EN<br />
TXD[1:0]<br />
RXD[3:0]<br />
RX_ER<br />
RX_DV<br />
MAC23<br />
MAC25<br />
MAC27<br />
MAC24<br />
MAC26<br />
MAC28<br />
MAC21<br />
MAC22<br />
1287
41. Mechanical Characteristics<br />
41.1 Thermal Considerations<br />
41.1.1 Thermal Data<br />
32117D–AVR-01/12<br />
Table 41-1 summarizes the thermal resistance data depending on the package.<br />
Table 41-1. Thermal Resistance Data<br />
41.1.2 Junction Temperature<br />
The average chip-junction temperature, T J , in °C can be obtained from the following:<br />
1. TJ = TA + ( PD × θJA) 2. TJ =<br />
TA + ( P D × ( θ HEATSINK + θJC ))<br />
where:<br />
<strong>AT32UC3C</strong><br />
Symbol Parameter Condition Package Typ Unit<br />
θ JA Junction-to-ambient thermal resistance No air flow QFN64 20.0<br />
θ JC Junction-to-case thermal resistance QFN64 0.8<br />
θ JA Junction-to-ambient thermal resistance No air flow TQFP64 40.5<br />
θ JC Junction-to-case thermal resistance TQFP64 8.7<br />
θ JA Junction-to-ambient thermal resistance No air flow TQFP100 39.3<br />
θ JC Junction-to-case thermal resistance TQFP100 8.5<br />
θ JA Junction-to-ambient thermal resistance No air flow LQFP144 38.1<br />
θ JC Junction-to-case thermal resistance LQFP144 8.4<br />
θ JA = package thermal resistance, Junction-to-ambient (°C/W), provided in Table 41-1 on<br />
page 1288.<br />
θ JC = package thermal resistance, Junction-to-case thermal resistance (°C/W), provided in<br />
Table 41-1 on page 1288.<br />
θHEAT SINK = cooling device thermal resistance (°C/W), provided in the device <strong>datasheet</strong>.<br />
PD = device power consumption (W) estimated from data provided in the section ”Power<br />
Consumption” on page 1249.<br />
TA = ambient temperature (°C).<br />
From the first equation, the user can derive the estimated lifetime of the chip and decide if a<br />
cooling device is necessary or not. If a cooling device is to be fitted on the chip, the second<br />
equation should be used to compute the resulting average chip-junction temperature TJ in °C.<br />
°C/W<br />
°C/W<br />
°C/W<br />
°C/W<br />
1288
41.2 Package Drawings<br />
Figure 41-1. QFN-64 package drawing<br />
32117D–AVR-01/12<br />
<strong>AT32UC3C</strong><br />
Note: The exposed pad is not connected to anything internally, but should be soldered to ground to increase board level reliability.<br />
Table 41-2. Device and Package Maximum Weight<br />
200 mg<br />
Table 41-3. Package Characteristics<br />
Moisture Sensitivity Level Jdec J-STD0-20D - MSL 3<br />
Table 41-4. Package Reference<br />
JEDEC Drawing Reference MS-026<br />
JESD97 Classification E3<br />
1289
Figure 41-2. TQFP-64 package drawing<br />
Table 41-5. Device and Package Maximum Weight<br />
300 mg<br />
Table 41-6. Package Characteristics<br />
Moisture Sensitivity Level Jdec J-STD0-20D - MSL 3<br />
Table 41-7. Package Reference<br />
JEDEC Drawing Reference MS-026<br />
JESD97 Classification E3<br />
32117D–AVR-01/12<br />
<strong>AT32UC3C</strong><br />
1290
Figure 41-3. TQFP-100 package drawing<br />
Table 41-8. Device and Package Maximum Weight<br />
500 mg<br />
Table 41-9. Package Characteristics<br />
Moisture Sensitivity Level Jdec J-STD0-20D - MSL 3<br />
Table 41-10. Package Reference<br />
JEDEC Drawing Reference MS-026<br />
JESD97 Classification E3<br />
32117D–AVR-01/12<br />
<strong>AT32UC3C</strong><br />
1291
Figure 41-4. LQFP-144 package drawing<br />
Table 41-11. Device and Package Maximum Weight<br />
1300 mg<br />
Table 41-12. Package Characteristics<br />
Moisture Sensitivity Level Jdec J-STD0-20D - MSL 3<br />
Table 41-13. Package Reference<br />
JEDEC Drawing Reference MS-026<br />
JESD97 Classification E3<br />
32117D–AVR-01/12<br />
<strong>AT32UC3C</strong><br />
1292
41.3 Soldering Profile<br />
Table 41-14 gives the recommended soldering profile from J-STD-20.<br />
32117D–AVR-01/12<br />
Table 41-14. Soldering Profile<br />
Profile Feature Green Package<br />
Average Ramp-up Rate (217°C to Peak) 3°C/sec<br />
Preheat Temperature 175°C ±25°C Min. 150 °C, Max. 200 °C<br />
Temperature Maintained Above 217°C 60-150 sec<br />
Time within 5⋅C of Actual Peak Temperature 30 sec<br />
Peak Temperature Range 260 °C<br />
Ramp-down Rate 6 °C/sec<br />
Time 25⋅C to Peak Temperature Max. 8 minutes<br />
Note: It is recommended to apply a soldering temperature higher than 250°C.<br />
A maximum of three reflow passes is allowed per component.<br />
<strong>AT32UC3C</strong><br />
1293
42. Ordering Information<br />
Table 42-1. Ordering Information<br />
32117D–AVR-01/12<br />
<strong>AT32UC3C</strong><br />
Device Ordering Code Carrier Type Package Temperature Operating Range<br />
<strong>AT32UC3C</strong>0512C<br />
<strong>AT32UC3C</strong>0256C<br />
<strong>AT32UC3C</strong>0128C<br />
<strong>AT32UC3C</strong>064C<br />
<strong>AT32UC3C</strong>1512C<br />
<strong>AT32UC3C</strong>1256C<br />
<strong>AT32UC3C</strong>1128C<br />
<strong>AT32UC3C</strong>164C<br />
<strong>AT32UC3C</strong>2512C<br />
<strong>AT32UC3C</strong>2256C<br />
<strong>AT32UC3C</strong>2128C<br />
<strong>AT32UC3C</strong>264C<br />
<strong>AT32UC3C</strong>0512C-ALUT Tray<br />
<strong>AT32UC3C</strong>0512C-ALUR Tape & Reel<br />
<strong>AT32UC3C</strong>0256C-ALUT Tray<br />
<strong>AT32UC3C</strong>0256C-ALUR Tape & Reel<br />
<strong>AT32UC3C</strong>0128C-ALUT Tray<br />
<strong>AT32UC3C</strong>0128C-ALUR Tape & Reel<br />
<strong>AT32UC3C</strong>064C-ALUT Tray<br />
<strong>AT32UC3C</strong>064C-ALUR Tape & Reel<br />
<strong>AT32UC3C</strong>1512C-AUT Tray<br />
<strong>AT32UC3C</strong>1512C-AUR Tape & Reel<br />
<strong>AT32UC3C</strong>1256C-AUT Tray<br />
<strong>AT32UC3C</strong>1256C-AUR Tape & Reel<br />
<strong>AT32UC3C</strong>1128C-AUT Tray<br />
<strong>AT32UC3C</strong>1128C-AUR Tape & Reel<br />
<strong>AT32UC3C</strong>164C-AUT Tray<br />
<strong>AT32UC3C</strong>164C-AUR Tape & Reel<br />
<strong>AT32UC3C</strong>2512C-A2UT Tray<br />
<strong>AT32UC3C</strong>2512C-A2UR Tape & Reel<br />
<strong>AT32UC3C</strong>2512C-Z2UT Tray<br />
<strong>AT32UC3C</strong>2512C-Z2UR Tape & Reel<br />
<strong>AT32UC3C</strong>2256C-A2UT Tray<br />
<strong>AT32UC3C</strong>2256C-A2UR Tape & Reel<br />
<strong>AT32UC3C</strong>2256C-Z2UT Tray<br />
<strong>AT32UC3C</strong>2256C-Z2UR Tape & Reel<br />
<strong>AT32UC3C</strong>2128C-A2UT Tray<br />
<strong>AT32UC3C</strong>2128C-A2UR Tape & Reel<br />
<strong>AT32UC3C</strong>2128C-Z2UT Tray<br />
<strong>AT32UC3C</strong>2128C-Z2UR Tape & Reel<br />
<strong>AT32UC3C</strong>264C-A2UT Tray<br />
<strong>AT32UC3C</strong>264C-A2UR Tape & Reel<br />
<strong>AT32UC3C</strong>264C-Z2UT Tray<br />
<strong>AT32UC3C</strong>264C-Z2UR Tape & Reel<br />
LQFP 144<br />
TQFP 100<br />
TQFP 64<br />
QFN 64<br />
TQFP 64<br />
QFN 64<br />
TQFP 64<br />
QFN 64<br />
TQFP 64<br />
QFN 64<br />
Industrial (-40°C to 85°C)<br />
1294
43. Errata<br />
43.1 rev E<br />
43.1.1 ADCIFA<br />
43.1.2 AST<br />
43.1.3 aWire<br />
43.1.4 Power Manager<br />
32117D–AVR-01/12<br />
<strong>AT32UC3C</strong><br />
1 ADCREFP/ADCREFN can not be selected as an external ADC reference by setting the<br />
ADCIFA.CFG.EXREF bit to one<br />
Fix/Workaround<br />
A voltage reference can be applied on ADCREFP/ADCREFN pins if the<br />
ADCIFA.CFG.EXREF bit is set to zero, the ADCIFA.CFG.RS bit is set to zero and the voltage<br />
reference applied on ADCREFP/ADCREFN pins is higher than the internal 1V<br />
reference.<br />
1 AST wake signal is released one AST clock cycle after the BUSY bit is cleared<br />
After writing to the Status Clear Register (SCR) the wake signal is released one AST clock<br />
cycle after the BUSY bit in the Status Register (SR.BUSY) is cleared. If entering sleep mode<br />
directly after the BUSY bit is cleared the part will wake up immediately.<br />
Fix/Workaround<br />
Read the Wake Enable Register (WER) and write this value back to the same register. Wait<br />
for BUSY to clear before entering sleep mode.<br />
1 aWire MEMORY_SPEED_REQUEST command does not return correct CV<br />
The aWire MEMORY_SPEED_REQUEST command does not return a CV corresponding to<br />
the formula in the aWire Debug Interface chapter.<br />
Fix/Workaround<br />
Issue a dummy read to address 0x100000000 before issuing the<br />
MEMORY_SPEED_REQUEST command and use this formula instead:<br />
fsab =<br />
7faw ----------------<br />
CV – 3<br />
1 TWIS may not wake the device from sleep mode<br />
If the CPU is put to a sleep mode (except Idle and Frozen) directly after a TWI Start condition,<br />
the CPU may not wake upon a TWIS address match. The request is NACKed.<br />
Fix/Workaround<br />
When using the TWI address match to wake the device from sleep, do not switch to sleep<br />
modes deeper than Frozen. Another solution is to enable asynchronous EIC wake on the<br />
TWIS clock (TWCK) or TWIS data (TWD) pins, in order to wake the system up on bus<br />
events.<br />
1295
43.1.5 SCIF<br />
43.1.6 SPI<br />
32117D–AVR-01/12<br />
<strong>AT32UC3C</strong><br />
1 PLLCOUNT value larger than zero can cause PLLEN glitch<br />
Initializing the PLLCOUNT with a value greater than zero creates a glitch on the PLLEN signal<br />
during asynchronous wake up.<br />
Fix/Workaround<br />
The lock-masking mechanism for the PLL should not be used.<br />
The PLLCOUNT field of the PLL Control Register should always be written to zero.<br />
2 PLL lock might not clear after disable<br />
Under certain circumstances, the lock signal from the Phase Locked Loop (PLL) oscillator<br />
may not go back to zero after the PLL oscillator has been disabled. This can cause the propagation<br />
of clock signals with the wrong frequency to parts of the system that use the PLL<br />
clock.<br />
Fix/Workaround<br />
PLL must be turned off before entering STOP, DEEPSTOP or STATIC sleep modes. If PLL<br />
has been turned off, a delay of 30us must be observed after the PLL has been enabled<br />
again before the SCIF.PLL0LOCK bit can be used as a valid indication that the PLL is<br />
locked.<br />
3 BOD33 reset locks the device<br />
If BOD33 is enabled as a reset source (SCIF.BOD33.CTRL=0x1) and when VDDIN_33<br />
power supply voltage falls below the BOD33 voltage (SCIF.BOD33.LEVEL), the device is<br />
locked permanently under reset even if the power supply goes back above BOD33 reset<br />
level. In order to unlock the device, an external reset event should be applied on RESET_N.<br />
Fix/Workaround<br />
Use an external BOD on VDDIN_33 or an external reset source.<br />
1 SPI data transfer hangs with CSR0.CSAAT==1 and MR.MODFDIS==0<br />
When CSR0.CSAAT==1 and mode fault detection is enabled (MR.MODFDIS==0), the SPI<br />
module will not start a data transfer.<br />
Fix/Workaround<br />
Disable mode fault detection by writing a one to MR.MODFDIS.<br />
2 Disabling SPI has no effect on the SR.TDRE bit<br />
Disabling SPI has no effect on the SR.TDRE bit whereas the write data command is filtered<br />
when SPI is disabled. Writing to TDR when SPI is disabled will not clear SR.TDRE. If SPI is<br />
disabled during a PDCA transfer, the PDCA will continue to write data to TDR until its buffer<br />
is empty, and this data will be lost.<br />
Fix/Workaround<br />
Disable the PDCA, add two NOPs, and disable the SPI. To continue the transfer, enable the<br />
SPI and PDCA.<br />
3 SPI disable does not work in SLAVE mode<br />
SPI disable does not work in SLAVE mode.<br />
Fix/Workaround<br />
Read the last received data, then perform a software reset by writing a one to the Software<br />
Reset bit in the Control Register (CR.SWRST).<br />
1296
43.1.7 TC<br />
43.1.8 TWIM<br />
43.1.9 TWIS<br />
43.1.10 USBC<br />
32117D–AVR-01/12<br />
<strong>AT32UC3C</strong><br />
4 SPI bad serial clock generation on 2nd chip_select when SCBR=1, CPOL=1, and<br />
NCPHA=0<br />
When multiple chip selects (CS) are in use, if one of the baudrates equal 1 while one<br />
(CSRn.SCBR=1) of the others do not equal 1, and CSRn.CPOL=1 and CSRn.NCPHA=0,<br />
then an additional pulse will be generated on SCK.<br />
Fix/Workaround<br />
When multiple CS are in use, if one of the baudrates equals 1, the others must also equal 1<br />
if CSRn.CPOL=1 and CSRn.NCPHA=0.<br />
1 Channel chaining skips first pulse for upper channel<br />
When chaining two channels using the Block Mode Register, the first pulse of the clock<br />
between the channels is skipped.<br />
Fix/Workaround<br />
Configure the lower channel with RA = 0x1 and RC = 0x2 to produce a dummy clock cycle<br />
for the upper channel. After the dummy cycle has been generated, indicated by the<br />
SR.CPCS bit, reconfigure the RA and RC registers for the lower channel with the real<br />
values.<br />
1 SMBALERT bit may be set after reset<br />
For TWIM0 and TWIM1 modules, the SMBus Alert (SMBALERT) bit in the Status Register<br />
(SR) might be erroneously set after system reset.<br />
Fix/Workaround<br />
After system reset, clear the SR.SMBALERT bit before commencing any TWI transfer.<br />
For TWIM2 module, the SMBus Alert (SMBALERT) is not implemented but the bit in the Status<br />
Register (SR) is erroneously set once TWIM2 is enabled.<br />
Fix/Workaround<br />
None.<br />
1 Clearing the NAK bit before the BTF bit is set locks up the TWI bus<br />
When the TWIS is in transmit mode, clearing the NAK Received (NAK) bit of the Status Register<br />
(SR) before the end of the Acknowledge/Not Acknowledge cycle will cause the TWIS to<br />
attempt to continue transmitting data, thus locking up the bus.<br />
Fix/Workaround<br />
Clear SR.NAK only after the Byte Transfer Finished (BTF) bit of the same register has been<br />
set.<br />
1 UPINRQx.INRQ field is limited to 8-bits<br />
In Host mode, when using the UPINRQx.INRQ feature together with the multi-packet mode<br />
to launch a finite number of packet among multi-packet, the multi-packet size (located in the<br />
descriptor table) is limited to the UPINRQx.INRQ value multiply by the pipe size.<br />
Fix/Workaround<br />
UPINRQx.INRQ value shall be less than the number of configured multi-packet.<br />
2 In USB host mode, downstream resume feature does not work (UHCON.RESUME=1).<br />
1297
43.1.11 WDT<br />
32117D–AVR-01/12<br />
Fix/Workaround<br />
None.<br />
<strong>AT32UC3C</strong><br />
3 In host mode, the disconnection during OUT transition is not supported<br />
In USB host mode, a pipe can not work if the previous USB device disconnection has<br />
occurred during a USB transfer.<br />
Fix/Workaround<br />
Reset the USBC (USBCON.USB=0 and =1) after a device disconnection (UHINT.DDISCI).<br />
4 In USB host mode, entering suspend mode can fail<br />
In USB host mode, entering suspend mode can fail when UHCON.SOFE=0 is done just<br />
after a SOF reception (UHINT.HSOFI).<br />
Fix/Workaround<br />
Check that UHNUM.FLENHIGH is below 185 in Full speed and below 21 in Low speed<br />
before clearing UHCON.SOFE.<br />
5 In USB host mode, entering suspend mode for low speed device can fail when the<br />
USB freeze (USBCON.FRZCLK=1) is done just after UHCON.SOFE=0.<br />
Fix/Workaround<br />
When entering suspend mode (UHCON.SOFE is cleared), check that USBFSM.DRDSTATE<br />
is not equal to three before freezing the clock (USBCON.FRZCLK=1).<br />
1 WDT Control Register does not have synchronization feedback<br />
When writing to the Timeout Prescale Select (PSEL), Time Ban Prescale Select (TBAN),<br />
Enable (EN), or WDT Mode (MODE) fieldss of the WDT Control Register (CTRL), a synchronizer<br />
is started to propagate the values to the WDT clcok domain. This synchronization<br />
takes a finite amount of time, but only the status of the synchronization of the EN bit is<br />
reflected back to the user. Writing to the synchronized fields during synchronization can lead<br />
to undefined behavior.<br />
Fix/Workaround<br />
-When writing to the affected fields, the user must ensure a wait corresponding to 2 clock<br />
cycles of both the WDT peripheral bus clock and the selected WDT clock source.<br />
-When doing writes that changes the EN bit, the EN bit can be read back until it reflects the<br />
written value.<br />
1298
43.2 rev D<br />
43.2.1 ADCIFA<br />
43.2.2 AST<br />
43.2.3 aWire<br />
43.2.4 GPIO<br />
43.2.5 Power Manager<br />
32117D–AVR-01/12<br />
<strong>AT32UC3C</strong><br />
1 ADCREFP/ADCREFN can not be selected as an external ADC reference by setting the<br />
ADCIFA.CFG.EXREF bit to one<br />
Fix/Workaround<br />
A voltage reference can be applied on ADCREFP/ADCREFN pins if the<br />
ADCIFA.CFG.EXREF bit is set to zero, the ADCIFA.CFG.RS bit is set to zero and the voltage<br />
reference applied on ADCREFP/ADCREFN pins is higher than the internal 1V<br />
reference.<br />
1 AST wake signal is released one AST clock cycle after the BUSY bit is cleared<br />
After writing to the Status Clear Register (SCR) the wake signal is released one AST clock<br />
cycle after the BUSY bit in the Status Register (SR.BUSY) is cleared. If entering sleep mode<br />
directly after the BUSY bit is cleared the part will wake up immediately.<br />
Fix/Workaround<br />
Read the Wake Enable Register (WER) and write this value back to the same register. Wait<br />
for BUSY to clear before entering sleep mode.<br />
1 aWire MEMORY_SPEED_REQUEST command does not return correct CV<br />
The aWire MEMORY_SPEED_REQUEST command does not return a CV corresponding to<br />
the formula in the aWire Debug Interface chapter.<br />
Fix/Workaround<br />
Issue a dummy read to address 0x100000000 before issuing the<br />
MEMORY_SPEED_REQUEST command and use this formula instead:<br />
f sab<br />
7faw =<br />
----------------<br />
CV – 3<br />
1 Clearing Interrupt flags can mask other interrupts<br />
When clearing interrupt flags in a GPIO port, interrupts on other pins of that port, happening<br />
in the same clock cycle will not be registered.<br />
Fix/Workaround<br />
Read the PVR register of the port before and after clearing the interrupt to see if any pin<br />
change has happened while clearing the interrupt. If any change occurred in the PVR<br />
between the reads, they must be treated as an interrupt.<br />
1 Clock Failure Detector (CFD) can be issued while turning off the CFD<br />
While turning off the CFD, the CFD bit in the Status Register (SR) can be set. This will<br />
change the main clock source to RCSYS.<br />
Fix/Workaround<br />
Solution 1: Enable CFD interrupt. If CFD interrupt is issues after turning off the CFD, switch<br />
back to original main clock source.<br />
Solution 2: Only turn off the CFD while running the main clock on RCSYS.<br />
1299
43.2.6 SCIF<br />
43.2.7 SPI<br />
32117D–AVR-01/12<br />
<strong>AT32UC3C</strong><br />
2 Requesting clocks in idle sleep modes will mask all other PB clocks than the<br />
requested<br />
In idle or frozen sleep mode, all the PB clocks will be frozen if the TWIS or the AST need to<br />
wake the cpu up.<br />
Fix/Workaround<br />
Disable the TWIS or the AST before entering idle or frozen sleep mode.<br />
3 TWIS may not wake the device from sleep mode<br />
If the CPU is put to a sleep mode (except Idle and Frozen) directly after a TWI Start condition,<br />
the CPU may not wake upon a TWIS address match. The request is NACKed.<br />
Fix/Workaround<br />
When using the TWI address match to wake the device from sleep, do not switch to sleep<br />
modes deeper than Frozen. Another solution is to enable asynchronous EIC wake on the<br />
TWIS clock (TWCK) or TWIS data (TWD) pins, in order to wake the system up on bus<br />
events.<br />
1 PLLCOUNT value larger than zero can cause PLLEN glitch<br />
Initializing the PLLCOUNT with a value greater than zero creates a glitch on the PLLEN signal<br />
during asynchronous wake up.<br />
Fix/Workaround<br />
The lock-masking mechanism for the PLL should not be used.<br />
The PLLCOUNT field of the PLL Control Register should always be written to zero.<br />
2 PLL lock might not clear after disable<br />
Under certain circumstances, the lock signal from the Phase Locked Loop (PLL) oscillator<br />
may not go back to zero after the PLL oscillator has been disabled. This can cause the propagation<br />
of clock signals with the wrong frequency to parts of the system that use the PLL<br />
clock.<br />
Fix/Workaround<br />
PLL must be turned off before entering STOP, DEEPSTOP or STATIC sleep modes. If PLL<br />
has been turned off, a delay of 30us must be observed after the PLL has been enabled<br />
again before the SCIF.PLL0LOCK bit can be used as a valid indication that the PLL is<br />
locked.<br />
3 BOD33 reset locks the device<br />
If BOD33 is enabled as a reset source (SCIF.BOD33.CTRL=0x1) and when VDDIN_33<br />
power supply voltage falls below the BOD33 voltage (SCIF.BOD33.LEVEL), the device is<br />
locked permanently under reset even if the power supply goes back above BOD33 reset<br />
level. In order to unlock the device, an external reset event should be applied on RESET_N.<br />
Fix/Workaround<br />
Use an external BOD on VDDIN_33 or an external reset source.<br />
1 SPI data transfer hangs with CSR0.CSAAT==1 and MR.MODFDIS==0<br />
When CSR0.CSAAT==1 and mode fault detection is enabled (MR.MODFDIS==0), the SPI<br />
module will not start a data transfer.<br />
Fix/Workaround<br />
Disable mode fault detection by writing a one to MR.MODFDIS.<br />
1300
43.2.8 TC<br />
43.2.9 TWIM<br />
32117D–AVR-01/12<br />
<strong>AT32UC3C</strong><br />
2 Disabling SPI has no effect on the SR.TDRE bit<br />
Disabling SPI has no effect on the SR.TDRE bit whereas the write data command is filtered<br />
when SPI is disabled. Writing to TDR when SPI is disabled will not clear SR.TDRE. If SPI is<br />
disabled during a PDCA transfer, the PDCA will continue to write data to TDR until its buffer<br />
is empty, and this data will be lost.<br />
Fix/Workaround<br />
Disable the PDCA, add two NOPs, and disable the SPI. To continue the transfer, enable the<br />
SPI and PDCA.<br />
3 SPI disable does not work in SLAVE mode<br />
SPI disable does not work in SLAVE mode.<br />
Fix/Workaround<br />
Read the last received data, then perform a software reset by writing a one to the Software<br />
Reset bit in the Control Register (CR.SWRST).<br />
4 SPI bad serial clock generation on 2nd chip_select when SCBR=1, CPOL=1, and<br />
NCPHA=0<br />
When multiple chip selects (CS) are in use, if one of the baudrates equal 1 while one<br />
(CSRn.SCBR=1) of the others do not equal 1, and CSRn.CPOL=1 and CSRn.NCPHA=0,<br />
then an additional pulse will be generated on SCK.<br />
Fix/Workaround<br />
When multiple CS are in use, if one of the baudrates equals 1, the others must also equal 1<br />
if CSRn.CPOL=1 and CSRn.NCPHA=0.<br />
1 Channel chaining skips first pulse for upper channel<br />
When chaining two channels using the Block Mode Register, the first pulse of the clock<br />
between the channels is skipped.<br />
Fix/Workaround<br />
Configure the lower channel with RA = 0x1 and RC = 0x2 to produce a dummy clock cycle<br />
for the upper channel. After the dummy cycle has been generated, indicated by the<br />
SR.CPCS bit, reconfigure the RA and RC registers for the lower channel with the real<br />
values.<br />
1 SMBALERT bit may be set after reset<br />
For TWIM0 and TWIM1 modules, the SMBus Alert (SMBALERT) bit in the Status Register<br />
(SR) might be erroneously set after system reset.<br />
Fix/Workaround<br />
After system reset, clear the SR.SMBALERT bit before commencing any TWI transfer.<br />
For TWIM2 module, the SMBus Alert (SMBALERT) is not implemented but the bit in the Status<br />
Register (SR) is erroneously set once TWIM2 is enabled.<br />
Fix/Workaround<br />
None.<br />
2 TWIM TWALM polarity is wrong<br />
The TWALM signal in the TWIM is active high instead of active low.<br />
Fix/Workaround<br />
Use an external inverter to invert the signal going into the TWIM. When using both TWIM<br />
and TWIS on the same pins, the TWALM cannot be used.<br />
1301
43.2.10 TWIS<br />
43.2.11 USBC<br />
32117D–AVR-01/12<br />
<strong>AT32UC3C</strong><br />
1 Clearing the NAK bit before the BTF bit is set locks up the TWI bus<br />
When the TWIS is in transmit mode, clearing the NAK Received (NAK) bit of the Status Register<br />
(SR) before the end of the Acknowledge/Not Acknowledge cycle will cause the TWIS to<br />
attempt to continue transmitting data, thus locking up the bus.<br />
Fix/Workaround<br />
Clear SR.NAK only after the Byte Transfer Finished (BTF) bit of the same register has been<br />
set.<br />
2 TWIS stretch on Address match error<br />
When the TWIS stretches TWCK due to a slave address match, it also holds TWD low for<br />
the same duration if it is to be receiving data. When TWIS releases TWCK, it releases TWD<br />
at the same time. This can cause a TWI timing violation.<br />
Fix/Workaround<br />
None.<br />
3 TWALM forced to GND<br />
The TWALM pin is forced to GND when the alternate function is selected and the TWIS<br />
module is enabled.<br />
Fix/Workaround<br />
None.<br />
1 UPINRQx.INRQ field is limited to 8-bits<br />
In Host mode, when using the UPINRQx.INRQ feature together with the multi-packet mode<br />
to launch a finite number of packet among multi-packet, the multi-packet size (located in the<br />
descriptor table) is limited to the UPINRQx.INRQ value multiply by the pipe size.<br />
Fix/Workaround<br />
UPINRQx.INRQ value shall be less than the number of configured multi-packet.<br />
2 In USB host mode, downstream resume feature does not work (UHCON.RESUME=1).<br />
Fix/Workaround<br />
None.<br />
3 In host mode, the disconnection during OUT transition is not supported<br />
In USB host mode, a pipe can not work if the previous USB device disconnection has<br />
occurred during a USB transfer.<br />
Fix/Workaround<br />
Reset the USBC (USBCON.USB=0 and =1) after a device disconnection (UHINT.DDISCI).<br />
4 In USB host mode, entering suspend mode can fail<br />
In USB host mode, entering suspend mode can fail when UHCON.SOFE=0 is done just<br />
after a SOF reception (UHINT.HSOFI).<br />
Fix/Workaround<br />
Check that UHNUM.FLENHIGH is below 185 in Full speed and below 21 in Low speed<br />
before clearing UHCON.SOFE.<br />
5 In USB host mode, entering suspend mode for low speed device can fail when the<br />
USB freeze (USBCON.FRZCLK=1) is done just after UHCON.SOFE=0.<br />
Fix/Workaround<br />
When entering suspend mode (UHCON.SOFE is cleared), check that USBFSM.DRDSTATE<br />
is not equal to three before freezing the clock (USBCON.FRZCLK=1).<br />
1302
43.2.12 WDT<br />
32117D–AVR-01/12<br />
<strong>AT32UC3C</strong><br />
1 Clearing the Watchdog Timer (WDT) counter in second half of timeout period will<br />
issue a Watchdog reset<br />
If the WDT counter is cleared in the second half of the timeout period, the WDT will immediately<br />
issue a Watchdog reset.<br />
Fix/Workaround<br />
Use twice as long timeout period as needed and clear the WDT counter within the first half<br />
of the timeout period. If the WDT counter is cleared after the first half of the timeout period,<br />
you will get a Watchdog reset immediately. If the WDT counter is not cleared at all, the time<br />
before the reset will be twice as long as needed.<br />
2 WDT Control Register does not have synchronization feedback<br />
When writing to the Timeout Prescale Select (PSEL), Time Ban Prescale Select (TBAN),<br />
Enable (EN), or WDT Mode (MODE) fieldss of the WDT Control Register (CTRL), a synchronizer<br />
is started to propagate the values to the WDT clcok domain. This synchronization<br />
takes a finite amount of time, but only the status of the synchronization of the EN bit is<br />
reflected back to the user. Writing to the synchronized fields during synchronization can lead<br />
to undefined behavior.<br />
Fix/Workaround<br />
-When writing to the affected fields, the user must ensure a wait corresponding to 2 clock<br />
cycles of both the WDT peripheral bus clock and the selected WDT clock source.<br />
-When doing writes that changes the EN bit, the EN bit can be read back until it reflects the<br />
written value.<br />
1303
44. Datasheet Revision History<br />
44.1 Rev. D – 01/12<br />
44.2 Rev. C – 08/11<br />
44.3 Rev. B – 03/11<br />
32117D–AVR-01/12<br />
<strong>AT32UC3C</strong><br />
Please note that the referring page numbers in this section are referred to this document. The<br />
referring revision in this section are referring to the document revision.<br />
1 Errata: Updated<br />
2 PM: Clock Mask Table Updated<br />
3 Fixed PLLOPT field description in SCIF chapter<br />
4 MDMA: Swapped bit descriptions for IER and IDR<br />
5 MACB: USRIO register description and bit descriptions for IMR/IDR/IER Updated<br />
6 USBC: UPCON.PFREEZE and UPINRQn description Updated<br />
7 ACIFA: Updated<br />
8 ADCIFA: CFG.MUXSET, SSMQ description and conversion results section Updated<br />
9 DACIFB: Calibration section Updated<br />
10 Electrical Characteristics: ADCREFP/ADCREFN added<br />
1<br />
Electrical Characteristics Updated:<br />
- I/O Pins characteristics<br />
- 8MHz/1MHz RC Oscillator (RC8M) characteristics<br />
- 1.8V Voltage Regulator characteristics<br />
- 3.3V Voltage Regulator characteristics<br />
- 1.8VBrown Out Detector (BOD18) characteristics<br />
- 3.3VBrown Out Detector (BOD33) characteristics<br />
- 5VBrown Out Detector (BOD50) characteristics<br />
- Analog to Digital Converter (ADC) and sample and hold (S/DH) Characteristics<br />
- Analog Comparator characteristics<br />
2 Errata: Updated<br />
3 TWIS: Updated<br />
1 Package and pinout: Added supply column. Updated peripheral functions<br />
2 Supply and Startup Considerations: Updated I/O lines power<br />
3 PM: Added AWEN description<br />
4 SCIF: Added VREGCR register<br />
1304
44.4 Rev. A – 10/10<br />
32117D–AVR-01/12<br />
5 AST: Updated digital tuner formula<br />
6 SDRAMC: cleaned-up SDCS/NCS names. Added VERSION register<br />
7 SAU: Updated SR.IDLE<br />
8 USART: Updated<br />
9 CANIF: Updated address map figure<br />
10 USBC: Updated<br />
11 DACIFB: Updated<br />
12 Programming and Debugging: Added JTAG Data Registers section<br />
13 Electrical Characteristics: Updated<br />
14 Ordering Information: Updated<br />
15 Errata: Updated<br />
1 Initial revision<br />
<strong>AT32UC3C</strong><br />
1305
Table of Content<br />
32117D–AVR-01/12<br />
<strong>AT32UC3C</strong><br />
1 Description ............................................................................................... 3<br />
2 Overview ................................................................................................... 5<br />
2.1 Block diagram ....................................................................................................5<br />
2.2 Configuration Summary .....................................................................................6<br />
3 Package and Pinout ................................................................................. 8<br />
3.1 Package .............................................................................................................8<br />
3.2 Peripheral Multiplexing on I/O lines .................................................................11<br />
3.3 Signals Description ..........................................................................................18<br />
3.4 I/O Line Considerations ...................................................................................24<br />
4 Processor and Architecture .................................................................. 25<br />
4.1 Features ..........................................................................................................25<br />
4.2 AVR32 Architecture .........................................................................................25<br />
4.3 The AVR32UC CPU ........................................................................................26<br />
4.4 Programming Model ........................................................................................30<br />
4.5 Exceptions and Interrupts ................................................................................34<br />
5 Memories ................................................................................................ 39<br />
5.1 Embedded Memories ......................................................................................39<br />
5.2 Physical Memory Map .....................................................................................40<br />
5.3 Peripheral Address Map ..................................................................................41<br />
5.4 CPU Local Bus Mapping .................................................................................43<br />
6 Supply and Startup Considerations ..................................................... 46<br />
6.1 Supply Considerations .....................................................................................46<br />
6.2 Startup Considerations ....................................................................................49<br />
7 Power Manager (PM) .............................................................................. 50<br />
7.1 Features ..........................................................................................................50<br />
7.2 Overview ..........................................................................................................50<br />
7.3 Block Diagram .................................................................................................51<br />
7.4 I/O Lines Description .......................................................................................51<br />
7.5 Product Dependencies ....................................................................................51<br />
7.6 Functional Description .....................................................................................52<br />
7.7 User Interface ..................................................................................................59<br />
7.8 Module Configuration ......................................................................................81<br />
1306
32117D–AVR-01/12<br />
<strong>AT32UC3C</strong><br />
8 System Control Interface (SCIF) ........................................................... 82<br />
8.1 Features ..........................................................................................................82<br />
8.2 Description .......................................................................................................82<br />
8.3 I/O Lines Description .......................................................................................82<br />
8.4 Product Dependencies ....................................................................................82<br />
8.5 Functional Description .....................................................................................83<br />
8.6 User Interface ..................................................................................................91<br />
8.7 Module Configuration ....................................................................................133<br />
9 Asynchronous Timer (AST) ................................................................ 134<br />
9.1 Features ........................................................................................................134<br />
9.2 Overview ........................................................................................................134<br />
9.3 Block Diagram ...............................................................................................135<br />
9.4 Product Dependencies ..................................................................................135<br />
9.5 Functional Description ...................................................................................136<br />
9.6 User Interface ................................................................................................142<br />
9.7 Module configuration .....................................................................................161<br />
10 Watchdog Timer (WDT) ....................................................................... 162<br />
10.1 Features ........................................................................................................162<br />
10.2 Overview ........................................................................................................162<br />
10.3 Block Diagram ...............................................................................................162<br />
10.4 Product Dependencies ..................................................................................162<br />
10.5 Functional Description ...................................................................................163<br />
10.6 User Interface ................................................................................................168<br />
10.7 Module Configuration ....................................................................................174<br />
11 Interrupt Controller (INTC) .................................................................. 175<br />
11.1 Features ........................................................................................................175<br />
11.2 Overview ........................................................................................................175<br />
11.3 Block Diagram ...............................................................................................175<br />
11.4 Product Dependencies ..................................................................................176<br />
11.5 Functional Description ...................................................................................176<br />
11.6 User Interface ................................................................................................179<br />
11.7 Interrupt Request Signal Map ........................................................................183<br />
12 External Interrupt Controller (EIC) ..................................................... 188<br />
12.1 Features ........................................................................................................188<br />
12.2 Overview ........................................................................................................188<br />
1307
32117D–AVR-01/12<br />
<strong>AT32UC3C</strong><br />
12.3 Block Diagram ...............................................................................................188<br />
12.4 I/O Lines Description .....................................................................................189<br />
12.5 Product Dependencies ..................................................................................189<br />
12.6 Functional Description ...................................................................................189<br />
12.7 User Interface ................................................................................................193<br />
12.8 Module Configuration ....................................................................................209<br />
13 Frequency Meter (FREQM) .................................................................. 210<br />
13.1 Features ........................................................................................................210<br />
13.2 Overview ........................................................................................................210<br />
13.3 Block Diagram ...............................................................................................210<br />
13.4 Product Dependencies ..................................................................................210<br />
13.5 Functional Description ...................................................................................211<br />
13.6 User Interface ................................................................................................213<br />
13.7 Module Configuration ....................................................................................224<br />
14 Peripheral Event Controller (PEVC) ................................................... 226<br />
14.1 Features ........................................................................................................226<br />
14.2 Overview ........................................................................................................226<br />
14.3 Block Diagram ...............................................................................................227<br />
14.4 I/O Lines Description .....................................................................................228<br />
14.5 Product Dependencies ..................................................................................228<br />
14.6 Functional Description ...................................................................................229<br />
14.7 User Interface ................................................................................................231<br />
14.8 Module Configuration ....................................................................................252<br />
15 Flash Controller (FLASHC) ................................................................. 254<br />
15.1 Features ........................................................................................................254<br />
15.2 Overview ........................................................................................................254<br />
15.3 Product Dependencies ..................................................................................254<br />
15.4 Functional description ....................................................................................255<br />
15.5 Flash Commands ..........................................................................................260<br />
15.6 General-purpose fuse bits .............................................................................262<br />
15.7 Security bit .....................................................................................................265<br />
15.8 User interface ................................................................................................266<br />
15.9 Fuses Settings ...............................................................................................276<br />
15.10 Calibration Settings .......................................................................................279<br />
15.11 Serial Number ................................................................................................285<br />
1308
32117D–AVR-01/12<br />
<strong>AT32UC3C</strong><br />
15.12 Module Configuration ....................................................................................285<br />
16 HSB Bus Matrix (HMATRIXB) .............................................................. 286<br />
16.1 Features ........................................................................................................286<br />
16.2 Overview ........................................................................................................286<br />
16.3 Product Dependencies ..................................................................................286<br />
16.4 Functional Description ...................................................................................286<br />
16.5 User Interface ................................................................................................290<br />
16.6 Bus Matrix Connections .................................................................................298<br />
17 External Bus Interface (EBI) ................................................................ 300<br />
17.1 Features ........................................................................................................300<br />
17.2 Overview ........................................................................................................300<br />
17.3 Block Diagram ...............................................................................................301<br />
17.4 I/O Lines Description .....................................................................................301<br />
17.5 Product Dependencies ..................................................................................303<br />
17.6 Functional Description ...................................................................................304<br />
17.7 Application Example ......................................................................................304<br />
18 Static Memory Controller (SMC) ......................................................... 307<br />
18.1 Features ........................................................................................................307<br />
18.2 Overview ........................................................................................................307<br />
18.3 Block Diagram ...............................................................................................308<br />
18.4 I/O Lines Description .....................................................................................308<br />
18.5 Product Dependencies ..................................................................................308<br />
18.6 Functional Description ...................................................................................309<br />
18.7 User Interface ................................................................................................341<br />
19 SDRAM Controller (SDRAMC) ............................................................ 348<br />
19.1 Features ........................................................................................................348<br />
19.2 Overview ........................................................................................................348<br />
19.3 Block Diagram ...............................................................................................349<br />
19.4 I/O Lines Description .....................................................................................349<br />
19.5 Application Example ......................................................................................350<br />
19.6 Product Dependencies ..................................................................................351<br />
19.7 Functional Description ...................................................................................352<br />
19.8 User Interface ................................................................................................361<br />
20 Peripheral DMA Controller (PDCA) .................................................... 375<br />
1309
32117D–AVR-01/12<br />
<strong>AT32UC3C</strong><br />
20.1 Features ........................................................................................................375<br />
20.2 Overview ........................................................................................................375<br />
20.3 Block Diagram ...............................................................................................376<br />
20.4 Product Dependencies ..................................................................................376<br />
20.5 Functional Description ...................................................................................377<br />
20.6 Performance Monitors ...................................................................................379<br />
20.7 User Interface ................................................................................................381<br />
20.8 Module Configuration ....................................................................................409<br />
21 Memory DMA Controller (MDMA) ....................................................... 411<br />
21.1 Features ........................................................................................................411<br />
21.2 Overview ........................................................................................................411<br />
21.3 Product Dependencies ..................................................................................411<br />
21.4 Functional Description ...................................................................................412<br />
21.5 Single Transfer Mode ....................................................................................413<br />
21.6 Descriptor Mode ............................................................................................414<br />
21.7 User interface ................................................................................................416<br />
21.8 Module Configuration ....................................................................................431<br />
22 Secure Access Unit (SAU) .................................................................. 432<br />
22.1 Features ........................................................................................................432<br />
22.2 Overview ........................................................................................................432<br />
22.3 Block Diagram ...............................................................................................433<br />
22.4 Product Dependencies ..................................................................................434<br />
22.5 Functional Description ...................................................................................434<br />
22.6 User Interface ................................................................................................438<br />
22.7 Module configuration .....................................................................................453<br />
23 General-Purpose Input/Output Controller (GPIO) ............................. 454<br />
23.1 Features ........................................................................................................454<br />
23.2 Overview ........................................................................................................454<br />
23.3 Block Diagram ...............................................................................................454<br />
23.4 I/O Lines Description .....................................................................................455<br />
23.5 Product Dependencies ..................................................................................455<br />
23.6 Functional Description ...................................................................................456<br />
23.7 User Interface ................................................................................................461<br />
23.8 Module Configuration ....................................................................................486<br />
24 Ethernet MAC (MACB) ......................................................................... 488<br />
1310
32117D–AVR-01/12<br />
<strong>AT32UC3C</strong><br />
24.1 Features ........................................................................................................488<br />
24.2 Overview ........................................................................................................488<br />
24.3 Block Diagram ...............................................................................................489<br />
24.4 Product Dependencies ..................................................................................489<br />
24.5 Functional Description ...................................................................................490<br />
24.6 Programming Interface ..................................................................................503<br />
24.7 User Interface ................................................................................................506<br />
24.8 Module Configuration ....................................................................................561<br />
25 Universal Synchronous Asynchronous Receiver Transmitter (USART)<br />
562<br />
25.1 Features ........................................................................................................562<br />
25.2 Overview ........................................................................................................562<br />
25.3 Block Diagram ...............................................................................................564<br />
25.4 I/O Lines Description ....................................................................................565<br />
25.5 Product Dependencies ..................................................................................566<br />
25.6 Functional Description ...................................................................................567<br />
25.7 User Interface ................................................................................................625<br />
25.8 Module Configuration ....................................................................................655<br />
26 Serial Peripheral Interface (SPI) ......................................................... 657<br />
26.1 Features ........................................................................................................657<br />
26.2 Overview ........................................................................................................657<br />
26.3 Block Diagram ...............................................................................................658<br />
26.4 Application Block Diagram .............................................................................658<br />
26.5 I/O Lines Description .....................................................................................659<br />
26.6 Product Dependencies ..................................................................................659<br />
26.7 Functional Description ...................................................................................659<br />
26.8 User Interface ................................................................................................670<br />
26.9 Module Configuration ....................................................................................697<br />
27 Two-wire Master Interface (TWIM) ...................................................... 698<br />
27.1 Features ........................................................................................................698<br />
27.2 Overview ........................................................................................................698<br />
27.3 List of Abbreviations ......................................................................................699<br />
27.4 Block Diagram ...............................................................................................699<br />
27.5 Application Block Diagram .............................................................................700<br />
27.6 I/O Lines Description .....................................................................................700<br />
1311
32117D–AVR-01/12<br />
<strong>AT32UC3C</strong><br />
27.7 Product Dependencies ..................................................................................700<br />
27.8 Functional Description ...................................................................................702<br />
27.9 User Interface ................................................................................................714<br />
27.10 Module Configuration ....................................................................................731<br />
28 Two-wire Slave Interface (TWIS) ......................................................... 732<br />
28.1 Features ........................................................................................................732<br />
28.2 Overview ........................................................................................................732<br />
28.3 List of Abbreviations ......................................................................................733<br />
28.4 Block Diagram ...............................................................................................733<br />
28.5 Application Block Diagram .............................................................................734<br />
28.6 I/O Lines Description .....................................................................................734<br />
28.7 Product Dependencies ..................................................................................734<br />
28.8 Functional Description ...................................................................................735<br />
28.9 User Interface ................................................................................................745<br />
28.10 Module Configuration ....................................................................................761<br />
29 CAN Interface (CANIF) ......................................................................... 762<br />
29.1 Features ........................................................................................................762<br />
29.2 Overview ........................................................................................................762<br />
29.3 Block Diagram ...............................................................................................763<br />
29.4 I/O Lines Description .....................................................................................763<br />
29.5 Product Dependencies ..................................................................................763<br />
29.6 Functional Description ...................................................................................764<br />
29.7 User Interface ................................................................................................774<br />
29.8 Module Configuration ....................................................................................802<br />
30 Inter-IC Sound Controller (IISC) .......................................................... 803<br />
30.1 Features ........................................................................................................803<br />
30.2 Overview ........................................................................................................803<br />
30.3 Block Diagram ...............................................................................................804<br />
30.4 I/O Lines Description .....................................................................................804<br />
30.5 Product Dependencies ..................................................................................804<br />
30.6 Functional Description ...................................................................................805<br />
30.7 IISC Application Examples ............................................................................811<br />
30.8 User Interface ................................................................................................813<br />
30.9 Module configuration .....................................................................................828<br />
31 Timer/Counter (TC) .............................................................................. 829<br />
1312
32117D–AVR-01/12<br />
<strong>AT32UC3C</strong><br />
31.1 Features ........................................................................................................829<br />
31.2 Overview ........................................................................................................829<br />
31.3 Block Diagram ...............................................................................................830<br />
31.4 I/O Lines Description .....................................................................................830<br />
31.5 Product Dependencies ..................................................................................830<br />
31.6 Functional Description ...................................................................................831<br />
31.7 User Interface ................................................................................................846<br />
31.8 Module Configuration ....................................................................................869<br />
32 USB Interface (USBC) .......................................................................... 870<br />
32.1 Features ........................................................................................................870<br />
32.2 Overview ........................................................................................................870<br />
32.3 Block Diagram ...............................................................................................870<br />
32.4 I/O Lines Description .....................................................................................872<br />
32.5 Product Dependencies ..................................................................................873<br />
32.6 Functional Description ...................................................................................874<br />
32.7 User Interface ................................................................................................903<br />
32.8 Module Configuration ....................................................................................962<br />
33 Pulse Width Modulation Controller (PWM) ........................................ 963<br />
33.1 Features ........................................................................................................963<br />
33.2 Overview ........................................................................................................963<br />
33.3 Block Diagram ...............................................................................................965<br />
33.4 I/O Lines Description .....................................................................................966<br />
33.5 Product Dependencies ..................................................................................967<br />
33.6 Functional Description ...................................................................................968<br />
33.7 User Interface ................................................................................................994<br />
33.8 Module Configuration ..................................................................................1047<br />
34 Quadrature Decoder (QDEC) ............................................................ 1048<br />
34.1 Features ......................................................................................................1048<br />
34.2 Overview ......................................................................................................1048<br />
34.3 Block Diagram .............................................................................................1049<br />
34.4 I/O Lines Description ...................................................................................1049<br />
34.5 Product Dependencies ................................................................................1049<br />
34.6 Functional Description .................................................................................1050<br />
34.7 User Interface ..............................................................................................1057<br />
34.8 Module Configuration ..................................................................................1073<br />
1313
32117D–AVR-01/12<br />
<strong>AT32UC3C</strong><br />
35 Analog Comparator Interface (ACIFA) ............................................. 1074<br />
35.1 Features ......................................................................................................1074<br />
35.2 Overview ......................................................................................................1074<br />
35.3 Block Diagram .............................................................................................1075<br />
35.4 I/O Lines Description ...................................................................................1076<br />
35.5 Product Dependencies ................................................................................1076<br />
35.6 Functional Description .................................................................................1076<br />
35.7 User Interface ..............................................................................................1080<br />
35.8 Module configuration ...................................................................................1099<br />
36 ADC Interface (ADCIFA) .................................................................... 1102<br />
36.1 Features ......................................................................................................1102<br />
36.2 Overview ......................................................................................................1103<br />
36.3 Block Diagram .............................................................................................1104<br />
36.4 I/O Lines Description ...................................................................................1105<br />
36.5 Product Dependencies ................................................................................1105<br />
36.6 Functional Description .................................................................................1106<br />
36.7 User Interface ..............................................................................................1119<br />
36.8 Module configuration ...................................................................................1146<br />
37 DACIFB Interface (DACIFB) .............................................................. 1148<br />
37.1 Features ......................................................................................................1148<br />
37.2 Overview ......................................................................................................1148<br />
37.3 Block Diagram .............................................................................................1149<br />
37.4 I/O Lines Description ...................................................................................1150<br />
37.5 Product Dependencies ................................................................................1150<br />
37.6 Functional Description .................................................................................1151<br />
37.7 User Interface ..............................................................................................1155<br />
37.8 Module Configuration ..................................................................................1175<br />
38 aWire UART (AW) ............................................................................... 1176<br />
38.1 Features ......................................................................................................1176<br />
38.2 Overview ......................................................................................................1176<br />
38.3 Block Diagram .............................................................................................1176<br />
38.4 I/O Lines Description ...................................................................................1177<br />
38.5 Product Dependencies ................................................................................1177<br />
38.6 Functional Description .................................................................................1177<br />
38.7 User Interface ..............................................................................................1180<br />
1314
32117D–AVR-01/12<br />
<strong>AT32UC3C</strong><br />
38.8 Module Configuration ..................................................................................1193<br />
39 Programming and Debugging .......................................................... 1194<br />
39.1 Overview ......................................................................................................1194<br />
39.2 Service Access Bus .....................................................................................1194<br />
39.3 On-Chip Debug ............................................................................................1197<br />
39.4 JTAG and Boundary-scan (JTAG) ...............................................................1205<br />
39.5 JTAG Instruction Summary .........................................................................1213<br />
39.6 aWire Debug Interface (AW) .......................................................................1230<br />
39.7 Module Configuration ..................................................................................1247<br />
40 Electrical Characteristics .................................................................. 1248<br />
40.1 Absolute Maximum Ratings* .......................................................................1248<br />
40.2 Supply Characteristics .................................................................................1248<br />
40.3 Maximum Clock Frequencies ......................................................................1249<br />
40.4 Power Consumption ....................................................................................1249<br />
40.5 I/O Pin Characteristics .................................................................................1253<br />
40.6 Oscillator Characteristics .............................................................................1255<br />
40.7 Flash Characteristics ...................................................................................1258<br />
40.8 Analog Characteristics .................................................................................1259<br />
40.9 Timing Characteristics .................................................................................1268<br />
41 Mechanical Characteristics ............................................................... 1288<br />
41.1 Thermal Considerations ..............................................................................1288<br />
41.2 Package Drawings .......................................................................................1289<br />
41.3 Soldering Profile ..........................................................................................1293<br />
42 Ordering Information ......................................................................... 1294<br />
43 Errata ................................................................................................... 1295<br />
43.1 rev E ............................................................................................................1295<br />
43.2 rev D ............................................................................................................1299<br />
44 Datasheet Revision History .............................................................. 1304<br />
44.1 Rev. D – 01/12 .............................................................................................1304<br />
44.2 Rev. C – 08/11 .............................................................................................1304<br />
44.3 Rev. B – 03/11 .............................................................................................1304<br />
44.4 Rev. A – 10/10 .............................................................................................1305<br />
1315
Headquarters International<br />
Atmel Corporation<br />
2325 Orchard Parkway<br />
San Jose, CA 95131<br />
USA<br />
Tel: 1(408) 441-0311<br />
Fax: 1(408) 487-2600<br />
107486<br />
Atmel Asia<br />
Unit 1-5 & 16, 19/F<br />
BEA Tower, Millennium City 5<br />
418 Kwun Tong Road<br />
Kwun Tong, Kowloon<br />
Hong Kong<br />
Tel: (852) 2245-6100<br />
Fax: (852) 2722-1369<br />
Product Contact<br />
Web Site<br />
www.atmel.com<br />
Literature Requests<br />
www.atmel.com/literature<br />
Atmel Europe<br />
Le Krebs<br />
8, Rue Jean-Pierre Timbaud<br />
BP 309<br />
78054 Saint-Quentin-en-<br />
Yvelines Cedex<br />
France<br />
Tel: (33) 1-30-60-70-00<br />
Fax: (33) 1-30-60-71-11<br />
Technical Support<br />
avr32@atmel.com<br />
Atmel Japan<br />
9F, Tonetsu Shinkawa Bldg.<br />
1-24-8 Shinkawa<br />
Chuo-ku, Tokyo 104-0033<br />
Japan<br />
Tel: (81) 3-3523-3551<br />
Fax: (81) 3-3523-7581<br />
Sales Contact<br />
www.atmel.com/contacts<br />
Disclaimer: The information in this document is provided in connection with Atmel products. No license, express or implied, by estoppel or otherwise, to any<br />
intellectual property right is granted by this document or in connection with the sale of Atmel products. EXCEPT AS SET FORTH IN ATMEL’S TERMS AND CONDI-<br />
TIONS OF SALE LOCATED ON ATMEL’S WEB SITE, ATMEL ASSUMES NO LIABILITY WHATSOEVER AND DISCLAIMS ANY EXPRESS, IMPLIED OR STATUTORY<br />
WARRANTY RELATING TO ITS PRODUCTS INCLUDING, BUT NOT LIMITED TO, THE IMPLIED WARRANTY OF MERCHANTABILITY, FITNESS FOR A PARTICULAR<br />
PURPOSE, OR NON-INFRINGEMENT. IN NO EVENT SHALL ATMEL BE LIABLE FOR ANY DIRECT, INDIRECT, CONSEQUENTIAL, PUNITIVE, SPECIAL OR INCIDEN-<br />
TAL DAMAGES (INCLUDING, WITHOUT LIMITATION, DAMAGES FOR LOSS OF PROFITS, BUSINESS INTERRUPTION, OR LOSS OF INFORMATION) ARISING OUT OF<br />
THE USE OR INABILITY TO USE THIS DOCUMENT, EVEN IF ATMEL HAS BEEN ADVISED OF THE POSSIBILITY OF SUCH DAMAGES. Atmel makes no<br />
representations or warranties with respect to the accuracy or completeness of the contents of this document and reserves the right to make changes to specifications<br />
and product descriptions at any time without notice. Atmel does not make any commitment to update the information contained herein. Unless specifically provided<br />
otherwise, Atmel products are not suitable for, and shall not be used in, automotive applications. Atmel’s products are not intended, authorized, or warranted for use<br />
as components in applications intended to support or sustain life.<br />
© 2012 Atmel Corporation. All rights reserved. Atmel ® , Atmel logo and combinations thereof, AVR ® and others are registered trademarks or<br />
trademarks of Atmel Corporation or its subsidiaries. Other terms and product names may be trademarks of others.<br />
32117D-AVR–01/12