

BRUSH ROBOT - 4M-IND.com
BRUSH ROBOT - 4M-IND.com
BRUSH ROBOT - 4M-IND.com
- TAGS
- brush
- robot
- www.4m-ind.com

You also want an ePaper? Increase the reach of your titles
YUMPU automatically turns print PDFs into web optimized ePapers that Google loves.
F. TROUBLESHOOTING<br />
If the motor does not run:<br />
• Check that you are using fresh batteries.<br />
• Check that the batteries are inserted the correct way round in the battery case.<br />
• Check that all four wires are touching the metal terminals.<br />
If the small brush be<strong>com</strong>es loose, tighten up the bolts on its bracket.<br />
G. HOW IT WORKS<br />
The batteries provide electricity to the motor, which turns the rotor at high speed. The centre of gravity of the<br />
rotor is off to one side — it is not in line with the motor’s spindle. When the rotor spins, it makes the whole<br />
robot vibrate from side to side and up and down. The vibrations make the brushes jump off the surface and<br />
land again at high frequency. As the large brush lands after each vibration, its bristles bend, pushing the<br />
whole Robot a little the same way as the brush is angled. When the brush jumps again the bristles straighten<br />
up. This process is repeated again and again, making Brush Robot move along.<br />
H. FUN FACTS<br />
• Brush Robot is an example of a ‘vibrobot’ — a robot that moves along because it vibrates.<br />
• A micro vibrobot is a tiny vibrobot made from a vibrating alarm from an old mobile phone and the head of a<br />
toothbrush.<br />
• Some vibrobots are solar powered, so can keep jiggling along as long as the Sun shines.<br />
• Brush vibrobots have been used to explore blocked pipes. Their bristles can go past obstructions that would<br />
stop the wheels of a normal robot.<br />
• Vibrations are used in many industrial machines. For example, vibrating conveyors move materials such as<br />
powders by making them jump up and down at high frequency.<br />
• In the construction industry, vibrating machines are used to remove air bubbles from fresh concrete and to<br />
<strong>com</strong>pact loose rock and soil to make the ground firm.<br />
• Robot vacuum cleaners automatically clean floors. They learn the layout of a room, clean it, and return to<br />
their base station to recharge their batteries.<br />
• Many different materials are used to make brush bristles, including synthetic fibres, twigs, and horse and<br />
pig hairs. Synthetic fibres are made by pushing molten plastic or nylon through tiny holes.<br />
41-03282/1<br />
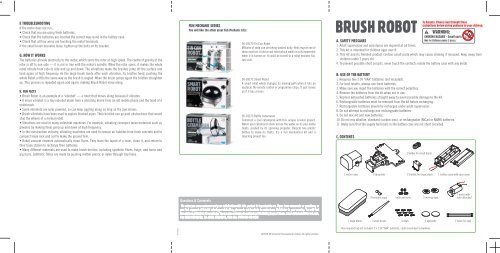
FUN MECHANIC SERIES<br />
You will like the other great Fun Mechanic kits:<br />
00-03270 Tin Can Robot<br />
Millions of soda can are being wasted daily. Help recycle one of<br />
them and turn it into a cool robot which walks in silly movement<br />
when it is turned on. It could be turned to a robot monster too.<br />
Just cool.<br />
00-03272 Smart Robot<br />
A smart robot which changes its moving path when it hits an<br />
obstacle. No remote control or programme chips. It just moves<br />
as if it has a brain.<br />
00-03273 Bottle Catamaran<br />
Construct a cool catamaran with this unique science project.<br />
Watch your catamaran skim across the water on its pop-bottle<br />
floats, pushed by its spinning propeller. Recycle two plastic<br />
bottles to make its floats. It’s a fun mechanical kit and a<br />
recycling project too.<br />
Questions & Comments<br />
We value you as a customer and your satisfaction with this product is important to us. If you have <strong>com</strong>ments or questions, or<br />
you find any part of this kit missing or defective, please do not hesitate to contact our distributor in your country. You will find<br />
the address printed on the package. You are also wel<strong>com</strong>e to contact our Marketing Support Team: Email: infodesk@4m-ind.<strong>com</strong>,<br />
Fax (852) 25911566, Tel: (852) 28936241, Web site: WWW.<strong>4M</strong>-<strong>IND</strong>.COM<br />
©2008 <strong>4M</strong> Industrial Development Limited. All rights reserved.<br />
<strong>BRUSH</strong> <strong>ROBOT</strong><br />
A. SAFETY MESSAGES<br />
1. Adult supervision and assistance are required at all times.<br />
2. This kit is intended for children ages over 8.<br />
3. This kit and its finished product contain small parts which may cause choking if misused. Keep away from<br />
children under 3 years old.<br />
4. To prevent possible short circuits, never touch the contacts inside the battery case with any metal.<br />
B. USE OF THE BATTERY<br />
1. Requires two 1.5V "AAA" batteries (not included).<br />
2. For best results, always use fresh batteries.<br />
3. Make sure you insert the batteries with the correct polarities.<br />
4. Remove the batteries from the kit when not in use.<br />
5. Replace exhausted batteries straight away to avoid possible damage to the kit.<br />
6. Rechargeable batteries must be removed from the kit before recharging.<br />
7. Rechargeable batteries should be recharged under adult supervision.<br />
8. Do not attempt to recharge non-rechargeable batteries.<br />
9. Do not mix old and new batteries.<br />
10. Do not mix alkaline, standard (carbon-zinc), or rechargeable (NiCad or NiMH) batteries.<br />
11. Make sure that the supply terminals in the battery case are not short circuited.<br />
C. CONTENTS<br />
1 motor cover 1 baseplate 1 bracket for large brush<br />
2 terminal caps<br />
1 large brush 1 small brush<br />
bolts and nuts<br />
screws<br />
1 holder for small brush<br />
2 moving eyes<br />
Also required but not included: 2 x 1.5V “AAA” batteries, small crosshead screwdriver.<br />
To Parents: Please read through these<br />
instructions before giving gudiance to your children.<br />
1 battery case with case cover<br />
1 motor with<br />
rotor attached<br />
2 eyebacks 2 wires for eyes
D. ASSEMBLY<br />
1. Examine the baseplate. The upper side is the side with the motor housing on it. Push the battery case onto<br />
the pins on this side of the baseplate. The wires from the case must exit through the slot under the switch<br />
towards the motor housing. Secure the cover with two screws.<br />
2. Drop the motor into the housing on the baseplate, with the wire connections uppermost and closest to the<br />
battery case. Gently bend the wires over the back of the housing.<br />
3. Now you need to connect the wires from the battery case to the wires from the motor. There are two<br />
terminal holes on the baseplate, one each side of the motor cover. Push the bare ends of the red wire from<br />
the battery case and the red wire from the motor into one hole. Push a terminal cap into the hole to trap and<br />
connect the wires. Repeat with the black wires in the other hole.<br />
4. Push the motor cover over the motor. It should fit over the pins on the baseplate. Make sure that the motor<br />
wires fit through the two holes in the bottom of the cover without being trapped. Don’t put in the motor cover<br />
screws yet.<br />
2<br />
4<br />
3<br />
1<br />
5. Find one of the wires and a screw. Push the screw through the ring at one end of the wire. Now push<br />
the screw into one of the screw holes in the motor cover. There is a small slot next to the hole for the<br />
wire to fit through. Tighten the screw. Repeat with the other wire and another screw in the other hole<br />
in the cover.<br />
6. Gently bend the two wires upwards. Attach the two eye backs to the ends of the wires with screws<br />
through the loops in the wires. Peel off the backing from the eyes and stick them to the eye backs.<br />
7. Turn over the baseplate and hook one side of the large brush under the bracket on the baseplate.<br />
Add the brush bracket on the opposite edge of the brush and secure it loosely with two screws.<br />
(Tighten them in step 8 see below).<br />
8<br />
8. Slide in the large<br />
brush to the brackets.<br />
Tighten the screws of brush<br />
bracket installed in step 7.<br />
7<br />
9. Turn the baseplate the right way up again.<br />
Attach the small brush bracket to the baseplate<br />
through the hole alongside the battery case, using a<br />
nut and bolt. The bracket will only fit one way round. Screw<br />
up the bolt until the joint is tight but can still turn from side to<br />
side. Push the small brush down through the hole in the centre of the<br />
bracket, with the bristles pointing upwards. Put a nut and bolt through the holes<br />
at the end of the bracket and tighten the bolt to hold the brush in place.<br />
6<br />
5<br />
9<br />
10. Insert two 1.5 V "AAA" batteries into the battery case.<br />
The negative terminal (the flat end) of each battery goes<br />
against one of the springs in the battery case. If the motor<br />
runs, switch the switch to turn it off. Attach the battery case<br />
cover with a screw.<br />
Congratulations! Your Brush Robot is ready to go!<br />
E. OPERATION<br />
Put your Brush Robot on a smooth surface<br />
such as a table top or tiled or wooden<br />
floor. Switch the switch on the battery<br />
case to make the motor run, and watch<br />
Brush Robot go!<br />
Move the small brush up and down to<br />
make Brush Robot move backwards or<br />
forwards. The direction of movement<br />
depends on which way the large brush it<br />
tilted. You can tilt the large brush by<br />
moving the small brush up or down. The<br />
Robot’s speed depends on the angle of the<br />
tilt (more tilt means higher speed).<br />
You can make the Brush Robot steer left or right by<br />
turning the small brush bracket one way or the other.<br />
With the bracket straight (the brush in line with the centre<br />
of the large brush) the Robot should run in a straight line.<br />
10<br />
If you turn the small brush over, so that the bristles are pointing down,<br />
the Robot will tend to take a more random path.<br />
Try making Brush Robot brush up dust from the floor.<br />
How about having Brush Robot races with your friends?


