Configuring Password Manager Pro to Run in FIPS ... - ManageEngine
Configuring Password Manager Pro to Run in FIPS ... - ManageEngine
Configuring Password Manager Pro to Run in FIPS ... - ManageEngine

Create successful ePaper yourself
Turn your PDF publications into a flip-book with our unique Google optimized e-Paper software.
<strong>Configur<strong>in</strong>g</strong> <strong>Password</strong> <strong>Manager</strong> <strong>Pro</strong> <strong>to</strong> <strong>Run</strong><br />
<strong>in</strong> <strong>FIPS</strong> 140-2 Compliant Mode<br />
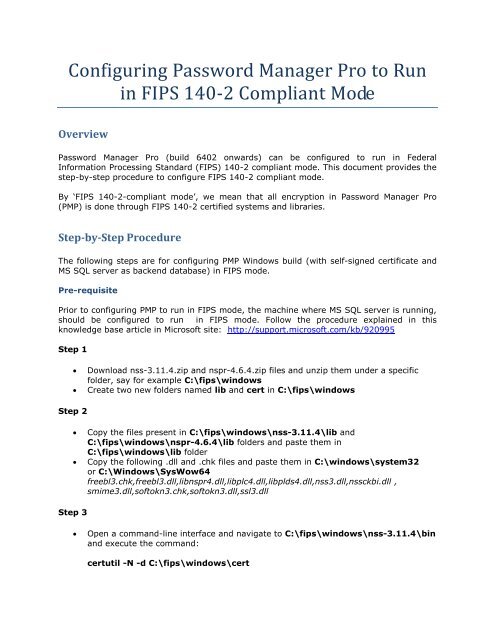
Overview<br />
<strong>Password</strong> <strong>Manager</strong> <strong>Pro</strong> (build 6402 onwards) can be configured <strong>to</strong> run <strong>in</strong> Federal<br />
Information <strong>Pro</strong>cess<strong>in</strong>g Standard (<strong>FIPS</strong>) 140-2 compliant mode. This document provides the<br />
step-by-step procedure <strong>to</strong> configure <strong>FIPS</strong> 140-2 compliant mode.<br />
By ‘<strong>FIPS</strong> 140-2-compliant mode’, we mean that all encryption <strong>in</strong> <strong>Password</strong> <strong>Manager</strong> <strong>Pro</strong><br />
(PMP) is done through <strong>FIPS</strong> 140-2 certified systems and libraries.<br />
Step-by-Step <strong>Pro</strong>cedure<br />
The follow<strong>in</strong>g steps are for configur<strong>in</strong>g PMP W<strong>in</strong>dows build (with self-signed certificate and<br />
MS SQL server as backend database) <strong>in</strong> <strong>FIPS</strong> mode.<br />
Pre-requisite<br />
Prior <strong>to</strong> configur<strong>in</strong>g PMP <strong>to</strong> run <strong>in</strong> <strong>FIPS</strong> mode, the mach<strong>in</strong>e where MS SQL server is runn<strong>in</strong>g,<br />
should be configured <strong>to</strong> run <strong>in</strong> <strong>FIPS</strong> mode. Follow the procedure expla<strong>in</strong>ed <strong>in</strong> this<br />
knowledge base article <strong>in</strong> Microsoft site: http://support.microsoft.com/kb/920995<br />
Step 1<br />
� Download nss-3.11.4.zip and nspr-4.6.4.zip files and unzip them under a specific<br />
folder, say for example C:\fips\w<strong>in</strong>dows<br />
� Create two new folders named lib and cert <strong>in</strong> C:\fips\w<strong>in</strong>dows<br />
Step 2<br />
� Copy the files present <strong>in</strong> C:\fips\w<strong>in</strong>dows\nss-3.11.4\lib and<br />
C:\fips\w<strong>in</strong>dows\nspr-4.6.4\lib folders and paste them <strong>in</strong><br />
C:\fips\w<strong>in</strong>dows\lib folder<br />
� Copy the follow<strong>in</strong>g .dll and .chk files and paste them <strong>in</strong> C:\w<strong>in</strong>dows\system32<br />
or C:\W<strong>in</strong>dows\SysWow64<br />
freebl3.chk,freebl3.dll,libnspr4.dll,libplc4.dll,libplds4.dll,nss3.dll,nssckbi.dll ,<br />
smime3.dll,sof<strong>to</strong>kn3.chk,sof<strong>to</strong>kn3.dll,ssl3.dll<br />
Step 3<br />
� Open a command-l<strong>in</strong>e <strong>in</strong>terface and navigate <strong>to</strong> C:\fips\w<strong>in</strong>dows\nss-3.11.4\b<strong>in</strong><br />
and execute the command:<br />
certutil -N -d C:\fips\w<strong>in</strong>dows\cert
Step 4<br />
(This command will create a database <strong>in</strong> the cert direc<strong>to</strong>ry. The password used here<br />
should be entered <strong>in</strong> the \conf\server.xml)<br />
� Execute the command:<br />
modutil -fips true -dbdir C:\fips\w<strong>in</strong>dows\cert |<br />
(This command will enable <strong>FIPS</strong> mode <strong>to</strong> certificate database)<br />
� Create self-signed certificate by execut<strong>in</strong>g the command:<br />
certutil -S -k rsa -n yournickname -s "CN=<br />
pmptestlab.manageeng<strong>in</strong>e.com,O=ManageEng<strong>in</strong>e,L=XYZ,ST=XYZ,C=IN" -x -t<br />
"C,C,C" -m 1234 -v 12 -d C:\fips\w<strong>in</strong>dows\cert -p "22280410" -f pwd.txt -1<br />
-2 -5<br />
Here, for CN, enter the FQDN of the host replac<strong>in</strong>g the example entry<br />
pmptestlab.manageeng<strong>in</strong>e.com.<br />
You need <strong>to</strong> change the CN name based on the hostname. You need <strong>to</strong> create a<br />
pwd.txt file, where your cert database password should be present. Refer <strong>to</strong> the<br />
screenshot below:<br />
C:\fips\w<strong>in</strong>dows\nss-3.11.4\b<strong>in</strong>>certutil -S -k rsa -n prasad -s<br />
"CN=prasad,O=ManageEng<strong>in</strong>e,L=Velachery,ST=Chennai,C=IN" -x -t "C,C,C" -<br />
m 1234 -v 12 -d c:\fips\w<strong>in</strong><br />
dows\cert -p "22280410" -f pwd.txt -1 -2 -5<br />
A random seed must be generated that will be used <strong>in</strong> the<br />
creation of your key. One of the easiest ways <strong>to</strong> create a<br />
random seed is <strong>to</strong> use the tim<strong>in</strong>g of keystrokes on a keyboard.<br />
To beg<strong>in</strong>, type keys on the keyboard until this progress meter<br />
is full. DO NOT USE THE AUTOREPEAT FUNCTION ON YOUR KEYBOARD!<br />
Cont<strong>in</strong>ue typ<strong>in</strong>g until the progress meter is full:<br />
|************************************************************|<br />
F<strong>in</strong>ished. Press enter <strong>to</strong> cont<strong>in</strong>ue:<br />
Generat<strong>in</strong>g key. This may take a few moments...<br />
0 - Digital Signature<br />
1 - Non-repudiation
0<br />
2 - Key encipherment<br />
3 - Data encipherment<br />
4 - Key agreement<br />
5 - Cert sign<strong>in</strong>g key<br />
6 - CRL sign<strong>in</strong>g key<br />
Other <strong>to</strong> f<strong>in</strong>ish<br />
0 - Digital Signature<br />
1 - Non-repudiation<br />
2 - Key encipherment<br />
3 - Data encipherment<br />
4 - Key agreement<br />
5 - Cert sign<strong>in</strong>g key<br />
6 - CRL sign<strong>in</strong>g key<br />
Other <strong>to</strong> f<strong>in</strong>ish<br />
8<br />
Is this a critical extension [y/N]?<br />
n<br />
Is this a CA certificate [y/N]?<br />
n<br />
Enter the path length constra<strong>in</strong>t, enter <strong>to</strong> skip [
Step 5<br />
Step 6<br />
� Execute the command:<br />
certutil -L -n yournickname -d C:\fips\w<strong>in</strong>dows\cert<br />
(This will list the certificate of alias/nickname)<br />
� Create a nss.cfg file and add the below contents<br />
o name=NSS<strong>FIPS</strong><br />
o nssLibraryDirec<strong>to</strong>ry=C:\fips\w<strong>in</strong>dows\lib<br />
o nssSecmodDirec<strong>to</strong>ry=C:\fips\w<strong>in</strong>dows\cert<br />
o nssDbMode=readWrite<br />
o nssModule=fips<br />
� Carry out the follow<strong>in</strong>g steps for SQL Server Setup<br />
Step 7<br />
o Create a certificate for SQL server us<strong>in</strong>g certutil command as expla<strong>in</strong>ed <strong>in</strong><br />
Step 4 above and add the certificate <strong>in</strong> the NSS Cert DB. CN name should<br />
be FQDN of the server where SQL Server is runn<strong>in</strong>g<br />
o Export the SQL Server certificate from the NSS Cert DB us<strong>in</strong>g the command<br />
below<br />
pk12util.exe -d c:\fips\w<strong>in</strong>dows\cert -n PMPSQLSERVER -o<br />
c:\fips\w<strong>in</strong>dows\name.fqdn.p12<br />
o Import the .p12 file <strong>in</strong> ‘Personal and trusted s<strong>to</strong>res’ by select<strong>in</strong>g W<strong>in</strong>dows<br />
Local Computer & Local User S<strong>to</strong>re. ( Use MMC->Certificate )<br />
o Export the certificate alone from the personal s<strong>to</strong>re (name.fqdn.cer - DER<br />
Format )<br />
Configure Service Broker Endpo<strong>in</strong>t <strong>in</strong> SQL server:<br />
o CREATE ENDPOINT BrokerEndpo<strong>in</strong>t<br />
STATE=STARTED<br />
AS TCP (LISTENER_PORT=9999)<br />
FOR SERVICE_BROKER (AUTHENTICATION=WINDOWS,<br />
ENCRYPTION=REQUIRED ALGORITHM AES)<br />
Note: TCP LISTENER_PORT 9999 is configurable.<br />
o To enable the service broker query:<br />
ALTER DATABASE [msdb] SET ENABLE_BROKER;<br />
o Service Broker transport will now be runn<strong>in</strong>g <strong>in</strong> <strong>FIPS</strong> compliance mode.
Step 8<br />
Step 9<br />
o Open SQL Server configuration manager, select the imported certificate and<br />
restart the SQL Server. In the SQL logs, you will f<strong>in</strong>d this trace: “Service<br />
Broker transport is runn<strong>in</strong>g <strong>in</strong> <strong>FIPS</strong> compliance mode.”<br />
For more details, refer <strong>to</strong> the SQL Server knowledge base article:<br />
http://www.sqlservercentral.com/Forums/Topic446704-359-<br />
1.aspx#bm483639<br />
o Import the name.fqdn.cer <strong>in</strong><strong>to</strong> the cacerts of the PMP build us<strong>in</strong>g the<br />
command importCert.bat name.fqdn.cer<br />
o Add the below system properties <strong>in</strong> /b<strong>in</strong>/ChangeDB.bat. To do this, open the file and look for the<br />
entry -Dsw<strong>in</strong>g.aatext=true<br />
o Replace the above l<strong>in</strong>e with the follow<strong>in</strong>g entries:<br />
-Dsw<strong>in</strong>g.aatext=true -Djavax.net.ssl.keyS<strong>to</strong>reType="PKCS11" -<br />
Djavax.net.ssl.keyS<strong>to</strong>re<strong>Pro</strong>vider=SunPKCS11-NSS<strong>FIPS</strong> -<br />
Djavax.net.ssl.keyS<strong>to</strong>re=NONE -<br />
Djavax.net.ssl.keyS<strong>to</strong>re<strong>Password</strong>=passtrix<br />
o Now use /ChangeDB.bat <strong>to</strong> create a new<br />
database <strong>in</strong> SQL Server<br />
o Add the below system properties <strong>in</strong> the /conf/wrapper.conf<br />
� wrapper.java.additional.21=-Djavax.net.ssl.keyS<strong>to</strong>reType=PKCS11<br />
� wrapper.java.additional.22=-<br />
Djavax.net.ssl.keyS<strong>to</strong>re<strong>Pro</strong>vider=SunPKCS11-NSS<strong>FIPS</strong><br />
� wrapper.java.additional.23=-Djavax.net.ssl.keyS<strong>to</strong>re=NONE<br />
� wrapper.java.additional.24=-<br />
Djavax.net.ssl.keyS<strong>to</strong>re<strong>Password</strong>=passtrix<br />
� Navigate <strong>to</strong> \jre\lib\security\java.security file and carry out the<br />
follow<strong>in</strong>g changes:<br />
o Look for the l<strong>in</strong>e security.provider.9=sun.security.mscapi.SunMSCAPI<br />
o Below this l<strong>in</strong>e, paste the follow<strong>in</strong>g<br />
security.provider.1=sun.security.pkcs11.SunPKCS11<br />
C:\\fips\\w<strong>in</strong>dows\\nss.cfg after the l<strong>in</strong>e<br />
o Change the l<strong>in</strong>e<br />
security.provider.1=sun.security.provider.Sun <strong>to</strong> security.provider.10=su<br />
n.security.provider.Sun<br />
o Look for the l<strong>in</strong>e<br />
security.provider.3=com.sun.net.ssl.<strong>in</strong>ternal.ssl.<strong>Pro</strong>vider and add the<br />
entry SunPKCS11-NSS<strong>FIPS</strong> as shown below<br />
o security.provider.3=com.sun.net.ssl.<strong>in</strong>ternal.ssl.<strong>Pro</strong>vider SunPKCS11-<br />
NSS<strong>FIPS</strong>
Step 10<br />
� Navigate <strong>to</strong> /conf/server.xml direc<strong>to</strong>ry and carry out<br />
the follow<strong>in</strong>g changes<br />
o Search for 7272 connec<strong>to</strong>r and remove the l<strong>in</strong>e<br />
keys<strong>to</strong>reFile="conf/server.keys<strong>to</strong>re"<br />
o Instead, add the l<strong>in</strong>e keys<strong>to</strong>reType="pkcs11"<br />
o Remove the l<strong>in</strong>e trusts<strong>to</strong>reFile="jre/lib/security/cacerts"<br />
trusts<strong>to</strong>rePass="changeit" trusts<strong>to</strong>reType="JKS"<br />
o If your certificate database password is different from passtrix, edit the<br />
attribute and enter the new password keys<strong>to</strong>rePass="passtrix"<br />
Step 11<br />
� Start PMP Server, launch web <strong>in</strong>terface and check the certificate.