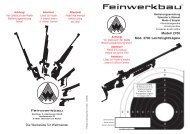
Untitled - Frankonia
Untitled - Frankonia
Untitled - Frankonia

Create successful ePaper yourself
Turn your PDF publications into a flip-book with our unique Google optimized e-Paper software.
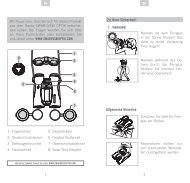
Stock Dismantling<br />
7.2.3 Adjusting the buttplate length<br />
1. Unscrew screws 515.<br />
2. Pull buttplate 516 back a little.<br />
3. Press spacers 519 towards the left on the top<br />
and turn them downwards for removal.<br />
4. Extract the spacers to the bottom.<br />
5. Tighten screws 515.<br />
.<br />
CAUTION!<br />
Rifle may be damaged<br />
• Do not overtighten screws 515 as otherwise<br />
the escutcheons will be torn out of the stock.<br />
Fig. 15<br />
519 515 516<br />
519<br />
7.3 Installing the cheekpiece<br />
Procedure: d<br />
1. Position the cheekpiece on the stock.<br />
2. Adjust the cheekpiece for height (see section<br />
7.2.2) and offset (see section 7.2.1).<br />
3. Tighten the locking screws 531 well.<br />
8 Dismantling<br />
WARNING!<br />
Uncontrolled discharge of shot as the rifle is<br />
ready to fire<br />
May lead to death or severe injuries<br />
• There must be no magazine in the rifle.<br />
• Before stripping your rifle, ensure once again<br />
that it is unloaded (see section 5.6).<br />
8.1 Removing the stock<br />
Procedure:<br />
1. Open the bolt and remove it<br />
(see section 5.7.2).<br />
2. Slacken off and remove the rear 514 and front<br />
512 stock retention screws.<br />
3. Remove the filler piece 511 from the magazine<br />
stock.<br />
4. Lift the system out of the stock.<br />
Fig. 16<br />
514 511 512<br />
8.2 Removing the carrying sling<br />
Procedure:<br />
1. Unscrew the knurled knob Fig. 17/A to the left.<br />
2. Press in the knurled knob with the plunger and<br />
twist it by 90° to the left.<br />
19 GB<br />
07.02