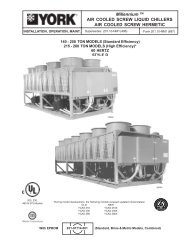
YVAA Style A Air-Cooled Screw Liquid Chillers ... - Johnson Controls
YVAA Style A Air-Cooled Screw Liquid Chillers ... - Johnson Controls
YVAA Style A Air-Cooled Screw Liquid Chillers ... - Johnson Controls

You also want an ePaper? Increase the reach of your titles
YUMPU automatically turns print PDFs into web optimized ePapers that Google loves.
FORM 201.28-NM1.1<br />
ISSUE DATE: 8/29/2012<br />
Option Flanges<br />
One of two types of flanges may be fitted depending<br />
on the customer or local pressure vessel code requirements.<br />
These are Victaulic-Adapter flanges, normally<br />
supplied loose, or weld flanges, which may be supplied<br />
loose or ready-fitted. Victaulic-Adapter and weld<br />
flange dimensions are to ISO 7005 - NP10.<br />
WELD FLANGE VICTAULIC ADAPTER<br />
FIGURE 12 - FLANGE ATTACHMENT<br />
REFRIGERANT RELIEF VALVE PIPING<br />
LD10495<br />
The evaporator is protected against internal refrigerant<br />
overpressure by refrigerant relief valves. A pressure relief<br />
valve is mounted on each of the main refrigerant<br />
lines connecting the evaporator to the compressors.<br />
A piece of pipe is fitted to each valve and directed so<br />
that when the valve is activated the release of high<br />
pressure gas and liquid cannot be a danger or cause<br />
injury. For indoor installations (not recommended),<br />
pressure relief valves should be piped to the exterior<br />
of the building.<br />
The size of any piping attached to a relief valve must<br />
be of sufficient diameter so as not to cause resistance to<br />
the operation of the valve. Unless otherwise specified<br />
by local regulations. Internal diameter depends on the<br />
length of pipe required and is given by the following<br />
formula:<br />
D 5 = 1.447 x L<br />
• Where:<br />
• D = minimum pipe internal diameter in cm<br />
• L = length of pipe in meters<br />
SECTION 4 - INSTALLATION<br />
If relief piping is common to more than one valve, its<br />
cross-sectional area must be at least the total required<br />
by each valve. Valve types should not be mixed on a<br />
common pipe. Precautions should be taken to ensure<br />
the outlets of relief valves or relief valve vent pipes<br />
remain clear of obstructions at all times.<br />
ELECTRICAL CONNECTION<br />
The following connection recommendations are intended<br />
to ensure safe and satisfactory operation of the<br />
unit. Failure to follow these recommendations could<br />
cause harm to persons or damage the unit, and may<br />
invalidate the warranty.<br />
POWER WIRING<br />
No additional controls (relays, etc.)<br />
should be mounted in the control panel.<br />
Power and control wiring not connected<br />
to the control panel should not be run<br />
through the control panel. If these precautions<br />
are not followed it could lead to<br />
a risk of electrocution. In addition, electrical<br />
noise could cause malfunctions or<br />
damage the unit and its controls.<br />
After power wiring connection, do not<br />
switch on mains power to the unit. Some<br />
internal components are live when the<br />
mains are switched on and this must only<br />
be done by “Authorized” persons familiar<br />
with starting, operating, and troubleshooting<br />
this type of equipment.<br />
All electrical wiring should be carried out in accordance<br />
with local regulations. Route properly sized<br />
cables to cable entries on the unit.<br />
In accordance with local codes, NEC codes, U.L. and<br />
C.E. standards, it is the responsibility of the user to install<br />
over current protection devices between the supply<br />
conductors and the power supply terminals on the<br />
unit.<br />
To ensure that no eddy currents are set up in the power<br />
panel, the cables forming the 3-phase power supply<br />
must enter via the same cable entry.<br />
All sources of supply to the unit must be<br />
taken via a common point of isolation (not<br />
supplied by <strong>Johnson</strong> <strong>Controls</strong>).<br />
JOHNSON CONTROLS 29<br />
4