IBM Tivoli System Automation for Multiplatforms - e IBM Tivoli ...
IBM Tivoli System Automation for Multiplatforms - e IBM Tivoli ...
IBM Tivoli System Automation for Multiplatforms - e IBM Tivoli ...
You also want an ePaper? Increase the reach of your titles
YUMPU automatically turns print PDFs into web optimized ePapers that Google loves.
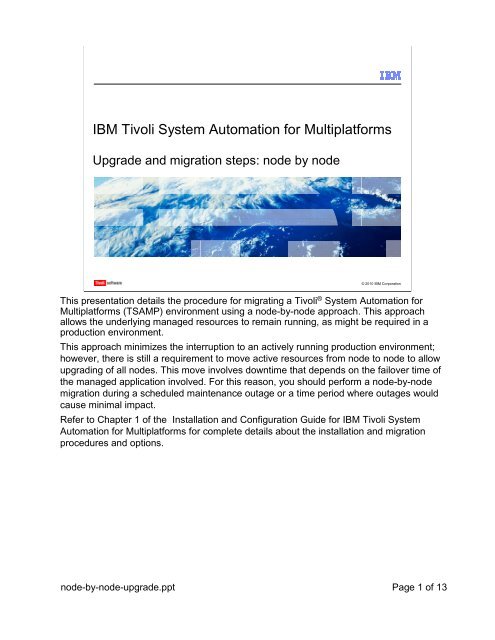
<strong>IBM</strong> <strong>Tivoli</strong> <strong>System</strong> <strong>Automation</strong> <strong>for</strong> Multiplat<strong>for</strong>ms<br />
Upgrade and migration steps: node by node<br />
© 2010 <strong>IBM</strong> Corporation<br />
This presentation details the procedure <strong>for</strong> migrating a <strong>Tivoli</strong> ® <strong>System</strong> <strong>Automation</strong> <strong>for</strong><br />
Multiplat<strong>for</strong>ms (TSAMP) environment using a node-by-node approach. This approach<br />
allows the underlying managed resources to remain running, as might be required in a<br />
production environment.<br />
This approach minimizes the interruption to an actively running production environment;<br />
however, there is still a requirement to move active resources from node to node to allow<br />
upgrading of all nodes. This move involves downtime that depends on the failover time of<br />
the managed application involved. For this reason, you should per<strong>for</strong>m a node-by-node<br />
migration during a scheduled maintenance outage or a time period where outages would<br />
cause minimal impact.<br />
Refer to Chapter 1 of the Installation and Configuration Guide <strong>for</strong> <strong>IBM</strong> <strong>Tivoli</strong> <strong>System</strong><br />
<strong>Automation</strong> <strong>for</strong> Multiplat<strong>for</strong>ms <strong>for</strong> complete details about the installation and migration<br />
procedures and options.<br />
node-by-node-upgrade.ppt Page 1 of 13
Table of contents<br />
� Introduction<br />
� Preparation and prerequisite checking<br />
� Steps to per<strong>for</strong>m node-by-node migration<br />
� Verifying the active and installed version<br />
� Completing the migration<br />
2 Upgrade and migration steps: node by node © 2010 <strong>IBM</strong> Corporation<br />
This IEA module includes the following topics:<br />
• Introduction<br />
• Preparing and checking prerequisites<br />
• Per<strong>for</strong>ming node-by-node migration<br />
• Verifying the active and installed version<br />
• Completing the migration<br />
node-by-node-upgrade.ppt Page 2 of 13
Introduction<br />
� The migration process involves :<br />
– Installing a new code level on each node in the domain<br />
– Activating the new code level after all nodes are at the new installed code level<br />
� There are two different procedures <strong>for</strong> migrating to a higher code level<br />
– Migrating an entire domain with it offline<br />
– Per<strong>for</strong>ming a node-by-node migration<br />
� Migrating the nodes of a domain one by one has the advantage that the domain remains<br />
online and <strong>Tivoli</strong> <strong>System</strong> <strong>Automation</strong> <strong>for</strong> Multiplat<strong>for</strong>ms remains available during the<br />
migration<br />
3 Upgrade and migration steps: node by node © 2010 <strong>IBM</strong> Corporation<br />
I will start by defining what migration means in a TSAMP environment. The software stack<br />
is duplicated across every node in a given domain. New code, such as a fix pack, needs to<br />
be installed separately on each node in the domain. This is the first part of a migration. To<br />
complete the migration, the newly installed code levels <strong>for</strong> the cluster software (RSCT)<br />
and automation software (TSAMP) are activated with the domain in an online state.<br />
The primary purpose of TSAMP is to make an underlying application highly available. You<br />
might need to migrate TSAMP while the underlying managed application is kept online and<br />
active. If this is the case, a node-by-node migration technique needs to be per<strong>for</strong>med. This<br />
technique is also known as a rolling upgrade.<br />
If it is possible to bring down the complete environment across all nodes, namely offline<br />
the complete domain, then the entire domain can be migrated at once, which is simpler<br />
and quicker.<br />
For the purposes of this module, you are only covering a node-by-node migration<br />
procedure.<br />
node-by-node-upgrade.ppt Page 3 of 13
Preparation and prerequisite checking (1 of 2)<br />
� Download the appropriate fix pack <strong>for</strong> your version of TSAMP and plat<strong>for</strong>m<br />
– Check the current version<br />
• lssamctrl<br />
– Click the Download link on the TSAMP Support Web site<br />
• http://www.ibm.com/software/tivoli/support/sys-auto-multi/<br />
– Check the documentation, which includes the Release Notes<br />
• http://publib.boulder.ibm.com/tividd/td/<strong>IBM</strong><strong>Tivoli</strong><strong>System</strong><strong>Automation</strong><strong>for</strong>Multiplat<strong>for</strong>ms3.1.html<br />
� FTP (using binary mode) the package so that it is local to each node<br />
� Untar the downloaded package on each node, <strong>for</strong> example:<br />
– tar -xvf 3.1.0-TIV-SAMP-AIX-FP0005.tar<br />
� Change to the directory that is created from the untar step, <strong>for</strong> example depending on your<br />
plat<strong>for</strong>m:<br />
– cd SAM3105MPAIX<br />
– cd SAM3105MPLinux<br />
– cd SAM3105MPSunOS<br />
4 Upgrade and migration steps: node by node © 2010 <strong>IBM</strong> Corporation<br />
The majority of migrations involve upgrading to a new fixpack level. In order to download<br />
the correct fixpack, you need to know your current TSAMP version, release, and fixpack<br />
level. You also need to know your plat<strong>for</strong>m.<br />
Select the appropriate download package from the TSAMP Support Web site. If you are<br />
unsure which package you need, refer to the latest Release Notes <strong>for</strong> your TSAMP<br />
version by visiting the second URL on this slide.<br />
It is recommended that you have a copy of the downloaded installation package on each<br />
node. There have been some installation failures when attempting to install from a<br />
common shared disk, typically because of access permission problems. Consider<br />
installing from a local package per node if you run into installation problems with error<br />
messages that don't make sense <strong>for</strong> your situation.<br />
The actual TSAMP installer utility is always located in a directory with a name that starts<br />
with SAM. This name is created when the tar file is extracted. At the bottom of this slide<br />
are three examples, based on the different plat<strong>for</strong>ms supported by TSAMP.<br />
node-by-node-upgrade.ppt Page 4 of 13
Preparation and prerequisite checking (2 of 2)<br />
� Open a root session<br />
� To start the prerequisites check, issue the command:<br />
./prereqSAM<br />
� When the prerequisite check is complete, check the following log file <strong>for</strong> in<strong>for</strong>mation about<br />
missing prerequisites:<br />
/tmp/prereqSAM..log<br />
where is a number that increments each time the prereq check is run; the highest<br />
number identifies the most recent log file<br />
� If the prereq check fails on any of the nodes, resolve be<strong>for</strong>e upgrading any of the nodes<br />
� Important: For the AIX ® plat<strong>for</strong>m and TSAMP version 2.3 or lower, you would need to<br />
upgrade the RSCT code level (the underlying cluster software) be<strong>for</strong>e upgrading the TSAMP<br />
code level per the prerequisite requirements documented in the TSAMP Release Notes:<br />
http://publib.boulder.ibm.com/tividd/td/<strong>IBM</strong><strong>Tivoli</strong><strong>System</strong><strong>Automation</strong><strong>for</strong>Multiplat<strong>for</strong>ms2.2.html<br />
� RSCT code level is also typically upgraded when a TSAMP fix pack is installed. This<br />
happens on all plat<strong>for</strong>ms with fix packs <strong>for</strong> TSAMP v3.1, but not on AIX <strong>for</strong> TSAMP versions<br />
be<strong>for</strong>e 3.1<br />
5 Upgrade and migration steps: node by node © 2010 <strong>IBM</strong> Corporation<br />
You must per<strong>for</strong>m preinstallation, installation, and postinstallation activities as the root<br />
user.<br />
The installer utility runs a prerequisite checker utility called prereqSAM. Even so, you<br />
should prerun prereqSAM on each node first to ensure all nodes meet the prerequisite<br />
requirements be<strong>for</strong>e starting the upgrade on any of the nodes.<br />
The standard output from prereqSAM indicates if all prerequisites are met. You only need<br />
to examine the prereqSAM log if there is a prerequisite failure indicated on standard out.<br />
It is important to note that TSAMP installs and upgrades RSCT (the underlying cluster<br />
component) on all versions of Linux ® <strong>for</strong> all versions of TSAMP. However on AIX, RSCT<br />
packages were not included in the TSAMP installation or upgrade process until version<br />
3.1. Prior to version 3.1 and on AIX, the process of installing or upgrading RSCT to the<br />
prerequisite level was a manual step, per<strong>for</strong>med independently of the TSAMP migration<br />
process.<br />
node-by-node-upgrade.ppt Page 5 of 13
Steps to per<strong>for</strong>m node-by-node migration (1 of 3)<br />
Start with your standby node, where your highly available application is not<br />
currently active, <strong>for</strong> example, node2, and per<strong>for</strong>m the following steps as the root<br />
user<br />
1 Exclude the node from automation to ensure that resources that must be kept<br />
available are <strong>for</strong>ced to move to another node in the peer domain<br />
samctrl -u a node2<br />
Note: The move operations might take a moment<br />
2 Do not update the installed code level while the node is online in a domain. Offline the node<br />
from the cluster perspective:<br />
stoprpnode node2<br />
lsrpnode<br />
3 To upgrade the node, run the script ./installSAM from the installation directory <strong>for</strong> the fix<br />
pack that was extracted, <strong>for</strong> example :<br />
/SAM3105MPAIX/installSAM<br />
6 Upgrade and migration steps: node by node © 2010 <strong>IBM</strong> Corporation<br />
To ensure a minimum interruption to your managed applications, start the upgrade<br />
process on the node that is currently considered your standby server. This server is the<br />
one where you do not have online resources currently running or where offlining resources<br />
have the least impact.<br />
You might need to move the online resources to another node if they are defined to run on<br />
different servers. Otherwise, you might need to offline resources that are fixed to run on<br />
the one server. The point is that all resources on the node that you are about to upgrade<br />
need to be in an offline state.<br />
One of the ways of doing this is to exclude the node from automation using the samctrl<br />
command shown on this slide in step 1. Alternatively, you can issue a resource group<br />
move request using the 'rgreq -o move ...' command. For fixed resources, you need to<br />
change their resource group to offline using the 'chrg -o offline ...' command.<br />
Confirm all resources are offline on the node you are about to stop by checking the output<br />
of the 'lssam' command. Only then would you stop the node from participating in the<br />
domain by using the 'stoprpnode ... ' command in step 2. Confirm the node is offline in the<br />
domain by using the 'lsrpnode' command, issued on the opposite node. If you run<br />
'lsrpnode' on the node that you have stopped, you will see an error message returned.<br />
With the node offline, you can start the TSAMP installation process by starting the<br />
installSAM utility, shown as step 3 on this slide.<br />
node-by-node-upgrade.ppt Page 6 of 13
Steps to per<strong>for</strong>m node-by-node migration (2 of 3)<br />
4 When the installer is complete, check the following log file if it indicates an error occurred:<br />
/tmp/installSAM..log<br />
where is a number that increments each time installSAM is run; the highest<br />
number identifies the most recent log file<br />
5 Start the node so that it can rejoin the domain:<br />
startrpnode node2 [issued from node1]<br />
or<br />
startrpdomain [issued from node2]<br />
6 If you had previously excluded the node from automation, include the node in automation<br />
again:<br />
samctrl -u d node2<br />
At this point, TSAMP (and RSCT) code level on node2 is upgraded, though it is still using<br />
the older code level <strong>for</strong> both TSAMP and RSCT. The new code levels have not been<br />
activated and cannot be activated until all nodes are at the same new levels<br />
7 Upgrade and migration steps: node by node © 2010 <strong>IBM</strong> Corporation<br />
Step 4 is optional. You only need to examine the installSAM log if there were errors<br />
displayed during the installation process. If unsure, check it. You should save the<br />
installSAM logs if your system is configured to delete all contents of /tmp on reboot.<br />
Assuming a successful upgrade installation, the node can be restarted as shown in step 5.<br />
You can either issue the 'startrpnode ... ' command from a node that is currently online, or<br />
you can issue the 'startrpdomain ...' command on the currently offline node. It rejoins the<br />
existing online domain. Either method yields the same results. Neither method affects the<br />
online status of the overall domain, and there<strong>for</strong>e the status of your managed applications<br />
is untouched.<br />
You only per<strong>for</strong>m step 6 if you excluded the node at the beginning of this migration<br />
process (step 1 in the previous slide).<br />
This node (node2 as shown in the contents of this slide and the previous slide) now has<br />
the new code level <strong>for</strong> TSAMP (and potentially RSCT). The code is not active yet. The<br />
node is still running at the older code level.<br />
node-by-node-upgrade.ppt Page 7 of 13
Verifying the active and installed version<br />
� When upgrading the TSAMP code level, the previous and new code levels coexist until the<br />
migration is complete<br />
� The following command shows you the active version number AVN (3.1.0.0 in the sample<br />
below) and the installed version number IVN (3.1.0.5 in the sample below) of the product:<br />
lssrc –ls <strong>IBM</strong>.RecoveryRM<br />
� When IVN and AVN are the same, migration is complete. Here is an example of the output:<br />
Subsystem : <strong>IBM</strong>.RecoveryRM<br />
PID : 27973<br />
Cluster Name : ws<br />
Node Number : 1<br />
Daemon start time : Wed Dec 9 08:09:10 2009<br />
Daemon State:<br />
My Node Name : node2<br />
Master Node Name : lnxcm3x (node number = 1)<br />
Our IVN : 3.1.0.5<br />
Our AVN : 3.1.0.0<br />
Our CVN : 11082527751 {0x140861007}<br />
Total Node Count : 1<br />
Joined Member Count : 1<br />
Config Quorum Count : 1<br />
Startup Quorum Count : 1<br />
Operational Quorum State: HAS_QUORUM<br />
In Config Quorum : TRUE<br />
In Config State : TRUE<br />
Replace Config State : FALSE<br />
8 Upgrade and migration steps: node by node © 2010 <strong>IBM</strong> Corporation<br />
To verify the installed and active versions of TSAMP, you can use the 'lssrc -ls<br />
<strong>IBM</strong>.RecoveryRM' command to check the Installed Version Number (IVN) and compare it to<br />
the Active Version Number (AVN). You should see the IVN set to the version you just<br />
installed and the AVN set to the previous version.<br />
When the IVN and AVN differ, the migration is not considered complete. However, there is<br />
nothing more that can be done on this node until all the other nodes contain the same<br />
installed version, the same IVN.<br />
Time to move onto repeating these upgrade steps on the other node or nodes.<br />
node-by-node-upgrade.ppt Page 8 of 13
Steps to per<strong>for</strong>m node-by-node migration (3 of 3)<br />
� Switch to a root session on the other node, <strong>for</strong> example, node1, to upgrade it to the same<br />
new code level as node2<br />
� The node must be offlined.<br />
– Move the active/online resources to the other node, <strong>for</strong> example:<br />
rgreq -o move <br />
Note: Do not use rgreq in DB2 ® V9.5/9.7 HADR environments. Instead, use the native<br />
'db2 takeover hadr ... ' (executed on the standby node, node2) command to move the<br />
active HADR database to the standby node<br />
– Offline the fixed resources that only run on this node, <strong>for</strong> example:<br />
chrg -o offline <br />
Note: DB2 v9.5 and 9.7 HADR environments should use the native 'db2stop <strong>for</strong>ce'<br />
command to stop the local DB2 instance instead of offlining the resource group <strong>for</strong> the<br />
DB2 instance<br />
� To upgrade node1, repeat the same steps 1 - 6 (slides 6 and 7) that were per<strong>for</strong>med on<br />
node2<br />
� Also, per<strong>for</strong>m the same IVN/AVN verification as described on the previous slide (slide 8)<br />
9 Upgrade and migration steps: node by node © 2010 <strong>IBM</strong> Corporation<br />
The upgrade process is repeated <strong>for</strong> each node. The requirements are the same: stop all<br />
online resources or move them to other nodes so that the 'lssam' command shows all<br />
resources on this node in an offline state. In this example, you are now upgrading node1.<br />
Consider the case where DB2 is the underlying managed application, in particular DB2 9.5.<br />
For the HADR database resources, you move these resources to an alternative DB2 server<br />
by per<strong>for</strong>ming controlled takeovers. Instead of using the TSAMP command 'rgreq -o move<br />
...', use the native 'db2 takeover ...' command <strong>for</strong> each database. In the case of the locally<br />
running DB2 instance, you stop the instance after the HADR takeovers have completed. Use<br />
the native 'db2stop <strong>for</strong>ce' command instead of offlining the instance's resource group.<br />
When repeating steps 1 to 6, make sure you substitute the node name <strong>for</strong> the one you are<br />
currently working on. In this example, it would now be node1 where you see node2. In one<br />
case, you would be using node2 where the previous instructions described an action on<br />
node1.<br />
node-by-node-upgrade.ppt Page 9 of 13
Completing the migration (1 of 2)<br />
To check and complete the migration, per<strong>for</strong>m the following steps<br />
1 Make sure that the domain is started and that all nodes in the domain are online<br />
2 Issue the lsrpdomain command to display the version of RSCT that is active in<br />
the peer domain, and the mixed version status:<br />
Name OpState RSCTActiveVersion MixedVersions TSPort GSPort<br />
SA_Domain Online 2.4.9.2 Yes 12347 12348<br />
3 Issue the lsrpnode command to display the version of RSCT that is installed on<br />
each node. All nodes must be online:<br />
Name OpState RSCTVersion<br />
node1 Online 2.4.11.5<br />
node2 Online 2.4.11.5<br />
Note: It can take a couple minutes be<strong>for</strong>e the RSCTVersion is updated to<br />
the newly installed version and be<strong>for</strong>e the domain reports MixedVersions<br />
is Yes. Wait until this occurs be<strong>for</strong>e proceeding.<br />
10 Upgrade and migration steps: node by node © 2010 <strong>IBM</strong> Corporation<br />
At this point, each node has been upgraded to the same code level, the same IVN. Now you<br />
can complete the migration by following the next five steps.<br />
Step 1: Ensure all nodes in the domain are online.<br />
Step 2: List the domain in<strong>for</strong>mation and note that the MixedVersions show Yes.<br />
Step 3: List the node in<strong>for</strong>mation and check that all show the same RSCT level and the new<br />
RSCT code level.<br />
The main point of steps 2 and 3 is to compare the RSCT level shown in the node listing with<br />
the “RSCTActiveVersion” from the domain in<strong>for</strong>mation. They should differ. If not, wait a<br />
couple minutes and re-issue each of the lsrpdomain and lsrpnode commands until you see<br />
the difference. Do not proceed until you do.<br />
node-by-node-upgrade.ppt Page 10 of 13
Completing the migration (2 of 2)<br />
4 If the RSCT peer domain is running in mixed version mode (MixedVersions = Yes) and all<br />
nodes show the new RSCT level (all nodes have been upgraded to the new release of<br />
TSAMP), you must update the active RSCT version by running the RSCT<br />
CompleteMigration action on one of the nodes. To update the RSCTActiveVersion, make<br />
sure that all nodes are online, and issue the following command on one of the nodes :<br />
runact -c <strong>IBM</strong>.PeerDomain CompleteMigration Options=0<br />
To verify that the active RSCT version has been updated, issue the lsrpdomain command again:<br />
Name OpState RSCTActiveVersion MixedVersions TSPort GSPort<br />
SA_Domain Online 2.4.11.5 No 12347 12348<br />
5 To finish the migration, activate the newly installed TSAMP code level by issuing the<br />
following command on one of the nodes :<br />
samctrl -m<br />
The code version of the Active Version (AVN) and the Installed Version (IVN) of TSAMP<br />
should now be the same <strong>for</strong> all nodes :<br />
lssrc –ls <strong>IBM</strong>.RecoveryRM<br />
Until this is true, the new code features have not been activated and cannot be used<br />
11 Upgrade and migration steps: node by node © 2010 <strong>IBM</strong> Corporation<br />
The last two steps complete the migration by activating the new code levels <strong>for</strong> both RSCT<br />
and TSAMP components.<br />
Step 4: Use the runact command to activate the new RSCT level. List the domain in<strong>for</strong>mation<br />
using 'lsrpdomain' to confirm that the newer code level is now the “RSCTActiveVersion” and<br />
that “MixedVersions” changed to No.<br />
Step 5: Use the 'samctrl -m' (lower case “m”) command to activate the newer code level <strong>for</strong><br />
TSAMP. As described on slide 8, the IVN (installed version) and AVN (active version) can be<br />
compared using the 'lssrc -ls <strong>IBM</strong>.RecoveryRM' command. The activation of the new code<br />
level of TSAMP is complete when the AVN matches the IVN.<br />
When both RSCT and TSAMP activation steps have been per<strong>for</strong>med, the migration is<br />
considered complete and successful.<br />
node-by-node-upgrade.ppt Page 11 of 13
Feedback<br />
Your feedback is valuable<br />
You can help improve the quality of <strong>IBM</strong> Education Assistant content to better meet your<br />
needs by providing feedback.<br />
� Did you find this module useful?<br />
� Did it help you solve a problem or answer a question?<br />
� Do you have suggestions <strong>for</strong> improvements?<br />
Click to send e-mail feedback:<br />
mailto:iea@us.ibm.com?subject=Feedback_about_node-by-node-upgrade.ppt<br />
This module is also available in PDF <strong>for</strong>mat at: ../node-by-node-upgrade.pdf<br />
12 Upgrade and migration steps: node by node © 2010 <strong>IBM</strong> Corporation<br />
You can help improve the quality of <strong>IBM</strong> Education Assistant content by providing<br />
feedback.<br />
node-by-node-upgrade.ppt Page 12 of 13
Trademarks, disclaimer, and copyright in<strong>for</strong>mation<br />
<strong>IBM</strong>, the <strong>IBM</strong> logo, ibm.com, AIX, DB2, and <strong>Tivoli</strong> are trademarks or registered trademarks of International Business Machines Corp., registered in<br />
many jurisdictions worldwide. Other product and service names might be trademarks of <strong>IBM</strong> or other companies. A current list of other <strong>IBM</strong> trademarks<br />
is available on the Web at "Copyright and trademark in<strong>for</strong>mation" at http://www.ibm.com/legal/copytrade.shtml<br />
THE INFORMATION CONTAINED IN THIS PRESENTATION IS PROVIDED FOR INFORMATIONAL PURPOSES ONLY. THE INFORMATION<br />
CONTAINED IN THIS PRESENTATION IS PROVIDED FOR INFORMATIONAL PURPOSES ONLY. WHILE EFFORTS WERE MADE TO VERIFY<br />
THE COMPLETENESS AND ACCURACY OF THE INFORMATION CONTAINED IN THIS PRESENTATION, IT IS PROVIDED "AS IS" WITHOUT<br />
WARRANTY OF ANY KIND, EXPRESS OR IMPLIED. IN ADDITION, THIS INFORMATION IS BASED ON <strong>IBM</strong>’S CURRENT PRODUCT PLANS AND<br />
STRATEGY, WHICH ARE SUBJECT TO CHANGE BY <strong>IBM</strong> WITHOUT NOTICE. <strong>IBM</strong> SHALL NOT BE RESPONSIBLE FOR ANY DAMAGES<br />
ARISING OUT OF THE USE OF, OR OTHERWISE RELATED TO, THIS PRESENTATION OR ANY OTHER DOCUMENTATION. NOTHING<br />
CONTAINED IN THIS PRESENTATION IS INTENDED TO, NOR SHALL HAVE THE EFFECT OF, CREATING ANY WARRANTIES OR<br />
REPRESENTATIONS FROM <strong>IBM</strong> (OR ITS SUPPLIERS OR LICENSORS), OR ALTERING THE TERMS AND CONDITIONS OF ANY AGREEMENT<br />
OR LICENSE GOVERNING THE USE OF <strong>IBM</strong> PRODUCTS OR SOFTWARE.<br />
© Copyright International Business Machines Corporation 2010. All rights reserved.<br />
13 © 2010 <strong>IBM</strong> Corporation<br />
node-by-node-upgrade.ppt Page 13 of 13


