XMEGA-A3BU Xplained Hardware User Guide - Atmel Corporation
XMEGA-A3BU Xplained Hardware User Guide - Atmel Corporation
XMEGA-A3BU Xplained Hardware User Guide - Atmel Corporation

You also want an ePaper? Increase the reach of your titles
YUMPU automatically turns print PDFs into web optimized ePapers that Google loves.
<strong>Atmel</strong> AVR1923: <strong>XMEGA</strong>-<strong>A3BU</strong> <strong>Xplained</strong><br />
<strong>Hardware</strong> <strong>User</strong> <strong>Guide</strong><br />
Features<br />
• <strong>Atmel</strong> ® AVR ® ATxmega256<strong>A3BU</strong> microcontroller<br />
• FSTN LCD display with 128x32 pixels resolution<br />
• Battery backup<br />
• Analog sensors<br />
- Ambient light sensor<br />
- Temperature sensor<br />
• Analog filter<br />
• Digital I/O<br />
- Three mechanical buttons<br />
- Two user LEDs, one power LED and one status LED<br />
- Four expansion headers<br />
• Touch<br />
- One <strong>Atmel</strong> AVR QTouch ® button<br />
• Memory<br />
- <strong>Atmel</strong> AVR AT45DB642D DataFlash ® serial flash<br />
• Footprints for external memory<br />
- <strong>Atmel</strong> AVR AT25DF series industry standard serial flash<br />
1 Introduction<br />
The <strong>Atmel</strong> AVR <strong>XMEGA</strong>-<strong>A3BU</strong> <strong>Xplained</strong> evaluation kit is a hardware platform to<br />
evaluate the <strong>Atmel</strong> ATxmega256<strong>A3BU</strong> microcontroller.<br />
The kit offers a large range of features that enables the <strong>Atmel</strong> AVR <strong>XMEGA</strong> ® user<br />
to get started using <strong>XMEGA</strong> peripherals right away and understand how to<br />
integrate the <strong>XMEGA</strong> device in their own design.<br />
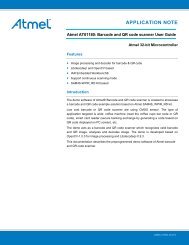
Figure 1-1. <strong>XMEGA</strong>-<strong>A3BU</strong> <strong>Xplained</strong> evaluation kit.<br />
8-bit <strong>Atmel</strong><br />
Microcontrollers<br />
Application Note<br />
Rev. 8394B-AVR-02/12
2 Related items<br />
2 <strong>Atmel</strong> AVR1923<br />
The following list contains links to the most relevant documents, software and tools<br />
for the <strong>Atmel</strong> AVR <strong>XMEGA</strong>-<strong>A3BU</strong> <strong>Xplained</strong>:<br />
<strong>Atmel</strong> AVR <strong>Xplained</strong> products<br />
<strong>Xplained</strong> is a series of small-sized and easy-to-use evaluation kits for 8- and 32-bit<br />
AVR microcontrollers. It consists of a series of low cost MCU boards for evaluation<br />
and demonstration of feature and capabilities of different MCU families.<br />
<strong>Atmel</strong> <strong>Xplained</strong> USB CDC driver<br />
The <strong>Xplained</strong> USB CDC driver file supports both 32- and 64-bit versions of Windows ®<br />
XP and Windows 7. Driver installs are not necessary on Linux ® operating systems.<br />
<strong>XMEGA</strong>-<strong>A3BU</strong> <strong>Xplained</strong> schematics<br />
Package containing schematics, BOM, assembly drawings, 3D plots, layer plots…<br />
AVR1923: <strong>XMEGA</strong>-<strong>A3BU</strong> <strong>Xplained</strong> <strong>Hardware</strong> <strong>User</strong>s <strong>Guide</strong><br />
This document.<br />
AVR1935: <strong>XMEGA</strong>-<strong>A3BU</strong> <strong>Xplained</strong> Getting Started <strong>Guide</strong><br />
This application note is a getting started guide for the <strong>XMEGA</strong>-<strong>A3BU</strong> <strong>Xplained</strong>.<br />
AVR1934: <strong>XMEGA</strong>-<strong>A3BU</strong> <strong>Xplained</strong> Software <strong>User</strong> <strong>Guide</strong><br />
This application note is a user guide for the <strong>XMEGA</strong>-<strong>A3BU</strong> <strong>Xplained</strong> demo software.<br />
AVR1916: <strong>XMEGA</strong> USB DFU Boot Loaders<br />
This application note is a user guide for the <strong>XMEGA</strong> USB DFU boot loaders.<br />
<strong>Atmel</strong> AVR Studio ® 5<br />
AVR Studio 5 is a free <strong>Atmel</strong> IDE for development of C/C++ and assembler code for<br />
<strong>Atmel</strong> microcontrollers.<br />
<strong>Atmel</strong> FLIP (Flexible In-system Programmer)<br />
BatchISP (FLIP) is a command line tool for programming the flash and EEPROM<br />
memories of the AVR and is part of the FLIP installation. It can be used to<br />
communicate with the preprogrammed USB DFU boot loader.<br />
<strong>Atmel</strong> JTAGICE 3<br />
JTAGICE 3 is a mid-range development tool for <strong>Atmel</strong> 8- and 32-bit AVR<br />
microcontrollers with on-chip debugging for source level symbolic debugging,<br />
NanoTrace (if supported by the device) and device programming.<br />
<strong>Atmel</strong> AVR JTAGICE mkII<br />
AVR JTAGICE mkII is a mid-range development tool for <strong>Atmel</strong> 8- and 32-bit AVR<br />
devices with on-chip debugging for source level symbolic debugging, NanoTrace (if<br />
supported by the device), and device programming (superseded by JTAGICE 3).<br />
<strong>Atmel</strong> AVR ONE!<br />
AVR ONE! is a professional development tool for all <strong>Atmel</strong> 8- and 32-bit AVR devices<br />
with on-chip debug capability. It is used for source level symbolic debugging, program<br />
trace, and device programming. The AVR ONE! supports the complete development<br />
cycle and is the fastest debugging tool offered from <strong>Atmel</strong>.<br />
<strong>Atmel</strong> AVR Dragon<br />
AVR Dragon sets a new standard for low cost development tools for 8- and 32-bit<br />
AVR devices with on-chip debug (OCD) capability.<br />
8394B-AVR-02/12
8394B-AVR-02/12<br />
<strong>Atmel</strong> AVR1923<br />
IAR Embedded Workbench ® for <strong>Atmel</strong> AVR<br />
IAR Embedded Workbench is a commercial C/C++ compiler that is available for 8bit<br />
AVR. There is a 30 day evaluation version as well as a 4k (code size limited) kickstart<br />
version available from their website.<br />
3
3 General information<br />
4 <strong>Atmel</strong> AVR1923<br />
The <strong>Atmel</strong> AVR <strong>XMEGA</strong>-<strong>A3BU</strong> <strong>Xplained</strong> kit is intended to demonstrate the <strong>Atmel</strong><br />
AVR ATxmega256<strong>A3BU</strong> microcontroller. Figure 3-1 shows the available feature on<br />
the board.<br />
Figure 3-1. Overview of the <strong>XMEGA</strong> <strong>A3BU</strong> <strong>Xplained</strong> kit.<br />
3.1 Preprogrammed firmware<br />
The ATxmega256<strong>A3BU</strong> on the <strong>XMEGA</strong>-<strong>A3BU</strong> <strong>Xplained</strong> is pre-programmed with a<br />
boot loader and a default firmware. The detailed description of the software is<br />
available in the <strong>XMEGA</strong>-<strong>A3BU</strong> <strong>Xplained</strong> Software <strong>User</strong> <strong>Guide</strong><br />
(http://atmel.com/dyn/resources/prod_documents/doc8413.pdf).<br />
3.2 Power supply<br />
The kit needs an external power supply that can deliver 5V and up to 500mA. The<br />
actual current requirement for the board is much less than 500mA but in order to be<br />
able to power optional expansion boards this margin is recommended.<br />
The power can be applied to the board either via the USB connector or on pin 10 on<br />
the header J3. The USB connector is the preferred input because it is then possible to<br />
connect expansion boards on top of the J3 header.<br />
The 5V (USB supply voltage) is regulated down to 3.3V with an onboard LDO<br />
regulator, which provides power to the entire board. Expansion top boards that<br />
require 5V will get this from the header J3 pin 10.<br />
3.3 Measuring the <strong>Atmel</strong> AVR <strong>XMEGA</strong> power consumption<br />
As part of an evaluation of the ATxmega256<strong>A3BU</strong>, it can be of interest to measure its<br />
power consumption. Because the <strong>XMEGA</strong> has a separate power plane<br />
(VCC_MCU_P3V3) on this board it is possible to measure the current consumption<br />
8394B-AVR-02/12
8394B-AVR-02/12<br />
<strong>Atmel</strong> AVR1923<br />
by measuring the current that is flowing into this plane. The VCC_MCU_P3V3 plane<br />
is connected via a jumper to the main power plane (VCC_P3V3) and by replacing the<br />
jumper with an amperemeter it is possible to determine the current consumption. To<br />
locate the power measurement header, please refer to Figure 3-1.<br />
WARNING Do not power the board without having the jumper or an amperemeter<br />
mounted since this can cause latch-up of the <strong>Atmel</strong> AVR<br />
ATxmega256<strong>A3BU</strong> due to current flow into the I/O pins.<br />
3.4 Programming the kit<br />
The kit can be programmed either from an external programming tool or through an<br />
USB boot loader which is pre-programmed on the device.<br />
The boot loader is evoked by pushing the push button (SW0) during power-on, that is<br />
push and hold the button and hence connect an USB cable to the kit. Programming<br />
can be performed through the DFU programmer FLIP.<br />
How a programmer can be connected to the kit is described in Section 4.1.<br />
5
4 Connectors<br />
4.1 Programming headers<br />
6 <strong>Atmel</strong> AVR1923<br />
The <strong>Atmel</strong> AVR <strong>XMEGA</strong>-<strong>A3BU</strong> <strong>Xplained</strong> kit has five 10-pins, 100mil headers. One<br />
header is used for programming the <strong>Atmel</strong> AVR ATxmega256<strong>A3BU</strong>, and the others<br />
are used to access spare analog and digital pins on the <strong>Atmel</strong> AVR <strong>XMEGA</strong><br />
(expansion headers).<br />
The <strong>XMEGA</strong> can be programmed and debugged by connecting an external<br />
programming/debugging tool to the “JTAG & PDI” header shown in Figure 3-1. The<br />
header has a standard pin-out and therefore tools like the <strong>Atmel</strong> JTAGICE 3 or <strong>Atmel</strong><br />
AVR ONE! can be connected to the header.<br />
Due to physical differences of the <strong>Atmel</strong> AVR JTAGICE mkII and AVR ONE! probes,<br />
the PCB has an opening below the JTAG and PDI header. This is to make room for<br />
the orientation tap on the JTAGICE mkII probe.<br />
The grey female 10-pin header on JTAGICE mkII has to be used when connecting to<br />
the kit. The opening in the board is made to fit the orientation tab on the header.<br />
When using PDI with the JTAGICE mkII it is necessary to use the squid cable.<br />
A standoff adapter (no. 1) is needed when using AVR ONE!<br />
Pin 1 on the JTAG header is at the top right corner and is marked with a square pad.<br />
Table 4-1. <strong>XMEGA</strong> programming and debugging interface – JTAG and PDI.<br />
Pin on programming header JTAG (1)<br />
PDI (2)<br />
1 TCK -<br />
2 GND GND (3)<br />
3 TDO DATA<br />
4 VCC VCC<br />
5 TMS -<br />
6 nSRST CLK<br />
7 - -<br />
8 - -<br />
9 TDI -<br />
10 GND GND (3)<br />
Notes: 1. Standard pin-out for JTAGICE mkII and other <strong>Atmel</strong> programming tools.<br />
2. Requires adapter (squid cable) to connect a JTAGICE mkII.<br />
3. It is only required to connect to one GND pin.<br />
Because JTAG TDO and PDI DATA are connected on the PCB for this kit, JTAG<br />
must be disabled on the device in order to use PDI. The reason for this is that when<br />
JTAG is enabled it will enable a pull-up internally on TDO which interferes with the<br />
PDI initialization sequence.<br />
This will also be an issue when the application on the device uses the JTAG_TDO<br />
pin. Nevertheless it is possible to use the pin if the TDO signal is disconnected from<br />
the PDI DATA signal by cutting a strap (the cut-strap J203 is on the back side of the<br />
board and marked with a text that describes its function) on the back side of the PCB.<br />
8394B-AVR-02/12
4.2 I/O expansion headers<br />
8394B-AVR-02/12<br />
<strong>Atmel</strong> AVR1923<br />
This however will disable the JTAG interface until the connection is reestablished by,<br />
for example soldering a bridge on the cut-strap.<br />
NOTE<br />
The <strong>Atmel</strong> AVR <strong>XMEGA</strong>-<strong>A3BU</strong> <strong>Xplained</strong> headers J1, J2, J3, and J4 offer access to<br />
the I/O of the microcontroller in order to expand the board, for example by mounting a<br />
top module onto the board.<br />
The header J1 offers digital communication interfaces like UART, TWI and SPI. Table<br />
4-2 shows how the <strong>Atmel</strong> AVR <strong>XMEGA</strong> is connected to the header.<br />
When using TWI please note that no pull-ups are mounted on the board from the<br />
factory, so it is required to either enable the internal pull-ups of the device or to mount<br />
the external pull-ups on the available footprints (R200 and R201). Please refer to the<br />
assembly drawing in the design documentation for the location of these footprints.<br />
Table 4-2. Expansion header J1.<br />
Pin on J1 Name on J1 <strong>XMEGA</strong> pin Shared with onboard functionality<br />
1 SDA PC0 -<br />
2 SCL PC1 -<br />
3 RXD PC2 -<br />
4 TXD PC3 -<br />
5 SS PC4 -<br />
6 MOSI PC5 -<br />
7 MISO PC6 -<br />
8 SCK PC7 -<br />
9 GND - -<br />
10 VCC_P3V3 - -<br />
The header J2 is connected to analog ports of the <strong>XMEGA</strong> as shown in Table 4-3.<br />
Table 4-3. Expansion header J2.<br />
Pin on J2 Name on J2 <strong>XMEGA</strong> pin Shared with onboard functionality<br />
1 ADC0 PB0 -<br />
2 ADC1 PB1 -<br />
3 ADC2 PB2 -<br />
4 ADC3 PB3 -<br />
5 ADC4 PA4 -<br />
6 ADC5 PA5 -<br />
7 ADC6 PA6 -<br />
8 ADC7 PA7 -<br />
9 GND - -<br />
10 VCC_P3V3 - -<br />
The I/O connected to the expansion header J3 is shared with on-board features as<br />
sensors and JTAG interface. Therefore care must be taken when J3 is used for<br />
expansions. Table 4-4 shows the mapping of the <strong>XMEGA</strong> I/O to J3.<br />
7
8 <strong>Atmel</strong> AVR1923<br />
Table 4-4. Expansion header J3.<br />
Pin on J3 Name on J3 <strong>XMEGA</strong> pin Shared with onboard functionality<br />
1 PA0 PA0 Light sensor (1)<br />
2 PA1 PA1 Temperature sensor (1)<br />
3 PA2 PA2 Filter output (1)<br />
4 PA3 PA3 Display reset<br />
5 PB4 PB4 JTAG TMS<br />
6 PB5 PB5 JTAG TDI<br />
7 PB6 PB6 JTAG TCK<br />
8 PB7 PB7 JTAG TDO<br />
9 GND - -<br />
10 VCC_P5V0 - -<br />
Note: 1. Can be disconnected from onboard functionality by cut-straps.<br />
The header J4 offers digital communication interfaces such as UART and TWI but<br />
care must be taken because some pins are also connected to on-board peripherals.<br />
Table 4-5. Expansion header J4.<br />
Pin on J4 Name on J4 <strong>XMEGA</strong> pin Shared with onboard functionality<br />
1 SDA PE0 -<br />
2 SCL PE1 -<br />
3 RXD PE2 -<br />
4 TXD PE3 -<br />
5 SS PD0 Display register select (1)<br />
6 MOSI PD3 Serial flash MOSI<br />
7 MISO PD2 Display and serial flash MISO input<br />
8 SCK PD1 Display and serial flash clock input<br />
9 GND - -<br />
10 VCC_P3V3 - -<br />
Note: 1. Can be disconnected from onboard functionality by cut-strap (J204).<br />
8394B-AVR-02/12
5 Peripherals<br />
5.1 Serial flash<br />
8394B-AVR-02/12<br />
<strong>Atmel</strong> AVR1923<br />
The <strong>Atmel</strong> AVR <strong>XMEGA</strong>-<strong>A3BU</strong> <strong>Xplained</strong> has an external <strong>Atmel</strong> AVR AT45DB642D<br />
DataFlash device mounted. A footprint is also available for adding an industrial<br />
standard serial flash like the AT25 series from <strong>Atmel</strong>. Compatible serial flash devices<br />
for both footprints are listed in Table 5-2 and the connection to the MCU is shown in<br />
Table 5-1.<br />
The footprints share the same SPI lines including the chip select, and therefore it is<br />
not possible to mount devices on both footprints at the same time.<br />
Table 5-1. Serial flash connection.<br />
Pin on <strong>XMEGA</strong> Serial flash<br />
PD1 SCK<br />
PD3 MOSI<br />
PD2 MISO<br />
PF4 SS<br />
Table 5-2. Compatible devices for the footprints.<br />
<strong>Atmel</strong> AVR AT45DB <strong>Atmel</strong> AVR AT25DF<br />
AT45DB64D2-CNU (mounted) AT25DF641A-SH<br />
AT45DB321D-MWU AT25DF321A-SH<br />
AT45DB161D-SS AT25DF161-SH<br />
AT45DB081D-SS AT25DF081-SSH<br />
AT45DB041D-SS<br />
AT45DB021D-SS<br />
AT45DB011D-SS<br />
AT25DF021-SSH<br />
5.2 <strong>Atmel</strong> AVR QTouch button<br />
The <strong>XMEGA</strong>-<strong>A3BU</strong> <strong>Xplained</strong> kit has one <strong>Atmel</strong> QTouch button and the connection to<br />
the <strong>Atmel</strong> AVR <strong>XMEGA</strong> is shown in Table 5-3. The QTouch sensor, a copper fill, is<br />
located on the second layer of the board (same as GND layer). The sensor is<br />
shielded by the third layer (VCC layer) and therefore the sensor is not affected by any<br />
touches from the back side of the board.<br />
Table 5-3. QTouch button connection.<br />
5.3 Battery backup system<br />
Pin on <strong>XMEGA</strong> QButton<br />
PF6 SNS<br />
PF7 SNSK<br />
The battery backup system backs up the RTC of the <strong>XMEGA</strong>. It consists of a coin cell<br />
battery, a battery holder and a jumper that can be used to disconnect the battery from<br />
the <strong>XMEGA</strong>. A manganese dioxide lithium battery (CR1220) from Panasonic with a<br />
nominal voltage of 3V and nominal capacity of 35mAh is used in this design. In order<br />
9
5.4 Mechanical buttons<br />
5.5 LEDs<br />
5.6 FSTN LCD display<br />
10 <strong>Atmel</strong> AVR1923<br />
to measure the backup system power consumption a header with a mounted jumper<br />
is available. The header is shown in Figure 3-1 and is also marked with “VBAT” on<br />
the silkscreen. The jumper can also be used to simulate battery insertion and removal<br />
without actually removing the battery from the holder.<br />
Three mechanical buttons are connected to <strong>Atmel</strong> AVR <strong>XMEGA</strong>. All buttons have<br />
external pull-ups so there is no need to activate internal pull-ups in order to use them.<br />
When a button is pressed it will drive the I/O line to GND.<br />
Table 5-4. Mechanical button connection.<br />
Pin on <strong>XMEGA</strong> Silkscreen text on PCB and designator in the schematics<br />
PE5 SW0<br />
PF1 SW1<br />
PF2 SW2<br />
There are four LEDs available on the board that can be turned on and off. Two yellow<br />
LEDs, one green LED (power indicator LED), and one red LED (status LED). The<br />
green and red LEDs are inside the same package and therefore the colors can be<br />
mixed to orange when both are activated. The yellow LEDs and the red LED can be<br />
activated by driving the connected I/O line to GND. The green LED is controlled via a<br />
FET and is by default on when the board is powered. However, this power indicator<br />
LED can also be turned off by driving the gate of the FET to GND.<br />
Table 5-5. LED connections.<br />
Pin on <strong>XMEGA</strong> LED<br />
PR0 Yellow LED0<br />
PR1 Yellow LED1<br />
PD4 Red status LED<br />
PD5 Green power indicator LED<br />
The NHD-C12832A1Z-FSW-FBW-3V3 is a FSTN LCD display and has a resolution of<br />
128 x 32 pixels. In the design the display is connected via a SPI based interface.<br />
Detailed information about the display can be obtained from the display datasheet<br />
(NHD-C12832A1Z-FSW-FBW-3V3 from New Haven Displays) and from the display<br />
controller datasheet (ST7565R from Sitronix).<br />
The external circuitry of the display is configured to boost the 3.3V supply voltage by<br />
a factor of 3 to ~10V. However, the typical supply voltage of the display (contrast<br />
control) is 6V and therefore the boosted supply must be adjusted, and this must be<br />
done by software when the display is configured. The following formula is used when<br />
the voltage is adjusted by software:<br />
⎛ Rb ⎞ ⎛ α<br />
⎞<br />
V0 = ⎜1+<br />
⎟⋅<br />
⎜1−<br />
⎟⋅V<br />
⎝ Ra ⎠ ⎝ 162 ⎠<br />
REG<br />
8394B-AVR-02/12
8394B-AVR-02/12<br />
V0: Display voltage (contrast control).<br />
⎛ Rb ⎞<br />
⎜1<br />
+ ⎟ : Voltage regulator internal resistance ratio.<br />
⎝ Ra ⎠<br />
VREG: Internal fixed voltage supply typically 2.1V.<br />
α: Electronic volume level, 1 to 64 are possible values:<br />
<strong>Atmel</strong> AVR1923<br />
⎛ Rb ⎞<br />
The recommended configuration for the display is to use ⎜1<br />
+ ⎟ = 3.<br />
5 because it<br />
⎝ Ra ⎠<br />
will center the adjustable voltage range at 6V which is the typical setting for this<br />
display. Recommended values for α are listed in Table 5-6.<br />
Table 5-6. Recommended electronic volume configuration.<br />
Electronic volume<br />
register value (α) Display supply voltage V 0 [V] Contrast<br />
20 6.44 Too strong contrast<br />
21 6.40<br />
22 6.35<br />
23 6.31<br />
24 6.26<br />
25 6.22<br />
26 6.17<br />
27 6.13<br />
28 6.08<br />
29 6.03<br />
30 5.99 Optimal setting<br />
31 5.94<br />
32 5.90<br />
33 5.85<br />
34 5.81<br />
35 5.76<br />
36 5.72<br />
37 5.67<br />
38 5.63<br />
39 5.58<br />
40 5.54 Very weak contrast<br />
The display backlight is controlled by a FET which is by default in an off state but it is<br />
possible to turn the backlight on with the <strong>Atmel</strong> AVR <strong>XMEGA</strong> by driving the gate of<br />
the FET high. On the <strong>XMEGA</strong> pin PE4 is connected to the gate of the FET. The pin<br />
PE4 is also an output of an on-chip timer module and because of that it is easy to do<br />
dimming of the backlight by using PWM.<br />
11
5.7 Analog I/O<br />
5.7.1 Temperature sensor<br />
12 <strong>Atmel</strong> AVR1923<br />
The temperature sensor circuitry consists of a serial connection of a normal and a<br />
NTC resistor. The NTC sensor is from Murata and some part details are shown in<br />
Table 5-7, more information can be obtained from the manufacturer’s website.<br />
Table 5-7. NTC characteristics.<br />
Global part number NCP18WF104J03RB<br />
Resistance (25℃) 100kΩ ±5%<br />
B-Constant (25/50℃) (reference value) 4250K ±2%<br />
B-Constant (25/80℃) (reference value) 4303K<br />
B-Constant (25/85℃) (reference value) 4311K<br />
B-Constant (25/100℃) (reference value) 4334K<br />
Table 5-8 shows the temperature vs. resistance characteristic. The values are<br />
available from Murata in the datasheet of the NTC.<br />
Table 5-8. Resistance vs. temperature (from Murata).<br />
Temp.<br />
[°C]<br />
NTC<br />
resistance<br />
[kΩ]<br />
Temp.<br />
[°C]<br />
NTC<br />
resistance<br />
[kΩ]<br />
Temp.<br />
[°C]<br />
NTC<br />
resistance<br />
[kΩ]<br />
Temp.<br />
[°C]<br />
NTC<br />
resistance<br />
[kΩ]<br />
-30 2197.225 0 357.012 30 79.222 60 22.224<br />
-29 2055.558 1 338.006 31 75.675 61 21.374<br />
-28 1923.932 2 320.122 32 72.306 62 20.561<br />
-27 1801.573 3 303.287 33 69.104 63 19.782<br />
-26 1687.773 4 287.434 34 66.061 64 19.036<br />
-25 1581.881 5 272.500 35 63.167 65 18.323<br />
-24 1483.100 6 258.426 36 60.415 66 17.640<br />
-23 1391.113 7 245.160 37 57.797 67 16.986<br />
-22 1305.413 8 232.649 38 55.306 68 16.360<br />
-21 1225.531 9 220.847 39 52.934 69 15.760<br />
-20 1151.037 10 209.710 40 50.677 70 15.184<br />
-19 1081.535 11 199.196 41 48.528 71 14.631<br />
-18 1016.661 12 189.268 42 46.482 72 14.101<br />
-17 956.080 13 179.890 43 44.533 73 13.592<br />
-16 899.481 14 171.028 44 42.675 74 13.104<br />
-15 846.579 15 162.651 45 40.904 75 12.635<br />
-14 797.111 16 154.726 46 39.213 76 12.187<br />
-13 750.834 17 147.232 47 37.601 77 11.757<br />
-12 707.524 18 140.142 48 36.063 78 11.344<br />
-11 666.972 19 133.432 49 34.595 79 10.947<br />
-10 628.988 20 127.080 50 33.195 80 10.566<br />
-9 593.342 21 121.066 51 31.859 81 10.200<br />
-8 559.931 22 115.368 52 30.584 82 9.848<br />
8394B-AVR-02/12
8394B-AVR-02/12<br />
Temp.<br />
[°C]<br />
NTC<br />
resistance<br />
[kΩ]<br />
Temp.<br />
[°C]<br />
NTC<br />
resistance<br />
[kΩ]<br />
Temp.<br />
[°C]<br />
<strong>Atmel</strong> AVR1923<br />
NTC<br />
resistance<br />
[kΩ]<br />
Temp.<br />
[°C]<br />
NTC<br />
resistance<br />
[kΩ]<br />
-7 528.602 23 109.970 53 29.366 83 9.510<br />
-6 499.212 24 104.852 54 28.203 84 9.185<br />
-5 471.632 25 100.000 55 27.091 85 8.873<br />
-4 445.772 26 95.398 56 26.028 86 8.572<br />
-3 421.480 27 91.032 57 25.013 87 8.283<br />
-2 398.652 28 86.889 58 24.042 88 8.006<br />
-1 377.193 29 82.956 59 23.113 89 7.738<br />
Two common approximations can be used to model the temperature vs. resistance<br />
characteristic; these are the B parameter and the Steinhart-Hart equations.<br />
Coefficients for both formulas can be calculated from Table 5-8.<br />
When the internal reference VCC/1.6 is used and the ADC is measuring in signed<br />
single ended mode the codes in Table 5-9 can be read from the ADC at the various<br />
temperatures. The calculation is based on Table 5-8.<br />
Table 5-9. ADC codes vs. temperature (signed single ended mode with internal<br />
VCC/1.6 reference).<br />
ADC input [V] Temp. [°C] ADC codes ADC input [V] Temp. [°C] ADC codes<br />
2.076 -14 2047 0.347 38 345<br />
2.030 -13 2014 0.334 39 332<br />
1.983 -12 1968 0.321 40 319<br />
1.936 -11 1921 0.309 41 307<br />
1.889 -10 1875 0.297 42 295<br />
1.841 -9 1828 0.286 43 283<br />
1.794 -8 1781 0.275 44 273<br />
1.747 -7 1734 0.264 45 262<br />
1.700 -6 1687 0.254 46 252<br />
1.653 -5 1640 0.244 47 243<br />
1.606 -4 1594 0.235 48 233<br />
1.560 -3 1548 0.226 49 225<br />
1.514 -2 1503 0.218 50 216<br />
1.469 -1 1458 0.209 51 208<br />
1.425 0 1414 0.202 52 200<br />
1.380 1 1370 0.194 53 193<br />
1.337 2 1327 0.187 54 185<br />
1.294 3 1285 0.180 55 178<br />
1.252 4 1243 0.173 56 172<br />
1.211 5 1202 0.167 57 165<br />
1.171 6 1162 0.161 58 159<br />
1.131 7 1123 0.155 59 154<br />
1.093 8 1084 0.149 60 148<br />
13
5.7.2 Ambient light sensor<br />
14 <strong>Atmel</strong> AVR1923<br />
ADC input [V] Temp. [°C] ADC codes ADC input [V] Temp. [°C] ADC codes<br />
1.055 9 1047 0.144 61 142<br />
1.018 10 1010 0.138 62 137<br />
0.982 11 975 0.133 63 132<br />
0.947 12 940 0.128 64 127<br />
0.913 13 907 0.124 65 123<br />
0.880 14 874 0.119 66 118<br />
0.848 15 842 0.115 67 114<br />
0.817 16 811 0.111 68 110<br />
0.787 17 781 0.107 69 106<br />
0.758 18 752 0.103 70 102<br />
0.730 19 724 0.100 71 99<br />
0.702 20 697 0.096 72 95<br />
0.676 21 671 0.093 73 92<br />
0.650 22 645 0.090 74 89<br />
0.626 23 621 0.086 75 86<br />
0.602 24 597 0.083 76 83<br />
0.579 25 575 0.081 77 80<br />
0.557 26 553 0.078 78 77<br />
0.535 27 531 0.075 79 75<br />
0.515 28 511 0.073 80 72<br />
0.495 29 491 0.070 81 70<br />
0.476 30 472 0.068 82 67<br />
0.458 31 454 0.065 83 65<br />
0.440 32 437 0.063 84 63<br />
0.423 33 420 0.061 85 61<br />
0.407 34 404 0.059 86 59<br />
0.391 35 388 0.057 87 57<br />
0.376 36 373 0.055 88 55<br />
0.361 37 359 0.053 89 53<br />
The ambient light sensor TEMT6000X01 from Vishay Semiconductors is sensitive to<br />
visible light much like the human eye. The measurement circuitry is configured to<br />
measure the illuminance from ~10 to ~900lx when the internal VCC/1.6 reference is<br />
used.<br />
The data in Table 5-10 which shows the relationship between illuminance and output<br />
voltage of the sensor circuitry is generated based on the symbols and formulas in<br />
Table 5-9.<br />
8394B-AVR-02/12
8394B-AVR-02/12<br />
Table 5-10. Symbol description for illuminance calculation.<br />
Symbols Description<br />
<strong>Atmel</strong> AVR1923<br />
Calibrated sensor responsivity at 100lx. This is 50µA according<br />
ICA<br />
to the sensor datasheet<br />
Ev Illuminance<br />
I Current through the sensor<br />
U Output voltage of the sensor circuitry that is provided to the ADC<br />
Series resistor of the sensor circuitry. 4.7kΩ has been chosen in<br />
R<br />
this design<br />
Illuminance is calculated based on the relation of the actual<br />
Ev = 100 x I / ICA current through the sensor to the calibrated value at 100lx<br />
Since the ADC measures the voltage across the series resistor<br />
of the sensor circuitry it is necessary to calculate the voltage<br />
I = U / R<br />
based on the current<br />
Based on the current and the illuminance the output voltage of<br />
U = (Ev x R x ICA) / 100 the sensor circuitry can be calculated<br />
Table 5-11. Illuminance vs. ADC input voltage.<br />
Illuminance [lux] ADC input [V] Illuminance<br />
1 0.0024 Dusk<br />
10 0.0235 Dusk<br />
20 0.0470 Dusk<br />
30 0.0705 Dusk<br />
40 0.0940 Dusk<br />
50 0.1175 Living room<br />
60 0.1410 Living room<br />
70 0.1645 Living room<br />
80 0.1880 Living room<br />
90 0.2115 Living room<br />
100 0.2350 Living room<br />
200 0.4700 Office lighting<br />
300 0.7050 Office lighting<br />
400 0.9400 Office lighting<br />
500 1.1750 Office lighting<br />
600 1.4100 Office lighting<br />
700 1.6450 Office lighting<br />
800 1.8800 Office lighting<br />
900 2.1150 Office lighting<br />
1000 2.3500 Overcast day<br />
15
6 Code examples<br />
16 <strong>Atmel</strong> AVR1923<br />
The example application is based on the <strong>Atmel</strong> AVR Software Framework that is<br />
included in <strong>Atmel</strong> AVR Studio 5. The AVR Software Framework can also be found as<br />
a separate package online at:<br />
http://www.atmel.com/dyn/products/tools_card.asp?tool_id=4192.<br />
For more information about the code example, see the application note <strong>Atmel</strong> AVR<br />
<strong>XMEGA</strong>-<strong>A3BU</strong> <strong>Xplained</strong> Software <strong>User</strong>s <strong>Guide</strong>:<br />
http://atmel.com/dyn/resources/prod_documents/doc8413.pdf.<br />
8394B-AVR-02/12
7 Revision history<br />
7.1 Revision 2<br />
8394B-AVR-02/12<br />
<strong>Atmel</strong> AVR1923<br />
To identify the revision of the <strong>Atmel</strong> AVR <strong>XMEGA</strong>-<strong>A3BU</strong> <strong>Xplained</strong> kit, locate the barcode<br />
sticker on the back side of the board. The first line on the sticker shows the<br />
product ID and the revision. For example “A09-1248/2” can be resolved to ID=A09-<br />
1248 and revision=2.<br />
Revision 2 of the <strong>XMEGA</strong>-<strong>A3BU</strong> <strong>Xplained</strong> kit is the initially released version. This<br />
revision of the kit has the following product ID: A09-1248/2.<br />
17
8 Table of contents<br />
18 <strong>Atmel</strong> AVR1923<br />
Features............................................................................................... 1<br />
1 Introduction...................................................................................... 1<br />
2 Related items.................................................................................... 2<br />
3 General information......................................................................... 4<br />
3.1 Preprogrammed firmware.................................................................................... 4<br />
3.2 Power supply....................................................................................................... 4<br />
3.3 Measuring the <strong>Atmel</strong> AVR <strong>XMEGA</strong> power consumption..................................... 4<br />
3.4 Programming the kit ............................................................................................ 5<br />
4 Connectors....................................................................................... 6<br />
4.1 Programming headers......................................................................................... 6<br />
4.2 I/O expansion headers ........................................................................................ 7<br />
5 Peripherals ....................................................................................... 9<br />
5.1 Serial flash........................................................................................................... 9<br />
5.2 <strong>Atmel</strong> AVR QTouch button .................................................................................. 9<br />
5.3 Battery backup system ........................................................................................ 9<br />
5.4 Mechanical buttons ........................................................................................... 10<br />
5.5 LEDs.................................................................................................................. 10<br />
5.6 FSTN LCD display............................................................................................. 10<br />
5.7 Analog I/O.......................................................................................................... 12<br />
5.7.1 Temperature sensor ................................................................................................ 12<br />
5.7.2 Ambient light sensor................................................................................................ 14<br />
6 Code examples............................................................................... 16<br />
7 Revision history ............................................................................. 17<br />
7.1 Revision 2.......................................................................................................... 17<br />
8 Table of contents ........................................................................... 18<br />
8394B-AVR-02/12
<strong>Atmel</strong> <strong>Corporation</strong><br />
2325 Orchard Parkway<br />
San Jose, CA 95131<br />
USA<br />
Tel: (+1)(408) 441-0311<br />
Fax: (+1)(408) 487-2600<br />
www.atmel.com<br />
<strong>Atmel</strong> Asia Limited<br />
Unit 01-5 & 16, 19F<br />
BEA Tower, Milennium City 5<br />
418 Kwun Tong Road<br />
Kwun Tong, Kowloon<br />
HONG KONG<br />
Tel: (+852) 2245-6100<br />
Fax: (+852) 2722-1369<br />
© 2012 <strong>Atmel</strong> <strong>Corporation</strong>. All rights reserved.<br />
<strong>Atmel</strong> Munich GmbH<br />
Business Campus<br />
Parkring 4<br />
D-85748 Garching b. Munich<br />
GERMANY<br />
Tel: (+49) 89-31970-0<br />
Fax: (+49) 89-3194621<br />
<strong>Atmel</strong> Japan<br />
16F, Shin Osaki Kangyo Bldg.<br />
1-6-4 Osaki Shinagawa-ku<br />
Tokyo 104-0032<br />
JAPAN<br />
Tel: (+81) 3-6417-0300<br />
Fax: (+81) 3-6417-0370<br />
<strong>Atmel</strong> ®<br />
, <strong>Atmel</strong> logo and combinations thereof, AVR ®<br />
, AVR Studio ®<br />
, DataFlash ®<br />
, QTouch ®<br />
, <strong>XMEGA</strong> ®<br />
, and others are registered<br />
trademarks or trademarks of <strong>Atmel</strong> <strong>Corporation</strong> or its subsidiaries. Windows ® and others are registered trademarks or trademarks of<br />
Microsoft <strong>Corporation</strong> in U.S. and or other countries. Other terms and product names may be trademarks of others.<br />
Disclaimer: The information in this document is provided in connection with <strong>Atmel</strong> products. No license, express or implied, by estoppel or otherwise, to<br />
any intellectual property right is granted by this document or in connection with the sale of <strong>Atmel</strong> products. EXCEPT AS SET FORTH IN THE ATMEL<br />
TERMS AND CONDITIONS OF SALES LOCATED ON THE ATMEL WEBSITE, ATMEL ASSUMES NO LIABILITY WHATSOEVER AND DISCLAIMS<br />
ANY EXPRESS, IMPLIED OR STATUTORY WARRANTY RELATING TO ITS PRODUCTS INCLUDING, BUT NOT LIMITED TO, THE IMPLIED<br />
WARRANTY OF MERCHANTABILITY, FITNESS FOR A PARTICULAR PURPOSE, OR NON-INFRINGEMENT. IN NO EVENT SHALL ATMEL BE<br />
LIABLE FOR ANY DIRECT, INDIRECT, CONSEQUENTIAL, PUNITIVE, SPECIAL OR INCIDENTAL DAMAGES (INCLUDING, WITHOUT LIMITATION,<br />
DAMAGES FOR LOSS AND PROFITS, BUSINESS INTERRUPTION, OR LOSS OF INFORMATION) ARISING OUT OF THE USE OR INABILITY TO<br />
USE THIS DOCUMENT, EVEN IF ATMEL HAS BEEN ADVISED OF THE POSSIBILITY OF SUCH DAMAGES. <strong>Atmel</strong> makes no representations or<br />
warranties with respect to the accuracy or completeness of the contents of this document and reserves the right to make changes to specifications and<br />
product descriptions at any time without notice. <strong>Atmel</strong> does not make any commitment to update the information contained herein. Unless specifically<br />
provided otherwise, <strong>Atmel</strong> products are not suitable for, and shall not be used in, automotive applications. <strong>Atmel</strong> products are not intended, authorized, or<br />
warranted for use as components in applications intended to support or sustain life.<br />
8394B-AVR-02/12