CD Stereo System SC-PM533 - Operating Manuals for Panasonic ...
CD Stereo System SC-PM533 - Operating Manuals for Panasonic ...
CD Stereo System SC-PM533 - Operating Manuals for Panasonic ...

Create successful ePaper yourself
Turn your PDF publications into a flip-book with our unique Google optimized e-Paper software.
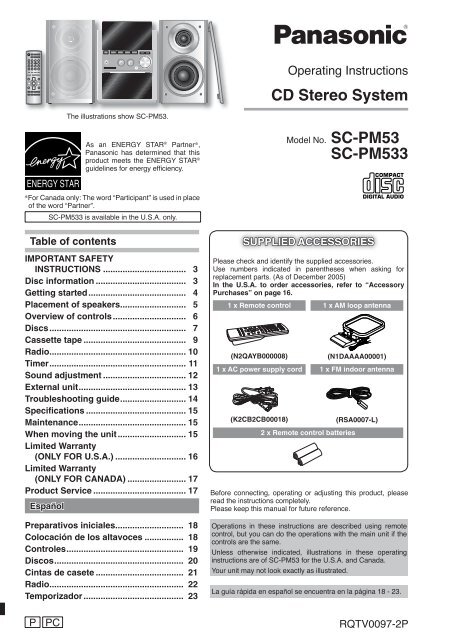
The illustrations show <strong>SC</strong>-PM53.<br />
<strong>SC</strong>-<strong>PM533</strong> is available in the U.S.A. only.<br />
Table of contents<br />
IMPORTANT SAFETY<br />
INSTRUCTIONS .................................. 3<br />
Disc in<strong>for</strong>mation ..................................... 3<br />
Getting started ........................................ 4<br />
Placement of speakers ........................... 5<br />
Overview of controls .............................. 6<br />
Discs ........................................................ 7<br />
Cassette tape .......................................... 9<br />
Radio ........................................................ 10<br />
Timer ........................................................ 11<br />
Sound adjustment .................................. 12<br />
External unit ............................................ 13<br />
Troubleshooting guide ........................... 14<br />
Specifi cations ......................................... 15<br />
Maintenance ............................................ 15<br />
When moving the unit ............................ 15<br />
Limited Warranty<br />
(ONLY FOR U.S.A.) ............................. 16<br />
Limited Warranty<br />
(ONLY FOR CANADA) ........................ 17<br />
Product Service ...................................... 17<br />
Español<br />
Preparativos iniciales ............................ 18<br />
Colocación de los altavoces ................ 18<br />
Controles ................................................ 19<br />
Discos ..................................................... 20<br />
Cintas de casete .................................... 21<br />
Radio ....................................................... 22<br />
Temporizador ......................................... 23<br />
P PC<br />
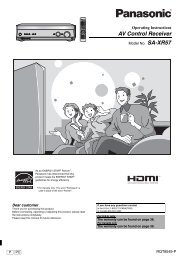
<strong>Operating</strong> Instructions<br />
<strong>CD</strong> <strong>Stereo</strong> <strong>System</strong><br />
Model No. <strong>SC</strong>-PM53<br />
<strong>SC</strong>-<strong>PM533</strong><br />
SUPPLIED ACCESSORIES<br />
Please check and identify the supplied accessories.<br />
Use numbers indicated in parentheses when asking <strong>for</strong><br />
replacement parts. (As of December 2005)<br />
In the U.S.A. to order accessories, refer to “Accessory<br />
Purchases” on page 16.<br />
1 x Remote control<br />
(N2QAYB000008)<br />
1 x AC power supply cord<br />
(K2CB2CB00018)<br />
2 x Remote control batteries<br />
1 x AM loop antenna<br />
(N1DAAAA00001)<br />
1 x FM indoor antenna<br />
(RSA0007-L)<br />
Be<strong>for</strong>e connecting, operating or adjusting this product, please<br />
read the instructions completely.<br />
Please keep this manual <strong>for</strong> future reference.<br />
Operations in these instructions are described using remote<br />
control, but you can do the operations with the main unit if the<br />
controls are the same.<br />
Unless otherwise indicated, illustrations in these operating<br />
instructions are of <strong>SC</strong>-PM53 <strong>for</strong> the U.S.A. and Canada.<br />
Your unit may not look exactly as illustrated.<br />
La guía rápida en español se encuentra en la página 18 - 23.<br />
RQTV0097-2P
RQTV0097<br />
2<br />
Dear customer<br />
Thank you <strong>for</strong> purchasing this product.<br />
For optimum per<strong>for</strong>mance and safety, please read these<br />
instructions carefully.<br />
These operating instructions are applicable to the following<br />
system.<br />
<strong>System</strong> <strong>SC</strong>-PM53 <strong>SC</strong>-<strong>PM533</strong><br />
Main unit SA-PM53 SA-<strong>PM533</strong><br />
Speakers SB-PM53 SB-PM53<br />
The model number and serial number of this product can<br />
be found on either the back or the bottom of the unit.<br />
Please note them in the space provided below and keep<br />
<strong>for</strong> future reference.<br />
MODEL NUMBER<br />
SERIAL NUMBER<br />
CAUTION: TO REDUCE THE RISK OF ELECTRIC<br />
SHOCK, DO NOT REMOVE <strong>SC</strong>REWS.<br />
NO USER-SERVICEABLE PARTS<br />
INSIDE.<br />
REFER SERVICING TO QUALIFIED<br />
SERVICE PERSONNEL.<br />
Except <strong>for</strong> U.S.A.<br />
The lightning flash with arrowhead symbol,<br />
within an equilateral triangle, is intended to<br />
alert the user to the presence of uninsulated<br />
dangerous voltage within the product s<br />
enclosure that may be of sufficient<br />
magnitude to constitute a risk of electric<br />
shock to persons.<br />
The exclamation point within an equilateral<br />
triangle is intended to alert the user to the<br />
presence of important operating and<br />
maintenance (servicing) instructions in the<br />
literature accompanying the appliance.<br />
Inside of product
Disc in<strong>for</strong>mation<br />
• This unit can play MP3 or WMA fi les and <strong>CD</strong>-DA <strong>for</strong>mat audio<br />
<strong>CD</strong>-R/RWs that have been fi nalized.<br />
• It may not be able to play some <strong>CD</strong>-R/RWs depending on the<br />
condition of the recording.<br />
• Do not use irregularly shaped discs.<br />
• Do not use discs with labels and stickers that are coming off or with<br />
adhesive exuding from under labels and stickers.<br />
• Do not attach extra labels or stickers on the disc.<br />
• Do not write anything on the disc.<br />
<strong>CD</strong><br />
• This unit can access up to 99 tracks.<br />
• Choose a disc with this mark:<br />
Using DualDiscs<br />
The “<strong>CD</strong>” sides of DualDiscs do not meet the <strong>CD</strong>-DA standard so it<br />
may not be possible to play them on this unit.<br />
MP3 WMA<br />
• Files are treated as tracks and folders are treated as albums.<br />
• This unit can access up to 999 tracks, 255 albums and 20 sessions.<br />
• Disc must con<strong>for</strong>m to ISO9660 level 1 or 2 (except <strong>for</strong> extended<br />
<strong>for</strong>mats).<br />
• To play in a certain order, prefi x the folder and fi le names with the<br />
3-digit numbers in the order you want to play them.<br />
Not doing the following will cause damage to the unit.<br />
Removing the power plug<br />
• “GOODBYE” is displayed when the unit turns off. Remove the<br />
power plug after this display disappears.<br />
Tray caution<br />
����������<br />
• Always press [OPEN/CLOSE 0] to insert or remove a disc.<br />
• Do not push or pull out the tray by hand as this may cause an<br />
accident.<br />
Inserting a disc<br />
• Place the disc label-up in the center or tray.<br />
• Insert only one disc into each tray.<br />
RQTV0097<br />
3<br />
ENGLISH<br />
English<br />
English
RQTV0097<br />
4<br />
Getting started<br />
Step 1 - Making the connections<br />
Connect the AC power supply cord only after all other connections have been made.<br />
1 Connect the AM loop antenna.<br />
AM loop antenna<br />
Stand the antenna up on its base. Keep the loose antenna cord<br />
away from other wires and cords.<br />
3 Connect the speaker cords.<br />
Blue<br />
Gray<br />
Optional antenna connections<br />
connections<br />
FM outdoor antenna AM outdoor antenna<br />
AM ANT<br />
EXT LOOP<br />
Red<br />
Black<br />
FM ANT<br />
75<br />
Gray<br />
(ª)<br />
L<br />
R<br />
Black (·)<br />
Blue (·)<br />
Red (ª)<br />
HIGH (6 ) LOW (6 )<br />
Incorrect connection can damage the unit.<br />
FM outdoor antenna<br />
(not included)<br />
75 Ω coaxial cable<br />
(not included)<br />
2 Connect the FM indoor antenna.<br />
AM ANT<br />
EXT LOOP<br />
4 Connect the AC power supply cord.<br />
The included AC power supply cord is <strong>for</strong> use with this<br />
unit only. Do not use it with other equipment.<br />
AM ANT<br />
EXT LOOP<br />
FM ANT<br />
75<br />
AM outdoor antenna<br />
(not included)<br />
(16 - 40 ft.)<br />
AM loop antenna<br />
(included)<br />
• Never use an outdoor antenna during a lightning storm.<br />
• You can connect the FM outdoor antenna <strong>for</strong> better reception. Please consult your dealer <strong>for</strong> installation.<br />
• Disconnect the FM indoor antenna if an FM outdoor antenna is installed.<br />
• Connect the AM outdoor antenna without removing the AM loop antenna. Run 5 to 12 m (16 - 40 feet) of vinyl-covered wire<br />
horizontally along a window or other convenient location.<br />
FM ANT<br />
75<br />
Adhesive<br />
tape<br />
FM indoor<br />
antenna<br />
Tape the antenna to a wall or column, in a<br />
position with least amount of interference.
Step 2 - Inserting batteries into the remote control<br />
AA/R6/LR6<br />
Step 3 - DEMO function<br />
Placement of speakers<br />
■ Batteries<br />
• Insert so the poles (+ and –) match those in the remote control.<br />
• Remove if the remote control is not going to be used <strong>for</strong> a long period of<br />
time. Store in a cool, dark place.<br />
• Do not use rechargeable type batteries.<br />
• Mishandling of batteries in the remote control can cause electrolyte<br />
leakage, which may cause a fi re.<br />
Do not:<br />
• mix old and new batteries.<br />
• use different types of batteries at the same time.<br />
• heat or expose to fl ame.<br />
• take apart or short circuit.<br />
• attempt to recharge alkaline or manganese batteries.<br />
• use batteries if their covering has been peeled off.<br />
■ Use<br />
• Aim at the remote control sensor, avoiding obstacles, at a maximum<br />
range of 7 m (23 feet) directly in front of the unit.<br />
Refer to page 6 <strong>for</strong> remote control signal sensor position.<br />
When the unit is fi rst plugged in, a demonstration of its functions may be<br />
shown on the display.<br />
If the demo setting is off, you can show a demonstration by selecting<br />
“DEMO ON”.<br />
Press and hold [–DEMO, 7].<br />
The display changes each time the button is held down.<br />
DEMO OFF DEMO ON<br />
While in standby mode, select “DEMO OFF” to reduce power<br />
consumption.<br />
Speakers are designed identically so that no left or right channel orientation is necessary.<br />
Use only the supplied speakers.<br />
The combination of the main unit and speakers provide the best sound. Using other speakers can damage the unit and sound<br />
quality will be negatively affected.<br />
Note<br />
• Keep your speakers at least 10mm ( 13 /32˝) away from the system <strong>for</strong> proper ventilation.<br />
• These speakers do not have magnetic shielding. Do not place them near televisions, personal computers or other devices easily infl uenced<br />
by magnetism.<br />
• To avoid damage to the speakers, do not touch the speaker cones if you have taken the nets off.<br />
Caution<br />
• Use the speakers only with the recommended system. Failure to do so can damage the amplifi er and<br />
speakers, and can cause fi re. Consult a qualifi ed service person if damage occurs or if a sudden<br />
change in per<strong>for</strong>mance is apparent.<br />
• Do not attach these speakers to walls or ceilings.<br />
RQTV0097<br />
5<br />
ENGLISH<br />
English<br />
English
RQTV0097<br />
6<br />
Overview of controls<br />
Main unit<br />
Refer to numbers in parentheses <strong>for</strong> page reference.<br />
Cassette lid (9)<br />
AC supply indicator (AC IN)<br />
This indicator lights when the unit is connected<br />
to the AC power supply.<br />
1 Standby/on switch (POWER y/l) (15)<br />
Press to switch the unit from on to standby<br />
mode or vice versa. In standby mode, the unit is<br />
still consuming a small amount of power.<br />
2 Disc play/pause (7)<br />
3 Tape play (9)<br />
4 Bass selection (12)<br />
Music port jack (13)<br />
5 Treble selection (12)<br />
Disc skip/search, tape fast-<strong>for</strong>ward/<br />
rewind, tune/preset channel selection,<br />
time adjustment (9)<br />
Remote control<br />
Disc tray open/close (7)<br />
Disc selection (7)<br />
Disc tray (7)<br />
Top of unit<br />
Buttons such as 1 function the same as the controls on the main unit.<br />
Sleep timer (11)<br />
1<br />
Auto off<br />
Disc (7)<br />
Program (8)<br />
Clear (8)<br />
Repeat (8)<br />
Album selection<br />
(7)<br />
2<br />
6<br />
Treble/bass<br />
adjustment (12)<br />
4<br />
!<br />
Re-Master (13)<br />
7<br />
Clock/Timer (11)<br />
Play timer/Record timer (11)<br />
Display (8)<br />
Dimmer<br />
Numeric (7, 10)<br />
Delete (8)<br />
Disc skip/search, tape fast<strong>for</strong>ward/rewind,<br />
tune/preset<br />
channel selection, time<br />
adjustment (7, 10, 11)<br />
8<br />
3<br />
Stop (7)<br />
9<br />
Enter (8)<br />
5<br />
Preset EQ (12)<br />
Surround (13)<br />
Muting<br />
Play mode (7, 9, 10)<br />
Headphone jack ( )<br />
Avoid listening <strong>for</strong> prolonged<br />
periods of time to prevent<br />
hearing damage.<br />
Plug type: 3.5 mm ( 1/8˝) stereo<br />
(not included)<br />
Cassette lid open (9)<br />
Display panel<br />
Remote control sensor<br />
6 Music port selection (13)<br />
Stop/Demo (5, 9)<br />
7 Recording start/pause (9, 13)<br />
8 Tuner/Band selection (10)<br />
9 Volume control<br />
! H.BASS selection (13)<br />
Checking disc position (8)<br />
Changing disc (7)<br />
This function allows you to<br />
turn off the unit in disc or<br />
tape mode only after left<br />
unused <strong>for</strong> 10 minutes.<br />
The setting is maintained<br />
even if the unit is turned<br />
off.<br />
Dims the display panel.<br />
Mutes the sound.<br />
• Press the button to activate.<br />
• Press again to cancel.
1<br />
2<br />
3<br />
4<br />
5<br />
Basic play<br />
<strong>CD</strong><br />
MP3 WMA<br />
Press [y] to turn the unit on.<br />
Press [1 3~ 5 3] to select your desired tray.<br />
Press [OPEN/CLOSE 0] to open the disc tray and<br />
then load the disc. Press [OPEN/CLOSE 0] again to<br />
close the tray.<br />
Label must<br />
face upward<br />
Press [<strong>CD</strong> 6] to start play.<br />
Adjust the volume.<br />
Tray number<br />
Disc tray<br />
To Action<br />
stop the disc Press [STOP 7].<br />
pause play Press [<strong>CD</strong> 6]. Press again to<br />
resume play.<br />
skip tracks Press [4/REW/4] or [3/FF/¢]<br />
during play or pause.<br />
search through tracks Press and hold [4/REW/4] or<br />
<strong>CD</strong><br />
[3/FF/¢] during play or pause.<br />
direct play If the unit is on standby mode and a<br />
disc is loaded, press [<strong>CD</strong> 6] or<br />
[1 3 ~ 5 3] to start play.<br />
skip album<br />
MP3 WMA<br />
Press [ALBUM or ] in the play<br />
mode.<br />
Press [ALBUM or ] once and<br />
then the numeric buttons in the stop<br />
mode.<br />
Changing disc (<strong>CD</strong> CHANGE)<br />
<strong>CD</strong> MP3 WMA<br />
While one disc is playing, you can change the discs in other<br />
trays (except in All-Disc random play or program play).<br />
Press [CHANGE 0].<br />
1<br />
2<br />
3<br />
4<br />
Discs<br />
Press [1 3~ 5 3] to select the tray.<br />
Change the disc.<br />
Press [CHANGE 0] again to close the tray.<br />
Numeric<br />
buttons<br />
Play Mode function<br />
1<br />
2<br />
3<br />
Disc trays<br />
<strong>CD</strong><br />
MP3 WMA<br />
Press [<strong>CD</strong> 6] and then [STOP 7].<br />
Press [DI<strong>SC</strong>] and (within 10 seconds) press [1 ~ 5] to<br />
select the disc.<br />
Press [PLAY MODE] to select the desired mode.<br />
Mode To play<br />
one selected disc.<br />
1-DI<strong>SC</strong><br />
1DI<strong>SC</strong><br />
ALL-DI<strong>SC</strong><br />
ALL DI<strong>SC</strong><br />
1-TRACK<br />
1TR<br />
1-ALBUM<br />
1ALBUM<br />
MP3 WMA<br />
1-DI<strong>SC</strong> RANDOM<br />
1DI<strong>SC</strong> RND<br />
1-ALBUM RANDOM<br />
1ALBUM RND<br />
MP3 WMA<br />
ALL-DI<strong>SC</strong> RANDOM<br />
ALL DI<strong>SC</strong> RND<br />
all discs in trays, e.g., 4→5→1→2→3.<br />
one selected track on the selected<br />
disc.<br />
Press the numeric buttons to select<br />
the track.<br />
one selected album on the selected<br />
disc.<br />
Press [ALBUM or ] to select<br />
the album.<br />
one selected disc randomly.<br />
all tracks in one selected album<br />
randomly.<br />
Press [ALBUM<br />
the album.<br />
or ] to select<br />
all loaded discs randomly.<br />
Note<br />
• During any random play, you cannot skip to tracks that have been<br />
played.<br />
• <strong>CD</strong><br />
During 1-DI<strong>SC</strong> RANDOM or ALL-DI<strong>SC</strong> RANDOM play, you can<br />
search <strong>for</strong>ward or backward only within the current track.<br />
RQTV0097<br />
7<br />
ENGLISH<br />
English<br />
English
RQTV0097<br />
8<br />
Discs (continued)<br />
Checking which discs are in the trays (<strong>CD</strong> CHECK)<br />
1<br />
2<br />
<strong>CD</strong><br />
MP3 WMA<br />
Press [<strong>CD</strong> CHECK].<br />
5<br />
4<br />
3<br />
<strong>CD</strong> CHECK<br />
Press the button again to close the trays.<br />
Note<br />
• The tray with a disc being played will not open.<br />
• If the player is stopped, all trays will open.<br />
• Do not remove or insert discs during disc check.<br />
• Do not pull out the trays during disc check.<br />
• 8 cm discs cannot be checked.<br />
Display function<br />
2<br />
This function allows you to display the in<strong>for</strong>mation of the<br />
current track.<br />
Press [DISPLAY] repeatedly during play or pause mode.<br />
<strong>CD</strong><br />
Elapsed time Remaining time<br />
MP3 WMA<br />
1<br />
Elapsed time Remaining<br />
time<br />
Album name Track name<br />
Tag (Artist) Tag (Track) Tag (Album)<br />
Note<br />
• Maximum number of displayable characters: approximately 30<br />
• This unit supports ver. 1.0 & 1.1 ID3 tags. Text data that is not<br />
supported will not be displayed.<br />
• ID3 is a tag embedded in MP3 tracks to provide in<strong>for</strong>mation about<br />
the track.<br />
Advanced play<br />
Direct access play<br />
This function allows you to start play from a specifi c track.<br />
<strong>CD</strong><br />
Press the numeric buttons to select and play your<br />
desired track.<br />
MP3 WMA<br />
1 Press [ALBUM or ] to select the album.<br />
2 Press [3/FF/¢] once and then the numeric buttons<br />
to select and play your desired track.<br />
For two-digit track, press [h10] once, and then the two<br />
digits.<br />
For three-digit track, press [h10] twice, and then the three<br />
digits.<br />
Note<br />
This function does not work during any random/program mode.<br />
Repeat play<br />
You can repeat program play or other selected play mode.<br />
<strong>CD</strong> MP3 WMA<br />
Press [REPEAT] be<strong>for</strong>e or during play.<br />
“REPEAT ON” and “ ” are displayed.<br />
To cancel<br />
Press [REPEAT] again.<br />
“REPEAT OFF” is displayed and “ ” is cleared.<br />
Program play<br />
This function allows you to program up to 24 tracks.<br />
<strong>CD</strong><br />
1<br />
2<br />
3<br />
4<br />
5<br />
6<br />
7<br />
Press [<strong>CD</strong> 6] and then [STOP 7].<br />
Press [PROGRAM].<br />
Press [DI<strong>SC</strong>].<br />
(Within 10 seconds or so)<br />
Press [1~5] to select your desired disc.<br />
Press the numeric buttons to select your desired<br />
track.<br />
Repeat steps 3 to 5 to program other tracks.<br />
Press [<strong>CD</strong> 6] to start play.<br />
MP3 WMA<br />
1<br />
2<br />
3<br />
4<br />
5<br />
6<br />
7<br />
8<br />
9<br />
Press [<strong>CD</strong> 6] and then [STOP 7].<br />
Press [DI<strong>SC</strong>].<br />
(Within 10 seconds or so)<br />
Press [1~5] to select your desired disc.<br />
Press [STOP 7].<br />
Press [PROGRAM].<br />
Press [ALBUM or ] to select your desired<br />
album.<br />
Press [3/FF/¢] once and then the numeric buttons<br />
to select your desired track.<br />
Press [ENTER].<br />
Repeat steps 6 to 8 to program other tracks.<br />
Press [<strong>CD</strong> 6] to start play.<br />
To Action<br />
cancel program mode Press [PROGRAM] in the stop mode.<br />
replay the program Press [PROGRAM] then [<strong>CD</strong> 6].<br />
check program Press [ /REW/4] or [ /FF/¢] when<br />
contents<br />
“PGM” is displayed in the stop mode.<br />
To check while programming, press<br />
[PROGRAM] twice after “PGM” appears,<br />
then press [ /REW/4] or [ /FF/¢] .<br />
add to the program <strong>CD</strong><br />
Repeat step 3 to 5 in the stop mode.<br />
MP3 WMA<br />
Repeat steps 6 to 8 in the stop mode.<br />
clear the last track Press [DEL] in the stop mode.<br />
clear all programmed Press [CLEAR] in the stop mode. “CLR ALL”<br />
tracks<br />
is displayed.<br />
Note<br />
• When you try to program more than 24 tracks “PGM FULL”<br />
appears.<br />
• During program play, skipping is always in the programmed order,<br />
whether <strong>for</strong>ward or backward.<br />
• You cannot program <strong>CD</strong>-DA together with MP3 and WMA tracks.<br />
• You cannot change or open other trays during program play mode.<br />
• <strong>CD</strong><br />
During program play, you can search backward or <strong>for</strong>ward only<br />
within the current track.<br />
• MP3 WMA<br />
The program memory is cleared when you change a disc or open<br />
a disc tray.
Cassette tape<br />
Top of unit<br />
Cassette lid<br />
The buttons described <strong>for</strong> “Cassette tape” are mainly<br />
<strong>for</strong> the main unit unless indicated otherwise.<br />
1<br />
2<br />
3<br />
Basic play<br />
Press [0] and insert the cassette.<br />
Forward side<br />
Close the lid by hand.<br />
�<br />
Insert inside<br />
the guides<br />
Press [TAPE 3] to start play.<br />
To play the other side of the cassette, turn the cassette over.<br />
To Action<br />
stop tape playback Press [–DEMO, 7].<br />
start one-touch play Press [TAPE 3] when the unit is OFF with<br />
the cassette loaded.<br />
fast-<strong>for</strong>ward and Press [4/REW/4] or [3/FF/¢] in the<br />
rewind<br />
stop mode.<br />
Note<br />
• Tapes exceeding 100 minutes are thin and can break or get caught<br />
in the mechanism.<br />
• Endless tapes can get caught up in the deckʼs moving parts if used<br />
incorrectly.<br />
TPS (Tape Program Sensor)<br />
This function enables you to search the beginning of a track,<br />
up to a maximum of 9.<br />
Press [4/REW/4] or [3/FF/¢] during play.<br />
Play resumes from the track found.<br />
Note<br />
TPS may not function properly:<br />
• with short silent parts<br />
• when noise occurs between tunes<br />
• if silent parts found within tunes<br />
Recording<br />
Use normal position tapes.<br />
High position and metal position tapes can be used, but this<br />
unit will not be able to record or erase them correctly.<br />
Preparation<br />
Wind the leader tape so that recording can begin<br />
immediately.<br />
Recording the radio<br />
1<br />
2<br />
3<br />
Insert the cassette to be recorded.<br />
Tune to the required station (refer to page 10).<br />
Press [ REC/8] to start recording.<br />
Recording discs<br />
1<br />
2<br />
3<br />
4<br />
5<br />
Insert the cassette to be recorded.<br />
Press [<strong>CD</strong> 6] and then [–DEMO, 7].<br />
Press [OPEN/CLOSE 0] to insert the disc. Press<br />
again to close.<br />
Press [PLAY MODE] on the remote control to select<br />
your desired mode (refer to page 7).<br />
Press [ REC/8] to start recording.<br />
Recording programmed tracks<br />
1<br />
2<br />
3<br />
Insert the cassette to be recorded.<br />
Program the tracks you want (refer to page 8).<br />
Press [ REC/8] to start recording.<br />
Other basic operations<br />
To Action<br />
erase a recorded<br />
sound<br />
stop recording Press [–DEMO, 7].<br />
stop recording<br />
temporarily<br />
record on the other<br />
side of the tape<br />
1) Insert the cassette to be recorded.<br />
2) Press [TAPE 3] and then [–DEMO, 7].<br />
3) Press [ REC¥8].<br />
1) Press [ REC¥8].<br />
2) Press again to resume recording.<br />
Turn the cassette over and press<br />
[ REC¥8].<br />
You can per<strong>for</strong>m the same operation of [ REC¥8] on the<br />
main unit by pressing [REC ¥8] and [TAPE] simultaneously<br />
on the remote control.<br />
Erasure prevention<br />
The illustration shows how to remove the tabs to prevent<br />
recording. To record on the tape again, cover as shown.<br />
Tab <strong>for</strong><br />
side B<br />
Side A<br />
Tab <strong>for</strong><br />
side A<br />
To re-record<br />
Normal tape<br />
Adhesive tape<br />
RQTV0097<br />
9<br />
ENGLISH<br />
English<br />
English
RQTV0097<br />
10<br />
1<br />
2<br />
3<br />
Radio<br />
Manual tuning<br />
Numeric<br />
buttons<br />
Press [TUNER/BAND] to select “FM” or “AM”.<br />
Press [PLAY MODE] to select “MANUAL”.<br />
Press [4/REW/4] or [3/FF/¢] to select the<br />
frequency of the required station.<br />
“ ST ” is displayed when a stereo FM broadcast is being<br />
received.<br />
To tune automatically<br />
Press [4/REW/4] or [3/FF/¢] <strong>for</strong> a moment until the<br />
frequency starts changing rapidly. The unit begins auto<br />
tuning, stopping when it fi nds a station.<br />
• Auto tuning may not function when there is excessive<br />
interference.<br />
• To cancel auto tuning, press [4/REW/4], [3/FF/¢] or<br />
[STOP 7].<br />
To improve FM FM sound quality<br />
Press and hold [PLAY MODE] to display “MONO”.<br />
To cancel<br />
Press and hold [PLAY MODE] again until “MONO”<br />
disappears.<br />
• MONO is also canceled if the frequency is changed.<br />
• Turn off “MONO” <strong>for</strong> normal listening.<br />
Memory preset<br />
Up to 15 stations can be set in both the FM and AM bands.<br />
Preparation<br />
Press [TUNER/BAND] to select “FM” or “AM”.<br />
Automatic presetting<br />
Press and hold [PROGRAM] to start presetting.<br />
Manual presetting<br />
1<br />
2<br />
3<br />
4<br />
5<br />
Press [PLAY MODE] to select “MANUAL”.<br />
Press [4/REW/4] or [3/FF/¢] to tune to the<br />
required station.<br />
Press [PROGRAM].<br />
Press numeric buttons to select a channel.<br />
The station occupying a channel is erased if another<br />
station is preset in that channel.<br />
Repeat steps 2 to 4 to preset more stations.<br />
Selecting a preset station<br />
Press numeric buttons to select the channel.<br />
For channels 10 to 15 press [h10], then the two digits.<br />
OR<br />
1 Press [PLAY MODE] to select “PRESET”.<br />
2 Press [4/REW/4] or [3/FF/¢] to select the<br />
channel.<br />
FM allocation setting<br />
By main unit only<br />
This system can also receive FM broadcasts allocated in<br />
0.1 MHz steps.<br />
To change the step to 0.1 MHz<br />
1<br />
2<br />
Press and hold [TUNER/BAND].<br />
After a few seconds the display changes to a fl ashing<br />
display of the current minimum frequency.<br />
Continue to hold down [TUNER/BAND].<br />
• When the minimum frequency changes, release the<br />
button. To return to the original step, repeat the above<br />
steps.<br />
• After the setting is changed, any previously preset<br />
frequency will be cleared.
Timer<br />
Setting the clock<br />
This is a 12-hour clock.<br />
1<br />
2<br />
3<br />
Press [CLOCK/TIMER] to select “CLOCK”.<br />
Each time you press the button:<br />
CLOCK ˚ PLAY<br />
Original display<br />
˚ REC<br />
Within 5 seconds, press [4/REW/4] or [3/FF/¢]<br />
to set the time.<br />
Press [CLOCK/TIMER] again to confi rm.<br />
Displaying the clock<br />
Press [CLOCK/TIMER] to display the clock <strong>for</strong> a few<br />
seconds.<br />
Note<br />
The clock may lose or gain minutes over a period of time. Readjust<br />
as necessary.<br />
Using the sleep timer<br />
This function enables you to turn off the unit automatically<br />
after the set time.<br />
Press [SLEEP] repeatedly to select your desired time.<br />
30MIN 60MIN 90MIN 120MIN OFF<br />
Sleep timer indicator<br />
To cancel<br />
Press [SLEEP] to select “OFF”.<br />
Changing the remaining time<br />
Press [SLEEP] to show the remaining time, and press<br />
[SLEEP] again to select your desired time.<br />
Note<br />
• The play and sleep timer or the record and sleep timer can be used<br />
together.<br />
• The sleep timer always has priority. Be sure not to overlap timer<br />
settings.<br />
Using the play or record timer<br />
You can set the timer to come on at a certain time to wake<br />
you up (play timer) or to record from the radio or a music port<br />
source (record timer).<br />
Preparation<br />
Turn the unit on and set the clock.<br />
Timer Action<br />
Play timer Prepare the music source you want to listen<br />
to; cassette, disc number (1-5), radio or<br />
music port source, and set the volume.<br />
Record timer Check the cassetteʼs erasure prevention<br />
tabs (refer to page 9), insert the cassette and<br />
tune to the radio station (refer to page 10) or<br />
select music port source (refer to page 13).<br />
1<br />
2<br />
3<br />
4<br />
Press [CLOCK/TIMER] repeatedly to select your<br />
desired timer.<br />
CLOCK ˚ PLAY<br />
Original display<br />
˚ REC<br />
Within 5 seconds, press [4/REW/4] or [3/FF/¢]<br />
to set the starting time.<br />
Start time<br />
Play timer indicator<br />
Press [CLOCK/TIMER] to confirm.<br />
Record timer indicator<br />
Repeat steps 2 and 3 to set the finishing time.<br />
Finish time<br />
To activate the timer<br />
5<br />
6<br />
Press [˚PLAY/REC] to turn on your desired timer.<br />
˚ PLAY ˚ REC<br />
no display (off)<br />
Press [y] to turn off the unit.<br />
The unit must be off <strong>for</strong> the timers to operate.<br />
To enjoy the desired source after the timer setting is<br />
completed.<br />
The volume level (<strong>for</strong> play timer) and music source are stored<br />
in the timer memory and the timer will start in these preset<br />
conditions. However, the disc numbers do not get stored in<br />
the timer memory.<br />
1. After step 5, start playing the desired source.<br />
2. Reset the disc numbers if you have changed any of them,<br />
confi rm that a disc or cassette is inserted, then press [y]<br />
to put the unit on standby.<br />
RQTV0097<br />
11<br />
ENGLISH<br />
English<br />
English
RQTV0097<br />
12<br />
Timer (Continued)<br />
Other basic operations<br />
To Action<br />
change the settings Repeat steps 1 to 4 and 6 on page 11.<br />
change the source 1) Press [˚PLAY/REC] to clear the timer<br />
or volume<br />
indicator from the display.<br />
2) Make changes to the source or volume.<br />
3) Per<strong>for</strong>m steps 5 and 6 on page 11.<br />
check the settings Press [CLOCK/TIMER] repeatedly to<br />
(when the unit is on<br />
or in standby mode)<br />
select ˚PLAY or ˚REC.<br />
cancel Press [˚PLAY/REC] to clear the timer<br />
indicators from the display.<br />
Note<br />
• The play timer and record timer cannot be used together.<br />
• The play timer will start at the preset time, with the volume<br />
increasing gradually to the preset level.<br />
• The record timer will start 30 seconds be<strong>for</strong>e the set time with the<br />
volume muted.<br />
• The timer comes on at the set time every day if the timer is on.<br />
• The unit must be in the standby mode <strong>for</strong> the timer to function.<br />
• If you turn the unit off and on again while a timer is functioning, the<br />
fi nish time setting will not be activated.<br />
• If MUSIC PORT is selected as the source when the timer comes on,<br />
the system turns on and engages MUSIC PORT as the source. If<br />
you wish to playback or record from the portable audio equipment,<br />
activate the equipmentʼs play mode and increase the volume. (See<br />
the portable audio equipmentʼs instruction manual.)<br />
Sound adjustment<br />
Selecting sound effects<br />
You can change the sound effect by selecting Preset EQ or<br />
adjusting the bass or treble effect.<br />
Preset EQ<br />
Press [PRESET EQ] repeatedly to select your desired<br />
setting.<br />
HEAVY → CLEAR → SOFT → VOCAL → EQ-OFF<br />
Setting Effect<br />
HEAVY Adds punch to rock<br />
CLEAR Clarifi es higher frequencies<br />
SOFT For background music<br />
VOCAL Adds gloss to vocal<br />
EQ-OFF No effect<br />
Bass or treble<br />
Enable you to enjoy the lower or higher pitch sound.<br />
1 Press [BASS] or [TREBLE] to select your desired<br />
setting.<br />
Setting Effect<br />
BASS For lower pitch sound<br />
TREBLE For higher pitch sound<br />
2 Press [5] or [∞] to adjust the level.<br />
OR<br />
To adjust bass or treble using the main unit.<br />
Turn [BASS] or [TREBLE] clockwise to increase the<br />
level.<br />
Turn [BASS] or [TREBLE] counter-clockwise to decrease<br />
the level.<br />
Note<br />
The tone level can be varied within -3 to +3.
Enjoying surround sound<br />
Enable you to add natural width and depth to the stereo<br />
sound.<br />
To activate<br />
Press [SURROUND] to display “ ” indicator.<br />
To cancel<br />
Press [SURROUND] again to clear “ ” indicator.<br />
Note<br />
• Surround sound is less discernible when listening through<br />
headphones.<br />
• If interference in FM stereo reception increases, cancel the<br />
surround sound effect.<br />
Enhancing the bass<br />
Enable you to enjoy the powerful bass effect.<br />
Press [H.BASS] repeatedly to select your desired<br />
setting.<br />
LEVEL 1 → LEVEL 2 → OFF<br />
Note<br />
The actual effect depends on the disc.<br />
Re-master – Enjoying more natural sound<br />
Discs recorded at:<br />
MP3<br />
32 kHz, 44.1 kHz or 48 kHz<br />
WMA<br />
22 kHz, 32 kHz, 44 kHz or 48 kHz<br />
This feature reproduces the frequencies lost during recording<br />
to give you a sound closer to the original.<br />
Press [RE-MASTER] during play to select “RE-MASTER<br />
ON”.<br />
Each time you press the button:<br />
RE-MASTER ON ↔ RE-MASTER OFF<br />
Note<br />
You cannot change RE-MASTER during recording.<br />
External unit<br />
The buttons described <strong>for</strong> “External unit” are mainly <strong>for</strong><br />
the main unit unless indicated otherwise.<br />
Connecting to a portable audio equipment<br />
This feature enables you to enjoy music from portable audio<br />
equipment.<br />
MUSIC<br />
PORT<br />
jack<br />
Audio cord (not included)<br />
Portable audio equipment<br />
(not included)<br />
Playing from portable audio equipment<br />
Switch off the equalizer function (if there is any) of the<br />
portable audio equipment be<strong>for</strong>e you plug into the MUSIC<br />
PORT jack. Otherwise, sound from the speaker may be<br />
distorted.<br />
1 Plug the audio cord into the MUSIC PORT jack and<br />
press [MUSIC P.].<br />
2 Play the portable audio equipment. (See the portable<br />
audio equipment’s instruction manual.)<br />
1<br />
2<br />
3<br />
4<br />
Recording from portable audio equipment<br />
Insert the cassette to be recorded.<br />
Press [MUSIC P.].<br />
Play the portable audio equipment.<br />
Press [ REC¥8] to start recording.<br />
Note<br />
• All peripheral components and cables are sold separately.<br />
• For other recording operations, refer page 9, “Other basic<br />
operations”.<br />
RQTV0097<br />
13<br />
ENGLISH<br />
English<br />
English
RQTV0097<br />
14<br />
Troubleshooting guide<br />
Be<strong>for</strong>e requesting service, make the following checks. If you are in doubt about some of the check points, or if the<br />
remedies indicated in the chart do not solve the problem, refer to the “Customer Services Directory” on page 16 if<br />
you reside in the U.S.A., or refer to the “Product in<strong>for</strong>mation” on page 17 if you reside in Canada.<br />
Common problems<br />
No sound. Turn the volume up.<br />
The speaker cords may not be connected properly. Turn the unit off, check and correct the<br />
connections and turn the unit on (refer to page 4).<br />
Sound is unfi xed, reversed or comes Check the speaker connections (refer to page 4).<br />
from one speaker only.<br />
Humming heard during play. An AC power supply cord or fl uorescent light is near the cables. Keep other appliances and<br />
cords away from this unitʼs cables.<br />
“ERROR” is displayed. Incorrect operation per<strong>for</strong>med. Read the instructions and try again.<br />
“– –:– –” appears on the display. You plugged the AC power supply cord in <strong>for</strong> the fi rst time or there was a power failure<br />
recently.<br />
Set the time (refer to page 11).<br />
“F61” is displayed. Check and correct the speaker cord connections (refer to page 4). Unplug and plug in the<br />
AC power supply cord, then turn on the unit.<br />
If this does not fi x the problem, there is a power supply problem. Consult the dealer.<br />
Listening to the radio<br />
Noise is heard.<br />
The stereo indicator fl ickers or doesn’t<br />
light.<br />
Sound is distorted.<br />
Use an outdoor antenna (refer to page 4).<br />
A beat sound is heard. Turn the TV off or separate it from the unit.<br />
A low hum is heard during AM<br />
broadcast.<br />
Separate the antenna from other cables and cords.<br />
When there is a television set nearby<br />
The picture on the TV<br />
disappears or stripes appear<br />
on the screen.<br />
Using the cassette deck<br />
The location and direction of the antenna are incorrect. If you are using an indoor antenna,<br />
change to an outdoor antenna (refer to page 4).<br />
The TV antenna wire is too close to the unit. Separate the antenna wire of the TV set from<br />
the unit.<br />
Recording is not possible. If the erasure prevention tabs have been removed, cover the holes with adhesive tape (refer<br />
to page 9).<br />
Playing discs<br />
The display is wrong or play<br />
won’t start.<br />
The total number of tracks displayed<br />
differs each time the same disc is<br />
inserted.<br />
Unusual sound is heard.<br />
The disc may be upside down (refer to page 3).<br />
Wipe the disc.<br />
Replace the disc if it is scratched, warped, or non-standard.<br />
Condensation may have <strong>for</strong>med inside the unit due to a sudden change in temperature. Wait<br />
about an hour <strong>for</strong> it to clear and try again.<br />
The disc may be scratched, or its data may be defective. Replace the disc.<br />
<strong>CD</strong>-RW cannot be read. The disc was incompletely <strong>for</strong>matted. Use the recording equipment to fully <strong>for</strong>mat the disc<br />
be<strong>for</strong>e recording.<br />
“VBR–” is displayed instead of the The unit cannot display the remaining play time <strong>for</strong> variable bit rate (VBR) tracks.<br />
remaining play time.<br />
“TAKE OUT/DI<strong>SC</strong>” appears on the<br />
display.<br />
The remote control<br />
There is a problem with the disc mechanism. (A power failure may have occurred.)<br />
The tray will open automatically. Remove the disc from the tray, and after ensuring there is<br />
no disc in the tray, close it. The unit will make the disc changing noises <strong>for</strong> a few moments<br />
and then it should operate normally.<br />
Remote control doesn’t work. Check that the batteries are inserted correctly (refer to page 5).<br />
Replace the batteries if they are worn.
Specifi cations<br />
AMPLIFIER SECTION<br />
FTC OUTPUT POWER both channel driven<br />
simultaneously<br />
10% Total harmonic distortion<br />
60 Hz to 3 kHz<br />
(Low channel) <strong>SC</strong>-PM53 40 W per channel (6 Ω)<br />
<strong>SC</strong>-<strong>PM533</strong> 38 W per channel (6 Ω)<br />
3 kHz to 16 kHz<br />
(High channel) <strong>SC</strong>-PM53 39 W per channel (6 Ω)<br />
<strong>SC</strong>-<strong>PM533</strong> 36 W per channel (6 Ω)<br />
Total Bi-Amp power <strong>SC</strong>-PM53 79 W per channel<br />
<strong>SC</strong>-<strong>PM533</strong> 74 W per channel<br />
RMS OUTPUT POWER both channel driven<br />
simultaneously<br />
10% total harmonic distortion<br />
1 kHz<br />
(Low channel) <strong>SC</strong>-PM53 45 W per channel (6 Ω)<br />
<strong>SC</strong>-<strong>PM533</strong> 43 W per channel (6 Ω)<br />
8 kHz<br />
(High channel) <strong>SC</strong>-PM53 45 W per channel (6 Ω)<br />
<strong>SC</strong>-<strong>PM533</strong> 42 W per channel (6 Ω)<br />
Total Bi-Amp power <strong>SC</strong>-PM53 90 W per channel<br />
<strong>SC</strong>-<strong>PM533</strong> 85 W per channel<br />
Input Impedance<br />
Music port 250 mV 12 kΩ<br />
Output Impedance<br />
Headphone 16 Ω to 32 Ω<br />
Phone jack<br />
Terminal <strong>Stereo</strong>, 3.5 mm ( 1 /8")<br />
Music port input jack<br />
Terminal <strong>Stereo</strong>, 3.5 mm ( 1 /8")<br />
FM TUNER SECTION<br />
Frequency range<br />
87.9 MHz to 107.9 MHz (200 kHz steps)<br />
87.5 MHz to 108.0 MHz (100 kHz steps)<br />
Sensitivity 0.3 µV (IHF)<br />
S/N 26 dB 0.2 µV<br />
Antenna terminals 75 Ω (unbalanced)<br />
Preset station FM 15 stations<br />
AM 15 stations<br />
AM TUNER SECTION<br />
Frequency range 520 kHz to 1710 kHz (10 kHz steps)<br />
Sensitivity<br />
S/N 20 dB (at 1000 kHz) 900 µV/m<br />
CASSETTE DECK SECTION<br />
Track system 4-track, 2-channel<br />
Heads<br />
Record/playback Solid permalloy head<br />
Erasure Double gap ferrite head<br />
Motor DC servo motor<br />
Recording system AC bias 100 kHz<br />
Erase system AC erase 100 kHz<br />
Tape speed 4.8 cm/s (1 7 /8 ips)<br />
Overall frequency response (+3, –6 dB at DECK OUT)<br />
NORMAL 35 Hz to 14 kHz<br />
S/N RATIO 54 dB (A weighted)<br />
Wow and fl utter 0.08% (WRMS)<br />
Fast-<strong>for</strong>ward and rewind time<br />
Approx. 120 seconds with C-60 cassette tape<br />
Maintenance<br />
If the surfaces are dirty<br />
To clean this unit, wipe with a soft, dry cloth.<br />
• Never use alcohol, paint thinner or benzine to clean this<br />
unit.<br />
• Be<strong>for</strong>e using chemically treated cloth, read the instructions<br />
that came with the cloth carefully.<br />
For a cleaner, crisper sound<br />
Clean the heads regularly to assure good quality playback<br />
and recording.<br />
Use a cleaning tape (not included).<br />
<strong>CD</strong> SECTION<br />
Disc played [8 cm (3") or 12 cm (5")]<br />
(1) <strong>CD</strong>-Audio (<strong>CD</strong>-DA)<br />
(2) <strong>CD</strong>-R/RW (<strong>CD</strong>-DA, MP3, WMA <strong>for</strong>matted disc)<br />
(3) MP3/WMA<br />
Sampling frequency<br />
<strong>CD</strong>-DA 44.1 kHz<br />
MP3/WMA 32 kHz, 44.1 kHz, 48 kHz<br />
Bit rate<br />
MP3/WMA 32 kbps to 384 kbps<br />
Decoding 16/20/24 bit linear<br />
Pick up<br />
Wavelength 785 nm<br />
Beam source Semiconductor laser<br />
Laser power CLASS 1<br />
Audio output (Disc)<br />
Number of channels 2-Channel<br />
Frequency response 20 Hz to 20 kHz (+1dB, -2 dB)<br />
Wow and fl utter Below measurable limit<br />
Digital fi lter 8 fs<br />
D/A converter MASH (1 bit DAC)<br />
SPEAKER SECTION<br />
Type 2 way, 2 speaker system<br />
Speaker(s)<br />
Woofer 10cm (4˝) cone type (6 Ω)<br />
Tweeter 6 cm (2 3 /8˝) cone type (6 Ω)<br />
Impedance 6 Ω<br />
Input power (IEC)<br />
HIGH 90 W (Max)<br />
LOW 90 W (Max)<br />
Output sound pressure 80 dB/W (1.0 m)<br />
Crossover over frequency 2.2 kHz<br />
Frequency range 45 Hz to 35 kHz (-16 dB)<br />
50 Hz to 31 kHz (-10 dB)<br />
Dimensions (W x H x D) 144 mm x 249 mm x 200 mm<br />
(5 11 /16˝ x 9 13 /16˝ x 7 7 /8˝)<br />
Mass 1.9 kg (4.2 lb.)<br />
GENERAL<br />
Power supply AC 120 V, 60 Hz<br />
Power consumption 140 W<br />
Dimensions (W x H x D) 175 mm x 249 mm x 355 mm<br />
(6 7 /8˝ x 9 13 /16˝ x 13 63 /64˝)<br />
Mass 5.4 kg (11.9 lb.)<br />
<strong>Operating</strong> temperature range<br />
+5°C to +35°C (+41°F to +95°F)<br />
<strong>Operating</strong> humidity range<br />
5% to 90% RH (no condensation)<br />
Power consumption in standby mode 0.4 W<br />
Note<br />
1. Specifi cations are subject to change without notice.<br />
Mass and dimensions are approximate.<br />
2. Total harmonic distortion is measured by the digital spectrum<br />
analyzer.<br />
3. The labels “HIGH” and “LOW” on the rear or the speakers refer to<br />
High frequency and Low frequency.<br />
1<br />
2<br />
3<br />
When moving the unit<br />
Remove all discs.<br />
Press [POWER y/I] to turn the unit off.<br />
Disconnect the AC power supply cord.<br />
RQTV0097<br />
15<br />
ENGLISH<br />
English<br />
English
RQTV0097<br />
16<br />
Limited Warranty (ONLY FOR U.S.A.)<br />
<strong>Panasonic</strong> Consumer Electronics Company,<br />
Division of <strong>Panasonic</strong> Corporation of North America<br />
One <strong>Panasonic</strong> Way Secaucus, New Jersey 07094<br />
Limited Warranty Coverage<br />
If your product does not work properly because of a defect in materials or<br />
workmanship, <strong>Panasonic</strong> Consumer Electronics Company or <strong>Panasonic</strong> Puerto<br />
Rico, Inc. (collectively referred to as “the warrantor”) will, <strong>for</strong> the length of<br />
the period indicated on the chart below, which starts with the date of original<br />
purchase (“warranty period”), at its option either (a) repair your product with new<br />
or refurbished parts, or (b) replace it with a new or a refurbished product. The<br />
decision to repair or replace will be made by the warrantor.<br />
Product or Part Name Parts Labor<br />
Audio Products (except items listed<br />
below)<br />
USB Reader-Writer, Personal<br />
One (1) year One (1) year<br />
Computer Card Adapters<br />
(in exchange <strong>for</strong> defective item)<br />
One (1) year Not Applicable<br />
Accessories: Headphones,<br />
Cartridges, Microphones, Adapters<br />
Rechargeable Batteries, DVD-R/-RAM<br />
Discs (in exchange <strong>for</strong> defective item)<br />
SD Memory Cards, Rechargeable<br />
Battery Packs (in exchange <strong>for</strong><br />
defective item)<br />
During the “Labor” warranty period there will be no charge <strong>for</strong> labor. During the<br />
“Parts” warranty period, there will be no charge <strong>for</strong> parts. You must carry-in or<br />
mail-in your product during the warranty period. If non-rechargeable batteries<br />
are included, they are not warranted. This warranty only applies to products<br />
purchased and serviced in the United States or Puerto Rico. This warranty is<br />
extended only to the original purchaser of a new product which was not sold “as<br />
is”. A purchase receipt or other proof of the original purchase date is required<br />
<strong>for</strong> warranty service.<br />
Customer Services Directory<br />
<strong>Panasonic</strong> Audio Products<br />
Limited Warranty<br />
Ninety (90)<br />
days<br />
Ninety (90)<br />
days<br />
Ten (10) days Not Applicable<br />
Ninety (90)<br />
days<br />
Not Applicable<br />
<strong>Panasonic</strong> Puerto Rico, Inc.<br />
Ave. 65 de Infantería, Km. 9.5<br />
San Gabriel Industrial Park, Carolina, Puerto Rico 00985<br />
Carry-In or Mail-In Service<br />
For Carry-In or Mail-In Service in the United States call 1-800-211-PANA (1-800-<br />
211-7262) or visit <strong>Panasonic</strong> web site: http://www.panasonic.com<br />
For assistance in Puerto Rico call <strong>Panasonic</strong> Puerto Rico, Inc. (787)-750-4300<br />
or fax (787)-768-2910.<br />
Limited Warranty Limits And Exclusions<br />
This warranty ONLY COVERS failures due to defects in materials or workmanship,<br />
and DOES NOT COVER normal wear and tear or cosmetic damage. The warranty<br />
ALSO DOES NOT COVER damages which occurred in shipment, or failures which<br />
are caused by products not supplied by the warrantor, or failures which result from<br />
accidents, misuse, abuse, neglect, mishandling, misapplication, alteration, faulty<br />
installation, set-up adjustments, misadjustment of consumer controls, improper<br />
maintenance, power line surge, lightning damage, modifi cation, or commercial<br />
use (such as in a hotel, offi ce, restaurant, or other business), rental use of the<br />
product, service by anyone other than a Factory Servicenter or other Authorized<br />
Servicer, or damage that is attributable to acts of God.<br />
THERE ARE NO EXPRESS WARRANTIES EXCEPT AS LISTED UNDER<br />
“LIMITED WARRANTY COVERAGE”. THE WARRANTOR IS NOT LIABLE<br />
FOR INCIDENTAL OR CONSEQUENTIAL DAMAGES RESULTING FROM<br />
THE USE OF THIS PRODUCT, OR ARISING OUT OF ANY BREACH OF THIS<br />
WARRANTY. (As examples, this excludes damages <strong>for</strong> lost time, travel to and from<br />
the servicer, loss of media or images, data or other memory content. The items<br />
listed are not exclusive, but are <strong>for</strong> illustration only.) ALL EXPRESS AND IMPLIED<br />
WARRANTIES, INCLUDING THE WARRANTY OF MERCHANTABILITY, ARE<br />
LIMITED TO THE PERIOD OF THE LIMITED WARRANTY.<br />
Some states do not allow the exclusion or limitation of incidental or consequential<br />
damages, or limitations on how long an implied warranty lasts, so the exclusions<br />
may not apply to you.<br />
This warranty gives you specifi c legal rights and you may also have other rights<br />
which vary from state to state. If a problem with this product develops during or<br />
after the warranty period, you may contact your dealer or Servicenter. If the problem<br />
is not handled to your satisfaction, then write to the warrantorʼs Consumer Affairs<br />
Department at the addresses listed <strong>for</strong> the warrantor.<br />
PARTS AND SERVICE WHICH ARE NOT COVERED BY THIS LIMITED<br />
WARRANTY ARE YOUR RESPONSIBILITY.<br />
Obtain Product In<strong>for</strong>mation and <strong>Operating</strong> Assistance; locate your nearest Dealer or Servicenter; purchase Parts and<br />
Accessories; or make Customer Service and Literature requests by visiting our Web Site at:<br />
http://www.panasonic.com/comsumersupport<br />
or, contact us via the web at:<br />
http://www.panasonic.com/contactinfo<br />
You may also contact us directly at:<br />
1-800-211-PANA (7262),<br />
Monday-Friday 9 am-9 pm; Saturday-Sunday 10 am-7 pm, EST.<br />
For hearing or speech impaired TTY users, TTY: 1-877-833-8855<br />
Accessory Purchases<br />
Purchase Parts, Accessories and Instruction Books online <strong>for</strong> all <strong>Panasonic</strong> Products by visiting our Web Site at:<br />
http://www.pasc.panasonic.com<br />
or, send your request by E-mail to:<br />
npcparts@us.panasonic.com<br />
You may also contact us directly at:<br />
1-800-332-5368 (Phone) 1-800-237-9080 (Fax Only) (Monday-Friday 9 am to 8 pm, EST.)<br />
<strong>Panasonic</strong> Services Company<br />
20421 84th Avenue South, Kent, WA 98032<br />
(We Accept Visa, MasterCard, Discover Card, American Express, and Personal Checks)<br />
For hearing or speech impaired TTY users, TTY: 1-866-605-1277<br />
Service in Puerto Rico<br />
<strong>Panasonic</strong> Puerto Rico, Inc.<br />
Ave. 65 de Infantería, Km. 9.5, San Gabriel Industrial Park, Carolina, Puerto Rico 00985<br />
Phone (787)750-4300, Fax (787)768-2910
Limited Warranty (ONLY FOR CANADA)<br />
<strong>Panasonic</strong> Canada Inc.<br />
PANASONIC/TECHNICS PRODUCT – LIMITED WARRANTY<br />
<strong>Panasonic</strong> Canada Inc. warrants this product to be free from defects in material and workmanship and agrees to remedy<br />
any such defect <strong>for</strong> a period as stated below from the date of original purchase.<br />
Technics Audio Product One (1) year, parts and labour<br />
<strong>Panasonic</strong> Audio & DVD Product One (1) year, parts and labour<br />
Accessories including rechargeable batteries Ninety (90) days<br />
In-home Service will be carried out only to locations accessible by roads and within 50 km of an authorized <strong>Panasonic</strong><br />
service facility.<br />
LIMITATIONS AND EXCLUSIONS<br />
This warranty does not apply to products purchased outside Canada or to any product which has been improperly installed,<br />
subjected to usage <strong>for</strong> which the product was not designed, misused or abused, damaged during shipping, or which has<br />
been altered or repaired in any way that affects the reliability or detracts from the per<strong>for</strong>mance, nor does it cover any product<br />
which is used commercially. Dry cell batteries are also excluded from coverage under this warranty.<br />
This warranty is extended to the original end user purchaser only. A purchase receipt or other proof of date of original<br />
purchase is required be<strong>for</strong>e warranty service is per<strong>for</strong>med.<br />
THIS EXPRESS, LIMITED WARRANTY IS IN LIEU OF ALL OTHER WARRANTIES, EXPRESS OR IMPLIED,<br />
INCLUDING ANY IMPLIED WARRANTIES OF MERCHANTABILITY AND FITNESS FOR A PARTICULAR PURPOSE.<br />
IN NO EVENT WILL PANASONIC CANADA INC. BE LIABLE FOR ANY SPECIAL, INDIRECT OR CONSEQUENTIAL<br />
DAMAGES.<br />
In certain instances, some jurisdictions do not allow the exclusion or limitation of incidental or consequential damages, or<br />
the exclusion of implied warranties, so the above limitations and exclusions may not be applicable.<br />
WARRANTY SERVICE<br />
FOR PRODUCT OPERATION ASSISTANCE, please contact:<br />
Our Customer Care Centre: Telephone #: (905) 624-5505<br />
1-800 #: 1-800-561-5505<br />
Fax #: (905) 238-2360<br />
Email link: “Contact Us” on www.panasonic.ca<br />
FOR PRODUCT REPAIRS, please locate your nearest Authorized Servicente at www.panasonic.ca:<br />
Link: “ServicentresTM locator” under “Customer support”<br />
<strong>Panasonic</strong> Factory Service:<br />
Richmond British Columbia Mississauga, Ontario<br />
Product Service<br />
<strong>Panasonic</strong> Canada Inc.<br />
12111 Riverside Way<br />
Richmond BC V6W 1K8<br />
Tel: (604) 278-4211<br />
Fax: (604) 278-5627<br />
<strong>Panasonic</strong> Canada Inc.<br />
5770 Ambler Drive<br />
Mississauga ON L4W 2T3<br />
Tel: (905) 624-8447<br />
Fax: (905) 238-2418<br />
IF YOU SHIP THE PRODUCT TO A SERVICENTRE<br />
Carefully pack and send prepaid, adequately insured and preferably in the original carton.<br />
Include details of the defect claimed, and proof of date of original purchase.<br />
1. Damage requiring service — The unit should be serviced by qualifi ed service personnel if:<br />
(a) The AC power supply cord or the plug has been damaged; or<br />
(b) Objects or liquids have gotten into the unit; or<br />
(c) The unit has been exposed to rain; or<br />
(d) The unit does not operate normally or exhibits a marked change in per<strong>for</strong>mance; or<br />
(e) The unit has been dropped or the cabinet damaged.<br />
2. Servicing— Do not attempt to service the unit beyond that described in these operating instructions. Refer all other<br />
servicing to authorized servicing personnel.<br />
3. Replacement parts— When parts need replacing ensure the servicer uses parts specifi ed by the manufacturer or parts<br />
that have the same characteristics as the original parts. Unauthorized substitutes may result in fi re, electric shock, or<br />
other hazards.<br />
4. Safety check— After repairs or service, ask the servicer to per<strong>for</strong>m safety checks to confi rm that the unit is in proper<br />
working condition.<br />
The servicer will require all components to service your system.<br />
There<strong>for</strong>e, should service ever be necessary, be sure to bring the entire system.<br />
Product in<strong>for</strong>mation<br />
For product in<strong>for</strong>mation or assistance with product operation:<br />
In the U.S.A., refer to “Customer Services Directory” on page 16.<br />
In Canada, contact the <strong>Panasonic</strong> Canada Inc. Customer Care Centre at 905-624-5505, or visit the website (www.panasonic.ca),<br />
or an authorized Servicentre closest to you.<br />
RQTV0097<br />
17<br />
ENGLISH<br />
English<br />
English
RQTV0097<br />
18<br />
Preparativos iniciales<br />
Paso 1 - Conexiones<br />
Conecte el cable de alimentación de CA sólo después de haber hecho todas las demás conexiones.<br />
1 Conecte la antena de cuadro de AM.<br />
Ponga la antena en posición vertical sobre su base.<br />
3 Conecte los cables de los altavoces.<br />
Azul<br />
Gris<br />
Rojo<br />
Negro<br />
Gris<br />
(ª)<br />
L<br />
R<br />
Azul (·)<br />
HIGH (6 ) LOW (6 )<br />
Negro (·)<br />
Rojo (ª)<br />
Una conexión incorrecta puede dañar el aparato.<br />
Paso 2<br />
2 - Introducción de pilas en el<br />
mando a distancia<br />
■ Pilas<br />
• Inserte los polos (+ y –) de la <strong>for</strong>ma que se indica en el<br />
mando a distancia.<br />
• Retire las pilas si no va a utilizar el mando a distancia<br />
durante un periodo de tiempo largo. Guárdelas en un<br />
lugar fresco y oscuro.<br />
• No utilice baterías recargables.<br />
• Un mal manejo de pilas en el control remoto puede<br />
provocar fugas electrolíticas, que pueden provocar fuego.<br />
■ Utilización<br />
• Diríjalo al sensor del mando a distancia, evitando los<br />
obstáculos, desde una distancia máxima de 7 m (23 pies)<br />
directamente frente al aparato.<br />
Consulte la página 6 para ver la posición del sensor de la<br />
señal del mando a distancia.<br />
Colocación de los altavoces<br />
2 Conecte la antena interior de FM.<br />
AM ANT<br />
EXT LOOP<br />
FM ANT<br />
75<br />
Cinta<br />
adhesiva<br />
Antena interior<br />
de FM<br />
Fije la antena en una pared o columna en una<br />
posición en que las señales de radio se reciban<br />
con la menor interferencia.<br />
4 Conecte el cable de alimentación de CA<br />
El cable de alimentación de CA incluido es para ser<br />
usado con este aparato solamente. No lo utilice con<br />
otro equipo.<br />
Paso 3 - Función de demostración<br />
Cuando el aparato se enchufe por primera vez puede<br />
aparecer en el visualizador una demostración de sus<br />
funciones.<br />
Si el ajuste de demostración está desactivado, usted podrá<br />
activarlo seleccionando “DEMO ON”.<br />
Mantenga pulsado [–DEMO, 7] en la unidad principal.<br />
La visualización cambia cada vez que se pulsa el botón.<br />
DEMO OFF DEMO ON<br />
(desactivación) (activación)<br />
Durante el modo de espera, seleccione “NO DEMO” para<br />
reducir el consumo de energía.<br />
Los altavoces han sido diseñados identicamente por lo que no es necesario orientar el canal derecho o izquiedo.<br />
Utilice solamente los altavoces suministrados.<br />
La combinación de la unidad principal y los altavoces proporciona el mejor sonido. Utilizando otros altavoces se puede<br />
estropear la unidad y el sonido quedará afectado negativamente.<br />
Nota<br />
• Mantenga sus altavoces alejados un mínimo de 10mm ( 13 /32˝) del sistema para disponer de una ventilación apropiada.<br />
• Estos altavoces no disponen de blindaje magnético. No los ponga cerca de televisores, ordenadores personales y otros dispositivos a los<br />
que afecte fácilmente el magnetismo.<br />
• Para evitar estropear los altavoces, no toque los conos de los altavoces si ha quitado las redes.<br />
Precaución<br />
Use los altavoces sólo con el sistema recomendado. De lo contrario, se podrían dañar el amplifi cador<br />
y los altavoces, y se podría ocasionar un incendio. Consulte a un técnico de servicio especializado si<br />
se ha producido algún daño o si se ha producido un cambio repentino en su funcionamiento.<br />
No instale estos altavoces en paredes ni techos.
Controles<br />
Aparato principal<br />
Los números entre paréntesis indican la página de referencia.<br />
Soporte de casete (21)<br />
Indicador de alimentación de CA (AC IN)<br />
Este indicador se encenderá cuando el aparato<br />
esté conectado a la red de CA.<br />
1 Interruptor de alimentación en espera/<br />
conectada (POWER y/l) (15)<br />
Pulse este interruptor para cambiar del modo de<br />
alimentación conectada al modo de alimentación<br />
en espera o viceversa. En el modo de<br />
alimentación en espera el aparato consume una<br />
pequeña cantidad de corriente.<br />
2 Reproducción/pausa de disco (20)<br />
3 Reproducción de la cinta (21)<br />
4 Selección de graves (12)<br />
Conector de puerto de música (13)<br />
5 Selección de agudos (12)<br />
Omitir/buscar disco, avance rápido de cinta/<br />
rebobinar, sintonizar/selección de canal<br />
presintonizado (21)<br />
Abrir/cerrar bandeja de disco (20)<br />
Selección de <strong>CD</strong> (7)<br />
Mando a distancia<br />
Bandeja de disco (20)<br />
Parte superior del aparato<br />
Los botones como el 1 funcionan del mismo modo que los botones del aparato principal.<br />
Temporizador<br />
para dormir (11)<br />
1<br />
Apagado<br />
automático<br />
Disco (20)<br />
Programas (8)<br />
Cancelación de<br />
programas (8)<br />
Repetición (8)<br />
Selección de<br />
àlbum (20)<br />
2<br />
6<br />
Ajuste de<br />
graves/agudos<br />
(12)<br />
4<br />
!<br />
Re-Master (13)<br />
7<br />
Reloj/temporizador (23)<br />
Temporizadorde<br />
reproducción/grabación (23)<br />
Visualizador (8)<br />
Reducción de la iluminación<br />
del visualizador<br />
Numerados (20, 22)<br />
Borrado (8)<br />
Omitir/buscar disco, avance<br />
rápido de cinta/rebobinar,<br />
sintonizar/selección de canal<br />
presintonizado (20, 22, 23)<br />
8<br />
3<br />
Parada (20)<br />
9<br />
Introducir (8)<br />
5<br />
Ecualizador preajustado (12)<br />
Sonido envolvente (13)<br />
Silenciamiento<br />
Selector del modo de<br />
reproducción (20 a 22)<br />
Toma de auriculares ( )<br />
Procure evitar utilizarlos mucho<br />
rato con el fi n de evitar lesiones<br />
auditivas.<br />
Tipo de clavija: estéreo de<br />
3.5 mm ( 1/8˝)<br />
(no suministrada)<br />
Abra la tapa del disco (21)<br />
Visualizador<br />
Sensor de señal del mando a<br />
distancia<br />
6 Selección de puerto de<br />
música (13)<br />
Paro/demostración (18, 21)<br />
7 Grabación (13, 21)<br />
8 Selector de sintonizador/<br />
banda (22)<br />
9 Control de volumen<br />
! Selección H.BASS (13)<br />
Comprobación de posición<br />
de <strong>CD</strong> (8)<br />
Cambiador de <strong>CD</strong> (7)<br />
Esta función de apagado<br />
automático le permite<br />
apagar el aparato en<br />
modo disco o cinta, sólo<br />
después de 10 minutos sin<br />
utilizarlo.<br />
El ajuste se mantiene<br />
aunque el aparato esté<br />
apagado.<br />
Reduce la iluminación del<br />
visualizador.<br />
Silencia el sonido.<br />
• Pulse el botón para activarlo.<br />
• Vuélvalo a pulsar para cancelar.<br />
RQTV0097<br />
19<br />
ESPAÑOL English<br />
English
RQTV0097<br />
20<br />
1<br />
2<br />
3<br />
4<br />
5<br />
Discos<br />
Reproducción básica<br />
<strong>CD</strong><br />
MP3 WMA<br />
Pulse [y] para encender el aparato.<br />
Pulse [1 3~ 5 3] para seleccionar la bandeja<br />
deseada.<br />
Pulse [OPEN/CLOSE 0] para abrir la bandeja del<br />
disco y cargar un <strong>CD</strong>. Vuelva a pulsar [OPEN/CLOSE<br />
0] para cerrar la bandeja.<br />
La etiqueta<br />
tiene que estar<br />
hacia arriba<br />
Número de<br />
bandeja<br />
Bandeja de disco<br />
Pulse [<strong>CD</strong> 6] para iniciar la reproducción.<br />
Ajuste el volumen.<br />
Botones<br />
numéricos<br />
Para Acción<br />
detener el disco Pulse [STOP 7].<br />
interrumpir la<br />
Pulse [<strong>CD</strong> 6]. Vuelva a pulsar para<br />
reproducción<br />
reanudar la reproducción.<br />
saltar pistas Pulse [4/REW/4] o [3/FF/¢]<br />
durante la reproducción<br />
o la pausa.<br />
buscar por pistas Mantenga pulsado [4/REW/4] o<br />
<strong>CD</strong><br />
[3/FF/¢] durante la reproducción<br />
o la pausa.<br />
iniciar la reproducción Si el aparato está en modo de espera<br />
con un toque<br />
y se introduce un disco compacto,<br />
pulse [<strong>CD</strong> 6] o [1 3 ~ 5 3] para<br />
iniciar la reproducción.<br />
saltar álbum<br />
MP3 WMA<br />
Pulse [ALBUM o ] en el modo<br />
de reproducción.<br />
Pulse [ALBUM or ] una vez y<br />
los botones numéricos en el modo<br />
de parada.<br />
Bandeja de<br />
disco<br />
Función de modo de reproducción<br />
1<br />
2<br />
3<br />
<strong>CD</strong><br />
MP3 WMA<br />
Pulse [<strong>CD</strong> 6] y después [STOP 7].<br />
Pulse [DI<strong>SC</strong>] y (antes de que pasen 10 segundos)<br />
pulse [1 ~ 5] para seleccionar el disco.<br />
Pulse [PLAY MODE] en el mando a distancia para<br />
seleccionar el modo deseado.<br />
Modo Para reproducir<br />
un disco seleccionado.<br />
1-DI<strong>SC</strong><br />
1DI<strong>SC</strong><br />
ALL-DI<strong>SC</strong><br />
ALL DI<strong>SC</strong><br />
1-TRACK<br />
1TR<br />
1-ALBUM<br />
1ALBUM<br />
MP3 WMA<br />
1-DI<strong>SC</strong> RANDOM<br />
1DI<strong>SC</strong> RND<br />
1-ALBUM RANDOM<br />
1ALBUM RND<br />
MP3 WMA<br />
ALL-DI<strong>SC</strong> RANDOM<br />
ALL DI<strong>SC</strong> RND<br />
todos los discos de las bandejas,<br />
p. ej., 4→5→1→2→3.<br />
una melodía seleccionada del disco<br />
seleccionado.<br />
Pulse las teclas numéricas para<br />
seleccionar la pista.<br />
un disco seleccionado aleatoriamente.<br />
Pulse [ALBUM or ] para<br />
seleccionar el álbum.<br />
todos los discos cargados en orden<br />
aleatorio.<br />
un álbum seleccionado del disco<br />
seleccionado.<br />
Pulse [ALBUM or ] para<br />
seleccionar el álbum.<br />
todos los discos cargados en orden<br />
aleatorio.<br />
Note<br />
• Durante cualquier reproducción aleatoria, no puede saltar pistas<br />
que ya han sido reproducidas.<br />
• <strong>CD</strong><br />
Durante la reproducción RANDOM de 1 <strong>CD</strong> o de TODOS LOS<br />
<strong>CD</strong>ʼs, podrá buscar hacia delante sólo en la pista actual.
Cintas de casete<br />
Parte superior del<br />
aparato<br />
Soporte de casete<br />
Los botones descritos para “Cintas de casete” son<br />
principalmente para la unidad a no ser que se indique<br />
lo contrario.<br />
1<br />
2<br />
3<br />
Reproducción básica<br />
Pulse [0] e insertar la cinta.<br />
Lado de avance<br />
Cierre la tapa con la mano.<br />
�<br />
Introduzca<br />
dentro de las<br />
guías<br />
Pulse [TAPE 3] para iniciar la reproducción.<br />
Para reproducir la otra cara de la cinta, dé la vuelta al casete.<br />
Para Acción<br />
detener la<br />
reproducción<br />
Pulse [–DEMO, 7].<br />
iniciar la<br />
reproducción con<br />
un toque<br />
avanzar<br />
rápidamente o<br />
rebobinar<br />
Pulse [TAPE 3] cuando el sistema esté<br />
apagado con el casete cargado.<br />
Pulse [4/REW/4] o [3/FF/¢] el modo<br />
de parada.<br />
Grabación<br />
Use cintas de posición normal.<br />
Pueden usarse cintas de posición alta y de metal, pero el<br />
aparato no las grabará ni las borrará correctamente.<br />
Preparación<br />
Rebobine la cinta original para que la grabación pueda<br />
comenzar de inmediato.<br />
Grabación de discos<br />
1<br />
2<br />
3<br />
4<br />
5<br />
Introduzca el casete en el que quiera grabar.<br />
Pulse [<strong>CD</strong> 6] y luego [–DEMO, 7].<br />
Pulse [OPEN/CLOSE 0] para introducir el <strong>CD</strong>. Vuélvalo<br />
a pulsar para cerrar.<br />
Pulse [PLAY MODE] en el mando a distancia para<br />
seleccionar el modo deseado (consulte la página 20).<br />
Pulse [ REC/8] para iniciar la grabación.<br />
Other basic operations<br />
Para Acción<br />
detener la grabación Pulse [–DEMO, 7].<br />
grabar en la otra cara Dé la vuelta a la cinta de casete y pulse<br />
de la cinta<br />
[ REC¥8].<br />
Puede realizar la misma operación de [ REC¥8] en la unidad<br />
principal, pulsando [REC ¥8] y [TAPE] simultáneamente en<br />
el mando a distancia.<br />
RQTV0097<br />
21<br />
ESPAÑOL English<br />
English
RQTV0097<br />
22<br />
1<br />
2<br />
3<br />
Radio<br />
Sintonización manual<br />
Botones<br />
numéricos<br />
Pulse [TUNER/BAND] para seleccionar “FM” o<br />
“AM”.<br />
Pulse [PLAY MODE] para seleccionar “MANUAL”.<br />
Pulse [4/REW/4] o [3/FF/¢] para seleccionar la<br />
frecuencia de la emisora requerida.<br />
Se visualizará “ ST ” cuando esté siendo recibida una<br />
emisora estéreo por FM.<br />
Para sintonizar automáticamente<br />
Pulse [4/REW/4] o [3/FF/¢] hasta que la frecuencia<br />
empiece a cambiar rápidamente. El aparato inicia la<br />
sintonización automática y se detendrá cuando encuentre<br />
una emisora.<br />
• La sintonización automática tal vez se interrumpa cuando<br />
las interferencias sean excesivas.<br />
• Para cancelar la sintonización automática, pulse [4/<br />
REW/4], [3/FF/¢] ó [STOP 7].<br />
Para mejorar la calidad del sonido de FM<br />
Mantenga pulsado [PLAY MODE] para visualizar<br />
“MONO”.<br />
Para cancelar<br />
Pulse y mantenga pulsado [PLAY MODE] otra vez hasta<br />
que“MONO” desaparezca.<br />
• MONO también se cancelará si se cambia la frecuencia.<br />
• Deje “MONO” apagado para la escucha normal.<br />
Grabación de emisoras en memoria<br />
Se puede presintonizar un máximo de 15 emisoras en cada<br />
banda, FM y AM.<br />
Preparación<br />
Pulse [TUNER/BAND] para seleccionar “FM” o “AM”.<br />
Presintonización automática<br />
Mantenga pulsado [PROGRAM] para iniciar la<br />
presintonización.<br />
Presintonización manual<br />
1<br />
2<br />
3<br />
4<br />
5<br />
Pulse [PLAY MODE] para seleccionar “MANUAL”.<br />
Pulse [4/REW/4] o [3/FF/¢] para seleccionar la<br />
emisora deseada.<br />
Pulse [PROGRAM].<br />
Pulse los botones numéricos para seleccionar el<br />
canal.<br />
La emisora que ocupa un canal se borrará si se<br />
presintoniza otra emisora en ese canal.<br />
Repita los pasos del 2 al 4 para preestablecer más<br />
emisoras.<br />
Selec Selección de ción de<br />
Pulse los botónes numéricos para seleccionar el canal.<br />
Para los canales 10 a 15 pulse [h10] y luego los dos<br />
dígitos.<br />
O<br />
1 Pulse [PLAY MODE] para seleccionar “PRESET”.<br />
2 Pulse [4/REW/4] o [3/FF/¢] para seleccionar el<br />
canal.<br />
Ajuste de la asignación de FM<br />
Aparato principal solamente<br />
Este sistema le permite recibir emisiones de FM asignadas<br />
en pasos de 0,1 MHz.<br />
Para cambiar el paso a 0,1 MHz<br />
1<br />
2<br />
Mantenga pulsado [TUNER/BAND].<br />
Después de unos segundos, la visualización cambiará a<br />
una visualización parpadeante de la frecuencia mínima<br />
actual.<br />
Continúe pulsando [TUNER/BAND].<br />
• Si la frecuencia mínima cambia, suelte el botón. Para<br />
volver al paso original, repita los pasos anteriores.<br />
• Después de cambiar el ajuste de “asignación”, las<br />
frecuencias previamente preajustadas en la memoria<br />
se borrarán.
Temporizador<br />
Puesta en hora<br />
Éste es un reloj de sistema de 12 horas.<br />
1<br />
2<br />
3<br />
Pulse [CLOCK/TIMER] para seleccionar “CLOCK”.<br />
Cada vez que pulse el botón:<br />
CLOCK ˚ PLAY ˚ REC<br />
Visulización original<br />
Entre 5 segundos, Pulse [4/REW/4] o [3/FF/¢]<br />
para ajustar la hora.<br />
Pulse [CLOCK/TIMER] para terminar de poner la<br />
hora.<br />
Visualización del reloj<br />
Pulse [CLOCK/TIMER] para visualizar el reloj durante unos<br />
segundos.<br />
Nota<br />
El reloj puede atrasar o adelantar minutos, pasado un plazo de<br />
tiempo. Si es necesario, vuelva a ponerlo en hora.<br />
Utilización del temporizador de<br />
reproducción/grabación<br />
Puede ajustar el temporizador para que se encienda a<br />
una hora determinada para despertarle (temporizador de<br />
reproducción) o para grabar la radio o fuente de puerto de<br />
música (temporizador de grabación).<br />
Preparación<br />
Encienda el aparato y ponga en hora el reloj.<br />
Temporizador Acción<br />
Temporizador de<br />
reproducción<br />
Temporizador de<br />
grabación<br />
Prepare la fuente musical que desee<br />
escuchar: cinta, número de disco (1-5), radio<br />
o fuente de puerto de musica y ajuste el<br />
volumen.<br />
Compruebe las lengüetas de prevención de<br />
borrado del casete (consulte la página 9),<br />
inserte el casete y sintonice la emisora de<br />
radio (consulte la página 22) o seleccione<br />
la fuente de puerto de musica (consulte la<br />
página 13).<br />
1<br />
2<br />
3<br />
4<br />
Pulse [CLOCK/TIMER] repetidamente<br />
seleccionar el temporizador deseado.<br />
para<br />
CLOCK ˚ PLAY<br />
Visulización original<br />
˚ REC<br />
Entre 5 segundos, pulse [4/REW/4] o [3/FF/¢]<br />
para ajustar la hora de inicio.<br />
Hora de inicio<br />
Indicador del temporizador<br />
de reproducción<br />
Indicador del temporizador de<br />
grabación<br />
Pulse [CLOCK/TIMER] para confirmar.<br />
Repita los pasos 2 y 3 para ajustar la hora de<br />
finalización.<br />
Hora de fi nalización<br />
Para activar el temporizador<br />
5<br />
6<br />
Pulse [˚PLAY/REC] para encender el temporizador<br />
deseado.<br />
˚ PLAY ˚ REC<br />
Ninguna visualización<br />
(desactivado)<br />
Pulse [y] para apagar el aparato.<br />
El aparato debe estar apagado para que funcionen los<br />
temporizadores.<br />
Otras operaciones básicas Otras operaciones básicas<br />
Para Acción<br />
cambiar la confi<br />
guración<br />
Repita los pasos 1 a 4 y 6.<br />
cambiar la fuente o<br />
el volumen<br />
compruebe la confi<br />
guración<br />
1) Pulse [˚PLAY/REC] para cancelar el<br />
temporizador indicador del visualizador.<br />
2) Cambie la fuente o el volumen.<br />
3) Realice los pasos 5 y 6.<br />
Pulse [CLOCK/TIMER] repetidamente<br />
seleccione ˚PLAY o ˚REC.<br />
cancelar Pulse [˚PLAY/REC] para cancelar el<br />
temporizador indicadores del visualizador.<br />
Nota<br />
• El temporizador de reproducción no puede utilizarse en combinación<br />
con el temporizador de grabación.<br />
• El temporizador de reproducción se pondrá en marcha a la hora<br />
programada y el volumen aumentará gradualmente hasta el nivel<br />
seleccionado.<br />
• El temporizador de grabación de registro comenzará 30 segundos<br />
antes del tiempo del sistema con el volumen silenciado.<br />
• Si el temporizador está activo, se encenderá todos los días a la<br />
hora fi jada.<br />
• El aparato debe estar en modo de espera para que el temporizador<br />
funcione.<br />
• Si apaga el aparato y lo vuelve a encender mientras esté<br />
funcionando un temporizador, no se activará el ajuste de tiempo de<br />
terminación.<br />
• Si se selecciona el puerto música (MUSIC PORT) como fuente<br />
cuando el temporizador avance, el sistema se enciende y utilice el<br />
puerto de música (MUSIC PORT) como fuente. Si desea reproducir<br />
o grabar desde el equipo reproductor portátil de audio, solo ha de<br />
activar el modo reproducir del equipo reproductor y aumente el<br />
volumen. (Ver el manual de instrucciones del reproductor portátil<br />
de audio.)<br />
RQTV0097<br />
23<br />
ESPAÑOL English<br />
English
���� ����<br />
<strong>Panasonic</strong> Consumer Electronics<br />
Company, Division of <strong>Panasonic</strong><br />
Corporation of North America<br />
One <strong>Panasonic</strong> Way Secaucus,<br />
New Jersey 07094<br />
http://www.panasonic.com<br />
© 2005 Matsushita Electric Industrial Co., Ltd.<br />
Printed in Malaysia<br />
<strong>Panasonic</strong> Puerto Rico, Inc.<br />
Ave. 65 de Infantería, Km. 9.5<br />
San Gabriel Industrial Park, Carolina,<br />
Puerto Rico 00985<br />
<strong>Panasonic</strong> Canada Inc.<br />
5770 Ambler Drive<br />
Mississauga, Ontario,<br />
L4W 2T3<br />
www.panasonic.ca<br />
En Sp<br />
RQTV0097-2P<br />
L1205YS2026