

User Manual Radar Traffic Classifier SDR
User Manual Radar Traffic Classifier SDR
User Manual Radar Traffic Classifier SDR

Create successful ePaper yourself
Turn your PDF publications into a flip-book with our unique Google optimized e-Paper software.
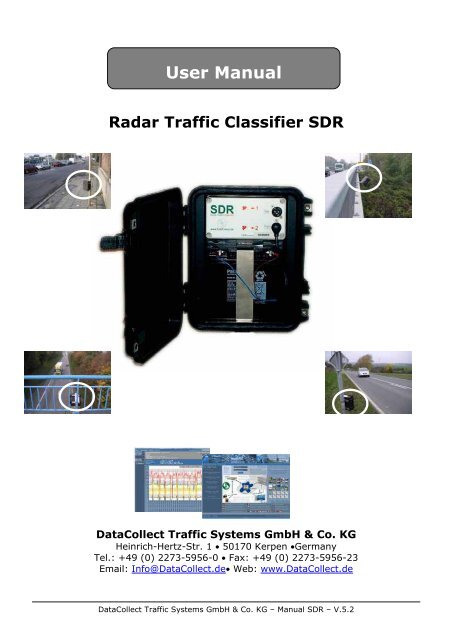
<strong>User</strong> <strong>Manual</strong><br />
<strong>Radar</strong> <strong>Traffic</strong> <strong>Classifier</strong> <strong>SDR</strong><br />
DataCollect <strong>Traffic</strong> Systems GmbH & Co. KG<br />
Heinrich-Hertz-Str. 1 • 50170 Kerpen •Germany<br />
Tel.: +49 (0) 2273-5956-0 • Fax: +49 (0) 2273-5956-23<br />
Email: Info@DataCollect.de• Web: www.DataCollect.de<br />
DataCollect <strong>Traffic</strong> Systems GmbH & Co. KG – <strong>Manual</strong> <strong>SDR</strong> – V.5.2
Table of contents<br />
1. General Description .............................................................................. Page 4<br />
1.1 <strong>Radar</strong>sensor.............................................................................................. Page 4<br />
1.2 Directional measurement ............................................................................ Page 4<br />
2. Parts and accessories ........................................................................... Page 4<br />
2.1 Internal parts ............................................................................................ Page 4<br />
2.1.1 Measurement electronic ........................................................................... Page 4<br />
2.1.2 Battery and installation of battery ............................................................. Page 4<br />
2.1.3 Mounting rails......................................................................................... Page 4<br />
2.2 External parts............................................................................................ Page 5<br />
2.2.1 Installation material ................................................................................ Page 5<br />
2.2.2 Anti theft material................................................................................... Page 5<br />
2.2.3 Laser45 calibration tool............................................................................ Page 5<br />
2.2.4 Aluminium triangle .................................................................................. Page 5<br />
2.2.5 Angle finder............................................................................................ Page 5<br />
2.2.6 Cable PDA .............................................................................................. Page 6<br />
2.2.7 Charger for battery ................................................................................. Page 6<br />
2.2.8 Software for <strong>SDR</strong> .................................................................................... Page 6<br />
2.2.9 Palm PDA ............................................................................................... Page 6<br />
2.2.9.1 Travel kit for Palm Vx ......................................................................... Page 6<br />
2.2.9.2 Connecting Palm to <strong>SDR</strong>........................................................................ Page 7<br />
2.2.9.3 Connecting Palm to PC .......................................................................... Page 7<br />
3. Installation on site................................................................................ Page 7<br />
3.1 Locations .................................................................................................. Page 7<br />
3.2 Installation................................................................................................ Page 7-11<br />
4. Adjustment on site................................................................................ Page 11<br />
4.1 Horizontal adjustment ................................................................................ Page 12-13<br />
4.2 Vertical adjustment.................................................................................... Page 14<br />
5. Description Software DataCollect Com ............................................... Page 14<br />
5.1 Menu Parameter ........................................................................................ Page 15-17<br />
5.2 Menu Clock ............................................................................................... Page 18-19<br />
5.3 Menu Get data .......................................................................................... Page 19-20<br />
5.4 Clear Mem ................................................................................................ Page 20-21<br />
5.5 Menu Online.............................................................................................. Page 21<br />
5.6 Menu Stop ................................................................................................ Page 21<br />
5.7 Menu Setup............................................................................................... Page 22<br />
5.8 Menu Service ............................................................................................ Page 22<br />
6. <strong>Manual</strong> calibration................................................................................. Page 23<br />
6.1 <strong>Manual</strong> calibration...................................................................................... Page 23-24<br />
7. Data transmission Palm-PC.................................................................. Page 25<br />
7.1 HotSync.................................................................................................... Page 25<br />
7.2 Data on PC................................................................................................ Page 25-26<br />
DataCollect <strong>Traffic</strong> Systems GmbH & Co. KG – <strong>Manual</strong> <strong>SDR</strong> – V.5.2<br />
2
8. Evaluation of data ................................................................................ Page 27<br />
8.1 Description of evaluation software DC-Report for MS-Excel ............................. Page 27<br />
8.2 Generating reports with DC-Report .............................................................. Page 28-32<br />
8.3 Data description of <strong>SDR</strong>.............................................................................. Page 33<br />
9. Short description................................................................................... Page 34<br />
9.1 Short description 3.33 ft (1 m) installation height .......................................... Page 34<br />
9.2 Short description above 3.33 ft (1 m) installation height................................. Page 35<br />
9.3 Short description for overhead measurements from a bridge........................... Page 36<br />
10. Attention – VERY IMPORTANT INFORMATION.............................. Page 37<br />
11. Comparison of <strong>SDR</strong> 3 , <strong>SDR</strong> 4 and <strong>SDR</strong> 5 ................................................. Page 38<br />
11.1 Capabilities of different versions ................................................................ Page 38<br />
12. Software installation ...................................................................... Page 39<br />
12.1 Installation of Palm Desktop software ......................................................... Page 39-40<br />
12.2 Installation of DataCollect Com ................................................................. Page 40-41<br />
12.3 Installation of DC-Report........................................................................... Page 42-43<br />
13. Options ................................................................................................. Page 44<br />
13.1 Data transmission via Web-Interface .......................................................... Page 44-45<br />
14. FAQ ....................................................................................................... Page 46<br />
14.1 General questions .................................................................................... Page 46<br />
14.2 Technical specification <strong>SDR</strong> ....................................................................... Page 47<br />
DataCollect <strong>Traffic</strong> Systems GmbH & Co. KG – <strong>Manual</strong> <strong>SDR</strong> – V.5.2<br />
3
1. General description<br />
1.1 <strong>Radar</strong>sensor<br />
The traffic classifier <strong>SDR</strong> is using a doppler radar with the frequency of 24,125 GHz for the<br />
vehicle detection.<br />
The doppler effect is using the fact that a signal sent by the radar will be reflected with a phase<br />
shift from an moving object. The phase shift is called doppler frequency.<br />
The doppler frequency is proportional to the speed of the moving object.<br />
1.2 Directional measurement<br />
The doppler frequency is only a value and gives no indication of the direction.<br />
To determine the direction a 2 channel or stereosystem will be used.<br />
The doppler frequency will be generated by integrated high frequency transceivers.<br />
2. Parts and accessories<br />
2.1 Internal parts<br />
2.1.1 Measurement electronic (standard equipment)<br />
The complete electronic incl. the internal backup battery is installed in the grey box of the <strong>SDR</strong>.<br />
On the front panel two LED indicate the battery voltage and the activated lanes.<br />
The top right connector is used for the PDA connection, the lower right connector for the battery.<br />
PDA connection<br />
Battery cable<br />
2.1.2 Battery and installation of battery (standard equipment)<br />
The 12V /17 Ah battery is located below the measurement electronic and will be fixed with the<br />
steel clamp. By pressing on the top of the clamp, the clamp can be released and removed. The<br />
battery will be connected to the 2 pin female connector of the <strong>SDR</strong> electronic. Make sure that the<br />
battery is connected as shown (cable wire points to the bottom of <strong>SDR</strong>).<br />
NEW:<br />
After connecting the battery with the <strong>SDR</strong>, both LED will light<br />
up for ca. 10 seconds. During this time the battery voltage<br />
will be checked and will then be shown by:<br />
Upper LED flashing: Battery is fully charged<br />
Both LED flashing: Battery is half-full (measurement for<br />
max. 3 days possible).<br />
Bottom LED flashing: Battery nearly empty (measurement<br />
for max. 24 hours possible)<br />
After this, the <strong>SDR</strong> will check which lanes are activated.<br />
Upper LED lights up: Lane 1 will be measured only<br />
Both LED light up: Lane 1 and Lane 2 will be measured<br />
Bottom LED lights up: Lane 2 will be measured only<br />
2.1.3 Mounting rails (standard equipment)<br />
At the back of the <strong>SDR</strong> two mounting rails are located which allow the user to install any kind of<br />
brackets or similar installation systems. Back to Table of contents<br />
DataCollect <strong>Traffic</strong> Systems GmbH & Co. KG – <strong>Manual</strong> <strong>SDR</strong> – V.5.2<br />
4
2.2 External parts<br />
2.2.1 Installation material<br />
Different kind of installation brackets are available. As a standard 68 mm brackets are used to<br />
attach the <strong>SDR</strong> to a pole.<br />
Installation brackets 68 mm Variable installation brackets (up to 160 mm ∅)<br />
2.2.2 Anti theft material (optional equipment)<br />
The lid of the <strong>SDR</strong> will be secured with two locks.<br />
2.2.3 Laser45 calibration tool (optional equipment)<br />
Patented tool for a precise adjustment of the 45° angle (see 4.1 Horizontal adjustment).<br />
Laser45<br />
Standard<br />
accessory<br />
2.2.4 Aluminium triangle (standard equipment)<br />
Two aluminium triangles are mounted on each <strong>SDR</strong>. One triangle is mounted on the top of the<br />
<strong>SDR</strong> housing and one triangle is mounted on the bottom of the <strong>SDR</strong> housing. They are used for<br />
an exact adjustment of the 45° angle (see 4.1 Horizontal adjustment).<br />
2.2.5 Angle finder (standard equipment)<br />
The angle finder will be used to adjust the vertical angle of the measurement box for installations<br />
higher than 1m. The correct angle will be calculated by the DataCollect Com software on the<br />
Palm.<br />
Angle finder<br />
Security locks<br />
Aluminium triangle (top view on <strong>SDR</strong>)<br />
DataCollect <strong>Traffic</strong> Systems GmbH & Co. KG – <strong>Manual</strong> <strong>SDR</strong> – V.5.2<br />
Back to Table of contents<br />
5<br />
Optional<br />
equipment
2.2.6 Cable PDA (standard equipment)<br />
The cable is used to connect the PDA to the <strong>SDR</strong>.<br />
Cable PDA to <strong>SDR</strong><br />
2.2.7 Charger for battery (standard equipment)<br />
The charging process will be monitored and the process of charging is shown with an LED. The<br />
charger can be connected to the battery with the two connectors.<br />
Charger for battery<br />
2.2.8 Software for <strong>SDR</strong> (standard equipment)<br />
Programming software DataCollect Com for programming and data retrieval.<br />
Softwarepack<br />
2.2.9 Palm PDA (optional equipment)<br />
With the PDA all parameters of the <strong>SDR</strong> can be set. Also an online check of the measurement is<br />
possible. The customer is free to choose which PDA to use but minimum requirements are: Palm<br />
OS and serial interface.<br />
Palm Vx<br />
2.2.9.1 Travel kit for Palm Vx (only available with Palm Vx)<br />
The Travel kit for the Palm Vx contains a charger that automatically adjusts to all voltages and<br />
frequencies worldwide (AC, 50/60Hz, 100V-240V) and the HotSync ® cable for connecting the<br />
Palm to the PC.<br />
Travel kit<br />
DataCollect <strong>Traffic</strong> Systems GmbH & Co. KG – <strong>Manual</strong> <strong>SDR</strong> – V.5.2<br />
Back to Table of contents<br />
6
2.2.9.2 Connecting Palm to <strong>SDR</strong><br />
<strong>SDR</strong> Cable PDA Palm PDA<br />
2.2.9.3 Connecting Palm to PC<br />
PC HotSync® cable Palm PDA<br />
3. Installation on site<br />
3.1 Locations<br />
By choosing a location for the <strong>SDR</strong> the user has to make sure that no objects like trees, buildings<br />
etc. will block the “view” from the radar to the road.<br />
The distance between the <strong>SDR</strong> and the centre of lane 1 should not exceed 10m.<br />
The installation height should not exceed 8 m (26,25 ft).<br />
3.2 Installation<br />
The <strong>SDR</strong> can be attached with different installation systems to poles, trees, buildings etc.<br />
An overhead measurement as like as from bridges is also possible.<br />
DataCollect <strong>Traffic</strong> Systems GmbH & Co. KG – <strong>Manual</strong> <strong>SDR</strong> – V.5.2<br />
Back to Table of contents<br />
7
The following graphs will show different kind of installations:<br />
A) Two lanes, two directions<br />
DataCollect <strong>Traffic</strong> Systems GmbH & Co. KG – <strong>Manual</strong> <strong>SDR</strong> – V.5.2<br />
Back to Table of contents<br />
8
B) One lane, two directions<br />
The values for distance 1 and distance 2 can be similar.<br />
If the road is wider than normal the distances for direction 1 and 2 have to be measured.<br />
The value for the gain has to be checked too.<br />
DataCollect <strong>Traffic</strong> Systems GmbH & Co. KG – <strong>Manual</strong> <strong>SDR</strong> – V.5.2<br />
Back to Table of contents<br />
9
C) Measurement (english), detection of lane 1 from the back.<br />
The user has to keep in mind that now lane 1 and lane 2 are switched.<br />
Lane 2 is now the closer lane (oncomeing traffic).<br />
DataCollect <strong>Traffic</strong> Systems GmbH & Co. KG – <strong>Manual</strong> <strong>SDR</strong> – V.5.2<br />
10<br />
Back to Table of contents
D) Two lanes, one direction<br />
1 m<br />
At this location two <strong>SDR</strong>´s are needed.<br />
<strong>SDR</strong> 1 measures lane 1 (lane 2 off)<br />
<strong>SDR</strong> 2 measures lane 2 (lane 1 off)<br />
Please make sure that the radar beams do not cross each other because this will affect the<br />
quality of measurement on both units.<br />
The gain has to be adjusted that only the closer lane will be detected by its <strong>SDR</strong>.<br />
4. Adjustment on site<br />
4. Adjustment on site<br />
A correct adjustment of the <strong>SDR</strong> is essential for a good quality of traffic data.<br />
A wrong adjustment will result in wrong vehicle speed and length.<br />
1 m<br />
Recommended installation:<br />
Distance: 1 m (3.33 ft)<br />
Height: 1 m (3.33 ft)<br />
Gain: 10<br />
Angle /vertical): 68 degree<br />
„Mechanical blindout“: The<br />
<strong>SDR</strong> electronic (grey box) will<br />
be tilt as much as possible, so<br />
that only one lane will be<br />
detected.<br />
DataCollect <strong>Traffic</strong> Systems GmbH & Co. KG – <strong>Manual</strong> <strong>SDR</strong> – V.5.2<br />
11<br />
Back to Table of contents
4.1Horizontal adjustment<br />
An angle of 45° to the direction of travel is important.<br />
Make sure that one of the short sides of the triangle on top of the <strong>SDR</strong> is parallel or 90 degree to<br />
the direction of travel.<br />
Parallel<br />
DataCollect <strong>Traffic</strong> Systems GmbH & Co. KG – <strong>Manual</strong> <strong>SDR</strong> – V.5.2<br />
90 degree<br />
Aluminium triangle on <strong>SDR</strong><br />
12<br />
Back to Table of contents
The horizontal adjustment can also be made with the patented Laser45 calibration tool. With this<br />
optional available accessory, the user will easily be able to adjust the important 45 ° angle as<br />
precise as possible.<br />
Mount the Laser45 on the Turnover the small arm to Now the Laser45 is<br />
<strong>SDR</strong> electronic. activate the sucker. ready for use.<br />
d 1<br />
d 2<br />
Measure the distance d1 from Move ca. 5 m away from At this point you have<br />
the <strong>SDR</strong> to the edge of the the <strong>SDR</strong> and measure the to put the angle finder<br />
roadway. same distance (d 2) that you which has a reflective<br />
had before from the edge foil on its rear side.<br />
of the roadway to the <strong>SDR</strong>.<br />
Screw<br />
By twisting the small plastic screw on the bottom side of the Laser (see arrow), the Laser45 will be<br />
activated. Now you have to point the laser beam directly on the reflective foil of the angle finder. By<br />
doing this, you will automatically turn the <strong>SDR</strong> in this direction because the Laser itself is fixed and<br />
cannot be moved. When the laser beam points directly on the angle finder, the 45 ° degree angle is<br />
set. Just unlock the sucker and remove the Laser45 from the electronic.<br />
Back to Table of contents<br />
d 2<br />
DataCollect <strong>Traffic</strong> Systems GmbH & Co. KG – <strong>Manual</strong> <strong>SDR</strong> – V.5.2<br />
~5<br />
d 2<br />
d m<br />
d 1 = d 2<br />
13
4.2 Vertical adjustment<br />
The vertical angle is related to the installation height of the <strong>SDR</strong>.<br />
At an height of 1m the correct angle will be 90° and will be lower the higher the installation<br />
height will be. After setting the installation height on the Palm the DataCollect Com software will<br />
calculate the vertical angle. With the angle finder the vertical angle of the <strong>SDR</strong> electronic can be<br />
adjusted.<br />
5. Description Software DataCollect Com<br />
The software is already installed on the Palm. (If you use your own PDA you will have to install<br />
the software first).<br />
After switch on of the Palm (green button on upper right corner) the following menu will appear:<br />
DataCollect Com icon<br />
DataCollect <strong>Traffic</strong> Systems GmbH & Co. KG – <strong>Manual</strong> <strong>SDR</strong> – V.5.2<br />
14<br />
Back to Table of contents
After clicking on the Data Collect icon the following menu appears:<br />
5.1 Menu Parameter<br />
The menu PARAMETER contains all options for the setup of the <strong>SDR</strong>.<br />
Attention: The metric units (m=meter or ‘=foot) will be choosen automatically, depending on<br />
the programming of the <strong>SDR</strong>. Programming will be made by manufacturer before delivery.<br />
In this case, the <strong>SDR</strong> measured in foot and km/h.<br />
Menu PARAMETER, page 1:<br />
Installation height: 3.33 foot (1 m):<br />
Menu PARAMETER, page 1:<br />
Installation height: above 3.33 foot (1 m):<br />
PARAMETER: contains all options for the setup of the <strong>SDR</strong><br />
CLOCK: setting the correct time in the <strong>SDR</strong><br />
GET DATA: data transfer from <strong>SDR</strong> into the Palm<br />
CLEAR MEM: clear memory before new measurement<br />
ONLINE: quality of measurement can be checked online<br />
STOP: communication between Palm and <strong>SDR</strong> will stop<br />
SETUP: for activating the power saving mode<br />
SERVICE: code-protected (for technical service only)<br />
On account of further improvements of the <strong>SDR</strong>, at an<br />
installation height of 3.33 foot (1 m), no distances (Distance 1<br />
and Distance 2) have to be put in anymore. The vertical angle<br />
will always be 90 ° and cannot be changed.<br />
At an installation height of 3.33 ft (1 m), the user just has to<br />
choose Angle (horz.), Direction, Gain, AutoCal aktiv. More<br />
information regarding these parameters can be found below.<br />
If the installation height of the <strong>SDR</strong> is above 3.33 ft (1 m), the<br />
user has to put in the installation height manually.<br />
This has to be made by tapping on the + and – symbol next to<br />
Inst. height.<br />
In this case the user has also to put in the distances by<br />
tapping on + and - symbol next to Distance 1 and Distance 2.<br />
By pressing the + symbol, the height and/or distance will<br />
increase by 0.33 ft (0,10 m) steps.<br />
By pressing the - symbol, the height and/or distance will<br />
decrease by 0.33 ft (0,10 m) steps.<br />
Back to Table of contents<br />
DataCollect <strong>Traffic</strong> Systems GmbH & Co. KG – <strong>Manual</strong> <strong>SDR</strong> – V.5.2<br />
15
Distance 1 (‘) or (m):<br />
Distance of <strong>SDR</strong> to centre lane 1 (coming lane).<br />
Distance 2 (‘) or (m):<br />
Distance of <strong>SDR</strong> to centre lane 2 (going lane).<br />
Inst. height (‘) or (m):<br />
Installation height from the ground to the centre of the grey electronic box.<br />
Angle (vertical):<br />
The angle changes automatically in relation to the installation height and will be checked and<br />
adjusted with the angle finder.<br />
Angle (horz.):<br />
The user can choose between two measurement modes:<br />
SIDE: for sidefired measurements<br />
TOP: for overhead measurements (e. g. from a bridge).<br />
Attention: If TOP is selected, the vertical angle will automatically be 30 degree and cannot be<br />
changed. Additionally, no distances nor the installation height can be put in (see picture below).<br />
Direction:<br />
By clicking on the arrow symbol, three measurement methods can be choosen:<br />
1 + 2: Both traffic directions will be stored<br />
1: Direction 1 (coming lane) will be stored<br />
2: Direction 2 (going lane) will be stored.<br />
Even if only one direction has been choosen for storage, traffic on the other direction can disturb<br />
the measurement (occlusion by vehicles).<br />
Gain (sensivity):<br />
The standard sensitivity (gain) is 18 and should not be changed!<br />
Only in 3 special cases, the user should change this value from 18 into 20:<br />
1. The distance from the <strong>SDR</strong> to the edge of the roadway is greater than 6.56 ft (2 m)<br />
2. The installation height is greater than 6.56 ft (2 m)<br />
3. The installation will be made on a bridge (overhead measurement).<br />
We highly recommend not to put in any other values than 18 or 20. Our long-standing<br />
experience has clearly shown, that these values are the most suitable.<br />
Back to Table of contents<br />
DataCollect <strong>Traffic</strong> Systems GmbH & Co. KG – <strong>Manual</strong> <strong>SDR</strong> – V.5.2<br />
16
AutoCal aktiv:<br />
If the hook is set, the autocal-function is activated. This automatic calibration makes the <strong>Radar</strong><br />
<strong>Traffic</strong> <strong>Classifier</strong> <strong>SDR</strong> unique. By the use of self-learning algorithms, the <strong>SDR</strong> does the length<br />
calibration automatically which means that the very time-consuming manual calibration is not<br />
necessary anymore. This saves time and costs, too.<br />
Only in 2 special cases, the user should deactivate the autocal-function by removing the hook:<br />
1. Measurement of only two-wheeled vehicles<br />
2. Measurement of only heavy vehicles (trucks…)<br />
In these cases, the user should use the manual calibration by using the online mode for these<br />
special measurements (more information at 5.5 Menu Online).<br />
Menu PARAMETER, page 2:<br />
Site no.:<br />
The site location can be identified with a 16 digit alphanumeric site identification number.<br />
PSL:<br />
Means Posted Speed Limit. This function is often used by the police. They set the PSL of the<br />
measuring site and will shortly be able to see whether they should or should not go out to write<br />
speeding tickets. They do not have to make a complete evaluation of all data. If the user sets 0<br />
as PSL, this function will be disabled. (More information at 5.3 Menu Get data)<br />
Time:<br />
Internal time of the <strong>SDR</strong>.<br />
Date:<br />
Internal date of the <strong>SDR</strong>.<br />
Mem used:<br />
Shows amount of vehicles in the memory of the <strong>SDR</strong>.<br />
Status MMC:<br />
Shows, if an optional MMC card is plugged into the <strong>SDR</strong>.<br />
-- No card<br />
OK MMC card plugged in the <strong>SDR</strong> and activated.<br />
The standard memory will take up to 57,000 vehicles. By installing a MMC card this memory can<br />
be extended to store 1,200.000 vehicles.<br />
Battery voltage:<br />
Shows the current battery voltage.<br />
Serialno.:<br />
Serialnumber of the <strong>SDR</strong>.<br />
Version:<br />
Internal software version of the <strong>SDR</strong>. Back to Table of contents<br />
DataCollect <strong>Traffic</strong> Systems GmbH & Co. KG – <strong>Manual</strong> <strong>SDR</strong> – V.5.2<br />
17
5.2 Menu Clock<br />
By using the CLOCK button before a new measurement starts, the correct time will be set in the<br />
<strong>SDR</strong>. The internal time of the PDA will be transferred into the <strong>SDR</strong> and has to be confirmed by<br />
clicking on the OK button.<br />
Attention: Make sure, that the time and date on the PDA are set correctly!<br />
If there are still data from the last measurement on the device, the following screen will appear<br />
after clicking on CLOCK:<br />
Now the user has two possibilities:<br />
1. GET DATA AND DELETE: The following screen appears:<br />
DataCollect <strong>Traffic</strong> Systems GmbH & Co. KG – <strong>Manual</strong> <strong>SDR</strong> – V.5.2<br />
18<br />
Back to Table of contents
By a click on GET DATA a new security query appears:<br />
If the user confirms this query by tapping on OK, the data will be transferred to the Palm and<br />
deleted from the <strong>SDR</strong> automatically. After this, the clock will be set and Clock set OK appears<br />
again.<br />
2. DELETE DATA ONLY: The following security query screen appears:<br />
If the user confirms this query by tapping on OK, the data will be deleted from the <strong>SDR</strong><br />
automatically (without a download of the data!!!). After this, the clock will be set and Clock set<br />
OK appears again.<br />
5.3 Menu Get data<br />
After a click on GET DATA, the following screen appears (Attention: Do not change the PSL after<br />
having clicked GET DATA because otherwise the data get lost):<br />
If a PSL has been set in the menu PARAMETER, you will get<br />
the following information after the measurement:<br />
Meas. started: date and time of measurement<br />
Count:<br />
Lane 1: number of vehicles on Lane 1<br />
Lane 2: was disabled in this test measurement<br />
Total: number of vehicles on lane 1 and 2 together<br />
Vehicles Speeding<br />
>PSL (Posted Speed Limit) (35 [km/h]: Speed limit on<br />
site is 35 km/h<br />
Lane 1: number and percentage of vehicles speeding<br />
Lane 2: number and percentage of vehicles speeding<br />
If no PSL has been set, only the count on lane 1, lane 2<br />
and the total count will be shown!<br />
DataCollect <strong>Traffic</strong> Systems GmbH & Co. KG – <strong>Manual</strong> <strong>SDR</strong> – V.5.2<br />
19
After another click on GET DATA, the following screen will appear:<br />
5581 vehicles have been<br />
downloaded to the PDA. (The data<br />
are still on the <strong>SDR</strong>, too)<br />
5.4 Clear Mem<br />
In this menu, the user can decide whether to delete the data from the device (<strong>SDR</strong>) or from the<br />
PDA (Palm).<br />
Attention: Before the start of a new measurement, the user should delete the data from the<br />
device (<strong>SDR</strong>)!<br />
In both cases (CLEAR DATA ON DEVICE and/or CLEAR DATA ON PALM), the following security<br />
query screen appears again:<br />
Attention: After confirming the process of deleting with OK all data will be deleted!<br />
DataCollect <strong>Traffic</strong> Systems GmbH & Co. KG – <strong>Manual</strong> <strong>SDR</strong> – V.5.2<br />
20<br />
Back to Table of contents
After the process of deleting any data from the device and/or the Palm the following message<br />
will be shown:<br />
5.5 Menu Online<br />
By using the online menu, the user can check the quality of the measurement. Each individual<br />
vehicle will be displayed with its direction (1 or 2), speed (km/h or mph) and length (ft or m).<br />
By clicking on ESC, the menu will be closed.<br />
5.6 Menu Stop<br />
Before the user leaves the DataCollect Com software, the user has to use the STOP button to close the<br />
communication between the Palm and the <strong>SDR</strong>.<br />
DataCollect <strong>Traffic</strong> Systems GmbH & Co. KG – <strong>Manual</strong> <strong>SDR</strong> – V.5.2<br />
21<br />
Back to Table of contents
5.7 Menu Setup<br />
In the SETUP menu the power saving mode can be activated.<br />
By setting a time in minutes the user can define a time when the power saving mode should be<br />
activated.<br />
For example if 15 is set, it means that after 15 minutes the radar will shut off and will be<br />
activated by a passing vehicle.<br />
After this vehicle passed by, the radar will shut off again if no new vehicle is passing within the<br />
next 15 minutes.<br />
Additionally, data logging time thresholds can be set. If these time thresholds are activated,<br />
traffic data will only stored during this times. Per day 4 time thresholds can be preset.<br />
For example: if the user sets a hook in the casket below Active, a new screen will appear (see<br />
picture 2) and there a Starttime and a Stoptime can be set, which means that data will only be<br />
stored within this time period. After the start- and stoptime is set, the user has to click on SEND.<br />
Then a confirmation of these settings will follow with OK.<br />
5.8 Menu Service<br />
The menu SERVICE is for technical service only and therefore protected with a code.<br />
Just click on CANCEL to leave this menu.<br />
Picture 2<br />
DataCollect <strong>Traffic</strong> Systems GmbH & Co. KG – <strong>Manual</strong> <strong>SDR</strong> – V.5.2<br />
22<br />
Back to Table of contents
6.1 <strong>Manual</strong> calibration of <strong>SDR</strong><br />
6. <strong>Manual</strong> calibration<br />
The online menu is also used for a manually calibration of the <strong>SDR</strong>.<br />
When the user removes the hook on the left screen below (Parameter page 1), the calibration<br />
has to be done manually:<br />
Remove this hook by<br />
clicking on it and go<br />
to NEXT PAGE.<br />
After having clicked<br />
on NEXT PAGE, this<br />
screen appears.<br />
DataCollect <strong>Traffic</strong> Systems GmbH & Co. KG – <strong>Manual</strong> <strong>SDR</strong> – V.5.2<br />
23<br />
Back to Table of contents
After confirmation with OK, the menu ONLINE will change:<br />
If a vehicle appears now, values will be<br />
displayed.<br />
1: Lane 1<br />
2: Lane 2<br />
If the user recognizes that the displayed length cannot be correct, the lengths can be adjusted<br />
by clicking on CAL. Then a new screen will open:<br />
By using + and – the length on each lane can now be changed. Each click on + or – will change<br />
the measured length for 0.33 ft (0,10 m), e. g. if a vehicle with a real length of 13.7 ft (4,10 m)<br />
will be measured as 15.3 ft (6 m), the user has to set the calibration value on lane 1 to 13,7 by<br />
clicking on -. The calibration for lane 2 has to be done in the same way as described for lane 1. If<br />
the values are set, the user has to confirm the new length by OK. Now the user has to check and<br />
calibrate the length of the next vehicles until the values are as exact as possible.<br />
By clicking on - , the length<br />
can be changed to 13,7 ft<br />
DataCollect <strong>Traffic</strong> Systems GmbH & Co. KG – <strong>Manual</strong> <strong>SDR</strong> – V.5.2<br />
24<br />
Back to Table of contents
7. Data transmission Palm-PC<br />
7.1 HotSync<br />
For a data transmission the Palm has to be connected to the <strong>SDR</strong> with the datacable<br />
(see 2.2.9.1). Then the user has to click on GET DATA on the PDA, to download the data to the<br />
Palm. After connecting the Palm to the PC the hotsync process can be started. Click on HotSync<br />
on your Palm and then on the HotSync-symbol which will appear on the Palm screen.<br />
7.2 Data on the PC<br />
After the click on HotSync, the following screen appears:<br />
Please select a language:<br />
The user can choose between D (German), GB (English), F (French), I (Italian)<br />
Date format:<br />
The user can choose between yyyy mm dd, dd mm yyyy, mm dd yyyy.<br />
Separator for the date string:<br />
The user can choose between – (dash), / (slash), . (dot)<br />
After the user has done all settings, click on Continue/Weiter.<br />
DataCollect <strong>Traffic</strong> Systems GmbH & Co. KG – <strong>Manual</strong> <strong>SDR</strong> – V.5.2<br />
25<br />
Back to Table of contents
Now a further screen appears:<br />
The user can now choose between 5 different data formats:<br />
XLS: <strong>User</strong> has to choose this data format (MS-Excel) for using the data with DC-Report.<br />
ASCII: American Standard Code for Information Interchange<br />
SEQ: Data format for software VISPA for Windows (optional)<br />
DMP: Special data format<br />
SCP: Special data format<br />
The screen will also show the user automatically in which directory the data will be placed<br />
(marked red). The standard directory is C:\DataCollect\data. After the data format has been<br />
choosen, the user has to click on OK and the menu will close.<br />
DataCollect <strong>Traffic</strong> Systems GmbH & Co. KG – <strong>Manual</strong> <strong>SDR</strong> – V.5.2<br />
26<br />
Back to Table of contents
8. Evaluation of data<br />
8.1 Description of evaluation software DC-Report for MS-Excel<br />
The user has to open the MS-Excel based software DC-Report. On account of the fact that this<br />
software works with a macro, the user has to confirm the activation of macros. Then the user<br />
will see the following screen:<br />
Open <strong>SDR</strong>-File: With a click on that button, the user can open the data from the directory<br />
C:\DataCollect\data\...<br />
Open DSD-File: With a click on that button, the user can open the data from the directory<br />
C:\DataCollect\data\...<br />
Print/View: For printing and viewing the reports after the evaluation has been done.<br />
Language: <strong>User</strong> can choose between the following languages: German, English, French,<br />
Italian, Spanish.<br />
DataCollect <strong>Traffic</strong> Systems GmbH & Co. KG – <strong>Manual</strong> <strong>SDR</strong> – V.5.2<br />
27<br />
Back to Table of contents
8.2 Generating reports with DC-Report<br />
After a click on Open <strong>SDR</strong>-File, the xls data file can be opened by a double click. Then the<br />
following screen appears (for demonstration purposes, a demo file has been choosen for<br />
evaluation):<br />
Total line of data: All data within the data file will be shown up here<br />
Interval: <strong>User</strong> can choose between 15, 30 and 60 minutes as interval for the<br />
evaluation.<br />
Speed bins: <strong>User</strong> is free to choose different speed bins.<br />
Length bins: <strong>User</strong> is free to choose different length bins (in this demo the length is in<br />
m not in ft).<br />
Process data: By clicking on that icon, the report will be generated.<br />
Generating the report will take some minutes (approx. 1 minute per 10,000 records). In the<br />
lower left corner of MS-Excel the user will see how many records have to be imported totally and<br />
how many lines have already been imported. When the import has been done, the following<br />
graphs appear (can be closed seperatly):<br />
DataCollect <strong>Traffic</strong> Systems GmbH & Co. KG – <strong>Manual</strong> <strong>SDR</strong> – V.5.2<br />
28<br />
Back to Table of contents
Graph 1: Shows the volume of traffic separated by vehicle classes<br />
Graph 2: Shows the speed allocation<br />
V15: shows the speed, 15 % of the drivers do not fall below<br />
Vm: shows the medium speed<br />
V85: shows the speed, 85 % of the drivers do not exceed<br />
DataCollect <strong>Traffic</strong> Systems GmbH & Co. KG – <strong>Manual</strong> <strong>SDR</strong> – V.5.2<br />
Back to Table of contents<br />
29
Graph 3: Shows graph 1 and graph 2 together<br />
Graph 4: Shows the data in a table<br />
DataCollect <strong>Traffic</strong> Systems GmbH & Co. KG – <strong>Manual</strong> <strong>SDR</strong> – V.5.2<br />
30<br />
Back to Table of contents
After these graphs have been shown up and closed again, a new screen can be seen:<br />
Total counts can be seen here!<br />
DataCollect <strong>Traffic</strong> Systems GmbH & Co. KG – <strong>Manual</strong> <strong>SDR</strong> – V.5.2<br />
31<br />
Back to Table of contents
If you click on Diagrams you will get the following diagram:<br />
With a click on Print/View, the user will now be able to print the reports and diagrams. The<br />
evaluation can also be saved as a pdf-file.<br />
DataCollect <strong>Traffic</strong> Systems GmbH & Co. KG – <strong>Manual</strong> <strong>SDR</strong> – V.5.2<br />
32<br />
Back to Table of contents
8.3 Data description of <strong>SDR</strong><br />
55 10:10:19 19.07.2005 1 18.700<br />
54 10:10:20 19.07.2005 1 4.000<br />
72 10:10:23 19.07.2005 1 4.000<br />
64 10:10:29 19.07.2005 1 2.700<br />
66 10:10:34 19.07.2005 1 4.800<br />
82 10:10:50 19.07.2005 1 4.500<br />
88 10:10:56 19.07.2005 1 3.900<br />
55 10:11:13 19.07.2005 1 4.300<br />
52 10:11:17 19.07.2005 1 3.300<br />
72 10:12:07 19.07.2005 1 4.500<br />
91 10:12:17 19.07.2005 1 4.700<br />
62 10:12:24 19.07.2005 1 4.600<br />
69 10:12:25 19.07.2005 1 3.800<br />
Definition:<br />
Location: Site identification number<br />
Km/h Unit of measurement<br />
1. column Speed of vehicle<br />
2. column Time<br />
3. column Date<br />
4. column Lane of traffic<br />
5. column Length of vehicle<br />
One line per vehicle will be generated.<br />
DataCollect <strong>Traffic</strong> Systems GmbH & Co. KG – <strong>Manual</strong> <strong>SDR</strong> – V.5.2<br />
33<br />
Back to Table of contents
9. Short description<br />
S A F E T Y F I R S T!<br />
In order to prevent accidental damages, injury, or death, read and understand the instructions below before installing the<br />
<strong>Radar</strong> <strong>Traffic</strong> <strong>Classifier</strong> <strong>SDR</strong>. If you do not understand or are unable to comply with these instructions, DO NOT ATTEMPT TO<br />
INSTALL THE RADAR TRAFFIC CLASSIFIER <strong>SDR</strong>!<br />
<strong>Radar</strong> <strong>Traffic</strong> <strong>Classifier</strong> <strong>SDR</strong> suspended overhead pose a risk of serious injury or death if they fall. Overhead suspension of any<br />
object is inherently dangerous. It poses a substantial risk of injury or death to both those persons performing the installation<br />
and those persons who may later occupy the space under the suspended object. For an installation on a bridge, the road below<br />
the bridge has to be closed during the installation. You may be held liable for any injury or damages which may be alleged to<br />
result from installation.<br />
Generally, at all installations, the user has to ensure that the installation will be made properly and secure with regard to all<br />
terms and rules of traffic safety.<br />
9.1 Short description 3.33 ft (1 m) installation height<br />
The following steps show a standard measurement from the side.<br />
Location: Country road (2 lanes in opposite direction)<br />
Installation height:
3<br />
9.2 Short description above 3.33 ft (1 m) installation height and distance from the<br />
<strong>SDR</strong> to the 1 st lane greater than 3.33 ft (1 m)<br />
4<br />
Height from<br />
<strong>SDR</strong> to bottom<br />
greater than<br />
1,1 m<br />
(3,61 ft)<br />
Here: 6 m<br />
(19,69 ft)<br />
Distance from<br />
<strong>SDR</strong> to 1. lane<br />
greater than<br />
1,1 m<br />
(3,61 ft)<br />
d 1 (distance 1)<br />
Necessary settings:<br />
Lane 1 Lane 2<br />
d 2 (distance 2)<br />
(Imperial units) (Metric units)<br />
1<br />
1<br />
DataCollect <strong>Traffic</strong> Systems GmbH & Co. KG – <strong>Manual</strong> <strong>SDR</strong> – V.5.2<br />
2<br />
35<br />
Measure the distance from the <strong>SDR</strong> to the middle<br />
of lane 1 and insert the value in Distance 1.<br />
Measure the distance from the <strong>SDR</strong> to<br />
the middle of lane 2 and insert the value<br />
in Distance 2.<br />
Measure the height from the <strong>SDR</strong><br />
electronic (grey box) to the bottom<br />
and insert the value in Inst. height.<br />
The necessary angle for the <strong>SDR</strong> electronic wi<br />
automatically be calculated and shown in<br />
Angle (vertical).<br />
By using the angle finder (chapter 4.1) the <strong>SDR</strong> electronic has to be set to the angle shown in Angle<br />
(vertical). Additionally, for this application the user should set the Gain from 18 to 20. Now click on<br />
NEXT PAGE and click on SEND in the appearing screen. After that, click on STOP in the main menu<br />
and disconnect the Palm from the <strong>SDR</strong>. Now the installation has been done!<br />
4<br />
2<br />
3
9.3 Short description for overhead measurements (from a bridge):<br />
S A F E T Y F I R S T!<br />
In order to prevent accidental damages, injury, or death, read and understand the instructions below before installing the<br />
<strong>Radar</strong> <strong>Traffic</strong> <strong>Classifier</strong> <strong>SDR</strong>. If you do not understand or are unable to comply with these instructions, DO NOT ATTEMPT TO<br />
INSTALL THE RADAR TRAFFIC CLASSIFIER <strong>SDR</strong>!<br />
<strong>Radar</strong> <strong>Traffic</strong> <strong>Classifier</strong> <strong>SDR</strong> suspended overhead pose a risk of serious injury or death if they fall. Overhead suspension of any<br />
object is inherently dangerous. It poses a substantial risk of injury or death to both those persons performing the installation<br />
and those persons who may later occupy the space under the suspended object. For an installation on a bridge, the road below<br />
the bridge has to be closed during the installation. You may be held liable for any injury or damages which may be alleged to<br />
result from installation.<br />
Generally, at all installations, the user has to ensure that the installation will be made properly and secure with regard to all<br />
terms and rules of traffic safety.<br />
(Metric units)<br />
<br />
1. For the Angle (horz.) TOP has to be choosen instead of SIDE. Now the Angle (vertical) will<br />
automatically be set to 30 degree and cannot be changed. Now the <strong>SDR</strong> electronic has to be<br />
tilt to 30 degree by using the angle finder (chapter 4.1).<br />
2. In this picture only the fast lane with the car (see arrow) will be measured. Therefore the<br />
<strong>SDR</strong> has to be adjusted that way, that only the right lane will be measured.<br />
3. Now click on NEXT PAGE and click on SEND in the appearing screen. After that, click on<br />
STOP in the main menu and disconnect the Palm from the <strong>SDR</strong>. Now the installation has been<br />
done!<br />
If the second lane (left one with the truck) shall also be measured, a second <strong>SDR</strong> is<br />
necessary which then has to be mounted over that lane. For the lane on the left, the<br />
autocalibration should also be deactivated be removing the hook on AutoCal aktiv on<br />
account of the mostly heavy vehicles on that lane. Now the calibration has to be done<br />
manually via the Online menu (see chapter 6.1) for that lane.<br />
Back to Table of contents<br />
DataCollect <strong>Traffic</strong> Systems GmbH & Co. KG – <strong>Manual</strong> <strong>SDR</strong> – V.5.2<br />
36<br />
Necessary Palm settings<br />
for this application:<br />
(Imperial units)
10. Attention<br />
VERY IMPORTANT INFORMATION<br />
Please read the following hints carefully to avoid any problems or loss of data!!!<br />
� S A F E T Y F I R S T!<br />
In order to prevent accidental damages, injury, or death, read and understand the<br />
instructions below before installing the <strong>Radar</strong> <strong>Traffic</strong> <strong>Classifier</strong> <strong>SDR</strong>. If you do not understand<br />
or are unable to comply with these instructions, DO NOT ATTEMPT TO INSTALL THE<br />
RADAR TRAFFIC CLASSIFIER <strong>SDR</strong>! <strong>Radar</strong> <strong>Traffic</strong> <strong>Classifier</strong> <strong>SDR</strong> suspended overhead pose<br />
a risk of serious injury or death if they fall. Overhead suspension of any object is inherently<br />
dangerous. It poses a substantial risk of injury or death to both those persons performing the<br />
installation and those persons who may later occupy the space under the suspended object.<br />
For an installation on a bridge, the road below the bridge has to be closed during the<br />
installation. You may be held liable for any injury or damages which may be alleged to result<br />
from installation. Generally, at all installations, the user has to ensure that the installation<br />
will be made properly and secure with regard to all terms and rules of traffic safety.<br />
� After a measurement has been done, UNPLUG the battery from the <strong>SDR</strong> electronic before<br />
dismounting the unit. Additionally, when the battery has been unplugged from the <strong>SDR</strong> for 5<br />
minutes, the data record of that measurement will be closed! Now the user can do another<br />
measurement on another location without using a Palm. Just plug in the battery again and<br />
the new measurement (in a new data record) starts!<br />
� Always be sure, that the time in the <strong>SDR</strong> and in the Palm is set correctly.<br />
� Never change the PSL (Posted Speed Limit) after you did click on GET DATA.<br />
� Never let your Palm completely discharge because this will lead to a loss of the DataCollect<br />
Com software on the Palm. In this case you will have to re-install the DataCollect Com<br />
software on the Palm (while installation of the DataCollect softwarepack, a re-installation kit<br />
will automatically be installed on your PC. With this re-install kit, the DataCollect Com<br />
software can easily be installed on the Palm again by doing a HotSync).<br />
� Before the start of a new measurement, the user should delete the old data from the <strong>SDR</strong>.<br />
� Before connecting the Palm with the <strong>SDR</strong>, the user has to leave the DataCollect Com menu<br />
on the Palm by clicking on the “house-button” of the Palm. Now the Palm can be connected<br />
to the <strong>SDR</strong> and the DataCollect Com software on the Palm can be started.<br />
� The minimum measurement period is 5 hours. For measurements below 5 hours no report<br />
can be created by DC-Report. The reason for this is, that DC-Report need at least 20<br />
intervals for expressive reports. The smallest interval is 15 minutes. 15 minutes * 20<br />
intervals = 300 minutes (5 hours).<br />
DataCollect <strong>Traffic</strong> Systems GmbH & Co. KG – <strong>Manual</strong> <strong>SDR</strong> – V.5.2<br />
37<br />
Back to Table of contents
11. Comparison of <strong>SDR</strong> 3 , <strong>SDR</strong> 4<br />
and <strong>SDR</strong> 5<br />
11.1 Capabilities of different versions<br />
<strong>SDR</strong> 3<br />
High sophisticated instrument for fast, easy and reliable traffic surveys.<br />
<strong>SDR</strong> 4<br />
New features towards <strong>SDR</strong> 3 :<br />
- improved AutoCal-function<br />
- faster download from <strong>SDR</strong> to Palm<br />
- new algorithms for an improved length resolution – improved classification<br />
<strong>SDR</strong> 5 (latest release)<br />
New features towards <strong>SDR</strong> 4 :<br />
- improved software pack for an easier installation<br />
- menu CLOCK has been changed<br />
- PSL-function<br />
- GPRS connectivity available<br />
- Bluetooth connectivity available<br />
DataCollect <strong>Traffic</strong> Systems GmbH & Co. KG – <strong>Manual</strong> <strong>SDR</strong> – V.5.2<br />
38<br />
Back to Table of contents
12. Software installation<br />
The installation of the necessary software is very easy. Just insert the disc into the CD-Rom<br />
drive and the installation starts (if not, browse the CD and click on CD_Start.exe).<br />
12.1 Installation of Palm Desktop software:<br />
1. Choose your language by clicking on one<br />
of the flags on the left!<br />
DataCollect <strong>Traffic</strong> Systems GmbH & Co. KG – <strong>Manual</strong> <strong>SDR</strong> – V.5.2<br />
39<br />
2. Choose Basicinstallation by clicking on the<br />
button!<br />
3. Choose Palm-Desktop by clicking on it! 4. If you wish to install now, click on Next>.<br />
5.Confirm the SLA terms and click Next> 6. Choose Recommended and click Next>
7. Insert a username and click Next> 8. Select the Port for the Palm. Click Next><br />
9. Now click on Install 10. After the installation, click on Finish<br />
12.2 Installation of DataCollect-Com (after the installation of Palm Desktop, click on DC-<br />
Com on the new screen. Now, the installation of DC-Com starts):<br />
1. Click on Next> to<br />
start the installation of<br />
DC-Com 5.2.<br />
DataCollect <strong>Traffic</strong> Systems GmbH & Co. KG – <strong>Manual</strong> <strong>SDR</strong> – V.5.2<br />
40<br />
Back to Table of contents
2. You should not<br />
change the installation<br />
directory here. Just<br />
click on Next>!<br />
DataCollect <strong>Traffic</strong> Systems GmbH & Co. KG – <strong>Manual</strong> <strong>SDR</strong> – V.5.2<br />
3. Confirm the<br />
installation of DC-Com<br />
5.2 with Start!<br />
41<br />
4. The installation of<br />
DC-Com 5.2 is finished.<br />
Click on Exit, to reach<br />
the main menu again.<br />
Back to Table of contents
12.3 Installation of DC-Report<br />
After the installation of DC-Com, the installation menu (for Palm Desktop and DC-Com) appears<br />
again. Click on Back to reach the main installation menu. Then click on Reports and the following<br />
menu will appear:<br />
DC-Report: Standard<br />
Evaluation software based on a MS-Excel macro.<br />
Notice: you need at least MS-Excel 2000 to run this<br />
software!<br />
VISPA: Optional<br />
Windows-based evaluationsoftware for seq-data<br />
format. Protected by hardlock-dongle. Can only be<br />
used after sale of full version of VISPA.<br />
Now the following screen will appear (just follow the installation guide as like as you did with the<br />
DC-Com software. After the installation has been done, you will find a short cut on your<br />
desktop.)<br />
DataCollect <strong>Traffic</strong> Systems GmbH & Co. KG – <strong>Manual</strong> <strong>SDR</strong> – V.5.2<br />
42<br />
Click on DC-Report to start the installation.<br />
Back to Table of contents
Just click on Exit now, to leave the installation software.<br />
During the installation, the following short cuts have been installed on your desktop:<br />
1. Short cut for Palm Desktop: notes, dates…can be insert here and can be installed on your<br />
Palm by doing a HotSync.<br />
2. Short cut for DC-Report: just click on it and DC-report will start.<br />
3. Short cut for Quick install: very useful tool for re-installation of the DataCollect Com<br />
software on the Palm.<br />
Attention: if the battery of the Palm runs down, the DataCollect Com software will disappear<br />
and has to be installed again. During the installation of the software package, a restore Palm tool<br />
has been installed. You will find it at Start/Programs/DataCollect/restore Palm. In this restore<br />
Palm, you will find DCCom.prc and Mathlib.prc. Just click on DC-Com.prc and the Quick install<br />
tool will open. Then click on Add in the Quick install tool and click on Mathlib.prc. When you do a<br />
HotSync now, DC-Com.prc and Mathlib.prc will be installed on your Palm again and you will find<br />
the DataCollect Com icon on your Palm again, too.<br />
DataCollect <strong>Traffic</strong> Systems GmbH & Co. KG – <strong>Manual</strong> <strong>SDR</strong> – V.5.2<br />
43<br />
Back to Table of contents
13. Options<br />
13.1 Mode of operation of remote data transmission via GPRS<br />
<strong>Radar</strong> <strong>Traffic</strong> <strong>Classifier</strong> with<br />
UCM-board and SIM-card.<br />
Step 2<br />
Step 4<br />
Step 1<br />
PC/Laptop with Internet accessibility<br />
DataCollect <strong>Traffic</strong> Systems GmbH & Co. KG – <strong>Manual</strong> <strong>SDR</strong> – V.5.2<br />
Web-Interface<br />
Send data<br />
Request data<br />
I. Description:<br />
Step 1:<br />
At a pre-defined time of day, the <strong>SDR</strong> contacts the database and sends the gathered data. These<br />
data will be saved in the database.<br />
Step 2:<br />
The user does a log-in into the password-secured Web-Interface and requests the data for<br />
download on his PC.<br />
Step 3:<br />
The Web-Interface sends the data to the user´s PC/Laptop. The user can choose between an<br />
ASCII- or EXCEL-file.<br />
Step 4:<br />
The user can change the parameters via the Web-Interface. The information will directly be send<br />
to the <strong>SDR</strong>.<br />
Step 3<br />
Back to Table of contents<br />
44
II. Necessary components:<br />
� <strong>Radar</strong> <strong>Traffic</strong> <strong>Classifier</strong> <strong>SDR</strong> with UCM-board ( = GPRS-connection)<br />
� SIM-card which supports GPRS<br />
� Internet accessibility<br />
III. FAQ:<br />
� Do I need one UCM-board for every <strong>SDR</strong>?<br />
� Yes! Every <strong>SDR</strong> which shall use the GPRS connectivity, needs a UCM-board.<br />
� Will the dimension of the <strong>SDR</strong> change on account of the additional UCM-board?<br />
� No, because the UCM-board will be connected directly to the <strong>SDR</strong> electronic. Therefore<br />
the dimensions of the <strong>SDR</strong> will stay the same.<br />
� Can I upgrade my existing <strong>SDR</strong>(s) with a UCM-board?<br />
� Yes, it can be upgraded. More information on request.<br />
� Can I set parameters of the <strong>SDR</strong> via the Web-Interface?<br />
� Yes, also the parameters in the <strong>SDR</strong> can be set via the Web-Interface.<br />
� Can I specify the time of day the <strong>SDR</strong> contacts the database and sends the gathered data?<br />
� Yes, the default-value (01:00 o´clock), can be changed through the Web-Interface.<br />
� Will I loose data of the current measurement while the <strong>SDR</strong> contacts the database and sends<br />
the data?<br />
� No! On account of the innovative memory architecture of our systems, the <strong>SDR</strong> will<br />
collect all data correctly, even during the process of data transmission.<br />
� What is the advantage of GPRS towards GSM?<br />
� Theoretical maximum speeds of up to 171.2 kilobits per second (kbps) are achievable<br />
with GPRS using all eight timeslots at the same time. This is about three times as fast<br />
as the data transmission speeds possible over today's fixed telecommunications<br />
networks and ten times as fast as current Circuit Switched Data services on GSM<br />
networks. Additionally not the connection time (GSM) but only the volume of data will<br />
be invoiced.<br />
� Can I „only“ download data from the Web-Interface?<br />
� No! The Web-Interface offers further possibilities:<br />
- Complete database where you can archive your gathered data<br />
- Possibility of changing the parameters in the <strong>SDR</strong><br />
- Setup of <strong>SDR</strong> parameters<br />
- …<br />
- ...<br />
- …<br />
-<br />
- Back to Table of contents<br />
DataCollect <strong>Traffic</strong> Systems GmbH & Co. KG – <strong>Manual</strong> <strong>SDR</strong> – V.5.2<br />
45
14. FAQ<br />
14.1 General questions<br />
This chapter will be filled with regard to the customers feedback.<br />
1. I did a HotSync on my Palm to transfer the data to the PC but I cannot find the data in the<br />
C:\DataCollect\Data\... directory!<br />
Check the settings in the HotSync-manager!<br />
Click with the right mouse button<br />
on the HotSync-manager symbol in<br />
the tray icon in task bar.<br />
Click with the left mouse button on<br />
Handheld overwrites Desktop<br />
Click with the left mouse button on<br />
Custom.<br />
Click with the left mouse button on<br />
DataCollect data transfer. Then click<br />
on Change…<br />
VERY IMPORTANT:<br />
DataCollect <strong>Traffic</strong> Systems GmbH & Co. KG – <strong>Manual</strong> <strong>SDR</strong> – V.5.2<br />
46<br />
Set a hook in this casket by clicking into<br />
it!!! Then leave this menu by clicking on<br />
OK!<br />
Now do a HotSync again and the data can<br />
be found in the C:\DataCollect\Data\...<br />
directory<br />
Back to Table of contents
14.2 Technical specification<br />
Sensor: Microwave, 24 GHz – ISM Band, power output 5mW<br />
Speed range: 3-250 km/h or 2-130 mph<br />
<strong>Radar</strong> range: up to 120 m (adjustable)<br />
Power: Battery rechargeable, 12V<br />
Current: 80 mA (typ.)<br />
Weight <strong>SDR</strong>: 4,7 kg<br />
Weight battery: 2,7 kg or 6,3 kg<br />
Operating temp.: -25°C to + 75°C<br />
Housing: PVC<br />
Dimensions: 300 x 350 x 150 mm<br />
Units: metric or english<br />
Data rate: up to 57,6 kB<br />
Real time clock: Yr,Mo,Dy,Hr,Min,Sec.<br />
Memory: 512 kB-16MB (back up battery)<br />
Data format: speed, date, time, direction, length (per veh. data)<br />
Resolution: 1 km/h, 0,1 m<br />
Verification: Online mode via PDA<br />
Setup / Retrieval: via PDA<br />
Calibration: manual or automatic<br />
Install. angle: Horiz. 45°, vertical 30° to 90° (adjustable)<br />
Install. distance: up to 12 m<br />
Install. height: up to 12 m<br />
DataCollect <strong>Traffic</strong> Systems GmbH & Co. KG – <strong>Manual</strong> <strong>SDR</strong> – V.5.2<br />
47<br />
Back to Table of contents


