Fane Of The Drow.pdf - RoseRed
Fane Of The Drow.pdf - RoseRed
Fane Of The Drow.pdf - RoseRed

Create successful ePaper yourself
Turn your PDF publications into a flip-book with our unique Google optimized e-Paper software.
CREDITS<br />
Design: Gwendolyn F.M. Kestrel<br />
Additional Design: Rob Heinsoo<br />
Development Team: Jesse Decker, Mike Donais, Stephen Schubert<br />
Editing Manager: Kim Mohan<br />
Design Manager: Christopher Perkins<br />
Development Manager: Jesse Decker<br />
Director of RPG R&D: Bill Slavicsek<br />
Senior Art Director RPG: Stacy Longstreet<br />
Production Managers: Josh Fischer, Randall Crews<br />
Art Director: Mari Kolkowsky<br />
Cover Artist: Marc Sasso<br />
Interior Artist: Chad Sergesketter<br />
Graphic Designers: Karin Jaques, Mari Kolkowsky<br />
Cartographer : Jason Engle<br />
Graphic Production Specialist: Erin Dorries<br />
Image Technician: Bob Jordan<br />
Based on the original DUNGEONS & DRAGONS® rules created by E. Gary Gygax and Dave Arneson, and the new DUNGEONS & DRAGONS game<br />
designed by Jonathan Tweet, Monte Cook, Skip Williams, Richard Baker, and Peter Adkison.<br />
This product uses updated material from the v.3.5 revision.<br />
This WIZARDS OF THE COAST® game product contains no Open Game Content. No portion of this work may be reproduced in any form without<br />
written permission. To learn more about the Open Gaming License and the d20 System License, please visit www.wizards.com/d20.<br />
U.S., CANADA, ASIA, EUROPEAN HEADQUARTERS<br />
PACIFIC, & LATIN AMERICA Hasbro UK Ltd<br />
Wizards of the Coast, Inc. Caswell Way<br />
P.O. Box 707 Newport, Gwent NP9 0YH<br />
Renton WA 98057-0707 GREAT BRITAIN<br />
(Questions?) 1-800-324-6496 Please keep this address for your records<br />
ISBN-10: 0-7869-3847-1<br />
620–95003740–001–EN<br />
9 8 7 6 5 4 3 2 1<br />
First Printing: September 2005<br />
ISBN-13: 978-0-7869-3847-6<br />
DUNGEONS & DRAGONS, D&D, DUNGEON MASTER, d20, d20 System, WIZARDS OF THE COAST, Player’s Handbook, Dungeon Master’s Guide, Monster Manual, Fantastic Locations: <strong>Fane</strong> of the <strong>Drow</strong>, and their respective logos<br />
are trademarks of Wizards of the Coast, Inc., in the U.S.A. and other countries. All Wizards characters, character names, and the distinctive likenesses thereof are property of Wizards of the Coast, Inc.<br />
Distributed to the hobby, toy, and comic trade in the United States and Canada by regional distributors. Distributed in the United States to the book trade by Holtzbrinck Publishing. Distributed in Canada to the<br />
book trade by Fenn Ltd. Distributed worldwide by Wizards of the Coast, Inc. and regional distributors. This material is protected under the copyright laws of the United States of America.<br />
Any reproduction or unauthorized use of the material or artwork contained herein is prohibited without the express written permission of Wizards of the Coast, Inc. This product is a work of fi ction.<br />
Any similarity to actual people, organizations, places, or events is purely coincidental.<br />
©2005 Wizards of the Coast, Inc. Printed in the U.S.A.<br />
Visit our website at www.wizards.com/dnd
2<br />
INTRODUCTION<br />
This 16-page adventure booklet contains several challenging<br />
encounters that can be combined to form a short DUNGEONS<br />
& DRAGONS® adventure intended for four 4th-level characters.<br />
<strong>The</strong> encounters play out on the battle maps included<br />
in this product. To run these encounters properly, you (as<br />
the Dungeon Master) need the Player’s Handbook, Dungeon<br />
Master’s Guide, and Monster Manual, as well as some D&D<br />
miniatures. <strong>The</strong> Adventure Background (see below) contains<br />
all of the information you need to get the adventure<br />
underway. Although designed for 4th-level characters, this<br />
adventure requires only minor adjustments to adapt it to<br />
lower- or higher-level play.<br />
USING THE BATTLE MAPS<br />
Fantastic Locations: <strong>Fane</strong> of the <strong>Drow</strong> includes four miniaturesscale<br />
maps that provide exciting battlegrounds for RPG<br />
encounters or miniatures skirmishes. <strong>The</strong>se maps allow<br />
for dynamic and challenging encounters, encouraging you<br />
and your players to make important tactical decisions while<br />
combat is underway.<br />
For the Roleplaying Game: Fantastic Locations battle<br />
maps don’t depict your average dungeon complex. <strong>The</strong> maps<br />
aren’t meant to represent an entire adventure, either. Instead,<br />
the maps provide interesting locations for key scenes and<br />
important battles. <strong>The</strong> monster tactics take advantage of the<br />
maps provided, ensuring that the battles range over large<br />
sections of the map terrain.<br />
Small reproductions of the maps, with the numbered<br />
locations within each site identifi ed, are printed on the<br />
inside covers of this booklet. For obvious reasons, your<br />
players should not be allowed to view these small maps.<br />
If you decide not to run the <strong>Fane</strong> of the <strong>Drow</strong> adventure,<br />
you can freely adapt the battle maps to other encounters in<br />
your own campaign.<br />
Some of the labels on the battle maps are intended for the<br />
D&D Miniatures Game only. <strong>The</strong>se include areas marked<br />
“Start Area,” “Exit,” and “Victory Area.” Room tags for the RPG<br />
adventure have been deliberately left off of the battle maps,<br />
although they appear on the DM’s maps on the inside cover.<br />
Battle map labels that apply to the roleplaying game<br />
include the following:<br />
Diffi cult Terrain: Squares marked with a light-colored<br />
triangle are considered diffi cult terrain. Each square of diffi<br />
cult terrain costs 2 squares to move into (3 squares if it’s a<br />
diagonal move).<br />
Risky Terrain: Squares marked with a light-colored skull<br />
REUSING THE MAPS<br />
All the encounters described in this adventure booklet unfold<br />
on the miniatures-scale battle maps included in this product.<br />
Although the maps in each Fantastic Locations product emphasize<br />
specific terrain elements that allow for more exciting<br />
and compelling battles, they are quite versatile, and we<br />
encourage you to use them more than once in a campaign.<br />
Characters might revisit the <strong>Fane</strong> of the <strong>Drow</strong> after many levels<br />
are considered risky terrain. Any creature that enters a<br />
square of risky terrain has a 25% chance of taking 2d6 points<br />
of damage.<br />
Sacred Circles: Any creature that stands on a sacred circle<br />
(wholly or partly) gains a +2 bonus on attack rolls. In addition,<br />
that creature’s attacks are considered magic for the<br />
purpose of overcoming damage reduction.<br />
For Skirmish Play: <strong>The</strong> maps in this product are carefully<br />
designed for fast and exciting D&D miniatures play.<br />
You can use these maps for any D&D Miniatures games.<br />
Starting in 2006, you will be able to use Fantastic Locations<br />
maps in sanctioned miniatures tournaments.<br />
Refer to page 16 for specifi cs on using these maps with<br />
offi cial D&D miniatures.<br />
ADVENTURE BACKGROUND<br />
For the past few months, a small and relatively isolated<br />
dwarven fortress called Stonehelm has suffered from drow<br />
raids. Although the dark elves seem too few in number to<br />
approach the fortress itself, they have slain several dwarf<br />
miners brave or foolish enough to venture beyond its<br />
protective confi nes. Hoping to rid themselves of the drow<br />
threat and gain access to the valuable mithral mines near<br />
the drow enclave of Til’Asperna, the dwarves enlist the aid<br />
of adventurers.<br />
CHOOSING AN ADVENTURE HOOK<br />
<strong>The</strong> player characters can become involved in the dwarves’<br />
plight in one of several ways. Choose the hook that best<br />
suits your particular group of characters:<br />
—Dwarves occupying a small fortress called Stonehelm<br />
hire the PCs. <strong>The</strong>ir farthest-ranging miners have recently<br />
encountered drow and goblin raiders, and the dwarves need<br />
help from adventurers to drive the drow and their goblin<br />
slaves away.<br />
If You Choose This Hook: <strong>The</strong> adventure assumes that you<br />
use this option, and you need to make only minor modifi cations<br />
to adapt the adventure to your own campaign world.<br />
—<strong>The</strong> PCs are traveling through the fringes of the Underdark<br />
on their way to some important destination when they<br />
stumble upon the drow enclave of Til’Asperna.<br />
If You Choose This Hook: <strong>The</strong> adventure begins at Til’Asperna<br />
instead of the dwarven fortress of Stonehelm. <strong>The</strong> PCs can<br />
visit the adventure’s four encounter areas (Mithral Mines,<br />
<strong>Drow</strong> Enclave, <strong>Fane</strong> of Lolth, and Tomb of Queen Peregrine)<br />
in any order.<br />
—One of the PCs’ friends or acquaintances disappears<br />
after venturing into a cave that leads to Til’Asperna. PCs who<br />
and confront higher-level foes, or the Mithral Mines map could<br />
be used to represent another underground complex later in<br />
your campaign.<br />
Check the Wizards of the Coast website, RPGA adventures,<br />
and the pages of Dungeon ® Magazine for variant encounters<br />
using the Fantastic Locations maps.
explore the cave (Search DC 20) discover a secret door at<br />
the back of the cave leading to a secret tunnel. <strong>The</strong> tunnel<br />
descends for over a mile before fi nally connecting with the<br />
Mithral Mines.<br />
If You Choose This Hook: <strong>The</strong> friend was captured by a<br />
goblin raiding party and taken as a slave to Til’Asperna.<br />
Characters can learn this information by listening for<br />
rumors around the dwarven fortress of Stonehelm (Gather<br />
Information DC 15). Now he is one of the prisoners in the<br />
dungeon waiting his turn in the torture chamber.<br />
1: MITHRAL MINES<br />
<strong>The</strong> fi rst section of this adventure takes place in an extensive<br />
area of mines and natural caverns that marks the border<br />
between the lower reaches of the dwarven fortress of<br />
Stonehelm and the drow enclave known as Til’Asperna.<br />
Til’Asperna and the mines in its immediate vicinity lie on<br />
the fringe of the Underdark, and the enclave and surrounding<br />
area have long been the sites of confrontation between<br />
the dwarves of Stonehelm, duergar forces from deep within<br />
the earth, and drow seeking to hold on to their outpost.<br />
<strong>The</strong> drow of Til’Asperna and their duergar neighbors<br />
alternate between uneasy truces and outright confl ict. Currently,<br />
the two groups are in prolonged negotiations about<br />
this area rich in mithral. Both sides are quite interested in<br />
taking possession of it, but both are using it as a bargaining<br />
chip. According to the terms of the latest temporary treaty,<br />
neither side is permitted to explore or exploit this area. <strong>The</strong><br />
small group of drow that controls the enclave managed to<br />
drive the duergar out of the area several weeks ago and force<br />
a short-term truce that holds still.<br />
Sensing a lull in the confl ict between the two evil races, the<br />
dwarves of Stonehelm must strike quickly. <strong>The</strong> dwarves sense<br />
that they must prevent both the drow and the duergar from<br />
gathering enough might to thoroughly dominate the region<br />
or forge a lasting treaty. More importantly, the dwarves must<br />
keep their own fortress secure and therefore cannot devote<br />
their own military might to the area. With little recourse,<br />
the dwarves enlist some adventurers to fi nally secure the<br />
valuable mines and to drive the drow from Til’Asperna.<br />
<strong>The</strong> mithral mines show evidence of the drow occupation,<br />
from discarded weapons to the ancient magical symbols<br />
of the ruined teleportation circle (see below).<br />
JOURNEY TO THE MINES<br />
Once the adventurers have agreed to drive the drow from<br />
Til’Asperna and the nearby Mithral Mines, the fi rst step in<br />
their journey takes them through the fortress of Stonehelm<br />
itself and then deep into the earth through a series of caverns<br />
and mine shafts.<br />
Read or paraphrase the following text to the players:<br />
<strong>The</strong> journey through the mines near the dwarven fortress of<br />
Stonehelm is uneventful at fi rst. <strong>The</strong> even tunnels of the dwarves<br />
are easy to navigate, safely reinforced, and well guarded. Dwarf<br />
sentries, stationed at key defensive points, eye you warily as you<br />
pass, but they don’t hesitate to point you toward the areas plagued<br />
by drow raiders once you identify your purpose in their mines.<br />
If you’d like to extend the adventure, you can insert an<br />
encounter with one or more wandering Underdark predators<br />
of the appropriate Challenge Rating (CR). Some possibilities<br />
include a group of 1d6+6 kobold miners, a pair of dire bats,<br />
a dark creeper, or a burrowing ankheg.<br />
ENCOUNTERS IN THE<br />
MITHRAL MINES (EL 6)<br />
Once the characters reach the mithral mines, have the<br />
players place their miniatures in the area marked “1” on<br />
the map on the inside front cover.<br />
1. PCS’ START AREA<br />
<strong>The</strong> PCs enter the map from the tunnel marked on the map.<br />
Once the players place their miniatures on the battle map,<br />
proceed with the fi ght against the Bloodweb goblin raiders<br />
(described below).<br />
2. BLOODWEB GOBLIN RAIDERS<br />
A small but vicious tribe of goblins has long served the<br />
drow of Til’Asperna. <strong>The</strong>se goblins call themselves the<br />
Bloodweb tribe as a sign of their acceptance of the drow’s<br />
mastery over them.<br />
Creatures: Ten goblin warriors, a goblin fi ghter named<br />
Blood web Okkar (their leader), and a goblin shaman named<br />
Blood web Guurrark guard the mines, but they are spread<br />
out. As soon as the combat begins, the goblins shout to their<br />
companions and all rush to join in the fi ght. <strong>The</strong> goblins’<br />
starting positions are marked on the map on the inside<br />
front cover.<br />
Like their leaders, the goblin warriors begin their names<br />
with their tribe’s name, so Arrk refers to herself as Bloodweb<br />
Arrk. <strong>The</strong> goblins’ fi rst names are monosyllabic: Arrk, Drom,<br />
Eeth, Gurn, Hant, Kurp, Noth, Parrg, Taath, and Vun.<br />
Bloodweb Okkar (goblin leader): hp 24; see below.<br />
Suggested Miniature: Snig the Axe (Archfi ends 38/60).<br />
Bloodweb Guurrark (goblin shaman): hp 20; see below.<br />
Suggested Miniature: Goblin Adept (Deathknell 34/60).<br />
Goblins, 1st-Level Warriors (10): hp 5 each; see Monster<br />
Manual page 133. Each goblin warrior has fi ve javelins. Suggested<br />
Miniature: Goblin Warrior (Dragoneye 32/60).<br />
Tactics: <strong>The</strong> goblins use their superior numbers to full<br />
advantage and make an effort to draw fi ght through length<br />
of cavern. A goblin doesn’t hesitate to double move away<br />
from a character, especially if the character has already<br />
felled one of its companions. <strong>The</strong> goblins essentially try to<br />
“shoot and scoot” to stay away from the PCs for as long as<br />
possible while throwing their javelins. An ideal round for<br />
a goblin warrior is to throw a javelin and then move 30 feet<br />
farther away from the PCs while drawing another javelin. If<br />
pressed, the goblins double move away from the enemy. <strong>The</strong><br />
goblins don’t all simply move in the same direction—they<br />
fan out and surround the PCs from a distance.<br />
3
4<br />
Development: When the goblins lose Bloodweb Okkar<br />
and more than half of their total number, a band of duergar<br />
arrives. Proceed with the next encounter. Any remaining<br />
goblins scatter and fl ee when the duergar appear. At least<br />
one of the fl eeing goblins tries to lure the PCs into area 5.<br />
Bloodweb Okkar, Goblin Leader CR 2*<br />
Male goblin fighter 3<br />
NE Small humanoid (goblinoid)<br />
Init +3; Senses darkvision 60 ft.; Spot +2, Listen +2<br />
Languages Common, Goblin<br />
AC 18, touch 14, flat-footed 15<br />
hp 24 (3 HD)<br />
Fort +4, Ref +4, Will +0<br />
Speed 30 ft. (6 squares)<br />
Melee mwk greataxe +5 (1d8+1/×3) or<br />
Ranged mwk composite shortbow +7 (1d6+1/×3) or<br />
Ranged mwk composite shortbow +5/+5 (1d6+1/×3)<br />
Space 5 ft.; Reach 5 ft.<br />
Base Atk +3; Grp +0<br />
Combat Gear potion of cure moderate wounds<br />
Abilities Str 13, Dex 16, Con 13, Int 10, Wis 8, Cha 10<br />
Feats Point Blank Shot, Precise Shot, Rapid Shot,<br />
Weapon Focus (composite shortbow)<br />
Skills Listen +2, Move Silently +6, Ride +6, Spot +2<br />
Possessions combat gear plus masterwork chain<br />
shirt, masterwork composite shortbow (+1 Str<br />
bonus) with 20 arrows, masterwork greataxe<br />
Hook A cunning leader who favors hit-and-run tactics.<br />
*CR adjusted down for low gear and poor physical<br />
statistics.<br />
Bloodweb Guurrark, Goblin Shaman CR 2*<br />
Male goblin cleric 3 (Maglubiyet)<br />
NE Small humanoid (goblinoid)<br />
Init +3; Senses darkvision 60 ft.; Spot +2, Listen +2<br />
Languages Common, Goblin<br />
AC 17, touch 13 , flat-footed 15<br />
hp 20 (3 HD)<br />
Fort +4, Ref +4, Will +5<br />
Speed 30 ft. (6 squares)<br />
Melee mwk heavy mace +5 (1d6)<br />
Space 5 ft.; Reach 5 ft.<br />
Base Atk +2; Grp –2<br />
Special Actions spontaneous casting (inflict spells),<br />
command undead (–2, 2d6+1, 3rd)<br />
Combat Gear potion of invisibility, potion of spider climb<br />
Cleric Spells Prepared (CL 3rd):<br />
2nd—hold person, invisibility D , silence<br />
1st—bless, cure light wounds, cure light wounds,<br />
protection from good D (CL 4th)<br />
0—cure minor wounds, cure minor wounds, detect<br />
magic, read magic<br />
D: Domain spell. Domains: Evil, Trickery<br />
Abilities Str 10, Dex 16, Con 13, Int 10, Wis 15, Cha 6<br />
SQ Darkvision 60 ft.<br />
Feats Brew Potion, Weapon Focus (heavy mace)<br />
Skills Concentration +7, Heal +8<br />
Possessions combat gear plus masterwork chain shirt,<br />
masterwork light shield, masterwork heavy mace<br />
Hook More concerned about himself than his tribesmen.<br />
*CR adjusted down for low gear and poor physical<br />
statistics.<br />
3. DUERGAR TREATYBREAKERS<br />
<strong>The</strong> duergar have their own plans to betray the drow and<br />
mine the mithral. <strong>The</strong>y’re quickly carving tunnels from their<br />
settled area. Upon hearing the altercation between the PCs<br />
and the goblins, they hastily follow the new dwarven tunnels<br />
to the source of the disturbance, prepared for a fi ght.<br />
Creatures: Just as the battle with the goblins seems to<br />
be nearing its end, six duergar come in from the tunnels<br />
marked on the accompanying map. One of them cries out<br />
in Dwarven, “Bloodweb goblins, eh? <strong>The</strong> dark elves have<br />
broken the treaty!” Another shouts, “<strong>The</strong>se mines will be<br />
ours again!” before moving in for the kill.<br />
<strong>The</strong>ir names are Drothyrd, Gimain, Glororic, Kargund,<br />
Kilthur, and Whurtryd.<br />
Duergar, 1st-Level Warriors (6): hp 9 each; see Monster<br />
Manual page 91. Suggested Miniature: Duergar Warrior<br />
(Archfi ends 32/60).<br />
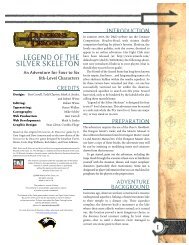
Tactics: Duergar that get within striking distance of<br />
the Bloodweb goblins will attack<br />
them, but they would rather<br />
attack the PCs. <strong>The</strong>y<br />
Duergar on the attack!
have a straightforward approach to combat: <strong>The</strong>y simply<br />
move to the closest PCs as a solid group and try to take one<br />
foe down at a time.<br />
Development: Once the goblins and duergar are defeated<br />
or routed, the PCs can explore the other areas of the map.<br />
4. WORKED TUNNELS<br />
<strong>The</strong> tunnels in this area show evidence of orderly dwarven<br />
work, rather than the hasty work of the drow and their<br />
goblin slaves.<br />
When the characters enter this area, read or paraphrase<br />
the following text.<br />
<strong>The</strong> walls of this cave remind you of the dwarven mine tunnels that<br />
you traveled through to reach this complex. As you probe deeper<br />
into the mines, you see this orderly work gives way to rough-hewn<br />
walls of less skilled craftsmanship.<br />
Trace amounts of mithral can be seen in the walls and fl oor,<br />
but it would take a team of skilled miners to extract any<br />
mithral of measurable worth.<br />
5. REFUSE AND CLUTTER<br />
While the drow were mining the area, their slaves piled<br />
ordinary rocks here and used the location as a garbage<br />
dump, waste disposal, and trash heap for broken equipment<br />
and the like.<br />
When the characters enter this area, read or paraphrase<br />
the following text.<br />
Loose rock, offal, and pieces of broken tools litter this section of the<br />
cave. <strong>The</strong> stench of rotting garbage wafts from it, and small spiders<br />
scurry over every inch of the refuse.<br />
Creatures: <strong>The</strong> presence of the drow and the blessings of<br />
Lolth that pervade the area have made the spiders in this area<br />
both numerous and dangerous. <strong>The</strong> goblins have learned to<br />
avoid the area, because the small spiders here can quickly<br />
swarm over an unwary creature (see Tactics, below).<br />
Spider Swarms (3): hp 9 each; see Monster Manual page 239.<br />
Suggested Miniature: Swarm of Spiders (Underdark 58/60).<br />
Tactics: <strong>The</strong> spider swarms rush to attack any creature that<br />
comes within 15 feet of this area or within 15 feet of one of<br />
the swarms. Goblin warriors skirt wide around the area and<br />
throw their javelins from the far side, hoping to lure their foes<br />
into the spiders’ hunting area without entering themselves.<br />
6. TELEPORTATION PLATFORM<br />
<strong>The</strong> temple at Til’Asperna has been in and out of drow possession<br />
for many centuries. Ten years ago, a powerful drow cleric<br />
brought a mighty group of drow to the area. While searching<br />
for the fane, the group built a powerful teleportation circle,<br />
linking the area with their home city far to the south and deep<br />
in the Underdark. Unknown to the dwarves of Stonehelm,<br />
these drow met their end at the hands of a group of powerful<br />
adventurers from the surface who left the teleportation<br />
circle broken but not completely destroyed.<br />
When the characters enter this area, read or paraphrase<br />
the following text.<br />
This chamber is covered with strange runes and arcane symbols.<br />
<strong>The</strong> circle and its symbols pulse with a slow, disquieting light, but<br />
a large gash runs through the symbol nearest to the open area of<br />
the mine. This symbol, perhaps once a highly stylized spider, has<br />
none of the pale glow seen in the rest of the symbols.<br />
A read magic spell or a DC 20 Spellcraft check reveals that<br />
this is an area designed for teleporting material to another<br />
site. It has been disabled and cannot be used, but traces of<br />
magic suggest that someone skilled at the manufacture of<br />
magic items could, in time, repair the circle.<br />
7. DROW OVERSEER’S OFFICE<br />
This small room houses tools of low enough value that they<br />
were not worth securing in Til’Asperna. <strong>The</strong> room was built<br />
with a strong wooden door in case drow stationed in the<br />
mine need a safe place to hole up and are denied entry into<br />
Til’Asperna itself.<br />
When the characters enter this area, read or paraphrase<br />
the following text.<br />
This small area shows clear signs of dark elf habitation. <strong>The</strong> refuse<br />
and goblin stench that pervade the rest of the mine stop cleanly here.<br />
Some tools, picks, and shovels lie against the far wall. However,<br />
the room contains few furnishings—only one small hide cot and<br />
a bone chair with spider designs. Markings on the fl oor clearly<br />
show where other furniture once rested.<br />
A DC 20 Search check unearths a tiny hidden compartment<br />
in the fl oor beneath the simple cot. <strong>The</strong> compartment holds<br />
nothing of real value but does contain a small bundle of<br />
nonmagical scrolls.<br />
Development: <strong>The</strong>se scrolls are ten years old and describe<br />
the efforts of a drow cleric named Narlanafael to lead a band<br />
of wizards and clerics back to “the lost enclave of Til’Asperna.”<br />
This expedition failed and has little to do with the current<br />
(and much less powerful) occupants of the drow enclave.<br />
However, the papers can plant the seeds for later adventures;<br />
they mention a great drow city to the south and east and<br />
confi rm a temple there as the destination linked to the<br />
ruined teleportation circle described above.<br />
2: DROW ENCLAVE<br />
<strong>The</strong> drow who have recently plagued the dwarven mines near<br />
the fortress of Stonehelm hail from a small but potentially<br />
powerful temple located in the enclave of Til’Asperna. This<br />
subterranean fane, sacred to Lolth but also subject to her<br />
cruel whims, has a long history of occupation and betrayal.<br />
Two individuals lead the enclave presently: Amandrucul, a<br />
male drow wizard who attends to the militaristic functions<br />
of the outpost, and Destra Darkweb, a female drow cleric of<br />
Lolth. Although a relatively minor priestess in her home city,<br />
Destra believes she has earned the Spider Queen’s favor and<br />
has undertaken the ambitious task of securing Til’Asperna<br />
5
6<br />
for herself and restoring it to prominence in the region.<br />
With only a small band at her command, Destra grows<br />
desperate for Lolth to grant her more personal power as well<br />
as more numerous and powerful followers. In recent days,<br />
Amandrucul has run the place while Destra lurks in her<br />
chambers in between ever more desperate rituals designed<br />
to attract Lolth’s favor.<br />
In addition to the immediate benefi t of providing a short<br />
adventure centered around a series of interesting combat<br />
encounters, the drow enclave of Til’Asperna provides an<br />
intriguing link to the mysteries and machinations of the<br />
Underdark.<br />
This enclave is small, used as an outpost for the larger<br />
drow city of Erelhei-Cinlu. <strong>The</strong> drow here protect some<br />
of the tunnels leading toward their patron city. House<br />
Despana, currently third in the political maneuverings of<br />
the eight houses of the city, is charged with keeping the<br />
enclave secure.<br />
ENCOUNTERS IN THE<br />
DROW ENCLAVE<br />
Once the characters reach the drow enclave, the series of<br />
encounters described below begins to unfold.<br />
8. PCS’ START AREA<br />
Once the PCs reach the enclave, have the players place<br />
their respective miniatures in the area marked “8” on the<br />
map on the inside front cover.<br />
9. GUARD POST (EL 6)<br />
Read or paraphrase the following text once the PCs get<br />
past the iron doors.<br />
This open area stands just inside the large, spider-festooned doors.<br />
<strong>The</strong> bare space beyond contains only a few scattered chairs. A net<br />
of webs obscures the ceiling.<br />
Two guards struggle with boredom as they guard the<br />
entry to Til’Asperna. <strong>The</strong> web net that covers the ceiling is<br />
designed to be dropped on interlopers (see Tactics, below).<br />
However, it looks more like a tangle of spider webs than a<br />
GETTING INTO THE ENCLAVE<br />
After the PCs fight their way through the mithral mines, they can<br />
continue on to the strong iron doors that lead into Til’Asperna.<br />
Large Iron Door: hardness 10, hp 60; break DC 28; Open Lock<br />
DC 30.<br />
Characters can gain entrance to the enclave in one of several<br />
ways, but regardless of their approach, they must eventually<br />
contend with the drow housed within. Fortunately for the PCs,<br />
the drow are not expecting an attack.<br />
Guile: Because the drow guards do not expect an attack, they<br />
are vulnerable to deception. Provided that the characters can<br />
come up with a reasonable explanation for their desire to enter<br />
net; characters who succeed on a DC 15 Search check realize<br />
its true nature.<br />
Creatures: <strong>The</strong> two guards begin shouting as soon as<br />
intruders are detected. <strong>The</strong> following round, four more<br />
drow warriors rush from the barracks to the south to<br />
help them.<br />
<strong>Drow</strong>, 1st-level Warriors (6): hp 4 each; Monster Manual<br />
page 102. Suggested Miniature: <strong>Drow</strong> Warrior (Dragoneye<br />
49/60)<br />
Tactics: <strong>The</strong> drow realize that they face a serious threat<br />
from the PCs. On the second round of combat, one of the<br />
guards runs away and heads to the summoning chamber<br />
(area 13) to alert Amandrucul and then dashes to the spider<br />
pens to release the four Large monstrous spiders that<br />
inhabit the complex. <strong>The</strong> remaining drow stage a fi ghting<br />
withdrawal back to the summoning chamber and the torture<br />
chamber as needed, attempting to draw the characters<br />
into confl ict with the Large monstrous spiders, the spiders<br />
of Lolth, and the wizard Amandrucul (described below).<br />
<strong>The</strong> last guard leaving the area he pulls a ripcord of spider<br />
silk that dangles near one wall, causing the web net on the<br />
ceiling to drop. At that time, make a ranged touch attack (+5<br />
modifi er) against every creature in the room; a successful<br />
hit means the creature is entangled, just as if it was snared<br />
in a normal net (see page 119 of the Player’s Handbook).<br />
10. GUARD BARRACKS<br />
<strong>The</strong>se sloppy chambers obviously serve as a barracks for drow<br />
warriors. A dozen beds line the walls, and bits of broken equipment<br />
and spoiled food lay about the rooms.<br />
<strong>The</strong>se sparse chambers are the resting chambers of the small<br />
group of drow warriors that serves Destra Darkweb and her<br />
wizard consort Amandrucul.<br />
11. EGG CHAMBER<br />
An immense egg sac fi lls this warm and humid chamber. <strong>The</strong> sac holds<br />
a hundred or more large spider eggs, each nearly six inches long.<br />
This small chamber holds the valuable eggs of the monstrous<br />
spiders that dwell in the spider pens (area 14). <strong>The</strong> drow<br />
keep the eggs here so that they do not have to disturb the<br />
the fane of the drow, they might be able to use a Bluff check<br />
(opposed by the guards’ Sense Motive check) to gain entry.<br />
Stealth: Although the characters do not know this, the<br />
guards inside the fane are not especially vigilant. A character<br />
can try to sneak up to the iron doors and silently pick the lock.<br />
If the drow guards do not succeed in detecting the adventurers<br />
as they open the door, the party gains a surprise round before<br />
combat begins.<br />
Frontal Attack: If your players prefer a more kick-in-the-door<br />
approach, they can simply launch an attack on the stronghold.<br />
<strong>The</strong> drow guards have grown complacent and aren’t expecting an<br />
attack, but battering down the door will almost surely alert them<br />
before the characters gain entry and lead to a stand-up fight.
larger spiders when they wish to put the eggs to some foul<br />
purpose. <strong>The</strong> eggs are due to hatch in less than a week, and<br />
Destra eagerly awaits the day that she can add their numbers<br />
to the defenses of Til’Asperna.<br />
12. WIZARD’S LABORATORY (EL 6)<br />
<strong>The</strong> wizard Amandrucul lairs in these chambers.<br />
Arcane and alchemical experiments are conducted here. Flasks<br />
bubble, strange creatures’ body parts float in preservative jars,<br />
maggots writhe on an indeterminate piece of meat under a glass<br />
dome, and anatomical drawings show an assortment of dissected<br />
creatures. Bookcases and shelves line the walls.<br />
Amandrucul enjoys torturing prisoners with his caustic<br />
alchemical concoctions. After they die, he takes the time<br />
to carefully dissect them and sketch their muscle and<br />
bone structures.<br />
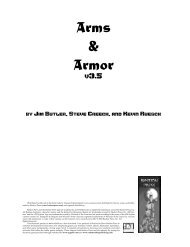
Creature: Amandrucul giggles in combat, reveling in<br />
the pain and suffering he infl icts on others. If alerted to<br />
the presence of intruders, he casts mirror image on himself,<br />
grasps his wand of magic missiles, and readies a grease spell. If<br />
deprived of his wand and offensive spells, he uses his hand<br />
crossbow or hurls a fl ask of acid at a foe.<br />
Amandrucul (4th-level drow wizard): hp 15; see below.<br />
Suggested Miniature: <strong>Drow</strong> Wizard (Dragoneye 50/60)<br />
Treasure: As gory and repulsive as Amandrucul’s<br />
drawings and notes might be, they do include valuable<br />
information about a variety of creatures. Consulting them<br />
grants the user a +2 circumstance bonus on Knowledge<br />
(nature) checks. <strong>The</strong> collection can be sold to an interested<br />
buyer for 100 gp and weighs a total of 5 pounds.<br />
Among the various liquid-fi lled containers, PCs can<br />
also fi nd four fl asks of acid.<br />
Development: If you wish, the characters<br />
might find information about the Tomb of<br />
Queen Peregrine that Amandrucul was studying,<br />
perhaps with the intent of bringing her<br />
back from the dead, or perhaps simply to loot<br />
her tomb. See page xx for more information<br />
about the tomb.<br />
Amandrucul CR 6<br />
Male drow wizard 4<br />
CE Medium humanoid (elf)<br />
Init +2; Senses darkvision 120 ft.; Listen<br />
+5, Spot +5<br />
Languages Abyssal, Common, Draconic,<br />
<strong>Drow</strong> Sign Language, Elven, Goblin,<br />
Undercommon<br />
Weakness light blindness<br />
AC 12, touch 12, flat-footed 10<br />
hp 15 (4 HD)<br />
Immune sleep<br />
SR 15<br />
Fort +3, Ref +4, Will +5 (+7 against<br />
spells and spell-like effects)<br />
Speed 30 ft. (6 squares)<br />
Melee mwk rapier +1 (1d6–1/18–20) or<br />
Ranged mwk hand crossbow +6 (1d4/19–20)<br />
Base Atk +2; Grp +0<br />
Combat Gear wand of magic missiles (1st; 50 charges),<br />
potion of cure light wounds, potion of cure moderate<br />
wounds<br />
Wizard Spells Prepared (CL 4th; 1d20+6 to overcome<br />
SR):<br />
2nd—flaming sphere (DC 16), mirror image,<br />
scorching ray (+5 ranged touch)<br />
1st—grease (DC 15), magic missile, ray of<br />
enfeeblement (+5 ranged touch), sleep (DC 15)<br />
0—acid splash (+5 ranged touch), detect magic,<br />
open/close, read magic<br />
Spell-Like Abilities (CL 4th; 1d20+6 to overcome SR):<br />
1/day—dancing lights, darkness, faerie fire<br />
Abilities Str 8, Dex 15, Con 12, Int 18, Wis 10, Cha 14<br />
SQ able to notice secret or concealed doors, familiar<br />
Feats Combat Casting, Scribe Scroll, Spell Penetration<br />
Skills Concentration +8 (+12 to cast defensively),<br />
Knowledge (arcana) +11, Knowledge (religion) +11,<br />
Listen +5, Search +6, Spellcraft +11, Spot +5<br />
Possessions combat gear plus cloak of resistance<br />
+1, masterwork hand crossbow with 10 bolts,<br />
masterwork rapier<br />
Spellbook spells prepared plus 0—all; 1st—shield;<br />
2nd—invisibility, see invisibility<br />
Hook “Your screams are music to my ears.”<br />
Amandrucul<br />
7
8<br />
13. SUMMONING CHAMBER<br />
(EL 4)<br />
This grand chamber rises to a height of 30 feet at its center.<br />
Beneath this vaulted roof, a circle of ornate and spiderlike<br />
magical runes glows with a sickly purple hue. <strong>The</strong><br />
bare chamber is built of beautiful but sinister-looking<br />
material, the dark black stone of the fl oor shines<br />
with a dark and forbidding luster, and every inch of<br />
the walls depict bloated spiders and drow engaged<br />
in depraved and decadent magical rites.<br />
Lolth has blessed this chamber with a small<br />
spark of her will and power. Any conjuration<br />
(summoning) or conjuration (calling) spells<br />
cast within this chamber fail to have their<br />
described effect. Instead, a servant of Lolth—<br />
usually a spider of Lolth—appears in the magic<br />
circle in the center of the chamber. <strong>The</strong> creature<br />
that appears is subject to the cruel and capricious<br />
will of Lolth, but generally increases in power<br />
in proportion to the original spell. Higher-level<br />
spells might cause draegloths, driders, or more<br />
powerful creatures to appear.<br />
Creatures: Four spiders of Lolth guard<br />
this chamber. <strong>The</strong>y cling to the walls, blending<br />
in nicely with the various spider carvings.<br />
Characters who succeed on an opposed Spot check<br />
(against the spiders’ Hide check result) sees the spiders<br />
of Lolth for what they are. When the PCs enter the room,<br />
the spiders drop to the fl oor and move to attack.<br />
Spiders of Lolth (4): hp 25 each; see below. Suggested<br />
Miniature: Spider of Lolth (Underdark 57/60).<br />
Spiders of Lolth (4) CR 2<br />
N vermin (Lolth-touched)<br />
Init +3; Senses darkvision 60 ft., tremorsense 60 ft.;<br />
Listen +0, Spot +8<br />
AC 14, touch 13, flat-footed 11<br />
hp 25 (3 HD)<br />
Immune vermin immunities<br />
Fort +7, Ref +4, Will +1<br />
Speed 30 ft. (6 squares), climb 20 ft.<br />
Melee bite +5 (1d6+4 plus poison)<br />
Base Atk +2; Grp +5<br />
Abilities Str 17, Dex 17, Con 18, Int —, Wis 10, Cha 2<br />
SQ vermin traits<br />
Feats Weapon Finesse<br />
Skills Climb +11, Hide +11, Jump +13, Listen +0, Spot +8<br />
Poison (Ex) Injury, Fortitude DC 15, initial and<br />
secondary damage 1d4 Str<br />
14. SPIDER PEN (EL 4)<br />
Webs festoon this area. It’s obviously a haven for spiders.<br />
This room houses numerous harmless spiders and two<br />
Large monstrous spiders. Once released from their<br />
Denizens of the spider pens<br />
confi nement (presumably by the drow warriors who guard<br />
the entrance to the enclave), they attack any nondrow that<br />
they encounter.<br />
Large Monstrous Spiders (2): hp 22 each; see Monster<br />
Manual page 54. Suggested Miniature: Large Monstrous Spider<br />
(Dragoneye 54/60).<br />
15. TORTURE CHAMBER (EL 5)<br />
This foul chamber smells of blood. Barbed hooks, slender scalpels,<br />
and other dastardly implements of torture are casually strewn<br />
around the room, as if their user might select or discard them at<br />
random. <strong>The</strong> large table in the middle of the room is made of a<br />
dark black stone that seems to draw light into itself. Each pit and<br />
scar on the table hints at a malevolent will bent on drawing the<br />
pain from another living creature.<br />
Amandrucul enjoys what he calls “the art of pain” and has<br />
active displays at least once a week. He tortures what prisoners<br />
the Bloodweb goblins and drow soldiers can bring him<br />
in this chamber, often allowing the other drow in the fane<br />
to watch his cruel sport. For those who cannot attend the<br />
festivities, small holes in the ceiling of the chamber carry<br />
screams emanating from this room along a web of 1-inchwide<br />
copper pipes that open up in the ceilings of other<br />
rooms throughout the enclave. In this way, drow can revel<br />
in the agony issuing from the chamber.<br />
Creature: Although Amandrucul is the torturer of the<br />
complex, Destra’s most powerful servant, a draegloth, guards<br />
the torture chamber.
Draegloth: hp 42; see below. Suggested Miniature: Draegloth<br />
(Underdark 45/60)<br />
Draegloth CR 5<br />
CE Large outsider (chaotic, evil)<br />
Init +2; Senses darkvision 60 ft.; Listen +9, Spot +9<br />
Languages Abyssal, Undercommon<br />
AC 16, touch 11, flat-footed 14<br />
hp 42 (6 HD)<br />
Immune poison, sleep<br />
Resist acid 20, cold 20, fire 20, electricity 20<br />
Fort +7, Ref +7, Will +5 (+7 against enchantments)<br />
Speed 30 ft. (6 squares)<br />
Melee 2 claws +11 (1d6+6) and<br />
bite +6 (1d8+3)<br />
Base Atk +6; Grp +14<br />
Atk Options Blind-Fight, Power Attack<br />
Spell-Like Abilities (CL 6th):<br />
1/day—dancing lights, desecrate, darkness, faerie fire,<br />
unholy blight (DC 14)<br />
Abilities Str 22, Dex 15, Con 14, Int 13, Wis 11, Cha 11<br />
Feats Blind-Fight, Power Attack, Toughness<br />
Skills Hide +7, Jump +11, Knowledge (religion) +5,<br />
Listen +9, Move Silently +11, Search +10, Spot +9<br />
Hook Attacks elves in preference over other prey<br />
3: FANE OF LOLTH<br />
Once the characters have dealt with the wizard Amandrucul<br />
and the guards in the outer portion of the fane, they can<br />
proceed into the temple area itself. You can either have the<br />
fane of Lolth connect directly with the previous map of<br />
the drow enclave, or you can create some intervening areas<br />
for the characters to explore.<br />
ENCOUNTERS IN<br />
THE FANE OF LOLTH<br />
Once the characters reach the fane of Lolth, have the players<br />
place their miniatures in the area marked “16” on the map<br />
on the inside back cover.<br />
16. PCS’ START AREA<br />
<strong>The</strong> characters enter the fane of Lolth at this point on the<br />
map. Have the players place their respective miniatures on<br />
the map in this location, then have the PCs make a DC 15<br />
Listen check. Characters who succeed on the check hear a<br />
lonely prayer to Lolth (spoken by a woman’s voice, in <strong>Drow</strong>)<br />
emanating from the inner fane (area 18).<br />
17. MEDITATION CHAMBERS<br />
<strong>The</strong>se chambers, though sparsely furnished, give witness to the cruel<br />
beauty and wild might of Lolth, demon goddess of the drow. <strong>The</strong><br />
glossy black marble fl oor and ceiling frame lush scenes of corrupt<br />
revelry that have been painted directly onto the bare stone of the<br />
walls. A few black cushions rest in the center of the fl oor, but the<br />
rooms are empty of other furnishings.<br />
Several of these spacious chambers abut the inner fane,<br />
providing areas where priestesses and other worshipers can<br />
prepare themselves for supplication before Lolth’s altar.<br />
18. INNER FANE OF LOLTH (EL 7)<br />
<strong>The</strong> inner fane of Lolth is the real power of Til’Asperna.<br />
Even though the drow have not yet fully mastered all of<br />
the blessings that Lolth has bestowed upon Til’Asperna,<br />
they have command of a powerful magical trap and use it<br />
to defend the temple.<br />
<strong>The</strong> black walls of this chamber are carved with weblike patterns<br />
interspersed with bas-reliefs of drow clerics and warriors tormenting<br />
members of “lesser races.” <strong>The</strong> outline of a huge spider has been<br />
traced into the fl oor, its body and legs fi lled in with magical runes.<br />
<strong>The</strong> outline of the spider, along with the runes engraved within,<br />
glow with the same sickly purple hue seen in the magic circles<br />
found elsewhere in the temple complex.<br />
An altar stands in front of a large, fi nely crafted statue of Lolth<br />
in her ghastly hybrid form. Images on the walls show a variety of<br />
spiderlike creatures, and the stone fl oor beneath the altar is crimson<br />
in color.<br />
While everyone in the enclave worships Lolth, individuals<br />
vary in the extent of their devotions. Some visit the shrine<br />
twice per day, others less frequently. Even so, all of the<br />
drow in Til’Asperna gather here every eight days to worship<br />
their spider goddess. Occasionally, there are even larger<br />
ceremonies to honor special drow holidays. During these<br />
rites, the spiders housed in the nearby stables are brought<br />
into the fane.<br />
<strong>The</strong> fane has been warded by an unhallow spell centered<br />
on the altar (see Player’s Handbook, page 297). Furthermore,<br />
a dispel magic effect has been tied to the unhallow spell (see<br />
Player’s Handbook, page 233).<br />
Creatures: Eight drow warriors and one minor priestess<br />
guard the room. <strong>The</strong> priestess, Kaellara, is kneeling before<br />
the altar in prayer.<br />
If an intelligent creature that does not worship Lolth<br />
moves into the rectangular area around the altar (as defi ned<br />
by the blood rock fl oor), the statue animates.<br />
Kaellara (3rd-level drow cleric): hp 17; see below. Suggested<br />
Miniature: <strong>Drow</strong> Cleric of Lolth (Harbinger 61/80)<br />
<strong>Drow</strong>, 1st-level Warriors (8): hp 4 each; Monster Manual<br />
page 102. Suggested Miniature: <strong>Drow</strong> Warrior (Dragoneye<br />
49/60)<br />
Tactics: <strong>The</strong> drow warriors are aware of the magical<br />
power contained in the spider engraved into the fl oor. <strong>The</strong>y<br />
never end their movement in a square containing part of the<br />
spider. <strong>The</strong> warriors also know to lure the characters onto<br />
the spider so that Kaellara can use it to drain them.<br />
<strong>The</strong> guards in area 20 automatically hear sounds of battle<br />
emanating from the inner fane. <strong>The</strong>y skirt the edges of the<br />
fane and attempt to surprise the PCs by attacking from<br />
the rear.<br />
Kaellara has little loyalty to her fell mistress Destra, and<br />
in fact merely bides her time until she betrays the more<br />
9
10<br />
powerful priestess. Although Destra’s ambition brought the<br />
group to Til’Asperna, Kaellara believes she alone is capable<br />
of building real power here. Kaellara thinks she has a great<br />
future and wants to live to see that future. If the characters<br />
seem close to victory, she surrenders or fl ees rather than<br />
fi ghting to the death.<br />
Spider Trap: <strong>The</strong> massive spider engraved into the fl oor has<br />
many powers, and the drow currently inhabiting Til’Asperna<br />
have mastered only the most rudimentary of them. Either<br />
drow priestess in the temple (Destra Darkweb or Kaellara)<br />
can take a standard action to activate the spider’s power. <strong>The</strong><br />
priestess must be adjacent to the altar to activate the spider.<br />
Activating the spider’s power does not provoke attacks<br />
of opportunity.<br />
When the spider is activated, it produces a pulse of evil<br />
energy that affects any living creature standing on a square<br />
that contains part of the spider engraving. Each affected<br />
creature takes 1d8+1 points of damage (Refl ex DC 15 half).<br />
For every 10 points of damage dealt in this manner in a single<br />
round, a Small monstrous spider appears. <strong>The</strong>se spiders<br />
appear in the middle of the spider carving (or as close to<br />
the middle as possible) and immediately move to attack<br />
any non-drow in the fane. <strong>The</strong> spiders are not affected by<br />
the spider engraving trap and disappear after 10 minutes or<br />
when they are killed.<br />
Blood Rock: Any creature standing on a blood rock<br />
square that threatens a critical hit has that threat automatically<br />
confi rmed (no roll necessary).<br />
Kaellara CR 5<br />
Female drow cleric 3 (Lolth)<br />
CE Medium humanoid (elf)<br />
Init +5; Senses darkvision 120 ft.; Listen +4, Spot +4<br />
Languages Abyssal, Common, <strong>Drow</strong> Sign Language,<br />
Elven, Goblin, Undercommon<br />
Weakness light blindness<br />
AC 19, touch 11, flat-footed 18<br />
hp 17 (3 HD)<br />
Immune sleep<br />
SR 14<br />
Fort +3, Ref +2, Will +5 (+7 against spells and spelllike<br />
effects)<br />
Weakness light blindness<br />
Speed 20 ft. (4 squares)<br />
Melee mwk rapier +5 (1d6+1/18–20)<br />
Base Atk +2; Grp +4<br />
Atk Options smite 3/day (+4 attack, +5 damage)<br />
Special Actions command undead (+0, 2d6+3, 3rd),<br />
spontaneous casting (inflict spells)<br />
Combat Gear potion of see invisibility<br />
Cleric Spells Prepared (CL 3rd):<br />
2nd—cure moderate wounds, silence, invisibility D<br />
1st—cure light wounds, shield of faith, sanctuary,<br />
inflict light wounds D<br />
0—cure minor wounds, cure minor wounds, detect<br />
magic, detect magic, read magic<br />
D: Domain spell. Domains: Destruction, Trickery<br />
Spell-Like Abilities (CL 3rd):<br />
1/day—dancing lights, darkness, faerie fire<br />
Abilities Str 12, Dex 12, Con 11, Int 16, Wis 15, Cha 10<br />
Feats Combat Casting, Improved Initiative<br />
Skills Concentration +6 (+12 to cast defensively),<br />
Diplomacy +6, Knowledge (religion) +9, Listen +4,<br />
Search +5, Spellcraft +9, Spot +5<br />
Possessions combat gear plus masterwork full plate,<br />
masterwork rapier, holy symbol<br />
Hook “Lolth does not abide cattle in her temple!”<br />
19. DESTRA DARKWEB’S<br />
QUARTERS (EL 6)<br />
This well-appointed chamber has a beautifully patterned mosaic<br />
fl oor in the shape of a spider. <strong>The</strong> walls are carved to look like spider<br />
webs. <strong>The</strong> furniture is of heavy woods imported from the surface. A<br />
large bed, upholstered chairs, and writing desk offer every comfort<br />
and convenience. A small section of the room is even equipped with<br />
a bath surrounded by a warming brazier.<br />
Destra Darkweb, a cleric of Lolth, occupies a room near<br />
the fane. A minor cleric all but ignored in the great city<br />
where she was born, Destra craves power with a desperate<br />
hunger. She snuck away from the city after learning of the<br />
abandoned enclave of Til’Asperna. Although Destra senses<br />
that mastering the true powers of the fane are beyond her,<br />
she yet hopes that Lolth will show favor on her ambitious<br />
plan and grant her complete mastery of the magical powers<br />
hidden within the temple.<br />
Creature: Destra is a 5th-level cleric, but she has expended<br />
signifi cant resources on her machinations, casting obscure<br />
object spells to hide the seal of House Aleval (see Treasure,<br />
below). This lowers her CR by 1.<br />
Destra Darkweb (5th-level drow cleric): hp 36; see<br />
below. Suggested Miniature: <strong>Drow</strong> Cleric of Lolth (Harbinger<br />
61/80)<br />
Treasure: Before she left the city of Erelhei-Cinlu, Destra<br />
stole the seal of House Aleval. If the characters recover this<br />
house seal, it might become the subject of later adventures.<br />
Mevremas, the drow matron of House Aleval, wore the ring<br />
and used it to place her offi cial mark to important documents.<br />
Using it provides a +10 bonus on Forgery checks<br />
to create papers from House Aleval. A DC 20 Knowledge<br />
(history) check points out that the seal also has great cultural<br />
signifi cance, and losing it would cause the drow house to<br />
lose some status. <strong>The</strong> seal has the potential to embroil the<br />
characters in confl ict with House Aleval; bold PCs might<br />
try to exchange it for access to the drow city and deeper<br />
regions of the Underdark.<br />
Several other small treasures can be had with a thorough<br />
search of the room. Destra has 50 gp worth of incense, bone<br />
augury sticks worth 25 gp, and a fi ne hematite strand of<br />
prayer beads worth 75 gp.<br />
<strong>The</strong> bathtub in this room has a drain, but no running<br />
water. Since the room was designed for a cleric, the architect<br />
assumed that create water spells would fi ll it.
Destra Darkweb<br />
Destra Darkweb CR 6<br />
Female drow cleric 5 (Lolth)<br />
CE Medium humanoid (elf)<br />
Init +2; Senses darkvision 120 ft.; Listen +5, Spot +5<br />
Languages Common, <strong>Drow</strong> Sign Language, Elven,<br />
Undercommon<br />
AC 20, touch 11, flat-footed 19<br />
hp 36 (5 HD)<br />
Immune sleep<br />
SR 16<br />
Fort +4, Ref +3, Will +7 (+9 against spells and spelllike<br />
effects)<br />
Weakness light blindness<br />
Speed 20 ft. (4 squares)<br />
Melee mwk rapier +9 (1d6+4/18–20)<br />
Base Atk +3; Grp +5<br />
Atk Options smite 3/day (+4 attack, +5 damage)<br />
Special Actions command undead (+1, 2d6+4, 5th),<br />
spontaneous casting (inflict spells)<br />
Combat Gear potion of spider climb, potion of see<br />
invisibility, potion of cure moderate wounds<br />
Cleric Spells Prepared (CL 5th):<br />
3rd—contagion D , obscure object (2; one already cast)<br />
2nd—bear’s endurance†, bull’s strength†, hold<br />
person, invisibility D<br />
1st—cause fear, cure light wounds (2), inflict light<br />
wounds D , sanctuary<br />
0—cure minor wounds (2), detect magic (2), read<br />
magic<br />
D: Domain spell. Deity: Lolth. Domains:<br />
Destruction, Trickery.<br />
† Already cast<br />
Spell-Like Abilities (CL 5th):<br />
1/day—dancing lights, darkness, faerie fire<br />
Abilities Str 14 (16 with bull’s strength), Dex 14, Con 11<br />
(15 with bear’s endurance), Int 10, Wis 16, Cha 12<br />
Feats Extra Smiting, Weapon Focus (rapier)<br />
Skills Concentration +8, Knowledge (religion) +7,<br />
Listen +5, Search +2, Speak Language (<strong>Drow</strong> Sign<br />
Language), Spot +5<br />
Possessions combat gear plus +1 full plate,<br />
masterwork rapier, holy symbol, platinum ring with<br />
spider signet (House Aleval seal; see Treasure)<br />
Hook “I have Lolth on my side. Good for me, bad<br />
for you.”<br />
20. PRISONER CELLS<br />
<strong>The</strong> guards stationed here might have already been encountered<br />
in defeated in the inner fane (see area 18 for details).<br />
Heavy iron gates bar entry to dark cells. In a darkened corner of the<br />
nearest cell, a humanlike form clad in dirty gray rags slumps.<br />
Two prisoners—a male human and a male dwarf—have<br />
been confi ned here. <strong>The</strong>y wear iron manacles and have been<br />
stripped of their gear. See page 126 of the Player’s Handbook<br />
for the manacles’ statistics.<br />
Creatures: Two drow warriors guard the prisoners in this<br />
area. One guard carries an iron key that unlocks the cell<br />
gates; the other carries the key to the prisoners’ manacles.<br />
<strong>Drow</strong>, 1st-level Warriors (2): hp 4 each; Monster Manual<br />
page 102. In addition to his or her normal gear, each guard<br />
carries a vial of antitoxin. Suggested Miniature: <strong>Drow</strong> Warrior<br />
(Dragoneye 49/60)<br />
Development: <strong>The</strong> human prisoner—a poor farmer<br />
named Thurgeon Vrell—was captured by Bloodweb goblins<br />
while traveling by wagon along a lonely trail. <strong>The</strong> dwarf<br />
prisoner, Granikar Flinthammer, is a miner from Stonehelm.<br />
If the characters are here to rescue a specifi c person (see<br />
Choosing an Adventure Hook, page xx), replace Thurgeon<br />
with this individual.<br />
Thurgeon is a 1st-level commoner with 3 hit points. Granikar<br />
is a 1st-level expert with 4 hit points at full; however,<br />
Amandrucul recently tortured the dwarf, who has only 1<br />
hit point currently. Neither of the prisoners is a particularly<br />
effective combatant.<br />
21. LOLTH’S VENGEANCE (EL 4)<br />
This wide alcove holds a statue of the demon queen Lolth, a creature<br />
with the upper torso of a beautiful drow woman and the lower<br />
body of a bloated black spider.<br />
11
12<br />
Lolth’s will is fi ckle, and the goddess herself would never<br />
spend a drop of her own attention on a minion such as<br />
Destra. However, the fane of Til’Asperna is sacred to Lolth,<br />
and agents of her divinity will not abide its desecration. If<br />
the characters move into the rectangular area surrounding<br />
the altar (see area 18) or defi le the statue of Lolth by touching<br />
or damaging it, it animates and attacks.<br />
Creature: <strong>The</strong> statue has the statistics of a Large animated<br />
object (see Monster Manual page 14). <strong>The</strong> statue moves at a<br />
speed of 40 feet and has hardness 8. It can use web as a spelllike<br />
ability once per day (as a 5th-level arcane spellcaster).<br />
<strong>The</strong> statue of Lolth is considered a CR 4 monster because<br />
of its web spell-like ability.<br />
Once animated, the statue attacks intruders until destroyed<br />
or until all of the intruders are driven off the map (at which<br />
point it returns to its alcove).<br />
Statue of Lolth (animated object): hp 52; Monster<br />
Manual page 14.<br />
FURTHER ADVENTURES<br />
If the PCs defeat the drow or drive them from the temple, the<br />
fane of Til’Asperna remains free of their cruel infl uence for<br />
some time to come. However, the potential power dormant<br />
within Til’Asperna will always serve as a beacon for the<br />
drow. Should a more powerful priestess of Lolth come to<br />
understand the secrets of Til’Asperna in the future, one of<br />
her fi rst acts might be to hunt down those adventurers from<br />
the surface who dared to invade its sacred halls in the past.<br />
Months or even years after their initial foray into the fane<br />
of the drow, the PCs might fi nd themselves beset by dark<br />
elf assassins. Tracking their assailants back to their origin,<br />
the heroes could once again fi nd themselves driving drow<br />
out of the halls of Til’Asperna, but this time the power of<br />
the occupants might be far greater.<br />
Conversely, the teleportation circle that the characters discovered<br />
in the mithral mines might lead some to wonder about its<br />
destination. With some work, the circle might be restored and<br />
the heroes asked to explore further reaches of the Underdark<br />
on behalf of the dwarves or other powerful agencies.<br />
4: TOMB OF<br />
QUEEN PEREGRINE<br />
<strong>The</strong> tomb of Queen Peregrine lies a short distance from the<br />
drow enclave of Til’Asperna. <strong>The</strong> encounters that follow are<br />
only loosely connected to the rest of the adventure and use<br />
the Tomb of Queen Peregrine battle map.<br />
ADVENTURE<br />
BACKGROUND<br />
About fi ve thousand years ago, a visionary human aristocrat<br />
named Peregrine the Sly unifi ed the nobles of her realm.<br />
She was proclaimed Queen, and her reign lasted up until<br />
her death. A large tomb was raised to honor Peregrine, her<br />
noble comrades, and her wisest councilors.<br />
In the intervening centuries, the tomb has been violated<br />
several times, its vaults plundered and ruined. Venifar, a necromancer<br />
who planned to return for further grave robbing, turned<br />
some of the ancient bodies into evil guardians and left behind<br />
some additional undead guards from his personal retinue.<br />
ADVENTURE HOOK<br />
<strong>The</strong> player characters might learn of the tomb after speaking<br />
with some of the dwarves of Stonehelm. Alternatively,<br />
the drow wizard Amandrucul has learned of the tomb and<br />
plans to explore it. If the PCs kill Amandrucul, they could<br />
determine the tomb’s location from notes contained in his<br />
chambers (see area 12).<br />
JOURNEY TO THE TOMB<br />
<strong>The</strong> PCs must navigate a labyrinth of tunnels to reach<br />
the tomb of Queen Peregrine. Fortunately, the tunnels<br />
are uninhabited.<br />
If you’d like to extend the adventure, you can insert an<br />
encounter with one or more wandering Underdark predators<br />
of the appropriate CR. Some possibilities include a doppelganger<br />
disguised as a lost dwarf (“Sure, I’ll join you on<br />
your quest!”), a hungry grick, a carrion crawler, or a wight<br />
accompanied by seven dwarf skeletons.<br />
ENCOUNTERS<br />
IN THE TOMB<br />
Once the characters reach the tomb of Queen Peregrine, the<br />
series of encounters described below begins to unfold.<br />
22. PCS’ START AREA<br />
Once the PCs reach the tomb, the players can place their<br />
miniatures in the area marked “22” on the map on the inside<br />
back cover.<br />
23. QUEEN’S TOMB (EL 7)<br />
<strong>The</strong> large sarcophagus at one end of the tomb houses the<br />
remains of Queen Peregrine.<br />
This vault occupies a position of honor in the great hall. It is large<br />
and well-built, unspoiled by age or intruders. <strong>The</strong> walls are carved<br />
with images showing nobles of many species kneeling to a woman<br />
wearing a crown of falcons. <strong>The</strong> words QUEEN PEREGRINE THE<br />
SLY have been carved into the stone in Common.<br />
This tomb is solidly sealed with an arcane lock but can be<br />
opened with a knock spell or a successful DC 36 Strength<br />
check. <strong>The</strong> reinforced stone is 1 foot thick and has hardness<br />
10 and 240 hit points. Trying to break into this tomb draws<br />
the attention of all denizens inhabiting the larger tomb.<br />
Creature: If the PCs break through, the Queen rises as<br />
a ghost and attacks. In addition, ten human skeletons—the<br />
remains of some of the tomb’s architects—break up through<br />
the stone-tiled fl oor to repel the invaders. Place the skeletons’<br />
miniatures in open squares as close to Queen Peregrine’s
tomb as possible. <strong>The</strong> skeletons are mere fodder for the PCs,<br />
but they serve to draw attacks and absorb turning attempts.<br />
Queen Peregrine the Sly (ghost): hp 32; see below.<br />
Suggested Miniature: Ghostly Consort (Angelfi re 41/60).<br />
Human Skeletons (10): hp 6 each; see Monster Manual<br />
page 226. Suggested Miniature: Skeleton (Harbinger 55/80).<br />
Treasure: <strong>The</strong> queen’s sepulcher contains a gold crown<br />
shaped like fl ying falcons (worth 1,200 gp), a gold scepter set<br />
with emeralds (worth 1,500 gp), a jeweled box (worth 100 gp)<br />
containing dust of appearance, a wand of false life (10 charges<br />
remaining), and a potion of eagle’s splendor. <strong>The</strong> sepulcher<br />
also contains her well-preserved journals, which show that<br />
Peregrine unifi ed the lands through a combination of armed<br />
force, diplomacy, and blackmail. <strong>The</strong>y reveal both prosaic<br />
and intimate details about the highest-ranking nobles in<br />
her realm—those who built the six tombs closest to hers.<br />
Development: Sounds of combat in this area attract<br />
undead from the nearby tombs (see area 24). You could use<br />
Peregrine’s journals as a plot hook for an intrigue-based<br />
campaign to connect to descendants of the journal’s historical<br />
fi gures. Alternatively, the journal could describe the<br />
location of a long-lost fortress or dungeon.<br />
Queen Peregrine the Sly CR 6<br />
Ghost female human aristocrat 5<br />
LE M undead (augmented humanoid) (incorporeal)<br />
Init +0; Senses darkvision 60 ft.; Listen +8, Spot +8<br />
Languages Common, Elven<br />
AC 14, touch 14, flat-footed 14<br />
hp 32 (5 HD); rejuvenation<br />
Immune undead immunities<br />
Resist +4 turn resistance<br />
Fort +1, Ref +1, Will +6<br />
Speed 30 ft. (6 squares) (perfect)<br />
Melee incorporeal touch +3 (1d4 ability drain)<br />
Base Atk +3; Grp —<br />
Atk Options draining touch<br />
Special Actions corrupting gaze, malevolence<br />
Abilities Str —, Dex 10, Con —, Int 12, Wis 11, Cha 18<br />
SQ incorporeal traits, manifestation<br />
Feats Iron Will, Negotiator, Persuasive<br />
Skills Bluff +14, Diplomacy +20, Disguise +4 (+6<br />
acting in character), Gather Information +6,<br />
Hide +8, Intimidate +16, Knowledge (local) +9,<br />
Knowledge (nobility and royalty) +9, Listen +8,<br />
Search +9, Sense Motive +10, Spot +8<br />
Rejuvenation (Su) Queen Peregrine reappears in<br />
her tomb 2d4 days after being destroyed, with a<br />
successful level check (1d20 + 5) against DC 16.<br />
Draining Touch (Su) Touch attack, drain 1d4 points<br />
of chosen ability score, heal 5 hp. Against ethereal<br />
opponents, she adds her Strength modifier to<br />
attack rolls only. Against nonethereal opponents,<br />
she adds her Dexterity modifier to attack rolls only.<br />
Corrupting Gaze (Su) 2d10 damage plus 1d4 Cha<br />
damage, range 30 ft., Fort DC 16 negates.<br />
Malevolence (Su) MM 118.<br />
Manifestation (Su) Incorporeal creature on Material<br />
Plane. When not manifested, can affect ethereal<br />
creatures only.<br />
Hook “My treasures are mine and mine alone.”<br />
24. RUINED TOMBS<br />
<strong>The</strong>se ruined tombs contain various undead denizens, but<br />
their treasures were carted off long ago.<br />
24A. Argul’s Tomb (EL 4)<br />
This tomb looks remarkably natural, resembling an irregular<br />
granite rock formation. Partially defaced words carved into one<br />
side indicate that it belonged to a druid who most loved the lands<br />
below the earth. <strong>The</strong> doors, which had once seamlessly fi t into the<br />
rock face, now lie shattered, and rubble fi lls the area.<br />
This tomb once belonged to a dwarf aristocrat named Argul<br />
Shattershield, and one of the interior walls features a life-sized<br />
bas-relief of the dwarf with his name carved beneath it (in<br />
Dwarven). Gems once set into the bas-relief have been pried<br />
away, and shallow pools of sticky black blood cover the fl oor.<br />
Creature: A bloodhulk fi ghter (formerly a male human<br />
8th-level fi ghter) lurks here. It guards no treasure. <strong>The</strong> creature<br />
resembles an impossibly bloated human corpse that oozes<br />
and spurts horrible black blood when damaged.<br />
Bloodhulk Fighter: hp 99; see below. Suggested Miniature:<br />
Bloodhulk Fighter (Deathknell 46/60).<br />
Bloodhulk Fighter CR 4<br />
NE Medium undead<br />
Init +0; Senses darkvision 60 ft.; Listen +0, Spot + 0<br />
AC 12, touch 10, flat-footed 12<br />
hp 99 (8 HD)<br />
Immune mind-affecting spells and effects, undead<br />
immunities<br />
Fort +2, Ref +2, Will +6<br />
Weakness fragile<br />
Speed 20 ft. (4 squares)<br />
Melee slam +10 (2d6+9)<br />
Base Atk +4; Grp +10<br />
Abilities Str 23, Dex 11, Con —, Int —, Wis 10, Cha 1<br />
Fragile (Su) A bloodhulk fighter takes an additional<br />
1d6 points of damage when damaged.<br />
24B. Bellorin’s Tomb (EL 3)<br />
This mausoleum has simple, elegant lines marred by vandalism.<br />
<strong>The</strong> inscription indicates that it belonged to Bellorin of Valkoon,<br />
a knight who served Queen Peregrine loyally for many years. A<br />
foul stench issues forth from the knight’s sepulcher.<br />
Everything of value has been looted from this tomb, leaving<br />
nothing behind except dust, cobwebs, and the Creature.<br />
Creature: An ogre zombie brought here by the grave<br />
robbing necromancer Venifar guards this tomb.<br />
13
14<br />
Ogre Zombie: hp 55; see Monster Manual page 267. Suggested<br />
Miniature: Ogre Zombie (Aberrations 56/60).<br />
24C. Caliope’s Tomb (EL 3)<br />
<strong>The</strong> plain slate that formed this tomb has been thoroughly broken<br />
and chipped. No inscription can be discerned.<br />
This tomb once belonged to Queen Peregrine’s trusted companion<br />
and advisor, a gnome bard named Caliope Sunsilver.<br />
It contains a Creature and no treasure.<br />
Creature: A minotaur skeleton brought here by the grave<br />
robbing necromancer Venifar guards this tomb. If it can, it<br />
uses its powerful charge ability to gore the fi rst foe it sees.<br />
Minotaur Skeleton: hp 39; see below. Suggested Miniature:<br />
Minotaur Skeleton (Giants of Legend 55/72)<br />
Minotaur Skeleton CR 3<br />
N Large undead<br />
Init +5; Senses darkvision 60 ft.; Listen +0, Spot + 0<br />
AC 12, touch 10, flat-footed 11<br />
hp 39 (6 HD); DR 5/bludgeoning<br />
Immune cold, mind-affecting spells and effects,<br />
undead immunities<br />
Fort +2, Ref +3, Will +5<br />
Speed 30 ft. (6 squares)<br />
Melee greataxe +6 (3d6+6/×3) and<br />
gore +1 (1d8+2)<br />
Base Atk +3; Grp +11<br />
Combat Options powerful charge<br />
A ghast hungers for tasty fl esh<br />
Abilities Str 19, Dex 12, Con —, Int —, Wis 10, Cha 1<br />
Feats Improved Initiative<br />
Powerful Charge (Ex) A minotaur skeleton that<br />
charges a foe can make a single gore attack with a<br />
+6 bonus; if the attack hits, it deals 4d6+6 points<br />
of damage.<br />
24D. Dharzon’s Tomb (EL 5)<br />
This crumbling mausoleum has obviously been ransacked and<br />
pillaged. Its doors are long gone. Ornaments or gemstones once<br />
set into the stonework have been crudely removed, as evidenced<br />
by the chisel marks.<br />
Dharzon Emethor, a human aristocrat/wizard, was laid to<br />
rest here. His gnawed bones and shredded funereal wrappings<br />
lie strewn about the tomb.<br />
Creatures: Two hungry ghasts lair in this crumbling<br />
mausoleum.<br />
Ghasts (2): hp 29 each; see Monster Manual page 119.<br />
25. UNDISTURBED TOMBS<br />
<strong>The</strong>se tombs have survived intact. Each has 6-inch-thick<br />
walls with hardness 8 and 90 hit points. Smashing into a<br />
tomb draws the attention of nearby undead. <strong>The</strong> stone door<br />
of the tomb can either be smashed open (hardness 8, hp 90,<br />
break DC 36) or unlocked with a successful DC 25 Open<br />
Lock check. Each tomb contains some skeletal remains<br />
and treasure.<br />
25A. Alioth’s Tomb (EL 5)<br />
Engraved upon this sealed tomb are some words in fl owing Elven<br />
script.<br />
<strong>The</strong> engraved words read: Alioth the Magical. Alioth was<br />
an elf wizard, and the Treasure can be found with his<br />
remains. In addition, the door to his tomb is warded<br />
with a Trap.<br />
Trap: A fi r e t r a p spell has been placed on the<br />
door to Alioth’s tomb.<br />
Fire Trap: CR 5; spell; spell trigger; no reset;<br />
spell effect (fi re trap, 7th-level wizard, 1d4+7 fi re,<br />
Refl ex DC 16 half); Search DC 29; Disable<br />
Device DC 29.<br />
Treasure: Alioth’s tomb holds 400 sp,<br />
a pearl worth 100 gp, and a spellbook<br />
containing all 0-level spells plus the spells<br />
comprehend languages, identify, shield, summon<br />
monster I, and Tenser’s fl oating disk. Feel free<br />
to swap out any of these spells for other,<br />
more obscure spells.<br />
25B. Brey’s Tomb<br />
Engraved upon this sealed tomb is the name BREY<br />
VILTIERS in Common.
Brey Viltiers was a noble wine merchant who fancied Queen<br />
Peregrine for a time before becoming her trusted friend<br />
and confi dante.<br />
Treasure: Brey was buried with 30 pp, 120 gp, 540 sp,<br />
1,230 cp, seven casks of wine (long evaporated and worthless),<br />
and 20 banded agates worth 10 gp each.<br />
25C. Cirdain’s Tomb<br />
Engraved upon this sealed tomb are the following words in<br />
Common: SIR CIRDAIN ERDUIN, LORD PROTECTOR.<br />
Cirdain Erduin, a half-elf lord, was the love of Peregrine’s<br />
life as well as the captain of her royal guard.<br />
Treasure: Cirdain’s skeleton is clad in masterwork full<br />
plate, and his masterwork greatsword hangs on a wall.<br />
His tomb also contains a small painting that appears to<br />
be of Queen Peregrine (worth 150 gp), a love letter to Sir<br />
Cirdain on crumbling parchment signed by Peregrine, and<br />
a black onyx pin (worth 15 gp) with a small woven wreath<br />
of golden hair.<br />
26. FAMILIAR TOMB<br />
This tomb serves as a memorial for various familiars belonging to<br />
the wizards of a place called Ashwand House. <strong>The</strong> tomb lists the<br />
dates the familiars were called and the date each of them died.<br />
Queen Peregrine’s ancestral family estate was known as<br />
Ashwand House—a little-known fact revealed with a successful<br />
DC 20 bardic knowledge or Knowledge (nobility<br />
and royalty) check.<br />
According to the words inscribed on the walls of the<br />
tomb, some of the familiars outlived their masters and were<br />
cared for as dear pets by the other members of the Ashwand<br />
household. If the tomb is opened, the PCs fi nd the bones or<br />
ashes of these long-dead arcane companions.<br />
27. PARTIALLY RANSACKED TOMBS<br />
Each of these tombs has obviously been broken into, but<br />
the structure remains mostly intact.<br />
27A. Anwar’s Tomb<br />
This marble tomb lies in ruins. <strong>The</strong> cunning stonework built to<br />
memorialize some long-ago noble has been pried up and chipped<br />
away in numerous areas. Rotting corpses lie amid the wreckage.<br />
While looting this tomb, the thieves (two humans) were<br />
attacked and slain by undead. Rotting remnants of their<br />
bodies lay among the ruins.<br />
Treasure: Characters searching the corpses fi nd 2 suits of<br />
studded leather armor, 2 short swords, 2 sets of masterwork<br />
thieves’ tools, a magnifying glass, a torn backpack, 2 banded<br />
agates worth 25 gp each, and assorted coins (40 gp, 300 sp,<br />
and 235 cp).<br />
27B. Bajari’s Tomb<br />
It’s obvious from the sculpted decor that this mausoleum’s occupant<br />
was fascinated by dragons and magic.<br />
This tomb belonged to a half-elf wizard named Bajari Phyrran.<br />
Bajari’s skeletal remains lie strewn about the interior<br />
of the crypt. Nothing of value is left in this tomb, and a<br />
successful DC 25 Search check reveals that the tomb has<br />
been thoroughly looted. Some fragments of paper indicate<br />
that it once contained scrolls, papers, or a spellbook.<br />
27C. Crannoc’s Tomb (EL 5)<br />
<strong>The</strong> man portrayed on this tomb has a noble, scholarly bearing.<br />
He wears long fl owing robes.<br />
Lord Crannoc Gryfalcon was a cleric of Wee Jas, and a<br />
successful DC 15 Spot check reveals a holy symbol amid<br />
the carved stylings of his clothing. A DC 10 Knowledge<br />
(religion) check determines that it is a holy symbol of<br />
Wee Jas.<br />
This tomb has been looted. However, a DC 25 Search<br />
check fi nds a secret compartment overlooked by the last<br />
plunderers. It is protected by a Trap and contains the<br />
Treasure.<br />
Trap: Anyone opening the secret compartment releases<br />
a blast of ungol dust vapor.<br />
Ungol Dust Vapor Trap: CR 5; mechanic; location<br />
trigger; manual reset; gas; multiple targets (all targets in<br />
a 10-ft.-by-10-ft. area); never miss; onset delay (2 rounds);<br />
poison (ungol dust, Fortitude DC 15 resists, 1 Cha/1d6 Cha<br />
plus 1 Cha drain); Search DC 20; Disable Device DC 16.<br />
Treasure: <strong>The</strong> secret compartment in Lord Gryfalcon’s<br />
tomb contains a holy symbol of Wee Jas, 2 packets of<br />
diamond dust (worth 100 gp each), and a special ointment<br />
for the eyes made from mushroom powder, saffron, and fat<br />
(worth 250 gp). A DC 20 Knowledge (arcana) check reveals<br />
the diamond dust and ointment are material components<br />
for restoration and true seeing spells, respectively.<br />
28. UNFINISHED TOMB<br />
<strong>The</strong> construction of this tomb was never completed. <strong>The</strong> basic<br />
form has been established, but it’s obvious that no bodies were<br />
ever interred here.<br />
<strong>The</strong>re are no recent tracks across the rubble.<br />
FURTHER ADVENTURES<br />
<strong>The</strong> necromancer Venifar could one day return to the<br />
tomb of Queen Peregrine, hoping to fi nd the journals<br />
hidden within. Perhaps her journals contain clues to<br />
the whereabouts of a sequestered artifact that Venifar<br />
craves—a powerful necromantic item that House Ashwand<br />
has kept hidden for centuries. If he discovers that<br />
someone else has looted the Queen’s tomb and taken<br />
the journals, Venifar sets his sights on recovering the<br />
journals. He consults with a powerful cleric of Wee Jas<br />
and, through commune and divination spells, learns of the<br />
PCs. However, it might be months before the necromancer<br />
fi nally catches up to them.<br />
15
16<br />
<strong>The</strong> battle maps in Fantastic Locations: <strong>Fane</strong> of the <strong>Drow</strong>, in<br />
addition to their usefulness for the DUNGEONS & DRAGONS<br />
roleplaying game, were designed to allow exciting battles<br />
using the DUNGEONS & DRAGONS Miniatures skirmish rules.<br />
Essentially, using one of these maps replaces the terrain<br />
setup step for your skirmish battle. To use the maps in this<br />
way, follow the rules below.<br />
WARBAND CONSTRUCTION<br />
Warband construction occurs normally, with one exception.<br />
Instead of bringing four terrain tiles to the skirmish, each<br />
player brings one battle map.<br />
TERRAIN INITIATIVE<br />
Players fi rst reveal their warbands, then determine terrain<br />
initiative.<br />
Choose a Map: Each player rolls 1d20 for terrain initiative,<br />
adding the Commander rating of his or her best commander<br />
to the roll. <strong>The</strong> winner chooses which map (his or her own<br />
or the opponent’s) will be used for the skirmish.<br />
Choose a Side: After the map has been chosen, each player<br />
rolls 1d20 for start area initiative, adding the Commander<br />
rating of his or her best commander to the roll. <strong>The</strong> winner<br />
chooses in which start area his or her warband will set up<br />
and places the entire warband there. If a map has multiple<br />
start areas with the same designator (such as Start Area A),<br />
the warband can occupy squares in any or all of those areas.<br />
WARBAND PLACEMENT<br />
<strong>The</strong> player who picked the fi rst start area sets his or her<br />
warband up fi rst, using the chosen starting area.<br />
VICTORY AREAS<br />
<strong>The</strong> victory areas on each battle map are important for the<br />
Assault scenario, described below.<br />
Assault: When playing the Assault scenario on a battle<br />
map, you score 10 victory points at the end of each round<br />
in which at least one of your creatures occupies a space in a<br />
corresponding victory area. <strong>The</strong> player whose warband sets<br />
up in Start Area A scores victory points at the end of each<br />
round that at least one of his creatures occupies a square in<br />
a space marked as Victory Area A; similarly, the opponent<br />
scores victory points at the end of each round for occupying<br />
a square in a space marked as Victory Area B.<br />
SCOUT<br />
<strong>The</strong> Scout special ability works slightly differently when<br />
using a battle map. Instead of placing this creature on your<br />
starting area at the start of the skirmish, you may place it on<br />
any victory area that is located on the half of the map closest<br />
to your starting area. Two creatures with Scout can’t set up<br />
on the same victory area. If a creature with Scout enters play<br />
after the fi rst round, it enters like any other creature.<br />
TERRAIN<br />
Different types of terrain have various effects on play. <strong>The</strong><br />
terrain described below is new to the maps in Fantastic<br />
Locations: <strong>Fane</strong> of the <strong>Drow</strong>.<br />
Doors<br />
Ignore doors marked on the maps. <strong>The</strong>y are included on the<br />
maps to facilitate using the maps in the Dungeons & Dragons<br />
roleplaying game, and have no effect on skirmish play.<br />
Risky Terrain<br />
A creature on a square marked as risky terrain gets melee<br />
damage +5. In addition, when a creature activates in risky<br />
terrain, the controlling player rolls 1d20. On a result of 1–5,<br />
the creature takes 10 damage. On a result of 6–20, there is<br />
no effect. In either case, the creature continues with its turn<br />
normally (assuming it has not been destroyed).<br />
Summoning Circle<br />
When a creature summons another creature using a summon<br />
spell of any kind, its controller can have the summoned<br />
creature enter play on a summoning circle within range (any<br />
square containing part of a summoning circle is eligible). If<br />
it does, the summoned creature can activate on the round<br />
that it enters play. <strong>The</strong> summoned creature’s activation<br />
counts as one of its controller’s normal activations.<br />
SCENARIOS<br />
<strong>The</strong> following scenarios are provided to introduce variety in<br />
casual one-on-one games, and should not be used in tournament<br />
play. For more such scenarios, see the Miniatures Handbook.<br />
Summoning Circle: Any creature that can cast spells can<br />
use a special action when adjacent to a summoning circle.<br />
This ability replaces the creature’s attacks and allows that<br />
creature to summon a Spider of Lolth (Underdark 57/60) to<br />
join your warband. <strong>The</strong> Spider of Lolth joins the summoning<br />
creature’s warband, and follows all the rules for summoned<br />
creatures. This scenario can be used only on the <strong>Drow</strong><br />
Enclave map.<br />
<strong>Drow</strong> Defenses: This scenario uses special warband<br />
building rules. One player is designated as the drow player.<br />
<strong>The</strong> drow player gains 20% more points with which to consruct<br />
his or her warband, but can only use CE miniatures<br />
that are <strong>Drow</strong>, Spiders, Bugbears, Ogres, or Trolls. This<br />
scenario can only be used on the <strong>Fane</strong> of Lolth map.<br />
Prisoner Release: This scenario uses special warband<br />
building rules. One player is designated as the drow player.<br />
<strong>The</strong> drow player gains 20% more points with which to<br />
construct his or her warband, but 40% of that warband’s<br />
points must start in the prisoner cells (area 20 on the <strong>Fane</strong><br />
of Lolth map). In order to release the prisoners, a creature<br />
outside the cells must spend its entire turn opening the door.<br />
This special action can be taken only when the creature is<br />
adjacent to the cell door.