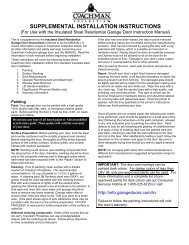
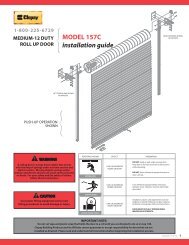
The Next Generation Garage Door Installation & Maintenance - Clopay
The Next Generation Garage Door Installation & Maintenance - Clopay
The Next Generation Garage Door Installation & Maintenance - Clopay

Create successful ePaper yourself
Turn your PDF publications into a flip-book with our unique Google optimized e-Paper software.
Introduction and Opening Preparation<br />
STEP 1 – Things to Know Before You Begin ....................................................................................................3<br />
STEP 2 – Read Safety Information ..................................................................................................................4<br />
STEP 3 – Check Headroom, Backroom, Sideroom ..........................................................................................5<br />
STEP 4 – Removing the Existing <strong>Door</strong> Springs ...............................................................................................6<br />
STEP 5 – Removing <strong>Door</strong> Sections and Track .................................................................................................7<br />
STEP 6 – Preparing the Opening .....................................................................................................................7<br />
Preparing the New <strong>Door</strong><br />
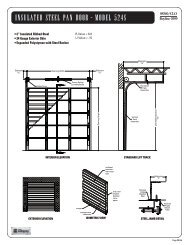
Typical <strong>Garage</strong> <strong>Door</strong> <strong>Installation</strong> Illustration .....................................................................................................8<br />
Hardware Components ....................................................................................................................................9<br />
Installing the New <strong>Door</strong><br />
STEP 7 – Preparing Bottom Section ..............................................................................................................10<br />
STEP 8 – Lift Handle Attachment............. ......................................................................................................12<br />
STEP 9 – Installing <strong>Door</strong> Sections.............. ...................................................................................................13<br />
STEP 10 – Reinforcing the Top Section for Opener Attachment ....................................................................14<br />
STEP 11 – Assembling and Installing Track ...................................................................................................15<br />
STEP 12 – Lock <strong>Installation</strong> (if included).................. ......................................................................................17<br />
STEP 13 – Pull Rope.......... ............................................................................................................................17<br />
STEP 14 – Spring <strong>Installation</strong>....... ..................................................................................................................17<br />
STEP 15 – Attaching an Automatic Opener ....................................................................................................18<br />
<strong>Maintenance</strong>/Adjustments/Options<br />
Table of Contents<br />
Painting and Windows ....................................................................................................................................19<br />
<strong>Maintenance</strong> ...................................................................................................................................................20<br />
Checking and Adjusting the <strong>Door</strong> ...................................................................................................................20<br />
Replacement Parts .........................................................................................................................................20<br />
STEP 1 – Things to Know Before You Begin<br />
• Read the instructions completely before starting the installation<br />
of the door. Becoming familiar with the components before<br />
assembling the door will reduce the installation time.<br />
• Be sure all hardware components for your new door are included<br />
before removing existing door (see pages 8,9). If your door is<br />
missing any parts, call the toll-free Consumer Services number<br />
listed on the front of this manual.<br />
• Allow enough time to do the work; removing an existing door will<br />
take approximately 1-3 hours.<br />
• An assistant may be required for lifting the unsprung door. It can<br />
weigh from 100 to 500 pounds.<br />
• A typical installation takes between 9 and 12 hours to complete.<br />
• Keep in mind when planning the installation that the garage<br />
will be open and unsecured when disassembling the old and<br />
assembling the new door.<br />
• If the garage door is the only opening in the structure make sure<br />
everything you need is inside. You will have no way of leaving the<br />
garage until the track is assembled and installed. This will take<br />
approximately 5 hours.<br />
• To avoid damage to the door, you must reinforce the top section<br />
of the door in order to provide a strengthened mounting point for<br />
attachment of an automatic opener (see page 14).<br />
• Low Headroom doors require special instructions. Options for<br />
doors with low headroom can be found on page 5. Purchase<br />
of additional hardware may be required. Check headroom<br />
requirements in the chart on page 5 before beginning.<br />
• To avoid installation problems which could result in personal injury<br />
or property damage, never reuse old track or hardware.<br />
• <strong>Door</strong>s installed in high windload regions (Florida and other high<br />
wind prone areas) may require additional reinforcement beyond<br />
what is detailed in these instructions. Please refer to supplemental<br />
instructions for these areas.<br />
• Express warranties apply only to doors installed using original,<br />
factory-supplied sections, parts, and hardware installed in strict<br />
accordance with these instructions.<br />
Tools Needed<br />
• “C” Clamps or Locking Pliers<br />
• Hammer<br />
• Screwdriver<br />
• Tape Measure<br />
• Level<br />
• Socket wrench kit<br />
• Pliers<br />
• Drill, 1/4", 3/16", & 3/8" drill bits, and 7/16" socket bit<br />
• Step ladder<br />
• Saw horses (with carpet or other soft material on top surface) or<br />
other supports for placing section on while assembling<br />
• Hacksaw<br />
• Wood Saw<br />
• T-Square<br />
• Additional tools may be required; see the Spring Supplement for<br />
more information.<br />
Additional Material Required<br />
• Light household oil<br />
• 1-1/4" x 1-1/4" Minimum punched angle<br />
- 13 ga. (3/32") minimum thickness for Operator Reinforcement<br />
(see page 14)<br />
- 16 ga. (1/16") minimum thickness for rear track hangers on<br />
doors weighing up to 300 lbs. that use torsion springs, or doors<br />
weighing up to 150 lbs. that use extension springs. If your door<br />
exceeds these weight limitations, or if you do not know the weight<br />
of your door, 13 ga. angle should be used. (See page 16)<br />
• Eight 3/8" x 1" bolts and nuts for rear track hangers<br />
• Six 5/16" x 11/2" lag screws for rear track hangers<br />
• Ten 10d 3" nails<br />
• Stop Molding<br />
• Wood Block<br />
• Rope<br />
G01-R01-0704<br />
3