Commercial Driver Handbook ( PDF ) - California Department of ...
Commercial Driver Handbook ( PDF ) - California Department of ...
Commercial Driver Handbook ( PDF ) - California Department of ...

Create successful ePaper yourself
Turn your PDF publications into a flip-book with our unique Google optimized e-Paper software.
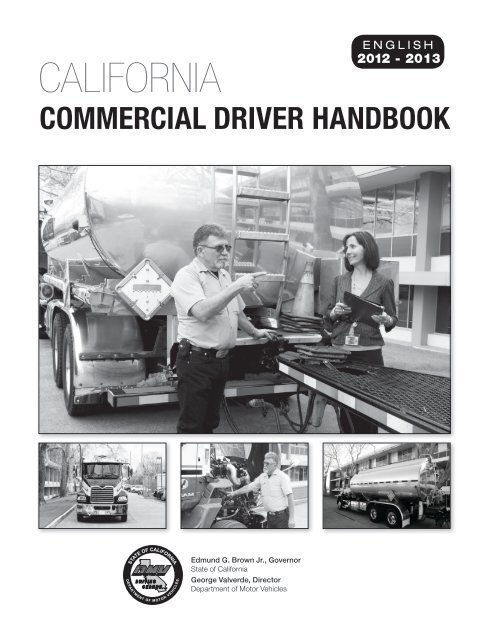
<strong>California</strong><br />
CommerCial <strong>Driver</strong> HanDbook<br />
STATE OF CALIFORNIA<br />
®<br />
Edmund G. Brown Jr., Governor<br />
State <strong>of</strong> <strong>California</strong><br />
George Valverde, Director<br />
<strong>Department</strong> <strong>of</strong> Motor Vehicles<br />
ENGLISH<br />
2012 - 2013
Page left<br />
intentionally blank
cAlIFORnIA DRIVeR lIcenSe clASSeS—VAlID AS OF APRIl 1, 2012<br />
You May Drive… And You May Tow… Examples…<br />
any single vehicle with a Gross Vehicle Weight Rating (GVWR) <strong>of</strong> more than<br />
10,000 lbs.<br />
any trailer bus, with endorsement OR more than one vehicle, with endorsement.<br />
any vehicles under Classes B and C.<br />
travel trailers weighing over 10,000 lbs. GVWR, not used for hire.<br />
5th-wheel travel trailers weighing over 15,000 lbs., not used for hire.<br />
With a vehicle weighing 4,000 lbs. or more unladen, you may tow a: livestock<br />
trailer exceeding 10,000 lbs. GVWR but not exceeding 15,000 lbs. GVWR if<br />
the vehicle is controlled and operated by a farmer, used to transport livestock<br />
to or from a farm, not used in commerce or contract carrier operations, and is<br />
used within 150 miles <strong>of</strong> the person’s farm.<br />
With a CommerCial Class a liCense:<br />
Any legal combination <strong>of</strong> vehicles, including vehicles under Class B and Class C.<br />
With a nonCommerCial Class a liCense:<br />
Any vehicles under Class C.<br />
a single vehicle with a GVWR <strong>of</strong> 10,000 lbs. or less.<br />
any vehicle a Class C licensed driver may tow.<br />
With a CommerCial Class B liCense:<br />
a single vehicle with a GVWR <strong>of</strong> more than 26,000 lbs.<br />
a 3-axle vehicle weighing over 6,000 lbs.<br />
a bus (except a trailer bus), with endorsement.<br />
any farm labor vehicle, with endorsement.<br />
all vehicles under Class C.<br />
With a nonCommerCial Class B liCense:<br />
any vehicles under Class C.<br />
any housecar over 40' but not over 45', with endorsement.<br />
a single vehicle with a GVWR <strong>of</strong> 10,000 lbs. or less including a tow dolly, if<br />
used.<br />
With a vehicle weighing 4,000 lbs. or more unladen, you may tow a:<br />
trailer coach not exceeding 9,000 lbs. gross.<br />
trailer coach or 5th-wheel travel trailer under 10,000 lbs. GVWR when towing<br />
is not for compensation.<br />
5th-wheel travel trailer exceeding 10,000 lbs. but not exceeding 15,000 lbs.<br />
GVWR, when towing is not for compensation and with endorsement.<br />
Note: No passenger vehicle regardless <strong>of</strong> weight, may tow more than one<br />
vehicle. No motor vehicle under 4,000 lbs. unladen may tow any vehicle<br />
weighing 6,000 lbs. or more gross (CVC §21715).<br />
With a BasiC Class C liCense:<br />
a 2-axle vehicle with a GVWR <strong>of</strong> 26,000 lbs. or less.<br />
a 3-axle vehicle weighing 6,000 lbs. gross or less.<br />
a motorized scooter.<br />
any housecar 40' or less.<br />
A farmer or employee <strong>of</strong> a farmer may also drive:<br />
any combination <strong>of</strong> vehicles with a Gross Combination Weight Rating (GCWR)<br />
<strong>of</strong> 26,000 lbs. or less if used exclusively in agricultural operations and it is not<br />
for hire or compensation.<br />
With a CommerCial Class C liCense:<br />
Any Class C vehicle carrying hazardous materials which requires placards. The<br />
hazardous materials (HAZMAT) endorsement must be on the license. <strong>Driver</strong>s<br />
who transport hazardous wastes, as defined by CVC §§353 and 15278, are also<br />
required to have the HAZMAT endorsement.<br />
With a motorCyCle Class m1 liCense:<br />
Two-wheel motorcycle, motor-driven cycle, or motorized scooter Note: Class M1 or M2 is added to any other class license after passing law<br />
With a motorCyCle Class m2 liCense:<br />
and skill tests.<br />
Motorized bicycle, moped, any bicycle with an attached motor, or motorized scooter.
Page left<br />
intentionally blank
SectIOn 1: IntRODuctIOn ........................... 1<br />
This section is for all commercial drivers<br />
Who Needs a CDL? ......................................... 1<br />
CDL Exceptions ............................................... 2<br />
How to Get a CDL ........................................... 3<br />
General ............................................................ 7<br />
Violation Point Counts ..................................... 9<br />
State Laws and Rules .....................................10<br />
Other Rules ....................................................17<br />
SectIOn 2: DRIVIng SAFely ....................... 23<br />
This section is for all commercial drivers<br />
CDL Rules ..................................................... 23<br />
Vehicle Inspections ........................................ 23<br />
Basic Vehicle Control .................................... 30<br />
Shifting Gears ................................................ 31<br />
Seeing ........................................................... 32<br />
Communicating .............................................. 34<br />
Controlling Speed .......................................... 35<br />
Managing Space............................................ 38<br />
Driving at Night .............................................. 41<br />
Driving in Fog ................................................ 43<br />
Driving in Winter ............................................ 43<br />
Driving in Very Hot Weather .......................... 44<br />
Mountain Driving ........................................... 45<br />
Railroad Crossings ........................................ 46<br />
Seeing Hazards ............................................. 47<br />
Emergencies .................................................. 51<br />
Skid Control/Recovery ................................... 55<br />
Collision Procedures ...................................... 56<br />
Fires ............................................................... 57<br />
Staying Alert and Fit to Drive ......................... 58<br />
Illness ............................................................ 61<br />
HazMat Rules for All <strong>Commercial</strong> <strong>Driver</strong>s ...... 61<br />
SectIOn 3: tRAnSPORtIng cARgO .......... 63<br />
This section is for all commercial drivers<br />
Inspecting Cargo ........................................... 63<br />
Cargo Weight and Balance ............................ 63<br />
Securing Cargo .............................................. 64<br />
Handling Other Cargo .................................... 65<br />
tABle OF cOntentS<br />
SectIOn 4: tRAnSPORtIng<br />
PASSengeRS SAFely .................................. 67<br />
This section is for all drivers who transport<br />
passengers<br />
Vehicle Inspections ........................................ 67<br />
Loading and Unloading.................................. 69<br />
Driving Techniques ........................................ 70<br />
Passenger Management ............................... 72<br />
Miscellaneous Requirements ........................ 72<br />
SectIOn 5: AIR BRAkeS .............................. 73<br />
This section is for drivers who drive or tow<br />
vehicles with air brakes<br />
The Air Brake System .................................... 73<br />
Dual Air Brake Systems ................................. 77<br />
Combination Vehicle Air Brakes ..................... 78<br />
Inspecting the Air Brake System .................... 80<br />
Using Air Brakes ............................................ 84<br />
SectIOn 6: cOmBInAtIOn VehIcleS ........ 87<br />
This section is for drivers who need a<br />
Class A CDL<br />
Driving Combination Vehicles Safely ............. 87<br />
Combination Vehicle Air Brakes ..................... 90<br />
Antilock Brake Systems ................................. 93<br />
Coupling and Uncoupling .............................. 94<br />
Inspecting a Combination Vehicle .................. 97<br />
SectIOn 7: DOuBleS AnD tRIPleS .......... 99<br />
This section is for drivers who tow doubles<br />
or triples<br />
Towing Double/Triple Trailers ......................... 99<br />
Coupling and Uncoupling .............................100<br />
Inspecting Doubles and Triples .....................102<br />
Doubles/Triples Air Brake Check ..................103
SectIOn 8: tAnk VehIcleS .......................105<br />
This section is for drivers who drive tank<br />
vehicles<br />
Tank Vehicle Defined ....................................105<br />
Inspecting Tank Vehicles ...............................105<br />
Driving Tank Vehicles ....................................106<br />
Safe Driving Rules ........................................107<br />
SectIOn 9: hAzARDOuS mAteRIAlS/<br />
WASteS..........................................................109<br />
This section is for drivers who need a<br />
HAZMAT endorsement<br />
Intent <strong>of</strong> the Regulations ............................... 110<br />
Transporting Hazardous Materials ................ 110<br />
Communication Rules .................................. 111<br />
Loading and Unloading.................................119<br />
Bulk Tanks ....................................................122<br />
Federal Driving and Parking Rules ...............123<br />
Dealing with Emergencies ............................126<br />
Appendix A—Table <strong>of</strong> Hazard<br />
Class Definitions ...........................................129<br />
Hazardous Materials Warning Labels<br />
and Placards .................................................131<br />
SectIOn 10: SchOOl BuSeS .....................135<br />
This section is for all commercial drivers<br />
that drive school buses<br />
Danger Zones – Use <strong>of</strong> Mirrors ....................135<br />
Loading and Unloading.................................136<br />
Emergency Exit and Evacuation ..................139<br />
Railroad-highway Crossings .........................140<br />
Student Management ...................................142<br />
Antilock Braking Systems ............................143<br />
Special Safety Considerations .....................144<br />
© Copyright, <strong>Department</strong> <strong>of</strong> Motor Vehicles 2012-2013<br />
All rights reserved<br />
This work is protected by U. S. Copyright Law. DMV owns the copyright <strong>of</strong> this work. Copyright law prohibits the following:<br />
(1) reproduction <strong>of</strong> the copyrighted work; (2) distribution <strong>of</strong> copies <strong>of</strong> the copyrighted work; (3) preparation <strong>of</strong> derivative works<br />
based upon the copyrighted work; (4) displaying the copyrighted work publicly; or (5) performing the copyrighted work publicly.<br />
All requests for permission to make copies <strong>of</strong> all or any part <strong>of</strong> this publication should be addressed to:<br />
<strong>Department</strong> <strong>of</strong> Motor Vehicles<br />
Legal Office MS C128<br />
PO Box 932382<br />
Sacramento, CA 94232-3820<br />
SectIOn 11: PRe-tRIP teSt .......................145<br />
This section will assist drivers taking the<br />
pre-trip test<br />
All Vehicles ...................................................145<br />
External Inspection<br />
(Buses, Trucks, Tractors) ...............................148<br />
Trailer ............................................................152<br />
Coach/Transit Bus ........................................153<br />
School Buses Only .......................................154<br />
Typical Truck or Combination<br />
Vehicle Inspection Guide ..............................155<br />
Typical Passenger Transport<br />
Vehicle Inspection Guide ..............................156<br />
SectIOn 12: BASIc VehIcle cOntROl<br />
SkIllS teSt ..................................................157<br />
This section will assist drivers taking the<br />
skills tests<br />
Scoring .........................................................157<br />
Exercises ......................................................157<br />
SectIOn 13: DRIVIng teSt .........................159<br />
This section will assist drivers taking the<br />
driving test<br />
How Will You Be Tested? ..............................159<br />
glOSSARy .....................................................163
The <strong>California</strong> <strong>Commercial</strong> Motor Vehicle Safety<br />
Program was enacted to improve traffic safety on<br />
our roadways. As a result, <strong>California</strong> has developed<br />
licensing and testing requirements for drivers <strong>of</strong><br />
commercial vehicles which equals or exceeds<br />
federal standards.<br />
It takes special skills and a pr<strong>of</strong>essional attitude to<br />
safely operate large trucks and buses. Only pr<strong>of</strong>essional<br />
drivers will receive and keep a <strong>Commercial</strong><br />
<strong>Driver</strong> License (CDL). A CDL is pro<strong>of</strong> <strong>of</strong> your<br />
pr<strong>of</strong>essional skills and aptitude.<br />
The commercial driving test will be administered<br />
in the English language only. This is pursuant<br />
to Federal Motor Carrier Safety Administration<br />
regulations §§391.11(b)(2) and 383.133(c)(5).<br />
WhO neeDS A cDl?<br />
To operate commercial vehicles, you must apply<br />
for a CDL. Only <strong>California</strong> residents may obtain<br />
a <strong>California</strong> CDL. Residency is established by any<br />
<strong>of</strong> the following: registering to vote here, paying<br />
resident tuition at a public institution <strong>of</strong> higher<br />
education, filing for a <strong>California</strong> homeowner’s<br />
property tax exemption, obtaining a license (such as<br />
a fishing license), or any other privilege or benefit<br />
not ordinarily extended to nonresidents. You need<br />
a CDL if you operate a vehicle or combination<br />
<strong>of</strong> vehicles which requires a Class A or Class B,<br />
license or Class C license with endorsements.<br />
This handbook will help you pass the written<br />
and skills tests. However, this handbook is not<br />
a substitute for a truck driver training class or<br />
program. Formal training is the most reliable way<br />
to learn the many special skills required for safely<br />
driving a large commercial vehicle and becoming<br />
a pr<strong>of</strong>essional driver in the trucking industry.<br />
SectIOn 1: IntRODuctIOn<br />
This section is for all commercial drivers<br />
A commercial motor vehicle is a motor vehicle or<br />
combination <strong>of</strong> vehicles that:<br />
• Has a gross vehicle weight rating (GVWR) <strong>of</strong><br />
26,001 pounds or more.<br />
• Is a combination vehicle with a gross combination<br />
weight rating <strong>of</strong> 26,001 or more pounds, if<br />
the trailer(s) has a GVWR <strong>of</strong> 10,001 or more<br />
pounds.<br />
• Tows any vehicle with a GVWR <strong>of</strong> 10,001<br />
pounds or more.<br />
• Tows more than one vehicle or a trailer bus.<br />
• Has three or more axles (excludes three-axle<br />
vehicles weighing 6,000 pounds or less gross).<br />
• Is any vehicle (bus, farm labor vehicle, general<br />
public paratransit vehicle, etc.) designed, used,<br />
or maintained to carry more than 10 passengers<br />
including the driver, for hire or pr<strong>of</strong>it, or is<br />
used by any nonpr<strong>of</strong>it organization or group.<br />
• Is any size vehicle which requires hazardous<br />
material placards or is carrying material listed<br />
as a select agent or toxin in 42 CFR part 73.*<br />
• Transports hazardous wastes (Health and<br />
Safety Code §§25115 and 25117).*<br />
Note: Employees <strong>of</strong> school districts, private<br />
schools, community colleges, and <strong>California</strong> state<br />
universities who operate 15-passenger vans must<br />
have a CDL with a passenger transport vehicle<br />
(PV) endorsement. A 15-passenger van is a van<br />
manufactured to accommodate 15 passengers,<br />
including the driver, or a van “designed” to carry<br />
15 passengers, including the driver, even if seats<br />
have been removed to accommodate fewer than<br />
15 passengers.<br />
* <strong>Driver</strong>s subject to the commercial driver sanctions.<br />
- 1 -
endorsements<br />
A special endorsement is also required to drive<br />
the following types <strong>of</strong> vehicles. The endorsement<br />
shows as a single letter on the driver license.<br />
• Placarded or marked vehicles transporting<br />
hazardous materials or wastes—(H).<br />
• Tank vehicles (including a cement truck) —(N).<br />
• Passenger transport vehicles—(P).<br />
• School bus—(S).<br />
• Double/Triples combination—(T).<br />
• Tank vehicles transporting hazardous materials<br />
or wastes–(X). (Hazardous waste must meet<br />
the definition <strong>of</strong> CVC §§353 and 15278.)<br />
• Firefighter—(F) (not required but optional<br />
for commercial class A or B license holders.)<br />
cDl excePtIOnS<br />
Exceptions to the CDL requirements are:<br />
• Persons exempted under Health and Safety<br />
Code §25163.<br />
• Persons operating a vehicle in an emergency<br />
situation at the direction <strong>of</strong> a peace <strong>of</strong>ficer.<br />
• <strong>Driver</strong>s who tow a fifth-wheel travel trailer<br />
over 15,000 pounds GVWR or a trailer coach<br />
over 10,000 pounds GVWR, when the towing<br />
is not for compensation. <strong>Driver</strong>s must have a<br />
noncommercial Class A license.<br />
• <strong>Driver</strong>s <strong>of</strong> housecars over 40 feet but not over<br />
45 feet, with endorsement.<br />
• Noncivilian military personnel operating<br />
military vehicles.<br />
• Implement <strong>of</strong> husbandry operators who are<br />
not required to have a driver license.<br />
speCial CertifiCates<br />
Special certificates may sometimes be required<br />
in addition to a CDL, depending on the type <strong>of</strong><br />
vehicle or load you carry.<br />
Note: It is unlawful to drive a school bus or transit<br />
vehicle while using a wireless (cell) telephone<br />
for non-work purposes. Emergency calls to law<br />
enforcement, a health care provider, a fire department,<br />
or other emergency services are permitted.<br />
- 2 -<br />
Apply at DMV field <strong>of</strong>fices for the following<br />
certificates:<br />
Ambulance <strong>Driver</strong> Certificate—required for<br />
driving an ambulance used commercially in<br />
emergency service (CVC §2512). Persons who<br />
have an ambulance driver certificate must submit<br />
a copy <strong>of</strong> the medical report to DMV every two<br />
years. (See page 3.)<br />
Hazardous Agricultural Materials (HAM)*<br />
Certificate—exempts persons who transport<br />
hazardous waste or placarded loads from CDL<br />
requirements if the:<br />
• Person is at least 21 years <strong>of</strong> age.<br />
• Person is employed in an agricultural operation.<br />
• Load is not being transported for compensation.<br />
• Vehicle is owned or leased by a farmer.<br />
• Person has completed a HAM program<br />
approved by the <strong>California</strong> Highway Patrol<br />
(CHP). Although the person who qualifies for<br />
a HAM is not required to have a CDL, commercial<br />
motor vehicle penalties and sanctions<br />
will apply.<br />
• Person submits to DMV every two years a copy<br />
<strong>of</strong> the medical report or health questionnaire.<br />
• Person operates a vehicle which is an implement<br />
<strong>of</strong> husbandry or requires a Class C license<br />
and does not exceed 50 miles from one point<br />
to another.<br />
Verification <strong>of</strong> Transit Training Document<br />
(VTT)—requires drivers <strong>of</strong> transit bus vehicles<br />
to comply with specified training requirements.<br />
Transit bus vehicles provide the public with<br />
regularly scheduled transportation for which a<br />
fare is charged. (Does not include general public<br />
paratransit vehicle). <strong>Driver</strong>s who have a school<br />
bus driver certificate or school pupil activity bus<br />
certificate do not need a VTT.<br />
* <strong>Driver</strong>s subject to the commercial driver sanctions.
hOW tO get A cDl<br />
Apply at CHP <strong>of</strong>fices for the following<br />
certificates:<br />
Applicants for a CDL:<br />
General Public Paratransit Vehicle Certificate<br />
(GPPV)*—required for any person who drives:<br />
• May drive for hire within <strong>California</strong> if you are<br />
18 years <strong>of</strong> age or older and do not engage in<br />
• A vehicle which carries not more than 24<br />
persons including the driver and provides<br />
local transportation to the general public (e.g.,<br />
Dial-A-Ride) (CVC §§336 and 12523.5).<br />
•<br />
interstate commerce activities.<br />
Must be at least 21 years old to drive a commercial<br />
vehicle engaged in interstate commerce<br />
or to transport hazardous materials or wastes<br />
• Pupils at or below the 12th grade level to or from (intrastate or interstate commerce) (CVC<br />
a public or private school or school activity. §12515).<br />
School Bus <strong>Driver</strong> Certificate*—required <strong>of</strong> any • Must be 18 years <strong>of</strong> age.<br />
person who drives a bus for any school district or<br />
any other party carrying public or private pupils provide the folloWing items:<br />
(CVC §§545, 12517, 12522, 34500, 34501.5). A • A completed <strong>Commercial</strong> <strong>Driver</strong> License<br />
school bus driver must also have a school bus (S)<br />
endorsement on his/her CDL. School bus drivers<br />
65 years <strong>of</strong> age and older must submit an annual<br />
medical report to DMV (CVC §12517.2).<br />
Application (DL 44C) form. Signing this form<br />
means you agree to submit to a chemical test to<br />
determine the alcohol or drug content <strong>of</strong> your<br />
blood. If you refuse to sign this form, DMV<br />
School Pupil Activity Bus Certificate (SPAB)*—<br />
will not issue or renew your driver license.<br />
required <strong>of</strong> any person who drives a bus for any • Your true full name.<br />
school district or any other party carrying public • An approved medical form (or copy) com-<br />
or private pupils for school related activities (CVC pleted by a U.S. licensed doctor <strong>of</strong> medicine<br />
§§546 and 12517).<br />
(M.D.), licensed doctor <strong>of</strong> osteopathy (D.O.),<br />
Farm Labor Vehicle Certificate*—required to<br />
drive farm labor trucks and buses (CVC §§322 and<br />
12519). Note: The driver and all passengers in a<br />
farm labor vehicle are required to use seat belts.<br />
Youth Bus Certificate*—required to operate any<br />
bus other than a school bus which carries not more<br />
than 16 children and the driver to or from a school,<br />
to an organized non-school related activity, or to<br />
and from home (after receiving additional CHP<br />
training) (CVC §§680 and 12523).<br />
licensed physician’s assistant (P.A.), registered<br />
advanced practice nurse (APN), or licensed<br />
chiropractor when you apply for a driver<br />
license or instruction permit. <strong>Driver</strong>s who hold<br />
certificates to drive school buses, SPAB, youth<br />
buses, GPPV, or farm labor vehicles must have<br />
their medical examinations given by doctors<br />
<strong>of</strong> medicine, licensed physician’s assistant,<br />
or a registered advanced practice nurse (CVC<br />
§12517.2).<br />
Note: Do not mail your medical report to<br />
Tow Truck <strong>Driver</strong> Certificate*—required for the CHP.<br />
drivers in emergency road service organizations<br />
that provide freeway service patrol operations<br />
pursuant to an agreement or who contract with<br />
a specified public transportation planning entity<br />
(traffic commission).<br />
Vehicle for Developmentally Disabled Persons<br />
(VDDP)*—required to operate a vehicle for a<br />
business or nonpr<strong>of</strong>it organization or agency whose<br />
primary job is to transport for hire persons with<br />
developmental disabilities (Welfare and Institutions<br />
A medical report dated within the last two years<br />
is required for any CDL application and then<br />
every two years after that.<br />
Mail the interim medical to:<br />
<strong>Department</strong> <strong>of</strong> Motor Vehicles<br />
<strong>Commercial</strong> Problem <strong>Driver</strong>s Inquiry Unit<br />
MS G204<br />
PO Box 942890<br />
Sacramento, CA 94290-0001<br />
Code §4512(A) and CVC §12523.6). * <strong>Driver</strong>s subject to the commercial driver sanctions.<br />
- 3 -
You will be given a Medical Certificate Card<br />
(DL 51A) to carry when you drive commercially.<br />
You can be given a citation for driving<br />
out <strong>of</strong> class if your medical certificate expires,<br />
or you drive without a valid medical certificate<br />
in your possession. You may also be removed<br />
from your vehicle by a law enforcement <strong>of</strong>ficer<br />
for driving out <strong>of</strong> class.<br />
If you must have a CDL as part <strong>of</strong> your job, your<br />
employer shall pay the cost <strong>of</strong> the examination<br />
unless your examination was taken before you<br />
applied for the job (Labor Code §231).<br />
Note: Customers who do not meet the minimum<br />
medical standards will either be restricted<br />
or refused a CDL. The restrictions are:<br />
— may not transport passengers commercially<br />
or transport materials which require placards<br />
(CVC §27903).<br />
— may not drive in interstate commerce.<br />
• An acceptable birth date/legal presence (BD/<br />
LP) document. All applicants for an original<br />
DL/ID card must submit pro<strong>of</strong> <strong>of</strong> legal presence<br />
in the US as authorized under federal law. If<br />
the name on your BD/LP document is different<br />
from the name on your DL application form,<br />
you must also bring in an acceptable true full<br />
name document. Your true full name, as shown<br />
on your BD/LP document, will appear on your<br />
DL/ID card. (Refer to the <strong>California</strong> <strong>Driver</strong><br />
<strong>Handbook</strong>.)<br />
An acceptable BD/LP or true full name document<br />
is one produced by an issuing authority<br />
(i.e., county, state, etc.). This document is a<br />
certified copy <strong>of</strong> the original (the original is<br />
always retained by the issuing authority) and<br />
will contain an impressed seal or an original<br />
stamped impression. The certified copy will<br />
be returned to you. If you make a copy <strong>of</strong> the<br />
certified copy, DMV will not accept it for BD/<br />
LP verification.<br />
• Your social security card (cannot be laminated),<br />
Medicare card, or U.S. Armed Forces<br />
active, retired, or reserve DD2 form for an<br />
original CDL. The document must contain your<br />
name and social security number (SSN). Your<br />
SSN will be verified with the Social Security<br />
Administration while you are in the <strong>of</strong>fice.<br />
- 4 -<br />
• A Certificate <strong>of</strong> Driving Skill (DL 170 ETP) if<br />
your employer is authorized by DMV to issue<br />
such certificates. Both you and your employer<br />
sign this form.<br />
• The applicable fee. This fee is good for 12<br />
months from the application date. You are<br />
allowed three attempts to pass the written<br />
knowledge test and a total <strong>of</strong> three attempts to<br />
pass the entire road test (pre-trip inspection,<br />
skills, and driving test) on a single application.<br />
If you fail any portion <strong>of</strong> the road test (pre-trip<br />
inspection, skills, or driving test), it will count as<br />
one failure towards the maximum three attempts<br />
you are allowed. Example: Failing the pre-trip<br />
inspection, skills test, and driving test counts as<br />
a three-time failure (or any failure combination<br />
equaling three). However, if you are required to<br />
take a driving test for separate types <strong>of</strong> vehicles<br />
(Class A or passenger transport vehicle), you<br />
are allowed three driving tests for the Class A<br />
vehicle and three driving tests for the passenger<br />
transport vehicle.<br />
If you fail the skills test or the road test there will<br />
be a $30 retest fee charged upon your return to<br />
take the commercial driving test.<br />
required testing<br />
You must take and pass vision, knowledge (law),<br />
and performance (pre-trip, skills, and driving, if<br />
required) tests to get your original CDL and/or<br />
endorsements or to upgrade to a different class <strong>of</strong><br />
license. Law and vision tests may be required for<br />
renewals. A driving test is required:<br />
• For an original CDL.<br />
• To remove a restriction placed on your license<br />
because <strong>of</strong> vehicle size or equipment.<br />
• To add a “P” or “S” endorsement.<br />
• To renew a CDL expired for more than two<br />
years.
fees suBjeCt to legislative Change eaCh january 1.<br />
If the class <strong>of</strong><br />
license is… and the application type is… the fee is…<br />
commercial<br />
class A or B<br />
commercial<br />
class c<br />
an original—no prior <strong>California</strong> DL (with/without a driving test) ..................... $66<br />
an original—prior <strong>California</strong> DL (with/without a driving test) .......................... $66<br />
to remove a restriction(s) imposed due to vehicle size or equipment ............ $66<br />
to add a passenger transport endorsement ................................................... $66<br />
a driving or skill retest fee .............................................................................. $30<br />
a renewal ....................................................................................................... $39<br />
a renewal by mail or internet .......................................................................... $39<br />
add an endorsement other than PV ............................................................... $39<br />
add noncommercial Class A to a Class B ...................................................... $39<br />
add Class M1/M2 ........................................................................................... $39<br />
a duplicate ..................................................................................................... $29<br />
a name change .............................................................................................. $25<br />
an original—prior <strong>California</strong> DL (with/without a driving test) .......................... $39<br />
a renewal ....................................................................................................... $39<br />
a renewal by mail or internet .......................................................................... $39<br />
add an endorsement not requiring a driving test ........................................... $39<br />
remove an air brake restriction ...................................................................... $39<br />
a duplicate ..................................................................................................... $29<br />
a driving or skill retest fee .............................................................................. $30<br />
a name change .............................................................................................. $25<br />
The CDL law tests are:<br />
• General Knowledge Test, for all Class A, B,<br />
and commercial C applicants.<br />
• Air Brakes Test, if you operate vehicles with<br />
air brakes.<br />
• Combination Vehicles Test, if you drive Class<br />
A combination vehicles.<br />
• Passenger Transport Vehicle Test, if you<br />
transport passengers.<br />
• Hazardous Materials Test, if you transport hazardous<br />
materials or wastes requiring placards.<br />
• Tank Vehicle Test, if you transport liquids in<br />
bulk (including cement mixers).<br />
• Doubles/Triples Test, if you pull double or triple<br />
trailers. (Triple trailers are illegal in <strong>California</strong>.)<br />
• The School Bus test is required if you want to<br />
drive a school bus.<br />
• Firefighter Endorsement Test, to operate firefighting<br />
equipment. (Not required but optional<br />
for commercial class A or B license holders).<br />
Note: Your law and/or endorsement test(s) will<br />
not be returned to you.<br />
You may take the law test at any DMV <strong>of</strong>fice. Office<br />
hours vary. Please go online at www.dmv.ca.gov<br />
or call 1-800-777-0133 to make an appointment.<br />
- 5 -
After passing the required knowledge test(s), you<br />
must schedule a CDL performance test which<br />
includes a pre-trip inspection/knowledge test,<br />
basic control skills tests, and the driving test.<br />
You must use the same (or similar) vehicle for all<br />
three performance tests. Under certain specified<br />
conditions, the driving test requirements may be<br />
waived by DMV or CHP.<br />
Use <strong>of</strong> TesTing Aids ProhibiTed<br />
The use <strong>of</strong> testing aids is strictly prohibited during<br />
the knowledge test. This includes, but is not limited<br />
to: the <strong>California</strong> <strong>Commercial</strong> <strong>Driver</strong> <strong>Handbook</strong>,<br />
cheat sheets, or electronic communication devices<br />
such as a cell phone, hand-held computer, etc.<br />
If any testing aid(s) or a substitute test taker is<br />
used during the written test, the written test will<br />
be marked as a “failure.” An action may also be<br />
taken by DMV against your driving privilege or<br />
the driving privilege <strong>of</strong> anyone else who assists<br />
the applicant in the examination process.<br />
During the pre-trip inspection the department does<br />
not allow the use <strong>of</strong> testing aids other than the<br />
vehicle inspection guide (pages 155 and 156) in<br />
this handbook. If you are caught using anything<br />
other than the inspection guides, the commercial<br />
driving test will be marked as a failure. The use<br />
<strong>of</strong> electronic devices such as cell phones, blue<br />
tooth, CB radios, etc. is prohibited during the<br />
commercial driving test. Also people waiting in<br />
the testing vicinity are prohibited from using hand<br />
- 6 -<br />
Cdl <strong>of</strong>fiCes<br />
Call 1-800-777-0133 to schedule a CDL driving test at one <strong>of</strong> the following <strong>of</strong>fices:<br />
Arleta Fremont Redding Stockton<br />
Bakersfield<br />
Fresno CDL<br />
Driving Center<br />
Bishop Fullerton<br />
Salinas Torrance<br />
San Bernardino CDL<br />
Driving Test Center<br />
Ukiah<br />
Capitola Lancaster San Luis Obispo Vallejo<br />
Compton Modesto Santa Barbara Ventura<br />
El Centro Montebello Santa Rosa<br />
Eureka Rancho San Diego Santa Teresa Yuba City<br />
W Sacramento CDL<br />
Driving Test Center<br />
signals and shouting instructions. If this occurs,<br />
the test will be discontinued and be marked as a<br />
commercial drive test failure. If markings are found<br />
on the vehicle being used for the test to help with<br />
passing the pre-trip or skills test, including but<br />
not limited to: writing on the vehicle, tape, paint<br />
markings that do not appear like they belong, or<br />
markings on the curbs, walls, or trees that would<br />
help the applicant maneuver the vehicle for the<br />
skills test, the test will be discontinued and will<br />
be marked as a failure.<br />
Pre-trip inspection. You demonstrate your knowledge<br />
<strong>of</strong> how the specific features and equipment on<br />
the test vehicle should be checked. This handbook<br />
contains inspection guides on pages 155 and 156 for<br />
handy reference. You may use only one <strong>of</strong> these<br />
guides when taking your pre-trip test. If you do<br />
not pass the pre-trip inspection test, the other tests<br />
will be postponed. There is no additional fee for<br />
re-taking the pre-trip tests on the same application.<br />
See Section 11 for pre-trip information.<br />
Skills tests. You perform various skills that test<br />
your control and ability to maneuver the vehicle.<br />
The tests consist <strong>of</strong> exercises marked by traffic<br />
cones or markers. The examiner will explain how<br />
each exercise is to be done. You will be scored on<br />
your ability to properly perform each exercise.<br />
Failure <strong>of</strong> any skill test ends the test and a retest<br />
fee is due for each skills retest. See Section 12 for<br />
skill test information.
Driving test. You drive on a DMV-specified<br />
route. The test takes about 45 to 60 minutes and<br />
includes left and right turns, intersections, railroad<br />
crossings, curves, rural or semi-rural roads, city<br />
multilane streets, and freeway driving. If you fail<br />
the driving test, a retest fee is charged for each<br />
additional driving test. See Section 13 for driving<br />
test information.<br />
CdL resTriCTions<br />
Your CDL will be restricted to the type <strong>of</strong> vehicle<br />
you use for the driving test. For example, if your<br />
test vehicle does not have air brakes you will be<br />
restricted to driving vehicles without air brakes. If<br />
your passenger transport vehicle carries 15 persons<br />
or less including the driver, you will be restricted<br />
to driving a small size bus.<br />
additional requirements<br />
All commercial vehicle drivers must:<br />
• Be a <strong>California</strong> resident before applying for a<br />
<strong>California</strong> CDL.<br />
• Disclose all states in which they were previously<br />
licensed during the past ten years and<br />
surrender all out-<strong>of</strong>-state driver licenses<br />
(current or expired), if any.<br />
• Certify that they do not have a driver license<br />
from more than one state or country.<br />
• Notify their home state <strong>Department</strong> <strong>of</strong> Motor<br />
Vehicles <strong>of</strong> any conviction which occurred in<br />
other states within 30 days <strong>of</strong> the conviction.<br />
• Notify their employer <strong>of</strong> any conviction within<br />
30 days <strong>of</strong> the conviction using form Report<br />
<strong>of</strong> Traffic Conviction (DL 535).<br />
• Notify their employer <strong>of</strong> any revocation,<br />
suspension, cancellation, or disqualification<br />
before the end <strong>of</strong> the business day following<br />
the action.<br />
• Give their employer a 10-year employment<br />
history <strong>of</strong> commercial driving, if applying for<br />
a job as a driver.<br />
sanCtions/disqualifiCations<br />
Please see the charts on pages 20 to 22 for required<br />
sanctions and disqualifications.<br />
geneRAl<br />
You may not drive a commercial motor vehicle<br />
(CMV) if you are disqualified for any reason.<br />
You will lose your CDL for at least one year for<br />
a first <strong>of</strong>fense for:<br />
• Driving a CMV if your BAC is .04% or higher.<br />
• Driving a CMV under the influence <strong>of</strong> alcohol.<br />
• Refusing to undergo blood alcohol testing.<br />
• Driving a CMV while under the influence <strong>of</strong><br />
a controlled substance.<br />
• Leaving the scene <strong>of</strong> a collision involving a<br />
CMV.<br />
• Committing a felony involving the use <strong>of</strong> a<br />
CMV.<br />
• Driving a CMV when your CDL is suspended/<br />
revoked.<br />
• Causing a fatality through negligent operation<br />
<strong>of</strong> a CMV.<br />
You will lose your CDL for at least three years if<br />
the <strong>of</strong>fense occurs while you are operating a CMV<br />
that is placarded for hazardous materials.<br />
You will lose your CDL for life for a second <strong>of</strong>fense.<br />
You will lose your CDL for life if you use a CMV<br />
to commit a felony involving controlled substances.<br />
You will be put out-<strong>of</strong>-service for 24 hours if you<br />
have any detectable amount <strong>of</strong> alcohol under .04%.<br />
- 7 -
serious traffiC violations<br />
Serious traffic violations include:<br />
• Excessive speeding (15 mph or more above<br />
the posted speed limit).<br />
• Reckless driving.<br />
• Improper or erratic lane changes.<br />
• Following a vehicle too closely.<br />
• Traffic <strong>of</strong>fenses committed in a CMV in connection<br />
with fatal traffic collisions.<br />
• Driving a CMV without obtaining a CDL.<br />
• Having a CDL in the driver’s possession, and<br />
driving a CMV without the proper class <strong>of</strong><br />
CDL and/or endorsements.<br />
You will lose your CDL for at least:<br />
• 60 days if you commit two serious traffic<br />
violations within a three-year period involving<br />
a CMV.<br />
• 120 days for three or more serious traffic<br />
violations within a three-year period involving<br />
a CMV.<br />
violation or out-<strong>of</strong>-serviCe orders<br />
You will lose your CDL for at least:<br />
• 90 days for your first conviction <strong>of</strong> an out-<strong>of</strong>service<br />
order.<br />
• One year for two convictions <strong>of</strong> an out-<strong>of</strong>service<br />
order in a ten-year period.<br />
• Three years for three or more convictions <strong>of</strong><br />
an out-<strong>of</strong>-service order in a ten-year period.<br />
violation <strong>of</strong> hands free or texting<br />
laW<br />
You will lose your CDL:<br />
• For at least 60 days for your second violation<br />
<strong>of</strong> the cell phone hands free or texting law,<br />
within a 3 year period, and receive one point<br />
on your driving record.<br />
• For at least 120 days for your third and subsequent<br />
violations <strong>of</strong> the cell phone hands free or<br />
texting law, within a 3 year period, and receive<br />
one point on your driving record.<br />
- 8 -<br />
railroad-highWay grade Crossing<br />
violations<br />
You will lose your CDL for at least:<br />
• 60 days for your first conviction.<br />
• 120 days for your second conviction within a<br />
three-year period.<br />
• One year for your third conviction within a<br />
three-year period.<br />
These violations include violation <strong>of</strong> a federal,<br />
state, or local law or regulation pertaining to one<br />
<strong>of</strong> the following six <strong>of</strong>fenses at a railroad-highway<br />
grade crossing for:<br />
• <strong>Driver</strong>s who are not required to always stop,<br />
failing to stop before reaching the crossing if<br />
the tracks are not clear.<br />
• <strong>Driver</strong>s who are not required to always stop,<br />
failing to slow down and check that the tracks<br />
are clear <strong>of</strong> an approaching train.<br />
• <strong>Driver</strong>s who are always required to stop, failing<br />
to stop before driving onto the crossing<br />
• All drivers failing to have sufficient space to<br />
drive completely through the crossing without<br />
stopping.<br />
• All drivers failing to obey a traffic control<br />
device or the directions <strong>of</strong> an enforcement<br />
<strong>of</strong>ficial at the crossing.<br />
• All drivers failing to negotiate a crossing<br />
because <strong>of</strong> insufficient undercarriage clearance.
hazardous materials endorsement<br />
BaCkground CheCk and<br />
disqualifiCations<br />
If you require a hazardous materials endorsement<br />
you will be required to submit your fingerprints and<br />
be subject to a background check.<br />
You will be denied or you will lose your hazardous<br />
materials endorsement if you:<br />
• Are not a lawful permanent resident <strong>of</strong> the<br />
United States.<br />
• Renounce your United States citizenship.<br />
• Are wanted or under indictment for certain<br />
felonies.<br />
• Have a conviction in a military or civilian court<br />
for certain felonies.<br />
• Have been adjudicated as a mental defective<br />
or committed to a mental institution.<br />
• Are considered to pose a security threat as<br />
determined by the Transportation Security<br />
Administration (TSA).<br />
For more information you can go online at<br />
hazprints.tsa.dhs.gov or call 1-877-429-7746.<br />
traffiC violations in your personal<br />
vehiCle<br />
The Motor Carrier Safety Improvement Act<br />
(MCSIA) <strong>of</strong> 1999 requires a CDL holder to be<br />
disqualified from operating a commercial motor<br />
vehicle if the CDL holder has been convicted <strong>of</strong><br />
certain types <strong>of</strong> moving violations in their personal<br />
vehicle.<br />
If your privilege to operate your personal vehicle<br />
is revoked, cancelled, or suspended:<br />
• Due to violations <strong>of</strong> traffic control laws (other<br />
than parking violations) you will also lose your<br />
CDL driving privileges.<br />
• Due to alcohol, a controlled substance, or felony<br />
violations, you will lose your CDL for one year.<br />
If you are convicted <strong>of</strong> a second violation in<br />
your personal vehicle or commercial motor<br />
vehicle, you will lose your CDL for life.<br />
You may not obtain a “hardship” license to operate<br />
a commercial motor vehicle.<br />
VIOlAtIOn POInt cOuntS<br />
Convictions that occur while you are driving a<br />
commercial vehicle or as a holder <strong>of</strong> a commercial<br />
driver license are retained on your driving record<br />
as listed below:<br />
• Major violations and disqualification actions,<br />
55 years.<br />
• Out-<strong>of</strong>-service violations and disqualification<br />
actions, 15 years.<br />
• Collisions, serious violations and disqualification<br />
actions, 10 years.<br />
• Railroad grade crossings and disqualification<br />
actions, 4 years.<br />
• Minor convictions, 3 years.<br />
A traffic conviction for driving unsafely counts as<br />
one point. Any collision you contributed to or were<br />
responsible or at fault for, is normally counted as<br />
one point. If you are convicted <strong>of</strong> reckless driving,<br />
driving under the influence <strong>of</strong> alcohol and/or drugs,<br />
or <strong>of</strong> a hit-and-run, you are charged two points.<br />
If you get too many points, you lose your privilege<br />
to drive. You are considered a negligent operator<br />
<strong>of</strong> a commercial motor vehicle when your driving<br />
record shows the following point counts:<br />
4 points in 12 months<br />
6 points in 24 months<br />
8 points in 36 months<br />
You may be entitled to a higher point count (6,<br />
8, or 10 points) if you request and appear for a<br />
hearing and if 4, 6, or 8 points were not obtained<br />
in a Class C vehicle.<br />
A violation received in a commercial vehicle<br />
carries one and one-half times the point count. A<br />
Class A or B driver who does not have a special<br />
certificate or an endorsement may be allowed<br />
two additional points before being considered a<br />
negligent operator.<br />
Convictions reported by other states are added<br />
to your driving record and may result in license<br />
sanctions. If you have an out-<strong>of</strong>-state CDL, any<br />
conviction while operating in <strong>California</strong> will be<br />
reported to your home state.<br />
Note: <strong>Commercial</strong> drivers may not attend a traffic<br />
violator school to have an <strong>of</strong>fense dismissed for<br />
any traffic violation (CVC §42005(c)).<br />
- 9 -
StAte lAWS AnD RuleS<br />
All commercial drivers must know the state laws<br />
limiting the size and weight <strong>of</strong> vehicles and loads.<br />
All commercial vehicles must stop at locations<br />
posted for CHP testing and inspection (CVC<br />
§§2802 – 2805, 2813).<br />
Any <strong>of</strong>ficer, who has reason to believe that a<br />
commercial vehicle is not safely loaded or that the<br />
height, width, length, or weight <strong>of</strong> a vehicle and<br />
load is unlawful, is authorized to require the driver<br />
to stop and submit to an inspection, measurement,<br />
or weighing <strong>of</strong> the vehicle. The <strong>of</strong>ficer may have<br />
the driver stop in a suitable area and reload or<br />
remove any part <strong>of</strong> the load.<br />
Any person driving a commercial vehicle over a<br />
highway or bridge illegally is liable for all damage<br />
caused to the highway or bridge. When the driver<br />
is not the owner <strong>of</strong> the vehicle but is operating it<br />
with the permission <strong>of</strong> the owner, the owner and<br />
driver may both have to pay for the damage.<br />
state air emissions rules<br />
ALL diesel vehicles and equipment operating<br />
in <strong>California</strong>, even those based out-<strong>of</strong>-state, are<br />
currently subject to the following emission reduction<br />
requirements. For more information on each<br />
regulation, visit the Air Resources Board (ARB)<br />
webpage at www.arb.ca.gov/truckstop or call<br />
1-866-6DIESEL (1-866-634-3735).<br />
heAvy dUTy vehiCLe insPeCTion ProgrAm<br />
Heavy duty vehicles in <strong>California</strong> are subject to<br />
opacity test requirements that are verified by random<br />
roadside inspections <strong>of</strong> engine smoke emissions and<br />
tampering. For more information, see www.arb.<br />
ca.gov/enf/hdvip/hdvip_pamphlet.pdf.<br />
engine emission ConTroL LAbeLs (eCL)<br />
All heavy duty commercial vehicles need to have<br />
pro<strong>of</strong> that their engines meet emissions requirements<br />
at least as stringent as U.S. federal standards<br />
for the engine model year. A properly affixed<br />
and legible manufacturer emission control label<br />
is required as pro<strong>of</strong> that the engine meets these<br />
standards. For more information, see www.arb.<br />
ca.gov/enf/advs/advs364.pdf.<br />
- 10 -<br />
PeriodiC smoke insPeCTion ProgrAm<br />
This program applies to <strong>California</strong> based fleets with<br />
two or more heavy duty vehicles. Requires fleets<br />
to perform smoke opacity tests for their vehicles<br />
each year and to maintain records for a minimum<br />
<strong>of</strong> two years. There are some exceptions to the<br />
annual requirement. For more information, see<br />
www.arb.ca.gov/enf/hdvip/psip_pamphlet.pdf.<br />
CommerCiAL idLing reqUiremenTs<br />
These requirements prohibit commercial diesel<br />
vehicles greater than 10,000 GVWR from idling<br />
longer than five minutes. When at or within 100 feet<br />
<strong>of</strong> a school, engines <strong>of</strong> all fuel types must shut down<br />
immediately upon arrival and restart no later than<br />
30 seconds before leaving. Penalties start at $300.<br />
For more information, see www.arb.ca.gov/noidle<br />
or www.arb.ca.gov/toxics/sbidling/sbidling.htm.<br />
reTr<strong>of</strong>iT/UPgrAde reqUiremenTs<br />
The following NEW requirements for trucks<br />
and buses will further reduce diesel exhaust and<br />
greenhouse gas emissions. These reductions require<br />
the retr<strong>of</strong>it and/or upgrade <strong>of</strong> existing vehicles and<br />
equipment.<br />
Trucks and Buses (Private and Federal<br />
Fleets)<br />
The Truck and Bus Rule requires the clean up <strong>of</strong><br />
existing diesel engines used in most diesel trucks and<br />
buses with a GVWR over 14,000 pounds, including<br />
agricultural yard trucks equipped with <strong>of</strong>f-road<br />
certified engines. For more information, see www.<br />
arb.ca.gov/dieseltruck. Clean-up requirements<br />
are based on the engine model year (MY) and the<br />
GVWR <strong>of</strong> the vehicle. Any person or business<br />
residing in <strong>California</strong> who sells an affected vehicle<br />
must provide a disclosure notice about the regulation<br />
to the buyer.
Heavier vehicles with a GVWR more than<br />
26,000 lbs. need engine upgrades as shown in the<br />
schedule below (no reporting is required). More<br />
flexible compliance options are available to owners<br />
that choose to report fleet information by the<br />
March 30, 2012 deadline.<br />
ScheDule FOR<br />
heAVIeR tRuckS AnD BuSeS<br />
Engine Year PM Filter* 2010 MY Engine<br />
Pre-1994 Not required January 1, 2015<br />
1994-1995 Not required January 1, 2016<br />
1996-1999 January 1, 2012 January 1, 2020<br />
2000-2004 January 1, 2013 January 1, 2021<br />
2005 or newer January 1, 2014 January 1, 2022<br />
2007-2009 Already Equipped January 1, 2023<br />
*50% Pm reduction can be used if 85% reduction is not<br />
available.<br />
Lighter vehicles with a GVWR 26,000 lbs. or less<br />
need to be upgraded to 2010 model year engines<br />
or to newer models as shown in the table below.<br />
No retr<strong>of</strong>it PM filters or reporting is required.<br />
ScheDule FOR<br />
lIghteR tRuckS AnD BuSeS<br />
Engine Year 2010 MY Engine<br />
1995 and older January 1, 2015<br />
1996 January 1, 2016<br />
1997 January 1, 2017<br />
1998 January 1, 2018<br />
1999 January 1, 2019<br />
2003 and older January 1, 2020<br />
2004-2006 January 1, 2021<br />
2007-2009 January 1, 2023<br />
Requirements for Drayage Trucks<br />
Trucks (gVWR > 26,000 lbs.) that transport<br />
cargos going to or coming from <strong>California</strong>’s<br />
ports and intermodal rail yards. Diesel-fueled<br />
trucks that transport marine cargo, containers, or<br />
transport chassis must be registered in the statewide<br />
Drayage Truck Registry prior to port or rail yard<br />
entry. For more information, call 888-247-4821<br />
or see www.arb.ca.gov/drayagetruck. Drayage<br />
trucks must comply as shown in the table. Retr<strong>of</strong>it<br />
particulate matter (PM) filters must be verified by<br />
the Air Resource Board to reduce PM by 85%.<br />
Dray-<strong>of</strong>f: It is illegal for a drayage truck to exchange<br />
cargo with a noncompliant drayage truck outside<br />
<strong>of</strong> port or intermodal rail yard property anywhere<br />
in <strong>California</strong>.<br />
StAteWIDe ScheDule FOR<br />
clASS 8 DRAyAge tRuckS<br />
WIth A gVWR > 33,000 lBS.<br />
Compliance<br />
Date<br />
January 1, 2010<br />
Requirements<br />
PM filter on 1994-2003 MY engines<br />
and Pre-1994 MY engines no longer<br />
allowed<br />
January 1, 2012 PM filter on 2004 MY engines<br />
January 1, 2013 PM filter on 2005-2006 MY engines<br />
January 1, 2014<br />
January 1, 2023<br />
All must have 2007 MY engines and<br />
newer<br />
All must have 2010 MY engines and<br />
newer<br />
StAteWIDe ScheDule FOR<br />
clASS 7 DRAyAge tRuckS<br />
WIth A gVWR OF 26,001-33,000 lBS.<br />
Compliance<br />
Requirements<br />
Date<br />
January 1, 2012* PM filter on pre-2007 MY engines<br />
January 1, 2014<br />
All must have 2007 MY engines and<br />
newer<br />
All must have 2010 MY engines and<br />
January 1, 2023<br />
newer<br />
* While Operating In the South coast Air Basin<br />
- 11 -
Requirements for Transport Refrigeration<br />
Units (TRU or Reefer)<br />
Every <strong>California</strong>-based TRU and TRU generator<br />
set must be registered and operator reports must<br />
be submitted and kept current at https://arber.<br />
arb.ca.gov/Welcome.arb. All TRUs that operate<br />
in <strong>California</strong> must also meet the in-use standards,<br />
regardless <strong>of</strong> where they are based.<br />
Compliance schedules to reduce PM emissions are<br />
based on the engine’s model year as shown in the<br />
table below. Engines may be retr<strong>of</strong>it with diesel<br />
particulate filters or replaced with newer, cleaner<br />
engines but the replacement engines must then<br />
comply with the appropriate in-use standard, based<br />
on replacement engine model year. For example,<br />
if an engine is replaced by a 2012 MY engine, it<br />
must be upgraded to meet the in-use standard by<br />
December 31, 2019. Engines have seven years after<br />
the model year before upgrades are required. For<br />
more information see: www.arb.ca.gov/diesel/<br />
tru/tru.htm.<br />
Engine<br />
Model<br />
Year<br />
2001<br />
or older<br />
- 12 -<br />
tRu AnD tRu geneRAtOR Set<br />
cOmPlIAnce ScheDule<br />
Low Emission<br />
TRU In-Use<br />
Standard (50% PM<br />
Reduction)<br />
Ultra Low Emission<br />
TRU In-Use<br />
Standard (85% PM<br />
Reduction)<br />
December 31, 2008 December 31, 2015<br />
2002 December 31, 2009 December 31, 2016<br />
2003 December 31, 2010 December 31, 2017<br />
2004<br />
(25 hp)<br />
2005<br />
and newer<br />
December 31, 2011 December 31, 2018<br />
Not applicable December 31, 2011<br />
Not applicable<br />
December 31st <strong>of</strong> the<br />
model year +7 years<br />
TrACTor-TrAiLer greenhoUse gAs emission<br />
redUCTion reqUiremenTs<br />
The Tractor-Trailer Greenhouse Gas regulation<br />
applies to 53-foot or longer box-type trailers,<br />
including both dry-van and refrigerated-van trailers,<br />
and all heavy-duty tractors that pull them on<br />
<strong>California</strong> highways. Any person or business residing<br />
in <strong>California</strong> who sells an affected vehicle must<br />
provide a disclosure notice about the regulation to<br />
the buyer. Fleets must report to take advantage <strong>of</strong><br />
short haul, local haul or storage trailer exemptions<br />
and passes. For more information see www.arb.<br />
ca.gov/cc/hdghg/hdghg.htm.<br />
Low-rolling resistance tires are required on all 2011<br />
MY or newer tractors and trailers, and are required<br />
on older equipment as shown in the table below.<br />
Date<br />
lOW-ROllIng<br />
ReSIStAnce tIReS<br />
Requirements for 2010 MY<br />
and Older Equipment<br />
January 1, 2013 All Tractors<br />
January 1, 2017<br />
All trailers (except 2003-2009 MY<br />
reefer trailers have until 2018-2020).<br />
Smart Way aerodynamic requirements must currently<br />
be met by all 2011 MY or newer sleeper-cab<br />
tractors and trailers. Older trailers must meet the<br />
following:<br />
SmARt WAy AeRODynAmIc<br />
RequIRementS<br />
Requirements for 2010 MY<br />
Date<br />
June 1, 2012<br />
July 1, 2012<br />
January 1, 2013<br />
and Older Trailers<br />
Optional phase-in registration<br />
deadline for fleets with 21 or more<br />
trailers.<br />
Optional phase-in registration<br />
deadline for small fleets with 20 or<br />
fewer trailers.<br />
All trailers are not using a phase-in<br />
schedule
length <strong>of</strong> vehiCle/loads–single<br />
vehiCle<br />
The maximum length for a single vehicle is<br />
40 feet. This length may be exceeded by parts<br />
complying with fender and mudguard provisions<br />
<strong>of</strong> the <strong>California</strong> Vehicle Code (CVC).<br />
Note: Some vehicles are conditionally exempted<br />
from the 40-foot maximum length (e.g., semitrailers,<br />
buses, housecars).<br />
The front bumper <strong>of</strong> a vehicle must not extend more<br />
than two feet ahead <strong>of</strong> fenders, cab, or radiator,<br />
whichever is foremost.<br />
On a bus, a front and/or rear safety bumper may<br />
extend an additional foot, and a wheel chair lift<br />
may extend up to 18 inches ahead <strong>of</strong> the bus.<br />
Additional extensions up to 36 inches in front or<br />
10 feet in the rear <strong>of</strong> some buses may be added to<br />
transport bicycles.<br />
length <strong>of</strong> vehiCle/loads–<br />
ComBination vehiCles<br />
In a combination <strong>of</strong> vehicles, auxiliary parts or<br />
equipment which do not provide space for carrying<br />
a load or are not used to support or carry the vehicle<br />
may exceed the single vehicle length limit, but the<br />
combination may not exceed the length limit for<br />
combinations.<br />
An articulated bus or trolley coach cannot exceed<br />
a length <strong>of</strong> 60 feet.<br />
A semitrailer being towed by a motor truck or truck<br />
tractor may exceed 40 feet when certain conditions<br />
are met (CVC §35400b(4)).<br />
A combination <strong>of</strong> a truck tractor and a trailer<br />
coupled together shall not exceed a total length<br />
<strong>of</strong> 65 feet except as provided in CVC §§35401<br />
and 35401.5.<br />
A combination <strong>of</strong> vehicles consisting <strong>of</strong> a truck<br />
tractor, a semitrailer, and a trailer cannot be longer<br />
than 75 feet, providing the length <strong>of</strong> either trailer<br />
does not exceed 28 feet 6 inches.<br />
If posted, cities and counties may prohibit a<br />
combination <strong>of</strong> vehicles in excess <strong>of</strong> 60 feet in<br />
length on highways they control.<br />
Other exceptions can be found in CVC §35401.5.<br />
Extension devices are allowed with restrictions<br />
(CVC §35402).<br />
The load length on any vehicle or combination<br />
<strong>of</strong> vehicles may not be more than 75 feet long<br />
measured from the front <strong>of</strong> vehicle or load to the<br />
back <strong>of</strong> vehicle or load.<br />
length exCeptions<br />
Some length exceptions are listed below:<br />
• If the load consists only <strong>of</strong> poles, timbers, pipes,<br />
integral structural materials, or single unit<br />
component parts, including: missile components,<br />
aircraft assemblies, drilling equipment,<br />
and tanks not exceeding 80 feet in length;<br />
provided they are being transported on one <strong>of</strong><br />
the following:<br />
— pole or pipe dolly or other legal trailer<br />
used as a pole or pipe dolly pulled by a<br />
motor vehicle.<br />
— semitrailer.<br />
— semitrailer and a pole or pipe dolly, pulled<br />
by a truck tractor to haul flexible integral<br />
structural material (CVC §35414).<br />
• Public utilities. Refer to CVC §35414(B) for<br />
load exceptions.<br />
• The load on any vehicle or combination <strong>of</strong><br />
vehicles must not extend more than three feet<br />
beyond the foremost part <strong>of</strong> the front bumper or<br />
tires. There are exceptions for booms, or masts<br />
<strong>of</strong> shovels or cranes, or water well drilling and<br />
servicing equipment (CVC §35407). A load<br />
composed solely <strong>of</strong> vehicles may extend four<br />
feet ahead <strong>of</strong> the front tires or the front bumper.<br />
• The load on any single vehicle may not extend to<br />
the rear, beyond the last point <strong>of</strong> support, more<br />
than two-thirds the length <strong>of</strong> the wheel base<br />
<strong>of</strong> the vehicle. On a semitrailer, the wheelbase<br />
extends from the center <strong>of</strong> the last axle <strong>of</strong> the<br />
towing vehicle to the center <strong>of</strong> the last axle on<br />
the semitrailer.<br />
- 13 -
Width <strong>of</strong> vehiCles and loads<br />
The outside width <strong>of</strong> the body <strong>of</strong> the vehicle or<br />
load must not exceed 102 inches (8 1/2 feet). The<br />
width <strong>of</strong> a vehicle with pneumatic (air filled) tires,<br />
measured from the outside <strong>of</strong> one wheel to the<br />
outside <strong>of</strong> the opposite wheel, must not exceed<br />
108 inches (9 feet).<br />
Permitted devices limited to door handles, hinges,<br />
cable cinchers, chain binders, and placard holders<br />
may extend three inches (6 inches on one side for<br />
vehicles used for recreational purposes) on each<br />
side <strong>of</strong> the vehicle or load.<br />
Required devices limited to lights, mirrors, or other<br />
devices may extend up to 10 inches on each side.<br />
Cities and counties may post highways, which<br />
they control, to permit wider vehicles, but may<br />
also prohibit vehicles wider than 96 inches (8 feet).<br />
Special mobile equipment and special construction<br />
and highway maintenance equipment may not be<br />
more than 120 inches (10 feet) wide.<br />
Motor coaches or buses may be 102 inches wide.<br />
When operated by common carriers for hire in urban<br />
or suburban service, they may be 104 inches wide.<br />
When a vehicle is carrying loosely piled agricultural<br />
products such as hay, straw, or leguminous plants<br />
in bulk rather than crated, baled, boxed, or stacked,<br />
the load and the racks that hold the load, may be<br />
no more than 120 inches wide.<br />
A special trip permit may be obtained from the<br />
<strong>California</strong> <strong>Department</strong> <strong>of</strong> Transportation (Cal-<br />
Trans) to transport trusses and similar one-piece<br />
construction components up to 12 feet wide (CVC<br />
§35780.5).<br />
Variances for farm equipment.<br />
Implements <strong>of</strong> husbandry (farm equipment)<br />
are generally exempted from width and length<br />
limitations if they are being operated, transported,<br />
or towed over a highway incidental to normal<br />
farming operations. Owners and operators <strong>of</strong><br />
such equipment should refer to the <strong>California</strong><br />
Vehicle Code provisions which apply. A CalTrans<br />
transportation permit may be necessary (CVC<br />
§§36000 and 36600).<br />
- 14 -<br />
height <strong>of</strong> vehiCles and loads<br />
The vehicle height limit and/or load limit, measured<br />
from the surface <strong>of</strong> the roadway on which the<br />
vehicle stands, is 14 feet.<br />
Exceptions:<br />
• Double deck buses may not exceed 14 feet,<br />
3 inches.<br />
• Farming equipment moved incidentally over<br />
a highway.<br />
Weight limits–general<br />
CalTrans has authority to post signs at bridges and<br />
along state highways stating the maximum weight<br />
they will sustain. Such weight may be greater<br />
or lesser than the maximum weight limits for a<br />
vehicle specified in the <strong>California</strong> Vehicle Code<br />
(CVC §§35550-35557).<br />
Counties and cities may post higher or lower weight<br />
limits along highways and at bridges they control.<br />
Alternate routes may be given for vehicles which<br />
are too heavy for posted highways and bridges.*<br />
axle Weight limits<br />
The gross weight which can be carried by the wheels<br />
<strong>of</strong> any one axle must not exceed 20,000 pounds<br />
(20,500 pounds for buses). Additionally, the load<br />
limit stated by the tire manufacturer (molded on<br />
at least one sidewall) shall not be exceeded.<br />
The weight carried by the wheel or wheels on one<br />
end <strong>of</strong> an axle must not exceed 10,500 pounds. This<br />
limitation does not apply to vehicles transporting<br />
livestock (CVC §35550).<br />
Combinations <strong>of</strong> vehicles made up <strong>of</strong> a trailer or<br />
semitrailer, and each vehicle in the combination,<br />
must meet either the weight provisions <strong>of</strong> CVC<br />
§35551 or the following:<br />
• The gross weight placed on a highway by the<br />
wheels on any one axle <strong>of</strong> a vehicle must not<br />
exceed 18,000 pounds. The gross weight on<br />
any one wheel, or wheels, supporting one end<br />
<strong>of</strong> an axle and resting on a roadway must not<br />
exceed 9,500 pounds.<br />
* Weight limitations by local ordinance do not prevent commercial vehicles<br />
from entering posted streets or highways by direct route to (a) make pickups<br />
or deliveries <strong>of</strong> goods, wares, and merchandise, (b) deliver materials<br />
for bona fide construction, repair, etc. <strong>of</strong> a structure for which a permit<br />
has been obtained, or (c) make public utility construction or repairs.
• Exceptions:<br />
— the gross weight placed on a highway by<br />
the wheels on any front steering axle <strong>of</strong><br />
a motor vehicle must not exceed 12,500<br />
pounds.<br />
— vehicles carrying livestock are exempt from<br />
the gross weight limit which applies to a<br />
wheel at one end <strong>of</strong> an axle.<br />
A complete listing <strong>of</strong> vehicles exempt from<br />
front axle weight limits can be found in<br />
CVC §35551.5(b).<br />
The total gross weight, with load, placed on a<br />
highway by any two or more consecutive axles<br />
<strong>of</strong> a combination <strong>of</strong> vehicles, or a vehicle in the<br />
combination, where the distance between the first<br />
and last axles <strong>of</strong> the two or more consecutive axles<br />
is 18 feet or less, must not exceed that given for<br />
the respective distance as shown in the table in<br />
CVC §35551.5(c).<br />
When the distance between the first and last axles<br />
is more than 18 feet, use the table shown in CVC<br />
§35551.5(d).<br />
Weight limit–logs<br />
Weight limits for vehicles transporting logs are<br />
contained in CVC §§35552 and 35785. Such<br />
additional weight may not be transported on<br />
interstate highways.<br />
Weight-to-axle ratio (CvC §35551)<br />
Highways and bridges are designed to carry only<br />
a certain amount <strong>of</strong> weight per foot <strong>of</strong> distance<br />
between axles. Vehicles carrying heavy loads must<br />
not put too much weight on any point. The <strong>California</strong><br />
Vehicle Code shows limitations in the tables found<br />
in CVC §§35551 and 35551.5.<br />
The total gross weight in pounds placed on the<br />
highway by any group <strong>of</strong> two or more consecutive<br />
axles must not exceed that given for the respective<br />
distance in that table.<br />
In addition to the weight specified in the previously<br />
mentioned table, two consecutive sets <strong>of</strong> tandem<br />
axles may carry a gross weight <strong>of</strong> 34,000 pounds<br />
each, if the distance between the first and last<br />
axles <strong>of</strong> the sets <strong>of</strong> axles is 36 feet or more. The<br />
gross weight on each set <strong>of</strong> tandem axles must not<br />
exceed 34,000 pounds and the gross weight on two<br />
consecutive sets <strong>of</strong> tandem axles must not exceed<br />
68,000 pounds (CVC §35551(b)).<br />
loading/unloading (CvC §35553)<br />
Load limits are not enforced when vehicles are<br />
loading or unloading in the immediate vicinity <strong>of</strong><br />
a loading or unloading area.<br />
A driver moving a load under a special permit may<br />
not change the route. Exception: to avoid violating<br />
a local city traffic regulation, the driver may detour<br />
the route on nonresidential streets only and return<br />
to the route as soon as possible.<br />
penalties for Weight restriCtion<br />
violations<br />
A driver who changes from the permitted route<br />
for an extralegal load, without a peace <strong>of</strong>ficer’s<br />
authorization to do so, is guilty <strong>of</strong> a misdemeanor.<br />
Chp uniform Weight standard<br />
A standard for enforcing weight laws has been<br />
established by the CHP. The standard states,<br />
“Vehicles weighing in excess <strong>of</strong> the legal limits<br />
by 100 pounds or more shall not be permitted to<br />
proceed until the overload has been adjusted or<br />
removed.”<br />
In practice, CHP will allow for a 200 pound variation<br />
factor. After applying the variation factor,<br />
any vehicle exceeding the axle weight, axle group<br />
weight, or gross weight limits by 100 pounds or<br />
more will be issued a citation and required either<br />
to adjust the load to make it legal or obtain an<br />
overweight permit before proceeding.<br />
Hazardous materials cargoes may be allowed to<br />
proceed unless unloading or load adjustment can<br />
be handled with reasonable safety to the driver<br />
and the public.<br />
Livestock and field-loaded bulk perishable agricultural<br />
products destined for human consumption<br />
being transported from the field to the first point <strong>of</strong><br />
processing have a special exemption. The vehicles<br />
transporting livestock and perishable agricultural<br />
products will be cited and allowed to proceed as<br />
- 15 -
long as the weight does not exceed legal limits<br />
by 1,000 pounds on any axle or axle group <strong>of</strong> a<br />
single truck, or 2,000 pounds gross weight on a<br />
combination <strong>of</strong> vehicles.<br />
permits<br />
Transporting an oversize extralegal load without a<br />
permit is punishable by a $500 fine or six months<br />
in jail or both. Also, excess load penalties may be<br />
imposed.<br />
It is against the law in <strong>California</strong> to drive or move,<br />
on any street or highway, any vehicle which is wider,<br />
higher, or heavier than the limits described here.<br />
Permits for oversized vehicles may be obtained<br />
from:<br />
• Caltrans–for state highways<br />
• The city or county–for city or county highways.<br />
motor Carrier permits<br />
Any person who operates any commercial motor<br />
vehicle either for hire or privately (not for hire)<br />
must obtain a motor carrier permit (MCP) (CVC<br />
§34620).<br />
The MCP definition for a commercial motor<br />
vehicle is any:<br />
• Self-propelled vehicle listed in<br />
CVC §34500(a), (b), (f), (g), and (k).<br />
• Motor truck with two or more axles weighing<br />
more than 10,000 lbs. GVWR.<br />
• Other motor vehicle used to transport property<br />
for hire.<br />
Note: An MCP commercial motor vehicle does<br />
not include vehicles operated by household<br />
goods carriers (PUC §5109), pickup trucks<br />
(CVC §471), or two-axle daily rental trucks<br />
(noncommercial use) weighing less than 26,001<br />
lbs. gross.<br />
To obtain MCP forms and information, go to www.<br />
dmv.ca.gov/mcs/mcs.htm or write or call:<br />
<strong>Department</strong> <strong>of</strong> Motor Vehicles<br />
Motor Carrier Services Branch MS G875<br />
PO Box 932370<br />
Sacramento, CA 94232–3700<br />
(916) 657-8153<br />
- 16 -<br />
unified Carrier registration (uCr)<br />
Interstate or foreign motor carriers transporting<br />
property are required to obtain UCR, as outlined<br />
in the final regulations issued by the Federal<br />
Unified Carrier Registration Act <strong>of</strong> 2005. UCR<br />
fees can be paid online at www.ucr.in.gov.<br />
To obtain UCR forms and information go to<br />
www.dmv.ca.gov/mcs/mcs.htm or write or call:<br />
<strong>Department</strong> <strong>of</strong> Motor Vehicles<br />
MCP MS G875<br />
PO Box 932370<br />
Sacramento, CA 94232-3700<br />
(916) 657-8153<br />
speed limits<br />
The maximum speed limit in <strong>California</strong><br />
is 55 miles per hour (mph)<br />
for the following listed vehicles<br />
(CVC §22406):<br />
• Any truck or truck tractor having three or<br />
more axles.<br />
• Any vehicle pulling any other vehicle.<br />
• A school bus transporting any pupil.<br />
• A farm labor vehicle transporting passengers.<br />
• Any vehicle transporting explosives.<br />
• A trailer bus.<br />
For all other vehicles, the maximum speed limit<br />
on most <strong>California</strong> highways is 65 mph. However,<br />
for two-lane undivided highways, the maximum<br />
speed limit is 55 mph, unless posted for a higher<br />
speed. On some highways the maximum speed<br />
limit is 70 mph, but only if there are signs posted<br />
showing 70 mph.<br />
No person shall drive at such a slow speed as to<br />
impede or block normal and reasonable movement<br />
<strong>of</strong> traffic, except when reduced speed is necessary<br />
for safe operation or for compliance with the law,<br />
or when the size and weight <strong>of</strong> the vehicle or<br />
combination makes reduced speed unavoidable.
ight lane rule<br />
Vehicles listed in CVC §22406 must be driven in<br />
the designated lane or lanes when signs are posted.<br />
When no signs are posted, these vehicles must be<br />
driven in the right-hand traffic lane or as close as<br />
possible to the right edge or curb. On a divided<br />
highway with four or more traffic lanes in one<br />
direction, these vehicles may also be driven in the<br />
lane just to the left <strong>of</strong> the right-hand lane. When<br />
overtaking or passing another vehicle going in the<br />
same direction, drivers <strong>of</strong> such vehicles must use<br />
either: (1) the designated lane, (2) the lane just to<br />
the left <strong>of</strong> the right-hand lane, or (3) the right-hand<br />
traffic lane when such use is permitted.<br />
designated system aCCess<br />
Designated System Access does not apply to a<br />
driver who is: (1) preparing for a left- or right-hand<br />
turn, (2) in the process <strong>of</strong> entering or exiting a<br />
highway, or (3) driving in a lane other than the<br />
right-hand lane “to continue on the intended route.”<br />
Buses, except school buses or trailer buses, may<br />
drive in any lane as long as they are not towing<br />
any other vehicle.<br />
Movement <strong>of</strong>f or onto the designated<br />
(freeways/highways) system by<br />
larger trucks is allowed only at<br />
interchanges or exits which have the<br />
following signs:<br />
• Movement is allowed along signed routes to<br />
reach terminals. Terminals are locations where:<br />
— Freight is consolidated.<br />
— Full loads are <strong>of</strong>f-loaded.<br />
— Vehicle combinations are regularly maintained,<br />
stored, or manufactured.<br />
• Movement is allowed up to one<br />
mile from the identified exits<br />
or entrances leading to or from<br />
specified highways to obtain:<br />
— Food<br />
— Fuel<br />
— Lodging<br />
— Repairs<br />
sloW vehiCle rule<br />
On a two-lane highway where passing is unsafe,<br />
a slow-moving vehicle with five or more vehicles<br />
behind it must turn <strong>of</strong>f the roadway at the nearest<br />
place designated by signs as a turnout, or wherever<br />
sufficient area for a safe turnout exists, to let the<br />
following vehicles pass.<br />
hours <strong>of</strong> serviCe<br />
You are required to comply with <strong>California</strong>’s<br />
driver hours <strong>of</strong> service regulations when you are<br />
involved in INTRAstate commerce. You are<br />
considered to be involved in intrastate commerce<br />
when you do not:<br />
• Cross the state line.<br />
• Transport cargo which originated from another<br />
state.<br />
• Transport cargo destined outside <strong>of</strong> <strong>California</strong>.<br />
• Transport any hazardous substance or waste.<br />
(49 CFR 171.8)<br />
OtheR RuleS<br />
You are required to comply with federal hours<br />
<strong>of</strong> service regulations when you are involved in<br />
INTERstate commerce. You are considered to be<br />
involved in interstate commerce when the cargo<br />
you transport:<br />
• Originates out <strong>of</strong> state.<br />
• Is destined out <strong>of</strong> state.<br />
• Consists <strong>of</strong> hazardous substances or wastes.<br />
(49 CFR 171.8)<br />
• Any combination <strong>of</strong> the above.<br />
driver’s reCord <strong>of</strong> duty status<br />
The <strong>California</strong> Highway Patrol is authorized to<br />
develop additional safety and driving regulations<br />
(CVC §§34501 and 34501.2).<br />
A driver’s record <strong>of</strong> duty status must be used<br />
to record all <strong>of</strong> the driver’s hours. <strong>Driver</strong>s <strong>of</strong><br />
commercial vehicles must be in compliance with<br />
the hours <strong>of</strong> service requirements <strong>of</strong> the Code <strong>of</strong><br />
Federal Regulations (CFR), Title 49, §395.8 and<br />
the <strong>California</strong> Code <strong>of</strong> Regulations (CCR), Title<br />
13, §§1201–1213.<br />
- 17 -
A driver’s record <strong>of</strong> duty status, in duplicate, must<br />
be kept by each driver and each co-driver while<br />
driving, on duty but not driving, or resting in a<br />
sleeper berth. The record <strong>of</strong> duty status must be<br />
presented for inspection immediately upon request<br />
by any authorized CHP employee, any regularly<br />
employed and salaried police <strong>of</strong>ficer, or deputy<br />
sheriff. There may be instances when you do not<br />
need to maintain a record <strong>of</strong> duty status.<br />
Collision reporting<br />
Every driver involved in a collision which results<br />
in death, injury, or property damage over $750<br />
must report the collision on a Report <strong>of</strong> Traffic<br />
Accident Occurring in <strong>California</strong> (SR 1) to DMV.<br />
The report forms are available at www.dmv.<br />
ca.gov, or by calling 1-800-777-0133, or at CHP<br />
and DMV <strong>of</strong>fices.<br />
- 18 -<br />
hours <strong>of</strong> serviCe<br />
condition FeDeRAl (Interstate commerce) cAlIFORnIA (Intrastate commerce)<br />
Driving<br />
time<br />
On duty<br />
time<br />
multiple<br />
day on<br />
duty time<br />
limitations<br />
Off duty<br />
time<br />
Adverse<br />
driving<br />
condition<br />
You may not drive for more than 11 hours<br />
following 10 consecutive hours <strong>of</strong>f duty.<br />
You may not drive beyond the 14th hour after<br />
coming on duty following 10 hours <strong>of</strong>f duty.<br />
You may perform work, except for driving, after<br />
being on duty for 14 hours.<br />
You are not eligible to drive after having been on<br />
duty for 60 hours in a 7-day period. However, if<br />
a motor carrier has commercial motor vehicles<br />
operating 7 days a week, the driver is not eligible<br />
to drive after having been on duty for 70 hours<br />
in an 8-day period. A driver may restart a 7/8<br />
consecutive day period after taking 34 or more<br />
consecutive hours <strong>of</strong>f duty.<br />
After driving for 11 hours or being on duty for 14<br />
hours, you may not drive again until you have<br />
had 10 consecutive hours <strong>of</strong>f duty.<br />
exception: If the truck is equipped with a<br />
sleeper berth, these 10 hours may be broken<br />
up into 2 periods provided one is not less than<br />
8 hours.<br />
You may drive an additional 2 hours if you<br />
encounter adverse weather conditions which<br />
were not apparent at the start <strong>of</strong> the trip.<br />
You may not drive for more than 12 hours following<br />
10 consecutive hours <strong>of</strong>f duty.<br />
You may not drive after having been on duty for 16<br />
hours. You may perform work, except for driving,<br />
after being on duty for 16 hours.<br />
You are not eligible to drive after having been on<br />
duty for 80 hours in any 8 consecutive day period<br />
or if transporting farm products after having been<br />
on duty 112 hours in any consecutive 8-day period.<br />
For truck drivers, any period <strong>of</strong> 8 consecutive days<br />
may end with the beginning <strong>of</strong> any <strong>of</strong>f-duty period<br />
<strong>of</strong> 34 or more consecutive hours.<br />
After driving for 12 hours or being on duty for 16<br />
hours, you may not drive again until you have had<br />
10 consecutive hours <strong>of</strong>f duty.<br />
exception: If the truck is equipped with a sleeper<br />
berth, these 10 hours may be broken up into 2<br />
periods, provided one period is not less than 8 hours.<br />
You may drive an additional 2 hours if you encounter<br />
adverse weather conditions which were not apparent<br />
at the start <strong>of</strong> the trip.<br />
Regardless <strong>of</strong> the adverse conditions, you are not<br />
allowed to drive for more than 14 hours or after<br />
having been on duty more than 16 hours.<br />
Note: The changes to hours <strong>of</strong> service (HOS) rules do not affect bus drivers, at this time. For up-to-date HOS rules, visit<br />
www.fmcsa.dot.gov or www.chp.ca.gov.<br />
You (or your authorized representative) must<br />
submit the report within 10 days <strong>of</strong> the collision<br />
whether you caused the collision or not and even<br />
if the collision occurred on private property. This<br />
form is required in addition to any other report<br />
made to or by the police, CHP, or your insurance<br />
company if the collision resulted in any damage<br />
over $750 and/or an injury or death. If you do not<br />
report the collision to DMV, your driving privilege<br />
will be suspended.<br />
Note: CDL holders may downgrade to a noncommercial<br />
license during any mandatory suspension<br />
period to be eligible to obtain a restricted license.<br />
All tests and fees will be required to upgrade when<br />
eligible.
<strong>California</strong> law states that you must notify your<br />
employer within five days if you have a collision<br />
while driving your employer’s vehicle (CVC<br />
§16002). However, your employer may require<br />
you to notify him or her immediately.<br />
finanCial responsiBility<br />
requirements<br />
Motor carriers <strong>of</strong> property. Most commercial<br />
vehicles transporting property are under the regulation<br />
<strong>of</strong> the <strong>Department</strong> <strong>of</strong> Motor Vehicles, whose<br />
liability and property damage requirements are<br />
listed below. The following limits do not apply to<br />
pickup trucks as defined in CVC §471 and two-axle<br />
daily rental trucks with a GVWR less than 26,001<br />
pounds when operated in noncommercial use.<br />
• Transporting general freight exclusively in<br />
vehicles having a GVWR <strong>of</strong> 10,000 pounds<br />
or less: $300,000 combined single limit.<br />
• Transporting general freight in vehicles having<br />
a GVWR <strong>of</strong> 10,001 pounds or more: $750,000<br />
combined single limit.<br />
• Transporting petroleum products in bulk on<br />
the highways: $500,000 for injury or death <strong>of</strong><br />
one person, $1,000,000 for injury or death to<br />
two or more persons, $200,000 for damage to<br />
property, or $1,200,000 combined single limit.<br />
• Transporting oil, hazardous materials, or waste:<br />
combined single limit <strong>of</strong> $1,000,000.<br />
• Transporting hazardous substances, compressed<br />
gas, liquefied compressed gas in cargo<br />
tanks, portable tanks, or hopper-type vehicles<br />
with capacities in excess <strong>of</strong> 3,500 water<br />
gallons, or transporting Division 1.1, 1.2, or<br />
1.3 explosives, poison gas, or highway-route<br />
controlled quantities <strong>of</strong> radioactive materials:<br />
combined single limit <strong>of</strong> $5,000,000.<br />
Information on transporting hazardous materials<br />
or wastes may be obtained from the <strong>Department</strong><br />
<strong>of</strong> Toxic Substances Control (DTSC) and the CHP.<br />
Note: Not all coverage requirements are listed<br />
in this section. For questions related to liability<br />
insurance for motor carriers, call the DMV Motor<br />
Carrier Services Branch at (916) 657-8153.<br />
Financial responsibility may be maintained by one<br />
<strong>of</strong> the following:<br />
• Certificate <strong>of</strong> Insurance (MC 65 M).<br />
• Surety bond (MC 55 M).<br />
• Certificate <strong>of</strong> Self Insurance Motor Carriers<br />
<strong>of</strong> Property (MC 131 M).<br />
Motor carriers must maintain evidence <strong>of</strong> insurance<br />
on file during the active life <strong>of</strong> the permit. Whenever<br />
DMV determines that a motor carrier’s Certificate<br />
<strong>of</strong> Insurance or surety bond has expired or been<br />
cancelled, DMV will suspend the MCP. To avoid<br />
MCP suspension, contact your insurance provider<br />
to submit valid liability coverage.<br />
pro<strong>of</strong> <strong>of</strong> fr Before a driving test<br />
<strong>Driver</strong>s must show evidence <strong>of</strong> financial responsibility<br />
prior to taking the driving test. Evidence<br />
is met if the vehicle displays exempt plates or is<br />
owned, leased by, or under the direction <strong>of</strong>, the<br />
United States Government.<br />
- 19 -
A driver is disqualified from operating a <strong>Commercial</strong> Motor Vehicle (CMV) if convicted <strong>of</strong> any <strong>of</strong> the following <strong>of</strong>fenses while<br />
operating either a COMMERCIAL or NONCOMMERCIAL motor vehicle (non-CMV):<br />
- 20 -<br />
2 nd conviction or DUI<br />
test refusal in separate<br />
incident <strong>of</strong> any <strong>of</strong> these<br />
<strong>of</strong>fenses in non-CMV<br />
2 nd conviction or DUI<br />
test refusal in separate<br />
incident <strong>of</strong> any <strong>of</strong> these<br />
<strong>of</strong>fenses in CMV<br />
1 st conviction or DUI test<br />
refusal in CMV<br />
transporting Hazmat<br />
1 st conviction or DUI test<br />
refusal in non-CMV<br />
1 st conviction or DUI test<br />
refusal in CMV<br />
Offense<br />
1 year 1 year 3 years Life Life<br />
Under the influence <strong>of</strong><br />
alcohol<br />
1 year 1 year 3 years Life Life<br />
Under the influence <strong>of</strong><br />
controlled substance<br />
1 year Not applicable 3 years Life Not applicable<br />
BAC <strong>of</strong> 0.04% or higher<br />
while operating CMV<br />
1 year 1 year 3 years Life Life<br />
Refusing to take DUI test<br />
required by implied<br />
consent laws<br />
1 year 1 year 3 years Life Life<br />
Leaving the scene <strong>of</strong> an<br />
accident<br />
1 year 1 year 3 years Life Life<br />
Using vehicle in felony<br />
not involving a<br />
controlled substance<br />
1 year Not applicable 3 years Life Not applicable<br />
Driving CMV while DL<br />
is revoked, suspended, or<br />
canceled or when<br />
disqualified from<br />
operating a CMV<br />
1 year Not applicable 3 years Life Not applicable<br />
Negligent operation <strong>of</strong><br />
CMV causing a fatality<br />
Life Life Life Life Life<br />
Using vehicle in felony<br />
involving a controlled<br />
substance<br />
Synopsis <strong>of</strong> Table 1 Section 383.51 Federal Motor Carrier Safety Administration
A driver is disqualified from operating a <strong>Commercial</strong> Motor Vehicle (CMV) if convicted <strong>of</strong> any <strong>of</strong> the following SERIOUS <strong>of</strong>fenses:<br />
3rd or subsequent conviction<br />
in separate incident within 3<br />
years <strong>of</strong> any <strong>of</strong> these <strong>of</strong>fenses<br />
in a non-CMV, if conviction<br />
results in revocation,<br />
cancellation, or suspension <strong>of</strong><br />
all driving privileges<br />
3 rd or subsequent conviction<br />
in separate incident within 3<br />
years <strong>of</strong> any <strong>of</strong> these <strong>of</strong>fenses<br />
in a CMV<br />
2 nd conviction in separate<br />
incident within 3 years <strong>of</strong> any<br />
<strong>of</strong> these <strong>of</strong>fenses in a non-<br />
CMV, if conviction results in<br />
revocation, cancellation, or<br />
suspension <strong>of</strong> all driving<br />
privileges<br />
2 nd conviction in separate<br />
incident within 3 years <strong>of</strong> any<br />
<strong>of</strong> these <strong>of</strong>fenses in a CMV<br />
Offense<br />
60 days 60 days 120 days 120 days<br />
Speeding 15 mph or more<br />
above the posted speed limit<br />
Reckless driving 60 days 60 days 120 days 120 days<br />
60 days 60 days 120 days 120 days<br />
Making improper or erratic<br />
lane changes<br />
Following too closely 60 days 60 days 120 days 120 days<br />
60 days 60 days 120 days 120 days<br />
Violating a traffic law which<br />
causes a fatal accident<br />
60 days Not applicable 120 days Not applicable<br />
Driving CMV without<br />
obtaining a CDL<br />
60 days Not applicable 120 days Not applicable<br />
Driving CMV without CDL in<br />
possession<br />
60 days Not applicable 120 days Not applicable<br />
Driving CMV without proper<br />
class CDL and/or<br />
endorsements<br />
Synopsis Table 2 Section 383.51 Federal Motor Carrier Safety Administration<br />
- 21 -
A driver is disqualified from operating a <strong>Commercial</strong> Motor Vehicle (CMV) if convicted <strong>of</strong> any <strong>of</strong> the following RAILROAD-<br />
HIGHWAY GRADE CROSSING <strong>of</strong>fenses (either federal, state, or local):<br />
- 22 -<br />
3 rd or subsequent conviction in<br />
separate incident within 3 years <strong>of</strong><br />
any <strong>of</strong> these <strong>of</strong>fenses<br />
2 nd conviction in separate incident<br />
within 3 years <strong>of</strong> any <strong>of</strong> these<br />
<strong>of</strong>fenses<br />
Offense 1 st conviction<br />
No less than 60 days No less than 120 days No less than 1 year<br />
No less than 60 days No less than 120 days No less than 1 year<br />
No less than 60 days No less than 120 days No less than 1 year<br />
No less than 60 days No less than 120 days No less than 1 year<br />
No less than 60 days No less than 120 days No less than 1 year<br />
No less than 60 days No less than 120 days No less than 1 year<br />
Fails to slow down to check for<br />
approaching train.<br />
NOTE: Regulations may not require<br />
the driver to stop.<br />
Fails to stop before reaching the<br />
crossing if tracks are not clear.<br />
NOTE: Regulations may not require<br />
the driver to stop.<br />
Fails to stop before crossing the<br />
tracks.<br />
NOTE: Regulations require the driver<br />
to stop.<br />
Fails to allow enough space to<br />
completely cross the tracks without<br />
stopping.<br />
Fails to obey traffic device or<br />
directions from a railroad crossing<br />
guard<br />
Cannot cross tracks because <strong>of</strong><br />
insufficient undercarriage clearance<br />
Synopsis <strong>of</strong> Table 3 Section 383.51 Federal Motor Carrier Safety Administration<br />
A driver is disqualified from operating a <strong>Commercial</strong> Motor Vehicle (CMV) if convicted <strong>of</strong> any <strong>of</strong> the following OUT-OF-<br />
SERVICE orders:<br />
3 rd or subsequent conviction in<br />
separate incident within 10 years <strong>of</strong><br />
any <strong>of</strong> these <strong>of</strong>fenses<br />
2 nd conviction in separate incident<br />
within 10 years <strong>of</strong> any <strong>of</strong> these<br />
<strong>of</strong>fenses<br />
Offense 1 st conviction<br />
No less than 3 years or<br />
more than 5 years<br />
No less than 1 year or<br />
more than 5 years<br />
No less than 90 days or<br />
more than 1 year<br />
No less than 3 years or<br />
more than 5 years<br />
No less that 3 years or<br />
more than 5 years<br />
No less than 180 days or<br />
more than 2 years<br />
Violates a driver or vehicle out-<strong>of</strong>service<br />
order while transporting non-<br />
HazMat<br />
Violates a driver or vehicle out-<strong>of</strong>service<br />
order while transporting<br />
HazMat or 16 or more passengers,<br />
including the driver.<br />
Synopsis <strong>of</strong> Table 4 Section 383.51 Federal Motor Carrier Safety Administration
This section contains general knowledge and safe<br />
driving practices which all commercial drivers<br />
should know. You must take a test on this information<br />
to get a CDL.<br />
This section does not contain information on air<br />
brakes, combination vehicles (tractor semitrailer,<br />
doubles/triples, or towing trailers), or buses. You<br />
must read other sections to get information applicable<br />
to the type <strong>of</strong> vehicle(s) you wish to drive.<br />
We have included some basic information on<br />
hazardous materials and wastes. Section 9 has more<br />
detailed information on hazardous materials/wastes.<br />
cDl RuleS<br />
There are federal and state rules that affect drivers<br />
operating CMV’s in all states. Among them are:<br />
• You cannot have more than one license. If<br />
you violate this rule, a court may fine you up<br />
to $5,000, or put you in jail, and DMV may<br />
cancel your <strong>California</strong> driver license.<br />
• You must notify your employer within 30 days<br />
<strong>of</strong> all traffic violations (except parking). This<br />
is true no matter what type <strong>of</strong> vehicle you<br />
were driving.<br />
• You must notify your employer within two<br />
business days if your license is suspended,<br />
revoked or canceled, or if you are disqualified<br />
from driving.<br />
• You must give your employer information on all<br />
driving jobs you have held for the past 10 years<br />
when you apply for a commercial driving job.<br />
• No one can drive a commercial motor vehicle<br />
without a CDL. A court may fine you up to<br />
$5,000 or put you in jail for violating this rule.<br />
• Your employer may not let you drive a commercial<br />
motor vehicle if you have more than<br />
one license or if you’re CDL is suspended or<br />
revoked. A court may fine the employer up<br />
to $5,000 or put him/her in jail for violating<br />
this rule.<br />
SectIOn 2: DRIVIng SAFely<br />
This section is for all commercial drivers<br />
• If you have a hazardous materials endorsement<br />
you must notify and surrender your hazardous<br />
materials endorsement to the state that issued<br />
your CDL within 24 hours <strong>of</strong> any conviction<br />
or indictment in any jurisdiction, civilian<br />
or military, or found not guilty by reason <strong>of</strong><br />
insanity <strong>of</strong> a disqualifying crime listed in 49<br />
CFR 1572.103; who is adjudicated as a mental<br />
defective or committed to a mental institution<br />
as specified in 49 CFR 1572.109; or who<br />
renounces his or her U.S. citizenship.<br />
• You must notify your motor vehicle licensing<br />
agency within 30 days if you are convicted in<br />
any other jurisdiction <strong>of</strong> any traffic violation<br />
(except parking). This is true no matter what<br />
type <strong>of</strong> vehicle you were driving.<br />
• All states are connected to one computerized<br />
system to share information about CDL drivers.<br />
The states will check on drivers’ collision<br />
records to be sure that drivers do not have more<br />
than one CDL.<br />
• You are required by law to be properly<br />
restrained by a safety belt at all times while<br />
operating a commercial motor vehicle. The<br />
safety belt design holds the driver securely<br />
behind the wheel during a collision, which helps<br />
the driver to control the vehicle and reduces<br />
the chance <strong>of</strong> serious injury or death. If you<br />
do not wear a safety belt, you are four times<br />
more likely to sustain serious injures or death<br />
if you are thrown from the vehicle.<br />
VehIcle InSPectIOnS<br />
Safety. Safety is the most important and obvious<br />
reason to inspect your vehicle. A vehicle defect<br />
found during an inspection could save you problems<br />
later. You could have a breakdown on the road<br />
that will cost time and dollars, or even worse, a<br />
collision. Federal and state laws require inspection<br />
by the driver. Federal and state inspectors also<br />
inspect commercial vehicles. An unsafe vehicle can<br />
- 23 -
e put “out <strong>of</strong> service” until the driver or owner<br />
has it repaired. Do not risk your life or the life <strong>of</strong><br />
another in an unsafe vehicle.<br />
pre-trip inspeCtions<br />
Pre-trip inspection. Do a pre-trip inspection<br />
before each trip to find problems that could cause<br />
a collision or a breakdown. A pre-trip inspection<br />
should be done routinely before operating the<br />
vehicle. Review the last vehicle inspection report.<br />
Make sure the vehicle has been released for service<br />
by the maintenance mechanics, if applicable. The<br />
motor carrier must repair any items in the report that<br />
affects safety and certify on the report that repairs<br />
were made or were unnecessary. Remember, when<br />
you get behind the wheel, you (not the mechanic)<br />
are responsible for the safe operation <strong>of</strong> the vehicle.<br />
If the defects have been repaired, sign the previous<br />
driver’s report. There is detailed information on<br />
pre-trips in Section 11 <strong>of</strong> this handbook.<br />
en route inspeCtion<br />
During a trip you should:<br />
• Watch gauges for signs <strong>of</strong> trouble.<br />
• Use your senses to check for problems (look,<br />
listen, smell, and feel).<br />
• Check critical items when you stop.<br />
— tires, wheels, and rims<br />
— brakes<br />
— lights and reflectors<br />
— brake and electrical connections to the<br />
trailer<br />
— trailer coupling devices<br />
— cargo securement devices<br />
after trip inspeCtions<br />
After-trip inspection and report. Inspect the<br />
vehicle at the end <strong>of</strong> the trip, day, or tour <strong>of</strong> duty<br />
for each vehicle you operated. <strong>Driver</strong>s must<br />
complete a written vehicle inspection report each<br />
day. It must include a listing <strong>of</strong> any problems you<br />
find. The inspection report helps the motor carrier<br />
know when the vehicle needs repairs.<br />
- 24 -<br />
inspeCtions–What to look for<br />
To obtain a CDL, you will be required to pass a<br />
pre-trip vehicle inspection test. You will be tested<br />
to see if you know whether your vehicle is safe to<br />
drive. You will be asked to do a pre-trip inspection<br />
<strong>of</strong> your vehicle and explain to the examiner<br />
what you would inspect and why. The following<br />
seven-step inspection method should be useful.<br />
seven-sTeP insPeCTion meThod<br />
You should do a pre-trip inspection the same way<br />
each time so you will learn all the steps and be<br />
less likely to forget something.<br />
• Approaching the vehicle, notice the general<br />
condition. Look for damage or if the vehicle<br />
leans to one side. Look under the vehicle for<br />
fresh oil, coolant, grease, or fuel leaks. Check<br />
the area around the vehicle for hazards to<br />
vehicle movement (people, other vehicles,<br />
objects, low hanging wires, limbs, etc.).<br />
Step 1: Vehicle Overview<br />
Review the last vehicle inspection report. <strong>Driver</strong>s<br />
may have to make a vehicle inspection report in<br />
writing each day. The motor carrier must repair<br />
any items in the report that affect safety and<br />
certify on the report that repairs were made or<br />
were unnecessary. You must sign the report only<br />
if defects were noted and certified to be repaired<br />
or not needed to be repaired.<br />
Step 2: check the engine<br />
compartment<br />
Check that the parking brakes are on and/or<br />
wheels chocked. You may have to raise the hood,<br />
tilt the cab (secure loose things so they don’t fall and<br />
break something), or open the engine compartment<br />
door. Check the following:<br />
• Engine oil level.<br />
• Coolant level in radiator; condition <strong>of</strong> hoses.<br />
• Power steering fluid level and hose condition<br />
(if so equipped).<br />
• Windshield washer fluid level.<br />
• Battery fluid level, connections, and tie downs<br />
(battery may be located elsewhere).
• Automatic transmission fluid level (may<br />
require engine to be running).<br />
• Check belts for tightness and excessive wear<br />
(alternator, water pump, air compressor)—<br />
learn how much “give” the belts should have<br />
when adjusted correctly, and check each one.<br />
• Leaks in the engine compartment (fuel, coolant,<br />
oil, power steering fluid, hydraulic fluid,<br />
battery fluid).<br />
• Cracked or worn electrical wiring insulation.<br />
• Lower and secure the hood, cab, or engine<br />
compartment door.<br />
Step 3: Start the engine and Inspect<br />
Inside the cab<br />
Get in and Start the Engine<br />
• Make sure the parking brake is on.<br />
• Put the gearshift in neutral (or park, if<br />
automatic).<br />
• Start the engine; listen for unusual noises.<br />
• If equipped, check the Anti-lock Brake System<br />
(ABS) indicator lights. The ABS Light on the<br />
dash board should come on and then turn <strong>of</strong>f.<br />
If it stays on, the ABS is not working properly.<br />
For trailers only; if the yellow light on the<br />
left rear <strong>of</strong> the trailer stays on, the ABS is not<br />
working properly.<br />
Look at the Gauges<br />
• Oil pressure. Should come up to normal within<br />
seconds after the engine is started.<br />
• Air pressure. Pressure should build from 50 to<br />
90 psi within 3 minutes. Build the air pressure<br />
to governor cut-out (usually 120 – 130 psi).<br />
Know your vehicle requirements.<br />
• Ammeter and/or voltmeter. Should be in normal<br />
range(s).<br />
• Coolant temperature. Should begin a gradual<br />
rise to normal operating range.<br />
• Engine oil temperature. Should begin gradual<br />
rise to normal operating range.<br />
• Warning lights and buzzers. Oil, coolant, charging<br />
circuit warning, and ABS lights should go<br />
out right away.<br />
Check Conditions <strong>of</strong> Controls<br />
Check all <strong>of</strong> the following for looseness, sticking,<br />
damage, or improper setting:<br />
• Steering wheel.<br />
• Clutch.<br />
• Accelerator (gas pedal).<br />
• Brake controls:<br />
— Foot brake.<br />
— Trailer brake, if vehicle has one.<br />
— Parking brake.<br />
— Retarder controls, if vehicle has them.<br />
• Transmission controls.<br />
• Interaxle differential lock, if vehicle has one.<br />
• Horn(s).<br />
• Windshield wiper/washer.<br />
• Lights.<br />
— Headlights.<br />
— Dimmer switch.<br />
— Turn signals.<br />
— Four-way flashers.<br />
— Parking, clearance, identification, and<br />
marker switch(es).<br />
Check Mirrors and Windshield<br />
Inspect the mirrors and windshield for cracks, dirt,<br />
illegal stickers, or other obstructions to seeing<br />
clearly. Clean and adjust as necessary.<br />
Check Emergency Equipment<br />
Check for safety equipment:<br />
• Spare electrical fuses (unless vehicle has circuit<br />
breakers).<br />
• Three red reflective triangles.<br />
• Properly charged and rated fire extinguisher.<br />
• List <strong>of</strong> emergency phone numbers.<br />
• Accident reporting kit (packet).<br />
Check for optional items such as:<br />
• Chains (where winter conditions require).<br />
• Tire changing equipment.<br />
- 25 -
Check Safety Belt<br />
Check that the safety belt is securely mounted,<br />
adjusts, latches properly, and is not ripped or frayed.<br />
Step 4: turn <strong>of</strong>f the engine and check<br />
the lights<br />
Make sure the parking brake is set, turn <strong>of</strong>f the<br />
engine, and take the key with you. Turn on the<br />
headlights (low beams) and four-way emergency<br />
flashers, and get out <strong>of</strong> the vehicle.<br />
Step 5: Do a Walkaround Inspection<br />
• Go to the front <strong>of</strong> the vehicle and check that<br />
the low beams are on and both <strong>of</strong> the four-way<br />
flashers are working.<br />
• Push the dimmer switch and check that the<br />
high beams work.<br />
• Turn <strong>of</strong>f the headlights and four-way emergency<br />
flashers.<br />
• Turn on the parking, clearance, side-marker,<br />
and identification lights.<br />
• Turn on the right turn signal and start the<br />
walk-around inspection.<br />
General<br />
• Walkaround and inspect the vehicle(s).<br />
• Clean all the lights, reflectors, and glass as<br />
you go along.<br />
Left Front Side<br />
• <strong>Driver</strong>’s door glass should be clean.<br />
• Door latches and/or locks should work properly.<br />
Left Front Wheel<br />
• Condition <strong>of</strong> the wheel and rim—missing, bent,<br />
or broken studs, clamps, lugs, or any signs <strong>of</strong><br />
misalignment.<br />
• Condition <strong>of</strong> the tires—properly inflated, valve<br />
stem and cap okay, and no serious cuts, bulges,<br />
or tread wear.<br />
• Use a wrench to test rust-streaked lug nuts,<br />
indicating looseness.<br />
• Hub oil level okay and no leaks.<br />
- 26 -<br />
Left Front Suspension<br />
• Condition <strong>of</strong> the spring, spring hangers,<br />
shackles, and u-bolts.<br />
• Condition <strong>of</strong> the shock absorber.<br />
Left Front Brake<br />
• Condition <strong>of</strong> the brake drum or disc.<br />
• Condition <strong>of</strong> the hoses.<br />
Front<br />
• Condition <strong>of</strong> front axle.<br />
• Condition <strong>of</strong> steering system.<br />
• No loose, worn, bent, damaged or missing parts.<br />
• Must grab steering mechanism to test for<br />
looseness.<br />
Steering<br />
Gear Box<br />
Steering<br />
Arms<br />
Pitman<br />
Arm<br />
Steering<br />
Wheel<br />
Figure 2-1<br />
Drag<br />
Link<br />
Steering<br />
Wheel<br />
Shaft<br />
Tie Rod<br />
Steering<br />
Ring<br />
Knuckle<br />
Spindle<br />
Condition <strong>of</strong> Windshield<br />
• Check for damage and clean if dirty.<br />
• Check the windshield wiper arms for proper<br />
spring tension.<br />
• Check the wiper blades for damage, “stiff”<br />
rubber, and securement.<br />
Lights and Reflectors<br />
• Parking, clearance, and identification lights are<br />
clean, operating, and the proper color (amber<br />
at front).<br />
• Reflectors are clean and the proper color (amber<br />
at front).<br />
• Right front turn signal light is clean, operating,<br />
and the proper color (amber or white on signals<br />
facing forward).
Right Side<br />
• Right front: check all items as done on left front.<br />
• Primary and secondary safety cab locks are<br />
engaged (if a cab-over-engine design).<br />
• Right fuel tank(s):<br />
— Securely mounted, and not damaged or<br />
leaking.<br />
— Fuel crossover line is secure.<br />
— Tank(s) contain enough fuel.<br />
— Cap(s) on and secure.<br />
Condition <strong>of</strong> Visible Parts<br />
• Rear <strong>of</strong> engine is not leaking.<br />
• Transmission is not leaking.<br />
• Exhaust system is secure, not leaking, and not<br />
touching wires, fuel, or air lines.<br />
• Frame and cross members have no bends or<br />
cracks.<br />
• Air lines and electrical wiring are secured<br />
against snagging, rubbing, and wearing.<br />
• Spare tire carrier or rack is not damaged, if<br />
so equipped.<br />
• Spare tire and/or wheel is securely mounted<br />
in rack.<br />
• Spare tire and wheel is adequate (proper size<br />
and properly inflated).<br />
Cargo Securement (Trucks)<br />
• Cargo is properly blocked, braced, tied,<br />
chained, etc.<br />
• Header board is adequate, secure (if required).<br />
• Side boards and stakes are strong enough,<br />
free <strong>of</strong> damage and properly set in place, if<br />
so equipped.<br />
• Canvas or tarp (if required) is properly secured<br />
to prevent tearing, billowing, or blocking <strong>of</strong><br />
mirrors.<br />
• If oversize, all required signs (flags, lamps,<br />
and reflectors) are safely and properly mounted<br />
and all required permits are in the driver’s<br />
possession.<br />
• Curbside cargo compartment doors are in good<br />
condition, securely closed, latched/locked, and<br />
required security seals are in place.<br />
Right Rear<br />
• Condition <strong>of</strong> the wheels and rims—no missing,<br />
bent, or broken spacers, studs, clamps, or lugs.<br />
• Condition <strong>of</strong> tires—properly inflated, valve<br />
stems and caps okay, and no serious cuts,<br />
bulges, or tread wear, tires are not rubbing<br />
each other, and nothing is stuck between them.<br />
• Tires same type (e.g., not mixed radial and<br />
bias types).<br />
• Tires are evenly matched (same sizes).<br />
• Wheel bearing/seals are not leaking.<br />
Suspension<br />
• Condition <strong>of</strong> the spring(s), spring hangers,<br />
shackles, and u-bolts.<br />
• Axle is secure.<br />
• Powered axle(s) are not leaking lube (gear oil).<br />
• Condition <strong>of</strong> the torque rod arms and bushings.<br />
• Condition <strong>of</strong> the shock absorber(s).<br />
• If retractable axle equipped, check the condition<br />
<strong>of</strong> the lift mechanism. If air powered, check<br />
for leaks.<br />
• Condition <strong>of</strong> the air ride components.<br />
Frame<br />
6 Leaf<br />
Steel Spring<br />
Torque<br />
Rod<br />
Side View<br />
Hydraulic<br />
Shock Absorber<br />
Bearing Plates<br />
Auxiliary<br />
Spring<br />
Axle<br />
Figure 2-2<br />
Front<br />
Axle<br />
Main<br />
Spring<br />
Vehicle<br />
Frame<br />
Vehicle<br />
Frame<br />
Shackle<br />
- 27 -
Front<br />
- 28 -<br />
Frame<br />
Frame<br />
Bracket<br />
Reinforcement<br />
Height Control Valve<br />
Eye Bolt<br />
U-Bolts<br />
Clamp Bolt<br />
Control Arm Anchor Plate<br />
Figure 2-3<br />
Bellows Support (Upper)<br />
Axle<br />
Axle Seat<br />
Air Suspension Diagram<br />
Figure 2-4<br />
Spacer<br />
Shock Absorber<br />
Bellows<br />
Bellows Support (Lower)<br />
Brakes<br />
• Brake adjustment.<br />
• Condition <strong>of</strong> the brake drum(s) or discs.<br />
• Condition <strong>of</strong> the hoses—look for any wear<br />
due to rubbing.<br />
Lights and Reflectors<br />
• Side-marker lights are clean, operating, and<br />
the proper color (red at rear, others amber).<br />
• Side-marker reflectors are clean and the proper<br />
color (red at rear, others amber).<br />
Rear<br />
• Lights and reflectors<br />
— Rear clearance and identification lights<br />
are clean, operating, and the proper color<br />
(red at rear).<br />
— Reflectors are clean and the proper color<br />
(red at rear).<br />
— Taillights are clean, operating, and the<br />
proper color (red at rear).<br />
— Right rear turn signal is operating and the<br />
proper color (red, yellow, or amber at rear).<br />
• License plate(s) are present, clean, and secured.<br />
• Splash guards present, not damaged, properly<br />
fastened, not dragging on the ground, or the<br />
rubbing tires.<br />
• Cargo is secure (trucks).<br />
• Cargo is properly blocked, braced, tied,<br />
chained, etc.<br />
• Tailboards are up and properly secured.<br />
• End gates are free <strong>of</strong> damage and properly<br />
secured in the stake sockets.<br />
• Canvas or tarp (if required) is properly secured<br />
to prevent tearing, billowing, or blocking <strong>of</strong><br />
either the rearview mirrors or rear lights.<br />
• If over-length or over-width, make sure all<br />
signs and/or additional lights/flags are safely<br />
and properly mounted and all required permits<br />
are in the driver’s possession.<br />
• Rear doors are securely closed and latched/<br />
locked.<br />
Left Side<br />
Check all items as done on right side, plus:<br />
• Battery(ies) (if not mounted in engine<br />
compartment).<br />
• Battery box(es) are securely mounted to<br />
vehicle.<br />
• Box has secure cover.<br />
• Battery(ies) are secured against movement.<br />
• Battery(ies) are not broken or leaking.<br />
• Fluid in the battery(ies) is at the proper level<br />
(except maintenance-free type).<br />
• Cell caps are present and securely tightened<br />
(except maintenance-free type).<br />
• Vents in the cell caps are free <strong>of</strong> foreign material<br />
(except maintenance-free type).<br />
Step 6: check the Signal lights<br />
Get in and Turn <strong>of</strong>f the Lights<br />
• Turn <strong>of</strong>f all the lights.<br />
• Turn on the stop lights (apply the trailer hand<br />
brake or have a helper apply the brake pedal.<br />
• Turn on the left turn signal lights.<br />
Get Out and Check the Lights<br />
• Left front turn signal light is clean, operating<br />
and the proper color (amber or white on signals<br />
facing the front).<br />
• Left rear turn signal light and both stop lights<br />
are clean, operating, and the proper color (red,<br />
yellow, or amber).<br />
Note: Checks <strong>of</strong> brake, turn signal, and 4-way<br />
flasher functions must be done separately.
Get in the Vehicle<br />
• Turn <strong>of</strong>f lights not needed for driving.<br />
• Check for all required papers, trip manifests,<br />
permits, etc.<br />
• Secure all loose articles in the cab (they might<br />
interfere with operation <strong>of</strong> the controls or hit<br />
you in a crash).<br />
• Start the engine.<br />
Step 7: Start the engine and check<br />
Test for Hydraulic Leaks<br />
If the vehicle has hydraulic brakes, pump the brake<br />
pedal three times. Then apply firm pressure to the<br />
pedal and hold for five seconds. The pedal should<br />
not move. If it does, there may be a leak or other<br />
problem. Get it fixed before driving. If the vehicle<br />
has air brakes, do the checks described in Sections<br />
5 and 6 <strong>of</strong> this handbook.<br />
Test Parking Brake(s)<br />
• Fasten your safety belt.<br />
• Set the parking brake (power unit only).<br />
• Release the trailer parking brake (if applicable).<br />
• Place the vehicle in low gear.<br />
• Gently pull forward against the parking brake<br />
to make sure the parking brake holds.<br />
• Repeat the same steps for the trailer with the<br />
trailer parking brake set and the power unit<br />
parking brakes released (if applicable).<br />
• If it doesn’t hold the vehicle, it is faulty, and<br />
needs to be fixed.<br />
Test the Service Brake Stopping Action<br />
• Go about five miles per hour.<br />
• Push the brake pedal firmly.<br />
• “Pulling” to one side or the other can mean<br />
brake trouble.<br />
• Any unusual brake pedal “feel” or delayed<br />
stopping action can mean trouble.<br />
• If you find anything unsafe during the pre-trip<br />
inspection, get it fixed. Federal and state laws<br />
forbid operating an unsafe vehicle.<br />
During a trip check the Vehicle<br />
Operation Regularly.<br />
You should check the:<br />
• Instruments.<br />
• Air pressure gauge (if you have air brakes).<br />
• Temperature Gauges.<br />
• Pressure Gauges.<br />
• Ammeter/voltmeter.<br />
• Mirrors.<br />
• Tires.<br />
• Cargo, cargo covers.<br />
• Lights.<br />
If you see, hear, smell, or feel anything that might<br />
mean trouble, check it out.<br />
safety inspeCtion<br />
<strong>Driver</strong>s <strong>of</strong> trucks and truck tractors transporting<br />
cargo must inspect the securement <strong>of</strong> the cargo<br />
within the first 50 miles <strong>of</strong> a trip and every 150<br />
miles or every three hours (whichever comes first).<br />
after-trip inspeCtion and report<br />
You must make a written report each day on the<br />
condition <strong>of</strong> the vehicle(s) you drive. Report<br />
anything affecting safety which could lead to a<br />
mechanical breakdown.<br />
The vehicle inspection report tells the vehicle owner<br />
about problems that may need repair. Keep a copy<br />
<strong>of</strong> your report in the vehicle for one day. That way,<br />
the next driver can learn about any problems you<br />
have found.<br />
- 29 -
BASIc VehIcle cOntROl<br />
To drive a vehicle safely, you must be able to<br />
control its speed and direction. Safely operating<br />
a commercial vehicle requires skill in:<br />
• Accelerating<br />
• Steering<br />
• Backing safely<br />
• Shifting gears<br />
• Braking/controlling speed<br />
Fasten your seat belt when on the road. Apply the<br />
parking brake when you leave your vehicle.<br />
aCCelerating<br />
Don’t roll back when you start. You may hit<br />
someone behind you. Partly engage the clutch<br />
before you take your right foot <strong>of</strong>f the brake. Set<br />
the parking brake whenever necessary to keep<br />
from rolling backward. Release it only when you<br />
have applied enough engine power to keep from<br />
rolling backward. On a tractor-trailer equipped with<br />
a trailer brake hand valve, the hand valve can be<br />
applied to keep from rolling backward.<br />
Speed up smoothly and gradually so the vehicle<br />
does not jerk. Rough acceleration can cause mechanical<br />
damage as well as damage to the coupling<br />
when pulling a trailer. It is also a common cause<br />
<strong>of</strong> passenger injuries on buses. When starting a<br />
bus on a level surface with good traction, there is<br />
<strong>of</strong>ten no need for the parking brake.<br />
Speed up very gradually when traction is poor, as<br />
in rain or snow. If you give the vehicle too much<br />
power, the drive wheels may spin and you could<br />
lose control. If the drive wheels begin to spin, take<br />
your foot <strong>of</strong>f the accelerator.<br />
steering<br />
Hold the wheel firmly with both hands. Your hands<br />
should be on opposite sides <strong>of</strong> the wheel. If you<br />
hit a curb or a pothole, the wheel could pull away<br />
from your hands unless you have a firm hold.<br />
- 30 -<br />
stopping<br />
Push the brake pedal down gradually. The amount<br />
<strong>of</strong> pressure you need to stop the vehicle will depend<br />
on the speed <strong>of</strong> the vehicle and how quickly you<br />
need to stop. Control the pressure so the vehicle<br />
comes to a smooth, safe stop. If you have a manual<br />
transmission, push the clutch in when the engine<br />
is close to idle.<br />
BaCking safely<br />
Because you cannot see everything behind your<br />
vehicle, backing is always dangerous. Avoid<br />
backing whenever you can. When you park, try<br />
to park so you will be able to pull forward when<br />
you leave. When you have to back, here are a few<br />
simple safety rules:<br />
• Look at your path.<br />
• Back slowly, using your mirrors.<br />
• Back and turn toward the driver’s side whenever<br />
possible.<br />
• Use a helper whenever possible.<br />
Start in the proper position. Put the vehicle in<br />
the best position to allow you to back safely. This<br />
position will depend on the type <strong>of</strong> backing to be<br />
done.<br />
Look at your path. Look at your line <strong>of</strong> travel<br />
before you begin. Get out and walk around the<br />
vehicle. Check your clearance to the sides and<br />
overhead in and near the path your vehicle will take.<br />
Use mirrors on both sides. Check the outside<br />
mirrors on both sides frequently. Get out <strong>of</strong> the<br />
vehicle and check your path if you are unsure.<br />
Back slowly. Always back as slowly as possible.<br />
Use the lowest reverse gear so that you can easily<br />
correct any steering errors before you get too far<br />
<strong>of</strong>f course. You can also stop quickly if necessary.<br />
Back and turn toward the driver’s side. Back<br />
to the driver’s side so you can see better. Backing<br />
toward the right side is very dangerous because<br />
you cannot see as well.<br />
Remember to always back in the direction that<br />
gives you the best vision.
BaCking With a trailer<br />
Backing with a trailer. When backing a car,<br />
straight truck, or bus, turn the steering wheel<br />
toward the direction you want to go. When backing<br />
a trailer, turn the steering wheel in the opposite<br />
direction. Once the trailer starts to turn, you must<br />
turn the wheel the other way to follow the trailer.<br />
Whenever you back with a trailer, try to position<br />
your vehicle so you can back in a straight line. If<br />
you must back on a curved path, back to the driver’s<br />
side so you can see. Back slowly so you can make<br />
corrections before you get too far <strong>of</strong>f course.<br />
Correct drift immediately. As soon as you see<br />
the trailer getting <strong>of</strong>f the proper path, correct it<br />
by turning the steering wheel in the direction <strong>of</strong><br />
the drift.<br />
Pull forward. When backing, make pull-ups to<br />
reposition your vehicle when needed.<br />
Use a helper. Use a helper when you can. He or<br />
she can see blind spots that you can’t. The helper<br />
should stand near the back <strong>of</strong> the vehicle where you<br />
can see him or her. Before you begin backing, work<br />
out a set <strong>of</strong> hand signals that you both understand.<br />
Agree on a signal for STOP.<br />
ShIFtIng geARS<br />
Shifting gears correctly is important. If you can’t<br />
get your vehicle into the correct gear while driving,<br />
you will have less control.<br />
manual transmissions<br />
Basic method for shifting up. Most heavy vehicles<br />
with manual transmissions require double clutching<br />
to change gears. This is the basic method:<br />
• Release accelerator, push in clutch, and shift<br />
into neutral at the same time.<br />
• Release clutch.<br />
• Let engine and gears slow down to the revolutions<br />
per minute (rpm) required for the next<br />
gear (this takes practice).<br />
• Push in clutch and shift into the higher gear<br />
at the same time.<br />
• Release clutch and press accelerator at the<br />
same time.<br />
Shifting gears using double clutching requires<br />
practice. If you remain in neutral too long, you may<br />
have difficulty putting the vehicle into the next gear.<br />
If so, don’t try to force it. Return to neutral and<br />
release the clutch, and increase the engine speed<br />
to match the road speed, then try again.<br />
There are two ways <strong>of</strong> knowing when to shift:<br />
• Engine speed or rpm. Study the owner’s manual<br />
for your vehicle and learn the operating rpm<br />
range. Watch your tachometer, and shift up<br />
when your engine reaches the top <strong>of</strong> the range.<br />
(Some newer vehicles use “progressive”<br />
shifting: the rpm at which you shift becomes<br />
higher as you move up in the gears. Find out<br />
what is right for your vehicle.)<br />
• Road speed or mph. Learn the correct speed<br />
for each gear. Then, by using the speedometer,<br />
you will know when to shift up.<br />
With either method, you may learn to use engine<br />
sounds to know when to shift.<br />
Basic procedures for shifting down<br />
• Release accelerator, push in clutch, and shift<br />
into neutral at the same time.<br />
• Release clutch.<br />
• Press accelerator. Increase engine and gear<br />
speed to the rpm required in the lower gear.<br />
• Push in clutch and shift to lower gear at the<br />
same time.<br />
• Release clutch and press accelerator at the<br />
same time.<br />
Downshifting, like upshifting, requires knowing<br />
when to shift. Use either the tachometer or the<br />
speedometer and downshift at the right rpm or<br />
road speed. Some special conditions where you<br />
should downshift are:<br />
• Before starting down a hill. Slow down and<br />
shift down to a speed that you can control<br />
without using the brakes hard. Otherwise, the<br />
brakes can overheat and lose their braking<br />
power. Downshift before starting down the<br />
hill. Make sure you are in a low enough gear,<br />
usually lower than the gear required to climb<br />
the same hill. The braking effect <strong>of</strong> the engine<br />
is greatest when it is near the governed rpms<br />
and the transmission is in the lower gears. Save<br />
- 31 -
your brakes so you will be able to stop or slow<br />
as required by road and traffic conditions.<br />
• Before entering a curve. Slow down to a safe<br />
speed, and downshift before entering the<br />
curve. This lets you use some power through<br />
the curve to help the vehicle be more stable<br />
while turning. It also lets you speed up as soon<br />
as you are out <strong>of</strong> the curve.<br />
multispeed rear axles and auxiliary<br />
transmissions<br />
Multispeed rear axles and auxiliary transmissions are<br />
used on many vehicles to provide extra gears. You<br />
usually control them by a selector knob or switch<br />
on the gearshift lever <strong>of</strong> the main transmission.<br />
There are many different shift patterns. Learn the<br />
right way to shift gears in the vehicle(s) you drive.<br />
automatiC transmissions<br />
Some vehicles have automatic transmissions which<br />
let you select a low range for greater engine braking<br />
when going down grades. The lower ranges<br />
prevent the transmission from shifting up beyond<br />
the selected gear (unless the governor rpm is<br />
exceeded). It is very important to use this braking<br />
effect when going down grades.<br />
automated transmissions<br />
Automated transmissions combine the convenience<br />
<strong>of</strong> an automatic transmission with the control <strong>of</strong> a<br />
manual transmission. An automated transmission<br />
has a clutch and gear selection lever. However,<br />
the only time the clutch is used is to start and stop<br />
the vehicle. Once the vehicle is started, sensors<br />
constantly monitor the vehicle’s speed and rpms.<br />
Gear shifting is automatic. DMV imposes a restriction<br />
when a vehicle equipped with an automated<br />
transmission is used for a driving test (because<br />
the clutch is only used to start or stop the vehicle).<br />
retarders<br />
Some vehicles have “retarders.” Retarders help<br />
slow a vehicle, reducing the need for using your<br />
brakes. They reduce brake wear and give you<br />
another way to slow down. There are many types <strong>of</strong><br />
retarders (exhaust, engine, hydraulic, electric). All<br />
- 32 -<br />
retarders can be turned on or <strong>of</strong>f by the driver. On<br />
some vehicles the retarding power can be adjusted.<br />
When turned “on,” retarders apply braking power<br />
to the drive wheels only whenever you let up on<br />
the accelerator pedal all the way.<br />
Retarders can be noisy; be sure you know where<br />
their use is permitted by law.<br />
Caution. When the drive wheels have poor traction,<br />
the retarder may cause them to skid. You should<br />
turn the retarder <strong>of</strong>f whenever the road is wet, icy,<br />
or snowy.<br />
SeeIng<br />
To be a safe driver and to help avoid collisions,<br />
you need to know what is going on all around your<br />
vehicle. Not looking properly is a major cause <strong>of</strong><br />
collisions. All drivers look ahead; but many do not<br />
look far enough ahead.<br />
seeing ahead<br />
Importance <strong>of</strong> looking far enough ahead.<br />
Because stopping or changing lanes can take a lot<br />
<strong>of</strong> distance, knowing what traffic is doing on all<br />
sides <strong>of</strong> you is very important. You need to look<br />
well ahead to make sure you have room to make<br />
these moves safely. If a traffic light has been green<br />
for a long time, it will probably change before you<br />
get there. Start slowing down and be ready to stop.<br />
How far ahead to look. Most good drivers look<br />
12 to 15 seconds ahead. That means looking ahead<br />
the distance you will travel in 12 to 15 seconds. At<br />
lower speeds, that is about one block. At highway<br />
speeds, it is about a quarter <strong>of</strong> a mile. If you are<br />
not looking that far ahead, you may have to stop<br />
too quickly or make quick lane changes. Looking<br />
12 to 15 seconds ahead does not mean that you<br />
should not pay attention to things that are closer.<br />
Good drivers shift their attention back and forth,<br />
near and far.<br />
What to look for in traffic. Be especially alert<br />
when nearing freeway on ramps. Look for vehicles<br />
entering the highway, moving into your lane, or<br />
turning. Watch for the brake lights <strong>of</strong> the vehicles<br />
ahead. By looking far enough ahead, you can<br />
change your speed or change lanes if necessary,<br />
to avoid a problem.
Road conditions. Look for hills and curves–anything<br />
for which you will have to slow or change<br />
lanes. Pay attention to traffic signals and signs.<br />
Traffic signs may alert you to road conditions<br />
where you may have to change speed.<br />
seeing Behind and to the sides<br />
It is important to know what is going on behind<br />
and to the sides. Check your mirrors regularly.<br />
Check more <strong>of</strong>ten in special situations.<br />
Every <strong>California</strong> registered motor vehicle must<br />
have at least two mirrors, including one attached<br />
to the left-hand side, and located to give a clear<br />
view <strong>of</strong> the roadway to the rear for a distance <strong>of</strong> at<br />
least 200 feet. Both left- and right-hand rear view<br />
mirrors are required on a motor vehicle which is<br />
constructed or loaded to obscure the driver’s view<br />
to the rear, or which is towing a vehicle or load<br />
which blocks the view (CVC §26709).<br />
Mirror adjustment. Mirror adjustment should<br />
be checked prior to the start <strong>of</strong> any trip and can<br />
only be checked accurately when the trailer(s) are<br />
straight. You should check and adjust each mirror<br />
to show some part <strong>of</strong> the vehicle. This will give<br />
you a reference point for judging the position <strong>of</strong><br />
other images.<br />
How to use mirrors. Use mirrors correctly by<br />
quickly checking them <strong>of</strong>ten and understanding<br />
what you see. When you use your mirrors while<br />
driving on the road, check quickly. Look back and<br />
forth between the mirrors and the road ahead. Do<br />
not focus on the mirrors for too long. Otherwise,<br />
you will travel quite a distance without knowing<br />
what is happening ahead.<br />
Many large vehicles have curved (convex,<br />
“fisheye,” “spot,” “bugeye”) mirrors that show a<br />
wider area than flat mirrors. This is <strong>of</strong>ten helpful.<br />
But remember, everything appears smaller in a<br />
convex mirror than it would if you were looking<br />
at it directly. Also, things seem farther away than<br />
they really are. It is important to realize this and<br />
to allow for it.<br />
Regular checks. You need to make regular checks<br />
<strong>of</strong> your mirrors to be aware <strong>of</strong> traffic and to check<br />
your vehicle.<br />
Traffic checks. Check the mirrors for vehicles on<br />
either side and in back <strong>of</strong> you. In an emergency,<br />
you will need to know whether you can make a<br />
quick lane change or stop. Use your mirrors to<br />
spot overtaking vehicles. Remember, there are<br />
blind spots that your mirrors cannot show you.<br />
Check your mirrors regularly to know where other<br />
vehicles are around you and to see if they move<br />
into your blind spots.<br />
Check your vehicle. Use the mirrors to keep an<br />
eye on your tires; it is one way to spot a tire fire.<br />
Use the mirrors to check open cargo. Look for<br />
loose straps, ropes, or chains. Watch for a flapping<br />
or ballooning tarp.<br />
Special situations. Special situations require more<br />
than regular mirror checks. These are lane changes,<br />
turns, merges, and tight maneuvers.<br />
Lane changes. Check your mirror to make sure<br />
no vehicle is alongside you or about to pass you.<br />
Check your mirrors:<br />
• Before you change lanes, to make sure there is<br />
enough room and signal at least 100 feet before<br />
turning. On the freeway, it is best to signal at<br />
least five seconds before changing lanes.<br />
• After you have signaled, check to see that the<br />
lane is clear and no one has moved into your<br />
blind spot.<br />
• Right after you start the lane change, to double<br />
check that your path is clear.<br />
• After you complete the lane change, to be sure<br />
you turned <strong>of</strong>f your signal lights.<br />
Turns. When turning, check your mirrors to make<br />
sure the rear <strong>of</strong> your vehicle will not hit anything.<br />
Merges. When merging, use your mirrors to make<br />
sure the gap in traffic is large enough for you to<br />
enter safely.<br />
Tight maneuvers. Any time you are driving in<br />
close quarters, check your mirrors <strong>of</strong>ten. Make<br />
sure you have enough clearance for any maneuver<br />
you wish to make.<br />
- 33 -
cOmmunIcAtIng<br />
Other drivers do not know what you are going to<br />
do until you tell them.<br />
signal your intentions<br />
Signaling what you intend to do is important for<br />
everyone’s safety. Here are some general rules<br />
for signaling:<br />
Turns. There are three good rules for using turn<br />
signal.<br />
1. Signal early. Signal several seconds before<br />
you turn. It is the best way to keep others from<br />
trying to pass you.<br />
2. Signal continuously. You need both hands<br />
on the wheel to turn safely. Do not cancel the<br />
signal until you have completed the turn.<br />
3. Cancel your signal. Turn the signal <strong>of</strong>f after<br />
you have turned.<br />
For information on vehicles which must be<br />
equipped with lamp turn signal systems and two<br />
stop lamps, see CVC §§24951 and 24600.<br />
Lane changes. Use your turn signal before changing<br />
lanes. Change lanes slowly and smoothly. That<br />
way a driver you did not see may have a chance<br />
to avoid your vehicle.<br />
Slowing down. Warn drivers behind you when you<br />
need to slow down. A few light taps on the brake<br />
pedal–enough to flash the brake lights–should<br />
warn following drivers. Use the 4-way flashers<br />
when you are stopped. Warn other drivers in any<br />
<strong>of</strong> the following situations:<br />
• Trouble ahead. The size <strong>of</strong> your vehicle may<br />
make it hard for drivers behind you to see<br />
hazards ahead <strong>of</strong> you. If you see a hazard that<br />
will require slowing down, warn the drivers<br />
behind you by flashing your brake lights.<br />
• Tight turns. Most passenger vehicle drivers<br />
do not know how slow you must go to make<br />
a tight turn in a large vehicle. Give drivers<br />
behind you warning by braking early and<br />
slowing gradually.<br />
- 34 -<br />
• Stopping on the road. Truck and bus drivers<br />
sometimes stop in the road to unload cargo or<br />
passengers or to stop at a railroad crossing.<br />
Warn other drivers by flashing your brake<br />
lights. Do not stop suddenly.<br />
• Driving slowly. <strong>Driver</strong>s <strong>of</strong>ten do not realize<br />
how fast they are catching up to a slow vehicle<br />
until they are very close. If you must drive<br />
slowly, alert following drivers by turning on<br />
your emergency flashers. (Laws regarding<br />
the use <strong>of</strong> flashers differ from one state to<br />
another. Check the laws <strong>of</strong> the states where<br />
you will drive).<br />
Don’t direct traffic. Some drivers try to help out<br />
others by signaling when it is safe to pass. You<br />
should not do this. You could cause a collision<br />
and be held liable for the costs.<br />
CommuniCating your presenCe<br />
Other drivers may not notice your vehicle even<br />
when it is in plain sight. Let them know you are<br />
there to help prevent collisions.<br />
When passing. Whenever you are about to pass<br />
a vehicle, pedestrian, motorcyclist, or bicyclist,<br />
assume they do not see you. They could suddenly<br />
move in front <strong>of</strong> you. When it is legal, tap the<br />
horn lightly or, at night, quickly flash your lights<br />
from low to high beam and back. Drive carefully<br />
enough to avoid a collision even if they don’t see<br />
or hear you.<br />
When it is hard to see. At dawn or dusk or in rain<br />
or snow, you need to make your vehicle easier to<br />
see. If you are having trouble seeing other vehicles,<br />
other drivers will have trouble seeing you. Turn<br />
on your lights. Use the headlights, not just the<br />
identification or clearance lights. Use the low<br />
beams; high beams can bother people at dawn or<br />
dusk as well as at night.<br />
When parked at the side <strong>of</strong> the road. When you<br />
pull <strong>of</strong>f the road and stop, be sure to turn on the<br />
4-way flashers. This is very important at night.<br />
Do not trust the taillights to give warning. <strong>Driver</strong>s<br />
have crashed into the rear <strong>of</strong> a parked truck because<br />
they thought it was moving.
If you must stop on the road or the shoulder <strong>of</strong><br />
a road, put out your reflective triangles within<br />
ten minutes. Place your warning devices at the<br />
following locations:<br />
• On a two-lane road with traffic in both<br />
directions or on an undivided highway, place<br />
warning devices within ten feet <strong>of</strong> the front or<br />
rear corners to mark the location <strong>of</strong> the vehicle<br />
and 100 feet behind and ahead <strong>of</strong> the vehicle,<br />
on the shoulder or in the lane in which you<br />
stopped. (Figure 2-5)<br />
• On the traffic side <strong>of</strong> the vehicle, within ten<br />
feet <strong>of</strong> the front or rear corners, to mark the<br />
location <strong>of</strong> the vehicle. (Figure 2-5)<br />
• About 100 feet behind and ahead <strong>of</strong> the<br />
vehicle, on the shoulder or in the lane you are<br />
in. (Figure 2-6)<br />
• Back beyond any hill, curve, or other obstruction<br />
that prevents other drivers from seeing the<br />
vehicle within 500 feet. (Figure 2-6)<br />
• If you must stop on or by a one-way or divided<br />
highway, place warning devices 10 feet, 100<br />
feet, and 200 feet toward the approaching<br />
traffic. (Figure 2-7)<br />
Carry the triangles with the reflective side toward<br />
the oncoming traffic when placing them, for your<br />
own safety. The other drivers will be able to see you.<br />
Use your horn only when needed. Your horn can<br />
let others know you are there and can help avoid<br />
a collision. However, it can also startle others and<br />
could be dangerous if used unnecessarily.<br />
cOntROllIng SPeeD<br />
Driving too fast is a major cause <strong>of</strong> fatal collisions.<br />
You must adjust your speed depending on<br />
several conditions which include: traction, curves,<br />
visibility, traffic, and hills.<br />
speed and stopping distanCes<br />
There are three things that add up to total stopping<br />
distance: Perception Distance + Reaction Distance<br />
+ Braking Distance = Total Stopping Distance.<br />
• Perception distance. This is the distance<br />
your vehicle moves from the time your eyes<br />
see a hazard until your brain knows it. The<br />
emergenCy Warning deviCe plaCement<br />
Figure 2-5 Two Lane or Undivided Highway<br />
HILL<br />
CURVE<br />
General Rule:<br />
If line <strong>of</strong> sight is obstructed due to hill or<br />
curve, move the rear triangle back down the<br />
road, so adequate warning is given.<br />
Figure 2-6 Obstructed View<br />
Figure 2-7 One way or Divided Highway<br />
- 35 -
perception time for an alert driver is about 3/4<br />
<strong>of</strong> a second. At 55 mph you travel 60 feet in<br />
3/4 <strong>of</strong> a second.<br />
• Reaction distance. The distance traveled from<br />
the time your brain tells your foot to move<br />
from the accelerator until your foot is actually<br />
pushing the brake pedal. The average driver<br />
has a reaction time <strong>of</strong> 3/4 <strong>of</strong> a second. This<br />
accounts for an additional 60 feet traveled at<br />
55 mph.<br />
• Braking distance. The distance it takes to<br />
stop once the brakes are put on. At 55 mph on<br />
dry pavement with good brakes, it can take a<br />
heavy vehicle about 170 feet to stop. (About<br />
4 and 3/4 seconds.)<br />
• Total stopping distance. At 55 mph it will<br />
take about 6 seconds to stop and your vehicle<br />
will travel about the distance <strong>of</strong> a football field<br />
(60 + 60 + 170 = 290 feet).<br />
Refer to Page 85 for stopping distances with air<br />
brakes.<br />
Control and stopping requirements. The service<br />
brake must hold the vehicle or combination <strong>of</strong><br />
vehicles stationary on any grade on which it is<br />
operated under all conditions <strong>of</strong> loading or unloading<br />
(CVC §26454).<br />
The service brakes <strong>of</strong> every motor vehicle or<br />
combination <strong>of</strong> vehicles must be capable <strong>of</strong> stopping<br />
from an initial speed <strong>of</strong> 20 mph as follows<br />
Maximum Stopping Distance in feet (MSD):<br />
• Passenger vehicle—25 MSD<br />
• Single motor vehicle with a manufacturer’s<br />
GVWR <strong>of</strong> less than 10,000 pounds—30 MSD<br />
• Single motor vehicle with a manufacturer’s<br />
GVWR <strong>of</strong> 10,000 pounds or more, or any<br />
bus—40 MSD<br />
• Combination <strong>of</strong> vehicles consisting <strong>of</strong> a<br />
passenger vehicle or any motor vehicle with<br />
a manufacturer’s GVWR <strong>of</strong> less than 10,000<br />
pounds in combination with any trailer,<br />
semitrailer, or trailer coach—40 MSD<br />
• All other combinations <strong>of</strong> vehicles—50 MSD<br />
- 36 -<br />
The effect <strong>of</strong> speed on stopping distance. The<br />
faster you drive, the greater the impact or striking<br />
power <strong>of</strong> your vehicle. When you double your speed<br />
from 20 to 40 mph the impact is 4 times greater.<br />
The stopping distance is also 4 times longer. Triple<br />
the speed from 20 to 60 mph and the impact and<br />
stopping distance is 9 times greater. At 60 mph,<br />
your stopping distance is greater than that <strong>of</strong> a<br />
football field. Increase the speed to 80 mph and the<br />
impact and stopping distance is 16 times greater<br />
than at 20 mph. High speeds greatly increase the<br />
severity <strong>of</strong> crashes and stopping distances. By<br />
slowing down, you can reduce stopping distance.<br />
The effect <strong>of</strong> vehicle weight on stopping distance.<br />
If a vehicle is heavier, brakes have to work harder<br />
(and absorb more heat) to stop. The brakes, tires,<br />
springs, and shock absorbers on heavy vehicles<br />
are designed to work best when the vehicle is fully<br />
loaded. Generally, empty trucks require greater<br />
stopping distances because an empty vehicle has<br />
less traction. It can bounce and lock up its wheels,<br />
giving much poorer braking. (This is not usually<br />
the case with buses.)<br />
matChing speed to the road surfaCe<br />
You cannot steer or brake a vehicle unless you have<br />
traction. Traction is friction between the tires and<br />
the road. These are some <strong>of</strong> the road conditions<br />
which reduce traction and call for lower speeds:<br />
Slippery surfaces. It will take longer to stop and<br />
it will be harder to turn without skidding when the<br />
road is slippery. You must drive slower to be able<br />
to stop in the same distance as on<br />
a dry road. Wet roads can double<br />
the stopping distance. Reduce<br />
speed by about one third (e.g., slow<br />
from 55 mph to about 35 mph) on<br />
a wet road. On packed snow, reduce<br />
speed by half, or more. If the surface is icy, reduce<br />
speed to a crawl and stop driving as soon as you<br />
can safely do so to install chains, if necessary.<br />
Sometimes it is difficult to know if the road is<br />
slippery. Here are some examples <strong>of</strong> slippery roads:<br />
• Shaded areas. Shady parts <strong>of</strong> the road will<br />
remain icy and slippery long after open areas<br />
have melted.
• Bridges. When the temperature drops, bridges<br />
will freeze before the road will. Be especially<br />
careful when the temperature is close to 32° F.<br />
• Melting ice. Slight melting will make ice wet.<br />
Wet ice is much more slippery than ice that is<br />
not wet.<br />
• Black ice. Black ice is a thin layer that is so clear<br />
you can see the road underneath it. It makes<br />
the road look wet. Any time the temperature is<br />
below freezing and the road looks wet, watch<br />
out for black ice.<br />
• Vehicle icing. An easy way to check for ice is<br />
to open the window and feel the front <strong>of</strong> the<br />
mirror, mirror support, or antenna. If there is<br />
ice on the mirror, the road surface is probably<br />
starting to ice up.<br />
• Just after rain begins. Right after it starts to<br />
rain, the water mixes with oil left on the road<br />
by vehicles. This makes the road very slippery.<br />
If it continues, it will wash the oil away.<br />
Hydroplaning. In some weather, water or slush<br />
collects on the road. When this happens, your<br />
vehicle can hydroplane, which means that the<br />
tires lose their contact with the road and have<br />
little or no traction. You may not be able to steer<br />
or brake. You can regain control by releasing the<br />
accelerator and pushing in the clutch. This will slow<br />
your vehicle and let the wheels turn freely. If the<br />
vehicle is hydroplaning, do not use the brakes to<br />
slow down. If the drive wheels start to skid, push<br />
in the clutch to let them turn freely.<br />
It does not take a lot <strong>of</strong> water to cause hydroplaning.<br />
Hydroplaning can occur at speeds as low as 30<br />
mph if there is a lot <strong>of</strong> water. It is more likely to<br />
occur if tire pressure is low or the tread is worn.<br />
(The grooves in a tire carry away the water; if they<br />
aren’t deep, they don’t work well.) Be especially<br />
careful driving through puddles. Puddles are <strong>of</strong>ten<br />
deep enough to cause hydroplaning.<br />
Road surfaces where water can collect can create<br />
conditions that cause a vehicle to hydroplane.<br />
Watch for clear reflections, tire splashes, and<br />
raindrops on the road. These are indicators <strong>of</strong><br />
standing water.<br />
speed and Curves<br />
<strong>Driver</strong>s must adjust their speed for curves in<br />
the road. If you take a curve too fast, two things<br />
can happen. The tires can lose their traction and<br />
continue straight ahead, so you skid <strong>of</strong>f the road.<br />
Or, the tires may keep their traction and the vehicle<br />
will roll over. Tests have shown that trucks with<br />
a high center <strong>of</strong> gravity can roll over traveling at<br />
the posted speed limit for the curve.<br />
Slow to a safe speed before you enter a curve.<br />
Braking in a curve is dangerous because it is easier<br />
to lock the wheels and cause a skid. Slow down<br />
as needed–never exceed the posted speed limit for<br />
the curve. (The speed zone signs posted at curves<br />
are for smaller vehicles.) Drive in a gear that will<br />
let you accelerate slightly in the curve. This will<br />
help you keep control.<br />
speed and distanCe ahead<br />
You should always be able to stop within the<br />
distance you can see ahead. At night, low beams<br />
let you see about 250 feet ahead. During the day,<br />
fog, rain, or other conditions may require that you<br />
slow down to be able to stop in the distance you<br />
can see.<br />
speed and traffiC floW<br />
When you are driving in heavy traffic, the safest<br />
speed is that <strong>of</strong> other vehicles. Vehicles going the<br />
same direction at the same speed are not likely to<br />
run into one another. In <strong>California</strong>, speed limits<br />
are lower for trucks and buses than for cars. It can<br />
vary as much as 15 mph. Use extra caution when<br />
you change lanes or pass on these roadways. Drive<br />
at the speed <strong>of</strong> the traffic, if you can do so without<br />
traveling at an illegal or unsafe speed. Keep a safe<br />
following distance.<br />
The main reason drivers exceed the speed limit is<br />
to save time. But anyone trying to drive faster than<br />
the speed <strong>of</strong> traffic will not be able to save much<br />
time. The risks involved are not worth it. Go with<br />
the flow <strong>of</strong> traffic–it is safer and easier. If you go<br />
faster than the speed <strong>of</strong> other traffic:<br />
- 37 -
• You will have to keep passing other vehicles.<br />
This increases the chance <strong>of</strong> a collision.<br />
• It is more tiring. Fatigue increases the chance<br />
<strong>of</strong> a collision.<br />
Overtaking or following another vehicle. You<br />
may not overtake and pass another vehicle which<br />
is moving at less than 20 mph on a grade (outside<br />
a business or residential district) unless you can<br />
pass that vehicle at least 10 mph faster than it is<br />
travelling and the pass can be completed within<br />
one quarter mile. (CVC §21758).<br />
You must not follow the vehicles listed below<br />
any closer than 300 feet. The rule does not apply<br />
during overtaking and passing, when there are two<br />
or more lanes for traffic in each direction, or in<br />
a business or residential district (CVC §21704).<br />
• A motor truck or truck tractor having three or<br />
more axles.<br />
• Any motor truck or truck tractor towing any<br />
other vehicle.<br />
• A passenger vehicle or bus towing any other<br />
vehicle.<br />
• A school bus transporting any school pupil.<br />
• A farm labor vehicle when transporting<br />
passengers.<br />
• A vehicle transporting explosives.<br />
• A trailer bus.<br />
When large vehicles are being driven in caravan<br />
on the open highway, at least 100 feet must be left<br />
between them to allow other vehicles to overtake<br />
and pass them (CVC §21705).<br />
speed on doWngrades<br />
Your vehicle’s speed will increase on down grades<br />
because <strong>of</strong> gravity. Your most important objective<br />
is to select and maintain a speed that is not too<br />
fast for the:<br />
• Total weight <strong>of</strong> the vehicle and cargo.<br />
• Length and steepness <strong>of</strong> the grade.<br />
• Road conditions and weather.<br />
If a speed limit is posted, or there is a sign indicating<br />
a maximum safe speed, never exceed the posted<br />
speed. Also look for and heed warning signs<br />
indicating the length and steepness <strong>of</strong> the grade.<br />
- 38 -<br />
You must use the braking effect <strong>of</strong> the engine as<br />
the principal way <strong>of</strong> controlling your speed on<br />
downgrades. The braking effect <strong>of</strong> the engine is<br />
greatest when it is near the governed rpms and the<br />
transmission is in the lower gears. Save your brakes<br />
so you will be able to slow or stop as required by<br />
road and traffic conditions.<br />
Slow the vehicle and shift your transmission to a<br />
low gear before starting down the grade and use<br />
the proper braking techniques.<br />
More information on going down steep hills safely<br />
is on page 45 in the section on “Mountain Driving.”<br />
roadWay Work zones<br />
Speeding traffic is the number one cause <strong>of</strong> injury<br />
and death in roadway work zones. Observe the<br />
posted speed limits at all times when approaching<br />
and driving through a work zone. The speed<br />
limit may be reduced in a work zone. Watch your<br />
speedometer, and don’t allow your speed to creep<br />
up as you drive through long sections <strong>of</strong> road<br />
construction. Decrease your speed for adverse<br />
weather or road conditions. Decrease your speed<br />
even further when a worker is close to the roadway.<br />
mAnAgIng SPAce<br />
A safe driver keeps space all around the vehicle.<br />
When things go wrong, space gives you time to<br />
think and to take action.<br />
To have space available when something goes<br />
wrong, you need to manage space. While this is<br />
true for all drivers, it is very important for large<br />
vehicles. They take up more space and they require<br />
more space for stopping and turning.<br />
spaCe ahead<br />
Of all the space around your vehicle, it is the area<br />
ahead <strong>of</strong> the vehicle–the space you are driving<br />
into–that is the most important.<br />
The need for space ahead. You need space ahead<br />
in case you must suddenly stop. According to<br />
collision reports, the vehicle that trucks and buses<br />
most <strong>of</strong>ten run into is the one in front <strong>of</strong> them. The<br />
most frequent cause <strong>of</strong> collisions is following too<br />
closely. Remember, if the vehicle ahead <strong>of</strong> you is
smaller than yours, it can probably stop faster than<br />
you can. You may crash into it if you are following<br />
too closely.<br />
How much space? How much space should you<br />
keep in front <strong>of</strong> you? One good rule says you need<br />
at least one second for each 10 feet <strong>of</strong> vehicle length<br />
at speeds below 40 mph. At higher speeds, you<br />
must add one second for safety. For example, if<br />
you are driving a 40-foot vehicle, you should leave<br />
4 seconds between you and the vehicle ahead. In a<br />
60-foot rig, you will need 6 seconds. Over 40 mph,<br />
you would need 5 seconds for a 40-foot vehicle<br />
and 7 seconds for a 60-foot vehicle.<br />
To know how much space you have, wait until<br />
the vehicle ahead passes a shadow on the road, a<br />
pavement marking, or some other obvious landmark.<br />
Then count <strong>of</strong>f the seconds like this: “one<br />
thousand-and-one, one thousand-and-two” and so<br />
on, until you reach the same spot. Compare your<br />
count with the rule <strong>of</strong> one second for every 10 feet<br />
<strong>of</strong> length. If you are driving a 40-foot truck and<br />
only counted up to 2 seconds, you are too close.<br />
Drop back a little and count again until you have 4<br />
seconds <strong>of</strong> following distance (or 5 seconds, if you<br />
are going over 40 mph). After a little practice, you<br />
will know how far back you should be. Remember<br />
to add one second for speeds above 40 mph. Also<br />
remember that when the road is slippery, you need<br />
much more space to stop.<br />
spaCe Behind<br />
You cannot stop others from following you too<br />
closely. But there are things you can do to make<br />
it safer.<br />
Stay to the right. Heavy vehicles are <strong>of</strong>ten tailgated<br />
when they cannot keep up with the speed <strong>of</strong> traffic<br />
such as when you are going uphill. If a heavy load<br />
is slowing you down, stay in the right lane if you<br />
can. Going uphill, you should not pass another<br />
slow vehicle unless you can get around it quickly<br />
and safely.<br />
Handle tailgaters safely. In a large vehicle, it is<br />
<strong>of</strong>ten hard to see whether a vehicle is close behind<br />
you. You may be tailgated:<br />
• When you are traveling slowly. <strong>Driver</strong>s trapped<br />
behind slow vehicles <strong>of</strong>ten follow too closely.<br />
• In bad weather many passenger vehicle drivers<br />
follow large vehicles closely, especially when<br />
it is hard to see the road ahead.<br />
If you find yourself being tailgated, here are<br />
some things you can do to reduce the chances <strong>of</strong><br />
a collision:<br />
• Avoid quick changes. If you have to slow<br />
down or turn, signal early and reduce speed<br />
very gradually.<br />
• Increase your following distance. Opening up<br />
room in front <strong>of</strong> you will help you to avoid<br />
having to make sudden speed or direction<br />
changes. It also makes it easier for the tailgater<br />
to get around you.<br />
• Do not speed up. It is safer to be tailgated at a<br />
low speed than a high speed.<br />
• Avoid tricks. Do not turn on your taillights or<br />
flash your brake lights. Follow the suggestions<br />
above to avoid collisions.<br />
When you follow too closely and another driver<br />
“cuts” in front <strong>of</strong> you, the normal reaction is to<br />
slam on your brakes and swerve out <strong>of</strong> the way.<br />
Swerving out <strong>of</strong> the way can <strong>of</strong>ten result in cutting<br />
someone else <strong>of</strong>f, possibly driving <strong>of</strong>f the roadway,<br />
or driving into another lane <strong>of</strong> traffic. It might also<br />
result in the vehicle behind you crashing into you<br />
or other vehicles around you.<br />
If another driver “cuts” in front <strong>of</strong> you, it is better<br />
to take your foot <strong>of</strong>f the gas. This creates space<br />
between your vehicle and the other driver without<br />
swerving into another lane. Do not overreact if<br />
you are cut <strong>of</strong>f. Plan your emergency escape route<br />
before the emergency happens.<br />
spaCe to the sides<br />
<strong>Commercial</strong> vehicles are <strong>of</strong>ten wide and take up<br />
most <strong>of</strong> a lane. Safe drivers will manage what little<br />
space they have. You can do this by keeping your<br />
vehicle centered in your lane, and avoid driving<br />
alongside other vehicles.<br />
Staying centered in a lane. Keep your vehicle<br />
centered in the lane to keep safe clearance on<br />
either side. If your vehicle is wide, you have little<br />
room to spare.<br />
- 39 -
Traveling next to others. There are two dangers<br />
in traveling alongside other vehicles:<br />
• Another driver may change lanes suddenly<br />
and turn into you.<br />
• You may be trapped when you need to change<br />
lanes.<br />
Find an open spot where you are not near other<br />
traffic. When traffic is heavy, it may be hard to find<br />
an open spot. If you must travel near other vehicles,<br />
try to keep as much space as possible between you<br />
and them. Also, drop back or pull forward so that<br />
you are sure the other driver can see you.<br />
Strong winds. Strong winds make it difficult to<br />
stay in your lane. The problem is usually worse for<br />
lighter vehicles. This problem can be especially<br />
bad coming out <strong>of</strong> tunnels. Do not drive alongside<br />
others if you can avoid it.<br />
spaCe overhead<br />
Hitting overhead objects is a danger. Know the<br />
overhead clearance <strong>of</strong> the vehicle you are driving.<br />
• Do not assume that the heights posted at bridges<br />
and overpasses are correct. Repaving or packed<br />
snow may have reduced the clearances since<br />
the heights were posted.<br />
• The weight <strong>of</strong> a cargo van changes its height.<br />
An empty van is higher than a loaded one.<br />
Because you cleared a bridge when you were<br />
loaded does not mean that you can do it when<br />
you are empty.<br />
• If you doubt you have safe space to pass under<br />
an object, go slowly. If you are not sure you<br />
can make it, do not try it. Take another route.<br />
Warnings are <strong>of</strong>ten posted on low bridges or<br />
underpasses, but sometimes they are not.<br />
• Some roads can cause a vehicle to tilt. There<br />
can be a problem clearing objects along the<br />
edge <strong>of</strong> the road, such as signs or trees. Where<br />
this is a problem, drive a little closer to the<br />
center <strong>of</strong> the road.<br />
• Before you back into an area, get out and check<br />
for overhanging objects such as trees, branches,<br />
electric wires. It is easy to miss seeing them<br />
while you are backing. (Also check for other<br />
hazards at the same time.)<br />
- 40 -<br />
spaCe BeloW<br />
Many drivers forget about the space under their<br />
vehicles. That space can be very small when a<br />
vehicle is heavily loaded. Railroad tracks can<br />
stick up several inches. This is <strong>of</strong>ten a problem on<br />
dirt roads and in unpaved yards where the surface<br />
around the tracks can wear away. Do not take a<br />
chance on getting hung up. Drainage channels<br />
across roads can cause some vehicles to drag.<br />
Cross such depressions carefully.<br />
spaCe for turns<br />
The space around a truck or bus is important when<br />
turning. Because <strong>of</strong> wide turning and <strong>of</strong>ftracking,<br />
large vehicles can hit other vehicles or objects<br />
during turns.<br />
Right turns. Here are some rules to help prevent<br />
right turn collisions:<br />
• Turn slowly to give<br />
yourself and others<br />
more time to avoid<br />
problems.<br />
• If you are driving a truck<br />
or bus that cannot make<br />
a right turn without<br />
swinging into another<br />
lane, turn wide as you<br />
complete the turn as Figure 2-8<br />
shown in Figure 2-8.<br />
Keep the rear <strong>of</strong> your vehicle close to the curb.<br />
This will stop other drivers from passing you<br />
on the right.<br />
• Do not turn wide to the left as you start the turn.<br />
A following driver may think you are turning<br />
left and try to pass you on the right. You may<br />
hit the other vehicle as you complete your turn.<br />
• If you must cross into the oncoming lane to<br />
make a turn, look for vehicles coming toward<br />
you. Give them room to go by or to stop.<br />
However, do not back up for them, because<br />
you might hit someone behind you.<br />
Left turns. Make sure you have reached the center<br />
<strong>of</strong> the intersection before you start a left turn. If<br />
you turn too soon, the left side <strong>of</strong> your vehicle may<br />
hit another vehicle because <strong>of</strong> <strong>of</strong>ftracking. If you
are turning into a multilane<br />
street, enter any lane that is<br />
safe and available to you.<br />
If there are two turning lanes,<br />
you should use the righthand<br />
turn lane as shown<br />
in Figure 2-9, because you<br />
may have to swing right to<br />
make the turn. <strong>Driver</strong>s on<br />
your right may be hard for<br />
you to see.<br />
Figure 2-9<br />
spaCe to Cross or enter traffiC<br />
Be aware <strong>of</strong> the size and weight <strong>of</strong> your vehicle<br />
when you cross or enter traffic. Here are some<br />
important things to keep in mind:<br />
• Because <strong>of</strong> slow acceleration and the space<br />
large vehicles require, you need a much larger<br />
gap to enter traffic than you would in a smaller<br />
vehicle.<br />
• Acceleration varies with the load. Allow more<br />
room if your vehicle is heavily loaded.<br />
• Before you start across a road, make sure you<br />
can get all the way across before cross traffic<br />
reaches you. It is against the law to enter an<br />
intersection if you cannot get completely across<br />
before the light changes.<br />
DRIVIng At nIght<br />
More than half <strong>of</strong> all traffic collisions happen at<br />
night. <strong>Driver</strong>s cannot see hazards as soon as in<br />
daylight, so they have less time to respond. <strong>Driver</strong>s<br />
caught by surprise are less able to avoid a collision.<br />
The problems <strong>of</strong> night driving involve the driver,<br />
the roadway, and the vehicle.<br />
human faCtors<br />
Vision. People cannot see as well at night or in<br />
dim light. Also, the eyes need time to adjust to<br />
seeing in dim light.<br />
glare. <strong>Driver</strong>s can be blinded for a short time by<br />
bright light. It can take several seconds to recover<br />
from glare. Even two seconds <strong>of</strong> glare blindness<br />
can be dangerous. A vehicle going 55 mph will<br />
travel more than half the distance <strong>of</strong> a football<br />
field during that time. Do not look directly at bright<br />
lights when driving. Look at the right-hand edge<br />
<strong>of</strong> the road or your traffic lane.<br />
Fatigue and lack <strong>of</strong> alertness. Fatigue and lack<br />
<strong>of</strong> alertness are bigger problems at night. The<br />
body naturally wants to sleep. Most drivers are<br />
less alert at night, especially after midnight. This<br />
is particularly true if you have been driving for a<br />
long time. <strong>Driver</strong>s may not see hazards as soon<br />
or react as quickly, so the chance <strong>of</strong> a collision is<br />
greater. If you are sleepy, the only safe cure is to<br />
get <strong>of</strong>f the road and get some sleep. If you don’t,<br />
you risk your life and the lives <strong>of</strong> others.<br />
roadWay faCtors<br />
Poor lighting. In the daytime, there is usually<br />
enough light to see well. This is not true at night.<br />
Some areas may have bright street lights, but many<br />
areas will have poor lighting. On most roads you<br />
will probably have to depend entirely on your<br />
headlights.<br />
Less light means you will not be able to see hazards<br />
as well as in daytime. Road users who do not have<br />
lights are hard to see. There are many collisions<br />
at night involving pedestrians, joggers, bicyclists,<br />
or animals that are hard to see.<br />
Even when there are lights, the road scene can<br />
be confusing. Traffic signals and hazards can be<br />
hard to see against a background <strong>of</strong> signs, shop<br />
windows, and other lights.<br />
When lighting is poor or confusing, drive slowly.<br />
Be sure you can stop within your sight distance.<br />
<strong>Driver</strong>s under the influence. <strong>Driver</strong>s under the<br />
influence <strong>of</strong> alcohol and/or drugs are a hazard to<br />
themselves and to you. Be especially alert around<br />
the closing time <strong>of</strong> bars and taverns. Watch for<br />
drivers who have trouble staying in their lane, or<br />
maintaining speed, stop without reason, or show<br />
other signs <strong>of</strong> driving under the influence <strong>of</strong> alcohol<br />
and/or drugs.<br />
- 41 -
vehiCle faCtors<br />
Headlights. At night your headlights will usually be<br />
the main source <strong>of</strong> light for you and for others to see<br />
you. You cannot see as much with your headlights<br />
as you can see in the daytime. With low beams,<br />
you can see ahead about 250 feet and with high<br />
beams about 300–500 feet. You must adjust your<br />
speed to keep your stopping distance within your<br />
sight distance. This means going slowly enough to<br />
be able to stop within the range <strong>of</strong> your headlights.<br />
Otherwise, by the time you see a hazard, you will<br />
not have time to stop.<br />
Night driving can be more dangerous if you have<br />
problems with your headlights. Dirty headlights<br />
may give only half the light they should. This<br />
reduces your ability to see, and makes it harder<br />
for others to see you. Make sure your lights are<br />
clean and working, and in adjustment. If out <strong>of</strong><br />
adjustment, they do not give you a good view and<br />
they can blind other drivers.<br />
You must turn on your headlights:<br />
• from a half hour after sunset to a half hour<br />
before sunrise, or<br />
• if snow, rain, fog, or other hazardous weather<br />
condition require the use <strong>of</strong> windshield wipers,<br />
or<br />
• when visibility is not sufficient to clearly see<br />
a person or a vehicle for a distance <strong>of</strong> 1,000<br />
feet (CVC §§280 and 24400).<br />
No vehicle may be driven with only parking lights<br />
on. However, they may be used as signals or when<br />
the headlamps are also lighted (CVC §24800).<br />
Other lights. In order for you to be seen easily,<br />
the following must be clean and working properly<br />
(CVC §25100):<br />
• Reflectors.<br />
• Marker and clearance lights.<br />
• Taillights.<br />
• Identification lights.<br />
Turn signals and brake lights. At night your turn<br />
signals and brake lights are even more important<br />
for telling other drivers what you intend to do.<br />
Make sure you have clean, working turn signals<br />
and stop lights.<br />
- 42 -<br />
Windshields and mirrors. It is more important at<br />
night than in the daytime to have clean windshields<br />
and mirrors. Dirt on your windshield or mirrors can<br />
cause bright lights at night to create a glare <strong>of</strong> its<br />
own, blocking your view. Clean your windshield<br />
on the inside and outside for safe driving.<br />
night driving proCedures<br />
Make sure you are rested and alert. If you are<br />
drowsy, sleep before you drive. Even a nap can<br />
save your life or the lives <strong>of</strong> others. If you wear eye<br />
glasses, make sure they are clean and unscratched.<br />
Don’t wear sun glasses at night. Do a complete<br />
pre-trip inspection <strong>of</strong> your vehicle. Pay attention<br />
to checking all lights and reflectors and cleaning<br />
those you can reach.<br />
Avoid blinding others. Glare from your headlights<br />
can cause problems for drivers coming toward you<br />
as well as drivers going in your direction. Dim your<br />
lights within 500 feet <strong>of</strong> an oncoming vehicle and<br />
when following another vehicle within 300 feet.<br />
Avoid glare from oncoming vehicles. Do not<br />
look directly at lights <strong>of</strong> oncoming vehicles. Look<br />
slightly to the right at a right lane or edge marking,<br />
if available. If other drivers don’t put their low<br />
beams on, don’t try to “get back at them” by putting<br />
your own high beams on. This increases glare for<br />
oncoming drivers and increases the chance <strong>of</strong> a<br />
collision.<br />
Use high beams when you can. Many drivers<br />
make the mistake <strong>of</strong> always using low beams. This<br />
cuts down on your ability to see ahead. Use high<br />
beams when it is safe and legal to do so. Use them<br />
unless you are within 500 feet <strong>of</strong> an approaching<br />
vehicle or are following another vehicle within 300<br />
feet. Also, don’t let the inside <strong>of</strong> your cab get too<br />
bright. This makes it harder to see outside. Keep<br />
the interior light <strong>of</strong>f and adjust your instrument<br />
lights as low as you can and still be able to read<br />
the gauges.<br />
If you get sleepy, stop driving. People <strong>of</strong>ten do<br />
not realize how close they are to falling asleep. If<br />
you look or feel sleepy, stop driving! You are in<br />
a very dangerous condition. The only safe cure<br />
is to sleep.
DRIVIng In FOg<br />
The best advice for driving in fog is “Don’t.” It is<br />
better to pull <strong>of</strong>f the road into a rest area or truck<br />
stop, if available, until visibility is better. If you<br />
must drive, be sure to consider the following:<br />
• Assume the fog will become thicker after you<br />
enter it.<br />
• Obey all fog-related warning signs.<br />
• Slow before you enter fog.<br />
• Turn on all your lights. (Headlights should be<br />
on low beams.)<br />
• Be prepared for emergency stops.<br />
DRIVIng In WInteR<br />
Make sure your vehicle is ready for driving in<br />
winter weather. During the pre-trip inspection, pay<br />
extra attention to the following items.<br />
vehiCle CheCks<br />
Coolant level and antifreeze. Make sure the cooling<br />
system is full and there is enough antifreeze in<br />
the system to protect against freezing. This can be<br />
checked with a special coolant tester.<br />
Defrosting and heating equipment. Check to<br />
see if the defrosters and heaters work. They are<br />
needed for safe driving. Make sure you know<br />
how to operate them. If you use other heaters and<br />
expect to need them (mirror heaters, battery box<br />
heaters, fuel tank heaters), check their operation.<br />
Wipers and washers. The windshield wiper blades<br />
must be in good condition. Make sure the wiper<br />
blades press against the window hard enough to<br />
wipe the windshield clean <strong>of</strong> snow. Make sure the<br />
windshield washer works and the washer reservoir<br />
is full. Use windshield washer antifreeze to prevent<br />
freezing <strong>of</strong> the washer liquid. If you can’t see well<br />
enough while driving (i.e., your wipers fail), stop<br />
safely and fix the problem.<br />
Tires. Check the tread on your tires. The drive<br />
tires must provide traction to push the rig over wet<br />
pavement and through snow. The steering tires must<br />
have traction to steer the vehicle. Enough tread is<br />
especially important in winter conditions. You must<br />
have at least 4/32 inch tread depth in every major<br />
groove on the front tires and at least 2/32 inch on<br />
other tires. More would be better. Use a gauge to<br />
determine if you have enough tread for safe driving.<br />
Tire chains. You may find yourself in conditions<br />
where you can’t drive without chains, even to get<br />
to a place <strong>of</strong> safety. Carry the correct number <strong>of</strong><br />
chains and extra cross links. Make sure they will<br />
fit your drive tires. Check the chains for broken<br />
hooks, worn or broken cross links, and bent or<br />
broken side chains. Learn how to put the chains<br />
on before you need to do it in snow or ice.<br />
Lights and reflectors. Make sure the lights and<br />
reflectors are clean. Lights and reflectors are<br />
especially important during bad weather. Check<br />
from time to time during bad weather to make sure<br />
they are clean and working.<br />
Windows and mirrors. Remove any ice, snow,<br />
etc. from the windshield, windows, and mirrors<br />
before starting. Use a windshield scraper, snow<br />
brush, and windshield defroster as necessary.<br />
Handholds, steps, and deck plates. Remove all<br />
ice and snow from hand holds, steps, and deck<br />
plates which you must use to enter the cab or<br />
to move about the vehicle. This will reduce the<br />
danger <strong>of</strong> slipping.<br />
Radiator shutters and winterfront. Remove<br />
ice from the radiator shutters. Make sure the<br />
winterfront is not closed too tightly. If the shutters<br />
freeze shut or the winterfront is closed too much,<br />
the engine may overheat and stop.<br />
Exhaust system. Exhaust system leaks are<br />
especially dangerous when cab ventilation is poor<br />
(windows rolled up, etc.). Loose connections can<br />
permit poisonous carbon monoxide to leak into<br />
your cab which will make you sleepy. In large<br />
amounts, it can kill you. Check the exhaust system<br />
for loose parts and for sounds and signs <strong>of</strong> leaks.<br />
driving on slippery surfaCes<br />
Slippery surfaces. Drive slowly and smoothly on<br />
slippery roads. If it is very slippery, you shouldn’t<br />
drive at all. Stop at the first safe place. The following<br />
are some safety guidelines:<br />
• Start gently and slowly. When first starting,<br />
get the feel <strong>of</strong> the road. Do not hurry.<br />
- 43 -
• Adjust turning and braking to conditions.<br />
Make turns as carefully as possible. Do not<br />
brake any harder than necessary and do not use<br />
the engine brake or speed retarder. (They can<br />
cause the driving wheels to skid on slippery<br />
surfaces.)<br />
• Adjust speed to conditions. Do not pass<br />
slower vehicles unless necessary. Go slowly<br />
and watch far enough ahead to keep a steady<br />
speed. Avoid having to slow down and speed<br />
up. Take curves at slower speeds and do not<br />
brake while in curves. Be aware that as the<br />
temperature rises to the point where ice begins<br />
to melt, the road becomes even more slippery<br />
and you must slow down even more.<br />
• Adjust space to conditions. Do not drive<br />
alongside other vehicles. Keep a greater following<br />
distance. When you see a traffic jam<br />
ahead, slow down or stop and wait for it to<br />
clear. Try to anticipate stops early and slow<br />
down gradually.<br />
Wet brakes. When driving in heavy rain or deep<br />
standing water, your brakes will get wet. Water on<br />
the brakes can cause the brakes to be weak, apply<br />
unevenly, or grab. This can cause lack <strong>of</strong> braking<br />
power, wheel lockups, pulling to one side or the<br />
other, and a jackknife if you pull a trailer.<br />
Avoid driving through deep puddles or flowing<br />
water, if possible. If you cannot, you should:<br />
• Slow down.<br />
• Place transmission in a low gear.<br />
• Gently put on the brakes. This presses linings<br />
against brake drums or discs and keeps mud,<br />
silt, and water from getting in.<br />
• Increase engine rpm and cross the water while<br />
keeping light pressure on the brakes.<br />
• When out <strong>of</strong> the water, maintain light pressure<br />
on the brakes for a short distance to heat them<br />
up and dry them out.<br />
CAUTION: Brake drums and linings can<br />
overheat if you do this for too long.<br />
• Make a test stop when safe to do so. Check<br />
your mirrors to be sure no one is following, then<br />
apply the brakes to be sure they are working.<br />
If not, dry out further as described above.<br />
- 44 -<br />
DRIVIng In VeRy hOt WeAtheR<br />
During the pre-trip inspection, pay special attention<br />
to the following items:<br />
vehiCle CheCks<br />
Tires. Check the tire mounting and air pressure.<br />
Inspect the tires for overheating and tread separation<br />
every two hours or 100 miles when driving<br />
in very hot weather. Air pressure increases with<br />
temperature. Do not let air out or the pressure will<br />
be too low when the tires cool <strong>of</strong>f. If a tire is too<br />
hot to touch, remain stopped until the tire cools<br />
<strong>of</strong>f. Otherwise, the tire may blow out or catch fire.<br />
Pay special attention to recapped or retreaded tires.<br />
Under high temperatures, the tread may separate<br />
from the body <strong>of</strong> the tire.<br />
Engine oil. The engine oil helps keep the engine<br />
cool, as well as lubricating it. Make sure there is<br />
enough engine oil. If you have an oil temperature<br />
gauge, make sure the temperature is within the<br />
proper range while you are driving.<br />
Engine coolant. Before starting out, be sure the<br />
engine cooling system has enough water and<br />
antifreeze according to the engine manufacturer’s<br />
directions. Antifreeze helps the engine under hot<br />
conditions, as well as cold conditions. When driving<br />
in hot weather, check the water temperature<br />
or coolant temperature gauge more frequently.<br />
Make sure it remains in the normal range. If the<br />
gauge goes above the highest safe temperature,<br />
there may be something wrong that could lead to<br />
engine failure and possibly fire. Stop driving as<br />
soon as safely possible.<br />
Some vehicles have sight glasses, see-through<br />
coolant overflow containers, or coolant recovery<br />
containers which permit checking coolant level<br />
while the engine is hot. If the container is not part<br />
<strong>of</strong> the pressurized system, the cap can be safely<br />
removed and coolant added even when the engine<br />
is at operating temperature. Never remove the<br />
radiator cap or any part <strong>of</strong> the pressurized<br />
system until the system has cooled. Steam and<br />
boiling water can spray under pressure and cause<br />
severe burns.
If coolant has to be added to a system without a<br />
recovery tank or overflow tank, follow these steps:<br />
• Shut engine <strong>of</strong>f.<br />
• Wait until engine has cooled.<br />
• Protect hands (use gloves or a thick cloth).<br />
• Turn radiator cap slowly to the first stop, which<br />
releases the pressure seal.<br />
• Step back while pressure is released from<br />
cooling system.<br />
• When all pressure has been released, press<br />
down on the cap and turn it further to remove it.<br />
• Visually check level <strong>of</strong> coolant.<br />
• Replace cap and turn all the way to the closed<br />
position.<br />
Engine belts. Learn how to check V-belt tightness<br />
on your vehicle by pressing on the belts. Loose belts<br />
will not turn the water pump and/or fan properly.<br />
This will result in overheating. Also check belts<br />
for cracking or other signs <strong>of</strong> wear.<br />
Hoses. Be sure the coolant hoses are in good<br />
condition because a broken hose can lead to engine<br />
failure and even fire.<br />
Watch for bleeding tar. Tar in road surfacing<br />
frequently rises to the surface in very hot weather.<br />
Spots where tar “bleeds” to the surface are very<br />
slippery.<br />
go slow to prevent overheating. High speeds<br />
create more heat for tires and engine. In desert<br />
conditions, the heat may build up to the point where<br />
it is dangerous. The heat will increase chances <strong>of</strong><br />
tire failure, tire fire, and engine failure.<br />
mOuntAIn DRIVIng<br />
In mountain driving, the force <strong>of</strong> gravity plays<br />
a major role. The steeper the grade, the longer<br />
the grade, and/or the heavier the load, the more<br />
you will have to use lower gears to climb hills<br />
or mountains. In going down steep hills, gravity<br />
will tend to speed you up. You must select an<br />
appropriate safe speed, then use a low gear and<br />
proper braking techniques. You should plan ahead<br />
and obtain information about any long steep grades<br />
along your planned route <strong>of</strong> travel. If possible, talk<br />
to other drivers who are familiar with the grades<br />
to find out what speeds are safe.<br />
You must go slowly enough so your brakes can<br />
hold you back without getting too hot. If the brakes<br />
become too hot, they may start to “fade.” This<br />
means you have to apply them harder and harder<br />
to get the same stopping power. If you continue<br />
to use the brakes hard, they can keep fading (have<br />
less stopping power) until you cannot slow down<br />
or stop at all.<br />
seleCt a “safe” speed<br />
Your most important consideration is to select a<br />
speed that is not too fast for the:<br />
• Total weight <strong>of</strong> the vehicle and cargo.<br />
• Length and steepness <strong>of</strong> the grade.<br />
• Road conditions and weather.<br />
If a speed limit is posted, or there is a sign indicating<br />
maximum safe speed, never exceed the speed<br />
shown. Also, look for and heed warning signs<br />
indicating the length and steepness <strong>of</strong> the grade.<br />
going doWnhill in the CorreCt gear<br />
Use the braking effect <strong>of</strong> the engine as the principal<br />
way <strong>of</strong> controlling your speed. The braking effect <strong>of</strong><br />
the engine is greatest when it is near the governed<br />
rpms and the transmission is in the lower gears.<br />
Save your brakes so you will be able to slow or<br />
stop as required by road and traffic conditions.<br />
Slow the vehicle and shift the transmission to a low<br />
gear before starting down the grade. Do not try to<br />
downshift after your speed has already built up.<br />
You will not be able to shift into a lower gear. You<br />
may not even be able to get back into any gear and<br />
all engine braking effect will be lost. Forcing an<br />
automatic transmission into a lower gear at high<br />
speed could damage the transmission also and lead<br />
to loss <strong>of</strong> all engine braking effect.<br />
With older trucks, a rule for choosing gears is to<br />
use the same gear going down a hill that you would<br />
need to climb the hill. However, new trucks have<br />
low friction parts and streamlined shapes for fuel<br />
economy. They may also have more powerful<br />
engines. This means they can go up hills in higher<br />
gears and have less friction and air drag to hold them<br />
back going down hills. For that reason, drivers <strong>of</strong><br />
newer trucks may have to use lower gears going<br />
down a hill than needed to go up the hill. Find out<br />
what is right for your vehicle.<br />
- 45 -
Brake fade or failure<br />
When going downhill, brakes will always heat<br />
up. They are designed so brake shoes or pads rub<br />
against the brake drum or discs to slow the vehicle,<br />
which creates heat. Brakes are designed to take a lot<br />
<strong>of</strong> heat. However, brakes can fail from excessive<br />
heat if you try to slow down from a high speed too<br />
many times or too quickly. Brakes will fade when<br />
they get very hot and may not slow the vehicle.<br />
Brakes also can fade because they are out <strong>of</strong> adjustment.<br />
To safely control a vehicle, every brake must<br />
do its share <strong>of</strong> the work. If some brakes are out<br />
<strong>of</strong> adjustment, they will not be doing their share.<br />
The other brakes can overheat and fade and there<br />
will not be enough braking available to control<br />
the vehicle(s). Brakes can get out <strong>of</strong> adjustment<br />
quickly, especially when they are used a lot; also,<br />
brake linings wear faster when they are hot. Check<br />
brake adjustment frequently.<br />
proper Braking teChnique<br />
Remember: The use <strong>of</strong> brakes on a long and/<br />
or steep downgrade is only a supplement to the<br />
braking effect <strong>of</strong> the engine. Once the vehicle is<br />
in the proper low gear, the following is a proper<br />
braking technique:<br />
• Apply the brakes just hard enough to feel a<br />
definite slowdown.<br />
• When your speed has been reduced to approximately<br />
5 mph below your “safe” speed,<br />
release the brakes. (This brake application<br />
should last for about three seconds.)<br />
• When your speed has increased to your “safe”<br />
speed, repeat the steps above.<br />
For example, if your “safe” speed is 40 mph, you<br />
would not apply the brakes until your speed reaches<br />
40 mph. You now apply the brakes hard enough to<br />
gradually reduce your speed to 35 mph and then<br />
release the brakes. Repeat this as <strong>of</strong>ten as necessary<br />
until you have reached the end <strong>of</strong> the downgrade.<br />
esCape ramps<br />
Escape ramps have been built on many steep mountain<br />
grades, and are used to stop runaway vehicles<br />
safely without injuring drivers and passengers.<br />
Escape ramps use a long bed <strong>of</strong> loose, s<strong>of</strong>t material<br />
- 46 -<br />
(pea gravel or sand) to slow a runaway vehicle,<br />
sometimes in combination with an upgrade.<br />
Know escape ramp locations on your route. Signs<br />
show drivers where ramps are located. Escape<br />
ramps save lives, equipment, and cargo. (Also<br />
see page 53.)<br />
RAIlROAD cROSSIngS<br />
Railroad crossings are always dangerous. You<br />
must approach every railroad crossing expecting<br />
to see a train coming.<br />
The round, black-on-yellow warning sign is placed<br />
ahead <strong>of</strong> a public railroad-highway crossing. The<br />
advanced warning sign tells you to slow down,<br />
look and listen for the train, and be prepared to<br />
stop before the tracks if a train is coming.<br />
Never attempt to race a train to a crossing. It is<br />
extremely difficult to judge the speed <strong>of</strong> an approaching<br />
train.<br />
Your speed should be based on your ability to see<br />
whether a train is approaching from any direction.<br />
You should be driving slowly enough so you can<br />
stop short <strong>of</strong> the tracks in case <strong>of</strong> an emergency.<br />
Because <strong>of</strong> noise in the cab, you cannot expect to<br />
hear the train horn until the train is dangerously<br />
close to the crossing.<br />
Do not rely solely upon the presence <strong>of</strong> warning<br />
signals, gates, or flagmen to warn <strong>of</strong> approaching<br />
trains.<br />
Double tracks require a double check. Remember<br />
that a train on one track may hide a train on the<br />
other track. Look both ways before crossing. After<br />
one train has cleared a crossing, be sure no other<br />
trains are near before starting across the tracks.<br />
Train yard areas and grade crossings in cities and<br />
towns are just as dangerous as rural grade crossings.<br />
Approach them with care.<br />
A full stop is required at grade crossings whenever:<br />
• The nature <strong>of</strong> the cargo makes a stop mandatory<br />
under state or federal regulations.<br />
• Such a stop is otherwise required by law.<br />
Railroad crossings with steep approaches can cause<br />
your unit to hang up on the tracks. Never permit
traffic conditions to trap you in a position where<br />
you have to stop on the tracks. Be sure you can<br />
get all the way across the tracks before you start<br />
across. It takes a typical tractor-trailer unit at least<br />
14 seconds to clear a single track and more than<br />
15 seconds to clear a double track.<br />
If your vehicle gets stuck on a raised railroad<br />
crossing, you should immediately get out <strong>of</strong> the<br />
vehicle and move away from the tracks.<br />
Do not shift gears while crossing railroad tracks.<br />
SeeIng hAzARDS<br />
What is a hazard? A hazard is any road condition,<br />
road obstacle, or other road user (driver, motorcyclist,<br />
bicyclist, or pedestrian) that is a possible<br />
danger. For example, a vehicle in front <strong>of</strong> you is<br />
headed toward the freeway exit, but the brake<br />
lights come on and the driver begins braking hard.<br />
This could mean that the driver is uncertain about<br />
taking the <strong>of</strong>framp and might suddenly return to<br />
the highway. This vehicle is a hazard. If the driver<br />
<strong>of</strong> the vehicle cuts in front <strong>of</strong> you, it is no longer<br />
just a hazard, it is an emergency.<br />
Seeing hazards lets you be prepared. You will<br />
have more time to react if you see hazards before<br />
they become emergencies. In the example above,<br />
you might make a lane change or slow down if the<br />
vehicle suddenly cuts in front <strong>of</strong> you. Seeing this<br />
hazard gives you time to check your mirrors and<br />
signal for a lane change. Being prepared reduces<br />
the danger. Sudden braking or a quick lane change<br />
is much more likely to lead to a collision.<br />
Learning to see hazards. There are <strong>of</strong>ten clues<br />
that will help you see hazards. The more you drive,<br />
the better you can get at seeing hazards.<br />
Slow down and be very careful if you see any <strong>of</strong><br />
the following road hazards:<br />
• Work zones. Road work can create hazardous<br />
conditions with narrower lanes, sharp turns,<br />
or uneven surfaces. Other drivers are <strong>of</strong>ten<br />
distracted and drive unsafely. Workers and<br />
construction vehicles may get in the way.<br />
Drive slowly and carefully near work zones.<br />
Use your 4-way flashers or brake lights to<br />
warn drivers behind you.<br />
• Drop-<strong>of</strong>fs. Sometimes the pavement drops<br />
<strong>of</strong>f sharply near the edge <strong>of</strong> the road. Driving<br />
too near the edge can tilt your vehicle toward<br />
the side <strong>of</strong> the road. This can cause the top<br />
<strong>of</strong> your vehicle to hit roadside objects (signs,<br />
tree limbs). Also, it can be hard to steer as you<br />
cross the drop-<strong>of</strong>f, either going <strong>of</strong>f the road or<br />
coming back on.<br />
• Foreign objects. Things that have fallen on the<br />
road can be a danger to your tires and wheel<br />
rims and can damage electrical and brake lines.<br />
They can be caught between dual tires and<br />
cause severe damage. Some obstacles such as<br />
boxes and sacks, may appear harmless but can<br />
cause major damage if hit by the vehicle. It is<br />
important to remain alert so you can avoid these<br />
objects without any sudden moves or stops.<br />
• Offramps/onramps. Freeway and turnpike<br />
exits can be particularly dangerous for commercial<br />
vehicles. Offramps and onramps <strong>of</strong>ten<br />
have speed limit signs posted. Remember, these<br />
speeds may be safe for smaller vehicles, but<br />
may not be safe for larger vehicles or heavily<br />
loaded vehicles. Exits which go downhill<br />
and turn at the same time can be especially<br />
dangerous. The downgrade makes it difficult to<br />
reduce speed. Braking and turning at the same<br />
time can be a dangerous practice. Be sure to<br />
slow down before you enter the curved part<br />
<strong>of</strong> an <strong>of</strong>framp or onramp.<br />
hazardous situations<br />
In order to protect yourself and others, you must<br />
recognize other drivers who may do something<br />
hazardous. Here are some clues:<br />
Blocked vision. People who cannot see others<br />
are dangerous. Be alert for drivers whose vision<br />
is blocked. Vans, loaded station wagons, and cars<br />
with the rear windows blocked are examples.<br />
Rental trucks should be watched carefully. Their<br />
drivers are <strong>of</strong>ten not used to the limited vision they<br />
have to the sides and rear <strong>of</strong> the truck. In winter,<br />
vehicles with frosted, ice-covered, or snow-covered<br />
windows are hazards.<br />
Vehicles may be partly hidden by blind intersections<br />
or alleys. If you can see only the rear or front end<br />
<strong>of</strong> a vehicle but not the driver, then he or she cannot<br />
- 47 -
see you. Be alert, because the driver may back out<br />
or enter into your lane. Always be prepared to stop.<br />
Delivery truck drivers’ vision is <strong>of</strong>ten blocked by<br />
packages or vehicle doors. <strong>Driver</strong>s <strong>of</strong> step vans,<br />
postal vehicles, and local delivery vehicles <strong>of</strong>ten<br />
are in a hurry and may suddenly step out <strong>of</strong>, or<br />
drive their vehicle into, the traffic lane.<br />
Watch for movement inside parked vehicles or<br />
movement <strong>of</strong> the vehicle itself that shows people<br />
are inside. They may get out, or the vehicle may<br />
pull out into the traffic. Watch for brake lights,<br />
backup lights, exhaust, and other clues that a<br />
vehicle is about to move.<br />
Be careful when approaching a stopped bus. Passengers<br />
may cross in front <strong>of</strong> or behind the bus<br />
and they <strong>of</strong>ten cannot see you.<br />
Walkers, joggers, and bicyclists may be on the<br />
road with their back to the traffic, so they cannot<br />
see or hear you. This can be dangerous. On rainy<br />
days, pedestrians may not see you because <strong>of</strong> hats<br />
or umbrellas.<br />
Distractions. Watch where drivers are looking. If<br />
they are looking elsewhere, they can’t see you. Be<br />
alert even when they are looking at you since they<br />
may believe they have the right-<strong>of</strong>-way.<br />
Children. Children tend to move quickly without<br />
checking traffic. When playing with one another<br />
on the street, they may not look for traffic.<br />
Talkers. <strong>Driver</strong>s or pedestrians talking to one<br />
another may not be paying close attention to the<br />
traffic.<br />
Workers. People working on or near the roadway<br />
are a hazard clue. The work creates a distraction<br />
for other drivers and the workers themselves may<br />
not see you.<br />
Ice cream truck. Someone selling ice cream is<br />
a hazard clue. Children may be nearby and may<br />
not see you.<br />
Disabled vehicle. <strong>Driver</strong>s changing a tire or fixing<br />
an engine <strong>of</strong>ten do not pay attention to the dangers<br />
<strong>of</strong> roadway traffic. Jacked up wheels or raised<br />
hoods are hazard clues.<br />
- 48 -<br />
Collisions. People involved in the collision may not<br />
look for traffic. Passing drivers tend to look at the<br />
collision. People <strong>of</strong>ten run across the road without<br />
looking. Vehicles may slow or stop suddenly.<br />
Shoppers. People in and around shopping areas<br />
are <strong>of</strong>ten not watching traffic because they are<br />
looking for stores or window shopping.<br />
Confused drivers. <strong>Driver</strong>s that are confused may<br />
change direction suddenly or stop without warning,<br />
<strong>of</strong>ten near freeways, toll roads, or interchanges<br />
and major intersections. Unexpected actions (e.g.,<br />
stopping in the middle <strong>of</strong> a block, changing lanes for<br />
no apparent reason, backup lights suddenly going<br />
on) are clues to confusion. Hesitation is another<br />
clue, including driving very slowly, using brakes<br />
<strong>of</strong>ten, or stopping in the middle <strong>of</strong> an intersection.<br />
You may also see drivers who are looking at street<br />
signs, maps, and house numbers. These drivers<br />
may not be paying attention to you.<br />
Slow drivers. Motorists who fail to maintain<br />
normal speed are hazards. Seeing slow moving<br />
vehicles (e.g., mopeds, farm machinery,<br />
construction machinery, tractors,<br />
etc.) early can prevent a collision.<br />
Some vehicles by their nature are<br />
slow and seeing them is a hazard clue. Some <strong>of</strong><br />
these will have the “slow moving vehicle” symbol<br />
to warn you. This is a red triangle with an orange<br />
center. A vehicle displaying this sign may not be<br />
operated faster than 25 mph.<br />
<strong>Driver</strong>s signaling a turn may slow more than<br />
expected or even stop. If making a tight turn into an<br />
alley or driveway, the driver may go very slowly. If<br />
blocked by pedestrians or other vehicles, the driver<br />
may have to stop on the roadway. Vehicles turning<br />
left may have to stop for oncoming vehicles.<br />
<strong>Driver</strong>s in a hurry. <strong>Driver</strong>s may feel your commercial<br />
vehicle is preventing them from getting<br />
where they want to go on time. Such drivers may<br />
pass you without a safe gap in the oncoming traffic,<br />
cutting too close in front <strong>of</strong> you. <strong>Driver</strong>s entering<br />
the road may pull in front <strong>of</strong> you in order to avoid<br />
being stuck behind you, causing you to brake.<br />
Impaired drivers. <strong>Driver</strong>s who are sleepy, have<br />
had too much to drink, are on drugs, or who are<br />
ill are hazards. Some clues to these drivers are:
• Weaving across the road or drifting from one<br />
side to another.<br />
• Leaving the road (dropping right wheels onto<br />
the shoulder or bumping across a curb in a turn).<br />
• Stopping at the wrong time (stopping at a green<br />
light or waiting too long at a stop).<br />
• An open window in cold weather.<br />
• Speeding up or slowing down suddenly.<br />
• Be alert for impaired drivers late at night.<br />
<strong>Driver</strong> body movement as a clue. <strong>Driver</strong>s look<br />
in the direction they are going to turn. You may<br />
sometimes get a clue from a driver’s head and body<br />
movements that a driver may be going to make a<br />
turn even though the turn signals are not on. <strong>Driver</strong>s<br />
making over-the-shoulder checks may be going to<br />
change lanes. These clues are most easily seen in<br />
motorcyclists and bicyclists.<br />
Conflicts. You are in conflict when you have to<br />
change speed and/or direction to avoid hitting<br />
someone. Conflicts occur at intersections where<br />
vehicles meet, at merges (such as freeway onramps),<br />
and where lane changes are needed. Other<br />
situations include slow moving or stalled traffic and<br />
collision scenes. Watch for other drivers who are<br />
in conflict because they are a hazard to you. When<br />
they react to this conflict, they may do something<br />
that will put them in conflict with you.<br />
distraCted driving<br />
Whenever you are driving a vehicle and your attention<br />
is not on the road, you are putting yourself,<br />
your passengers, other vehicles, and pedestrians<br />
in danger. Distracted driving can result when<br />
you perform any activity that may shift your<br />
full attention from the driving task. Taking your<br />
eyes <strong>of</strong>f the road or hands <strong>of</strong>f the steering wheel<br />
presents obvious driving risks. Mental activities<br />
that take your mind away from driving are just as<br />
dangerous. Your eyes can gaze at objects in the<br />
driving scene, but fail to see them because your<br />
attention is distracted elsewhere.<br />
Activities that can distract your attention include:<br />
talking to passengers; adjusting the radio, CD<br />
player, or climate control; eating, drinking, or<br />
smoking; reading maps or other literature; picking<br />
up something that fell; reading billboards and other<br />
road advertisements; watching other people and<br />
vehicles, including aggressive drivers; talking<br />
on the cell phone or CB radio; using telematic<br />
devices (such as navigation systems, pagers, etc.);<br />
daydreaming or being occupied with other mental<br />
distractions.<br />
Don’t Drive Distracted<br />
If drivers react a half-second slower because <strong>of</strong><br />
distractions, crashes double. Some tips to follow<br />
so you won’t become distracted:<br />
• Review and be totally familiar with all safety<br />
and usage features on any in-vehicle electronics,<br />
including your cell phone, before you drive.<br />
• Pre-program radio stations.<br />
• Pre-load your CD’s.<br />
• Clear the vehicle <strong>of</strong> any unnecessary objects.<br />
• Review maps and plan your route before you<br />
begin to drive.<br />
• Adjust all mirrors for the best all-around visibility<br />
before you start your trip.<br />
• Don’t attempt to read or write while you drive.<br />
• Avoid smoking, eating, and drinking while<br />
you drive.<br />
• Don’t engage in complex or emotionally intense<br />
conversations with other occupants.<br />
Use In-Vehicle Communication Equipment<br />
Cautiously<br />
When possible, pull <strong>of</strong>f the road in a safe, legal place<br />
when making/receiving a call on communication<br />
equipment.<br />
• If possible, turn the cell phone <strong>of</strong>f until your<br />
destination is reached.<br />
• Position the cell phone within easy reach.<br />
• Pre-program cell phones with commonly called<br />
numbers.<br />
If you have to place a call, find a safe place to pull<br />
<strong>of</strong>f the road. Do not place a call while driving.<br />
- 49 -
In <strong>California</strong>, you are required to use a hands-free<br />
device while driving. Even these devices are unsafe<br />
to use when you are driving down the road.<br />
If you must use your cell phone, keep conversations<br />
short. Develop ways to get free <strong>of</strong> long-winded<br />
friends and associates while on the road. Never<br />
use the cell phone for social visiting while driving.<br />
• Hang up your cell phone in tricky traffic<br />
situations.<br />
• Do not use the vehicle’s equipment when<br />
approaching locations with heavy traffic, road<br />
construction, heavy pedestrian traffic, or severe<br />
weather conditions.<br />
• Do not attempt to type or read messages on<br />
your satellite system while driving.<br />
Watch out for Other Distracted <strong>Driver</strong>s<br />
You need to be able to recognize other drivers who<br />
are engaged in any form <strong>of</strong> driving distraction. Not<br />
recognizing other distracted drivers can prevent<br />
you from perceiving or reacting correctly in time<br />
to prevent a collision. Watch for:<br />
• Vehicles that may drift over the lane divider<br />
lines or within their own lane.<br />
• Vehicles traveling at inconsistent speeds.<br />
• <strong>Driver</strong>s who are preoccupied with maps, food,<br />
cigarettes, cell phones, or other objects.<br />
• <strong>Driver</strong>s who appear to be involved in conversations<br />
with their passengers.<br />
Give a distracted driver plenty <strong>of</strong> room and maintain<br />
your safe following distance. Be very careful when<br />
passing a driver who seems to be distracted. The<br />
other driver may not be aware <strong>of</strong> your presence,<br />
and they may drift in front <strong>of</strong> you.<br />
Aggressive <strong>Driver</strong>s and Road Rage<br />
What is it?<br />
Aggressive driving and road rage is not a new<br />
problem. However, in today’s world, where heavy<br />
and slow-moving traffic and tight schedules are the<br />
norm, more and more drivers are taking out their<br />
anger and frustration in their vehicles.<br />
Crowded roads leave little room for error, leading<br />
to suspicion and hostility among drivers and<br />
encouraging them to take personally the mistakes<br />
- 50 -<br />
<strong>of</strong> other drivers. One sign <strong>of</strong> an aggressive driver<br />
is a driver changing lanes frequently and abruptly<br />
without notice. Aggressive driving is the act <strong>of</strong><br />
operating a motor vehicle in a selfish, bold, or<br />
pushy manner, without regard for the rights or<br />
safety <strong>of</strong> others.<br />
Road rage is operating a motor vehicle with the<br />
intent <strong>of</strong> doing harm to others or physically assaulting<br />
a driver or their vehicle.<br />
Don’t be an Aggressive <strong>Driver</strong><br />
• How you feel before you even start your vehicle<br />
has a lot to do with how stress will affect you<br />
while driving.<br />
• Give the drive your full attention. Don’t allow<br />
yourself to become distracted by talking on<br />
your cell phone, eating, etc.<br />
• Be realistic about your travel time. Expect<br />
delays because <strong>of</strong> traffic, construction, or bad<br />
weather and make allowances.<br />
• If you’re going to be later than expected, take<br />
a deep breath and accept the delay.<br />
• Give other drivers the benefit <strong>of</strong> the doubt.<br />
Try to imagine why he or she is driving that<br />
way. Whatever their reason, it has nothing to<br />
do with you.<br />
• Slow down and keep your following distance<br />
reasonable.<br />
• Don’t drive slowly in the left lane <strong>of</strong> traffic.<br />
• Avoid gestures. Keep your hands on the wheel.<br />
Avoid making any gestures that might anger<br />
another driver, even seemingly harmless<br />
expressions <strong>of</strong> irritation like shaking your head.<br />
• Be a cautious and courteous driver. If another<br />
driver seems eager to get in front <strong>of</strong> you, let<br />
them. This response will soon become a habit<br />
and you won’t be as <strong>of</strong>fended by other drivers’<br />
actions.<br />
What You Should do When Confronted by<br />
an Aggressive <strong>Driver</strong><br />
• First and foremost, make every attempt to get<br />
out <strong>of</strong> their way.<br />
• Put your pride in the back seat. Do not challenge<br />
them by speeding up or attempting to<br />
hold-your-own in your travel lane.
• Avoid eye contact.<br />
• Ignore gestures and refuse to react to them.<br />
• Report aggressive drivers to the appropriate<br />
authorities by providing a vehicle description,<br />
license number, location and, if possible,<br />
direction <strong>of</strong> travel.<br />
• If you have a cell phone, and can use it safely,<br />
call the police.<br />
• If an aggressive driver is involved in a crash<br />
farther down the road, stop a safe distance<br />
from the crash scene, wait for the police to<br />
arrive, and report the driving behavior that<br />
you witnessed.<br />
Be prepared for hazards<br />
You should always be looking for hazards–they<br />
may turn into emergencies. Look for hazards and<br />
plan a way out <strong>of</strong> any emergency. When you see<br />
a hazard, think about the emergencies that could<br />
develop and figure out what you would do. Always<br />
be prepared to take action based on your plans. In<br />
this way, you will be a prepared, defensive driver<br />
who will improve not only your own safety but<br />
the safety <strong>of</strong> all road users.<br />
emeRgencIeS<br />
Traffic emergencies occur when two vehicles are<br />
about to collide. Vehicle emergencies occur when<br />
tires, brakes, or other critical parts fail. Following<br />
the safety practices in this handbook can help<br />
prevent emergencies. But if an emergency does<br />
happen, your chances <strong>of</strong> avoiding a collision<br />
depend upon what action you take. Actions you<br />
can take are discussed below.<br />
steering to avoid a Collision<br />
Stopping is not always the safest thing to do in an<br />
emergency. When you do not have enough room<br />
to stop, you may have to steer away from what is<br />
ahead. Remember, you can almost always turn to<br />
miss an obstacle more quickly than you can stop.<br />
However, top-heavy vehicles and tractors with<br />
multiple trailers may flip over.<br />
Keep both hands on the steering wheel. In order<br />
to turn quickly, you must grip the steering wheel<br />
firmly with both hands. Make a habit <strong>of</strong> having<br />
both hands on the wheel at all times. Then, if there<br />
is an emergency, you will be prepared.<br />
How to turn quickly and safely. A quick turn can<br />
be made safely, if it is done the right way. Here<br />
are some points that safe drivers use:<br />
• Do not apply the brakes while you are turning.<br />
It is very easy to lock your wheels while<br />
turning. If that happens, you will be skidding<br />
out <strong>of</strong> control before you know it.<br />
• Do not turn any more than needed to clear<br />
whatever is in your way. The more sharply<br />
you turn, the greater the chances <strong>of</strong> a skid or<br />
rollover.<br />
• Be prepared to “countersteer” (turn the wheel<br />
back in the other direction), once you have<br />
passed whatever was in your path. Unless you<br />
are prepared to countersteer, you will not be<br />
able to do it quickly enough. You should think<br />
<strong>of</strong> emergency steering and countersteering as<br />
two parts <strong>of</strong> one driving action.<br />
Where to steer. If an oncoming driver has drifted<br />
into your lane, a move to your right is best. If that<br />
driver realizes what has happened, the natural<br />
response will be to return to his or her own lane.<br />
If something is blocking your path, the best<br />
thing to do will depend on the situation:<br />
• If you have been using your mirrors, you will<br />
know which lane is empty and can be safely<br />
used.<br />
• If the shoulder is clear, steering to the right<br />
may be best. No one is likely to be driving on<br />
the shoulder but someone may be passing you<br />
on the left. You will know if you have been<br />
using your mirrors.<br />
• If you are blocked on both sides, a move to the<br />
right may be best. At least you will not force<br />
anyone into an opposing traffic lane and a<br />
possible head-on collision. If a stopped vehicle<br />
is in front <strong>of</strong> you, a lane change may be better<br />
than running directly into it.<br />
Leaving the road. In some emergencies, you may<br />
have to drive <strong>of</strong>f the road. It may be less risky than<br />
facing a collision with another vehicle.<br />
- 51 -
Most shoulders are strong enough to support the<br />
weight <strong>of</strong> a large vehicle and, therefore, <strong>of</strong>fer an<br />
available escape route. Here are some guidelines<br />
if you do leave the road:<br />
• Avoid braking. If possible, avoid using the<br />
brakes until your speed has dropped to about 20<br />
mph. Then brake very gently to avoid skidding<br />
on a loose surface.<br />
• Keep one set <strong>of</strong> wheels on the pavement if<br />
possible. This helps to maintain control.<br />
• Stay on the shoulder. If the shoulder is clear,<br />
stay on it until your vehicle has come to a stop.<br />
Signal and check your mirrors before pulling<br />
back onto the road.<br />
Returning to the road. If you are forced to return<br />
to the road before you can stop, use the following<br />
procedure:<br />
• Hold the wheel tightly and turn sharply enough<br />
to get right back on the road safely. Don’t try<br />
to edge gradually back onto the road. If you<br />
do, your tires might grab unexpectedly and<br />
you could lose control.<br />
• When both front tires are on the paved surface,<br />
countersteer immediately. The two turns should<br />
be made as a single “steer-countersteer” move.<br />
stopping quiCkly and safely<br />
If somebody suddenly pulls out in front <strong>of</strong> you,<br />
your natural response is to hit the brakes. This is<br />
a good response if you have enough distance to<br />
stop and you use the brakes correctly.<br />
You should brake in a way that will keep your<br />
vehicle in a straight line and allow you to turn, if<br />
it becomes necessary. You can use the “controlled<br />
braking” method or the “stab braking” method.<br />
Controlled braking. With this method, apply the<br />
brakes as hard as you can without locking the wheels<br />
and keep steering wheel movements very small.<br />
If you need to make a larger steering adjustment<br />
or if the wheels lock, release the brakes. Reapply<br />
the brakes as soon as you can.<br />
Stab braking. Can only be done in vehicles without<br />
antilock brake systems (ABS). With this method,<br />
you should apply your brakes all the way and release<br />
the brakes when the wheels lock up. Then, as soon<br />
- 52 -<br />
as the wheels start rolling, apply the brakes fully<br />
again. It can take up to one second for the wheels<br />
to start rolling after you release the brakes. If you<br />
reapply the brakes before the wheels start rolling,<br />
the vehicle will not straighten out.<br />
Do not slam on the brakes. Emergency braking<br />
does not mean pushing down on the brake pedal<br />
as hard as you can. That will only keep the wheels<br />
locked up and cause a skid. If the wheels are skidding,<br />
you cannot control the vehicle. Emergency<br />
braking means “responding to a hazard by slowing<br />
the vehicle.”<br />
Note: If you drive a vehicle with antilock brakes,<br />
you should read and follow the directions found in<br />
the owner’s manual for stopping quickly.<br />
Brake failure<br />
Brakes kept in good condition rarely fail. Most<br />
hydraulic brake failures occur for one <strong>of</strong> two<br />
reasons: (Air brakes are discussed in Section 5.)<br />
• Loss <strong>of</strong> hydraulic pressure.<br />
• Brake fade on long hills.<br />
Loss <strong>of</strong> hydraulic pressure. When the system<br />
will not build up pressure, the brake pedal will feel<br />
spongy or go to the floor. Here are some things<br />
you can do:<br />
• Downshift. Put the vehicle into a lower gear<br />
to help to slow the vehicle.<br />
• Pump the brakes. Sometimes pumping brakes<br />
will generate enough hydraulic pressure to<br />
stop the vehicle.<br />
• Use the parking brake. The parking or<br />
emergency brake is separate from the hydraulic<br />
brake system and can be used to slow the<br />
vehicle. However, be sure to press the release<br />
button or pull the release lever at the same<br />
time you use the emergency brake so you can<br />
adjust the brake pressure and keep the wheels<br />
from locking up.<br />
• Find an escape route. While slowing the<br />
vehicle, look for an escape route such as an<br />
open field, side street, or escape ramp. Turning<br />
uphill is a good way to slow and stop the vehicle.<br />
Keep the vehicle from rolling backward after<br />
you stop. Put it in low gear, apply the parking<br />
brake, and, if necessary, roll back into some<br />
obstacle that will stop the vehicle.
Brake failure on downgrades. Slow down and<br />
brake properly to prevent brake failure on long<br />
downgrades. Once the brakes have failed, however,<br />
you are going to have to look outside your vehicle<br />
for something to stop it.<br />
Your best hope is an escape ramp. If there is one,<br />
there will be signs telling you about it. Use it.<br />
Ramps are usually located a few miles from the<br />
top <strong>of</strong> the downgrade. Some escape ramps use<br />
s<strong>of</strong>t gravel that resists the motion <strong>of</strong> the vehicle<br />
and brings it to a stop. Others turn uphill, using<br />
the hill to stop the vehicle and s<strong>of</strong>t gravel to hold<br />
it in place.<br />
Any driver who loses brakes going downhill should<br />
use an escape ramp if it’s available. If you don’t<br />
use it, your chances <strong>of</strong> having a serious collision<br />
may be much greater.<br />
If no escape ramp is available,<br />
take the least hazardous<br />
escape route you can such as<br />
an open field, or a side road<br />
that flattens out or turns uphill. Make the move as<br />
soon as you know your brakes do not work. The<br />
longer you wait, the faster the vehicle will be going<br />
and the harder it will be to stop.<br />
tire failure<br />
RUNAWAY<br />
TRUCK RAMP<br />
1 MILE<br />
There are four important things that safe drivers<br />
do to safely handle a tire failure:<br />
• Know that a tire has failed.<br />
• Hold the steering wheel firmly.<br />
• Stay <strong>of</strong>f the brake.<br />
• After stopping, check all the tires.<br />
Recognize tire failure. Knowing quickly that you<br />
have a tire failure gives you more time to react.<br />
The major signs <strong>of</strong> tire failure are:<br />
• Sound. The loud “bang” <strong>of</strong> a blowout is an<br />
easily recognized sign. Because it can take a<br />
few seconds for the vehicle to react, you might<br />
think it was some other vehicle. Any time you<br />
hear a tire blow, to be safe, assume it is yours.<br />
• Vibration. If the vehicle thumps or vibrates<br />
heavily, it may be a sign that one <strong>of</strong> the tires<br />
has gone flat. With a rear tire, that may be the<br />
only sign you get.<br />
• Feel. If the steering feels “heavy,” it is probably<br />
a sign that one <strong>of</strong> the front tires has failed.<br />
Sometimes, failure <strong>of</strong> a rear tire will cause the<br />
vehicle to slide back and forth or “fishtail.”<br />
However, dual rear tires usually prevent this<br />
feeling.<br />
Any <strong>of</strong> these signs is a warning <strong>of</strong> possible tire<br />
failure. You should do the following things:<br />
• Hold the steering wheel firmly. If a front<br />
tire fails, it can twist the steering wheel out <strong>of</strong><br />
your hands. The only way to prevent this is<br />
to have a firm grip on the steering wheel with<br />
both hands at all times.<br />
• Stay <strong>of</strong>f the brakes. It is natural to want to<br />
brake in an emergency. However, do not slam on<br />
the brakes. Hard braking when a tire has failed<br />
could cause loss <strong>of</strong> control. Once you have<br />
control <strong>of</strong> the vehicle, slow down and brake<br />
very gently. Then pull <strong>of</strong>f the road and stop.<br />
• Check all the tires. After you have come to a<br />
stop, check all the other tires. Do this even if<br />
the vehicle seems to be handling all right. If<br />
one <strong>of</strong> your dual tires goes, the only way you<br />
may know it is by looking at it.<br />
antiloCk Braking system (aBs)<br />
ABS is a computerized system that keeps your<br />
wheels from locking up during hard brake applications.<br />
ABS is an addition to your normal brakes. It<br />
does not decrease or increase your normal braking<br />
capability. ABS only activates when wheels are<br />
about to lock up.<br />
ABS does not necessarily shorten your stopping<br />
distance, but it does help you keep the vehicle<br />
under control during hard braking.<br />
how ABS Works<br />
• Sensors detect potential wheel lock up. An<br />
electronic control unit (ECU) will then decrease<br />
brake pressure to avoid wheel lockup.<br />
• Brake pressure is adjusted to provide the<br />
maximum braking without danger <strong>of</strong> lockup.<br />
• ABS works far faster than the driver can<br />
respond to potential wheel lockup. At all other<br />
times the brake system will operate normally.<br />
- 53 -
Vehicles Required to have ABS<br />
The <strong>Department</strong> <strong>of</strong> Transportation (DOT) requires<br />
that ABS be on:<br />
• Truck tractors with air brakes built on or after<br />
March 1, 1997.<br />
• Other air brake vehicles, (trucks, buses, trailers,<br />
and converter dollies) built on or after March<br />
1, 1998.<br />
• Hydraulically braked trucks and buses with a<br />
gross vehicle weight rating <strong>of</strong> 10,000 pounds<br />
or more built on or after March 1, 1999.<br />
Many commercial vehicles built before these dates<br />
have been voluntarily equipped with ABS.<br />
how to know if your Vehicle is<br />
equipped with ABS<br />
• Tractors, trucks, and buses will have yellow<br />
ABS malfunction lamps on the instrument<br />
panel.<br />
• Trailers will have yellow ABS malfunction<br />
lamps on the left side, either on the front or<br />
rear corner.<br />
• Dollies manufactured on or after March 1, 1998,<br />
are required to have a lamp on the left side.<br />
• As a system check on newer vehicles, the<br />
malfunction lamp comes on at start-up for a<br />
bulb check, and then goes out quickly. On older<br />
systems, the lamp could stay on until you are<br />
driving over five mph.<br />
• If the lamp stays on after the bulb check, or<br />
goes on once you are under way, you may have<br />
lost ABS control.<br />
• In the case <strong>of</strong> towed units manufactured before<br />
it was required by the DOT, it may be difficult<br />
to tell if the unit is equipped with ABS. Look<br />
under the vehicle for the ECU and wheel<br />
speed sensor wires coming from the back <strong>of</strong><br />
the brakes.<br />
how ABS helps you<br />
When you brake hard on slippery surfaces in a<br />
vehicle without ABS, your wheels may lock up.<br />
When your steering wheels lock up, you lose<br />
steering control. When your other wheels lock up,<br />
you may skid, jackknife, or even spin the vehicle.<br />
- 54 -<br />
ABS helps you avoid wheel lock up and maintain<br />
control. You may or may not be able to stop faster<br />
with ABS, but you should be able to steer around<br />
an obstacle while braking, and avoid skids caused<br />
by over braking.<br />
ABS on the tractor or trailer Only<br />
Having ABS on only the tractor, only the trailer, or<br />
even on only one axle, still gives you more control<br />
over the vehicle during braking. Brake normally.<br />
When only the tractor has ABS, you should be<br />
able to maintain steering control, and there is less<br />
chance <strong>of</strong> jackknifing. But keep your eye on the<br />
trailer and let up on the brakes (if you can safely<br />
do so) if it begins to swing out.<br />
When only the trailer has ABS, the trailer is less<br />
likely to swing out, but if you lose steering control<br />
or start a tractor jackknife, let up on the brakes<br />
(if you can safely do so) until you regain control.<br />
Braking with ABS<br />
When you drive a vehicle with ABS, you should<br />
brake as you always have. In other words:<br />
• Use only the braking force necessary to stop<br />
safely and stay in control.<br />
• Brake the same way, regardless <strong>of</strong> whether you<br />
have ABS on the bus, tractor, trailer, or both.<br />
• As you slow down, monitor your tractor and<br />
trailer and back <strong>of</strong>f the brakes (if it is safe to<br />
do so) to stay in control.<br />
There is only one exception to this procedure with<br />
ABS, it changes the way you brake in an emergency.<br />
If you drive a straight truck or combination with<br />
working ABS on all axles, in an emergency stop,<br />
you can fully apply the brakes.<br />
Braking if ABS is not Working<br />
Without ABS you still have normal brake functions.<br />
Drive and brake as you always have.<br />
Vehicles with ABS have yellow malfunction lamps<br />
to tell you if something isn’t working.<br />
As a system check on newer vehicles, the malfunction<br />
lamp comes on at start-up for a bulb check and<br />
then goes out quickly. On older systems, the lamp<br />
could stay on until you are driving over five mph.
If the lamp stays on after the bulb check, or goes<br />
on once you are under way, you may have lost<br />
ABS control on one or more wheels.<br />
Remember, if your ABS malfunctions, you still<br />
have regular brakes. Drive normally, but get the<br />
system serviced soon.<br />
Safety Reminders<br />
ABS won’t:<br />
• Allow you to drive faster, follow more closely,<br />
or drive less carefully.<br />
• Prevent power or turning skids. ABS should<br />
prevent brake-induced skids or jackknifes, but<br />
not those caused by spinning the drive wheels<br />
or going too fast in a turn.<br />
• Shorten your stopping distance. ABS will help<br />
maintain your vehicle control, but will not<br />
always shorten your stopping distance.<br />
• Increase or decrease the vehicles ultimate<br />
stopping power. ABS is an “add-on” to your<br />
normal brakes, not a replacement for them.<br />
• Change the way you normally brake. Under<br />
normal braking conditions, your vehicle will<br />
stop as it always has. ABS only comes into play<br />
when a wheel would normally have locked up<br />
because <strong>of</strong> over braking.<br />
• Compensate for bad brakes or poor brake<br />
maintenance.<br />
Remember:<br />
• The best vehicle safety feature is still a safe<br />
driver.<br />
• Drive carefully, so you never need to use your<br />
ABS.<br />
• If you need it, ABS could help to prevent a<br />
serious crash.<br />
SkID cOntROl/RecOVeRy<br />
A skid happens whenever the tires lose their grip<br />
on the road. This can be caused by:<br />
• Overbraking. Braking too hard and locking<br />
up the wheels. Skids also can occur if you use<br />
the speed retarder when the road is slippery.<br />
• Oversteering. Turning the wheels more<br />
sharply than the vehicle can turn.<br />
• Overacceleration. Supplying too much power<br />
to the drive wheels, causing them to spin.<br />
• Driving too fast. Most serious skids result from<br />
driving too fast for road conditions.<br />
<strong>Driver</strong>s who adjust their driving to road conditions<br />
do not overaccelerate and do not have to overbrake<br />
or oversteer.<br />
rear or drive Wheel skids<br />
By far the most common skid is one in which the<br />
rear wheels lose traction through excessive braking<br />
or acceleration. Skids caused by acceleration<br />
usually happen on ice or snow. They can be easily<br />
stopped by taking your foot <strong>of</strong>f the accelerator. (If<br />
it is very slippery, push the clutch in. Otherwise,<br />
the engine can keep the wheels from rolling freely<br />
and regaining traction.)<br />
Rear wheel braking skids occur when the rear drive<br />
wheels lock. Locked wheels have less traction<br />
than rolling wheels, so the rear wheels usually<br />
slide sideways in an attempt to “catch up” with<br />
the front wheels. In a bus or<br />
straight truck, the vehicle<br />
will slide sideways in a “spin<br />
out.” With vehicles towing<br />
trailers, a drive wheel skid<br />
can let the trailer push the<br />
towing vehicle sideways,<br />
causing a sudden jackknife.<br />
(Figure 2-10)<br />
drive Wheel skids<br />
Direction<br />
<strong>of</strong> Slide<br />
Rear Tractor<br />
Wheels Lock-<br />
Up or Spinning<br />
Line <strong>of</strong><br />
Travel<br />
Figure 2-10<br />
Stop braking. This will let the rear wheels roll<br />
again and keep them from sliding any further. If on<br />
ice, push in the clutch to let the wheels turn freely.<br />
Turn quickly. When a vehicle begins to slide<br />
sideways, quickly turn the wheel in the direction<br />
you want the vehicle to go.<br />
Countersteer. As a vehicle turns back on course,<br />
it has a tendency to keep right on turning. Unless<br />
you turn the steering wheel quickly the other way,<br />
you may find yourself skidding in the opposite<br />
direction.<br />
Learning to stay <strong>of</strong>f the brake, turning the steering<br />
wheel quickly, pushing in the clutch, and<br />
- 55 -
countersteering in a skid takes a lot <strong>of</strong> practice.<br />
The only place to get this practice is on a large<br />
driving range or “skid pad.”<br />
front Wheel skids<br />
Most front-wheel skids are caused by driving<br />
too fast for conditions. Other causes are: lack <strong>of</strong><br />
tread on the front tires, and cargo loaded so that<br />
not enough weight is on the front axle. In a frontwheel<br />
skid, the front end tends to go in a straight<br />
line regardless <strong>of</strong> how much you turn the steering<br />
wheel. On a very slippery surface, you may not be<br />
able to steer around a curve or turn.<br />
When a front-wheel skid occurs, the only way to<br />
stop the skid is to let the vehicle slow down. Stop<br />
turning and/or braking so hard. Stop the vehicle<br />
as quickly as possible.<br />
cOllISIOn PROceDuReS<br />
When you are in a collision and not seriously hurt,<br />
you need to act to prevent further damage or injury.<br />
The basic steps to be taken at any collision are:<br />
• Protect the area.<br />
• Notify the authorities.<br />
• Care for the injured.<br />
• Collect required information.<br />
• Report the collision.<br />
proteCt the area<br />
The first thing to do at a collision scene is to keep<br />
another one from happening at the same spot. To<br />
protect the collision area:<br />
• Try to get your vehicle to the side <strong>of</strong> the road,<br />
if it is involved in the collision. This will help<br />
prevent another collision and allow traffic to<br />
move.<br />
• Park away from the collision, if you are stopping<br />
to help. The area immediately around the<br />
collision scene will be needed for emergency<br />
vehicles.<br />
• Turn on your 4-way flashers.<br />
• Set out reflective triangles to warn other traffic.<br />
Make sure they can be seen by other drivers in<br />
time for them to avoid the collision.<br />
- 56 -<br />
notify authorities<br />
If you have a CB radio, put out a call over the<br />
emergency channel before you leave your vehicle<br />
or if you have a cellular phone, call 9-1-1. If you do<br />
not have a CB or a cellular phone, wait until after<br />
the collision scene has been properly protected, then<br />
phone or send someone to phone for the police or<br />
CHP. Try to determine where you are so you can<br />
give the exact location.<br />
Care for the injured<br />
If a qualified person is at the scene and helping the<br />
injured, stay out <strong>of</strong> the way unless you are asked<br />
to assist. Otherwise, do the best you can to help<br />
any injured parties. Here are some simple steps to<br />
follow in giving assistance:<br />
• Do not move a severely injured person unless<br />
the danger <strong>of</strong> fire or passing traffic makes it<br />
necessary.<br />
• Stop heavy bleeding by applying direct pressure<br />
to the wound.<br />
• Keep the injured person warm.<br />
gather information<br />
If you were involved in the collision, you will<br />
have to file a collision report. Collect the following<br />
information for the report:<br />
• Names, addresses, and driver license numbers<br />
<strong>of</strong> other drivers involved in the collision.<br />
• License plate numbers and types <strong>of</strong> vehicles<br />
involved in the collision.<br />
• Names and addresses <strong>of</strong> the owners <strong>of</strong> other<br />
vehicles (if different from the drivers).<br />
• Description <strong>of</strong> the damages, to other vehicles<br />
or to property.<br />
• Name(s) and address(es) <strong>of</strong> anyone who was<br />
injured or involved in the collision.<br />
• Name, badge number, and agency <strong>of</strong> any peace<br />
<strong>of</strong>ficer investigating the collision.<br />
• Names and addresses <strong>of</strong> witnesses.<br />
• Exact location <strong>of</strong> the collision.<br />
• Direction <strong>of</strong> travel <strong>of</strong> the vehicles involved.
FIReS<br />
Vehicle fires can cause damage and injury. Learn<br />
the causes <strong>of</strong> fires and how to prevent them. Know<br />
what to do to extinguish fires.<br />
fire Causes<br />
The following are some causes <strong>of</strong> vehicle fires:<br />
• After collisions. Spilled fuel, improper use<br />
<strong>of</strong> flares.<br />
• Tires. Underinflated tires or duals that touch.<br />
• Electrical system. Short circuits due to damaged<br />
insulation, loose connections.<br />
• Fuel. <strong>Driver</strong> smoking, improper fueling, loose<br />
fuel connections.<br />
• Cargo. Flammable cargo which is improperly<br />
sealed or loaded; poor ventilation.<br />
fire prevention<br />
Pay attention to the following:<br />
• Pre-trip inspection. Make a complete inspection<br />
<strong>of</strong> the electrical, fuel and exhaust systems,<br />
tires, and cargo. Be sure to check that the fire<br />
extinguisher is charged.<br />
• En route inspection. Check the tires, wheels,<br />
and truck body for signs <strong>of</strong> heat whenever you<br />
stop during a trip.<br />
• Follow safe procedures. Follow correct safety<br />
procedures for fueling the vehicle, using brakes,<br />
handling flares, and other activities that can<br />
cause a fire.<br />
• Monitoring. Check the instruments and gauges<br />
<strong>of</strong>ten for signs <strong>of</strong> overheating and use the<br />
mirrors to look for signs <strong>of</strong> smoke from tires<br />
or the vehicle.<br />
• Caution. Use care in handling anything<br />
flammable.<br />
fire fighting<br />
Knowing how to fight fires is important. Fires have<br />
been made worse by drivers who did not know<br />
what to do. Know how the fire extinguisher works.<br />
Study the instructions printed on the extinguisher<br />
before you need it. Here are some procedures to<br />
follow in case <strong>of</strong> fire:<br />
• Pull <strong>of</strong>f the road.<br />
— Park in an open area away from buildings,<br />
trees, brush, other vehicles, or anything<br />
that might catch fire.<br />
— Do not pull into a service station!<br />
— Notify emergency services <strong>of</strong> the problem<br />
and your location.<br />
• Keep the fire from spreading. Before you try<br />
to put out the fire, make sure it doesn’t spread<br />
any further.<br />
— With an engine fire, turn <strong>of</strong>f the engine as<br />
soon as you can. Do not open the hood if<br />
you can avoid it. Aim extinguishers through<br />
louvers, radiator, or underside <strong>of</strong> the vehicle.<br />
— With a cargo fire in a van or box trailer,<br />
keep the doors shut, especially if your cargo<br />
contains hazardous materials. Opening the<br />
van door supplies the fire with oxygen and<br />
can cause it to burn very fast.<br />
• Use the correct fire extinguisher.<br />
— A B:C type fire extinguisher is designed to<br />
work on electrical fires and burning liquids.<br />
— An A:B:C type fire extinguisher is designed<br />
to work on burning wood, paper, and cloth.<br />
— Water can be used on wood, paper, or cloth,<br />
but do not use water on an electrical fire<br />
(you could get shocked) or a gasoline fire<br />
(it will just spread the flames).<br />
— A burning tire must be cooled. Lots <strong>of</strong><br />
water may be required.<br />
— If you are not sure what to use, especially<br />
on a hazardous materials fire, wait for<br />
qualified fire fighters.<br />
• Extinguish the fire. Here are some rules to<br />
follow in putting out a fire. (Refer to 13 CCR<br />
§1242 for additional information):<br />
— Only try to extinguish the fire if you know<br />
what you are doing and it is safe to do so.<br />
— When using the extinguisher, stay as far<br />
away from the fire as possible.<br />
— Aim at the source or base <strong>of</strong> the fire, not<br />
in the flames.<br />
— Position yourself upwind. Let the wind<br />
carry the spray to the fire rather than carry<br />
the flames to you.<br />
- 57 -
- 58 -<br />
— Continue until whatever was burning has<br />
been cooled. Absence <strong>of</strong> smoke or flame<br />
does not mean the fire is completely out<br />
or cannot restart.<br />
StAyIng AleRt AnD FIt tO<br />
DRIVe<br />
Driving a vehicle for long hours is tiring. However,<br />
there are things that good drivers do to help stay<br />
alert and safe.<br />
get enough sleep. Leaving on a long trip when<br />
you are already tired is dangerous. If you have a<br />
long trip scheduled, make sure that you get enough<br />
sleep before you go.<br />
Schedule trips safely. Your body gets used to<br />
sleeping during certain hours. If you are driving<br />
during those hours, you will be less alert. Try<br />
to schedule trips for the hours you are normally<br />
awake. Many heavy motor vehicle collisions occur<br />
between midnight and 6:00 a.m. Tired drivers can<br />
easily fall asleep at these times, especially if they<br />
don’t regularly drive during those hours. Trying<br />
to push on and finish a long trip at these times can<br />
be very dangerous.<br />
Avoid medication. Many medicines can make<br />
you sleepy. Those that do have a label warning<br />
against operating vehicles or machinery. The most<br />
common medicine <strong>of</strong> this type is an ordinary cold<br />
pill. If you have to drive with a cold, you are better<br />
<strong>of</strong>f suffering from the cold than from the effects<br />
<strong>of</strong> the medicine.<br />
Keep cool. A hot, poorly ventilated cab can make<br />
you sleepy. Keep the window or vent cracked or<br />
use the air conditioner, if you have one.<br />
Take breaks. Short breaks can keep you alert.<br />
But the time to take them is before you feel<br />
really drowsy or tired. Stop <strong>of</strong>ten. Walk around<br />
and inspect your vehicle. It can help to do some<br />
physical exercises.<br />
When you are sleepy, trying to “push on” is far<br />
more dangerous than most drivers think. It is a<br />
major cause <strong>of</strong> fatal collisions. Here are some<br />
important rules to follow:<br />
• Stop to sleep. When your body needs sleep,<br />
sleep is the only thing that will work. If you<br />
have to make a stop anyway, make it whenever<br />
you feel the first signs <strong>of</strong> sleepiness, even if<br />
it is earlier than you planned. By getting up<br />
a little earlier the next day, you can keep on<br />
schedule without the danger <strong>of</strong> driving while<br />
you are not alert.<br />
• Take a nap. If you can’t stop for the night, at<br />
least pull <strong>of</strong>f the road at a safe place, such as a<br />
rest area or truck stop, and take a nap. A nap as<br />
short as a half hour will do more to overcome<br />
fatigue than a half hour c<strong>of</strong>fee stop.<br />
• Avoid drugs. There are no drugs that can<br />
overcome being tired. While they may keep<br />
you awake for a while, they will not make<br />
you alert. And eventually, you will be even<br />
more tired than if you had not taken them<br />
at all. Sleep is the only thing that can safely<br />
overcome fatigue.<br />
alCohol and driving<br />
Drinking alcohol and then driving is a very serious<br />
problem. People who drink alcohol are involved in<br />
traffic collisions resulting in thousands <strong>of</strong> deaths<br />
every year. You should know:<br />
• How alcohol works in the human body.<br />
• How alcohol affects driving.<br />
• Laws regarding drinking, drugs, and driving.<br />
• Legal, financial, and safety risks <strong>of</strong> drinking<br />
and driving.<br />
You may NEVER drink while on duty, nor consume<br />
any intoxicating beverage, regardless <strong>of</strong> its alcohol<br />
content, within 4 hours before going on duty.<br />
Remember–it is illegal to drive a commercial motor<br />
vehicle with a blood alcohol concentration (BAC)<br />
that is 0.04% or greater and doing so will result<br />
in an immediate administrative driver licensing<br />
sanction (Admin Per Se) (CVC §§23152(d)) and<br />
13353.2(3)). However, a BAC below 0.04% does<br />
not mean that it is safe or legal to drive.<br />
the truth aBout alCohol<br />
There are many dangerous ideas about the use <strong>of</strong><br />
alcohol. The driver who believes in these wrong<br />
ideas will be more likely to get into trouble. Look<br />
at the chart on following page for some examples.
What is Considered a drink?<br />
It is the alcohol in drinks that affects our performance.<br />
It does not make any difference whether<br />
that alcohol comes from a “couple <strong>of</strong> beers” or from<br />
two glasses <strong>of</strong> wine or two shots <strong>of</strong> hard liquor.<br />
All <strong>of</strong> the following drinks contain the same amount<br />
<strong>of</strong> alcohol:<br />
• A 12-ounce glass <strong>of</strong> 5% beer.<br />
• A 5-ounce glass <strong>of</strong> 12% wine.<br />
• A 1-1/2 ounce shot <strong>of</strong> 80 pro<strong>of</strong> liquor.<br />
How alcohol works. Alcohol goes directly from<br />
the stomach into the blood stream. A drinker can<br />
control the amount <strong>of</strong> alcohol which he or she takes<br />
in, by having fewer drinks or none. However, the<br />
drinker cannot control how fast the body gets rid<br />
<strong>of</strong> alcohol. If you have drinks faster than your body<br />
can get rid <strong>of</strong> them, you will have more alcohol in<br />
your body and your driving will be more affected.<br />
The amount <strong>of</strong> alcohol in your body is commonly<br />
measured by the BAC.<br />
What determines BAC. BAC is determined by<br />
the amount <strong>of</strong> alcohol you drink (more alcohol<br />
means a higher BAC), how fast you drink (faster<br />
drinking means a higher BAC), and your weight<br />
(a small person does not have to drink as much to<br />
reach the same BAC as a larger person).<br />
Alcohol and the brain. Alcohol affects more<br />
and more <strong>of</strong> the brain as BAC builds up. The first<br />
part <strong>of</strong> the brain affected controls judgment and<br />
self-control. One <strong>of</strong> the bad things about this is it<br />
can keep drinkers from knowing they are getting<br />
drunk. And, <strong>of</strong> course, good judgment and selfcontrol<br />
are absolutely necessary for safe driving.<br />
As BAC continues to build, muscle control, vision,<br />
and coordination are affected more and more.<br />
Eventually, a person will pass out.<br />
hoW alCohol affeCts driving<br />
All drivers are affected by drinking alcohol. Alcohol<br />
affects judgment, vision, coordination, and reaction<br />
time. It causes serious driving errors, such as:<br />
• Driving too quickly or too slowly.<br />
• Driving in the wrong lane.<br />
• Running over the curb.<br />
• Weaving.<br />
• Driving between lanes.<br />
• Quick, jerky starts.<br />
• Not signaling, failing to use lights.<br />
• Running stop signs and red lights.<br />
• Improper passing.<br />
• Being overly cautious.<br />
These effects increase the chances <strong>of</strong> a collision.<br />
You also could lose your driving privilege. Collision<br />
statistics show that the chance <strong>of</strong> a collision is<br />
much greater for drivers who have been drinking<br />
than for drivers who have not.<br />
other drugs<br />
Besides alcohol, other legal and illegal drugs are<br />
being used more <strong>of</strong>ten. Laws prohibit possession<br />
or use <strong>of</strong> many drugs while on duty. They prohibit<br />
driving while under the influence <strong>of</strong> any “controlled<br />
substance” such as amphetamines (including “pep<br />
pills” and “bennies”), narcotics, or any other<br />
substance which can make the driver unsafe. This<br />
could include a variety <strong>of</strong> prescription and over-<br />
FAlSe nOtIOn tRue StAtement<br />
Alcohol is a drug that will make you less alert<br />
Alcohol increases your ability to drive.<br />
and reduce your ability to drive safely.<br />
Some people can drink a lot and not be affected<br />
Everyone who drinks is affected by alcohol.<br />
by it.<br />
Food will slow down the effects <strong>of</strong> alcohol but<br />
If you eat a lot first, you will not get drunk.<br />
will not prevent them.<br />
C<strong>of</strong>fee and a little fresh air will help a drinker Only time will help a drinker sober up—other<br />
sober up.<br />
methods just do not work.<br />
Stick with beer—it is not as strong as wine or A few beers are the same as a few glasses <strong>of</strong><br />
whiskey.<br />
wine or a few shots <strong>of</strong> whiskey.<br />
- 59 -
the-counter drugs (cold or allergy medicines) which<br />
may make the driver drowsy or otherwise affect<br />
safe driving ability. However, possession and use<br />
<strong>of</strong> any medication given to a driver by a physician<br />
is permitted if the physician advises the driver that<br />
the medicine will not affect safe driving ability.<br />
Pay attention to warning labels <strong>of</strong> legitimate drugs<br />
and medicines and to your physician’s orders<br />
regarding possible side effects. Stay away from<br />
illegal drugs. Do not use any substance that hides<br />
fatigue–the only cure for fatigue is rest. Alcohol<br />
can make the effects <strong>of</strong> the drugs much worse.<br />
The safest rule is do not mix drugs with driving.<br />
Use <strong>of</strong> drugs can lead to traffic collisions resulting<br />
in death, injury, and property damage. Furthermore,<br />
it can lead to arrest, fines, and jail sentences. It may<br />
also mean the end <strong>of</strong> a person’s driving career.<br />
Be ready to drive<br />
get enough sleep. Sleep is not like money. You<br />
can’t save it up ahead <strong>of</strong> time and you can’t borrow<br />
it. But, just as with money, you can go into debt<br />
with it. If you don’t sleep enough, you “owe”<br />
more sleep to yourself. This sleep debt can only<br />
be paid <strong>of</strong>f by sleeping. You can’t overcome it<br />
with willpower, and it won’t go away by itself.<br />
The average person needs seven or eight hours <strong>of</strong><br />
sleep every 24 hours. Leaving on a long trip when<br />
you’re already tired is dangerous. If you have a<br />
long trip scheduled, make sure that you get enough<br />
sleep before you go.<br />
Exercise regularly. Resistance to fatigue and<br />
improved sleep are among the benefits <strong>of</strong> regular<br />
exercise. Try to incorporate exercise into your<br />
daily life. Instead <strong>of</strong> sitting and watching TV in<br />
your sleeper, walk or jog a few laps around the<br />
parking lot. A little bit <strong>of</strong> daily exercise will give<br />
you energy throughout the day.<br />
Eat healthy. It is <strong>of</strong>ten hard for drivers to find<br />
healthy food. But with a little extra effort, you<br />
can eat healthy, even on the road. Try to find<br />
restaurants with healthy, balanced meals. If you<br />
must eat at fast-food restaurants, pick low-fat items.<br />
Another simple way to reduce your caloric intake<br />
is to eliminate fattening snacks. Instead, try fruit<br />
or vegetables.<br />
- 60 -<br />
Avoid medication. Many medicines can make<br />
you sleepy. Those that do, have a label warning<br />
against operating vehicles or machinery. The most<br />
common medicine <strong>of</strong> this type is an ordinary cold<br />
pill. If you have to drive with a cold, you are better<br />
<strong>of</strong>f suffering from the cold than from the effects<br />
<strong>of</strong> the medicine.<br />
Visit your doctor. Regular checkups can literally be<br />
lifesavers. Illnesses such as diabetes, heart disease,<br />
and skin and colon cancer can be detected easily<br />
and treated if found in time. You should consult<br />
your physician or a local sleep disorder center if<br />
you suffer from frequent daytime sleepiness, have<br />
difficulty sleeping at night, take frequent naps,<br />
fall asleep at strange times, snore loudly, gasp<br />
and choke in your sleep, and/or wake up feeling<br />
as though you have not had enough sleep.<br />
While you are driving<br />
Keep cool. A hot, poorly ventilated vehicle can<br />
make you sleepy. Keep the window or vent cracked<br />
open or use the air conditioner, if you have one.<br />
Take breaks. Short breaks can keep you alert.<br />
But the time to take them is before you feel<br />
really drowsy or tired. Stop <strong>of</strong>ten. Walk around<br />
and inspect your vehicle. It may help to do some<br />
physical exercises. Be sure to take a mid-afternoon<br />
break and plan to sleep between midnight and 6 a.m.<br />
Recognize the danger signals <strong>of</strong> drowsy driving.<br />
Sleep is not voluntary. If you’re drowsy, you can fall<br />
asleep and never even know it. If you are drowsy,<br />
you are likely to have “micro sleeps”–brief naps<br />
that last around four or five seconds. At 55 miles<br />
an hour, that’s more than 100 yards, and plenty <strong>of</strong><br />
time for a crash. Even if you are not aware <strong>of</strong> being<br />
drowsy, if you have a sleep debt you are still at<br />
risk. There are a few ways to tell if you’re about to<br />
fall asleep. If you experience any <strong>of</strong> these danger<br />
signs, take them as a warning that you could fall<br />
asleep without meaning to:<br />
• Your eyes close or go out <strong>of</strong> focus by themselves.<br />
• You have trouble keeping your head up.<br />
• You can’t stop yawning.<br />
• You have wandering, disconnected thoughts.<br />
• You don’t remember driving the last few miles.
• You drift between lanes, tailgate, or miss<br />
traffic signs.<br />
• You keep jerking the truck back into the lane.<br />
• You have drifted <strong>of</strong>f the road and narrowly<br />
missed crashing.<br />
If you have even one <strong>of</strong> these symptoms, you may<br />
be in danger <strong>of</strong> falling asleep. Pull <strong>of</strong>f the road in<br />
a safe place and take a nap.<br />
When you do BeCome sleepy<br />
When you are sleepy, trying to “push on” is far<br />
more dangerous than most drivers think. It is a<br />
major cause <strong>of</strong> fatal accidents. Here are some<br />
important rules to follow:<br />
• Stop to sleep. When your body needs sleep,<br />
sleep is the only thing that will work. If you<br />
have to make a stop anyway, make it whenever<br />
you feel the first signs <strong>of</strong> sleepiness, even if<br />
it is earlier than you planned. By getting up<br />
a little earlier the next day, you can keep on<br />
schedule without the danger <strong>of</strong> driving while<br />
you are not alert.<br />
• Take a nap. If you can’t stop for the night, at<br />
least pull <strong>of</strong>f at a safe place, such as a rest area<br />
or truck stop, and take a nap. A nap as short as<br />
a half-hour will do more to overcome fatigue<br />
than a half-hour c<strong>of</strong>fee stop.<br />
• Avoid drugs. There are no drugs that can<br />
overcome being tired. While they may keep<br />
you awake for a while, they won’t make you<br />
alert. And eventually, you’ll be even more tired<br />
than if you hadn’t taken them at all. Sleep is<br />
the only thing that can overcome fatigue.<br />
• Do not. Do not rely on c<strong>of</strong>fee or another source<br />
<strong>of</strong> caffeine to keep you awake. Do not count<br />
on the radio, an open window, or other tricks<br />
to keep you awake.<br />
IllneSS<br />
Once in awhile, you may become so ill or fatigued<br />
that you cannot operate a motor vehicle safely. If<br />
this happens, you must not drive. In case <strong>of</strong> an<br />
emergency, drive only to the nearest place where<br />
you can safely stop.<br />
hAzmAt RuleS FOR All<br />
cOmmeRcIAl DRIVeRS<br />
All drivers should know something about hazardous<br />
materials (HazMat) and wastes. You must be<br />
able to recognize hazardous cargo and you must<br />
know whether you can transport it without having<br />
a HazMat endorsement on your CDL.<br />
To get a HazMat endorsement, you must pass a<br />
written test based on the information in Section 9<br />
<strong>of</strong> this handbook. You also will need a tank vehicle<br />
endorsement if you transport hazardous products<br />
in a cargo tank.<br />
If you apply for an original or renewal HazMat<br />
endorsement, you must undergo a Transportation<br />
Security Administration (TSA) federal security<br />
threat assessment (background records check). You<br />
start the TSA background records check after you<br />
apply for your CDL at DMV, successfully complete<br />
all appropriate law tests, and submit a valid medical<br />
form. You must submit fingerprints, a fee, and any<br />
additional required information to one <strong>of</strong> TSA’s<br />
designated agents. You must also provide the TSA<br />
agent with a copy <strong>of</strong> your CDL permit and one <strong>of</strong><br />
the following identification documents:<br />
• A <strong>California</strong> DL/ID card.<br />
• An out-<strong>of</strong>-state DL.<br />
• Your CDL permit accompanied by a DMV<br />
photo receipt.<br />
For a list <strong>of</strong> TSA agent sites, go online at<br />
hazprints.tsa.dhs.gov or call 1-877-429-7746.<br />
What are the rules?<br />
The Federal Hazardous Materials Table lists<br />
materials that are hazardous. They can be a risk to<br />
health, safety, and property during transportation.<br />
You must follow the many rules about transporting<br />
them. The intent <strong>of</strong> hazardous materials rules and<br />
regulations is to:<br />
• Contain the product.<br />
• Communicate the risk.<br />
• Ensure safe drivers and equipment.<br />
To contain the product. Many hazardous products<br />
can injure or kill on contact. In order to protect<br />
drivers and others from contact, the rules tell<br />
- 61 -
shippers how to package safely. Similar rules tell<br />
drivers how to load, transport, and unload. These<br />
are containment rules.<br />
To communicate the risk. The shipper uses a shipping<br />
paper and package labels to warn dockworkers<br />
and drivers <strong>of</strong> the risk and special handling needs.<br />
Shipping orders, bills <strong>of</strong> lading, and manifests are<br />
all examples <strong>of</strong> shipping papers.<br />
There are nine different hazard classes. A material’s<br />
hazard class reflects the risks associated with it. The<br />
hazard classes are shown on pages 111 and 112.<br />
Shippers write the proper shipping name and hazard<br />
class or division code in the item description <strong>of</strong> the<br />
shipping paper. Hazard class information will also<br />
be shown on four-inch diamond shaped labels on the<br />
containers <strong>of</strong> hazardous materials. If the diamond<br />
label will not fit on the container, shippers will put<br />
the label on a tag, or in some instances, reduce<br />
the size. For example, compressed gas cylinders<br />
that will not hold a label will have tags or decals.<br />
Package markings may convey proper shipping<br />
names, United Nations identification numbers,<br />
and special handling information (e.g., loading<br />
orientation arrows for liquids).<br />
After a collision or hazardous materials leak, the<br />
driver may be unable to speak when help arrives.<br />
Fire fighters and police must know the hazards<br />
involved in order to prevent more damage or<br />
injury. The driver’s life, and the lives <strong>of</strong> others,<br />
may depend on quickly finding the shipping papers<br />
for hazardous cargo. For that reason, you must tab<br />
shipping papers related to hazardous materials<br />
or wastes, or keep them on top <strong>of</strong> other shipping<br />
papers. You must also keep shipping papers in a<br />
pouch on the driver’s door, or in clear view within<br />
reach, or on the driver’s seat when out <strong>of</strong> the cab.<br />
- 62 -<br />
<strong>Driver</strong>s must use placards to warn others <strong>of</strong> their<br />
hazardous cargo. Placards are signs placed on the<br />
outside <strong>of</strong> a vehicle to show the hazard class(es)<br />
<strong>of</strong> products on board. Each is turned upright on a<br />
point, in a diamond shape. The person who does<br />
the loading must place the placards on the front,<br />
rear, and both sides <strong>of</strong> the vehicle. (See page 112.)<br />
Not all vehicles transporting hazardous materials<br />
or wastes need to have placards. The rules about<br />
placards are given in Section 9 <strong>of</strong> this handbook.<br />
To ensure safe drivers and equipment. The<br />
rules require all drivers <strong>of</strong> placarded or marked<br />
vehicles to have a commercial driver license with<br />
the HazMat endorsement. You must learn how to<br />
safely load and transport hazardous materials or<br />
wastes (CVC §27903).<br />
<strong>Driver</strong>s who need the HazMat endorsement must<br />
learn the placarding rules. If you do not know if<br />
your load requires placards, ask your employer or<br />
shipper. Never drive a vehicle needing placards,<br />
unless you have the HazMat endorsement on<br />
your CDL. To do so is a crime. If stopped, you will<br />
be cited and you will not be allowed to drive your<br />
vehicle further. It will cost you time and money. A<br />
failure to placard when needed will risk your life<br />
and others if you have a collision. Emergency help<br />
will not know <strong>of</strong> your hazardous cargo.<br />
Hazardous materials/wastes drivers must also<br />
know which products can be loaded together, and<br />
which cannot. These rules are also in Section 9.<br />
Before loading a vehicle with more than one type<br />
<strong>of</strong> product, you must know if it is safe to load<br />
them together.
This section is about cargo safety. You must pass<br />
a written test on cargo safety to get a commercial<br />
driver license.<br />
If you load or secure cargo incorrectly, it can be<br />
a danger to others and yourself. Loose cargo that<br />
falls <strong>of</strong>f a vehicle can cause traffic problems and<br />
others could be hurt or killed. Loose cargo can hurt<br />
or kill you during a quick stop or collision. Your<br />
vehicle can be damaged by an overload. Steering<br />
can be affected by an improperly loaded vehicle<br />
making it more difficult to control.<br />
Whether or not you load and secure the cargo<br />
yourself, you are responsible for:<br />
• Inspecting cargo.<br />
• Recognizing overloads and poorly balanced<br />
weight.<br />
• Ensuring that the cargo is securely tied down<br />
and covered, if applicable.<br />
If you intend to carry hazardous materials or wastes<br />
that require placards or markings on your vehicle,<br />
you will also need a HazMat endorsement.<br />
InSPectIng cARgO<br />
SectIOn 3: tRAnSPORtIng cARgO<br />
This section is for all commercial drivers<br />
As part <strong>of</strong> your pre-trip inspection, check for<br />
overloads, poorly balanced weight, and cargo that<br />
is not secured correctly.<br />
Inspect the cargo and its securing devices again<br />
within 25 miles after beginning a trip. Make any<br />
adjustments needed. Check the cargo and securing<br />
devices as <strong>of</strong>ten as necessary during a trip to keep<br />
the load secure. Inspect again:<br />
• After you have driven for three hours or 150<br />
miles, whichever comes first.<br />
• After every break you take during driving.<br />
Federal, state, and local regulations <strong>of</strong> weight,<br />
securement, cover, and truck routes vary greatly<br />
from place to place. Know the regulations where<br />
you will be driving.<br />
cARgO WeIght AnD BAlAnce<br />
You are responsible for making sure that the vehicle<br />
is not overloaded. Here are some definitions you<br />
should know:<br />
gross vehicle weight (gVW). The total weight<br />
<strong>of</strong> a single vehicle including its load.<br />
gross combination weight (gCW). The total<br />
weight <strong>of</strong> a combination <strong>of</strong> vehicles including<br />
the load.<br />
gross vehicle weight rating (gVWR). The maximum<br />
weight rating specified by the manufacturer<br />
for a single vehicle including its load.<br />
gross combination weight rating (gCWR). The<br />
total GVWRs for the power unit and any towed<br />
vehicles. (This is not the same as the GVWR<br />
specified by a manufacturer for the towing capacity<br />
<strong>of</strong> a vehicle.)<br />
Axle weight. The weight on the ground at one or<br />
more sets <strong>of</strong> axles.<br />
Tire load. The maximum safe weight rating a<br />
tire can carry at a specified pressure. This rating<br />
is stated on the side <strong>of</strong> each tire.<br />
Suspension systems. Suspension systems have a<br />
manufacturer’s weight capacity rating.<br />
Coupling device capacity. Coupling devices are<br />
rated for the maximum weight they can pull and/<br />
or carry.<br />
- 63 -
legal Weight limits<br />
Weights must be kept within legal limits. States<br />
have maximums for GVWs, GCWs, and axle<br />
weights. Often, maximum axle weights are set by<br />
a bridge formula which permits less axle weight<br />
for axles that are closer together. This is to prevent<br />
overloading bridges and roadways.<br />
Overloading can have bad effects on steering,<br />
braking, and speed control. Overloaded trucks have<br />
to go very slowly on upgrades. Worse, they may<br />
gain too much speed on downgrades. Stopping<br />
distance increases. Brakes can fail when forced<br />
to work too hard.<br />
During bad weather or in mountains, operating<br />
at legal maximum weights may not be safe. Take<br />
this into account before driving.<br />
avoid top-heavy loads<br />
The height <strong>of</strong> the vehicle’s center <strong>of</strong> gravity is<br />
very important for safe handling. A high center <strong>of</strong><br />
gravity (cargo piled up high, or heavy cargo on top)<br />
means you are more likely to roll, especially on<br />
curves or if you have to swerve to avoid a hazard.<br />
It is very important to distribute cargo so the center<br />
<strong>of</strong> gravity is as low as possible. Load the heaviest<br />
parts <strong>of</strong> the cargo first or on the bottom.<br />
BalanCe Cargo Weight<br />
Poor weight balance can make vehicle handling<br />
unsafe. Too much weight on the steering axle can<br />
cause hard steering and can damage the steering<br />
axle and tires. Underloaded front axles (caused by<br />
- 64 -<br />
loading weight too far to the rear) can make the<br />
steering axle weight too light to steer safely. Too<br />
little weight on the driving axles can cause poor<br />
traction, so that during bad weather, the truck may<br />
not be able to keep going. Weight that is loaded<br />
with a high center <strong>of</strong> gravity has a greater chance<br />
<strong>of</strong> rollover. On flatbed vehicles, there is also a<br />
greater chance that the load will shift to the side<br />
or fall <strong>of</strong>f. Figure 3-1 shows examples <strong>of</strong> the right<br />
and wrong way to balance cargo weight.<br />
SecuRIng cARgO<br />
Blocking is used in the front, back, and/or sides <strong>of</strong><br />
a piece <strong>of</strong> cargo to keep it from sliding. Blocking<br />
is shaped to fit snugly against cargo. It is secured<br />
to the cargo deck to prevent cargo movement.<br />
Bracing is also used to prevent movement <strong>of</strong> cargo.<br />
Bracing goes from the upper part <strong>of</strong> the cargo to<br />
the floor and/or walls <strong>of</strong> the cargo compartment.<br />
tiedoWns<br />
Wrong Right<br />
Wrong Wrong Right<br />
Wrong Right<br />
Figure 3-1 Balancing Cargo Weight<br />
On flatbed trailers or trailers without sides, cargo<br />
must be secured to keep it from shifting and falling<br />
<strong>of</strong>f. In closed vans, tiedowns can also be important<br />
to prevent cargo shifting that may affect the<br />
handling <strong>of</strong> the vehicle. Tiedowns must be <strong>of</strong> the<br />
correct type and strength. The combined strength<br />
<strong>of</strong> all cargo tiedowns must be strong enough to<br />
lift one and one half times the weight <strong>of</strong> the piece<br />
<strong>of</strong> cargo tied down. Proper tiedown equipment<br />
must be used, including ropes, straps, chains, and<br />
tensioning devices (winches, ratchets, cinching<br />
components). Tiedowns must be attached to the<br />
vehicle correctly (hook, bolt, rails, rings).
Cargo should have two tiedowns in the first 10 feet<br />
<strong>of</strong> cargo, and one tiedown every 10 feet thereafter.<br />
Make sure you have enough tiedowns to meet this<br />
need. No matter how small the cargo, it should<br />
have at least two tiedowns holding it.<br />
Rules governing the loading and securement <strong>of</strong><br />
logs, dressed lumber, metal coils, paper rolls,<br />
concrete pipe, intermodal containers, automobiles,<br />
heavy vehicles, flattened or crushed vehicles,<br />
Roll-On/Roll-Off containers, and large boulders<br />
are contained in the Code <strong>of</strong> Federal Regulations,<br />
Title 49, §393.<br />
Covering Cargo<br />
There are two basic reasons for covering cargo:<br />
1. To protect people from spilled cargo.<br />
2. To protect the cargo from weather.<br />
Spill protection is a safety requirement in many<br />
states. Be familiar with the laws in the states where<br />
you will be driving.<br />
You should look at your cargo covers in the mirrors<br />
<strong>of</strong>ten while driving. A flapping cover can tear loose,<br />
uncovering the cargo and possibly block your view<br />
or someone else’s.<br />
Spilling loads and damage to highway. It is<br />
against the law to operate on the highway a vehicle<br />
which is improperly covered, constructed, or loaded<br />
so that any part <strong>of</strong> its contents or load spills, drops,<br />
leaks, blows, sifts, or in any other way escapes from<br />
the vehicle. Exception: clear water or feathers from<br />
live birds (CVC §§23114 and 23115).<br />
Any vehicle transporting garbage, trash, rubbish,<br />
ashes, etc., must have the load covered to prevent<br />
any part <strong>of</strong> the load from spilling on to the highway.<br />
Aggregate material must be carried in the cargo<br />
area <strong>of</strong> the vehicle and be six inches below the<br />
upper edge. The cargo area must not have any<br />
holes, cracks, or openings which could allow the<br />
material to escape. The vehicle used to transport<br />
aggregate material must be equipped with seals on<br />
any openings used to empty the load, splash flaps<br />
behind every tire or set <strong>of</strong> tires, and fenders. Other<br />
requirements are listed in CVC §23114. This does<br />
not apply to vehicles carrying wet waste fruit or<br />
vegetable matter, or waste from food processing<br />
plants.<br />
Any person who willfully or negligently damages<br />
any street or highway is liable for the cost <strong>of</strong> repairing<br />
the road or any sign, signal, guard rail, or other<br />
facility that is damaged. The liability may include<br />
the cost <strong>of</strong> removing debris from the roadway.<br />
header Boards<br />
Front end header boards (“headache racks”) protect<br />
you from your cargo in case <strong>of</strong> a collision or<br />
emergency stop. Be sure the front end structure is<br />
in good condition. The front end structure should<br />
block the forward movement <strong>of</strong> any cargo you carry.<br />
sealed and Containerized loads<br />
Containerized loads generally are used when<br />
freight is carried part way by rail or ship. Delivery<br />
by truck occurs at the beginning and/or end <strong>of</strong> the<br />
journey. Some containers have their own tiedown<br />
devices or locks that attach directly to a special<br />
frame. Other containers (following the regulations<br />
established by the CHP) have to be loaded onto<br />
flatbed trailers. They are secured with tiedowns<br />
just like any other large cargo. You cannot inspect<br />
sealed loads, but you should check that you do not<br />
exceed gross weight and axle weight limits and<br />
that the seal is not broken.<br />
hAnDlIng OtheR cARgO<br />
Dry bulk tanks require special care because they<br />
<strong>of</strong>ten have a high center <strong>of</strong> gravity and the load can<br />
shift. Be extremely cautious going around curves<br />
and making sharp turns.<br />
hanging meat<br />
Hanging meat suspended in a refrigerated truck<br />
can be a very unstable load with a high center<br />
<strong>of</strong> gravity. Particular caution is needed on sharp<br />
curves such as <strong>of</strong>framps and onramps. Go slowly.<br />
livestoCk<br />
Livestock can move around in a trailer. This<br />
shifts the center <strong>of</strong> gravity and makes rollover<br />
more likely. With less than a full load, use false<br />
bulkheads to keep livestock bunched together. Even<br />
when bunched, special care is necessary because<br />
livestock can lean on curves.<br />
- 65 -
oversized loads<br />
Overlength, overwidth, and/or overweight<br />
loads require Caltrans transit permits. Driving is<br />
usually limited to certain times <strong>of</strong> the day. Special<br />
equipment may be necessary such as “wide load”<br />
signs, flashing lights, flags, etc. Such loads may<br />
require a police escort or pilot vehicles bearing<br />
warning signs and/or flashing lights. These special<br />
loads require special driving care.<br />
speCial markings needed<br />
Any vehicle and load over 80 inches must, in addition<br />
to required vehicle lighting, show an amber<br />
combination clearance and side-marker lamp on the<br />
side <strong>of</strong> the load projection at the front and show a<br />
red combination clearance and side-marker lamp<br />
on the side <strong>of</strong> the projection at the rear.<br />
Alternatively, if the overwidth <strong>of</strong> the projection<br />
does not extend more than three feet from front<br />
to rear at least one amber combination clearance<br />
lamp must be visible front, side, and rear at the<br />
extreme width, if the projection is near the front<br />
<strong>of</strong> the vehicle. If the projection is near the rear,<br />
at least one red combination side clearance lamp<br />
must be displayed (CVC §25100).<br />
projeCting loads<br />
Lights (or flags) on projecting loads. When the<br />
load on any vehicle extends 4 feet (48 inches) or<br />
more beyond the rear <strong>of</strong> the body, a solid red or<br />
fluorescent orange flag at least 12 inches square<br />
must be placed at the extreme end <strong>of</strong> the load. If<br />
the vehicle is operated during darkness, there must<br />
be two lit red lights at the end <strong>of</strong> the load visible<br />
at a distance <strong>of</strong> 500 feet to the side and rear <strong>of</strong> the<br />
vehicle (CVC §24604).<br />
- 66 -<br />
A load extending one foot or more to the left on any<br />
vehicle must have an amber light on the extreme<br />
left side <strong>of</strong> the load. It must be visible at least 300<br />
feet to the front and rear during darkness. If the<br />
load extends more than 120 inches, there must be<br />
an amber lamp at the front and a red lamp at the<br />
rear visible at least 300 feet.<br />
If the vehicle is wider than 102 inches, a red or<br />
fluorescent flag not less than 12 inches square<br />
must be displayed at left front and left rear during<br />
daylight (CVC §25104).<br />
piggyBaCk trailers<br />
When any trailer is loaded upon another vehicle<br />
(piggyback) to be moved on any highway, the<br />
trailer must be securely bound to the vehicle to<br />
prevent the trailer from shifting, toppling over, or<br />
becoming unstable.
SectIOn 4: tRAnSPORtIng PASSengeRS SAFely<br />
This section is for all drivers who transport passengers<br />
This section contains general knowledge and safe<br />
driving practices for passenger vehicle drivers. You<br />
must take a test on the information contained in<br />
this section to get an endorsement on your CDL.<br />
Passenger vehicle drivers have special responsibilities.<br />
They are not only responsible for the condition<br />
and safe operation <strong>of</strong> their vehicle, but also for the<br />
safety <strong>of</strong> their passengers.<br />
This section does not contain information on air<br />
brakes. You must read Section 5 <strong>of</strong> this handbook<br />
for that information.<br />
Passenger Vehicle Endorsement Needed<br />
You must have a passenger vehicle endorsement for<br />
a passenger transportation vehicle which includes,<br />
but is not limited to, a bus, farm labor vehicle, or<br />
general public paratransit vehicle when the vehicle<br />
is designed, used, or maintained to carry more than<br />
10 passengers including the driver, for hire or for<br />
pr<strong>of</strong>it, or by any nonpr<strong>of</strong>it organization or group.<br />
If you take a driving test in a van designed, used,<br />
or maintained to carry 15 persons or less including<br />
the driver, you will be restricted to driving a<br />
small-size bus.<br />
VehIcle InSPectIOnS<br />
Safety is the most important and obvious reason to<br />
inspect your vehicle. Also, federal and state laws<br />
require inspection by the driver. Federal and state<br />
inspectors also inspect commercial vehicles. An<br />
unsafe vehicle can be put out <strong>of</strong> service until the<br />
driver or owner has it repaired. Do not risk your<br />
life or the lives <strong>of</strong> your passengers in an unsafe<br />
vehicle.<br />
Many drivers work for companies who have<br />
maintenance mechanics responsible for much <strong>of</strong> the<br />
detailed checks outlined in this section. However,<br />
as a driver you must still be able to check for and<br />
recognize many <strong>of</strong> the signs <strong>of</strong> unsafe operating<br />
conditions. The driver must also inspect the<br />
emergency equipment and make sure it is in place<br />
and ready for use.<br />
Before driving your bus, you must make sure it is<br />
safe. You must review the inspection report made by<br />
the previous driver. Only if defects reported earlier<br />
have been certified as repaired or not needed to<br />
be repaired, should you sign the previous driver’s<br />
report. This is your certification that the defects<br />
reported earlier have been fixed.<br />
types <strong>of</strong> inspeCtions<br />
Pre-trip inspection. Do a pre-trip inspection before<br />
each trip to find problems that could cause a collision<br />
or a breakdown. A pre-trip inspection should<br />
be routinely done before operating the vehicle.<br />
During a trip you should:<br />
• Watch gauges for signs <strong>of</strong> trouble.<br />
• Use your senses to check for problems (look,<br />
listen, smell, feel).<br />
• Check critical items when you stop:<br />
— tires, wheels, and rims<br />
— brakes<br />
— lights<br />
After-trip inspection and report. Inspect your<br />
transport vehicle at the end <strong>of</strong> the trip, day, or<br />
tour <strong>of</strong> duty. You must complete a written vehicle<br />
inspection report each day. It must include a listing<br />
<strong>of</strong> any problems you find.<br />
If you work for an interstate carrier and you drive<br />
buses, you must complete a written inspection<br />
report for each bus driven. The report must specify<br />
each bus and list any defect that would affect safety<br />
or result in a breakdown. If there are no defects,<br />
the report should say so.<br />
- 67 -
What to look for<br />
Tire problems. It is dangerous to drive with bad<br />
tires. Front tires must not be recapped, retreaded,<br />
or regrooved. Look for:<br />
• Too much or too little air pressure.<br />
• Tire wear. You need at least 4/32 inch tread<br />
depth in every major groove on front tires and<br />
2/32 inch on other tires. No fabric should show<br />
through the tread or sidewall.<br />
• Cuts or other damage.<br />
• Tread separation.<br />
• Dual tires that come in contact with each other<br />
or parts <strong>of</strong> the vehicle.<br />
• Mismatched sizes.<br />
• Radial and bias-ply tires used together.<br />
• Cut or cracked valve stems.<br />
• After a tire has been changed, stop a short<br />
while later and recheck the tightness <strong>of</strong> the<br />
wheel fasteners.<br />
Wheel and rim problems. A damaged rim can<br />
cause a tire to lose pressure or come <strong>of</strong>f. Look for:<br />
• Rust around wheel fasteners—check tightness.<br />
• Missing clamps, spacers, studs, or lugs.<br />
• Mismatched, bent, or cracked lock rings.<br />
• Signs <strong>of</strong> damage in wheels or rims that have<br />
had welding repairs.<br />
Suspension system defects. The suspension<br />
system supports the vehicle and its load and keeps<br />
the axles in place. Check for, if visible:<br />
• Cracked or broken spring hangers, if so<br />
equipped.<br />
• Missing or broken leaves in any leaf spring (if<br />
1/4 or more are missing or broken or a main<br />
leaf spring is broken, the vehicle will be put out<br />
<strong>of</strong> service during a state or federal inspection.<br />
However, any defect could be dangerous).<br />
• Leaking shock absorbers.<br />
• Air suspension systems that are damaged and/<br />
or leaking (do not move with less than 80 psi.)<br />
- 68 -<br />
Exhaust system defects. A broken exhaust system<br />
can let poisonous fumes into the bus or other<br />
passenger transport vehicle. If visible, check for:<br />
• Loose, broken, or missing exhaust pipes,<br />
mufflers, tailpipes, or vertical stacks.<br />
• Loose, broken, or missing mounting brackets,<br />
clamps, or bolts.<br />
• Exhaust system parts rubbing against fuel system<br />
parts, tires, electrical wiring, combustible<br />
parts, or other moving parts.<br />
• Exhaust system parts that are leaking.<br />
• Excessive smoke.<br />
Emergency equipment. Federal law requires that<br />
a bus carry:<br />
• Spare electrical fuses (unless the vehicle has<br />
circuit breaker).<br />
• Three red reflective triangles.<br />
• Properly charged and rated fire extinguisher,<br />
if required.<br />
inspeCtion method<br />
See Section 11 for inspection information and<br />
guidelines. Memory aids are shown on pages 155<br />
and 156. You may only use one <strong>of</strong> these when you<br />
take your CDL pre-trip test for your CDL at the<br />
DMV. The memory aid cannot include instructions<br />
on how to perform the pre-trip inspection. Also<br />
refer to Section 5 for Air Brake information.<br />
emergenCy exits<br />
Check the emergency exits for ease <strong>of</strong> operation,<br />
correct markings, and to ensure that any required<br />
buzzers or devices work properly.<br />
Never drive with an open emergency exit door<br />
or window. The “emergency exit” sign on an<br />
emergency door must be clearly visible. If there is<br />
a red emergency door light, it must work. Turn it<br />
on at night or any other time you use your outside<br />
lights.
Bus interior<br />
Always check the interior <strong>of</strong> the bus before driving<br />
to ensure rider safety. Aisles and stairwells must<br />
always be clear. The following parts <strong>of</strong> your bus<br />
must be in safe working condition:<br />
• Each handhold and railing.<br />
• Floor covering.<br />
• Signaling devices, including the rest room<br />
emergency buzzer, if the bus has a rest room.<br />
• Emergency exit handles.<br />
The seats must be safe for riders and must be<br />
securely fastened to the bus. The number <strong>of</strong> passengers<br />
(excluding infants in arms) must not exceed<br />
the number <strong>of</strong> safe and adequate seating spaces,<br />
unless standing in designated areas is allowed.<br />
The driver’s seat should have a seat belt. Ensure it<br />
works properly and remember to wear it. The law<br />
requires you to wear your seat belt.<br />
In the passenger compartment <strong>of</strong> a farm labor<br />
vehicle, all cutting tools or tools with sharp edges<br />
shall be placed in covered container. All other tools,<br />
equipment, or materials carried in the passenger<br />
compartment shall be secured to the body <strong>of</strong> the<br />
vehicle. The driver and all passengers must wear<br />
seat belts.<br />
ro<strong>of</strong> hatChes<br />
You may lock some emergency ro<strong>of</strong> hatches in a<br />
partly open position for fresh air. Do not leave them<br />
open as a regular practice. Keep in mind the bus’<br />
higher clearance while driving with them open.<br />
lOADIng AnD unlOADIng<br />
Bus drivers need to consider passenger safety<br />
during loading and unloading. Always ensure your<br />
passengers are safely on the bus before closing<br />
the door(s) and pulling away. Allow passengers<br />
enough time to sit down or brace themselves<br />
before departing. Starting and stopping should be<br />
as smooth as possible to avoid rider injury.<br />
standee lines<br />
Buses designed to allow standing must have a<br />
two-inch line on the floor or some other means <strong>of</strong><br />
showing riders where they cannot stand. This is<br />
called the standee line. All standing riders must<br />
stay behind it.<br />
at your destination<br />
When you arrive at your destination or intermediate<br />
stops announce:<br />
• The location.<br />
• Reason for stopping.<br />
• Next departure time.<br />
• Bus number.<br />
Remind riders to take their carry-ons with them<br />
if they are getting <strong>of</strong>f the bus. If the aisle is on a<br />
lower level than the seats, remind the riders to watch<br />
their step. It is best to tell them before coming to<br />
a complete stop.<br />
Charter bus drivers should not allow riders on the<br />
bus until departure time. This will help prevent<br />
theft or vandalism <strong>of</strong> the bus.<br />
Baggage<br />
Do not allow riders to leave carry-on baggage in a<br />
doorway or aisle. There should be nothing in the<br />
aisle that might trip riders. Secure baggage and<br />
freight in ways that avoid damage, and:<br />
• Allow the driver to move freely and easily.<br />
• Allow riders to exit by any window or door<br />
in an emergency.<br />
• Protect riders from injury if carry-ons fall or<br />
shift.<br />
- 69 -
hazardous materials<br />
Watch for cargo or baggage containing hazardous<br />
materials or wastes. Most hazardous materials or<br />
wastes cannot be carried on a bus.<br />
The Federal Hazardous Materials Table shows<br />
which materials are hazardous. They pose a risk to<br />
health, safety, and property during transportation.<br />
Charts showing all the labels start on page 131.<br />
Watch for the diamond-shaped hazard labels. Do<br />
not transport any hazardous substances requiring<br />
placards, unless you are sure the rules allow it and<br />
you have a HazMat endorsement on your CDL.<br />
Buses may carry small arms ammunition labeled<br />
ORM-D, emergency hospital supplies and drugs.<br />
You can carry small amounts <strong>of</strong> some other hazardous<br />
materials if the shipper cannot send them any<br />
other way. Buses must never carry:<br />
• Division 2.3 poisons, liquid Division 6.1<br />
poisons, tear gas, irritating materials.<br />
• More than 100 pounds <strong>of</strong> solid Division 6.1<br />
poisons.<br />
• Explosives in the space occupied by people,<br />
except small arms ammunition.<br />
• Labeled radioactive materials in the space<br />
occupied by people.<br />
• More than 500 pounds total <strong>of</strong> allowed hazardous<br />
materials, and no more than 100 pounds<br />
<strong>of</strong> any one class.<br />
Riders sometimes board a bus with an unlabeled<br />
hazardous material. They may not know it is unsafe.<br />
Do not allow riders to carry on hazards such as car<br />
batteries or gasoline. Oxygen medically prescribed<br />
for, and in the possession <strong>of</strong> a passenger, and in<br />
a container designed for personal use is allowed.<br />
Wheelchairs transported on buses (except school<br />
buses) must have brakes or other mechanical means<br />
<strong>of</strong> holding still while it is raised or lowered on<br />
the wheelchair platform. Batteries must be spill<br />
resistant and securely attached to the wheelchair.<br />
Wheelchairs may not use flammable fuel. School<br />
bus wheelchair regulations are in 13 CCR 1293.<br />
- 70 -<br />
animals<br />
Transporting animals is prohibited except for<br />
certified service, guide, or signal dogs used by<br />
physically challenged passengers. (CC 54.2)<br />
DRIVIng technIqueS<br />
Stop at railroad crossings. Stop your bus between<br />
15 and 50 feet before railroad crossings. Look and<br />
listen in both directions for trains. You should<br />
open your forward door if it improves your ability<br />
to see or hear an approaching train. After a train<br />
has passed but before crossing the tracks, be sure<br />
there is not another train coming in either direction<br />
on other tracks. If your vehicle has a manual<br />
transmission, you must not change gears while<br />
crossing the tracks. You should always slow down<br />
and check for other vehicles at railroad crossings<br />
marked as “exempt.”<br />
managing spaCe<br />
How far ahead to look. Most good drivers look<br />
12 to 15 seconds ahead. That means looking ahead<br />
the distance you will travel in 12 to 15 seconds. At<br />
lower speeds, that is about one block. At highway<br />
speeds, it is about a quarter <strong>of</strong> a mile. If you are<br />
not looking that far ahead, you may have to stop<br />
too quickly or make quick lane changes. Looking<br />
12 to 15 seconds ahead does not mean that you<br />
should not pay attention to things that are closer.<br />
Good drivers shift their attention back and forth,<br />
from near and to far.<br />
Space to the sides. Buses are <strong>of</strong>ten wide and take<br />
up most <strong>of</strong> a lane. Safe drivers will manage what<br />
little space they have. You can do this by keeping<br />
your vehicle centered in your lane, and avoid<br />
traveling next to others when possible.<br />
How much space? How much space should you<br />
keep in front <strong>of</strong> you? One good rule says you need<br />
at least one second for each 10 feet <strong>of</strong> vehicle<br />
length at speeds below 40 mph. At higher speeds,<br />
you must add one second for safety. For example,<br />
if you are driving a 40-foot bus at 30 mph and the<br />
road is dry and visibility is good, you should leave<br />
4 seconds between you and the vehicle ahead.
If you are driving a 40 foot bus at 50 mph and<br />
the road is dry and visibility is good, you should<br />
keep at least 5 seconds <strong>of</strong> space in front <strong>of</strong> your<br />
bus to be safe. If you are driving a 30- foot bus<br />
on a highway at 45 mph and the road is dry and<br />
visibility is good, you should keep at least 4 seconds<br />
<strong>of</strong> space in front <strong>of</strong> your bus to be safe.<br />
Slippery surfaces. It will take longer to stop and<br />
it will be harder to turn without skidding when<br />
the road is slippery. You must drive slower to be<br />
able to stop in the same distance as on a dry road.<br />
Wet roads can double the stopping distance. Allow<br />
yourself much more space than needed for ideal<br />
driving conditions when the road is slippery.<br />
the effeCt <strong>of</strong> speed on stopping<br />
distanCe<br />
The faster you drive, the greater the impact or<br />
striking power <strong>of</strong> your bus. When you double<br />
your speed from 20 to 40 mph, the impact is four<br />
times greater and the stopping distance is four<br />
times longer. Triple the speed from 20 to 60 mph<br />
and the impact and stopping distance is nine times<br />
greater. High speeds greatly increase the severity<br />
<strong>of</strong> collisions and stopping distance. By slowing<br />
down, you can reduce the stopping distance.<br />
driving at night<br />
At night, your headlights will usually be the main<br />
source <strong>of</strong> light for you to see by and for others to<br />
see you. You can’t see nearly as much at night with<br />
your headlights as you see in the daytime. With<br />
low beams, you can see ahead about 250 feet and<br />
with high beams about 300-500 feet. You must<br />
slow down to keep your stopping distance within<br />
your sight range. This means slowing down to be<br />
Figure 4-1<br />
EXEMPT CROSSINGS<br />
able to stop within the range <strong>of</strong> your headlights.<br />
When you have your high beams on and must dim<br />
them for oncoming traffic, you should slow down<br />
to keep your stopping distance within the range<br />
<strong>of</strong> your headlights.<br />
hazards<br />
What is a hazard? A hazard is any road condition or<br />
other road user (e.g., driver, bicyclist, or pedestrian)<br />
that is a possible danger.<br />
using your mirrors<br />
When you use your mirrors while driving on the<br />
road, check them quickly. Look back and forth<br />
regularly as part <strong>of</strong> your scan for potential hazards.<br />
Do not focus on the mirrors for too long. Otherwise,<br />
you will travel quite a distance without knowing<br />
what is happening ahead.<br />
Many buses have convex mirrors that show a wider<br />
area than flat mirrors. This is <strong>of</strong>ten helpful. But<br />
remember, these mirrors make things seem smaller<br />
and farther away than they really are.<br />
railroad Crossings<br />
No stop needs to be made (See Figure 4-1):<br />
• At railroad tracks which run alongside and on<br />
the roadway within a business or residence<br />
district.<br />
• Where a traffic <strong>of</strong>ficer or flagman is directing<br />
traffic.<br />
• If the railroad track is within the intersection<br />
and the traffic control signal shows green.<br />
• At railroad crossings marked “exempt<br />
crossing.”<br />
NOT EXEMPT<br />
- Official traffic control signal<br />
- Railroad crossing warning device<br />
- 71 -
draWBridges<br />
Stop at drawbridges that do not have a signal light<br />
or traffic control attendant. Stop at least 50 feet<br />
before the draw <strong>of</strong> the bridge. Look to see if the<br />
draw is completely closed before crossing. You<br />
do not need to stop, but must slow down when:<br />
• There is a traffic light showing green.<br />
• The bridge has an attendant or traffic <strong>of</strong>ficer<br />
that controls traffic whenever the bridge opens.<br />
Common Causes <strong>of</strong> Bus Collisions<br />
Collisions <strong>of</strong>ten happen at intersections. Use<br />
caution, even if a signal or stop sign controls other<br />
traffic. Remember the clearance your bus needs,<br />
and watch for poles and tree limbs at stops. Know<br />
the size <strong>of</strong> the gap your bus needs to accelerate<br />
and merge with traffic. Never assume other drivers<br />
will brake to give you room when you signal or<br />
start to pull out.<br />
Collisions on curves result from excessive speed,<br />
<strong>of</strong>ten when rain or snow has made the road slippery.<br />
Every banked curve has a safe design speed. The<br />
design speed is <strong>of</strong>ten less than the posted speed<br />
for the curve. Although the posted speed is safe<br />
for smaller vehicles, it may be too high for many<br />
buses. With good traction, the bus may roll over;<br />
with poor traction, it will simply slide <strong>of</strong>f the curve.<br />
Reduce speed for curves! If your bus leans toward<br />
the outside on a banked curve, you are driving too<br />
fast. The best way to control the bus on curves is<br />
to slow to a safe speed before entering the curve,<br />
and then accelerate slightly through it.<br />
PASSengeR mAnAgement<br />
Passenger supervision is necessary while driving.<br />
Many charter and intercity carriers have passenger<br />
comfort and safety rules. Explaining the rules at<br />
the start <strong>of</strong> the trip will help to avoid trouble later.<br />
While driving, scan the interior <strong>of</strong> your bus as well<br />
as the road ahead, to the sides and to the rear. You<br />
may have to remind riders about the rules or to<br />
keep arms and heads inside the bus.<br />
Riders can stumble when getting on or <strong>of</strong>f and when<br />
the bus starts or stops. Caution riders to watch their<br />
step when leaving the bus. Wait for them to sit<br />
- 72 -<br />
down or brace themselves before starting. Starting<br />
and stopping should be as smooth as possible to<br />
avoid rider injury.<br />
unruly passengers<br />
Occasionally, you may have a rider who is unruly<br />
or under the influence <strong>of</strong> alcohol and/or drugs. You<br />
must ensure this rider’s safety as well as that <strong>of</strong><br />
others. Do not discharge a rider where it would<br />
be unsafe. It may be safer to unload a passenger<br />
at the next scheduled stop, or a well lighted area<br />
where there are other people.<br />
mIScellAneOuS<br />
RequIRementS<br />
The nozzle <strong>of</strong> the fuel hose must be in contact<br />
with the intake <strong>of</strong> the fuel tank when refueling.<br />
No driver or motor carrier shall permit a vehicle<br />
to be fueled while:<br />
• The engine is running.<br />
• A radio on the bus is transmitting.<br />
• The bus is close to any open flame or ignition<br />
source (including persons who are smoking).<br />
• Passengers are aboard any bus (except one<br />
fueled by diesel in an open area or in a structure<br />
open at both ends).<br />
Brake door interloCk<br />
Urban mass transit coaches may have a brake and<br />
accelerator interlock system. The interlock applies<br />
the brakes and holds the throttle in idle position<br />
when the rear door is open. The interlock releases<br />
when you close the rear door. Do not use this safety<br />
feature in place <strong>of</strong> the parking brake when safety<br />
requires the use <strong>of</strong> the parking brake.<br />
prohiBited praCtiCes<br />
Do not engage in unnecessary conversation with<br />
passengers or any other distracting activity while<br />
driving.<br />
Do not tow or push a disabled bus with riders<br />
aboard the vehicle, unless discharging the passengers<br />
would be unsafe. Follow your employer’s<br />
guidelines on towing or pushing a disabled bus.
SectIOn 5: AIR BRAkeS<br />
This section is for drivers who drive or tow vehicles with air brakes<br />
This section tells you about air brakes. If you drive<br />
or tow a commercial vehicle(s) equipped with air<br />
brakes, you will be tested on the information in<br />
this section. If you want to tow a trailer with air<br />
brakes, you must also read Section 6: Combination<br />
Vehicles.<br />
Air brakes use compressed air to make the brakes<br />
work and must be well maintained and used<br />
correctly.<br />
Air brake systems are three braking systems<br />
combined:<br />
• The service brake system applies and releases<br />
the brakes when you use the brake pedal during<br />
normal driving.<br />
• The parking brake system applies and releases<br />
the parking brakes when you use the parking<br />
brake control.<br />
• The emergency brake system uses parts <strong>of</strong> the<br />
service and parking brake systems to stop the<br />
vehicle in the event <strong>of</strong> a brake system failure.<br />
CDL air brake requirements. For CDL purposes,<br />
a vehicle’s air brake system must meet the above<br />
definition and must contain the following which<br />
will be checked during the pre-trip inspection test:<br />
• Air gauges.<br />
• Low pressure warning device(s).<br />
If the vehicle you use for your driving test does<br />
not have these components, your vehicle will not<br />
be considered as having an air brake system and<br />
you will have a “No Air Brakes” restriction on<br />
your CDL.<br />
Note: A full service brake application must deliver<br />
to all brake chambers not less than 90 percent <strong>of</strong><br />
the air reservoir pressure remaining with the brakes<br />
applied (CVC §26502).<br />
the AIR BRAke SyStem<br />
An air brake system is a system that uses air as a<br />
way to transmit pressure from the driver’s control<br />
to the service brake. It also includes an air-overhydraulic<br />
brake system.<br />
There are many parts to an air brake system. You<br />
should know about the parts discussed here.<br />
air Compressor and governor<br />
The air compressor pumps air into the air storage<br />
tanks (reservoirs). The air compressor is driven<br />
by the engine through gears or a V-belt. The<br />
compressor may be air cooled or may be cooled<br />
by the engine cooling system. It may have its own<br />
oil supply, or be lubricated by engine oil. If the<br />
compressor has its own oil supply check the oil<br />
level before driving.<br />
The governor controls when the air compressor<br />
will pump air into the air storage tanks. When air<br />
tank pressure rises to the “cut-out” (fully charged)<br />
level (no higher than 130 pounds per square inch,<br />
or “psi”), the governor stops the compressor from<br />
building air pressure. When the tank pressure falls<br />
to the “cut-in” pressure (no lower than 85 psi), the<br />
governor allows the compressor to start building<br />
pressure again.<br />
- 73 -
air storage tanks and air tanks<br />
drains<br />
Air storage tanks are used to hold compressed air.<br />
The number and size <strong>of</strong> air tanks varies among<br />
vehicles. The tanks will hold enough air to allow<br />
the brakes to be used several times even if the<br />
compressor stops working.<br />
Compressed air usually has some water and some<br />
compressor oil in it. This is bad for the air brake<br />
system. For example, the water can freeze in cold<br />
weather and cause brake failure. The water, oil,<br />
etc., tends to collect in the bottom <strong>of</strong> the air tank.<br />
Each air tank is equipped with a drain valve in the<br />
bottom. There are three types:<br />
• Manually operated by turning a quarter turn,<br />
shown in Figure 5-1, or by pulling a cable. You<br />
must drain the tanks yourself at the end <strong>of</strong> each<br />
day <strong>of</strong> driving.<br />
Reservoir<br />
• Automatic. The water and oil are automatically<br />
expelled from the valve (these valves are<br />
equipped for manual draining as well).<br />
• Air Dryer. The water and oil are automatically<br />
expelled from a spit valve. This type <strong>of</strong> valve<br />
“spits” out water and air each time the governor<br />
cycles.<br />
The automatic types are available with electric<br />
heating devices. These help prevent freeze up <strong>of</strong><br />
the automatic drain in cold weather.<br />
- 74 -<br />
Manual Draining Valve<br />
Air Tank<br />
Figure 5-1 Manual Drain Valve<br />
alCohol evaporator<br />
Some air brake systems have an alcohol evaporator<br />
to put alcohol into the air system. This helps to<br />
reduce the risk <strong>of</strong> ice in air brake storage tanks,<br />
valves, and other parts during cold weather. Ice<br />
inside the system can cause brake failure.<br />
Check the alcohol container and fill up as necessary<br />
every day during cold weather. Daily air tank<br />
drainage is still needed to get rid <strong>of</strong> water and oil<br />
(unless the system has automatic drain valves).<br />
safety valve<br />
A safety relief valve is installed in the first tank the<br />
air compressor pumps air into. The safety valve<br />
protects the tank and the rest <strong>of</strong> the system from<br />
too much air pressure. The valve is usually set to<br />
open at 150 psi If the safety valve releases air,<br />
something is wrong with the brake system.<br />
Brake pedal<br />
You apply the brakes by pushing down the brake<br />
pedal (also called the foot valve or treadle valve).<br />
The harder you push down on the pedal, the more<br />
air pressure is applied from the storage tanks into<br />
the brake chambers. Letting up on the brake pedal<br />
exhausts the air pressure from the brake chambers<br />
and releases the brakes. The air pressure used to<br />
apply the brakes must be built up in the reservoirs<br />
by the compressor. Pressing and releasing the pedal<br />
(fanning) can unnecessarily let air out faster than<br />
the compressor can replace it. If the pressure gets<br />
too low, the brakes will not work.<br />
When you push the brake pedal down, two forces<br />
push back against your foot. One force comes<br />
from a spring in the valve. The second force comes<br />
from the air pressure going to the brake chambers.<br />
This lets you feel how much air pressure is being<br />
applied to the brake chambers. This “feel” does<br />
not tell you how much force is being applied to the<br />
brakes because that depends on brake adjustment.
drum Brakes<br />
Drum brakes (foundation brakes) may be used at<br />
each wheel. The most common type is the S-cam<br />
drum brake (so called because <strong>of</strong> its shape) shown<br />
in Figure 5-2.<br />
Brake drums, shoes, and linings. Brake drums<br />
are located on each end <strong>of</strong> the vehicle’s axles.<br />
The wheels are bolted to the drums. The braking<br />
mechanism is inside the drum. To stop, the brake<br />
shoes and linings are pushed against the inside <strong>of</strong><br />
the drum. This causes friction which slows the<br />
vehicle (and creates heat). The heat a drum can<br />
take without damage depends on how hard and<br />
how long the brakes are used. Too much heat can<br />
cause brake failure.<br />
S-cam brakes. When you push the brake pedal,<br />
air is let into each brake chamber (Figure 5-2).<br />
Air pressure pushes the rod out, moving the slack<br />
adjuster, thus twisting the brake cam shaft. This<br />
turns the S-cam. The S-cam forces the brake shoes<br />
away from one another and presses them against<br />
the inside <strong>of</strong> the brake drum. When you release the<br />
brake pedal, the S-cam rotates back and a spring<br />
pulls the brake shoes away from the drum, letting<br />
the wheels roll freely again.<br />
Brake Drum<br />
Axle<br />
Return Spring<br />
CamLaster. The CamLaster brake has two key<br />
design differences over traditional S-cam brakes.<br />
One feature is a completely internal adjustment<br />
system which is designed to continually keep the<br />
brake in proper adjustment. S-cam brakes, on the<br />
other hand, require an external slack adjuster. The<br />
second feature is a unique cam design that applies<br />
the brake shoe. Unlike a standard drum brake that<br />
has either a single or double anchor-pin brake,<br />
CamLaster slides the shoes down an inclined ramp<br />
on a cam to evenly contact the brake drum.<br />
Wedge brakes. The brake chamber push rod<br />
pushes a wedge directly between the ends <strong>of</strong> two<br />
brake shoes. This shoves them apart and against the<br />
inside <strong>of</strong> the brake drum. Wedge brakes may have<br />
a single brake chamber, or two brake chambers,<br />
pushing wedges in at both ends <strong>of</strong> the brake shoes.<br />
Wedge type brakes may be self-adjusting or may<br />
require manual adjustment.<br />
Disc brakes. In air-operated disc brakes, air pressure<br />
acts on a brake chamber and slack adjuster,<br />
like S-cam brakes. But instead <strong>of</strong> the S-cam, a<br />
“power screw” is used. The pressure <strong>of</strong> the brake<br />
chamber on the slack adjuster turns the power<br />
screw. The power screw clamps the disc or rotor<br />
between the brake lining pads <strong>of</strong> a caliper, similar<br />
to a large C-clamp.<br />
Brake Chamber<br />
Figure 5-2 S-cam Air Brake<br />
Push Rod<br />
Brake Cam<br />
Cam Roller<br />
Slack Adjuster<br />
Brake Shoe<br />
Brake Shoe Lining<br />
Adjusting<br />
Nut<br />
- 75 -
one-Way CheCk valve<br />
This device allows air to flow in one direction only.<br />
All air tanks on air-braked vehicles must have a<br />
check valve located between the air compressor<br />
and the first reservoir (CVC §26507). The check<br />
valve keeps air from going out if the air compressor<br />
develops a leak.<br />
air supply pressure gauge<br />
All air-braked vehicles have an air supply pressure<br />
gauge connected to the air tank. If the vehicle has<br />
a dual air brake system, there will be a gauge for<br />
each half <strong>of</strong> the system or, sometimes, a single<br />
gauge with two needles. Dual systems will be<br />
discussed later. These gauges tell you how much<br />
pressure is in the air tanks.<br />
appliCation pressure gauge<br />
This gauge shows how much air pressure you<br />
are applying to the brakes (some vehicles do not<br />
have this gauge). When going down steep grades,<br />
increasing brake pressure to hold the same speed<br />
means the brakes are fading. The need for increased<br />
pressure can also be caused by brakes out <strong>of</strong><br />
adjustment, air leaks, or mechanical problems.<br />
loW air pressure Warning deviCe<br />
A low air pressure warning device is required on<br />
vehicles with air brakes. A warning device which<br />
you can see must come on when the air supply<br />
pressure drops between 55 to 75 psi or one half<br />
the compressor governor cut-out pressure on older<br />
vehicles. The warning is usually a red light. A<br />
buzzer may also come on.<br />
Another type <strong>of</strong> warning is the “wig wag.” This<br />
device drops a mechanical arm into your view<br />
when the pressure in the system drops between<br />
55 to 75 psi An automatic wig wag will rise out<br />
<strong>of</strong> your view when the pressure in the system goes<br />
above 55 or more psi. The manual reset type must<br />
be placed in the “out <strong>of</strong> view” position manually.<br />
It will not stay in place until the pressure in the<br />
system is between 55 to 75 psi.<br />
- 76 -<br />
On large buses, it is common for the low pressure<br />
warning devices to signal at 80 to 85 psi.<br />
Farm labor vehicles and Type I school buses must<br />
have both an audible and visual type warning<br />
device.<br />
stop light sWitCh<br />
<strong>Driver</strong>s behind you must be warned when you apply<br />
your brakes. The air brake system does this with<br />
an electric switch that works by air pressure. The<br />
switch turns on the brake lights when you apply<br />
the air brakes.<br />
front Brake limiting valve<br />
Some vehicles made before 1975 have a front<br />
brake limiting valve and a control in the cab. The<br />
control is usually marked “normal” and “slippery.”<br />
When you put the control in the slippery position,<br />
the limiting valve cuts the normal air pressure to<br />
the front brakes by half. Limiting valves are used<br />
to reduce the chance <strong>of</strong> the front wheels skidding<br />
on slippery surfaces. However, they also reduce<br />
the stopping power <strong>of</strong> the vehicle. Front wheel<br />
braking is good under all conditions. Tests have<br />
shown front wheel skids from braking are not<br />
likely even on ice. Make sure the control is in the<br />
normal position to have normal stopping power.<br />
Many vehicles have automatic front wheel limiting<br />
valves. They reduce the air to the front brakes<br />
except when the brakes are stepped on very hard<br />
(60 psi or more application pressure). These valves<br />
cannot be controlled by the driver. (Note: Some<br />
vehicles are manufactured with no front brakes.)
spring Brakes<br />
All trucks, truck tractors, and buses using air pressure<br />
to apply the service brakes must be equipped<br />
with emergency brakes and parking brakes. The<br />
parking brake must be held on by mechanical<br />
force (because air pressure can eventually leak<br />
away). Spring brakes are usually used to meet the<br />
emergency and parking brake requirements. When<br />
driving, powerful springs are held back by air<br />
pressure. If the air pressure is removed, the springs<br />
put on the brakes. A parking brake control in the<br />
cab allows the driver to let the air out <strong>of</strong> the spring<br />
brakes. This lets the springs put on the brakes. A<br />
leak in the air brake system will generally cause<br />
the springs to put on the brakes.<br />
Tractor and straight truck spring brakes will come<br />
fully on when air pressure drops to a range <strong>of</strong> 20 to<br />
45 psi (typically 20 to 30 psi). Do not wait for the<br />
brakes to come on automatically. When the low air<br />
pressure warning light and buzzer first come on,<br />
bring the vehicle to a safe stop right away while<br />
you can still control the brakes.<br />
The braking power <strong>of</strong> spring brakes depends on<br />
the brakes being in adjustment. If the brakes are<br />
not adjusted, neither the regular brakes nor the<br />
emergency/parking brakes will work correctly.<br />
parking Brake Controls<br />
In newer vehicles with air brakes, set the parking<br />
brakes using a diamond shaped, yellow, push-pull<br />
control knob. Pull the knob out to set the parking<br />
brakes (spring brakes), and push it in to release<br />
them. On older vehicles, the parking brakes may<br />
be controlled by a lever. Use the parking brakes<br />
whenever you park.<br />
Caution. If your vehicle is not equipped with an<br />
anti-compound system (only in vehicles with air<br />
brakes), you should not push the brake pedal down<br />
when the spring brakes are on. If you do, the brakes<br />
could be damaged by the combined forces <strong>of</strong> the<br />
springs and the air pressure. Many brake systems<br />
are designed so this will not happen. But not all<br />
systems are set up that way and those that are may<br />
not always work. It is much better to develop the<br />
habit <strong>of</strong> not pushing the brake pedal down when<br />
the spring brakes are on.<br />
Modulating control valves. In some vehicles a<br />
control handle on the dash board may be used to<br />
apply the spring brakes gradually. This is called a<br />
modulating valve. It is spring loaded so you have<br />
a feel for the braking action. The more you move<br />
the control lever, the harder the spring brakes<br />
come on. They work this way so you can control<br />
the spring brakes if the service brakes fail. When<br />
parking a vehicle with a modulating control valve,<br />
move the lever as far as it will go and hold it in<br />
place with the locking device.<br />
Dual parking control valve. When main air<br />
pressure is lost, the spring brakes come on. Some<br />
vehicles, such as buses, have a separate air tank<br />
which can be used to release the spring brakes. This<br />
is so you can move the vehicle in an emergency.<br />
One <strong>of</strong> the valves is a push-pull type and is used<br />
to put on the spring brakes for parking. The other<br />
valve is spring loaded in the “out” position. When<br />
you push the control in, air from the separate air<br />
tank releases the spring brakes so you can move.<br />
When you release the button, the spring brakes<br />
come on again. There is only enough air in the<br />
separate tank to do this a few times.<br />
DuAl AIR BRAke SyStemS<br />
Most newer heavy-duty vehicles use dual air brake<br />
systems for safety. A dual air brake system has two<br />
separate air brake systems which use a single set <strong>of</strong><br />
brake controls. Each system has its own air tanks,<br />
hoses, lines, etc. One system typically operates the<br />
regular brakes on the rear axle or axles. The other<br />
system operates the regular brakes on the front axle<br />
and possibly one rear axle. Both systems supply<br />
air to the trailer, if there is one. The first system is<br />
called the primary system and the other is called<br />
the secondary system.<br />
Before driving a vehicle with a dual air system,<br />
allow time for the air compressor to build up a<br />
minimum <strong>of</strong> 100 psi pressure in both the primary<br />
and secondary systems. Watch the primary and<br />
secondary air pressure gauges (or needles, if the<br />
system has two needles in one gauge). The low<br />
air pressure warning light and buzzer should shut<br />
<strong>of</strong>f when air pressure in both systems rises to a<br />
value set by the manufacturer. This value must be<br />
greater than 55 psi.<br />
- 77 -
The warning system devices should come on before<br />
the air pressure drops below 55 psi in either system.<br />
If one air system is very low on pressure, either<br />
the front or the rear brakes will not be operating<br />
fully. This means it will take you longer to stop.<br />
Bring the vehicle to a safe stop and have the air<br />
brake system fixed.<br />
antiloCk Braking systems (aBs)<br />
Truck tractors with air brakes built on or after<br />
March 1, 1997, and other air brakes vehicles (trucks,<br />
buses, trailers, and converter dollies) built on or<br />
after March 1, 1998, are required to be equipped<br />
with ABS. Many commercial vehicles built before<br />
these dates have been voluntarily equipped with<br />
ABS. Check the certification label for the date<br />
<strong>of</strong> manufacture to determine if your vehicle is<br />
equipped with ABS. ABS is a computerized system<br />
that keeps your wheels from locking up during<br />
hard brake applications. Some ABS information:<br />
• Vehicles with ABS have yellow malfunction<br />
lamps to tell you if something isn’t working.<br />
• Tractors, trucks, and buses have yellow ABS<br />
malfunction lamps on the instrument panel<br />
when you turn on the ignition.<br />
• Trailers will have yellow ABS malfunction<br />
lamps on either the left side, front or rear corner.<br />
• Dollies manufactured on or after March 1,<br />
1998, are required to have a malfunction lamp<br />
on the left side.<br />
On newer vehicles, the malfunction lamp comes<br />
on at start-up for a bulb check, and then goes out<br />
quickly. On older systems, the lamp could stay on<br />
until you are driving over five mph.<br />
• If the lamp stays on after the bulb check, or<br />
goes on while you are driving, you may have<br />
lost ABS control at one or more wheels.<br />
• In the case <strong>of</strong> towed units manufactured<br />
before ABS were required by the <strong>Department</strong><br />
<strong>of</strong> Transportation, it may be difficult to tell if<br />
the unit is equipped with ABS. Look under the<br />
vehicle for the electronic control unit (ECU)<br />
and wheel speed sensor wires coming from<br />
the back <strong>of</strong> the brakes.<br />
- 78 -<br />
• ABS is an addition to your normal brakes.<br />
It does not decrease or increase your normal<br />
braking capability. ABS only activates when<br />
wheels are about to lock up and changes the<br />
way you brake in an emergency.<br />
• ABS does not shorten your stopping distance,<br />
it helps keep the vehicle under control during<br />
hard braking.<br />
cOmBInAtIOn VehIcle AIR<br />
BRAkeS<br />
The trailer hand valve (also called the trolley<br />
valve or Johnson bar) works the trailer brakes. The<br />
trailer hand valve should be used only to test the<br />
trailer brakes. Do not slow a tractor and semitrailer<br />
combination by using only the trailer hand brake.<br />
Do not use it in driving because <strong>of</strong> the danger <strong>of</strong><br />
making the trailer skid. The foot brake sends air<br />
to all <strong>of</strong> the brakes on the vehicle including the<br />
trailers. There is much less danger <strong>of</strong> causing a<br />
skid or jackknife when using just the foot brake.<br />
trailer hand valve<br />
Never use the hand valve for parking, because all<br />
the air might leak out, unlocking the brakes (in<br />
trailers that do not have spring brakes). Always<br />
use the parking brakes when parking. If the trailer<br />
does not have spring brakes, use wheel chocks to<br />
keep the trailer from moving.<br />
traCtor proteCtion valve<br />
The tractor protection valve keeps air in the tractor<br />
or truck if the trailer breaks away or develops a bad<br />
leak. The tractor protection valve is controlled by<br />
the trailer air supply control valve in the cab. The<br />
control valve allows you to open and shut the tractor<br />
protection valve. It will close automatically if air<br />
pressure is low (in the range <strong>of</strong> 20 to 45 psi). When<br />
the valve closes, it stops any air from escaping and<br />
lets the air out <strong>of</strong> the trailer emergency line which<br />
causes the trailer emergency brakes to come on.<br />
(Emergency brakes are covered later.)
The trailer air supply control on newer vehicles<br />
is a red 8-sided knob which controls the tractor<br />
protection valve. Push it in to supply the trailer<br />
with air, and pull it out to shut the air <strong>of</strong>f and put<br />
on the trailer emergency brakes. The valve will<br />
pop out and close the tractor protection valve<br />
when the air pressure drops into the range 20 to 45<br />
psi. Emergency valves on older vehicles may not<br />
operate automatically. There may be a lever rather<br />
than a knob. The normal position is used for pulling<br />
a trailer. The emergency position is used to shut<br />
the air <strong>of</strong>f and put on the trailer emergency brakes.<br />
trailer air lines<br />
Every combination vehicle has two air lines—the<br />
service line and the emergency line. They run<br />
between each vehicle (tractor to trailer, trailer to<br />
dolly, dolly to second trailer, etc.).<br />
Service air line (normally blue). The service line<br />
(also called the control line or signal line) carries<br />
air which is controlled by the foot brake or the<br />
trailer hand brake. The pressure in the service line<br />
will similarly change depending on how hard you<br />
press the foot brake or hand valve. The service<br />
line is connected to a relay valve on the trailer to<br />
apply more or less pressure to the trailer brakes.<br />
The relay valve connects the trailer air tanks to<br />
the trailer air brakes. As pressure builds up in the<br />
service line, the relay valve opens and sends air<br />
pressure from the trailer air tank to the trailer brake<br />
chambers, putting on the trailer brakes.<br />
Emergency air line (normally red). The emergency<br />
line has two purposes. First, it supplies air<br />
to the trailer air tanks and secondly, the emergency<br />
line controls the emergency brakes on combination<br />
vehicles. Loss <strong>of</strong> air pressure in the emergency<br />
line causes the trailer emergency brakes to come<br />
on. The pressure loss could be caused by a trailer<br />
breaking loose, tearing apart the emergency air<br />
hose. It could also be caused by a hose, metal<br />
tubing, or other part which breaks, letting the air<br />
out. When the emergency line loses pressure, it<br />
causes the tractor protection valve to close (the<br />
air supply knob will pop out).<br />
hose Couplers (glad hands)<br />
Glad hands are coupling devices used to connect<br />
the service and emergency air lines from the truck<br />
or tractor to the trailer. The couplers have a rubber<br />
seal which prevents air from escaping. Clean the<br />
couplers and rubber seals before a connection is<br />
made. When connecting the glad hands, press the<br />
two seals together with the couplers at a 90° angle<br />
to each other. A turn <strong>of</strong> the glad hand attached to<br />
the hose will join and lock the couplers.<br />
It is very important to keep the air supply clean.<br />
To keep the air supply clean, some vehicles have<br />
“dead end” or dummy couplers to which the hoses<br />
may be attached when they are not in use. This<br />
will prevent water and dirt from getting into the<br />
coupler and the air lines. Use the dummy couplers,<br />
if available, when the air lines are not connected<br />
to a trailer.<br />
To avoid mistakes, metal tags are sometimes<br />
attached to the lines with the words service or<br />
emergency stamped on them. Sometimes colors<br />
are used. Blue is used for the service lines and red<br />
for the emergency lines.<br />
If you do cross the air lines, supply air will be<br />
sent to the service line instead <strong>of</strong> going to charge<br />
the trailer air tanks. Air will not be available to<br />
release the trailer spring brakes (parking brakes).<br />
If the spring brakes don’t release when you push<br />
the trailer air supply control, check the air line<br />
connections.<br />
Older trailers do not have spring brakes. If the air<br />
supply in the trailer air tank has leaked away there<br />
will be no emergency brakes and the trailer wheels<br />
will turn freely. If you crossed the air lines, you<br />
could drive away but you would not have trailer<br />
brakes. Before driving, always test the trailer brakes<br />
with the hand valve or by pulling the air supply<br />
control. Pull gently against them in a low gear to<br />
make sure the brakes work.<br />
- 79 -
trailer air tanks<br />
Each trailer and converter dolly has one or more air<br />
tanks. They are filled by the emergency supply line<br />
from the tractor and they provide the air pressure<br />
used to operate trailer brakes. Air pressure is sent<br />
from the air tanks to the brakes by relay valves. The<br />
pressure in the service line tells how much pressure<br />
the relay valves should send to the trailer brakes.<br />
The pressure in the service line is controlled by<br />
the brake pedal and the trailer hand brake.<br />
It is important that you do not let water or oil<br />
build up in the air tanks. If you do, the brakes<br />
may not work. Each tank has a drain valve on it,<br />
and must be drained every day. If your tanks have<br />
automatic drains, they will keep most moisture<br />
out. However, you should still open the drains to<br />
check for moisture.<br />
shut-<strong>of</strong>f valves<br />
Shut-<strong>of</strong>f valves (also called cut-out cocks) are used<br />
in the service and supply air lines at the back <strong>of</strong><br />
the trailers used to tow other trailers. These valves<br />
permit closing the air lines when no other trailer<br />
is being towed. You must check that all shut-<strong>of</strong>f<br />
valves are in the open position except the ones at<br />
the back <strong>of</strong> the last trailer, which must be closed.<br />
serviCe, spring, and emergenCy<br />
Brakes<br />
Newer trailers have spring brakes just like trucks<br />
and truck tractors. However, converter dollies and<br />
trailers built before 1975 are not required to have<br />
spring brakes. These have emergency brakes which<br />
work from the air stored in the trailer air tank. The<br />
emergency brakes come on whenever air pressure<br />
in the emergency line is lost. These trailers have<br />
no parking brake. The emergency brakes come<br />
on whenever the air supply knob is pulled out or<br />
the trailer is disconnected. The brakes will hold<br />
only as long as there is air pressure in the trailer<br />
air tank. Eventually, the air will leak away and<br />
then there will be no brakes. It is very important<br />
that you use wheel chocks when you park trailers<br />
without spring brakes.<br />
- 80 -<br />
A major leak in the emergency line will cause the<br />
tractor protection valve to close and the trailer<br />
emergency brakes to come on.<br />
You may not notice a major leak in the service line<br />
until you try to put the brakes on. Then, the air<br />
loss from the leak will lower the air tank pressure<br />
quickly. If it goes low enough, the trailer emergency<br />
brakes will come on.<br />
InSPectIng the AIR BRAke<br />
SyStem<br />
Use the basic inspection procedures described in<br />
Sections 2 or 4 to inspect your vehicle. There are<br />
more items to inspect on a vehicle with air brakes<br />
than one without them.<br />
engine Compartment<br />
Check air compressor drive belt. If the air<br />
compressor is belt-driven, check for excessive<br />
wear, cracks, and tightness <strong>of</strong> the belt.<br />
Walkaround<br />
Check brake adjustment on S-cam brakes. Park<br />
on level ground and chock the wheels to prevent the<br />
vehicle from moving. Release the parking brakes<br />
on the truck or tractor and the emergency brakes<br />
on the trailer so you can mark the push rod in the<br />
unapplied position. Make a mark on the push rod<br />
with a chalk or scribe close to the brake chamber<br />
where the push rod comes out <strong>of</strong> the air chamber.<br />
Apply the truck or tractor parking brake and the<br />
trailer emergency braking system. Measure the<br />
travel <strong>of</strong> the push rod from the brake chamber<br />
and the mark you made with the chalk or scribe<br />
at each brake chamber. The push rod should move<br />
less than one inch on most brakes. (Smaller brake<br />
cams will have less push rod travel.)<br />
If the brake push rod exceeds the required adjustment,<br />
adjust it or have it adjusted. (You are not<br />
expected to adjust them during the pre-trip test but<br />
you are expected to describe how to check that the<br />
brake push rod is adjusted properly.) Vehicles with<br />
too much brake slack can be very hard to stop.<br />
Out-<strong>of</strong>-adjustment brakes are the problem most<br />
<strong>of</strong>ten found in roadside inspections. Be safe—check<br />
the slack adjusters.
All vehicles built since 1994 have automatic slack<br />
adjustors. Even though automatic slack adjustors<br />
adjust themselves during full brake applications,<br />
they must be checked.<br />
Automatic adjustors should not have to be manually<br />
adjusted, except when performing maintenance<br />
on the brakes and during installation <strong>of</strong> the slack<br />
adjusters. In a vehicle equipped with automatic<br />
slack adjusters, when the pushrod stroke exceeds<br />
the legal brake adjustment limit, it is an indication<br />
that there is a mechanical problem with the adjuster<br />
itself, or the related foundation brake components,<br />
or the adjuster was improperly installed.<br />
The manual adjustment <strong>of</strong> an automatic adjuster to<br />
bring a brake pushrod stroke within legal limits is<br />
generally masking a mechanical problem, not fixing<br />
it. Additionally, manually adjusting most automatic<br />
adjusters will likely result in premature wear <strong>of</strong><br />
the adjuster. When brakes equipped with automatic<br />
adjusters are found to be out <strong>of</strong> adjustment, the<br />
driver should take the vehicle to a repair facility<br />
as soon as possible to have the problem corrected.<br />
The manual adjustment <strong>of</strong> an automatic adjuster<br />
should only be used as a temporary measure to<br />
correct the adjustment in an emergency situation<br />
as it is likely the brake will soon be back out <strong>of</strong><br />
adjustment since this procedure usually does not<br />
fix the underlying adjustment problem.<br />
(Note: Automatic slack adjusters made by different<br />
manufacturers do not all operate the same. Therefore,<br />
the specific Manufacturer’s Service Manual<br />
should be consulted prior to troubleshooting a<br />
brake adjustment problem.)<br />
Check brake drums (or discs), linings, and<br />
hoses. Brake drums must not have cracks. Linings<br />
must not be loose or soaked with oil or grease.<br />
They should not be thinner than the manufacturers<br />
specifications recommend. (Generally, this will be<br />
1/4 inch.) Mechanical parts must be in place, not<br />
broken or missing. Check the air hoses connected<br />
to the brake chambers to make sure they are not<br />
cracked, cut, or worn.<br />
in-CaB air Brake CheCk<br />
Note: All the Air Brakes system tests in this<br />
section are considered important and each can be<br />
considered critical parts <strong>of</strong> the in-cab air brakes<br />
tests. The items marked with an asterisk (*) in this<br />
section are required for testing purposes during<br />
the pre-trip portion <strong>of</strong> the CDL driving test. They<br />
may be performed in any order as long as they are<br />
performed correctly and effectively. If these items<br />
are not demonstrated and the parameters for each<br />
test are not verbalized correctly, it is considered an<br />
automatic failure <strong>of</strong> the pre-trip portion <strong>of</strong> the test.<br />
Testing air leakage rate. There are two tests as<br />
follows:<br />
Static Leakage Test<br />
With a basically fully-charged air system (within<br />
the effective operating range for the compressor),<br />
turn <strong>of</strong>f the engine, release all brakes, and let the<br />
system settle (air gauge needle stops moving).<br />
Time for one minute. The air pressure should not<br />
drop more than:<br />
— 2 psi for single vehicles.<br />
— 3 psi for a combination <strong>of</strong> two vehicles.<br />
— 5 psi for a combination <strong>of</strong> three or more<br />
vehicles.<br />
An air loss greater than those shown indicate a<br />
problem in the braking system and repairs are<br />
needed before operating the vehicle.<br />
- 81 -
*Applied Leakage Test<br />
With a basically fully-charged air system (within<br />
the effective operating range for the compressor),<br />
turn <strong>of</strong>f the engine, release all brakes so the entire<br />
system is charged. Allow the system to settle (air<br />
gauge needle stops moving), apply firm, steady<br />
pressure to the brake pedal (brake on), and hold.<br />
After the system settles again, time for one minute.<br />
The air pressure should not drop more than:<br />
— 3 psi for single vehicles.<br />
— 4 psi for a combination <strong>of</strong> two vehicles.<br />
— 6 psi for a combination <strong>of</strong> three or more<br />
vehicles.<br />
An air loss greater than those shown indicate a<br />
problem in the braking system and repairs are<br />
needed before operating the vehicle.<br />
Note: You must be able to demonstrate this test and<br />
verbalize the allowable air loss for the examiner<br />
on this test.<br />
If the air loss is too much, check for air leaks and<br />
fix. For testing purposes, identify if the air loss<br />
rate is too much.<br />
*Air Compressor Governor Cut-Out<br />
Pressure Test<br />
To perform this test, the air pressure for the vehicle<br />
must be rising when the engine is running. Run the<br />
engine at a fast idle. The air compressor governor<br />
must cut-out prior to the needle reaching 130 psi.<br />
Where the needle stops rising is the governor<br />
cut-out pressure.<br />
For testing purposes, identify where the air<br />
governor cuts out the compressor and verbalize<br />
the maximum pressure at which this can occur.<br />
Note: The air dryer exhausting should not be<br />
referenced as governor cut-out.<br />
- 82 -<br />
*Air Compressor Governor Cut-In Pressure<br />
Test<br />
To perform this test, the air pressure for the vehicle<br />
cannot be rising when the engine is running. With<br />
the engine idling, slowly pump the brake pedal<br />
to reduce the air tank pressure. Watch the air<br />
pressure gauge between pumps to identify when<br />
the compressor cuts in (needle starts to rise). This<br />
should occur no lower than 85 psi.<br />
For testing purposes, identify where the air<br />
governor cuts in the compressor and verbalize the<br />
minimum pressure at which this can occur.<br />
*Low Air Pressure Warning Device Test<br />
This test may be performed with engine on or <strong>of</strong>f.<br />
To perform the test with the engine <strong>of</strong>f, turn the<br />
electrical power on and have enough air pressure<br />
to keep the low air pressure warning device from<br />
coming on. Slowly pump the brake pedal to reduce<br />
air tank pressure. The low air pressure warning<br />
device must activate between 55 and 75 psi. For<br />
testing purposes, identify when the warning signal<br />
activates, and verbalize the legal range in which<br />
the signal must activate.<br />
If the warning signal does not work, you could<br />
lose air pressure and not know it. This could cause<br />
sudden emergency braking in a single circuit air<br />
system. In dual systems the stopping distance will<br />
be increased. Only limited braking can be done<br />
before the spring brakes come on.<br />
*Check that the spring brakes come on automatically.<br />
Chock the wheels. Release all parking<br />
brakes and shut the engine <strong>of</strong>f. Pump the brake<br />
pedal to reduce the air tank pressure. The trailer<br />
air supply valve knob should pop out when the air<br />
pressure falls to the manufacturer’s specifications<br />
(usually in a range between 20 to 45 psi). This<br />
causes the spring brakes to engage. Some trailers<br />
use an air applied emergency brake system and<br />
some trailers use spring brakes as the emergency<br />
brake system.
Check rate <strong>of</strong> air pressure buildup. With the<br />
engine at operating rpms, the pressure should build<br />
from 85 to 100 psi within 45 seconds in dual air<br />
systems. If the vehicle has larger than minimum<br />
air tanks, the buildup time can be longer and still<br />
be safe. Check the manufacturer’s specifications.<br />
In single air systems (pre-1975), typical requirements<br />
are pressure buildup from 50 to 90 psi<br />
within 3 minutes with the engine at an idle speed<br />
<strong>of</strong> 600-900 rpms.<br />
If air pressure does not build up fast enough, the<br />
pressure may drop too low during driving, requiring<br />
an emergency stop.<br />
Test service brakes. Wait for normal air pressure,<br />
release the parking brake, move the vehicle forward<br />
slowly (about 5 mph), and apply the brakes firmly<br />
using the brake pedal. Any pulling to one side,<br />
unusual feel, or delayed stopping action should<br />
be checked.<br />
Test parking brake. Fasten your seat belt. Set the<br />
parking brake and try to move the vehicle or allow<br />
the vehicle to slowly move forward and apply the<br />
parking brake. The parking brake should stop a<br />
rolling vehicle, or not allow any movement.<br />
ComBination vehiCle Brake CheCk<br />
In addition to those already listed in Section 2,<br />
complete these checks.<br />
Check that air flows to all trailers (double<br />
or triple trailers):<br />
• Use the tractor parking brake and/or chock the<br />
wheels to hold the vehicle.<br />
• Wait for air pressure to reach normal.<br />
• Use the trailer hand brake to provide air to the<br />
service line.<br />
• Open the emergency line shut-<strong>of</strong>f valve at<br />
the rear <strong>of</strong> the last trailer (you should hear air<br />
escaping).<br />
• Close the emergency line valve.<br />
• Open the service line valve to check that<br />
service pressure goes through all the trailers,<br />
then close the valve.<br />
If you do not hear air escaping from both lines,<br />
check that the shut-<strong>of</strong>f valves on the other trailer(s)<br />
and dolly(ies) are in the OPEN position. You must<br />
have air all the way to the back for all the brakes<br />
to work.<br />
Test tractor protection valve:<br />
• Charge the trailer air brake system. (That is,<br />
build up normal air pressure and push in the<br />
air supply knob.)<br />
• Shut <strong>of</strong>f the engine.<br />
• Pump the brake pedal several times to reduce<br />
the air pressure in the tanks. The trailer air<br />
supply control should pop out or go from the<br />
normal to the emergency position when the air<br />
pressure falls into the pressure range specified<br />
by the manufacturer (usually within the range<br />
<strong>of</strong> 20 to 45 psi).<br />
If the tractor protection valve does not work correctly,<br />
an air hose or trailer brake leak could drain<br />
all the air from the tractor. This would cause the<br />
emergency brakes to come on, with possible loss<br />
<strong>of</strong> control.<br />
Test trailer emergency brakes:<br />
• Charge the trailer air brake system and check<br />
that the trailer rolls freely.<br />
• Stop and pull out the trailer air supply control<br />
valve or place it in the emergency position.<br />
• Pull gently on the trailer with the tractor to<br />
check that the trailer emergency brakes are on.<br />
- 83 -
Test trailer service brakes:<br />
• Check for normal air pressure.<br />
• Release parking brakes.<br />
• Move the vehicle forward, slowly.<br />
• Apply the trailer brakes with the hand control<br />
(trolley valve), if so equipped.<br />
You should feel the brakes come on. This tells<br />
you the trailer brakes are connected and working.<br />
The trailer brakes should be tested with the hand<br />
valve but controlled in normal operation with the<br />
foot pedal, which applies air to the service brakes<br />
at all wheels.<br />
uSIng AIR BRAkeS<br />
Push the brake pedal down until the vehicle comes<br />
to a smooth stop. If you have a manual transmission,<br />
don’t push the clutch in until the engine rpm<br />
is close to idle. When you are stopped, select a<br />
starting gear. You should brake so you can steer<br />
and keep your vehicle in a straight line and allow<br />
you to turn if it becomes necessary. Use one <strong>of</strong> the<br />
following methods.<br />
Braking With antiloCk Brakes<br />
• When you brake hard on slippery surfaces in<br />
a vehicle without ABS, your wheels may lock<br />
up. When your steering wheels lock up, you<br />
lose steering control. When your other wheels<br />
lock up, you may skid, jackknife, or even spin<br />
the vehicle.<br />
• ABS helps you avoid wheel lock up. The<br />
computer senses impending lockup, reduces<br />
the braking pressure to a safe level, and you<br />
maintain control.<br />
• You may not be able to stop faster with ABS,<br />
but you should be able to steer around an<br />
obstacle while braking, and avoid skids caused<br />
by over-braking.<br />
• Having ABS on only the tractor, only the trailer,<br />
or even on only one axle, still gives you more<br />
control over the vehicle during braking. Brake<br />
normally.<br />
- 84 -<br />
• When only the tractor has ABS, you should be<br />
able to maintain steering control, and there is<br />
less chance <strong>of</strong> jackknifing. But keep your eye<br />
on the trailer and let up on the brakes (if you<br />
can safely do so) if it begins to swing out.<br />
• When only the trailer has ABS, the trailer is<br />
less likely to swing out. But if you lose steering<br />
control or start a tractor jackknife, let up on<br />
the brakes (if you can safely do so) until you<br />
gain control.<br />
• When you drive a tractor-trailer combination<br />
with ABS, you should brake as you always<br />
have. In other words:<br />
— Use only the braking force necessary to<br />
stop safely and stay in control.<br />
— Brake the same way, regardless <strong>of</strong> whether<br />
you have ABS on the tractor, the trailer,<br />
or both.<br />
— As you slow down, monitor your tractor<br />
and trailer and back <strong>of</strong>f the brakes (if it is<br />
safe to do so) to stay in control.<br />
— There is only one exception to this procedure;<br />
if you always drive a straight truck<br />
or combination with working ABS on all<br />
axles, in an emergency stop, you can fully<br />
apply the brakes.<br />
— Remember, if your ABS malfunctions, you<br />
still have regular brakes. Drive normally,<br />
but get the system serviced soon.<br />
— Without ABS, you still have normal brake<br />
functions. Drive and brake as you always<br />
have.
emergenCy stops<br />
Controlled braking. This method is also called<br />
“squeeze” braking. Put on the brakes as hard as<br />
you can without locking the wheels. Do not turn<br />
the steering wheel while doing this. If you need to<br />
make large steering adjustments or if you feel the<br />
wheels sliding, release the brakes. Brake again as<br />
soon as the tires get traction.<br />
Stab braking. (Only on vehicles without antilock<br />
brake systems.)<br />
• Press on the brake pedal as hard as you can.<br />
• Release the brakes when the wheels lock up.<br />
• As soon as the wheels start rolling, put on the<br />
brakes fully again.<br />
It can take up to one second for the wheels to start<br />
rolling after you release the brakes. Make sure you<br />
stay <strong>of</strong>f the brakes long enough to get the wheels<br />
rolling again. Otherwise the vehicle may not stay<br />
in a straight line.<br />
Note: If you drive a vehicle with antilock brakes,<br />
you should read and follow the directions found in<br />
the owner’s manual for stopping quickly.<br />
stopping distanCe<br />
This was discussed in Section 2 under Speed and<br />
Stopping Distances. With air brakes there is an<br />
added delay: the time required for the brakes to<br />
work after the brake pedal is pushed. With hydraulic<br />
brakes (used on cars and light/medium trucks), the<br />
brakes work instantly. However, with air brakes,<br />
it takes time (up to one half second) for the air<br />
to flow through the lines to the brakes. Thus, the<br />
total stopping distance for vehicles with air brake<br />
systems is made up <strong>of</strong> four different factors.<br />
Perception distance<br />
+ Reaction distance<br />
+ Brake lag distance<br />
+ Effective braking distance<br />
= TOTAL STOPPING DISTANCE<br />
The air brake lag distance at 55 mph on dry<br />
pavement adds about 32 feet. So at 55 mph for<br />
an average driver under good traction and brake<br />
conditions, the total stopping distance is over 300<br />
feet. This is longer than a football field.<br />
Brakes get hot from use and will stop working if<br />
there is too much heat. Excessive heat is caused by<br />
trying to slow down too many times or too quickly<br />
from a high speed. Brakes will fade when they get<br />
too hot and will not slow you.<br />
Brake fade or failure<br />
Brakes are designed so brake shoes or pads rub<br />
against the brake drum or discs to slow the vehicle.<br />
Braking creates heat, but brakes are designed to<br />
take a lot <strong>of</strong> heat. However, brakes can fade or fail<br />
from excessive heat caused by using them too much<br />
and not relying on the braking effect <strong>of</strong> the engine.<br />
Excessive use <strong>of</strong> the service brakes results in<br />
overheating and leads to brake fade. Brake fade<br />
results from excessive heat which causes chemical<br />
changes in the brake lining and expansion <strong>of</strong> the<br />
brake drums. As the overheated drums expand,<br />
the brake shoes and linings have to move farther<br />
to contact the drums, and the force <strong>of</strong> this contact<br />
is also reduced. Continued overuse may increase<br />
brake fade until the vehicle cannot be slowed or<br />
stopped at all.<br />
Brake fade is also affected by adjustment. To safely<br />
control a vehicle, every brake must do its share <strong>of</strong><br />
the work. Brakes out <strong>of</strong> adjustment will stop doing<br />
their share before those that are in adjustment. The<br />
other brakes can then overheat and fade and there<br />
will not be sufficient braking available to control<br />
the vehicle(s). Brakes can get out <strong>of</strong> adjustment<br />
quickly, especially when they are hot. Therefore,<br />
brake adjustment must be checked frequently.<br />
- 85 -
proper Braking teChnique<br />
Remember: The use <strong>of</strong> brakes on a long and/<br />
or steep downgrade is only a supplement to the<br />
braking effect <strong>of</strong> the engine. Once the vehicle is<br />
in the proper low gear, the following is the proper<br />
braking technique:<br />
• Apply the brakes just hard enough to feel a<br />
definite slowdown.<br />
• When your speed has been reduced to approximately<br />
5 mph below your “safe” speed,<br />
release the brakes. (This brake application<br />
should last for about three seconds.)<br />
• When your speed has increased to your “safe”<br />
speed, repeat the steps above.<br />
For example, if your “safe” speed is 40 mph, you<br />
would not apply the brakes until your speed reaches<br />
40 mph. You now apply the brakes hard enough to<br />
gradually reduce your speed to 35 mph and then<br />
release the brakes. Repeat this as <strong>of</strong>ten as necessary<br />
until you have reached the end <strong>of</strong> the downgrade.<br />
loW air pressure Warning signal<br />
If a low air pressure warning signal comes on,<br />
stop and safely park your vehicle as soon as possible.<br />
There may be an air leak in the system(s).<br />
Controlled braking is possible only while enough<br />
air remains in the air tanks. The spring brakes<br />
will come on when the air pressure drops into the<br />
range 20 to 45 psi A heavily loaded vehicle will<br />
take a long distance to stop, because the spring<br />
brakes do not work on all axles. Lightly loaded<br />
vehicles or vehicles on slippery roads may skid<br />
out <strong>of</strong> control when the spring brakes come on.<br />
Controlled braking is possible only while enough<br />
air remains in the air tanks.<br />
- 86 -<br />
parking Brakes<br />
Any time you park, use the parking brakes, except:<br />
• If the brakes are very hot, they can be damaged<br />
by the heat.<br />
• In freezing temperatures, if the brakes are very<br />
wet, they will freeze and the vehicle will be<br />
immobilized.<br />
air tank drains<br />
Pull the parking brake control knob out to apply<br />
the parking brakes, push it in to release them. The<br />
control will be a yellow, diamond-shaped knob<br />
labeled “parking brakes” on newer vehicles. On<br />
older vehicles, it may be a round blue knob or<br />
some other shape (including a lever that swings<br />
from side to side or up and down).<br />
Use wheel chocks to hold the vehicle. Let hot brakes<br />
cool before using the parking brakes. If the brakes<br />
are wet, use the brakes lightly while driving in a<br />
low gear to heat and dry them.<br />
If your vehicle does not have automatic air tank<br />
drains, drain your air tanks at the end <strong>of</strong> each<br />
working day to remove moisture and oil. Otherwise,<br />
the brakes could fail.
This section provides information needed to<br />
pass the test for Class A combination vehicles<br />
(tractor-trailers, or straight truck and trailer). The<br />
information gives you the minimum knowledge<br />
needed for driving most combination vehicles.<br />
You should also study Section 7 if you need to<br />
pass the tests for doubles/triples.<br />
DRIVIng cOmBInAtIOn<br />
VehIcleS SAFely<br />
Combination vehicles are heavier, longer, and<br />
require more driving skill than single commercial<br />
vehicles. This means that drivers <strong>of</strong> combination<br />
vehicles need more knowledge and skill than drivers<br />
<strong>of</strong> single vehicles. In this section, we list some<br />
important safety factors that apply specifically to<br />
combination vehicles.<br />
rollover risks<br />
SectIOn 6: cOmBInAtIOn VehIcleS<br />
This section is for drivers who need a Class A CDL<br />
More than half <strong>of</strong> truck driver deaths in collisions<br />
are from truck rollovers. As more cargo is stacked<br />
in a truck, the center <strong>of</strong> gravity gets higher from<br />
the road. The truck becomes easier to turn over.<br />
Fully loaded rigs are 10 times more likely to roll<br />
over in a collision than empty rigs.<br />
The following two things will help to prevent<br />
rollovers: keep the cargo as close to the ground<br />
as possible, and go slowly around turns. Section<br />
3 <strong>of</strong> this handbook talks about transporting cargo<br />
safely. Keeping cargo low is even more important<br />
in combination vehicles than in straight trucks. A<br />
trailer rollover is more likely if the load is to one<br />
side. Make sure your cargo is centered and spread<br />
out as much as possible.<br />
Rollovers happen when you turn too fast. Go<br />
slowly around corners, onramps, and <strong>of</strong>framps.<br />
Avoid quick lane changes, especially when fully<br />
loaded. A tractor-trailer vehicle combination is most<br />
likely to roll over in a turn when the configuration<br />
includes triple 27 ft. trailers.<br />
steer gently<br />
Trucks with trailers have a dangerous “crack-thewhip”<br />
effect. When you make a quick lane change,<br />
the crack-the-whip effect can turn the trailer over.<br />
There are many collisions where only the trailer<br />
has overturned.<br />
Steer carefully when you are pulling trailers. If<br />
you make a sudden movement with your steering<br />
wheel you could tip over a trailer. Follow far enough<br />
behind other vehicles (at least one second for each<br />
ten feet <strong>of</strong> vehicle length, plus another second if<br />
going over 40 mph). Look far enough down the<br />
road to avoid being surprised and having to make a<br />
sudden lane change. At night, drive slowly enough<br />
to see obstacles before it is too late to change lanes<br />
or stop gently. Slow down to a safe speed before<br />
going into a turn.<br />
Brake early<br />
Control your speed whether fully loaded or empty.<br />
Large combination vehicles that are empty take<br />
longer to stop than when they are fully loaded.<br />
When lightly loaded, the very stiff suspension<br />
springs and strong brakes give poor traction and<br />
make it very easy to lock up the wheels. When<br />
the wheels lock, your trailer can swing out and<br />
strike other vehicles or it can jackknife very<br />
quickly (Figure 6-1). You also must be very careful<br />
about driving “bobtail” tractors (tractors without<br />
semitrailers). Tests have shown that bobtails can<br />
be very hard to stop smoothly. It takes them longer<br />
to stop than a tractor and semitrailer loaded to<br />
maximum gross weight.<br />
In any combination rig, allow adequate following<br />
distance and look far enough ahead so you can<br />
brake early. Do not be caught by surprise and have<br />
to make a panic stop.<br />
- 87 -
avoid trailer skids<br />
When the wheels <strong>of</strong> a trailer lock up, the trailer will<br />
tend to swing around. This is more likely to happen<br />
when the trailer is empty or lightly loaded. This type<br />
<strong>of</strong> jackknife is <strong>of</strong>ten called a “trailer jackknife.”<br />
This is shown in Figure 6-2. The procedure for<br />
stopping a trailer skid is as follows:<br />
• Recognize the skid. The earliest and best way<br />
to recognize that the trailer has started to skid<br />
is by seeing it in your mirrors. Any time you<br />
apply the brakes hard, check the mirrors to<br />
make sure the trailer is staying where it should<br />
be. Once the trailer swings out <strong>of</strong> your lane, it<br />
is very difficult to prevent a jackknife.<br />
• Stop using the brake. Release the brakes to<br />
get traction back. Do not use the trailer hand<br />
brake to straighten out the rig. This is the wrong<br />
thing to do since it is the brakes on the trailer<br />
wheels that caused the skid in the first place.<br />
Once the trailer wheels grip the road again,<br />
the trailer will start to follow the tractor and<br />
straighten out. The best way to stop any skid<br />
is to get <strong>of</strong>f the brakes and let the tires restore<br />
traction.<br />
- 88 -<br />
Direction <strong>of</strong><br />
Slide<br />
Line <strong>of</strong><br />
Travel<br />
Rear Tractor<br />
Wheels Locked-Up<br />
or Spinning<br />
Line <strong>of</strong><br />
Travel<br />
make Wide enough turns<br />
When a vehicle goes around a corner, the rear<br />
wheels follow a different path than the front<br />
wheels. This is called <strong>of</strong>ftracking. Figure 6-3<br />
shows how <strong>of</strong>ftracking causes the path followed<br />
by a tractor and semitrailer to be wider than the rig<br />
itself. Longer vehicles will <strong>of</strong>ftrack more. The rear<br />
wheels <strong>of</strong> the powered unit (truck or tractor) will<br />
<strong>of</strong>ftrack some, and the rear wheels <strong>of</strong> the trailer<br />
will <strong>of</strong>ftrack even more. If there is more than one<br />
trailer, the rear wheels <strong>of</strong> the last trailer will <strong>of</strong>ftrack<br />
the most. Steer the front end wide enough around<br />
a corner so the rear end does not run over the curb,<br />
pedestrians, other vehicles, etc. However, keep the<br />
Semitrailer<br />
Trailer Wheels<br />
Locked and Sliding<br />
Figure 6-1 Tractor Jackknife Figure 6-2 Trailer Jackknife<br />
Maximum width <strong>of</strong><br />
swept path<br />
Path followed by<br />
innermost tire<br />
Path followed by<br />
outside tractor tire<br />
Figure 6-3 Offtracking in a 90 degree turn<br />
Tractor
ear <strong>of</strong> your vehicle close to the curb. This will<br />
stop other drivers from passing you on the right.<br />
If you cannot complete your turn without entering<br />
another lane <strong>of</strong> traffic, turn wide as you complete<br />
the turn. This is better than swinging wide to the<br />
left before starting the turn because it will keep<br />
other drivers from passing you on the right.<br />
railroad-highWay Crossings<br />
Railroad-highway crossings can also cause<br />
problems, particularly when pulling trailers with<br />
low underneath clearance.<br />
• These trailers can get stuck on raised crossings:<br />
— Low slung units (lowboy, car carrier, moving<br />
van, possum-belly livestock trailer).<br />
— Single-axle tractor pulling a long trailer<br />
with its landing gear set to accommodate<br />
a tandem-axle tractor.<br />
• If for any reason you get stuck on the tracks,<br />
get out <strong>of</strong> the vehicle and away from the tracks.<br />
Check sign posts or signal housing at the crossing<br />
for emergency notification information. Call 911<br />
or other emergency number. Give the location<br />
<strong>of</strong> the crossing using all identifiable landmarks,<br />
especially the DOT number, if posted.<br />
BaCking safely<br />
Because you cannot see everything behind your<br />
vehicle, backing is always dangerous. Avoid<br />
backing whenever you can. When you park, try<br />
to park so you will be able to pull forward when<br />
you leave. When you have to back, here are a few<br />
simple safety rules:<br />
• Look at your path.<br />
• Back slowly, using your mirrors.<br />
• Back and turn toward the driver’s side whenever<br />
possible.<br />
• Use a helper whenever possible.<br />
Start in the proper position. Put the vehicle in<br />
the best position to allow you to back safely. This<br />
position will depend on the type <strong>of</strong> backing to be<br />
done.<br />
Look at your path. Look at your line <strong>of</strong> travel<br />
before you begin. Get out and walk around the<br />
vehicle. Check your clearance to the sides and<br />
overhead in and near the path your vehicle will take.<br />
Use mirrors on both sides. Check the outside<br />
mirrors on both sides frequently. Get out <strong>of</strong> the<br />
vehicle and check your path if you are unsure.<br />
Back slowly. Always back as slowly as possible.<br />
Use the lowest reverse gear so that you can easily<br />
correct any steering errors before you get too far<br />
<strong>of</strong>f course. You can also stop quickly if necessary.<br />
Back and turn toward the driver’s side. Back<br />
to the driver’s side so you can see well. Backing<br />
toward the right side is very dangerous because<br />
you cannot see as well. Remember to always back<br />
in the direction that gives you the best vision.<br />
BaCking With a trailer<br />
Backing with a trailer. When backing a car,<br />
straight truck, or bus, turn the steering wheel<br />
toward the direction you want to go. When backing<br />
a trailer, turn the steering wheel in the opposite<br />
direction. Once the trailer starts to turn, you must<br />
turn the wheel the other way to follow the trailer.<br />
• Whenever you back with a trailer, try to position<br />
your vehicle so you can back in a straight line.<br />
If you must back on a curved path, back to the<br />
driver’s side so you can see.<br />
• Back slowly so you can make corrections<br />
before you get too far <strong>of</strong>f course.<br />
Correct drift immediately. As soon as you see<br />
the trailer getting <strong>of</strong>f the proper path, correct it<br />
by turning the steering wheel in the direction <strong>of</strong><br />
the drift.<br />
Pull forward. When backing, make pull-ups to<br />
reposition your vehicle when needed.<br />
Use a helper. Use a helper when you can. He or<br />
she can see blind spots that you can’t. The helper<br />
should stand near the back <strong>of</strong> the vehicle where you<br />
can see him or her. Before you begin backing, work<br />
out a set <strong>of</strong> hand signals that you both understand.<br />
Agree on a signal for STOP.<br />
- 89 -
cOmBInAtIOn VehIcle AIR<br />
BRAkeS<br />
You should study Section 5: Air Brakes before<br />
reading this. In combination vehicles the braking<br />
system has parts to control the trailer brakes, in<br />
addition to the parts described in Section 5. These<br />
parts are described below.<br />
trailer hand valve<br />
• The trailer hand valve (also called the trolley<br />
valve or Johnson bar) works the trailer brakes.<br />
The trailer hand valve should be used only to<br />
test the trailer brakes. Do not use it in driving<br />
because <strong>of</strong> the danger <strong>of</strong> making the trailer skid.<br />
The foot brake sends air to all <strong>of</strong> the brakes on<br />
the vehicle (including the trailer(s)). There is<br />
much less danger <strong>of</strong> causing a skid or jackknife<br />
when using just the foot brake.<br />
• Never use the hand valve for parking because<br />
all the air might leak out unlocking the brakes<br />
(in trailers that don’t have spring brakes).<br />
Always use the parking brakes when parking.<br />
If the trailer does not have spring brakes, use<br />
wheel chocks to keep the trailer from moving.<br />
traCtor proteCtion valve<br />
The tractor protection valve keeps air in the tractor<br />
or truck if the trailer breaks away or develops a bad<br />
leak. The tractor protection valve is controlled by<br />
the trailer air supply control valve in the cab. The<br />
control valve allows you to open and shut the tractor<br />
protection valve. It will close automatically if air<br />
pressure is low (in the range <strong>of</strong> 20 to 45 psi). When<br />
the valve closes, it stops any air from escaping and<br />
lets the air out <strong>of</strong> the trailer emergency line which<br />
causes the trailer emergency brakes to come on.<br />
(Emergency brakes are covered later.)<br />
trailer air supply Control<br />
The trailer air supply control on newer vehicles is a<br />
red eight-sided knob, which you use to control the<br />
tractor protection valve. You push it in to supply the<br />
trailer with air, and pull it out to shut the air <strong>of</strong>f and<br />
put on the trailer emergency brakes. The valve will<br />
pop out (thus closing the tractor protection valve)<br />
when the air pressure drops between 20 to 45 psi.<br />
- 90 -<br />
Tractor protection valve controls or “emergency”<br />
valves on older vehicles may not operate automatically.<br />
There may be a lever rather than a knob.<br />
The “normal” position is used for pulling a trailer.<br />
The “emergency” position is used to shut the air<br />
<strong>of</strong>f and put on the trailer emergency brakes.<br />
trailer air lines<br />
Every combination vehicle has two air lines—the<br />
service line and the emergency line. They run<br />
between each vehicle (tractor to trailer, trailer to<br />
dolly, dolly to second trailer, etc.).<br />
• Service air line (normally blue). The service<br />
line (also called the control line or signal line)<br />
carries air which is controlled by the foot brake<br />
or the trailer hand brake. The pressure in the<br />
service line will similarly change depending on<br />
how hard you press the foot brake or hand valve.<br />
The service line is connected to a relay valve<br />
on the trailer to apply more or less pressure<br />
to the trailer brakes. The relay valve connects<br />
the trailer air tanks to the trailer air brakes. As<br />
pressure builds up in the service line, the relay<br />
valve opens and sends air pressure from the<br />
trailer air tank to the trailer brake chambers,<br />
putting on the trailer brakes.<br />
• Emergency air line (normally red). The<br />
emergency line has two purposes. First, it<br />
supplies air to the trailer air tanks and secondly,<br />
the emergency line controls the emergency<br />
brakes on combination vehicles. Loss <strong>of</strong> air<br />
pressure in the emergency line causes the trailer<br />
emergency brakes to come on. The pressure<br />
loss could be caused by a trailer breaking<br />
loose, tearing apart the emergency air hose. It<br />
could also be caused by a hose, metal tubing,<br />
or other part which breaks, letting the air out.<br />
When the emergency line loses pressure, it<br />
causes the tractor protection valve to close<br />
(the air supply knob will pop out).
trailer air tanks<br />
Each trailer and converter dolly has one or more air<br />
tanks. They are filled by the emergency (supply)<br />
line from the tractor. They provide the air pressure<br />
used to operate trailer brakes. Air pressure is sent<br />
from the air tanks to the brakes by relay valves.<br />
The pressure in the service line tells how much<br />
pressure the relay valves should send to the trailer<br />
brakes. The pressure in the service line is controlled<br />
by the brake pedal (and the trailer hand brake).<br />
It is important that you don’t let water and oil build<br />
up in the air tanks. If you do, the brakes may not<br />
work correctly. Each tank has a drain valve on it<br />
and you should drain each tank every day. If your<br />
tanks have automatic drains, they will keep most<br />
moisture out. But you should still open the drains<br />
to make sure.<br />
shut-<strong>of</strong>f valves<br />
Shut-<strong>of</strong>f valves (also called cut-out cocks) are used<br />
in the service and supply air lines at the back <strong>of</strong><br />
trailers used to tow other trailers. These valves<br />
permit closing the air lines <strong>of</strong>f when another trailer<br />
is not being towed. You must check that all shut-<strong>of</strong>f<br />
valves are in the open position except the ones at<br />
the back <strong>of</strong> the last trailer, which must be closed.<br />
trailer serviCe, parking and<br />
emergenCy Brakes<br />
Newer trailers have spring brakes just like trucks<br />
and truck tractors. However, converter dollies and<br />
trailers built before 1975 are not required to have<br />
spring brakes. Those that do not have spring brakes<br />
have emergency brakes, which work from the air<br />
stored in the trailer air tank. The emergency brakes<br />
come on whenever air pressure in the emergency<br />
line is lost. These trailers have no parking brake.<br />
The emergency brakes come on whenever the air<br />
supply knob is pulled out or the trailer is disconnected.<br />
A major leak in the emergency line will<br />
cause the tractor protection valve to close and the<br />
trailer emergency brakes to come on. The brakes<br />
will hold only as long as there is air pressure in the<br />
trailer air tank. Eventually, the air will leak away<br />
and then there will be no brakes. Therefore, it is<br />
very important for safety that you use wheel chocks<br />
when you park trailers without spring brakes.<br />
You may not notice a major leak in the service line<br />
until you try to put the brakes on. Then, the air<br />
loss from the leak will lower the air tank pressure<br />
quickly. If it goes low enough, the trailer emergency<br />
brakes will come on.<br />
hose Couplers (glad hands)<br />
Glad hands are coupling devices used to connect<br />
the service and emergency air lines from the truck<br />
or tractor to the trailer. The couplers have a rubber<br />
seal which prevents air from escaping. Clean the<br />
couplers and rubber seals before a connection is<br />
made. When connecting the glad hands, press the<br />
two seals together with the couplers at a 90° angle<br />
to each other. A turn <strong>of</strong> the glad hand attached to<br />
the hose will join and lock the couplers.<br />
It is very important to keep the air supply clean.<br />
To keep the air supply clean, some vehicles have<br />
“dead end” or dummy couplers to which the hoses<br />
may be attached when they are not in use. This<br />
will prevent water and dirt from getting into the<br />
coupler and the air lines. Use the dummy couplers,<br />
if available, when the air lines are not connected<br />
to a trailer.<br />
To avoid mistakes, metal tags are sometimes<br />
attached to the lines with the words service or<br />
emergency stamped on them. Sometimes colors<br />
are used. Blue is used for the service lines and red<br />
for the emergency lines.<br />
If you do cross the air lines, supply air will be<br />
sent to the service line instead <strong>of</strong> going to charge<br />
the trailer air tanks. Air will not be available to<br />
release the trailer spring brakes (parking brakes).<br />
If the spring brakes don’t release when you push<br />
the trailer air supply control, check the air line<br />
connections.<br />
- 91 -
Older trailers do not have spring brakes. If the air<br />
supply in the trailer air tank has leaked away there<br />
will be no emergency brakes and the trailer wheels<br />
will turn freely. If you crossed the air lines, you<br />
could drive away but you would not have trailer<br />
brakes. Before driving, always test the trailer brakes<br />
with the hand valve or by pulling the air supply<br />
control. Pull gently against them in a low gear to<br />
make sure the brakes work.<br />
in-CaB air Brake CheCk<br />
Note: All the Air Brakes system tests in this<br />
section are considered important and each can be<br />
considered critical parts <strong>of</strong> the in-cab air brakes<br />
tests. The items marked with an asterisk (*) in this<br />
section are required for testing purposes during<br />
the pre-trip portion <strong>of</strong> the CDL driving test. They<br />
may be performed in any order as long as they are<br />
performed correctly and effectively. If these items<br />
are not demonstrated and the parameters for each<br />
test are not verbalized correctly, it is considered an<br />
automatic failure <strong>of</strong> the pre-trip portion <strong>of</strong> the test.<br />
Testing air leakage rate. There are two tests as<br />
follow:<br />
Static Leakage Test<br />
With a basically fully-charged air system (within<br />
the effective operating range for the compressor),<br />
turn <strong>of</strong>f the engine, release all brakes, and let the<br />
system settle (air gauge needle stops moving).<br />
Time for one minute. The air pressure should not<br />
drop more than:<br />
• 2 psi for single vehicles.<br />
• 3 psi for a combination <strong>of</strong> two vehicles.<br />
• 5 psi for a combination <strong>of</strong> three or more<br />
vehicles.<br />
An air loss greater than those shown indicate a<br />
problem in the braking system and repairs are<br />
needed before operating the vehicle.<br />
- 92 -<br />
*Applied Leakage Test<br />
With a basically fully-charged air system (within<br />
the effective operating range for the compressor),<br />
turn <strong>of</strong>f the engine, release all brakes so the entire<br />
system is charged. Allow the system to settle (air<br />
gauge needle stops moving), apply firm, steady<br />
pressure to the brake pedal (brake on), and hold.<br />
After the system settles again, time for one minute.<br />
The air pressure should not drop more than:<br />
• 3 psi for single vehicles.<br />
• 4 psi for a combination <strong>of</strong> two vehicles.<br />
• 6 psi for a combination <strong>of</strong> three or more<br />
vehicles.<br />
An air loss greater than those shown indicate a<br />
problem in the braking system and repairs are<br />
needed before operating the vehicle.<br />
Note: You must be able to demonstrate this test and<br />
verbalize the allowable air loss for the examiner<br />
on this test.<br />
If the air loss is too much, check for air leaks and<br />
fix. For testing purposes, identify if the air loss<br />
rate is too much.<br />
*Air Compressor Governor Cut-Out<br />
Pressure Test<br />
To perform this test, the air pressure for the vehicle<br />
must be rising when the engine is running. Run the<br />
engine at a fast idle. The air compressor governor<br />
must cut-out prior to the needle reaching 130 psi.<br />
Where the needle stops rising is the governor<br />
cut-out pressure.<br />
For testing purposes, identify where the air<br />
governor cuts out the compressor and verbalize<br />
the maximum pressure at which this can occur.<br />
Note: The air dryer exhausting should not be<br />
referenced as governor cut-out.
*Air Compressor Governor Cut-In Pressure<br />
Test<br />
To perform this test, the air pressure for the vehicle<br />
cannot be rising when the engine is running. With<br />
the engine idling, slowly pump the brake pedal<br />
to reduce the air tank pressure. Watch the air<br />
pressure gauge between pumps to identify when<br />
the compressor cuts in (needle starts to rise). This<br />
should occur no lower than 85 psi.<br />
For testing purposes, identify where the air<br />
governor cuts in the compressor and verbalize the<br />
minimum pressure at which this can occur.<br />
*Low Air Pressure Warning Device Test<br />
This test may be performed with engine on or <strong>of</strong>f.<br />
To perform the test with the engine <strong>of</strong>f, turn the<br />
electrical power on and have enough air pressure<br />
to keep the low air pressure warning device from<br />
coming on. Slowly pump the brake pedal to reduce<br />
air tank pressure. The low air pressure warning<br />
device must activate between 55 and 75 psi. For<br />
testing purposes, identify when the warning signal<br />
activates, and verbalize the legal range in which<br />
the signal must activate.<br />
If the warning signal does not work, you could<br />
lose air pressure and not know it. This could cause<br />
sudden emergency braking in a single circuit air<br />
system. In dual systems the stopping distance will<br />
be increased. Only limited braking can be done<br />
before the spring brakes come on.<br />
*Check that the spring brakes come on automatically.<br />
Chock the wheels. Release all parking<br />
brakes and shut the engine <strong>of</strong>f. Pump the brake<br />
pedal to reduce the air tank pressure. The trailer<br />
air supply valve knob and tractor protection<br />
valve should pop out when the air pressure falls<br />
to the manufacturer’s specifications (usually in<br />
a range between 20 to 45 psi). This causes the<br />
spring brakes to engage. Some trailers use an air<br />
applied emergency brake system and some trailers<br />
use spring brakes as the emergency brake system.<br />
Check rate <strong>of</strong> air pressure buildup. With the<br />
engine at operating rpms, the pressure should build<br />
from 85 to 100 psi within 45 seconds in dual air<br />
systems. If the vehicle has larger than minimum<br />
air tanks, the buildup time can be longer and still<br />
be safe. Check the manufacturer’s specifications.<br />
In single air systems (pre-1975), typical requirements<br />
are pressure buildup from 50 to 90 psi<br />
within 3 minutes with the engine at an idle speed<br />
<strong>of</strong> 600-900 rpms.<br />
If air pressure does not build up fast enough, the<br />
pressure may drop too low during driving, requiring<br />
an emergency stop.<br />
Test service brakes. Wait for normal air pressure,<br />
release the parking brake, move the vehicle forward<br />
slowly (about 5 mph), and apply the brakes firmly<br />
using the brake pedal. Any pulling to one side,<br />
unusual feel, or delayed stopping action should<br />
be checked.<br />
Test parking brake. Fasten your seat belt. Set the<br />
parking brake and try to move the vehicle or allow<br />
the vehicle to slowly move forward and apply the<br />
parking brake. The parking brake should stop a<br />
rolling vehicle, or not allow any movement.<br />
AntIlOck BRAke SyStemS<br />
trailers required to have aBs<br />
• All trailers and converter dollies built on or<br />
after March 1, 1998, are required to have ABS.<br />
However, many trailers and converter dollies<br />
built before this date have been voluntarily<br />
equipped with ABS.<br />
• Trailers will have yellow ABS malfunction<br />
lamps on the left side, either on the front or<br />
rear corner. Converter dollies manufactured on<br />
or after March 1, 1998, are required to have a<br />
lamp on the left side.<br />
• In the case <strong>of</strong> vehicles manufactured before<br />
the required date, it may be difficult to tell if<br />
the unit is equipped with ABS. Look under the<br />
vehicle for the ECU and wheel speed sensor<br />
wires coming from the back <strong>of</strong> the brakes.<br />
- 93 -
Braking With aBs<br />
• ABS is an addition to your normal brakes.<br />
It does not decrease or increase your normal<br />
braking capability. ABS only activates when<br />
wheels are about to lock up.<br />
• ABS does not necessarily shorten your stopping<br />
distance, but it does help you keep the vehicle<br />
under control during hard braking.<br />
• ABS helps you avoid wheel lock up. The<br />
computer senses impending lockup, reduces<br />
the braking pressure to a safe level, and you<br />
maintain control.<br />
• Having ABS on only the trailer, or even on only<br />
one axle, still gives you more control over the<br />
vehicle during braking.<br />
• When only the trailer has ABS, the trailer is<br />
less likely to swing out, but if you lose steering<br />
control or start a tractor jackknife, let up on<br />
the brakes (if you can safely do so) until you<br />
gain control.<br />
• When you drive a tractor-trailer combination<br />
with ABS, you should brake as you always<br />
have. In other words:<br />
— Use only the braking force necessary to<br />
stop safely and stay in control.<br />
— Brake the same way, regardless <strong>of</strong> whether<br />
you have ABS on the tractor, the trailer,<br />
or both.<br />
— As you slow down, monitor your tractor<br />
and trailer and back <strong>of</strong>f the brakes (if it is<br />
safe to do so) to stay in control.<br />
• Remember, if your ABS malfunctions, you<br />
still have regular brakes. Drive normally, but<br />
get the system serviced soon.<br />
• ABS won’t allow you to drive faster, follow<br />
more closely, or drive less carefully.<br />
- 94 -<br />
cOuPlIng AnD uncOuPlIng<br />
Knowing how to couple and uncouple correctly is<br />
basic to safe operation <strong>of</strong> combination vehicles.<br />
Coupling and uncoupling incorrectly can be very<br />
dangerous. There are differences between different<br />
rigs, so learn the details <strong>of</strong> coupling and uncoupling<br />
the vehicle(s) you will operate. General coupling<br />
and uncoupling steps are listed below:<br />
Coupling traCtor/semitrailers<br />
Step 1. Inspect the Fifth-Wheel<br />
• For damaged or missing parts.<br />
• To see that mounting to tractor is secure, no<br />
cracks in frame, etc.<br />
• To see that the fifth-wheel plate is completely<br />
greased. Failure to keep the fifth-wheel plate<br />
lubricated could cause steering problems<br />
because <strong>of</strong> friction between the tractor and<br />
trailer.<br />
• To see that the fifth-wheel is in proper position<br />
for coupling.<br />
— the fifth-wheel should be tilted down<br />
towards the rear <strong>of</strong> the tractor with the<br />
jaws open and the safety unlocking handle<br />
in the automatic lock position.<br />
• To see that the sliding fifth-wheel is locked.<br />
• To see that the trailer kingpin is not bent or<br />
broken.<br />
Step 2. Inspect Area and chock Wheels<br />
• To be sure the area around the vehicle is clear.<br />
• To be sure the trailer wheels are chocked or<br />
the spring brakes are on.<br />
• To see that cargo (if any) is secured against<br />
movement during coupling.
Step 3. Position tractor<br />
• Directly in front <strong>of</strong> the trailer. (Never back under<br />
the trailer at an angle because you might push<br />
the trailer sideways and break the landing gear.)<br />
• Check position, using outside mirrors, by<br />
looking down both sides <strong>of</strong> the trailer.<br />
Step 4. Back Slowly<br />
• Until the fifth-wheel just touches the trailer.<br />
• Do not hit the trailer.<br />
Step 5. Secure the tractor<br />
• Set the parking brake.<br />
• Put the transmission in neutral.<br />
Step 6. check the trailer height<br />
• The trailer should be low enough that it is<br />
raised slightly by the tractor when the tractor<br />
is backed under it. Raise or lower the trailer<br />
as needed.<br />
• To see that the kingpin and fifth-wheel are<br />
aligned.<br />
Step 7. connect the Air lines to the<br />
trailer<br />
• Check glad hand seals and connect tractor<br />
emergency air line to trailer emergency glad<br />
hand.<br />
• Check glad hand seals and connect tractor<br />
service air line to trailer service glad hand.<br />
• Make sure air lines are safely supported where<br />
they won’t be crushed or caught while tractor<br />
is backing under the trailer.<br />
Step 8. Supply Air to the trailer<br />
• From the cab, push in the air supply knob or<br />
move tractor protection valve control from<br />
the “emergency” to the “normal” position to<br />
supply air to the trailer brake system.<br />
• Wait until the air pressure is normal. Check<br />
brake system for crossed air lines:<br />
— shut engine <strong>of</strong>f so you can hear the brakes.<br />
— apply and release trailer brakes and listen<br />
for sound <strong>of</strong> trailer brakes being applied<br />
and released. You should hear the brakes<br />
move when applied and air escape when<br />
the brakes are released.<br />
— check air brake system pressure gauge for<br />
signs <strong>of</strong> major air loss.<br />
• When trailer brakes are working, start the<br />
engine.<br />
• Air pressure must be up to normal.<br />
Step 9. lock the trailer Brakes<br />
• Pull out the air supply knob or move the<br />
tractor protection valve control from normal<br />
to emergency.<br />
Step 10. Back under the trailer<br />
• Use lowest reverse gear.<br />
• Back tractor slowly under trailer to avoid<br />
hitting the kingpin.<br />
• Stop when the kingpin is locked into the<br />
fifth-wheel.<br />
- 95 -
Step 11. check the connection for<br />
Security<br />
• Raise the landing gear slightly <strong>of</strong>f the ground.<br />
• Pull forward gently against the trailer brakes to<br />
be sure that the trailer is locked to the tractor.<br />
Step 12. Secure the Vehicle<br />
• Put transmission in neutral.<br />
• Put parking brakes on.<br />
• Shut <strong>of</strong>f the engine and take the key so someone<br />
will not move the truck.<br />
Step 13. Inspect the coupling<br />
• Use a flashlight, if necessary.<br />
• Make sure there is no space between the upper<br />
and lower fifth-wheel.<br />
• Make sure the fifth-wheel jaws have closed<br />
around the shank <strong>of</strong> the kingpin. (Figure 6-4)<br />
• Check that the locking lever is in the “lock”<br />
position.<br />
• Check that the safety catch is in position over<br />
the locking lever.<br />
- 96 -<br />
Kingpin<br />
(View From Underneath)<br />
Shank<br />
Head<br />
Figure 6-4 trailer kingpin<br />
Kingpin<br />
Step 14. connect the electrical cord<br />
and check Air lines<br />
• Plug the electrical cord into the trailer and<br />
fasten the safety catch.<br />
• Check both air and electrical lines for signs<br />
<strong>of</strong> damage.<br />
• Make sure air and electrical lines will not hit<br />
any moving parts.<br />
Step 15. Fully Raise the Front trailer<br />
Supports (landing gear)<br />
• Use low gear range, if equipped, to begin<br />
raising the landing gear. Once free <strong>of</strong> weight,<br />
switch to the high gear range.<br />
• Raise the landing gear all the way up.<br />
• After raising landing gear, secure the crank<br />
handle safely.<br />
• When full weight <strong>of</strong> trailer is resting on tractor:<br />
— check for clearance between the rear <strong>of</strong> the<br />
tractor frame and the landing gear.<br />
— check for clearance between the top <strong>of</strong><br />
the tractor tires and the nose <strong>of</strong> the trailer.<br />
Step 16. Remove and Store the trailer<br />
Wheel chocks
unCoupling traCtor/semitrailer<br />
The following steps will help you to uncouple<br />
safely:<br />
Step 1. Position the Rig<br />
• Make sure surface <strong>of</strong> parking area can support<br />
weight <strong>of</strong> trailer.<br />
• Have tractor lined up with the trailer.<br />
Step 2. ease the Pressure on the<br />
locking Jaws<br />
• Shut <strong>of</strong>f trailer air supply to lock trailer brakes.<br />
• Ease pressure on fifth-wheel locking jaws by<br />
backing up gently.<br />
• Put parking brakes on while tractor is pushing<br />
against the kingpin.<br />
Step 3. chock the trailer Wheels<br />
• Chock the trailer wheels if the trailer doesn’t<br />
have spring brakes or if you are not sure.<br />
Step 4. lower the landing gear<br />
• If trailer is empty—lower the landing gear until<br />
it makes firm contact with the ground.<br />
• If trailer is loaded, after the landing gear makes<br />
firm contact with the ground, turn crank in<br />
low gear a few extra turns. This will lift some<br />
weight <strong>of</strong>f the tractor. This will:<br />
— make it easier to unlatch fifth-wheel.<br />
— make it easier to couple next time.<br />
Step 5. Disconnect the Air lines and<br />
electrical cable<br />
• Disconnect air lines from trailer. Connect air<br />
line glad hands to dummy couplers at back <strong>of</strong><br />
cab or couple them together.<br />
• Hang electrical cable with plug down to prevent<br />
moisture from getting in.<br />
• Make sure lines are supported so they won’t<br />
be damaged while driving the tractor.<br />
Step 6. unlock the Fifth-Wheel<br />
• Raise the release handle lock.<br />
• Pull the release handle to “open” position.<br />
• Keep legs and feet clear <strong>of</strong> the rear tractor<br />
wheels to avoid serious injury.<br />
Step 7. Pull the tractor Partially clear <strong>of</strong><br />
the trailer<br />
• Pull tractor forward until fifth-wheel comes<br />
out from under the trailer.<br />
• Stop with tractor frame under trailer.<br />
Step 8. Secure the tractor<br />
• Apply parking brake.<br />
• Place transmission in neutral.<br />
Step 9. Inspect the trailer Supports<br />
• Make sure ground is supporting trailer.<br />
• Make sure landing gear is not damaged.<br />
Step 10. Pull the tractor clear <strong>of</strong> the<br />
trailer<br />
• Release parking brakes.<br />
• Check the area and drive tractor forward until<br />
it clears.<br />
InSPectIng A cOmBInAtIOn<br />
VehIcle<br />
Use the inspection procedures described in Sections<br />
2 and 11 to inspect your combination vehicle.<br />
However, there are more items to inspect on a<br />
combination vehicle than on a single vehicle.<br />
In addition to the checks already listed in Section<br />
2, complete these checks:<br />
additional items for Walkaround<br />
inspeCtion<br />
Coupling system areas:<br />
• Fifth-wheel (lower):<br />
— securely mounted to frame<br />
— no missing, damaged parts<br />
— properly greased<br />
— no visible space between upper and lower<br />
fifth-wheel<br />
— locking jaws around the shank, not the<br />
head <strong>of</strong> the kingpin<br />
— release arm properly seated and safety<br />
latch/lock engaged<br />
- 97 -
• Fifth-wheel (upper):<br />
— glide plate securely mounted to trailer frame<br />
— kingpin not damaged<br />
• Air and electric lines to trailer:<br />
— electrical cord firmly plugged in and<br />
secured<br />
— air lines properly connected to glad hands,<br />
no air leaks, properly secured with enough<br />
slack for turns<br />
— all lines free from damage<br />
• Sliding fifth-wheel:<br />
— slide not damaged or parts missing<br />
— properly greased<br />
— all locking pins present and locked in place<br />
— if air powered—no air leaks<br />
— fifth-wheel not so far forward that tractor<br />
frame will hit landing gear, or cab hit the<br />
trailer, during turns<br />
Landing gear:<br />
• Fully raised, no missing parts, not bent or<br />
otherwise damaged.<br />
• Crank handle in place and secured.<br />
• If power operated, no air or hydraulic leaks.<br />
ComBination vehiCle Brake CheCk<br />
Do these checks in addition to Section 5: Inspecting<br />
Air Brake System.<br />
The following section explains how to check air<br />
brakes on combination vehicles. Check the brakes<br />
on a double or triple trailer as you would any<br />
combination vehicle.<br />
• Check that air flows to all trailers. Use the<br />
tractor parking brake and/or chock the wheels to<br />
hold the vehicle. Wait for air pressure to reach<br />
normal, then push in the red “trailer air supply”<br />
knob. This will supply air to the emergency<br />
(supply) lines. Use the trailer handbrake to<br />
provide air to the service line. Go to the rear<br />
<strong>of</strong> the rig. Open the emergency line shut-<strong>of</strong>f<br />
valve at the rear <strong>of</strong> the last trailer. You should<br />
hear air escaping, showing the entire system is<br />
charged. Close the emergency line valve. Open<br />
the service line valve to check that service<br />
pressure goes through all the trailers (this test<br />
- 98 -<br />
assumes that the trailer handbrake or the service<br />
brake pedal is on), and then close the valve. If<br />
you do NOT hear air escaping from both lines,<br />
check that the shut-<strong>of</strong>f valves on the trailer(s)<br />
and dolly(ies) are in the OPEN position. You<br />
MUST have air all the way to the back for all<br />
the brakes to work.<br />
• Test tractor protection valve. Charge the<br />
trailer air brake system. (That is, build up<br />
normal air pressure and push the “air supply”<br />
knob in.) Shut the engine <strong>of</strong>f. Step on and <strong>of</strong>f<br />
the brake pedal several times to reduce the air<br />
pressure in the tanks. The trailer air supply<br />
control (also called the tractor protection valve<br />
control) should pop out (or go from “normal”<br />
to “emergency” position) when the air pressure<br />
falls into the pressure range specified by the<br />
manufacturer. (Usually within the range <strong>of</strong> 20<br />
to 45 psi.)<br />
— If the tractor protection valve doesn’t work<br />
right, an air hose or trailer brake leak could<br />
drain all the air from the tractor. This would<br />
cause the emergency brakes to come on,<br />
with possible loss <strong>of</strong> control.<br />
• Test trailer emergency brakes. Charge the<br />
trailer air brake system and check that the<br />
trailer rolls freely. Then stop and pull out the<br />
trailer air supply control (also called tractor<br />
protection valve control or trailer emergency<br />
valve), or place it in the “emergency” position.<br />
Pull gently on the trailer with the tractor to<br />
check that the trailer emergency brakes are on.<br />
• Test trailer service brakes. Check for normal<br />
air pressure, release the parking brakes, move<br />
the vehicle forward slowly, and apply trailer<br />
brakes with the hand control (trolley valve), if<br />
so equipped. You should feel the brakes come<br />
on. This tells you the trailer brakes are connected<br />
and working. (The trailer brakes should<br />
be tested with the hand valve but controlled in<br />
normal operation with the foot pedal, which<br />
applies air to the service brakes at all wheels.)
This section has information you will need to<br />
pass the CDL knowledge test for driving safely<br />
with double/triple trailers. You should also study<br />
Sections 2, 5, and 6.<br />
Note: Triple combinations are not legal in <strong>California</strong>.<br />
Triples are discussed in this section because<br />
they are legal in many other states.<br />
The endorsement for doubles is given by written<br />
test only. Do not bring in a set <strong>of</strong> doubles for the<br />
driving test. <strong>Driver</strong>s must demonstrate the ability<br />
to back up the combination during the skills test,<br />
and backing doubles is dangerous.<br />
A Doubles/Triples Endorsement is needed.<br />
tOWIng DOuBle/tRIPle<br />
tRAIleRS<br />
Take special care when towing two or three<br />
trailers. There are more things that can go wrong<br />
and doubles/triples are less stable than other<br />
commercial vehicles.<br />
prevent trailer rollover<br />
SectIOn 7: DOuBleS AnD tRIPleS<br />
This section is for drivers who tow doubles or triples<br />
To prevent trailers from rolling over, you must steer<br />
gently and go slowly around corners, onramps,<br />
<strong>of</strong>framps, and curves. A safe speed on a curve for a<br />
straight truck or a single trailer combination vehicle<br />
may be too fast for a set <strong>of</strong> doubles or triples.<br />
Doubles and triples are more likely to turn over<br />
than other combination vehicles because <strong>of</strong> the<br />
crack-the-whip effect. You must steer gently when<br />
pulling trailers. The last trailer in a combination<br />
is most likely to turn over.<br />
inspeCt Completely<br />
There are more critical parts to check when you<br />
have two or three trailers. Check them all. Follow<br />
the procedures described later in this section.<br />
Doubles and triples must be driven very smoothly<br />
to avoid rollover or jackknife. Therefore, look far<br />
ahead so you can slow or change lanes gradually<br />
when necessary.<br />
manage spaCe<br />
Doubles and triples take up more space than other<br />
commercial vehicles. They are not only longer,<br />
but also need more space on the road because they<br />
can’t be turned or stopped suddenly. Allow more<br />
following distance. Make sure you have large<br />
enough gaps before entering or crossing traffic. Be<br />
certain you are clear at the sides before changing<br />
lanes. Look far ahead so you can slow down or<br />
change lanes gradually when necessary.<br />
adverse Conditions<br />
Be more careful in bad weather conditions. In bad<br />
weather, slippery conditions, and mountain driving<br />
you must be especially careful if you drive double<br />
or triple bottoms. You will have greater length<br />
and more dead axles to pull with your drive axles<br />
than other drivers. There is more chance for skids<br />
and loss <strong>of</strong> traction. You should never disable the<br />
steering axle brakes.<br />
- 99 -
parking the vehiCle<br />
Make sure you do not get in a spot you cannot pull<br />
straight through. You need to be aware <strong>of</strong> how<br />
parking lots are arranged in order to avoid a long<br />
and difficult escape.<br />
antiloCk Braking systems on<br />
Converter dollies<br />
Converter dollies built on or after March 1, 1998,<br />
are required to have antilock brakes. These dollies<br />
will have a yellow lamp on the left side <strong>of</strong> the dolly.<br />
cOuPlIng AnD uncOuPlIng<br />
Knowing how to couple and uncouple correctly<br />
is basic to safe operation <strong>of</strong> doubles and triples.<br />
Incorrect coupling and uncoupling can be very<br />
dangerous. Couple the tractor and first semitrailer<br />
as described in Section 6.<br />
Coupling tWin trailers<br />
Secure the second or rear trailer. If the second<br />
trailer does not have spring brakes, drive the<br />
tractor close to the trailer, connect the emergency<br />
line, charge the trailer air tank, and disconnect the<br />
emergency line. This will set the trailer emergency<br />
brakes if the slack adjusters are correctly adjusted.<br />
Chock the wheels.<br />
Note: For safe handling on the road, the more<br />
heavily loaded semitrailer must always be in the<br />
first position behind the tractor. The lighter trailer<br />
should be in the rear.<br />
A converter gear or dolly is a coupling device<br />
<strong>of</strong> one or two axles and a fifth-wheel by which a<br />
semitrailer can be coupled to the rear <strong>of</strong> a tractortrailer<br />
combination forming a double bottom rig.<br />
- 100 -<br />
Position the converter dolly in front <strong>of</strong> the<br />
second or rear trailer:<br />
• Release the dolly brakes by opening the air<br />
tank petcock. (Or, if the dolly has spring<br />
brakes, use the dolly parking brake control.)<br />
• If possible, wheel the dolly into position by<br />
hand so it is in line with the kingpin. Or, use<br />
the tractor and first semitrailer to pick up the<br />
converter dolly:<br />
— position combination as close as possible<br />
to converter dolly<br />
— move dolly to rear <strong>of</strong> first semitrailer and<br />
couple it to the trailer<br />
— lock pintle hook<br />
— secure dolly support in raised position<br />
— pull dolly into position as close as possible<br />
to nose <strong>of</strong> the second semitrailer<br />
— lower dolly support<br />
— unhook dolly from first trailer<br />
— wheel dolly into position in front <strong>of</strong> second<br />
trailer in line with the kingpin<br />
Connect the converter dolly to the front<br />
trailer:<br />
• Back first semitrailer into position in front <strong>of</strong><br />
the dolly tongue.<br />
• Hook dolly to front trailer:<br />
— lock pintle hook<br />
— secure converter gear support in raised<br />
position
Connect the converter dolly to the rear trailer:<br />
• Lock trailer brakes and/or chock wheels.<br />
• Make sure trailer height is correct. (It must be<br />
slightly lower than the center <strong>of</strong> the fifth-wheel<br />
so the trailer is raised slightly when the dolly<br />
is pushed under.)<br />
• Back converter dolly under rear trailer.<br />
• Raise landing gear slightly <strong>of</strong>f ground.<br />
• Test coupling by pulling against pin <strong>of</strong> rear<br />
trailer.<br />
• Check coupling and locking jaws.<br />
• Connect safety chains, air hoses, and electrical<br />
cords.<br />
• Close converter dolly air tank petcock, and<br />
shut-<strong>of</strong>f valves at rear <strong>of</strong> second trailer.<br />
• Open shut-<strong>of</strong>f valves at rear <strong>of</strong> first trailer and<br />
on the dolly, if so equipped.<br />
• Raise the landing gear completely.<br />
• Charge trailers and check for air at the rear <strong>of</strong><br />
the second trailer by opening the emergency<br />
line shut-<strong>of</strong>f.<br />
unCoupling douBle trailers<br />
Uncouple rear trailer:<br />
• Park rig in a straight line.<br />
• Apply parking brakes.<br />
• Chock wheels <strong>of</strong> the second trailer.<br />
• Lower the landing gear <strong>of</strong> the second semitrailer<br />
enough to remove some weight from the dolly.<br />
• Close air shut-<strong>of</strong>fs at rear <strong>of</strong> the first semitrailer<br />
and on the dolly, if so equipped.<br />
• Disconnect all dolly air and electric lines and<br />
secure them.<br />
• Release dolly brakes.<br />
• Release converter dolly fifth-wheel latch.<br />
• Slowly pull tractor, first semitrailer and dolly<br />
forward to pull dolly out from under rear<br />
semitrailer.<br />
unCouple Converter dolly:<br />
• Lower dolly landing gear.<br />
• Disconnect safety chains.<br />
• Apply converter gear spring brakes or chock<br />
wheels.<br />
• Release pintle hook on first semitrailer.<br />
• Slowly pull clear <strong>of</strong> dolly.<br />
CAUTION: Never unlock the pintle hook with the<br />
dolly still under the rear trailer. The dolly tow bar<br />
may fly up, possibly causing injury, and making<br />
it very difficult to re-couple.<br />
Coupling and unCoupling triple<br />
trailers<br />
Couple second and third trailers:<br />
• Couple second and third trailers using the<br />
method for coupling doubles.<br />
• Uncouple tractor and pull away from the second<br />
and third trailers.<br />
Couple tractor/first semitrailer to second/<br />
third trailers:<br />
• Couple tractor to first trailer. Use the<br />
method already described for coupling<br />
tractor-semitrailers.<br />
• Move converter dolly into position and couple<br />
first trailer to second trailer using the method for<br />
coupling doubles. Triples rig is now complete.<br />
Uncouple triple trailer rig:<br />
• Uncouple third trailer by pulling the dolly out,<br />
then unhitching the dolly, using the method for<br />
uncoupling doubles.<br />
• Uncouple remainder <strong>of</strong> rig as you would any<br />
double-bottom rig using the method already<br />
described.<br />
REMEMBER: Operating triples is not allowed<br />
in <strong>California</strong>.<br />
- 101 -
Coupling and unCoupling other<br />
ComBinations<br />
The methods described so far apply to the more<br />
common tractor-trailer combinations. However,<br />
there are other ways <strong>of</strong> coupling and uncoupling<br />
the many types <strong>of</strong> truck-trailer and tractor-trailer<br />
combinations that are in use. There are too many<br />
to cover in this handbook. Learn the right way to<br />
couple the vehicle(s) you will drive according to<br />
the manufacturer and/or vehicle owner.<br />
InSPectIng DOuBleS AnD<br />
tRIPleS<br />
There are more items to inspect on a combination<br />
vehicle than on a single vehicle. Many <strong>of</strong> these<br />
items are simply more <strong>of</strong> what you would find<br />
on a single vehicle. However, there are also some<br />
new items to check. These are discussed below.<br />
additional items for Walkaround<br />
inspeCtion<br />
Coupling system areas:<br />
• Fifth-wheel (lower):<br />
— securely mounted to frame<br />
— no missing, damaged parts<br />
— properly greased<br />
— no visible space between upper and lower<br />
fifth-wheel<br />
— locking jaws around the shank, not the<br />
head <strong>of</strong> the kingpin<br />
— release arm properly seated and safety<br />
latch/lock engaged<br />
• Fifth-wheel (upper):<br />
— glide plate securely mounted to trailer frame<br />
— kingpin not damaged<br />
• Air and electric lines to trailer:<br />
— electrical cord firmly plugged in and<br />
secured<br />
— air lines properly connected to glad hands,<br />
no air leaks, properly secured with enough<br />
slack for turns<br />
— all lines free from damage<br />
- 102 -<br />
• Sliding fifth-wheel:<br />
— slide not damaged or parts missing<br />
— properly greased<br />
— all locking pins present and locked in place<br />
— if air powered—no air leaks<br />
— fifth-wheel not so far forward that tractor<br />
frame will hit landing gear, or cab hit the<br />
trailer, during turns<br />
Landing gear:<br />
• Fully raised, no missing parts, not bent or<br />
otherwise damaged.<br />
• Crank handle in place and secured.<br />
• If power operated, no air or hydraulic leaks.<br />
Double and triple trailers:<br />
• Shut-<strong>of</strong>f valves (at rear <strong>of</strong> trailers, in service<br />
and emergency lines):<br />
— rear <strong>of</strong> front trailer(s): OPEN<br />
— rear <strong>of</strong> last trailer: CLOSED. (Glad hands<br />
should be covered to protect from debris.)<br />
— converter dolly air tank drain valve:<br />
CLOSED<br />
• Be sure air lines are supported and glad hands<br />
are properly connected.<br />
• If spare tire is carried on converter gear (dolly),<br />
make sure it is secured.<br />
• Be sure pintle-eye <strong>of</strong> dolly is in place in pintle<br />
hook <strong>of</strong> trailer(s).<br />
• Make sure pintle hook is latched.<br />
• Safety chains should be secured to trailer(s).<br />
• Be sure electrical cords are firmly in sockets<br />
on trailers.
DOuBleS/tRIPleS AIR BRAke<br />
check<br />
Check the brakes on a double or triple trailer as<br />
you would any combination vehicle. Refer to the<br />
information in Section 5 to learn how to check air<br />
brakes on combination vehicles.<br />
additional air Brake CheCks<br />
• Check that air flows to all trailers (double<br />
and triple trailers). Use the tractor parking<br />
brake and/or chock the wheels to hold the<br />
vehicle. Wait for air pressure to reach normal,<br />
and then push in the red “trailer air supply”<br />
knob. This will supply air to the emergency<br />
(supply) lines. Use the trailer handbrake to<br />
provide air to the service line. Go to the rear<br />
<strong>of</strong> the rig. Open the emergency line shut-<strong>of</strong>f<br />
valve at the rear <strong>of</strong> the last trailer. You should<br />
hear air escaping, showing the entire system is<br />
charged. Close the emergency line valve. Open<br />
the service line valve to check that service<br />
pressure goes through all the trailers (this test<br />
assumes that the trailer handbrake or the service<br />
brake pedal is on), and then close the valve. If<br />
you do NOT hear air escaping from both lines,<br />
check that the shut-<strong>of</strong>f valves on the trailer(s)<br />
and dolly(ies) are in the OPEN position. You<br />
MUST have air all the way to the back for all<br />
the brakes to work.<br />
• Test tractor protection valve. Charge the<br />
trailer air brake system. (That is, build up<br />
normal air pressure and push the “air supply”<br />
knob in.) Shut the engine <strong>of</strong>f. Step on and <strong>of</strong>f<br />
the brake pedal several times to reduce the air<br />
pressure in the tanks. The trailer air supply<br />
control (also called the tractor protection valve<br />
control) should pop out (or go from “normal”<br />
to “emergency” position) when the air pressure<br />
falls into the pressure range specified by the<br />
manufacturer. (Usually within the range <strong>of</strong> 20<br />
to 45 psi.)<br />
• If the tractor protection valve doesn’t work<br />
properly, an air hose or trailer brake leak could<br />
drain all the air from the tractor. This would<br />
cause the emergency brakes to come on, with<br />
possible loss <strong>of</strong> control.<br />
• Test trailer emergency brakes. Charge the<br />
trailer air brake system and check that the<br />
trailer rolls freely. Then stop and pull out the<br />
trailer air supply control (also called tractor<br />
protection valve control or trailer emergency<br />
valve) or place it in the “emergency” position.<br />
Pull gently on the trailer with the tractor to<br />
check that the trailer emergency brakes are on.<br />
• Test trailer service brakes. Check for normal<br />
air pressure, release the parking brakes, move<br />
the vehicle forward slowly, and apply trailer<br />
brakes with the hand control (trolley valve), if<br />
so equipped. You should feel the brakes come<br />
on. This tells you the trailer brakes are connected<br />
and working. (The trailer brakes should<br />
be tested with the hand valve, but controlled<br />
in normal operation with the foot pedal, which<br />
applies air to the service brakes at all wheels).<br />
- 103 -
- 104 -
This section has information needed to pass the<br />
CDL knowledge test for driving a tank vehicle.<br />
You should also study Sections 2, 5, and 6. A tank<br />
vehicle is used to carry any liquids or gaseous<br />
materials in tanks.<br />
Before loading, unloading, or driving a tank<br />
vehicle, inspect the vehicle. Make sure that the<br />
vehicle is safe to carry the liquid or gaseous material<br />
and is safe to drive.<br />
Tank Endorsement is needed.<br />
tAnk VehIcle DeFIneD<br />
SectIOn 8: tAnk VehIcleS<br />
This section is for drivers who drive tank vehicles<br />
A tank vehicle includes any commercial vehicle<br />
which has fixed tanks (including collapsible containers,<br />
also called “bladder bags”) or that carry<br />
portable tanks <strong>of</strong> 1,000 gallons or more capacity<br />
(CVC §15210(k)). Portable tanks are bulk containers<br />
which are not permanently attached to a<br />
vehicle. The product is loaded or unloaded while<br />
the portable tanks are <strong>of</strong>f the vehicle, they are then<br />
loaded on a vehicle for transportation.<br />
A tank vehicle also includes any fixed tank in excess<br />
<strong>of</strong> 119 gallons mounted on any vehicle or vehicle<br />
combination which requires a CDL or placards.<br />
(Example, a pickup transporting a 120 gallon fixed<br />
tank containing diesel requires a commercial Class<br />
C with Tank/HazMat endorsements. However, no<br />
CDL is needed for a 25,999 GVWR 2-axle truck<br />
with a 3000 gallon water tank pulling a trailer less<br />
than 10,000 lbs. GVWR.)<br />
InSPectIng tAnk VehIcleS<br />
Tank vehicles have special items that you need<br />
to check. Tank vehicles come in many types and<br />
sizes. You need to check the vehicle’s operator’s<br />
manual to make sure you know how to inspect<br />
your tank vehicle.<br />
On all tank vehicles, the most important item to<br />
check for is leaks. Check under and around the<br />
vehicle for signs <strong>of</strong> any leaking. Don’t carry liquids<br />
or gases in a leaking tank. In general, check the<br />
following:<br />
• The tank’s body or shell for dents or leaks.<br />
• The intake, discharge, and cut-<strong>of</strong>f valves. Make<br />
sure the valves are in the closed position except<br />
when loading or unloading.<br />
• The pipes, connections, and hoses for leaks<br />
especially around joints.<br />
• The manhole covers and vents. Make sure the<br />
covers have gaskets and they close correctly.<br />
Keep the vents clear so they work correctly.<br />
speCial purpose equipment<br />
If your vehicle has any <strong>of</strong> the following equipment,<br />
make sure it works:<br />
• vapor recovery systems<br />
• grounding and bonding cables<br />
• emergency shut-<strong>of</strong>f systems<br />
• built-in fire extinguisher and/or system<br />
Make sure you know how to operate your special<br />
equipment.<br />
• Check the emergency equipment required for<br />
your vehicle. Find out what equipment you<br />
are required to carry and make sure you have<br />
it and it works.<br />
- 105 -
DRIVIng tAnk VehIcleS<br />
speeding in a tank vehiCle<br />
If you are driving a tank vehicle containing more<br />
than 500 gallons <strong>of</strong> flammable liquid, which is<br />
subject to CVC §34000, faster than the speed<br />
limit allowed, you are subject to a $500 fine for a<br />
first <strong>of</strong>fense. Stiffer penalties apply for a second<br />
or subsequent <strong>of</strong>fense.<br />
hours <strong>of</strong> serviCe in a tank vehiCle<br />
The maximum driving time within a work period<br />
is 10 hours for drivers <strong>of</strong> tank vehicles with a<br />
capacity greater than 500 gallons when transporting<br />
flammable liquid. (49 CFR 395.1)<br />
Liquids in bulk are transported in tanks, mounted<br />
on trucks, semitrailers, or full trailers. Transporting<br />
liquids, including liquefied gases, in tanks requires<br />
special skills because <strong>of</strong> the high center <strong>of</strong> gravity<br />
and the liquid surge <strong>of</strong> the cargo. Transit mix trucks<br />
and cement mixers are considered tank vehicles<br />
for purposes <strong>of</strong> a <strong>California</strong> CDL.<br />
high Center <strong>of</strong> gravity<br />
High center <strong>of</strong> gravity means that the load is carried<br />
high up <strong>of</strong>f the road. This makes the vehicle<br />
top-heavy and easy to roll over. Tankers <strong>of</strong>ten roll<br />
over. Tests have shown that tankers can turn over<br />
even at the cautionary speeds posted for curves.<br />
You should drive on highway curves or onramp/<br />
<strong>of</strong>framp curves well below the posted speeds.<br />
liquid surge<br />
Liquid surge results from movement <strong>of</strong> the liquid in<br />
partially filled tanks. For example, when coming to<br />
a stop, the liquid will surge back and forth. When<br />
the wave hits the end <strong>of</strong> the tank, it tends to push<br />
the truck in the direction the wave is moving. If<br />
the truck is on a slippery surface such as ice, the<br />
wave can shove a stopped truck into an intersection.<br />
The driver <strong>of</strong> a tanker must be very familiar with<br />
the handling <strong>of</strong> the vehicle.<br />
- 106 -<br />
Controlling surge<br />
• Keep a steady pressure on the brakes.<br />
• To control the surge do not release brakes too<br />
soon when coming to a stop.<br />
• Brake far in advance <strong>of</strong> a stop and increase<br />
your following distance.<br />
• If you must make a quick stop to avoid a crash,<br />
use controlled or stab braking. Also, remember<br />
that if you steer quickly while braking, your<br />
vehicle may roll over.<br />
Bulkheads<br />
Some liquid tanks are divided into several smaller<br />
tanks by bulkheads. Bulkheads are liquid-tight<br />
separators between compartments inside the tank.<br />
When loading and unloading the smaller tanks,<br />
the driver must pay special attention to weight<br />
distribution. Do not put too much weight on the<br />
front or rear <strong>of</strong> the vehicle.<br />
Baffled tanks<br />
Some tanks have compartments in them that have<br />
holes. If the compartment walls have holes in them,<br />
they are called baffles. Baffles let the liquid flow<br />
through and help control the forward and backward<br />
liquid surge. However, side to side surge can still<br />
occur which can cause a rollover. Drive slowly and<br />
be careful in taking curves or making sharp turns<br />
with a partially or fully loaded tanker.
unBaffled tanks<br />
Smooth bore (or unbaffled) tankers have nothing<br />
inside to slow down the flow <strong>of</strong> the liquid.<br />
Therefore, forward and back surge is very strong.<br />
Smooth bore tanks are usually those that transport<br />
food products such as milk. Sanitation regulations<br />
rule out the use <strong>of</strong> baffles because <strong>of</strong> the difficulty<br />
in cleaning the inside <strong>of</strong> the tank. Corrosive liquids<br />
are also routinely transported in smooth bore<br />
tanks. Be extremely cautious (slow and careful)<br />
when driving smooth bore tanks, especially when<br />
starting and stopping.<br />
outage<br />
Never load a cargo tank totally full. Liquids expand<br />
as they warm and you must leave room for the<br />
expanding liquid. This is called outage. Since<br />
different liquids expand by different amounts,<br />
they require different amounts <strong>of</strong> outage. You must<br />
know the outage requirement <strong>of</strong> your load when<br />
transporting liquids in bulk.<br />
hoW muCh to load?<br />
A full tank <strong>of</strong> dense liquid such as some acids<br />
may exceed legal weight limits. For that reason,<br />
you may <strong>of</strong>ten only partially fill tanks with heavy<br />
liquids. The amount <strong>of</strong> liquid to load into a tank<br />
depends on:<br />
• The amount the liquid will expand in transit.<br />
• The weight <strong>of</strong> the liquid.<br />
• Legal weight limits.<br />
• Temperature <strong>of</strong> the load.<br />
SAFe DRIVIng RuleS<br />
In order to drive tank vehicles safely, you must<br />
remember to follow all the safe driving rules. A<br />
few <strong>of</strong> these rules are:<br />
• Drive smoothly. Because <strong>of</strong> the high center <strong>of</strong><br />
gravity and the surge <strong>of</strong> the liquid, you must<br />
start, slow, and stop very smoothly. Also, make<br />
smooth turns and lane changes.<br />
• If you must make a quick stop to avoid a<br />
collision, use controlled or stab braking. (See<br />
Section 2.) Remember that if you steer quickly<br />
while braking, your vehicle may roll over.<br />
• Slow down before curves and accelerate<br />
slightly when coming out <strong>of</strong> the curve. The<br />
posted and/or advisory speed for a curve may<br />
be too fast for a tank vehicle.<br />
• Keep in mind how much space you need to<br />
stop your vehicle. Remember that wet roads<br />
double the normal stopping distance. Empty<br />
tank vehicles may take longer to stop than<br />
full ones.<br />
• Don’t over steer, over accelerate, or over brake.<br />
If you do, your vehicle may skid. On tank<br />
trailers, if your drive wheels or trailer wheels<br />
begin to skid your vehicle may jackknife. When<br />
any vehicle starts to skid, you must take action<br />
to restore traction to the wheels.<br />
- 107 -
- 108 -
SectIOn 9: hAzARDOuS mAteRIAlS/WASteS<br />
This section is for drivers who need a HAZMAT endorsement<br />
Note: To ensure public safety, DMV examiners will<br />
not conduct commercial driving tests in vehicles<br />
displaying vehicle placards per CVC §27903. This<br />
includes vehicles carrying hazardous materials<br />
and/or wastes and vehicles which have not been<br />
purged <strong>of</strong> their hazardous cargo. CVC §15278(a)<br />
(4) requires a HazMat endorsement for those who<br />
drive a vehicle requiring placards.<br />
HazMat Endorsement is needed.<br />
Note: Your CDL tests will be based on your<br />
knowledge <strong>of</strong> federal transportation requirements.<br />
Text preceded by “<strong>California</strong>” refers<br />
to state (non-federal) requirements which also<br />
apply when driving in <strong>California</strong>. The state<br />
requirements are strictly enforced.<br />
Hazardous materials and wastes including<br />
radioactive materials pose a risk to health, safety,<br />
and property during transportation. The Hazardous<br />
Materials Table lists materials considered<br />
hazardous. The rules (Title 49 Code <strong>of</strong> Federal<br />
Regulations [CFR]) sometimes require diamond<br />
shaped, square-on-point, warning signs on vehicles<br />
transporting certain types or quantities <strong>of</strong> hazardous<br />
materials. These signs are called placards.<br />
You must have a commercial driver license with a<br />
HazMat endorsement before driving vehicles carrying<br />
hazardous materials which require placards.<br />
To get the endorsement, you must pass a written<br />
test in English about the hazardous materials<br />
transportation rules. By studying this section you<br />
will learn to recognize hazardous cargo, to contain<br />
the material, and to communicate the danger.<br />
This handbook provides all you need to know<br />
to pass the written test. However, this is only a<br />
beginning. You can learn more by reading the<br />
rules in state and federal regulations. You can also<br />
learn more by attending training courses <strong>of</strong>fered<br />
by your employer or others. Every employee who<br />
transports hazardous materials must receive training<br />
to recognize and identify hazardous materials<br />
and become familiar with HazMat requirements.<br />
(49 CFR 172.702, 172.704, and 13 CCR 1161.7)<br />
Government and industry publishers sell copies <strong>of</strong><br />
the regulations. Union or company <strong>of</strong>fices <strong>of</strong>ten<br />
have copies <strong>of</strong> the rules for driver use. Find out<br />
where you can get your own copy to use on the job.<br />
In addition to the general HazMat training requirements<br />
(49 CFR 172.700–172.706) and repeated<br />
training every three years, drivers are also required<br />
to be trained in function- and commodity-specific<br />
requirements (e.g., flammable cryogenic liquids or<br />
Highway Route Controlled Quantities [HRCQ] <strong>of</strong><br />
radioactive materials.)<br />
Permits. A permit or route restriction may be<br />
required to transport some classifications and<br />
quantities <strong>of</strong> hazardous materials. Contact the<br />
<strong>California</strong> Highway Patrol and the U. S. <strong>Department</strong><br />
<strong>of</strong> Transportation for information. Permits and<br />
registrations may also be required for hazardous<br />
waste and medical waste transportation. Contact<br />
the <strong>Department</strong> <strong>of</strong> Toxic Substances Control and<br />
the <strong>Department</strong> <strong>of</strong> Health Services respectively,<br />
for information.<br />
If you apply for an original or renewal HazMat<br />
endorsement, you must undergo a Transportation<br />
Security Administration (TSA) federal security<br />
threat assessment (background records check). You<br />
start the TSA background records check after you<br />
apply for your CDL at DMV, successfully complete<br />
all appropriate law tests, and submit a valid medical<br />
form. You must submit fingerprints, a fee, and any<br />
additional required information to one <strong>of</strong> TSA’s<br />
designated agents. You must also provide the TSA<br />
agent with a copy <strong>of</strong> your CDL permit and one <strong>of</strong><br />
the following identification documents:<br />
• A <strong>California</strong> DL/ID card<br />
• An out-<strong>of</strong>-state DL<br />
• Your CDL permit accompanied by a DMV<br />
photo receipt<br />
For a list <strong>of</strong> TSA agent sites, go online at hazprints.<br />
tsa.dhs.gov or call 1-877-429-7746.<br />
- 109 -
<strong>California</strong> hazardous material<br />
transportation liCense<br />
Every motor carrier who transports the following<br />
hazardous materials in <strong>California</strong> must have a<br />
Hazardous Materials Transportation License issued<br />
by the CHP (CVC §32000.5):<br />
• Hazardous materials shipments (unless<br />
specifically excepted) for which the display <strong>of</strong><br />
placards is required per CVC §27903.<br />
• Hazardous materials shipments in excess <strong>of</strong><br />
500 lbs., transported for a fee, which would<br />
require placarding if shipped in greater amounts<br />
in the same manner.<br />
A valid legible copy <strong>of</strong> the carrier’s Hazardous<br />
Materials Transportation License must be carried<br />
in the vehicle and be presented to any peace <strong>of</strong>ficer<br />
or duly authorized employee <strong>of</strong> the CHP upon<br />
request. (13 CCR 1160.3(g)(2))<br />
This is in addition to the federal HazMat registration<br />
that may be required under 49 CFR 107.601.<br />
Intent OF the RegulAtIOnS<br />
The 49 CFR Hazardous Materials Regulations<br />
(HMR) govern the safety aspects <strong>of</strong> transportation.<br />
They include requirements for classification<br />
<strong>of</strong> materials, packaging (including manufacture,<br />
continuing qualification, and maintenance), hazard<br />
communication (e.g., package marking, labeling,<br />
placarding, and shipping documentation), transportation,<br />
handling, HazMat employee training,<br />
and incident reporting. The intent <strong>of</strong> the hazardous<br />
materials rules and regulations is to ensure safe<br />
drivers and equipment; to communicate the risk;<br />
and to contain the product.<br />
paCkaging and seCurement<br />
Many hazardous materials can injure or kill on<br />
contact. In order to protect drivers and others, the<br />
rules tell shippers how to package safely. Loading,<br />
securement, and segregation rules tell drivers how<br />
to load, transport, and unload their cargo.<br />
- 110 -<br />
CommuniCate the risk<br />
Shippers must warn drivers and others about a<br />
material’s hazardous qualities. They must put<br />
warning labels and markings on packages and<br />
describe materials on the shipping paper in a way<br />
that clearly warns <strong>of</strong> the risk. There are rules for<br />
drivers too. If there is a collision or a leak, the driver<br />
must warn others <strong>of</strong> danger. Placards and package<br />
markings are another way to communicate the risk.<br />
assuring safe drivers and equipment<br />
<strong>Driver</strong>s must pass a written test about transporting<br />
hazardous materials or wastes. To pass the test,<br />
drivers must know how to:<br />
• Recognize shipments <strong>of</strong> hazardous materials<br />
or wastes.<br />
• Safely load shipments.<br />
• Correctly placard.<br />
• Safely transport shipments.<br />
You should, and are <strong>of</strong>ten required to, inspect your<br />
vehicle before and during each trip. Law enforcement<br />
<strong>of</strong>ficers may stop and inspect your vehicle.<br />
They may check shipping papers and your driver<br />
license for a HazMat endorsement.<br />
tRAnSPORtIng hAzARDOuS<br />
mAteRIAlS<br />
The shipper:<br />
• Sends the products from one place to another<br />
by truck, railroad, ship, or airplane.<br />
• Uses the hazardous materials regulations to<br />
decide the product’s:<br />
— proper shipping name<br />
— hazard class and division<br />
— identification number (ID)<br />
— correct packaging<br />
— correct label(s) and markings<br />
— correct placard(s)<br />
• Packages the materials, labels and marks the<br />
package, prepares the shipping paper and<br />
emergency response information, and supplies<br />
the placards.
• Certifies on a shipping paper that the shipment<br />
has been prepared according to the rules, unless<br />
a private carrier is used or the carrier supplies<br />
the cargo tanks.<br />
The carrier:<br />
• Takes the shipment from the shipper to its<br />
destination.<br />
• Before transporting, checks that the shipper<br />
correctly named, labeled, and marked the<br />
shipment.<br />
• Refuses improper shipments.<br />
• Reports collisions and incidents involving<br />
hazardous materials or wastes to the proper<br />
government agency.<br />
The driver:<br />
• Should check the route and the permits needed<br />
for the trip before starting the trip.<br />
• Makes sure the shipper has identified, marked,<br />
and labeled the product correctly.<br />
• Refuses leaking packages.<br />
• Refuses shipments not properly prepared.<br />
• Attaches placards when loading, if needed.<br />
• Ensures the appropriate product identification<br />
number(s) are displayed on transport vehicles,<br />
when required.<br />
• Ensures hazardous material shipment is<br />
properly secured with a lock.<br />
• Safely transports the shipment without delay.<br />
• Follows all special rules about transporting<br />
hazardous materials or wastes.<br />
• Keeps hazardous materials shipping papers,<br />
including the emergency response information,<br />
in order and in the proper place.<br />
cOmmunIcAtIOn RuleS<br />
Some words and phrases have special meanings<br />
when talking about hazardous materials. The<br />
meanings may differ from common use. Learn<br />
the words printed in bold below. The meanings <strong>of</strong><br />
other important words are in the glossary.<br />
definitions<br />
A material’s hazard class reflects the risks associated<br />
with it. Appendix A on pages 129 and 130<br />
tells the exact meaning <strong>of</strong> each hazard class. There<br />
are 9 different hazard classes. Some classes have<br />
subdivisions to better define the hazard.<br />
class 1— explosives<br />
Division 1.1— Explosives with a mass<br />
explosion hazard<br />
Division 1.2— Explosives with a projection<br />
hazard<br />
Division 1.3— Explosives with<br />
predominantly a fire hazard<br />
Division 1.4— Explosives with minor<br />
explosion hazard<br />
Division 1.5— Very insensitive explosives<br />
Division 1.6— Extremely insensitive<br />
explosive articles<br />
class 2— gases<br />
Division 2.1— Flammable gases<br />
Division 2.2— Nonflammable gases<br />
Division 2.3— Poison gases<br />
Division 2.4— Corrosive gases<br />
(Canada only)<br />
class 3— Flammable liquids<br />
class 4— Flammable Solids,<br />
Spontaneously combustible<br />
materials, and materials that<br />
are Dangerous When Wet<br />
Division 4.1— Flammable solids<br />
Division 4.2— Spontaneously combustible<br />
materials<br />
Division 4.3— Materials that are dangerous<br />
when wet<br />
class 5— Oxidizing materials<br />
Division 5.1— Oxidizers<br />
Division 5.2— Organic peroxides<br />
- 111 -
class 6— Poisonous and etiologic<br />
(Infectious) materials<br />
Division 6.1— Poisonous materials<br />
Division 6.2— Infectious substance<br />
(etiologic)<br />
class 7— Radioactive materials<br />
class 8— corrosive materials<br />
class 9— miscellaneous hazardous<br />
materials<br />
In addition to the above classifications, materials<br />
that meet the 49 CFR definition <strong>of</strong> a “combustible<br />
liquid” and do not meet the definition <strong>of</strong> any other<br />
hazard class, hazardous substance, or marine pollutant<br />
are only regulated domestically when shipped in<br />
a bulk package. Also, specified hazardous materials<br />
may be transported as Other Regulated Material-D<br />
(ORM-D) (e.g., “a consumer commodity”).<br />
shipping papers<br />
A proper shipping paper is a document or paper<br />
containing the hazardous materials information<br />
required by regulations. Shipping orders, bills<br />
<strong>of</strong> lading, and manifests are all shipping papers.<br />
Shippers show a material’s proper shipping name,<br />
hazard class or division, ID number, and packing<br />
group on the shipping paper. After a collision or<br />
hazardous materials incident, you may be unable<br />
to speak when help arrives. Fire fighters and police<br />
must know the hazards involved in order to prevent<br />
more damage or injury. Your life, and the lives<br />
<strong>of</strong> others, may depend on their quickly finding<br />
the shipping papers and emergency response<br />
information for hazardous cargo. For that reason<br />
the rules require:<br />
• Shippers to describe shipments correctly on<br />
shipping papers and include an emergency<br />
response telephone number on shipping papers.<br />
• Carriers and drivers to put tabs on shipping<br />
papers related to hazardous materials or wastes,<br />
or keep them on top <strong>of</strong> other shipping papers.<br />
Required emergency response information<br />
must be kept in the same manner as shipping<br />
papers.<br />
- 112 -<br />
• <strong>Driver</strong>s to keep shipping papers for hazardous<br />
cargo in a pouch on the driver’s door, or<br />
otherwise, in clear view within reach while<br />
the seat belt is fastened for driving, and on<br />
the driver’s seat or pouch on the driver’s door<br />
when away from the vehicle.<br />
laBels, plaCards, and markings<br />
Labels at least four inches by four inches in size<br />
are applied to the outside <strong>of</strong> hazardous materials<br />
shipping packages near the shipping name. (Note:<br />
Labels on packages prepared under United Nations<br />
Recommendations on the Transportation <strong>of</strong><br />
Dangerous Goods may be smaller than four inches.)<br />
These labels identify the primary and secondary<br />
hazard specific to the material being transported<br />
and give warning information about handling<br />
precautions in case <strong>of</strong> an emergency. If the diamond<br />
label will not fit on the package, shippers will put<br />
the label on a tag. For example, compressed gas<br />
cylinders that will not hold a label will have tags<br />
or decals. Labels look like the example in Figure<br />
9-1. See the charts starting on page 131.<br />
Figure 9-1 example <strong>of</strong> labeled Package<br />
“Marking” a non-bulk package refers to applying<br />
the required information to the outside <strong>of</strong> shipping<br />
containers (e.g., proper shipping name, ID number,<br />
consignee/consignor, and required instructions).<br />
For bulk packages and transport vehicles, when<br />
required, the ID numbers must be displayed on<br />
orange panels, white squares-on-point, or across the<br />
middle <strong>of</strong> the appropriate placard, as appropriate.<br />
Placards are signs used to warn others <strong>of</strong> hazardous<br />
cargo and are put on the outside <strong>of</strong> a vehicle to<br />
show the hazard class <strong>of</strong> the cargo. A placarded<br />
vehicle must have at least 4 placards representing<br />
the applicable hazard. They are attached to each side<br />
and each end <strong>of</strong> the vehicle, as shown in Figure 9-2.<br />
Placards must be readable from all four directions.<br />
There are 22 DOT specification placards. They are<br />
10 3/4 inches square, turned upright on a point,<br />
in a diamond shape. Cargo tanks and other bulk
Identification Numbers May Be Displayed On<br />
Placards or Orange Panels<br />
On front <strong>of</strong> Tractor or<br />
Trailer<br />
packaging show the ID number <strong>of</strong> their contents on<br />
placards, orange rectangular panels, or plain white<br />
square-on-point configurations having the same<br />
dimensions as placards. Whenever your vehicle<br />
is placarded, do not drive near open flame unless<br />
you can safely pass the fire without stopping.<br />
For hazardous materials for which placards are<br />
not specified, ID numbers may be displayed on<br />
orange panels or plain white square-on-point<br />
configurations.<br />
Safety signs such as “Drive Safely” and any other<br />
sign displayed as a square-on-point are not allowed.<br />
regulated produCts lists<br />
There are three main lists used by shippers, carriers,<br />
and drivers to identify hazardous materials. These<br />
can be found in Title 49 CFR, Section 172.101.<br />
Before transporting an unfamiliar product, look<br />
for its name on all lists. Some products are on all<br />
lists; others may be on only one. These are the<br />
lists to check:<br />
Symbols Hazardous materials<br />
descriptions and<br />
proper shipping<br />
names<br />
Placard and Panel<br />
Locations<br />
Each Side <strong>of</strong> Trailer Back <strong>of</strong><br />
Trailer<br />
Figure 9-2 Placard and Panel Locations<br />
Figure 9-3. Part <strong>of</strong> the hazardous materials table<br />
§172.101 hAzARDOuS mAteRIAlS tABle<br />
Hazard<br />
class or<br />
Division<br />
Identification<br />
Numbers<br />
Packing<br />
Group<br />
• Hazardous Materials Table.<br />
• List <strong>of</strong> Hazardous Substances and Reportable<br />
Quantities.<br />
• List <strong>of</strong> Marine Pollutants.<br />
Identification numbers are four digit codes used<br />
by first responders to identify hazardous materials.<br />
An identification number may be used to identify<br />
more than one chemical on shipping papers. The<br />
identification number will be preceded by the letters<br />
“NA” or “UN”. The US DOT Emergency Response<br />
Guidebook (ERG) identifies the chemicals all<br />
identification numbers are assigned to.<br />
The hazardous materials table (See Figure 9-3).<br />
Column 1 <strong>of</strong> the Hazardous Materials Table tells<br />
which mode <strong>of</strong> transportation the entry affects.<br />
The next five columns show each material’s shipping<br />
name, hazard class or division, ID number,<br />
packaging group, and required labels. Six different<br />
symbols may appear in Column 1 <strong>of</strong> the table.<br />
+ Shows the shipping name and hazard class to<br />
use, even if the product does not match the<br />
hazard class definition.<br />
A Means the entry is subject to the regulations<br />
only when <strong>of</strong>fered or intended for transport by<br />
air, unless it is also a hazardous substance or<br />
hazardous waste.<br />
D Means the entry applies to domestic transportation<br />
but may be inappropriate for international<br />
shipment.<br />
g Means the entry contains a proper shipping<br />
name for which one or more hazardous<br />
materials technical names must be entered in<br />
parenthesis, in addition to the proper shipping<br />
name.<br />
I Means the entry applies to international<br />
transportation. An alternate proper shipping<br />
Label(s) required<br />
(if not excepted)<br />
Special<br />
provisions<br />
(8)<br />
Packaging authorizations<br />
(§173.***)<br />
Exceptions Non-bulk<br />
packaging<br />
Bulk<br />
packaging<br />
(1) (2) (3) (4) (5) (6) (7) (8A) (8B) (8C)<br />
— Poisonous, solids,<br />
self heating, n.o.s.…<br />
6.1 UN3124 I POISON,<br />
SPONTANEOUSLY<br />
COMBUSTIBLE<br />
A5 — None 211 241<br />
- 113 -
name may be selected when only domestic<br />
transportation is involved.<br />
W Means the entry is subject to the regulations<br />
only when <strong>of</strong>fered or intended for transport<br />
by water, unless it is a hazardous substance<br />
or waste or a marine pollutant.<br />
Column 2 shows proper shipping names and<br />
descriptions <strong>of</strong> regulated materials. Entries are in<br />
alphabetical order. Use the name <strong>of</strong> the material<br />
on the shipping paper—it must be the proper<br />
shipping name. The Hazardous Materials Table<br />
shows proper shipping names in regular type. The<br />
entries that are in italics are not proper shipping<br />
names. A shipper may only use them in addition<br />
to the proper shipping names.<br />
Column 3 shows each material’s hazard class or<br />
division, or the word “Forbidden.” Never transport<br />
a material that is forbidden. A material’s hazard<br />
class or division is the key to using placards. You<br />
can decide which placards to use if you know<br />
these five things:<br />
• Material’s hazard class or division.<br />
• Special provisions.<br />
• Amount being shipped.<br />
• Total amount <strong>of</strong> weight <strong>of</strong> all hazard classes<br />
loaded on your vehicle.<br />
• Type <strong>of</strong> packaging (i.e., drum versus cargo tank)<br />
Column 4 shows each material’s ID number. ID<br />
numbers are preceded by the letters “UN” or “NA.”<br />
The letters “NA” are associated with proper shipping<br />
names that are only used within the United<br />
States and to and from Canada. The identification<br />
number must appear on the shipping paper as part<br />
<strong>of</strong> the shipping description and also appear on the<br />
package. It also must appear on cargo tanks and<br />
other bulk packaging. The number is used by police<br />
and fire crews to quickly identify the material after<br />
a collision.<br />
Column 5 shows each material’s packing group.<br />
Packing groups indicate the degree <strong>of</strong> danger presented<br />
by the material. The shipper is responsible<br />
for determining the appropriate packing group.<br />
- 114 -<br />
Note: Classes 2, 7, and ORM-D materials do not<br />
have packing groups assigned.<br />
Column 6 shows the label(s) shippers must put on<br />
packages <strong>of</strong> hazardous materials. Where the word<br />
“none” is shown, no label is needed. The rules<br />
require more than one label for some products.<br />
Column 7 shows special provisions which may<br />
be required by 49 CFR 172.102 for the item being<br />
shipped. These special provisions may require<br />
specific additional and/or alternate requirements<br />
(e.g., packaging, handling, marking, etc.).<br />
Column 8 is a three-part column showing the section<br />
numbers covering the packaging requirements<br />
for each hazardous material.<br />
Note: Columns 9 and 10 do not apply to highway<br />
transportation.<br />
Appendix A, §172.101—The List <strong>of</strong> Hazardous<br />
Substances and Reportable Quantities (RQ).<br />
The <strong>Department</strong> <strong>of</strong> Transportation (DOT) and the<br />
Environmental Protection Agency (EPA) monitor<br />
spills <strong>of</strong> hazardous substances, which are named in<br />
the List <strong>of</strong> Hazardous Substances and Reportable<br />
Quantities. Any spill <strong>of</strong> an RQ hazardous substance<br />
must be reported by telephone. Refer to pages 127<br />
and 128 for additional information.<br />
This list shows each product’s RQ. Carriers must<br />
report spills from packages containing a quantity<br />
equal to or greater than the RQ for that product.<br />
The shipper identifies these materials as hazardous<br />
substances by entering the letters “RQ” on the<br />
shipping paper either before or after the basic<br />
shipping description.<br />
Appendix B—Marine pollutants are contained<br />
in Appendix B <strong>of</strong> The Hazardous Materials Table.<br />
These materials are regulated in interstate and<br />
intrastate commerce in bulk quantities only and<br />
may require special vehicle markings.<br />
the shipping paper<br />
The shipping paper shown in Figure 9-4 describes<br />
a hazardous materials shipment. It must include:<br />
• Page numbers if the shipping paper has more<br />
than one page. The first page must tell the total<br />
number <strong>of</strong> pages. For example: “Page 1 <strong>of</strong> 4.”
“RQ” m eans that<br />
this is a reportable<br />
quantity .<br />
• A proper shipping description and technical<br />
name, when required, <strong>of</strong> the hazardous<br />
product. This information must be printed or<br />
typewritten.<br />
• The packing group assignment.<br />
• Quantity <strong>of</strong> hazardous materials being shipped.<br />
• A 24-hour emergency response telephone<br />
number must appear on the shipping document<br />
for every hazardous material transported.<br />
• A “shipper’s certification,” signed by the<br />
shipper, saying that he or she prepared the<br />
shipment according to the regulations.<br />
Emergency response information accompanying<br />
the shipping papers must contain:<br />
• Immediate hazards to health.<br />
• Risk <strong>of</strong> fire or explosion.<br />
• Immediate methods for handling fires.<br />
• Immediate precautions to be taken in the event<br />
<strong>of</strong> an incident or collision.<br />
• Initial methods <strong>of</strong> handling spills or leakage.<br />
• Preliminary first aid information.<br />
Figure 9-4. example <strong>of</strong> Shipping Paper<br />
Proper shipping name from<br />
Column 2 <strong>of</strong> the Hazardous<br />
Materials Table.<br />
Hazard Class from<br />
Column 3 <strong>of</strong> the Table.<br />
SHIPPING PAPER Page 1 <strong>of</strong> 1<br />
To: Wafers R Us From: Essex Corporation<br />
88 Valley Street 5775 Dawson Avenue<br />
Silicon Junction, CA Goleta, CA 931 17<br />
QTY HM DESCRIPTION WEIGHT<br />
1 cyl RQ Phosgene, 2.3, UN1076, 25 lbs<br />
Poison, Inhalation<br />
Hazard, Zone A<br />
This is to certify that the above named materials are properly classified, described, packaged,<br />
marked, and labeled, and are in proper condition for transportation according to the applicable<br />
regulations <strong>of</strong> the <strong>Department</strong> <strong>of</strong> Transportation.<br />
Shipper: Essex Corp Carrier: Knuckle Bros.<br />
Per: Shultz Per:<br />
Date: 6/27/94 Date:<br />
SPECIAL INSTRUCTIONS: 24 Hr . Emergency Contact, Ed Shultz, 1-800-555-5555<br />
ID Number from Column 4 <strong>of</strong><br />
the Hazardous Materials<br />
Table.<br />
shipping paper item desCriptions<br />
If the shipping paper describes both hazardous and<br />
nonhazardous products, the hazardous materials<br />
must be either: (1) described first, (2) highlighted<br />
in a contrasting color, or (3) identified by an “X”<br />
placed before the shipping name in a column<br />
captioned “HM.” The letters RQ may be used<br />
instead <strong>of</strong> X if the shipment is a reportable quantity.<br />
The basic description <strong>of</strong> a hazardous product<br />
includes the proper shipping name, hazard class<br />
or division, ID number, and the packing group, if<br />
any, in that order. Any additional information such<br />
as customer item number, product code(s), trade<br />
names, etc., must be placed after the basic shipping<br />
description. Shipping name, hazard class, and ID<br />
number must not be abbreviated unless specifically<br />
authorized in the hazardous materials regulations.<br />
The description must also show:<br />
• The total quantity and unit <strong>of</strong> measure.<br />
• The letters RQ if a reportable quantity.<br />
• If the letters RQ appear, the name <strong>of</strong> the<br />
hazardous substance.<br />
- 115 -
• For “n.o.s.” and generic descriptions, the<br />
technical name <strong>of</strong> the hazardous material<br />
when indicated by a “G” in column 1 <strong>of</strong> the<br />
Hazardous Materials Table.<br />
Total quantity can appear before or after the<br />
basic description. Packaging type and the unit <strong>of</strong><br />
measurement may be abbreviated. For example:<br />
10 ctns. paint, 3, UN 1263, PG II, 500 lbs.<br />
The shipper <strong>of</strong> hazardous waste must put the word<br />
WASTE before the name <strong>of</strong> the material on the<br />
hazardous waste manifest. For example:<br />
Waste Acetone, 3, UN 1090, PG II<br />
A nonhazardous material must not be described<br />
by using a hazard class or an ID number.<br />
Technical names are required for n.o.s. and other<br />
generic descriptions. If a material is described on<br />
a shipping paper by proper shipping name, the<br />
technical name <strong>of</strong> the hazardous material must be<br />
entered in parentheses. For example:<br />
Corrosive liquid, n.o.s.<br />
(Caprylyl chloride), 8, UN1760, PG I<br />
OR<br />
Corrosive liquid, n.o.s., 8, UN1760, PG I,<br />
(Caprylyl chloride)<br />
The same requirement applies to shipping descriptions<br />
for poisonous (toxic) materials if the proper<br />
shipping name does not specifically identify the<br />
poisonous material by technical name.<br />
If a hazardous material is a mixture or a solution<br />
<strong>of</strong> two or more hazardous materials, the technical<br />
names <strong>of</strong> at least two <strong>of</strong> the materials (those<br />
contributing the most hazard to the mixture) must<br />
be entered on the shipping paper. For example:<br />
Flammable liquid, corrosive, n.o.s., 3<br />
UN2924, PG I, (contains Methanol, Potassium<br />
hydroxide)<br />
shipper’s CertifiCation<br />
When the shipper packages a hazardous material, he<br />
or she certifies that the package has been prepared<br />
according to the regulations. The signed shipper’s<br />
certification appears on the original shipping paper.<br />
An exception is if a shipper is a private carrier<br />
transporting the company’s own product. Also, a<br />
- 116 -<br />
shipper’s certification is not required on shipping<br />
papers used by the carrier, or when the material<br />
is <strong>of</strong>fered by the primary carrier to a subsequent<br />
carrier. The glossary at the back <strong>of</strong> this handbook<br />
shows acceptable shipper certifications. Unless<br />
a package is clearly unsafe (leaking, etc.) accept<br />
the shipper’s certification concerning proper<br />
packaging. Some carriers have additional rules<br />
about transporting hazardous products. Follow<br />
your employer’s rules when accepting shipments.<br />
paCkage markings and laBels<br />
Shippers print other required information directly<br />
on the package, an attached label, or a tag. The<br />
most important package marking is the proper<br />
shipping name <strong>of</strong> the hazardous material, which<br />
must be the same as the one on the shipping paper.<br />
When required, the shipper also will mark the<br />
package with the:<br />
• Name and address <strong>of</strong> the shipper or consignee.<br />
• Content’s proper shipping name and ID number.<br />
• Required hazard labels.<br />
If the rules require it, the shipper also will put RQ<br />
or INHALATION HAZARD on the package. You<br />
will see markings or orientation arrows on cartons<br />
with liquid containers inside. The labels used will<br />
always reflect the hazard class <strong>of</strong> the product. If a<br />
package needs more than one label (e.g., to show a<br />
subsidiary hazard), the labels will be close together,<br />
near the proper shipping name.<br />
Bulk packages containing material classed as<br />
MARINE POLLUTANTS must be marked on<br />
two opposing sides or two ends with the MARINE<br />
POLLUTANT mark, if not already labeled or<br />
placarded according to 49 CFR 172, Subparts E<br />
or F respectively.<br />
reCognizing hazardous materials<br />
Learn to recognize shipments <strong>of</strong> hazardous materials.<br />
To find out if the shipment includes hazardous<br />
materials, look at the shipping paper. Does it have:<br />
• An entry with a proper shipping name, hazard<br />
class, and ID number?<br />
• A highlighted entry, or one with an X or RQ<br />
in the hazardous materials column?
Other clues suggesting hazardous materials:<br />
• What business is the shipper in? Paint dealer?<br />
Chemical supply? Scientific supply house? Pest<br />
control or agricultural supplier? Explosives,<br />
munitions, or fireworks dealer?<br />
• Are there tanks with diamond labels or placards<br />
on the premises?<br />
• What type <strong>of</strong> package is being shipped? Cylinders<br />
and drums are <strong>of</strong>ten used for hazardous<br />
materials shipments.<br />
• Is a hazard class label, proper shipping name,<br />
or ID number on the package?<br />
• Are there any handling precautions?<br />
The laws and regulations regarding hazardous<br />
waste are found in the Health and Safety Code,<br />
Division 20, Chapter 6.5, and Title 22, <strong>California</strong><br />
Code <strong>of</strong> Regulations, Division 4.5.<br />
hazardous Waste manifest<br />
When transporting hazardous wastes, you must<br />
sign by hand and carry a Uniform Hazardous Waste<br />
Manifest. The name and EPA registration number<br />
<strong>of</strong> the shippers, carriers, and destination must appear<br />
on the manifest. Shippers must prepare, date,<br />
and sign by hand the manifest. Treat the manifest<br />
as a shipping paper when transporting the waste.<br />
Only give the waste shipment to another registered<br />
carrier or disposal/treatment facility. Each carrier<br />
transporting the shipment must sign by hand the<br />
manifest. After you deliver the shipment, keep<br />
your copy <strong>of</strong> the manifest. Each copy must have<br />
all needed signatures and dates, including those<br />
<strong>of</strong> the person to whom you delivered the waste.<br />
hazardous Waste regulations<br />
A person who transports hazardous wastes in the<br />
State <strong>of</strong> <strong>California</strong> must first obtain a Hazardous<br />
Waste Transporter Registration from the <strong>Department</strong><br />
<strong>of</strong> Toxic Substances Control (DTSC). The<br />
registration certificate must be carried in the vehicle<br />
transporting the hazardous waste and shown upon<br />
demand to any DTSC representative, peace <strong>of</strong>ficer,<br />
local health <strong>of</strong>ficer, or public <strong>of</strong>ficer designated<br />
by DTSC.<br />
There is an exemption for the transportation <strong>of</strong> up<br />
to 5 gallons or 50 lbs. <strong>of</strong> hazardous waste or 2.2 lbs.<br />
<strong>of</strong> extremely hazardous waste when transported by<br />
the producer <strong>of</strong> the waste to an authorized facility<br />
following specified guidelines.<br />
The transporter <strong>of</strong> hazardous wastes is responsible<br />
for making sure that a Uniform Hazardous Waste<br />
Manifest is completed properly. The transporter<br />
must sign and date the manifest before removing<br />
the load <strong>of</strong> hazardous waste from the generator’s<br />
facility. The manifest must be in his or her possession<br />
while transporting the hazardous waste and<br />
must be treated as a shipping paper. Hazardous<br />
wastes must only be delivered to another registered<br />
transporter or an authorized facility. The<br />
facility operator must sign and date the manifest<br />
when accepting the load <strong>of</strong> hazardous waste. If<br />
the hazardous waste cannot be delivered to the<br />
facility designated on the manifest, the transporter<br />
must contact the generator for instructions. The<br />
transporter must keep the copy <strong>of</strong> the manifest for<br />
a minimum <strong>of</strong> three years.<br />
plaCarding<br />
Attach the proper placards as you load the vehicle<br />
and before you drive it. You may move an improperly<br />
placarded vehicle only in an emergency<br />
to protect life or property.<br />
Placards must be put on each side and each end <strong>of</strong><br />
the vehicle (refer to Figure 9-2 on page 97). Each<br />
placard must be:<br />
• Easily seen from the direction it faces.<br />
• Placed so that the words or numbers are level<br />
and read from left to right.<br />
• At least 3 inches away from any other markings.<br />
• Kept clear <strong>of</strong> attachments or devices such as<br />
ladders, doors, and tarpaulins.<br />
• Kept clean and undamaged so that the color,<br />
format, and message are easily seen.<br />
Use the hazard class, special provisions, the amount<br />
shipped, type <strong>of</strong> packaging, and the total weight <strong>of</strong><br />
all hazardous materials on board to decide which<br />
placards you need.<br />
- 117 -
First, check that the shipper is using the correct<br />
hazard class for the shipping paper and package<br />
label. If you are not familiar with the material,<br />
contact the shipper or your <strong>of</strong>fice.<br />
There are two placard tables. Table 1 materials<br />
always require the use (display) <strong>of</strong> placards. Any<br />
amount <strong>of</strong> Table 2 materials in non-bulk packaging<br />
is required to be placarded if the material is<br />
subject to 49 CFR 172.505 (i.e., Poison-Inhalation<br />
Hazard or Dangerous When Wet) or if the amount<br />
transported in each vehicle is 1,001 lbs. or more,<br />
including the packaging. You may use DANGER-<br />
OUS placards for each Table 2 hazard class when:<br />
- 118 -<br />
PLACARD TABLE 1<br />
IF VEHICLE IS TO BE PLACARDED FOR… USE PLACARD…<br />
Explosives 1.1 1.1<br />
Explosives 1.2 1.2<br />
Explosives 1.3 1.3<br />
Poison Gas 2.3<br />
Dangerous When Wet<br />
Poison 6.1 (PG I, inhalation hazard only)<br />
Radioactive * (Radioactive Yellow III label only) 7<br />
* Radioactive placard also required for exclusive use shipments <strong>of</strong> low specific activity material (49 CFR §173.425).<br />
PLACARD TABLE 2<br />
IF VEHICLE IS TO BE PLACARDED FOR… USE PLACARD…<br />
Explosives 1.4 1.4<br />
Explosives 1.5 1.5<br />
Explosives 1.6 1.6<br />
Flammable gas 2.1<br />
Nonflammable gas 2.2<br />
Flammable 3<br />
Combustible* Combustible liquid<br />
Flammable solid 4.1<br />
Spontaneously combustible 4.2<br />
Oxidizer 5.1<br />
Organic perixide 5.2<br />
Poison 6.1 (PGI or II, other than PG I<br />
inhalation hazard<br />
Keep away from food 6.1 (PG III)<br />
6.2 none<br />
Corrosive 8<br />
Class 9** 9 (not mandatory)<br />
ORM-D none<br />
* FLAMMABLE placard may be used in place <strong>of</strong> a COMBUSTIBLE placard on a cargo tank or portable tank.<br />
** Class 9 Placard is not required for domestic transportation.<br />
4.3<br />
• You have two or more Table 2 hazard classes,<br />
requiring different placards, that total 1001<br />
lbs. or more.<br />
• You have not loaded 2,205 lbs. (1000 kg) or<br />
more <strong>of</strong> any Table 2 hazard class material at any<br />
one place. (You must use the specific placard<br />
for this material.)<br />
• If the words INHALATION HAZARD are<br />
on the shipping paper or package, you must<br />
display POISON GAS placards for Division<br />
2.3 materials and POISON INHALATION<br />
HAZARD placards or POISON placards in<br />
addition to any other placards needed by the<br />
product’s hazard class.
You do not need EXPLOSIVES 1.5, OXIDIZER,<br />
and DANGEROUS placards if a vehicle contains<br />
Division 1.1 or 1.2 explosives and is placarded with<br />
EXPLOSIVES 1.1 or 1.2. A NONFLAMMABLE<br />
GAS placard is not needed on a vehicle displaying<br />
a FLAMMABLE GAS or an OXYGEN placard.<br />
lOADIng AnD unlOADIng<br />
Do all you can to protect hazardous materials<br />
containers. Don’t use any tools which might damage<br />
containers or other packaging during loading.<br />
Don’t use hooks.<br />
• Before loading or unloading, set the parking<br />
brake and make sure the vehicle will not move.<br />
• Many products are more hazardous in the heat.<br />
Load all hazardous materials away from heat<br />
sources.<br />
• Watch for signs <strong>of</strong> leaking or damaged<br />
containers: LEAKS SPELL TROUBLE! Do<br />
not transport leaking packages. You, your<br />
truck, and others could be in danger. If you<br />
see a leaking or damaged hazardous materials<br />
container, you should move it away from the<br />
other containers.<br />
Containers <strong>of</strong> Class 1 (explosives), Class 3<br />
(flammable liquids), Class 4 (flammable solids),<br />
Class 5 (oxidizers), Class 8 (corrosives), Class<br />
2 (gases), and Division 6.1 (poisons) must be<br />
braced to prevent movement <strong>of</strong> the packages<br />
during transportation.<br />
No smoking. When loading hazardous materials,<br />
keep away from fires. Do not smoke or allow<br />
others to smoke near your vehicle. Never smoke<br />
within 25 feet <strong>of</strong>:<br />
• Explosives.<br />
• Oxidizers.<br />
• Flammables.<br />
Secure against movement. Make sure containers<br />
do not move around in transit. Brace them so they<br />
will not fall or bounce around. Use care when<br />
loading containers that have valves or other fittings.<br />
Do not open any package between the points <strong>of</strong><br />
origin and destination. You must never transfer<br />
hazardous products from one package to another.<br />
You may empty a cargo tank or intermodal (IM)<br />
specification portable tank, but do not empty any<br />
other package while it is on the vehicle, except<br />
as necessary to fuel machinery or other vehicles.<br />
Cargo heater rules. There are special cargo heater<br />
rules for loading these hazard classes:<br />
• Explosives.<br />
• Flammable liquid.<br />
• Flammable gas.<br />
The rules usually forbid use <strong>of</strong> cargo heaters,<br />
including automatic cargo heater/air conditioner<br />
units. Unless you have read all the related rules, do<br />
not load the above products in a cargo space that<br />
has a heater. Use closed cargo space. You must load<br />
the following hazard classes into a closed cargo<br />
space. You cannot have overhang or a tailgate load<br />
for these hazard classes:<br />
• Explosives.<br />
• Flammable solids.<br />
• Oxidizing materials.<br />
preCautions<br />
Explosives. Before loading or unloading any<br />
explosive, turn your engine <strong>of</strong>f. Then check the<br />
cargo space. You must:<br />
• Disable cargo heaters. Disconnect power<br />
sources and drain heater fuel tanks.<br />
• There must be no sharp points that might<br />
damage cargo. Look for bolts, screws, nails,<br />
broken side panels, and broken floor boards.<br />
• Use a floor lining when transporting Division<br />
1.1, 1.2, or 1.3 explosives. The floors must be<br />
tight and the liner must not contain steel or iron.<br />
Explosives need special handling to avoid damage.<br />
Never use hooks or other metal tools. Never drop,<br />
throw, or roll the shipment. Protect explosive packages<br />
from other cargo that might cause damage.<br />
Do not transfer a Division 1.1, 1.2, or 1.3 explosive<br />
from one vehicle to another on a public roadway<br />
except in an emergency. If safety requires an<br />
emergency transfer, set out red warning reflectors,<br />
flags, or electric lanterns. You must warn other<br />
highway users.<br />
- 119 -
Never transport damaged packages <strong>of</strong> explosives.<br />
Do not take a package that shows any dampness<br />
or an oily stain.<br />
Do not transport Division 1.1 or 1.2 explosives in<br />
a triples combination or in vehicle combinations if:<br />
• There is a marked or placarded cargo tank in<br />
the combination.<br />
• The other vehicle in the combination contains<br />
the following:<br />
— initiating explosive<br />
— radioactive materials labeled YELLOW III<br />
— Division 2.3 or 6.1 poisons<br />
— hazardous materials in a portable tank,<br />
Spec 106A or 110A tank<br />
Corrosive materials. If loading by hand, load<br />
breakable containers <strong>of</strong> corrosive liquid one by<br />
one. Keep them right side up. Do not drop or<br />
roll the containers. Load them onto an even floor<br />
surface. Stack carboys only if the lower tiers can<br />
safely bear the weight <strong>of</strong> the upper tiers.<br />
Do not load nitric acid above any other product.<br />
Cyanides or cyanide mixtures may not be loaded<br />
or stored with acids.<br />
Load storage batteries so their liquid will not spill.<br />
Keep them right side up. Make sure other cargo<br />
will not fall against or short circuit them.<br />
Never load corrosive liquids on the same transport<br />
vehicle with:<br />
• Division 1.1, 1.2, 1.3, or 1.5 explosives. (Refer<br />
to Division 14 <strong>of</strong> the <strong>California</strong> Vehicle Code<br />
for additional requirements.)<br />
• Division 2.3, Zone A or 6.1, PG-I, Zone A,<br />
poisons.<br />
• Division 4.2 materials.<br />
Never load corrosive liquids near or above:<br />
• Division 1.4 explosives<br />
• Division 2.3, Zone B, gases<br />
• Division 4.1 or 4.3 materials<br />
• Division 5.1 or 5.2 materials<br />
- 120 -<br />
Compressed gases, including cryogenic liquids.<br />
If your vehicle does not have racks to hold cylinders,<br />
the cargo space floor must be flat. The cylinders<br />
must be loaded securely to prevent overturning.<br />
They can be:<br />
• Held upright or braced laying down flat.<br />
• In racks attached to the vehicle.<br />
• In boxes that will keep them from turning over.<br />
Poisons. Never transport Division 2.3 (Poisonous<br />
gas) or irritating materials in containers with<br />
interconnections. Never load a package labeled<br />
POISON or POISONOUS GAS in the driver’s<br />
cab or sleeper.<br />
Never load a package labeled POISON, POISON<br />
- INHALATION HAZARD, or POISONOUS<br />
GAS in the same vehicle with foodstuffs, feed, or<br />
any edible material intended for consumption by<br />
humans or animals, except as provided under 49<br />
CFR 177.841(e). Packages with hazard labels or<br />
package markings displaying the text “PG III” may<br />
be loaded on the same vehicle with foodstuffs, feed,<br />
or other edible material if separated as specified<br />
in CFR 177.848(e)(3).<br />
Radioactive materials. Some packages <strong>of</strong><br />
radioactive materials bear a number called the<br />
“transport index.” The shipper labels these packages<br />
Radioactive II or Radioactive III and prints the<br />
package’s transport index on the label. Radiation<br />
surrounds each package, passing through all nearby<br />
packages. The transport index tells the degree <strong>of</strong><br />
control needed during transportation. The total<br />
transport index <strong>of</strong> all packages in a single vehicle<br />
must not exceed 50.<br />
If the cargo you are transporting requires placarding,<br />
you must have a HazMat endorsement.<br />
Mixed loads. The rules require some products to be<br />
loaded separately. They cannot be put together in<br />
the same cargo space. Figures 9-5 and 9-6 list some<br />
examples <strong>of</strong> the incompatibilities. The regulations<br />
(The Segregation and Separation Chart) name other<br />
materials to keep apart.
Class<br />
or<br />
Division<br />
Explosives 1.1 and 1.2 A * * * * * X X X X X X X X X X X X X<br />
Explosives 1.3 * * * * * X X X X X X X X X X<br />
Explosives 1.4 * * * * * O O O O O O O<br />
Very insensitive explosives A * * * * * X X X X X X X X X X X X X<br />
Extremely insensitive explosives, 1.6 * * * * *<br />
Flammable gases 2.1 X X O X X O O O<br />
Nontoxic, nonflammable gases, 2.2 X X<br />
Poisonous gas Zone A, 2.3 X X O X X X X X X X X X<br />
Poisonous gas Zone B, 2.3 X X O X O O O O O O O O<br />
Flammable liquids, 3 X X O X X O O X<br />
Flammable solids, 4.1 X X X O X O<br />
Spontaneous combust. materials, 4.2 X X O X X O X X<br />
Dangerous when wet materials, 4.3 X X X X O X O<br />
Oxidizers, 5.1 A X X X X O O X O<br />
Organic peroxides, 5.2 X X X X O X O<br />
Poisonous liquids PG I Zone A, 6.1 X X O X O X X X X X X X<br />
Radioactive materials, 7 X X O<br />
8<br />
liquids<br />
only<br />
Corrosive liquids, 8 X X O X X O O X O O O X<br />
A blank space indicates that no restrictions apply.<br />
X—materials may not be loaded, transported, or stored together in same transport vehicle.<br />
O—materials may not be loaded, transported, or stored together in same transport vehicle unless separated in a manner that would<br />
prevent the materials from commingling in case <strong>of</strong> a leak. note: Class 8 materials may not be loaded above Class 4 or Class 5 materials<br />
unless it is known that the mixture <strong>of</strong> contents will not cause a fire or dangerous evolution <strong>of</strong> heat or gas.<br />
*—segregation among different Class 1 materials is governed by the Compatibility Table for Class 1 (Explosive) Materials (Fig. 9-5).<br />
A—notwithstanding the requirements <strong>of</strong> the letter “X”, ammonium nitrate fertilizer may be loaded or stored with Division 1.1 or 1.5<br />
materials.<br />
Class<br />
or<br />
Division<br />
notes 1.1<br />
Figure 9-5<br />
SegRegAtIOn tABle FOR hAzARDOuS mAteRIAlS<br />
2.3<br />
gas<br />
6.1<br />
2.3 other<br />
liquids<br />
gas than<br />
PG I<br />
1.3 1.4 1.5 1.6 2.1 2.2 Zone Zone 3 4.1 4.2 4.3 5.1 5.2 Zone 7<br />
1.2 A A<br />
A<br />
Figure 9-6<br />
cOmPAtIBIlIty tABle FOR clASS 1 (exPlOSIVe) mAteRIAlS<br />
A B C D E F G H J K L N S<br />
A X X X X X X X X X X X X<br />
B X X X (4) X X X X X X X X 4/5<br />
C X X 2 2 X 6 X X X X 3 4/5<br />
D X X (4) 2 2 X 6 X X X X 3 4/5<br />
E X X 2 2 X 6 X X X X 3 4/5<br />
F X X X X X X X X X X X 4/5<br />
G X X 6 6 6 X X X X X X 4/5<br />
H X X X X X X X X X X X 4/5<br />
J X X X X X X X X X X X 4/5<br />
K X X X X X X X X X X X 4/5<br />
L X X X X X X X X X X 1 X X<br />
N X X 3 3 3 X X X X X X 4/5<br />
S X 4/5 4/5 4/5 4/5 4/5 4/5 4/5 4/5 4/5 X 4/5<br />
A blank space indicates that no restrictions apply.<br />
X—explosives <strong>of</strong> different groups may not be carried on the same transport vehicle.<br />
1—explosive from group L shall only be carried on the same transport vehicle with an identical explosive.<br />
2—any combination <strong>of</strong> explosives from groups C, D, or E is assigned to group E.<br />
3—any combination <strong>of</strong> explosives from groups C, D, or E with those in group N is assigned to group D.<br />
4—refer to 49 CFR §177.835(g) when transporting detonators.<br />
5—Div. 1.4 fireworks may not be loaded on same transport vehicle with Div. 1.1 or 1.2 (Class A) explosive material.<br />
- 121 -
Inhalation hazards. An INHALATION HAZARD<br />
is defined as a POISONOUS GAS or LIQUID <strong>of</strong><br />
which a very small amount <strong>of</strong> gas or vapor <strong>of</strong> a<br />
liquid mixed with air is dangerous to life. Some<br />
inhalation hazards are classified as Division 2.3<br />
(gas, poison by inhalation) while many others are<br />
classified under various other Divisions. These other<br />
materials are identified as POISON-INHALATION<br />
HAZARDS or INHALATION HAZARDS per the<br />
special provisions codes, column 7, listed in the<br />
Hazardous Materials Table.<br />
Bulk tAnkS<br />
A bulk tank is intended primarily for carrying<br />
liquids, gases, or solids. Refer to the Glossary<br />
for more information. Cargo tanks remain on the<br />
vehicle when you load and unload them. Portable<br />
tanks are bulk containers which are not permanently<br />
attached to a vehicle. They are loaded or unloaded<br />
with the product while <strong>of</strong>f the vehicle. Portable<br />
tanks are then put on a vehicle for transportation.<br />
Exception: IM specification portable tanks are<br />
authorized to be unloaded while attached to the<br />
transport vehicle.<br />
There are many types <strong>of</strong> cargo tanks in use. The<br />
most common are MC 306 for liquids and MC<br />
331 for gases.<br />
markings<br />
You must display the ID number <strong>of</strong> the contents<br />
<strong>of</strong> portable tanks, cargo tanks, and other bulk<br />
packagings (such as dump trucks). Product ID<br />
numbers are in column 4 <strong>of</strong> the Hazardous Materials<br />
Table. Those rules require black numbers on<br />
orange panels, placards, or white diamond-shaped<br />
backgrounds if no placards are required. Specification<br />
cargo tanks must show retest and inspection<br />
date markings.<br />
Portable tanks must also show the lessee or owner’s<br />
name. They must also display the shipping name<br />
<strong>of</strong> the contents on two opposing sides. The letters<br />
<strong>of</strong> the shipping name must be at least two inches<br />
tall on portable tanks with capacities <strong>of</strong> 1,000<br />
gallons or more and one inch tall on portable tanks<br />
with capacities <strong>of</strong> less than 1,000 gallons. The ID<br />
number must appear on each side and each end <strong>of</strong> a<br />
- 122 -<br />
portable tank or other bulk packaging that holds<br />
1,000 gallons or more and on two opposing sides,<br />
if the portable tank holds less than 1,000 gallons.<br />
The ID numbers must still be visible when the<br />
portable tank is on the motor vehicle. If they are<br />
not visible, you must display the ID number on<br />
both sides and ends <strong>of</strong> the motor vehicle.<br />
loading<br />
The loading and unloading <strong>of</strong> a cargo tank must<br />
be attended. The person overseeing the loading or<br />
unloading must be alert and:<br />
• Have a clear view <strong>of</strong> the cargo tank.<br />
• Be within 25 feet <strong>of</strong> the tank.<br />
• Be aware <strong>of</strong> the hazards.<br />
• Know the procedures to follow in an emergency.<br />
• Be authorized to move the cargo tank and able<br />
to do so.<br />
Close all manholes and valves before moving a tank<br />
carrying hazardous materials. It does not matter<br />
how small the amount in the tank or how short<br />
the distance. Manholes and valves must not leak.<br />
flammaBle liquids<br />
Turn <strong>of</strong>f your engine before loading or unloading<br />
any flammable liquid. Only run the engine if it is<br />
needed to operate a pump. Ground a cargo tank<br />
correctly before filling it through an open filling<br />
hole. Ground the tank before opening the filling<br />
hole, and maintain the ground until after closing<br />
the filling hole.<br />
Compressed gas<br />
Keep liquid discharge valves on a compressed gas<br />
tank closed except when loading and unloading.<br />
Unless your engine must run a pump for product<br />
transfer, turn if <strong>of</strong>f when loading or unloading.<br />
If you use the engine, turn if <strong>of</strong>f after material<br />
delivery, before unhooking the hose.<br />
Chlorine Cargo<br />
Unhook all loading/unloading connections before<br />
coupling, uncoupling, or moving a chlorine cargo<br />
tank. Always chock trailers and semitrailers to<br />
prevent motion after the trailers are dropped.
FeDeRAl DRIVIng AnD<br />
PARkIng RuleS<br />
division 1.1, 1.2, or 1.3 explosives<br />
Do not park with Division 1.1, 1.2, or 1.3 explosives<br />
within 5 feet <strong>of</strong> the traveled part <strong>of</strong> the road.<br />
Except for short periods <strong>of</strong> time needed for vehicle<br />
operation necessities (i.e., fueling), do not park<br />
within 300 feet <strong>of</strong>:<br />
• A bridge, tunnel, or building.<br />
• A place where people gather.<br />
• An open fire.<br />
If you must park to do your job, only do so briefly.<br />
Do not park on private property unless the owner<br />
is aware <strong>of</strong> the danger. You must always watch the<br />
parked vehicle. You may let someone else watch<br />
it for you only if your vehicle is on the:<br />
• Shipper’s property.<br />
• Carrier’s property.<br />
• Consignee’s property.<br />
Vehicles may be parked unattended in a safe<br />
haven. A safe haven is a government approved<br />
place for parking unattended vehicles loaded with<br />
explosives. Designation <strong>of</strong> authorized safe havens<br />
are usually made by local authorities. In <strong>California</strong>,<br />
safe havens are designated by the CHP and referred<br />
to as “safe parking places.”<br />
other plaCarded vehiCles<br />
You may park a placarded vehicle (not laden with<br />
explosives) within 5 feet <strong>of</strong> the traveled part <strong>of</strong> the<br />
road if your work requires it. You may park for<br />
only a brief time. Someone must always watch<br />
a vehicle parked with hazardous materials on a<br />
public roadway or shoulder. Do not uncouple or<br />
leave a trailer with hazardous materials on a public<br />
street. Do not park within 300 feet <strong>of</strong> an open fire.<br />
attending parked vehiCles<br />
The person attending a placarded vehicle must:<br />
• Be in the vehicle, awake, and not in the sleeper<br />
berth.<br />
• Within 100 feet <strong>of</strong> the vehicle and have it<br />
within clear view.<br />
• Be aware <strong>of</strong> the hazards.<br />
• Know what to do in emergencies.<br />
• Be able to move the vehicle, if necessary.<br />
<strong>Driver</strong>s <strong>of</strong> vehicles required to be placarded or<br />
marked per 49 CFR 177.823 (CVC §27903) must<br />
also be driven and parked in compliance with state<br />
and local requirements (49 CFR 397.3).<br />
transporting explosives in<br />
<strong>California</strong><br />
When transporting any amount <strong>of</strong> Division 1.1,<br />
1.2, 1.3, or 1.6 EXPLOSIVES or a combination<br />
<strong>of</strong> any <strong>of</strong> these explosives together with a Division<br />
1.5 EXPLOSIVE (blasting agent) as a delivery<br />
service or “for hire,” you must use special routes,<br />
safe stopping places, safe parking places, and<br />
mandatory vehicle inspection locations prescribed<br />
by the CHP. When transporting more than 1000 lbs.<br />
<strong>of</strong> these explosives in private carriage (other than<br />
as a delivery service) the same requirements apply.<br />
transporting inhalation hazards in<br />
<strong>California</strong><br />
Shipments <strong>of</strong> materials designated as “Poison<br />
Inhalation Hazard,” “Toxic Inhalation Hazard,” or<br />
“Inhalation Hazard” per 49 CFR 172.203, when<br />
transported in bulk packagings (49 CFR 171.8),<br />
must also be transported using special routes, safe<br />
stopping places, and mandatory vehicle inspection<br />
locations prescribed by the CHP for these materials.<br />
transporting radioaCtive materials<br />
in <strong>California</strong><br />
There are also specific routes prescribed by the<br />
CHP for “Highway Route Controlled Quantity<br />
(HRCQ)” and “Radioactive Materials (RAM)”<br />
shipments.<br />
<strong>Driver</strong>s must have in their possession, supplied by<br />
the carrier, a copy <strong>of</strong> the routes applicable to their<br />
shipment when transporting these materials. The<br />
routes, stopping places, and inspection locations<br />
are contained in 13 CCR 1150-1152.8 (Explosives),<br />
1155-1157.20 (IH), and 1158-1159 (HRCQ). These<br />
requirements are also published by the CHP.<br />
- 123 -
Motor carriers may receive these publications,<br />
including revisions, by indicating their request<br />
on the APPLICATION FOR HAZARDOUS<br />
MATERIALS TRANSPORTATION LICENSE<br />
or by contacting the <strong>Commercial</strong> Vehicle Section,<br />
Routing Coordinator at (916) 327-3310.<br />
<strong>California</strong> general hazardous<br />
materials routing requirement<br />
The following general routing and parking restrictions<br />
(CVC §31303) apply to hazardous material<br />
and hazardous waste shipments for which the<br />
display <strong>of</strong> vehicle placards and/or markings are<br />
required per CVC §27903 (except shipments<br />
subject to, and in conformance with, special routing<br />
and related requirements):<br />
• Unless specifically restricted or prohibited<br />
(CVC §31304), use state or interstate highways<br />
which <strong>of</strong>fer the least transit time whenever<br />
possible.<br />
• Avoid, whenever practicable, congested<br />
highways, places where crowds are assembled,<br />
and residence districts (CVC §515).<br />
• Deviation from designated routes is not excusable<br />
on the basis <strong>of</strong> operating convenience.<br />
• Do not leave a loaded vehicle unattended or<br />
parked overnight in a residence district.<br />
• Except for specifically restricted or prohibited<br />
highways, other highways may be used that<br />
provide necessary access for pickup or delivery<br />
consistent with safe vehicle operation.<br />
• Highways which provide reasonable access<br />
to fuel, repairs, rest, or food facilities that<br />
are designed to and intended for commercial<br />
vehicle parking, when that access is safe and<br />
when the facility is within one-half mile <strong>of</strong> the<br />
points <strong>of</strong> exit and/or entry to the designated<br />
route.<br />
• Restricted or prohibited routes may only be<br />
used when no other lawful alternative exists.<br />
The CHP also publishes a list <strong>of</strong> restricted or<br />
prohibited highways (CVC §31304). Copies<br />
<strong>of</strong> this list may be obtained by contacting<br />
the <strong>Commercial</strong> Vehicle Section, Routing<br />
Coordinator at (916) 327-3310.<br />
- 124 -<br />
flammaBle Cargo restriCtions<br />
You might break down in a place where you must<br />
use stopped vehicle signals. Use reflective triangles<br />
or red electric lights. Do not use burning signals<br />
such as flares or fusees around a:<br />
• Tank used for flammable liquids or flammable<br />
gas whether loaded or empty.<br />
• Vehicle loaded with the following:<br />
— Division 1.1, 1.2, or 1.3 explosives.<br />
— Class 3 materials.<br />
— Division 2.1 flammable gas.<br />
Do not smoke within 25 feet <strong>of</strong> a placarded tank<br />
used for flammable liquids or gases. Also, do not<br />
smoke or carry a lighted cigarette, cigar, or pipe<br />
within 25 feet <strong>of</strong> any vehicle which contains:<br />
• Class 1 (explosives).<br />
• Class 5.1 (oxidizers).<br />
• Class 3 (flammables, including tanks containing<br />
residue).<br />
fueling restriCtions<br />
Turn <strong>of</strong>f your engine before fueling a placarded<br />
vehicle. Someone must always be at the nozzle<br />
controlling fuel flow.<br />
fire extinguishers<br />
The power unit <strong>of</strong> placarded vehicles must have a<br />
fire extinguisher with a UL rating <strong>of</strong> at least 10 B:C<br />
or more. In <strong>California</strong>, tank vehicles or combinations<br />
<strong>of</strong> tank vehicles used to transport flammable<br />
or combustible liquids shall be equipped with at<br />
least one fire extinguisher rated not less than 20<br />
B:C, serviced annually.
tire CheCks<br />
The driver <strong>of</strong> a placarded vehicle with dual tires<br />
must make sure the tires are properly inflated.<br />
Check at the start <strong>of</strong> each trip and when you park.<br />
Check the tires every two hours or 100 miles,<br />
whichever is less. The only acceptable way to<br />
check tire pressure is to use a tire pressure gauge.<br />
Do not drive with a tire that is leaking or flat<br />
except to the nearest safe place to fix it. Remove<br />
any overheated tire. Place it a safe distance from<br />
your vehicle. Do not drive until you have corrected<br />
the cause <strong>of</strong> overheating. Always follow the rules<br />
about parking and attending placarded vehicles.<br />
They apply even when checking, repairing, or<br />
replacing tires.<br />
Where to keep shipping papers<br />
Do not accept a hazardous materials shipment<br />
without a properly prepared shipping paper. A<br />
shipping paper for hazardous materials must always<br />
be easily recognized. Other people must be able to<br />
find it quickly in the event <strong>of</strong> a collision.<br />
• Clearly distinguish hazardous materials shipping<br />
papers from others by tabbing them or<br />
keeping them on top <strong>of</strong> the stack <strong>of</strong> papers.<br />
• When you are behind the wheel, keep shipping<br />
papers within your reach (with your seat belt<br />
on), or in a pouch on the driver’s door. They<br />
must be easily seen by someone entering the<br />
cab.<br />
• When not behind the wheel, leave the shipping<br />
papers in the driver’s door pouch or on the<br />
driver’s seat.<br />
• Emergency response information must be kept<br />
in the same manner as the shipping paper.<br />
papers needed for division 1.1, 1.2,<br />
or 1.3 explosives<br />
A carrier must give each driver transporting Division<br />
1.1, 1.2, or 1.3 explosives a copy <strong>of</strong> the Federal<br />
Motor Carrier Safety Regulation (FMCSR) part<br />
397. The carrier must also give written instructions<br />
on what to do in the event <strong>of</strong> a collision or delay.<br />
The written instructions must include the:<br />
• Names and telephone numbers <strong>of</strong> people to<br />
contact (including carrier agents or shippers).<br />
• Nature <strong>of</strong> the explosives transported.<br />
• Precautions to take in emergencies such as<br />
fires, collisions, or leaks.<br />
You must sign a receipt for these documents and<br />
be familiar with, and have in your possession while<br />
driving, the:<br />
• Shipping papers.<br />
• Written emergency instructions.<br />
• Written route plan.<br />
• Copy <strong>of</strong> FMCSR part 397.<br />
speCial equipment for Chlorine<br />
A driver transporting chlorine in cargo tanks must<br />
have an approved gas mask on the cargo tank.<br />
The driver must also have an emergency kit for<br />
controlling leaks in dome cover plate fittings on<br />
the cargo tank.<br />
railroad Crossings<br />
Stop before crossing a railroad if your<br />
vehicle:<br />
• Is marked or placarded. (49 CFR 392.10)<br />
• Carries any amount <strong>of</strong> chlorine.<br />
(49 CFR 392.10)<br />
• Has cargo tanks, whether loaded or empty,<br />
used for hazardous materials or wastes.<br />
(49 CFR 392.10)<br />
You must stop 15 to 50 feet before the nearest rail.<br />
Proceed only when you are sure no train is coming.<br />
Do not shift gears while crossing the tracks.<br />
- 125 -
DeAlIng WIth emeRgencIeS<br />
The <strong>Department</strong> <strong>of</strong> Transportation publishes an<br />
Emergency Response Guidebook for fire fighters,<br />
police, and industry personnel. The guidebook<br />
tells them what to do first to protect themselves<br />
and the public from hazardous materials or wastes.<br />
The guidebook is indexed by shipping name and<br />
hazardous material ID number. Emergency personnel<br />
look for these things on the shipping paper.<br />
It is important that the proper shipping name, ID<br />
number, label, and placards used are correct.<br />
emergenCy response guideBook<br />
(erg)<br />
As a pr<strong>of</strong>essional driver, your job at the<br />
collision scene is to:<br />
• Keep people away from the area.<br />
• Limit the spread <strong>of</strong> material, only if you are<br />
trained to do so.<br />
• Communicate the danger to emergency<br />
response personnel.<br />
• Provide emergency responders with the<br />
shipping papers and emergency response<br />
information.<br />
vehiCle Collisions<br />
Follow this checklist:<br />
1. Check to see that your driving partner is OK.<br />
2. Keep shipping papers with you.<br />
3. Keep people far away and upwind.<br />
4. Warn others <strong>of</strong> the danger.<br />
5. Send for help.<br />
6. Follow your employer’s instructions.<br />
fires<br />
You might have to control minor fires involving<br />
your vehicle on the road. However, unless you<br />
have the training and equipment to do so safely,<br />
do not fight hazardous materials fires. Dealing with<br />
hazardous materials fires requires special training<br />
and protective gear.<br />
- 126 -<br />
When you discover a fire, send someone or call<br />
9-1-1 for help. You may use the fire extinguisher<br />
to keep minor vehicle fires from spreading to cargo<br />
before fire fighters arrive. You should feel trailer<br />
doors to see if they are hot before opening them.<br />
If hot, you may have a cargo fire and should not<br />
open the doors. Opening doors lets air in and may<br />
make the fire flare up. Without air many fires only<br />
smolder until firemen arrive, doing less damage.<br />
If your cargo is already on fire, it is not safe to<br />
fight the fire. Keep the shipping papers with you<br />
to give to emergency personnel as soon as they<br />
arrive. Warn other people <strong>of</strong> the danger and keep<br />
them away.<br />
leaks<br />
If you discover a cargo leak, identify the material<br />
by using shipping papers, labels, package location<br />
in trailer, and any other clue. Do not touch any<br />
leaking material. Many people, under the stress<br />
<strong>of</strong> handling an accident or leak, forget and injure<br />
themselves this way. Do not attempt to identify<br />
materials or find the source <strong>of</strong> a leak by smell.<br />
Many toxic gases destroy one’s sense <strong>of</strong> smell.<br />
They can injure or kill you without smell. Do not<br />
eat, drink, or smoke around a leak or spill.<br />
If no material is spilling from your vehicle, you<br />
may drive to the closest area where you can get<br />
help. Never move your vehicle if doing so will<br />
spread contamination or damage the vehicle. Keep<br />
downwind and away from roadside rest stops, truck<br />
stops, cafes, and businesses. Never try to repack<br />
leaking containers unless you have the training<br />
and equipment to repair leaks safely. Call your<br />
dispatcher or supervisor for instructions and, if<br />
needed, emergency personnel.<br />
If hazardous material is spilling from your vehicle,<br />
you may move <strong>of</strong>f the road and away from places<br />
where people gather, if doing so serves safety.<br />
Only move your vehicle if you can do so without<br />
danger to yourself or others.
Never continue driving with hazardous materials<br />
leaking from your vehicle even to find a<br />
phone booth, truck stop, help, or similar reason.<br />
Remember that the carrier pays for the cleanup <strong>of</strong><br />
contaminated parking lots, roadways, and drainage<br />
ditches. If hazardous materials are spilling from<br />
your vehicle:<br />
• Park it and secure the area.<br />
• Stay there.<br />
• Call 9-1-1 or send someone else for help.<br />
If you must send someone for help, give that person<br />
the following information in writing:<br />
• A description <strong>of</strong> the emergency.<br />
• Your exact location and direction <strong>of</strong> travel.<br />
• Your name, the carrier’s name, and the name<br />
<strong>of</strong> the community or city where your terminal<br />
is located.<br />
• The shipping name, hazard class, and ID<br />
number <strong>of</strong> the material.<br />
This information will help emergency crews to<br />
respond with the right equipment the first time.<br />
other hazards<br />
Explosives. If your vehicle breaks down or is in a<br />
collision while carrying explosives, you must warn<br />
others <strong>of</strong> the danger. Keep bystanders away. Do<br />
not allow smoking or open fire near the vehicle.<br />
Do not try to pull apart vehicles involved in a<br />
collision until any explosive cargo is removed.<br />
The explosives should be placed at least 200 feet<br />
from the vehicles and occupied buildings. If there<br />
is a fire, warn everyone <strong>of</strong> the danger <strong>of</strong> explosion<br />
and leave the area.<br />
Compressed gases. If compressed gas is leaking<br />
from your vehicle, warn others <strong>of</strong> the danger. Only<br />
permit those involved in removing the hazard or<br />
wreckage to get close. You must notify the shipper<br />
<strong>of</strong> the compressed gas <strong>of</strong> any collision or spill.<br />
Do not transfer flammable compressed gas from<br />
one tank to another on any public roadway except<br />
in an emergency.<br />
Flammable liquids. If you are transporting a<br />
flammable liquid and have a collision or your<br />
vehicle breaks down, prevent bystanders from<br />
gathering. Warn people <strong>of</strong> the danger. Keep them<br />
from smoking.<br />
Never transport a leaking cargo tank farther than<br />
needed to reach a safe place. If safe to do so, get<br />
<strong>of</strong>f the roadway. Do not transfer flammable liquid<br />
from one vehicle to another on a public roadway<br />
except in an emergency.<br />
Flammable solids and oxidizing materials. If a<br />
flammable solid or oxidizing material spills, warn<br />
others <strong>of</strong> the fire hazard. Do not open smoldering<br />
packages <strong>of</strong> flammable solids. Remove them from<br />
the vehicle if you can safely do so. Also remove<br />
unbroken packages if it will decrease the fire hazard.<br />
Corrosive materials. If corrosives spill or leak<br />
in transit, be careful to avoid further damage or<br />
injury when handling the containers. Parts <strong>of</strong> the<br />
vehicle exposed to a corrosive liquid must be<br />
thoroughly neutralized. Clean the interior as soon<br />
after unloading as possible, before reloading the<br />
vehicle.<br />
If further transportation <strong>of</strong> a leaking tank would<br />
be unsafe, get <strong>of</strong>f the road. If safe to do so, try to<br />
contain any liquid leaking from the vehicle. Keep<br />
bystanders away from the liquid and its fumes.<br />
Do everything possible to prevent injury to other<br />
highway users.<br />
Poisons. You must protect yourself, other people,<br />
and property from harm. Remember that many<br />
products classed as poison are also flammable.<br />
Warn bystanders <strong>of</strong> the hazards <strong>of</strong> fire, <strong>of</strong> inhaling<br />
vapors, or coming in contact with the poison. Do<br />
not allow smoking or open flame.<br />
A vehicle involved in a leak <strong>of</strong> Division 2.3 or<br />
Division 6.1 poisons must be checked for stray<br />
poison before being used again.<br />
If you know that a leaking poison liquid or gas is<br />
flammable, take the added precautions needed for<br />
flammable liquids or gases.<br />
- 127 -
Radioactive materials. If a leak or broken package<br />
involves radioactive materials, notify your<br />
dispatcher or supervisor as soon as possible. If<br />
there is a spill, or if an internal container might<br />
be damaged, do not touch or inhale the material.<br />
Do not use the vehicle until it is decontaminated<br />
and checked with a survey meter.<br />
The National Response Center helps coordinate<br />
emergency response to chemical hazards. They<br />
are a resource to the local police and fire fighters.<br />
Their 24-hour toll free number is 1-800-424-8802<br />
or within <strong>California</strong>, 1-800-852-7550. The person<br />
in charge <strong>of</strong> a vehicle involved in a collision may<br />
have to phone the National Response Center. The<br />
call will be in addition to any made to police or fire<br />
fighters. You or your employer must phone when<br />
any <strong>of</strong> the following occurs as a direct result <strong>of</strong><br />
hazardous materials incident:<br />
• There is spill or release <strong>of</strong> a reportable quantity<br />
(RQ) hazardous substance.<br />
• A person is killed.<br />
• A person receives injuries requiring<br />
hospitalization.<br />
• Estimated carrier or other property damage<br />
exceeds $50,000.<br />
• The general public is evacuated for one or<br />
more hours.<br />
• One or more major transportation arteries or<br />
facilities are closed or shut down for one hour<br />
or more.<br />
• Fire, breakage, spillage, or suspected radioactive<br />
contamination occurs and/or involves<br />
a shipment <strong>of</strong> etiologic agents (bacteria or<br />
toxins).<br />
• A situation (e.g., continuing danger to life<br />
exists at the scene <strong>of</strong> an incident) that, in the<br />
judgment <strong>of</strong> the carrier, should be reported.<br />
- 128 -<br />
The person making the immediate telephone report<br />
should be ready to give:<br />
• His or her name.<br />
• Name and address <strong>of</strong> the carrier.<br />
• Phone number where someone can be reached.<br />
• Date, time, and location <strong>of</strong> incident.<br />
• The extent <strong>of</strong> injuries, if any.<br />
• Classification, name, and quantity <strong>of</strong> hazardous<br />
materials involved, if such information is<br />
available.<br />
• Type <strong>of</strong> incident and nature <strong>of</strong> hazardous substance<br />
involvement and whether a continuing<br />
danger to life exists at the scene.<br />
• If a reportable quantity <strong>of</strong> hazardous substance<br />
was involved, the caller should give the<br />
following:<br />
— the name <strong>of</strong> the shipper.<br />
— the quantity <strong>of</strong> the hazardous substance<br />
discharged.<br />
You should know these immediate reporting<br />
requirements so you can give your employer the<br />
required information. Carriers must also make<br />
detailed written reports within 30 days.<br />
The Chemical Transportation Emergency Center<br />
(CHEMTREC) in Washington D.C. also has a 24<br />
hour toll free line (1-800-424-9300). CHEMTREC<br />
was established to provide emergency personnel<br />
with technical information about the physical<br />
properties <strong>of</strong> hazardous products. The National<br />
Response Center and CHEMTREC are in close<br />
communication. If you call either one, they will<br />
tell the other about the problem, when appropriate.<br />
<strong>California</strong> immediate spill reporting<br />
Spills <strong>of</strong> hazardous materials on <strong>California</strong> highways<br />
must be reported immediately to the CHP<br />
<strong>of</strong>fice or police department having traffic control<br />
jurisdiction (CVC §23112.5).
hAzARD clASS<br />
and DIVISIOn<br />
CLASS 1—EXPLOSIVES<br />
APPenDIx A—tABle OF hAzARD clASS DeFInItIOnS<br />
DeFInItIOn<br />
Division 1.1 Explosives that have a mass explosion hazard (affects lmost the entire load instantaneously).<br />
(Refer to 49 CFR 173.50(b)(1).)<br />
Division 1.2 Explosives that have a projection hazard but not a mass explosion hazard. (Refer to 49 CFR<br />
173.50 (b)(2).)<br />
Division 1.3 Explosives that have a fire hazard and either a minor blast or projection hazard or both, but<br />
not a mass explosion hazard. (Refer to 49 CFR 173.50 (b)(3).)<br />
Division 1.4 Explosives that present a minor explosion hazard (effects are largely confined to the package).<br />
(Refer to 49 CFR 173.50 (b)(4).)<br />
Division 1.5 Explosives that are very insensitive (very little probability <strong>of</strong> detonation under normal<br />
transport condition). (Refer to 49 CFR 173.50 (b)(5).)<br />
Division 1.6 Articles which do not have a mass explosive hazard (negligible probability <strong>of</strong> accidental<br />
detonation). (Refer to 49 CFR 173.50 (b)(6).)<br />
CLASS 2—GASES<br />
Division 2.1 Flammable gas is any material which is a gas at 20°C (68°F) or less and 101.3 kPa (14.7 psi)<br />
<strong>of</strong> pressure and is ignitable when mixed with air. (Refer to 49 CFR 173.115(a).)<br />
Division 2.2 Division 2.2 includes non-flammable, non-poisonous compressed gas including compressed<br />
gas, liquefied gas, pressurized cryogenic gas and compressed gas in solution, asphyxiant<br />
gas, or oxidizing gas with an absolute pressure <strong>of</strong> 280 kpa (40.6 PSIA) or greater at 20°C<br />
(68°F). (Refer to 49 CFR 173.115(b).)<br />
Division 2.3 A gas poisonous by inhalation is a gas which is known to be so toxic to humans as to pose<br />
a hazard to health during transportation. (Refer to 49 CFR 173.115(c).)<br />
CLASS 3—FLAMMABLE LIQUIDS<br />
A flammable liquid means a liquid having a flash point <strong>of</strong> not more than 60.5°C (141°F), or any material in a<br />
liquid phase with a flash point at or above 37.8°C (100°F) that is intentionally heated and <strong>of</strong>fered for transport, or<br />
transported at or above its flash point in a bulk package, with the following exceptions:<br />
Any liquid meeting one <strong>of</strong> the definitions specified in 49 CFR 173.115 (gases).<br />
Any mixture having one or more components with a flash point <strong>of</strong> 60.5°C (141°F) or higher, that makes up at<br />
least 99% <strong>of</strong> the total volume <strong>of</strong> the mixture, if the mixture is not <strong>of</strong>fered for transportation or transported at or<br />
above its flash point.<br />
CLASS 4—FLAMMABLE SOLIDS<br />
Division 4.1 A flammable solid means any <strong>of</strong> the following three types <strong>of</strong> material:<br />
1. Desensitized Explosives that: A) when dry are explosives Class 1 other than those <strong>of</strong><br />
compatibility group A, which are wetted with sufficient water, alcohol, or plasticizer to<br />
suppress explosive properties; and B) are specifically authorized by name and hazard class<br />
by the Associate Administrator for Hazard ous Materials under the provisions <strong>of</strong> an exemption<br />
issued under subchapter A <strong>of</strong> 49 CFR or an approval issued under 49 CFR 173.56(i).<br />
2. Self-reactive materials are materials that are liable to undergo, at normal or elevated<br />
temperature, a strong exothermal decomposition caused by excessively high transport<br />
temperatures or by contamination, even without participation <strong>of</strong> oxygen (air).<br />
- 129 -
- 130 -<br />
APPenDIx A—tABle OF hAzARD clASS DeFInItIOnS (continued)<br />
CLASS 4—FLAMMABLE SOLIDS (continued)<br />
Division 4.1<br />
(continued)<br />
3. Readily combustible materials are materials that are solids which may cause fire through<br />
friction such as matches; shows a burn rate <strong>of</strong> more than 2.2 mm (0.087 inches); or any metal<br />
powders that can be ignited and react over the whole length <strong>of</strong> the sample in 10 minutes or less.<br />
Division 4.2 A spontaneously combustible material means:<br />
1. A Pyrophoric Material—a liquid or solid that, even in small quantities, and without an<br />
external ignition source, can ignite within five minutes after coming in contact with air.<br />
2. A Self-heating Material—a material that, when in contact with air and without an energy<br />
supply is liable to self heat. A material <strong>of</strong> this type which exhibits spontaneous ignition or if<br />
the temperature <strong>of</strong> a sample exceeds 200°C (392°F) in 24 hours is a Division 4.2 material.<br />
Division 4.3 A dangerous when wet material is a material that, by contact with water, is liable to become<br />
spontaneously flammable or to give <strong>of</strong>f flammable or toxic gas. (Refer to 49 CFR 173.124 (c).)<br />
CLASS 5—OXIDIzInG MATERIALS<br />
Division 5.1 An oxidizer is any material that may, generally by yielding oxygen, cause or enhance the<br />
combustion <strong>of</strong> other materials. (Refer to 49 CFR 173.127 (a).)<br />
Division 5.2 Organic peroxide is a compound containing oxygen (O) in the bivalent-O-O structure and<br />
which may be considered a derivative <strong>of</strong> hydrogen peroxide where one or more <strong>of</strong> the<br />
hydrogen atoms have been replaced by organic radicals. (Refer to 49 CFR 173.128 (a).)<br />
CLASS 6—POISOnOUS/InFECTIOUS SUBSTAnCES<br />
Division 6.1 A poisonous material is any material, other than a gas, which is known to be so toxic to<br />
humans that it causes a hazard to health during transportation. (Refer to 49 CFR 173.132 (a).)<br />
Division 6.2 An infectious substance is a viable microorganism, or its toxin, which causes or may cause<br />
disease in humans or animals. (Refer to 49 CFR 173.134 (a).)<br />
CLASS 7—RADIOACTIVE MATERIALS (Refer to 49 CFR 173.403.)<br />
CLASS 8—CORROSIVE MATERIALS<br />
A corrosive material is any liquid or solid that causes visible destruction or irreversible alterations in human skin<br />
tissue at the site <strong>of</strong> contact, or a liquid that has a severe corrosion rate on steel or aluminum. (Refer to 49 CFR<br />
173.136 (a).)<br />
CLASS 9—MISCELLAnEOUS HAzARDOUS MATERIALS<br />
A miscellaneous hazardous material is any material which presents a hazard during transportation but which does<br />
not meet the definition <strong>of</strong> any other hazard class. (Refer to 49 CFR 173.140.)<br />
ORM-D MATERIALS<br />
Other Regulated Materials (ORM) means a material such as a consumer commodity, which, although otherwise<br />
subject to the regulations <strong>of</strong> 49 CFR 173, presents a limited hazard during transportation due it its form, quantity,<br />
and packaging. (Refer to 49 CFR 173.144.)<br />
COMBUSTIBLE LIQUIDS<br />
A combustible liquid is any liquid that does not meet the definition <strong>of</strong> any other hazard class and has a flash point<br />
above 141°F, but less than 220°F. (Refer to 49 CFR 173.120(a)).<br />
Note: Some flammable liquids with a flash point at or above 100°F may be reclassed as combustible liquid for<br />
domestic transportation (Refer to 49 CFR 173.120(b)).
hAzARDOuS mAteRIAlS WARnIng lABelS AnD PlAcARDS<br />
- 131 -
- 132 -
- 133 -
- 134 -
You should be thoroughly familiar with <strong>California</strong><br />
and your local school district laws and regulations.<br />
DAngeR zOneS – uSe OF<br />
mIRRORS<br />
danger zones<br />
SectIOn 10: SchOOl BuSeS<br />
This section is for all commercial drivers that drive school buses<br />
The danger zone is the area on all sides <strong>of</strong> the bus<br />
where children are in the most danger <strong>of</strong> being<br />
hit, either by another vehicle or their own bus.<br />
The danger zones may extend as much as 30 feet<br />
from the front bumper (with the first 10 feet being<br />
the most dangerous), 10 feet from the left and<br />
right sides <strong>of</strong> the bus and 10 feet behind the rear<br />
bumper <strong>of</strong> the school bus. In addition, the area to<br />
the left <strong>of</strong> the bus is always considered dangerous<br />
because <strong>of</strong> passing cars.<br />
CorreCt mirror adjustment<br />
Proper adjustment and use <strong>of</strong> all mirrors is vital to<br />
the safe operation <strong>of</strong> a school bus to observe the<br />
danger zone around the bus and look for students,<br />
traffic, and other objects in this area. You should<br />
always check each mirror before operating the<br />
school bus to obtain maximum viewing area. If<br />
necessary, have the mirrors adjusted.<br />
outside left and right side flat<br />
mirrors<br />
These mirrors are mounted at the left and right<br />
front corners <strong>of</strong> the bus at the side or front <strong>of</strong> the<br />
windshield. They are used to monitor traffic, check<br />
clearances and students on the sides and to the rear<br />
<strong>of</strong> the bus. There is a blind spot immediately below<br />
and in front <strong>of</strong> each mirror and directly in back<br />
<strong>of</strong> the rear bumper. The blind spot behind the bus<br />
extends 50 to 150 feet and could extend up to 400<br />
feet depending on the length and width <strong>of</strong> the bus.<br />
Ensure that the mirrors are properly adjusted so<br />
you can see:<br />
• 200 feet or four bus lengths behind the bus.<br />
• Along the sides <strong>of</strong> the bus.<br />
• The rear tires touching the ground.<br />
outside left and right side Convex<br />
mirrors<br />
The convex mirrors are located below the outside<br />
flat mirrors. They are used to monitor the left and<br />
right sides at a wide angle. They provide a view<br />
<strong>of</strong> traffic, clearances, and students at the side <strong>of</strong><br />
the bus. These mirrors present a view <strong>of</strong> people<br />
and objects that does not accurately reflect their<br />
size and distance from the bus.<br />
You should position the mirrors to see:<br />
• The entire side <strong>of</strong> the bus up to the mirror<br />
mounts.<br />
• Front <strong>of</strong> the rear tires touching the ground.<br />
• At least one traffic lane on either side <strong>of</strong> the bus.<br />
outside left and right side<br />
Crossover mirrors<br />
The mirrors are mounted on both left and right front<br />
corners <strong>of</strong> the bus. They are used to see the front<br />
bumper “danger zone” area directly in front <strong>of</strong> the<br />
bus that is not visible by direct vision, and to view<br />
the “danger zone” area to the left side and right<br />
side <strong>of</strong> the bus, including the service door and front<br />
wheel area. The mirror presents a view <strong>of</strong> people<br />
and objects that does not accurately reflect their<br />
size and distance from the bus. You must ensure<br />
that these mirrors are properly adjusted to see:<br />
• The entire area in front <strong>of</strong> the bus from the<br />
front bumper at ground level to a point where<br />
direct vision is possible. Direct vision and<br />
mirror view vision should overlap.<br />
• The right and left front tires touching the<br />
ground.<br />
- 135 -
• The area from the front <strong>of</strong> the bus to the service<br />
door.<br />
• The mirrors (both the convex and flat mirrors),<br />
should be viewed in a logical sequence to<br />
ensure that a child or object is not in any <strong>of</strong><br />
the danger zones.<br />
overhead inside rearvieW mirror<br />
This mirror is mounted directly above the windshield<br />
on the driver’s side area <strong>of</strong> the bus. This<br />
mirror is used to monitor passenger activity inside<br />
the bus. It may provide limited visibility directly<br />
in back <strong>of</strong> the bus if the bus is equipped with a<br />
glass-bottomed rear emergency door. There is a<br />
blind spot area directly behind the driver’s seat<br />
as well as a large blind spot area that begins at<br />
the rear bumper and could extend up to 400 feet<br />
or more behind the bus. You must use the exterior<br />
side mirrors to monitor traffic that approaches and<br />
enters this area. Position the mirror to see:<br />
• The top <strong>of</strong> the rear window in the top <strong>of</strong> the<br />
mirror.<br />
• All <strong>of</strong> the students, including the heads <strong>of</strong> the<br />
students right behind you.<br />
lOADIng AnD unlOADIng<br />
More students are killed while getting on or <strong>of</strong>f a<br />
school bus each year than are killed as passengers<br />
inside <strong>of</strong> a school bus. As a result, knowing what<br />
to do before, during, and after loading or unloading<br />
students is critical. This section will give you<br />
specific procedures to help avoid unsafe conditions,<br />
which could result in injuries and fatalities, during<br />
and after loading and unloading students.<br />
The information in this section is intended to<br />
provide a broad overview, but is not a definitive<br />
set <strong>of</strong> actions. It is imperative that you learn and<br />
obey <strong>California</strong> regulations governing loading/<br />
unloading operations.<br />
- 136 -<br />
approaChing the stop<br />
Each school district establishes <strong>of</strong>ficial routes<br />
and <strong>of</strong>ficial school bus stops. All stops should be<br />
approved by the school district prior to making<br />
the stop. Never change the location <strong>of</strong> a bus stop<br />
without written approval from the appropriate<br />
school district <strong>of</strong>ficial.<br />
Use extreme caution when approaching a school<br />
bus stop. It is critical that you understand and<br />
follow all <strong>California</strong> and local laws and regulations<br />
regarding approaching a school bus stop. This<br />
would involve the proper use <strong>of</strong> mirrors, amber<br />
and red flashing light systems, stop arm, handheld<br />
stop sign, and student escort procedures.<br />
When approaching the stop:<br />
• Approach cautiously at a slow rate <strong>of</strong> speed.<br />
• Look for pedestrians, traffic, or other objects<br />
before, during, and after coming to a stop.<br />
• Continuously check all mirrors.<br />
• If the school bus is so equipped, activate<br />
alternating flashing amber warning lights at<br />
least 200 feet.<br />
• Turn on right turn signal indicator about 100-<br />
300 feet or approximately 3-5 seconds before<br />
pulling over.<br />
• Continuously check mirrors to monitor the<br />
danger zones for students, traffic, and other<br />
objects.<br />
• Move as far as possible to the right on the<br />
traveled portion <strong>of</strong> the roadway.<br />
• Bring school bus to a full stop with the front<br />
bumper at least 10 feet away from students at<br />
the designated stop. This forces the students<br />
to walk to the bus, so you have a better view<br />
<strong>of</strong> their movements.<br />
• Place transmission in park, or if there is no<br />
park shift point, in neutral. Set the parking<br />
brake at each stop.<br />
• Open service door, if possible, enough to<br />
activate alternating red lights when traffic is<br />
a safe distance from the school bus.<br />
• Make a final check to see that all traffic has<br />
stopped before completely opening the door<br />
and signaling students to approach.
loading proCedures<br />
• Students should wait in a designated location<br />
for the school bus, facing the bus as it<br />
approaches.<br />
• Students should board the bus only when<br />
signaled by the driver.<br />
• Monitor all mirrors continuously.<br />
• Count the number <strong>of</strong> students at the bus stop<br />
and be sure all board the bus. If possible, know<br />
names <strong>of</strong> students at each stop. If there is a<br />
student missing, ask the other students where<br />
the student is.<br />
• Have the students board the school bus slowly,<br />
in single file, and use the handrail. The dome<br />
light should be on while loading in the dark.<br />
• Wait until students are seated and facing<br />
forward before moving the bus.<br />
• Check all mirrors. Make certain no one is<br />
running to catch the bus.<br />
• If you cannot account for a student outside,<br />
secure the bus, take the key, and check around<br />
and underneath the bus.<br />
• When all students are accounted for, prepare<br />
to leave by:<br />
— Closing the door.<br />
— Engaging the transmission.<br />
— Releasing the parking brake.<br />
— Turning <strong>of</strong>f alternating flashing red lights.<br />
— Turning on left turn signal.<br />
— Checking all mirrors again.<br />
— Allowing congested traffic to disperse.<br />
• When it is safe, move the bus to enter traffic<br />
flow and continue the route.<br />
Additional procedures for loading at a school<br />
campus. When loading students at a school<br />
campus, also:<br />
• Turn <strong>of</strong>f the ignition switch.<br />
• Remove key if leaving driver’s compartment.<br />
• Position yourself to supervise loading as<br />
required or recommended by <strong>California</strong> or<br />
local regulations.<br />
unloading proCedures on the route<br />
• Have the students remain seated until told to<br />
exit.<br />
• Check all mirrors.<br />
• Count the number <strong>of</strong> students while unloading<br />
to confirm the location <strong>of</strong> all students before<br />
pulling away from the stop.<br />
• Tell students to exit the bus and walk at least 10<br />
feet away from the side <strong>of</strong> the bus to a position<br />
where the driver can plainly see all students.<br />
• Check all mirrors again. Make sure no students<br />
are around or returning to the bus.<br />
• If you cannot account for a student outside<br />
the bus, secure the bus, and check around and<br />
underneath the bus.<br />
• When all students are accounted for, prepare<br />
to leave by:<br />
— Closing the door.<br />
— Engaging transmission.<br />
— Releasing parking brake.<br />
— Turning <strong>of</strong>f alternating flashing red lights.<br />
— Turning on left turn signal.<br />
— Checking all mirrors again.<br />
— Allowing congested traffic to disperse.<br />
• When it is safe, move the bus, enter the traffic<br />
flow and continue the route.<br />
Note: If you have missed a student’s unloading<br />
stop, do not back up. Be sure to follow local<br />
procedures.<br />
additional proCedures for students<br />
Who must Cross the roadWay<br />
When a school bus is stopped on a highway or<br />
private road for the purpose <strong>of</strong> loading or unloading<br />
pupils, at a location where traffic is not controlled<br />
by a traffic <strong>of</strong>ficer or <strong>of</strong>ficial traffic control signal,<br />
the school bus driver shall do all <strong>of</strong> the following:<br />
• Escort all pupils in prekindergarten, kindergarten,<br />
or any grades one through eighth, who<br />
need to cross the highway or private road upon<br />
which the school bus is stopped. The driver<br />
shall use an approved hand-held “STOP” sign<br />
while escorting all pupils.<br />
- 137 -
• Require all pupils who cross the highway or<br />
private road upon which the school bus is<br />
stopped to walk in front <strong>of</strong> the bus as they cross.<br />
• Ensure that all pupils who cross the highway<br />
or private road upon which the school bus is<br />
stopped have crossed safely, and that all other<br />
pupils and pedestrians are at a safe distance<br />
from the school bus before setting the school<br />
bus in motion.<br />
unloading proCedures at sChool<br />
State and local laws and regulations regarding<br />
unloading students at schools, particularly in<br />
situations where such activities occur in a school<br />
parking lot or other location that is <strong>of</strong>f the traveled<br />
roadway, are <strong>of</strong>ten different than unloading along<br />
the school bus route. It is important that the school<br />
bus driver understands and obeys state and local<br />
laws, and regulations.<br />
When unloading the bus at the school you should<br />
follow these procedures which are general<br />
guidelines:<br />
• Safely stop at designated unloading areas.<br />
• Secure the bus by:<br />
— Turning <strong>of</strong>f the ignition switch.<br />
— Removing key if leaving driver’s<br />
compartment.<br />
• Have the students remain seated until told to<br />
exit.<br />
• Position yourself to supervise unloading as<br />
required or recommended by <strong>California</strong> or<br />
local regulations.<br />
• Have students exit in orderly fashion.<br />
• Observe students as they step from the bus<br />
to see that all move promptly away from the<br />
unloading area.<br />
• Walk through the bus and check for hiding/<br />
sleeping students and items left by students.<br />
• Check all mirrors. Make certain no students<br />
are returning to the bus.<br />
• If you cannot account for a student outside the<br />
bus and the bus is secure, check around and<br />
underneath the bus.<br />
- 138 -<br />
• When all students are accounted for, prepare<br />
to leave by:<br />
— Closing the door.<br />
— Fastening safety belt.<br />
— Starting engine.<br />
— Engaging the transmission.<br />
— Releasing the parking brake.<br />
— Turning <strong>of</strong>f alternating flashing red lights.<br />
— Turning on left turn signal.<br />
— Checking all mirrors again.<br />
— Allowing congested traffic to disperse.<br />
• When it is safe, pull away from the unloading<br />
area.<br />
speCial dangers <strong>of</strong> loading and<br />
unloading<br />
Dropped or forgotten objects. Always focus on<br />
students as they approach the bus and watch for<br />
any who disappear from sight.<br />
Students may drop an object near the bus during<br />
loading and unloading. Stopping to pick up the<br />
object, or returning to pick up the object may cause<br />
the student to disappear from the driver’s sight at<br />
a very dangerous moment.<br />
Students should be told to leave any dropped object<br />
and move to a point <strong>of</strong> safety out <strong>of</strong> the danger<br />
zones and attempt to get the driver’s attention to<br />
retrieve the object.<br />
Handrail hang-ups. Students have been injured<br />
or killed when clothing, accessories, or even parts<br />
<strong>of</strong> their body get caught in the handrail or door as<br />
they exited the bus. You should closely observe all<br />
students exiting the bus to confirm that they are in<br />
a safe location prior to moving the bus.<br />
post-trip inspeCtion<br />
When your route or school activity trip is finished,<br />
you should conduct a post-trip inspection <strong>of</strong> the bus.<br />
You should walk through the bus and around the<br />
bus looking for the following:<br />
• Articles left on the bus.<br />
• Sleeping students.<br />
• Open windows and doors.
• Mechanical/operational problems with the bus,<br />
with special attention to items that are unique<br />
to school buses – mirror systems, flashing<br />
warning lamps and stop signal arms.<br />
• Damage or vandalism.<br />
Any problems or special situations should be<br />
reported immediately to your supervisor or school<br />
authorities.<br />
emeRgency exIt AnD<br />
eVAcuAtIOn<br />
An emergency situation can happen to anyone,<br />
anytime, anywhere. It could be a collision, a stalled<br />
school bus on a railroad-highway crossing or in<br />
a high-speed intersection, an electrical fire in the<br />
engine compartment, a medical emergency to a<br />
student on the school bus, etc. Knowing what to<br />
do in an emergency–before, during and after an<br />
evacuation–can mean the difference between life<br />
and death.<br />
planning for emergenCies<br />
Determine need to evacuate bus. The first<br />
and most important consideration is for you to<br />
recognize the hazard. If time permits, school bus<br />
drivers should contact their dispatcher to explain<br />
the situation before making a decision to evacuate<br />
the school bus.<br />
As a general rule, student safety and control is best<br />
maintained by keeping students on the bus during<br />
an emergency and/or impending crisis situation,<br />
if doing so does not expose them to unnecessary<br />
risk or injury. Remember, the decision to evacuate<br />
the bus must be a timely one.<br />
A decision to evacuate should include consideration<br />
<strong>of</strong> the following:<br />
• Is there a fire or danger <strong>of</strong> fire?<br />
• Is there a smell <strong>of</strong> raw or leaking fuel?<br />
• Is there a chance the bus could be hit by other<br />
vehicles?<br />
• Is the bus in the path <strong>of</strong> a sighted tornado or<br />
rising waters?<br />
• Are there downed power lines?<br />
• Would removing students expose them to<br />
speeding traffic, severe weather, or a dangerous<br />
environment such as downed power lines?<br />
• Would moving students complicate injuries<br />
such as neck and back injuries and fractures?<br />
• Is there a hazardous spill involved? Sometimes,<br />
it may be safer to remain on the bus and not<br />
come in contact with the material.<br />
mandatory evaCuations<br />
Evacuate the bus when:<br />
• The bus is on fire or there is a threat <strong>of</strong> a fire.<br />
• The bus is stalled on or adjacent to a railroadhighway<br />
crossing.<br />
• The position <strong>of</strong> the bus may change and increase<br />
the danger.<br />
• There is an imminent danger <strong>of</strong> collision.<br />
• There is a need to quickly evacuate because<br />
<strong>of</strong> a hazardous materials spill.<br />
evaCuation proCedures—Be<br />
prepared and plan ahead<br />
When possible, assign two responsible, older student<br />
assistants to each emergency exit. Teach them<br />
how to assist the other students <strong>of</strong>f the bus. Assign<br />
another student assistant to lead the students to a<br />
“safe place” after evacuation. However, you must<br />
recognize that there may not be older, responsible<br />
students on the bus at the time <strong>of</strong> the emergency.<br />
Therefore, emergency evacuation procedures must<br />
be explained to all students. This includes knowing<br />
how to operate the various emergency exits and<br />
the importance <strong>of</strong> listening to and following all<br />
instructions given by you.<br />
Some tips to determine a safe place:<br />
• A safe place will be at least 100 feet <strong>of</strong>f the<br />
road in the direction <strong>of</strong> oncoming traffic. This<br />
will keep the students from being hit by debris<br />
if another vehicle collides with the bus.<br />
• Lead students upwind <strong>of</strong> the bus if fire is<br />
present.<br />
• Lead students as far away from railroad<br />
tracks as possible and in the direction <strong>of</strong> any<br />
oncoming train.<br />
- 139 -
• Lead students upwind <strong>of</strong> the bus at least 300<br />
feet if there is a risk from spilled hazardous<br />
materials.<br />
• If the bus is in the direct path <strong>of</strong> a sighted tornado<br />
and evacuation is ordered, escort students to a<br />
nearby ditch or culvert if shelter in a building<br />
is not readily available, and direct them to lie<br />
face down, hands covering their head. They<br />
should be far enough away so the bus cannot<br />
topple on them. Avoid areas that are subject<br />
to flash floods.<br />
general proCedures<br />
Determine if an evacuation is in the best interest<br />
<strong>of</strong> safety.<br />
• Determine the best type <strong>of</strong> evacuation:<br />
— Front, rear, or side–door evacuation, or<br />
some combination <strong>of</strong> doors.<br />
— Ro<strong>of</strong> or window evacuation.<br />
• Secure the bus by:<br />
— Placing transmission in Park, or if there is<br />
no shift point, in Neutral.<br />
— Setting parking brakes.<br />
— Shutting <strong>of</strong>f the engine.<br />
— Removing ignition key.<br />
— Activating hazard-warning lights.<br />
• If time allows, notify dispatch <strong>of</strong>fice <strong>of</strong> the<br />
evacuation location, conditions, and type <strong>of</strong><br />
assistance needed.<br />
• Dangle radio microphone or telephone out <strong>of</strong><br />
driver’s window for later use, if operable.<br />
• If no radio or the radio is inoperable, dispatch<br />
a passing motorist or area resident to call<br />
for help. As a last resort, dispatch two older,<br />
responsible students to go for help.<br />
• Order the evacuation.<br />
• Evacuate students from the bus.<br />
— Do not move a student you believe may<br />
have suffered a neck or spinal injury unless<br />
his or her life is in immediate danger.<br />
— Special procedures must be used to move<br />
neck spinal injury victims to prevent further<br />
injury.<br />
- 140 -<br />
• Direct a student assistant to lead students to<br />
the nearest safe place.<br />
• Walk through the bus to ensure no students<br />
remain on the bus. Retrieve emergency<br />
equipment.<br />
• Join waiting students.<br />
• Account for all students and check for their<br />
safety.<br />
• Protect the scene. Set out emergency warning<br />
devices as necessary and appropriate.<br />
• Prepare information for emergency responders.<br />
RAIlROAD-hIghWAy<br />
cROSSIngS<br />
types <strong>of</strong> Crossings<br />
Passive crossings. This type <strong>of</strong> crossing does<br />
not have any type <strong>of</strong> traffic control device. You<br />
must stop at these crossings and follow proper<br />
procedures. However, the decision to proceed rests<br />
entirely in your hands. Passive crossings require<br />
you to recognize the crossing, search for any train<br />
using the tracks and decide if there is sufficient<br />
clear space to cross safely. Passive crossings have<br />
yellow circular advance warning signs, pavement<br />
markings and crossbucks to assist you in recognizing<br />
a crossing.<br />
Active crossings. This type <strong>of</strong> crossing has a traffic<br />
control device installed at the crossing to regulate<br />
traffic at the crossing. These active devices include<br />
flashing red lights, with or without bells and flashing<br />
red lights with bells and gates.<br />
Warning signs and deviCes<br />
Advance warning signs. The round, black-onyellow<br />
warning sign is placed ahead <strong>of</strong> a public<br />
railroad-highway crossing. The advance warning<br />
sign tells you to slow down, look and listen for<br />
the train, and be prepared to stop at the tracks if<br />
a train is coming.<br />
Pavement markings. Pavement markings mean<br />
the same as the advance warning sign. They consist<br />
<strong>of</strong> an “X” with the letters “RR” and a no-passing<br />
marking on two-lane roads.
There is also a no passing zone sign on two-lane<br />
roads. There may be a white stop line painted on<br />
the pavement before the railroad tracks. The front<br />
<strong>of</strong> the school bus must remain behind this line<br />
while stopped at the crossing.<br />
Crossbuck signs. This sign marks the crossing. It<br />
requires you to yield the right-<strong>of</strong>-way to the train.<br />
If there is no white line painted on the pavement,<br />
you must stop the bus before the crossbuck sign.<br />
When the road crosses over more than one set <strong>of</strong><br />
tracks, a sign below the crossbuck indicates the<br />
number <strong>of</strong> tracks.<br />
Flashing red light signals. At many highway-rail<br />
grade crossings, the crossbuck sign has flashing<br />
red lights and bells. When the lights begin to flash,<br />
stop! A train is approaching. You are required to<br />
yield the right-<strong>of</strong>-way to the train. If there is more<br />
than one track, make sure all tracks are clear before<br />
crossing.<br />
gates. Many railroad-highway crossings have<br />
gates with flashing red lights and bells. Stop when<br />
the lights begin to flash and before the gate lowers<br />
across the road lane. Remain stopped until the<br />
gates go up and the lights have stopped flashing.<br />
Proceed when it is safe. If the gate stays down<br />
after the train passes, do not drive around the gate.<br />
Instead, call your dispatcher.<br />
reCommended proCedures<br />
<strong>California</strong> has laws and regulations governing how<br />
school buses must operate at railroad-highway<br />
crossings. It is important for you to understand<br />
and obey these laws and regulations. In general,<br />
school buses must stop at all crossings, and ensure<br />
it is safe before proceeding across the tracks.<br />
A school bus is one <strong>of</strong> the safest vehicles on the<br />
highway. However, a school bus does not have the<br />
slightest edge when involved in a collision with a<br />
train. Because <strong>of</strong> a train’s size and weight it cannot<br />
stop quickly. An emergency escape route does<br />
not exist for a train. You can prevent school bus/<br />
train collisions by following these recommended<br />
procedures.<br />
• Approaching the Crossing:<br />
— Slow down, including shifting to a lower<br />
gear in a manual transmission bus, and test<br />
your brakes.<br />
— Activate hazard lights approximately 200<br />
feet before the crossing. Make sure your<br />
intentions are known.<br />
— Scan your surroundings and check for<br />
traffic behind you.<br />
— Stay to the right <strong>of</strong> the roadway, if possible.<br />
— Choose an escape route in the event <strong>of</strong> a<br />
brake failure or problems behind you.<br />
• At the Crossing:<br />
— Stop no closer than 15 feet and no farther<br />
than 50 feet from the nearest rail, where<br />
you have the best view <strong>of</strong> the tracks.<br />
— Place the transmission in park, or if there<br />
is no park shift point, in neutral and press<br />
down on the service brake or set the parking<br />
brakes.<br />
— Turn <strong>of</strong>f all radios and noisy equipment,<br />
and silence the passengers.<br />
— Open the service door and driver’s window.<br />
Look and listen for an approaching train.<br />
• Crossing the Track:<br />
— Check the crossing signals again before<br />
proceeding.<br />
— At a multiple-track crossing, stop only<br />
before the first set <strong>of</strong> tracks. When you are<br />
sure no train is approaching on any track,<br />
proceed across all <strong>of</strong> the tracks until you<br />
have completely cleared them.<br />
— Cross the tracks in a low gear. Do not<br />
change gears while crossing.<br />
— If the gate comes down after you have<br />
started across, drive through it even if it<br />
means you will break the gate.<br />
- 141 -
speCial situations<br />
Bus stalls or trapped on tracks.<br />
• If your bus stalls or is trapped on the tracks:<br />
— Get everyone out and <strong>of</strong>f the tracks<br />
immediately.<br />
— Move everyone far from the bus at an<br />
angle, which is both away from the tracks<br />
and toward the train.<br />
Police <strong>of</strong>ficer at the crossing.<br />
• If a police <strong>of</strong>ficer is at the crossing, obey<br />
directions.<br />
• If there is no police <strong>of</strong>ficer, and you believe the<br />
signal is malfunctioning, call your dispatcher<br />
to report the situation and ask for instructions<br />
on how to proceed.<br />
Obstructed view <strong>of</strong> tracks. Plan your route so it<br />
provides maximum sight distance at highway-rail<br />
grade crossings. Do not attempt to cross the tracks<br />
unless you can see far enough down the track to<br />
know for certain that no trains are approaching.<br />
Passive crossings are those that do not have any<br />
type <strong>of</strong> traffic control device. Be especially careful<br />
at “passive” crossings.<br />
Even if there are active railroad signals that indicate<br />
the tracks are clear, you must look and listen to be<br />
sure it is safe to proceed.<br />
Containment or storage areas. If it won’t fit, don’t<br />
commit! Know the length <strong>of</strong> your bus and the size<br />
<strong>of</strong> the containment area at highway-rail crossings<br />
on the school bus route, as well as any crossing<br />
you encounter in the course <strong>of</strong> a school activity<br />
trip. When approaching a crossing with a signal<br />
or stop sign on the opposite side, pay attention to<br />
the amount <strong>of</strong> room there. Be certain the bus has<br />
enough containment or storage area to completely<br />
clear the railroad tracks on the other side if there is<br />
a need to stop. As a general rule, add 15 feet to the<br />
length <strong>of</strong> the school bus to determine an acceptable<br />
amount <strong>of</strong> containment or storage area.<br />
- 142 -<br />
StuDent mAnAgement<br />
don’t deal With on-Bus proBlems<br />
When loading and unloading<br />
In order to get students to and from school safely<br />
and on time, you need to be able to concentrate on<br />
the driving task. Loading and unloading requires<br />
all your concentration. Don’t take your eyes <strong>of</strong>f<br />
what is happening outside the bus.<br />
If there is a behavior problem on the bus, wait until<br />
the students unloading are safely <strong>of</strong>f the bus and<br />
have moved away. If necessary, pull the bus over<br />
to handle the problem.<br />
handling serious proBlems<br />
Tips on handling serious problems:<br />
• Follow your school’s procedures for discipline<br />
or refusal <strong>of</strong> rights to ride the bus.<br />
• Stop the bus. Park in a safe location <strong>of</strong>f the<br />
road, perhaps a parking lot or a driveway.<br />
• Secure the bus. Take the ignition key with you<br />
if you leave your seat.<br />
• Stand up and speak respectfully to the <strong>of</strong>fender<br />
or <strong>of</strong>fenders. Speak in a courteous manner<br />
with a firm voice. Remind the <strong>of</strong>fender <strong>of</strong> the<br />
expected behavior. Do not anger, but show that<br />
you mean business.<br />
• If a change <strong>of</strong> seating is needed, request that<br />
the student move to a seat near you.<br />
• Never put a student <strong>of</strong>f the bus except at school<br />
or at his or her designated school bus stop.<br />
If you feel that the <strong>of</strong>fense is serious enough<br />
that you cannot safely drive the bus, call for<br />
a school administrator or the police to come<br />
and remove the student. Always follow state<br />
or local procedures for requesting assistance.
AntIlOck BRAkIng SyStemS<br />
vehiCles required to have antiloCk<br />
Braking systems<br />
The <strong>Department</strong> <strong>of</strong> Transportation requires that<br />
antilock braking systems be on:<br />
• Air brakes vehicles, (trucks, buses, trailers<br />
and converter dollies) built on or after March<br />
1, 1998.<br />
• Hydraulically braked trucks and buses with a<br />
gross vehicle weight rating <strong>of</strong> 10,000 lbs. or<br />
more built on or after March 1, 1999.<br />
Many buses built before these dates have been<br />
voluntarily equipped with ABS.<br />
Your school bus will have a yellow ABS malfunction<br />
lamp on the instrument panel if it is equipped<br />
with ABS.<br />
hoW aBs helps you<br />
When you brake hard on slippery surfaces in a<br />
vehicle without ABS, your wheels may lock up.<br />
When your steering wheels lock up, you lose<br />
steering control. When your other wheels lock up,<br />
you may skid or even spin the vehicle.<br />
ABS helps you avoid wheel lock up and maintain<br />
control. You may or may not be able to stop faster<br />
with ABS, but you should be able to steer around<br />
an obstacle while braking, and avoid skids caused<br />
by over braking.<br />
Braking With aBs<br />
When you drive a vehicle with ABS, you should<br />
brake as you always have. In other words:<br />
• Use only the braking force necessary to stop<br />
safely and stay in control.<br />
• Brake the same way, regardless <strong>of</strong> whether you<br />
have ABS on the bus. However, in emergency<br />
braking, do not pump the brakes on a bus with<br />
ABS.<br />
• As you slow down, monitor your bus and back<br />
<strong>of</strong>f the brakes (if it is safe to do so) to stay in<br />
control.<br />
Braking if aBs is not Working<br />
Without ABS, you still have normal brake functions.<br />
Drive and brake as you always have.<br />
Vehicles with ABS have yellow malfunction lamps<br />
to tell you if something is not working. The yellow<br />
ABS malfunction lamp is on the bus’s instrument<br />
panel.<br />
As a system check on newer vehicles, the malfunction<br />
lamp comes on at start-up for a bulb check and<br />
then goes out quickly. On older systems, the lamp<br />
could stay on until you are driving over five mph.<br />
If the lamp stays on after the bulb check, or goes<br />
on once you are under way, you may have lost<br />
ABS control at one or more wheels.<br />
Remember, if your ABS malfunctions, you still<br />
have regular brakes. Drive normally, but get the<br />
system serviced soon.<br />
safety reminders<br />
• ABS won’t allow you to drive faster, follow<br />
more closely, or drive less carefully.<br />
• ABS won’t prevent power or turning skids–<br />
ABS should prevent brake-induced skids but<br />
not those caused by spinning the drive wheels<br />
or going too fast in a turn.<br />
• ABS won’t necessarily shorten stopping distance.<br />
ABS will help maintain vehicle control,<br />
but not always shorten stopping distance.<br />
• ABS won’t increase or decrease ultimate<br />
stopping power–ABS is an “add-on” to your<br />
normal brakes, not a replacement for them.<br />
• ABS won’t change the way you normally brake.<br />
Under normal brake conditions, your vehicle<br />
will stop as it always stopped. ABS only comes<br />
into play when a wheel would normally have<br />
locked up because <strong>of</strong> over braking.<br />
• ABS won’t compensate for bad brakes or poor<br />
brake maintenance.<br />
• Remember: The best vehicle safety feature is<br />
still a safe driver.<br />
• Remember: Drive so you never need to use<br />
your ABS.<br />
• Remember: If you need it, ABS could help to<br />
prevent a serious collision.<br />
- 143 -
SPecIAl SAFety<br />
cOnSIDeRAtIOnS<br />
stroBe lights<br />
Some school buses are equipped with ro<strong>of</strong>mounted,<br />
white strobe lights. If your bus is so<br />
equipped, the overhead strobe light should be used<br />
when you have limited visibility. This means that<br />
you cannot easily see around you – in front, behind,<br />
or beside the school bus. Your visibility could be<br />
only slightly limited or it could be so bad that you<br />
can see nothing at all. In all instances, understand<br />
and obey state or local regulations concerning the<br />
use <strong>of</strong> these lights.<br />
driving in high Winds<br />
Strong winds affect the handling <strong>of</strong> the school<br />
bus! The side <strong>of</strong> a school bus acts like a sail on<br />
a sailboat. Strong winds can push the school bus<br />
sideways. They can even move the school bus <strong>of</strong>f<br />
the road or, in extreme conditions, tip it over. If<br />
you are caught in strong winds:<br />
• Keep a strong grip on the steering wheel. Try<br />
to anticipate gusts.<br />
• You should slow down to lessen the effect <strong>of</strong><br />
the wind, or pull <strong>of</strong>f the roadway and wait.<br />
• Contact your dispatcher to get more information<br />
on how to proceed.<br />
• Backing. Backing a school bus is strongly<br />
discouraged. You should back your bus only<br />
when you have no other safe way to move the<br />
vehicle. You should never back a school bus<br />
when students are outside <strong>of</strong> the bus. Backing is<br />
dangerous and increases your risk <strong>of</strong> a collision.<br />
If you have no choice and you must back your<br />
bus, follow these procedures:<br />
- 144 -<br />
• Post a lookout.<br />
• The purpose <strong>of</strong> the lookout is to warn you<br />
about obstacles, approaching persons, and<br />
other vehicles.<br />
• The lookout should not give directions on how<br />
to back the bus.<br />
• Signal for quiet on the bus.<br />
• Constantly check all mirrors and rear windows.<br />
• Back slowly and smoothly.<br />
• If no lookout is available:<br />
— Set the parking brake.<br />
— Turn <strong>of</strong>f the motor and take the keys with<br />
you.<br />
— Walk to the rear <strong>of</strong> the bus to determine<br />
whether the way is clear.<br />
• If you must back up at a student pick-up point,<br />
be sure to pick up students before backing and<br />
watch for late comers at all times.<br />
• Be sure that all students are in the bus before<br />
backing.<br />
• If you must back-up at a student drop-<strong>of</strong>f point,<br />
be sure to unload students after backing.<br />
tail sWing<br />
A school bus can have up to a three-foot tail swing.<br />
You need to check your mirrors before and during<br />
any turning movements to monitor the tail swing.
SectIOn 11: PRe-tRIP teSt<br />
This section will assist drivers taking the pre-trip test<br />
The pre-trip inspection is a knowledge test to see<br />
if the customer understands which features and<br />
equipment on the test vehicle should be inspected<br />
before operating the vehicle. The entire pre-trip<br />
must be conducted in the English language. This is<br />
pursuant to Federal Motor Carrier Safety Administration<br />
regulations §§391.11 (b)(2) and 383.133<br />
(c)(5). You will be warned twice for speaking in<br />
a foreign language during the pre-trip inspection<br />
and will not be given credit for items checked and<br />
explained in a foreign language. If you are told<br />
a third time the test will be counted as a failure.<br />
A pre-trip inspection should be done the same<br />
way each time so you will learn all the steps and<br />
be less likely to forget something during the test.<br />
Before your pre-trip test, the examiner will check<br />
the brake lights, emergency flashers, turn signals,<br />
and horn. If any <strong>of</strong> these items do not work, the skills<br />
and driving portions <strong>of</strong> the test will be postponed.<br />
Pre-trips are conducted to ensure that a vehicle is<br />
safe to operate. During the pre-trip test, you will<br />
be expected to explain or show your knowledge<br />
<strong>of</strong> the pre-trip process.<br />
You must point to every item you would check,<br />
identify it, and explain in detail what you are<br />
checking the item for. You will NOT have to crawl<br />
under the vehicle.<br />
You may use the guides shown on pages 155 or<br />
156 when taking your pre-trip test. You cannot<br />
write any instructions or Notes on how to perform<br />
the pre-trip inspection on the guide. If you do not<br />
pass the pre-trip inspection test, the other tests<br />
will be postponed.<br />
Remember: You are allowed a total <strong>of</strong> three attempts<br />
to pass the pre-trip, skills, or driving tests.<br />
See page 6.<br />
All VehIcleS<br />
Study the following vehicle parts for the type <strong>of</strong><br />
vehicle you will be using during the CDL pre-trip<br />
inspection. You should be able to identify each<br />
part and tell the examiner what you are looking<br />
for or inspecting.<br />
vehiCle overvieW<br />
As you approach the vehicle, notice its general<br />
condition. Look for damage or if the vehicle is<br />
leaning to one side. Look under the vehicle for<br />
fresh oil, coolant, grease, or fuel leaks. Check<br />
area around the vehicle for hazards to vehicle<br />
movement such as people, other vehicles, objects,<br />
low hanging wires, or limbs, etc.<br />
Check that the parking brakes are set and/or wheels<br />
chocked. You may have to raise the hood, tilt the<br />
cab (secure loose objects so they don’t fall and<br />
break something), or open the engine compartment<br />
door. Check the following:<br />
- 145 -
engine compartment (engine Off)<br />
Leaks/Hoses (fuel, coolant, oil, power<br />
steering fluid, hydraulic fluid, battery fluid,<br />
etc.)<br />
• Look for puddles on the ground.<br />
• Look for dripping fluids on underside <strong>of</strong> engine<br />
and transmission.<br />
• Inspect hoses for condition and leaks.<br />
Water Pump<br />
• Identify water pump.<br />
• Identify water pump is mounted securely and<br />
is not leaking.<br />
Alternator<br />
• Identify alternator.<br />
• Check that alternator is securely mounted and<br />
that all wires are securely fastened.<br />
Air Compressor<br />
• Identify air compressor.<br />
• Check that the air compressor is securely<br />
mounted and is not leaking.<br />
Oil Level<br />
• Indicate where dipstick is located.<br />
• See that oil level is within safe operating range.<br />
Level must be above refill mark.<br />
Coolant Level<br />
• Inspect reservoir sight glass or<br />
• (If engine is not hot), remove radiator cap and<br />
check for visible coolant level.<br />
Power Steering Fluid<br />
• Indicate where power steering fluid dipstick<br />
is located.<br />
• Check for adequate power steering fluid level.<br />
Level must be above refill mark.<br />
Windshield Washer Fluid Level<br />
• Check fluid level and cap secure.<br />
- 146 -<br />
Automatic Transmission Fluid Level (may<br />
require engine to be running)<br />
Engine Compartment Belts<br />
• Check and identify the following belts for<br />
snugness, cracks, frays, or excessive wear:<br />
— power steering belt<br />
— water pump belt<br />
— alternator belt<br />
— air compressor belt<br />
— belt deflection is not more than ¾ <strong>of</strong> an inch<br />
cab check/engine Start<br />
Get in and start the engine.<br />
Note: Ensure engine compartment hood is closed<br />
and latched. Cab-over-primary and safety locks<br />
engaged.<br />
Safe Start<br />
• Make sure the parking brake is set.<br />
• Depress clutch.<br />
• Place gearshift lever in neutral (or park, for<br />
automatic transmissions).<br />
• Start engine, then release clutch slowly.<br />
• Accelerator checked for looseness, sticking,<br />
or damage.<br />
• Listen for unusual engine noises.<br />
Oil Pressure Gauge<br />
• Start vehicle.<br />
• Make sure oil pressure gauge is working.<br />
• Check that pressure gauge shows increasing or<br />
normal oil pressure or that the warning light<br />
goes <strong>of</strong>f.<br />
• If equipped, oil temperature gauge should begin<br />
a gradual rise to the normal operating range.
Coolant Temperature Gauge<br />
• Start vehicle.<br />
• Make sure the temperature gauge is working.<br />
• Temperature should begin to climb to the<br />
normal operating range or temperature light<br />
should be <strong>of</strong>f.<br />
Ammeter/Voltmeter<br />
• Start vehicle.<br />
• Check that gauges show alternator and/or<br />
generator is charging or that warning light is <strong>of</strong>f.<br />
Oil Temperature Gauge<br />
• Check that gauge begins gradual rise to normal<br />
operating range.<br />
Air Gauge<br />
• Check that the air gauge is working properly and<br />
that the air compressor builds the air pressure to<br />
the governor cut-out at no higher than 130 psi.<br />
Mirrors and Windshield<br />
• Mirrors should be clean and adjusted properly<br />
from the inside.<br />
• Windshield should be clean with no illegal<br />
stickers, no obstructions, or damage to the glass.<br />
• If equipped, check that the windshield washer<br />
operates correctly.<br />
Emergency Equipment<br />
• Check for spare electrical fuses.<br />
• Check for three red reflective triangles.<br />
• Check for a properly charged and rated fire<br />
extinguisher.<br />
Check Optional Emergency Equipment<br />
• Tire chains (where winter conditions require<br />
them)<br />
• Tire changing equipment<br />
• List <strong>of</strong> emergency phone numbers<br />
• Collision reporting kit (packet)<br />
Steering Wheel<br />
• Check for looseness, sticking, or damage.<br />
Steering Play<br />
• Non-power steering: Check for excessive<br />
play by turning steering wheel back and forth.<br />
Play should not exceed 10 percent (about two<br />
inches on a 20-inch wheel).<br />
• Power steering: With the engine running,<br />
check for excessive play by turning the steering<br />
wheel back and forth. Play should not exceed<br />
10 percent (about two inches on a 20-inch<br />
wheel) before front left wheel barely moves.<br />
Wipers/Washers<br />
• Check that wiper arms and blades are secure,<br />
not damaged, and operate smoothly.<br />
Lighting Indicators<br />
• Test that dash indicators work when corresponding<br />
lights are turned on:<br />
— left and right turn signals<br />
— 4-way emergency flashers<br />
— high beam headlight<br />
Horn<br />
• Check that air horn and/or electric horn work.<br />
Heater/Defroster<br />
• Test that the heater and defroster work.<br />
Parking Brake Check<br />
• Fasten your seat belt.<br />
• Check the parking brake holds the vehicle<br />
in place by trying to drive forward with the<br />
parking brake engaged. (Trailer brakes released<br />
on combination vehicles.)<br />
• Check the trailer parking brake holds the<br />
vehicle by trying to drive forward with the<br />
trailer parking brake engaged. (Parking brake<br />
released and the trailer parking brake engaged<br />
on combination vehicles.)<br />
- 147 -
Service Brake/ABS Brake Test<br />
• Demonstrate the service brakes are working<br />
properly by driving forward at 5 mph and<br />
applying the service brake to see if the vehicle<br />
pulls to one side or the other.<br />
• Check the ABS lighting indicator illuminates<br />
and then promptly turns <strong>of</strong>f.<br />
• Check the ABS light on the rear driver’s side<br />
on the trailer. (Combination vehicles only.)<br />
Hydraulic Brake Check<br />
• Pump the brake pedal three times, then hold it<br />
down for five seconds. The brake pedal should<br />
not move during the five seconds.<br />
• If equipped with a hydraulic brake reserve<br />
system, with the key <strong>of</strong>f, depress the brake<br />
pedal and listen for the sound <strong>of</strong> the reserve<br />
system electric motor.<br />
• If equipped with a “Hydro—Boost” brake<br />
system, release the parking brake and with the<br />
engine <strong>of</strong>f, depress and release the brake pedal<br />
several times to deplete all hydraulic pressure.<br />
Depress and hold the brake pedal with light<br />
pressure (15–25 lbs) then start the engine and<br />
run it at idle speed. If the Hydro—Boost is<br />
operating, the pedal will yield slightly to foot<br />
pressure and then hold. Less pressure is required<br />
to hold the pedal at this position.<br />
• Check that the warning buzzer or light is <strong>of</strong>f.<br />
Air Brake Check (for air brake equipped<br />
vehicles only)<br />
Refer to Section 5, “In-Cab Air Brake Check”<br />
for DMV pre-trip testing. All items marked with<br />
an asterisk (*) are required during the pre-trip<br />
test. These items must be demonstrated and the<br />
parameters verbalized to receive credit. Failure to<br />
perform these air brakes tests correctly will result in<br />
an automatic disqualification for the entire pre-trip<br />
portion <strong>of</strong> the test.<br />
Seat Belts<br />
• Check that the seat belt is securely mounted,<br />
and adjusts and latches properly.<br />
• Check that belt is not ripped or frayed.<br />
- 148 -<br />
exteRnAl InSPectIOn (BuSeS,<br />
tRuckS, tRActORS)<br />
lights/refleCtors<br />
• Check that all external lights and reflective<br />
equipment are clean and functional. Light and<br />
reflector checks include:<br />
— clearance lights (red on rear, amber<br />
elsewhere)<br />
— headlights (high and low beams)<br />
— sidemarker lights<br />
— taillights<br />
— turn signals (left and right)<br />
— 4-way flashers<br />
— brake lights<br />
— red reflectors (on rear) and amber reflectors<br />
(elsewhere)<br />
— license plate light(s)<br />
Note: Checks <strong>of</strong> brake, turn signal, and 4-way<br />
flasher functions must be done separately.<br />
steering<br />
Steering Box/Hoses<br />
• Check that the steering box is securely mounted<br />
and not leaking. Look for any missing nuts,<br />
bolts, and cotter keys.<br />
• Check for power steering fluid leaks or damage<br />
to power steering hoses.<br />
Steering Linkage<br />
• See that connecting links, arms, and rods from<br />
the steering box to the wheel are not worn or<br />
cracked.<br />
• Check that joints and sockets are not worn or<br />
loose and that there are no missing nuts, bolts,<br />
or cotter keys.
suspension<br />
Springs/Air/Torque<br />
• Look for missing, shifted, cracked, or broken<br />
leaf springs (if 1/4 or more are missing or<br />
broken, it will put the vehicle out <strong>of</strong> service).<br />
• Look for broken or distorted coil springs.<br />
• If vehicle is equipped with torsion bars, torque<br />
arms, or other types <strong>of</strong> suspension components,<br />
check that they are not damaged and are<br />
mounted securely.<br />
• Air ride suspension should be checked for<br />
damage and leaks.<br />
• Axles secure<br />
• If retractable axle equipped, check condition <strong>of</strong><br />
lift mechanism. If air powered, check for leaks.<br />
Mounts<br />
• Look for cracked or broken spring hangers,<br />
missing or damaged bushings, and broken,<br />
loose, or missing bolts, U-bolts, or other axle<br />
mounting parts.<br />
Shock Absorbers<br />
• See that shock absorbers are secure and that<br />
there are no leaks.<br />
Note: Be prepared to perform the same suspension<br />
components inspection on every axle (power unit<br />
and trailer, if equipped).<br />
Brakes<br />
Slack Adjustors/Push-Rod<br />
• Check slack adjuster is securely mounted.<br />
• Look for broken, loose, or missing parts.<br />
• When the brakes are applied, the push rod<br />
from the brake chamber should not move more<br />
than two inches. (It is also acceptable to state<br />
that the angle between the push rod and the<br />
adjustor arm should be a little over 90° when<br />
the brakes are released, and not less than 90°<br />
when the brakes are applied.)<br />
Brake Chambers<br />
• See that brake chambers are not leaking,<br />
cracked, dented, and are mounted securely.<br />
• See that there are no loose or missing clamps.<br />
Brake Hoses/Lines<br />
• Look for cracked, worn, or leaking hoses, lines,<br />
and couplings.<br />
Brake Drums<br />
• Check for cracks or damage. Also check for<br />
loose or missing bolts.<br />
• Check for contaminants such as grease or oil<br />
on drums and linings.<br />
Brake Linings<br />
• Brake linings, where visible, should not be<br />
worn down dangerously thin.<br />
Note: Be prepared to perform the same<br />
brake components inspection on every<br />
axle (power unit and trailer, if equipped.)<br />
Wheels<br />
Rims, Rim Locks, or Slide Ring<br />
• Check for damaged or bent wheels or rims.<br />
• Wheels cannot have welding repairs.<br />
• Check that there are no rust trails that would<br />
indicate the wheel is loose.<br />
- 149 -
Tires<br />
• The following items must be inspected on<br />
every tire:<br />
— tread depth: Check for minimum tread<br />
depth (4/32 inch on steering axle tires, 2/32<br />
inch on all other tires).<br />
— tire condition: Check that tread is evenly<br />
worn and look for cuts or other damage<br />
to tread or sidewalls. Also, make sure that<br />
valve caps and stems are not missing,<br />
broken, or damaged.<br />
— tire inflation: Check for proper inflation by<br />
using a tire gauge, or inflation by striking<br />
tires with a mallet or other similar device.<br />
— tires same size. Duals not touching and<br />
nothing stuck between them.<br />
— tires same type (not mixed radial and bias).<br />
Front tires for buses cannot be recapped,<br />
retreaded, or regrooved.<br />
Note: You will not get credit if you simply<br />
kick the tires to check for proper inflation.<br />
Hub Oil Seals/Axle Seals<br />
• See that hub oil/grease seals and axle seals are<br />
not leaking and, if wheel has a sight glass, oil<br />
level is adequate.<br />
Lug nuts<br />
• Check that all lug nuts are present, free <strong>of</strong><br />
cracks and distortions, and show no signs <strong>of</strong><br />
looseness such as rust trails or shiny threads.<br />
• Make sure all bolt holes are not cracked or<br />
distorted.<br />
Spacers/Budds<br />
• If equipped, check that spacers are not bent,<br />
damaged, or rusted through.<br />
• Spacers should be evenly centered, with the<br />
dual wheels and tires evenly separated.<br />
• No debris between dual tires.<br />
Note: Be prepared to perform the same<br />
wheel inspection on every axle (power unit<br />
and trailer, if equipped).<br />
- 150 -<br />
side <strong>of</strong> vehiCle<br />
Door(s)/Mirror(s)/Window(s)<br />
• Check that door(s) are not damaged and that<br />
they open and close properly.<br />
• Hinges should be secure with seals intact.<br />
• Check that mirror(s) are clean, mirror brackets<br />
are not damaged, and mirrors are mounted<br />
securely with no loose attachments.<br />
• Windows are clean and work properly.<br />
Fuel Tank<br />
• Check that tank(s) are secure, cap(s) are tight,<br />
and that there are no leaks from tank(s) and<br />
fuel cap(s).<br />
Drive Shaft<br />
• See that drive shaft is not bent or cracked.<br />
• Couplings should be secure and free <strong>of</strong> foreign<br />
objects.<br />
Exhaust System<br />
• Check system for damage and signs <strong>of</strong> leaks<br />
such as rust or carbon soot.<br />
• System should be connected tightly and<br />
mounted securely.<br />
• Exhaust system should not have excessive<br />
noise when engine is running.<br />
Frame<br />
• Look for cracks, bends, aftermarket welds,<br />
or holes to longitudinal frame members and<br />
cross members.<br />
Condition <strong>of</strong> Visible Parts<br />
• Rear <strong>of</strong> engine not leaking<br />
• Transmission not leaking<br />
• Air lines and electrical wiring secured against<br />
sagging, rubbing, or wearing.<br />
• Spare tire carrier or rack not damaged (if so<br />
equipped).<br />
• Spare tire and/or wheel securely mounted in<br />
rack (if so equipped).<br />
• Spare tire and wheel adequate (proper size,<br />
properly inflated, and in good condition).
ear <strong>of</strong> vehiCle<br />
Splash Guards<br />
• If equipped, check that splash guards or mud<br />
flaps are not damaged and are mounted securely,<br />
not dragging on ground, or rubbing tires.<br />
Doors/Ties/Lifts<br />
• Check that doors and hinges are not damaged<br />
and that they open, close, and latch properly<br />
from the outside, if equipped.<br />
• Ties, straps, chains, and binders must also be<br />
secure.<br />
• If equipped with a cargo lift, look for leaking,<br />
damaged or missing parts, and explain how it<br />
should be checked for correct operation.<br />
• Lift must be fully retracted and latched securely.<br />
traCtor/Coupling<br />
Air/Electric Lines<br />
• Listen for air leaks. Check that air hoses and<br />
electrical lines are not cut, chafed, spliced, or<br />
worn (steel braid should not show through).<br />
• Make sure air and electrical lines are not<br />
tangled, pinched, or dragging against tractor<br />
parts.<br />
Catwalk/Tongue Storage Area<br />
• Check that the catwalk is solid, clear <strong>of</strong> objects,<br />
and securely bolted to tractor frame.<br />
• Check that the storage area is solid and secured<br />
to the tongue.<br />
• Cargo in the storage area (i.e., chains, binders,<br />
etc.) must be secured.<br />
Mounting Bolts<br />
• Check for loose or missing mounting brackets,<br />
clamps, bolts, or nuts. Both the fifth-wheel and<br />
the slide mounting must be solidly attached.<br />
• On other types <strong>of</strong> coupling systems (e.g., ball<br />
hitch, pintle hook, etc.), inspect all coupling<br />
components and mounting brackets for missing<br />
or broken parts.<br />
• Check for loose or missing mounting bolts.<br />
Look for broken welds on the pintle hook,<br />
or other hitch mount, and tongue/drawbar<br />
assembly to be sure they are solidly attached<br />
in place.<br />
Safety Latch/Locking Jaws/Safety Devices<br />
• Look into fifth-wheel gap and check that locking<br />
jaws are fully closed around the kingpin.<br />
• Check that the latch is secured and locked in<br />
place and that the cotter pin is not missing, is<br />
in place, and not damaged.<br />
• Safety chains must be hooked and crisscrossed,<br />
free <strong>of</strong> kinks and excessive slack, cotter pins<br />
to hooks are in place and hooks are secured<br />
with the hooks pointing in an outward position.<br />
• If trailer is equipped with electric brakes, check<br />
that the breakaway chains or cables with battery<br />
back up are not missing or damaged.<br />
• On other types <strong>of</strong> coupling systems (i.e., ball<br />
hitch, drawbar/eye, etc.), inspect the locking<br />
mechanism for missing or broken parts and<br />
make sure it is locked securely. If present,<br />
safety cables or chains must be secure and free<br />
<strong>of</strong> kinks and excessive slack.<br />
Platform (Fifth-Wheel) (Pintle Hook)<br />
• Check for cracks or breaks in the platform<br />
structure which supports the fifth-wheel skid<br />
plate.<br />
• Check the pintle hook for cracks, breaks, or<br />
excessive wear.<br />
Release Arm (Fifth-Wheel)<br />
• If equipped, make sure the release arm is in<br />
the engaged position and the safety latch is in<br />
place. Check to see if the hitch release lever<br />
is in place and secure.<br />
- 151 -
Kingpin/Apron/Gap/Tongue Drawbar<br />
• Check that the kingpin is not bent.<br />
• Make sure the visible part <strong>of</strong> the apron is not<br />
bent, cracked, or broken.<br />
• Check that the trailer is laying flat on the<br />
fifth-wheel skid plate (no gap).<br />
• Check that the tongue/drawbar is not bent or<br />
twisted. Check for broken welds and stress<br />
cracks.<br />
• Check that the tongue/drawbar eye is not worn<br />
excessively.<br />
Sliding Fifth-Wheel Locking Pins/Sliding<br />
Pintle<br />
• If equipped, look for loose or missing pins in<br />
the slide mechanism <strong>of</strong> the sliding fifth-wheel.<br />
If air powered, check for leaks.<br />
• Make sure locking pins are fully engaged.<br />
• Check that the fifth-wheel is positioned properly<br />
so the tractor frame will clear the landing<br />
gear during turns.<br />
• If equipped, check that the sliding pintle is<br />
secured, that there are no loose or missing<br />
nuts or bolts, and that the cotter pin is in place.<br />
tRAIleR<br />
front <strong>of</strong> trailer<br />
Air/Electrical Connections<br />
• Check that trailer air connectors are sealed and<br />
in good condition.<br />
• Make sure glad hands are locked in place and<br />
free <strong>of</strong> damage or air leaks.<br />
• Make sure the trailer electrical plug is firmly<br />
seated and locked in place.<br />
Header Board<br />
• If equipped, check the header board to see that<br />
it is secure, free <strong>of</strong> damage, and strong enough<br />
to contain cargo.<br />
• If equipped, the canvas or tarp carrier must be<br />
mounted and fastened securely.<br />
• On enclosed trailers, check the front area for<br />
signs <strong>of</strong> damage such as cracks, bulges, or holes.<br />
- 152 -<br />
side <strong>of</strong> trailer<br />
Landing Gear<br />
• Check that the landing gear is fully raised, has<br />
no missing parts, crank handle is secure, and<br />
the support frame is not damaged.<br />
• If power operated, check for air or hydraulic<br />
leaks.<br />
Doors/Ties/Lifts<br />
• If equipped, check that doors are not damaged.<br />
Check that doors open, close, and latch properly<br />
from the outside.<br />
• Check that ties, straps, chains, and binders<br />
are secure.<br />
• If equipped with a cargo lift, look for leaking,<br />
damaged or missing parts, and explain how it<br />
should be checked for correct operation.<br />
• Lift should be fully retracted and latched<br />
securely.<br />
Frame<br />
• Look for cracks, broken welds, holes or other<br />
damage to the frame, cross members, box,<br />
and floor.<br />
Tandem Release Arm/Locking Pins<br />
• If equipped, make sure the locking pins are<br />
locked in place and release arm is secured.<br />
remainder <strong>of</strong> trailer<br />
Remainder <strong>of</strong> Trailer<br />
• Please refer to earlier pages <strong>of</strong> this handbook<br />
for detailed inspection procedures regarding<br />
the following components:<br />
— wheels<br />
— suspension system<br />
— brakes<br />
— doors/ties/lift<br />
— splash guards
cOAch/tRAnSIt BuS<br />
passenger items<br />
Passenger Entry/Lift<br />
• Check that entry doors operate smoothly and<br />
close securely from the inside.<br />
• Check that hand rails are secure and, if<br />
equipped, that the step light(s) is working.<br />
• Check that the entry steps are clear, with the<br />
treads not loose or worn excessively.<br />
• If equipped with a handicap lift, look for any<br />
leaking, damaged, or missing part and explain<br />
how it should be checked for correct operation.<br />
• Lift should be fully retracted and latched<br />
securely.<br />
• Make sure the lift control interlock(s) functions<br />
properly.<br />
Emergency Exits<br />
• Make sure that all emergency exits are undamaged,<br />
operate smoothly, and close securely<br />
from the inside.<br />
• Check that any emergency exit warning devices<br />
are working.<br />
Passenger Seating<br />
• Look for broken seat frames and check that<br />
seat frames are firmly attached to the floor.<br />
• Check that seat cushions are attached securely<br />
to the seat frames.<br />
entry/exit<br />
Doors/Mirrors<br />
• Check that entry/exit doors are not damaged<br />
and operate smoothly from the outside. Hinges<br />
should be secure with seals intact.<br />
• Make sure that the passenger exit mirrors and<br />
all external mirrors and mirror brackets are<br />
not damaged and are mounted securely with<br />
no loose fittings.<br />
external inspeCtion–CoaCh/transit<br />
Bus<br />
Level/Air Leaks<br />
• See that the vehicle is sitting level (front to<br />
rear), and if air-equipped, check for audible<br />
air leaks from the suspension system.<br />
Fuel Tank(s)<br />
• See that fuel tank(s) is secure with no leaks<br />
from tank(s) or lines.<br />
Compartments<br />
• Check that baggage and all other exterior<br />
compartment doors are not damaged, operate<br />
properly, and latch securely.<br />
remainder <strong>of</strong> CoaCh/transit Bus<br />
Battery/Box<br />
• Wherever located, see that battery(ies) is<br />
secure, connections are tight, and cell caps<br />
are present.<br />
• Battery connections should not show signs <strong>of</strong><br />
excessive corrosion.<br />
• Check that battery box and cover or door is<br />
not damaged and is secure.<br />
Remainder <strong>of</strong> Vehicle<br />
• Please refer to earlier pages <strong>of</strong> this handbook<br />
for detailed inspection procedures regarding<br />
the following components:<br />
— wheels<br />
- 153 -
SchOOl BuSeS Only<br />
emergenCy equipment<br />
• In addition to checking for spare electrical<br />
fuses, if equipped, three red reflective triangles,<br />
and a properly charged and rated fire extinguisher,<br />
school bus drivers must also inspect<br />
the following emergency equipment:<br />
— three red-burning flares (fusees) or three<br />
bidirectional emergency reflective triangles<br />
(FMVSS 125)<br />
— a first aid kit consisting <strong>of</strong> 10–24 items,<br />
depending on the number <strong>of</strong> passengers<br />
lighting indiCators<br />
• In addition to checking the lighting indicators<br />
listed in Section 11 <strong>of</strong> this handbook, school bus<br />
drivers must also check the following lighting<br />
indicators (internal panel lights):<br />
— alternately flashing amber lights indicator,<br />
if equipped<br />
— alternately flashing red lights indicator<br />
— strobe light indicator, if equipped<br />
lights/refleCtors<br />
• In addition to checking the lights and reflective<br />
devices, school bus drivers must also check<br />
the following (external) lights and reflectors:<br />
— strobe light, if equipped<br />
— stop arm light, if equipped<br />
— alternately flashing amber lights, if<br />
equipped<br />
— alternately flashing red lights<br />
stop arm<br />
• If equipped, check the stop arm to see that it is<br />
mounted securely to the frame <strong>of</strong> the vehicle.<br />
Also, check for loose fittings and damage.<br />
- 154 -<br />
passenger entry/lift<br />
• Check that the entry door is not damaged,<br />
operates smoothly, and closes securely from<br />
the inside.<br />
• Hand rails are secure and the step light is<br />
working, if equipped.<br />
• The entry steps must be clear with the treads<br />
not loose or worn excessively.<br />
• If equipped with a handicap lift, look for leaking,<br />
damaged, or missing parts and explain how<br />
lift should be checked for correct operation. Lift<br />
must be fully retracted and latched securely.<br />
Make sure the lift door warning device is<br />
activated when the door is open.<br />
emergenCy exit<br />
• Make sure that all emergency exits are not<br />
damaged, operate smoothly, and close securely<br />
from the inside.<br />
• Make sure that any exterior or interior locking<br />
devices, if equipped, are not “locked” and that<br />
the door is free to open.<br />
• Check that any emergency exit warning devices<br />
are working.<br />
seating<br />
• Look for broken seat frames and check that<br />
seat frames are firmly attached to the floor.<br />
• Check that seat cushions are attached securely<br />
to the seat frames.<br />
Remember: The pre-trip test must be passed before<br />
you can proceed to the skills test.
tyPIcAl tRuck OR cOmBInAtIOn VehIcle InSPectIOn guIDe<br />
STEP 1: Engine Compartment<br />
Fluids<br />
Belts and hoses<br />
Components<br />
STEP 2: Left Side <strong>of</strong> Cab Area<br />
Left front wheel<br />
Left front suspension<br />
Left front brake<br />
STEP 3: Front <strong>of</strong> Cab Area<br />
Front axle<br />
Condition <strong>of</strong> Steering system<br />
Windshield<br />
Light and reflectors<br />
STEP 4: Right Side <strong>of</strong> Cab Area<br />
All items as done on left side <strong>of</strong> cab area<br />
STEP 5: Fuel tank(s)<br />
Visible parts<br />
STEP 6: Trailer Front Area<br />
Air and electrical lines and connections<br />
Lights and reflectors<br />
STEP 7: Right Rear Tractor Wheels Area<br />
Dual wheels<br />
Suspension<br />
Tandem axles<br />
Brakes<br />
STEP 8: Rear <strong>of</strong> Tractor Area<br />
Frame and cross members<br />
Lights and reflectors<br />
Air and electrical lines and connections<br />
STEP 9: Coupling System Area<br />
Fifth-wheel (lower)<br />
Fifth-wheel (upper)<br />
Sliding fifth-wheel<br />
Air and electrical lines and connections<br />
STEP 10: Right Side <strong>of</strong> Trailer Area<br />
Front trailer support (landing gear or dollies)<br />
Spare tire(s)<br />
Lights and reflectors<br />
Frame and body<br />
STEP 11: Right Rear Trailer Wheels Area<br />
Dual tires Suspension<br />
Tandem axles<br />
Brakes<br />
STEP 12: Rear <strong>of</strong> Trailer Area<br />
Lights and reflectors<br />
Cargo securement<br />
STEP 13: Left Rear Trailer Wheels Area<br />
STEP 14: Left Side <strong>of</strong> Trailer Area<br />
STEP 15: Left Saddle Tank Area<br />
STEP 16: In Cab Brake Checks<br />
Headlights, Signal &<br />
Clearance Lights<br />
Engine<br />
Compartment<br />
Start Engine<br />
Signal, Brake, and<br />
Clearance Lights<br />
Front Suspension<br />
Front Wheel<br />
Front Brake<br />
Cab Area<br />
Saddle Tank Area<br />
Coupling System<br />
Rear Tractor Wheels<br />
Suspension<br />
Brakes<br />
Side <strong>of</strong> Trailer<br />
Trailer Wheels<br />
Suspension<br />
Brakes<br />
- 155 -
- 156 -<br />
tyPIcAl PASSengeR tRAnSPORt VehIcle InSPectIOn guIDe<br />
STEP 1: Engine Compartment<br />
Fluids<br />
Belts and hoses<br />
Components<br />
STEP 2: Front <strong>of</strong> Vehicle<br />
Windshield<br />
Wipers<br />
Lights and reflectors<br />
STEP 3: Right Front Corner<br />
General condition<br />
Right front wheel<br />
Right outside mirror<br />
Front passenger door<br />
STEP 4: Right Side <strong>of</strong> Vehicle<br />
General condition<br />
Lights and reflectors<br />
Exit doors<br />
Fuel cap<br />
Fuel tank<br />
Exterior body<br />
Baggage compartment doors<br />
Right rear wheels<br />
STEP 5: Rear <strong>of</strong> Vehicle<br />
General condition<br />
Lights and reflectors<br />
Engine cover and inspection doors<br />
Bellows level<br />
Fluid leaks<br />
Exhaust<br />
STEP 6: Left Side <strong>of</strong> Vehicle<br />
General condition<br />
Lights and reflectors<br />
Exterior body<br />
Left rear wheels<br />
Battery box<br />
STEP 7: Left Front Corner<br />
General condition<br />
Left front wheel<br />
Left outside mirror<br />
STEP 8: Inside the Vehicle<br />
Fire extinguisher (if applicable)<br />
Emergency reflectors (if applicable)<br />
Passenger entry and exit door<br />
Emergency exits<br />
Interior lights<br />
Rear door interlock (if applicable)<br />
Seats<br />
Handrails<br />
STEP 9: Operator’s Cab<br />
Service brakes Gauges<br />
Parking brakes Horn<br />
Steering Mechanism Wiper operation<br />
Wheel chair lift & Mirrors<br />
tie downs (if applicable) Turn signals<br />
<strong>Driver</strong>’s seat belt Lights<br />
Passenger signals Heater/defroster<br />
Radio/PA system Sun visors<br />
Destination signs<br />
STEP 10: In Cab Brake Check<br />
Headlights, Signal &<br />
Clearance Lights<br />
Engine Start<br />
Passenger Items<br />
Engine<br />
Compartment<br />
Signal, Brake, and<br />
Clearance Lights<br />
Entry Area<br />
Front Suspension &<br />
Brake<br />
Front Wheel<br />
Fuel Tank Area<br />
Baggage<br />
Compartments<br />
Rear Wheels<br />
Rear Suspension &<br />
Brakes
SectIOn 12: BASIc VehIcle cOntROl SkIllS teSt<br />
This section will assist drivers taking the skills tests<br />
Three <strong>of</strong> the six following CDL skills tests are<br />
required. All directions for the skills tests will be<br />
given in the English language. This is pursuant<br />
to Federal Motor Carrier Safety Administration<br />
regulations §§391.11 (b) (2) and 383.133 (c) (5).<br />
If you are unable to understand the instructions<br />
given in the English language after three times,<br />
the test will be counted as a failure.<br />
• Straight line backing.<br />
• Off-set backing right.<br />
• Off-set backing left.<br />
• Alley dock (driver side).<br />
• Parallel park (conventional).<br />
• Parallel park (sight side).<br />
These exercises are shown on the following page.<br />
ScORIng<br />
Your performance on the Basic Vehicle Controls<br />
Skills tests is scored by the Examiner.<br />
Errors occur anytime:<br />
• You pull-up to prevent crossing over a boundary<br />
for the skill.<br />
• You actually cross over a boundary line with<br />
any portion <strong>of</strong> the vehicle (except the mirrors.)<br />
• You leave the vehicle to check your progress.<br />
• The final position <strong>of</strong> the vehicle is not within<br />
the prescribed boundaries upon completion<br />
<strong>of</strong> the skill.<br />
exeRcISeS<br />
The examiner will give you specific instructions<br />
before each skill is attempted. The instructions<br />
will inform you <strong>of</strong> the skill objective and the<br />
parameters for the skill. You are expected to inform<br />
the examiner that your attempt at any skill is<br />
complete by sounding the vehicle horn and setting<br />
the parking brake.<br />
Straight line backing — You will back your<br />
vehicle 100 feet in a straight line between two<br />
rows <strong>of</strong> cones without touching or crossing over<br />
the exercise boundaries.<br />
Offset backing right — You will be asked to<br />
pull forward from a lane and stop at a barrier <strong>of</strong><br />
cones. You will then back up so your vehicle is<br />
positioned in the lane to the right <strong>of</strong> the lane you<br />
pulled from. You must continue backing until the<br />
vehicle has cleared the forward set <strong>of</strong> cones with<br />
the front <strong>of</strong> the vehicle.<br />
Offset backing left — You will be asked to pull<br />
forward from a lane and stop at the barrier <strong>of</strong><br />
cones. You will then back up so your vehicle is<br />
positioned in the lane to the left <strong>of</strong> the lane you<br />
pulled from. You must continue backing until the<br />
vehicle has cleared the forward set <strong>of</strong> cones with<br />
the front <strong>of</strong> the vehicle.<br />
Alley dock — You will be asked to back your<br />
vehicle from the sight side into an alley, bringing<br />
the rear <strong>of</strong> your vehicle or trailer within three feet<br />
<strong>of</strong> the rear <strong>of</strong> the alley without going beyond the<br />
exercise boundary. The final position <strong>of</strong> the vehicle<br />
must be within the exercise boundaries and within<br />
three feet <strong>of</strong> the rear boundary.<br />
Parallel park (sight side) — You will be asked<br />
to park in a parallel parking space that is on your<br />
left. You will drive past the space and back into<br />
the space getting the entire vehicle (tractor and<br />
trailer for Class A) completely into the space. The<br />
vehicle’s final position must be entirely within the<br />
exercise boundaries.<br />
Parallel park (conventional) — You will be<br />
asked to park in a parallel parking space that is<br />
on your right. You will drive past the space and<br />
back the entire vehicle (tractor and trailer for<br />
Class A) completely into the space. The vehicles<br />
final position must be entirely within the exercise<br />
boundaries.<br />
- 157 -
- 158 -<br />
Alley Dock<br />
90° Alley Dock<br />
Straight Line Backing<br />
Offset Back/Left<br />
Offset Back/Right<br />
Sight Side Parallel Park<br />
Parallel Park (Sight Side)<br />
Minimum <strong>of</strong> 225ft<br />
Parallel Park (Conventional)
SectIOn 13: DRIVIng teSt<br />
This section will assist drivers taking the driving test<br />
To pass the road test portion <strong>of</strong> the CDL DPE you<br />
must make no more than 30 errors and have no<br />
Critical Driving Errors (CDE), which will result in<br />
an automatic failure. All directions for the road test<br />
maneuvers will be given in the English language.<br />
This is pursuant to Federal Motor Carrier Safety<br />
Administration regulations §§391.11 (b) (2) and<br />
383.133 (c) (5). If you are unable to understand<br />
the directions given in the English language three<br />
times, the test will be counted as a failure.<br />
During the driving test, the examiner will be scoring<br />
you on specific driving maneuvers as well as on<br />
your general driving behavior. You will follow<br />
the directions <strong>of</strong> the examiner. Directions will be<br />
given to you so you will have plenty <strong>of</strong> time to<br />
do what the examiner has asked. You will not be<br />
asked to drive in an unsafe manner.<br />
If your test route does not have certain traffic<br />
situations, you may be asked to simulate a traffic<br />
situation. You will do this by telling the examiner<br />
what you are or would be doing if you were in that<br />
traffic situation. A failure <strong>of</strong> the driving test will<br />
require a retest fee.<br />
Remember: You are allowed a total <strong>of</strong> three attempts<br />
to pass the pre-trip, skills, or driving tests.<br />
(See page 4.)<br />
hOW WIll yOu Be teSteD?<br />
You have been asked to make a turn:<br />
• Check traffic in all directions.<br />
• Use turn signals and safely get into the lane<br />
needed for the turn.<br />
turns<br />
As you approach the turn:<br />
• Use turn signals to warn others <strong>of</strong> your turn.<br />
• Slow down smoothly, change gears as needed to<br />
keep power, but do not coast unsafely. Unsafe<br />
coasting occurs when your vehicle is out <strong>of</strong><br />
gear for more than the length <strong>of</strong> your vehicle.<br />
If you must stop before making the turn:<br />
• Come to a smooth stop without skidding.<br />
• Come to a complete stop behind the stop line,<br />
crosswalk, or stop sign.<br />
• If stopping behind another vehicle, stop where<br />
you can see the rear tires on the vehicle ahead<br />
<strong>of</strong> you (safe gap).<br />
• Keep the front wheels aimed straight ahead.<br />
When ready to turn:<br />
• Check traffic in all directions.<br />
• Keep both hands on the steering wheel during<br />
the turn.<br />
• Do not change gears during the turn.<br />
• Keep checking your mirror to make sure the<br />
vehicle does not hit anything on the inside <strong>of</strong><br />
the turn.<br />
• Vehicle should not move into oncoming traffic.<br />
• Vehicle should finish turn in correct lane.<br />
- 159 -
After turn:<br />
• Make sure turn signal is <strong>of</strong>f.<br />
• Get up to speed <strong>of</strong> traffic, use turn signal, and<br />
move into the far right lane when safe to do<br />
so (if not already there).<br />
lane Changes<br />
• Check traffic.<br />
• Use signals to warn other drivers.<br />
• Change lanes smoothly.<br />
• Turn signal <strong>of</strong>f when lane change is completed.<br />
interseCtions<br />
As you approach an intersection:<br />
• Check traffic thoroughly in all directions.<br />
• Decelerate gently.<br />
• Brake smoothly and, if necessary, change gears.<br />
• If necessary, come to a complete stop behind<br />
any stop signs, signals, sidewalks, or stop lines<br />
maintaining a safe gap behind any vehicle in<br />
front <strong>of</strong> you.<br />
• Your vehicle must not roll forward or backward.<br />
• Do not enter the intersection if there is insufficient<br />
space to clear it.<br />
When driving through an intersection:<br />
• Check traffic thoroughly in all directions.<br />
• Decelerate and yield to any pedestrians and<br />
traffic in the intersection.<br />
• Do not change lanes or shift gears while<br />
proceeding through the intersection.<br />
• Keep your hands on the wheel.<br />
Once through the intersection:<br />
• Continue checking traffic.<br />
• Accelerate smoothly and change gears as<br />
necessary.<br />
- 160 -<br />
urBan/rural normal driving<br />
During this part <strong>of</strong> the test, you are expected to make<br />
regular traffic checks and maintain a safe following<br />
distance. Your vehicle should be centered in the<br />
proper lane and you should keep up with the flow<br />
<strong>of</strong> traffic but not exceed the posted speed limit.<br />
urBan/rural lane Changes<br />
During the multiple lane portion <strong>of</strong> the urban or<br />
rural sections, you will be asked to change lanes<br />
to the left, and then back to the right. You should<br />
make the necessary traffic checks first, then use<br />
proper signals and smoothly change lanes when<br />
it is safe to do so.<br />
freeWay driving<br />
Before entering the freeway:<br />
• Check traffic.<br />
• Use proper signals.<br />
• Merge smoothly into the proper traffic lane.<br />
Once on the freeway:<br />
• Maintain proper lane position, distance, and<br />
speed.<br />
• Continue to check traffic thoroughly in all<br />
directions.<br />
You will be instructed to change lanes:<br />
• You must make necessary traffic checks.<br />
• Use proper signals.<br />
• Change lanes smoothly when it is safe to do so.<br />
When exiting the freeway:<br />
• Make necessary traffic checks.<br />
• Use proper signals.<br />
• Decelerate smoothly in the exit lane.<br />
• Once on the exit ramp, you must continue<br />
to decelerate within the lane markings and<br />
maintain adequate following distance.
stop/start<br />
For this maneuver, you will be asked to pull your<br />
vehicle over to the side <strong>of</strong> the road and stop as if<br />
you were going to get out and check something on<br />
your vehicle. You must check traffic thoroughly<br />
in all directions and move to the far right lane or<br />
shoulder <strong>of</strong> the road.<br />
As you prepare for the stop:<br />
• Check traffic.<br />
• Turn on your right turn signal.<br />
• Decelerate smoothly, brake evenly, change<br />
gears as necessary.<br />
• Bring your vehicle to a full stop without<br />
coasting.<br />
Once stopped:<br />
• Vehicle must be parallel to the curb or shoulder<br />
<strong>of</strong> the road and safely out <strong>of</strong> the traffic flow.<br />
• Vehicle should not be blocking driveways, fire<br />
hydrants, intersections, signs, etc.<br />
• Cancel your turn signal.<br />
• Activate 4-way emergency flashers.<br />
• Apply the parking brake.<br />
• Move the gear shift to neutral or park.<br />
• Take your feet <strong>of</strong>f the brake and clutch pedals.<br />
When instructed to resume:<br />
• Check traffic and your mirrors thoroughly in<br />
all directions.<br />
• Turn <strong>of</strong>f 4-way flashers.<br />
• Turn on left turn signal.<br />
• When traffic permits, you should release the<br />
parking brake and pull straight ahead.<br />
• Do not turn the wheel before your vehicle<br />
moves.<br />
• Check traffic from all directions, especially<br />
to the left.<br />
• Steer and accelerate smoothly into the proper<br />
lane when safe to do so.<br />
• Once your vehicle is back into the flow <strong>of</strong><br />
traffic, cancel your left turn signal.<br />
Curve<br />
When approaching a curve:<br />
• Check traffic thoroughly in all directions.<br />
• Before entering the curve, reduce speed so<br />
further braking or shifting is not required in<br />
the curve.<br />
• Keep vehicle in the lane.<br />
• Continue checking traffic in all directions.<br />
railroad Crossing<br />
Before reaching the crossing, all<br />
commercial drivers should:<br />
• Decelerate, brake smoothly, and shift gears<br />
as necessary.<br />
• Look and listen for the presence <strong>of</strong> trains.<br />
• Check traffic in all directions.<br />
• Do not stop, change gears, pass another vehicle,<br />
or change lanes while any part <strong>of</strong> your vehicle<br />
is in the crossing.<br />
If you are driving a bus, a school bus, or a vehicle<br />
displaying placards, you should be prepared<br />
to observe the following procedures at every<br />
railroad crossing (unless the crossing is exempt):<br />
• As the vehicle approaches a railroad crossing,<br />
activate the 4-way flashers.<br />
• Stop the vehicle within 50 feet but not less<br />
than 15 feet from the nearest rail.<br />
• Listen and look in both directions along the<br />
track for an approaching train and for signals<br />
indicating the approach <strong>of</strong> a train. If operating<br />
a bus, you may also be required to open the<br />
window and door prior to crossing tracks.<br />
• Keep hands on the steering wheel as the vehicle<br />
crosses the tracks.<br />
• Do not stop, change gears, or change lanes<br />
while any part <strong>of</strong> your vehicle is proceeding<br />
across the tracks.<br />
• 4-way flashers should be turned <strong>of</strong>f after the<br />
vehicle crosses the tracks.<br />
Not all driving tests will have a railroad crossing.<br />
You may be asked to explain and demonstrate the<br />
proper railroad crossing procedures to the examiner<br />
at a simulated location.<br />
- 161 -
Bridge/overpass/sign<br />
After driving under an overpass, you may be asked<br />
to tell the examiner what the posted clearance or<br />
height was. After going over a bridge, you may<br />
be asked to tell the examiner what the posted<br />
weight limit was. If your test route does not have<br />
an overpass or bridge, you may be asked about<br />
another traffic sign. When asked, be prepared to<br />
identify and explain to the examiner any traffic<br />
sign which may appear on the route.<br />
During the driving test you must:<br />
• Wear your safety belt.<br />
• Obey all traffic signs, signals, and laws.<br />
• Complete the test without a collision or moving<br />
violation.<br />
You will be scored on your overall performance in<br />
the following general driving behavior categories:<br />
Clutch Usage (for manual transmission)<br />
• Always use clutch to shift.<br />
• Double-clutch if vehicle is equipped with<br />
non-synchronized transmission.<br />
- 162 -<br />
• Do not rev or lug the engine.<br />
• Do not ride clutch to control speed, coast with<br />
the clutch depressed, or “pop” the clutch.<br />
Gear Usage (for manual transmission)<br />
• Do not grind or clash gears.<br />
• Select gear that does not rev or lug engine.<br />
• Do not shift in turns and intersections.<br />
Brake Usage<br />
• Do not ride or pump brake.<br />
• Do not brake harshly. Brake smoothly using<br />
steady pressure.<br />
Lane Usage<br />
• Do not drive the vehicle over curbs, sidewalks,<br />
or lane markings.<br />
• Stop behind stop lines, crosswalks, or stop<br />
signs.<br />
• Complete turns in the proper lane on multiple<br />
lane roads.<br />
• Finish right turns in the right lane.<br />
• Move to or remain in the far right lane unless<br />
the lane is blocked.<br />
student disCharge (sChool Buses)<br />
You will be scored on how you demonstrate and<br />
describe the procedure for discharging students.
Bulk packaging—a packaging, including a transport<br />
vehicle or freight container in which hazardous<br />
materials are loaded with no intermediate form <strong>of</strong><br />
containment, with a capacity greater than:<br />
• 450 L (119 gallons) for a liquid,<br />
• 450 L (119 gallons) and a net mass greater than<br />
400 kg (882 lbs.) for a solid, or<br />
• water capacity greater than 454 kg (1000 lbs.)<br />
for a gas<br />
<strong>California</strong> Hazardous Waste Manifest—shipping<br />
paper which must accompany all shipments<br />
<strong>of</strong> hazardous waste.<br />
CalTrans—<strong>California</strong> <strong>Department</strong> <strong>of</strong> Transportation<br />
Carboy—a bottle or rectangular container that<br />
holds from 5 to 15 gallons <strong>of</strong> liquid. Carboys<br />
are made <strong>of</strong> glass, plastic, or metal and are <strong>of</strong>ten<br />
cushioned in a wooden box.<br />
Cargo tank—any bulk liquid or compressed gas<br />
packaging, whether or not permanently attached<br />
to any motor vehicle, which by reason <strong>of</strong> its size,<br />
construction, or attachment to a motor vehicle, is<br />
loaded or unloaded without being removed from<br />
the motor vehicle. Any packaging fabricated under<br />
specifications for cylinders is not a cargo tank.<br />
Carrier—a person engaged in the transportation<br />
<strong>of</strong> passengers or property by land or water (as a<br />
common, contract, or private carrier) or by civil<br />
aircraft.<br />
CCR—<strong>California</strong> Code <strong>of</strong> Regulations—Title 13<br />
and Title 22<br />
CFR—Code <strong>of</strong> Federal Regulations—Title 49<br />
CHP—<strong>California</strong> Highway Patrol<br />
glOSSARy<br />
Compressed gas—any gaseous material, or<br />
liquefied gas, kept in a container under pressure.<br />
(See more specific Class 2 definitions in 49 CFR<br />
173.115.)<br />
Consignee—the business or person to whom a<br />
shipment is delivered.<br />
CVC §—<strong>California</strong> Vehicle Code Section.<br />
Cryogenic liquid—a refrigerated liquefied gas<br />
having a boiling point colder than -130°F at 14.7<br />
psia.<br />
Cylinder—a pressure vessel designed for pressures<br />
higher than 40 psia. and having a circular cross<br />
section. It does not include a portable or cargo tank.<br />
DMV—<strong>Department</strong> <strong>of</strong> Motor Vehicles<br />
DOT—<strong>Department</strong> <strong>of</strong> Transportation (Federal)<br />
DTSC—<strong>Department</strong> <strong>of</strong> Toxic Substance Control<br />
EPA—U. S. Environmental Protection Agency<br />
FAA—Federal Aviation Administration<br />
FHWA—Federal Highway Administration<br />
FMCSA —Federal Motor Carrier Safety<br />
Administration<br />
Freight container—a reusable container designed<br />
and constructed to permit being lifted with its contents<br />
intact and intended primarily for containment<br />
<strong>of</strong> packages (in unit form) during transportation.<br />
gross weight—the weight <strong>of</strong> the packaging plus<br />
the weight <strong>of</strong> its contents.<br />
Hazardous material—any material that poses an<br />
unreasonable risk to health, safety, and property<br />
during transportation. These materials are named<br />
by the DOT in the Hazardous Materials Table.<br />
- 163 -
Page left<br />
intentionally blank
Infectious substances or etiologic agents—a<br />
living microorganism, or its toxin, which causes<br />
or may cause human or animal disease.<br />
Limited quantity—when specified as such in a<br />
section applicable to a particular material, it means<br />
the maximum amount with specific placarding,<br />
labeling, and packaging exceptions.<br />
Marking—applying the descriptive name(s),<br />
identification numbers, instructions, cautions,<br />
weight(s), or specification marks required to be<br />
placed on the outside <strong>of</strong> hazardous materials<br />
packages and/or their transport vehicle(s).<br />
Mixture—a material containing more than one<br />
chemical compound or element.<br />
Name <strong>of</strong> contents—the proper shipping name as<br />
specified in the Hazardous Materials Table.<br />
n.o.s.—not otherwise specified<br />
Outage—the amount by which a packaging falls<br />
short <strong>of</strong> being liquid full, usually expressed in<br />
percent by volume. The amount <strong>of</strong> outage required<br />
for liquids in cargo tanks depends on how much<br />
the material will expand with temperature change<br />
during transit. Different materials expand at different<br />
rates. Enough outage must be allowed so that<br />
the tank will still not be full at 130°F.<br />
Overpack—an enclosure used by a single shipper<br />
to provide protection or convenience in handling<br />
<strong>of</strong> a package or to combine two or more packages.<br />
“Overpack” does not include a transport vehicle<br />
or a freight container.<br />
Portable tank—any bulk packaging (except a<br />
cylinder having a 1000 lbs. or less water capacity)<br />
designed primarily to be loaded in, on, or<br />
temporarily attached to, a transport vehicle. A<br />
portable tank is equipped with skids, mounting,<br />
or accessories to facilitate handling <strong>of</strong> the tank by<br />
mechanical means.<br />
Proper shipping name—the name <strong>of</strong> the hazardous<br />
material shown in Roman print (not italics) in<br />
the Hazardous Materials Table.<br />
psi—Pounds per square inch.<br />
psia.—Pounds per square inch absolute.<br />
PUC—Public Utilities Commission<br />
Registered hazardous waste transporter—<br />
person registered by DTSC who engages in the<br />
<strong>of</strong>fsite transportation <strong>of</strong> hazardous waste by air,<br />
rail, highway, or water.<br />
Reportable quantity (RQ)—the quantity (per<br />
single package) which equals or exceeds the quantity<br />
specified in column 3 <strong>of</strong> the List <strong>of</strong> Hazardous<br />
Substances and Reportable Quantities. Reportable<br />
quantities are treated as hazardous materials and<br />
have specific spill reporting requirements.<br />
Shipper’s certification—a statement on a shipping<br />
paper, signed by the shipper, saying he or she<br />
prepared the shipment properly according to law.<br />
“This is to certify that the above named materials<br />
are properly classified, described, packaged,<br />
marked and labeled and are in proper condition<br />
for transportation according to the applicable<br />
regulations <strong>of</strong> the <strong>Department</strong> <strong>of</strong> Transportation.”<br />
or<br />
“I hereby declare that the contents <strong>of</strong> this consignment<br />
are fully and accurately described above<br />
by the proper shipping name and are classified,<br />
packaged, marked and labeled/placarded, and are<br />
in all respects in proper condition for transport<br />
according to applicable international and national<br />
governmental regulations.”<br />
Shipping paper—a shipping order, bill <strong>of</strong> lading,<br />
manifest or other shipping document serving a<br />
similar purpose and containing the information<br />
required by the regulations.<br />
- 165 -
Tank vehicle—any commercial motor vehicle<br />
with any size fixed tank(s) (except tanks necessary<br />
for vehicle operation such as: air, gas, and oil) or<br />
portable tanks <strong>of</strong> 1,000 gallons or more capacity.<br />
Also includes any fixed tank in excess <strong>of</strong> 119 gallons<br />
mounted on any vehicle or vehicle combination<br />
which requires a CDL or placards.<br />
To transport hazardous materials or wastes, a Tank<br />
Vehicle Endorsement and a HazMat endorsement<br />
is required for a fixed tank(s) regardless <strong>of</strong> the<br />
weight <strong>of</strong> the vehicle or the size <strong>of</strong> the tank. If the<br />
tank is portable and is under 1,000 gallons, only<br />
the HazMat endorsement is required.<br />
Technical name—a recognized chemical name or<br />
microbiological name currently used in scientific<br />
and technical handbooks, journals, and texts.<br />
Title 13—<strong>California</strong> Code <strong>of</strong> Regulations—Motor<br />
Vehicles.<br />
Title 22—<strong>California</strong> Code <strong>of</strong> Regulations—Environmental<br />
Health Standards for the Management<br />
<strong>of</strong> Hazardous Waste.<br />
Transport vehicle—a cargo carrying vehicle such<br />
as an automobile, van, tractor, truck, semitrailer,<br />
tank car, or rail car used for the transportation <strong>of</strong><br />
cargo by any mode. Each cargo carrying body<br />
(trailer, rail car, etc.) is a separate transport vehicle.<br />
Water reactive material—any material (including<br />
sludge and pastes) which when mixed with<br />
water, is likely to ignite or give <strong>of</strong>f flammable or<br />
toxic gases in dangerous quantities. Water reactive<br />
material is required to be labeled DANGEROUS<br />
WHEN WET.<br />
- 166 -<br />
to purChase referenCe materials<br />
A <strong>California</strong> Vehicle Code book may be viewed<br />
online at www.dmv.ca.gov or be purchased at any<br />
DMV <strong>of</strong>fice.<br />
<strong>California</strong> Regulations relating to commercial<br />
vehicles are contained in Title 13 <strong>of</strong> the <strong>California</strong><br />
Code <strong>of</strong> Regulations (CCR).<br />
Title 13, CCR, may be purchased from:<br />
Thomson-West Group<br />
PO Box 95767<br />
Chicago, IL 60694-5767<br />
Telephone Number 1-800-866-3600<br />
www.barclaysccr.com<br />
Copies <strong>of</strong> the Code <strong>of</strong> Federal Regulations,<br />
Title 49, or Title 22, CCR, Division 4.5 may be<br />
purchased from:<br />
Superintendent <strong>of</strong> Documents<br />
U. S. Government Printing Office<br />
Washington, D. C. 20402<br />
Telephone Number (202) 512-1800<br />
7:30 AM to 4:30 PM EST<br />
Fax Number (202) 512-2250<br />
www.access.gpo.gov<br />
disClaimer<br />
When using this handbook, please remember that<br />
it is only a summary <strong>of</strong> the laws and regulations.<br />
DMV, law enforcement, and courts follow the<br />
full and exact language <strong>of</strong> the contained in the<br />
<strong>California</strong> Vehicle Code. You may view the most<br />
current <strong>California</strong> Vehicle Code on our website<br />
at www.dmv.ca.gov or purchase a copy at any<br />
DMV <strong>of</strong>fice.<br />
Where to Write<br />
Questions or comments regarding this handbook<br />
may be addressed to:<br />
<strong>Department</strong> <strong>of</strong> Motor Vehicles<br />
Customer Communications Unit<br />
MS H165<br />
PO Box 932345<br />
Sacramento, CA 94232-3450
nOteS<br />
- 167 -
Save Time.<br />
...for what you love<br />
Go Online.<br />
...for DMV transactions<br />
visit dmv.ca.gov<br />
24/7 online services
Page left<br />
intentionally blank
Page left<br />
intentionally blank<br />
DL 650 (REV. 5/2012)