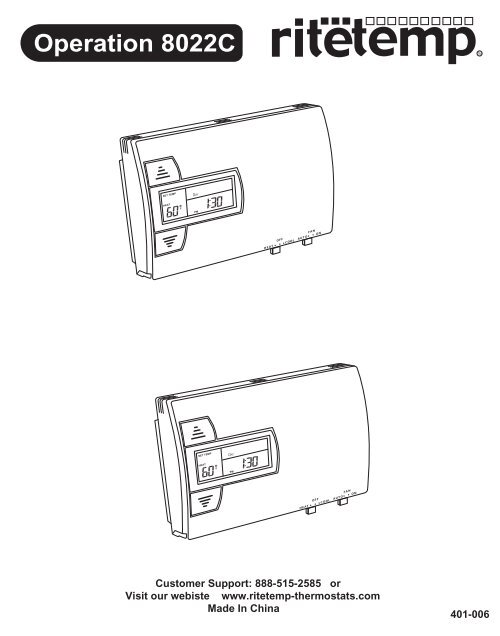
Operation 8022C - The RiteTemp Support Site
Operation 8022C - The RiteTemp Support Site Operation 8022C - The RiteTemp Support Site
Operation 8022C SET TEMP HEAT F PM SET TEMP HEAT F PM OFF FAN HEAT COOL AUTO ON OFF FAN HEAT COOL AUTO ON Customer Support: 888-515-2585 or Visit our webiste www.ritetemp-thermostats.com Made In China 401-006
- Page 2 and 3: Operation 8022C - Cover Closed - PG
- Page 4 and 5: 3 Program cont. Select the next TIM
- Page 6 and 7: 4 Spec. Featr. cont. TEMP HOLD To c
<strong>Operation</strong> <strong>8022C</strong><br />
SET TEMP<br />
HEAT<br />
F<br />
PM<br />
SET TEMP<br />
HEAT<br />
F<br />
PM<br />
OFF FAN<br />
HEAT COOL AUTO ON<br />
OFF FAN<br />
HEAT COOL AUTO ON<br />
Customer <strong>Support</strong>: 888-515-2585 or<br />
Visit our webiste www.ritetemp-thermostats.com<br />
Made In China<br />
401-006
<strong>Operation</strong> <strong>8022C</strong><br />
- Cover Closed -<br />
PG 1<br />
PG 2<br />
SET TEMP<br />
PM<br />
TEMP DOWN<br />
button<br />
TEMP UP<br />
button<br />
Set Temp<br />
Display<br />
TEMP<br />
UP<br />
Statement of use: <strong>The</strong> GPMG8022c can be used with<br />
most 24 volt gas, oil or electric heating and air conditioning<br />
systems, single-stage heat pumps or gas millivolt heating<br />
systems. It cannot be used with 120 volt heating<br />
systems or multistage heat pumps.<br />
1 Set Clock<br />
Time/ Current Temp<br />
Display<br />
OFF FAN<br />
HEAT COOL AUTO ON<br />
Mode<br />
Switch<br />
Fan<br />
Switch<br />
AA Battery<br />
Compartment<br />
BATTERY<br />
DOWN<br />
HOME<br />
SET CLOCK<br />
DAY<br />
PROGRAM<br />
SDP<br />
TIME SLOT<br />
NEXT P<br />
TIME SET<br />
TEMP HOLD<br />
COPY<br />
TIME<br />
TIME<br />
RESET<br />
MODE FAN<br />
Reset button<br />
Set day of the week -<br />
Press SET CLOCK once to set the day of the week. <strong>The</strong><br />
day of the week display flashes. (Initially SU for Sunday)<br />
Press TIME<br />
to select the day.<br />
Press HOME to store your<br />
settings.<br />
Set time of day -<br />
Press SET CLOCK twice to set<br />
the time. <strong>The</strong> time display will<br />
flash.<br />
Press TIME to set<br />
the time. Press and hold to set<br />
the time in the fast mode.<br />
Press HOME to store your<br />
settings.<br />
SET TEMP<br />
PM<br />
TEMP<br />
UP<br />
SET TEMP<br />
F<br />
DOWN<br />
BATTERY<br />
P2<br />
HOME<br />
FILTER<br />
REVIEW<br />
SET CLOCK SDP<br />
DAY<br />
PROGRAM<br />
TIME SLOT<br />
NEXT P<br />
TEMP HOLD<br />
COPY<br />
RESET<br />
Control Panel<br />
Fan<br />
Switch<br />
Heat/Cool<br />
Mode Switch<br />
TIME SET<br />
TIME<br />
TIME<br />
FILTER<br />
REVIEW<br />
MODE FAN
PG 3<br />
PG 4<br />
2 Auto-run<br />
This <strong>The</strong>rmostat comes preprogrammed with an Energy-Star TM<br />
approved program. This program is recommended by the EPA for<br />
energy efficiency.<br />
SET TEMP<br />
We strongly recommend that you Auto-Run this<br />
program for one week, and see if it works for you.<br />
If it does not fit your needs you can always input a<br />
custom program.<br />
To Auto-Run the Energy-Star TM<br />
program, select HEAT or COOL with the mode<br />
switch. <strong>The</strong> unit is now running the Energy-Star TM<br />
program.<br />
<strong>The</strong> clock and the ambient temperature are displayed on the right.<br />
<strong>The</strong>y alternate every 2 seconds. One of the TIME SLOT icons P1/P2/P3/P4<br />
comes on, this indicates the TIME SLOT active in the Energy-Star Tm<br />
program.<br />
<strong>The</strong> programmed temperature is shown on the left. For program details refer to<br />
the Energy-Star TM<br />
program chart below.<br />
All Days 70 o<br />
F 62 o<br />
F 70 o<br />
HEAT P1<br />
6:00am<br />
P2<br />
8:00am<br />
P3<br />
6:00pm<br />
F<br />
P4<br />
10:00pm<br />
All Days 78 o<br />
F 85 o<br />
F 78 o<br />
COOL P1<br />
6:00am<br />
P2<br />
8:00am<br />
P3<br />
6:00pm<br />
F<br />
3 Program NOTE: 60 Second Rule-During programming, if a button is not<br />
pushed within 60 seconds, the unit will go out of the set mode.<br />
Everything you have input in this programming will automatically be saved.<br />
Select HEAT with the HEAT/Cool MODE switch. SET TEMP<br />
Select the day you want to program: Press the<br />
PROGRAM to enter programming mode. <strong>The</strong><br />
PROGRAM FOR icon will come on. <strong>The</strong> day icon will<br />
show SU (Sunday). Press day DAY again to advance<br />
the day selection.<br />
Select the TIME SLOT you want to program: To change the TIME SLOT<br />
(P1, P2, P3, P4) press the NEXT P button. <strong>The</strong> display will cycle through the<br />
time periods in sequence. Select P1.<br />
Select the desired temperature for that TIME SLOT : To change the<br />
temperature for that TIME SLOT press the TEMP UP / TEMP DOWN buttons.<br />
Select the time of day you want that TIME SLOT to represent:<br />
To set the time when P1 will begin , press the TIME buttons to<br />
move the set point forward or backward in time.<br />
P4<br />
10:00pm
3 Program cont.<br />
Select the next TIME SLOT and program temp and time:<br />
Press NEXT NEXT>, P the display will show P2, for Period 2. Repeat setting temp<br />
and time. Select the remaining TIME SLOT's, P3 and P4. Program their temp<br />
and time info.<br />
Repeat the above procedures for each day of the week. Push DAY> DAY button<br />
to cycle through the days.<br />
To COPY the program of the current day to another day, press COPY<br />
program once. COPY will display on the LCD. <strong>The</strong> day icon for the source<br />
day will go solid and the day icon for the destination day will flash. Use day DAY<br />
button to select the destination day. Press COPY again to confirm the copy.<br />
If you decide you don't want to copy, press HOME to exit.<br />
To program an alternate or "Special Day" program, that you can access at<br />
any time, press PRO DAY until PROGRAM FOR for SDP DAY is displayed.<br />
Repeat the procedure above to program temp settings for the Special Day.<br />
3 Program cont.<br />
When finished with your custom program, either wait 60 sec or press HOME<br />
to save and run your program.<br />
To program for cooling, select COOL with the Heat/Cool MODE switch and<br />
repeat the above procedure.<br />
To REVIEW the program you have entered:<br />
Press PROGRAM once to enter programming mode.<br />
<strong>The</strong>n press FILTER/REVIEW once.<br />
<strong>The</strong> display will cycle through the prgrammed times and temps, showing<br />
each program for 12 seconds. Starting from Sunday; P1 and ending on<br />
Saturday; P4. <strong>The</strong> programmed temperature is shown on the left of the LCD,<br />
the programmed time, day and time slot are shown on the right and the right<br />
top of the LCD respectfully.<br />
Press HOME to leave program REVIEW mode and run the program.<br />
PG 5<br />
PG 6
4 Special Features<br />
SDP<br />
<strong>The</strong> "Special Day Program" can be used when you are unexpectedly home<br />
and need to activate this heat / cooling program just for the day.<br />
With the MODE switch in HEAT or COOL press the SPECIAL DAY button to<br />
activate.<br />
When the SPECIAL DAY Program is active, all other day settings are all<br />
ignored even if the day is matched.<br />
<strong>The</strong> SPECIAL DAY program will terminate when the mode switch is moved<br />
or if the SPECIAL DAY button is pushed again.<br />
4 Spec. Featr. cont.<br />
Swing<br />
Swing setting determines the temperature difference from<br />
ON to OFF that the thermostat will command the heating/cooling system to run.<br />
With the MODE switch in HEAT or COOL, press the TIME button.<br />
<strong>The</strong> SET TEMP SWING icon is displayed. <strong>The</strong> current setting of temp swing is<br />
shown on the display (default at 3 ).<br />
To change the swing, push TEMP UP or TEMP DOWN buttons. <strong>The</strong> furnace will<br />
cycle more at the lower numbers as it tries to keep your set point constant.<br />
To complete the swing setting, push the HOME button.<br />
Manual<br />
SET TEMP<br />
With the MODE switch in HEAT or COOL, push the UP or DOWN<br />
arrow buttons to temporarily change the control temperature by 1<br />
degree per step. Press and hold for faster setting.<br />
<strong>The</strong> OVERRIDE icon comes on which shows the displayed<br />
temperature may be different from the programmed setting.<br />
<strong>The</strong> OVERRIDE is canceled at the start of the next time period,<br />
or when the MODE switch is moved, or if TEMP HOLD is pressed twice.<br />
UP-Arrow<br />
button<br />
PG 7<br />
DOWN-Arrow<br />
button<br />
PG 8
4 Spec. Featr. cont.<br />
TEMP HOLD<br />
To change and hold the temperature until you return.<br />
Open the door and push the TEMP HOLD button. <strong>The</strong> HOLD icon comes on.<br />
Push the UP or DOWN arrow buttons to set the hold temperature.<br />
HOLD is canceled if the MODE switch is moved, or press TEMP HOLD again.<br />
Filter<br />
<strong>The</strong> life of a heater filter varies depending on many factors, furnace run<br />
time, and this will vary from the filter life noted on the filter media.<br />
<strong>The</strong> <strong>8022C</strong> has a feature that keeps track of actual furnace run time and<br />
reminds you to periodically replace your system's air filter.<br />
Press the FILTER button once to review the current filter record.<br />
<strong>The</strong> FILTER and HR icons come on with accumulated filter hours being displayed.<br />
Press TIME to clear the record. Press again to recover the previous record.<br />
To see the filter limit setting, press and hold the FILTER button for two seconds.<br />
To change the filter limit hours setting, press TIME<br />
F. or or TIME B. Press and<br />
hold for faster setting. <strong>The</strong> filter limit can be set within 000-500 hours.<br />
To leave the filter display, press HOME or wait 60 seconds.<br />
4 Spec. Ftr. cont.<br />
Lock<br />
Allows you to lock the Program (to prevent any changes in custom settings)<br />
To enable or disable the program lock, press the following buttons one at a time,<br />
in this sequence.<br />
C or F display<br />
Centigrade / Fahrenheit selection. <strong>The</strong> C/F jumper is on the back of the<br />
thermostat control unit. Separate the control unit from the wall mounted<br />
terminals. When changed, the thermostat must be reset to activate the change.<br />
When resetting, all custom settings and programming will be erased and only<br />
the Energy-Star TM<br />
program will remain.<br />
12/24 hour<br />
<strong>The</strong> thermostat can display<br />
time in 12 or 24 hour<br />
formats. <strong>The</strong> 12/24 jumper<br />
is on the back of the<br />
thermostat<br />
(see illustration).<br />
When changed, the<br />
thermostat must be reset to<br />
activate the change.<br />
Calibration<br />
Gas - Electric jumper<br />
NOTE: Your thermostat comes from the factory calibrated to + or - 1 o F actual<br />
temperature. It is an accurate instrument. If you want your thermostat to display<br />
the same temperature as another thermometer in your home, you can adjust its<br />
calibration.<br />
To change the calibration:<br />
Mode switch of the unit must be in the HEAT or COOL position.<br />
Press the


